
Still scrolling through outdoor Christmas lights photos on Pinterest without knowing which style will actually work on your house? We spent serious time browsing Amazon, Home Depot, Target, Wayfair, and Lowe’s to bring you only what’s worth your attention this year — 25 curated ideas from $15 to $450.
Inside, you’ll find the full range: warm white classic, multicolored whimsy, snowy woodland, and modern architectural. And stay until the end — we break down the most common mistakes that can ruin these looks. In 2026, outdoor lighting is all about warm white LEDs, solar starbursts, and weather-safe smart controls, so there’s no reason to settle for tangled, outdated setups. Pin this guide for later — your future self will thank you when it’s time to actually do this. 📌 Save this to Pinterest for later — you’ll want to revisit these ideas.
1. Warm White Icicle Lights on a Luxe French Colonial Entrance with Red and Green Topiaries
The real hinge here isn’t the icicle lights on the roofline — it’s the pair of topiary trees wrapped in red and green string lights flanking the garage. Remove them and the facade becomes a generic warm white house. That controlled pop of Christmas color is what makes the whole composition feel deliberate rather than ‘we bought a few strands at the hardware store.’ If you only copy one thing, copy the flanking colored topiaries and let everything else stay warm white.
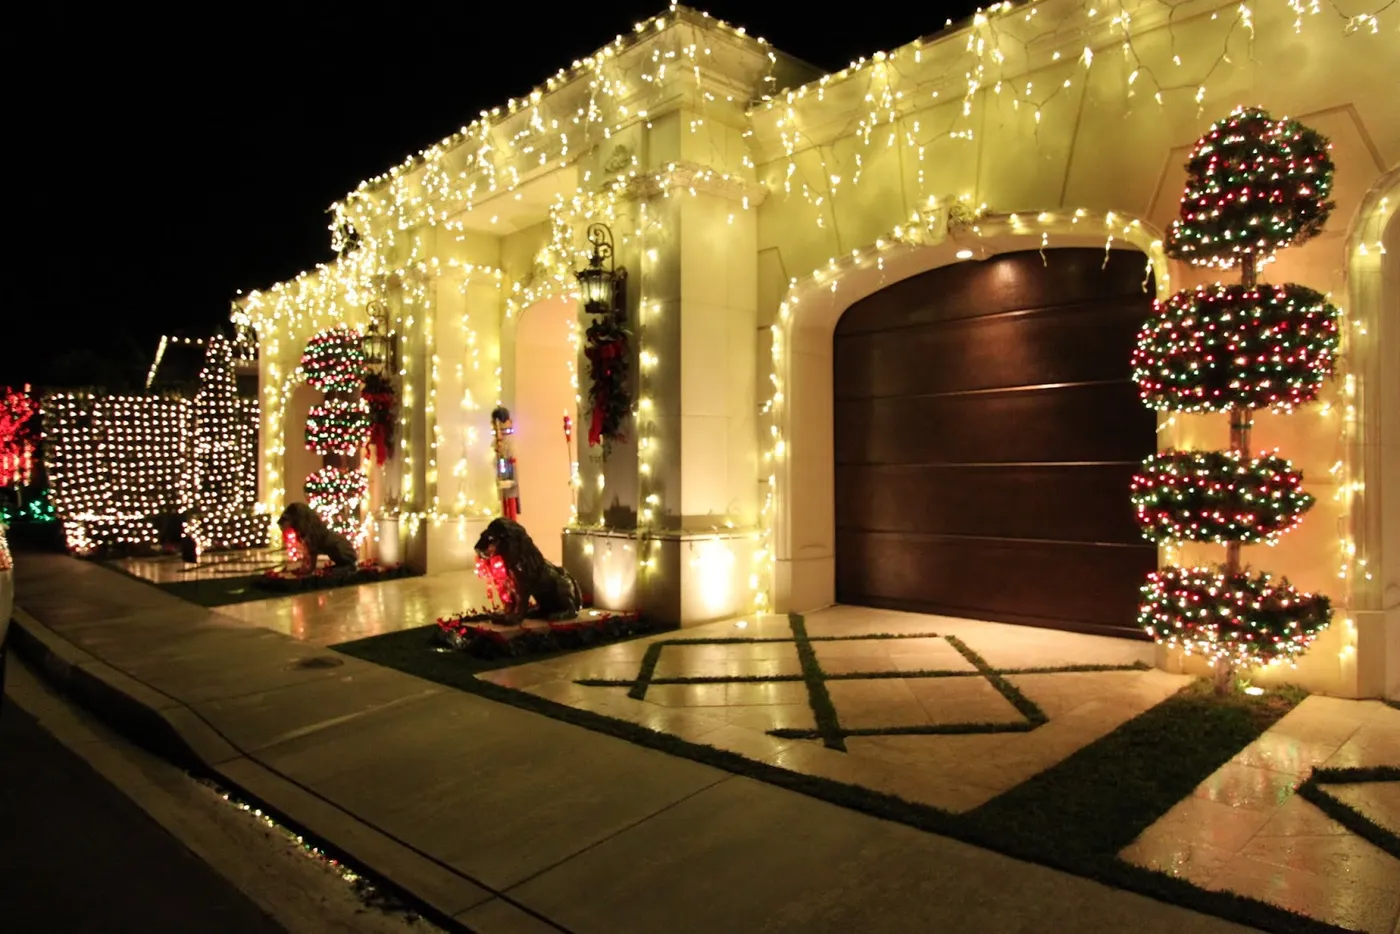
“Warm white icicle lights along the roofline and columns create a continuous bright frame, while the red and green topiaries inject a festive punctuation at the door zone.”
The dark wooden garage door gives the bright lights enough contrast to feel crisp instead of washed out. The cream-colored tiled pathway with grass joints adds texture and breaks up the hardscape, so the lights have somewhere to reflect at ground level. It’s a simple rule: one neutral light color plus two saturated accents in equal, symmetrical places.
2. C9 Roofline and Bare Tree Wrap on a Stone Facade at Dusk
When you wrap a bare tree like this, use C9 bulbs spaced about 8–12 inches apart and start at the base, winding every branch to its tip — not just the trunk. For a 20-foot tree, budget 1,500 to 2,000 lights. The ground-level pathway lights should sit 6 to 8 inches from the walkway edge to avoid glare. And always plug into a stake-mounted photo-eye timer so the house and tree come on together at dusk; mismatched timing is the fastest way to lose the grand, pulled-together look.
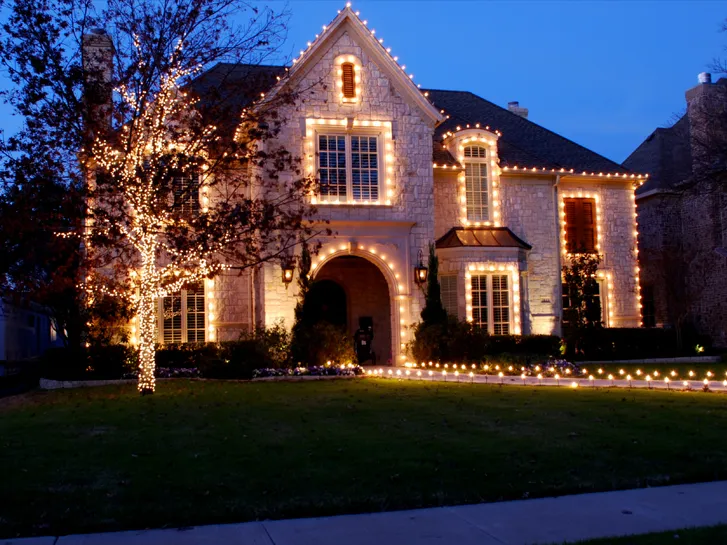
“The formula here is 70% warm white architecture, 20% wrapped tree, 10% ground path glow.”
The light-colored stone facade does the heavy lifting, so the lights read as eyeliner rather than floodlights. If your house is darker, you can swap the stone base for painted siding and use the same warm white C9s — just increase the path light count slightly. Keep all bulbs in the 2700K–3000K range; that’s the magic number that makes this look welcoming instead of sterile.
3. Traditional Red Brick Roofline Outlines with a Blue-Lit Entry Tree
The red brick facade is naturally warm, so the warm white strings along the roofline, dormers, and pathways don’t have to fight the material — they just outline it. The single blue-lit Christmas tree near the entrance is the wildcard: it’s the only cool color in the whole scene, so it draws your eye exactly to the front door. The illuminated bare tree in the yard repeats the vertical light motif and keeps the composition from feeling flat. The paved pathways reflect enough light to create a glowing runner effect at ground level without additional path lights.
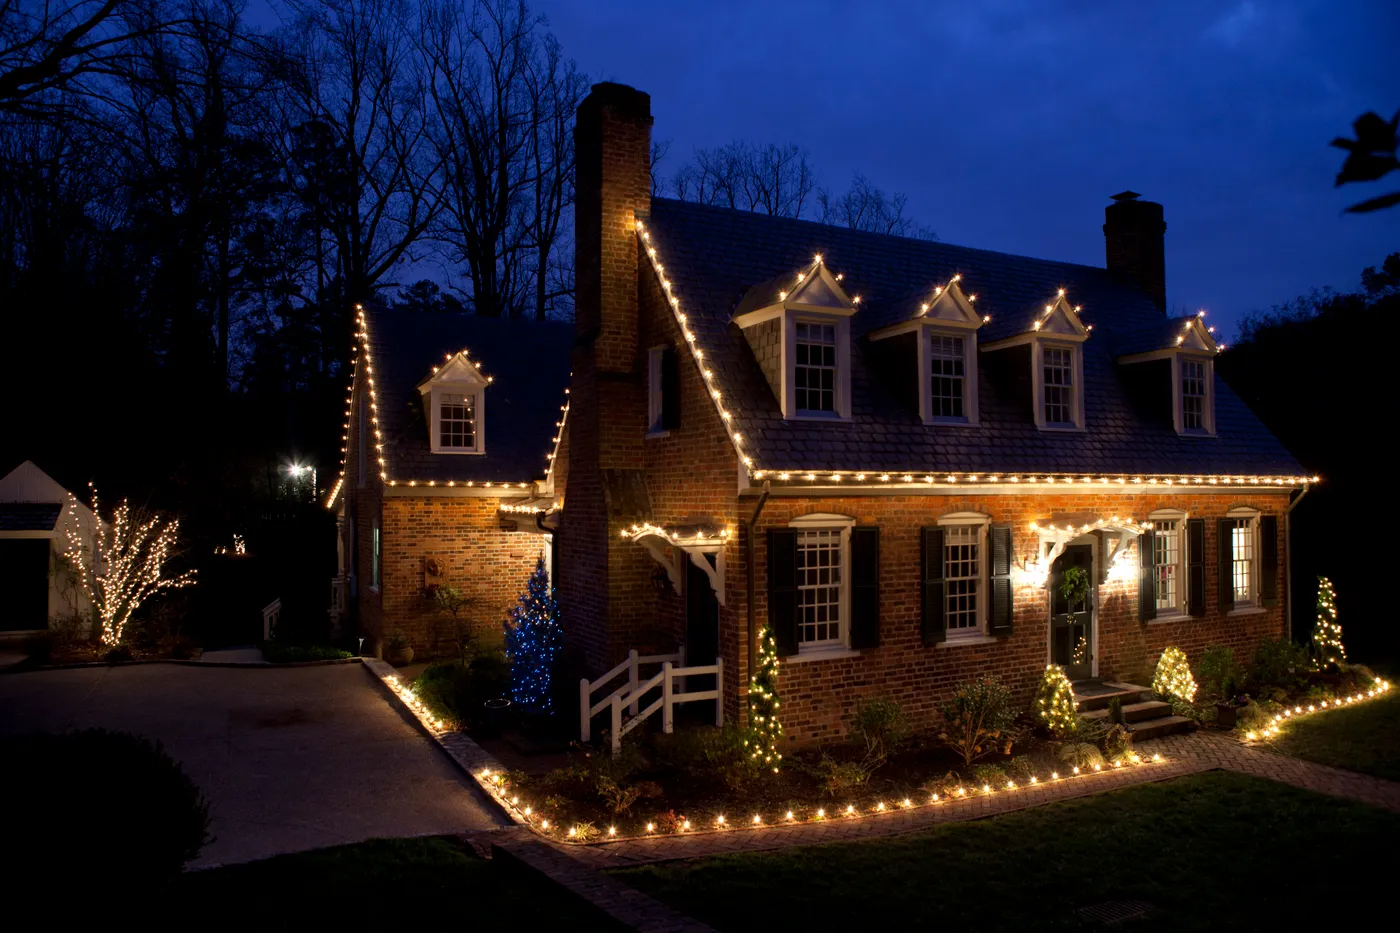
“This look doesn’t require professional install.”
Walmart and Target carry warm white LED stringers, and the blue-lit tree can be a simple 5-foot pre-lit artificial spruce placed in a plastic urn — about $25 at Target. Use clip-on light stakes from Home Depot to line the walkway for under $20 total. The bare tree wrap can be done with 300 miniature lights from Amazon for roughly $30. Compare that to a custom trim-light install at $2,800, and you’re getting the same curb appeal for under $100 if you’re willing to climb a ladder.
4. Classic Porch Columns and Garland Wrapped in Warm White String Lights
When you wrap porch columns, start at the bottom and wrap upward at a 45-degree angle, spacing each spiral about 4–6 inches apart. For a 9-foot column, you’ll need roughly 60–75 feet of string lights. Tuck the male plug end behind the column base so extension cords hide along the porch floor, not up the column. For the garland around the entry, use commercial-grade garland with integrated clips; add a second strand of lights woven in and out every third branch to avoid a flat, store-bought look.
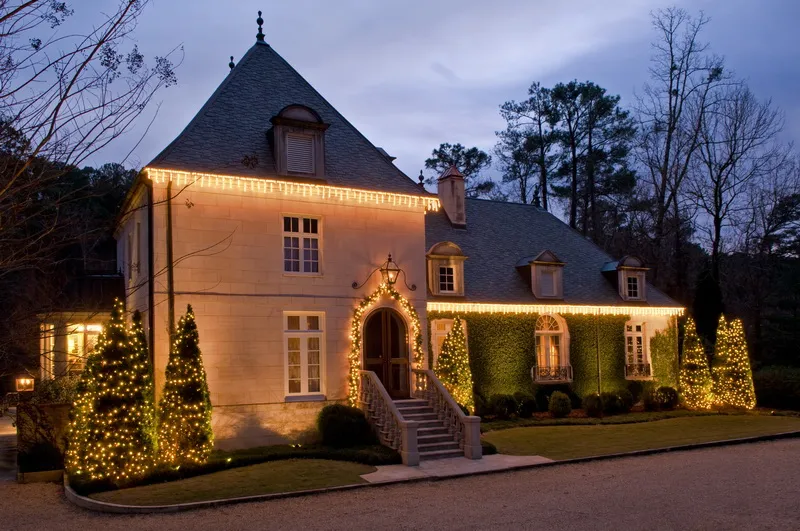
“Real garland in a covered porch area can last four to six weeks if you keep a spray bottle nearby and mist it every other day.”
But if your porch gets direct afternoon sun, swap to high-quality faux garland — no one will notice at night, and you won’t be vacuuming needles out of the door track until March. Wipe down string light bulbs once mid-season; dust and porch grime cut their brightness by 20–30%. Check the door wreath battery pack weekly if it’s battery-operated, because nothing kills a welcoming entry faster than a half-dead wreath.
5. Stone Gable Outlines with Star-Shaped Ground Lights and Lantern Pillars
This kind of whole-house roofline treatment shines on lots at least 6,000 square feet with a setback of 30 feet or more — you need room for the lights to read as one continuous outline. If your yard is smaller, skip the full gable outlining and focus on the entry-level ground lights and a single gable peak. Here’s a quick reality check:
- Frontage width: at least 40 feet to balance multiple gables
- Ceiling height of porch: 9 feet minimum for the lantern pillars to feel grounded
- Viewing distance from street: 25–50 feet
Compare with Idea #15 if your outdoor space is a cozy backyard patio — same warm light, completely different scale.
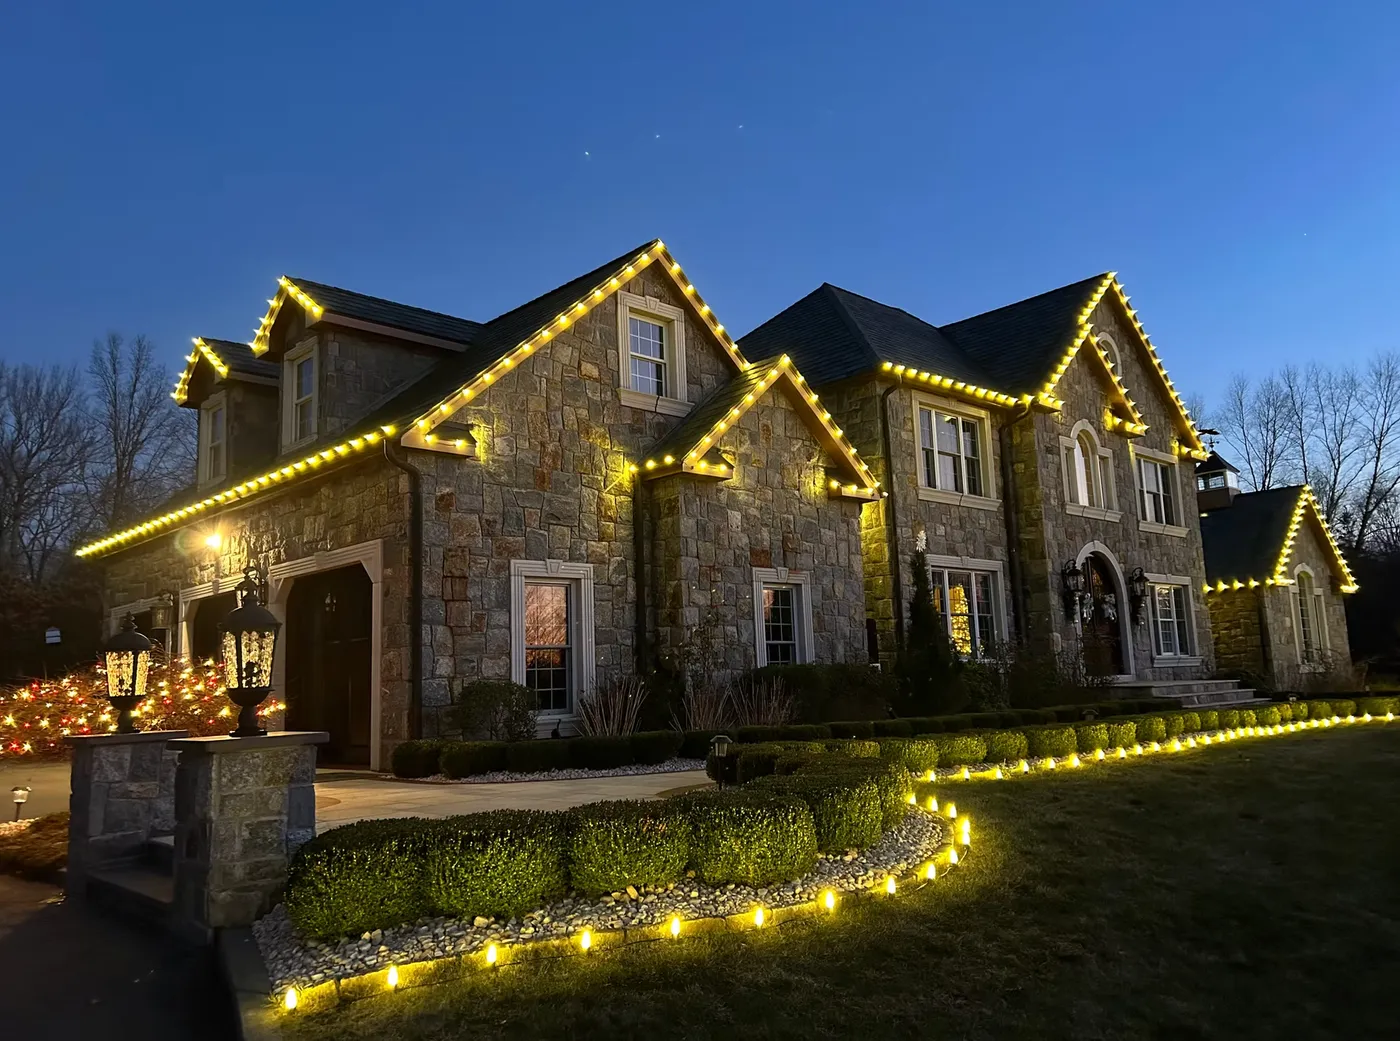
“The star-shaped red and white lights near the manicured hedges are the single element that keeps this from looking like a generic ‘we outlined everything’ display.”
They add a touch of whimsy without turning the place into a carnival. If you take those away, you still have a beautiful but predictable stone house with warm white rooflines. With them, there’s a quiet focal point that echoes the decorative lanterns on the stone pillars. Keep them low, keep them few, and place them where the eye already lands.
6. Single-Story Brick Gable and Column Wrap with Landscape Uplights
Here’s how to wrap that front column cleanly:
- Measure the column height and circumference; for an 8-foot, 12-inch-wide column, buy two 30-foot strands.
- Plug one strand into an outdoor-rated extension cord at the base and secure the plug with electrical tape.
- Wrap upward at a 30-degree angle, keeping the spacing even — about 4 inches between spirals.
- Zip-tie the first and last loops to the column cap and base, not to the brick itself.
- Step back from the street after every 10 wraps to check for sagging.
Time: about 25 minutes per column. Material cost: $18–$35 per column with LED string lights from Home Depot or Amazon.
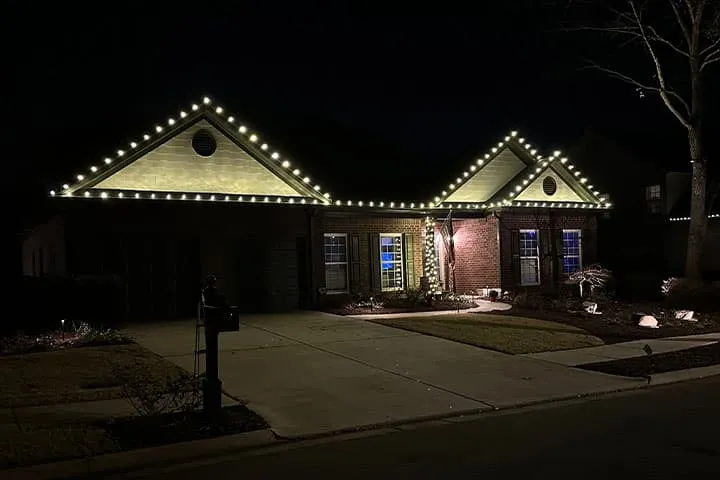
“A brick single-story like this is the easiest place to get a high-end look on a Walmart budget.”
Use two sets of warm white LED mini lights from Walmart ($22 each) for the gables, and a $15 outdoor clip set to keep lines straight. Landscape spotlights from a hardware store run $12–$20 each and plug into one timer. Total cost for the entire front can stay under $90. The real splurge you don’t need is custom track lighting — because on a one-story facade, anyone can reach the roofline with a standard A-frame ladder.
7. Modern Dark-Sided Gable Outlines with Stone Chimney Uplighting
This dark-siding-plus-stone look is everywhere on Pinterest right now because it lets warm white lights feel architectural instead of festive-only. In 2026, homeowners are leaning into ‘quiet outdoor Christmas’ — precise roofline outlines, landscape uplighting, and zero inflatable clutter. It’s the same logic as the modern farmhouse boom: dark exteriors need warm bulbs to avoid looking cold. The payoff is a clean, sophisticated display that photographs beautifully and still reads as holiday from the street.
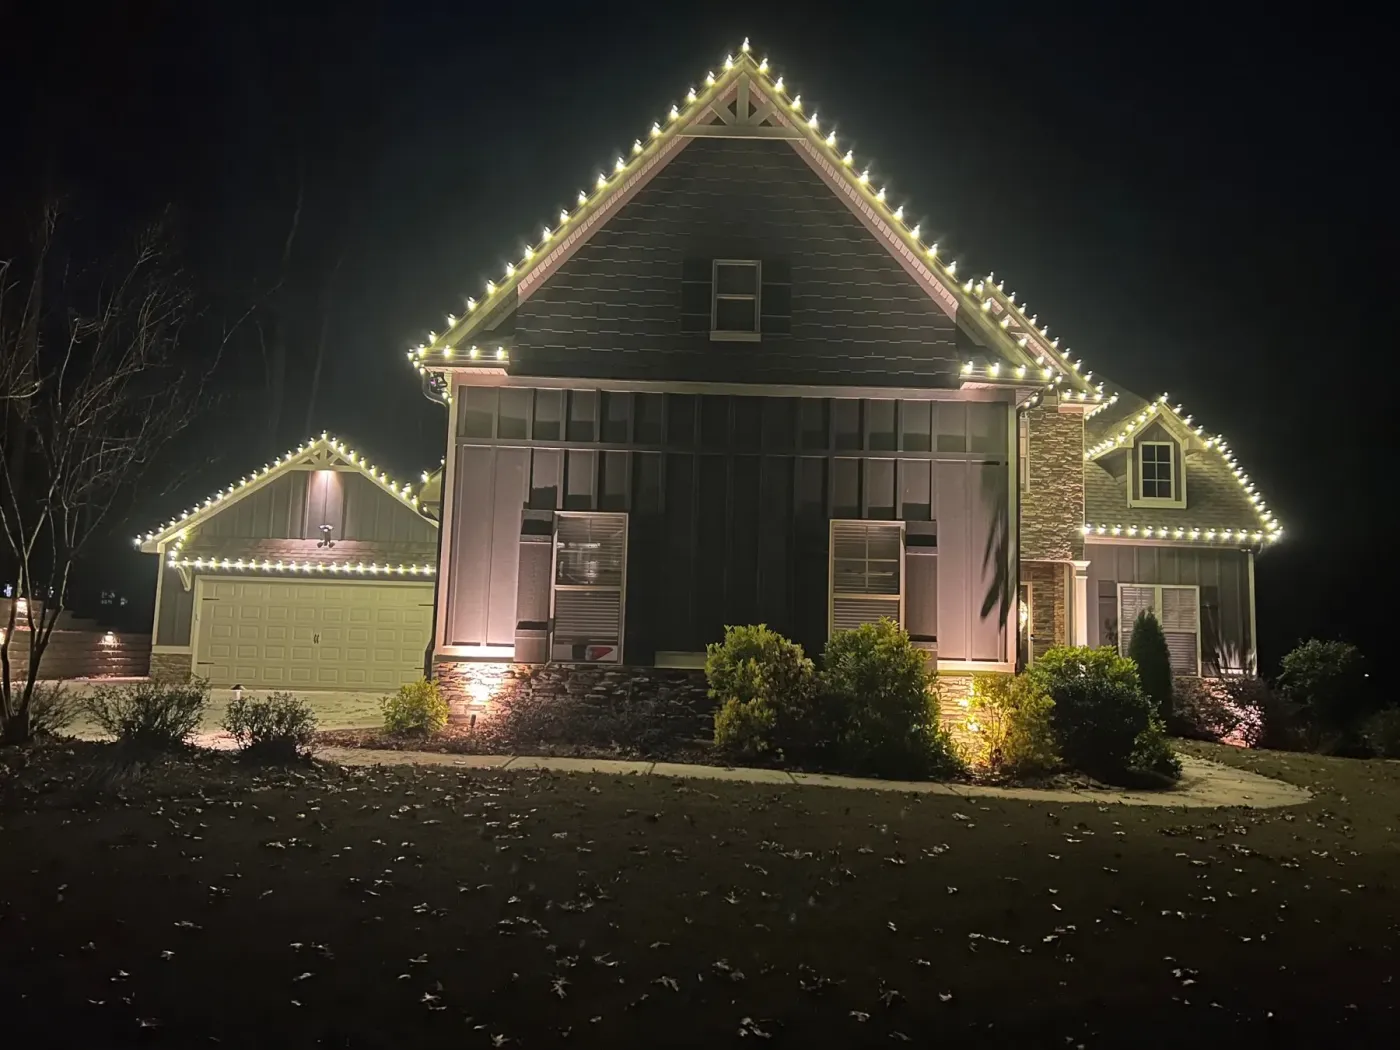
“Break this one down as 60% dark siding as backdrop, 25% warm white linear outlines, 15% landscape uplighting on stone and shrubs.”
The dark grey siding is the real hero — it makes the white light lines snap into focus. If your home is light instead of dark, you can still use this formula; just switch to cool white or vary the bulb spacing to create more contrast. Keep every bulb the same kelvin temperature, and limit any additional color to one small accent near the entry.
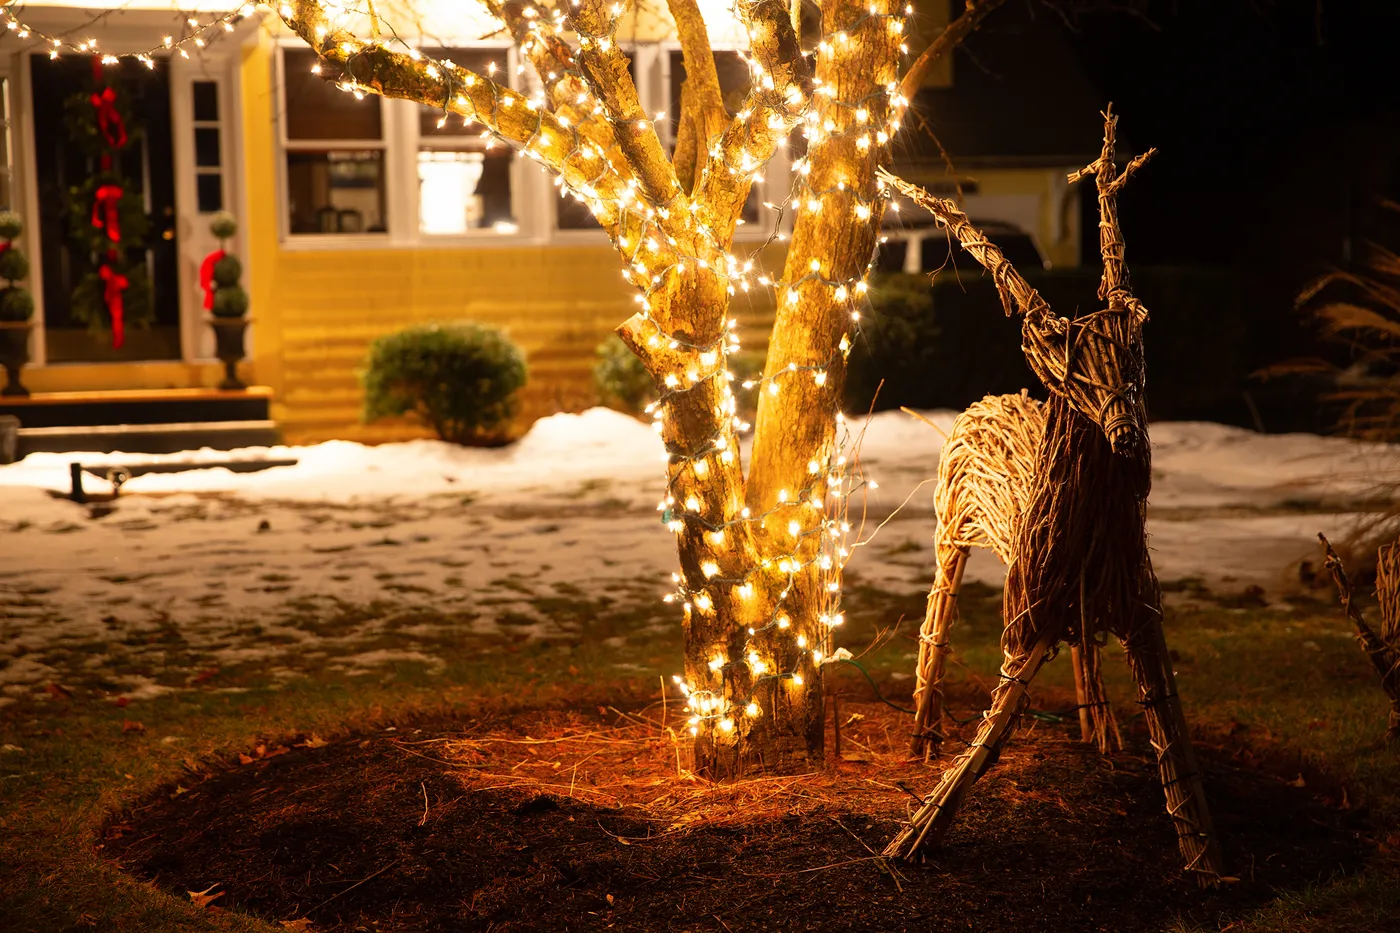
8. Bare Trees Fully Wrapped in Warm White Lights with Wrought Iron Fence and Snow
Before you wrap bare trees like this, check the following:
- Each branch you plan to wrap is at least 1/2 inch thick and not brittle or cracked.
- You have an outdoor outlet within 50 feet of the trunk, or a weatherproof extension cord rated for -20°F.
- Your ladder reaches the top branches without leaning against the tree itself.
- You have 300–500 lights per 10 feet of tree height.
- Snow and ice are in the forecast? Use LED bulbs — they don’t get hot enough to melt into wet bark like incandescent can.
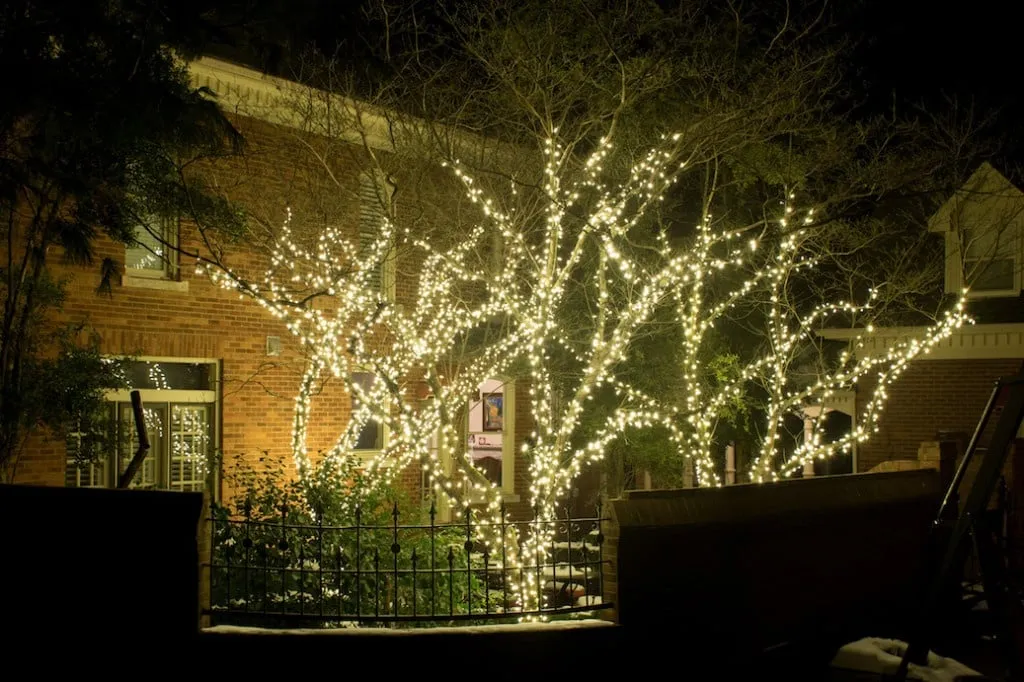
“Here’s what no one pins: wrapping bare branches this densely takes hours, and if you don’t trim deadwood first, you’ll be picking broken strands out of the snow.”
Also, the whole display only works when the trees are leafless. Come late February, you’re either living with lights strangled by new growth or spending a full Saturday untangling. It is drop-dead gorgeous in snow and twilight, but know it’s the most maintenance-heavy idea in this article.
9. Warm White Window and Roofline Outlines on a Snow-Dusted Traditional House
The trick here is repetition with intention: roofline, window frames, porch, and shrubs all get the same warm white treatment, so the eye reads the whole house as one cozy lantern. The snow-covered ground acts like a giant reflector, doubling the light output and hiding any dark garden spots. The lit wreath on the front door provides the only circular shape, which naturally says ‘come in.’ It’s a masterclass in using one light color at three different heights to create depth without extra wattage.
“Outlining windows from the outside means dealing with snow, ice, and condensation.”
Use clips made for siding or shingles, not adhesive hooks that fail below freezing. After a heavy snow, gently brush snow off lower window strands so they don’t pull down or short. Expect to lose 2–3 bulbs per season; keep a small bag of replacement LEDs. If you don’t have a GFCI outlet outdoors, add one before hanging anything — extension cords buried in snow are not a plan.
10. Stone Arched Entry with Lit Topiaries and a Wreath on the White Door
To get the arched entry glow:
- Place two pre-lit topiary trees in weatherproof urns, one on each side of the door, with their tops at roughly 2/3 the height of the arch.
- Wrap each urn base in a 10-foot string of warm white lights, hiding the battery pack behind the urn.
- Run a 25-foot outdoor extension cord along the stone wall, tucked under the step lip.
- Hang the wreath at eye level (57–62 inches from ground) so it centers visually in the arch.
- Use a timer to run everything from 4:30 pm to 11:30 pm.
Time: 40 minutes. Cost: $35–$80 depending on topiary size.
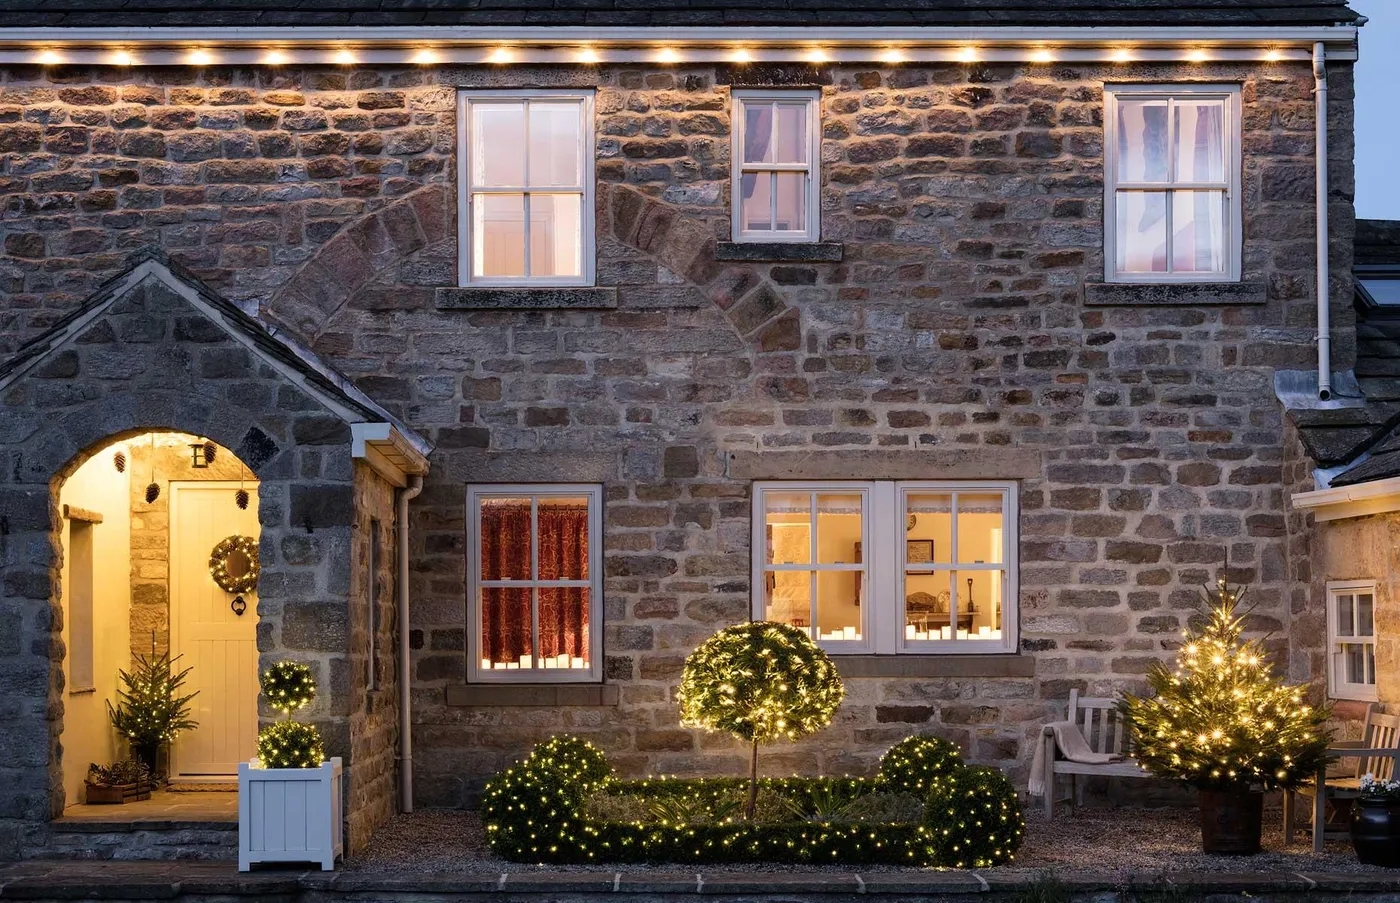
“The white front door is doing more work than you think.”
With a stone facade this textured, a white door bounces the warm light back into the archway, so the entry doesn’t become a black hole. If your door is dark, add a battery-powered spotlight at the base of the arch pointing upward at a 30-degree angle. That one light will lift the whole entry and make the wreath visible from the street.
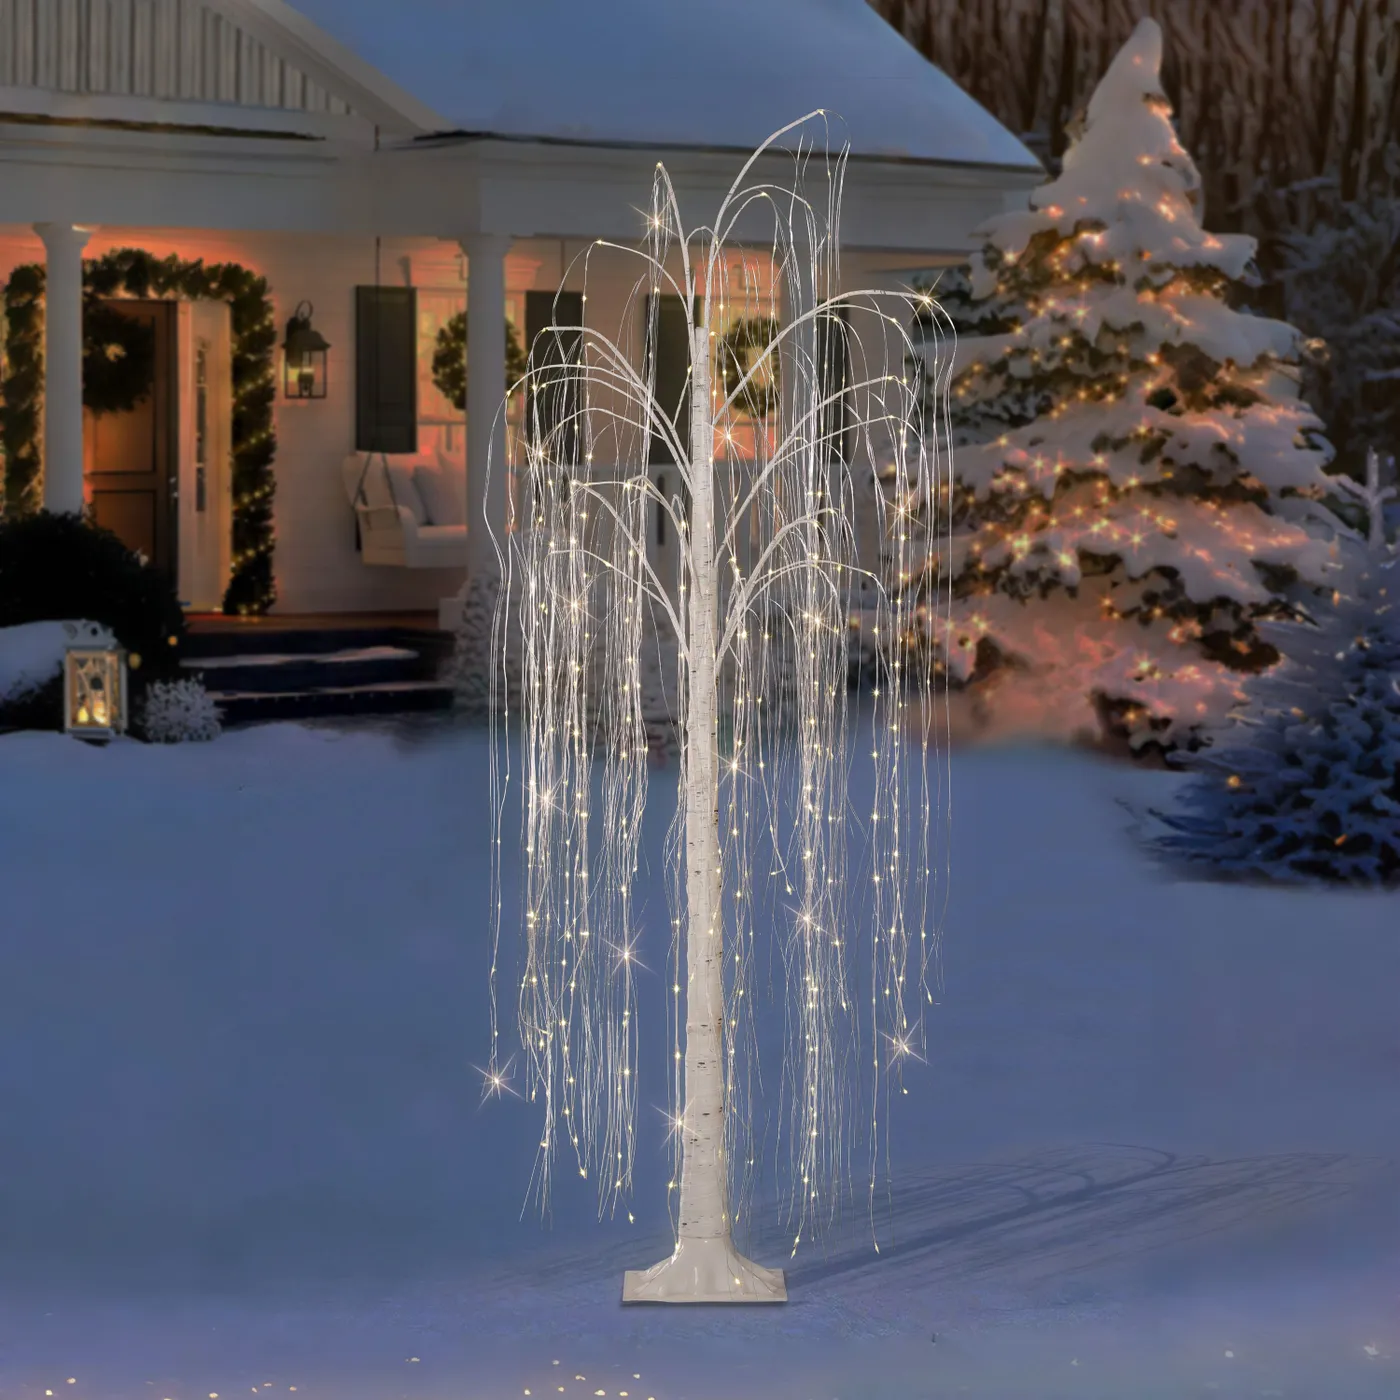
11. White Weeping Willow Fairy Light Tree with Snow and Orange Porch Garland
The white weeping willow-style tree is everything. Densely lit with warm white fairy lights and a subtle starburst effect, it becomes the focal point that lets the rest of the scene — the snow, the porch garland, the orange-hued lights — stay soft. If you removed that one tree, this would just be a nice snowy house with garland. The vertical cascade of light is what gives the whole yard a magical, almost otherworldly quality. It’s also the element people stop and photograph.
“Before you recreate this scene, verify:The tree is structurally sound and not ov”
Before you recreate this scene, verify:
- The tree is structurally sound and not overloaded with snow or ice.
- Your fairy lights are rated for wet locations and can handle sub-freezing temps.
- The branches can support the weight — use zip ties every 6 inches.
- Your extension cord is plugged into a GFCI outlet and elevated above snow depth.
- You have a plan for removing lights after the season without damaging new buds.
12. Tree-Shaped LED Fixture Glowing on a Snow-Dusted Patio
This one is actually manageable in a rental or a small patio because it’s a single tree-shaped LED fixture, not a house wrap. But be honest: the fixture itself can look sparse in daylight. The magic only happens after dark, when the warm white glow and falling snow do the work. If you have kids or dogs playing on that paved patio, anchor the base or run the cord under a rubber cable protector. Also, the snow-dusted paving gets slick — that rectangular lantern and potted evergreens need to be placed wide enough for a clear walk path.
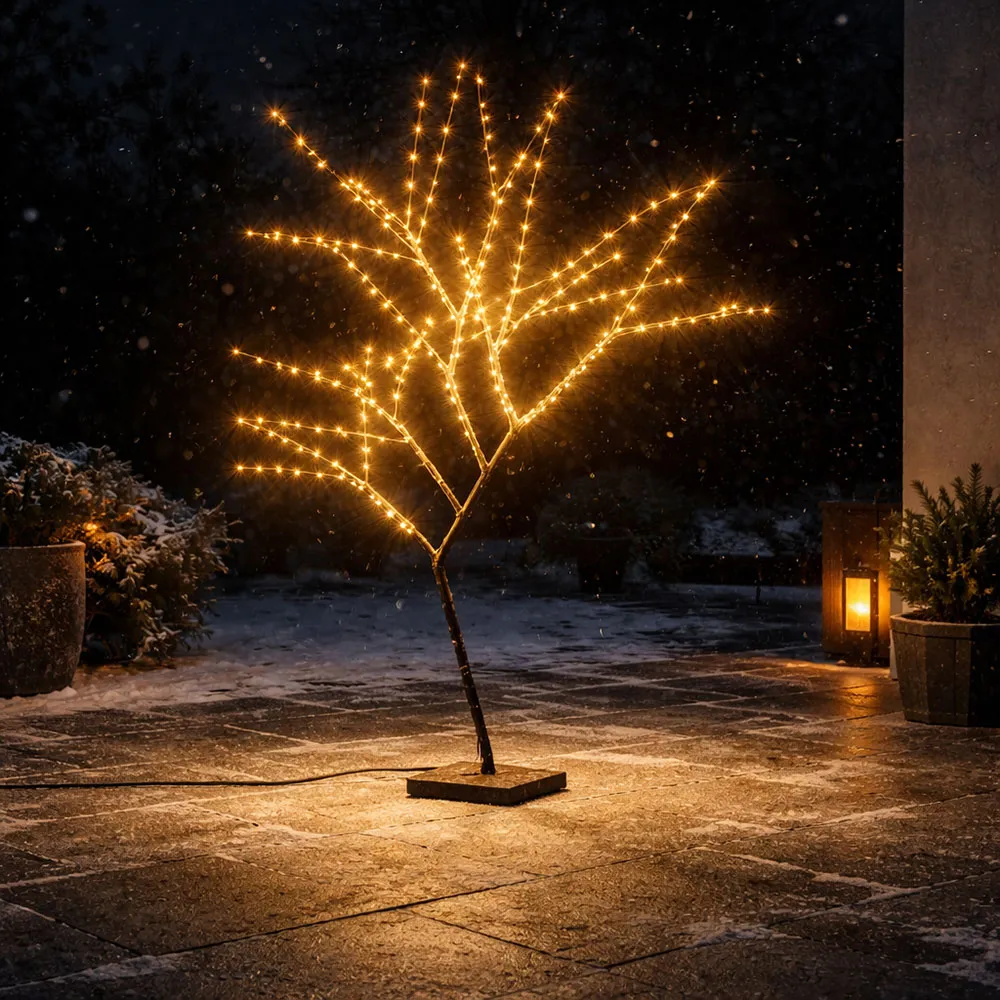
“You don’t need to spend $150 on this fixture.”
Get a black tomato-cage-style wire form from a garden store, zip-tie three 25-light warm white LED strands in a spiral, and top it with a zip-tied star. Total cost: under $35. Pair it with two potted evergreens from IKEA or Trader Joe’s, a $10 lantern, and a small timer. On a snowy night, it reads identical to the designer version from ten feet away. Compare with Idea #13 if you want a full tree shape instead of a single fixture.
13. Artificial Blossom Tree Covered in Warm Yellow LED Clusters
To get that blossom-light effect on an artificial tree:
- Start with a 5–7 foot bare artificial tree with textured brown branches.
- Wrap each main branch with a 20-light warm yellow LED string, spacing clusters every 2–3 inches.
- Pull individual bulbs out at branch tips and bend them upward like buds.
- Test before you finish each section; a dead bulb at the center will leave a dark hole.
- Bundle excess cord along the trunk and secure with brown floral tape.
Time: 1 hour for a 6-foot tree. Material cost: $40–$60 for lights plus the tree base.
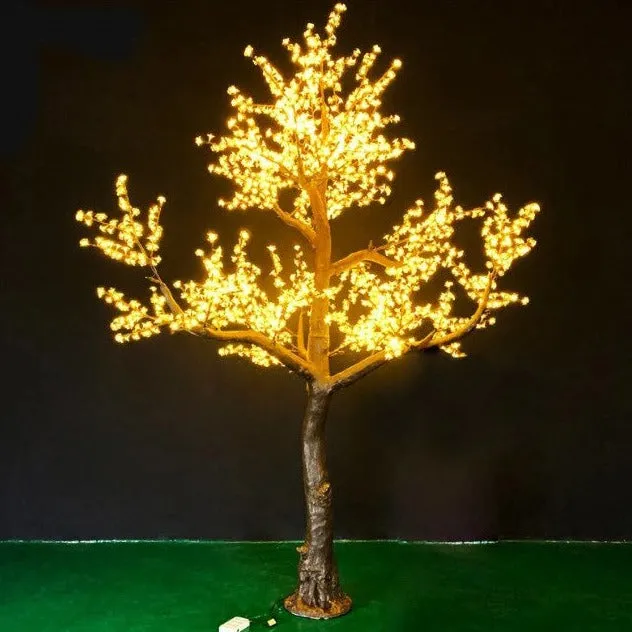
“The power adapter at the base is visible in the photo, which is a useful cue: place it behind a planter or painted box, but don’t bury it in soil or fake snow.”
It needs airflow to avoid overheating. If you’re putting this on a bright green floor surface (like indoor/outdoor turf), keep the warm yellow bulbs between 2700K and 3000K — cooler whites will clash with the green and make the tree look artificial in a bad way.
14. The Missing Reference: How to Work With What Your Own House Gives You
Every once in a while, the perfect inspiration photo doesn’t exist — or it won’t load on your phone at 11 pm. That’s actually useful: it forces you to look at your own roofline, porch depth, and outlet placement before buying anything. A photo of someone else’s stone house won’t tell you that your gutter is in the wrong spot or your front yard is too small for a 20-foot tree wrap. So if you’re stuck, start with a daylight photo of your own house and mark where shadows fall.
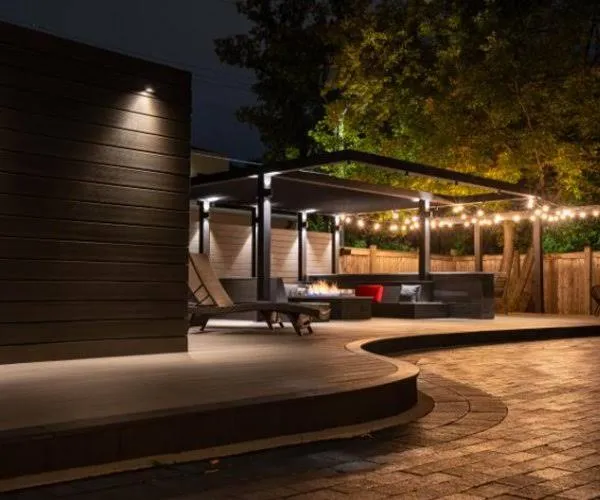
“The single element you’re really looking for in any missing reference is contrast.”
Without a photo, decide where you’ll create contrast: a warm white outline against dark siding, icicles against a pale stucco, colored lights against a bare branch. The house itself is the missing image’s stand-in. Find one area with the most visual weight — usually the front door or a main gable — and build outward from there.
15. Backyard Patio String Lights with Fire Pit Table and Dandelion Fixtures
This setup needs a minimum of 10×12 feet of patio or deck to breathe. The L-shaped sectional alone is about 7×7 feet, and the gas fire pit table wants a 24-inch clearance on all sides. If you’re working with a narrow balcony, skip the sectional and do two chairs with a small fire table. Overhead string lights should be 8–9 feet above the deck to keep the glow from feeling like a low ceiling.
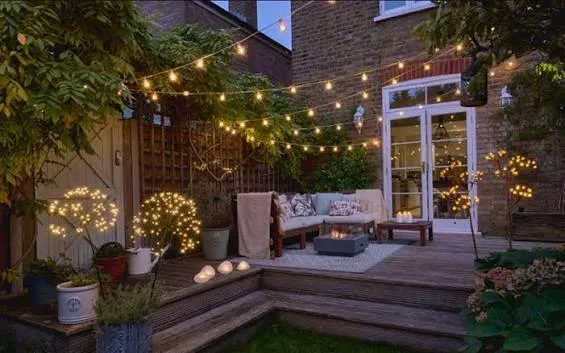
“The style math here:50% warm overhead string lights25% wooden deck and grey bric”
The style math here:
- 50% warm overhead string lights
- 25% wooden deck and grey brick backdrop
- 15% fire pit glow
- 10% dandelion and potted plant sparkle
Swap the fire pit for a lantern in warm climates or use cream textiles instead of grey for a lighter look.
You can recreate this for a fraction: IKEA and Target sell outdoor sectionals from $599, but you can also use a used wooden L-shaped seating set from Facebook Marketplace for $150–$250. String lights from Costco or Amazon run $30–$50 for 100 feet. The dandelion-shaped light fixtures can be swapped for solar ground stakes at $12 each. The gas fire pit table is the only splurge; look for a secondhand one around $80 and use a propane tank from a local hardware store.
16. Symmetrical Red Brick Entry with White-Lit Garland and Potted Evergreens
The symmetry here is what makes it look expensive. Measure from the center of the front door to each window and hang matching wreaths at identical heights — use a laser level or a string line, not your eyeball. Place the two potted evergreens exactly 18–24 inches from the door frame, and line up their tops with the bottom third of the side windows. If your walkway isn’t perfectly centered, adjust the planters slightly forward or back, but never move just one; the whole look is a mirror image.
“This works because red brick, white trim, forest green garland, and black planters are a ready-made palette.”
The white-lit garland outlines the entry without adding a second light color, while the wreaths repeat the circle motif at eye level. The two potted evergreens flanking the door create a symmetrical ‘bookend’ that frames the door as the focal point, and the black planters ground the arrangement so it doesn’t float against the brick.
17. Conical String Light Tree with Star Topper on Gravel
Build this cone shape:
- Source a metal cone frame or a tomato cage turned upside down and tied at the top.
- Wrap three strands of warm white string lights from the base upward, spacing loops 4–5 inches apart.
- Secure the star topper with a zip tie at the peak and run its cord down the inside of the frame.
- Set the frame on a level gravel patch and anchor with landscape staples.
- Connect to an outdoor timer and test before adding any dark garden foliage around the base.
Time: 45 minutes. Cost: $25–$45 depending on frame.
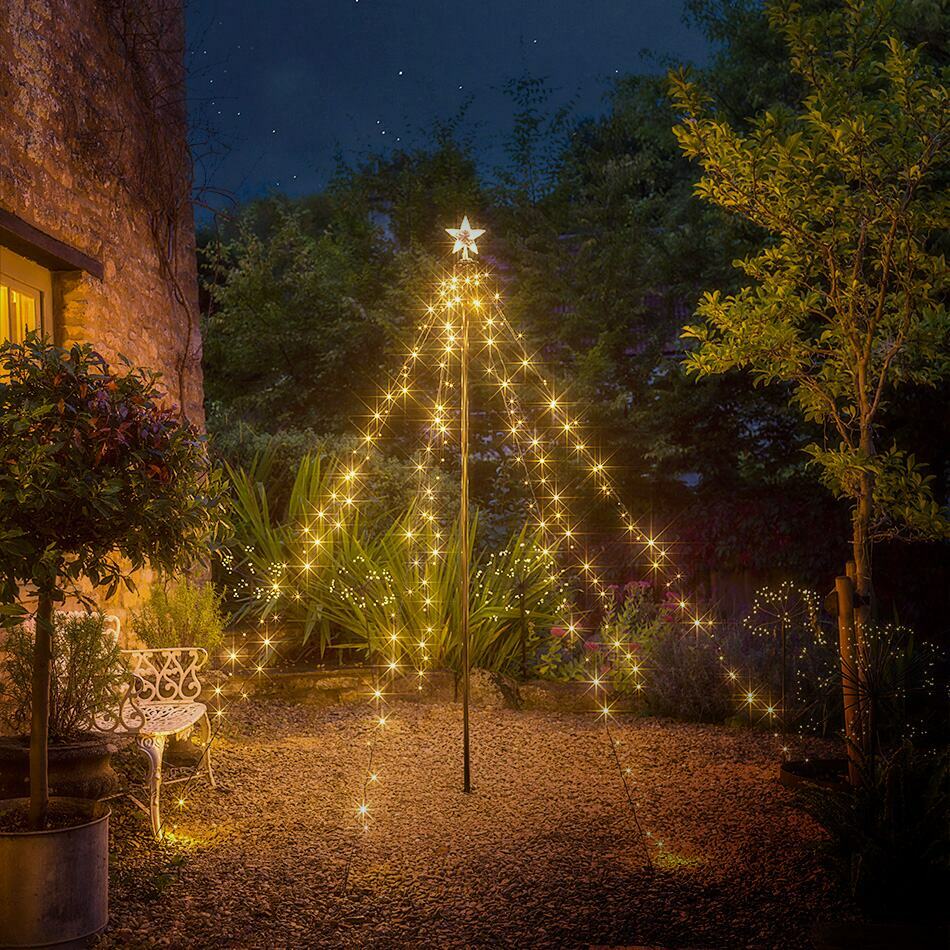
“The illuminated star topper is the single detail that turns a cone of lights into an intentional Christmas tree.”
Without it, the shape reads as a utility structure or a weird traffic cone. The star also gives the human eye a finishing point, so the eye travels up the spiral and lands somewhere satisfying. Even if your cone isn’t perfectly symmetrical, a bright star at the top forgives a lot of crooked loops. For a softer, blossom-like tree effect, check Idea #13.
18. Arched White Entry with Icicle Lights and Red-Wrapped Bushes
The formula is 60% white house facade, 25% icicle and roofline lights, 15% red tree and bush accents. The white columns and arched wooden door keep the entry bright, while the red string lights on bushes and trees add exactly enough color to feel festive without competing with the white icicles. If you love the look but want a different accent, swap red for warm amber or even soft green — the key is keeping the accent confined to low-level plantings so the roofline stays crisp.
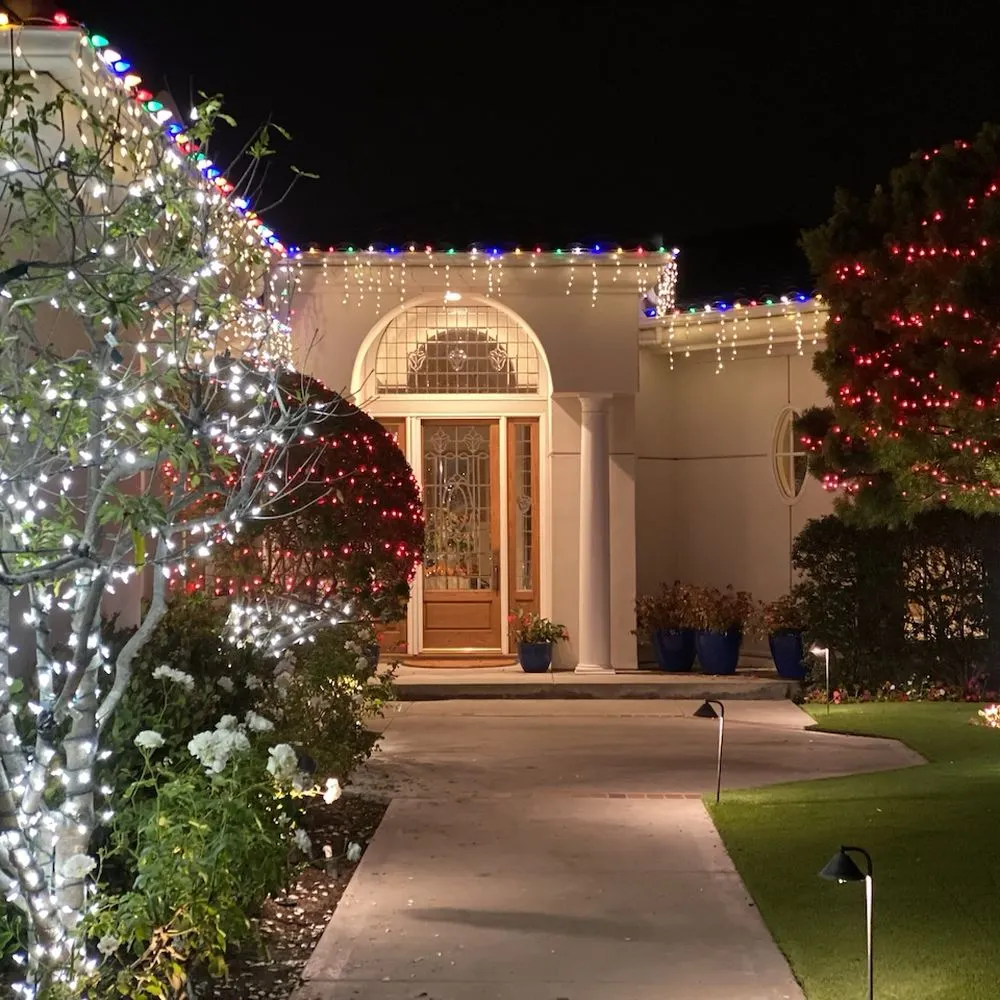
“Recreating this specific look:White icicle lights (2 sets of 300): $25–$40Colorf”
Recreating this specific look:
- White icicle lights (2 sets of 300): $25–$40
- Colorful roofline string lights (100 ft): $35–$60
- Red string lights for bushes and trees (3 sets): $30–$50
- Ground path lights (8 pack): $20–$40
- Arched door decorative glass and column trim: existing
- Total: $110–$190
Budget alternative: use white mini lights you already own for the icicles and only add red net lights on bushes — total about $50.
19. Snow-Dusted Porch with Pinecone Garlands and Globe Lights
Pinecone garlands and faux fur throws on an open porch are gorgeous in snow, but they require realistic expectations. Faux fur will hold moisture and eventually mildew if it’s directly exposed to wet snow — bring it inside or cover it during storms. Pinecones can open and drop seeds when temperatures swing; spray them with a clear acrylic sealer before hanging. Globe lights in a covered porch area should be wiped down monthly, and the two potted mini Christmas trees will need water even in winter if the porch gets sun.
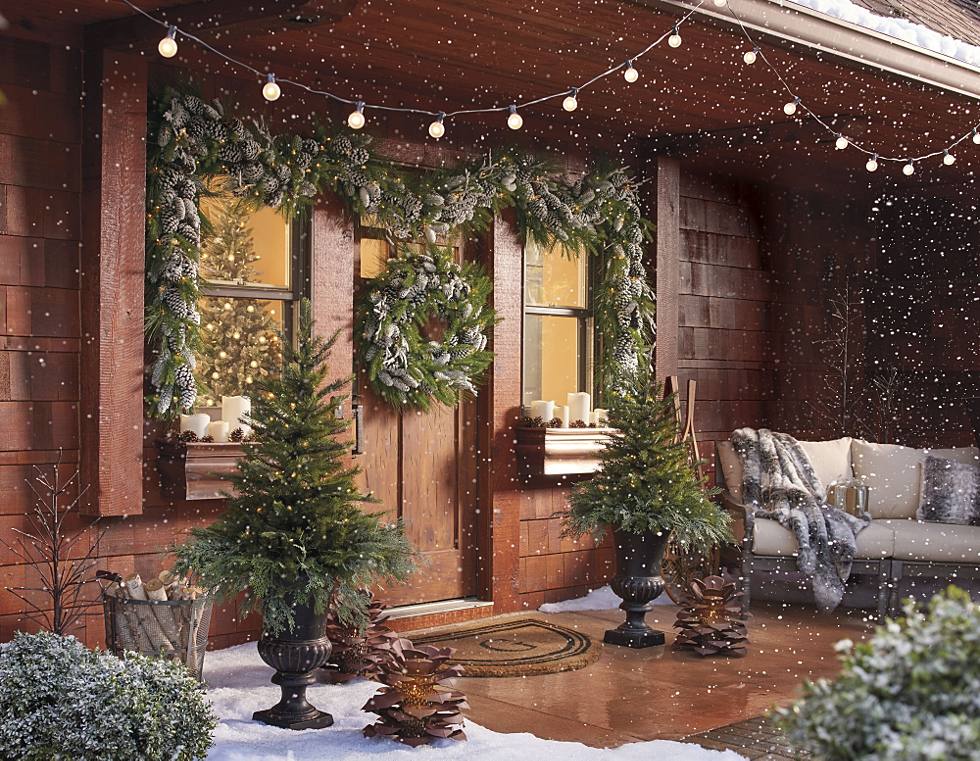
“Use a mix of globe string lights and mini lights in the garland, but keep both on separate timers.”
The globe lights should come on first at dusk, then the mini lights 15 minutes later for a layered, gallery-like transition. If you have the room, set the outdoor sofa so its back faces the snow-covered bushes rather than the railing — that way the faux fur throw catches the glow from the garland instead of disappearing into the shadows.
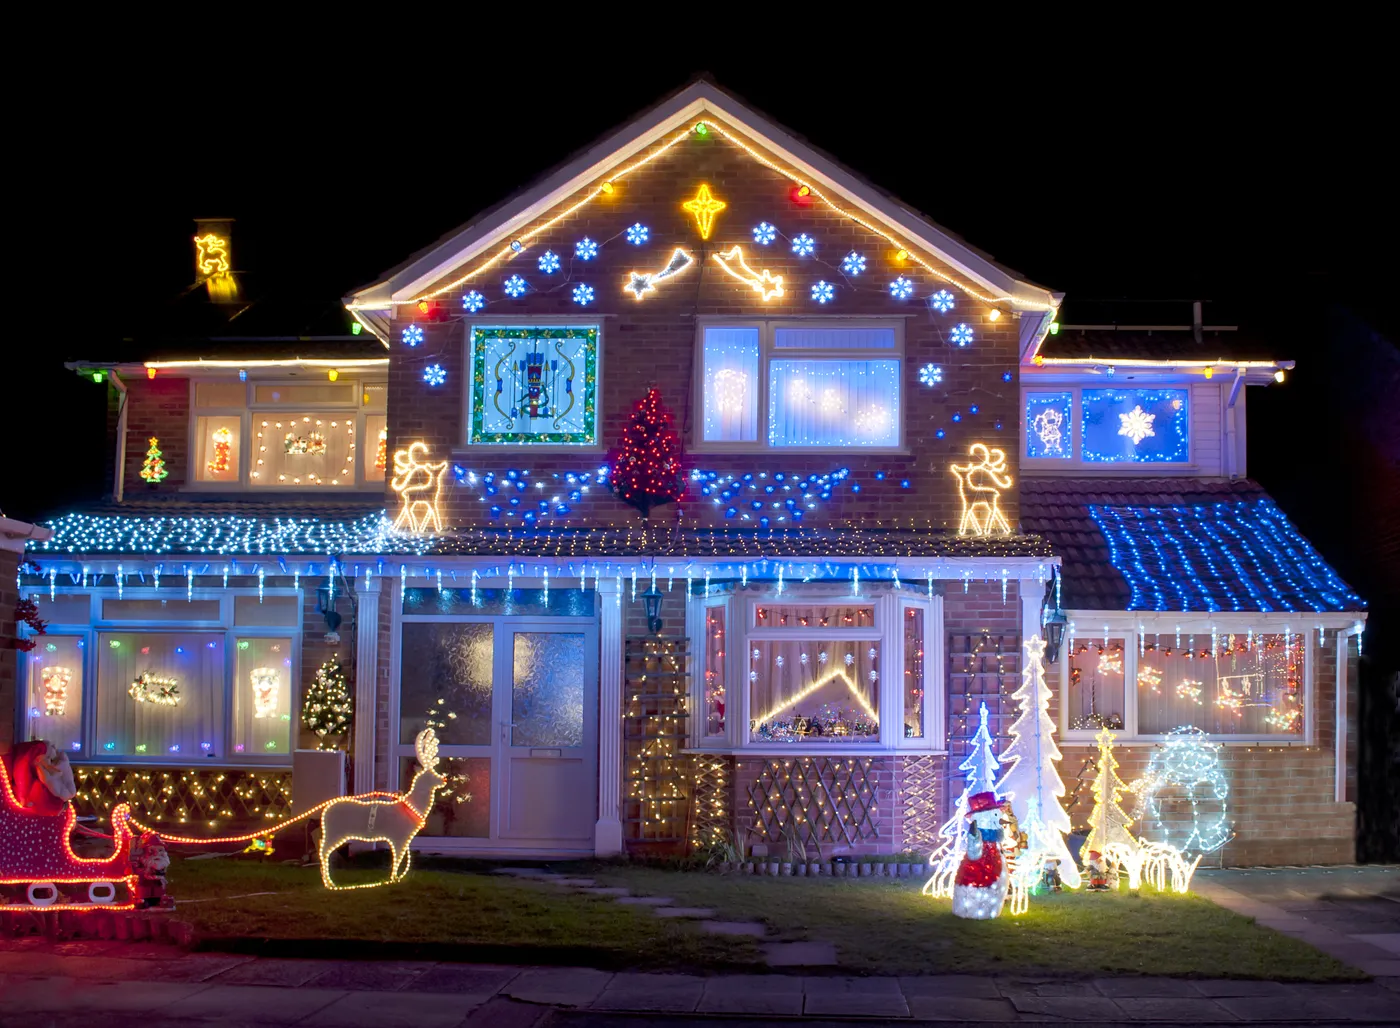
20. Over-the-Top Multicolored Lawn Display with Animated Rooftop Figures
This is the display that makes neighbors slow down and small children lose their minds. It is also the display that will take over your yard, your weekends, and your electrical panel. The sheer density of multicolored lights on the house and tree plus animated figures on the roof means you need multiple circuits and serious outdoor wiring. Check local code — some HOAs or municipalities have limits on illuminated figures and blinking lights. If you rent, this isn’t your project. But if you own and you love the chaos, go all in.
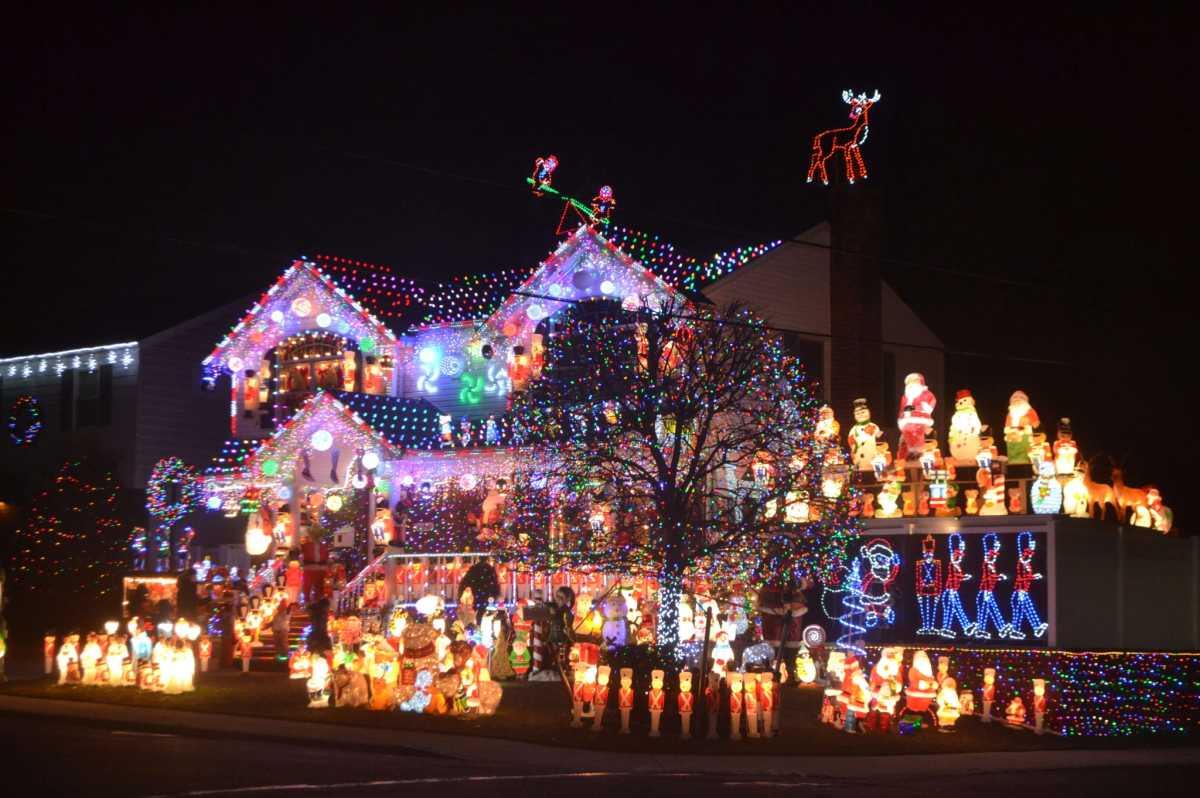
“This kind of display needs a front yard at least 30 by 40 feet and a house facade of 50 feet or more.”
The illuminated toy soldiers, Santas, reindeer, and snowmen are all space hogs — each figure typically takes 3–6 square feet, and you need walking paths between them. Roof-mounted animated pieces require a roof pitch of 4:12 or less for safe installation. If you have a small yard, steal just one idea — like the multicolored tree wrap — and keep the rest simple. Compare with Idea #2 for a more restrained warm white version.
21. Colonial Facade Wrapped in Warm White with Red Bow Wreaths
The colonial facade already has strong symmetry, so the warm white strings outlining the structure and windows reinforce the architecture instead of distracting from it. The red bows on the large wreaths are the only saturated accent, which gives the eye a clean route across the two-story facade — white, dark green, then red. Snow dusting mutes the roof color and softens the dark gray shutters, making the warm white lights feel even brighter by comparison. It’s a classic but never boring formula.
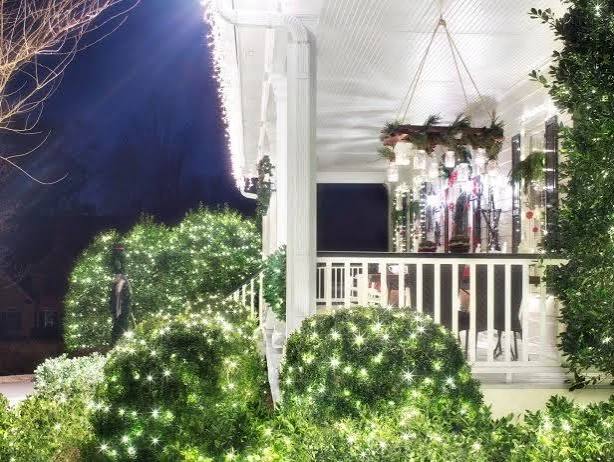
“Estimated cost for this exact look:Warm white string lights for rooflines and windows (400 ft): $60–$90Garland with lights for porch columns and railings (3 rolls): $75–$120Large Christmas wreaths with red bows (3–5): $90–$150Snow-proof clips, timers, and extension cords: $30–$50Total: $255–$410Budget alternative: use one wreath on the door, wrap only the porch columns, and outline only the first-floor windows — about $90 total.”
For a lower-maintenance solar option, compare with Idea #23.
22. Pre-Lit Porch Tree Next to Black Door and Wall Lantern
The pre-lit artificial tree in a black metal stand is the whole ball game. It sits next to the black door with glass panels and the black wall lantern, creating a small, tight grouping that does more than a dozen scattered decorations would. The light-colored horizontal siding gives the warm white lights a bright backdrop, and the natural wicker planter or stand adds texture. If you removed that tree, you’d have a bare porch with a nice lantern and a door — this one piece makes the whole entry feel finished.
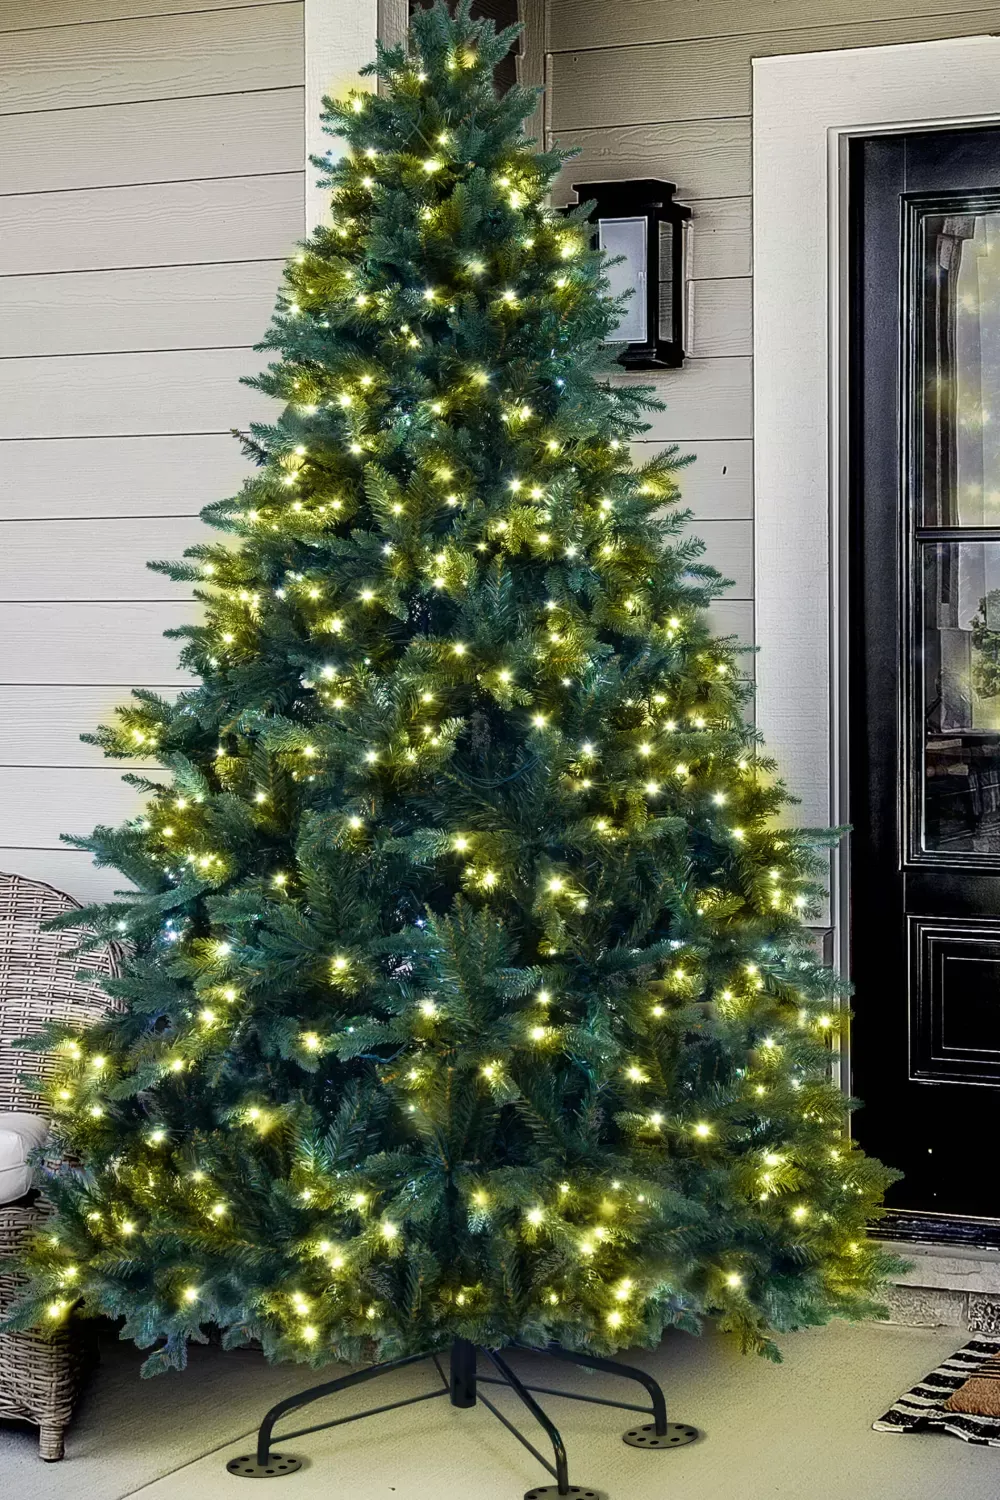
“To place this tree like a pro:Choose a pre-lit tree 5–6 feet tall, no wider than 30 inches at the base.Set it 8–12 inches from the door frame, not flush — it needs a shadow line.Top the stand with a wicker or metal collar to hide the black metal base.Run a single outdoor extension cord along the door threshold and tuck it behind the door hinge.Switch the wall lantern to a warm white bulb so the tree and lantern don’t fight.Time: 15 minutes.”
Cost: $60–$120 for the tree, $10 for cord.
23. Solar Starburst LED Lights Hanging from a Rain Gutter
Starburst LED lights with solar panels are having a moment in 2026 because they solve the biggest outdoor lighting headache: no outlet, no extension cord, no timer. These spherical clusters hang from gutters and charge from a tiny black solar panel on the roof. They look like fireworks frozen in place, especially against brick or dark siding. The fact that they’re weatherproof and motion-activating on some models makes them a favorite for people who want festive without the ladder-heavy install.
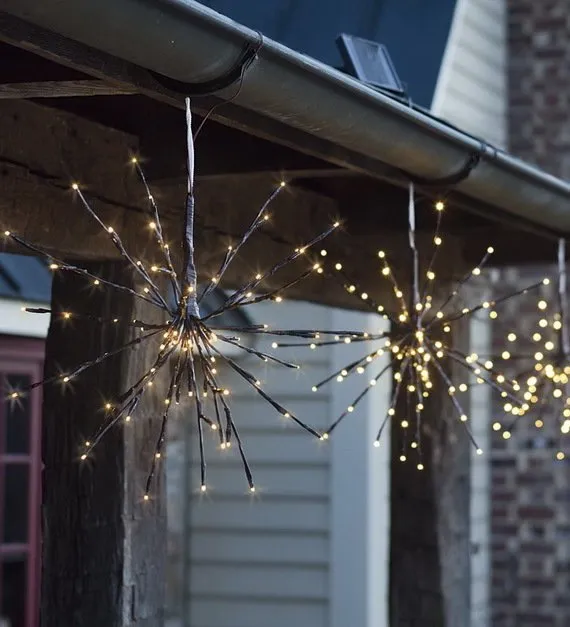
“The solar panel needs direct sun for at least 4–6 hours a day to get through a full evening.”
If your gutter faces north or sits under a tree, these will be dim by 9 pm. Also, the thin dark branches and small bulbs are more fragile than they look; in high wind, they tangle and snap. Hanging them from a rain gutter means you need clips rated for gutter weight. In a snowstorm, brush them off or they’ll sag into the roofline.
24. Grand Double Door Entry with Nutcracker Sentinels and Illuminated Garlands
That opulent stone entry with double doors, illuminated garlands, and nutcracker figures can be borrowed for far less. Use two faux nutcrackers from Home Depot ($40 each) placed in simple wooden shelters you can build from scrap pallets. The garlands with red bows and ornaments can be assembled from faux pine, red ornaments, and string lights for under $75. Stone facade isn’t required — a painted brick or stucco entry with two wall lanterns gives the same grand feeling from the curb.
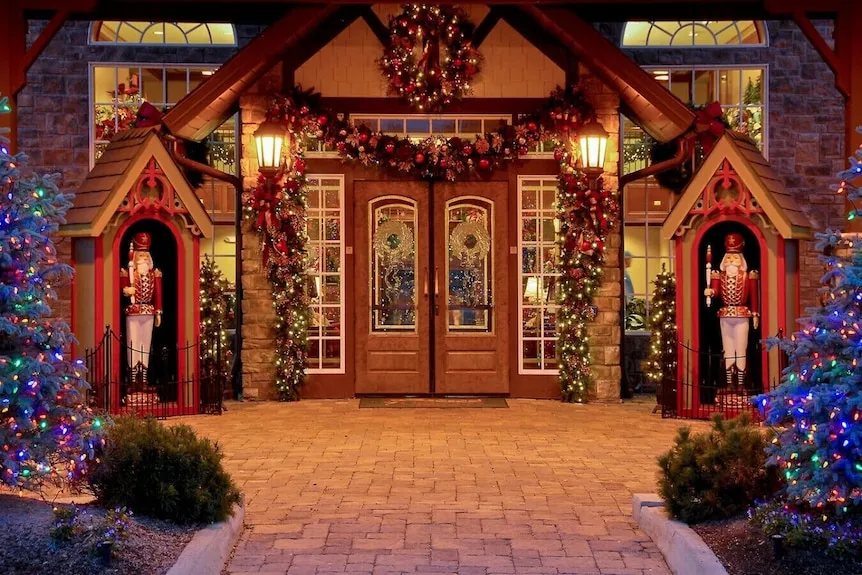
“A double-door entry like this needs vertical clearance; the nutcracker shelters and garlands need at least 9-foot ceilings and a covered landing.”
Here’s what to check:Door width: 6–8 feet total for double doors to feel grandLanding depth: 5 feet minimum to hold nutcrackers without blocking the pathPaving: brick or stone pavers no smaller than 4×8 inches, otherwise the scale gets busyFor a smaller front entry, borrow the red bow and garland idea from Idea #21 instead.
25. Gingerbread Garage Door with Ornament Garland and Conical Trees
Before hanging anything on a garage door:
- Verify your garage door opens without hitting the garland or lights.
- Use magnetic clips or outdoor-rated removable hooks — never screw into the door panels.
- Check the door’s edge clearance; many garages have less than 1/2 inch of gap.
- Ensure the two conical illuminated trees won’t block driveway clearance.
- Set timers so lights don’t run all night and trip the GFCI.
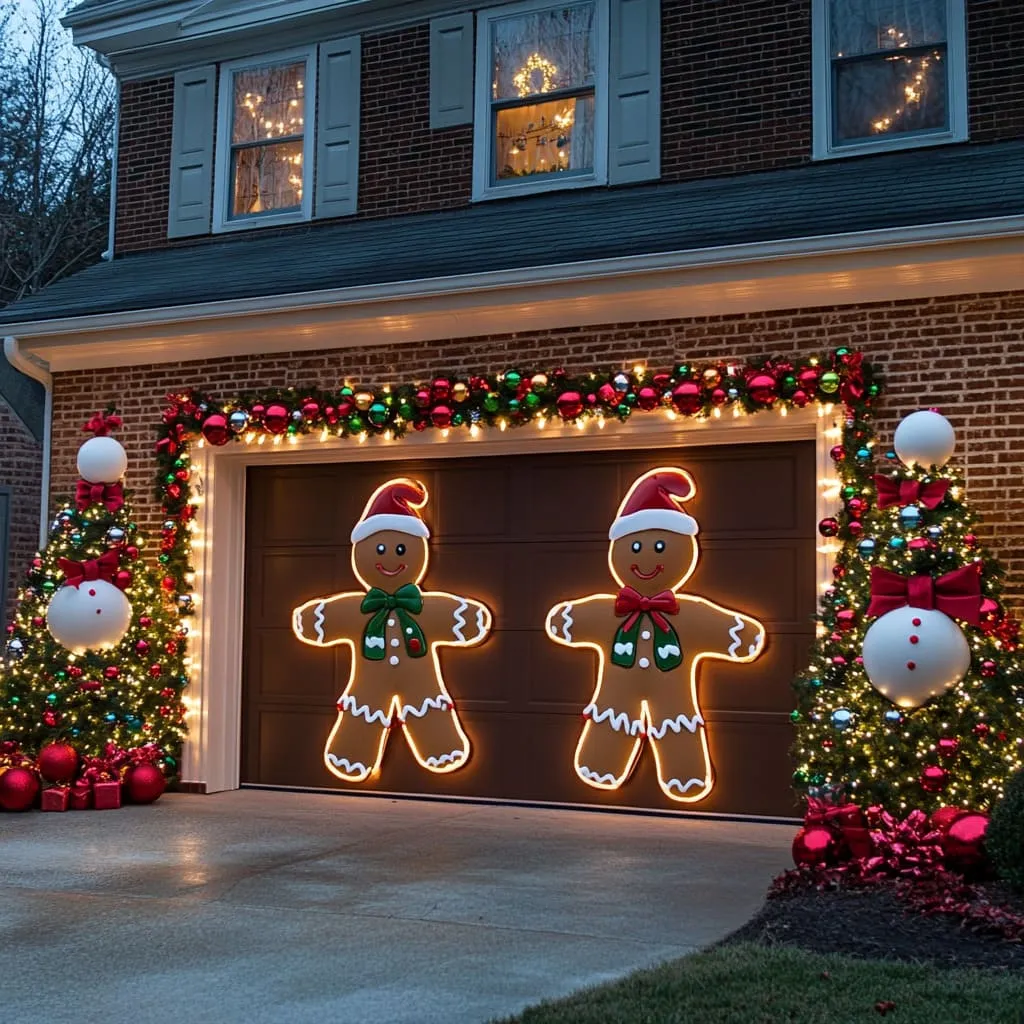
“This look balances 40% natural brick or siding backdrop, 30% garland with red and green ornaments, 20% conical trees, and 10% giant gingerbread men for high-impact fun.”
The warm white string lights keep it festive, but it’s the oversized white spherical ornaments on the trees that give it that modern, polished edge. Swap the gingerbread men for snowflakes or stars and you keep the formula while making it less specific to one theme.
Your House’s Nighttime Holiday Glow Starts Here
Pick the idea that makes you feel something — the warm white colonial glow, the over-the-top lawn figures, or the quiet starburst lights by the gutter — and start with just one section of your house. Pin this guide now so you have it when the weather turns cold and the ladder comes out.