
28 Stunning DIY Halloween Decorations for 2026 That Will Turn Heads in Your Neighborhood and Elevate Your Spooky Style to New Heights

Still scrolling through DIY Halloween decoration photos without knowing where to start? We get it. The line between charmingly spooky and just plain messy is a fine one. After filtering through hundreds of ideas, from Dollar Tree hauls to ambitious cardboard projects, we’ve found what truly works for 2026. Inside, you’ll find 28 brilliant ideas for every part of your home, covering traditional, rustic, and even minimalist styles.
The biggest shift this year is a move toward personal, story-driven decor. It’s less about buying a kit and more about combining simple materials in clever ways to create something totally unique. And stay until the end—we break down the most common mistakes that can ruin these looks. 📌 Save this to Pinterest for later—you’ll want to revisit these ideas.
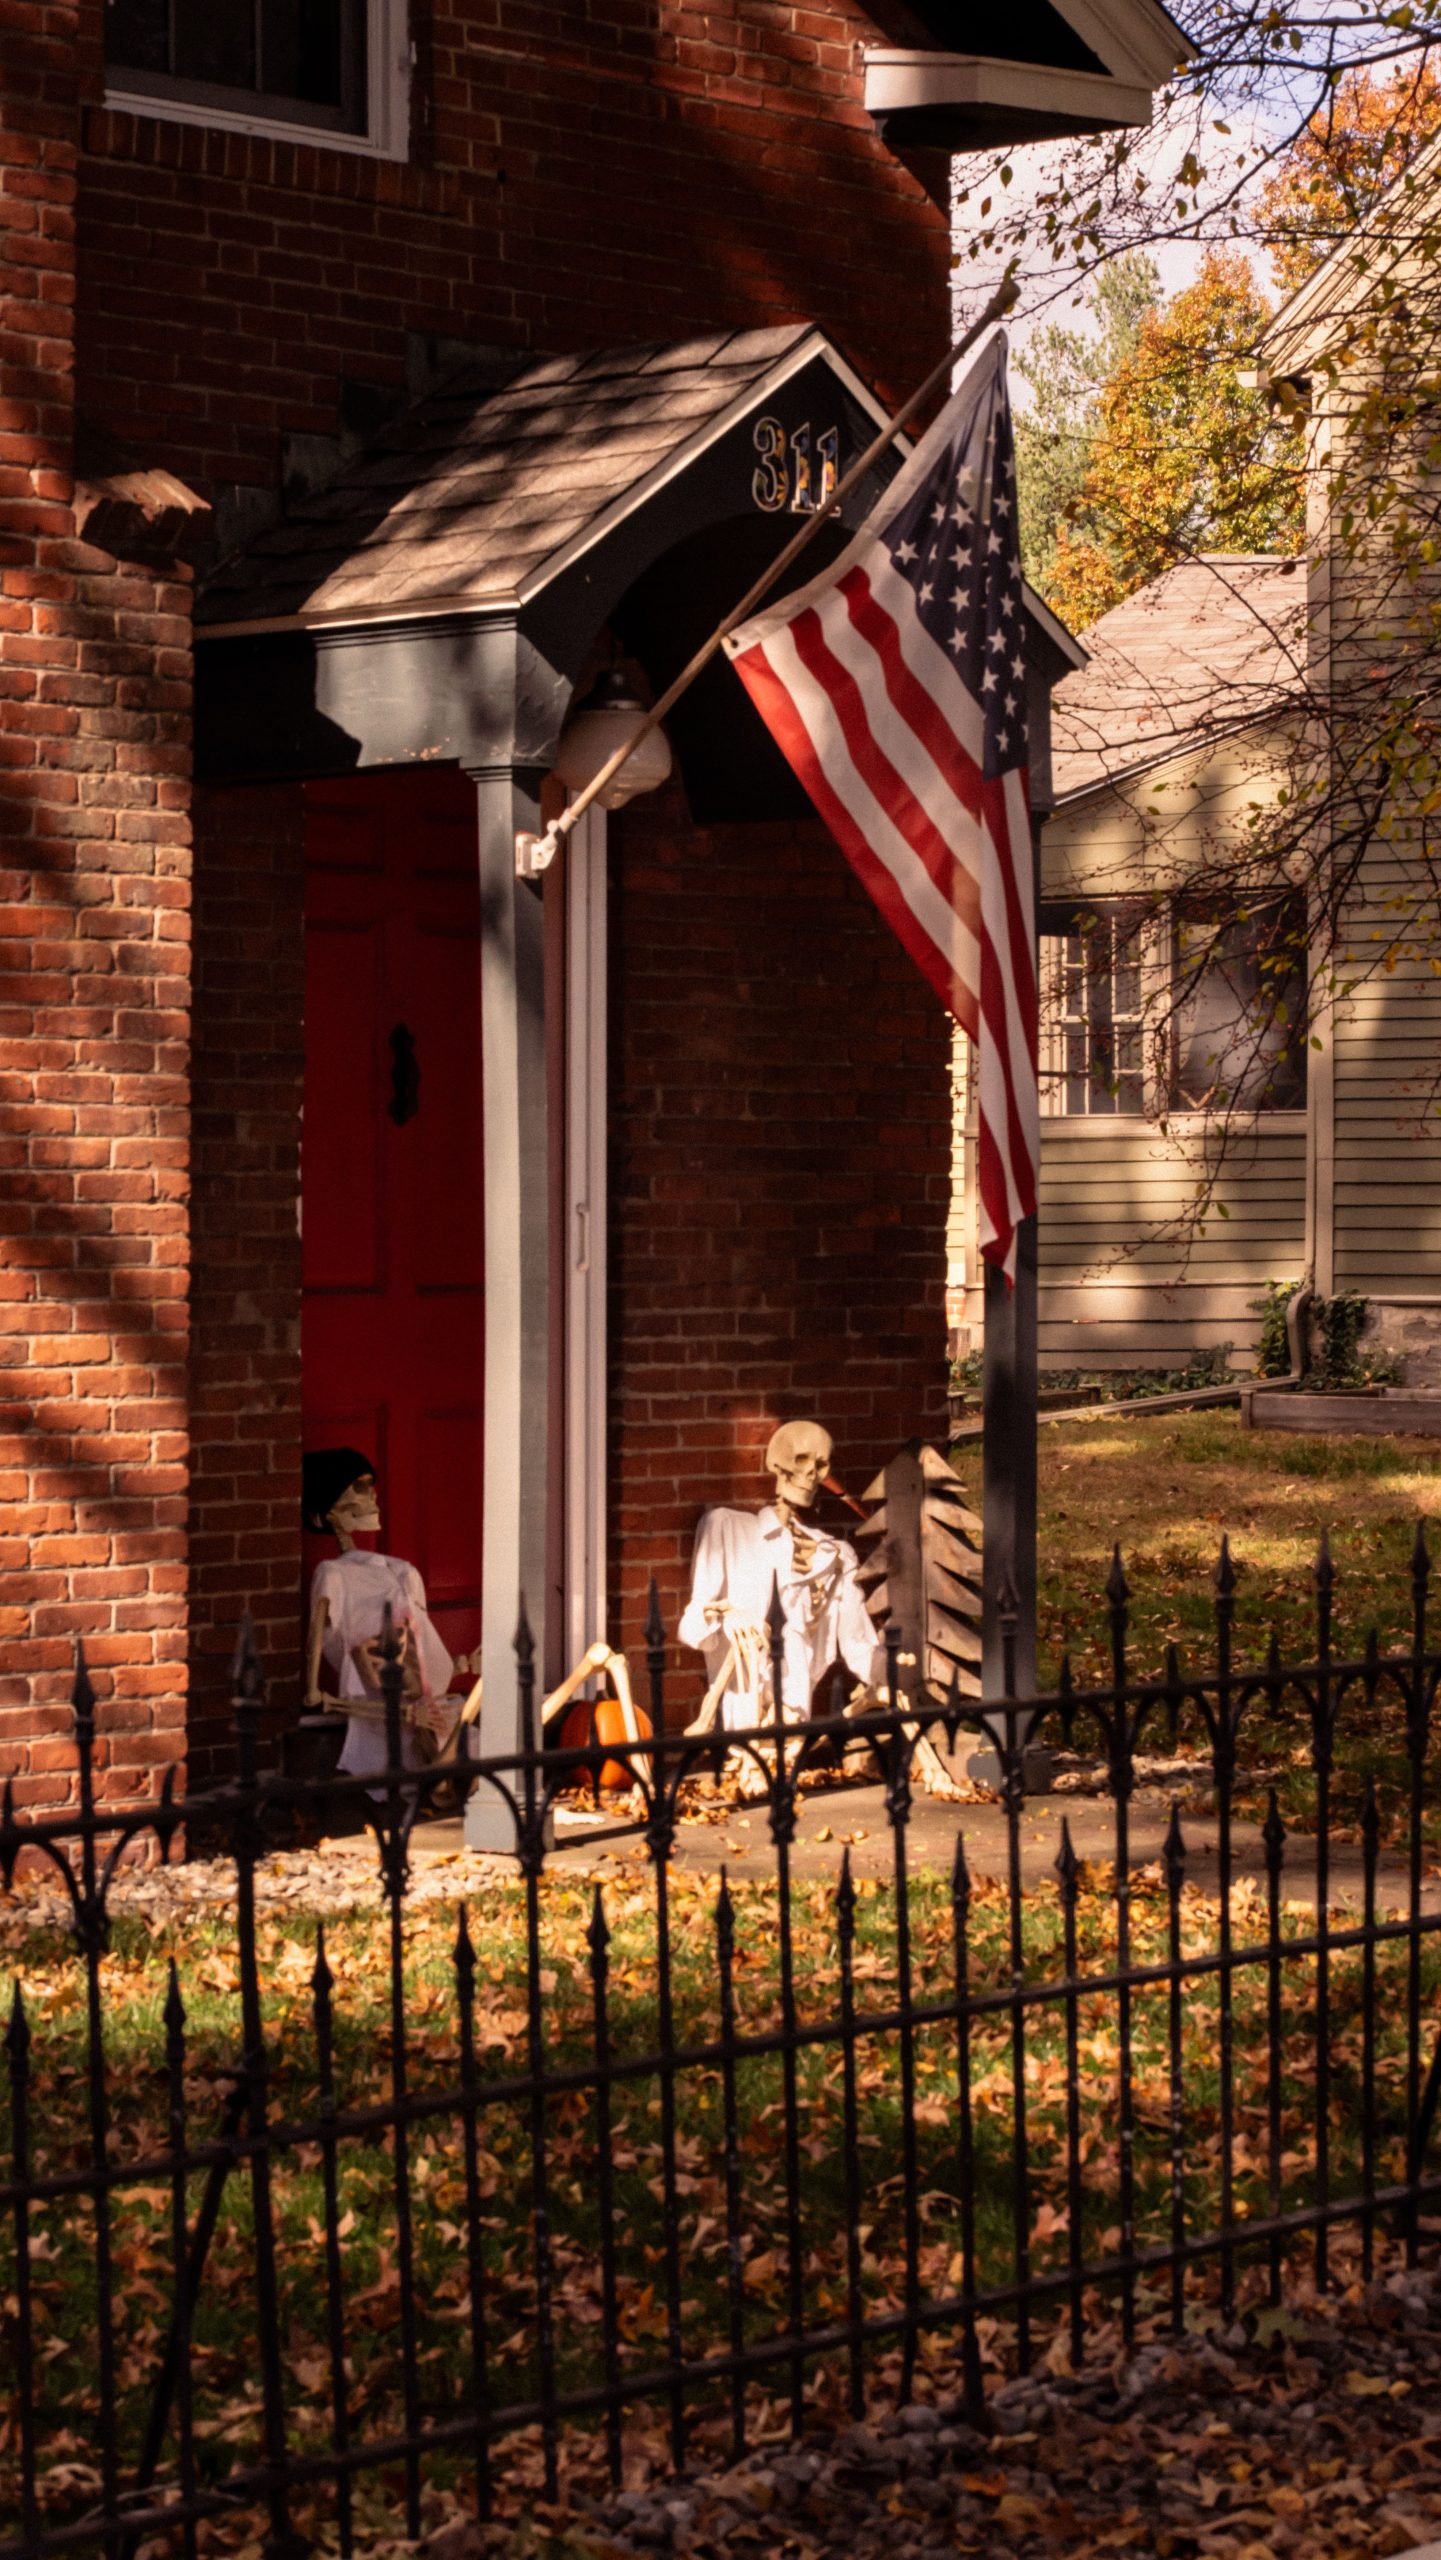
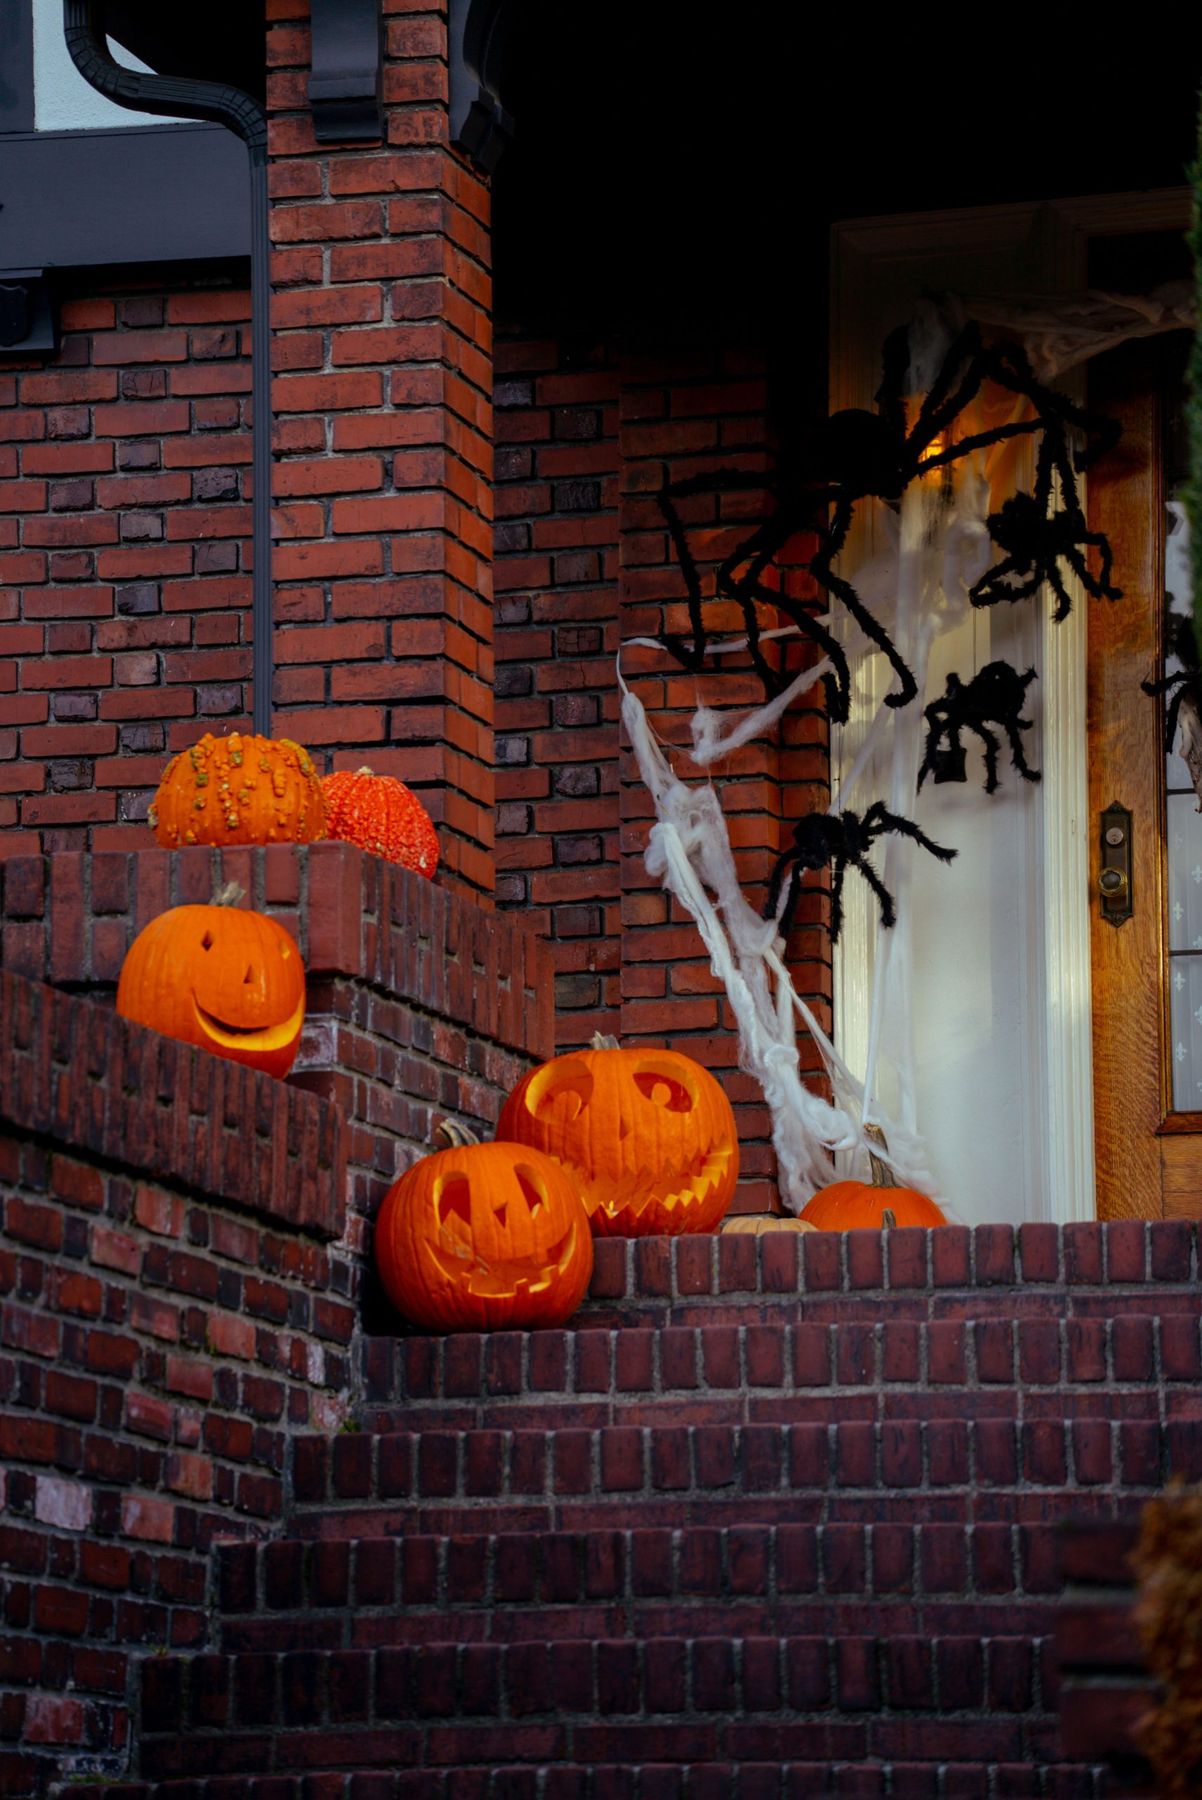
1. Classic Brick Porch with Carved Pumpkins and Climbing Spiders
This look is a masterclass in classic Halloween charm. The magic is in the layering of textures and iconic motifs. The roughness of the red brick and stone steps provides a perfect rustic backdrop for the smooth, glowing jack-o’-lanterns. By clustering the pumpkins and gourds on the steps, it creates a sense of abundance and guides the eye upward toward the focal point: the spider-infested front door. The contrast between the natural, warm pumpkins and the stark, creepy black spiders adds just the right amount of spooky tension without being overly scary.
“While this setup looks fantastic, remember that real pumpkins have a shelf life.”
Carved jack-o’-lanterns typically last 5-10 days, depending on your climate. In warmer, more humid areas, they may start to mold or collapse sooner. To extend their life, give the carved surfaces a light wipe with a bleach solution. The artificial cobwebs are notorious for trapping leaves and debris, so plan on a bit of cleanup after a windy or rainy day. For a lower-maintenance version, use craft pumpkins that you can reuse year after year.
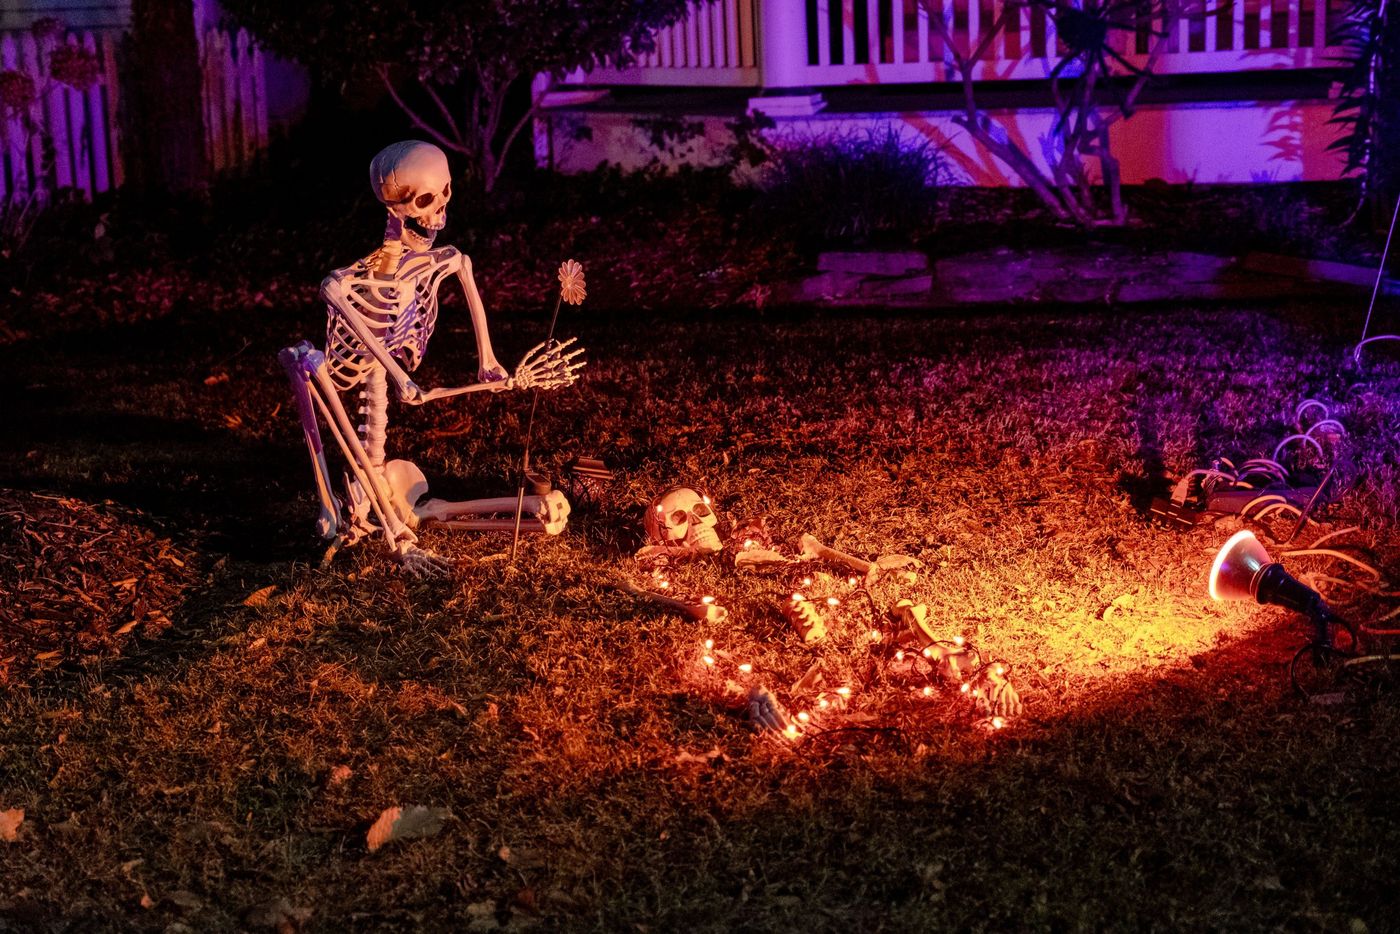
2. Dramatic Lawn Skeleton Scene with Purple and Orange Lighting
When using spotlights for a yard display, the secret is strategic placement. Don’t just point them straight at your props. Instead, position your purple and orange floodlights at low angles, aiming upwards. This technique, called uplighting, creates long, dramatic shadows and makes the objects feel larger and more imposing. For a scene like this, place one purple light behind the skeleton to create a spooky silhouette and an orange light in front and to the side to highlight the details of the bones and the small flower prop. This creates depth and a professional, theatrical quality.
“Take away the dramatic lighting, and you just have a plastic skeleton kneeling in the grass.”
The lighting is everything. It’s what transforms a simple prop into a cinematic, eerie moment. The combination of deep purple and vibrant orange is an unexpected twist on the traditional Halloween palette, creating a modern, high-contrast look that feels both spooky and strangely beautiful. The focused beams of light draw you into the small story being told on the lawn, making it an intentional and captivating vignette rather than just a random decoration.
3. Patriotic Porch Skeletons with a Bright Red Door
A quick heads-up if you’re planning on recreating this friendly-but-spooky look: life-sized skeletons are surprisingly lightweight. A strong gust of wind can send them tumbling, potentially damaging them or your porch railings. Use clear zip ties or fishing line to discreetly secure your bony friends to chairs, pillars, or railings. Also, be mindful of your entryway’s traffic flow. Make sure your seated skeletons aren’t blocking the main path to the door, especially for trick-or-treaters or delivery people. A patriotic and spooky porch is great, but a tripping hazard is not.
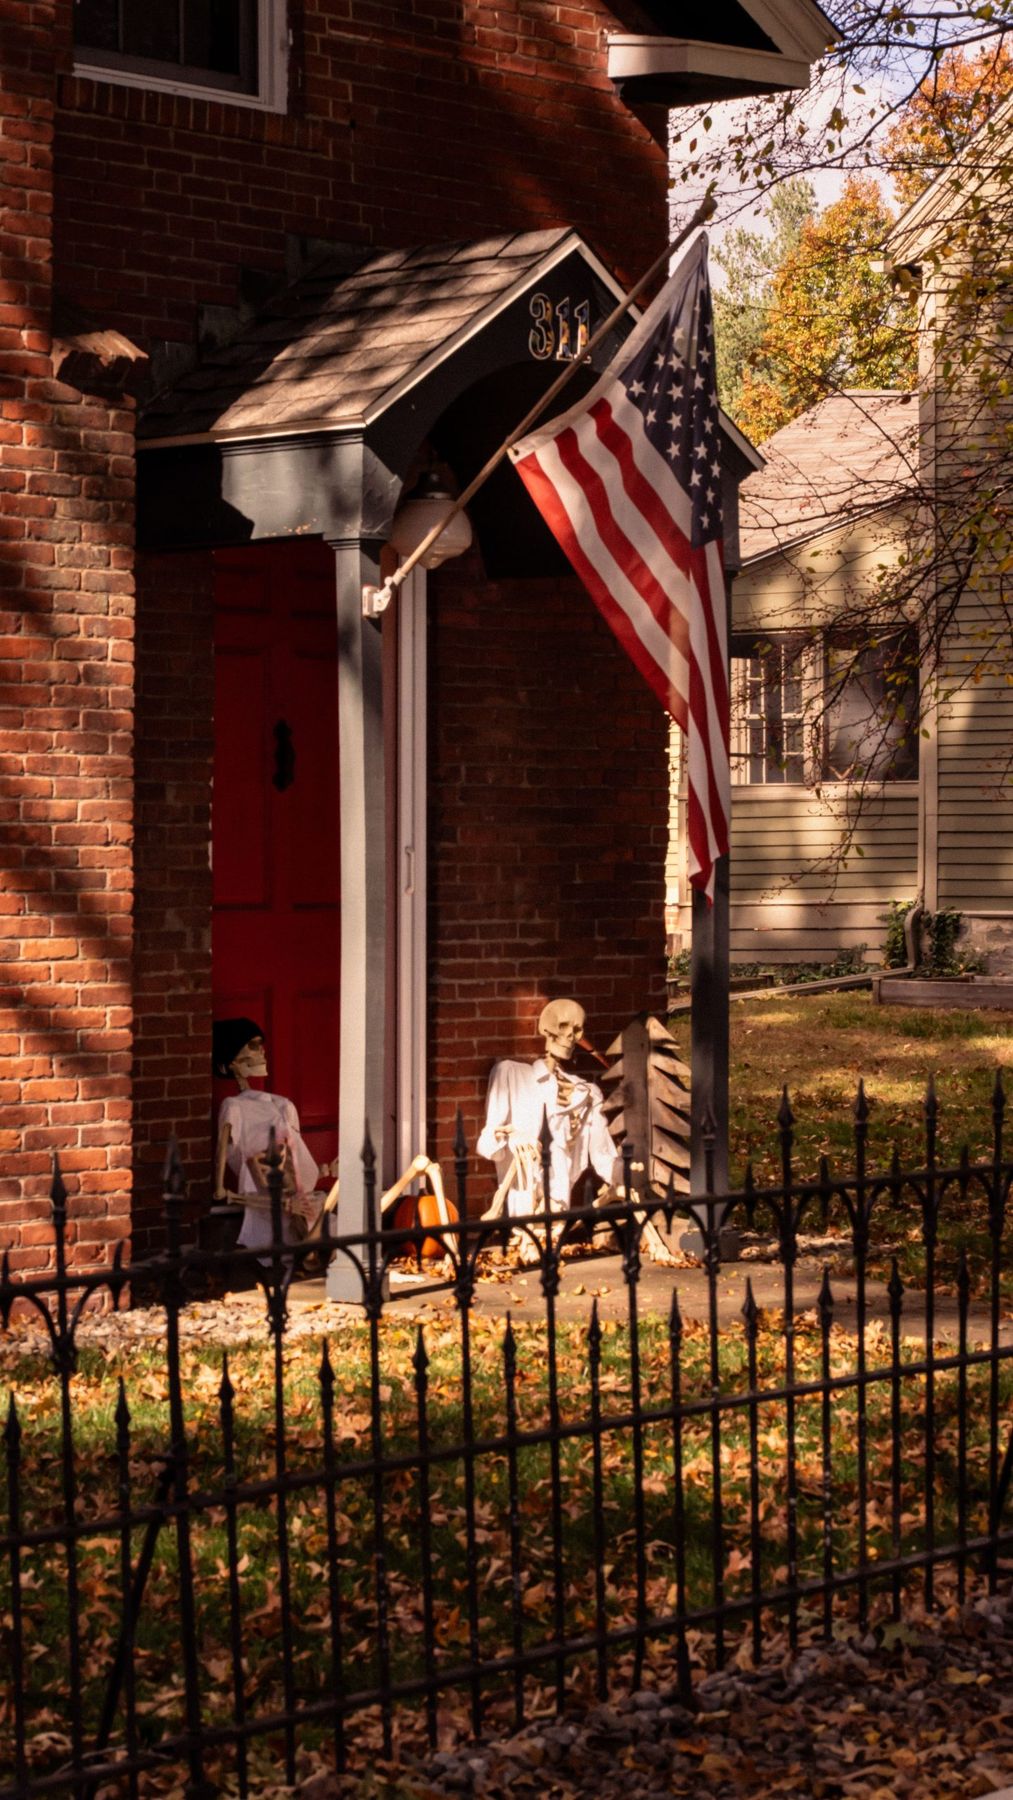
“The visual recipe here is surprisingly balanced: 40% traditional Americana (the red door, the flag, the brick), 40% classic Halloween (the two skeletons), and 20% natural autumn (the scattered leaves).”
The key is how the colors interact. The bright red of the door provides a vibrant, cheerful base that keeps the skeletons from feeling too macabre. The black fence and off-white bones act as strong graphic elements. You could easily swap the American flag for a simple autumn wreath and still maintain the same festive, balanced feel.
4. Tiered Porch Display with Mums and a Single Jack-O-Lantern
This arrangement is so effective because it uses varying heights to create visual interest. The tiered wooden crates elevate the potted mums and gourds, preventing them from looking like a flat, cluttered pile on the porch. This verticality draws the eye up and around the entire display. The design also expertly balances color and texture. The vibrant magenta of the mums pops against the weathered gray wood and terracotta tile, while the singular carved jack-o’-lantern acts as a clear, festive focal point. It’s a structured yet rustic look. Compare this with the lush feel of Idea #21.
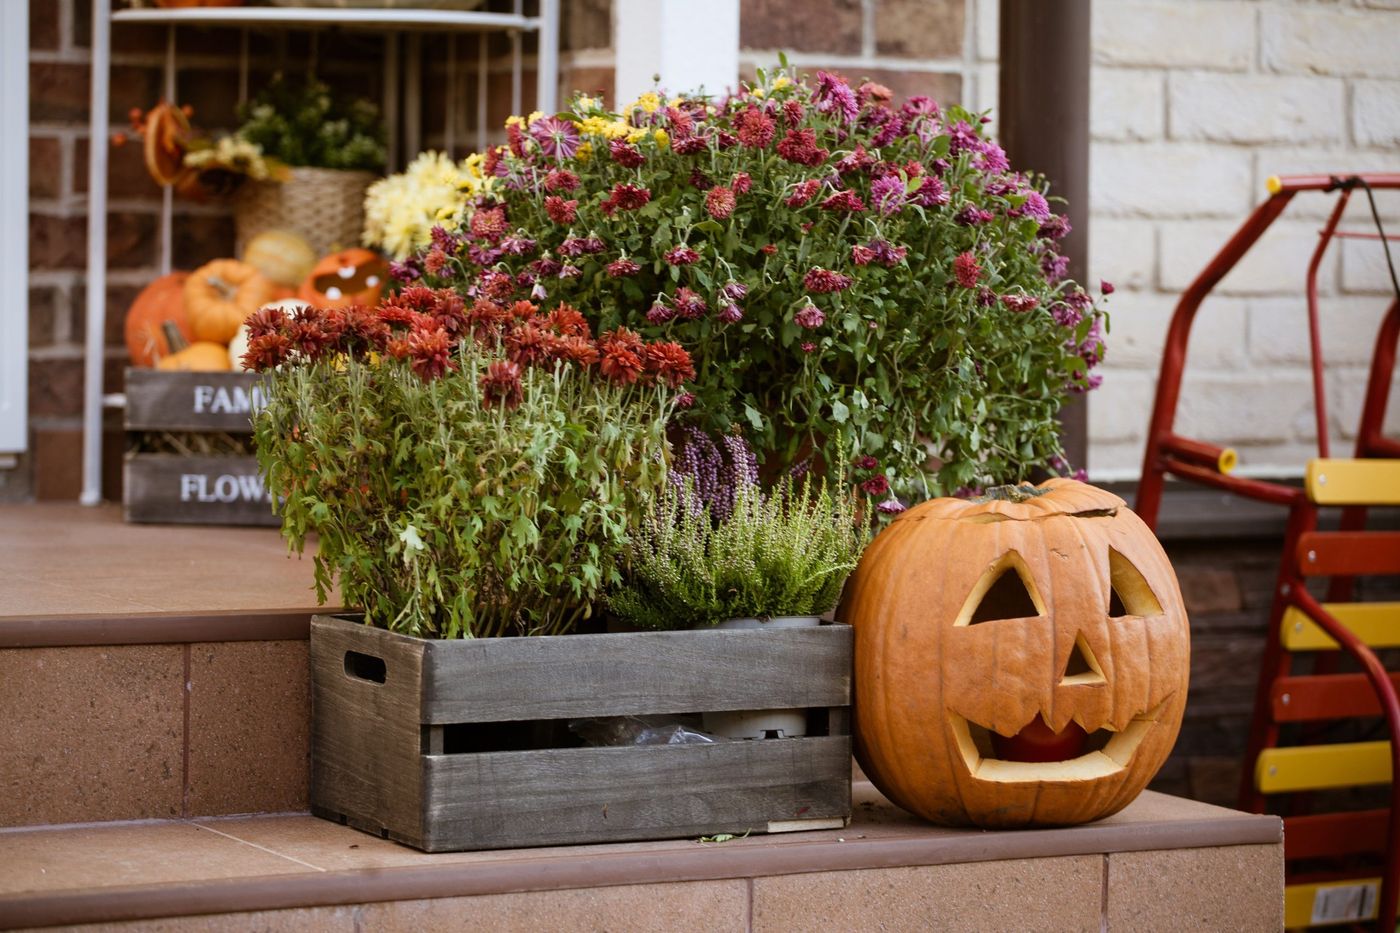
“You don’t need a huge budget to get this cozy, layered harvest vibe.”
Check Facebook Marketplace or local yard sales for old wooden crates—people often give them away for free or sell them for under $10. Instead of nursery chrysanthemums, which can be pricey, grab a few smaller pots from a hardware store like Lowe’s for about $5-$8 each. Forgo the garden cart and focus on finding a variety of pumpkins and gourds at a local farm stand, where you can often get more for your money than at a grocery store. The whole look can be achieved for under $50.
5. Spooky Front Porch with a Giant DIY Spider Web
Creating a giant spider web is easier than it looks and makes a huge impact. Here’s a quick guide for a porch column version. Time: 45 mins. Cost: $10-15.
- Start with a ball of thick white yarn. Tie the end to your porch column or a hook near the roofline.
- Create the ‘spokes’ of your web by running long pieces of yarn from the central point out to surrounding anchor points (railings, wall hooks, etc.), forming a star shape.
- Once your spokes are secure, start weaving the spiral. Tie a new piece of yarn to one of the spokes near the center.
- Weave this yarn around the spokes, looping it once around each spoke as you go to secure it. Keep the yarn slightly slack to create a draped effect.
- Continue spiraling outwards, leaving more space between the lines as you get bigger. Tie it off and you’re done!
Remember to measure twice and cut your yarn spokes once for a clean, symmetrical look.
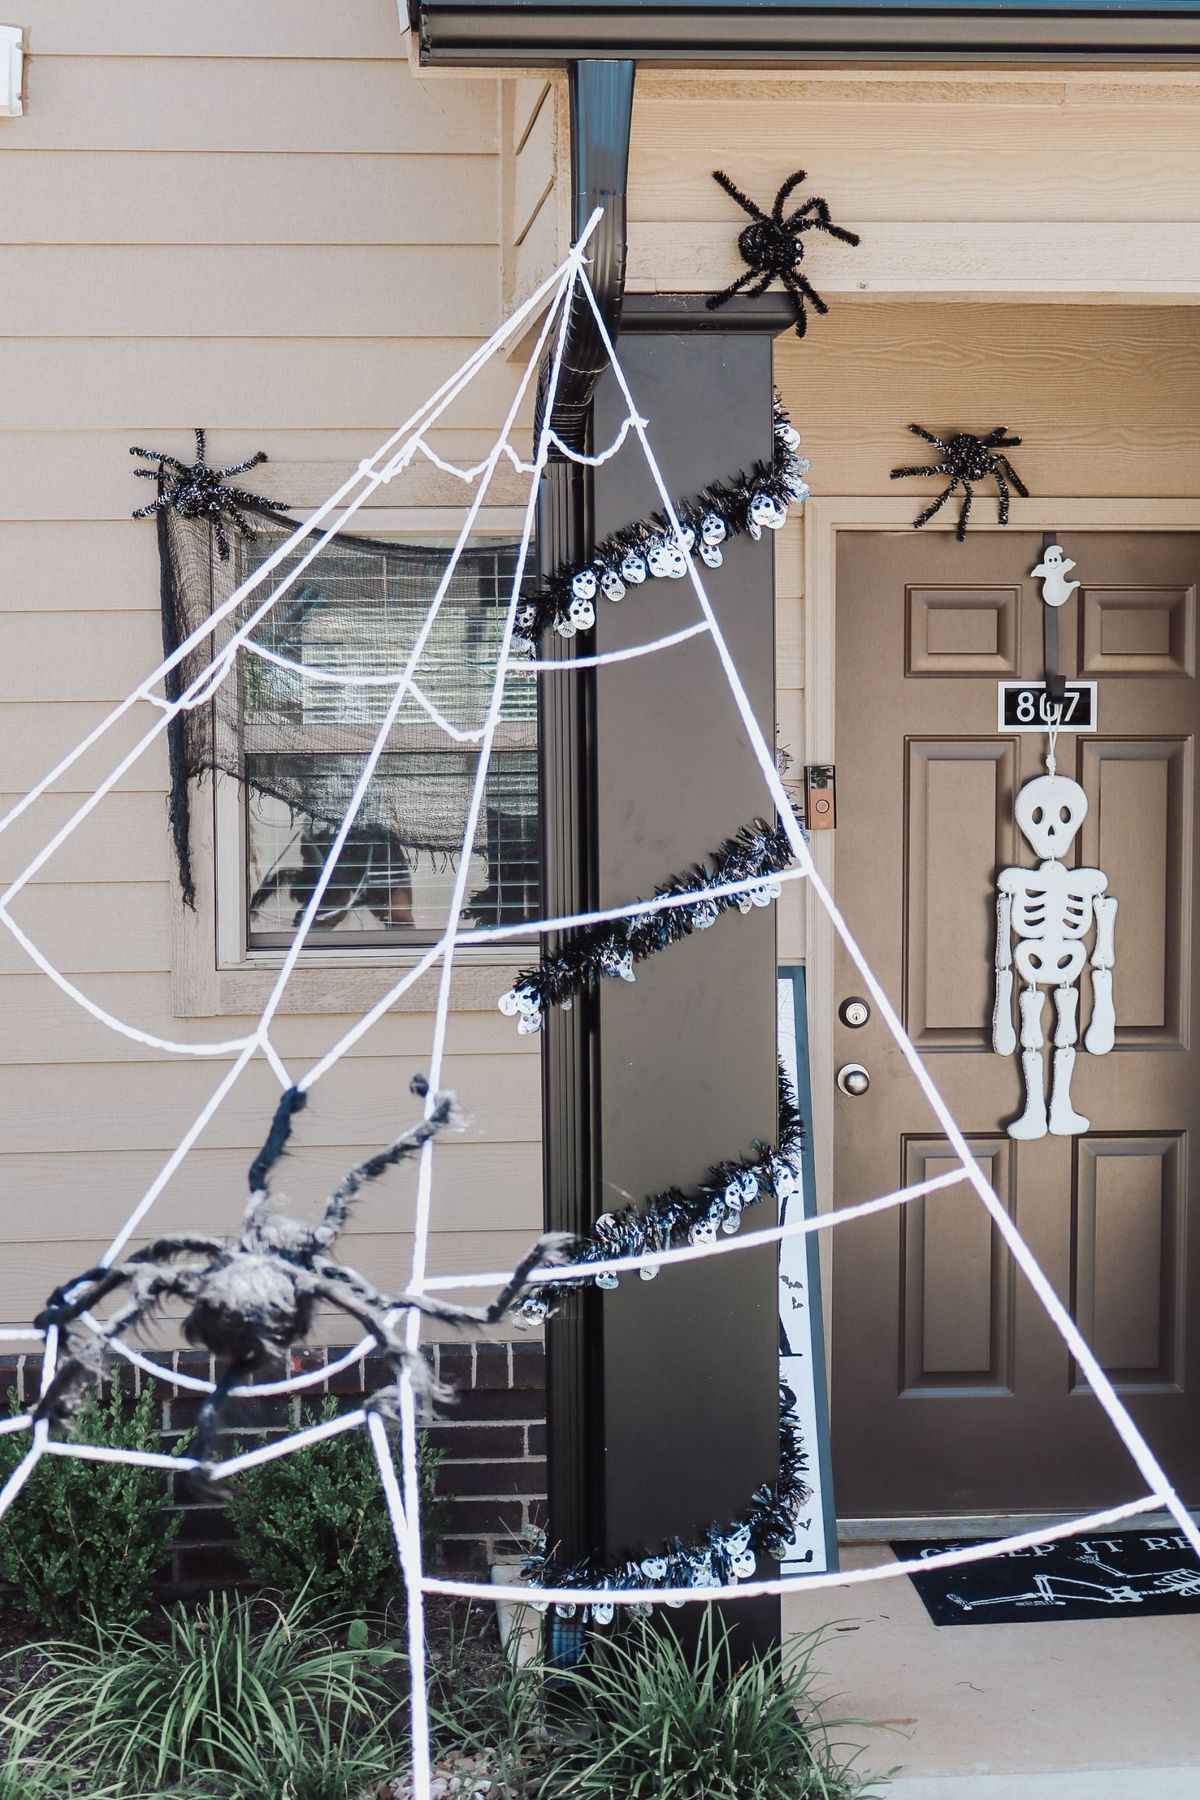
“This idea is perfect for porches with at least one vertical element, like a column, post, or even the corner of the house.”
You need a minimum width of about 6-8 feet to make the web look substantial and not cramped. The ideal ceiling height for the anchor point is at least 8 feet to allow the web to span dramatically. If your porch is smaller, consider scaling this down to a single window frame. A similar spider-centric idea, but for a tabletop, can be seen in Idea #8, which works in any size space.
6. Entryway Ghosts Made from Paper Lanterns and Cobwebs
The patterned tile on the stair risers is a fantastic detail that adds personality year-round, but it really shines here. If you’re considering a similar project, don’t feel locked into expensive cement tiles. You can get this exact look for a fraction of the cost using peel-and-stick tile decals. They’re renter-friendly, easy to apply, and come in thousands of patterns. For an outdoor application like this, just make sure to choose a high-quality, waterproof vinyl and thoroughly clean the riser surface before applying for maximum adhesion.
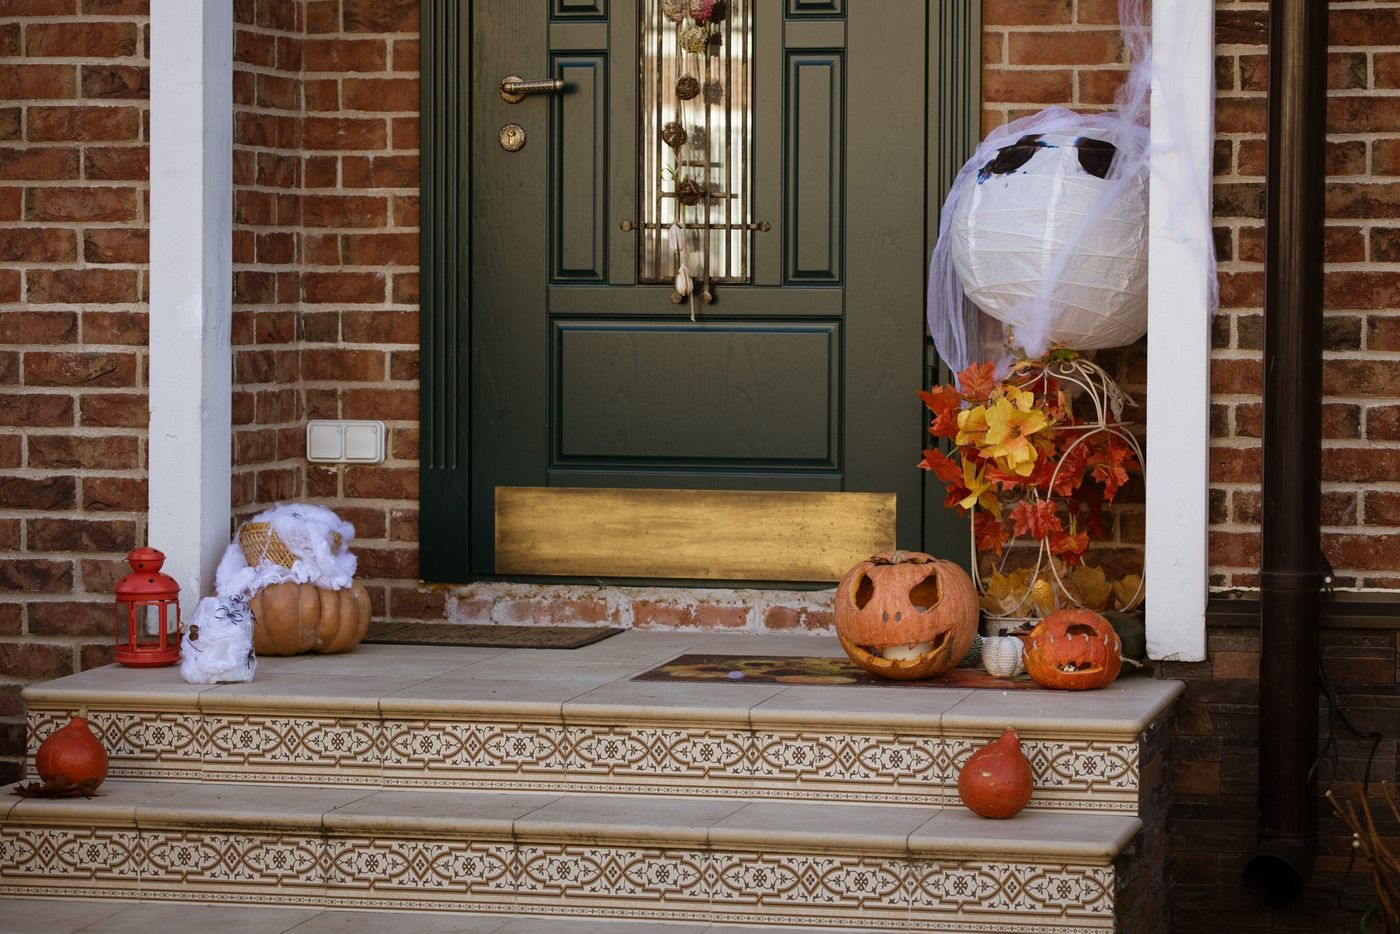
“This charmingly spooky porch look is incredibly budget-friendly and focuses on clever DIY crafts.Paper Lanterns (pack of 5): $10 – $15Bag of Stretchy Spiderwebbing: $2 – $5Carved Pumpkins (2-3): $15 – $30 (or use craft pumpkins for a one-time cost)Red Metal Lantern: $20 – $40Paint for Door (if needed): $30 – $50TOTAL: $77 – $140Budget alternative: Use white plastic grocery bags instead of paper lanterns.”
Stuff them with newspaper, drape with cheesecloth, and draw on faces with a marker for nearly free ghosts.
7. Giant Ground-Emerging Skeleton with Glowing Red Eyes
The single most important element here is the illusion of emergence. This isn’t just a skeleton placed on the lawn; it’s a creature breaking free from the earth. The way the torso is partially buried and the hands are angled as if pushing up from the dirt is what sells the story. Without that careful positioning, you’d lose the dynamic action that makes it so creepy and captivating. The glowing red eyes are a great accent, but the pose is what does all the heavy lifting for the imagination. For a similar but less intense version, check out Idea #27.
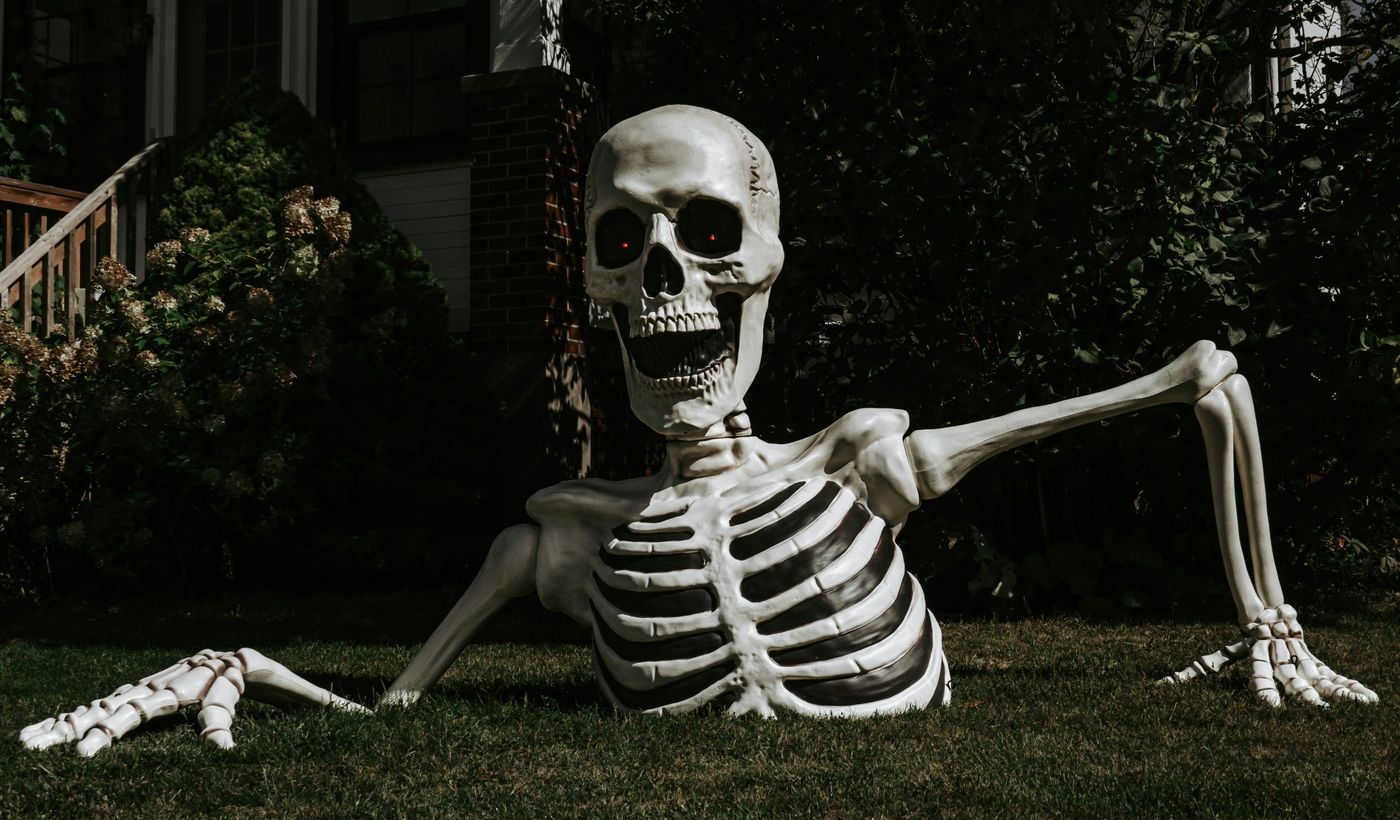
“While this prop is a showstopper, be prepared for a bit of upkeep.”
The molded plastic is durable, but the electronic components for the LED eyes are often not 100% waterproof. To prevent them from shorting out in the rain, you can apply a bead of clear silicone caulk around the battery compartment seal. The off-white plastic can also pick up dirt and grass stains, so a quick wipe-down with a damp cloth after Halloween, before storing it, will keep it looking fresh for next year. Make sure it’s completely dry before packing it away to prevent mildew.
8. Fuzzy Black Spider Atop a Straw Bale with Eyeball Lanterns
This playful look is all about a simple, effective formula: 60% rustic texture + 30% spooky character + 10% quirky detail. The straw bale provides the huge dose of rustic, autumnal texture. The giant fuzzy spider is the undeniable spooky hero of the scene. And the hand-painted eyeball lanterns are that crucial 10% of weirdness that makes it memorable. You could swap the spider for a skeleton or the eyeball lanterns for mini pumpkins, and the formula would still work because the ratio of rustic base to spooky focal point remains the same.
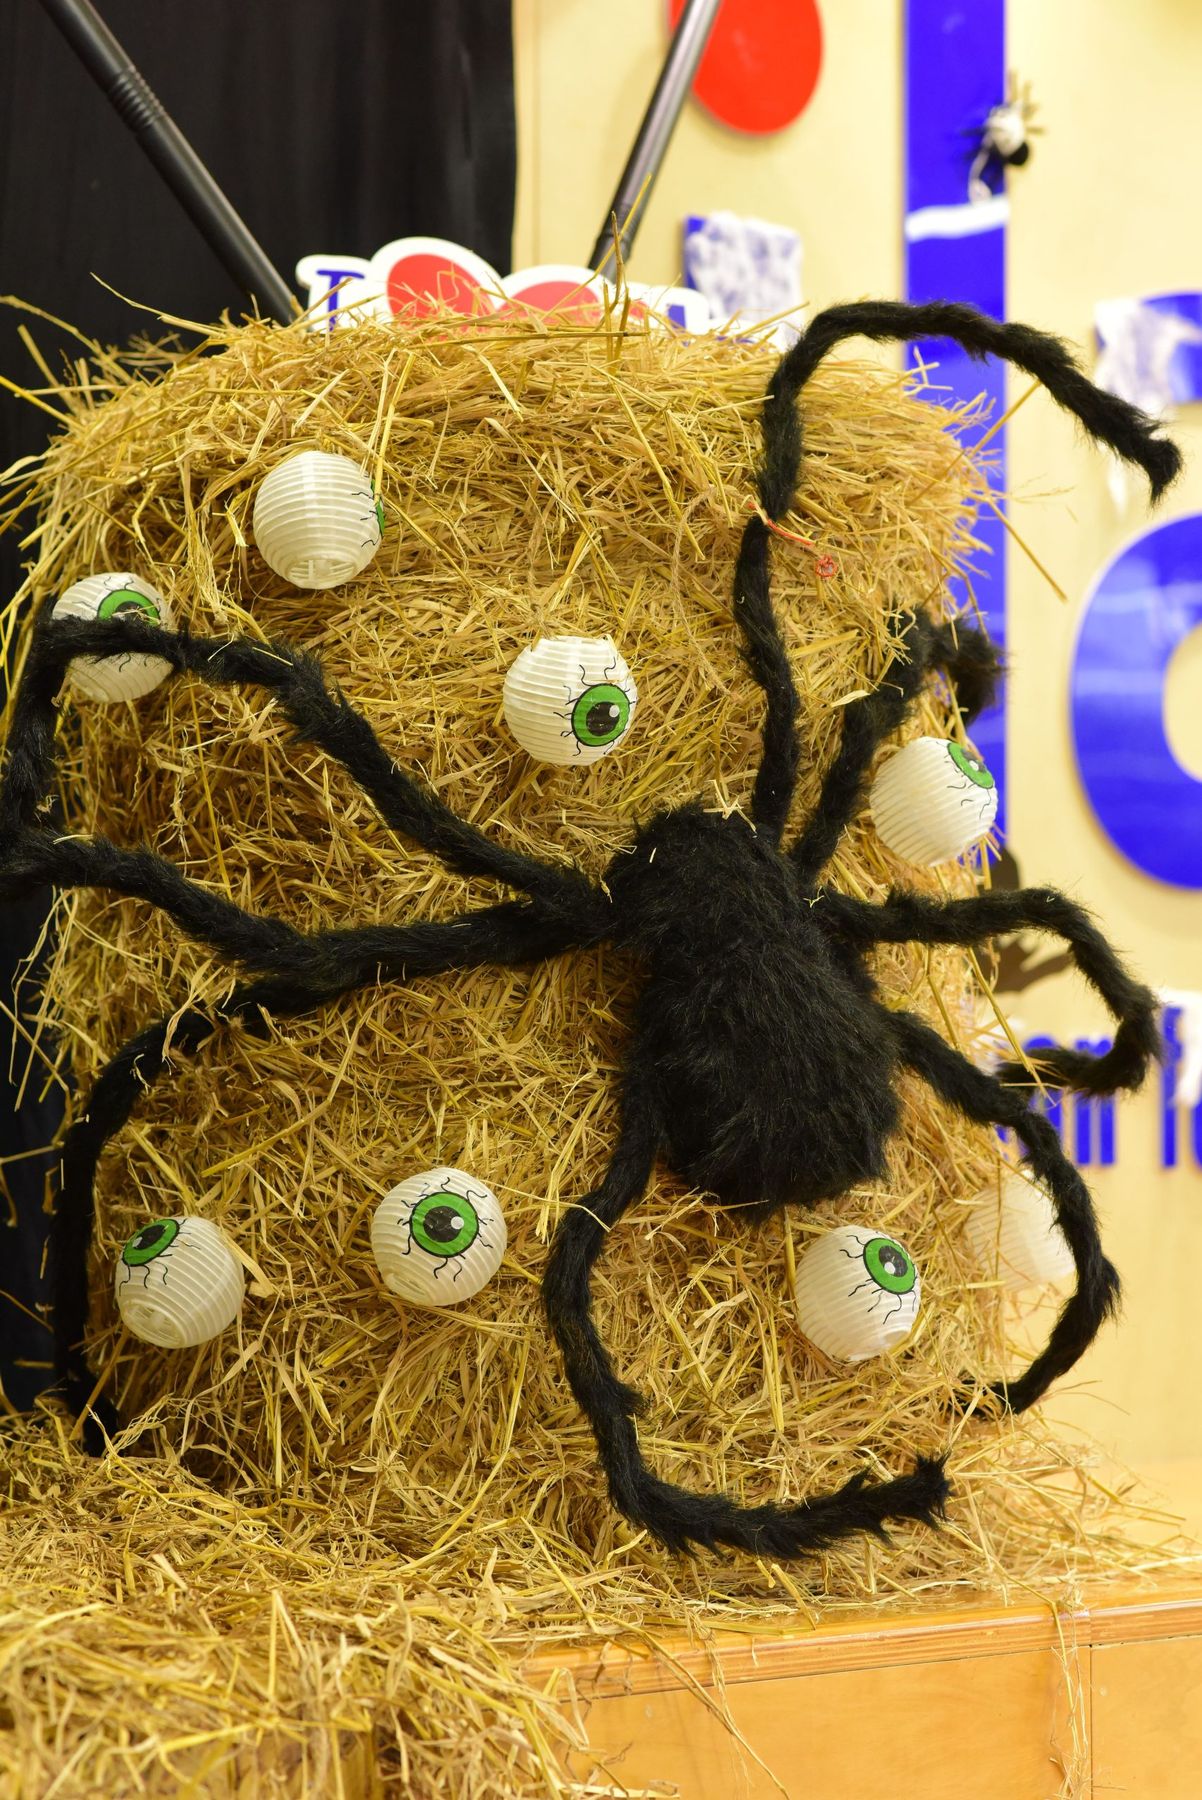
“A full-sized straw bale can cost $15-$25 and be messy.”
Get the same vibe for less! Head to a craft store like Michaels or Joann for a small decorative hay bale for about $10. You can find a medium-sized fuzzy spider at Target or Walmart for around $12. The real savings are the eyeballs: grab a pack of white paper lanterns and a green marker from the Dollar Tree for a total of $3. You can create this entire vignette for under $25, and it’s perfect for a porch, balcony, or even an indoor corner. Compare the spider here with the one in Idea #5.
9. Illuminated Front Yard Graveyard with a Celtic Cross
This spooky scene works so well because of its smart use of lighting to create atmosphere and depth. The warm string lights on the porch in the background create a cozy, inviting glow that contrasts beautifully with the eerie, shadowy graveyard in the foreground. This layering of light makes the scene feel more dimensional. The focal Celtic cross tombstone is large and detailed, acting as an anchor for the entire display. The scattered spider webs catch the light just enough to add texture and another layer of spookiness, tying it all together.
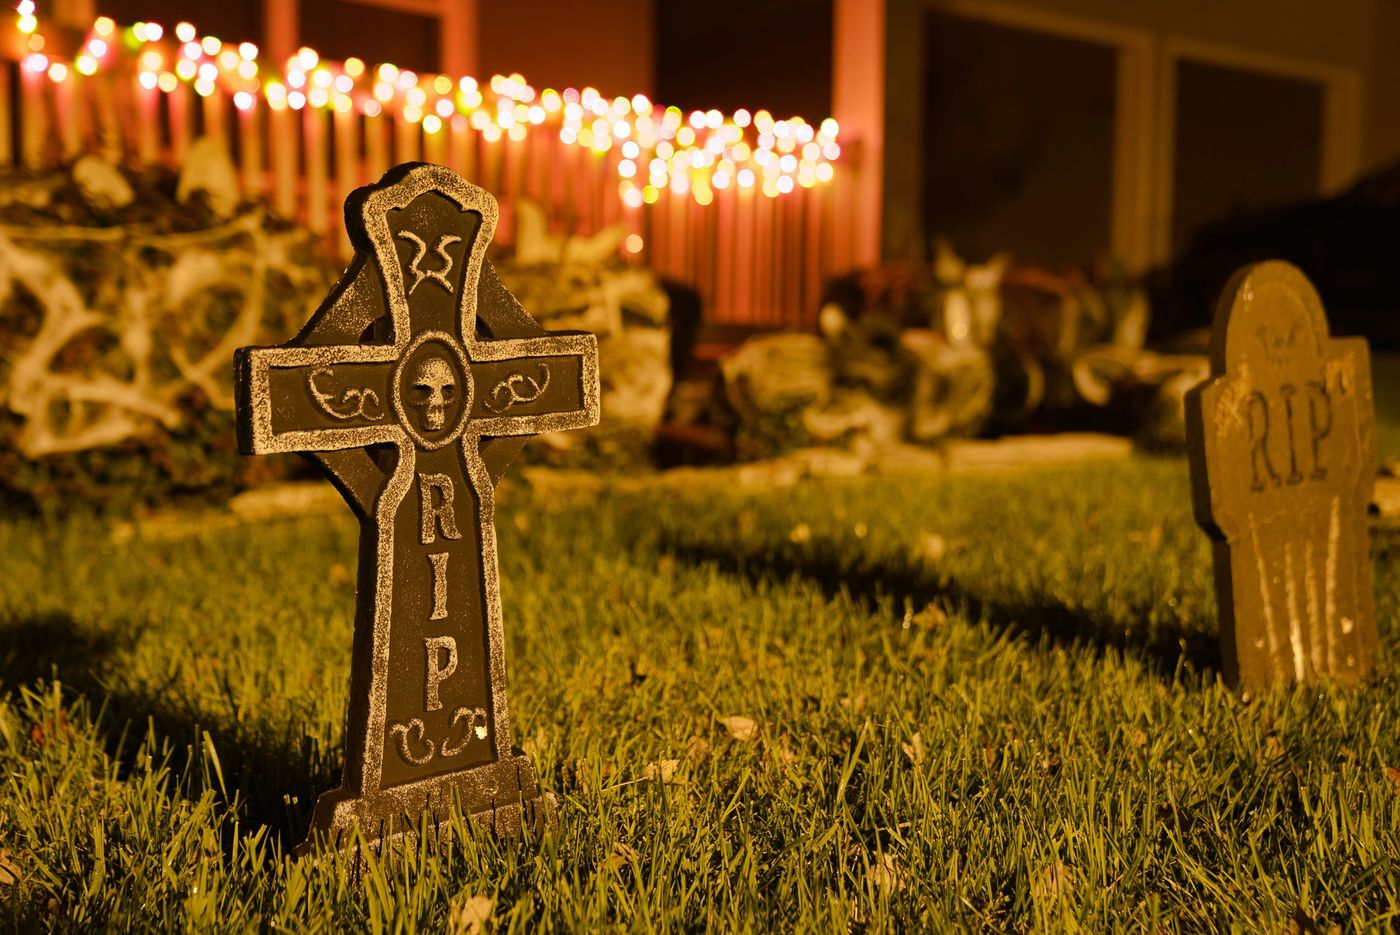
“To make foam gravestones look less like, well, foam, give them a quick and easy paint job.”
Get a can of dark gray or black matte spray paint and a can of a lighter stone-textured spray paint. First, lightly spray the gravestones with the dark color, focusing on the crevices and edges to create depth. Before it dries completely, lightly mist the whole thing with the stone-textured paint from about 18 inches away. This adds a speckled, realistic finish that takes them from party-store-basic to movie-prop-moody in minutes.
10. Rustic Farmyard Ghost Display with Spiderweb Netting
This is a large-scale idea that thrives on having room to breathe. It’s best suited for a larger front yard, a farm, or a commercial space like a pumpkin patch. You’ll want at least a 20×20 foot area to properly stage the ghosts, pumpkins, and hay so they don’t look crowded. The spiderweb-covered structure in the back needs to be significant—like a barn wall, a large shed, or a dense line of tall trees—to provide a proper backdrop. For a smaller yard, scale down to a single ghost figure and a smaller web, like the hanging ghosts in Idea #11.
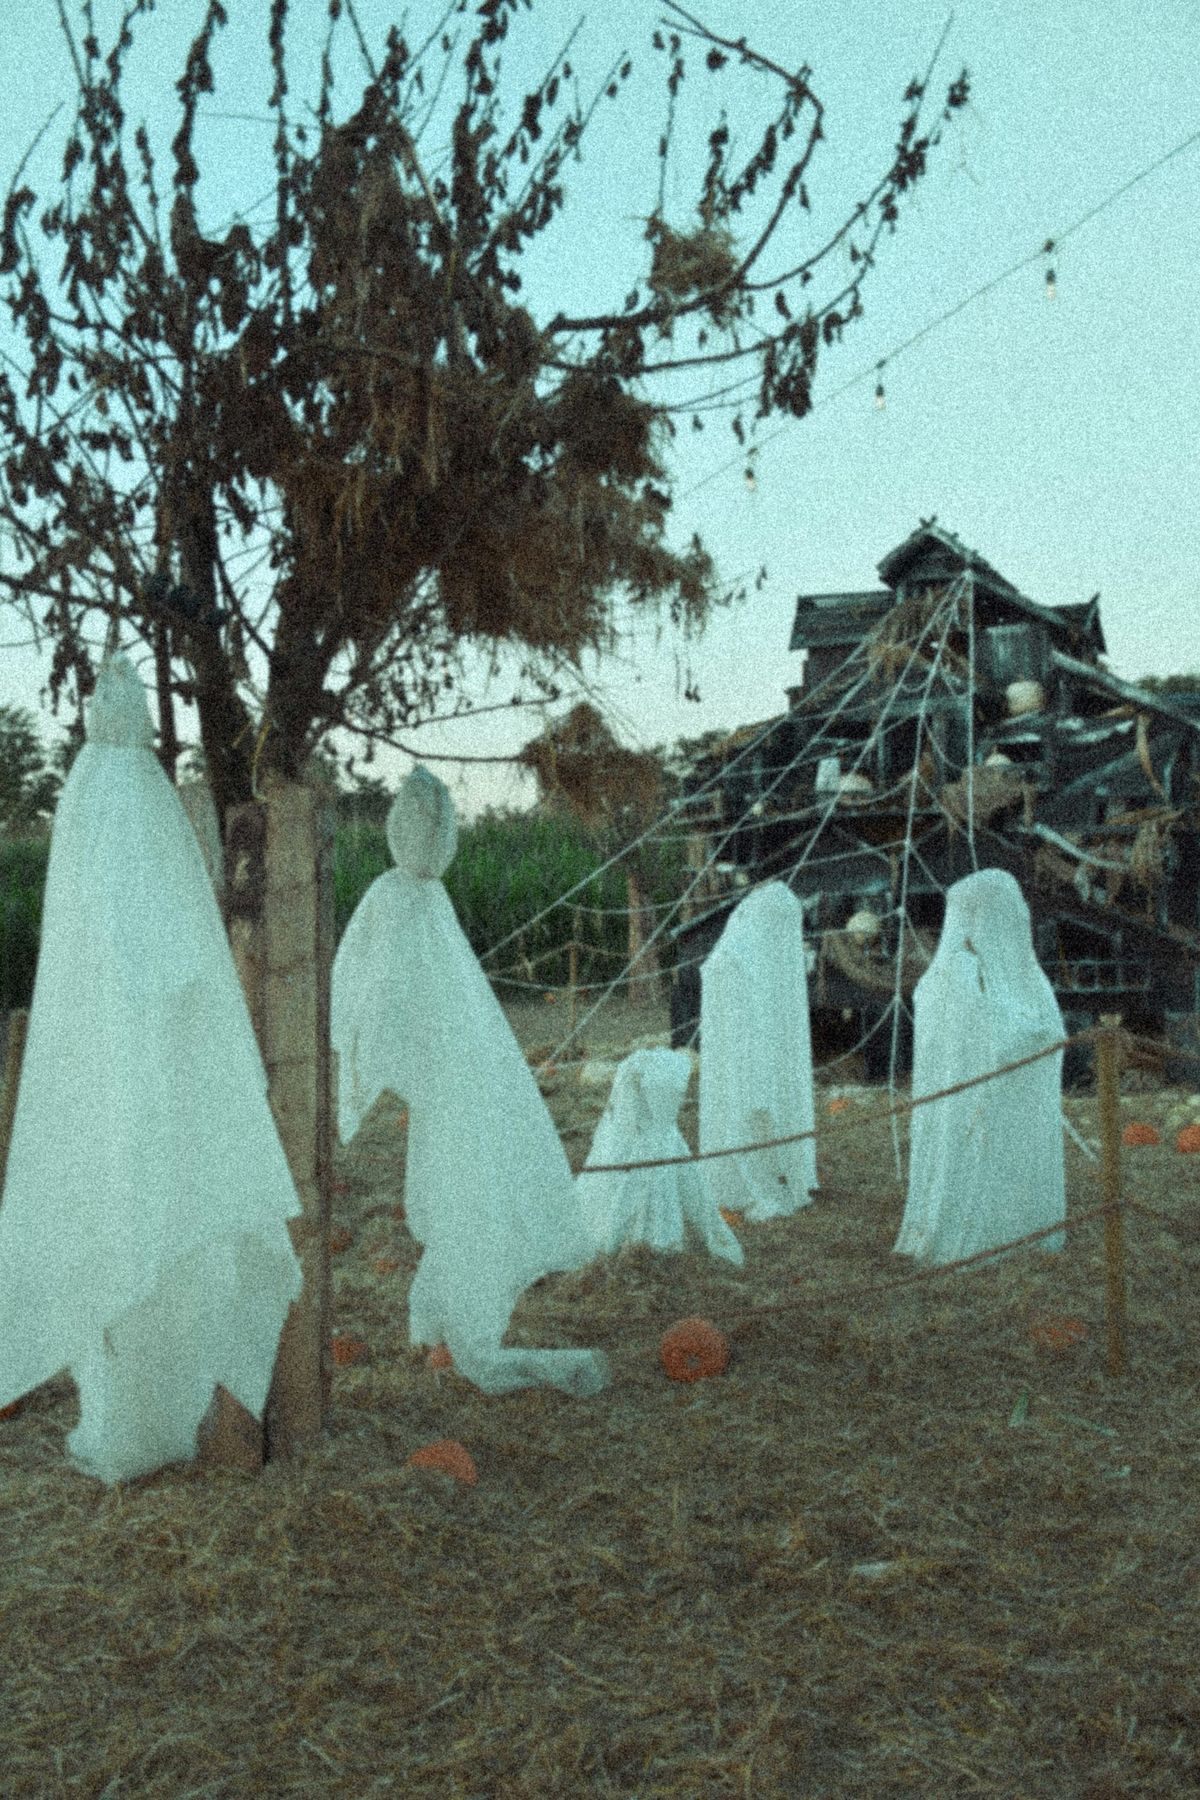
“Let’s be honest: white fabric and a farm do not mix well.”
These beautiful draped ghosts will inevitably get dirty from dust, mud, and moisture. If you plan to reuse them, opt for a durable, machine-washable fabric like a cheap white bedsheet rather than delicate cheesecloth. Also, the large-scale spider webbing is a magnet for leaves, twigs, and actual spiders. Plan for a slightly messy cleanup at the end of the season. It’s a fantastic look, but it’s one that embraces the beautiful decay of the season—dirt and all.
11. Floating White Ghosts Hanging from Tree Branches
The key to this hauntingly beautiful look is the fabric. It’s not a solid white sheet; it’s a sheer, tattered, gauzy material. This choice is brilliant for two reasons. First, it allows the ghosts to catch the wind and float and billow in a truly spectral way. A heavier fabric would just hang limply. Second, the translucency makes them feel ephemeral and otherworldly, especially when backlit by the moon or landscape lighting. The skeletal hands holding the lanterns are a great detail, but the ethereal quality of the fabric is what makes these figures so effective and genuinely creepy.
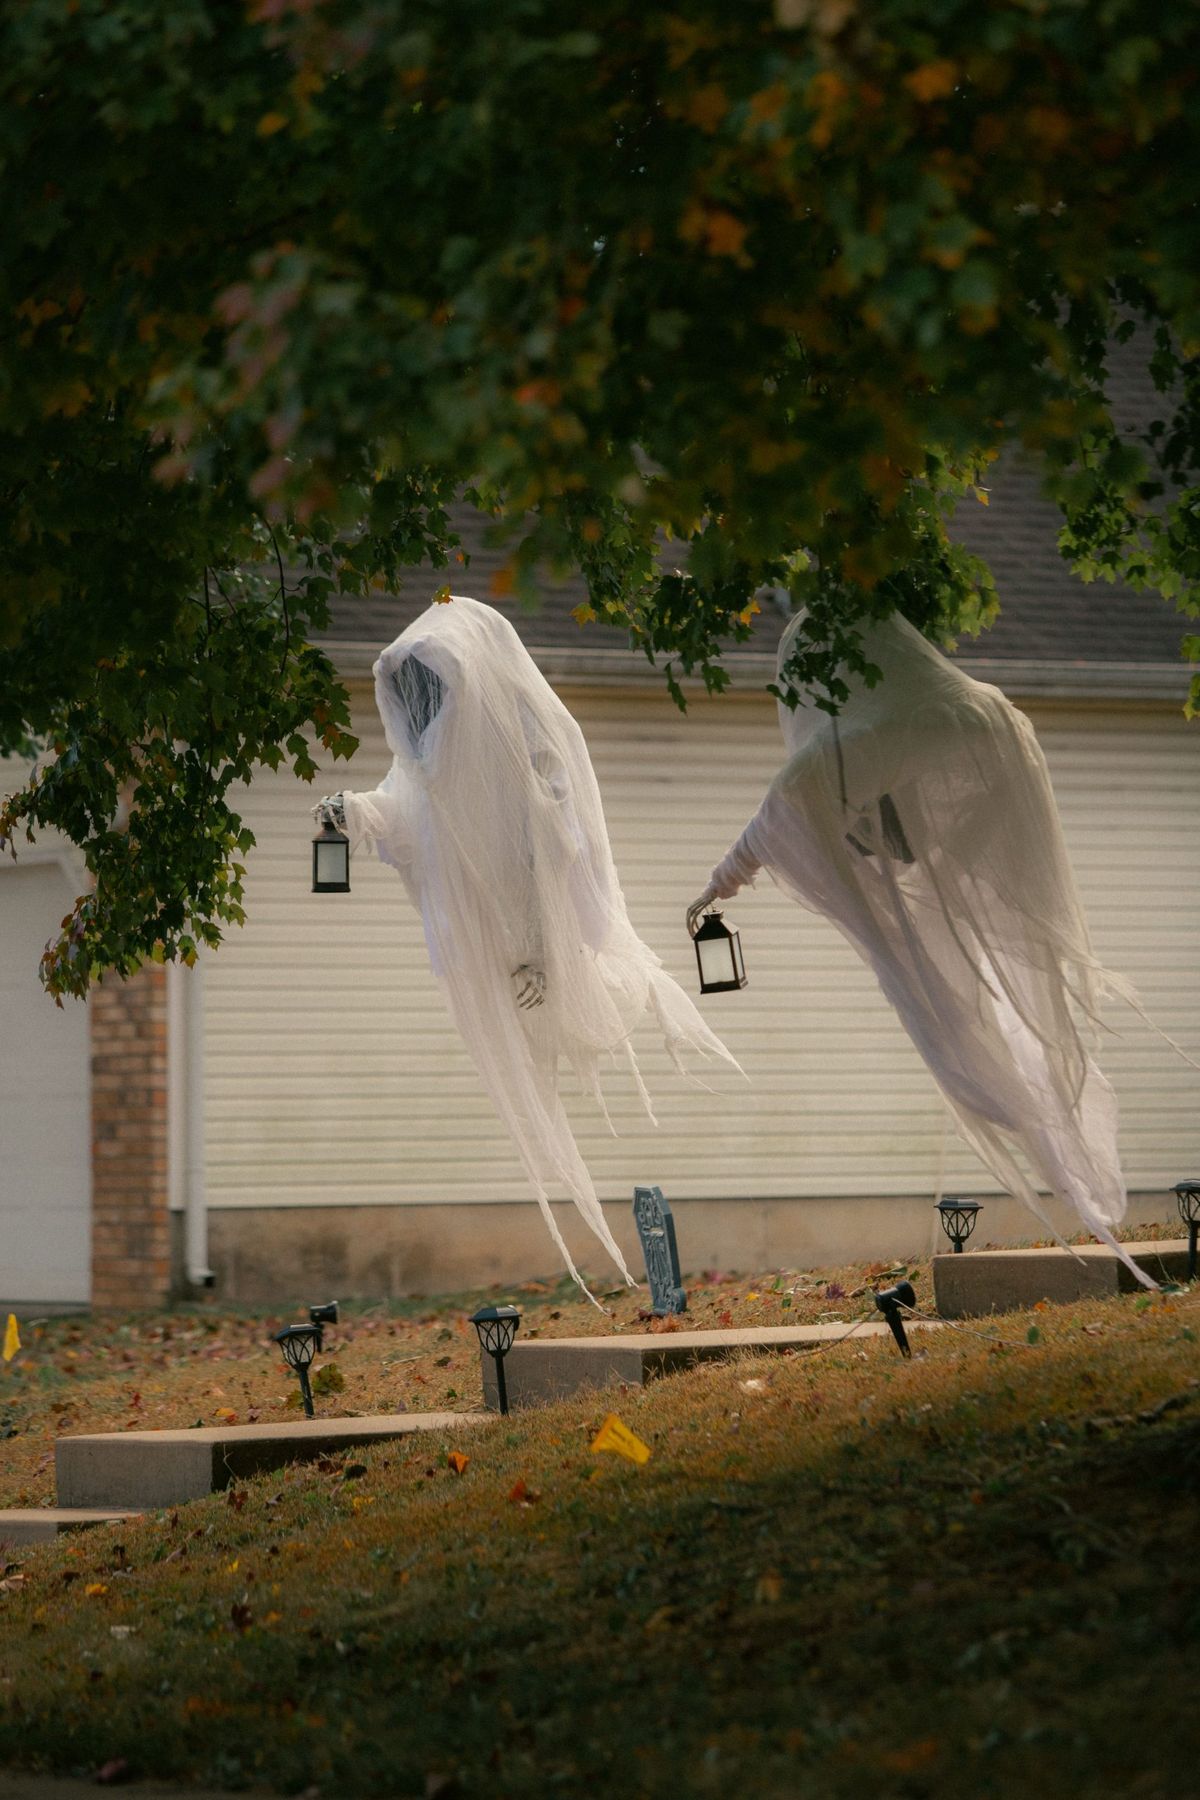
“You can create these simple, elegant ghosts in under 30 minutes.”
The cost is minimal, mainly for the fabric. Start with a styrofoam ball for the head. Screw a small eye hook into the top.Drape a large square of sheer white fabric or cheesecloth over the ball. Let it hang unevenly.Cinch the fabric under the ‘head’ with a piece of clear fishing line or a rubber band, but keep it loose.Get a pair of cheap plastic skeleton hands. Use a hot glue gun to attach the wrist of each hand to the draped fabric, positioning them to hold a lantern.Thread fishing line through the eye hook on the head and hang from a tree branch.Add a small, lightweight black lantern for the final touch.
12. Rustic Farmhouse Skeleton in a Hoodie with Harvest Pumpkins
This display is pure charm, and it works because it tells a simple, humorous story. The skeleton isn’t scary; it’s just chilling out. Dressing it in a modern black hoodie and beanie gives it a relatable, almost human personality. This playful approach is set against a backdrop of classic autumnal abundance—crates overflowing with pumpkins, gourds, and rustic textures like wicker and weathered wood. The juxtaposition of the slightly spooky skeleton with the warm, cozy harvest decor is what makes the scene so memorable and fun. It feels less like a haunted house and more like a fall festival.
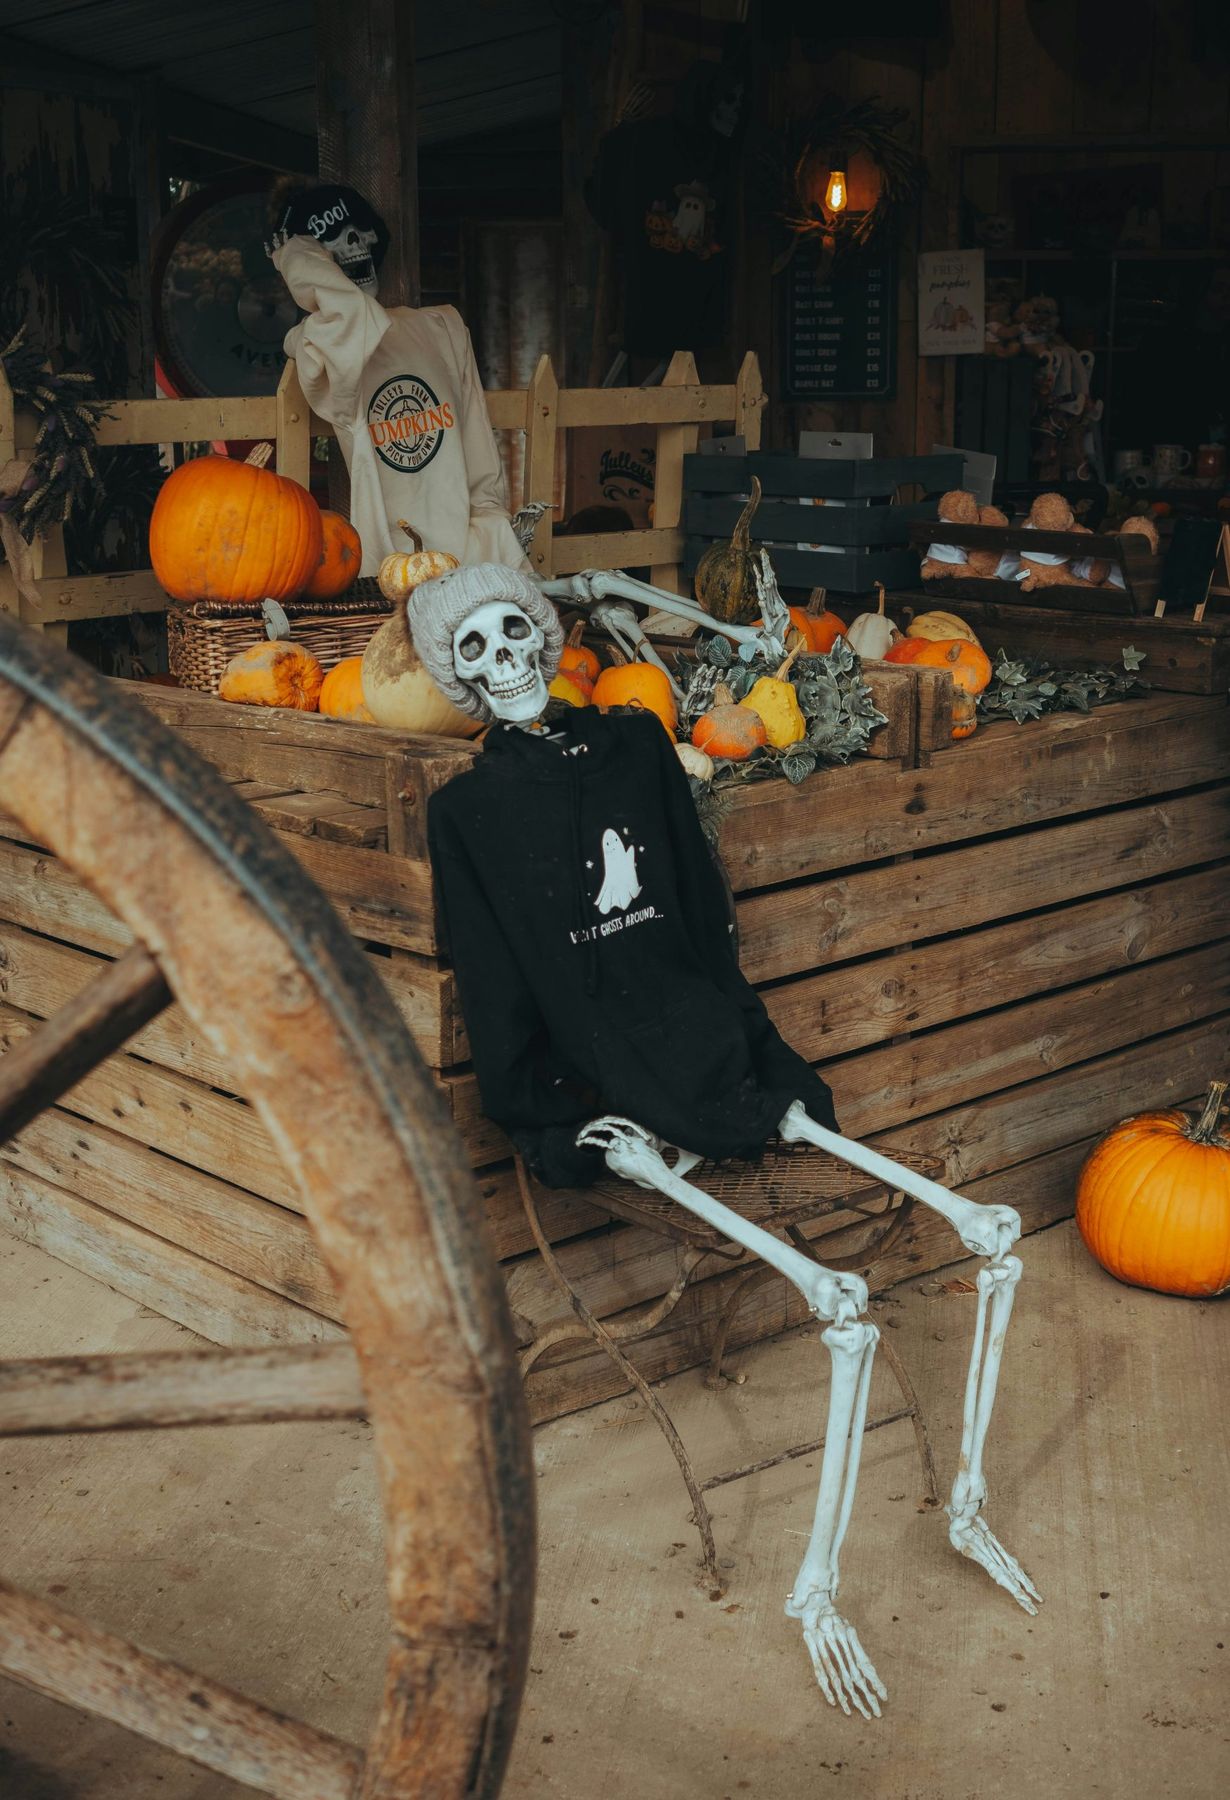
“Don’t have a vintage wagon wheel or dozens of heirloom pumpkins?”
No problem. You can get this look with items from a home improvement store and a pumpkin patch. A life-sized posable skeleton is your main investment (around $50-70, but reusable!). Grab two unfinished wooden crates from Home Depot for about $15 each. Fill them with a mix of affordable carving pumpkins, a few interesting gourds, and some faux autumn leaf garlands from the craft store. Raid your own closet for an old hoodie and beanie. The total can be under $100 for a display with major impact.
13. Symmetrical Skeletal Spiders on Neoclassical Columns
When decorating a formal, symmetrical entryway like this, lean into the architecture—don’t fight it. The power of this design comes from its perfect balance. Placing one identical spider on each column reinforces the home’s neoclassical symmetry. For a secure and damage-free mount on columns or pillars, use heavy-duty outdoor-rated hook-and-loop strips (like Velcro). This allows for easy placement and removal without drilling holes or using adhesives that could damage the paint. Make sure to place them at the exact same height on each column for a crisp, intentional look.
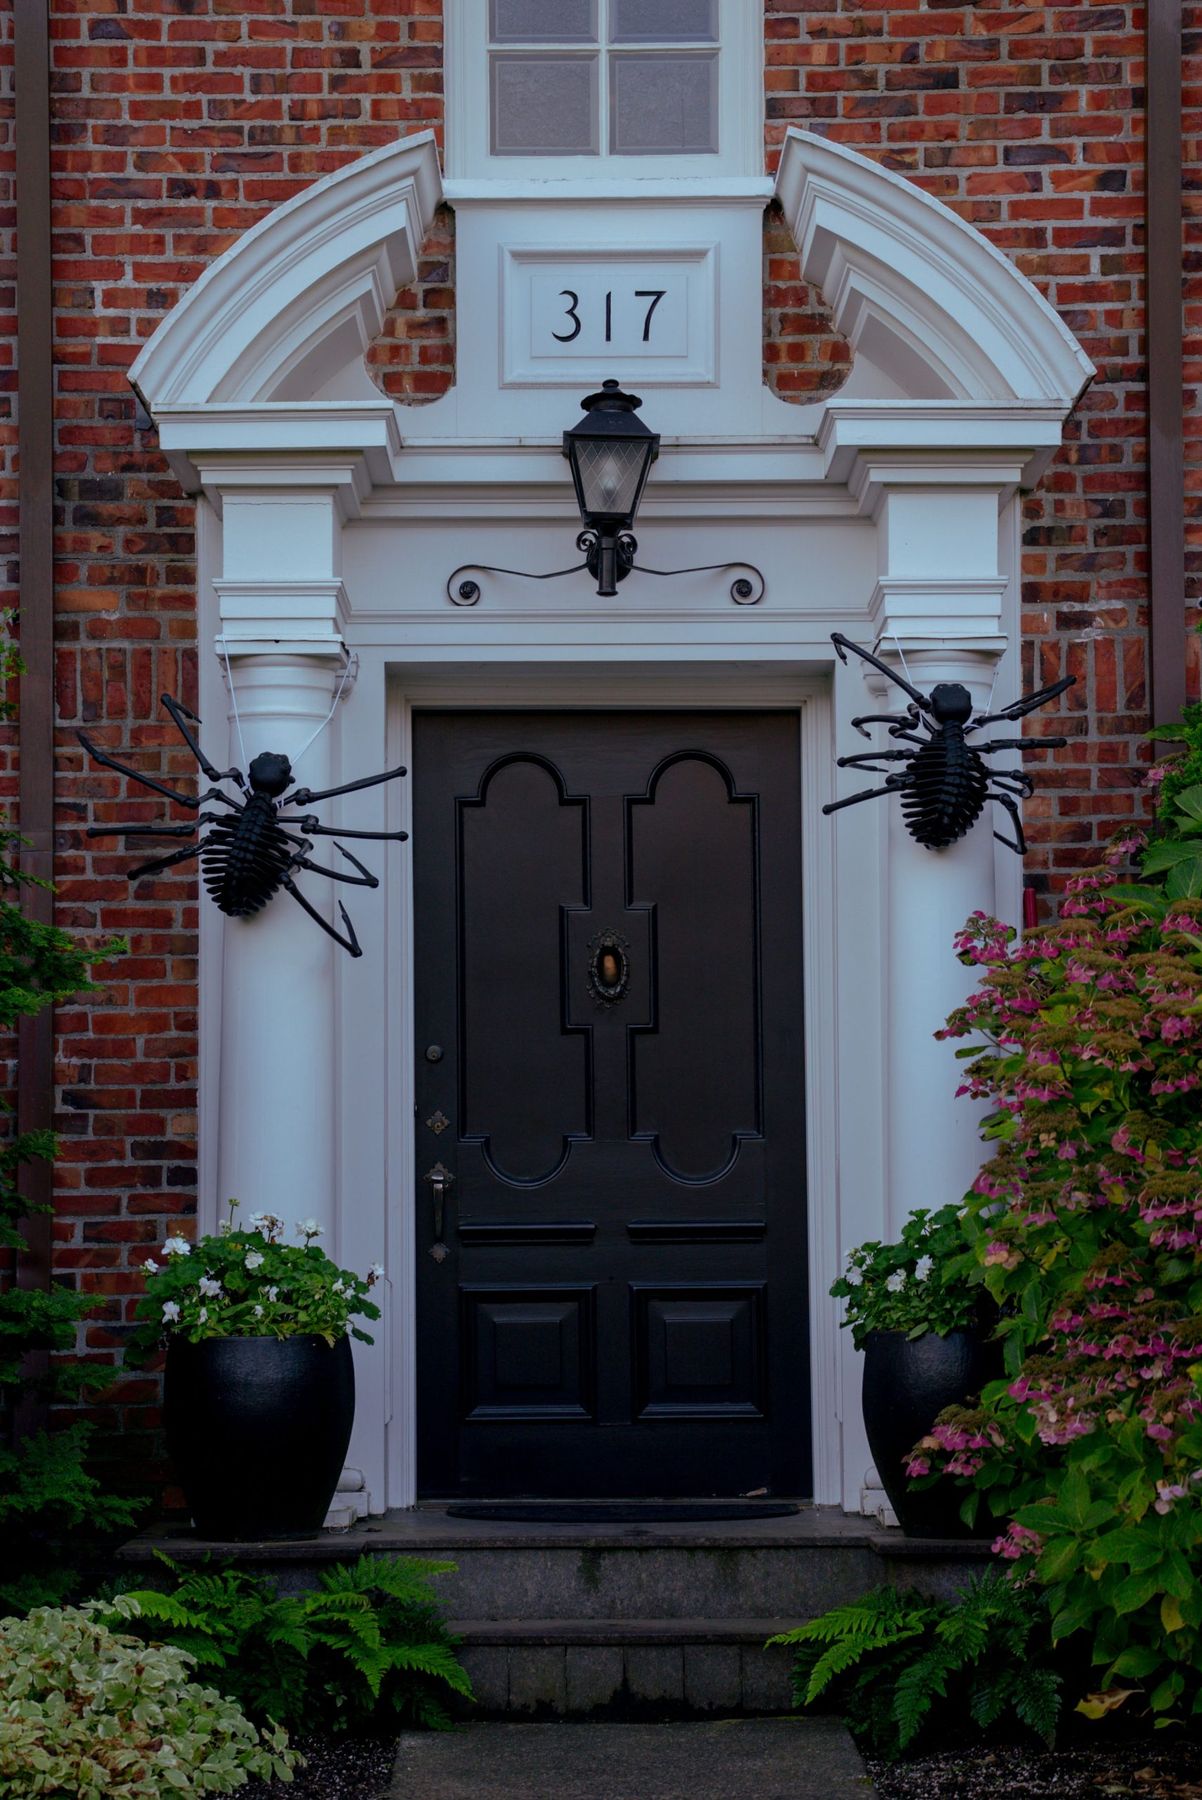
“This look is part of a larger trend called ‘spooky chic’ or ‘elegant goth.’ Homeowners are moving beyond kitschy decor and looking for ways to incorporate Halloween elements that complement their home’s existing style.”
For a traditional or historic home, this means using classic, structured decorations. The matte black spiders against the crisp white columns feel sophisticated, not silly. It’s a nod to the season that feels curated and design-forward, proving that Halloween decor can be both spooky and stylish without sacrificing the architectural integrity of the home.
14. Minimalist Spooky Vignette with LED Candles and Cobwebs
This moody corner achieves its look with a formula of 70% darkness, 20% focused light, and 10% texture. The key is what you don’t see. The surrounding area is intentionally kept in shadow, allowing the warm, concentrated glow from the three LED pillar candles to be the hero. This creates a sense of mystery and intimacy. The texture comes from the rough ceramic of the vase, the spindly dried branches, and the wispy artificial cobwebs. You could swap the branches for dried hydrangeas or the grey vase for a black one, and the moody effect would remain as long as you maintain that high-contrast light-to-dark ratio.
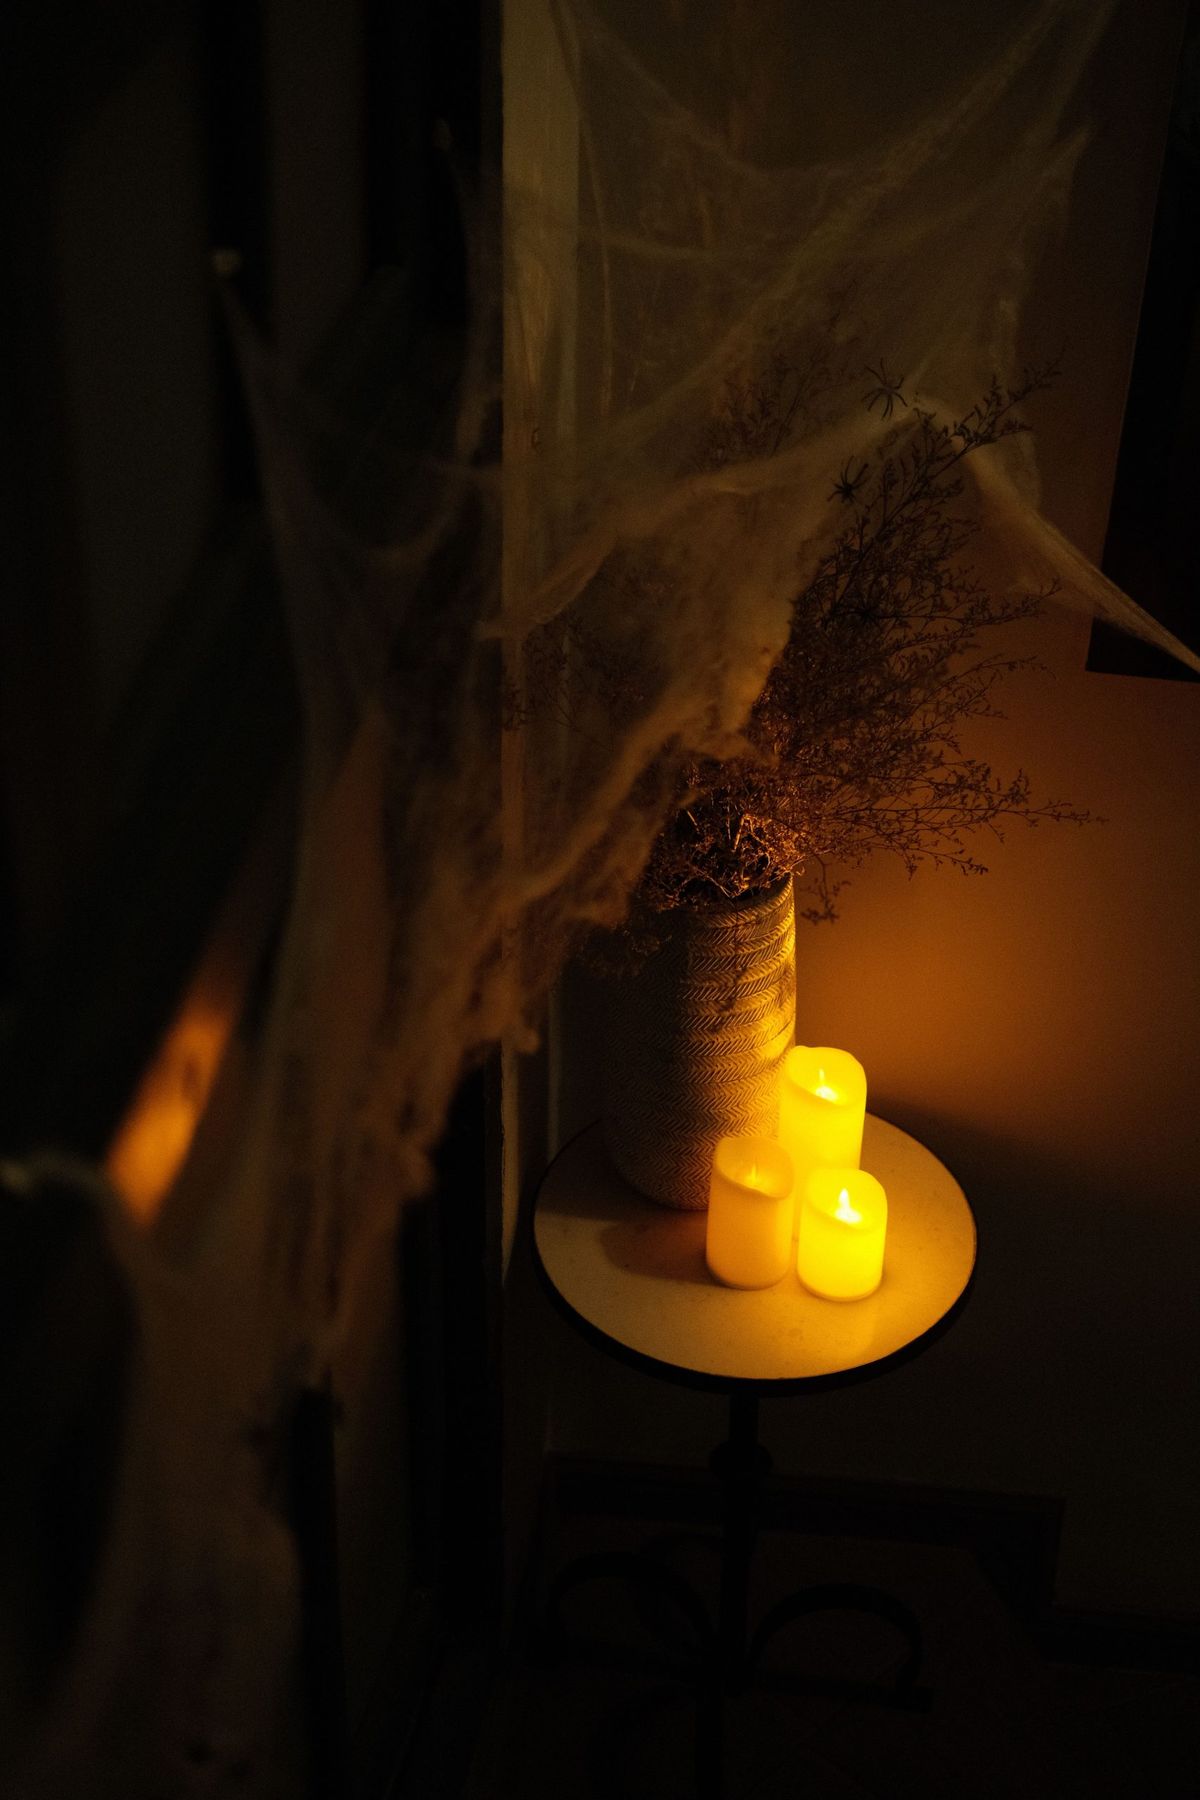
“Before you commit to creating a dark, moody corner like this, run through this quick checklist:Find your spot: Do you have a corner, console table, or bookshelf that doesn’t get a lot of direct natural light?”
This look works best in naturally dim areas.Check your outlets: If you opt for plug-in candles, is there an outlet nearby? If not, make sure you have a good supply of batteries for battery-operated LEDs.Consider the surface: The small side table here is perfect. A large, cluttered surface will detract from the minimalist, focused feel.Gather your textures: Do you have a vase, some dried botanicals, and cobwebs? The power is in the simple combination of these elements.
15. Outdoor Display with Jack-O’-Lanterns and an Inflatable Spider
Inflatable decorations are a fast way to get a big impact, but they come with a few realities. First, the internal fan needs to run continuously to keep it inflated, which means it will be consuming electricity and making a low humming noise whenever it’s on. Second, they are very susceptible to wind. You absolutely must use all the included stakes and tethers to secure it to the ground. A breezy day can turn your giant spider into a neighborhood tumbleweed. Lastly, the combination of an inflatable, a fog machine, and extension cords requires careful planning to avoid tripping hazards, especially on trick-or-treat night.
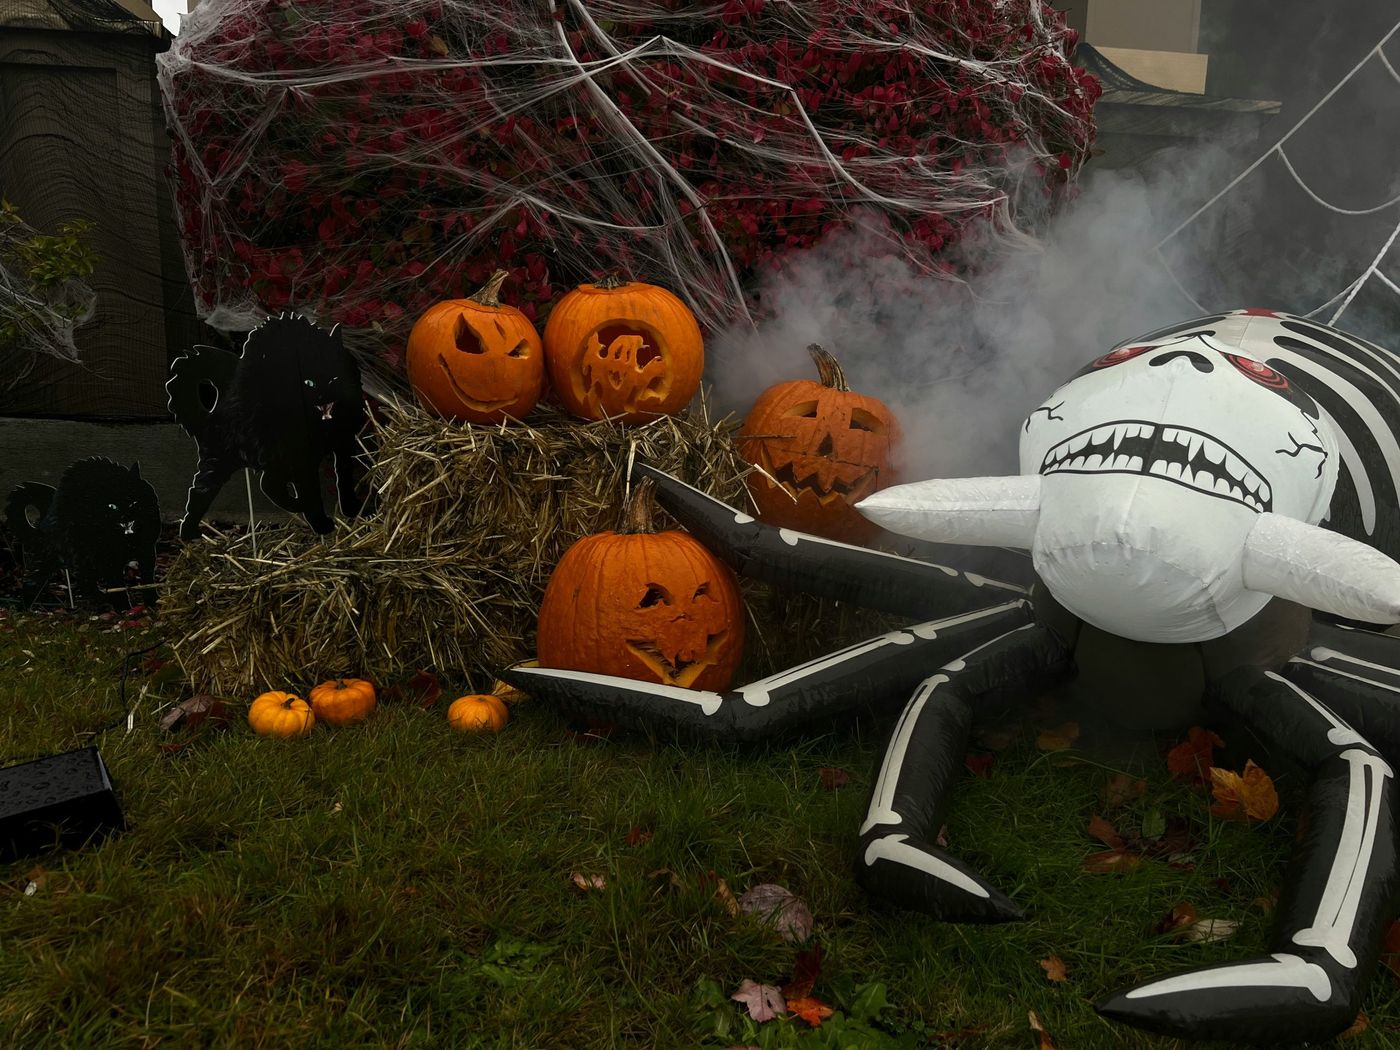
“This fun, multi-element scene can be pulled together from most big-box stores in October.”
Here’s a general cost estimate:Inflatable Skeleton Spider: $50 – $90Hay Bale (square): $15 – $25Carving Pumpkins (2-3 large): $20 – $35Artificial Cobwebs with plastic spiders: $5 – $10Black Cat Silhouettes (set of 2-3): $10 – $20Fog Machine with Juice: $30 – $50TOTAL: $130 – $230Budget alternative: Skip the inflatable and fog machine. Focus on carving more pumpkins and add some DIY ghost figures made from stakes and white sheets to fill out the yard.
16. Rustic Hay Bale Display with Orange Pumpkins and Black Lanterns
This display feels so wonderfully nostalgic and autumnal because it relies on a classic, high-contrast color palette and simple, strong shapes. The bright, round orange pumpkins pop against the square, yellow hay bale. The matte black lanterns and the dark, twisted wreath provide a graphic punch that breaks up all the warm tones. The composition is also very grounded, with the heavy hay bale creating a solid foundation for the lighter elements on top. The soft, blurred fairy lights in the background add a touch of magic and prevent the scene from feeling too flat.
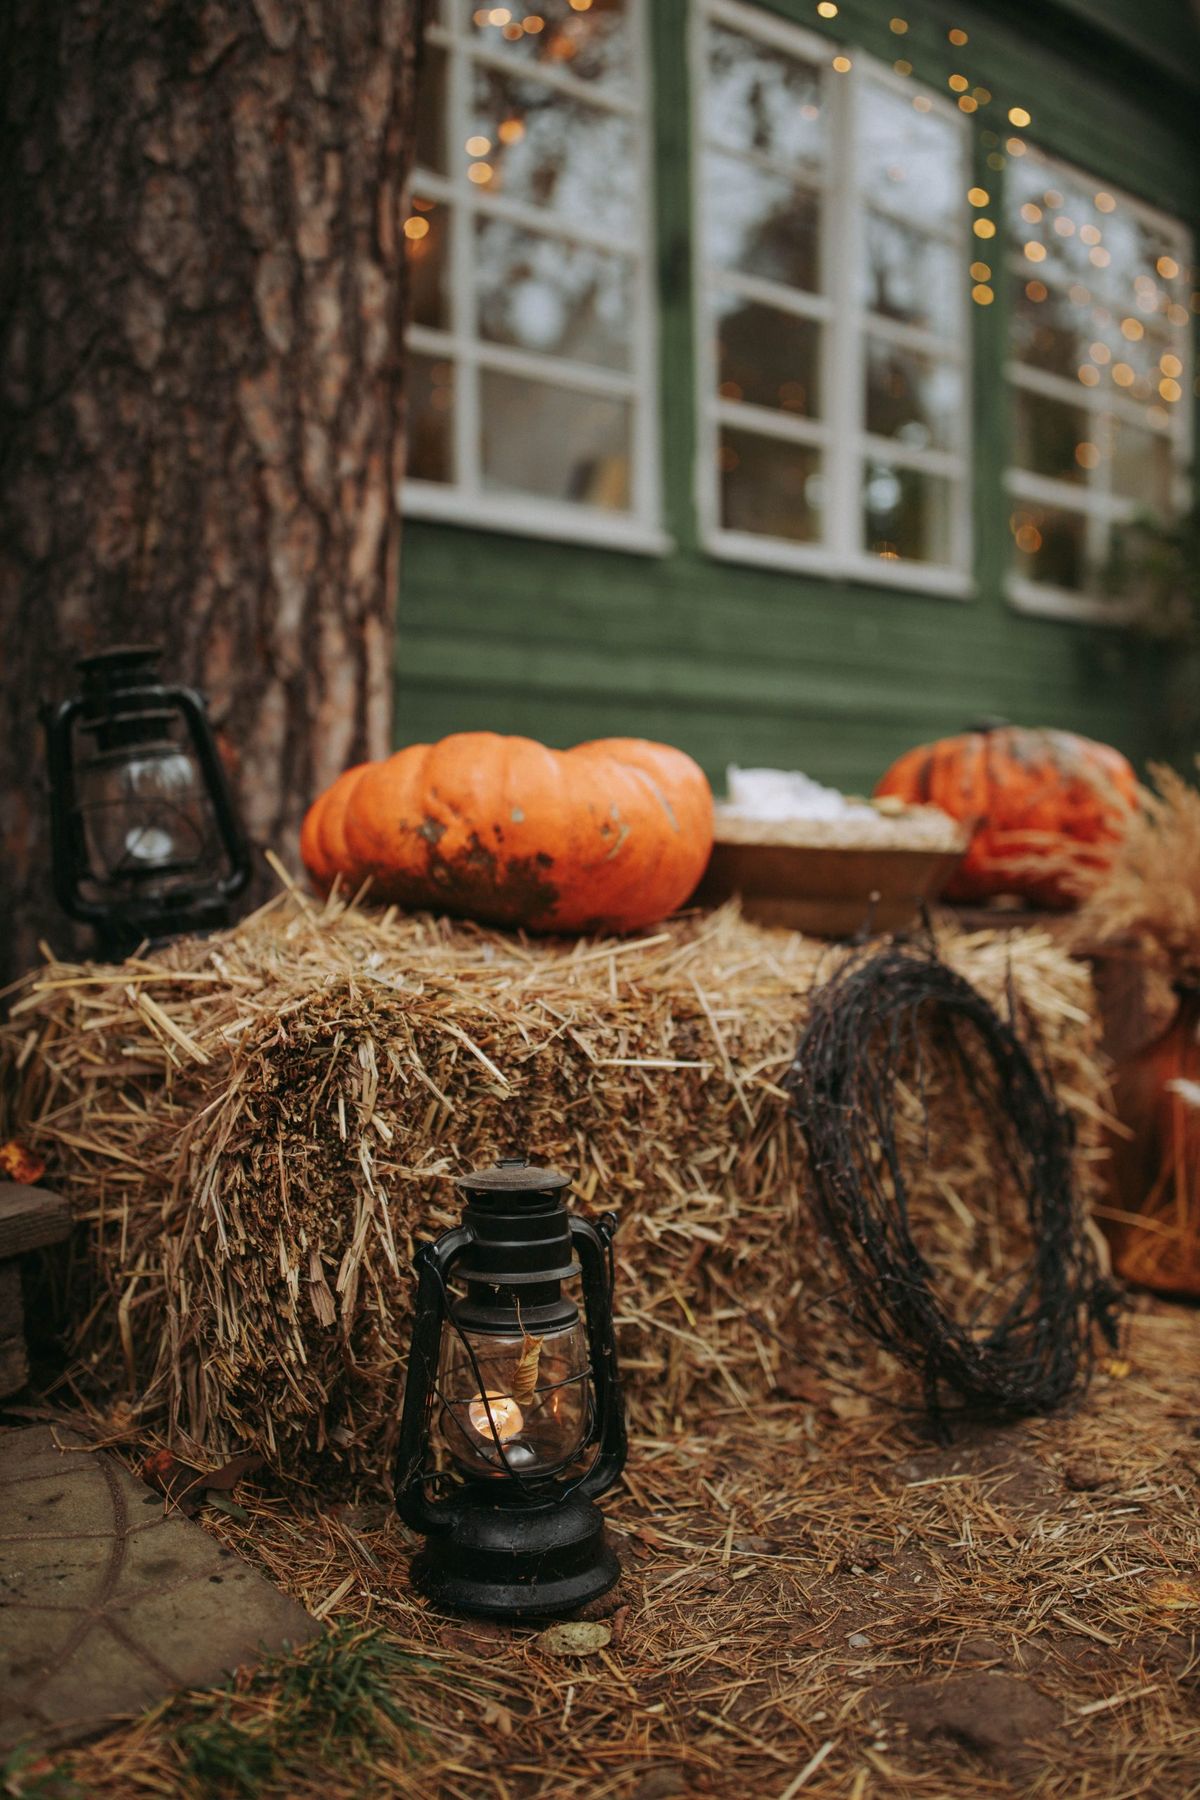
“The single element holding this entire rustic vision together is the hay bale.”
Without it, you would just have pumpkins and lanterns sitting on the ground, lacking presence and a cohesive theme. The hay bale provides height, a wonderfully textured base, and an unmistakable feeling of harvest time and country living. It’s the stage for all the other decorative pieces, instantly transforming them from a simple collection of items into a thoughtfully designed autumnal scene. It does all the heavy lifting in establishing the cozy, rustic mood.
17. Harvest-Decorated Entryway on a Red Clapboard House
This welcoming entryway follows a beautiful formula: 50% bold architecture + 30% natural textures + 20% seasonal color. The vibrant red clapboard siding and the strong lines of the natural wood door provide a powerful architectural base. The natural textures from the dried wheat wreath, granite steps, and potted mum foliage soften the look. Finally, the pops of orange from the pumpkins and white from the smaller gourds add that essential seasonal color. This balance is what makes it feel festive but still elegant and integrated with the home’s character.
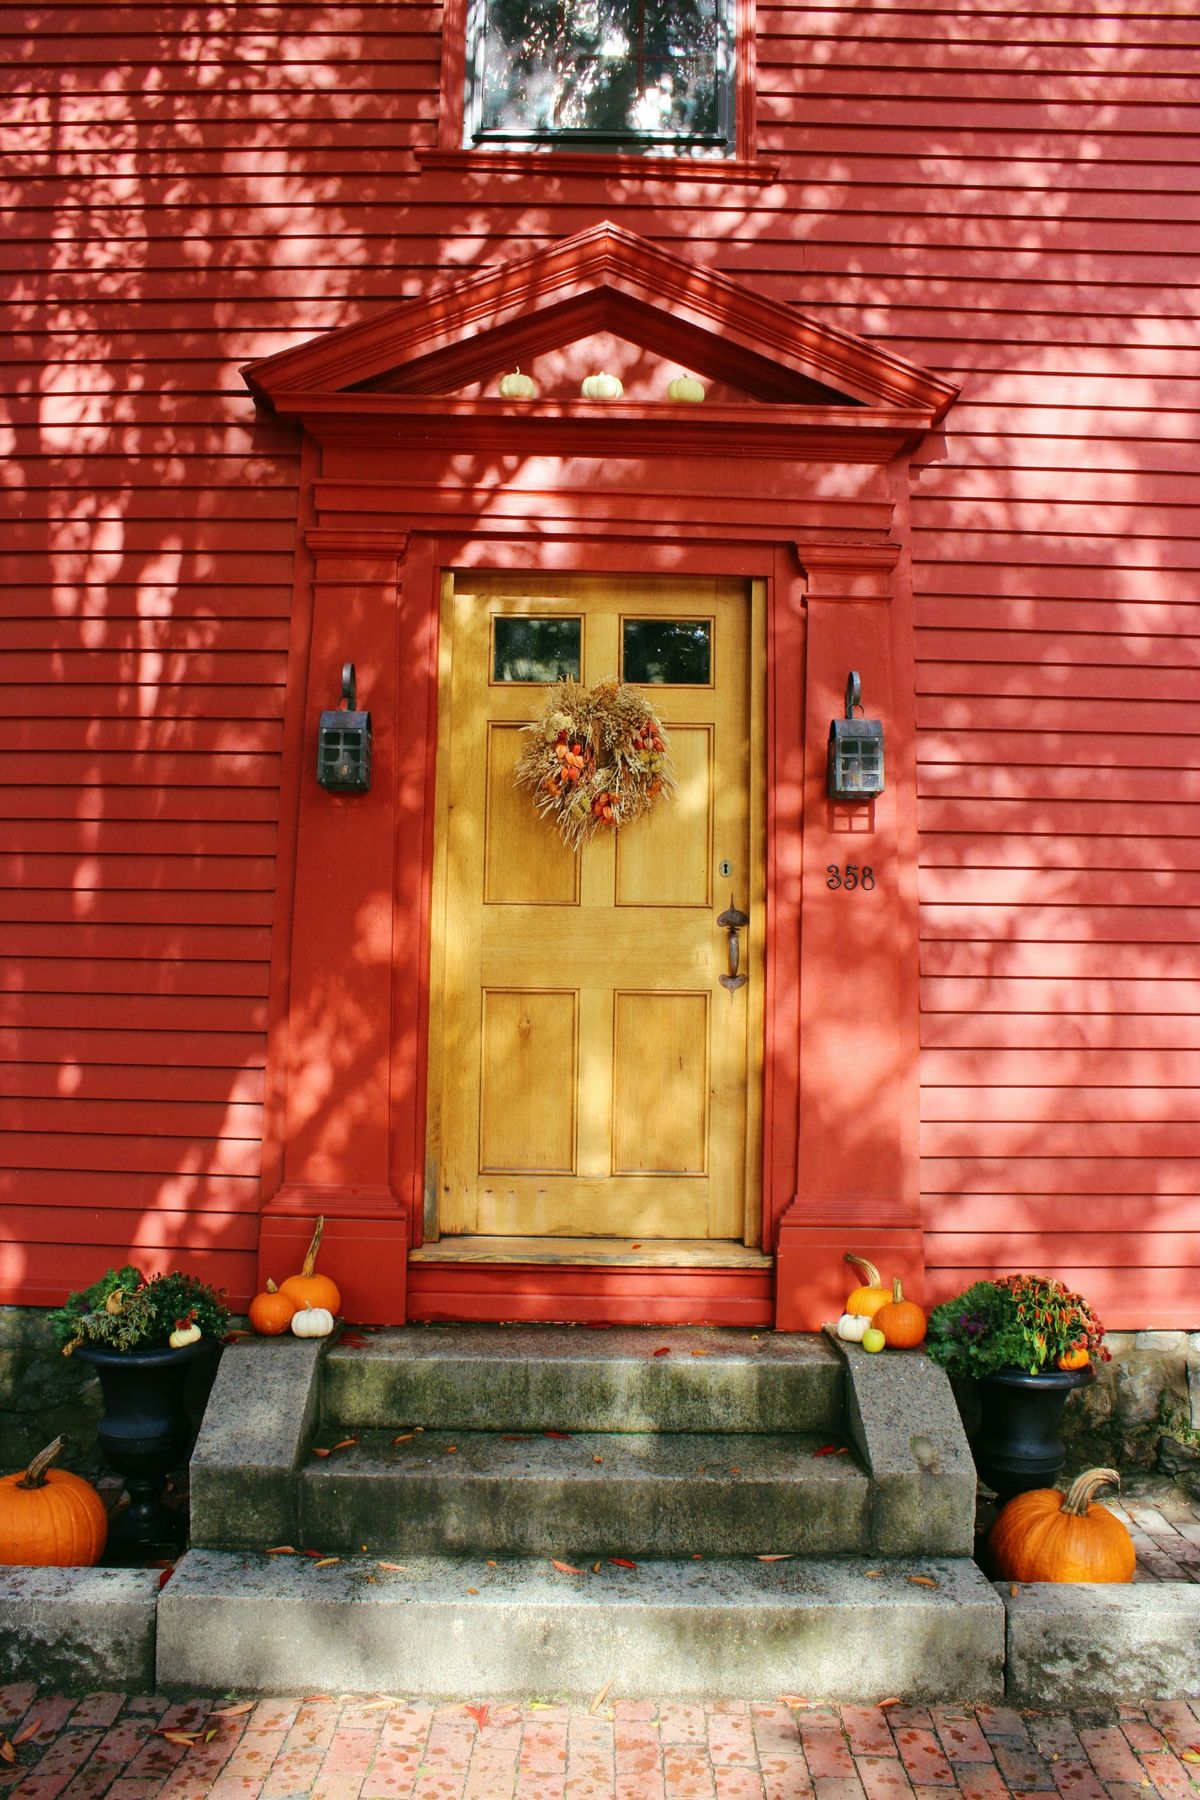
“The small white pumpkins sitting on the door’s pediment are a professional touch that’s easy to replicate.”
The trick is to use faux pumpkins for this. Real pumpkins can be surprisingly heavy and unstable on a narrow ledge. Use lightweight craft pumpkins from a store like Hobby Lobby. To secure them, apply a generous dab of museum wax or clear mounting putty to the bottom of each pumpkin. This will hold them firmly in place without damaging the paint, and they’ll peel right off at the end of the season. It’s a small detail that adds a lot of charm.
18. Eerie Yard Skeletons Illuminated by Green and Purple Lights
A scene this theatrical and colorful looks amazing at night, but be sure to consider its daytime appearance. During the day, you’ll have a collection of plastic skeletons, floodlights, and visible extension cords sitting in your yard. To make it look less like backstage at a concert, try to strategically hide the lights behind shrubs or other decor. You can also buy green extension cords that blend in better with the grass. The tattered gauze fabric helps, as it adds texture and interest even when the lights are off, but it’s still something to be aware of when planning your display.
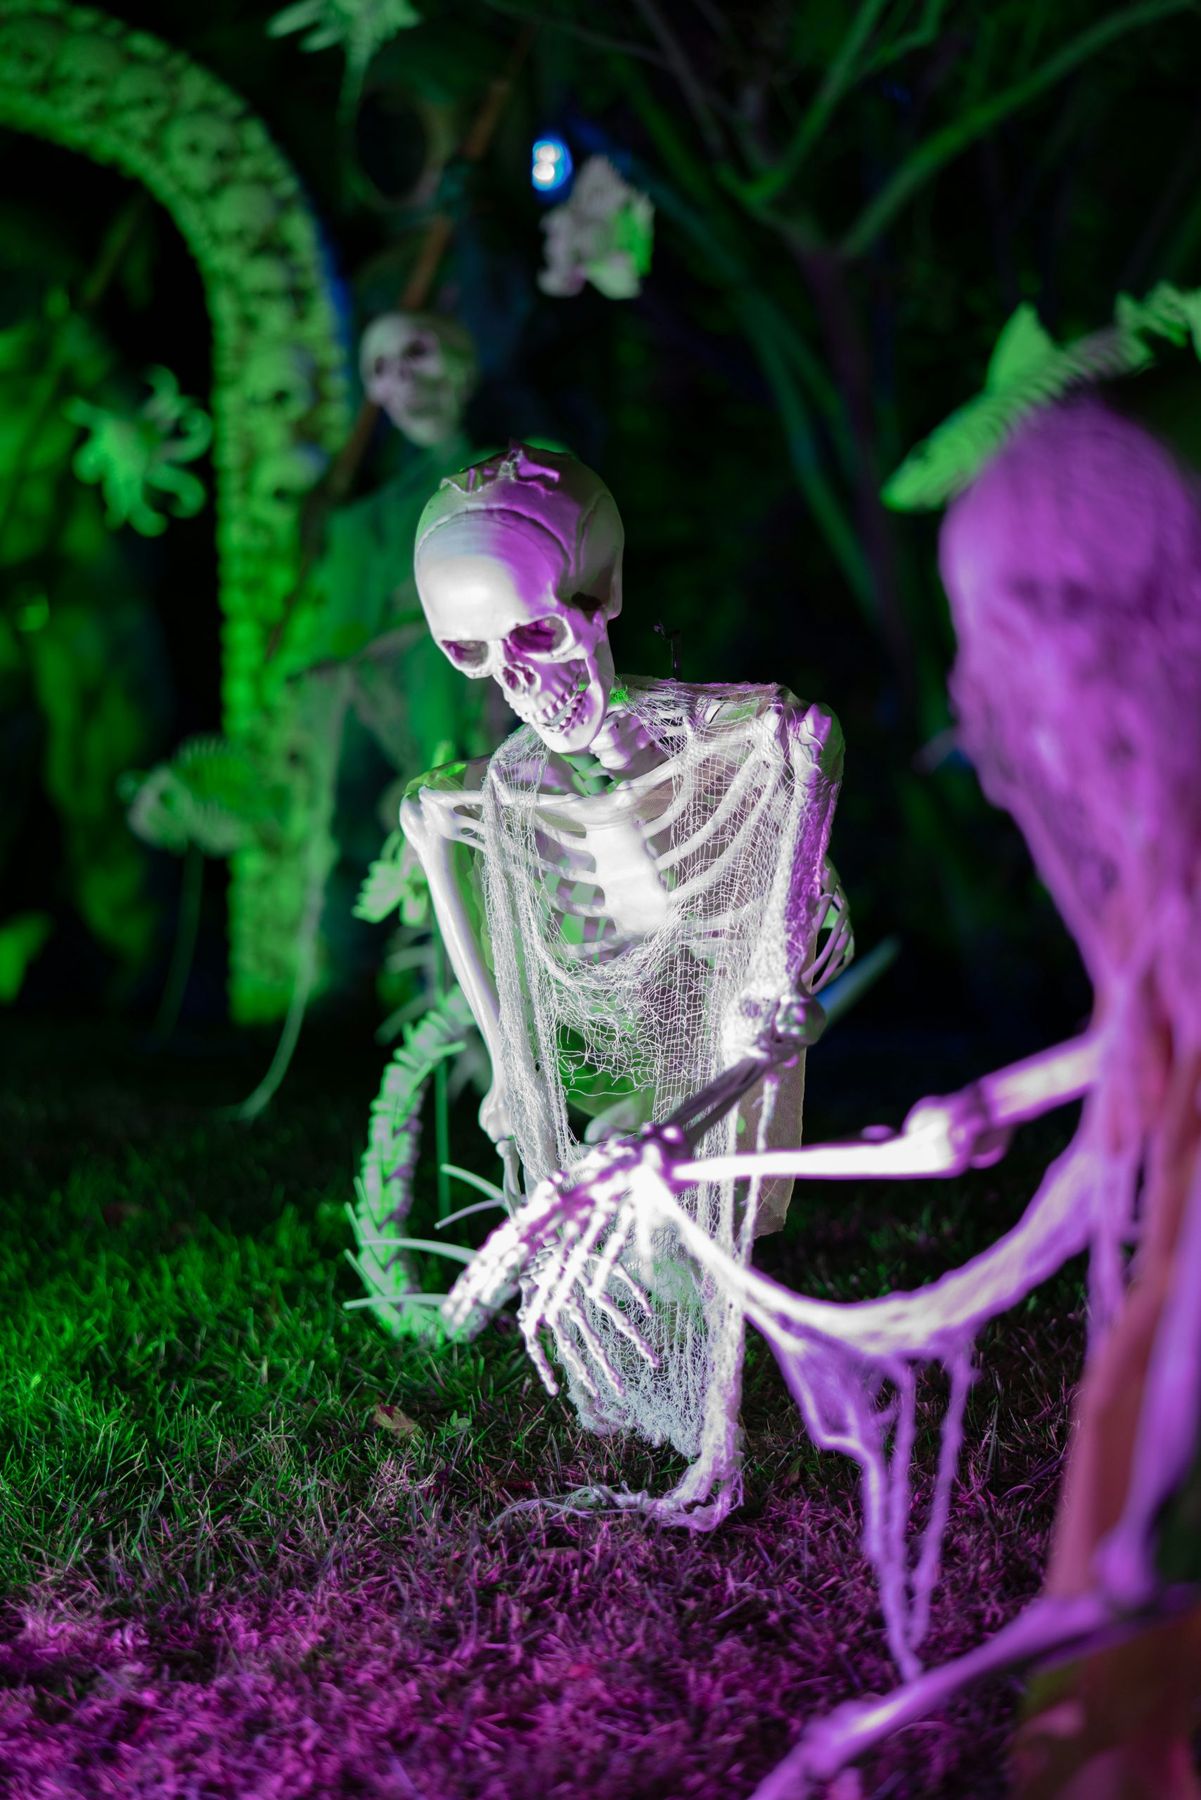
“This otherworldly setup is perfect for a medium to large front yard where you can create a full scene.”
You need enough space to position at least three skeleton figures with some separation between them to avoid looking like a jumbled pile. A minimum area of 15×10 feet is ideal. The skeletal archway also requires a decent amount of clearance. This idea is all about creating an immersive environment, so it’s less effective on a small patch of grass or a narrow side yard. If you’re short on space, one or two skeletons with a single colored floodlight can still pack a punch.
19. Rustic Corner Shelf with Carved and Painted Pumpkins
This entire cozy corner can be put together on a serious budget, especially if you already have a shelf. Scour thrift stores or Goodwill for a small metal or wooden shelf; you can often find one for under $20. The plastic jack-o’-lanterns are a dollar store staple. For the painted pumpkin, grab an inexpensive faux pumpkin from Walmart and a black paint pen. The wheat bundle and faux leaves can also be found at the Dollar Tree. This is a perfect example of how combining a few very inexpensive items can create a display that looks much more curated and thoughtful. Also see Idea #23 for another simple indoor idea.
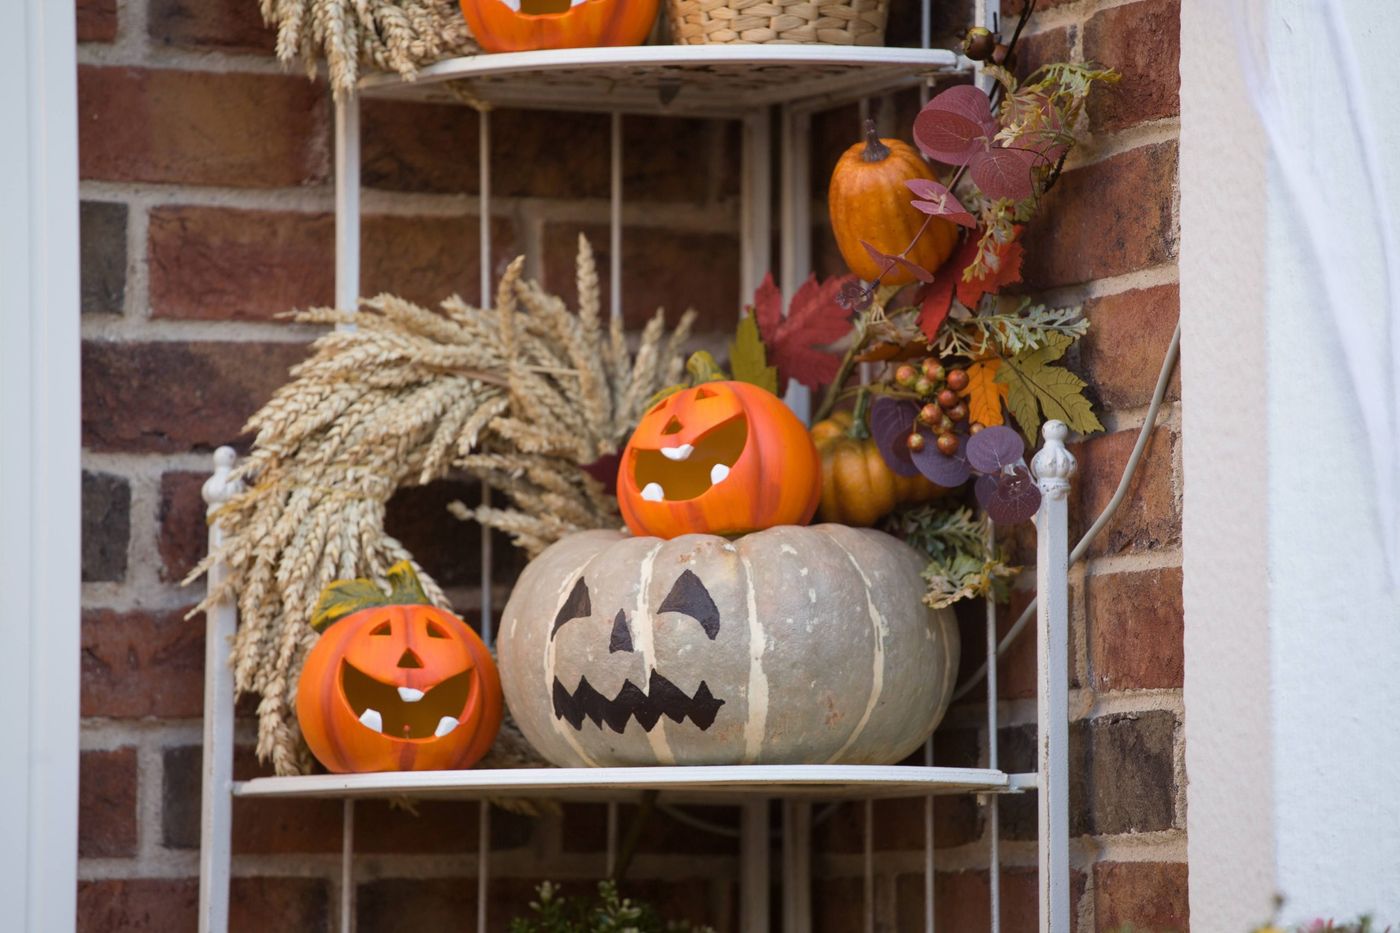
“Creating that hand-painted grey pumpkin is a simple project that adds a custom touch to your display.”
Time: 20 mins + dry time. Cost: $5-8. Start with a small foam or plastic pumpkin from a craft store.Paint the entire pumpkin, including the stem, with 1-2 coats of a medium-grey acrylic craft paint. Let it dry completely.Using a pencil, lightly sketch a simple, cartoonish jack-o’-lantern face. Think wide eyes and a stitched mouth.Go over your pencil lines with a black permanent marker or a fine-tipped black paint pen.Add a few small white dots in the eyes with a white paint pen to give it a little life. Let it dry and you’re done!
20. Craft Spooky Porch Monsters from Cardboard Boxes
Turn those leftover delivery boxes into a family of spooky porch monsters! This is a fun, creative, and nearly free project. Time: 1-2 hours. Cost: Under $10.
- Gather a few cardboard boxes in different sizes.
- Decide on your monster’s design. Will it have one big eye? Sharp teeth? Horns? Sketch it out first.
- Use a box cutter (adults only!) or sturdy scissors to cut out shapes for eyes, mouths, and arms from scrap cardboard.
- Paint the boxes and the shapes. Black, green, and purple are great monster colors. Use simple craft or spray paint.
- Once dry, use a hot glue gun to attach the eyes, teeth, and other features to your main box body.
- Stack them up on your porch for a fun, custom-made monster crew!
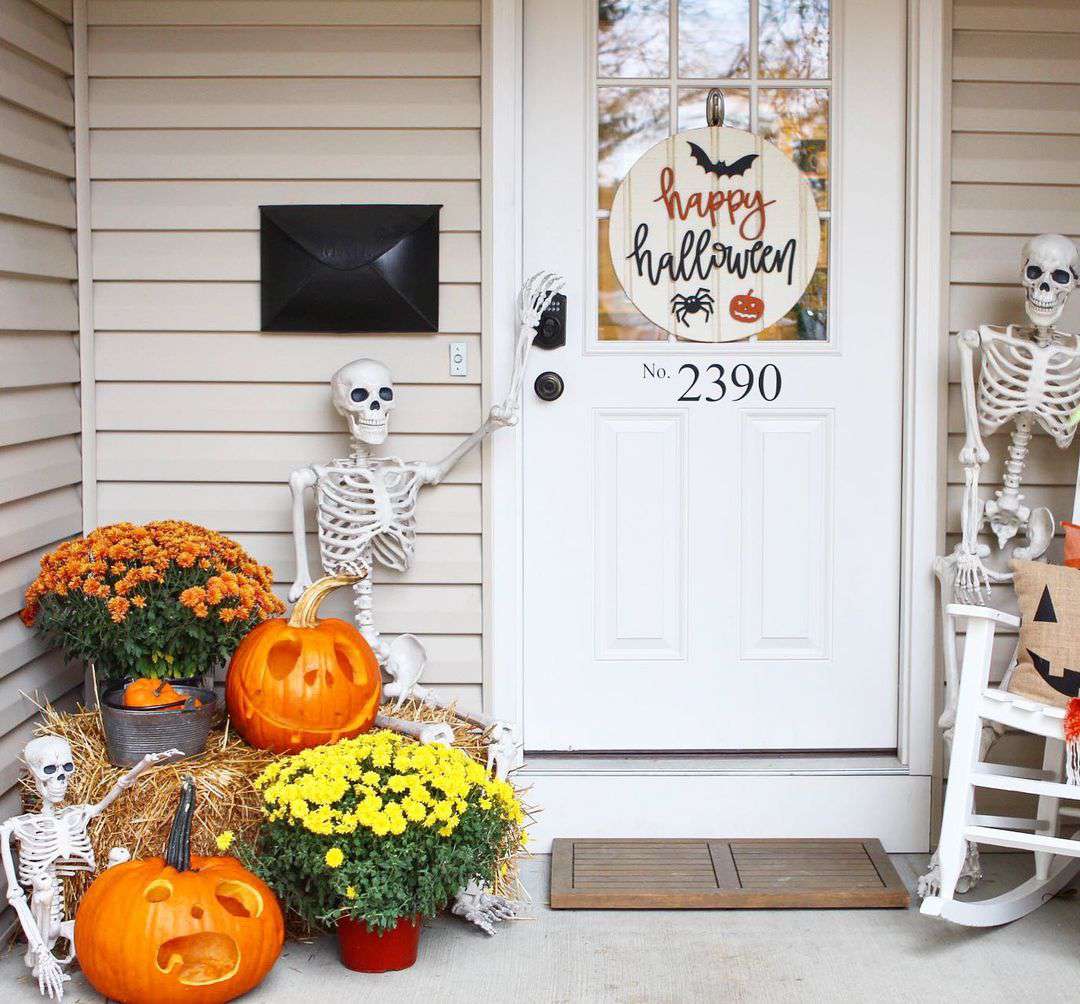
“Cardboard and weather are not friends.”
An unexpected downpour can turn your magnificent monster into a pile of soggy mush. If your porch is not fully covered and protected from the elements, this might not be the project for you. To add some weather resistance, you can try coating the entire finished piece with a few layers of a clear sealant spray like Mod Podge Ultra or an outdoor-rated polyurethane. However, even with sealant, a heavy, driving rain could still cause damage. These guys are best for covered porches or for short-term display when clear skies are forecasted.
21. Lush Autumn Porch with Potted Mums and Heirloom Pumpkins
This beautiful display works because of its feeling of effortless abundance. The key is the variety. Instead of just one type of pumpkin, there’s a mix of shapes, colors, and textures—smooth orange, warty orange, and striped green and white. This creates visual richness. The same goes for the flowers; the vibrant orange and deep purple chrysanthemums complement each other perfectly. By arranging them in a dense cluster on the steps, it creates a cascading effect that feels lush and generous. It’s a celebration of the harvest season in all its diversity. Compare with the more structured look of Idea #4.
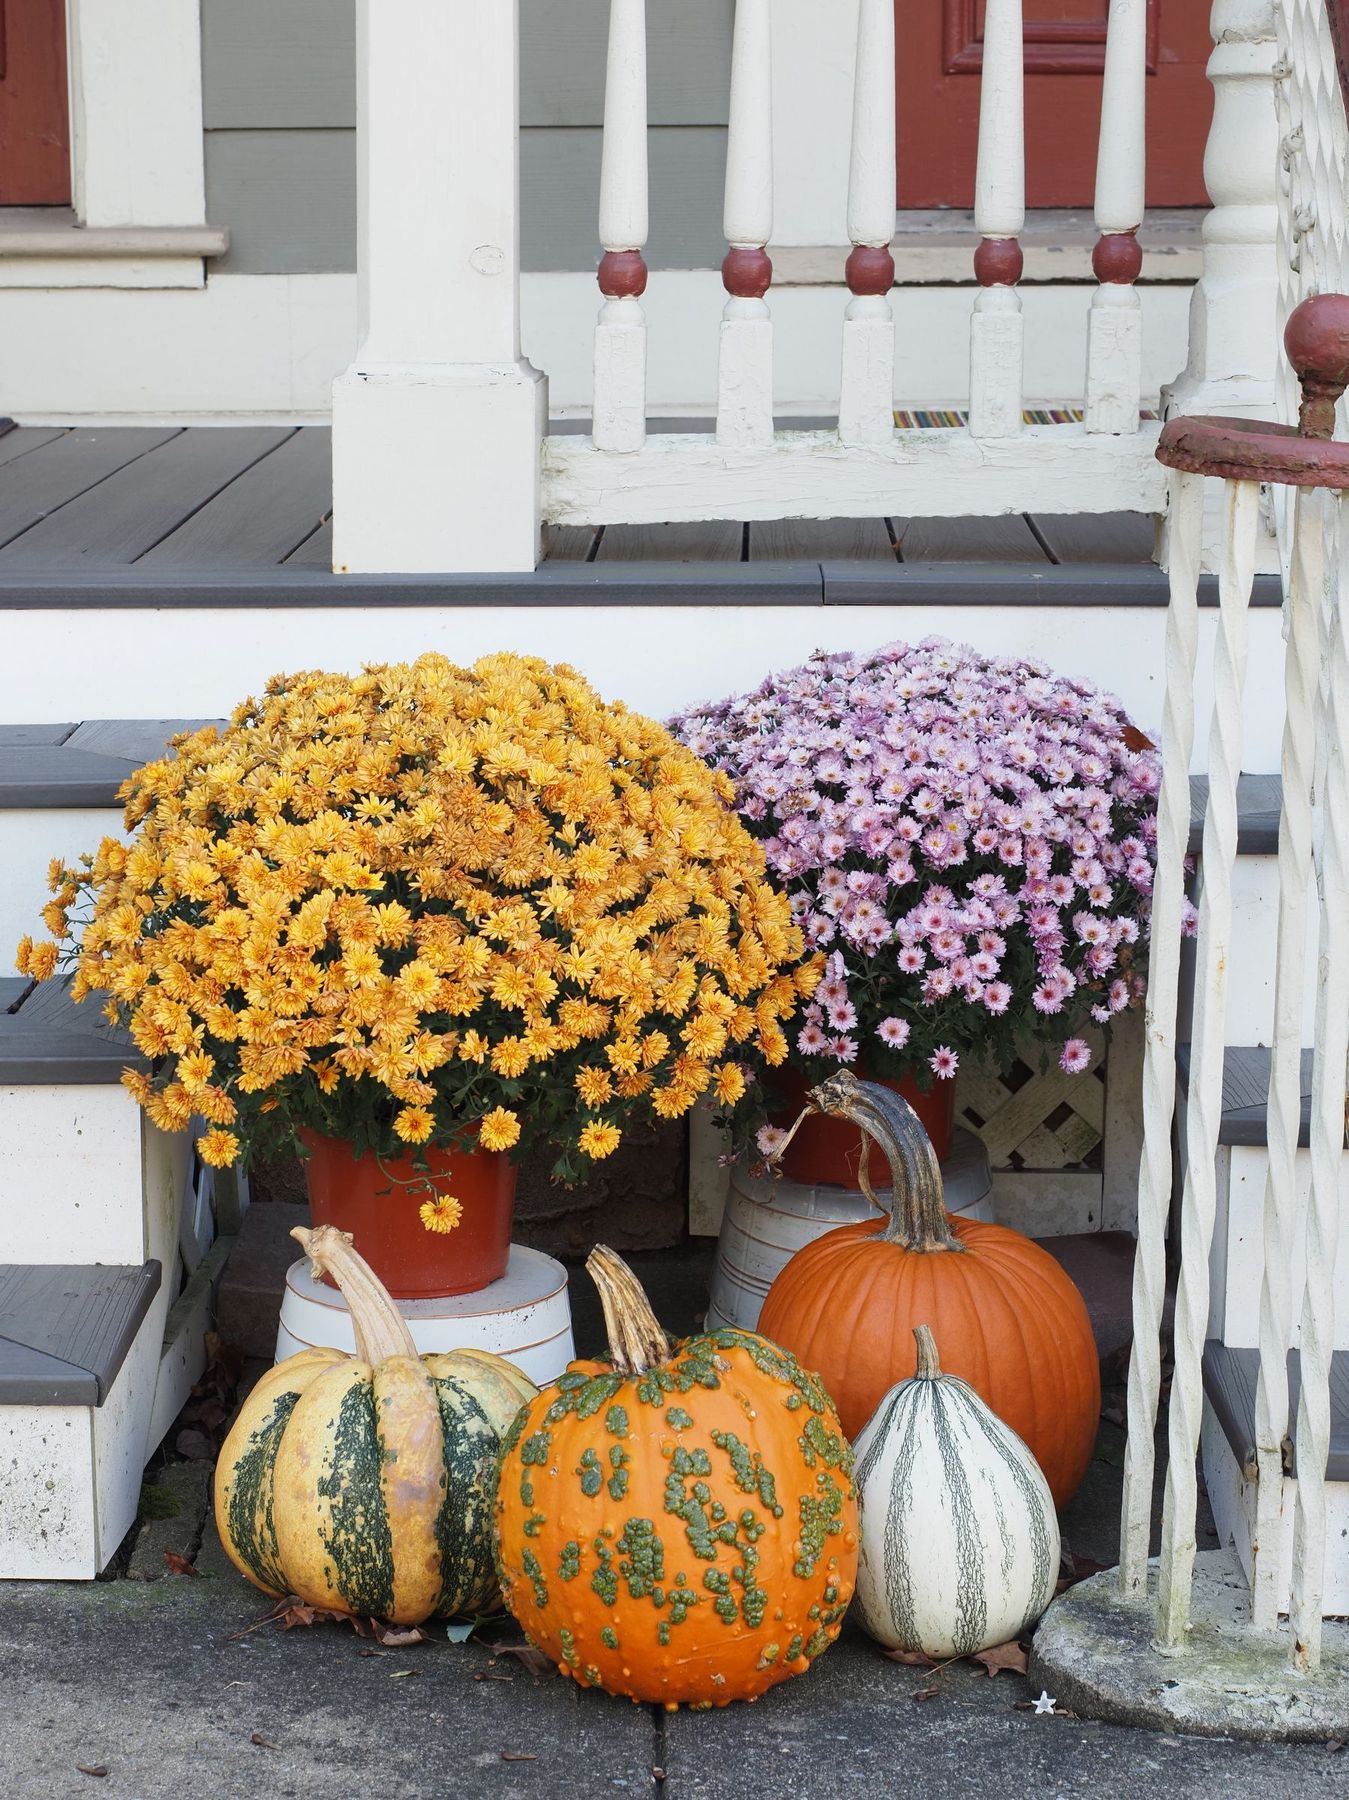
“Potted chrysanthemums are the star of many autumn displays, but they do require some care to stay looking their best through the season.”
Mums are thirsty plants, especially in containers. You’ll need to check the soil daily and water them thoroughly whenever the top inch feels dry. To encourage continuous blooming, be sure to ‘deadhead’ them regularly by pinching or snipping off the spent, withered flowers. This redirects the plant’s energy into producing new buds instead of seeds, keeping your display vibrant for weeks longer.
22. Whimsical Miniature Ghost on an Interior Door Handle
For tiny decorations like this, the material choice is critical. To get that perfectly translucent, floaty ghost effect, don’t use regular fabric. Go to a fabric store and ask for organza or chiffon. These materials are incredibly lightweight and have a slight shimmer that catches the light beautifully, making your ghost feel more magical. Cheesecloth is another good option for a more rustic, tattered look. A small quarter-yard of fabric is more than enough for several of these little guys, and it makes all the difference in the final result.
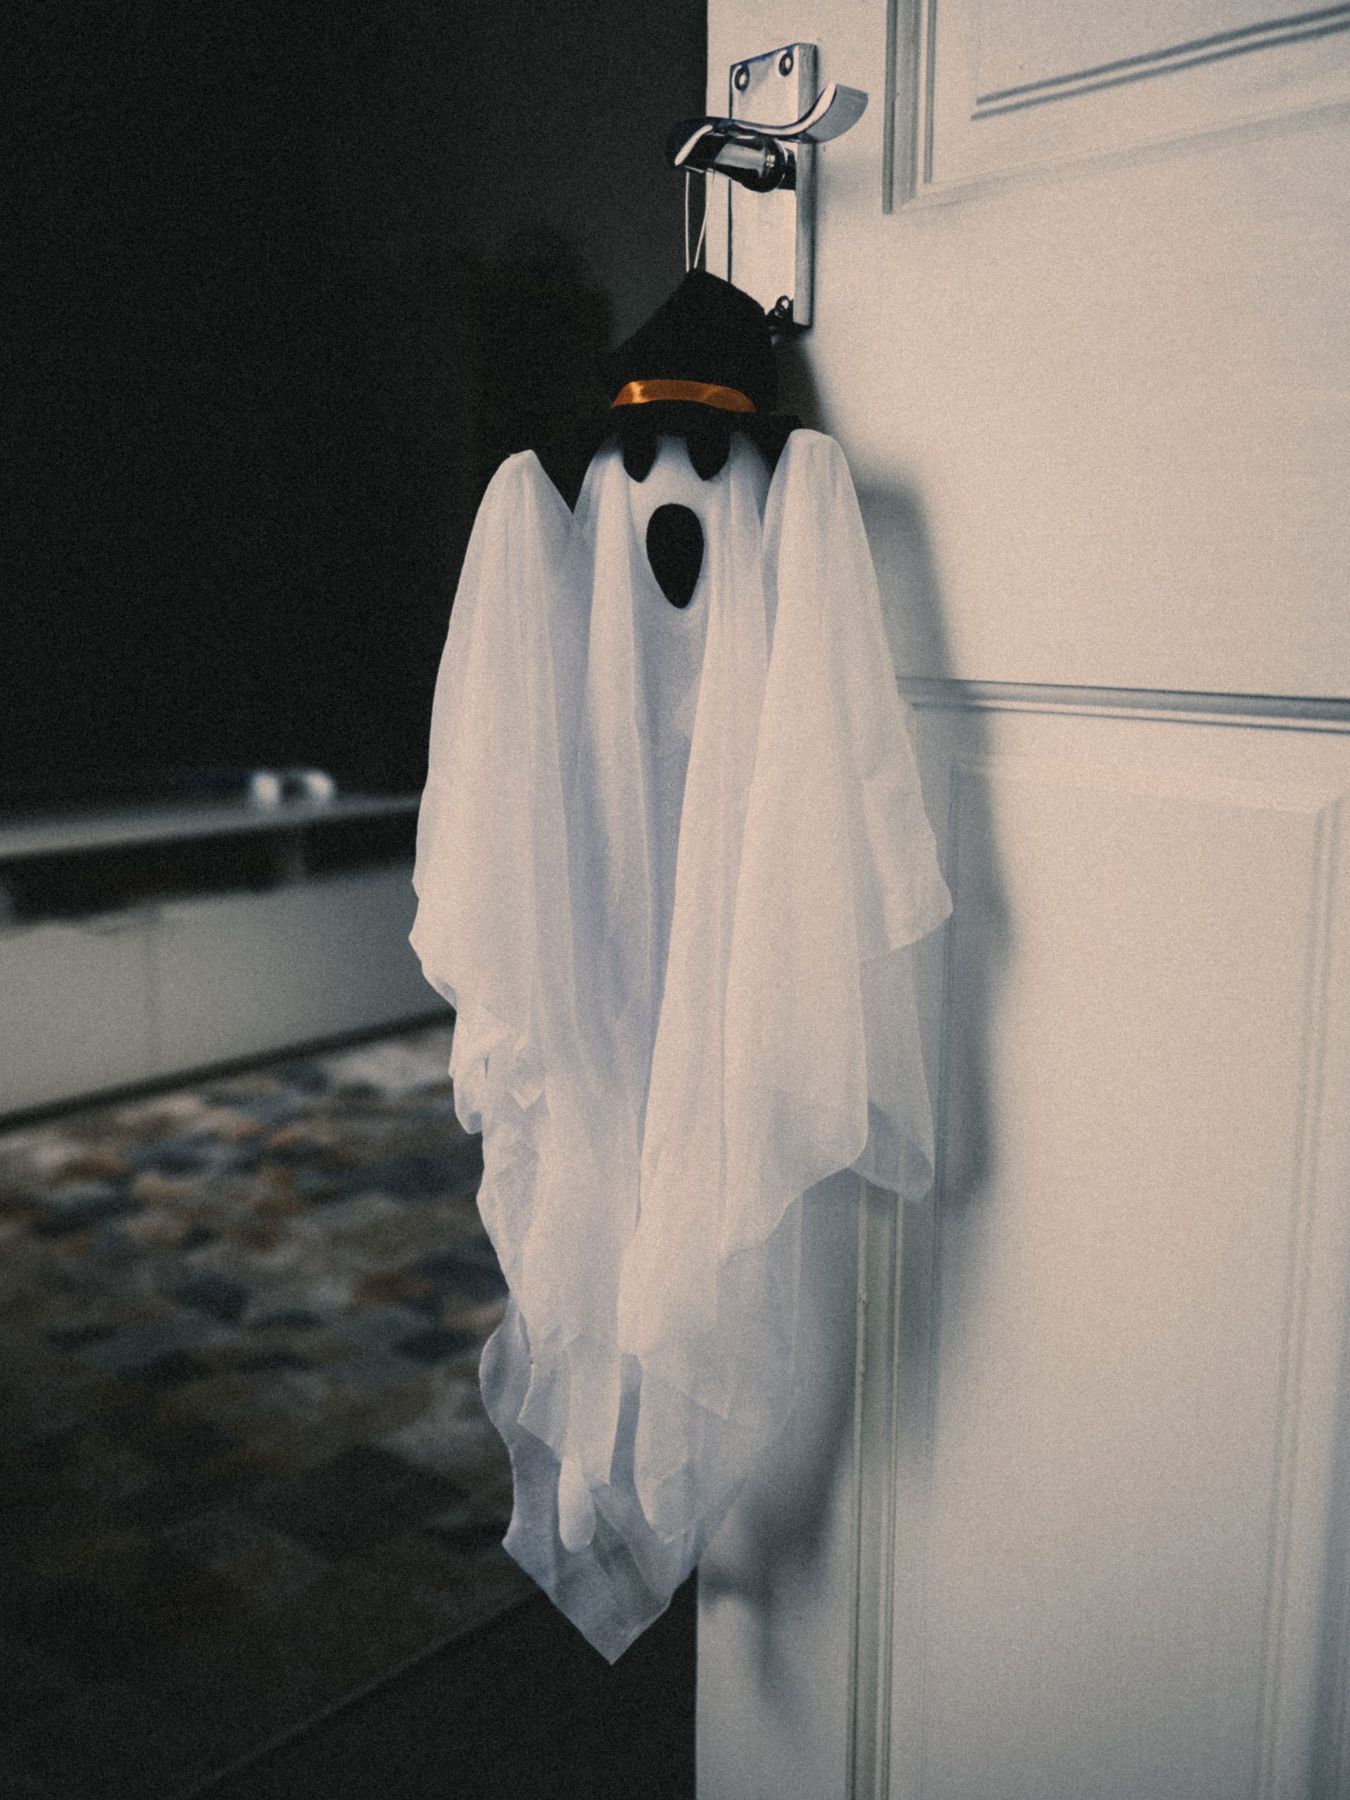
“The witch’s hat is what elevates this from a simple craft to a delightful, charming decoration.”
Without it, you have a cute but generic tiny ghost. The hat adds a pop of contrasting color (black and orange), a surprising detail, and a touch of personality. It turns the ghost into a character. This tiny accessory is what makes you smile and look twice. It’s a perfect example of how one small, thoughtful addition can completely transform a simple DIY project and give it a story.
23. Minimalist Jack-O’-Lantern on a Wooden Console Table
This simple, festive look proves you don’t need a lot of stuff to decorate for Halloween. The formula is beautifully minimal: 50% natural elements + 50% handmade charm. The small orange pumpkin and the potted plant in the background bring in the natural, organic feel. The black paper-cut face on the pumpkin provides that perfect touch of handmade, kid-friendly spookiness. The warm wood of the console table and the green glass of the vase act as a neutral, earthy backdrop. It’s a quiet, happy nod to the season that can fit into any decor style.
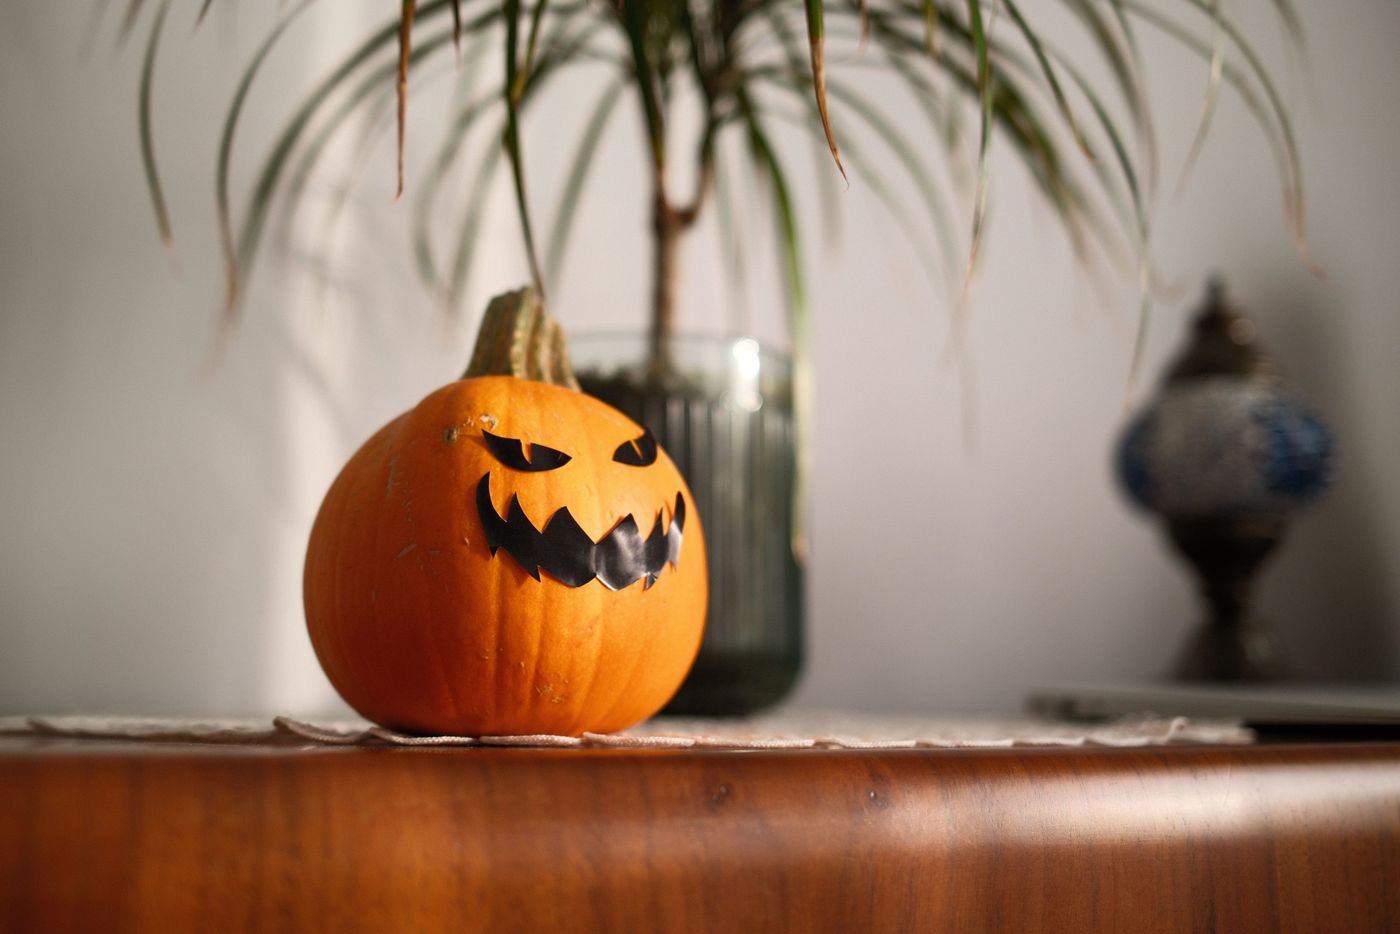
“This is the ultimate budget-friendly Halloween decoration.”
Grab one of the smallest pumpkins from the grocery store or a farm stand for just a few dollars. Instead of buying special paper, you likely already have what you need at home. A single sheet of black construction paper or even just a piece of black-painted printer paper will work perfectly. The face can be cut out with regular scissors. The total cost for this project can easily be under $5, making it a perfect craft for kids or for adding a tiny touch of festive spirit to a dorm room or office desk. See Idea #19 for another indoor shelf idea.
24. Vintage-Style Jack-O’-Lantern with a Printed Paper Hat
This jack-o’-lantern is so charming because it perfectly captures a sense of nostalgia. The hand-painted, slightly imperfect features and the wide, toothy grin are reminiscent of vintage Halloween decorations from the mid-20th century. The addition of the patterned paper hat enhances this retro feel, looking like something you might have crafted in elementary school. It’s not trying to be genuinely scary; it’s designed to evoke a feeling of happy, playful autumns past. The surrounding natural gourds ground it in a classic harvest theme.
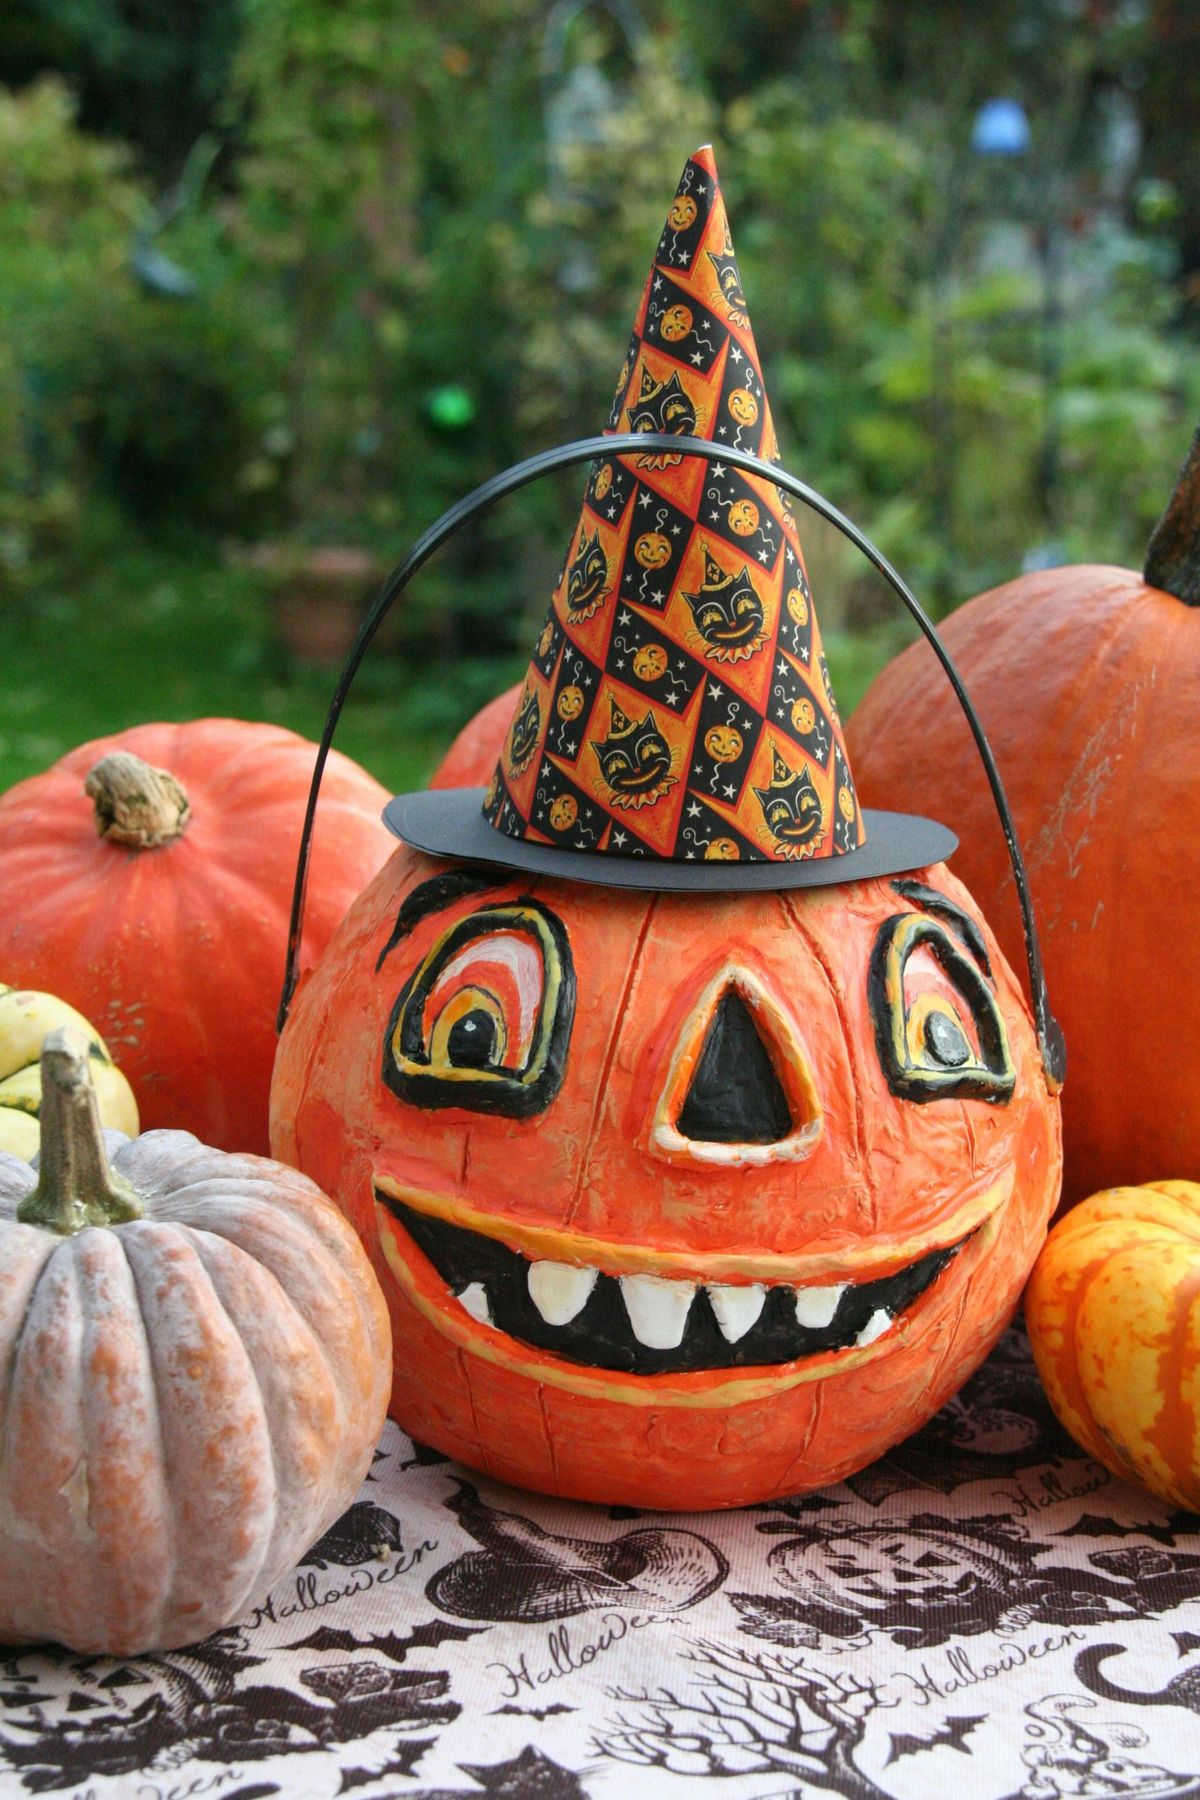
“There’s a huge trend right now for ‘nostalgiacore’ and vintage-inspired holiday decor.”
People are looking for decorations that feel personal and have a sense of history, as a counterpoint to mass-produced modern items. This hand-painted jack-o’-lantern with its quirky paper hat fits perfectly into that movement. It feels like a treasured item you’ve brought out year after year, even if it’s brand new. It’s a rejection of sleek minimalism in favor of something with character, texture, and a story.
25. Cozy Display of Illuminated Ceramic Halloween Decor
The single element that makes this scene so cozy and atmospheric is the warm, glowing light. Take away the internal illumination from the ceramic house, the jack-o’-lantern, and the metal lantern, and you just have a collection of objects on a table. The light is what brings them to life. It creates a sense of warmth and magic, casting soft shadows and highlighting the details of each piece. It draws you in and transforms a simple tabletop display into an enchanting little world. When in doubt, adding a layer of warm light is the fastest way to create a cozy vibe.
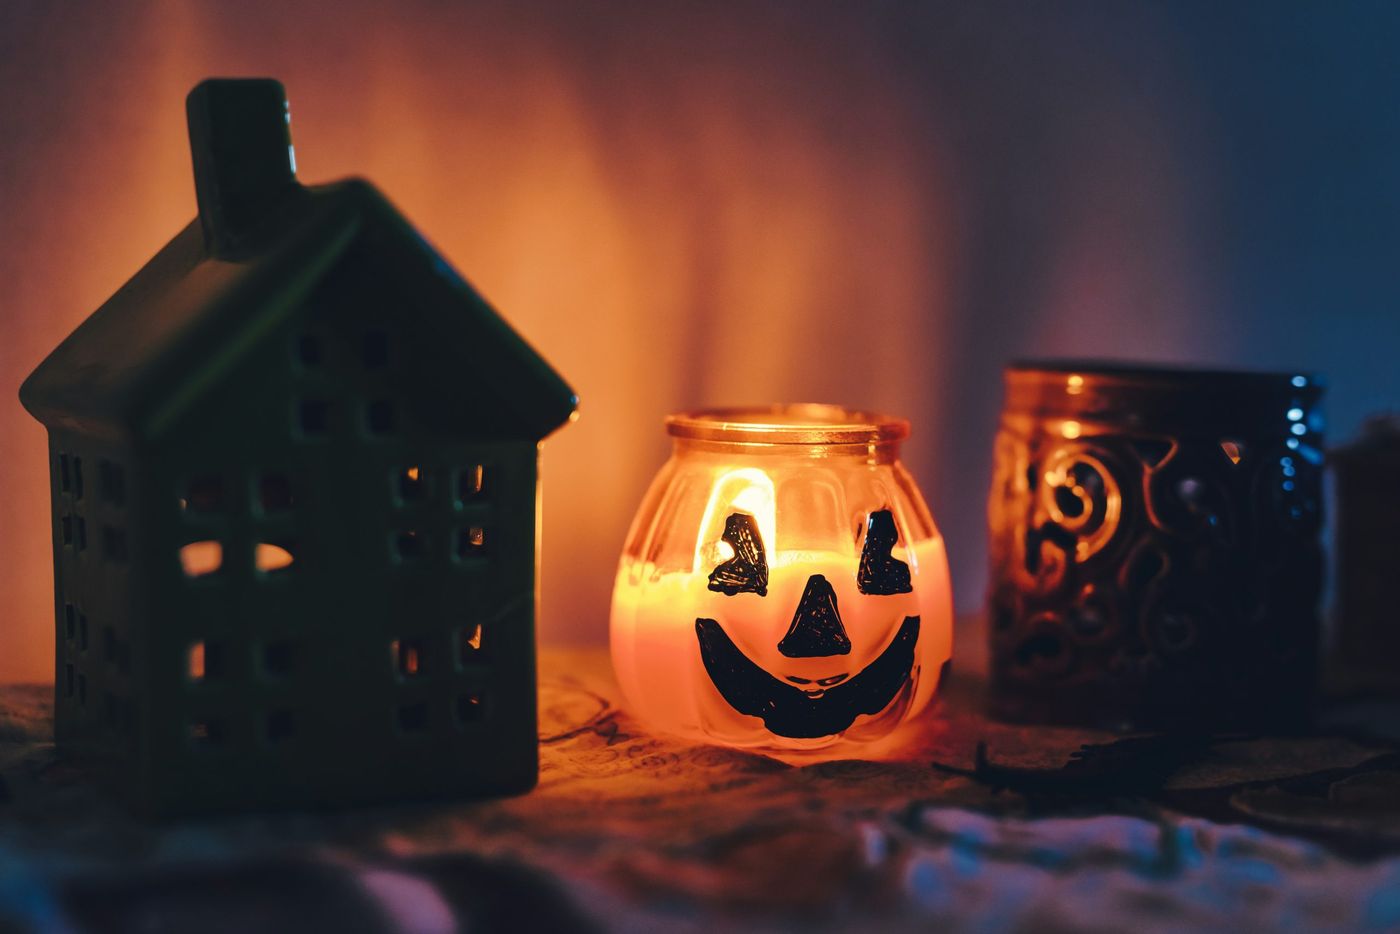
“Before you invest in a collection of light-up Halloween decor, here are a few things to check:Power Source: Are they battery-operated or do they need to be plugged in?”
Plan your display location based on outlet availability or your willingness to change batteries.Bulb Type: Look for pieces that use LED bulbs. They stay cool to the touch, are much safer than incandescent bulbs, and use significantly less energy.Ambiance Check: Turn them on in the store if possible. You want a warm, golden glow, not a harsh, bright white light, to achieve this cozy look.Cord Management: If they are plug-in, think about how you will hide the cords to maintain a clean, curated look.
26. Miniature Wizarding House Centerpiece with Ghost Pumpkins
Creating a magical tabletop world like this involves layering several small, charming elements. Here’s an estimated cost to build your own:
- Miniature House/Shop (from a craft store holiday village section): $25 – $50
- Fairy Lights (battery-operated): $5 – $10
- Mini Pumpkins (set of 3-4): $5 – $8
- Craft Paint (white, black): $3 – $5
- Red Ceramic Teapot (optional accent): $15 – $30
- Leaf-shaped cookie cutter and dough (if baking): $5 – $10
- TOTAL: $58 – $113
Budget alternative: Make the house yourself from a small cardboard box painted dark green. Use clippings from your own backyard instead of store-bought pumpkins and paint them.
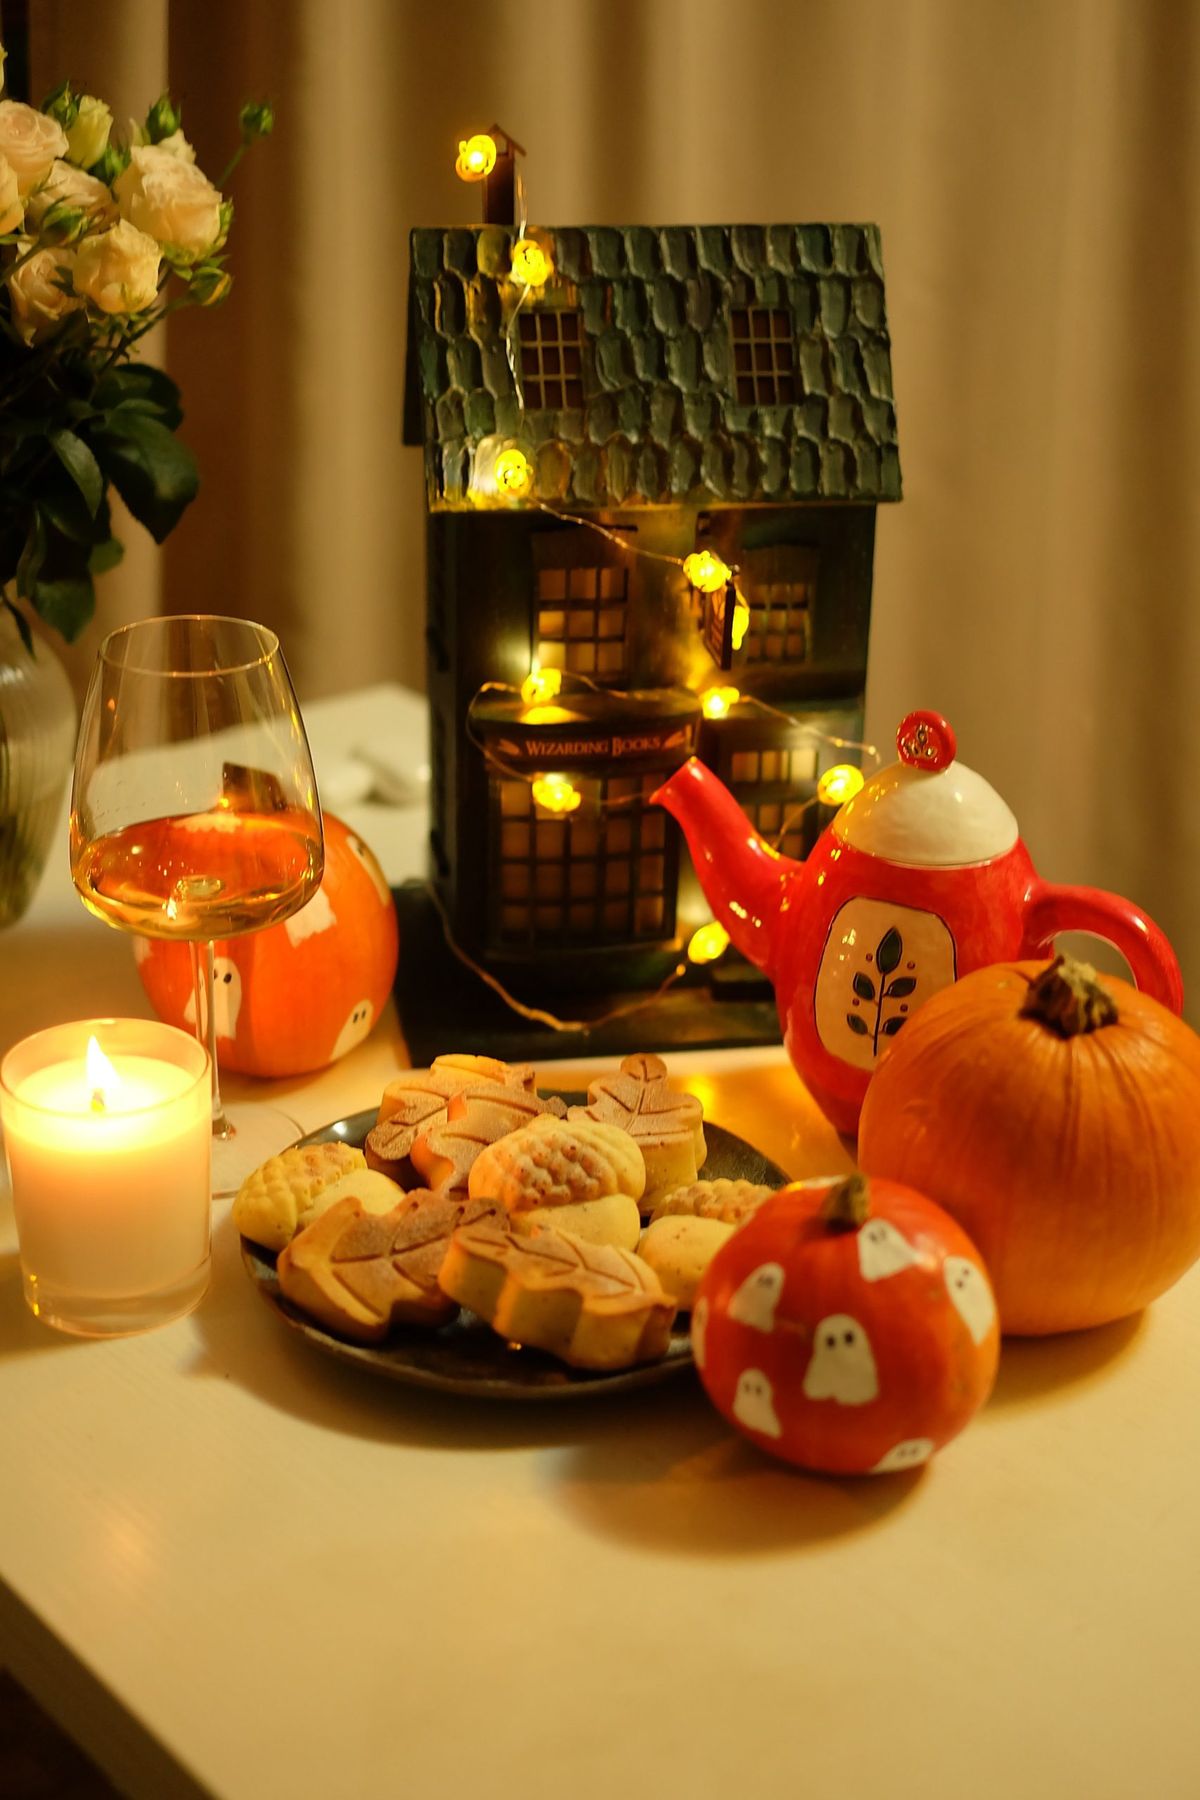
“The secret to making fairy lights look magical instead of messy is to hide the wire.”
For a scene like this, start by loosely wrapping the miniature house with the lights, tucking the wire into crevices and behind the roofline. Then, snake the rest of the string light through the display, hiding the green or copper wire underneath the pumpkins, cookies, and other decorative elements. The goal is to see the points of light, not the wire connecting them. Finally, make sure the battery pack is completely hidden behind the largest object in your centerpiece.
27. Life-Sized Skeleton Emerging from a Front Yard Lawn
This is a fantastic high-impact idea for almost any size of front yard with a lawn. You don’t need a huge amount of space for it to be effective. A small patch of grass, at least 4×4 feet, is plenty of room for your skeleton to look like it’s dramatically emerging. The key is to place it somewhere visible from the street or sidewalk for maximum effect. It works well near a walkway, under a tree, or in a garden bed surrounded by low plants like the ornamental grasses shown here. Its verticality makes it a great choice for adding height to a display. Compare this to the more sprawling look of Idea #7.
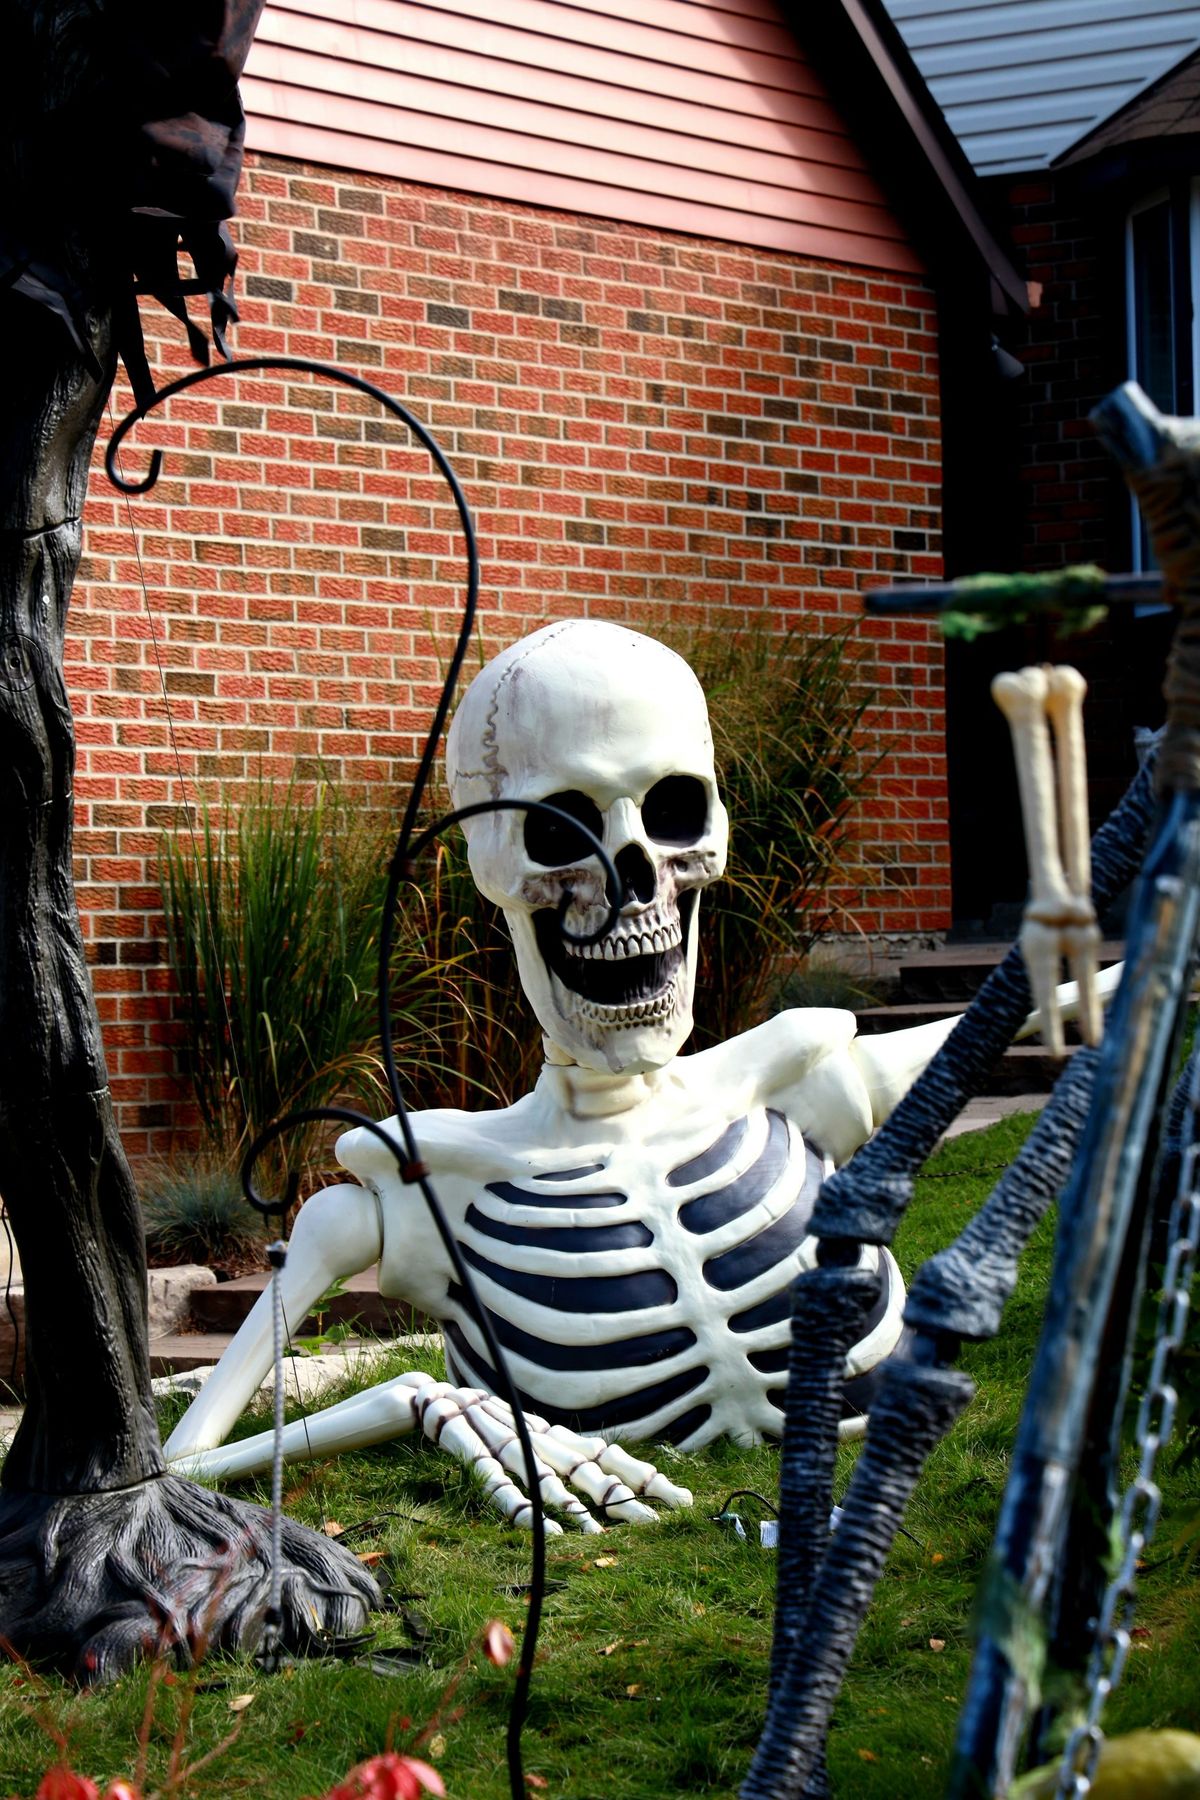
“A word of warning from someone who has done this: mow your lawn *before* you install your emerging skeleton.”
Trying to navigate a lawnmower or a weed whacker around the carefully placed bones is a recipe for frustration and will likely knock your display askew. Once it’s in place, you’re committed to that section of lawn being a bit unruly for the rest of the month. Think of it as part of the abandoned, overgrown graveyard aesthetic! Also, the plastic can become brittle in very cold weather, so handle with care during takedown if you live in a frosty climate.
28. Classic Graveyard-Inspired Garden Display with Tombstones
This classic Halloween setup is effective because it uses layering to create a sense of history and decay. It’s not just tombstones on a lawn; it’s a scene. The fallen autumn leaves provide the base layer. The foam tombstones are set at slight angles, making them look old and settled. The artificial spiderwebs are then stretched over everything—tombstones, shrubs, and the ground—which unifies the different elements and adds age. Finally, the small skeletal hands and signs are added as the top layer of detail. This multi-layered approach makes the scene feel much richer and more realistic. For a night-time version, see Idea #9.
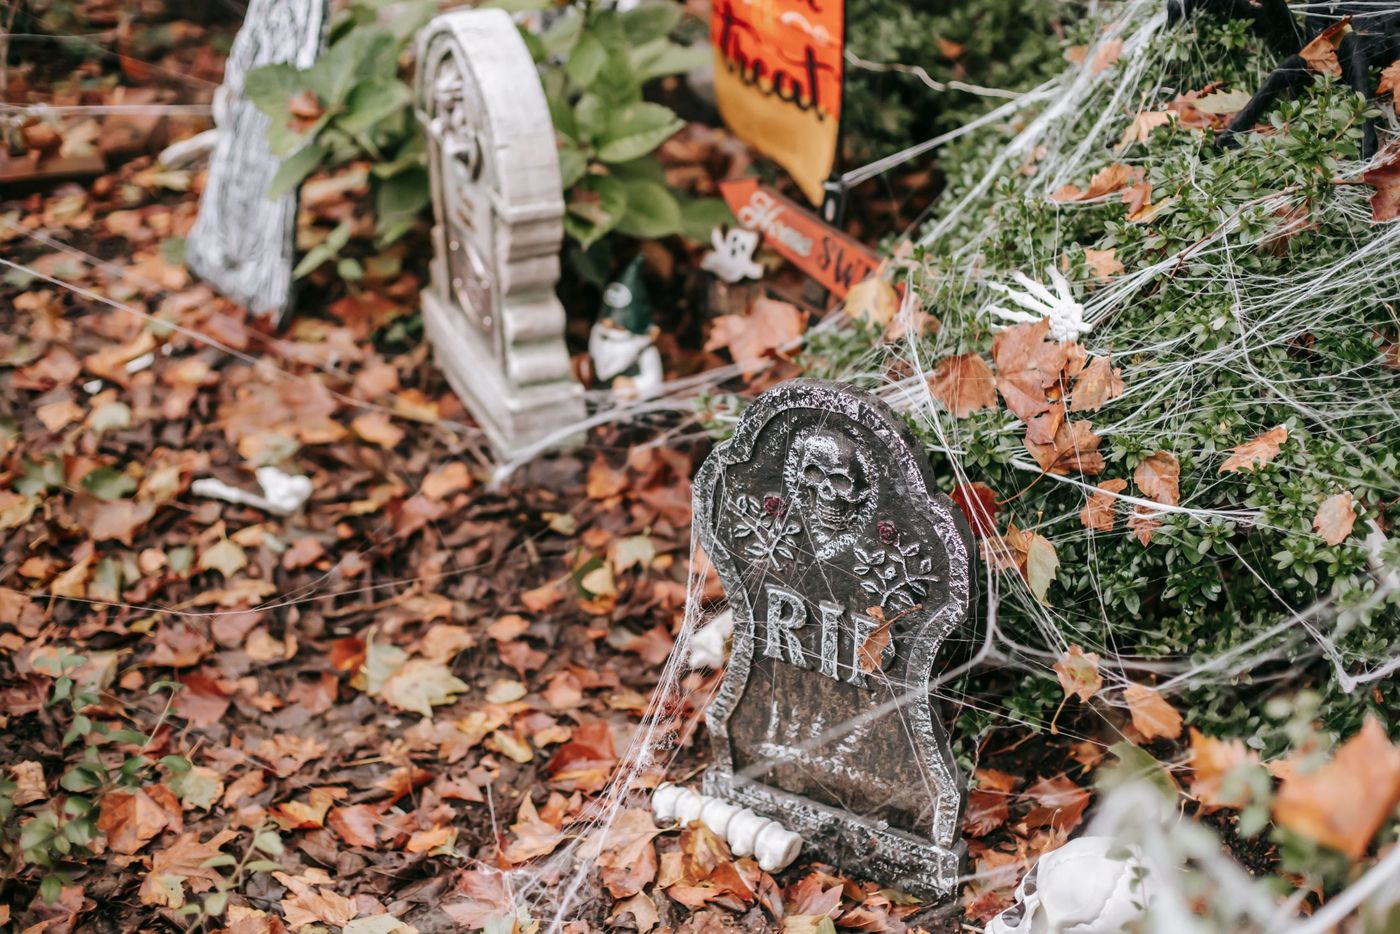
“You can create a convincing graveyard scene with items almost exclusively from the Dollar Tree or a similar dollar store.”
A pack of 2-3 foam tombstones usually costs just a few dollars. Grab a bag of stretchy spiderwebbing and a bag of plastic bones or a skeleton garland you can cut apart. The total cost to create a small but effective graveyard vignette can easily be under $15. The ‘fallen leaves’ are free if you have trees in your yard! Focus on clustering the items together in one section of your yard rather than spreading them out thinly for a bigger impact.
Your Spookiest Season Starts Now
Whether you go for a full-blown yard haunt or a single, perfectly painted pumpkin on your desk, the goal is to have fun and add a little bit of seasonal magic to your space. These ideas are just a starting point. The best decorations are the ones that tell a little story about you and bring a touch of magic to your home.
Feeling inspired? Pick your favorite idea, make a supply list, and get crafting. And don’t forget to save your favorite looks to your Halloween board on Pinterest so you can find them again next year!