You know that feeling when you finally find the homemade Christmas ornament that looks exactly right for your tree — and then realize it was probably assembled from supplies you already have in the kitchen drawer? That’s the magic of handmade decorating.
I combed through ideas from Etsy, Michaels, Hobby Lobby, and my own slightly chaotic craft bin to pull together 28 ornaments that range from about $4 in raw materials to $80 when you get a little fancy. You’ll find rustic pinecone characters, playful felt snowmen, hand-painted keepsakes, and just enough glitter to make peace with your vacuum. 2026 is leaning hard into personal, slightly imperfect holiday decor, which means store-bought perfection is quietly losing its grip. Some links may earn a small commission at no cost to you. 📌 Save this to Pinterest for later — you’ll want to revisit these ideas.
1. Pinecone Critters That Turn Your Tree into a Woodland Gathering
There’s a reason a tabletop cluster of pinecone critters makes people stop and stare. The natural scales of the pinecone already do the heavy lifting — each little owl, deer, and hedgehog has built-in texture that paint alone can’t fake. Felt hats and tiny scarves in red and white warm up the brown and green palette, while miniature pinecone trees and wreaths fill in the negative space so the scene feels like a tiny forest.
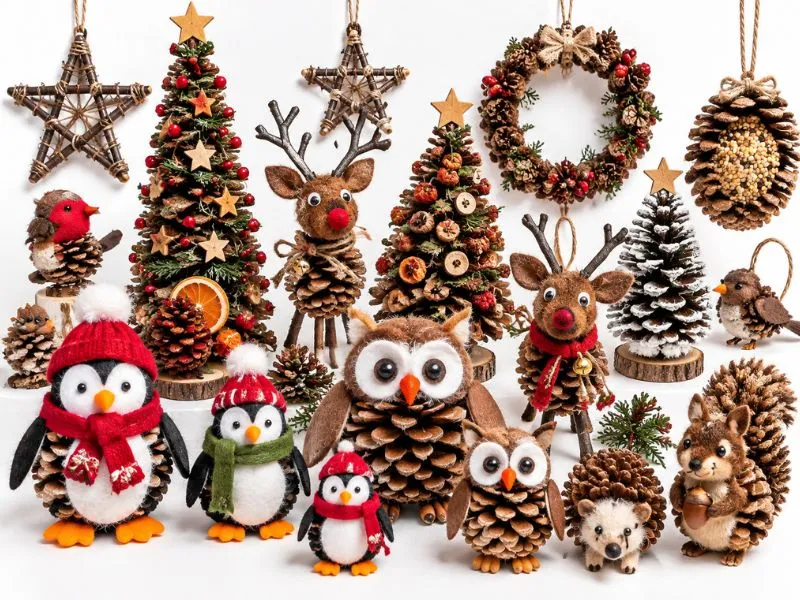
“This is the handmade look that quietly took over 2026 holiday feeds, and honestly, it has staying power.”
It leans on the same slow-craft movement that made visible mending and folk-inspired decor feel fresh again — less about perfection, more about character. Unlike shiny blow-mold figurines, these feel collected over time, which is exactly the point.
2. Glitter-Filled Glass Baubles with Tiny Bulb and Candy Cane Scenes
Fillable glass ornaments are your best friend if you want maximum sparkle with minimum artistic skill. Use a small funnel to add about one teaspoon of extra-fine glitter into each clear ball, then tilt it slowly until the inside is fully coated. For the light bulb string, candy cane, and snowflake details, adhesive decals or small vinyl shapes stay smooth and don’t wrinkle like stickers after a few seasons.
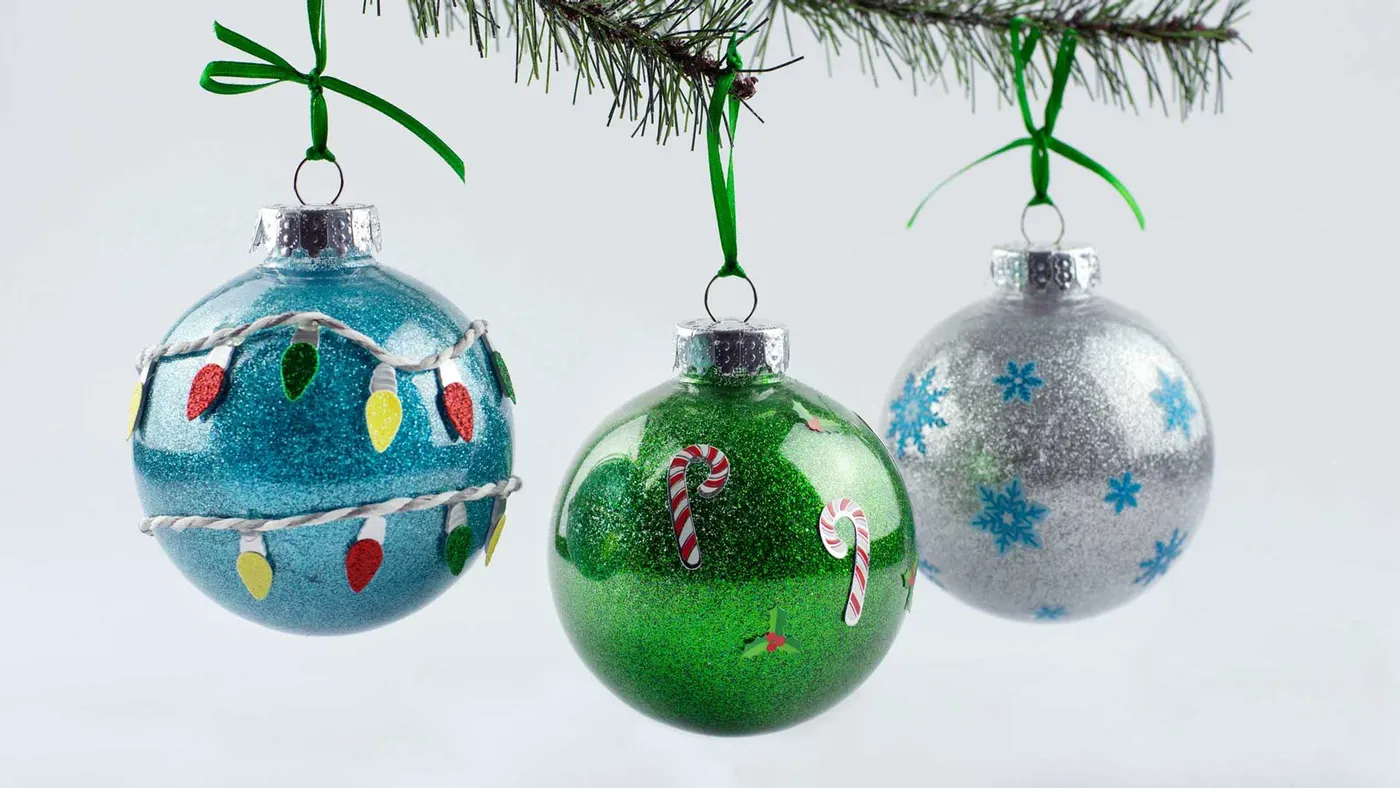
“Glitter is a commitment.”
You’ll find traces on the floor, on the dog, and somehow inside the fridge. Tap each ornament gently after filling and seal the cap with a dot of clear glue so the glitter can’t escape. Store these separately in tissue paper; stacked together, the soft glass scratches fast.
3. Fused Glass Christmas Trees and Wreaths with Embedded Mini Details
Think of these as 60% clear glassy base, 25% saturated embedded color, and 15% ribbon. The transparent body lets the little trees, wreaths, and star shapes float like they’re suspended in ice, while red, green, blue, and white details give each piece its own personality. If you’re mixing colors, keep the red and green together but let one clear star act as a visual pause.
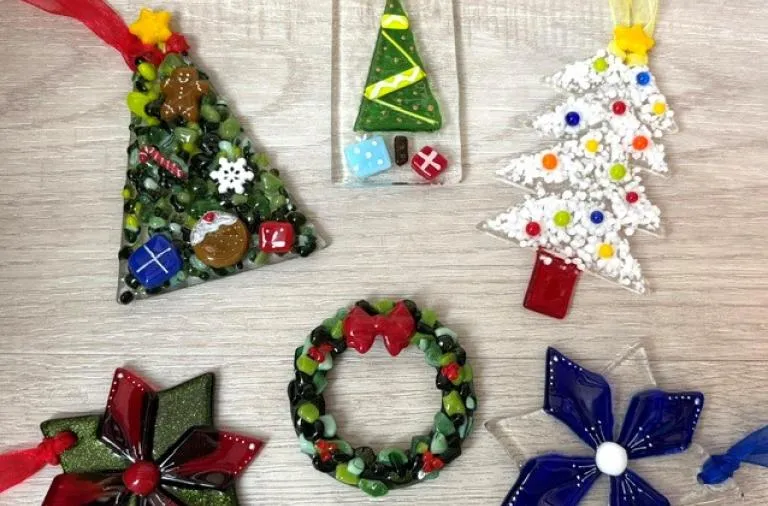
“Main materials (resin or fused glass kit): $20–$38Pigments, glitters, and tiny e”
- Main materials (resin or fused glass kit): $20–$38
- Pigments, glitters, and tiny embedded details: $6–$12
- Coordinated ribbons and gold jump rings: $4–$9
- Basic tools, mixing cups, and sanding film: $5–$10
- Total: $35–$69 for a set of 4–6 ornaments
Budget alternative: use clear plastic fillable ornaments and pour in colored resin with small plastic charms — the same floating effect for under $12.
4. Coiled Paper Snowmen with Red Ribbon Scarves and Top Hats
- Cut heavyweight white cardstock into 1/4-inch-by-12-inch strips, one per snowman.
- Coil each strip around a dowel, gluing every half inch until you have a 2-inch ball; allow 15 minutes to dry.
- Glue two black dots for eyes and a small orange cardboard cone for the carrot nose.
- Fold a red ribbon over the top as both scarf and hanger, then add the black top hat with hot glue.
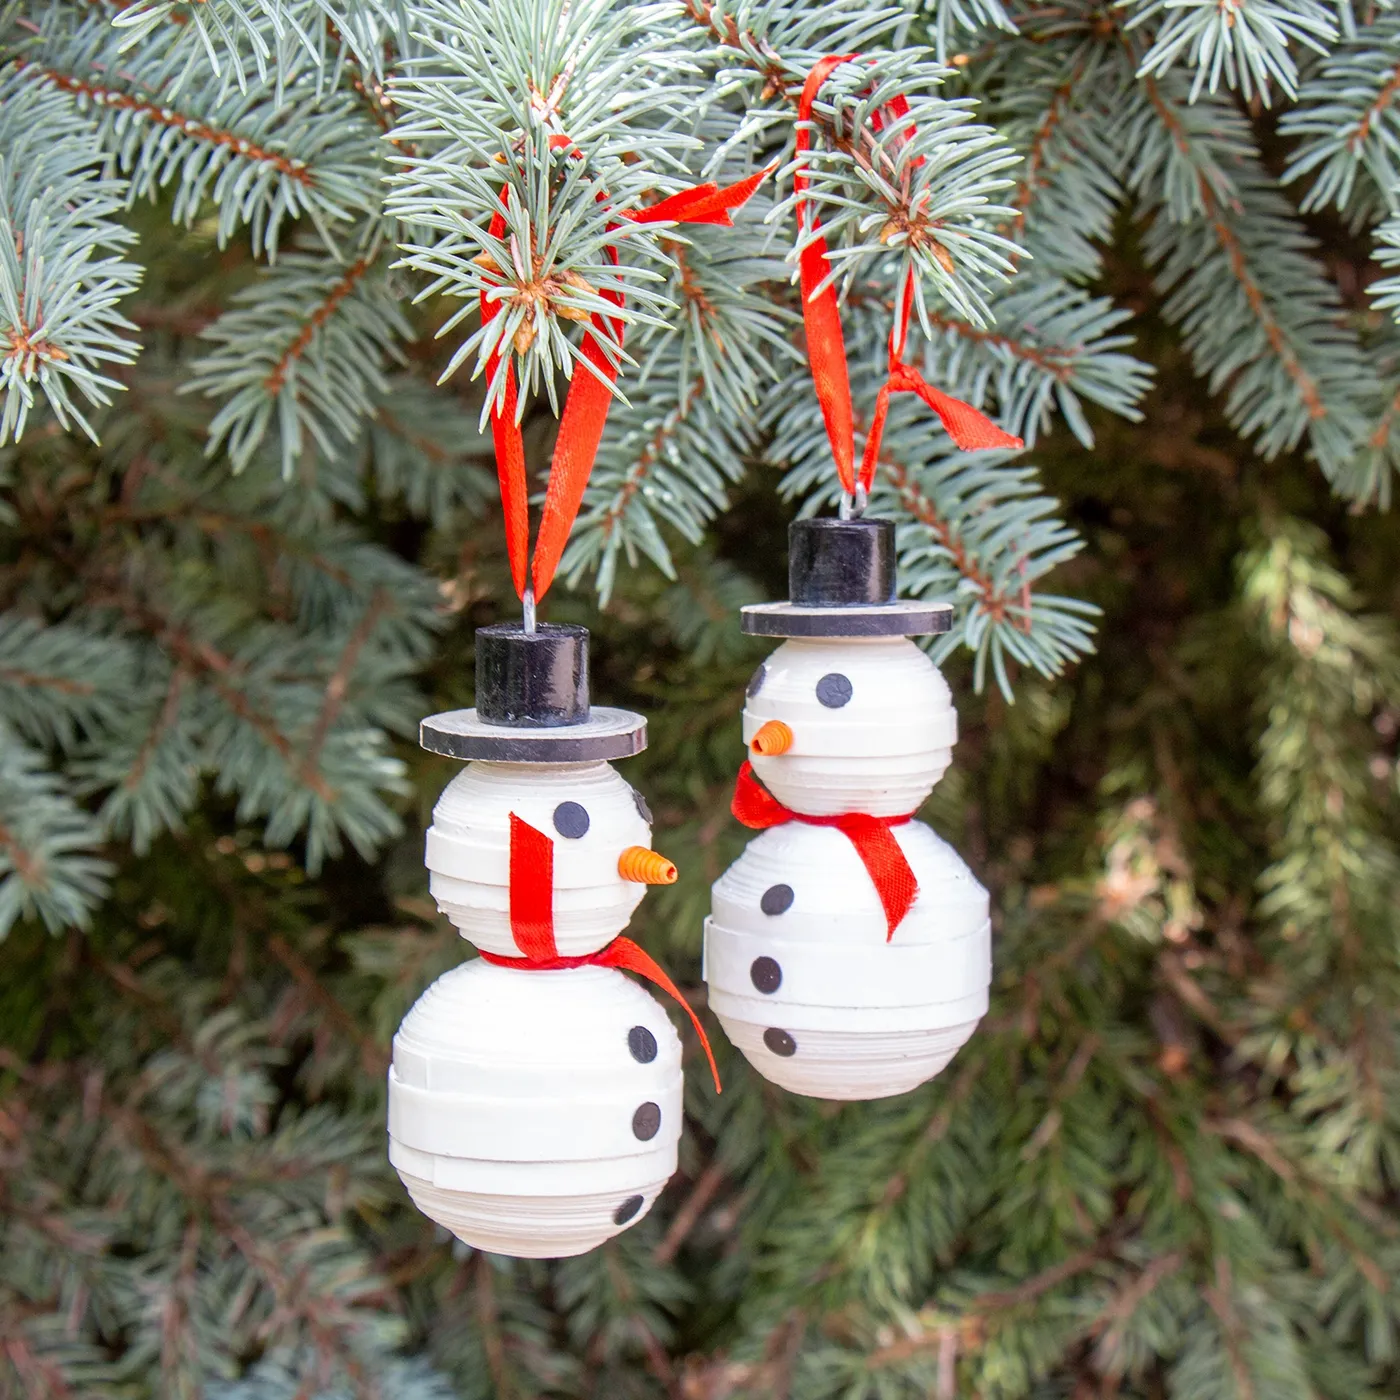
“Time estimate: 25 minutes per snowman.”
Material cost: under $4 per ornament.
The red ribbon is the make-or-break detail. It does three jobs at once — scarf, hanging loop, and the only strong color against all that white — so don’t swap it for plain string unless you want these to fade into the tree.
5. Hand-Painted Lightbulb Garland Strung on Natural Twine
This look is basically the budget, branch-friendly cousin of the fused glass set in Idea #3. Pick up thin wood lightbulb cutouts at any craft store or cut your own from cereal box cardboard, paint them white, add the gold base, and draw a swirled filament with a fine black paint pen. String them together with jute twine and you’ll spend under $10 total.
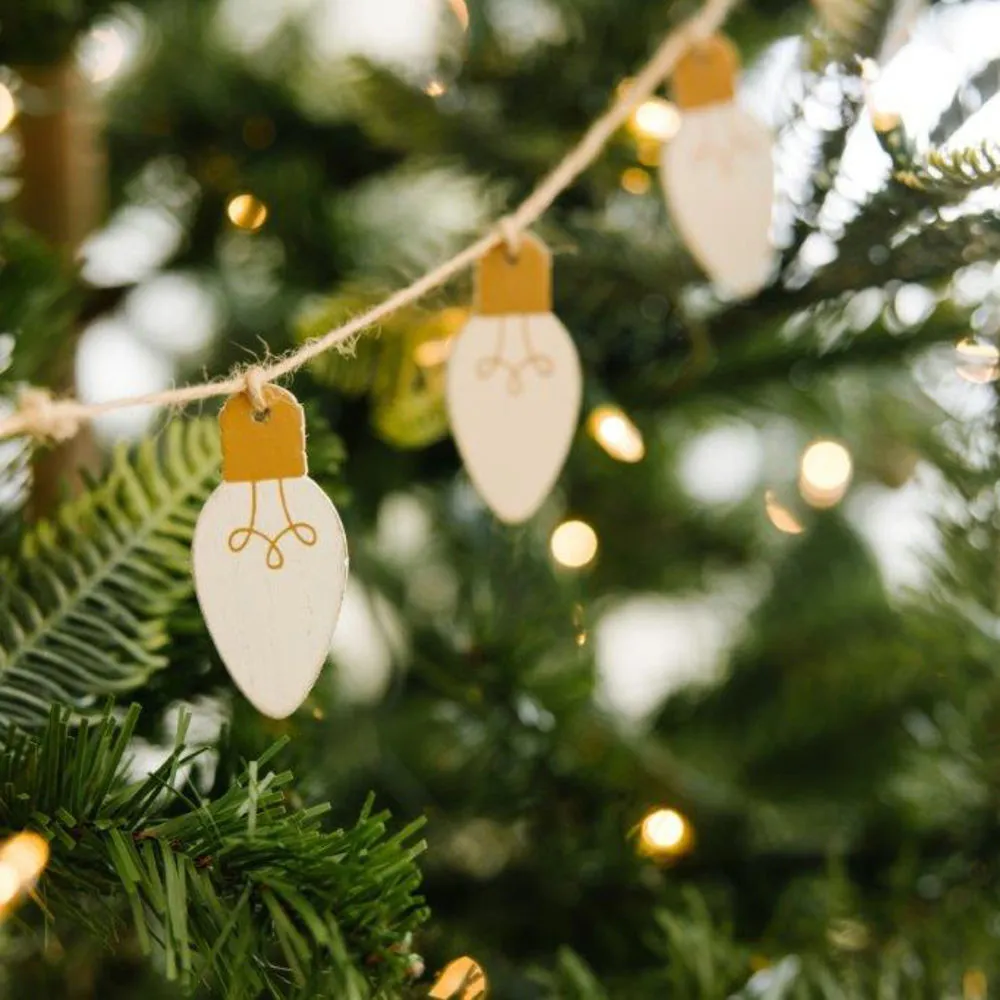
“hand-painting tiny filament details tests your patience and your brush control.”
If your first bulb looks like a sad squiggle, wipe it off before the paint dries and try again. These are also strictly indoor ornaments — if you hang them near a doorway, they’ll chip after a few shoulder bumps.
6. White Felt Star with Red Embroidered Snowflake and Gold Beads
The contrast here is doing all the work — crisp white felt against deep blue-green needles, with red embroidery that pulls your eye straight to the star’s center. The small gold beads on each point and in the middle aren’t just decorative; they give the flat shape just enough dimension to catch light without turning it into a disc.
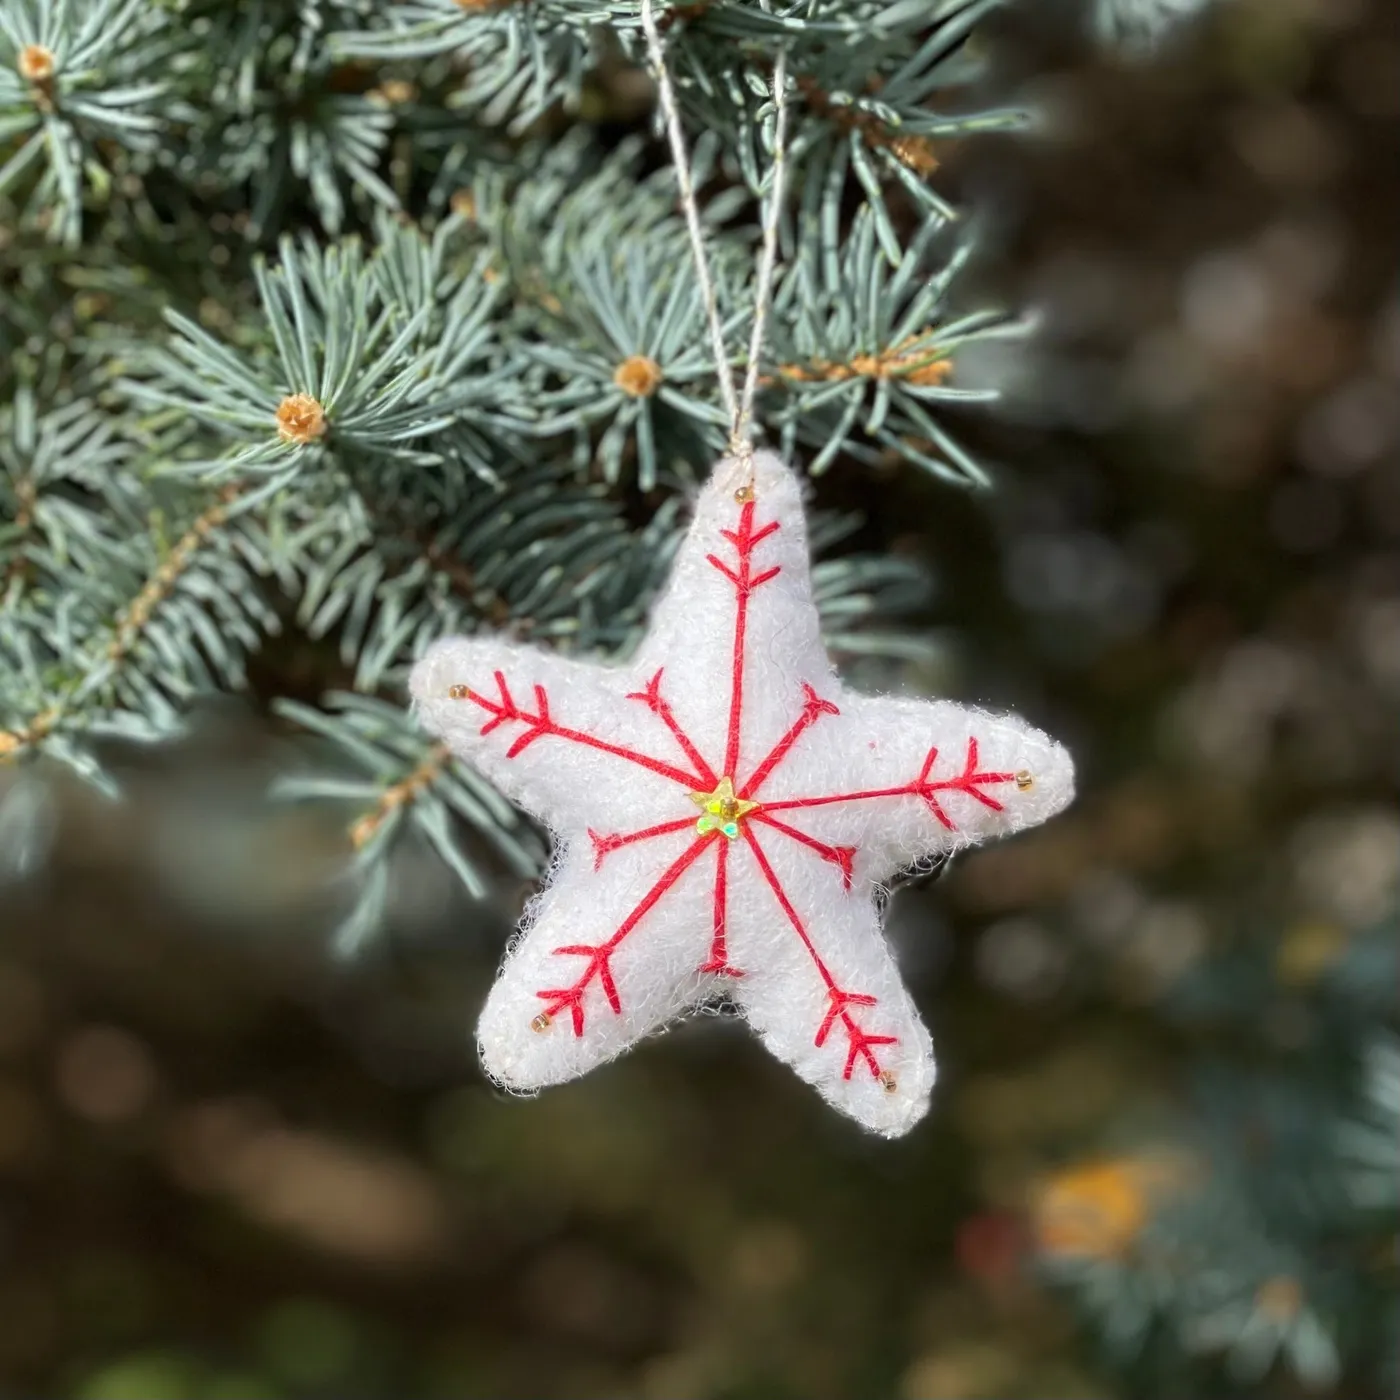
“Use two strands of red embroidery floss for the snowflake so the lines read as deliberate, not thin and timid.”
Backstitch the entire pattern first, then sew the beads on with a double knot behind each one. If the star curls at the tips, press it under a heavy book for a few hours before hanging.
7. Beaded Wreath and Candy Cane Ornaments Glowing in Warm Lights
That glossy, slightly irregular bead surface is the whole point. When the warm string lights hit the green wreath and red-and-white candy cane, they glow in a way flat paint can’t. The white ribbon ties it together and gives the eye a clean break between the two shapes.
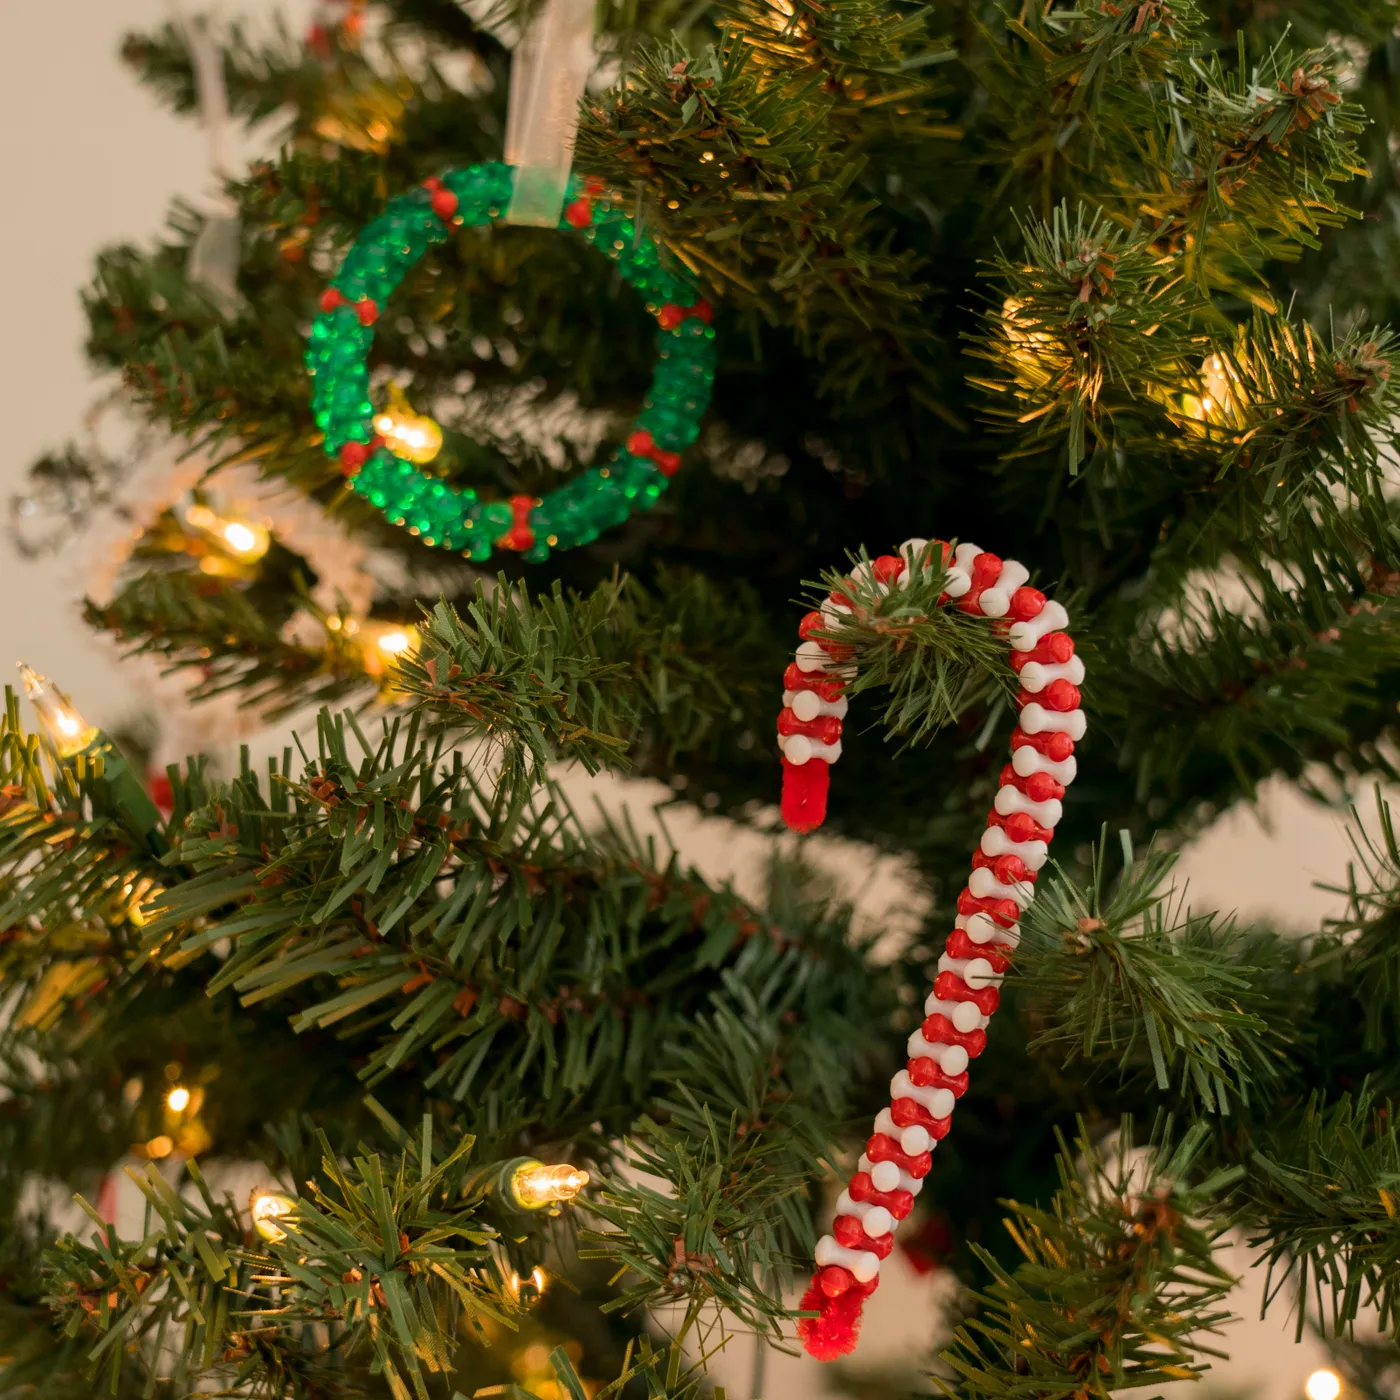
“Beaded ornaments are heavier than they look, especially once you’ve used hundreds of tiny pony beads.”
Loop the ribbon through a glued bead cluster rather than a single thread. And keep them away from young kids — dropped once on hard floor, these can pop into a thousand pieces of chaos.
8. Western Letter S Ornament with Cowboy Hat and Floral Accents
- Measure the branch where this will hang — the letter and hat need about 4 inches of clearance.
- Use a gold cord no longer than 5 inches so it won’t tangle in the lights.
- Seal any painted details with a matte spray before hanging.
- Pick a hat scale under 1.5 inches tall, or it’ll cover the letter.

“This ornament works best on a full-size tree with medium branch spacing; on a sparse tabletop tree the detailed letter S can look oversized and pull the branch down.”
If your tree is on the smaller side, go with the lighter felt snowmen in Idea #24 instead.
9. Glazed Ceramic Santa Head with Swirling Beard Texture
Glazed ceramic has a way of catching light that flat acrylic paint never will, and this Santa’s swirling beard is the star. Dust it with a dry microfiber cloth once a season, not water or detergent. Ceramic is also unforgiving in storage: wrap each head separately in tissue or bubble wrap, because one hard knock against another ornament can chip the glossy finish.
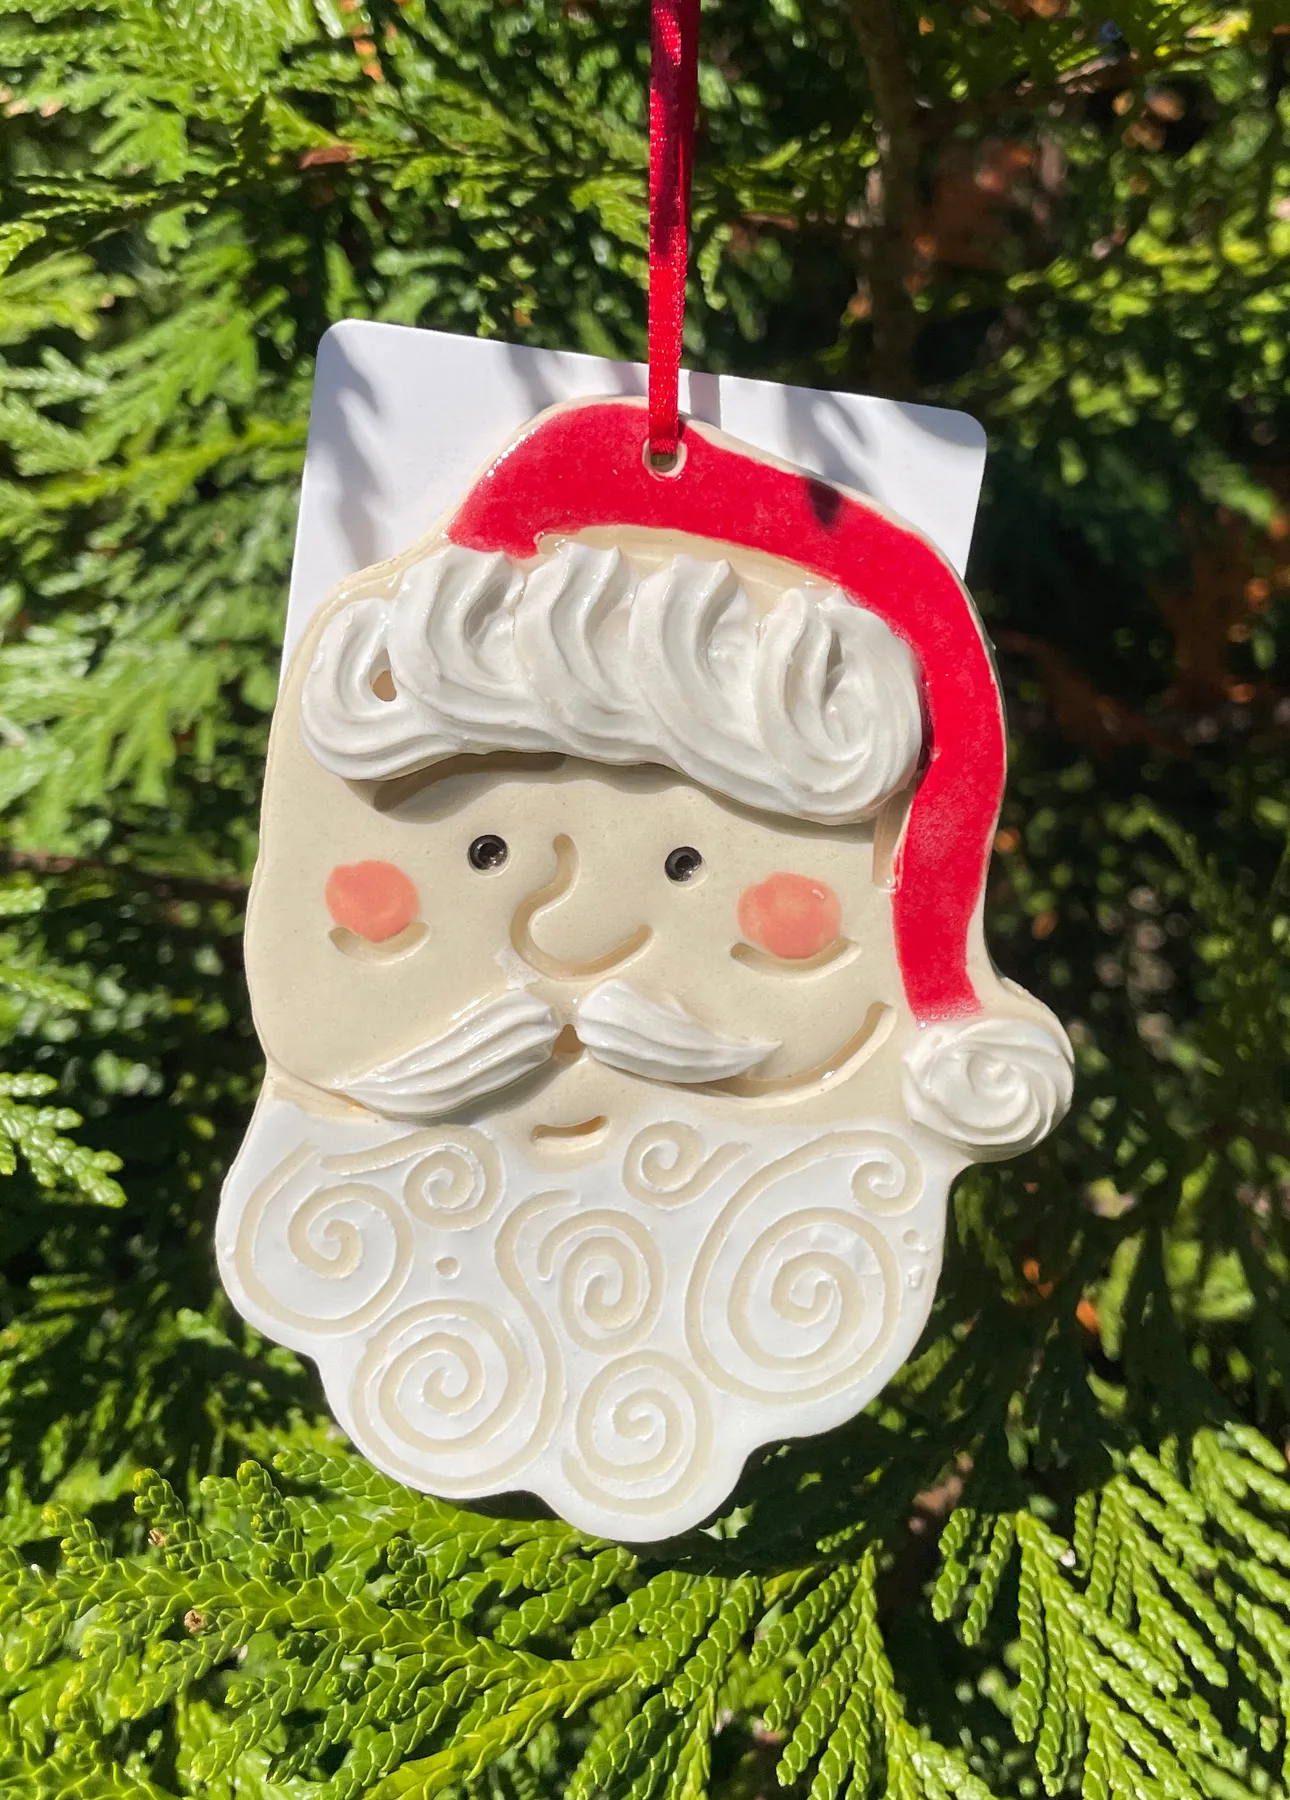
“Handcrafted ceramic holiday pieces are having a real moment in 2026 — part of a wider shift toward buying fewer, nicer things from small makers instead of boxes of identical plastic.”
A Santa like this feels like it could have been pulled from your grandmother’s ornament box on its third generation.
10. Hand-Painted Green Ceramic Tree with Red Dots and Ribbon
The formula is simple: 70% soft green ceramic tree, 20% tiny red dots, 10% red ribbon hanger. The dots create rhythm without turning it into a polka-dot explosion, and the red base anchors the whole thing. Against dark evergreen needles, that light green body almost glows.
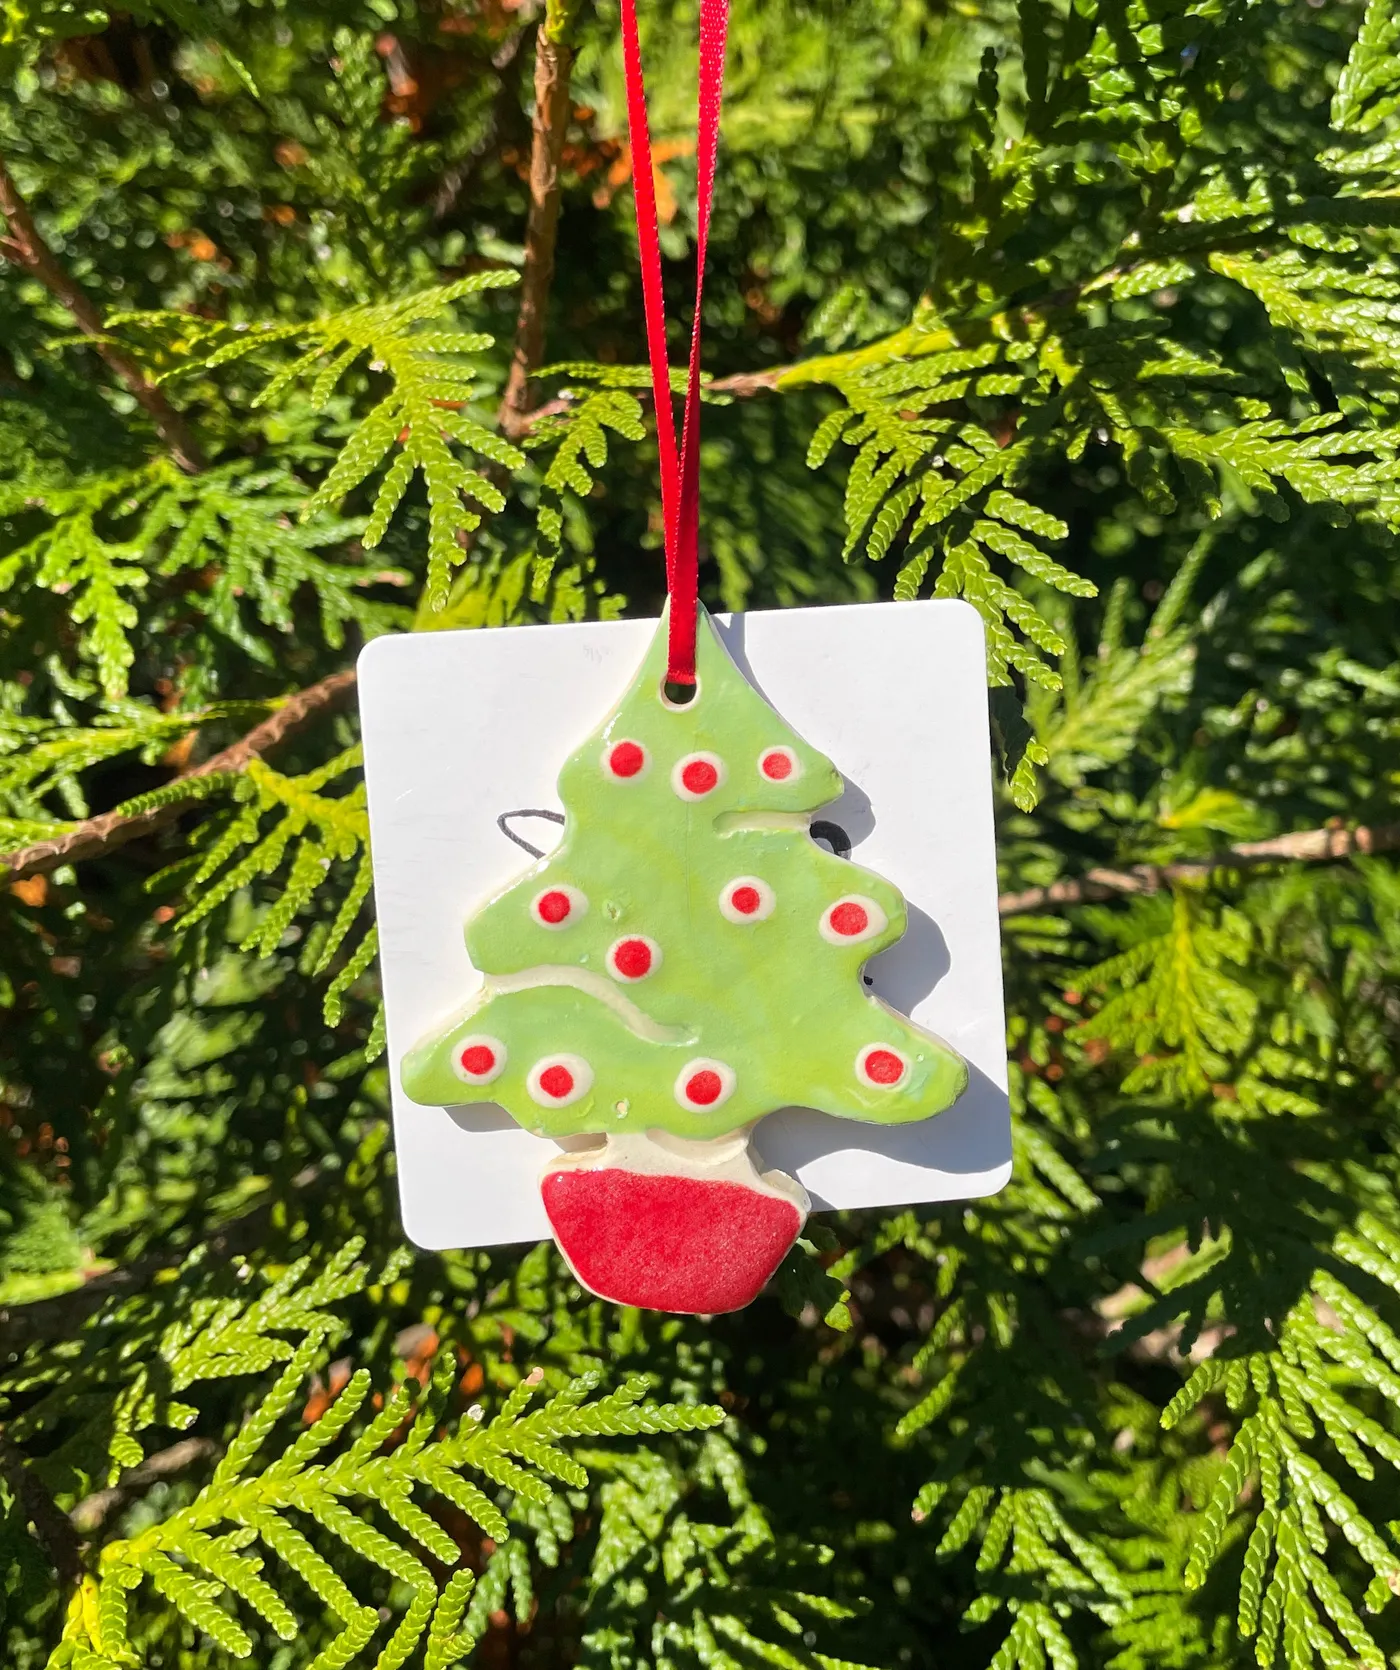
“Air-dry clay in a pale green shade or white clay with green paint: $5–$8Acrylic ”
- Air-dry clay in a pale green shade or white clay with green paint: $5–$8
- Acrylic craft paint for red dots and base: $3–$6
- Thin red ribbon or cord: $2–$4
- Clear acrylic sealant: $5–$9
- Total: $15–$27 for multiple trees
Budget alternative: draw the same tree on shrink film, color with markers, bake, and add a red ribbon loop — under $5 all in.
11. Personalized Gingerbread Family on a Mini Baking Sheet Ornament
For names this small, use a fine-tip acrylic paint pen, not a brush. Write the name once, wait a full 20 minutes, then add a second pass only where the paint looked thin. Bake or seal the figures only after every layer is completely dry, or the red and white icing details will smudge into pink gauze.
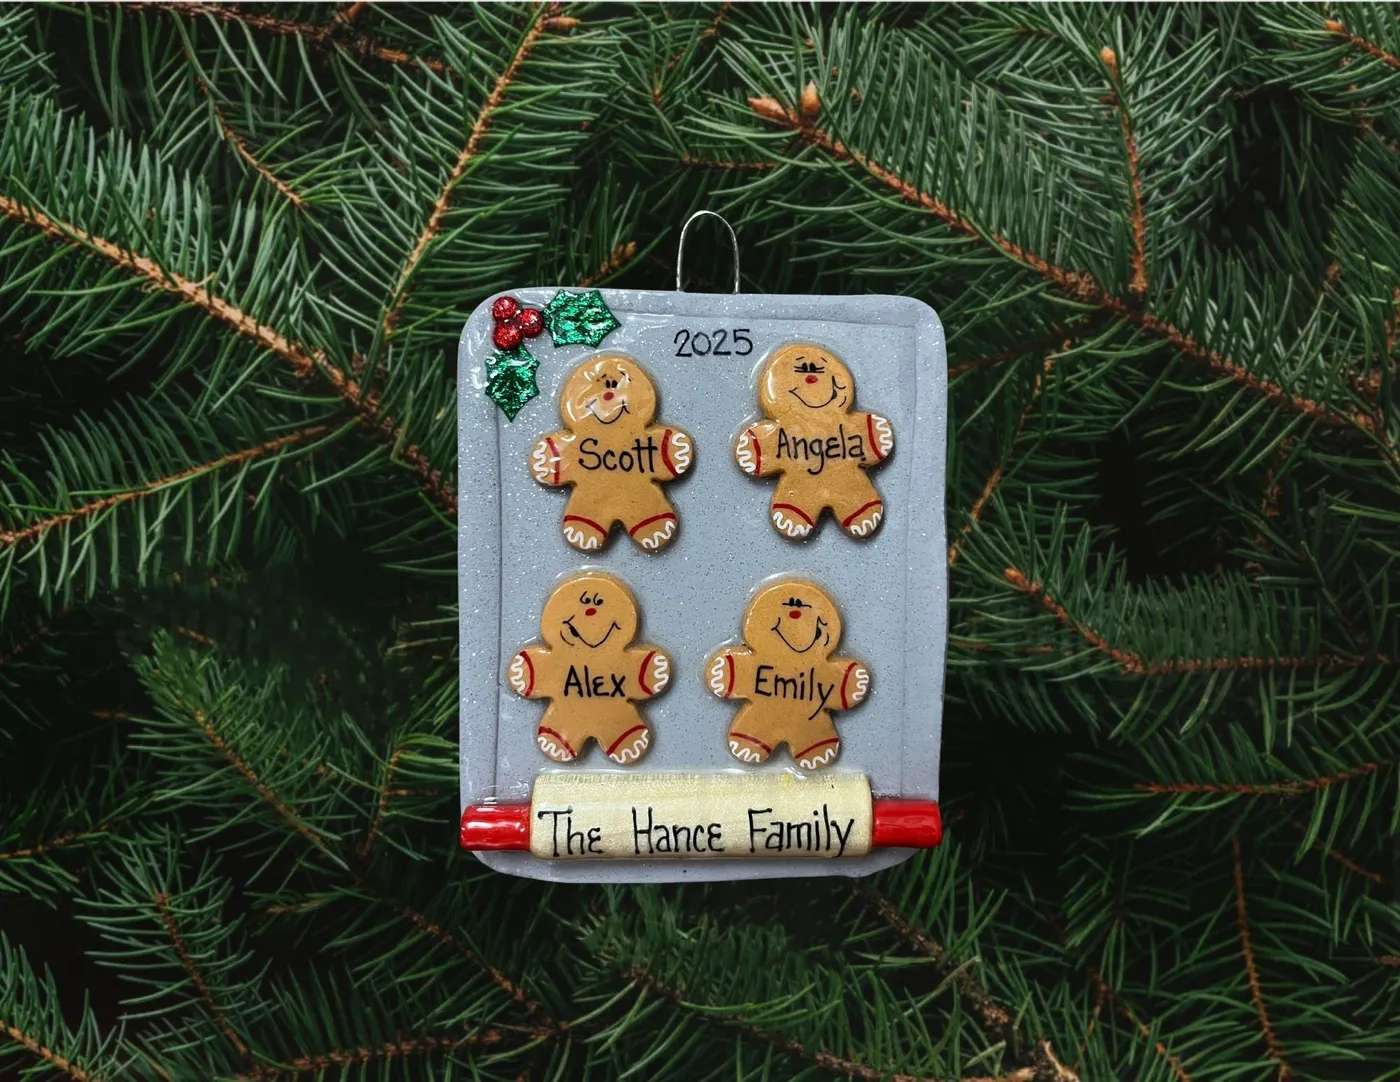
“The personalized names — Scott, Angela, Alex, Emily, and the family name on the rolling pin — are what turn a cute craft into a keepsake.”
This is the ornament people pull out first each year and spend five minutes looking at. Don’t skip the names to save time.
12. Impressed Handprint Keepsake with Pink Striped Ribbon
Air-dry clay can crack if you roll it too thin, so keep it around 1/4 inch thick before making the handprint. Press the child’s hand evenly and firmly, but don’t rock it — that creates shallow spots and double lines. Poke two hanging holes before drying, not after, unless you want a cracked ornament and a small heartbreak.
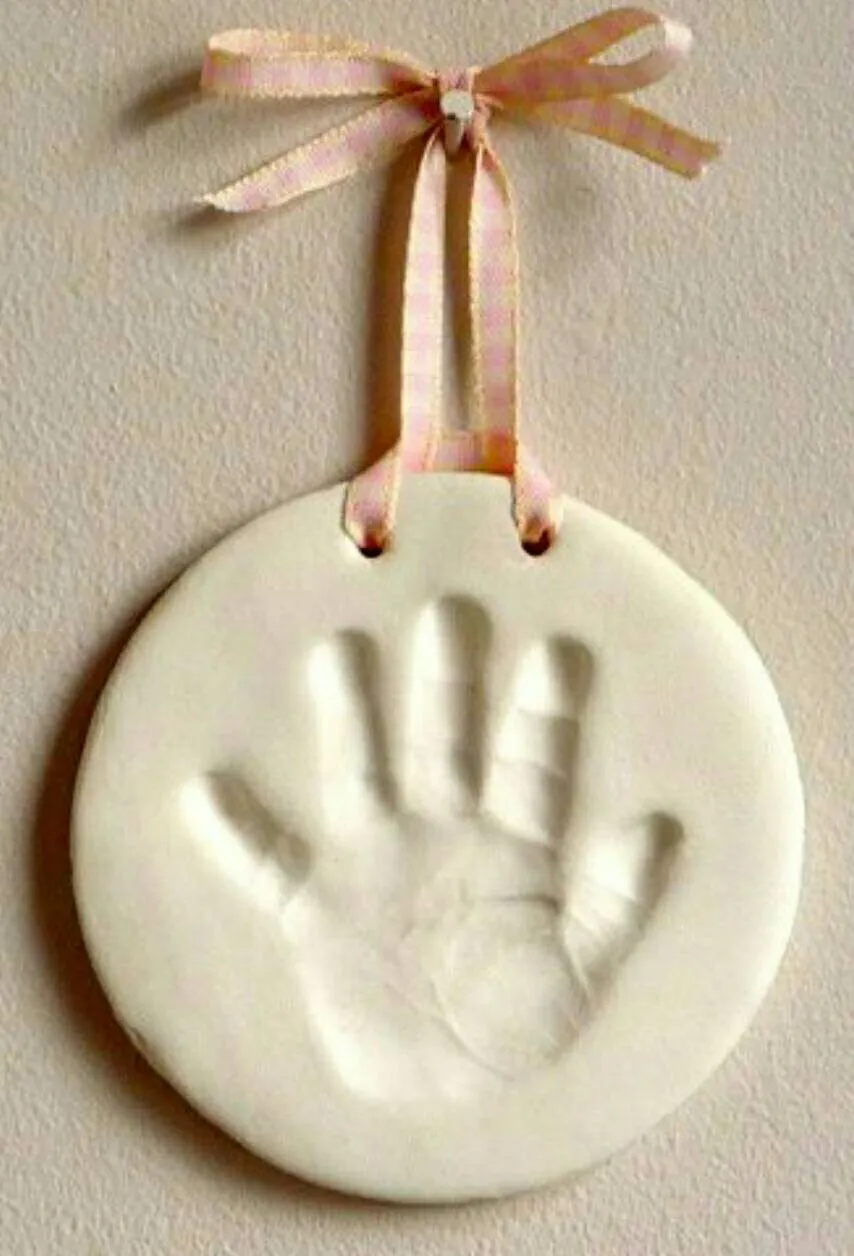
“Roll air-dry clay to 1/4 inch thick on parchment paper.Press the hand straight d”
- Roll air-dry clay to 1/4 inch thick on parchment paper.
- Press the hand straight down, then lift without sliding.
- Cut a 3-inch circle around the print with a cookie cutter.
- Poke two holes near the top for ribbon.
- Let dry 24–48 hours, flipping halfway.
- Add the pink and white striped ribbon as the final step.
Time estimate: 20 minutes of active work plus drying. Material cost: under $6.
13. Glass Pancake Stack Ornament with Syrup and Sugary Drizzle
The stacked layers are what sell the illusion — if the edges were smooth, this would just read as a tan blob. The amber syrup trails, white icing drips, and sparkling sugar texture create three different finishes that make the glass feel almost edible. It’s a small masterclass in texture contrast.
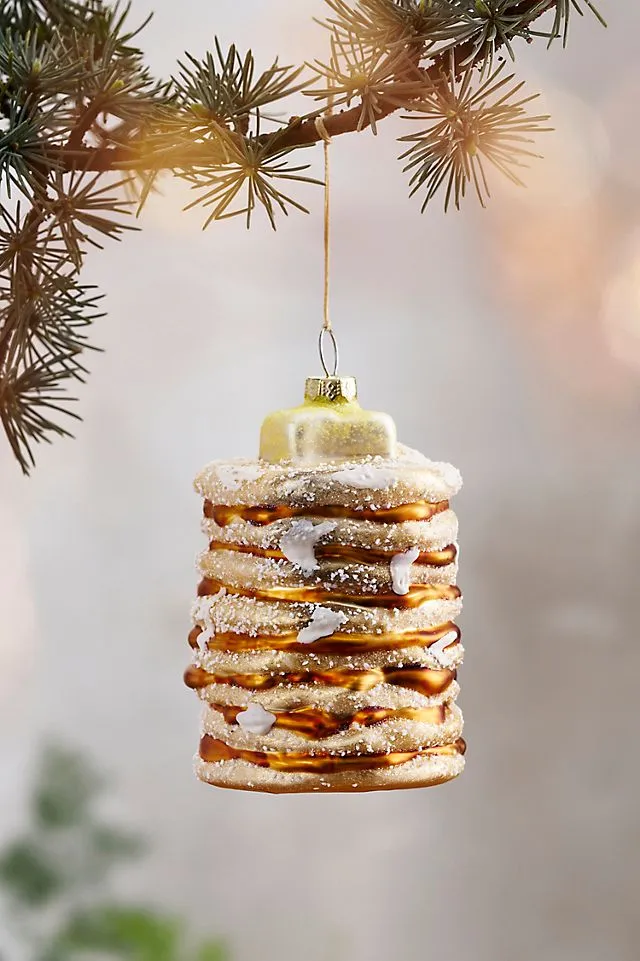
“Food-shaped ornaments keep climbing on Etsy and Pinterest because they’re funny without being loud, sweet without being saccharine.”
A pancake stack on a branch is unexpected enough to make guests do a double take, but the warm gold and brown tones still fit a traditional tree.
14. White Ceramic Tree Ornament with Painted Figures and 2024
This little ceramic tree works best on a full 7–9 foot tree where it can be one of the more detailed focal points. On a tiny tabletop tree, the painted figures and gold tassel chain will feel crowded. Hang it at eye level where the warm lights can hit the glossy white glaze.
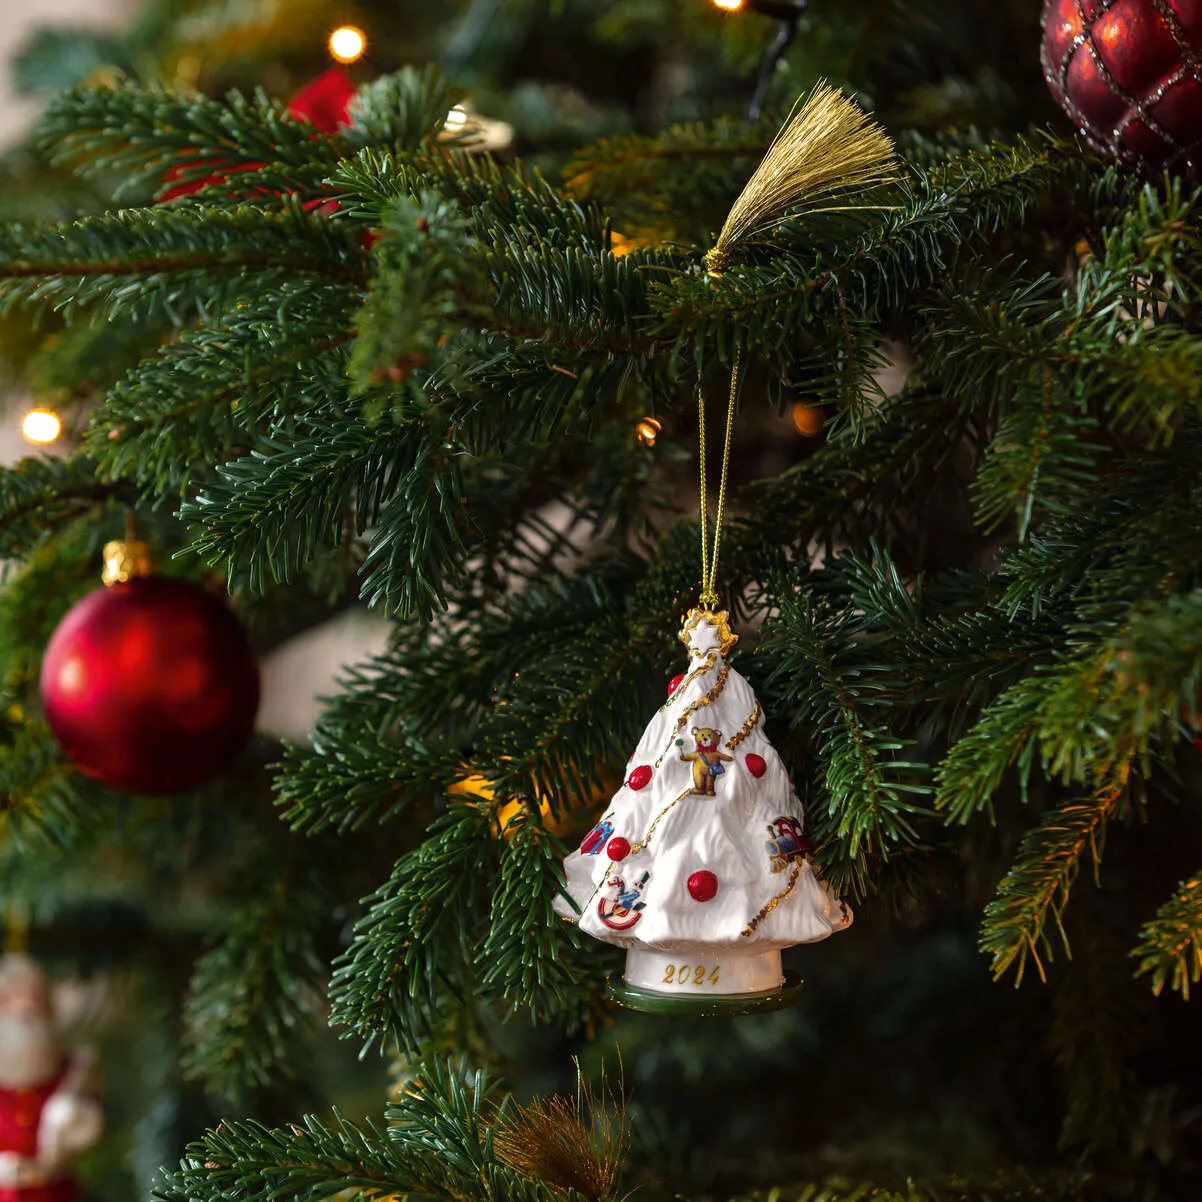
“The gold chain and tassel add visual weight, which means storage requires a light touch.”
Wrap it separately so the chain doesn’t knot or scratch the ceramic. A tiny jewelry pouch or a cupcake liner in an egg carton works beautifully.
15. State-Shaped Clay Ornaments with Heart Cutouts and Dried Oranges
You don’t need to spend much to get this rustic look. Grab air-dry clay, a state-shaped cookie cutter or simple heart cutter, some twine, and a bag of navel oranges. Dry the orange slices in a 200°F oven for two to three hours, blotting every 30 minutes until they stop weeping moisture. Thread twine through the clay hearts and dried oranges, then drape a red berry garland between them.
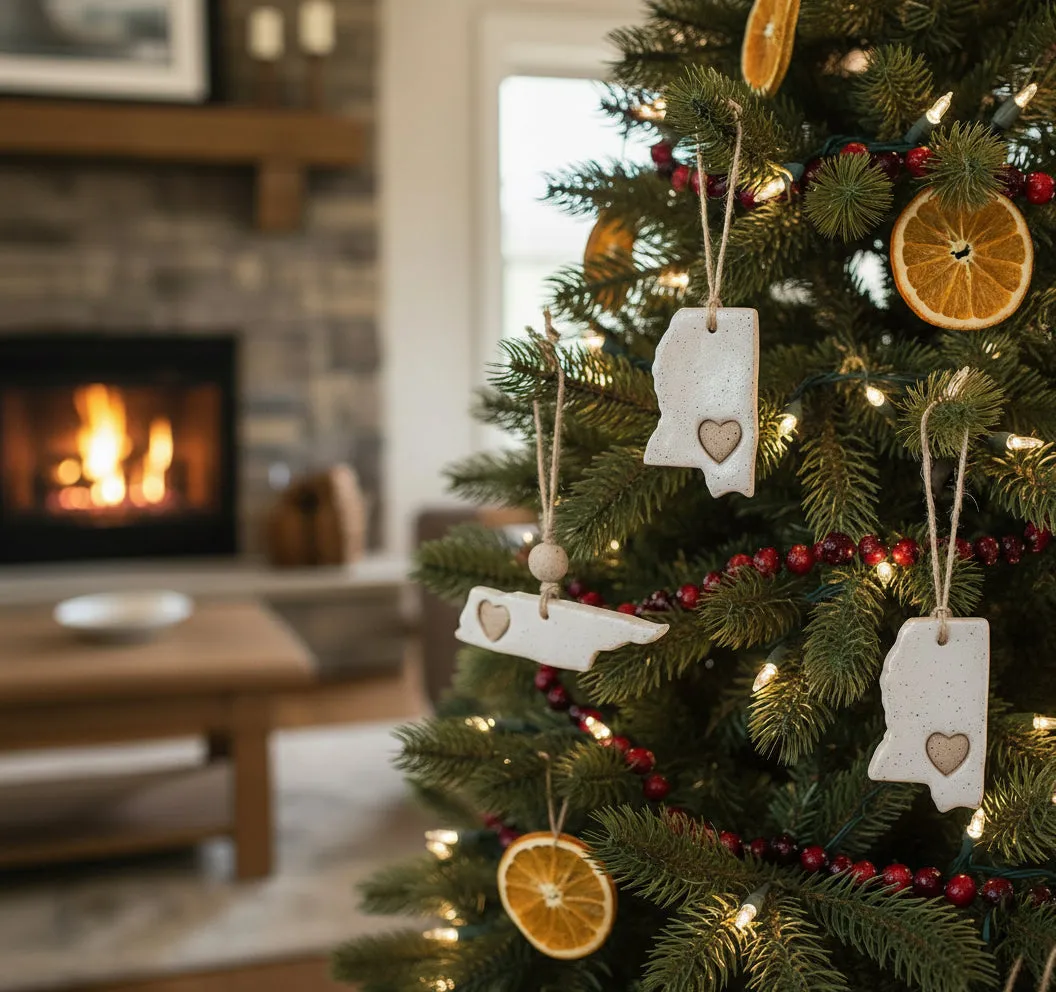
“Before you hang dried oranges, check for moisture by bending one slice.”
If it flexes, it’s not dry enough and will attract mold in storage. Once fully dried, they’ll last several seasons if kept in an airtight container with silica packets. Compare with the natural pinecone mantel in Idea #18 — same cozy fireplace energy, but this one gives you fruit and clay instead of pinecone scales.
16. Glittery Snow Globe Ornament with Candy Cane and Holly Sprig
The style math here is 50% glittery white surface, 30% glossy red base, and 20% candy cane and holly detail. The glossy red base is non-negotiable — it’s what turns a flat round ornament into a snow globe silhouette. Swap the holly for tiny pine sprigs or the candy cane for a tiny reindeer, but keep that red base.
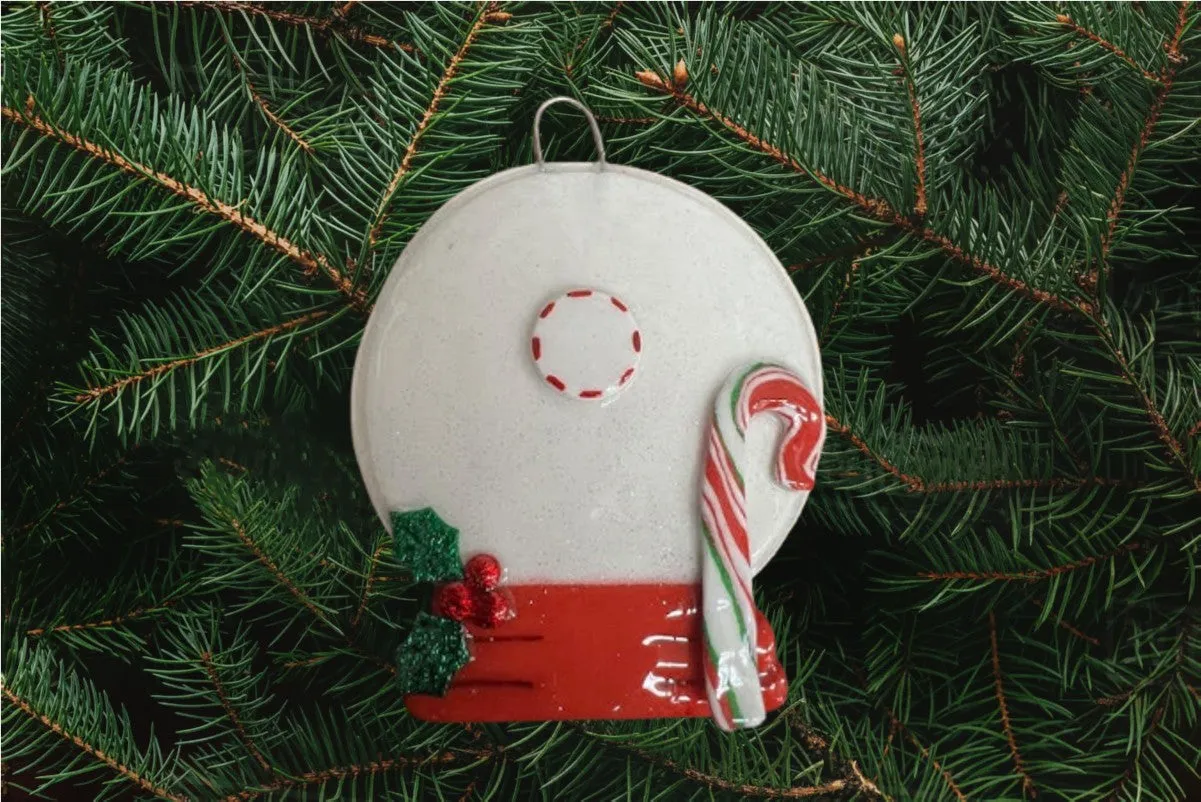
“The small white circle with the red dashed rim is a clever little anchor that keeps the top half from feeling empty.”
Without it, the candy cane and holly would float awkwardly. Notice how the green glittery holly repeats the green of the pine needles without blending in.
17. Glittery Baking Sheet Ornament with Two Gingerbread Men
- Cut a small rectangle from polymer clay or craft wood, about 2 by 3 inches.
- Paint the surface with gray glitter paint and let it fully dry for one hour.
- Glue two tiny gingerbread men near the top, leaving space for the rolling pin below.
- Add a mini gold rolling pin with red handles and a sprig of red berries with green holly.
- Attach a silver hanger and let all glue cure for at least 24 hours.
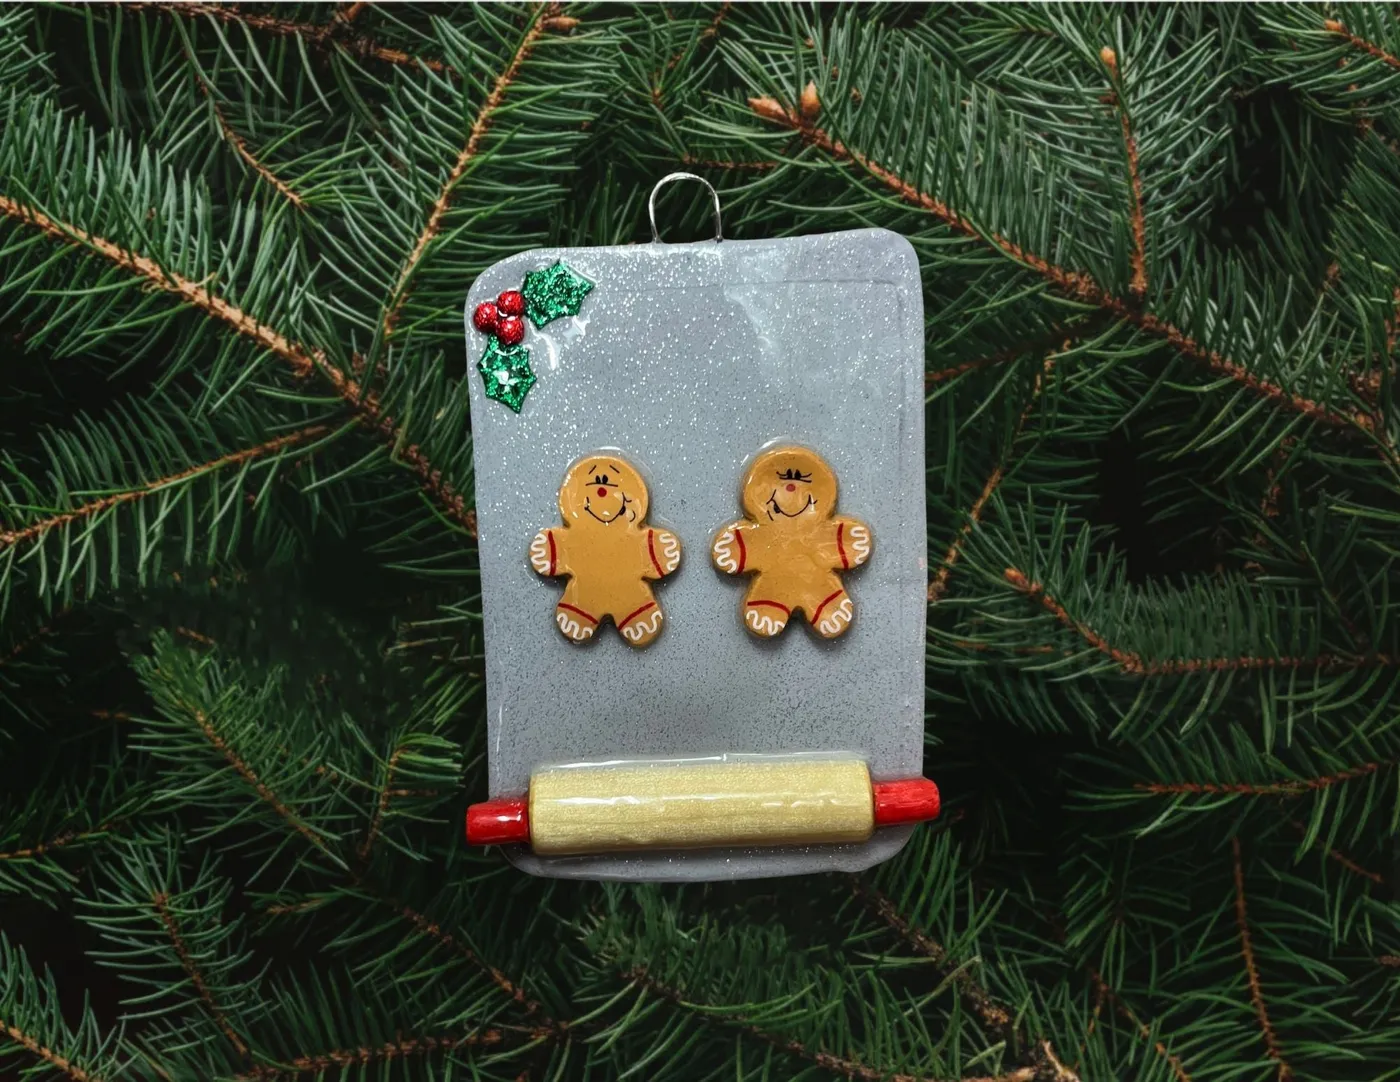
“Time estimate: 40 minutes plus drying.”
Material cost: around $7 with leftover supplies.
The tiny pieces are exactly as fragile as they look. This ornament is a looker, not a tosser — hand it on an upper branch away from pets and curious toddlers. If you’re making a family version, reference the personalized gingerbread crew in Idea #11.
18. Natural Pinecone Ornament and Tied Ribbon on a Cozy Mantel
This is the quiet luxe version of holiday decor that’s taking over 2026: natural pinecone ornaments, warm string lights, wooden bead garlands, and a stone fireplace in the background. The cone-shaped decoration made from individual pinecone scales on the mantel repeats the texture from the tree, which makes the whole room feel intentional rather than just decorated.
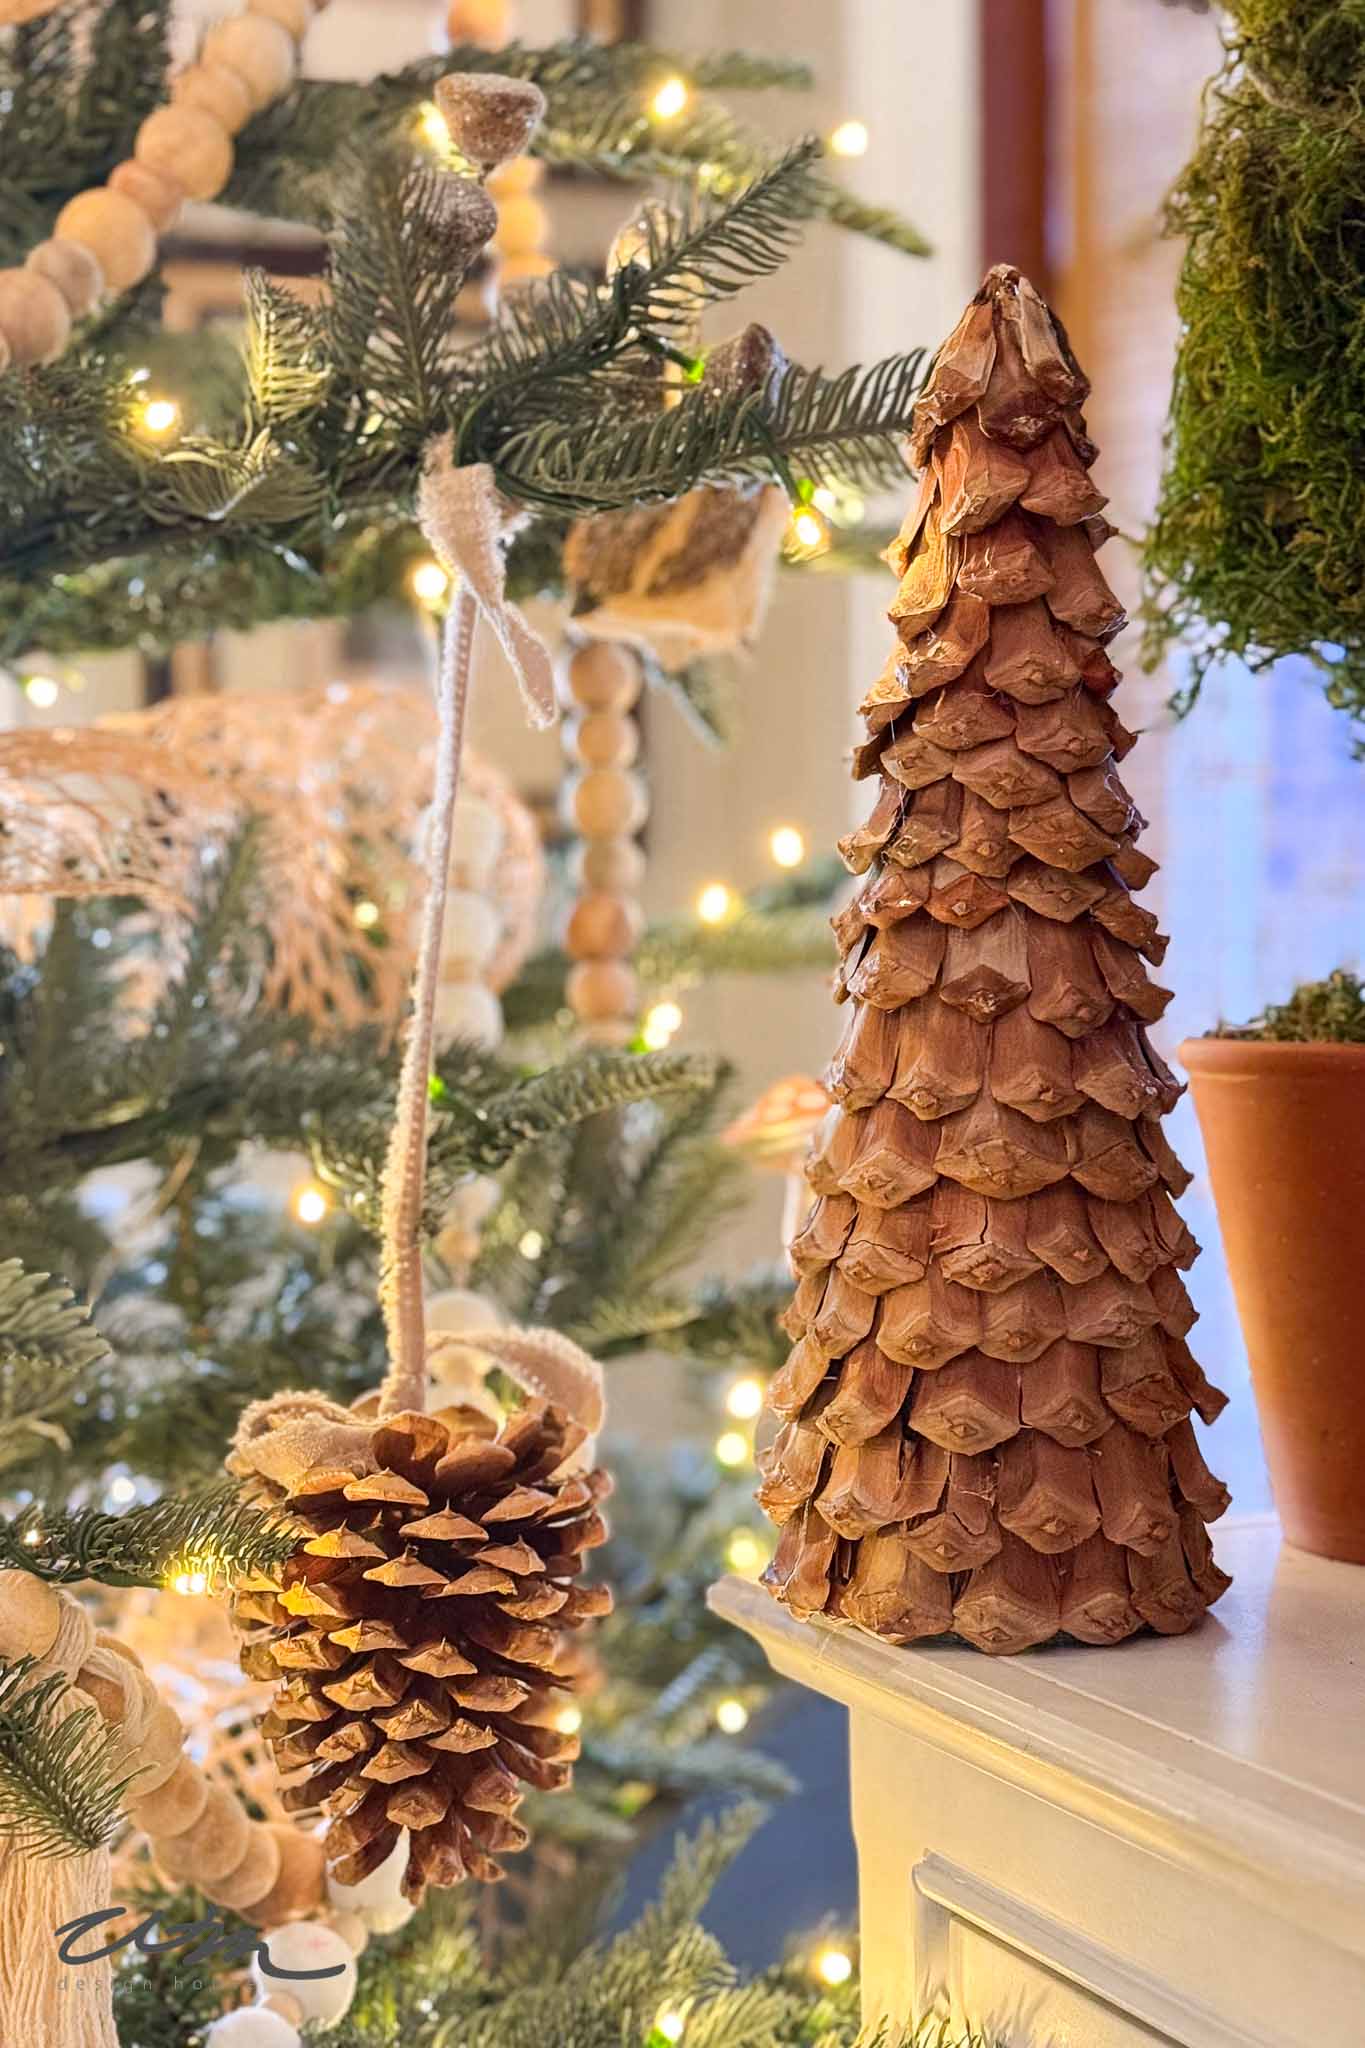
“The cream ribbon on the large pinecone is doing more work than you might think.”
It softens all that deep green and brown and gives the eye a place to rest. If you swap it for a thinner red ribbon, you’ll get a more traditional pop, but you’ll lose some of that calm neutral layering.
19. Embroidered Woodland Animal Mini Stocking on Faux Snow
Use a wool-blend felt for the stocking body — it holds embroidery better than cheap acrylic felt and won’t stretch out of shape. Transfer the owl and raccoon pattern with a water-soluble pen, embroider all the little faces before sewing the side seams, then stitch the sides and finish with the red and gold ribbon ties.
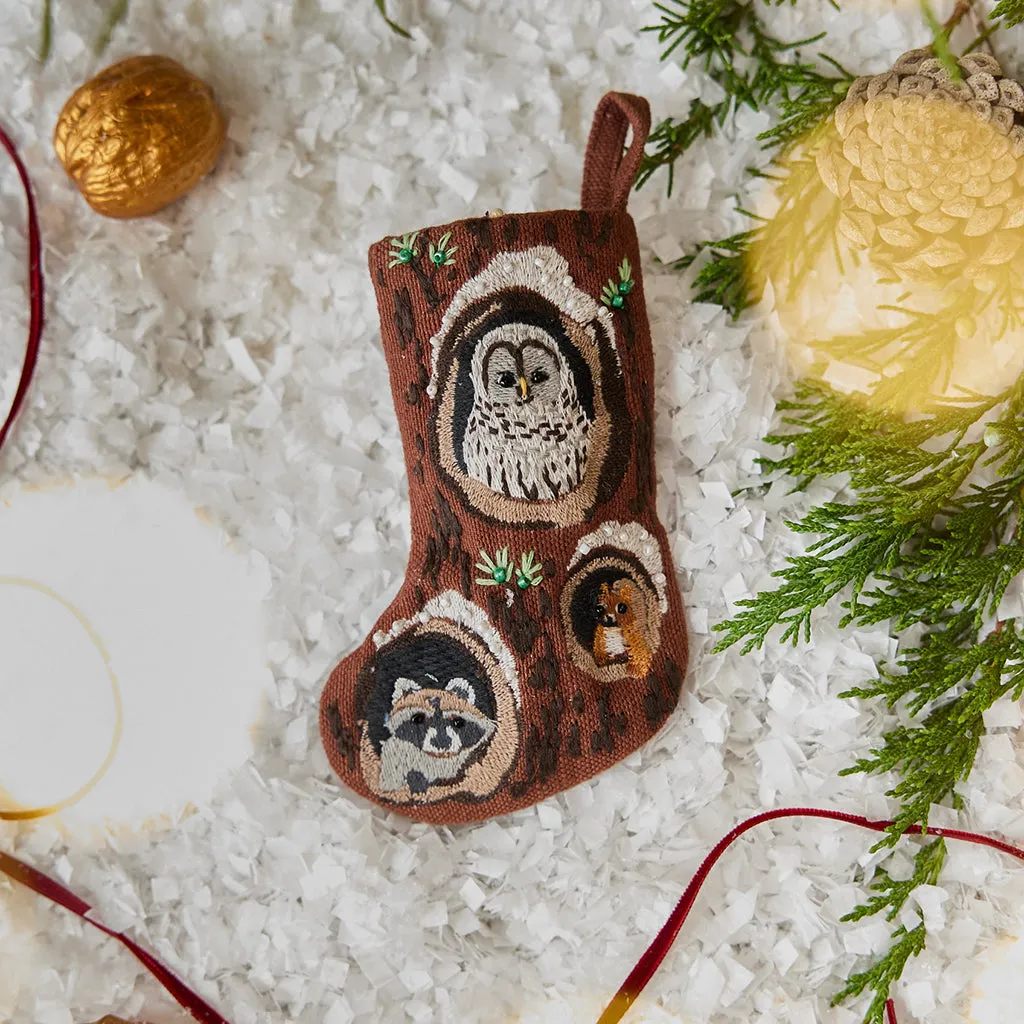
“That tiny embroidered stocking is adorable, but it’s also a magnet for cat claws and dust.”
Store it flat in acid-free tissue, not crushed under heavier ornaments. The gold-painted walnut next to it is a nice touch for weight; use metallic spray paint on a real walnut shell and let it dry outside for a few hours.
20. White Floral-Relief Bauble and Silver Squirrel on a Classic Tree
The formula here is 60% matte white ornaments, 25% metallic gold and bronze detailing, and 15% natural pinecone or wood tones. The floral relief bauble is the star, but the glittery white ball and silver squirrel keep it from feeling too serious. Keep the brightest metallic only on one or two pieces so the tree doesn’t turn into a jewelry box.
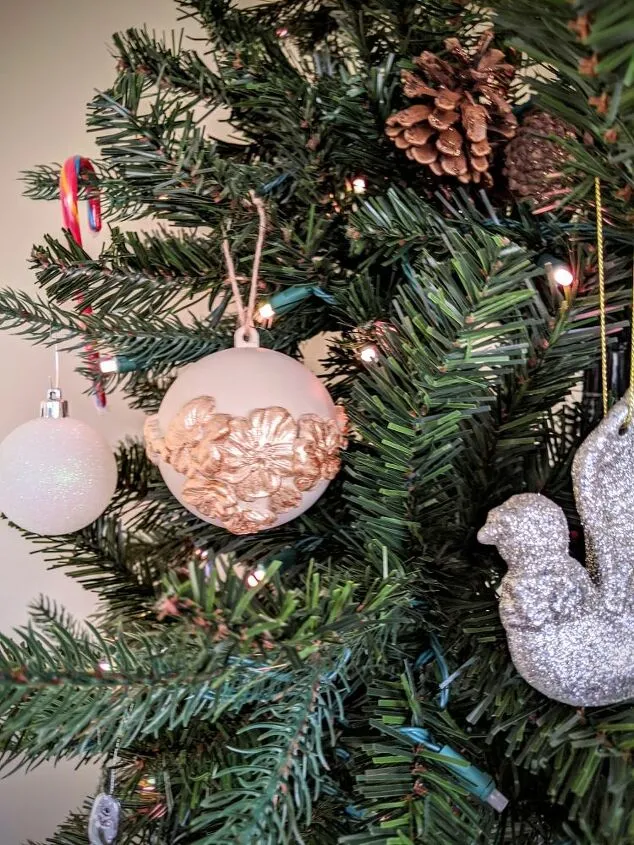
“Plain white baubles are everywhere for under $5 a pack at Target or Walmart.”
Add metallic puffy paint for raised floral shapes, let it dry completely, then use a soft brush and gold craft paint to highlight the edges. You’ll get the same elegant look for about a quarter of the boutique price. Compare with the white ceramic textures in Idea #22 — that one skews playful, this one skews refined.
21. White Paper-Cut Mandala Ornament with Red Glitter Bow
That layered white paper cutwork isn’t just decoration — it’s the whole reason this ornament looks expensive. The depth from three stacked layers, the fine gold accent lines, and the bright red glitter bow create a focal point that practically pulls the eye through the warm white lights. Remove the bow and it still works, but remove the layered depth and it becomes a flat snowflake.
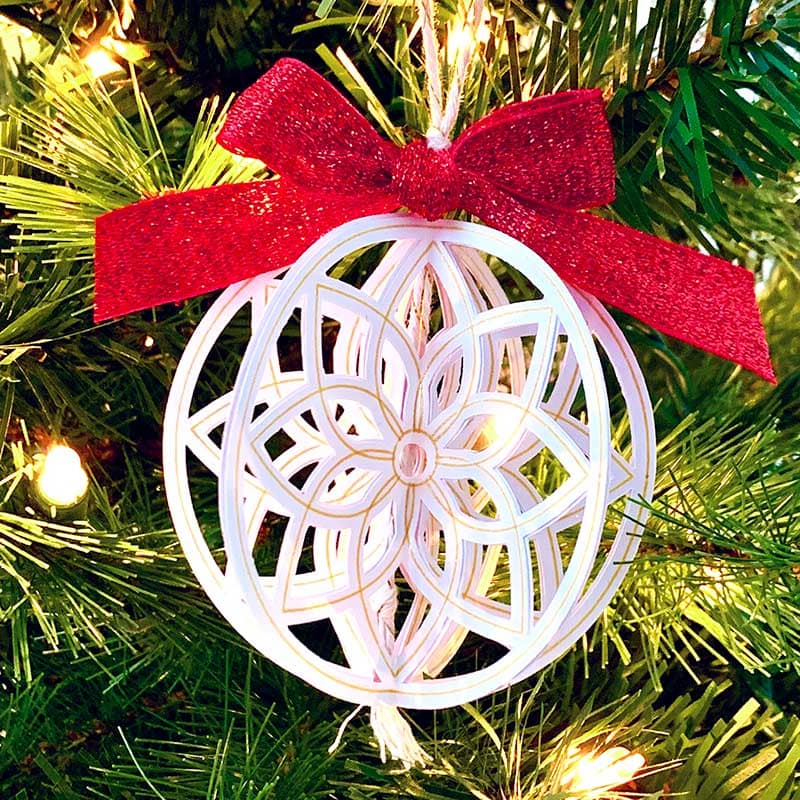
“Cut three identical mandala designs from 65-lb white cardstock.Score and fold ea”
- Cut three identical mandala designs from 65-lb white cardstock.
- Score and fold each into halves, alternating direction.
- Glue the center folds together with craft glue, pressing gently for 30 seconds.
- Add thin gold lines with a metallic marker along the cutout edges.
- Finish with a small red glitter bow at the top.
Time estimate: 50–70 minutes. Material cost: under $5 if you hand-cut; under $3 with a cutting machine.
22. Yarn-Wrapped Cone Trees with Buttons, Tinsel, and Pom-Poms
The texture is the story here. The left tree layers bright green yarn, blue tinsel, and mismatched buttons for a cheerful, slightly chaotic personality; the right tree uses clean pastel stripes and small metallic flowers for a more curated feel. Together they prove that one technique can carry two completely different moods.
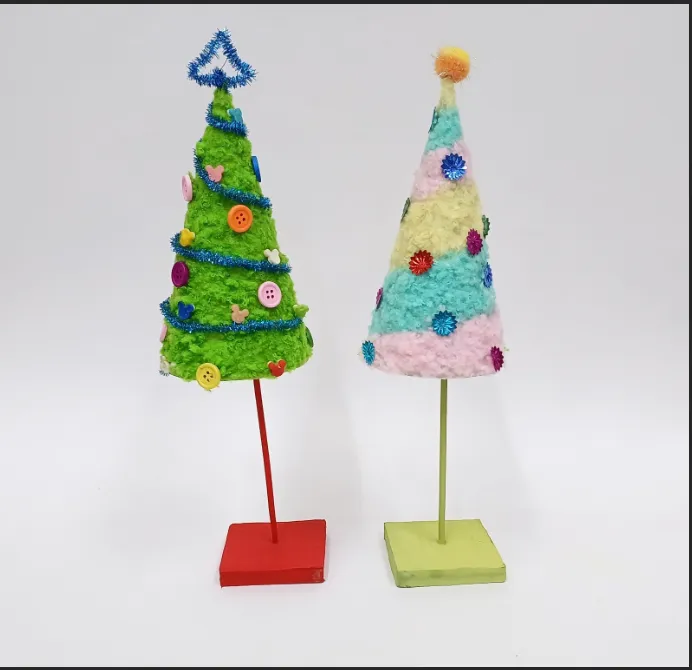
“These are tabletop or mantel pieces, not tree ornaments.”
Give them at least 4 square inches each on a shelf, and keep them out of direct sunlight if you used pastel yarn — those soft colors fade faster than the bright green. A clear acrylic stand or thin wood base keeps them stable on uneven stone.
23. Kids’ Painted Paper Christmas Trees with Clothespin Daubers
Clothespin daubers are the secret to keeping this project from becoming brown paint soup. Clip a cotton ball or foam circle into each clothespin, set out no more than three colors per kid, and give each child one dauber per color. This limits over-mixing and keeps the red, blue, gold, and green from turning into a single murky tone.

“this is a messy one.”
Cover the table with kraft paper, tape the paper trees to the surface so they don’t spin, and keep baby wipes nearby. The payoff is a pile of one-of-a-kind paper ornaments that actually look like holiday art, not a paint accident.
24. Felt Snowmen with Twig Arms on a Frosted Pine Branch
Felt ornaments hold dust like a magnet, so give them a gentle shake or a quick pass with a dry microfiber cloth before hanging each season. Store them flat in a zip-top bag to keep the felt from crushing. If a bead eye pops off, use a dot of fabric glue and let it cure overnight before rehanging.
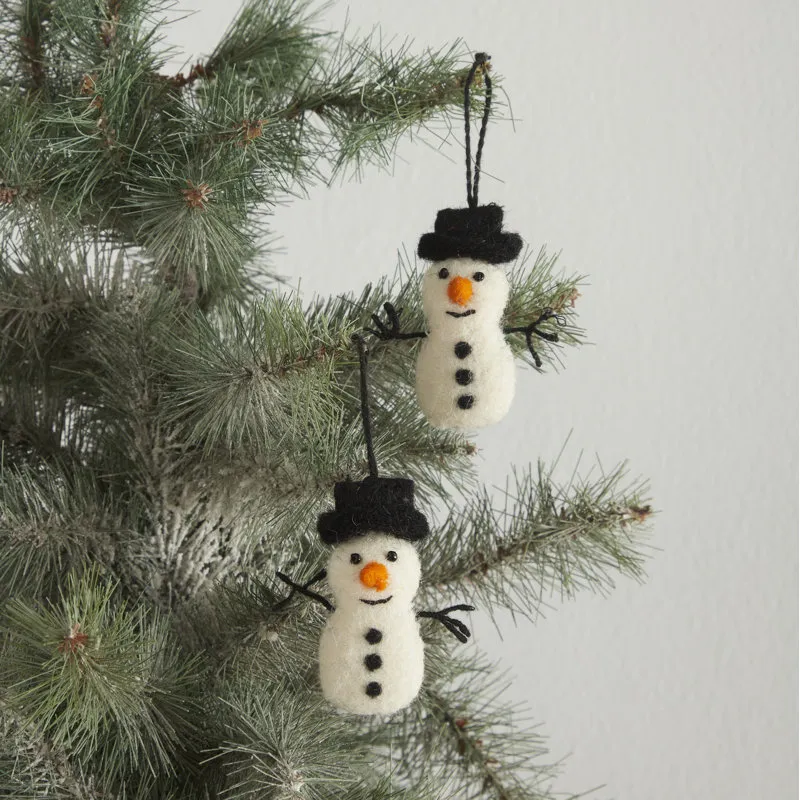
“The skinny black twig arms are the one detail that makes these snowmen feel alive.”
They break up the roundness of the body and add a little bit of movement against the frosted pine. Don’t skip them, and don’t replace them with paper — real twigs or tightly twisted wire hold their shape better.
25. Personalized Dog Portrait Ornament with Santa Hat and Cabin Scene
The style math is 60% white ceramic surface, 20% brown and green painted scene, and 20% red Santa hat plus gold hanging cord. The white background gives the dog portrait room to breathe, so the ornament reads clearly even across a room. Keep the hat bright red rather than burgundy; that clear red is what ties it to the rest of the tree.
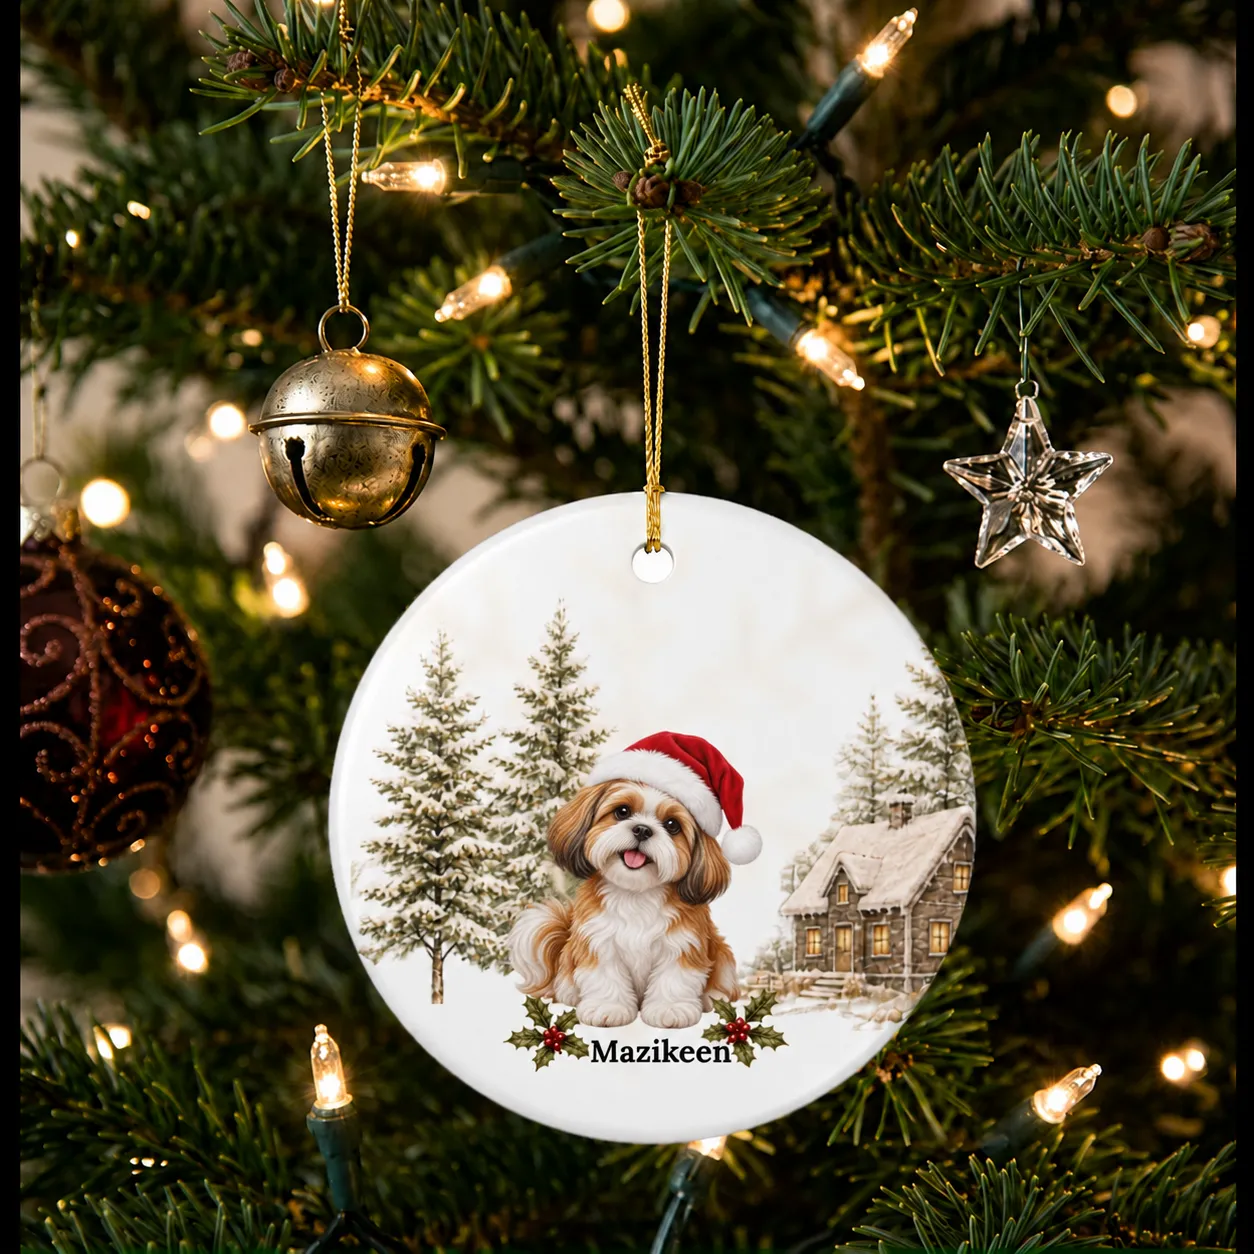
“Pet ornaments are one of the biggest personalized decor shifts in 2026, driven by owners who want their tree to reflect the actual family — including the four-legged one.”
A personalized name under the scene turns a mass-produced shape into a mini portrait you’ll dig for every year. Compare with the personalized gingerbread family in Idea #11 — same sentimental pull, different canvas.
26. Kraft Paper Honeycomb Spheres with Gold Glitter Edges
You can make a whole set of honeycomb spheres for under $8. Grab kraft cardstock from any craft store, cut it into equal circles, fold them into honeycomb shapes, and glue two halves together. Add a light wooden bead at the bottom and a dusting of gold glitter along the folded edges. Walmart and Michaels both carry kraft paper in multi-packs.
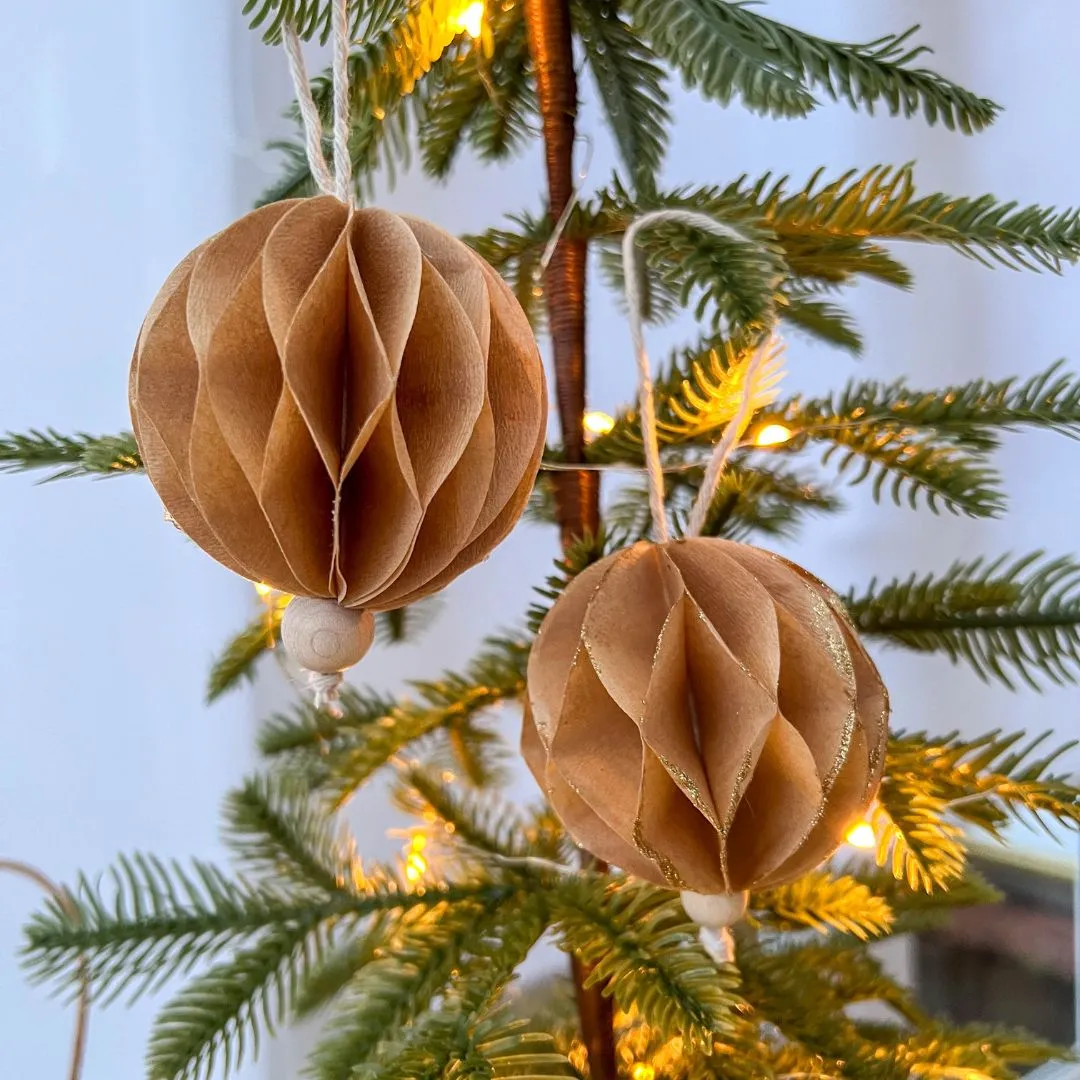
“Score every half inch before you fold, even if you think you don’t need to.”
Uneven accordion folds will leave gaps and make the sphere lopsided. After gluing, clamp the two halves with a bulldog clip for at least 20 minutes so the edges don’t pull apart as the glue dries.
27. Fabric Elf Boot Ornaments with Pipe Cleaner Candy Canes
These boots will crush if you store them at the bottom of a bin, and the pipe cleaner candy canes can bend out of shape with one good squeeze. Roll them in tissue paper or give each one a small organza bag. The brass bells are sturdier than they look, but they should stay dry to avoid tarnish.
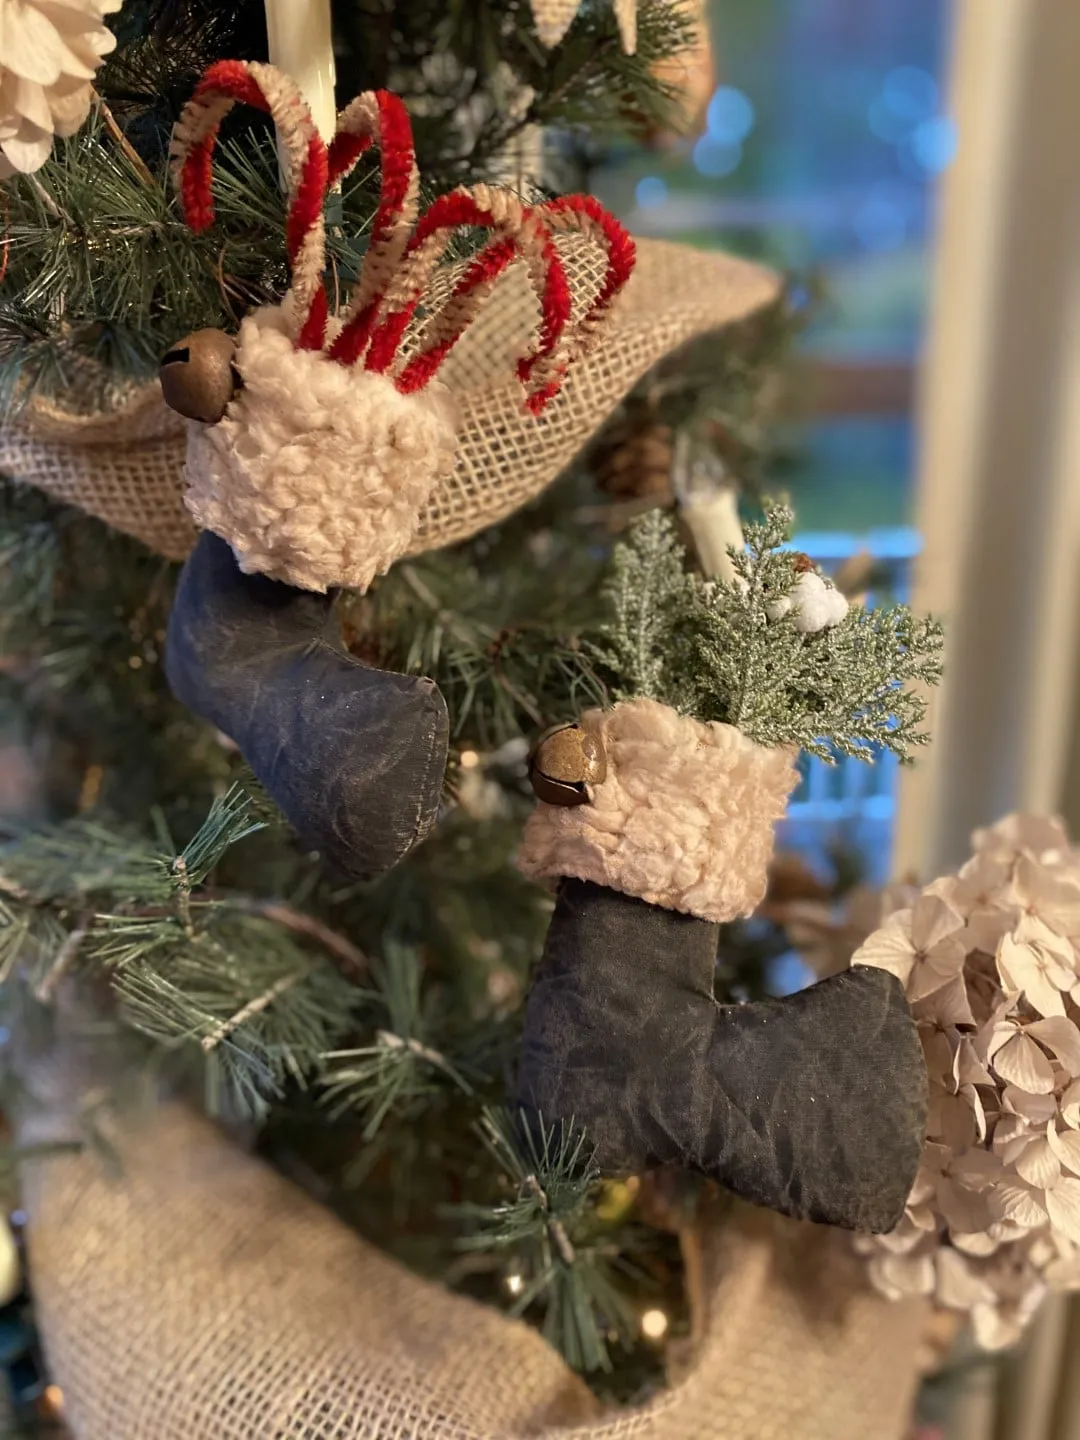
“The combination of dark gray fabric, fluffy beige cuffs, red and beige pipe cleaners, and natural burlap ribbon works because all the materials are soft and matte.”
That lets the brass bells and bristly pipe cleaners provide the only shine — just enough to catch the tree lights without competing.
28. Hands-On Garland Styling with Baubles, Stars, and Fairy Lights
For a garland this lush, plan on at least 6 feet of evergreen garland, roughly 18 to 24 mixed ornaments, and one set of warm fairy lights for every 4 feet. Lay everything on the floor first, distribute the baubles, stars, and bells evenly, then weave in the lights before you hang it. A light wood floor makes the dark green and burgundy pop.
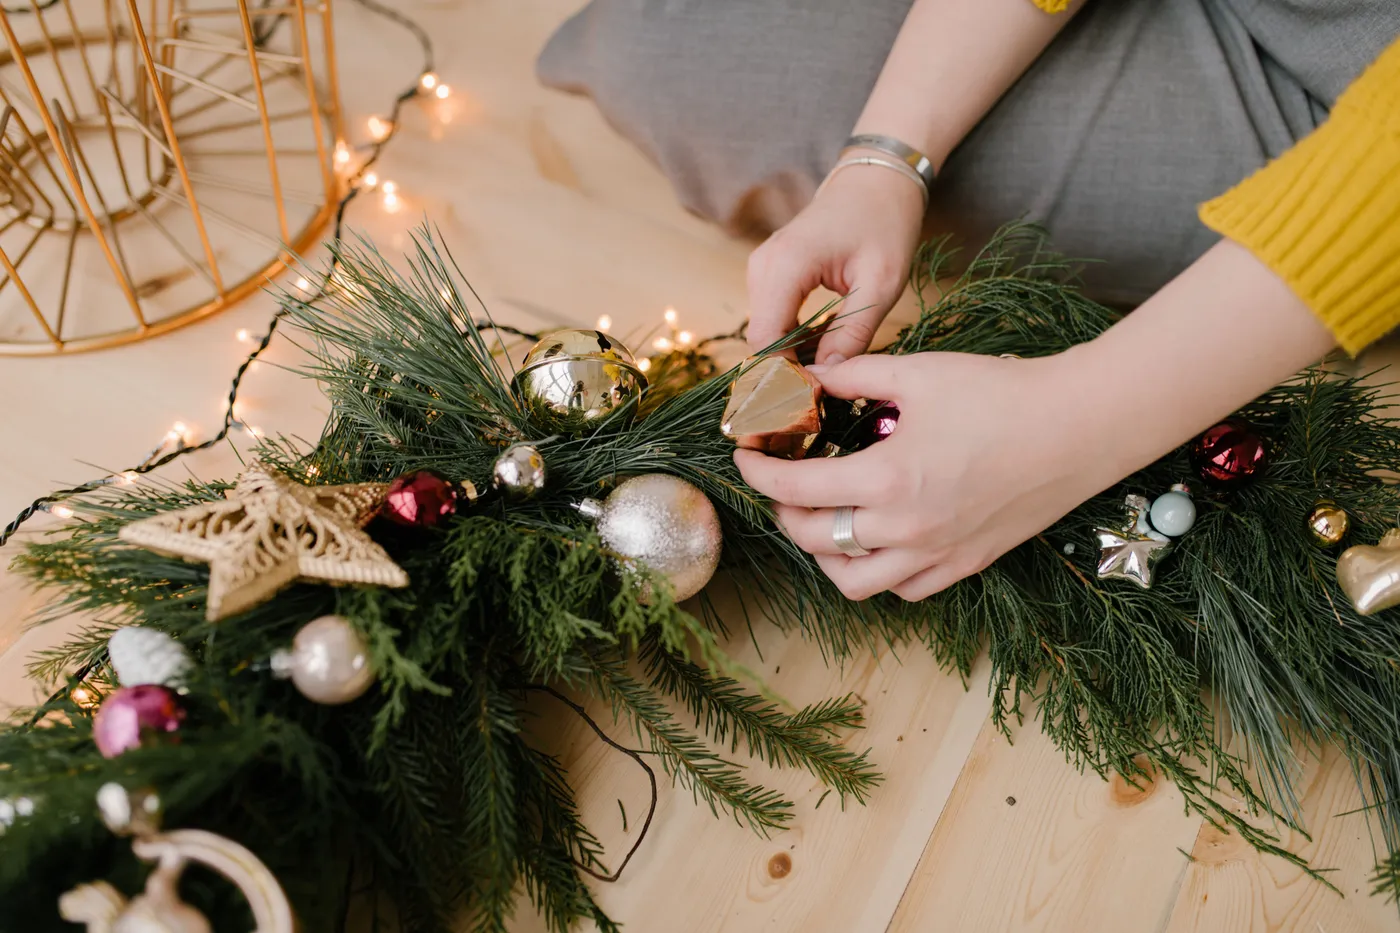
“Hands-on garland styling is having a moment in 2026 because it turns an otherwise standard decorating task into an event.”
There’s something satisfying about arranging a garland from scratch — and unlike a pre-decorated one, you can steal pieces from other areas of the house. Reference the dried orange and berry tree in Idea #15 for another layer of that homespun charm.
Your Tree Just Got More Personal
Craft a few of these, mix in the ones that make you laugh, and give yourself full permission to skip the ones that feel like homework. The best homemade Christmas ornaments are the ones that make your tree feel like nobody else’s.
📌 Save this post to Pinterest before your supplies run out — your future tree will thank you.