
29 Stunning Stone Fireplace Ideas That Will Elevate Your Living Room and Outdoor Space in 2026

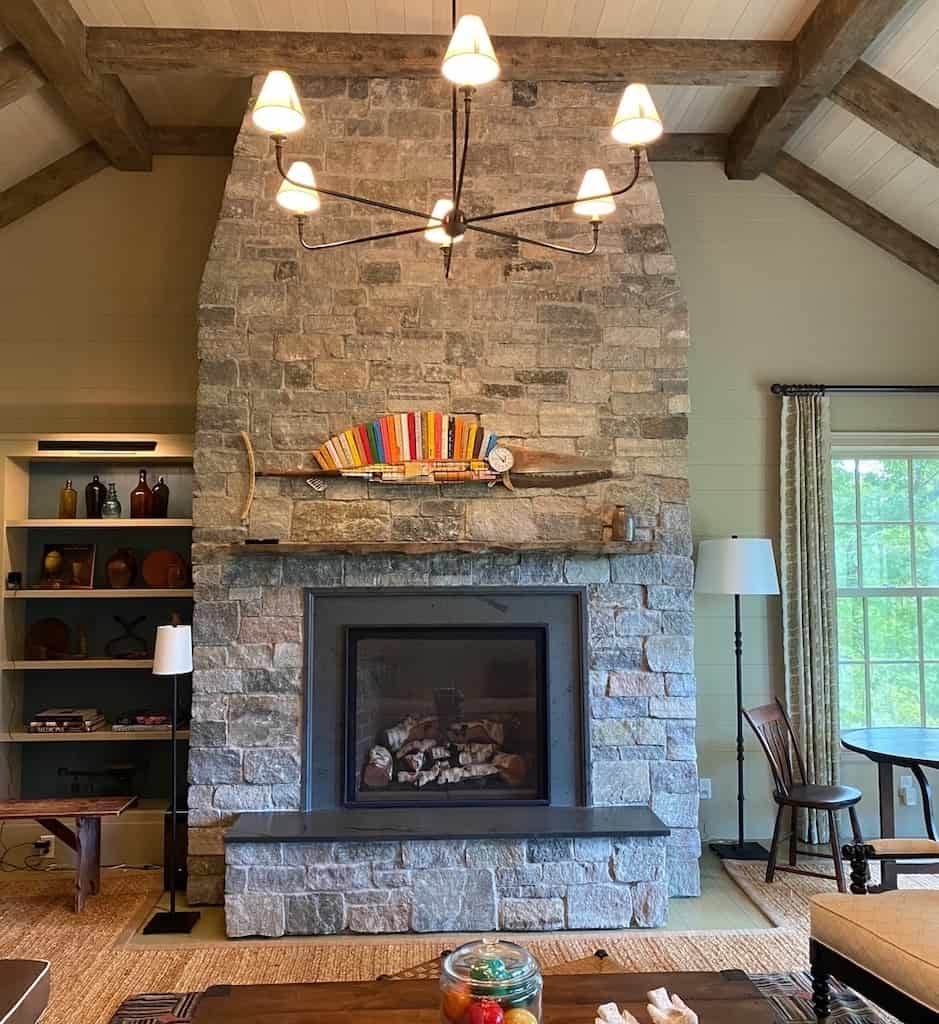
You know that feeling when you finally find the one stone fireplace idea that looks *exactly* right for your space? That little spark of “Yes, that’s it!” is what we live for. We’ve sifted through hundreds of options from high-end designers, local stone yards, and even the latest drops at places like Wayfair to bring you only what’s worth your attention in 2026. This isn’t just a random photo dump. Inside, you’ll find 29 distinct, real-home ideas covering everything from grand rustic centerpieces to sleek, modern minimalist designs. We’re seeing a huge shift towards natural, textural materials that make a house feel like a home, and a stone fireplace is the ultimate expression of that trend. And stay until the end—we break down the most common mistakes that can ruin these looks. 📌 Pin this guide for later—your future self will thank you when it’s time to actually get started.
1. Create a Central Hub with a Stacked Stone Fireplace Divider
This design succeeds by using the fireplace as an architectural element, not just an accent. It masterfully divides the open-plan space without closing it off, thanks to the floor-to-ceiling glass walls on either side. The magic is in the material consistency: the warm tones of the sandstone echo the rich timber of the floors and vaulted ceiling beams, creating a unified, earthy atmosphere. The choice to use it as a divider makes the room feel both expansive and defined at the same time.
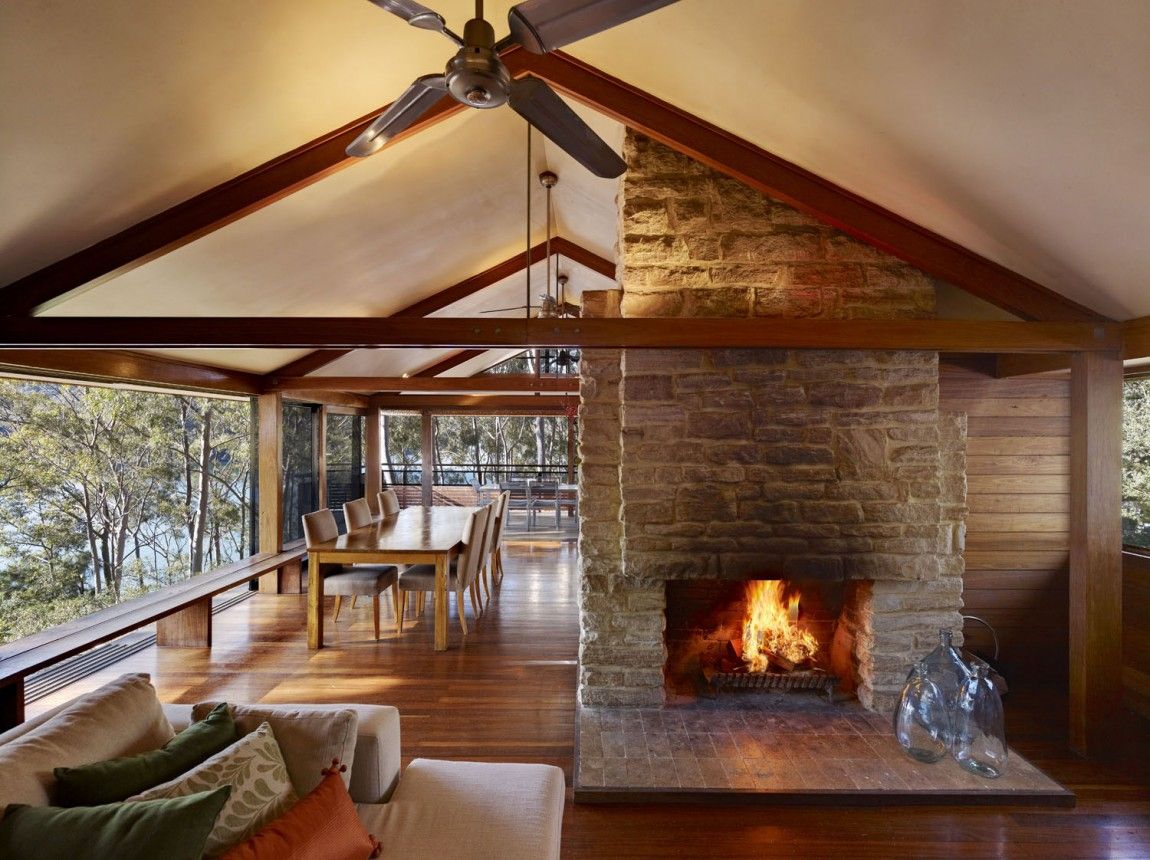
“A statement piece like this demands volume.”
This idea is best suited for rooms with a minimum footprint of 400 square feet and vaulted ceilings at least 15 feet high. The key is allowing for adequate clearance (at least 4-5 feet) on all sides so the fireplace acts as a grand pillar, not a clumsy obstacle. In spaces with standard 8-9 foot ceilings, attempting this scale can make the room feel cramped and top-heavy. For a similar but more compact feel, look at the integrated built-ins in Idea #7.
2. Add Character with a Sculptural Stone Arch in a Log Cabin
that makes this entire room sing is the sculptural stone arch. If you replaced it with a simple wood beam or a standard rectangular surround, the fireplace would just fade into the rustic log wall behind it. This arch, with its smooth, geometric, mauve-toned tiles, introduces a touch of artistry and intention. It elevates the entire wall from just “rustic” to “rustic and refined,” proving that organic spaces can still have moments of deliberate, beautiful craft.
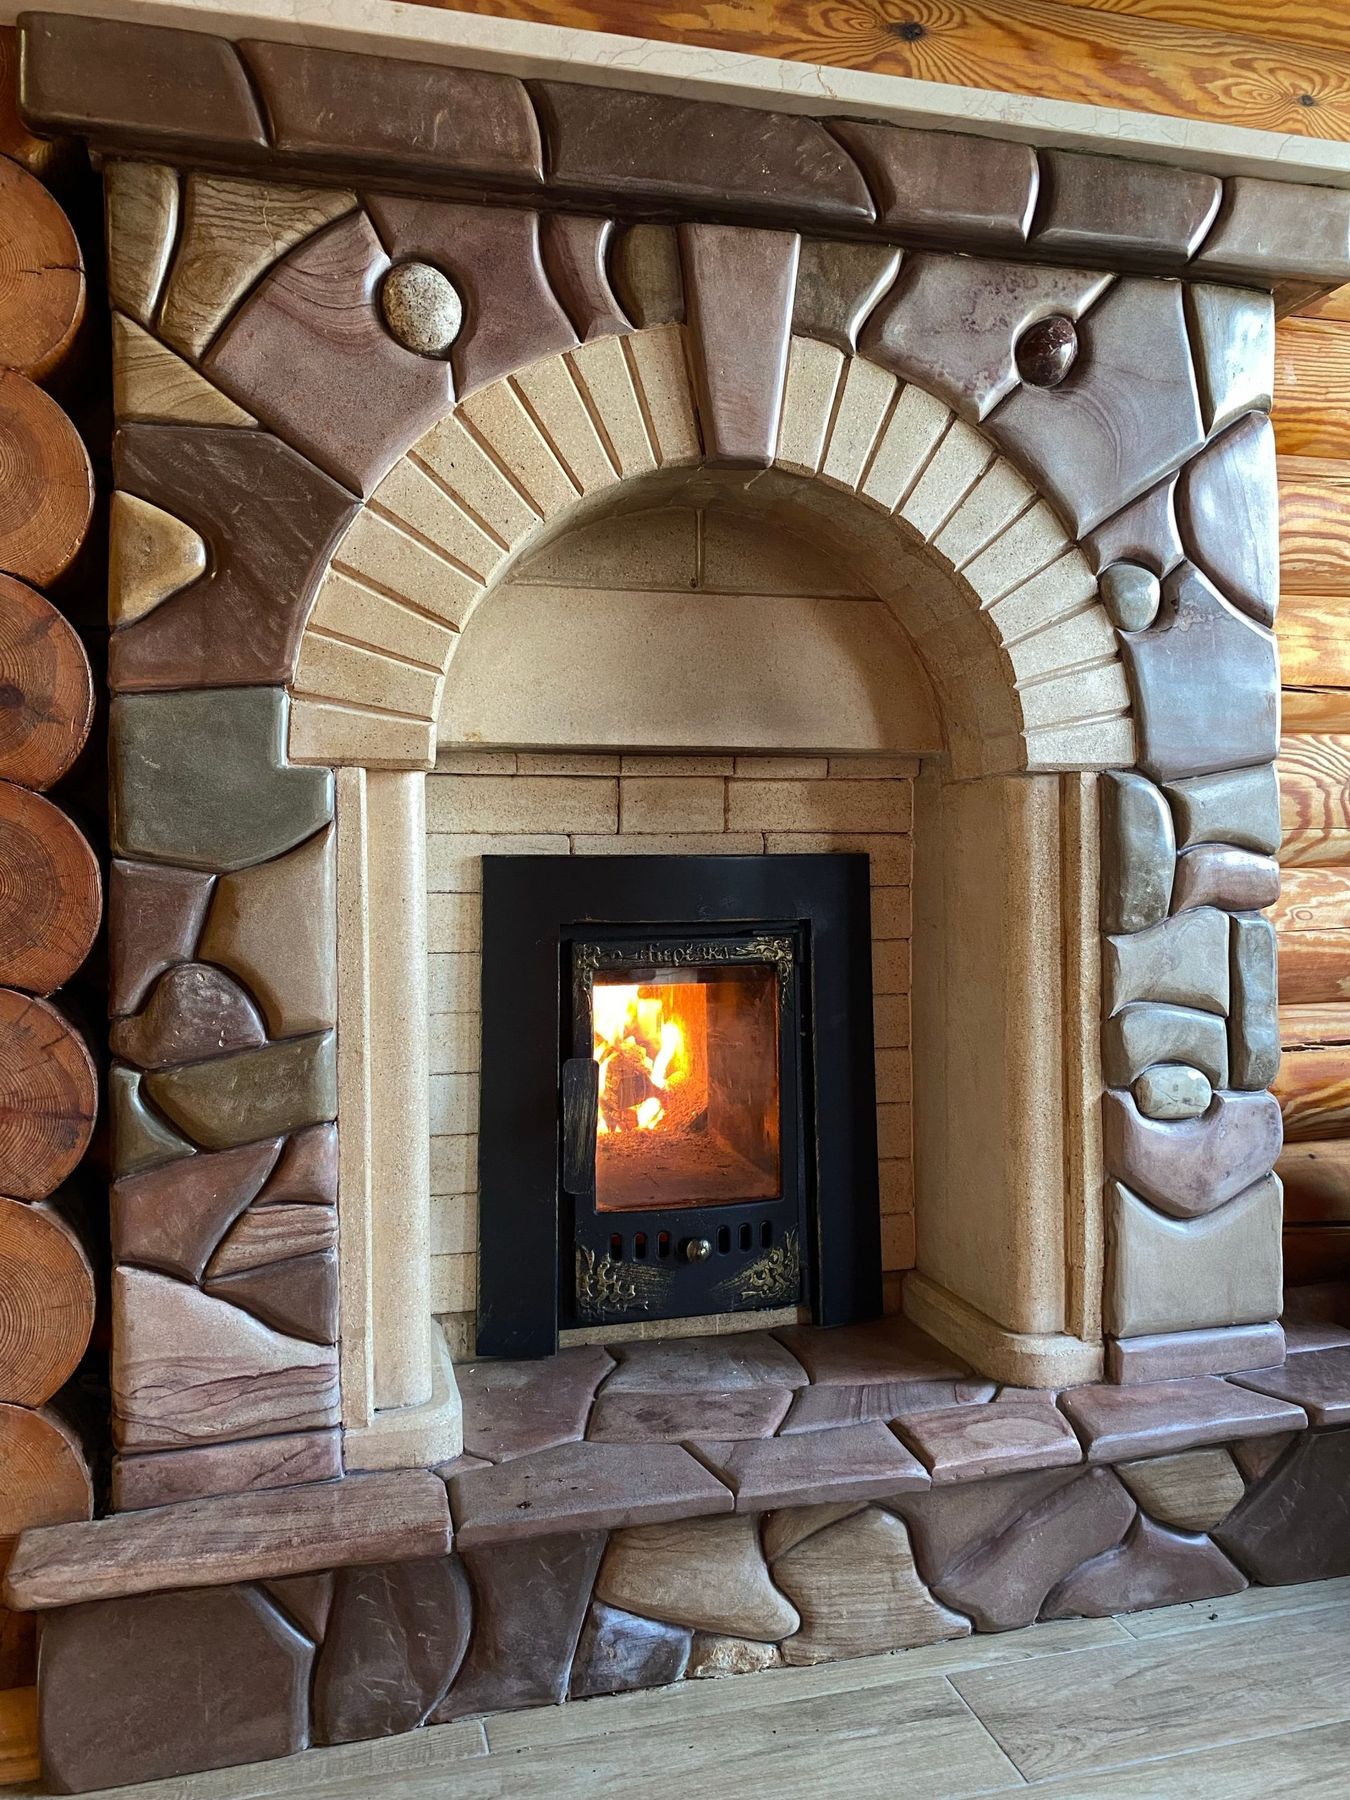
“We’re seeing a huge move away from perfectly uniform, mass-produced fireplace surrounds.”
This look taps into the 2026 trend of “New Rustic,” which celebrates natural materials but with an artisanal, handcrafted twist. Homeowners are craving unique focal points that tell a story, and using varied, smooth-edged stone tiles to create a custom arch feels personal and collected over time. It’s a departure from the sharp, linear stone veneers that dominated the 2010s, leaning into a softer, more organic silhouette that has real staying power.
3. Go Classic with Irregular Gray Stone and a Polished Log Mantle
You don’t need to commission a full stone wall to get this cozy, traditional vibe. You can achieve a very similar look using stone veneer panels, which are significantly cheaper and easier to install than full-bed stone. A box of quality gray stone veneer from a big-box store might run you $50-$80, covering about 8 square feet. For the mantle, skip the custom fabricator and head to a local lumber yard or even Facebook Marketplace to find a reclaimed beam or a thick, unfinished wood slab for under $200. With some sanding and a dark stain, you’ve got the look for a fraction of the price.
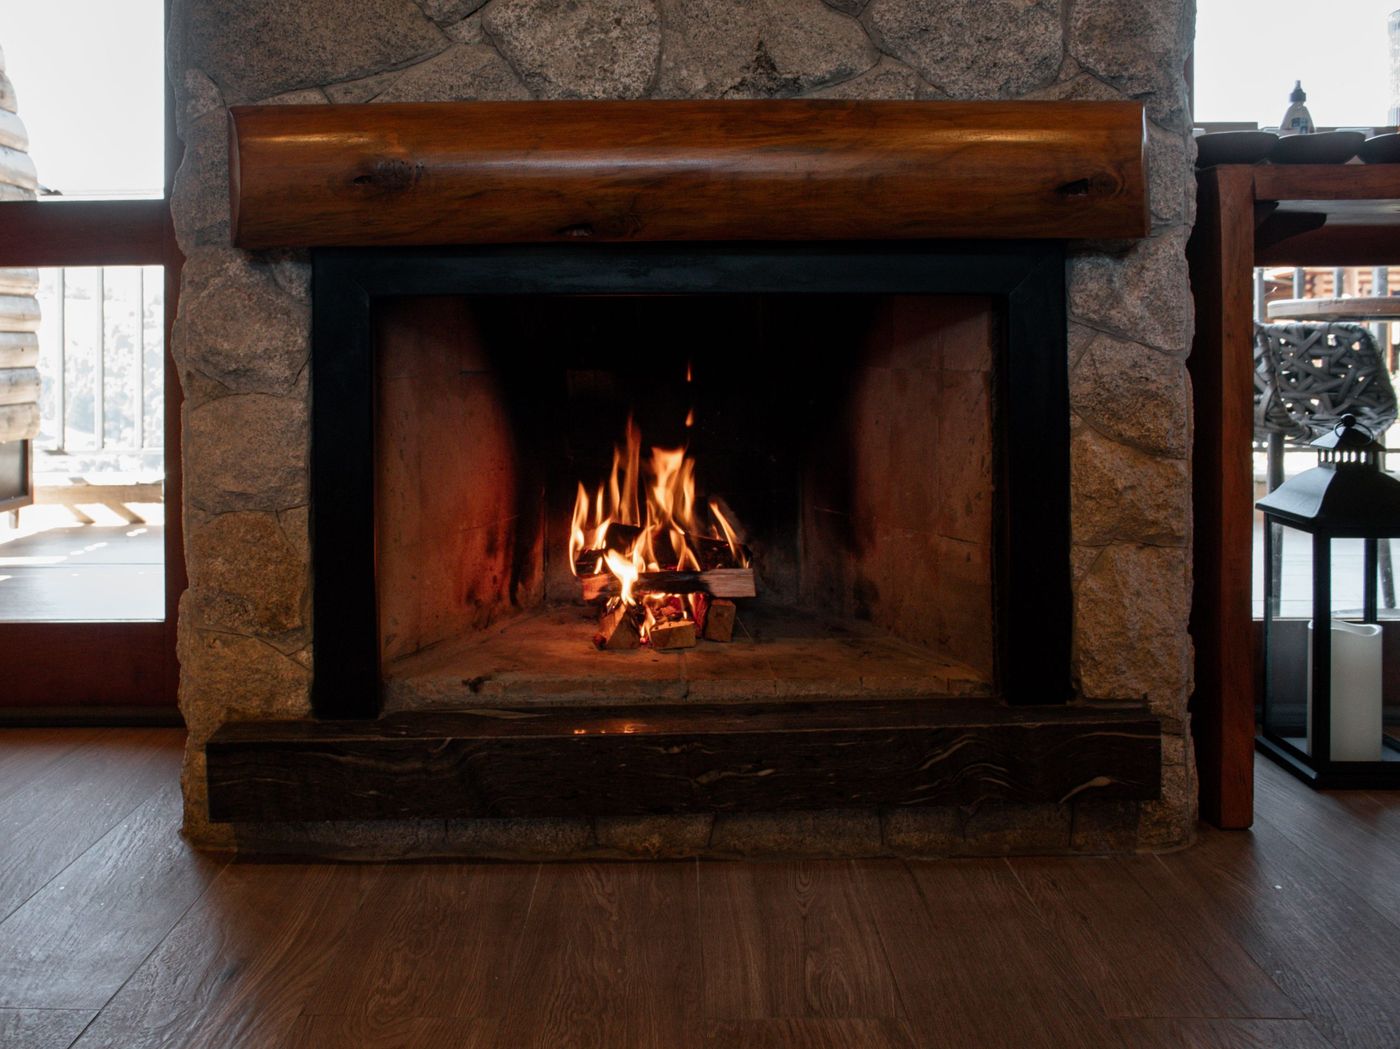
“Let’s be honest: a real wood-burning fireplace is romantic, but it’s also work.”
You’ll be dealing with soot, ash cleanup, and the annual expense of a chimney sweep (around $150-$350). The irregular gray stones, while beautiful, are also dust magnets. The deep crevices require regular vacuuming with a brush attachment to keep them looking clean. If you love the look but hate the maintenance, consider a high-quality gas insert and swap the real stone for larger, smoother faux stone panels that are easier to wipe down. Compare this with the sleeker approach in Idea #9.
4. Make a Statement with a Dry-Stacked Stone Wall and Live-Edge Mantel
When using a live-edge mantel on a heavily textured surface like dry-stacked stone, the secret is in the mounting. Don’t just place it on stone corbels. For a cleaner, more integrated look, have your mason cut recesses into the stone facade where the mantel will sit. Then, use long, heavy-duty floating mantel brackets drilled directly into the wall studs *before* the stone veneer is applied. This makes the mantel look like it’s organically emerging from the stonework, creating a much more professional and high-end finish.
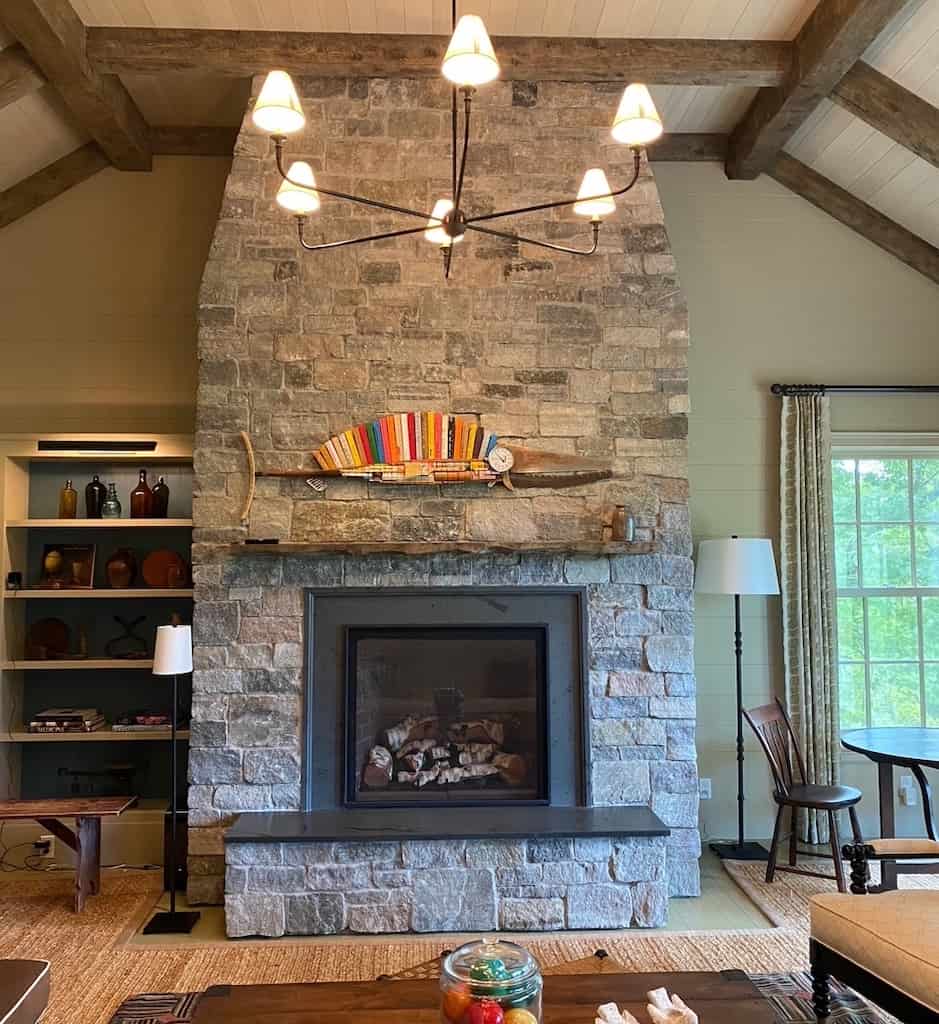
“That beautiful, rugged dry-stacked stone look comes with a cleaning commitment.”
Because there is no mortar filling the gaps, the nooks and crannies are perfect collectors of dust, cobwebs, and pet hair. You’ll need to vacuum it with a soft brush attachment at least once a month. Spills from drinks on the mantel or soot from the fire can also stain the porous stone. A high-quality penetrating sealer is not optional; it’s a necessity. You’ll need to re-apply it every 3-5 years, which can cost $200-$400, to prevent permanent staining.
5. Contrast Dark Stacked Stone with a Crisp White Wood Mantle
The formula here is all about balance and contrast. It’s roughly 70% textured dark material (the charcoal stacked stone) + 30% crisp, smooth light material (the white wood mantle and trim). The final 10% is the smooth, light-colored stone hearth slab, which acts as a visual bridge. You could swap the materials while keeping the ratio: imagine a dark, moody plaster wall (70%) with a light oak beam mantel (30%). Or a wall of dark walnut slats with a sleek white quartz surround. The key is the strong play between dark/textured and light/smooth.
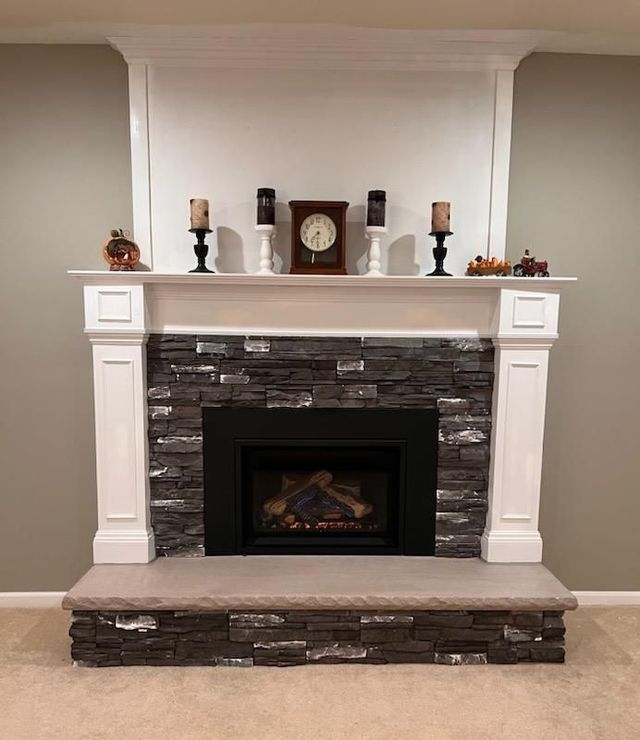
“Before you commit to this high-contrast look, run through this quick checklist to make sure it will work in your space.”
This isn’t a design you can easily undo.Will the room get enough natural light to handle the dark stone without feeling like a cave? Check the window placement and direction.Are my wall colors compatible? This look works best with neutral walls (like the taupe shown) that won’t compete with the stone or the white trim.Do I have the budget for both a mason and a carpenter? This look requires two different trades to get the finish right.Is the scale right? This design needs at least 9-foot ceilings to avoid the white mantle visually ‘squishing’ the firebox.
6. Achieve a Cozy Cabin Vibe with Whitewashed Brick
You can get this charming whitewashed look on existing brick in a single weekend. Here’s a quick guide to doing it right:
- Prep is everything (1 hour): Clean the brick thoroughly with a wire brush and a mixture of water and TSP substitute. Let it dry completely. Tape off your mantel, walls, and floor.
- Mix your wash (5 mins): In a bucket, mix one part white latex paint with one part water. For a more transparent look, use a 1:2 paint-to-water ratio. Stir until smooth.
- Apply and Wipe (2-3 hours): Brush the wash onto the brick in small sections. Let it sit for 30-60 seconds, then use a clean, lint-free rag to wipe off the excess. The more you wipe, the more of the original brick color shows through.
- Vary your technique (Ongoing): Dab, wipe, and blot differently across the surface to create a natural, imperfect finish. Stand back often to check your progress.
Total time: 4-5 hours. Material cost: Under $50.
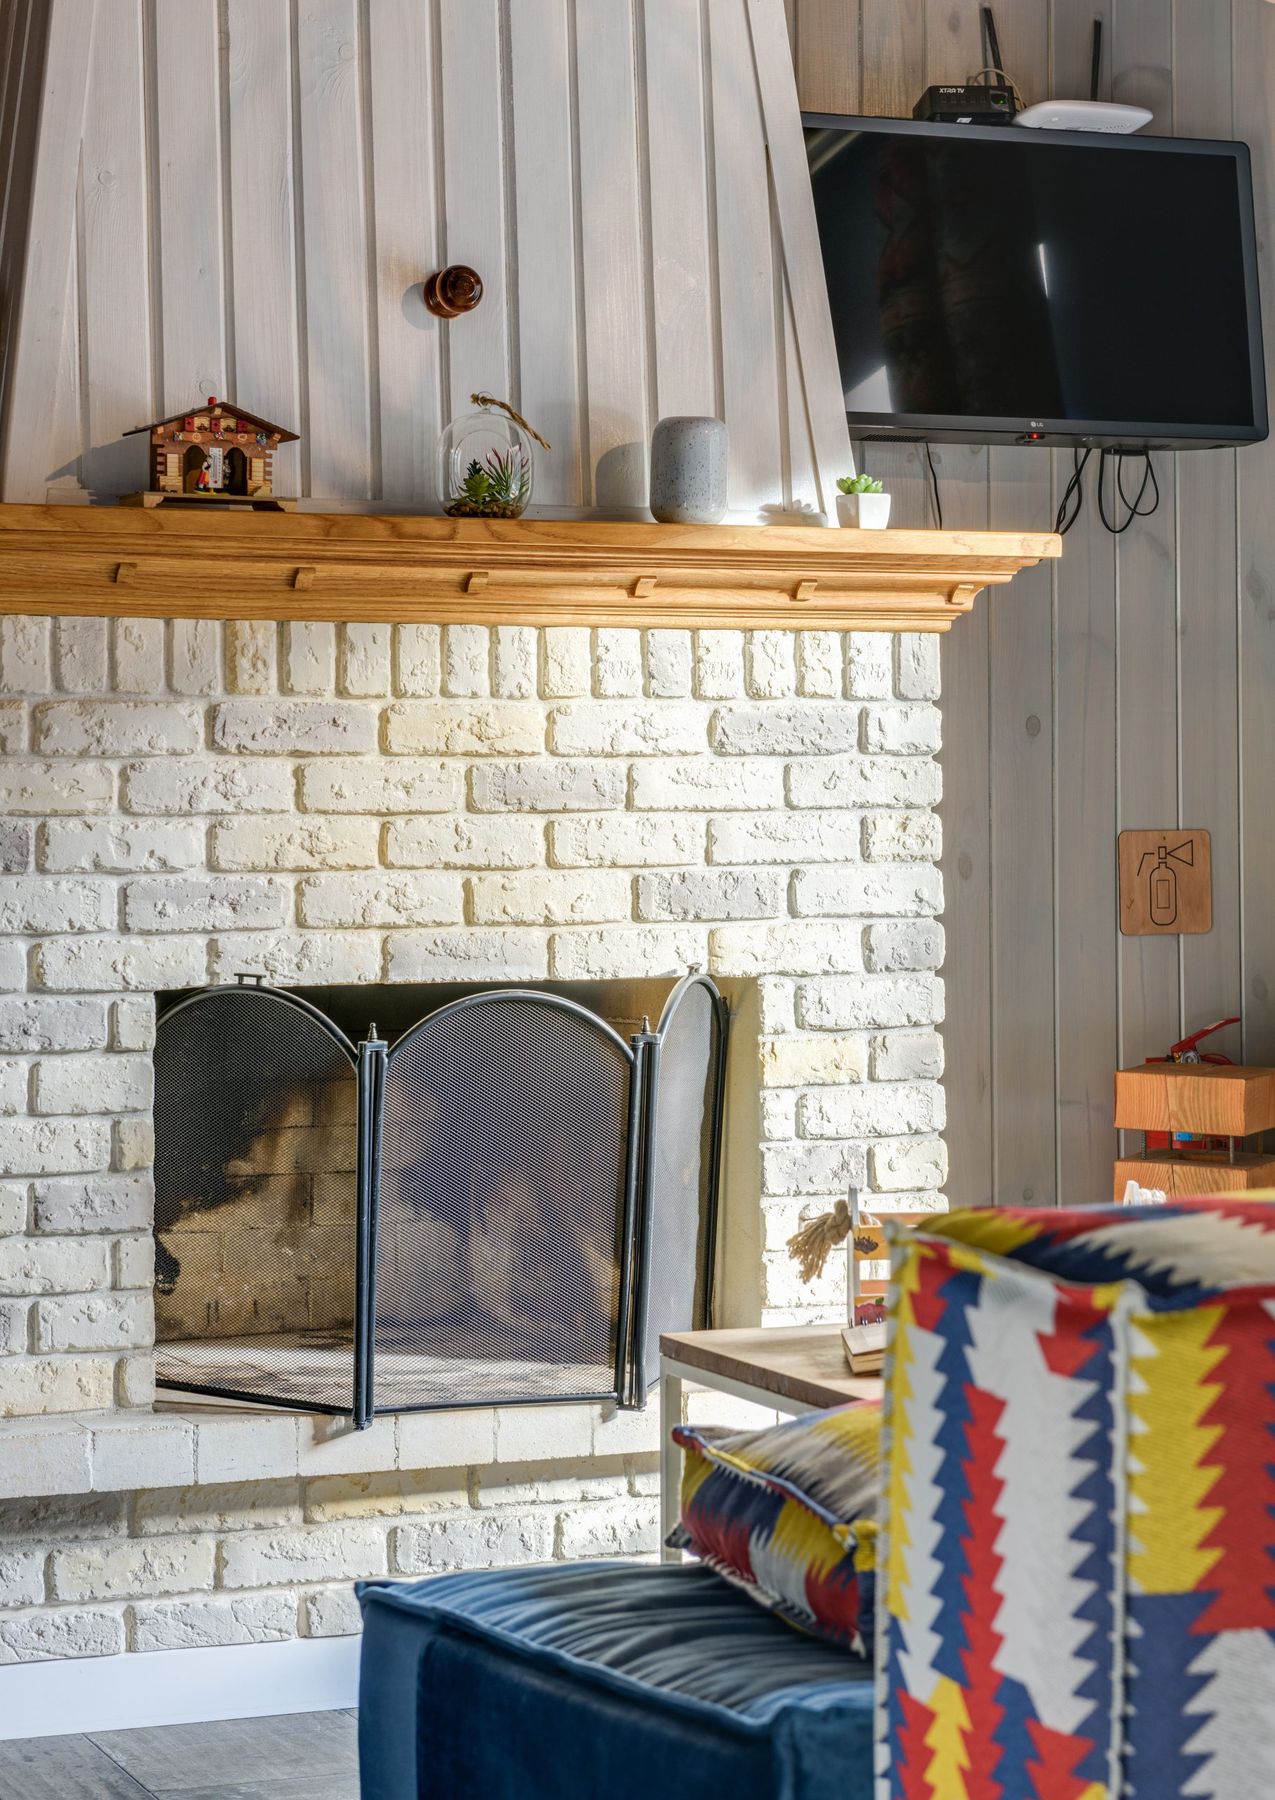
“The combination of whitewashed brick and a natural wood mantel is a classic for a reason, and you don’t need a huge budget.”
If you don’t have existing brick, you can buy thin brick veneer panels at Home Depot or Lowe’s for about $10-$15 per square foot. For the mantel, look for a simple floating shelf from IKEA (like the LACK, if weight allows) or Target. Or, find a piece of reclaimed lumber from a local architectural salvage yard for under $100. The key is to keep the wood tone light and natural to complement the soft white of the brick.
7. Frame Light Stone with Floor-to-Ceiling Cream Built-ins
This design is a masterclass in creating a focal point that feels both grand and integrated. The success lies in its perfect symmetry and tonal harmony. The cream-colored cabinetry flawlessly matches the undertones of the light gray stone, creating a cohesive, unified wall. By running the built-ins from floor to ceiling, they frame the stone chimney, making it feel intentional and architectural rather than just stuck on the wall. The thick wood mantel then acts as a warm, horizontal line that breaks up the verticality and adds a necessary touch of organic texture.
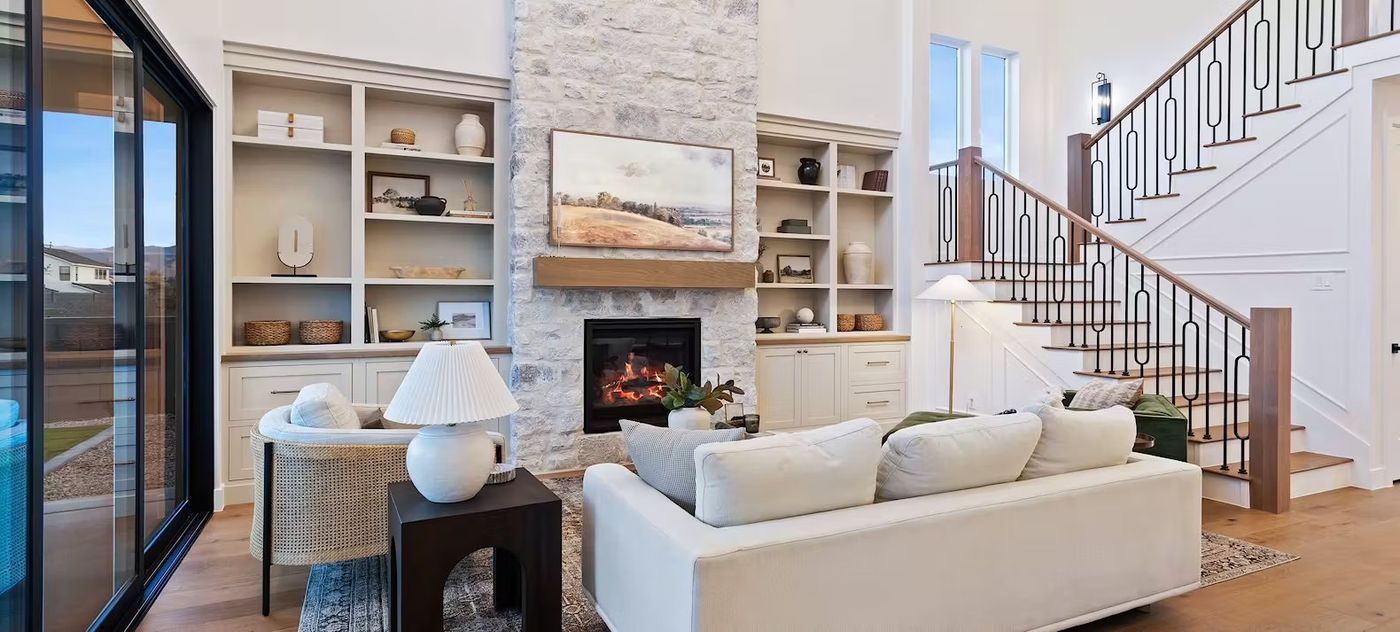
“This look is all about scale and proportion, making it ideal for rooms with high ceilings (10 feet or more) and a wide, uninterrupted wall.”
You need a minimum wall width of 12-15 feet to accommodate the fireplace and flanking bookcases without them feeling cramped. A similar approach is taken in Idea #29 with brick, but the light color palette here makes this version feel much more airy and suitable for spaces that might not have as much natural light. In a smaller room, this could easily feel overwhelming.
8. Embrace Ornate Detail with a Neoclassical Carved Mantel
The singular element making this fireplace unforgettable is the ornate neoclassical carving. Without the fluted pilasters, floral details, and elegant swags, this would be a simple white fireplace. Those details are what give it its formal, traditional, almost historic character. The decision to pair it with a soft, unexpected pale pink marble surround is a genius move, softening the formality and adding a touch of modern femininity. It’s a lesson in how a single, highly detailed piece can define an entire room’s aesthetic.
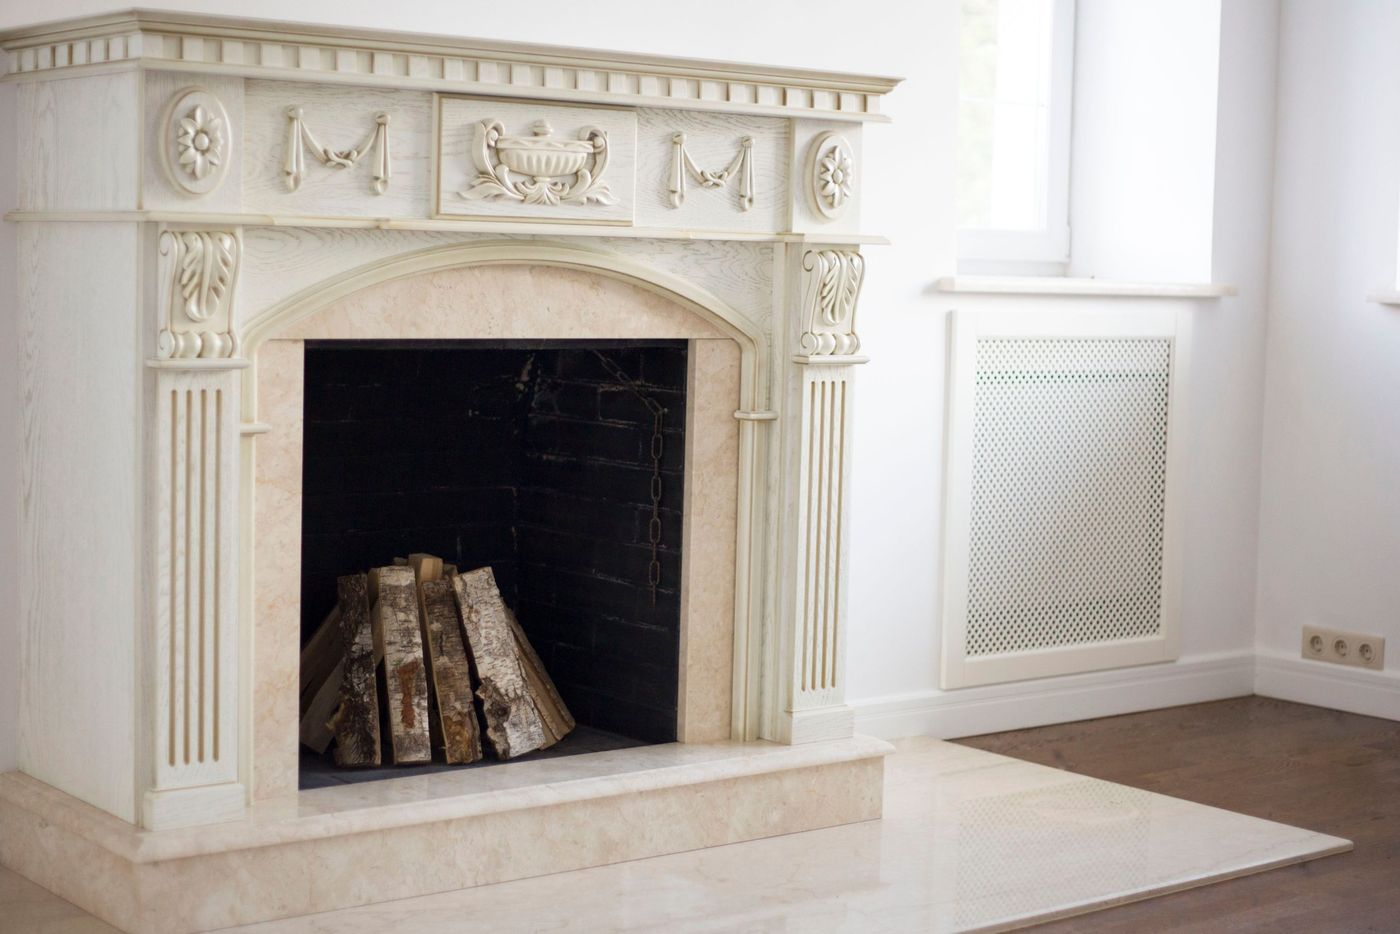
“A style this specific and ornate can be tricky to integrate into a modern home.”
It demands a certain level of formality from the rest of the room. If you have casual, contemporary furniture, this fireplace can look out of place, like it belongs in a different house. It works best in homes with traditional architectural details like crown molding, high ceilings, and hardwood floors. Also, that beautiful off-white paint and intricate carving are a nightmare to keep clean—dusting will become a very regular and detailed chore.
9. Pair a Limestone Feature Wall with a Modern Wood Stove
This look perfectly captures the “Modern Natural” trend that’s dominating design in 2026. It’s a reaction against the cold, sterile minimalism of the past. By cladding the entire chimney breast in rough-cut cream limestone, the design introduces immense texture and warmth. But instead of a traditional firebox, it features a sleek, cylindrical black stove. This high-contrast pairing of a raw, ancient material (limestone) with a clean, contemporary form (the stove) is what makes it feel so current and sophisticated.
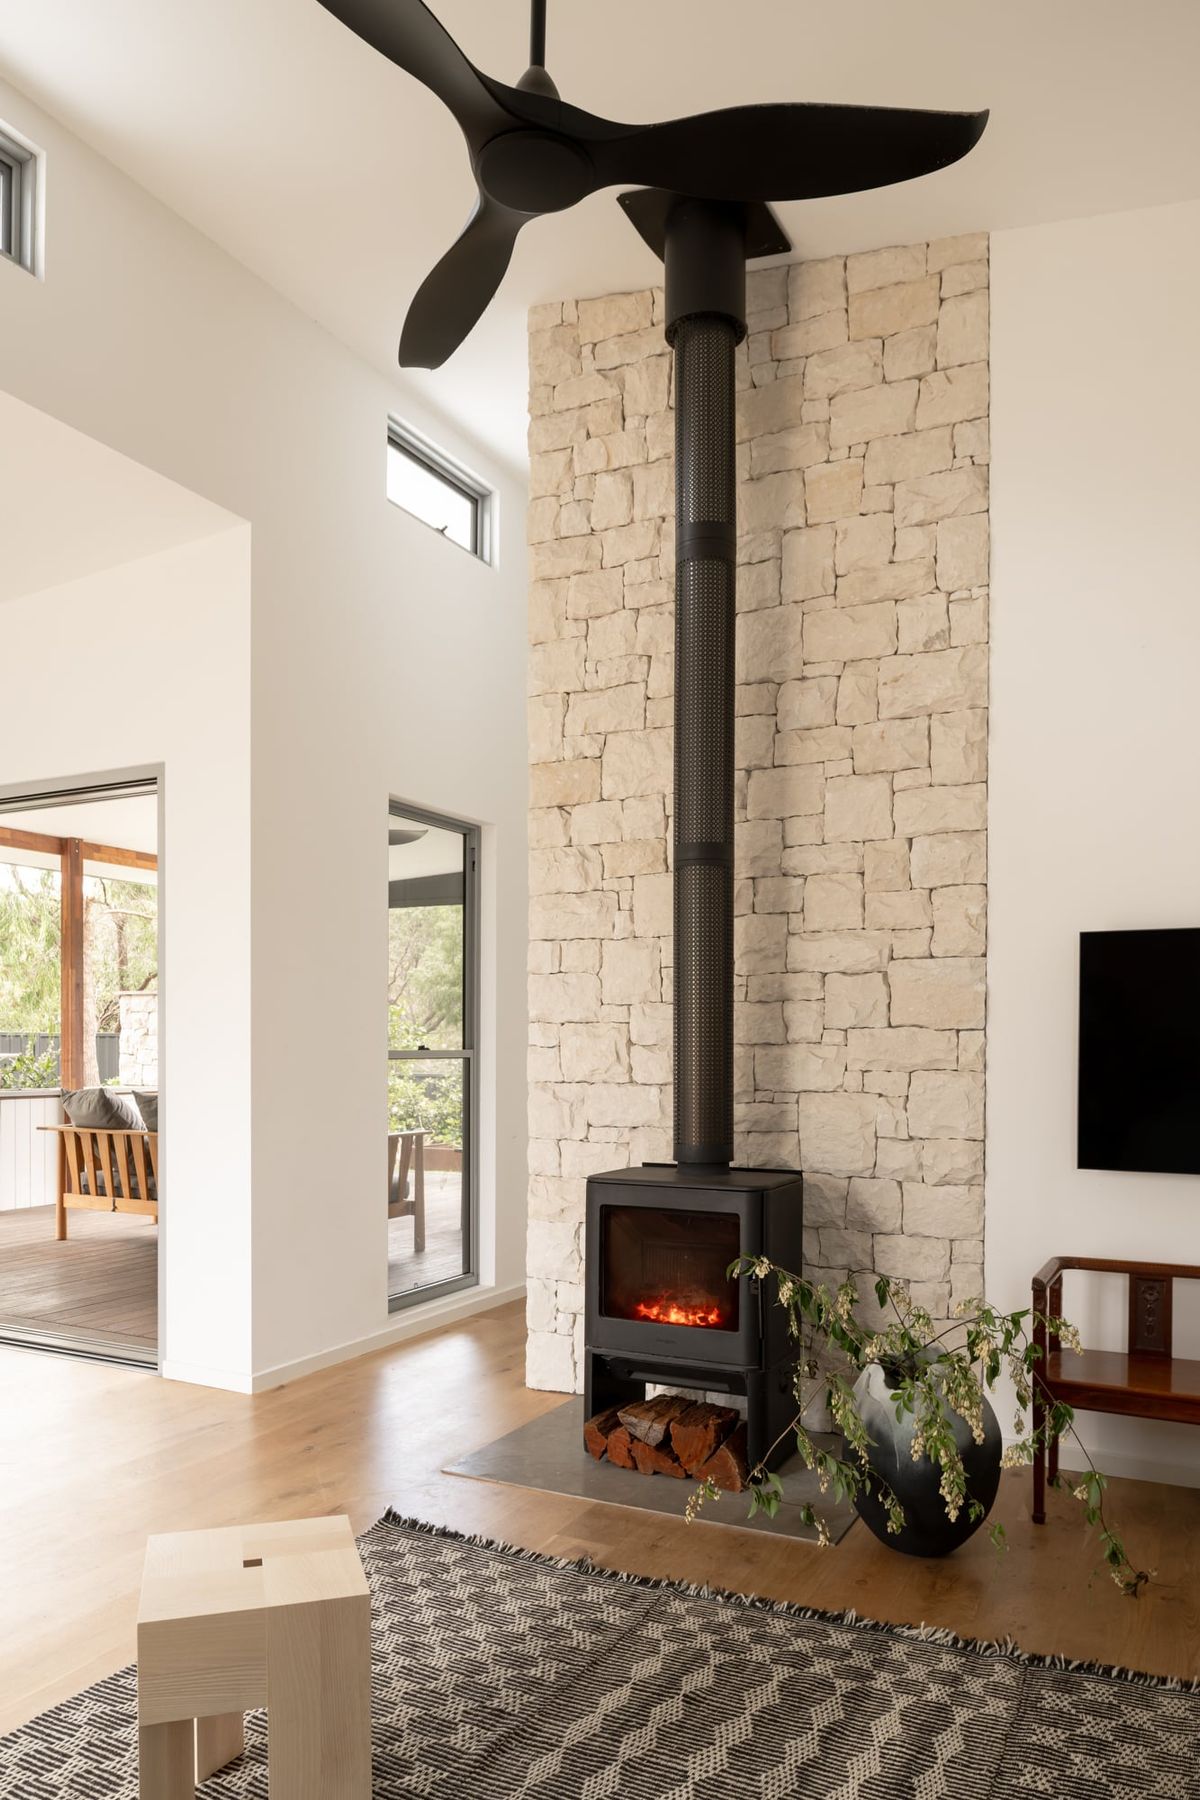
“When you’re installing a modern freestanding stove against a stone feature wall, the placement of the flue pipe is critical.”
Don’t center it on the stove. Instead, use an offset flue pipe that travels back into the wall a few feet above the stove. This creates a cleaner visual line and allows the beautiful texture of the limestone to be the uninterrupted hero. It’s a small detail that makes the installation look custom and thoughtfully designed, rather than just placing a stove in front of a wall.
10. Warm Up a Room with Multicolor Stacked Stone and a Wood Mantel
Recreating this classic rustic look has a moderate price tag, with the stone veneer being the biggest variable.
- Stone Veneer Panels: $800 – $2,000 (depending on real vs. faux stone)
- Gas Fireplace Insert: $2,500 – $5,000
- Wood Beam Mantel: $250 – $700
- Flagstone Hearth: $300 – $600
- Professional Installation: $2,000 – $4,000
- TOTAL: $5,850 – $12,300
Budget alternative: Use faux stone panels (~$500), an electric insert (~$600), and a reclaimed wood beam (~$150) for a total cost closer to $2,500 with DIY installation.
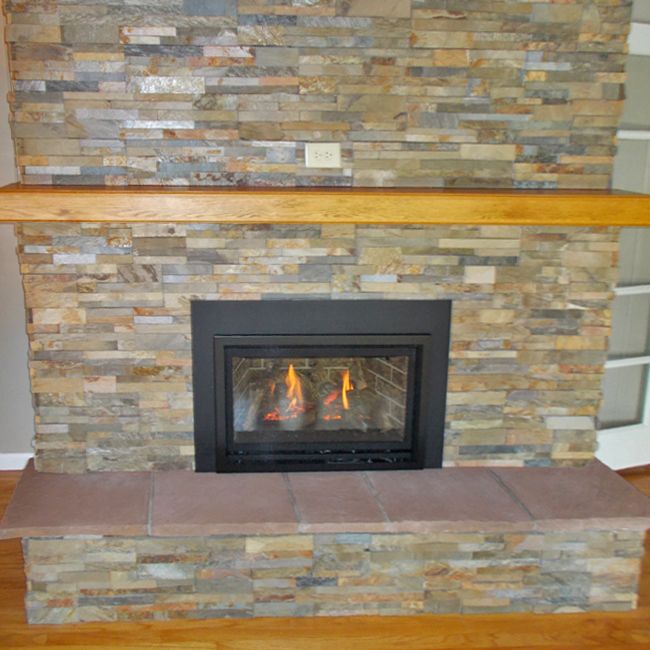
“The reason this timeless look feels so balanced is due to the principle of repetition with variation.”
The horizontal lines of the stacked stone are repeated in the horizontal grain of the hardwood floor and the long line of the wood mantel. This creates a sense of calm and order. The variation comes from the texture and color: the rough, multi-toned stone contrasts beautifully with the smooth, uniform finish of the wood floor and mantel. This play between repeating lines and varying textures is what gives the design both harmony and visual interest.
11. Anchor a Room with a Heavy Dark Wood Mantel
A dark, espresso-stained wood mantel like this one is stunning, but it shows dust more than any other finish. A weekly dusting with a microfiber cloth is non-negotiable. Because it’s a solid wood beam supported by corbels, it can be prone to drying and cracking over time, especially with the heat from the fireplace. To prevent this, you’ll need to apply a quality wood conditioner or oil every 6-12 months. Also, be mindful of what you place on it; the dark stain can be susceptible to water rings from plants or condensation, so always use coasters.
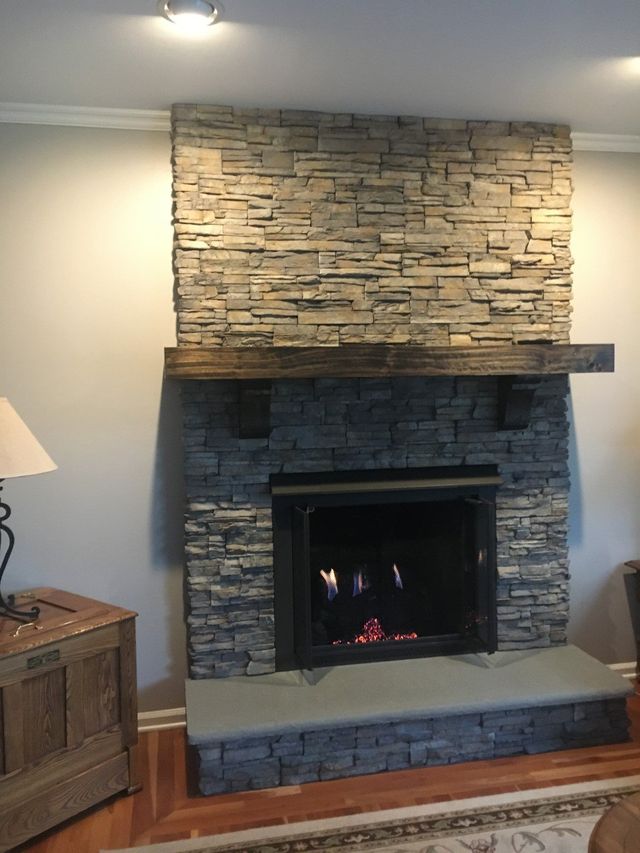
“To make a heavy, dark wood mantel feel integrated rather than just stuck on, the key is in the corbels.”
Don’t use small, decorative brackets. Opt for substantial wood corbels that are at least two-thirds the depth of the mantel itself. Stain them to match the mantel perfectly. This creates the illusion that the entire structure is a single, solid piece of timber, giving it the visual weight and architectural significance needed to stand up to the heavy texture of the stacked stone behind it.
12. Introduce Pattern with Southwestern Geometric Drapes
This room’s cozy, eclectic charm comes from a simple but effective formula: 80% neutral texture + 20% bold pattern and color. The light-toned brick and off-white plaster walls create a quiet, textured backdrop. Then, the Southwestern drapes crash in with a powerful dose of vibrant red, sage green, and geometric shapes. The carved wood mantel acts as a bridge between the two. You could easily swap the Southwestern print for a floral chintz or a graphic Art Deco pattern to completely change the room’s personality while keeping the foundational balance intact.
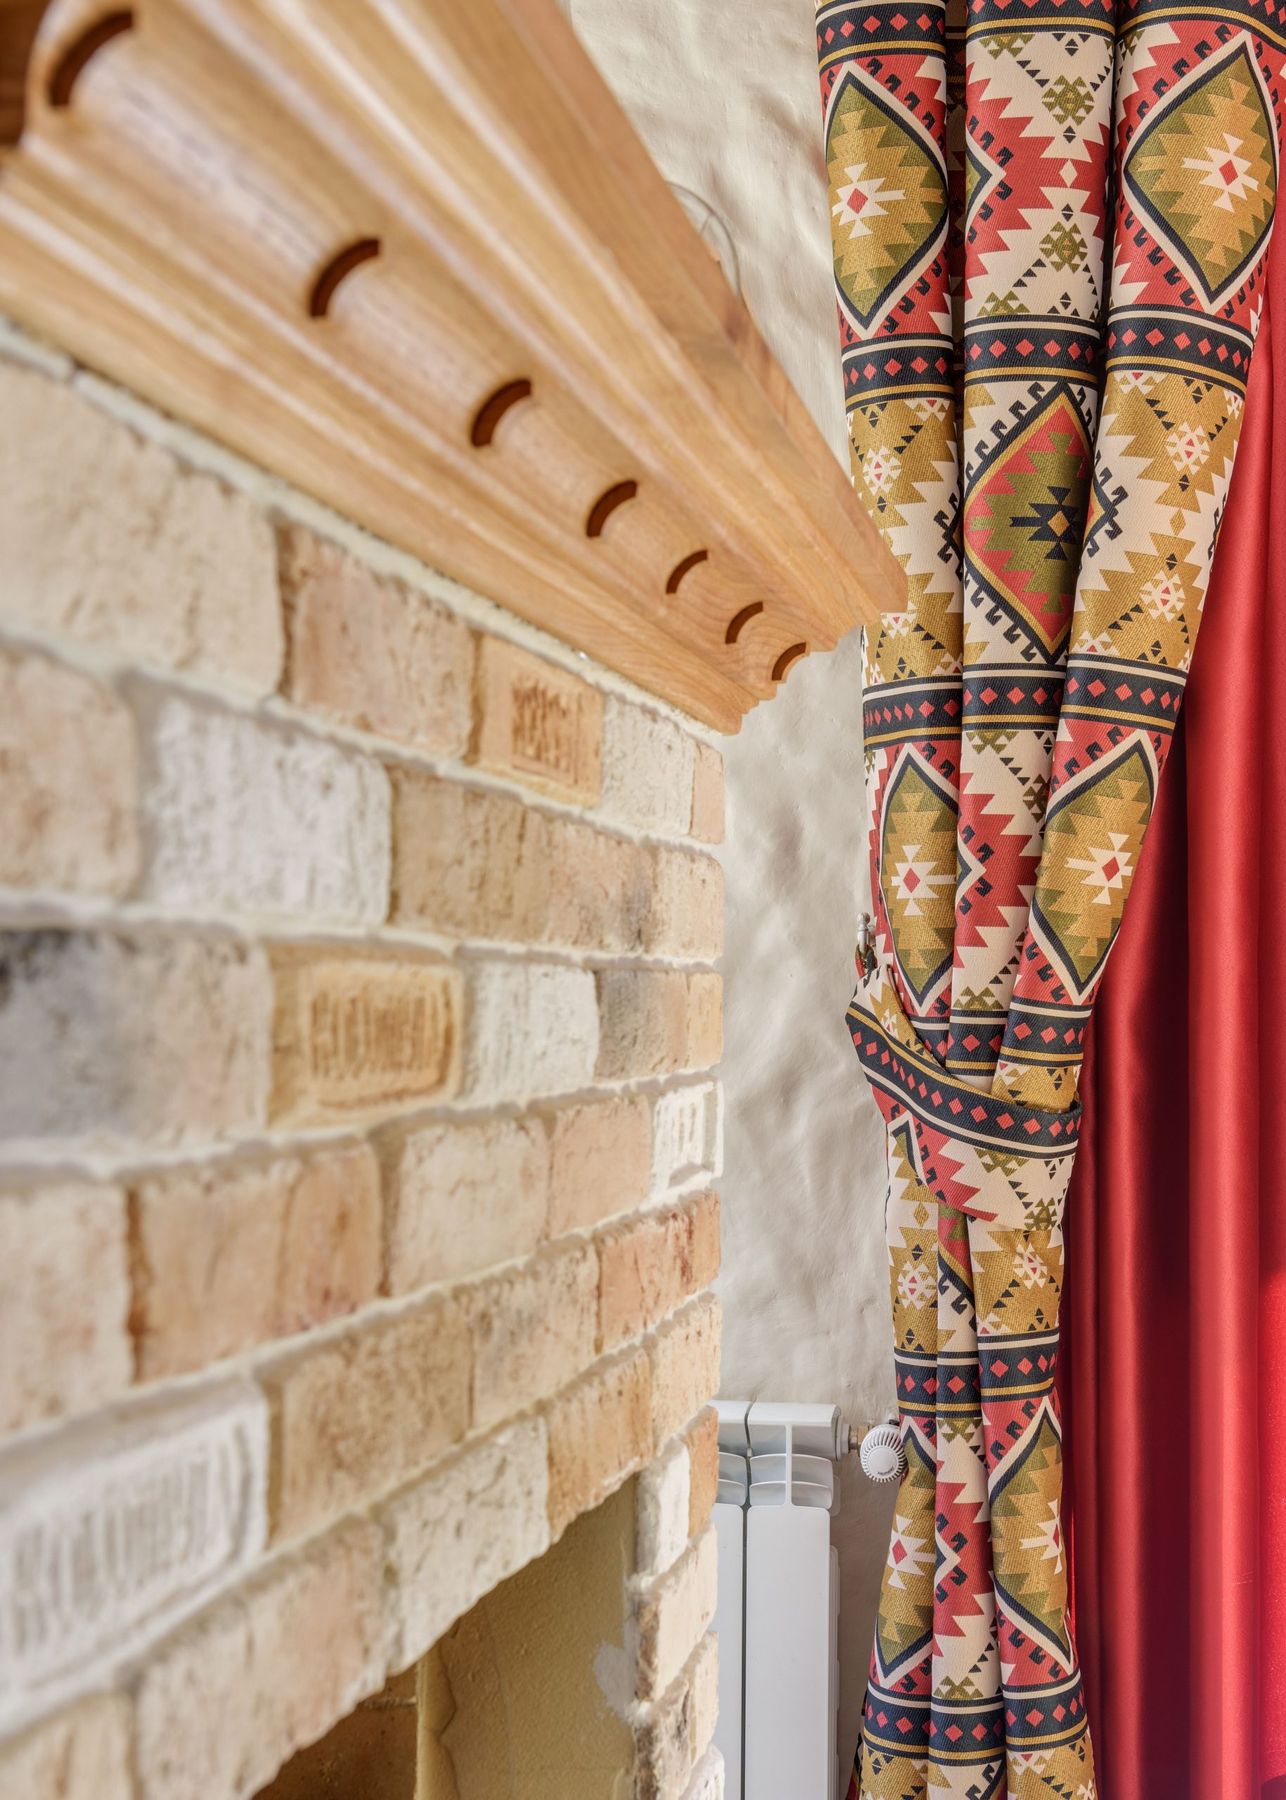
“A bold pattern like this is a major commitment.”
Before you invest in custom drapes, buy a fabric sample or even a pillow in the same pattern and live with it for a week. A pattern you love on Pinterest can feel overwhelming in your own space, especially in a room you use every day. Also, a heavy, lined drape like this one, while great for insulation, will block a significant amount of natural light even when open. Make sure you have other light sources in the room to compensate.
13. Layer Textures with Stacked Stone and Whitewashed Shiplap
Want to recreate that floor-to-ceiling shiplap effect above the mantel? It’s a great DIY project.
- Measure and Cut: Measure the width and height of the wall area above your mantel. Cut your shiplap boards to length. You’ll likely need to rip the final top board to fit snugly against the ceiling.
- Find and Mark Studs: Use a stud finder to locate the vertical studs in the wall. Mark them with a pencil line from mantel to ceiling. This is where you’ll nail the boards.
- Install from the Bottom Up: Place your first board directly on top of the mantel, ensuring it’s level. Nail it into the studs with a brad nailer.
- Stack and Repeat: Slot the next board on top of the first, making sure the tongue-and-groove system engages. Nail it into the studs. Repeat until you reach the ceiling.
- Finish: Caulk the seams and fill nail holes before painting.
Total time: 3-4 hours. Material Cost: $100-$200.
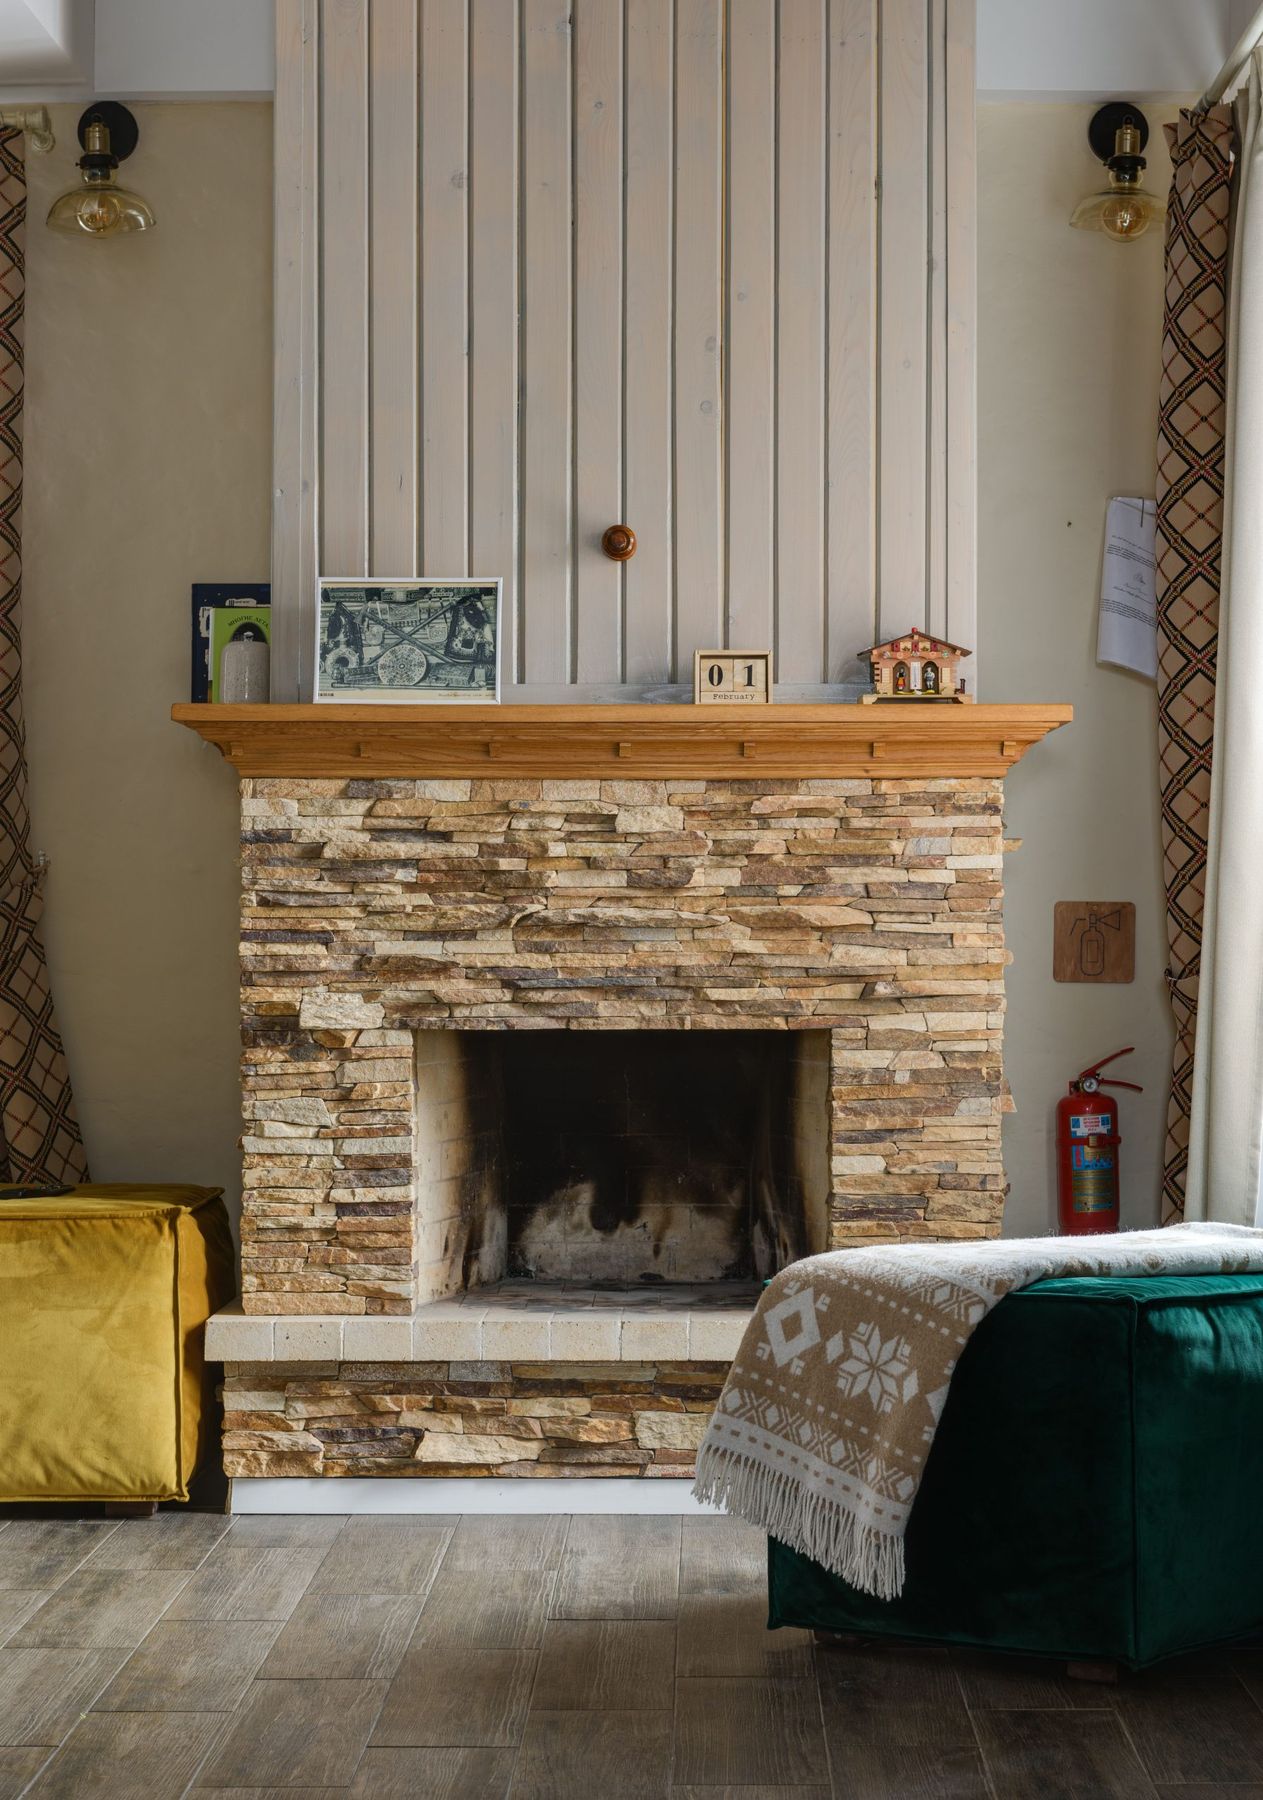
“The element that elevates this from a standard rustic fireplace is the unexpected pop of saturated color from the floor cushions.”
The mustard yellow and forest green velvet injects a dose of personality and modern eclecticism. Without them, the scene would still be beautiful, but much more conventional with its neutral palette of tan, beige, and white. The cushions are a brave choice that signals confidence and a playful approach to design, preventing the rustic theme from feeling too serious or one-note.
14. Keep it Simple with a Rustic Multi-Tonal Stacked Stone Surround
When using multi-tonal stacked stone, especially with a mix of cool grays and warm beiges, the grout (or lack thereof) is critical. For this rustic, grounded look, ask your mason for a ‘dry-stack’ installation with tight joints and no visible mortar. If mortar is necessary for structural reasons, insist on a color that perfectly matches the darkest stone in the mix. This makes the mortar recede, emphasizing the texture and color variation of the stone itself, rather than a grid of grout lines.
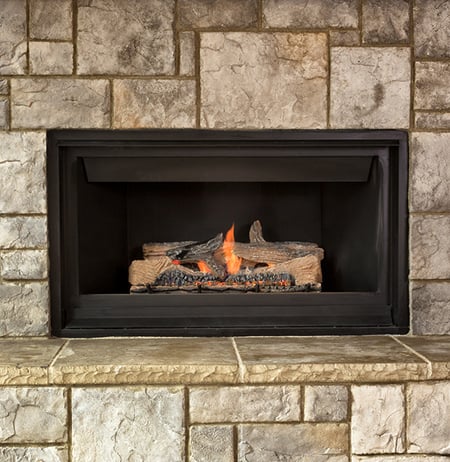
“This is a versatile look that works well in standard-sized living rooms.”
It doesn’t require the soaring ceilings of a design like Idea #4. It’s best for a fireplace wall that is between 8 and 12 feet wide, with a standard 8 or 9-foot ceiling. The key is to keep the surround proportional. A good rule of thumb is for the stone to extend 12-18 inches on either side of the firebox opening, and for the hearth to be at least 16-20 inches deep to feel substantial without jutting too far into the room.
15. Go Bold with a Floor-to-Ceiling Cream Stone & Dark Wood Combination
This design is a powerful example of using contrast to create drama. The light, rough texture of the cream-colored stone provides a bright, airy backdrop that makes the dark, smooth wood elements pop. The thick, dark walnut mantel and hearth base create strong horizontal lines that ground the entire composition, preventing the tall stone facade from feeling like it’s floating. The recessed, dark firebox and the TV above it repeat the dark accent color, creating a satisfying visual rhythm. It’s the tension between light/rough and dark/smooth that gives this fireplace its confident, polished look.
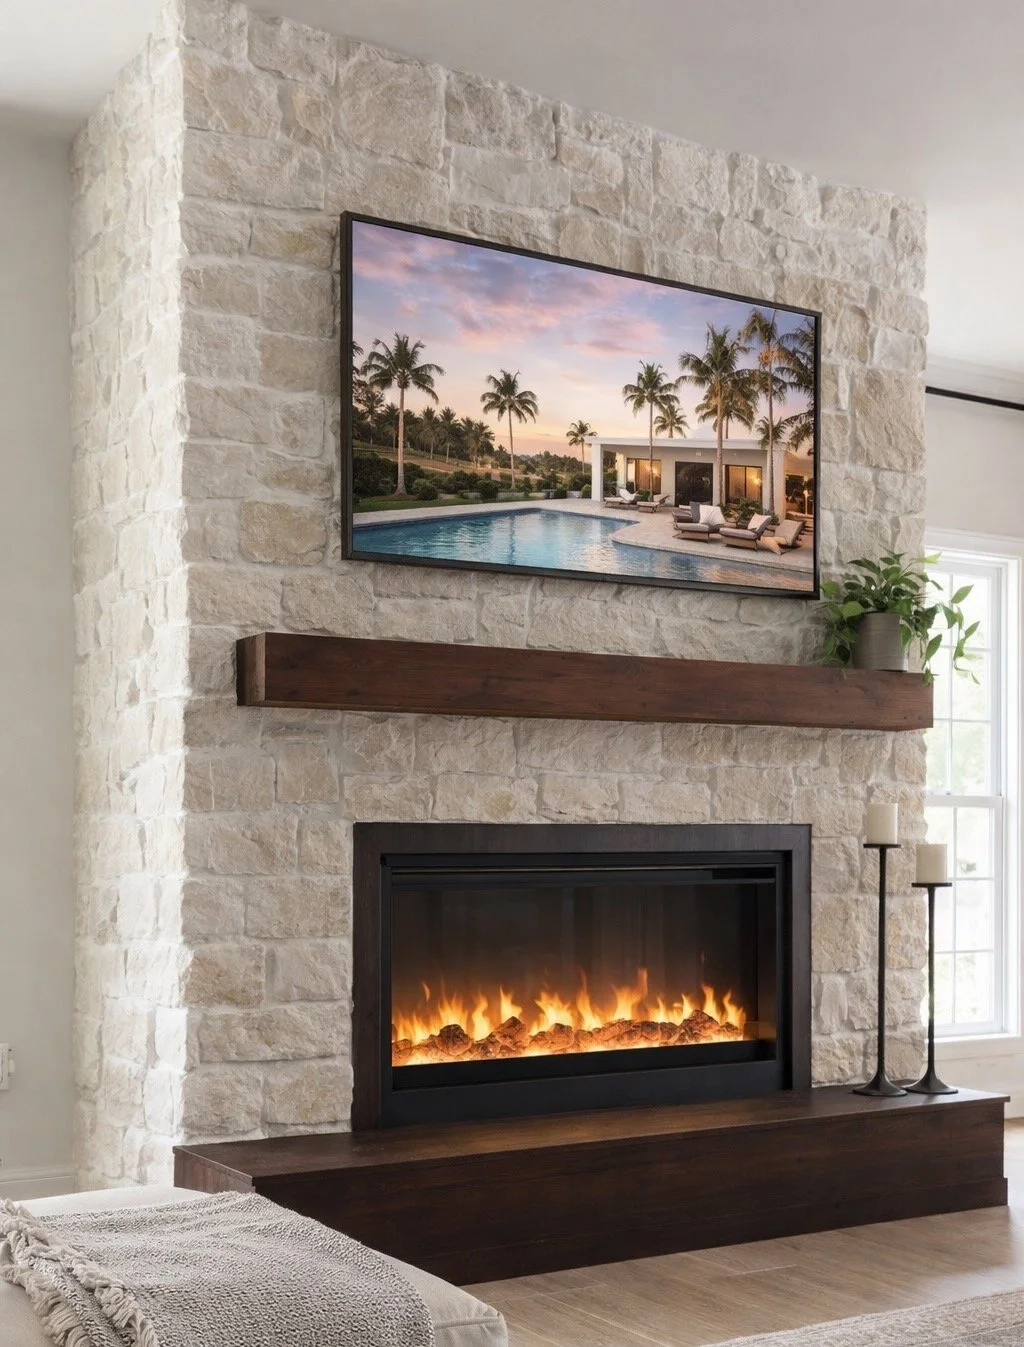
“This is a high-impact look that requires careful planning.”
Before you start calling contractors, check these boxes:Structural Support: A floor-to-ceiling stone installation is incredibly heavy. Does your floor joist system need reinforcement? Consult a structural engineer.Electrical and AV: Where will the wiring for the TV and any lighting go? Plan for conduit to be run behind the stone *before* it’s installed. Accessing it later is nearly impossible.Ceiling Height: This look needs a minimum of a 10-foot ceiling to work. On a standard 8-foot ceiling, it will feel imposing and out of scale.
16. Get a Clean, Textural Look with White Ledger Stone
The formula for this clean, minimalist look is all about subtle texture and monochromatic layers. It’s 90% white and light gray, with only 10% black for a sharp, graphic punch. The breakdown is: 60% textured white (the ledger stone), 30% smooth white (the mantel and surrounding walls), and 10% black glass/metal (the fireplace insert). The key is that the whites aren’t all the same; the variation between the off-white stone and the crisp white mantel adds depth without adding color, keeping the overall feeling serene and bright.
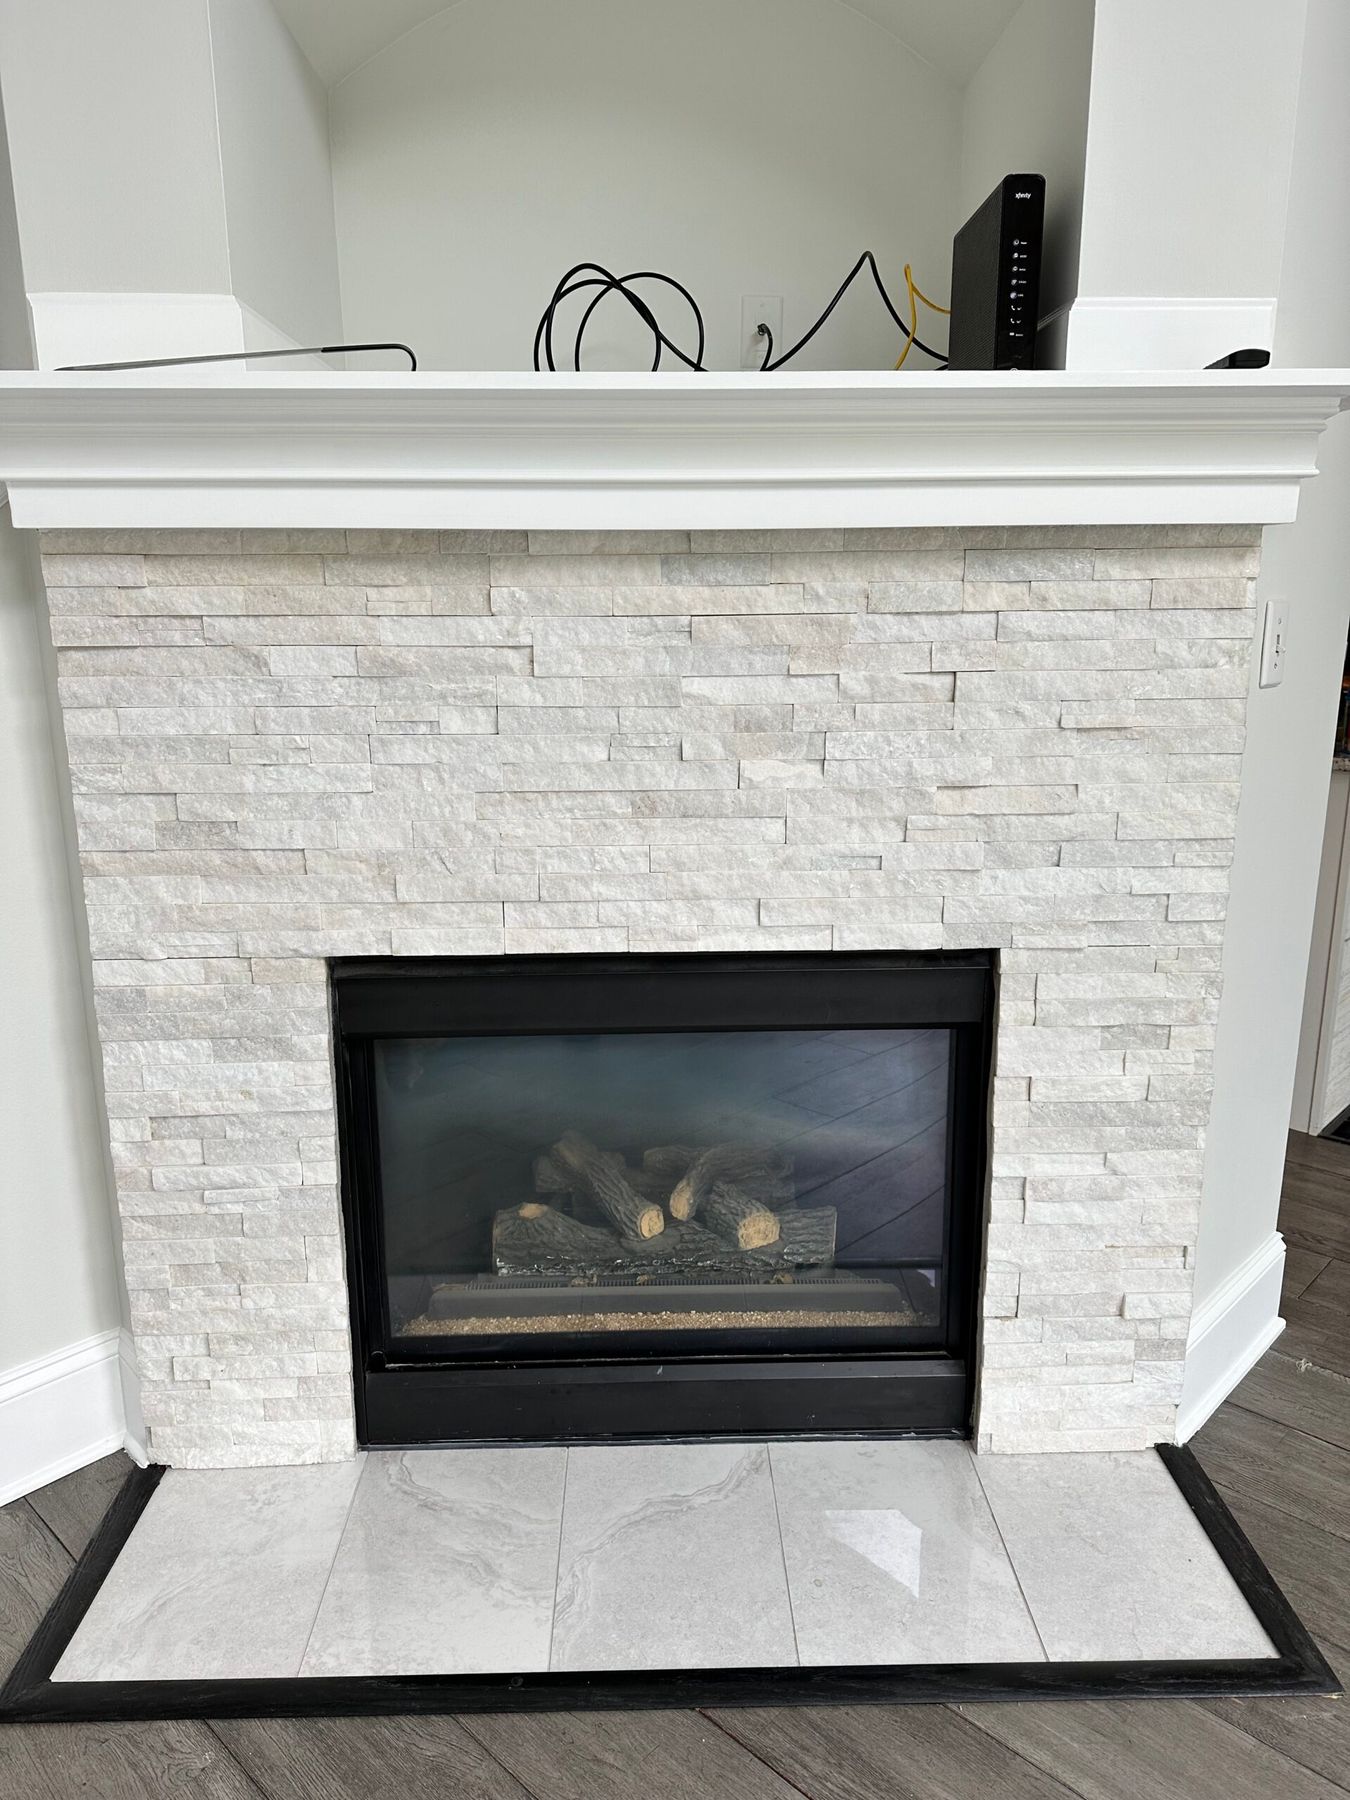
“A full wall of ledger stone can get pricey, but you can achieve this clean, structural vibe for much less.”
Several companies now make peel-and-stick 3D wall panels in similar stacked stone patterns for about $5-$8 per square foot. They are made from lightweight PVC or plant fiber and are a breeze to install yourself. Pair them with a simple white floating shelf from IKEA or Target as the ‘mantel’ and a can of high-heat black spray paint to refresh an old fireplace insert. This brings the look into a very friendly DIY budget. Compare it to the more rustic white stone in Idea #27.
17. Embrace the Process with an Exposed Brick and Reclaimed Wood Frame
This “in-progress” shot is a great reminder that major renovations are a messy, multi-stage process. A project like this isn’t a weekend affair. It involves masons for the brick and flagstone, carpenters for the heavy timber framing and paneling, and electricians for the sconces. Expect dust, disruption, and a timeline that could stretch for weeks. While the finished product is worth it, don’t underestimate the coordination and patience required to bring together so many raw, heavy materials into a cohesive design. This is not a simple DIY—hire professionals you trust.
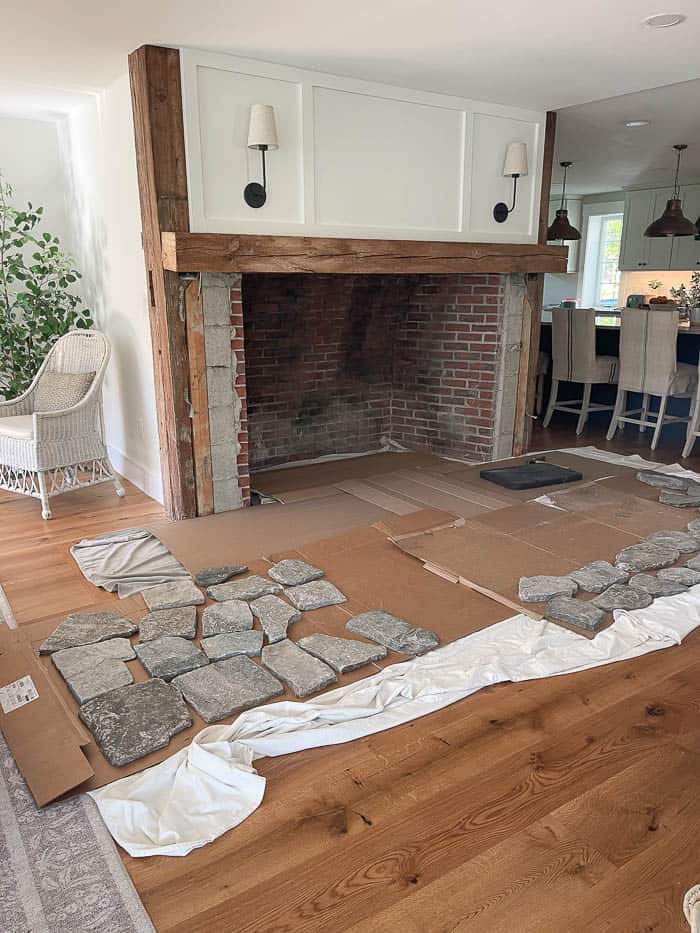
“What makes this design so compelling, even in its unfinished state, is the tension between the raw materials.”
The reclaimed wood beams, with their history and rough-hewn texture, are the absolute soul of the piece. They frame the classic red brick and provide a rugged foundation for the clean, white paneling above. If you were to swap them for new, perfectly milled lumber, you would lose all the character and sense of history. These beams are the element that bridges the gap between rustic and refined.
18. Add Rustic Charm with a Gray Fieldstone Fireplace
Fieldstone, with its irregular shapes and deep mortar joints, is a beautiful but high-maintenance choice. Those crevices are prime real estate for dust and cobwebs, requiring a vacuum with a brush attachment for regular cleaning. The porous nature of both the stone and the mortar means they can absorb soot stains over time, leading to a dingy appearance. Sealing the stone every few years is crucial, and you may need to have the mortar joints professionally repointed (scraped out and refilled) every 20-30 years to maintain structural integrity.
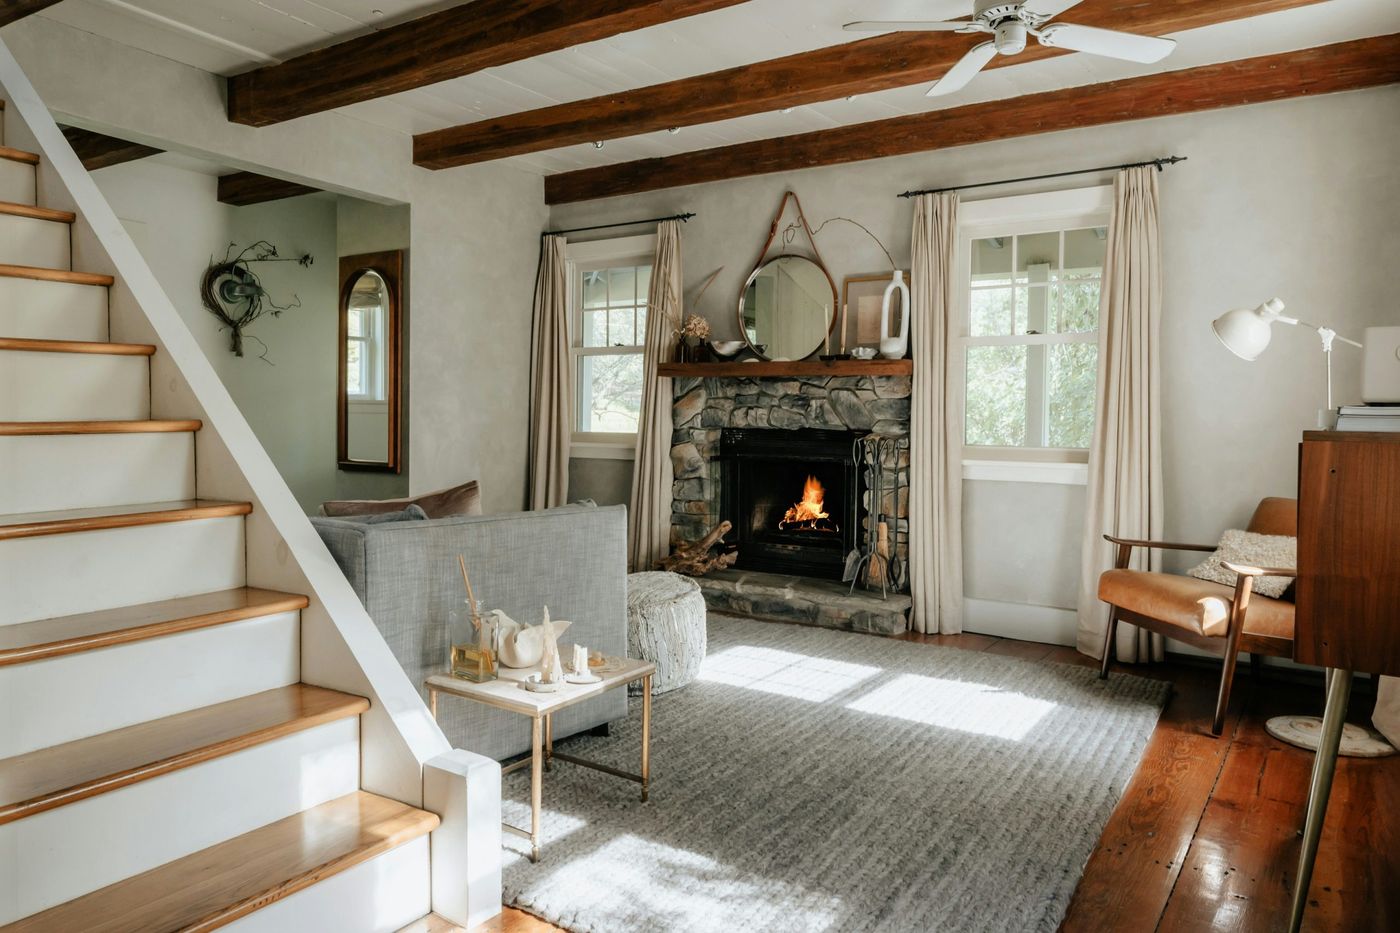
“When styling a rustic fieldstone fireplace, resist the urge to clutter the mantel.”
The stone itself provides so much texture and visual interest. Instead of a dozen small items, opt for one or two large-scale pieces that can hold their own against the heavy stone. The circular mirror suspended by a leather strap is a perfect example. It’s simple, its shape contrasts with the irregular stones, and its scale is substantial enough to make a statement without creating visual noise. A single large piece of art would work just as well.
19. Go Grand with a Tapered Floor-to-Ceiling Dry Stack Fireplace
This is not a design for a standard room. A grand, tapered chimney like this requires significant vertical space to look right. It’s intended for a great room with a vaulted ceiling of at least 18-20 feet. The taper is key; if the chimney went straight up, it would look like a monolithic, intimidating column. The gradual narrowing as it rises draws the eye upward and makes the structure feel more elegant and less bulky, despite its massive size. The base of the fireplace should also be substantial, occupying at least 10-12 feet of wall width.
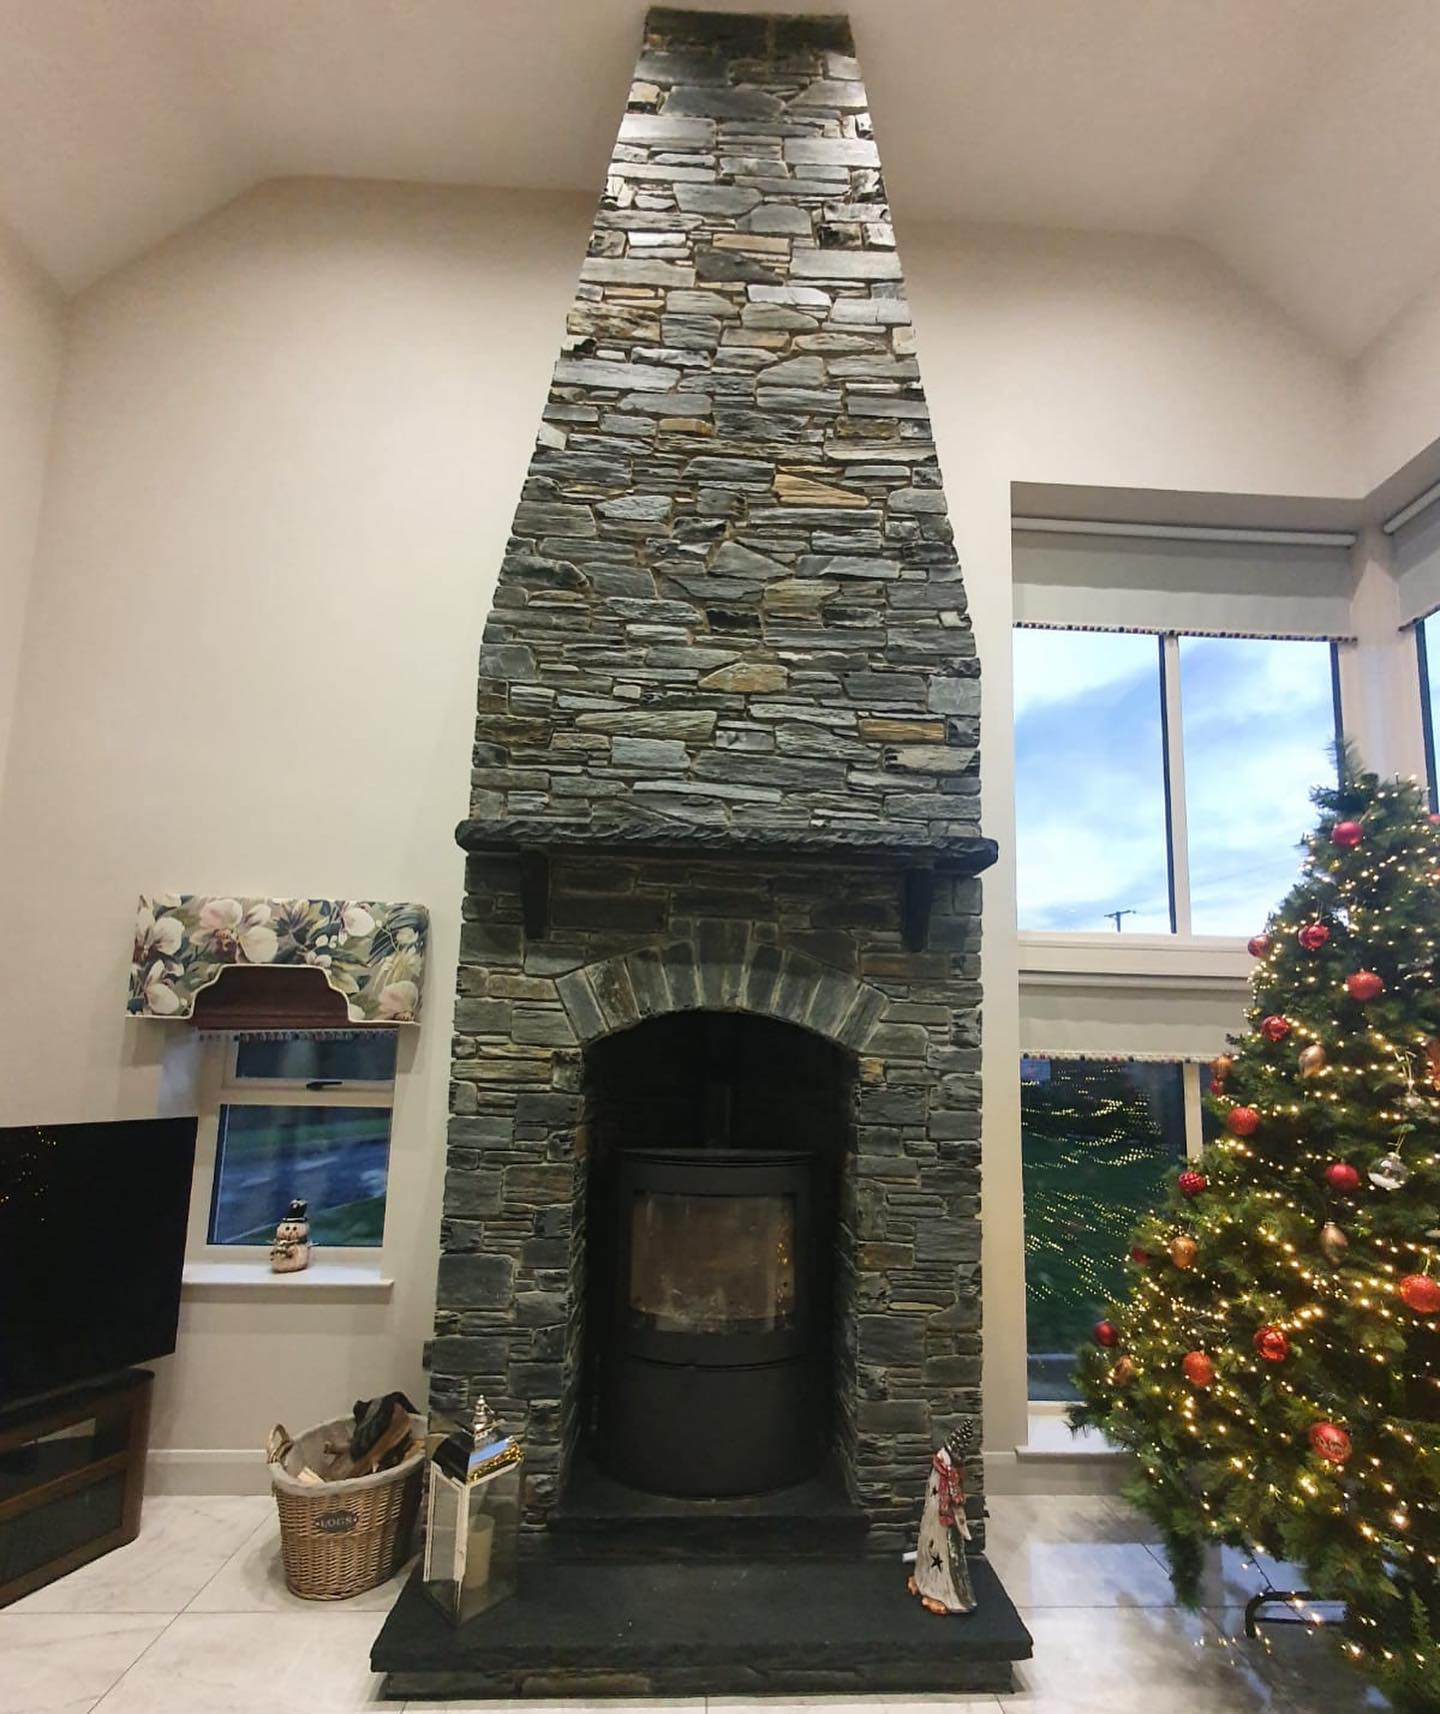
“The power of this design comes from its masterful use of shape and form.”
The gentle arch of the firebox opening softens the rugged, masculine feel of the stacked stone. This curve is a welcoming gesture, inviting you to gather around the fire. The overall tapered shape of the chimney breast creates a forced perspective, making the already high ceiling feel even taller and more dramatic. It’s a clever use of architectural form to manipulate the perception of space and create a truly breathtaking focal point.
20. Craft an Arched Fireplace with Irregular Polished Stone
While commissioning a custom stone mosaic arch is a high-end endeavor, you can get a similar feel on a budget. Look for ‘river rock’ mesh tile sheets online or at tile stores. These feature smooth, polished stones of various sizes pre-arranged on a mesh backing for easy installation. You can use these tiles to create your own arched surround. For the log wall effect, check out reclaimed wood paneling from places like Stikwood or Timeline Wood, which offer a similar look without the structural complexity of a true log cabin. This brings a custom look into the realm of a savvy DIYer for a few hundred dollars.
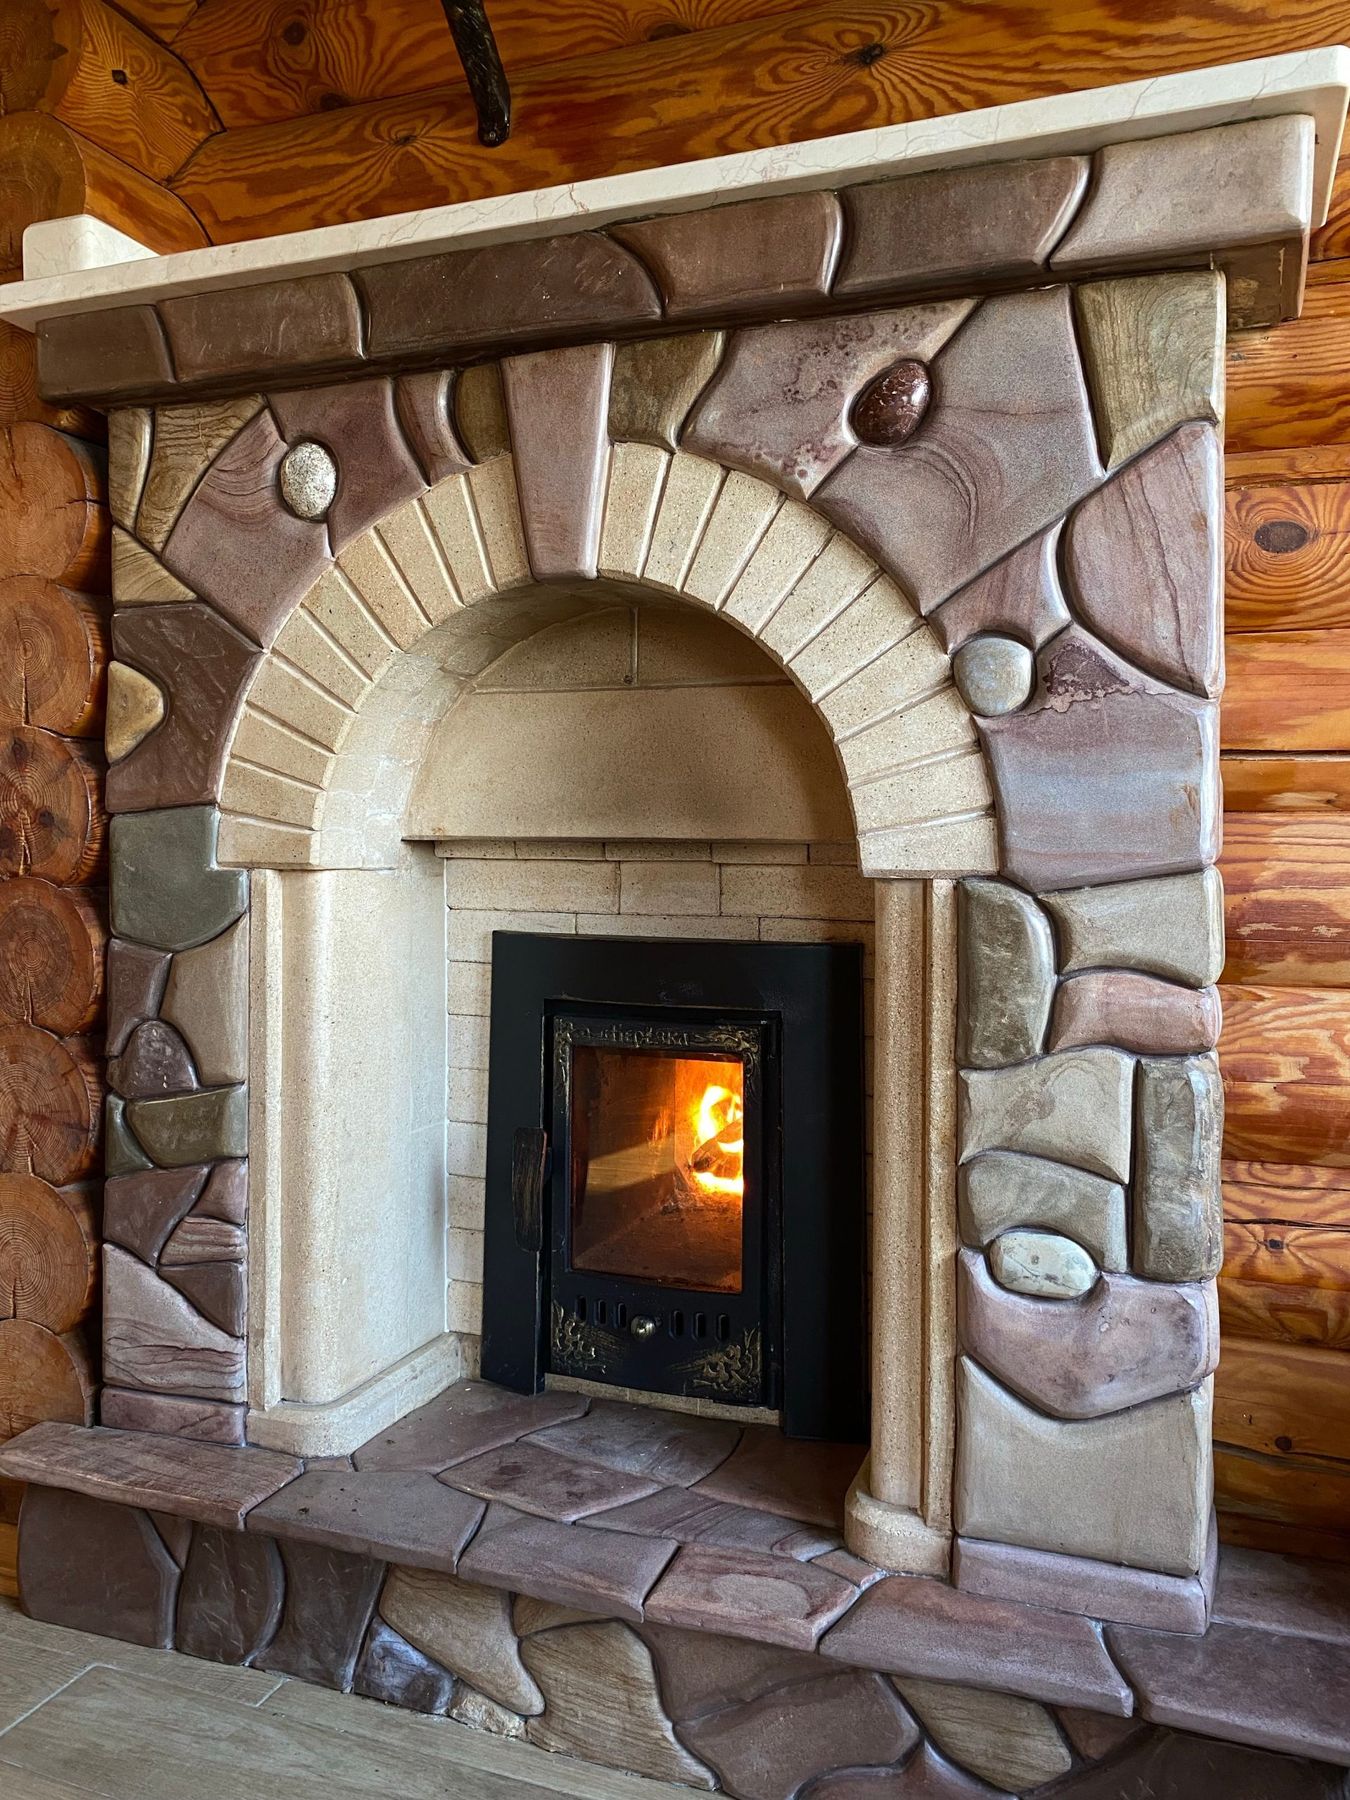
“Creating that unique polished stone mosaic look involves a process called ‘buttering’.”
Here’s the simplified version:Create a Template: Draw your arch shape on a piece of plywood or cement board that will serve as your form.Dry Fit: Arrange your polished, irregular stones on the template, fitting them together like a puzzle. Aim for tight grout lines.Back Butter Each Stone: Apply a thick layer of thin-set mortar to the back of each individual stone (this is ‘back buttering’).Set in Place: Press each mortared stone firmly onto your substrate, following your dry-fit pattern. Use wedges or shims to hold them in place as the mortar sets.Grout and Seal: Once cured, fill the gaps with grout and, after another curing period, apply a stone sealer.It’s a time-consuming process, but the result is a one-of-a-kind feature.
21. Decorate a Minimalist Stone Hearth for the Holidays
The single most important element making this festive scene work is restraint. The fireplace itself is incredibly simple—a smooth, light-toned stone frame with clean lines. This minimalist backdrop allows the holiday decor to shine without competing. If this were a heavily textured, multi-colored stone fireplace, the garland, lanterns, and ornaments would look cluttered and chaotic. The quiet elegance of the fireplace surround is what gives the seasonal decorations their impact. It’s a lesson in knowing when the architecture should be the star, and when it should be the supporting act.
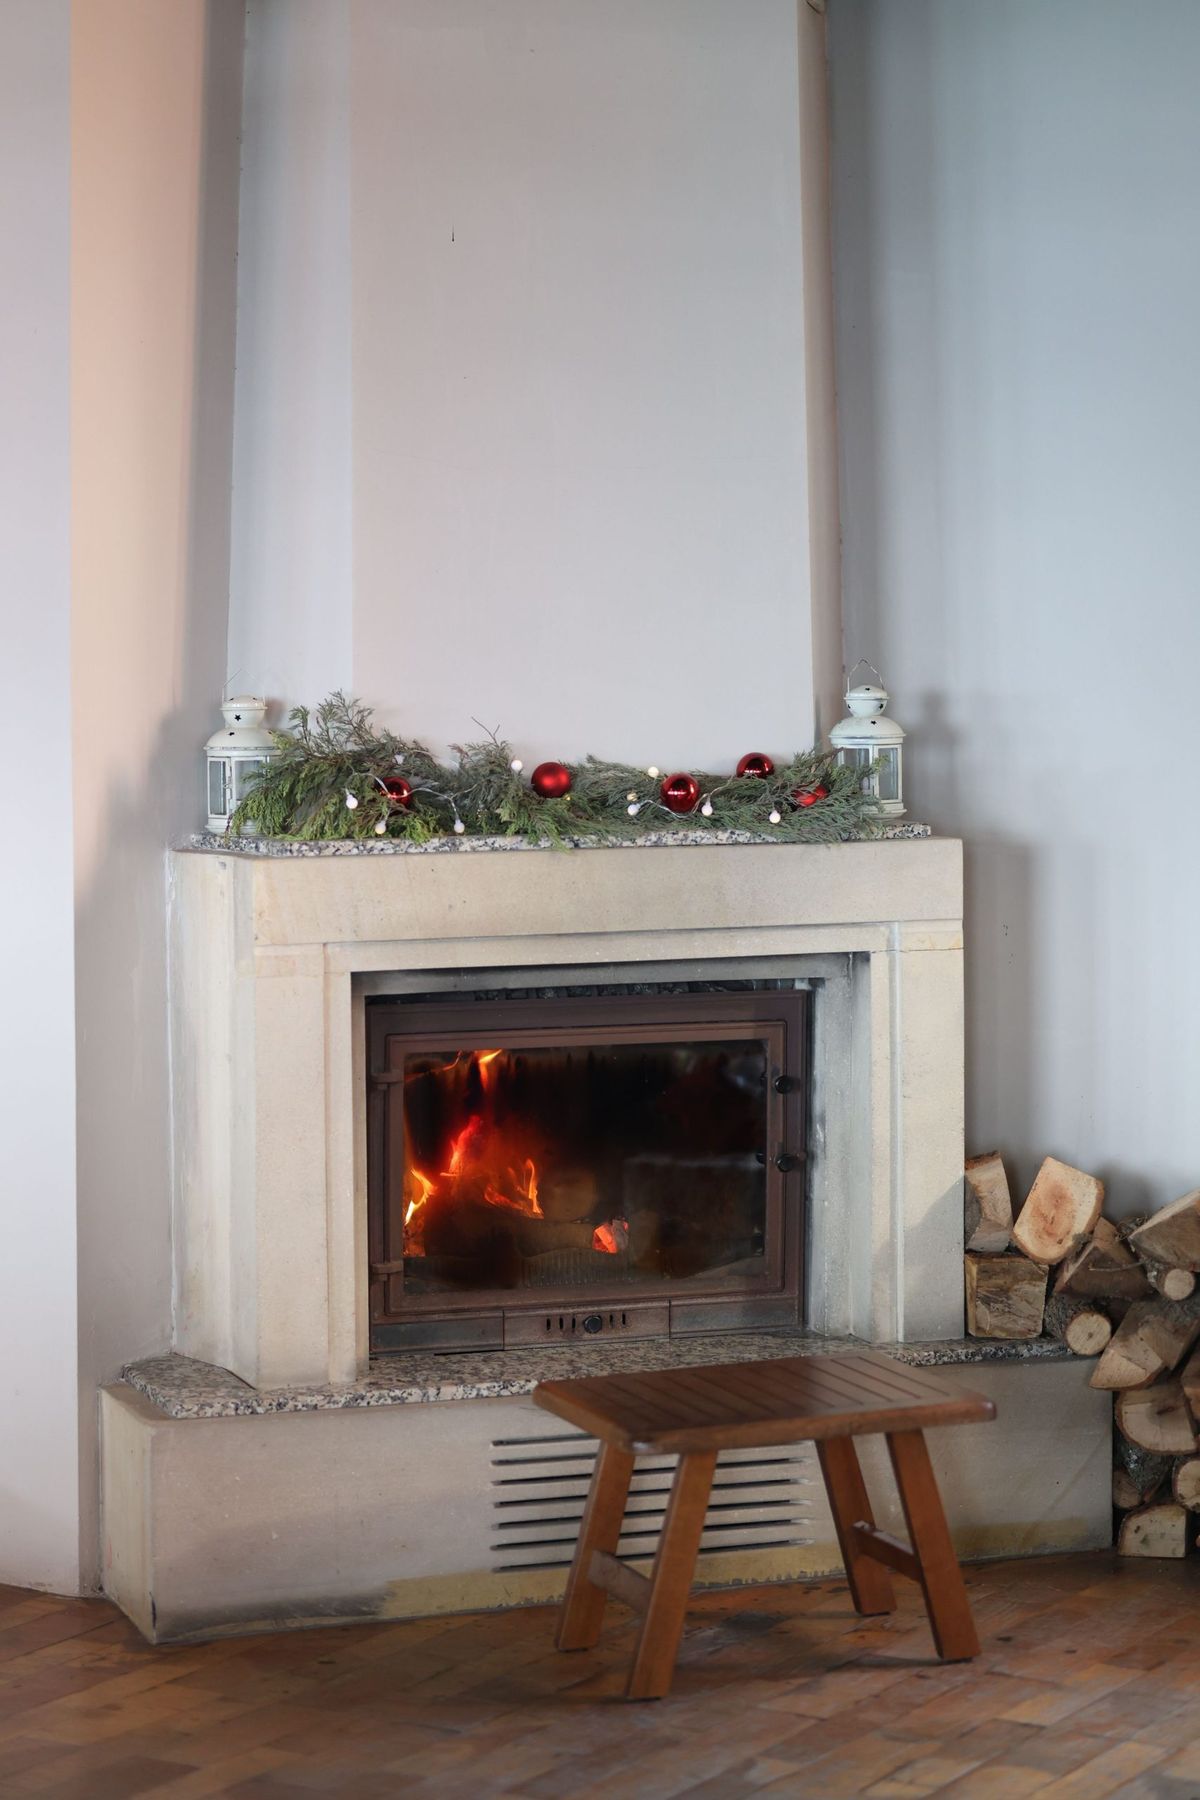
“A beautiful stack of birch or other firewood next to the hearth is a classic, cozy touch.”
But let’s be real: that wood pile is also a perfect home for spiders, insects, and other critters. If you’re bringing in wood from outdoors, inspect it carefully. For a completely pest-free option that gives the same rustic look, you can purchase kiln-dried, insect-free decorative logs from online retailers. They’re more expensive than a standard cord of wood, but they save you the headache of unwanted eight-legged roommates.
22. Add Farmhouse Charm with a Diamond-Pattern Tiled Hearth
When using a patterned tile for your hearth, the trim is everything. Don’t just end the tile at the edge of the floor. Notice how this design uses a clean piece of decorative wood molding, painted to match the mantel, to frame the tiled area. This small detail defines the hearth as a distinct zone, gives it a clean, finished edge, and makes the entire installation look more custom and polished. It’s a simple step that elevates the look from a basic tile job to a thoughtful design feature.
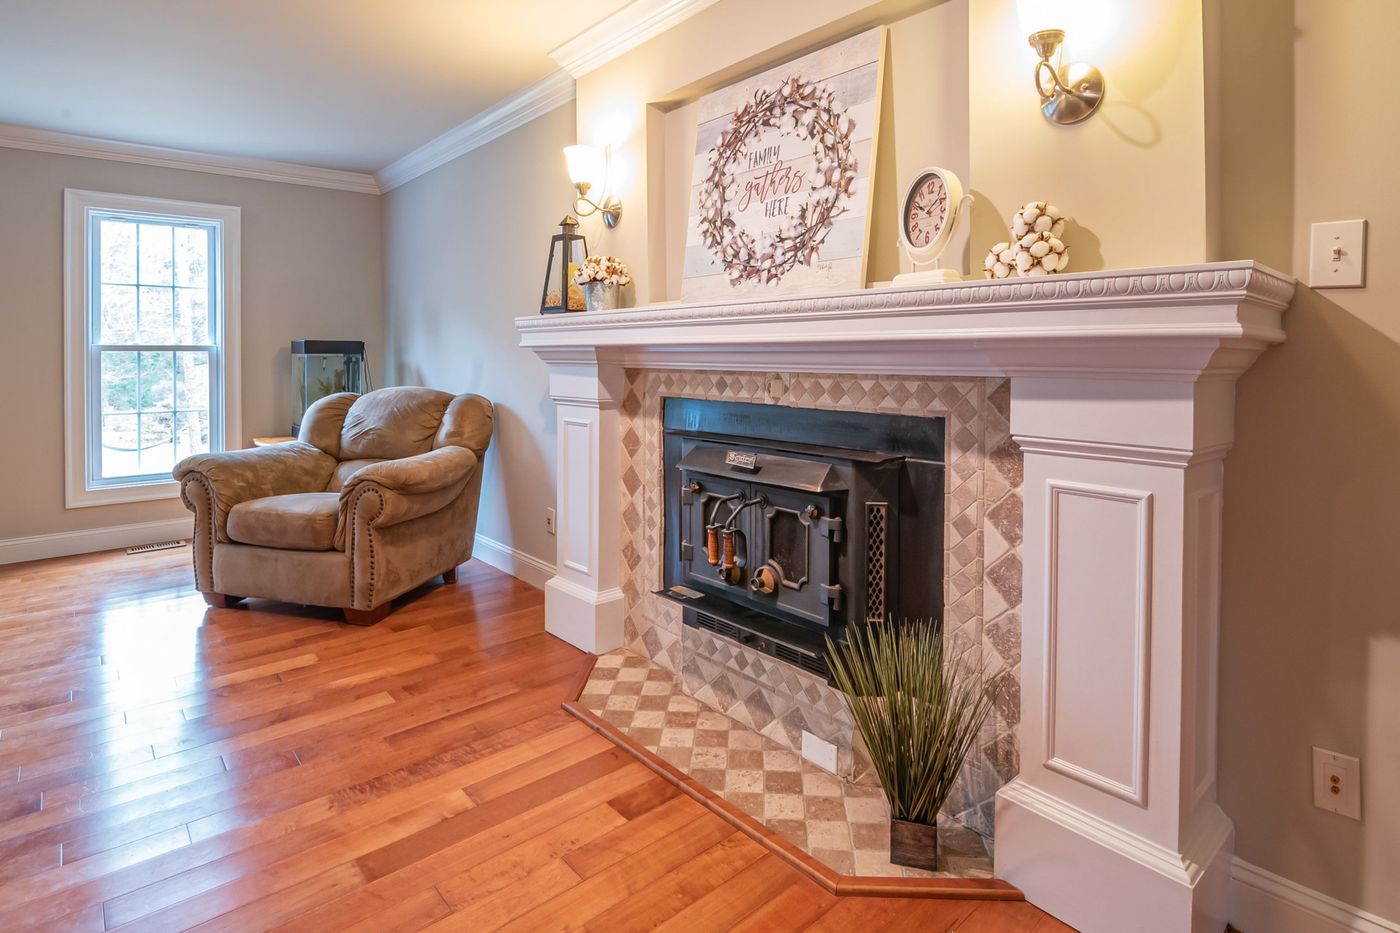
“This cozy, traditional look follows a reliable style recipe: 50% classic architectural elements (the ornate white mantel, the wall sconces), 40% rustic texture (the diamond-patterned stone tiles, the wood-toned sign), and 10% modern clean lines (the black metal of the fireplace insert).”
This blend is why it feels both timeless and comfortable. It’s not slavishly traditional or overly rustic; the mix of elements creates a balanced, welcoming atmosphere that feels collected and personal.
23. Mix Materials with Whitewashed Stone and a Distressed Timber Mantel
This modern rustic look is achievable with a mix of high and low cost items. The custom mantel is the star.
- Rough-Hewn Stone Veneer: $600 – $1,500
- Custom Distressed Timber Mantel w/ Brackets: $800 – $2,000
- Shiplap Paneling: $200 – $400
- Electric Fireplace Insert: $500 – $1,200
- Professional Installation (Mason/Carpenter): $2,500 – $4,500
- TOTAL: $4,600 – $9,600
Budget alternative: Use Airstone veneer from Lowe’s (~$400), a DIY distressed mantel from a standard lumber beam (~$100), and do the shiplap and installation yourself for a total project cost under $1,500.
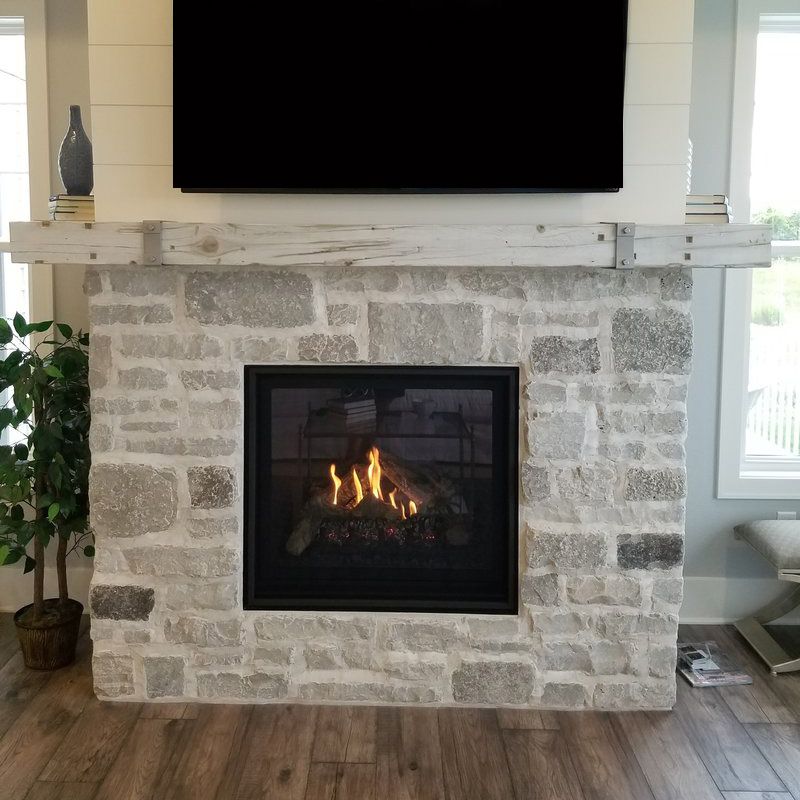
“A design that mixes multiple bold textures needs careful planning to avoid looking chaotic.”
Before you start, create a mood board.Get physical samples: Gather a sample of your stone, a wood block with your desired mantel finish, a painted piece of shiplap, and your wall paint color.Check them in your light: Look at all the samples together in your room, during the day and at night. The cool gray stone and bleached wood need to harmonize with the undertones of your wall paint.Consider the finish: Notice how the matte finish of the stone, wood, and shiplap works together. A glossy mantel, for instance, would have thrown off the whole vibe.
24. Contrast Rugged Stone with Minimalist Plaster Shelving
This room is a study in textural contrast. The magic happens where the rough-hewn, charcoal-colored stone fireplace meets the smooth, off-white plaster of the arched shelving. One surface is rugged, dark, and absorbs light; the other is sleek, light, and reflects it. This dramatic juxtaposition is what creates the visual interest. The reclaimed timber mantel acts as a warm, organic bridge between the two opposing textures, tying the whole composition together. It’s a sophisticated design that feels both ancient and modern at the same time.
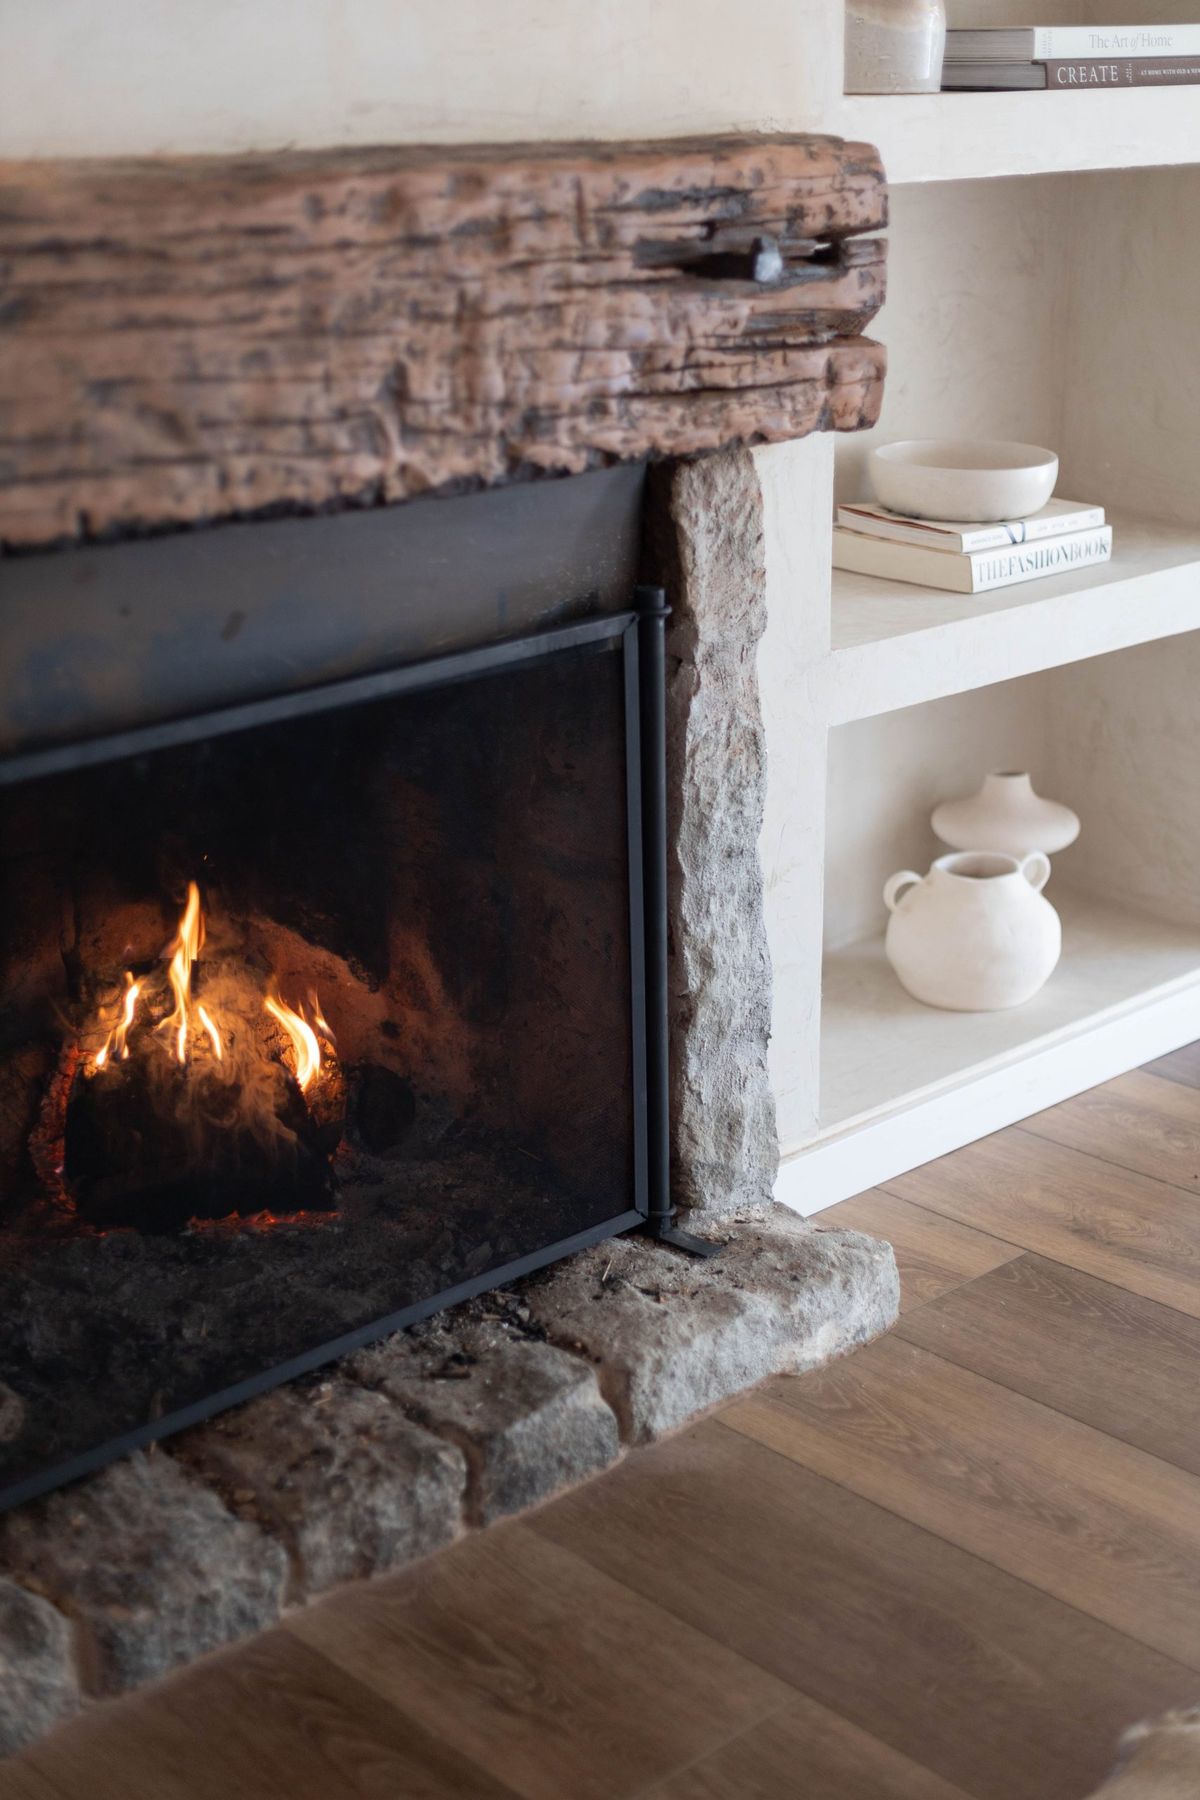
“That beautiful off-white plaster shelving is stunning, but it’s also delicate.”
Unlike painted drywall, plaster can be porous and susceptible to chipping and staining. Be careful what you place on it—the base of a rough ceramic pot could easily scratch the surface. Dusting should be done with a soft cloth or feather duster. If you get a scuff mark, you can’t just touch it up with paint; it often requires a skilled plasterer to patch it seamlessly. It’s a beautiful choice, but not the most practical for a high-traffic family room with kids.
25. Create a Moody Vibe with Charcoal Stacked Stone and Wood Slats
This dramatic, moody look is right on trend for 2026, reflecting a desire for cozy, enveloping spaces often called “cocooning.” The combination of dark, rough-hewn stacked stone and vertical charcoal wood slats creates an incredibly rich, textural wall. The long linear fireplace adds a sleek, modern counterpoint. This isn’t about making a room feel bigger and brighter; it’s about creating a sophisticated, intimate, and dramatic atmosphere. This is the perfect look for a media room or a living room primarily used in the evening.
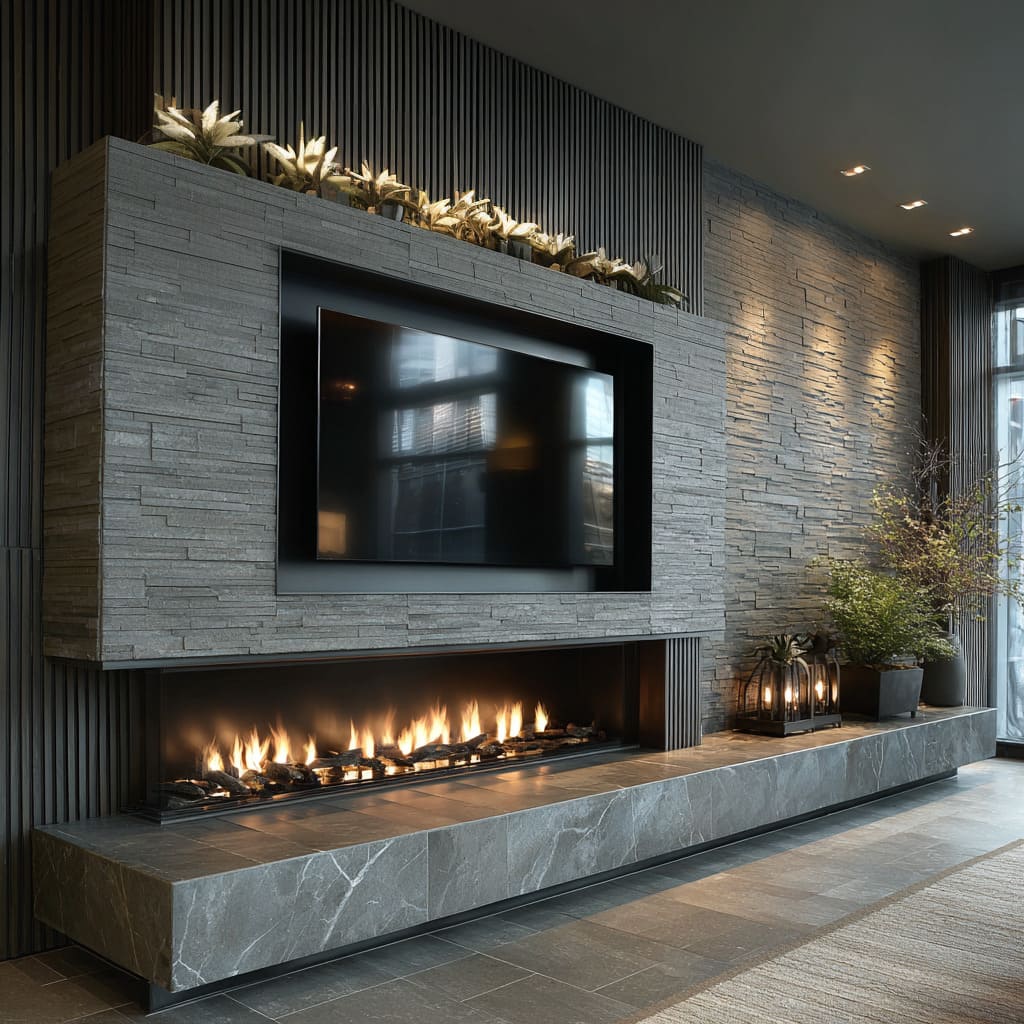
“A monolithic, dark feature wall like this works best in a large, open-concept space or a room with very high ceilings (10ft+).”
In a smaller room with standard 8-foot ceilings, this design would be overpowering and could make the space feel claustrophobic. It requires a wall at least 15 feet wide to accommodate the fireplace, TV, and enough of the stone and slat textures on either side to feel balanced. For a lighter but still textural look, consider the cream stone in Idea #15.
26. Balance an Off-White Stone Fireplace with a Dark Wood Mantel
The single element that anchors this entire design is the dark-stained floating mantel. Without it, the floor-to-ceiling off-white stone would feel a bit monotonous and floaty. This heavy, dark horizontal line provides a crucial visual resting point and a touch of grounding contrast. It breaks up the verticality of the stone and its dark color is repeated in the black firebox, creating a cohesive look. All the decor on the mantel serves to reinforce its importance as the focal point.
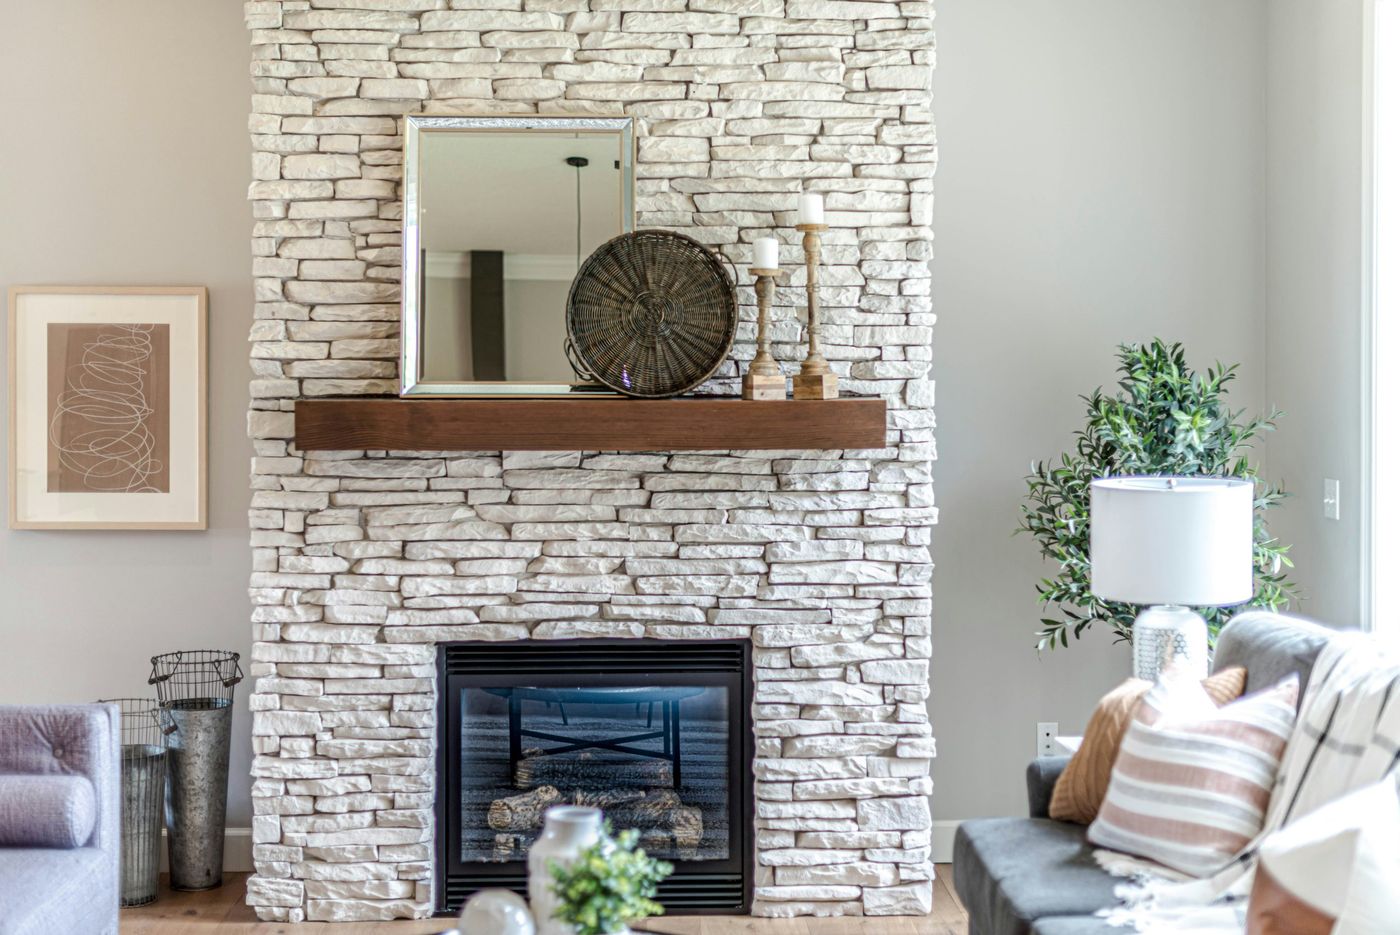
“When styling a floating mantel on a textured stone wall, proportion is your best friend.”
The key is to use fewer, larger items. Notice the substantial size of the mirror, the woven tray, and the chunky pillar candlesticks. A collection of small, fussy objects would get lost against the busy texture of the dry-stack stone. A good rule is to have at least one object that is two-thirds the height between the mantel and the ceiling, like the mirror here, to draw the eye upward.
27. Get an Airy, Rustic Look with Whitewashed Stone and Exposed Beams
This room’s successful formula is built on high-contrast neutrals. It’s approximately 70% bright white (the whitewashed stone, the walls), 20% deep black/charcoal (the slate hearth, the rug, the fireplace screen), and 10% warm wood (the ceiling beams). This strict, almost graphic, color palette is what makes it feel both rustic and modern. The texture of the stone and wood keeps it from feeling sterile, while the black and white color scheme keeps it feeling fresh and airy. The fiddle leaf fig adds a necessary pop of organic green.
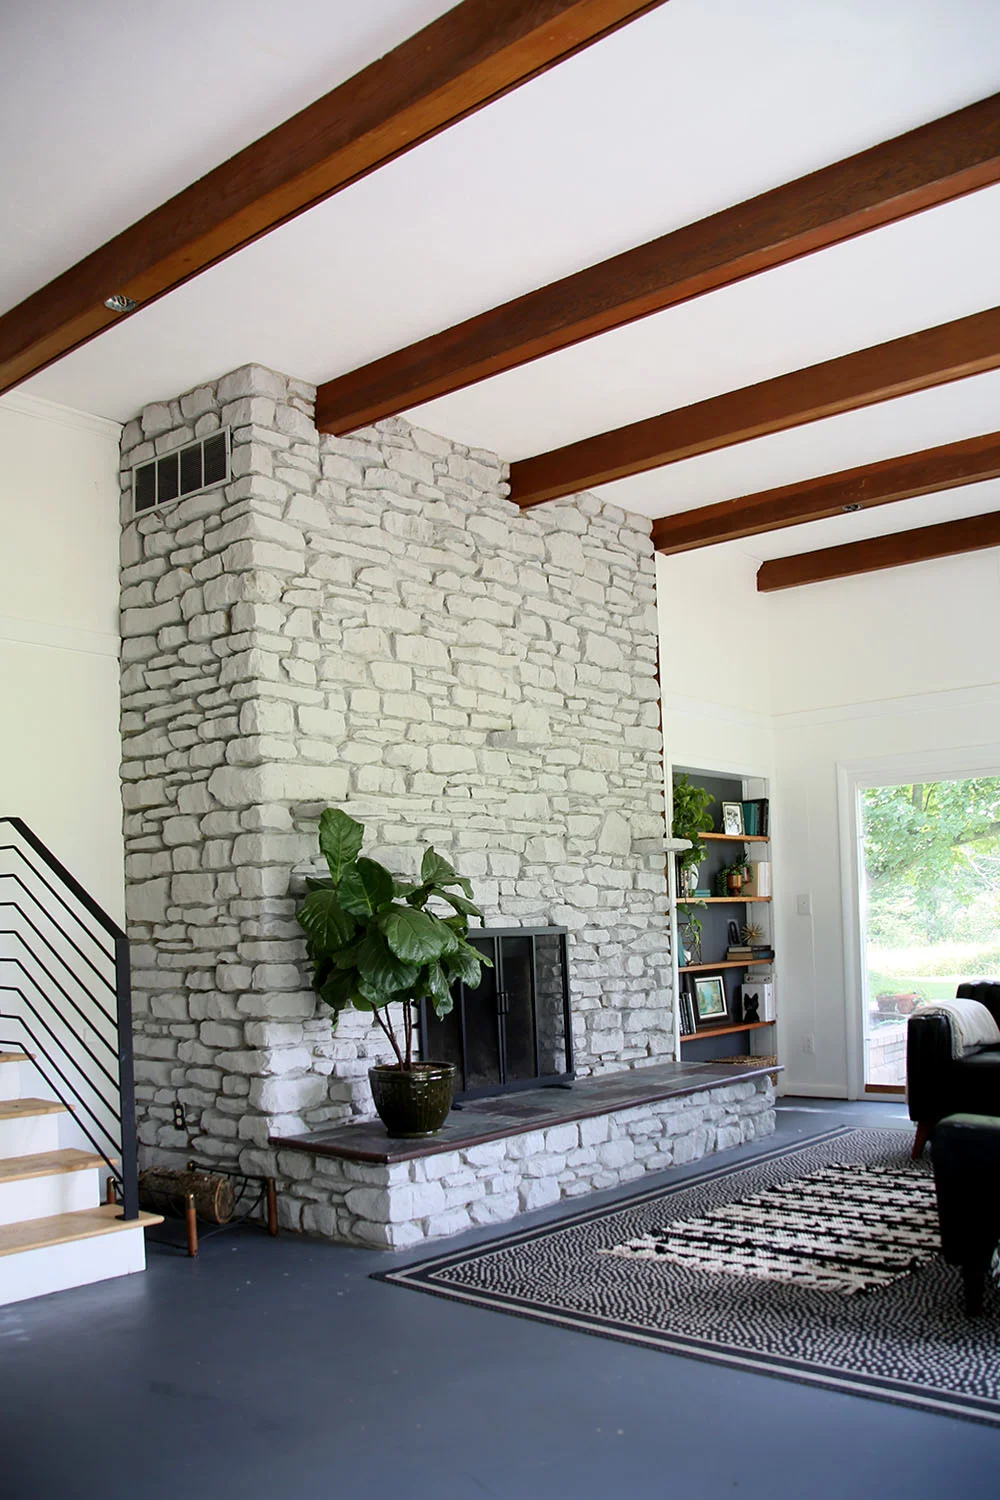
“Whitewashed or painted stone is a major commitment.”
Unlike a painted wall, you can’t easily go back. Stripping paint from porous stone is an incredibly difficult, expensive, and often damaging process. Be absolutely certain you want a white fireplace before you pick up that brush. If you’re hesitant, try living with a large white canvas or sheet draped over the fireplace for a week to see how you feel about such a large white element in your room. This is a design decision that is practically irreversible.
28. Add Texture with a Floor-to-Ceiling Dark Stacked Stone Veneer
Installing stacked stone veneer panels (often called ledger panels) is a manageable DIY that creates huge impact. Here’s the quick version:
- Wall Prep: Ensure your wall is clean, flat, and primed. If it’s drywall, installing a cement backer board is recommended for better adhesion and moisture protection.
- Layout: Start by laying out a row of panels on the floor to plan your pattern and stagger the seams so they don’t line up vertically.
- Apply Mortar: Using a notched trowel, apply a layer of polymer-modified thin-set mortar to the back of your first panel.
- Set the First Row: Press the first panel firmly onto the wall at the bottom, wiggling it slightly to set it into the mortar. Use a level to ensure it’s perfectly horizontal. This first row is critical.
- Build Up: Continue adding panels, working your way up the wall in a staggered pattern. Cut panels as needed with a wet tile saw.
Total time: A full weekend for a floor-to-ceiling wall.
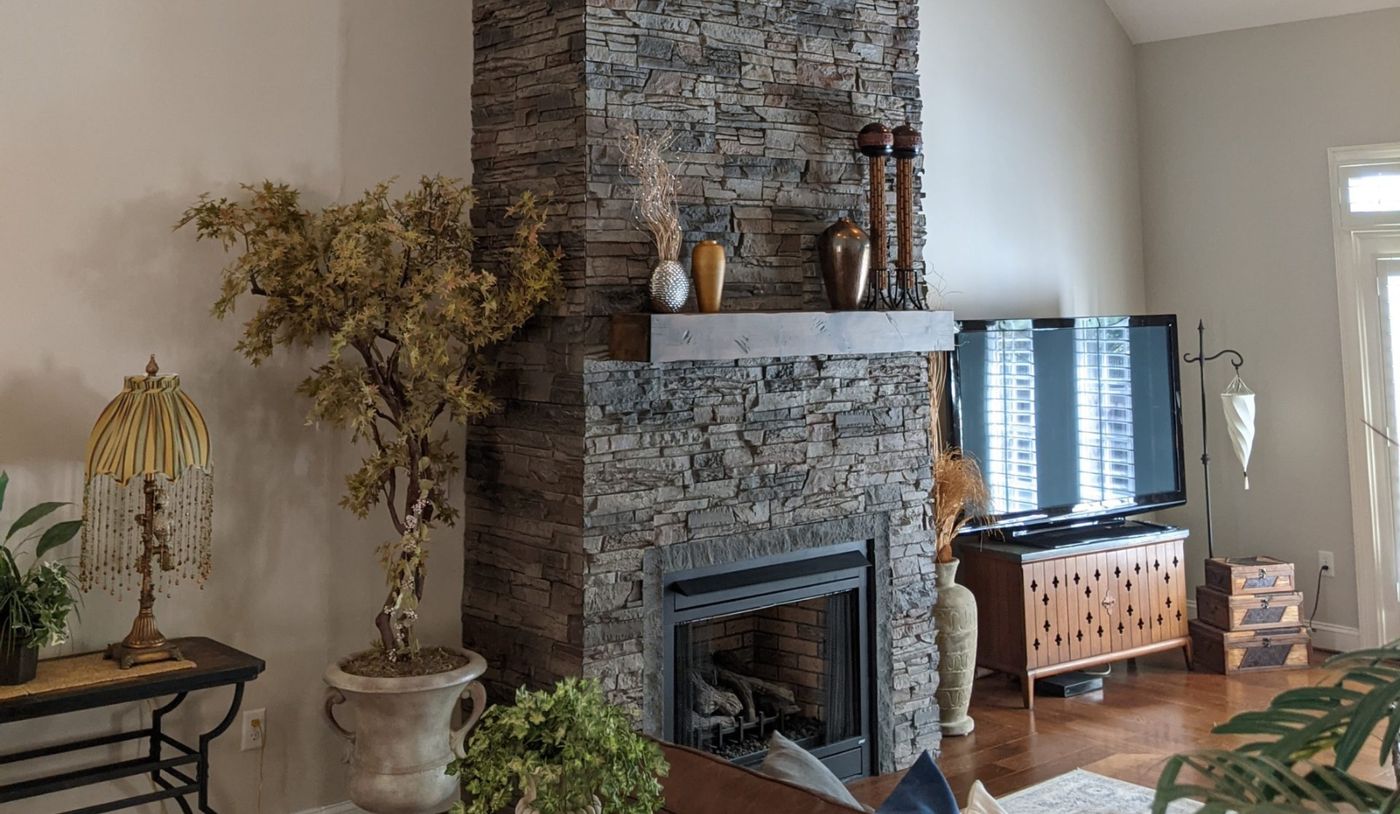
“Faux stone veneer panels have come a long way and can give you this exact look for a fraction of the cost and weight.”
Brands like GenStone or Ekena Millwork offer high-density polyurethane panels that are shockingly realistic. A full wall might cost you $500 – $900 in materials, compared to several thousand for real stone veneer. They install with screws and adhesive, making it a much faster and more forgiving DIY project. Pair it with a simple dark-stained floating shelf from Wayfair or Home Depot for a budget-friendly take on this cozy, traditional style.
29. Integrate a Classic Red Brick Fireplace with White Bookshelves
This design works so beautifully because it uses the principle of framing. The floor-to-ceiling white built-in bookcases act as a clean, bright frame for the warm, textural red brick fireplace. This makes the fireplace the undeniable star of the show. The white mantel serves as a visual link, tying the brick to the bookcases. The symmetry of the shelves on either side of the central window creates a sense of order and calm, balancing the rustic nature of the brick and making the entire wall feel like a single, cohesive architectural unit. For another take on built-ins, check out the look in Idea #7.
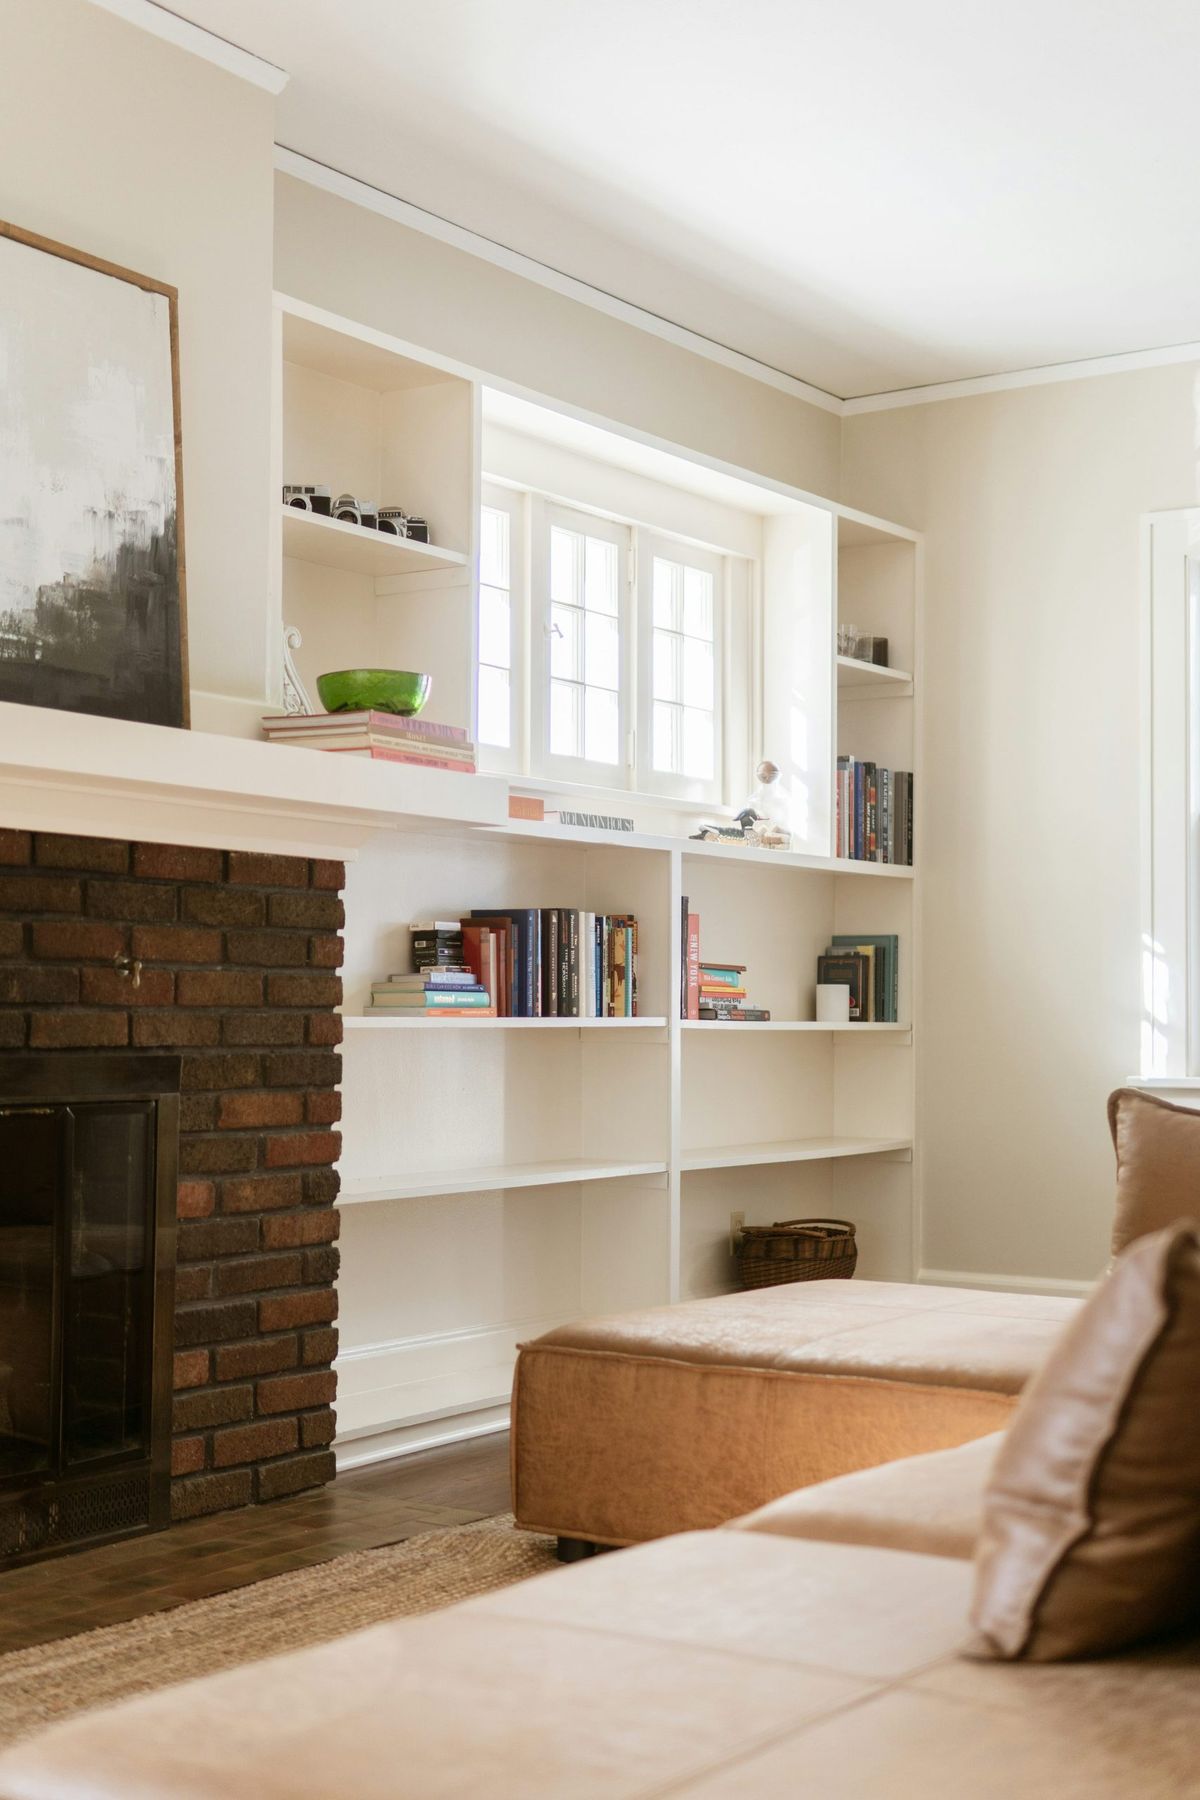
“This classic, integrated look is perfect for a moderately sized living room, especially one with a central window that might otherwise feel awkward.”
You need a wall width of at least 12 feet to accommodate the fireplace (around 4-5 feet wide) and decent-sized bookcases (3-4 feet each) on either side. It works perfectly with standard 8 or 9-foot ceilings. The key is that the bookcases should go all the way to the ceiling to create that intentional, built-in look. Half-height bookcases would not have the same framing effect. Be sure to avoid the common mistakes we outline in our mistakes section.
Your Hearth, Your Story
Well, there you have it—29 ways to turn a simple fireplace into the heart of your home. The next step? Stop scrolling and start planning. You don’t have to tackle a huge renovation tomorrow. Just pick one detail you absolutely loved—a mantel style, a stone color, a specific texture—and let that be the starting point for your own project. Go ahead and save your top three ideas to your Pinterest board. Creating a home you truly love is a marathon, not a sprint, and you’ve just taken the first step.