
You know that feeling when you finally find the no-carve pumpkin idea that looks exactly right for your home? We’re here to make that happen, without the endless scrolling. Forget the pumpkin carving mess and the risk of a carving slip-up. We’ve dug through all the trends to find the best, most stylish ways to decorate your pumpkins in 2026, no knives required.
We’ve focused on 30 incredible ideas that are genuinely achievable, whether you’re a seasoned crafter or just looking for a fun afternoon project with the kids. We’re covering everything from elegant and minimalist designs using gold leaf to playful, cartoon-inspired characters. And stay until the end — we break down the most common mistakes that can ruin these looks.
📌 Save this to Pinterest for later — you’ll want to revisit these ideas.
1. Classic Painted Pumpkins and Mums on Brick Steps
This setup works because it uses the classic design principle of repetition with variation. You see the repeating round shapes of the pumpkins and the mums, but they vary in size, color, and texture (smooth pumpkins vs. fluffy flowers). The painted faces add a touch of personality that draws the eye and makes the whole arrangement feel intentional and joyful, not just like a pile of gourds.
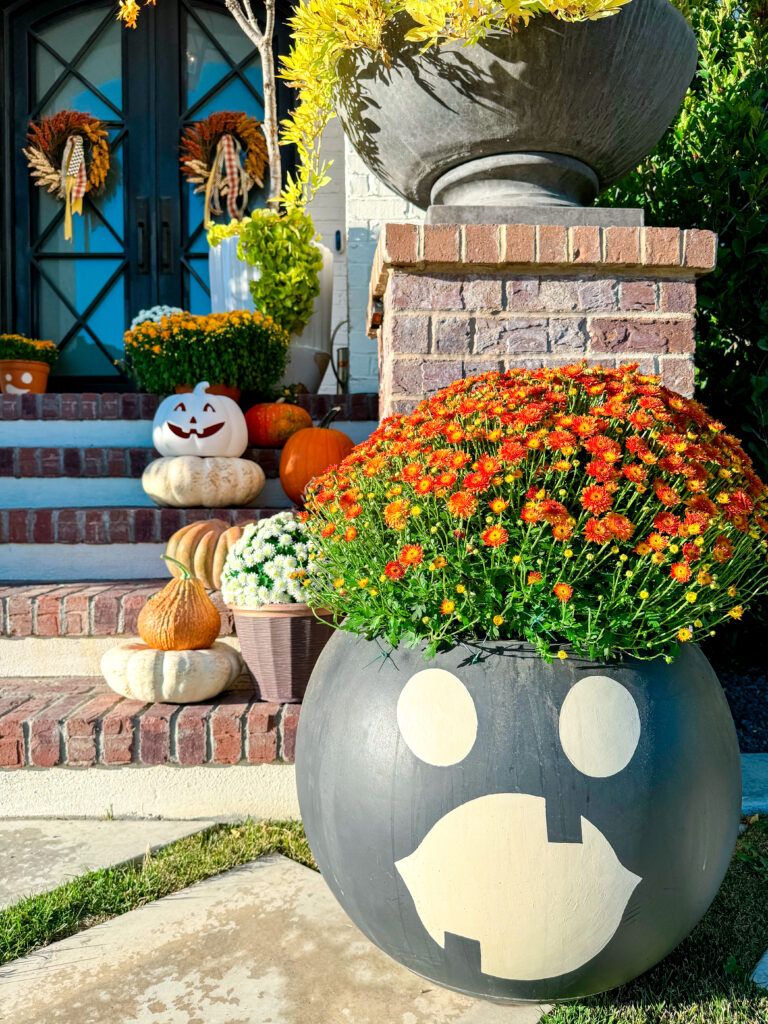
“The white pumpkins are key.”
They provide high contrast against the red brick and orange mums, making the entire display pop from the street. Without them, the orange would just blend in.
A welcoming front porch display like this is fantastic, but be prepared for the reality of outdoor decor. Painted pumpkins can peel or run if exposed to heavy rain, especially if you use standard acrylics without a weatherproof sealant. Also, real pumpkins and mums will need to be checked regularly; a single rotting gourd can quickly spoil the whole look. Bring them inside or cover them during harsh weather to prolong their life.
2. Spooky White Ghost and Spiderweb Painted Pumpkins
The single element that makes this idea so successful is the use of crisp, white paint on the vibrant orange pumpkins. The high contrast makes the ghost and spiderweb designs pop in a way that black on orange wouldn’t. It gives the spooky theme a clean, graphic, and almost playful quality. If you took away the white paint, you’d just have a nice pile of pumpkins; with it, you have a story.
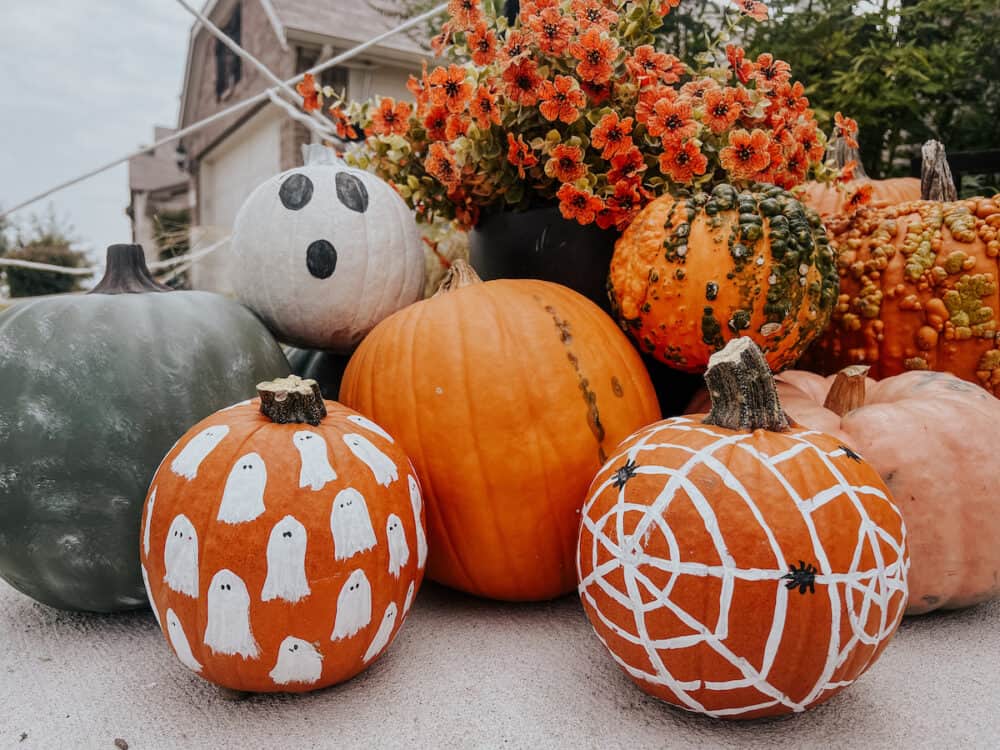
“When painting fine details like the little spiders or ghost faces, don’t use the clunky brush that comes with a craft paint set.”
Instead, head to an art supply store and buy a set of fine-tipped detail brushes (sizes 0, 1, and 2 are perfect). This gives you ultimate control for sharp lines and clean shapes. For perfect dots, just dip the wooden end of your brush in the paint and press it onto the pumpkin.
3. Elegant Muted Palette with Fabric and Twine Pumpkins
This look is all about texture and a muted palette, and the formula is simple. Think 50% smooth surfaces (the white pumpkin), 30% woven/wrapped texture (the fabric and twine pumpkins), and 20% delicate botanicals (the faux eucalyptus). You could easily swap the gray patterned fabric for a cozy flannel or a simple burlap and still maintain the same sophisticated, rustic vibe. The key is the balance of textures.
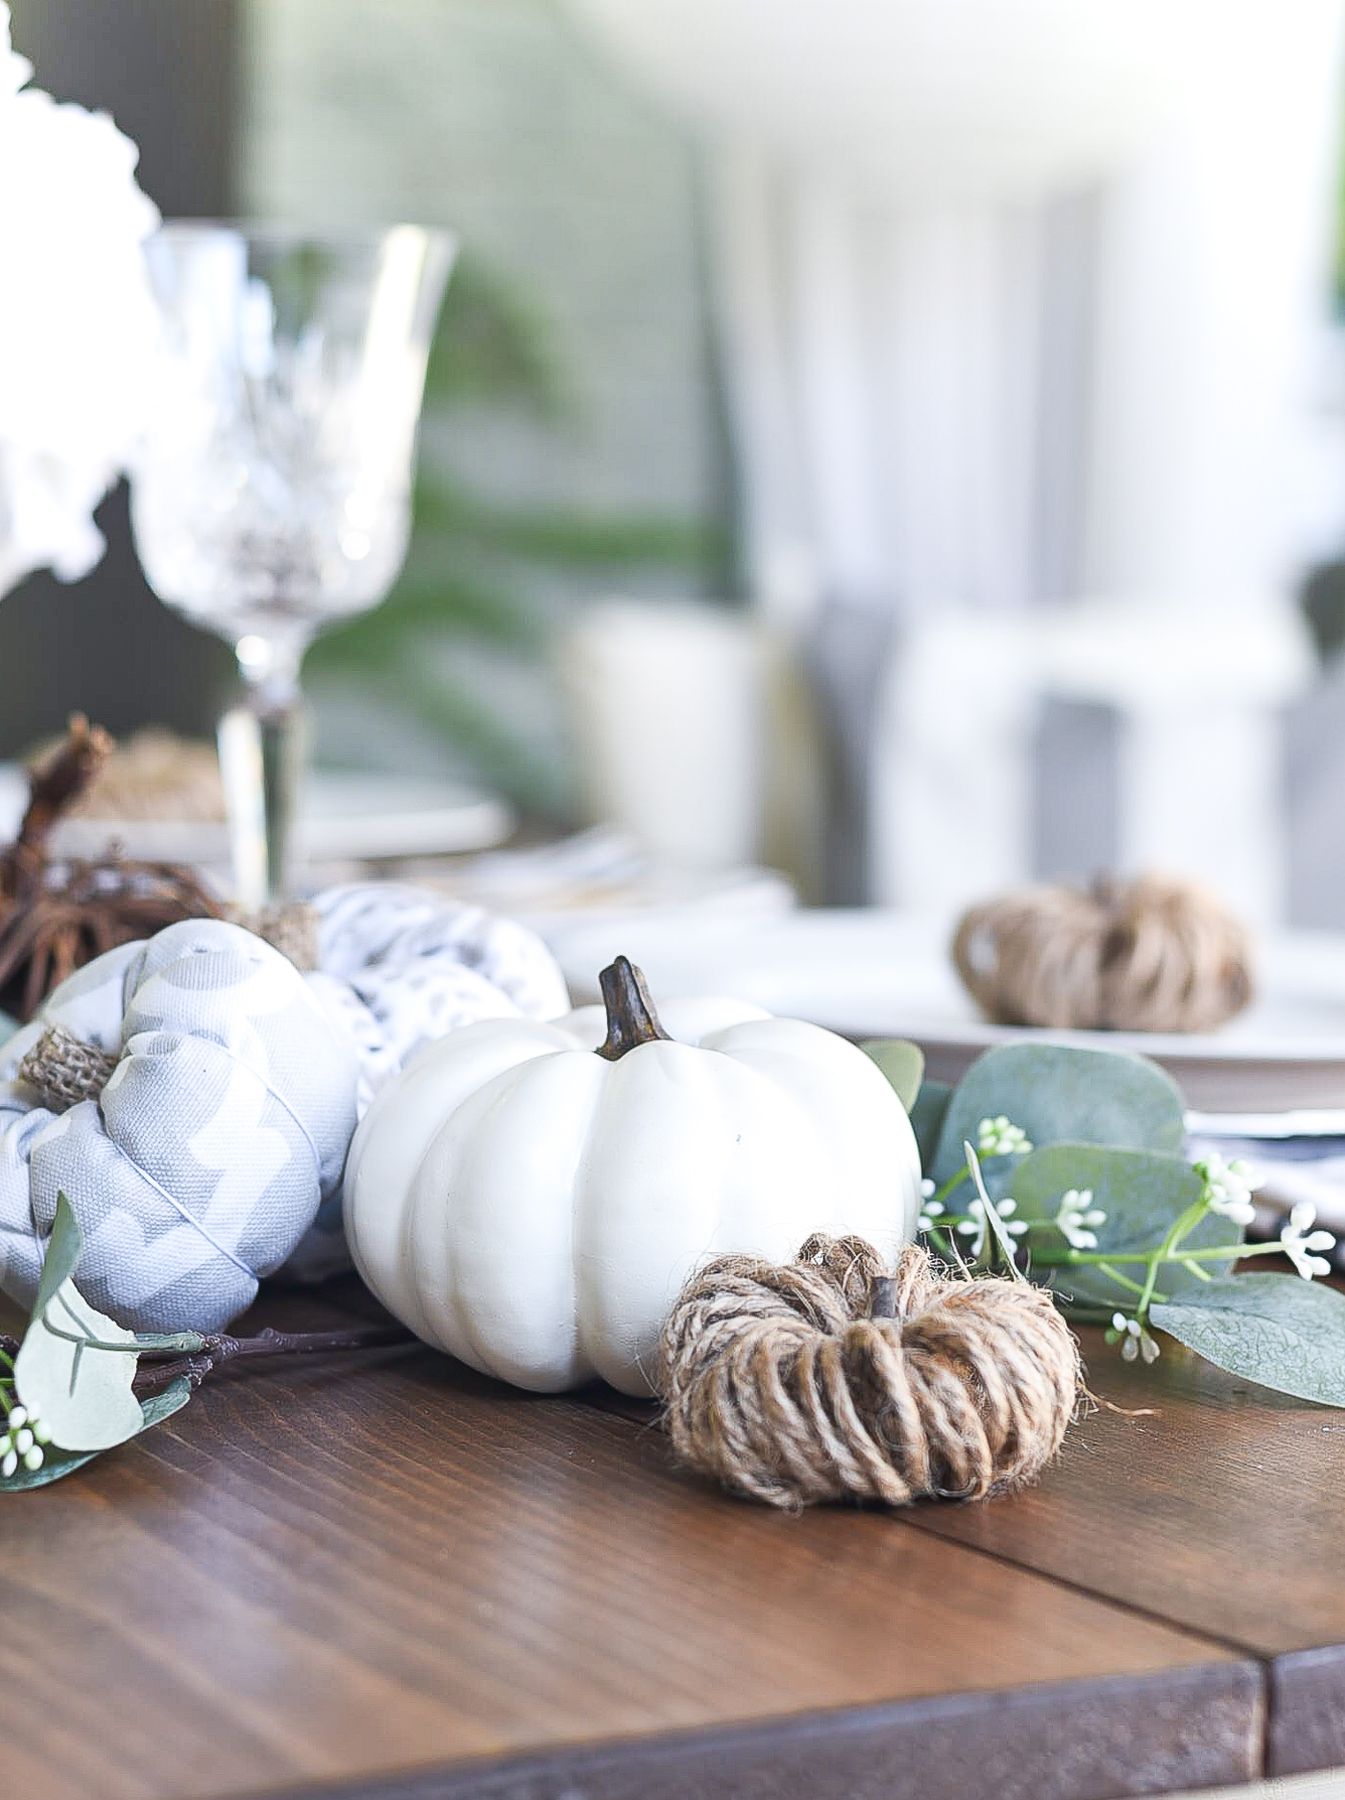
“While these no-carve pumpkins are built to last, they aren’t zero-maintenance.”
Fabric-wrapped and twine-covered pumpkins are dust magnets, so give them a gentle once-over with a microfiber cloth or a soft-bristled brush every week or so. Be mindful of placement; keep them out of direct sunlight, which can fade the fabric over time. The biggest enemy is moisture, which can lead to mildew, so this is strictly an indoor-only arrangement.
4. Add Some Sparkle with Easy No-Carve Glitter Designs
You don’t need expensive craft store supplies to get a glamorous glitter look. A bottle of Elmer’s glue ($2), some craft glitter from Walmart ($3), and a foam brush ($1) are all you need. Use painter’s tape to create sharp geometric patterns or apply the glue freehand for a more organic design. This is a much more affordable route than pre-made glitter pumpkins, which can run $20-$30 for a single medium-sized one.
“Here’s how to create a perfect glitter-dipped pumpkin in about 20 minutes (plus ”
Here’s how to create a perfect glitter-dipped pumpkin in about 20 minutes (plus drying time) for under $10.
- Clean your pumpkin surface with a damp cloth and let it dry completely.
- Use painter’s tape to mark off the area you want to glitter. Press the edges down firmly to prevent bleeding.
- Apply a thin, even layer of craft glue (like Mod Podge or Elmer’s) to the exposed section with a foam brush.
- Hold the pumpkin over a paper plate and generously sprinkle glitter over the glue, rotating to cover it completely. The plate will catch the excess.
- Let it sit for 5-10 minutes, then carefully peel off the painter’s tape while the glue is still wet.
- Allow it to dry for at least 4-6 hours before handling. You can add a sealant spray to minimize glitter shed.
5. Achieve a Luxe Look with Fine Glitter Patterns
For a high-end, gallery-like glitter effect, use a spray adhesive instead of craft glue. It creates a much smoother, more uniform surface for the glitter to adhere to, eliminating brush strokes. Work in a well-ventilated area and protect your surfaces. Spray a section, apply the glitter, and repeat. Use a high-quality, fine-milled glitter for a more luxe shimmer rather than a chunky, craft-store look.
“Let’s be honest: glitter is the confetti of the craft world—it gets everywhere.”
Even with careful application, you’ll be finding specks of it for weeks. To minimize the inevitable “glitter bomb” effect, apply a clear acrylic sealant spray over the finished, dried design. This locks the glitter in place and adds a layer of protection. This is non-negotiable if you have kids or pets who might be tempted to touch the sparkly pumpkin.
6. Enchanted Fairy Houses with Moss and Pressed Flowers
that elevates these from simple decorated pumpkins to something truly magical is the use of real, natural elements. The soft moss, delicate pressed flowers, and rustic twigs make these fairy houses feel like they could have been plucked directly from an enchanted forest. If you swapped these organic materials for plastic craft store items, you would completely lose the charm and authenticity.
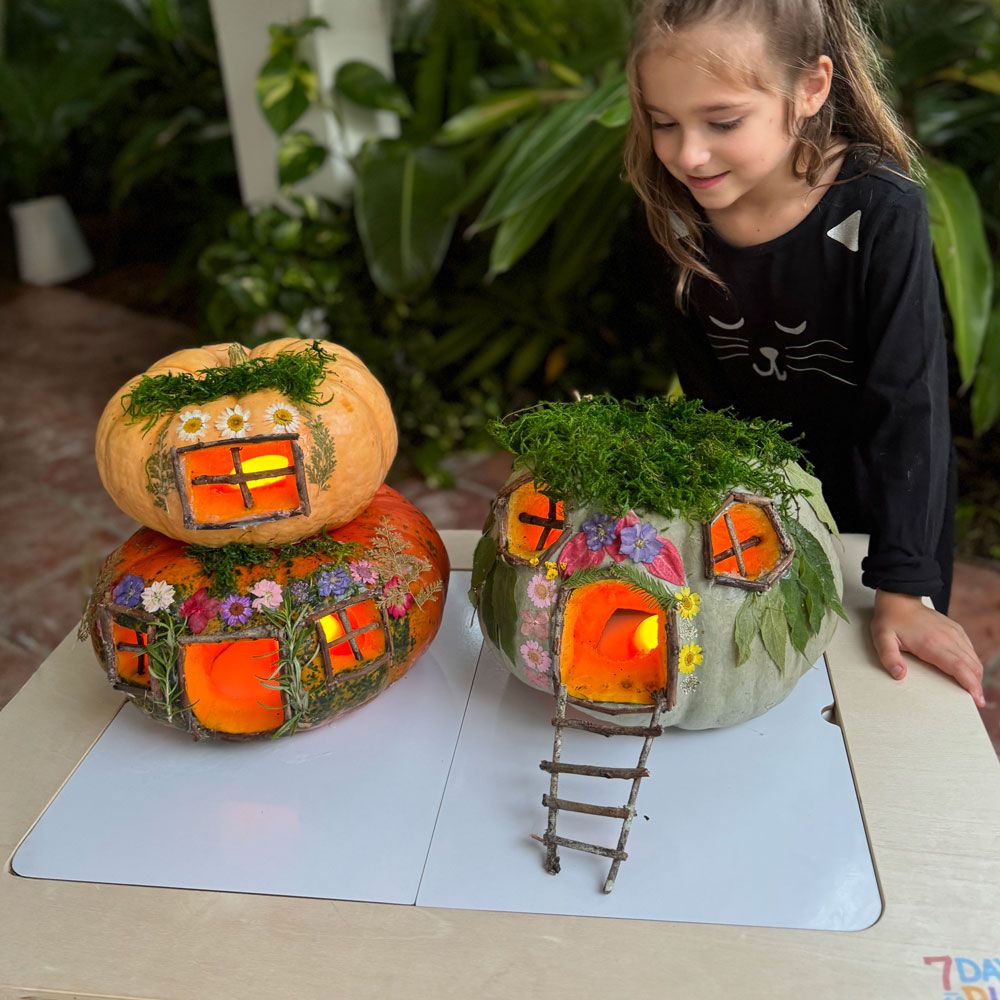
“This design works by perfectly blending the whimsical with the natural.”
The scale is also crucial; the tiny twig ladders and window frames are proportional to what you’d imagine a fairy using, which sells the entire concept. The warm glow from inside the cut-out windows provides a beautiful contrast to the earthy, organic textures on the exterior, making the scene feel alive and inhabited. For a no-carve version, you can paint the windows black and add a yellow highlight to simulate a glow.
7. Vibrant Green Cartoon Monster with Purple Hair
This monster’s impact comes from a bold, simple color formula: 70% shocking base color (the neon green), 20% contrasting detail color (the purple and lighter green), and 10% classic neutrals (the black and white). You could use this exact formula with a different palette—imagine a bright purple base with orange details, or a hot pink base with teal details—and achieve the same playful, monstrously fun effect.
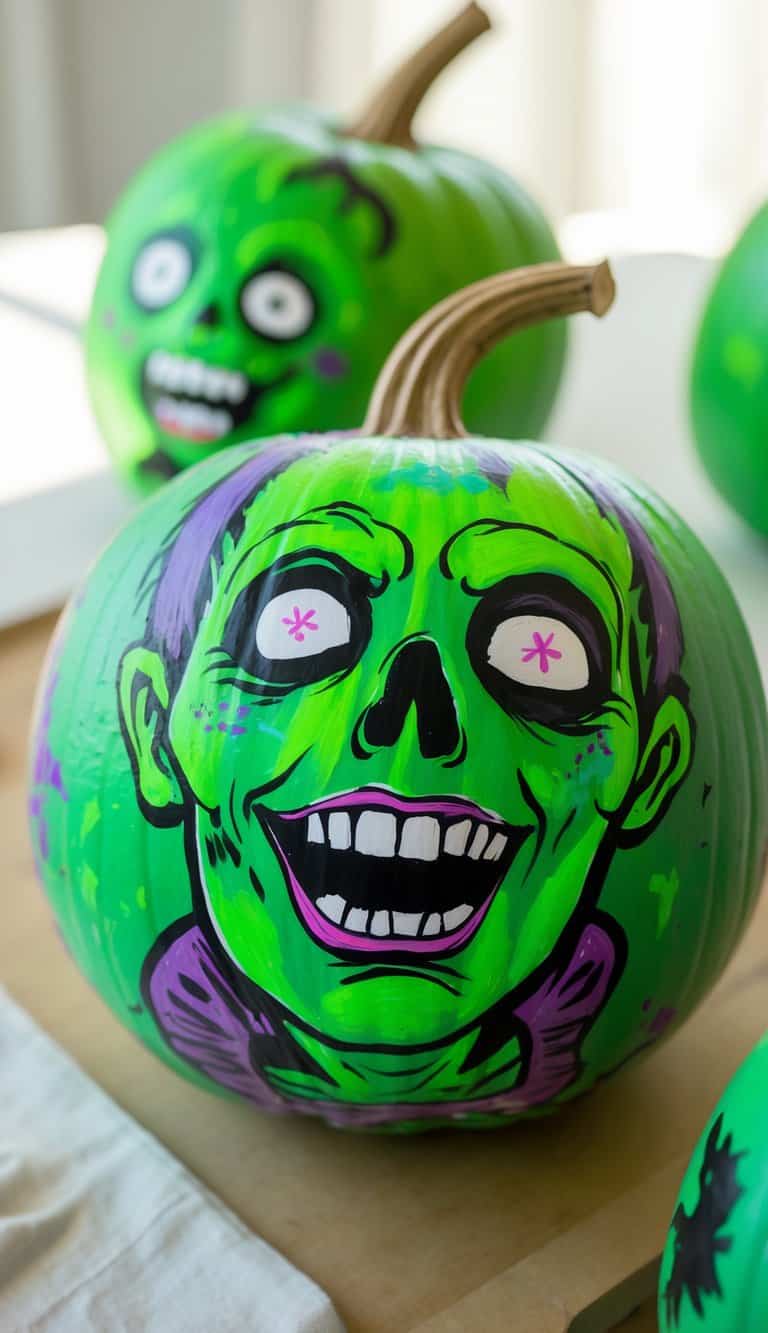
“Before you dive into painting a character this detailed, make sure you’re set up for success.”
Here’s a quick checklist:
- Did you sketch your design on paper first? It helps to work out the proportions before you touch the pumpkin.
- Is your pumpkin clean and completely dry? Paint won’t adhere properly to a waxy or dirty surface.
- Do you have the right brushes? You’ll need a larger flat brush for the base coat and small, fine-tipped brushes for the details.
- Are you using the right paint? A multi-surface acrylic paint will give you the best coverage and durability.
8. Colorful Hand-Decorated Pumpkin Display
Want a fun, decorated pumpkin without buying a bunch of different paint colors? Stickers are your best friend. A pack of Halloween-themed stickers from the dollar store ($1.25) can create a super fun and detailed pumpkin in minutes. Look for sticker books that include faces, letters, and spooky shapes like bats and ghosts. It’s a perfect mess-free activity for kids and costs a fraction of what you’d spend on paints and brushes.
“When decorating a pumpkin, especially with kids, don’t feel like you have to do it all in one sitting.”
Turn it into a multi-day project. Day one can be about cleaning the pumpkin and painting a solid base coat. Let that dry overnight. On day two, you can add the larger painted shapes, like the ghost’s body or the cat’s head. On day three, add the final details like whiskers, eyes, and lettering. This keeps the activity fun and low-stress.
9. Playful Painted Black Cat and Friendly Ghost Duo
This duo is charming because of its simplicity and character. The artist didn’t overcomplicate things. The designs use simple, bold shapes and a limited color palette (orange, black, white, with pops of green and pink). This makes the faces easy to “read” from a distance. The pairing of two different characters—a spooky-cute cat and a friendly ghost—creates a small narrative, making it more engaging than a single decorated pumpkin. Compare this to the spookier version in Idea #26.
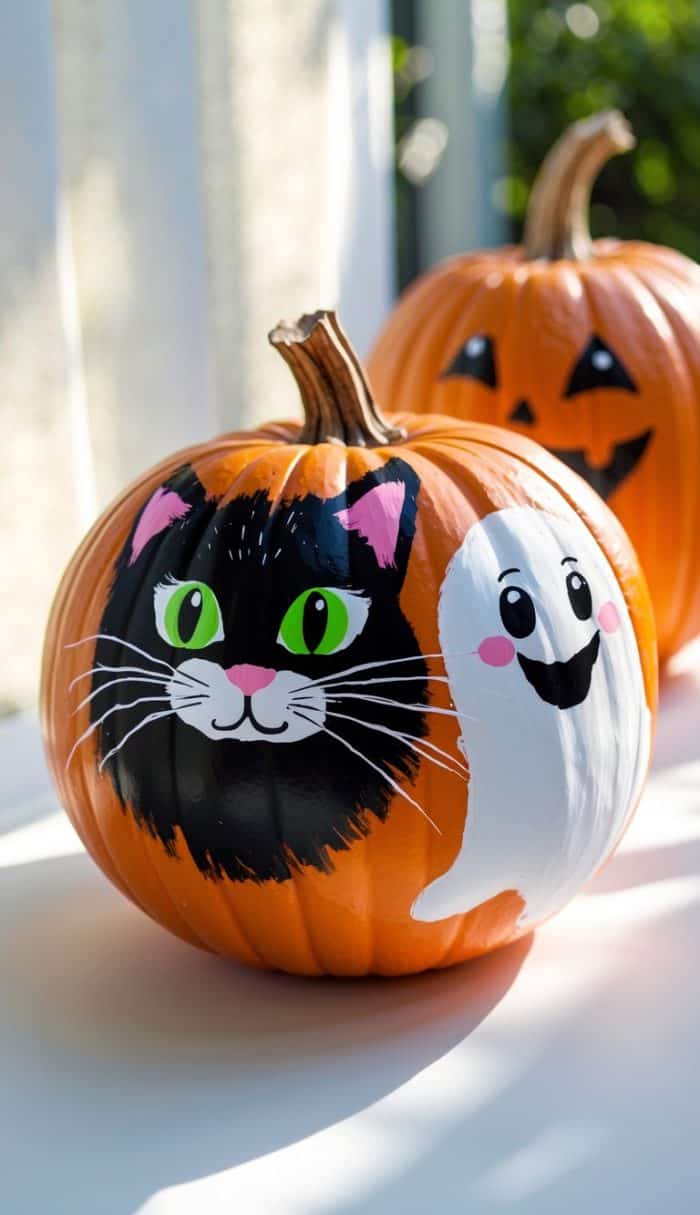
“A word of caution if you’re trying this at home: achieving those clean, sharp lines for the cat’s whiskers and the ghost’s outline requires a steady hand and the right tools.”
If you use a thick, gloopy paint or a clunky brush, you’ll end up with a blurry mess. Practice on a piece of paper first. Also, remember that paint can look different on an orange surface, so you may need a second coat for the white ghost to look truly opaque.
10. Hand-Lettered ‘BOO’ Pumpkin with Spooky Doodles
The single element that makes this pumpkin feel special is its handcrafted, slightly imperfect charm. It doesn’t look like a store-bought decoration; it looks like someone spent a happy afternoon making it. The mix of lettering and simple icons like the bat, cat, and ghost tells a complete little Halloween story on one single pumpkin, making it feel personal and full of spirit.
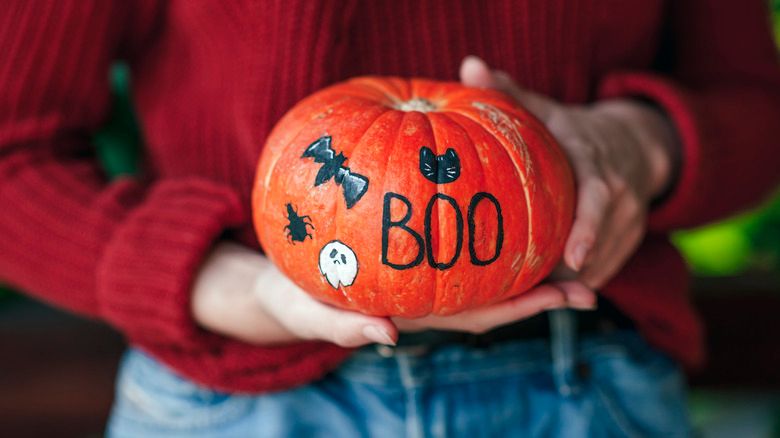
“Want to create your own hand-lettered pumpkin?”
It’s easier than it looks. Here’s a quick guide:
- Wipe your pumpkin clean and let it dry.
- Lightly sketch your word (like “BOO”) onto the pumpkin with a pencil. Don’t press too hard.
- Use a black paint pen (a Sharpie oil-based marker works great) to trace over your pencil lines. Start with thin lines.
- Go back and thicken the down-strokes of each letter to create a faux-calligraphy look.
- Add simple doodles like stars, spiders, or bats in the empty spaces. Let it dry completely.
11. A Vibrant Collection of Abstract and Painted Face Pumpkins
The visual formula here is all about controlled chaos. It’s roughly 60% abstract expression (the drips, splashes, and swirls) and 40% graphic faces. By packing the pumpkins tightly together, the individual designs start to merge into a single, vibrant tapestry of color and pattern. The key is that every pumpkin has a different personality, but they all share the same maximalist energy, creating a cohesive and eye-catching display.
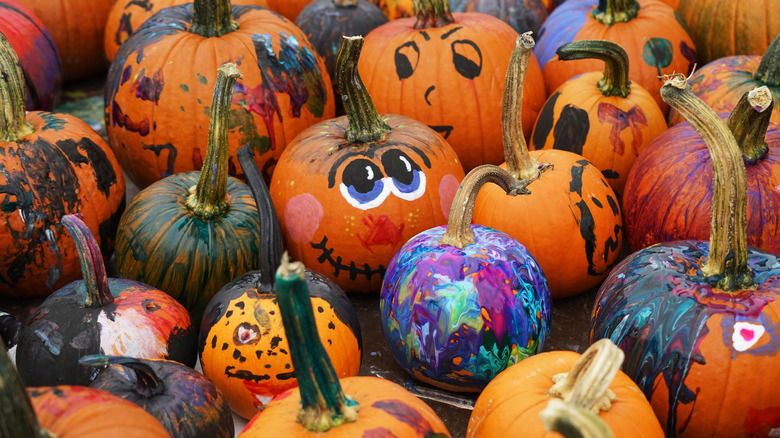
“This abstract, free-form painting style is part of a larger trend away from perfect, Pinterest-ready decor and towards more personal, authentic self-expression.”
People are tired of striving for unattainable perfection. A project like this is liberating because there’s no way to mess it up. Every drip and splatter adds to the character. It’s a joyful, low-stakes way to be creative, which is exactly what people are craving in 2026.
12. Orange Pumpkin Covered in Hand-Painted White Ghosts
This design works so well because of the high-contrast tablecloth underneath. The dark fabric with its own pattern of orange bats makes the bright orange pumpkin pop, and it frames the decoration in a festive context. It’s a simple trick, but it makes the single pumpkin feel like a complete, styled tablescape. The repetition of the ghost motif across the pumpkin surface is playful and dynamic, giving your eye plenty to look at.
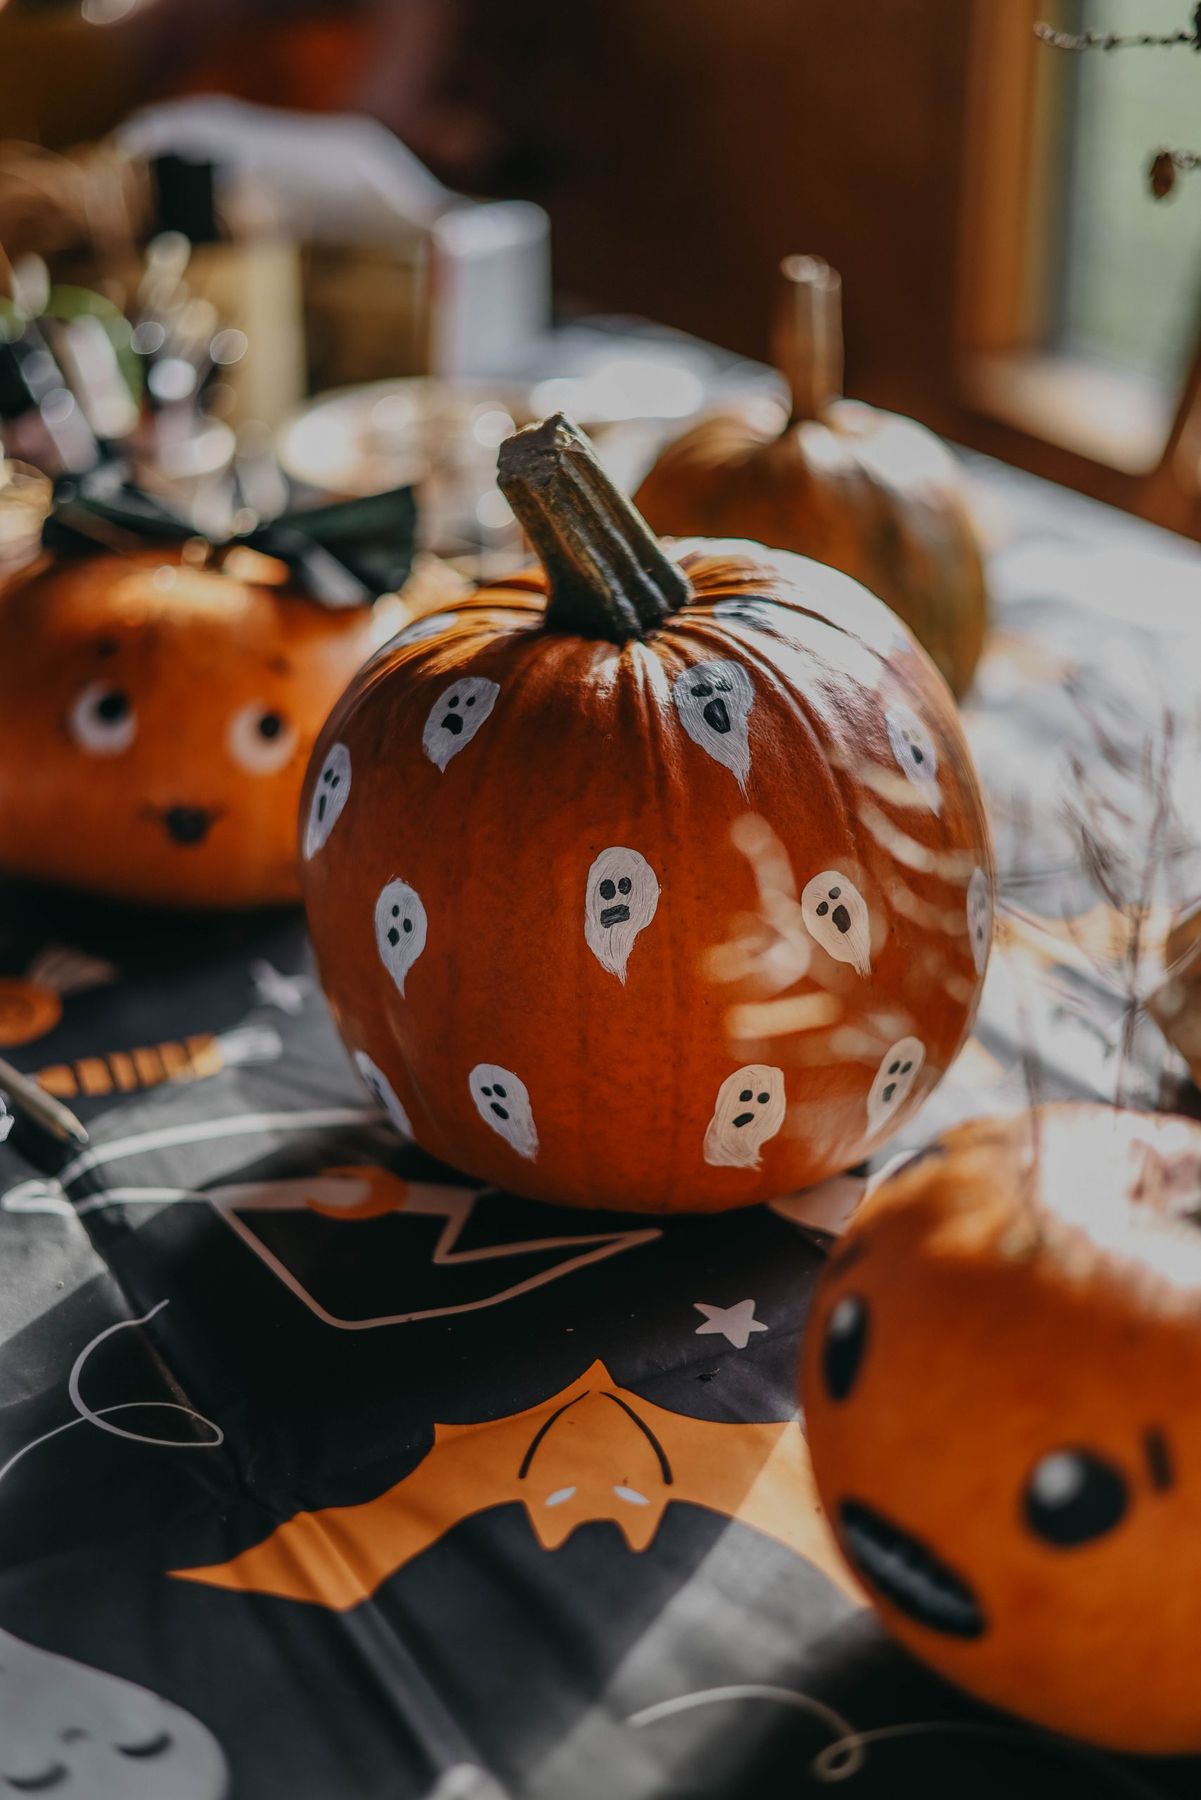
“To get your painted ghosts to look uniform, create a small stencil out of cardboard or thick cardstock.”
Just draw a simple ghost shape and cut it out with a craft knife. Hold the stencil against the pumpkin and dab white paint on with a sponge brush. This technique is much faster than painting each one by hand and ensures they all have a consistent shape and size. You can then go back in with a small brush to add the eyes.
13. Elegant White Pumpkin with Gold Leaf and Polka Dots
Gold leafing can seem intimidating and expensive, but you can get this exact look for much less. Instead of traditional gold leaf sheets and sizing adhesive, just buy a gold leafing pen. Brands like Krylon and Sharpie make metallic “leafing” pens for around $8-10. They give you incredible control for creating fine lines and perfect little polka dots, with way less mess and expense. The final look is nearly indistinguishable from the real thing on a small decorative object like this.
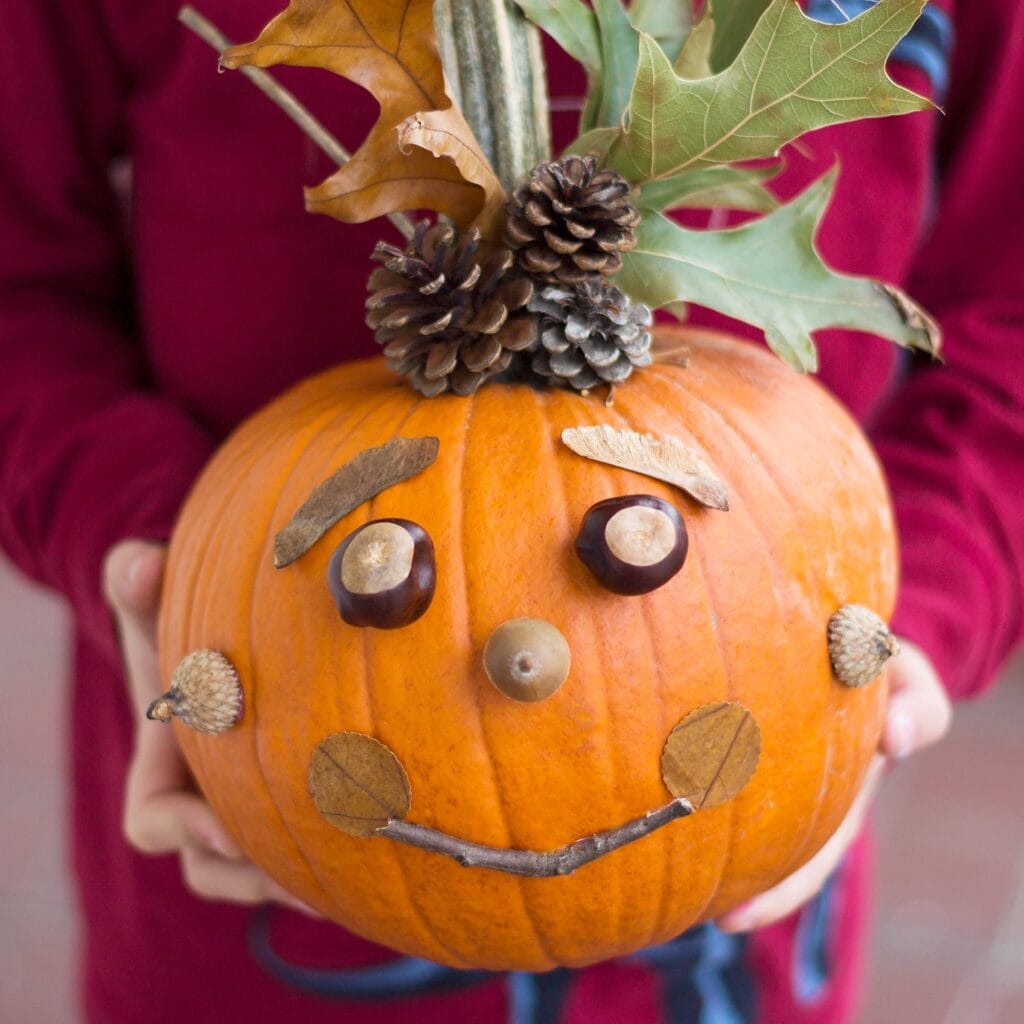
“that makes this pumpkin so chic is its restraint.”
The designer knew when to stop. The gold is used as a delicate accent, not a full-coverage treatment. It’s concentrated near the stem and then sprinkled lightly across the surface. This minimalist approach is what makes it feel elegant and expensive. If the entire pumpkin were covered in gold leaf, it would lose all of its subtlety and charm. This is a perfect example of “less is more.”
14. Cozy No-Carve Velvet Wrapped Pumpkins
Achieving this plush, cozy look is all about the fabric choice. The style math is simple: 90% luxurious texture and 10% rustic detail. The texture is the star here, so you need a fabric with a deep pile and a slight sheen, like velvet or velour. The rustic detail comes from a real, dried pumpkin stem, which is essential for making it look like an enchanted pumpkin rather than a simple throw pillow. The contrast between the soft, luxe body and the rough, natural stem is what makes it work.
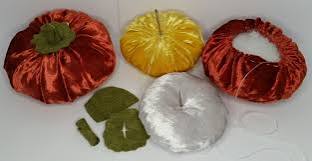
“While these velvet pumpkins look incredibly luxe, be aware that high-quality velvet can be pricey, and cheap velvet can look…”
well, cheap. Also, this is a more involved DIY than simply painting a pumpkin. It requires some basic sewing skills and stuffing. If you’re not a crafty person, this might be a frustrating project. For a simpler but still tactile version, consider the knit-wrapped pumpkin in Idea #29.
15. Simple Painted Ghosts on a Vibrant Orange Pumpkin
The success of this design lies in its simplicity. The artist chose one simple, recognizable shape—a ghost—and repeated it across the surface. The ghosts themselves are not overly detailed, just a white shape with two black dots for eyes, which makes them easy to paint and instantly readable. The vibrant orange of the pumpkin acts as the perfect high-energy background for the stark white figures, creating a classic Halloween color combination that’s impossible to miss.
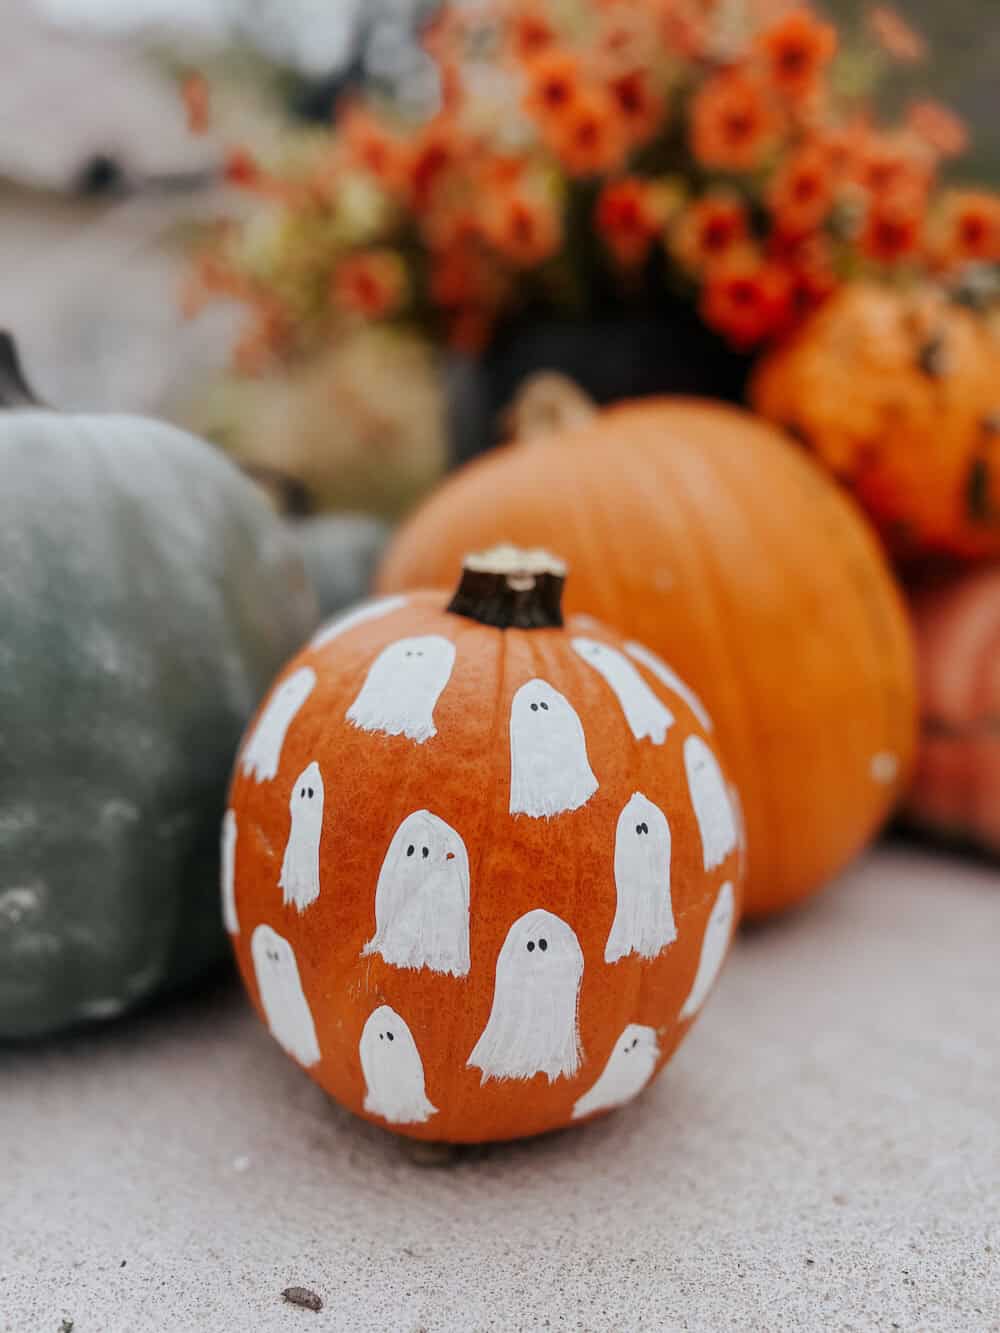
“Recreating this playful look is incredibly affordable and makes for a great week”
Recreating this playful look is incredibly affordable and makes for a great weekend project with the kids.
- Medium Orange Pumpkin: $5 – $10
- White Acrylic Craft Paint: $2 – $4
- Black Acrylic Craft Paint: $2 – $4
- Paintbrushes: $3 – $6
- TOTAL: $12 – $24
- Budget Alternative: Use a white paint pen or a white Sharpie for the ghosts’ bodies and a black one for the eyes to get the look for under $15, with far less mess.
16. Textured Autumn Display with Fabric Pumpkins and Pinecones
that makes this arrangement feel so cozy and abundant is the masterful mix of textures. You have the smooth skin of the real pumpkins, the deep ribs of the fabric ones, the rough scales of the pinecones, and the light airiness of the dried grasses. This textural variety is what creates visual interest and makes the display feel rich and layered, even with a relatively simple color palette. It’s a feast for the eyes.
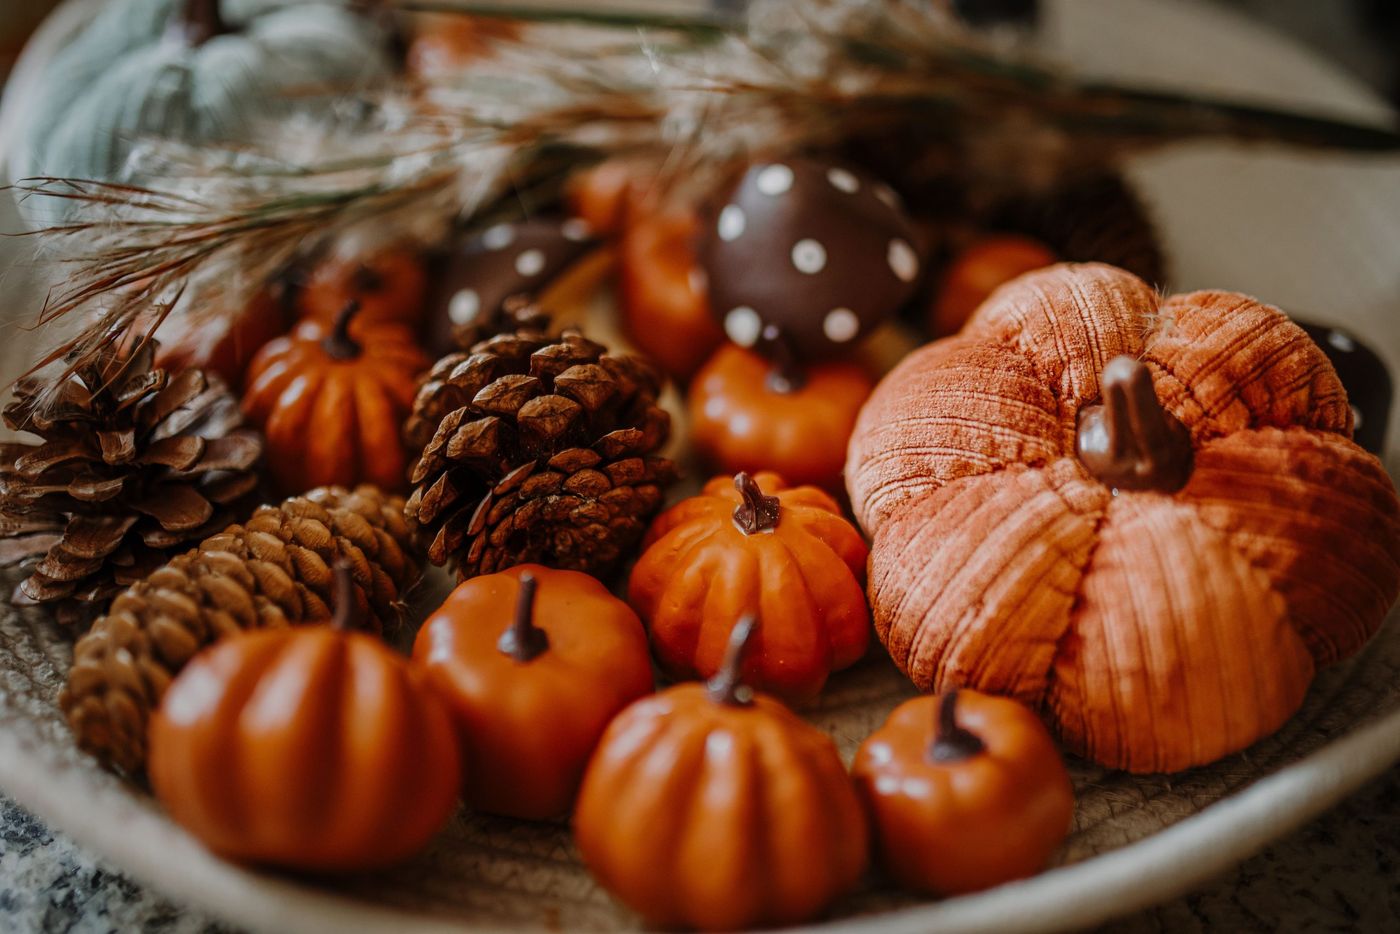
“This type of dense, layered arrangement is perfect for a coffee table, a console table, or a dining room centerpiece.”
It works best in a contained space, like the woven tray shown. The ideal surface area is between 18 to 30 inches in diameter. If you try to spread these small elements out over too large a surface, the feeling of abundance is lost and it just looks sparse. For larger spaces, consider a bigger statement piece, like the planter in Idea #1.
17. Modern Color-Block and Glitter Painted Pumpkins
When color-blocking with a bold, graphic line like this, painter’s tape is your best friend. For a perfectly crisp edge, apply the tape firmly and then paint a thin layer of your base color (or clear Mod Podge) along the edge of the tape you’re about to paint over. This seals the edge, so any bleeding that occurs will be in the base color. Let it dry for a few minutes, then paint your contrasting color. Peel the tape off when the paint is still slightly wet for the sharpest line imaginable.
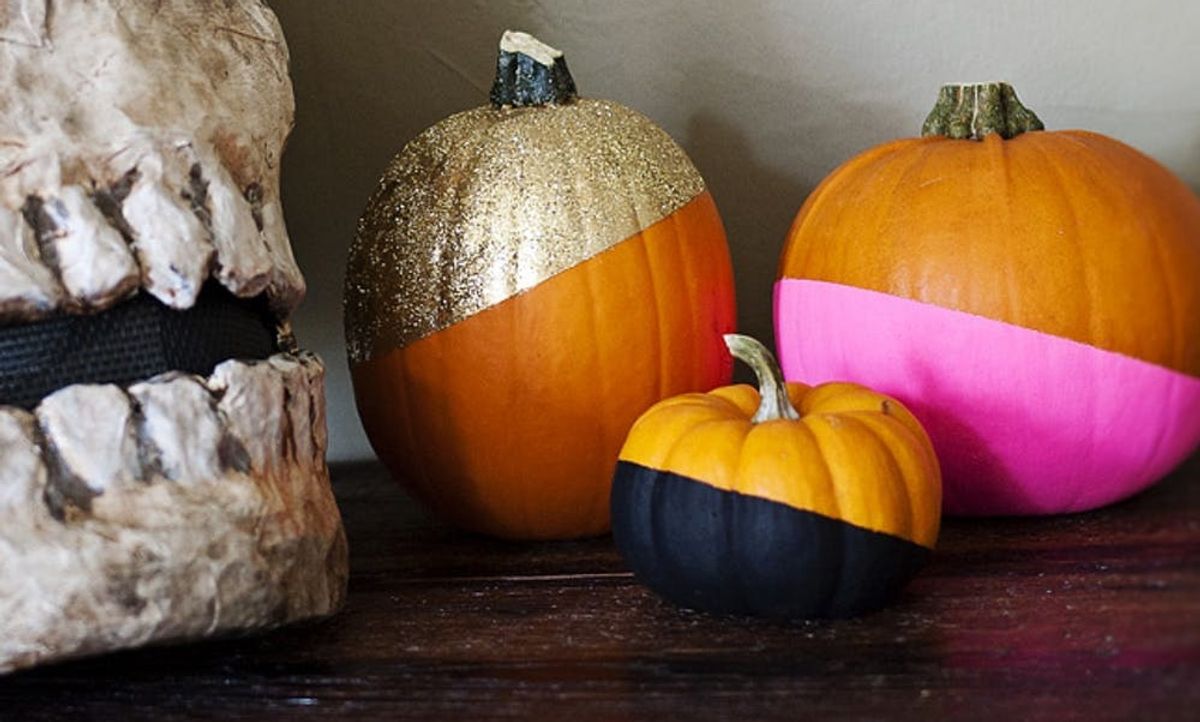
“This look is a modern, graphic take on fall decor.”
The formula is all about a 50/50 split. 50% traditional autumn (the natural orange pumpkin shape) plus 50% unexpected modernism (the bold color-blocking and glitter). The skull accent pushes it into spooky territory. By keeping the dividing line perfectly horizontal, it feels intentional and clean, not chaotic. This is a great way to incorporate seasonal decor if your home style is more contemporary.
18. Whimsical Cartoon-Faced Pumpkins on a Bed of Hay
These pumpkins are pure fun, and they work because they lean into a classic cartoon aesthetic. The designs use bold black outlines, bright primary colors (red, blue), and exaggerated features like the giant sunglasses and buck teeth. This instantly signals “playful” and “whimsical.” Placing them on a bed of hay reinforces the autumn theme and adds a nice textural contrast to the smooth, painted pumpkins. They don’t take themselves seriously, and that’s their charm.
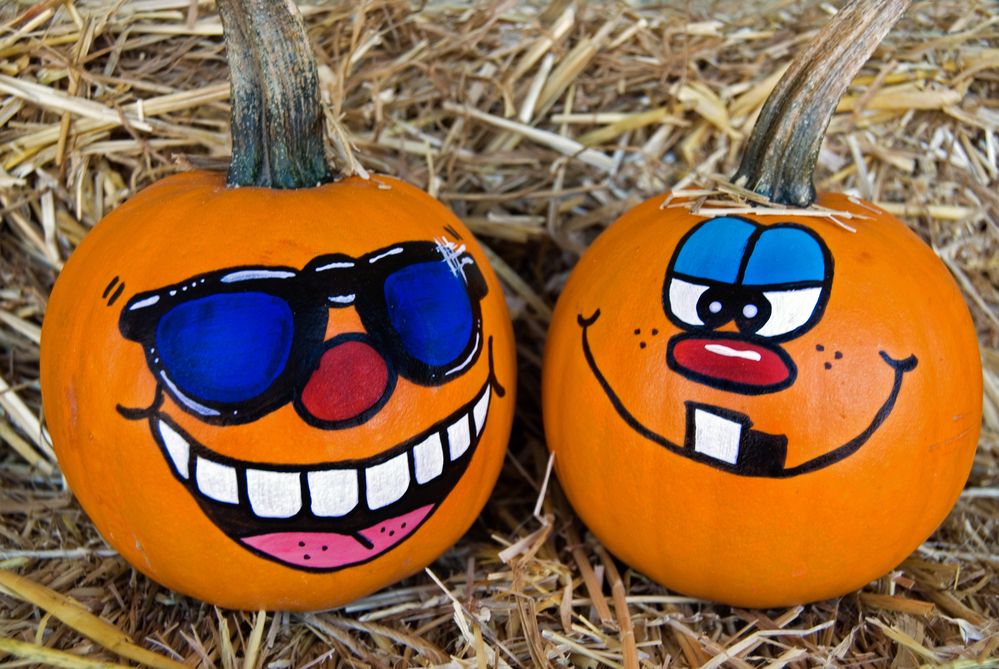
“Painting faces this detailed requires patience.”
If you’re not confident in your freehand skills, you might end up with a wobbly, messy result that looks more like a horror movie monster than a cute cartoon character. Use a pencil to lightly sketch the design on the pumpkin first. And remember, these are best for indoor display. A single rainy day will turn your cheerful characters into a smeary, tragic mess unless you use a weatherproof sealant.
19. Adorable Painted Deer Pumpkin with Felt Ears
This adorable deer pumpkin is a perfect example of how to bring a character to life using mixed materials, and it’s a very budget-friendly project.
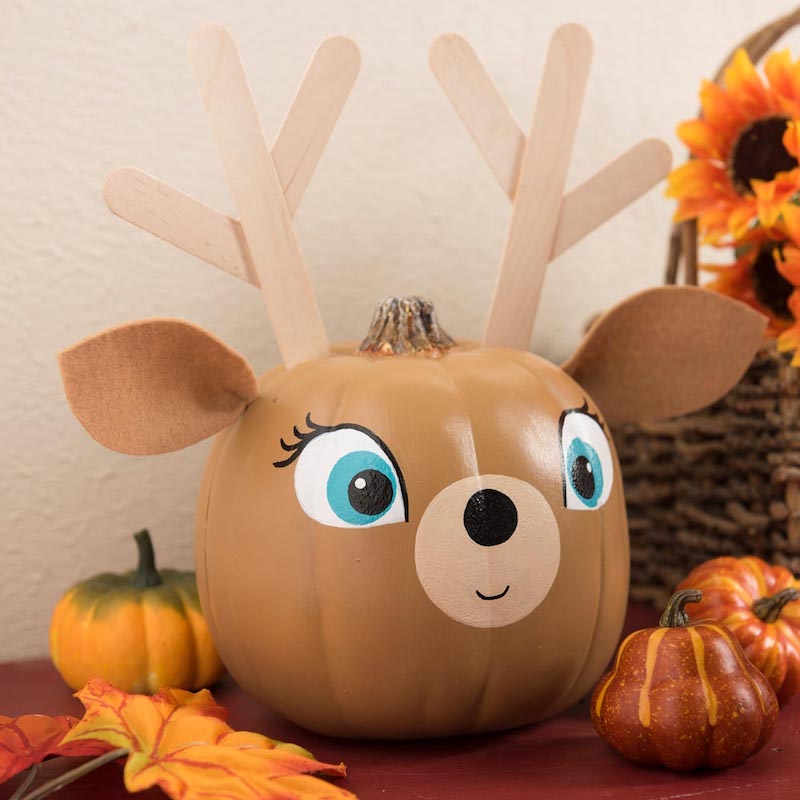
“Medium Pumpkin: $5 – $10Brown, White, Black, Blue Craft Paint: $8 – $12Brown Fel”
- Medium Pumpkin: $5 – $10
- Brown, White, Black, Blue Craft Paint: $8 – $12
- Brown Felt Sheet: $1
- Craft Sticks: $1 – $3
- Hot Glue Gun & Glue: $5 – $10
- TOTAL: $20 – $36
- Budget Alternative: Forage for small twigs in your backyard to use for the antlers instead of buying craft sticks to get this look for under $20.
Crafting the no-stick antlers is the key to this project. Here’s how:
- Take four standard-sized craft sticks.
- Use hot glue to attach a second stick to the first at a slight angle, creating a ‘V’ shape. Hold for 30 seconds until the glue sets.
- Repeat with the other two sticks to create a second antler.
- If you want smaller tines, you can carefully snap a craft stick in half and glue the pieces onto your main antler frame.
- Once the glue is completely cool and hard, attach the base of each antler to the top of your painted pumpkin with a generous dot of hot glue.
20. Cozy Cream Cable Knit Sweater Pumpkin
The single element that defines this piece is the cream cable knit covering. It instantly evokes the feeling of a favorite cozy sweater, bringing a sense of warmth and comfort that you just can’t get with paint or other materials. It transforms the pumpkin from a piece of autumn decor into a symbol of the entire “cozy season.” The simple twine bow is the perfect rustic finishing touch. Check out the other fabric pumpkin in Idea #14 for a different vibe.
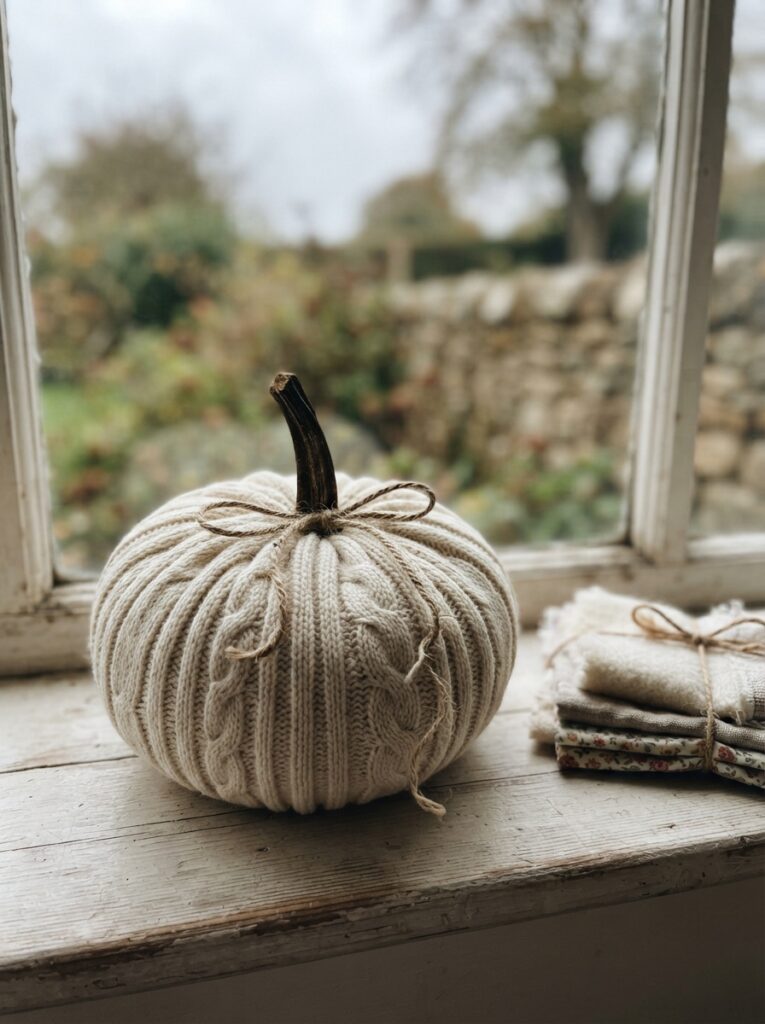
“This cozy, sweater-wrapped pumpkin is right at the heart of the “cottagecore” and “hygge” trends that continue to dominate home decor in 2026.”
These trends are all about celebrating comfort, simplicity, and natural textures. People are looking for ways to make their homes feel like a safe, warm sanctuary, and this little pumpkin does exactly that. It’s less about Halloween and more about embracing the quiet, cozy feeling of autumn.
21. Elegant Patterns with Metallic Paint Pens
To create intricate, delicate line work like this with paint pens, always prime your pumpkin first. A light coat of matte white spray paint or a brush-on chalk paint will create a perfect “tooth” for the pen to grip. Trying to draw directly onto a slick, waxy pumpkin surface often results in the pen skipping, creating blotchy, uneven lines. A good primer is the secret to professional-looking results.
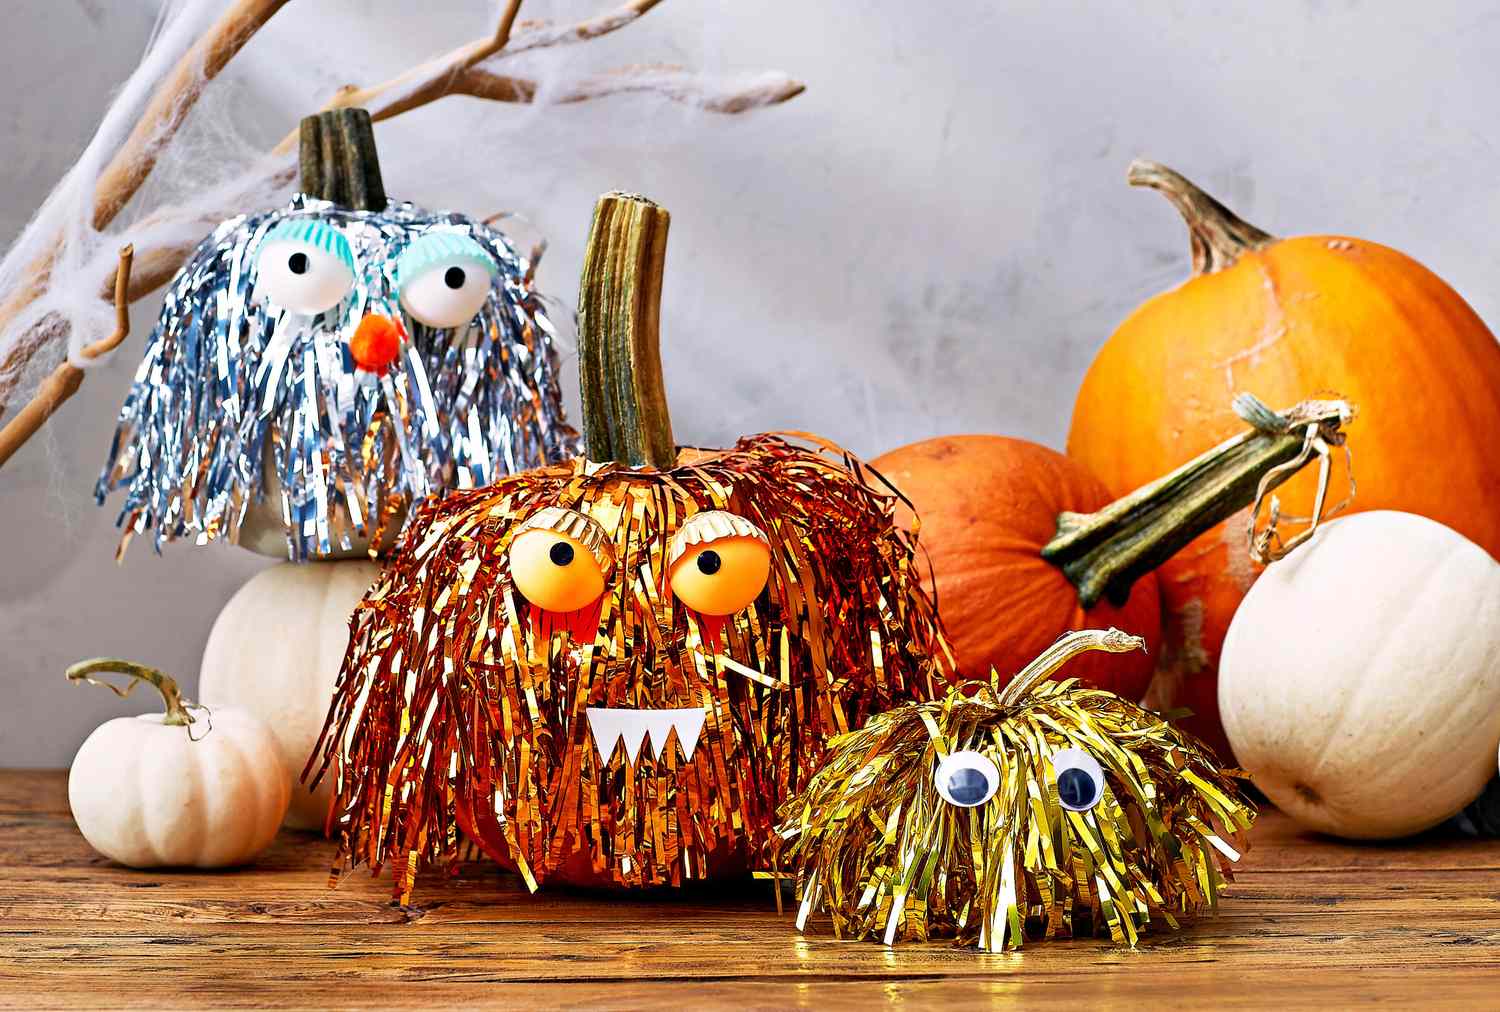
“This delicate, artistic approach is best suited for smaller pumpkins, often called “pie pumpkins” or “sugar pumpkins,” which range from 6 to 10 inches in diameter.”
The intricate patterns would get lost on a massive pumpkin. This style is perfect for creating a sophisticated centerpiece or an elegant accent on a bookshelf or mantel. It’s not designed to be a big, impactful statement on a front porch; it’s meant to be appreciated up close.
22. Artistic White Pumpkins with Paint Splashes and Silhouettes
This artistic look follows a clear formula: 60% neutral base + 30% chaotic color + 10% sharp detail. The white-painted pumpkin serves as a clean canvas. The splashes of bright pink and yellow add energy and an abstract-expressionist feel. Finally, the crisp black silhouette of the tree or jack-o’-lantern face provides a focal point and a touch of graphic storytelling. This contrast between the messy color and the clean silhouette is what makes it so visually interesting.
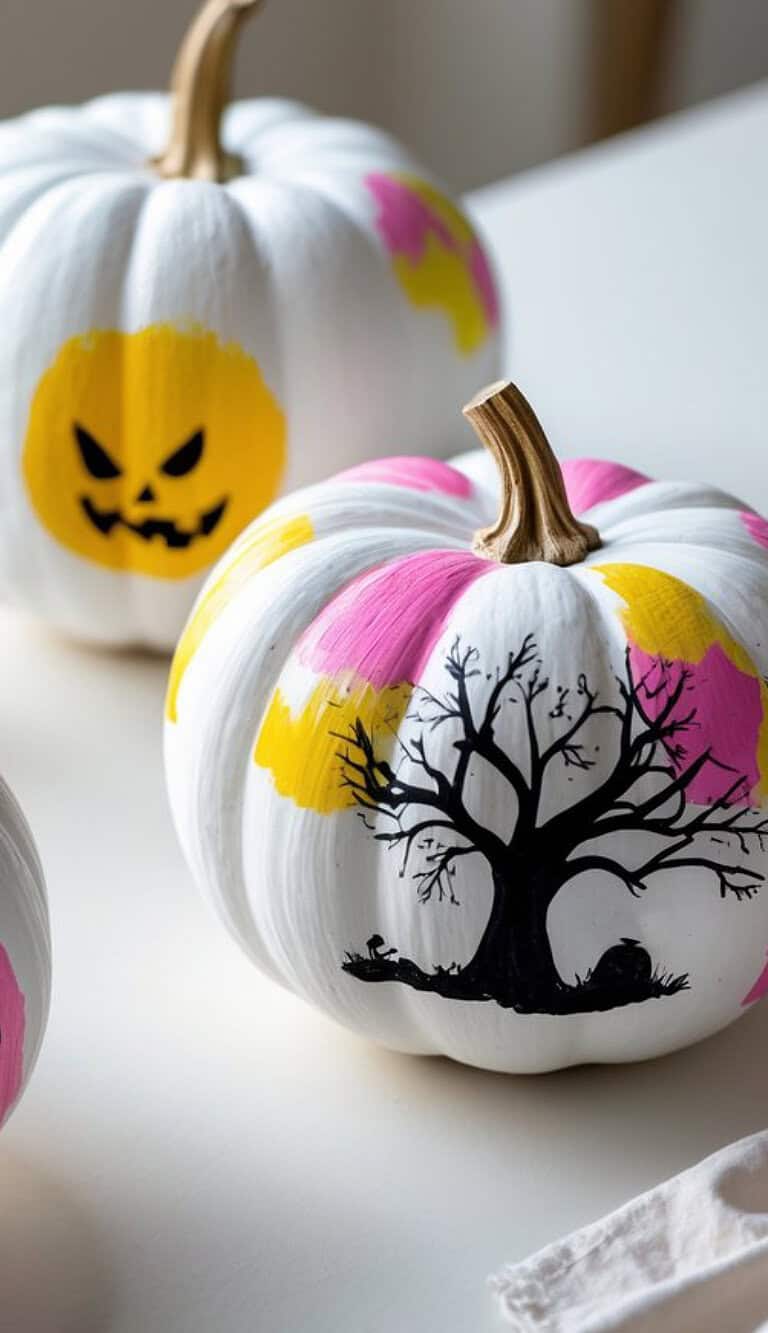
“This design succeeds by breaking the pumpkin-decorating rules.”
Instead of a perfectly painted, symmetrical design, it embraces randomness and artistic expression. The bright, non-traditional colors (pink and yellow) feel fresh and modern. The silhouette overlay adds a layer of sophistication and narrative, elevating it from a simple painted pumpkin to a small piece of art. It’s a great example of how to be festive without using a traditional Halloween color palette.
23. A Cheerful Mix of Patterns and Stenciled Designs
You can get this cheerful, multi-patterned look without spending a fortune on different paint pots. The secret is a set of multi-surface paint pens, which you can get for around $15-$20. They are perfect for creating sharp lines, dots, and intricate stenciled patterns with much more control and less mess than a brush. One set of pens can produce a huge variety of designs, making it a very cost-effective way to decorate a whole patch of pumpkins.
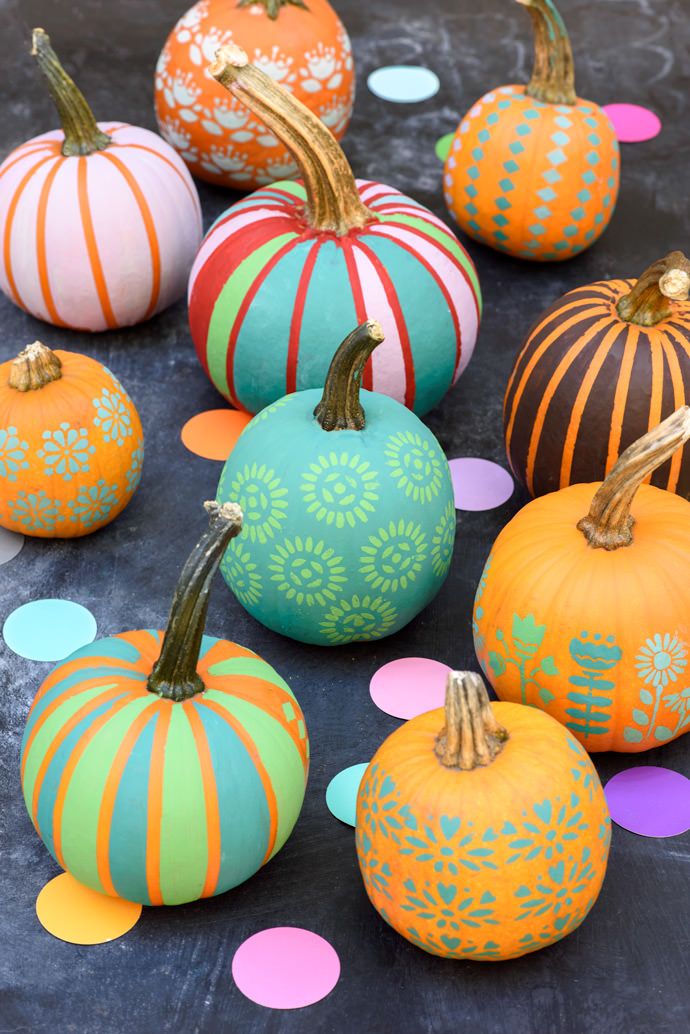
“a multi-pumpkin project like this, do a quick check to make sure you’re ready:”
a multi-pumpkin project like this, do a quick check to make sure you’re ready:
- Do you have a cohesive color palette? Choose 3-4 colors that work well together to ensure your pumpkin patch looks curated, not chaotic.
- Have you planned your patterns? Decide which patterns you’ll use (stripes, dots, florals) beforehand so you get a good variety.
- Is your surface protected? This many pumpkins means a lot of paint. Cover your table with newspaper or a cheap plastic tablecloth.
- Did you gather pumpkins of various sizes? A mix of small and medium pumpkins will make your final display much more dynamic.
24. Charming Hand-Painted Pumpkin Characters
The charm of these pumpkins comes from their expressive, cartoonish faces. They work because they tap into a universal language of simple emotions—the happy smiles, the big eyes, the cute blush. By giving each pumpkin a distinct “character” (the girl with the bow, the boy with the buck teeth), the artist has created a little story. It feels more like a pair of friends than a set of decorations, which is instantly endearing.
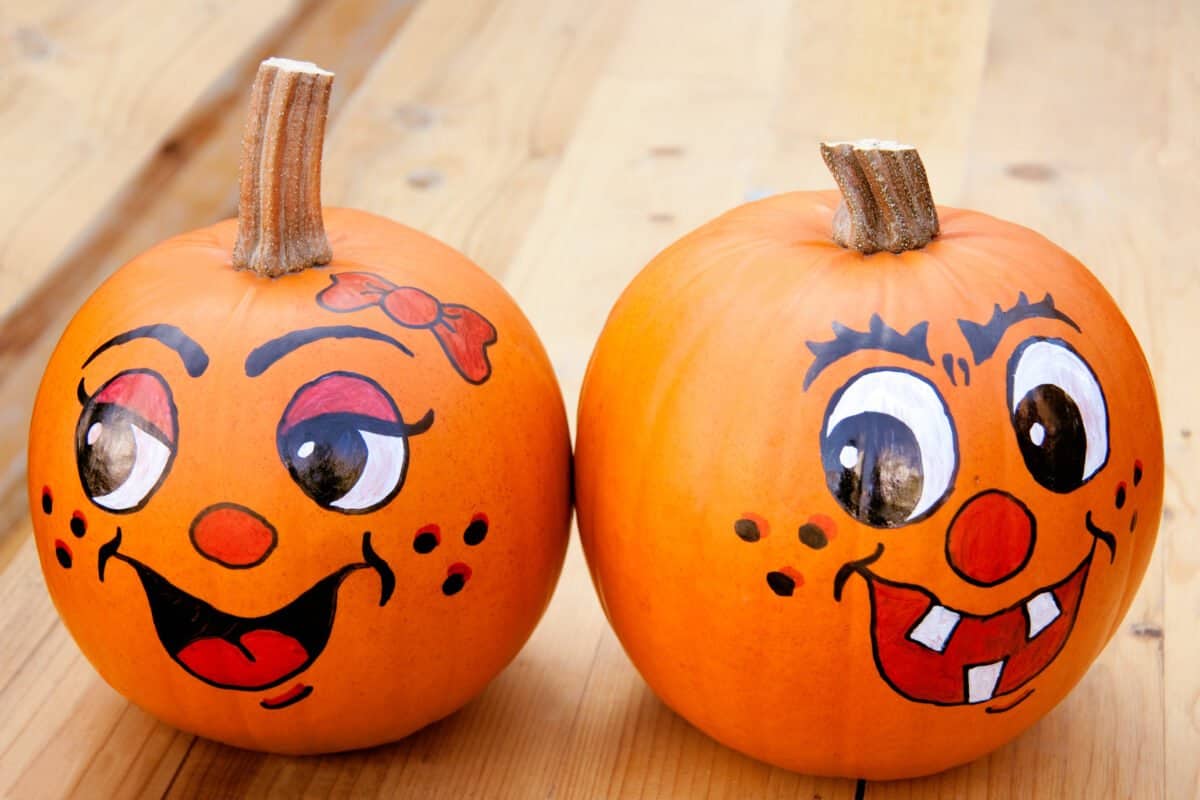
“To make painted faces pop, always add a tiny white dot of paint to the pupils of the eyes.”
This small detail, called a “catchlight,” instantly makes the character look more alive and three-dimensional. It’s a classic animation trick that works wonders on painted pumpkins. Use the wooden end of a small paintbrush dipped in white paint to apply a perfect, tiny dot.
25. Festive Ghost-Painted Pumpkin Tablescape
While this tablescape looks amazing, painting this many ghosts by hand can be tedious. If you’re not patient, your first few ghosts will look great, but you might start rushing by the end, leading to inconsistent shapes and sizes. It’s a project that looks simple but requires a bit of stamina to execute well. Using a stencil, as mentioned in Idea #12, can be a great way to speed up the process and ensure a uniform look.
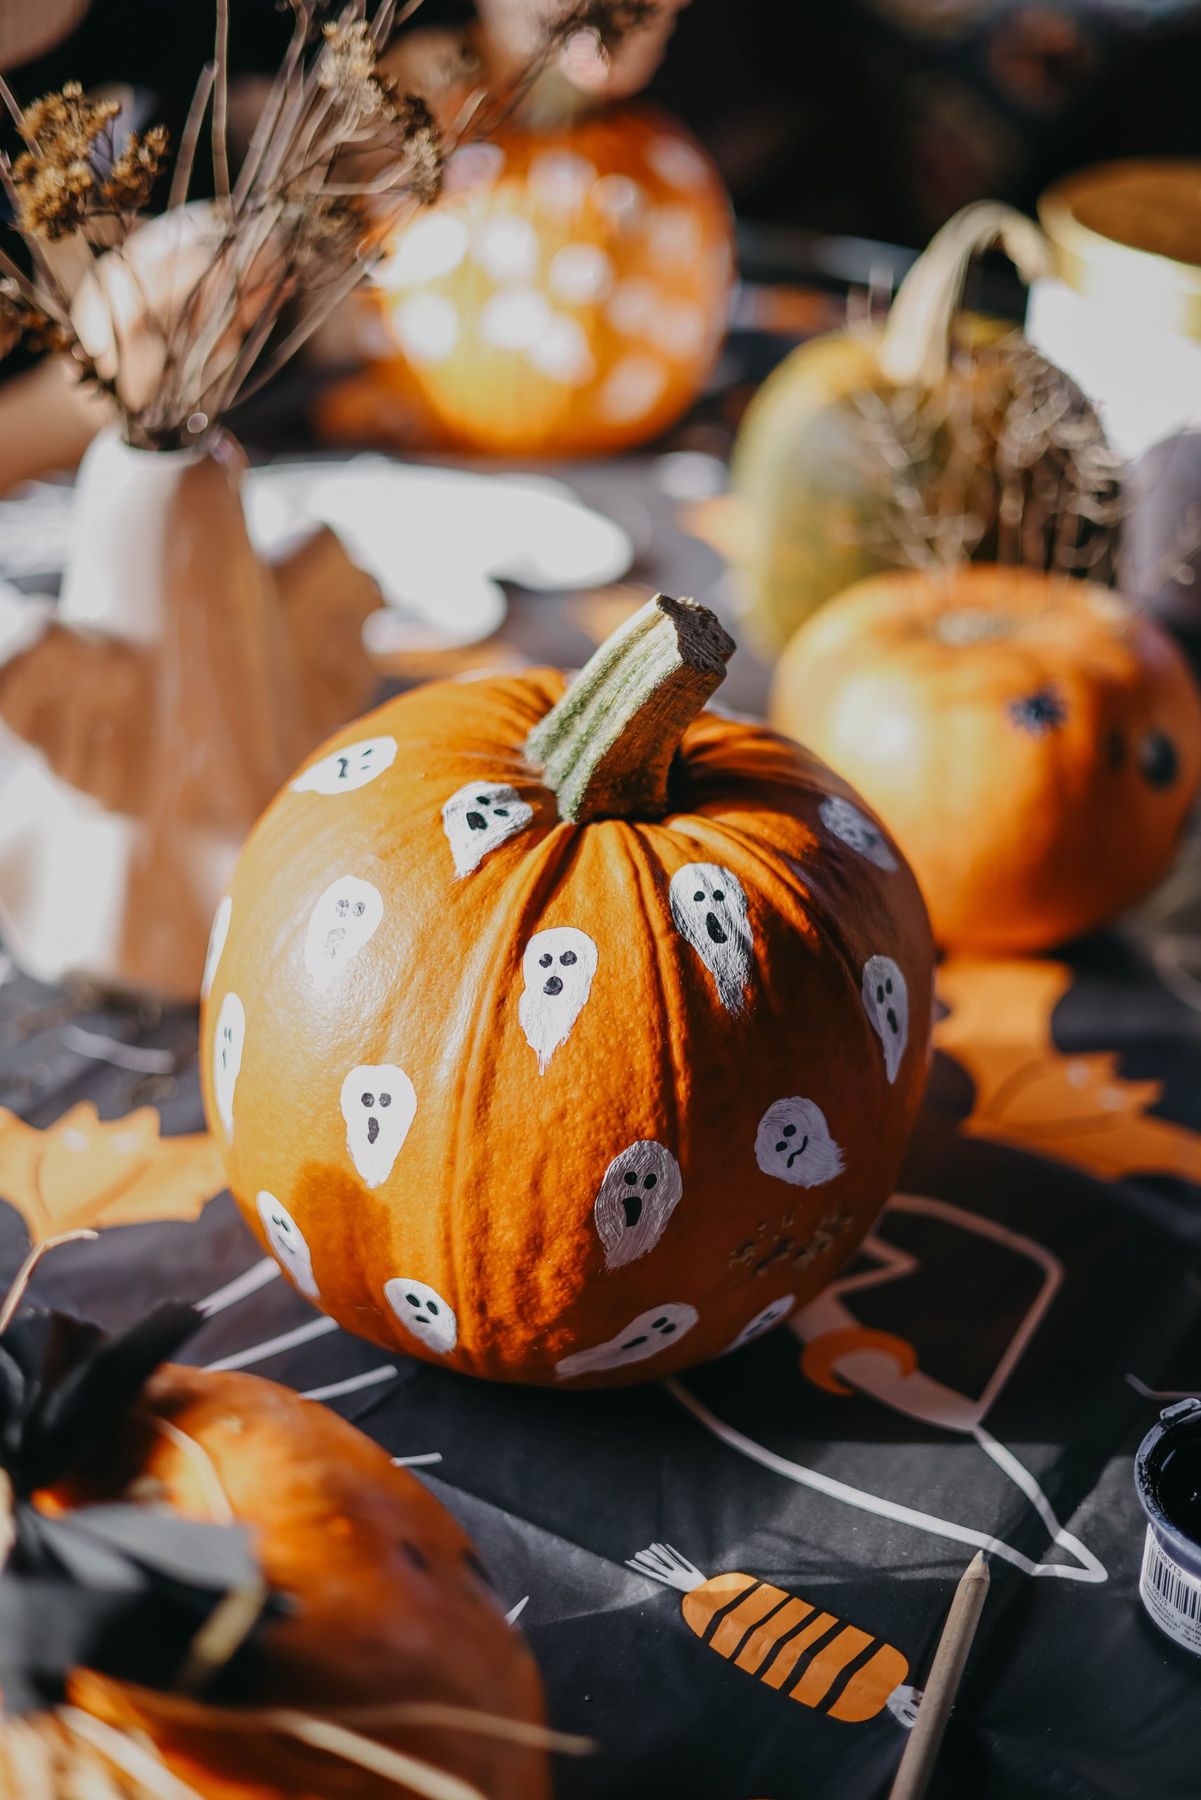
“Painted pumpkins, especially those intended for a dining or entryway table, can be prone to scuffs and scratches as people brush past them.”
After your paint is completely dry (wait a full 24 hours), apply a thin coat of matte Mod Podge or a clear acrylic sealant. This will create a protective layer that guards against minor bumps and makes the surface easier to wipe clean with a dry cloth if it gets dusty. Reapply if you notice any wear and tear.
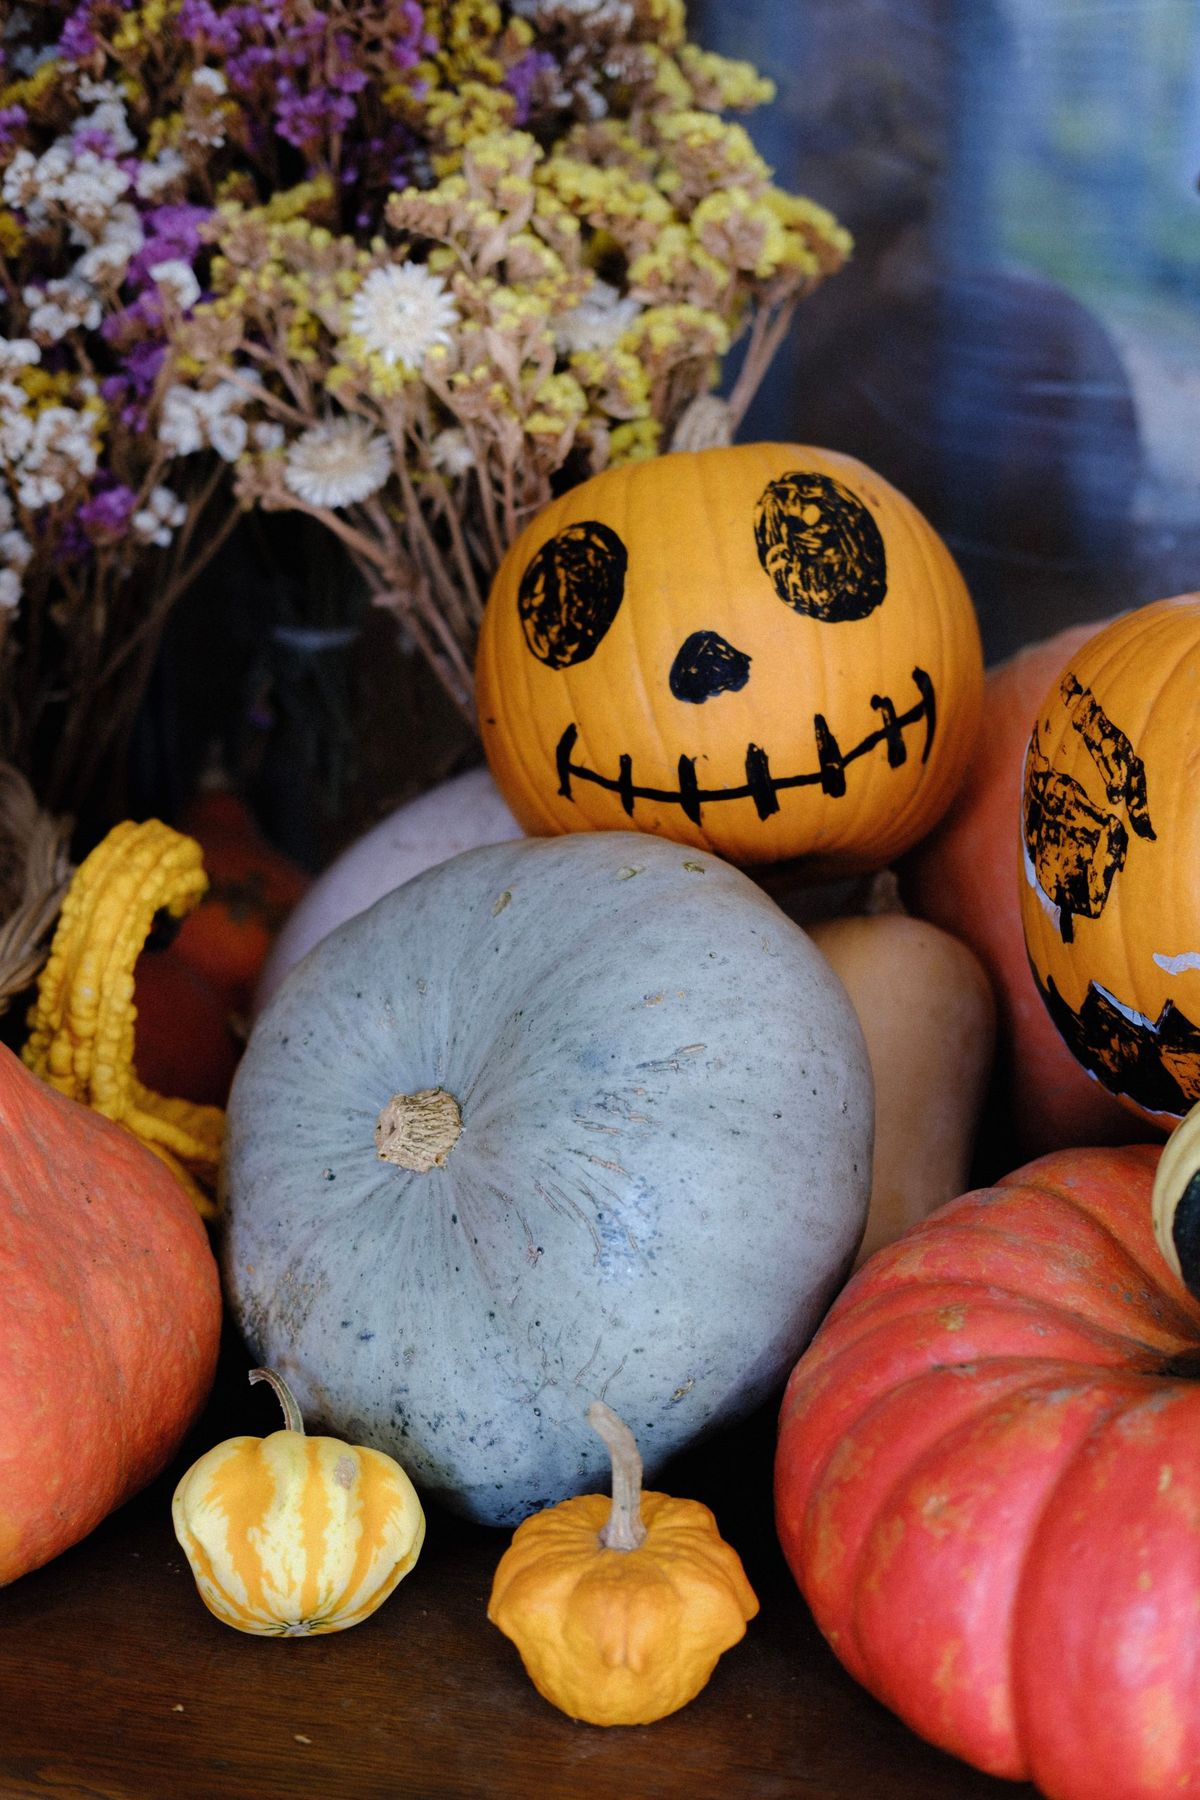
26. Iconic ‘Scream’ Mask Painted on an Orange Pumpkin
The single thing that makes this pumpkin stand out is the instantly recognizable ‘Scream’ mask face. It taps directly into a pop culture touchstone, making it feel both spooky and witty. It’s a simple design, but it’s effective because it carries a whole set of cultural associations with it. This isn’t just a scary face; it’s a specific, iconic scary face, which gives it a fun, nostalgic twist for anyone who grew up in the 90s.
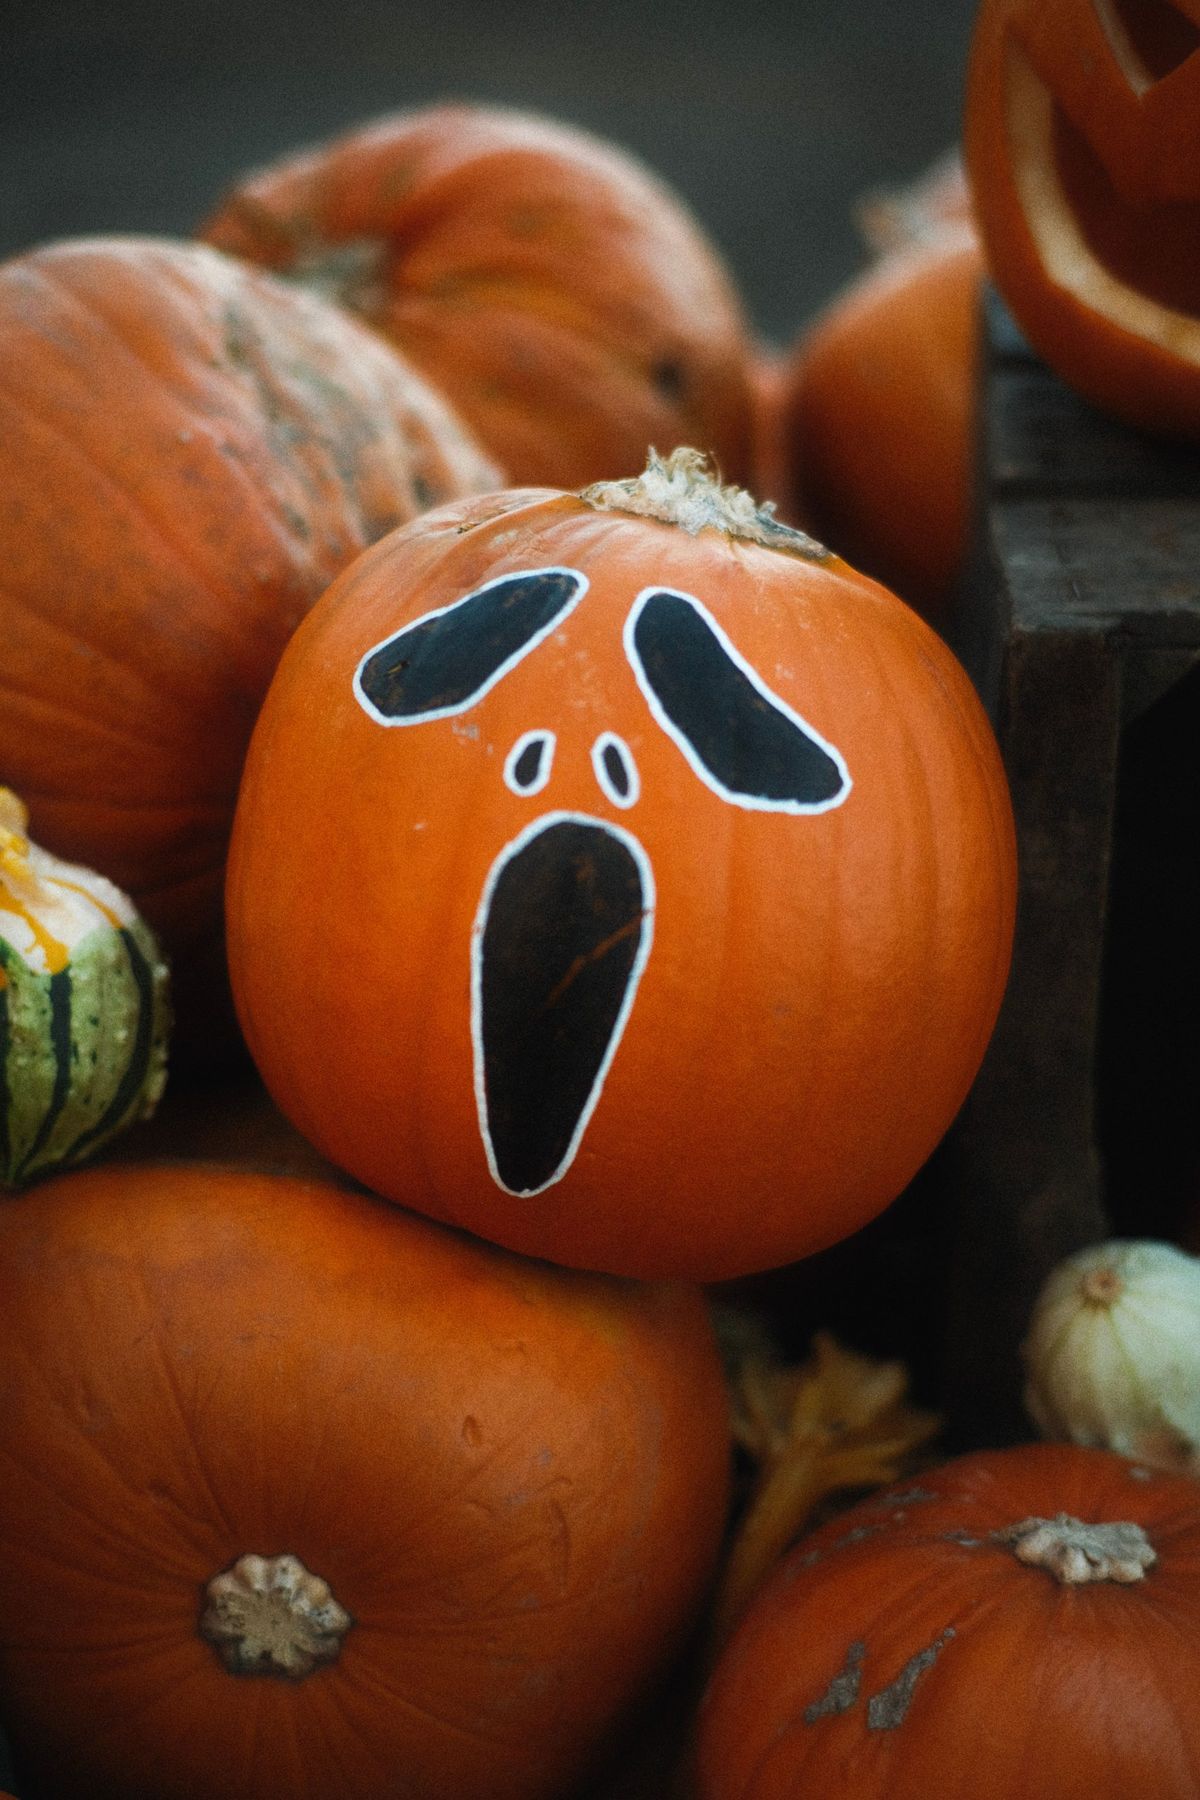
“This display works because of the contrast in shapes and sizes.”
You have the one “hero” pumpkin with the detailed painted face, which serves as the clear focal point. It’s surrounded by plain, unadorned pumpkins and gourds of various sizes and colors. This supporting cast makes the main pumpkin stand out even more. If every pumpkin had a face on it, the overall effect would be chaotic and much less impactful. A similar principle is used in Idea #1.
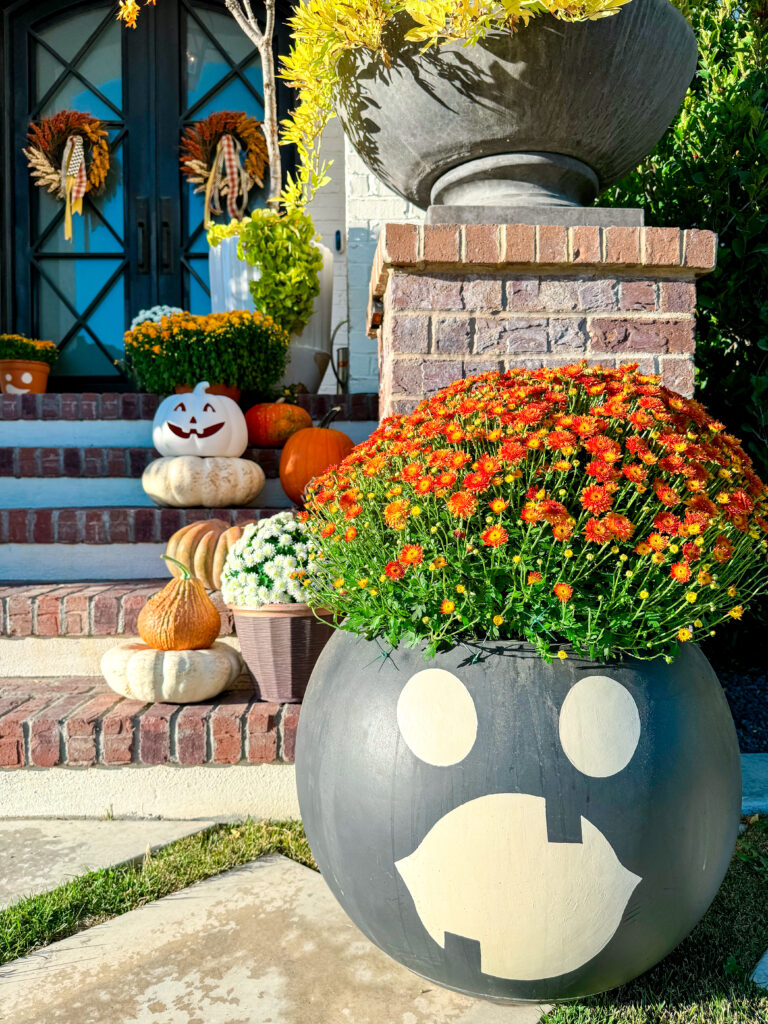
27. Whimsical Painted Planter and Pumpkin Porch Display
The formula for this whimsical porch is about layering and personality. It’s 40% natural elements (the real pumpkins and overflowing mums), 40% crafted decor (the painted planter and ceramic pumpkin), and 20% classic fall accents (the wreaths). The key is that the crafted items are given character with painted faces, which transforms them from simple containers into part of the welcoming committee. It feels curated and full of joy.
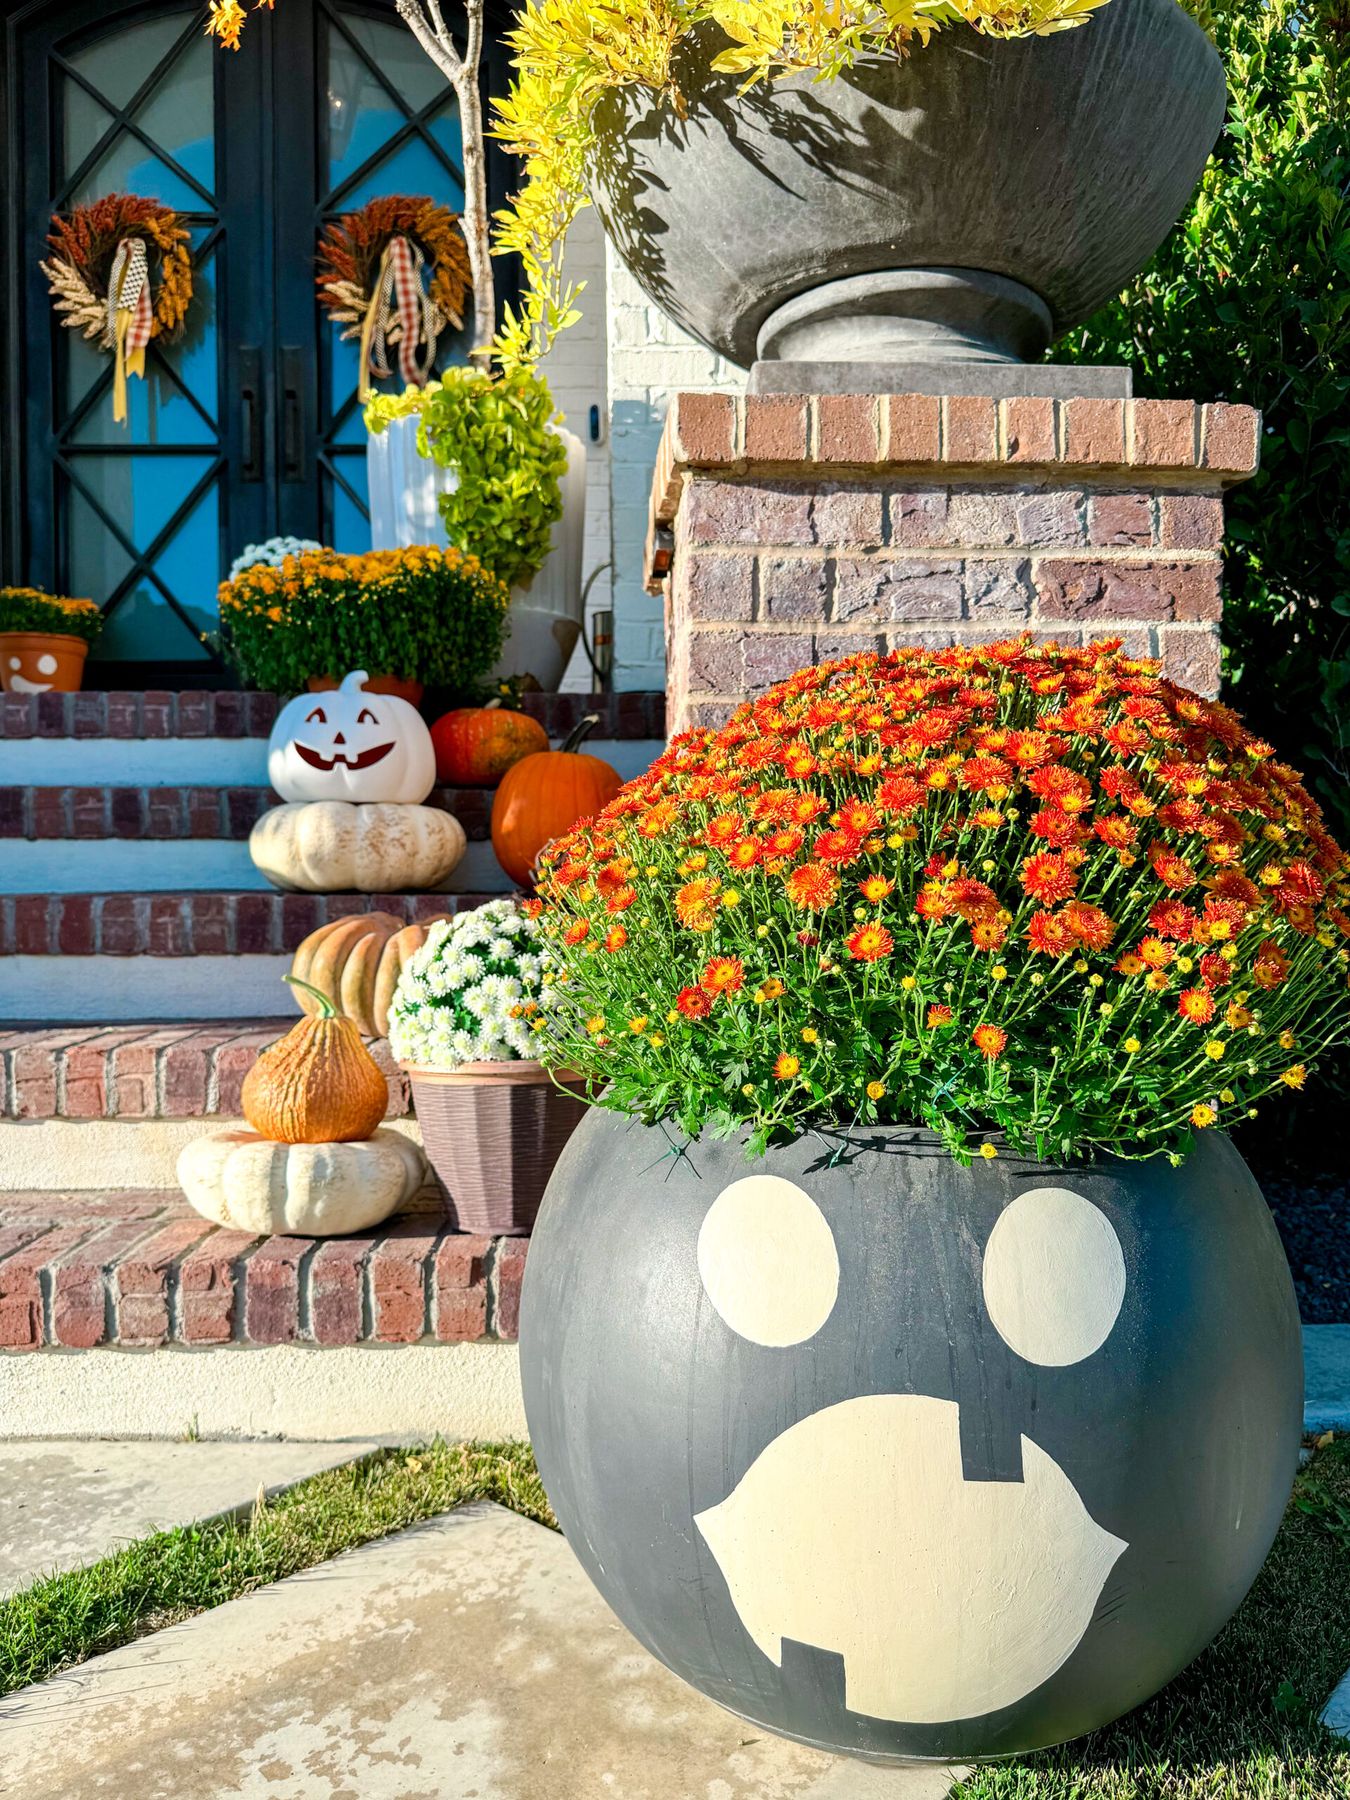
“This grand, multi-element display is best suited for a larger front porch with steps.”
You need at least 4-5 feet of width and a few steps to create the sense of layered abundance. For a smaller porch or a balcony, you could scale this down by using the main concept—a single large planter with a painted face and a couple of smaller gourds—to create a similar vibe without overwhelming the space. The planter itself should be at least 18-24 inches tall to have the proper impact.
28. Chic White Pumpkin with a Polka Dot Witch Hat
To get eyelash decals to adhere perfectly to a pumpkin’s curved surface, use a little bit of heat. After you’ve positioned the vinyl decal, gently warm it with a hairdryer on the low setting for a few seconds. This makes the vinyl more pliable. Then, use your thumb to press the decal firmly into the pumpkin’s grooves and curves. This will ensure it’s fully attached and won’t peel up at the edges.
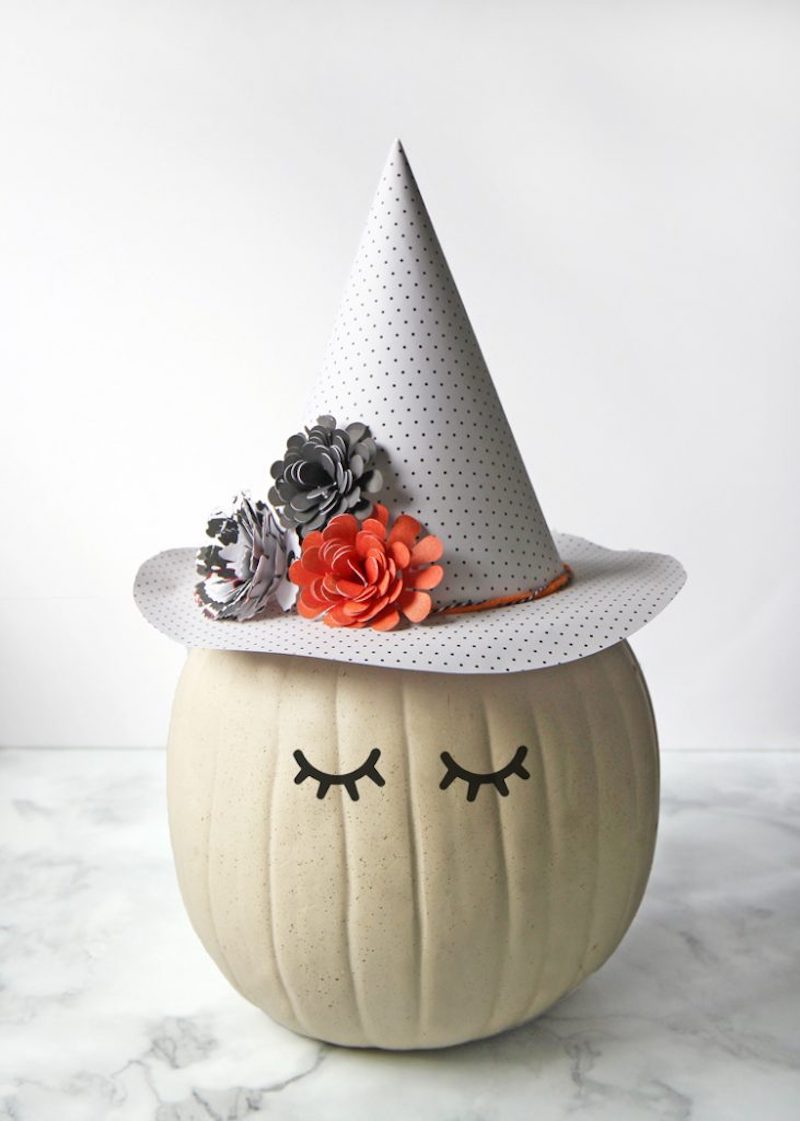
“You don’t need to buy a fancy, pre-made witch hat for this project.”
Grab a basic black witch hat from the dollar store ($1.25) and customize it yourself. You can add polka dots with a white paint pen, glue on some ribbon, or create your own paper flowers from colored construction paper. This DIY approach will save you $15-$20 compared to buying a pre-decorated hat from a craft store and allows you to perfectly match it to your decor.
29. An Artful Mix of Knit, Painted, and Gilded Pumpkins
This collection works so beautifully because it’s a masterclass in texture. Each pumpkin offers a different tactile experience: the soft, chunky knit; the smooth, painted surface; the slightly rough feel of the gold leaf; and the natural skin of the plain pumpkin. This variety, combined with a cohesive, muted color palette, makes the arrangement look sophisticated and thoughtfully curated. The dried oak leaves and acorns complete the rustic, autumnal story.
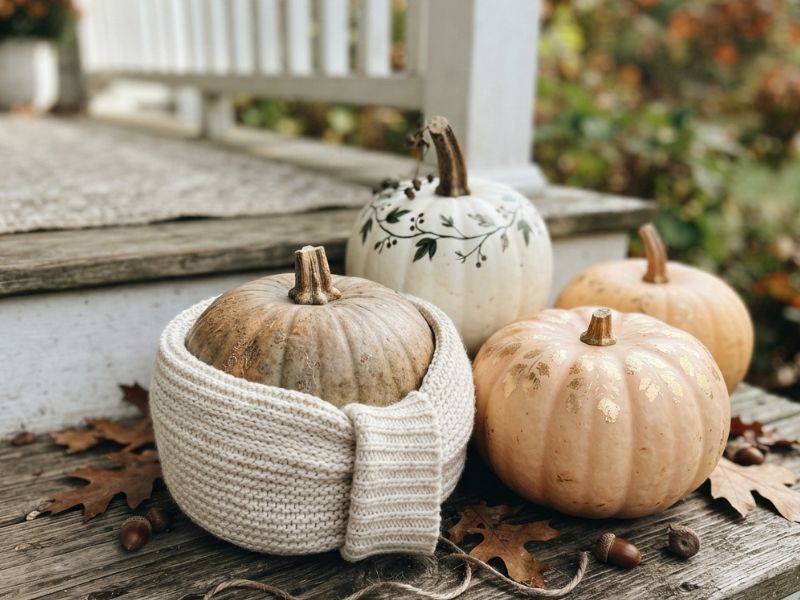
“This is an indoor-only display.”
The knit-wrapped pumpkin is particularly vulnerable to the elements and would be ruined by a single rainy day. The painted and gold-leafed pumpkins could also suffer from moisture and sun-fading. To keep them looking their best, display them away from direct sunlight and give them a gentle dusting with a soft, dry cloth once a week. The acorns and leaves may become brittle over time, so handle the arrangement with care.
30. Classic Illuminated Carved Cat and Jack-o’-Lanterns
that makes this display truly special is the internal illumination. The warm, flickering candlelight from within brings the carved faces to life, giving them personality and a dynamic quality that you can’t achieve with a no-carve design. It transforms them from static objects into lively characters, creating a classic and cozy Halloween ambiance. The glow is what makes it feel magical.
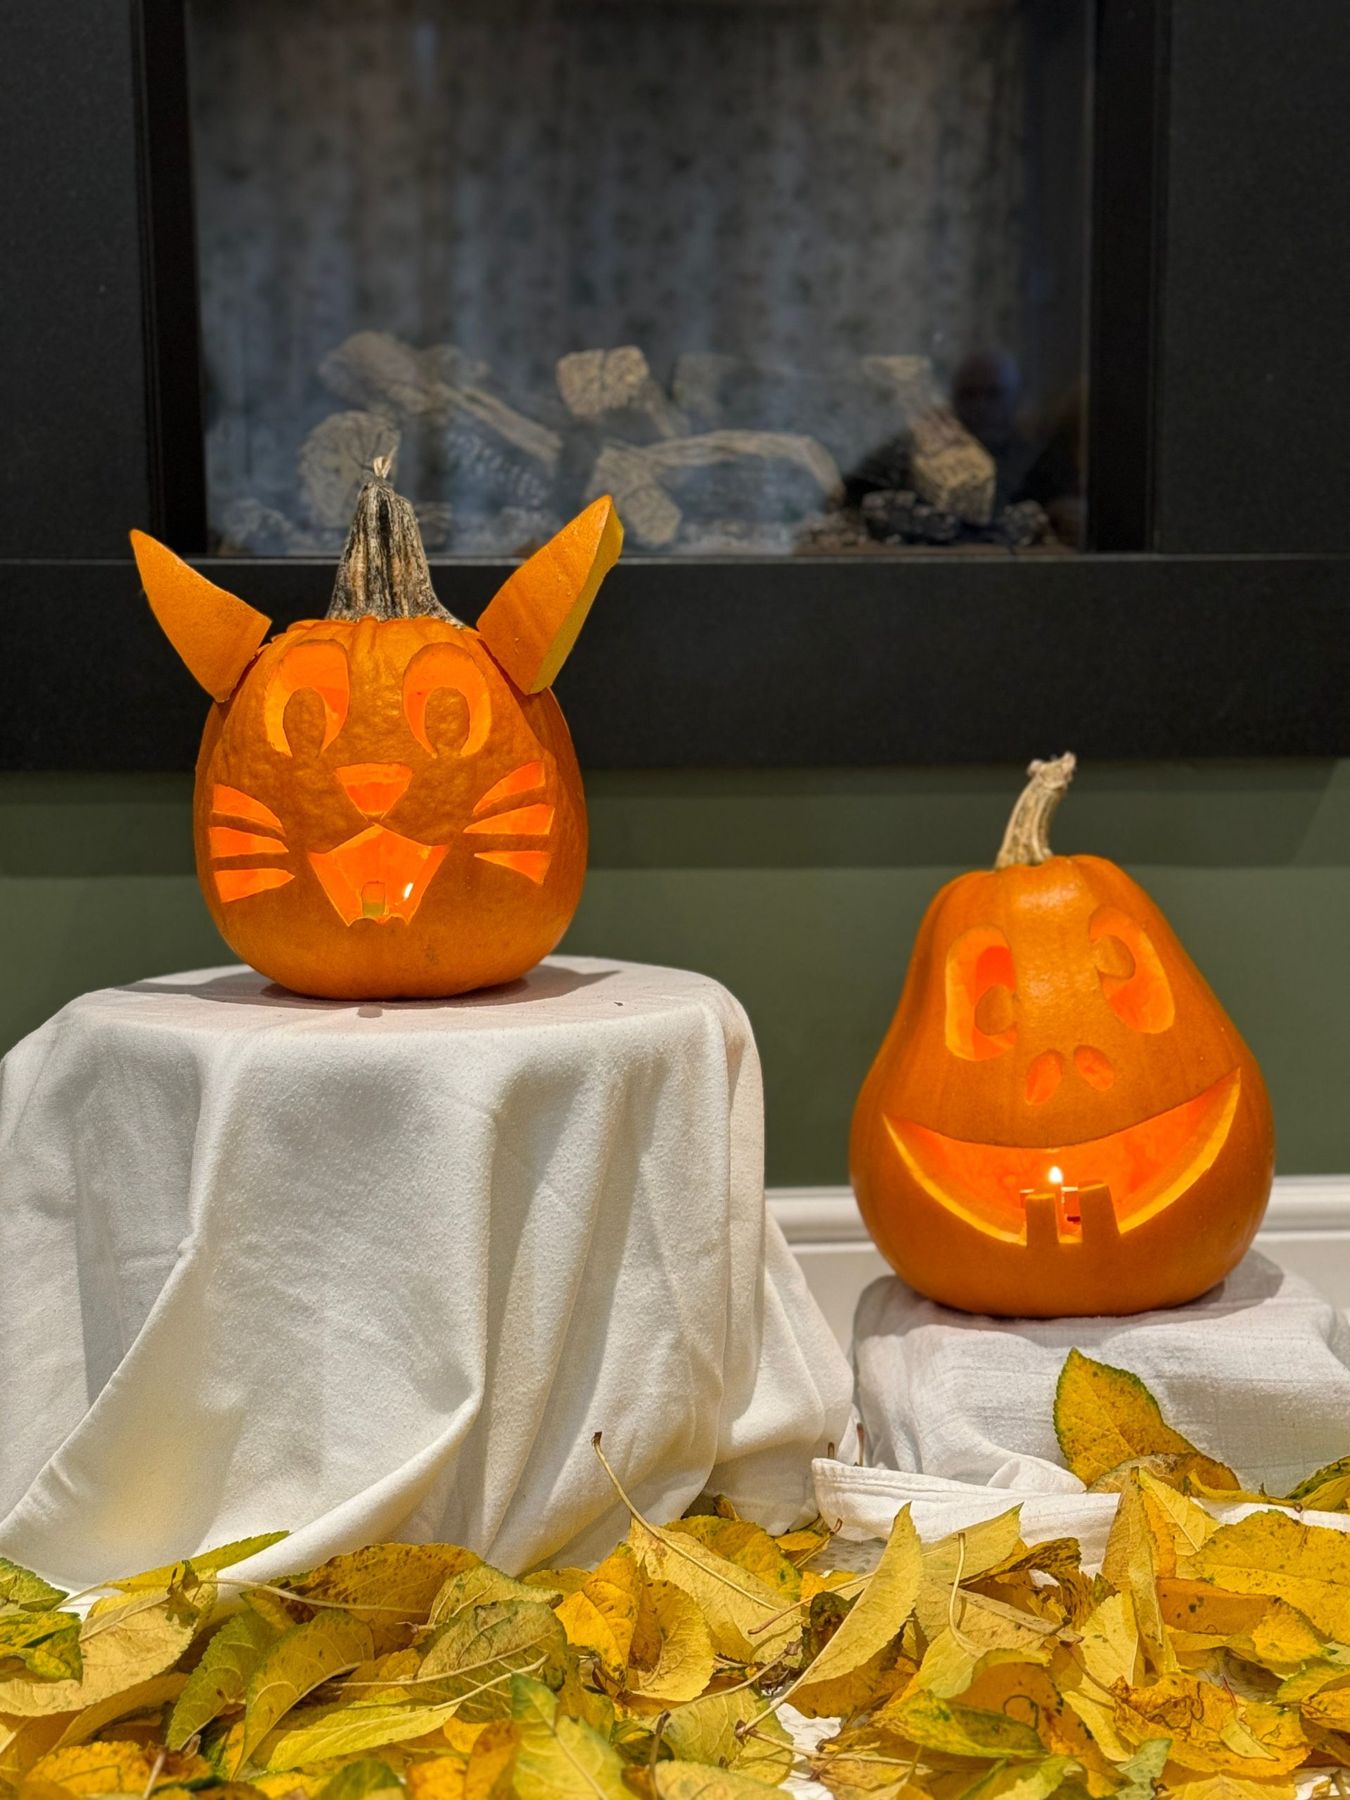
“While charming, using real candles in pumpkins is a fire hazard.”
Never leave a candle-lit pumpkin unattended, especially indoors or near flammable materials like dried leaves or fabric. A much safer alternative is to use battery-operated LED tea lights or puck lights. You’ll get the same warm glow without any of the risk, and they often come with a timer function, which is incredibly convenient.
Ready to Ditch the Carving Knife?
See? You don’t need a single carving tool to create a stunning display for your front porch or dining table. Pick a favorite, grab your supplies, and make this your most creative autumn yet.
Pin your best ideas to your fall decor board on Pinterest to keep the inspiration flowing!
