
30 Stunning Halloween Decor Ideas for 2026 That Will Transform Your Home Indoor and Outdoor Spaces This Season


You know that feeling when you finally find the Halloween decor that looks exactly right for your space? It’s that perfect mix of festive, stylish, and personal. But sifting through endless photos to find *the one* can feel like a chore. That’s where we come in.
After filtering through hundreds of options from craft stores like Michaels to everyday spots like Target and even Facebook Marketplace, we narrowed it down to 30 ideas that actually deliver. We’ve gathered curated looks that hit every note, from cozy and traditional to clean and minimalist. For 2026, it’s all about creating an authentic, lived-in seasonal feel, moving away from plastic novelties and toward natural textures and warmth. And stay until the end—we break down the most common mistakes that can ruin these looks. 📌 Go ahead and save this—you’re going to want to reference it.
1. Heirloom Pumpkins on a Classic Brownstone Stoop
This look is pure elegance, and it works because it leans into natural beauty instead of novelty. The sophisticated color story is key: the muted tones of sage green, cream, and burnt orange in the heirloom pumpkins stand out beautifully against the charcoal black door and rich brown stone. It’s a lesson in restraint. By grouping a variety of shapes and sizes, from smooth gourds to bumpy pumpkins, the display creates a rich textural landscape that feels abundant without being cluttered. The single cluster of dried corn is the perfect finishing touch, adding a vertical element that draws the eye upward.
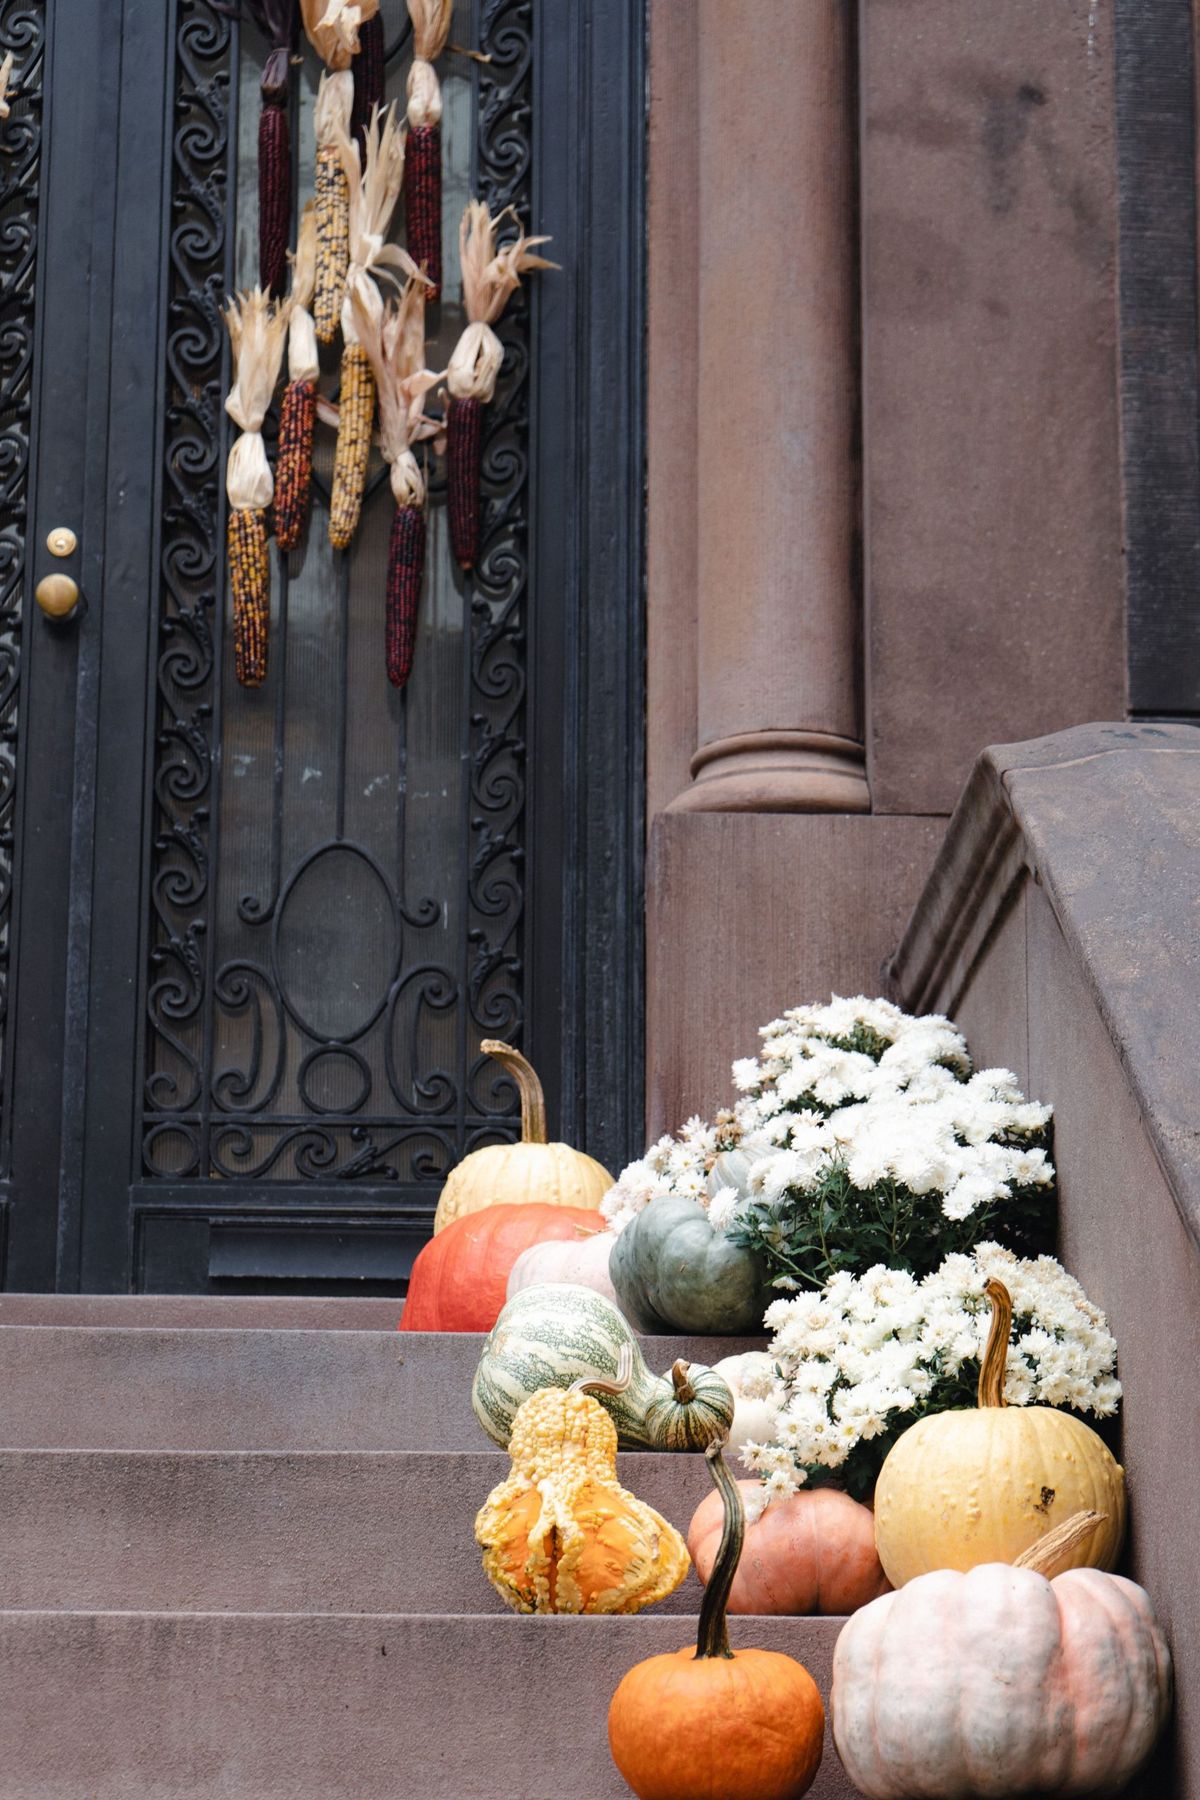
“To get the most out of your heirloom pumpkins, give them a quick bleach bath before you put them out.”
Mix one part bleach to ten parts water and gently wipe them down, then let them dry completely. This kills off any surface bacteria that can cause them to rot prematurely. For pumpkins you don’t plan to carve, a light coat of clear matte sealant spray can also help them brave the elements and last all the way through Thanksgiving. It creates a barrier against moisture and pests, keeping them looking fresh for weeks longer.
2. A Gothic Centerpiece with a Jack-o’-Lantern Teapot
The single element holding this entire scene together is the jack-o’-lantern teapot. Remove it, and you just have some nice candles on a black cloth. With it, you have a story. It injects a necessary dose of personality and whimsy into what could otherwise be a very severe, gothic arrangement. The bright orange ceramic provides a pop of color that balances the surrounding matte black, and its cheerful, spooky face is what defines the mood as distinctly Halloween. It’s the perfect example of how one quirky, unexpected object can become the entire focal point of a design.

“Let’s be honest: real, lit taper candles create an unmatched atmosphere, but they come with risks.”
Never leave them burning unattended, especially when surrounded by flammable materials like dried moss or a fabric tablecloth. Wax WILL drip. To minimize mess, you can buy dripless candles, but even those aren’t foolproof. Place a small, heat-resistant tray or mat under the candlesticks to protect your surfaces. For a worry-free alternative, high-quality flameless LED taper candles can give you a surprisingly realistic flicker without any of the fire hazard or waxy cleanup.
3. A Festive Porch with Cascading Leaf Garlands and Lights
- Artificial Leaf Garlands (2 strands): $40 – $80
- Outdoor String Lights (2 strands): $30 – $60
- Pumpkins (assorted sizes): $50 – $100
- Potted Mums (3-4 large pots): $60 – $120
- TOTAL: $180 – $360
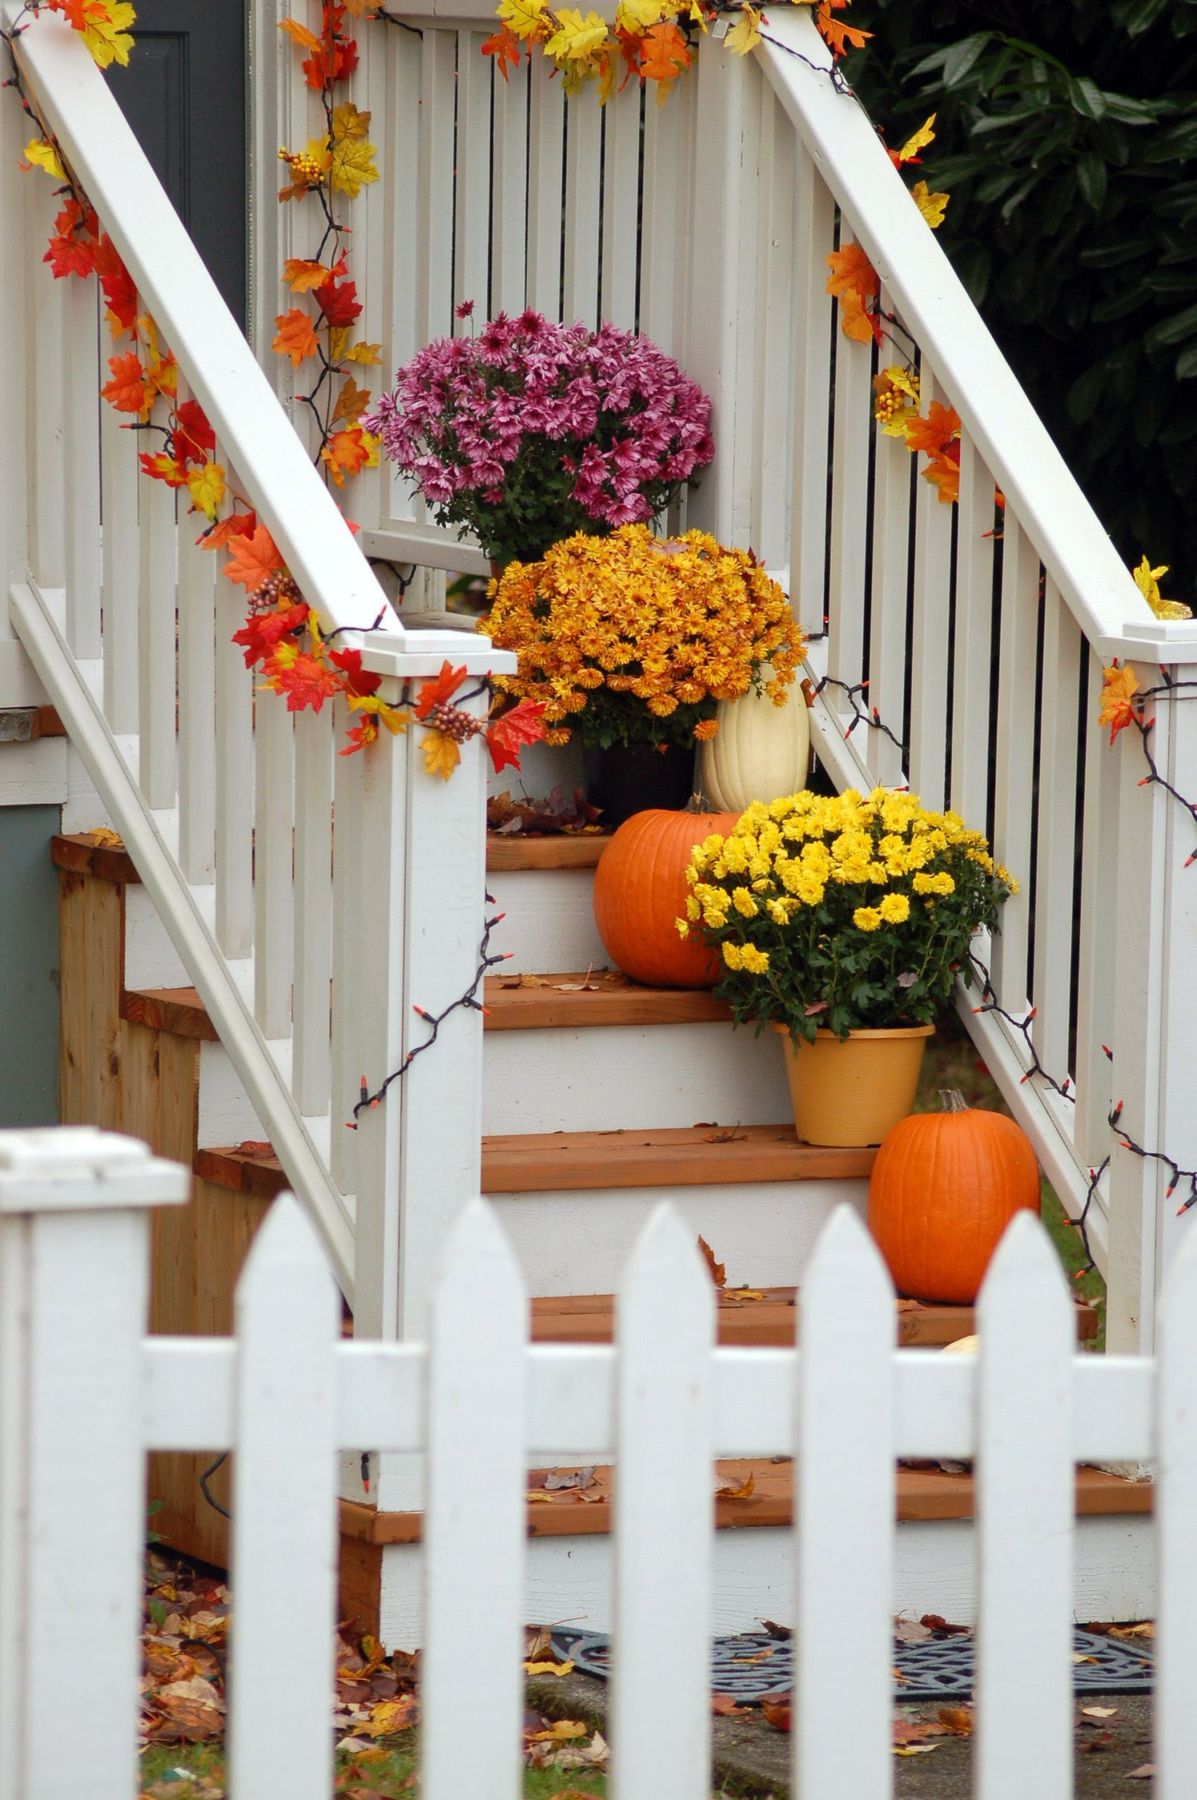
“Budget alternative: Get this look for about 40% less by buying your mums from a local farm stand or nursery, which is often cheaper than big-box stores.”
For pumpkins, focus on a few large ones for impact and fill in with smaller, less expensive sugar pumpkins. Use one long garland instead of two, and supplement with real fallen leaves scattered on the steps for a fuller look at no extra cost.
The visual success here is a simple formula: 50% natural elements + 30% artificial enhancements + 20% classic architecture. The pumpkins and vibrant mums provide the bulk of the color and organic texture. The faux leaf garlands and string lights add a layer of festive sparkle and fill in the gaps. It all works because it’s layered against a clean, neutral backdrop—in this case, the white wooden porch. You could swap the color palette entirely (e.g., white pumpkins and purple mums) and the formula would still hold true, proving the balance is what matters most.
4. A Single Glazed Ceramic Jack-o’-Lantern Tealight Holder
This simple setup is incredibly effective because of its focus and warmth. The design relies on the principle of a single, strong focal point. Your eye goes directly to the glossy orange pumpkin, whose vibrant color and cheerful face immediately set a festive mood. The magic is amplified by the contrast in textures: the smooth, reflective glaze of the ceramic against the raw, natural grain of the wood surface. The blurred bokeh lights in the background add depth and a sense of coziness, making this one small object feel like the center of a warm, inviting world.

“You don’t need to spend a lot to capture this cozy vibe.”
Target’s Bullseye’s Playground and craft stores like Michaels are your best friends for this look. You can find a similar ceramic or resin jack-o’-lantern for $5-$10. Instead of a fancy wood slab, a simple acacia wood cutting board from IKEA ($15) or even a clean piece of reclaimed wood will work perfectly. A short strand of battery-operated copper wire fairy lights ($5 at Walmart or Amazon) can be loosely coiled behind the pumpkin to recreate that gorgeous golden bokeh glow for a total cost of around $25.
5. Creating a Rustic and Welcoming Autumn Porch
A full-blown rustic porch looks incredible on Pinterest, but it’s not always practical. Natural materials like hay bales, corn stalks, and unsealed wood can get messy, fast. Rain can turn hay into a sludgy, moldy mess, and corn stalks will disintegrate and stain your porch. If you have a covered porch, you’re in a much better position to protect these elements. If your porch is exposed to the elements, consider using faux alternatives for key pieces or be prepared for a significant cleanup session once the season is over. Also, be aware that these natural materials can attract critters looking for a cozy home.
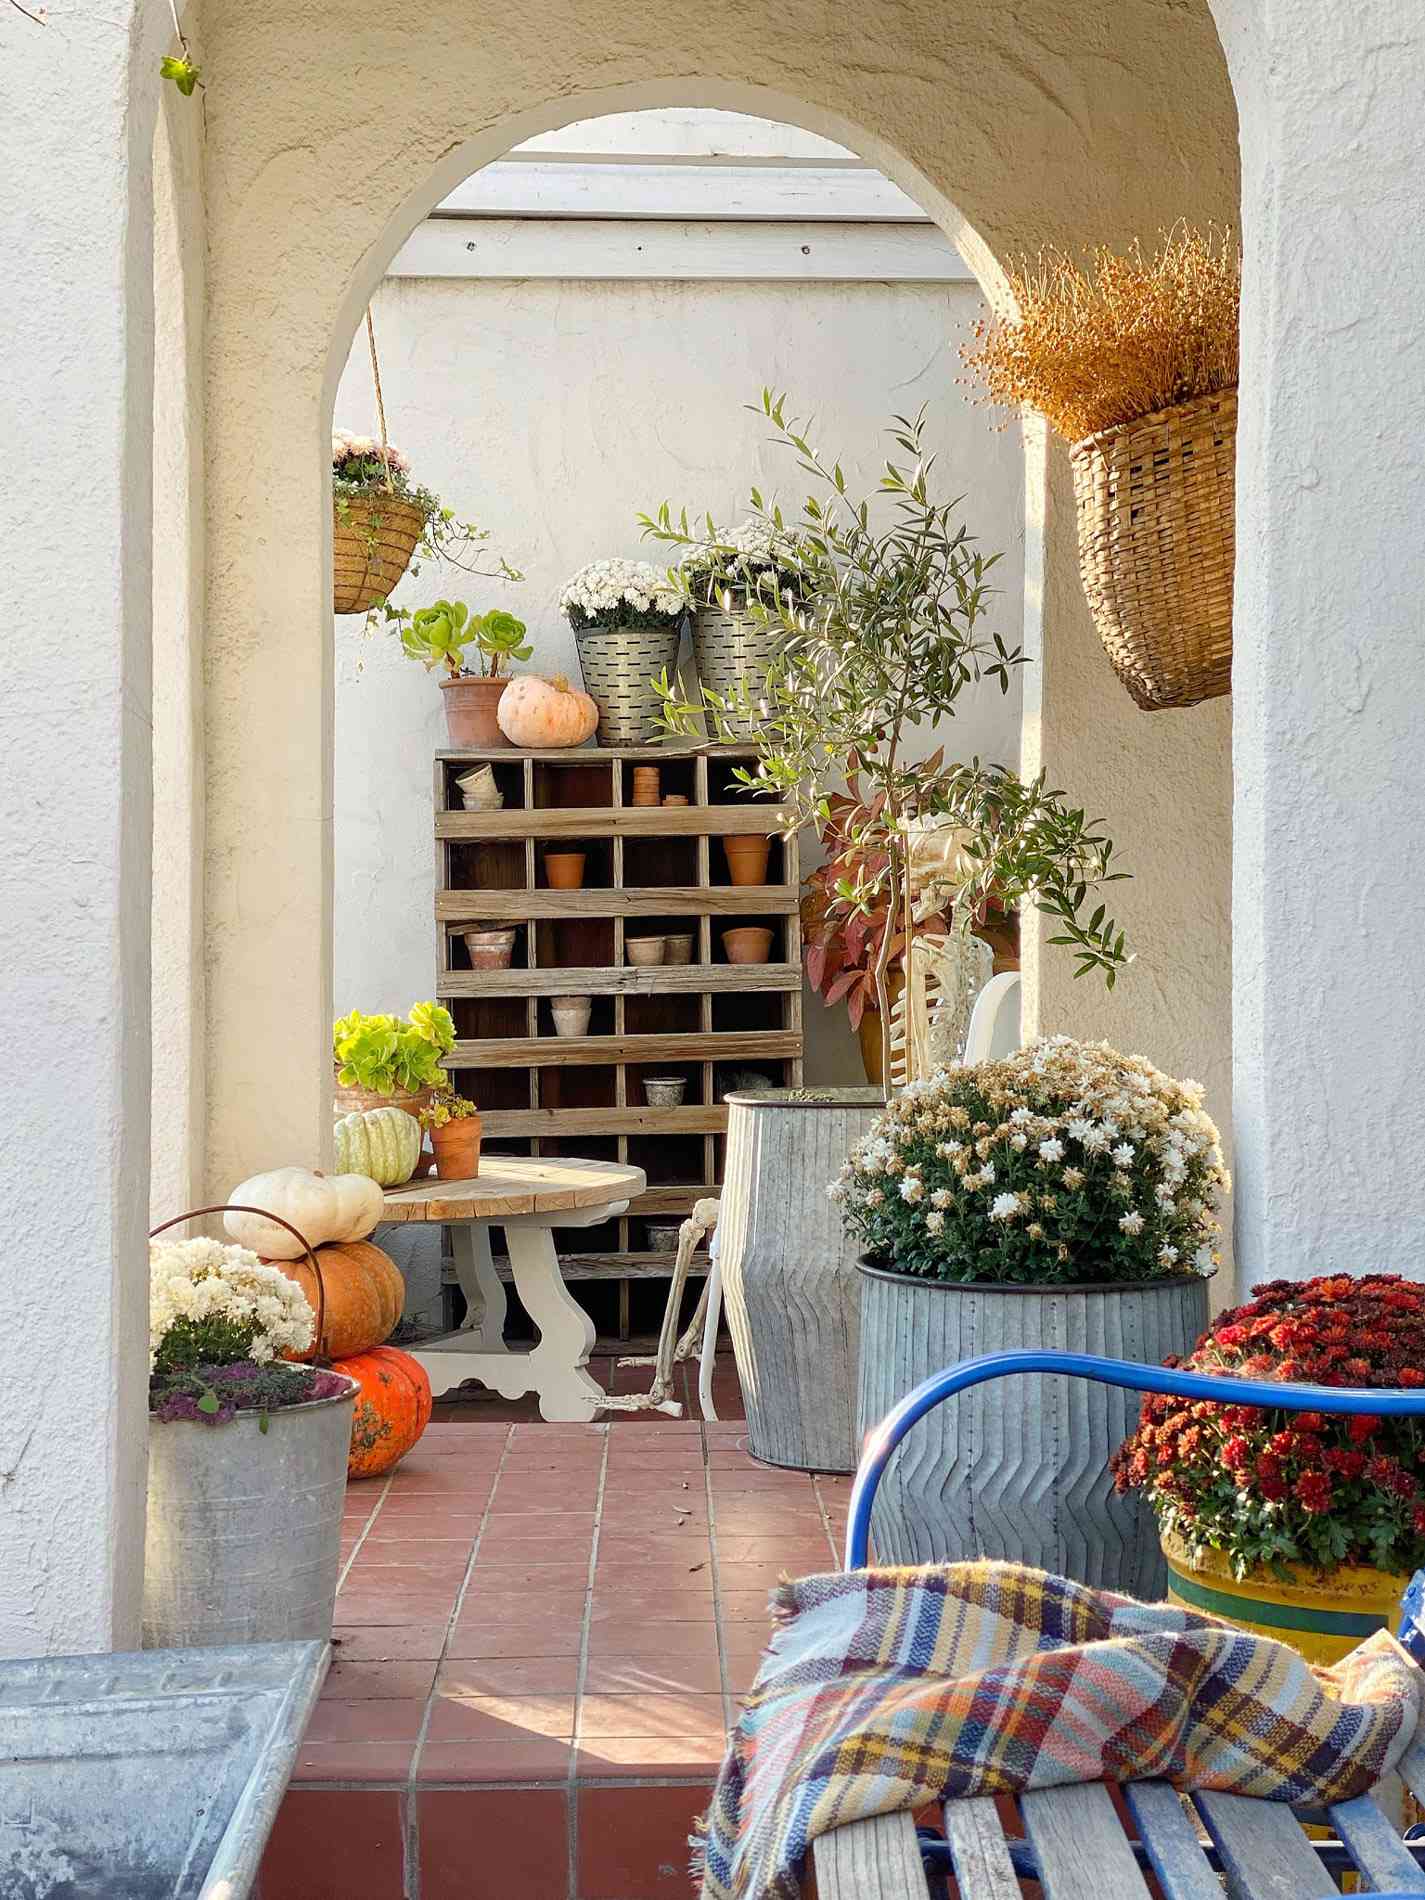
“Before you commit to a full rustic porch makeover, run through this quick checkl”
Before you commit to a full rustic porch makeover, run through this quick checklist:
- What is the square footage of your porch? Make sure you have enough room for decor without creating a tripping hazard.
- Is your porch covered or exposed? This will dictate which natural materials are realistic to use.
- What is your cleanup tolerance? Be honest about how much time you’re willing to spend sweeping up leaves and straw.
- Do you have outdoor electrical outlets? If you want to add lighting, know where your power sources are before you start designing.
6. A Cozy Porch Corner with a Wicker Chair and Pumpkins
Natural wicker furniture adds incredible texture, but it needs some care to last. If your porch is exposed to rain and direct sun, a real wicker chair will fade, crack, and potentially grow mildew. To keep it looking good, you’ll need to clean it with a soft brush and mild soap solution at the start and end of the season, and ideally bring it indoors during the off-season or harsh weather. For a lower-maintenance option, look for all-weather resin wicker, which gives you the same look without the susceptibility to moisture and UV damage. It might cost more upfront but will last many more seasons.
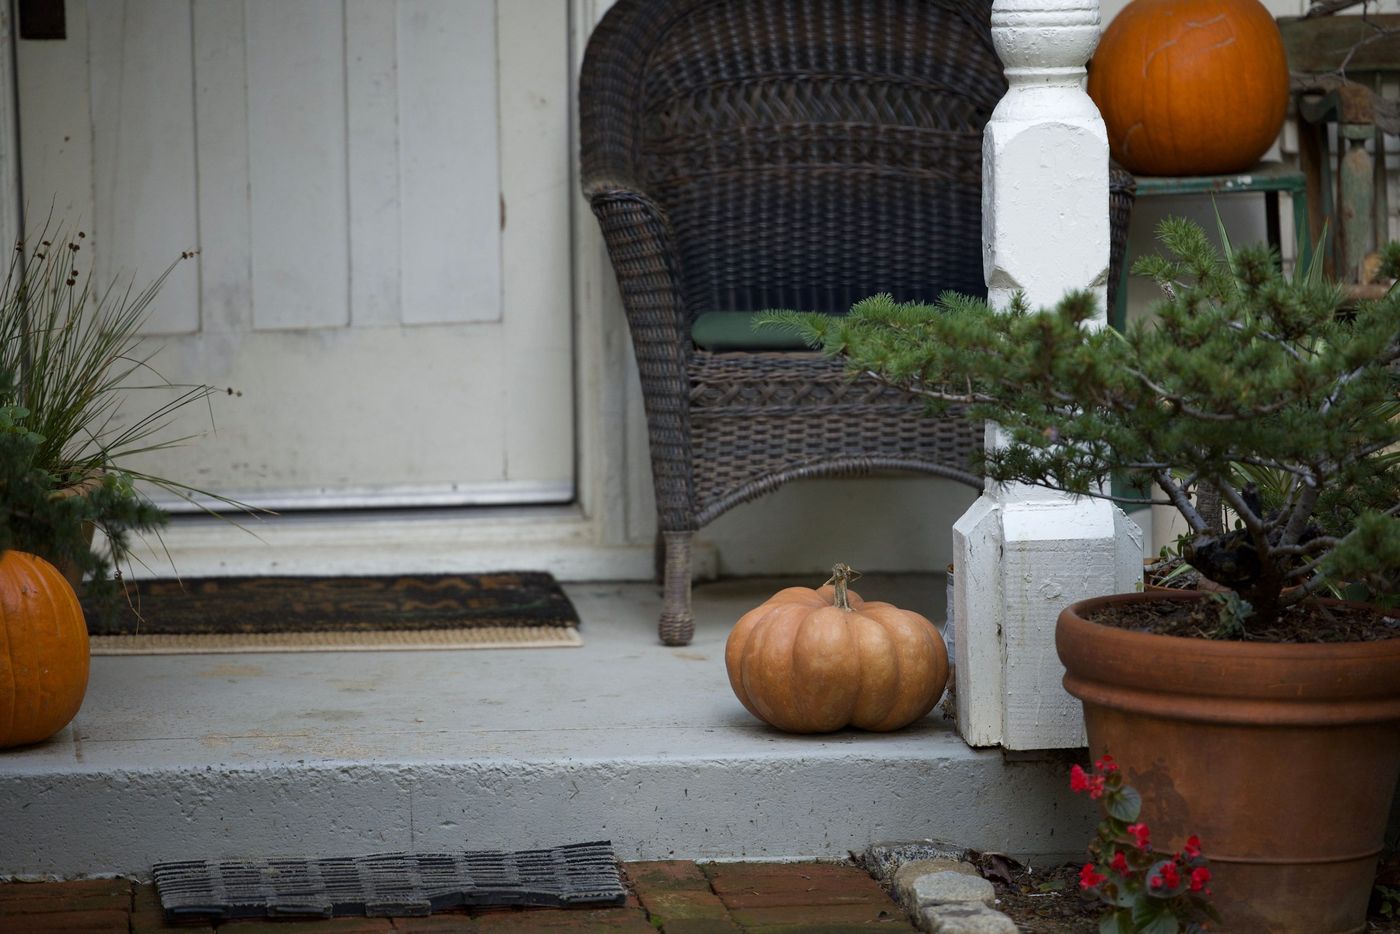
“When styling a small porch or corner, think in triangles.”
Notice how the tall evergreen, the wicker chair, and the cluster of pumpkins on the steps form a visual triangle. This creates a sense of balance and intentionality. To replicate this, pick one tall element (a plant or a stack of pumpkins), one medium-sized anchor piece (your chair), and a low cluster of decor (more pumpkins or lanterns). This simple geometric trick keeps a small space from looking cluttered. While some grand displays like the brownstone steps in Idea #1 are stunning, this triangular approach is perfect for more modest spaces.
7. A Traditional Display with Corn Stalks and Stacked Pumpkins
This classic look follows a tried-and-true formula: 40% vertical elements + 40% grounded color + 20% refined detail. The tall bundle of corn stalks provides the vertical interest, drawing the eye up the pillar. The stacked heirloom pumpkins and the vibrant yellow mums in the urn provide a heavy, grounded block of seasonal color. The refined detail comes from the ornate gray metal urn itself, which adds a touch of sophistication and keeps the arrangement from feeling too rustic or country. You could swap the corn stalks for tall branches and the urn for a simple terracotta pot, and the balance would still work.
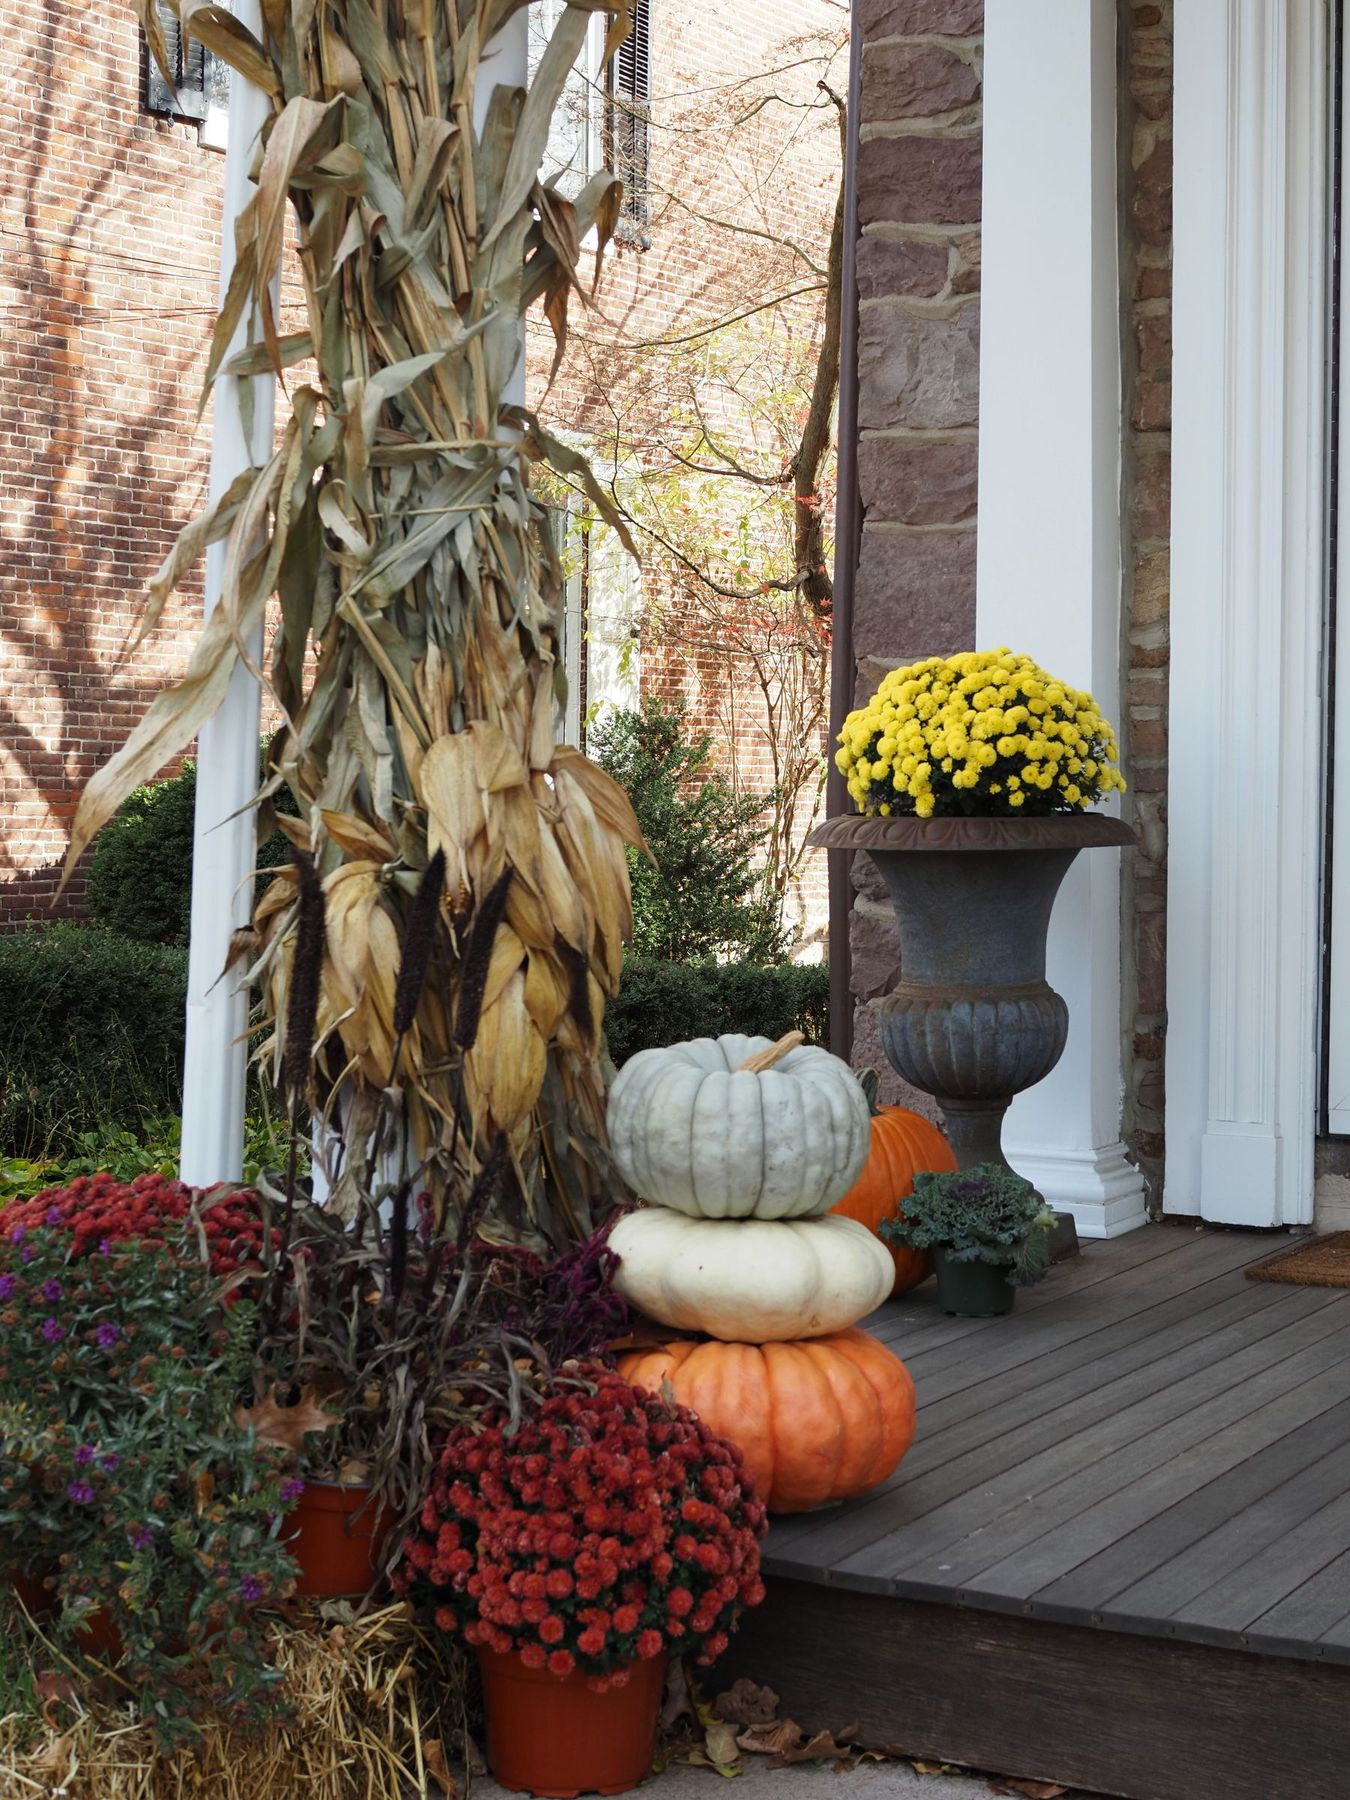
“The single most important element here is the stack of pumpkins.”
Without it, the composition falls apart. The corn stalk would feel lonely, and the urn of mums would just be a nice plant. Stacking the pumpkins accomplishes two things: it introduces a variety of colors and textures (bumpy green, smooth orange) in a compact space, and it creates a visual ‘bridge’ between the low-to-the-ground urn and the tall corn stalks. It’s the piece that connects everything else, turning separate decorative items into a cohesive, thoughtfully designed vignette. It’s the anchor of the whole setup.
8. Vibrant Autumn Foliage on a Dark Blue Porch
The reason this design pops so effectively is the brilliant use of color theory. The deep navy blue of the house acts as a cool, moody backdrop that makes the warm colors—the fiery oranges, reds, and yellows of the faux maple leaves—appear even more vibrant and saturated. It’s a classic complementary color scheme at play. The repetition of the deep red in the potted chrysanthemums ties the whole look together, creating a cohesive flow from the railing down to the porch floor. The warm glow from the lantern light adds the final touch, enhancing the cozy, inviting feel.
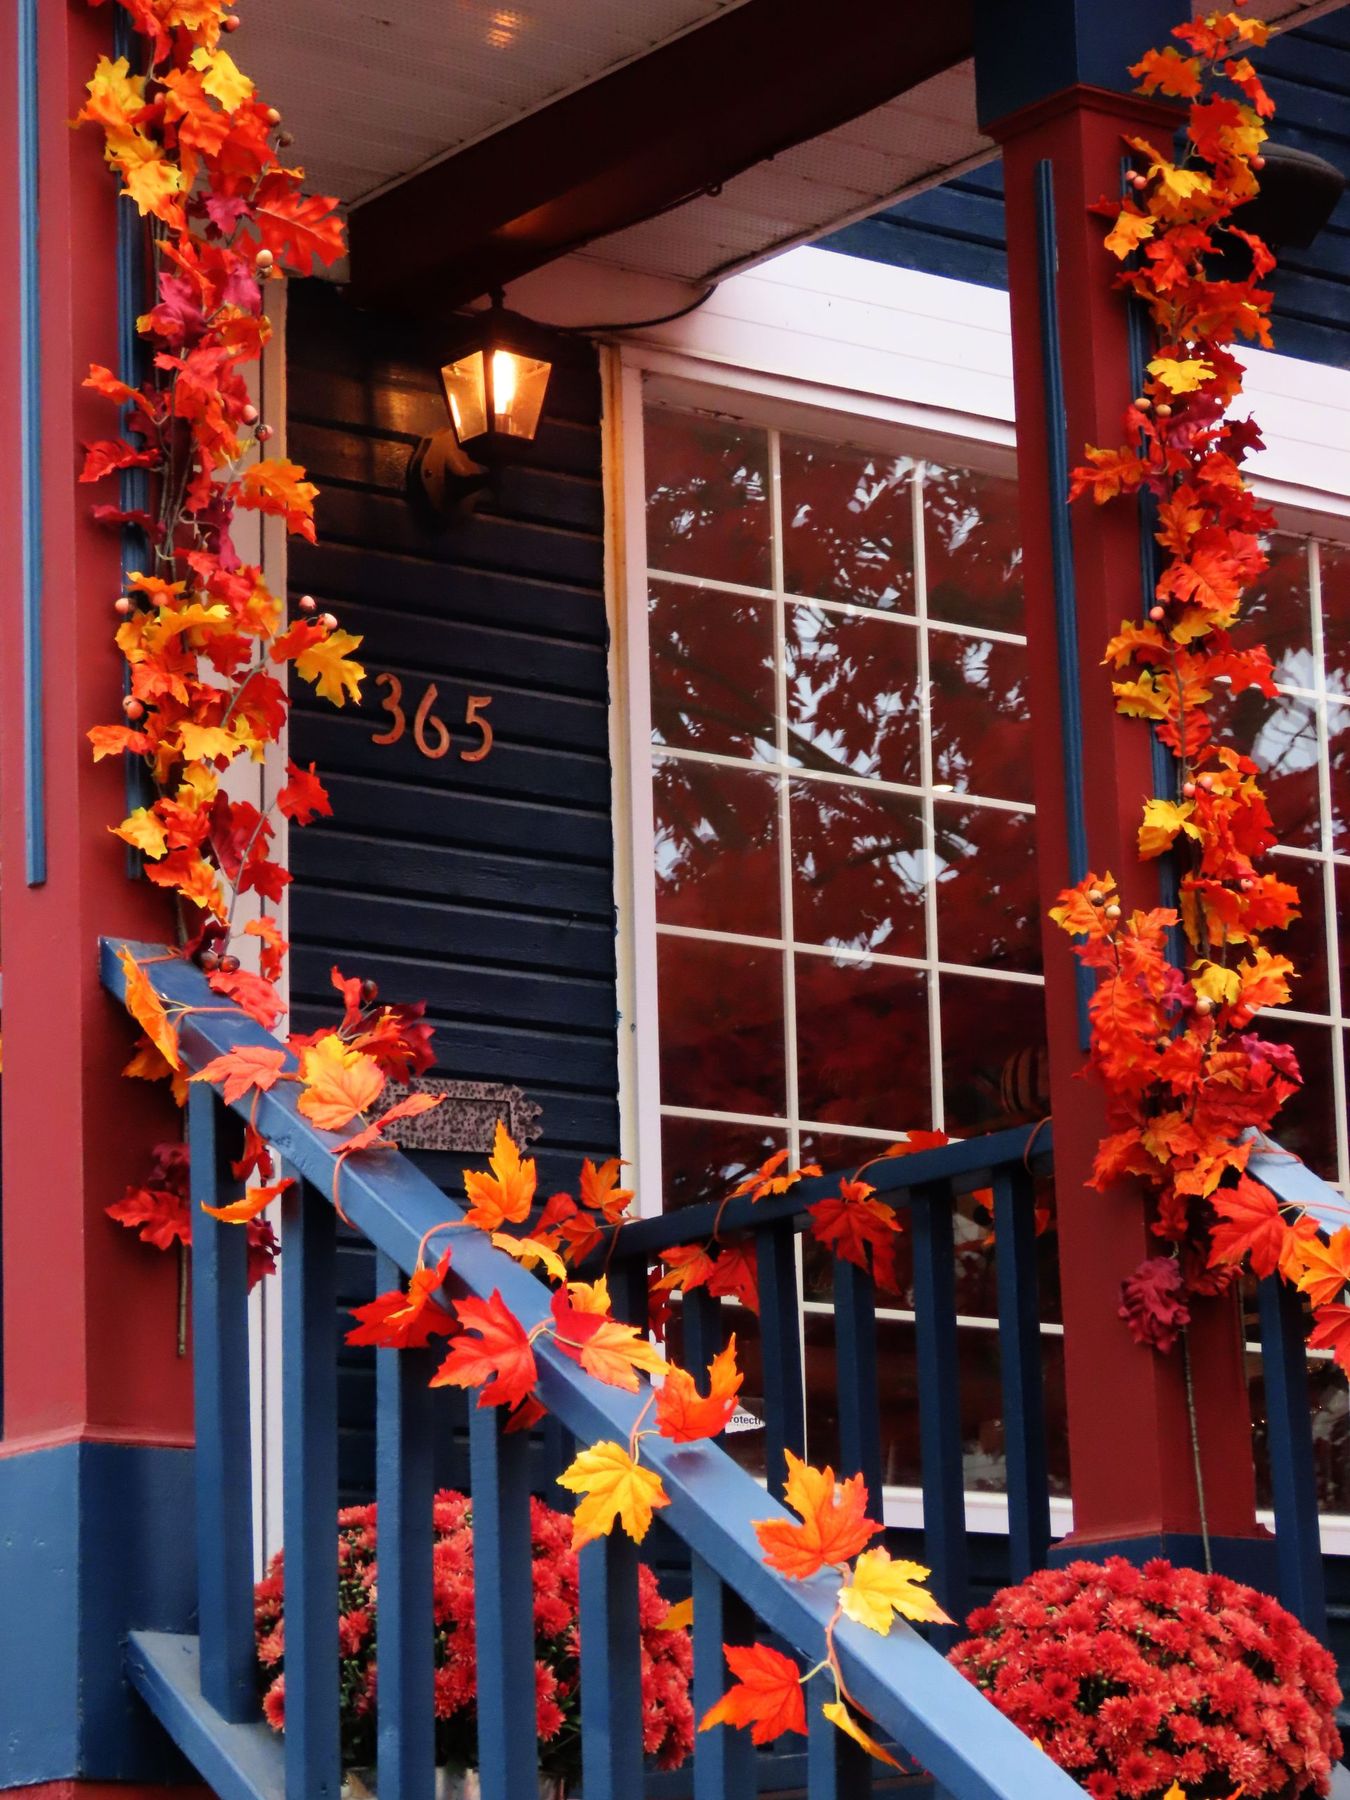
“This dense, layered garland approach works best on porches with a clearly defined railing or entryway structure to support the decor.”
A railing length of at least 8-10 feet is ideal to achieve this look without it feeling cramped. The key is having enough space to let the garlands drape naturally. This style is fantastic for traditional homes with prominent porches, but it could easily overwhelm a very small stoop or a minimalist modern entrance. For smaller spaces, consider using a single, more delicate garland around the doorframe instead of draping it across the entire porch.
9. Porch Steps with Yellow and Lavender Chrysanthemums
A professional trick for arranging decor on steps is to create a ‘cascade’ effect. Start with your largest items at the top and let the smaller items ‘spill’ down the stairs. Here, the big, fluffy potted mums are placed on a higher step, anchoring the display. The assorted pumpkins are then arranged below them and on the next step down. This creates a natural, downward visual flow that feels organic and pleasing to the eye. Avoid placing items of the same size right next to each other; mixing large mums with medium and small pumpkins creates rhythm and interest.
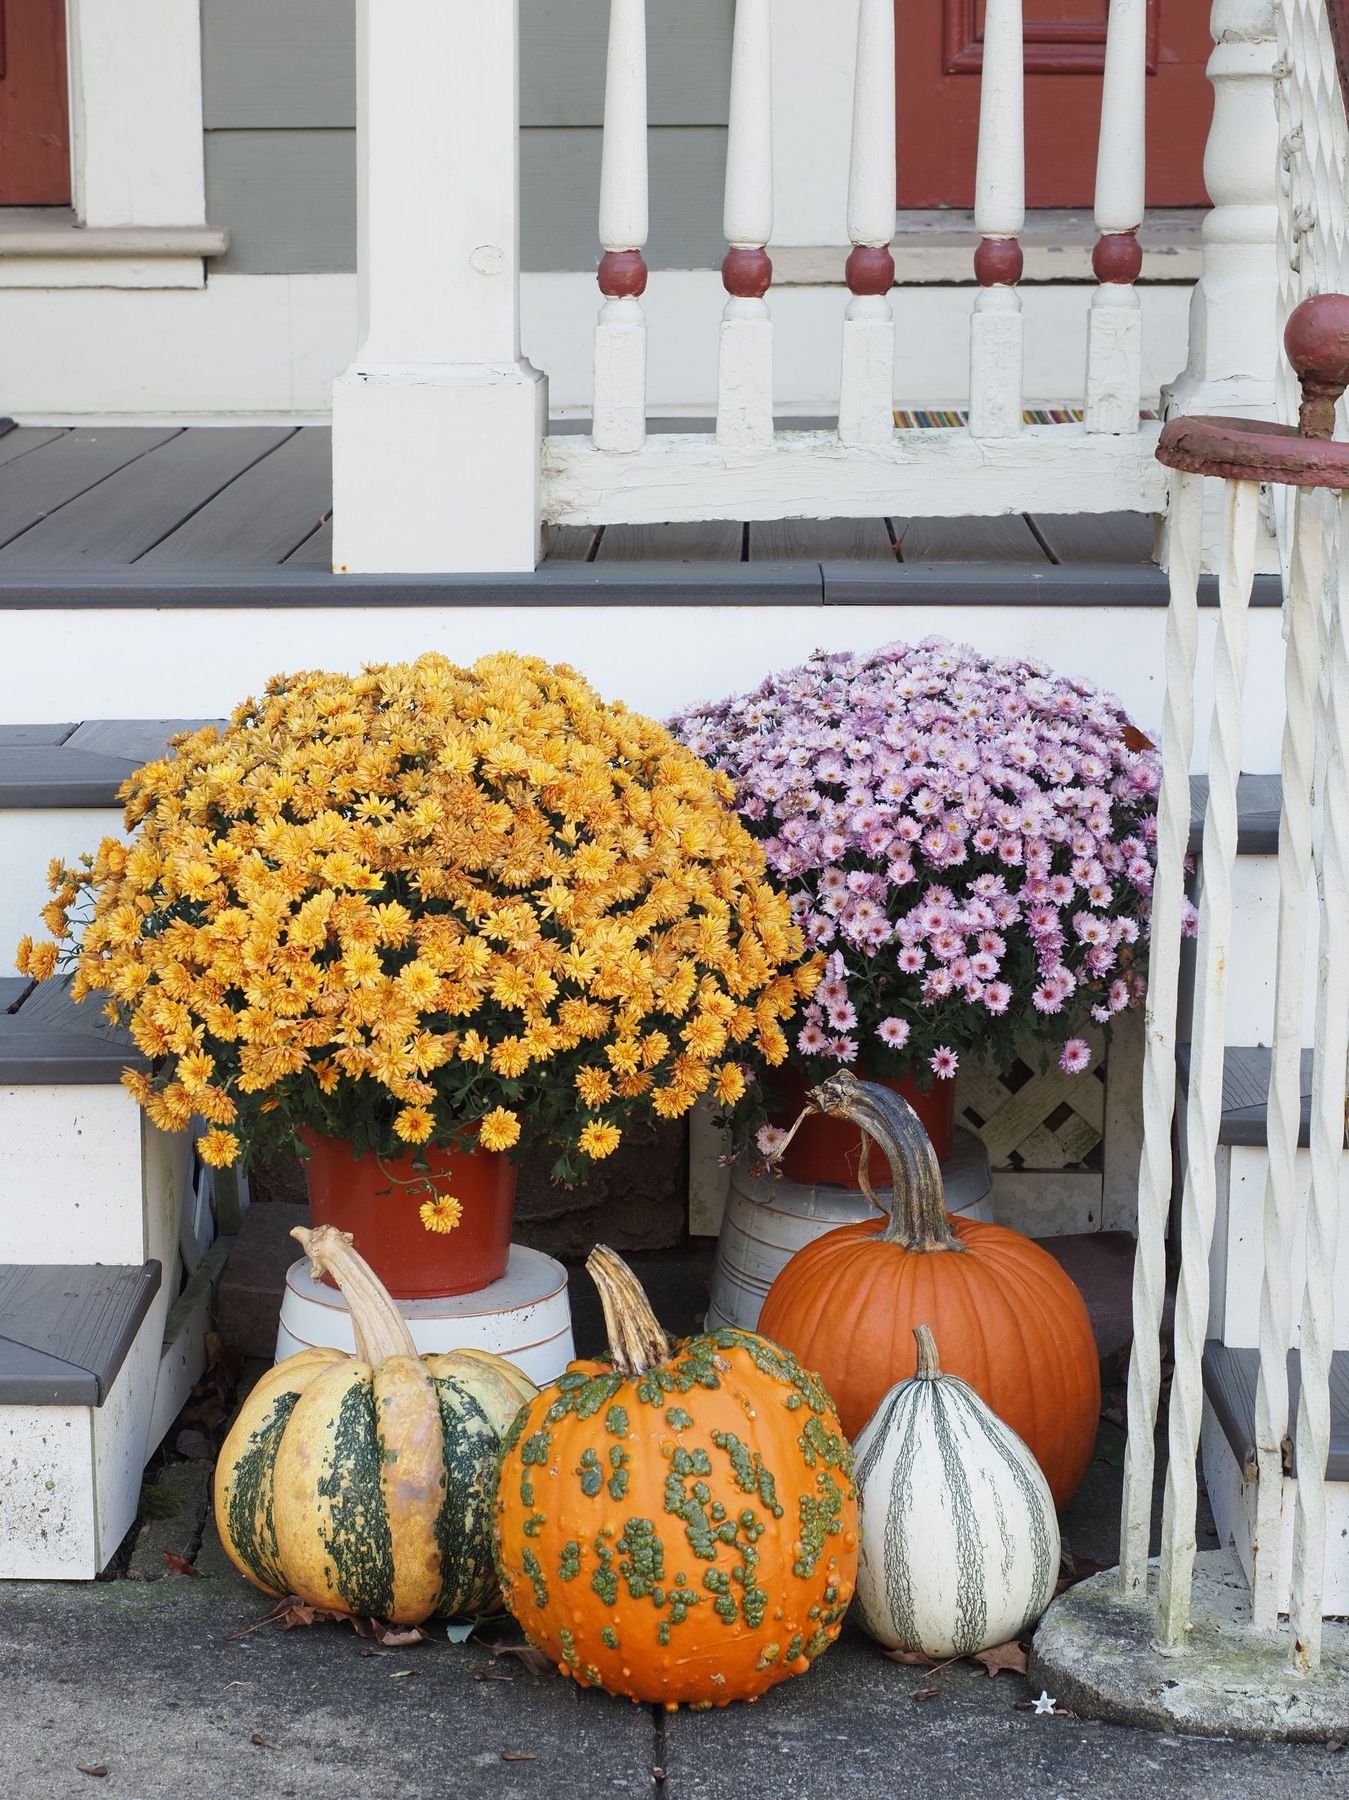
“You can achieve this lush, multi-pumpkin look without breaking the bank.”
Instead of buying a dozen different heirloom pumpkins, which can get pricey, invest in two large, classic orange pumpkins as your main anchors. Then, visit your local grocery store or farmer’s market for inexpensive miniature pumpkins and gourds to fill in the gaps. You can often get a bag of assorted minis for under $10. For the mums, buy them early in the season when they are still in bud form; they’ll be cheaper and will last longer, blooming right on your porch.
10. A Cozy Window Sill with a Knit Throw and Fairy Lights
This look is a perfect example of the ‘cozy season’ aesthetic that dominates Pinterest and Instagram from September to December. It’s less about traditional Halloween motifs and more about evoking a feeling of warmth, comfort, and serenity. In 2026, we’re seeing a huge move toward these small, self-contained ‘moments’ of seasonal decor rather than decking out an entire room. It’s about creating a personal, sensory experience—the texture of the knit blanket, the warm glow of the lights, the rustic feel of the clay mug. This trend has staying power because it’s adaptable, personal, and focuses on wellness and ambiance over overt decoration.
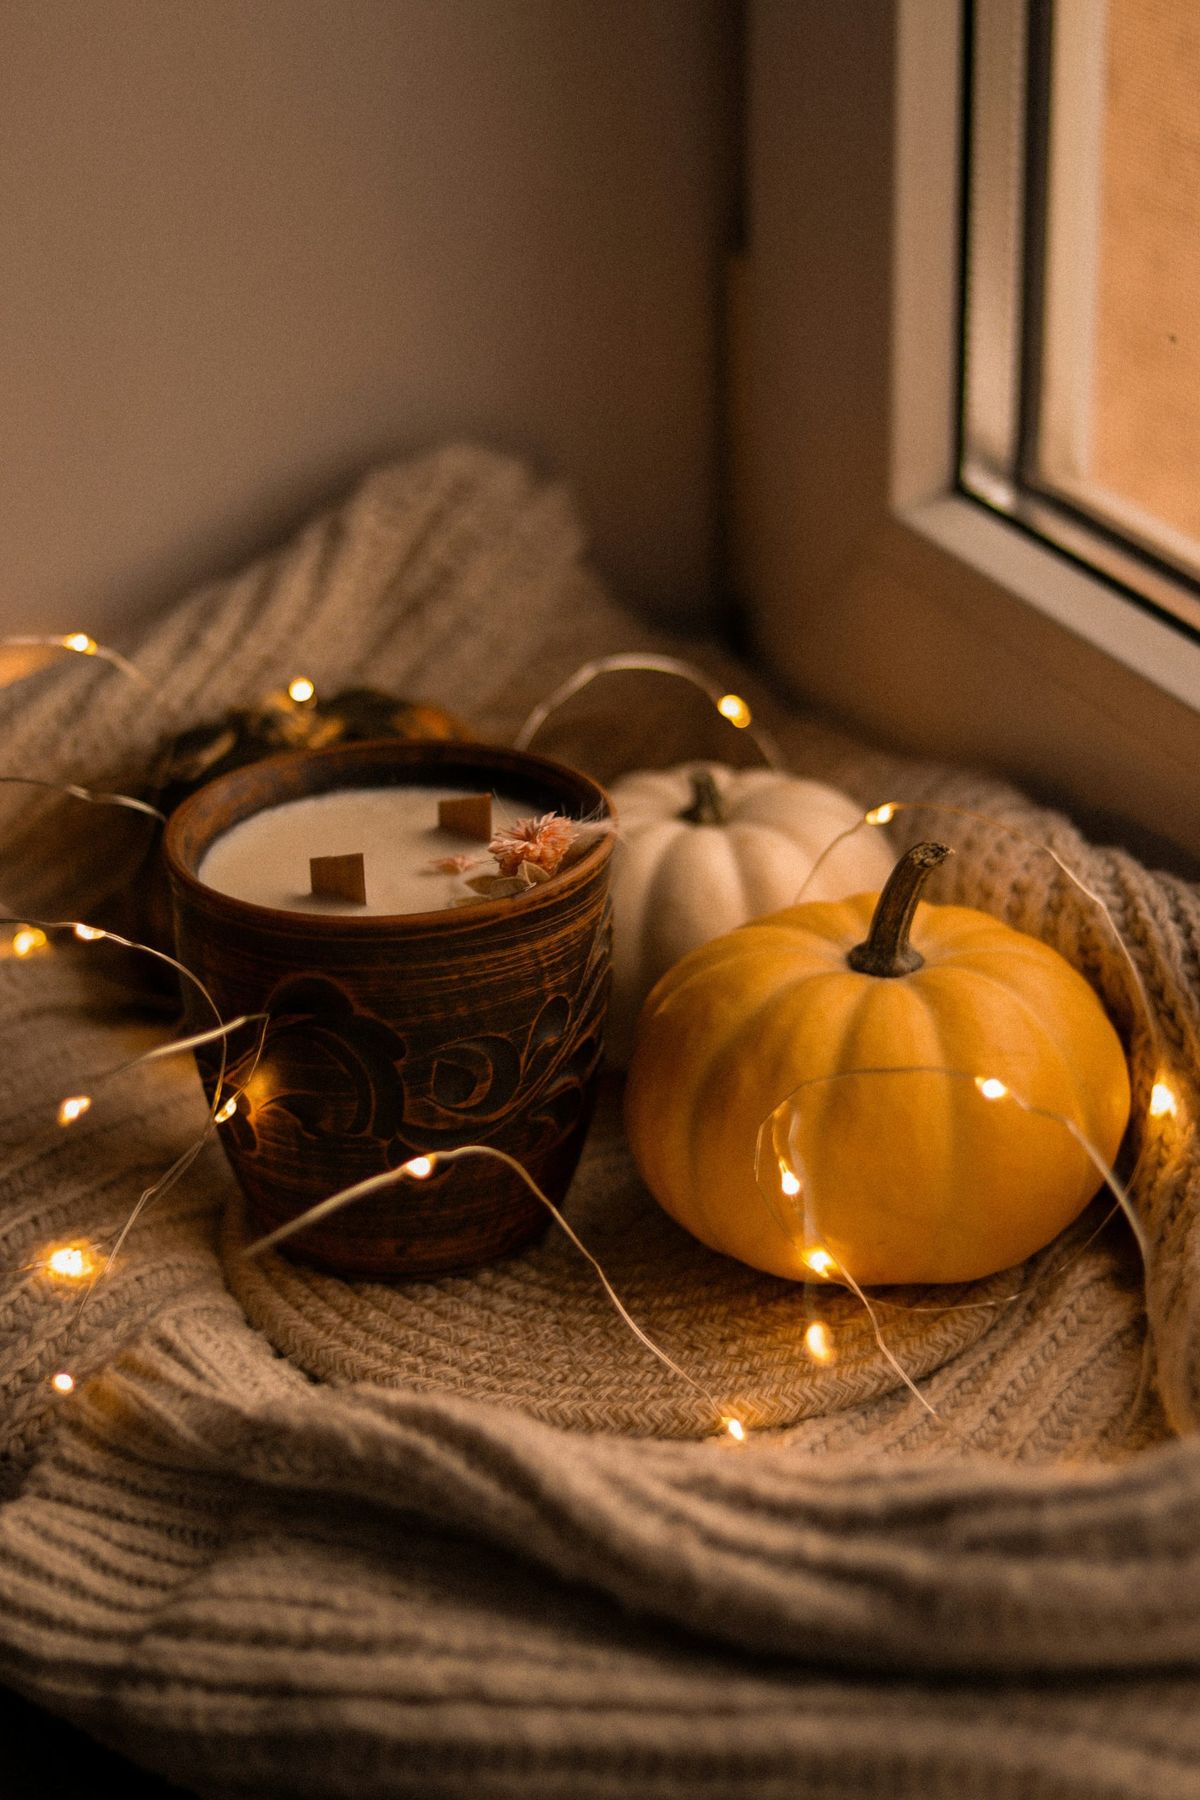
“You can create your own rustic wooden-wick candle in about 30 minutes (plus curing time) for around $15.”
Here’s how: Secure a wooden wick and its metal base to the bottom center of your clay mug using a hot glue gun.Melt natural soy wax flakes in a microwave-safe container or a double boiler until fully liquid.Add a few drops of your favorite fall-scented essential oil (like cinnamon, clove, or cedarwood) to the melted wax and stir.Carefully pour the wax into the mug, using clips or clothespins to hold the wick straight.Let the candle cure for at least 24-48 hours before trimming the wick to 1/4 inch and lighting.
11. A Rustic Farmhouse Porch with a Pallet Sofa
The wooden barrel is the secret weapon of this entire design. Take it away, and the potted mum would be sitting on the floor, looking short and disconnected from the height of the pallet sofa. By using the barrel as a pedestal, the designer elevates the mum, bringing its deep red color up to the eye level of someone sitting on the sofa. This simple move creates a more balanced and dynamic composition. It also reinforces the rustic, reclaimed theme established by the pallet furniture, making the whole space feel more cohesive. It’s a perfect example of using an unconventional item to solve a design problem.
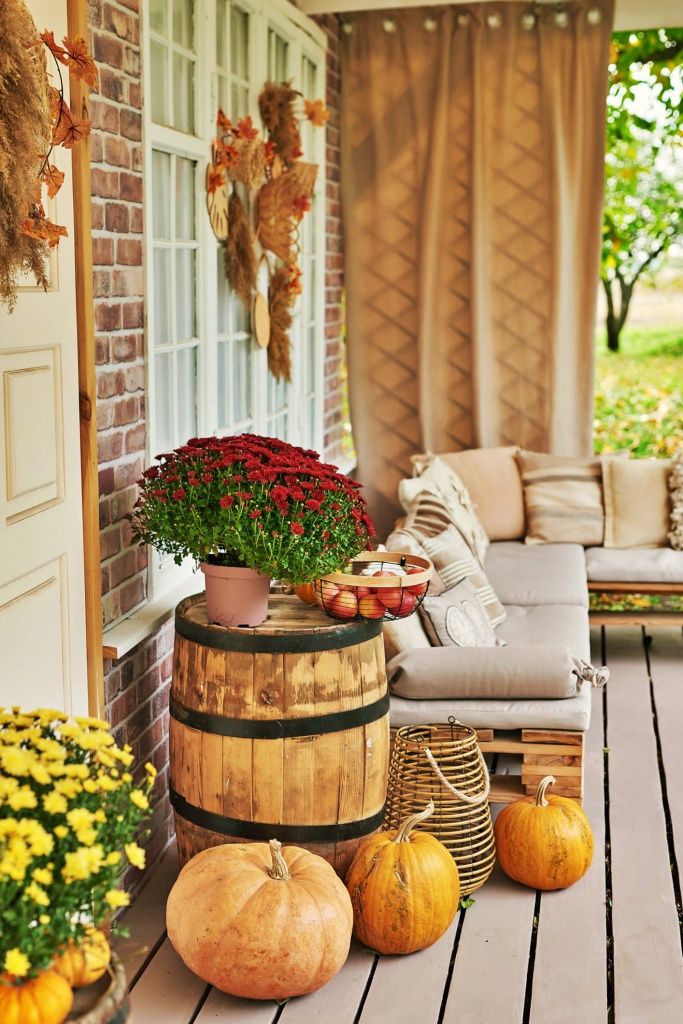
“A pallet sofa looks amazing and is a budget-friendly DIY, but comfort is not its strong suit.”
Those cushions and pillows are doing some heavy lifting. If you plan to build one, be prepared to invest in thick, high-density foam for the seat cushions—at least 4-5 inches thick. Otherwise, you’ll be feeling the hard wooden slats underneath. Also, ensure the pallets you use are heat-treated (marked with ‘HT’), not chemically treated (marked with ‘MB’), especially if kids or pets will be using the furniture. This has a similar rustic farmhouse feel to the porch in Idea #6, but with a focus on seating.
12. Green Farmhouse Stairs with Pumpkins and Gingham
This charming vignette works because of its unexpected and delightful color combination. The dark, forest green of the stairs isn’t a typical Halloween color, but it acts as a perfect backdrop for the bright, saturated orange of the pumpkin, making it pop. The red and white gingham fabric adds another layer of pattern and a touch of classic country charm that bridges the gap between the green, white, and orange. The contrast between the bumpy texture of the large pumpkin and the smooth, clean lines of the white lap siding adds tactile interest, making the scene feel rich and layered.
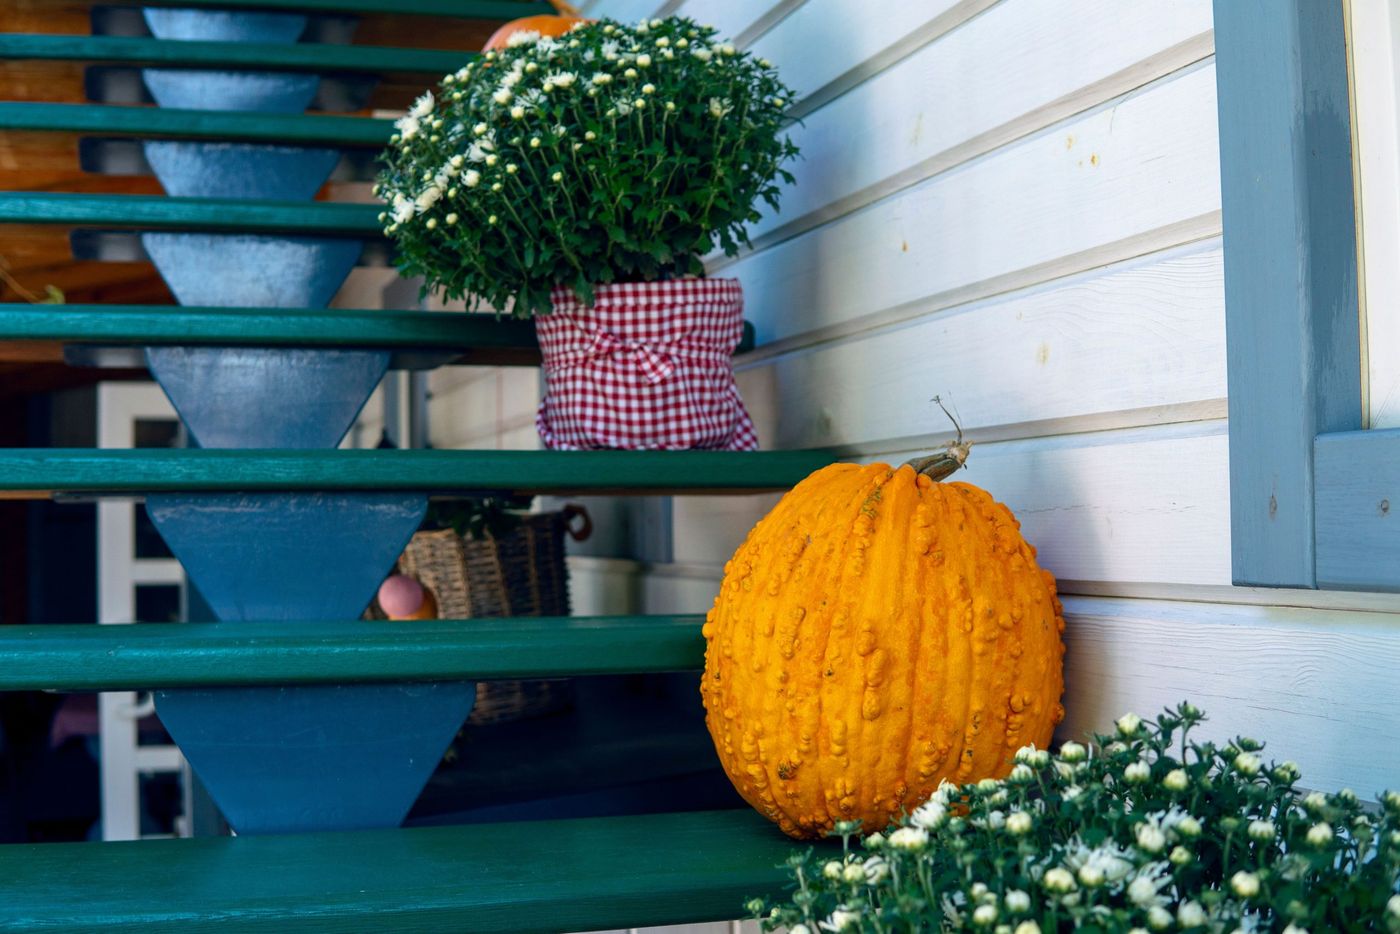
“Painted wooden stairs, especially outdoors, require consistent upkeep.”
High-traffic areas will show scuffs and wear within a single season. To keep them looking fresh, you’ll need to do a thorough cleaning and likely a touch-up coat of paint every year. In climates with harsh winters, moisture can cause the paint to peel and the wood to rot if not properly sealed. When you first paint them, use a high-quality exterior porch and floor paint, which is designed to withstand foot traffic and the elements. Be prepared for this to be a recurring task on your annual home maintenance list.
13. A Simple DIY Fabric Ghost Hanging in a Tree
Create this sweet and spooky ghost in under 15 minutes for less than $5. It’s a perfect project to do with kids.
- Start with a square piece of white fabric, like an old bedsheet or a yard of cheesecloth.
- Ball up some stuffing, cotton balls, or even a plastic bag to form the head and place it in the center of the fabric.
- Gather the fabric under the ‘head’ and tie it off securely with a piece of string or a rubber band to create the neck.
- Use a hot glue gun or fabric glue to attach two red felt circles for eyes and a small piece of black felt for the mouth.
- Tie a longer piece of fishing line or string around the neck, and it’s ready to hang from a tree branch!
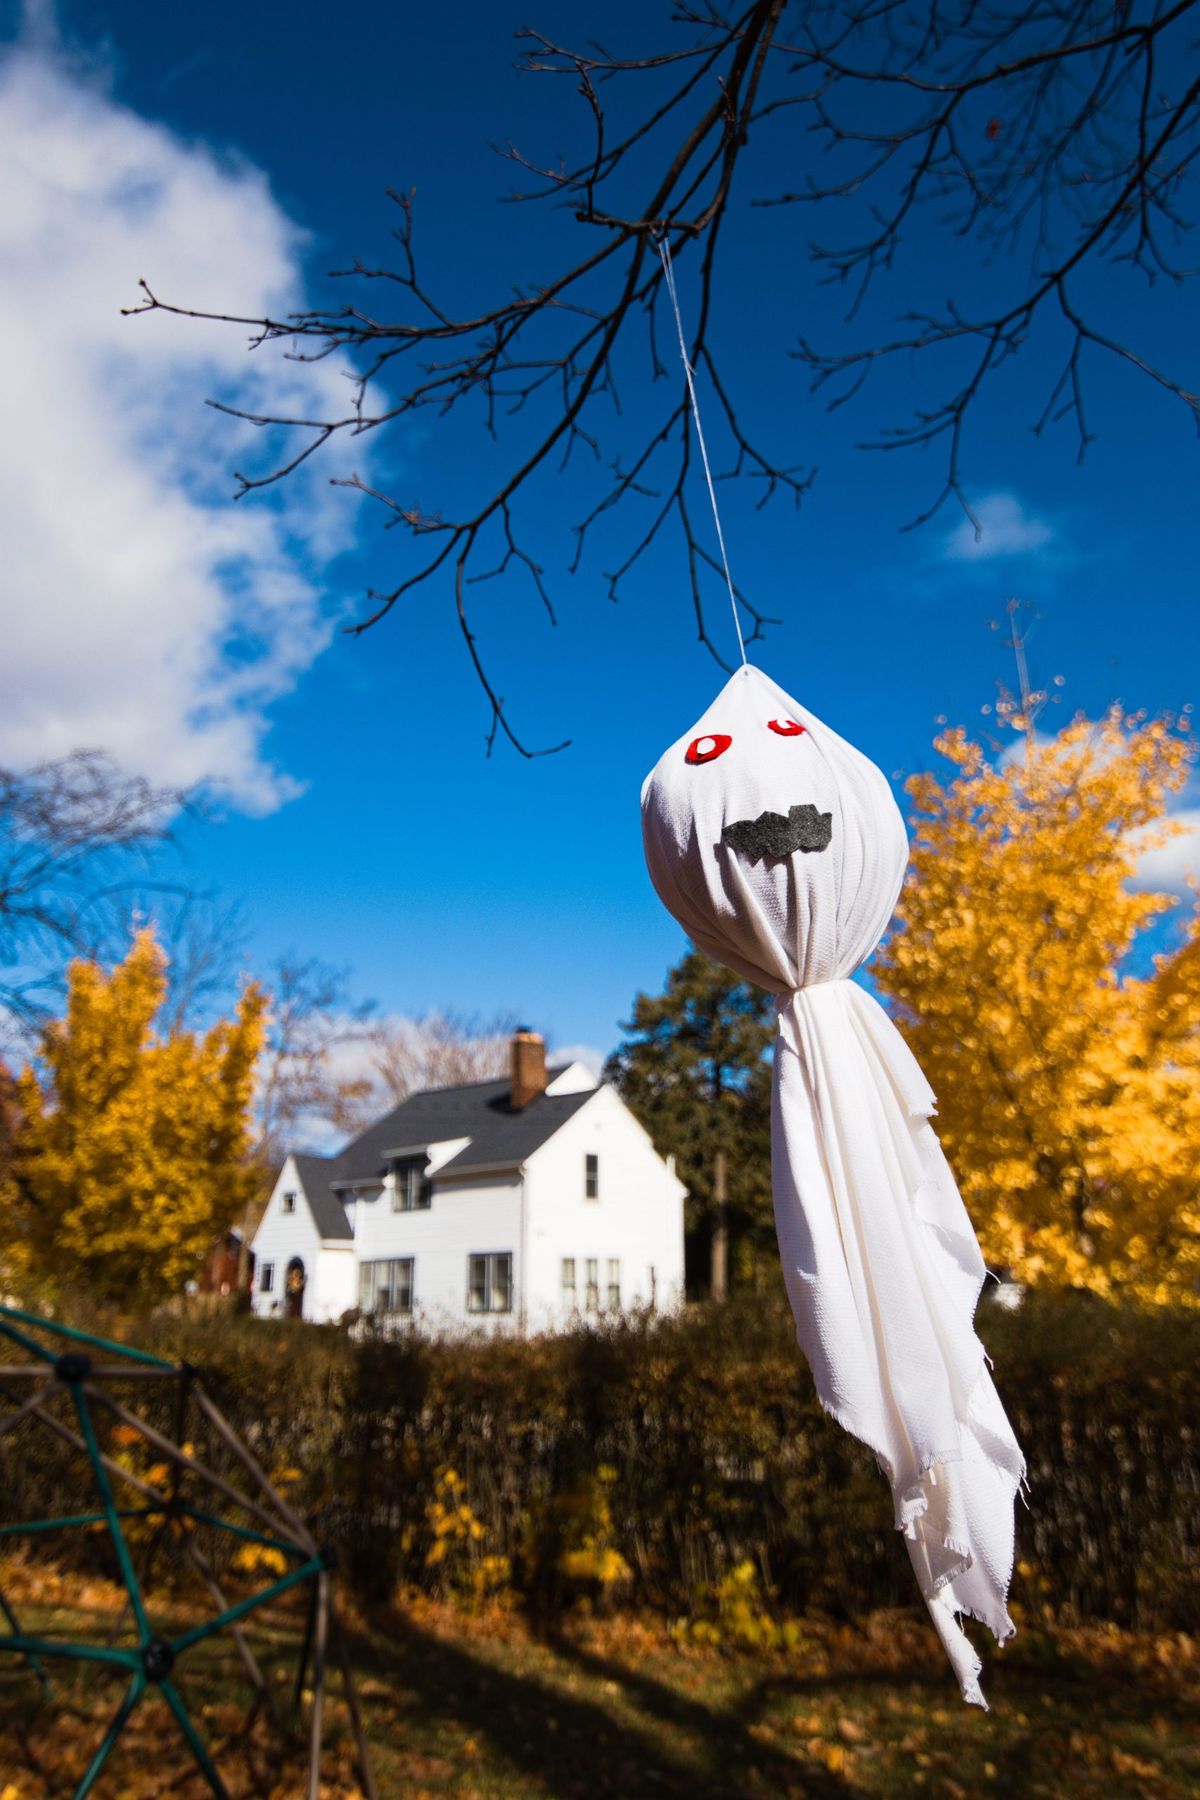
“This entire project is the definition of budget-friendly.”
You can make it for practically free if you have the materials on hand. An old white pillowcase or t-shirt can be used for the fabric. No felt for the face? No problem. Use a black permanent marker to draw on the eyes and mouth. You could even use buttons, like the smaller ghosts in Idea #18. Instead of craft stuffing, a wadded-up grocery bag or some balled-up newspaper will work just as well to form the head. The goal is charming and handmade, not store-bought perfection, so lean into using what you’ve got.
14. A Rustic Bench with a Carved Spiderweb Backrest
This porch masters a subtle Halloween vibe with a simple equation: 70% rustic harvest + 30% spooky detail. The bulk of the decor—the natural wood bench, the classic orange pumpkins, the potted plants—firmly establishes a warm, autumnal, harvest theme. The single, impactful spooky element is the carved spiderweb on the bench’s backrest. It’s just enough to say ‘Halloween’ without screaming it. This ratio is perfect for anyone who wants to acknowledge the holiday in a more grown-up, atmospheric way. By keeping the spooky elements minimal, the overall look remains stylish and welcoming.
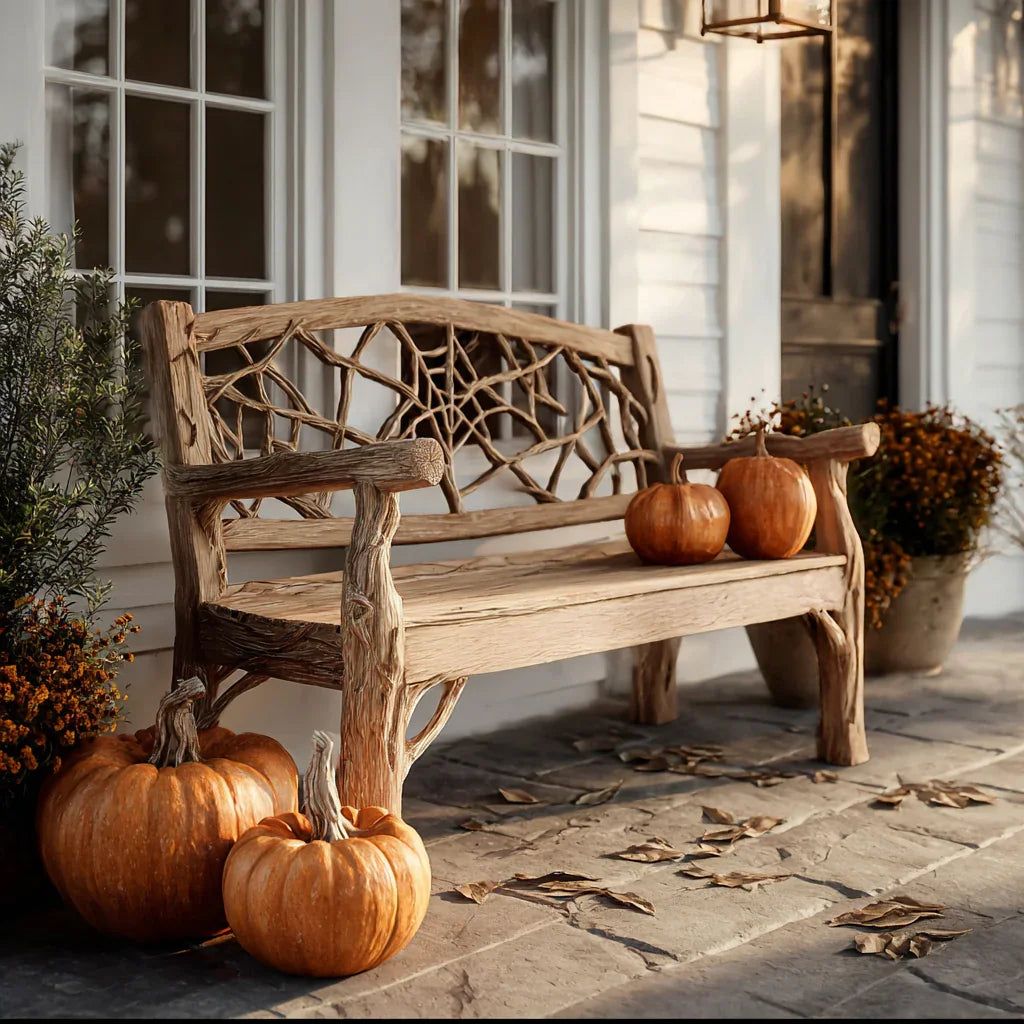
“When styling around a statement piece of furniture like this bench, don’t try to compete with it.”
The bench is the star. Your job is to support it. Notice how the pumpkins are arranged asymmetrically around the base of the bench, not lined up perfectly. This creates a more natural, casual feel. One larger pumpkin is placed to one side, while a smaller grouping is on the other. This prevents the scene from feeling too staged or rigid and allows the beautifully carved spiderweb to remain the undeniable focal point. Let your hero piece breathe.
15. A Sunny Window Ledge with Shelves and Pumpkins
- Floating Wooden Shelves (set of 2): $25 – $50
- Miniature Pumpkins & Gourds (assorted): $15 – $30
- String Fairy Lights (battery-operated): $5 – $15
- Decorative Glass/Ceramic Vases & Dishes: $20 – $40
- TOTAL: $65 – $135
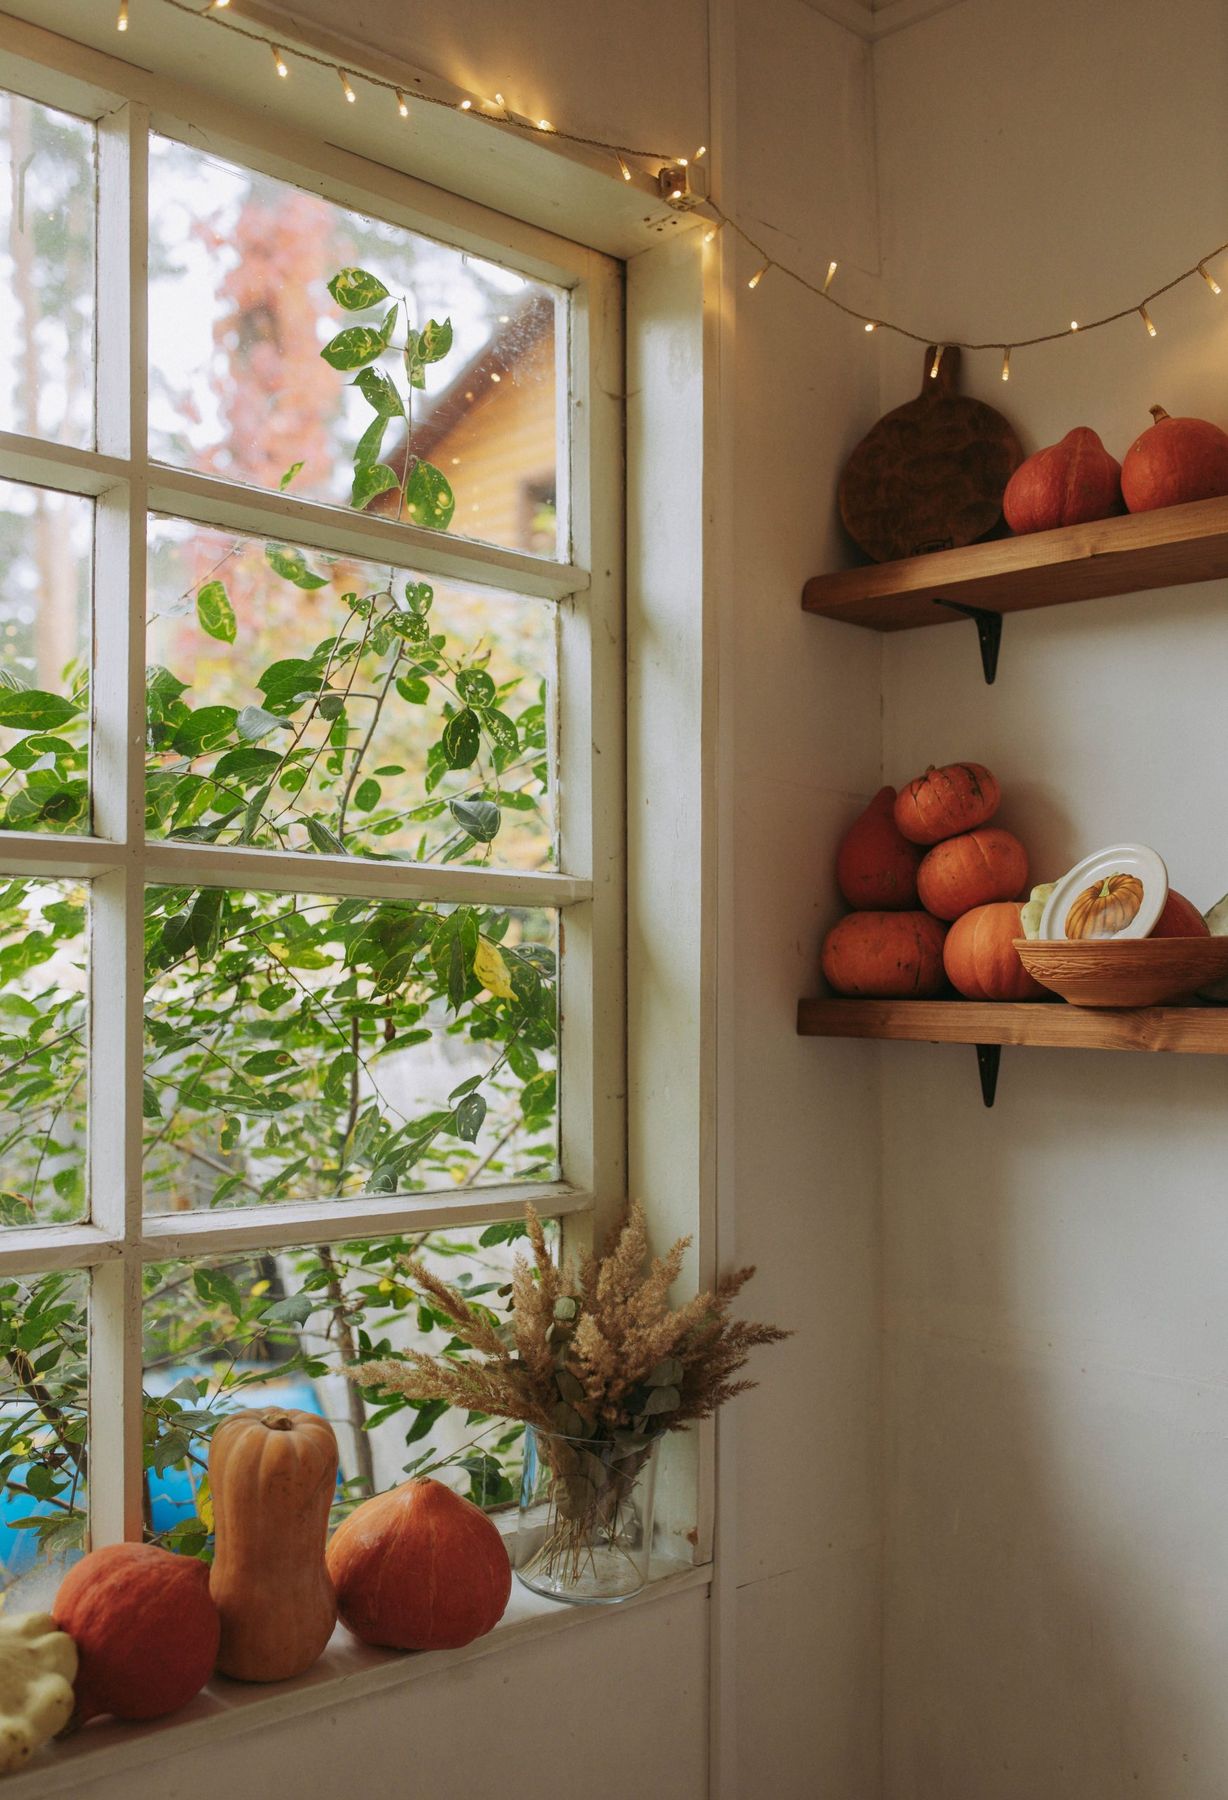
“Budget alternative: You can create this look for around $40.”
Use simple picture ledges from IKEA ($15 for two) instead of thicker floating shelves. Forage for small, interesting branches or dried grasses from your backyard instead of buying wheat stalks. A clean glass jar can serve as a vase. The key elements—the small pumpkins and fairy lights—are already quite affordable, so focus savings on the shelving and vessels.
This idea is perfect for small spaces and apartments where you don’t have a porch or a mantel to decorate. It works beautifully on any window sill that’s at least 6 inches deep and gets decent natural light. The wall-mounted shelves can be installed in a nook as small as 24 inches wide. This is a vertical decorating strategy, drawing the eye upward and making a small area feel more intentionally designed. To maximize the effect, keep the surrounding wall area relatively clear to let the cozy, illuminated display be the star.
- Best for: small living rooms, kitchen nooks, bedroom corners
- Avoid if: You have very little wall space or prefer large-scale decor.
16. A Minimalist Armchair with a ‘HOME’ Pumpkin Pillow
The entire seasonal statement here rests on that one lumbar pillow. Without it, you have a lovely, neutral, year-round corner with a comfy armchair and a cozy throw. The pillow is the single element that says ‘autumn’ and does so with clever, graphic charm. The pumpkin shape replacing the ‘O’ is a playful touch that feels more design-forward than a pillow with just a picture of a pumpkin on it. It’s a minimalist approach to seasonal decorating, proving that you don’t need to change everything in a room—sometimes, one perfect accessory is all it takes.
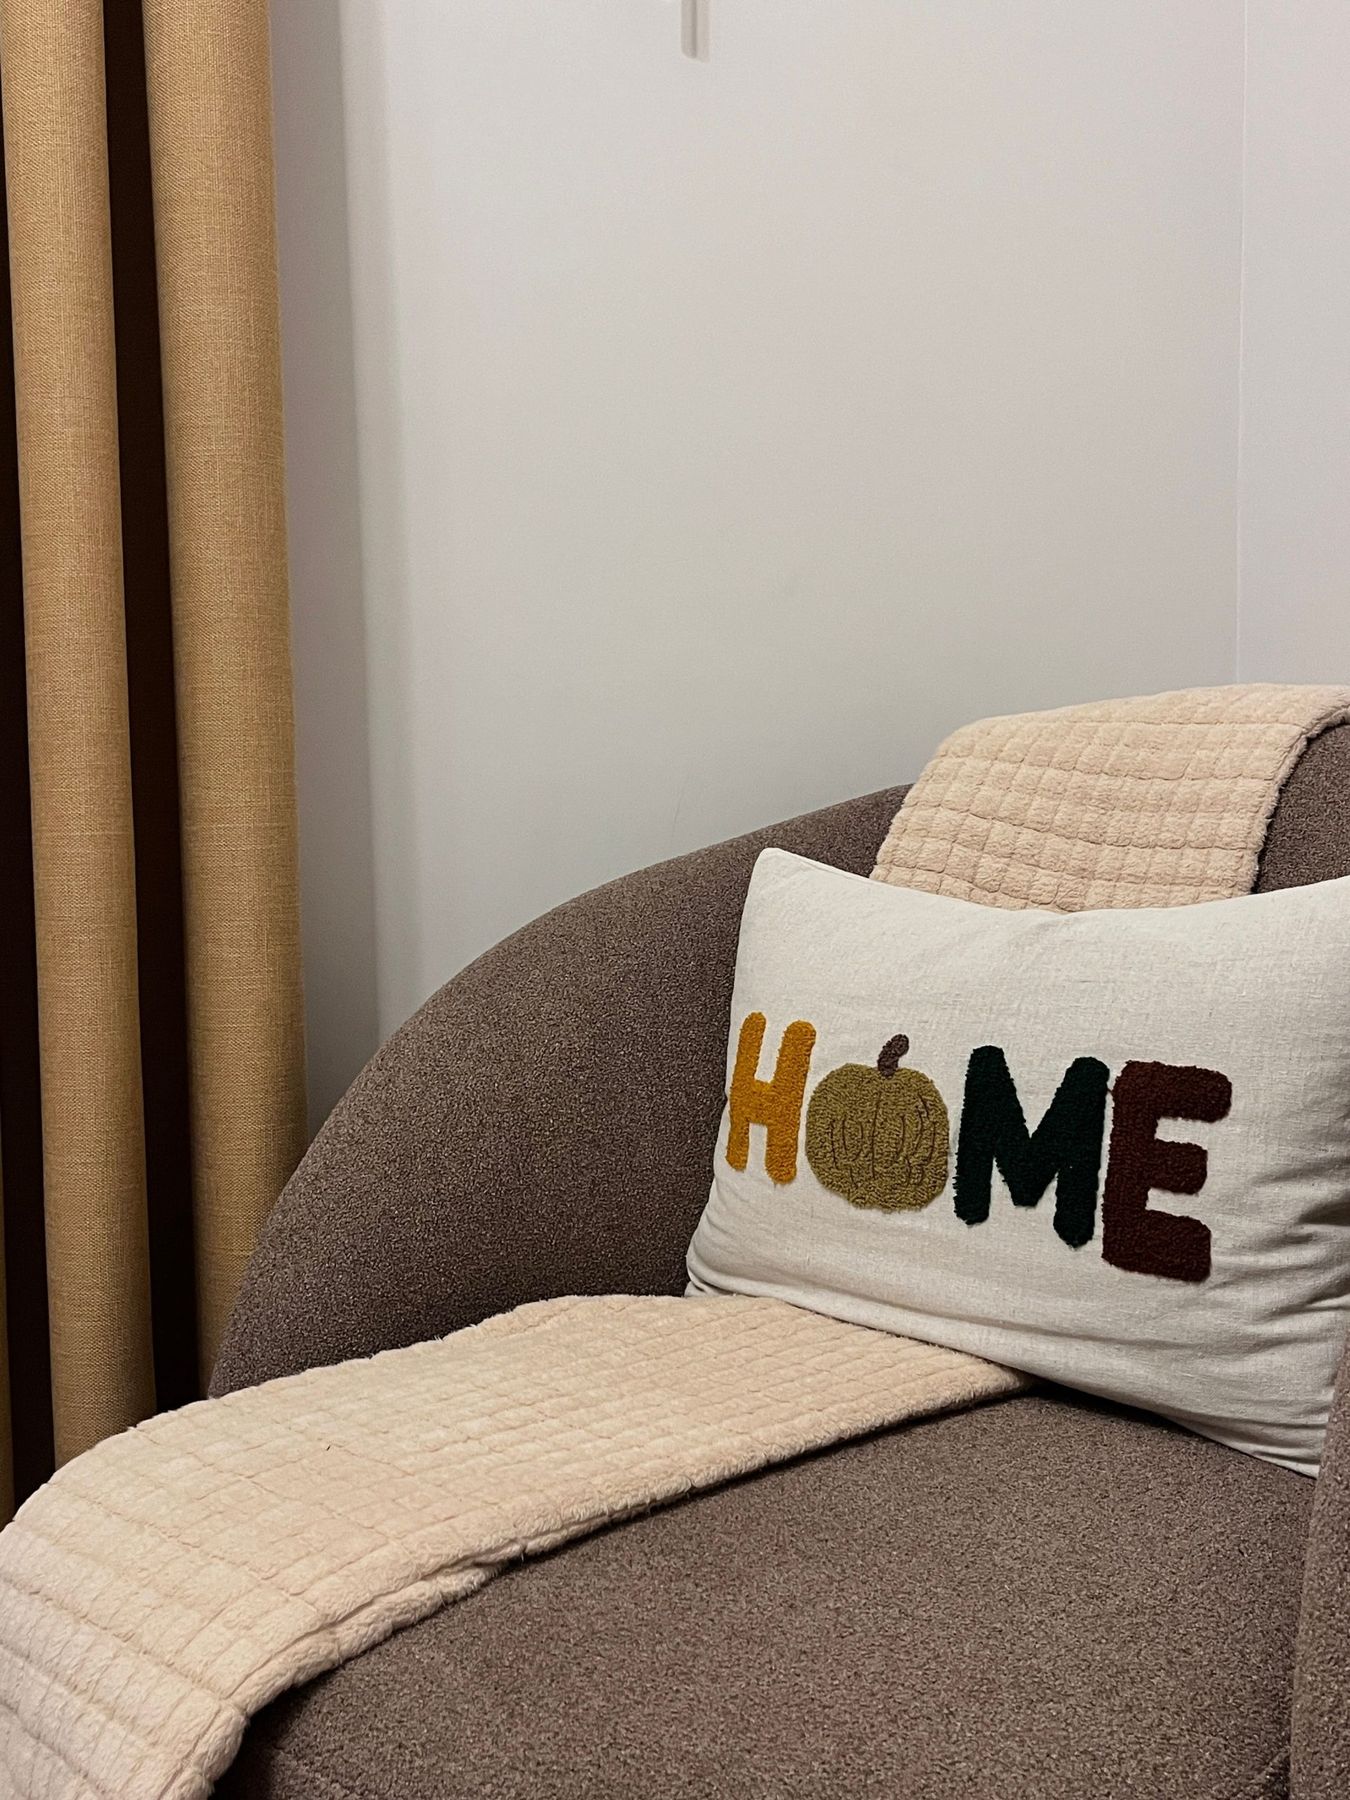
“This look is beautiful, but a dark taupe armchair, especially one with a textured boucle finish, can be a magnet for lint, pet hair, and dust.”
The deep color will show every little speck. If you have pets that shed or live in a dusty environment, be prepared to vacuum or lint-roll this chair regularly to keep it looking sharp. The waffle-weave blanket is also prone to snagging on jewelry or pets’ claws. It’s a gorgeous, high-texture look, but it’s not the most forgiving for a high-traffic family room with kids and pets running around.
17. A Coffee Table Centerpiece with Mini Gourds and a Votive
This small, curated centerpiece is part of the ‘bookshelf wealth’ and ‘curated clutter’ trends that are huge right now. It’s about arranging everyday objects and seasonal touches in a way that feels personal, collected, and effortlessly stylish. The focus is on natural textures (the woven placemat, the organic shapes of the gourds) and warm, ambient light. The out-of-focus TV in the background is key—it frames this as a real, lived-in space. This style is popular because it feels authentic and achievable, turning a simple coffee table into a mini-exhibit of personal taste. If you love the minimalist pumpkin look of Idea #23 but want something cozier, this is it.
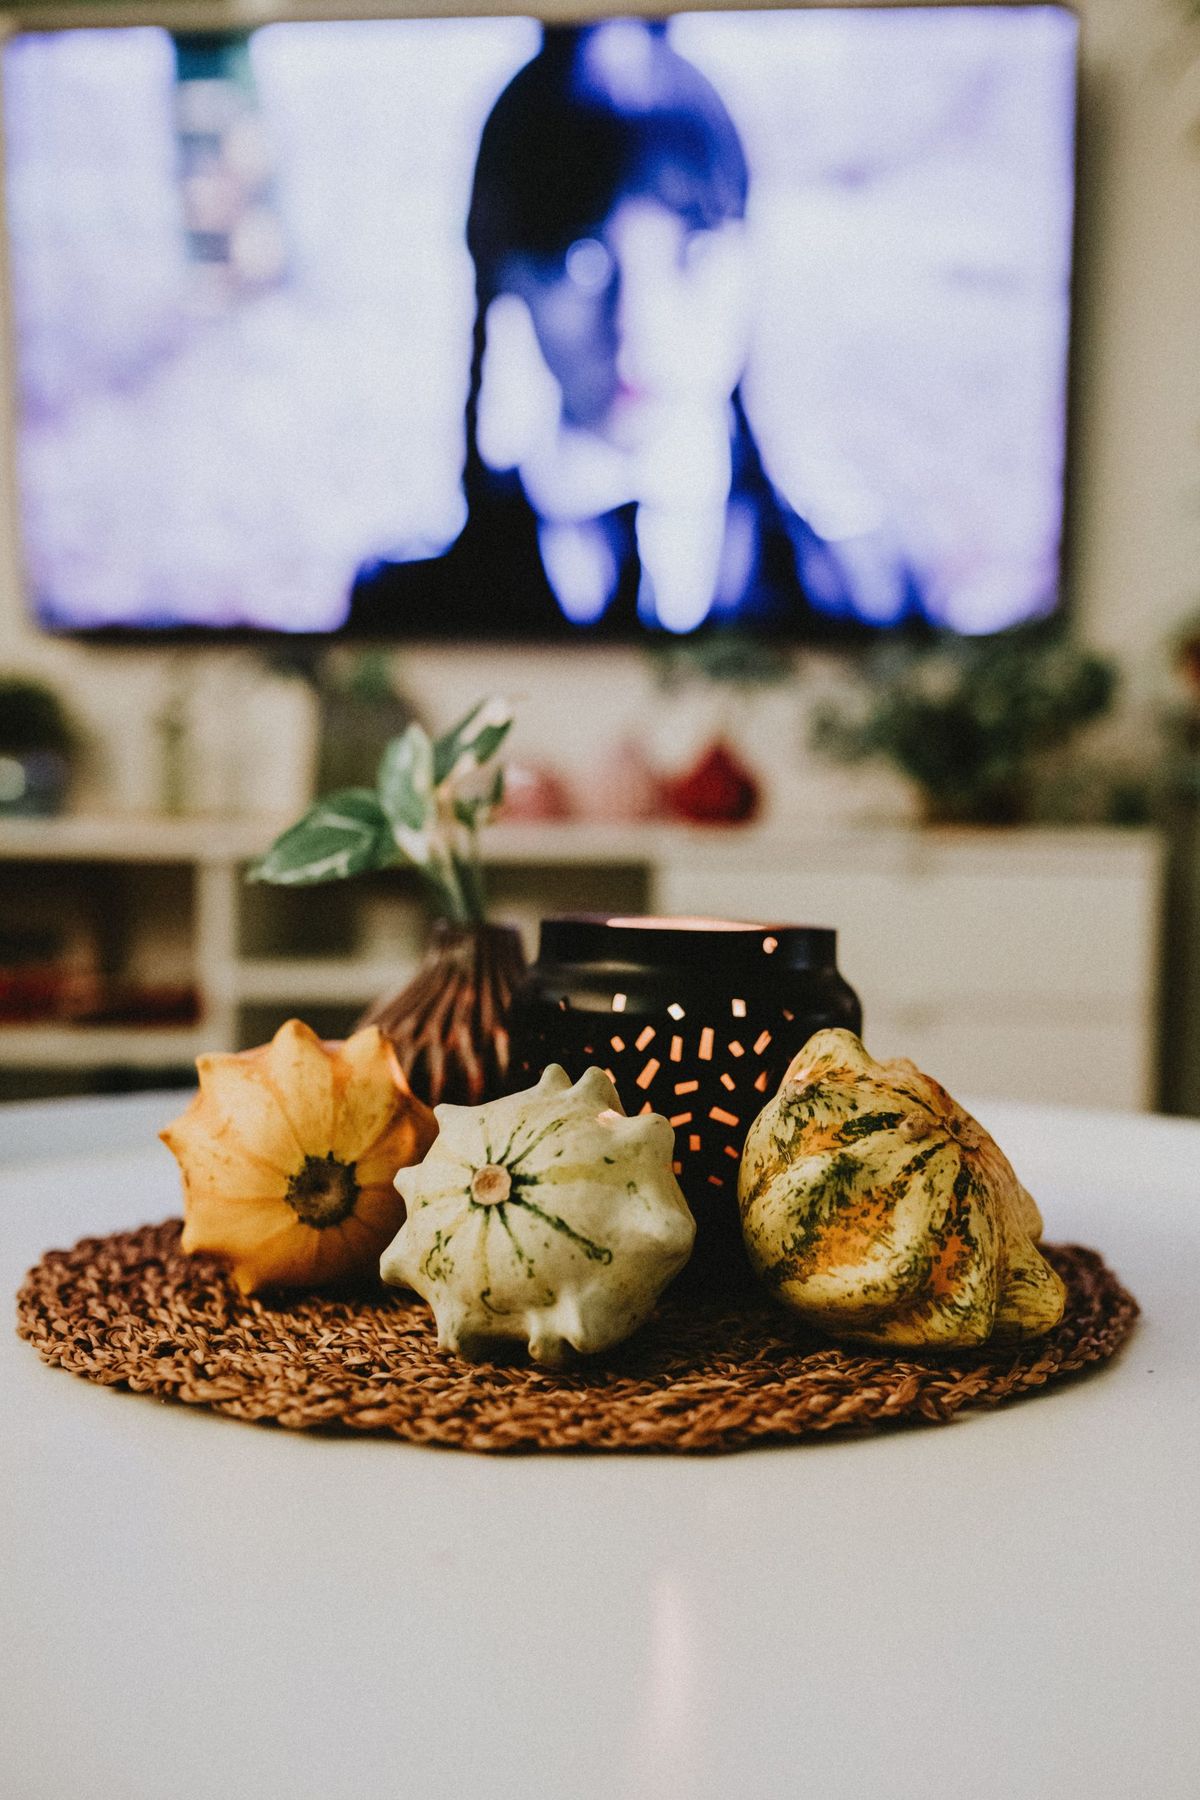
“Before you try to recreate this moody, cinematic vibe, consider these points:”
Before you try to recreate this moody, cinematic vibe, consider these points:
- What is your primary light source? This look relies on the warm, low light from the candle, which works best in the evening or in a room with controlled, dimmable lighting.
- Is your coffee table a high-traffic zone? If you have kids or pets, a delicate arrangement with a real candle might not be practical. Consider swapping for an LED votive.
- Do you have the right supporting cast? The magic is in the mix: the woven mat, the mini gourds, the bud vase. Make sure you have a few textural elements to group together.
18. DIY Miniature Cheesecloth Ghosts with Button Eyes
Making these adorable ghosts is a classic, easy DIY. You can make a whole family of them in 30 minutes.
- Cut a piece of cheesecloth into a square (about 10×10 inches).
- Drape the cheesecloth over a small styrofoam ball or even a balled-up piece of aluminum foil to form the head shape. A small bottle or cup can act as a stand.
- In a bowl, mix equal parts white school glue and water. Fully saturate the cheesecloth in the mixture.
- Drape the wet cloth back over the form, arranging the ‘draped’ parts as you like.
- Let it dry completely for several hours until it’s stiff.
- Remove the form from underneath and hot glue two small black buttons on for eyes.

“There’s no need to buy special supplies for this.”
If you don’t have cheesecloth, a single-ply paper towel or even a coffee filter can work, though the texture will be different. No styrofoam balls? Use a lollipop, a golf ball, or just a wad of paper to shape the head. White craft paint can be used instead of glue for a less stiff result. The buttons are cute, but you can just as easily use a black marker to draw on two simple dots for eyes. The rustic charm comes from the simplicity, so don’t be afraid to improvise with what you have around the house.
19. A Minimalist Centerpiece with a Candle and Pinecone
This arrangement feels calm and composed because it follows the ‘Rule of Threes’ and uses a tight color palette. The three main elements—the candle, the pumpkins, and the pinecone/berry sprig cluster—create a balanced visual triangle. Our brains find groupings of three inherently pleasing. Furthermore, the design sticks to a simple palette of white, orange, and natural brown/red. This restraint keeps the look feeling clean and minimalist rather than busy. The round woven placemat acts as a ‘stage,’ containing the decor and separating it from the rest of the white table, giving it importance.
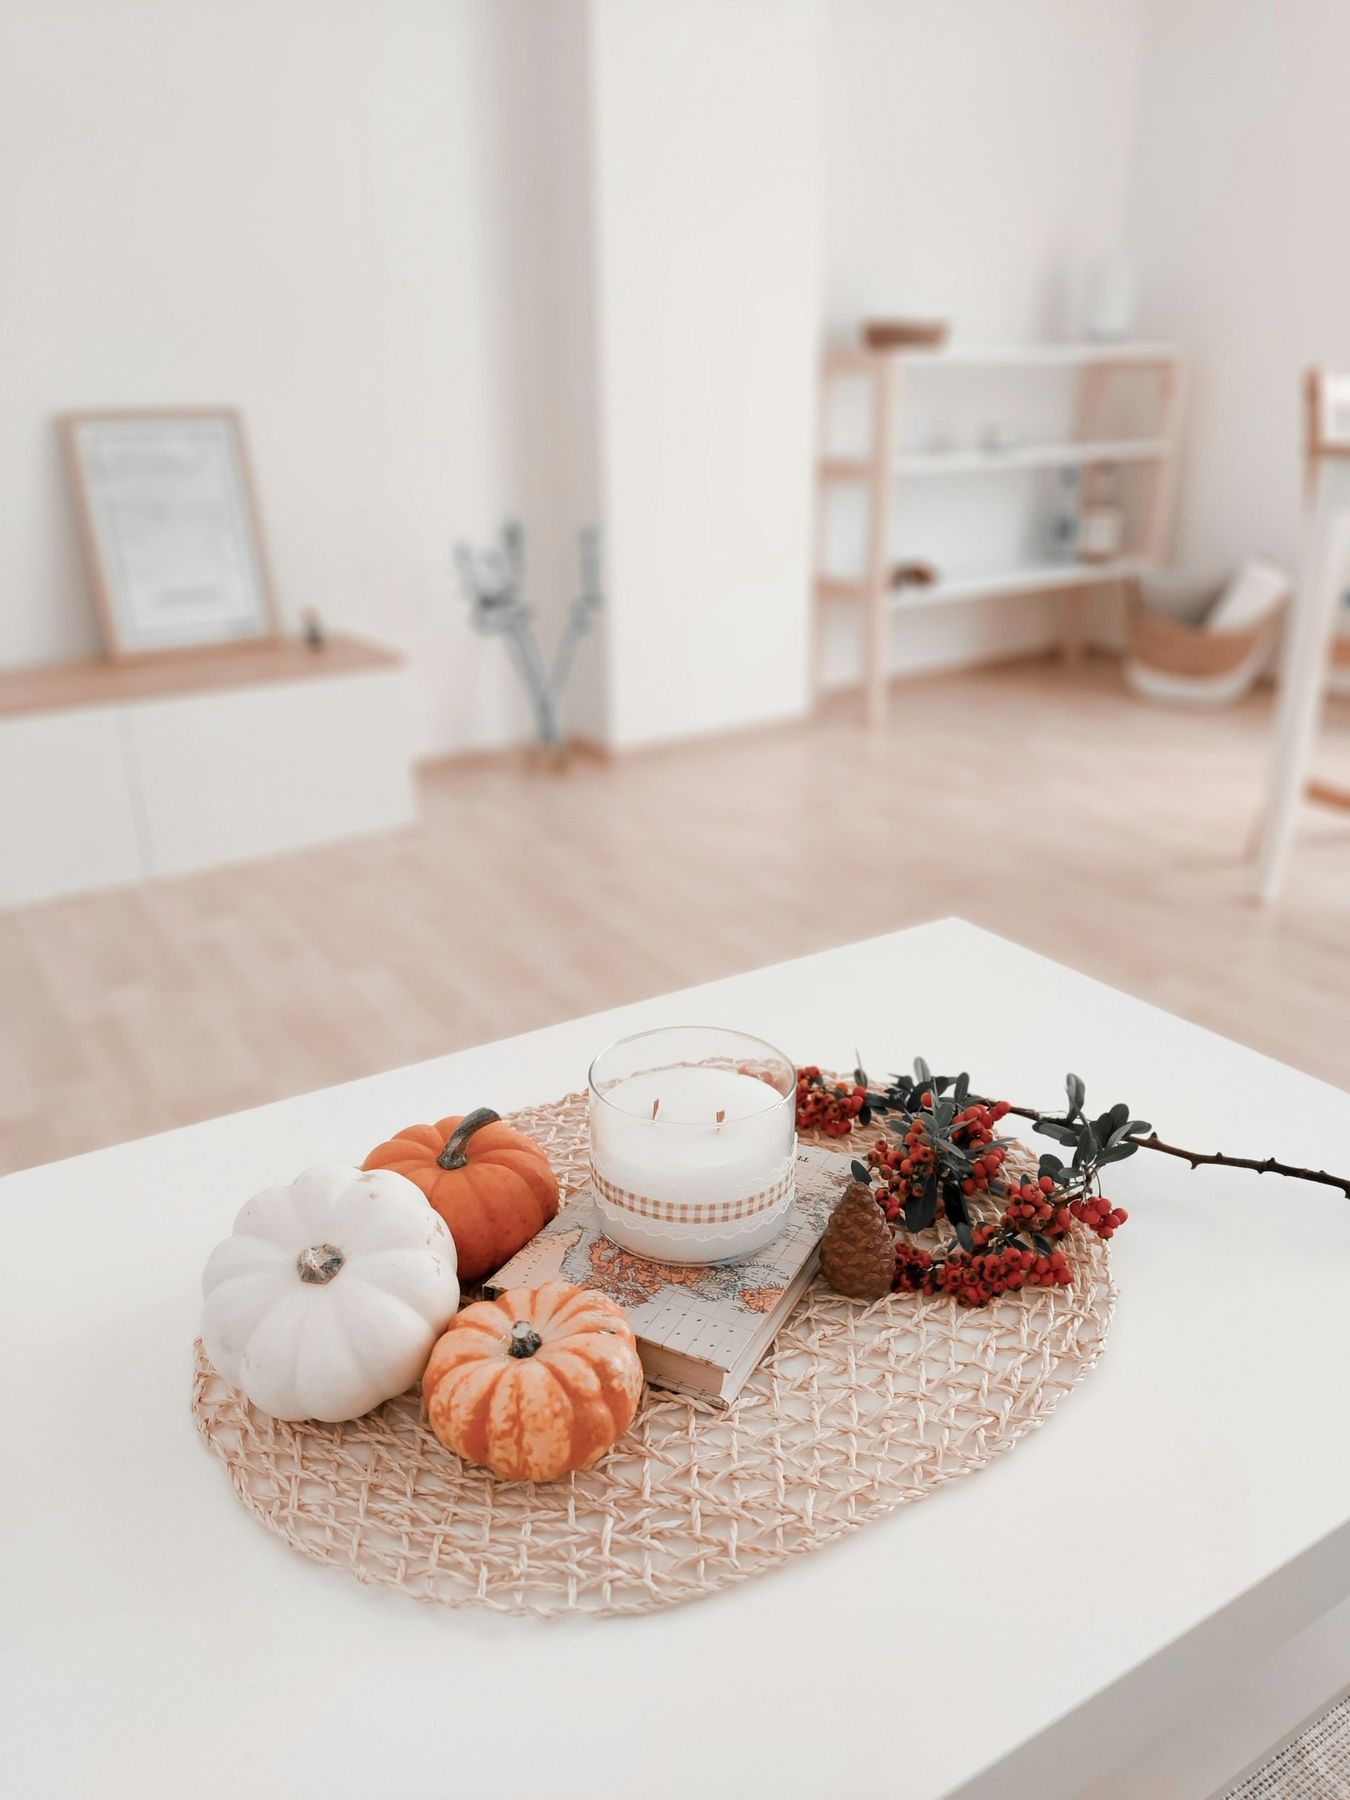
“For a centerpiece to feel truly integrated, it needs a ‘base’ or an ‘anchor.’ Here, the woven straw placemat serves that purpose perfectly.”
It adds a layer of texture and defines the space for the arrangement. Without it, the items would look a bit lost and random floating on the white table. When you’re creating a small vignette on a large surface like a coffee table or dining table, always start with an anchor: a tray, a placemat, a stack of books, or even a folded piece of fabric. This simple addition makes your arrangement look intentional and professionally styled.
20. A Modern White Kitchen with Paper Bat Decals
Paper or vinyl decals are a fantastic, renter-friendly way to decorate, but be mindful of the surface. On a semi-gloss or glossy cabinet finish like the one shown, they should peel off cleanly. However, if you have matte or chalk-painted cabinets, decals can sometimes pull up the paint finish when you remove them. Always test one decal in an inconspicuous spot first (like the inside of a cabinet door) before you commit to covering your kitchen in them. Also, avoid placing them near heat sources like your stove or toaster, as the heat can cause the adhesive to become gummy and difficult to remove.
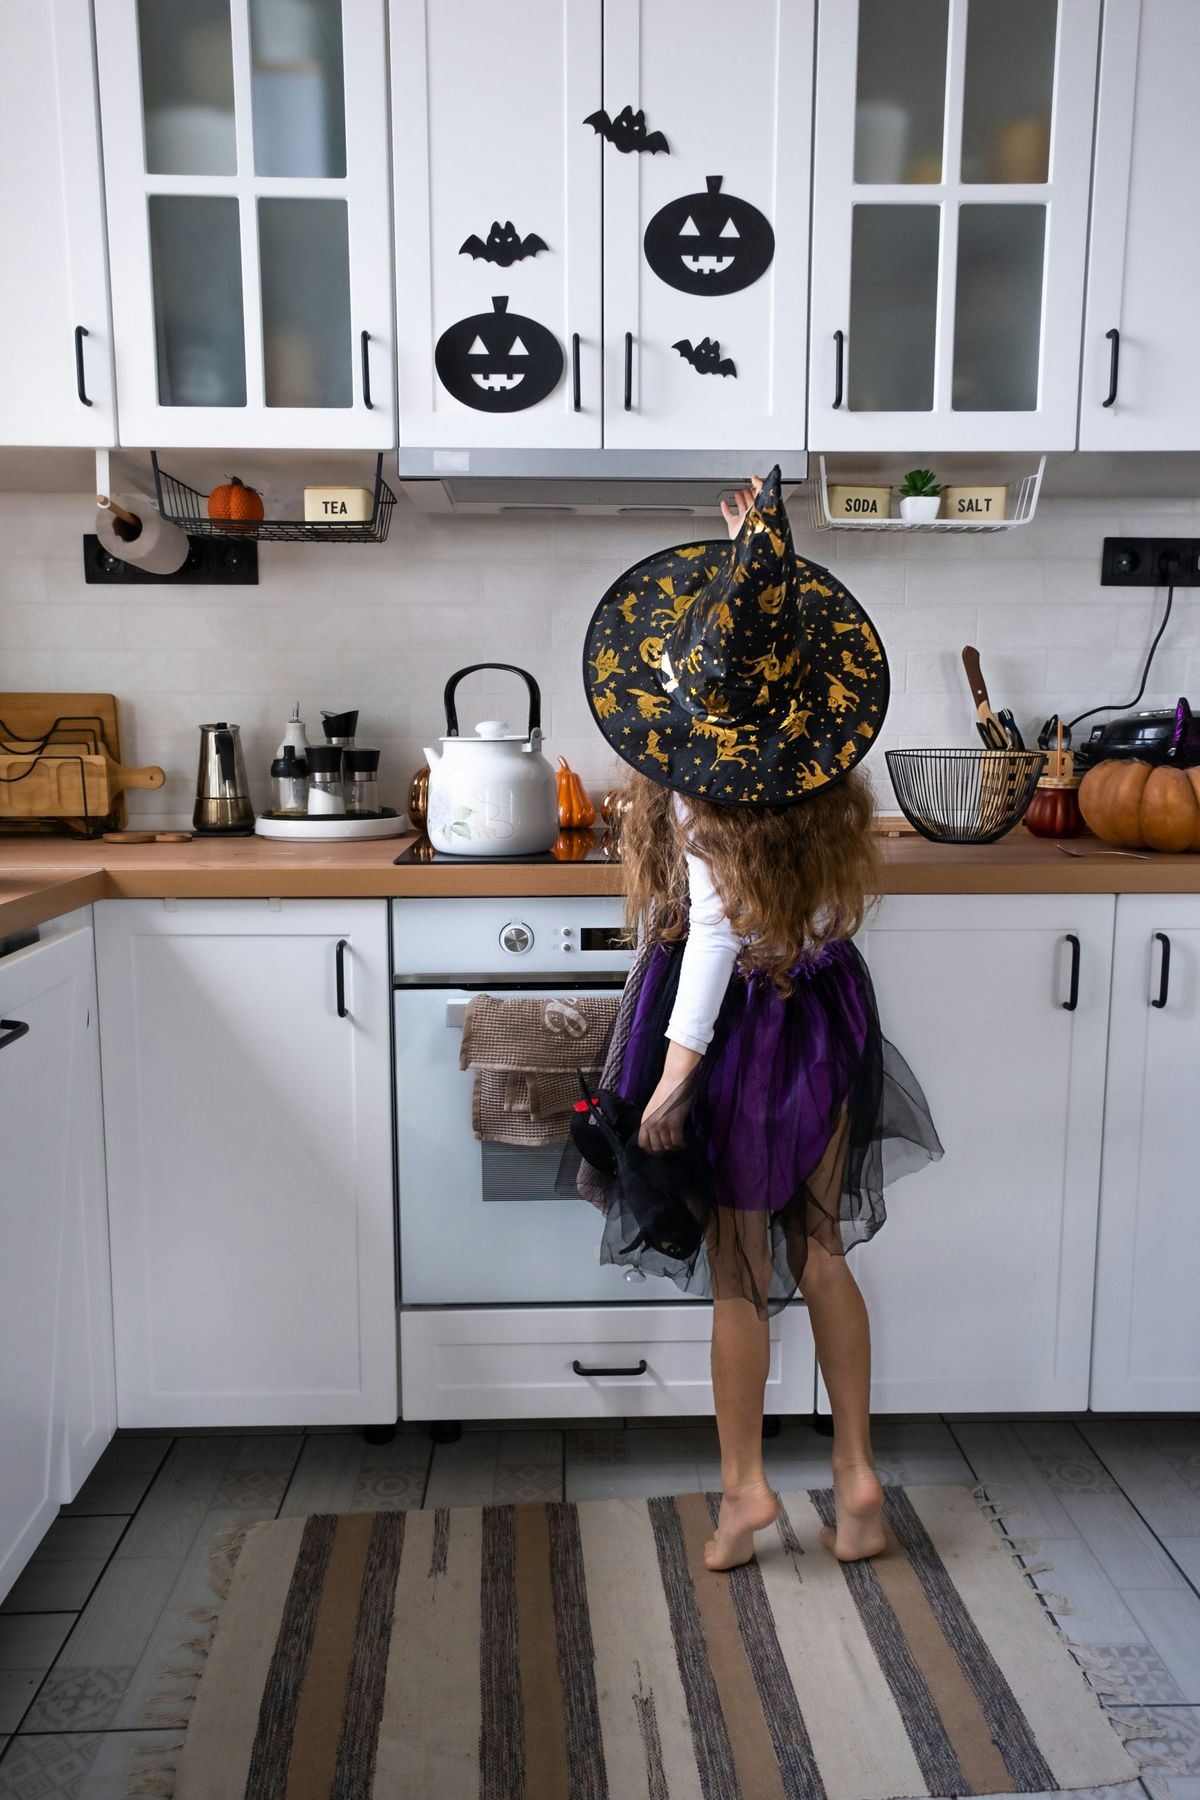
“This playful look is all about a simple ratio: 95% your normal kitchen + 5% Halloween fun.”
The success of this idea is that the kitchen itself remains clean, modern, and functional. The decor is purely supplemental. The paper bats and the few mini pumpkins on the counter are just enough to signal the holiday without disrupting the room’s primary purpose. This is a great formula for spaces like kitchens and bathrooms where you want to be festive but can’t afford to sacrifice counter space or create clutter. It’s a light-hearted sprinkle of spooky, not a full-on theme party. For a playful, DIY feel that’s less spooky than the hanging ghost in Idea #13, this is a great option.
21. A Subtle Scarecrow Centerpiece with Autumn Leaves
The clear glass pitcher of faux autumn foliage is the key to making this centerpiece feel elevated and complete. The scarecrow on its own might look a bit too crafty or juvenile. The foliage arrangement, however, adds height, sophistication, and a necessary burst of seasonal color. It balances the visual weight of the scarecrow figure and ties into the colors of a traditional fall tablescape. The transparency of the glass keeps it from feeling heavy, allowing the focus to remain on the beautiful colors of the leaves and berries. It’s the element that bridges the gap between ‘cute craft’ and ‘elegant centerpiece’.
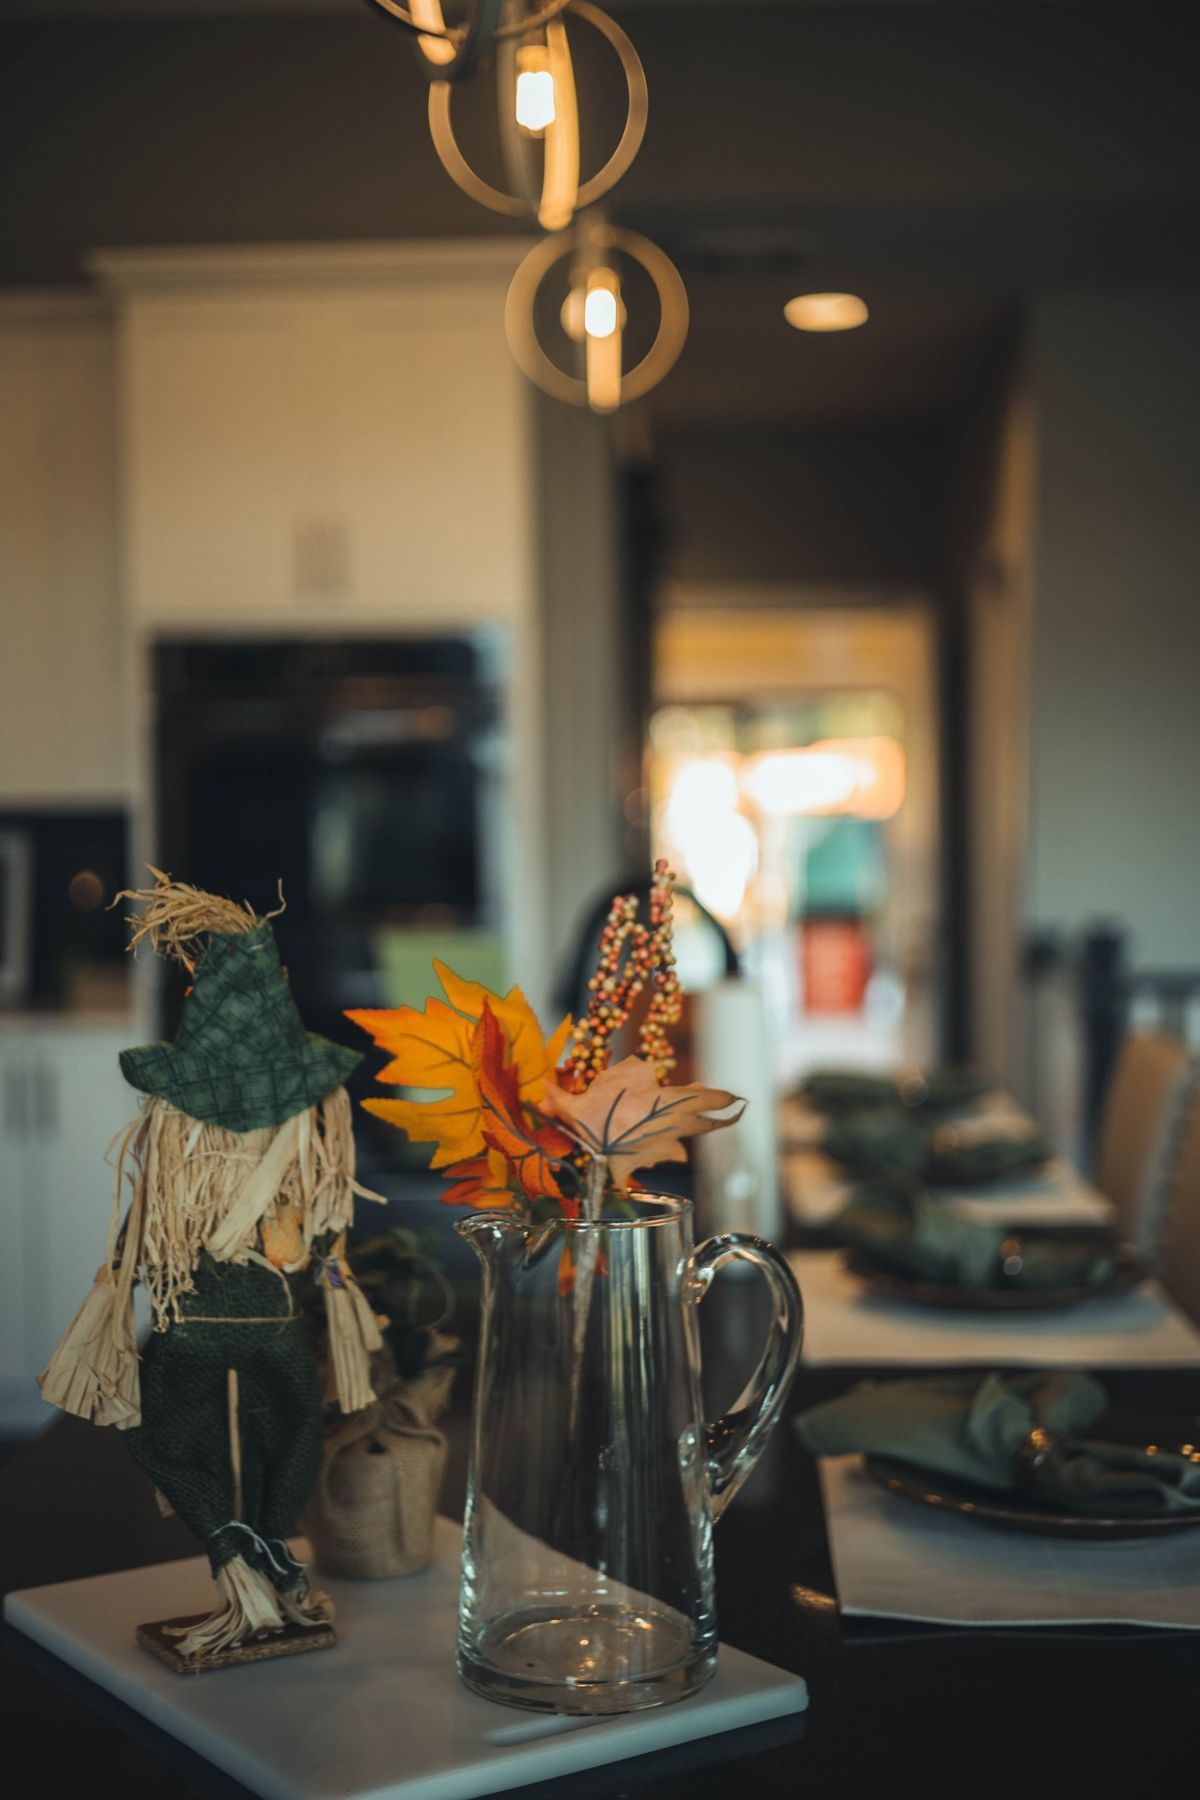
“Small Scarecrow Figure: $10 – $25Clear Glass Pitcher: $15 – $30Faux Autumn Folia”
- Small Scarecrow Figure: $10 – $25
- Clear Glass Pitcher: $15 – $30
- Faux Autumn Foliage (3-4 stems): $20 – $40
- White Rectangular Platter: $15 – $35
- TOTAL: $60 – $130
Budget alternative: Score this look for about 50% less. Find a scarecrow figure at a dollar store or craft store after Halloween for next year. Use a simple, clean glass vase or even a large mason jar you already own instead of a pitcher. The best way to save is to forage for your foliage! Find some beautiful, colorful autumn branches in your own backyard for a stunning and completely free arrangement.
22. A Rustic Log Cabin with an Autumn Door Wreath
When you have a home with a very strong architectural identity, like this log cabin, your decor should complement it, not fight it. The wreath works so well here because its materials—twigs, dried leaves, and subtle orange accents—echo the natural, rustic texture of the logs. A shiny, plastic, or overly glittery wreath would look jarring and out of place. The rule is simple: let your home’s materials guide your decor choices. For a brick house, incorporate terracotta and deep reds. For a modern house with clean lines, choose decor with a simple, graphic quality.
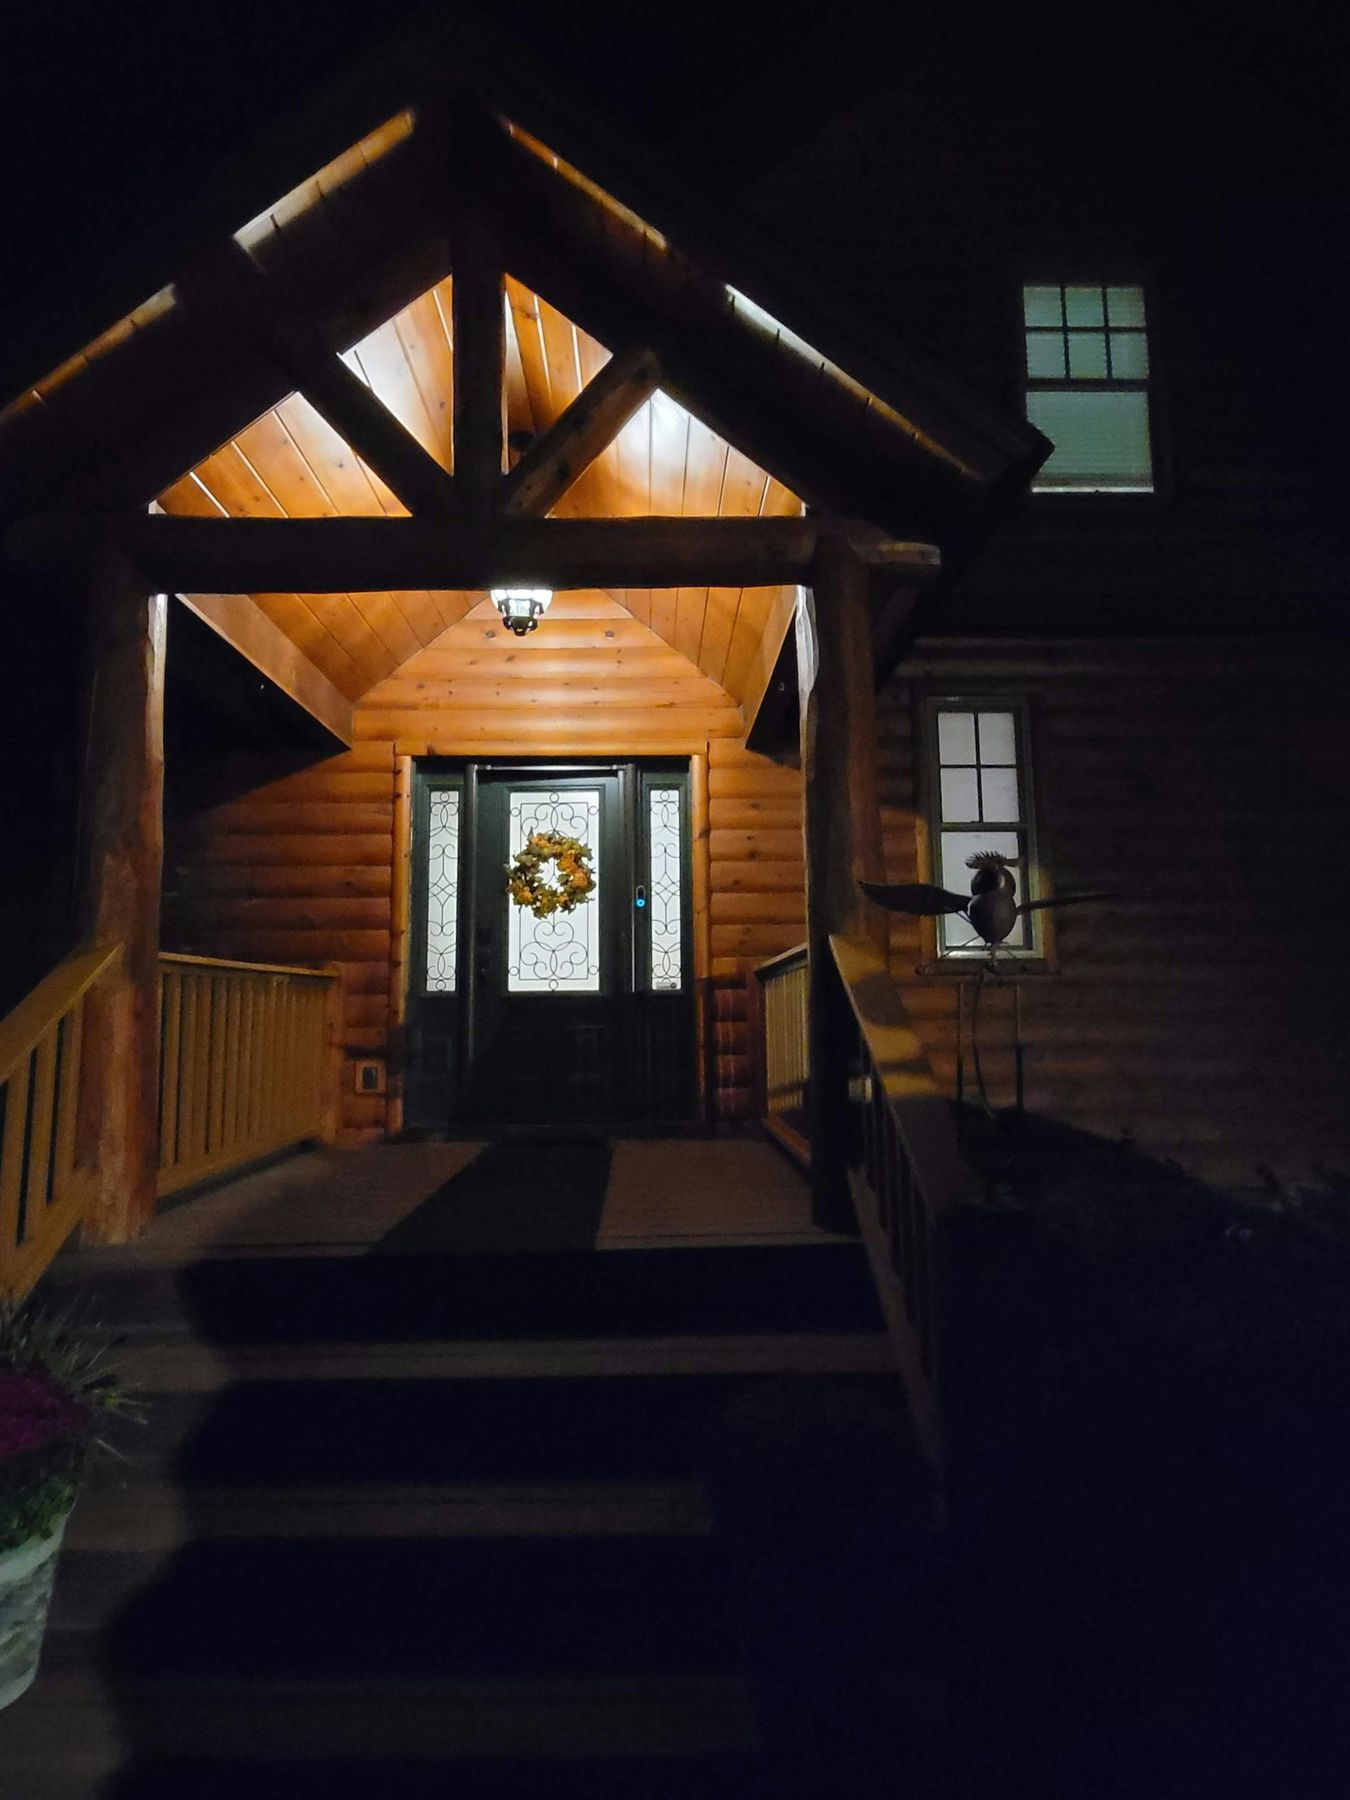
“A wreath should be properly scaled to your door.”
A common mistake is choosing a wreath that is too small, which can look lonely and insignificant. A good rule of thumb is that the wreath’s outer diameter should be about two-thirds the width of your door’s top panel or window section. For a standard 36-inch wide door, aim for a wreath that is at least 22-24 inches in diameter. This ensures it has a real presence and feels balanced. A larger, more dramatic door, like the one pictured, can even handle a wreath up to 30 inches wide.
23. A Cluster of Miniature Pumpkins on a Marble Table
This is a masterclass in minimalist decor. Its power comes from the stark contrast between the organic, colorful, and slightly imperfect pumpkins and the cold, smooth, perfect surface of the white marble. Each element makes the other stand out more. The composition is also incredibly simple: a tight cluster. By grouping the four pumpkins together so they’re touching, they read as a single decorative object rather than four separate items scattered about. This creates a stronger, more confident statement. The clean, empty space around the cluster is just as important, allowing the eye to focus entirely on the subject.
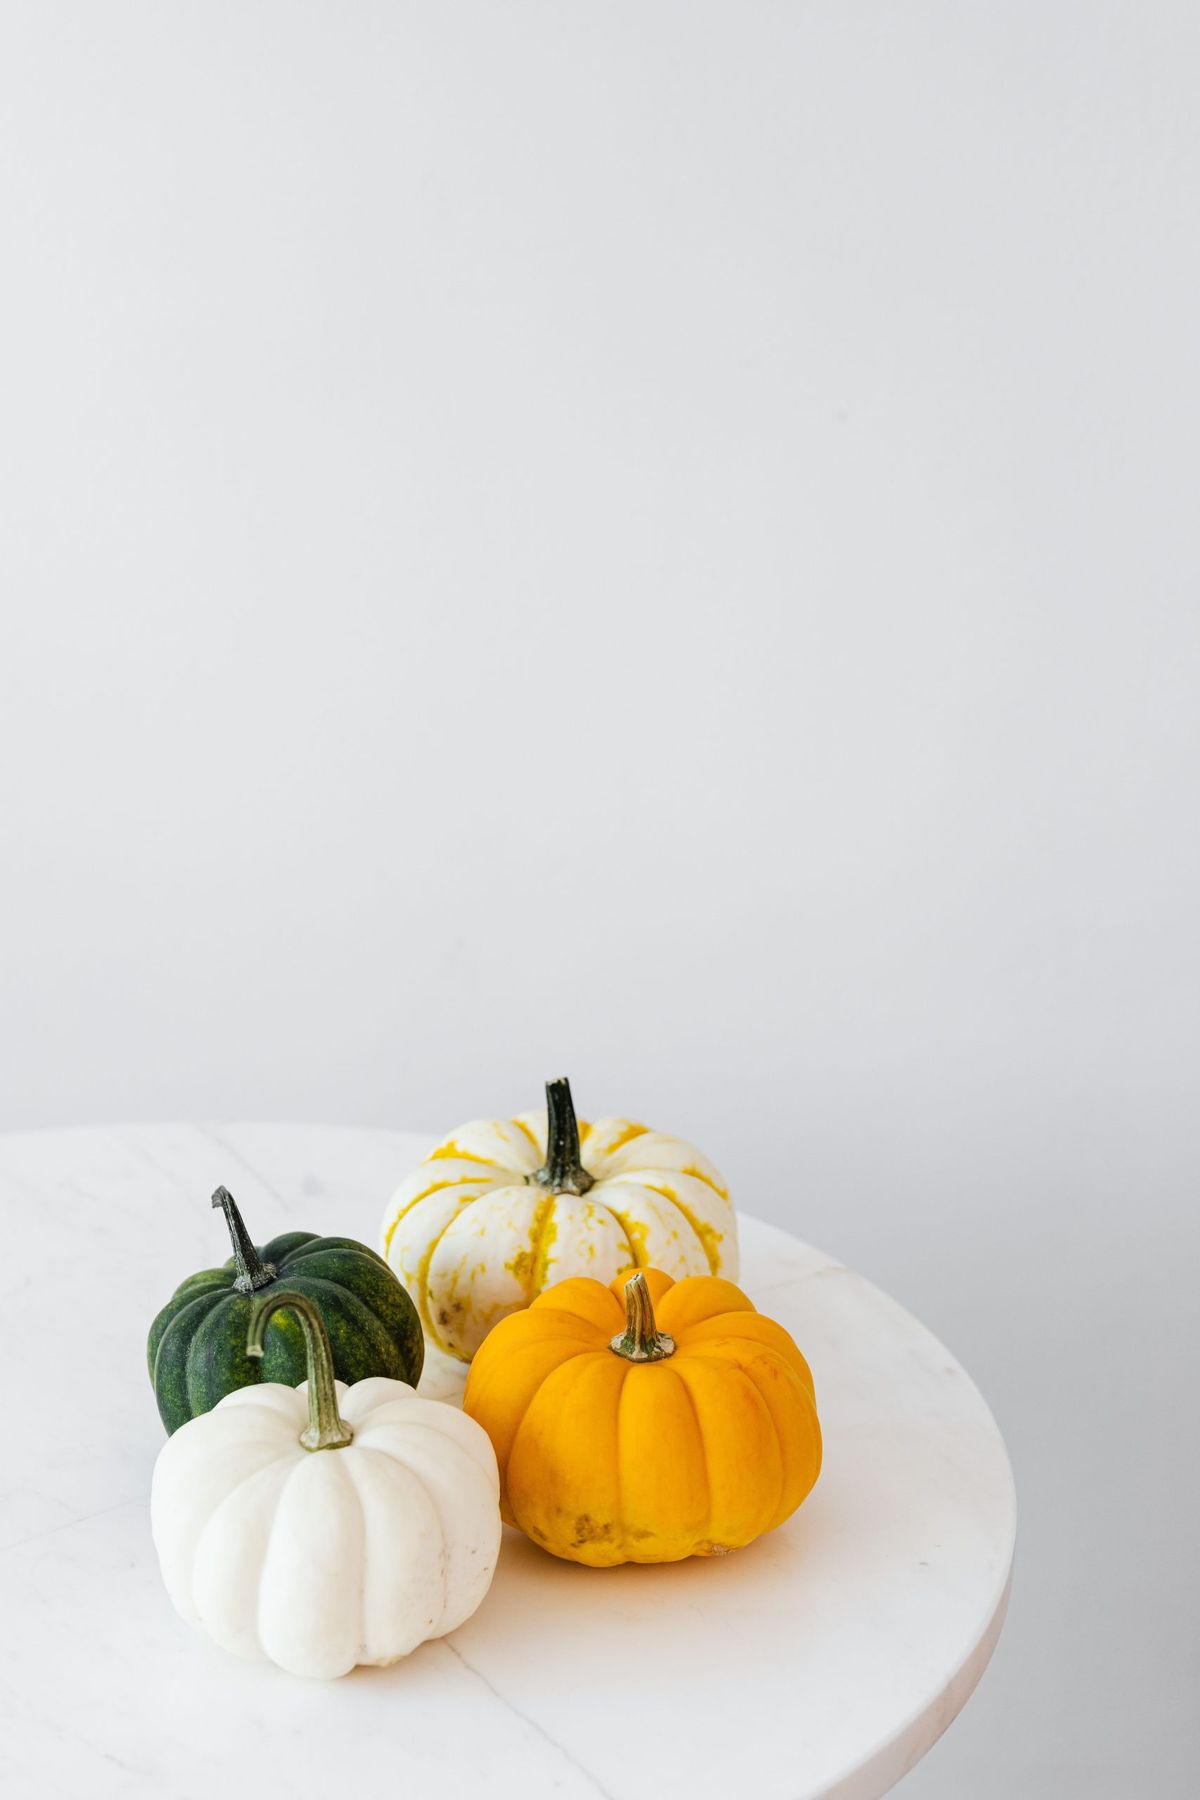
“You can get this exact minimalist, high-contrast look for next to nothing.”
The key is the surface, not the decor. If you don’t have a marble table, use a large, white ceramic serving platter from Target or IKEA ($20) as your base. Even a piece of white foam core board from a craft store ($5) can create that clean, gallery-like effect. The miniature pumpkins themselves are very affordable at any grocery store in the fall. Group three or five of them (odd numbers are often more visually appealing) on your clean white surface for an instant touch of chic, seasonal style.
24. A Cozy Reading Nook with an Exposed Brick Wall
Exposed brick is gorgeous, but it’s not a zero-maintenance surface. The porous nature of brick and mortar means it collects a lot of dust. You’ll need to vacuum it with a brush attachment or wipe it down a few times a year to keep it from looking grimy. More importantly, older brick can be crumbly. If it’s not properly sealed, you’ll have a constant fine red dust settling on your floors and furniture. A clear, matte-finish brick sealant can solve this problem, but it’s an extra step and expense. It adds incredible character, but it’s dustier and more delicate than drywall.

“That beautiful layered look with multiple throws and a dozen pillows is pure Pinterest bliss, but it’s not always practical for daily life.”
Where do all those pillows go when you actually want to sit on the sofa? Be honest with yourself about how much ‘styling’ you’re willing to undo and redo every day. A more realistic approach is to have 3-5 great pillows that you love and can easily shuffle around, plus one cozy throw blanket that you actually use. This creates a similar cozy reading nook vibe as seen in Idea #10, but scaled up for a living room.
25. A Sunlit Hanging Plant in a Moody, Dark Interior
This image perfectly captures the ‘Dark Academia’ and ‘Moody Maximalism’ trends that continue to influence interior design in 2026. It’s a move away from the all-white, brightly lit spaces of the past toward rooms with more depth, shadow, and intellectual character. The dark wood wall creates a dramatic, almost theatrical backdrop. This look is about creating an atmosphere that feels rich, historical, and a little bit melancholic. The single, brightly lit plant serves as a point of life and hope within the moody setting, a classic motif in art and literature that resonates deeply with these trends.
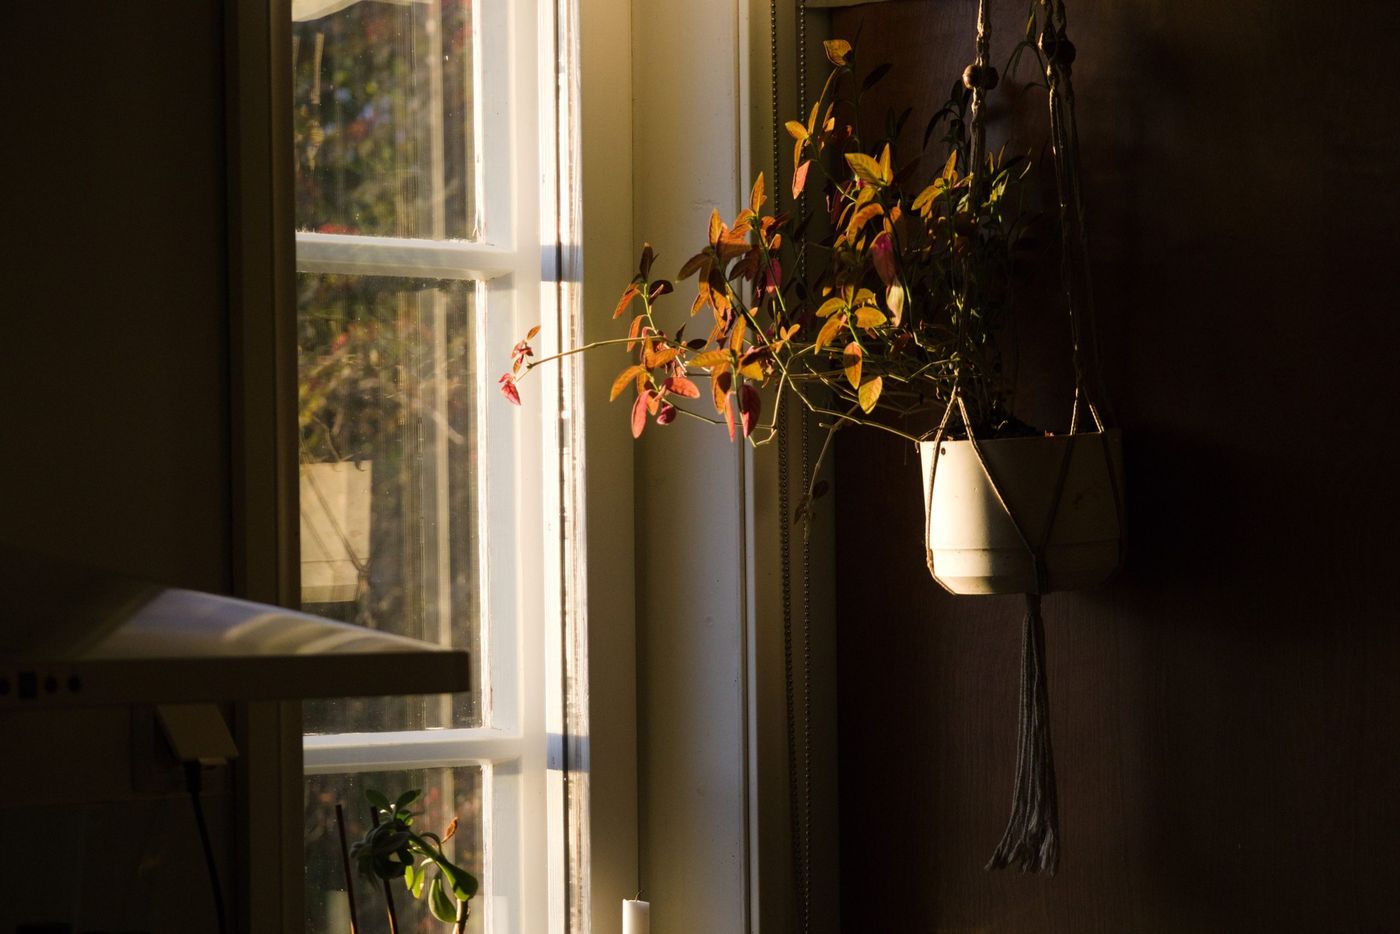
“that makes this entire scene work is the single beam of bright, natural light from the window.”
Without it, the plant’s beautiful reddish-orange foliage would be lost against the dark wood wall, and the whole image would be flat and gloomy. The light is what creates the drama. It highlights the plant’s color, carves out its shape, and casts subtle shadows, giving the scene depth and a focal point. This demonstrates a critical design principle: dark, moody spaces need a strong, contrasting light source to truly come alive. Plants that thrive in this setup: Coleus, Croton, or certain varieties of Tradescantia.These plants offer vibrant colors that pop against dark backgrounds.
26. A Vintage White Truck Filled with Pumpkins and Mums
- Vintage Truck Prop (rental or purchase): $200 – $2000+
- Assorted Pumpkins (large quantity): $200 – $400
- Potted Mums and Kale (large quantity): $150 – $300
- Ornamental Grasses & Wheat Wreath: $50 – $100
- TOTAL: $600 – $2800+
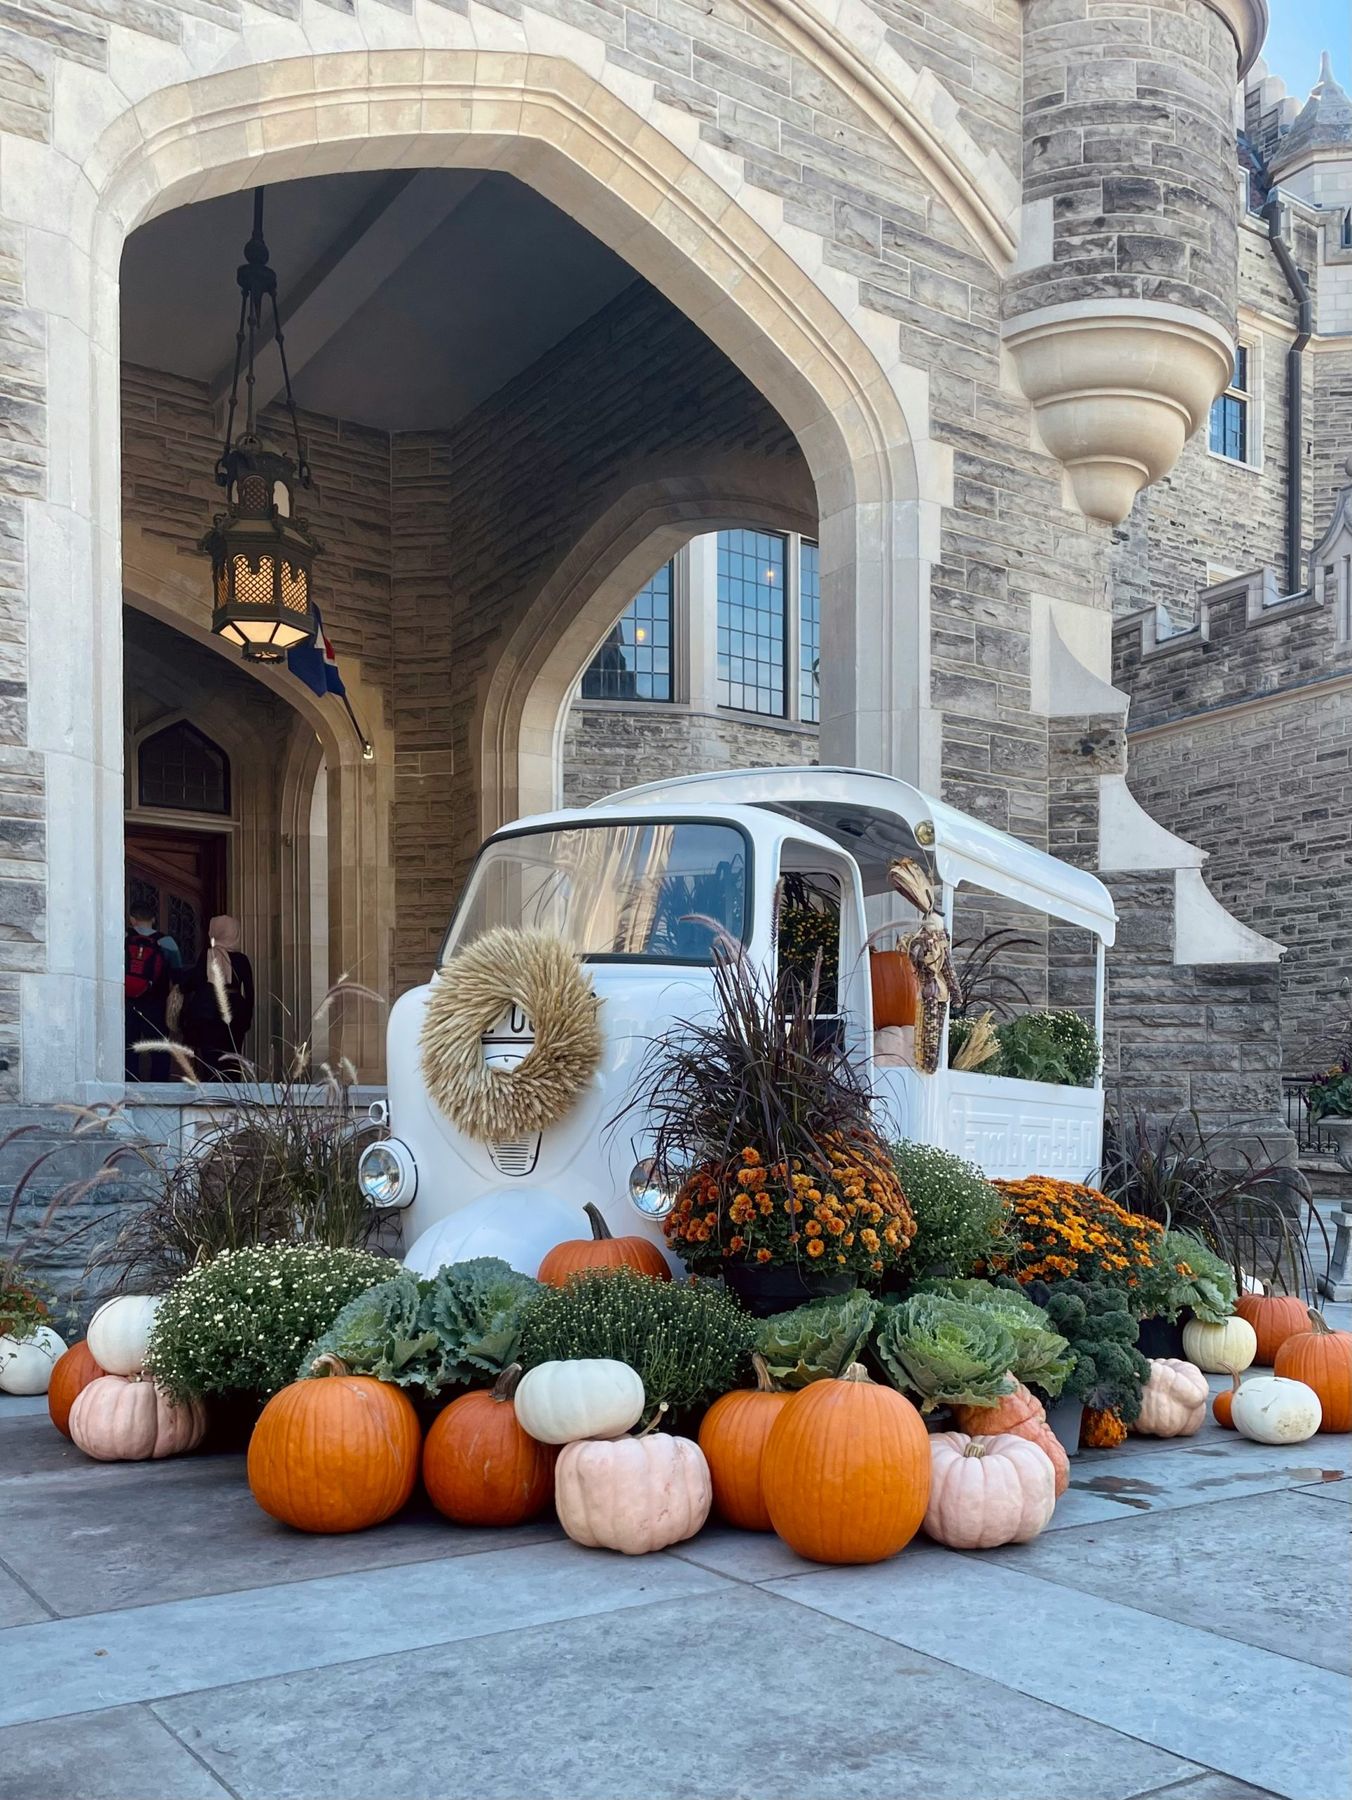
“Budget alternative: Clearly, not everyone has a vintage truck.”
Recreate the ‘vessel’ concept on a smaller scale. Use a rustic wooden wheelbarrow ($50-$100 at a garden center) or even a vintage-style Radio Flyer wagon ($100). Fill it to overflowing with a mix of pumpkins and mums to get that same feeling of abundance for a fraction of the cost.
The secret to a lush, overflowing display like this is to use fillers. Don’t just rely on expensive pumpkins and perfect mums. The designer here has brilliantly used large bunches of ornamental kale and tall ornamental grasses to fill in the gaps and add texture and height. Kale is inexpensive, hardy, and its deep green and purple tones are a beautiful complement to orange pumpkins. The grasses add a feathery, airy quality that breaks up the density of the pumpkins. When you think you have enough pumpkins, you probably need to add 20% more in the form of these less expensive, high-impact fillers.
27. A Sophisticated Centerpiece with Gourds and a Gold Mirror
This elegant arrangement is a lesson in balancing tones and textures. The formula is approximately 50% dark and moody + 30% rustic harvest + 20% luxe accent. The charcoal wall and dark surface create a dramatic, moody base. The small gourds on the wooden pedestal and the fresh pomegranate provide the unmistakable rustic, seasonal element. The final touch of luxury comes from the ornate gold mirror and the clean lines of the white ceramic tray. This mix is what makes the design feel so sophisticated and curated—it’s not just one style, but a thoughtful blend of several.
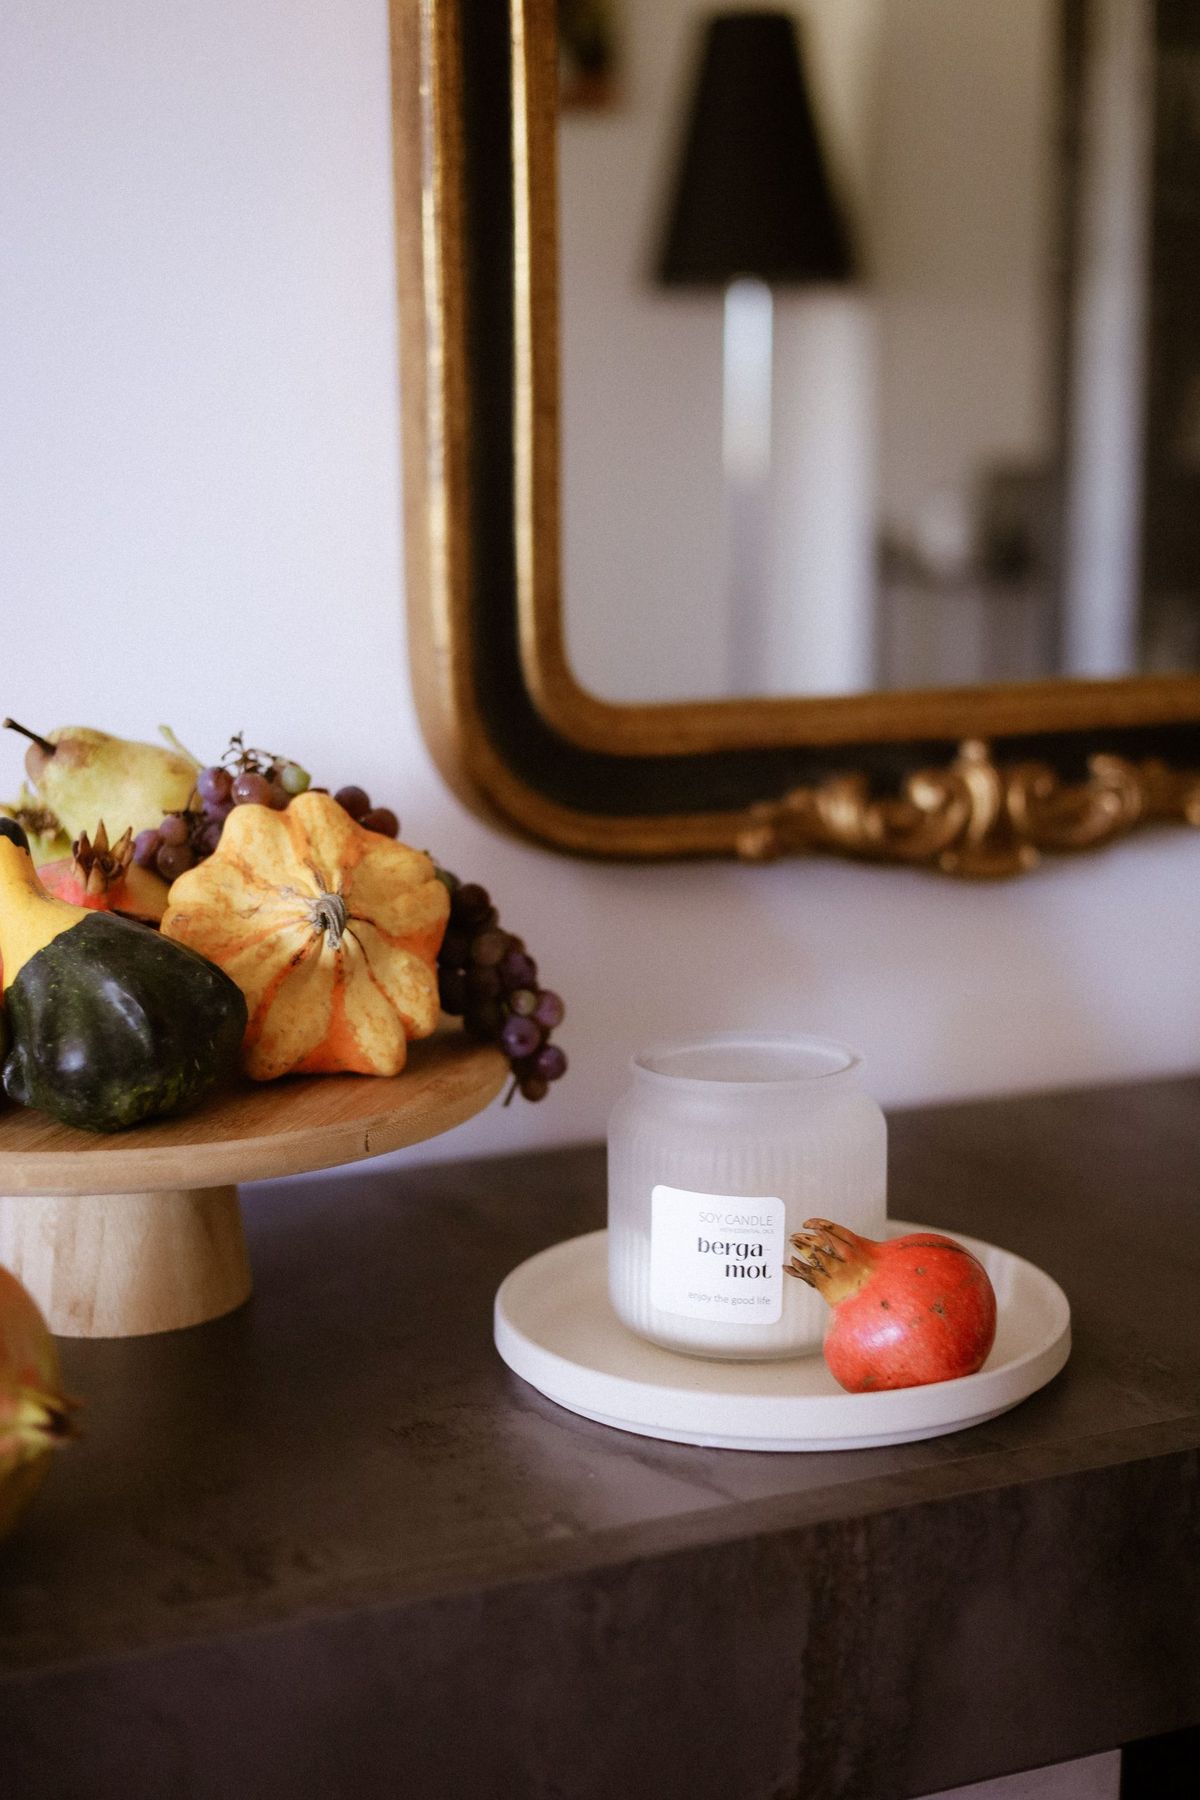
“This composition is so pleasing because of its mastery of height variation.”
The eye is guided on a journey across the scene. It starts low with the white tray and pomegranate, moves up to the pedestal of gourds, and then lands on the tall, ornate mirror in the background. If all these items were the same height, the arrangement would look flat and boring. By creating distinct levels, the designer adds depth and dynamism. The reflection in the mirror further enhances this effect, suggesting a larger, more complex space than what is actually there.
28. A Minimalist Paper House on a Bed of Dried Leaves
You can create a similar minimalist house decoration using a single sheet of heavy cardstock. Total time is about 20 minutes and it costs less than $1.
- Find a simple ‘paper house template’ online and print it out.
- Trace the template onto your sheet of white cardstock.
- Using a craft knife and a ruler for straight edges, carefully cut out the main shape, including windows and doors.
- Gently score the fold lines with the back of your craft knife to get crisp, clean folds.
- Fold the house into its 3D shape.
- Apply a thin line of craft glue to the tabs and press the seams together until they hold. Place an LED tea light inside to make it glow.
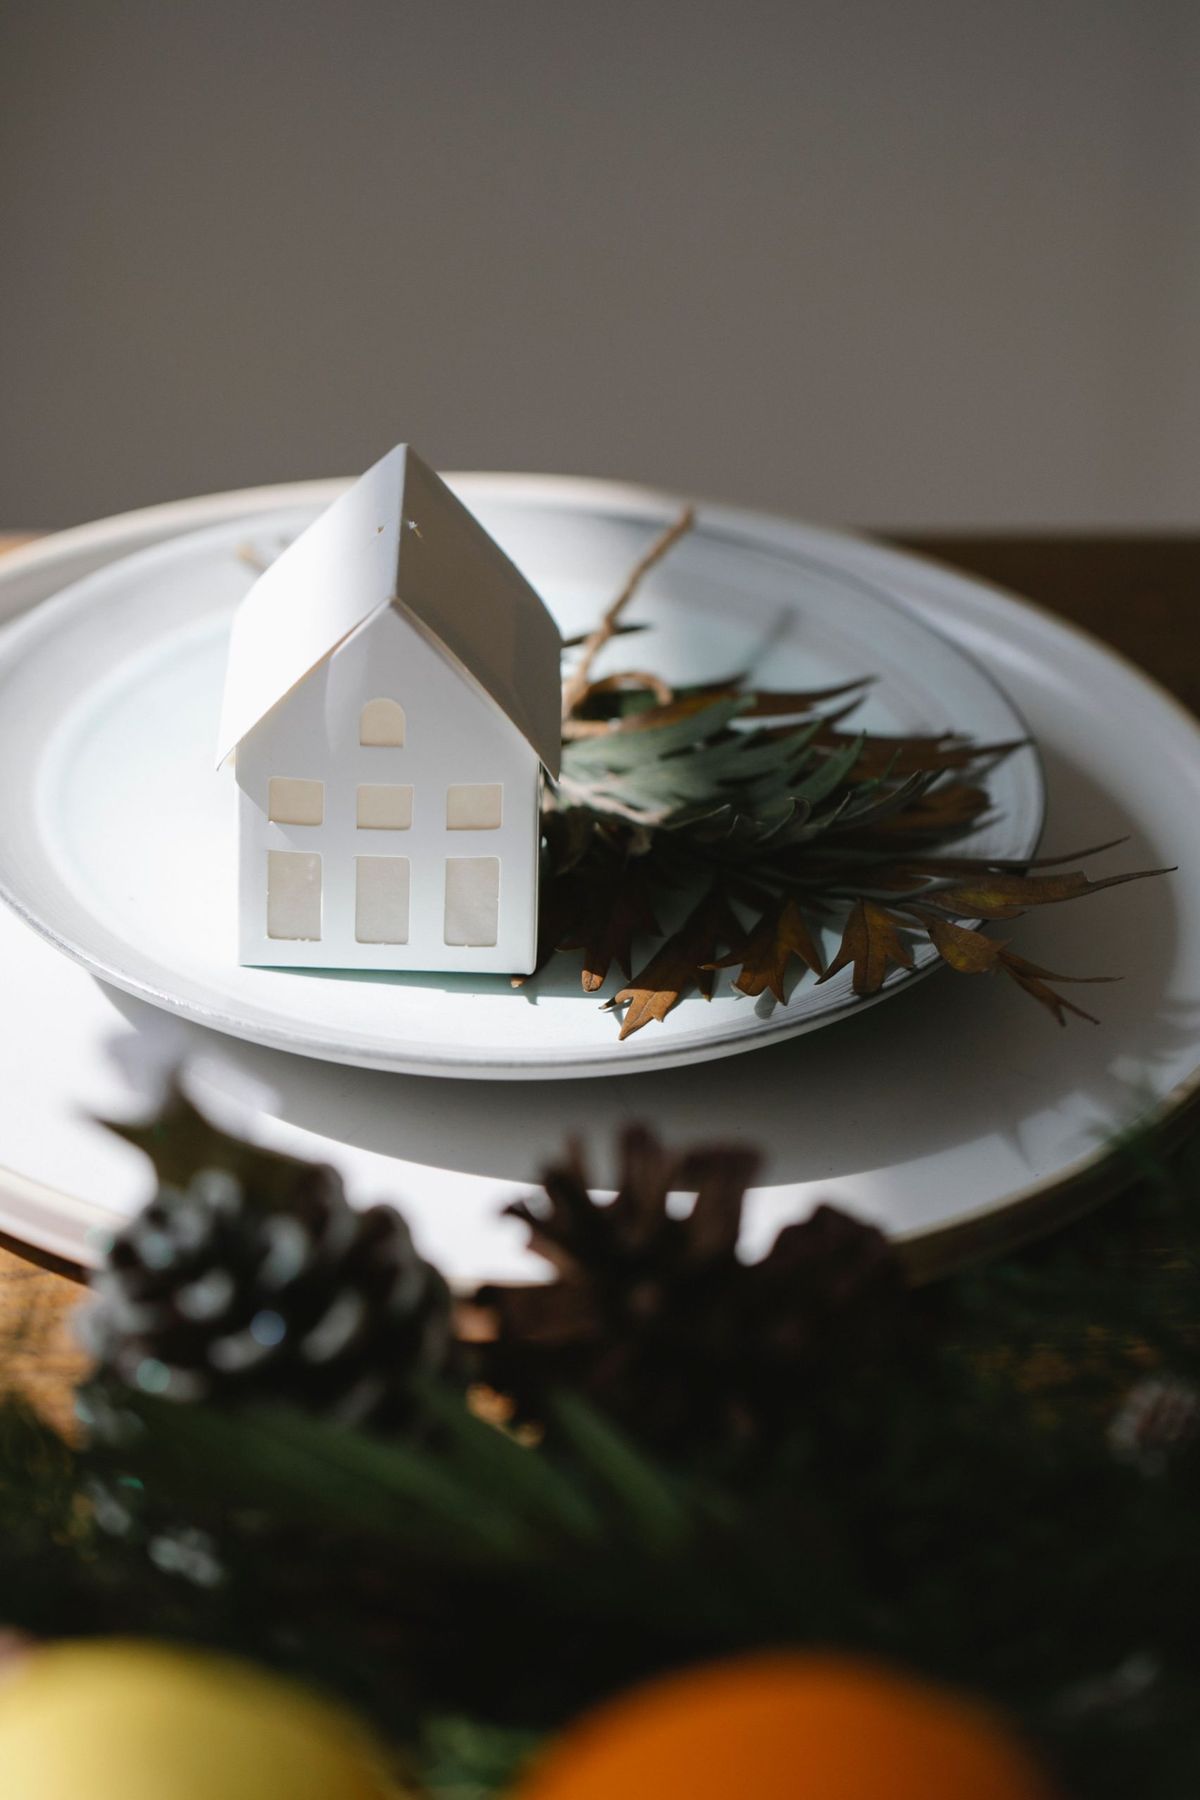
“This look is all about texture and simplicity, which is easily achieved on a tiny budget.”
Instead of buying specific dried foliage, go for a walk and collect interesting leaves, small twigs, and pinecones from your own neighborhood—it’s free and ensures a genuinely local, seasonal feel. The layered plates can be any mismatched white or cream plates you find at a thrift store for a dollar or two. This minimalist paper house offers a more architectural take on the simple DIY decor seen with the cheesecloth ghosts in Idea #18.
29. An Ambient Window Sill with Glowing Amber Votives
To create a truly cozy and intimate atmosphere with candles, always group them together. One candle is a light source; three or more is a statement. The designer here uses three amber votives, and their combined glow is what creates that powerful, warm ambiance. When grouping, use items of the same style but slightly different heights or shapes if possible, or arrange identical items in a slightly asymmetrical cluster. This feels more natural than a perfect, straight line. For safety and a longer burn, always trim your candlewicks to 1/4 inch before each use.
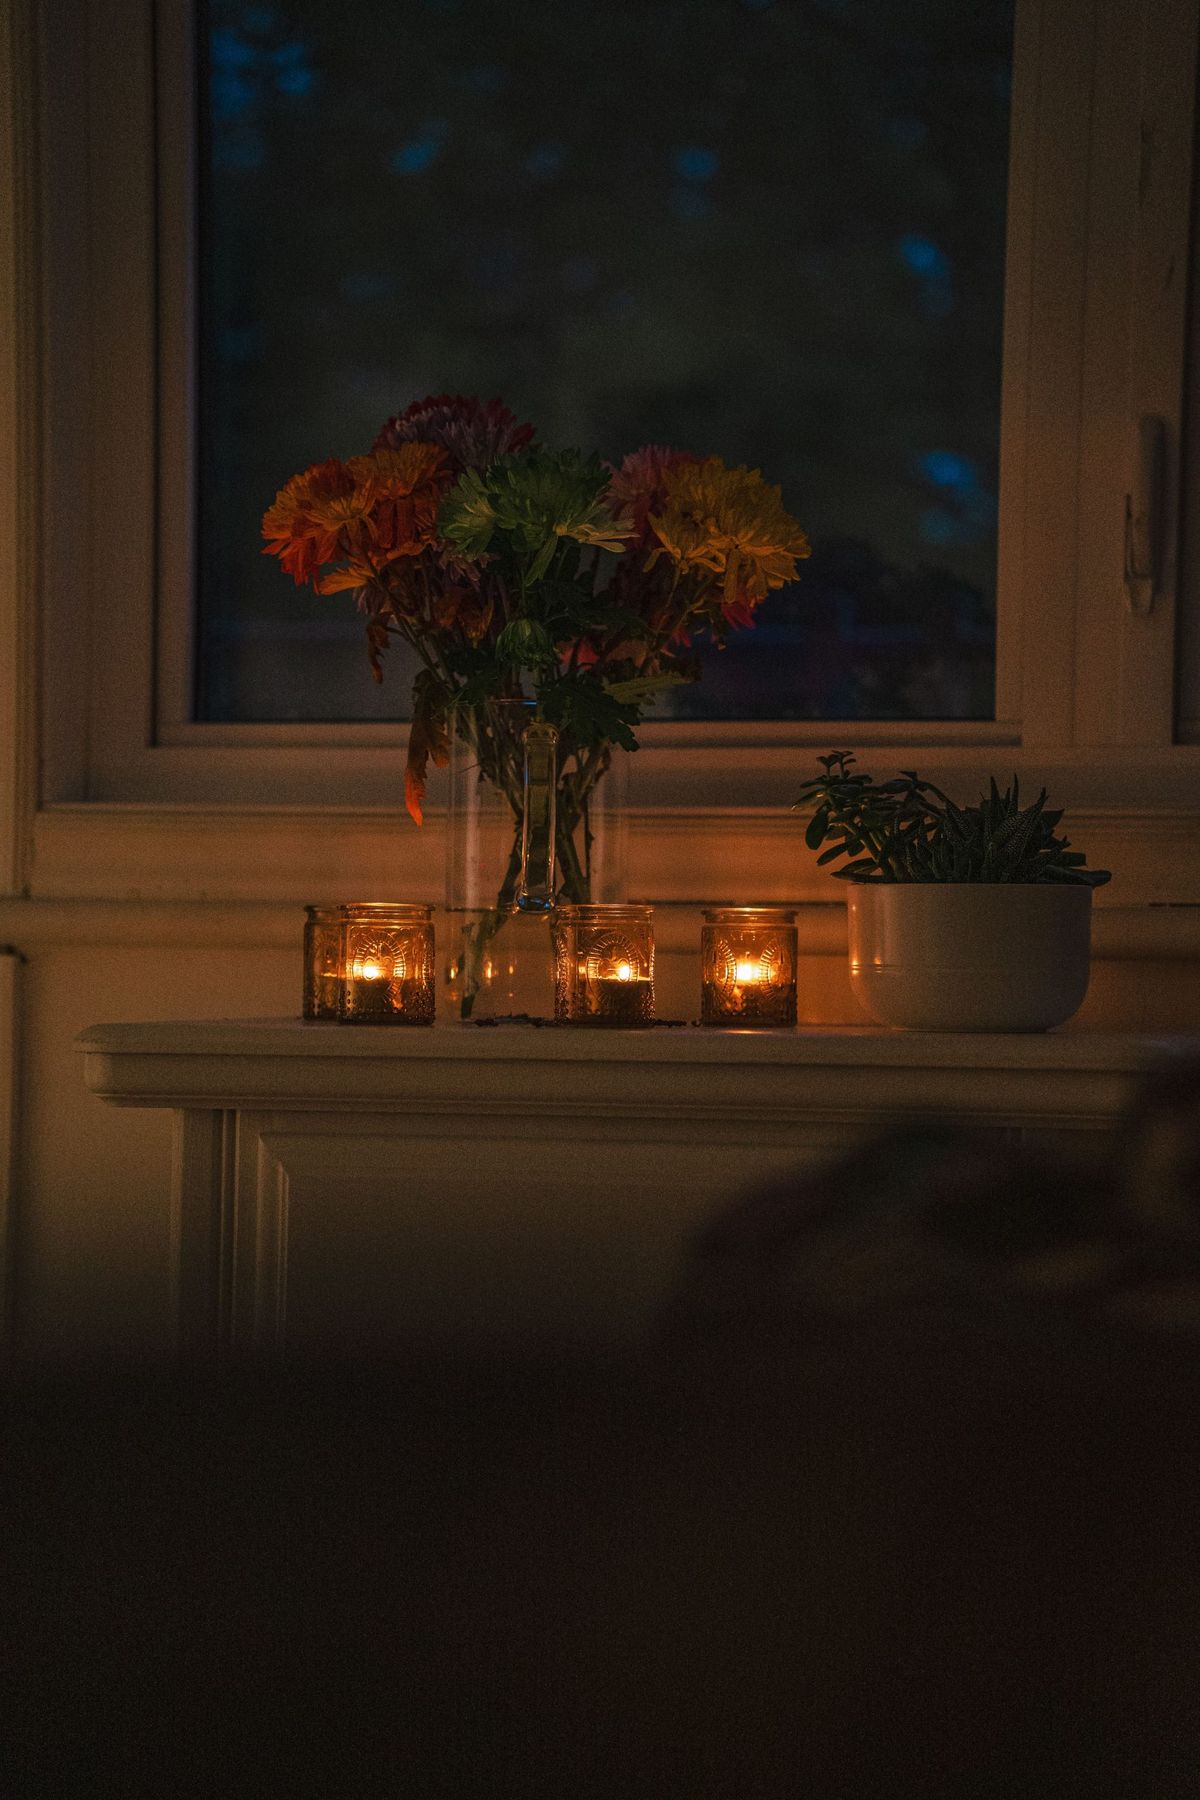
“This type of window sill decor is perfect for a bedroom or a cozy corner in a living room where you want to create a serene, end-of-day mood.”
It requires a window sill with a depth of at least 5-6 inches to safely accommodate the pitcher, planter, and votives without risk of them falling. The look is most effective against a dark backdrop, so it shines brightest at night when the window is a black pane of glass. It’s a small-scale idea, perfect for apartments or single-room decorating, offering a huge return in ambiance for a very small footprint.
30. A Moody Garden Table with Lilacs and Stoneware
The overflowing, slightly wild bouquet of lilacs and anemones is the heart and soul of this table setting. Without it, the dark green plates and gray tablecloth could feel somber and heavy. The flowers inject life, romance, and a touch of the untamed garden into the scene. The choice of purple lilacs and white anemones against the forest green plates is a sophisticated, unexpected color palette for fall, moving beyond the typical oranges and reds. This bouquet elevates the entire setting from a simple meal to a poetic, ethereal experience. It’s the element of living beauty that makes it all magical.
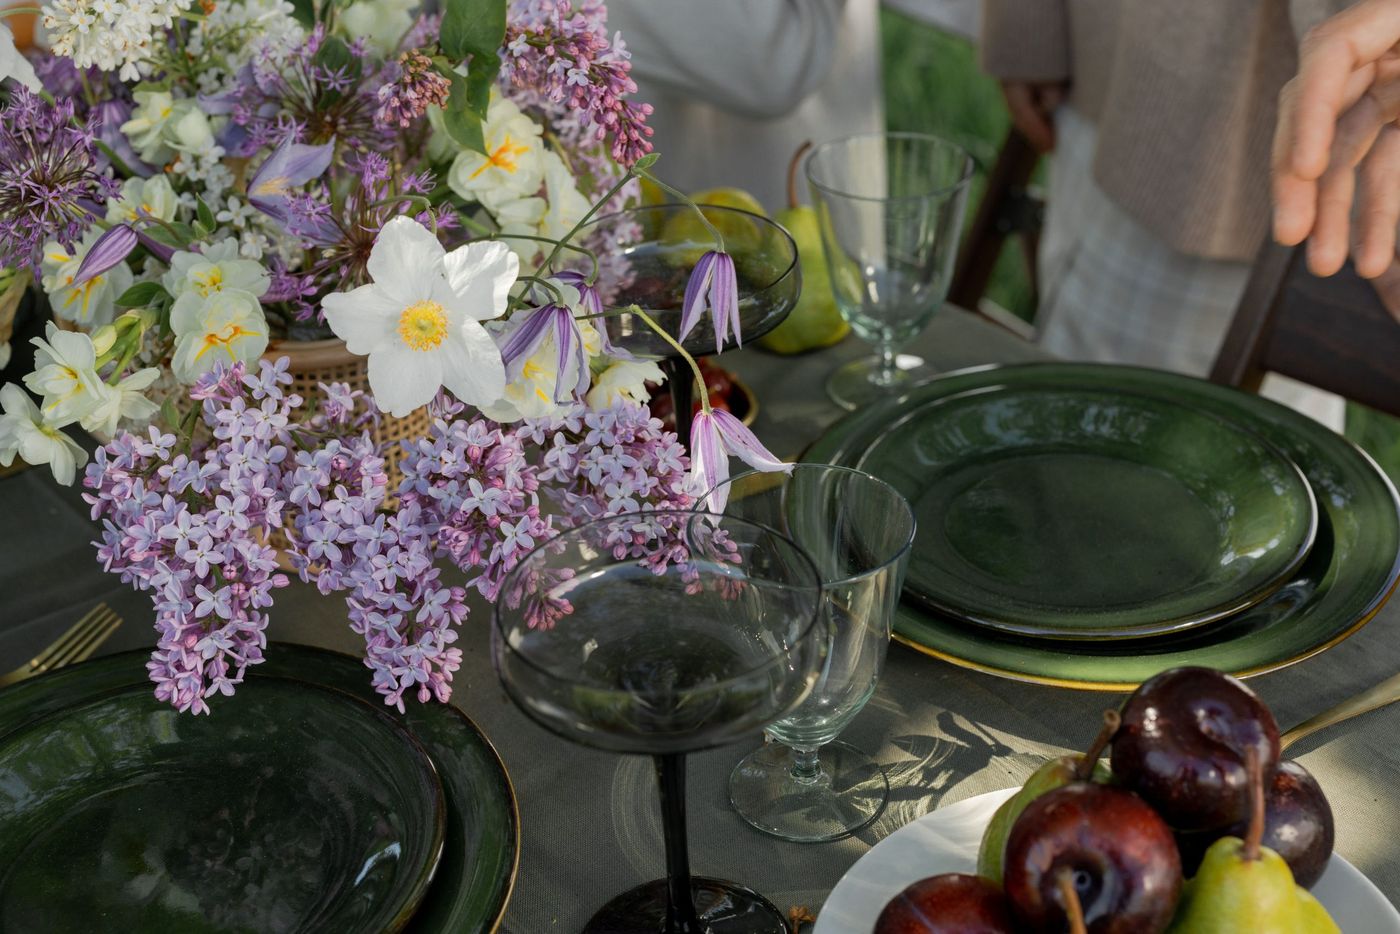
“A tablescape this lush and layered is absolutely stunning for a special occasion, but let’s be real: it’s not practical for your average Tuesday night dinner.”
The massive floral arrangement in the center, while beautiful, takes up a significant amount of space and can obstruct the view of guests across the table. This is a ‘style for the photo’ moment. For a real dinner party, you might opt for a lower, smaller arrangement or a series of bud vases so people can actually talk to each other. It’s beautiful inspiration, but remember to adapt it for real-life functionality.
Your Autumn Story Starts Now
Armed with these 30 ideas, you’re ready to skip the endless scrolling and start creating a home that feels perfectly festive for the season. Whether you go for a single, subtle pumpkin on the coffee table or a full-blown porch display, the goal is to create a space that brings you joy. Now go have fun with it! Don’t forget to save your favorite ideas to your Pinterest board to come back to year after year.