
You know that feeling when you finally find a Christmas village arrangement that looks exactly right for your space? The lights hit the snow just so, the train actually clears the bridge, and every little figure seems to be waving at you.
We spent serious time browsing Etsy, Amazon, and Walmart to bring you only what’s worth your attention this year. Below are 31 curated Christmas village display ideas spanning cozy tabletop scenes, elaborate multi-tier train layouts, rustic handmade paper houses, and whimsical vintage-inspired villages. And stay until the end — we break down the most common mistakes that can ruin these looks.
In 2026, the big shift is toward displays that feel collected and personal rather than straight out of one box — layered lighting, handmade accents, and tiny scenes with a sense of humor.
📌 Save this to Pinterest for later — you’ll want to revisit these ideas.
1. A Snow-Dusted Red House With Santa and a Present-Loaded Train
Before you commit to that charming arched opening, test your train at full speed with the tallest gift-stacked car attached. You want at least three-quarters of an inch of clearance above the highest package so the train doesn’t snag when the track shifts or the snow settles. Run the cord out the back of the arch, not through the front powder, and set the house slightly offset so the red facade doesn’t block your view of the train as it rounds the bend.
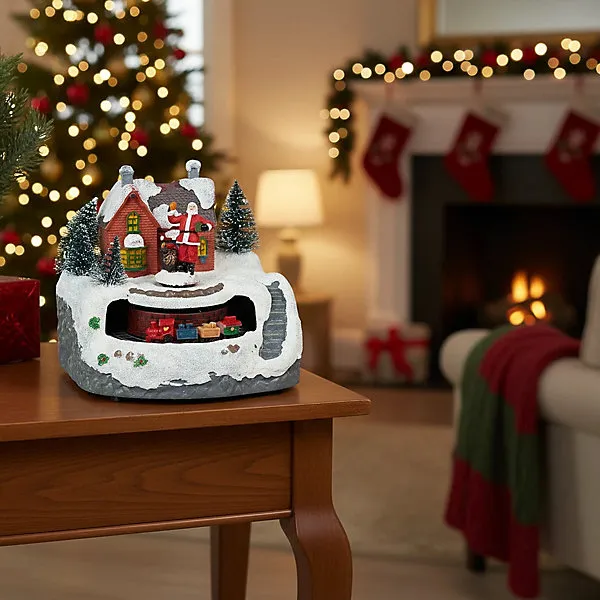
“What makes this little scene work is the warm glow repetition.”
The red house, the lit tree in the background, and the wooden end table all lean warm, so the white snow feels crisp instead of cold. Placing the display low on an end table near a sofa also gives you that seated eye-level view that makes miniature villages feel like real places rather than decor you glance down at.
2. A Whimsical Wooden Tiered Village With Toy Soldiers and a Big Reindeer
The multi-tiered wooden structure is what gives this whole arrangement its magic. Take it away and you’d have a few stuffed animals and toy soldiers standing in a flat pile of fake snow. The raised ledges let each figure get its own moment without turning the display into a crowded shelf, and the garland-wrapped edges soften the otherwise straight lines so it feels like a snowy village square rather than a step unit.
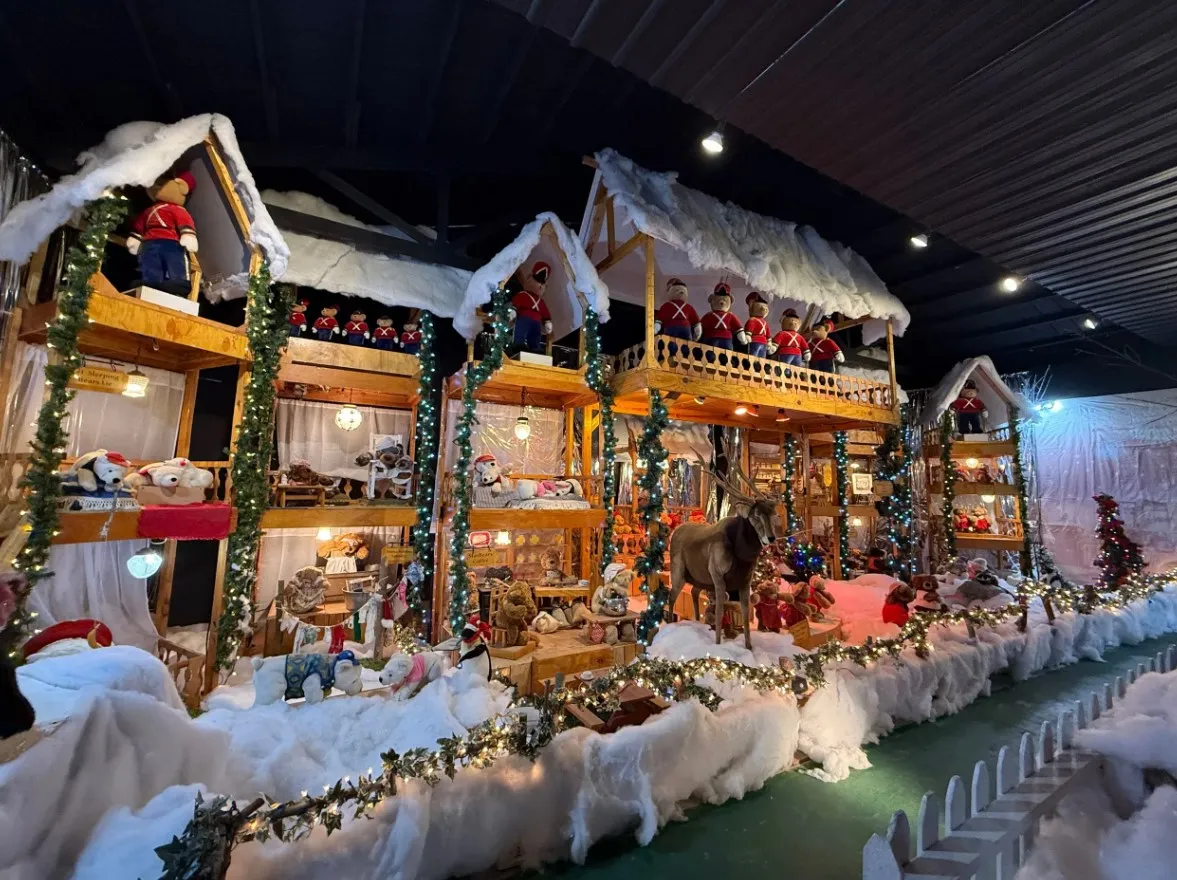
“Multi-tiered wood display riser: $45–$120Garland and warm string lights: $15–$40”
- Multi-tiered wood display riser: $45–$120
- Garland and warm string lights: $15–$40
- Faux snow mat or roll: $12–$30
- Stuffed animals and toy soldier figures: $20–$80
- Miniature white picket fences and reindeer: $18–$50
- Total: $110–$320
- Budget alternative: stack two thrifted wood risers, use faux fur fabric instead of snow, and shop holiday stuffed animals after Christmas for 50% off — you can land under $85.
Give this display a dedicated console or sideboard at least five feet wide. If you’re working with a narrower wall, try the lower tabletop approach in Idea #5 instead; the verticality here will feel cramped below about four feet of clear counter space.
3. Alpine Peaks, a Running Train, and a Snowy Canal at Night
To recreate that central canal without buying a pricey molded piece, start with a two-inch-thick foam board. Mark a gently curving channel about one and a half inches wide, carve it out with a hot wire or craft knife, then paint the bed deep blue-black. Glue in a strip of clear acrylic or glossy resin and surround the edges with small stones before adding bridges. This takes about two hours and costs roughly $20–$35.
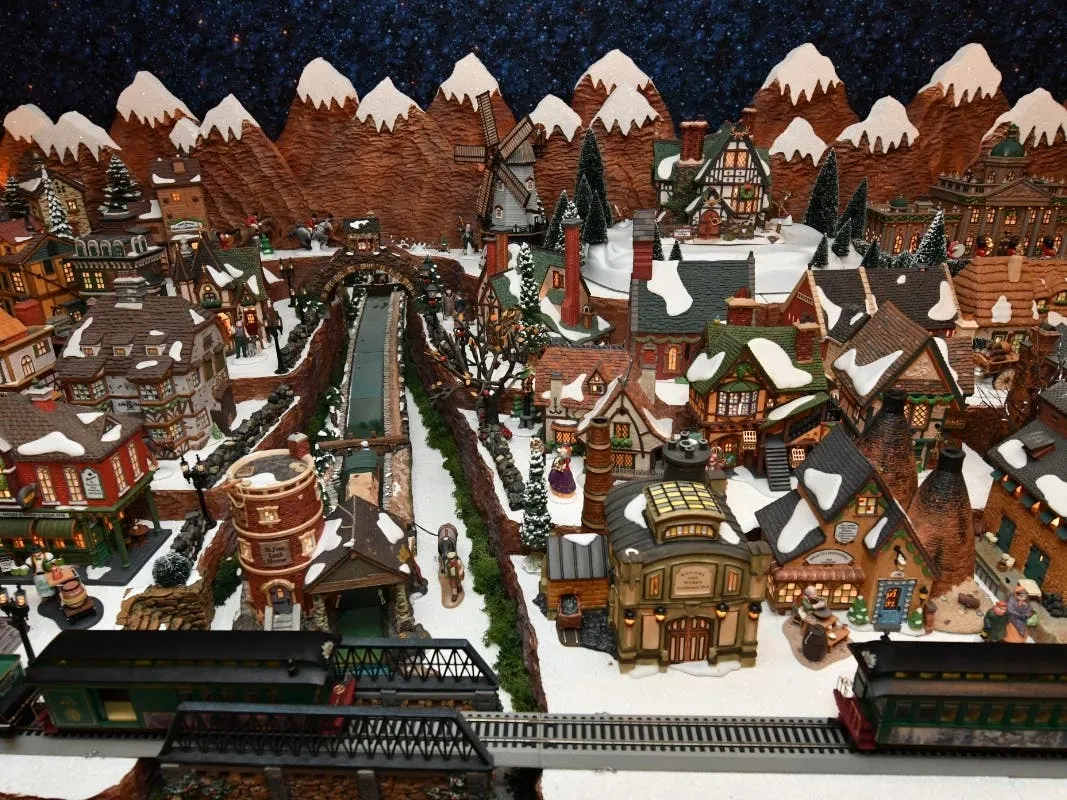
“The dark starry backdrop is doing most of the visual heavy lifting here.”
It makes the tiny white buildings and their warm windows look brighter than they actually are, while the curve of the train track pulls your eye through the scene. Repeating the brown mountain color in the bridge and bare trees keeps the whole landscape cohesive even though there’s a lot going on.
4. A Big Multicolor Tree Anchoring a Full Village and Train Loop
Integrating the full-size tree with the miniature village is one of the smartest collector trends for 2026. Instead of setting the village on a side table away from the tree, this approach treats the tree as the mountain above town. It gives the display a sense of scale you can’t get from a table alone, and it photographs beautifully because the multicolor tree lights reflect off the white fabric base.
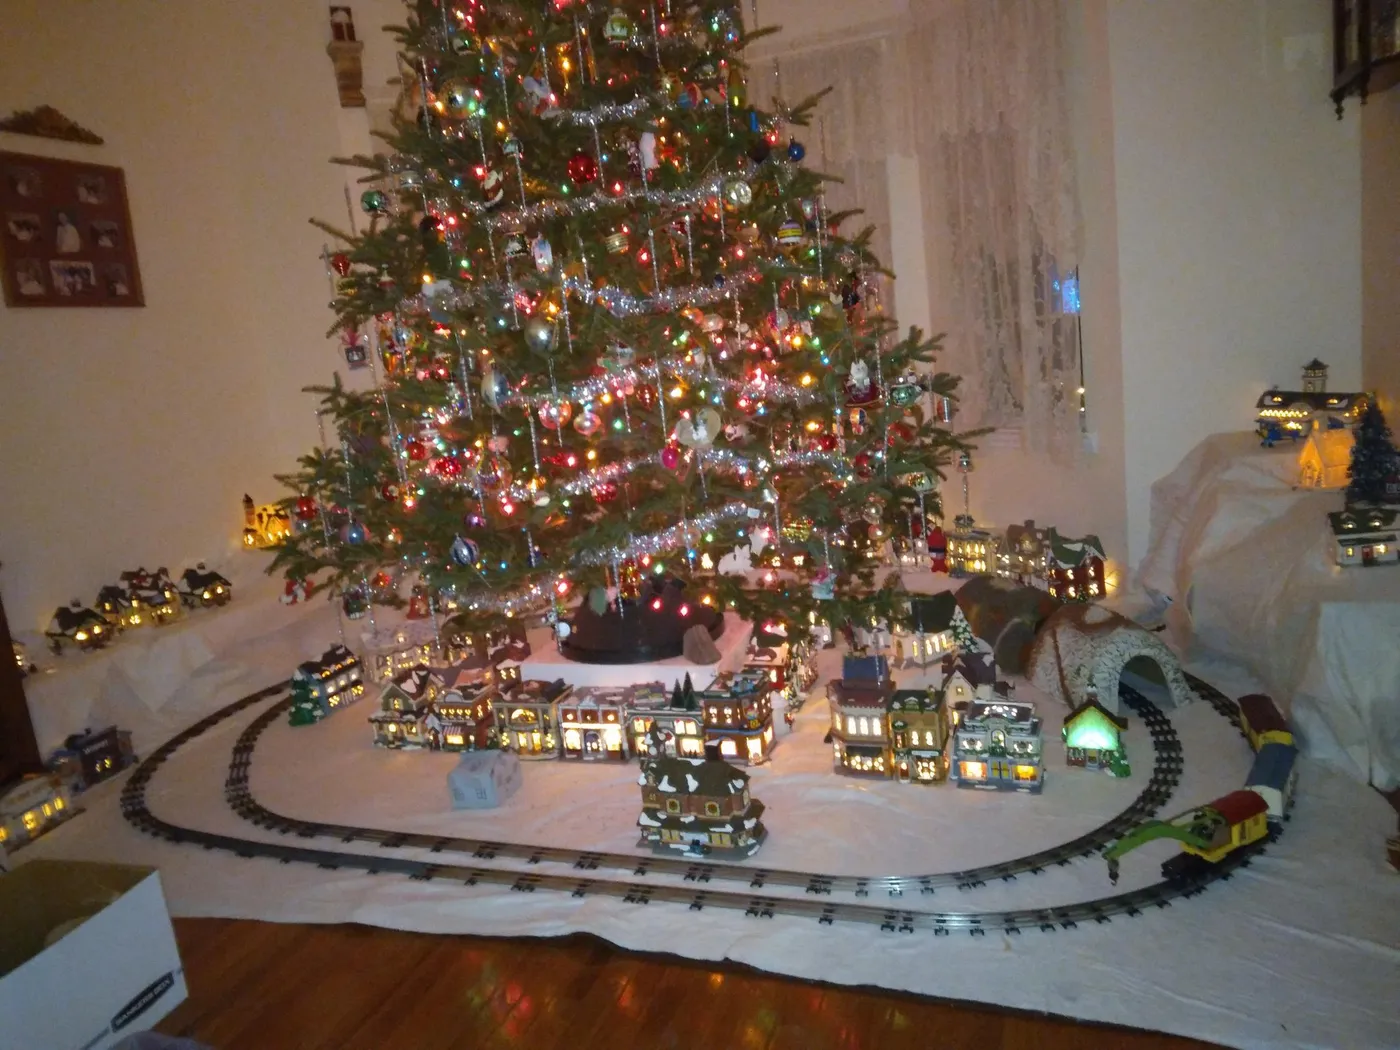
“that pretty white fabric snow will show every crumb, candle drip, and curious cat hair.”
Keep the display far enough from the tree water reservoir to avoid accidental spills, and use a low-profile power strip mounted under the table so the train transformer doesn’t sit in the snow. If you have small kids, this is also a “look but don’t touch” setup.
5. Warmly Lit Houses With Batting Snow and Dark Walking Paths
The formula here is about 70% white batting snow, 20% glowing buildings, and 10% dark pathways and deep green trees. The dark pathways do more than you’d think; they give the white snow a sense of village streets. Swap the houses for any style and keep the same ratio, and you’ll still get that cozy late-night glow.
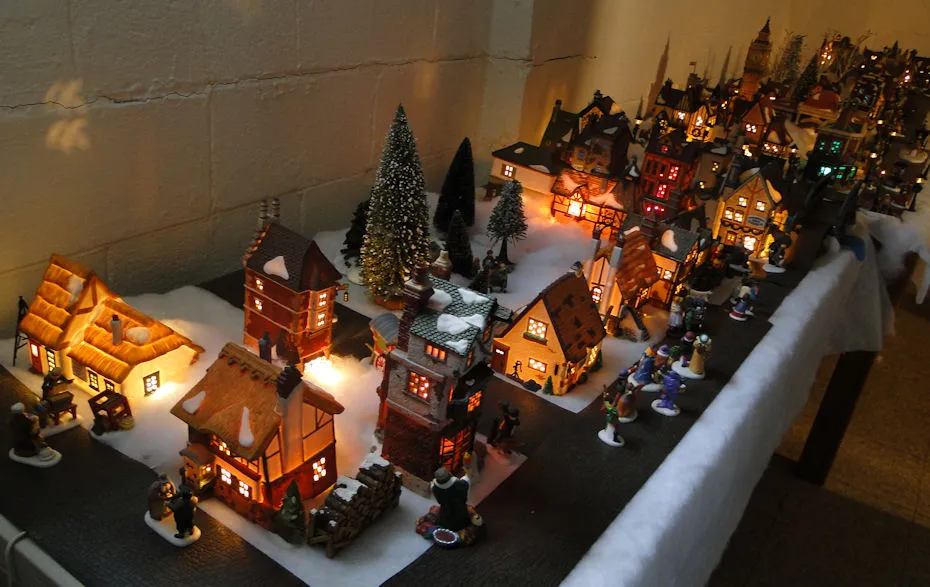
“White batting is a dust magnet and will slowly yellow if it sits in direct sun or near a heating vent.”
Plan to remove the entire snow layer once a season, shake it outside, and store it in a breathable cotton bag when the village comes down. If it looks dingy after a few years, new batting is usually under $15, which is cheaper than trying to wash it into shape.
6. A Red Streetcar, a Popcorn Cart, and Crocheted Snowflakes in the Window
You don’t need a premium ceramic set to get this nostalgic streetcar scene. Look for a red vintage-style toy streetcar on eBay or a local train shop, then pair it with cardstock houses from a craft store and a popcorn cart from a holiday miniatures kit. Hang handmade crocheted snowflakes from Etsy using clear fishing line, and the whole look can come together for $40–$75.
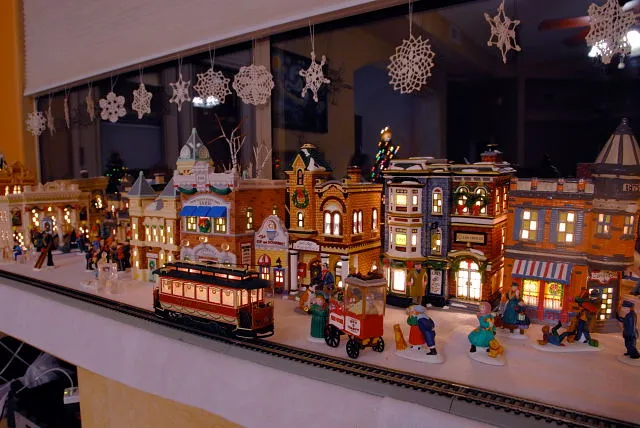
“Hang the snowflakes at three slightly different heights, about two to three inches apart, in front of the dark window.”
That way they catch the village lights from behind and give the scene a soft, almost snowglobe depth. Use removable adhesive hooks instead of nails so you can adjust the composition without damaging your window trim.
7. Horse-Drawn Sleigh, Blue Fountain, and Multi-Level Snowy Hills
This one needs room to breathe. I’d give it at least six feet of table length and two feet of depth, because the multi-level snow hills and blue fiber optic fountain only work when there’s enough foreground for the horse-drawn sleigh to feel settled. If your table is shallow, pull out the sleigh and fountain and use the smaller tabletop arrangement in Idea #5.
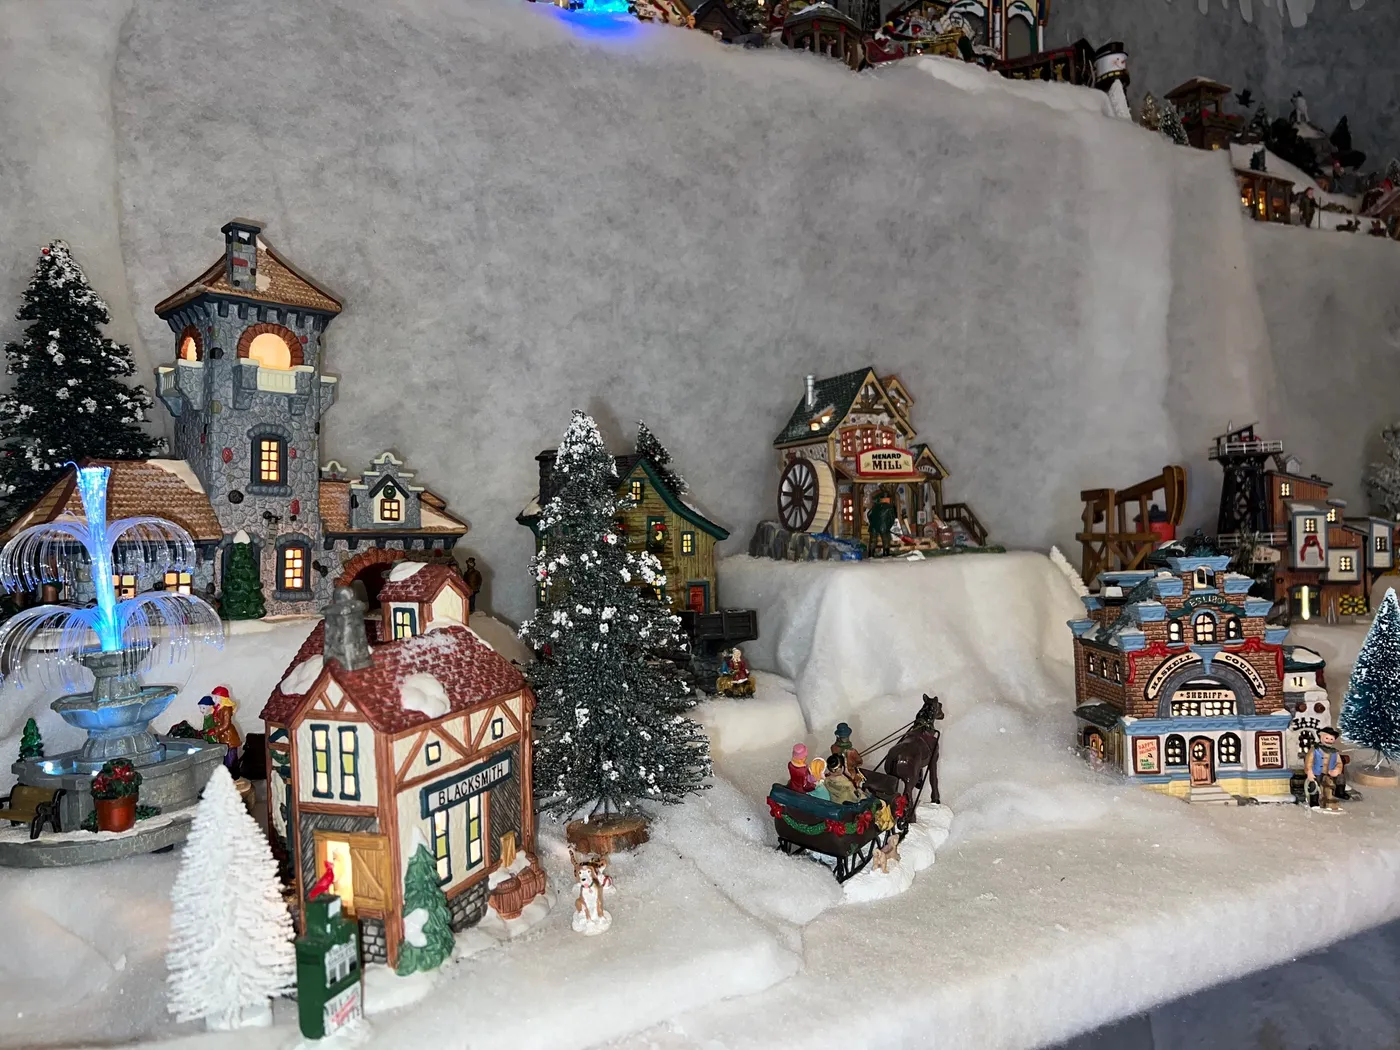
“is contrast.”
Warm yellow window light against white snow feels classic, but that bright blue fountain adds an unexpected cool note that wakes the whole landscape up. The varied building heights also create little pockets of discovery rather than a flat row of houses.
If I had to name the one thing that makes this display special, it’s the sculpted multi-level snow. It turns a table into topography, so every figure and tree has its own mini hill instead of standing on a sheet.
8. A Recessed Shelf Village With a Glittery Grey Backdrop and LED Color
Building this recessed shelf scene is easier than it looks. Start by lining the back of the shelf with adhesive glitter paper or a thin foam board, then set the tallest building in the back-left corner. Fill the front with white batting, push the multicolor LED tree just off-center, and add figures last. The whole insert takes about an hour and costs $25–$50 depending on whether you already have the shelf.
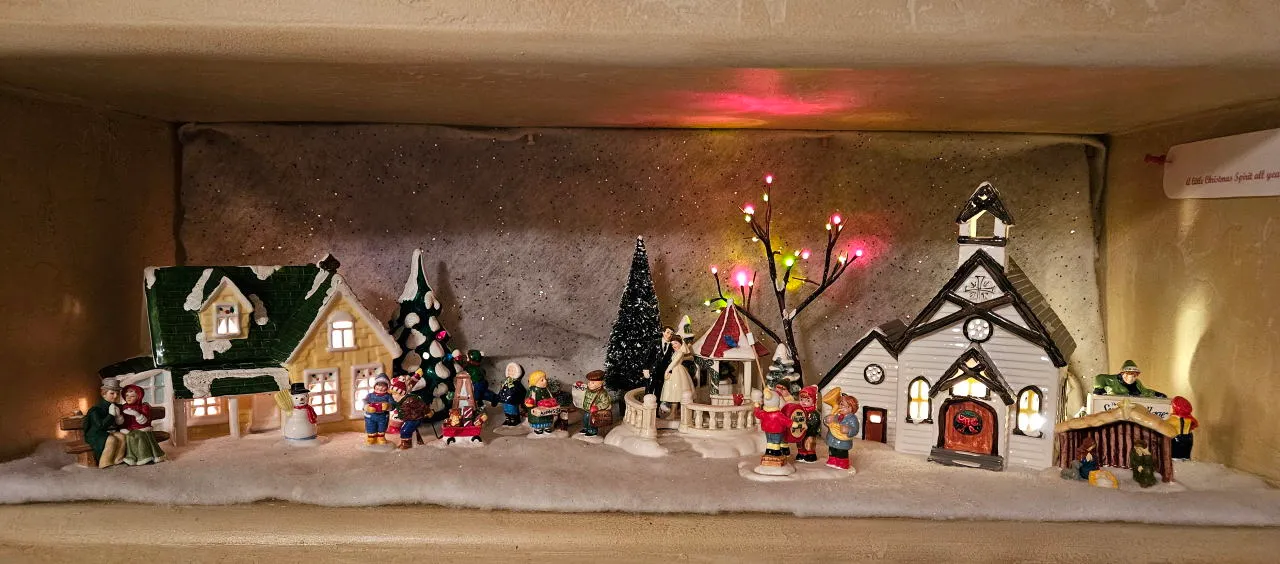
“The formula is 60% neutral white and grey, 30% warm yellow interior glow, and 10% multicolor LED of that tree.”
It works because the glittery grey backdrop reads as falling snow at night, while the small tree gives a controlled pop of color without overwhelming the mostly traditional houses.
9. Santa on a Snow Hill With a Moving Train Tunneling Below
Put the track down first, cover the transformer in the tunnel, and run the train for 20 minutes before you add any snow or Santa hill. That way any derailment happens while everything is still easy to reach. Keep the snow cover thin along the track bed, no more than half an inch, because even a little drift can lift the wheels.
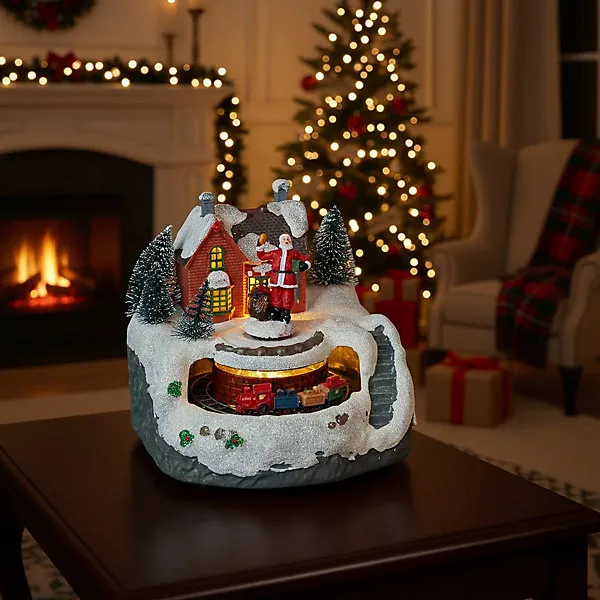
“moving trains and loose artificial snow can create a dusty mess over a few weeks.”
Use a small handheld vacuum with a brush attachment to clean the track weekly, and don’t place the display near a fireplace where airflow will constantly blow snow onto the next room’s floor.
10. Victorian Houses, Birch Trees, and Santa’s Carriage in the Foreground
The horse-drawn carriage with Santa in the foreground isn’t just a cute accessory; it’s what gives the whole scene a story and a sense of scale. It tells your eye that these are Victorian buildings, not just ceramic pieces, and it makes the village feel inhabited. If you remove it, you lose the main narrative.
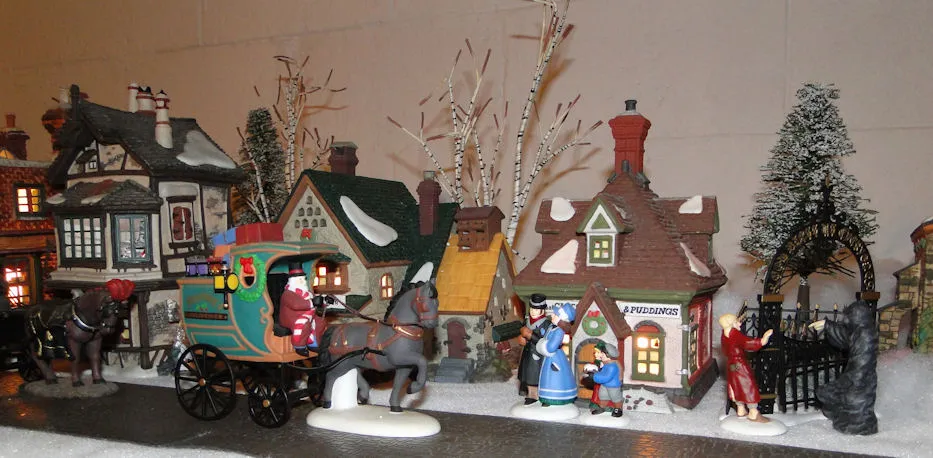
“For a lower-cost version, check thrift stores for unfinished or yellowed Victorian-style houses and repaint the roofs with white acrylic paint and a little fine glitter.”
Real birch twigs trimmed to different heights can stand in for the miniature birch trees. You can get this nostalgic look for $30–$60 instead of $150 or more.
11. A Glowing Yellow House Dripping in Warm Mini String Lights
The reason this little yellow house glows so beautifully is that the entire palette is soft. Pale yellow and grey recede, so the warm white string lights become the main character. A red door wreath and green bottle brush trees are just enough contrast to keep it from looking washed out.
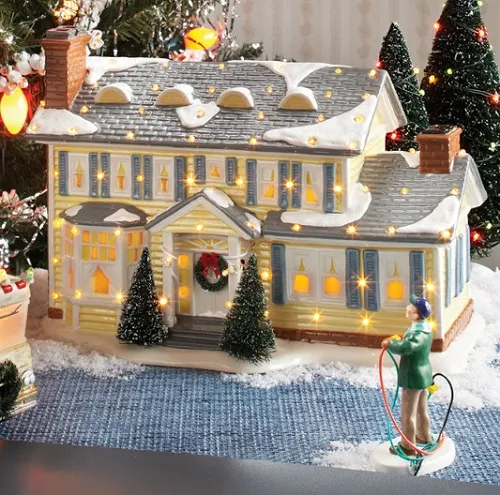
“Those tiny string lights are usually low-voltage LED, which won’t get hot, but they do collect dust between the bulbs.”
Wipe them gently with a dry microfiber cloth once a month while the display is up, and store the house with the lights detached if possible so the wires don’t crimp or kink at the roofline.
Use one continuous strand of warm-white micro LEDs rather than two short battery packs. Put the battery pack behind the house, then bury the extra wire under the faux snow. That gives you a cleaner look and one hidden switch to turn everything off at night.
12. A Two-Story Brick House Paired With a Rustic Illuminated Treehouse
This display fits a mantel or a sideboard as narrow as 12 inches, but it really shines on a 36- to 40-inch-wide surface. The two buildings have enough visual weight to anchor the scene, while the smaller trees and fencing keep it from feeling sparse. If you only have a deeper shelf, angle the treehouse slightly toward the brick house to close the gap.
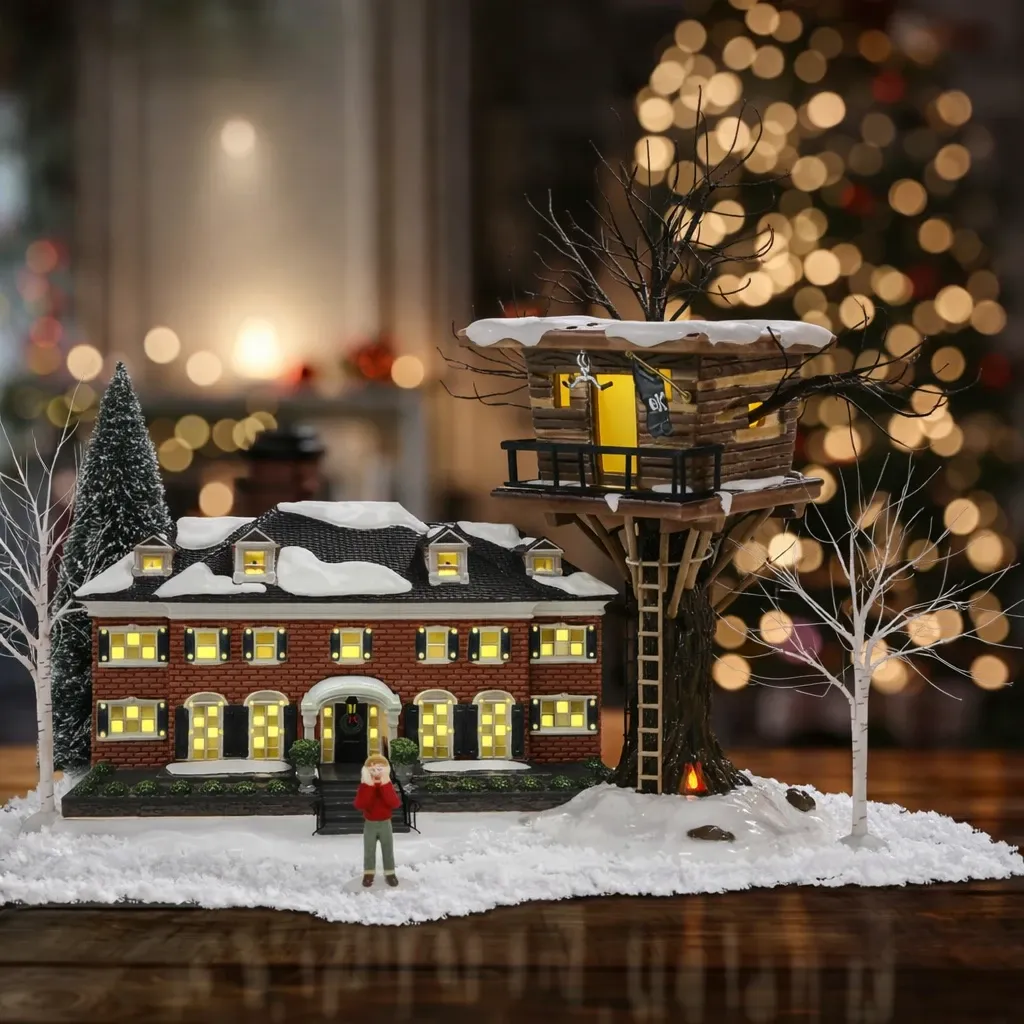
“To get that sculpted snow look, glue several thin layers of styrofoam to a cardboard base, then carve gentle slopes with a serrated knife.”
Brush on white acrylic mixed with fine glitter, and let each coat dry fully. This takes about 90 minutes and costs under $20 for a display base you can reuse every season.
13. A Yellow House, an RV, and a Man Tangled in Lights
The move toward storytelling is huge in 2026. Collectors are adding tiny, funny characters like a man tangled in lights alongside their traditional Santa and village buildings. It makes the display feel like a real place with real mishaps, and it’s a great conversation starter when guests lean in to see what’s happening at street level.
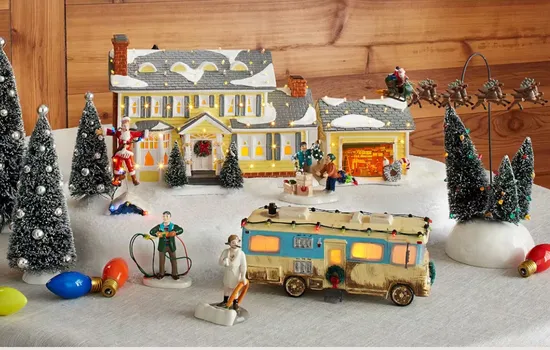
“The RV is the piece that makes this scene feel contemporary and personal rather than strictly Victorian.”
It tells you someone in this little village has a sense of humor and a road-trip habit. If you only add one non-traditional piece this year, make it something with that kind of personality.
14. A Dark Blue and Gold Sleigh With Reindeer on a Glittered Snow Base
This one is all about the sleigh, so let’s talk numbers.

“Santa sleigh with reindeer figurine: $25–$80Glitter-dusted snow base or tray: $1”
- Santa sleigh with reindeer figurine: $25–$80
- Glitter-dusted snow base or tray: $12–$30
- Mini battery-operated tree light for the sleigh: $8–$20
- Rustic wood riser or tray: $15–$45
- Soft-focus tree lights in background: $20–$50
- Total: $80–$225
- Budget alternative: use a vintage musical sleigh from a thrift store and a small strand of warm LEDs for under $45.
What makes this vignette feel rich is the deep blue and gold against the brown reindeer and red Santa. That combination keeps the scene traditional but gives it a slightly formal, almost heirloom quality. The rustic wood surface beneath prevents the glitter from feeling too precious.
15. Tiny Brick and White Houses Nestled in a Lighted Pine Garland
Recipe: 50% dark wood console, 25% white snow and green garland, 25% warm village glow. The dark wood grounds the whole thing and makes the tiny white buildings look brighter. If you swap the garland for eucalyptus, the same formula gets a softer, less traditional feel.
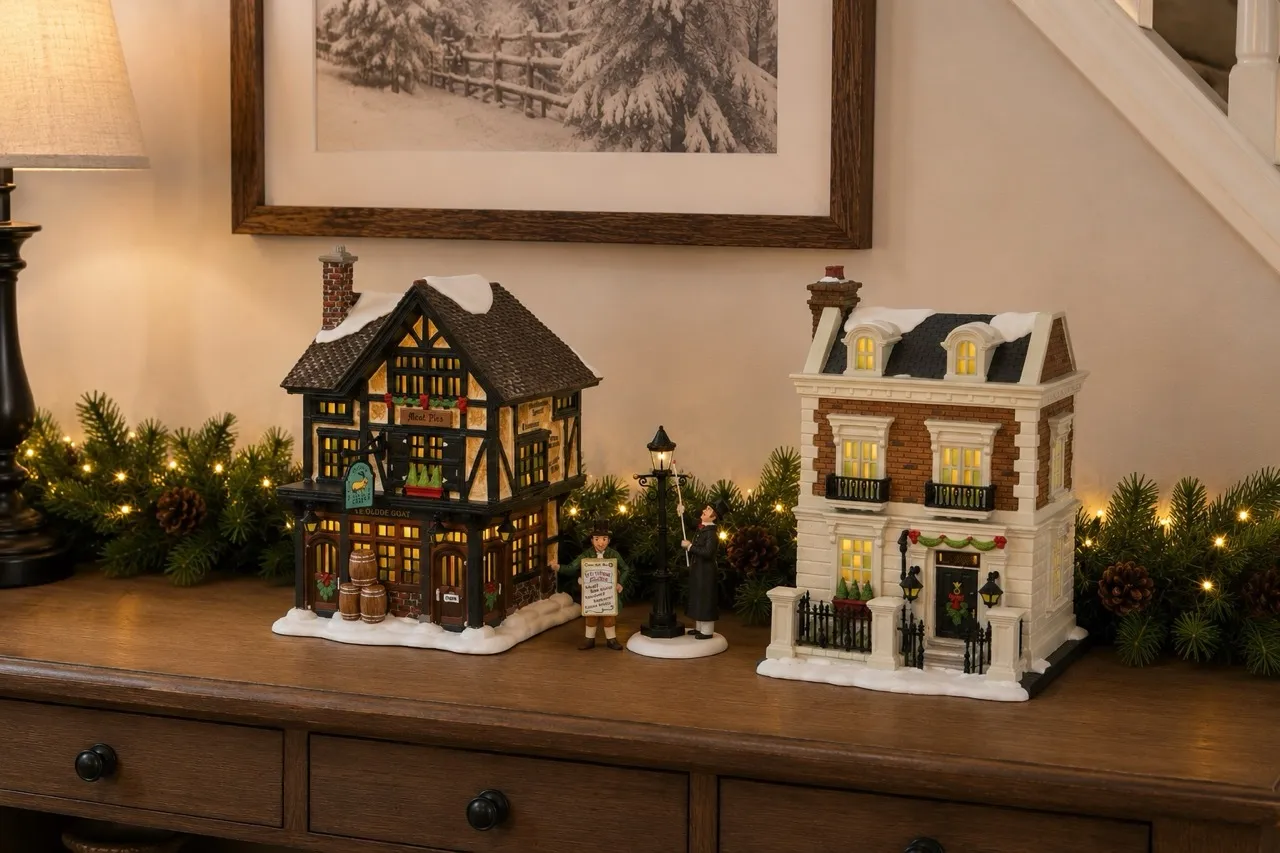
“Layer the warm micro lights inside the garland first, then place the houses slightly in front so they don’t disappear into the greenery.”
Use a timer plug so this turns on by itself around dinner, and keep the lamppost to one side rather than centered for a more relaxed composition.
16. A Southwestern Village With Adobe Houses, Cactus, and Gold Accents
That faux fur base is beautiful, but it will hold dust and pet hair like a magnet. Keep a lint roller nearby and run it over the fur once a week while the display is up. If anyone in your house has allergies, this might not be the year-round accent you want.
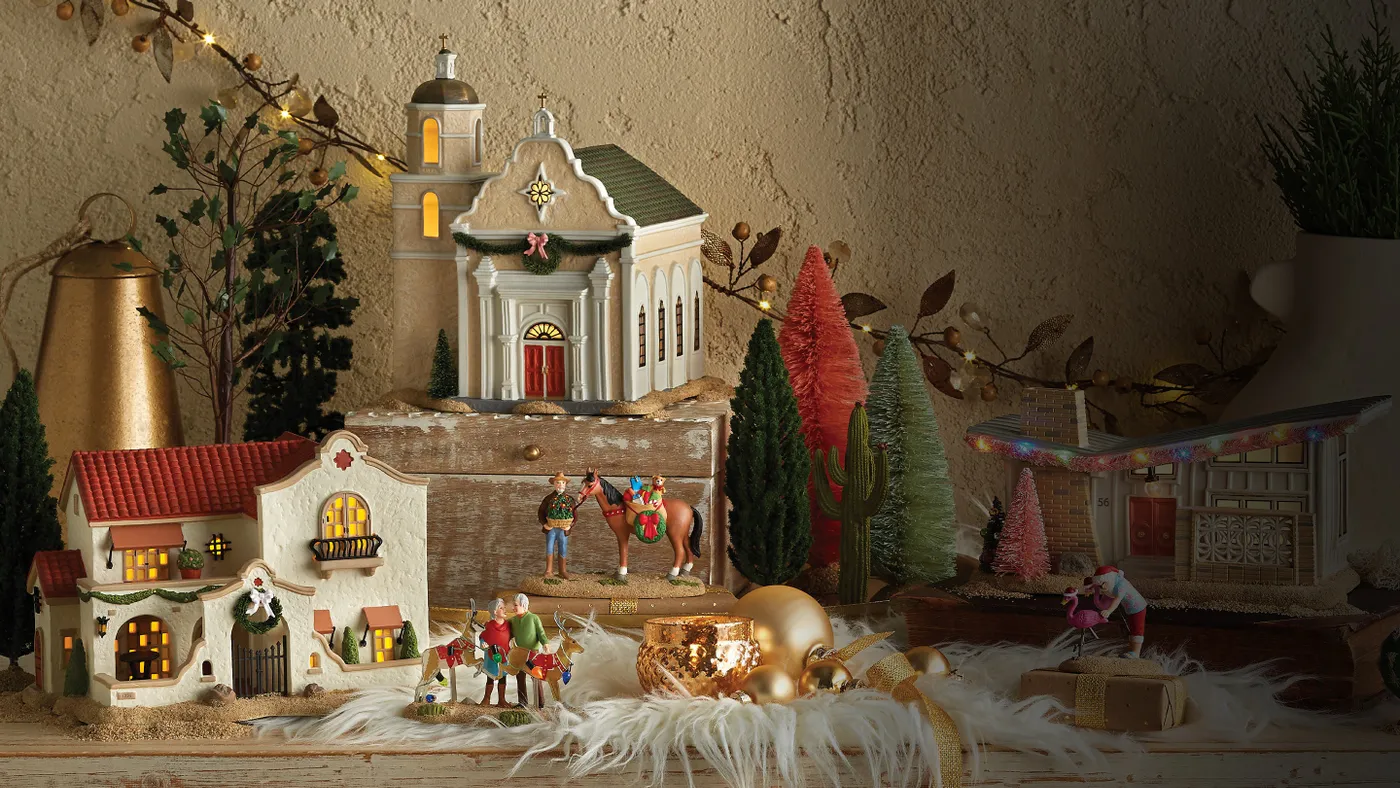
“You need about four feet of width on a console or buffet for the full church, adobe house, and mid-century home to sit without crowding.”
If your surface is smaller, try the jewelbox version in Idea #15 — same warm, collected energy with fewer buildings.
17. Glowing Victorian Facades With Villagers, Dogs, and Street Lamps
To create that nighttime background, pin a piece of dark grey or black fabric behind the village, letting it drape forward under the front edge. Then weave small warm fairy lights through the upper portion so they look like distant street lamps. Total time is about 45 minutes, and the fabric costs around $8–$15.
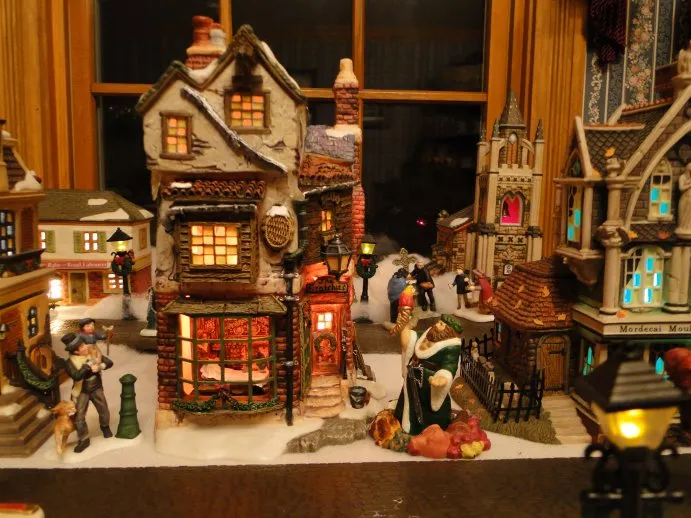
“The dark background makes every speck of dust visible, so brush the building facades and street lamps with a soft makeup brush every two weeks.”
A small can of compressed air works for crevices, but use it outside to avoid blowing dust into the room.
18. A Dense, Multi-Level Snowy Village With Red Accent Lights
here is density. This isn’t a village; it’s a miniature city block. The crowded, multi-level arrangement is what makes it feel magical rather than staged, so resist the urge to spread the pieces out too neatly.
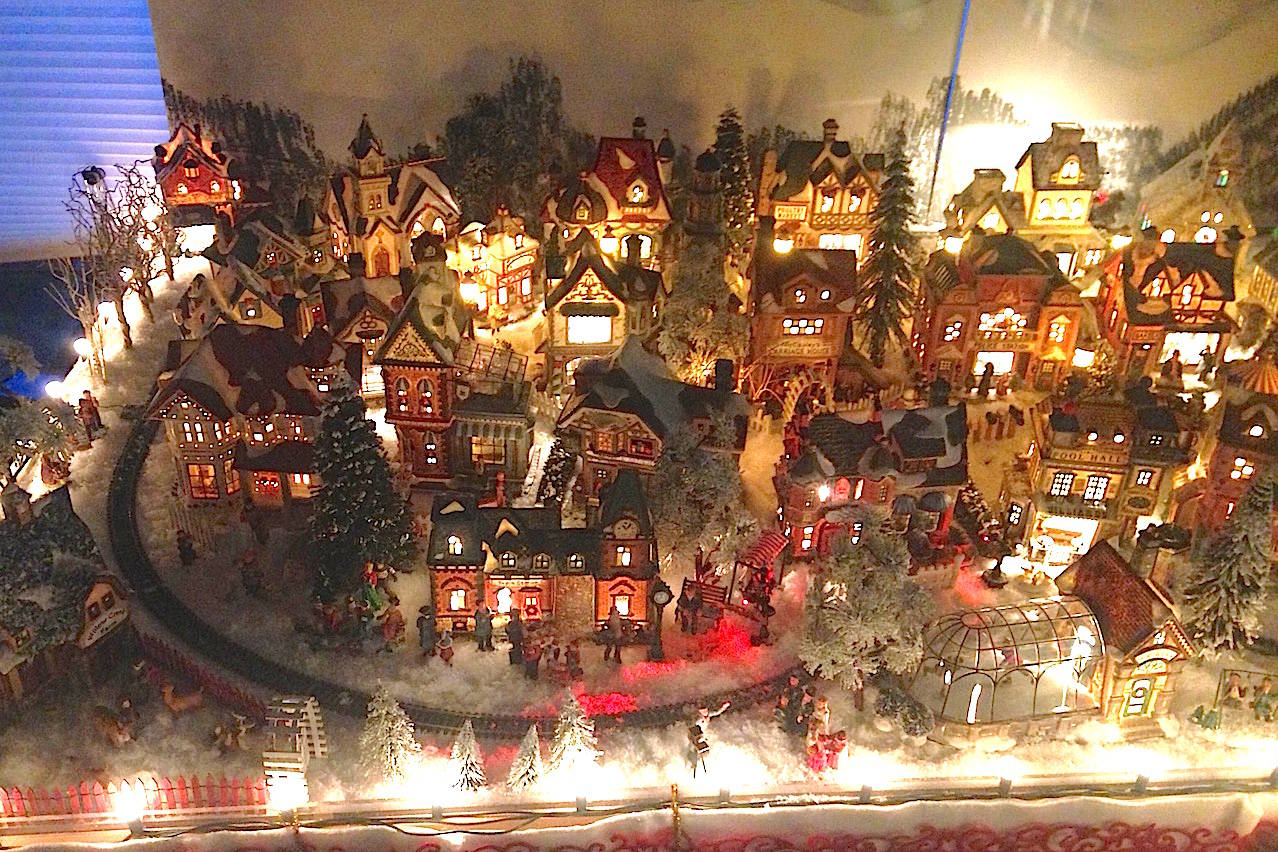
“The formula is 60% white snow, 25% warm yellow light, and 15% red and brown accents.”
You can swap the buildings for any era, but keep that snow-to-color ratio and the display will still read as a bustling winter night.
The repetition of glowing windows, bare branch trees, and rooflines gives the scene rhythm. Because your eye keeps finding another lit window, the whole table feels alive even when you’re standing still.
19. An All-White Ceramic Village With a Ferris Wheel and Mini Train
Stick to a strict off-white and forest green palette here. Use warm-white string lights rather than cool white or blue-tinted LEDs, because cool light against white ceramic can look sterile. The ferris wheel and train add motion, so keep them on a separate switch if possible for quiet evenings.
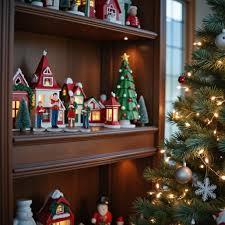
“All-white ceramic villages are having a comeback in 2026 thanks to that quieter, more curated holiday look.”
They photograph beautifully against light walls and work in homes where a bright red Santa would feel too loud. The variation comes from texture and shadow rather than color.
20. A Glowing Village Centerpiece Beside Formal Red and Gold Place Settings
You don’t need a full Department 56 set to get this elegant dining table moment. White ceramic houses from a big-box craft store, small bottle brush trees from a grocery store floral section, and gold-rimmed plates found at a thrift shop will get you 80% of the look for about $45–$85.
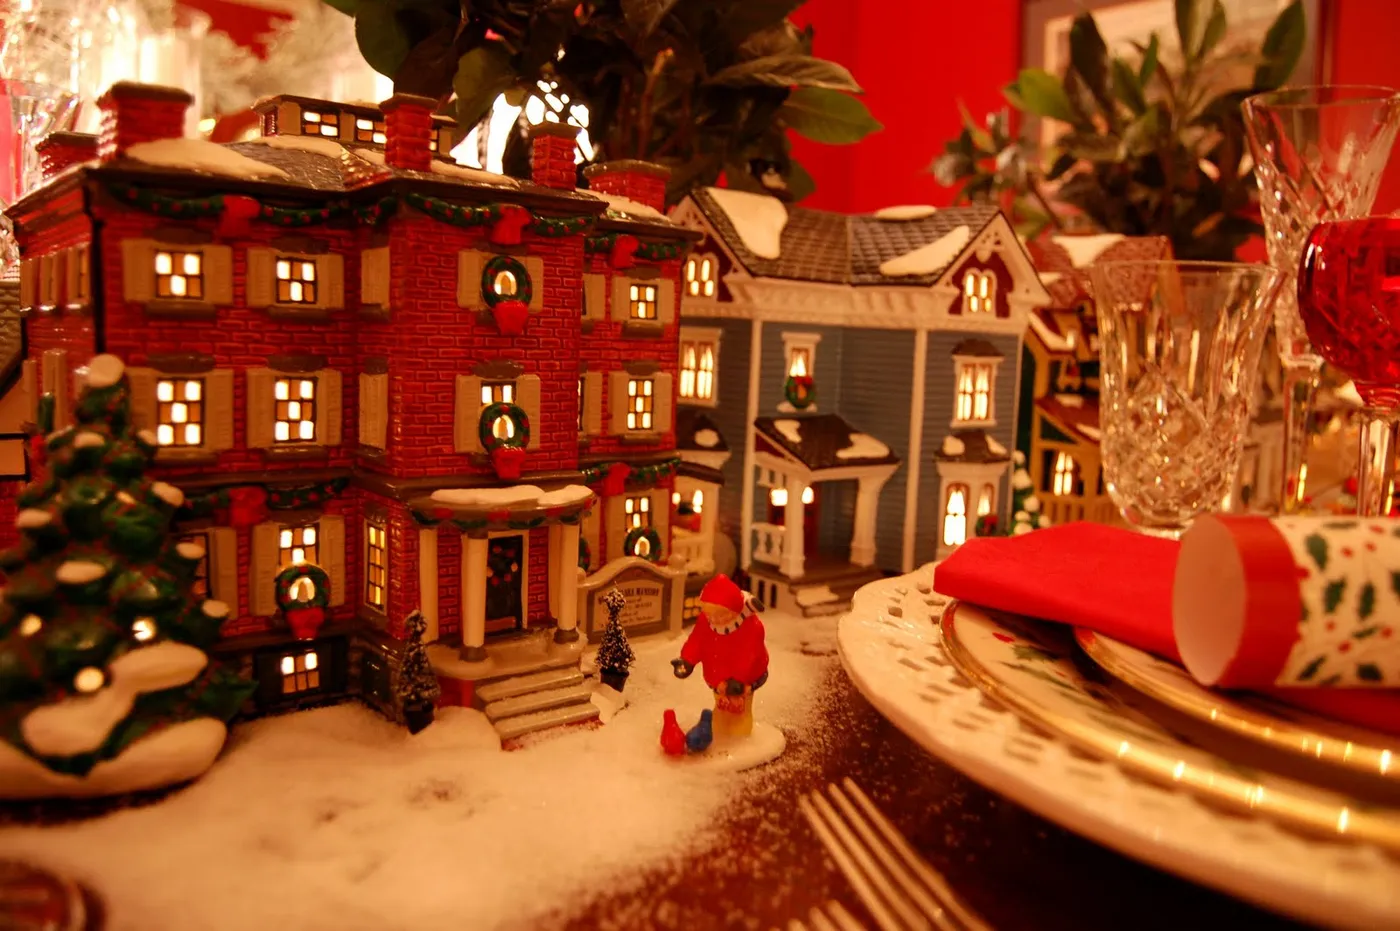
“This works best on a dining table at least eight feet long.”
You need enough room for the village to glow without stealing space from the place settings. If you want a lower-profile version, look at the centerpiece approach in Idea #29.
21. A Painted Mountain Sunset, Crinkled Silver Snow, and a Ruffled Green Base
The painted mountain and sunset backdrop is what makes this village feel expansive. It adds depth without requiring more buildings, and the mix of blue, white, and warm sunset tones gives the snow a golden hour warmth. The ruffled green base frames it all like a stage curtain.
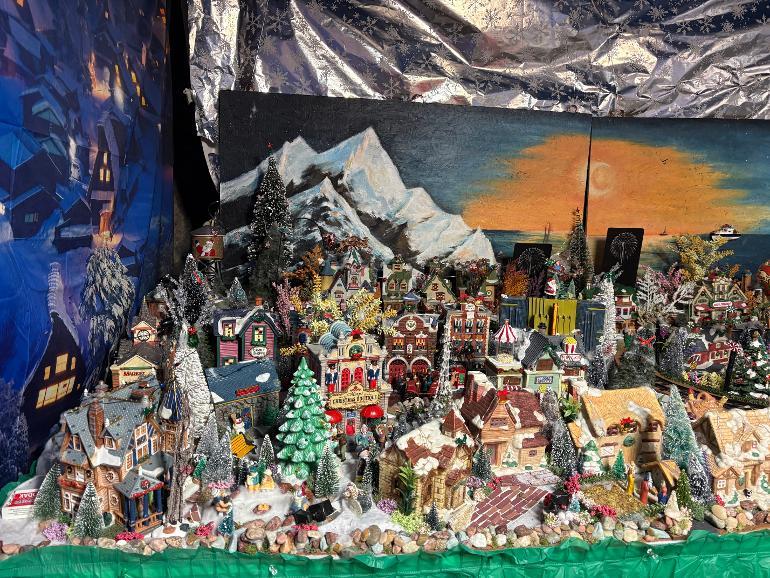
“Be careful with moisture and direct sun.”
A painted backdrop can fade if the display sits near a south-facing window, and it can buckle if it’s stored in a damp basement. Roll it around a cardboard tube rather than folding it flat.
22. A Carnival Christmas Village With a Ferris Wheel, Carousel, and Drop-Tower Lights
When you’ve got this many animated rides, label every cord before you bury anything. Use small adhesive tags near the plugs, then run everything to a single power strip with a built-in timer. Test the ferris wheel, carousel, and drop-tower ride for 30 minutes before adding snow, and leave access to the strip in the back.
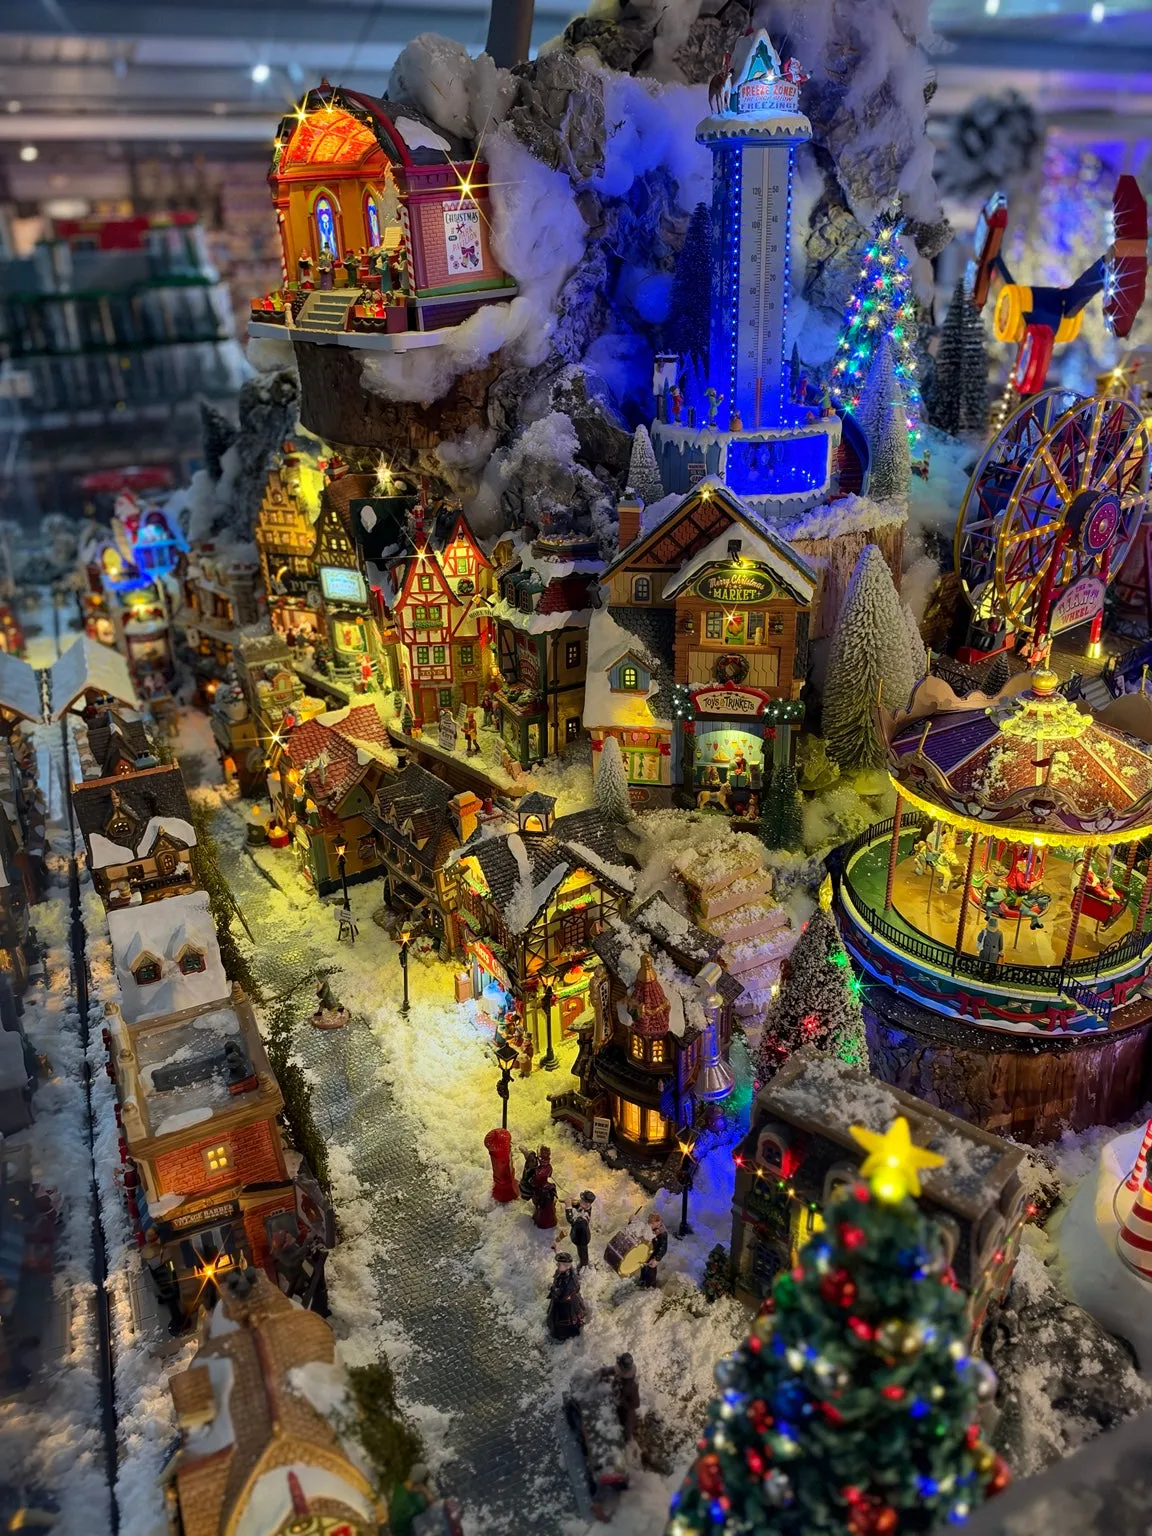
“Set each ride on its own small plywood platform covered with a thin layer of snow.”
That way if something stops working, you can lift the whole platform out without wrecking the landscape. Also keep the tallest ride near the back so it doesn’t block the lower village.
23. A Full Multi-Tier Village With Running Trains and a Decorated Tree Behind
This layout works because it layers about 50% village, 20% train track, 20% decorated tree, and 10% visible window light behind it. The real tree gives a vertical anchor, while the open sunroom windows keep the scene from feeling boxed in. Swap the village style and keep the same proportions.

“The active train is the heartbeat.”
Even if your buildings are simple, a moving train makes people stop and look longer. If you can only invest in one higher-quality piece, make it the train and track, then build the village around it over time.
24. Santa’s Sleigh Flying Over a Nighttime Train Village
Hanging Santa’s sleigh from the ceiling can tangle with tall street lamps and dust can settle on the reindeer. Use clear fishing line, check the knots each week, and keep the sleigh at least 10 inches above the tallest building. If it starts to sag or twist, lower it slightly and rebalance the line.
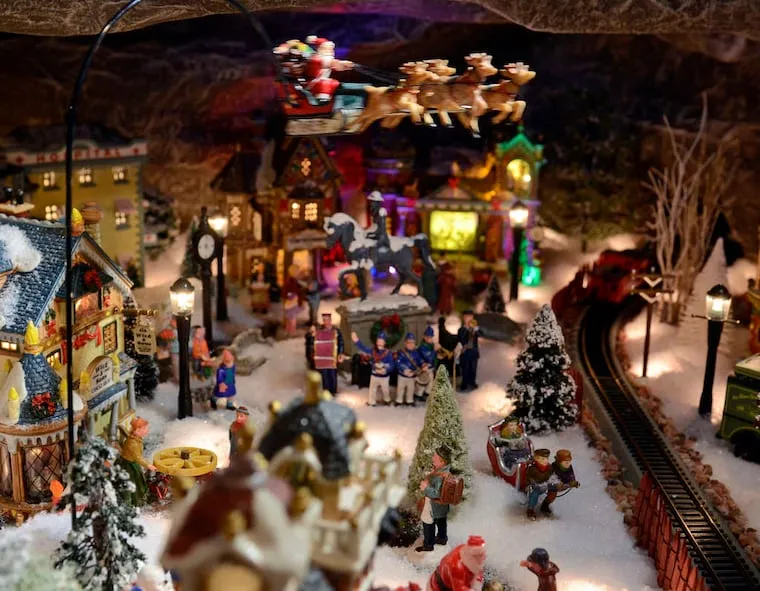
“You don’t need a pricey suspension kit.”
Small adhesive hooks, clear fishing line, and a lightweight resin sleigh set can work for under $25. For the village below, repurpose a basic train set you already have and add snow from cotton quilt batting. Compare this blue-black glow with Idea #28.
25. Houses Made From Aged Book Pages With Snow-Dusted Twig Roofs
The aged paper houses work because the cream and tan tones feel quiet and wintry against the dark green bottle brush trees. The twig roofs and cut-out windows add a handmade, almost storybook quality that no glossy ceramic building can match. It’s a display that says “made slowly” rather than “bought complete.”
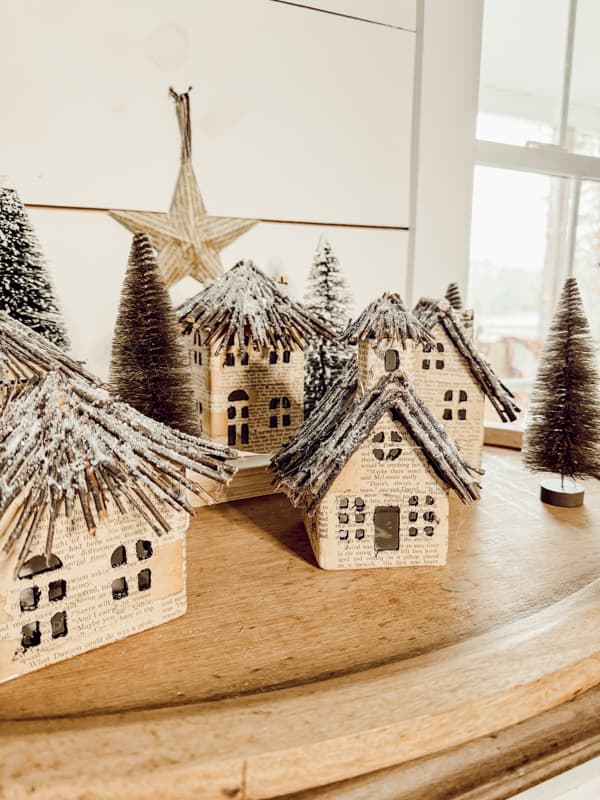
“Before you glue any paper elements to the snowy tray, seal them with a light coat of matte acrylic spray.”
This stops the paper from absorbing moisture from the faux snow adhesive and keeps the edges from curling. The whole sealing process takes about 20 minutes and costs $6–$10.
26. Teal, Red, and Green Lighted Houses Behind Tiny White Picket Fences
The tiny white picket fences are the detail that makes this scene feel finished. Each house has its own little front yard, which gives the arrangement structure and keeps the bottle brush trees from looking scattered. It’s a simple addition, but it changes the whole composition.
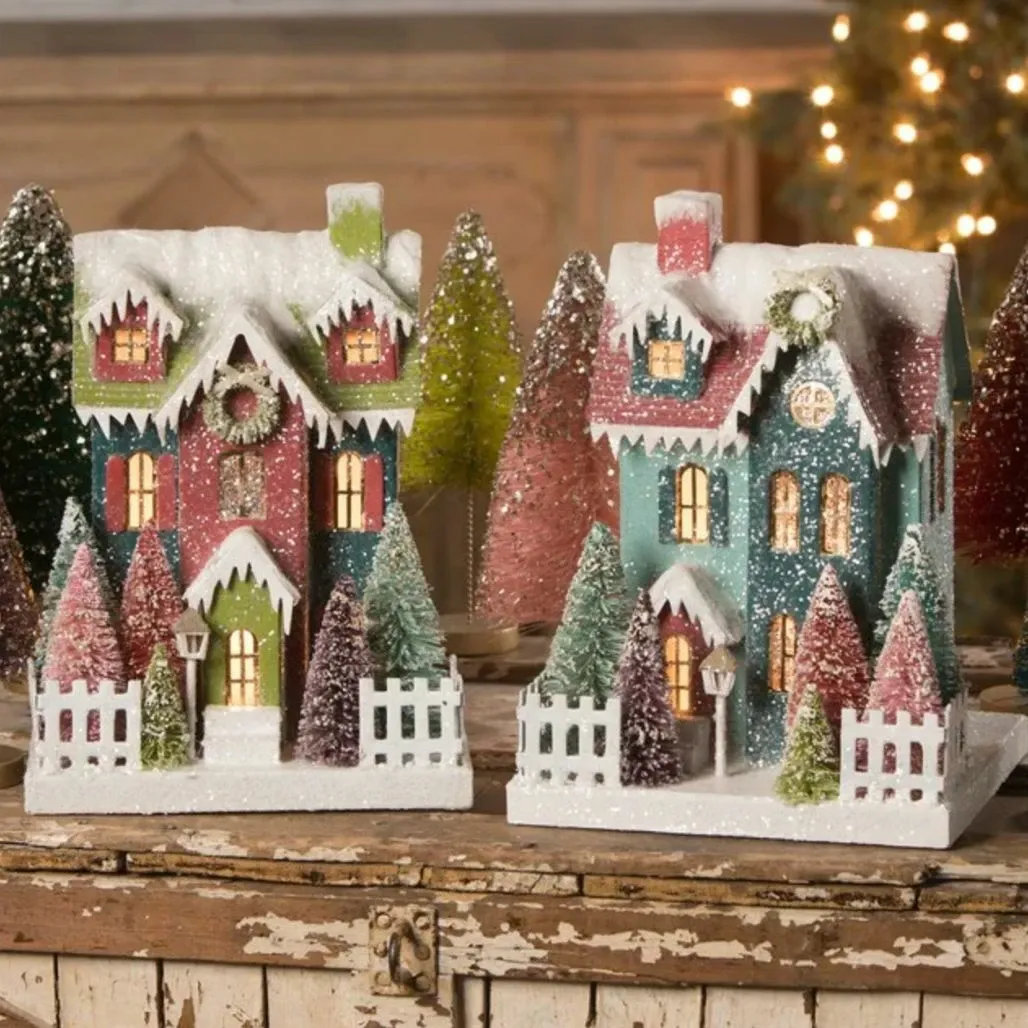
“This one fits a mantel or dresser as long as you have about three and a half feet of length.”
If you want a larger village with rides and full streets, skip this and look at Idea #22; that one needs real floor or table territory.
27. A Paper House Village on the Mantel With a Jute-Wrapped Lamp and Stocking
Here’s what a handmade mantel moment like this could cost.
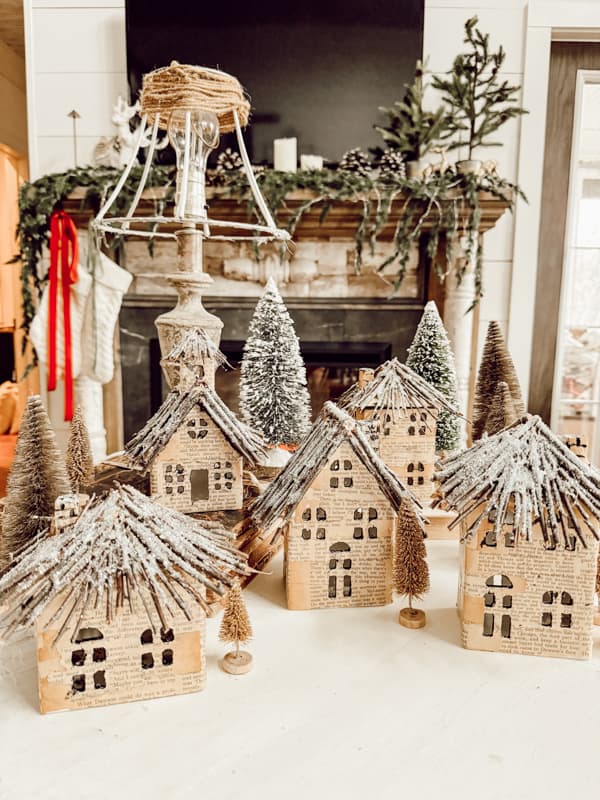
“Aged-paper houses and twig roofs: $12–$30Frosted bottle brush tree set: $15–$40E”
- Aged-paper houses and twig roofs: $12–$30
- Frosted bottle brush tree set: $15–$40
- Evergreen garland with pinecones: $12–$35
- Distressed lamp with jute-wrapped shade frame: $20–$60
- White knitted stocking with red ribbon: $10–$25
- Total: $69–$190
- Budget alternative: make your own paper houses from old sheet music and use a thrifted lamp with a bare Edison bulb for under $40.
The formula is 50% tan paper and wood, 30% frosted white, and 20% red and deep green accents. It works because the neutral base keeps the display calm, while the red ribbon and dark garland give it just enough holiday contrast.
28. A Glittering Blue-Backed Multi-Tier Village With a Train and Fountain
Large-scale collector villages are moving out of the basement and into main living spaces in 2026. People are treating them more like seasonal art installations than just toy sets, and the dark blue backdrop in this one makes the whole thing look intentional and gallery-like.
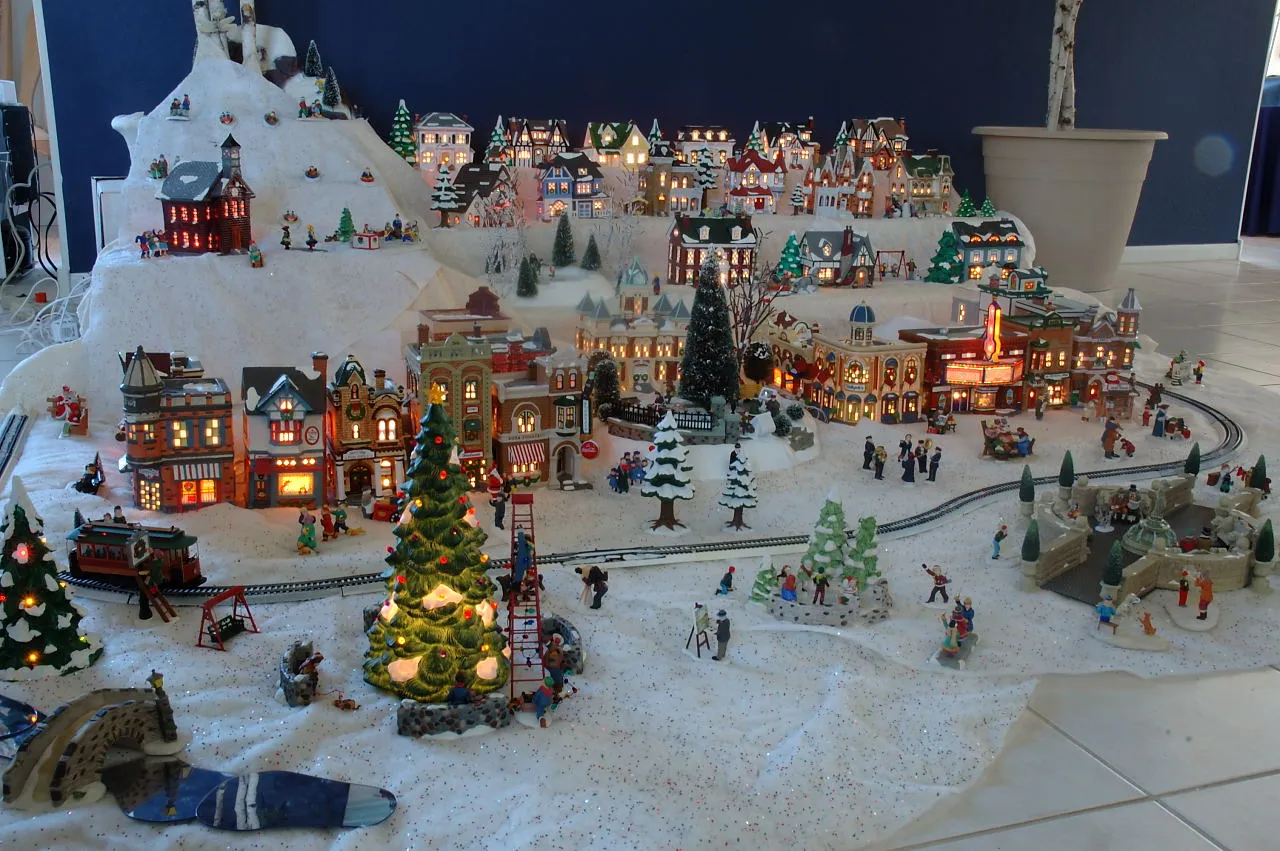
“The blue background does the heavy lifting by making every warm window, street lamp, and train light pop.”
The multi-tiered base creates pockets of shadow and light, while the white snow reflects color upward. That’s why this look reads as magical even from across the room.
29. A Candlelit Formal Table With a Glowing Snow-Dusted Village Centerpiece
Choose low houses for the centerpiece so guests can still see each other across the table. Use LED candles or very stable flameless votives instead of open flames anywhere near cotton snow. Run the village’s wires down the center and hide them under a long runner so nobody hooks a napkin on them.
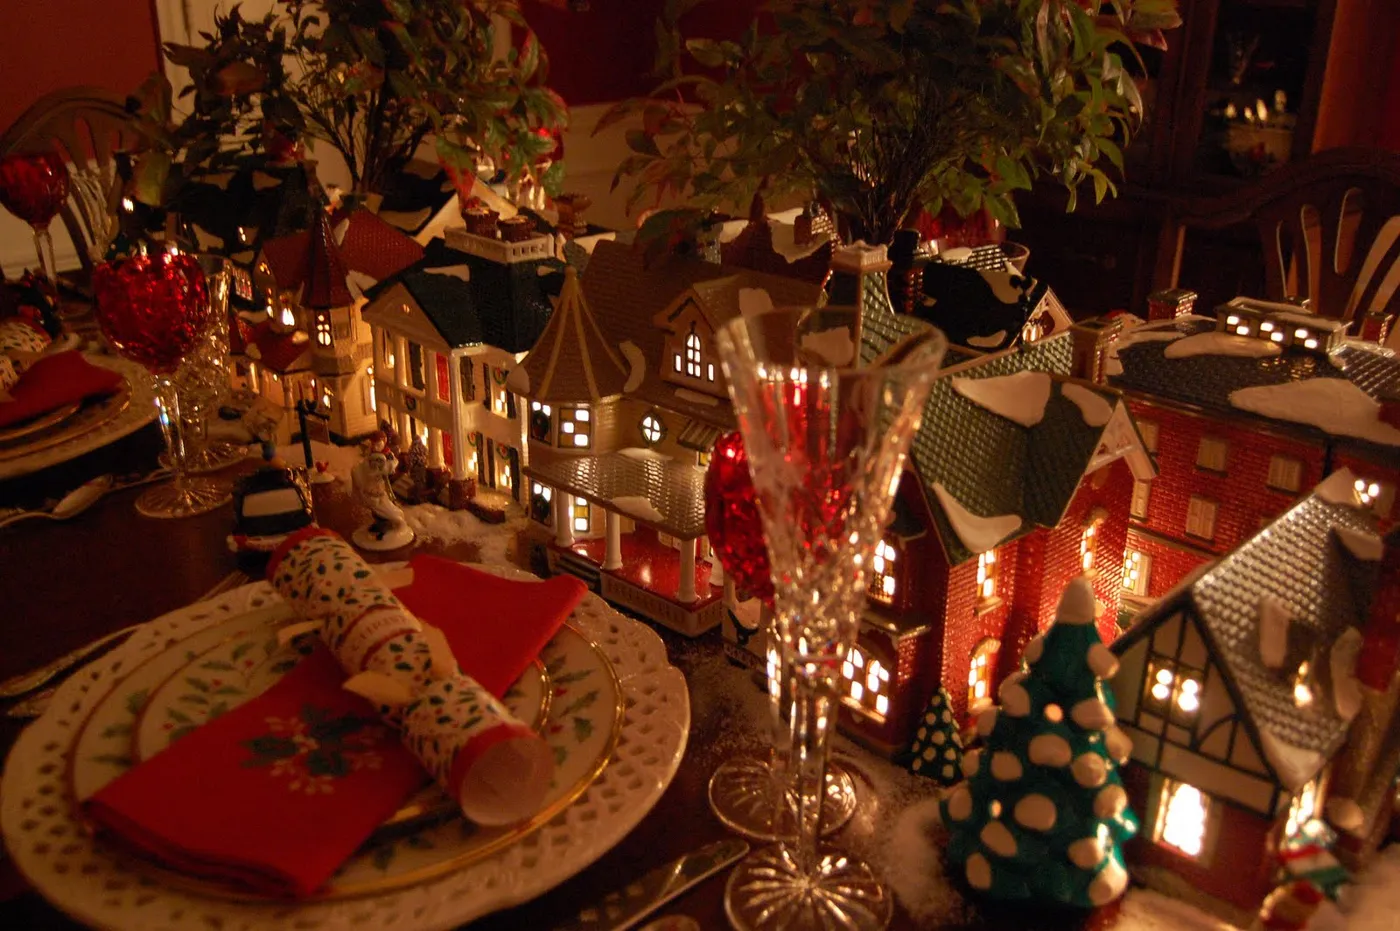
“a dinner table centerpiece this elaborate makes passing dishes harder.”
Leave at least 18 inches of clear table at each end, and remove the taller village pieces when food is actually being served if your table is under six feet. This is the fuller version of the setting in Idea #20.
30. Two Santas Inside an Open-Sided Christmas Cottage With a Glowing Fireplace
You can build this open-sided cottage using a wooden room box or an upturned crate with one side removed. Miniature furniture from craft store dollhouse sections, a small faux fireplace, and two inexpensive Santa figures from a budget holiday aisle will get you this look for $30–$70.
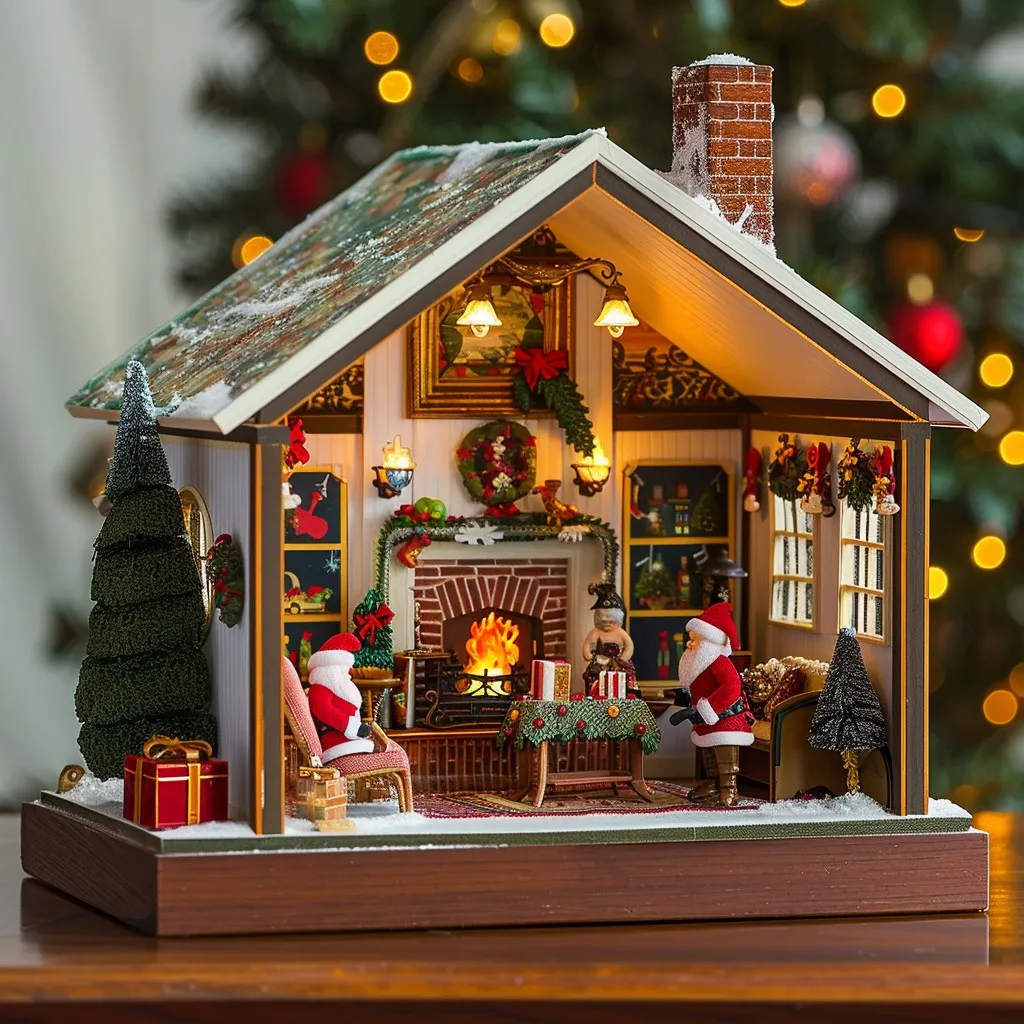
“The glowing fireplace inside the cottage is everything.”
It draws you in and makes you want to see what the two Santas are chatting about. Without it, the cottage is just a dollhouse shell; with it, it becomes a tiny lived-in room at the North Pole.
31. A Faux Brick Supermarket and a Red-Domed Church Under String Lights
This village’s formula is about 50% red brick and off-white snow, 25% warm window glow, and 25% green string lights draped through the scene. The red-domed church and supermarket roof add color, but the white snow keeps it from feeling too busy.
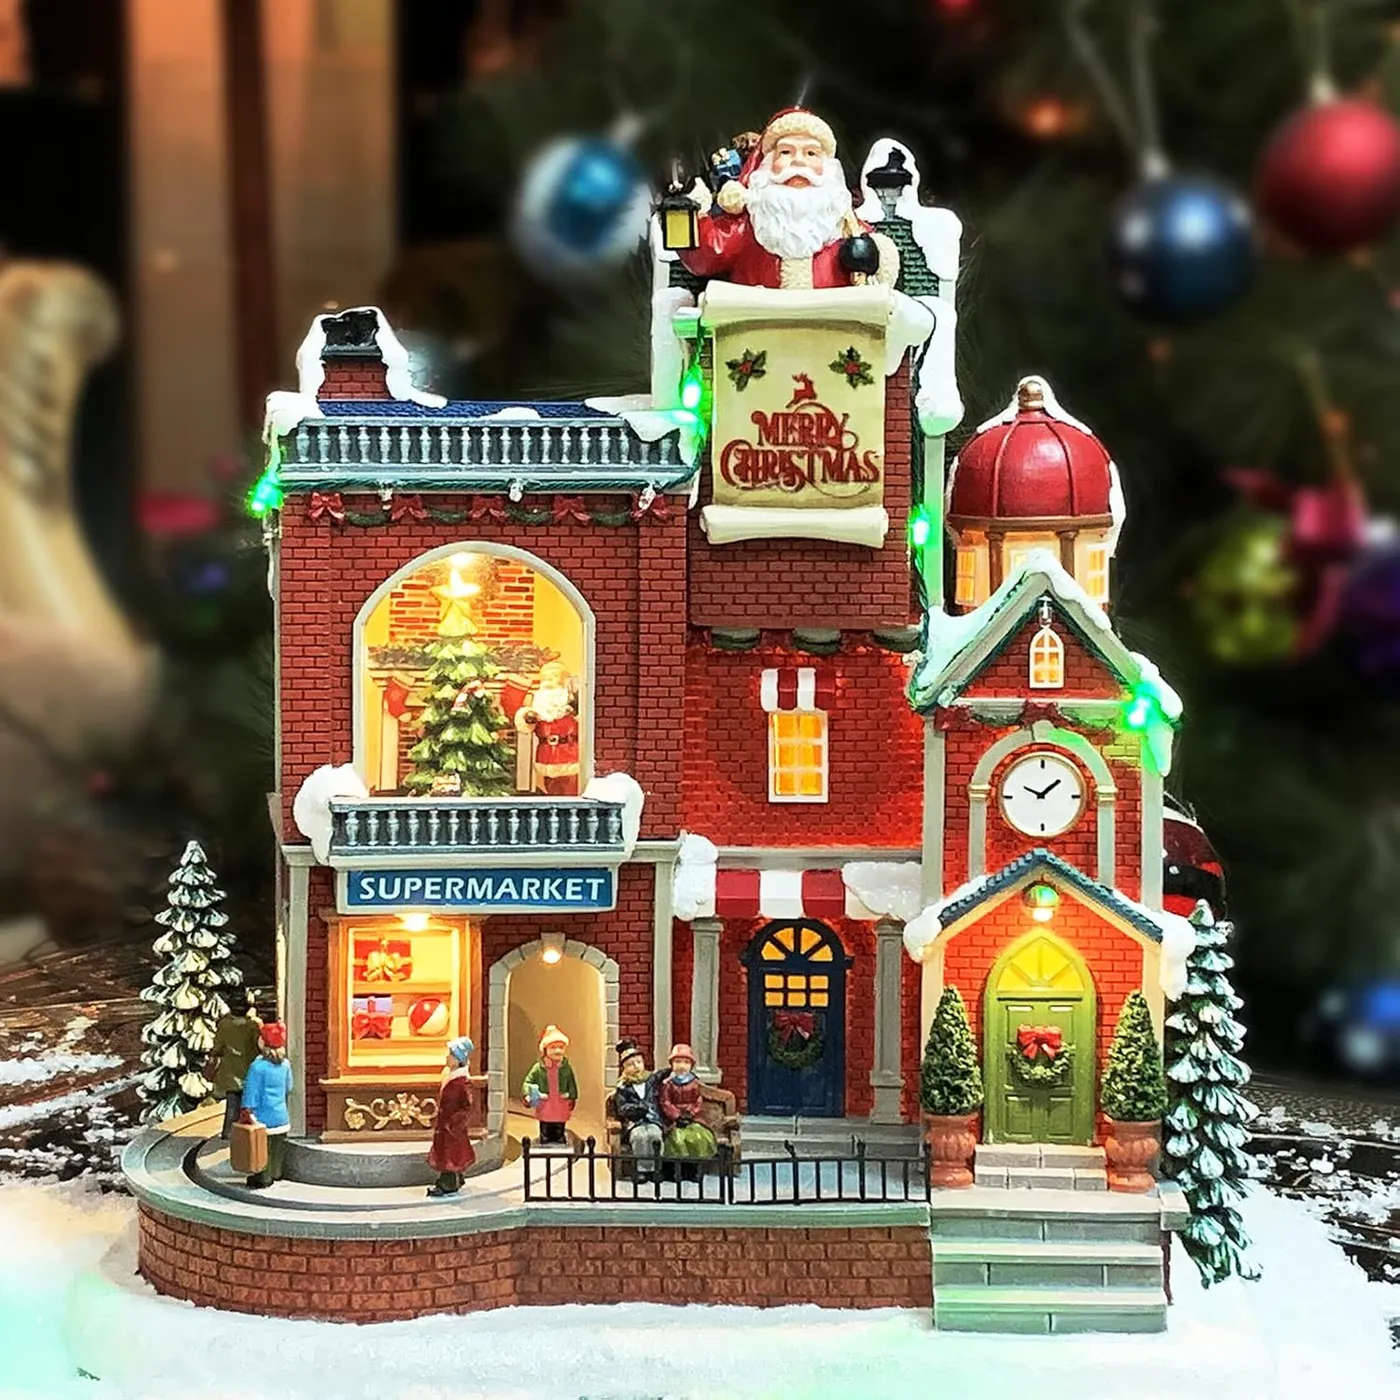
“This fits a deep sideboard or side table about four feet wide.”
If you want a larger layout with motion, compare the carnival rides in Idea #22 — that one needs a much bigger footprint and more power access.
Your Christmas Village Has a Story to Tell
Pick one idea that feels like your home, then build it slowly — the best villages aren’t finished in a day. Light the windows first, add the snow second, and let the tiny stories show up over time.
Pin this guide now so you can revisit these setups while you shop, and remember: the most magical display is the one that makes you lean in closer.