You know that feeling when you finally find the pumpkin decorating idea that looks exactly right for your home? That’s what this guide is for. Forget endless scrolling through generic photos. We’ve filtered through hundreds of options to bring you 32 creative, inspiring, and actually achievable ideas for 2026. Inside, you’ll find everything from classic carved jack-o’-lanterns and playful painted characters to elegant, no-carve natural arrangements. For 2026, it’s all about hyper-personalization and texture—moving beyond the basic smile to create something that tells a little story on your doorstep. And stay until the end — we break down the most common mistakes that can ruin these looks. 📌 Save this to Pinterest for later — you’ll want to revisit these ideas.
1. A Welcoming Entryway with Character Pumpkins and Florals
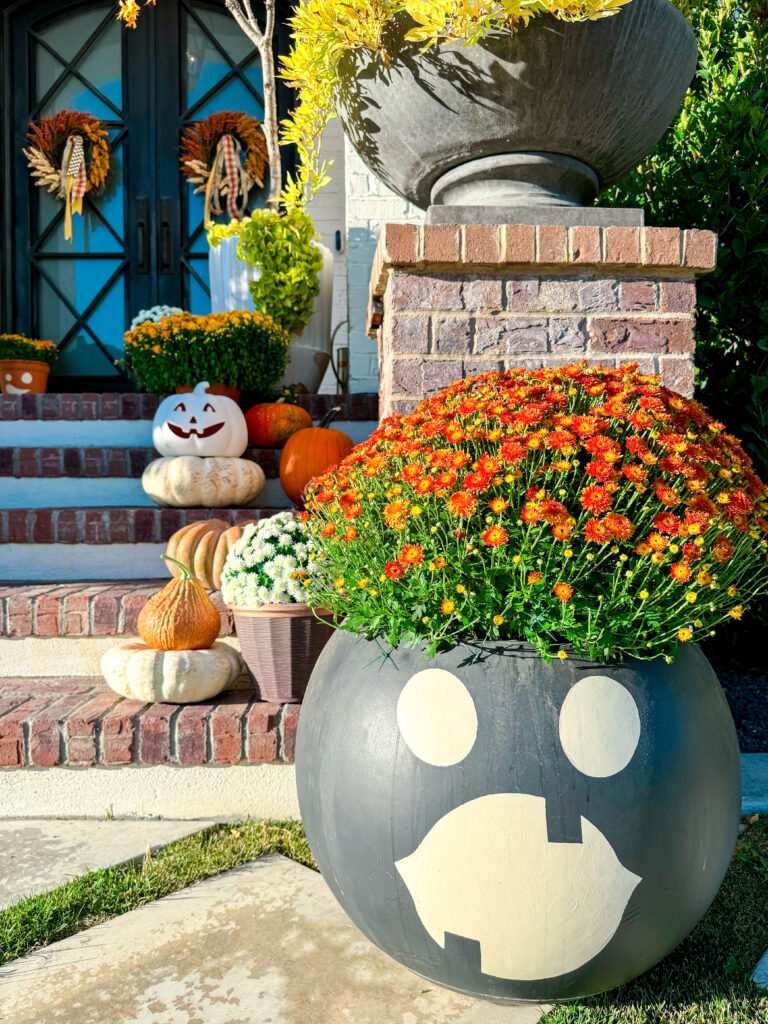
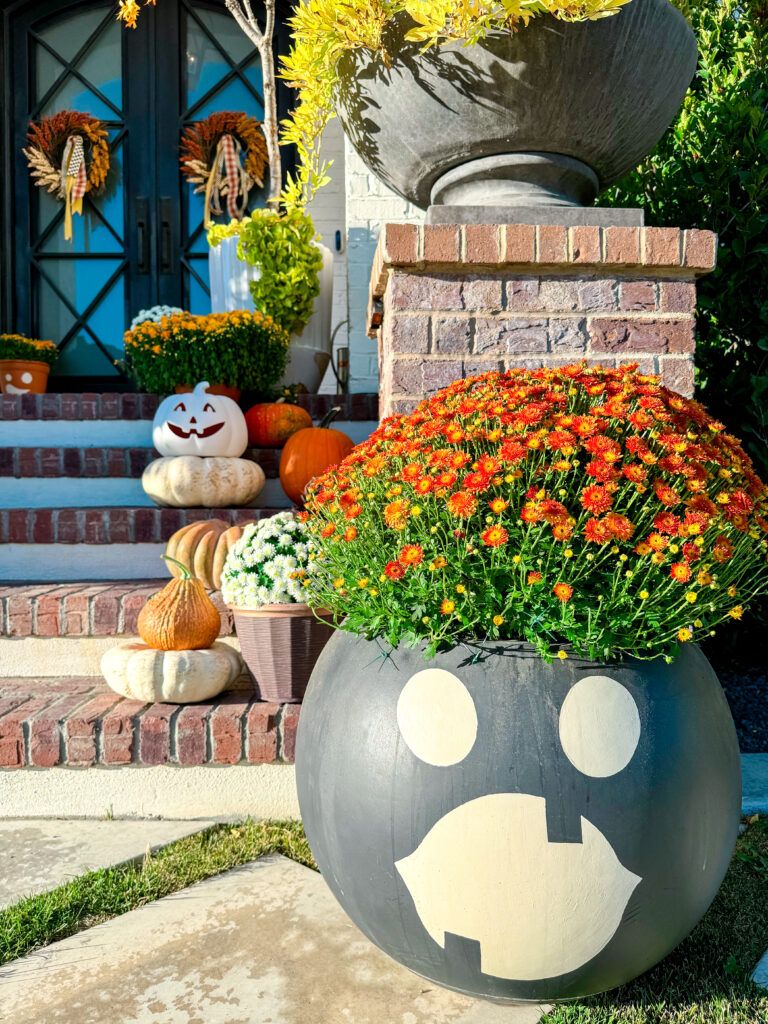
This stunning entryway proves that more is definitely more when it comes to autumn curb appeal. It works because of a masterful use of layering and scale. The large, painted planter acts as a strong anchor, while the smaller pumpkins lead the eye up the brick steps to the welcoming wreaths on the doors. This creates a journey for the eye, making the whole scene feel dynamic and full.
“Before you commit to an elaborate outdoor display, run through this quick checklist to ensure a beautiful, lasting setup.”
Measure your key areas: Will the planters you have in mind actually fit on your steps without being a tripping hazard?
Check the sun exposure: Mums love sun, but pumpkins can fade or rot faster in direct, hot sunlight. Plan your placement accordingly.
Plan for weight: That big urn planter is heavy *before* you add soil and flowers. Ensure you can move it into place and that your porch or steps can handle the load.
Lighting: How will this look at night? Consider adding a spotlight or some string lights to make your display pop after dark.
2. Playful Halloween Pumpkins with Spiders, Ghosts, and Faces
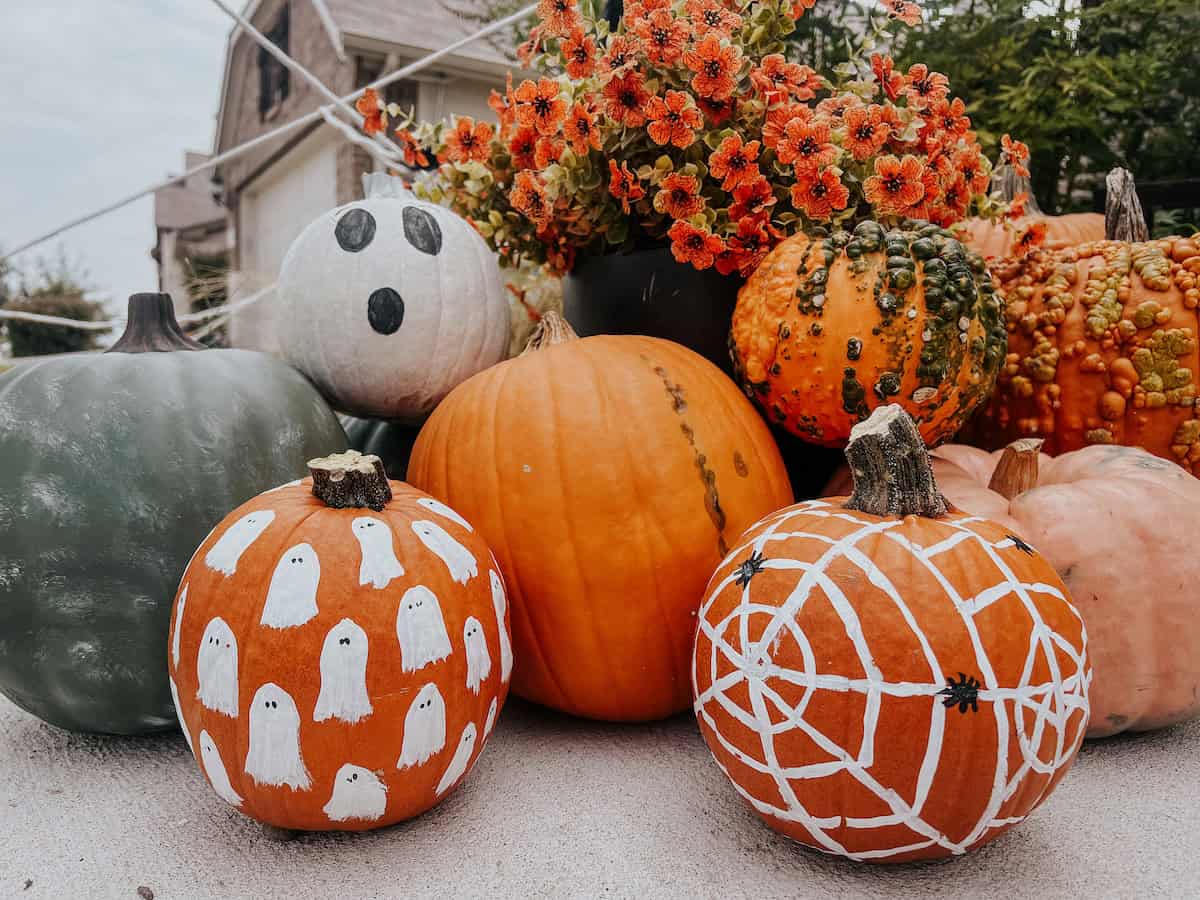
Want to get those crisp, clean ghost shapes? Here’s a quick guide to painting them perfectly without smudges. It’s a simple project that takes about an hour, plus drying time, and costs less than $15 for paint and brushes.
- Clean your pumpkin thoroughly with a damp cloth and let it dry completely. Any dirt or oil will prevent the paint from adhering properly.
- Use a pencil to lightly sketch the outline of your ghost shapes. Don’t press too hard!
- With a medium-sized craft brush, fill in the ghost shapes with white acrylic craft paint. Apply a thick, even coat.
- Let the first coat dry for at least 30 minutes. Then, apply a second coat to ensure its fully opaque.
- Once the white paint is bone dry, use the tip of a very small, fine brush to dot on the black eyes.
- Let the entire pumpkin cure for a few hours before displaying it.
“You don’t need a fancy pumpkin decorating kit for this look.”
A few bottles of acrylic craft paint from a big box store will cost you around $5, compared to a $20-25 specialized kit. The secret is the brush. Invest $5 in a pack of varied-size artist brushes for crisp lines and perfect dots—you’ll get a much more professional result than you would with the cheap plastic brushes included in most kits. For the pumpkins themselves, check a local farm stand; they’re often cheaper and have more character than grocery store bins.
3. A Classic Carved Jack-o’-Lantern with Gourds and Mums
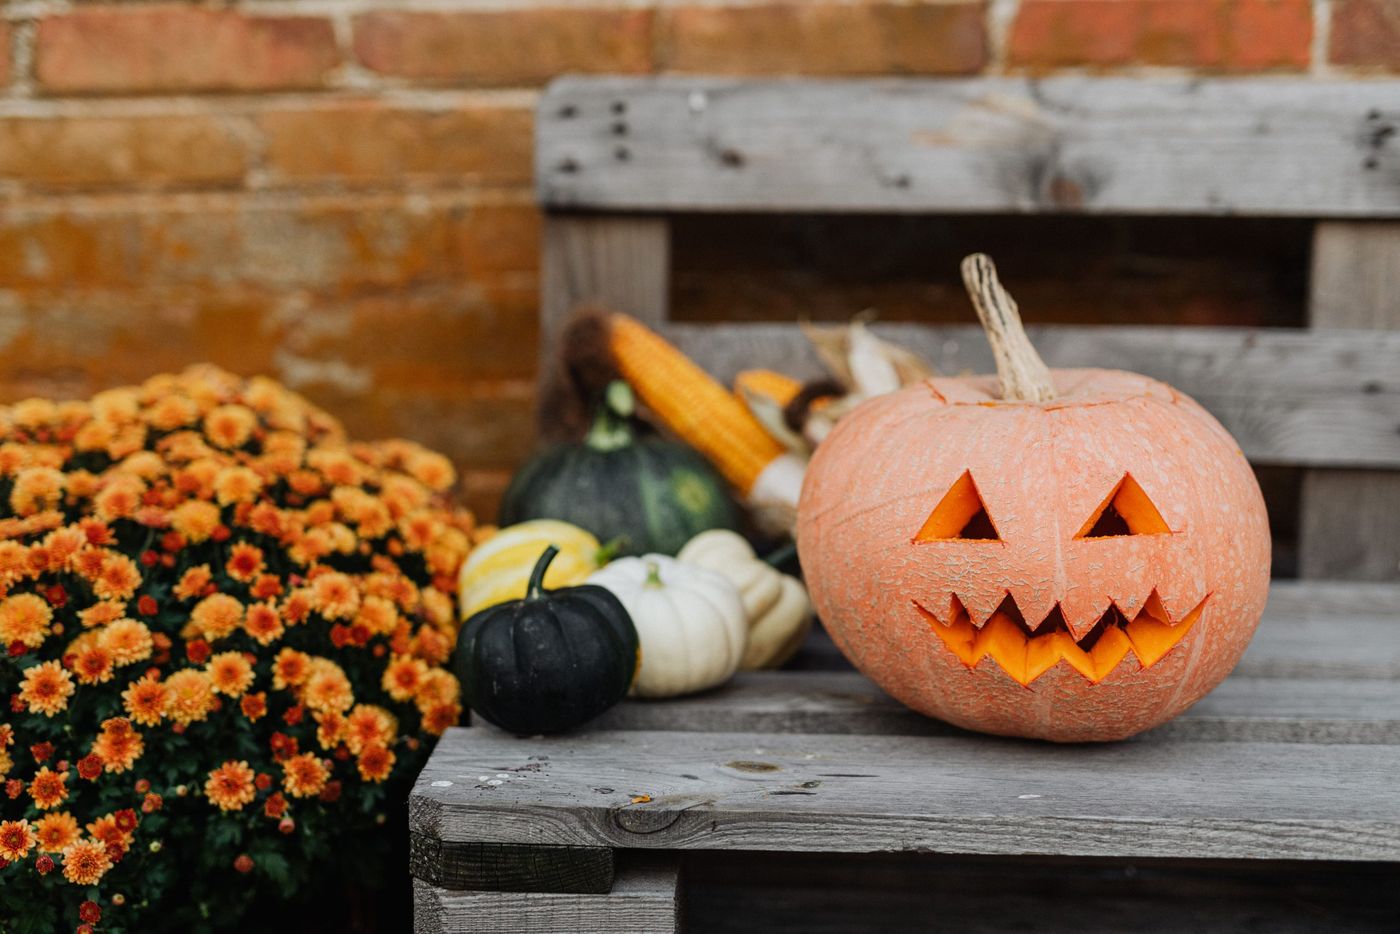
The single element that makes this scene so effective is the texture of the weathered wood. Without the gray, rustic planks, the jack-o’-lantern would still be nice, but it wouldn’t have the same depth or character. The wood provides a neutral, textured backdrop that makes the pumpkin’s smooth, bright orange skin pop. It tells a story of autumn, harvests, and rustic charm, elevating a simple carved pumpkin into a beautiful vignette.
“A carved pumpkin is a temporary treasure.”
To make it last as long as possible, take a few preventative steps. After carving, clean the inside thoroughly, scraping away all the stringy bits. Then, spray the entire inside and all cut edges with a mixture of water and a few drops of bleach or peppermint oil to inhibit mold growth. Re-spray it every day or two. Also, rubbing petroleum jelly on the cut edges will help seal in moisture and keep it from shriveling up so quickly. Expect your masterpiece to last about 5-10 days.
4. Elegant Glass Pumpkins for a Subtle Nod to Fall
When decorating with glass pumpkins, the key is to treat them like art objects, not seasonal novelties. Group them in odd numbers—threes or fives work best—and vary their height and shape. Place them on a reflective surface, like a mirror or a polished wood table, to amplify their glow. For an extra touch of elegance, intertwine delicate fairy lights around the display. The light will catch the glass and create a magical, shimmering effect that feels sophisticated and intentional.
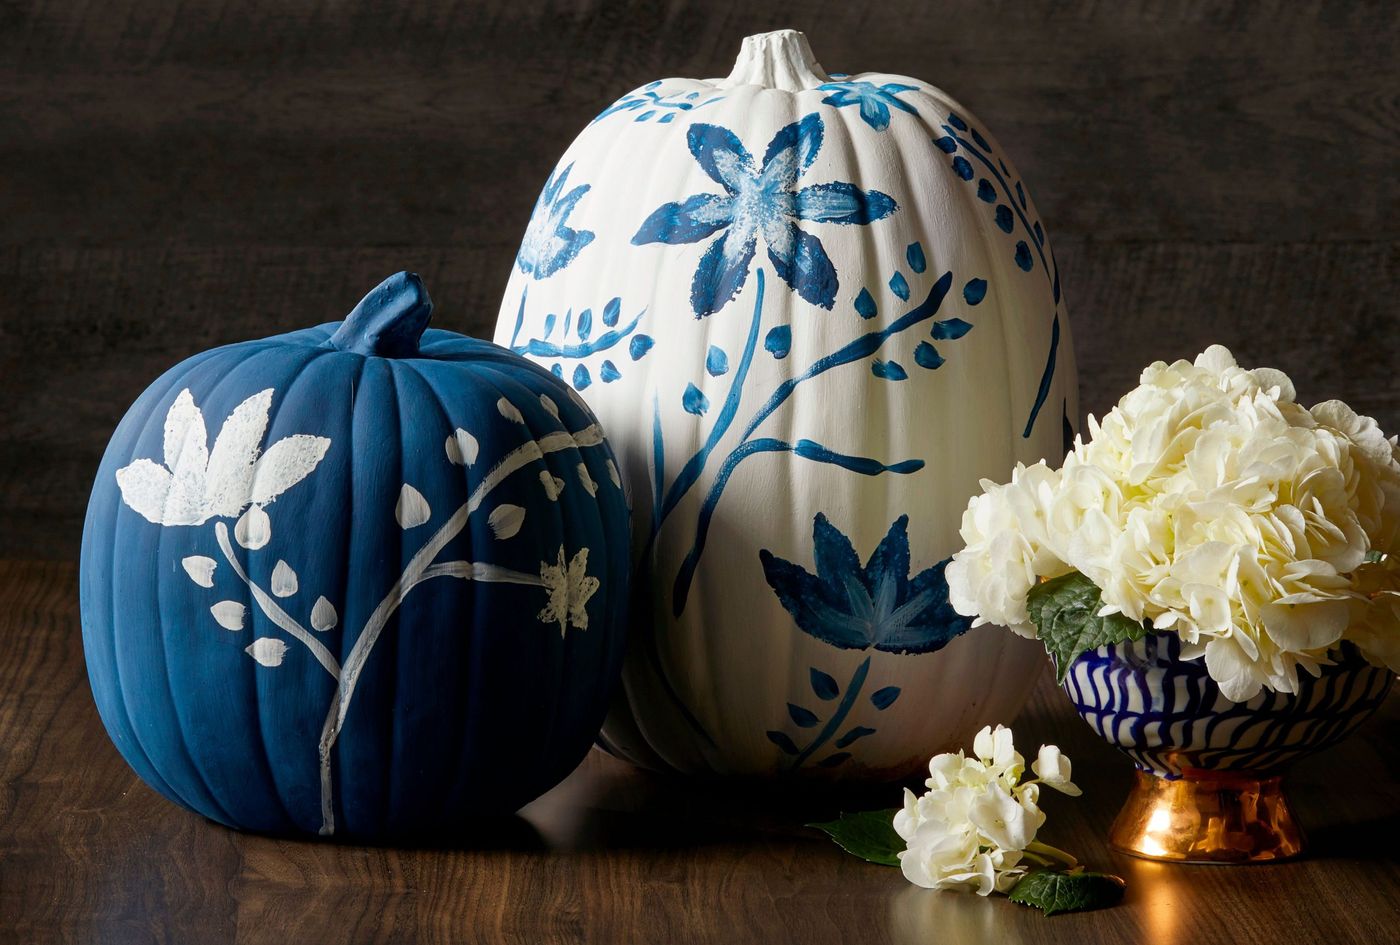
“Let’s be honest: glass pumpkins are beautiful, but they are also incredibly fragile and can be a pain to store.”
If you have kids or pets, placing them on a low coffee table is a recipe for disaster. Keep them on a high shelf, a mantel, or in a glass-front cabinet. For storage, save the original boxes they came in. If you’ve tossed them, wrap each pumpkin individually in thick bubble wrap and place them in a sturdy plastic bin, ensuring they can’t knock against each other.
5. A Simple Jack-o’-Lantern Trio on a Wooden Windowsill
The quiet harmony of this windowsill display comes down to a simple formula: 33% star + 66% supporting cast. The carved jack-o’-lantern is the undeniable focal point, while the two uncarved pumpkins serve to frame it and add visual weight without competing for attention. This principle can be adapted easily. You could swap the uncarved pumpkins for gourds, candles, or small floral arrangements, as long as you maintain that 1:2 ratio of “loud” to “quiet” elements.
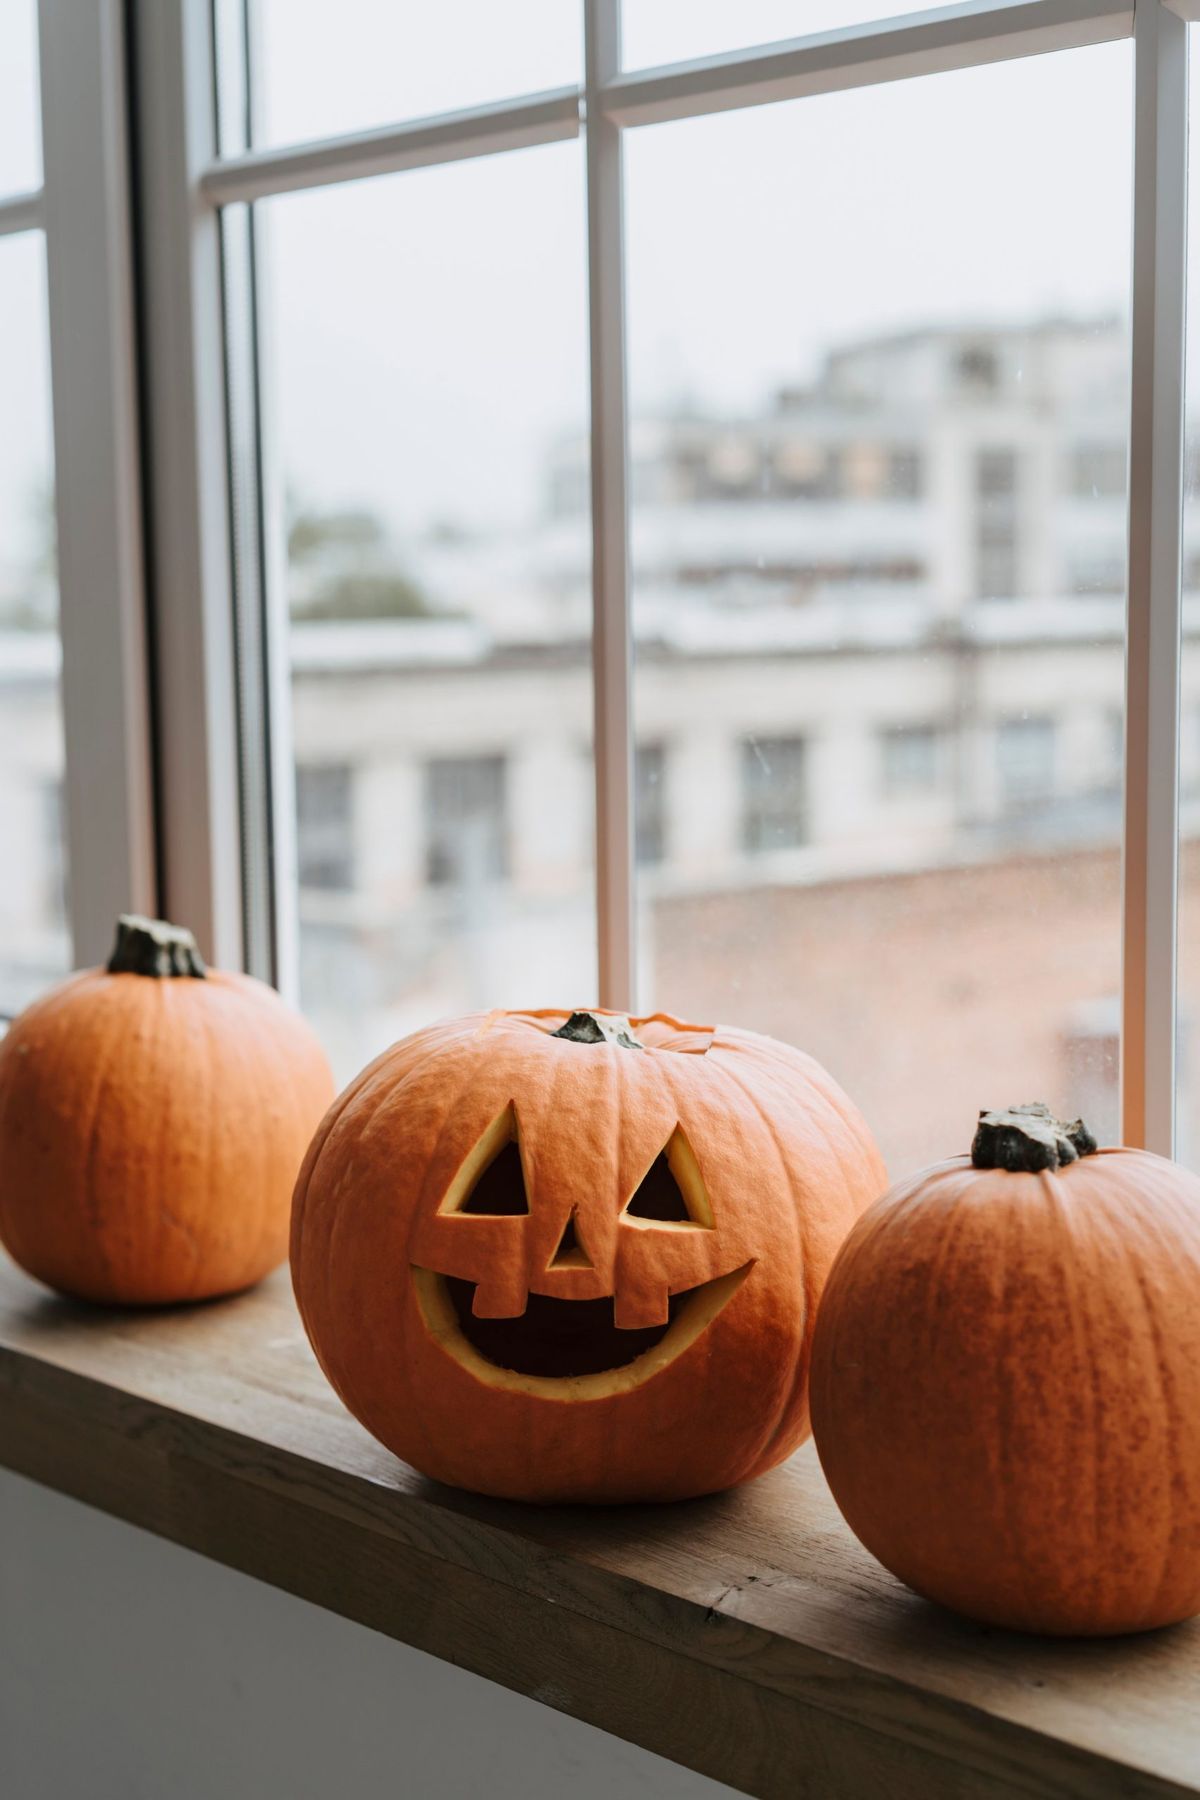
“This look is perfect for smaller spaces, particularly for apartment dwellers who don’t have a porch or yard.”
It requires a windowsill with a depth of at least 8-10 inches to safely accommodate the pumpkins without the risk of them tumbling down. If your sills are too narrow, you can get the same effect on a sofa table, a console table, or even the top of a low bookcase. It’s a high-impact design that doesn’t require a lot of square footage, unlike the sprawling porch in Idea #1.
6. A Serene White Pumpkin and Greenery Centerpiece
This arrangement feels so fresh and modern because it rejects the traditional autumn color palette. By sticking to a strict scheme of white, green, and a tiny hint of beige, the focus shifts entirely to form and texture. The gloss of the bowl contrasts with the matte pumpkin, and the varied faux botanicals add layers of visual interest. It works because it’s a whisper of autumn, not a shout, making it perfect for minimalist or transitional home styles.
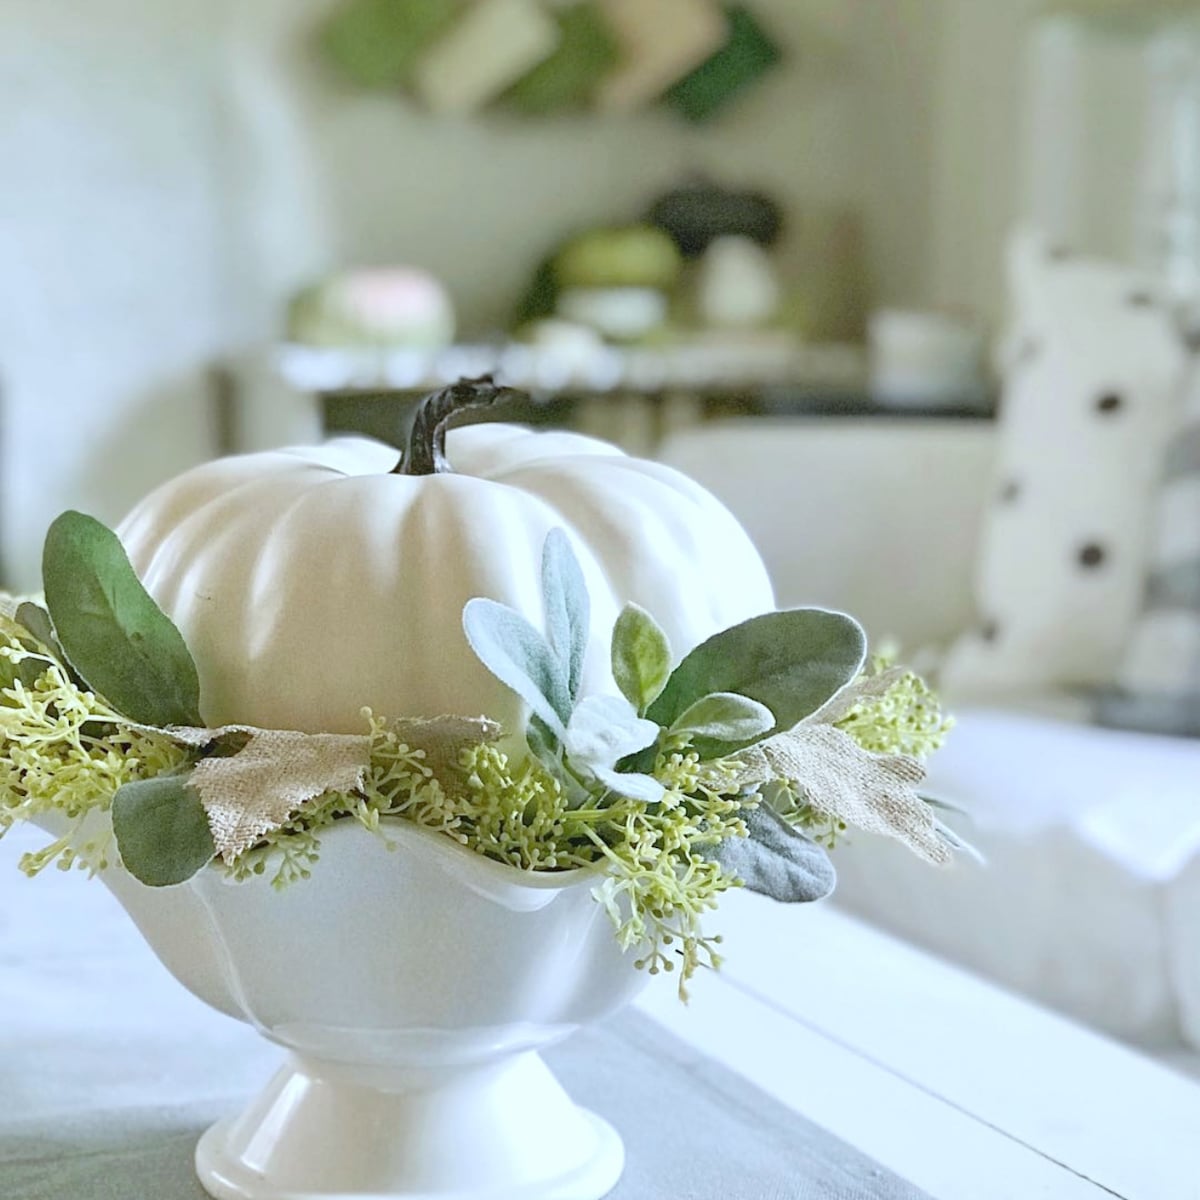
“There’s a growing movement towards “season-neutral” decor, and this is a perfect example.”
People want decorations that nod to the season without clashing with their year-round interior design. This serene, white-and-green palette feels autumnal without relying on bright orange, which allows it to blend seamlessly into homes with cool-toned color schemes. It’s a sophisticated take that has serious staying power long after Halloween is over.
7. White Pumpkins with Green Leaf Embellishments
The magic of this look is the distressed finish on the wooden candlesticks. They are the single element that bridges the gap between the clean, modern pumpkins and a more rustic, farmhouse aesthetic. Without that slightly weathered texture, the arrangement might feel too sterile or new. The candlesticks add a sense of history and warmth, making the whole composition feel collected and thoughtfully curated rather than purchased all at once from a single store.
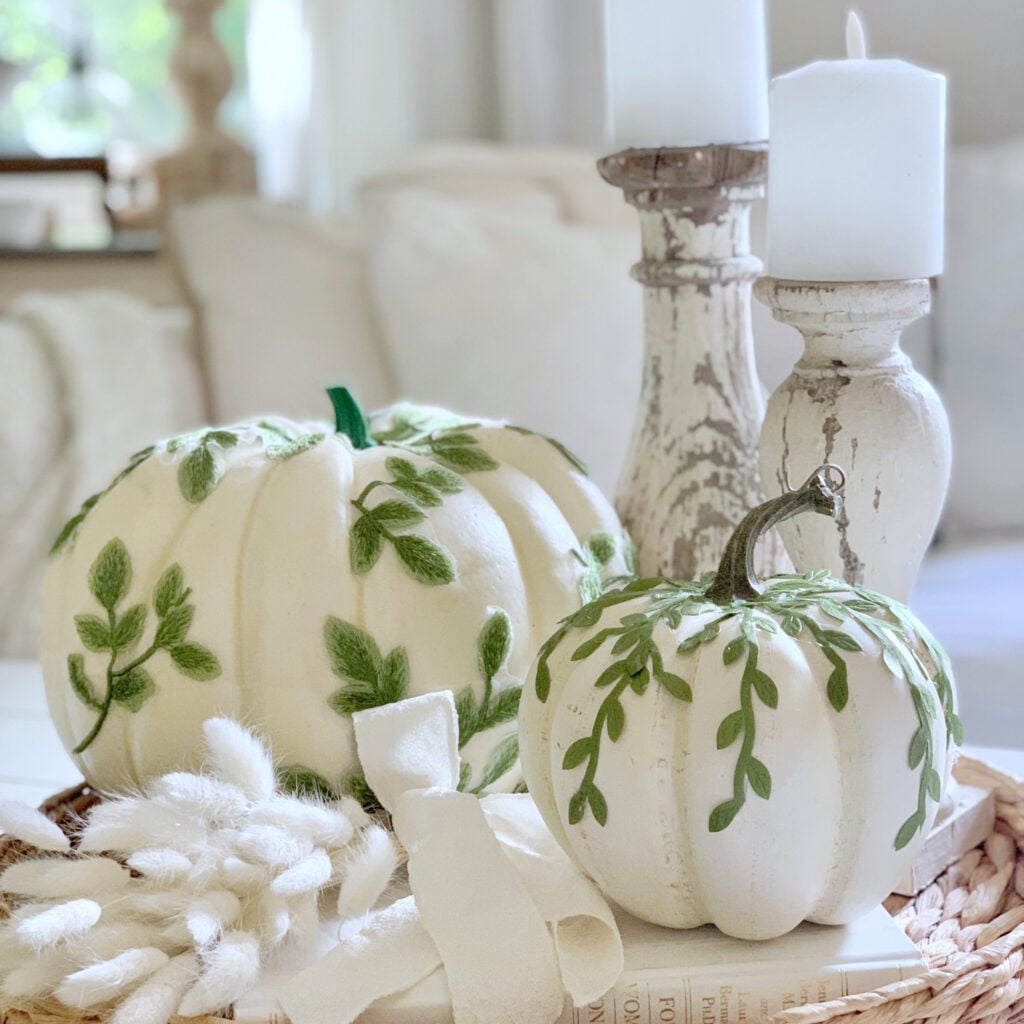
“Recreating this calm, rustic look is surprisingly affordable.”
The key is focusing on texture rather than expensive statement pieces.
Decorative pumpkins: $20 – $40
Distressed candlesticks: $25 – $50
Pillar candles: $10 – $20
Woven tray: $15 – $30
Dried floral stems: $10 – $20
TOTAL: $80 – $160
Budget alternative: Find old candlesticks at a thrift store for under $10 and give them a quick makeover with some white chalk paint and a bit of sandpaper.
8. An Orange Pumpkin Covered in a Hand-Painted White Ghost Pattern
Hand-painting dozens of tiny ghosts seems daunting, but a simple potato stamp makes it fast and fun. This is a great project to do with kids, taking about 45 minutes and costing next to nothing if you have paint and a potato.
- Cut a medium-sized potato in half.
- On the cut surface of one half, use a paring knife to carefully carve out a simple ghost shape. Think of a classic “bedsheet ghost” outline.
- Pour a small amount of white acrylic paint onto a paper plate.
- Dip the potato stamp into the paint, blotting any excess off on a clean part of the plate.
- Press the stamp firmly onto the clean surface of your orange pumpkin. Repeat to create your pattern.
- Once the white paint is dry, use a fine-tipped permanent marker or a tiny brush to add two dots for eyes.
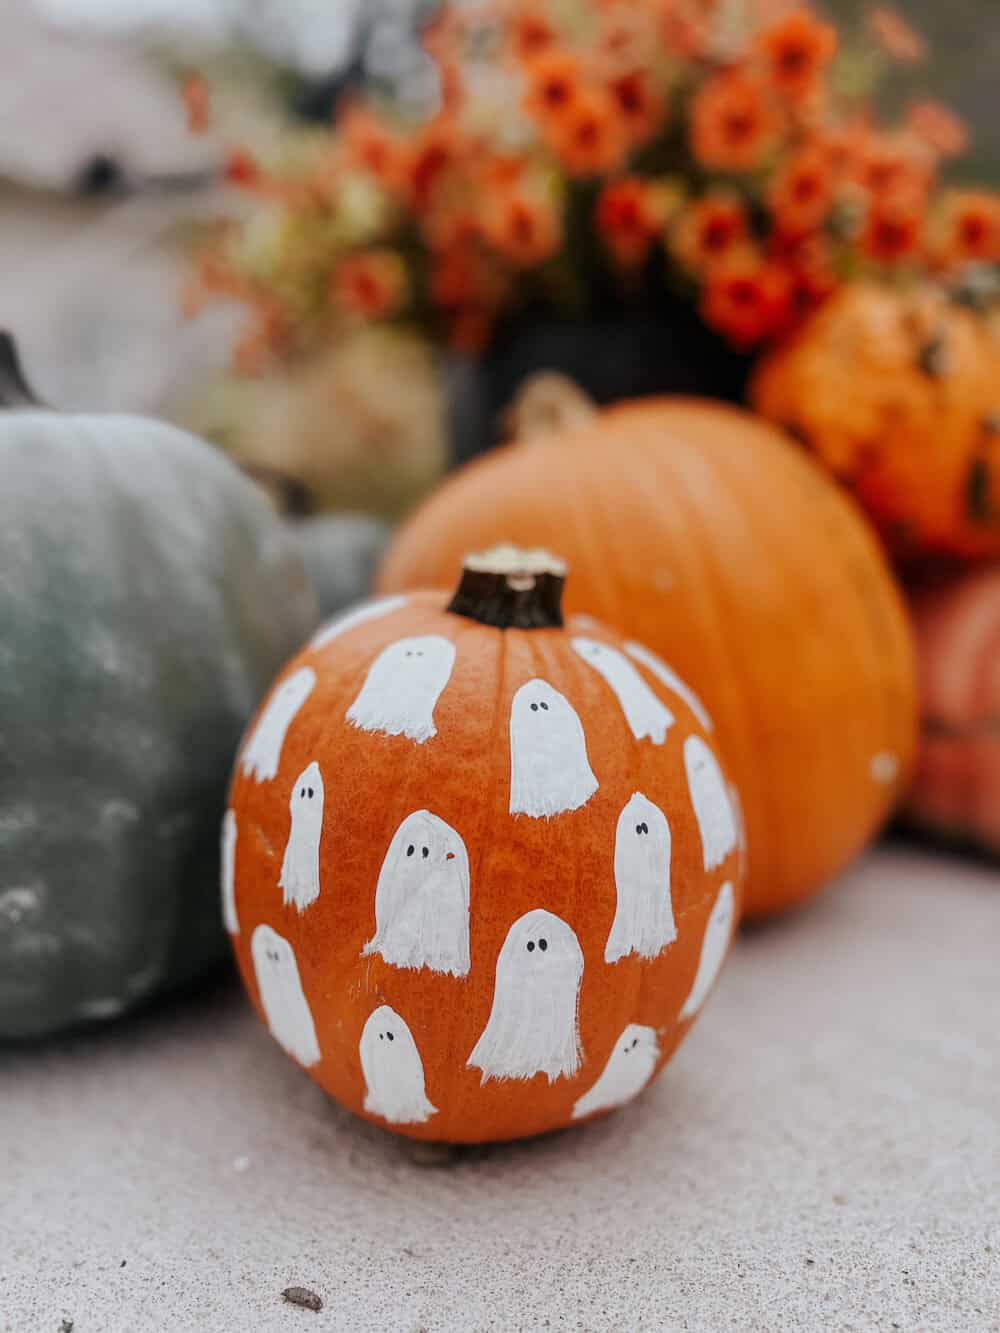
“While this is an adorable and easy no-carve idea, remember that acrylic paint is permanent.”
If you’re doing this with little ones, make sure you cover your work surface (and their clothes!) thoroughly. Also, if you plan to display this pumpkin outside, the paint may chip or peel in the rain. Give it a quick coat of a clear acrylic sealer spray to protect your handiwork from the elements and make it last much longer on your porch.
9. Painted Pumpkins with Contrasting Happy and Mischievous Faces
When painting faces on pumpkins, go big. The most common mistake people make is painting features that are too small for the pumpkin’s surface area. For a pumpkin that’s 10-12 inches in diameter, aim for eyes that are at least 2-3 inches wide. This ensures the expression is clear and impactful from a distance. Use a round object from your kitchen, like the lid of a jar or a small bowl, to trace perfect circles for the eyes before you start painting.
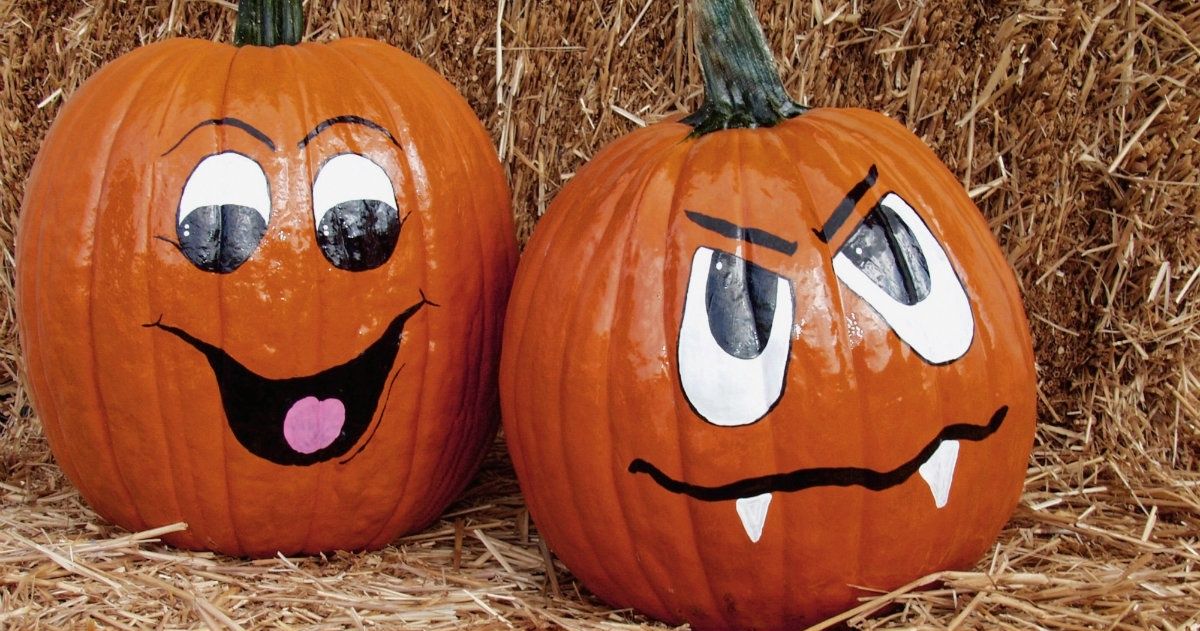
“This playful duo works because of a simple visual equation: 80% shared elements + 20% unique personality.”
The shared elements are the pumpkin size, the vibrant orange base color, and the large white circular eyes. This creates a cohesive look. The 20% difference—the happy mouth versus the mischievous fang-filled grin—is what gives the display its charm and tells a little story. You could apply this formula to any pair of pumpkins.
10. Trio of Unique Carved Pumpkins on a Dark Surface
What makes this pumpkin display work so well is the clever use of repetition and variation. The artist repeats the core element—a carved pumpkin—but varies the size, shape, and carving style of each one. The traditional jack-o’-lantern provides a familiar anchor, the one with drilled holes offers a more modern, graphic feel, and the smallest one with geometric slits adds another layer of texture. This variety keeps the eye engaged and makes the grouping feel dynamic and interesting.
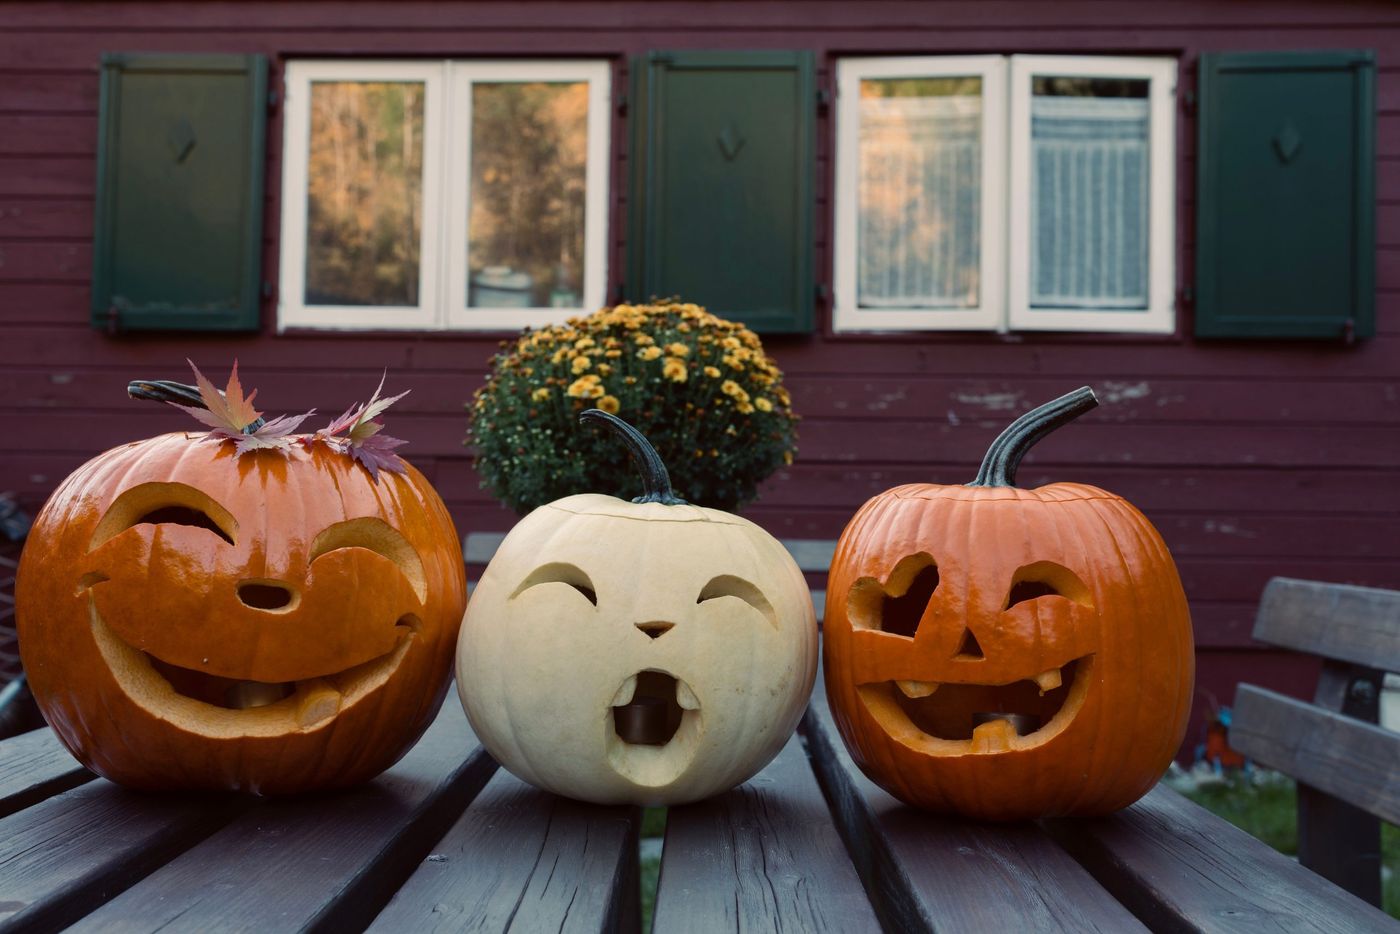
“This is a fantastic way to get a high-impact look on a budget.”
Instead of one giant, expensive pumpkin, buy three smaller, more affordable ones. You can often find medium and small pumpkins for just a few dollars each at a farmer’s market or grocery store. The carving tools are a one-time purchase, and you can get a decent set for under $10. The best part? Imperfections in carving just add to the charm, so there’s no need to stress about perfection. This is far cheaper than buying multiple pre-decorated faux pumpkins.
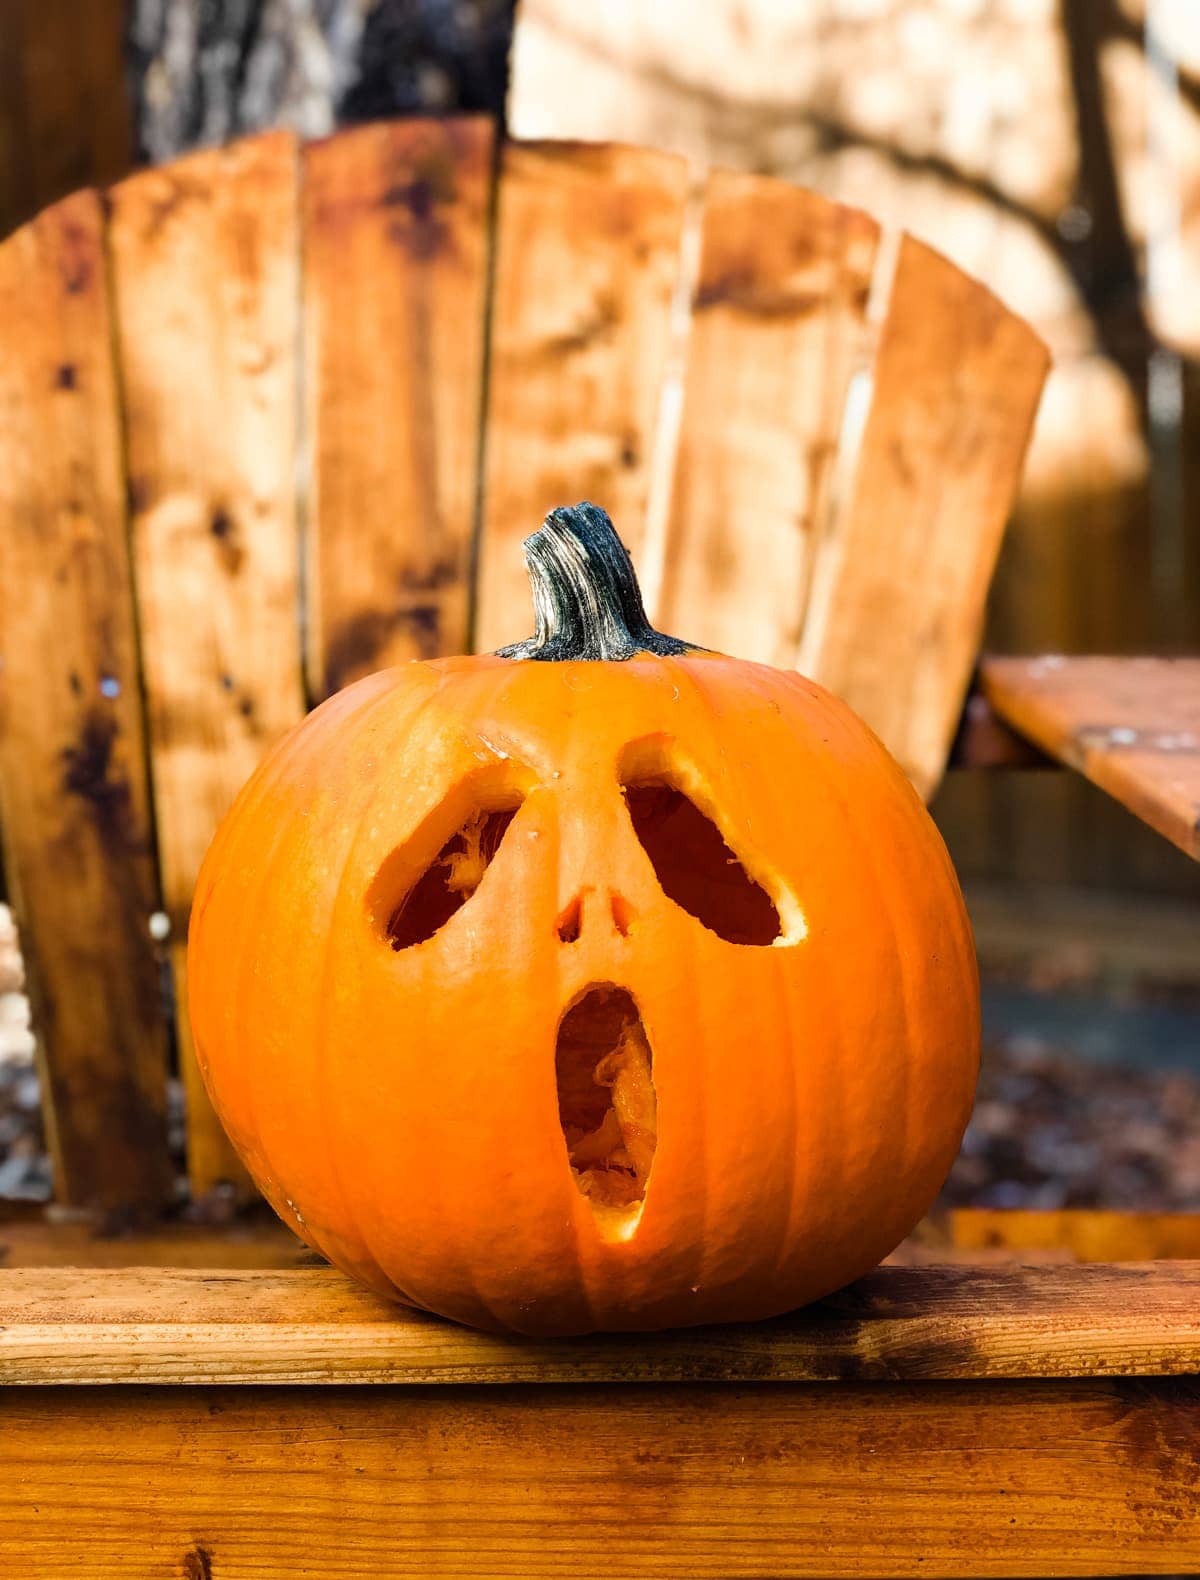
11. The Classic Carved Pumpkin with a Screaming Face
The power of this classic jack-o’-lantern lies in its simplicity. It’s not overly ornate or complex; it’s the quintessential Halloween pumpkin face that everyone recognizes. The single most important element is the expression. The wide, gaping mouth and simple oval eyes convey a universal feeling of shock or a scream, making it instantly spooky and fun. It proves that you don’t need an intricate, multi-tool carving design to make a big impact. A simple, well-executed expression is often more effective.
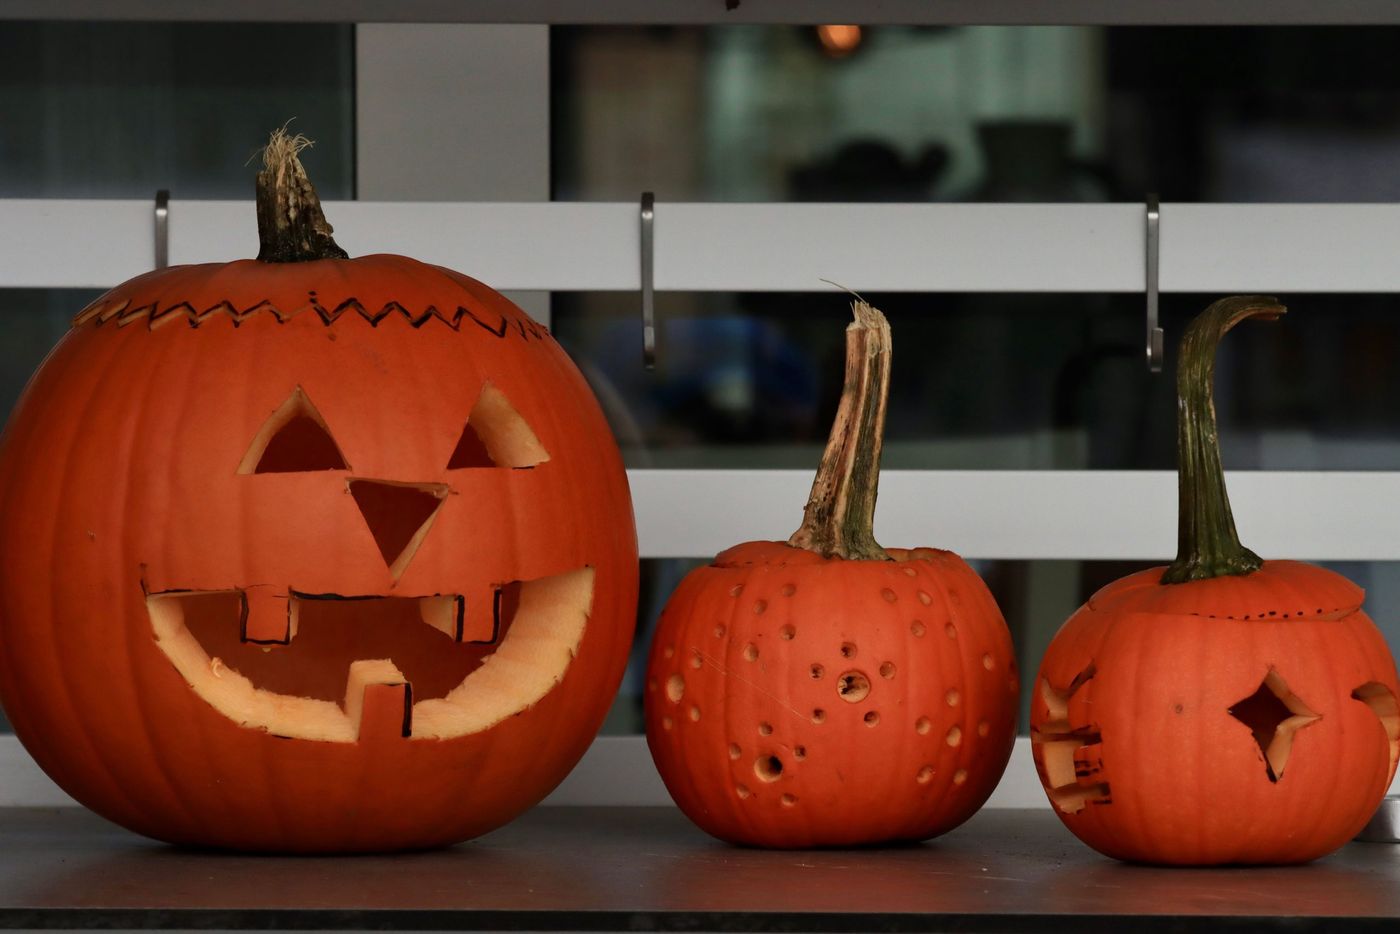
“This is a universally adaptable idea that works for any size of pumpkin and in any space.”
A single, medium-sized pumpkin like this is perfect for a small apartment balcony, a dorm room window, or as part of a larger display like in Idea #13. For it to really stand out on its own, you need about 2 square feet of display space. This ensures it has enough visual “breathing room” and doesn’t just get lost in the shuffle of other decor. It’s a classic for a reason—it always works, anywhere.
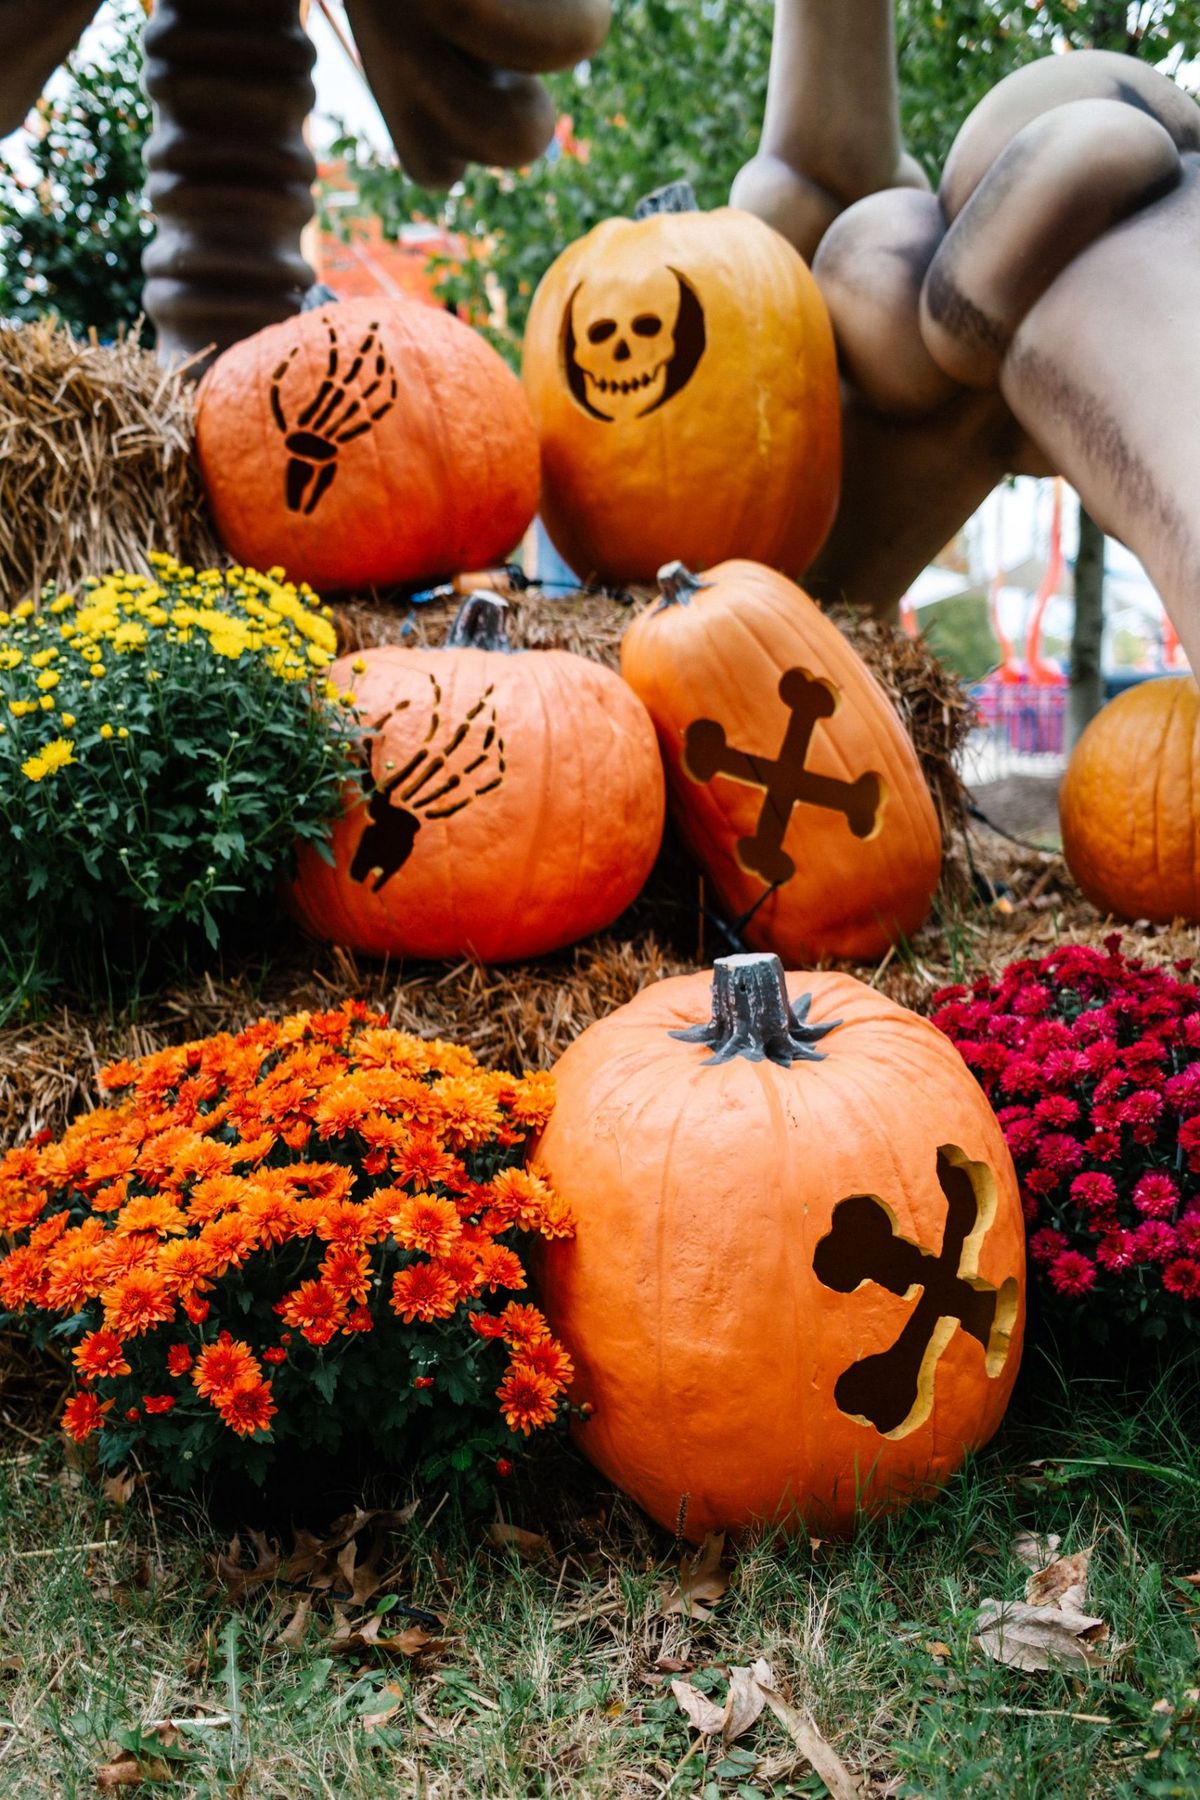
12. Carved Halloween Pumpkins on Hay with Autumnal Mums
Maximalism is having a moment in home decor, and this outdoor display is the perfect example of how to apply that trend to seasonal decorating. Instead of a single, lonely pumpkin, this look embraces a “more is more” philosophy. By piling on layers of texture (hay bales, potted mums, carved pumpkins) and color (vibrant orange, yellow, and red), it creates a rich, abundant scene that feels incredibly festive and celebratory. It’s a confident and joyful approach to autumn decorating.
“Creating an abundant, multi-layered display like this can add up, but it’s scalable to your budget.”
Carvable pumpkins (3-5): $30 – $60
Hay bale (1-2): $15 – $30
Potted chrysanthemums (3-4 large pots): $40 – $80
Decorative gourds/mini pumpkins: $10 – $20
TOTAL: $95 – $190
Budget alternative: Focus your budget on the pumpkins and use natural elements from your own yard—like fallen leaves and branches—to fill in the space instead of buying multiple pots of mums.
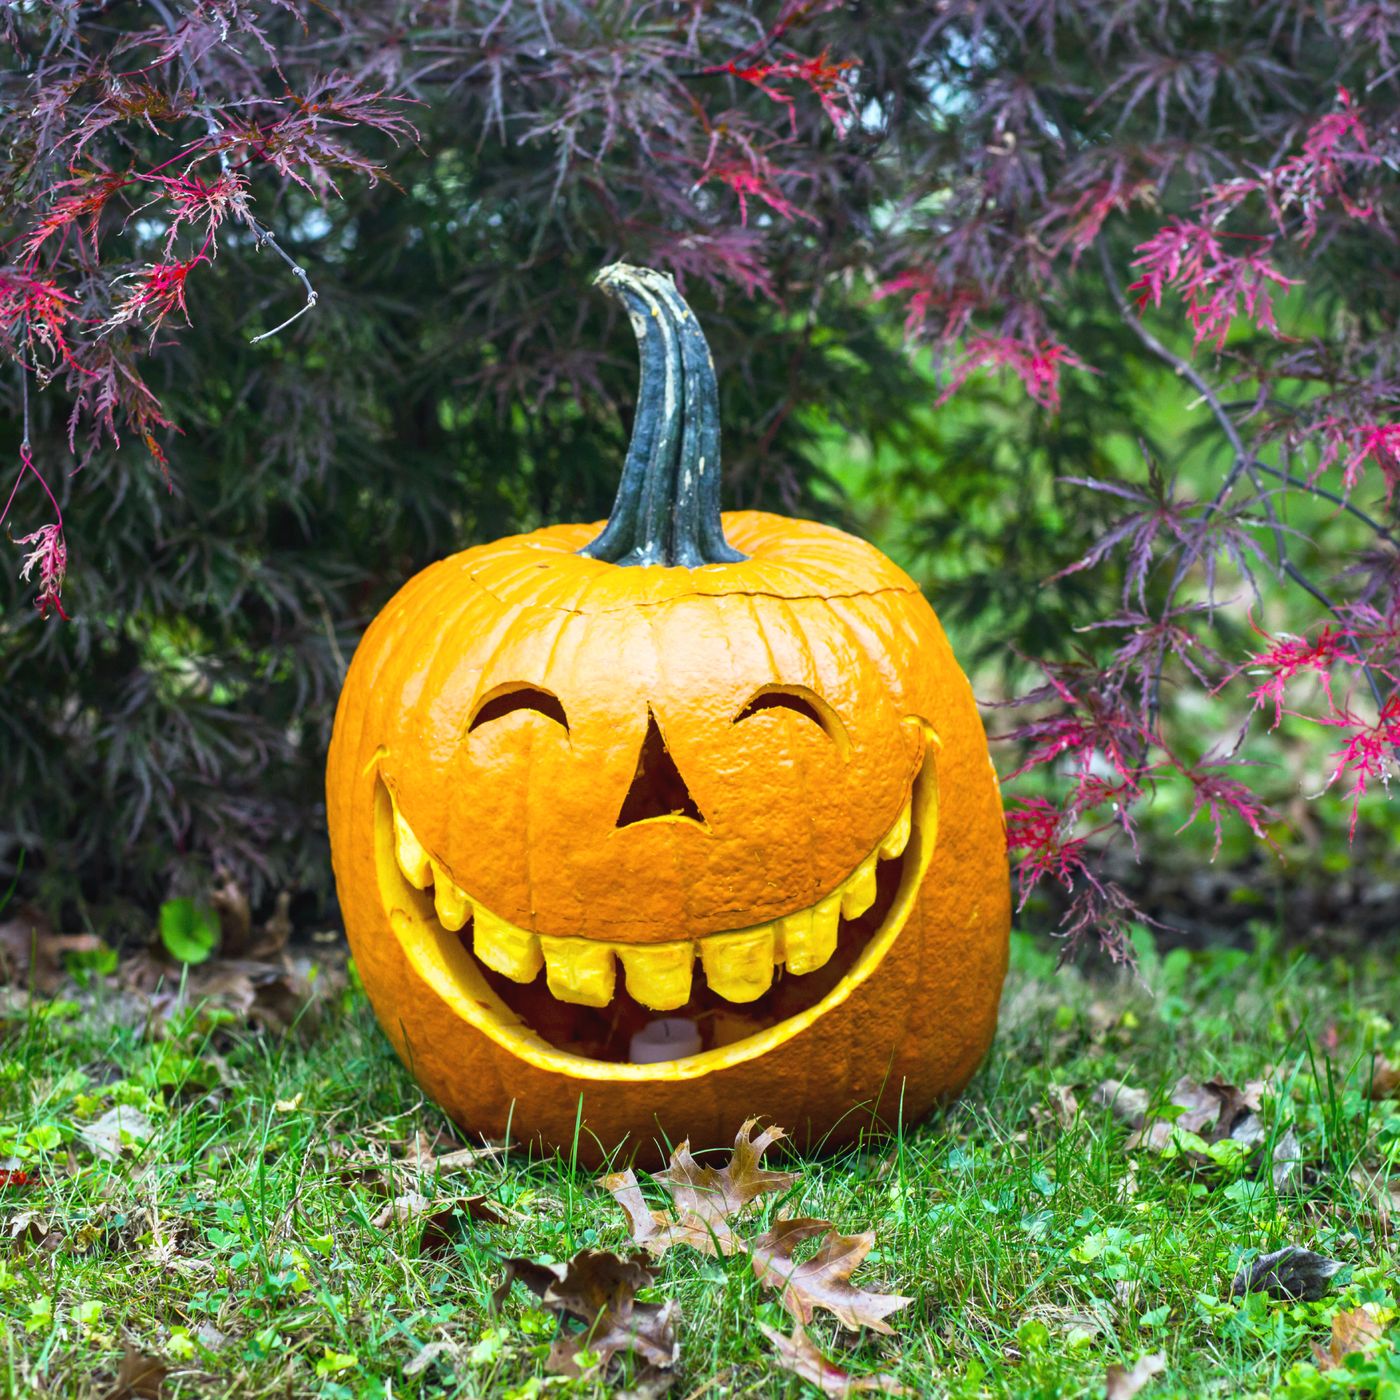
13. A Glowing Grinning Jack-o’-Lantern Amidst Autumn Foliage
The success of this image comes down to color theory. The pumpkin is a vibrant, warm orange, and it’s placed directly in front of foliage that is a deep, cool red-purple. Orange and purple are near-opposites on the color wheel, which creates a strong, dynamic contrast that makes the jack-o’-lantern’s glow appear even brighter and more intense. The green grass provides a complementary color to the orange, further enhancing its vibrancy. It’s a masterclass in using natural color to your advantage.
“An internally lit pumpkin looks amazing, but be mindful of fire safety.”
If you’re using a real candle, never place the pumpkin on an unstable surface or near flammable materials like dry leaves, hay, or fabric decorations. Make sure the top of the pumpkin has a small ventilation hole to allow heat to escape. For a worry-free glow, especially if you have pets or small children, opt for a battery-operated LED candle or puck light. They provide the same warm flicker without any of the risk.
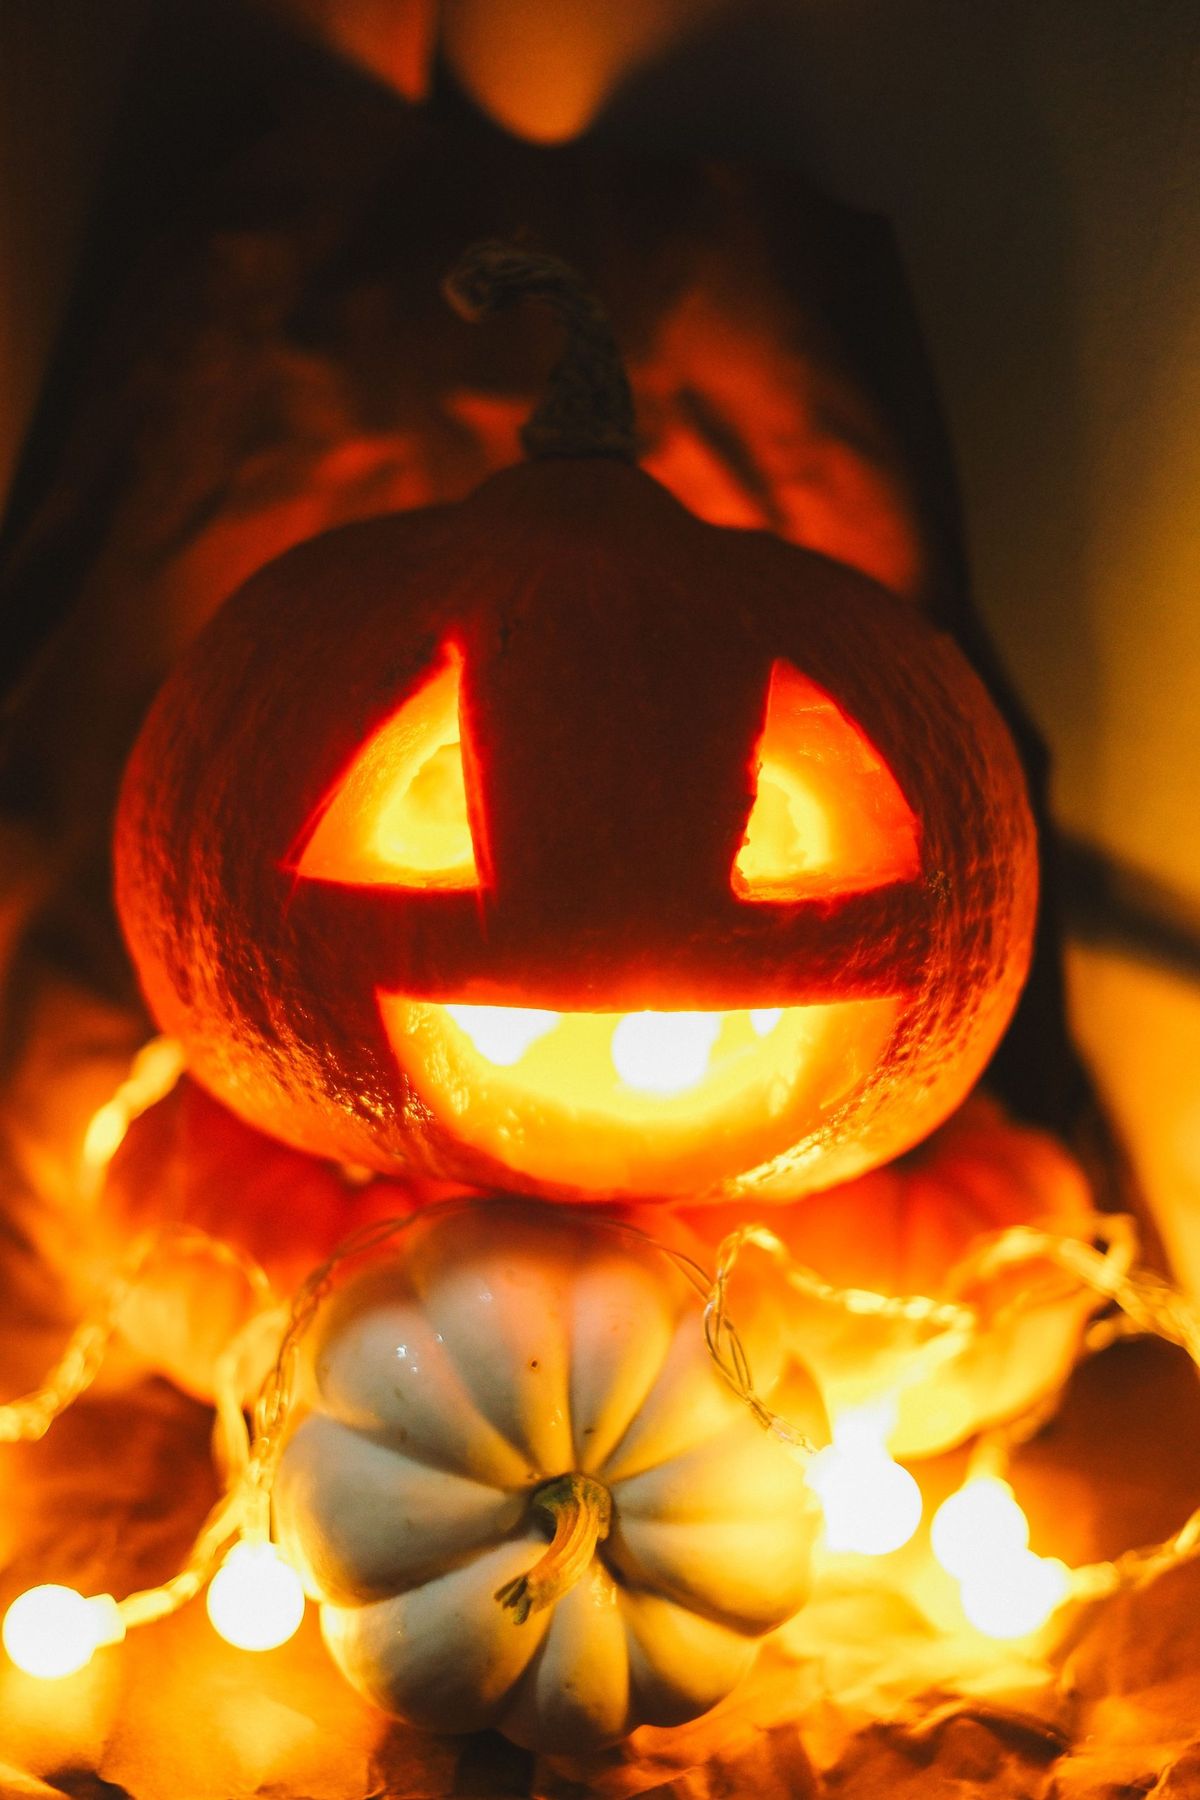
14. An Illuminated Pumpkin with Twinkling String Lights
To really make an illuminated pumpkin pop, especially for photos, pay attention to the light’s color temperature. Ditch the cool, bluish-white LEDs and opt for lights labeled “warm white” or “amber.” These will mimic the traditional soft, warm glow of a real candle. For an even more dramatic effect, line the inside of the pumpkin with a small piece of aluminum foil (shiny side out) behind the light source. This will reflect more light forward, making the carved face appear significantly brighter.
“Want to add some spooky ambiance with string lights?”
Here’s the best way to do it for maximum glow and minimal fuss. This quick project takes about 15 minutes and requires a drill and a string of lights.
Start with a clean, hollowed-out pumpkin.
Choose a drill bit that is slightly smaller than the diameter of your string light bulbs.
Carefully drill holes all over the pumpkin in your desired pattern. A random scattering often looks best.
Starting from the bottom or back, begin pushing the light bulbs through the holes from the inside out. This is easier than trying to feed the wire through.
Continue until all the lights are in place. Plug it in and enjoy the starry effect!
15. A Study in Texture with Orange and Pale Yellow Bumpy Gourds
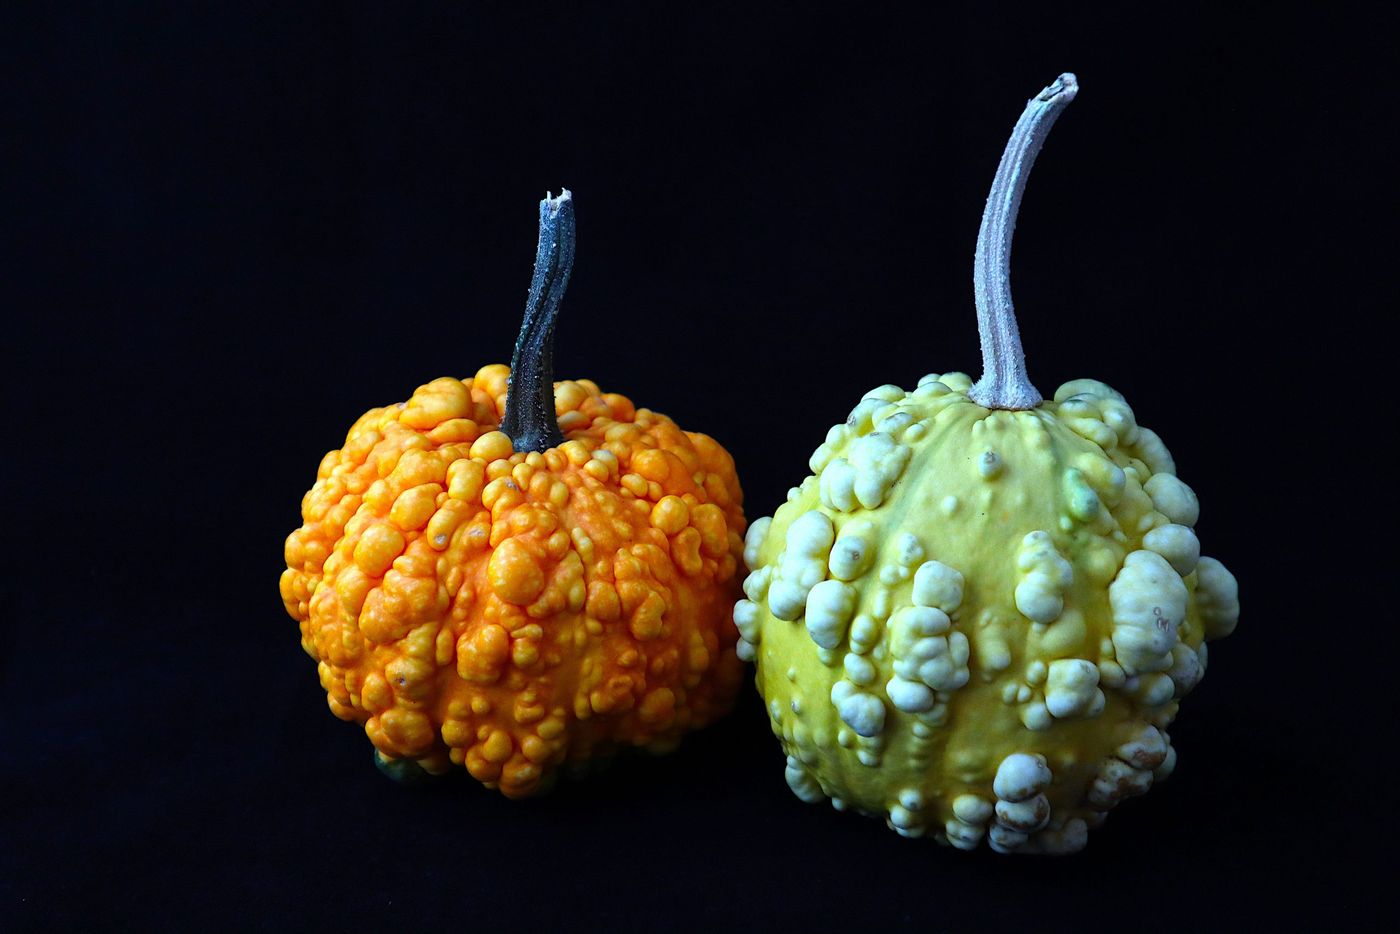
The defining characteristic of these gourds is their intensely textured skin. While their colors are beautiful, it’s the gnarly, bumpy surface that commands attention and makes them so visually interesting. They are nature’s sculptures. Displaying them against a plain, dark background is a brilliant choice, as it removes all distractions and forces you to focus solely on their unique and organic forms. They prove that you don’t need carving or paint to create a compelling autumn display.
“Bumpy gourds and squashes like these have a much longer shelf life than a carved pumpkin, but they won’t last forever.”
To maximize their lifespan, store them in a cool, dry place out of direct sunlight. Wipe them down with a dry cloth to remove any dirt. Avoid moisture, as it can lead to soft spots and mold. A healthy, unbroken gourd can last for several months, often right through Thanksgiving, making it a low-maintenance and long-lasting piece of natural decor.
16. Artistic Blue Pumpkin with Hand-Painted Swirls
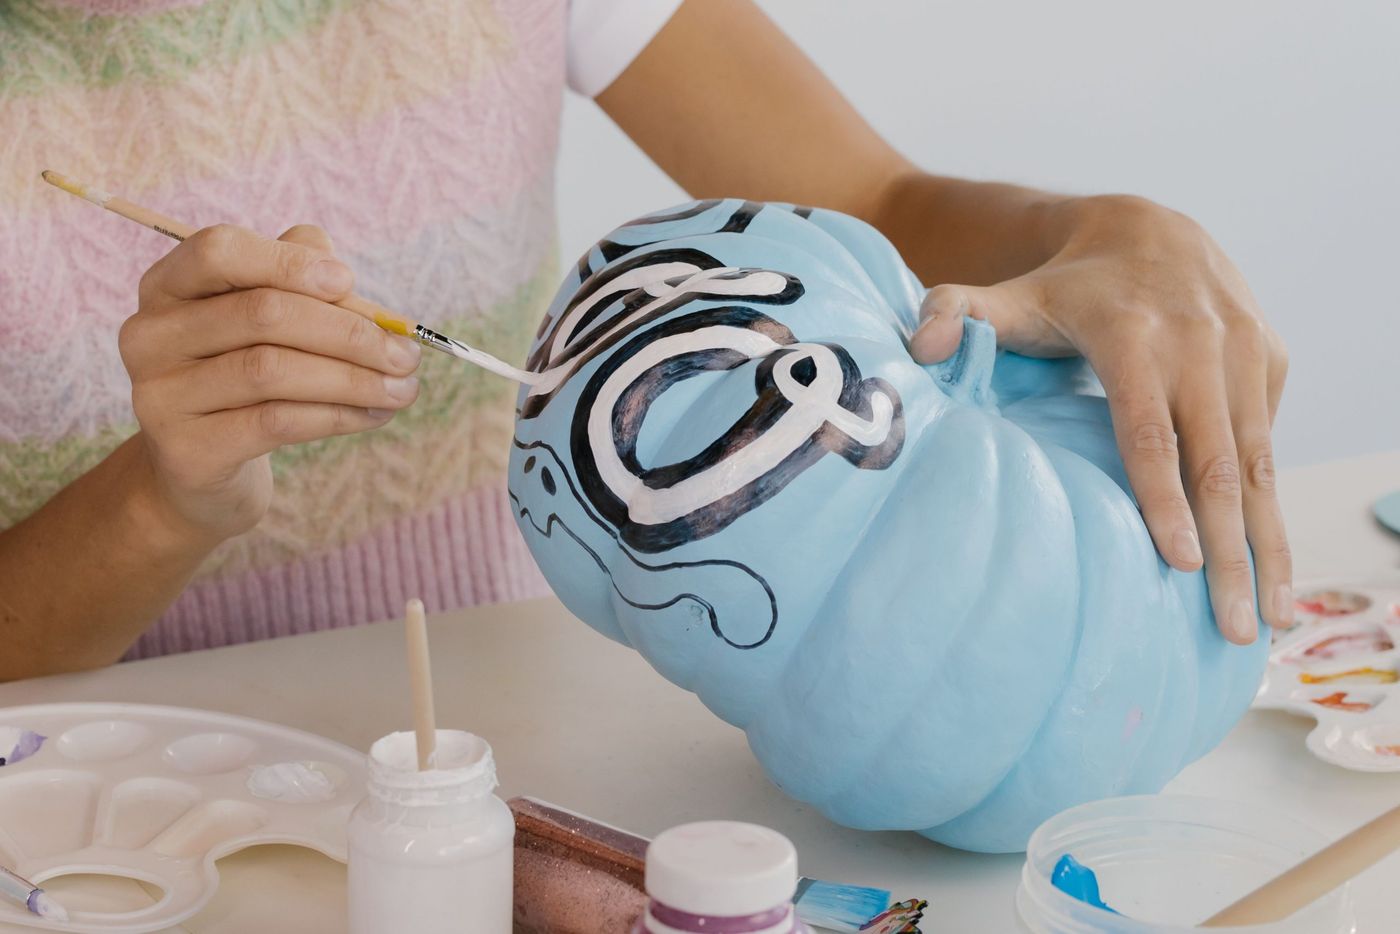
When painting with non-traditional pumpkin colors like this beautiful blue, the secret is in the prep work. A raw pumpkin has a waxy, slightly oily skin that resists paint. To get a smooth, professional finish, start by wiping the entire pumpkin down with a cloth soaked in a bit of rubbing alcohol. This will remove the waxy cuticle. Then, apply one to two thin coats of a white primer before you even start with your blue paint. This ensures the color will be vibrant, even, and durable.
“The artistic feel of this project comes from a balanced design formula: 60% solid base color + 30% intricate line work + 10% accent color.”
The calming light blue serves as the main canvas. The detailed black and white swirls provide the primary visual interest and showcase the artist’s skill. A tiny, well-placed pop of a third color, perhaps a metallic gold or a vibrant pink, could be added to the design to create a focal point without overwhelming the serene blue base.
17. Hand-Painted Ghost Pumpkins on a Themed Halloween Tablecloth
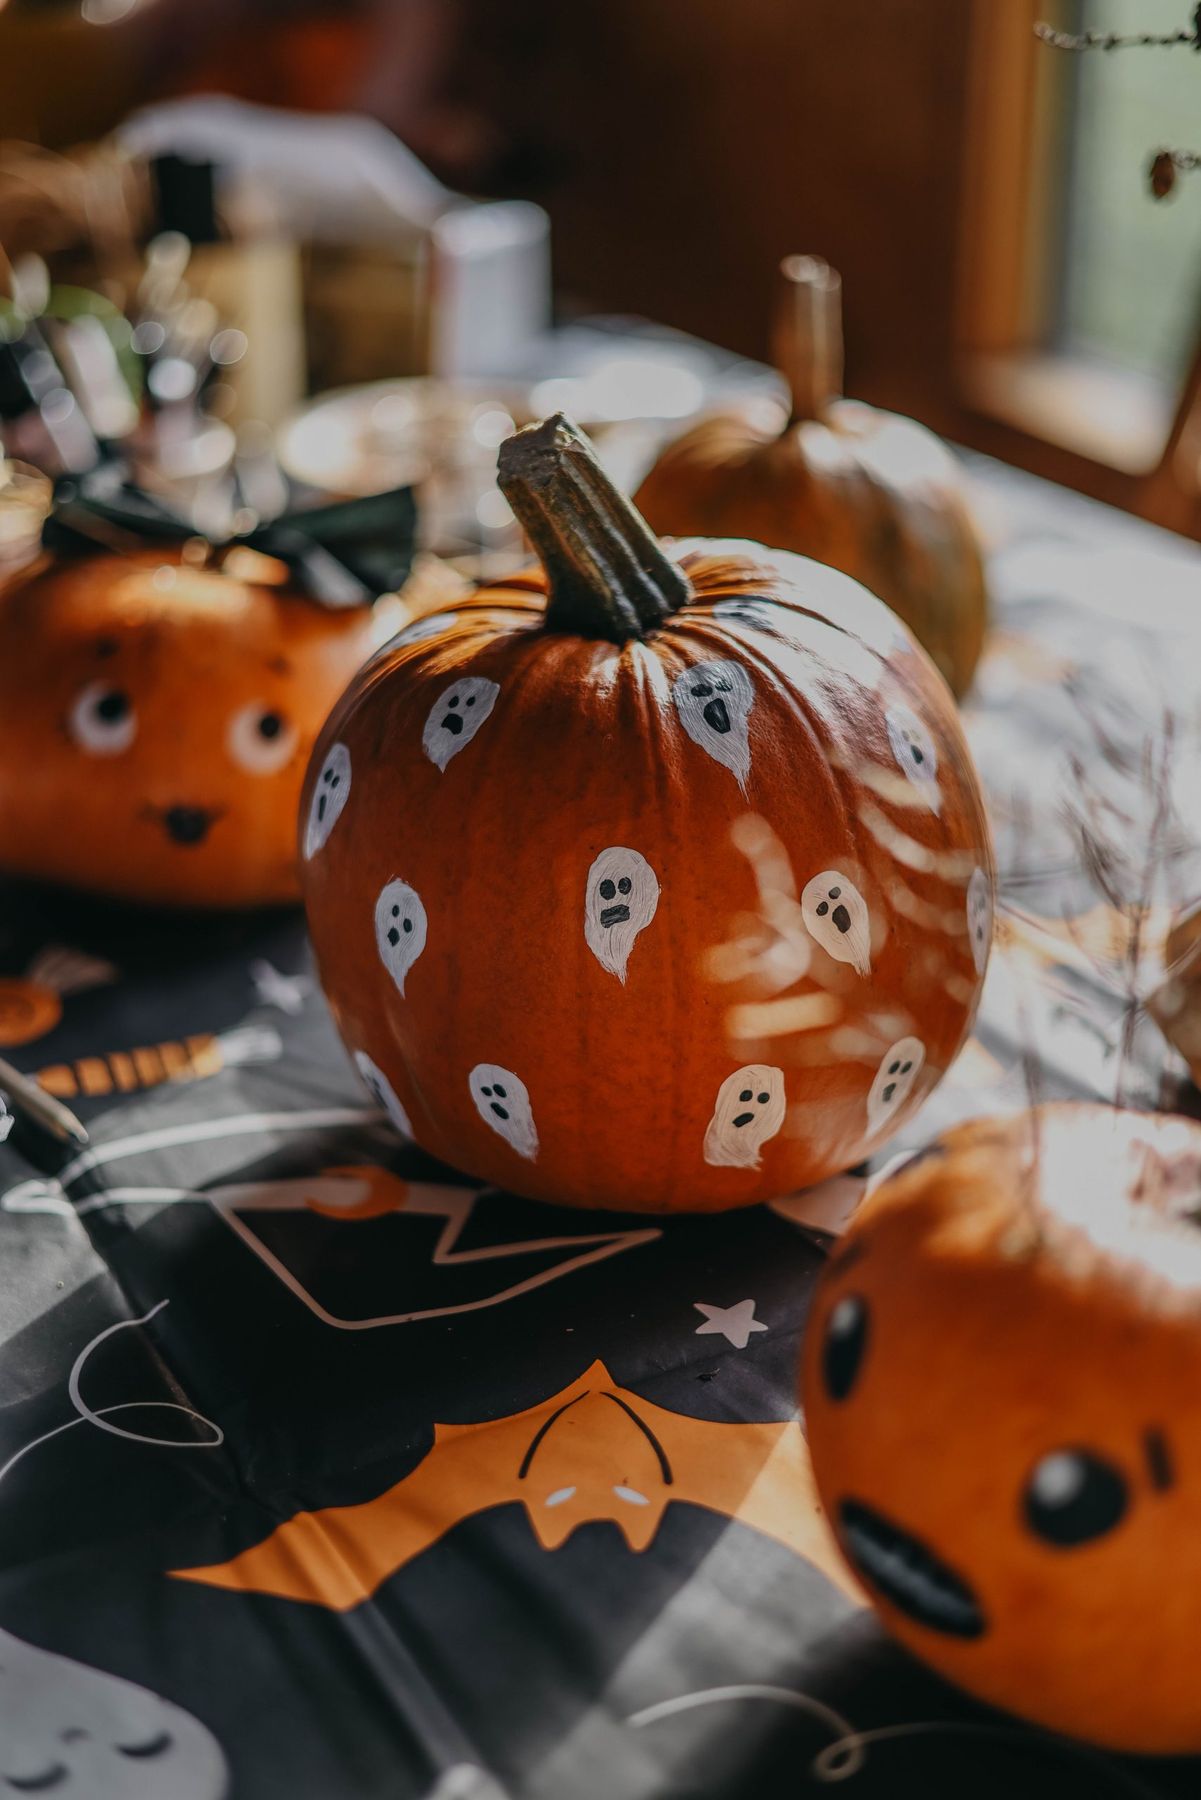
This design’s playful energy comes from the high-contrast, repeating pattern. The crisp white ghosts stand out sharply against the vibrant orange pumpkin, creating immediate visual punch. The repetition of the simple ghost shape across the curved surface gives it a sense of rhythm and movement. Furthermore, placing it on a tablecloth with a different but complementary pattern (bats and stars) creates a layered, maximalist look that feels fun and festive, not chaotic. For a similar vibe with less effort, check out Idea #7.
“Before you begin a detailed painting project like this, it’s crucial to pick the right pumpkin.”
A smooth, even surface will make your job infinitely easier.
Look for a pumpkin with minimal bumps and blemishes. A smooth canvas is key for clean paint lines.
Choose one with a symmetrical, round shape. This will make it easier to create a balanced, repeating pattern.
Check the stem! A sturdy, interesting stem adds character. Make sure it’s firmly attached and not soft or moldy.
Give it a thump. A healthy pumpkin should sound hollow.
18. A Spooky Stack of Carved Jack-o’-Lanterns on the Grass
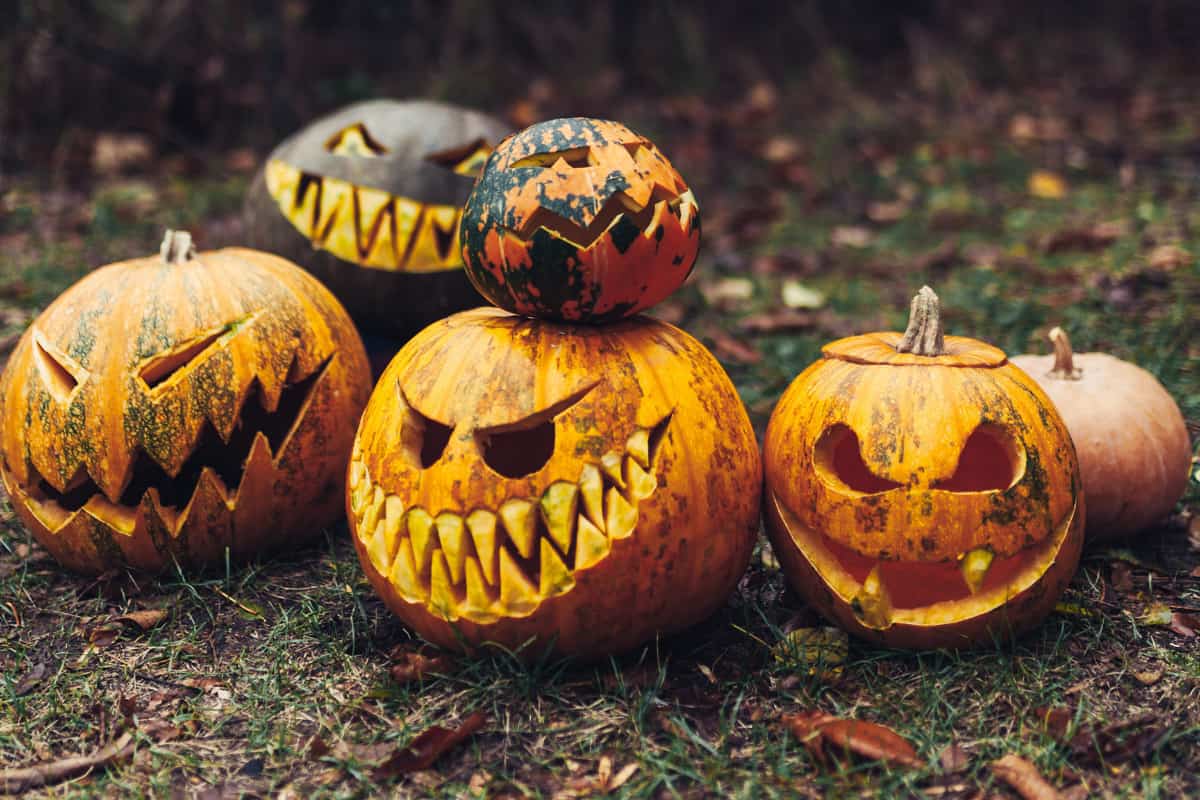
The element that elevates this from a simple pile of pumpkins to a dynamic scene is the act of stacking. By placing the small, multi-toned pumpkin on top of the larger one, the display gains height and a clear focal point. This simple action creates a sense of intentionality and composition. It introduces a playful relationship between the two pumpkins, turning them from individual objects into a single, more interesting sculpture. It’s a small detail that makes a huge difference.
“This stacked look works best when you have a bit of open ground to play with, making it ideal for a front yard or a spacious porch.”
To achieve a stable stack, the base pumpkin should be at least 1.5 times wider than the top pumpkin. For example, a 12-inch wide base pumpkin can comfortably support a pumpkin up to 8 inches wide. Ensure the base pumpkin has a flat, stable top surface or a securely attached stem that won’t wobble. Compare this to the vertical stacking in Idea #1, which uses steps for stability.
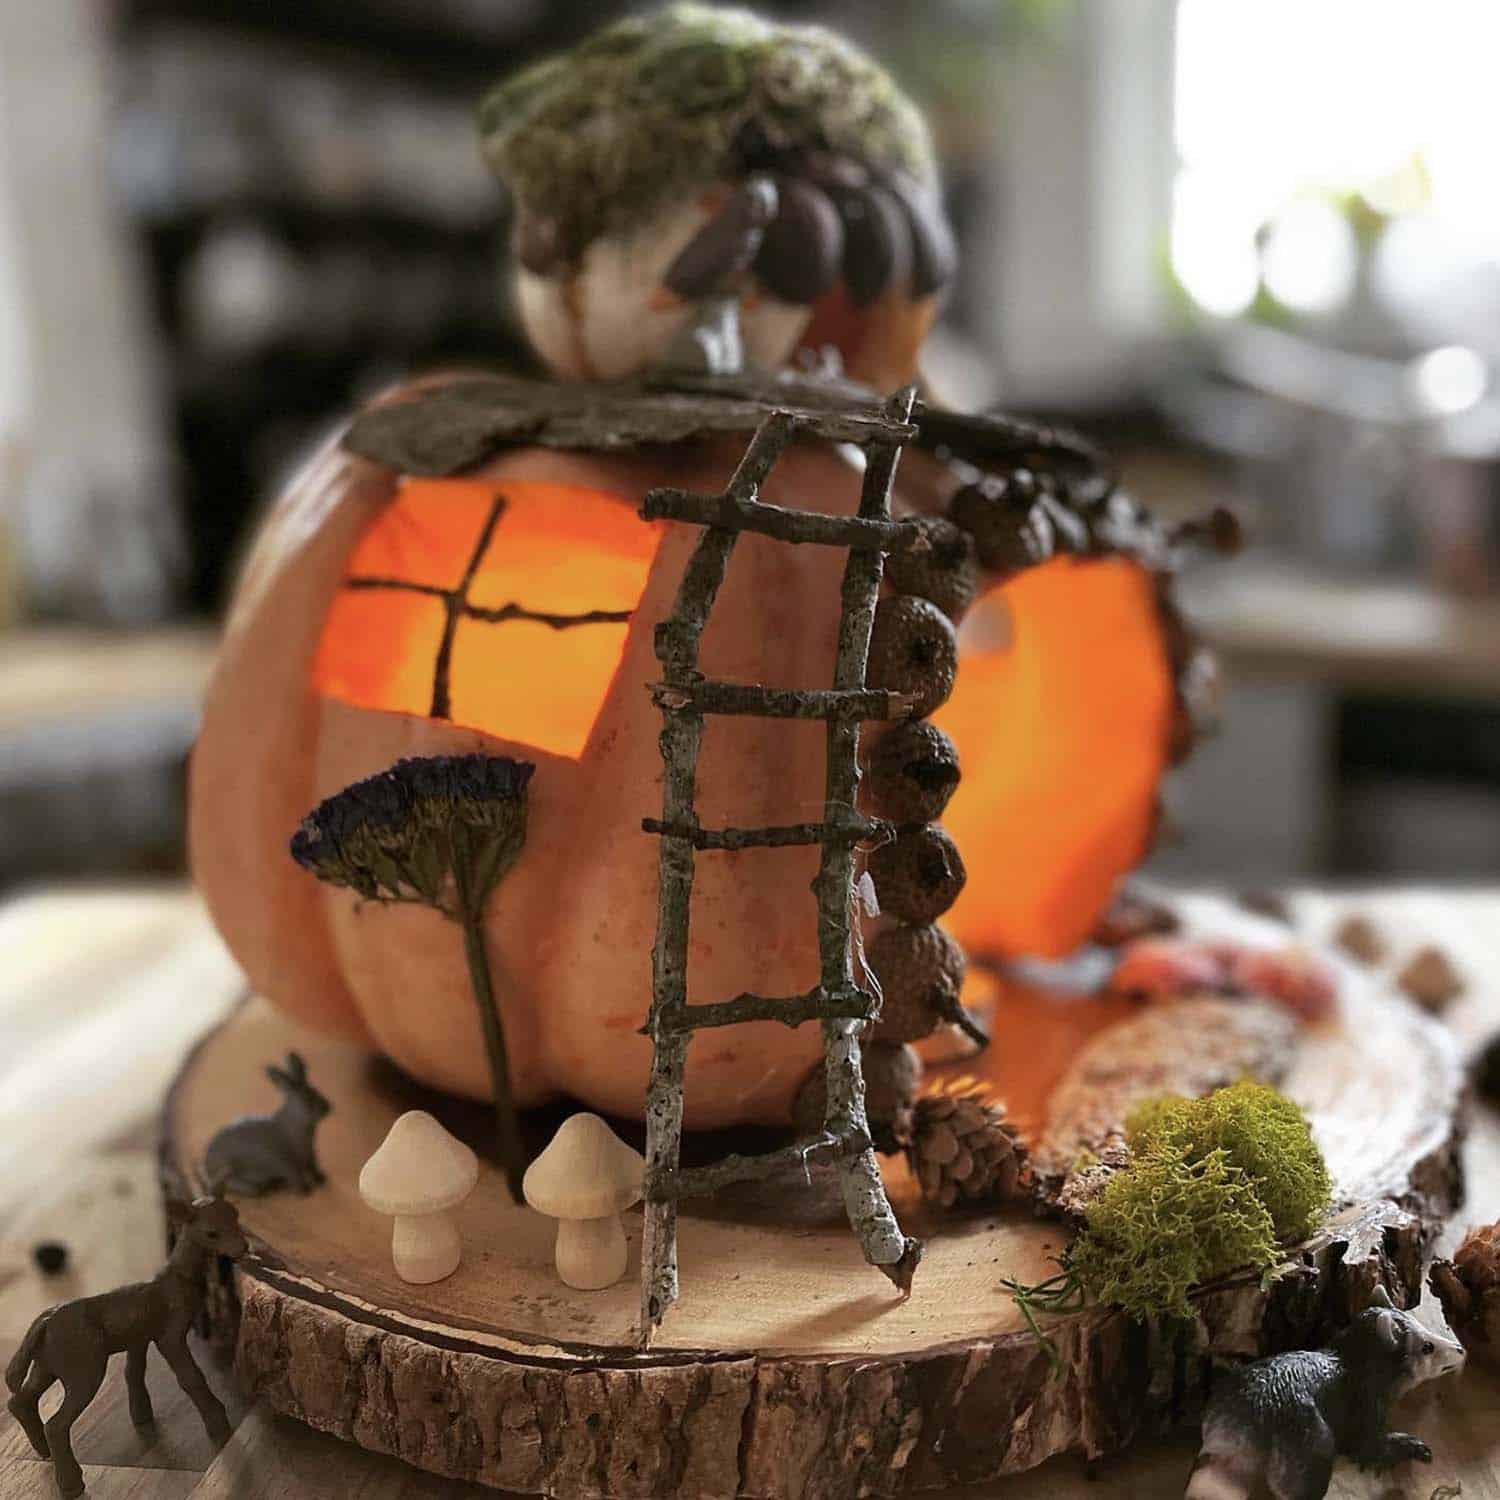
19. Whimsical Forest Pumpkin House with Glowing Windows
You can create this enchanting look for less by foraging for most of your materials. A walk in a park or your own backyard can yield twigs, moss, acorns, and pinecones for free. The wood slice can be purchased at a craft store for about $10-$15, or you might be able to get one from a local tree trimming service. The most expensive part will be the miniature animal figurines, but you can find affordable multipacks online or in the toy aisle of a craft store for under $15.
“This whimsical scene works because it plays with our sense of scale and imagination.”
By transforming a common object—a pumpkin—into a miniature house, it invites us into a tiny, magical world. The warm glow from within creates a feeling of life and coziness, making us wonder who lives there. The use of natural, rustic elements like moss and wood grounds the fantasy in reality, making it feel plausible and all the more enchanting.
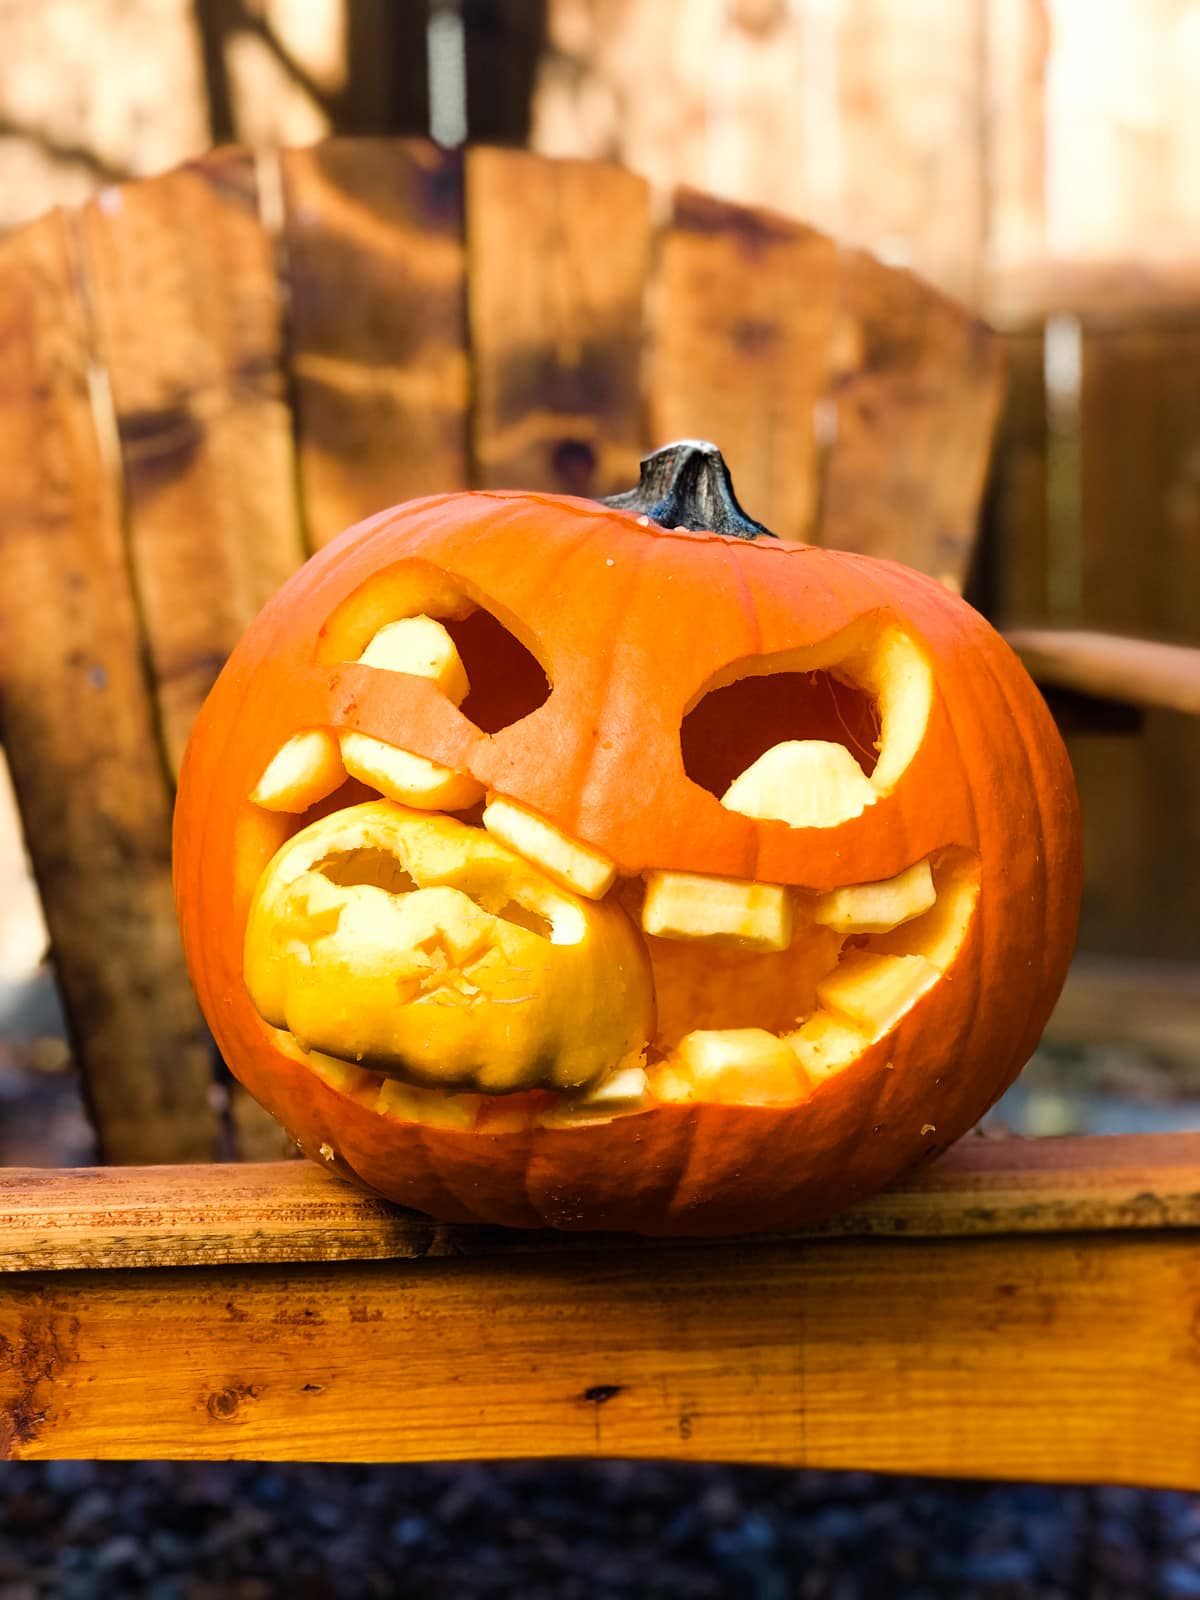
20. A Carved Jack-o’-Lantern That’s Eating a Smaller Pumpkin
When creating a “pumpkin eating a pumpkin” design, the key to making it look convincing is the ‘teeth’. Don’t just carve a smooth, open mouth. After you cut out the main mouth shape from the larger pumpkin, use a knife to carve away the outer orange skin from the top and bottom edges of the mouth, exposing the lighter-colored pulp underneath. Then, use a small tool to carve notches into this exposed pulp, creating the look of individual, jagged teeth. This small detail adds a ton of personality and realism.
“This is a super fun and creative idea, but it has a short lifespan.”
Because you have two carved pumpkins, you have double the cut surfaces exposed to air, which leads to faster dehydration and decay. The smaller pumpkin, nestled inside the larger one, also has less air circulation, which can accelerate mold growth. Think of this as a brilliant centerpiece for a Halloween party or for the week of Halloween itself, but don’t expect it to last for the entire month of October.
21. Elegant White Pumpkin Mantel with Greenery and Candles
The elegance of this mantelpiece comes from a tightly controlled formula: 70% monochromatic base + 20% natural greenery + 10% ambient light. The vast majority of the decor consists of white and cream pumpkins, creating a calm, cohesive foundation. The fresh green foliage is then woven through to provide a pop of life and organic texture. Finally, the soft glow from the pillar candles adds warmth and a touch of magic, preventing the all-white scheme from feeling cold or sterile.
“While this arrangement is stunning, using fresh greenery like eucalyptus means it requires some upkeep.”
The sprigs will start to dry out and look wilted after about 4-7 days. You can extend their life by lightly misting them with water every day. For a lower-maintenance version, opt for high-quality faux eucalyptus stems. They give the same look and can be stored and reused every year, making them a more sustainable and less fussy choice in the long run. Also, be sure to use glass holders for real candles to protect your mantel from wax drips.
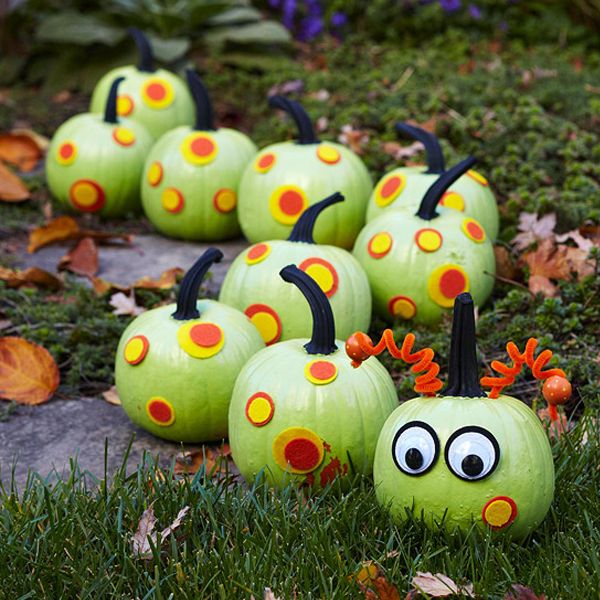
22. Painted Green Monster Pumpkins with Felt Spots and Googly Eyes
These goofy little monsters are a perfect no-carve project for a weekend afternoon. All you need are small pumpkins, paint, felt, and some craft supplies. The project takes about 1-2 hours, depending on paint drying time, and costs around $20.
- Paint your small pumpkins with a solid coat of light green craft paint and let them dry completely. Paint the stems black.
- While they dry, cut out circles of various sizes from yellow, orange, and red felt sheets.
- Once the pumpkins are dry, use a hot glue gun or strong craft glue to attach the felt spots in fun patterns.
- Add googly eyes for personality. You can find self-adhesive ones, or attach them with a dot of glue.
- For antennae, cut a pipe cleaner in half, twist it around a pencil to make it curly, and glue it to the top of the pumpkin.
“The cost of craft supplies can add up quickly.”
To get this look for less, skip the pre-packaged kits. Buy a multipack of small gourds or pumpkins from a grocery store instead of a craft store—they’re often much cheaper. For the decorative elements, look around your house. Instead of buying felt, you could use buttons of different sizes and colors for the spots. Instead of googly eyes, you could simply paint them on. It’s a great opportunity to use up leftover bits and bobs from other craft projects.
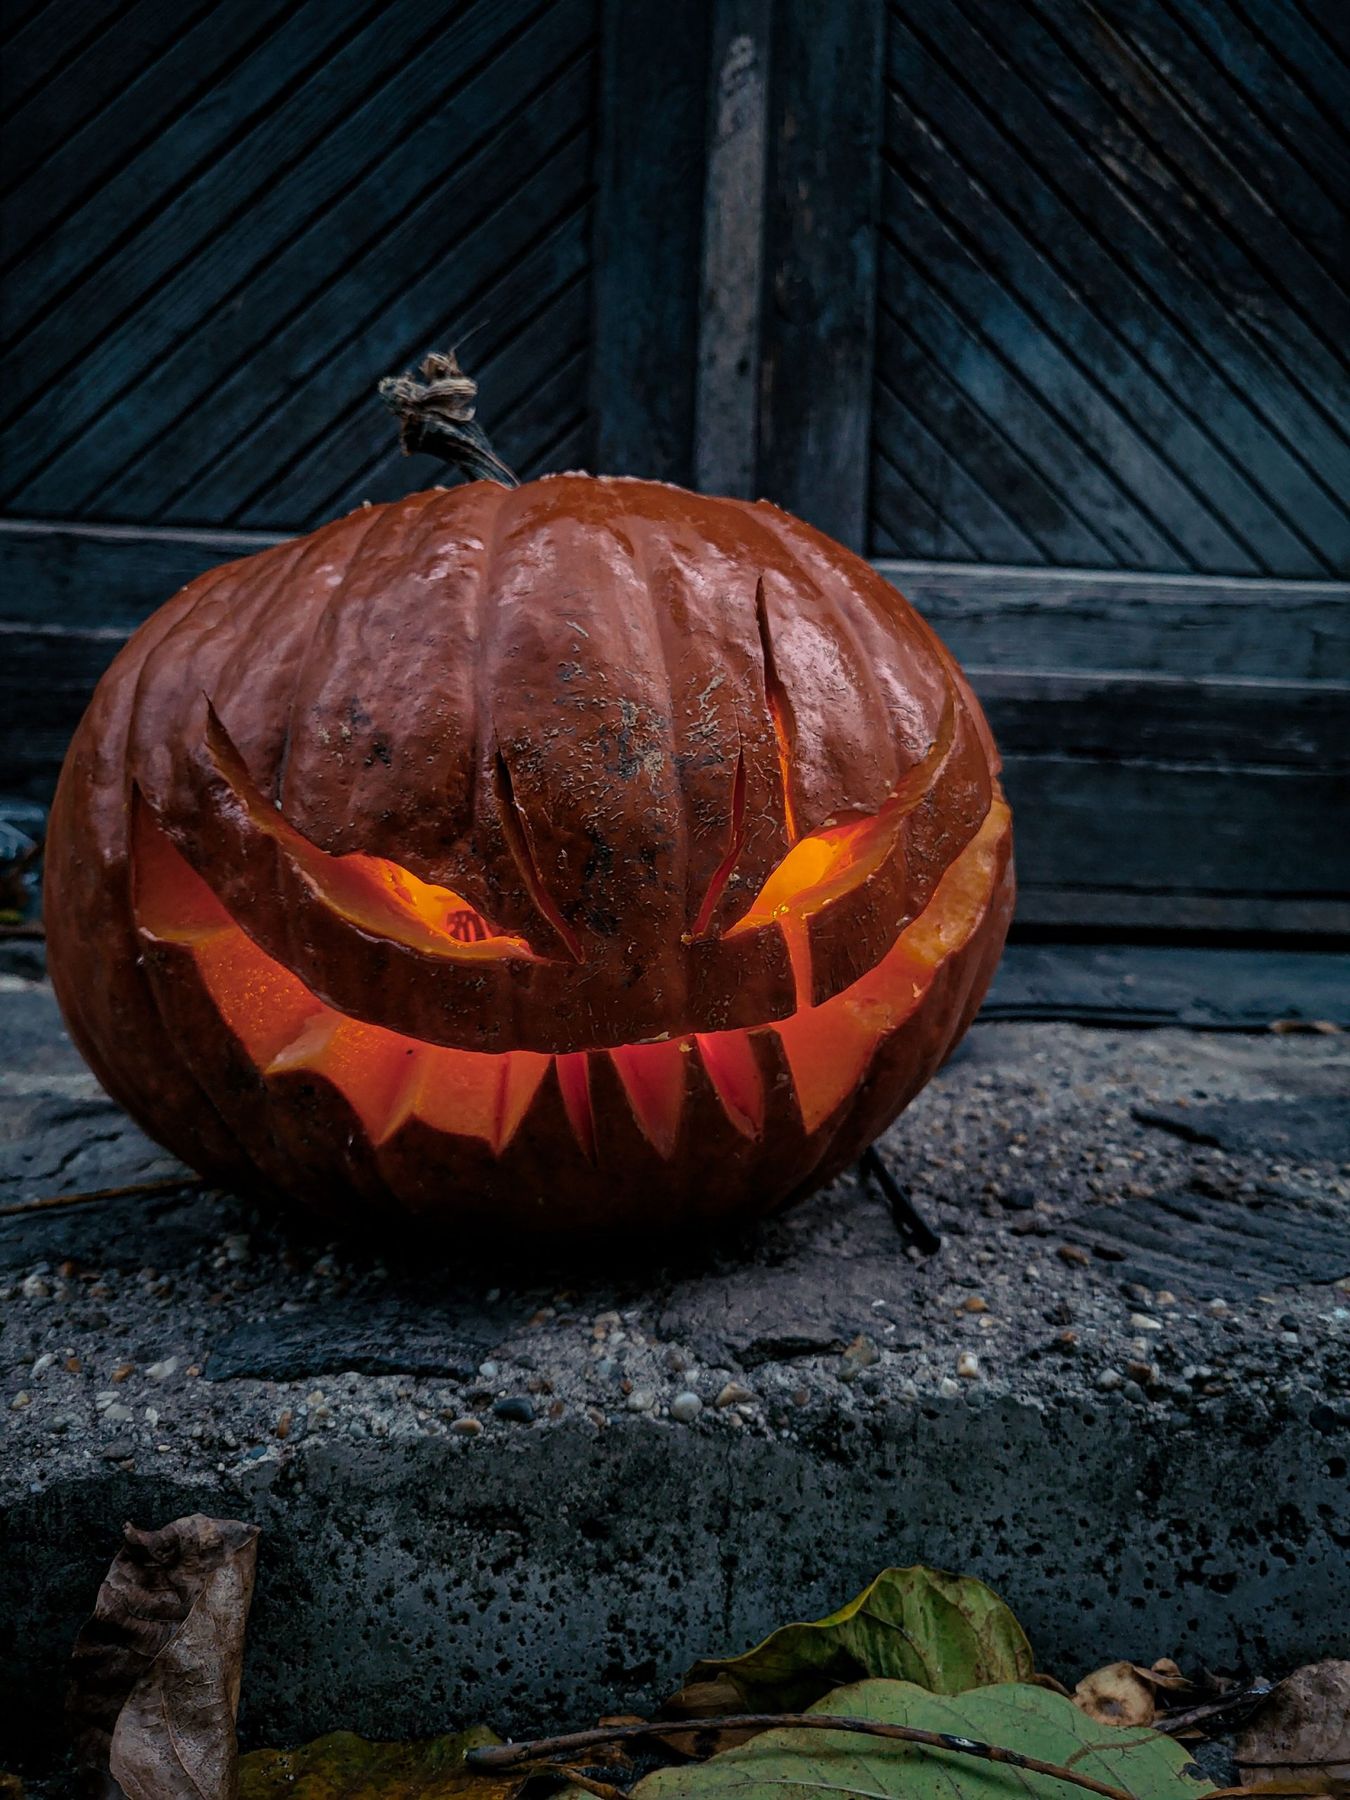
23. A Glowing Jack-o’-Lantern with Jagged Teeth Against a Dark Wood Background
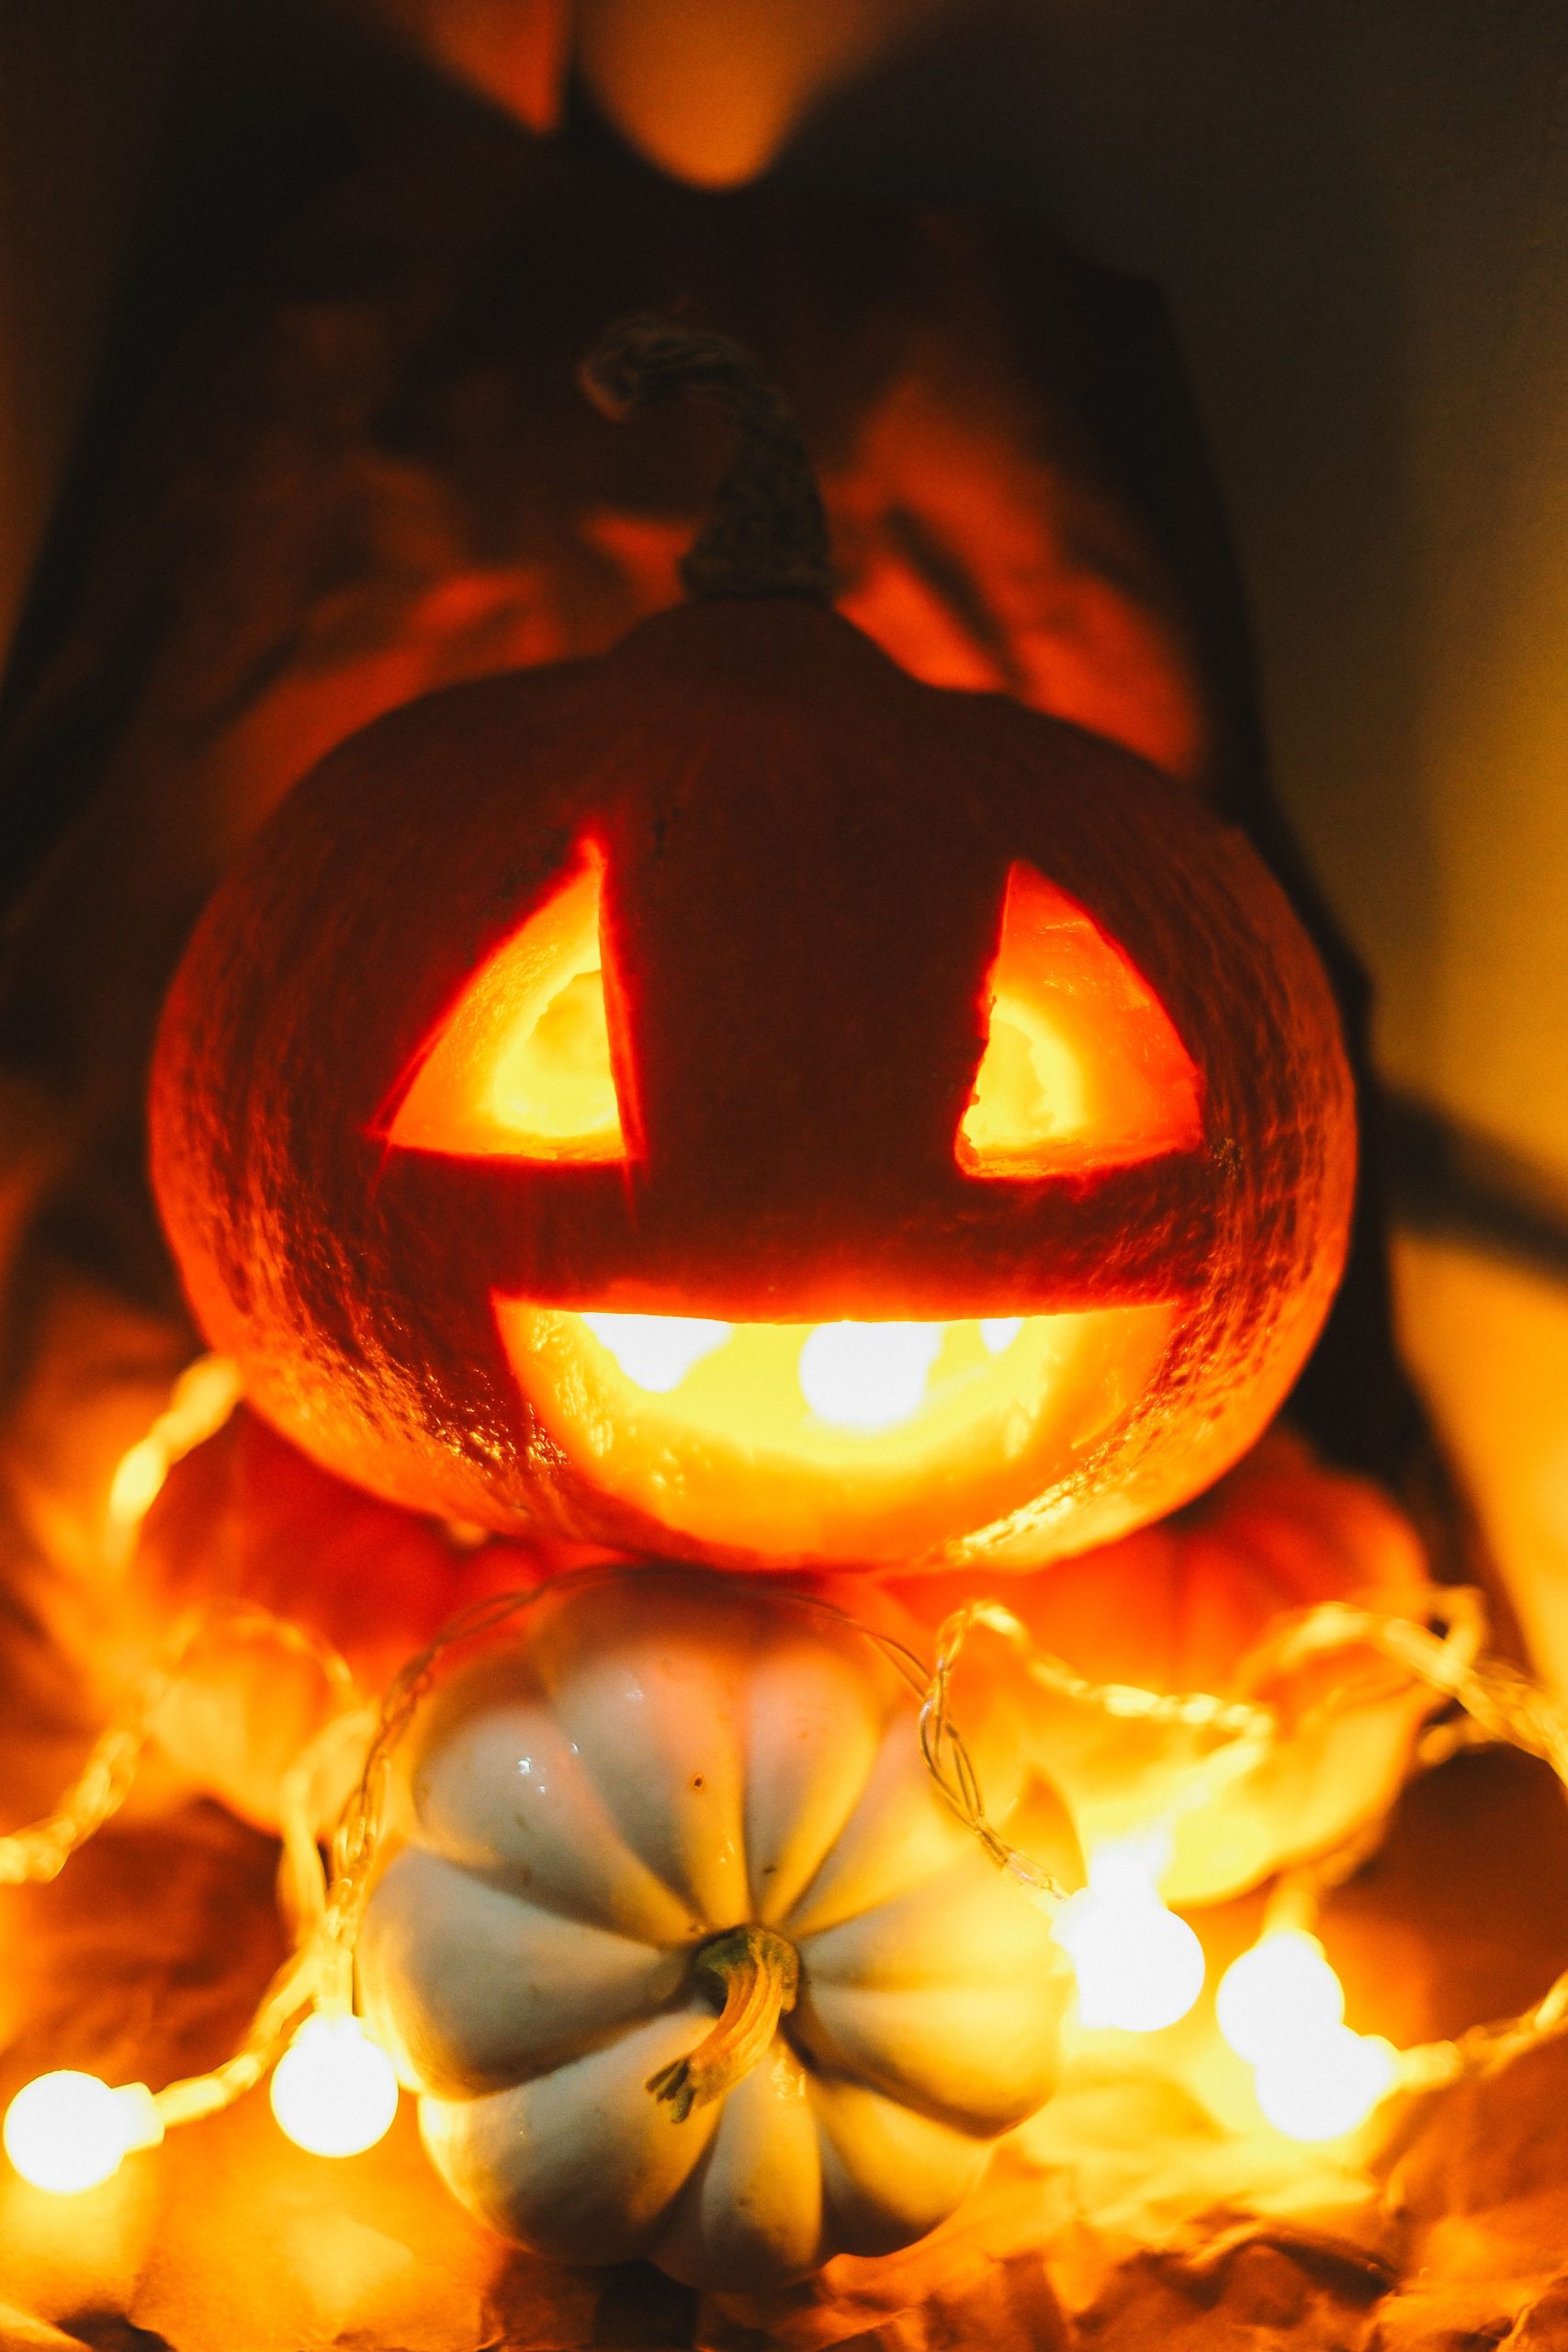
The single most crucial element here is the intense internal glow. It’s what transforms the pumpkin from a simple piece of decor into a focal point brimming with spooky energy. The light draws your eye directly to the jagged, smiling face, creating a strong contrast with the dark, weathered wood background. Without that bright, warm light emanating from within, the carving would be lost in the shadows and the entire scene would lack its dramatic, eerie impact.
“This image is a perfect lesson in contrast.”
It works by pairing a rough, dark, and rustic background with a bright, warm, and detailed subject. The vertical lines of the wooden planks contrast with the round shape of the pumpkin, and the dark, almost black, color of the wood makes the pumpkin’s orange glow appear even more saturated and vibrant. This play of light against dark, and smooth against rough, is what gives the scene its powerful, atmospheric mood.
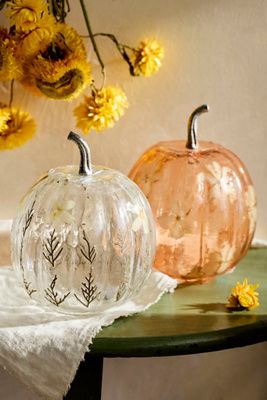
24. Floral Infused Glass Pumpkins with Metallic Stems
To create a high-end, curated look with decorative objects like these, think like a museum curator and tell a story through your grouping. Don’t just place them on a table. Combine them with other textures that complement their delicate nature. Here, the crinkled off-white textile adds softness, while the dried yellow flowers provide a pop of color and a rustic touch. This creates a multi-layered vignette that feels intentional and sophisticated. Compare this elegant approach with the more rustic look of Idea #26.
“This look taps into the “dark naturalism” or “cottage-gore” trend that’s popular on Pinterest and Instagram.”
It combines the beauty of nature (dried flowers, botanical motifs) with a slightly moody, ethereal aesthetic. The dark green tabletop and the delicate, almost scientific look of the botanicals inside the glass give it a sophisticated, slightly mysterious vibe that feels perfect for a modern autumn. It’s a move away from bright and cheerful, towards something more atmospheric and unique.
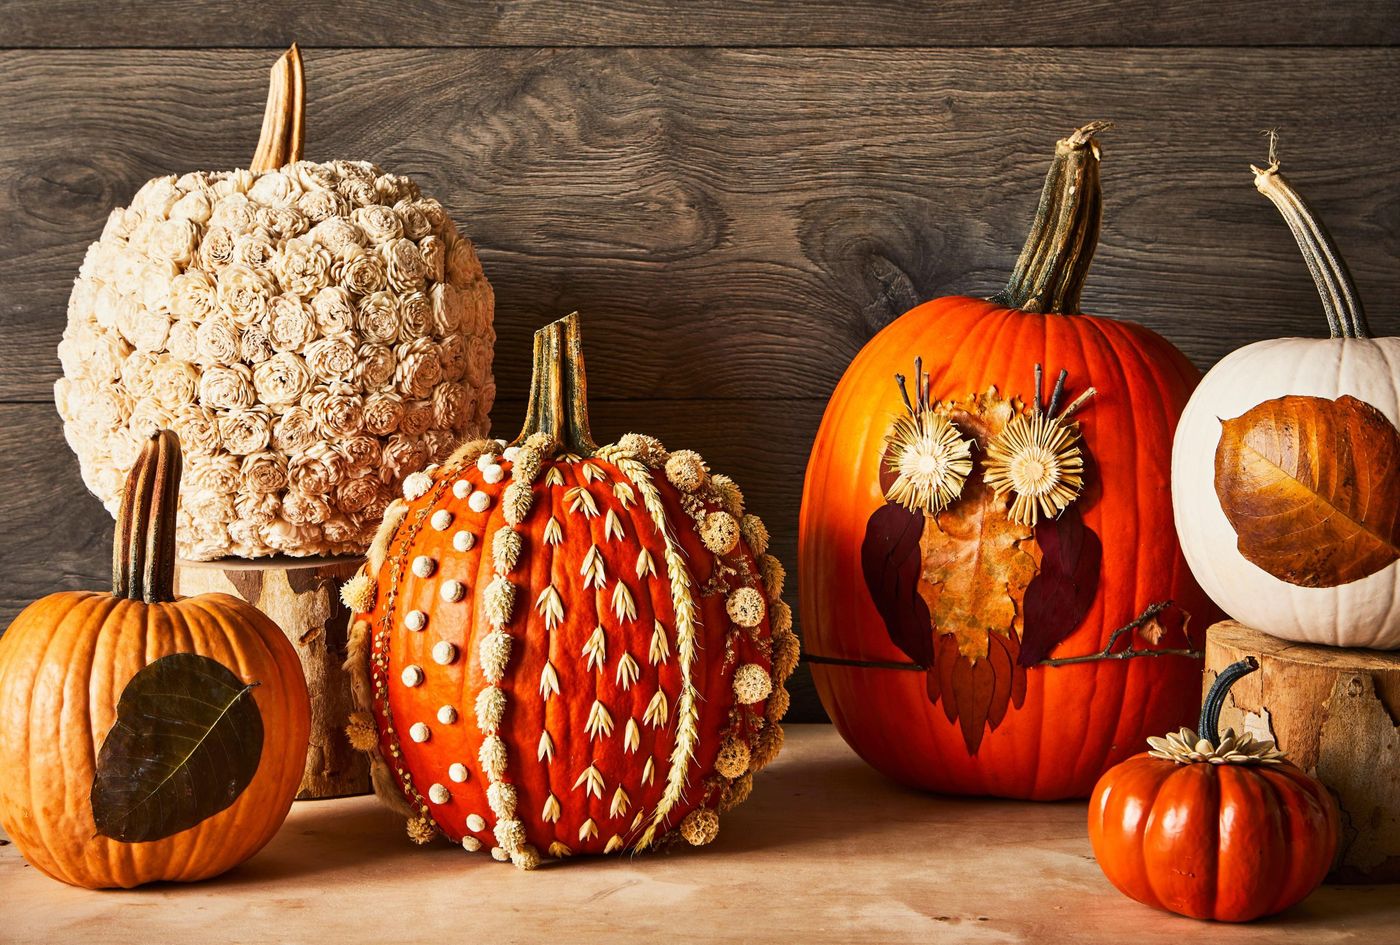
25. A Serene Cluster of Cream and Sage Pumpkins on a Rustic Surface
The beauty of this arrangement lies in its subtle, analogous color palette. By sticking to a narrow range of colors—cream, sage green, and the warm wood tone—the display feels incredibly serene and cohesive. There are no jarring contrasts, which allows the eye to focus instead on the wonderful variety of shapes and textures within the pumpkin cluster. The tight grouping enhances this effect, making them read as a single, unified centerpiece rather than a collection of individual items.
“This type of low, clustered centerpiece is incredibly versatile and works best on horizontal surfaces where it can spread out.”
It’s ideal for a dining room table (as long as it’s not too tall to see over), a coffee table, or a wide console table. You need a surface that is at least 18-24 inches deep to allow for a nice, dense grouping. For a smaller space, like a side table or a narrow shelf, you could adapt this by choosing just three of the pumpkins and arranging them in a tighter triangle formation.
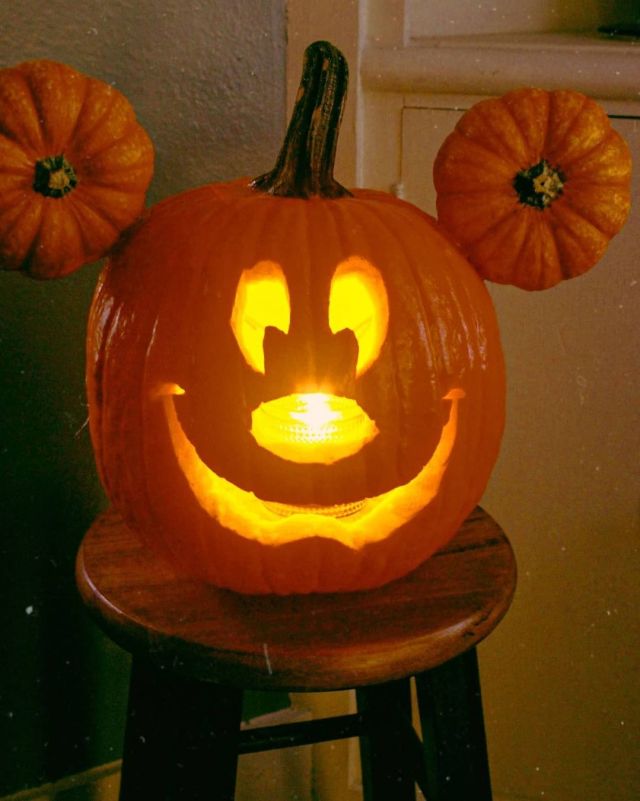
26. A Playful Character Pumpkin with Mini Pumpkin ‘Ears’
Creating those cute pumpkin ‘ears’ is easier than it looks and adds so much character. It’s a quick modification that takes just a few minutes.
- Select two small, matching pumpkins for the ears. They should be proportionate to your main pumpkin.
- Find the perfect spot for each ear on the top sides of the main pumpkin. Use a marker to trace their outline.
- Take a wooden BBQ skewer and break it into two 4-inch pieces.
- Carefully push one skewer about 2 inches deep into the bottom of a ‘ear’ pumpkin.
- Firmly press the other end of the skewer into the main pumpkin where you made your mark. The skewer should hold it securely in place.
- Repeat the process for the other ear, making sure they are symmetrical.
“The single thing that makes this design so successful is its undeniable charm.”
By adding two small pumpkins as ears, the creator has transformed a standard jack-o’-lantern into a delightful character. It’s this clever personification that captures our imagination. The wide, friendly smile and simple crescent eyes complete the look, resulting in a pumpkin that feels less like a spooky decoration and more like a cheerful creature greeting you at the door. It’s pure, simple, and incredibly effective.
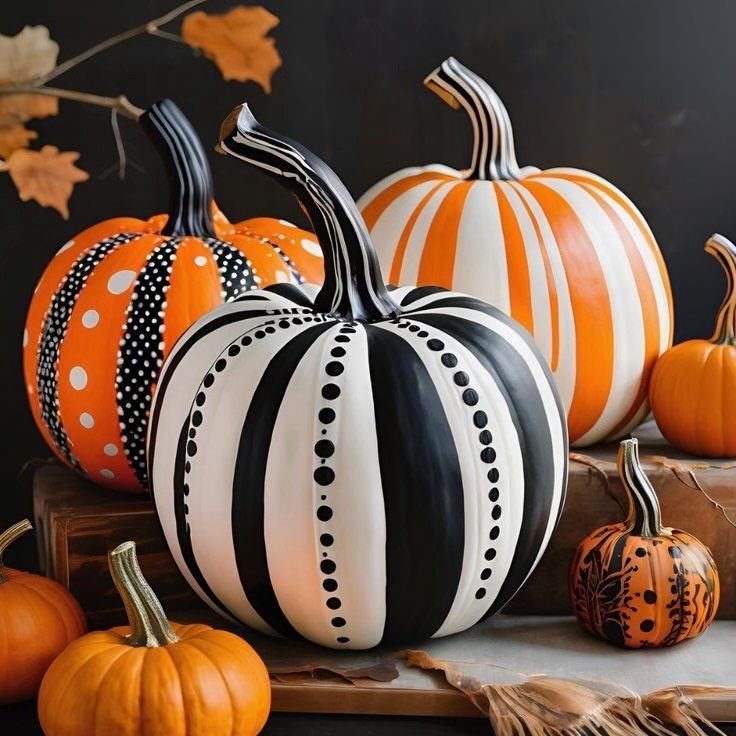
27. Bold Striped and Polka Dot Painted Pumpkins
When working with bold, graphic patterns like stripes and polka dots, a crisp, clean line is everything. The secret to achieving this isn’t free-handing it; it’s using painter’s tape. For the striped pumpkin, lay down strips of tape to mask off the areas you want to keep white or orange. For the polka dots, use round label stickers. Press the edges down firmly to prevent paint from bleeding underneath. Paint your section, let it dry completely, and then carefully peel away the tape or stickers to reveal your perfectly sharp design.
“A bold, high-contrast design like this looks incredible, but it’s also very unforgiving.”
Every wobble, drip, or smudge will be highly visible against the clean lines and solid colors. This isn’t a project to rush. You’ll need patience, a steady hand, and the right tools (like good painter’s tape and fine-tipped brushes). It also requires a very smooth pumpkin; any bumps or deep ridges will make it difficult to get those clean, graphic lines. Be prepared to potentially do two or three coats of paint to get a fully opaque finish.
28. Artistic Light Blue Pumpkin with Hand-Painted Swirls
The pastel color palette is what makes this design feel so fresh and unexpected. By swapping the traditional autumn oranges and blacks for a soft sky blue, white, and pastels, the pumpkin is transformed from a seasonal decoration into a piece of art. The intricate, swirling line work adds a layer of sophistication and showcases the creator’s skill. This works because it confidently breaks the “rules” of fall decorating, resulting in something truly unique and personal.
“This is a wonderfully budget-friendly way to create a custom piece of decor.”
The main cost is the pumpkin itself, and the rest is just a handful of craft supplies you may already have.
Medium pumpkin: $5 – $10
Acrylic craft paints (3-4 colors): $8 – $15
Set of detail paintbrushes: $5 – $10
Primer (optional but recommended): $5 – $8
TOTAL: $23 – $43
Budget alternative: Use a faux, craft-store pumpkin. It costs a bit more upfront ($15-25), but you can save your artwork and display it year after year.
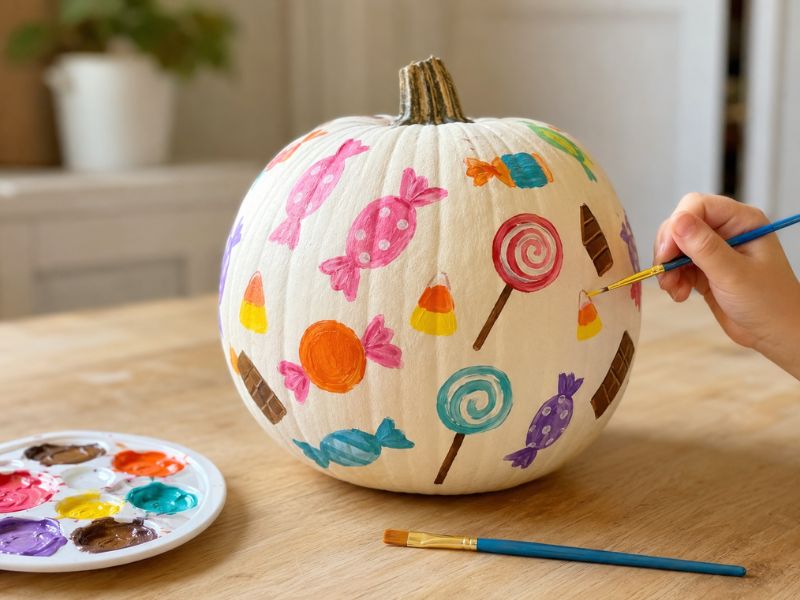
29. A White Pumpkin Hand-Painted with Colorful Candy Illustrations
Painting detailed illustrations on a round surface can be tricky. Here’s a quick guide to make it easier.
- Start with a base coat. Paint your entire pumpkin white and let it dry completely. This creates a smooth, even canvas.
- Lightly sketch your main candy shapes with a pencil. Don’t worry about details yet, just block out the placement.
- Begin filling in the base colors for each piece of candy. Use a medium brush and don’t be afraid to do two coats for vibrant color.
- Let the base colors dry. This is the most important step to prevent smudging.
- Use fine-tipped brushes to add the details: lollipop swirls, candy corn stripes, and chocolate bar lines.
- Finally, use a very fine black or dark brown brush to add outlines, which will make your illustrations pop.

“that makes this pumpkin so special is its sheer, unadulterated joy.”
The theme of candy, rendered in bright, happy colors, is pure fun. It moves beyond the typical spooky or elegant themes and taps into a sense of childlike delight that is universally appealing. It’s the kind of decoration that makes you smile instantly. The hand-painted quality adds to the charm, feeling personal and lovingly crafted rather than mass-produced. For another playful idea, see the monster pumpkins in Idea #21.
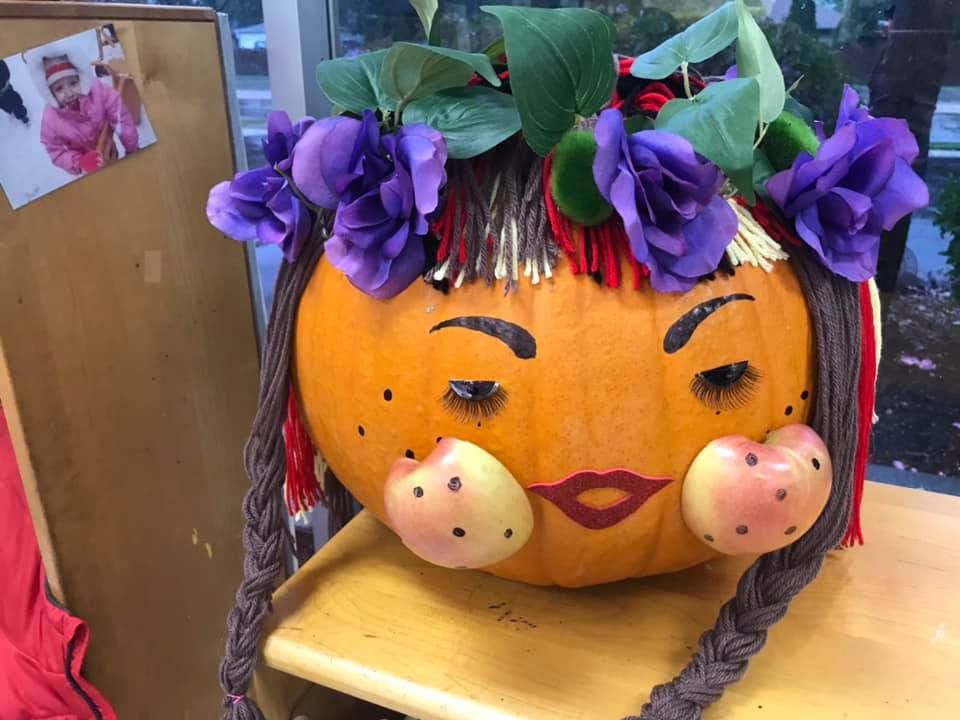
30. Create a Contest-Winning Character Pumpkin
If you want to create a pumpkin that could win a decorating contest, focus on telling a story. Don’t just paint a face; create a character. Think about who your pumpkin is. Is it a spooky witch? A silly monster? A famous character from a book? Add props and accessories to bring it to life. A small witch’s hat, some yarn for hair, or a pair of glasses can transform a simple decorated pumpkin into a memorable creation that stands out from the crowd.
“The formula for a contest-winning pumpkin often follows this recipe: 50% technical skill + 30% originality + 20% personality.”
Technical skill means your paint is neat, your carving is clean, or your construction is solid. Originality is about choosing a theme or character that isn’t one of the same ten ideas you always see. But personality is the magic ingredient—it’s the funny expression, the clever use of props, or the little detail that makes the judges smile and connect with your creation.
31. A Colorful Pumpkin Display on a Rustic Wooden Bench
This festive scene on a rustic bench works because it combines a variety of textures and sizes to create a single, cohesive display. The smooth, painted pumpkins contrast beautifully with the rough, natural texture of the wooden bench and the papery husks of the corn. The arrangement includes large, medium, and small pumpkins, which creates a sense of rhythm and keeps the eye moving throughout the composition. It feels abundant and thoughtfully curated.
“You can achieve this rustic, layered look without spending a lot.”
The wooden bench is the star here. You can often find old, weathered benches for a steal on Facebook Marketplace or at a garage sale. A little bit of wear and tear only adds to the charm. For the decor, supplement a few store-bought pumpkins with natural elements. Dried corn stalks can often be acquired for free from a local farm after the harvest, and pinecones or colorful autumn leaves from your own yard make perfect, no-cost fillers.
32. Experiment with Unique and Abstract Pumpkin Carvings
To create a truly unique carved pumpkin, think beyond the face. Some of the most stunning designs are abstract or geometric. Try carving repeating patterns, like chevrons, polka dots, or even a leafy vine that wraps around the pumpkin. Another great idea is to use the pumpkin’s natural shape as your guide. Let the ridges and bumps suggest a pattern to you. These more artistic carvings can feel more sophisticated and work well with modern home decor.
“Intricate carving designs look amazing, but they are structurally weak.”
The more delicate and detailed your cuts are, the faster the pumpkin will begin to wilt and sag. Thin, unsupported pieces are the first to go. This type of artistic pumpkin is best carved only a day or two before you want to display it at its peak, like for a party or for Halloween night itself. It is not a design that will look good for two weeks on your porch.
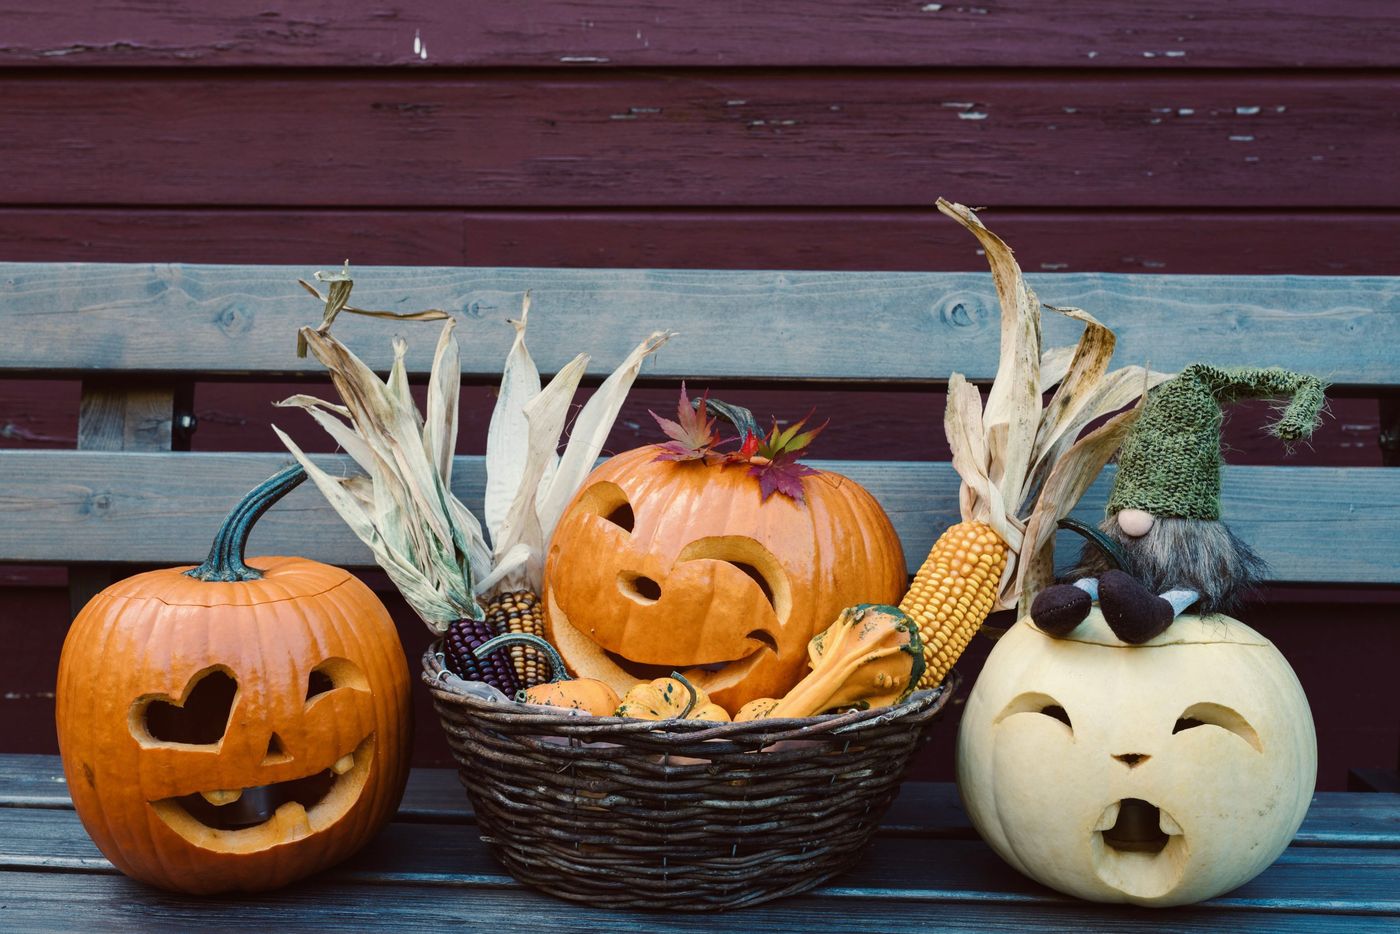
33. Decorated Pumpkins and Corn on a Rustic Bench
Fall decorating in 2026 is seeing a huge emphasis on texture and natural materials. People are moving away from plastic and glitter and towards more organic, tactile decorations. This display, with its mix of bumpy gourds, smooth pumpkins, dried corn, and rustic wood, is a perfect embodiment of this trend. It’s a celebration of the harvest season in its most authentic form, and it brings a sense of warmth and nature into the home or onto the porch.
“This arrangement is successful because of its strong composition.”
The pumpkins and gourds are not just scattered randomly; they are clustered in a tight group that feels intentional. The tall stalks of corn in the background add height and a strong vertical element, which contrasts nicely with the round, low shapes of the pumpkins. This creates a balanced and visually pleasing vignette that feels complete and well-thought-out. It’s a great example of how to arrange decor like a professional stylist.
Your Autumn Masterpiece Awaits
Armed with these ideas, you’re ready to create something that’s uniquely you this fall. Don’t just decorate—make a memory that brings a little warmth and whimsy to your home. Find even more inspiration and save your favorites over on our Pinterest board!