
Still scrolling through Christmas craft ideas on Pinterest without knowing which ones are actually worth making? You’re not alone. The handmade holiday scene is overflowing with options, but not all of them hold up in real life — some are too fussy, some fall apart by December 26th, and some just don’t look as good on your mantel as they did on the screen.
We spent serious time browsing Michaels, Etsy, and Amazon to bring you only what’s worth your attention this year — from a $5 pipe cleaner tree to a $50 wreath upgrade. After filtering through hundreds of projects, we narrowed it down to 25 ideas that actually deliver that cozy, curated, handmade magic without driving you crazy.
Inside, you’ll find 25 curated Christmas craft ideas spanning rustic natural wreaths, whimsical handmade ornaments, elegant neutral decor, and playful kid-friendly projects. And stay until the end — we break down the most common mistakes that can ruin these looks. In 2026, the craft revival continues — more of us are craving hands-on holiday traditions that feel personal and sustainable, not mass-produced. Pinterest searches for ‘Christmas crafts 2026’ are up 40%, driven by a desire for less waste and more meaning. Pin this guide for later — your future self will thank you when it’s time to actually make these.
1. A Handcrafted Wreath with Dried Orange Slices and Cinnamon Star Anise
When working with dried citrus, spray them with a light coat of matte sealant before wiring them on. This prevents the oranges from cracking in dry indoor heat and keeps their vibrant color through January.
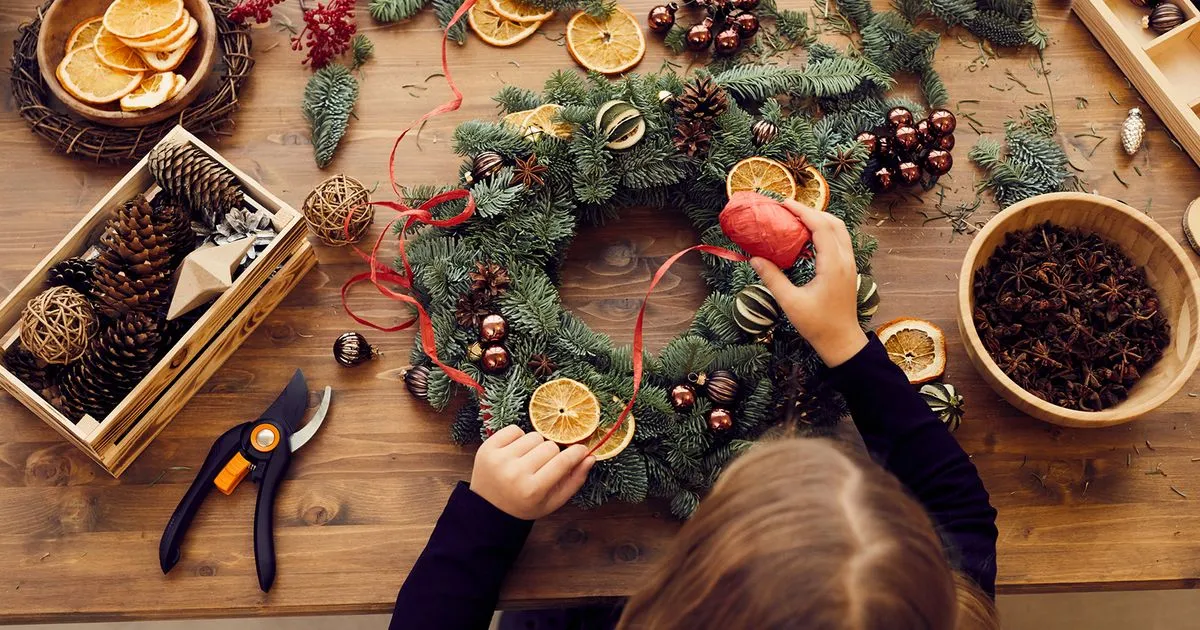
“The star anise isn’t just an accent — it’s the sensory soul of this wreath.”
Without those tiny, dark-brown floral shapes, the wreath would lose its aromatic warmth and the visual contrast with the bright orange slices. They pull the whole arrangement together.
2. The Cozy Crafting Table That Doubles as Holiday Décor
You can recreate this look for any table: 60% natural wood and greenery, 25% handmade paper elements (stars, tags), 15% deep red velvet accents. Swap the red for deep navy or plum if that suits your house better — same formula, different mood. If you’ve already made the wreath in Idea #1, this tabletop arrangement is the perfect staging ground.

“If your crafting table is also your dining table, this look will make you incredibly happy until someone needs to eat breakfast.”
Keep a big tray underneath the main grouping so you can lift the entire display off in one move without dismantling your masterpiece.
3. A White Ceramic Angel Ornament Nestled in Pine Boughs and Twinkling Lights
The single element that elevates this ornament from cute to gallery-worthy is the glossy white ceramic finish against the matte pine needles. Remove that shine, and the angel becomes just another off-white shape.

“Ceramic ornaments are fragile.”
If you have cats or a kid who treats the tree like a jungle gym, hang this angel high. Otherwise, you’ll be gluing wings every December. A felted wool angel might be a safer investment.
4. Candlelit Wreath Crafting by the Window on a December Afternoon
The trend of ‘slow crafting’ — setting aside an afternoon to make decorations while the light fades — is huge on TikTok this year. This scene isn’t just pretty; it’s a mindfulness practice wrapped in tinsel. If you love the botanical wreath from Idea #1 but want a softer, candlelit mood, this candlelit crafting setup is where that wreath was born.

“Position your work surface perpendicular to a large window, not facing it directly.”
The diffused sidelight shows off texture without casting harsh shadows on your hands, making it easier to see where you’re wiring pine sprigs.
5. A Botanical Wreath With Cinnamon Sticks, Berries, and Zesty Orange Slices
- Evergreen wreath base: $8–$15
- Dried orange slices (homemade): $0–$4
- Cinnamon sticks (12-pack): $4–$7
- Artificial red berries: $3–$6
- Pinecones (foraged or purchased): $0–$5
- Velvet ribbon: $3–$5
- Craft wire and tools: $5–$8

“Total: $25–$48”
Total: $25–$48
Budget alternative: use faux greenery from Dollar Tree and cinnamon from the bulk spice section for a total under $20.
This wreath size works best on doors that are at least 32 inches wide. For a compact apartment door, scale down to a 16-inch ring, and use smaller embellishments to keep the proportions right.
6. The Ornament Crafting Station With Red Velvet Ribbon and Twine Spools
You don’t need expensive storage. Mason jars, a thrifted wooden tray, and repurposed thread spools give the same organized look for under $10. The key is grouping by color and texture, not by item type, so the tray looks like decor even before you start crafting.
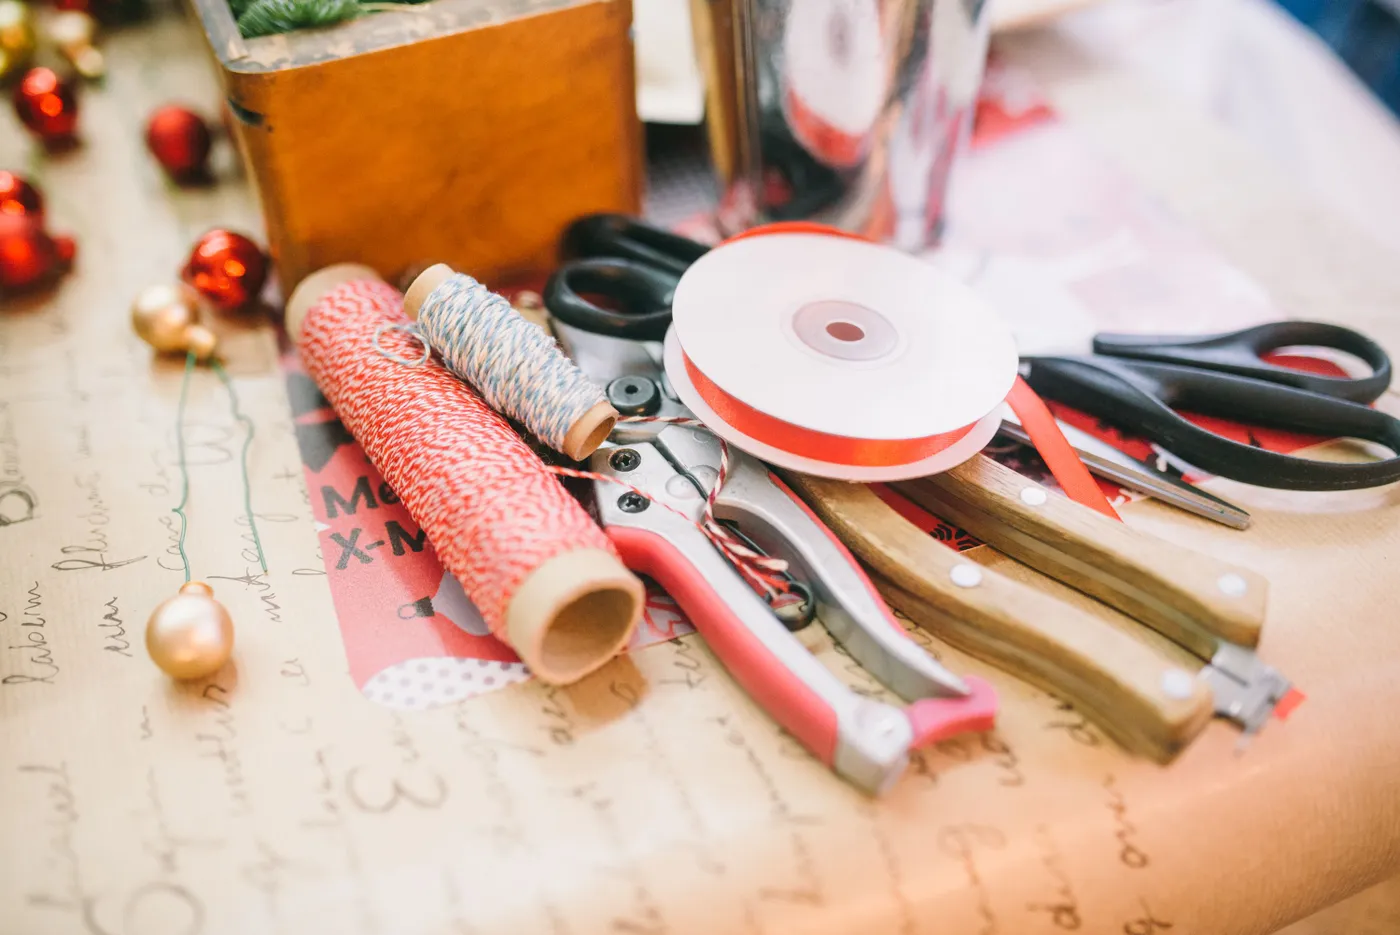
“Start with a flat wooden tray or large cutting board as your base.”
(Time: 2 min, cost: $5)Place all red ornaments together in a shallow bowl or jar, and the gold ones in another. (Time: 3 min)Stand spools of ribbon and baker’s twine upright in a jar with a wide mouth so you can pull lengths easily. (Time: 2 min)Lay out your scissors and wire cutters next to a small dish for scraps. (Time: 1 min)Fill any empty gaps with a few pine branches for scent and color. (Time: 2 min)
Total setup time: about 10 minutes.
7. A Glitter-Dusted Church Craft Nestled Among Striped Wallpaper and Pine
The contrast between the chaotic glitter and the disciplined striped wallpaper is what makes this display so striking. Without the wallpaper’s structure, the church would just look messy.
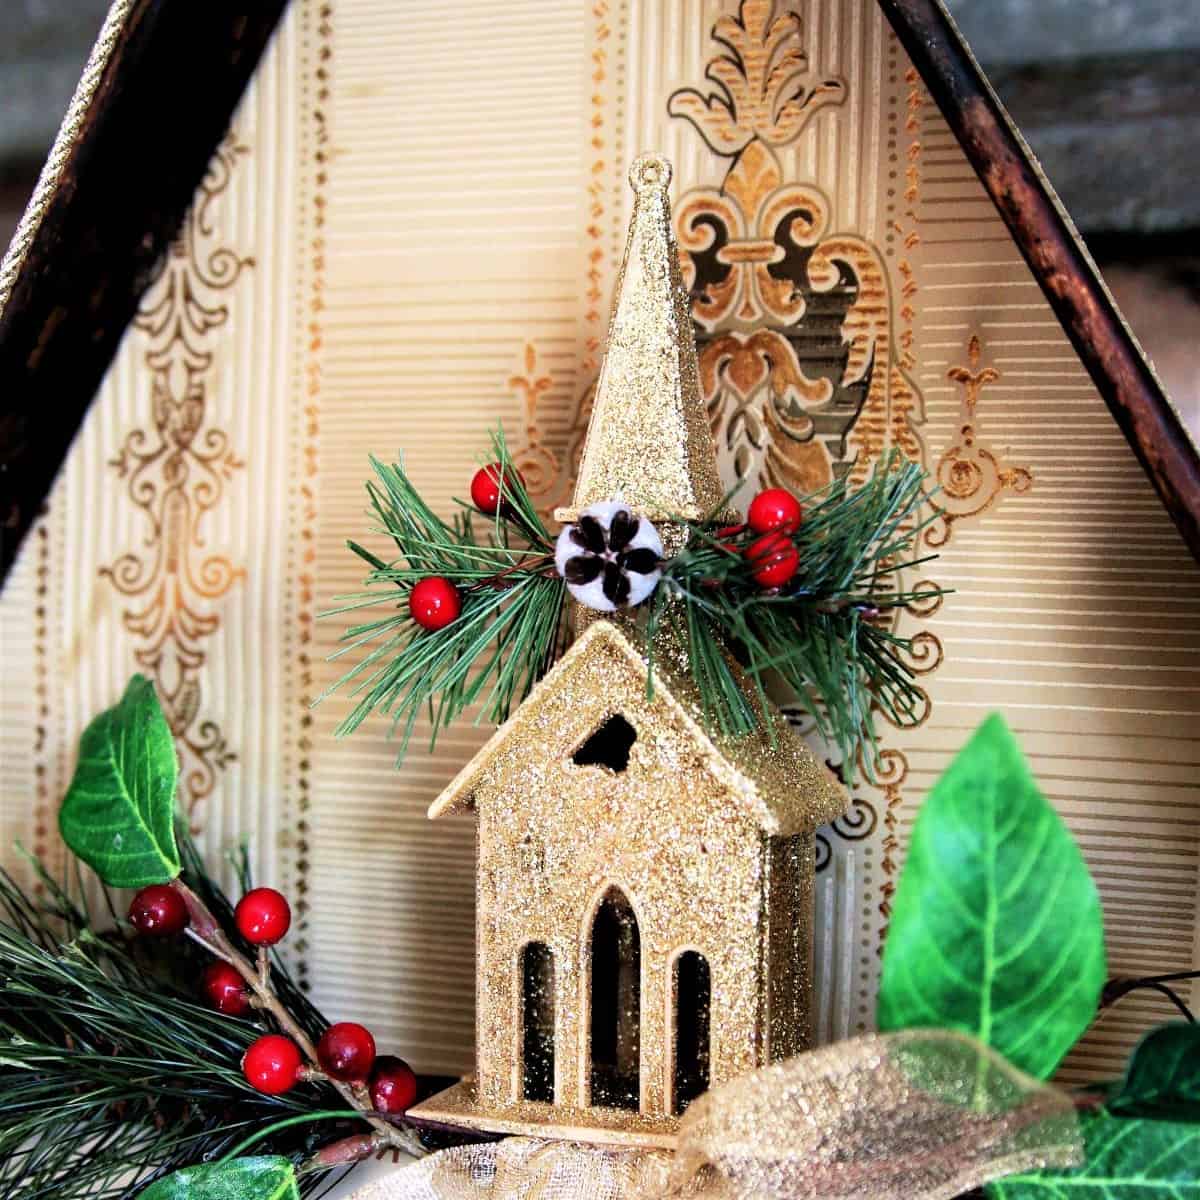
“Glitter.”
It will be on your forehead, in your coffee, and possibly under your eyelids until March. Use a spray adhesive and a crafting tray with high walls to contain the sparkle, or switch to glitter cardstock for the same look with 90% less cleanup.
8. A Child’s Hand Painting a Christmas Village Next to a Wooden Horse
Pre-paint the houses white and let them dry completely before the kids arrive. Then hand them dark-colored paint markers instead of brushes — way less splatter, more control, and the fine tip naturally details windows and doors. While your snowy village dries, keep little hands busy with the simple pipe cleaner tree in Idea #9.
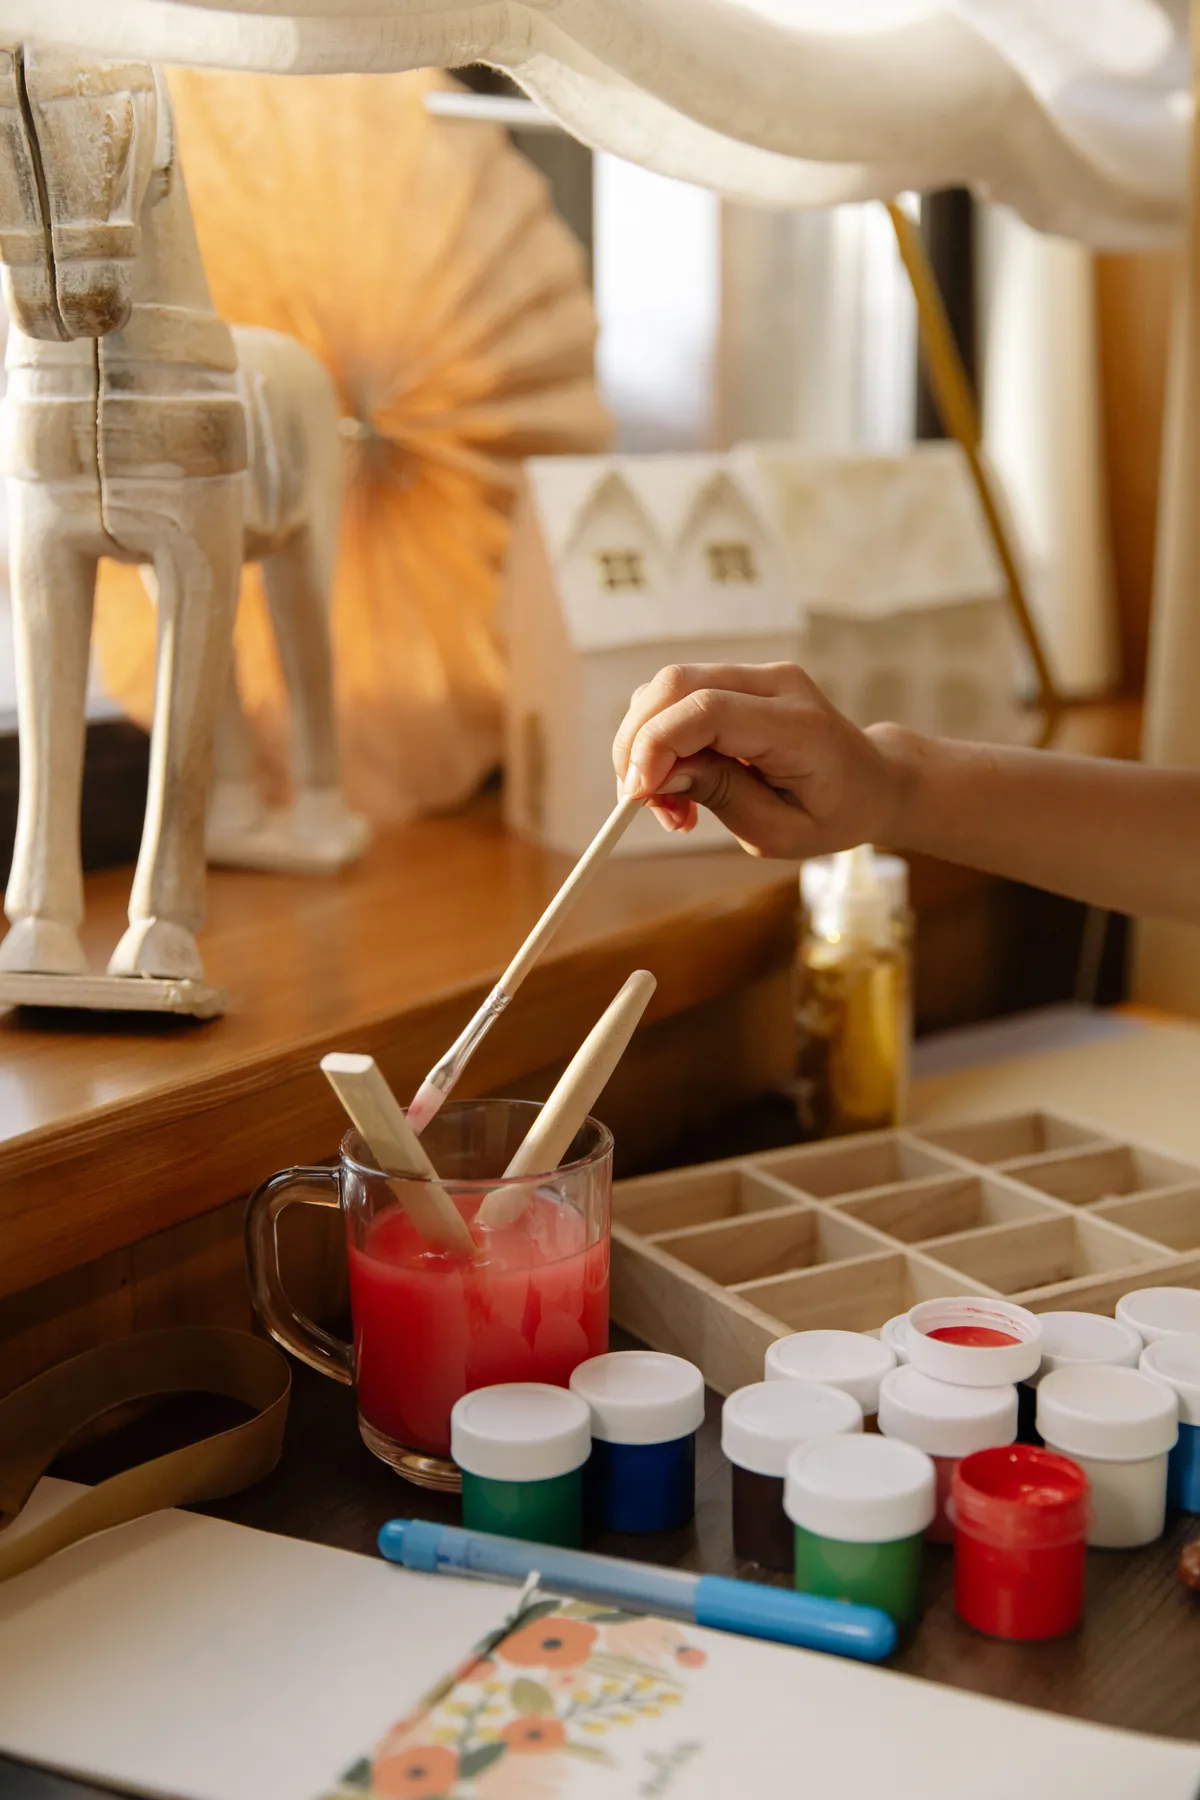
“The wooden horse figurine in the background isn’t a random toy — it grounds the whole project.”
It makes the village feel like a real place with a story, not just a craft.
9. A Tiered Pipe Cleaner Christmas Tree That Brings All the Texture
- Cut 30 green pipe cleaners in half. (Time: 5 min, cost: $2)
- Bend each half into a loop and twist the ends together to secure. (Time: 10 min)
- Wrap a styrofoam cone with a layer of felt to hide the white base. (Time: 2 min, cost: $1)
- Starting at the bottom, push the twisted end of each loop into the cone, packing them tightly so no gaps show. (Time: 15 min)
- Continue up the cone, alternating loop sizes to create the tiered effect. (Time: 5 min)
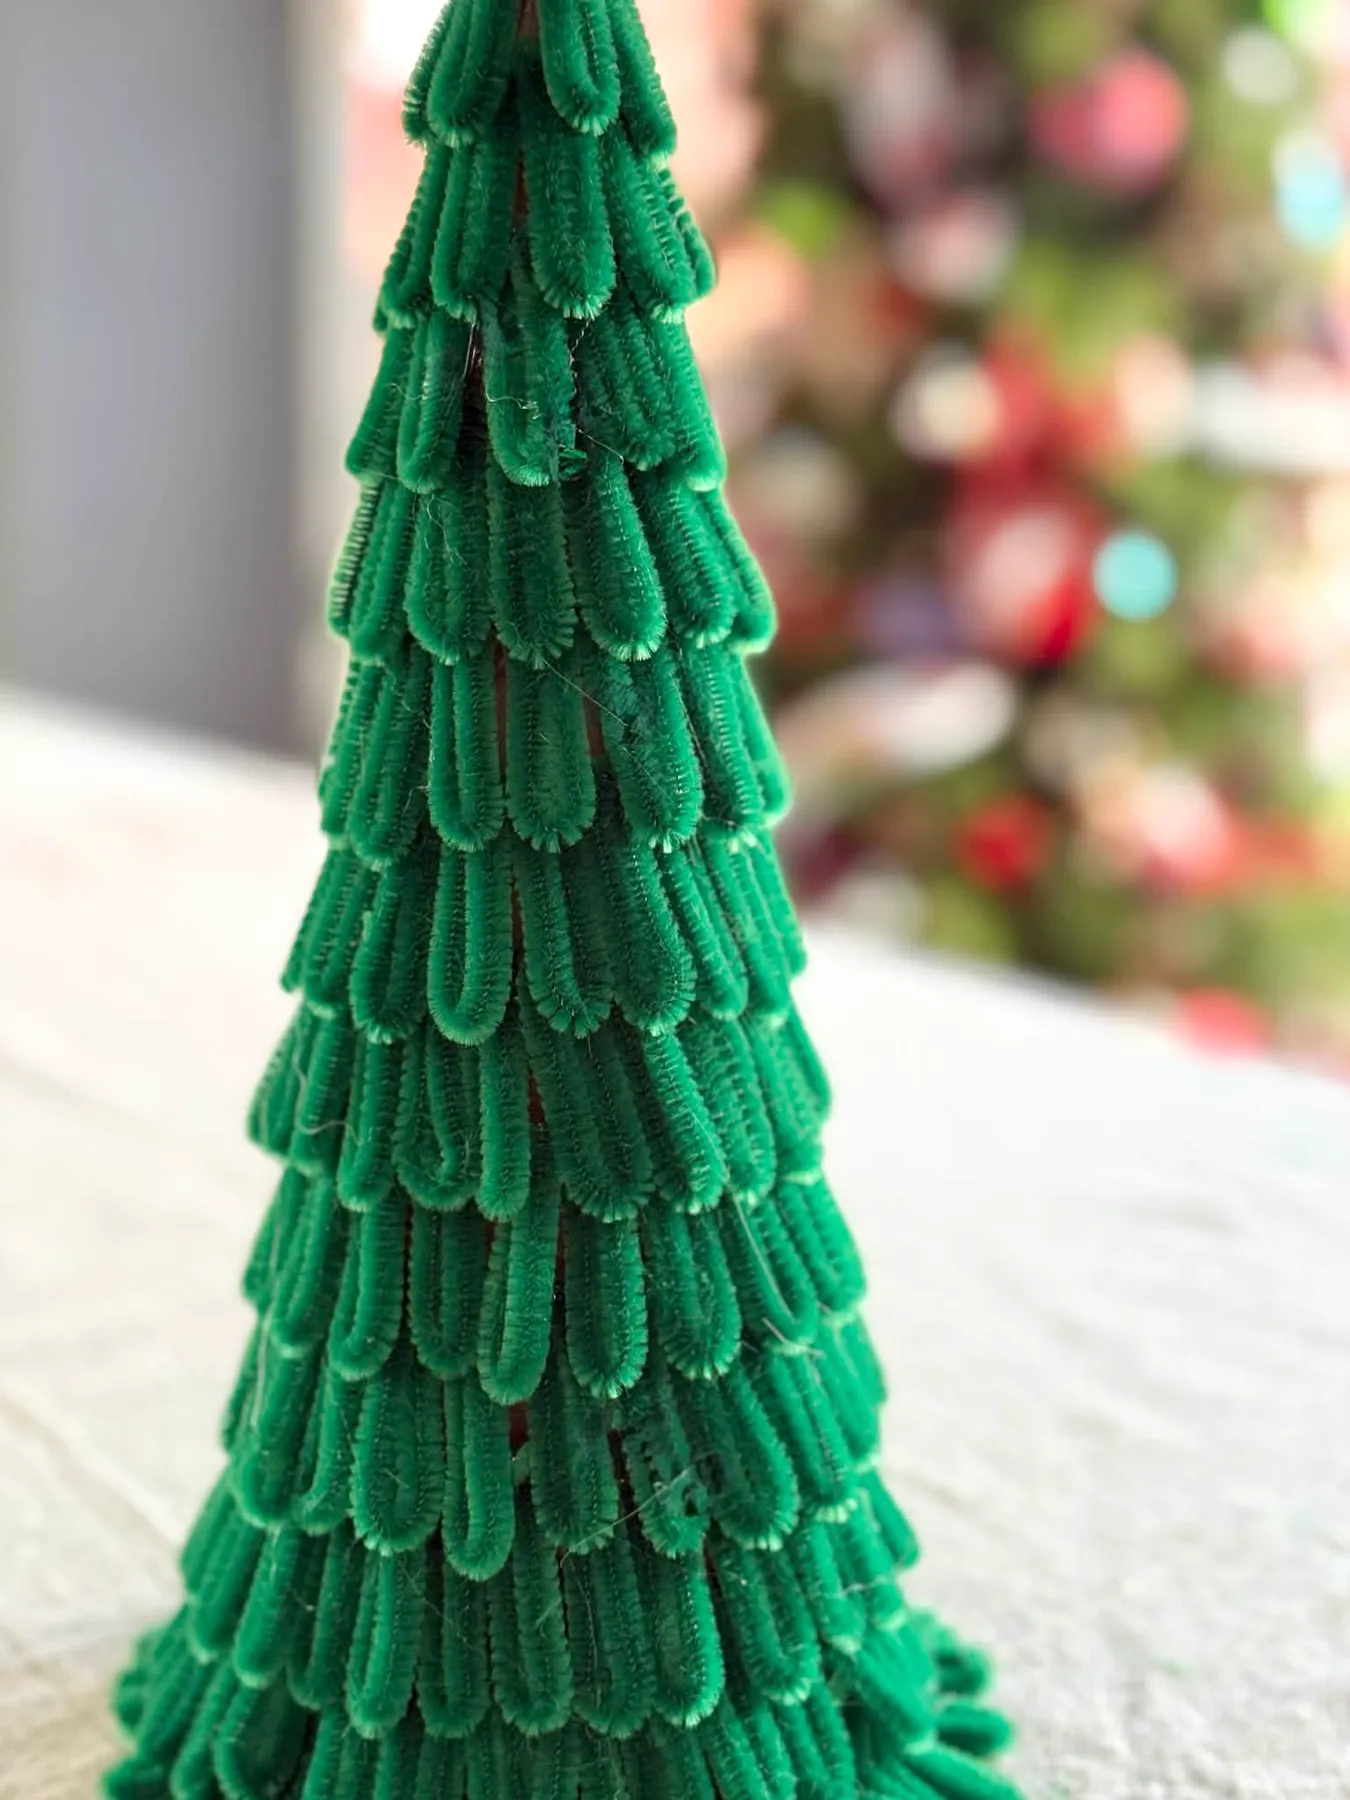
“Total cost: around $3.”
Time: 40 minutes.
10. A Beaded Pipe Cleaner Tree Ornament That Toddlers Can Actually Make
The fact that every bead is different — that joyful patchwork of colors — is what makes this ornament work. It doesn’t try to be symmetrical or perfect, which is exactly the right energy for a preschooler-made keepsake.
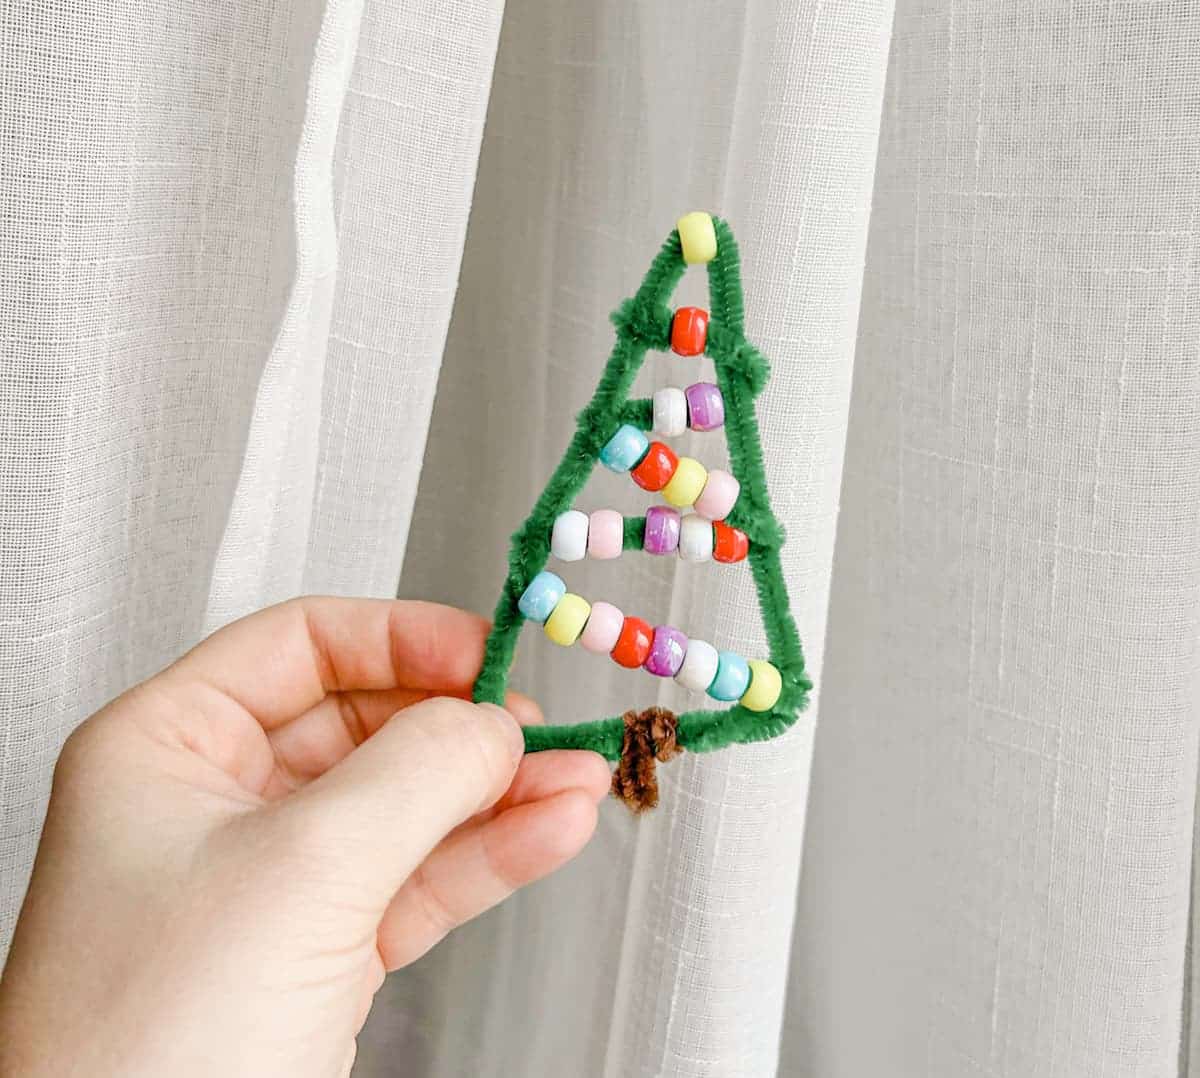
“The plastic beads are virtually indestructible, but the pipe cleaner trunk will bend over time if stuffed in an ornament box.”
Hang it directly on the tree with a hook, or store upright in a mug to keep its shape.
11. Hand-Carved Wooden Mushroom and Evergreen Ornaments on a Dark Plank
The grouping works because of the repetition of organic shapes — the mushrooms echo the layered branches of the trees. Even though they’re different colors, that silhouette repetition creates calm.
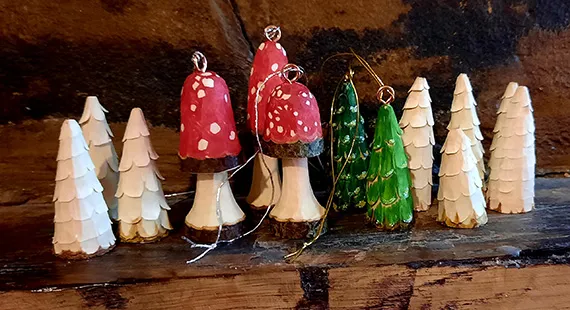
“Hand-carved wooden ornaments are part of the broader ‘slow decor’ movement where people invest in heirloom-quality pieces instead of disposable glitter.”
On Etsy, these handcrafted mushroom ornaments are selling out by mid-November.
12. A Glitter Gold Reindeer Ornament With Googly Eyes and Pom-Pom Nose
You can get this exact look for under $3. Grab a plain gold ornament from Target’s Bullseye’s Playground, a pack of googly eyes from the dollar store, a red pom-pom, and two brown pipe cleaners. Hot glue everything in under three minutes. Compared to the delicate glass angel in Idea #25, this reindeer is practically indestructible.

“The googly eyes are what take this from ‘neighbor’s craft fail’ to ‘genuinely ch”
The googly eyes are what take this from ‘neighbor’s craft fail’ to ‘genuinely charming.’ Their slight wiggle gives the reindeer a personality that painted-on eyes never could.
13. A Purple Paisley Paper Fan Ornament Hanging Among Twinkling Lights
50% rich pattern (paisley), 30% tactile texture (fan folds), 20% reflective light play (from the string lights). If purple isn’t your color, a deep emerald or teal paisley would be just as stunning.
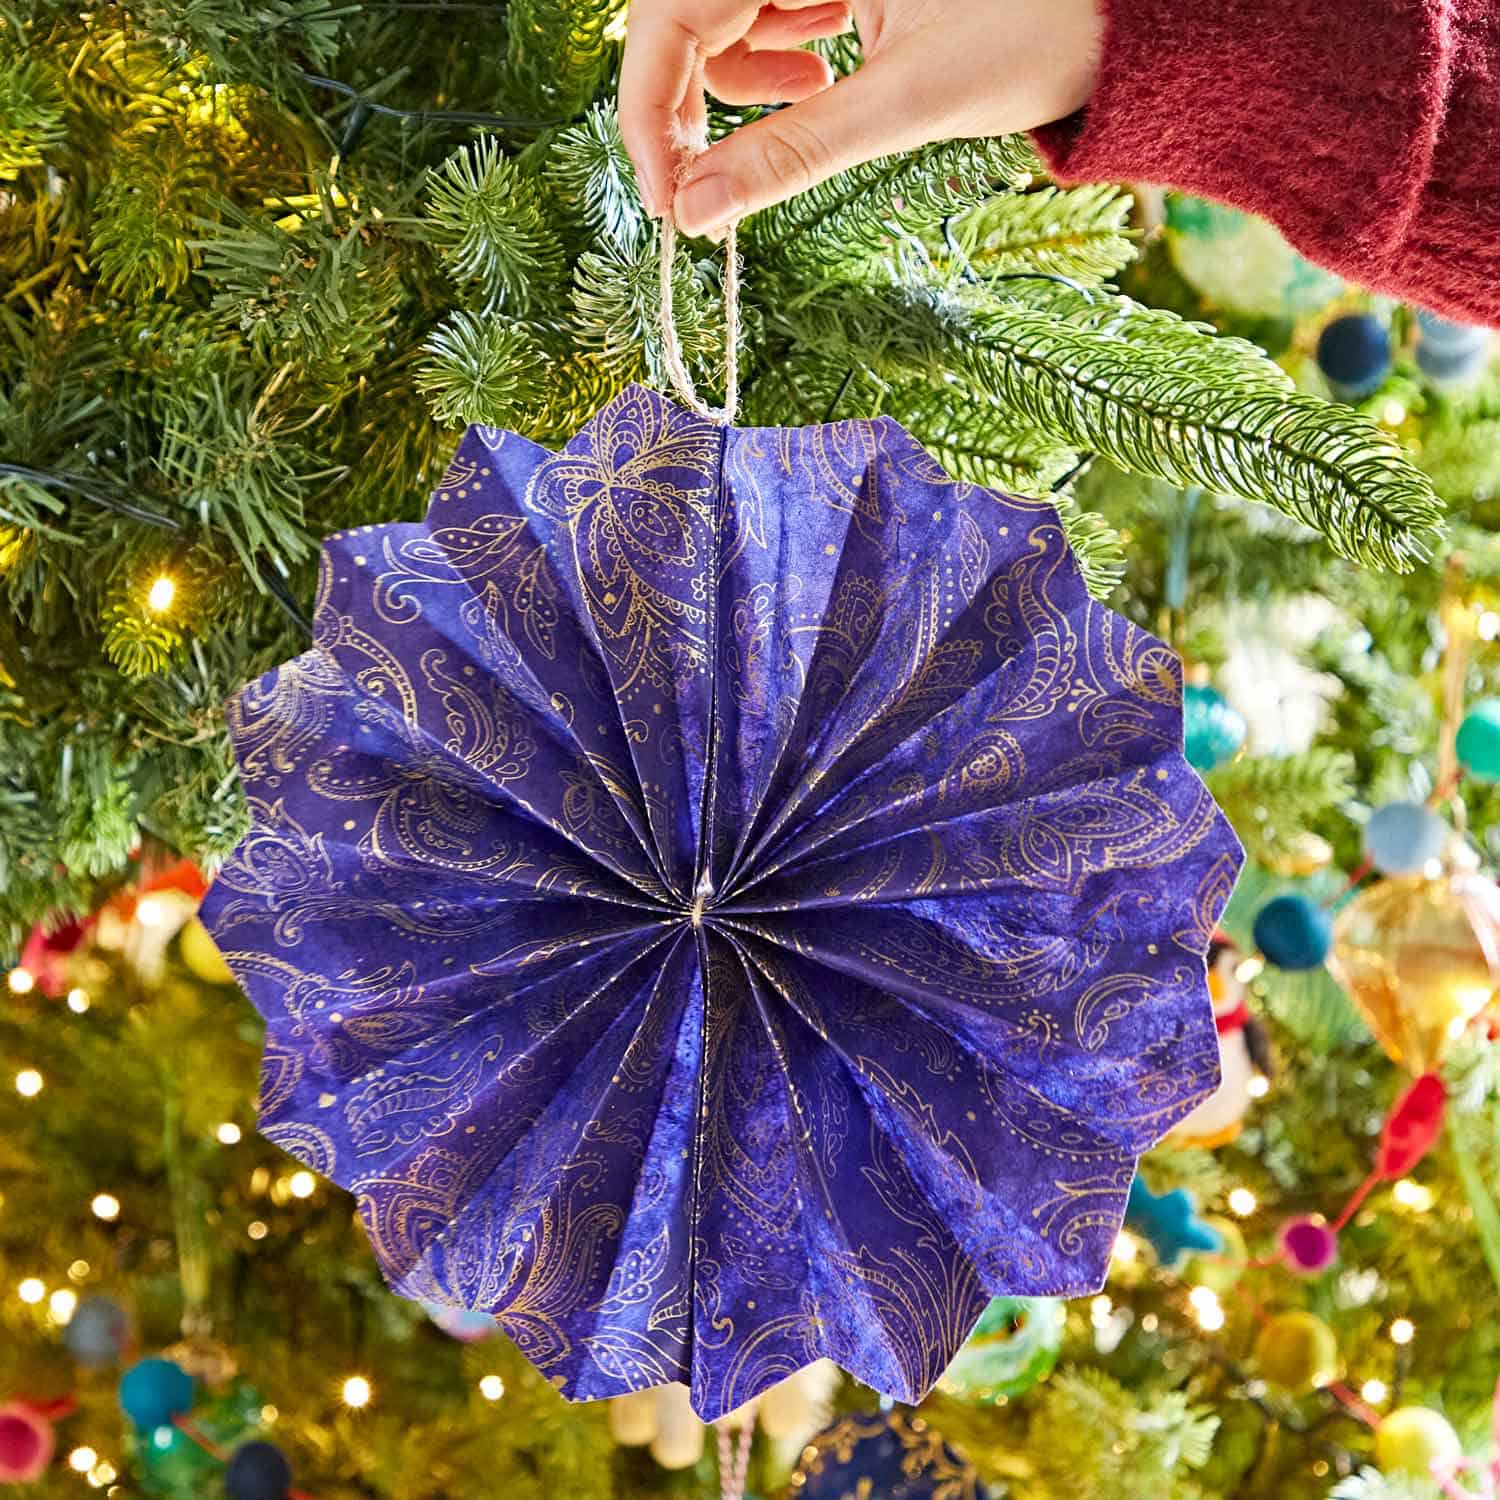
“Cut two 6×12-inch rectangles of decorative scrapbook paper.”
(Time: 1 min)Accordion-fold each rectangle in ½-inch increments. (Time: 3 min)Fold each fan in half and glue the center edges together to form a half-circle. (Time: 2 min)Glue the two half-circles together to make a full circle, and add a ribbon loop for hanging. (Time: 2 min)
Cost: under $1 per ornament.
14. Silver Embossed Metal Ornaments — An Angel, a Bird, and a Star on Branch
Silver-plated metal can tarnish if stored in a damp basement. Polish them with a jeweler’s cloth before hanging each year. For a worn-in look that’s equally lovely, just let them patina naturally.

“Hang metal ornaments near lights, not in dark corners — the embossing catches and scatters tiny glints differently than smooth metallics.”
Position a warm LED fairy light directly above them for a dramatic effect.
15. A Felt Seagull Ornament Perched on Pine Next To Buoys
- Felt sheets in white, gray, yellow: $3–$5
- Embroidery thread and needle: $3
- Polyester stuffing: $2–$4
- Two decorative buoys (or DIY with foam balls and paint): $5–$15
- Pine branch (from yard): free
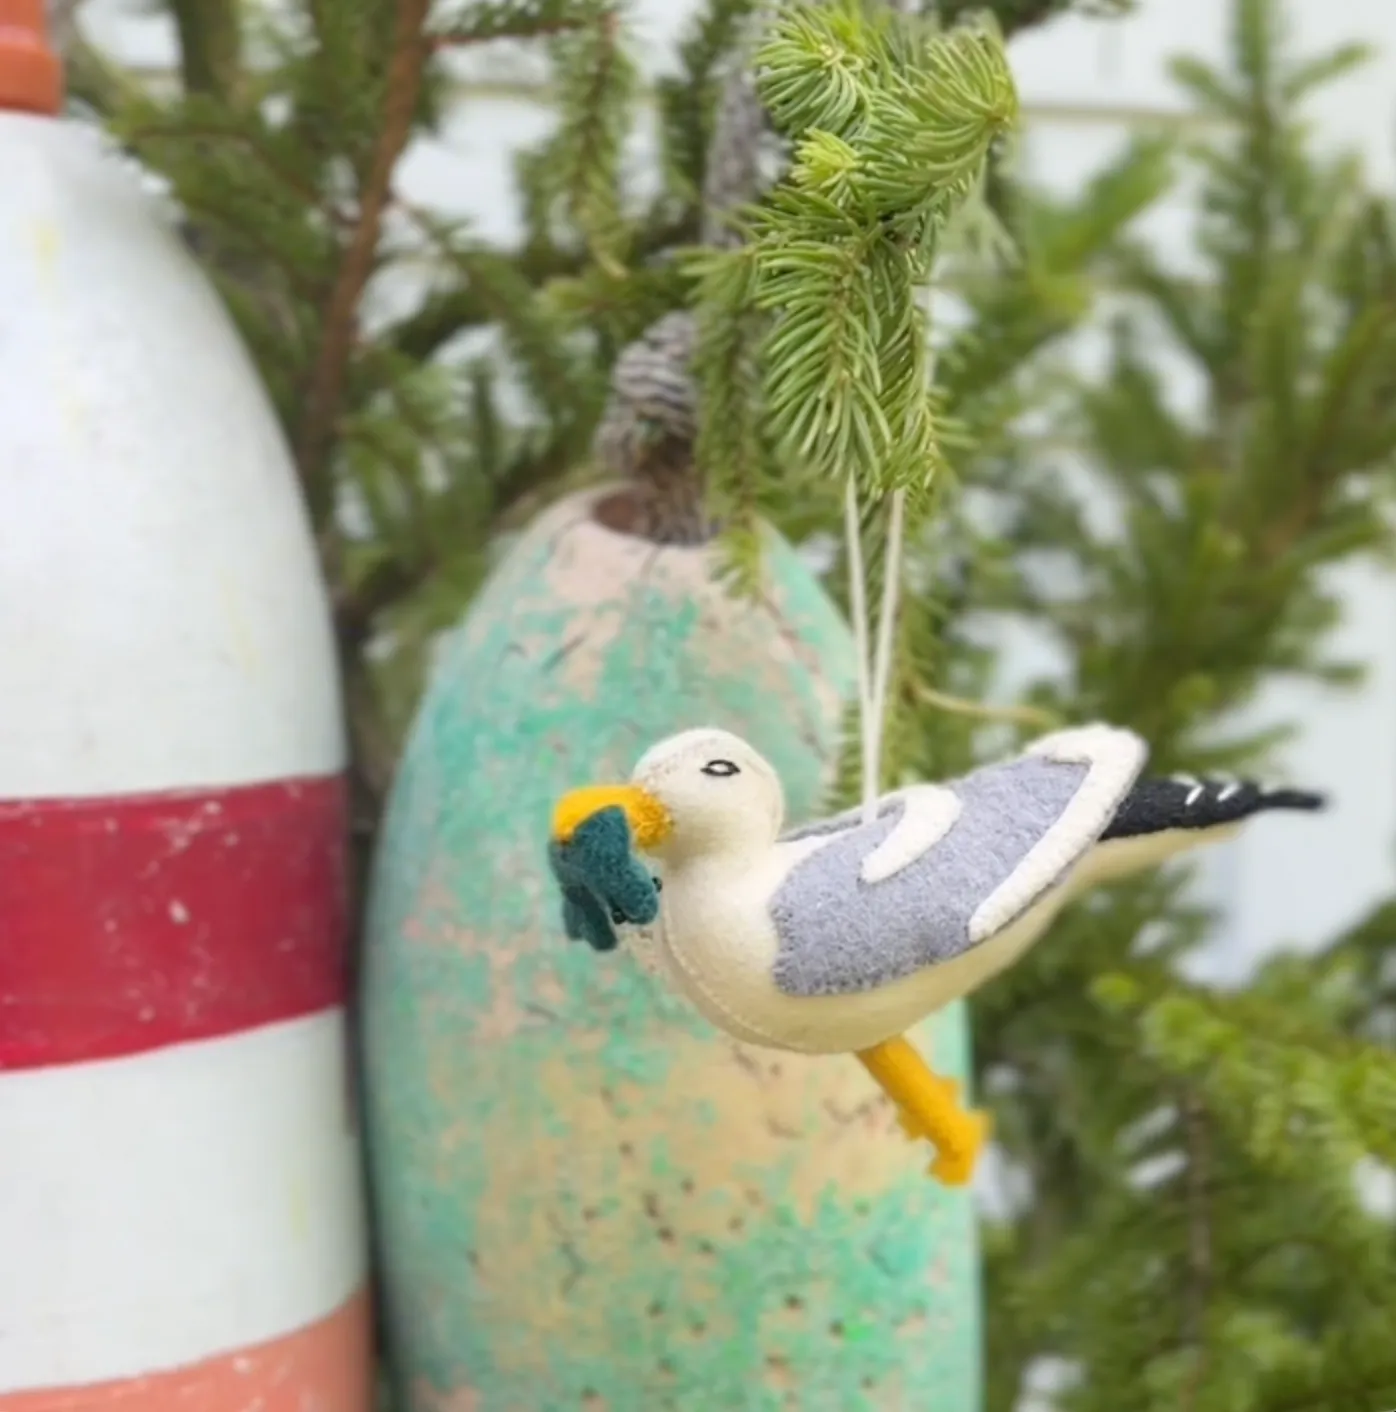
“Total: $13–$27”
Total: $13–$27
Budget alternative: cut buoys from painted cardboard tubes and suspend with twine for a coastal vibe under $10.
These nautical ornaments pair beautifully with the kraft paper gift wrap in Idea #17 for a coastal Christmas theme.
16. Three Light-Up Gnomes With Striped Hats and Dangling Legs
To get the perfect light-up gnome, use battery-operated LED fairy lights tucked inside the beard fabric — not a bulky light strand. The diffuse glow makes it look magical, not like a construction site safety vest.
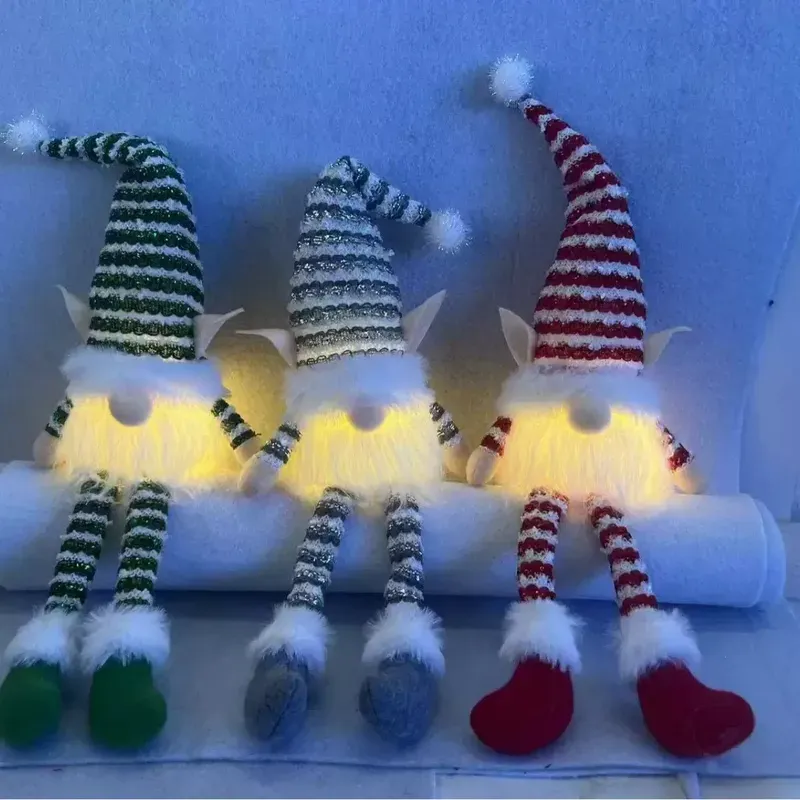
“The dangling legs are adorable until a curious toddler grabs them and pulls the whole gnome off the mantel.”
Use poster tack under the base to anchor these guys on shelves, especially if you have cats who like to investigate fluffy things.
17. Kraft Paper Gifts Adorned With Frosted Pinecones and Velvet Ribbon
The pairing of humble craft paper with luxurious velvet ribbon is a perfect high-low moment. The rough, organic texture of the paper makes the velvet feel even richer by contrast.

“If you’re mailing these gifts, the pinecone decorations will likely arrive as a crushed mess.”
Save this wrapping style for hand-delivered presents or place a photo of the wrapped gift inside the shipping box instead.
18. A Neutral Elegance Tree With Metallic Ornaments and Mirrored Garland
The formula: 70% neutral metallics (gold, bronze, champagne), 20% greenery, 10% dark accent (charcoal gray walls). The dark backdrop is the secret ingredient that makes the metallics glow.

“In 2026, the move toward ‘quiet luxury’ holiday decor means ditching bright red and embracing nuanced tonal palettes.”
This tree is the poster child.
19. A Frosted Tree Branch Display With Matte Red Ornaments and Warm Glow
The magic isn’t the red ornaments — it’s the frosted texture of the needles. That icy white dusting makes the red ornaments look like berries on a snowy day, not just baubles on plastic.

“To get that real-looking frost, don’t use spray snow in a can.”
Mix Epsom salts with a tiny bit of white craft paint and dab it onto the branches with a sponge. It stays crystalline and doesn’t clump.
20. Tissue Paper Suncatcher Trees and Ornaments in a Sunny Window
- Cut two identical tree shapes from a sheet of clear contact paper, one for each side. (Time: 5 min, cost: $2)
- Remove the backing from one piece and stick small squares of colored tissue paper all over the sticky surface, overlapping slightly. (Time: 10 min)
- Add a yellow tissue paper star at the top. (Time: 1 min)
- Seal with the second piece of contact paper, sticky sides together, and trim the edges. (Time: 3 min)
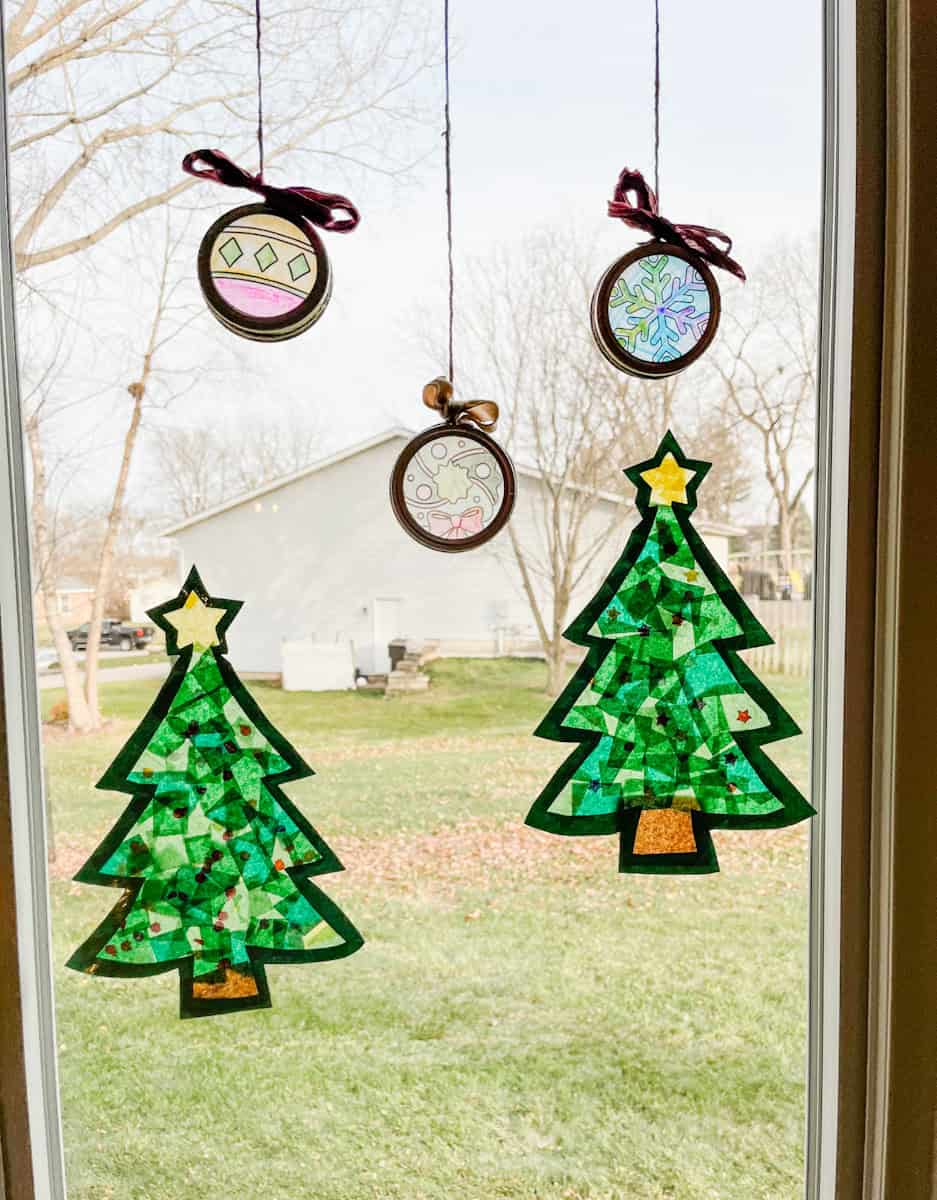
“Total cost: under $3 per suncatcher.”
Time: 20 minutes.
These suncatchers need a window that gets direct morning or afternoon light for at least 2 hours a day. A north-facing window will leave them dull. They also work best 4-6 feet off the ground so the sun hits them at the right angle, not behind the sofa. If you love the color play in these suncatchers but want something more textural, check out the felt ball tree in Idea #21 — same cheerful energy, different materials.
21. A Felt Ball Tree in Shades of Navy and Teal With Bright Pom-Pom Ornaments
Felt balls in bulk from Etsy will run you about $15 for a set of 100, but you can also repurpose old wool sweaters and felt them in the wash for a completely free (and sentimental) version. Check your local thrift store for 100% wool sweaters and throw them in a hot wash cycle.

“When building a felt ball tree, start with a foam cone base and pin the balls on with sewing pins — you can adjust the arrangement easily before committing with glue.”
This lets you play with color gradients without the panic of permanent mistakes.
22. A Rainbow Pipe Cleaner Tree on a Wood Slice, Adorned With Pom-Poms
- Assorted pipe cleaners (pack of 100): $4–$6
- Wood slice (craft store or garden center): $3–$5
- Mini pom-poms (multi-color): $2–$4
- Hot glue sticks: $2
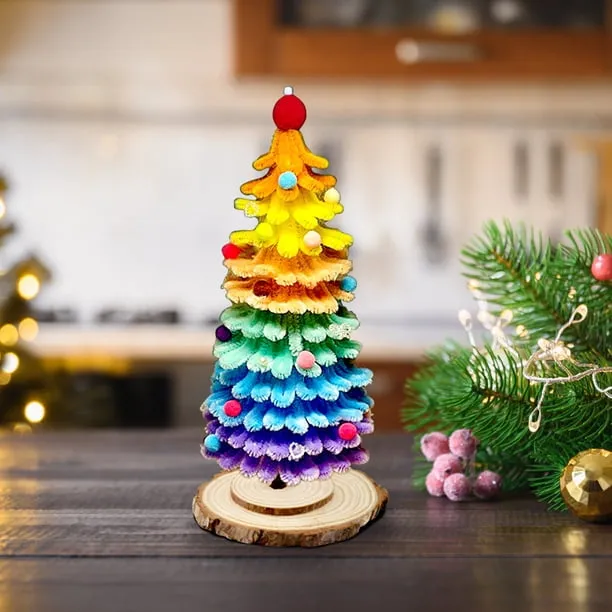
“Total: $11–$17”
Total: $11–$17
Budget alternative: use a thick cardboard circle from a cereal box as the base, and skip the wood slice for a completely free version with materials you already have. If you want an advanced version of the single-color pipe cleaner tree from Idea #9, this rainbow tree takes the concept to the next level.
23. A Vintage Tinsel Tree With White Candle Ornaments and a Red Star Base
The nostalgia trend is massive — tinsel trees that remind people of their grandmother’s 1970s living room are everywhere on Etsy. But the updated twist is the minimalist candle ornaments, which balance the kitsch.
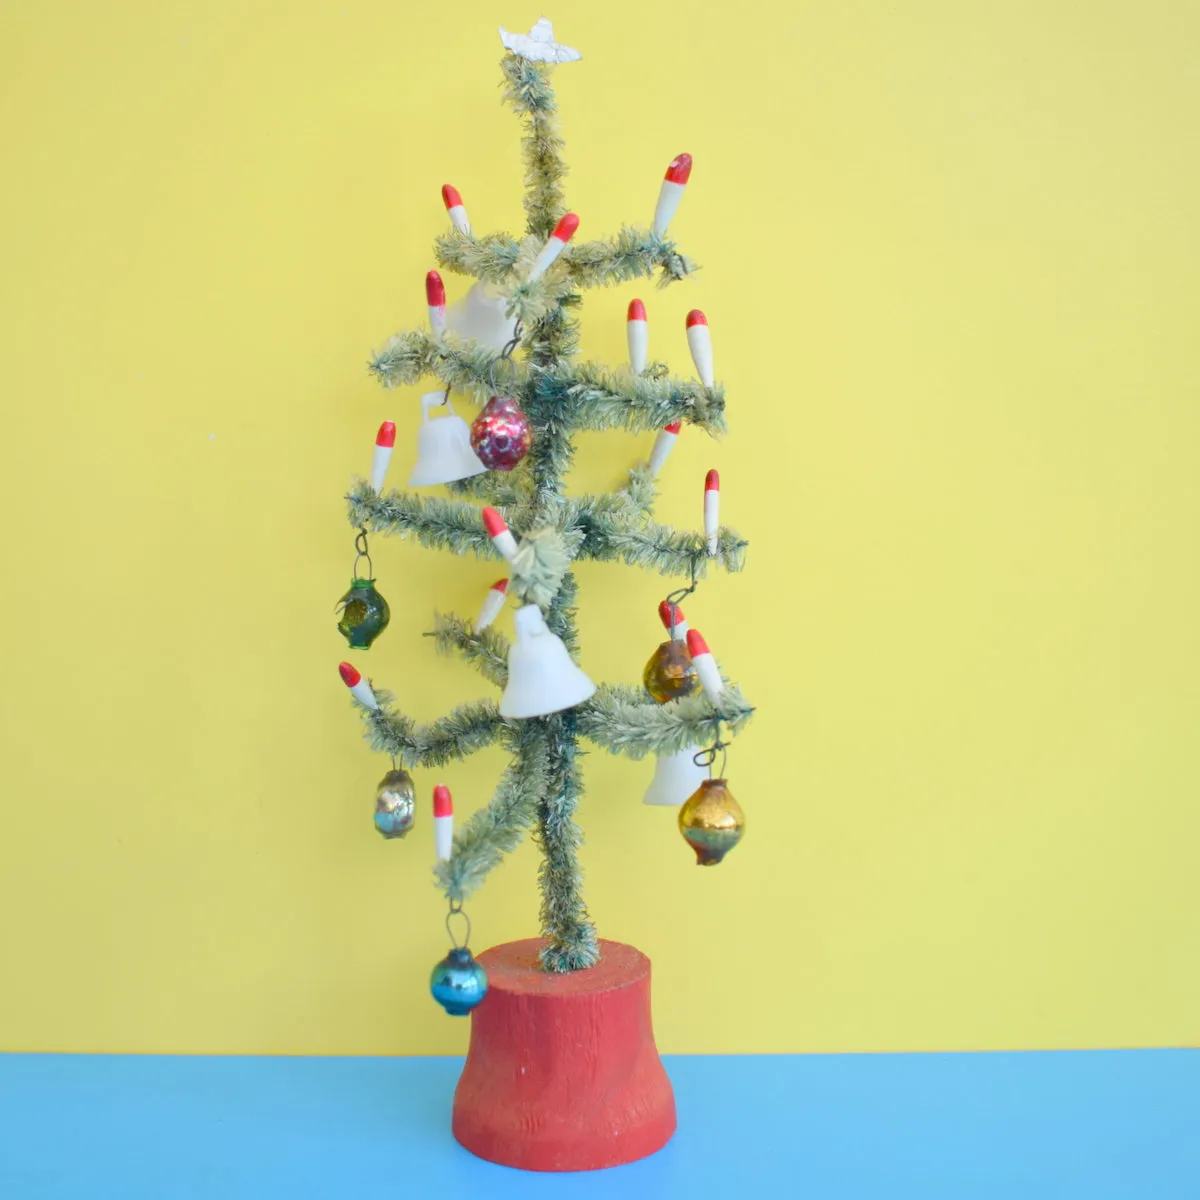
“Tinsel is notorious for tangling.”
Store this tree standing up in a tall, narrow garment bag, never flattened in a box. Or embrace the chaos — a slightly messy tinsel tree feels authentically vintage.
24. Homemade Craft Paper Lanterns With Star Cutouts and Candlelight
- Fold a 12×18-inch sheet of kraft paper in half lengthwise and draw a star on one half. (Time: 2 min)
- Cut out the star through both layers to create a symmetrical cutout. (Time: 3 min)
- Unfold and roll the paper into a cylinder, securing the seam with a glue stick. (Time: 2 min)
- Punch two holes at the top and thread a wire handle through. (Time: 1 min)
- Place a flameless LED tea light inside and enjoy the warm glow through the paper. (Time: 1 min)
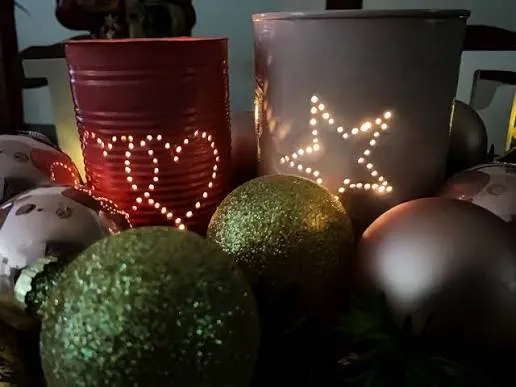
“Cost: about $2 per lantern.”
Time: under 10 minutes.
If you use real candles inside these, you’re essentially building a small paper fire hazard. Stick with LED tea lights that flicker realistically. The craft paper lasts longer too, without scorching.
25. A Glass Angel Ornament With Golden Hair and a Silver Heart on the Branch
The silver heart she’s holding is tiny but crucial. Without that metallic anchor, the angel’s shape would read as a blob of gold and white. That touch of cool silver grounds her whole form.

“When hanging glass ornaments, use clear fishing line instead of ribbon.”
The ornament appears to float weightlessly among the branches, and the line catches the lights like an ethereal thread.
Your Handmade Holiday Starts Right Here
You don’t need a craft room overflowing with expensive supplies — just a few intentional projects that bring your personality to the season. Pick a couple of these ideas to try, and save the rest for next year’s inspiration. 📌 Save this guide to Pinterest and make this the year your holiday decor feels truly yours.