31 Jaw-Dropping Built-In Storage Ideas That Will Transform Your Living Room, Playroom, and Bedroom

It’s a familiar feeling: you’re scrolling through Pinterest, saving image after image of gorgeous, clutter-free homes, and you land on *that* photo. The one with the perfectly seamless, clever built-in storage that looks like it was made just for that space. We’ve curated 31 of the very best built-in storage ideas that deliver on both style and function, from modern farmhouse kitchens to serene minimalist bedrooms. These aren’t just pretty pictures; they are real-world solutions. And stay until the end — we break down the most common mistakes that can ruin these looks. 📌 Save this to Pinterest for later — you’ll want to revisit these ideas.
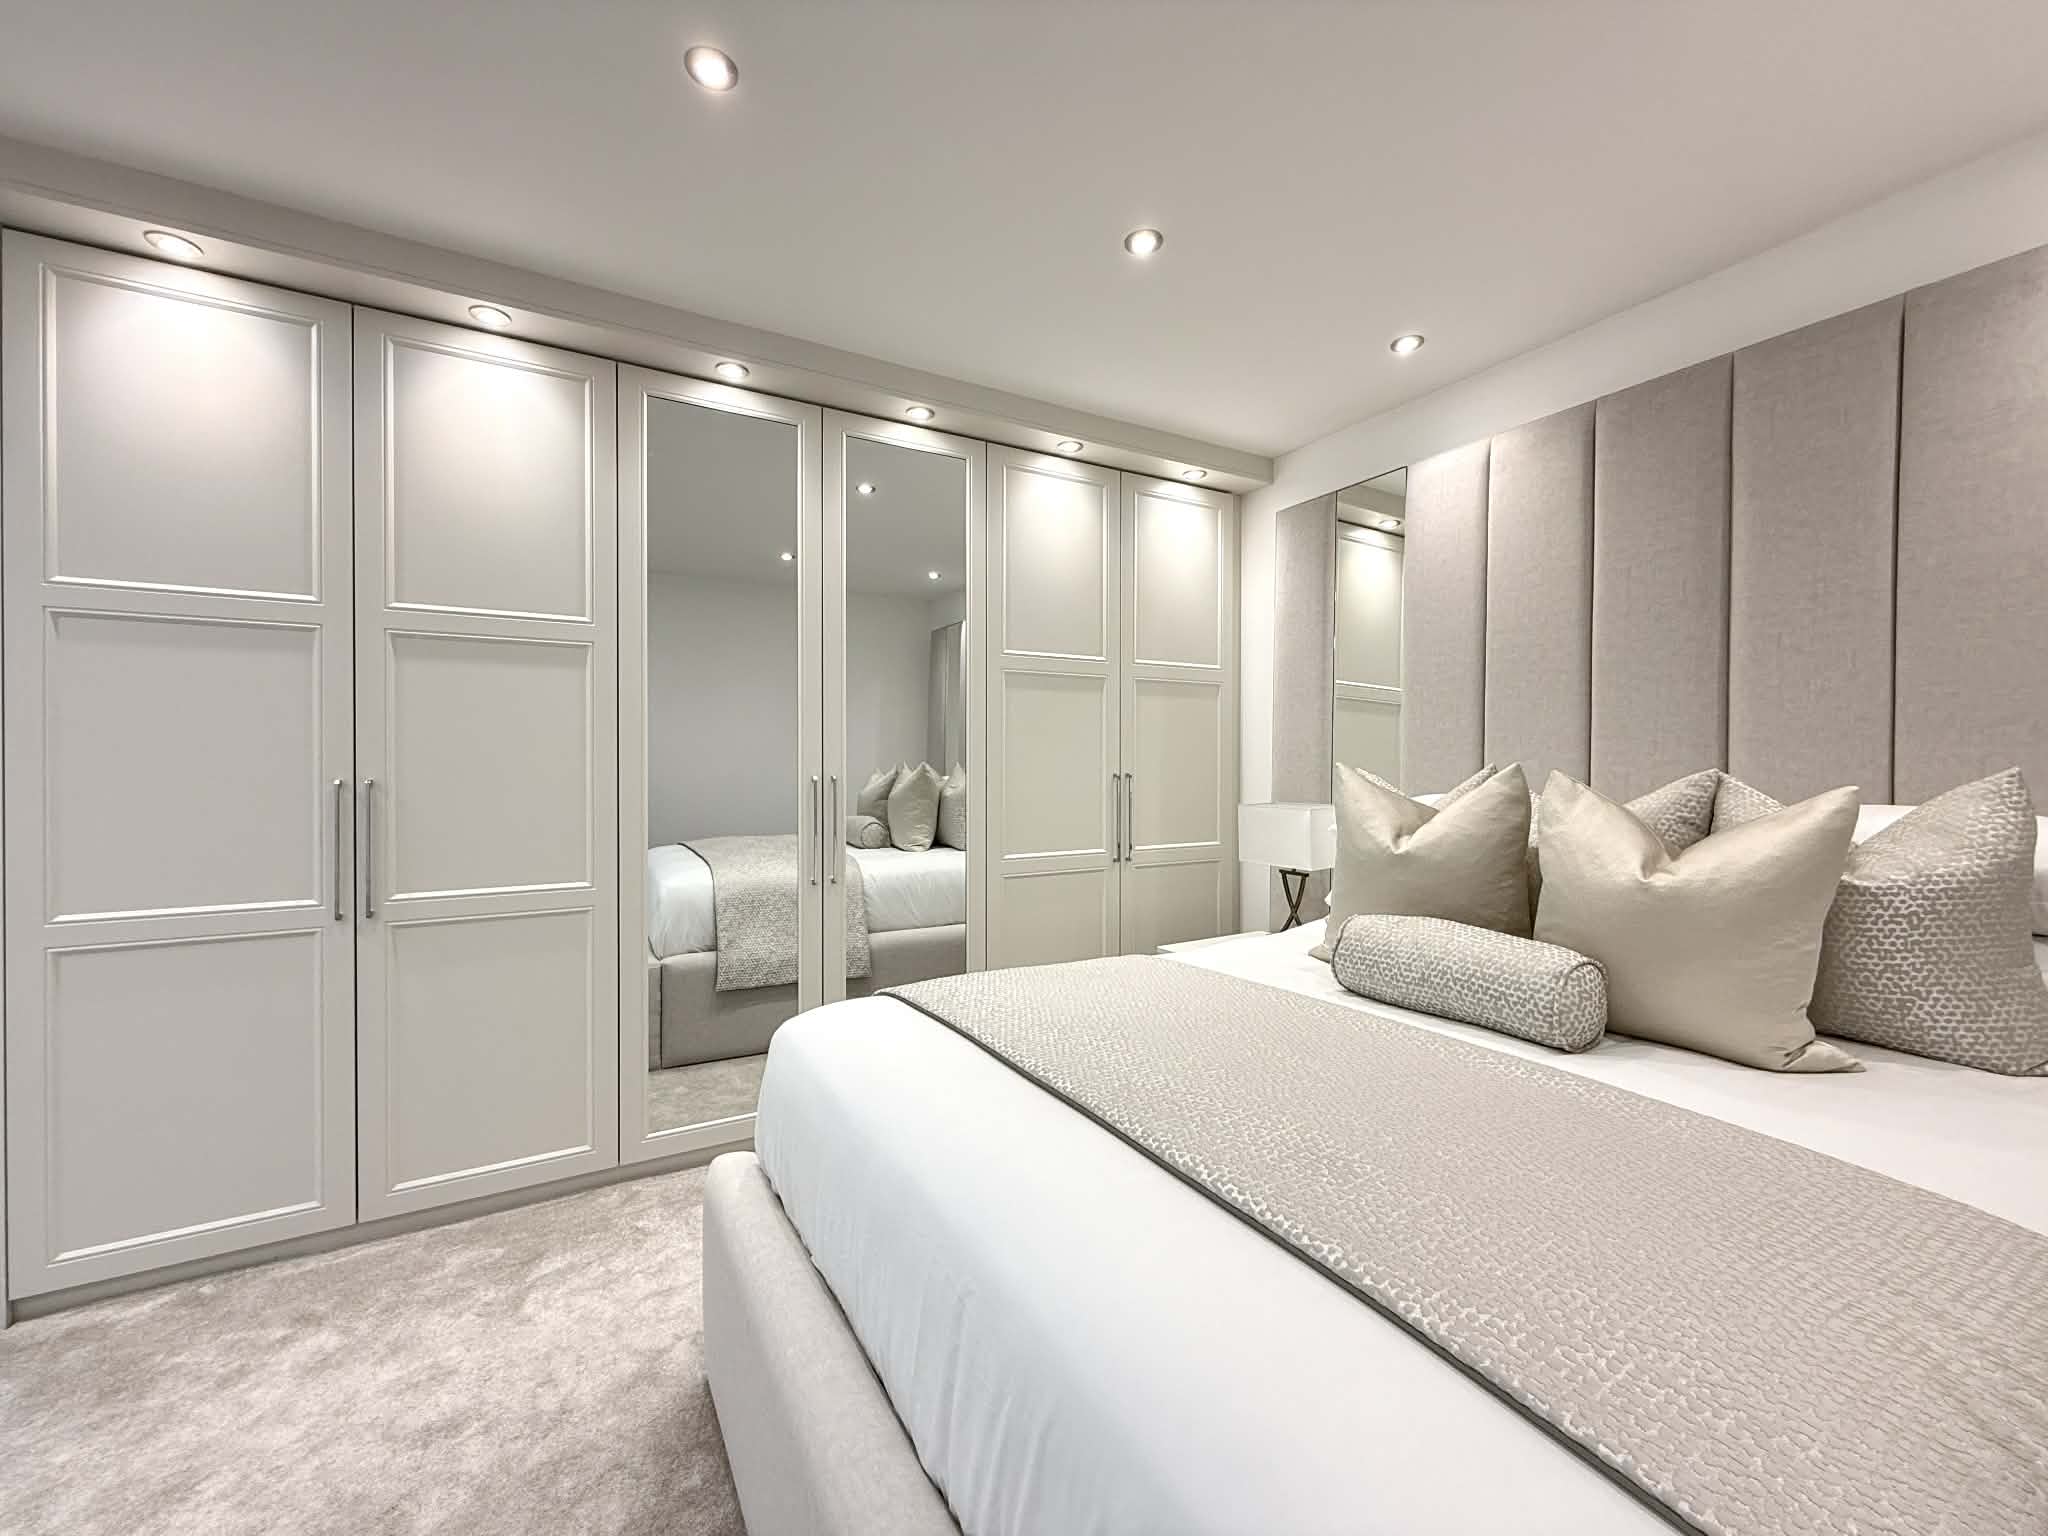
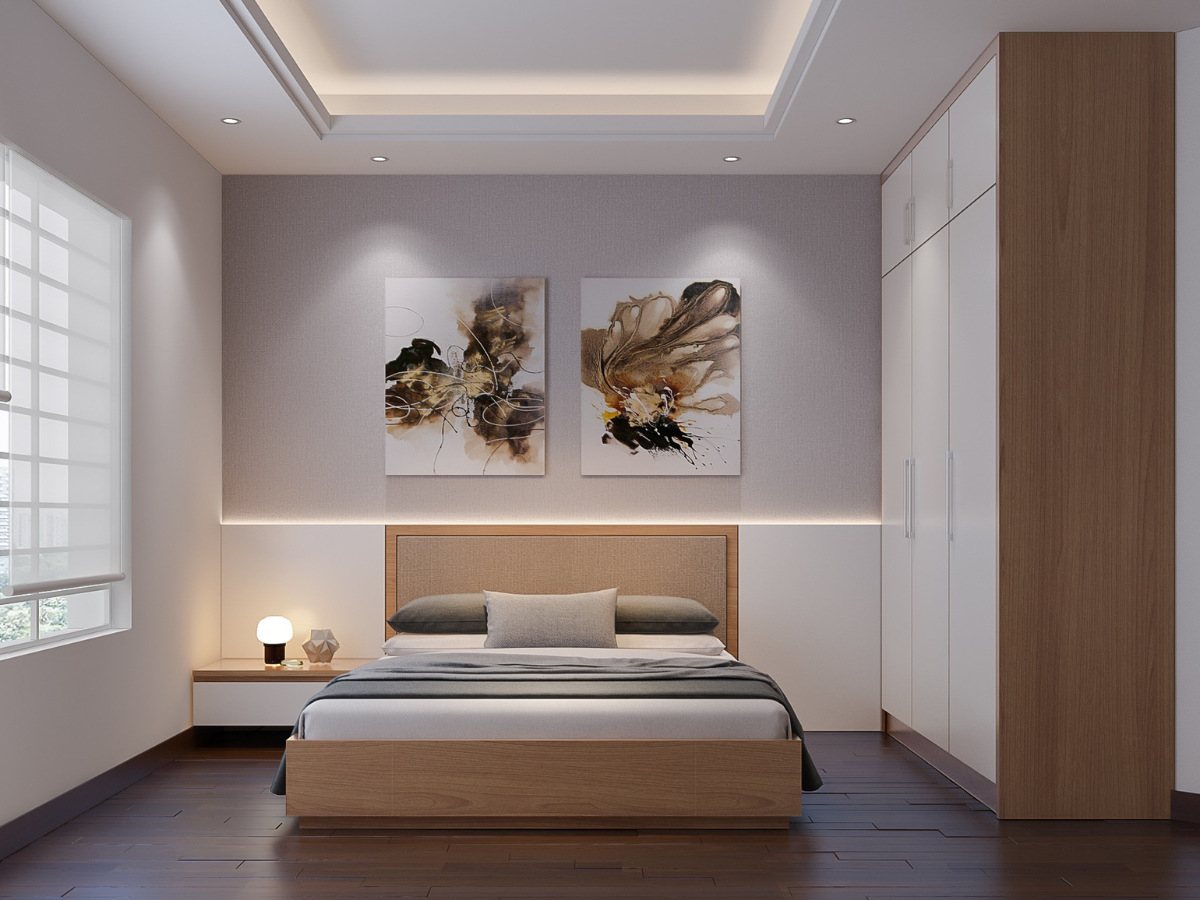
1. Maximize Light with Mirrored Floor-to-Ceiling Wardrobes
To recreate this serene and spacious bedroom look with custom, floor-to-ceiling mirrored wardrobes, you’re investing in a high-impact architectural feature. This isn’t a weekend project, but a professional undertaking with a significant payoff in both organization and style. The costs can vary widely based on materials, labor rates in your area, and the level of interior customization (drawers, dividers, etc.).
“Custom Cabinetry (materials & construction): $7,000 – $15,000
Mirrored Doors”
- Custom Cabinetry (materials & construction): $7,000 – $15,000
- Mirrored Doors: $2,000 – $4,000
- Professional Installation: $1,500 – $3,500
- Integrated Recessed Lighting: $800 – $2,000
- Hardware & Finishes: $300 – $800
- TOTAL: $11,600 – $25,300
- Budget alternative: Get a similar aesthetic using IKEA PAX wardrobes with mirrored doors for roughly $2,500 – $4,500.
The magic here is the dual function of the mirrored doors. They are not merely for checking your outfit; they are a design tool. By reflecting the bed and the rest of the room, they create the illusion of a much larger space, effectively doubling the room’s visual footprint. This is especially powerful in moderately sized bedrooms. The choice of a light, off-white or pale grey finish for the paneling prevents the large unit from feeling heavy and instead makes it feel like a natural extension of the walls. It’s a brilliant blend of utility and light-enhancing design.
2. Create a Statement with a Mint Green Wardrobe & Vanity Nook
When integrating a vanity directly into a wardrobe wall, lighting is everything. To avoid casting shadows on your face, install vertical sconces on either side of the mirror or use a backlit mirror. Aim for a total output of around 1600 lumens for a primary bathroom vanity. Also, consider the depth. A standard wardrobe is 24 inches deep, but your vanity section only needs to be 18-20 inches deep. This slight recession creates a more natural and comfortable nook for sitting.
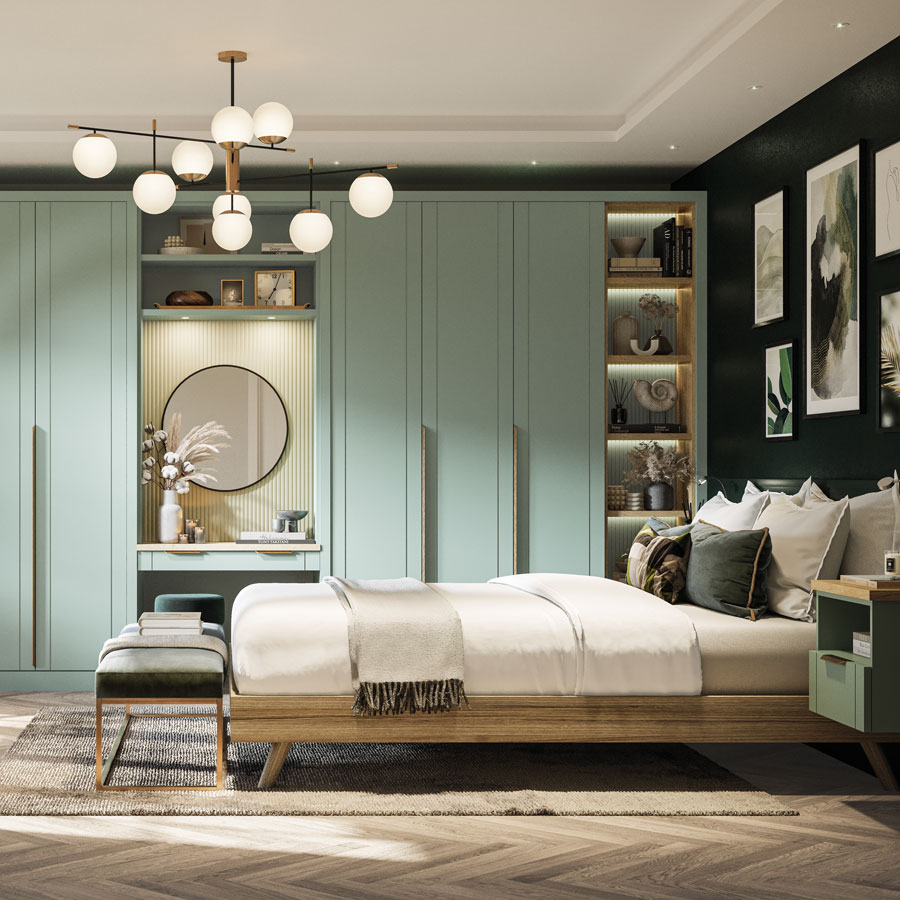
“Hands down, the single element that makes this design work is the color.”
That specific shade of soft mint green is breathtaking. It transforms what could be a monolithic wall of storage into a delicate, personality-rich focal point. It feels bespoke, thoughtful, and serene. Remove the color, and you have a very practical, but standard, storage system. The mint green, paired with the reeded paneling and gold accents, elevates the entire room from simply being organized to being truly designed.
3. Merge Form and Function in a Modern Farmhouse Kitchen
This kitchen’s inviting vibe comes down to a clear visual recipe: 60% neutral cabinetry (the light gray) forms a quiet, sophisticated base. 30% warm wood tones (the exposed ceiling beams and island) bring in natural texture and prevent the gray from feeling cold. Finally, 10% dark contrast (the black countertops and hardware) adds just enough graphic punch to keep it modern. You could exchange the light gray for navy blue and still get a stunning result, as long as you maintain that crucial 60/30/10 balance of base, texture, and accent.
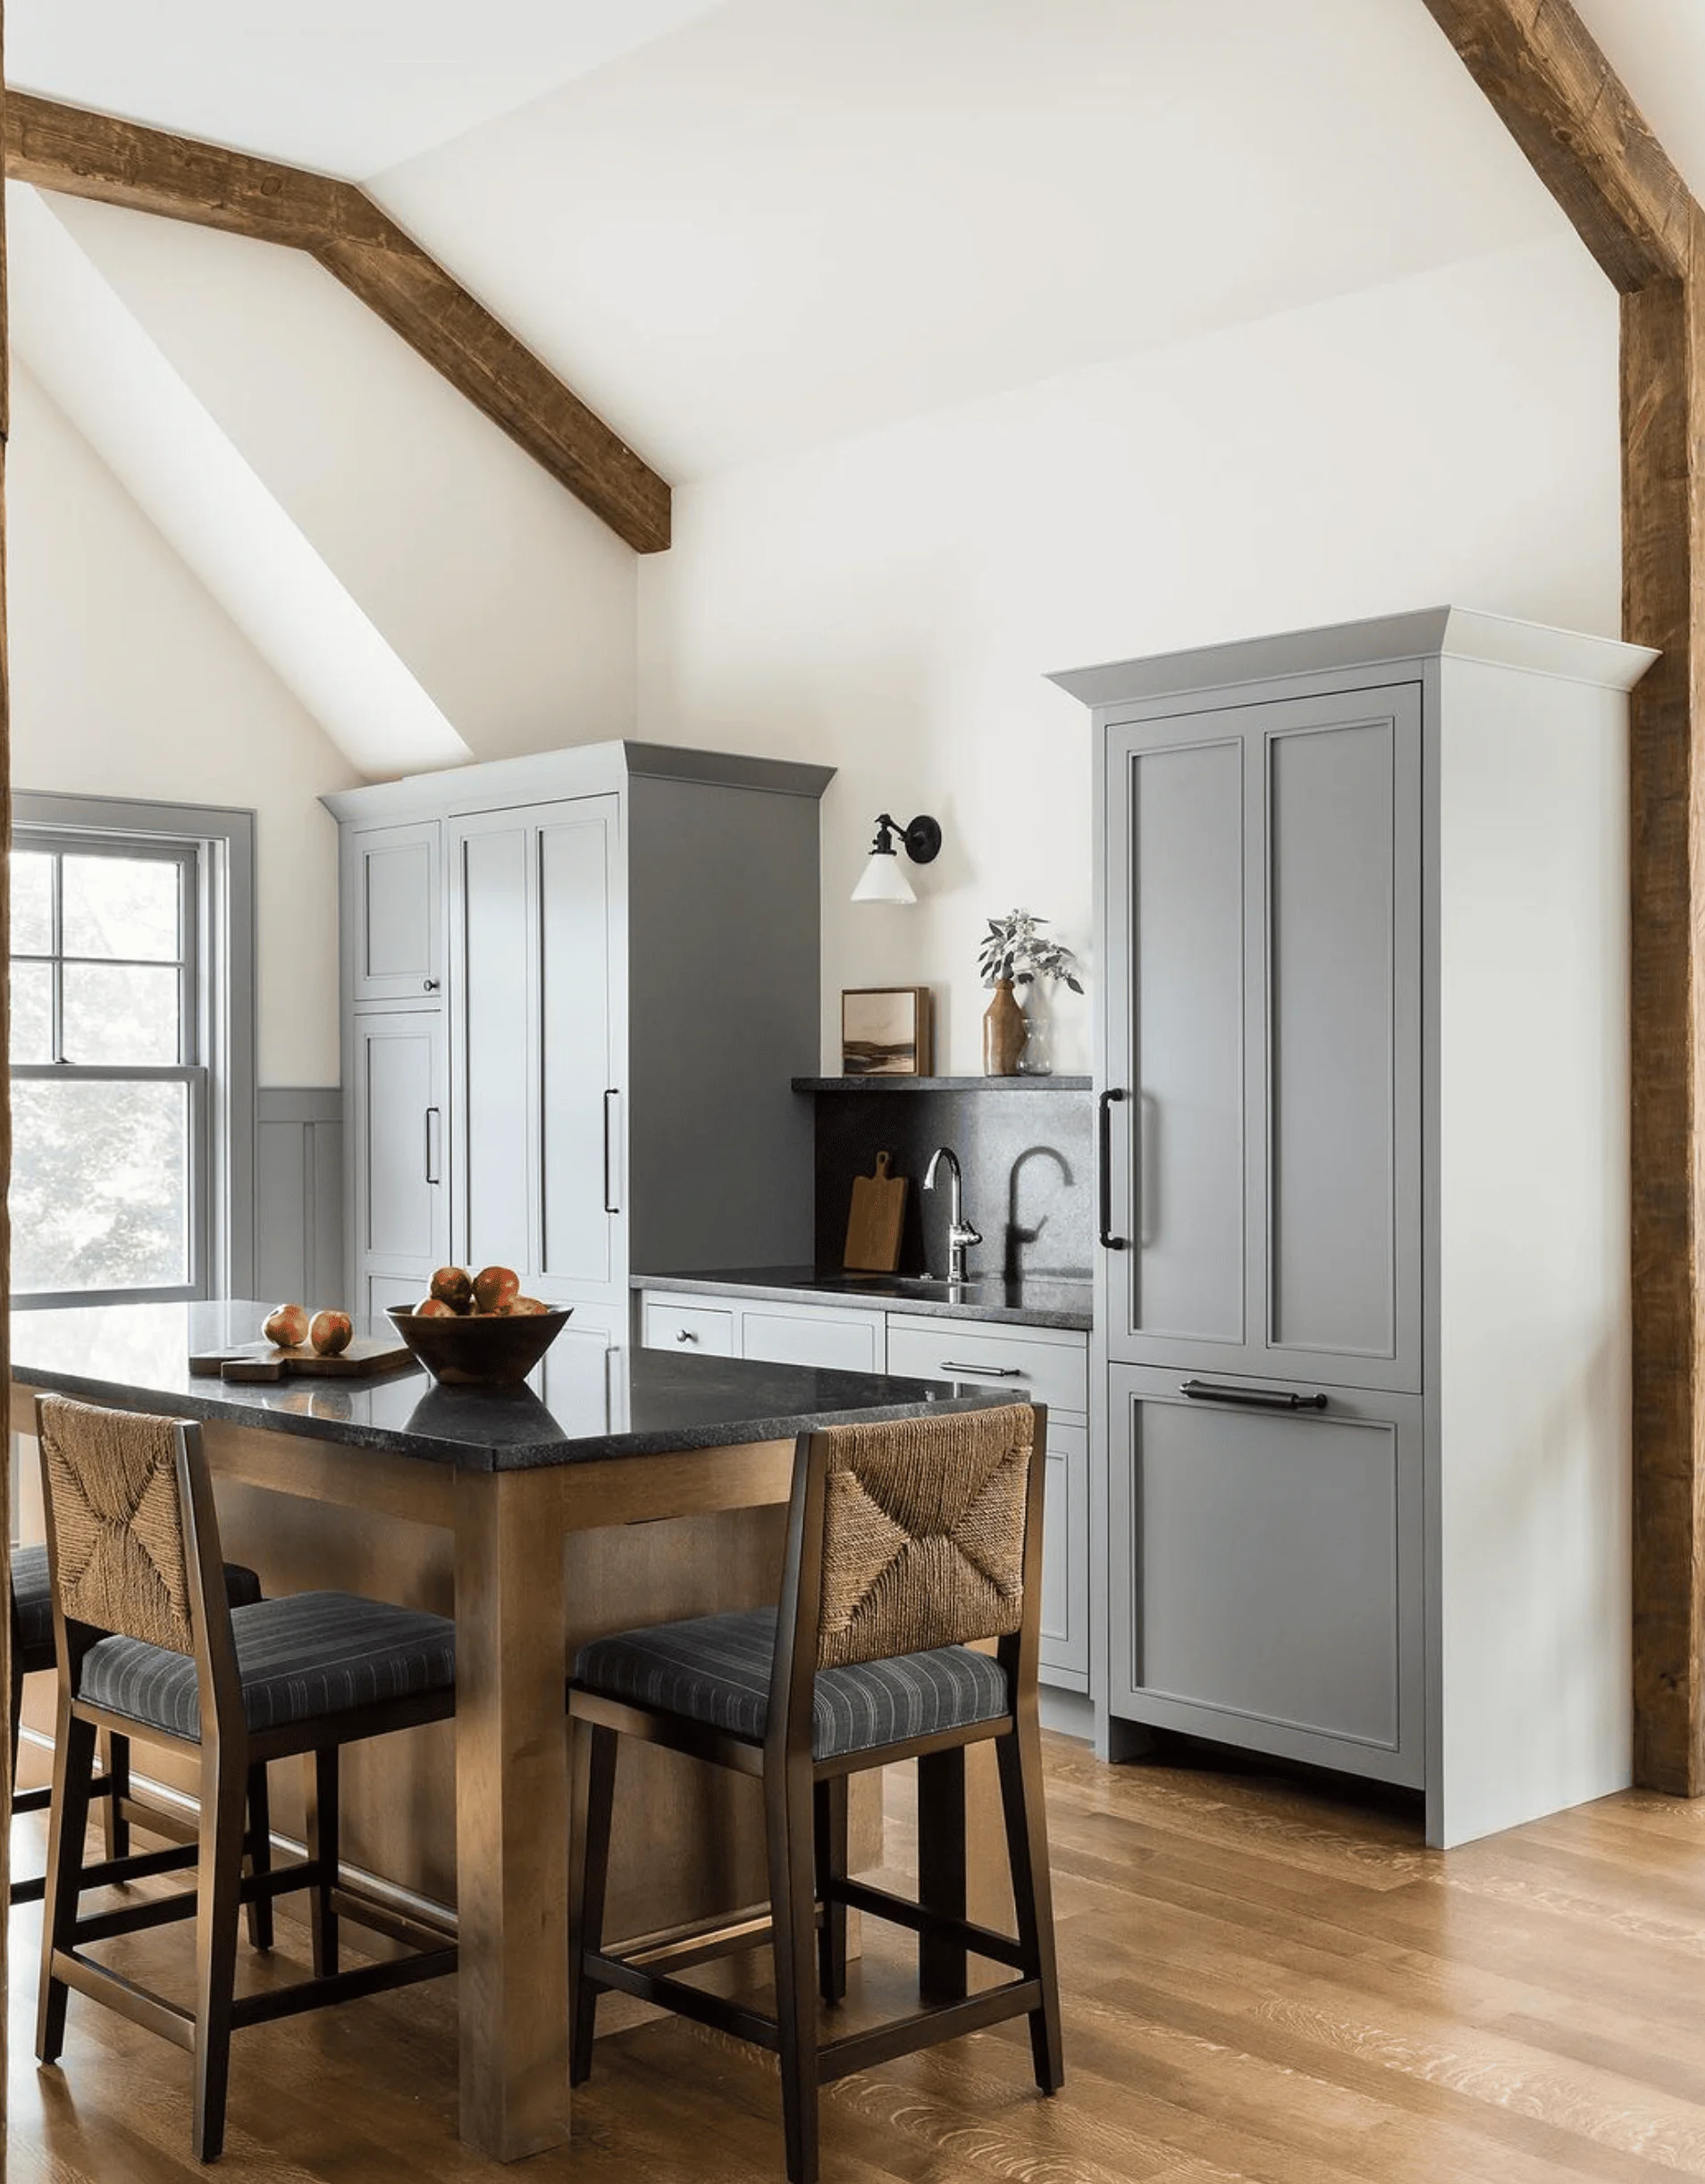
“Let’s be honest: while beautiful, exposed wooden beams can be serious dust collectors, especially in a kitchen where grease can travel.”
They require regular and sometimes tricky cleaning. Similarly, integrating appliances like the refrigerator behind custom panels creates that coveted seamless look, but it comes at a premium. Not only is the panel-ready appliance itself more expensive, but any future replacement will need to fit the exact same dimensions, potentially limiting your choices down the road.
4. Add Classic Detail with Paneled Wardrobes and Recessed Lighting
This floor-to-ceiling approach works best in rooms with standard or high ceilings (8 feet or more). A minimum ceiling height of 8 feet is needed to allow for the soffit containing the recessed lights and the crown molding without making the room feel compressed. For a similar expansive feel in rooms with lower ceilings, consider the mirrored wardrobe approach seen in Idea #1, which uses reflection to create a sense of height rather than verticality.
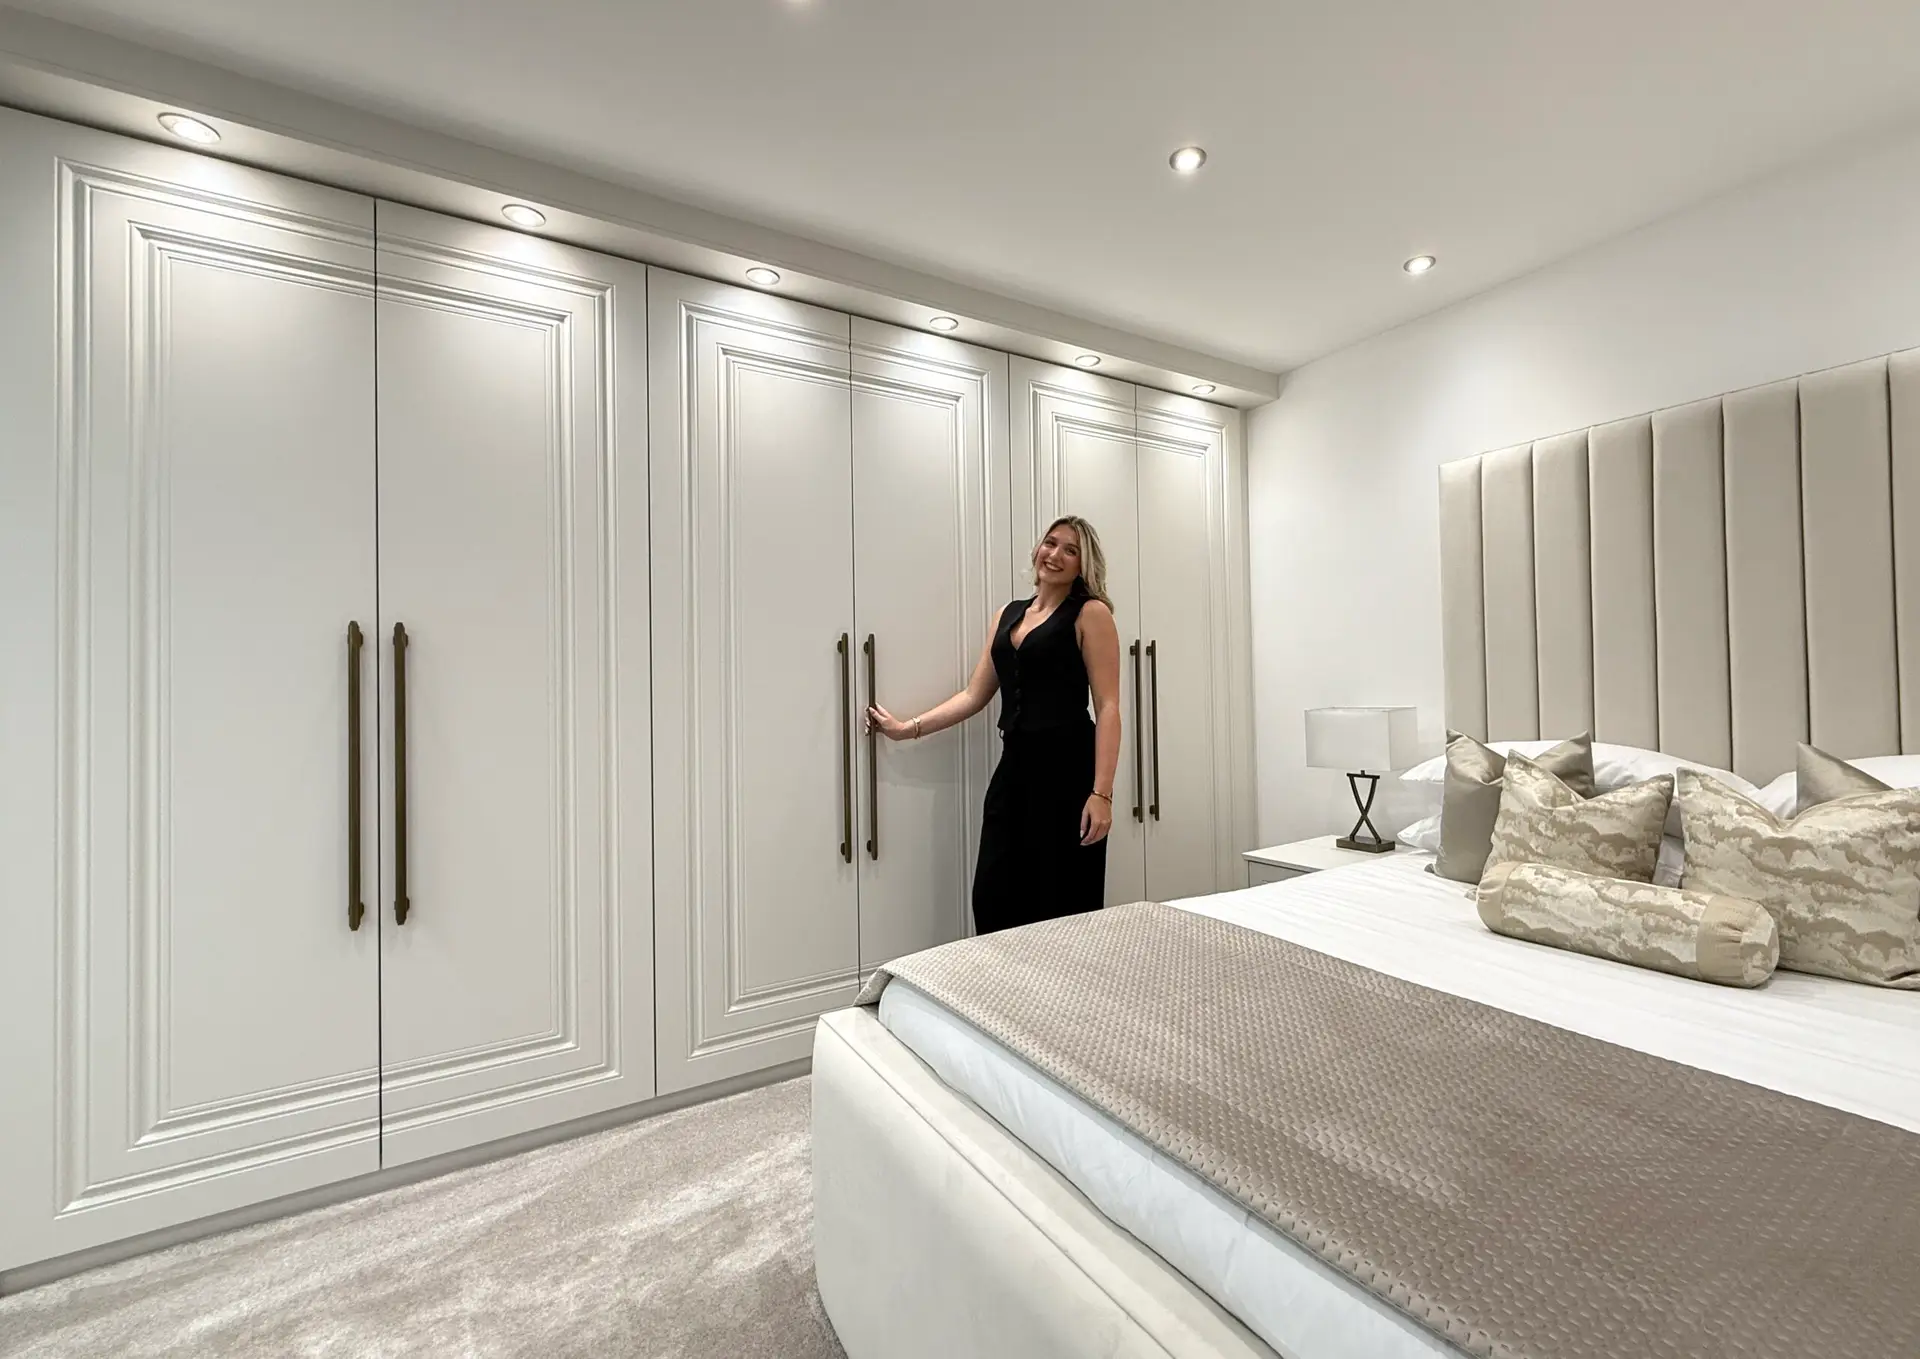
“This design succeeds because it treats storage as architecture.”
The paneled doors and molding integrate the wardrobes into the room’s structure, making them feel like they’ve always been there. The integrated soffit with recessed lighting is a genius move; it highlights the unit, turning it into a feature wall while also providing practical, targeted light right where you need it—on your clothes. The long, elegant bronze handles add a vertical line that draws the eye upward, enhancing the feeling of height.
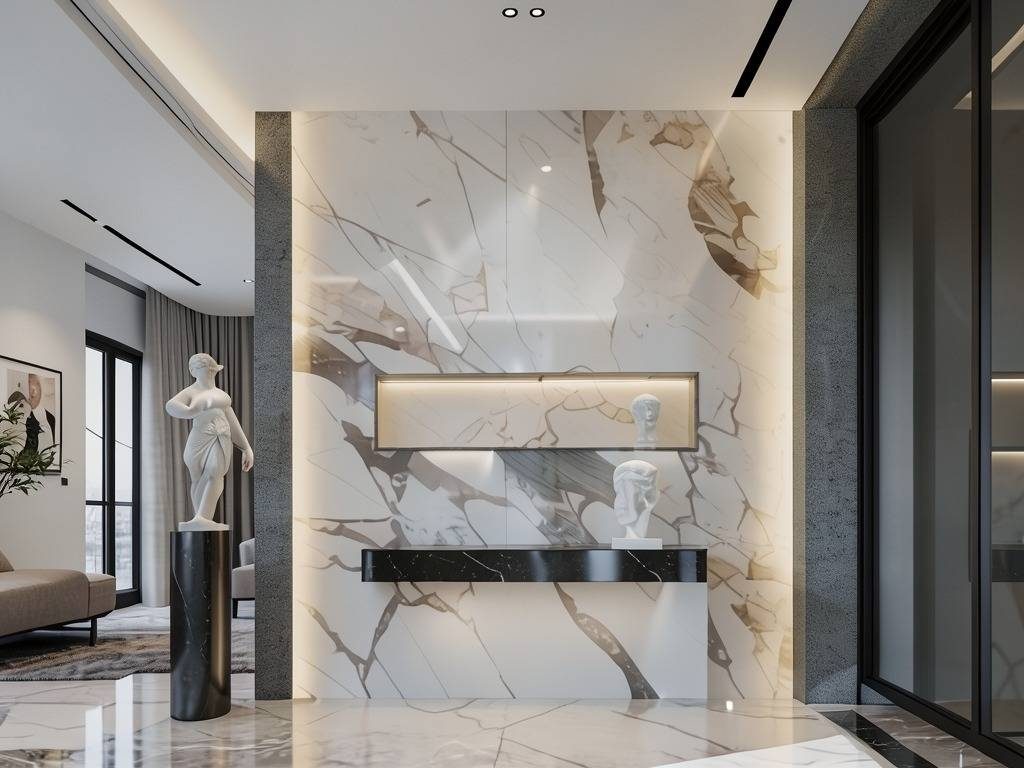
5. Embrace Minimalism with Dark, Matte-Finish Wardrobes
A matte dark finish is incredibly chic, but it can be a magnet for fingerprints, dust, and smudges, which show up more prominently than on lighter or glossier surfaces. Keep a microfiber cloth handy for frequent wipe-downs. While durable, deep scratches on a matte finish can be difficult to touch up seamlessly. If you have pets with claws or young children, you might consider a textured or satin finish in a similar dark tone, which will be more forgiving. The concealed base lighting is a great look, but check the connections and clean the strip every few months to ensure consistent performance.
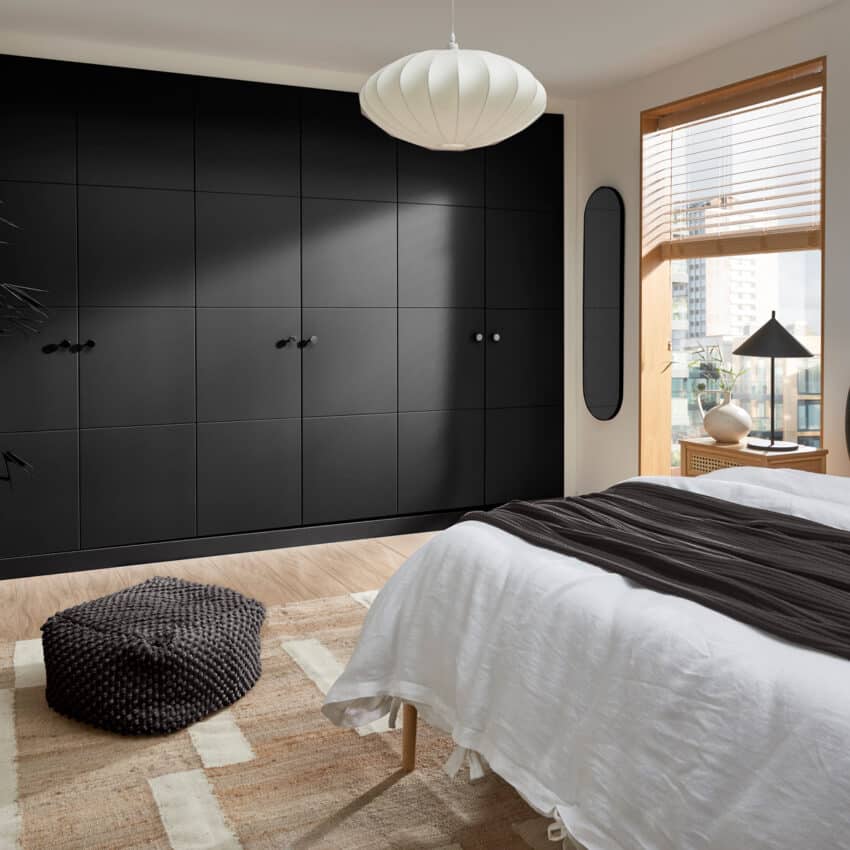
“The single most important element here is the concealed base lighting.”
Without it, this would be a very handsome, but potentially very heavy and imposing, wall of dark cabinetry. That subtle strip of light at the bottom makes the entire unit appear to float just above the floor. It defies gravity, adds a layer of sophistication, and provides a soft, ambient glow in the evening. It’s a small detail that completely transforms the feeling of the piece from bulky to levitating. Compare this to the overhead lighting in Idea #4 for a different but equally effective approach.
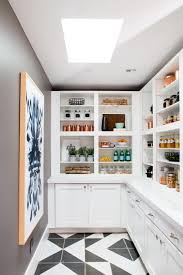
6. Organize a Pantry with Open Shelving and Blue Cabinets
Recreating this open-shelving look is a manageable DIY project. Here’s a quick guide for installing shelves on a tiled wall. Time: 3-4 hours. Cost: $150-$300.
- Plan your layout: Use painter’s tape to mark the exact placement of your brackets and shelves. Check for level.
- Drill pilot holes: Use a glass and tile drill bit to slowly drill through the subway tile at your marked spots. Use a bit of water to keep the bit cool.
- Insert wall anchors: Once through the tile, switch to a standard bit to drill into the wall stud or drywall behind. Gently tap in appropriate wall anchors.
- Mount brackets: Secure the dark metal brackets to the wall using screws into the anchors.
- Attach shelves: Place your light wood shelves onto the brackets and secure them from below.
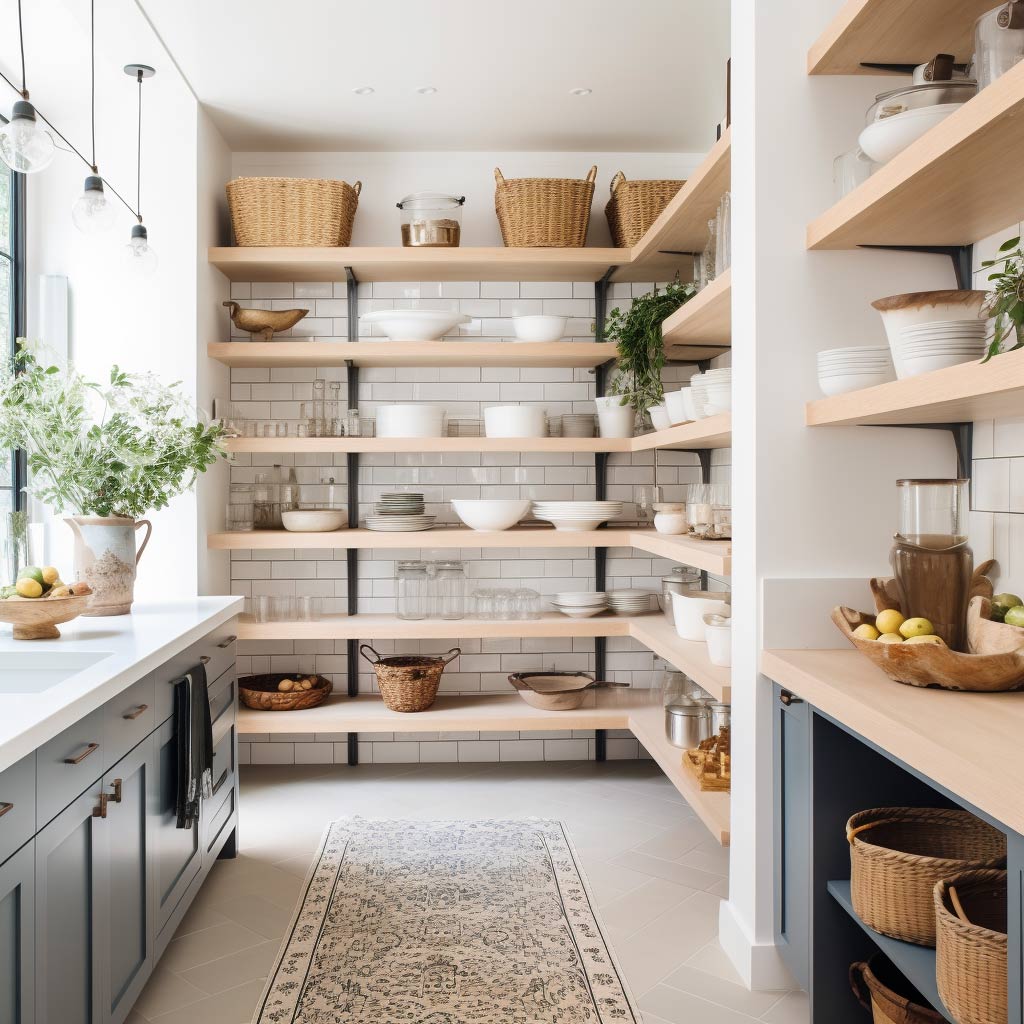
“You don’t need a custom butler’s pantry to get this organized, airy feel.”
Recreate this look for less by using IKEA or Home Depot for key components. Start with their stock light blue-grey base cabinets (around $400-$600). Top with a simple white laminate countertop ($100-$200). For the walls, simple peel-and-stick subway tile ($100) gives the same effect. Find similar light wood shelves and dark brackets at Target or on Amazon for under $150. You get the same functional and stylish pantry as seen in Idea #10, for a fraction of the price.
7. Frame Your Room with Classic Grey Built-In Shelves and Wardrobes
This built-in works because of its perfect symmetry. By flanking the central closed wardrobes with identical open shelving and drawer sections on each side, the design creates a sense of balance and calm. It draws the eye to the center of the wall, making it an ideal setup for placing a bed or a desk. The continuity of the crown and base molding across the unit and onto the walls is crucial; it’s what makes the piece feel fully integrated and custom, rather than just a large piece of furniture pushed against the wall.
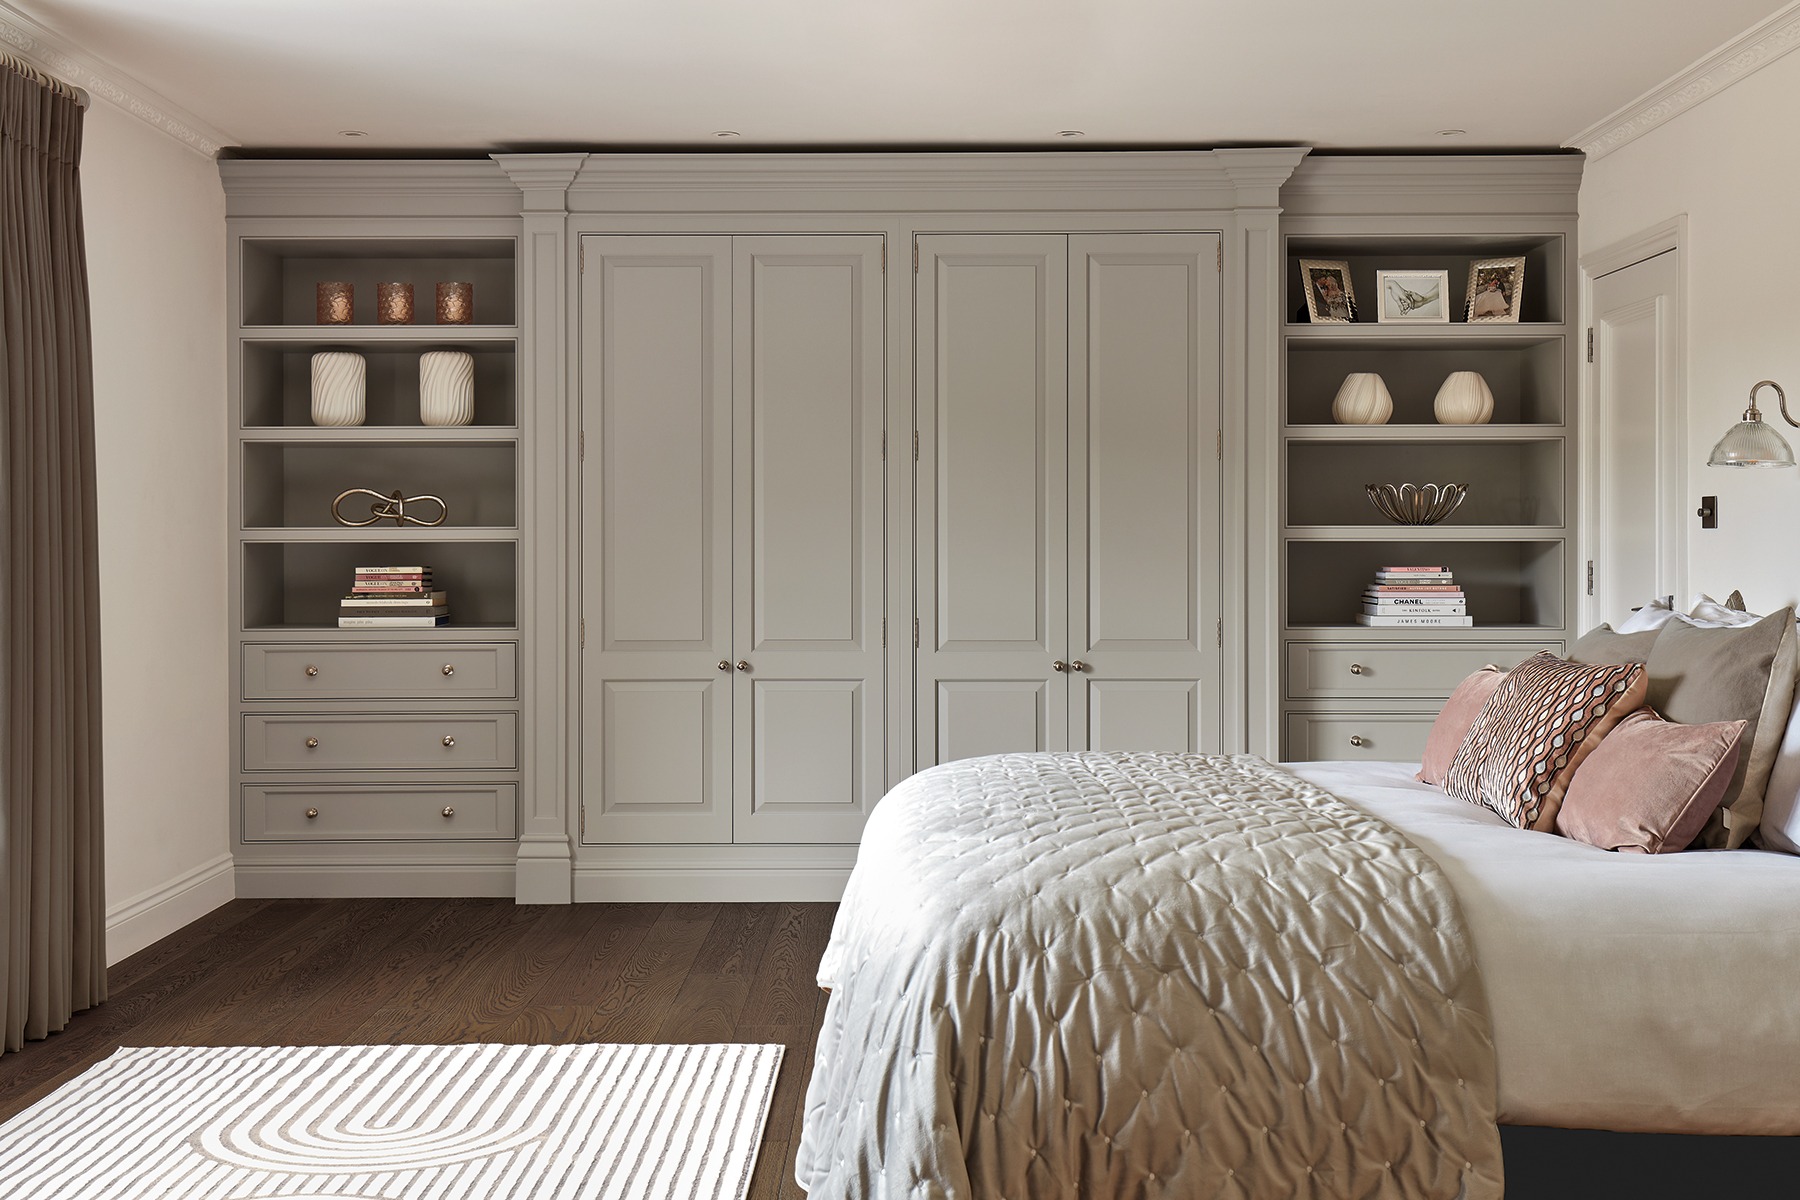
“For open shelving within a built-in, vary the shelf heights to accommodate different types of items.”
A standard height of 12-14 inches is great for books and most decor, but include one or two taller sections of 16-18 inches for larger vases or artwork. This visual variety prevents the shelves from looking monotonous. Also, paint the back wall of the open shelving the same color as the unit itself for a seamless, high-end look. Don’t forget to account for the thickness of the shelves (typically 3/4 to 1 inch) in your measurements.
8. Organize Your Kitchen Pantry with Smart Storage Solutions
The key to a truly functional pantry isn’t just shelves; it’s variety in storage types. Having a mix of open shelves for frequently used items, drawers for loose snacks or linens, and door-mounted racks for spices and small jars is what makes a pantry work hard. This mix-and-match approach ensures that every single item has a logical, accessible home, preventing the dreaded pantry chaos where things get lost in the back of deep shelves. It’s the system—not just the space—that creates order.
“An Instagram-perfect pantry filled with decanted goods in matching glass jars looks amazing, but it requires a real commitment to upkeep.”
Be honest with yourself: are you really going to refill that quinoa jar every time you buy a new bag? Or will you end up with a dozen half-empty bags behind the pretty jars? For many busy households, using clear bins to corral original packaging is a more realistic and sustainable way to maintain order without adding the extra step of decanting everything.
9. Create a Tranquil Bedroom with Cloud Wallpaper and Greige Wardrobes
The serene feeling here is a masterclass in texture and tone. Let’s call the formula: 50% solid, grounding color (the greyish-beige wardrobes) + 40% dark, patterned flooring (the herringbone wood) + 10% ethereal pattern (the cloud wallpaper). The key is the surprising wallpaper; it adds a touch of whimsy and dreaminess that prevents the tailored wardrobes and classic floor from feeling too serious. The silver hardware acts as quiet jewelry, linking the cool tones in the wallpaper and the warmth of the cabinetry.
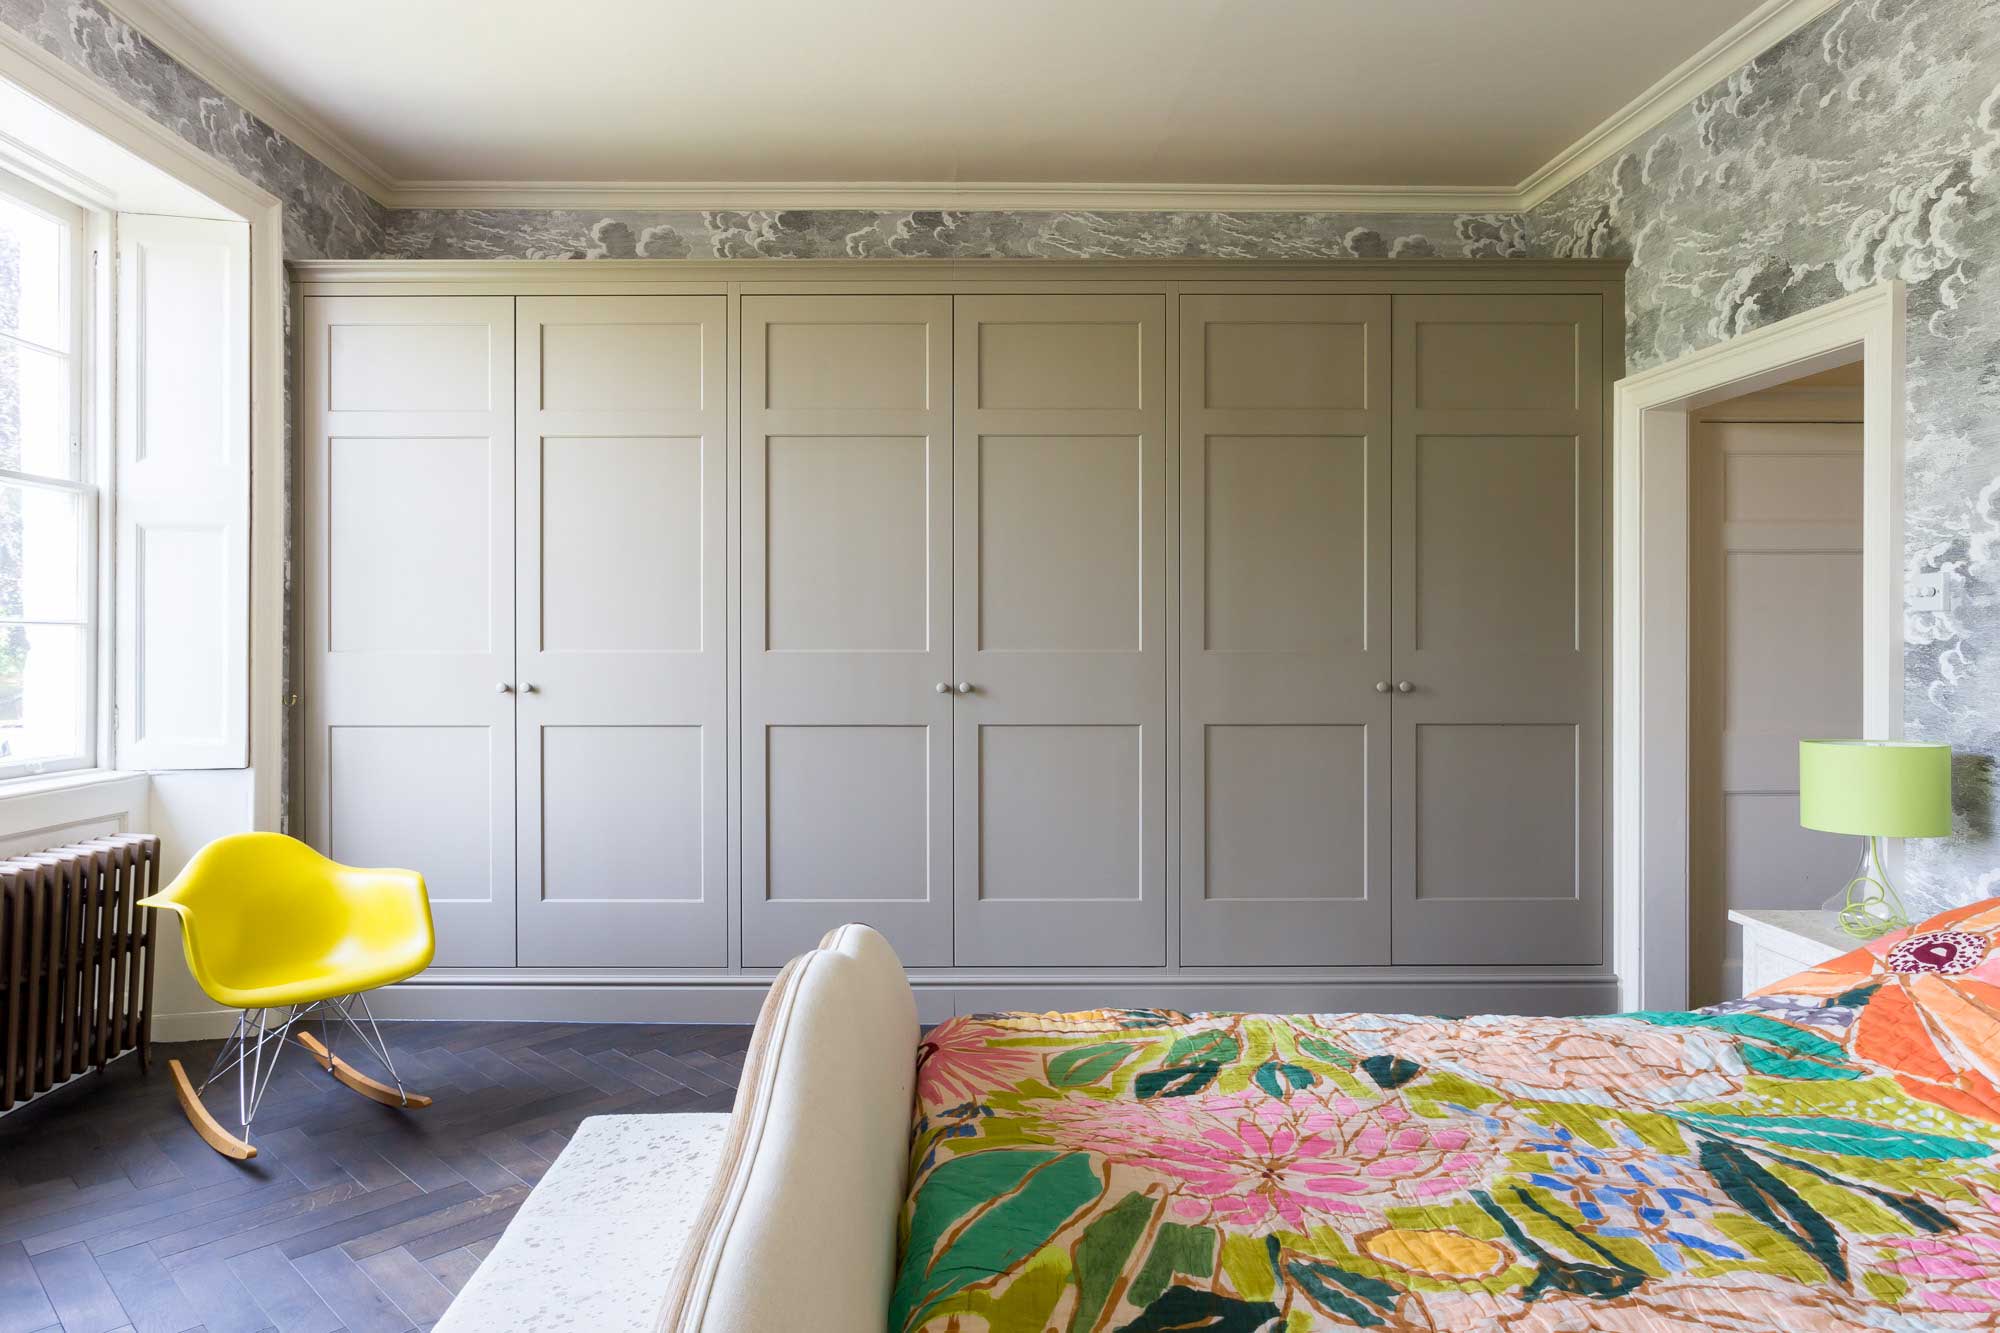
“A full wall of floor-to-ceiling built-ins works best in a primary bedroom or a large guest room with at least 120 square feet.”
This ensures you still have ample clearance (at least 30-36 inches) between the foot of the bed and the wardrobes. The detailed crown molding and wallpaper accent are most effective with ceilings that are 8 feet or higher, as they draw the eye upward and require a bit of visual breathing room to be fully appreciated without overwhelming the space.
10. Achieve a Natural, Organized Pantry with Warm Wood and Woven Baskets
Open shelving in a pantry is beautiful but requires diligence to keep it looking tidy. Dusting is a more frequent chore compared to closed cabinets. To make it easier, use shelf liners that can be wiped down or replaced. Woven baskets are fantastic for hiding visual clutter, but they can also hide spills or expired food. Plan to empty and wipe out each basket once or twice a year. Using clear, airtight containers for staples not only looks great but also protects food from pests and makes it easy to see when you’re running low.
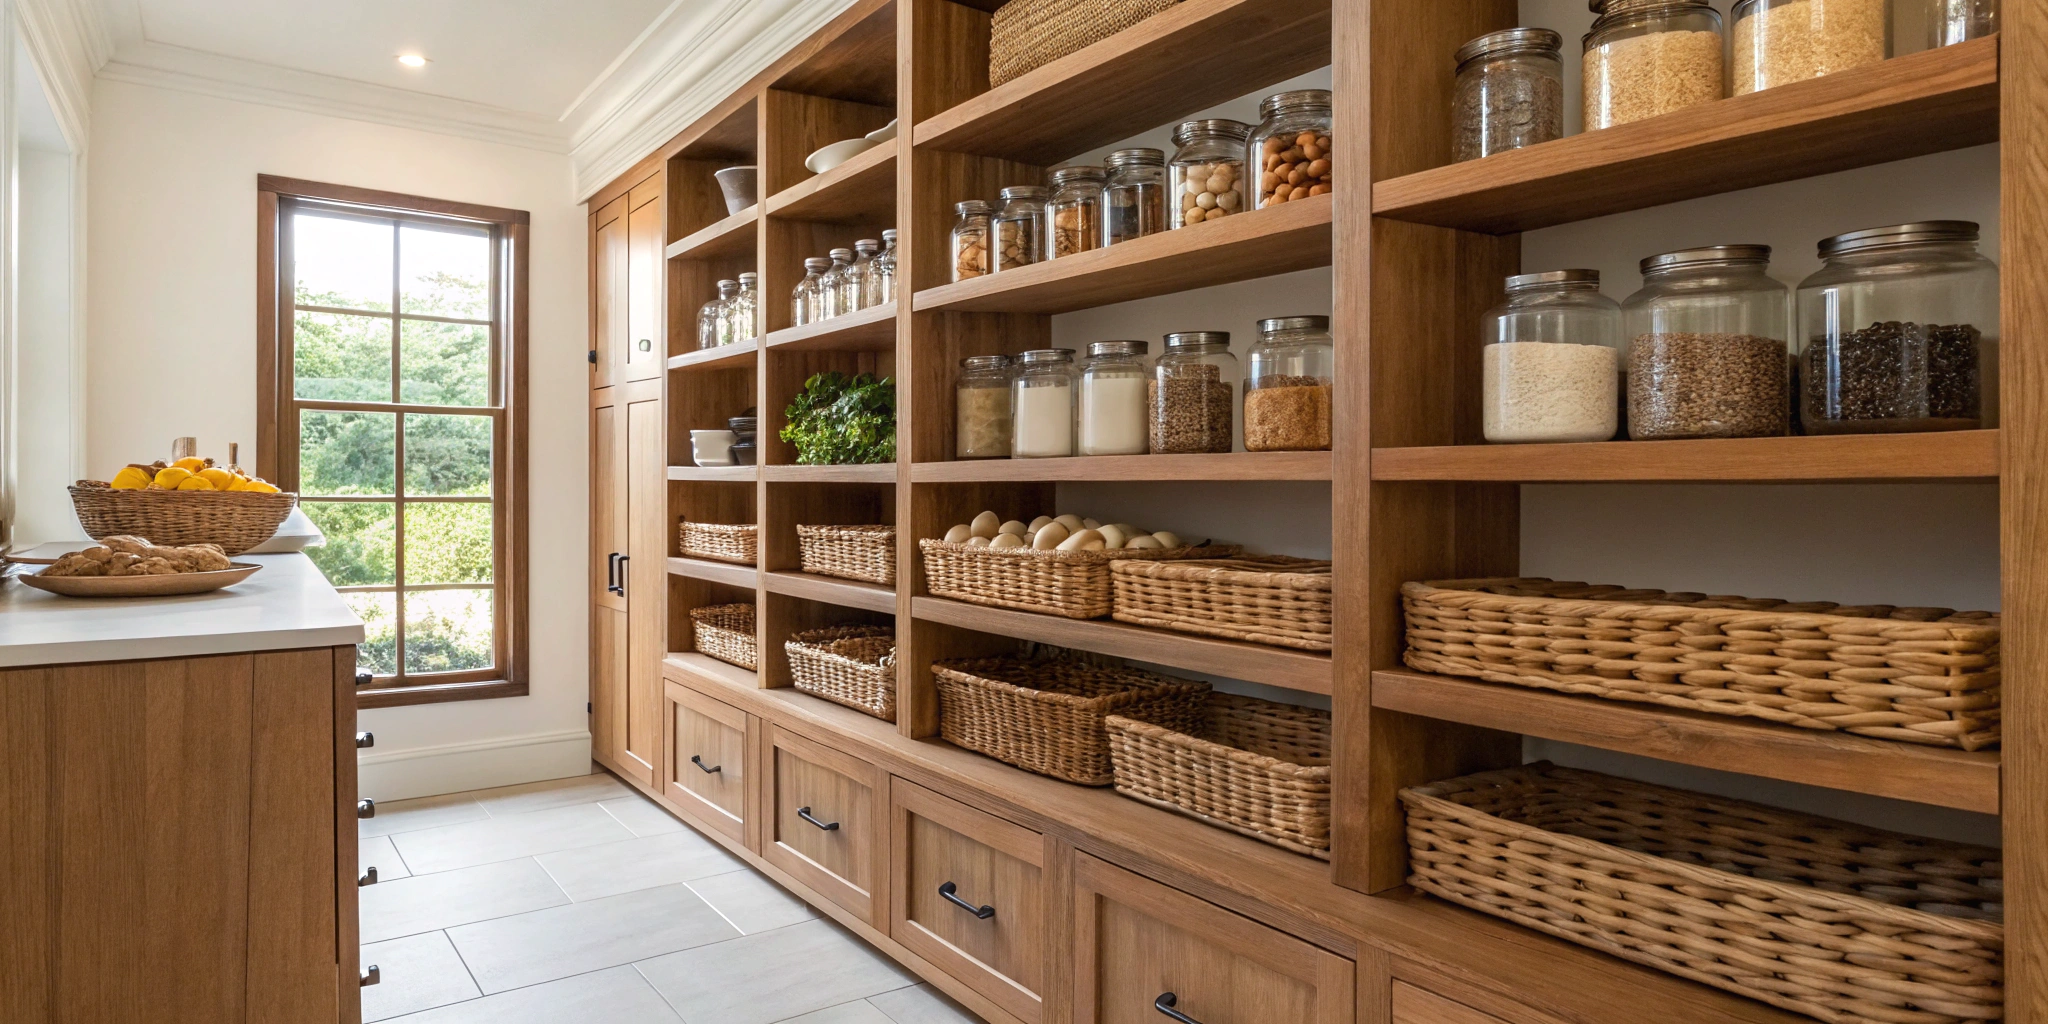
“This pantry feels so calming and functional because of the principle of repetition with variation.”
The warm wood tone is repeated in the shelves and cabinets, creating a cohesive backdrop. Then, the woven texture of the baskets is repeated throughout, but in different shapes and sizes, which adds interest and avoids monotony. Finally, the use of clear glass jars provides another layer of repetition. This structured yet natural approach makes the space feel organized without being sterile. It feels like a real, working pantry, not just a staged photo.
11. Integrate a Home Office into Your Bedroom with Seamless Paneling
When combining a wardrobe and a desk, continuity is key. Paint the entire built-in unit, the wall paneling, and the nightstand in the same color. This tricks the eye into seeing it as one cohesive architectural element, rather than a jumble of different furniture pieces. For the desk area, ensure you have at least 30 inches of width for comfortable laptop use and consider installing under-cabinet LED lighting to illuminate the workspace without needing a separate desk lamp.
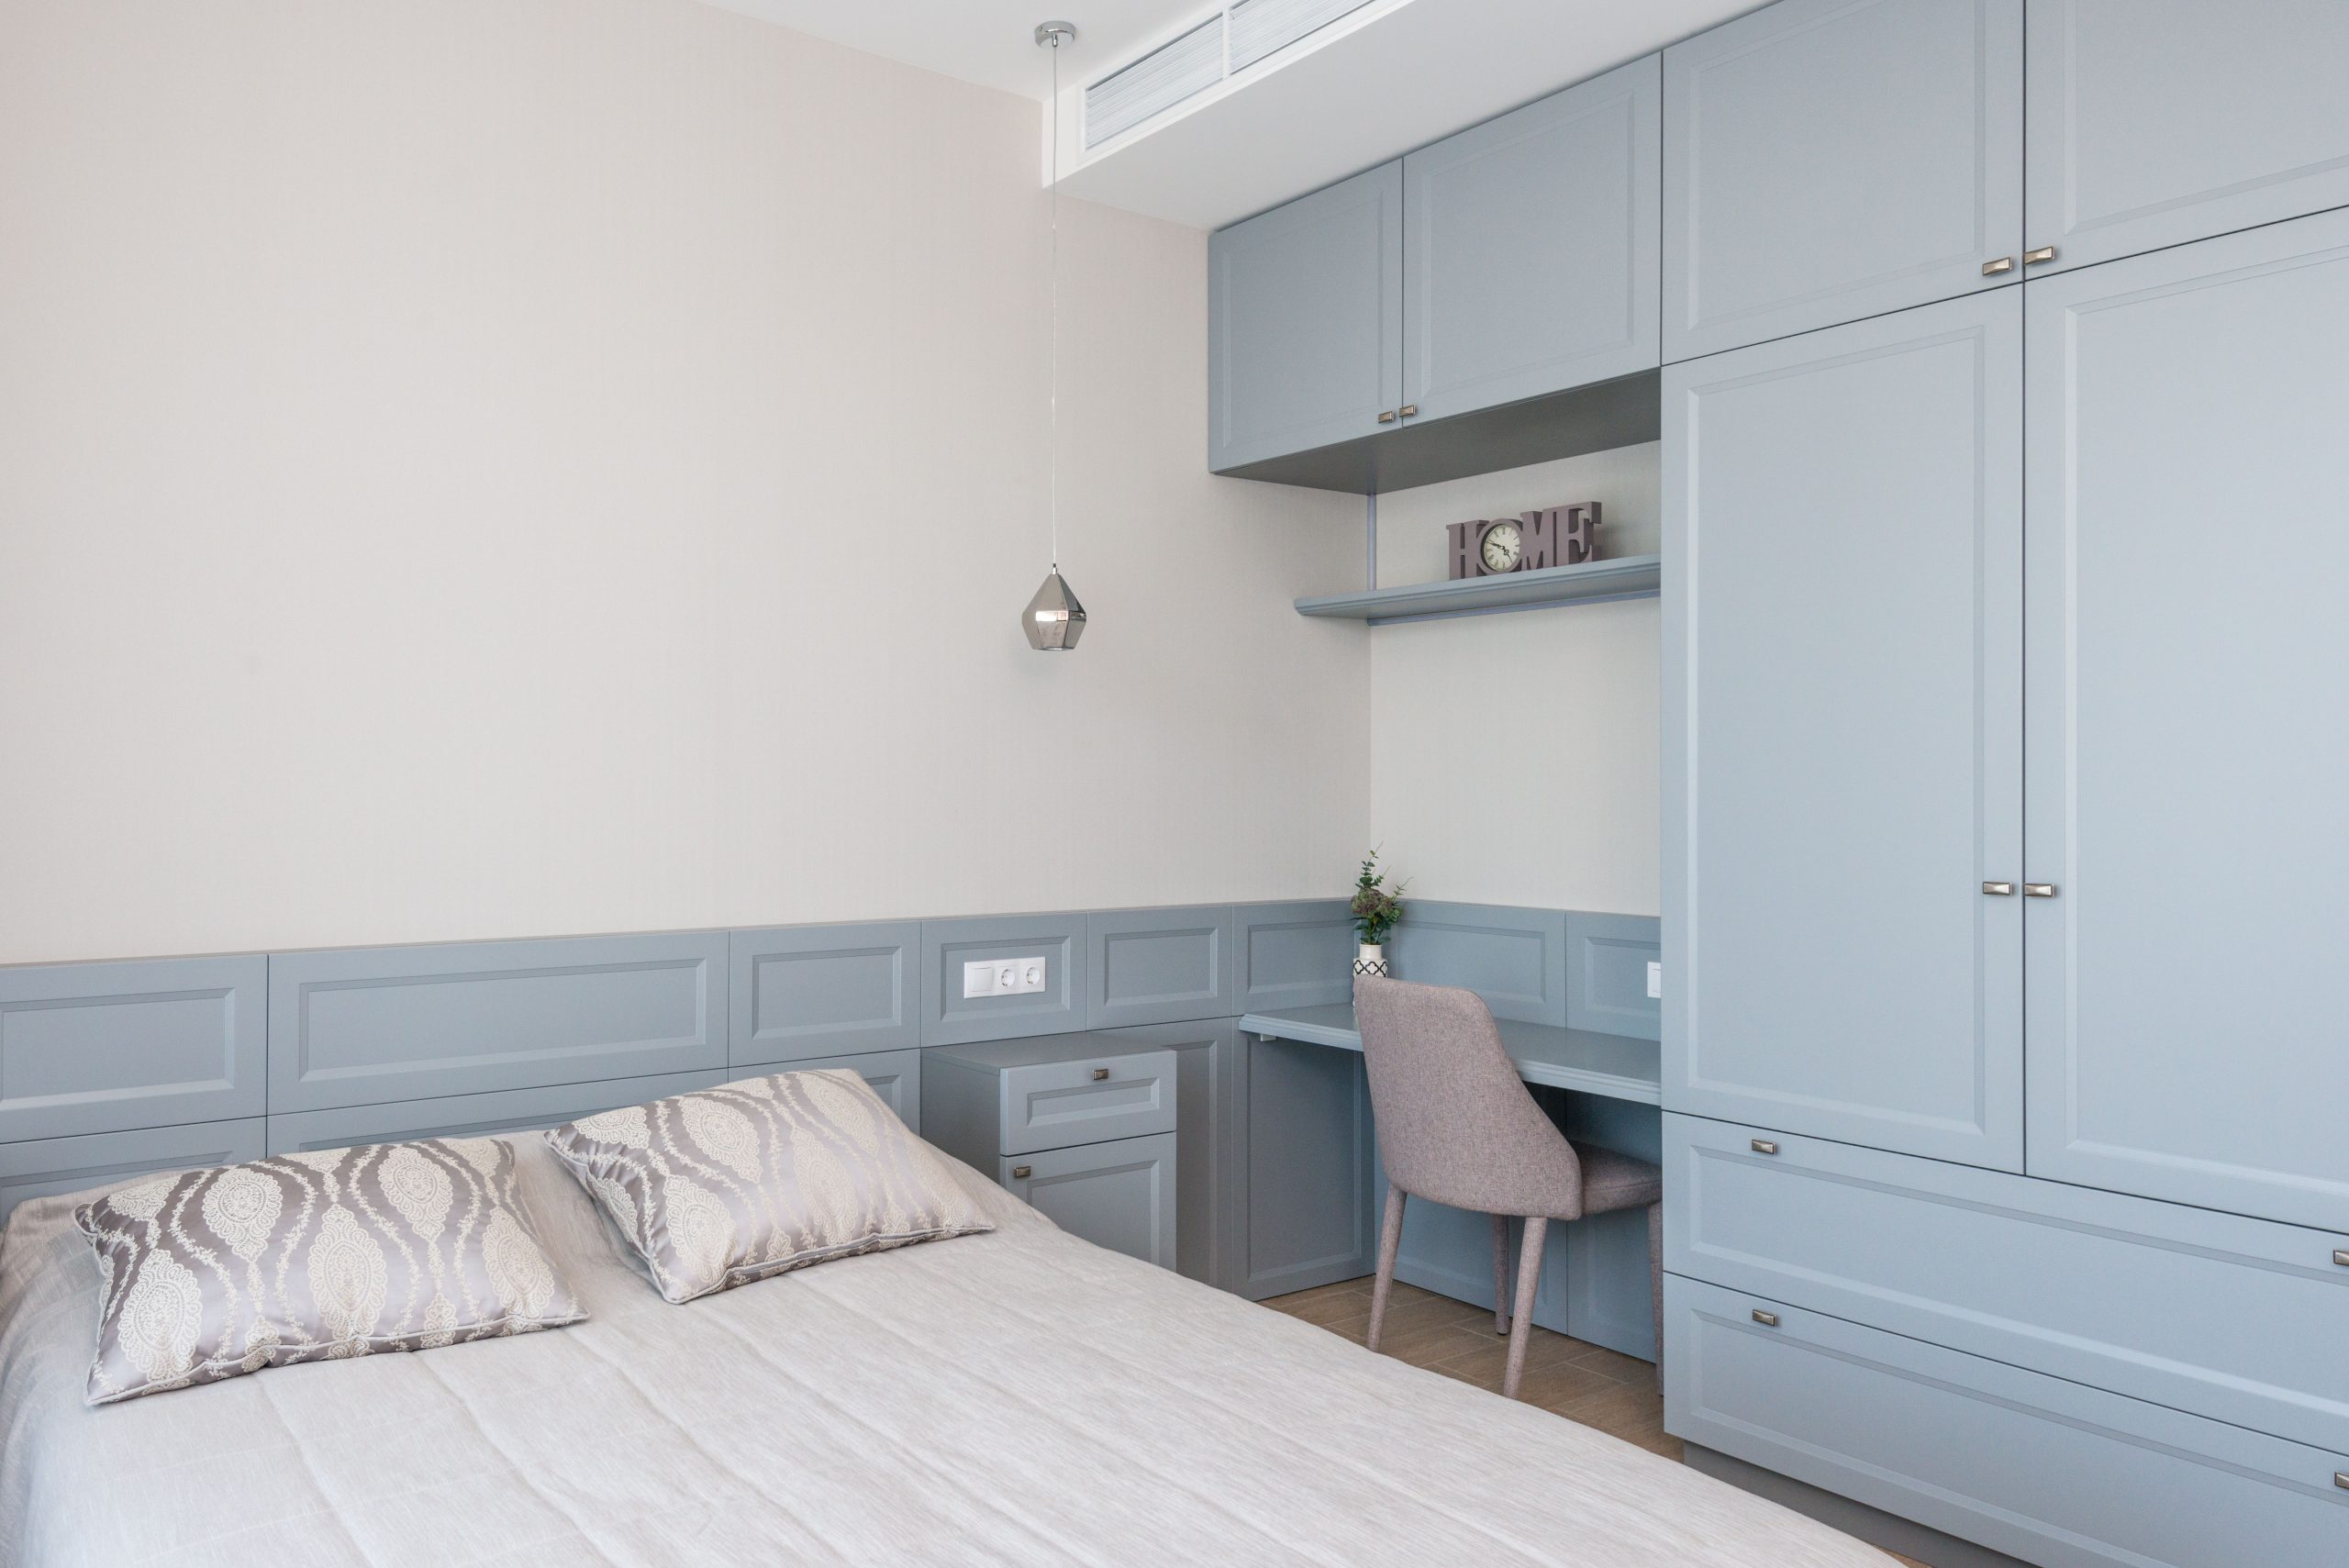
“The single best feature here is the way the built-in unit transitions from wardrobe to wall paneling.”
It doesn’t just stop; it continues behind the bed, becoming the headboard and integrating the nightstand. This clever design choice is what makes the room feel so resolved and custom. It solves multiple functional needs—clothing storage, a workspace, and a bedside area—within one unified and elegant design gesture. It’s a perfect solution for guest rooms or smaller primary suites where you need to maximize every square inch.
12. Add a Pop of Color with a Blue and Yellow Pantry Cabinet
This look is part of the “hidden jewel box” trend, where unexpected pops of vibrant color are concealed within otherwise neutral cabinetry. It’s a playful reaction against all-white kitchens, allowing homeowners to experiment with bold hues without committing to an entire room of color. This concept has staying power because it’s personal and low-risk. If you tire of the yellow in a few years, repainting a few drawer fronts is a simple and inexpensive weekend project.
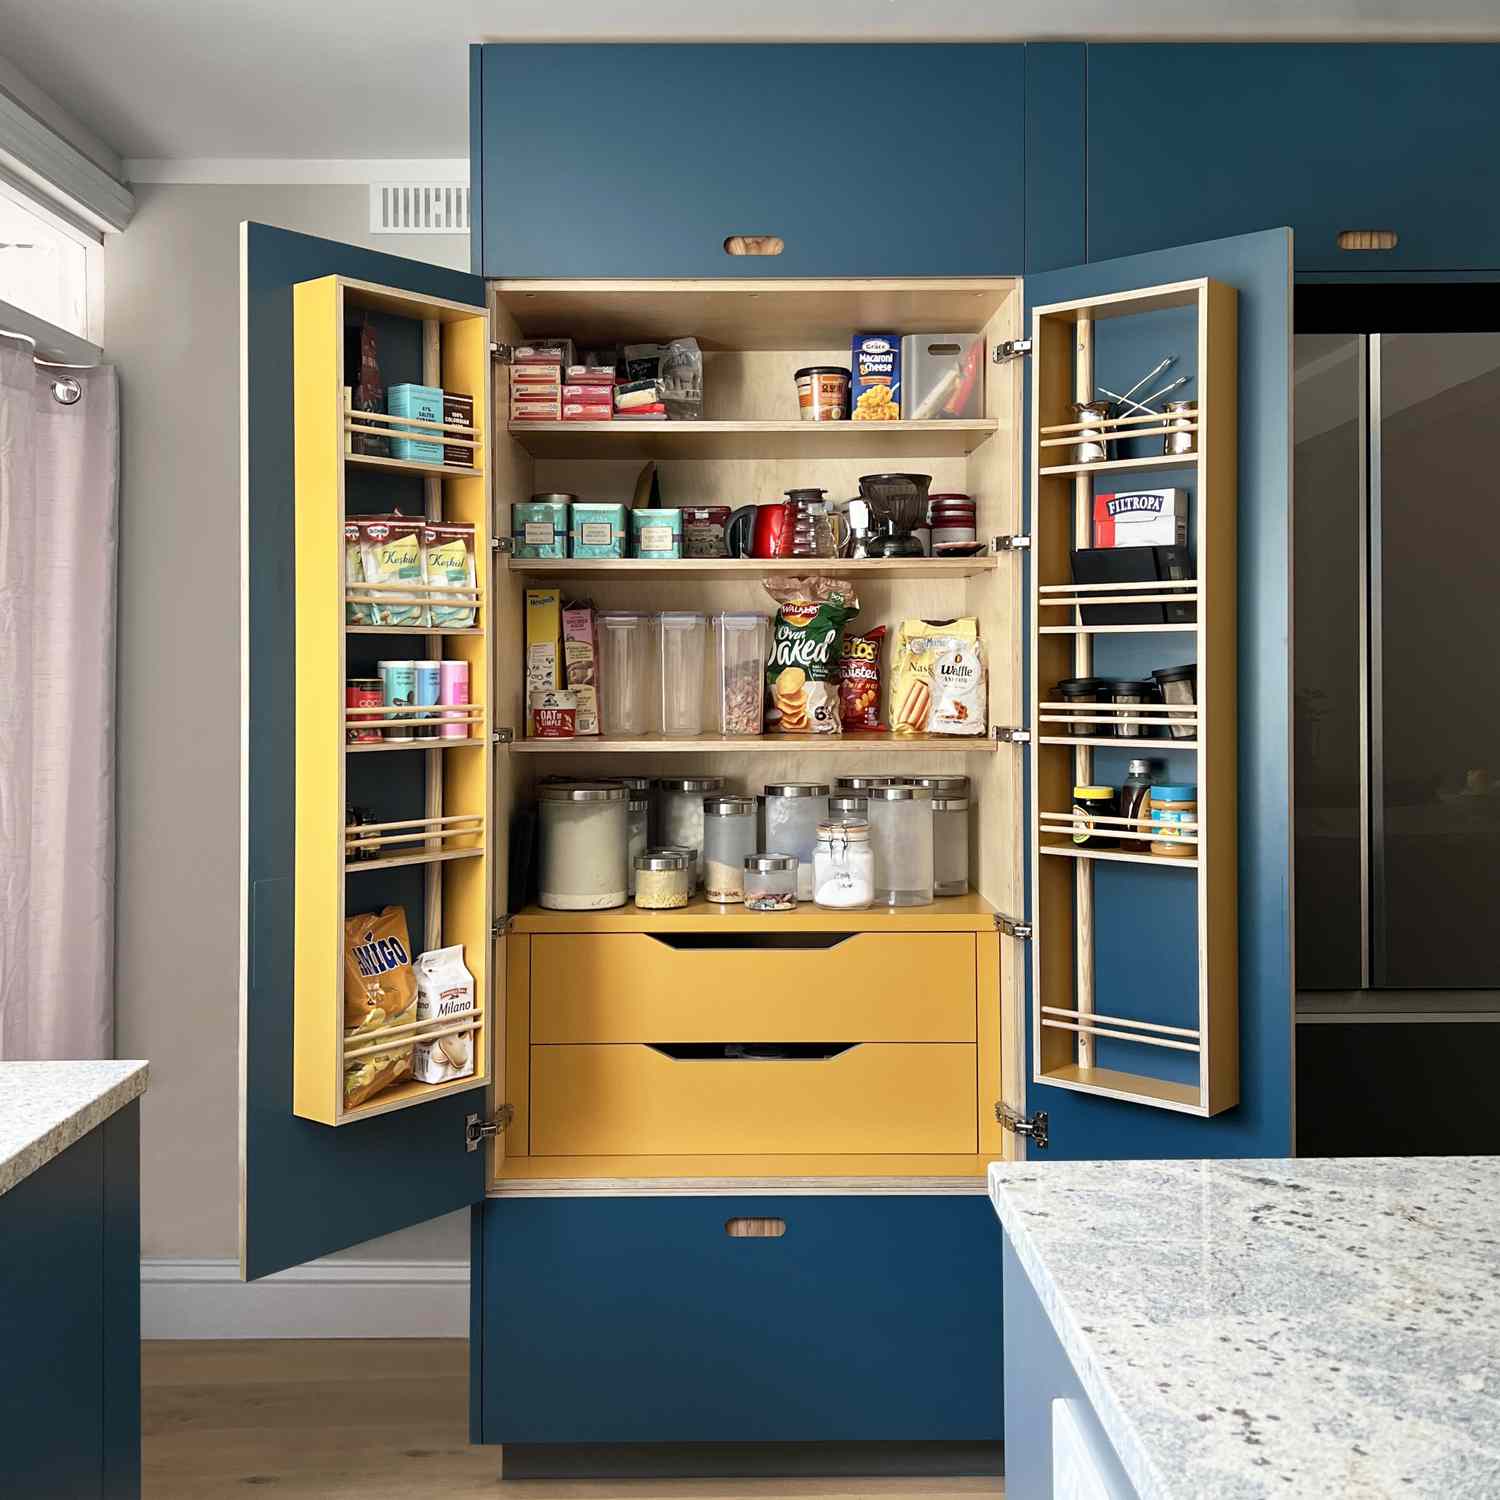
“A deep pantry cabinet like this is fantastic for storage capacity, but it can quickly become a black hole where items get lost at the back.”
Pull-out drawers and shelves are not just a luxury here; they are essential for accessibility. Be aware that high-quality, full-extension drawer slides add to the overall cost but are worth every penny in terms of functionality. Without them, you’ll be on your hands and knees digging for that can of tomatoes you know is in there somewhere.
13. Achieve a Minimalist Look with Handleless White Storage
This minimalist, flush-mount style is incredibly versatile. In a large room, it can cover an entire wall and blend in seamlessly, reducing visual clutter. In a smaller space, like an apartment living room or home office, a more compact version (e.g., two columns of cabinets/drawers) can provide substantial storage without the visual weight of traditional furniture. The key is the shallow depth; aim for 12-16 inches deep. This provides ample storage for most items without protruding too far into the room, making it ideal for spaces with less than 150 square feet.
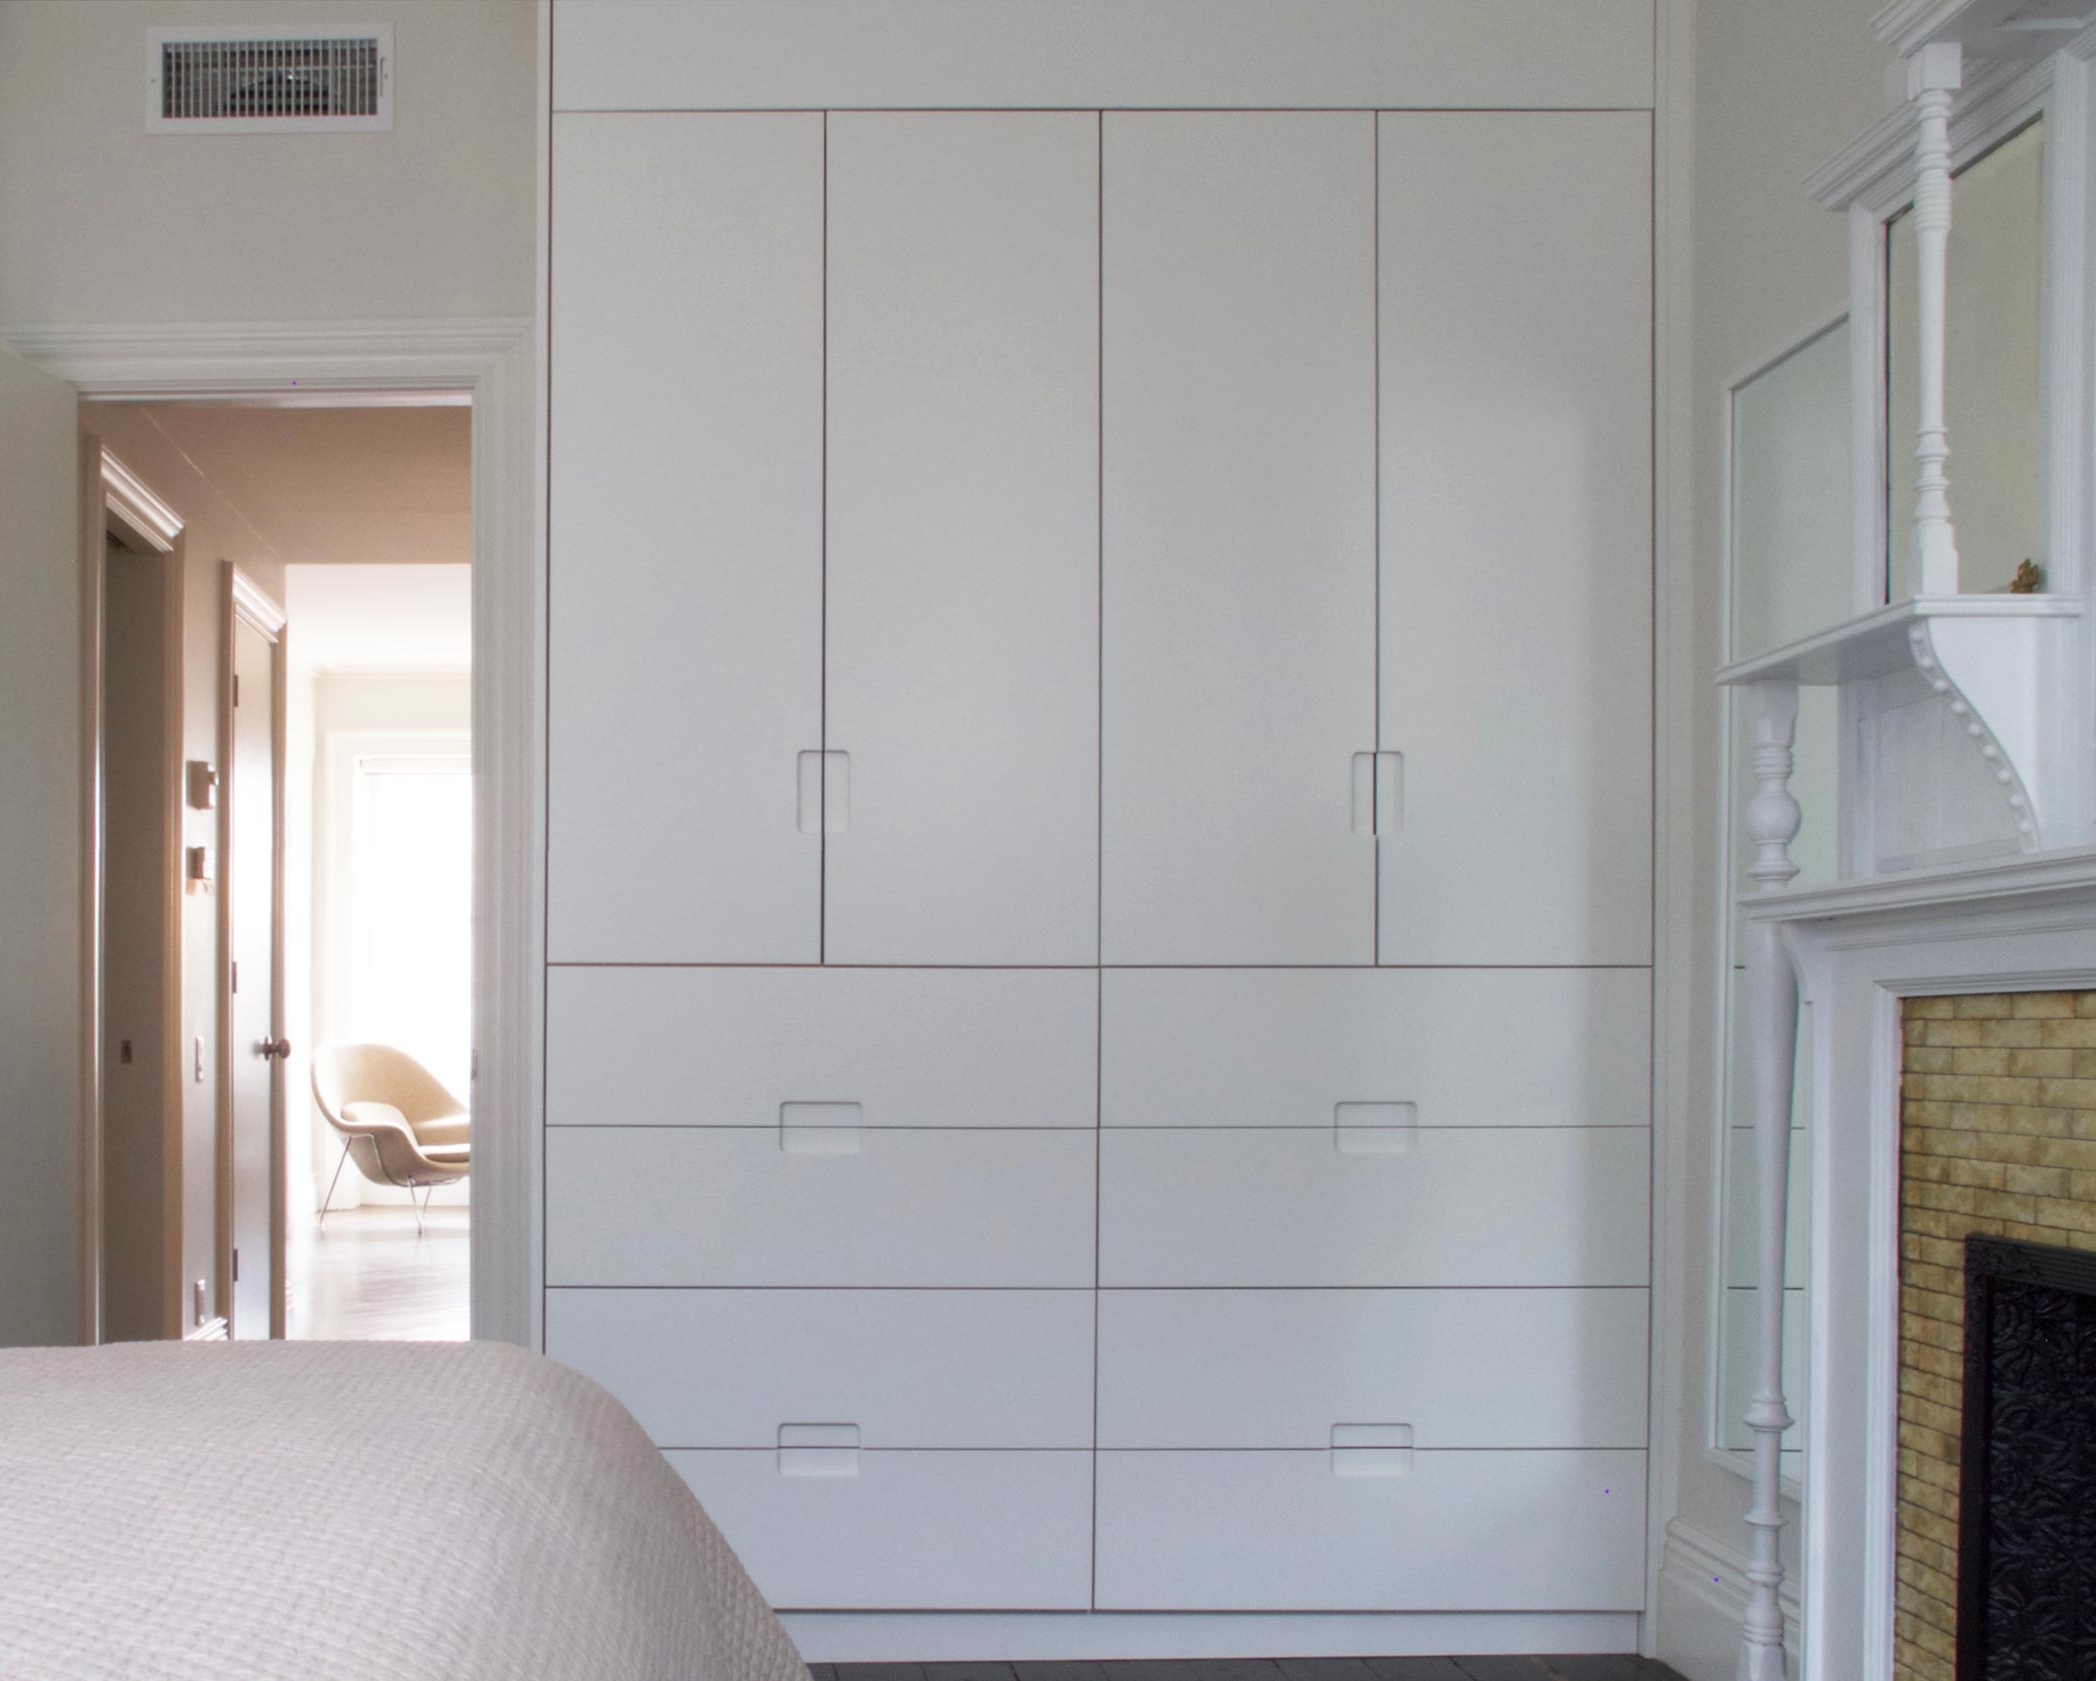
“The success of this design lies in its resolute commitment to minimalism.”
The matte white finish diffuses light rather than reflecting it, giving it a soft, architectural quality. The recessed finger pulls are the most critical detail; by eliminating external hardware, the unit reads as a series of clean, graphic planes rather than a set of cabinets and drawers. This allows it to function as a quiet, textural backdrop, providing massive amounts of storage without visually dominating the space.
14. Maximize a Small Bedroom with Fitted Wardrobes
In a small bedroom, every inch counts. When designing fitted wardrobes, opt for sliding doors instead of hinged doors to save floor space, as you won’t need to account for door swing. Also, consider integrating a mirror on one or more of the doors, as seen in Idea #25. This is a classic designer trick to make a small room feel significantly larger and brighter by reflecting light and creating an illusion of depth. It’s like adding a window where one doesn’t exist.
“You can achieve a custom, fitted look on a budget by using a system like the IKEA PAX.”
The key is to build a simple MDF or drywall frame around the units to create a soffit above and filler panels on the sides. Then, caulk all the seams and paint the frame and panels the same color as the wardrobe doors (or the wall). Add baseboard molding along the bottom that matches the rest of your room. This multi-step process makes the freestanding units look like a fully integrated, high-end custom built-in for a fraction of the cost.
15. Blend Storage Seamlessly with Neutral, Handleless Cabinets
The integrated full-length mirror is the game-changer in this design. It breaks up what could have been a monotonous wall of beige cabinetry, adding function and a touch of sparkle. By setting it within a clean white trim that matches the walls, it feels intentional and architecturally integrated. It provides a dedicated spot for checking your appearance without needing to hang a separate mirror, thus keeping the walls clean and minimalist. A truly smart and stylish addition.
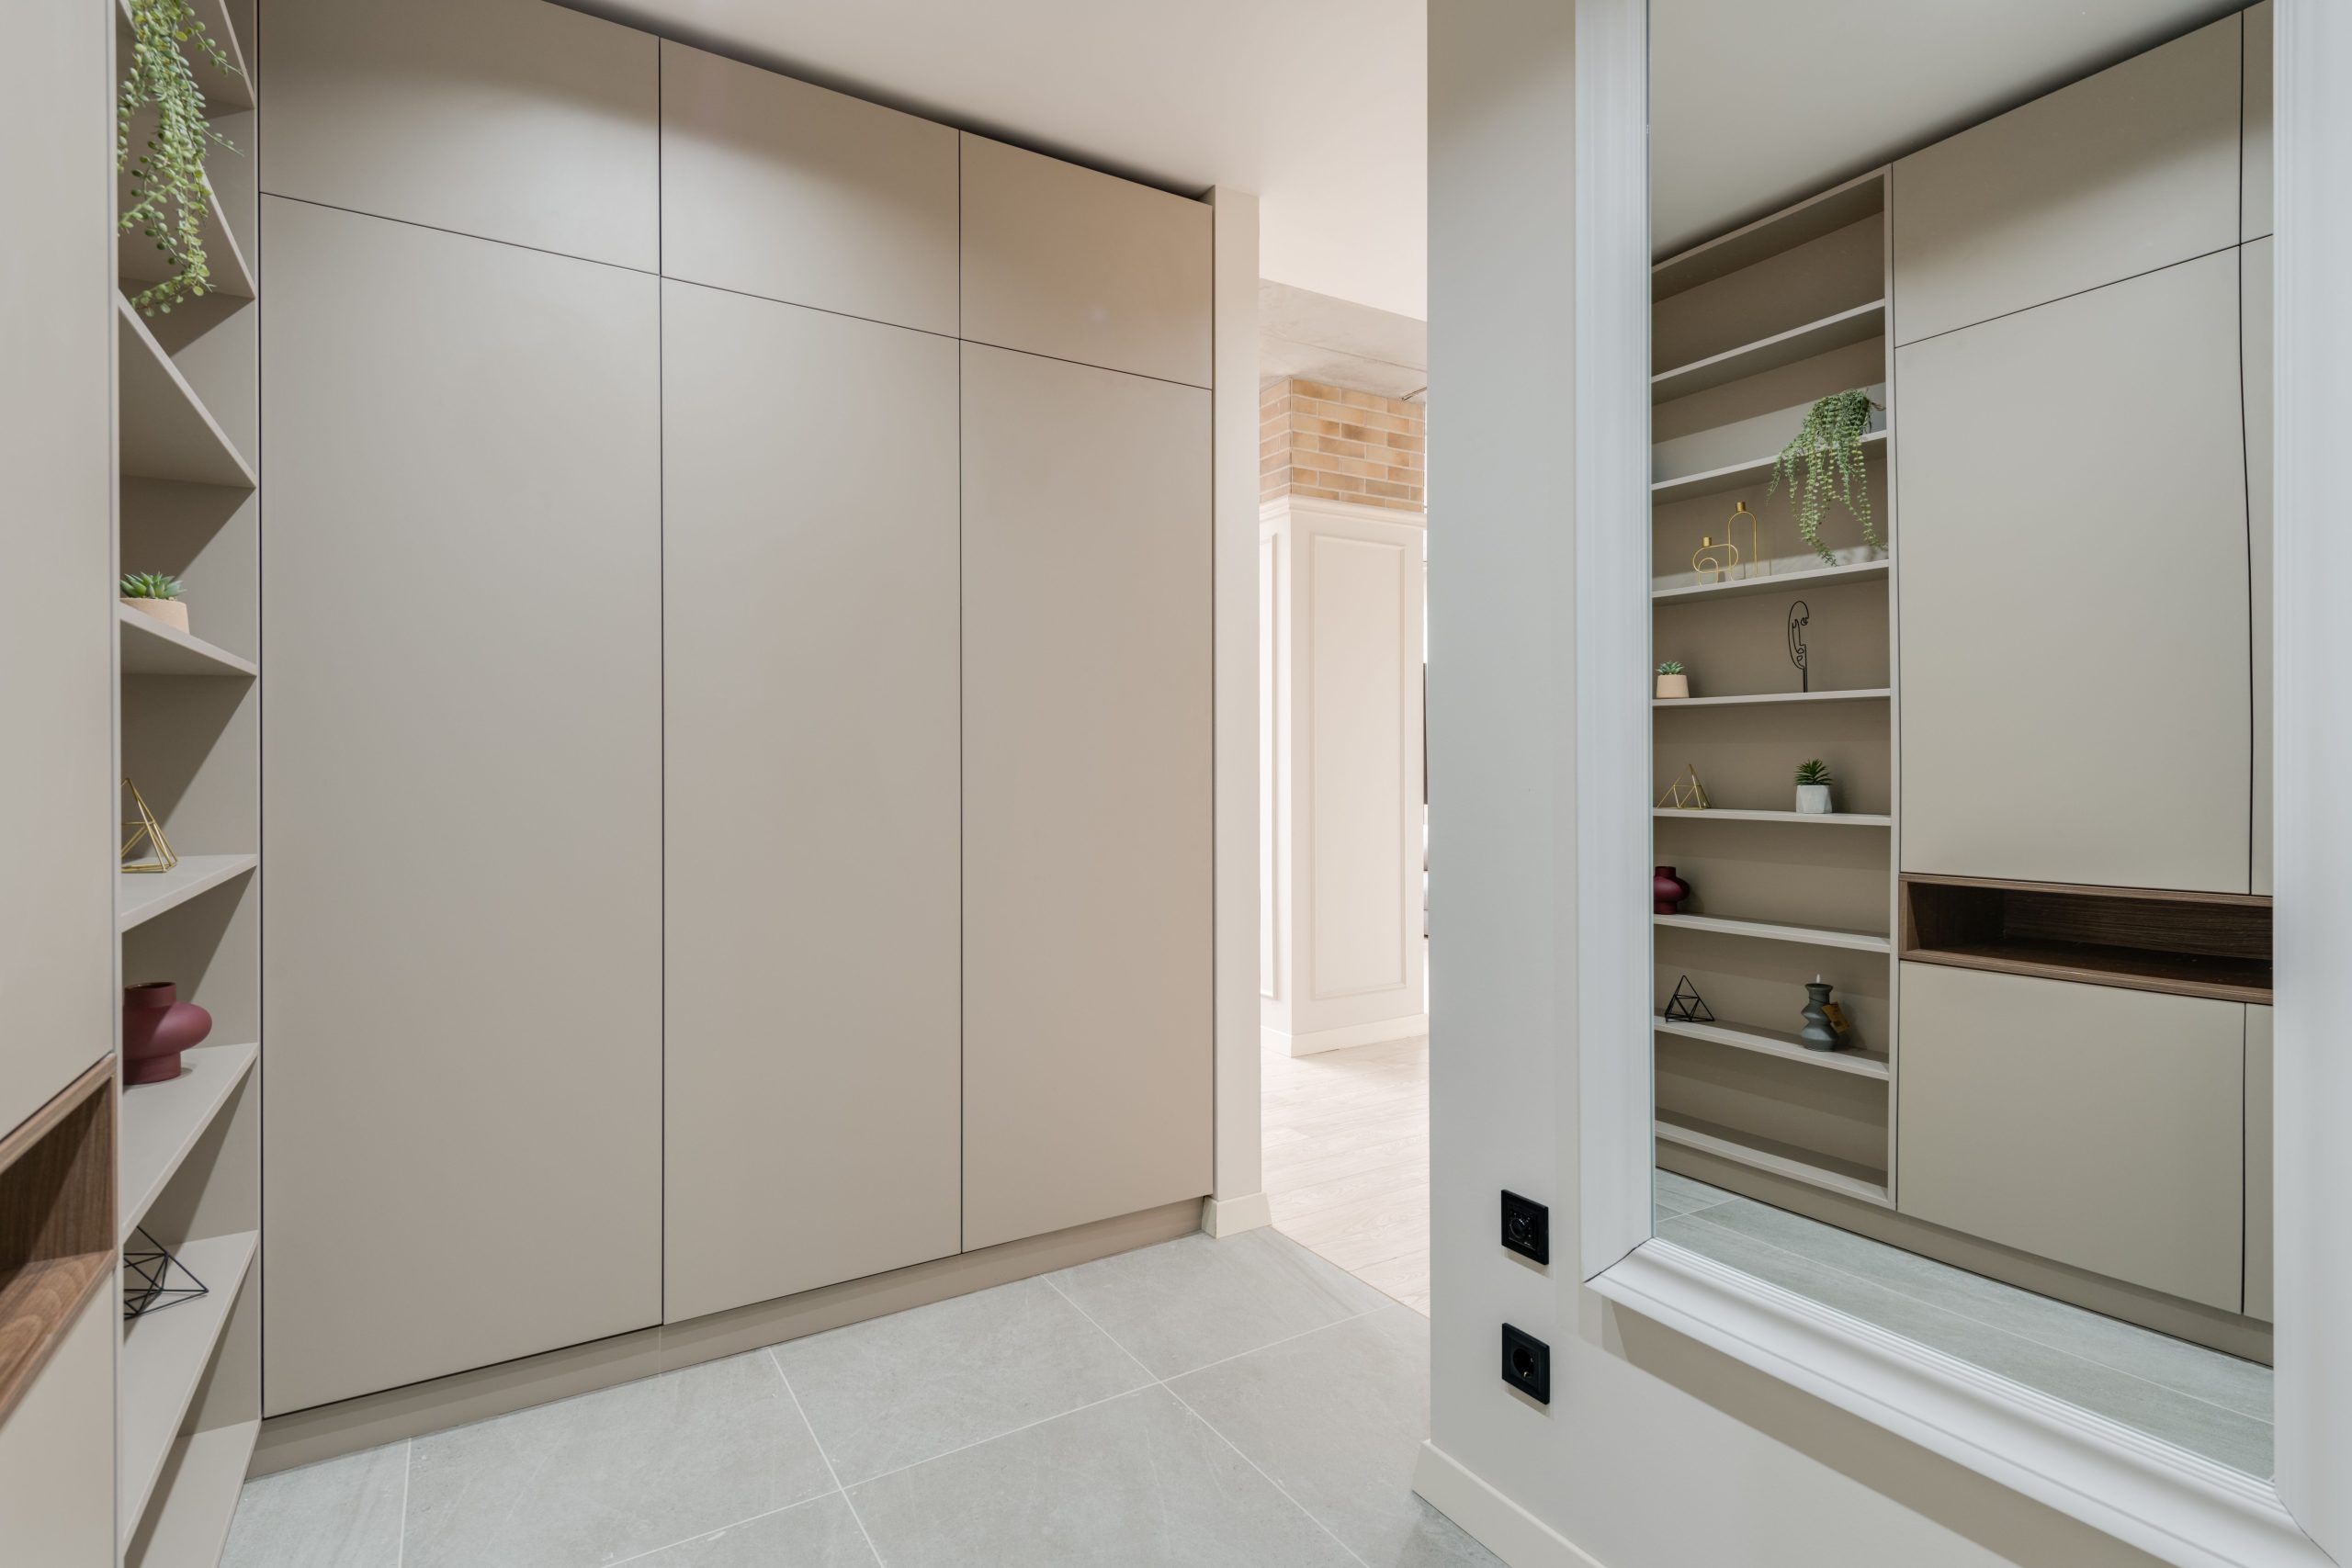
“Handleless, flat-panel doors create a beautifully clean and minimalist aesthetic, but they require precision during installation.”
Any slight misalignment in the doors will be immediately obvious and will disrupt the clean lines you’re trying to achieve. Using high-quality push-to-open hardware is critical for a smooth feel. Be prepared for some initial and potentially ongoing adjustments to get the gaps between each door perfectly even. This isn’t the most forgiving style if your walls or floors aren’t perfectly level.
16. Add Elegant Bathroom Storage with a Tall Linen Cabinet
This bathroom’s refined look follows a simple formula: 80% creamy white + 15% metallic accents + 5% color pop. The cabinetry, walls, and marble countertop create a serene, nearly monochromatic canvas. The silver/chrome hardware on the pulls and faucets adds a layer of classic sparkle. The final touch is the small, strategic pop of color from the pink towels on the open shelf. This tiny detail brings life to the space and prevents it from feeling sterile. You could swap the pink for navy, sage green, or lavender for a different mood.
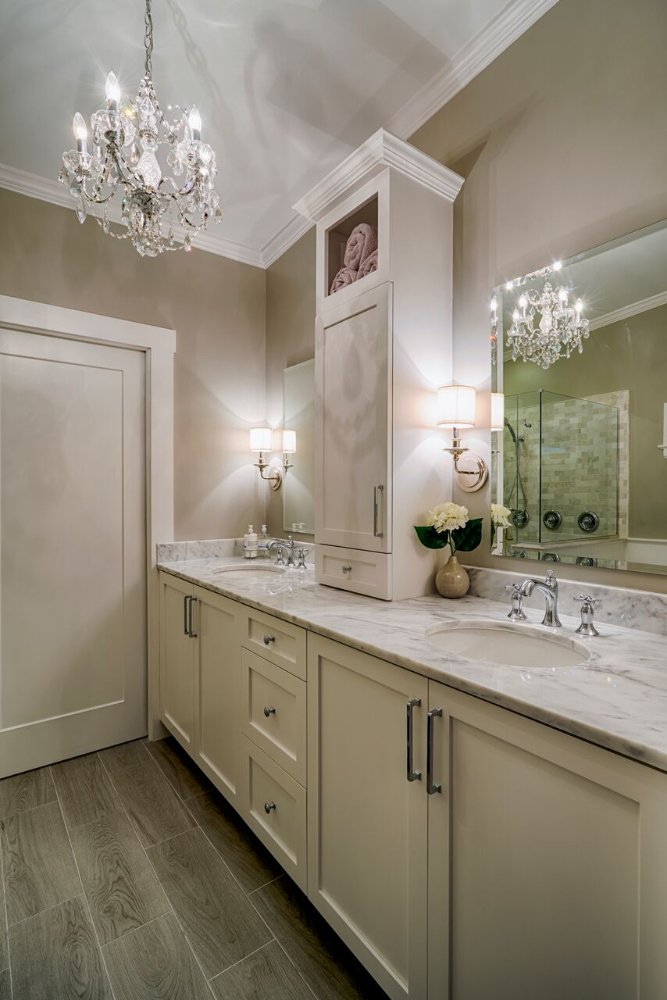
“Before committing to a tall tower cabinet between two vanities, verify these key”
Before committing to a tall tower cabinet between two vanities, verify these key details:
- Symmetry: Is the space perfectly centered? An off-center tower will look like a mistake. Measure from the center of the proposed cabinet to the center of each sink basin to ensure they are equal.
- Lighting: Do you have sconces or overhead vanity lights? Ensure the tall cabinet won’t cast a major shadow on one of the sinks, making it difficult to use.
- Door Swing: Check that the cabinet door can open fully without hitting a sconce, faucet, or mirror.
17. Create a Hotel-Luxe Feel with an Integrated Headboard Wall
This design feels so luxurious because it layers materials and textures within a very controlled color palette. The clean, flat white of the wardrobes provides a quiet frame. The vertical slatted wood panel adds warmth and directional movement. The dark, padded headboard offers a soft, grounding element. Finally, the touches of gold in the long handles provide a hint of glamour. Each material has a distinct job, and together they create a composition that is both serene and visually interesting. The integrated lighting is the final touch that makes it feel like a boutique hotel.
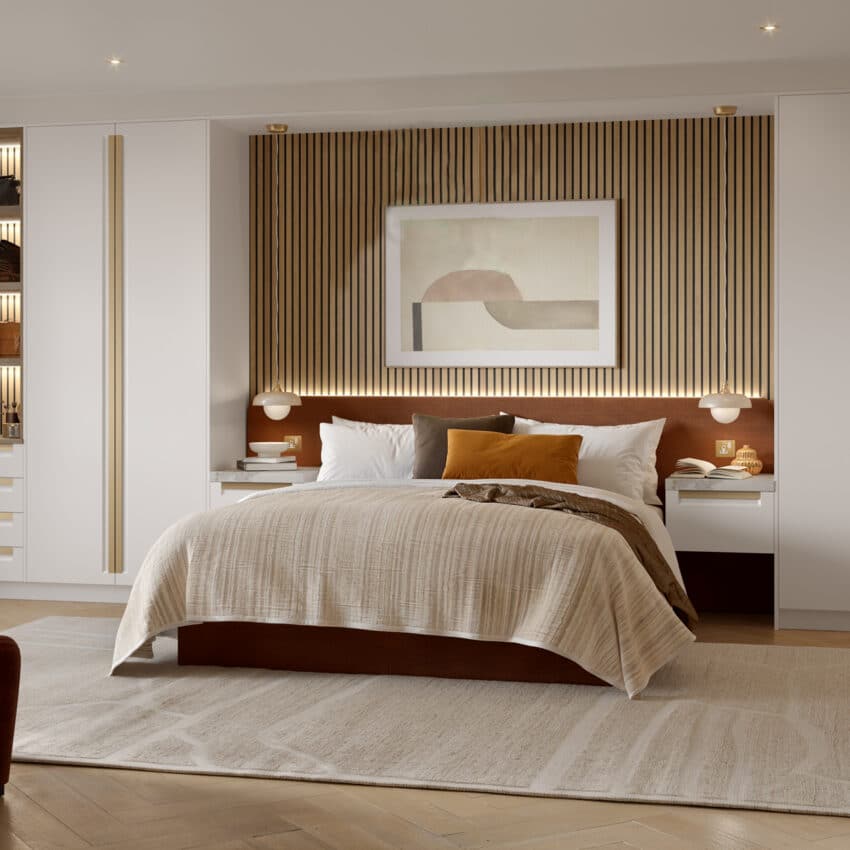
“You can get this high-end integrated look with more affordable materials.”
Instead of custom cabinetry, use IKEA’s white PLATSA or PAX wardrobes. For the accent wall, you can buy pre-made slatted wood panels from home improvement stores or even find peel-and-stick versions online. A simple upholstered headboard can be purchased separately and mounted to the wall. For the floating nightstands, look for simple wall-mounted shelves or small floating cabinets from retailers like Wayfair or Target. The key is sticking to the same color and material story.
18. Conceal a Hidden Coffee Bar Inside Your Kitchen Cabinet
Creating a hidden beverage station is a great way to reduce countertop clutter. Here’s how to retrofit an existing base cabinet:
- Measure Carefully: Measure the interior width, depth, and height of your cabinet. Also measure your coffee maker and any other small appliances to ensure they will fit.
- Source Shelving: Purchase wood or melamine shelves cut to your interior dimensions. Most hardware stores will cut them for you.
- Install Shelf Supports: Use a simple shelf pin jig to drill level holes for adjustable shelf pins. This gives you flexibility for future changes.
- Add Power (Optional but recommended): This is a job for a licensed electrician. Have them install an outlet on the back interior wall of the cabinet.
- Organize: Use small bins, jars, and trays to organize your tea bags, coffee pods, sugar, and stir sticks.
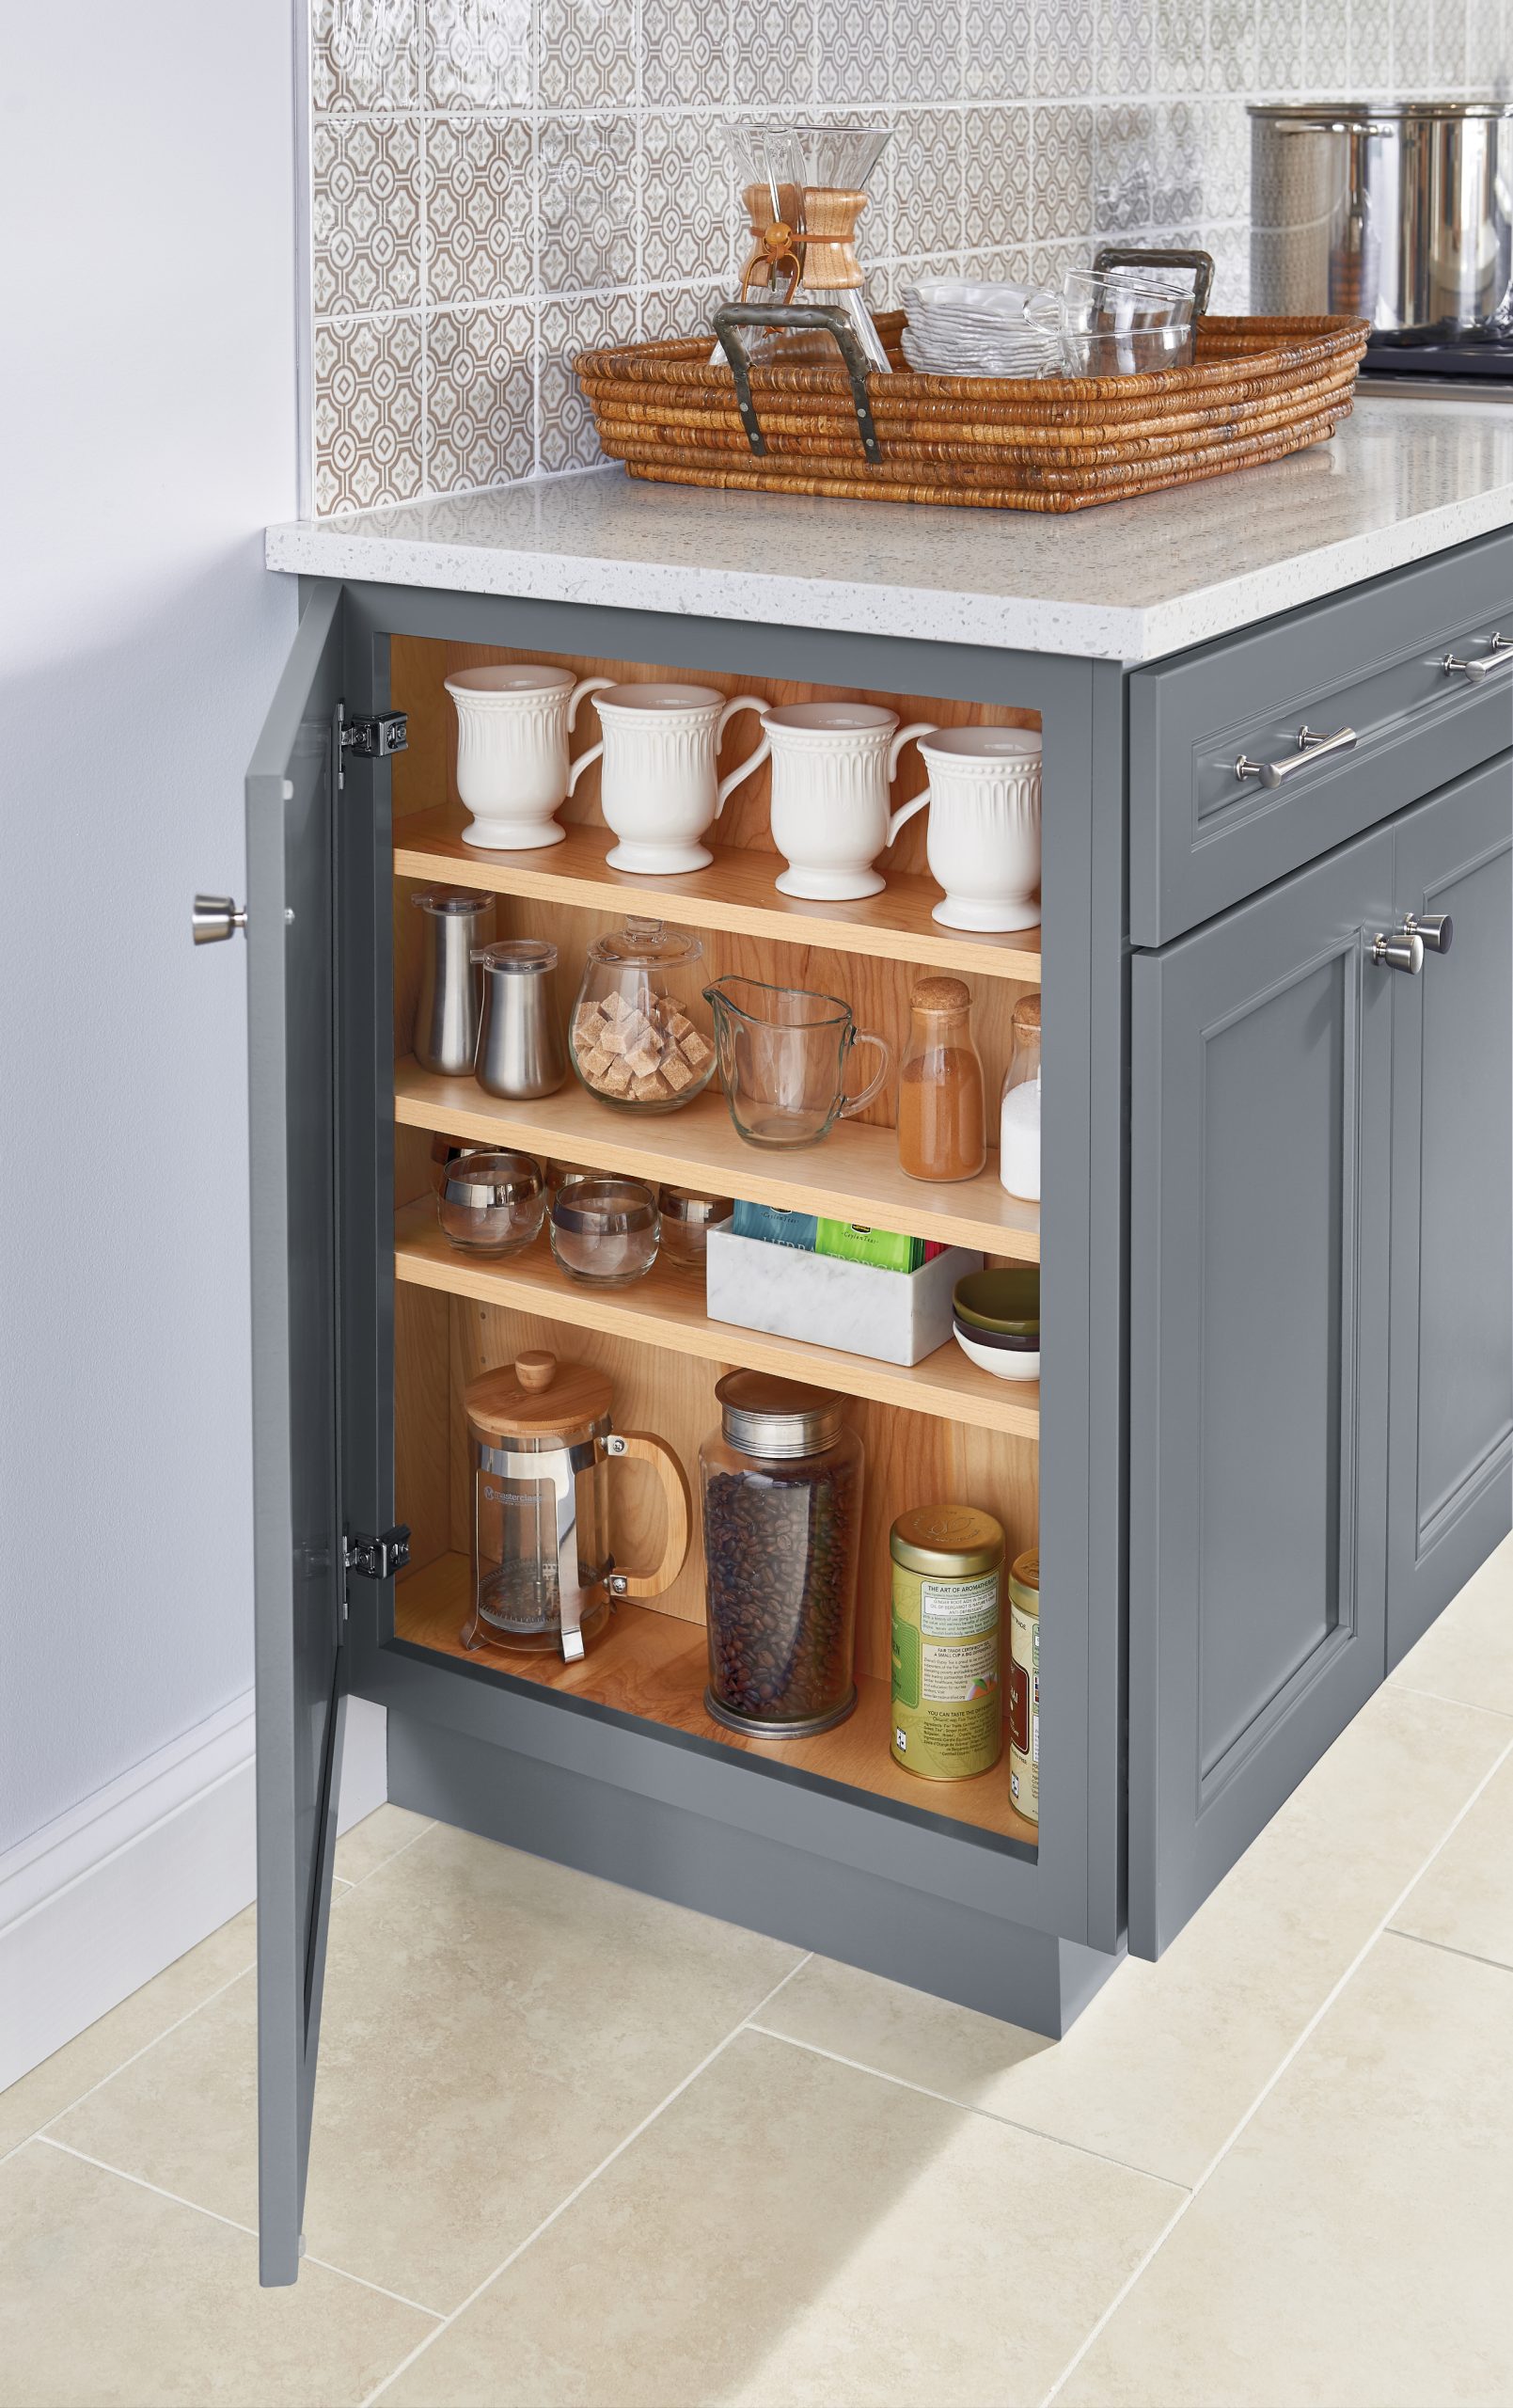
“When creating a hidden appliance garage or coffee bar, always prioritize ventilation.”
Coffee makers, toasters, and other small appliances produce heat. Never operate them inside a fully closed cabinet. Opt for a door style that can be pushed back or folded away, like a pocket door or a flip-up garage-style door, to ensure heat can dissipate safely during use. If that’s not possible, make a habit of keeping the cabinet doors fully open while the appliance is running and for a few minutes after.
19. Design a Flexible Workspace with an Adjustable Plywood Shelving System
This type of modular, adjustable shelving is gaining popularity as our homes need to be more flexible than ever. With the rise of hybrid work and multi-purpose rooms, people are looking for storage that can adapt with them. A system like this can be a craft station one year and a home office the next. The use of honest, raw materials like plywood also taps into a broader trend towards natural, sustainable design. It celebrates its own construction, which feels authentic and grounded in a world of overly-filtered perfection.
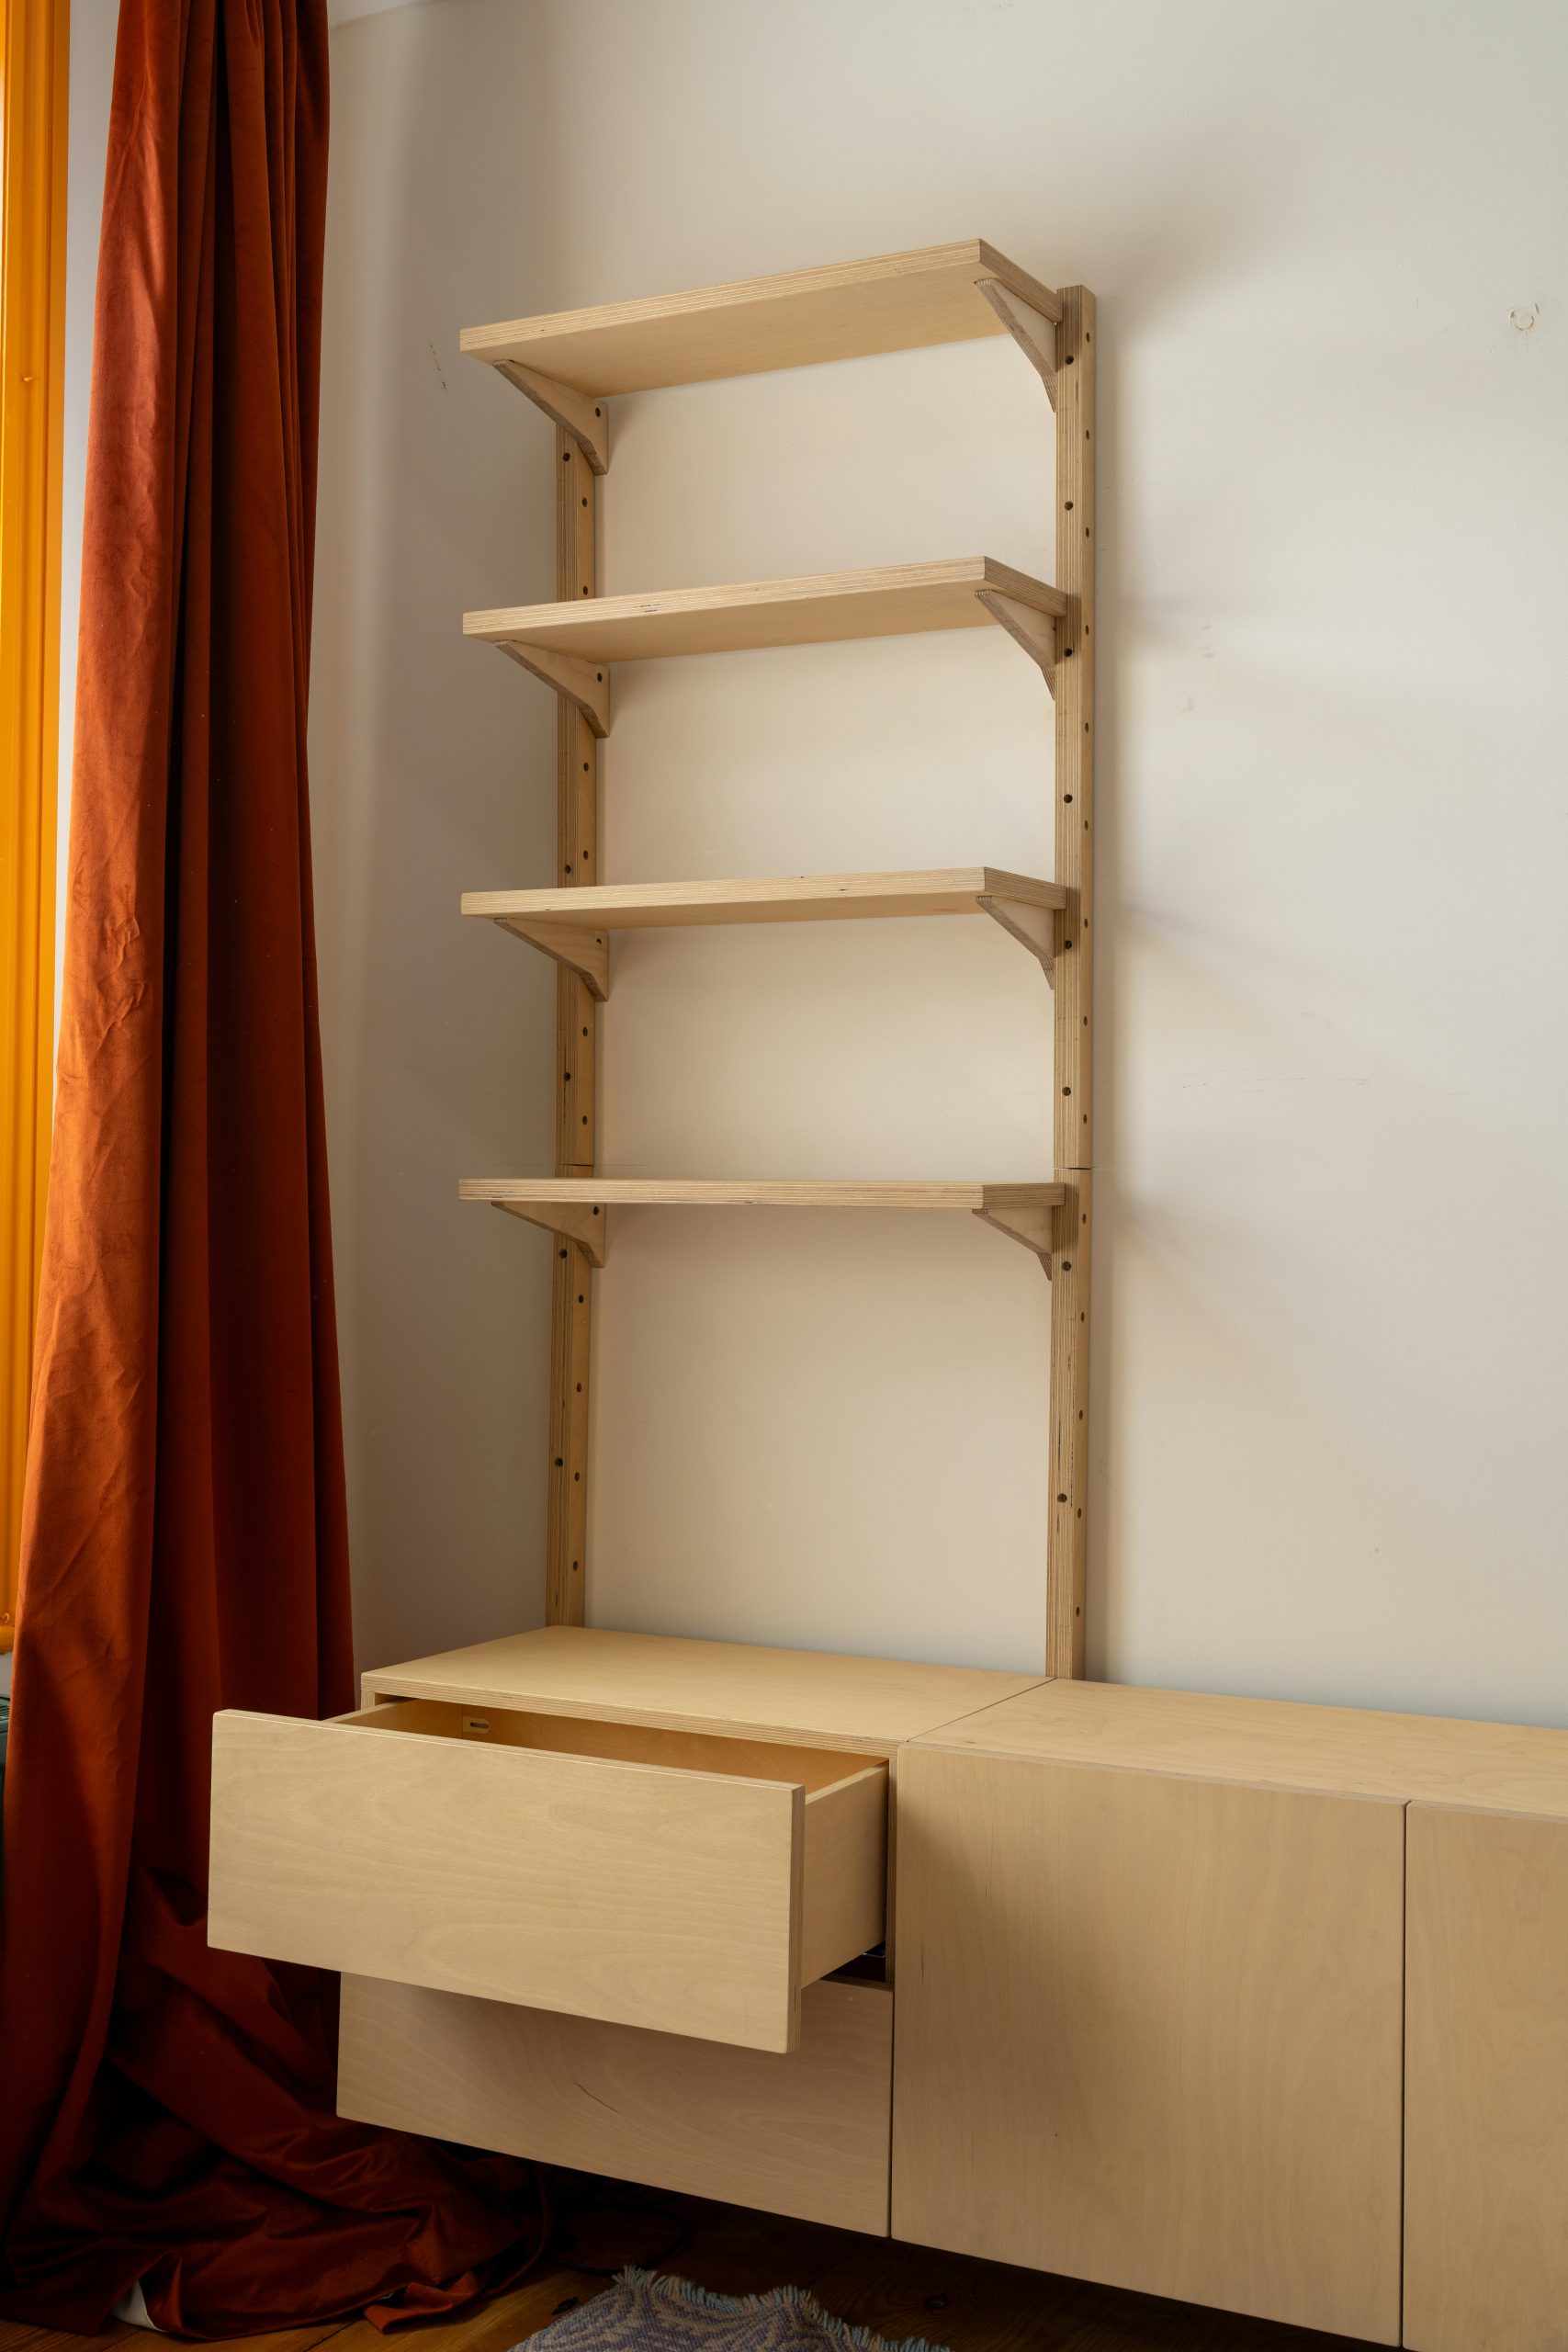
“A wall-mounted system like this is brilliant for rooms of all sizes because it’s completely customizable.”
The key is wall space. You need a clear, uninterrupted wall section at least 4-6 feet wide to make it feel substantial. It’s particularly effective in rooms with smaller square footage because it keeps the floor clear, creating a sense of spaciousness. The vertical nature of the supports draws the eye up, making ceilings feel higher. Just ensure your wall can support the weight, securing the tracks into studs is a must.
20. Tuck a Storage Bench with Wicker Baskets Under the Stairs
That awkward space under the stairs is full of potential. Before you build, check these three things:
- Measure the Slope: Know the exact angle of your staircase. You can build a simple triangular frame for a custom fit, or opt for a rectangular bench like this one that sits comfortably underneath the slope.
- Check for Utilities: Is there an HVAC vent, electrical outlet, or clean-out access panel in that space? Plan your design to either incorporate them or ensure they remain accessible.
- Basket Size: Buy your storage baskets *before* you finalize the dimensions of your bench cubbies. There’s nothing worse than building the perfect bench only to find the baskets you love don’t fit.
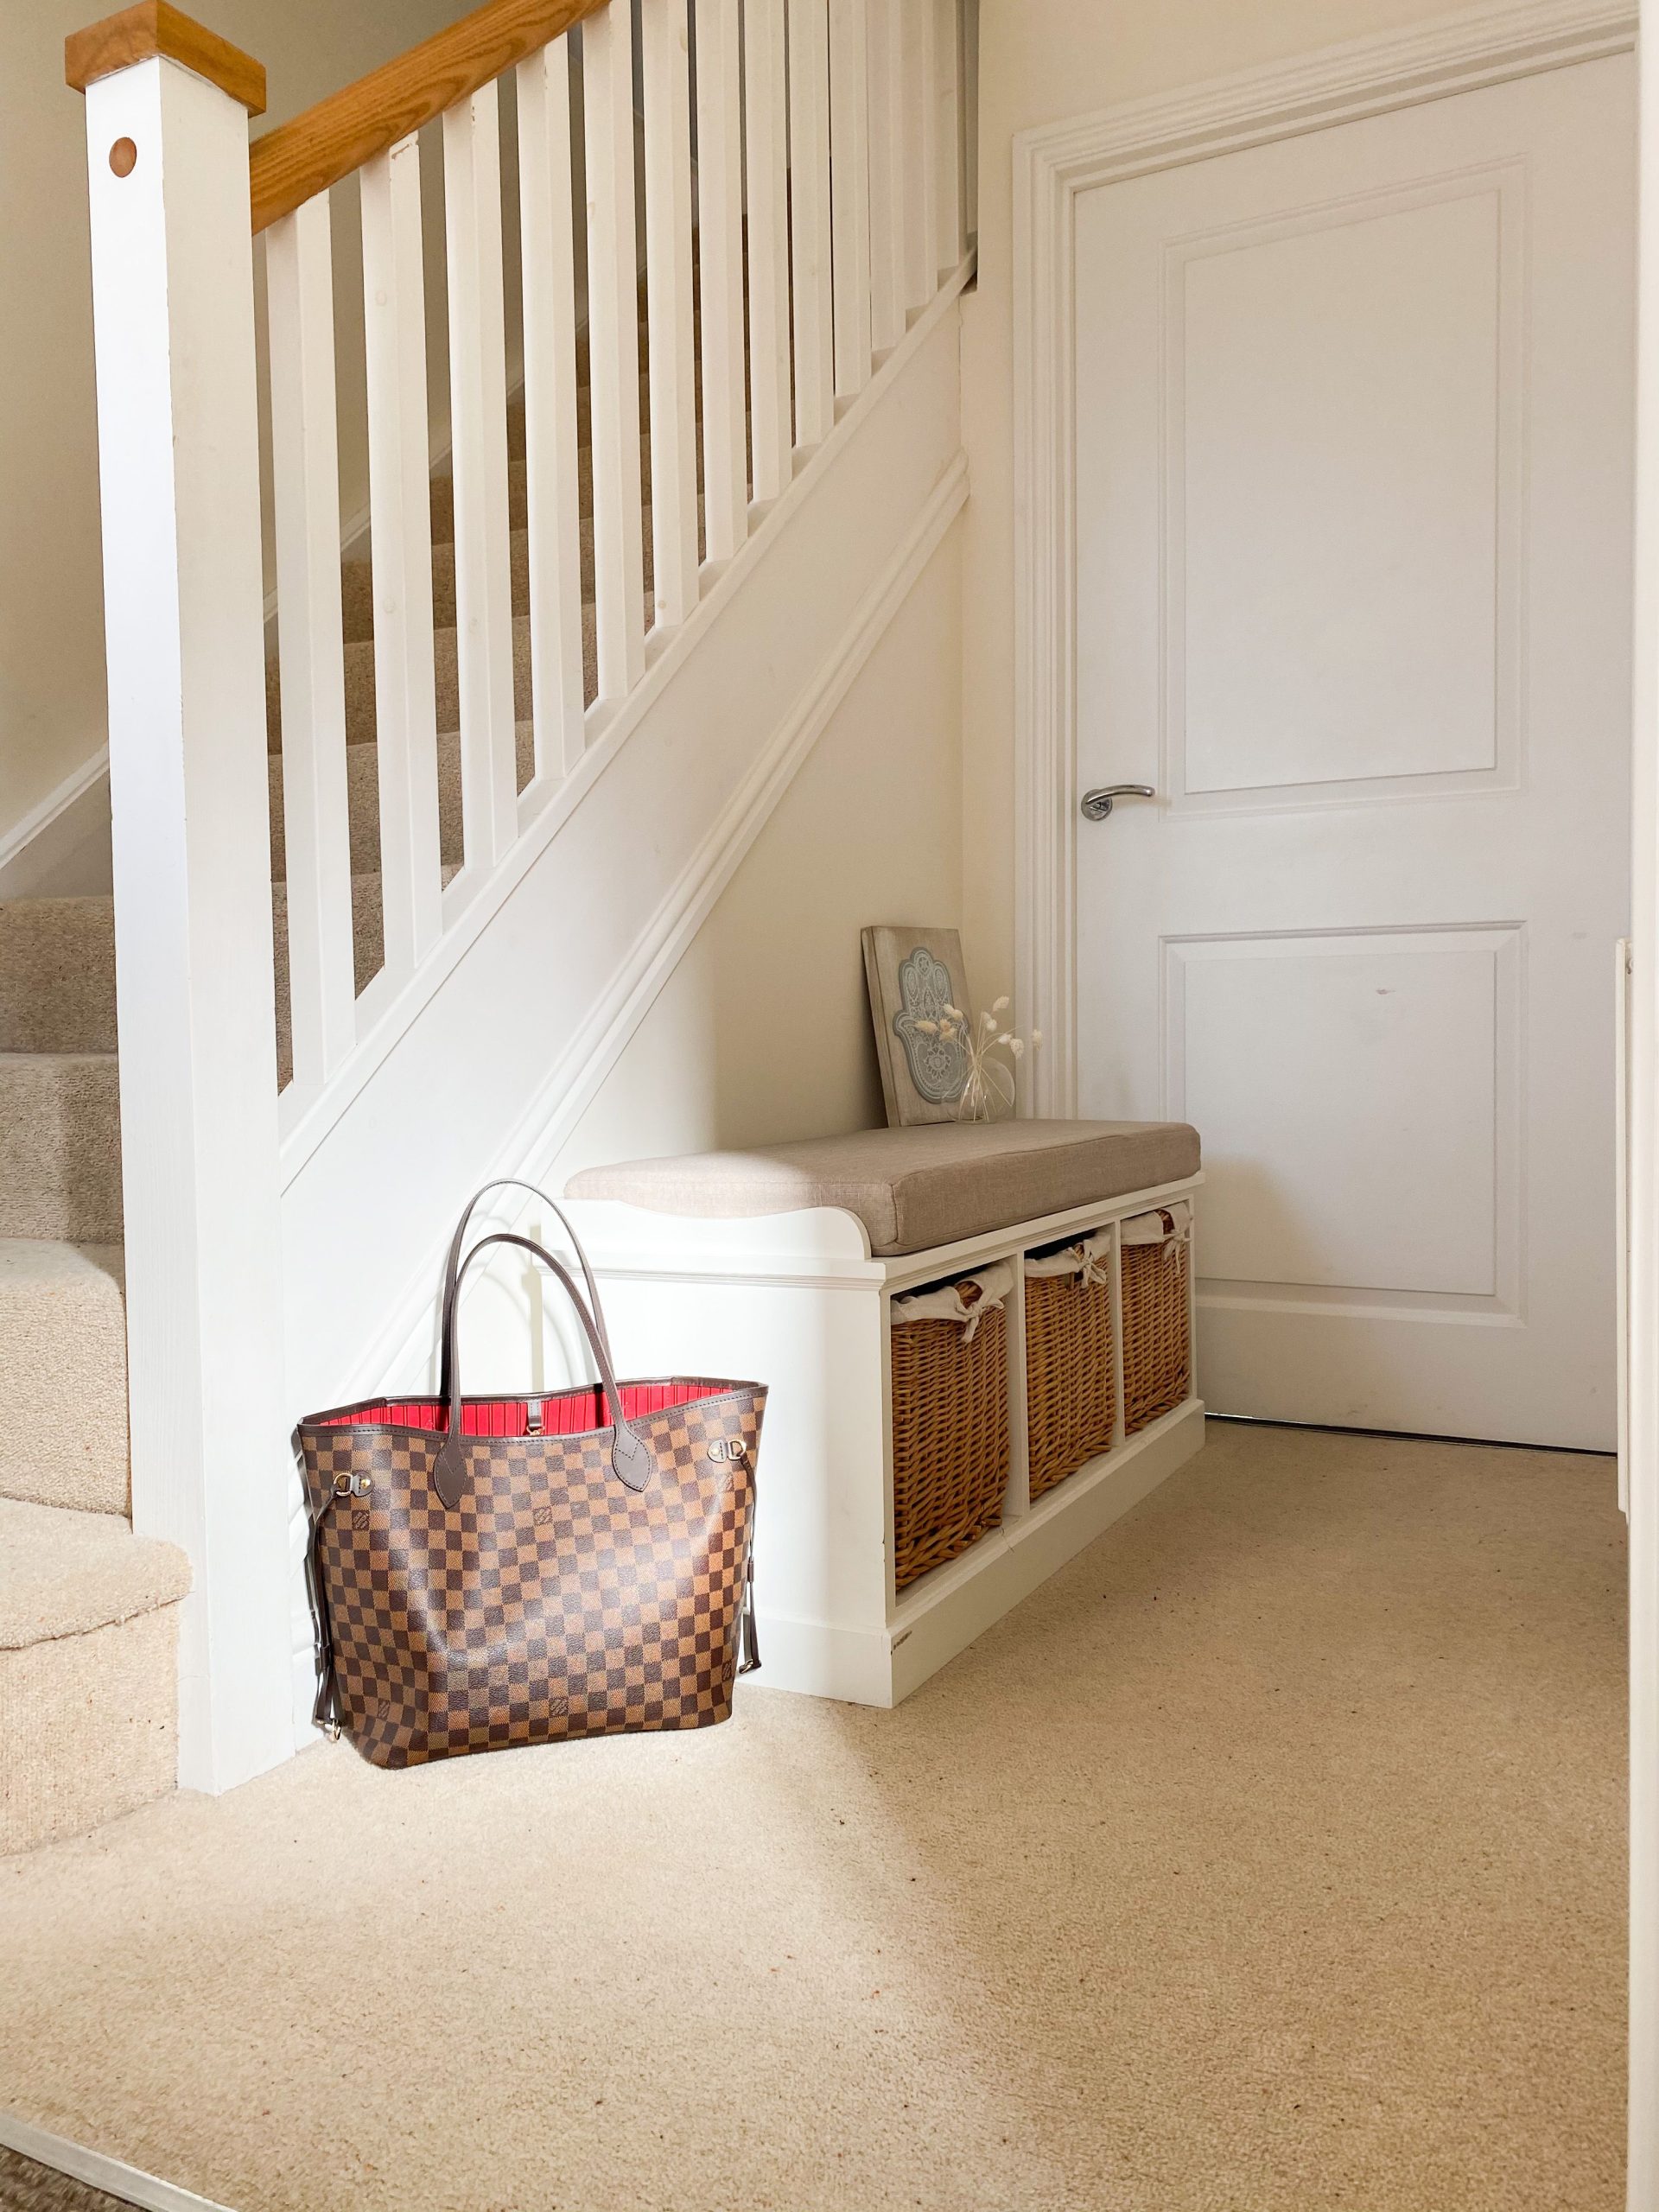
“This idea is so effective because it’s simple, charming, and practical.”
It takes a notoriously awkward architectural feature—the space under the stairs—and gives it a clear purpose. The combination of the crisp white painted wood, the natural texture of the wicker baskets, and the soft beige cushion is a classic recipe for a welcoming, casual feel. It adds seating, hides clutter, and looks completely intentional. It’s a perfect example of turning a “problem area” into a beloved feature. Compare this to the more formal entryway bench in Idea #26.
21. Embrace Classic Style with Dark Wood Shaker Kitchen Cabinets
Dark wood cabinetry, while timeless, can make a kitchen feel smaller and heavier if not balanced correctly. This look requires excellent lighting, both natural and artificial. Under-cabinet lighting is not optional here; it’s a necessity to illuminate your countertops and prevent the work areas from feeling like dark caves. The simple, clean lines of the Shaker style help to mitigate the visual weight of the dark wood, but the room itself needs to have enough light to support such a bold choice.
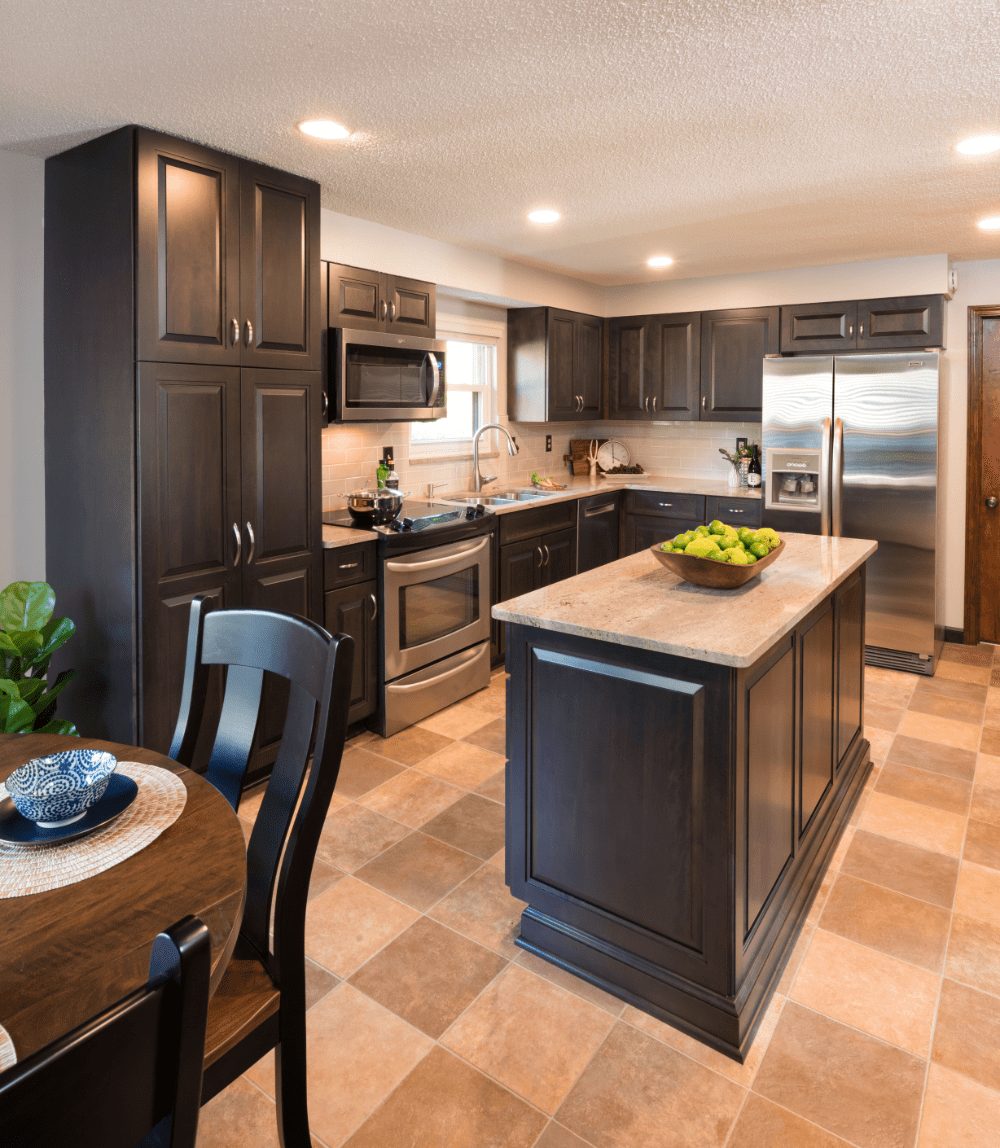
“The visual formula for a successful traditional kitchen like this is about balance: 70% dark wood cabinetry creates a warm, enclosing feeling.”
20% light surfaces (the countertops and backsplash) provide contrast and reflect light, keeping the space from feeling oppressive. The final 10% comes from metallic accents (the stainless steel appliances), which add a touch of modern gleam and break up the large expanses of wood. This careful ratio ensures the kitchen feels grounded and classic, not dated and dark.
22. Achieve a Sleek, Integrated Look with a Floating Bedside Table
The standout feature is the glowing light panel integrated directly above the floating bedside table. It’s a detail that elevates the entire wall from merely functional to truly high-design. It serves as a built-in reading lamp, an ambient light source, and a striking architectural element all in one. This thoughtful integration of lighting is what gives the space its serene, hotel-like vibe and makes the entire composition of wardrobe, nightstand, and headboard feel like a single, cohesive unit.
“You don’t need a full custom build to get this integrated vibe.”
Start with a white wardrobe system from IKEA, like PAX or PLATSA. Mount a simple floating shelf or a small floating drawer unit (widely available online) to the side of the wardrobe to act as the nightstand. For the magic touch, install a slim, plug-in LED light bar on the wall just above the shelf. Frame it with simple wood trim painted white to give it that built-in look. It’s a clever way to fake a high-end feature for a few hundred dollars.
23. Go Grand with a Butler’s Pantry Featuring a Rolling Ladder
A full-scale butler’s pantry of this caliber is a serious investment in luxury and organization. The star of the show, the rolling ladder, adds significant cost but also unmatched function and charm. This is a project for skilled carpenters and cabinet makers.
- Custom Cabinetry (White finish): $8,000 – $18,000
- Dark Wood Interior Shelving & Plate Racks: $2,000 – $5,000
- Rolling Library Ladder and Hardware: $1,500 – $4,000
- Professional Design & Installation: $3,000 – $6,000
- TOTAL: $14,500 – $33,000
Budget alternative: Use stock white cabinets from a big-box store and add custom dark wood shelves yourself. A decorative (non-rolling) ladder can be found for a few hundred dollars to capture the vibe.
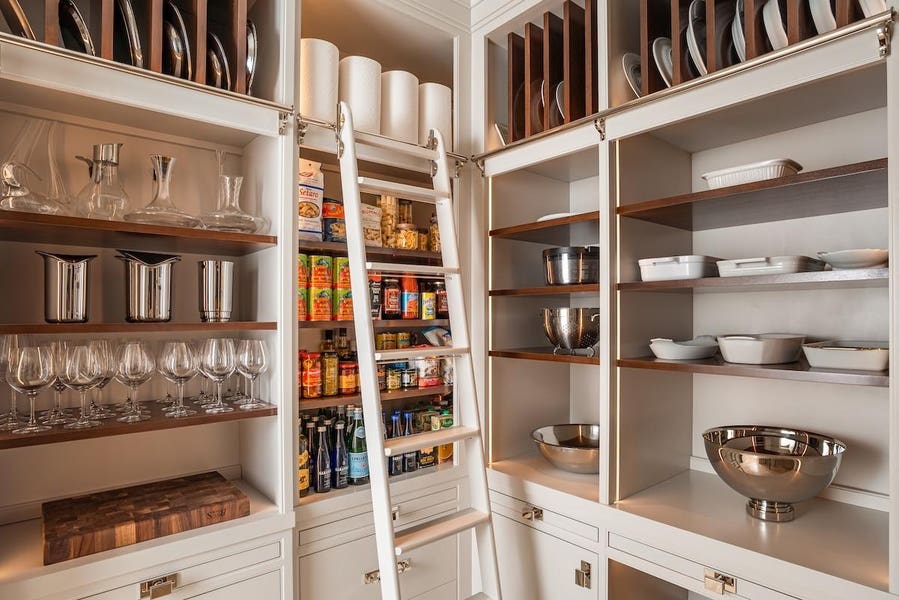
“While a rolling ladder is the romantic centerpiece of a grand pantry, it requires specific structural considerations.”
The top rail must be anchored securely into solid wood blocking within the wall or cabinetry, not just drywall. This needs to be planned for during the construction phase. Also, be honest about its practicality for your family. If you have small children, it could be a safety hazard. If your pantry is more modest in height, the ladder might be more of a charming obstacle than a necessary tool for access.
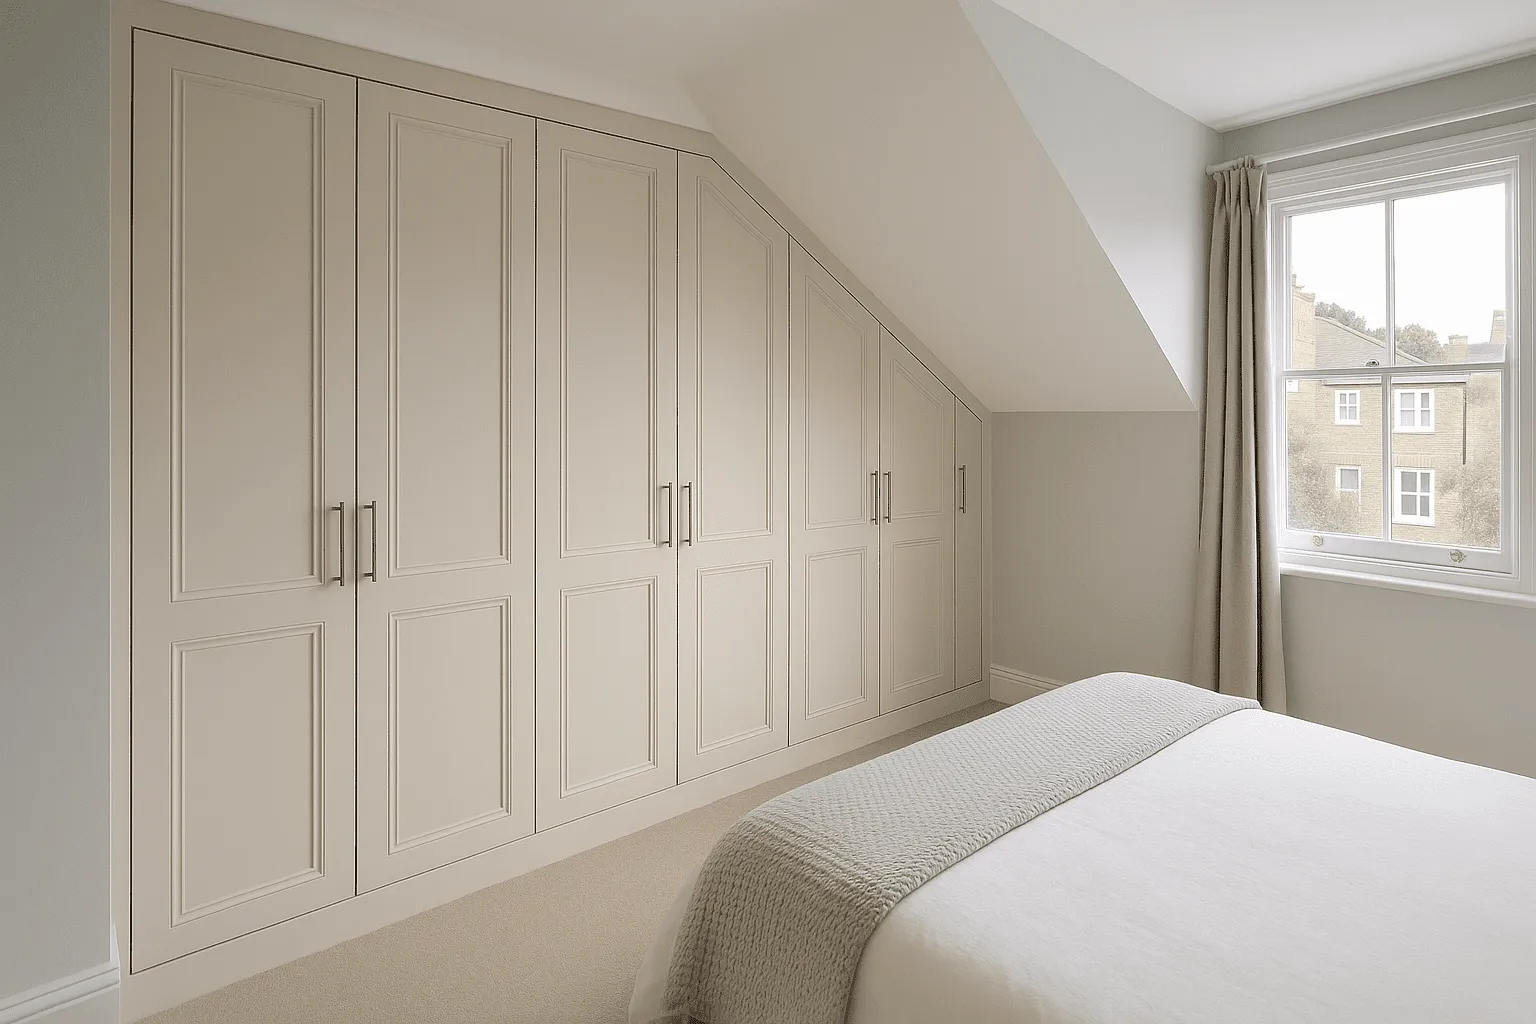
24. Fit Storage Perfectly with Wardrobes Scribed to an Angled Ceiling
Working with angled ceilings requires precision. This is a job for a professional carpenter. The key is a technique called “scribing.” The installer will hold the final top piece or panel of the wardrobe against the angled ceiling and use a compass or scribing tool to trace the exact line of the ceiling onto the wood. They then cut along this line for a perfect, gap-free fit. Don’t try to simply measure the angle; it’s rarely a perfect 45 degrees. Scribing is the only way to get that seamless, truly built-in look.
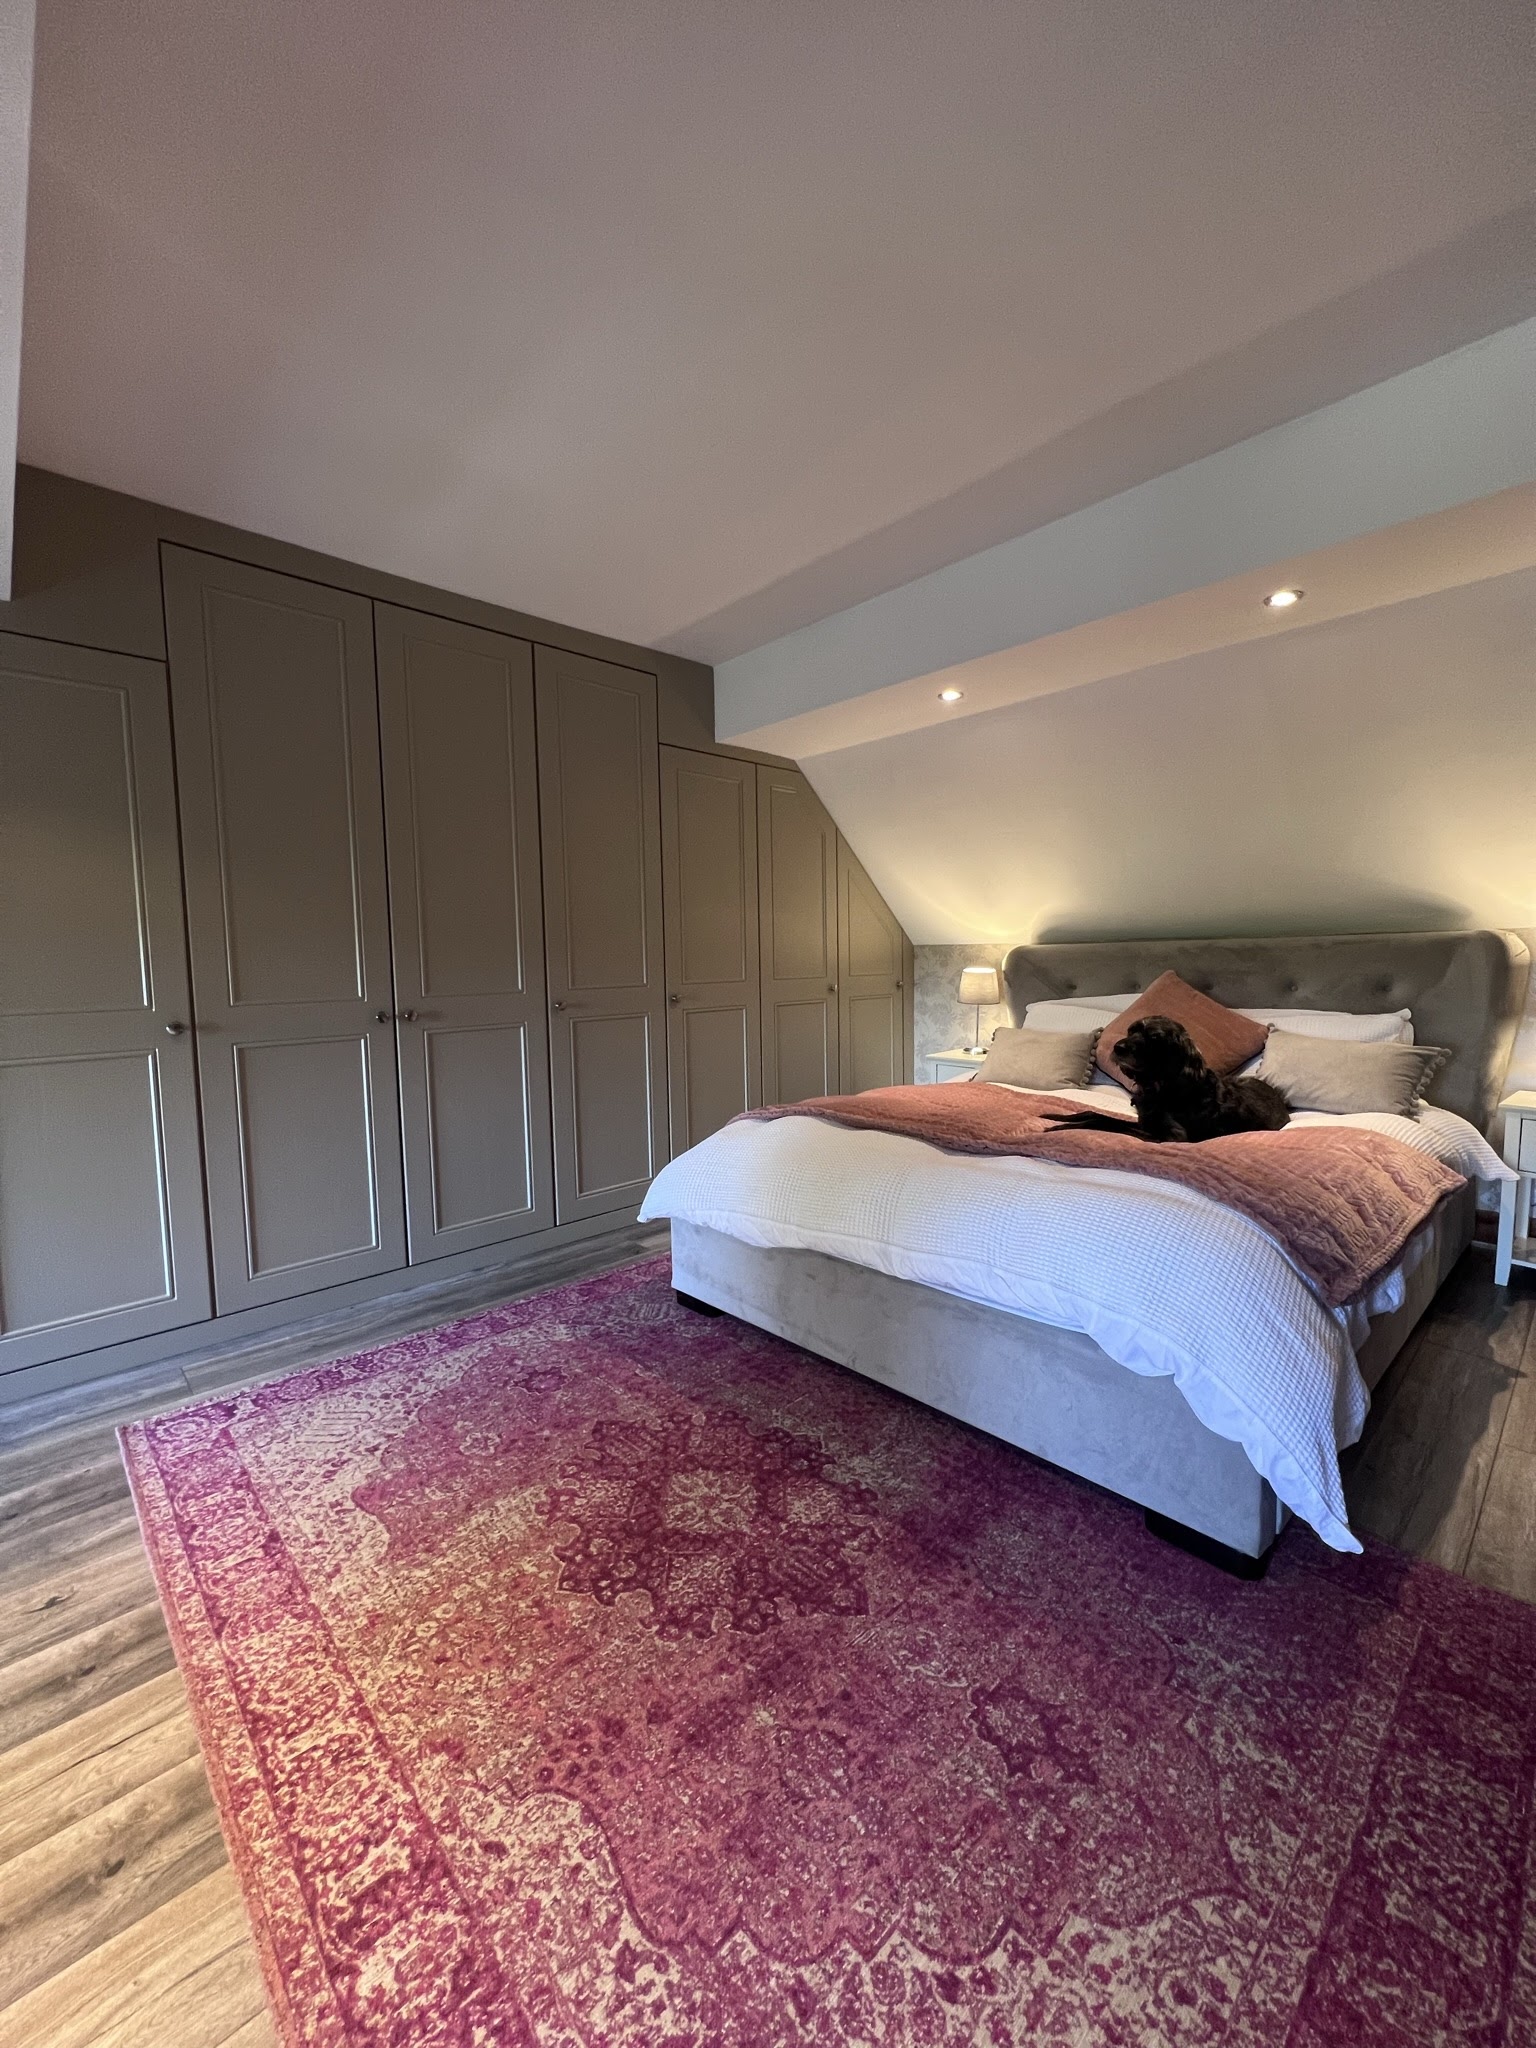
“This storage solution is so successful because it embraces the room’s architectural quirk instead of fighting it.”
By custom-fitting the wardrobes to the angled ceiling, the design transforms a potentially awkward space into a deliberate, fully utilized feature. The multi-panel design on the wardrobe doors adds texture and detail, preventing the large surface from feeling flat and monolithic. The choice of a soft, warm gray color keeps it from overpowering the cozy bedroom atmosphere.
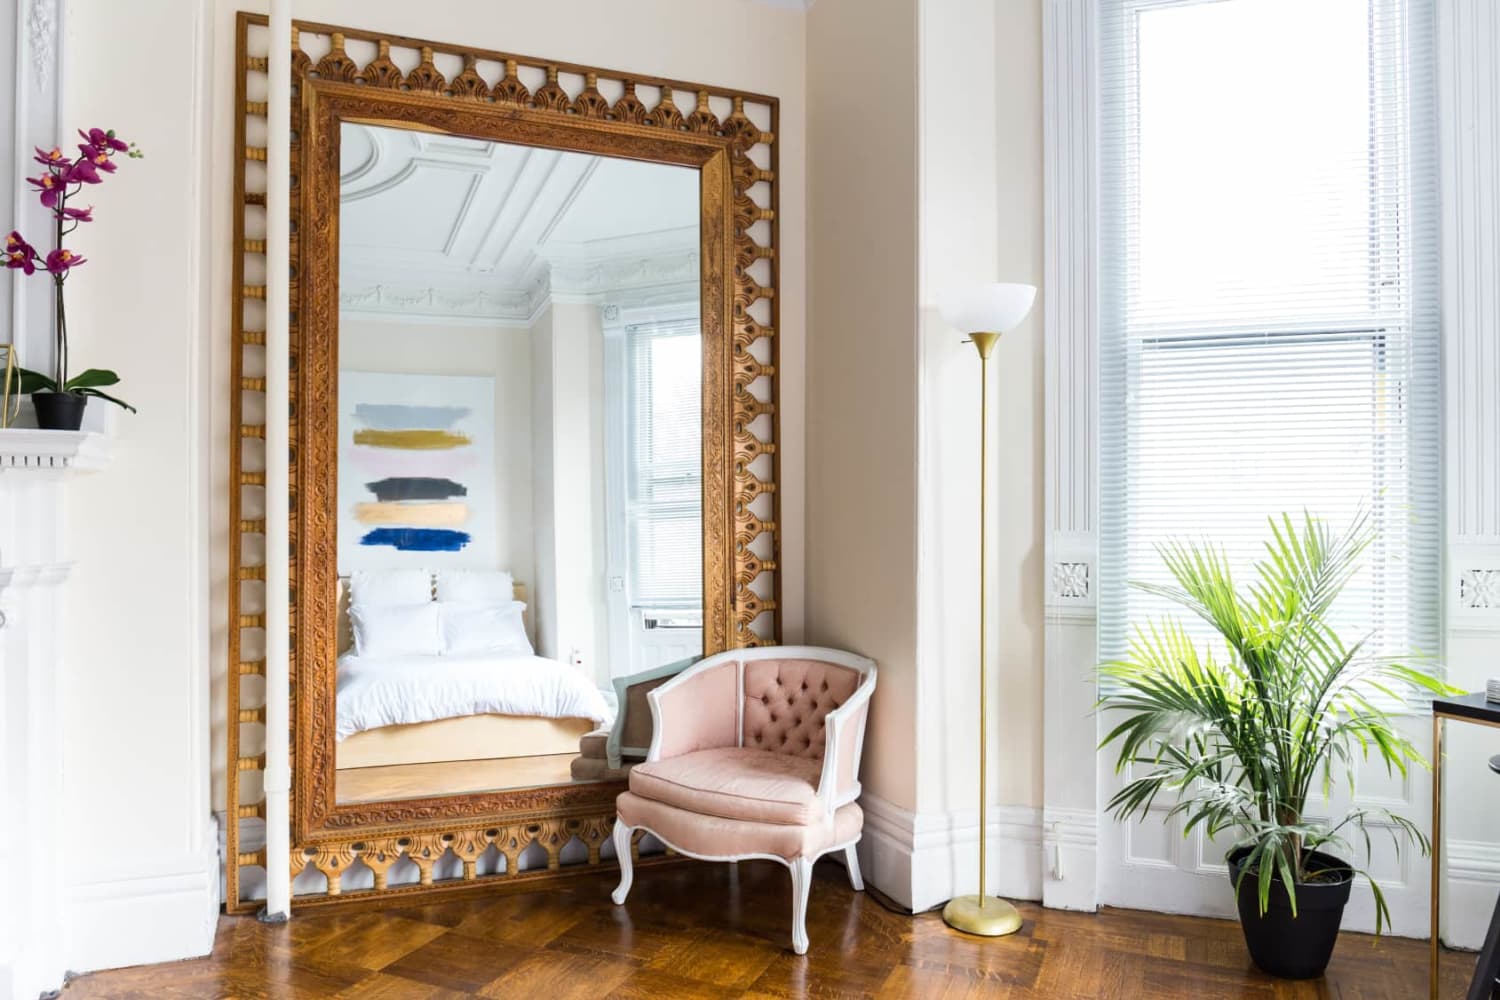
25. Expand a Room with a Large Mirrored Sliding Door Wardrobe
A large-scale mirrored wardrobe like this is a secret weapon for small to medium-sized bedrooms (around 100-180 sq ft). It’s especially effective in rooms that lack natural light or have a narrow layout. For it to work, you need a wall that is at least 8-10 feet long to accommodate a three-door system and make a real impact. The reflection needs space to work its magic; in a very tiny, cluttered room, it can sometimes amplify the feeling of chaos rather than space. Compare this with the hinged-door mirror in Idea #1, which works well on a shorter wall.
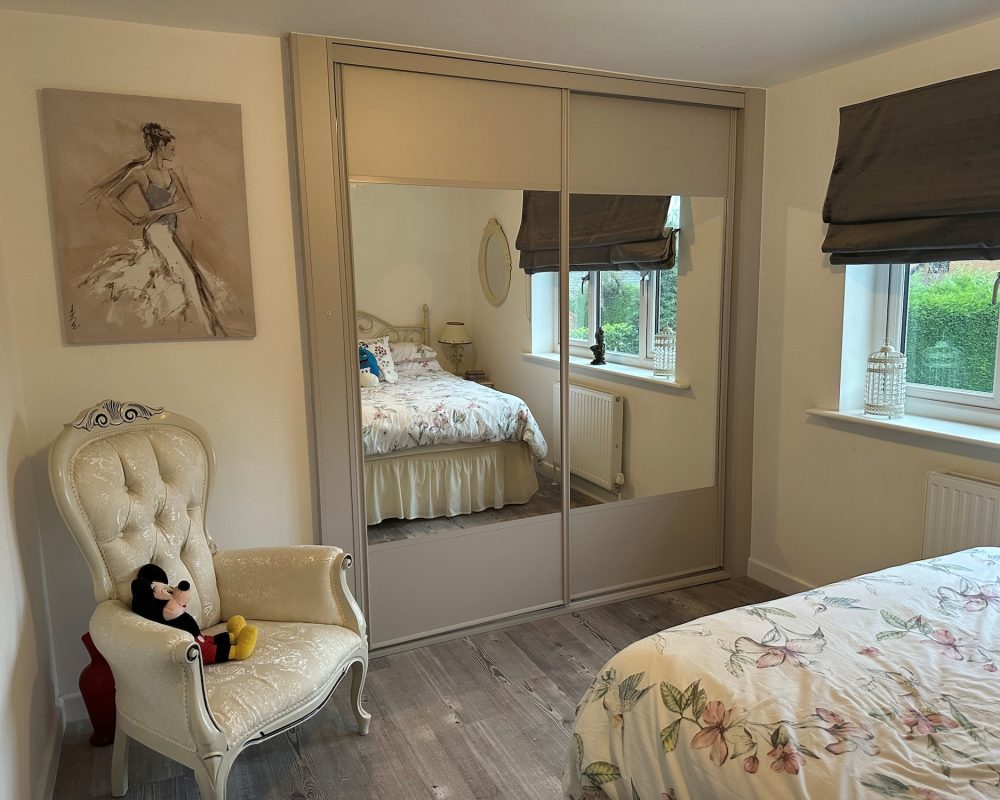
“Mirrors are fantastic for making a room feel bigger, but a mirror of this size requires constant cleaning to look its best.”
Fingerprints, smudges, and dust will be very noticeable, especially in a room with a lot of natural light. You’ll be reaching for the glass cleaner often. Also, consider what the mirror will be reflecting. If it’s facing a cluttered corner or an unmade bed, it will just double the mess. It forces you to keep the rest of the room tidy to get that clean, expansive look you’re after.
26. Design a Welcoming Entryway with a Dark Blue Storage Bench
What makes this entryway so appealing is the smart use of geometry and texture. The angled chevron paneling on the back wall creates dynamic energy and draws the eye upward. This contrasts beautifully with the simple, straight lines of the bench and the open cubbies above. The textural play between the smooth painted wood, the woven baskets, the striped fabric cushion, and the metallic brass hooks adds layers of interest. It’s a small space, but it’s packed with thoughtful details that make it feel custom and high-end.
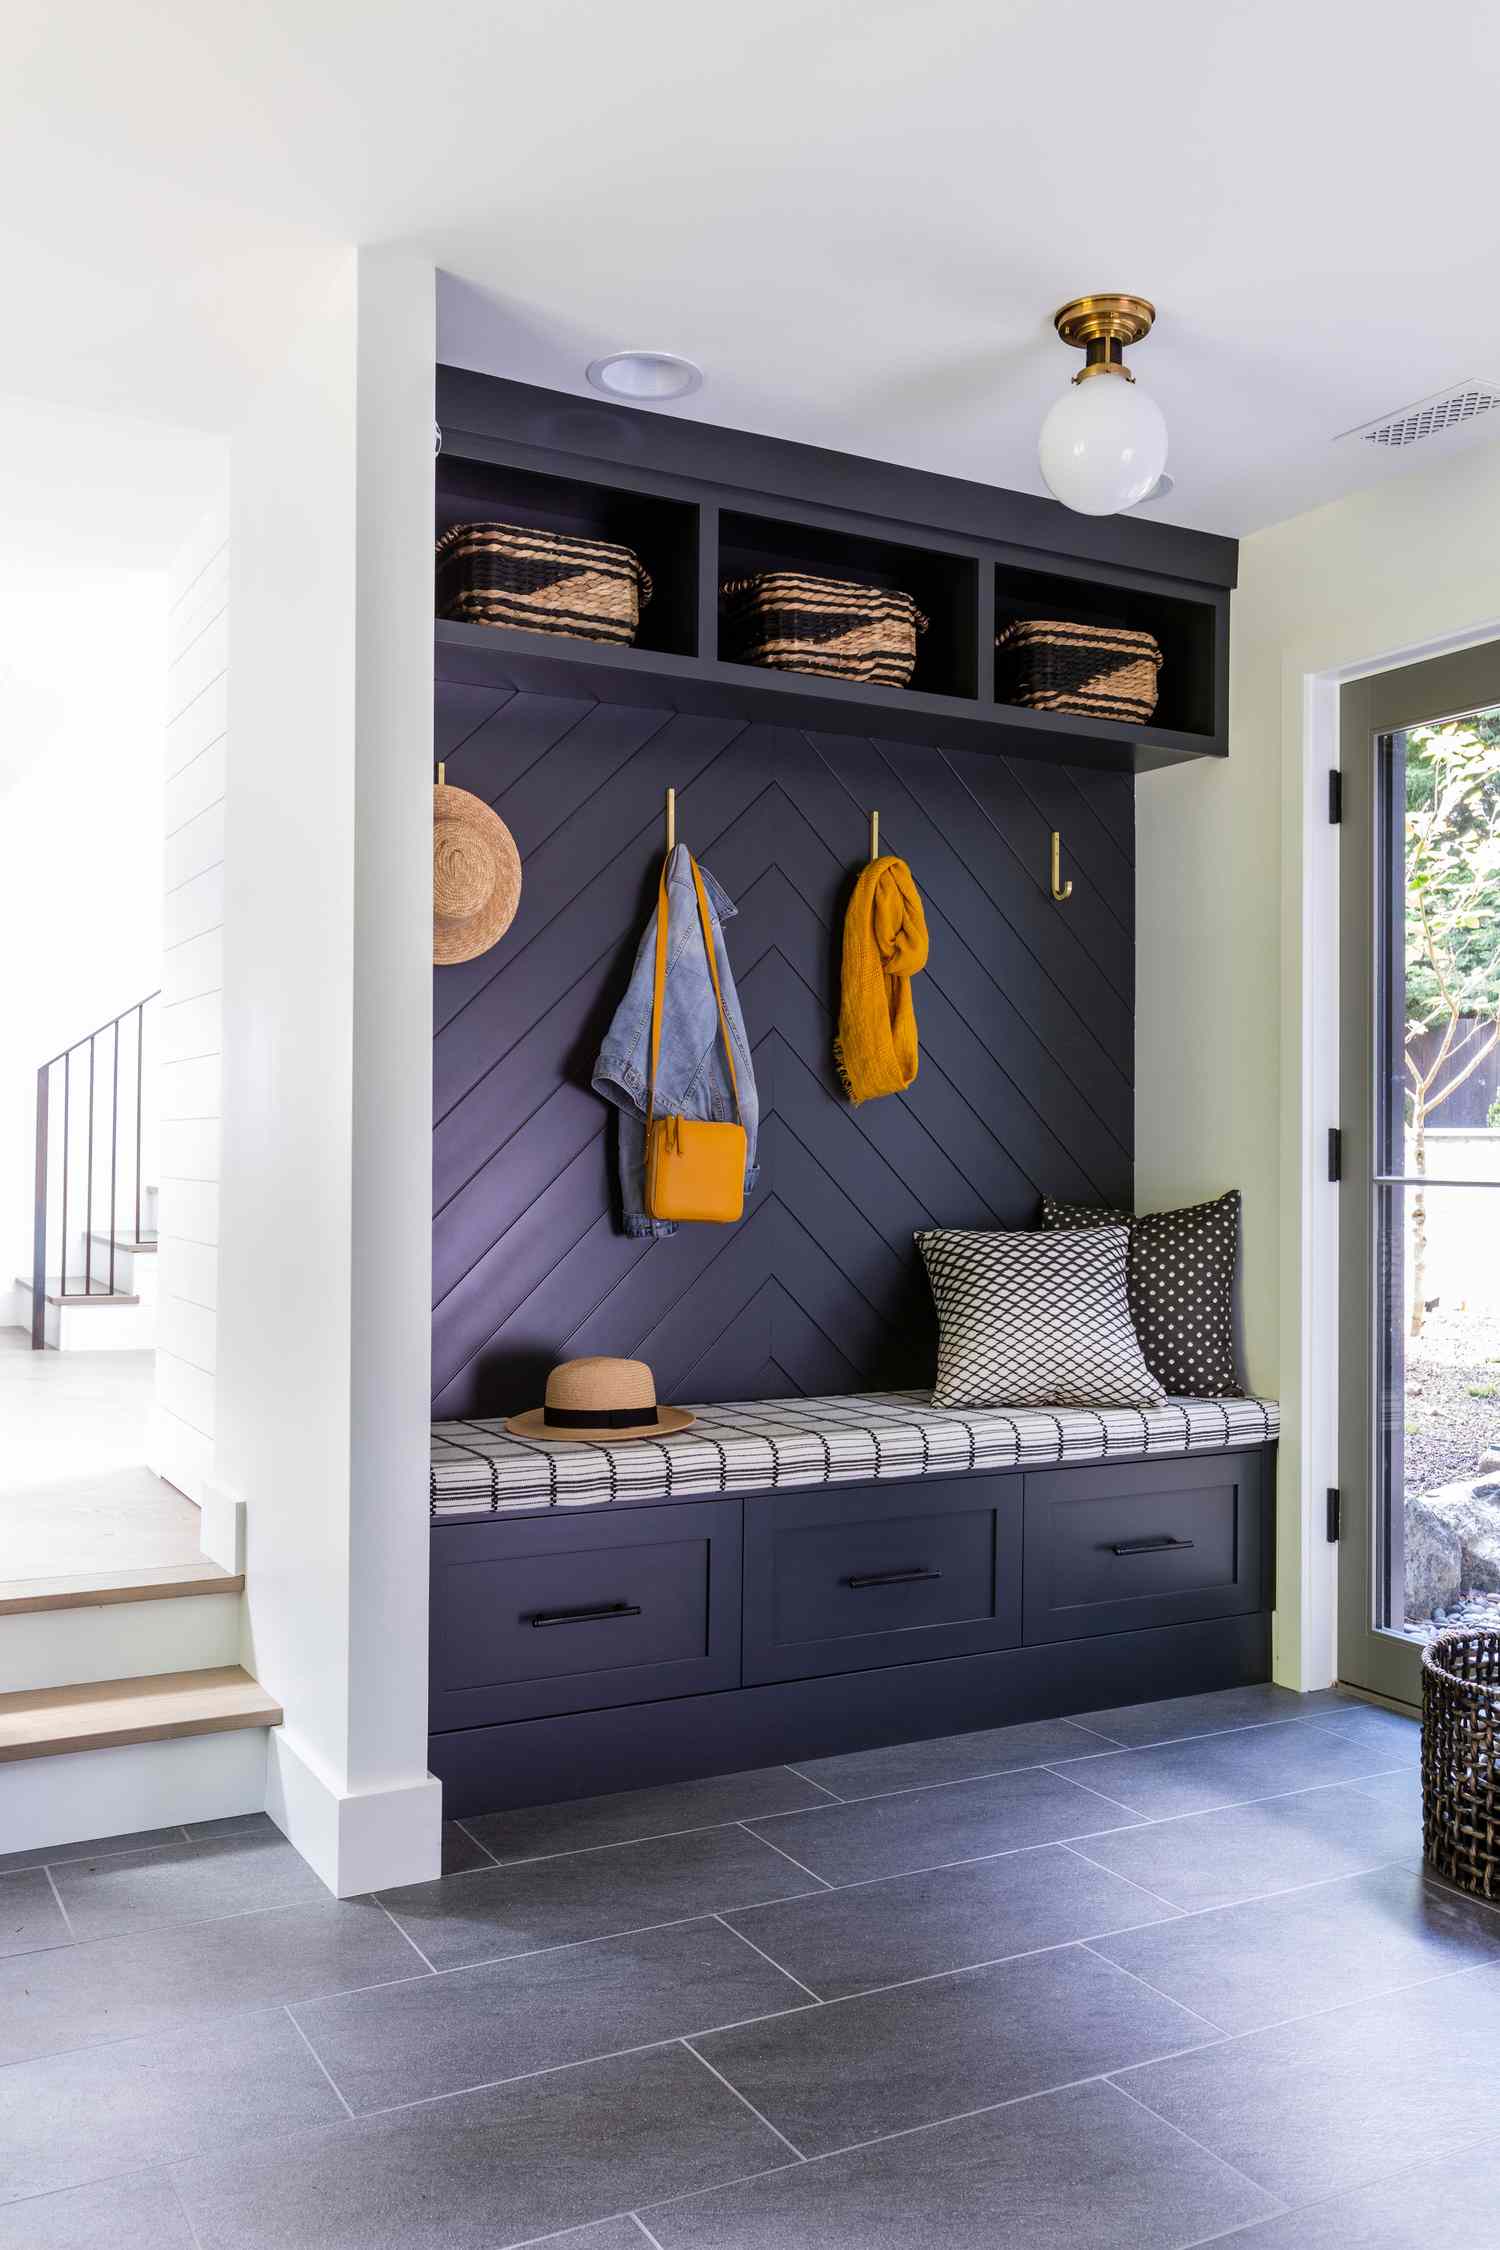
“The chevron paneling is the element that elevates this from a simple mudroom bench to a true design statement.”
It adds a bespoke, handcrafted quality that feels both modern and timeless. Without it, the wall would be flat and far less interesting. The angled lines create a sense of movement and sophistication, proving that the functional parts of a home can also be the most beautiful. It’s a detail worth splurging on to get that high-impact “wow” moment right at the front door.
27. Create a Casual and Functional Mudroom with a Modular Bench
This organized entryway look is very achievable on a budget. You can find modular storage benches with drawers like this at IKEA (the SMÅSTAD series is a great option) or Wayfair. For the wall treatment, you can get the same vertical plank look with inexpensive beadboard panels from a hardware store, painted white. The long wooden shelf can be a simple pine board stained to your liking. Look for multipacks of simple black hooks on Amazon. You can recreate this entire functional setup for under $500, making it a very accessible project.
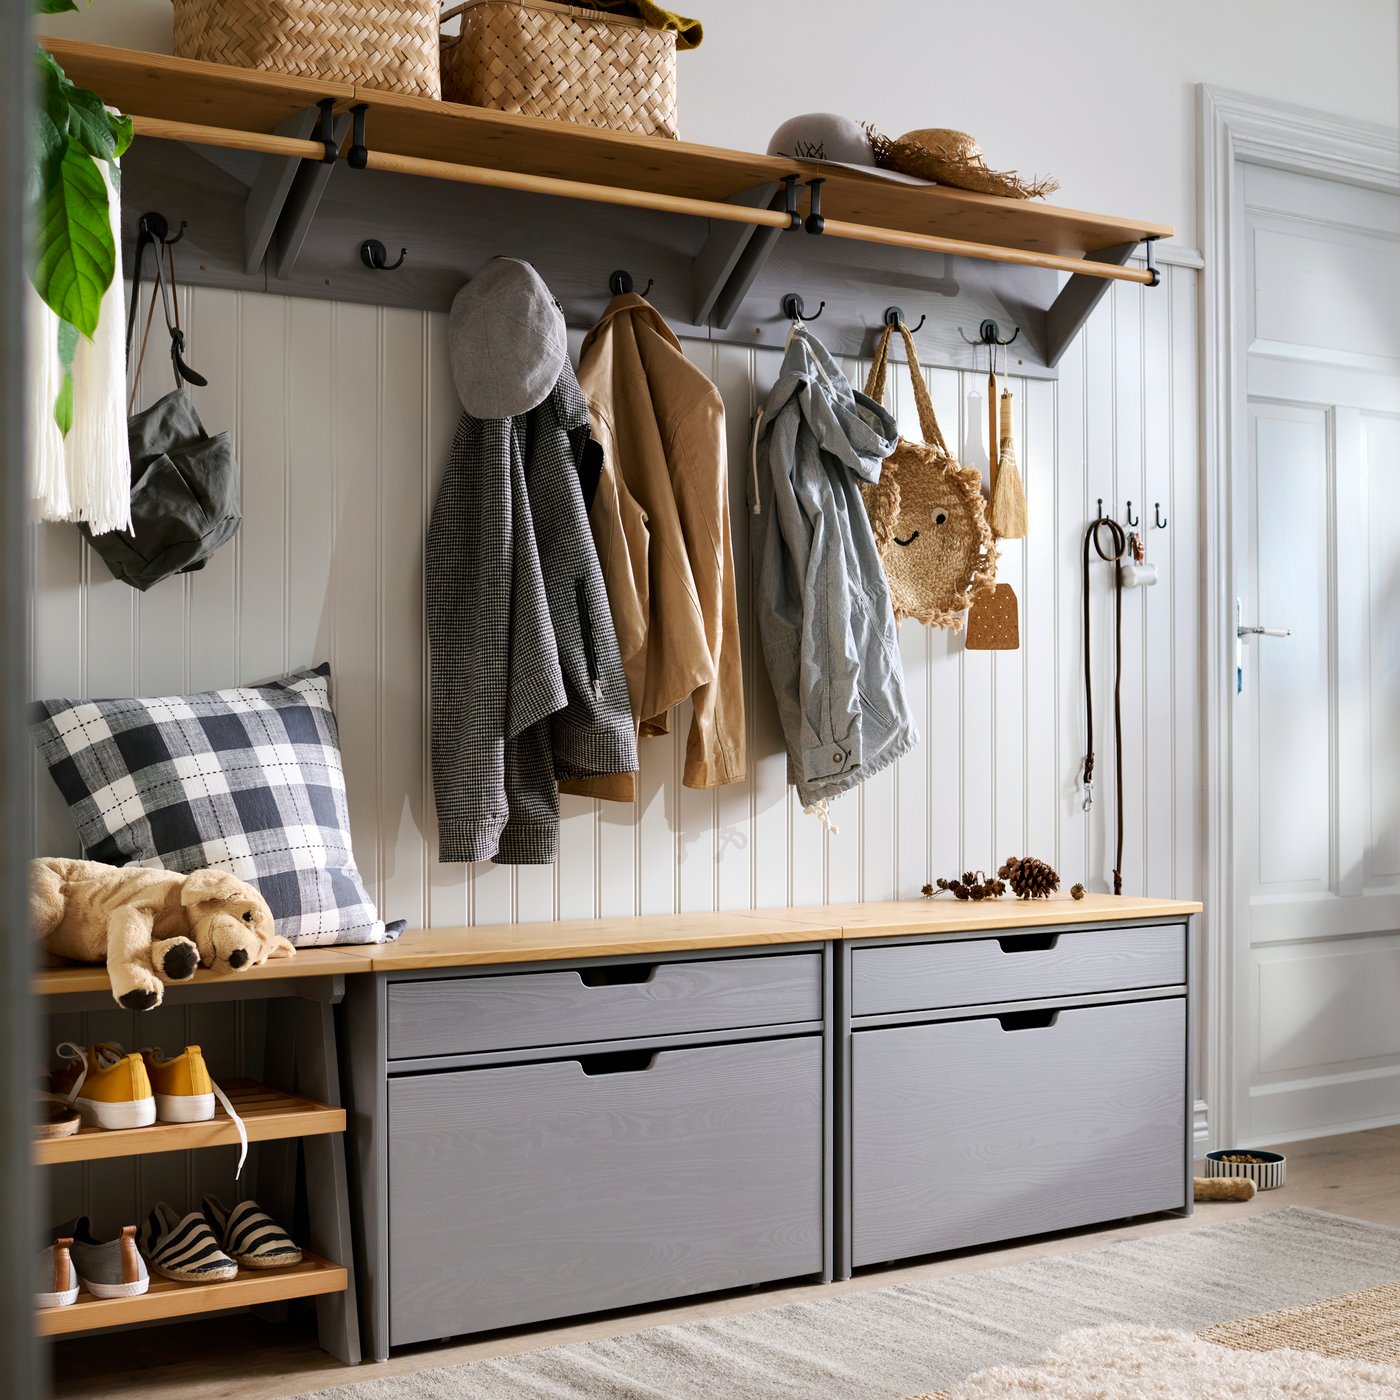
“The style here is about layered functionality: 40% white vertical paneling provides a clean, bright backdrop.”
30% grey storage furniture (the bench) grounds the space with a soft, modern neutral. 20% light wood (the shelf and bench tops) adds warmth and a natural touch. Finally, 10% black accents (the hooks) provide a sharp, graphic contrast that ties it all together. This formula ensures the space feels organized, welcoming, and visually balanced, not just like a pile of storage units.
28. Craft a Moody Entryway with a Dark Built-in Bench and Wood Accents
When using a dark, dramatic color like this charcoal grey in a smaller space like an entryway, lean into it. Painting the adjacent wall the same color, as seen here, is a brilliant move. It creates an enveloping, cohesive nook and makes the built-in feel even more integrated. To keep it from feeling too dark, use contrasting natural materials. The light wood of the bench top and shelf provides warmth and a place for the eye to rest. A large mirror is also key to bounce light and open up the space.
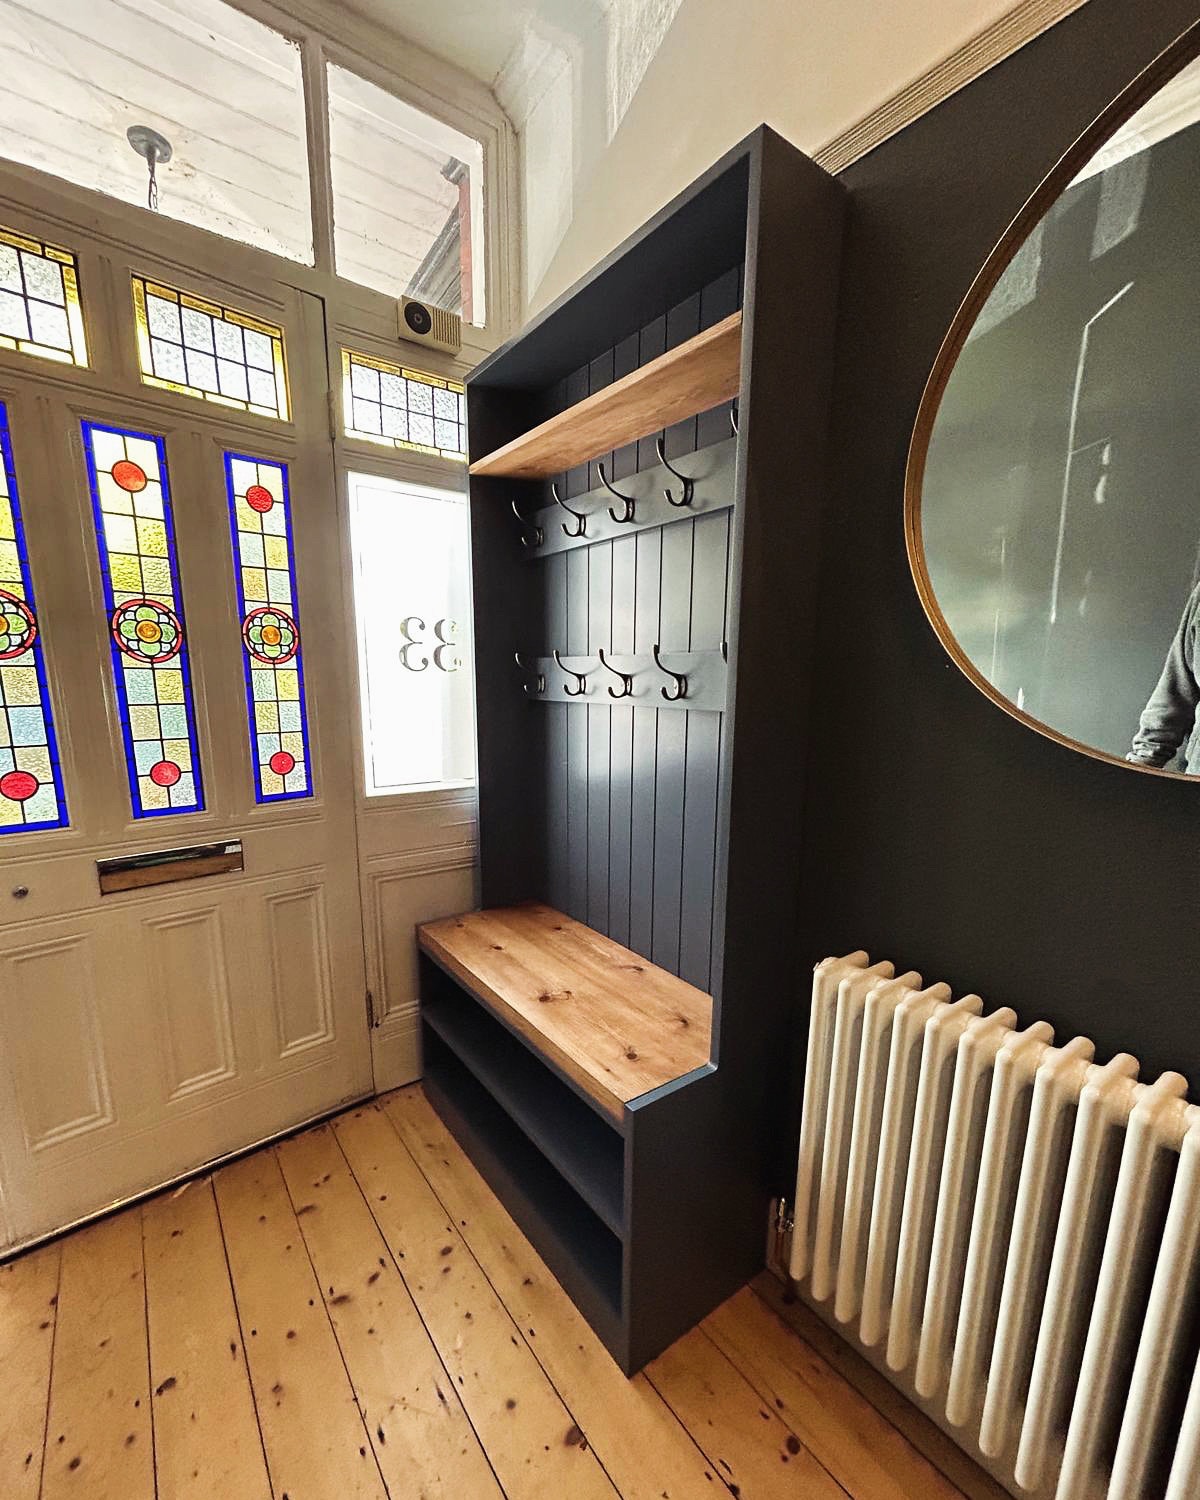
“This design works so well because of the bold contrast.”
The dark, moody grey of the built-in and the wall creates a dramatic, cozy alcove that immediately stands out. This darkness is perfectly balanced by the clean, bright white of the door and trim, and the organic warmth of the natural wood bench and shelf. The round mirror with its brass frame softens all the straight lines and adds a touch of classic elegance. It’s a confident mix of colors and materials that feels both traditional and completely fresh.
29. Organize Your Vanity Drawer with Bamboo Inserts
Drawer organizers are a lifesaver, but they are not a “set it and forget it” solution. Cosmetics, lotions, and powders inevitably spill or leak. Plan to take everything out and wipe down the bamboo inserts and the inside of the drawer every 2-3 months. Bamboo is naturally resistant to water, but don’t let spills sit for too long. For recurring messes, like powder foundations, consider placing a small, washable silicone mat inside the compartment. This will protect the bamboo and make cleanup a breeze.
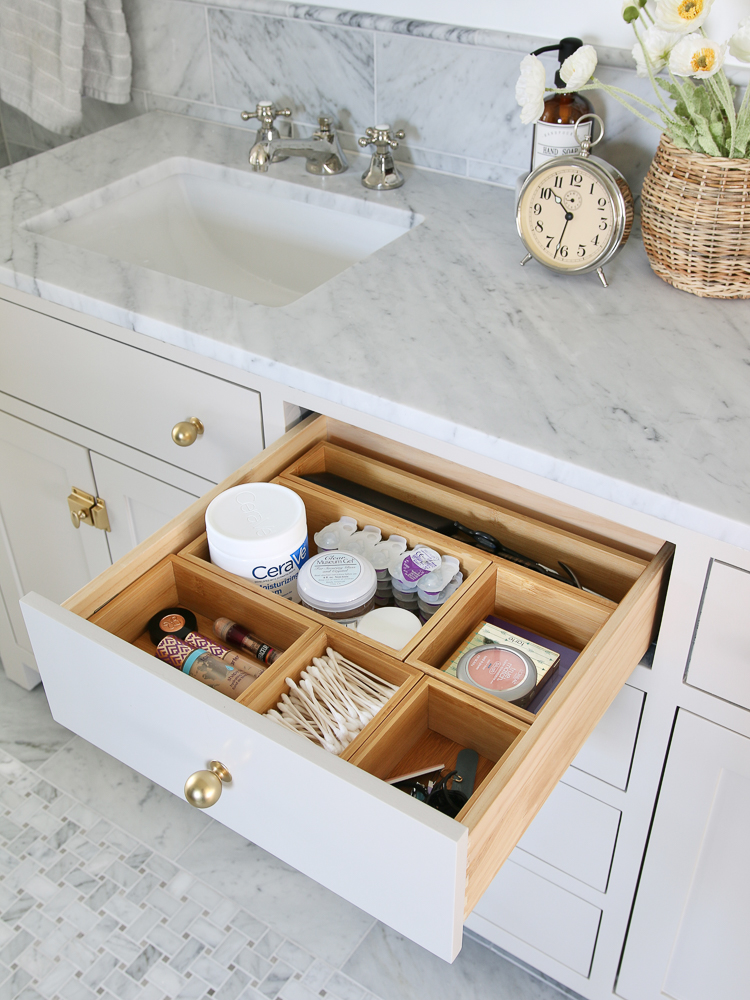
“This is one of the easiest and most satisfying organizing projects you can do.”
Time: 1 hour. Cost: $30-$80.
Empty and Clean: Take everything out of your drawer and give it a thorough wipe down.
Categorize: Group all your items into logical categories: daily makeup, skincare, dental, hair accessories, etc. Get rid of anything old or unused.
Measure: Measure the interior length, width, and height of your drawer.
Plan Your Layout: Buy a set of modular bamboo organizers. Play around with the arrangement like a puzzle until you find a configuration that fits your categories and your drawer perfectly.
Load It Up: Place your items back into their new, designated compartments. Enjoy the calm!
30. Incorporate a Stylish Deep Green Shower Niche
When designing a shower niche, think about what you’ll actually store in it. A standard shampoo bottle is about 9-10 inches tall. Make your niche at least 12 inches high to give you enough clearance to easily grab things. For width, 12 inches is a good minimum. If you have the space, a wider niche (24 inches or more) like the one shown is a great opportunity to add multiple shelves and create a real feature. Always ensure the bottom shelf of the niche is slightly sloped towards the shower to allow for proper water drainage.
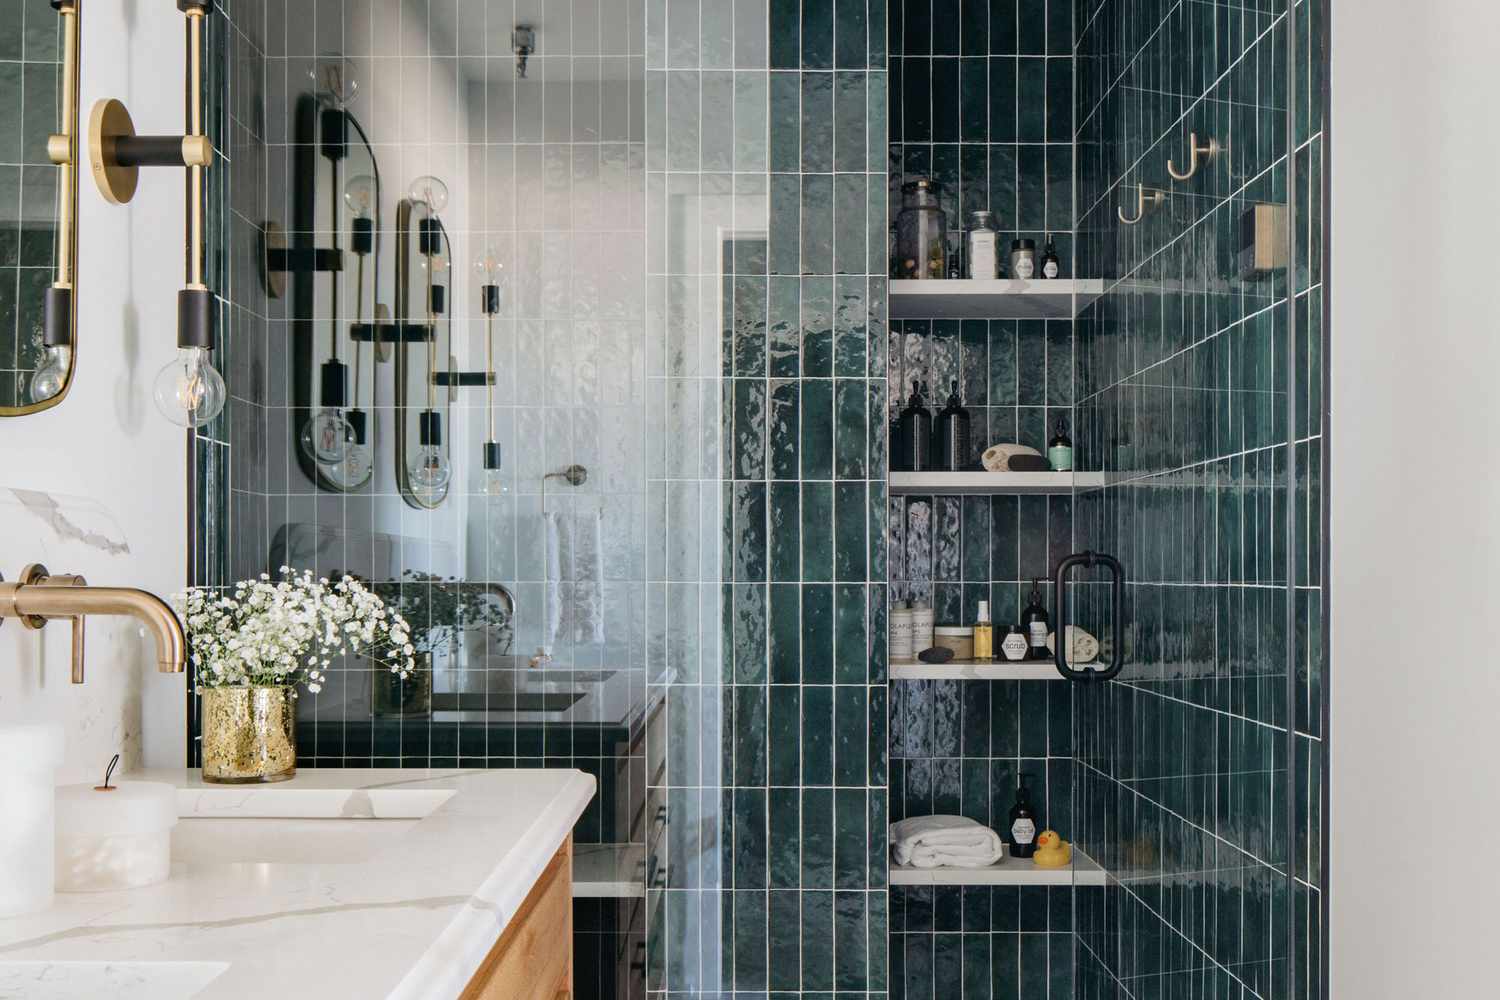
“A built-in shower niche is a fantastic feature, but it needs to be planned before your tile goes up.”
Here’s what to confirm with your contractor:
Waterproofing: A niche is a potential failure point for water intrusion. Ensure it will be properly waterproofed with a product like a Kerdi-Board pre-formed niche or a liquid-applied membrane.
Placement: Position the niche on a wall that doesn’t get direct, constant spray from the showerhead. This will help keep it cleaner. Avoid placing it on an exterior wall in cold climates, as this can be a spot for heat loss.
Stud Location: The width of your niche is often determined by the 14.5-inch space between wall studs. Plan the exact location with your builder early on.
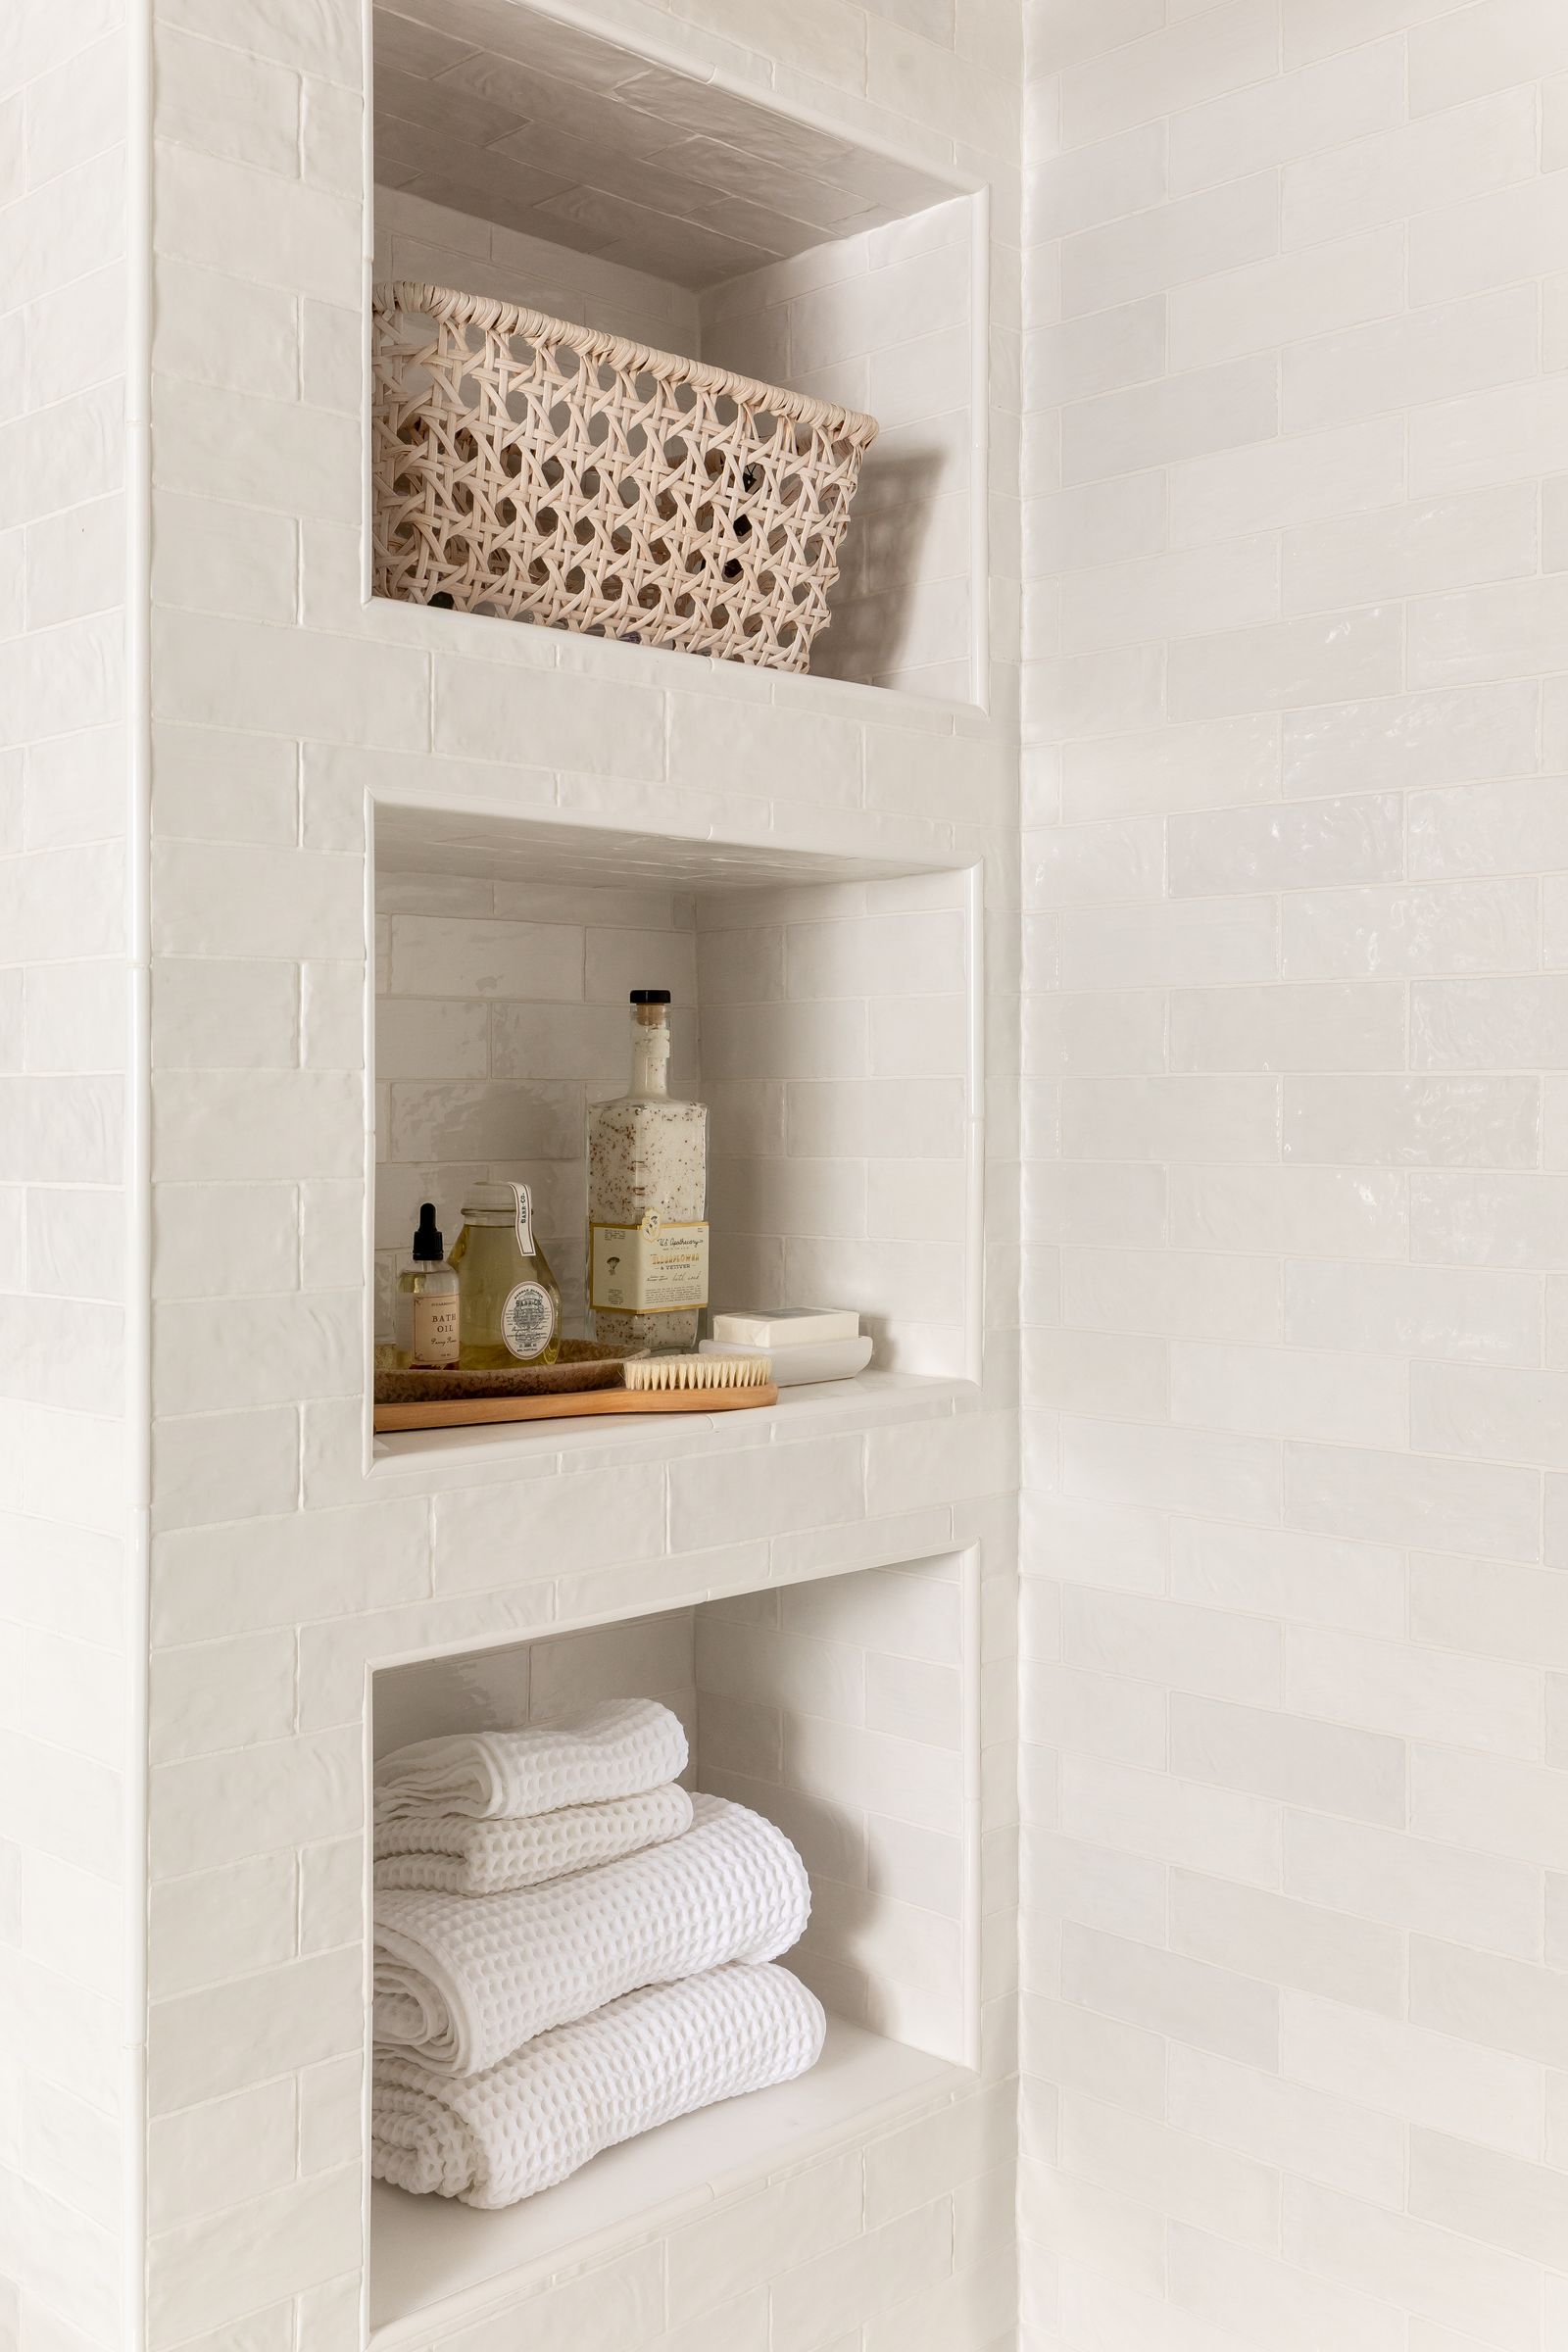
31. Create a Spa-Like Feel with Recessed Subway Tile Niches
The serene, spa-like quality of this design comes from a carefully curated textural palette, not from color. The formula is simple: 70% gently textured tile (the white subway) + 20% natural woven/wood elements (the basket and tray) + 10% soft textiles (the waffle-weave towels). This focus on texture within a monochromatic white and beige scheme creates a feeling that
Your Home’s Next Chapter is Built-In
Now that you have the inspiration, it’s time to start planning. Remember that the best built-ins don’t just add storage; they tell a story about your home and how you live in it. Pin your favorite looks to your board and start making your space truly and beautifully your own.