You know that feeling when you finally find the garage storage idea that looks exactly right for your space, only to realize you have no idea how to make it happen? We’ve all been there. After filtering through hundreds of options across The Home Depot, Lowe’s, and Amazon, we narrowed it down to the 27 ideas that actually deliver. We’re covering everything from sleek modular cabinet systems to clever overhead solutions and DIY-friendly pegboards. This isn’t just about trends; it’s about reclaiming your garage as a functional, even beautiful, part of your home, which is why this approach is gaining so much traction right now. And stay until the end — we break down the most common mistakes that can ruin these looks. 📌 Save this to Pinterest for later — you’ll want to revisit these ideas.
Please note: This article may contain affiliate links. We may earn a commission if you buy something through one of our links, but this doesn’t cost you anything extra.
1. Multi-Functional Entry with Overhead Bike Racks and Wood Built-ins
This design brilliantly combines form and function by treating the garage as a true extension of the home. It works because it designates clear zones: overhead for bulky items (bikes), vertical for display and access (peg rails), and enclosed for clutter (lower cabinets). The use of warm, light wood for the built-ins against crisp white walls keeps the space feeling bright and welcoming, not like a dark, forgotten corner. The patterned rug is the finishing touch that signals this is a thoughtfully designed room.
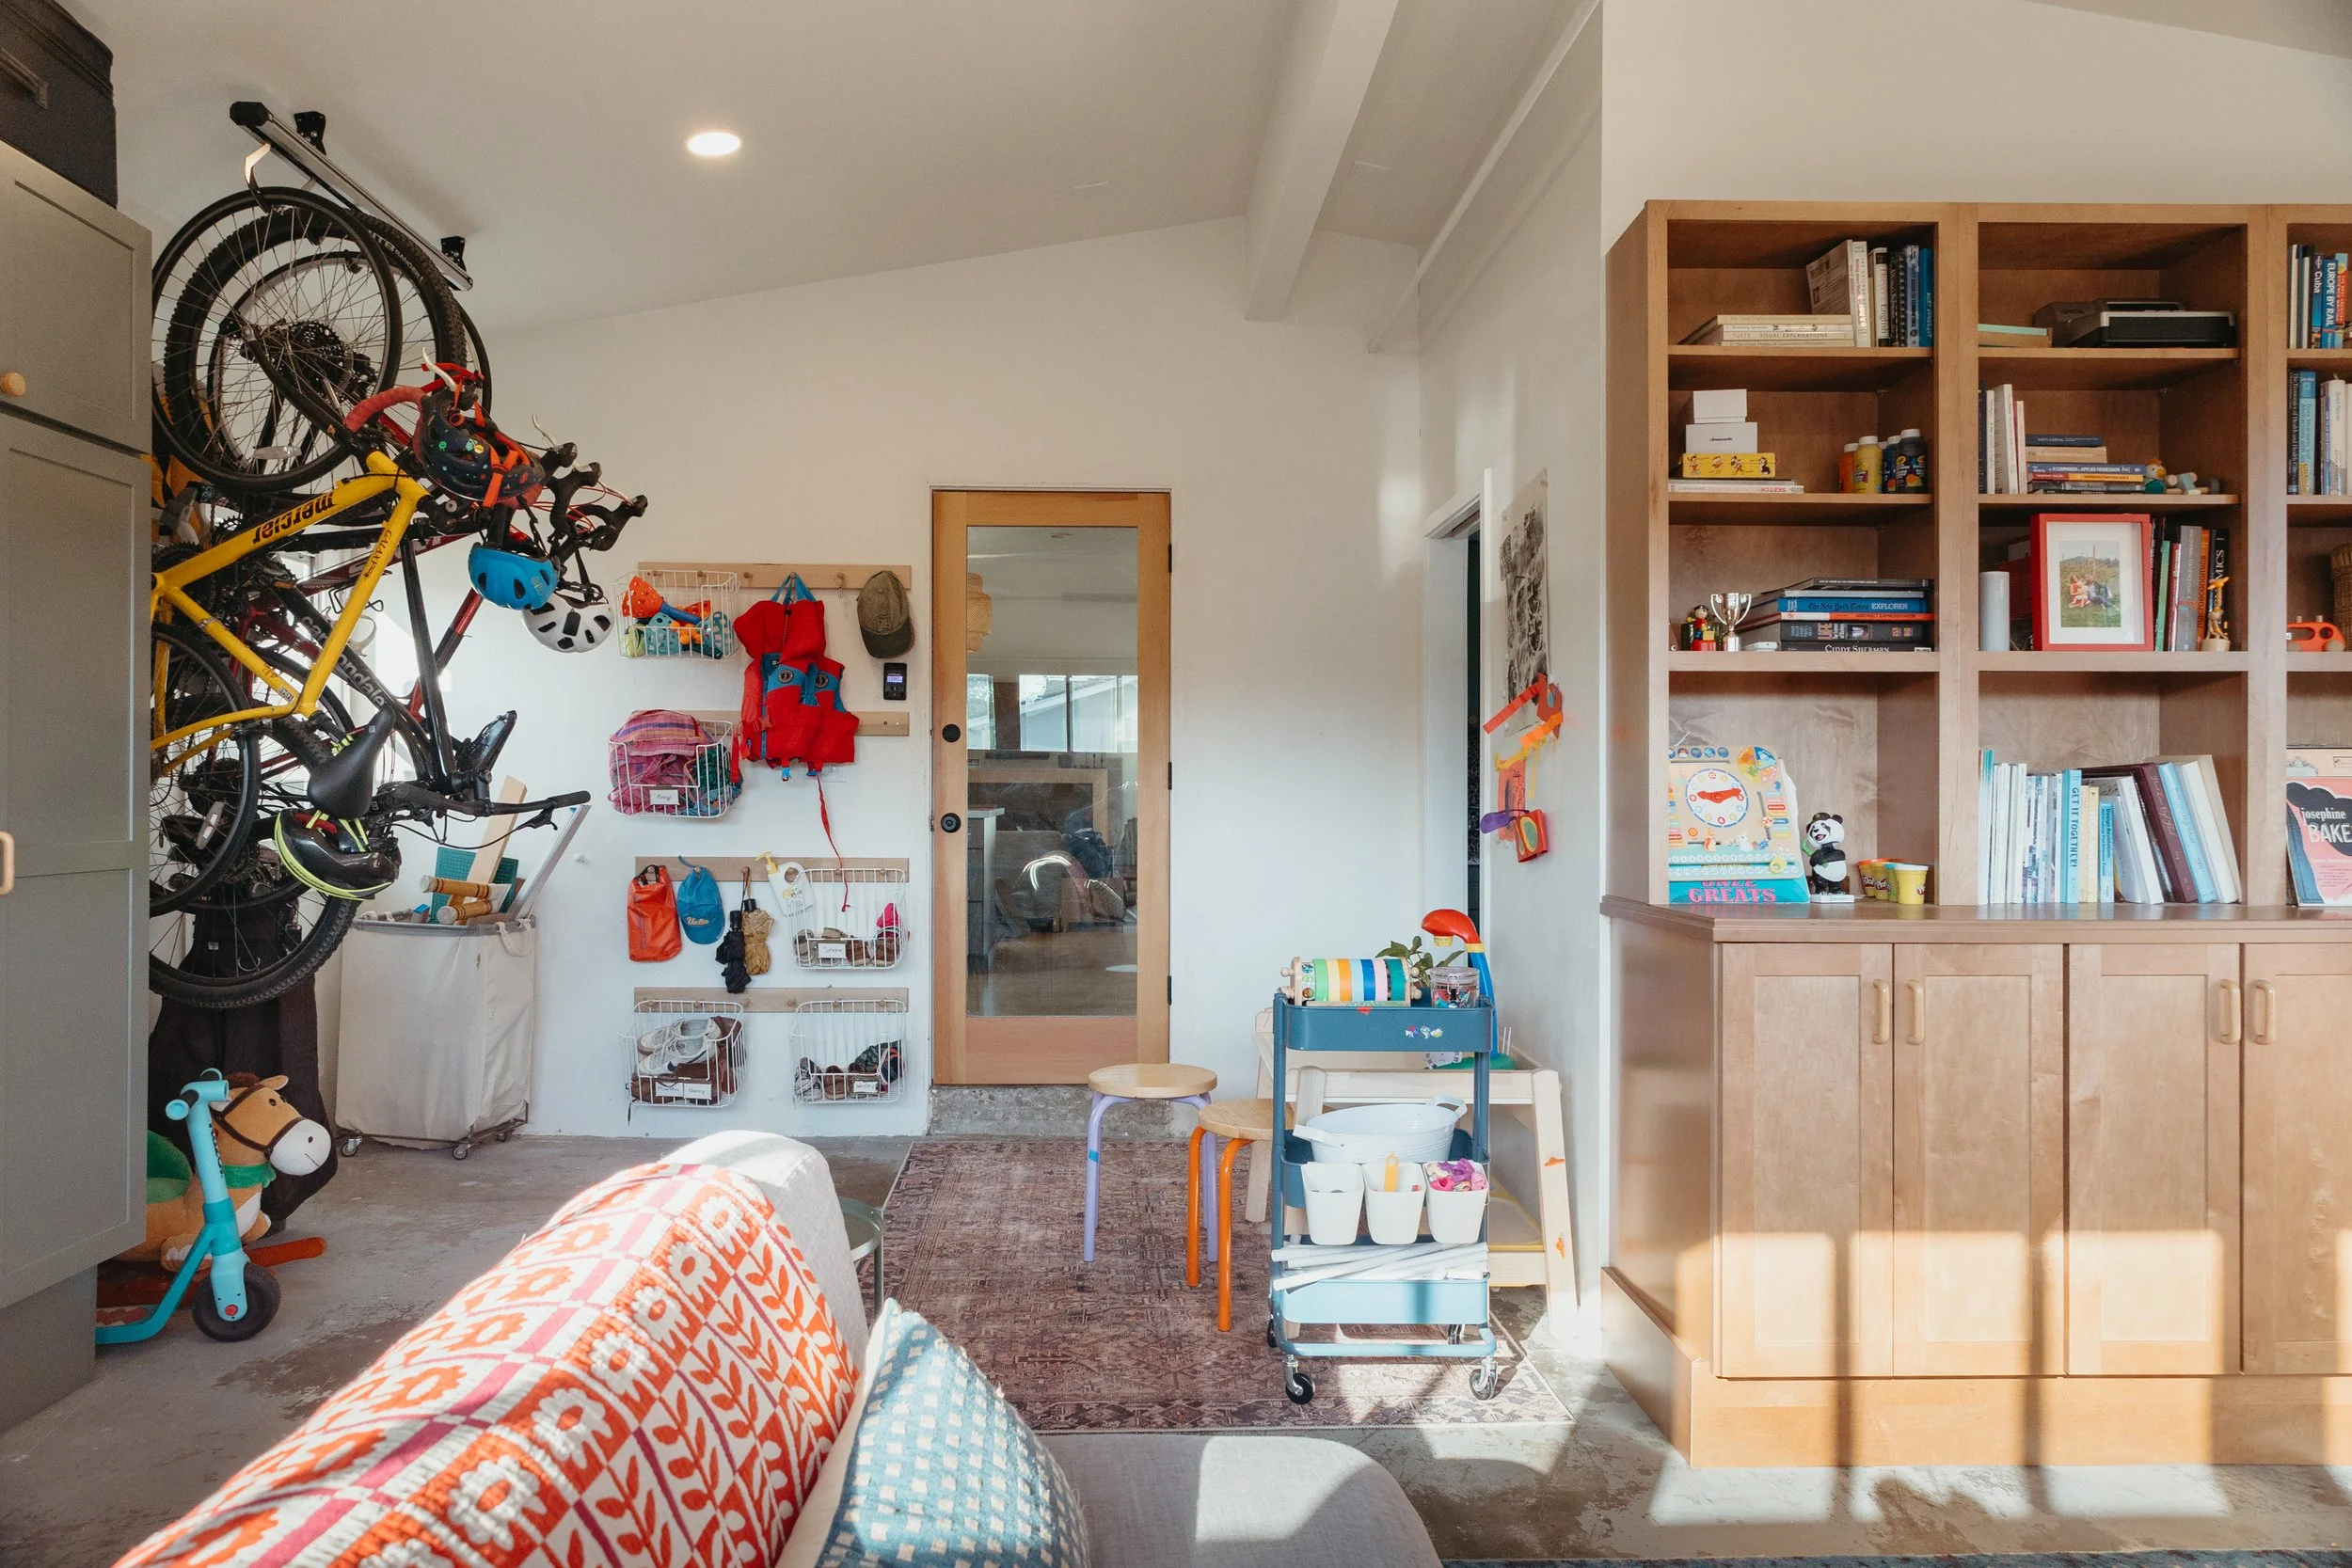
“A multi-functional space like this thrives with high ceilings.”
You’ll want a minimum of 10-12 feet to comfortably hang bicycles overhead without them feeling oppressive or becoming a head-banging hazard. For the wall-length built-ins, you need at least a 12-foot uninterrupted wall. The overall room should be at least 200 sq. ft. to avoid feeling cramped. If your space is smaller, consider adapting this by using only the peg rail wall, as seen in Idea #20, which offers great vertical storage without the large footprint of built-ins.
2. Personalized Plywood and Pegboard Workshop Wall
When creating a dense tool wall, visual organization is key. Don’t just hang things randomly. Group tools by function: all your wrenches together, pliers in another section, screwdrivers organized by type and size. Use a paint pen to trace the outline of key tools directly onto the pegboard or plywood. It feels a little old-school, but it forces you to put things back in their designated spot, making it ten times faster to find what you need and immediately see what’s missing.
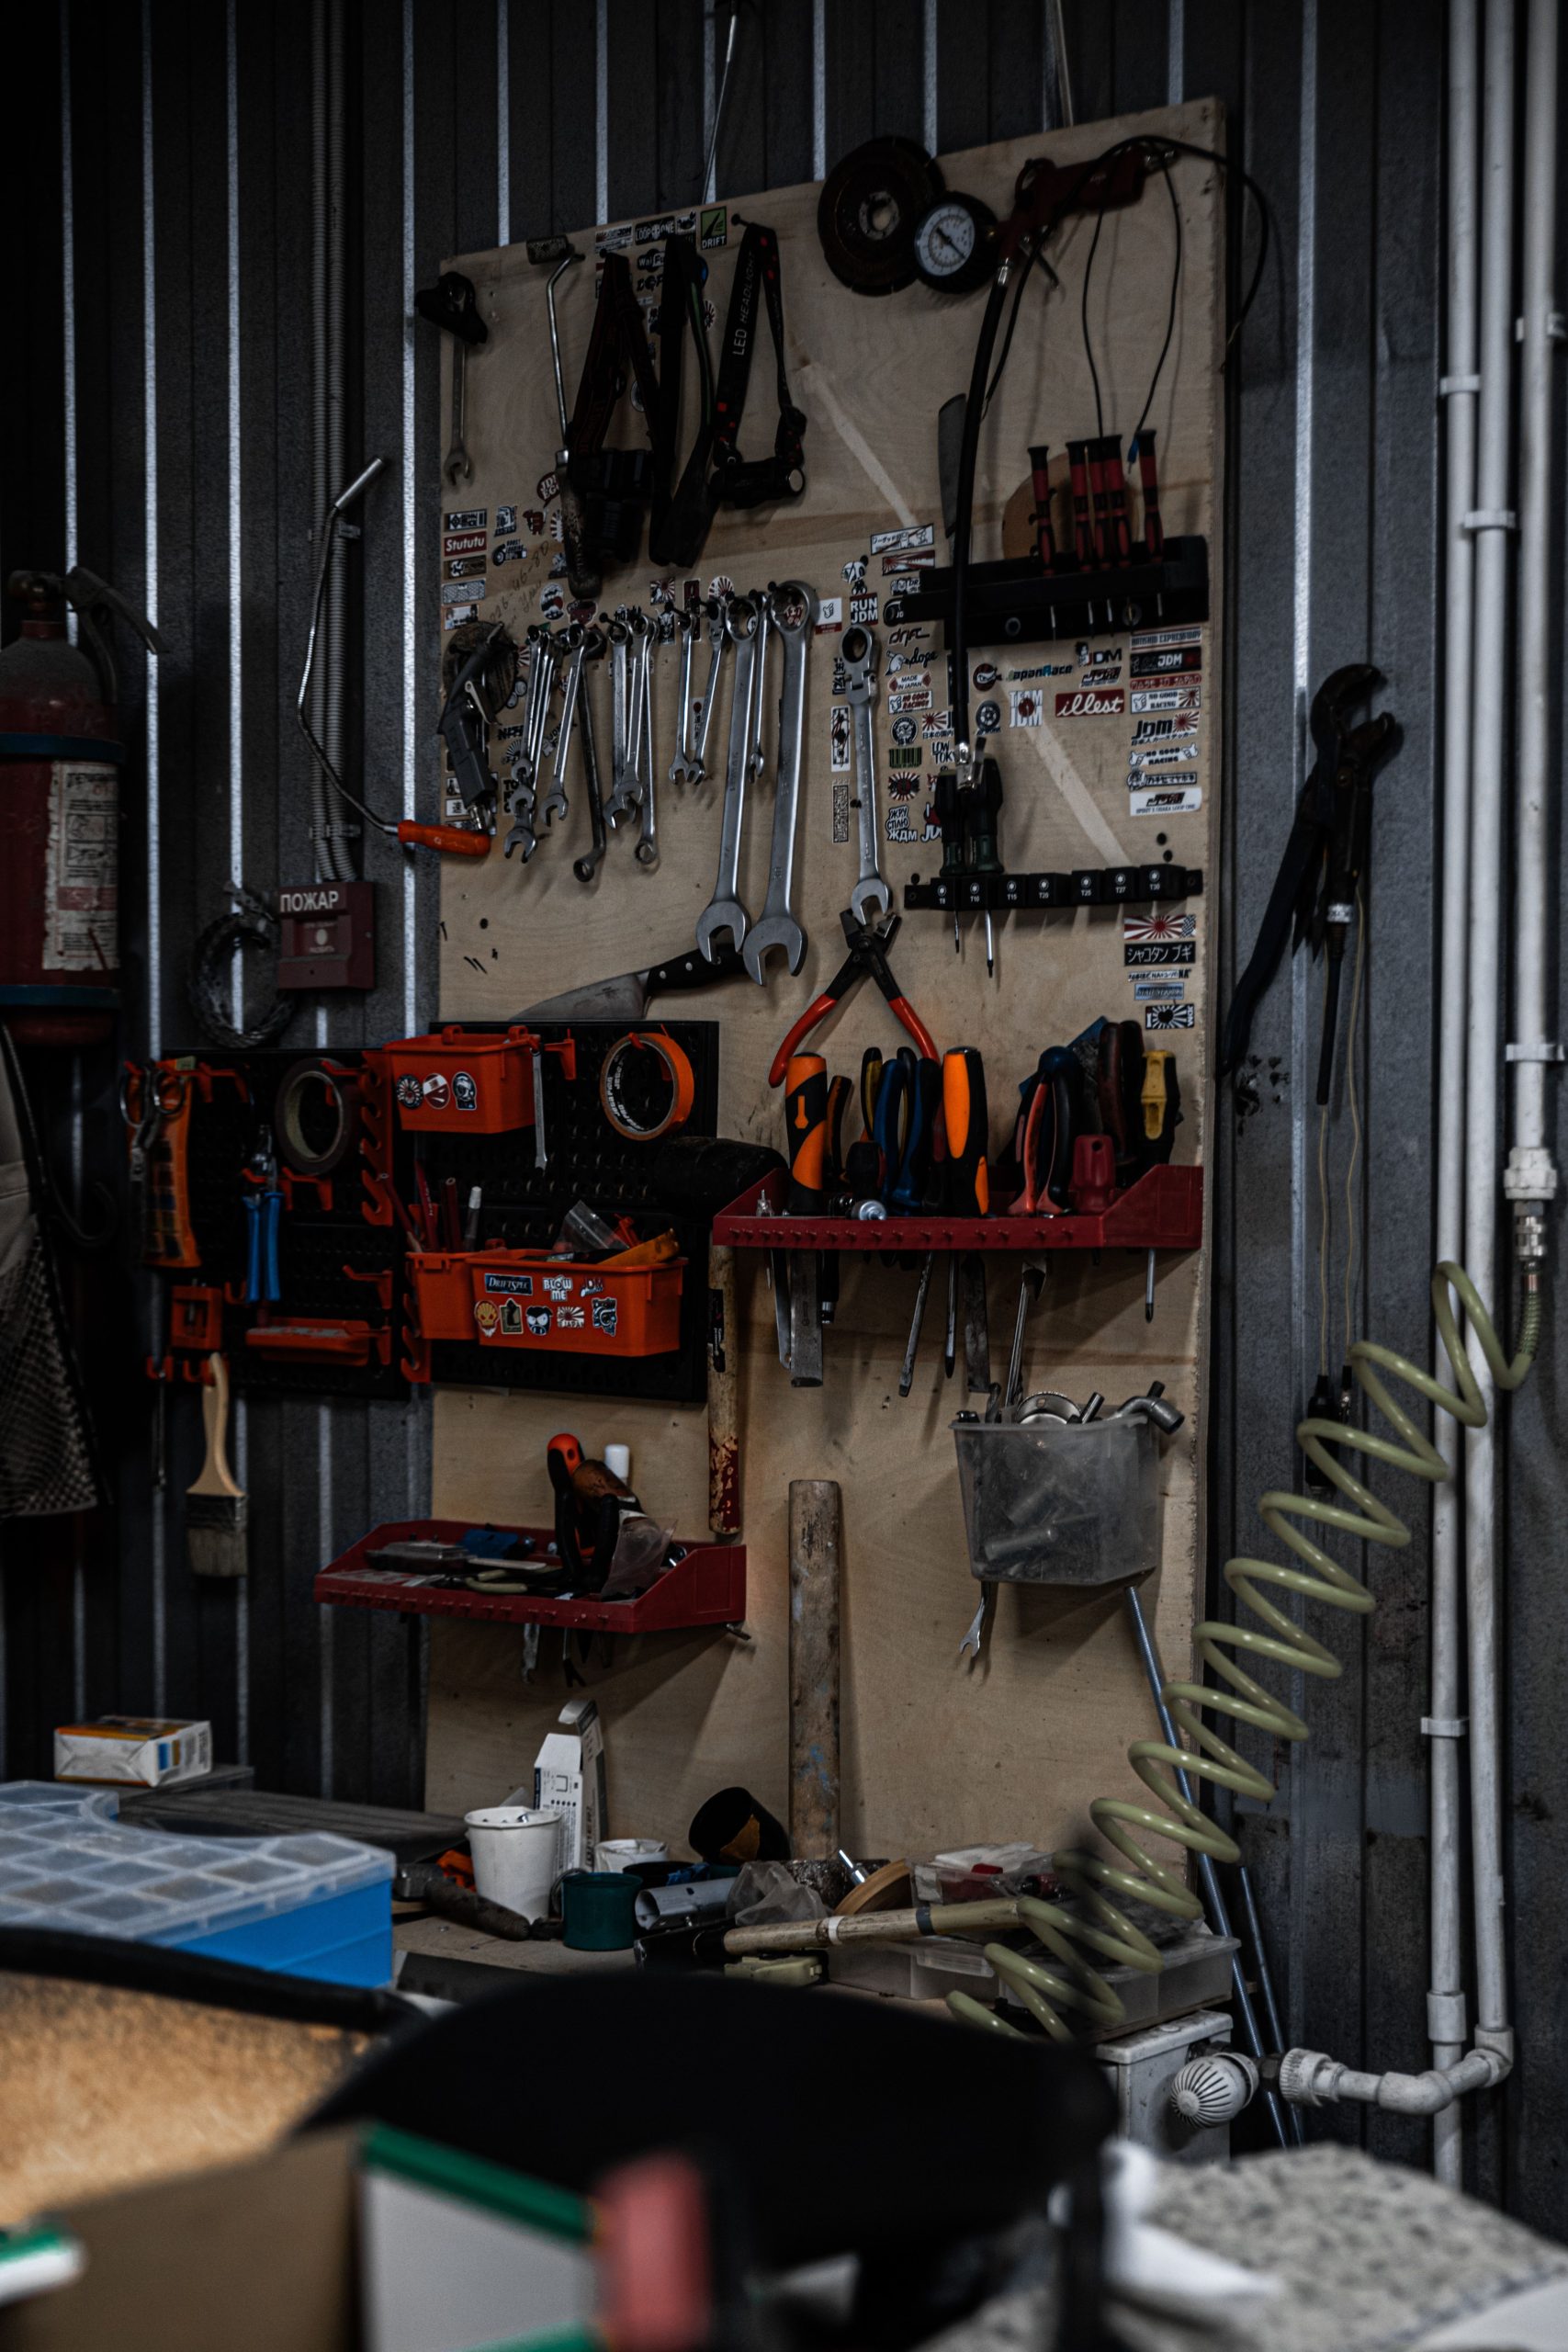
“A setup this personalized and dense is a double-edged sword.”
It’s incredibly efficient for the person who created it, but can be a nightmare for anyone else trying to find a tool. It’s also not a weekend project; a wall this organized can take days or even weeks to lay out perfectly. The decorative stickers add a ton of personality, but they can make it difficult to reorganize your tools down the line without leaving behind a sticky, torn mess. Be sure this is the layout you want for the long haul.
3. Tiered Storage with White Metal Shelves and Dark Gray Cabinets
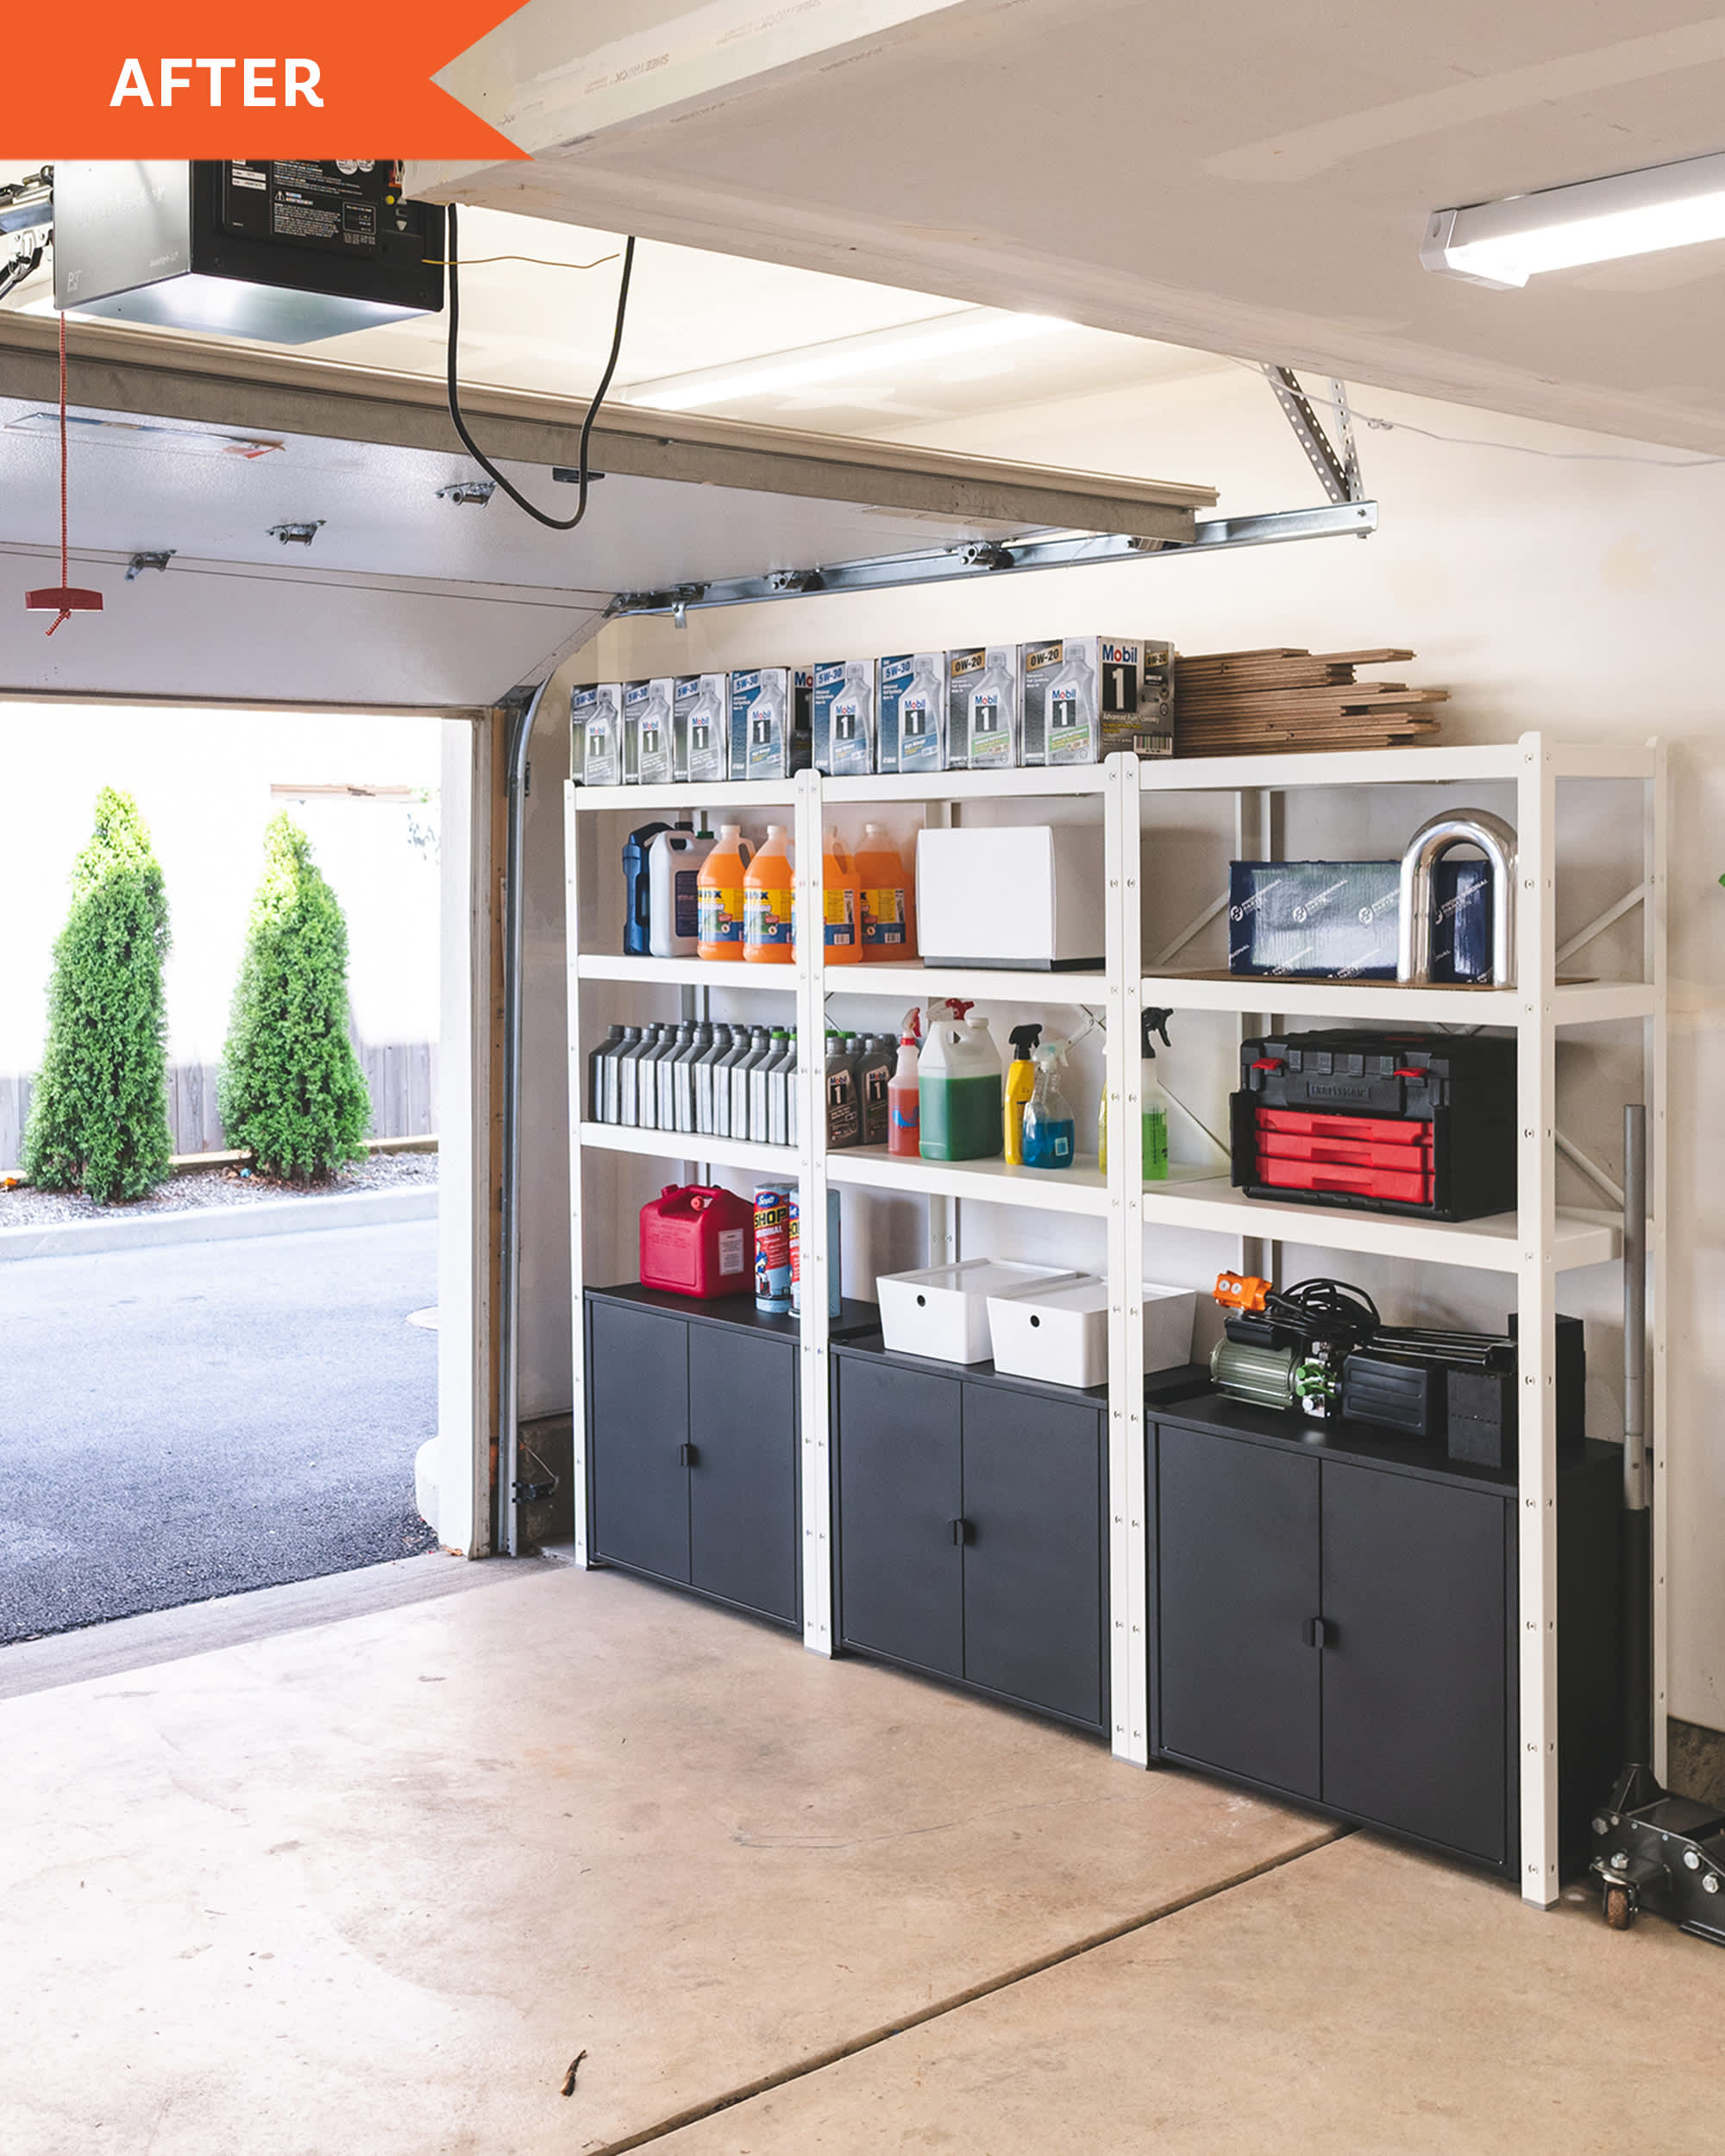
This look achieves a semi-custom feel by combining stock components. It’s a smart way to get both open and closed storage.
“Base Cabinets: $600 – $1,500Metal Shelving Units: $300 – $700Toolbox & Accessori”
- Base Cabinets: $600 – $1,500
- Metal Shelving Units: $300 – $700
- Toolbox & Accessories: $200 – $500
- Storage Bins & Containers: $100 – $250
- TOTAL: $1,200 – $2,950
Budget alternative: Skip the base cabinets and use all-metal shelving units from a big-box store. Use heavy-duty lidded bins on the bottom shelves for concealed storage. Total cost: $400 – $800.
The single most important element here is the combination of open shelving on top and closed cabinets below. Removing the base cabinets would leave you with just shelves, making the space feel less finished and more utilitarian. Removing the open shelves would hide everything, making it harder to grab frequently used items. It’s this high/low, open/closed duality that makes the system so effective, providing quick access to visible items and tidy concealment for everything else.
4. Clear Labeled Bins on Dark Wire Shelving
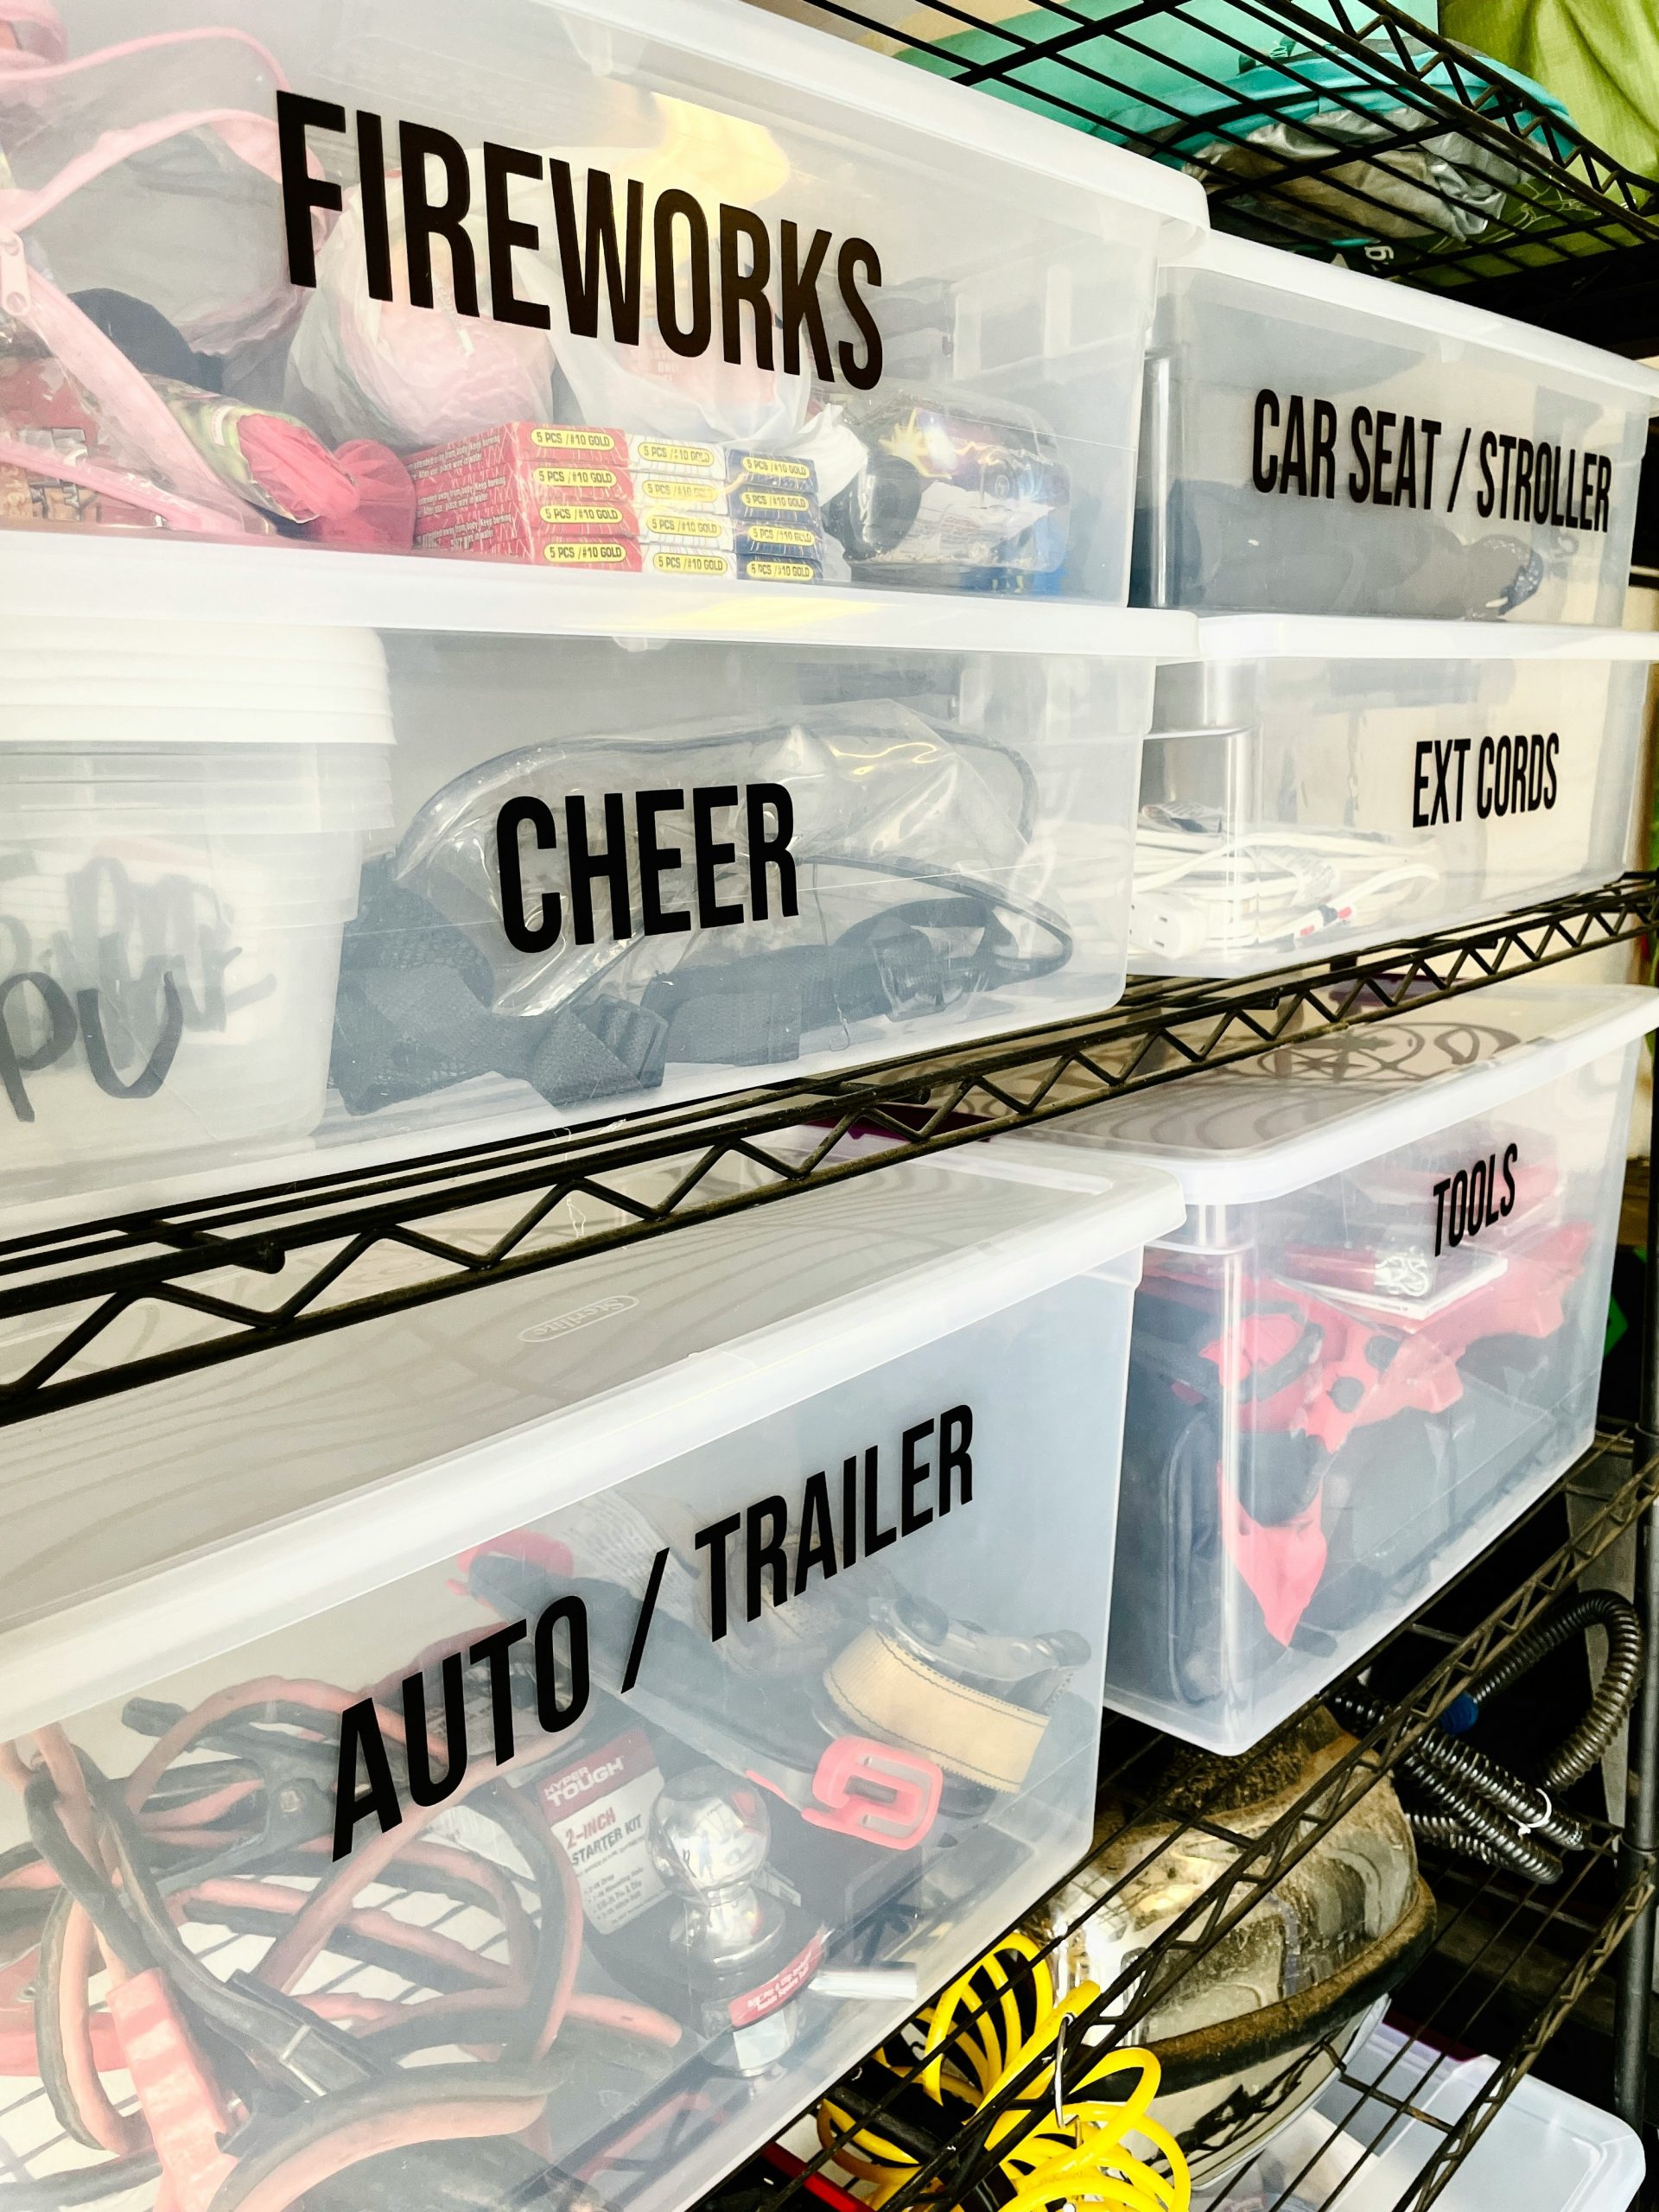
Creating these clean, vinyl labels is a simple DIY that makes a huge impact on organization. Here’s how to do it in under an hour for about $20 (if you own a cutting machine).
“Measure the flat face of your plastic bins to determine the maximum label size.Design your labels in your cutting machine’s software (like Cricut Design Space) using a bold, sans-serif font for readability.Cut the words from permanent black vinyl.”
‘Weed’ the design, which means removing all the negative space vinyl around your letters.Apply transfer tape over your vinyl words, burnishing it down firmly.Peel the backing off the vinyl, position the label on your bin, and burnish again before slowly peeling away the transfer tape.
This system is already budget-friendly, but you can take it even further. Look for wire shelving units on Facebook Marketplace or at restaurant supply stores, where they are often cheaper and more heavy-duty. Instead of buying all new clear bins (which can add up), start by using boxes and mismatched bins you already own. A pack of uniform shipping labels and a thick black marker costs less than $10 and achieves the same organizational goal: knowing exactly what’s inside without having to open a single box.
5. Modular Garage System with Slatwall and Folding Workbench
The formula here is about balancing different types of storage for maximum utility. It breaks down to roughly: 40% concealed storage (white cabinets) + 30% open display (gray slatwall) + 20% bulk shelving (black wire unit) + 10% flexible workspace (folding bench). You can customize this recipe easily. Need more workspace? Swap the wire shelving for a longer workbench. Have more to hide? Replace the slatwall with more white cabinets. The key is maintaining a mix of open, closed, and flexible components.
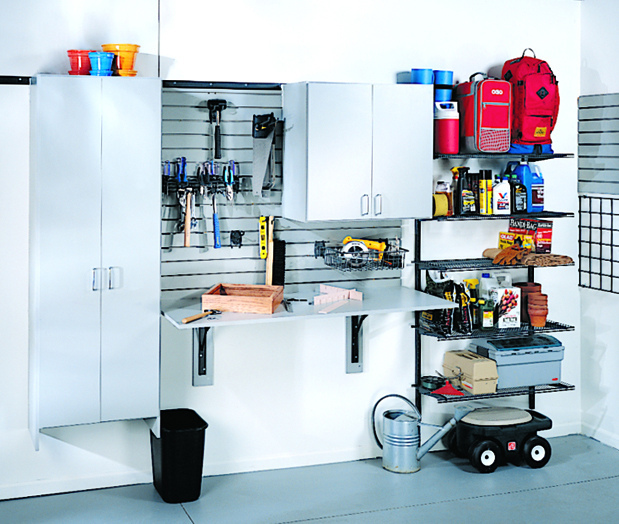
“This arrangement is successful because it offers a specific solution for every type of item.”
The white wall-mounted cabinets keep messy supplies out of sight, maintaining a clean look. The gray slatwall provides immediate, grab-and-go access to frequently used tools, preventing them from cluttering the workspace. Finally, the folding workbench offers a functional surface that can be tucked away to save space, a crucial feature in a multi-use garage. It’s a purpose-built design where every piece has a job.
6. Sleek White Cabinetry with a Speckled Epoxy Floor
When installing cabinets in a garage, always opt for units with legs that lift the base off the floor, as seen here. A minimum of 4-6 inches of clearance is ideal. Garages are prone to moisture, spills, and cleaning with hoses. Lifting your cabinets protects your investment from water damage, pests, and mold growth. It also makes it infinitely easier to clean the floor underneath, preventing dust bunnies and grime from building up in hidden corners. Don’t let your cabinets sit directly on the concrete slab.
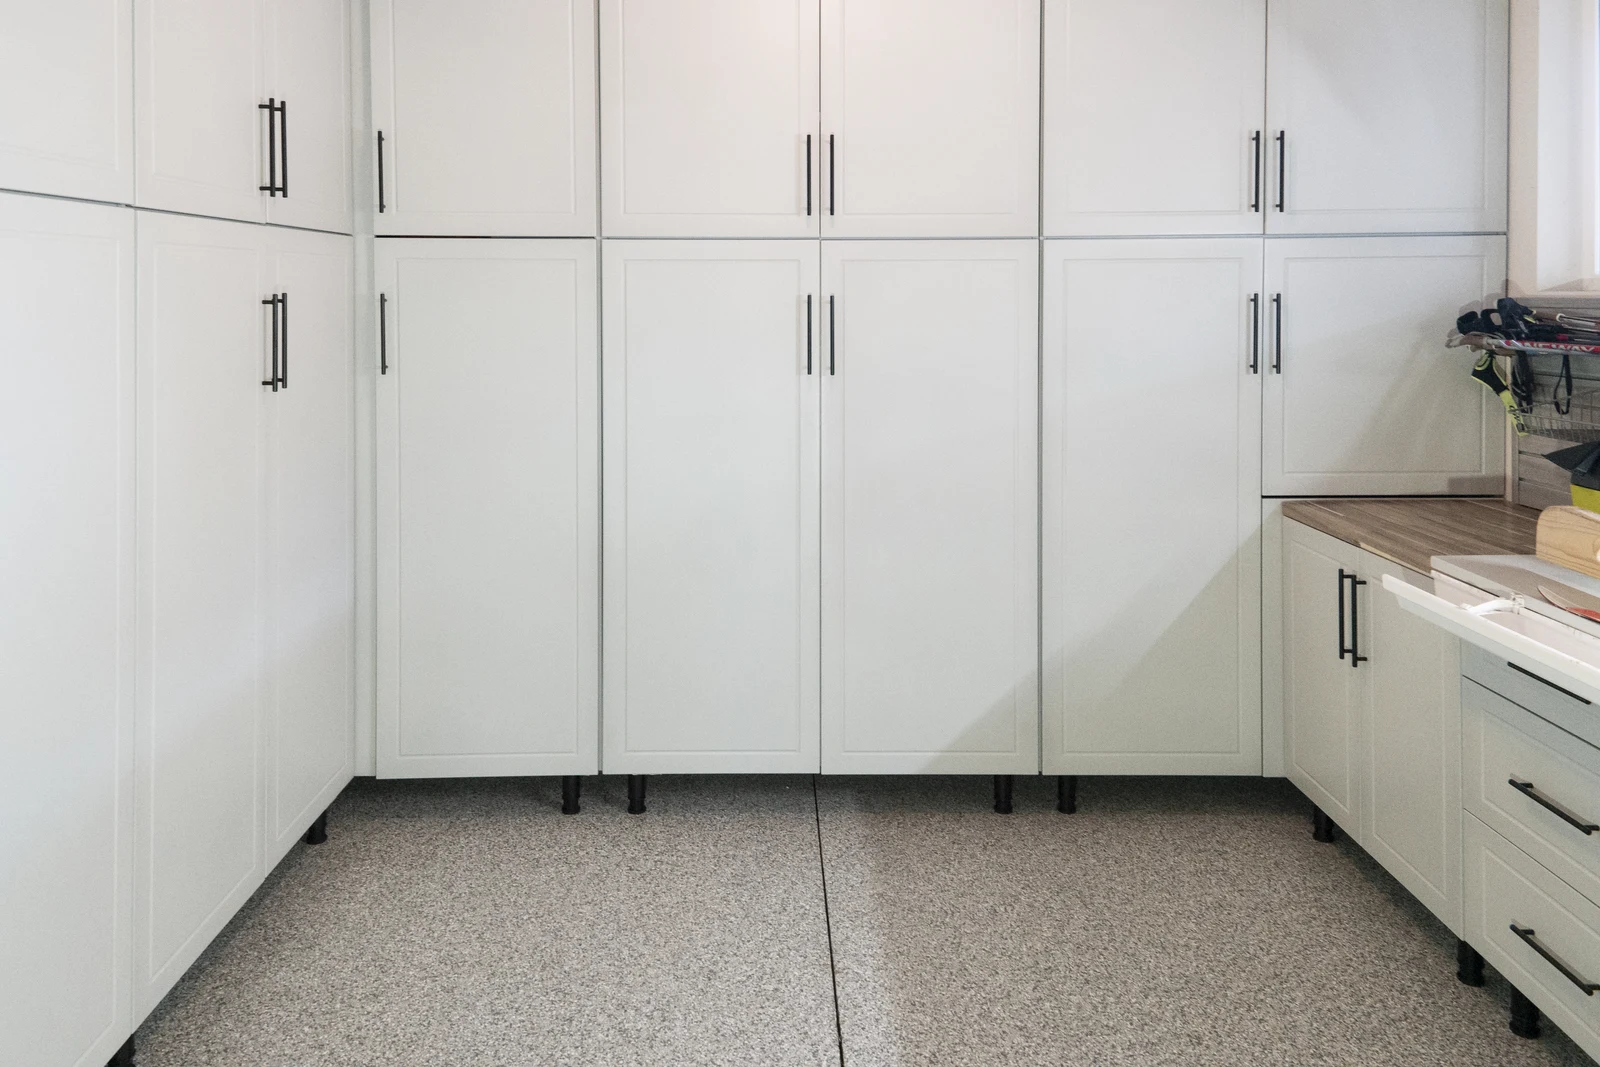
“An epoxy floor looks incredible, but it requires careful prep and has specific vulnerabilities.”
The concrete must be professionally ground and cleaned before application, or the epoxy will peel. While resistant to oil and gas, it can be permanently stained by rust or scratched by dragging heavy items. The clean, white cabinets are also a magnet for greasy fingerprints and dust. Plan on wiping down cabinet faces monthly and be prepared to spot-clean the floor regularly to keep it looking pristine. Compare this with the simple concrete in Idea #9.
7. White Cabinets, Black Countertop, and Rolling Tool Chest
This look taps into the ‘hobbyist haven’ trend, where homeowners are designing their garages to be dedicated spaces for passions, not just parking. The combination of clean white cabinetry (borrowed from kitchen design) with a rugged black tool chest and classic Americana decor (like the Route 66 sign) creates a space that feels both functional and deeply personal. It’s a move away from purely utilitarian storage and towards creating a destination for projects and relaxation, which is a huge driver on Pinterest right now.
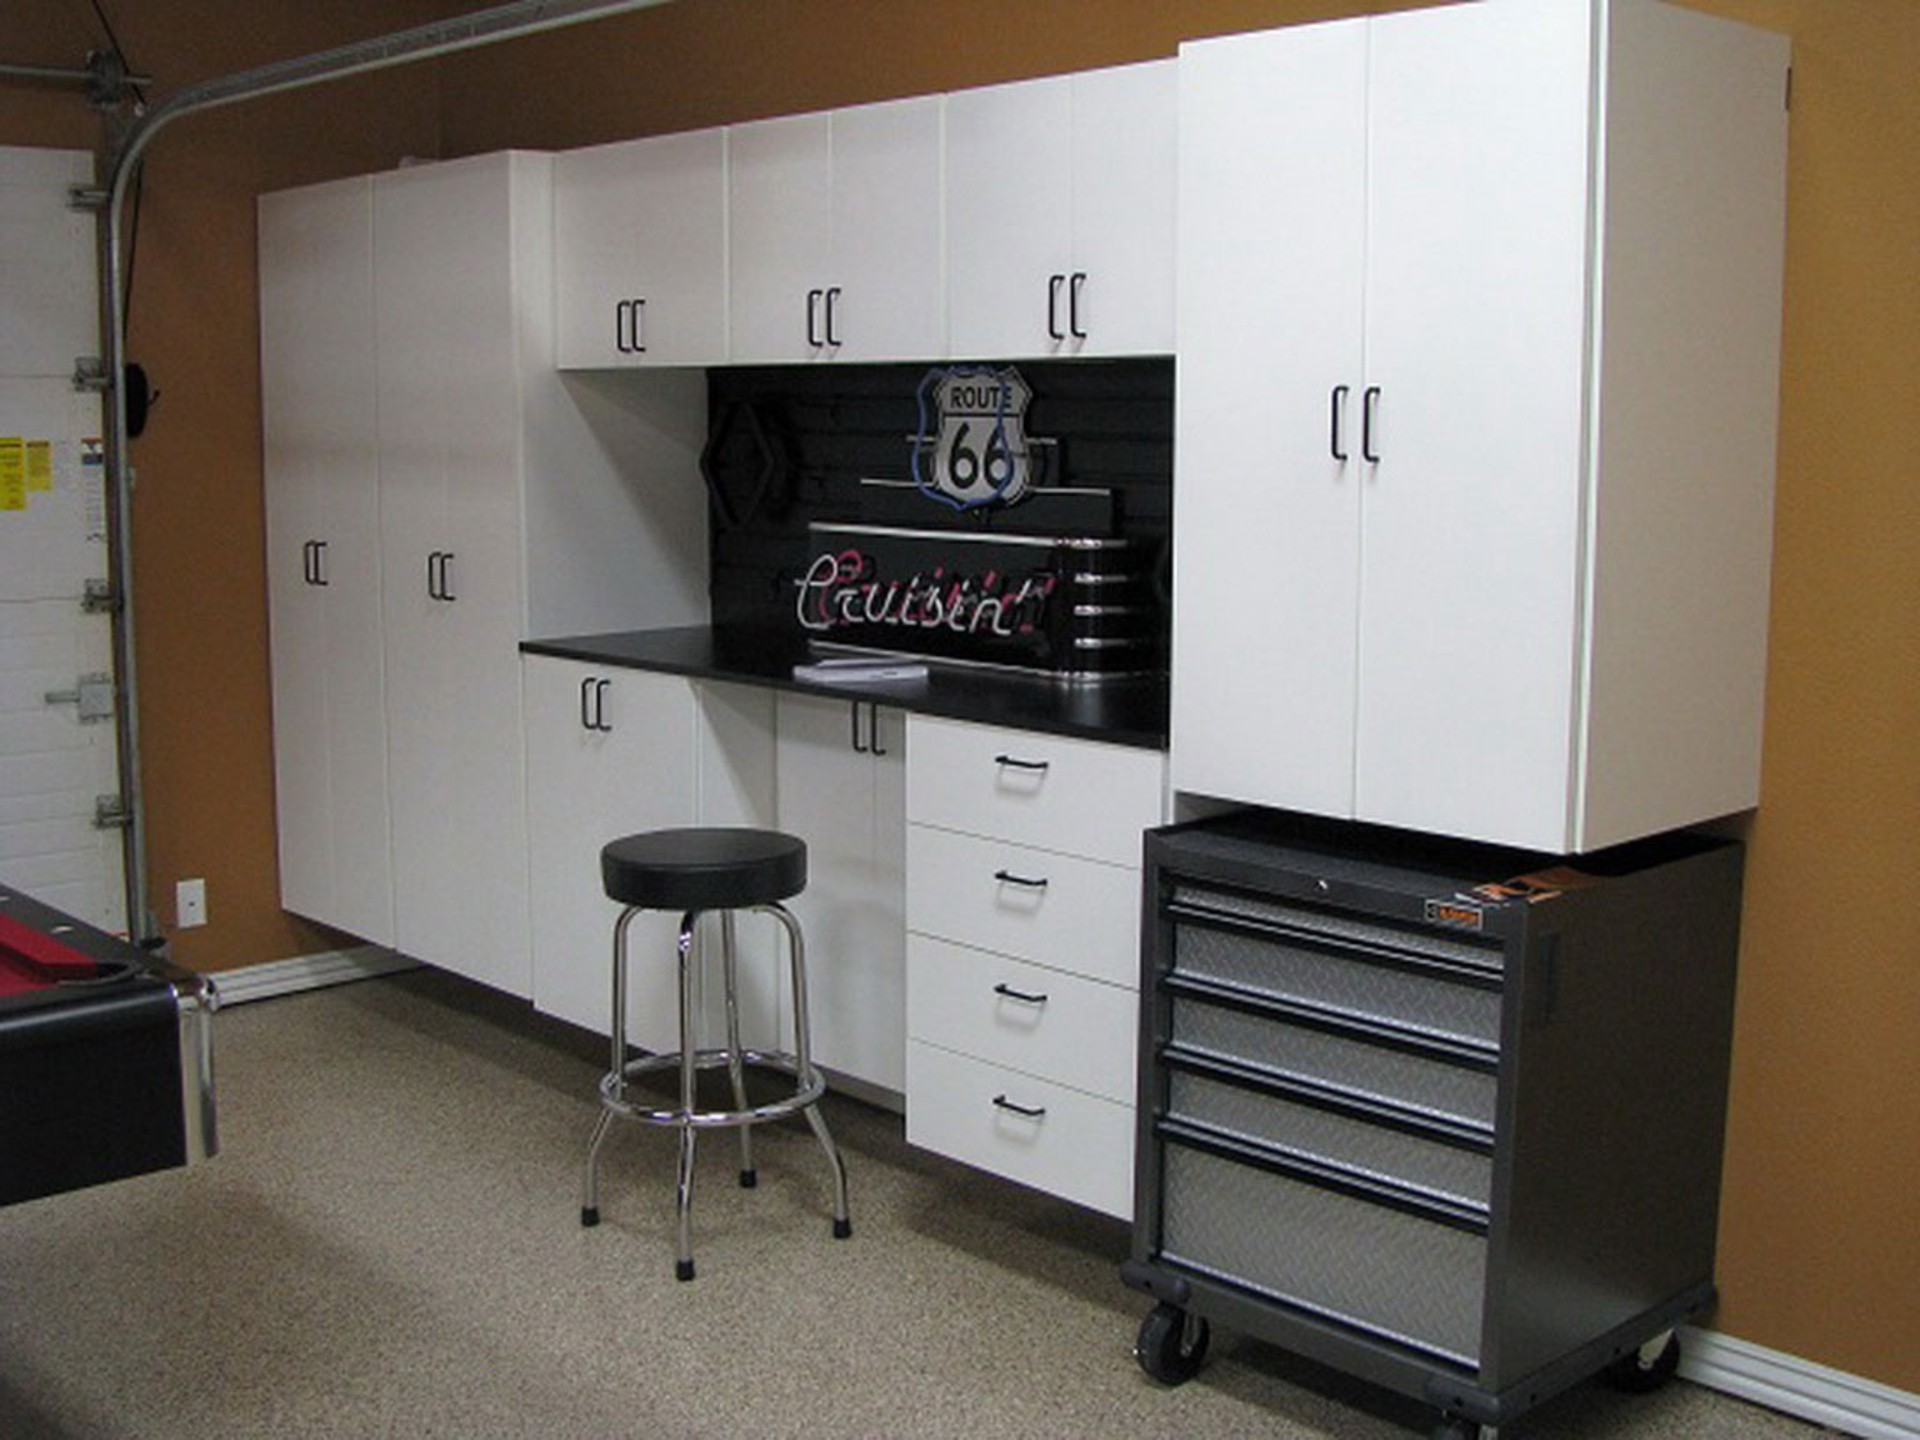
“A setup this extensive is a significant investment in both time and money.”
While it looks like a cohesive system, it’s often pieced together from different manufacturers, which can lead to slight variations in the ‘white’ of the cabinets or the finish of the black handles. The black countertop will show every speck of sawdust and dust, requiring constant wiping to look clean. Also, that rolling tool chest is heavy—make sure your epoxy floor is high-quality and fully cured before you start moving it around, or you risk permanent scratches.
8. Overhead Ceiling Rack with Uniform Gray Storage Totes
A professional overhead rack system can cost $300-$600+. For a much lower price, you can create a DIY version using heavy-duty shelf brackets and lumber from a hardware store. A set of 24-inch deep brackets is around $20 each, and a 2×4 frame with a plywood top will run you about $100 for an 8-foot section. The key is to securely anchor your supports into ceiling joists. For the bins, wait for back-to-school or holiday sales at Target or Walmart, where you can often get totes like these for under $10 each.
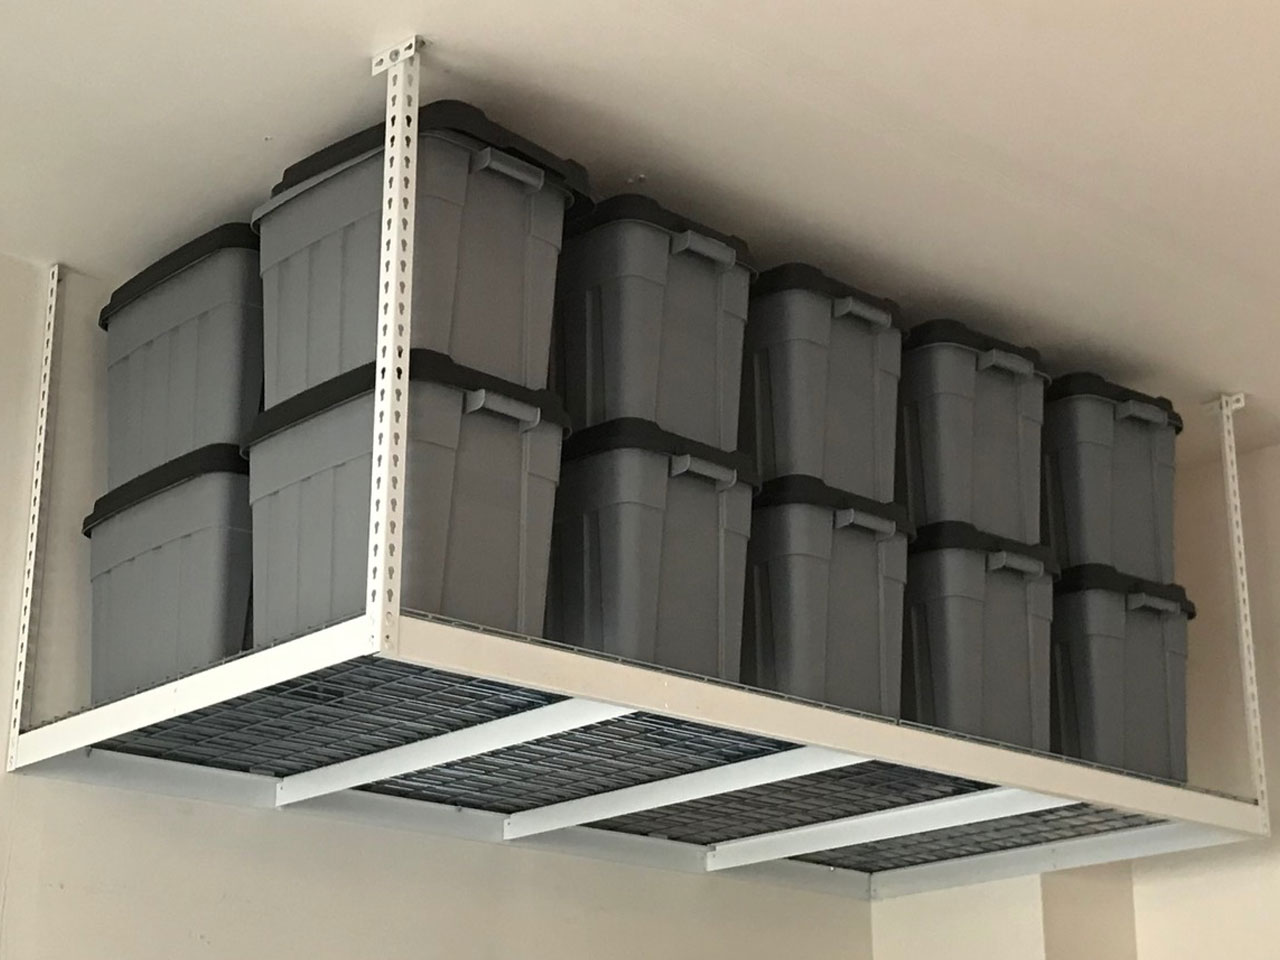
“The most critical detail in this photo is the use of identical light gray totes.”
If you were to swap these out for a random assortment of mismatched clear bins, cardboard boxes, and colorful containers, the entire system would instantly look cluttered and chaotic. The uniformity of the totes creates a visual calm and sense of order, making the stored items feel intentional and tidy, even though they are suspended in plain sight. It’s a decorator’s trick applied to the garage.
9. Built-in White Cabinets with a Light Wood Workstation
A built-in look like this is best suited for a standard two-car garage or larger, requiring a wall at least 15 feet long to accommodate the two tall cabinets and the central workstation. Ceiling height isn’t as critical here as in overhead storage setups, but 8-foot ceilings are the minimum. The windows are a key feature; this design works best on a wall with natural light to make the workstation feel bright and usable. In a garage without windows, you’d need to add dedicated under-cabinet lighting to achieve the same effect.
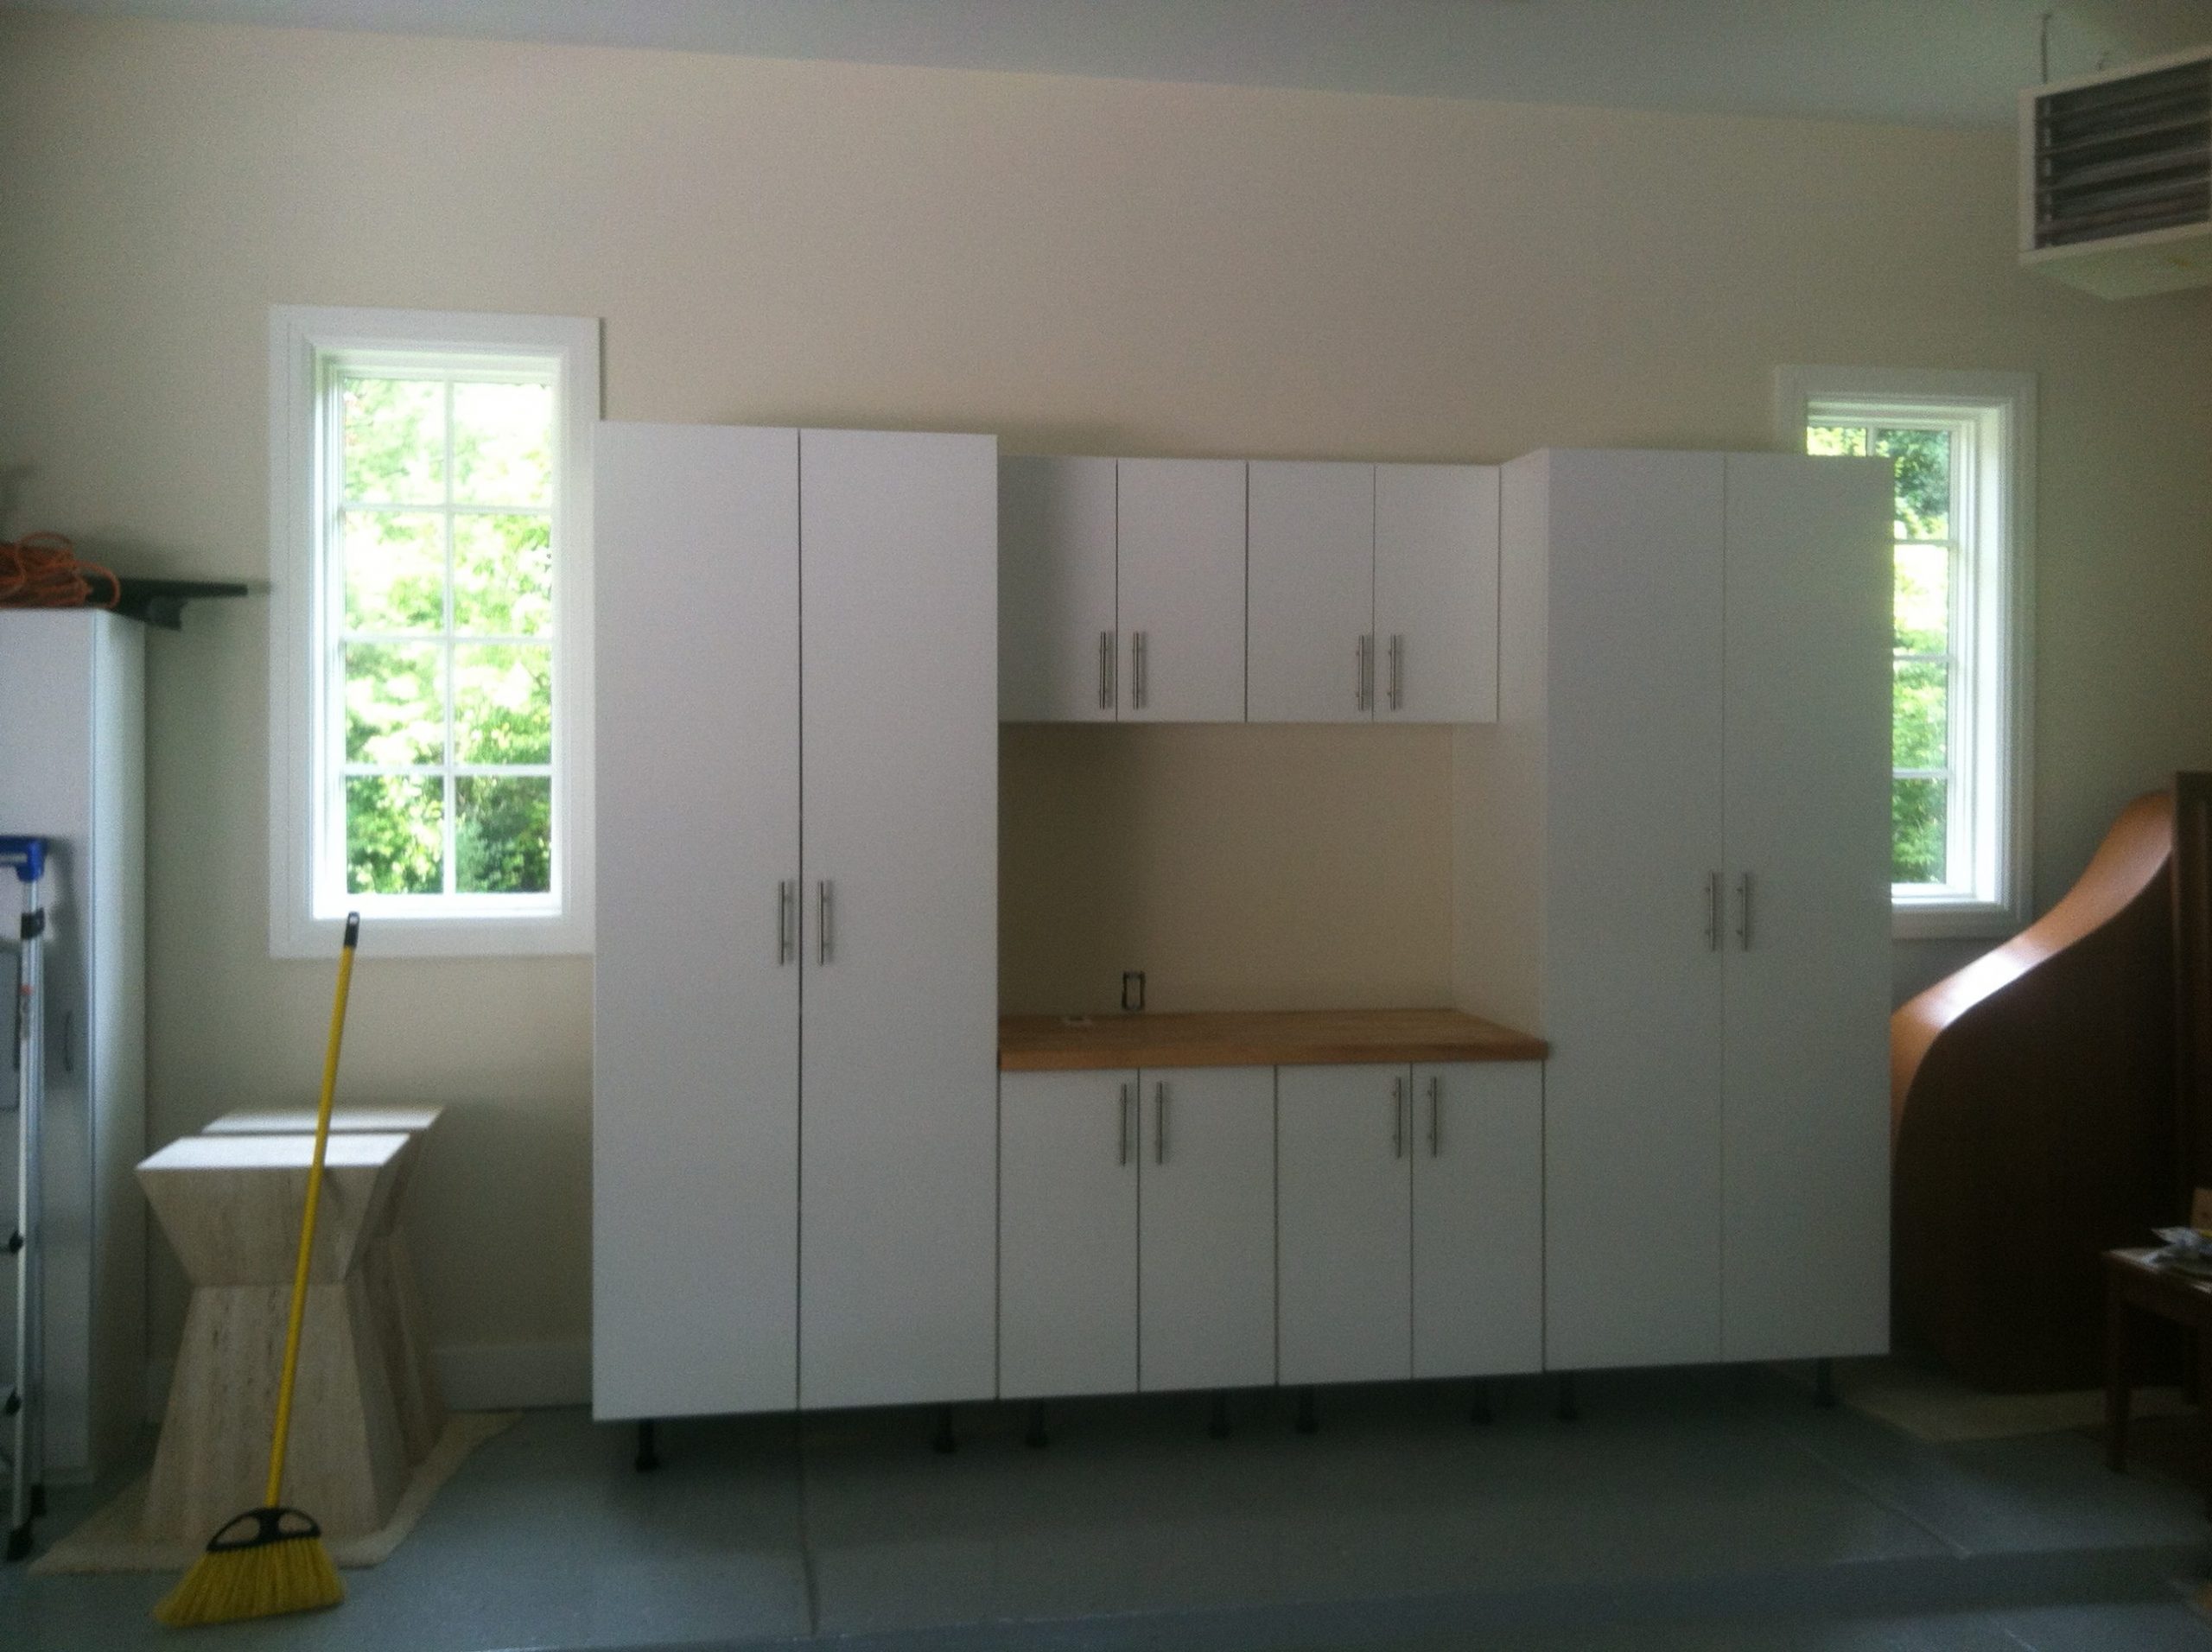
“This design succeeds by using principles of symmetry and material contrast.”
The two tall white cabinets flanking the lower workstation create a pleasing, balanced composition that feels intentional and custom. The introduction of the light wood countertop and matching upper cabinets injects warmth and organic texture, preventing the all-white scheme from feeling sterile or clinical. It’s this thoughtful combination that elevates it from simple storage to a genuine design feature. It’s a more integrated look than the modular approach in Idea #4.
10. Wall-Mounted White Wire Shelves with Assorted Storage Bins
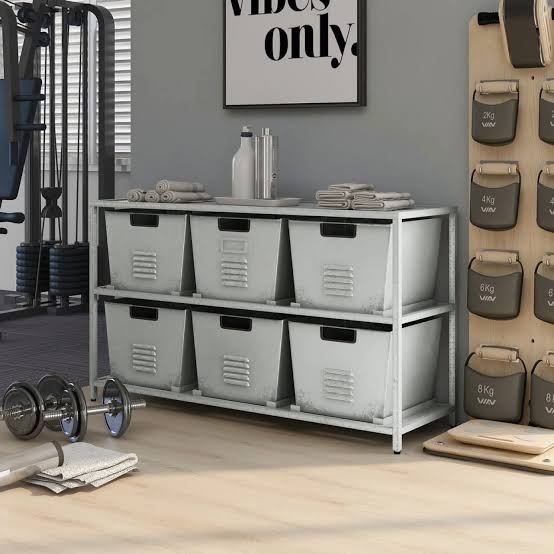
When installing wire shelving, most people just install one long run. A better approach is to vary the heights and depths. Install a shallow, 12-inch deep shelf up high for single-row items you rarely use. Below that, install a deeper, 16- or 20-inch shelf for larger bins and boxes. This tiered approach prevents items from getting lost at the back of a deep shelf and makes it easier to see what you have at a glance. It also allows you to customize the wall for items of different sizes, like coolers or shop vacs on the floor underneath.
“Before you commit to wall-mounted wire shelving, run through this quick checklis”
Before you commit to wall-mounted wire shelving, run through this quick checklist to save yourself a headache.
- Use a stud finder to locate and mark all the vertical studs on the wall. Wire shelving filled with bins is heavy, and you must anchor the support brackets into studs, not just drywall.
- Measure the largest bin or item you plan to store. This will determine the minimum depth of your shelves and the spacing you need between them.
- Check the wall for outlets, light switches, or plumbing access panels that you need to keep clear. Plan your shelf layout around them.
11. Overhead Wire-Grid Shelving Above Modular Cabinets
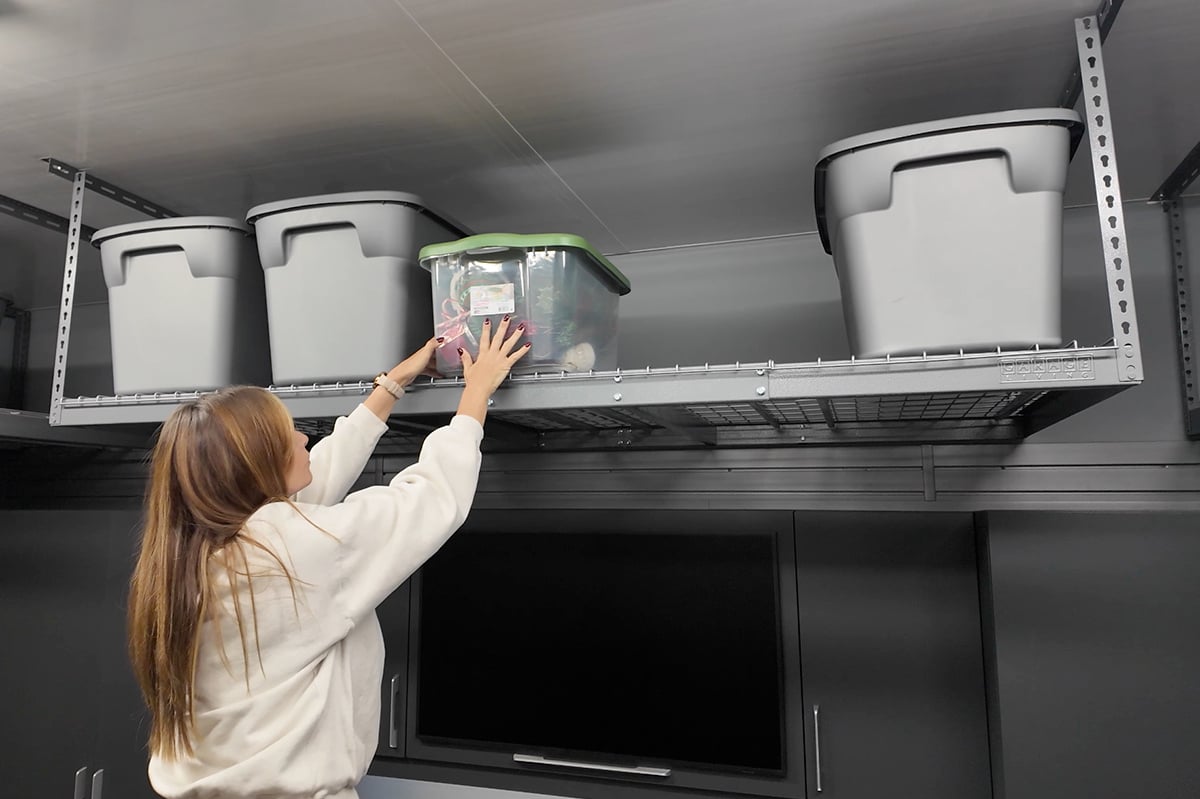
This combination offers a robust, high-capacity storage solution by claiming unused ceiling space. The cost can vary based on the quality and brand.
“Overhead Wire-Grid Shelving (8’x4′ unit): $250 – $600Professional Installation: ”
- Overhead Wire-Grid Shelving (8’x4′ unit): $250 – $600
- Professional Installation: $200 – $400
- Modular Base Cabinets (per linear foot): $150 – $400
- Storage Bins: $100 – $300
- TOTAL: $1,550 – $3,500+ (for an 8-foot section)
Budget alternative: Stick to just the overhead shelving from a brand like SafeRacks or Fleximounts and use your existing storage containers. Skip the pricey modular cabinets below for now. Total cost: $350 – $900.
Loading and unloading these overhead shelves is not for the faint of heart. You will need a very sturdy, stable ladder and the ability to lift heavy, awkward bins over your head. It’s fantastic for long-term storage (like holiday decorations or camping gear) but a real pain for items you need to access regularly. Also, be brutally honest about your ceiling height and garage door clearance. You need to ensure the rack doesn’t interfere with the door’s operation when it’s open. Measure twice, install once.
12. Ceiling-Mounted Wire Rack Positioned Above the Garage Door
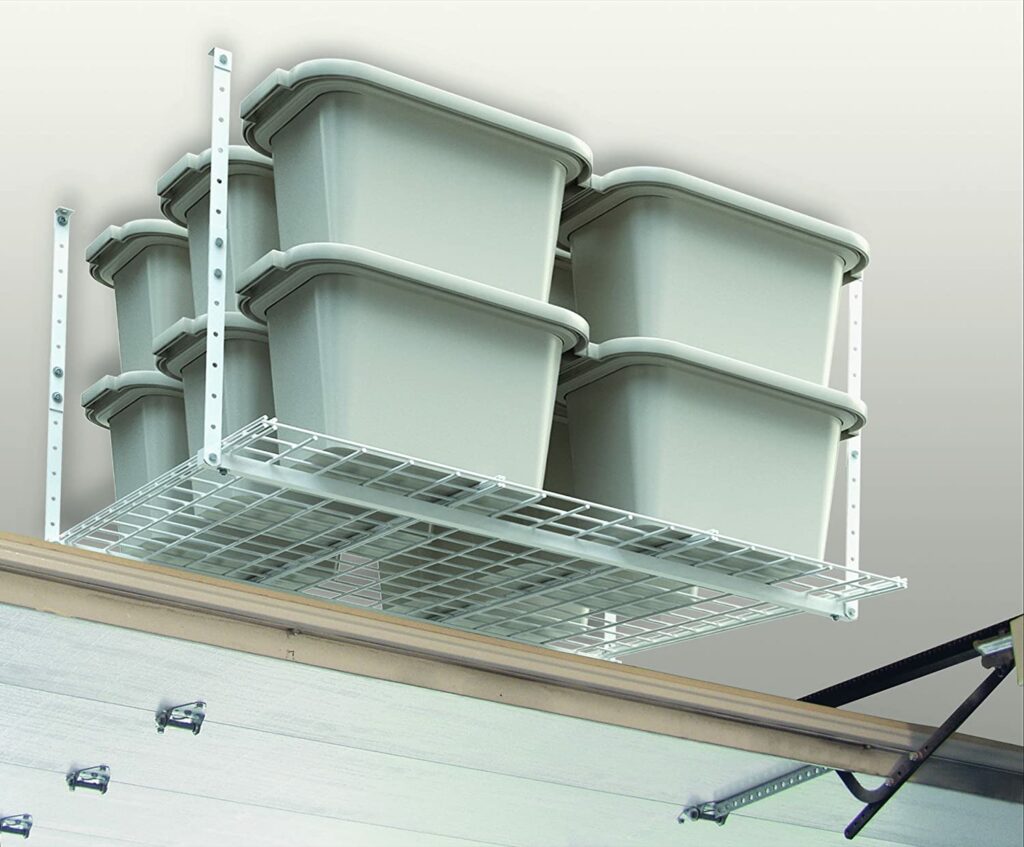
The most brilliant part of this solution is its specific placement: directly above the garage door’s open path. This is arguably the most underutilized real estate in the entire garage. By installing a rack here, you’re creating a massive amount of storage out of thin air, without sacrificing any floor space or wall space that could be used for cabinets, tools, or a workbench. It’s the ultimate space-saving hack for a garage that needs to do it all, including parking a car.
“This idea is specifically for garages with enough clearance between the top of the open garage door and the ceiling.”
You need a minimum of 24 inches of vertical space in that zone to fit a standard rack and bins. Before buying anything, open your garage door all the way and measure that gap. This works in almost any size garage, from a single-car to a three-car, as long as that crucial overhead clearance exists. It’s a fantastic solution for smaller garages where floor and wall space are at a premium.
13. Motorized Overhead Rack with a Cable Lift System
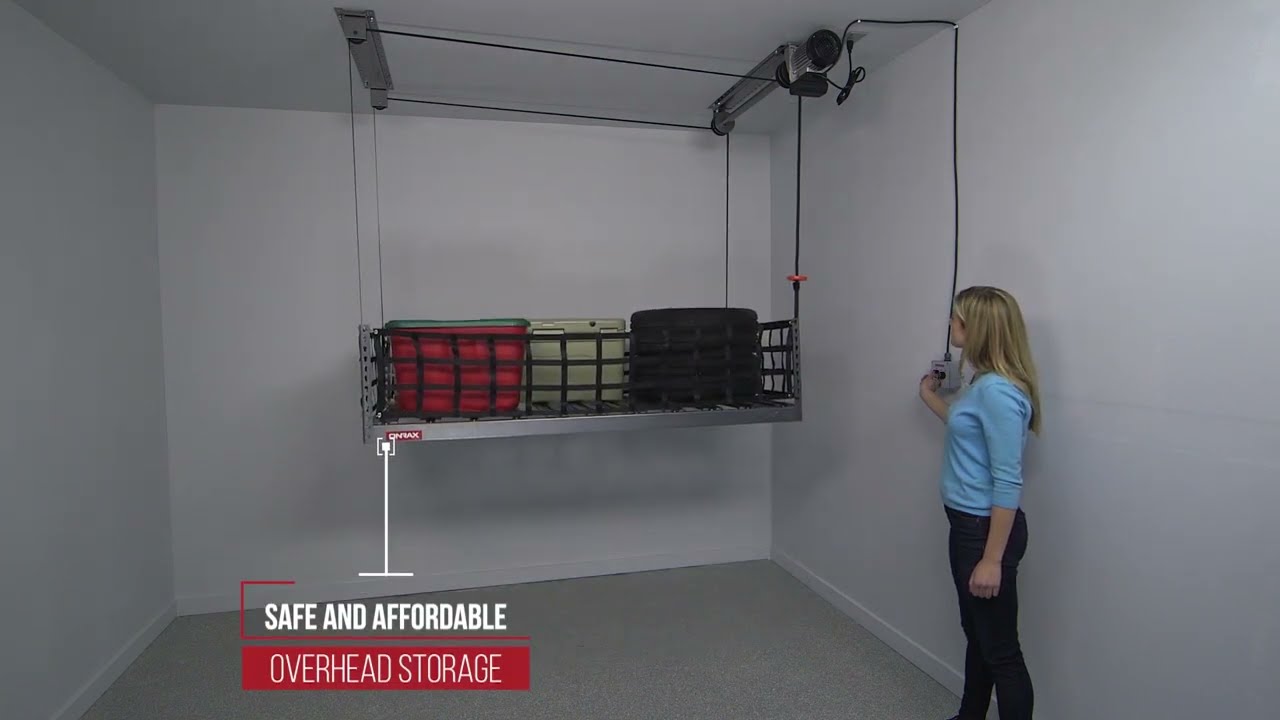
A motorized lift makes overhead storage dramatically more accessible. Installing one is a job for a confident DIYer with a helper. Here’s a simplified overview:
“Choose a location with clear space below and access to power.”
Use a stud finder to locate at least two ceiling joists for the motor and pulley mounts.Mount the main motor unit to the ceiling joists according to the manufacturer’s instructions. This is the heaviest part and requires secure anchoring.Install the four corner pulley brackets onto the joists, measuring carefully to ensure the platform will hang level.Assemble the metal storage rack platform on the floor.Thread the steel cables from the motor through the pulley system and attach them to the four corners of the rack.Mount the wall control switch and route the power. Test the lift without any weight on it first.
Time: 3-5 hours. Cost: $400 – $900 for the kit.
The visual formula here is 90% function and 10% safety. The core of the design is the gray metal framework, cables, and motor—pure industrial utility. The remaining 10% is dedicated to securing the contents, represented by the black cargo nets. Unlike the static racks in Idea #7 or Idea #11, which rely on neatly stacked bins, this dynamic system requires active containment. You can change what you store—tires, bins, equipment—but the netting is a non-negotiable part of the equation to prevent items from shifting or falling during operation.
14. Overhead Storage Featuring a Suspended Extension Ladder
Storing a large extension ladder like this is always a challenge. The key to suspending it safely is to use at least two, preferably three, heavy-duty hooks screwed directly into the center of ceiling joists. Do not use drywall anchors. For a 24-foot ladder weighing 50 lbs, each hook should be rated for at least 50 lbs to provide a safety margin. Place the hooks about 6-8 feet apart to distribute the weight evenly and prevent the ladder from bowing in the middle over time. The bright yellow hooks here are great for visibility.
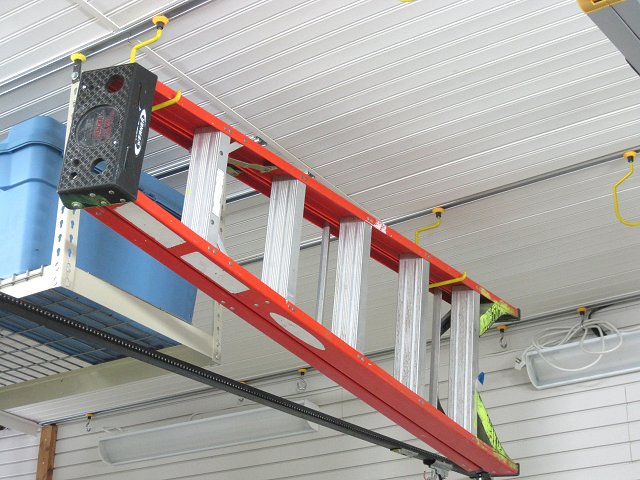
“You don’t need a fancy dedicated system to get your ladder out of the way.”
The hooks shown here are inexpensive—you can find similar heavy-duty garage hooks at any hardware store for about $10-$15 for a pair. The metal shelf above it can also be a simple DIY. Instead of a pre-made unit, you can install two sturdy wall brackets into studs and lay a 2×10 piece of lumber across them for a sturdy shelf that costs less than $40. It achieves the same goal of getting bulky items off the floor.
15. Dark Modular Cabinets Paired with Slatwall Panels
This system looks so clean because it creates a ‘storage cockpit.’ The dark grey cabinets and slatwall panels form a cohesive visual block, while the light wood-look countertop provides a defined workspace. Recessed lighting is crucial here; it eliminates shadows and puts bright, even light exactly where it’s needed, making the space feel more like a high-end workshop than a dim garage. The dark, polished floor reflects the light, adding to the brightness and giving the illusion of more space.
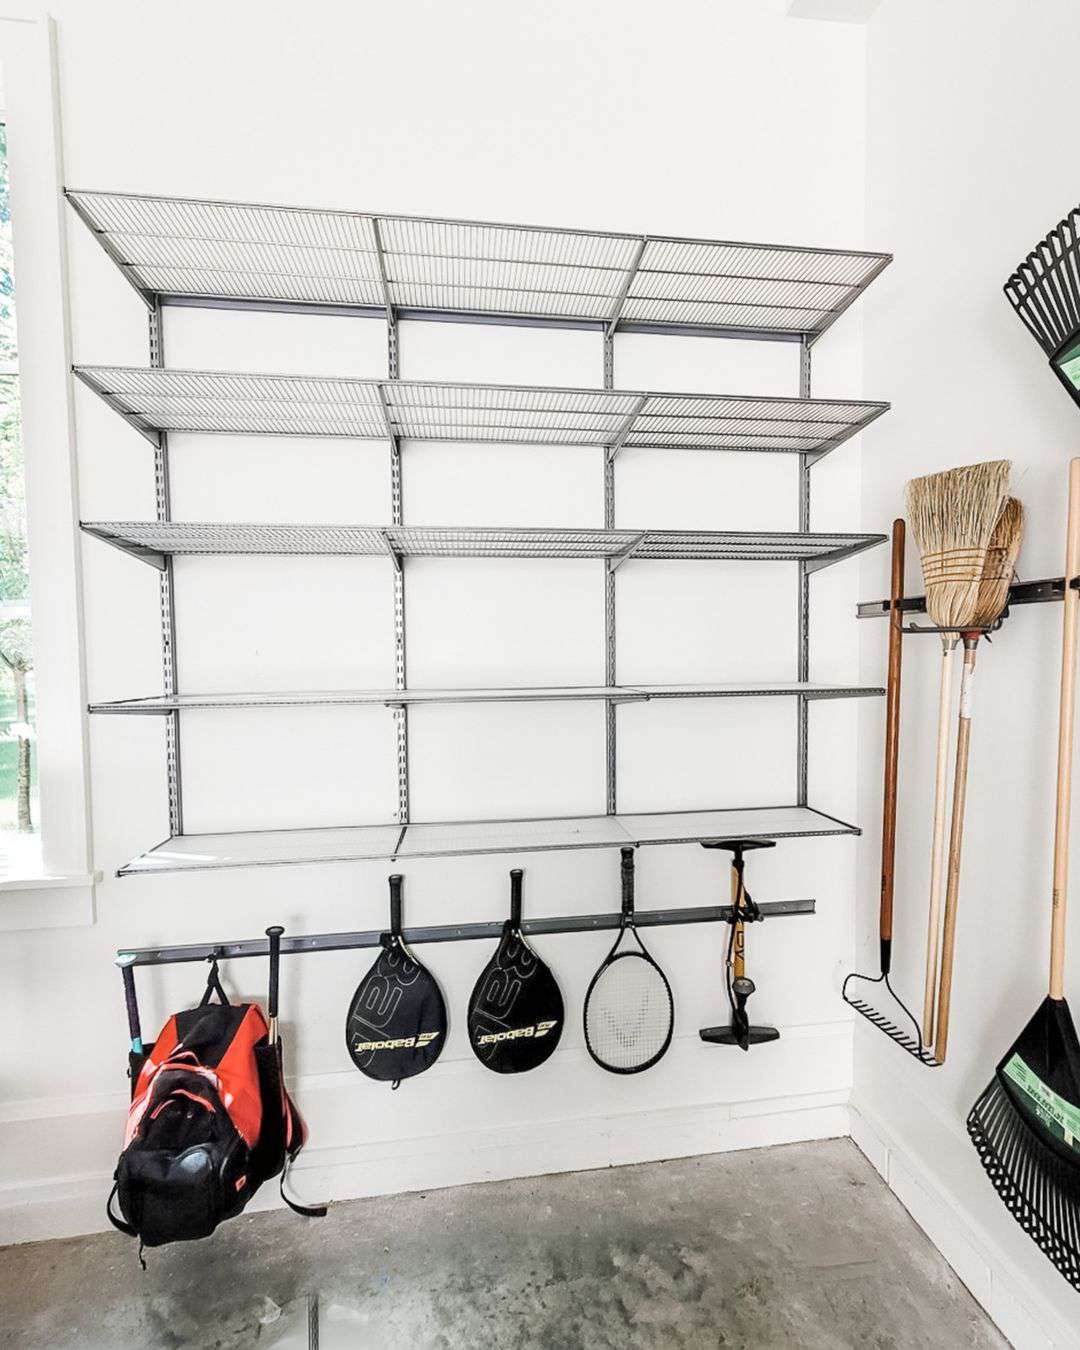
“That beautiful, dark, reflective floor is a high-maintenance hero.”
It will show every footprint, drop of water, and speck of dust. If you’re actually working in this space, be prepared to Swiffer or wipe it down daily to maintain this pristine look. The light wood-look countertops, while stylish, are likely laminate and can be susceptible to scratches from tools or stains from chemicals if not protected. Dark gray cabinets are more forgiving than white, but they will still show dusty outlines over time.
16. Modern Gray Cabinet System with a Black Grid Storage Wall
This is the garage as a ‘gear locker.’ This trend is huge with homeowners who have significant investments in sports equipment like skis, golf clubs, and bikes. The black grid wall is a direct descendant of retail display systems, chosen for its strength and modularity. It allows you to display expensive gear like art while keeping it organized and accessible. The mix of closed dark gray cabinets and open light gray cubbies speaks to a desire for a space that is both ruthlessly organized and aesthetically pleasing.
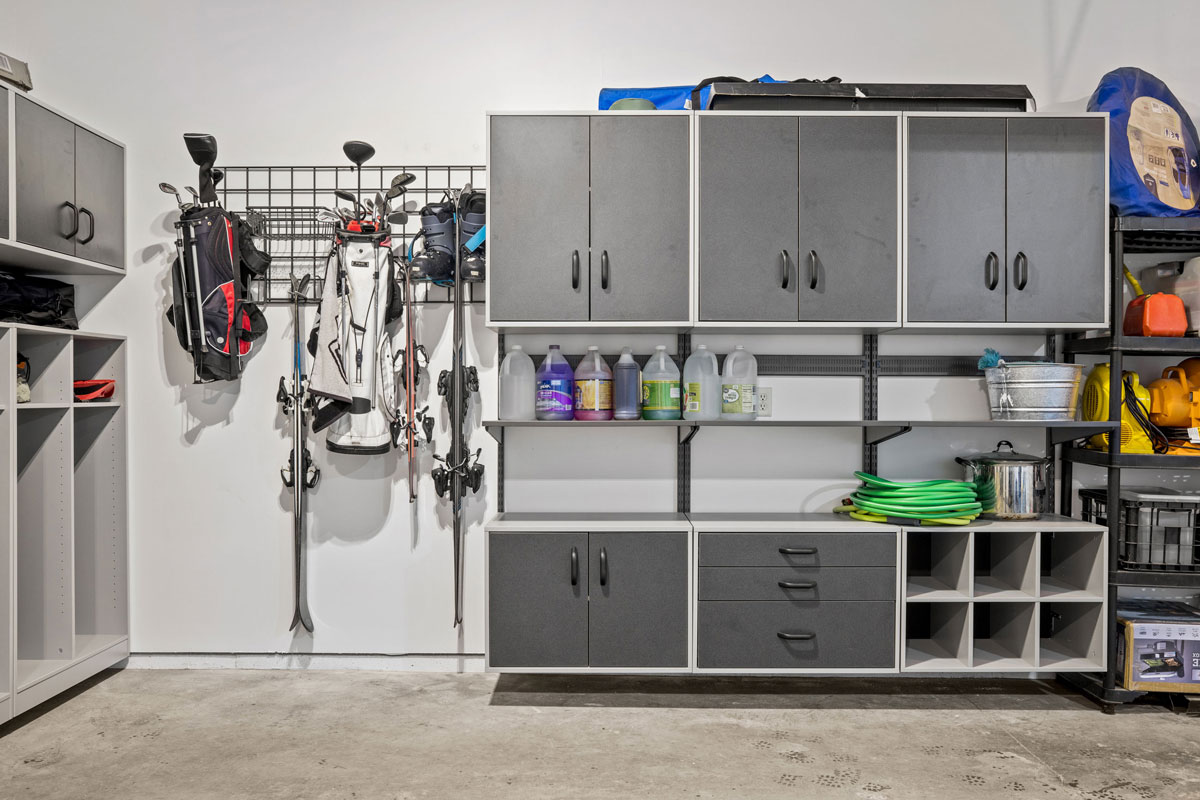
“A comprehensive system like this is best for a two- or three-car garage.”
You need a long, uninterrupted wall—at least 16-20 feet—to get the full effect of the cabinets, grid wall, and shelving units. The grid wall itself is most effective when it has at least 6 feet of width to accommodate bulky items like golf bags. Ceiling height should be a standard 8 feet or more. In a smaller garage, you could implement just the grid wall section as a feature for storing long items vertically.
17. Overhead Rack with Bins, Dog Crate, and Slatwall Tool Display
This is a great example of mixing different storage types to solve multiple problems. Here’s a rough cost estimate:
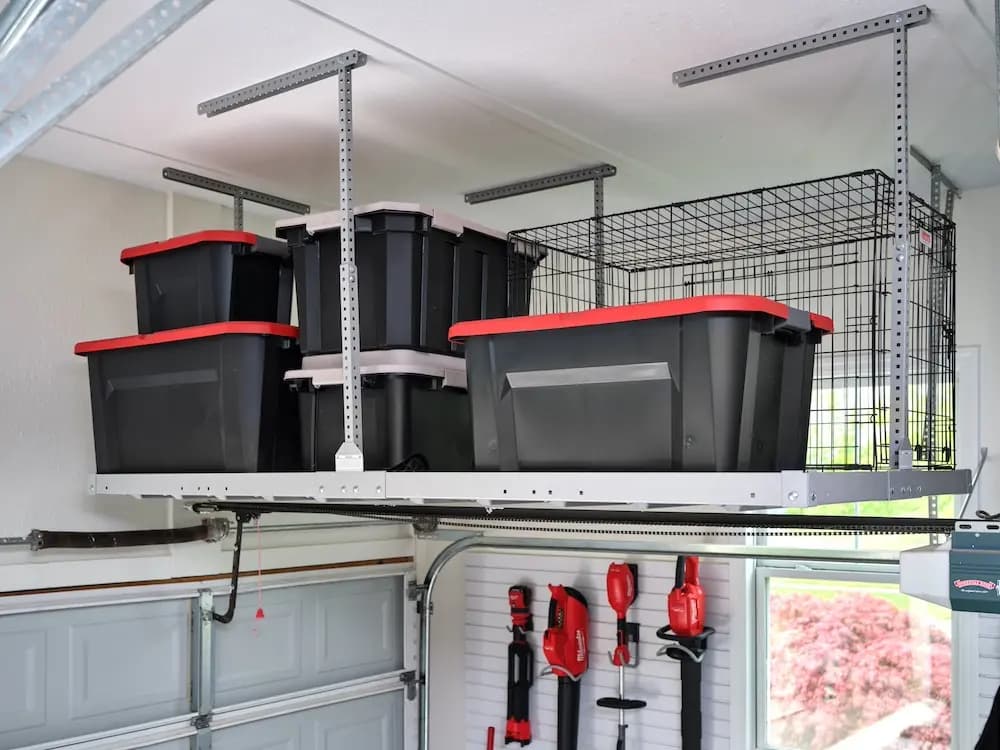
“Overhead Metal Storage Rack (4’x8′): $250 – $500White Slatwall Panels (4’x8′ sec”
- Overhead Metal Storage Rack (4’x8′): $250 – $500
- White Slatwall Panels (4’x8′ section): $150 – $300
- Slatwall Hooks and Accessories: $100 – $200
- Storage Bins (set of 6-8): $80 – $150
- Wire Dog Crate: $50 – $100
- TOTAL: $630 – $1,250
Budget alternative: Replace the slatwall with a simple pegboard panel ($40) and use cheaper peg hooks. Use existing bins and source a dog crate from a local buy/sell group. Total cost: $350 – $600.
Let’s be honest about the dog crate. While it’s clever to store it overhead and out of the way, getting it up and down from that rack would be a serious workout and potentially a two-person job. This is only a practical solution for a crate that is used very infrequently, like for occasional travel. If it’s for daily use, this is not a viable setup. Also, storing power tools directly over a garage door can expose them to more vibrations and temperature swings, which might affect their longevity.
18. Light Gray Modular Cabinets with Dark Gray Slatwall
When planning a slatwall section above a workbench, install it higher than you think you need to. You want at least 18-24 inches of clear space between the countertop and the bottom of the first slat. This ensures you have enough room for taller items on your workbench (like a drill press or bench grinder) and keeps the hanging tools from feeling like they are right in your face while you work. It also provides a clear, easy-to-clean backsplash area. Here, the paper towel holder is wisely placed to the side to maximize prime workspace.
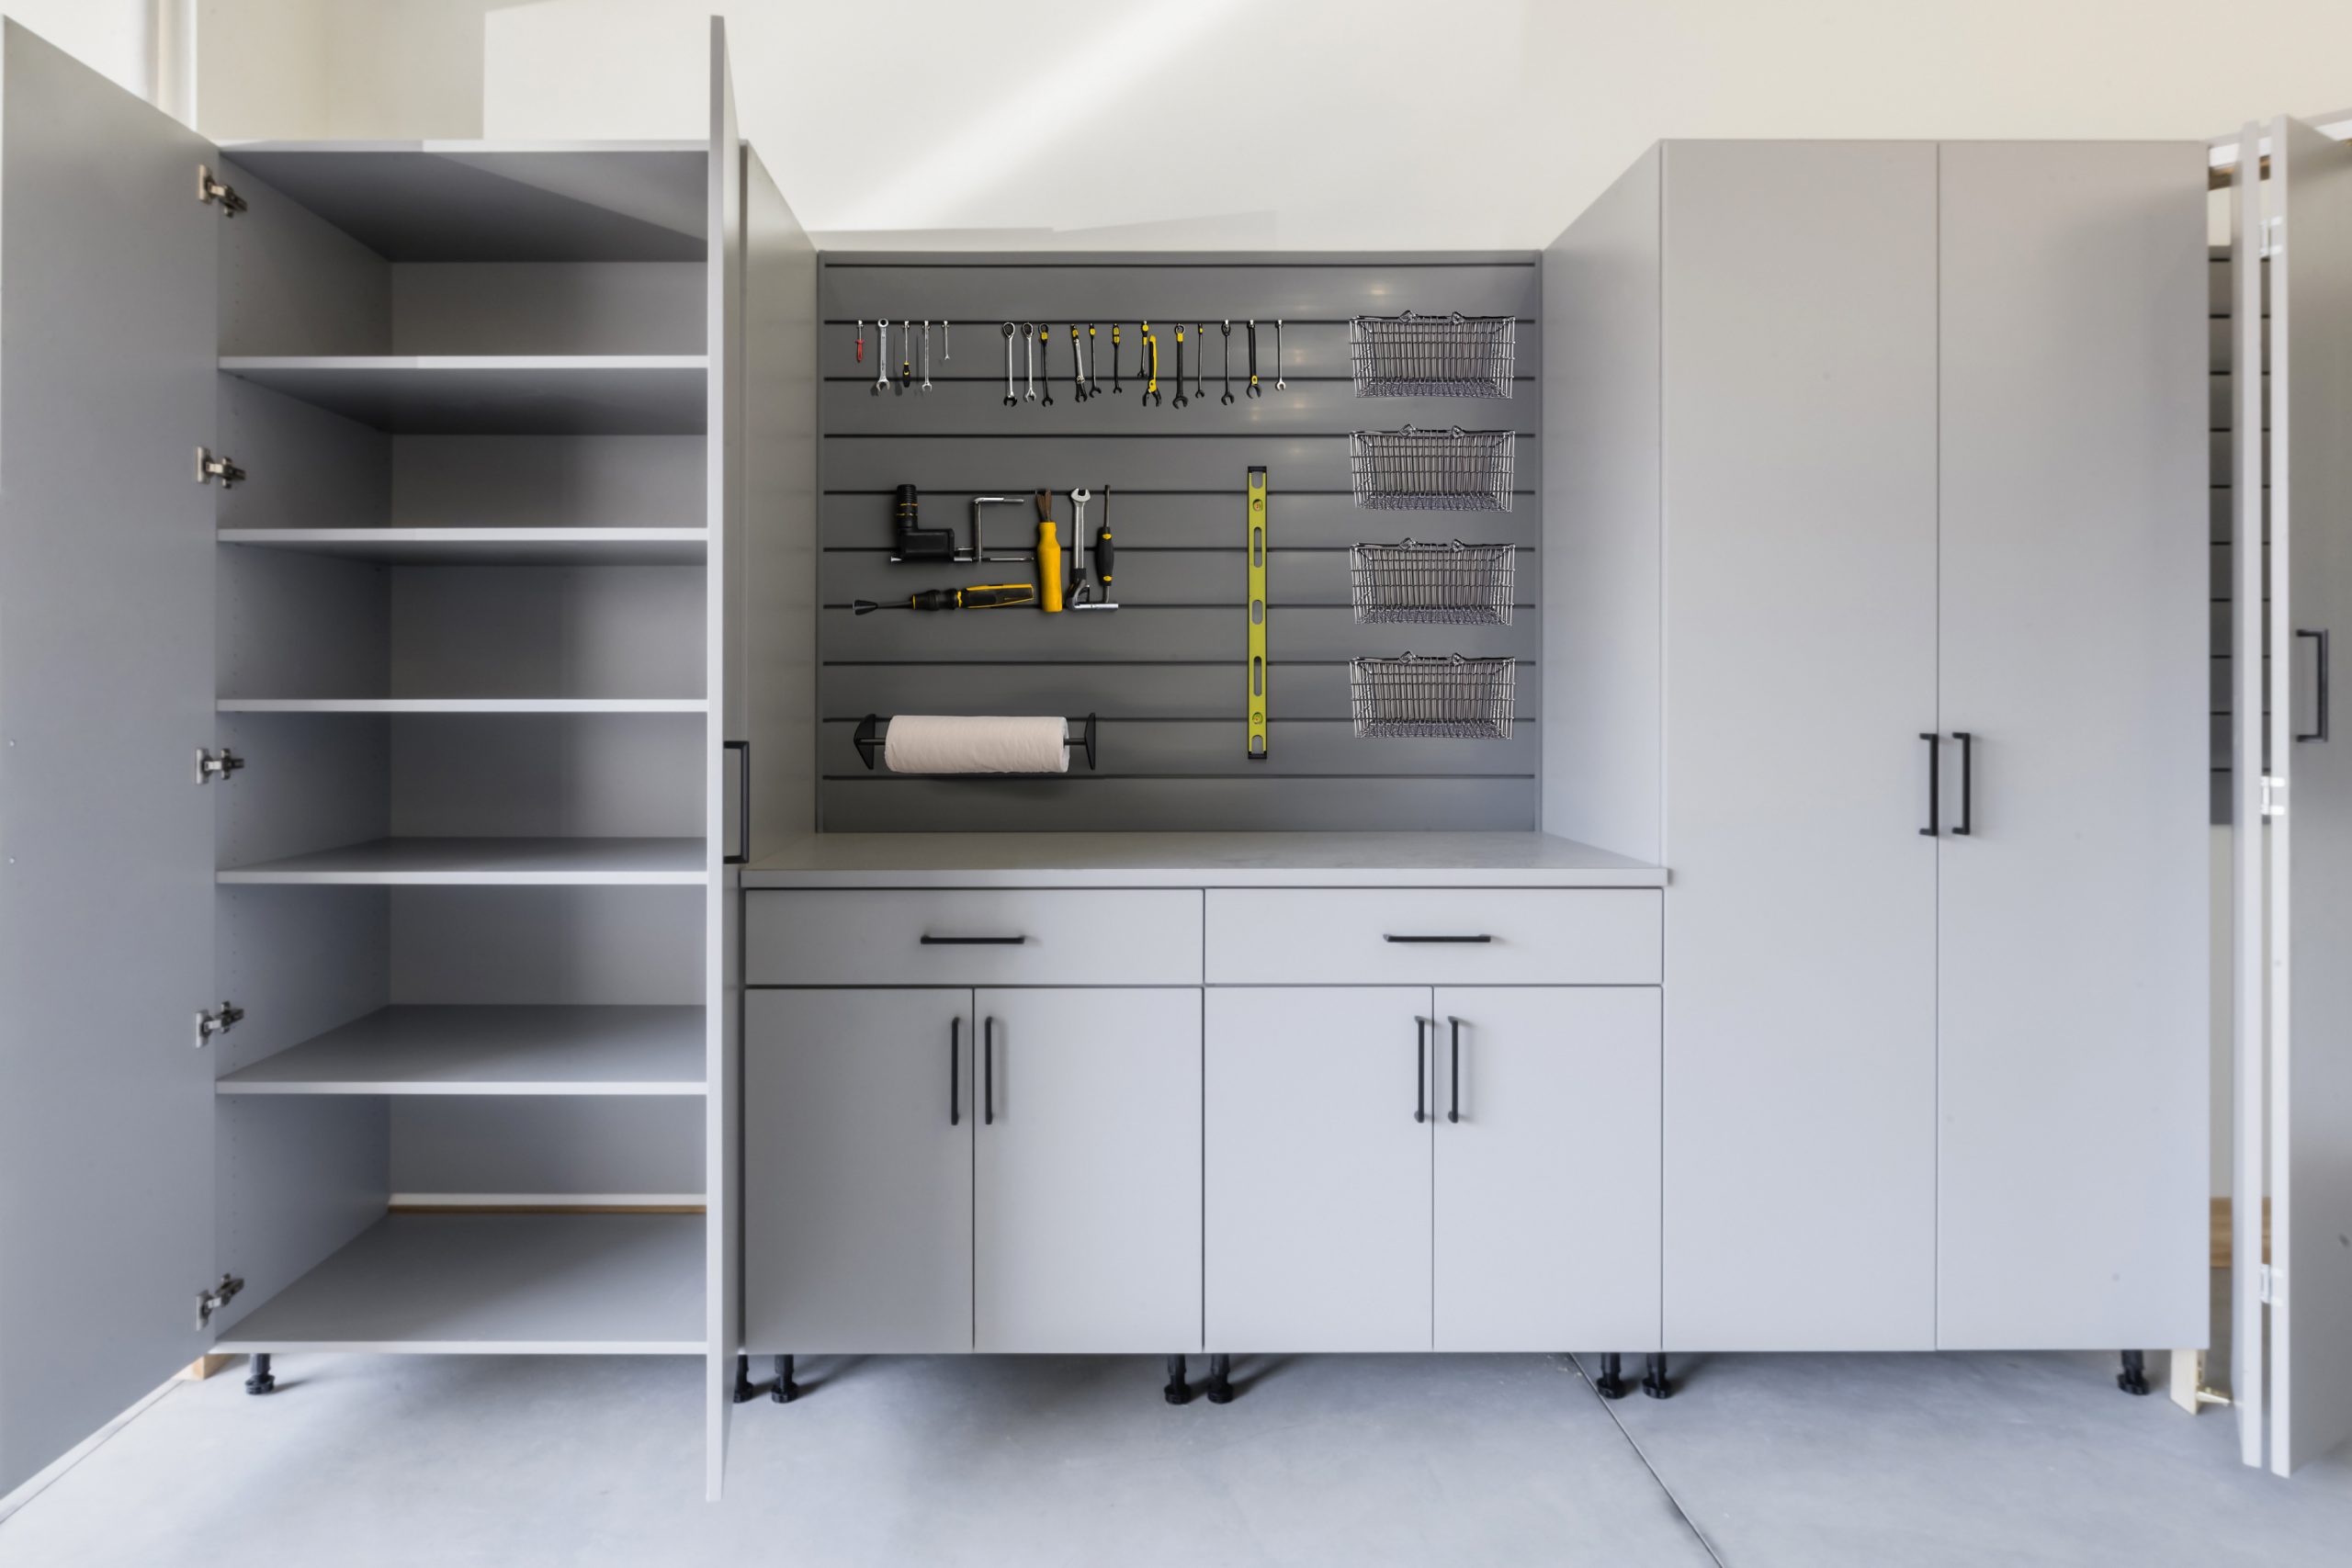
“The dark gray slatwall panel is the hero of this design.”
Without it, you’d have a clean but fairly standard set of light gray cabinets. The slatwall introduces a point of high contrast and intense functionality. It breaks up the monotony of the cabinet faces and provides a versatile, customizable zone for tools and accessories. It’s the element that transforms the setup from simple storage into a dedicated, high-performance workstation. All the other components are supporting actors.
19. Comprehensive Garage with Ceiling, Wall, and Shelf Systems
This garage is a masterclass in storage layering. The formula is: 40% long-term overhead storage (fixed and motorized racks) + 30% grab-and-go wall storage (slatwall for tools) + 20% bulk floor storage (freestanding metal shelving) + 10% concealed storage (wall cabinet). This layered approach ensures that there is an appropriate home for everything, from seasonal decorations in overhead bins to frequently used wrenches on the slatwall. The faux-brick wainscoting is a purely decorative element that ties the different zones together.
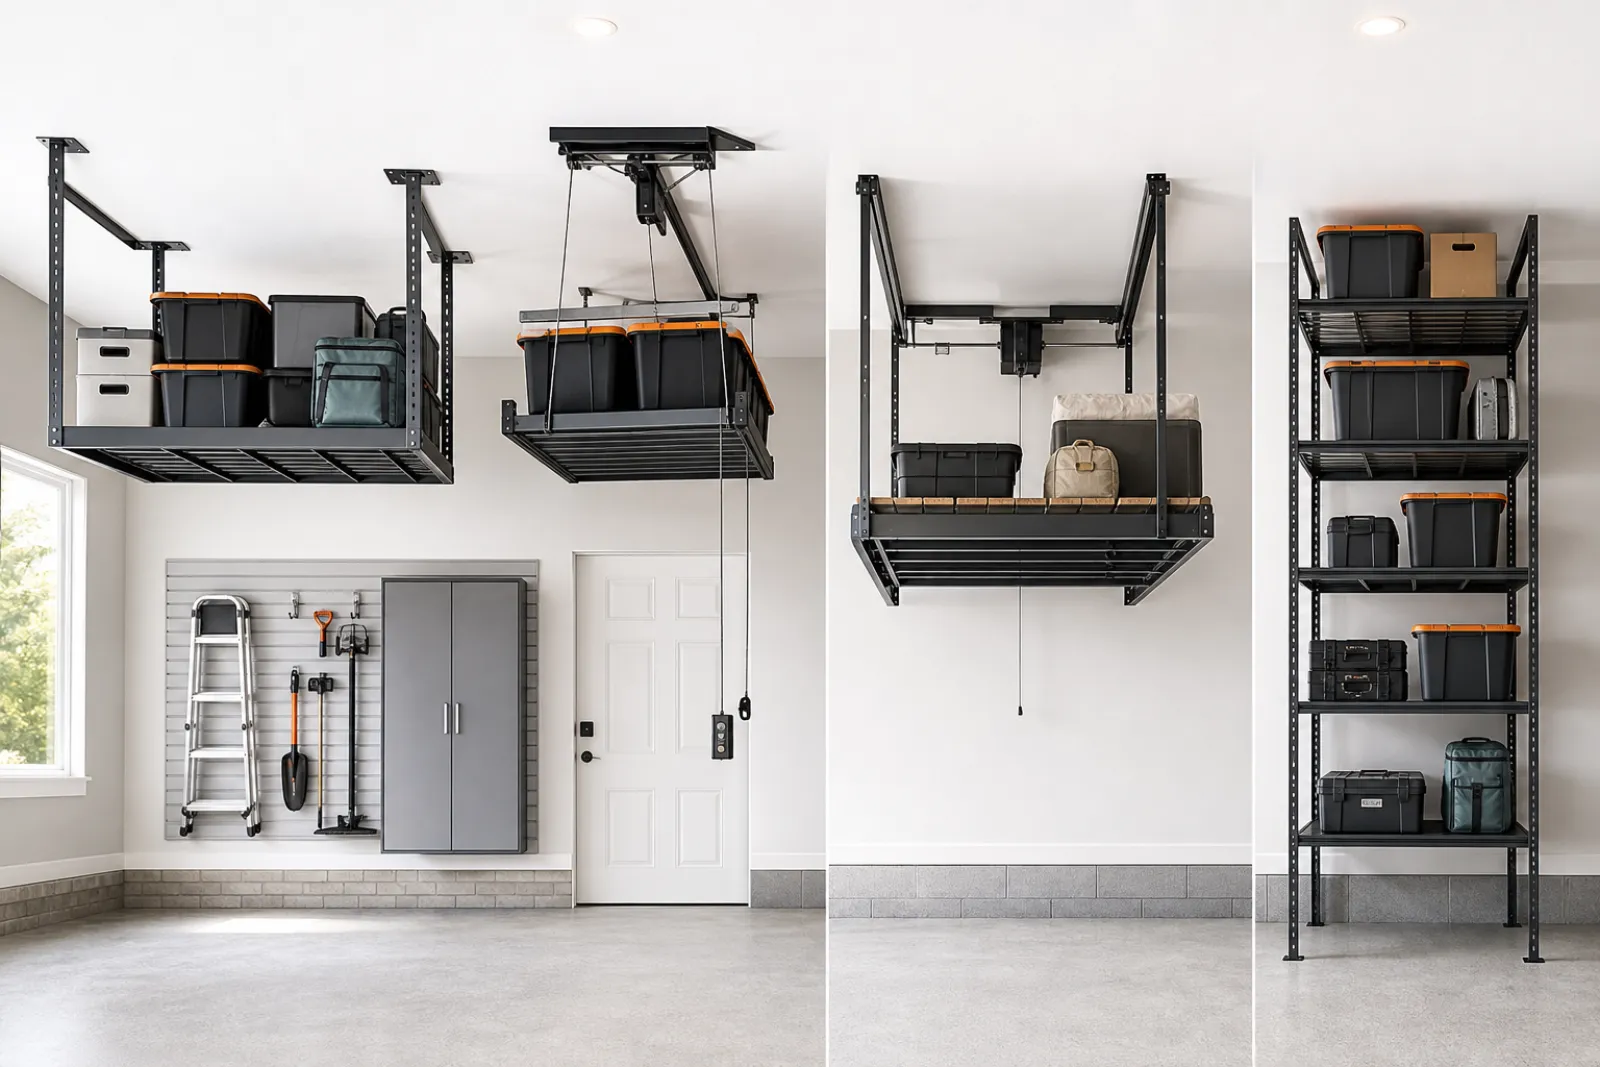
“A motorized lift, slatwall, and custom cabinets can run into the thousands.”
You can get 80% of this functionality for a fraction of the price. Start with one or two freestanding black metal shelving units like the one shown; a 48″ wide unit costs around $100-$150. For wall storage, a 4’x8′ sheet of pegboard is about $40, a huge saving over slatwall. For overhead, a static rack (like in Idea #11) is about one-third the cost of a motorized lift. You can build up to the full system over time as your budget allows.
20. Industrial Black Metal Wall Unit with Integrated Pegboard
Mounting a heavy unit like this requires precision and hitting studs. Here’s the general process for a secure installation:
“Assemble the main frame of the unit on the floor, but leave off the shelves and pegboard panels for now to keep it lighter.With a helper, hold the empty frame against the wall at the desired height.”
Use a level to ensure it’s perfectly straight.Use a pencil to mark the locations of the mounting holes on the wall.Use a stud finder to confirm that your marks align with wall studs. If they don’t, you may need to add a horizontal ledger board screwed into the studs first, then mount your unit to the board.Drill pilot holes into the studs at your marked locations.With your helper, lift the frame back into place and drive the heavy-duty lag bolts or screws through the frame into the pilot holes.Once the frame is secure, install the pegboard panels and shelves.
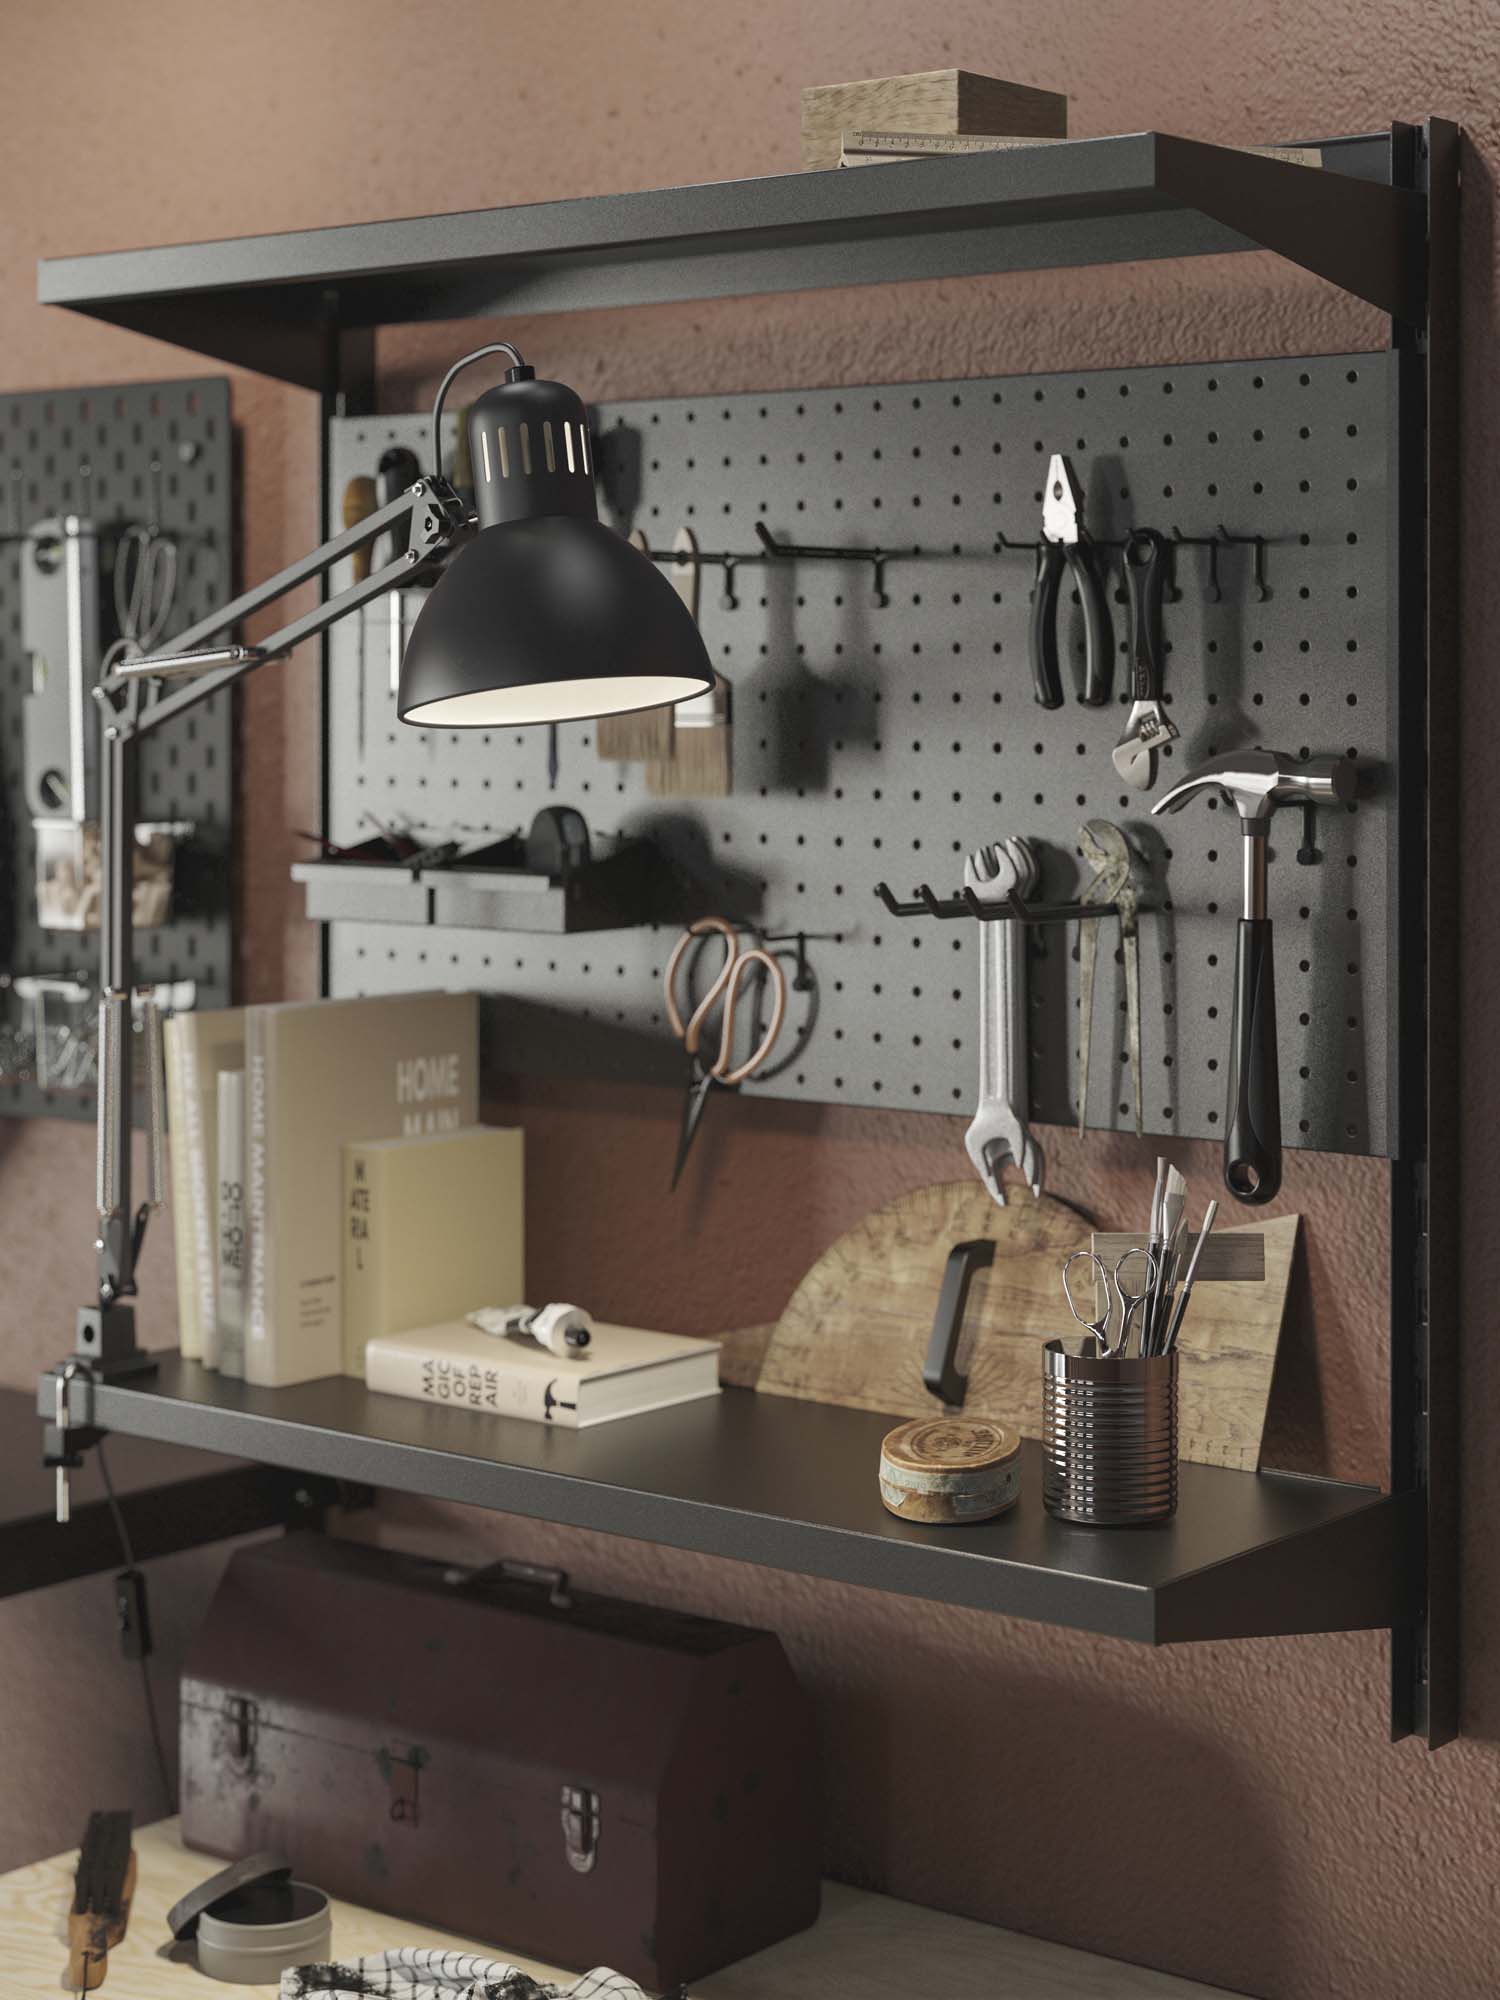
This setup feels so cohesive because it commits to a single material and color story. The matte black finish on the metal shelving, pegboard, and even the desk lamp creates a strong, unified industrial look. This bold frame is then set against a textured, warm-toned reddish-brown wall, creating a dramatic contrast that makes the unit pop. The light wood surface and beige book covers add just enough warmth and organic texture to keep the look from feeling too cold or severe. It’s a study in controlled contrast.
21. Black Metal Shelving Unit with Integrated Pegboard Tool Storage
While integrating a pegboard into a shelving unit is a great space-saver, it has a major drawback: access. The items on the shelves directly in front of the pegboard can make it difficult to reach the tools hanging at the back. You’re forced to keep the shelf contents shallow or constantly move things out of the way. It’s best for tools you don’t use every day. Also, the thin metal of the integrated pegboard may not be as sturdy as a traditional 1/4-inch hardboard panel, potentially warping under the weight of heavier tools.
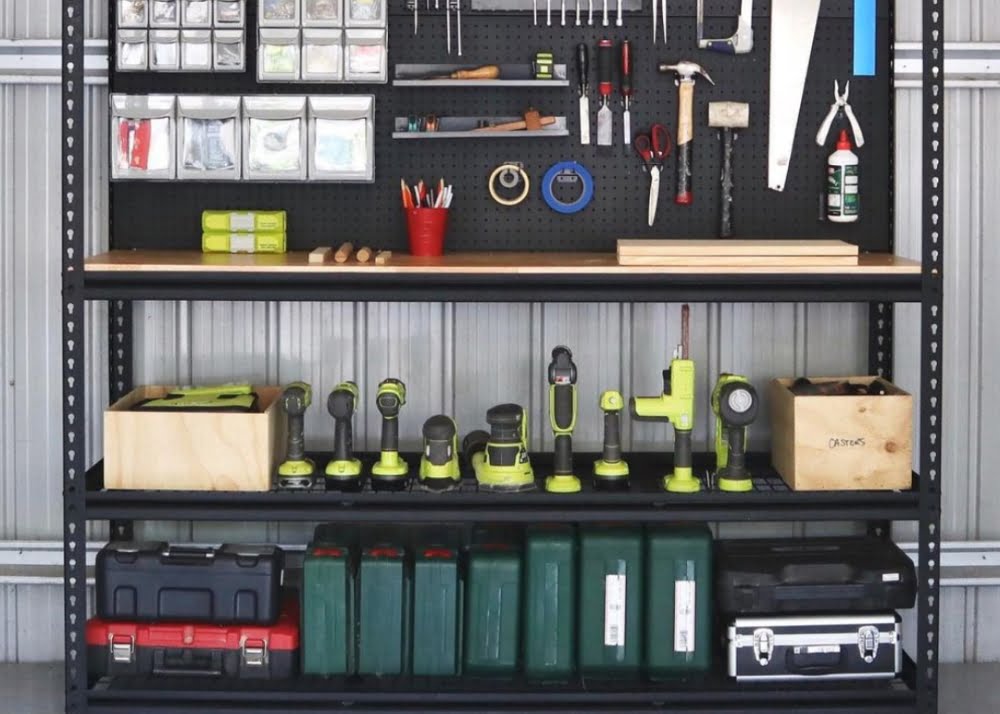
“A tall, all-in-one unit like this is an excellent solution for smaller garages or workshops where you don’t have enough clear wall space for a dedicated 4’x8′ pegboard.”
This unit likely measures around 48 inches wide and 18-24 inches deep, packing a huge amount of storage into a small footprint of just 6-8 square feet. It’s an ideal choice for a single-car garage or a designated corner of a basement workshop. You’ll need at least an 8-foot ceiling to accommodate its full height.
22. Organized Black Metal Shelves with Labeled Clear Containers
The cost of dozens of new, clear plastic boxes can be surprisingly high. To get this look for less, focus on uniformity over transparency. Head to a big-box store and buy a large quantity of their cheapest opaque lidded totes, ensuring they are all the same size and color (like the gray ones shown). A dozen basic 20-gallon totes might cost $100-$120. Then, invest in a good label maker or a pack of large, high-visibility labels. This gives you the clean, organized aesthetic without the high cost of the clear containers seen in Idea #3.
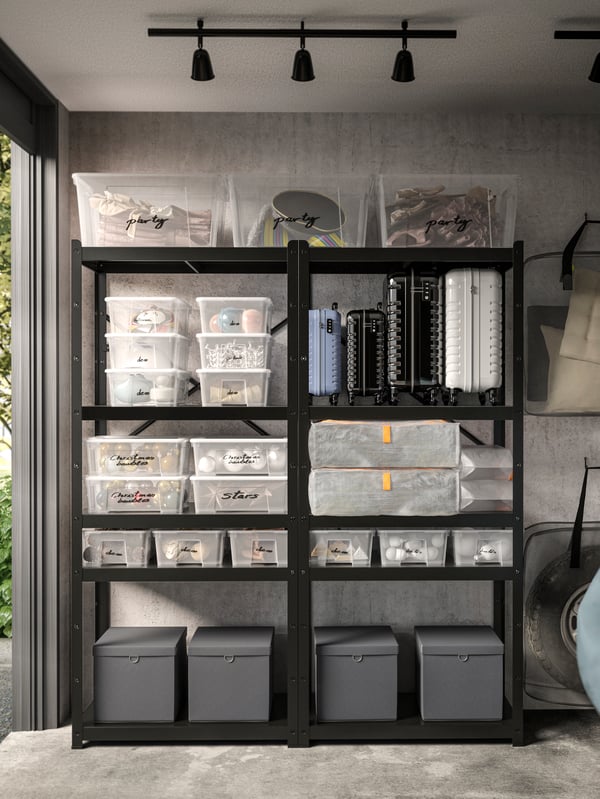
“The single most impactful element here is the labeling.”
Without the crisp, white, consistently placed labels, this would just be a wall of mystery boxes. The labels are what transform it from mere storage into a searchable, functional archive. You can instantly identify the contents of any box without having to pull it down and open it. It’s a simple, low-cost detail that provides 90% of the system’s efficiency. Take away the labels, and the whole organizational structure falls apart.
23. Modern Garage with Overhead Lift, Slatwall, and Gray Cabinetry
Lighting is a game-changer in a garage, and this space proves it. Ditch the single bare bulb. For a high-end, functional look, install linear LED fixtures that run the length of the car bays, as seen here. Aim for a color temperature of 4000K-5000K (cool white) for bright, clear visibility. A good rule of thumb is to provide 50 lumens per square foot for ambient lighting and up to 300 lumens per square foot over work areas. Well-planned lighting makes the space safer, more usable, and feel twice as big.
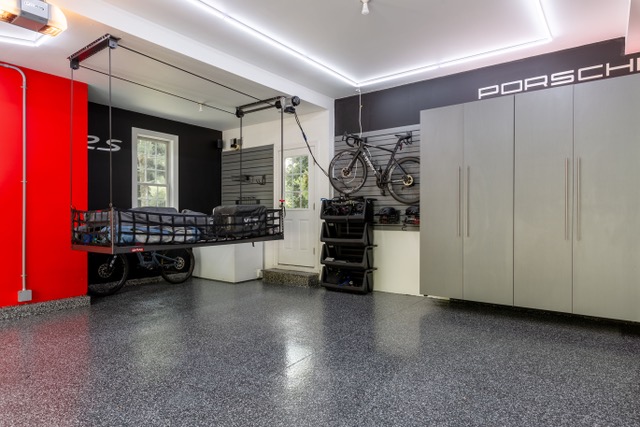
“That beautiful speckled epoxy floor requires a professional installation that can cost several thousand dollars for a two-car garage.”
While durable, it can be scratched by dragged toolboxes or chipped if a heavy tool is dropped. The matte gray cabinets and slatwall are great for hiding dust, but the red accent wall, while visually striking, will show every scuff and mark. And while the overhead lift is amazing for storage, it requires annual inspection of the motor and cables to ensure it remains safe to operate.
24. Overhead White Metal Shelving with Colorful Labeled Bins
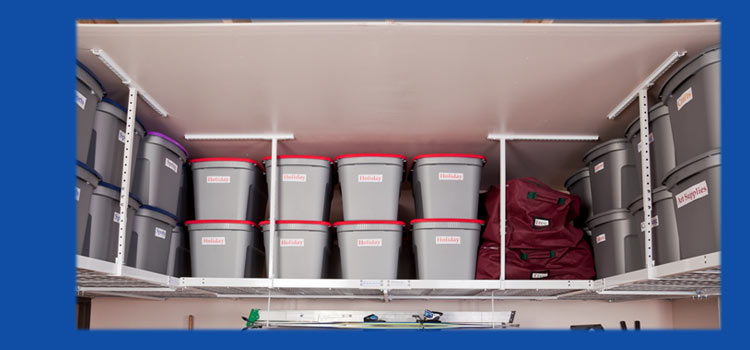
An overhead shelving system is one of the most cost-effective ways to add a massive amount of storage to a garage. Here’s a typical breakdown for a single 4×8-foot unit.
“White Metal Overhead Rack Kit: $200 – $450Assorted Plastic Storage Bins: $150 – ”
- White Metal Overhead Rack Kit: $200 – $450
- Assorted Plastic Storage Bins: $150 – $300
- Fabric Storage Bags: $40 – $80
- Label Maker and Tapes: $30 – $50
- TOTAL: $420 – $880
Budget alternative: Source a used rack from online marketplaces for around $100. Use bins and boxes you already own and hand-write labels on masking tape. You can achieve the storage for under $150 if you’re resourceful.
This system works because it employs a subtle but effective color-coding strategy. While the main bins are a uniform gray for a cohesive look, the use of distinct red and dark blue lids for certain containers allows for instant identification of specific categories at a glance. You immediately know that ‘red lid’ means one thing and ‘blue lid’ means another, without having to read a label from across the garage. It’s a simple visual shortcut that makes a large, homogenous storage area much faster to navigate.
25. Light Grey Full-Wall Cabinets with a Wood Countertop
This design is a formula for serene utility: 70% concealed storage (the tall light grey cabinets) + 20% functional surface (the light wood countertop) + 10% accent hardware (the dark vertical pulls). The overwhelming majority of the visual space is dedicated to the calm, uniform cabinet fronts, which hides the chaos. The wood countertop is a focal point that breaks the monotony, while the dark hardware adds a touch of graphic definition. Change the wood to a black counter for a more industrial feel, or swap the dark pulls for stainless steel to go more modern.
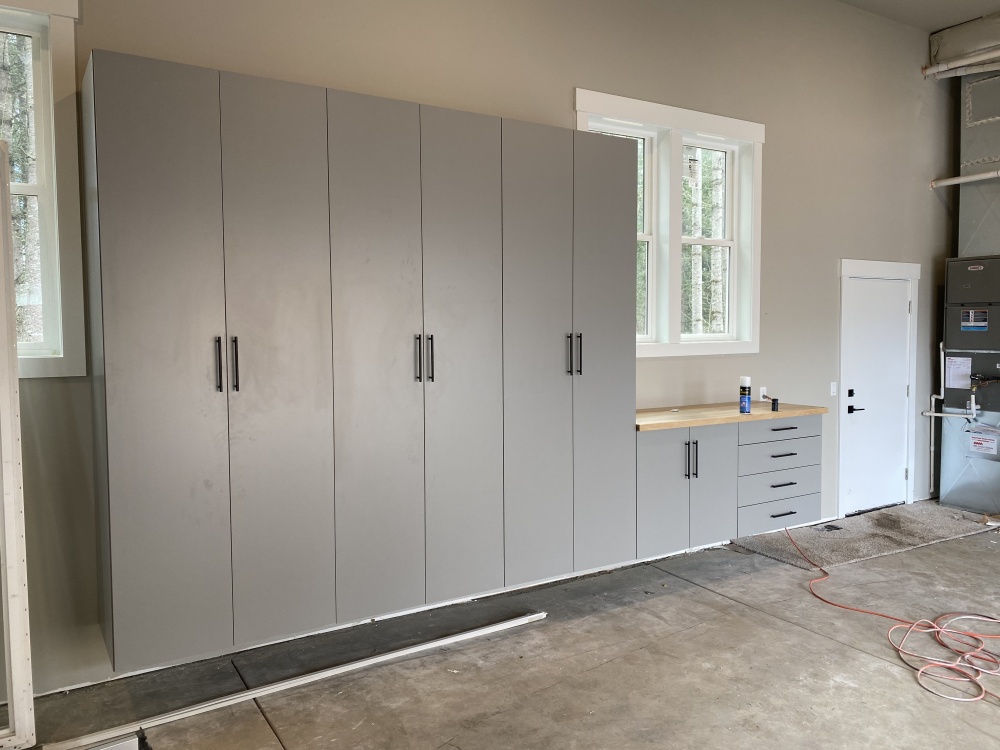
“A wall of floor-to-ceiling cabinets can make a narrow, single-car garage feel incredibly tight.”
This solution works best in a wider two- or three-car garage where you can afford to lose 24-26 inches of depth along one wall without making it impossible to open car doors. Also, light-colored flat-panel cabinets, especially in a dusty garage environment, will require regular cleaning. Dust settles on the tops of the lower cabinets and the countertop, and the flat grey faces will show any greasy smudges.
26. Dark Gray Modular Cabinets with a Light Wood-Tone Workbench
When configuring a modular cabinet system, create a dedicated ‘workbench zone’ by using a different countertop material, as seen here with the light wood-tone surface. This visually separates the workspace from the pure storage areas. For the countertop itself, ask your supplier for a commercial-grade laminate or a butcher block with a heavy-duty sealant. Standard residential-grade laminate will not stand up to the abuse of garage projects, solvents, and tools. A 1.5-inch thick top is a good standard for durability.
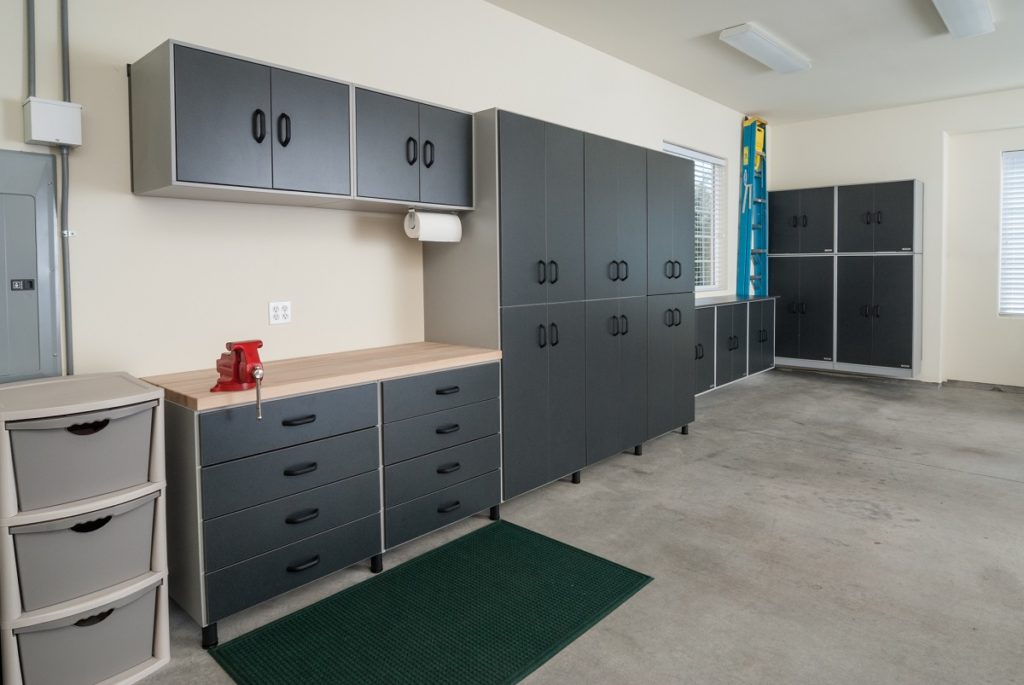
“The most important decision in this room was choosing dark gray for the cabinets.”
If these cabinets were white or light gray, the space would feel much larger but also more generic and less like a serious workshop. The dark gray grounds the space, hides dirt and scuffs better, and gives it a sophisticated, industrial edge. It’s a bold choice that defines the entire character of the room, making it feel substantial and purposeful. This is a great alternative to the lighter cabinet look in Idea #24.
27. Black Slatwall Paired with White Overhead Cabinet Storage
Before you install a full slatwall and cabinet system, tick off these crucial planning steps:
“Inventory everything you want to store on the wall.”
Group items to estimate how much slatwall you need versus how much cabinet space. Don’t eyeball it!Map out the location of your largest items first. Wall-mounted bikes, golf bags, and long-handled tools need dedicated zones. Plan the rest of the wall around them.Confirm the load capacity of both the slatwall panels and the specific hooks you plan to use. Heavy items like a full golf bag need heavy-duty hooks.Check for electrical outlets. You may need to cut holes in the slatwall panels for access, or hire an electrician to move them.
The high contrast between the black slatwall and the white upper cabinets is what makes this design so visually successful. The black wall creates a dramatic, dark background that makes the tools and colorful equipment pop, turning them into a design feature. The white cabinets above provide a clean, bright horizontal line that prevents the black wall from feeling too heavy or making the ceiling feel lower. This sharp black-and-white division creates a look that is organized, intentional, and graphically powerful.
Your Garage Is Ready for Its Glow-Up
See? Your garage doesn’t have to be a chaotic dumping ground. With the right combination of cabinets, shelves, and clever systems, it can become one of the most functional and organized rooms in your house. Start with one wall or one system and see what a difference it makes. Ready to get started? Pin your favorite ideas from this list to your dream garage board on Pinterest and begin planning your project today. You’ve got this.