You know that feeling when you finally find the Elf On the Shelf idea that’s the perfect blend of mischief and magic? We get it. We filtered through hundreds of options on Pinterest, Etsy, and Amazon to bring you 33 ideas that actually deliver on the fun without requiring a film degree. This isn’t just a list; it’s a playbook of curated scenes, from hilarious-mischievous setups to sweet and cozy moments. For 2026, the trend is all about clever, story-driven moments that spark imagination, and we’re breaking them down for you. And stay until the end — we break down the most common mistakes that can ruin these looks. 📌 Save this to Pinterest for later — you’ll want to revisit these ideas.
1. An Elf’s Spa Day in a Tiled Shower Niche
This setup’s brilliance lies in its use of an unexpected location. Placing the elf in a shower niche, a space we see every day, instantly creates a funny, surprising moment. The humor is amplified by the miniature props—the tiny soap bottles, the pouf, and the playful sign—which tell a complete story of an elf enjoying a little ‘me time.’ The strong color contrast of the elf’s red outfit against the clean white tile and bold black frame makes the whole scene pop visually.
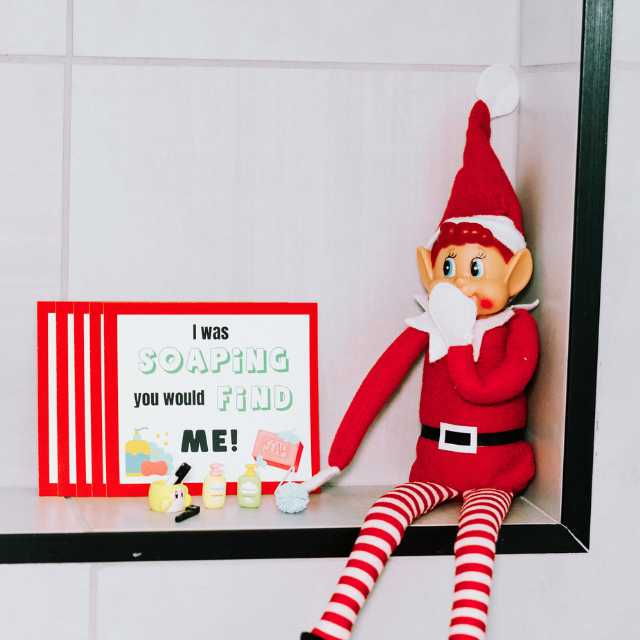
“Want to recreate those adorable miniature accessories?”
It’s easier than you think. You don’t need to be a dollhouse expert to make this scene feel special. A little creativity goes a long way in making the story believable and charming.Gather your materials: travel-sized bottles, a small piece of tulle or mesh, and some colorful craft foam or paper. Cost: ~$5. Time: 15 minutes.For the mini soap bottles, simply print or draw tiny labels and tape them onto the travel containers.Create a mini pouf by bunching up a small circle of tulle and tying it in the middle with a piece of thread.Write a playful message on a small piece of cardstock and place it in a mini frame or lean it against the tile.Arrange your tiny spa day scene, and you’re done!
2. Elf Relaxing in a Tarnished Brass Scale Bowl
The single element that makes this scene magical is the tarnished brass scale. Without it, you just have an elf in a bowl. But with it, you have a story. The vintage, slightly weathered quality of the brass adds a layer of character and history that feels more interesting than a standard kitchen bowl. The funnel hat is funny, but the scale provides a stage, turning a simple prop into an imaginative, antique-inspired moment that feels curated and special.
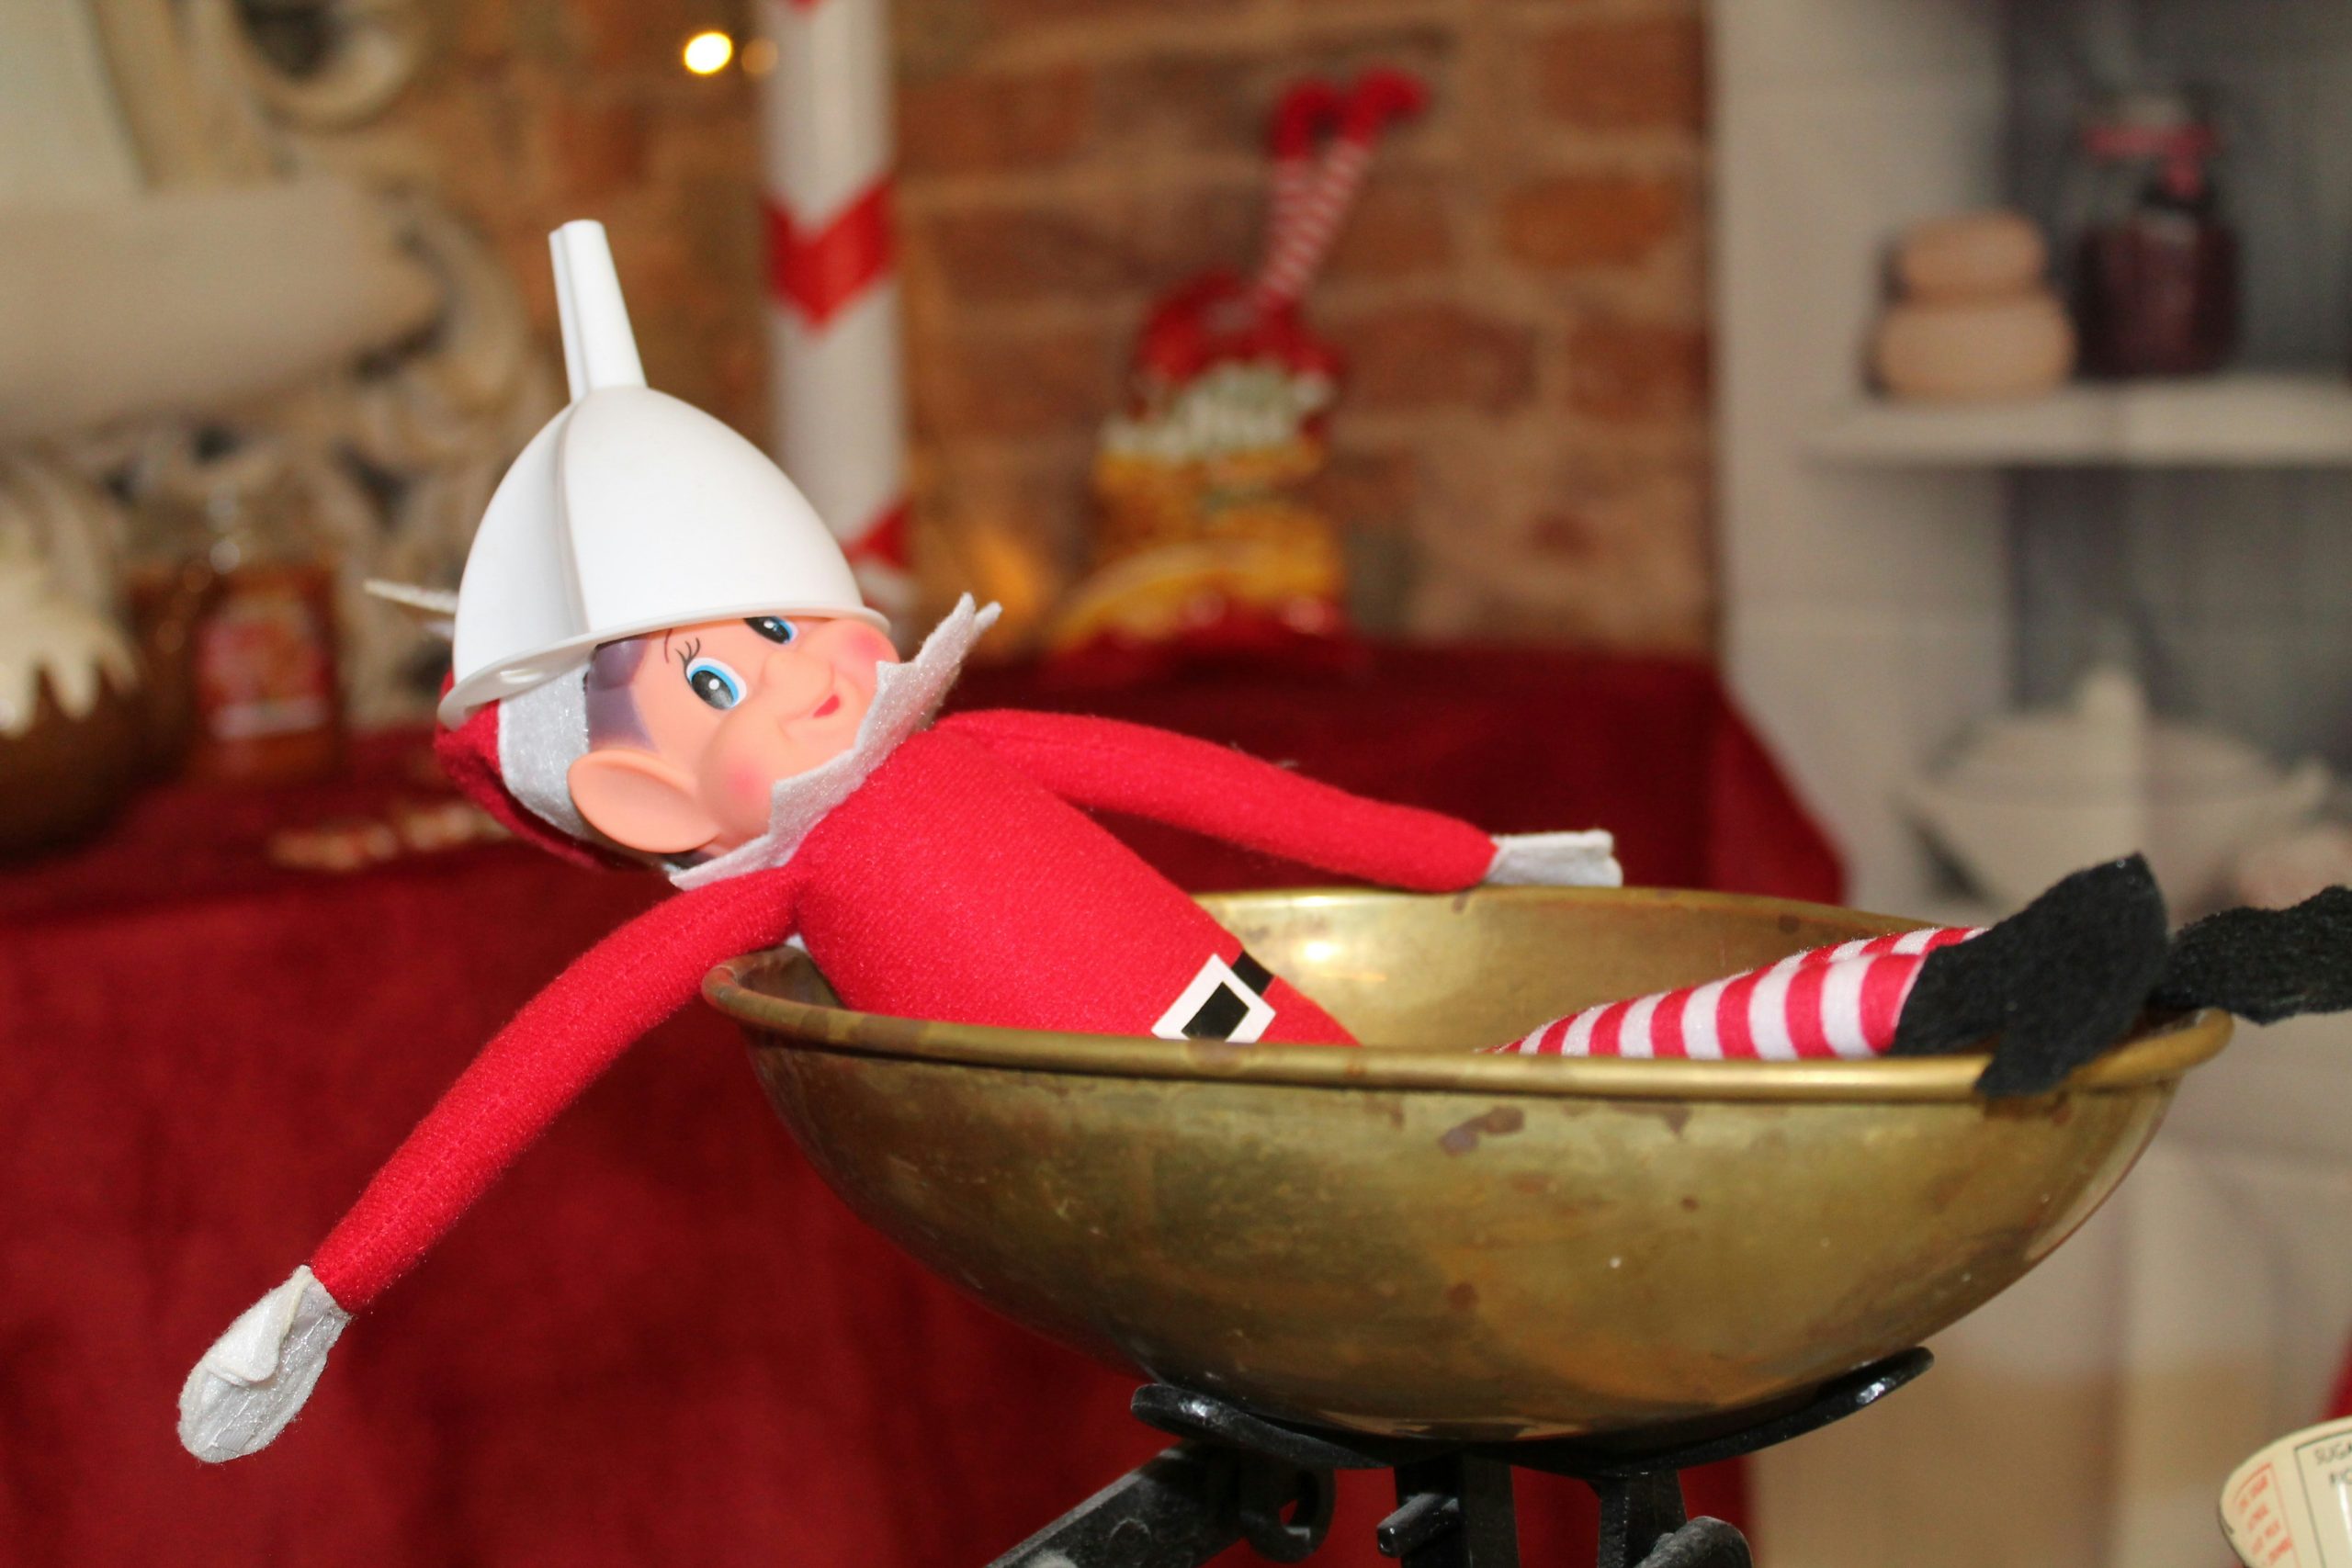
“You can find vintage treasures in the most unexpected places.”
Always keep an eye out at thrift stores, flea markets, or even your grandparents’ attic for old scales, tins, or decorative boxes. A little bit of authentic tarnish adds so much character. For a quick alternative, a new brass bowl from a home goods store works just as well. The trick is to give it importance by placing it on a stack of books or a small pedestal. This creates height and frames it as a deliberate centerpiece.
3. An Elf’s Birthday Party with Cadbury Chocolate
This adorable setup is all about mixing celebrations. The visual formula is simple: 50% Holiday Cheer (the elf himself) + 30% Birthday Surprise (the greeting cards) + 20% Sweet Treats (those iconic Cadbury bars). The genius is in the unexpected combination. It creates a mini-story: is the elf celebrating a birthday for another toy? Or maybe it’s a special countdown to a family member’s big day? You can swap the birthday cards for ‘get well soon’ or ‘congratulations’ cards to fit any occasion.
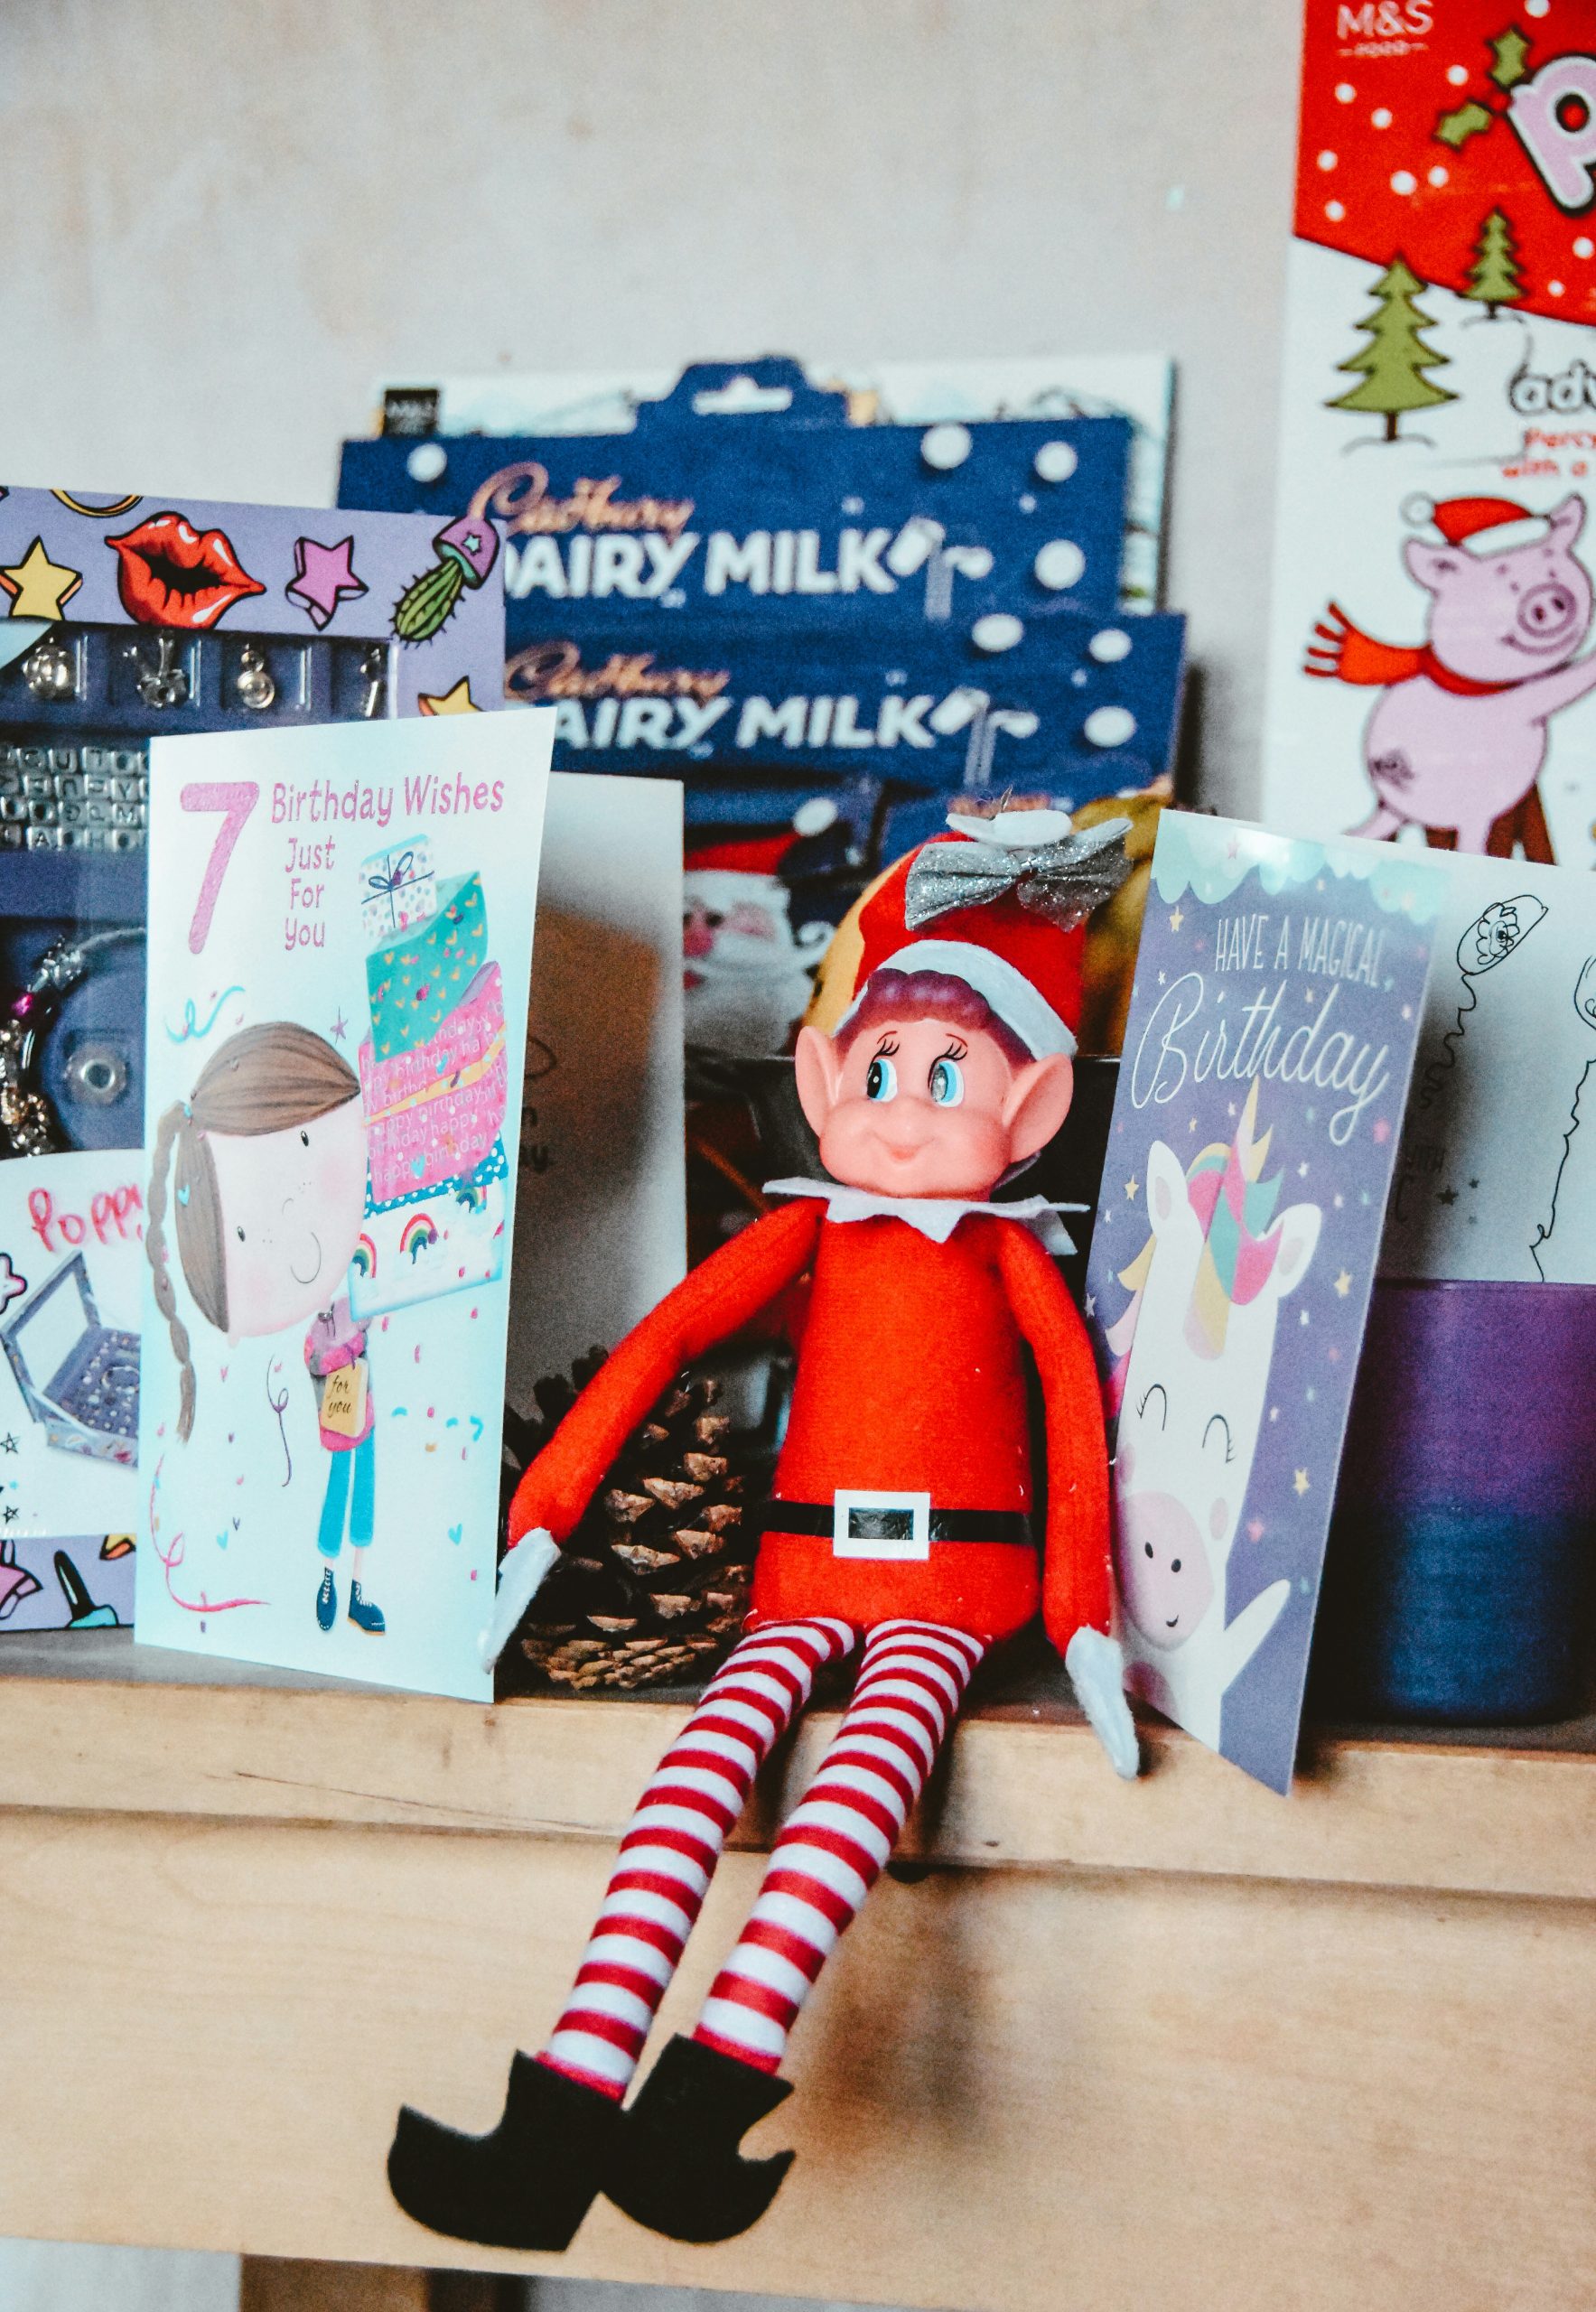
“Okay, let’s have a moment of honesty.”
Leaving real chocolate bars out overnight can be a risky game, especially if you have curious pets or toddlers in the house. A dog ingesting chocolate is a serious emergency, and a child finding a secret stash of candy at 6 AM might not be the kind of holiday magic you were hoping for. A safer bet? Use clean, empty wrappers carefully glued around a small piece of cardboard to get the same look without the risk.
4. Elves Sledding Down a Snowy White Towel Mountain
What makes this work so well is the transformation of an everyday object into a dramatic landscape. A simple stack of folded white towels becomes a snowy mountain slope, ready for adventure. The dynamic posing is key: one elf sits at the top in an inner tube, full of anticipation, while the other is captured mid-slide on a sled. This creates a strong sense of action and narrative, inviting you to imagine the squeals of joy. The familiar bathroom backdrop makes the fantasy even more delightful. This is a great alternative to the simple placement in Idea #10.
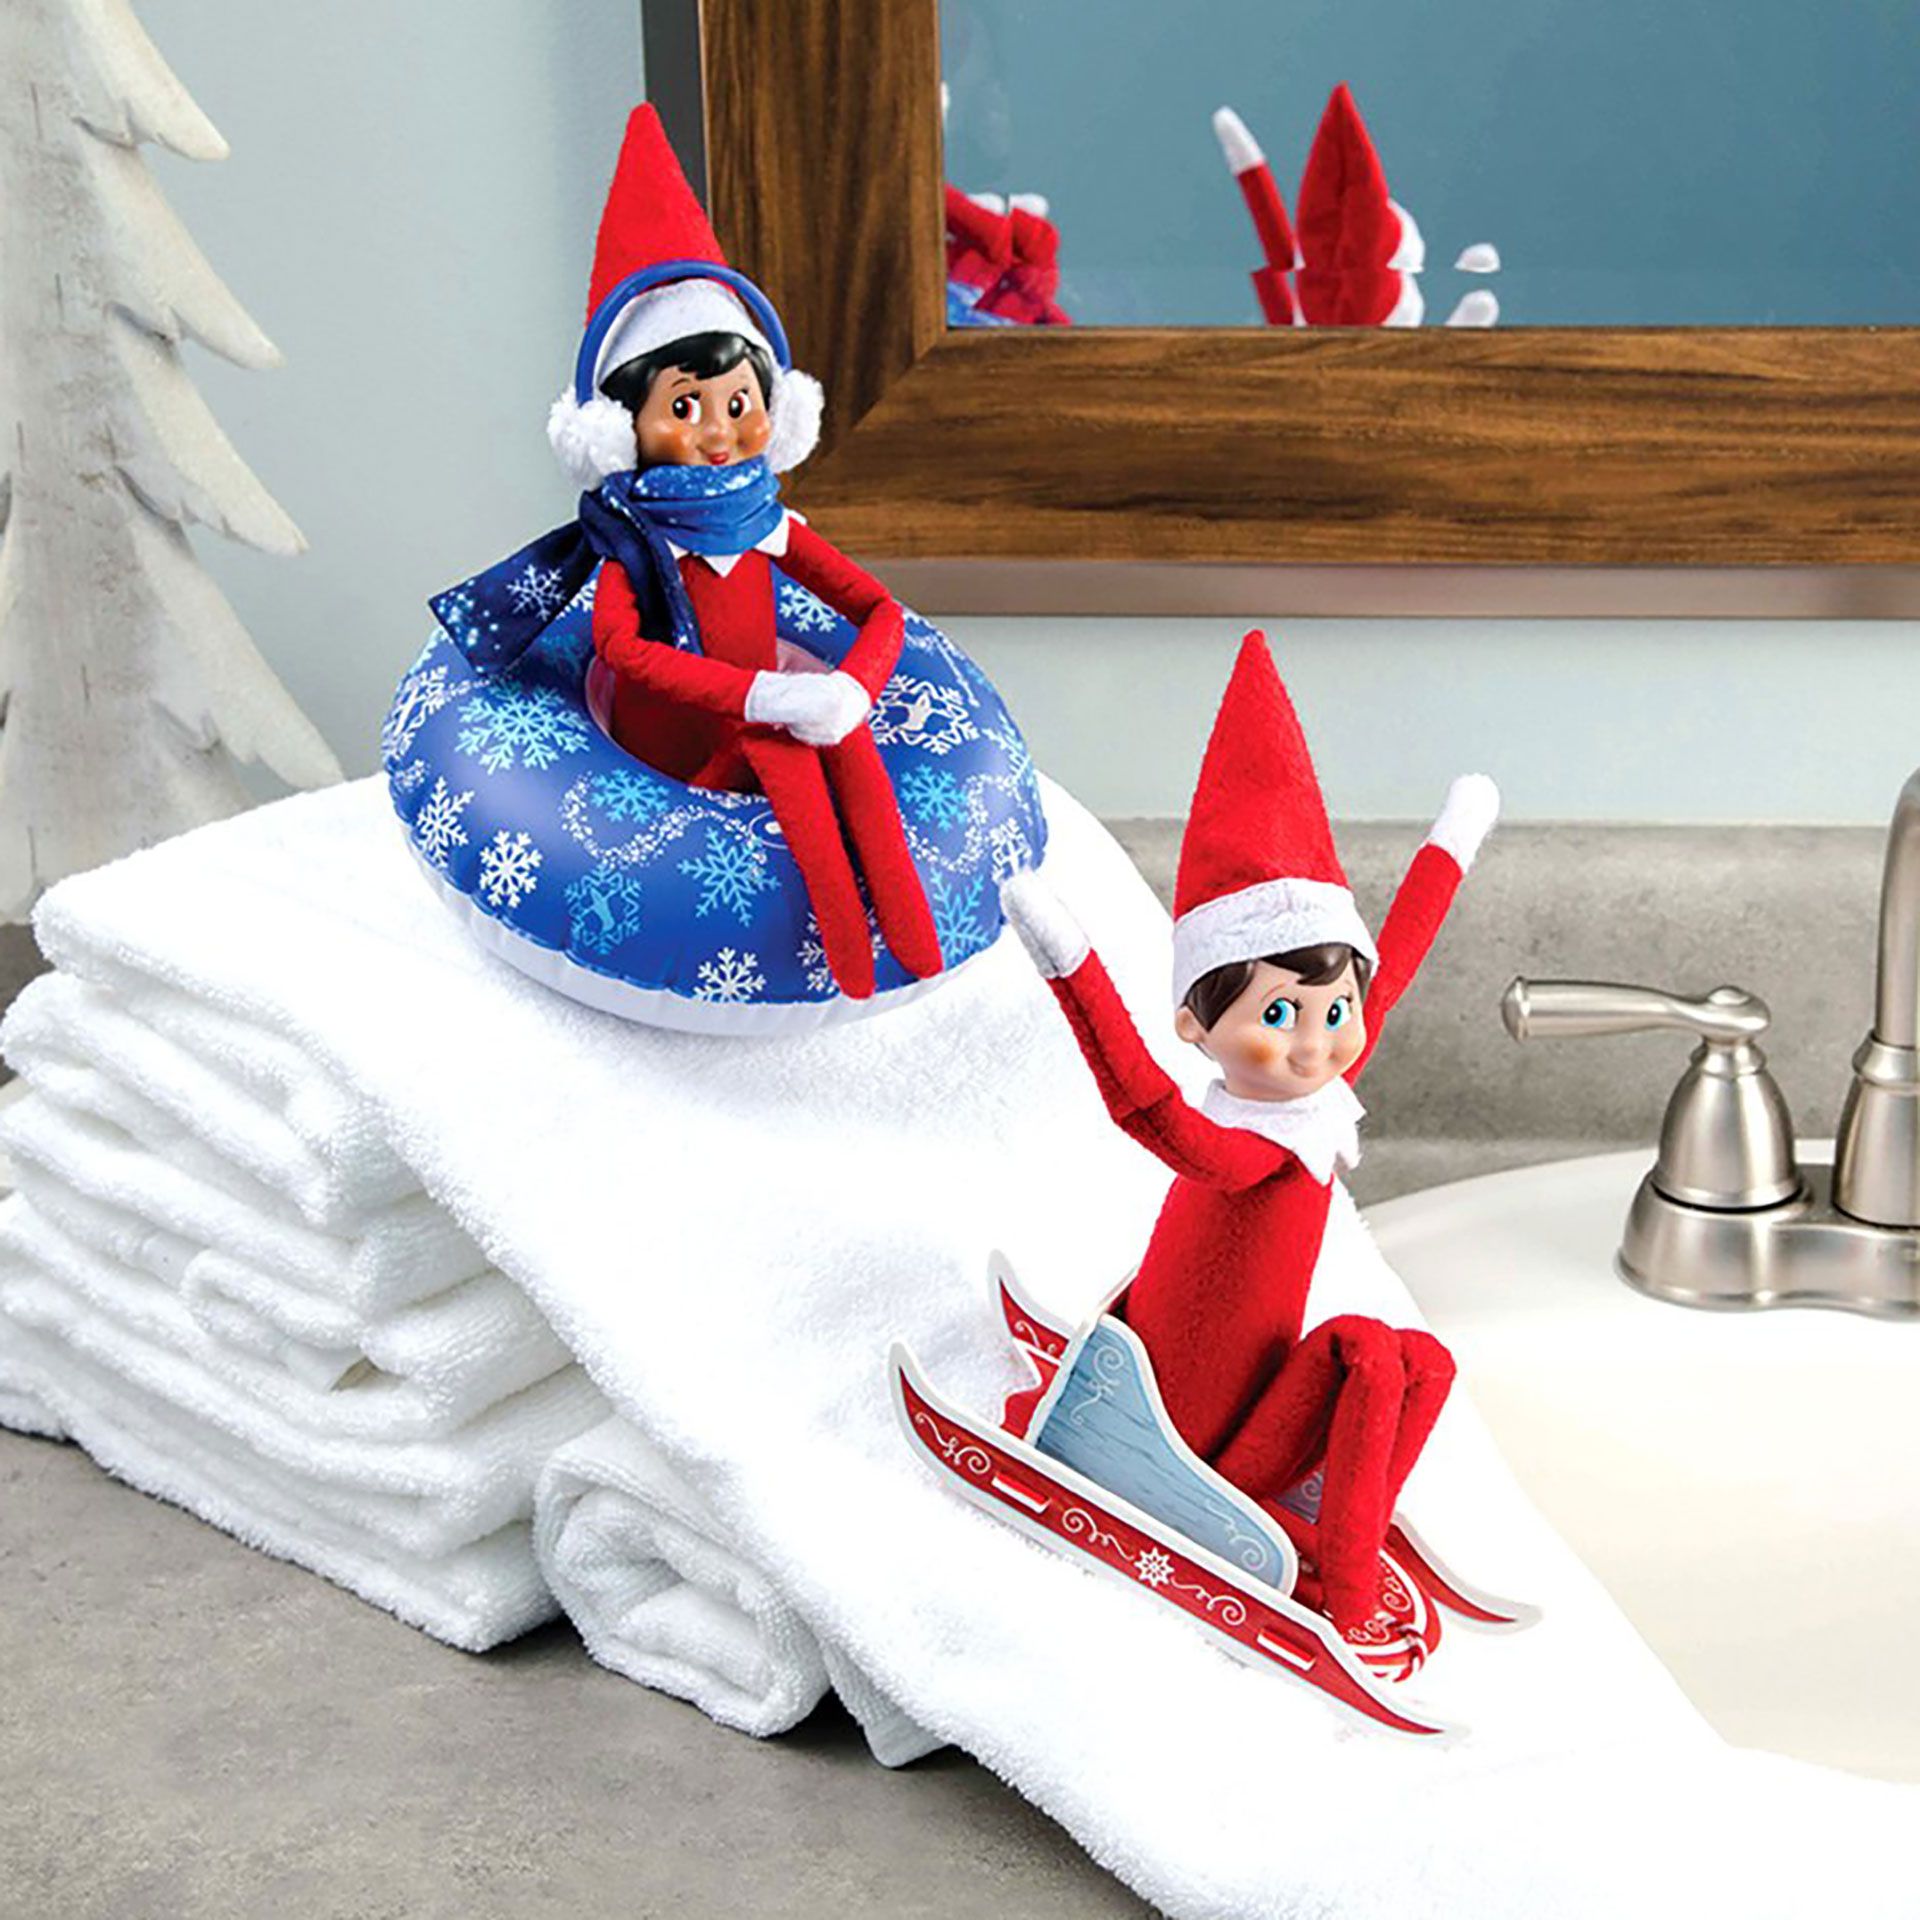
“Don’t have a miniature sled or a tiny snowflake-patterned inner tube?”
No problem at all. This is where you can get really creative and show off your elf’s resourcefulness. A plastic bottle cap makes a perfect snow saucer. A large metal or plastic spoon becomes a makeshift luge. Even a piece of wax paper folded into a toboggan shape will do the trick. The total cost is practically zero, and it reinforces the idea that these elves make their own fun with whatever they can find.
5. Twin Elves Flanking a Wooden Christmas Countdown
When you’re working with two elves, the goal is to create a composition, not just a crowd. The key is symmetry. Place them at roughly equal distances from the central object—in this case, the countdown blocks. Have them mirror each other’s poses. If one has its legs crossed, cross the other’s in the opposite direction. This creates a sense of balance and intention that looks polished and thoughtful, turning a simple placement into a deliberate, styled scene.
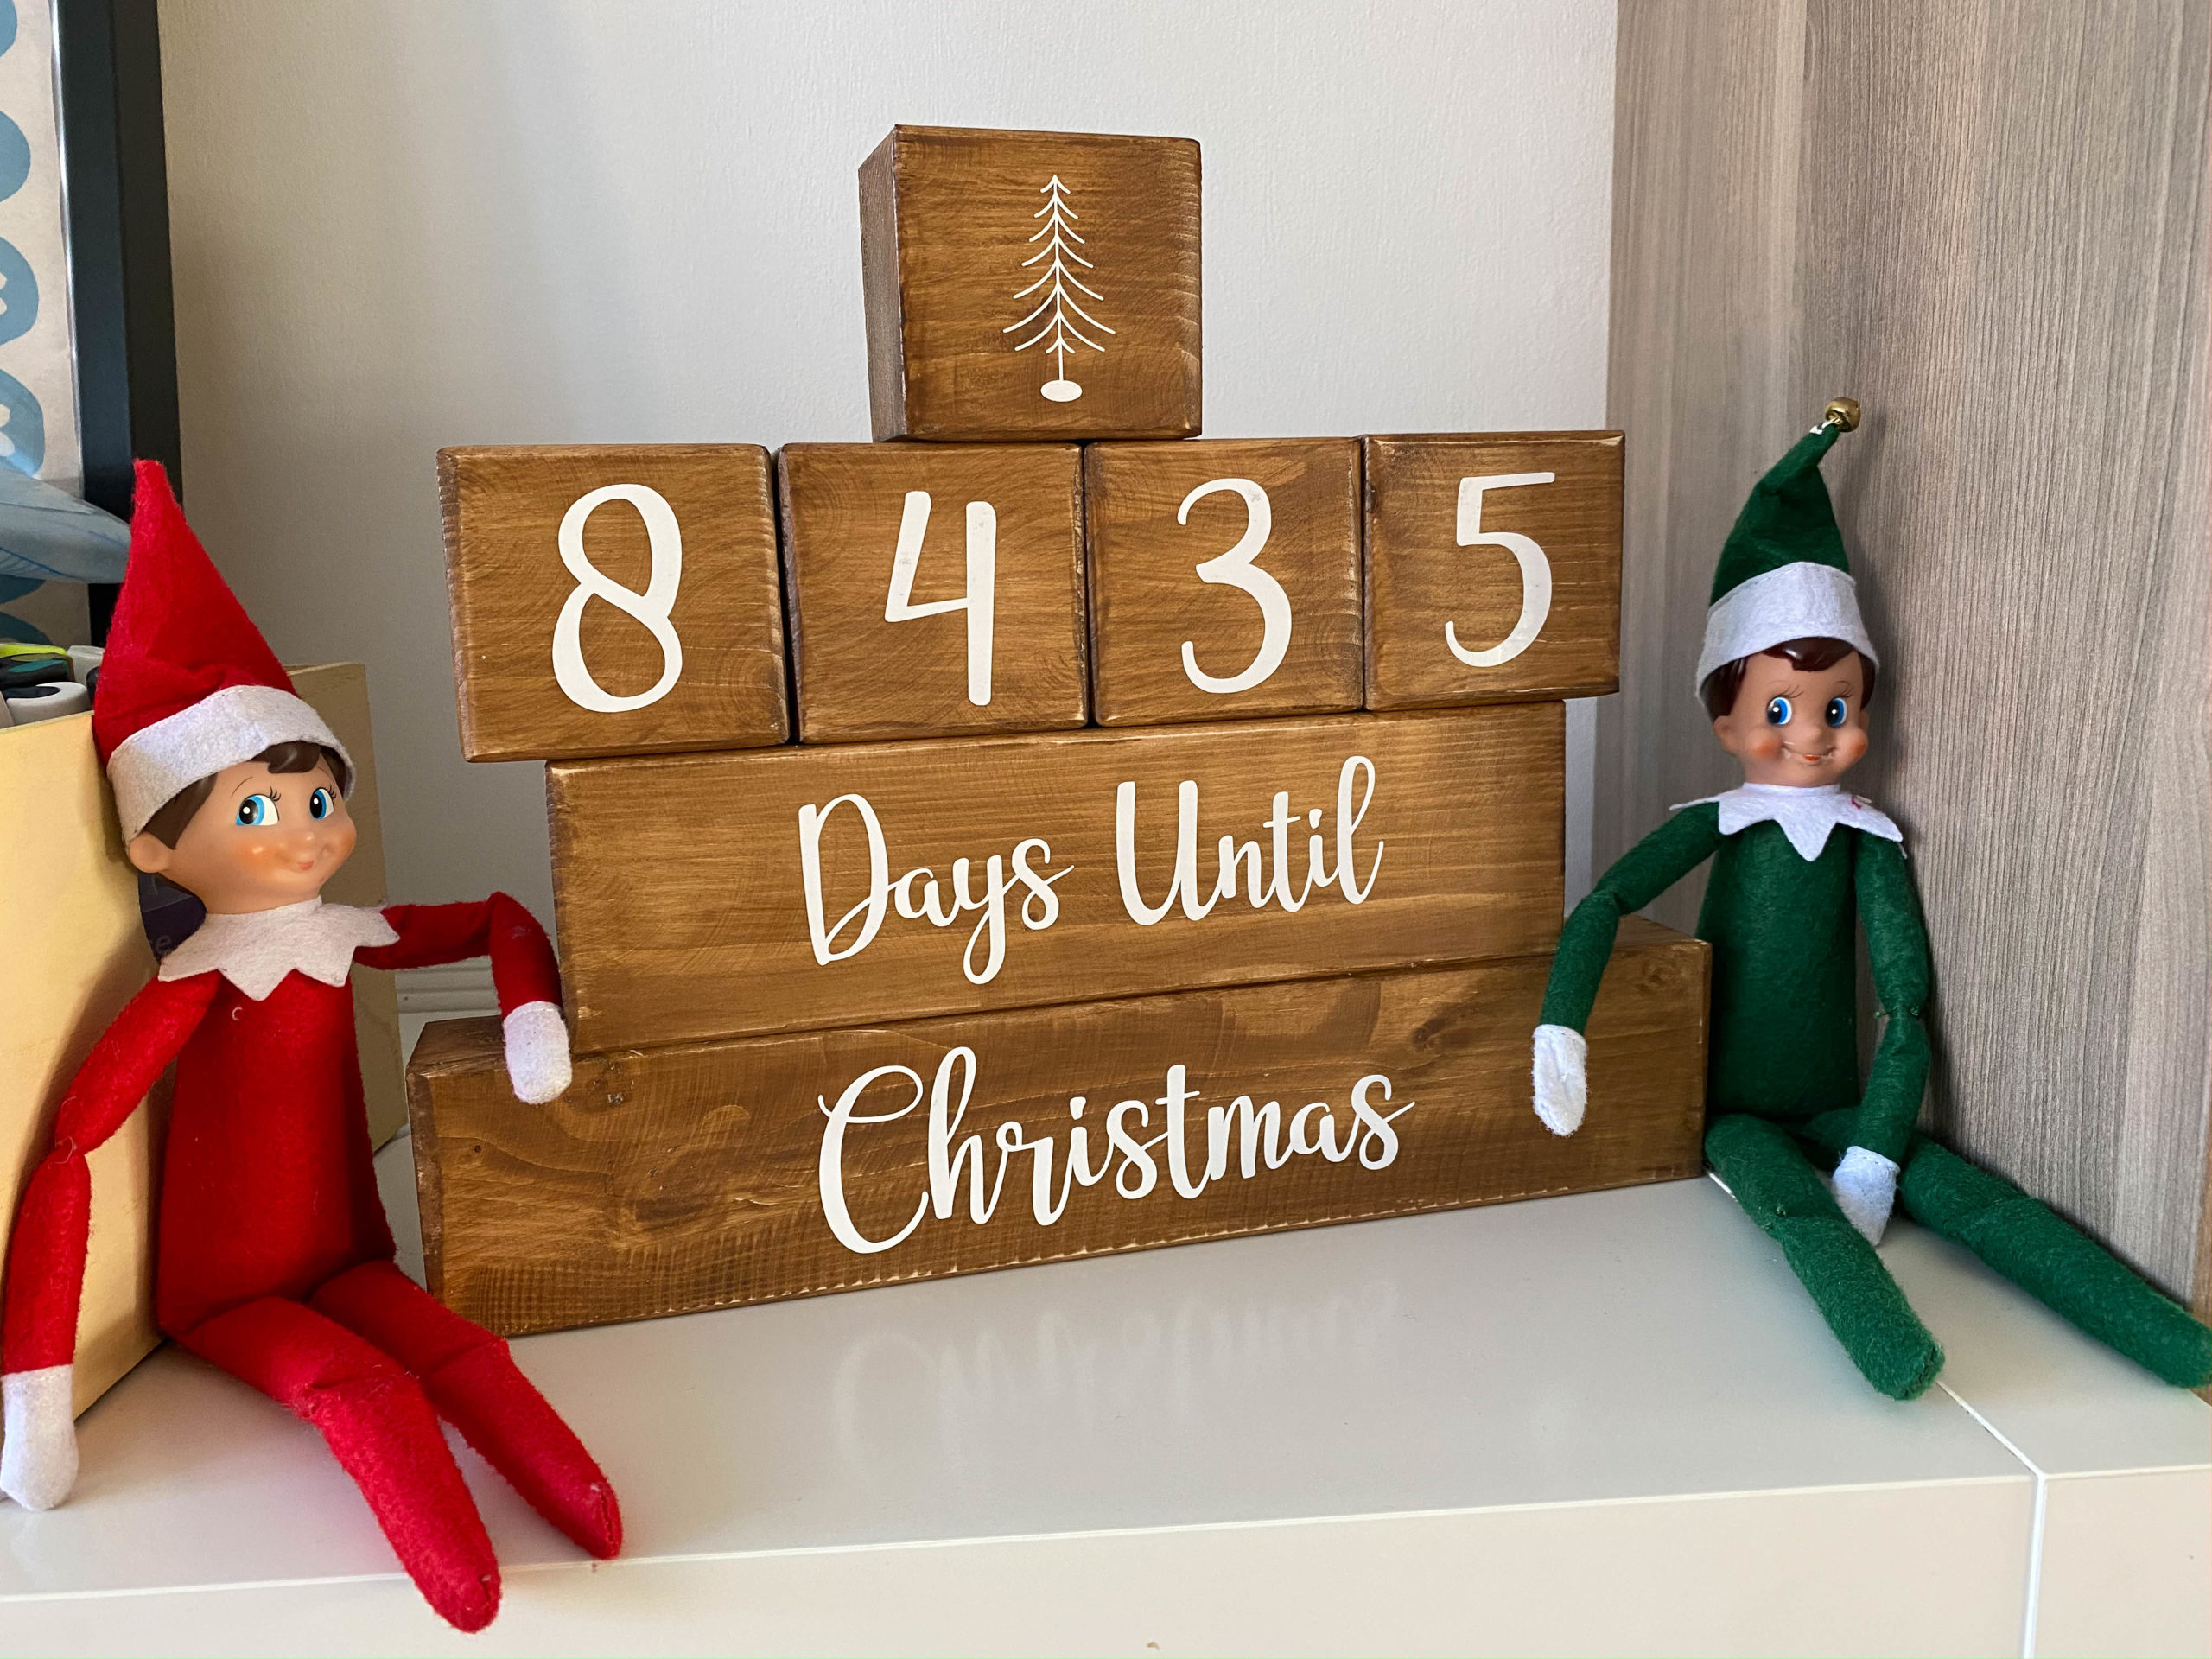
“Before you commit to this sweet countdown display on a shelf or mantel, run through this quick checklist to make sure it’s set up for success:Is the shelf or mantel at least 6 inches deep?”
You’ll need enough space to safely hold the blocks without them teetering on the edge.Are your elves the kind with internal wiring for posing, or will they need some support (like poster tack) to sit upright without slumping?Is the location safely out of reach of small children or pets who might see the elves as fun new toys to grab?Does the spot get good light, or should you add a small string of battery-powered fairy lights to make it glow?
6. An Elf’s Christmas Eve Box and Gingerbread Delivery
The absolute heart of this scene is the personalization. It’s not just a generic setup; it’s a delivery specifically for the family. The individually wrapped gingerbread cookies with names and the ‘Christmas Eve Box’ turn the elf from a mere prankster into a thoughtful gift-giver. Removing the personalized elements would leave you with just an elf and some boxes. The customization is what creates a direct connection and makes the moment feel incredibly special and personal to the home’s residents.
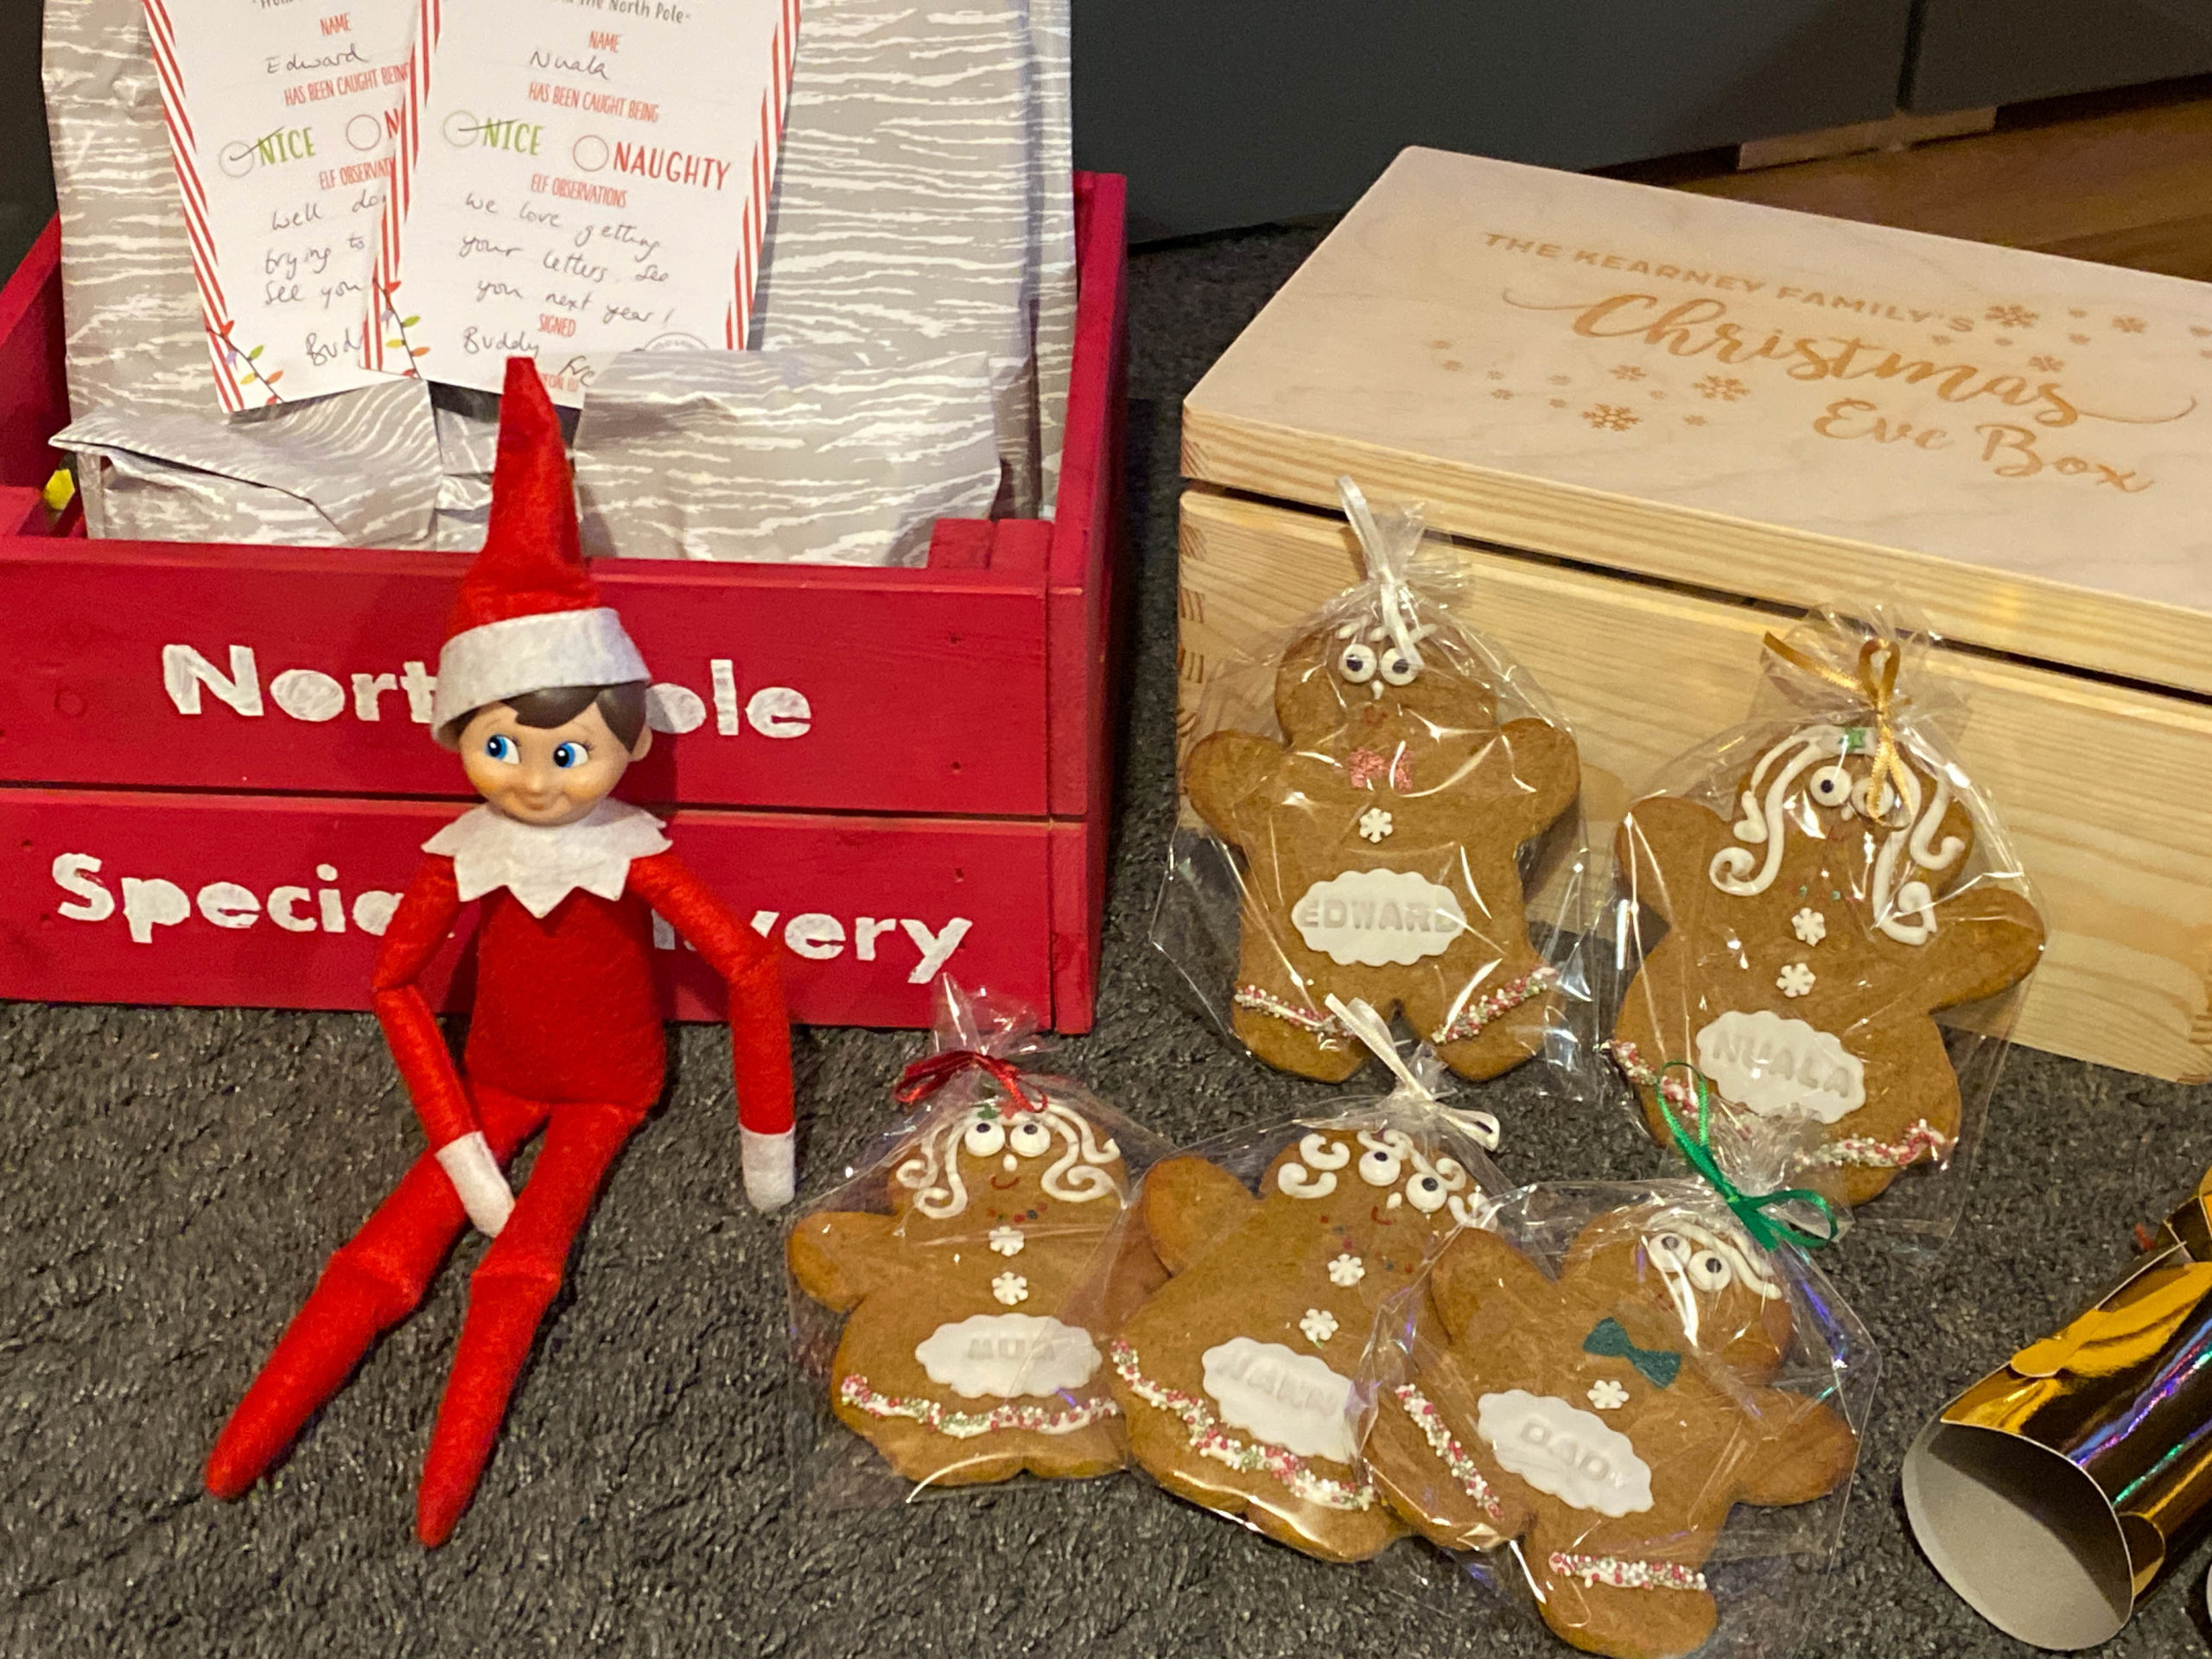
“Want to recreate this personalized delivery moment?”
It’s more about craftiness than cash.Elf Doll: $5 – $30Mini Crates & Box: $10 – $25 (craft store finds)Gingerbread Cookies: $5 – $15 (homemade or store-bought)Printables/Notes: $0 – $5 (free online or Etsy printables)Wrapping & Ribbon: $5 – $10TOTAL: $25 – $85Budget alternative: Use cardboard boxes from your recycling bin and wrap them in kraft paper. Bake simple sugar cookies instead of gingerbread, and handwrite the notes yourself. Total cost: under $15.
7. Elves Captured by a Menacing Egg Monster in the Fridge
This is pure storytelling genius. The humor works because it creates a micro-drama with a clear villain (the ‘bad’ milk egg), damsels in distress (the tied-up elves), and a call to action (the ‘HELP US!!!’ sign). The refrigerator setting is perfect because it’s an environment full of potential characters—and what’s more sinister than milk that’s ‘gone bad’? The hand-drawn angry face and tiny beanie on the egg are the perfect touches that bring the hilarious villain to life. For a sweeter scene, see the s’mores party in Idea #9.
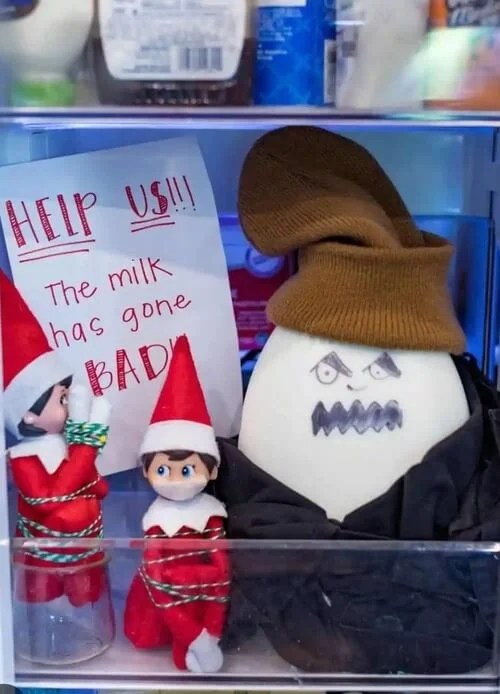
“Ready to make your own egg villain?”
It’s a quick craft that pays off big in laughs. Here’s how to bring your ‘bad milk’ character to life in under 10 minutes.Find Your Egg: Pick a nice, clean, large white egg. A hard-boiled one is best to avoid any cracking disasters.Draw the Face: Use a black permanent marker to draw an angry, menacing face. Think furrowed brows and a scowling mouth.Add the Beanie: Find a doll hat, a baby sock, or even the tip of an old glove to use as a tiny beanie. Place it on top of the egg.Create the Body: Drape a small piece of dark fabric (like from an old t-shirt) around the base of the egg to serve as its cloak.Set the Scene: Position your egg monster next to the tied-up elves and the desperate sign. The drama is served!
8. Elf Suspended in White Paper Loop Chains
A word of warning for this hanging setup: gravity is not your friend. While it looks fantastic, an elf suspended by simple paper loops can be precarious. Make sure the paper you use is sturdy cardstock, not flimsy printer paper. And when you create the loops, use strong tape or a stapler to secure them. Give it a gentle tug before you go to bed to ensure it will hold the elf’s weight all night. There’s nothing less magical than finding your elf in a heap on the floor in the morning.
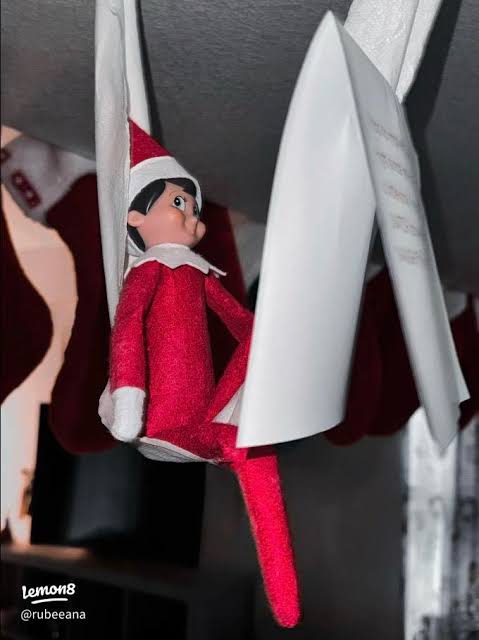
“This idea’s visual appeal comes from its simple, graphic formula.”
Think of it as 60% Playful Structure (the white paper loops) + 30% Bold Color Pop (the elf’s red suit) + 10% Festive Context (the red stockings in the background). The stark white of the paper makes the red of the elf stand out dramatically. You could easily swap the white paper for green or red, but you’d lose some of that high-contrast impact. The key is the simple, repeating shape of the loops.
9. An Elf’s S’mores Party with a Marshmallow Snowman
When creating a miniature scene like this, focus on varying the heights of your objects. Notice how the elf sits tall, the marshmallow snowman is a bit shorter, and the s’mores ingredients are laid flat. This creates visual interest and depth. If everything were the same height, the scene would look flat and less dynamic. Use a small block or a folded napkin to prop up a key element if you need to create more levels. The goal is to guide the eye through the whole story.
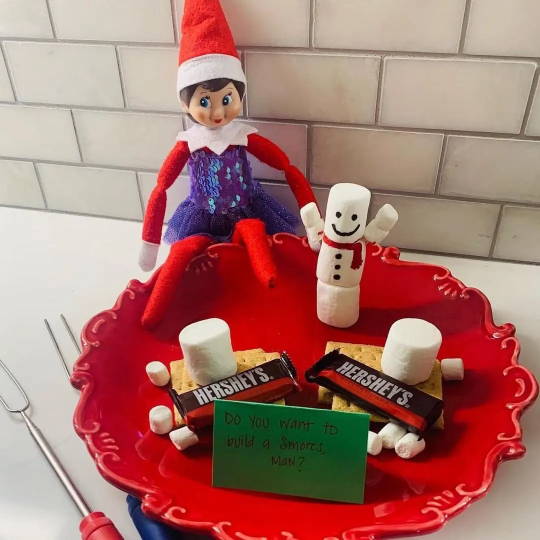
“You don’t need a fancy platter or special props to create a s’mores party.”
This look is incredibly easy to achieve on a dime. Use a simple ceramic plate or even a piece of cardboard covered in red construction paper as your base ($1). The s’mores ingredients—graham crackers, marshmallows, and a chocolate bar—can be pulled from your pantry (cost: maybe $3). The ‘snowman’ is just three marshmallows stacked with a face drawn on with a food-safe marker. It’s a high-impact scene for less than $5.
10. Elf Guarding a Wooden Crate by a Flocked Tree
The simple wooden crate is the key to this entire scene. Without it, the elf would just be sitting on the floor, looking a bit lost next to the grand Christmas tree. The crate acts as a rustic pedestal, giving the elf presence and purpose. It grounds the doll in the scene and creates a relationship of scale between the small elf and the large tree. The natural, unadorned wood also provides a lovely textural contrast to the sparkly elf outfit and the flocked branches, making the whole composition feel balanced and intentional.
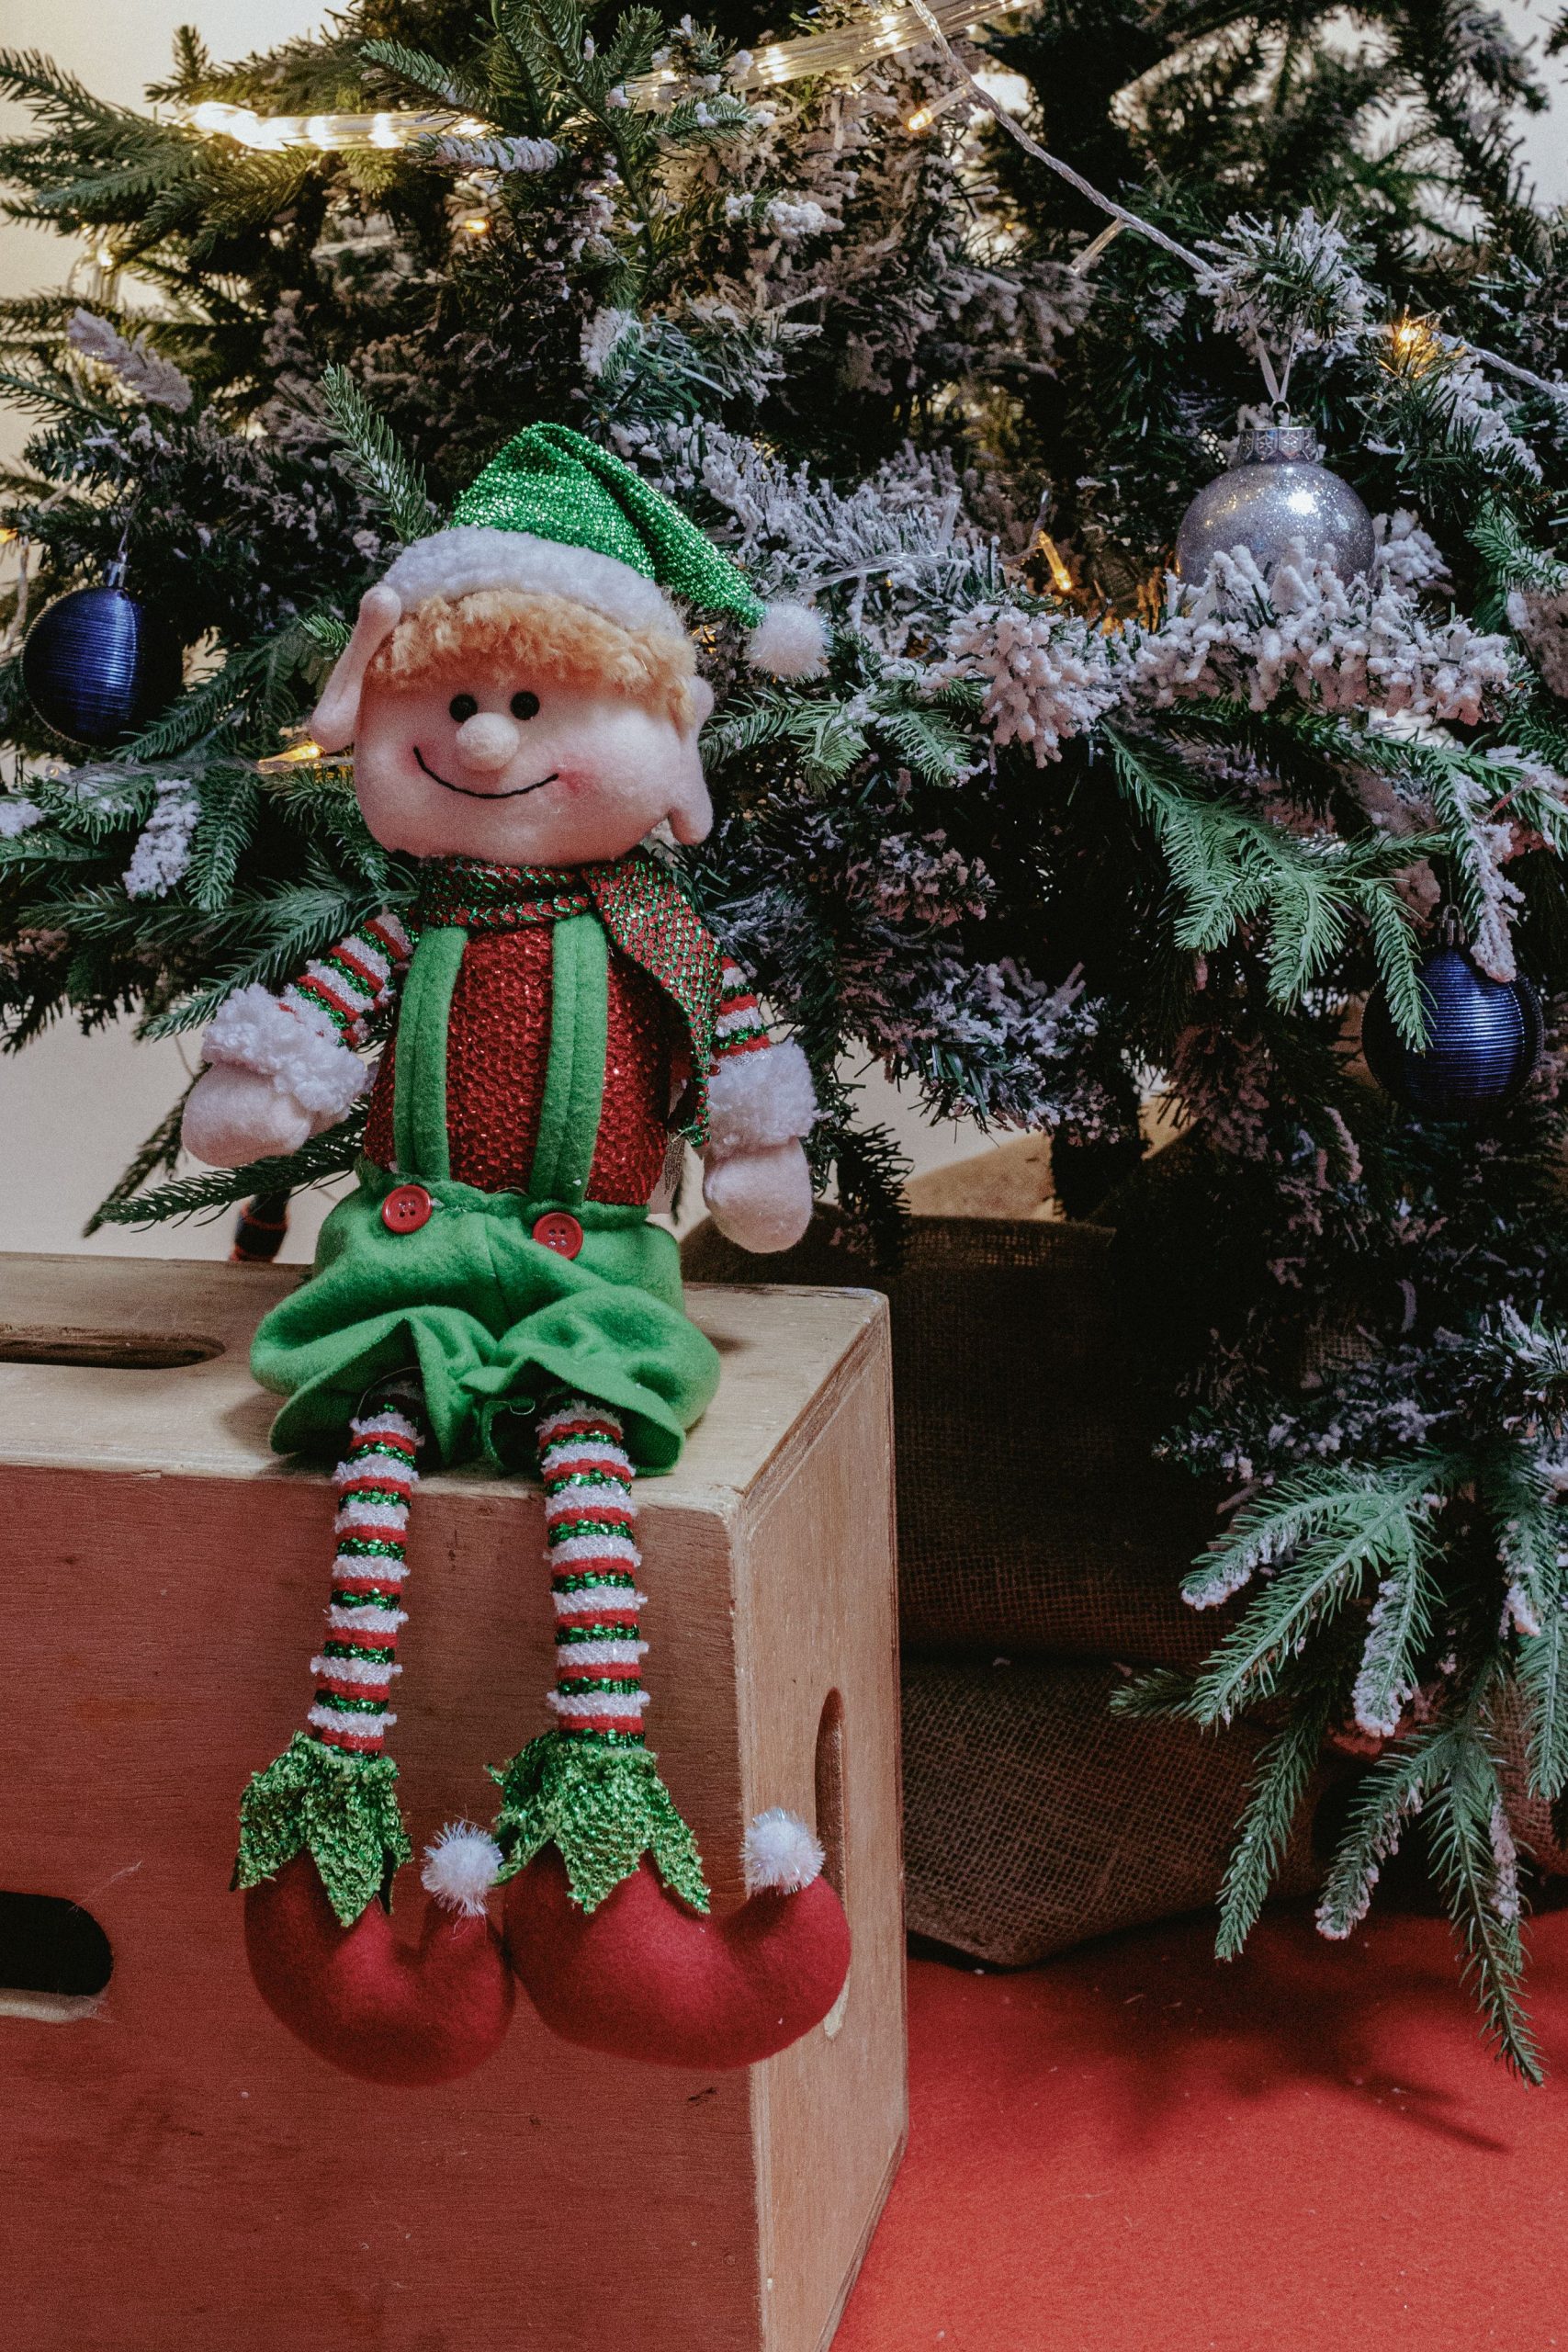
“This idea works wonderfully in rooms with standard 8-9 foot ceilings where a full-size Christmas tree is the main focal point.”
The key is the space *around* the tree. You need at least 2-3 feet of clear floor space next to the tree base to place the crate without it feeling cramped or becoming a tripping hazard. This setup is perfect for a living room corner or a spacious entryway. It’s a larger scale version of the tabletop scene in Idea #20, meant to be seen from across the room.
11. Elf on Horseback Leading a Dinosaur Parade
This scene is a masterclass in creative play. It works by mashing up different toy genres—a Christmas elf, a classic toy horse, and a herd of plastic dinosaurs—to create an entirely new and hilarious narrative. The magic is in the unexpectedness. An elf riding a reindeer is predictable; an elf leading a cavalry of T-Rexes and Stegosauruses is brilliantly absurd. It taps directly into a child’s logic, where any and all toys can interact in a shared universe. The positioning, with the elf at the front, establishes a clear story of leadership and adventure.
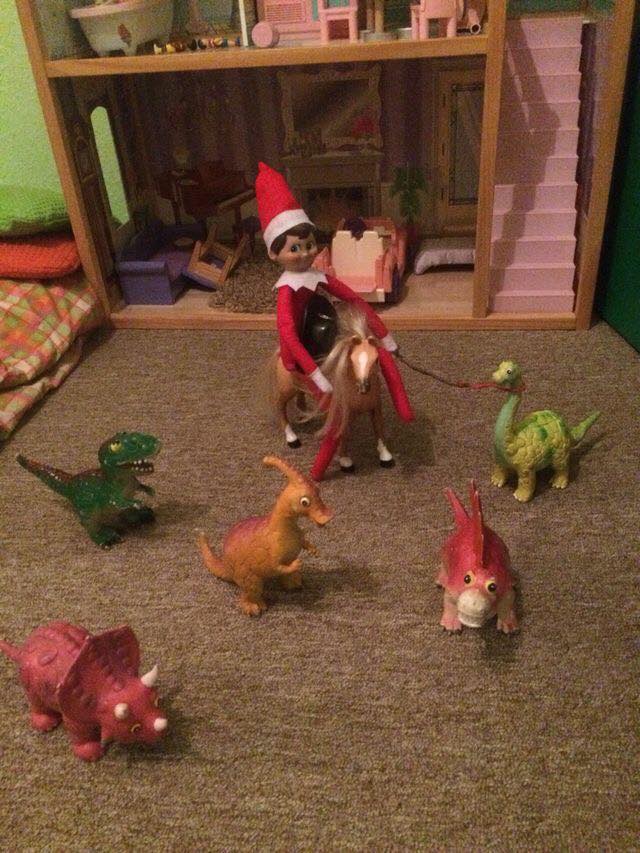
“Why is this kind of ‘toy crossover’ scene so popular right now?”
Because it reflects how kids actually play. For years, holiday decor was kept separate from everyday toys. But there’s a growing trend on Pinterest and Instagram to integrate the holiday magic directly into the existing play world of the child. It’s less about creating a perfect, untouchable tableau and more about showing the elf interacting with the Barbies, LEGOs, and dinosaurs that are already part of the family’s life. It feels more authentic and imaginative.
12. Elf Creating a Miniature Wall Art Gallery
When creating a miniature gallery wall, the secret is to use frames in a variety of sizes and orientations. Don’t just line up three identical frames. Mix a small square frame with a taller rectangular one and an even smaller one. This variation creates a more dynamic and visually interesting composition. Lay them out on the floor first to find an arrangement you like before you start hanging them. A little bit of controlled chaos is what makes a gallery wall feel authentic, even in miniature.
“Creating a tiny art gallery for your elf is a super affordable and creative project.”
You can get a high-end look for just a few dollars.Miniature Wooden Frames: $5 – $15 (pack from a craft store like Michael’s or Hobby Lobby)Twine/String: $1 – $3Tiny Art Prints: $0 – $5 (print tiny images from the internet or use scrapbook paper scraps)Removable Adhesive/Tacks: $3 – $6Elf Doll: $5 – $30TOTAL: $14 – $59Budget alternative: Skip the frames and just tape the tiny printed pictures directly to the wall for a more casual, ‘artist’s studio’ vibe. Total cost: under $5.
13. Elf Showcasing a Healthy Veggie Christmas Tree Snack
This idea is charming because it combines holiday fun with a healthy, creative activity. The veggie tree itself is a clever piece of food art, using the natural shape and color of broccoli to mimic pine branches. The cherry tomato ‘ornaments’ and yellow pepper ‘star’ are inspired touches. By posing the elf next to the creation, it reframes snack time as a magical, elf-approved event. It’s a gentle, fun way to encourage kids to engage with healthy foods during a season often dominated by sugar. The comparison with the gumdrop structure in Idea #26 is quite fun.
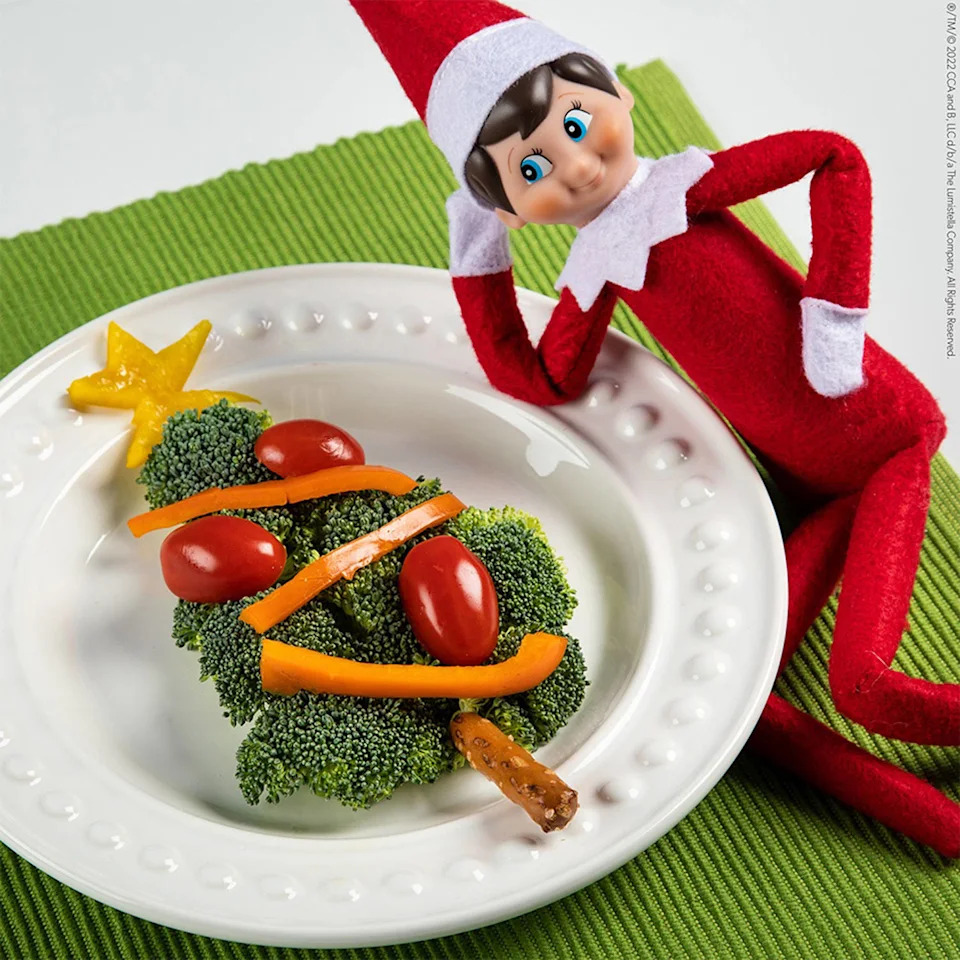
“Building your own edible Christmas tree is a fun 10-minute activity that the kids can even help with.”
It’s simple, colorful, and surprisingly easy to assemble.Gather your ingredients: A head of broccoli (cut into florets), a handful of cherry tomatoes, a yellow or orange bell pepper, and a few pretzel sticks.Create the Tree Shape: Arrange the broccoli florets on a white plate, forming a triangle/tree shape. Start with a wider base and taper towards the top.Decorate the Tree: Place the cherry tomatoes onto the ‘branches’ like ornaments. Slice the bell pepper to create ‘garland’ strips.Add the Star and Trunk: Cut a small star shape from the bell pepper for the topper. Place a pretzel stick at the base for the trunk.Position Your Elf: Seat your elf proudly next to the finished masterpiece!
14. Elf Interrupting a Colorful Jigsaw Puzzle
The scattered puzzle pieces are the absolute key to this scene’s story. If the elf were just sitting next to a completed puzzle or a closed box, the story would be ‘elf likes puzzles.’ But by laying the elf amidst the chaos of an unfinished puzzle, the narrative becomes ‘elf tried to help (or sabotage!) the puzzle.’ The disarray implies action and mischief. It’s a simple, brilliant way to create a scene that feels like it was captured in the middle of a story, using items you likely already have in your home.
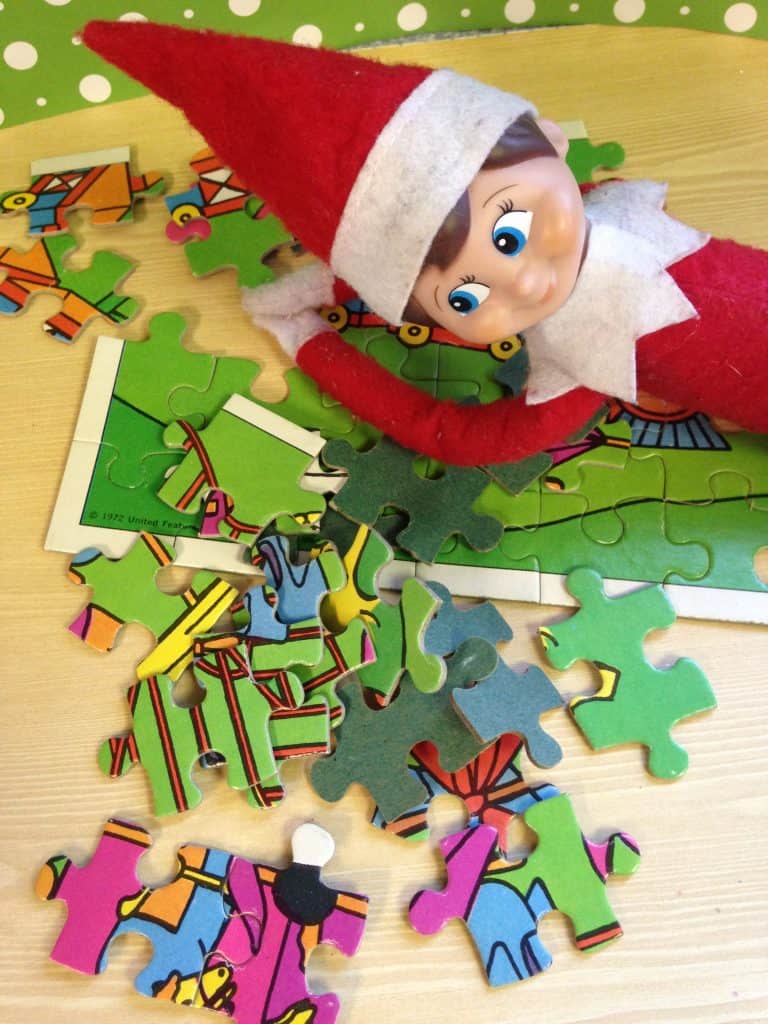
“Here’s a practical tip: if the puzzle is a beloved family project that you actually want to finish, maybe don’t use it for this particular elf antic.”
A determined toddler or a curious pet could easily walk off with a crucial corner piece that the elf ‘scattered’ on the table. For this idea, it’s best to use an older puzzle that you don’t mind sacrificing a few pieces from, or even a cheap one you picked up from a thrift store specifically for elf-related shenanigans.
15. Elf Nestled Inside Glowing Christmas Tree Branches
This classic placement is so effective because of its simplicity and use of light. By tucking the elf deep within the tree’s evergreen branches, you create a sense of discovery. It’s not immediately obvious, which makes finding him a fun morning surprise. The warm glow of the string lights wrapping around the elf creates a magical, ethereal effect, highlighting him like a special ornament. The soft focus on the surrounding branches enhances the cozy, intimate feeling of the scene.
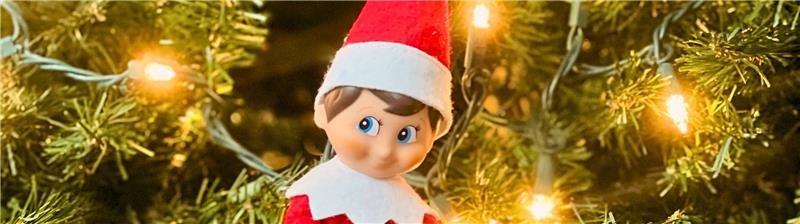
“To get that beautiful, soft glow, position your elf right next to a few bulbs on your string of lights.”
Don’t place him directly on top of a bulb, especially if they are older incandescent ones that get hot. Instead, nestle him beside them so the light spills onto his face and hat. If you have a tree with dense foliage, gently part the branches to create a small, well-lit nook for him. This ensures he is illuminated and visible, not lost in the shadows of the pine.
16. Elf Cutting Paper Snowflakes from a Toilet Paper Roll
The single element that elevates this from a simple prank to a work of mischievous art is the chain of cut snowflakes. Just having an elf with scissors next to a toilet paper roll is okay, but unrolling it and showing the *result* of his handiwork is what tells the story. The delicate, dangling paper shows his ‘creative process’ and makes the mess feel intentional and almost beautiful. It’s the evidence of his late-night craft session that makes the scene so funny and memorable. It shares a mischievous spirit with the towel-sledding in Idea #4.
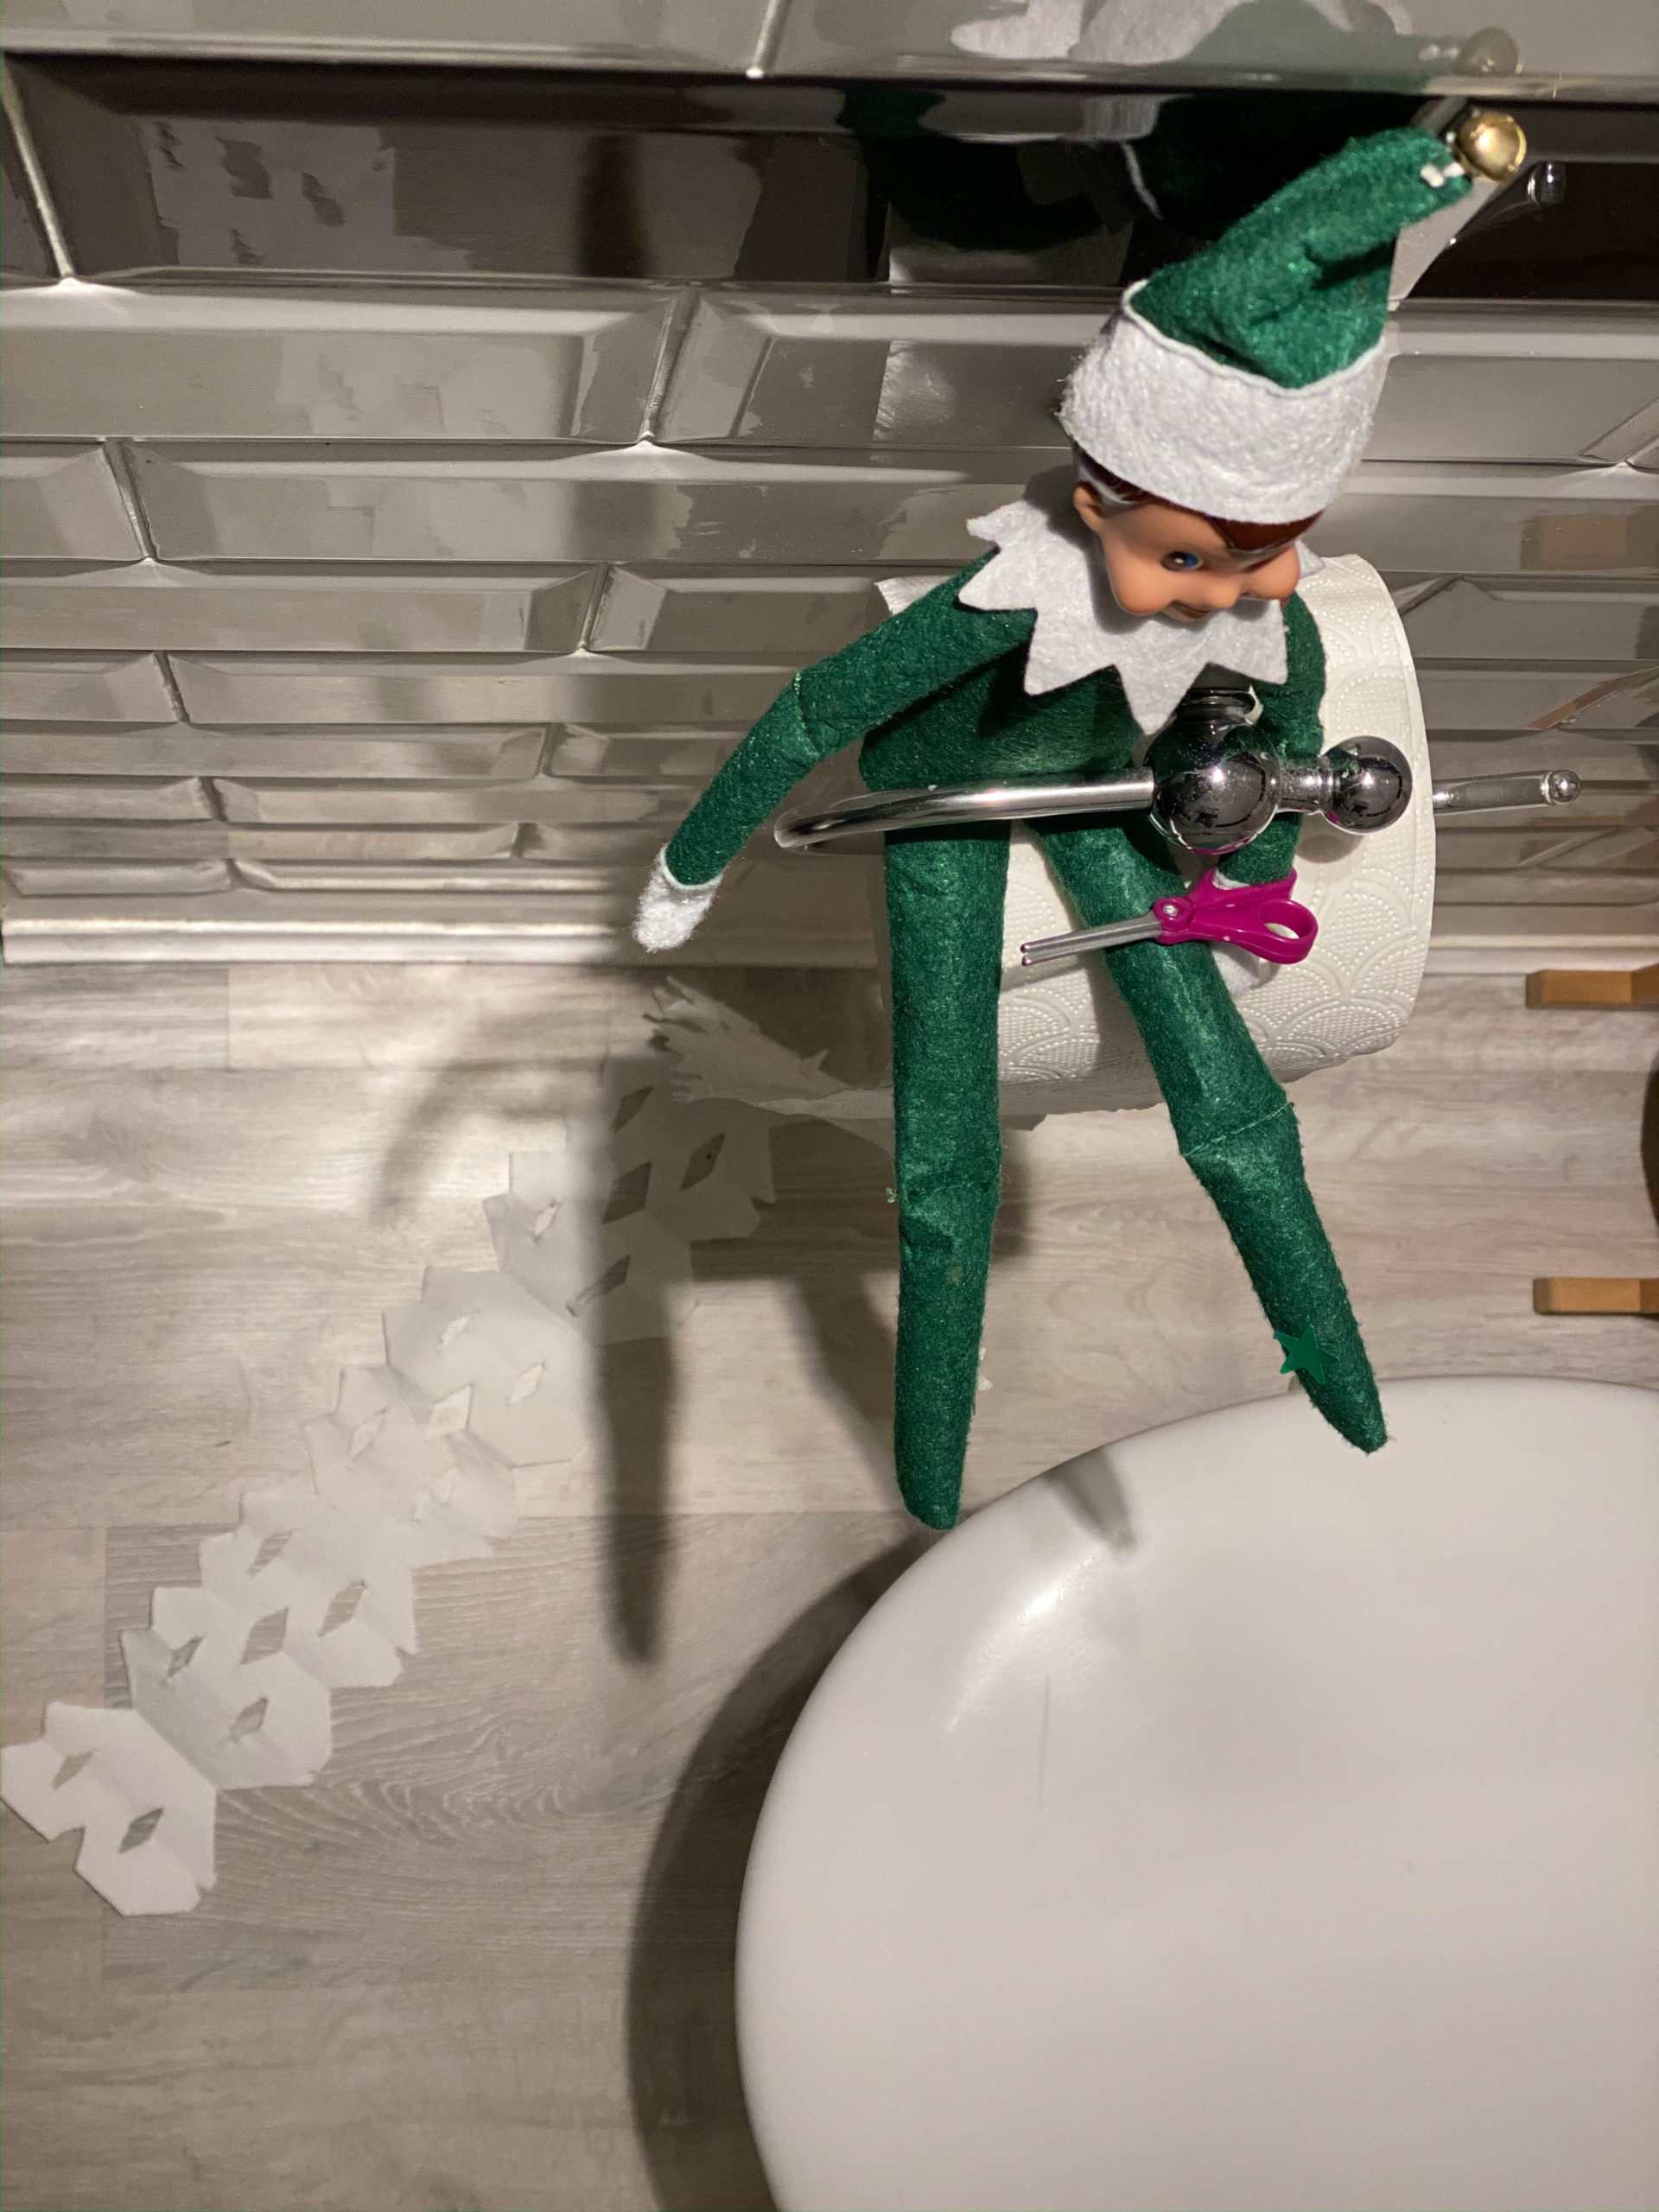
“This is a super fun idea, but be prepared for the reality: you are sacrificing a roll of toilet paper.”
Don’t do this with your last roll in the house! Also, the delicate paper chain can be fragile. If it’s in a high-traffic bathroom, it might get bumped or torn before the kids get to see it. It’s best suited for a powder room or a guest bathroom that doesn’t see a lot of morning rush-hour action. A little bit of planning prevents a ‘potty-time’ disaster.
17. Two Elves Playing Tic-Tac-Toe with Gift Bows
This scene is charming because it uses familiar holiday supplies in a completely new way. We all have gift bows, but we’ve never seen them used as game pieces. This creative repurposing is what sparks delight. The hand-drawn grid on simple green paper adds to the impromptu, DIY feel of the game. The posing of the elves, each holding a bow as if contemplating their next move, brings the competitive moment to life. It feels like we’ve stumbled upon a secret game night.
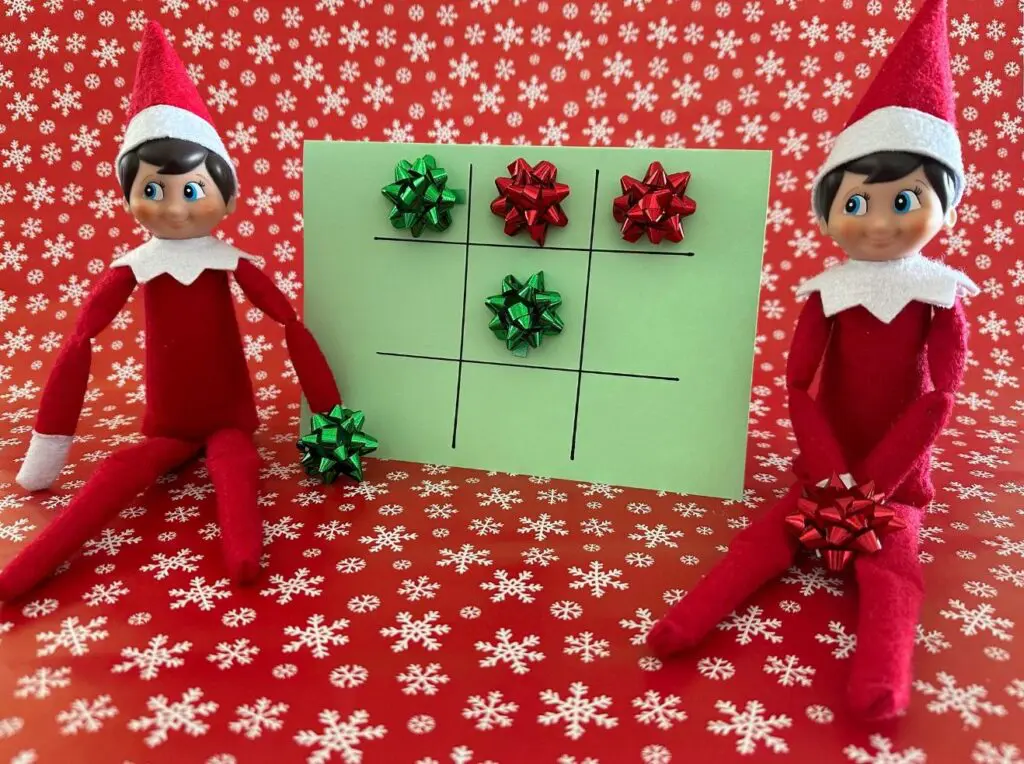
“Don’t have mini gift bows on hand?”
No problem. The spirit of this idea is using everyday items as game pieces. Raid your pantry or craft drawer! Red and green M&M’s, different colored buttons, two types of dried beans (like kidney beans vs. chickpeas), or even Cheerios and Goldfish crackers work perfectly as tic-tac-toe markers. The game board can be drawn on any piece of paper, a napkin, or even with dry-erase marker on a countertop for easy cleanup. Cost: literally zero.
18. Elf in a Wintry Fishbowl Terrarium
The formula for this perfect little winter wonderland is all about layering textures. Let’s break it down: 40% Glass Containment (the clear bowl) + 30% Snowy Base (the artificial snow) + 20% Festive Miniatures (the elf and bottlebrush trees) + 10% Natural Elements (the surrounding pinecones and branches). The glass bowl acts as a frame, turning the collection of small items into a cohesive, self-contained world. The mix of soft snow, bristly trees, and a cheerful elf creates a rich, tactile scene. This is a much sweeter take on a contained elf than the one seen in Idea #19.
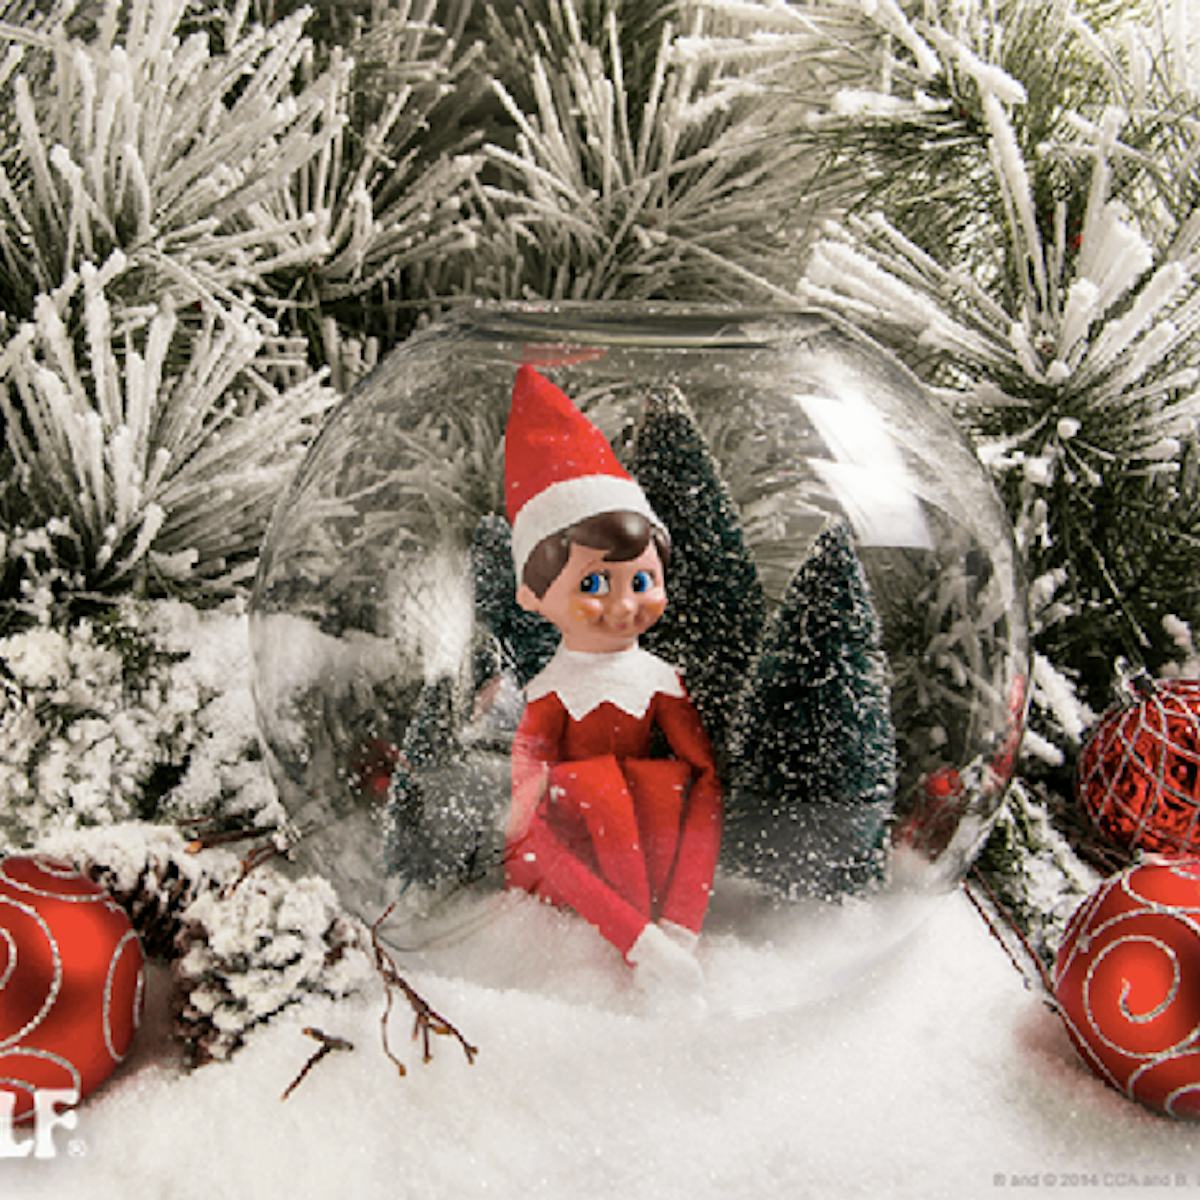
“The biggest maintenance challenge here is dust and potential spills.”
The artificial snow, while magical, can get everywhere if the bowl is knocked over. It’s best to place this on a stable, low-traffic surface like a console table or a wide bookshelf. To clean, use a can of compressed air to gently blow dust off the miniature trees and elf without disturbing the whole setup. A feather duster can also work, but be gentle! Wiping the outside of the glass bowl with a simple glass cleaner weekly will keep it sparkling.
19. Elf Trapped Helplessly Under a Drinking Glass
The clear glass tumbler is everything. It’s the perfect, universally understood symbol for being trapped. The transparency is crucial—we can see the elf’s predicament clearly, which makes it funnier. Using an everyday object like a drinking glass makes the scene instantly relatable and easy to replicate. If the elf were in an opaque box, the joke would be lost. The glass creates a mini-prison that is both dramatic and completely harmless, hitting the sweet spot of elf mischief.
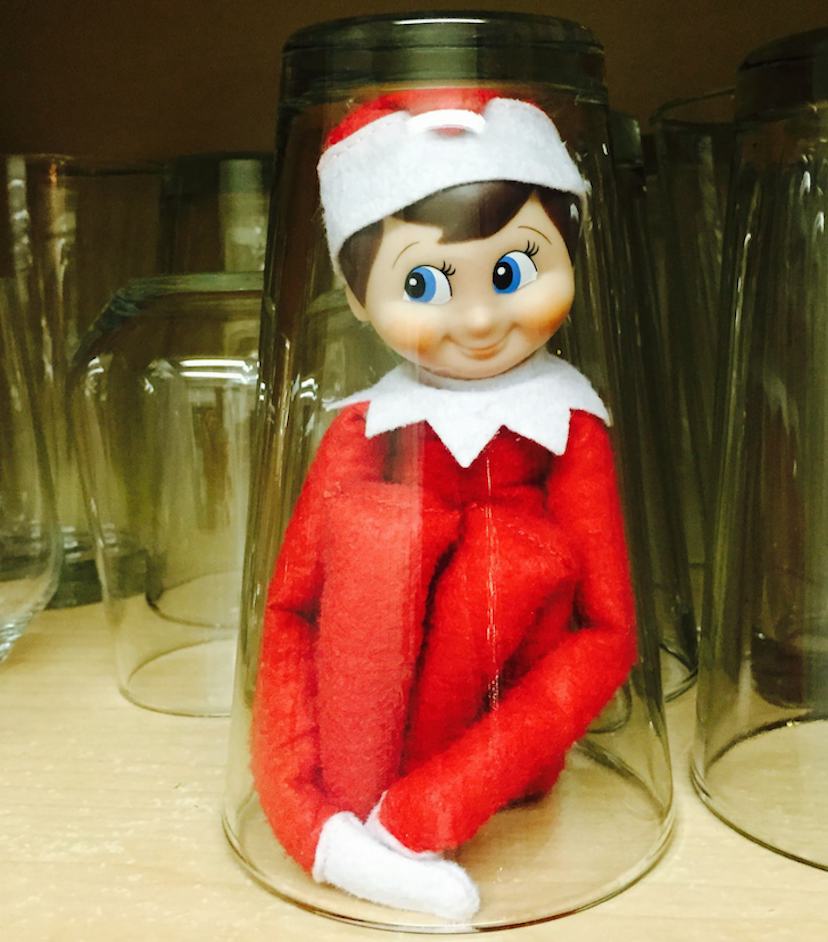
“This idea is a masterclass in minimalist storytelling.”
It requires only two elements—an elf and a glass—to create a complete narrative. The humor comes from the power dynamic: the small, magical elf has been outsmarted and contained by a simple, everyday object. The upright, slightly stiff posture of the elf inside the glass adds to the comedy, making it look genuinely stuck. It’s a low-effort, high-impact idea that relies on concept rather than a multitude of props.
20. Scout Elf Posing with His Official Storybook Box
This classic, simple setup is having a resurgence because it taps into pure nostalgia. For families who have had their elf for years, bringing out the original box and book is a tradition in itself. It’s the origin story! In 2026, there’s a big trend toward embracing the core traditions of the holidays, moving away from overly elaborate social media stunts. This idea feels authentic and heartwarming. It’s a nod to the very beginning of a family’s personal elf journey, which resonates more than a complex, trendy scene.
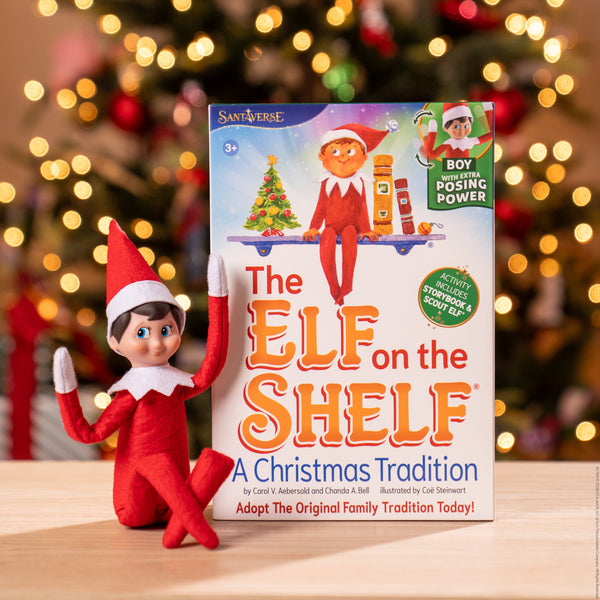
“This is a perfect idea for smaller spaces or tabletop displays.”
It works best on a surface like an entryway console, a nightstand, or a coffee table where it can be viewed up close. You need a space roughly 18 inches wide by 10 inches deep to comfortably fit the box and the elf side-by-side. Unlike the grand tree display in Idea #10, this setup is intimate. It draws you in rather than shouting across the room. The soft-focus Christmas tree in the background adds depth without requiring a large footprint.
21. Elf Hiding Among Jars in a White Kitchen Cabinet
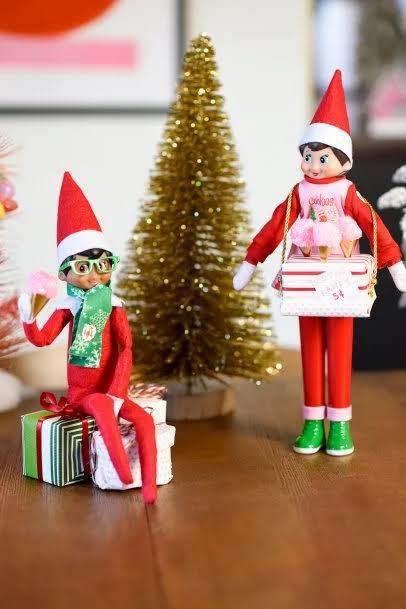
For hide-and-seek spots like this, the key is partial visibility. Don’t hide the elf so well that no one can find him. You want the discovery to be a fun surprise, not a frustrating hour-long search. Tuck him behind a glass jar or have him peeking out from behind a stack of plates. In this scene, his bright red hat is the visual clue that draws your eye. About 75% of the elf should be hidden, with a recognizable 25% (like his hat or face) clearly visible to reward the seeker.
“Let’s be practical: choosing a cabinet for your elf’s hiding spot requires a bit of strategy.”
Don’t pick the cabinet you open every single morning for cereal bowls or coffee mugs. Placing the elf there is a surefire way to have him accidentally knocked over during the morning rush. Instead, choose a less-frequented cabinet, like one that holds serving dishes, spice jars, or baking supplies. This ensures the scene stays intact until it’s discovered naturally, not disrupted by the search for a spoon.
22. Elf Perched on a Classic White Fireplace Mantel
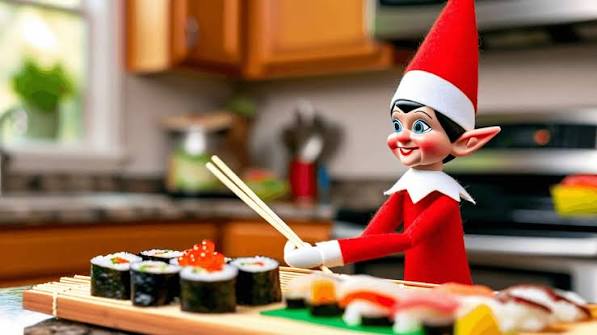
This composition feels so festive and balanced because of the classic ‘visual triangle.’ The elf acts as the peak of the triangle, drawing the eye upward. The greenery garland and the hanging stocking below form the wide, stable base. This structure is a fundamental principle of design that creates a sense of harmony and completeness. The pop of red from the elf’s suit and the bow contrasts beautifully with the white mantel and green garland, making the entire vignette feel intentional and professionally styled.
“Mantel decor can be a magnet for dust, especially delicate setups like this.”
To keep it looking fresh throughout the season, a light dusting every 3-4 days is a good idea. Use a feather duster or a soft-bristle brush to gently clean around the elf and garland without disturbing the arrangement. Be careful with any faux greenery that has ‘snow’ flocking, as aggressive dusting can cause it to shed. Also, if your fireplace is functional, be mindful of heat and soot rising, which could discolor the white mantel and decorations over time.
23. Mischievous Elf Climbing a Glimmering Christmas Tree
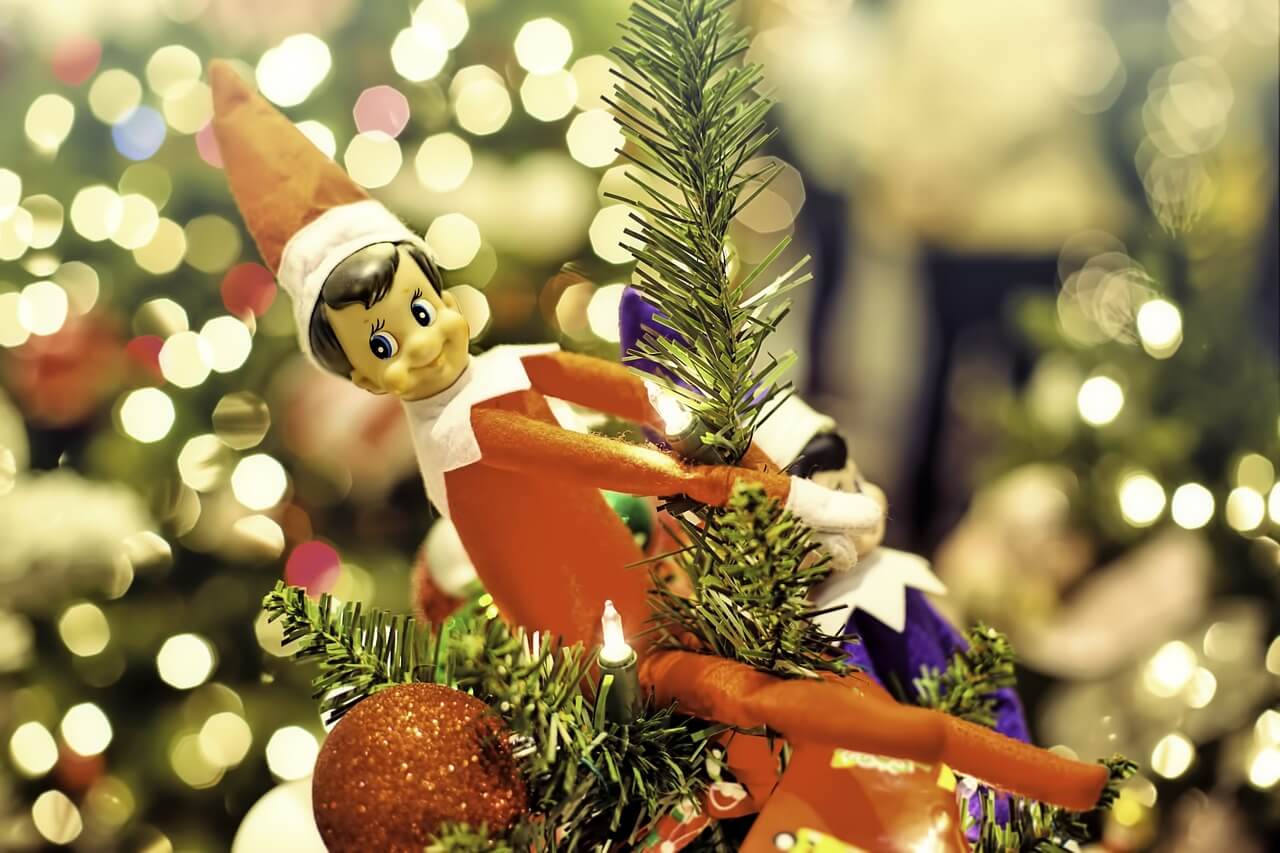
The single most important element in this photo is the lighting. It’s not just a tree with lights; it’s a scene composed of light. The soft-focus bokeh effect—those beautiful, blurry circles of light in the background—transforms a simple Christmas tree into a magical, dreamlike environment. The way the light catches the elf’s suit and the nearby ornament makes him feel like part of the glow. Without this specific, warm, and blurry lighting, the scene would lose all of its enchanting and magical atmosphere.
“This magical look is a careful balance of light and texture.”
The formula is approximately: 50% Soft Bokeh Lights (the background glow) + 30% Rich Greenery (the pine branches) + 15% Character (the elf himself) + 5% Sparkle (the single glittering ornament). The key is that the light isn’t just an accessory; it’s the main ingredient. You can achieve this by using multiple strands of lights and positioning the elf deep within the branches, letting the lights in front and behind him create that layered, dimensional effect.
24. An Elf’s Relaxing Marshmallow Bubble Bath
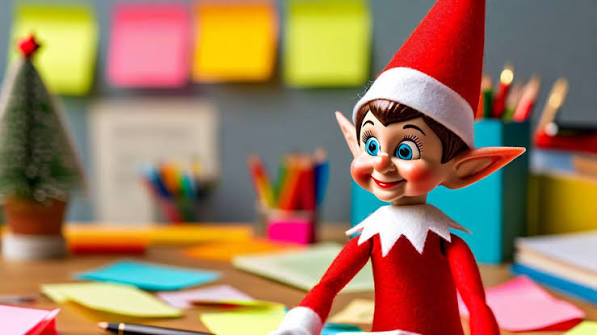
The humor here is all about context substitution. We expect to see bubbles in a bath, but the scene cleverly replaces them with miniature marshmallows. This simple switch is unexpected and instantly funny. The clear glass container allows us to see the joke from all angles. The elf’s relaxed, reclined pose sells the ‘spa day’ story perfectly. It’s a whimsical concept that uses common pantry items to create a memorable, silly moment that feels both surprising and sweet.
“This is an adorable idea, but let’s talk cleanup.”
Marshmallows, especially minis, can get sticky if there’s any moisture in the air or if they’re left out for several days. This is a great ‘one-night’ scene. Afterwards, you’ll want to dispose of the marshmallows (they’re not ideal for eating after being out all night). The glass jar might have some sugary residue.Wash the glass container thoroughly with hot, soapy water to remove any stickiness.Wipe down the surface where the jar was sitting, as mini marshmallows have a knack for escaping.Check the elf’s suit for any sticky spots and gently wipe with a damp cloth if needed.
25. A Child’s Joy with a Miniature Pink Christmas Tree
Miniature, colorful trees are a huge trend right now, especially in kids’ rooms. We’re seeing a shift away from the single, formal family tree towards more personalized holiday decor in every part of the house. A small pink, blue, or rainbow tree allows a child to have their ‘own’ Christmas tree to decorate and enjoy. Placing the elf on top of this personal tree makes the holiday magic feel like it belongs directly to them, strengthening that personal connection beyond the main living room display.
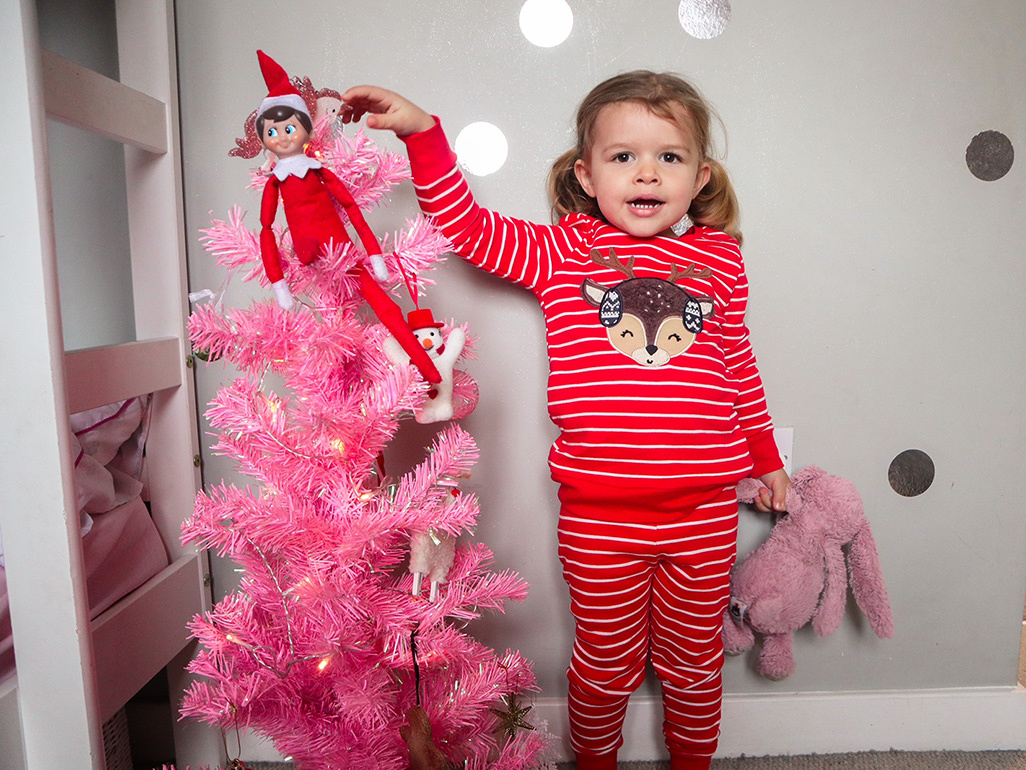
“While this is a heartwarming scene, it’s important to be realistic about safety when mixing kids, toys, and decorations.”
Ensure the miniature tree has a sturdy, wide base to prevent it from being easily knocked over. Check that all ornaments are shatterproof and large enough not to be a choking hazard for very young children. If the tree is pre-lit, make sure the cords are tucked away safely. The elf is a ‘don’t touch’ toy, which can be extra tempting when it’s on their very own tree, so a gentle reminder might be needed.
26. Elf Architect with a Gumdrop and Toothpick Sculpture
This idea is brilliant because it positions the elf not as a prankster, but as a creator. The geometric structure built from toothpicks and gumdrops looks like a genuine (and delicious) engineering project. The scattered materials around him suggest a work-in-progress, making the scene feel active and dynamic. It sparks the imagination by asking, ‘What is he building?’ This STEM-focused activity is a refreshing change of pace from typical mischief, presenting the elf as a tiny, clever architect. The creativity here is similar to the veggie art in Idea #13.
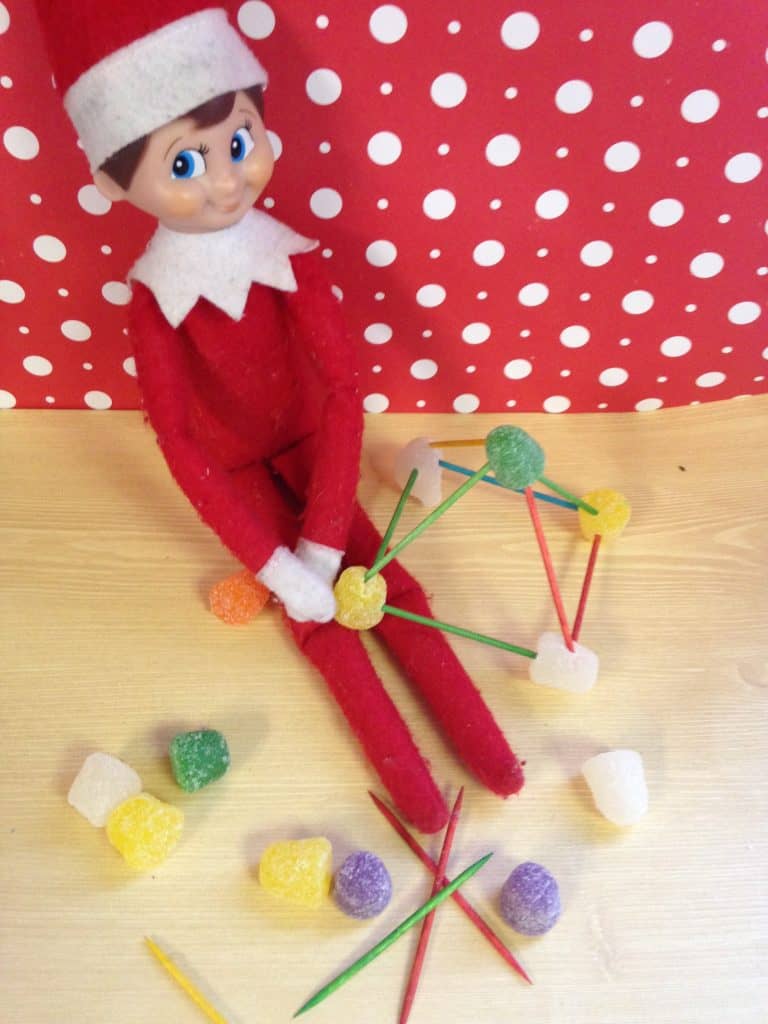
“Want to stage your own elf engineering project?”
It’s a fun and colorful setup that comes together in minutes. Here’s a quick guide to building a gumdrop structure.Materials Needed: A box of round toothpicks and a bag of colorful gumdrops. That’s it! Cost: ~$7.Build a Base: Start by creating a square or triangle on your work surface. Use four gumdrops as corners and connect them with toothpicks.Build Upwards: Add a toothpick vertically into each gumdrop corner. Connect the tops of these toothpicks with more gumdrops to create a cube.Get Creative: From there, you can add pyramids on top, extend bridges, or create more complex shapes. There’s no wrong way to do it!Set the Scene: Place your elf next to the masterpiece with a few loose gumdrops and toothpicks scattered around to show his ‘work’.
27. A Simple Red Warning Icon
The power of this image is its stark, unambiguous symbolism. The red circle with an exclamation mark is a universal sign for ‘warning,’ ‘alert,’ or ‘caution.’ There is no story, no character, no setting—just a direct, forceful message. The dark, pixelated background adds a sense of digital urgency or a system error. It’s effective precisely because it’s stripped of all other details, forcing you to focus entirely on the single, potent symbol at its center.
“While visually arresting, an image like this can be jarring or create anxiety if used improperly in a festive or family-oriented context.”
It’s the visual equivalent of an alarm bell. Unless you are specifically creating a ‘hacked’ or ‘system failure’ narrative for your elf (e.g., taping this to a TV screen with a note from the elf), this symbol could be confusing or even a little scary for young children who associate the elf with fun and games. Context is everything; use this one thoughtfully.
28. Elf Hiding Between Hardcover Books on a Shelf
This is a classic for a reason. It works by turning a bookshelf into a landscape of valleys and canyons. The vertical spines of the books create perfect little nooks for an elf to hide. The success of the scene lies in the elf’s pose—huddled sideways, gripping his knees. It’s not just placed there; it’s posed with intention, suggesting he’s hiding or seeking a cozy, quiet spot to read. The contrasting colors of his green felt outfit against the dark and red book spines help him stand out just enough to be found.
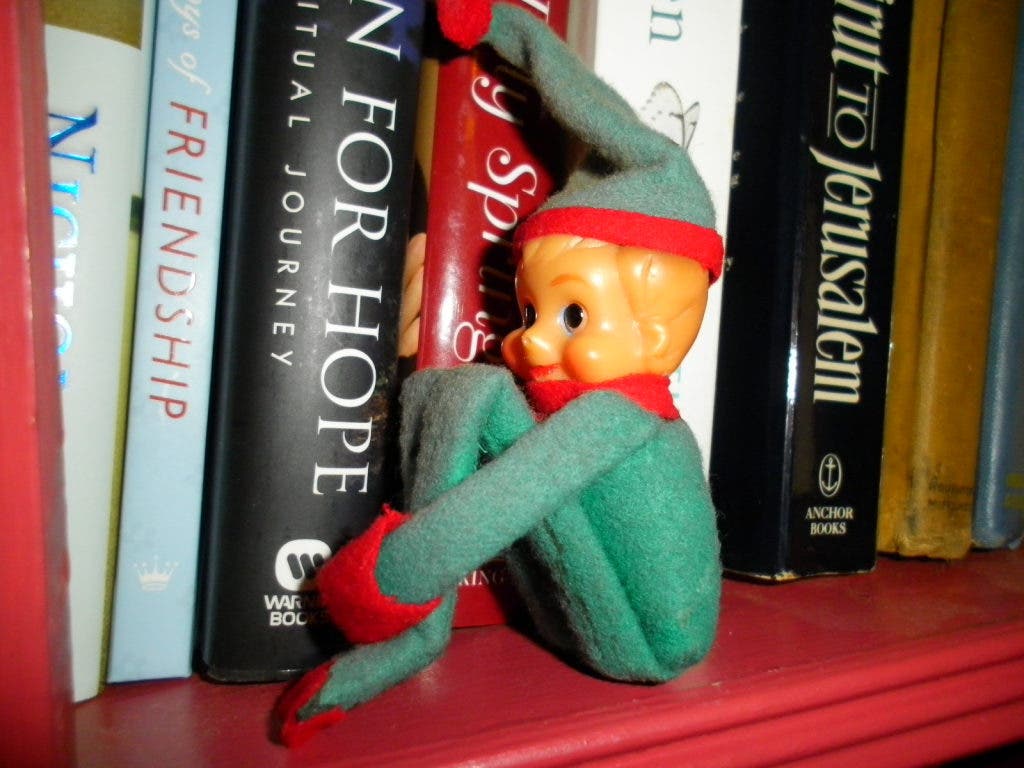
“You don’t need a custom-built, color-coordinated library to pull this off.”
This idea works with any collection of books you have. In fact, a slightly mismatched assortment of paperbacks and hardcovers can look even more authentic and charming. If you don’t have a bookshelf, a simple stack of 3-4 books on a coffee table or nightstand creates the same effect. The only prop required is a book, making this a completely free and endlessly repeatable idea. Just change the book, change the spot!
29. Buddy & Judy: Personalized Elves in a Christmas Tree
The personalized hats are what make this scene truly special. Without the names ‘Buddy’ and ‘Judy’, they are just two cute elves in a tree. But with the names, they become individuals with identities. It transforms them from generic holiday decorations into specific characters that are part of this family’s unique tradition. This simple act of personalization deepens the story and the connection, making the elves feel like cherished members of the household, not just store-bought props.
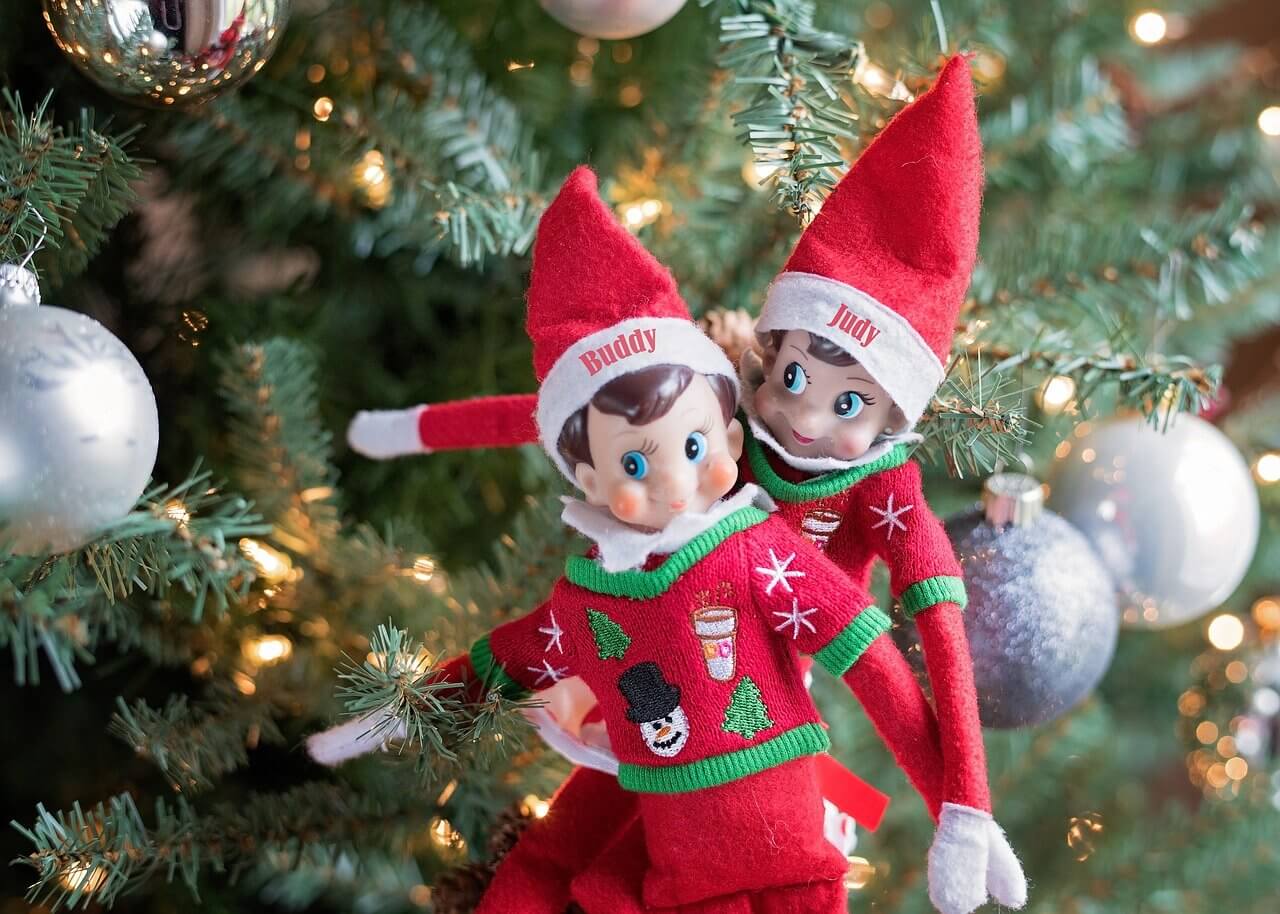
“If your elves have names, showcase them!”
You can easily add names to their hats or sweaters using a fabric marker, puffy paint, or iron-on vinyl letters from a craft store. When posing a named pair, try to give them a sense of interaction. Instead of just placing them separately in the tree, have them looking at each other, whispering a secret, or working together to hang an ornament. This reinforces their relationship and makes the scene more engaging and narrative-driven.
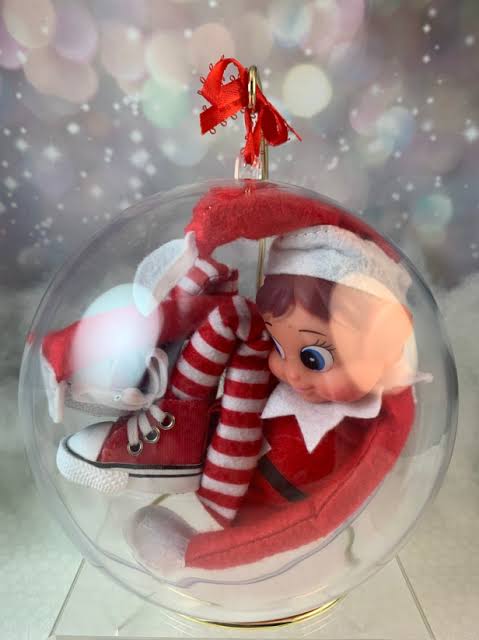
30. Elf Duo Amidst Red and White Ornaments
This lush, traditional look follows a classic holiday formula: 60% Evergreen Base (the tree itself) + 30% Bold Red Accents (the oversized baubles, bow, and tinsel) + 10% Whimsical Characters (the elves and candy cane). The key is the commitment to a tight color palette. By sticking primarily to red and white with touches of gray, the overall look is cohesive and impactful. The large, glittery bow acts as a focal point, while the elves are a playful discovery nestled within the branches.
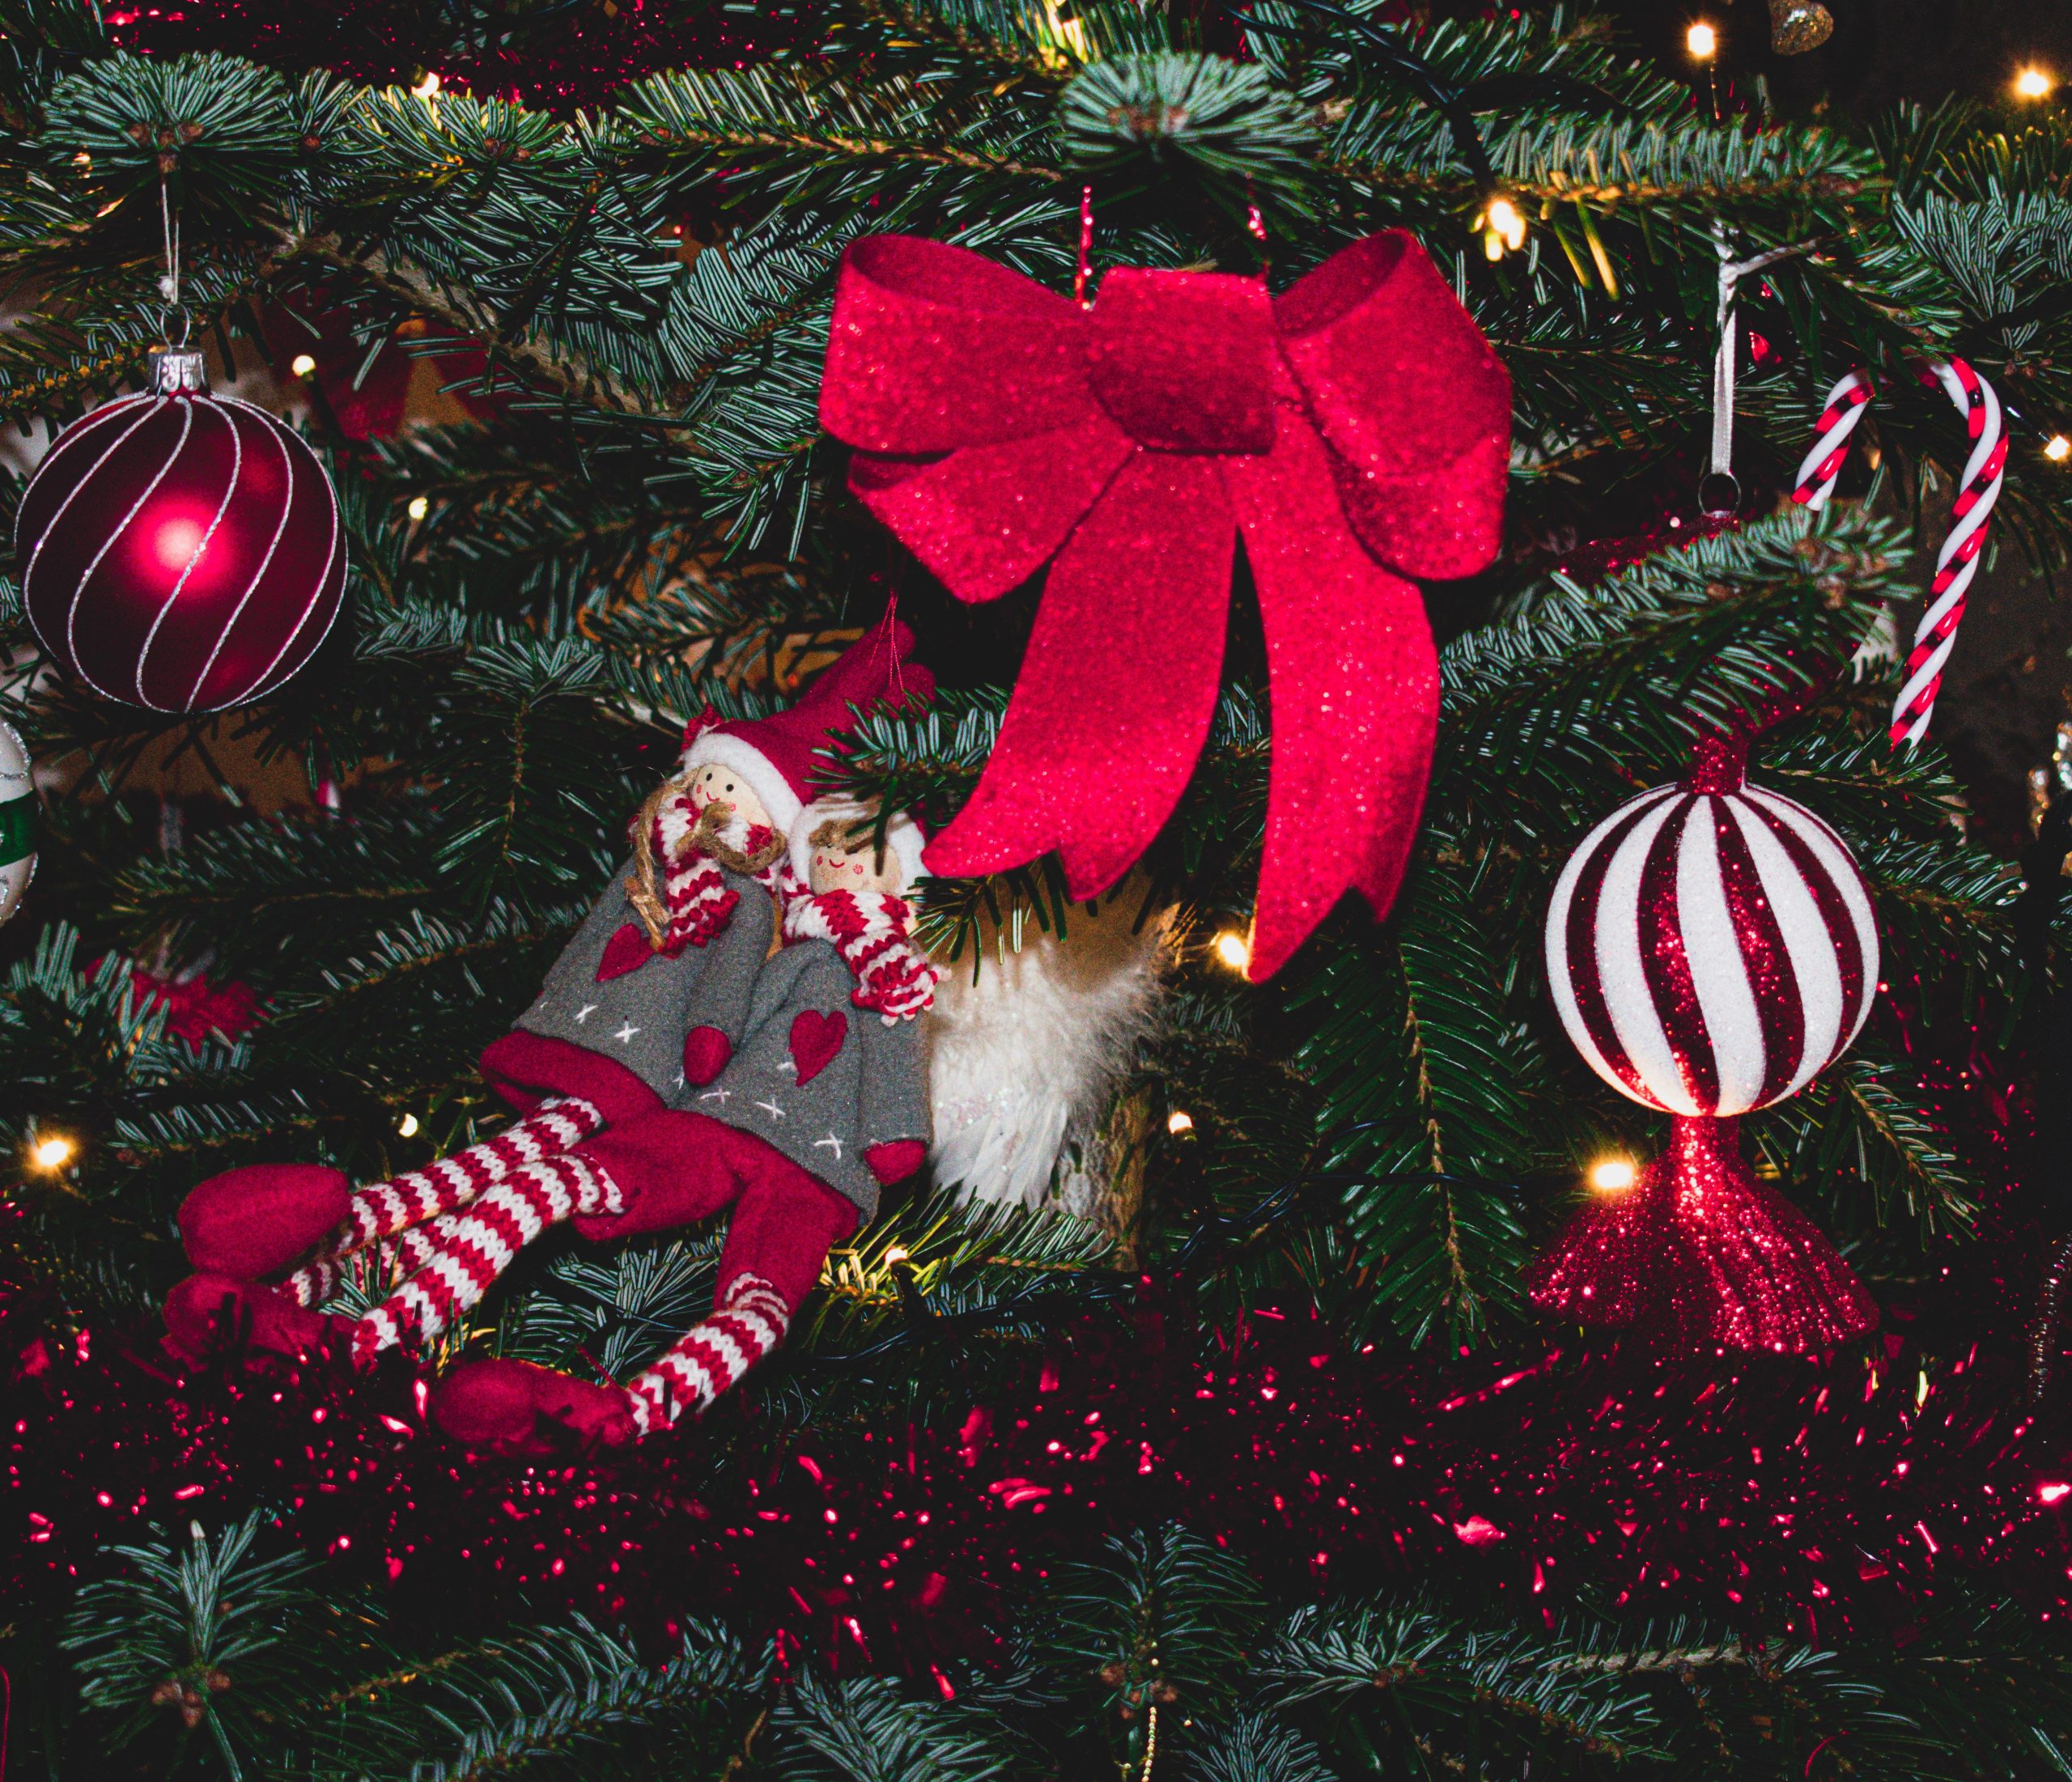
“This design works so well because it expertly plays with scale and repetition.”
The large red baubles are repeated throughout the tree, creating a strong visual rhythm. Then, the much smaller elf figures are introduced, and the contrast in size is what makes them so charming. We see the big, bold statement of the ornaments, and then we’re delighted by the tiny, detailed characters hidden within. This variation in scale keeps the eye moving and makes the tree feel full of secrets and surprises.
31. Plush Elf with a Jester Hat and Gift Boxes
The oversized props are the secret to this scene’s playful charm. The extra-large candy cane and the big, perfectly wrapped gift boxes create a whimsical, slightly cartoonish world. An elf with regular-sized props is cute, but an elf in a world where the candy canes are as tall as he is? That’s magical. This deliberate distortion of scale makes the scene feel more imaginative and less like a simple tabletop decoration. It creates a sense of wonder and makes the elf’s world feel larger than life.
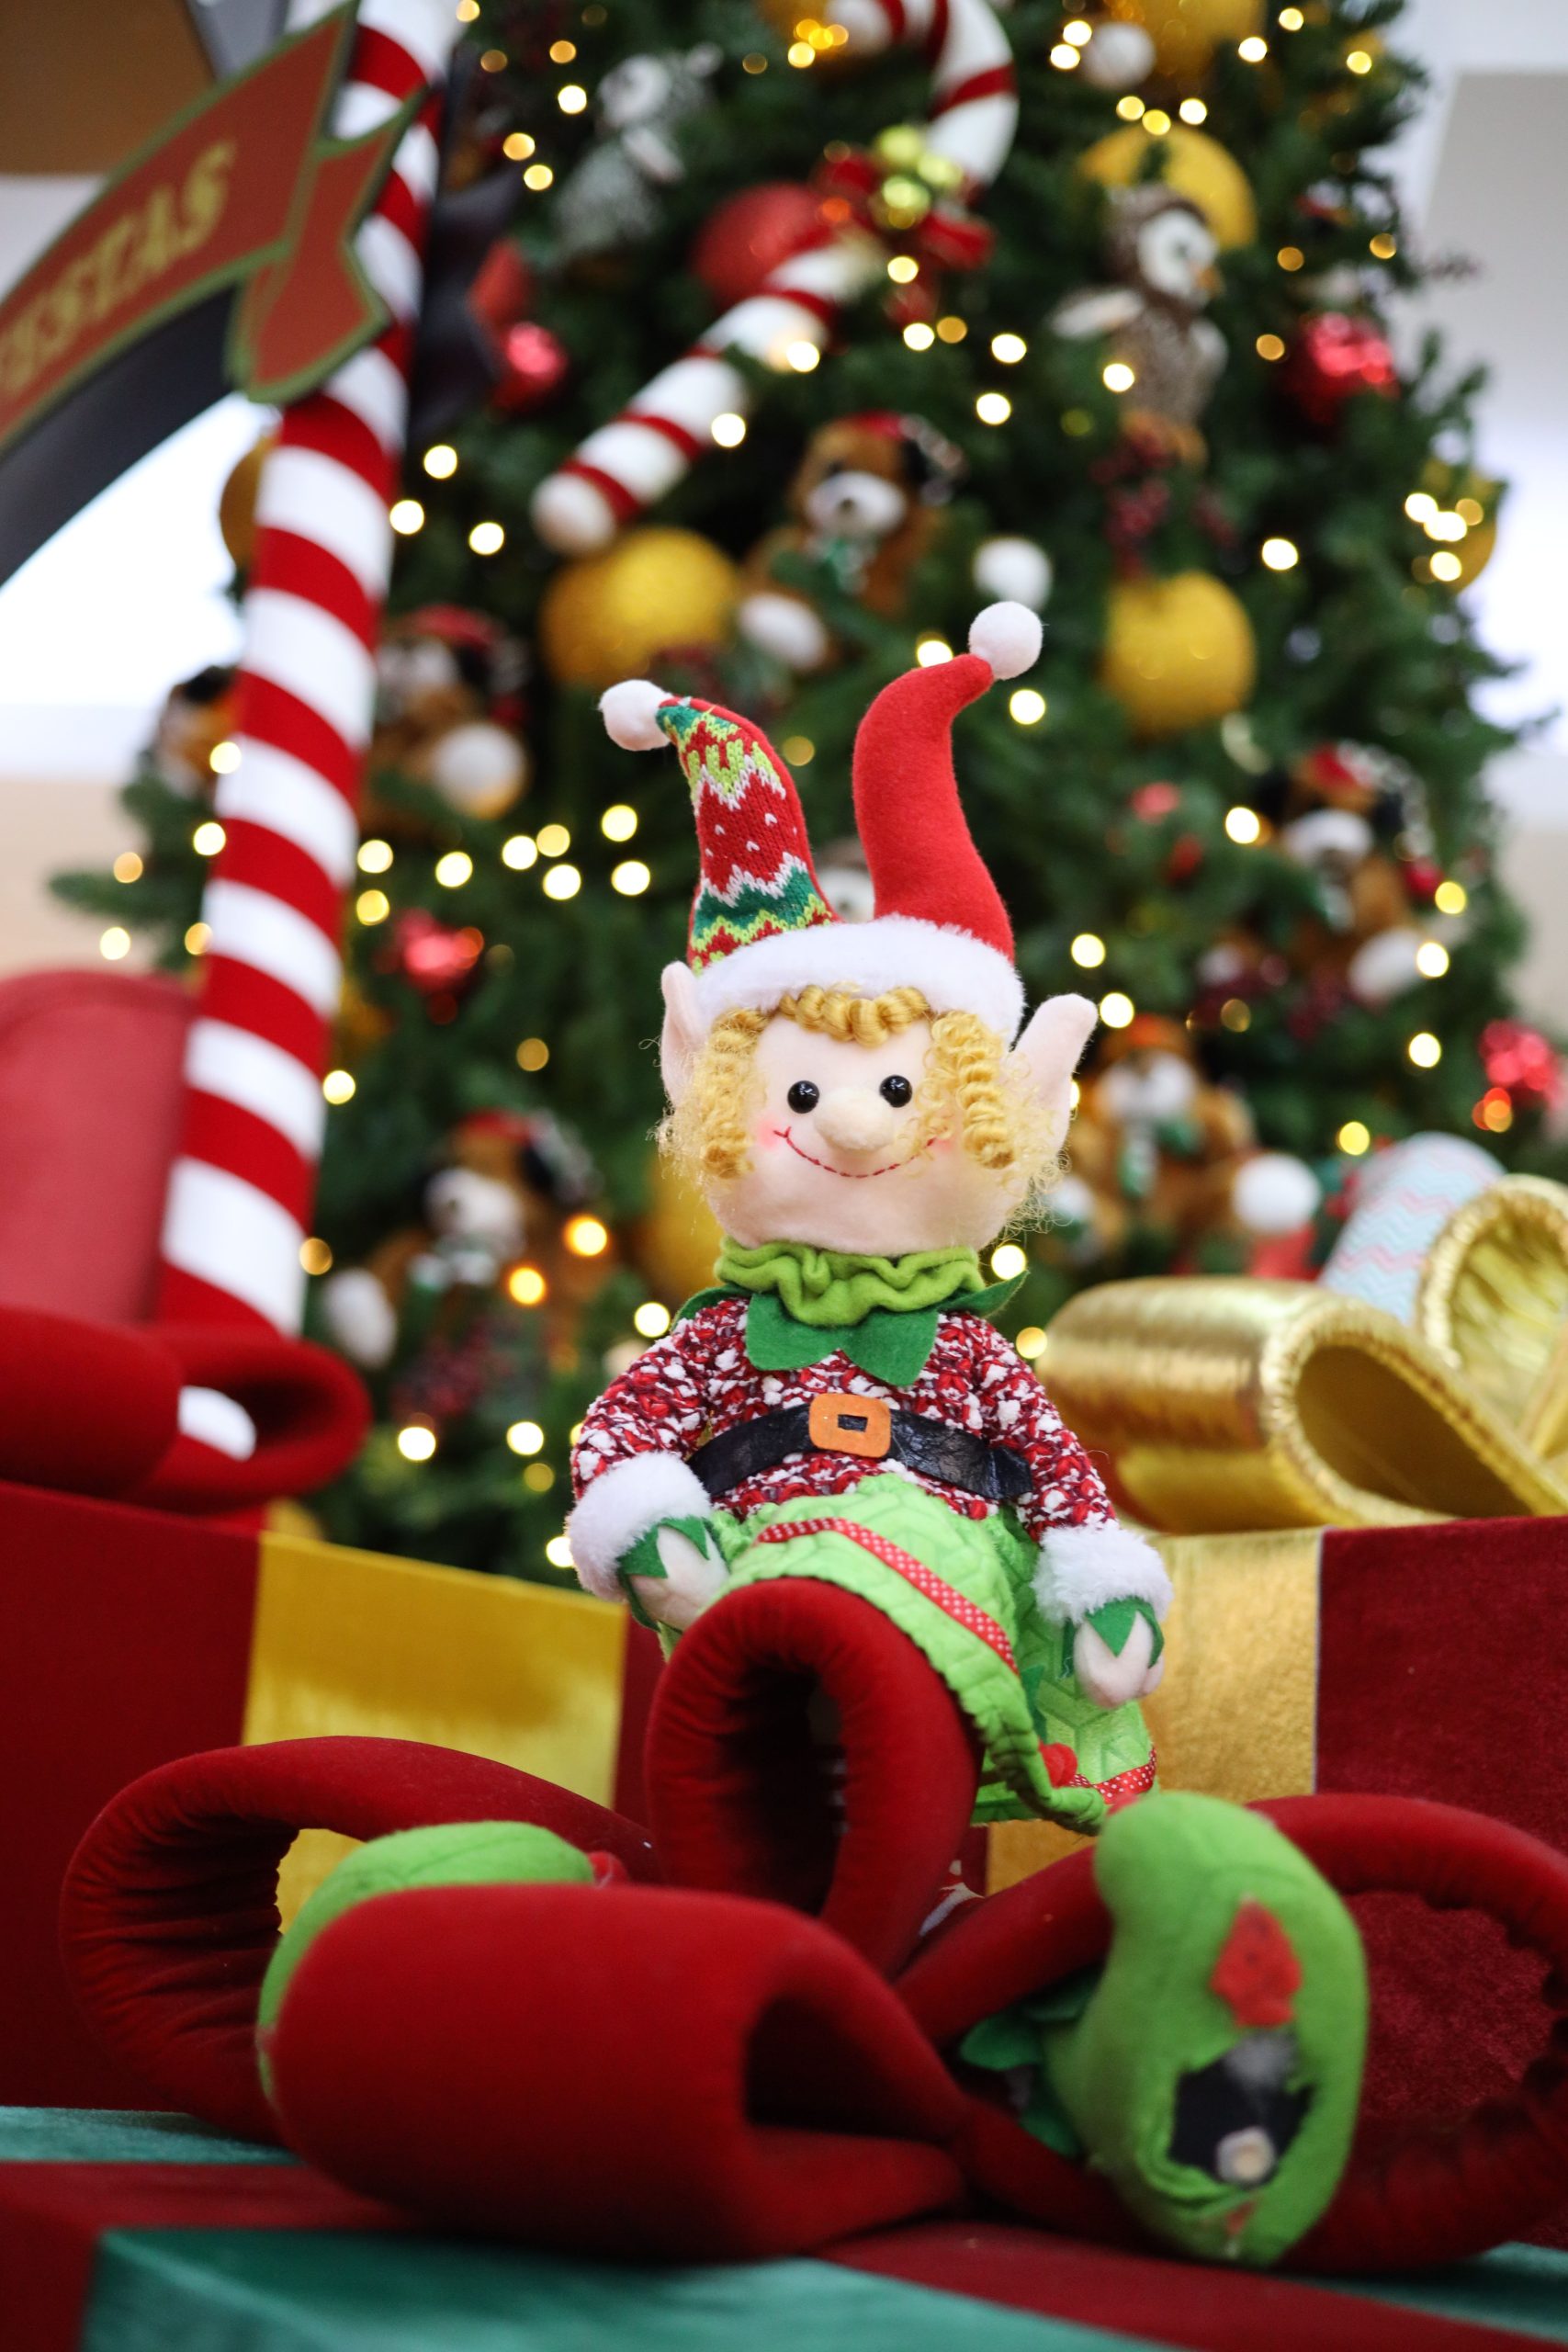
“This type of setup is ideal for an under-the-tree scene or a floor-level display in a family room corner.”
It’s meant to be big and bold. You need a clear floor space of at least 3×3 feet to arrange the elf and the oversized props without it feeling cluttered. It’s too large for a mantel or a narrow shelf. This idea is perfect for filling that empty spot next to the fireplace or in an entryway where you want to make a big, festive statement that can be seen from across the room. It’s a great companion to tree-focused ideas like Idea #23.
32. Elf Relaxing in a Miniature Fabric Hammock
The genius of this idea is the juxtaposition between the relaxed, vacation-like prop (the hammock) and the everyday indoor setting. A hammock belongs outside, between two trees. Seeing one strung up in a living room, holding a tiny elf, is an amusing and whimsical surprise. The patterned fabric and straps add a homemade, crafty feel, suggesting the elf made it himself. It’s this blend of the unexpected and the charmingly DIY that makes the scene so effective.
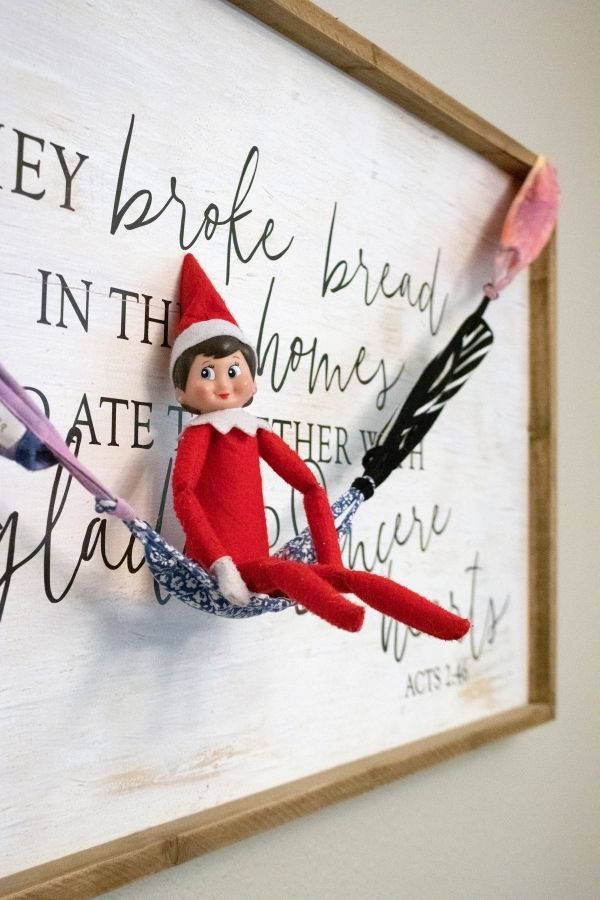
“You don’t need to be a sewing expert to create a mini hammock.”
In fact, you don’t need to sew at all! Find a rectangular scrap of fabric—an old dish towel, a cloth napkin, or even a baby’s washcloth will do. For the straps, use pieces of ribbon, shoelaces, or twine. Simply tie the straps to the corners of the fabric and suspend it between two heavy objects like books, two chair legs, or drawer pulls. The total cost can easily be $0 if you use materials from around the house.
33. Elves and Friends in a Paper Bag Sack Race
This scene is a home run because it uses incredibly simple, low-cost materials to create a story bursting with energy and competition. A line of brown paper bags—something most of us have—is instantly transformed into a classic sack race starting line. By including other stuffed toys, the elf isn’t just on display; he’s interacting with his friends, creating a narrative of a fun-filled game night. The composition, with the racers all lined up and ready to go, implies imminent action and excitement. Compare this group activity to the two-player game in Idea #17.
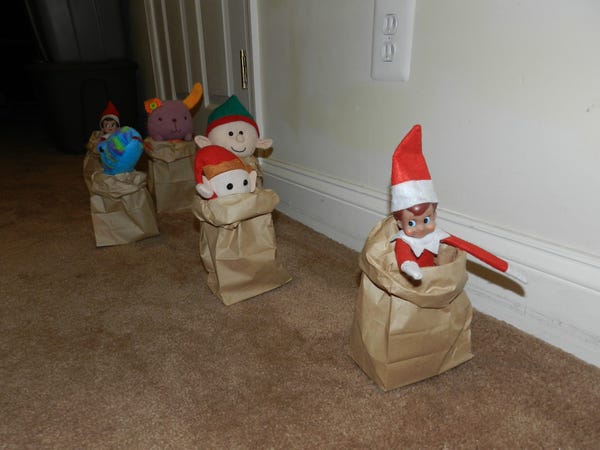
“Staging a sack race is one of the easiest and most fun group scenes you can create.”
It takes less than five minutes and always gets a laugh. Here’s how to do it.Gather Your Racers: Grab your elf (or elves) and 2-3 other similarly sized stuffed animals or dolls.Find Your ‘Sacks’: Standard brown paper lunch bags are perfect. If you don’t have those, small gift bags or even large coffee mugs can work.Position the Racers: Place each toy inside a bag, with just their head and shoulders peeking out.Line Them Up: Arrange the racers in a neat line against a wall or along the edge of a rug to create a ‘starting line.’Add a Finish Line (Optional): For extra flair, create a finish line a few feet away using masking tape or a piece of string.
Your Elf’s Next Adventure Awaits
And there you have it—33 ways to bring a little extra magic and mischief into your home this season. Remember, the best ideas are the ones that make your family smile, so don’t be afraid to get creative and silly with it. Don’t forget to check out our Pinterest board for even more inspiration and save your favorites for when you need a quick idea!