28 Jaw-Dropping Cleaning Hacks You Absolutely Need to Try for an Effortless Home Makeover
You know that feeling when you save a dozen ‘easy’ cleaning hacks on Pinterest, only to find they don’t work on your actual, real-life messes? We’ve been there. That’s why we sorted through the noise to find 28 genuinely effective cleaning methods that tackle everything from grimy ovens to dusty baseboards. These are the tricks real people use for a truly clean home. And stay until the end — we break down the most common cleaning mistakes that can actually damage your stuff. 📌 Save this to Pinterest for later — you’ll want to revisit these ideas.
1. A Clean and Serene Teal Laundry Room
What makes this laundry space so pleasant isn’t just the color, it’s the layout. By stacking the washer and dryer (or in this case, placing them side-by-side under a counter), you create a large, uninterrupted surface for sorting and folding. The combination of the deep teal walls with the crisp white cabinets provides a strong visual contrast that feels intentional and designed, not just utilitarian. The inclusion of a proper utility sink within the countertop run is a game-changer for treating stains right where you are.
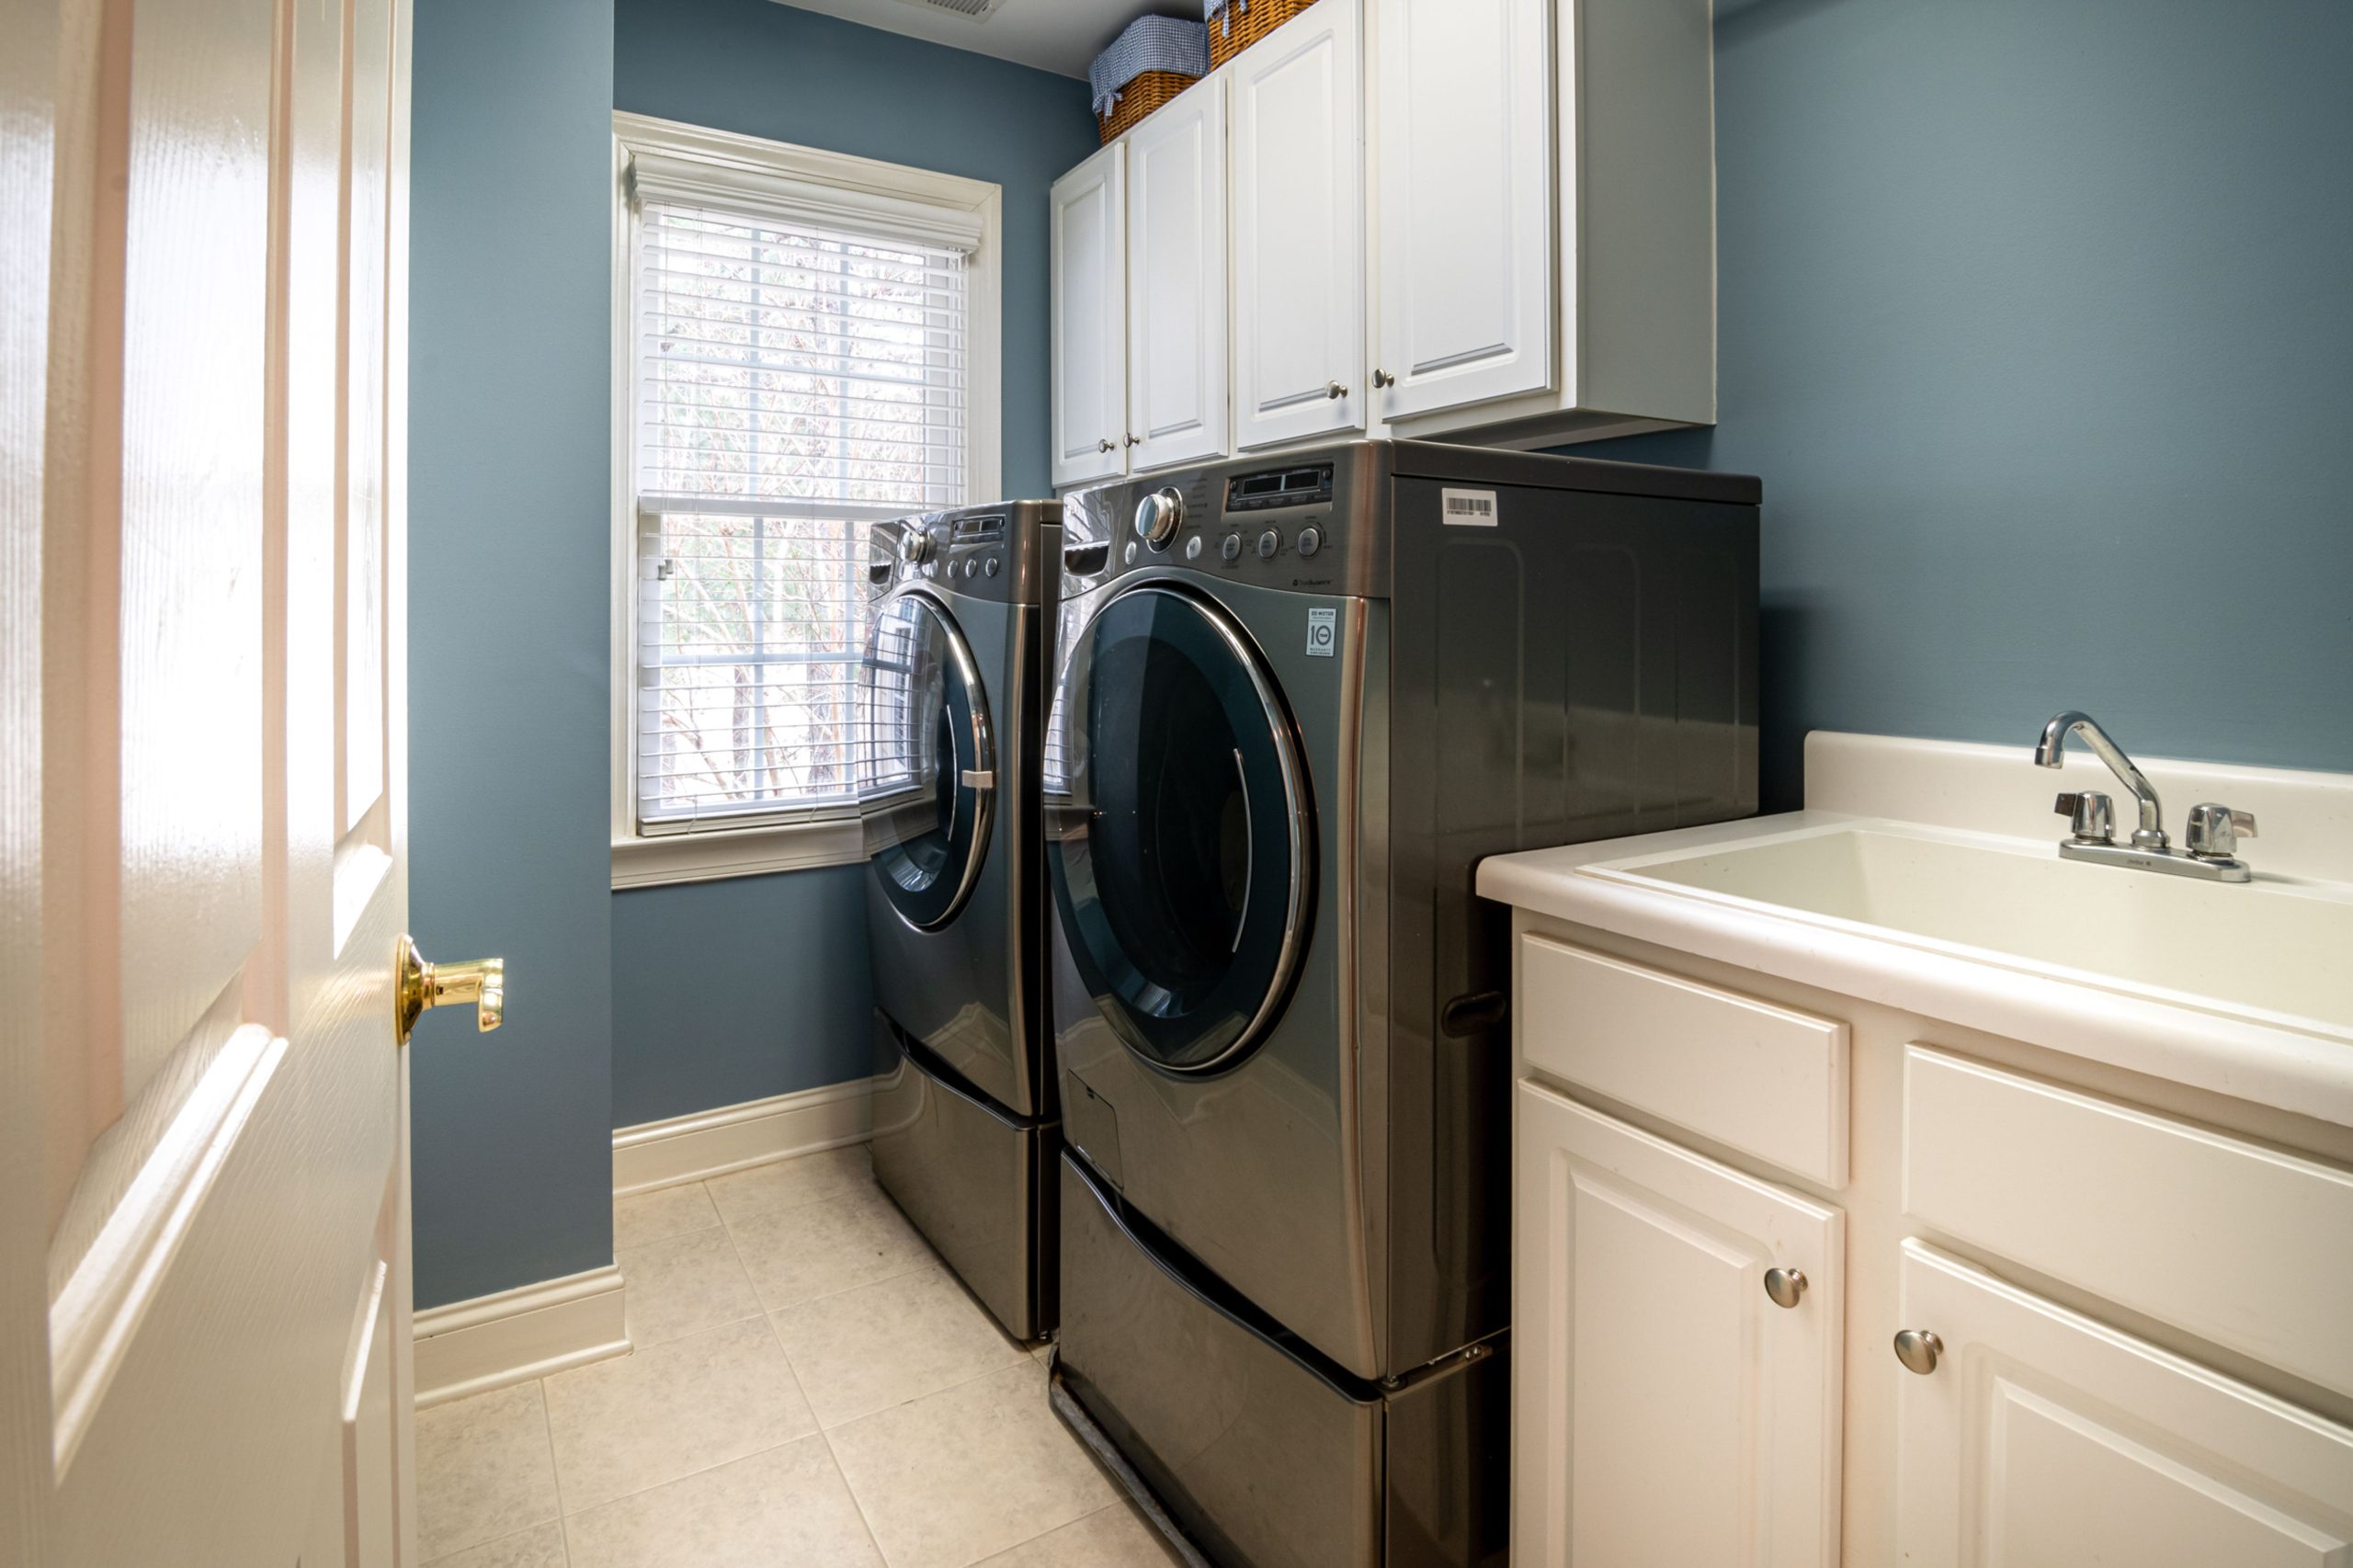
“A bright, well-organized laundry room is a joy, but it’s also a high-traffic, high-mess area.”
The tiled floor is a smart choice for dealing with potential water spills or detergent drips. Be mindful of the wall paint finish; a satin or semi-gloss in a color this rich will be far easier to wipe down than a matte finish, which can show scuffs and water marks. Regularly wipe down the interior of your washer and leave the door ajar to prevent mildew smells from developing—a common issue with front-loaders.
2. Floating Wood Vanity with a Teal Subway Tile Accent
When installing an accent tile wall like this, consider taking it up to the ceiling line, even if it’s angled. This draws the eye upward and makes the room feel much larger and more dramatic. For subway tiles, use a grout color that provides slight contrast to make the pattern pop—here, a light grey would work beautifully against the teal. Also, mounting your vanity to the wall is a fantastic trick. It frees up floor space, making a small bathroom feel significantly more open and easier to clean underneath.

“A floating vanity is a stunning, modern look, but it comes with a major caveat: storage.”
You lose all the cabinet space you would typically have underneath the sink. This style works best if you have a separate linen closet or other storage solutions in your bathroom. Also, that gorgeous teal tile? Keep in mind that cleaning grout lines in a shower or behind a sink requires consistent effort to prevent mildew buildup. Sealing the grout annually is non-negotiable to keep it looking fresh.
3. The Right Way to Get Streak-Free Windows
Getting perfectly clear glass isn’t about harsh chemicals, but the right tools and technique. Here’s a simple, pro-approved method.
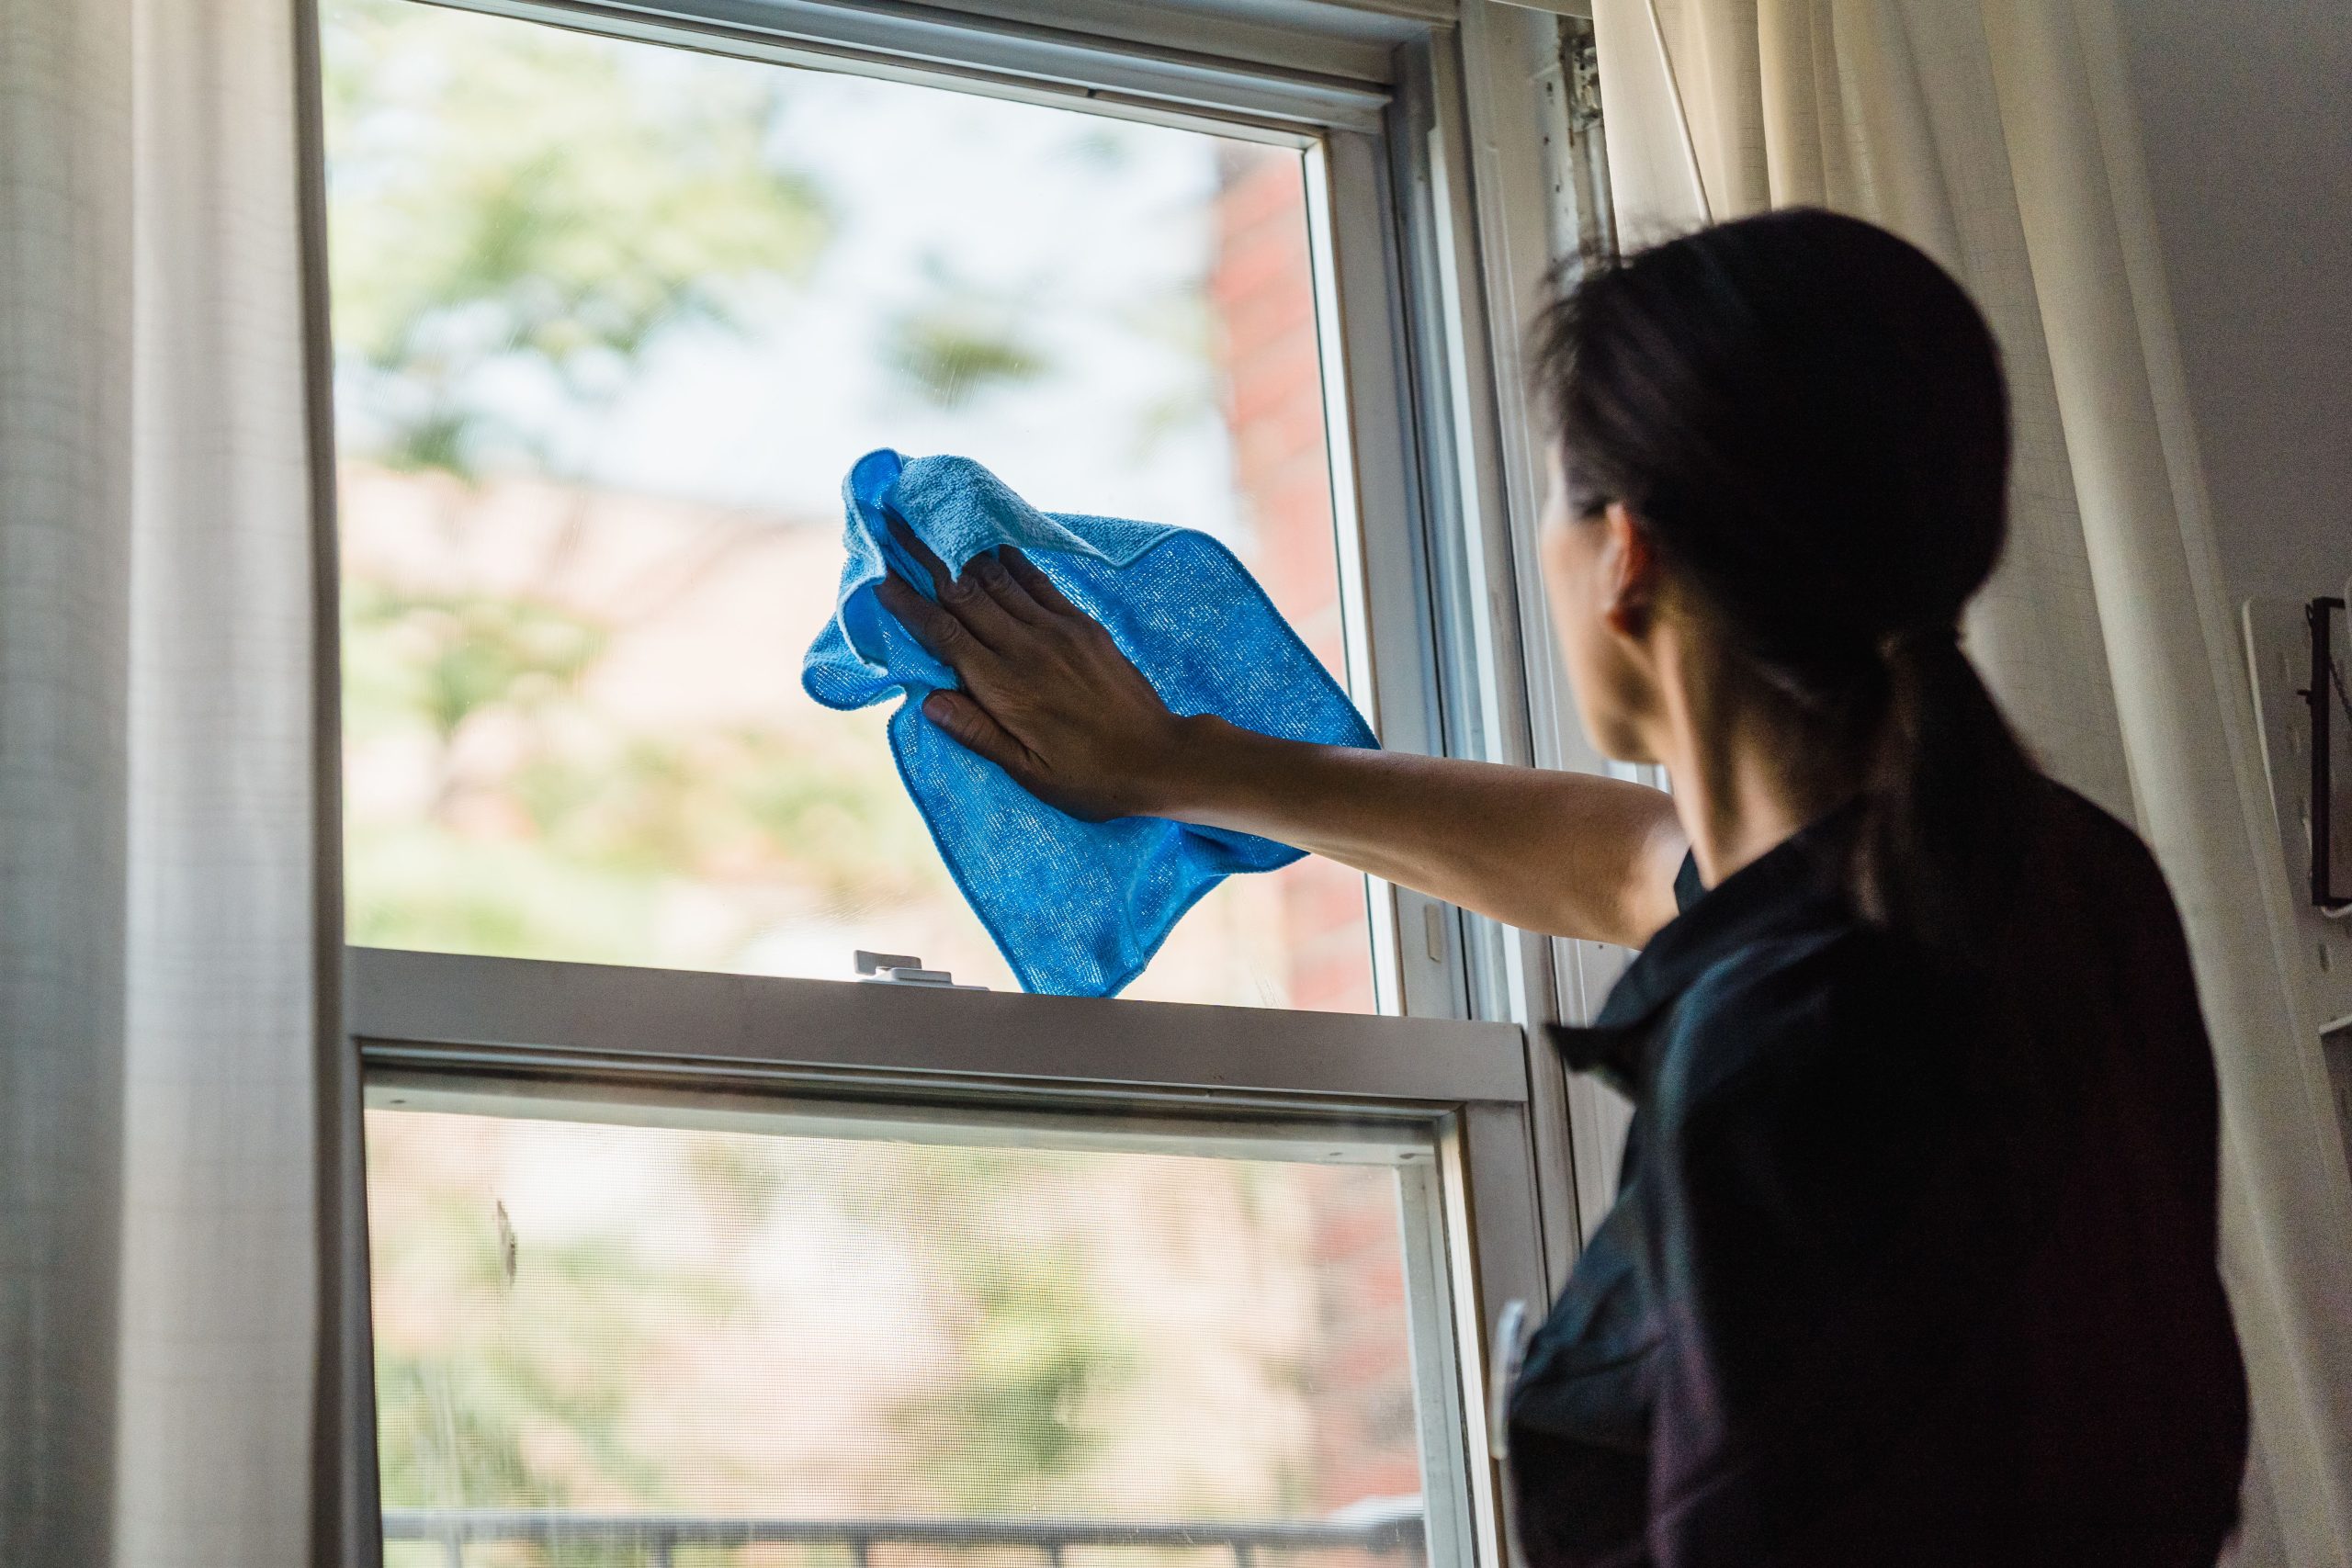
“Mix a solution of one part distilled white vinegar to ten parts warm water in a spray bottle.”
Lightly spritz the solution onto the window pane, starting from the top. Don’t drench it!
Using a clean, dry microfiber cloth (like the blue one shown), wipe from the top down in a “Z” pattern.
For the final wipe, use a second, completely dry microfiber cloth to buff away any remaining moisture.
Wash your microfiber cloths separately from other laundry without fabric softener to maintain their absorbency.
The single most important element for a streak-free finish is the microfiber cloth. Paper towels leave lint, and old cotton rags just smear the dirt and moisture around. A high-quality microfiber cloth has a unique texture designed to grab and hold onto dust, grime, and water without leaving anything behind. Investing in a good set of glass-specific microfiber cloths is the secret to getting that invisible, professionally-cleaned look every single time. It’s truly the hero of this task.
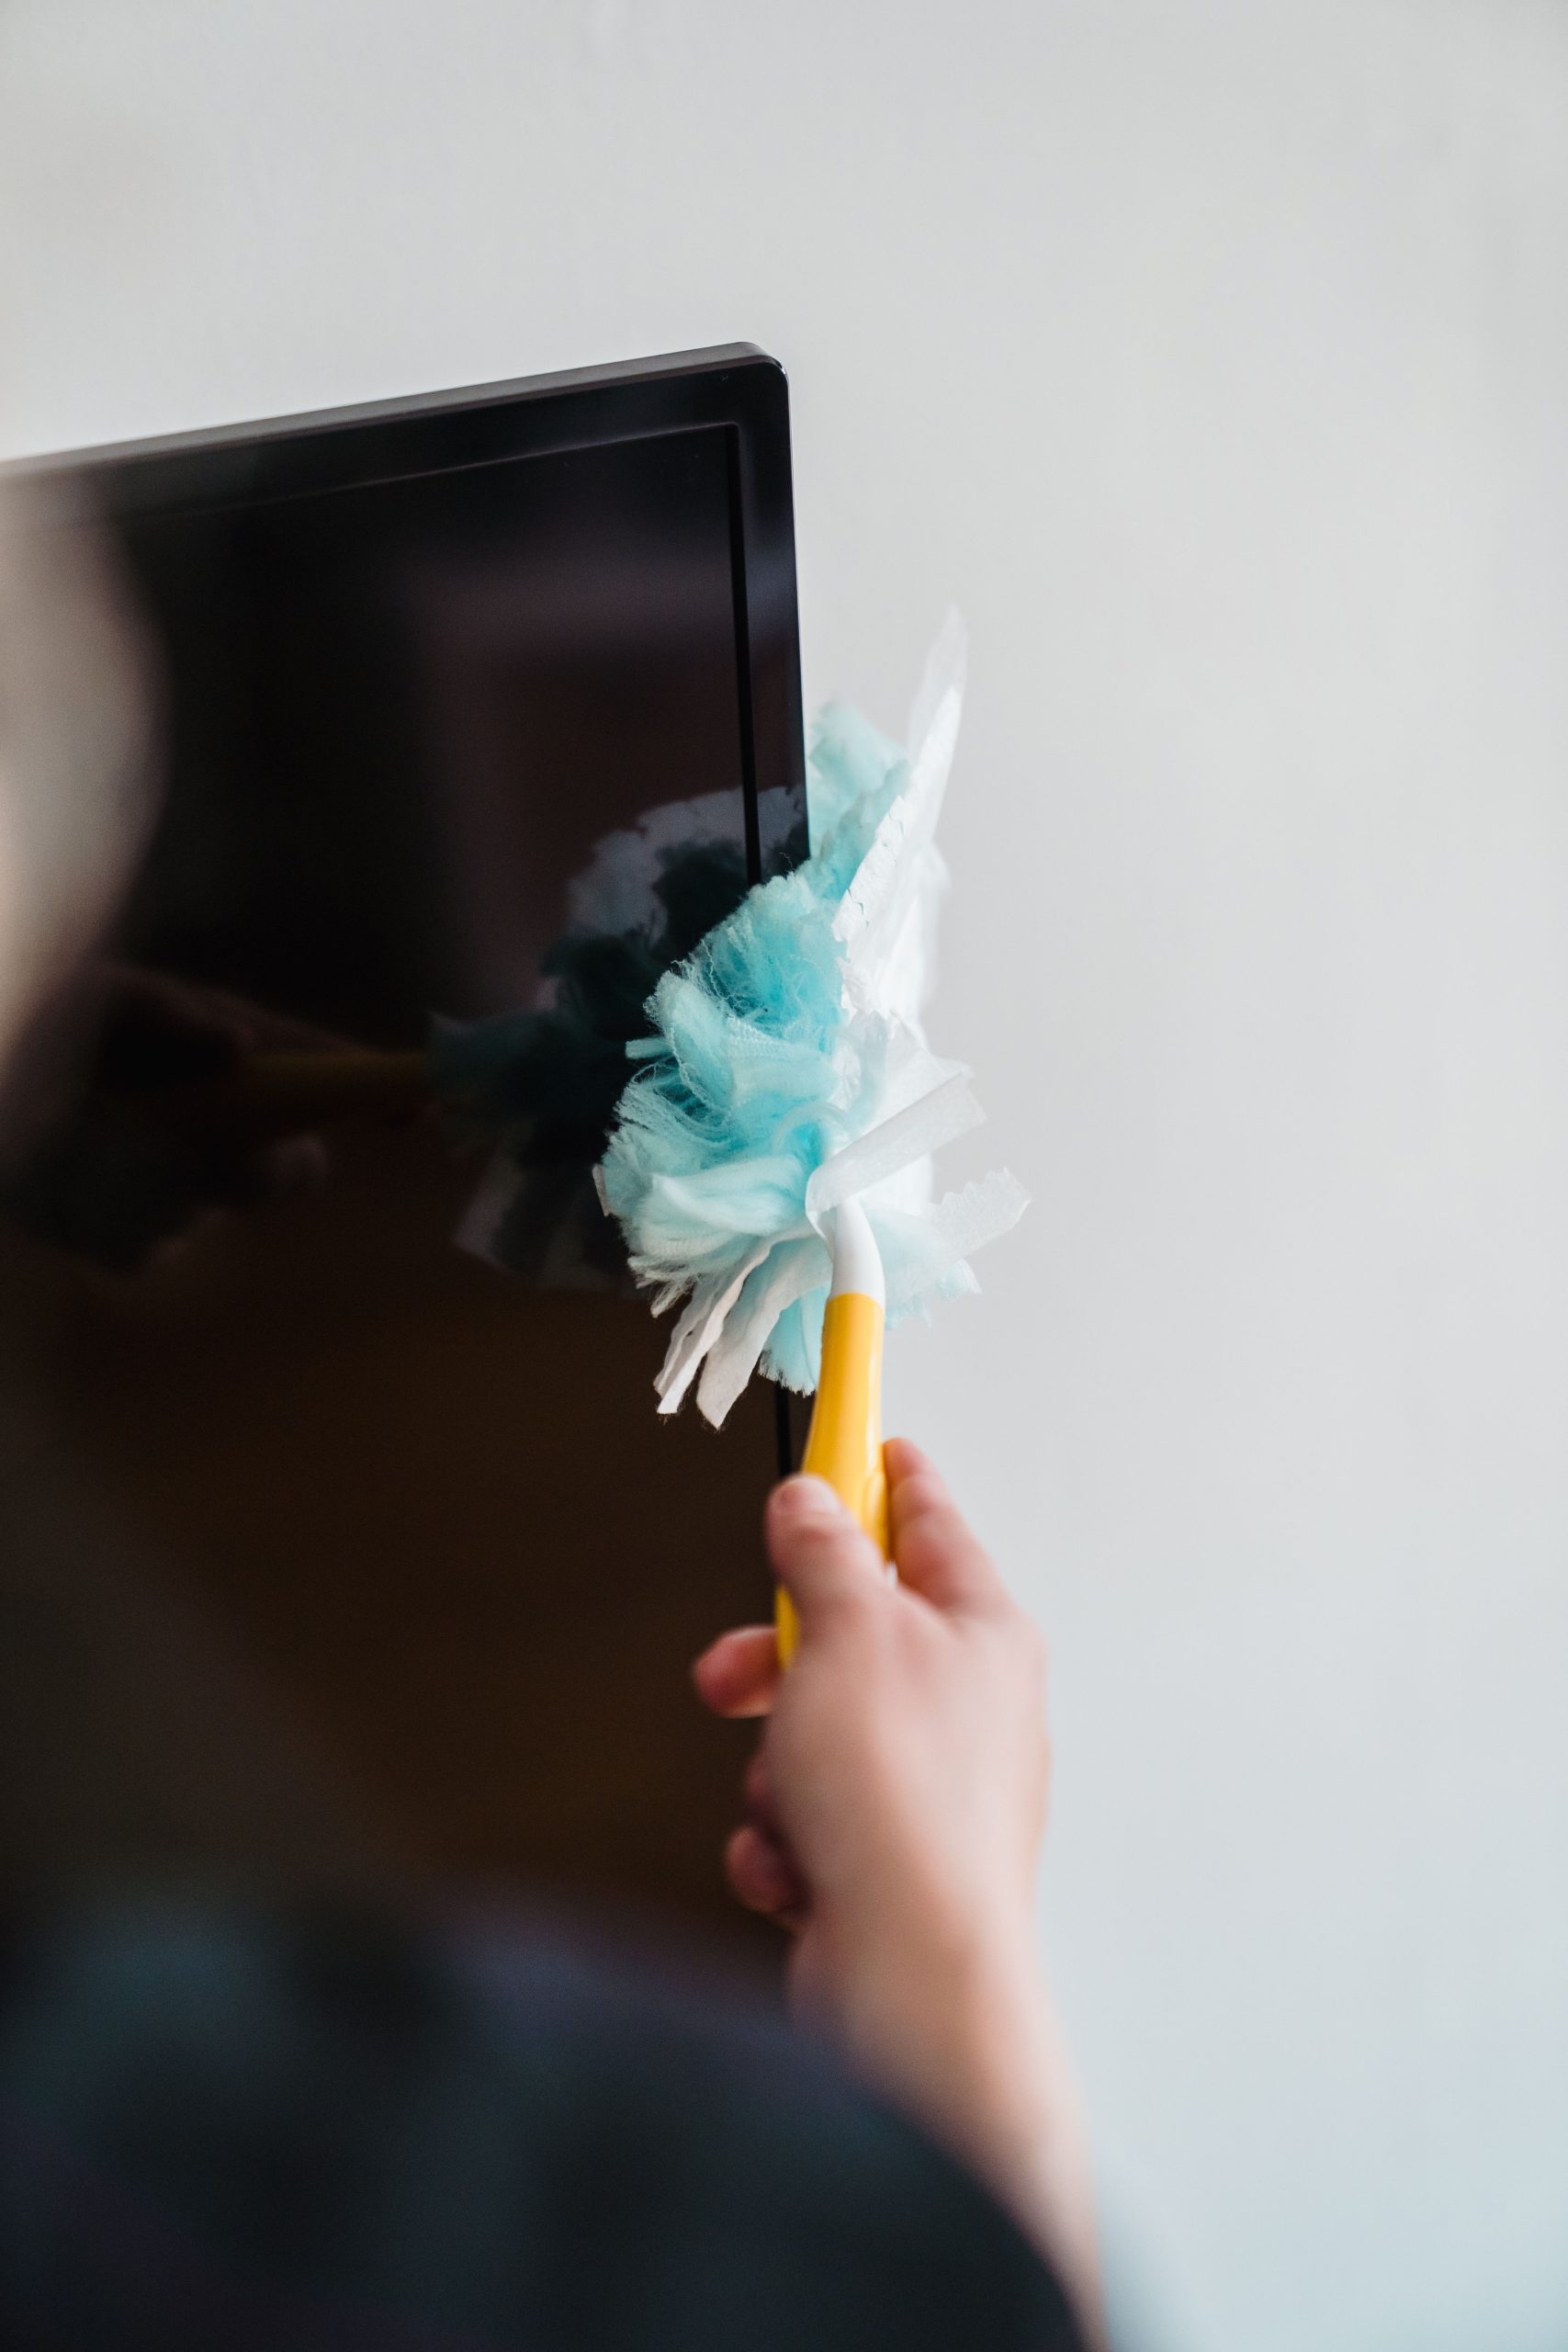
4. Dusting a Flat-Screen TV with a Feather Duster
Okay, let’s have an honest moment. While a fluffy duster is great for grabbing light dust from the frame and body of a television, you should be extremely careful using one on the screen itself. Older or cheaper dusters can have synthetic materials that might cause micro-scratches on delicate anti-glare screen coatings. This is especially true if the duster isn’t perfectly clean and has trapped larger, gritty dust particles from a previous job. For the screen, it’s always safer to use a clean, dry microfiber cloth, like you might use for eyeglasses. The duster is for the less-sensitive parts. Also compare this with Idea #19 for another take.
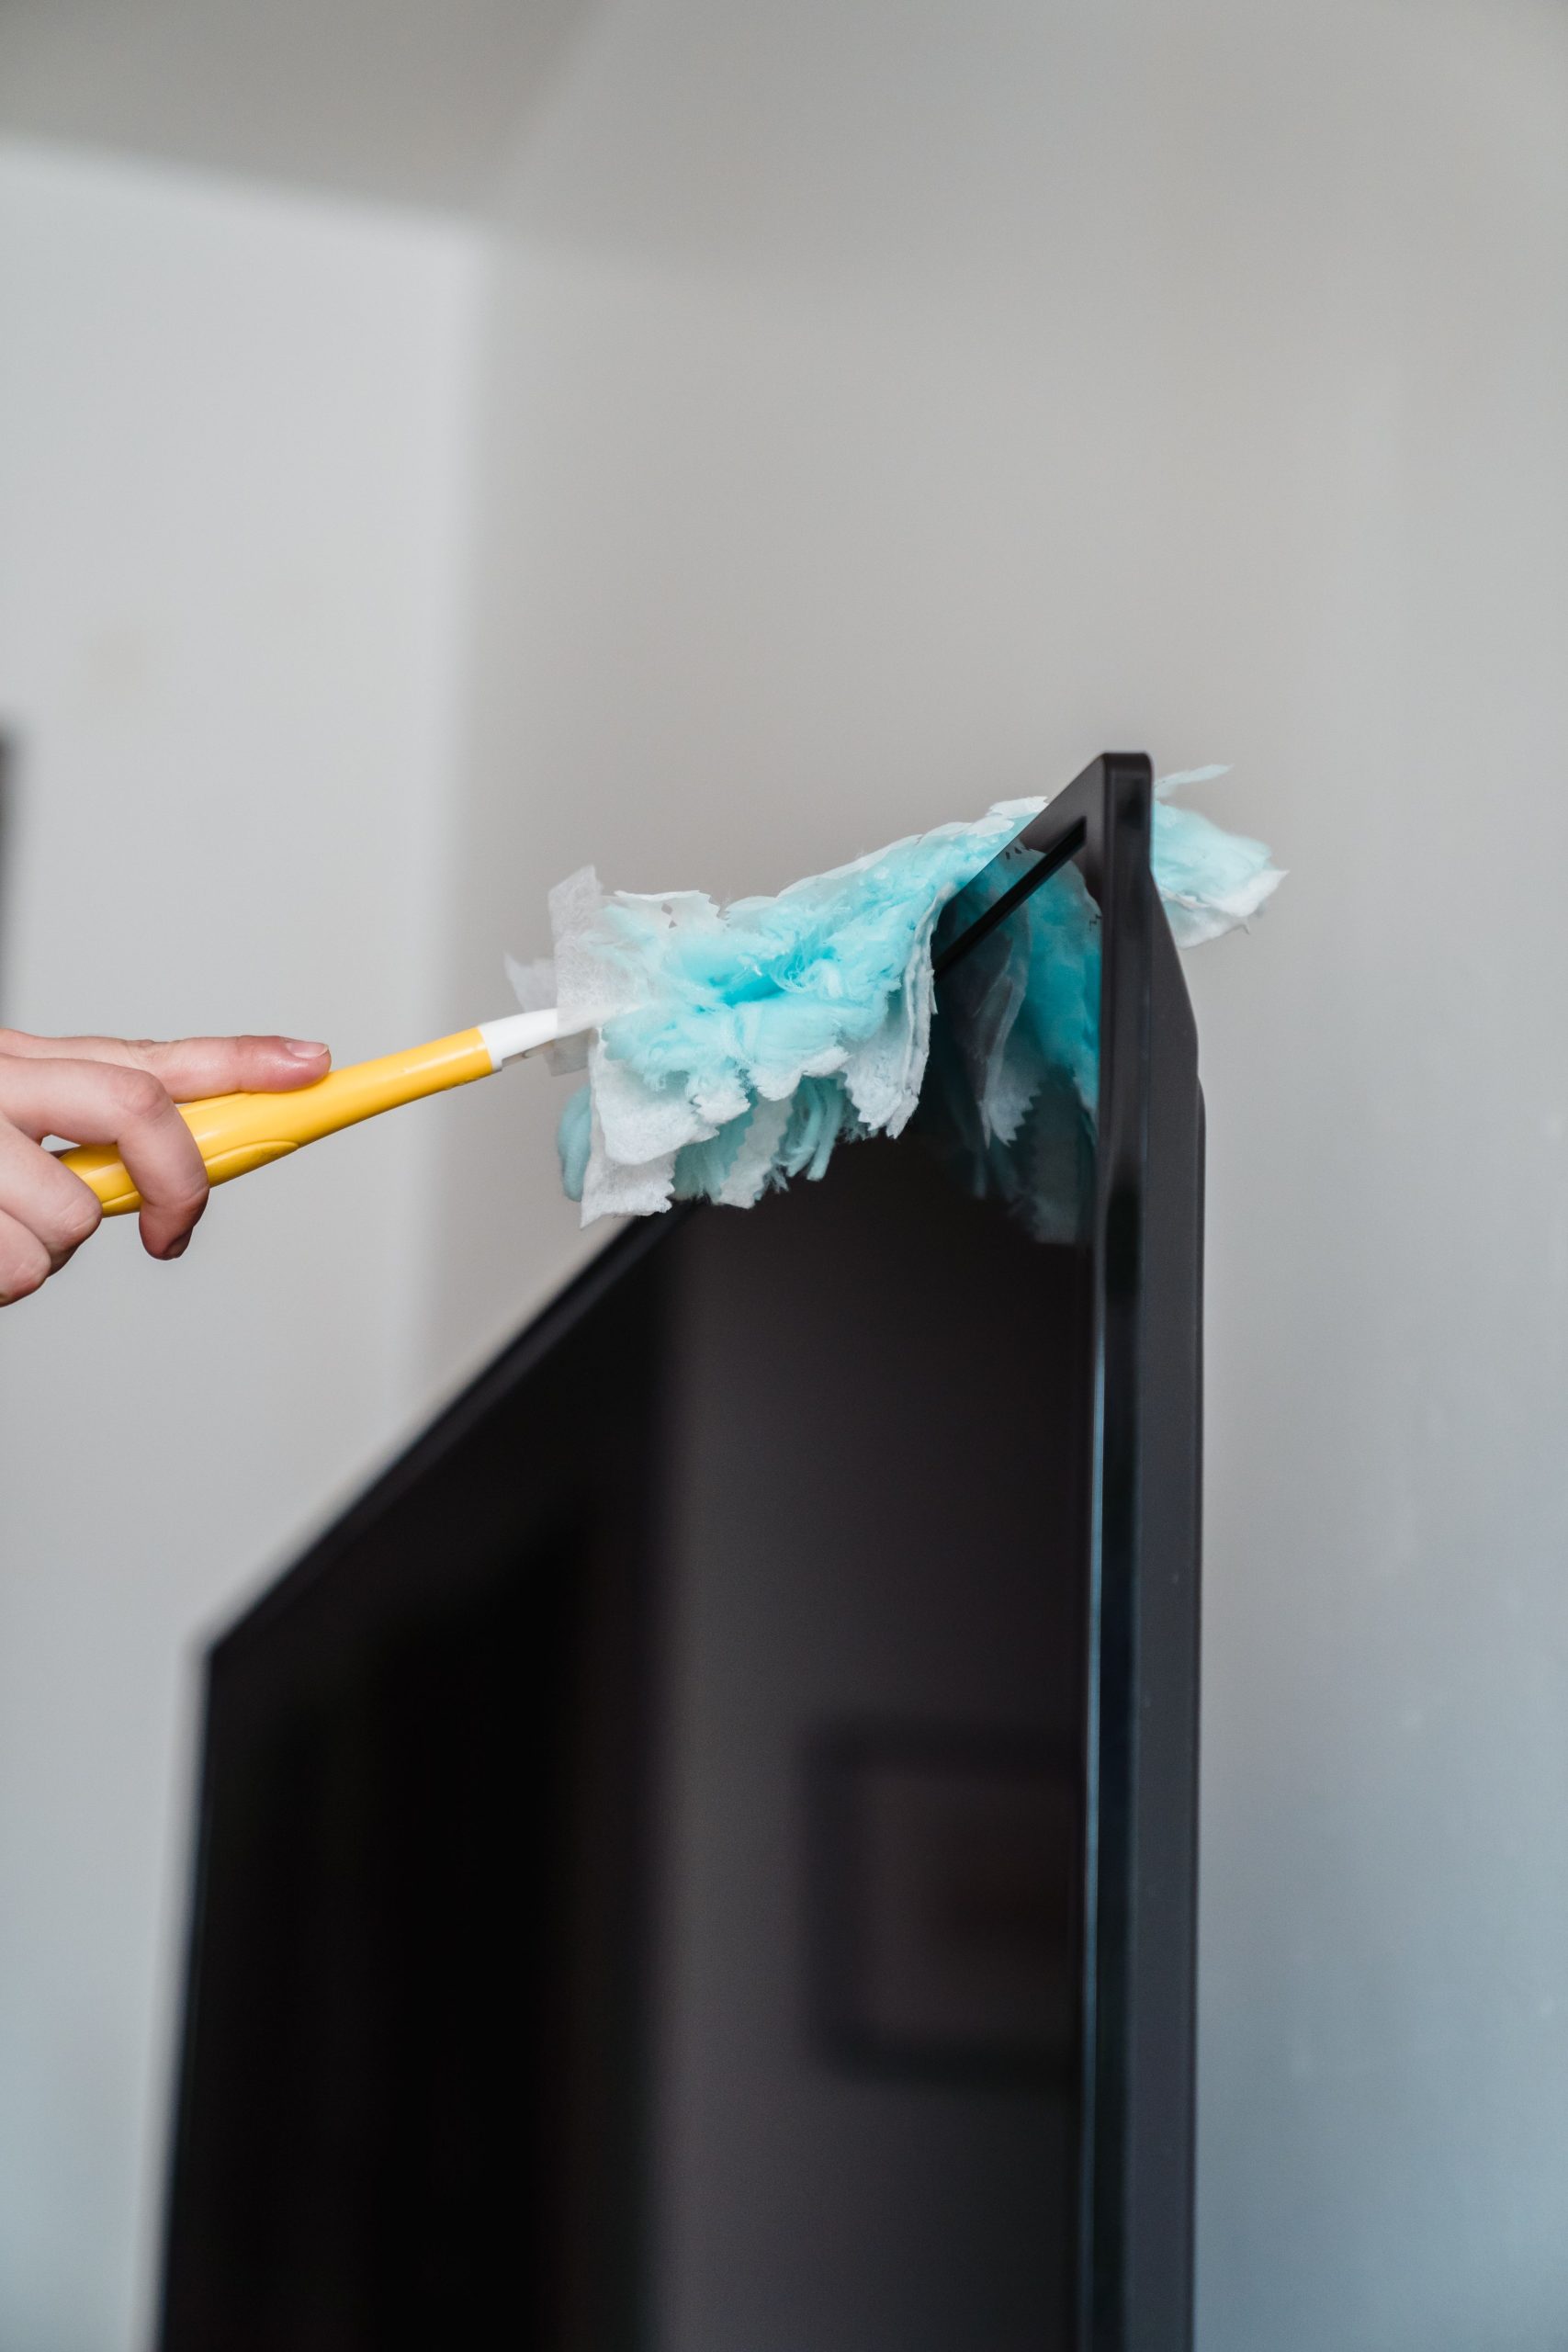
“This method is effective for quick, regular maintenance.”
The feathery tendrils are statically charged, which helps them attract and hold onto fine dust particles rather than just pushing them around. This is perfect for the top and back of the TV, where dust settles and can get into vents. Using a light touch prevents you from pressing dust against surfaces, minimizing the risk of scratching. It’s a fast way to handle one of the most visible dust-magnets in the living room.
5. Wiping Down White Kitchen Cabinets and Black Handles
wiping down your cabinets, especially if they are painted, it’s critical to do a spot test. Not all paint finishes are created equal. Here’s what to check:
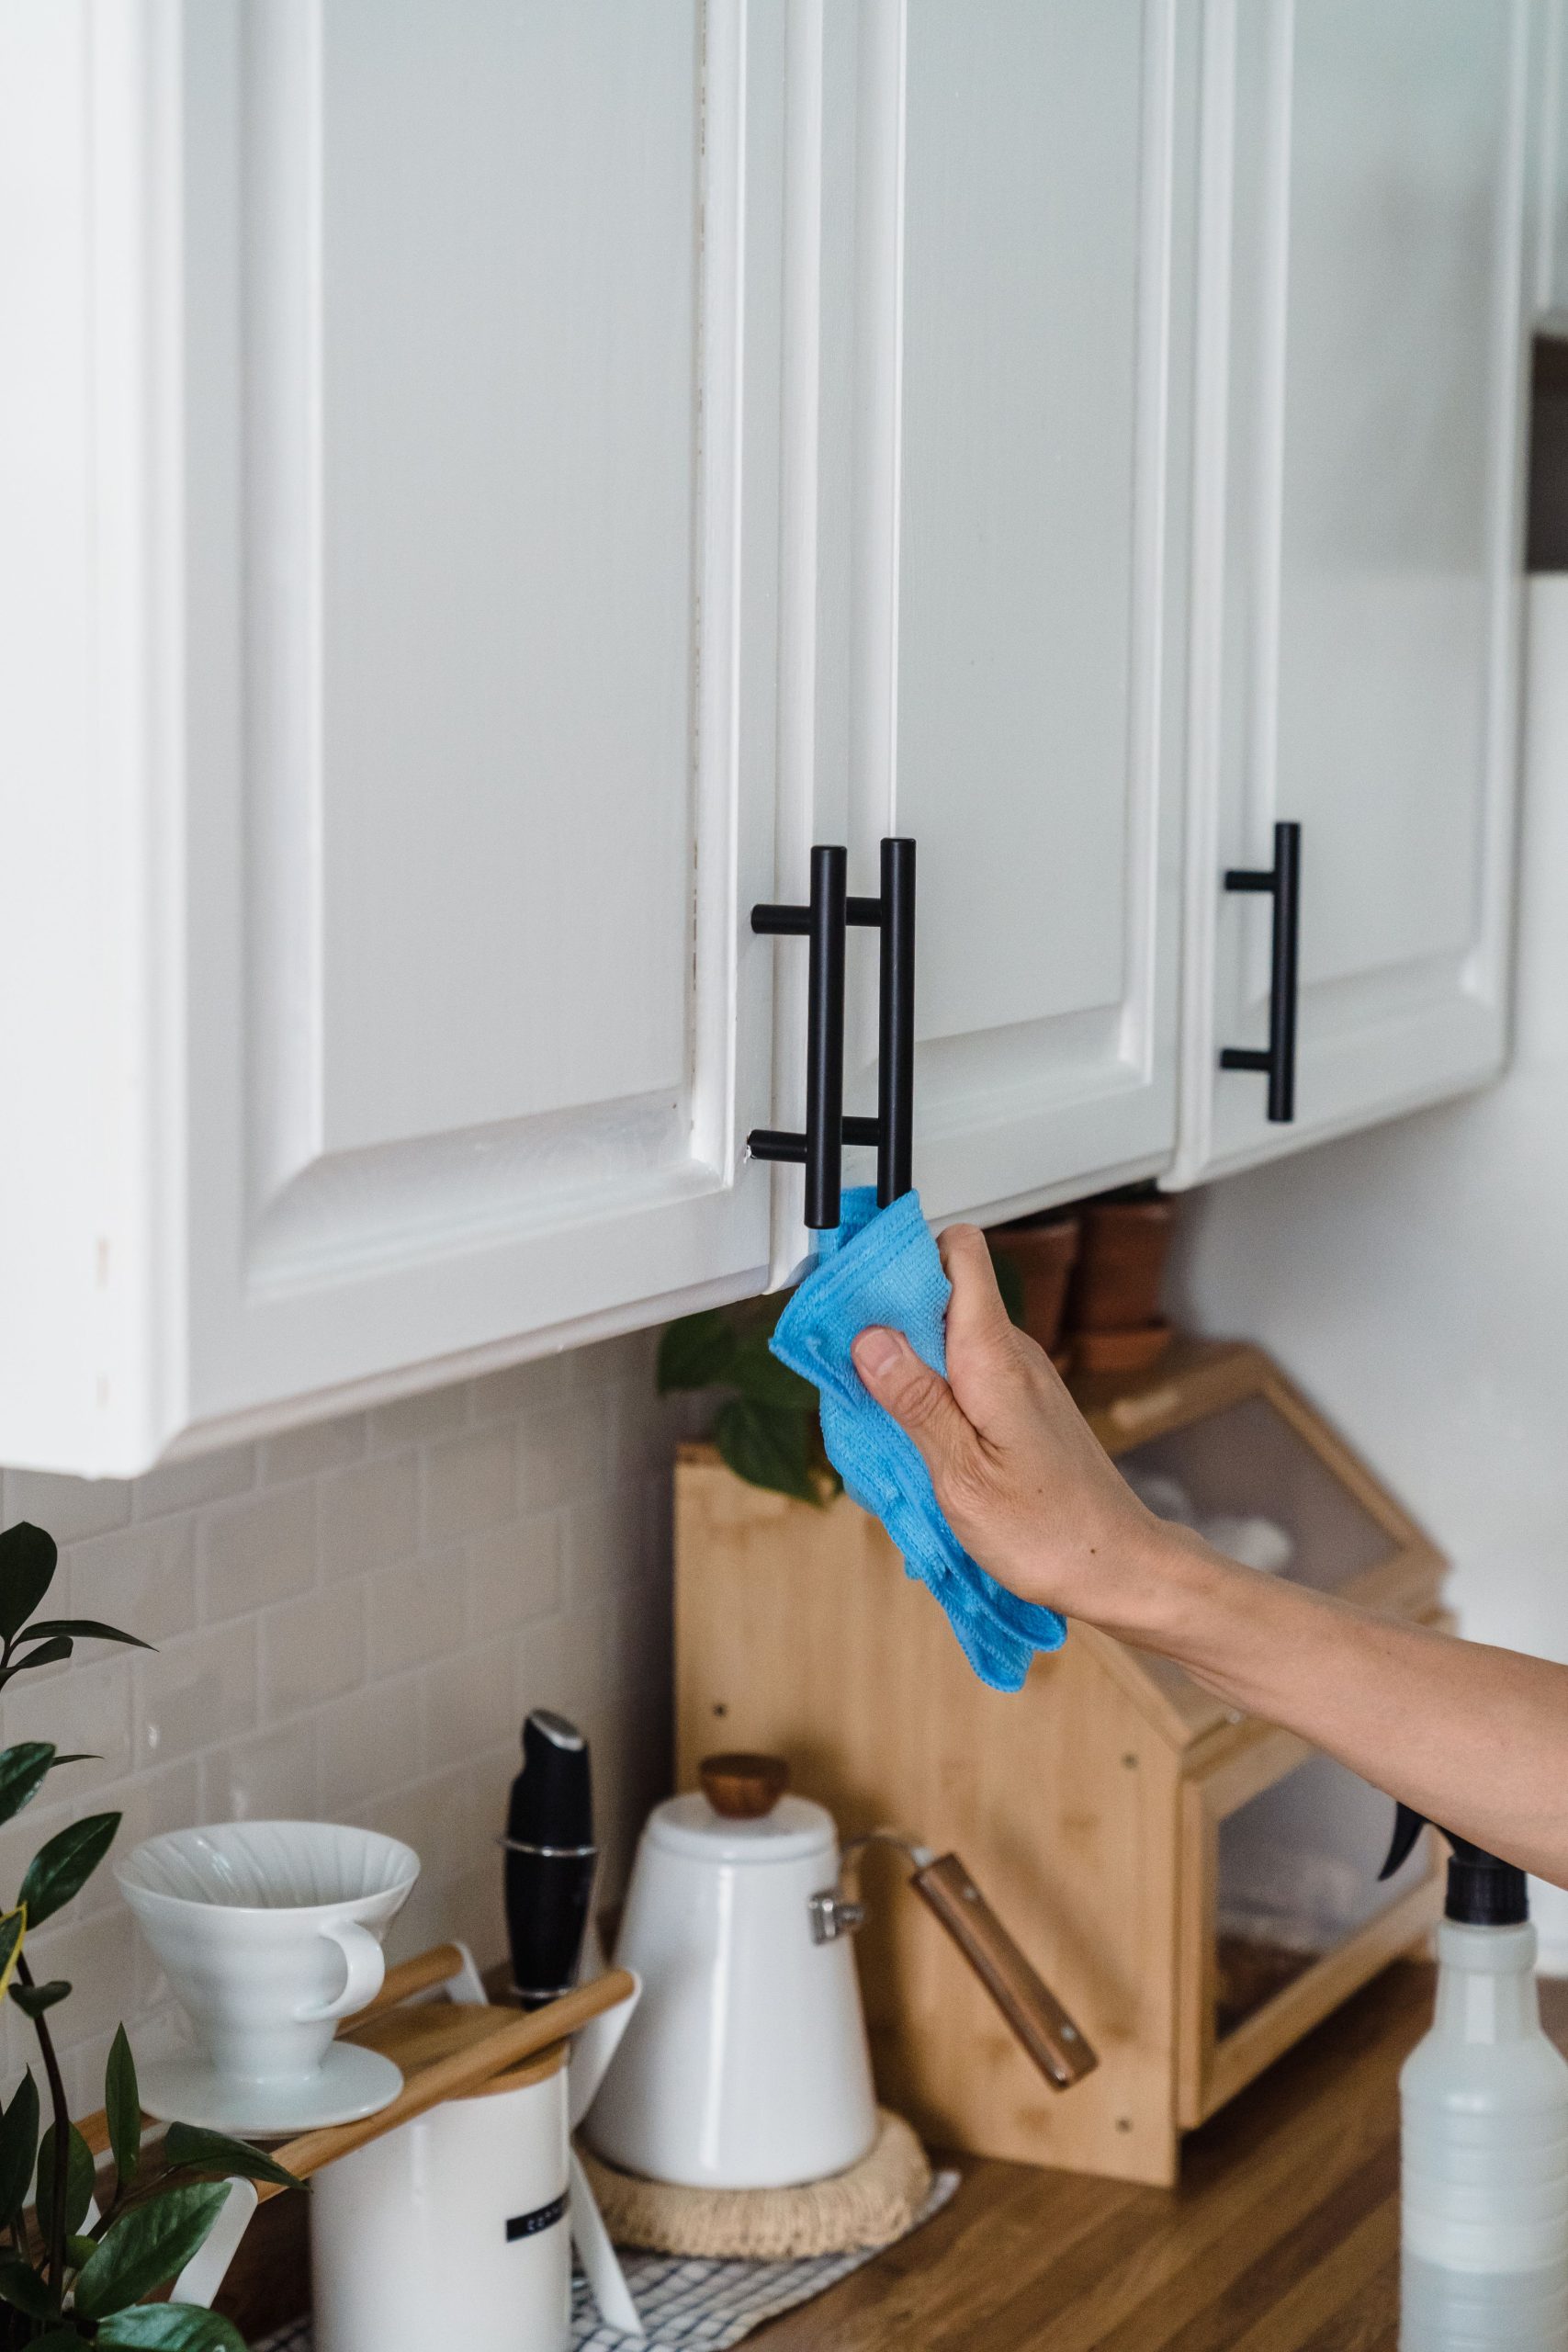
“Find an inconspicuous spot, like the inside of a cabinet door, to test your cleaning solution.”
Apply a small amount of your cleaner with a cloth and let it sit for a minute.
Wipe it away and check if the paint’s color, finish, or texture has changed.
Confirm you’re using a soft, non-abrasive cloth like microfiber to avoid dulling the finish.
Grease is the number one enemy of kitchen cabinets. To create an effective but safe cleaning solution, mix a few drops of a gentle dish soap (like Dawn) into a bowl of warm water. This solution is powerful enough to cut through cooking grease without being harsh on your cabinet finish. For stubborn spots, especially around the handles, you can make a paste of baking soda and water. Apply it with a soft cloth, let it sit for a few minutes, and then wipe it away with a damp cloth. Always dry your cabinets with a clean towel afterward to prevent water spots.
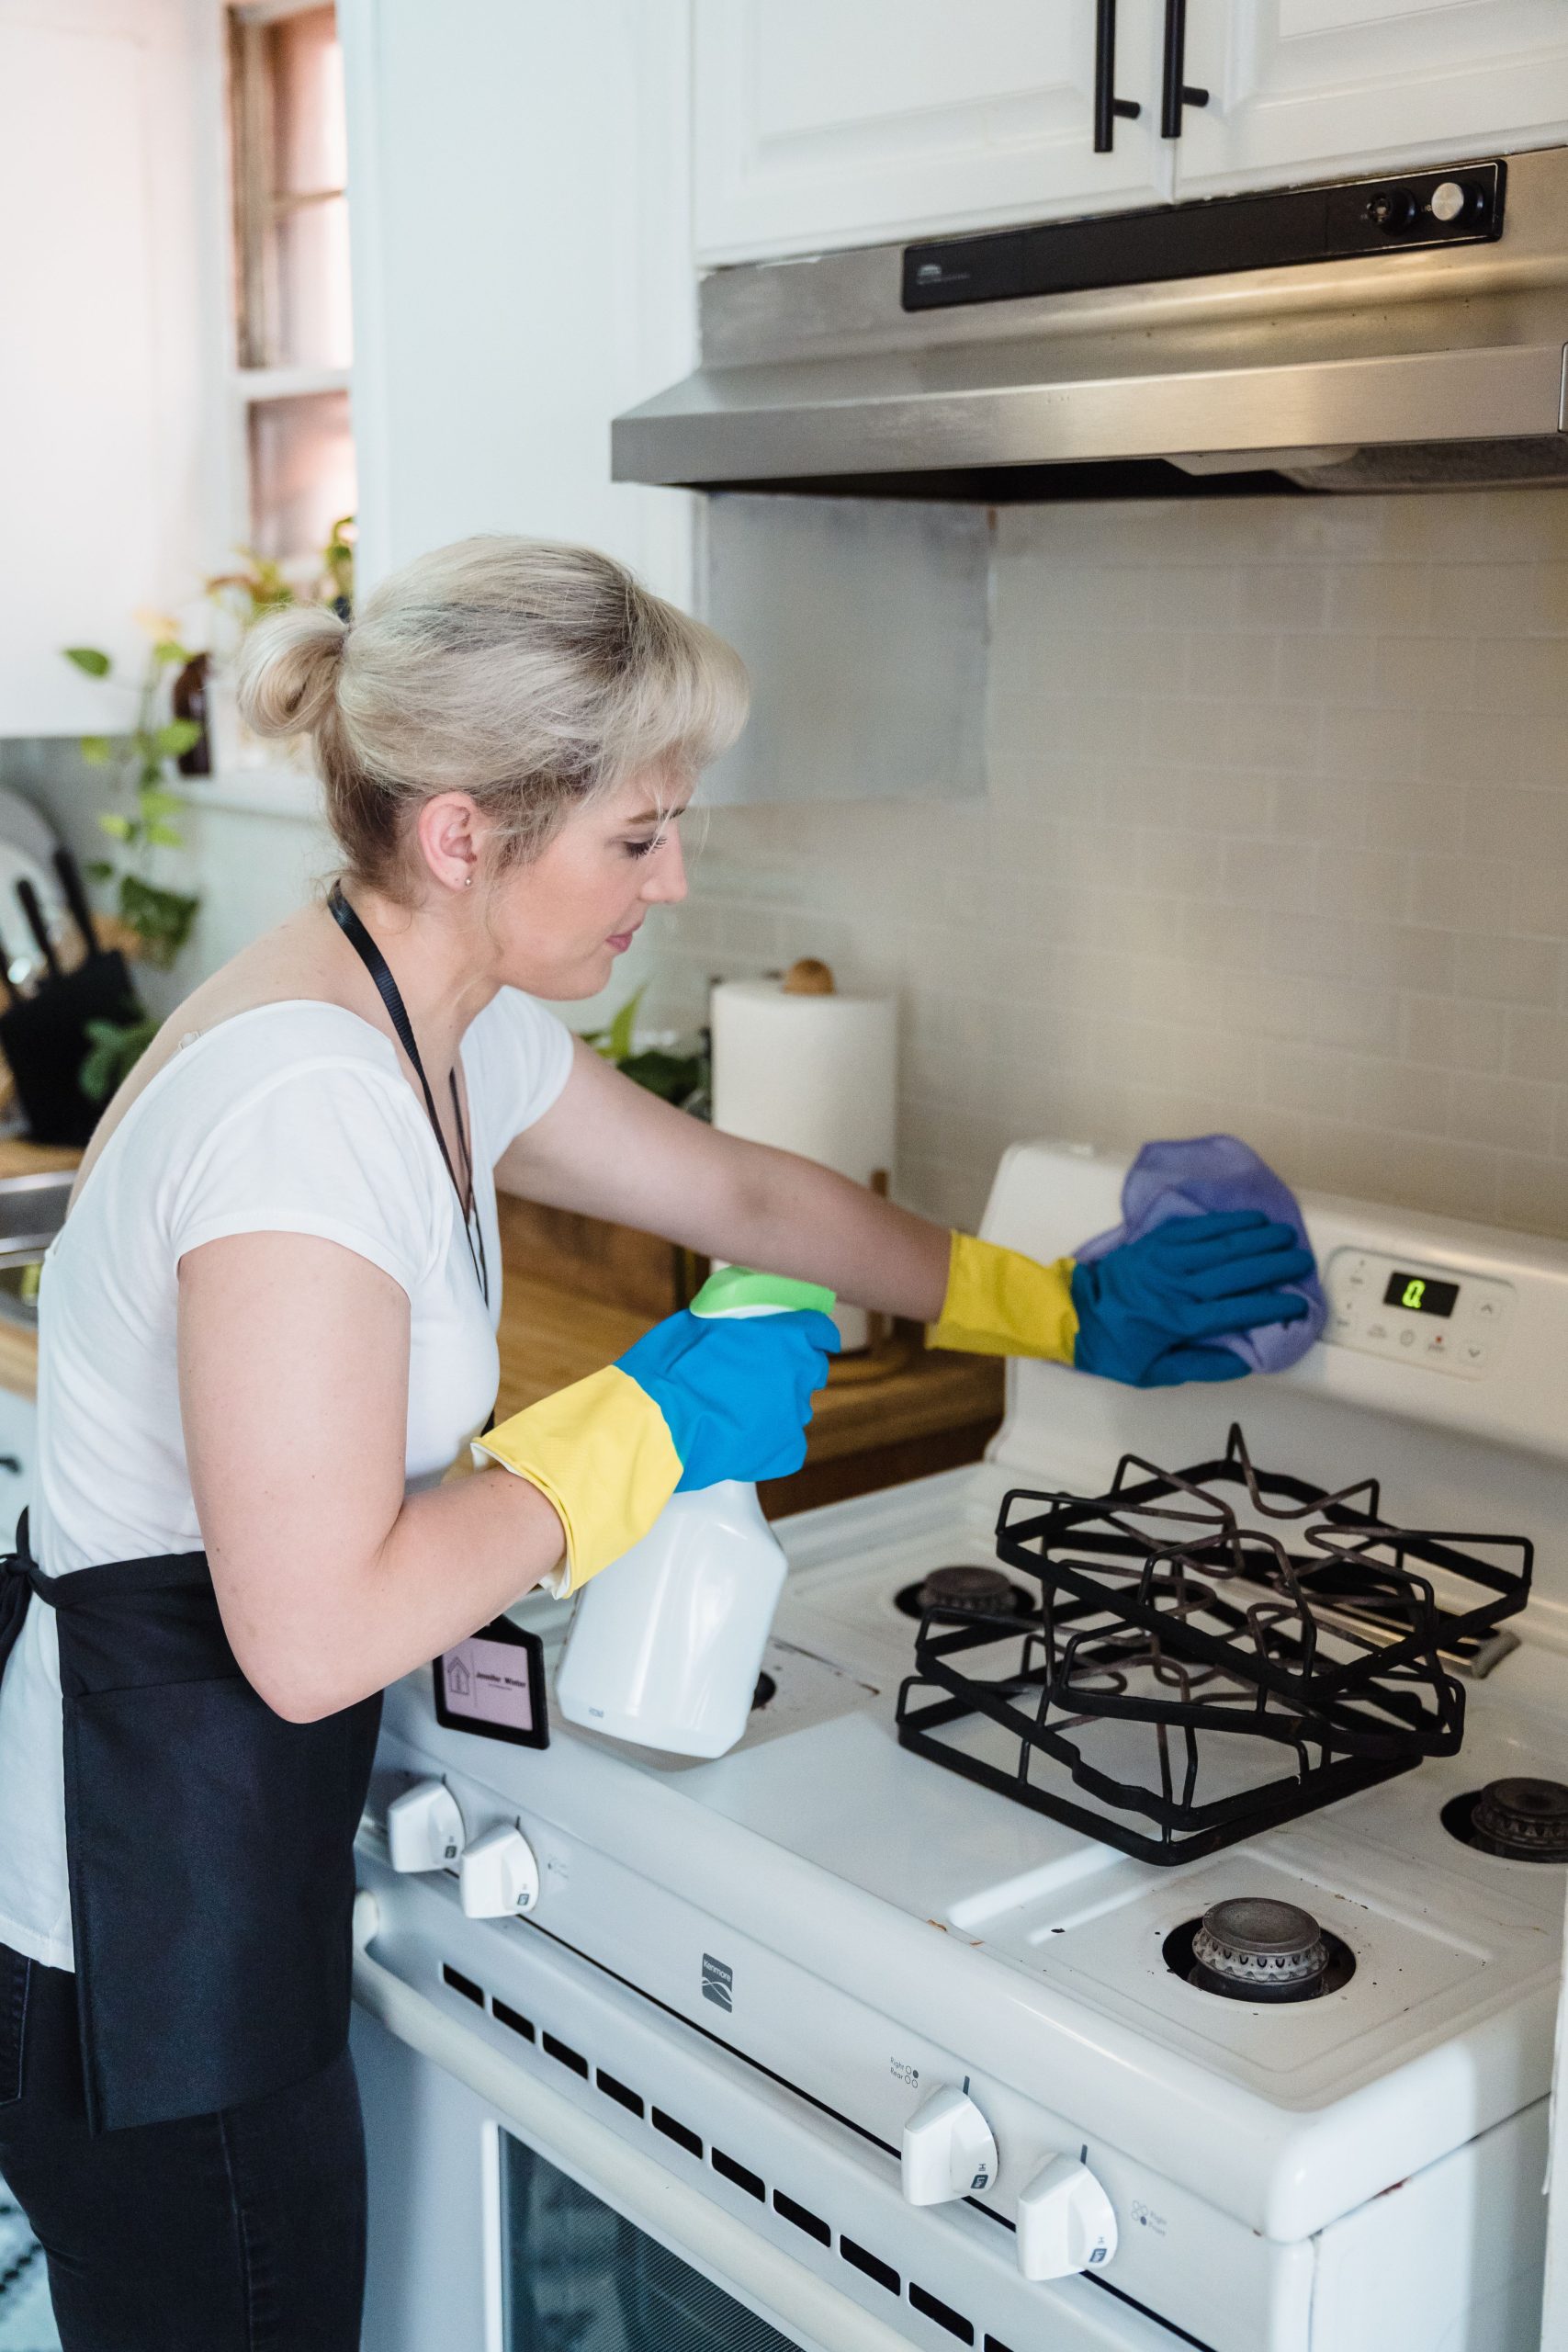
6. Cleaning a White Stovetop with a Spray Cleaner
A white stovetop shows every little spill. Here’s how to get it sparkling again without endless scrubbing. First, remove the black grates and soak them in hot, soapy water in your sink. While they soak, use a silicone or plastic scraper to gently lift off any large, cooked-on food bits from the stovetop. Next, liberally spray the surface with a non-abrasive cooktop cleaner or a 50/50 vinegar-water solution. Let the spray sit for at least 10-15 minutes to dissolve the grease and grime. Finally, wipe everything down with a soft microfiber cloth, moving in a circular motion for a streak-free shine.
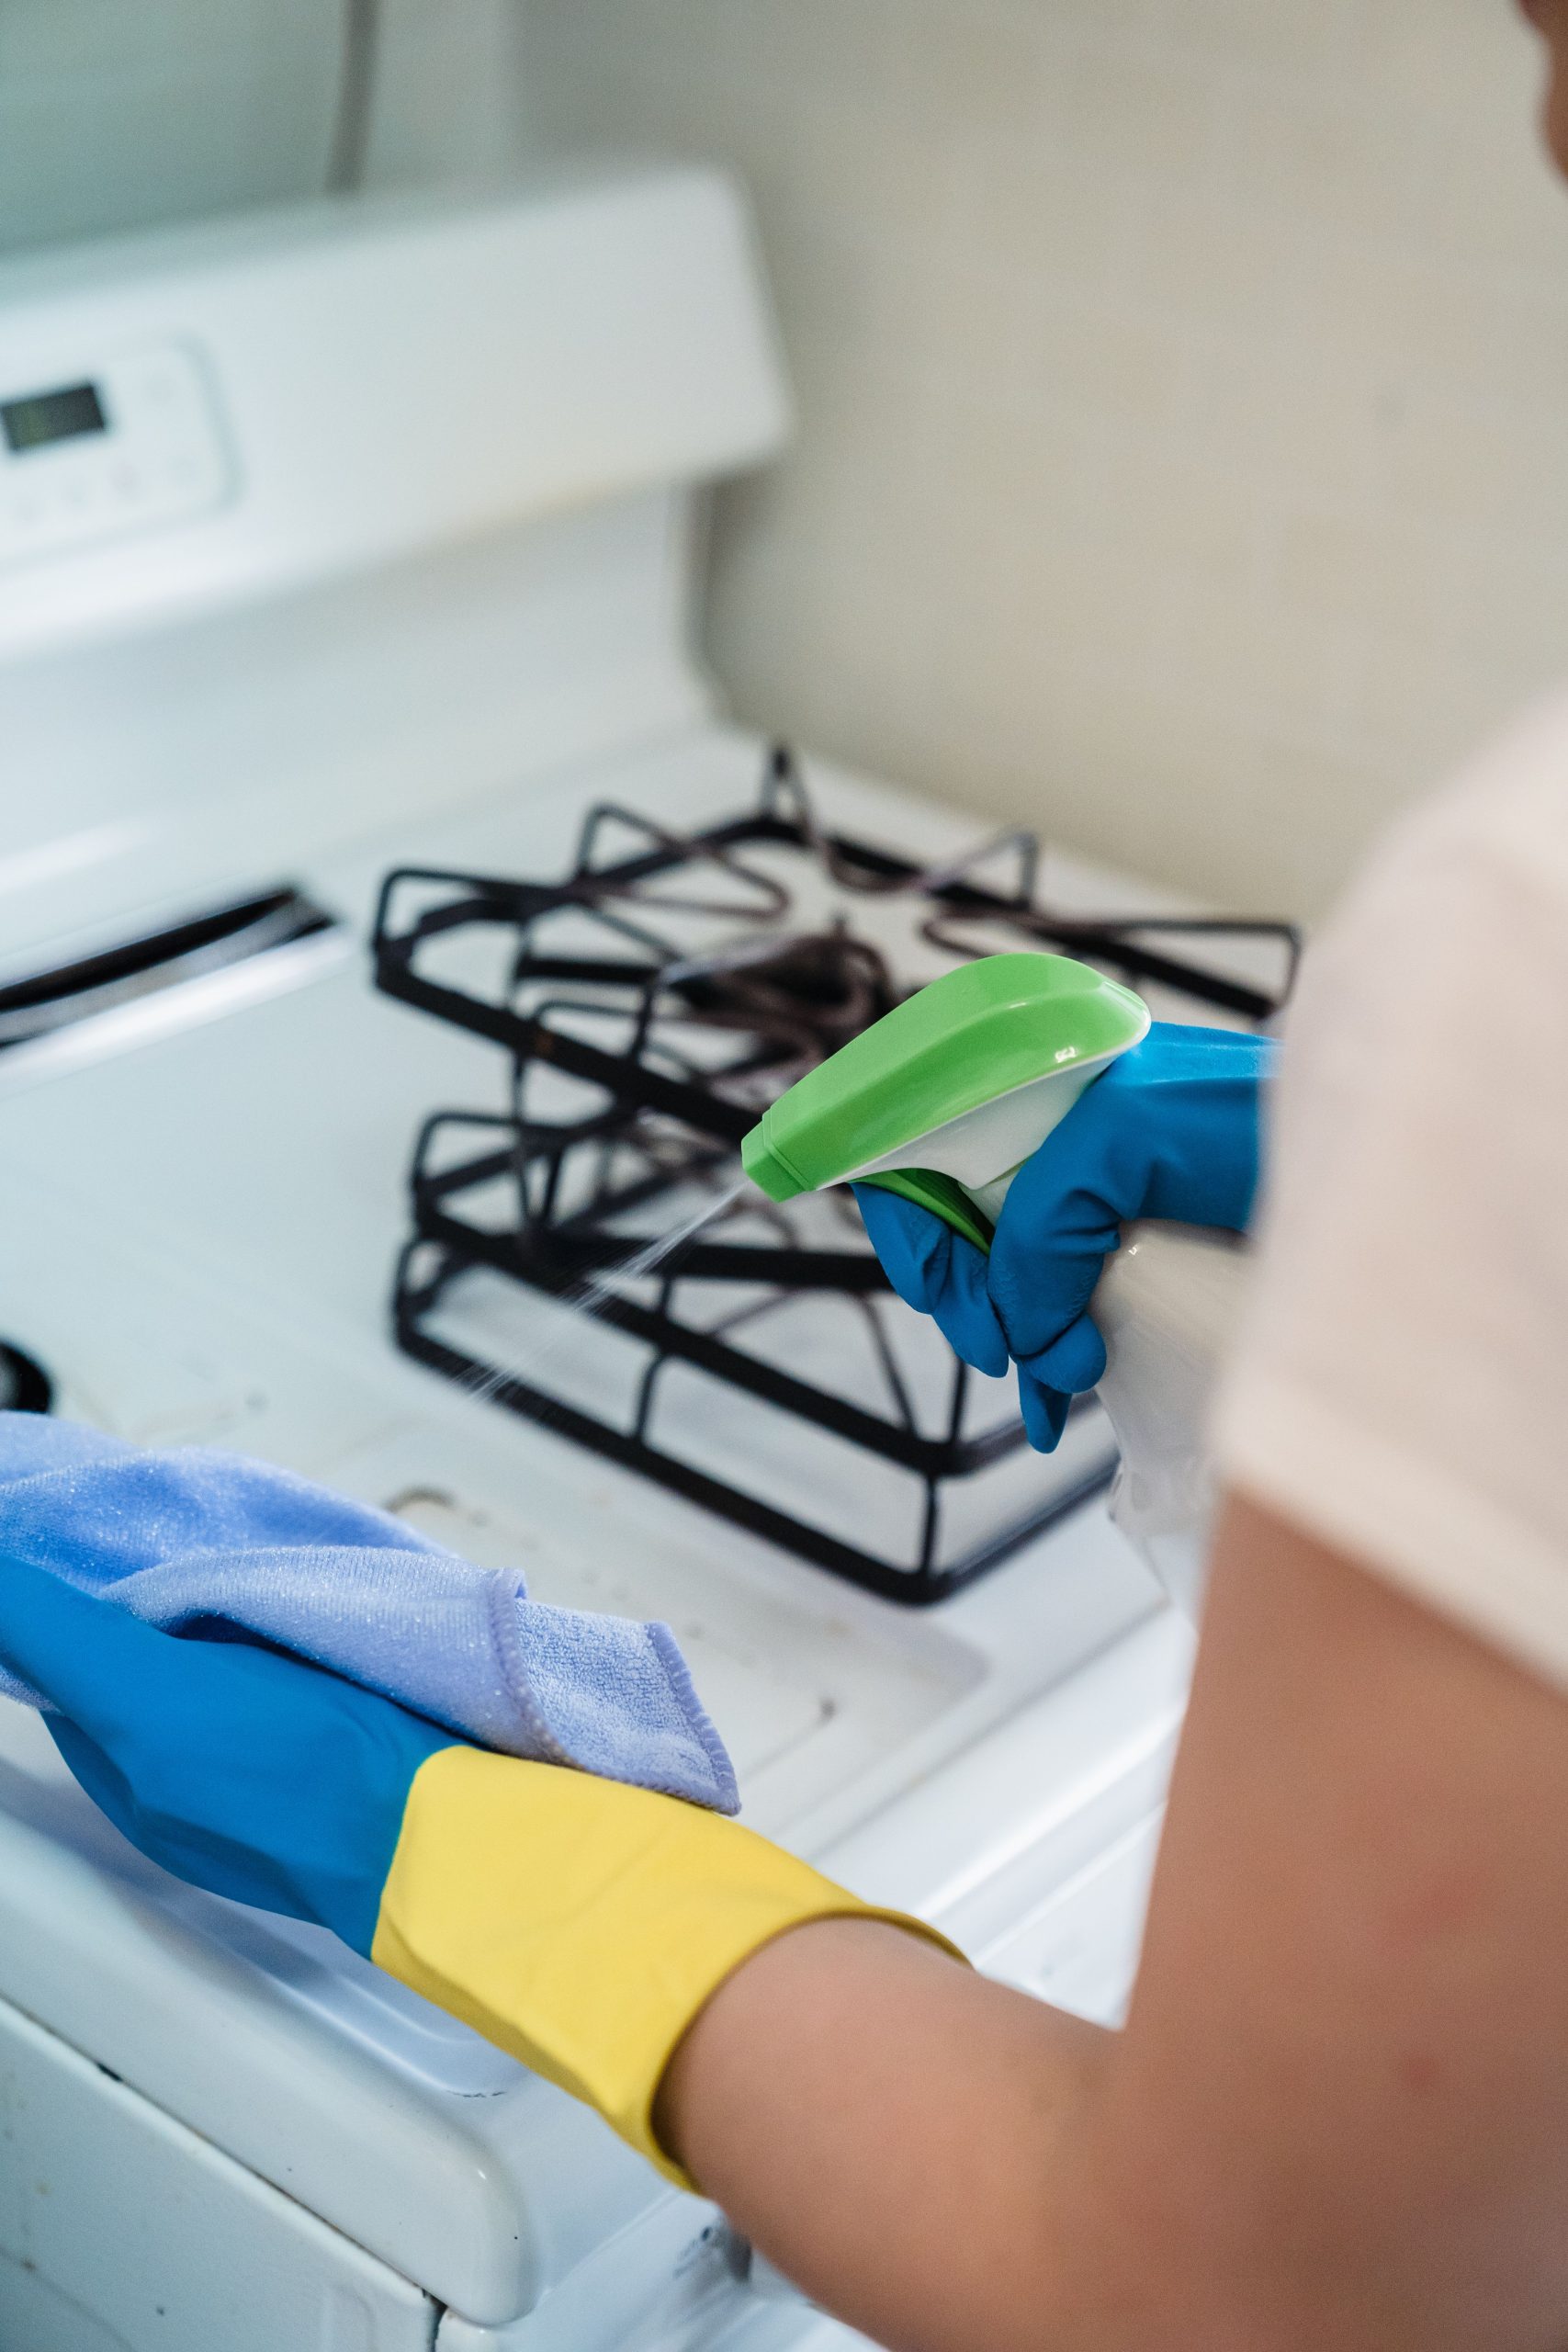
“The key to keeping a white stovetop looking good is consistency.”
Wipe up spills as soon as they happen (and the surface has cooled down!). The longer a tomato sauce or greasy splatter sits on that hot surface, the more it bakes on and becomes a nightmare to remove. Those black grates can be particularly tricky; they often have a matte or porous finish that holds onto grease. A weekly soak is good, but for really baked-on grime, you may need an overnight soak with a specialized oven cleaner. Check your manufacturer’s instructions first, as some harsh chemicals can damage the finish.
7. Wiping Down a Dark Kitchen Range Hood Filter
The single most overlooked—and most important—part of this cleaning task is the metallic mesh filter. You can wipe down the exterior of the hood all you want, but if the filter is clogged with grease, your ventilation system won’t work properly. A clogged filter reduces airflow, meaning more smoke and greasy air stays in your kitchen, coating your cabinets and walls. A clean filter is essential for both air quality and keeping the rest of your kitchen clean.
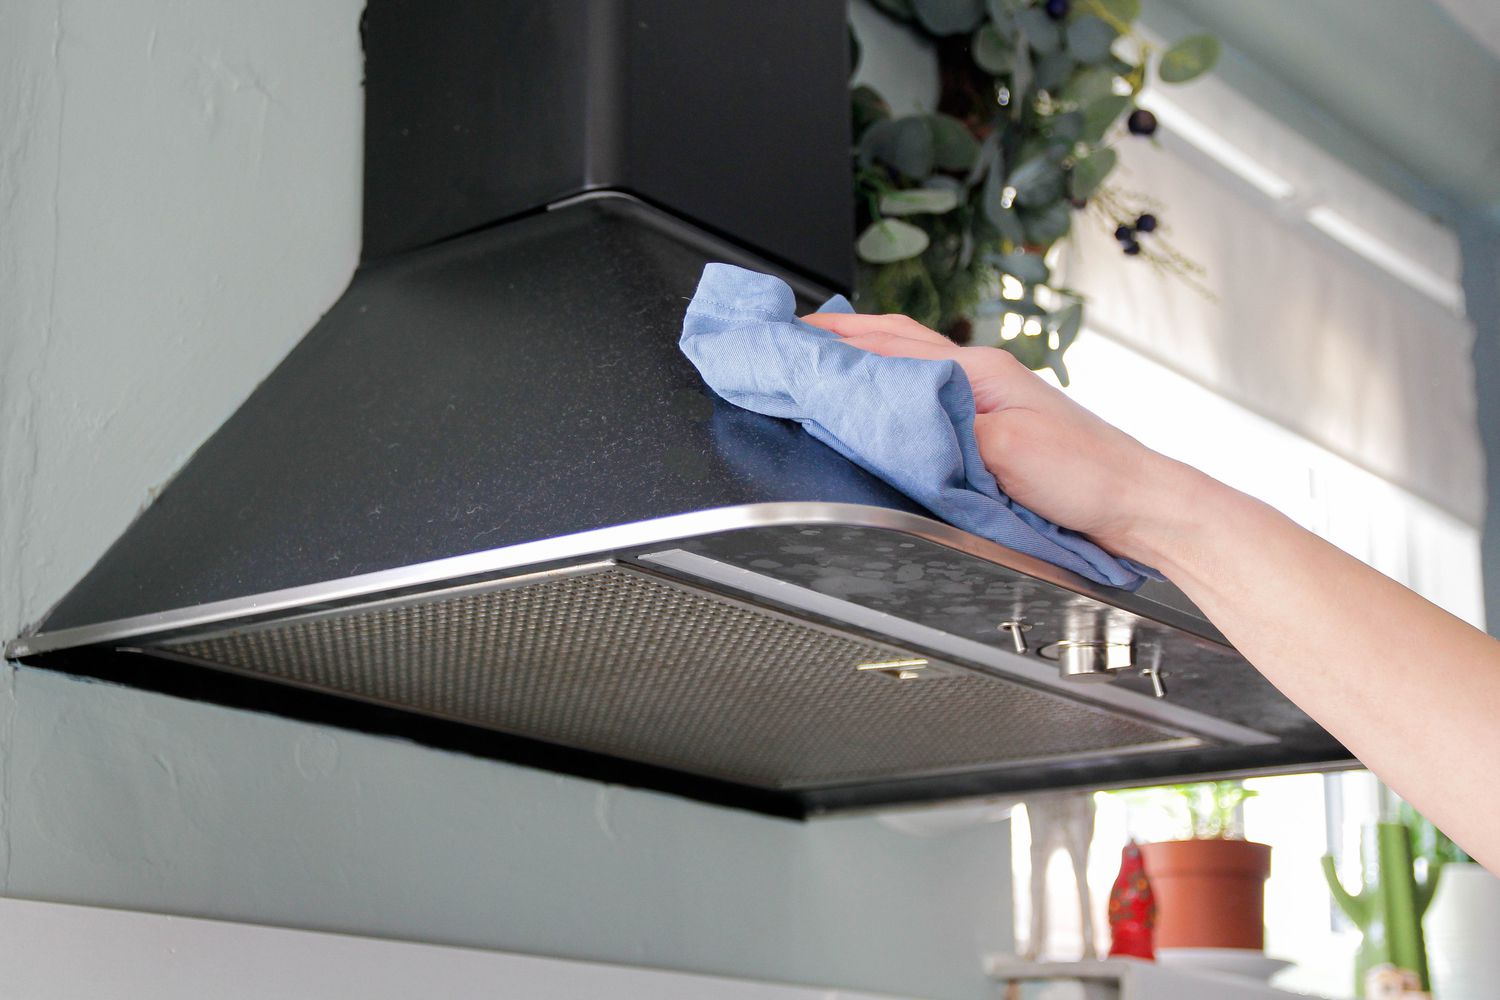
“Think of your range hood cleaning as a formula: 50% filter deep-clean + 40% exterior degreasing + 10% polishing.”
For the filter, pop it out and soak it in a degreasing solution (hot water and dish soap works, but a dedicated degreaser is better) for at least 30 minutes, then scrub, rinse, and dry completely. For the exterior, use a microfiber cloth with the same solution to wipe down all surfaces. For the final polish on stainless steel trim, use a tiny bit of mineral oil on a cloth and wipe with the grain to resist fingerprints and add shine.
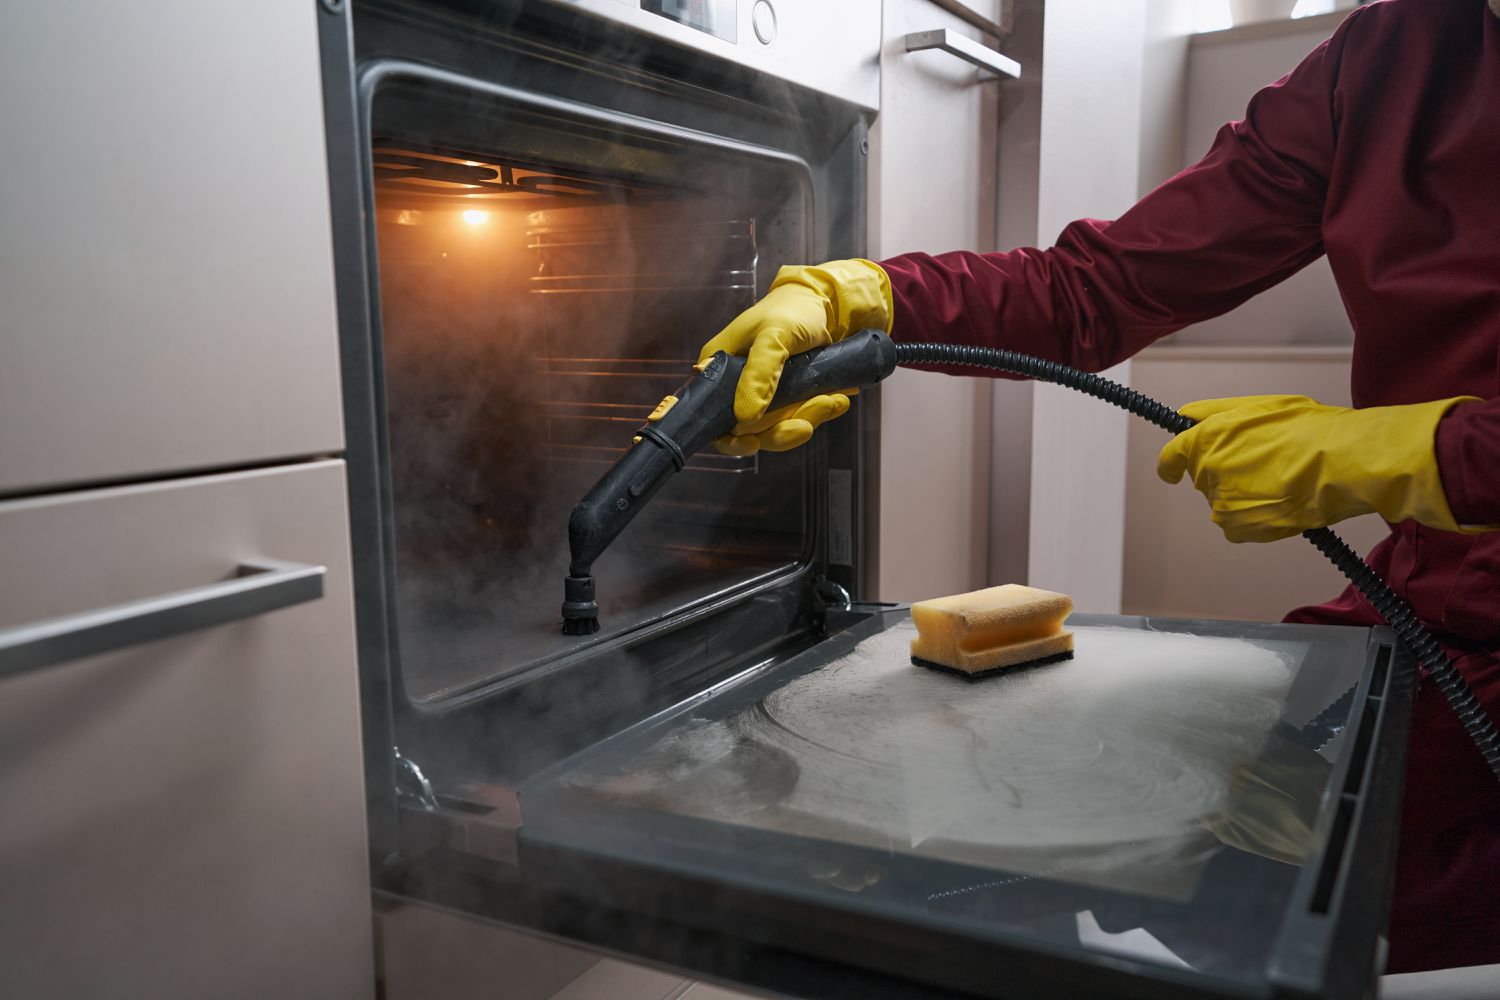
8. Deep Cleaning an Oven with a Handheld Steam Cleaner
Using a steam cleaner is a fantastic chemical-free way to tackle baked-on oven grime. Here’s a look at what it might cost to get set up for this method.
“Handheld Steam Cleaner: $40 – $80
Scrub Brush Attachments: Often included, o”
- Handheld Steam Cleaner: $40 – $80
- Scrub Brush Attachments: Often included, or $10 – $20 for a set
- Heat-Resistant Gloves: $15 – $25
- Microfiber Cloths (pack of 5): $10 – $15
- TOTAL: $75 – $140
- Budget alternative: A bowl of water placed in a hot oven for 20 minutes can create steam to loosen grime for manual scrubbing, costing you pennies.
This method is so effective because it combines heat and water to break down the toughest, most carbonized food messes. The high-temperature steam liquefies grease and softens burnt-on sugars without the need for harsh, fume-filled oven cleaners. The brush attachment provides the agitation needed to lift the grime, while the steam sanitizes the surface. It’s particularly great for reaching into the corners and crevices of the oven that are hard to clean with just a sponge.
9. Scrubbing the Interior Oven Door Glass
That greasy, brown film on your oven door glass can feel impossible to remove. The reason it’s so tough is that it’s not just one spill; it’s countless layers of grease that have been baked on repeatedly. Standard kitchen sprays often won’t cut it. Be very careful with abrasive sponges or steel wool here—it is very easy to permanently scratch the inside of the glass, which will make it look cloudy forever. Start with the least aggressive method first and only escalate if needed. And don’t forget to lay a towel on your floor to catch any drips!
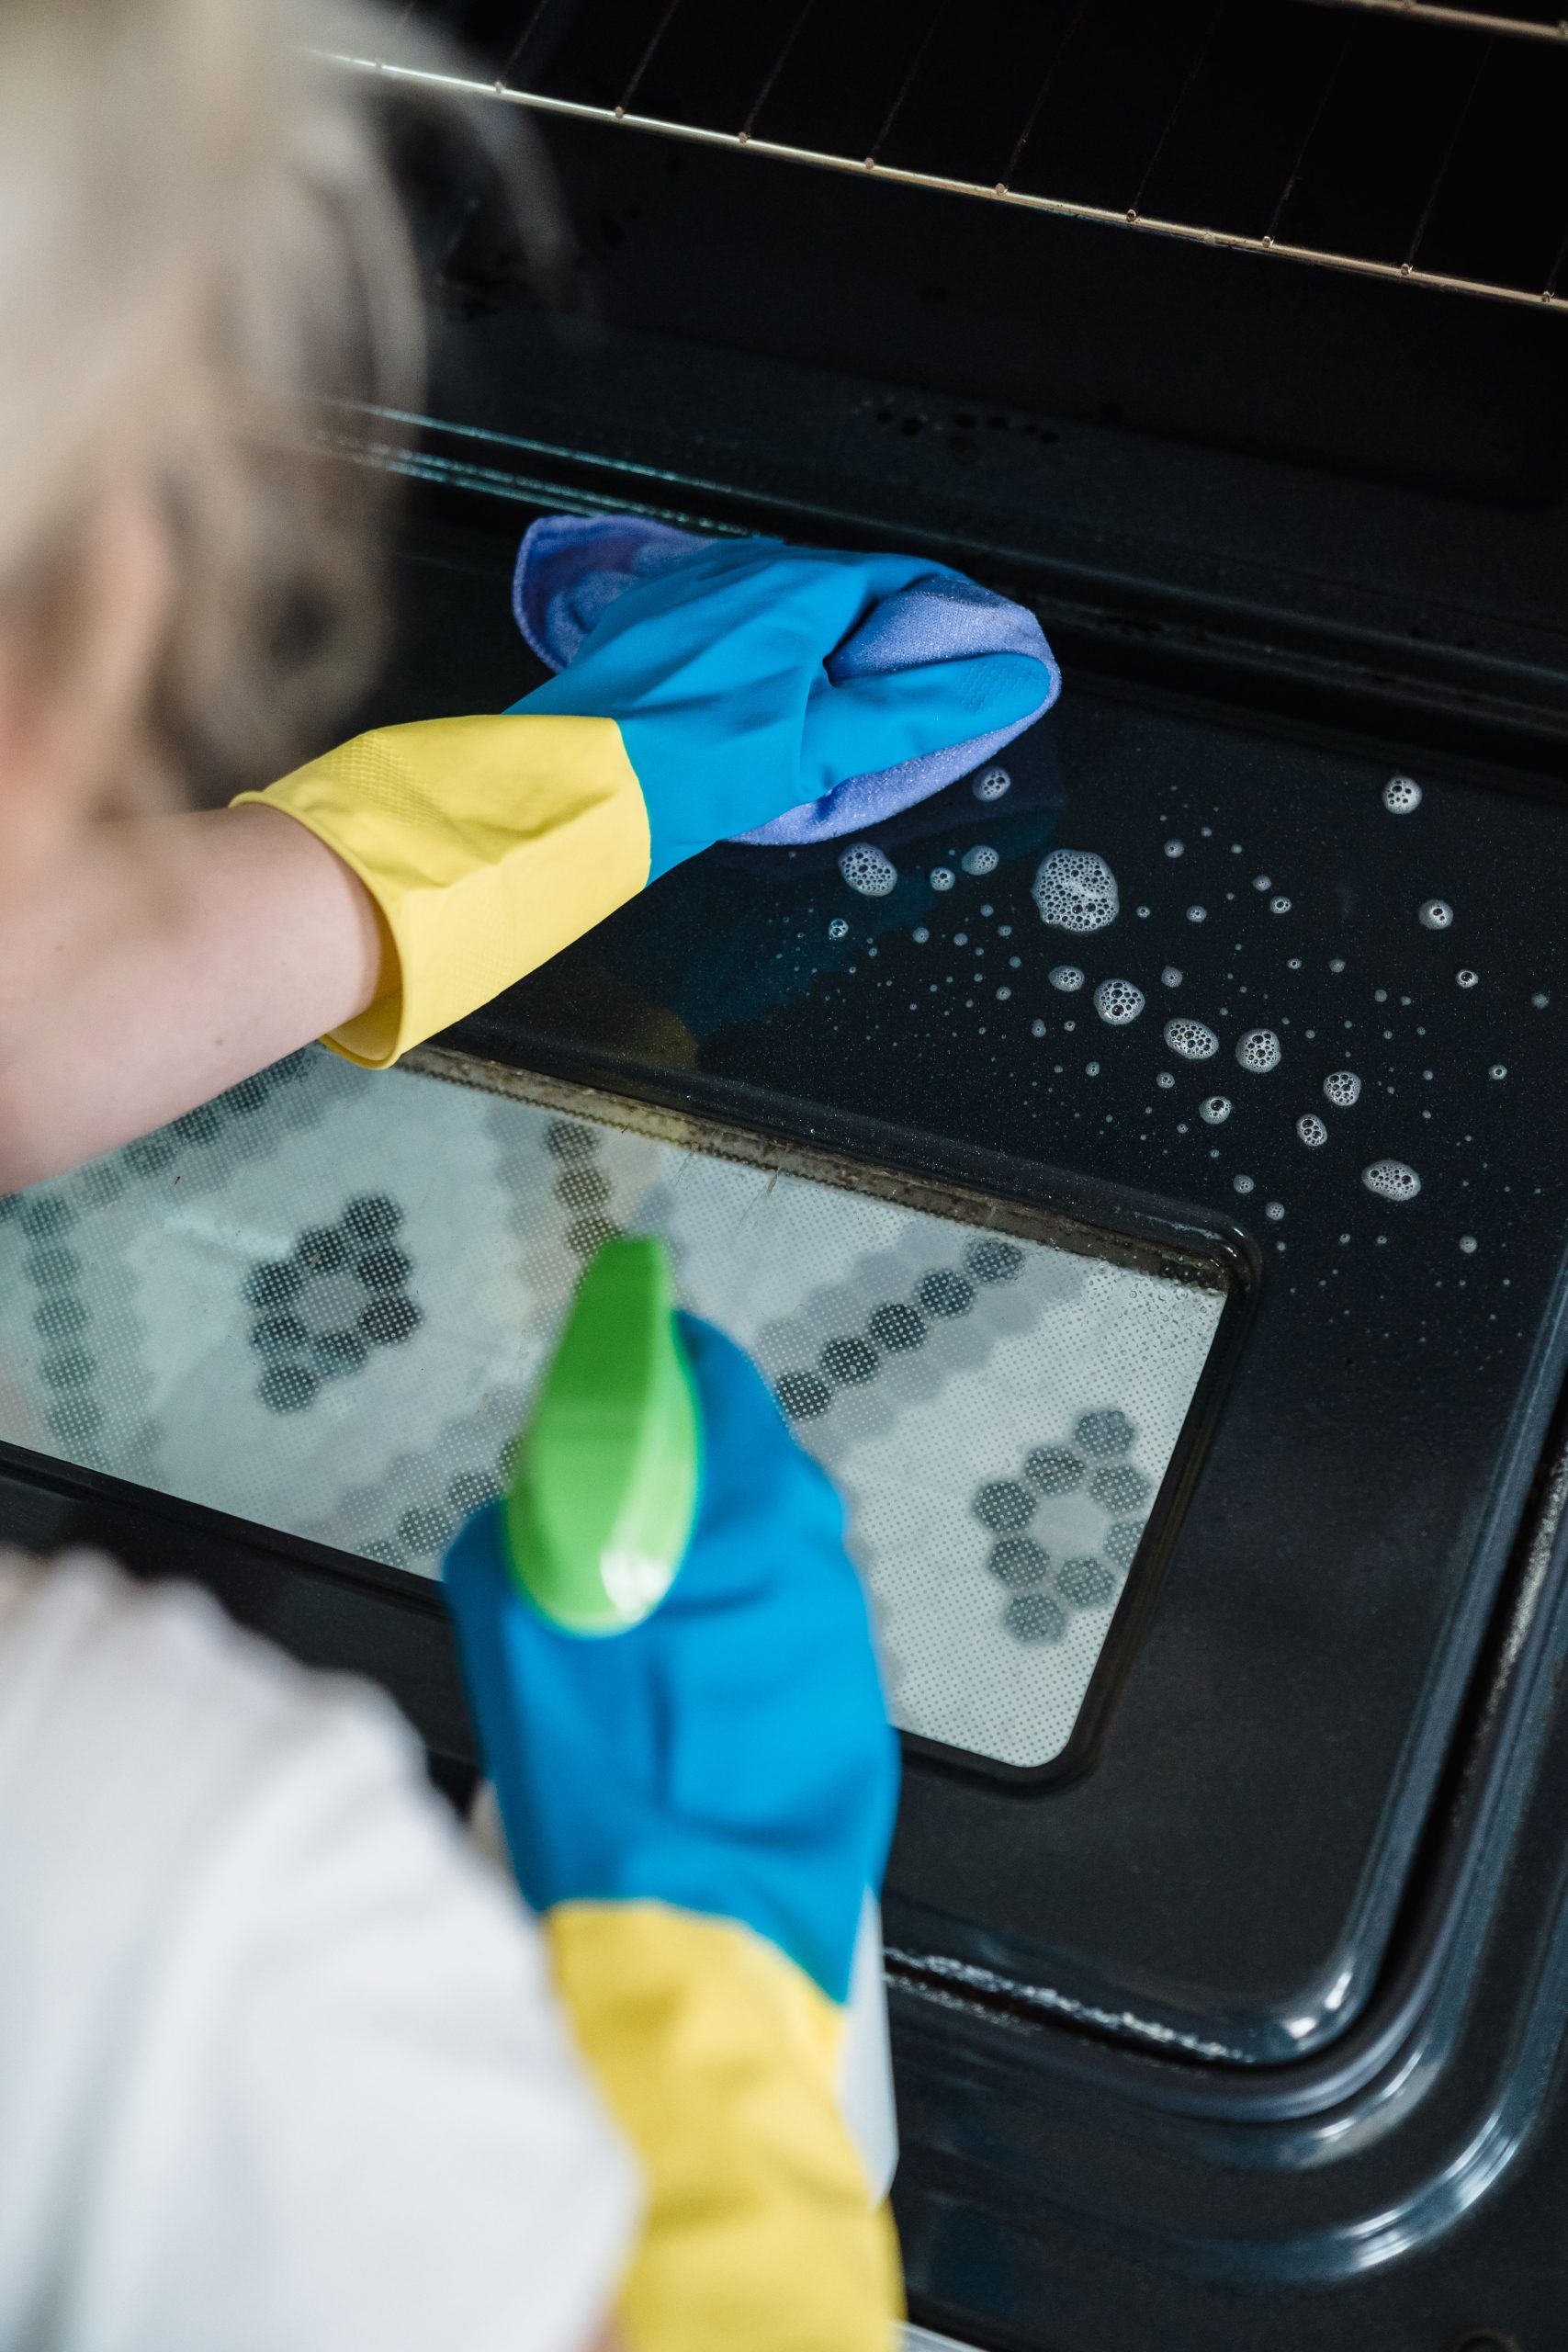
“For a surprisingly effective and gentle solution, create a paste using baking soda and a small amount of water.”
Apply this paste generously all over the interior glass. Let it sit for at least 20-30 minutes (an hour is even better). The baking soda will work to break down the grease without scratching the glass. After it has sat, use a non-scratch scrub sponge or a microfiber cloth to wipe it off. You’ll be amazed at how much grime comes away with it. For an extra boost, you can spray a little white vinegar on the paste before scrubbing to create a fizzing reaction. This method also works wonders on those grimy racks, as seen in Idea #24.
10. Cleaning the Inside of a Microwave Door
The part of the microwave everyone misses is the inside of the door, specifically the perforated screen area. Food splatters get baked into those tiny holes and are often missed during a quick wipe-down. But cleaning this area is what makes a microwave look truly, deeply clean. It blocks your view of the food cooking and can hold onto old food smells. Focusing on this one spot, in addition to the floor and walls, elevates the entire job from a quick wipe to a proper clean.
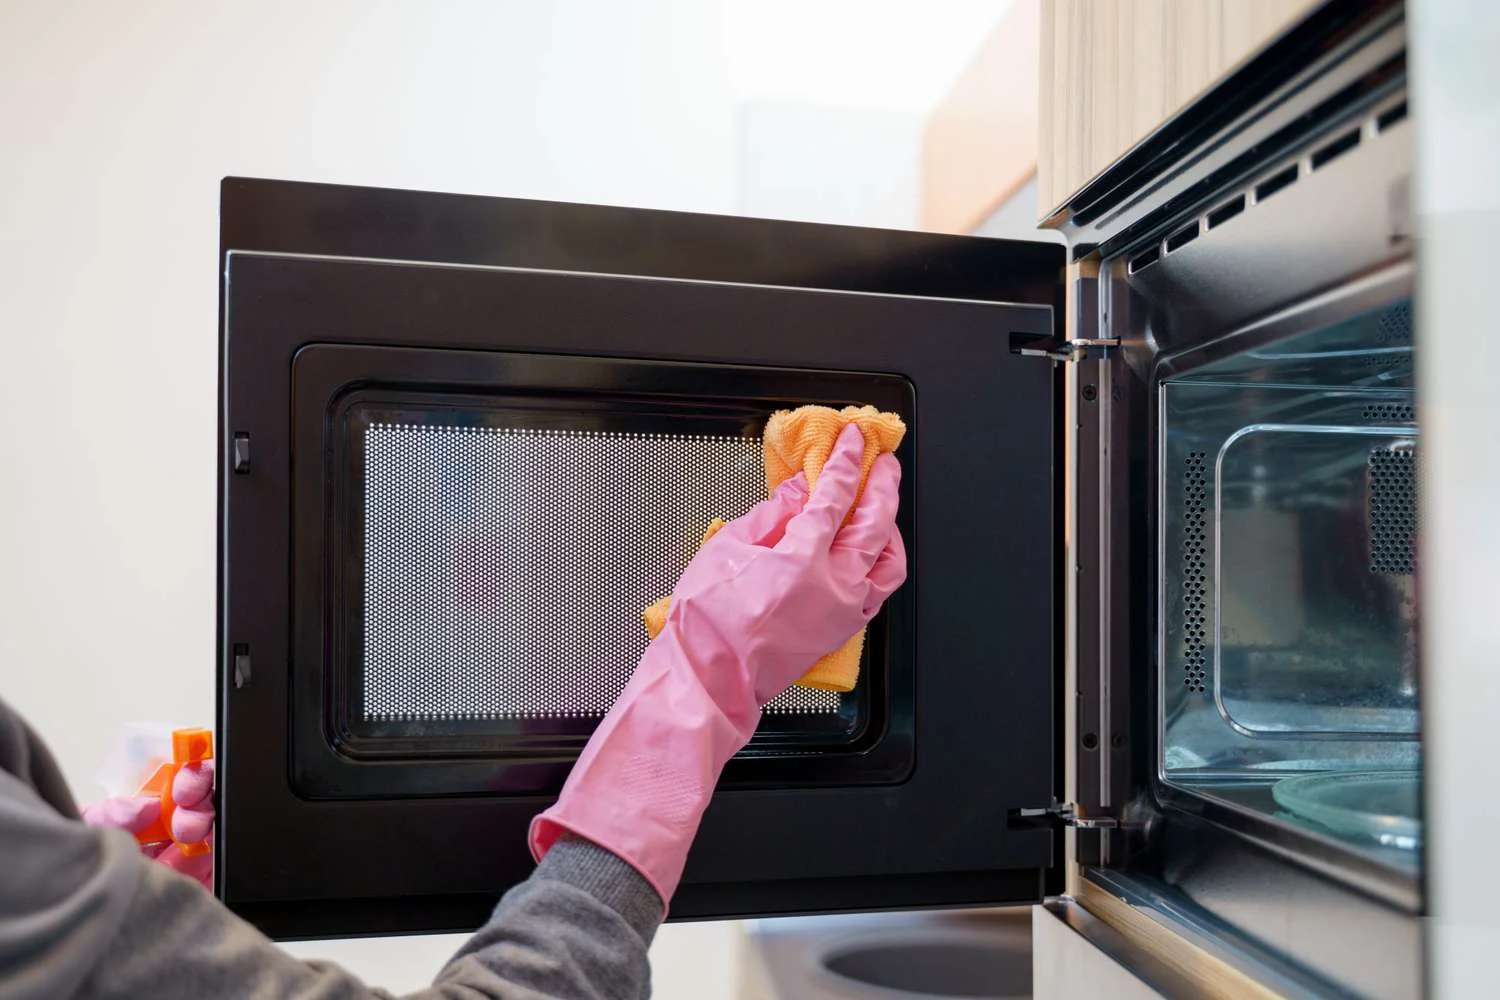
“You don’t need fancy sprays to get this job done.”
You can achieve the exact same result for pennies with items you already have. Fill a microwave-safe bowl with one cup of water and a tablespoon of white vinegar (or a few lemon slices). Microwave on high for 3-5 minutes, until the water is boiling and the interior is filled with steam. Let it sit with the door closed for another 5 minutes. The steam will have softened all the cooked-on gunk inside, including on the door. Then, simply open the door and wipe everything clean with an orange microfiber cloth like the one shown. No scrubbing required.
11. A Heavily Splattered and Stained Microwave Interior
We’re seeing a big trend on platforms like TikTok and Pinterest towards “worst-to-first” cleaning videos, and this is a classic example. There’s something deeply satisfying about watching a space go from catastrophically messy to sparkling clean. This image perfectly captures the “before” shot of a forgotten microwave. It represents a relatable, everyday mess that feels like a manageable project, which is why these types of cleaning transformations are so popular right now. People want hacks for real-life, not for perfectly staged homes.
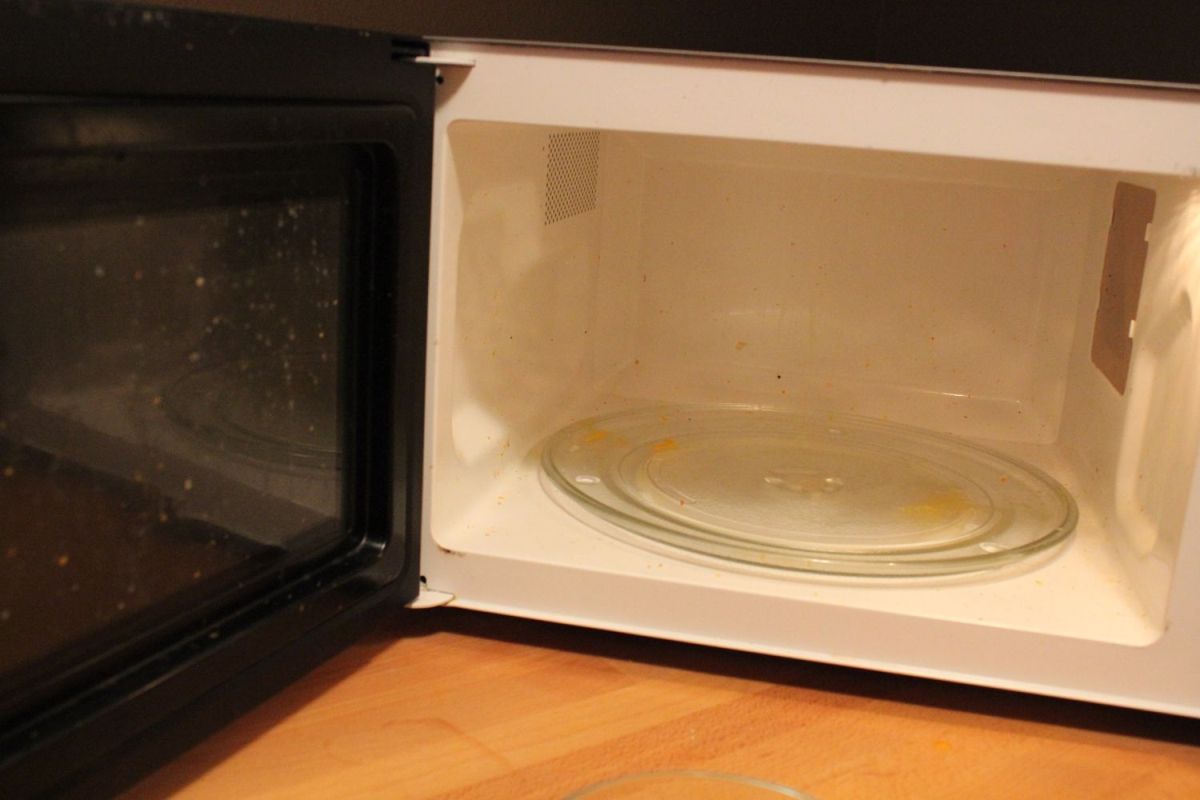
“Let’s be honest: a microwave gets this dirty because someone isn’t using a cover.”
The number one way to prevent this from happening is to invest in a reusable, vented microwave cover. It will save you so much time and effort in the long run. Trying to scrub this level of baked-on food without pre-treatment is a recipe for frustration. You absolutely must steam the interior first, as we mentioned in Idea #10, to have any hope of cleaning this without losing your mind. The splatters on the door glass can be especially stubborn.
12. Maintaining a White Vessel Sink with a Gold Faucet
A white vessel sink is a beautiful statement piece, but it requires daily attention to keep it looking pristine. Since the entire bowl is exposed, toothpaste dribbles, makeup dust, and water spots are on full display. A quick wipe-down with a soft cloth after each use is the best way to prevent buildup. The gold faucet, while stunning, also needs special care. Avoid abrasive cleaners at all costs, as they will scratch and strip the PVD finish. Use only gentle soap and water, and buff dry with a microfiber cloth to prevent water spots.
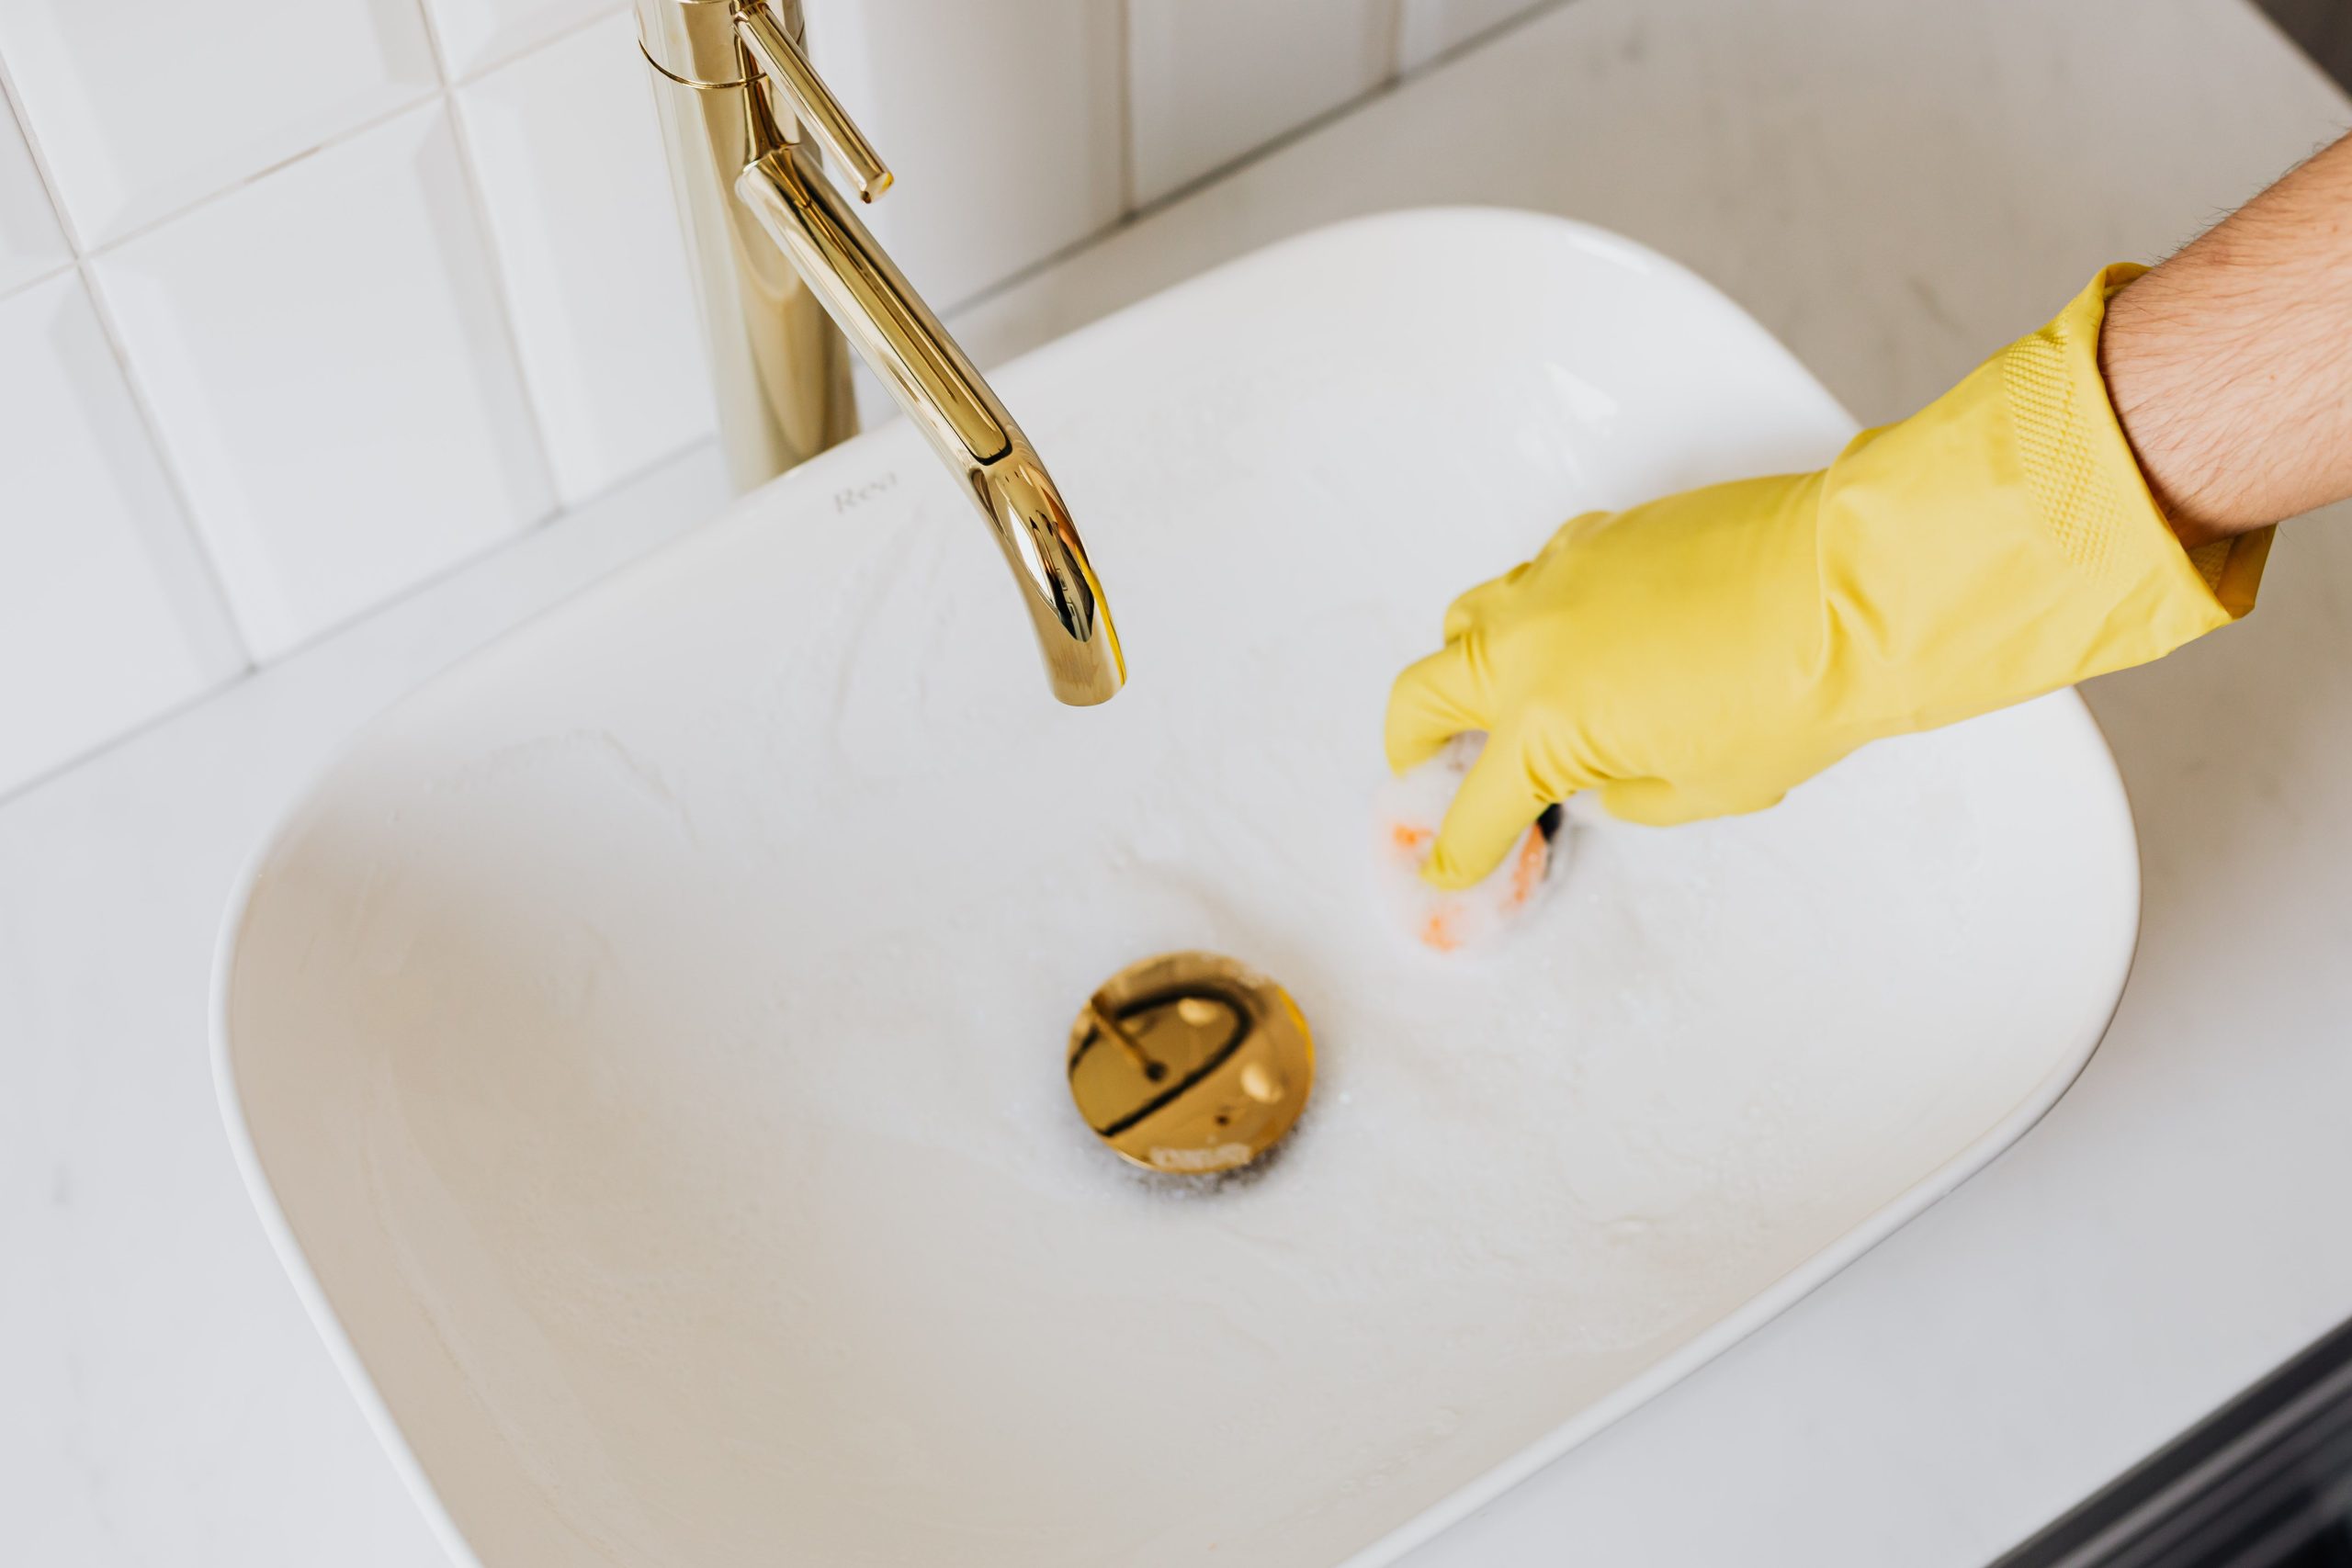
“The combination of glossy textures makes this cleaning process straightforward, as long as it’s done regularly.”
The smooth, glazed surface of the ceramic sink and the slick finish of the gold faucet don’t give grime much to cling to. As long as you don’t let hard water or toothpaste sit for days, a simple wipe is all it takes. The yellow glove and orange sponge show that basic tools are all that’s needed—the effectiveness comes from the gentle, consistent removal of residue before it has a chance to build up.
13. Scrubbing a Sink Basin Next to Tiled Walls
When you have tile and grout right behind a sink, sealing that grout is not optional—it’s essential. Water will splash and sit there, and unsealed grout will quickly become discolored and grow mildew. Ask your tile installer to use an epoxy-based grout, which is more stain and water-resistant than traditional cement grout. Failing that, apply a penetrating grout sealer yourself every 6-12 months. It’s a small task that prevents a huge, ugly problem down the road.
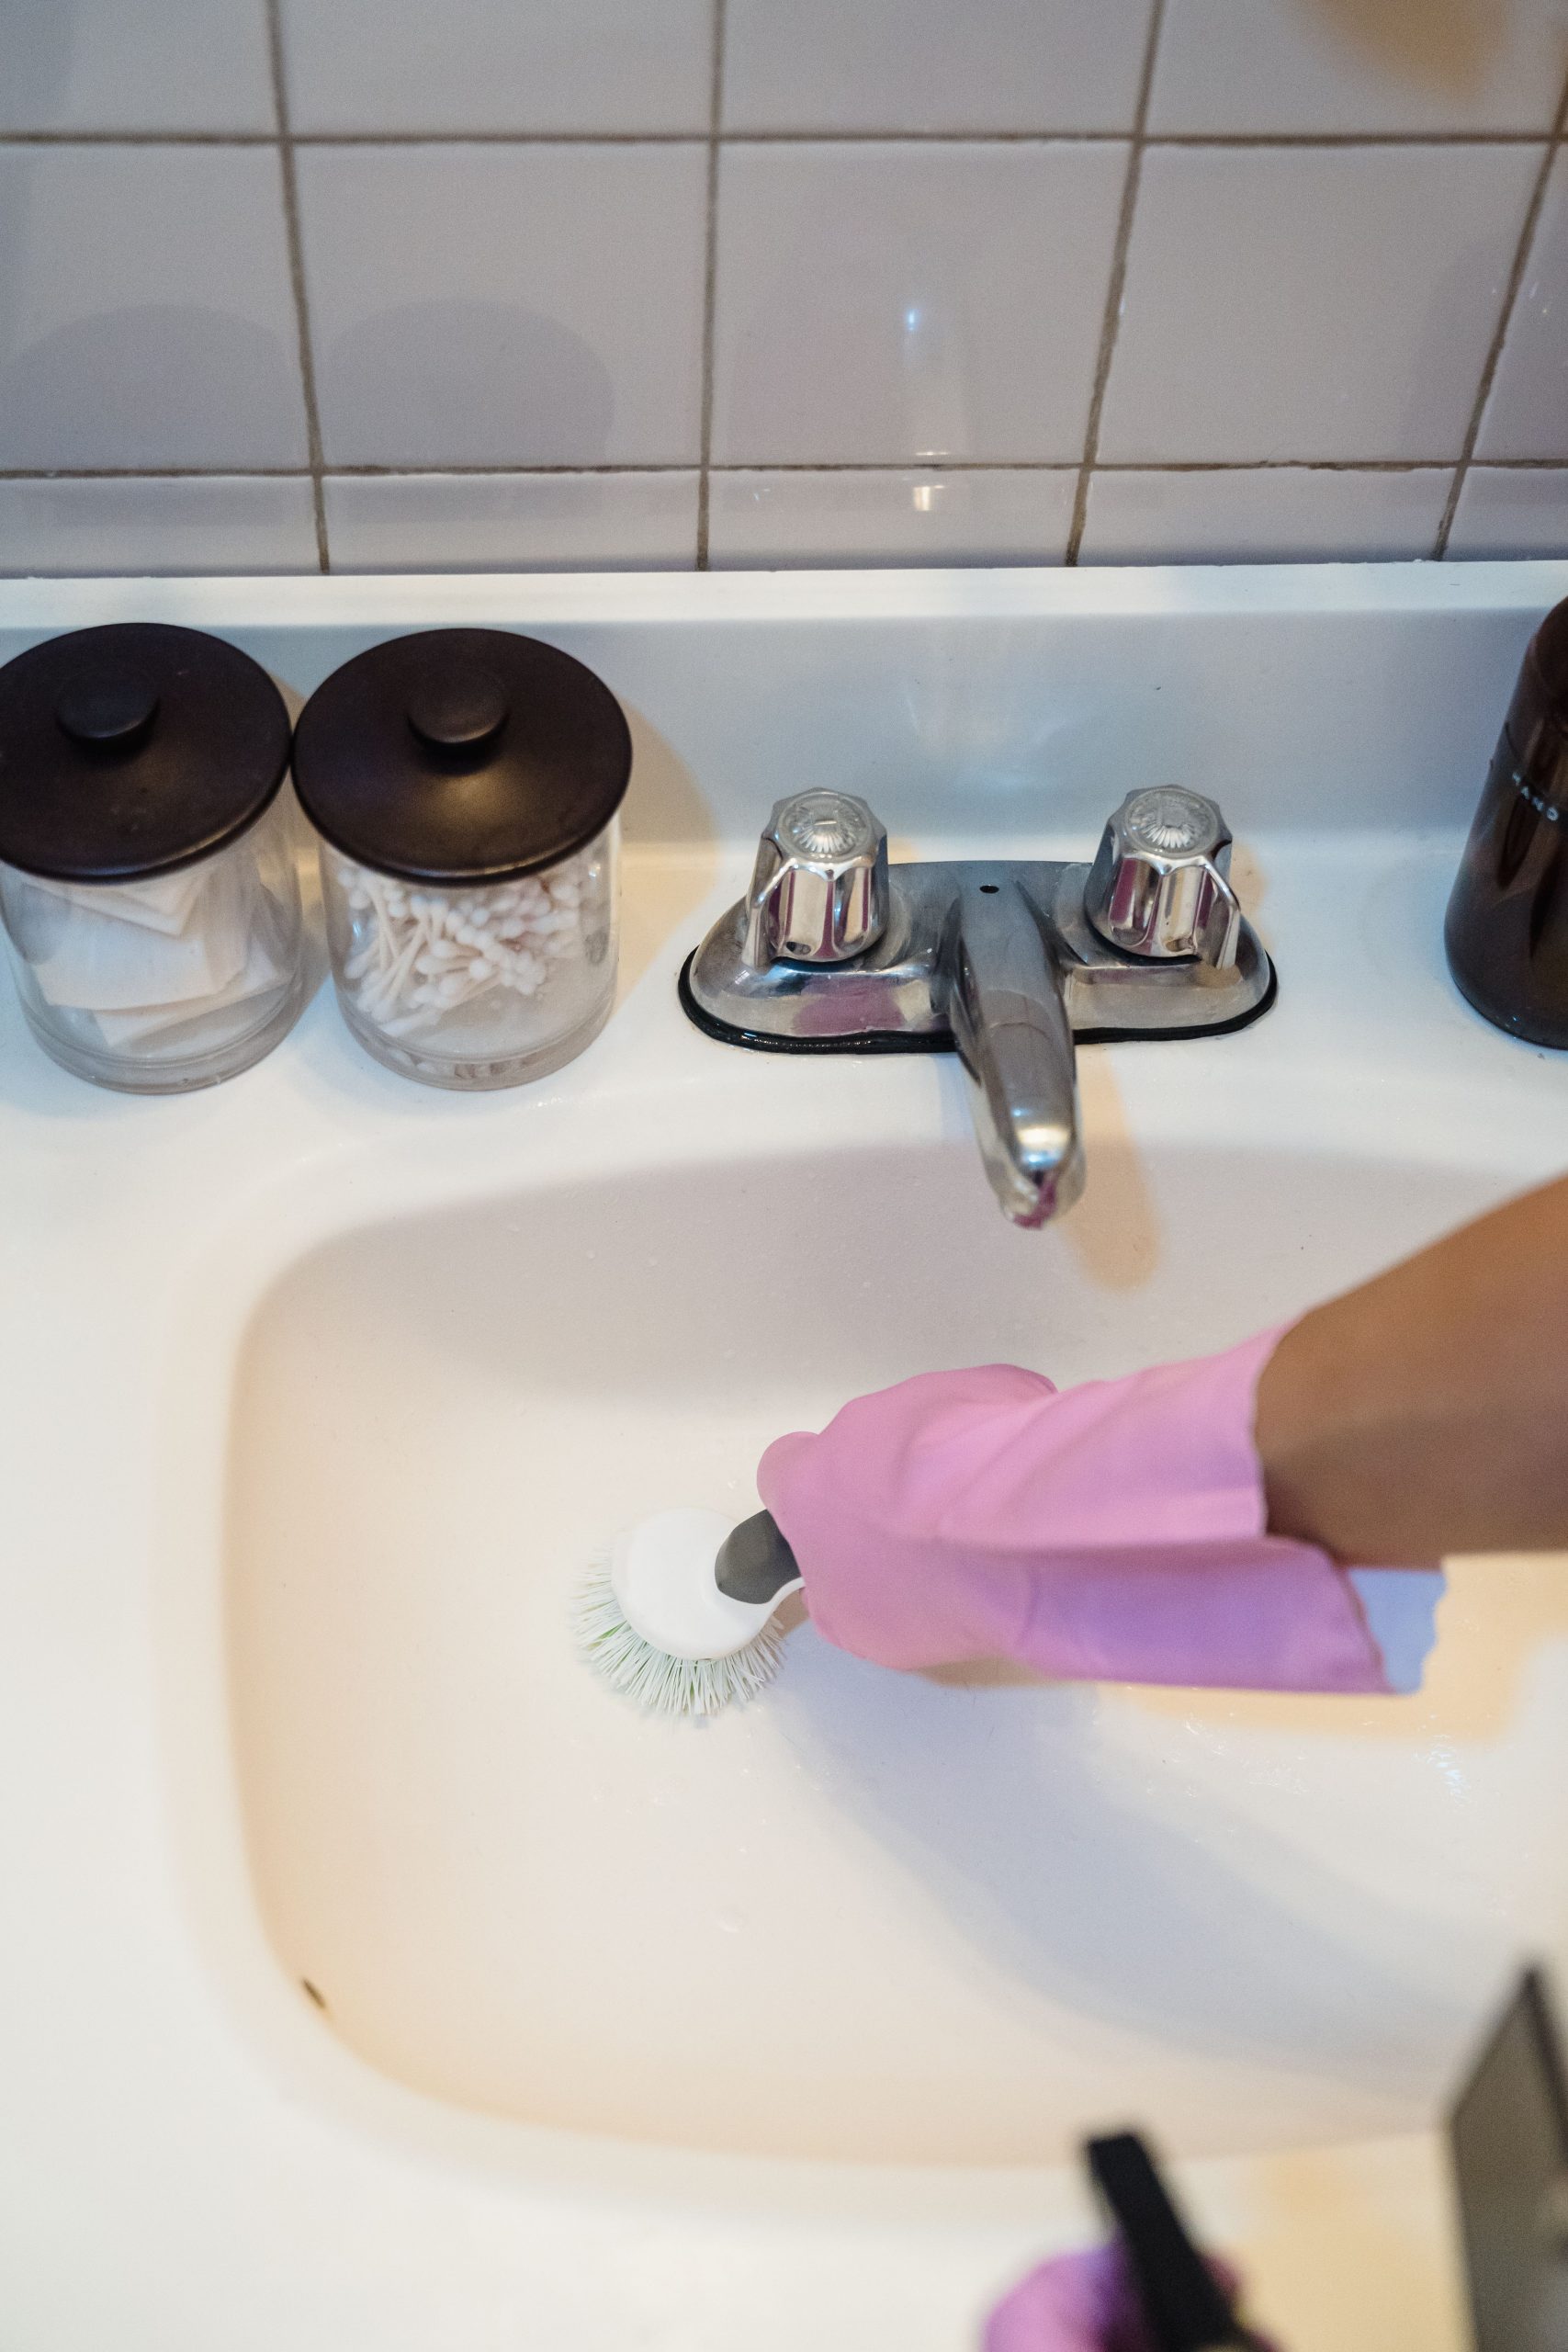
“A great bathroom cleaning routine follows a simple formula: 60% surface cleaning + 30% detail work + 10% polishing.”
The surface cleaning is the main event: scrubbing the white ceramic sink basin. The detail work is where the magic happens: using a small brush to get around the base of the chrome faucet and into the grout lines of the tile. The final polish involves wiping down the chrome faucet and the glass jars so they are free of water spots and fingerprints, making the entire space sparkle.
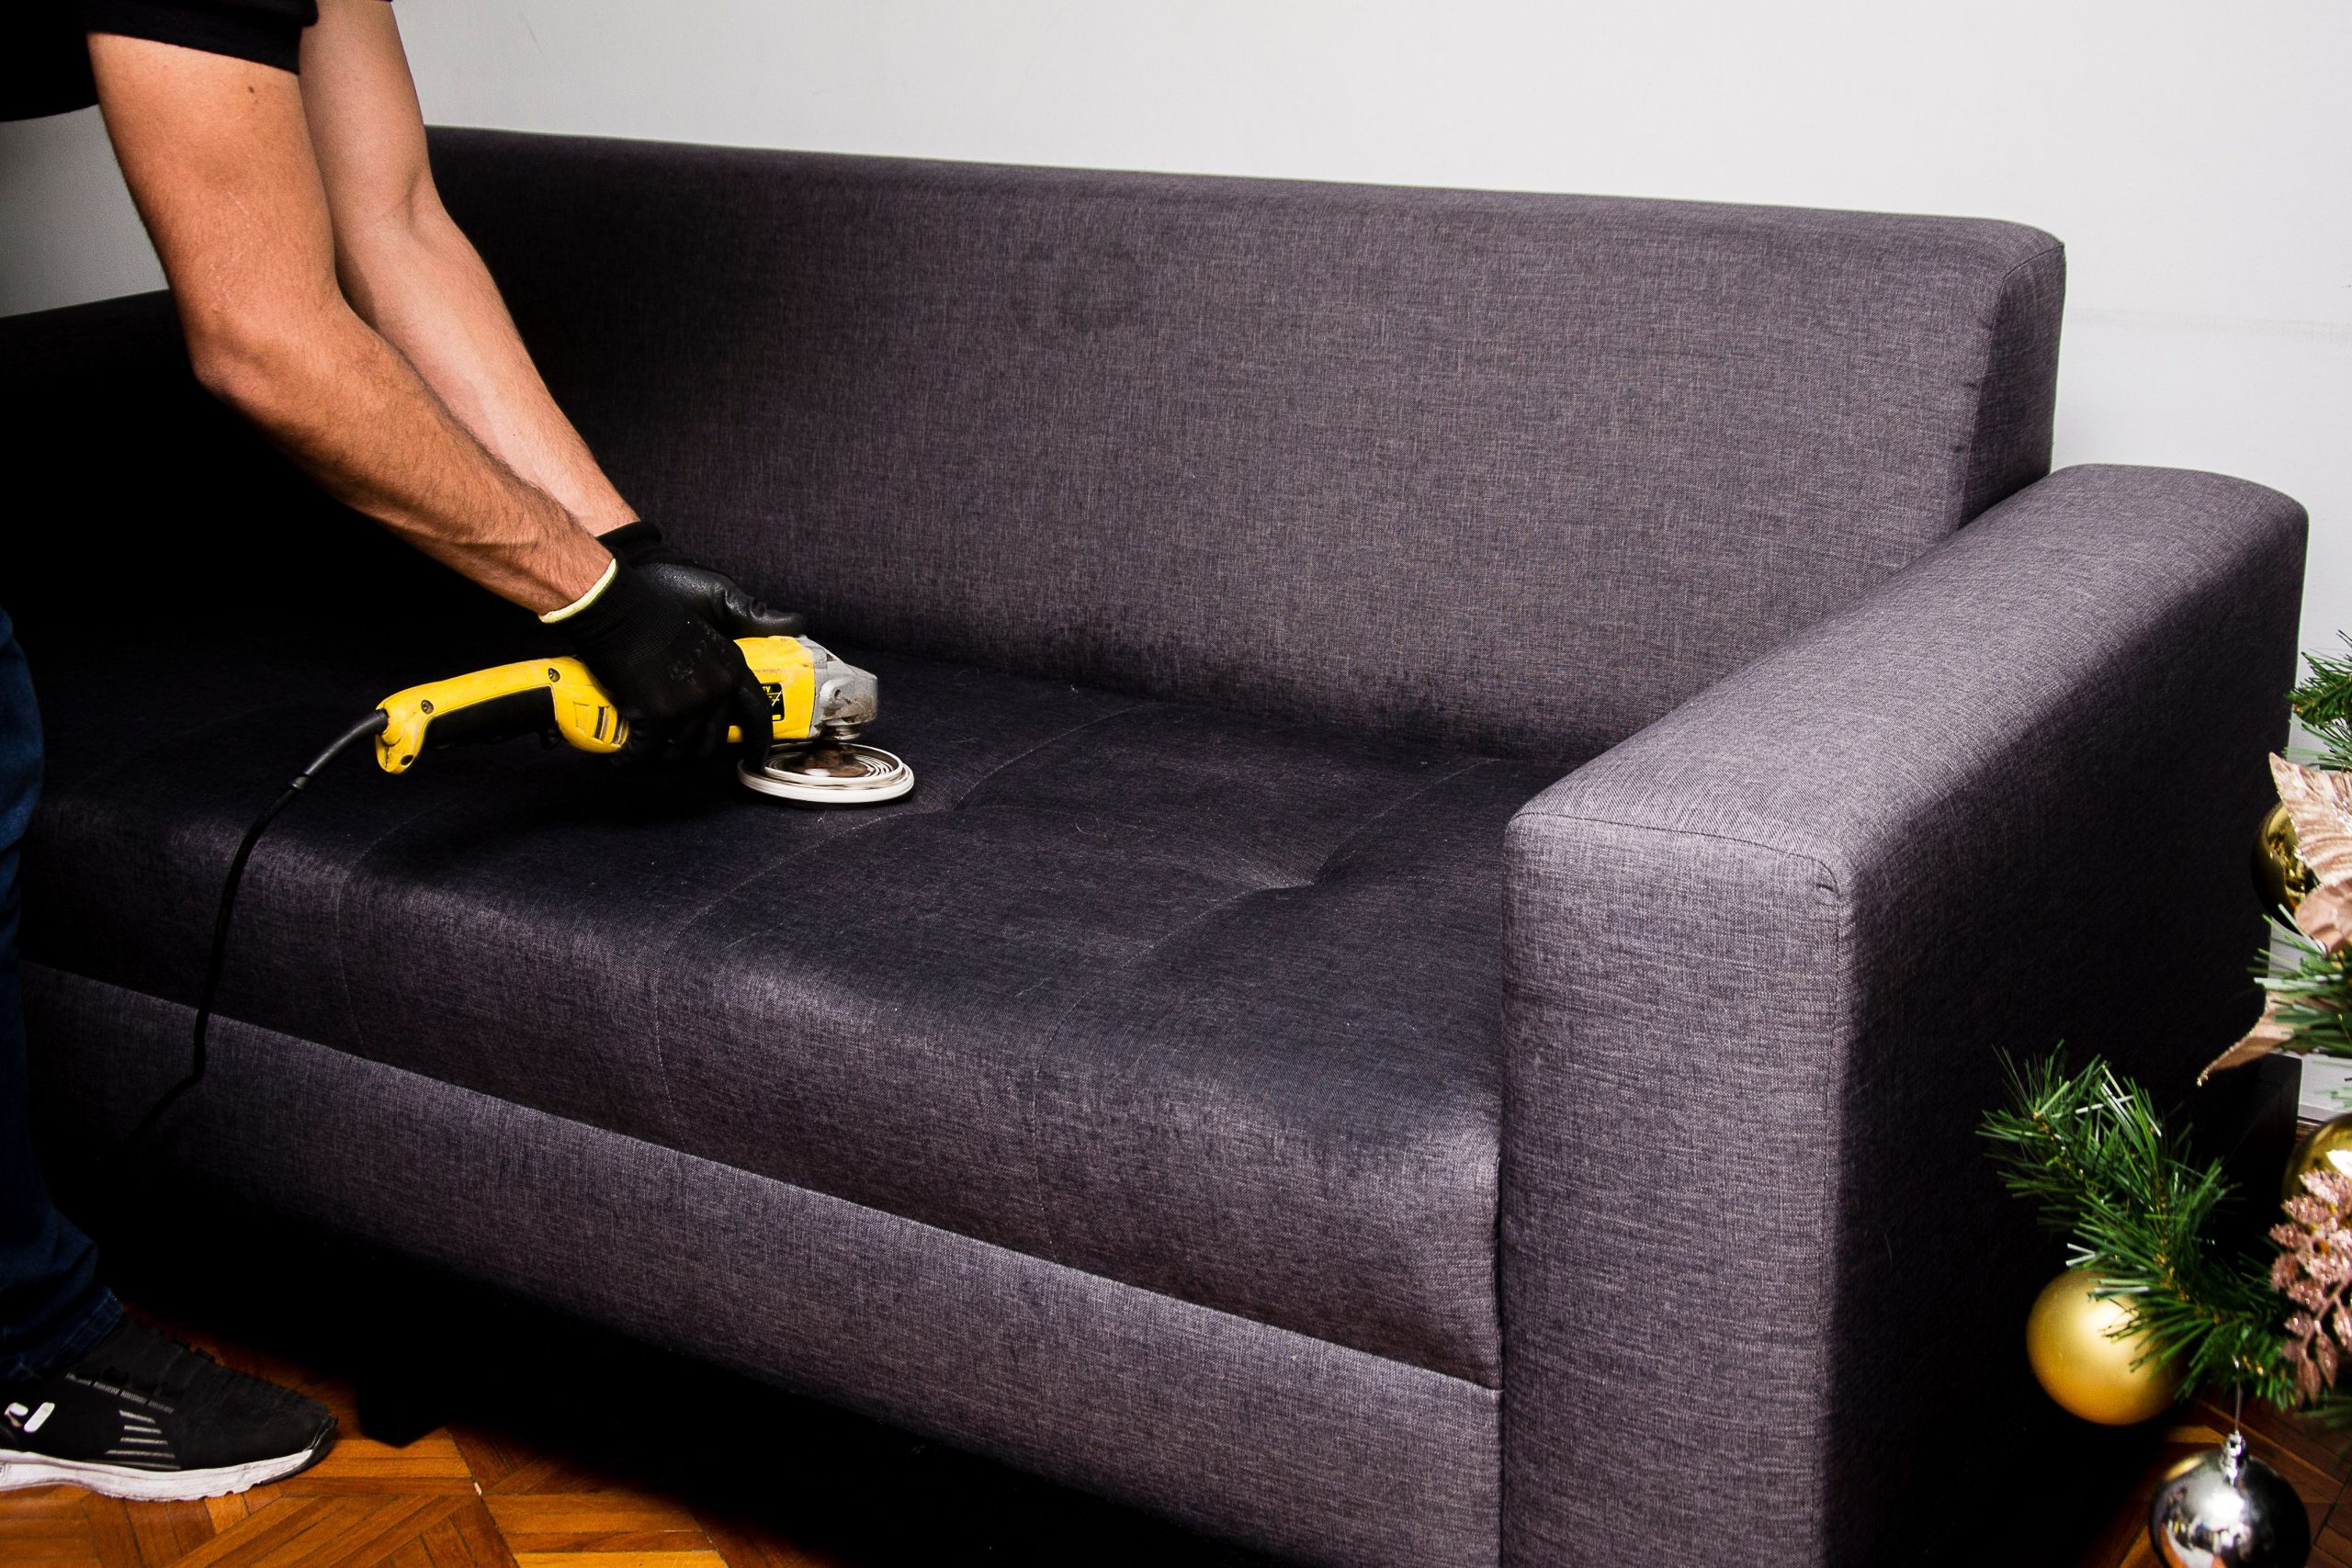
14. Deep Cleaning Sofa Upholstery with a Power Scrubber
Before you attack a sofa stain with a power tool, you absolutely must check the cleaning code on the tag. Look for these letters:
“W: Water-based cleaner is okay.”
S: Solvent-based cleaner only. Do NOT use water.
W/S: Either water or solvent-based cleaners can be used.
X: Vacuum only. Do not use any liquid cleaners.
Using the wrong type of cleaner can leave a permanent water ring, cause the fabric dye to bleed, or even shrink the material. Always test your cleaning solution on a hidden spot first, like the back or underside of a cushion.
While a power scrubber can be incredibly effective, it can also easily damage upholstery if you’re not careful. This is not a task to rush. Use a low-speed setting and very light pressure. Aggressive scrubbing can break the fabric fibers, leading to pilling, fraying, or a worn-out look. Make sure the cleaning pad is designed for upholstery and is perfectly clean. If you use too much liquid, you risk overwetting the cushion foam, which can lead to mold and mildew growth deep inside the sofa. More is not better here—work in small sections and blot with a dry towel as you go.
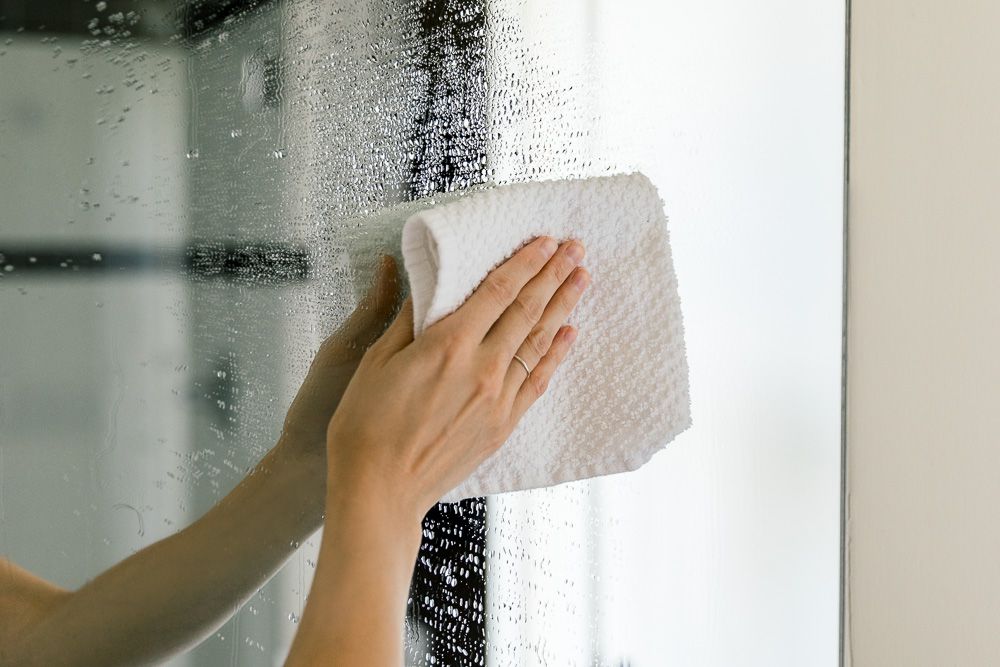
15. Wiping a Wet Glass Surface with a Terry Cloth
This image demonstrates a crucial step in cleaning glass shower doors or mirrors: absorption. After cleaning, the surface is still covered in water droplets and cleaning solution residue. A terry cloth towel is effective here because its looped cotton fibers create a large surface area, allowing it to quickly soak up a significant amount of liquid. This initial drying pass removes the bulk of the moisture, which is the key to preventing streaks and water spots from forming as the glass air-dries. It’s the first step to a clear finish.
“You don’t need to buy expensive, single-purpose cleaning tools to get great results.”
While a squeegee (like in Idea #18) is fantastic, a simple two-towel system works just as well and costs nothing if you already own towels. Use an old, absorbent terry cloth towel for the first pass to soak up all the water. Then, follow up with a clean, dry microfiber cloth to do the final buff and polish. This second step removes any lingering streaks or lint left by the terry cloth, leaving you with a perfectly clear, sparkling surface.
16. Using an Amber Bottle for DIY Glass Cleaner
The move toward amber glass spray bottles is part of a larger trend in home care focused on sustainability and aesthetics. People want to reduce plastic waste and are mixing their own cleaning solutions using simple ingredients like vinegar and essential oils. The amber glass isn’t just for looks; it protects the contents from UV light, which can degrade certain ingredients, especially essential oils, over time. It signals a shift towards a more intentional, eco-conscious, and visually pleasing approach to household chores.
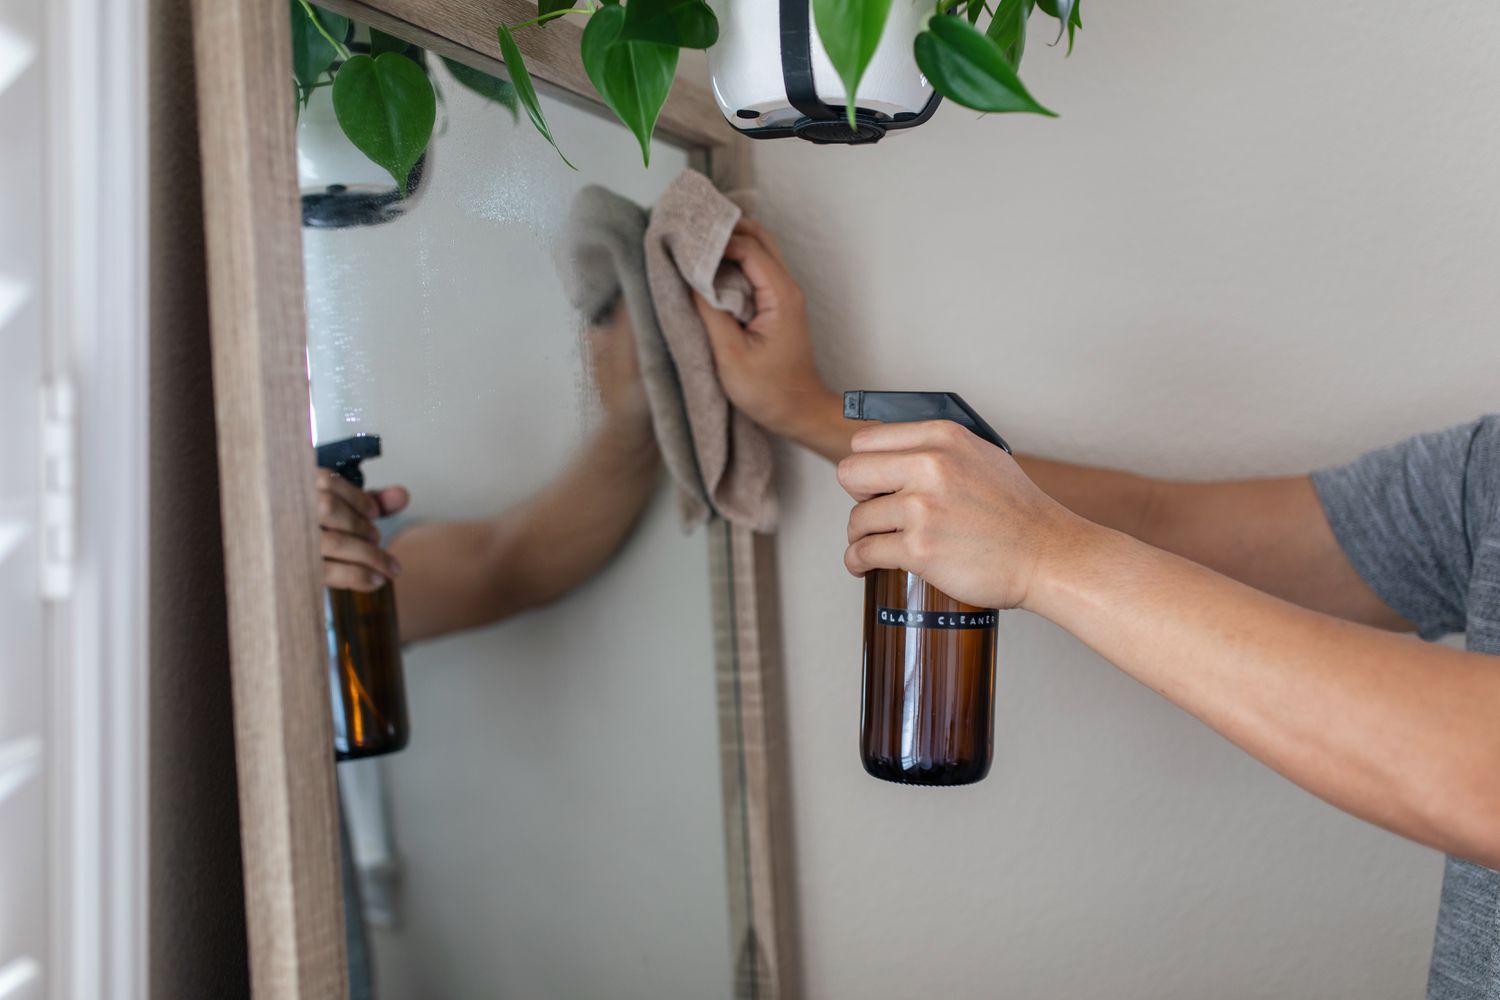
“Want to make your own version of the cleaner shown here?”
It’s incredibly simple and effective. You’ll need an amber glass spray bottle, distilled water, white vinegar, and a small amount of cornstarch. First, add two tablespoons of cornstarch to the bottle. Next, add a half cup of white vinegar and a half cup of distilled water. Screw on the lid and shake vigorously to dissolve the cornstarch. The cornstarch acts as a very fine abrasive to help scrub away grime without scratching the glass. Shake well before each use and spray directly onto your mirror or windows.
17. Removing Streaks from a Mirror with a Striped Cloth
that causes streaks is wiping a surface that isn’t fully clean or using a cloth that’s already dirty or too wet. Streaks are simply the residue of dirt, oil, or cleaning solution being spread thin instead of being lifted off. The key to avoiding them is a two-step process: one cloth for cleaning (the “wet” cloth) and a separate, perfectly dry cloth for buffing (the “dry” cloth). Trying to do both jobs with one cloth is the most common reason people get frustrated with the results.
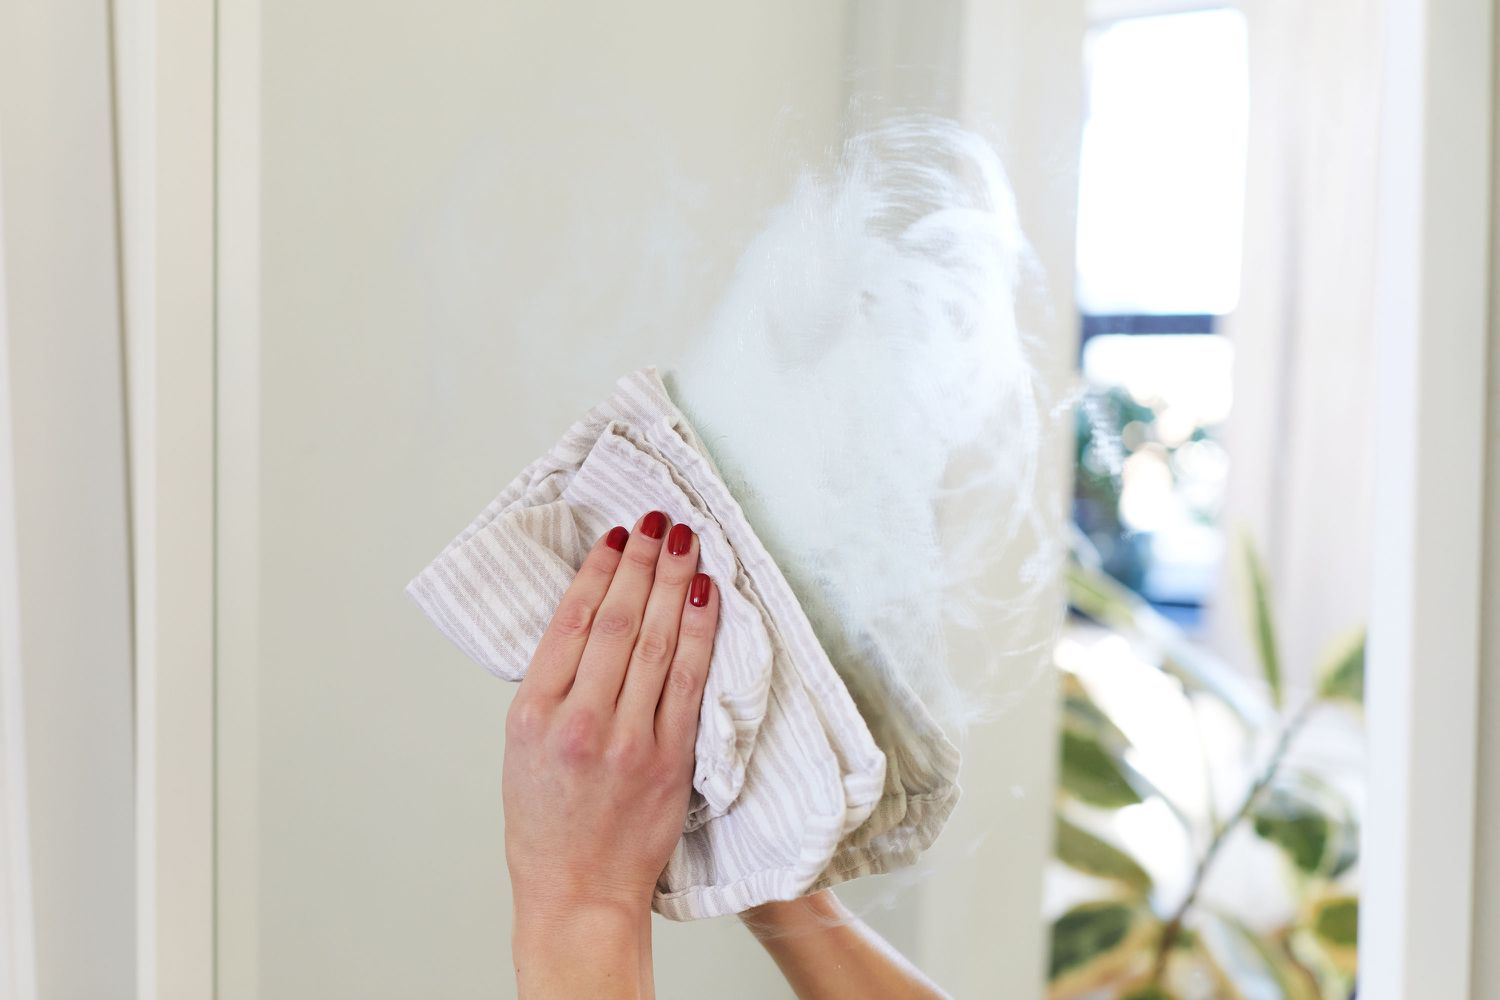
“A professional window cleaner’s trick is to use distilled water in your cleaning solution instead of tap water.”
Tap water contains minerals (like calcium and magnesium) that can be left behind on the glass as it dries, creating those faint, cloudy spots or streaks. Distilled water is completely pure, so it evaporates without leaving any mineral deposits behind. You can buy it by the gallon at any grocery store for a very low cost, and it will make a noticeable difference in the clarity of your mirrors and windows.
18. Getting a Professional Window Finish with a Squeegee
A squeegee is the fastest and most effective way to get streak-free windows for one simple reason: it doesn’t absorb, it removes. Instead of a cloth, which can get saturated and start smearing water and dirt around, a squeegee blade scrapes the glass surface perfectly clean, taking all the liquid and grime with it in one clean pass. The key is to overlap your strokes by about an inch and to wipe the blade clean with a cloth after every single pass. This prevents drips and redeploying dirt.
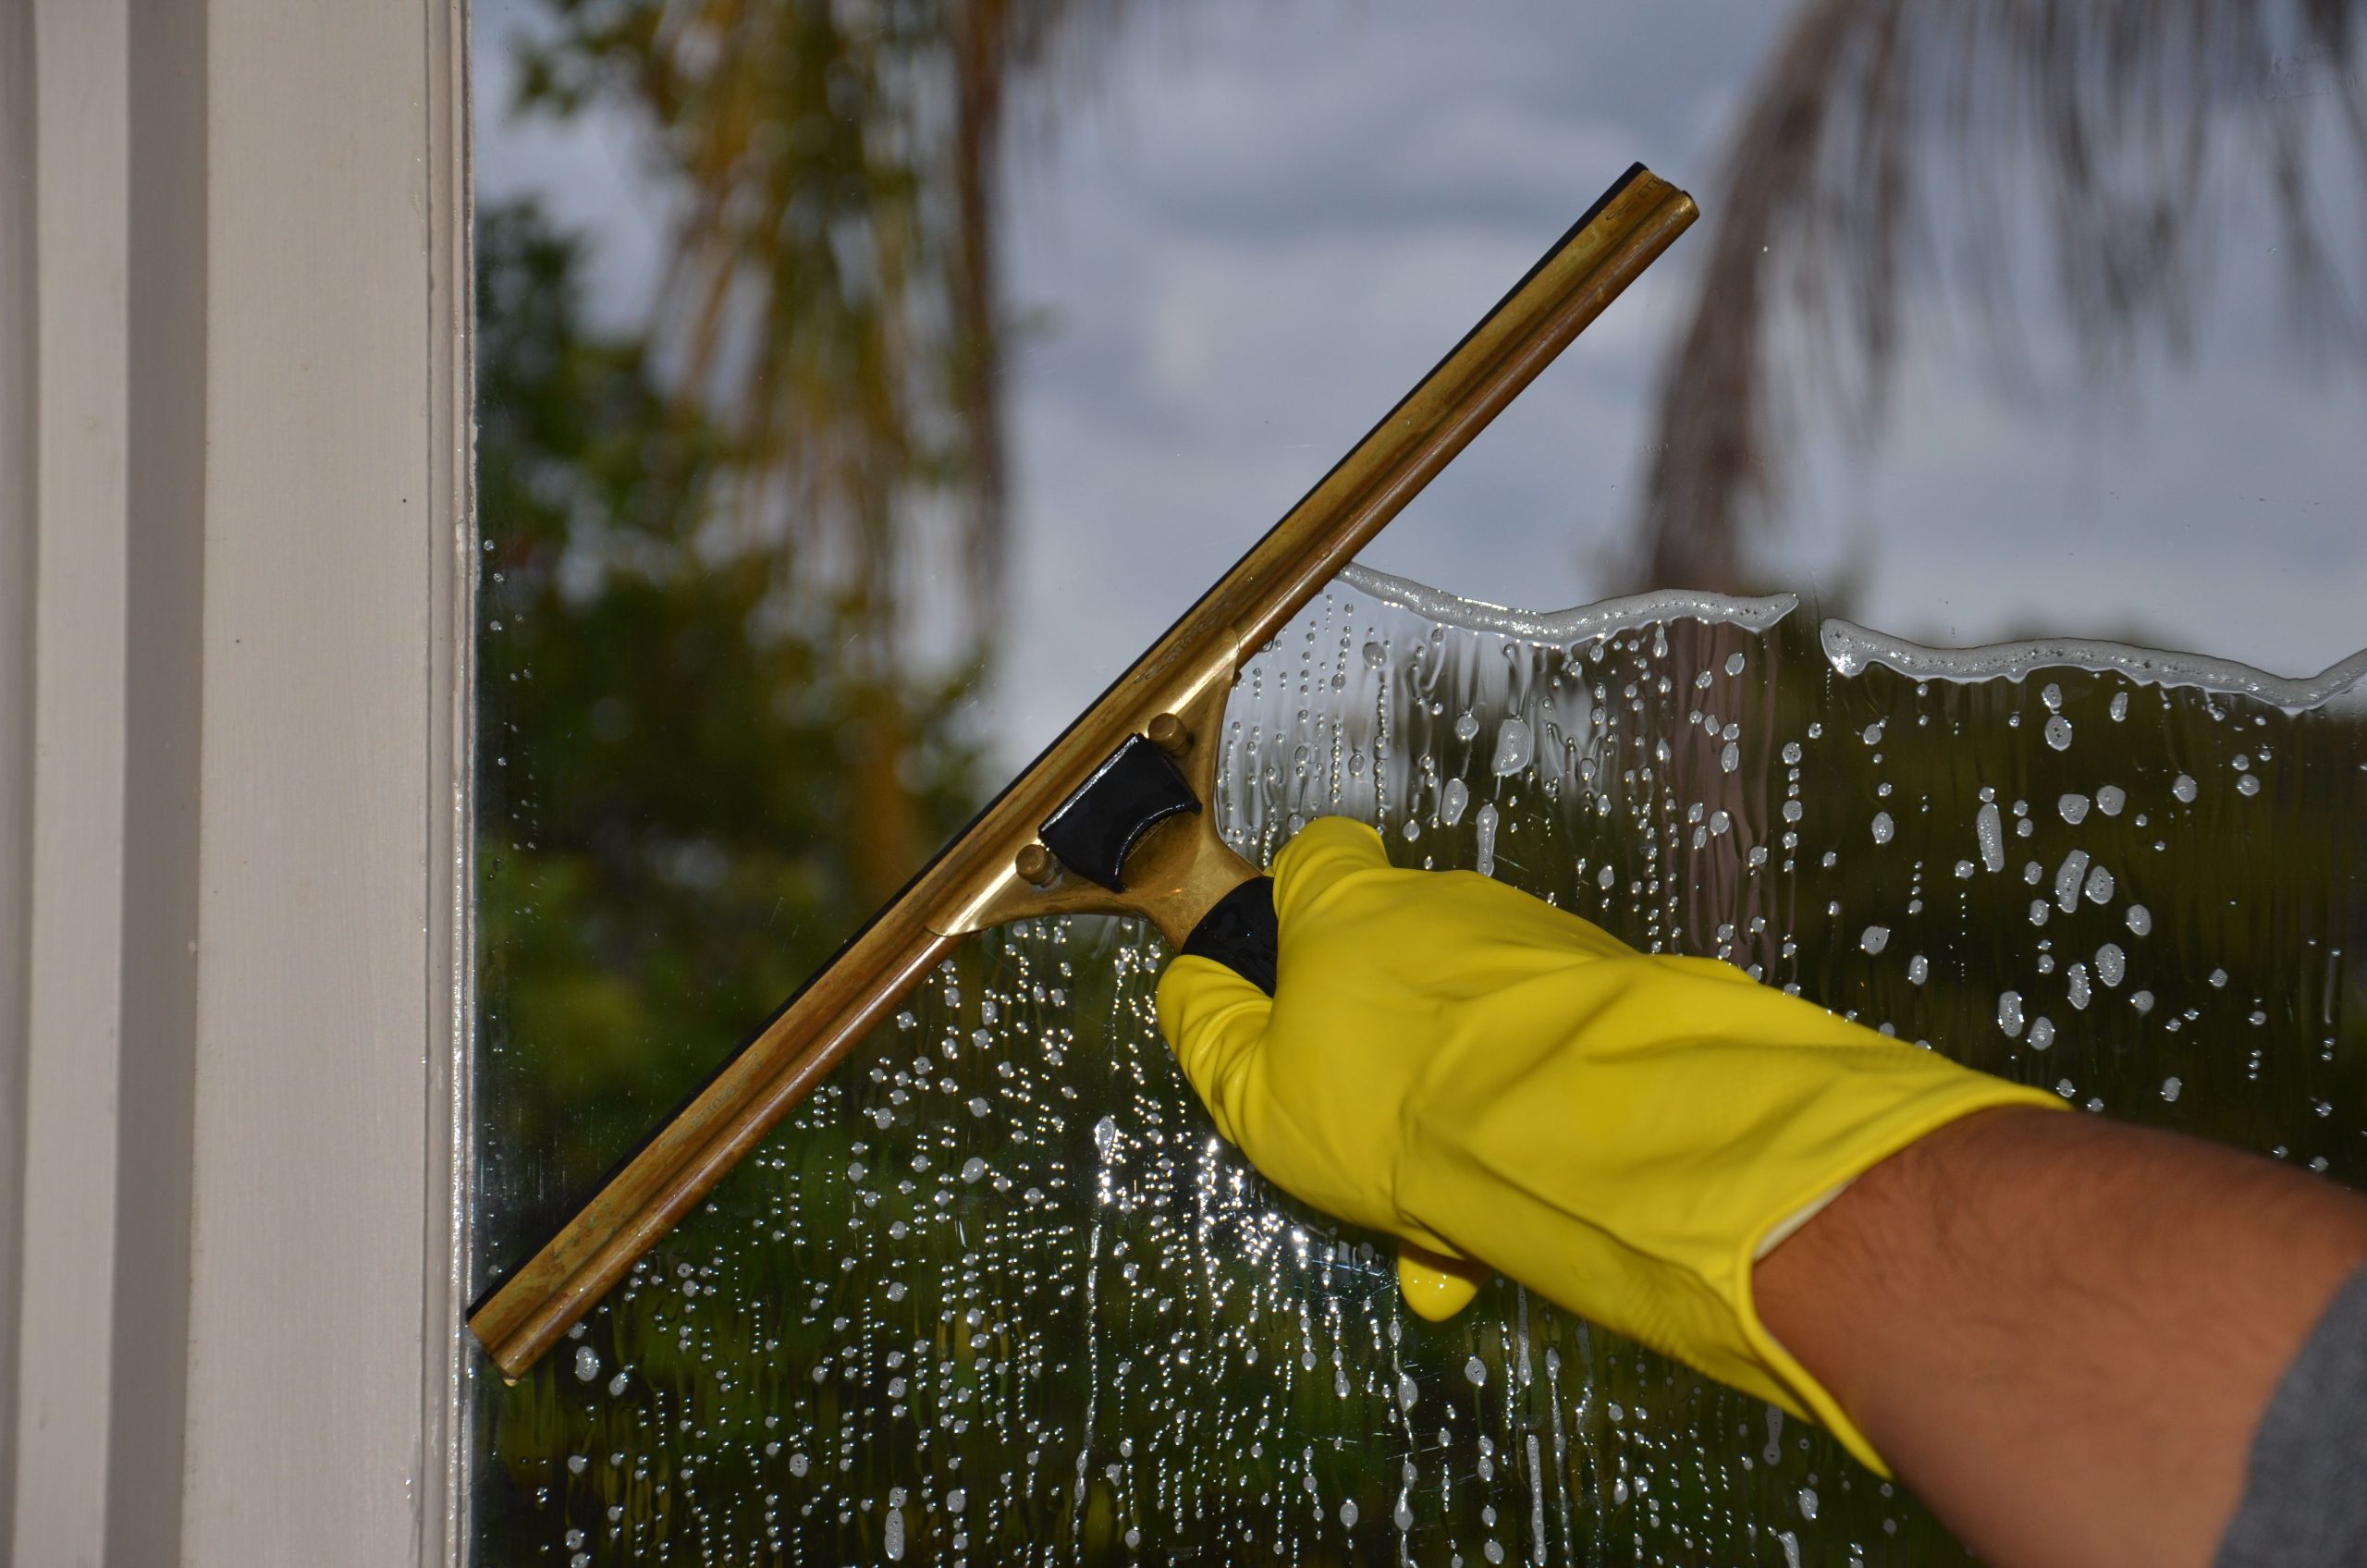
“There is a learning curve to using a squeegee without making a mess.”
If you don’t “cut in” the edge correctly or apply even pressure, you’ll be left with lines of water at the sides. And if you don’t wipe the blade after each stroke, you’ll get drips. For indoor use, it can be a watery mess on your floors and windowsills if you’re not careful. It’s often best for outdoor windows or large glass shower doors where water runoff isn’t an issue. For smaller indoor panes, the two-cloth method shown in Idea #15 might be more practical.
19. Wiping Down a Dark TV Screen with a Fluffy Duster
The critical element here is the duster material. The effectiveness of this task depends entirely on using a duster with electrostatic properties, typically made from microfiber or ostrich feathers. These materials don’t just push dust around; they attract and hold onto it like a magnet. This is crucial for electronic screens, where you want to lift the dust completely off the surface, not just shuffle it to another spot or, worse, grind it into the screen, which could cause scratches.
“Forget expensive electronic wipes or specialized dusters.”
The best tool for this job is likely something you already have: a clean, dry microfiber cloth, the kind that comes with eyeglasses or sunglasses. They are designed to clean delicate coated lenses without scratching or leaving lint, which is exactly what your TV screen needs. Make sure the TV is turned off so you can see the dust more easily. Gently wipe the screen in one direction—don’t scrub in circles. This costs nothing and is the safest method. This is a great alternative to the duster shown in Idea #4.
20. Wiping Down Kitchen Appliances on a Granite Countertop
A successful kitchen wipe-down follows a clear order of operations, just like a math problem: 90% preparation + 10% wiping. Before you even start wiping, you need to clear the space. Unplug the toaster and coffee maker, and move them aside. A quick wipe-around is never as effective as a full clear-and-clean. Once the counter is clear, you can properly wipe the surface and the appliances themselves, getting into all the corners and underneath where crumbs and coffee grounds hide.

“Speckled granite countertops like this are fantastic at hiding crumbs and small spills, which is both a blessing and a curse.”
It means your kitchen looks cleaner on a day-to-day basis, but it also means you might not see the messes that are actually there. You have to clean it more intentionally. Run your hand over the surface to feel for sticky spots or crumbs you can’t see. Use a cleaner formulated for natural stone to avoid damaging the sealant over time, and be sure to get into the area behind the appliances where dust and grease can build up unseen.
21. Cleaning a Speckled Countertop with a Yellow Sponge
The close-up on the yellow gloves and sponge highlights the most fundamental part of effective cleaning: direct contact and gentle abrasion. A sponge works better than a paper towel because its porous structure both holds the cleaning fluid and provides just enough texture to scrub away light grime without being abrasive. The gloves allow you to use hotter water than you could with your bare hands, which is highly effective for dissolving grease. It’s a simple, classic combination that works because it addresses the core needs of cleaning any surface.
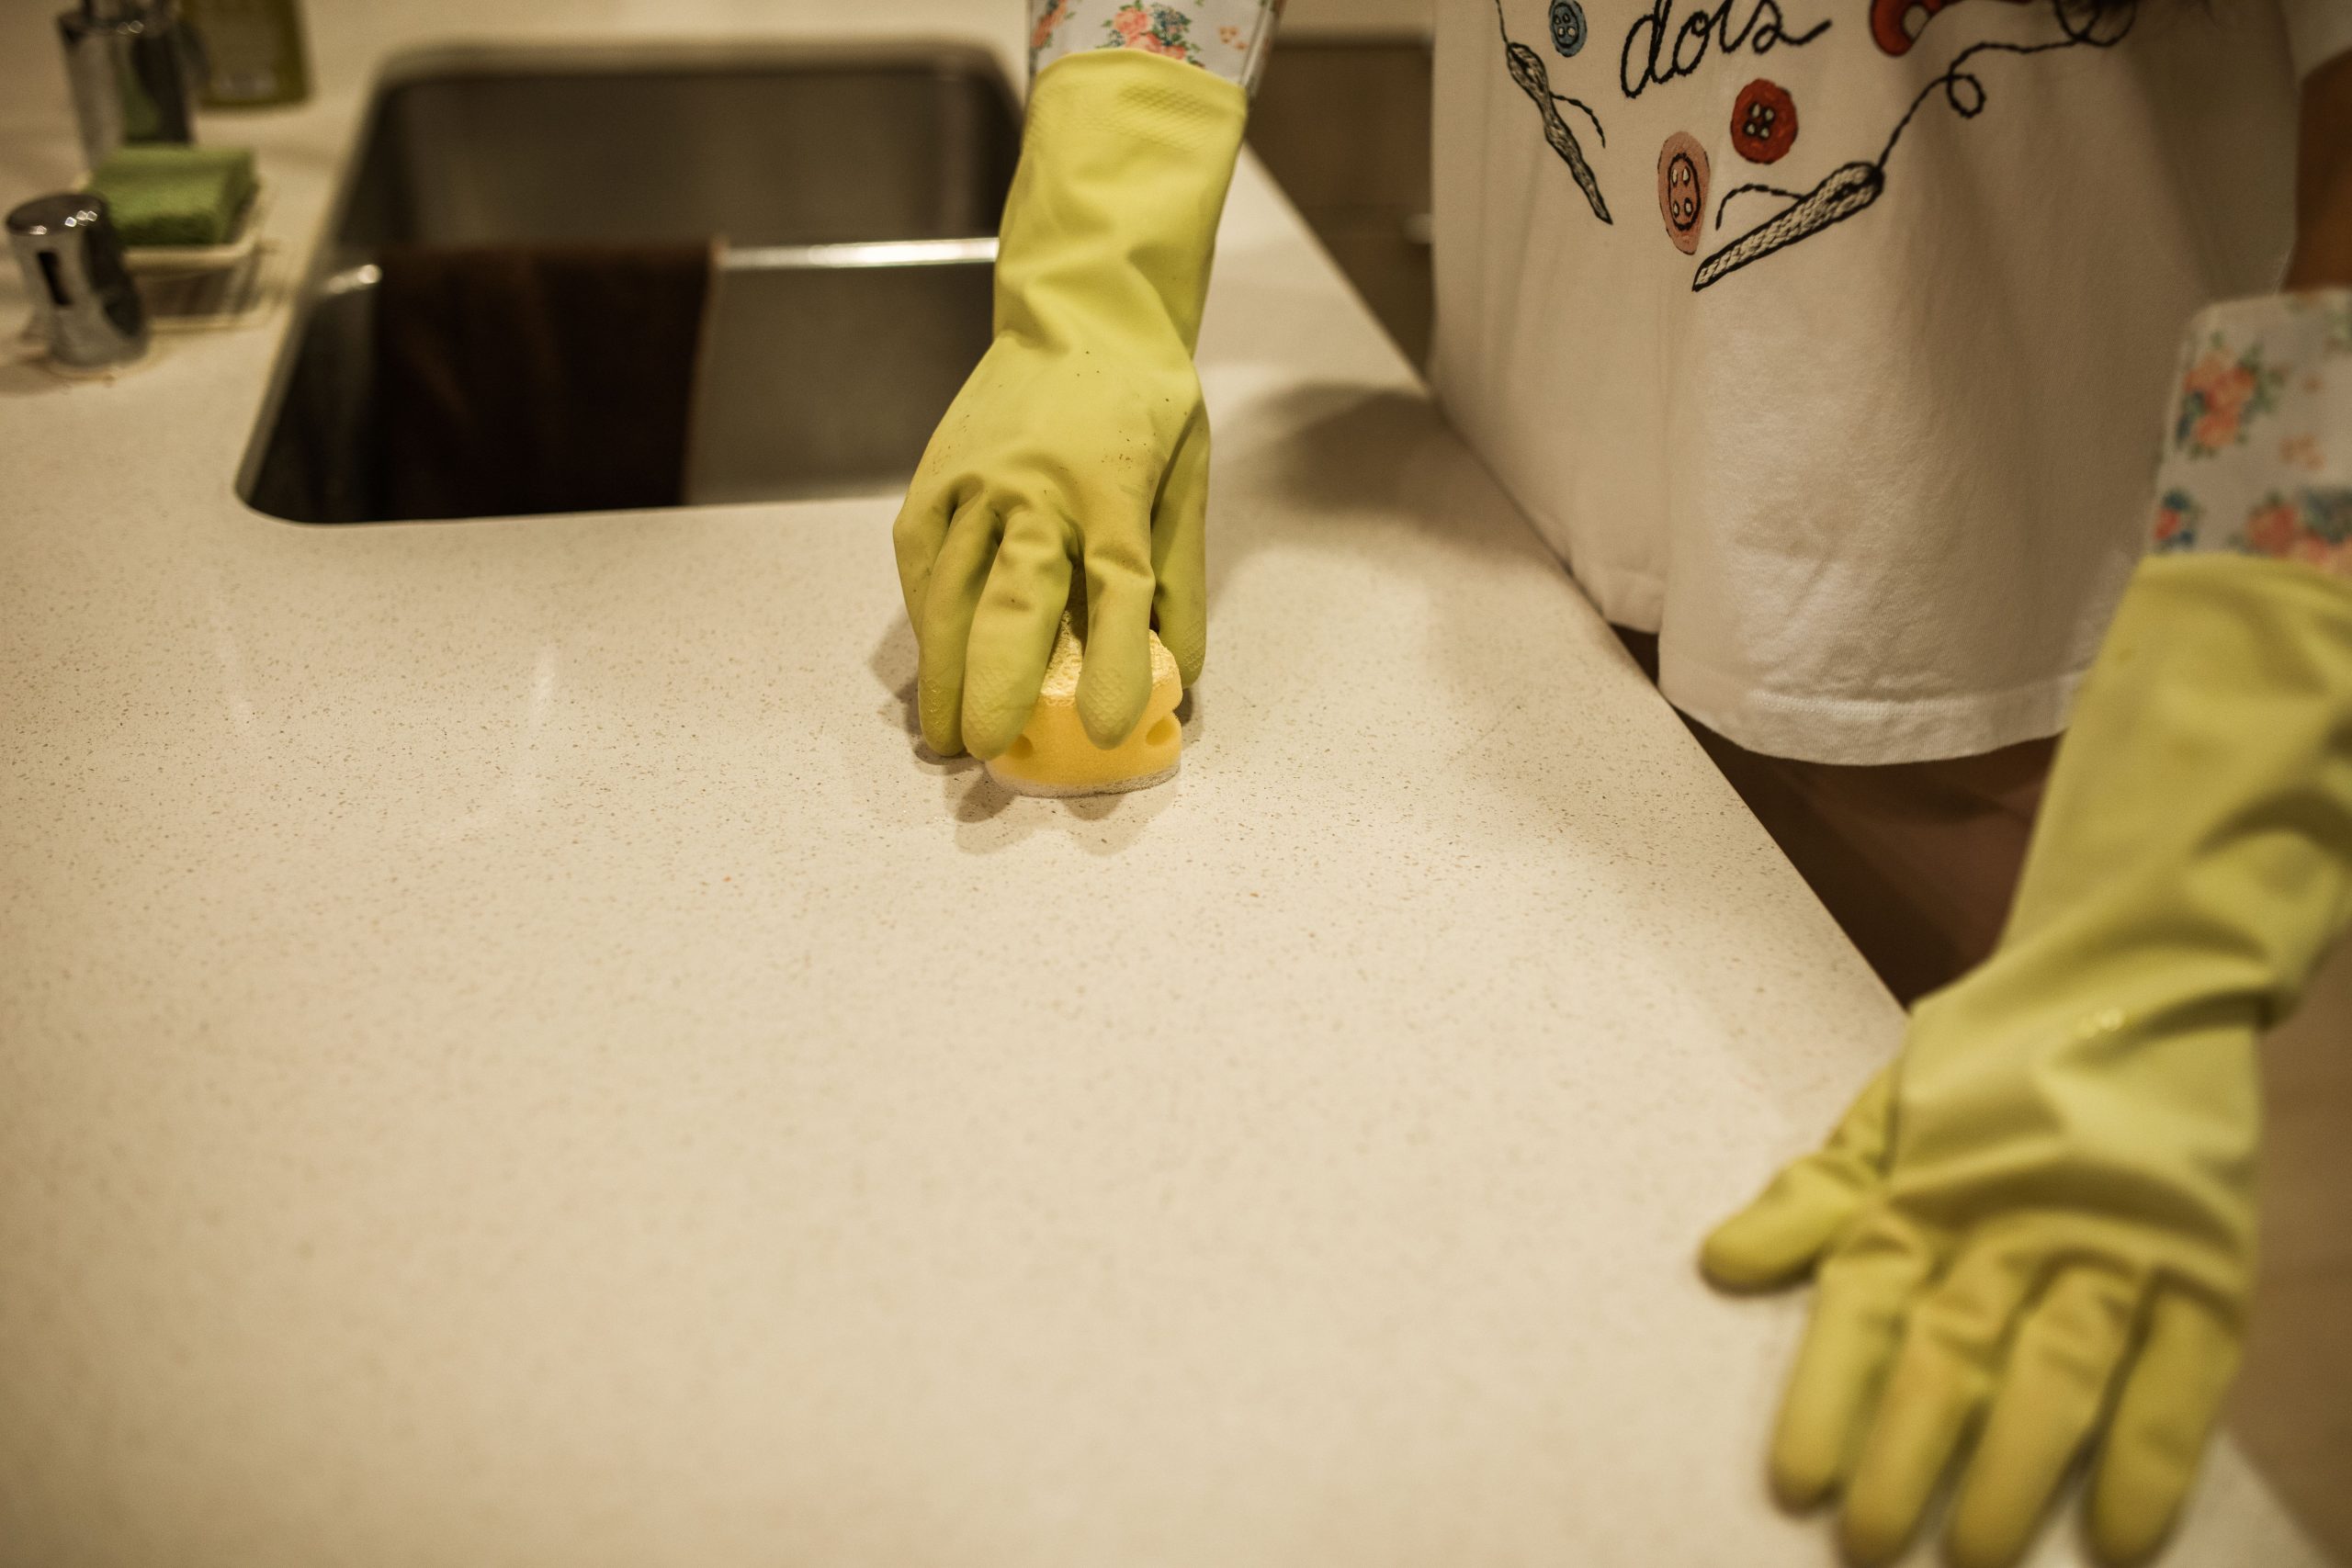
“scrubbing your countertop, especially with a sponge that might have been used for other tasks, make sure your sponge is clean.”
A dirty sponge will just spread bacteria and old food particles around. Disinfect your sponges daily by either running them through the dishwasher or microwaving them while damp for one minute. Also, check the type of countertop you have. While this speckled surface looks like a durable laminate or granite that can handle a standard sponge, using the abrasive side of a scrub sponge on a softer material like marble or acrylic could cause scratches.
22. Using Bright Pink Gloves to Clean a White Ledge
that makes this image so visually appealing is the bold color contrast. The bright, almost neon pink of the rubber gloves against the crisp white ledge and the cool blue of the spray bottle and cloth creates a vibrant, energetic scene. It turns a mundane chore into something that looks lively and even fun. This use of colorful cleaning tools is a simple but powerful way to make the process feel less like a drag and more like an act of care for your home.
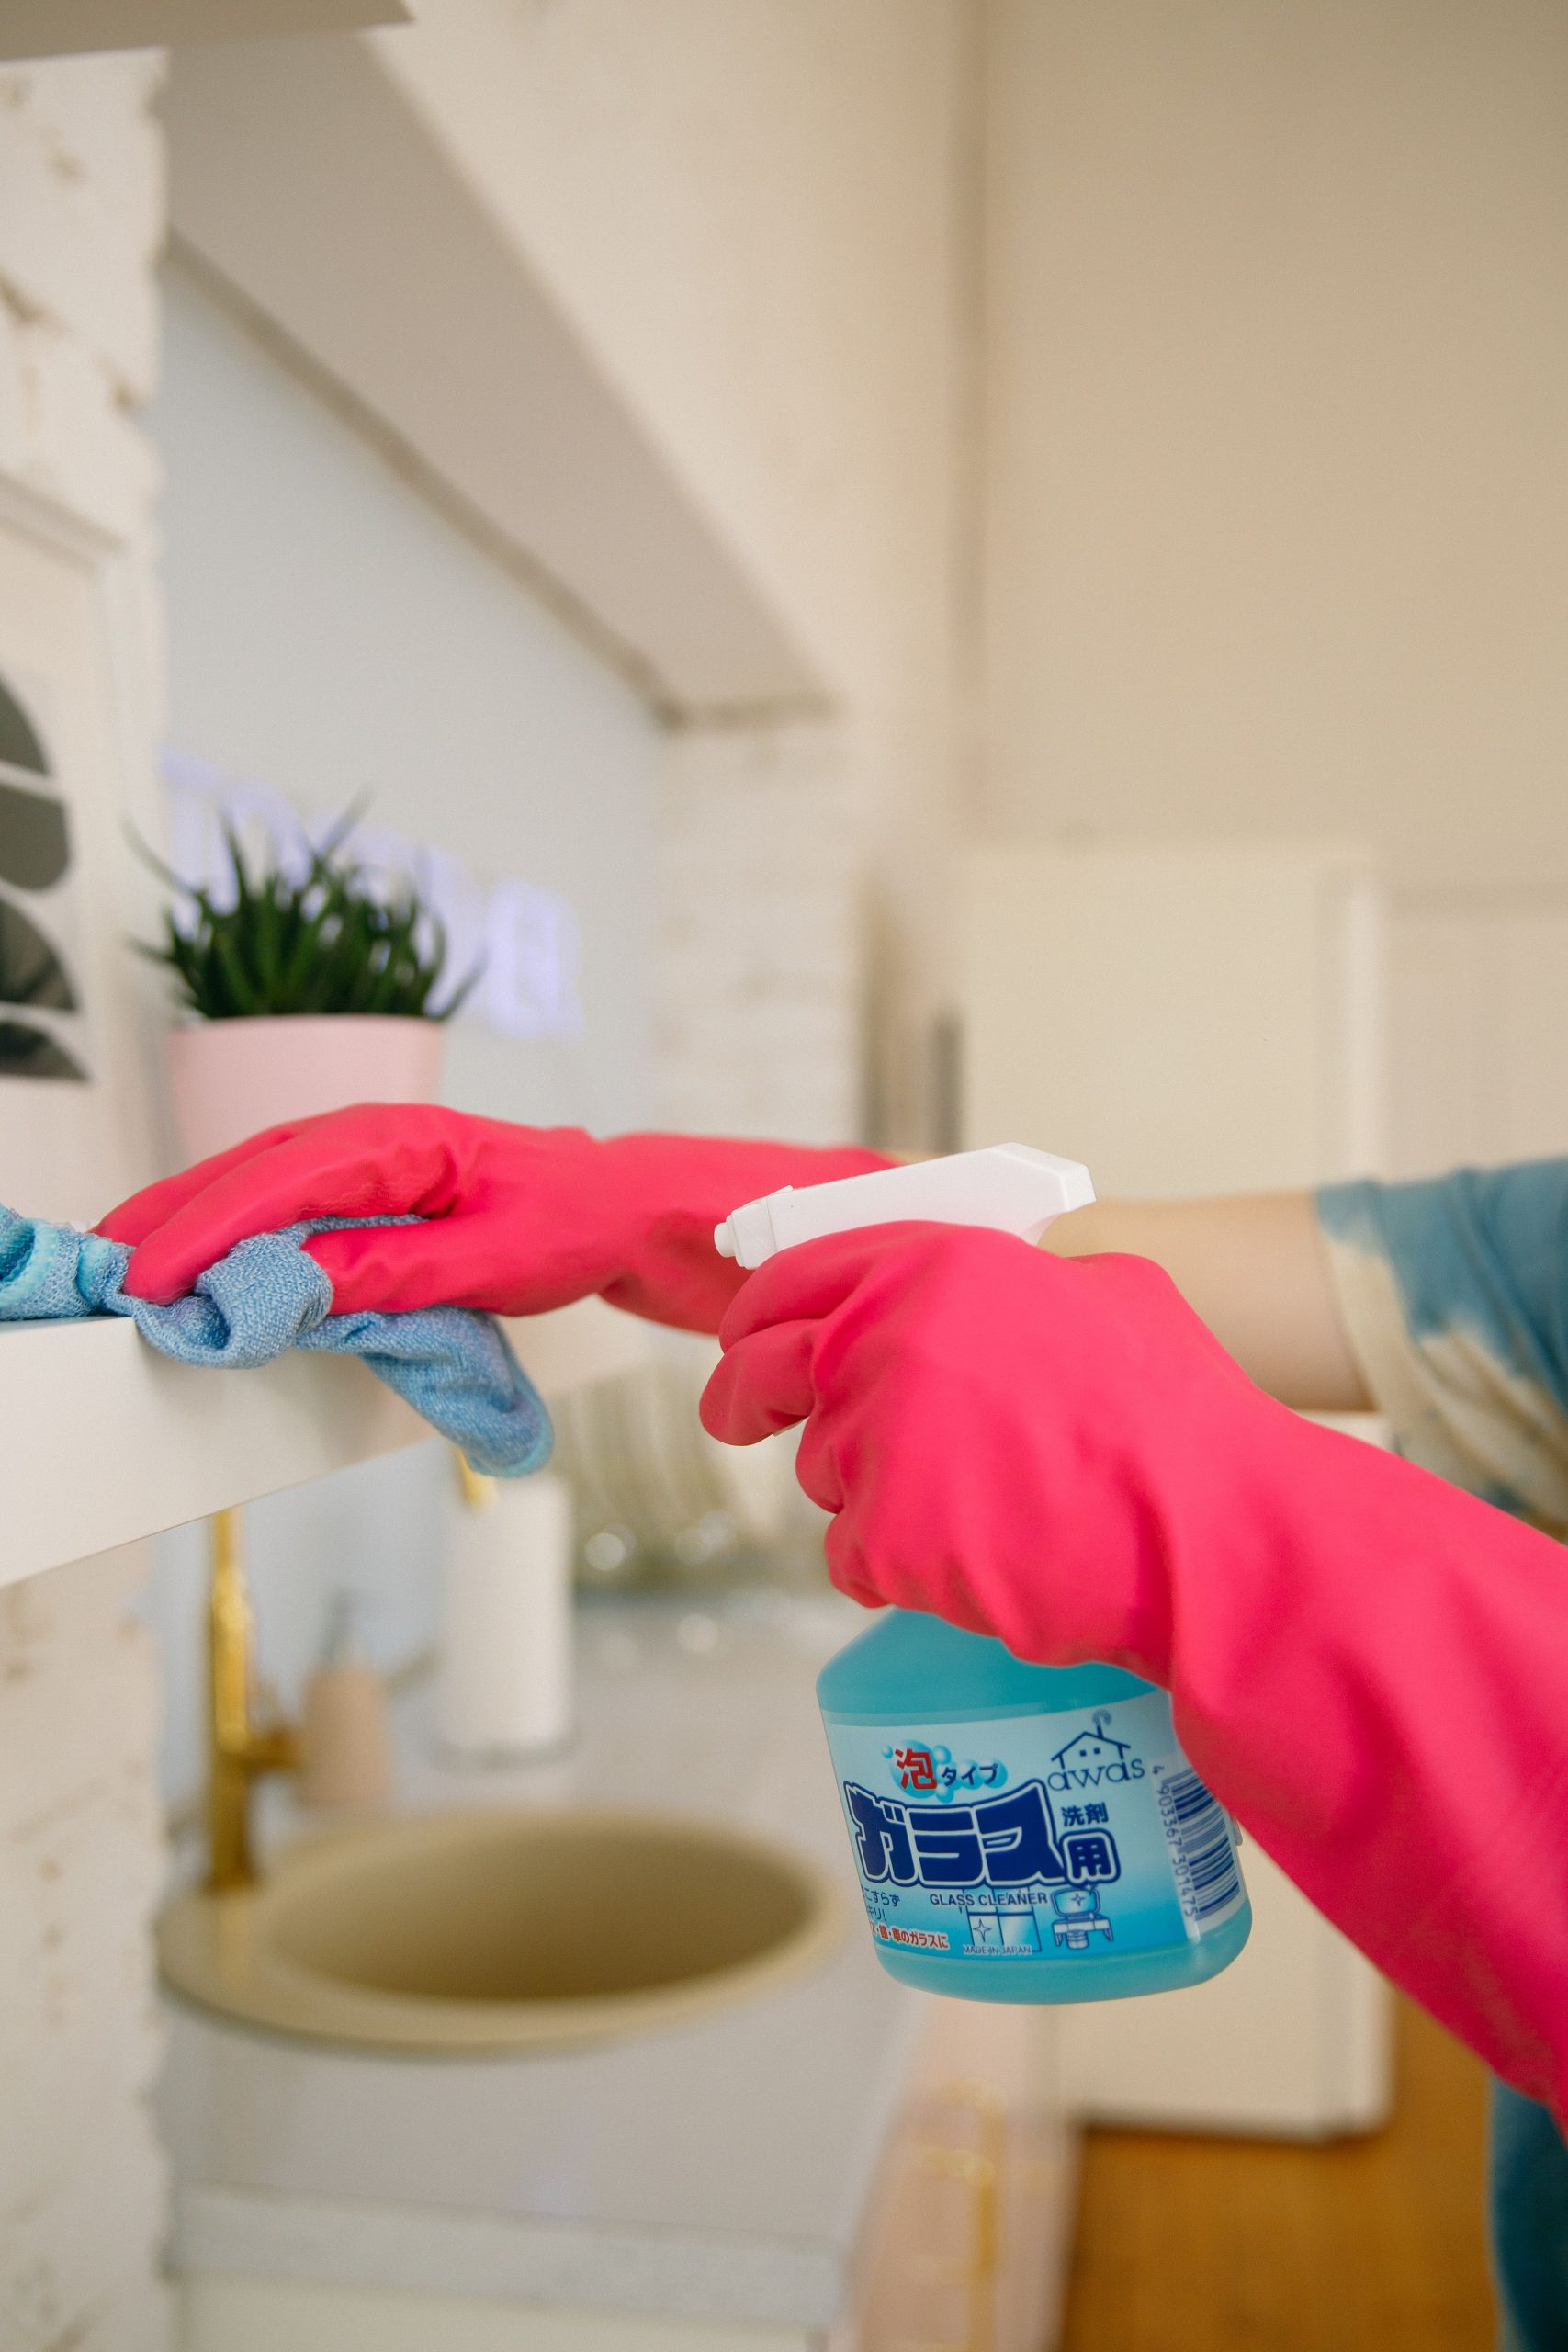
“Over the past few years, we’ve seen a huge ‘dopamine decor’ trend, where people use bright, happy colors to make their homes more joyful.”
That trend has officially trickled down to our cleaning supplies. Brands are releasing sponges, gloves, and spray bottles in bold, stylish colors like the hot pink and gold seen here. People are realizing that if they have to do chores, the tools they use might as well spark a little joy. It’s a small thing, but using beautiful, colorful tools can make the entire experience of cleaning feel a bit more pleasant and less utilitarian.
23. Cleaning a White Gas Range in a Modern Kitchen
When cleaning a gas range, don’t forget the burner heads and caps. These can often get clogged with food debris, which can lead to an uneven flame or difficulty lighting the burner. After removing the grates, lift off the caps and heads. Use a stiff brush (a toothbrush works well) to scrub away any cooked-on grime. To clear out the small gas ports, use a straightened paperclip or a specialized tool—don’t use a toothpick, as it can break off inside. A clean burner assembly ensures your stove functions safely and efficiently.
“This type of all-in-one range is a fantastic choice for kitchens of almost any size, from a compact apartment kitchen of around 80 sq.”
ft. to a larger suburban one. The key is the integrated nature of the appliance. You get your cooktop and your oven in a single footprint, typically 30 inches wide. The cleaning hack shown—wiping down the exterior—is universal. However, the need for a powerful stainless steel range hood becomes more critical in smaller spaces with less natural ventilation to handle cooking fumes and grease.
24. Tackling a Grimy Oven Rack in the Kitchen Sink
This is one of the most dreaded kitchen chores, but there’s a method that makes it much easier.
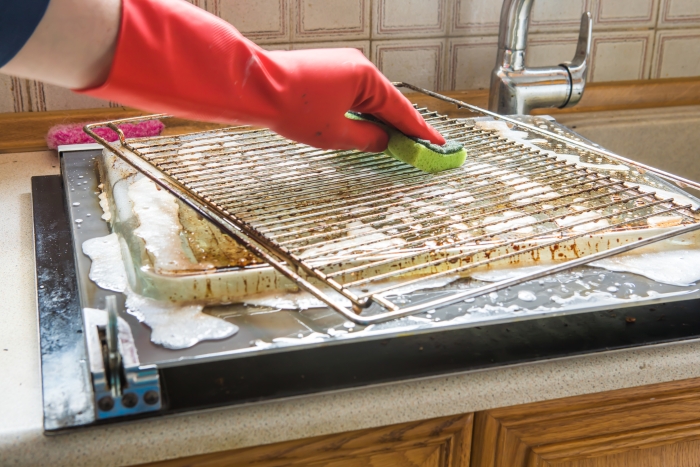
“Place an old towel in the bottom of your bathtub to prevent scratches.”
Put the grimy oven racks on top of the towel.
Fill the tub with the hottest water you can, just enough to cover the racks.
Add a half-cup of dishwasher detergent (the powder kind works best) and swish it around.
Let the racks soak for at least 4 hours, or even better, overnight.
The next day, the baked-on grime will have softened dramatically. Use a scrub brush to easily remove the rest, then rinse and dry.
This job is messy. There’s no way around it. You’re dealing with carbonized grease, which is sticky, black, and will get everywhere if you’re not careful. The red rubber gloves are non-negotiable. Don’t even think about trying this without them. Also, many people recommend using oven cleaner on these racks, but be warned: the fumes can be incredibly strong, and you need excellent ventilation. The bathtub-soak method is much more pleasant and fume-free, but it requires patience and planning since it takes several hours to work.
25. Scrubbing a Stainless Steel Kitchen Sink
The single most transformative step in cleaning a stainless steel sink isn’t just getting it clean—it’s making it shine. After you’ve scrubbed it with soap and water (or a paste of baking soda), rinse it thoroughly and—this is the important part—dry it completely with a microfiber cloth. Then, put a few drops of mineral oil or even olive oil on a clean cloth and buff it into the steel, wiping with the grain. This final step polishes the surface, repels water, and gives it that deep, reflective lustre that makes your whole kitchen look cleaner.
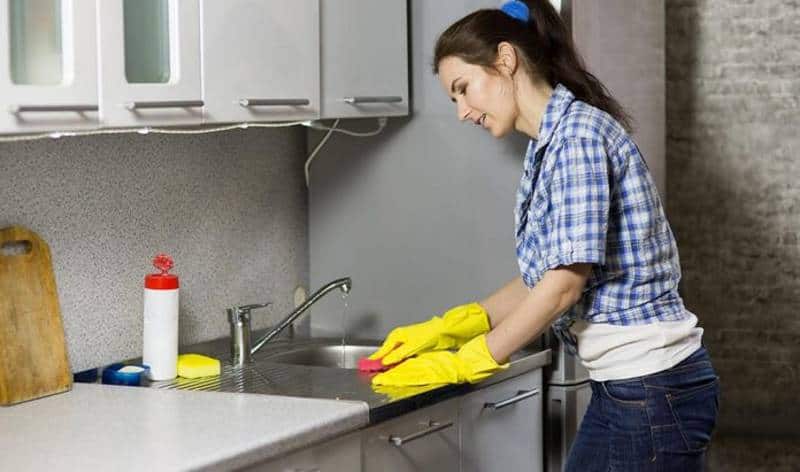
“You don’t need to buy expensive, specialized stainless steel cleaners.”
A fantastic and virtually free way to get a deep clean is with baking soda and vinegar. First, wet the sink and sprinkle it generously with baking soda. Using a sponge, scrub the basin to remove food residue and stains. Then, spray or pour white vinegar over the baking soda. It will fizz and bubble, which helps to disinfect and loosen mineral deposits. Let it sit for ten minutes, then rinse thoroughly with hot water. It’s a powerful combo you already have in your pantry.
26. Using Baby Wipes to Clean White Baseboard Trim
This is a surprisingly effective hack because baby wipes have a few key properties that make them perfect for this job. They have just the right amount of moisture—wet enough to clean, but not so wet that they leave drippy messes on your floor or wall. They also contain gentle cleaning agents that are safe for most painted surfaces. The texture of the wipe itself is soft but has enough grip to pick up dust and scuffs without being abrasive. It’s an all-in-one tool that’s incredibly convenient for quick touch-ups.
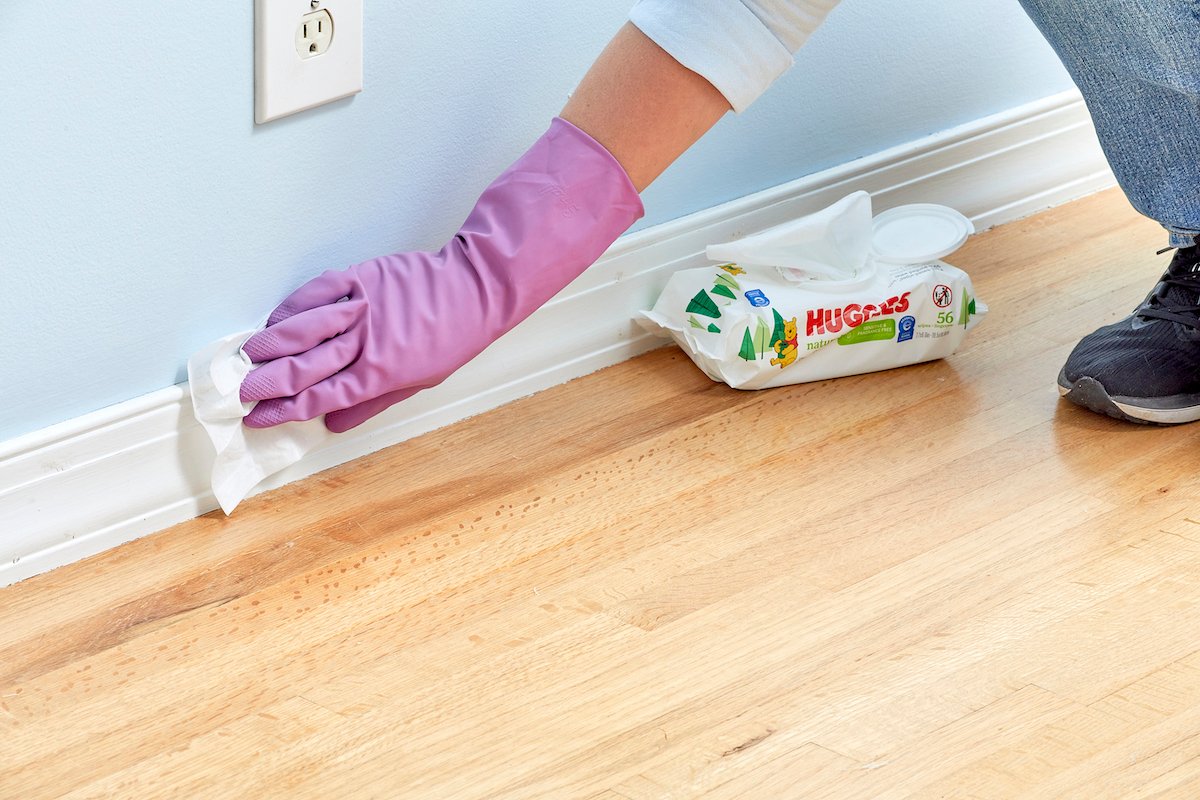
“While this is a brilliant trick for spot-cleaning scuffs and dust, it’s not the most efficient or cost-effective method for a deep clean of all the baseboards in your house.”
You’d go through a lot of wipes! For a full, deep-cleaning job, the bucket-and-sponge method shown in Idea #28 is still the way to go. Think of the wipes as your go-to for maintenance—when you spot a scuff mark from a shoe or a dusty corner and want to fix it in 30 seconds without pulling out all your supplies.
27. Vacuuming Dust from Baseboards and Trim
This should always be your first step before any wet cleaning of baseboards. Always vacuum first. If you try to wipe down a dusty baseboard, you’re just creating a muddy paste that gets smeared into the crevices and onto the wall. By using the brush attachment on your vacuum, you remove all the loose dust, pet hair, and debris first. This makes the actual washing part faster, easier, and much cleaner. It’s a classic pro-cleaner move: dry clean before you wet clean.
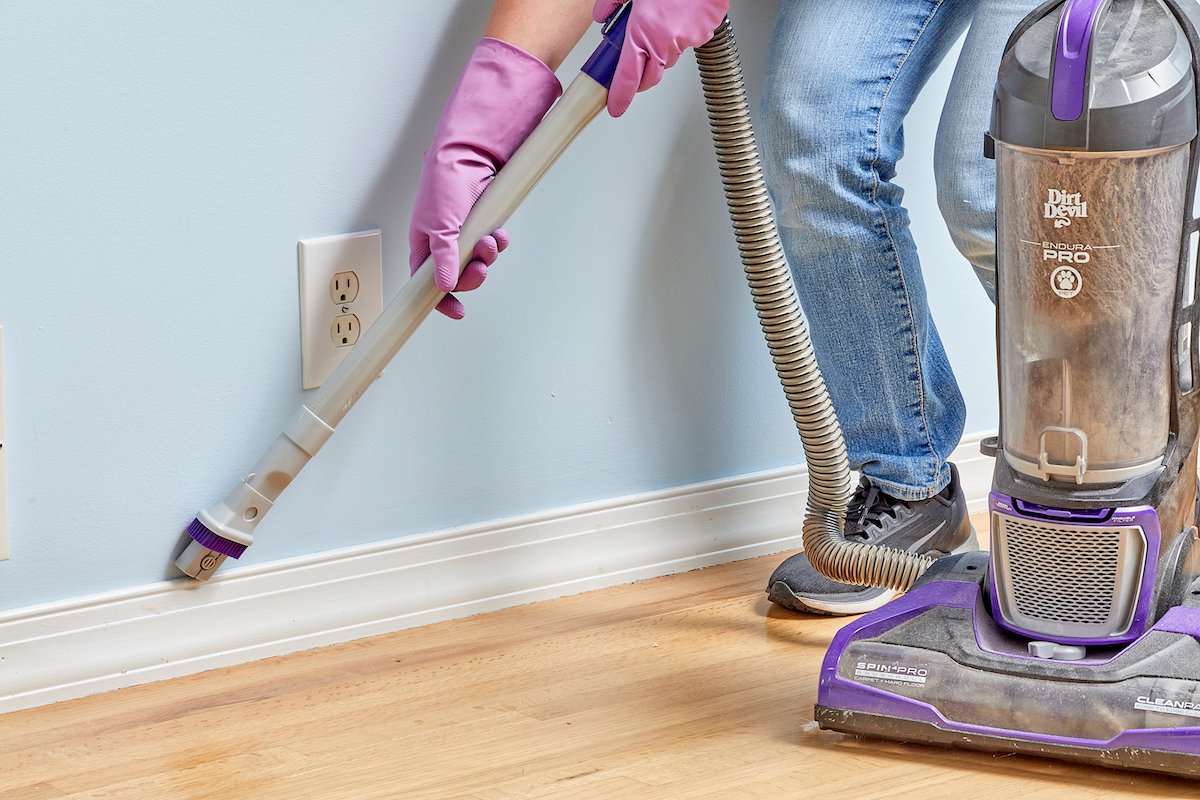
“Baseboards are a magnet for dust, pet hair, and scuff marks.”
Their location right at the floor level means they get hit with everything. The reality is that they need to be cleaned far more often than most people think. In a busy household, especially with pets or kids, a quick vacuum like this should happen weekly. A full wipe-down might be needed monthly. The little ledge on top of the baseboard is the worst offender; if you let dust build up there, it will constantly get kicked back into the air.
28. Washing Baseboards with a Vinegar Solution
This classic method is a staple for a reason. The warm water helps to loosen dirt and grime, while the white vinegar acts as a mild, natural disinfectant and cleaning agent that can help cut through greasy buildup without damaging most paint finishes. The sponge provides a large, absorbent surface for washing, and the bucket system—one for cleaning solution, one for rinsing—is the best way to ensure you’re not just spreading dirty water around your house. It’s a simple, low-cost, and highly effective system. For a slightly different approach, check out Idea #26.
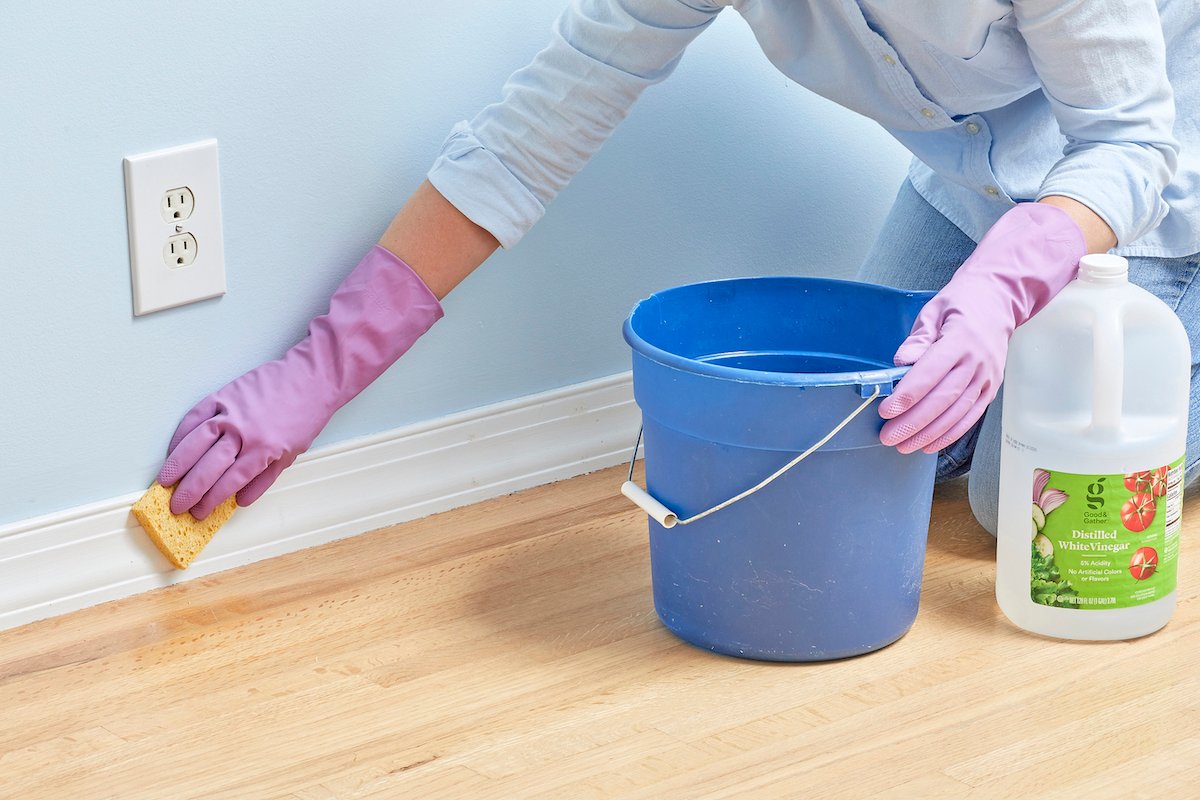
“Before you get on your hands and knees, do the dry work first.”
As we mentioned in Idea #27, you must vacuum the baseboards and the edge of the floor thoroughly. Next, do a quick spot test with your cleaning solution (e.g., water and vinegar) on an inconspicuous area to make sure it doesn’t harm your paint finish. An eggshell or satin finish is usually fine, but a flat paint might show watermarks. Finally, lay an old towel on the floor along the wall to catch any drips and protect your flooring, especially if it’s hardwood.
Time To Reclaim Your Weekend
Cleaning doesn’t have to be a monumental chore that you dread all week. With the right techniques and a little bit of cleverness, you can keep your home looking its best without the marathon cleaning sessions. Pick a hack, try it out, and see what a difference it makes. Ready to make your home shine? Pin your favorite ideas and get started!