You know that feeling when you finally find the tiny backyard slope idea that looks exactly right for your space? That “aha!” moment is what this guide is all about. After filtering through hundreds of options across big-box stores and landscaping suppliers, we narrowed it down to 29 incredible, real-world examples that actually deliver. Inside, you’ll find a mix of modern, rustic, and lush layered designs fit for any sloped yard. In 2026, we’re all about reclaiming every square inch of our property, and turning a tricky slope into a beautiful, functional feature is the ultimate home-value win. 📌 Save this to Pinterest for later — you’ll want to revisit these ideas.
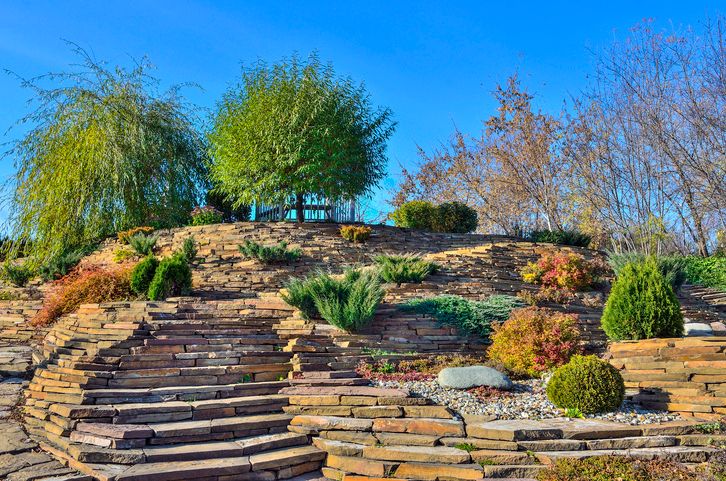
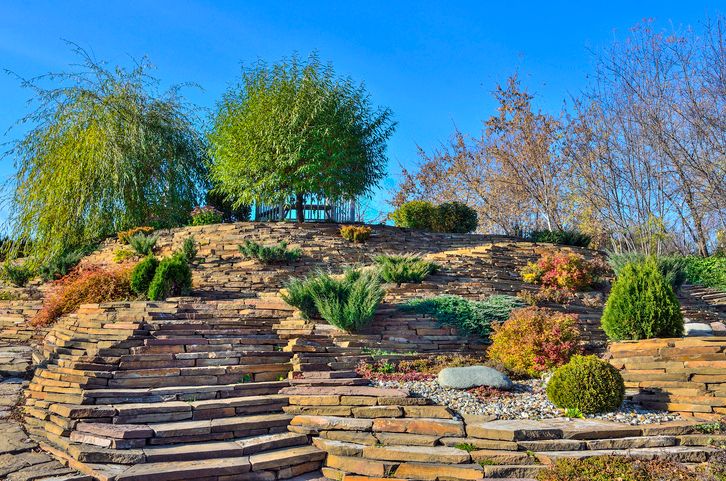
1. Embrace Natural Texture with Layered Stone Steps
This design leans into the natural chaos of a hillside, and that’s precisely what makes it work. The magic is in the mix of materials and the intentional imperfection. By combining chunky, irregular stone steps with finer gravel and oversized boulders, the design achieves a rich textural contrast that feels both wild and thoughtfully composed. The repetition of green foliage in various heights and shapes provides a unifying element, preventing the hardscaping from feeling too dominant and instead making it look like it was discovered rather than built.
“While stone is incredibly durable, a natural, layered design like this isn’t zero-maintenance.”
The key challenge will be weed control in the gravel areas and between the stone slabs, which will likely require attention every 2-3 weeks in peak growing season. The stacked stone walls are stable but should be inspected each spring for any shifting caused by winter freezes and thaws; resetting a loose stone is much easier than fixing a major slump. Finally, the lush plantings will need seasonal trimming to keep the steps clear and prevent them from becoming overgrown and slippery.
2. Modern Mediterranean Meets Drought-Tolerant Slope
The visual success of this landscape is a beautiful equation: 50% clean, modern architecture + 40% arid, low-water plantings + 10% classic texture. The light stucco and terracotta roof of the house provide a warm, neutral backdrop. The slope is then treated with a thoughtful mix of hardy, sculptural plants like agave and other succulents. The final touch is the classic brick inlay in the driveway, which adds a hint of traditional charm and keeps the modernism from feeling too stark. You can swap the plant types, but keep the formula of simple structure and textured, arid greenery.
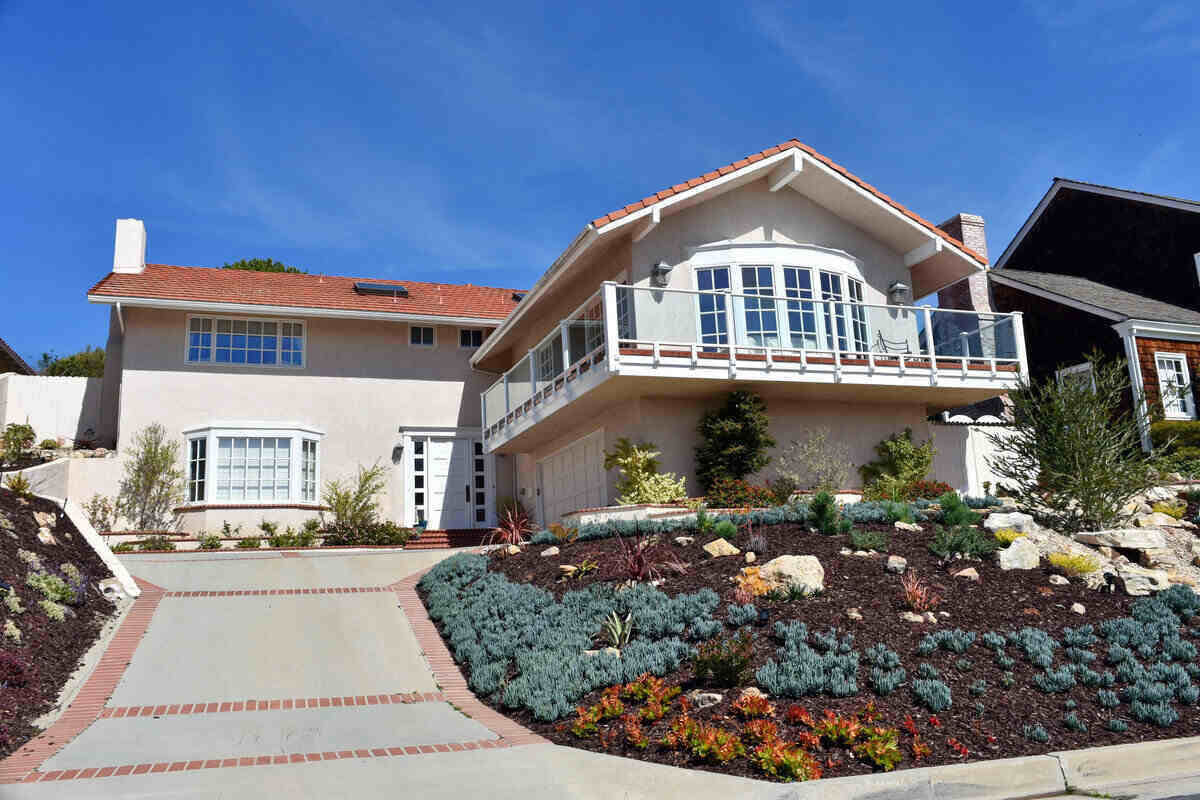
“This approach is best suited for medium to large front yards where the house itself is a major feature.”
The slope needs to be substantial enough to create a distinct visual plane between the street and the home, typically a grade of at least 15-25%. For this to not overwhelm a small yard, you’d need a minimum of 20 feet of depth from the curb to your front door. The grandeur of the two-story home balances the expansive, sloping garden; a smaller single-story home might be better served by a more compact terraced design like the one in Idea #15.
3. Install a Multilevel Deck with Built-in Seating
This is a significant investment in outdoor living, turning a challenging slope into a primary entertaining space. The composite decking and substantial retaining walls are the biggest costs.
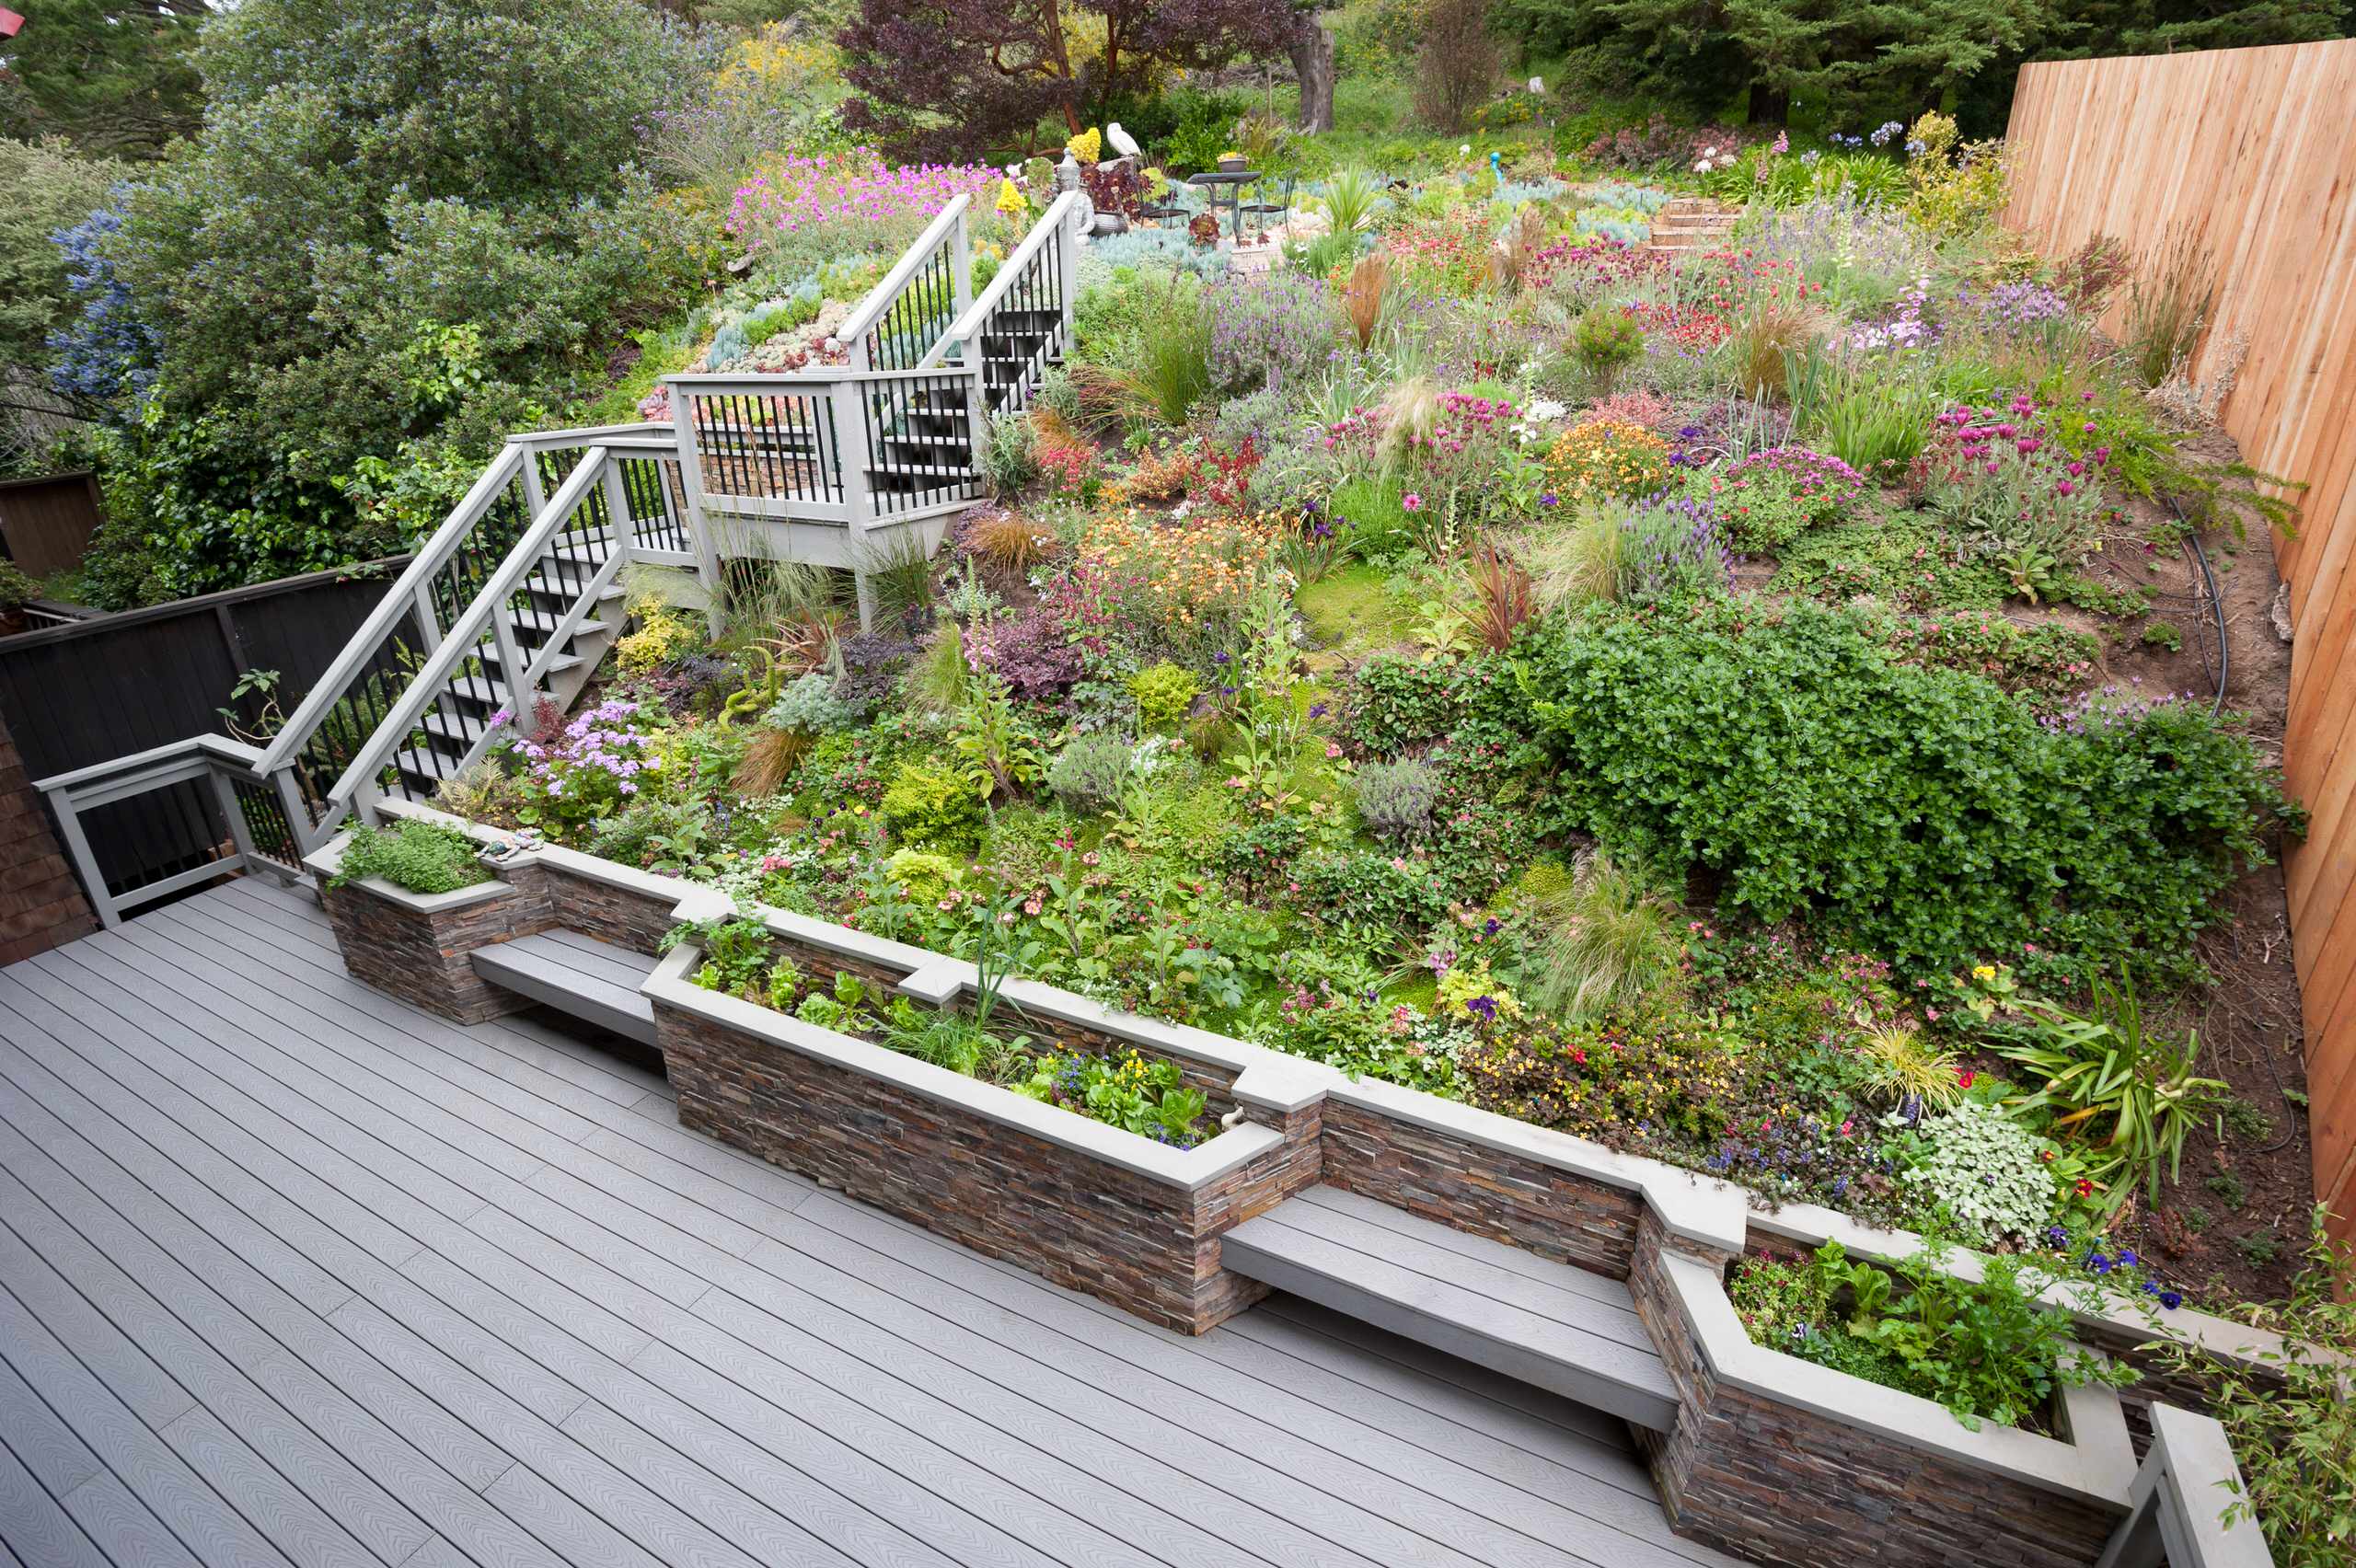
“Main Deck & Stairs: $12,000 – $22,000 (Composite decking is pricey but low-maint”
- Main Deck & Stairs: $12,000 – $22,000 (Composite decking is pricey but low-maintenance)
- Stone Planters & Built-in Seating: $5,000 – $9,000
- Plants & Soil: $2,000 – $4,000
- Labor & Excavation: $8,000 – $15,000
- TOTAL: $27,000 – $50,000
Budget alternative: Use pressure-treated wood instead of composite, and opt for simpler wooden planter boxes instead of custom stonework to bring the total cost down by 40-50%.
When building seating into a retaining wall, don’t make the bench depth less than 18 inches; 20-22 inches is ideal for accommodating outdoor cushions and leaning back comfortably. The seat height should be between 16 and 18 inches from the deck surface, which is standard chair height. Any lower and it feels awkward to get up from; any higher and your feet might not rest comfortably on the ground. Also, be sure to angle the back of the planter wall slightly, about 5 degrees, for a more relaxed lounging posture.
4. Create a Cozy Lounge Under a Raised Deck
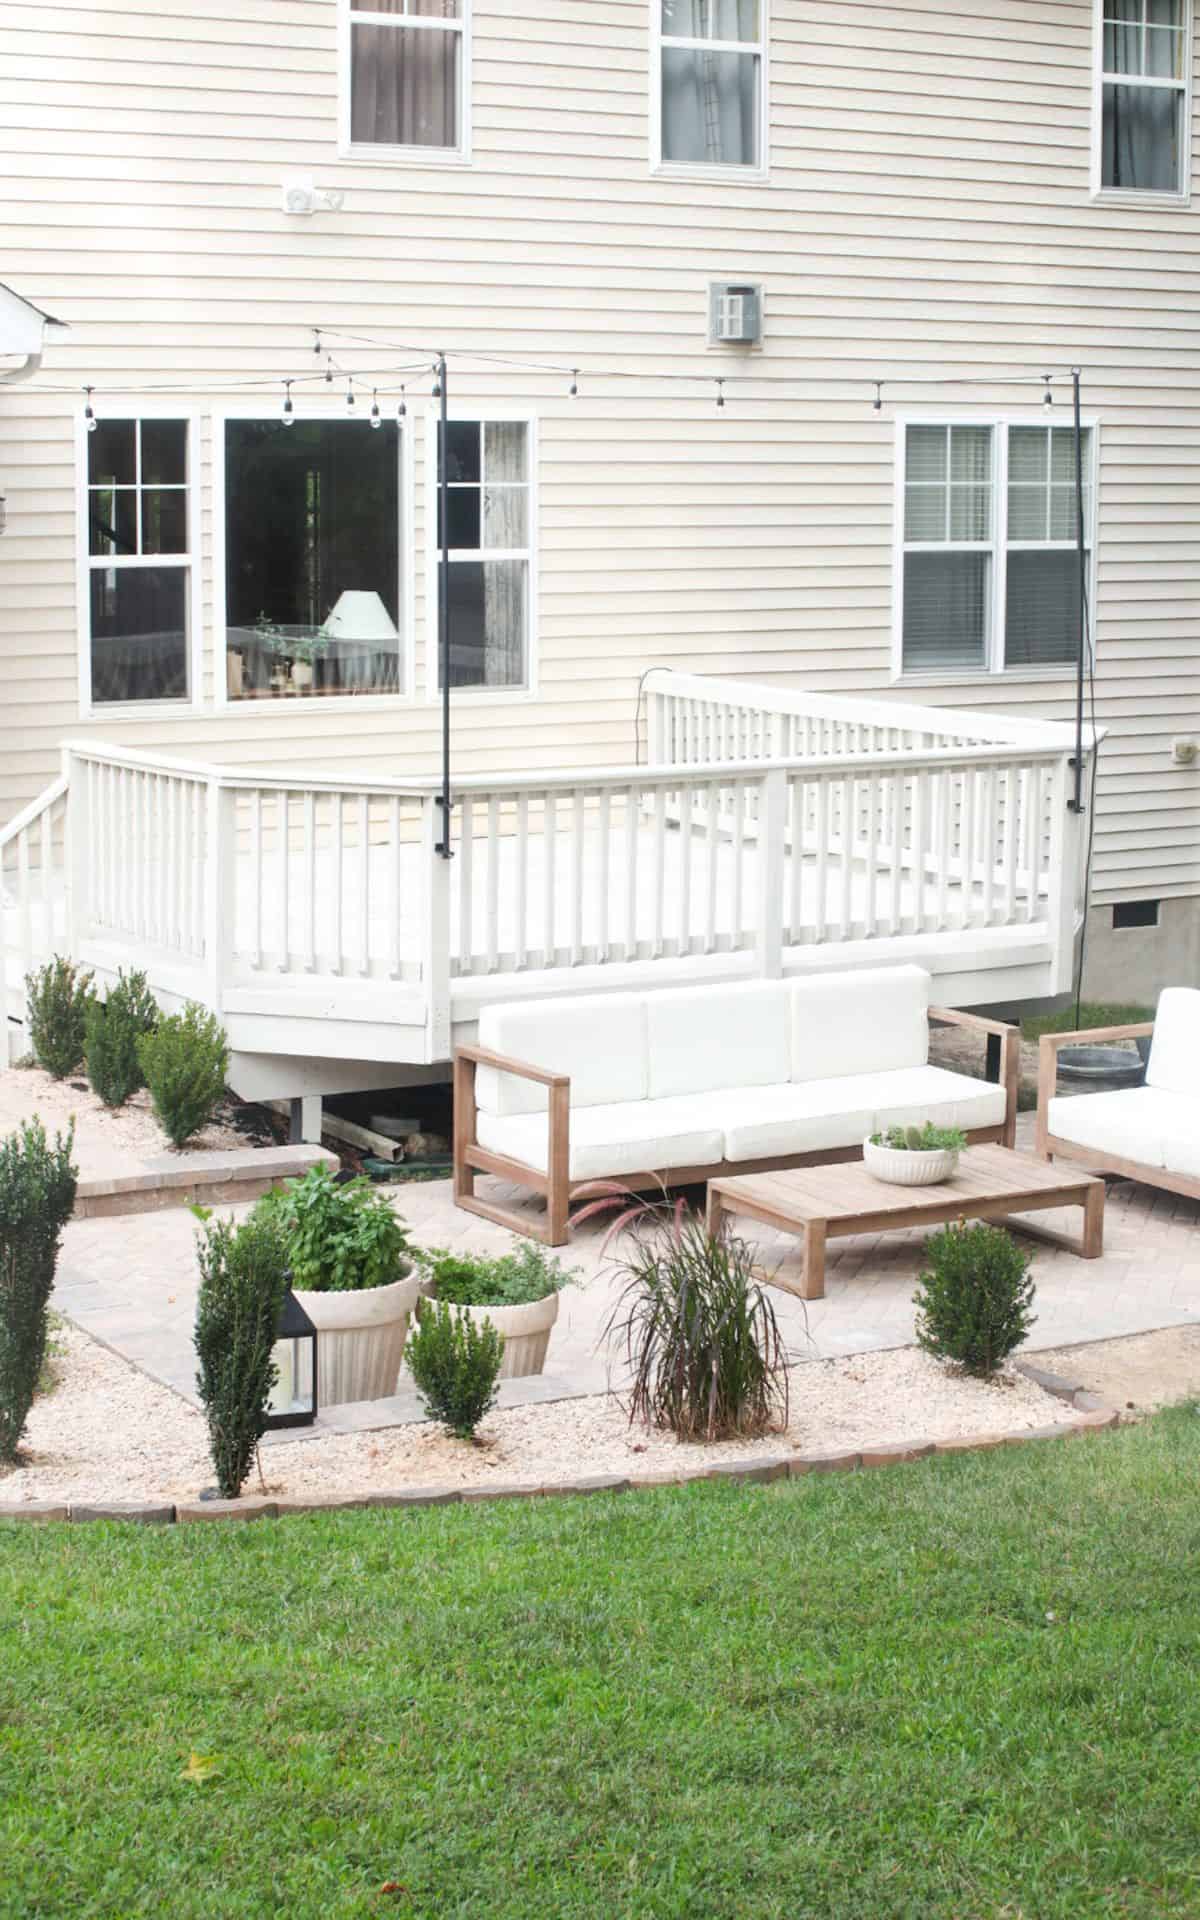
that makes this space feel so complete is the use of string lights. Without them, it’s a nice patio. With them, it’s a magical evening destination. The lights define the vertical space under the deck, creating a
5. Layer Lush Flowerbeds with Concrete and Brick Edging
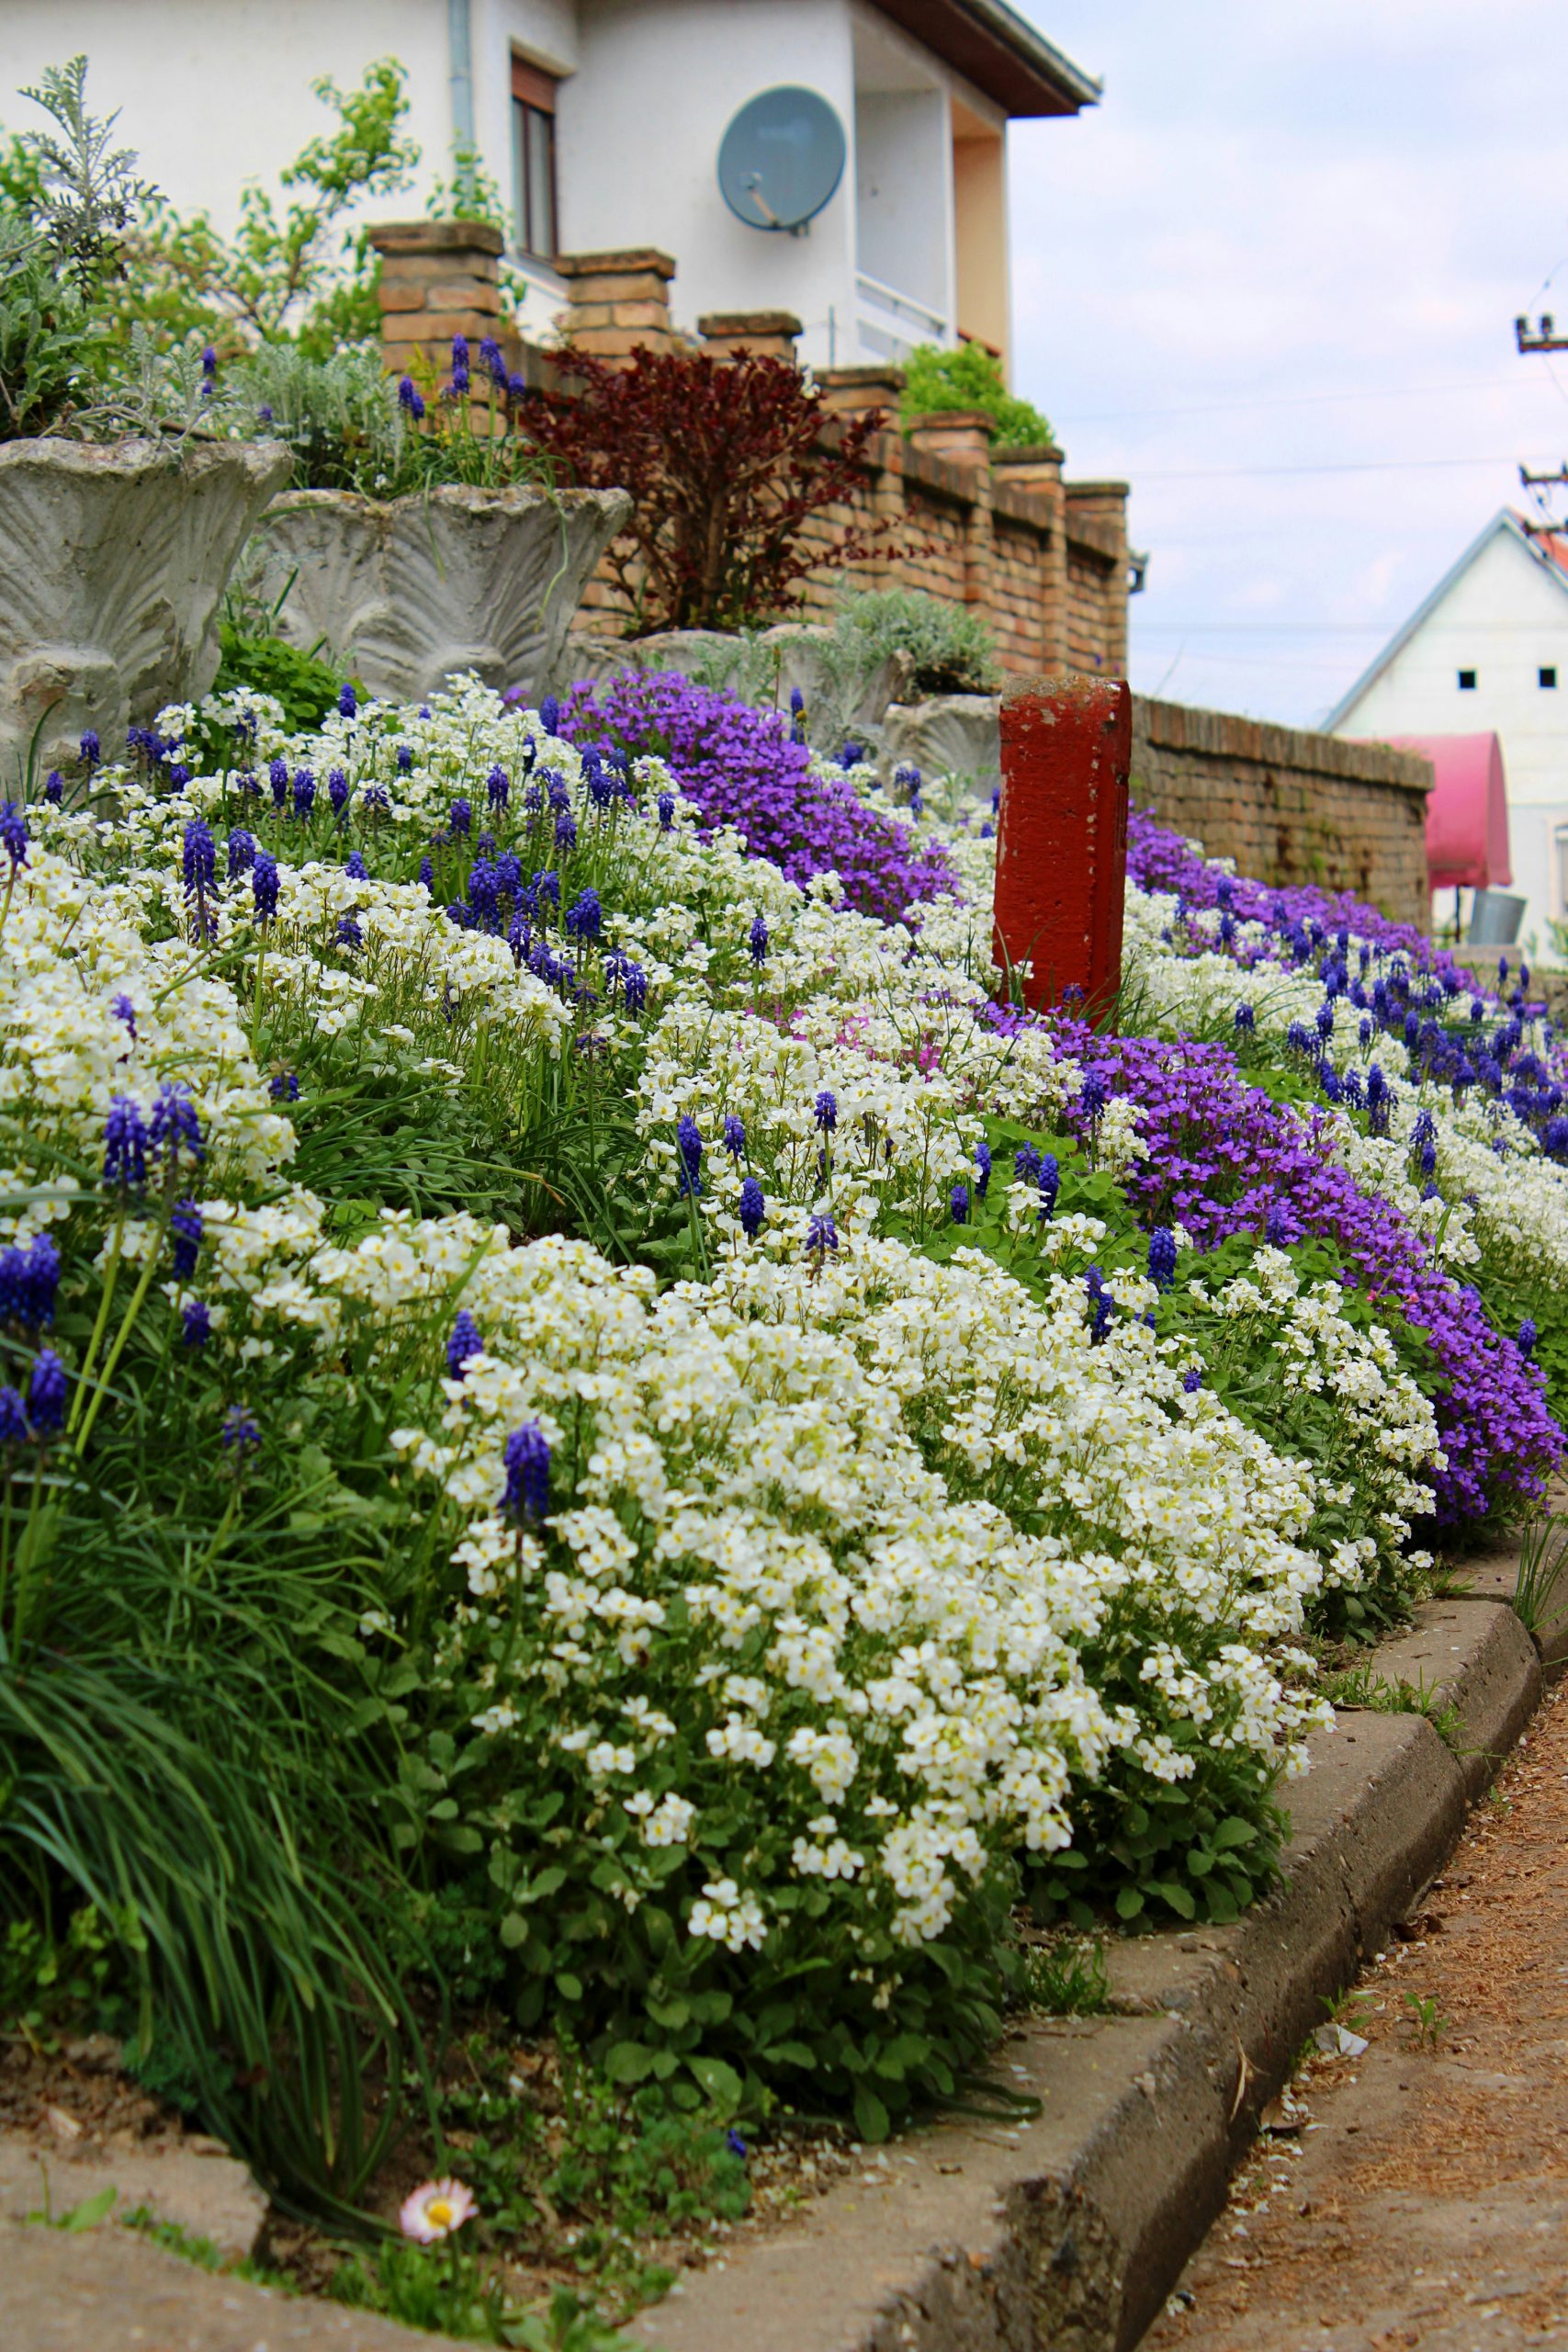
You can recreate these simple concrete-edged beds to tame a gentle slope. This small project adds professional-looking definition to your flowerbeds.
“Time: 3-4 hours for a 20-foot edge
Cost: $50-$80
Define & Dig: Lay out the curve”
- Time: 3-4 hours for a 20-foot edge
- Cost: $50-$80
- Define & Dig: Lay out the curve of your bed with a garden hose, then use a spade to dig a trench 4 inches wide and 4 inches deep.
- Mix & Pour: Mix a bag of concrete according to the directions. Pour it into the trench, over-filling it slightly.
- Shape & Smooth: Use a trowel to smooth the top and sides, creating a rounded or flat profile as desired.
- Cure: Let the concrete cure for 24-48 hours before adding soil or mulch next to it.
This design’s success comes from its smart use of layering and repetition. The low, white groundcover flowers are repeated in the foreground, creating a visual entry point. The purple and blue flowers provide a cool-toned color block that contrasts beautifully with the warm red brick in the background. The concrete and brick retaining elements, while different materials, both create strong horizontal lines that give the cascading, naturalistic planting a sense of structure and order. It’s a perfect marriage of formal hardscaping and informal planting.
6. Mix Large Boulders with Flowering Shrubs
Placing large boulders is not a casual weekend task. These rocks can weigh several hundred to over a thousand pounds. You will not be moving them with a wheelbarrow. This is a job for a landscaping company with a mini-excavator or crane. Trying to roll or lever them into place yourself is a recipe for a strained back or worse. Also, consider their placement carefully—once they’re in, they are *in*. You need to be 100% sure about their location before the crew leaves.
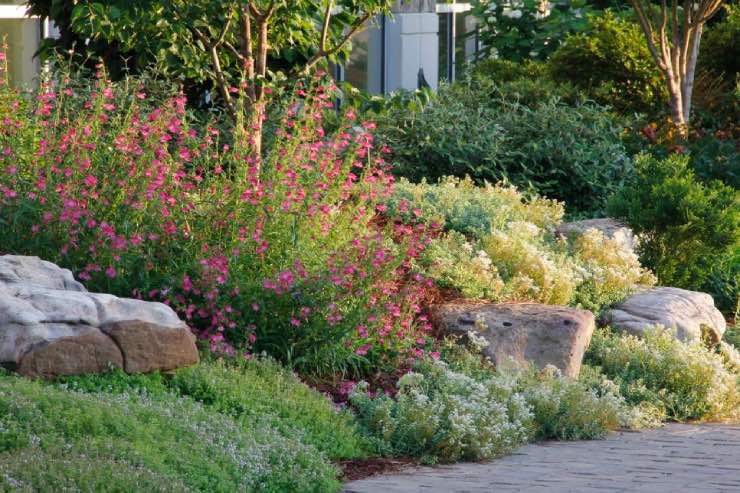
“The beauty of this garden lies in its balanced formula: 40% structural hardscape (the boulders) + 50% floral volume (the pink shrubs) + 10% delicate fillers (the low ground cover and other greens).”
The large, gray boulders provide a neutral, weighty anchor for the entire bed. The vibrant pink flowers are the undisputed star of the show. The varied green foliage acts as the supporting cast, filling in gaps and providing textural contrast without competing for attention. You could swap the pink for white or yellow flowers and achieve a completely different, but still balanced, mood.
7. Cultivate Mossy Stone Steps Through a Lush Thicket
This look taps directly into the ‘cottagecore’ and ‘goblincore’ trends that have been sweeping Pinterest. It’s all about embracing a slightly wild, aged, and romantic aesthetic. Homeowners are getting tired of sterile, perfectly manicured landscapes and are instead drawn to designs that feel like they have a history. The moss growing on the stones isn’t seen as a problem to be scrubbed away, but a feature to be cultivated. It speaks to a desire for authenticity and a connection to nature, even in a curated backyard space. This trend has staying power because it’s less about a specific look and more about a feeling of nostalgic comfort.
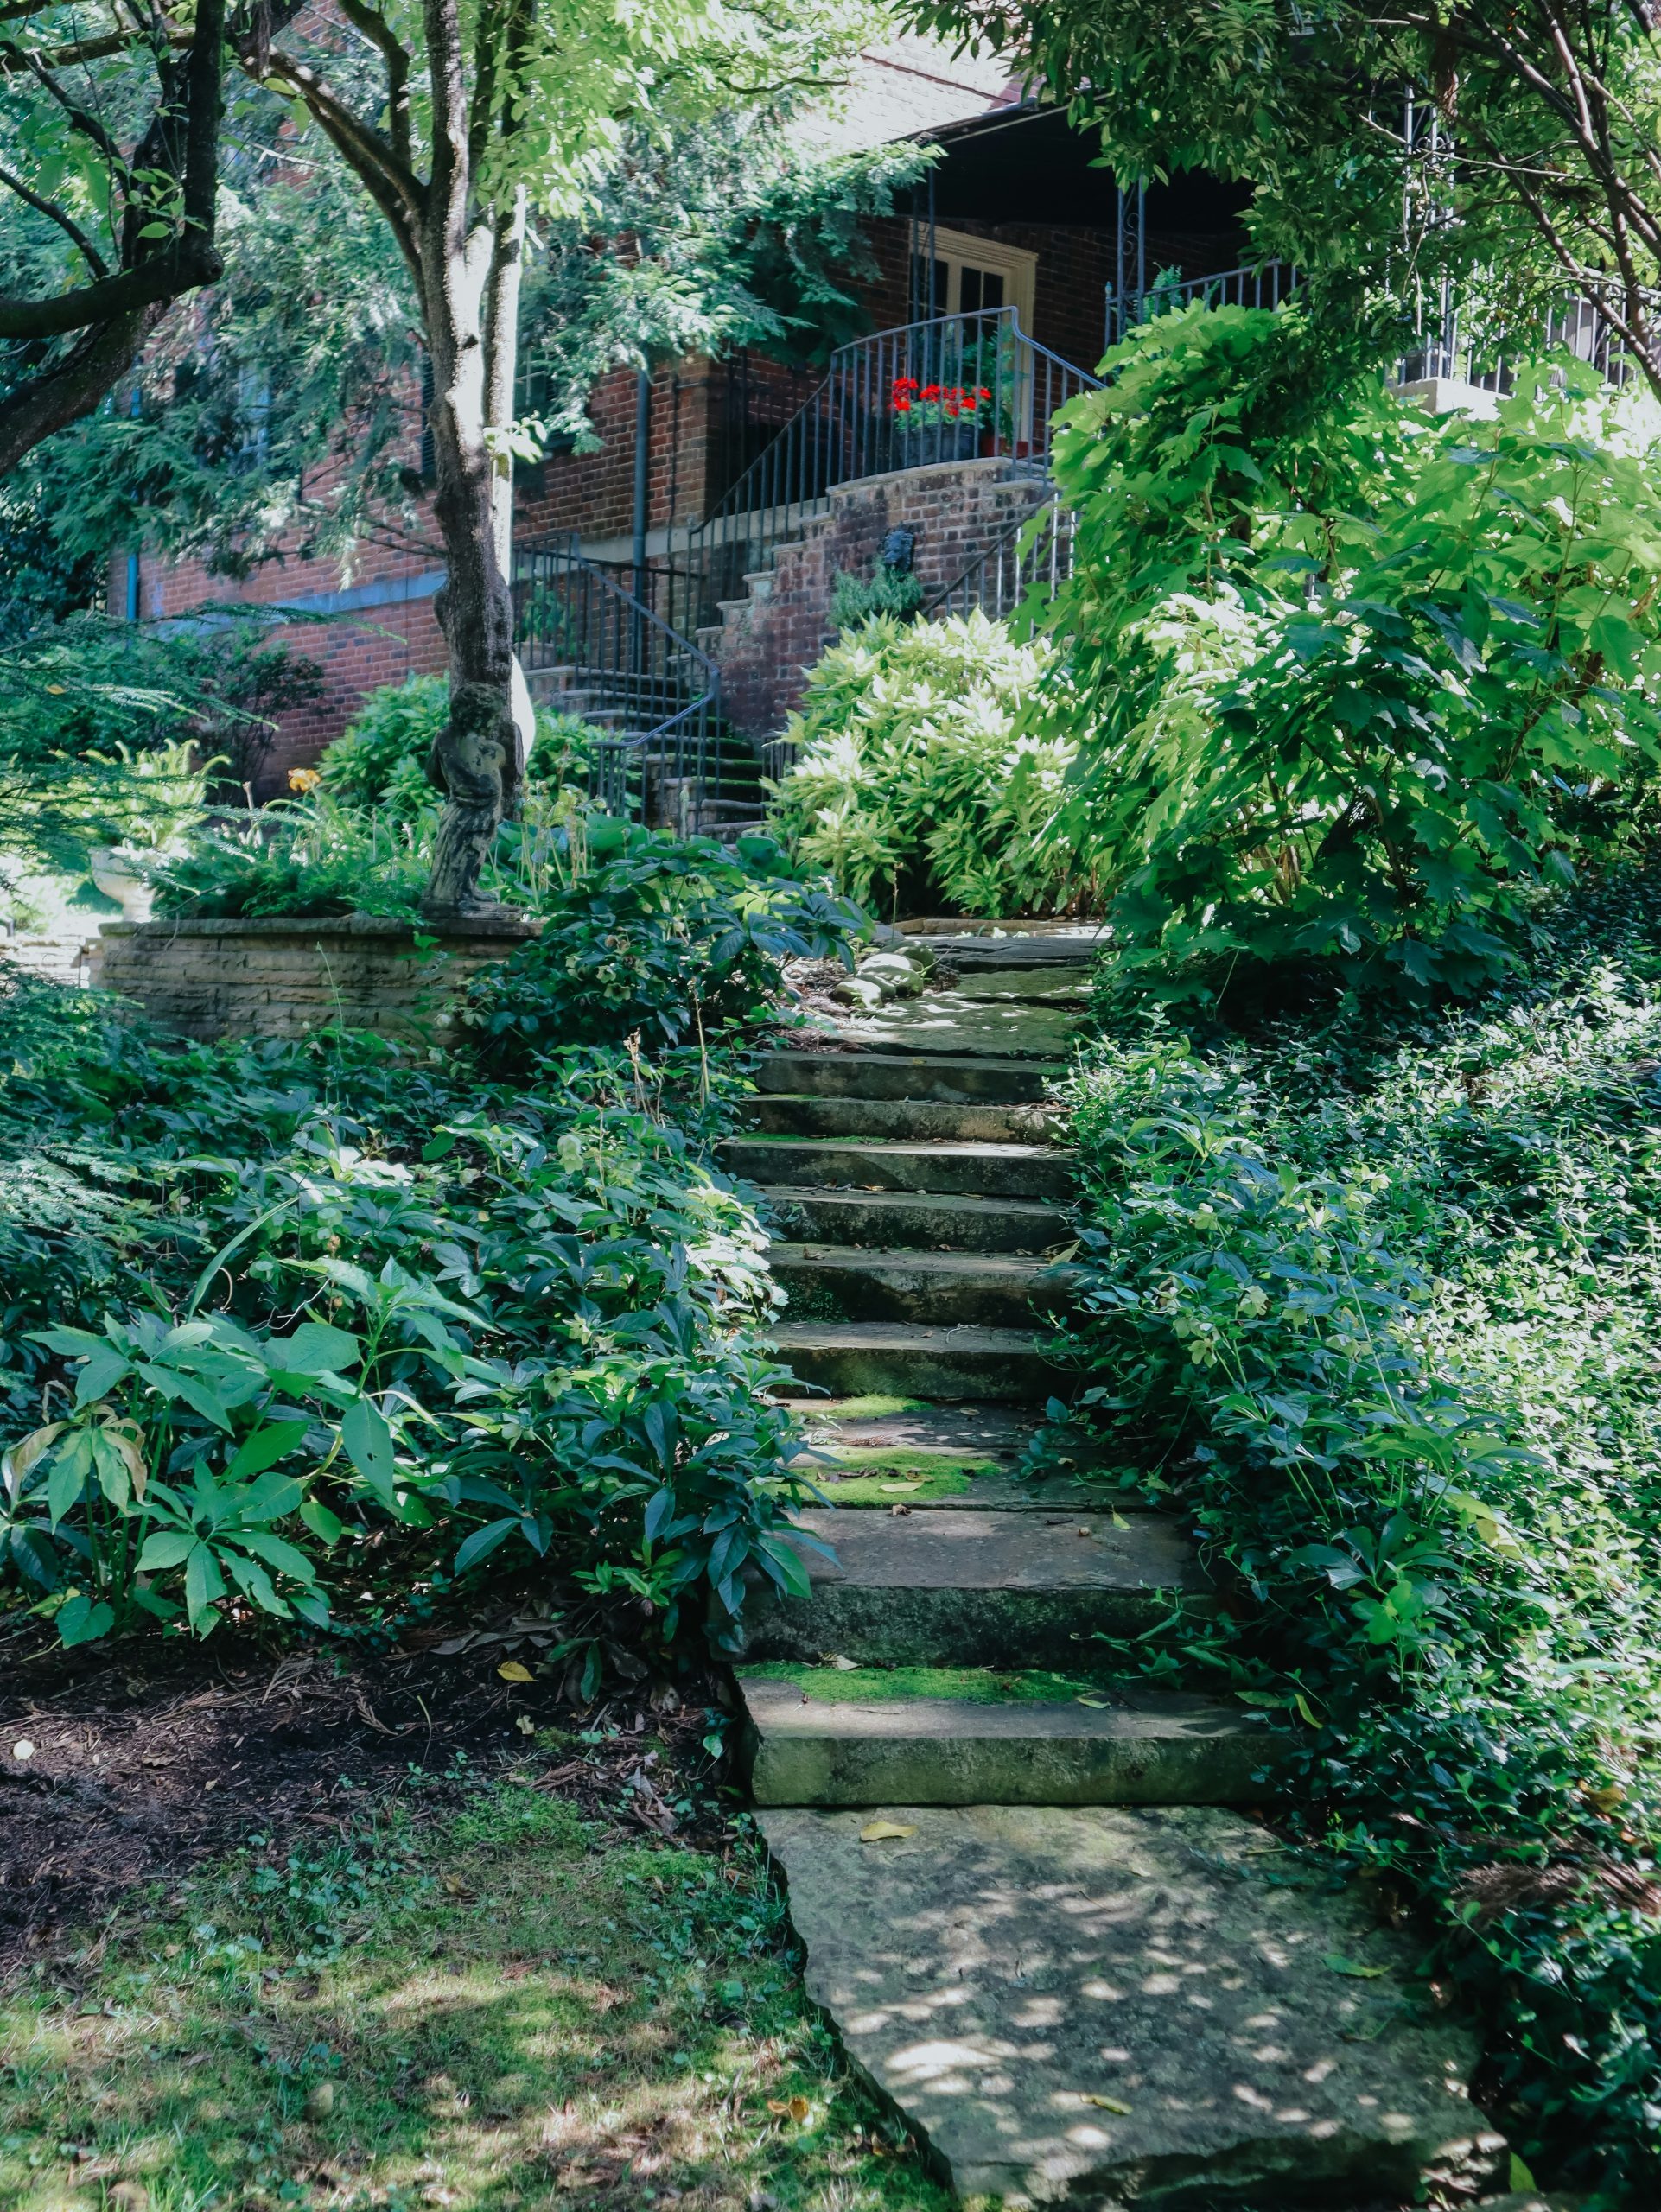
“While beautiful, moss-covered steps can be extremely slippery, especially after rain or in damp, shaded areas.”
This is not a great choice for a primary walkway used daily by family members, especially kids or those with mobility issues. The best way to maintain the look without the hazard is to use a pressure washer on a low setting or a stiff brush to clear the moss from the main walking path on each step, leaving it to grow on the edges and risers. You’ll also need to be vigilant about trimming back the encroaching foliage to keep the path accessible, which can mean weekly clipping in the spring.
8. Carve Concrete Steps into a Vibrant Rock-Filled Hillside
For hillside steps, the ‘7-11 rule’ is a great guideline for comfort and safety. This means the riser height (the vertical part) should be around 7 inches, and the tread depth (where you step) should be around 11 inches. When you add the riser height and tread depth, you should get a number close to 18. This ratio creates a natural and non-strenuous climbing cadence. Here, the steps appear even deeper, perhaps 14-16 inches, which slows the journey down and encourages you to pause and enjoy the surrounding garden.
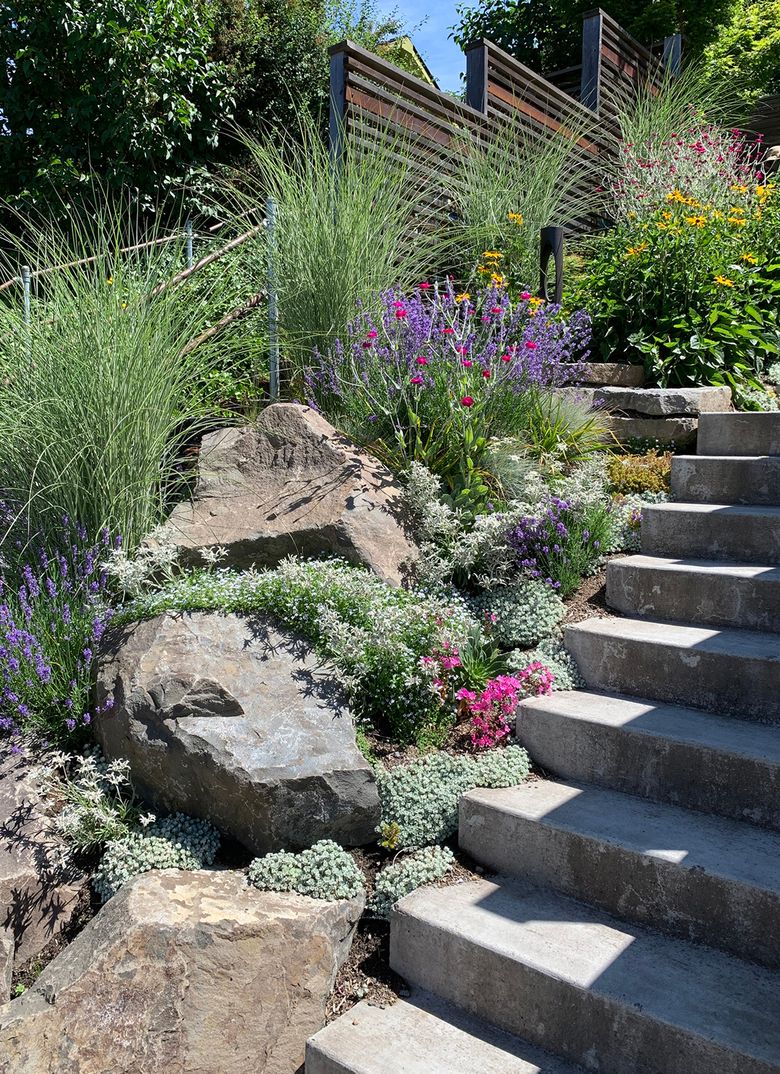
“The single element that makes this design truly breathtaking is the cascade of colorful, mixed plantings.”
Take away the flowers and ornamental grasses, and you just have rocks and concrete. But with the vibrant purples, pinks, and yellows spilling over the edges, the entire scene comes alive. The plants soften the hard edges of the stone and concrete, turning a purely functional staircase into an immersive journey. It’s a masterclass in using plants to transform infrastructure into a main attraction. Compare this with the more structured planting in Idea #11.
9. Build Rustic Tea Terraces with Dry-Stack Stone Walls
The effectiveness of this design lies in its rhythmic repetition and natural materials. The repeating horizontal lines of the dry-stack stone walls create a calming, organized pattern that tames the steepness of the slope. However, the use of irregular, natural stone (rather than uniform blocks) keeps the look from feeling too rigid or commercial. This contrast—between the orderly terraces and the rustic material—is what creates the harmonious, agricultural aesthetic. The consistent, dense green foliage further unifies the scene, making the stone walls look like they’ve been there for centuries.
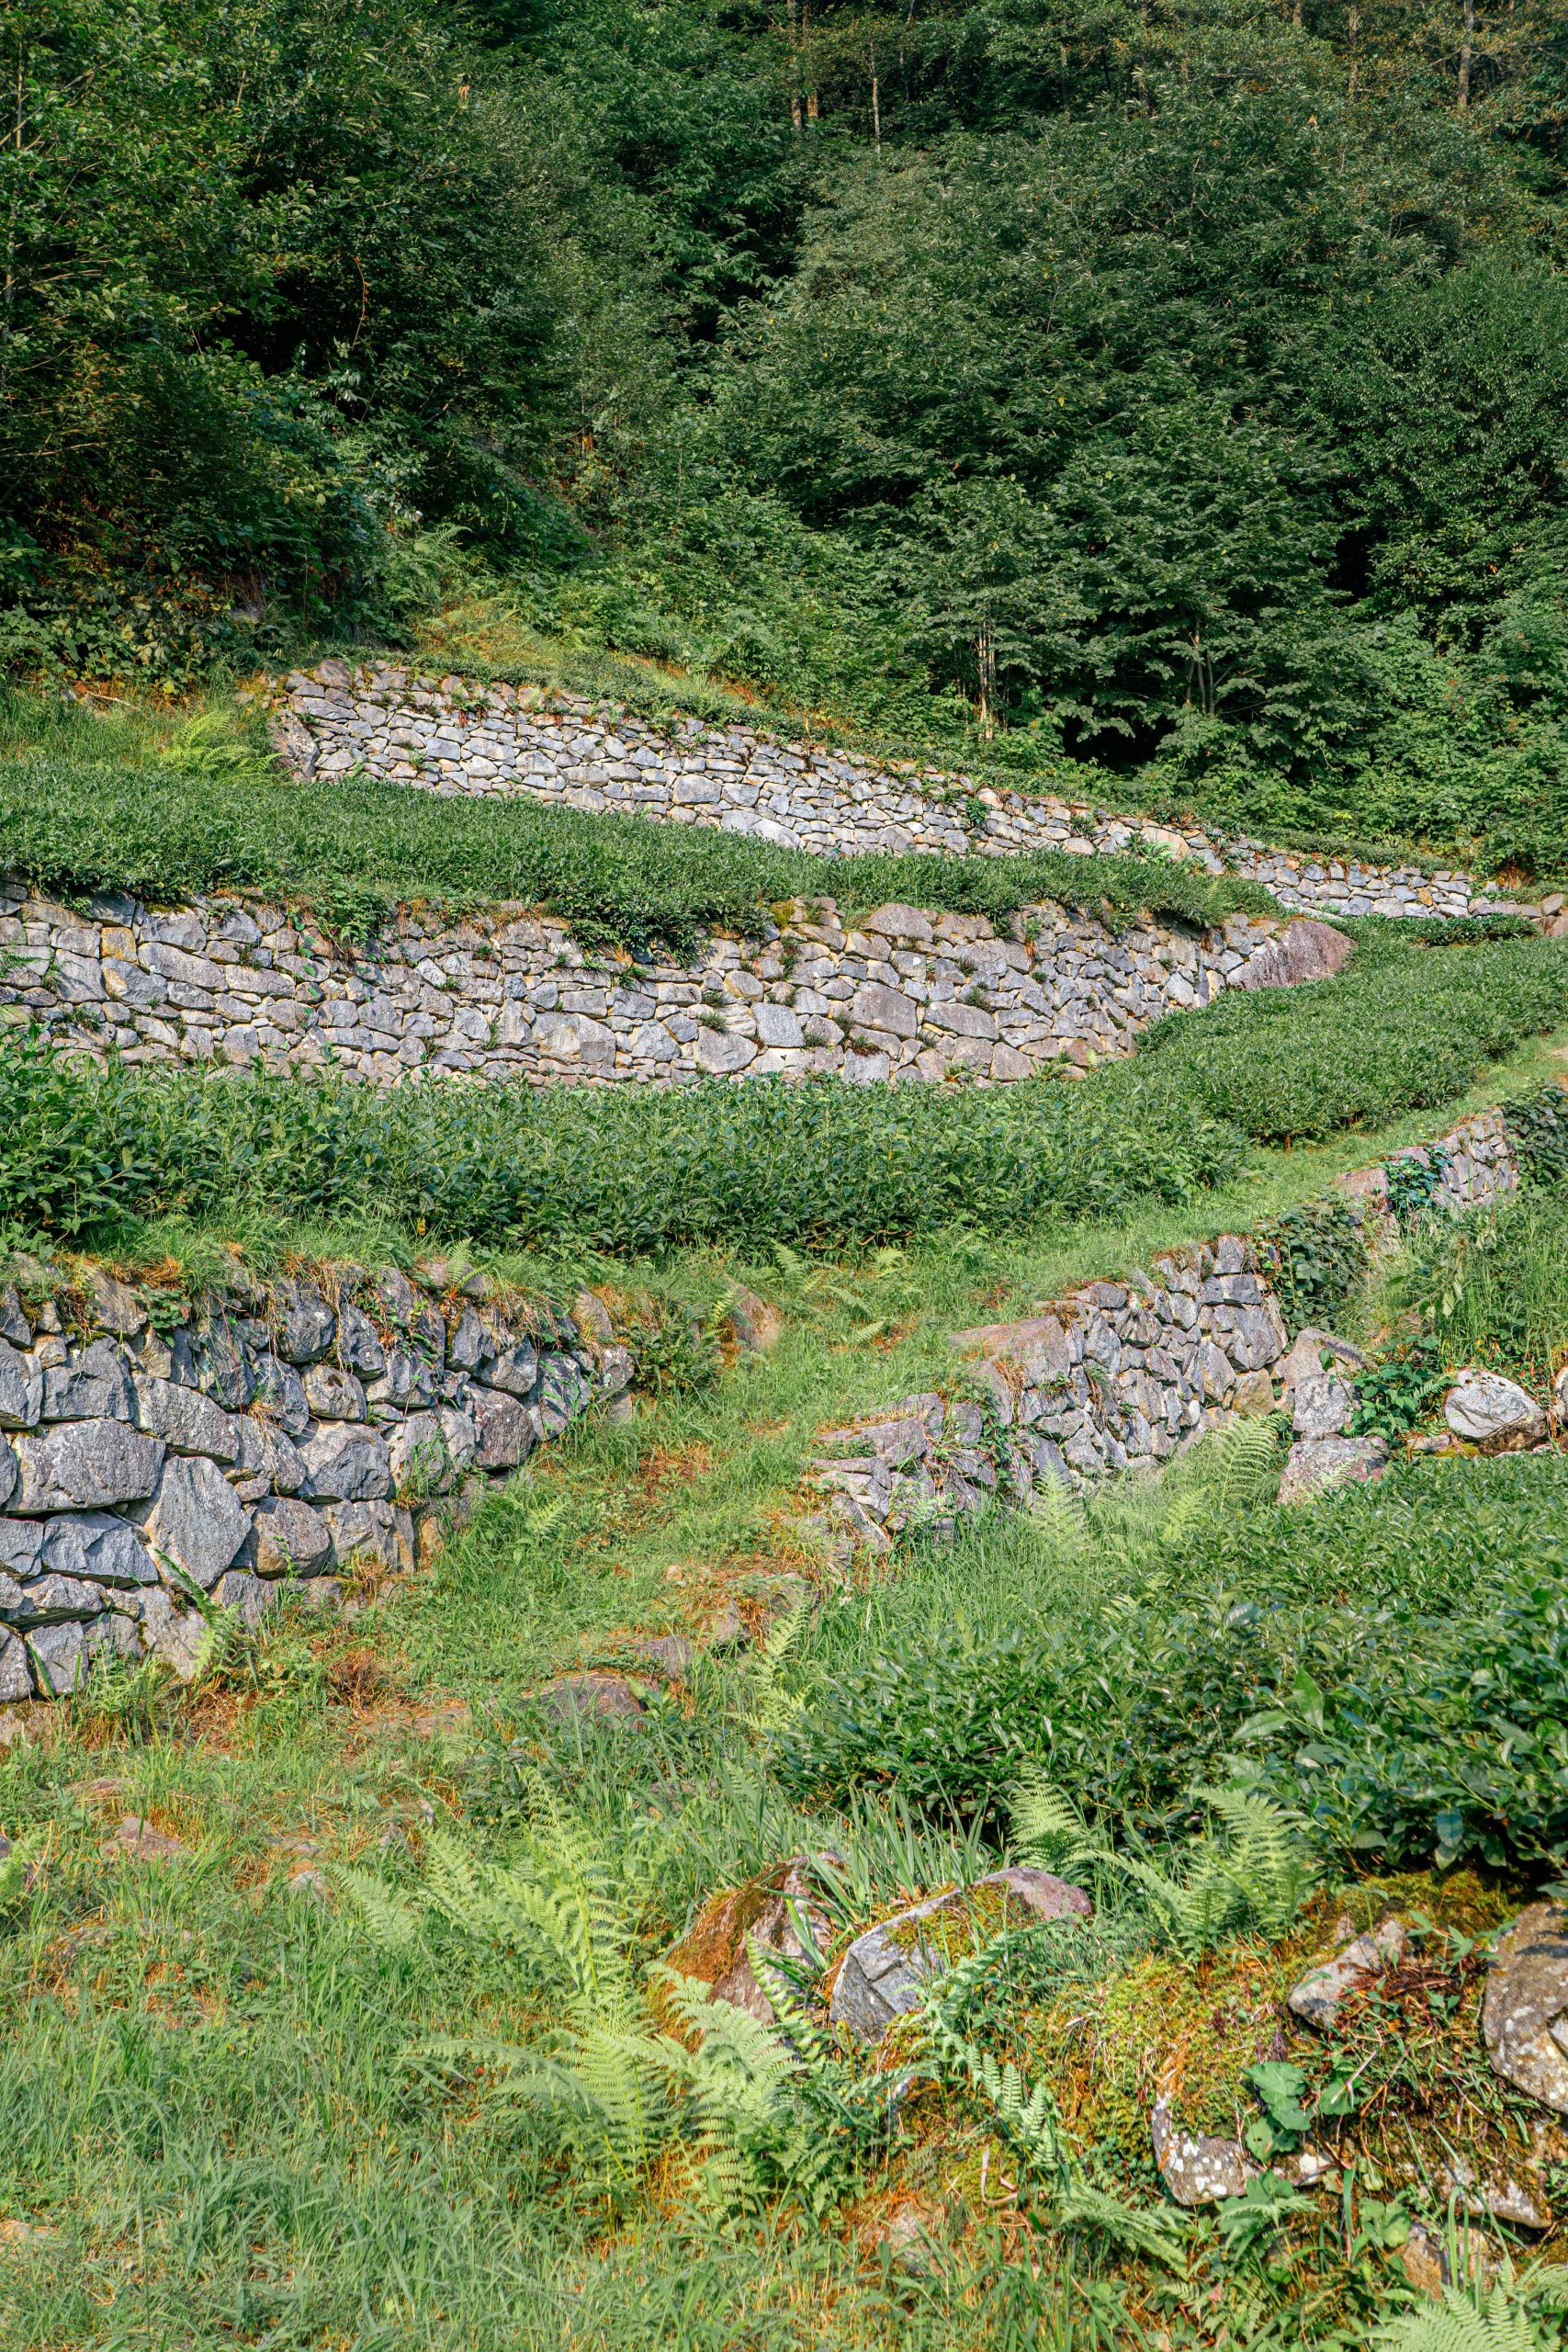
“A project like this requires some serious planning before you lay the first stone.”
Make sure you have these things squared away:
- Material Sourcing: Do you have access to a large quantity of suitable, relatively flat stones? Sourcing can be a major cost and logistical challenge.
- Drainage Plan: How will water move through and behind these walls? Dry-stack walls are permeable, but you still need to plan for runoff on a large slope.
- Foundation Prep: The first course of stones must be set in a level trench on compacted soil to ensure the stability of the entire wall.
- Your Own Skill/Patience: Dry-stacking is a puzzle. It takes time and a good eye to fit the stones together securely without mortar.
10. Integrate Steps into a Layered Retaining Wall Garden
This look follows a simple but effective design equation: 60% hardscape + 40% softscape. The majority of the visual weight is in the stacked stone retaining walls and integrated steps, which provide a strong, permanent structure. The other 40% is the lush, informal planting that softens the stone and adds color. The key is that the plants are allowed to spill over the edges of the walls, blurring the lines and preventing the hardscape from feeling too dominant or severe. This balance ensures the garden feels both orderly and abundant.
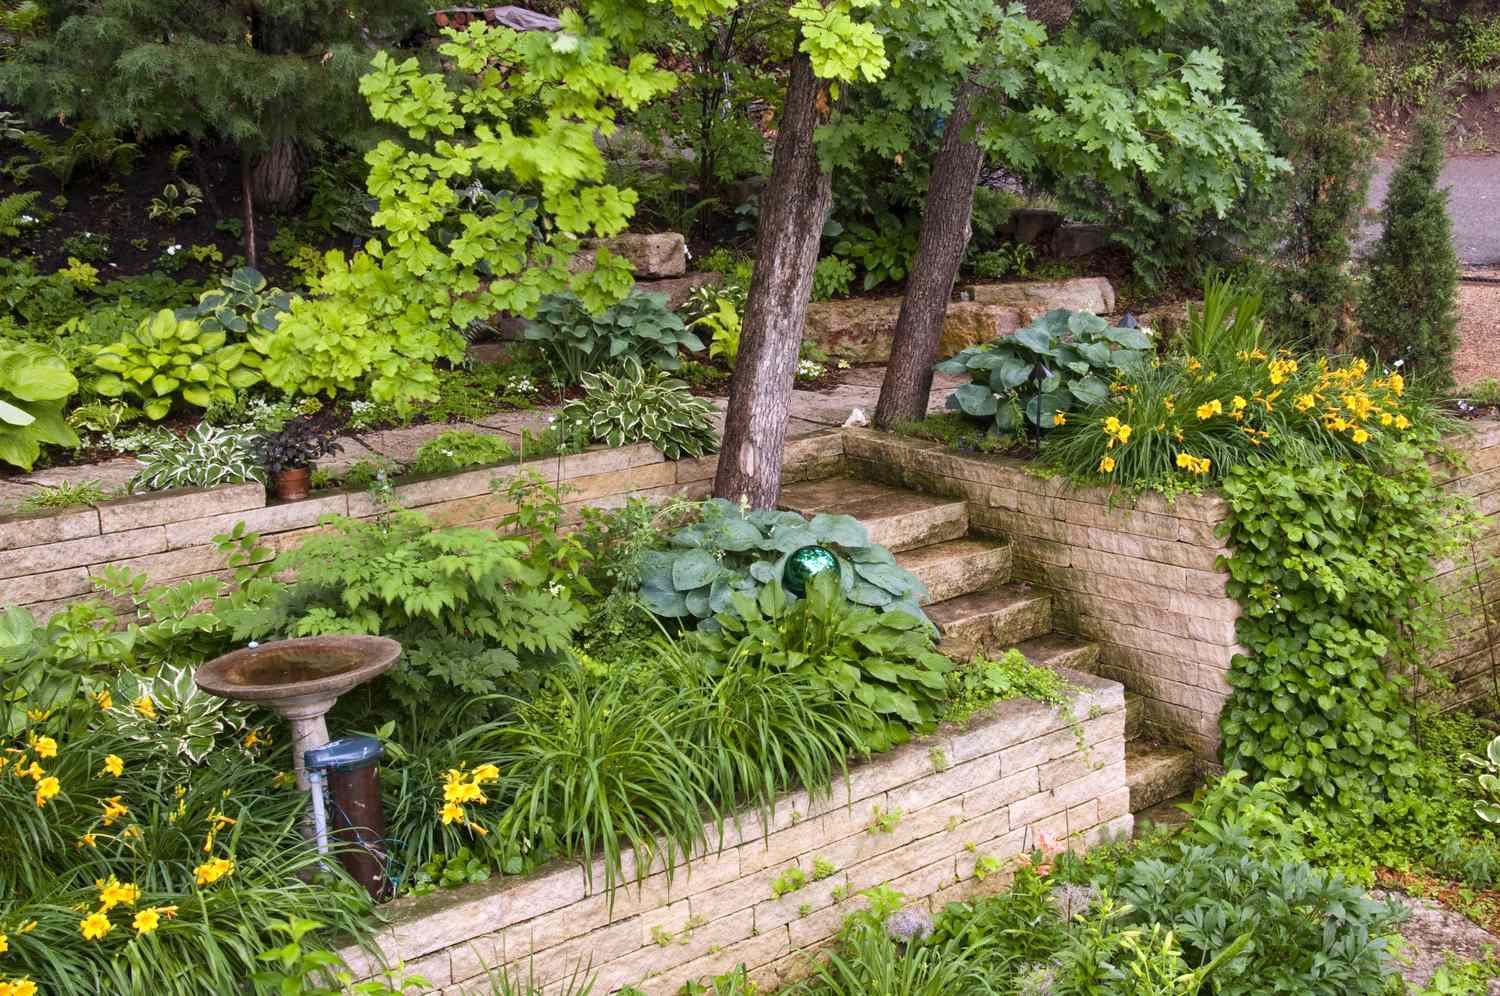
“You can achieve this terraced look for much less.”
Instead of custom-fit stone blocks, use more affordable interlocking concrete retaining wall blocks from a big-box store like Home Depot or Lowe’s. These are designed for DIY installation and cost a fraction of what natural stone does. For the steps, consider using solid concrete pavers or even creating steps from pressure-treated wood timbers. Fill the beds with budget-friendly perennials like daylilies and hostas, which will multiply over the years, giving you a lush look for a one-time investment.
11. Combine Curved White Walls with Gabion Baskets
This design is a masterclass in textural and formal contrast. The smooth, curved, brilliant white retaining walls feel sculptural and highly modern. Right next to them, the gabion wall—a rigid wire cage filled with rough, gray rocks—is industrial and rustic. The tension between these two opposing styles is what creates the visual excitement. The sleek gray tile on the steps acts as a bridge between the two, sharing the color of the gabion wall and the smooth finish of the white walls. It’s a bold choice that pays off in a truly custom look.
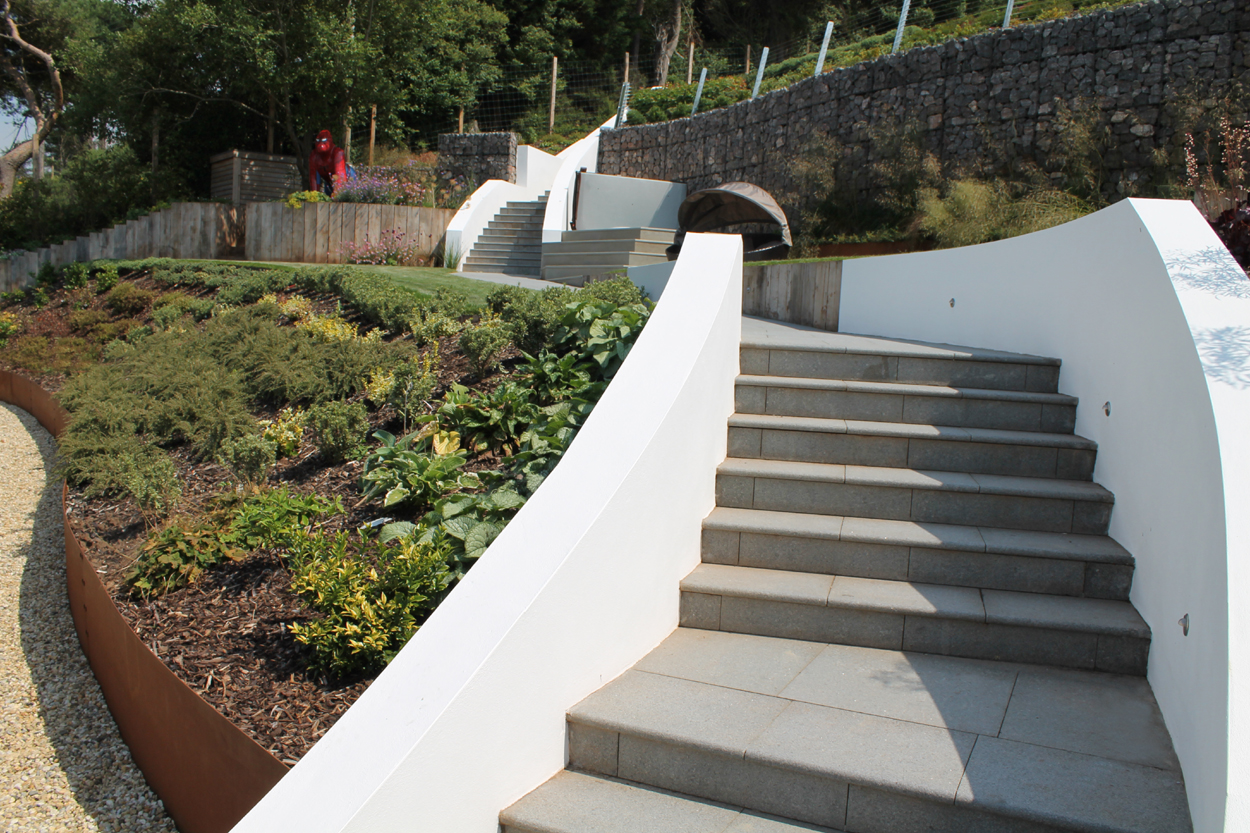
“A pristine white wall outdoors is a high-maintenance commitment.”
It will show every speck of dirt, every splash of mud from rain, and will be a tempting canvas for mildew and algae, especially in a damp or shady climate. To keep it looking this crisp, you’ll need to gently scrub it down at least 2-3 times a year. Using a high-quality exterior paint with a satin or semi-gloss finish will make cleaning easier than a matte finish. Be prepared for the upkeep before you fall in love with the look.
12. Soften a Slope with Natural Stone and Lush Landscaping
The key to this design’s success is the integration of plants *into* the stone structures. Notice how the ground cover and small shrubs aren’t just behind the retaining wall, but are tucked into the crevices and allowed to spill over the top. This simple technique completely changes the feel of the hardscaping. It blurs the hard lines of the stone, making the walls and steps feel like a natural part of the landscape rather than a man-made intrusion. Without this vegetative softening, the wall would look much harsher and more utilitarian.
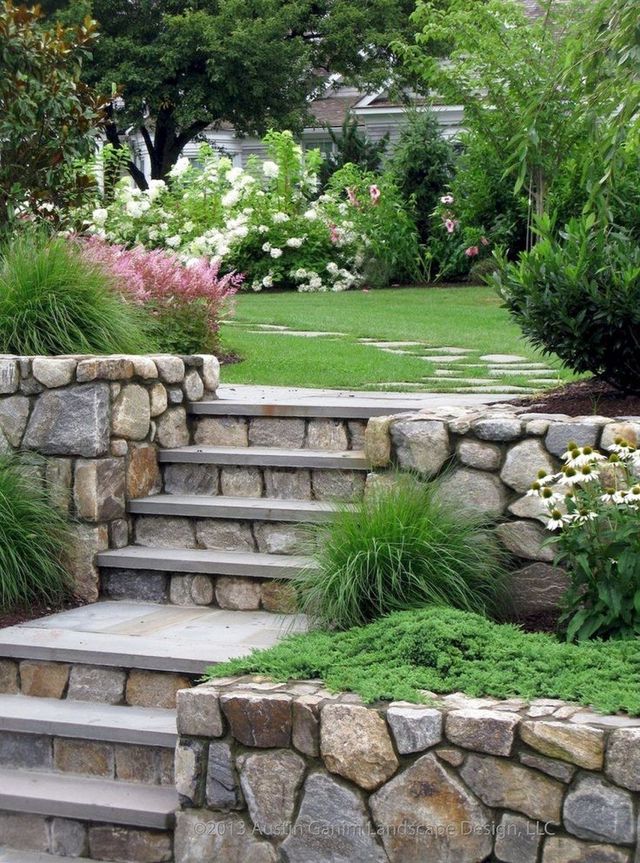
“When selecting stone for steps or a low retaining wall, ask your supplier for ‘wall stone’ and ‘flagstone’.”
Wall stones are thicker and more squarish, ideal for stacking into a stable wall. Flagstones are the flat, wide pieces perfect for the tread of the steps. For the most natural look as seen here, you want ‘irregular’ flagstone, not the uniformly cut square or rectangular kind. Specify that you need a few pieces with at least one flat, stable side to serve as the tops of your steps for secure footing.
13. Accent a Lush Staircase with an Ornate Metal Railing
What makes this small scene so captivating is the interplay between the functional, the natural, and the decorative. The concrete stairs are purely functional. The lush, overlapping green foliage is wild and natural. The ornate metal railing and the glazed ceramic pot are the decorative, human touch. It’s this combination of three distinct elements that elevates the design. The dark, intricate railing stands out against the simple gray concrete, and its leaf-like details echo the organic shapes of the surrounding plants, tying everything together.
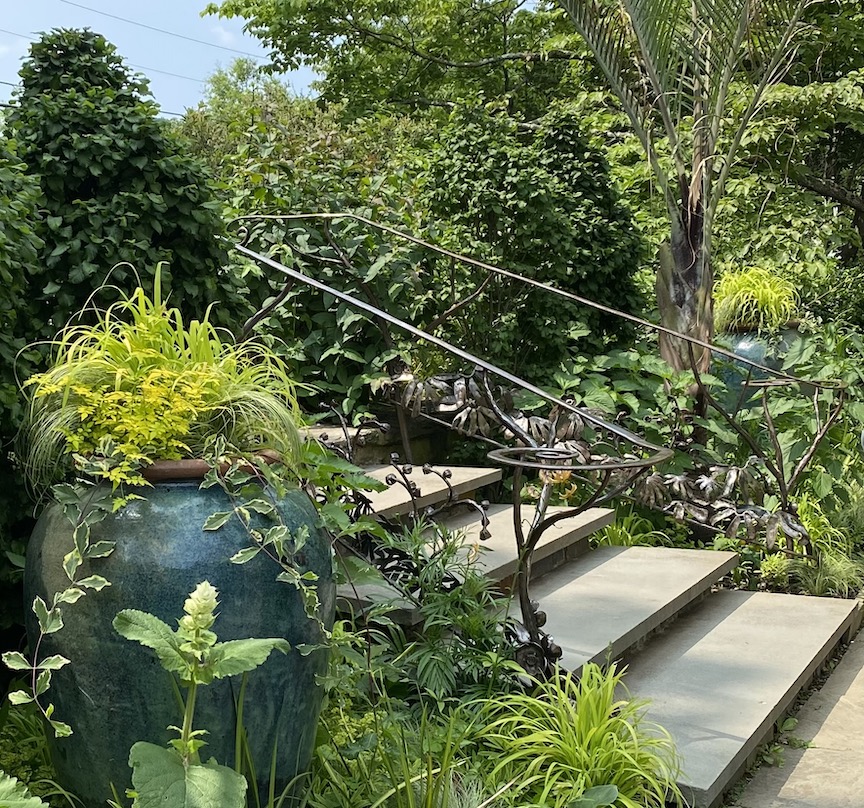
“A custom-fabricated metal railing can be very expensive.”
To get a similar feel on a budget, look for pre-fabricated railing sections at hardware stores. While they may not have the same unique, custom details, you can find options with simple curves or patterns that still add a decorative touch. For the planter, you don’t need a $300 ceramic pot. Check places like HomeGoods, Tuesday Morning, or even end-of-season sales at garden centers for a large, colorful pot for under $100. The key is the scale and the pop of color, not the price tag.
14. Divide a Sloped Yard with Decking and Terraced Beds
This multi-level approach is perfect for long, narrow backyards with a moderate to steep slope (20-40% grade). It smartly divides the yard into distinct functional zones: a flat lawn at the bottom for play, a terraced planting area in the middle for aesthetics, and a raised deck at the top for dining and relaxing. This zoning makes the entire space usable. For this to work, you need a depth of at least 40-50 feet to allow for each zone to feel distinct and not cramped. For a much smaller yard, you might combine the lawn and terrace into one larger planted slope, similar to Idea #6.
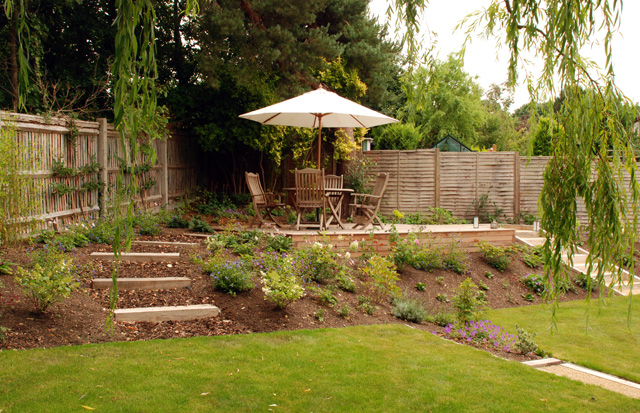
“Building simple sleeper steps like these is a great DIY project for providing in”
Building simple sleeper steps like these is a great DIY project for providing informal access up a gentle slope.
- Time: 2-3 hours for 4-5 steps
- Cost: $60 – $100
- Materials: 6×6 pressure-treated timbers, 24-inch rebar stakes, sledgehammer, drill, level.
- Cut & Place: Cut your timbers to the desired width (e.g., 3 feet). Dig a shallow, level trench for the bottom step.
- Secure: Drive two rebar stakes through pre-drilled holes in each timber to anchor it into the slope.
- Backfill: Rake the soil behind the secured timber to create a flat tread for the next step, and repeat your way up the hill.
15. Build a Tiered Slope with Redwood and Winding Stairs
This is a comprehensive and professionally executed landscaping project. The cost is driven by the woodwork and the sheer volume of materials needed to cover the slope.
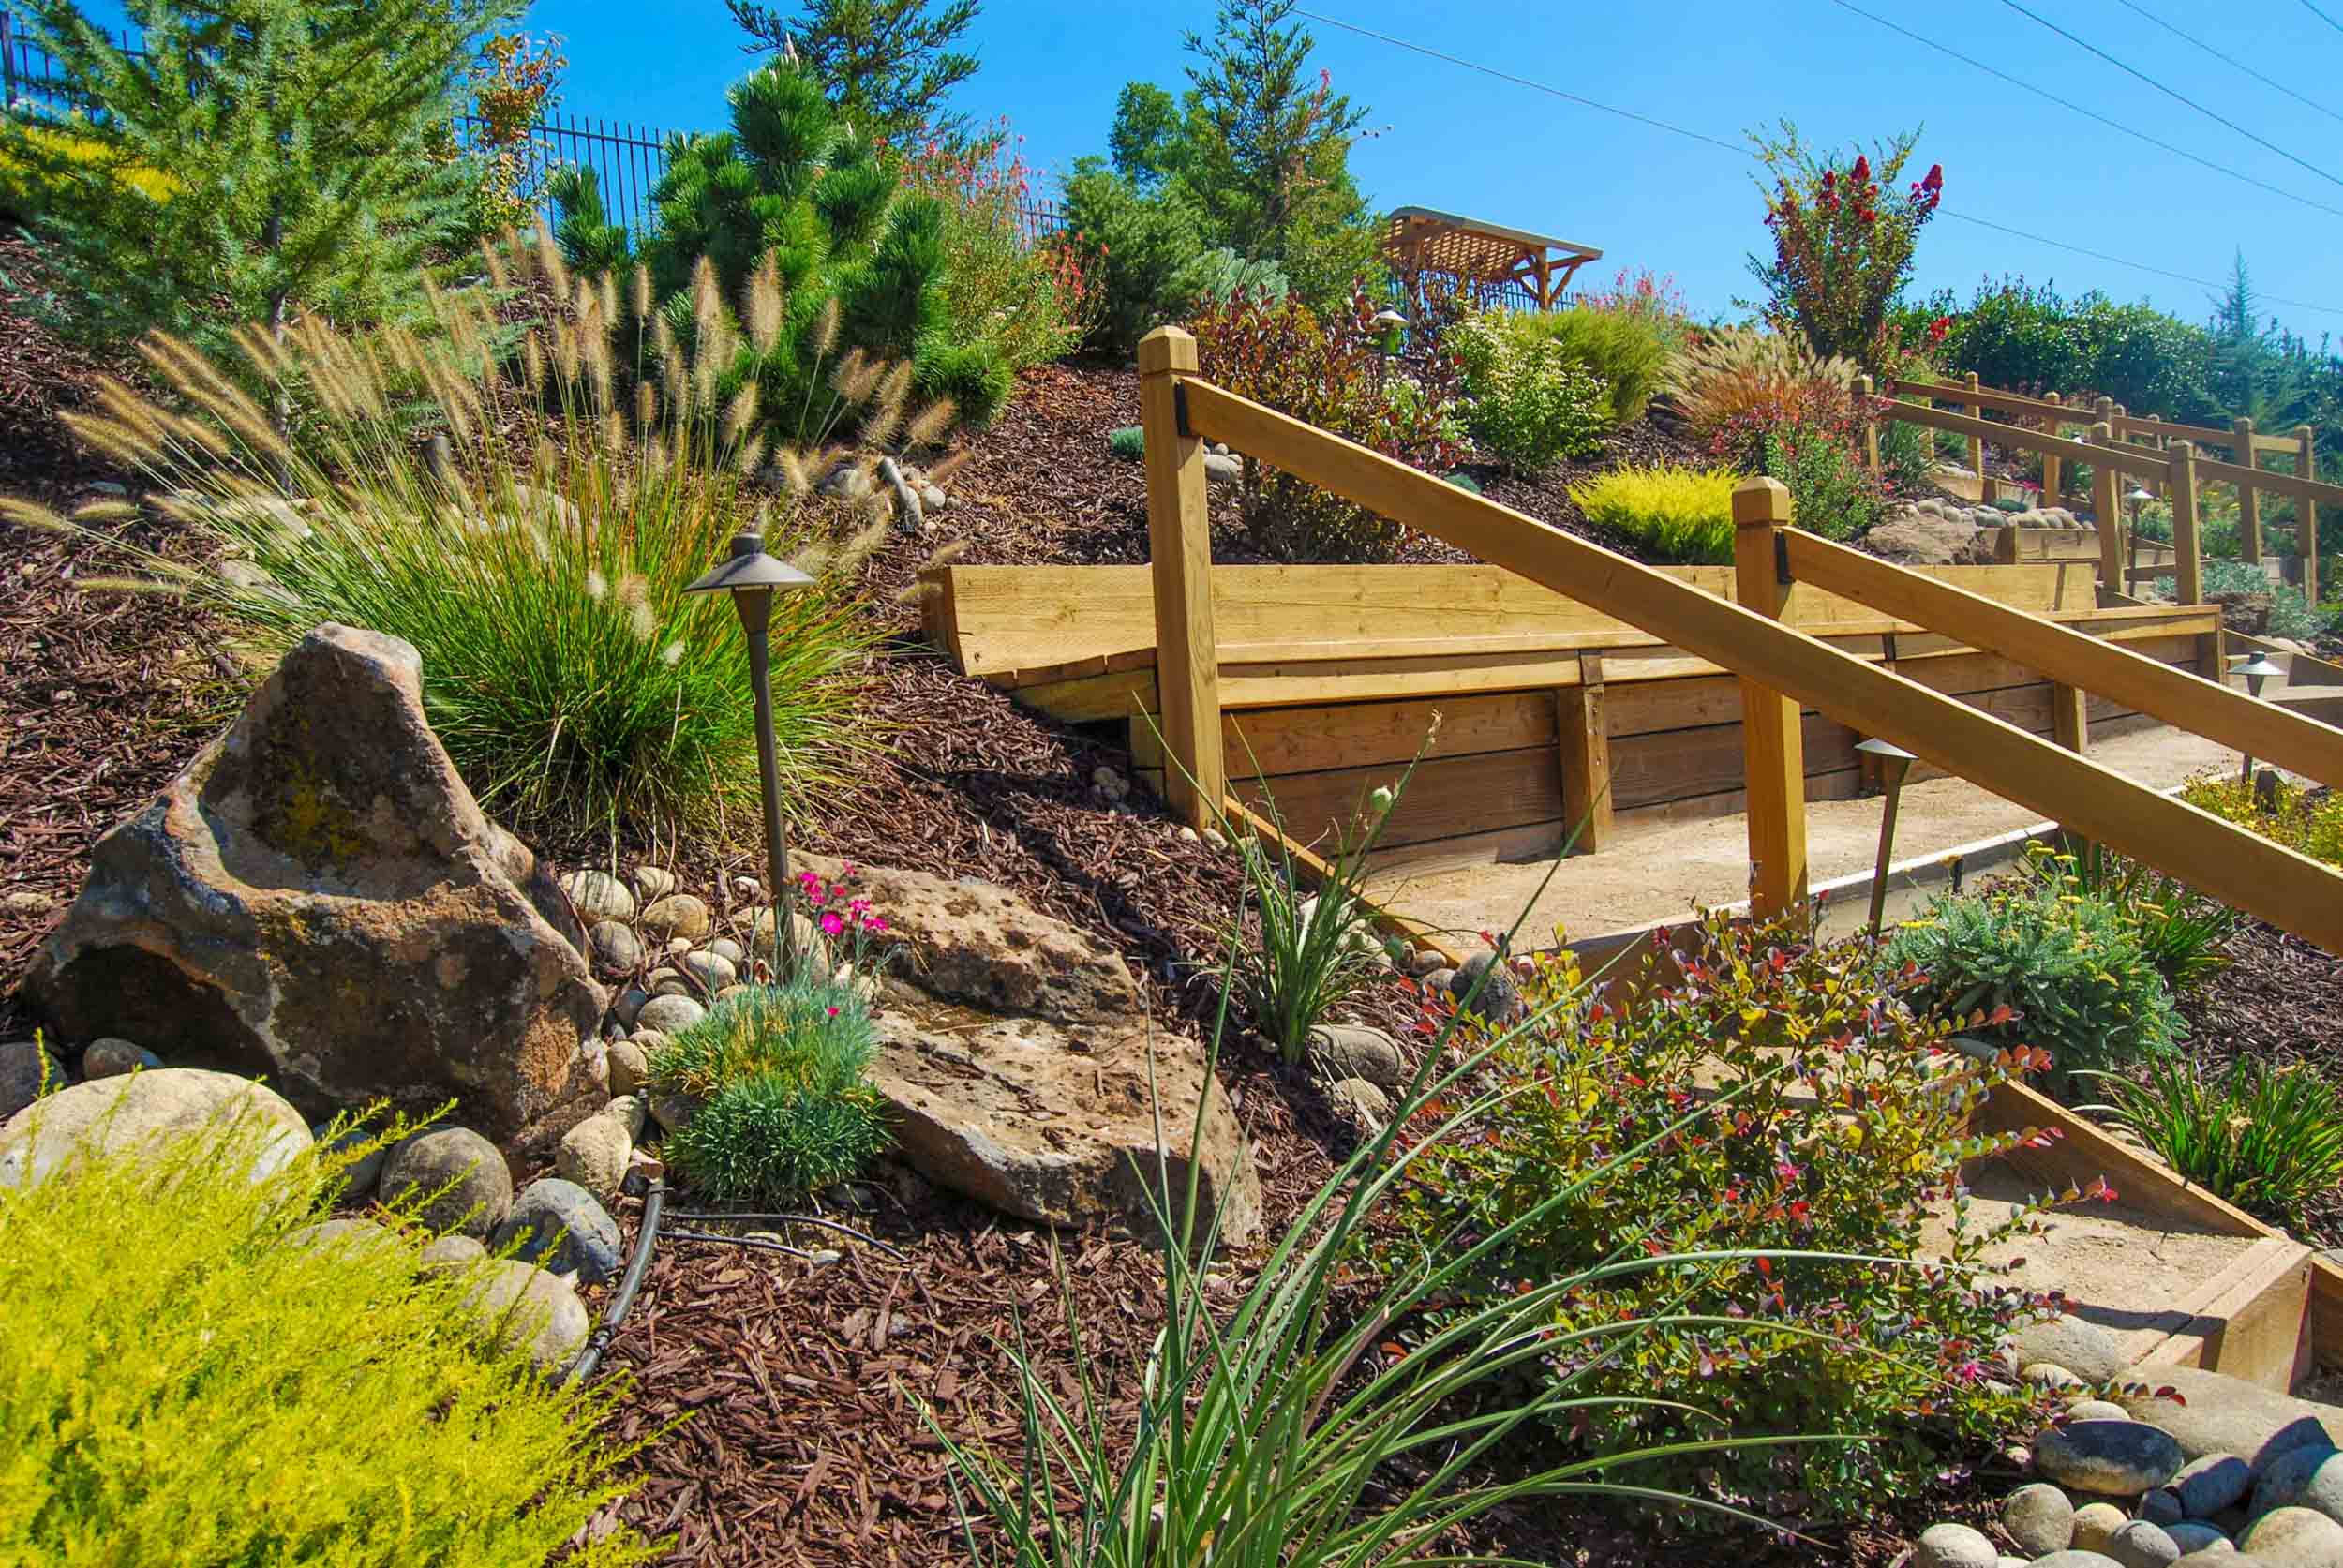
“Redwood for Planters & Stairs: $6,000 – $11,000 (Redwood is a premium, weather-r”
- Redwood for Planters & Stairs: $6,000 – $11,000 (Redwood is a premium, weather-resistant wood)
- Labor for Carpentry & Installation: $7,000 – $12,000
- Plants, Mulch, and Rocks: $3,000 – $5,000
- Low-Voltage Path Lighting: $1,500 – $3,000 (including transformer and installation)
- TOTAL: $17,500 – $31,000
Budget alternative: Using pressure-treated pine instead of redwood can cut the lumber cost by 50-60%. Solar-powered path lights can also save on electrical work.
A design with this much wood and mulch in direct contact with the ground requires a frank discussion about pests, particularly termites if you live in an area where they are common. While redwood has natural resistance, no wood is completely immune forever. It’s crucial that the wooden retaining walls are not directly touching your home’s foundation. Leaving a gap of at least 6-12 inches, ideally with a gravel or concrete barrier, is essential for pest inspection and prevention. Regular inspections by a pest control professional are a wise investment to protect both your landscape and your home.
16. Anchor a Sloped Flower Bed with Large Grey Boulders
The success of this vibrant garden bed lies in its masterful use of scale and color theory. The oversized, light grey boulders act as a neutral and grounding element, their large scale providing a visual anchor that prevents the riot of color from feeling chaotic. The color palette is a classic triadic scheme of pink, orange, and purple-blue. These colors are evenly spaced on the color wheel, creating a high-contrast, energetic, and visually harmonious combination that naturally pleases the eye. The varied green foliage serves as a neutral canvas that makes the floral colors pop even more.
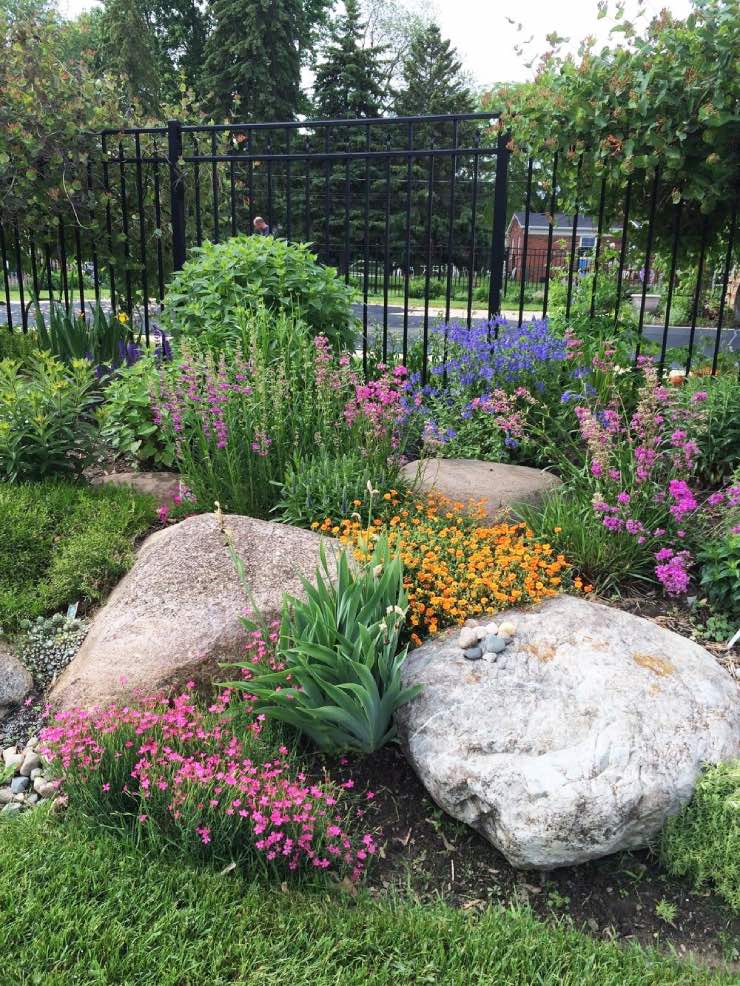
“The boulders are the single most important element in this design.”
Without them, this would be a lovely but somewhat formless pile of flowers on a slope. The rocks provide structure, permanence, and a sense of gravity. They create planting pockets, help with soil retention, and add a rugged, natural texture that contrasts beautifully with the soft petals of the flowers. They are the bones of the garden bed; the plants are the beautiful skin that covers them. For a different take on using boulders, see the more subtle approach in Idea #6.
17. Design a Modern Grey Patio with Tiered Greenery
This sleek, modern look is achieved with a disciplined formula: 70% monochrome hardscaping + 30% lush, textural greenery. The overwhelming majority of the space is dedicated to a palette of cool grays—from the light grey patio tiles and white retaining walls to the dark grey seating and pergola. This creates a serene, unified, and very contemporary foundation. The remaining 30% is a carefully curated explosion of green, with ornamental grasses and leafy shrubs providing all the color and organic texture needed to keep the space from feeling cold or sterile.
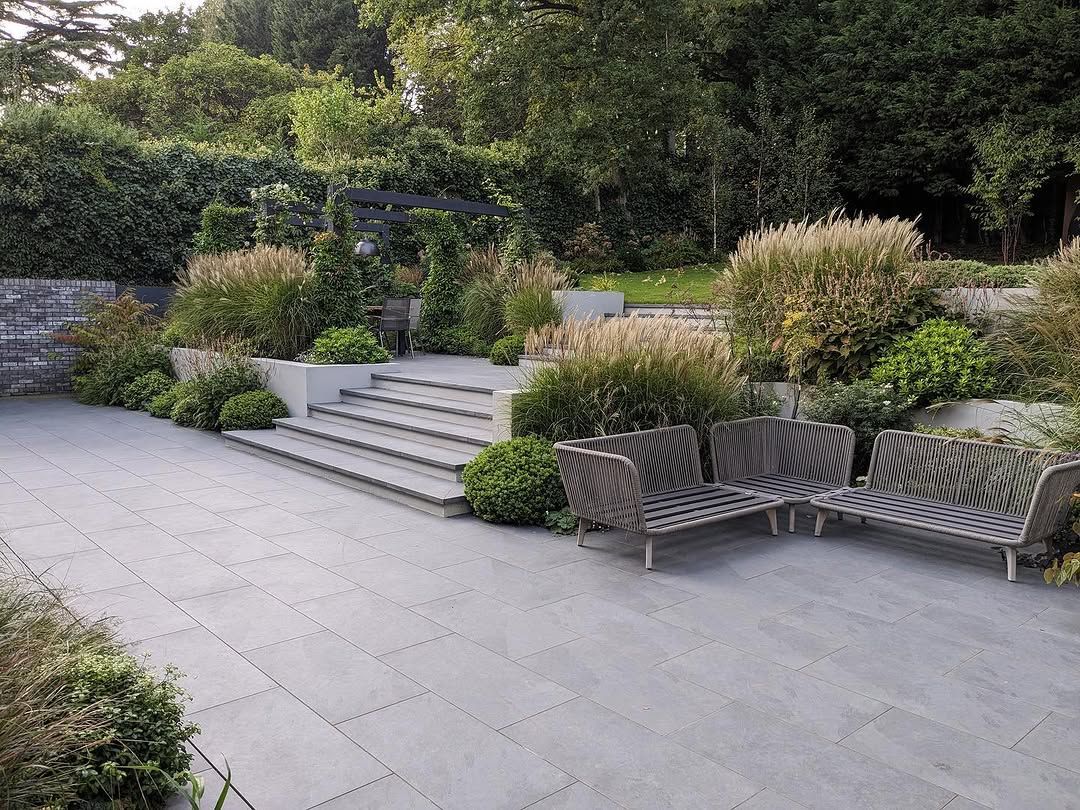
“While ornamental grasses are beautiful and low-maintenance for much of the year, they do have one significant annual task: cutting back.”
Most ornamental grasses need to be cut back hard in late winter or early spring, typically to just a few inches above the ground, to allow for fresh new growth. For a large, established planting like this, that can be a substantial amount of work and generate a lot of yard waste. Also, the light-colored grout between the patio tiles will require regular cleaning to prevent staining and mildew, especially in the shadier areas.
18. Layer a Garden with Concrete, Wood, and Tiered Planters
When designing floating concrete steps like these, the lighting is just as important as the structure. To get this beautiful wash of light, use a flexible waterproof LED strip light and mount it on the *back* edge of the step’s underside. This placement hides the light source itself and throws the light backward onto the riser of the step below it. This indirect illumination is soft, dramatic, and prevents glare in your eyes as you walk up the stairs. Always choose a warm white color temperature (2700K-3000K) for a welcoming, high-end feel.
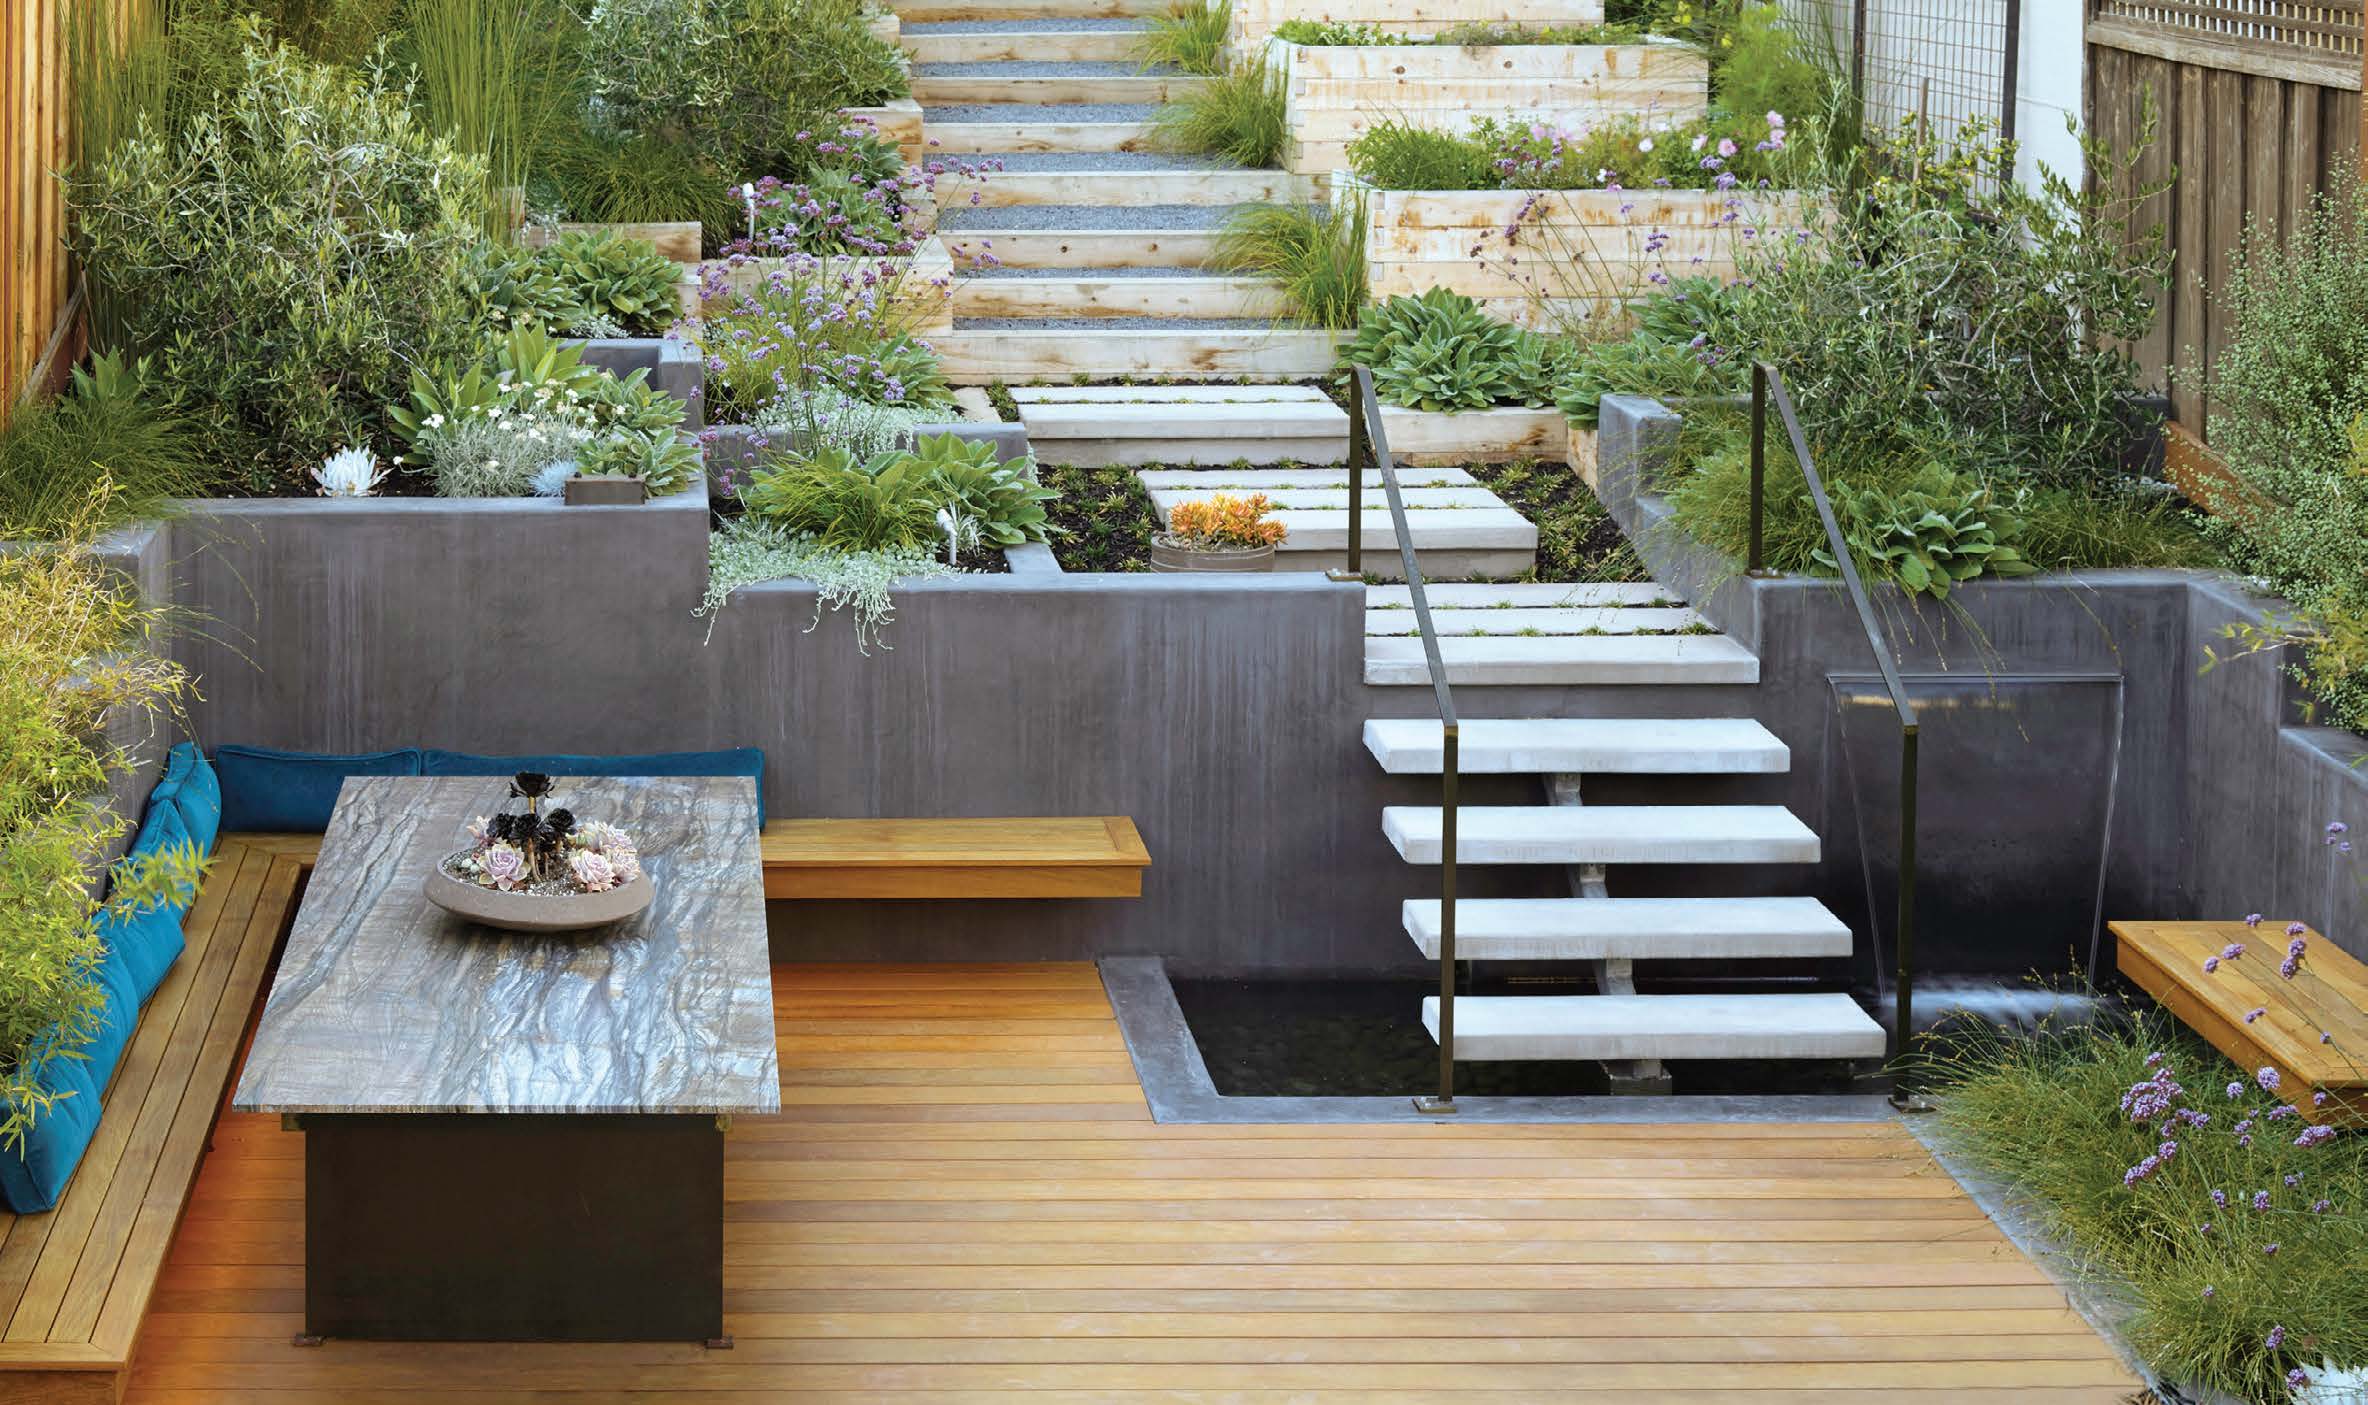
“Before you commit to a complex, multi-material design like this, you need to have your plan locked down.”
Here’s a quick checklist:
- Material Compatibility: Do the finishes of your chosen wood, concrete, and stone complement each other? Get samples and look at them together in your backyard’s natural light.
- Engineer’s Approval: A retaining wall over 3-4 feet high often requires a permit and an engineer’s stamp of approval to ensure it’s built safely. Check your local building codes.
- Water Management: Where will water go? Your plan must include drainage behind retaining walls and a slight grade on paved surfaces to direct water away from the house.
19. Illuminate a Modern Slope with Gabion Terraces
This landscape design works so well because of its powerful combination of industrial materials and sophisticated lighting. The gabion walls—wire cages filled with rock—are inherently rough, heavy, and utilitarian. However, the design elevates them by using them as clean, geometric forms. The masterstroke is the integrated lighting. By uplighting the greenery and washing the stairs with warm light, the design transforms the cold, hard materials into a dramatic, high-end, and surprisingly welcoming nightscape. The contrast between the raw material and the refined execution is genius.
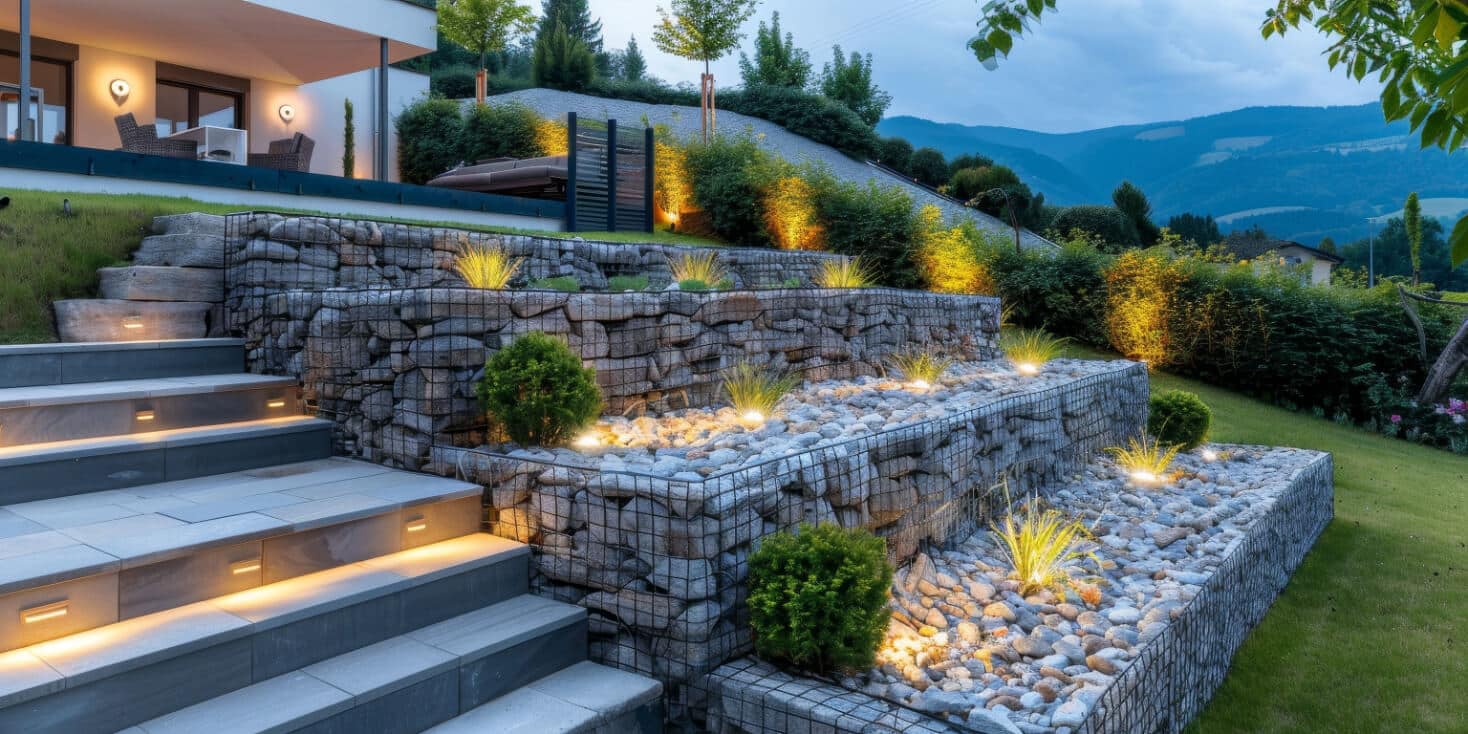
“Gabion walls look fantastic, but you can’t just fill them with any old rocks.”
The stones need to be larger than the openings in the wire mesh, obviously. But more importantly, they need to be clean and of a consistent type and color to achieve this modern look. Using a random assortment of dirt-covered rocks from your yard will look messy and amateurish. You will need to purchase washed river rock or another specific type of stone, which adds a significant material cost. Also, filling the cages is labor-intensive; the rock often needs to be hand-placed to ensure a tight, clean face.
20. Create Patio Zones with Wood Fences and a Concrete Fire Pit
The single element that makes this backyard so successful is the horizontal wooden slatted fence. It does so much work for the design. It provides privacy without feeling like a solid, oppressive wall. Its strong horizontal lines create a sense of calm and order, and they make the space feel wider than it actually is. The warm wood tones are a perfect bridge between the cool gray concrete and the lush green foliage, tying the entire color palette together. Remove that fence, and the design completely loses its modern, cohesive character.
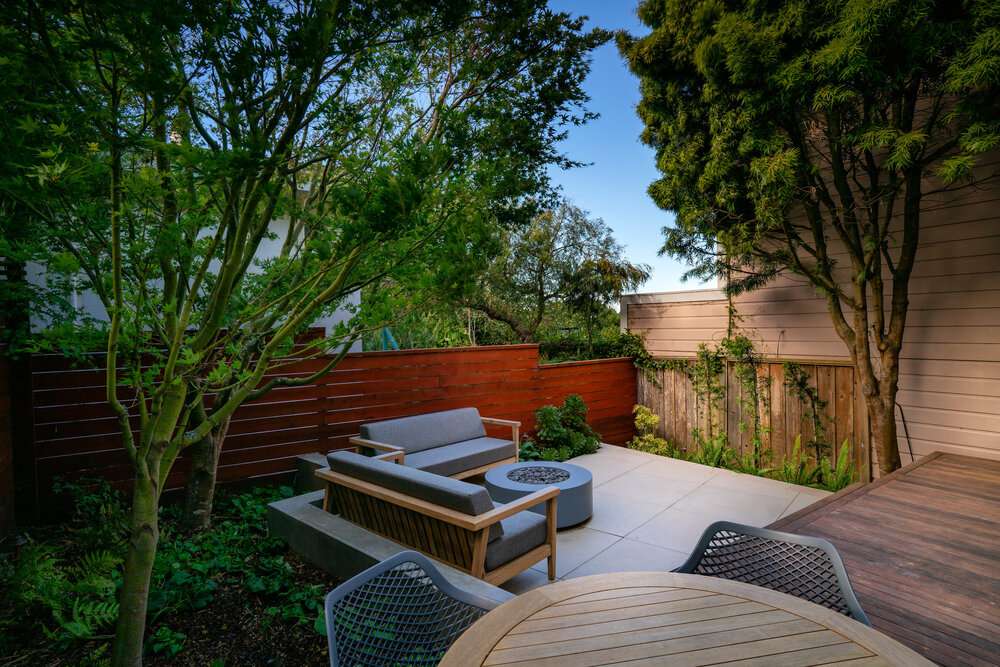
“This ‘zoning’ approach works best in backyards that are at least 25-30 feet wide.”
You need enough space to create distinct areas for lounging and dining without them feeling cramped or on top of each other. The fire pit area alone requires a minimum of a 10×10 foot footprint to allow for chairs and safe clearance. If your yard is narrower, you might consider combining functions, like a dining table that incorporates a fire feature, rather than separating them. The key is to ensure clear, comfortable circulation paths between the zones.
21. Use Modern Plank Paving to Create Tiered Raised Beds
Those large-format plank pavers can be pricey. For a more budget-friendly approach, you can create a similar look using standard 12×24 inch concrete pavers from a big-box store, laid in a running bond pattern to emphasize length. For the raised beds, swap the expensive lumber for pressure-treated pine, which is much more affordable and, when stained a dark brown or charcoal, can give a very similar modern vibe. This combination can give you the same structured, contemporary feel for about half the cost. Check Facebook Marketplace for leftover pavers from other people’s projects for even bigger savings.
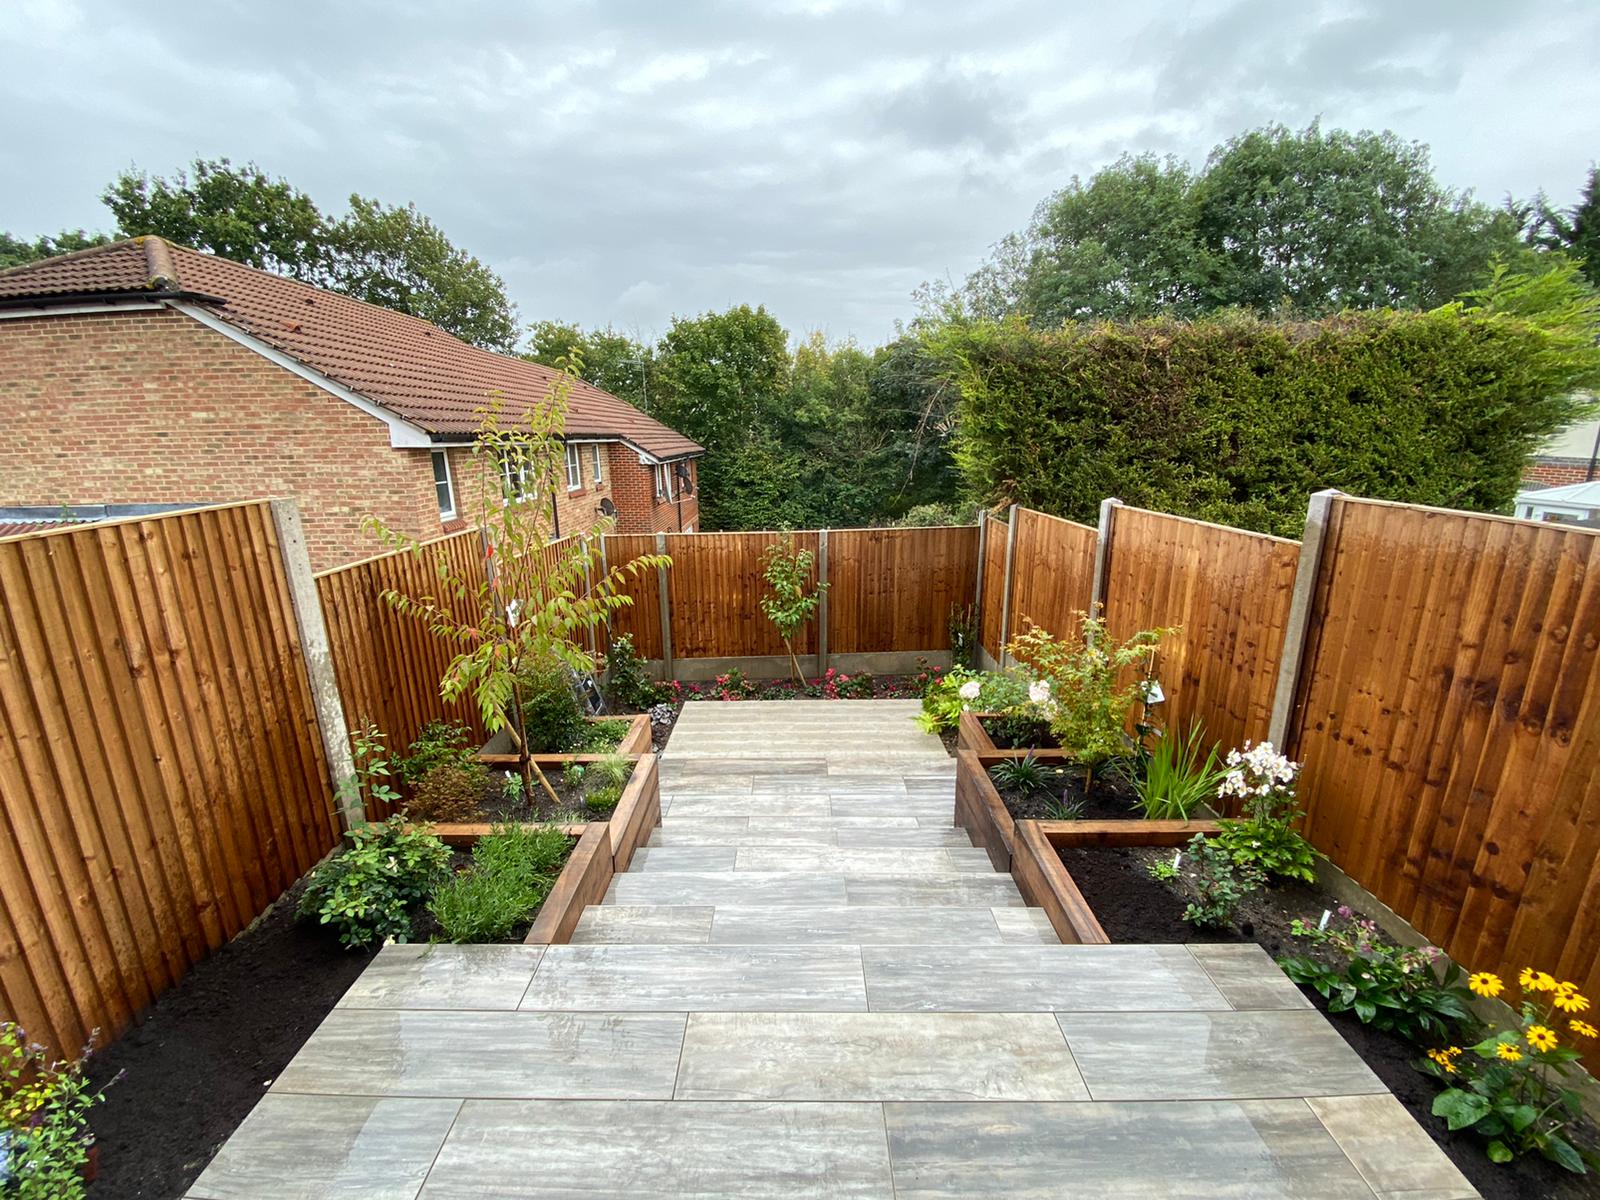
“Creating these tiered wooden raised beds is a manageable weekend project that ad”
Creating these tiered wooden raised beds is a manageable weekend project that adds instant structure to a slope.
- Time: 1 day
- Cost: $200-$500 depending on wood choice
- Foundation: Start at the lowest point of the slope. Build a simple rectangular a box from 2×6 or 2×8 lumber, ensuring it’s level.
- Stack & Stagger: Build the next box directly behind the first, staggering it back up the slope. The front of the second box will rest on the soil behind the first box.
- Secure: Screw the boxes together where they meet and use wood stakes on the inside corners to anchor them to the ground.
- Fill & Plant: Fill with a mix of garden soil and compost, and you’re ready to plant.
22. Design a Grand Terrace with Stacked Stone Walls and Patios
A common mistake when building wide stone steps is making them too uniform. For a grand, natural feel like this, vary the depth of the treads. Notice how some steps are deeper than others, creating mini-landings. This breaks up the monotony of the climb and provides natural spots for placing small pots or letting plants spill over. A good rule of thumb is to have a primary tread depth (say, 14 inches) but intentionally make every third or fourth step deeper (20-24 inches). It’s a subtle touch that makes a huge difference in the final look and feel.
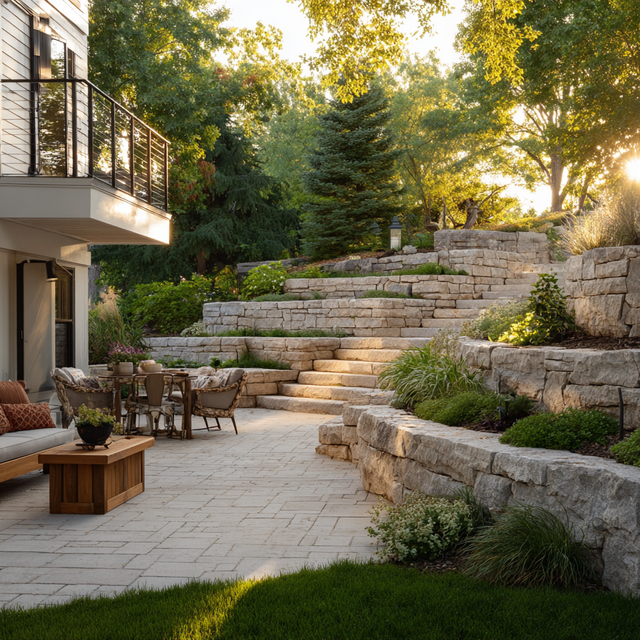
“This is a solution for a large-scale slope problem.”
This design requires significant width and depth to be effective—think a backyard that is at least 50 feet wide with a drop of 8 feet or more. The grand, sweeping nature of the tiered walls and patios would feel cramped and overwhelming in a small space. This is for a property where the backyard is a main feature, not a tiny patch of grass. For smaller slopes, a more contained design like Idea #18 or Idea #11 would be much more appropriate.
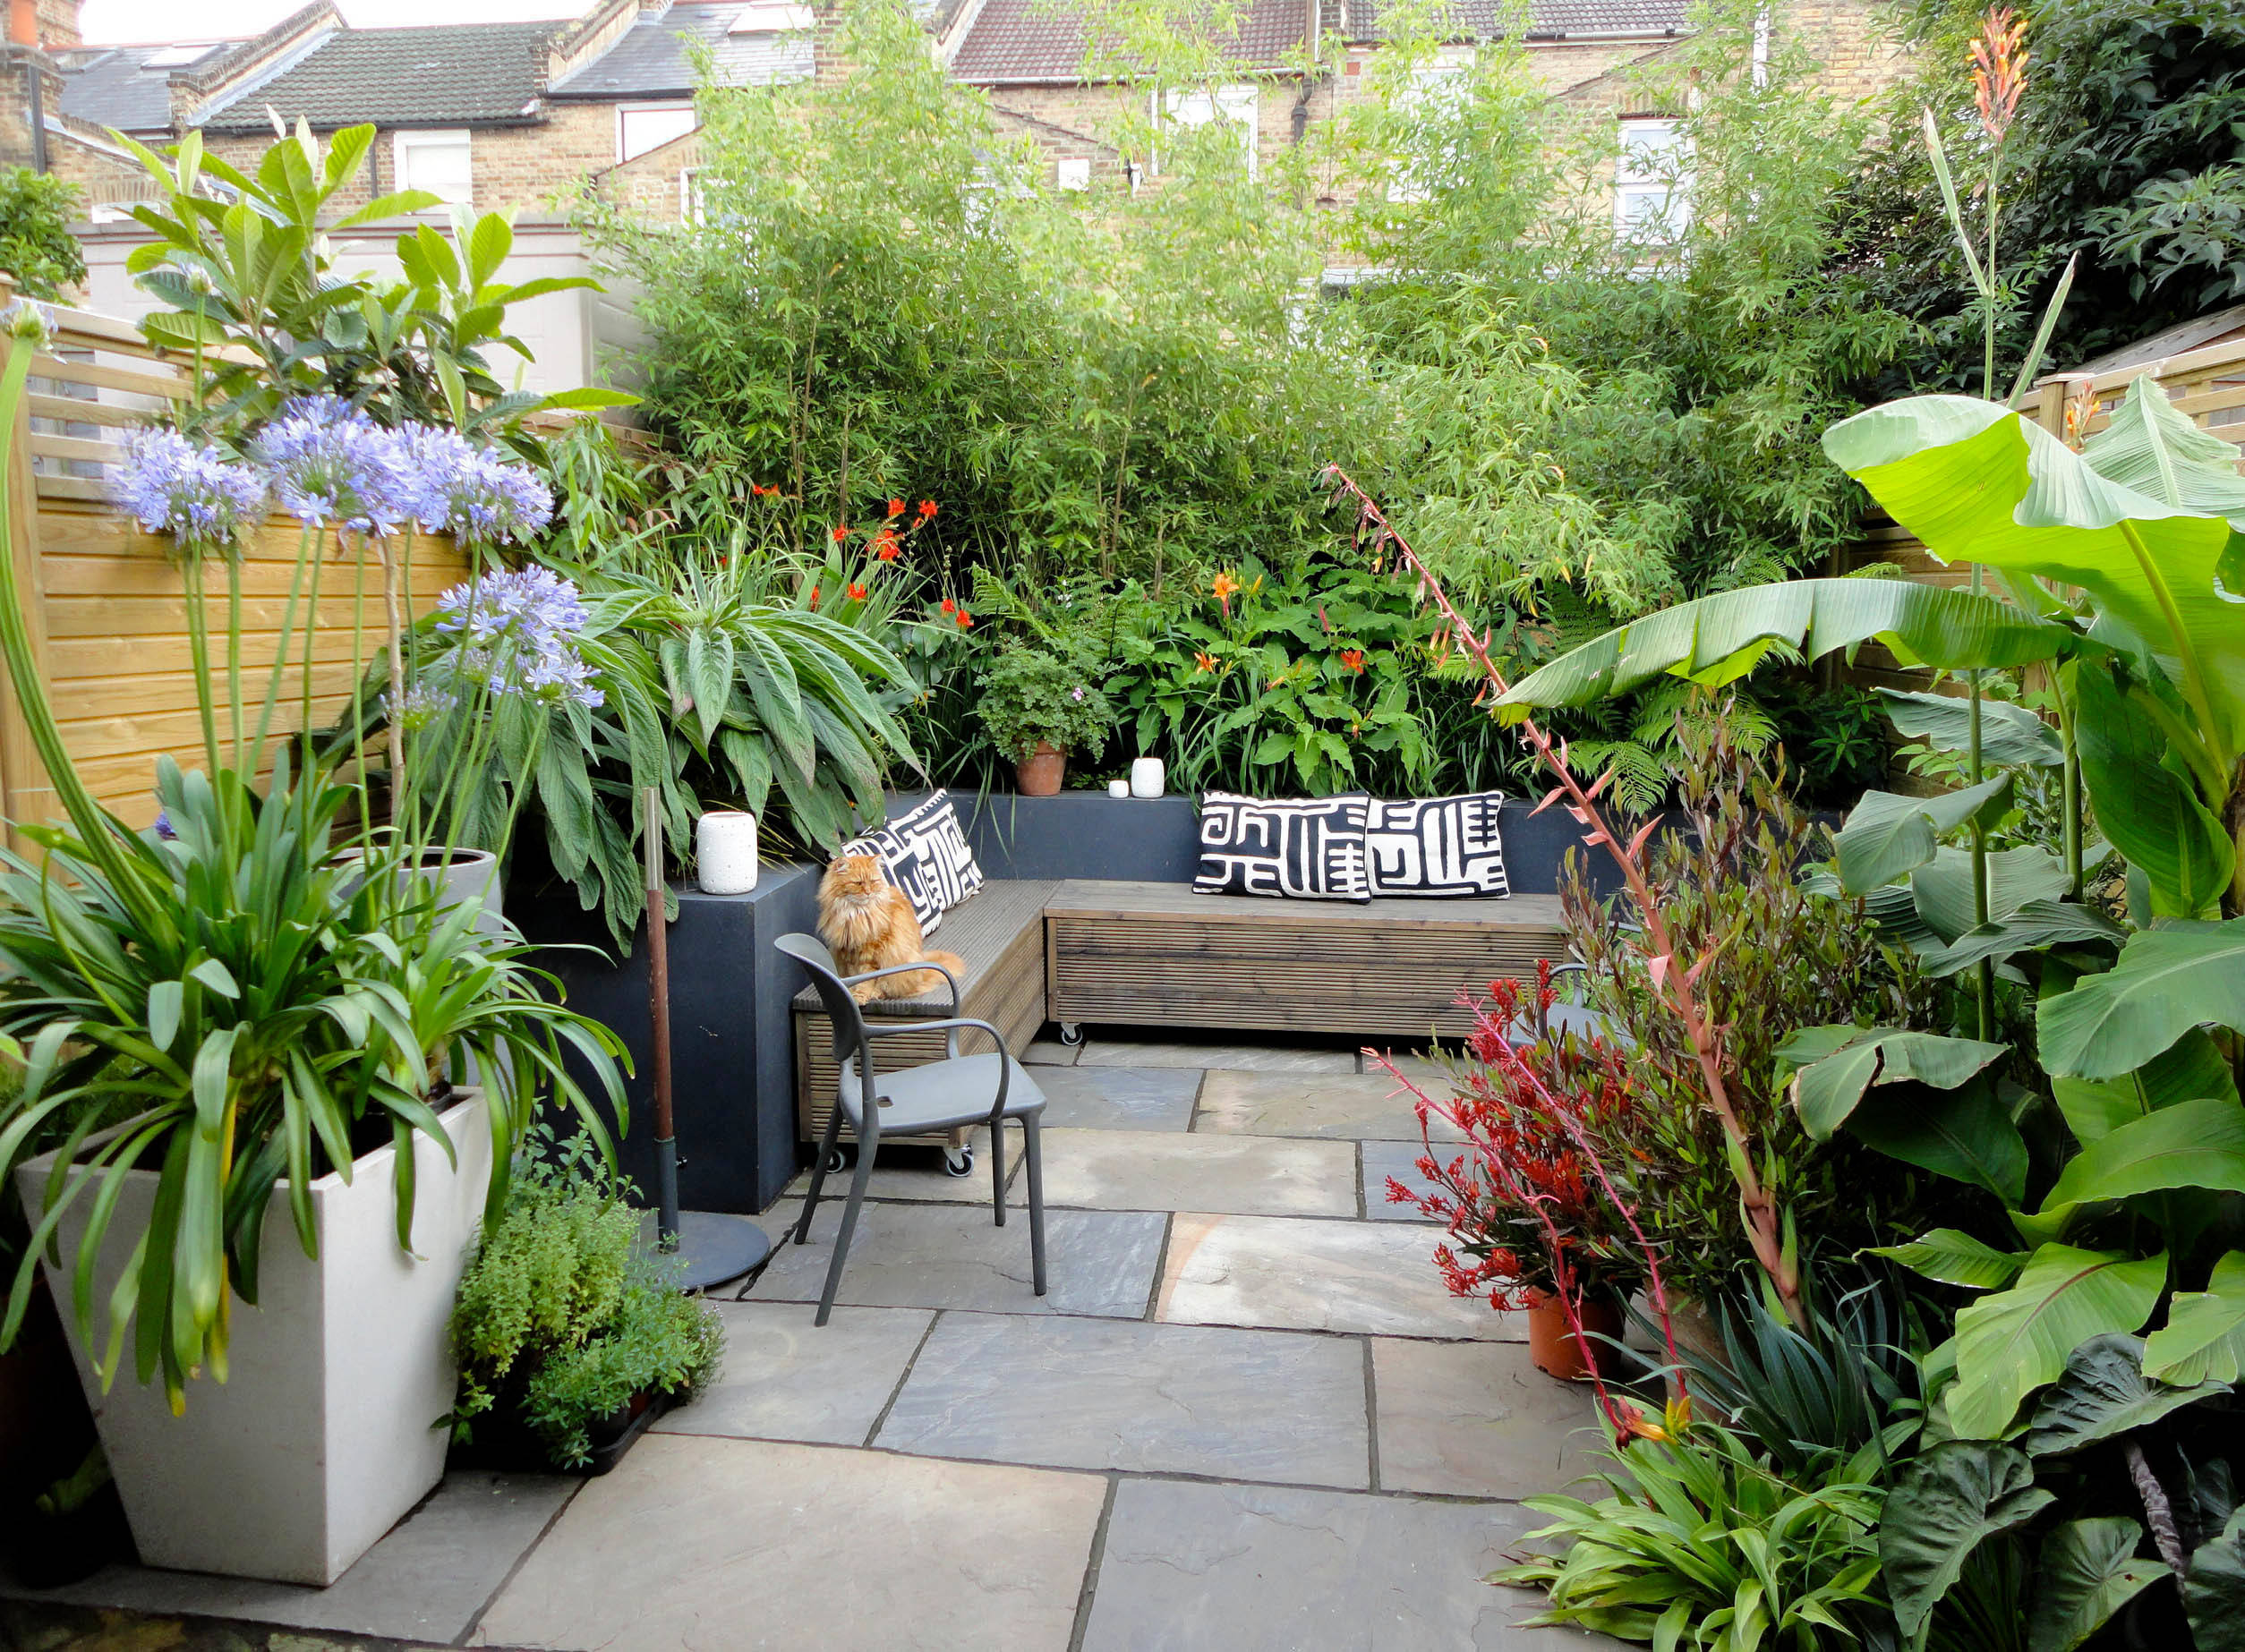
23. Carve out a Lush, Tropical Patio with Built-in Seating
This tiny space feels like a lush oasis because of a clever design trick: vertical layering. The tall wooden fence creates a backdrop, the bamboo and banana-leaf plants create a tall green layer in front of that, and then lower plants fill in below. This dense, multi-level planting creates a sense of enclosure and depth that makes the small patio feel secluded and private. The limited color palette—mostly greens, greys, and natural wood tones—also helps, creating a calm, cohesive look that isn’t busy or distracting. Compare this with the more open feeling of Idea #4.
24. Install a Pool with a Stone Retaining Wall and Grass Pavers
Before you fall in love with this look, have a geotechnical engineer assess your slope. Building a heavy structure like a swimming pool and a substantial retaining wall on a slope is a complex engineering challenge. You need to be absolutely certain the soil is stable and that the wall is designed to handle the immense pressure from both the soil behind it and the water of the pool. This is not a place to cut corners. An improperly engineered pool on a slope can lead to catastrophic failure, costing hundreds of thousands to fix. Get the soil report first, design second.
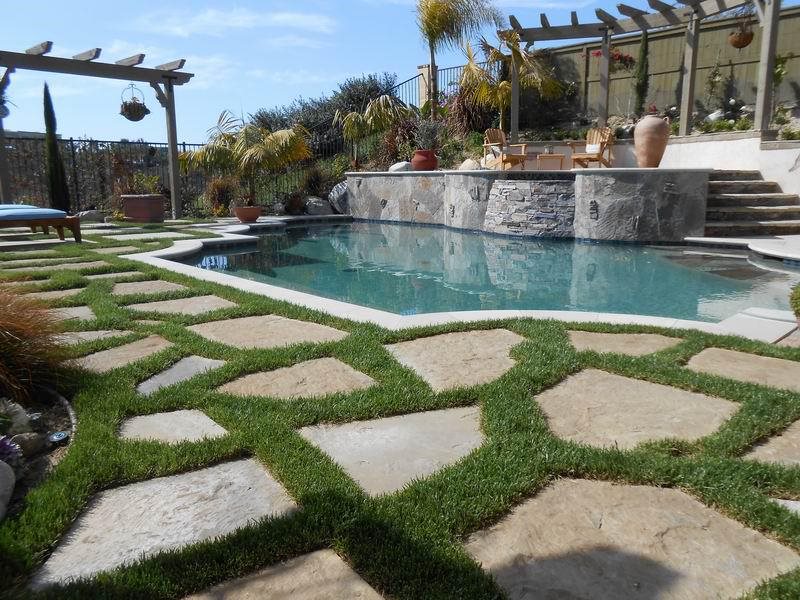
“Grass pavers, or ‘turfstone’, look beautiful and green, but they are not a low-maintenance choice.”
The grass growing between the stones needs to be watered and fertilized just like a regular lawn, but it’s much harder to do so evenly. More importantly, you can’t use a standard lawn mower on it; the blades will hit the pavers. You’ll need to trim the grass with a string trimmer, which is far more time-consuming and tedious. It’s a trade-off: you get a softer, greener look, but at the cost of significantly more difficult upkeep than a solid patio.
25. Build a Grand Stone Patio with a Pergola and Tiered Planters
This is a luxury-level outdoor construction project, with costs reflecting custom stonework and carpentry.
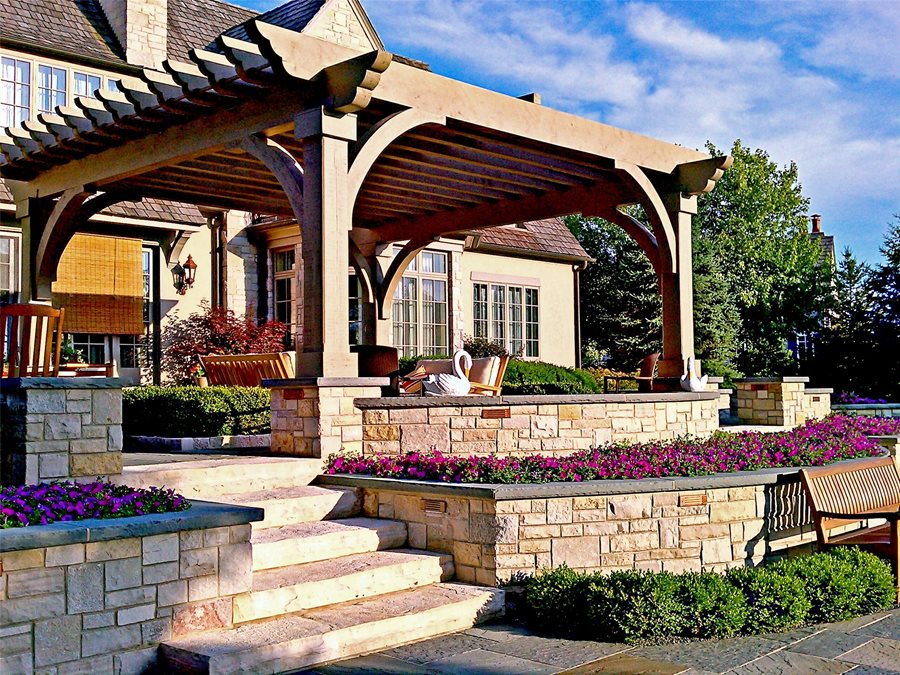
“Large Wooden Pergola: $10,000 – $25,000 (depending on wood type and complexity)
”
- Large Wooden Pergola: $10,000 – $25,000 (depending on wood type and complexity)
- Custom Stone Walls, Steps, and Patio: $20,000 – $45,000+
- Built-in Bench & Planters: $4,000 – $8,000
- Plants, Soil & Irrigation: $3,000 – $6,000
- TOTAL: $37,000 – $84,000+
Budget alternative: A pre-fabricated vinyl or aluminum pergola kit could be used for $3,000-$7,000. Using pre-cast concrete blocks instead of custom-cut stone for the walls would dramatically reduce cost as well.
The single element that defines this entire space is the massive wooden pergola. It’s the architectural anchor that everything else is built around. It creates a ceiling, turning what would be an exposed patio into a true outdoor room. It provides shade, adds a warm, organic material to contrast with the stone, and establishes the grand, classic scale of the design. Without the pergola, the impressive stonework would feel less like a living space and more like a fortress. The pergola makes it inviting.
26. Design a Split-Level Patio with a Contrasting Stone Wall
The key to making a dark, dramatic retaining wall like this work is the capstone. Notice how the light-colored cap provides a crisp, clean line that defines the top edge of the wall. This is crucial for two reasons. Visually, it prevents the dark stone from blending into the shadows or the dirt behind it. Functionally, it provides a finished, smooth surface to sit on or place a drink. Always invest in a proper capstone—whether it’s cut flagstone, bluestone, or poured concrete—to give your wall a professional, intentional look.
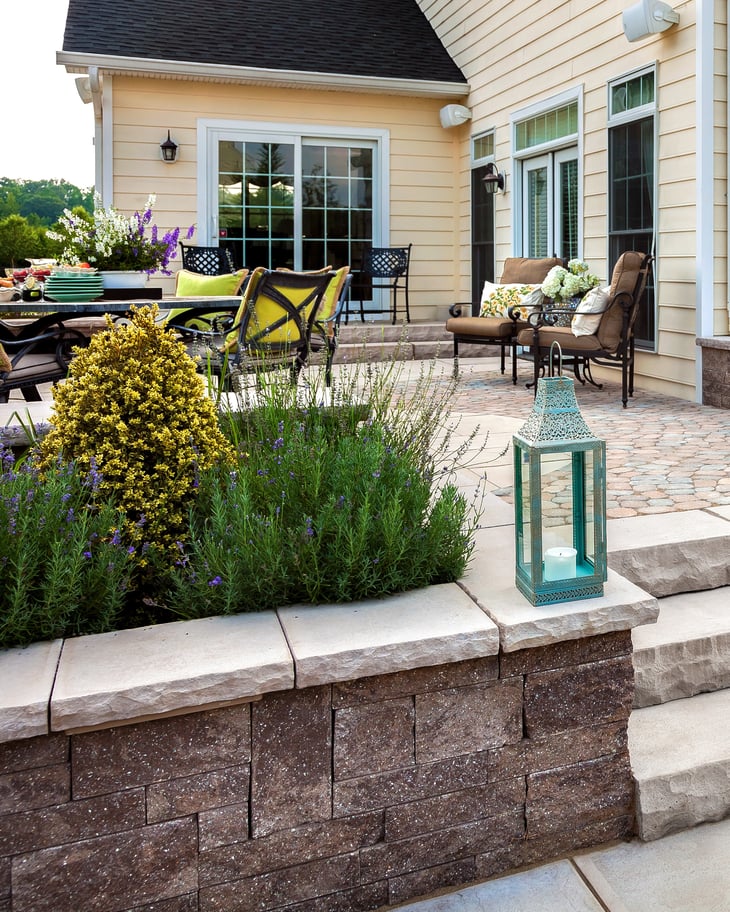
“This design’s charm comes from its smart use of contrast and color harmony.”
The primary contrast is between the dark, rough-textured retaining wall and the light yellow siding of the house—a classic dark-on-light pairing that creates instant visual drama. But the design is softened and unified by the repetition of the yellow hue from the house in the seat cushions on the dining chairs. This is a simple but incredibly effective trick for making your outdoor furniture feel perfectly coordinated with your home’s exterior.
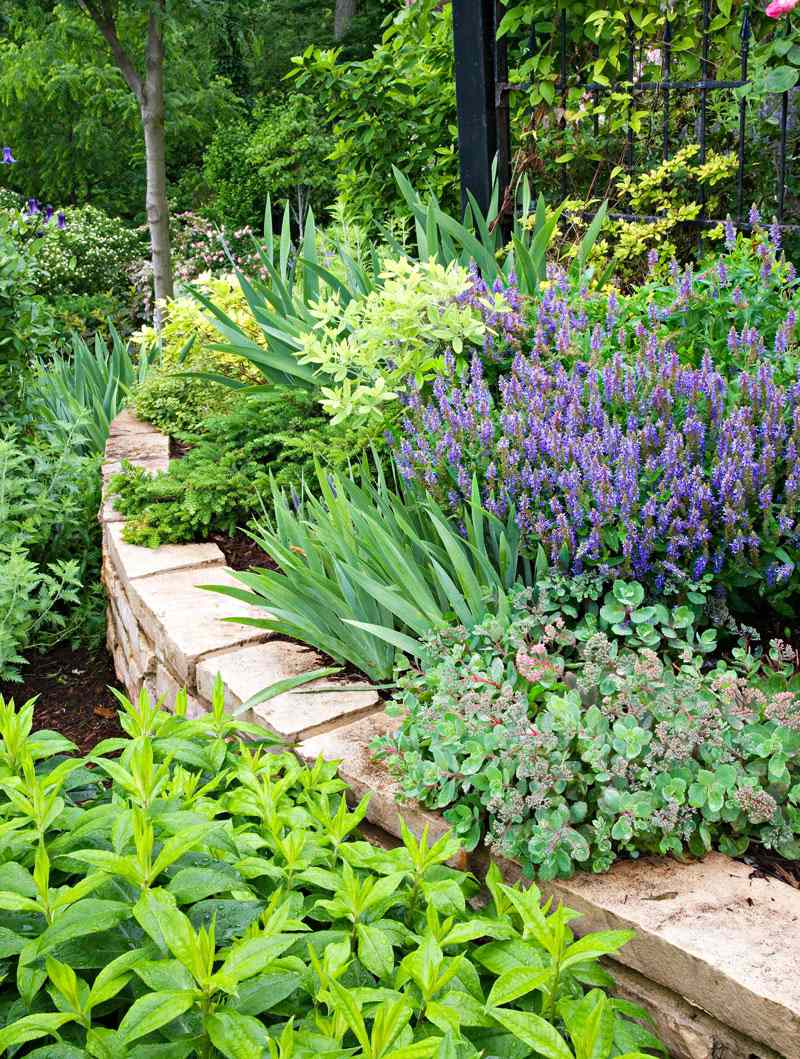
27. Create a Layered Garden with a Curved Stone Wall
that makes this garden feel so serene and natural is the gentle curve of the retaining wall. A straight wall would have sliced the space in two, creating a much more rigid and formal feel. The curve, however, feels organic and gentle. It allows the eye to flow smoothly from the lower level to the upper level, and it creates a sense of soft enclosure in the upper garden bed. It’s a simple geometric choice that has a massive impact on the overall mood of the space, turning it from a simple terrace into a graceful feature.
28. Lay a Natural Flagstone Path Up a Gentle Garden Slope
Laying an informal flagstone path like this is a very approachable DIY project for a gentle slope.
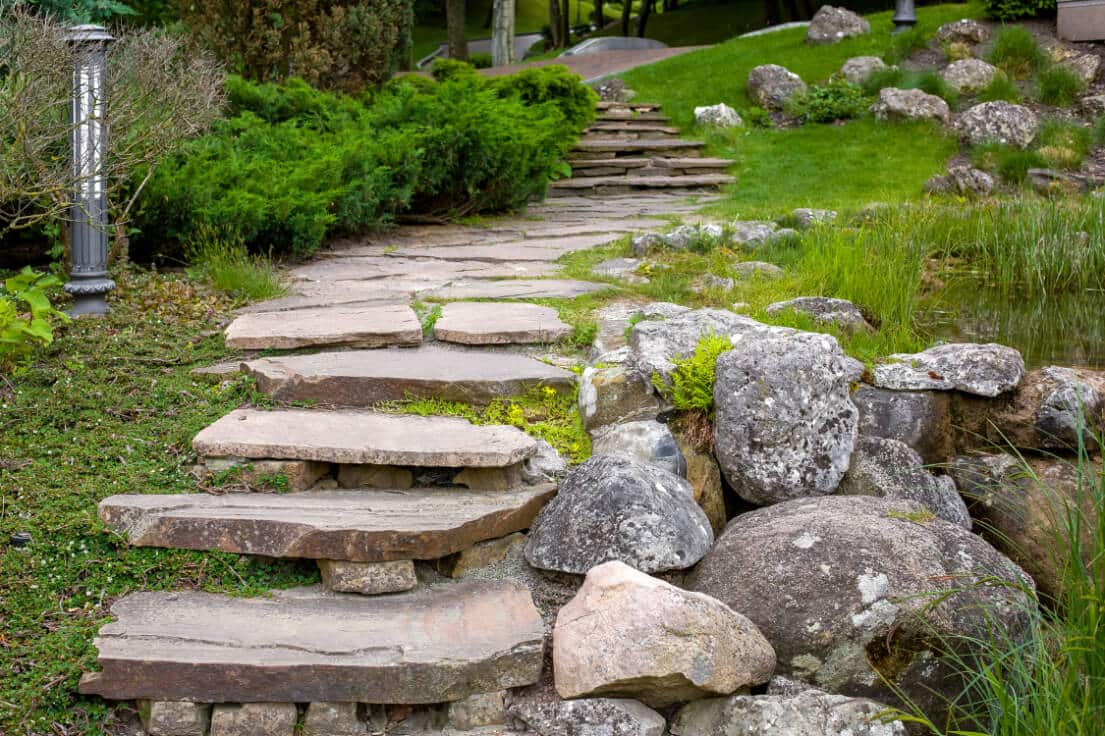
“Time: 1 weekend
Cost: $300 – $600
Lay Out the Stones: Arrange your irregular fla”
- Time: 1 weekend
- Cost: $300 – $600
- Lay Out the Stones: Arrange your irregular flagstones on top of the ground to create the path you want. Aim for 2-4 inches between stones.
- Trace & Excavate: Trace around each stone with a trowel. Set the stone aside and dig out the turf/soil to the thickness of the stone, plus one inch.
- Add a Sand Base: Add a one-inch layer of paver sand to the excavated area and level it.
- Set the Stone: Place the flagstone on the sand bed and wiggle it until it’s stable and doesn’t rock. A rubber mallet is helpful here. Fill the gaps with soil and allow ground cover to grow in.
29. Build Rustic Steps with Weathered Wood and Lavender
This design is a perfect example of a ‘site-specific’ solution, and that’s why it works so well. It doesn’t feel like a pre-packaged kit was dropped into place. The weathered wood of the steps looks like it could have been reclaimed from an old fence on the property. The gray rocks look like they were dug up right there. The placement feels organic, as if the steps were simply laid into a naturally occurring gap in the plants. This harmony with the surrounding materials and landscape is what gives the design its authentic, rustic charm.
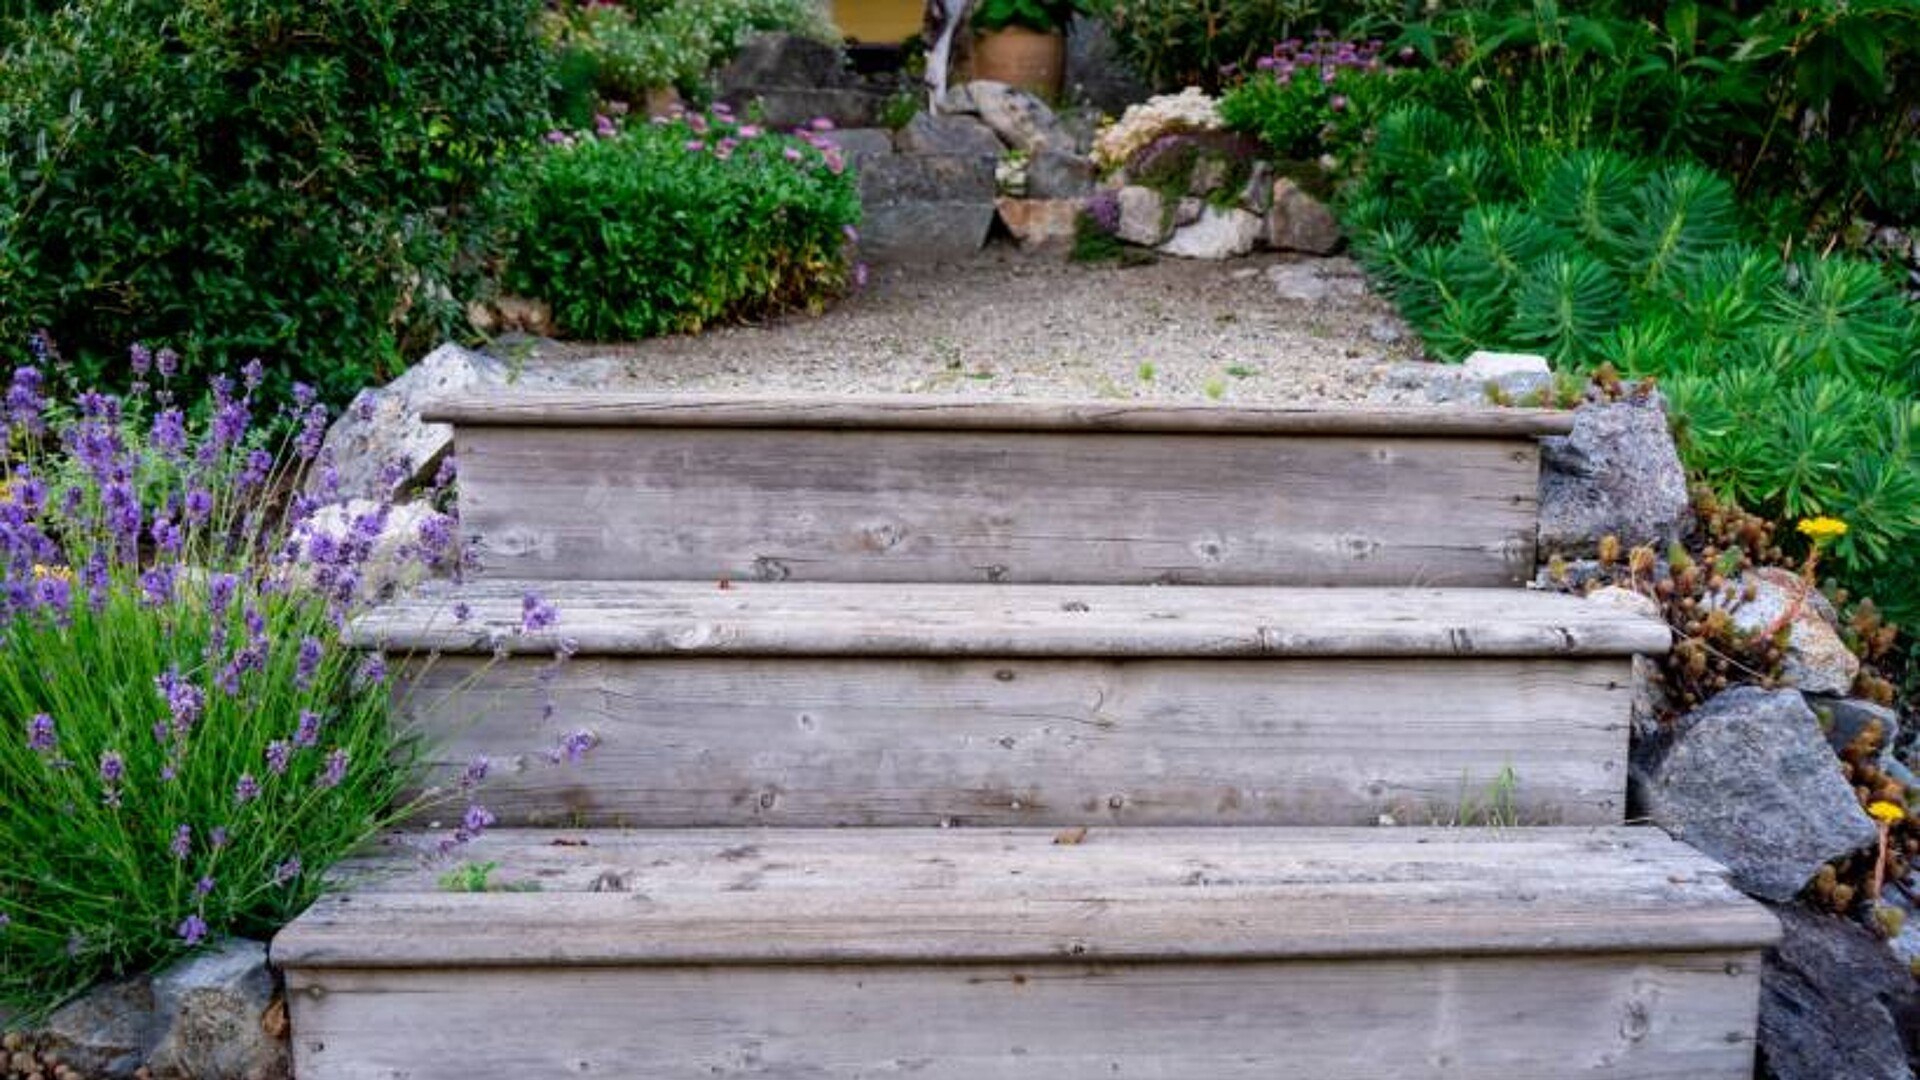
“Wood steps in direct contact with the ground have a finite lifespan, even when using weather-resistant wood.”
These weathered steps look beautiful, but they signal that they are nearing the end of their functional life. You can expect to replace untreated wood steps like this every 5-7 years, and pressure-treated ones every 10-15 years, due to eventual rot. The gravel used on the path will also need to be refreshed every few years as it gets kicked away or sinks into the soil. As for the lavender, it will need a healthy pruning after it flowers to prevent it from becoming woody and sparse.
Your Backyard’s Next Chapter: From Slope to Sanctuary
That tricky slope in your backyard isn’t a problem—it’s an opportunity waiting for a great design. We hope these 29 ideas have sparked the inspiration you need to get started on turning that incline into an asset. Don’t forget to save your favorites to your Pinterest board to keep the vision alive!