
Still scrolling through Christmas DIY decorations 2026 photos without knowing where to start? You’re not alone—Pinterest is packed with ideas, but many fall apart the moment you sit down at the craft table. We spent serious time browsing Michaels, Hobby Lobby, Target, and IKEA to pull together 29 ideas that actually look good in real homes, covering rustic handmade, Scandinavian minimalist, retro whimsical, and natural woodland styles—most using supplies from $3 to $120. In 2026, the shift toward quiet, handcrafted holiday decor is stronger than ever; people want ornaments and displays that don’t feel mass-produced. This post may contain affiliate links. And stay until the end — we break down the most common mistakes that can ruin these looks. 📌 Save this to Pinterest for later — you’ll want to revisit these ideas.
1. A Quirky Pink Starfish in a Felt Santa Hat
There’s something unexpectedly charming about a textured pink starfish that’s been turned into a tiny holiday character. The miniature red felt Santa hat with white trim gives it an immediate festive identity, while the hand-painted facial features and green shorts with dark blue flower motifs make it feel less like a generic ornament and more like a little creature with a backstory.
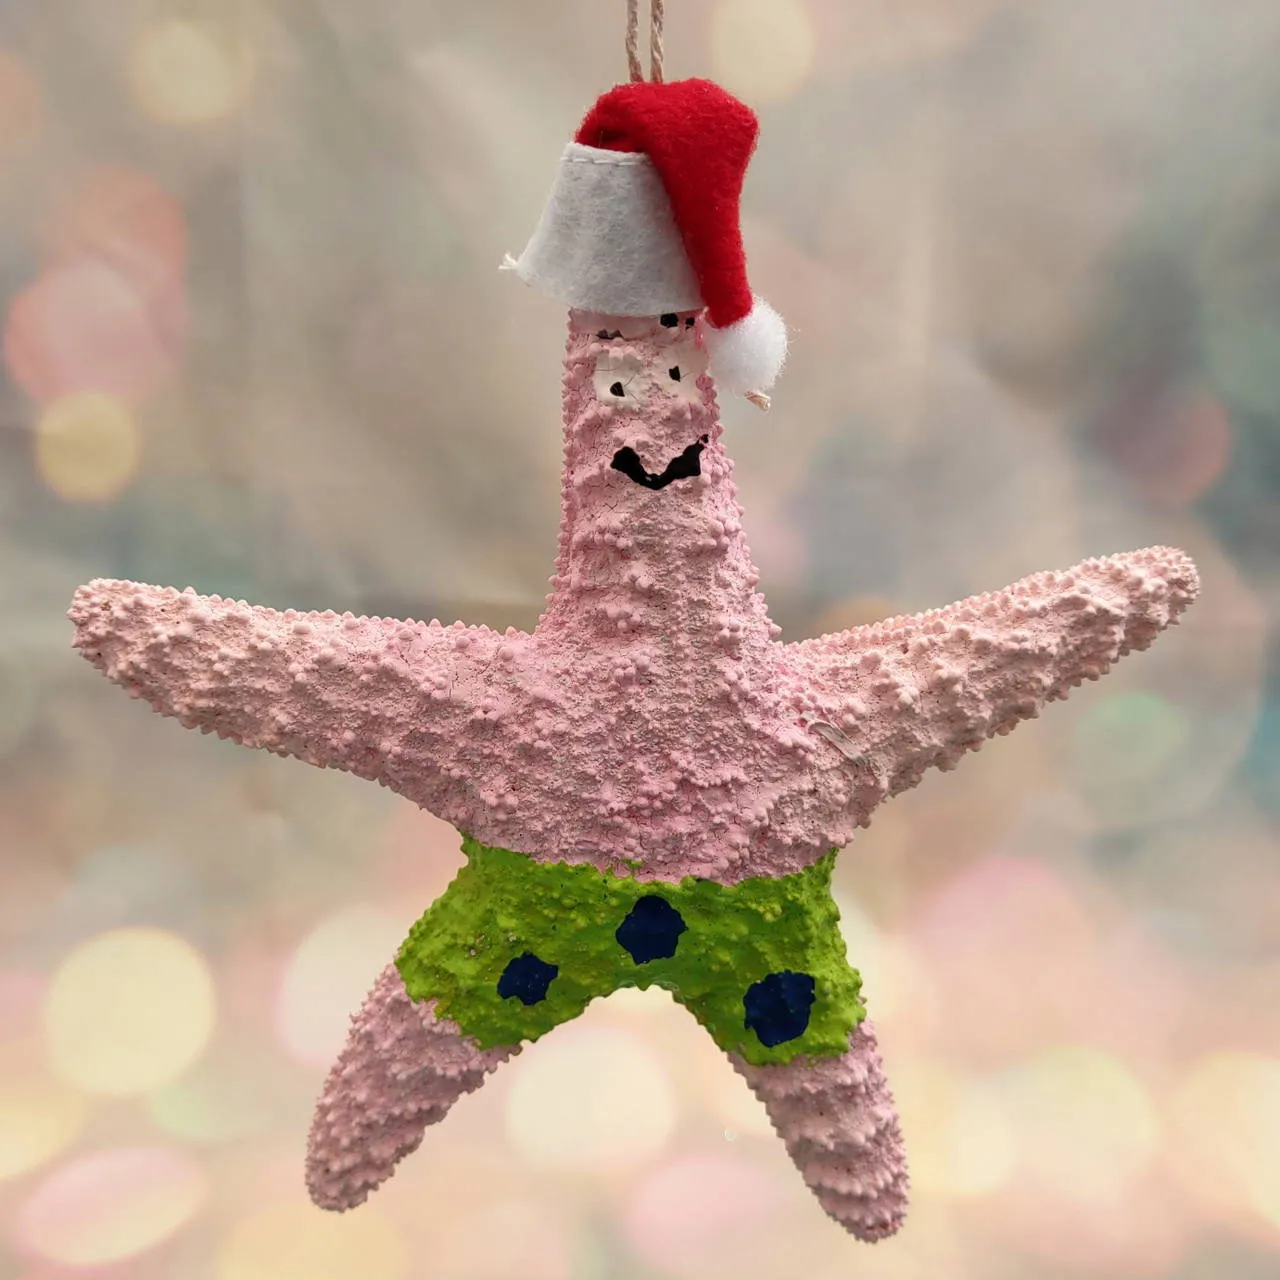
“you can’t skip is that fuzzy little felt hat.”
Without it, this would just be a painted starfish. With it, the whole piece tips into holiday character territory, and the twine hanging loop makes it ready for a tree branch, a door knob, or even a gift topper.
this kind of ornament is delicate. If you’re hanging it on a tree with curious kids or a tail-wagging dog, expect the hat to get pulled off at least once. Keep a hot glue gun nearby, and maybe make two—one for admiring, one for surviving. If you love this kind of handmade personality, check out the knitted mini stocking in Idea #18.
2. Rustic Tabletop with Pink Gingham and Fresh Florals
That pink and white gingham bow is doing a lot of work here. It softens the rustic wooden tabletop and ties the floral arrangement of white lilies and red roses into the rest of the scene without feeling precious. The unfurled spool of matching ribbon is a smart styling trick—it makes the whole display look like something caught mid-project rather than overly staged.
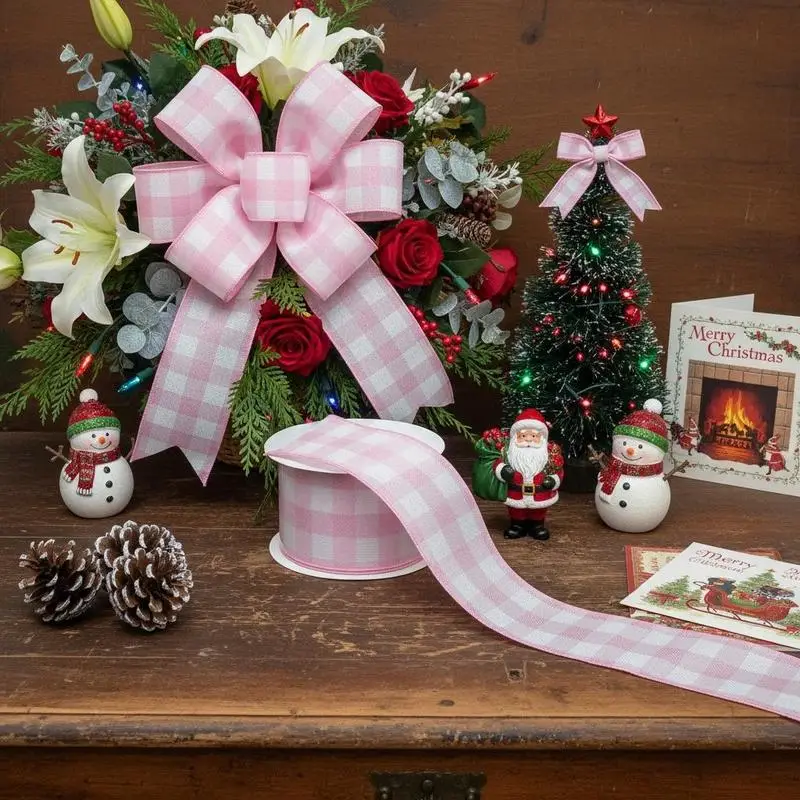
“The visual formula is roughly 60% natural wood and greenery, 25% pink gingham and floral white, 10% red accents from roses and Santa, and 5% tiny twinkle from the frosted tree.”
If you swap the gingham for a black and white check and the roses for dried orange slices, you get a completely different mood with the same structure. This kind of lived-in tabletop moment is exactly why my feed has shifted away from matchy-matchy store displays.
3. Layered Kraft Paper Stars on a Dark Green Wall
To recreate this layered star effect, start with a mix of kraft brown and white paper stars in at least three sizes—think 4, 7, and 10 inches across. Cluster them tightly so they overlap, then weave a warm-white fairy string light through the gaps before securing anything permanently.
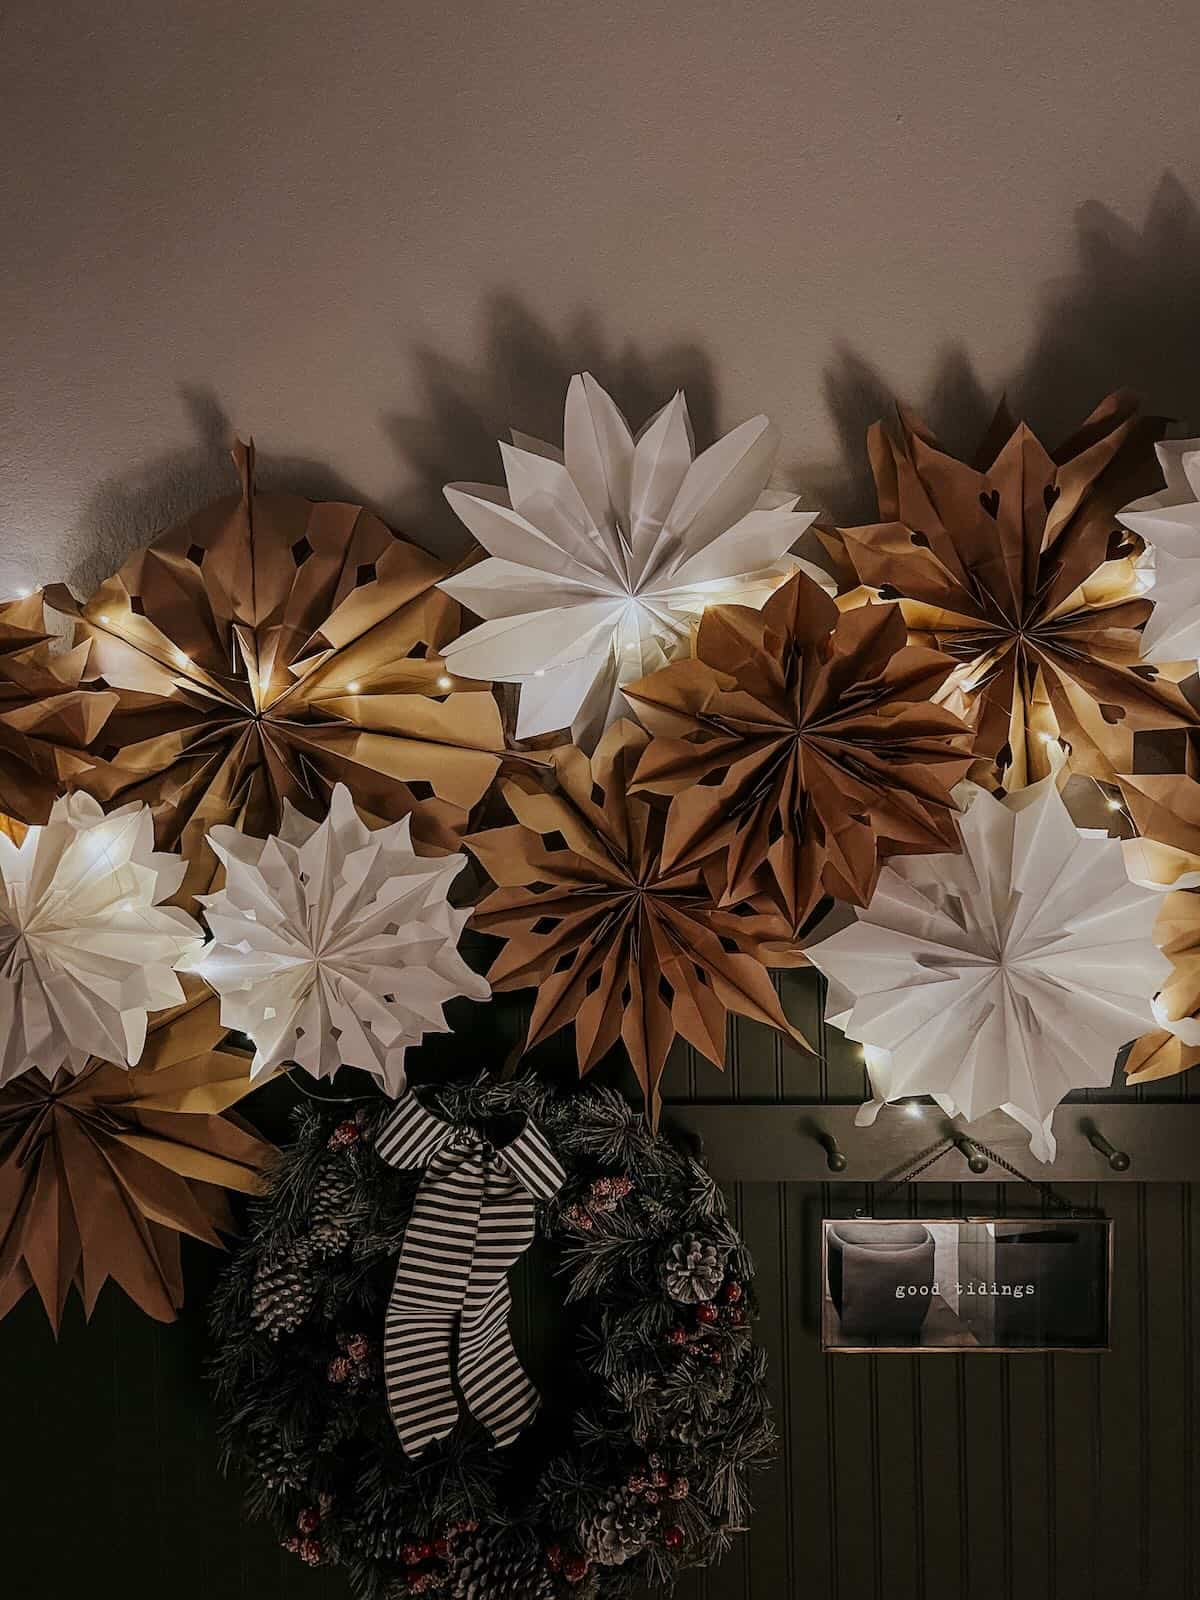
“Fold or buy 12–15 paper stars in two neutral tones.Lay them on the floor first t”
- Fold or buy 12–15 paper stars in two neutral tones.
- Lay them on the floor first to test the cluster shape.
- Mount the largest stars with small map pins or poster putty.
- Weave fairy lights through the openings, not behind the paper, so the glow hits the folds.
- Tuck smaller stars into the gaps and step back to check balance.
This works best on a dark green wall panel or any wall that can handle a little pin pressure, and it needs about 4 feet of vertical space to feel intentional rather than cramped. Compare it with the similar star garland over a peg rail in Idea #8—same color family, different vertical rhythm.
4. Folded Blue Snowflakes on Wrapped Gift Boxes
when you’re mixing handmade snowflakes with store-bought wrapping, stick to one paper family. Here, the turquoise and bright blue cardstock stars and newsprint snowflakes all share a cool blue-plus-ink palette, so the flat lay feels collected instead of chaotic. Cut your snowflake edges slightly larger than the gift box lid—about 1.5 inches of overhang—so they read as a deliberate topper, not a leftover scrap.
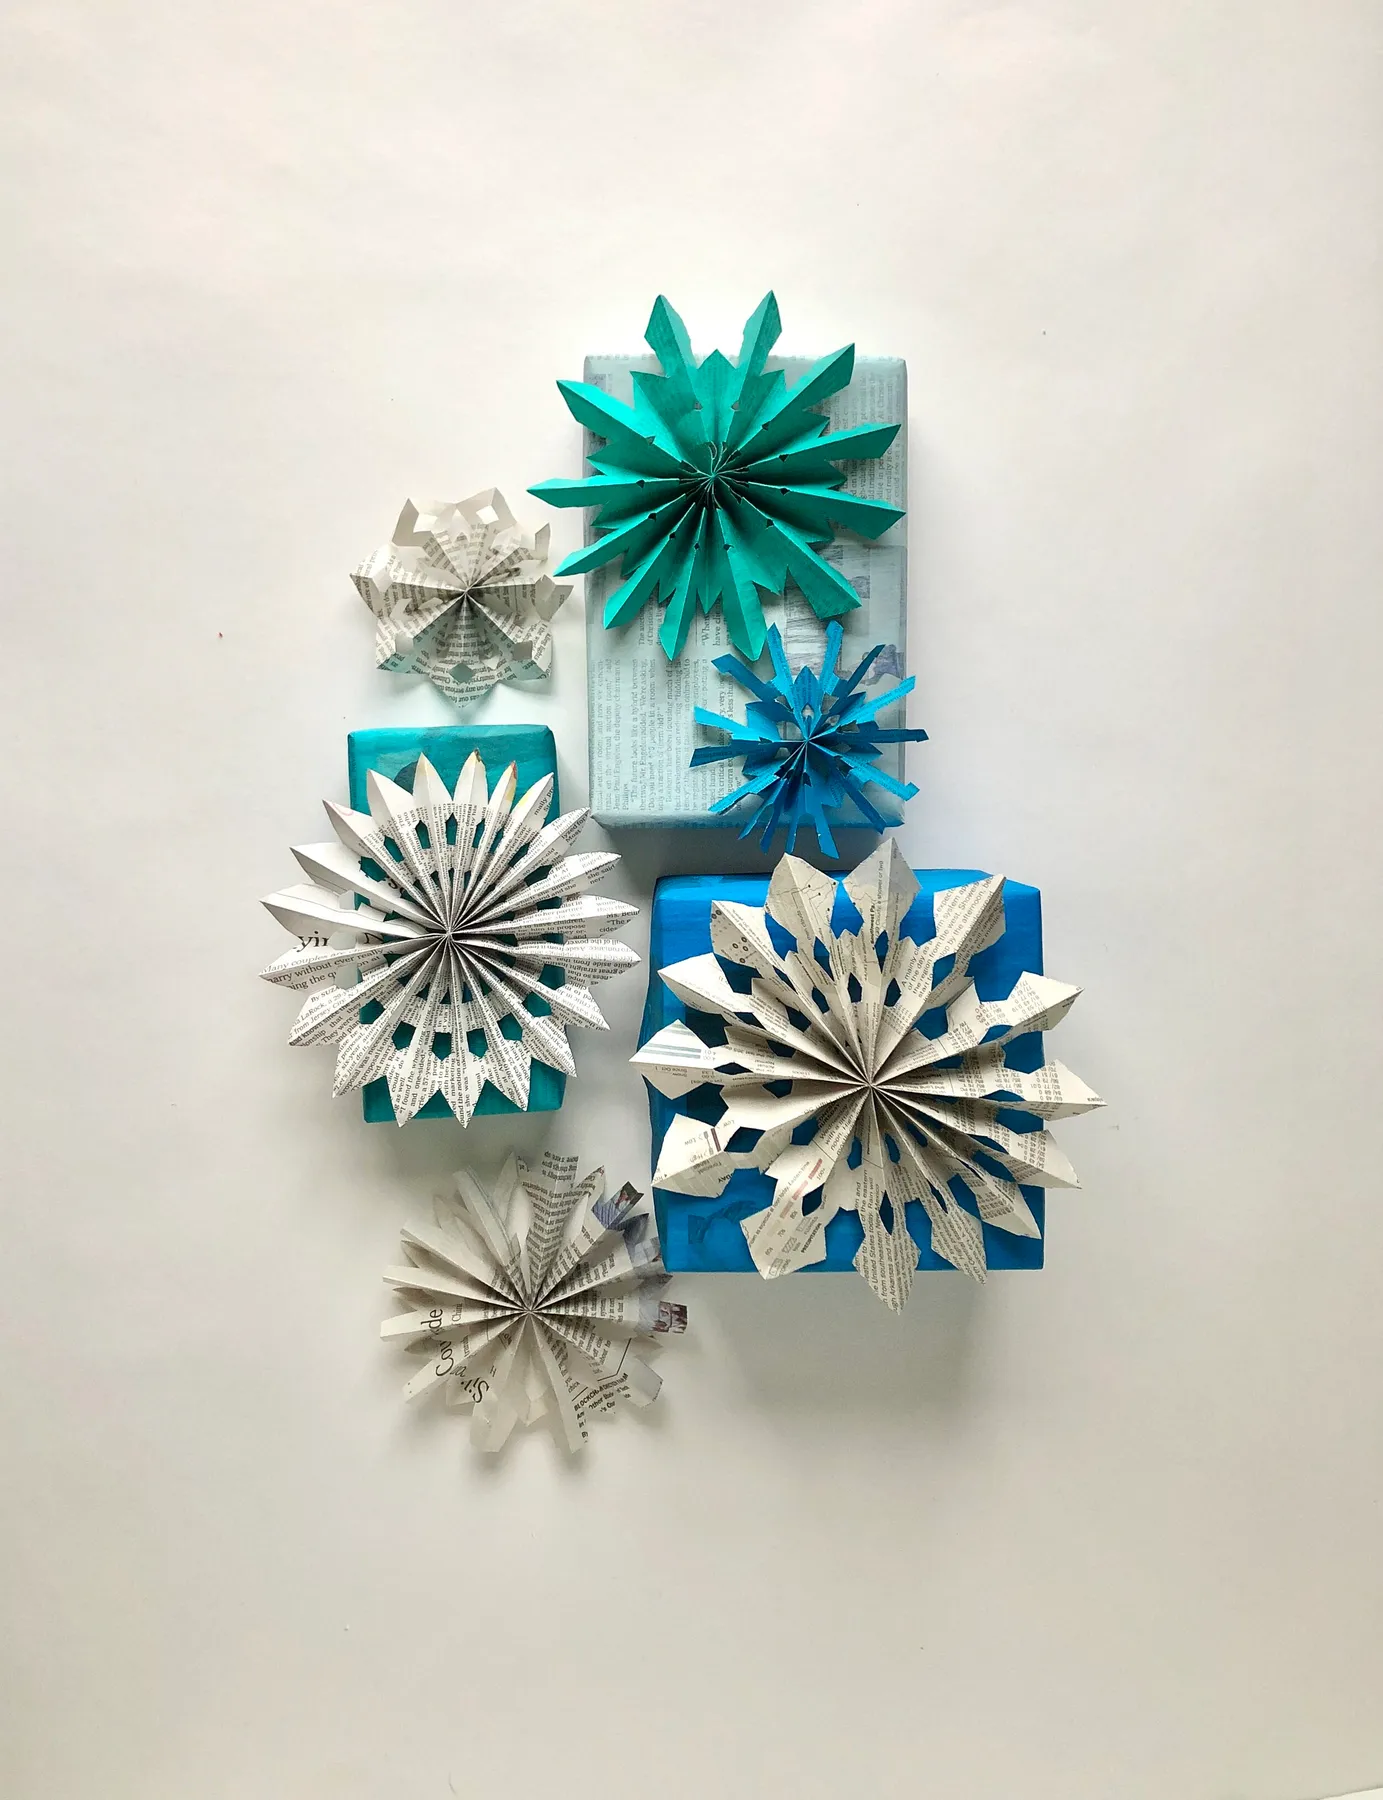
“You don’t need expensive paper to get this look.”
Newsprint or old book pages make the most interesting snowflakes, and a pack of turquoise cardstock from Michaels or Target runs around $4. Pair them with plain blue gift wrap from IKEA or even the inside of a grocery bag, and you’ve spent less than $10 on a whole gift table.
5. Suspended White Snowflakes Over a Candlelit Window Sill
The magic here comes from the varying heights. White paper snowflakes hanging at different lengths against a multi-paned window catch the light and feel like a flurry frozen mid-air. The draped pine garland around the frame grounds the whole thing, while the lit taper candles in glass holders add a warm glow that keeps the white from feeling cold.
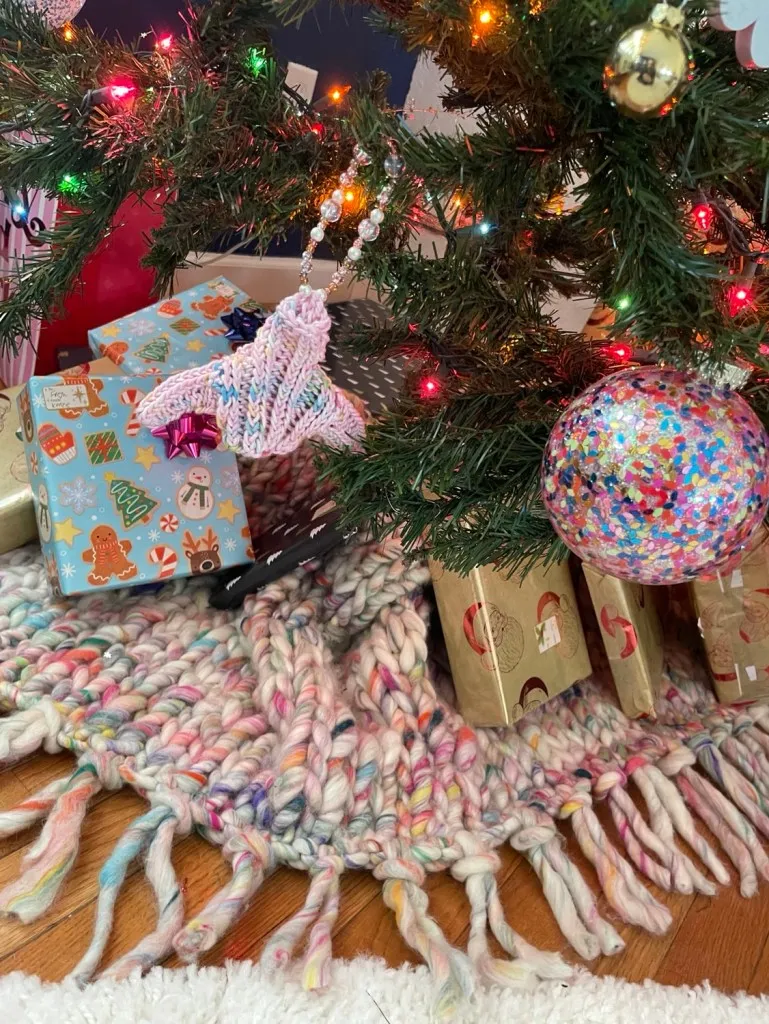
“Make sure your window frame can support small screw hooks or command hooks befor”
- Make sure your window frame can support small screw hooks or command hooks before you start.
- Check that the snowflakes won’t swing into the candle flames—keep at least 8 inches of clearance.
- Measure the drop heights so no snowflake blocks the window lock or a sash track.
- Use clear fishing line, not white string, for a true floating effect.
This is one of the easiest ways to get a big festive payoff from plain copy paper. For a more minimal version without candles, see the daylight window treatment in Idea #14.
6. White Pine Branch Snowflake Over Stacked Books and Houses
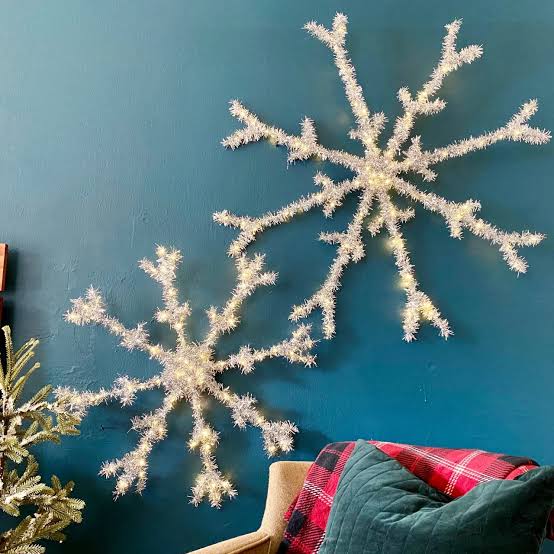
The oversized white artificial pine snowflake is the undisputed star here. The silver metallic center ornaments and fluffy white pom-pom accents give it dimension, but it’s the scale that matters—it fills the wall without needing a gallery of frames. The potted plant on stacked books and the three natural wood house sculptures below help ground the arrangement and keep it from feeling like a store window.
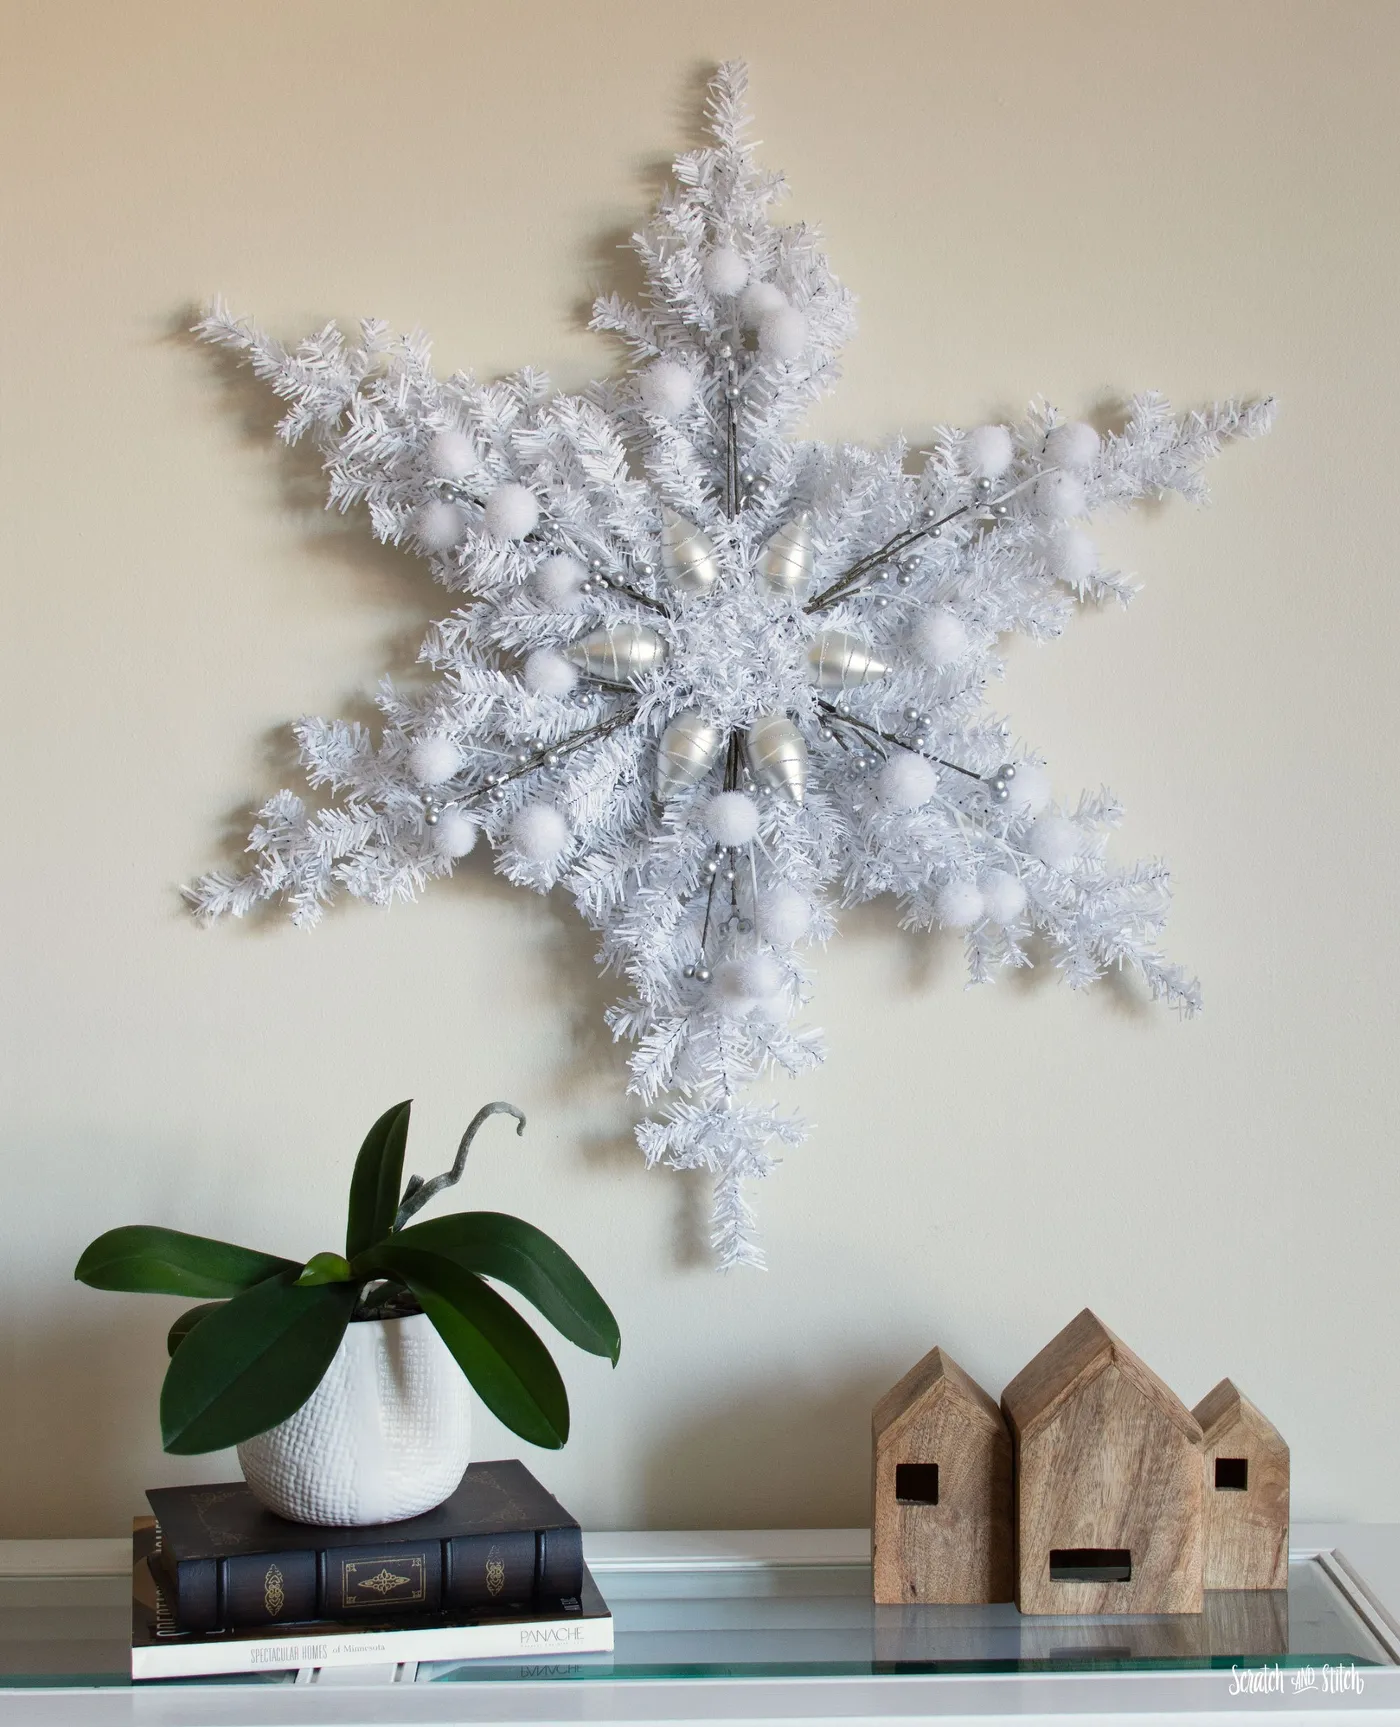
“Main snowflake wall hanging: $25–$60 depending on size, or about $15 to make wit”
- Main snowflake wall hanging: $25–$60 depending on size, or about $15 to make with artificial pine picks and a foam base
- Silver ornaments and pom-pom accents: $5–$12
- Potted plant and stack of books: $0–$30 if you shop your own shelves
- Three wood house sculptures: $8–$20 at craft stores or thrift shops
- Total: roughly $53–$122, with a budget alternative around $28 if you DIY the snowflake and use existing books.
What would you lose if the snowflake disappeared? You’d lose the whole focal point. That’s why the rest stays intentionally simple.
7. Pinecone Jar Lid Craft on a Woven Placemat
This little project is all about upgrading a simple glass jar into something that feels like a vintage market find. A person in a beige apron over plaid is attaching a small pinecone to a golden jar lid, but the real move is the mix of materials on the table: a wooden craft box filled with pinecones and ornaments, gold beaded garland, and white twine.
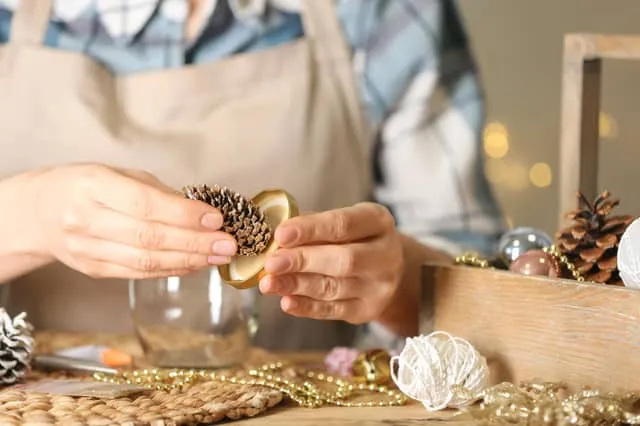
“Choose a small pinecone with an open, even shape.Dab hot glue or use a tiny scre”
- Choose a small pinecone with an open, even shape.
- Dab hot glue or use a tiny screw eye into the pinecone base.
- Thread white twine through the screw eye and wrap it around the gold lid.
- Add a short length of gold beaded garland around the neck for sparkle.
- Fill the jar with a battery tea light or a few sprigs of greenery.
pinecones can shed little bits all over your dining table. Give them a quick bake at 200°F for 20 minutes and a gentle brush before you glue, or you’ll be sweeping bark out of your placemats for weeks.
8. Paper Star Garland Over a Green Beadboard Peg Rail
The combination of white and kraft brown paper stars against that dark green vertical beadboard wall is a masterclass in rustic restraint. The peg rail below turns the display into something useful—a frosted pinecone wreath with a striped bow, a small framed sign, a hat, and a handbag all hang together without competing.
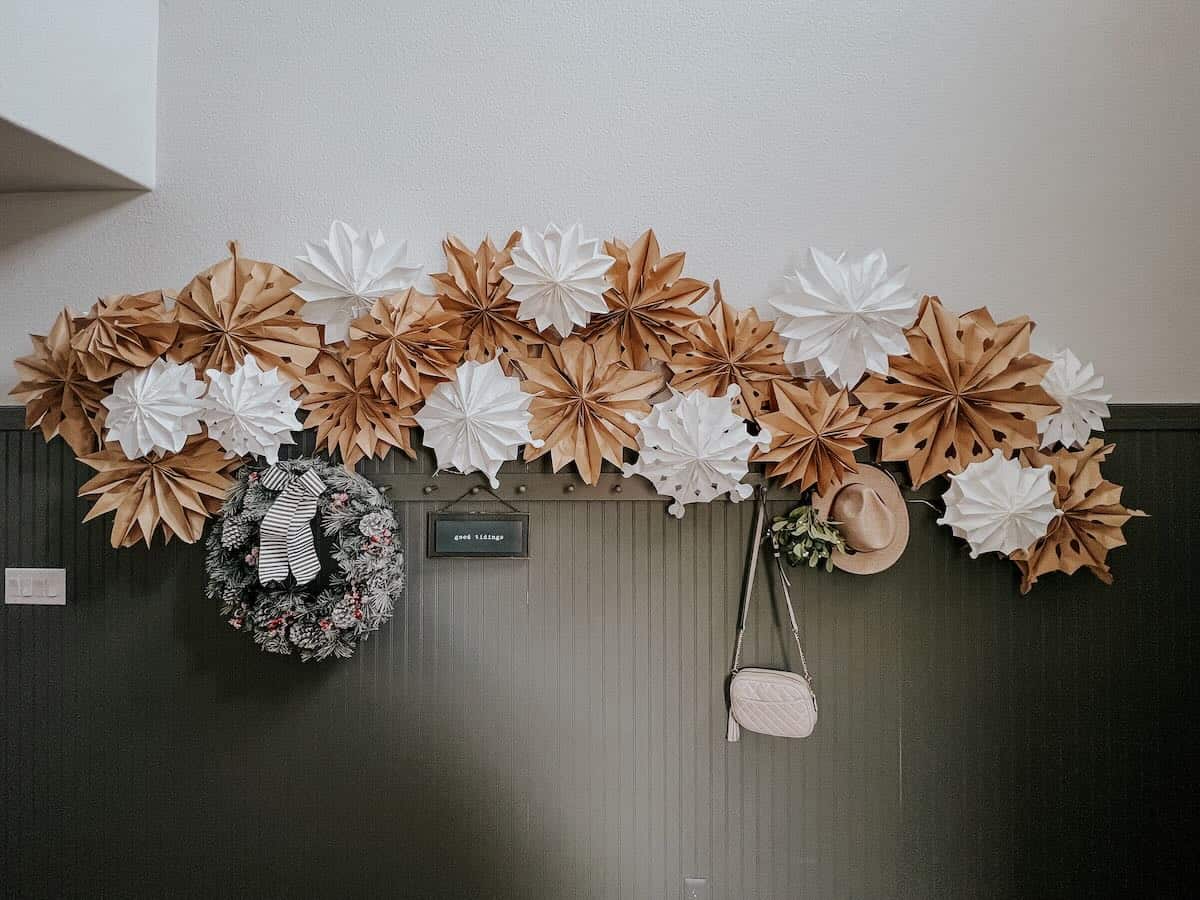
“I’d break the recipe down as 50% dark green wall acting as a rich backdrop, 30% kraft and white paper stars, 15% wreath and sign, and 5% everyday accessories like the hat and handbag.”
If you swapped the dark green for white shiplap and the paper stars for brass ornaments, you’d keep the layout but lose the cozy, woodsy atmosphere. This setup needs about 5 feet of wall width and works best above a bench or entryway table; for a smaller, tighter cluster, check out Idea #3.
9. Woven Yarn Rainbow With Natural Wooden Bead Trio
That tiny woven yarn rainbow suspended below three natural round wooden beads is the kind of ornament that makes you lean in. It plays beautifully against the white artificial tree branches and the matte pastel pink bauble with white line details, but it’s the rainbow itself that sets the tone—soft, a little playful, and clearly made by hand.
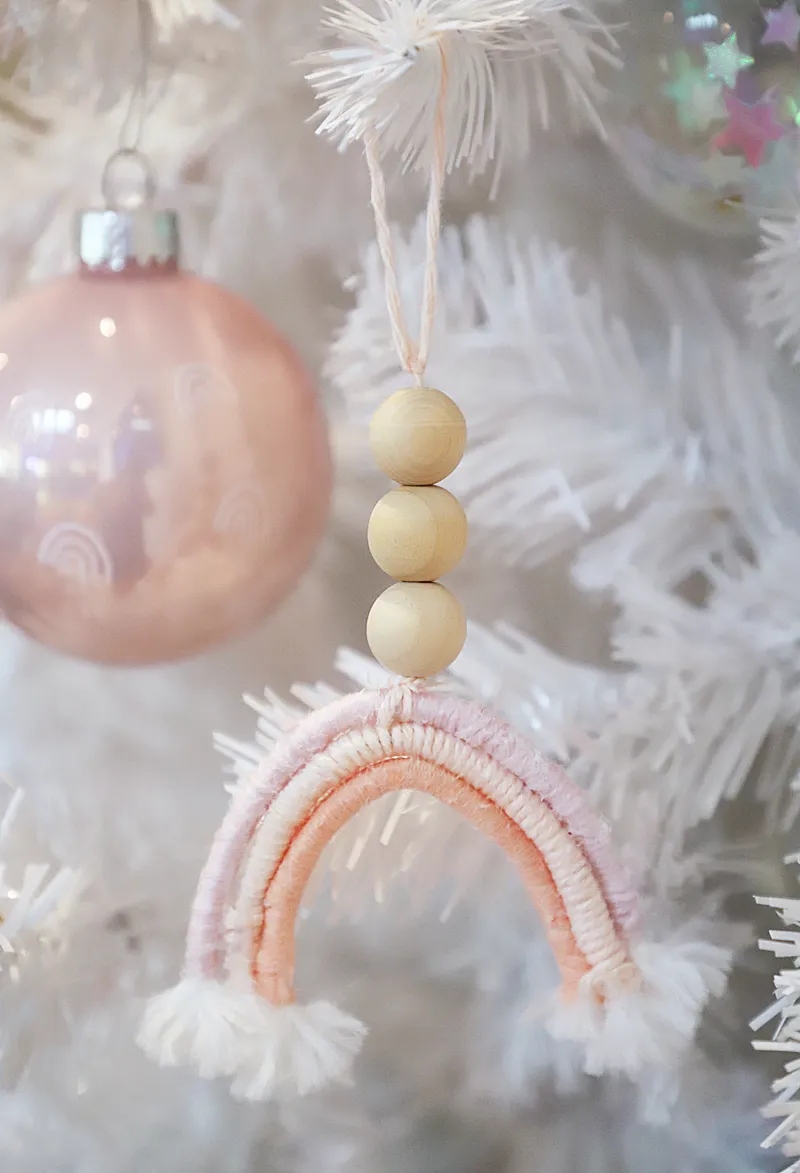
“If you remove the wooden beads, the ornament becomes too top-heavy and sticky-sweet.”
The three beads add an earthy pause between the string hanger and the pastel yarn, which is exactly why it doesn’t look like a kids’ craft table reject.
You can recreate this with a small cardboard rainbow template, a few yards of blush and peach yarn from Walmart, and three wooden beads from any craft aisle—total cost under $5. It’s a budget-friendly way to add a bit of whimsy without buying another box of generic pink balls.
10. Fringed Yarn Santa With Black Bead Eyes
when making a yarn Santa ornament, wrap the red yarn hat over a small foam cone or tightly rolled felt, not a flat card. That gives the hat enough structure to keep its shape on a tree branch. The fringed white yarn beard should be cut to at least 2.5 inches long so it fluffs out around the two black bead eyes and the tiny white pom-pom hat tip, creating that classic Santa silhouette.
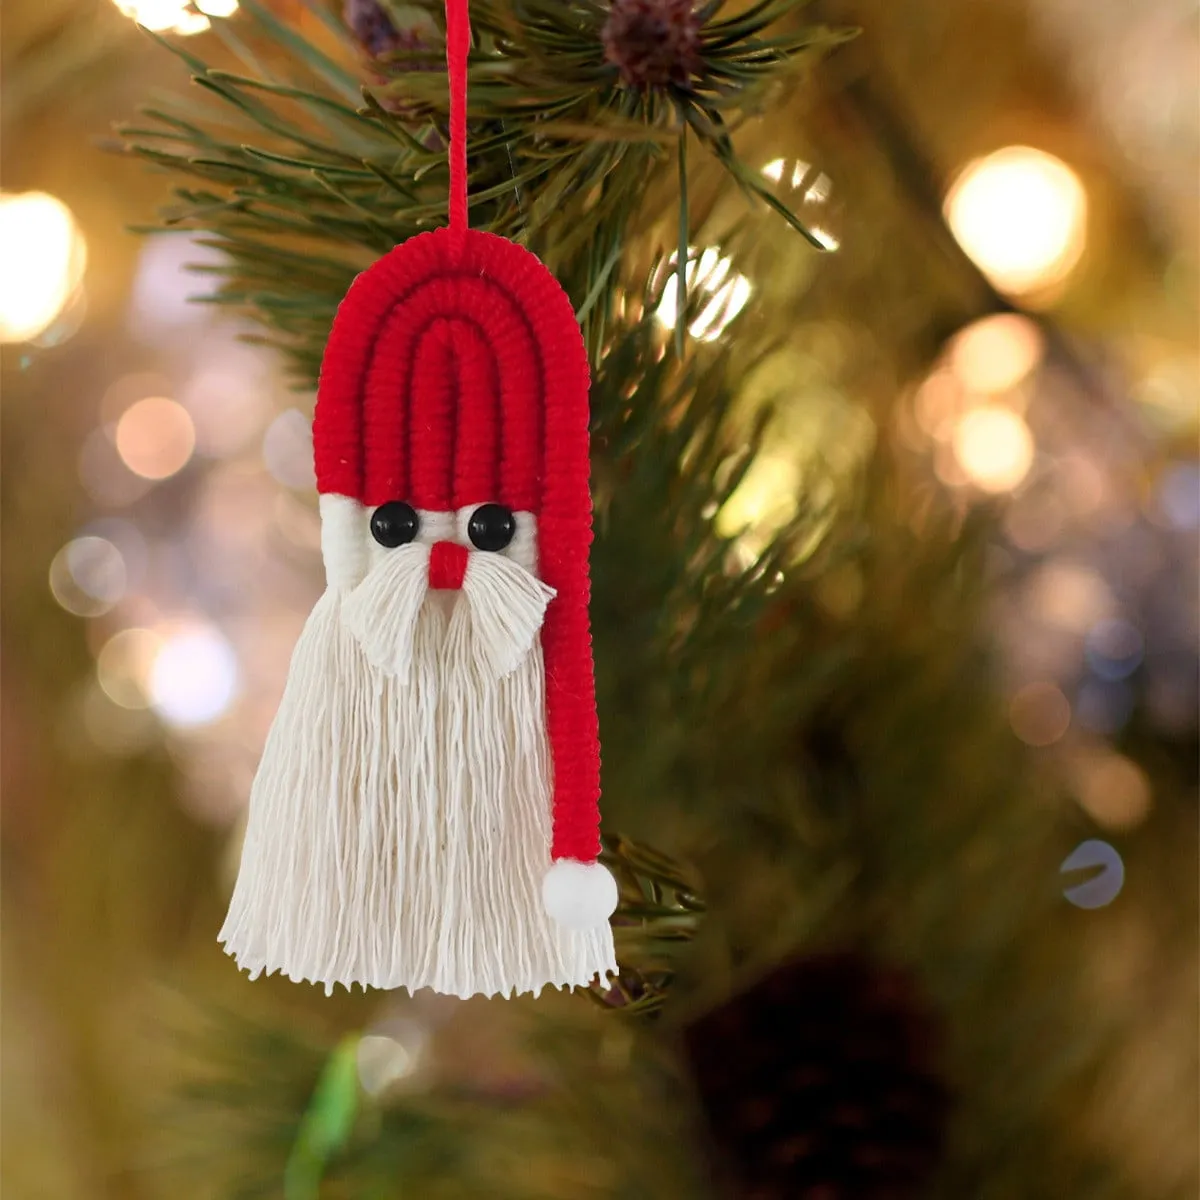
“fringed yarn beards collect dust and tree sap, and black bead eyes can pop off if the ornament gets squished in a storage bin.”
Store these individually in small cardboard jewelry boxes or an egg carton, and give the beard a gentle steam fluff each year. If you’re making a batch, keep extra black beads and a needle and thread nearby for quick repairs.
11. Red Floral Mason Jars on a Mirrored Tray
The silver mirrored tray is the secret ingredient here. It doubles the glow from the small red votive candles and makes the three glass mason jars filled with tinted red water and bright red carnations feel like a cohesive centerpiece rather than a row of random jars. The red ribbon around the jar necks and the glittering red twigs add sparkle without making the table look cluttered.
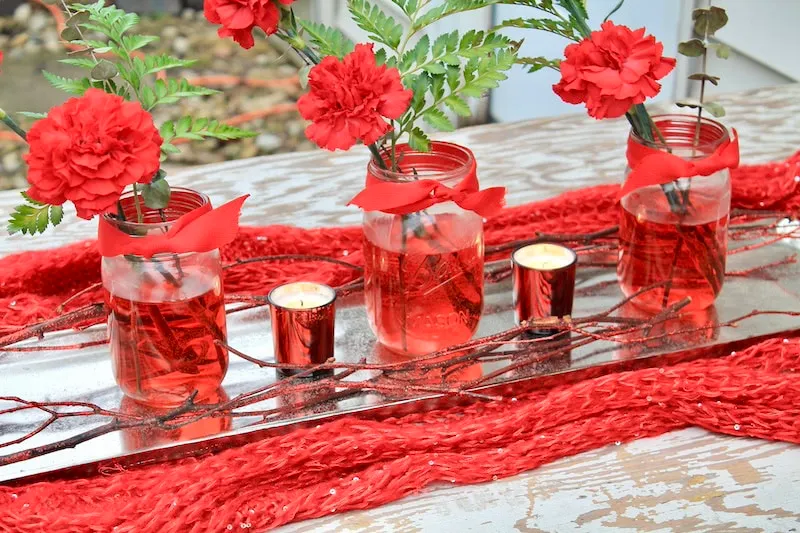
“Three glass mason jars: $6–$15Red carnations and greenery: $8–$20 depending on s”
- Three glass mason jars: $6–$15
- Red carnations and greenery: $8–$20 depending on season and grocery store
- Silver mirrored tray: $12–$30, or thrift one for $5
- Red votive candles and metallic holders: $6–$14
- Glittering red twigs and ribbon: $4–$10
- Total: roughly $36–$89, with a budget version around $22 using a thrifted tray and grocery store carnations.
If you love this particular shade of red and rustic wood pairing, the tabletop with pink gingham in Idea #2 gives you a softer, more pastel spin on the same idea.
12. Minimal Branch Hanging With Paper Honeycomb Ornaments
This is the quiet side of holiday decorating that has been taking over Pinterest in 2026. A simple wall-mounted natural wooden branch suspended by twine, with delicate minimalist paper ornaments and a small kraft paper tag, reads more slow living than holiday explosion. The white painted wall keeps the focus on the natural wood and beige tones.
“The rise of this look makes sense—people want holiday decor that can stay up through January without feeling stale.”
Because the palette is so neutral, it transitions into a winter branch display once the paper honeycombs come down.
Scale-wise, this works on any wall with at least 3 feet of width and 4 feet of height. If your space is tighter, the suspended snowflake window in Idea #5 gives a similar minimal feel in a smaller footprint.
13. Frosted Bottle Brush Trees and Ceramic House Figurines
You don’t need an expensive ceramic village set to get this cute winter forest scene. Bottle brush trees in forest green, dusty pink, and soft gray are easy to find at Target, IKEA, or thrift stores for $3–$8 each. Mix them with a few ceramic or wooden house figurines you already own, and set the whole group on a plain neutral surface like a sideboard or entry table.
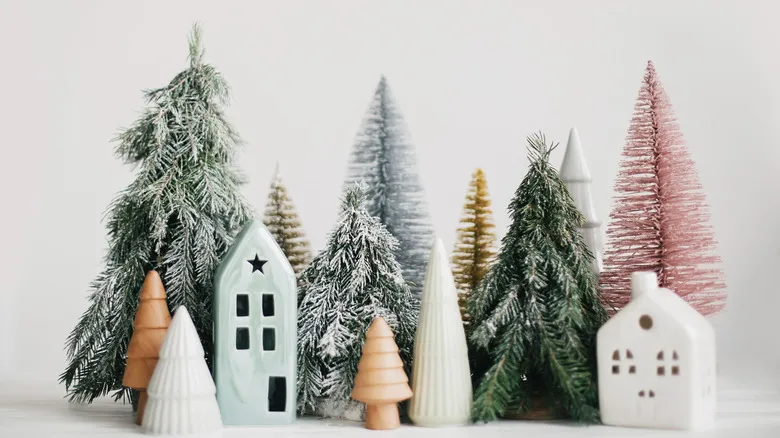
“flocked and frosted trees shed tiny white fibers every time you move them.”
That’s part of the charm until it’s all over your dark console table. Use a lint roller around the display base once a week, and keep the cluster on a small tray so you can move it without touching individual pieces. If you have cats, anchor the trees with a dot of museum putty.
14. Geometric Paper Snowflakes Against Daylight Window Panes
This is paper snowflake hanging at its most precise. The varying sizes and intricate geometric cutouts stand out against the multi-paned window because the clear string disappears in the daylight. To get that level of detail, you need a sharp craft knife or small scissors and a cutting mat rather than kid scissors.
“Fold your paper in thirds, then in half, to create a six-point base.Sketch small”
- Fold your paper in thirds, then in half, to create a six-point base.
- Sketch small diamond, triangle, and slit patterns before cutting.
- Keep the outer edge jagged for a more organic snowflake look.
- Press the finished snowflakes between two heavy books for an hour to flatten.
- Hang them with clear fishing line at three different heights.
use at least a 24-lb paper—standard copy paper is too floppy and will curl from window condensation. A bright white cardstock holds the folds better and photographs crisply.
15. Craft Table With Paper Snowflakes and Felt Santa Hat
this is the messy middle of every beautiful DIY photo you’ve ever saved. The light wood grain table holds cut paper snowflakes, a felt Santa hat craft piece, scissors in a wooden holder, and small gold star confetti. It’s proof that the good stuff doesn’t happen in a perfectly clean craft room—it happens in the middle of glue sticks and tiny scraps.
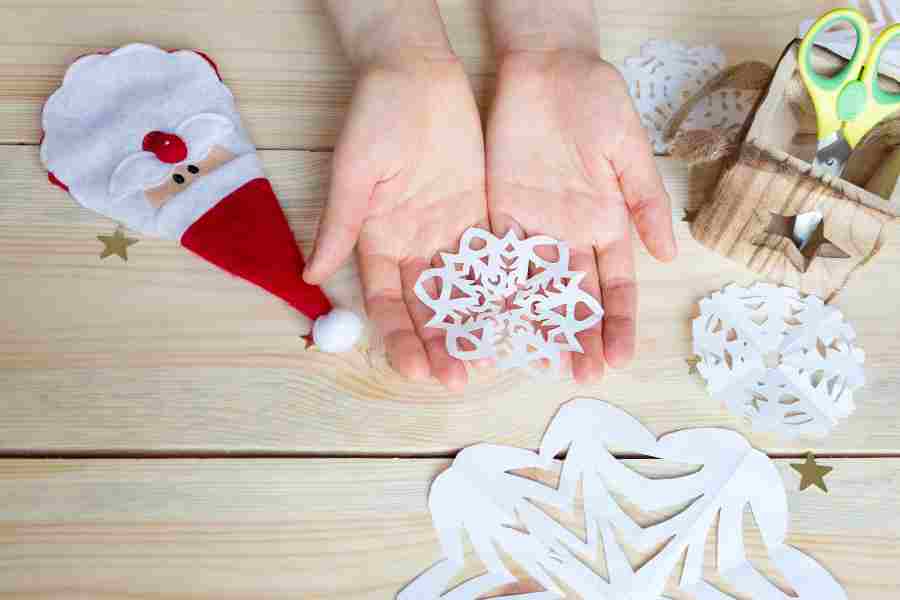
“There’s a formula buried in the clutter: 50% white paper cuts, 20% red felt accents, 15% light wood surface, 10% green and gold details, and 5% tool storage.”
That same ratio can be switched to blue and silver for a Hanukkah table or natural kraft and red for a more rustic look. Keep the tools in a wood or ceramic holder, not plastic, and the mess will photograph better than you expect.
16. Brick Mantel With Red Velvet Stockings and Pine Cones
The three red velvet stockings with white cuffs are what make this mantel feel like a real family tradition. The white brick accent wall, gold-framed round mirror, and lit evergreen garland all support them, but if you hung three mismatched knit stockings, the whole scene would lose its classic warmth.

“when decorating a brick mantel, place your candles in glass or metal holders at varying heights—one at 10 inches, one at 14 inches—to create movement across the top line.”
Scatter pine cones in odd numbers, three or five, rather than evenly, and let the garland lights sit behind the stocking cuffs so the red velvet glows from behind.
17. Blue Grid Paper Template for Holiday Crafting
Before you cut into your good cardstock, make a paper template. This hand holds a cut-out piece of blue grid paper with a curved top edge and pointed bottom tip—likely a shape for a stocking, dove, or star—over a dark textured background. The grid lines make it easy to repeat the same curve on multiple pieces.

“Draw your shape on blue grid paper using the squares for symmetry.Cut the templa”
- Draw your shape on blue grid paper using the squares for symmetry.
- Cut the template cleanly with small scissors.
- Trace it onto your final material with a pencil or chalk.
- Fold and notch as needed before cutting the final pieces.
- Store the template in a zip-top bag with the marker and scissors.
The reason this works is repetition. When every handmade piece starts from the same template, even a simple shape looks intentional and consistent—especially if you’re making a dozen ornaments for a garland or gift tags.
18. Knitted Mini Stocking and Vintage Truck Ornaments
This tree branch is a little time capsule. The prominent handmade red knitted miniature stocking with white trim shares space with a vintage red and white toy truck ornament, a small stuffed figure in a red stocking, and a whimsical teapot-shaped ornament. It’s that mix of handmade and vintage that has become the dominant tree mood for 2026—personal, imperfect, and nowhere near a matching set.
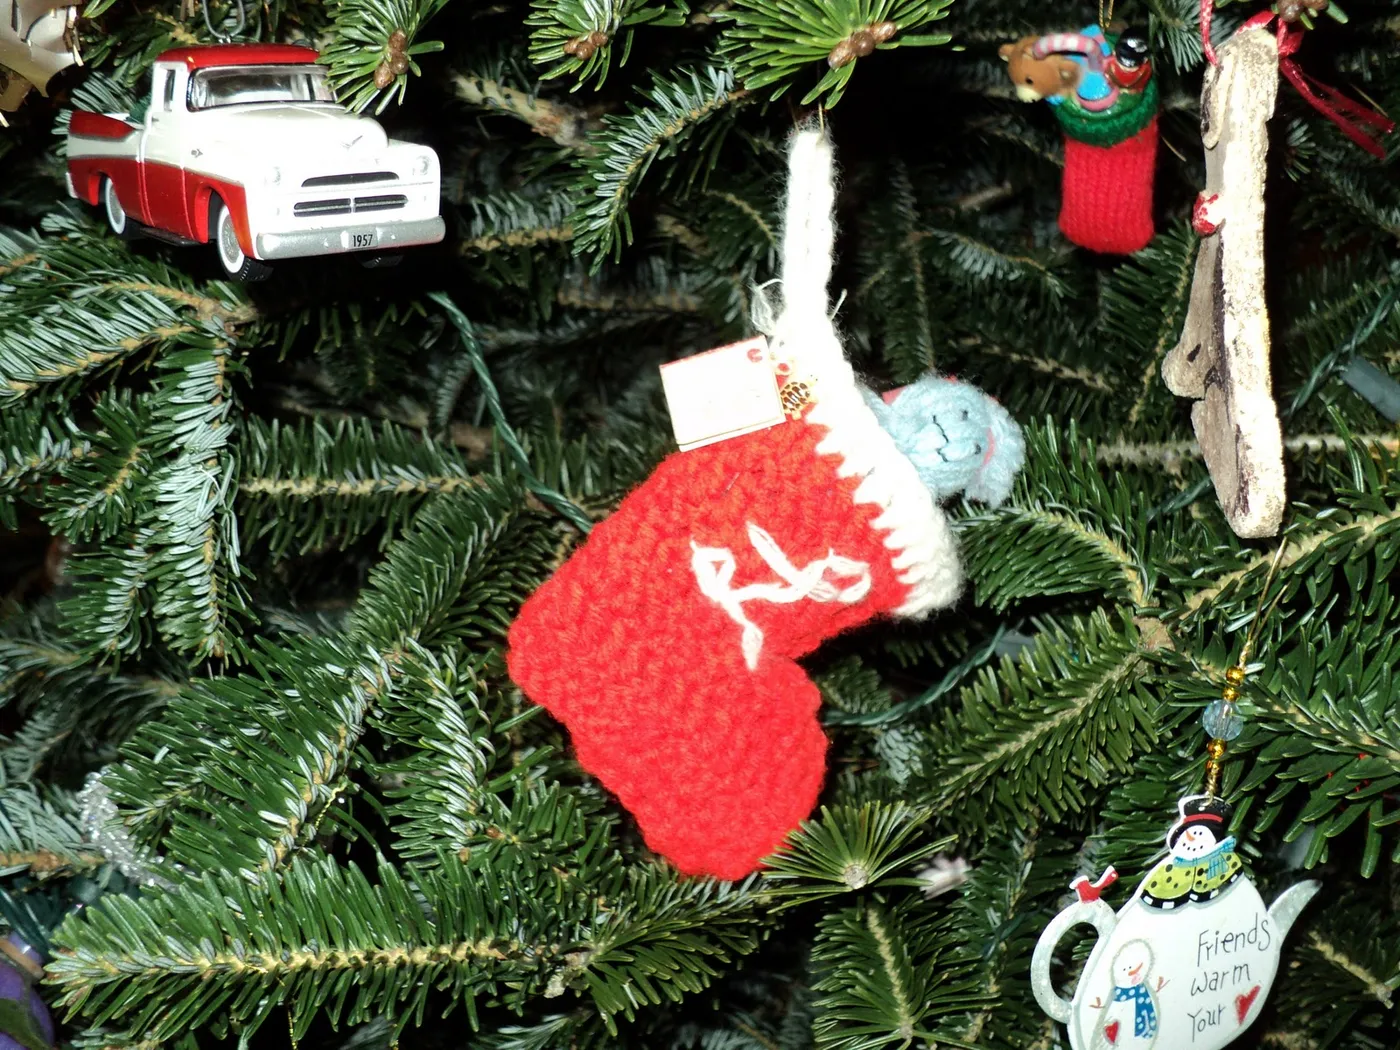
“knitted ornaments and vintage toy trucks don’t love moisture or heat.”
Keep them away from warm tree lights that sit too close, and wrap the knitted stocking in acid-free tissue before packing it away. The truck can collect dust in its tiny wheel wells, so a soft paintbrush or canned air will be your best friend each December.
19. Flocked Branch With Fabric Flowers and Rose Gold Baubles
The formula on this densely flocked branch is 50% snow-dusted green pine, 25% glittering gold accents, 15% rose gold and magenta ornaments, and 10% handmade fabric flower drama. That balance keeps it glamorous without tipping into gaudy.
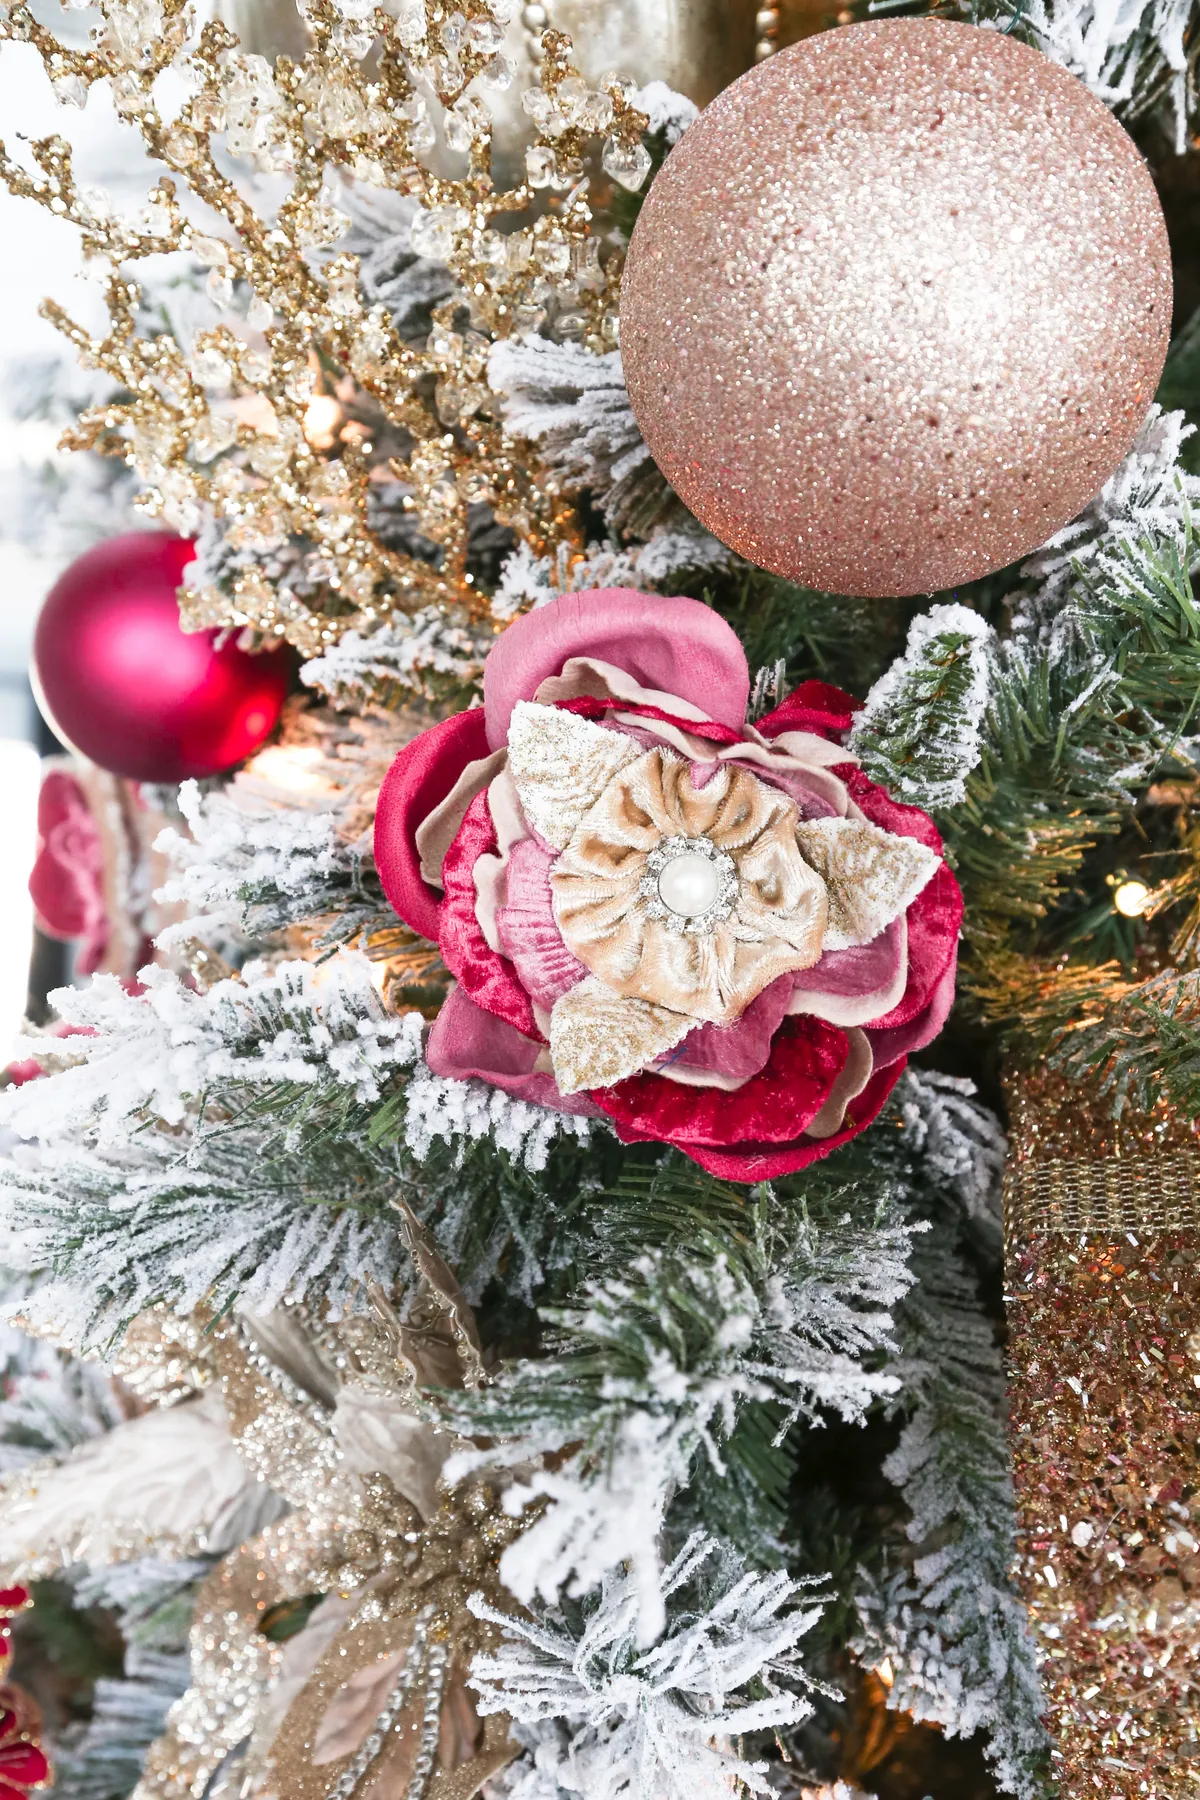
“that makes this work is the layered fabric flower with jeweled center.”
Without it, the branch would read as just another sparkly holiday display. The flower’s matte petals contrast with the shiny rose gold bauble and gold mesh ribbon, giving the eye a place to rest and a clear focal point. If you’re decorating a full tree, place a fabric flower every 12 to 18 inches and avoid clustering them all at eye level.
20. Buffalo Plaid Gnome Wall Hanging With Pinecone Body
You don’t need a store-bought gnome to get this look. The tall red and black buffalo check fabric hat is just a triangle of fabric wrapped around a foam cone, and the body is built from frosted eucalyptus foliage, evergreen pine branches, pinecones, and red berry clusters. A round wooden bead nose sits front and center against a white faux brick background.
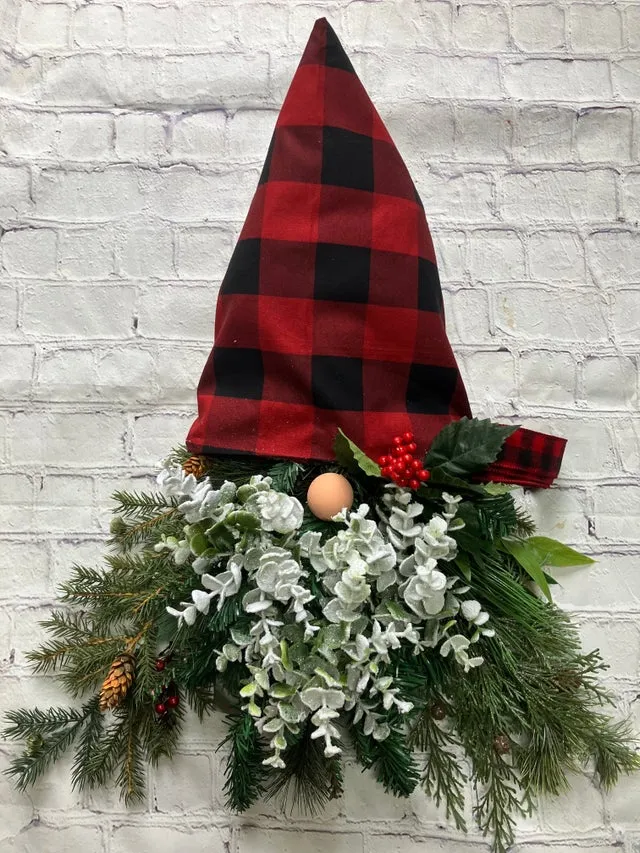
“keep the greenery slightly fuller at the bottom of the gnome body and taper it toward the nose.”
That creates a beard-like shape and keeps the round wooden nose from looking like an afterthought. If you’re hanging it on a door, use a removable hook rated for at least 3 pounds—the pine and pinecones add weight fast.
21. Handmade Straw Star and Blue Felt Horse on Blue Wood
This flat lay on a distressed blue wooden surface is a lesson in folk-art restraint. The woven straw star tied with red thread, blue felt horse ornament with embroidery, red and white woven paper heart, scattered small pinecones, and printed paper garland chain all share a handmade, slightly rustic language.

“Gather one textured natural piece—like a straw star or pinecone.Add one soft fel”
- Gather one textured natural piece—like a straw star or pinecone.
- Add one soft felt piece in a contrasting color, like the blue horse.
- Lay in one paper element, such as the red and white heart.
- Scatter small natural items instead of arranging them in a grid.
- Shoot or display on a distressed blue board to unify the palette.
The reason it works is the blue background. It bridges the natural straw, red accents, and white paper without letting any single color dominate. Without the blue, the red would feel too loud and the straw too plain.
22. Intricate Cut Paper Snowflake on a Wooden Floor
The intricate geometric cutouts and jagged outer edges on this circular paper snowflake are impressive, but the warm wooden floor underneath is doing half the work. It gives the white cutout a natural stage and adds a subtle contrast that a white tabletop couldn’t.
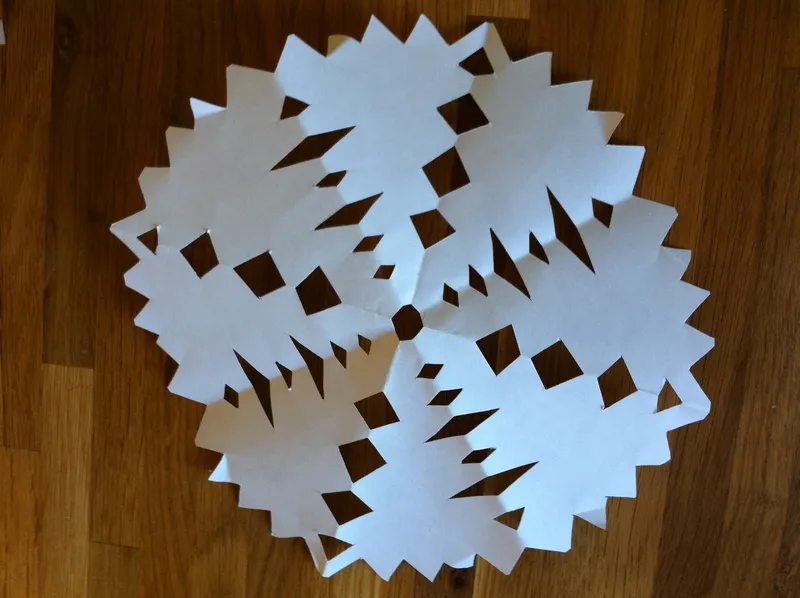
“If you removed the wooden floor, you’d lose the rustic, homemade feeling.”
The snowflake would look clean but cold. That’s why this works as a seasonal floor or table display—place it on warm oak or walnut, not a white rug or marble.
a paper snowflake this delicate won’t survive foot traffic. If you want it on the floor, use it under a clear acrylic chair mat or tape it down with removable washi tape. Otherwise, hang it or lean it against the wall where it won’t get stepped on.
23. Toilet Roll Angel With Cupcake Liner Wings
The easiest way to make this little angel look more polished is to swap flimsy cupcake liners for parchment or white coffee filter layers. The wings hold their shape better and the ruffled edges look more intentional. Curl the yellow paper hair with the edge of your scissors—just like curling ribbon—and use a silver foil halo that’s slightly larger than the top of the toilet roll so it doesn’t get lost.
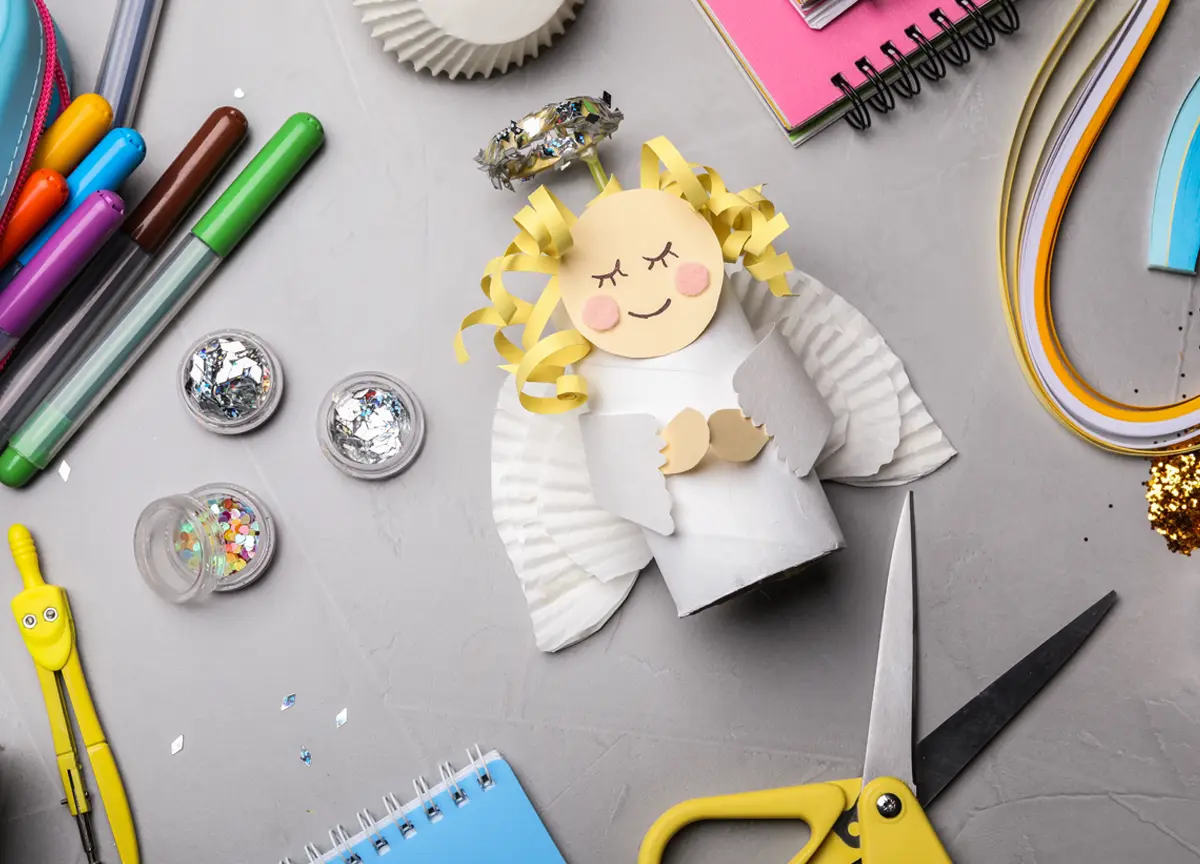
“Wrap a white toilet paper roll in white paper or leave it natural.Flatten and la”
- Wrap a white toilet paper roll in white paper or leave it natural.
- Flatten and layer three cupcake liners or coffee filters for wings.
- Curl yellow paper strips and glue them to the top for hair.
- Attach the silver foil halo using a small slit in the roll.
- Draw a simple face with marker, keeping it high on the roll.
This is a great one to make with kids, but expect glitter everywhere if you let them near the silver. Time: 20 minutes; cost: under $2.
24. Book Page Snowflake Among Birch Branches in Burlap
This book page snowflake hanging from natural birch branches in a burlap-wrapped container works best in a spot where you can get close to it—a sideboard, a reading chair side table, or a window ledge. The printed text and geometric cutouts are small details that get lost from across the room, so give it a space with about 3 feet of visibility in every direction.
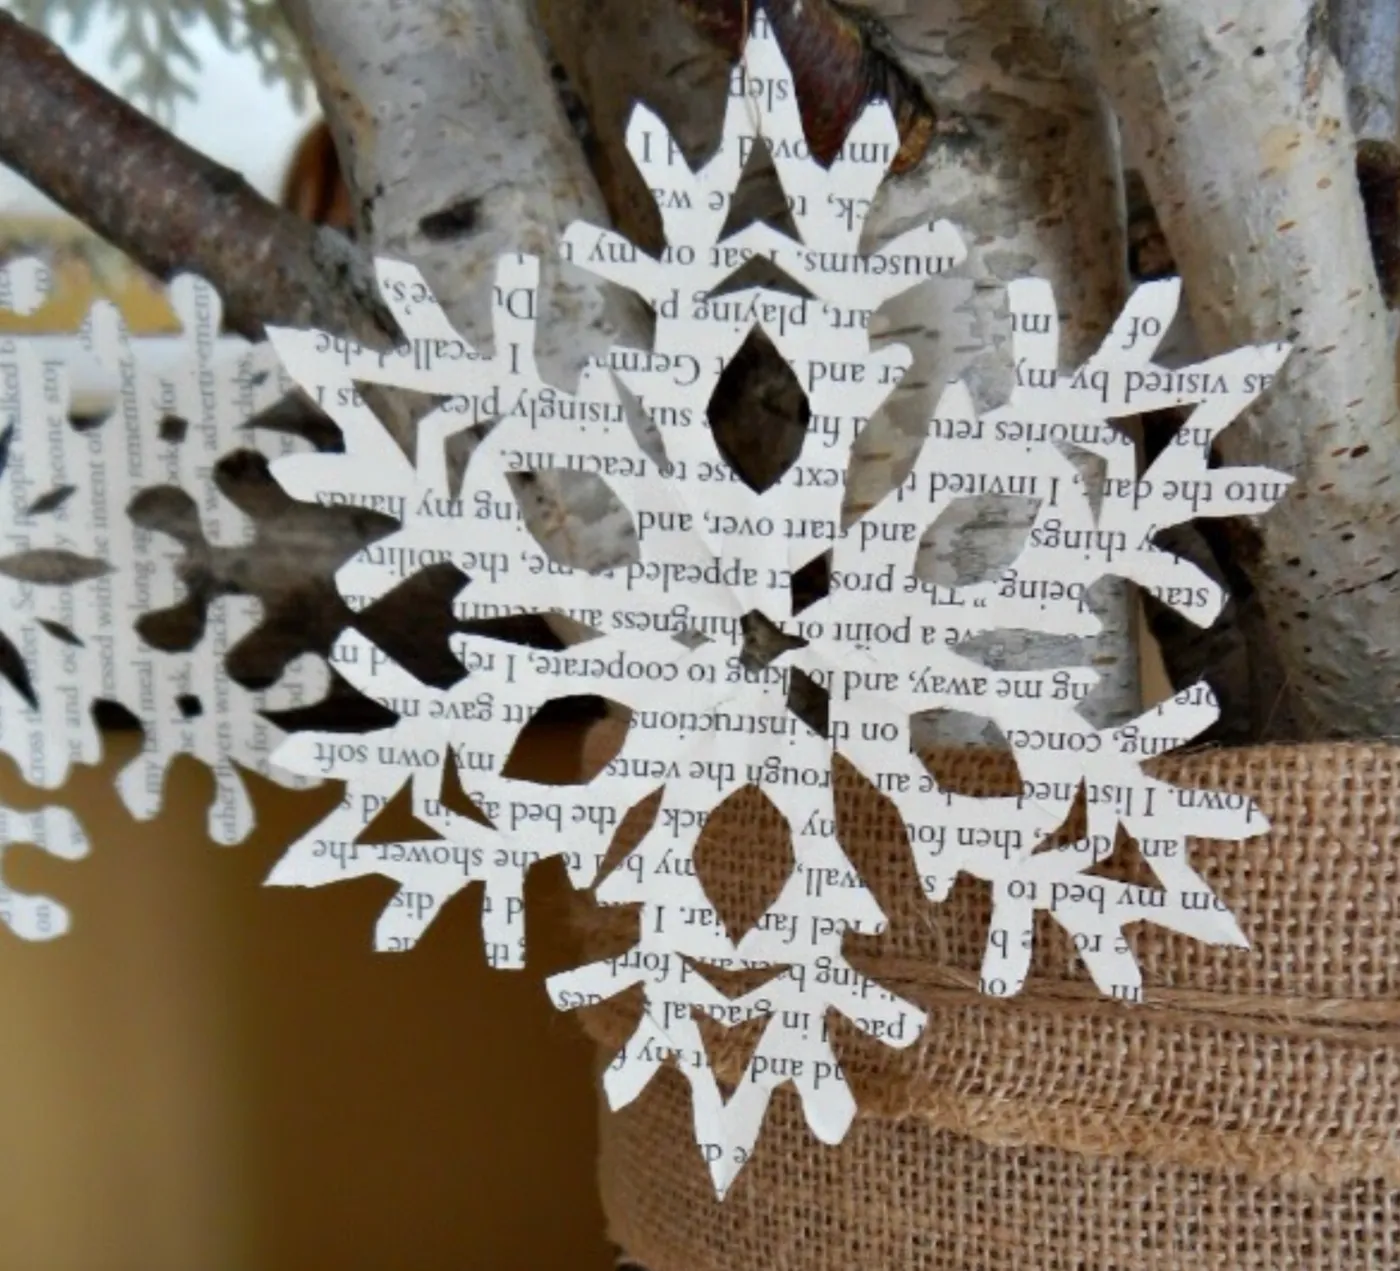
“The birch branches and burlap are low-maintenance, but the paper snowflake is vulnerable to humidity and heat.”
Keep it away from radiators and fireplaces, and consider spraying it lightly with a clear matte sealant if you live in a damp climate. Or make several snowflakes at once, because book page paper is thin and can tear at the narrowest cut points.
25. Paper Spiral Snowman With Safety Scissors and Markers
This paper spiral snowman is a perfect kid-friendly project, but real talk: the spiral needs to be cut from a single circular sheet, and little hands will want to cut it into a straight line. Draw the spiral in pencil first and use safety scissors with a blunt tip, and expect the first one to look more like a lumpy ghost than a snowman.
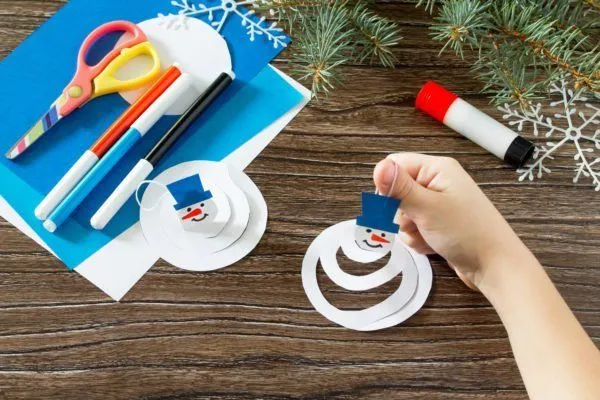
“The budget angle is obvious: white paper, blue paper, a glue stick, and a few markers cost maybe $4 total.”
You don’t need a kit. The dark wood table in the background actually makes the little white snowman pop, so set up on a contrasting surface and add a few pine tree branches nearby for a free festive backdrop.
26. Delicate White Snowflake Cutout in an Open Palm
Holding a small, intricately cut white paper snowflake in an open palm is the ultimate proof of scale. Against the dark cutting mat with its grid pattern and scattered paper scraps, the snowflake reads as both fragile and precise. The silver rings on the hand add a hint of real life, but they don’t distract from the cutout.
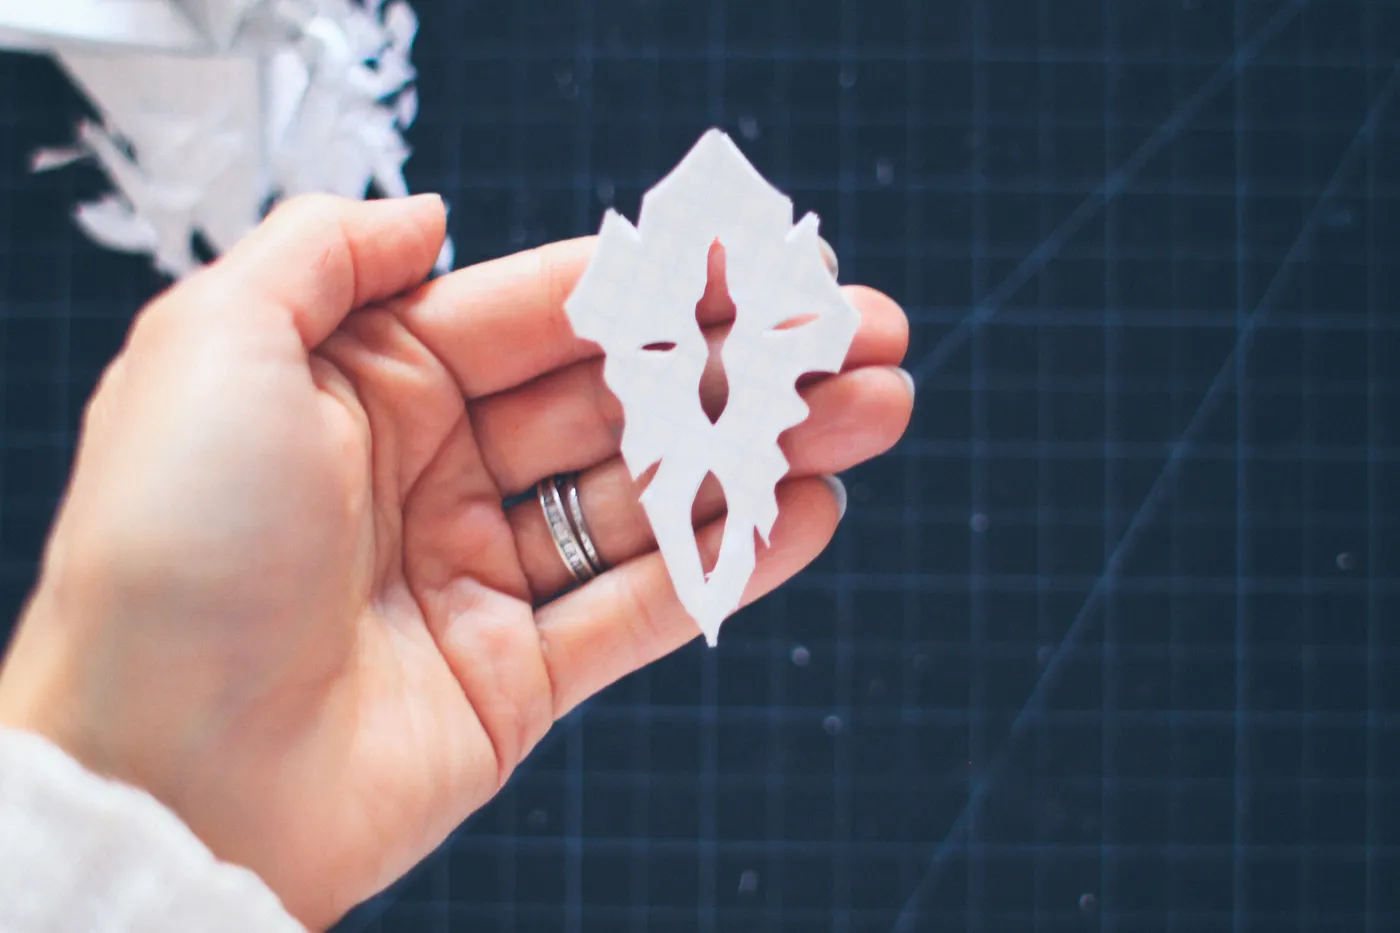
“here is the dark grid background.”
It makes the white cutout’s geometric shapes impossible to miss and gives the photo a graphic, almost editorial feel. If you’re photographing your own paper snowflakes, use a dark cutting mat or a piece of navy cardstock, and keep a few paper scraps in the corner to tell the story of the process.
27. Blue Ornaments With Cotton Swab Snowflake Designs
These round blue painted ornaments with cotton swab snowflake patterns are surprisingly architectural. The three discs in bright turquoise and deep teal each feature small white pom-pom centers and silver tinsel hanging cords, and they’re displayed on a light marble surface with patterned blue winter scrapbooking paper.
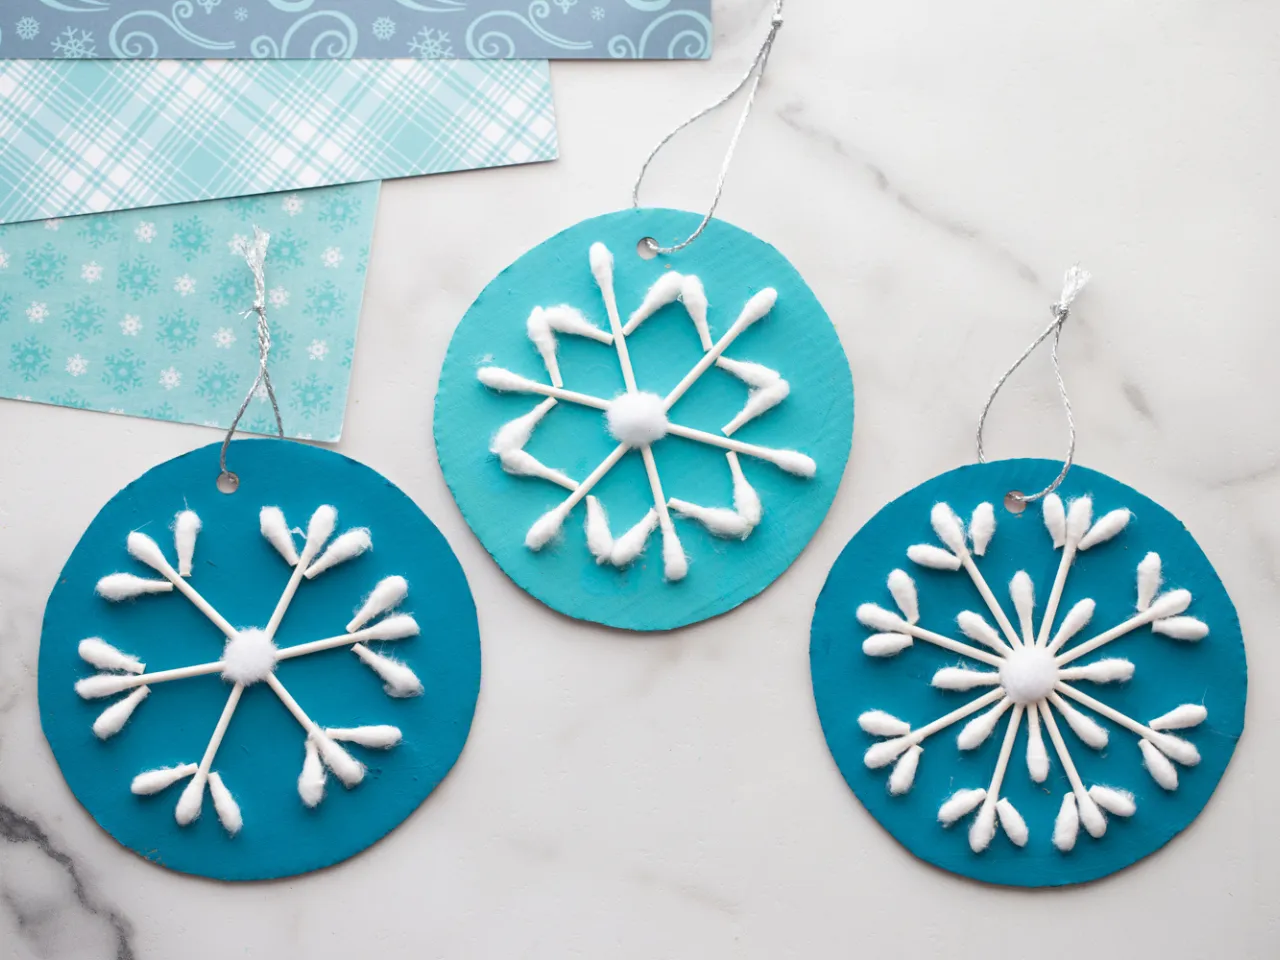
“Paint round wooden ornament discs in two shades of blue and let dry.Cut cotton s”
- Paint round wooden ornament discs in two shades of blue and let dry.
- Cut cotton swabs into varying lengths for snowflake arms.
- Glue the swab pieces in a radial pattern on the disc.
- Add a small white pom-pom to the center.
- Thread a silver tinsel cord through the hanging hole.
these are best in multiples of three or five. Because each disc is only a few inches wide, a single one will disappear on a large tree. Hang them at eye level where the cotton swab texture can be seen.
28. Retail Aisle of Buffalo Check Bows and Tinsel
Even a retail pegboard aisle can be a source of ideas. The rows of buffalo check bows in red-and-black and glittery green-and-red patterns, followed by metallic tinsel garlands and hanging stockings, show that 2026 has fully embraced a more-is-more holiday supply moment. But there’s a method to the madness: bows and tinsel are being bought as ready-made texture, not afterthoughts.
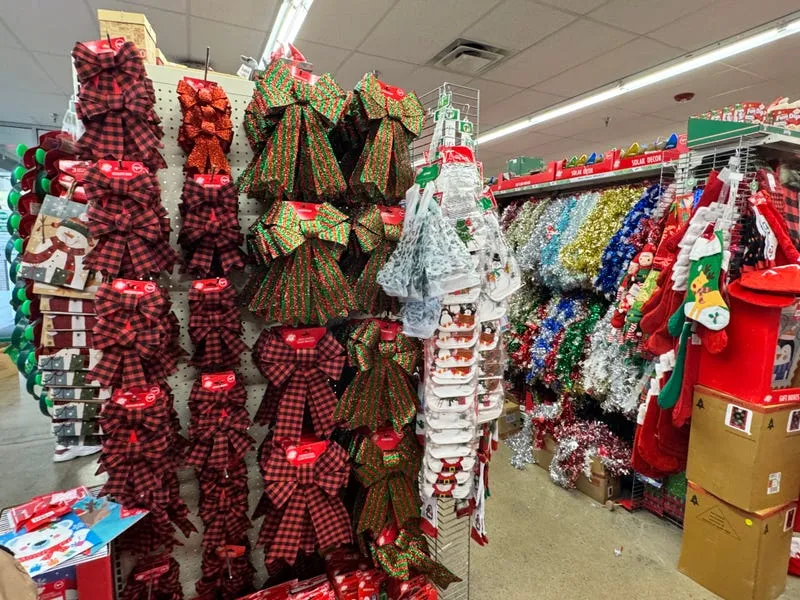
“if you’re shopping a wall like this, pick two colors max.”
The buffalo check in red and black plus one metallic—silver or gold—keeps your cart from turning into a chaotic mix. Buy twice as many bows as you think you need, because they can be layered on wreaths, chair backs, and stair rails without looking heavy.
29. Evergreen Wreaths With Red Bows on Exposed Wood Framing
There’s something quietly perfect about a row of fresh evergreen wreaths hanging against exposed OSB wood wall framing. The frosted pinecones and vibrant red fabric bows repeat in a line, which creates rhythm, while the raw wood framing keeps the whole thing from feeling too polished or formal.
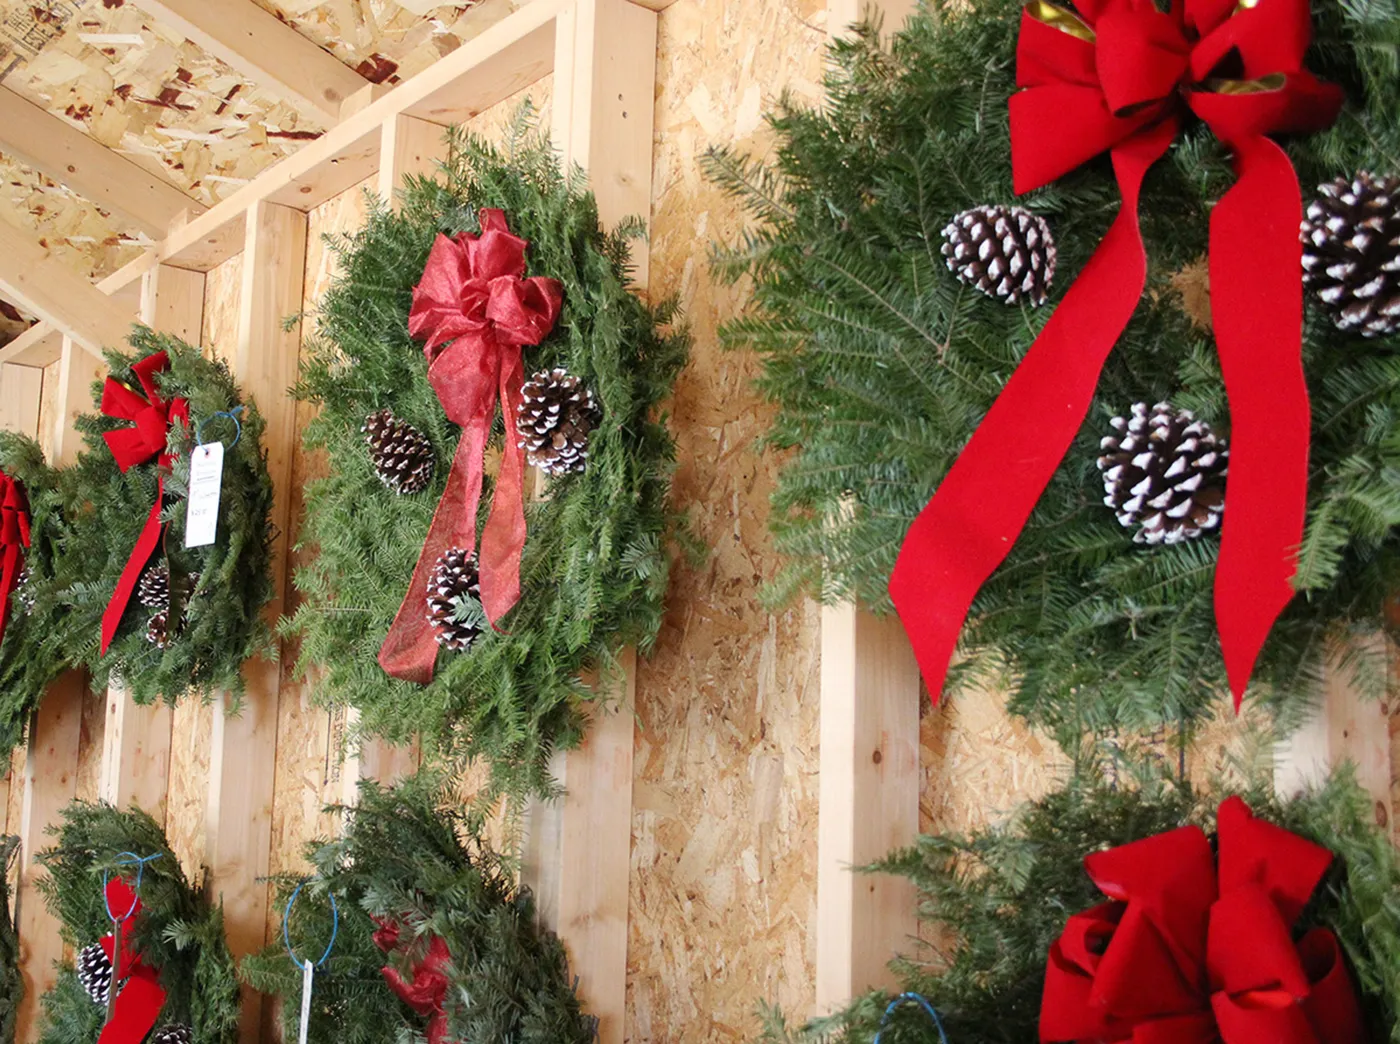
“This works because of repetition and contrast.”
The red bows pop against the forest green and brown wood, but it’s the consistent placement that makes it feel intentional. If the wreaths were hung at different heights, the display would fall apart.
this needs a long, uninterrupted wall—at least 8 feet—because the row of wreaths wants room to breathe. If you only have a small entryway, try the single white pine snowflake in Idea #6 or the buffalo plaid gnome in Idea #20 for a similar rustic vibe without the linear stretch.
Your Hot Glue and Paper Snowflake Era Starts Now
You don’t need 29 ideas—you need one that makes you actually start. Pick the project that matches your energy level and surface space, then let the rest live on a Pinterest board until the next cold weekend. Pin your favorite ideas now, and when someone asks where you bought that quirky starfish ornament, you can smile and say you made it.
