Bathroom pallet projects are having a major moment on Pinterest right now, and for good reason! It’s about bringing that warm, handcrafted feel back into our homes. After filtering through hundreds of options, we narrowed it down to the 30 ideas that really deliver. Inside, you’ll find styles ranging from rustic cabin to modern farmhouse and even some cozy minimalist looks. The big shift in 2026 is all about sustainability and personality—and salvaged wood is the perfect way to get there. And stay until the end — we break down the most common mistakes that can ruin these looks. 📌 Save this to Pinterest for later — you’ll want to revisit these ideas.
1. Embrace the Cabin Vibe with Wall-to-Wall Wood Planks
This look works because it fully commits. Instead of a single accent wall, the horizontal wood planks wrap the entire space, creating a cozy, immersive feeling that feels like a retreat. The simple white pedestal sink and toilet act as clean, modern counterpoints, preventing the wood from feeling too heavy or dated. It’s a classic study in textural contrast, where the smooth, bright porcelain pops against the warm, organic grain of the wood.
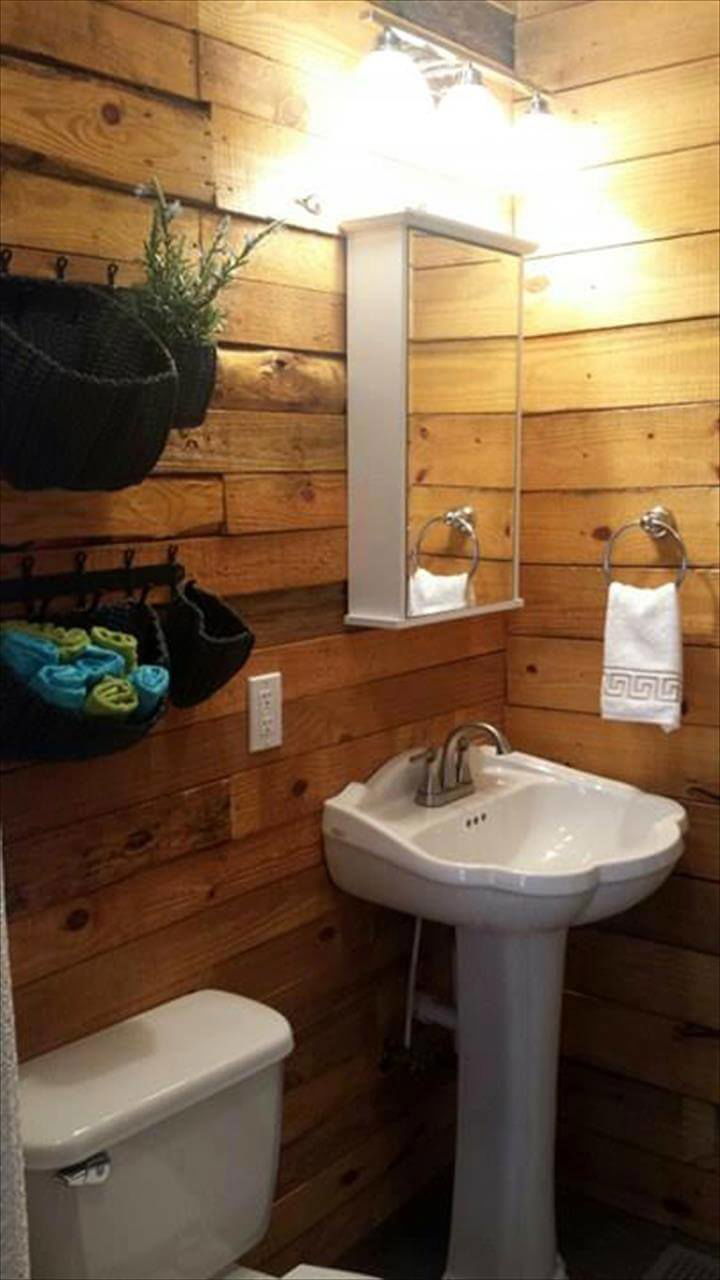
“A word of warning for a full wood-planked bathroom: moisture is your enemy.”
Ensure every single plank is sealed with a high-quality marine-grade varnish, paying extra attention to the end grains and seams. Without proper sealing, you risk warping, mold, and mildew, especially behind the toilet and sink. This is not a ‘finish it later’ project; the waterproofing has to be perfect from day one to protect your investment and your home.
2. Marry Industrial Subway Tile with a Warm Wood Ceiling
When using dark grout with white subway tile, the grid itself becomes a major design element. To keep it from looking too busy, stick to a larger format tile—3×6 inches is classic, but a 4×8 or even 4×12 can feel more modern and spacious. Also, insist that your tiler use a grout release agent before grouting; it makes cleanup on the porous tile surface infinitely easier and prevents the dark pigment from staining the white ceramic.
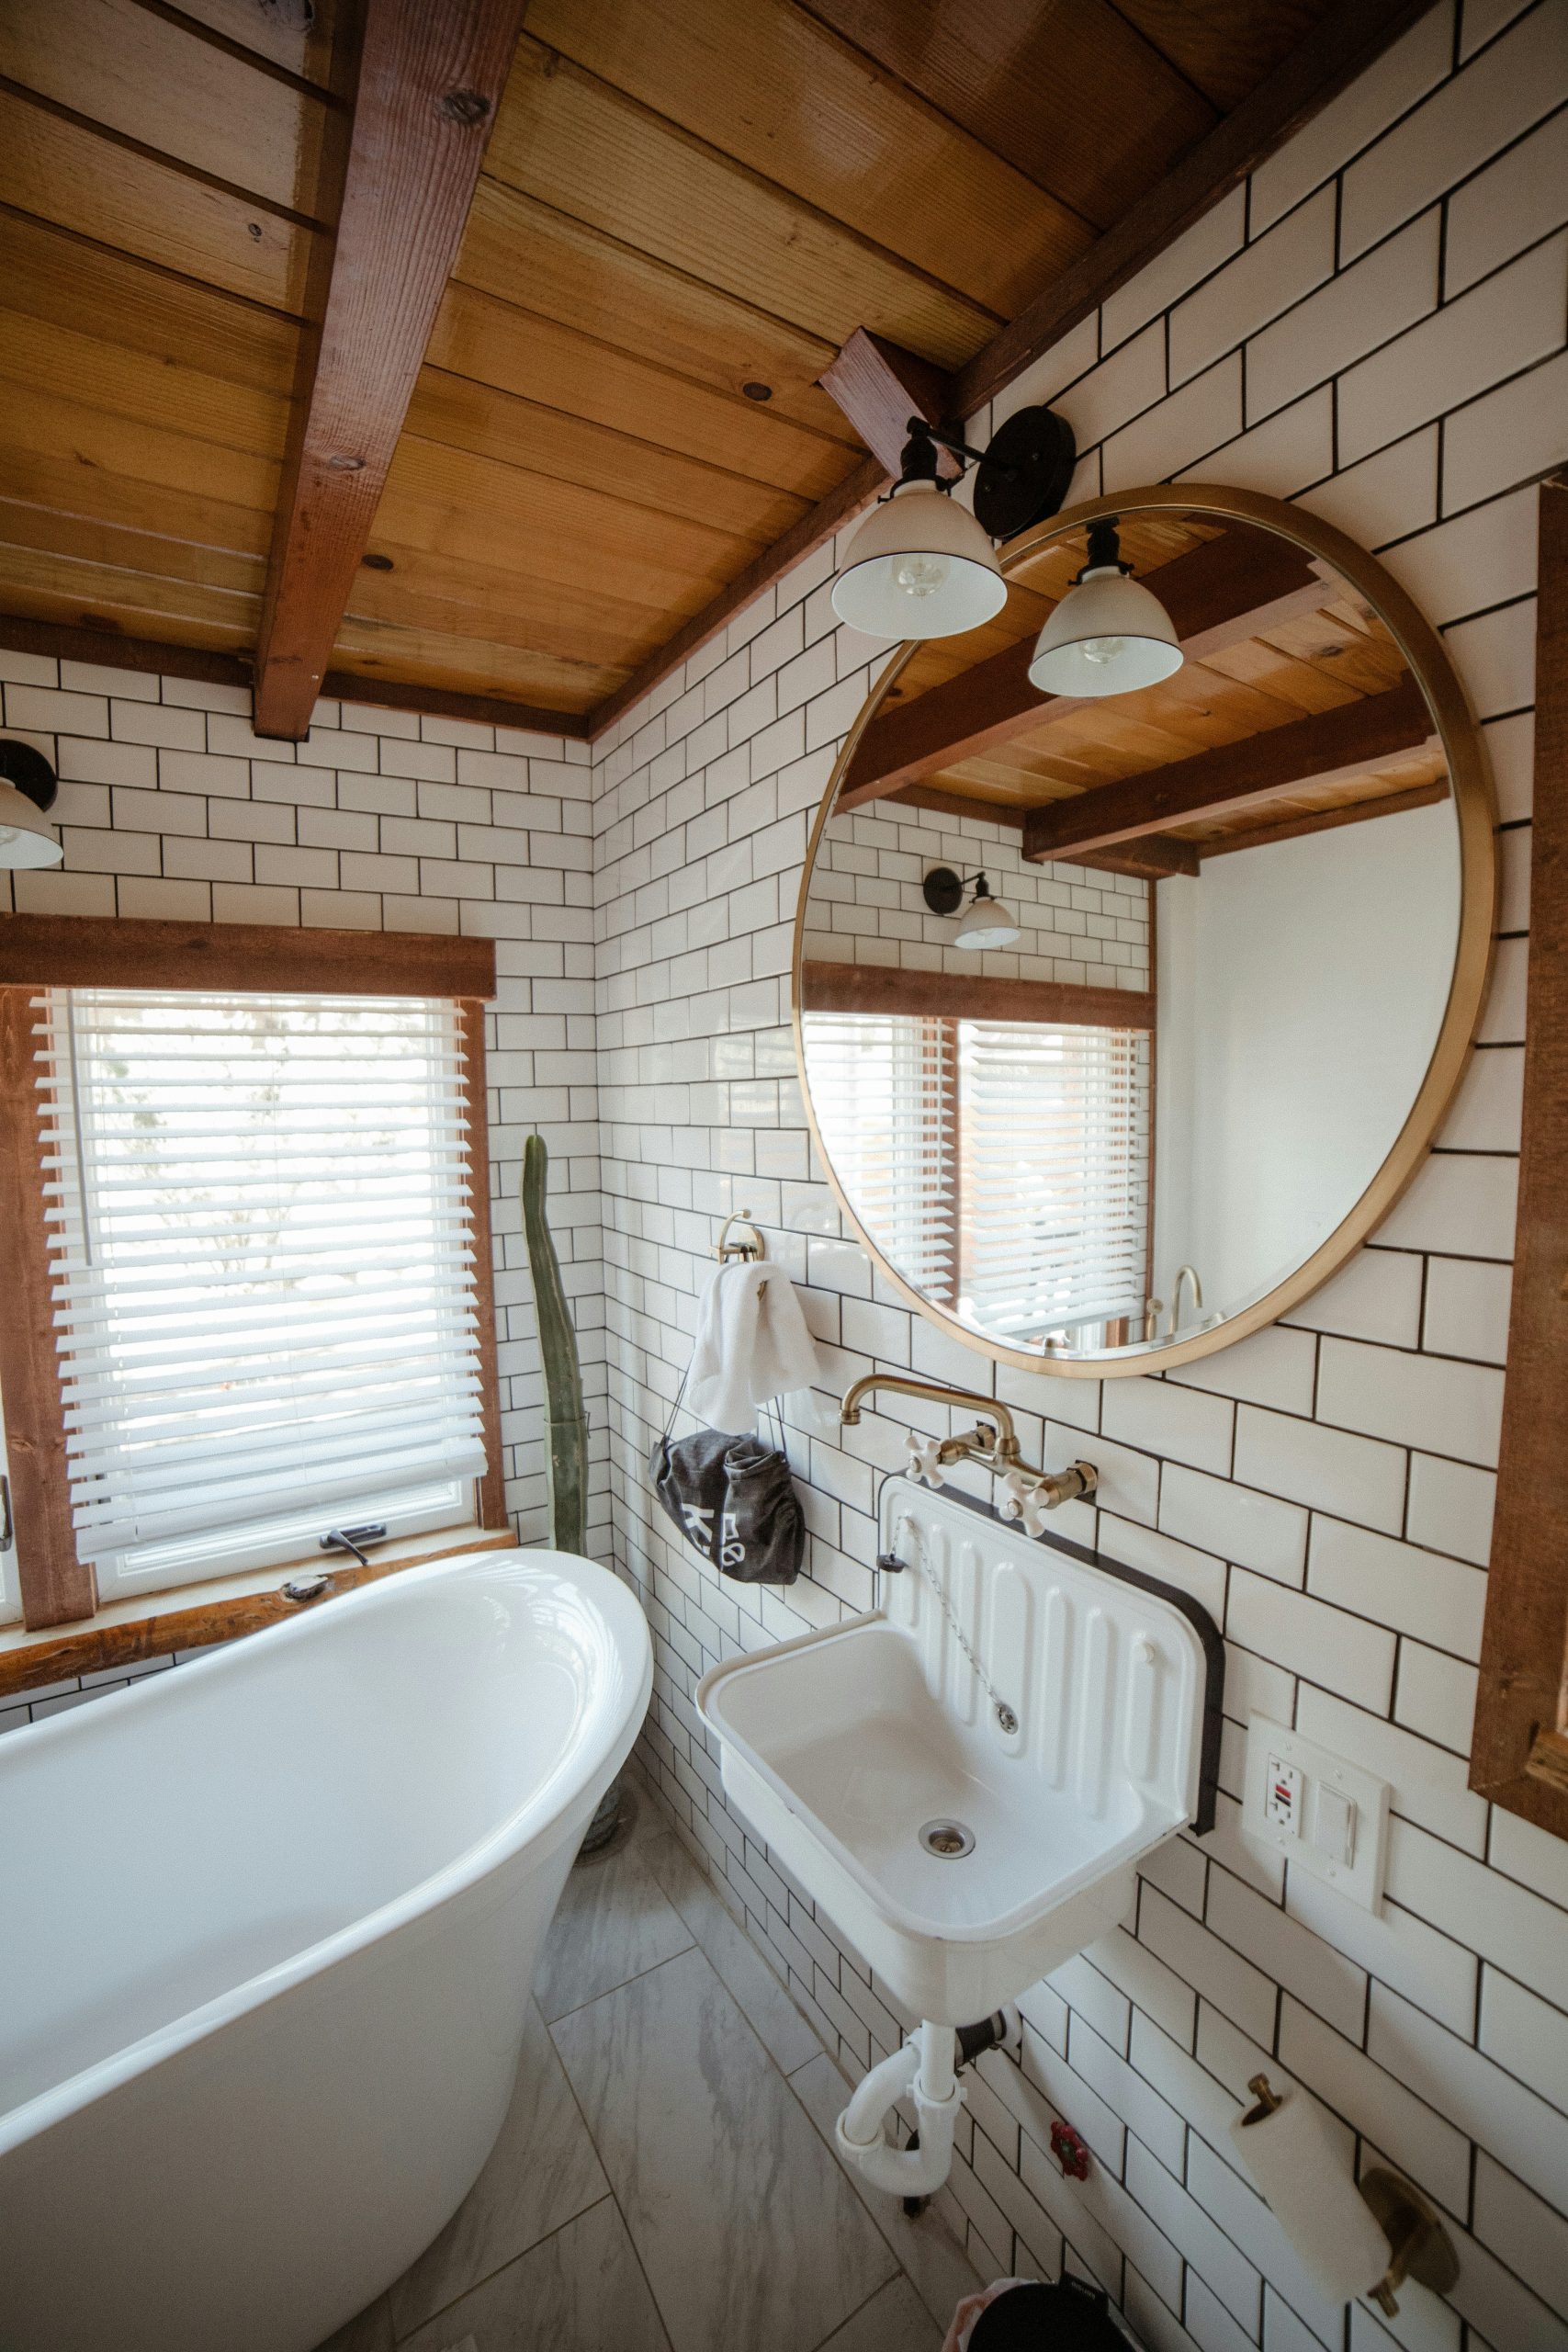
“The formula here is beautifully balanced: 50% clean industrial (the subway tile and vintage-style utility sink) + 40% rustic warmth (the light wood plank ceiling and beams) + 10% refined shine (the pop of gold from the mirror and fixtures).”
You could swap the gold for matte black for a more subdued look, or change the light wood ceiling to a dark stain to match the beams for higher contrast. Either way, the ratio keeps the room feeling cohesive.
3. Go Bold with a Yellow-Walled, Green-Tub Combo
The fearless color choice is the undeniable hero here. Take away the vibrant yellow walls and the minty green tub, and you’re left with a nice but fairly standard rustic bathroom. The color injects pure joy and personality, proving that rustic doesn’t have to mean all-neutral. It’s a deliberate, confident choice that makes the entire room feel unique and curated, turning a simple space into a memorable statement. Everything else—the dark vanity, the wood floors—serves to ground this playful palette.
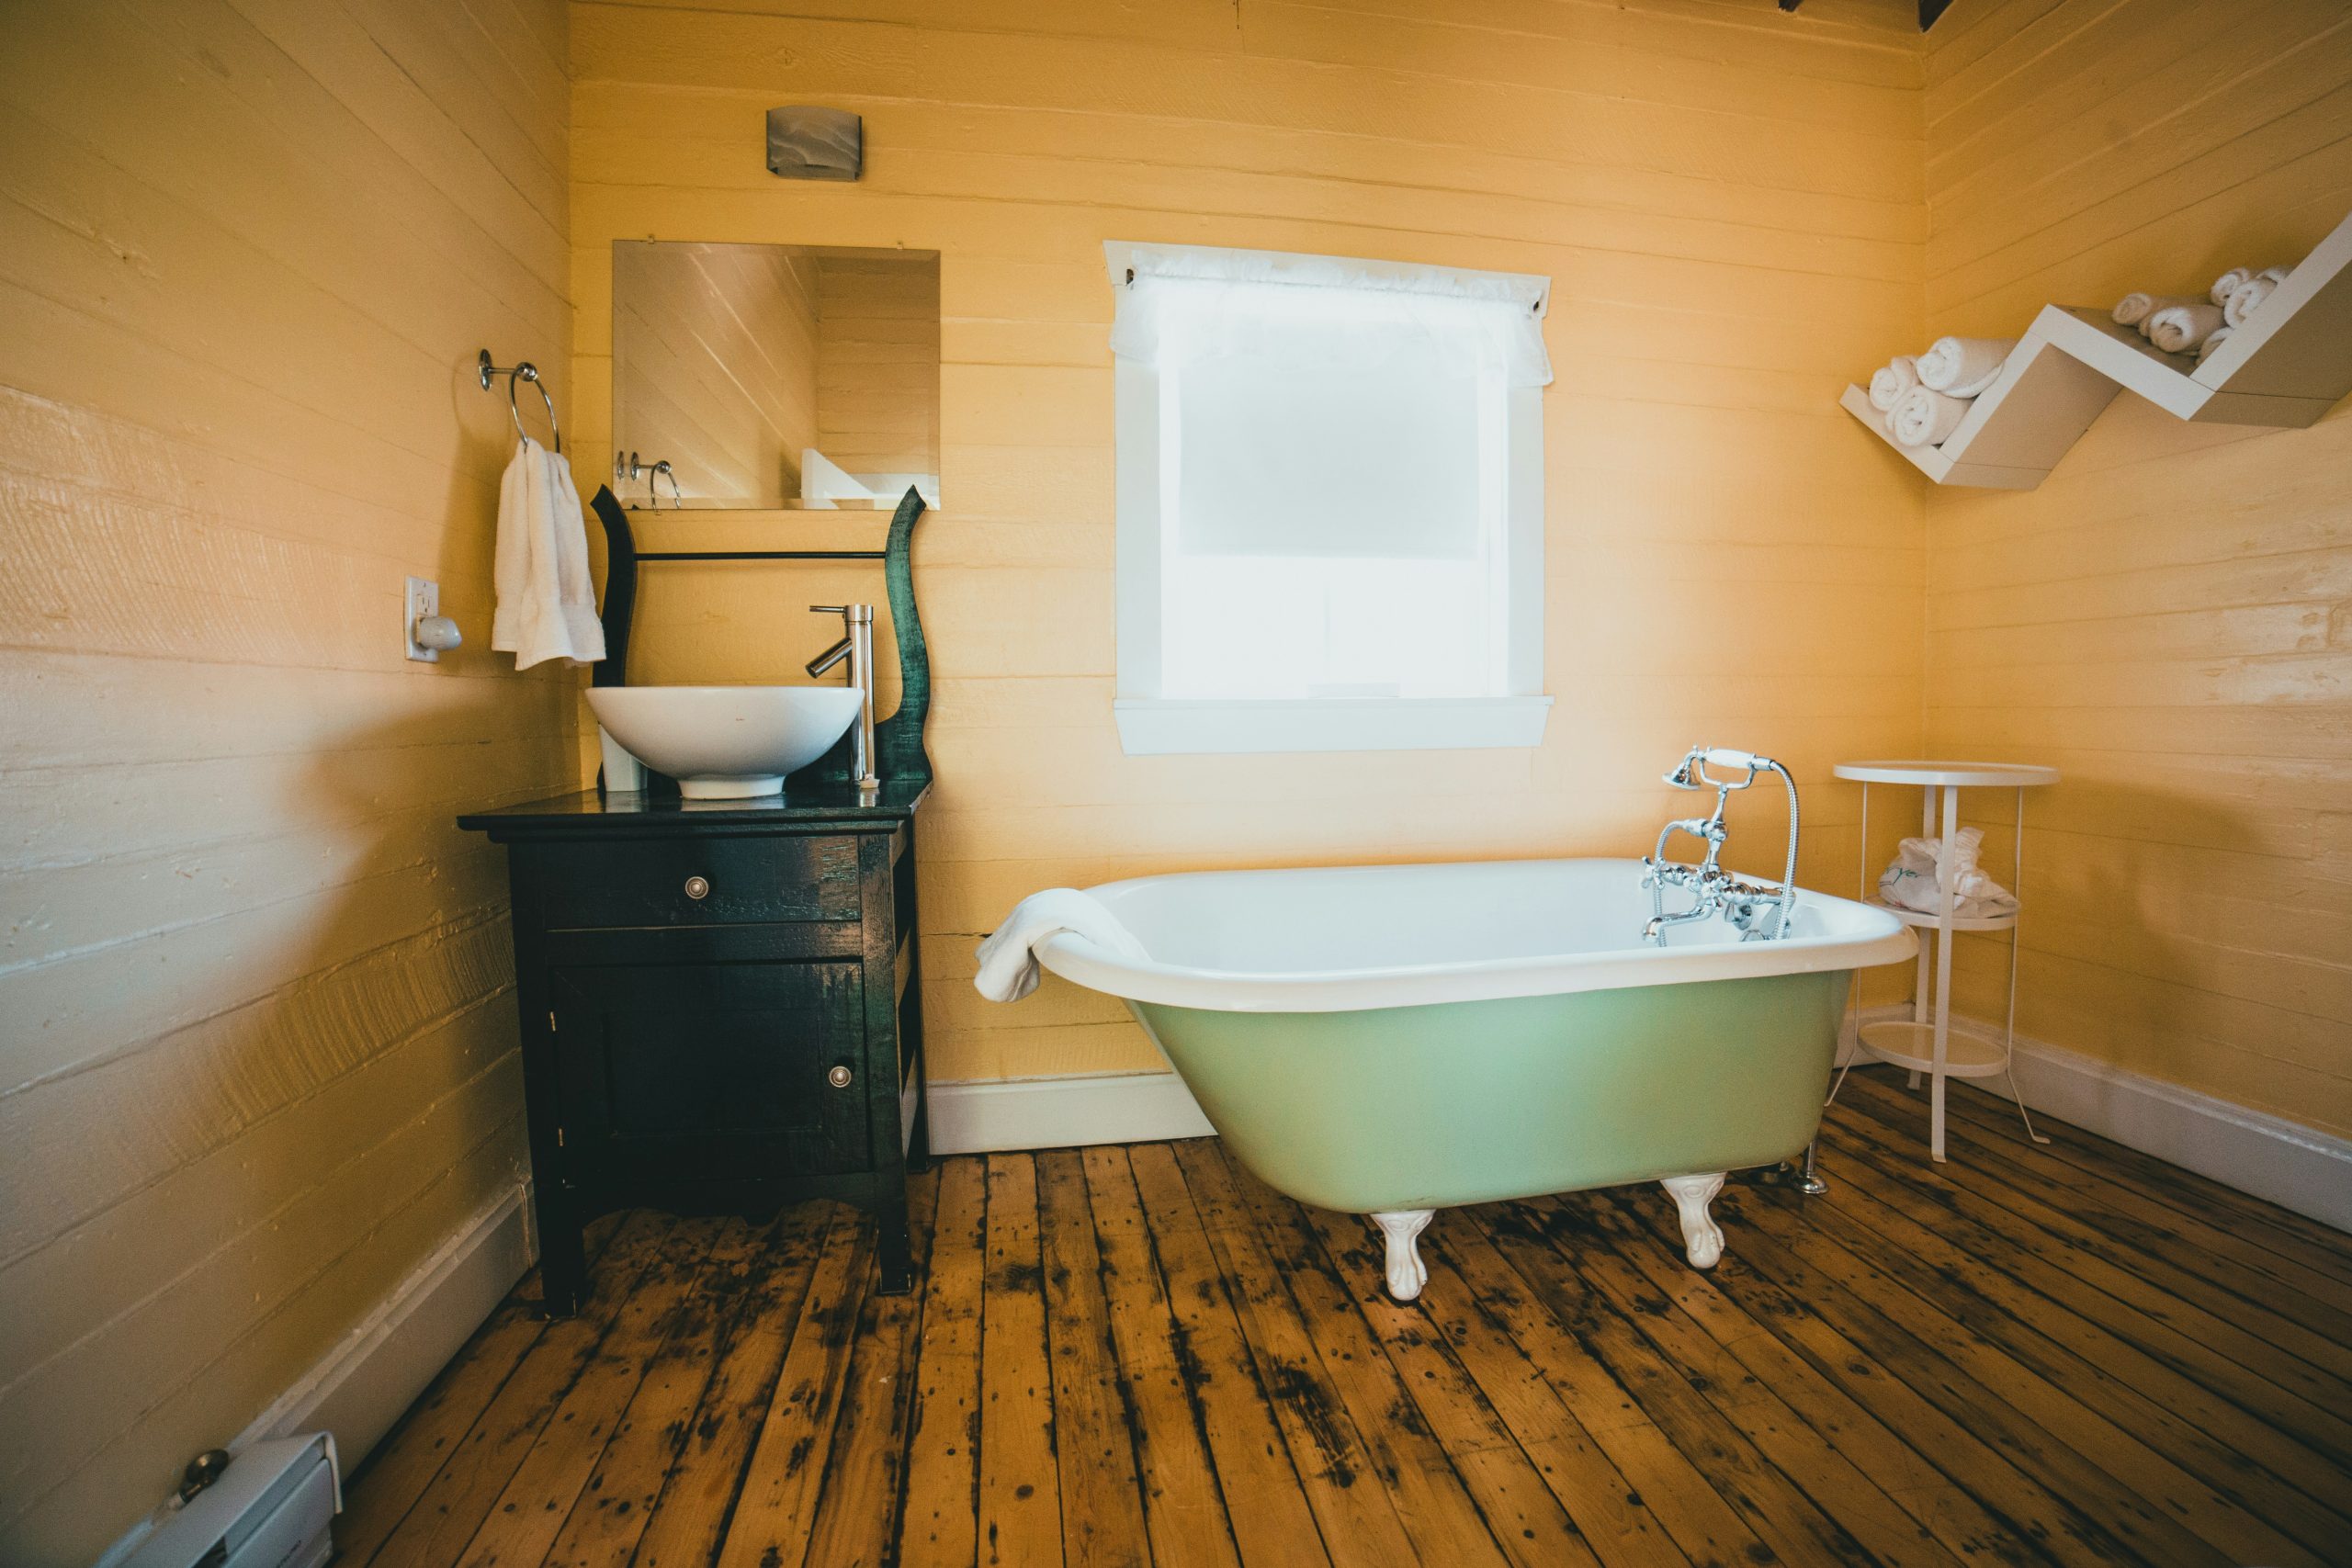
“Clawfoot Tub (Refinished Vintage): $600 – $1,800Distressed Wood Vanity: $400 – $900Wood Plank Flooring: $8 – $15 per sq.”
ft.Paint & Primer (High-Moisture Formula): $100 – $200Decor (shelving, towels): $150 – $300TOTAL: $1,950 – $4,200+Budget alternative: Find a tub on Facebook Marketplace and paint it yourself with an epoxy kit ($100). Use a standard vanity and apply a distressing wax finish for a similar effect.
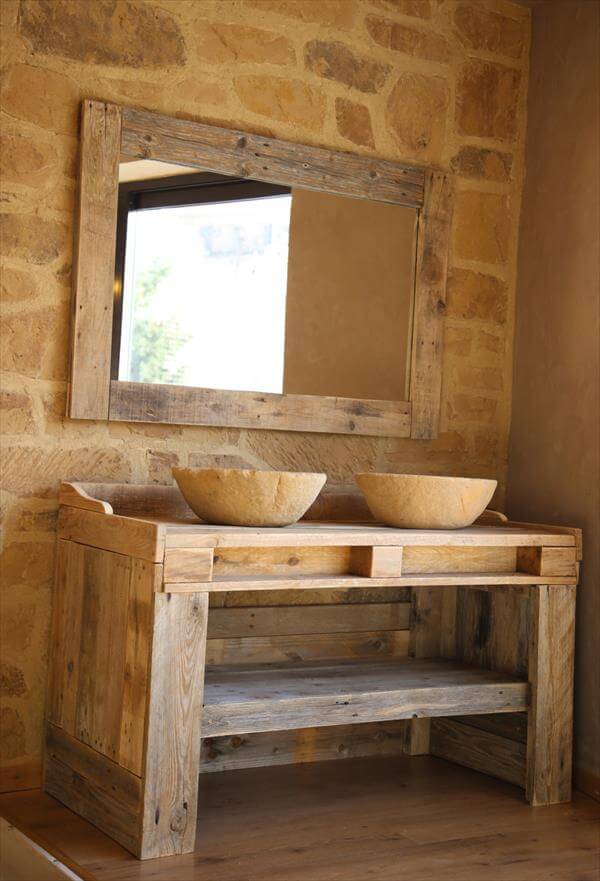
4. Craft a Double Vanity from Pallets and Natural Stone Sinks
How-To: Sealing Your DIY Pallet Vanity (Time: 2 hours + drying. Cost: $40)
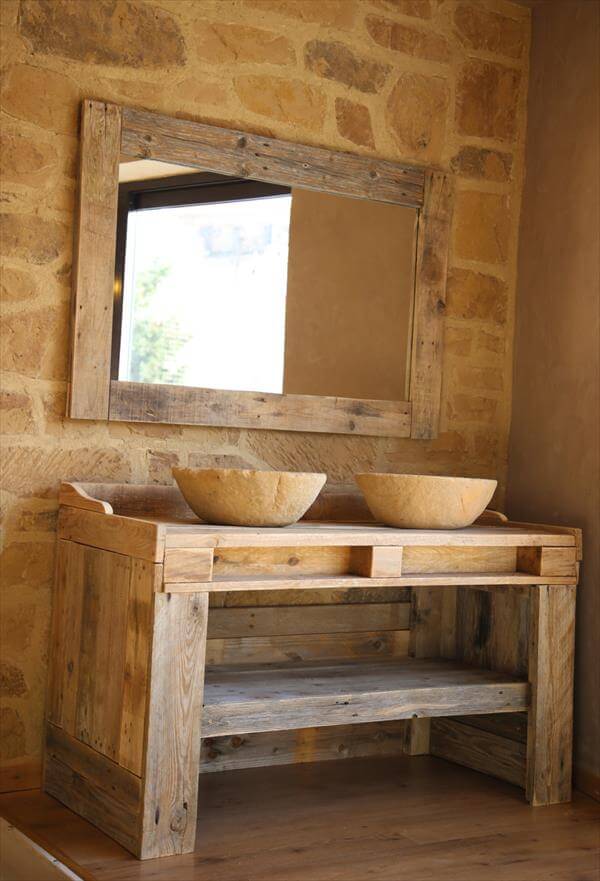
“Disassemble your pallets and sand every plank smooth, starting with 80-grit and finishing with 220-grit.”
Safety first: always wear a good quality mask when sanding pallet wood, as you don’t know its history.Wipe all dust off completely with a tack cloth.Apply a pre-stain wood conditioner to prevent a blotchy, uneven finish.Brush on 3-4 thin coats of a water-based marine polyurethane. This is non-negotiable for a bathroom environment.Lightly sand with 320-grit paper between each coat for a silky-smooth, durable finish.
That rough-hewn stone wall behind the vanity looks incredible, but it’s a real dust and grime collector, especially with toothpaste splashes and aerosol spray residue. You can’t just wipe it down; you’ll need a brush attachment on your vacuum to clean it weekly. The stone vessel sinks also require care; avoid harsh, acidic cleaners which can etch the surface. A simple pH-neutral stone cleaner is your best friend here. It’s a higher-maintenance choice than the tile in Idea #5.
5. Build a Compact Vanity from Mismatched Pallet Wood
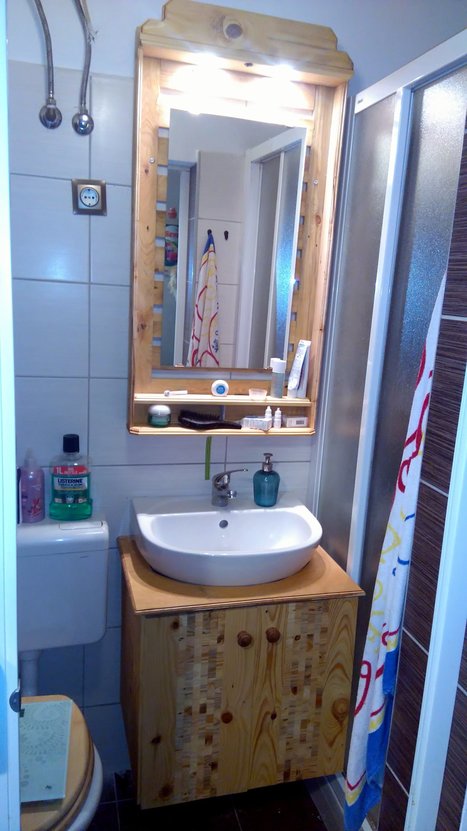
This idea is perfect for a small guest bath or powder room, ideally around 30-50 square feet. The compact, floating-style vanity made from pallet wood planks provides necessary storage without taking up valuable floor space, which makes the room feel larger. Because the wood tones are varied, it adds texture without overwhelming the small footprint. A wall-mounted sink, as seen here, is a great pairing for this approach. Avoid this in a primary bath that needs extensive counter space or storage.
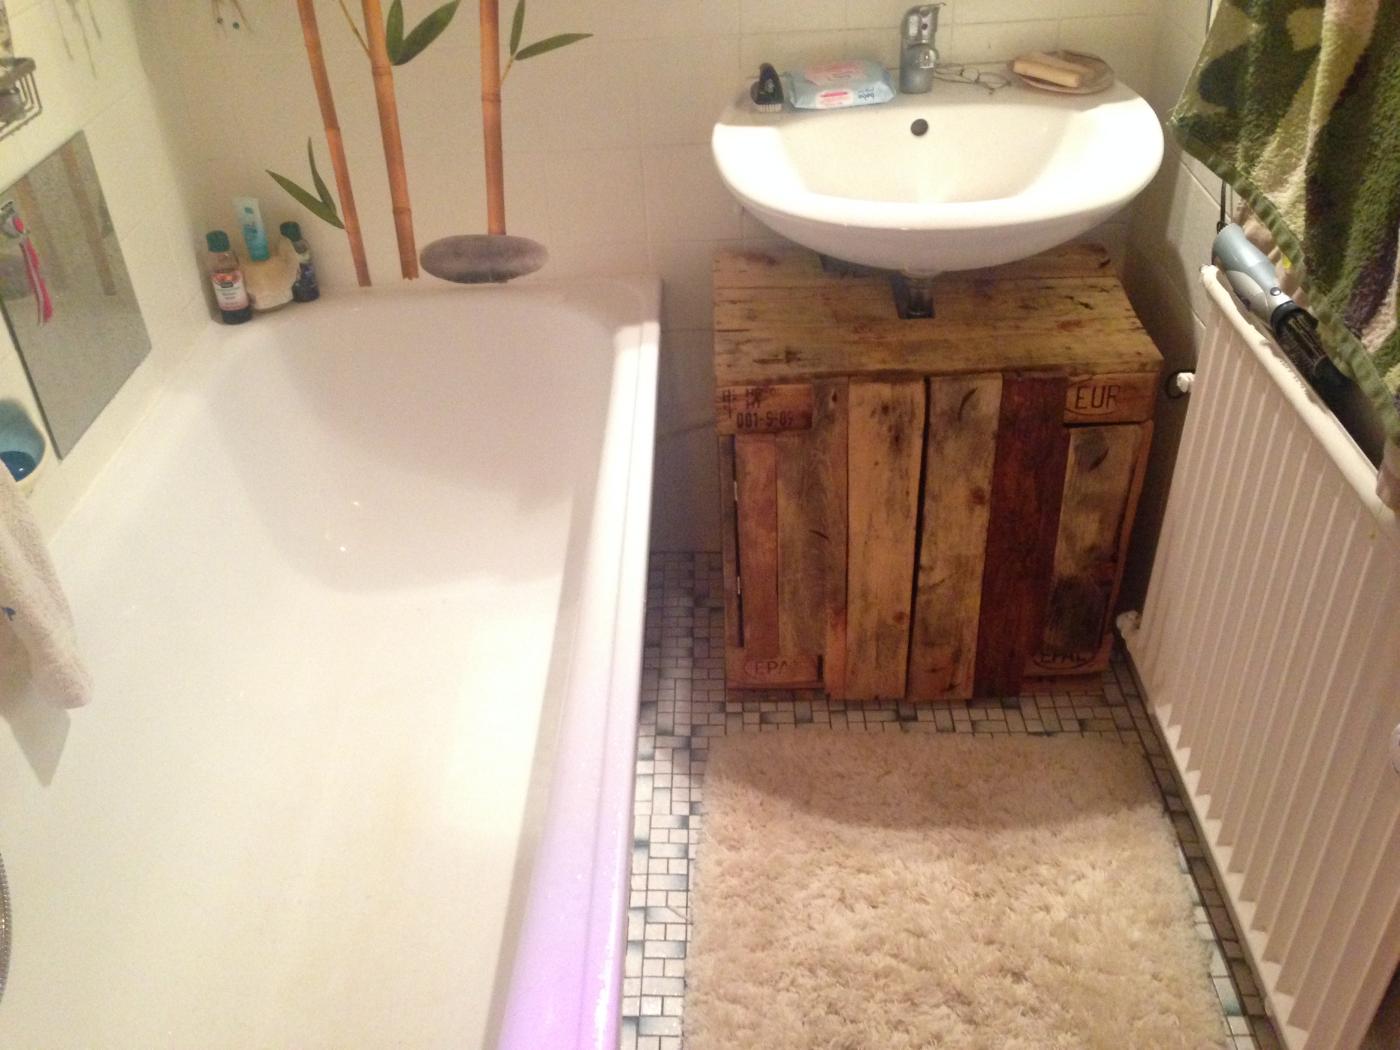
“You can get this look for well under $300.”
The key is sourcing free pallets (look for the ‘HT’ stamp for safety). The vanity structure is a simple box build. Pair it with an affordable IKEA sink and faucet combo like the LILLTJÄRN / ANSTÅENDE set (around $100). The mosaic floor tiles can be found at big box stores for a few dollars per square foot, and you can often find overstock for a steal. A fluffy bath mat from Target or Walmart completes the cozy feel.
6. Install a Minimalist Light Wood Pallet Wall Shelf
When creating a DIY shelf like this, the secret to a professional look is precision and finish. Use a pocket hole jig (like a Kreg jig) to join the planks from the back; this hides all the screws and creates incredibly strong joints. Also, don’t just nail the shelf boards in. Use wood glue on all joints before securing them with finish nails. Once assembled, sand everything to a uniform smoothness (220-grit) and apply a matte or satin clear coat to protect it from moisture without adding unnatural shine.
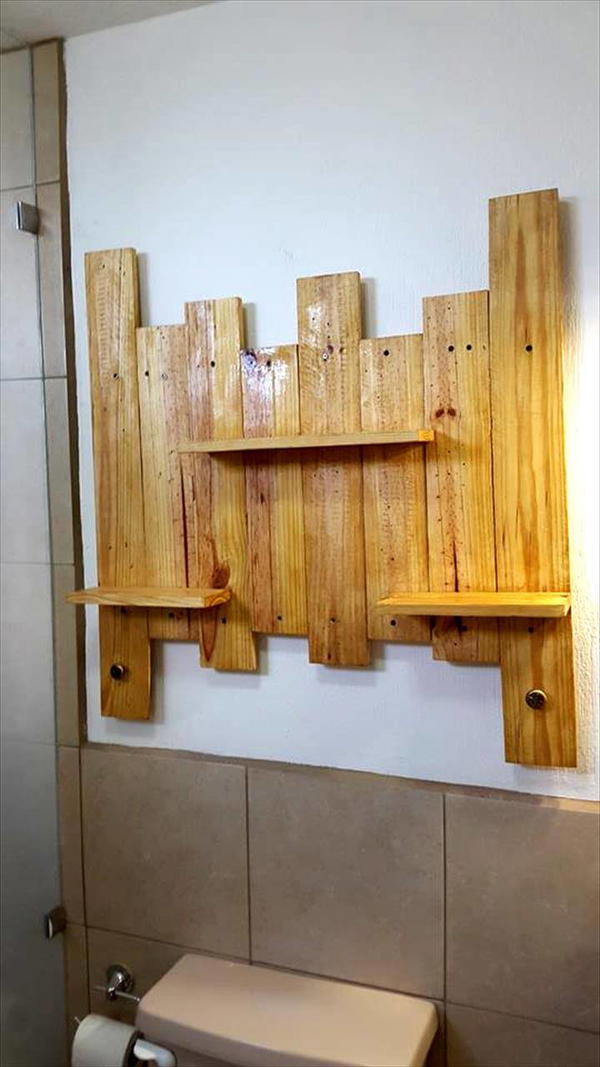
“Measure carefully: Ensure you have at least 10-12 inches of clearance above the toilet tank so you can easily access the flush mechanism and remove the tank lid if needed.Find your studs: This unit, once loaded, will have some weight.”
Use a stud finder to locate the wall studs and plan your mounting points accordingly. Do not rely on drywall anchors alone.Check your wood: Make sure your pallet planks are stamped ‘HT’ for heat-treated, meaning they’re safe for indoor use.
7. Opt for a Freestanding Dark Wood Towel Rack
In a bathroom without a dedicated linen closet, this freestanding towel rack is both functional and beautiful. It works because it adds an element of furniture and vertical interest to the room, breaking up the monotony of tiled walls and porcelain fixtures. The dark wood provides a grounding contrast, while the slatted lower shelf offers a perfect spot for a plant or a basket of essentials. It feels much more intentional and stylish than simple wall hooks, turning storage into a decorative feature.
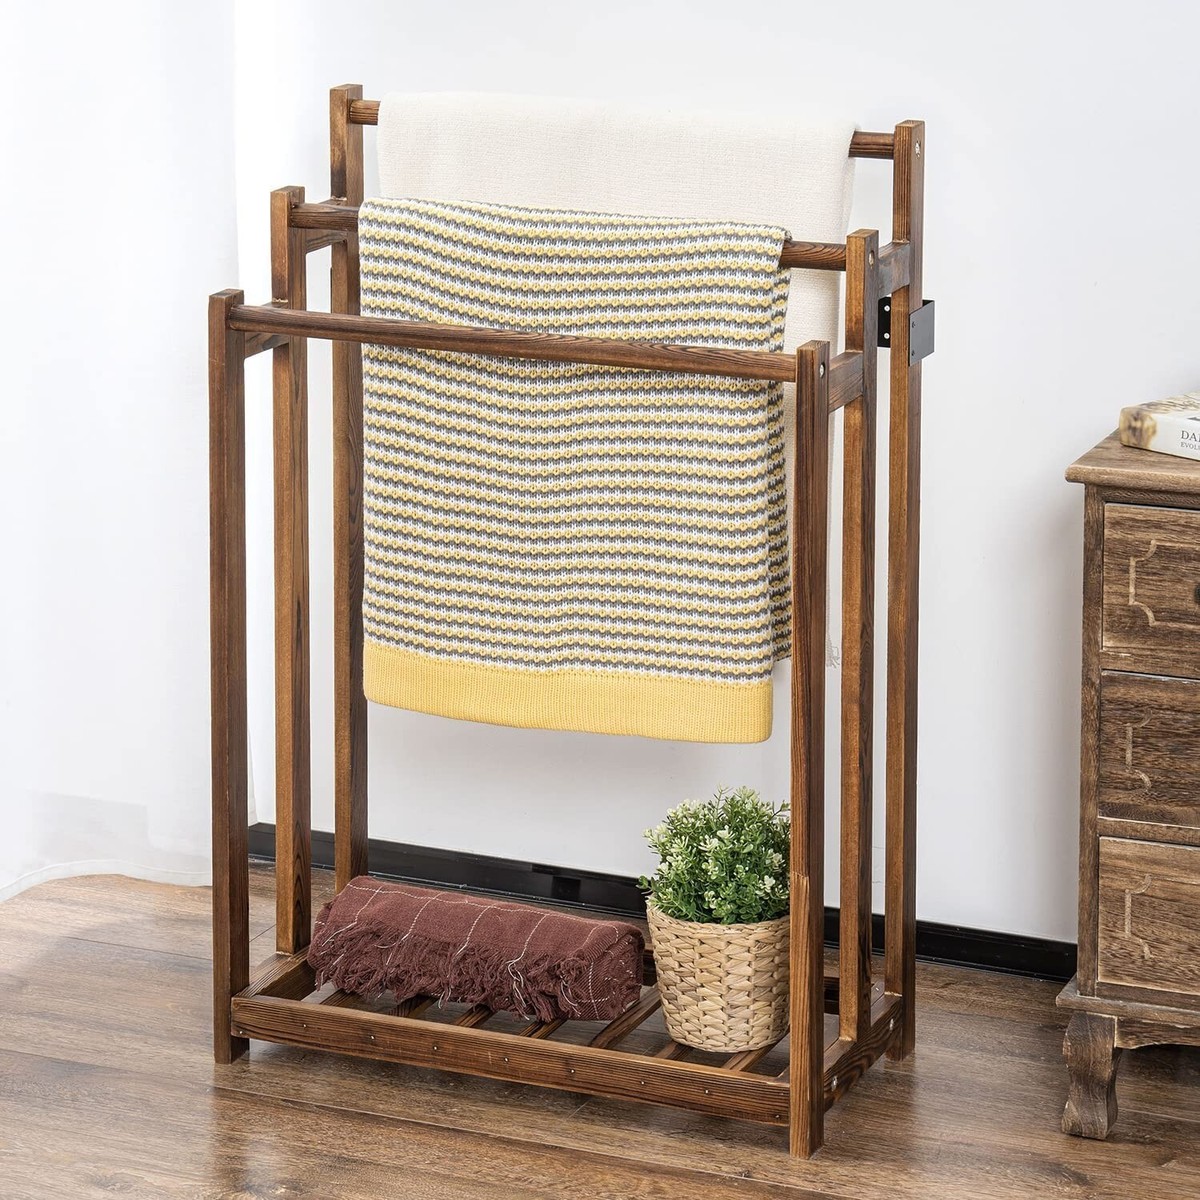
“Here’s the honest truth about freestanding towel racks: they are not for every family.”
If you have young kids who might be tempted to climb it, or if you’re tight on space, it can become a hazard or a nuisance. They also encourage draping, not folding, which means towels take longer to dry than they would on a heated or more exposed bar. It’s a great solution for a guest bath or a primary bath for tidy adults, but might not be practical for a chaotic family bathroom.
8. Stack Towels in Modern Ladder-Style Wooden Shelves
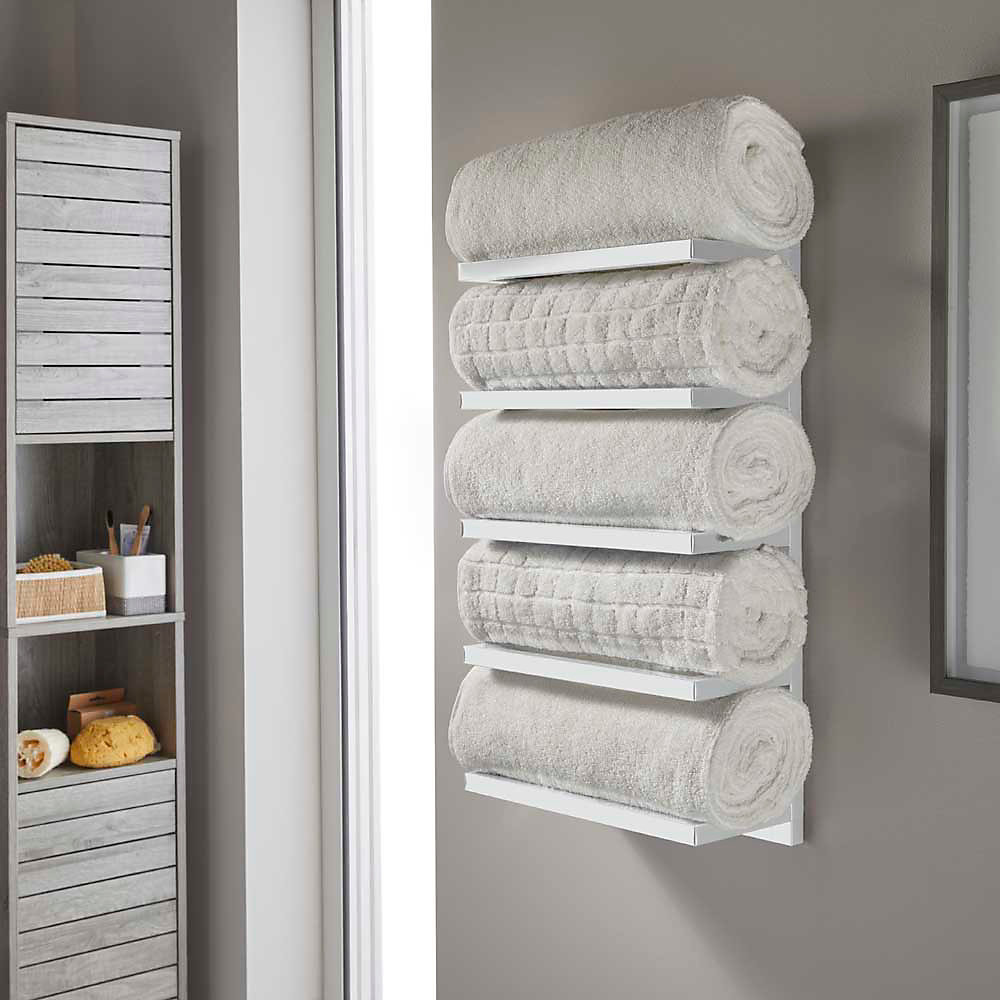
The single element that makes this work is the choice to roll the towels instead of folding them. Rolled towels transform basic storage into a neat, spa-like display. It feels organized and intentional, turning a stack of linens into a visual feature. If you were to simply fold and stack the towels in these frames, it would look cluttered and messy. The uniform cylinders of the rolled towels create a pleasing repetition that’s easy on the eyes and instantly elevates the entire vignette.
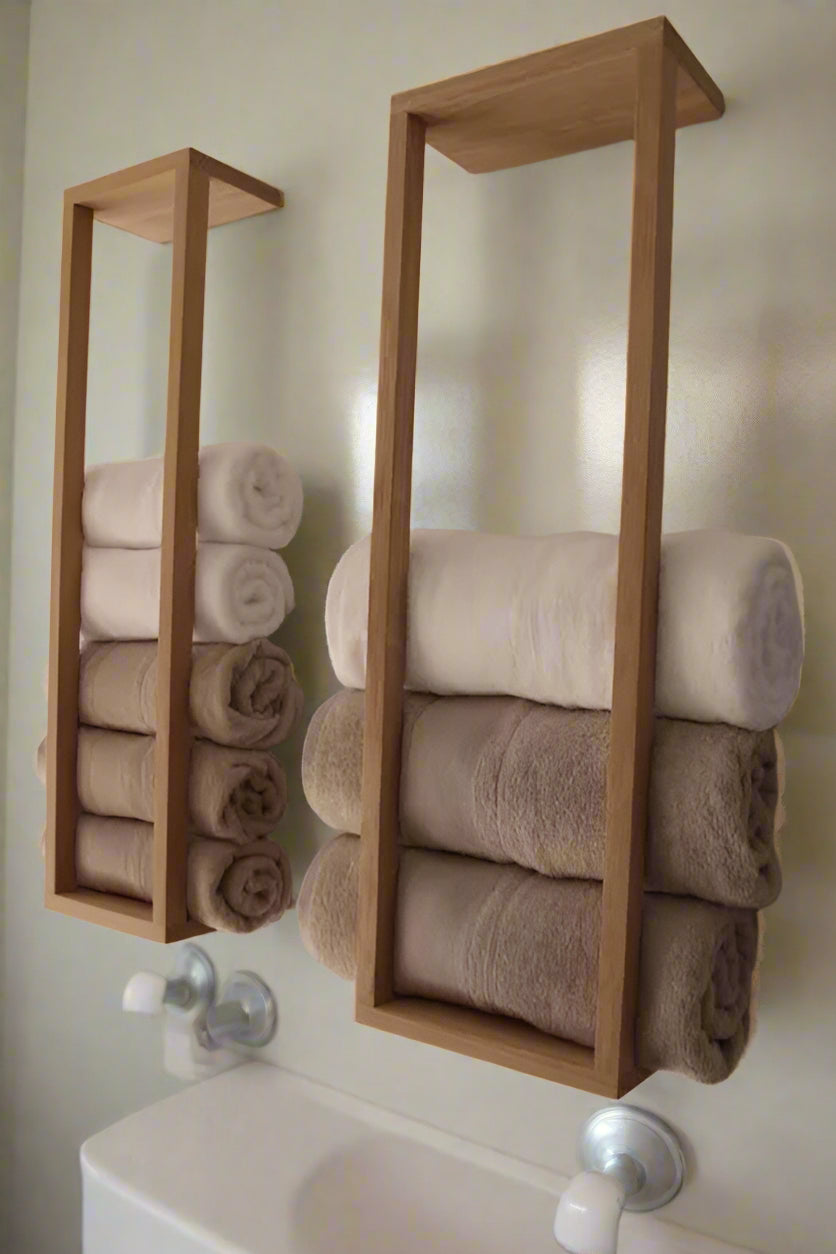
“This ‘deconstructed’ or open-frame storage is a direct reaction against the bulky upper cabinets of the past.”
It’s part of the larger ‘Japandi’ and minimalist design movement that has been dominating Pinterest for the last couple of years. The focus is on natural materials (the light wood), simple forms (the clean rectangles), and mindful organization (the neatly rolled towels). It signals a desire for calm, uncluttered spaces that feel both organic and highly organized. This trend has staying power because it’s both beautiful and practical.
9. Hang Towels from a Shelf with a Black Strap Holder
This minimalist setup is a simple equation: 70% negative space (the clean white wall) + 20% natural texture (the light wood shelf) + 10% graphic punch (the black leather straps). Keeping the wall mostly empty is key; it allows the shelf and its contents to breathe and feel like a curated art piece rather than just storage. You could trade the black straps for tan leather to soften the look or use a darker wood for more drama, but the ratio should stay the same.
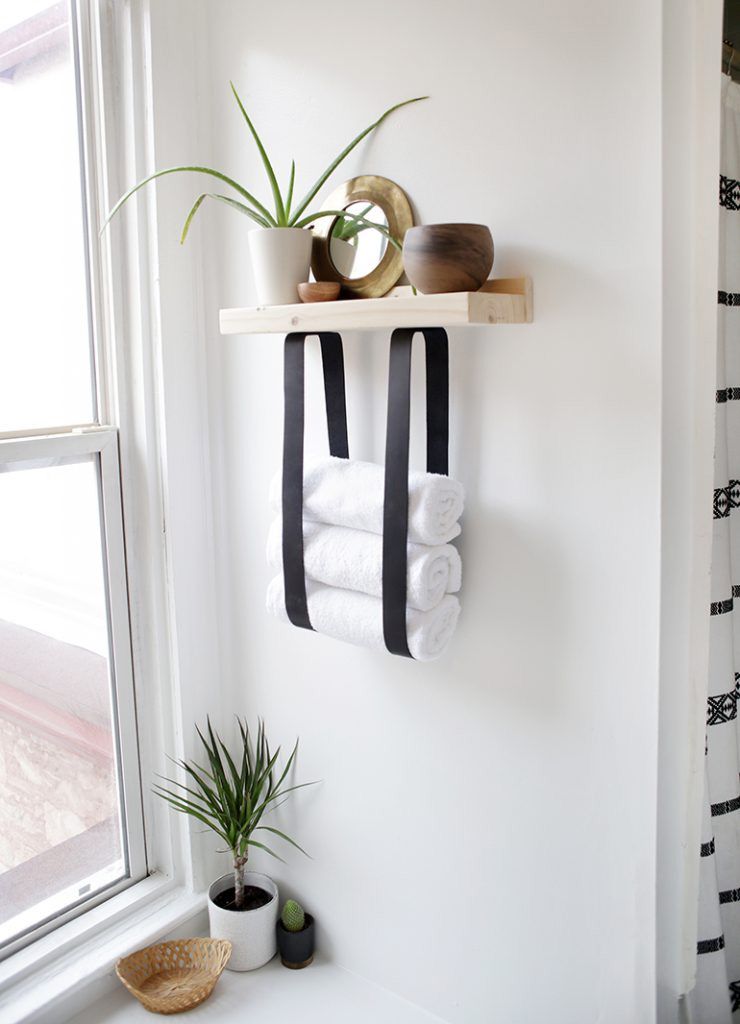
“When styling a shelf like this, think in triangles.”
Notice how the plant, the mirror, and the bowls form a visual triangle that guides the eye across the composition. To get the perfect towel roll, fold the towel in half lengthwise, then fold the decorative edge in about four inches. Now, roll it as tightly as you can from the opposite end. The folded-in edge creates that clean, commercial-looking finish with no messy seams visible.
10. Build a Simple DIY Over-the-Toilet Storage Unit
This is one of the most cost-effective storage projects you can tackle. All you need are a few pallet planks (or inexpensive pine boards from Home Depot, which are already smooth and straight). A weekend, some wood glue, and a box of finish nails can get you this exact unit for under $50. Compared to buying a pre-made MDF or particleboard version from a big box store for $100+, the DIY solid wood version is not only cheaper but will last significantly longer and look far more authentic. Compare this to the more complex vanity builds like in Idea #20.
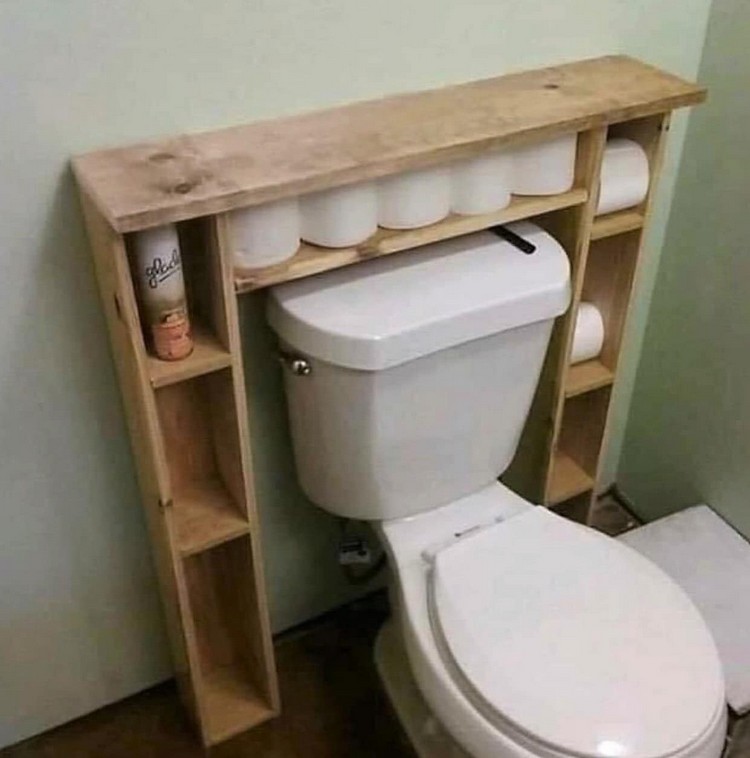
“This design fits perfectly in a standard bathroom with an 8-foot ceiling.”
The unit should be roughly the width of the toilet tank (20-22 inches) and about 36-42 inches tall. A critical measurement is the height of the lowest shelf—make sure it clears the top of your toilet tank by at least an inch to avoid rattling and to allow easy removal of the tank lid for maintenance. The depth should be no more than the tank itself (around 8-10 inches) to prevent it from feeling imposing.
11. Create a Spa-Like Jacuzzi Tub with a Wood Panel Surround
The genius of this design lies in its seamless integration. By using the same light, unstained wood paneling for both the bathtub surround and the walls, the jacuzzi tub doesn’t feel like a bulky appliance dropped into the room. Instead, it becomes a fully integrated, organic part of the architecture. This creates a serene, cohesive look that’s reminiscent of a high-end spa or a Scandinavian sauna. The warmth of the wood visually balances the cool white of the tub itself.
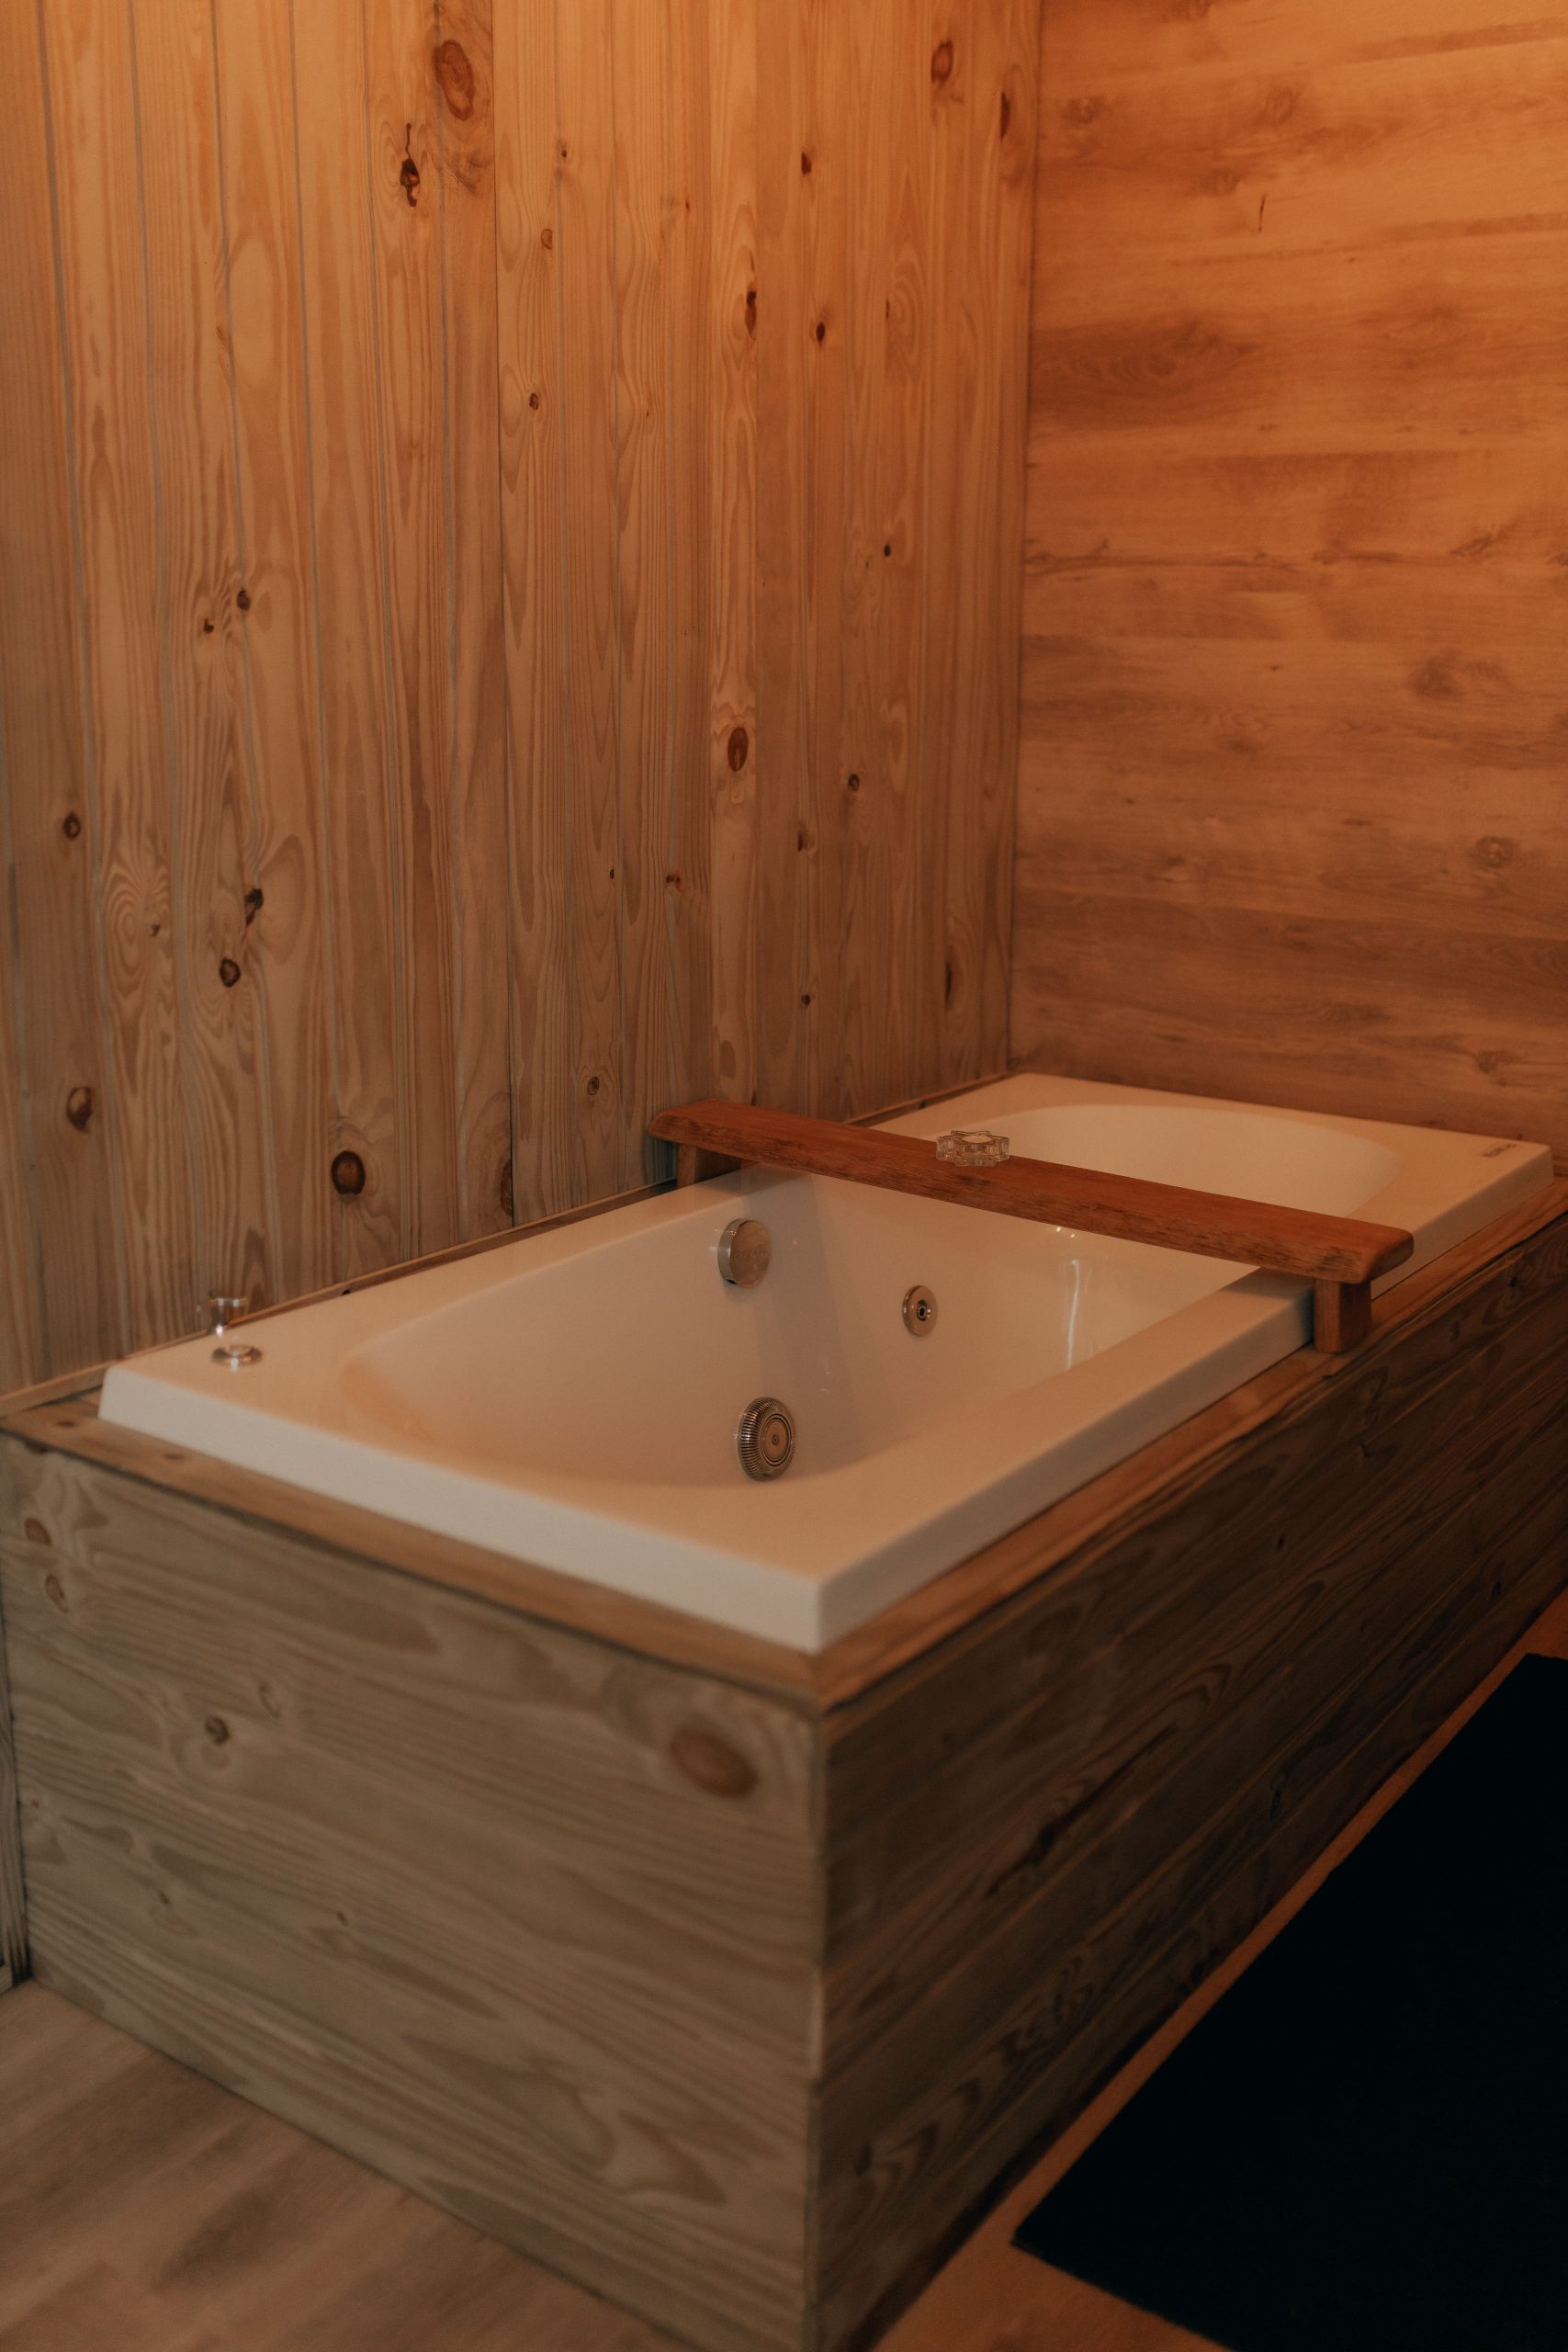
“While this looks incredibly relaxing, remember that wood and water require diligence.”
The area where the tub deck meets the wall is a critical failure point. This seam must be meticulously caulked with a high-quality, 100% silicone sealant designed for kitchens and baths. Check this caulking every 6-12 months for any signs of cracking or peeling, and re-caulk immediately if you find any gaps. Water intrusion here can lead to hidden mold and rot in the wall behind the paneling.
12. Mix Brick and Wood Tiles for a Striped Accent Wall
The sewing machine base vanity is the single element that elevates this room from interesting to unforgettable. Without it, you have a cool tile application. With it, you have a story. It’s an unexpected piece of history repurposed into something functional, adding a layer of wit and personality that you could never buy off a shelf. It proves that the most impactful design choices are often the most personal and unconventional ones.
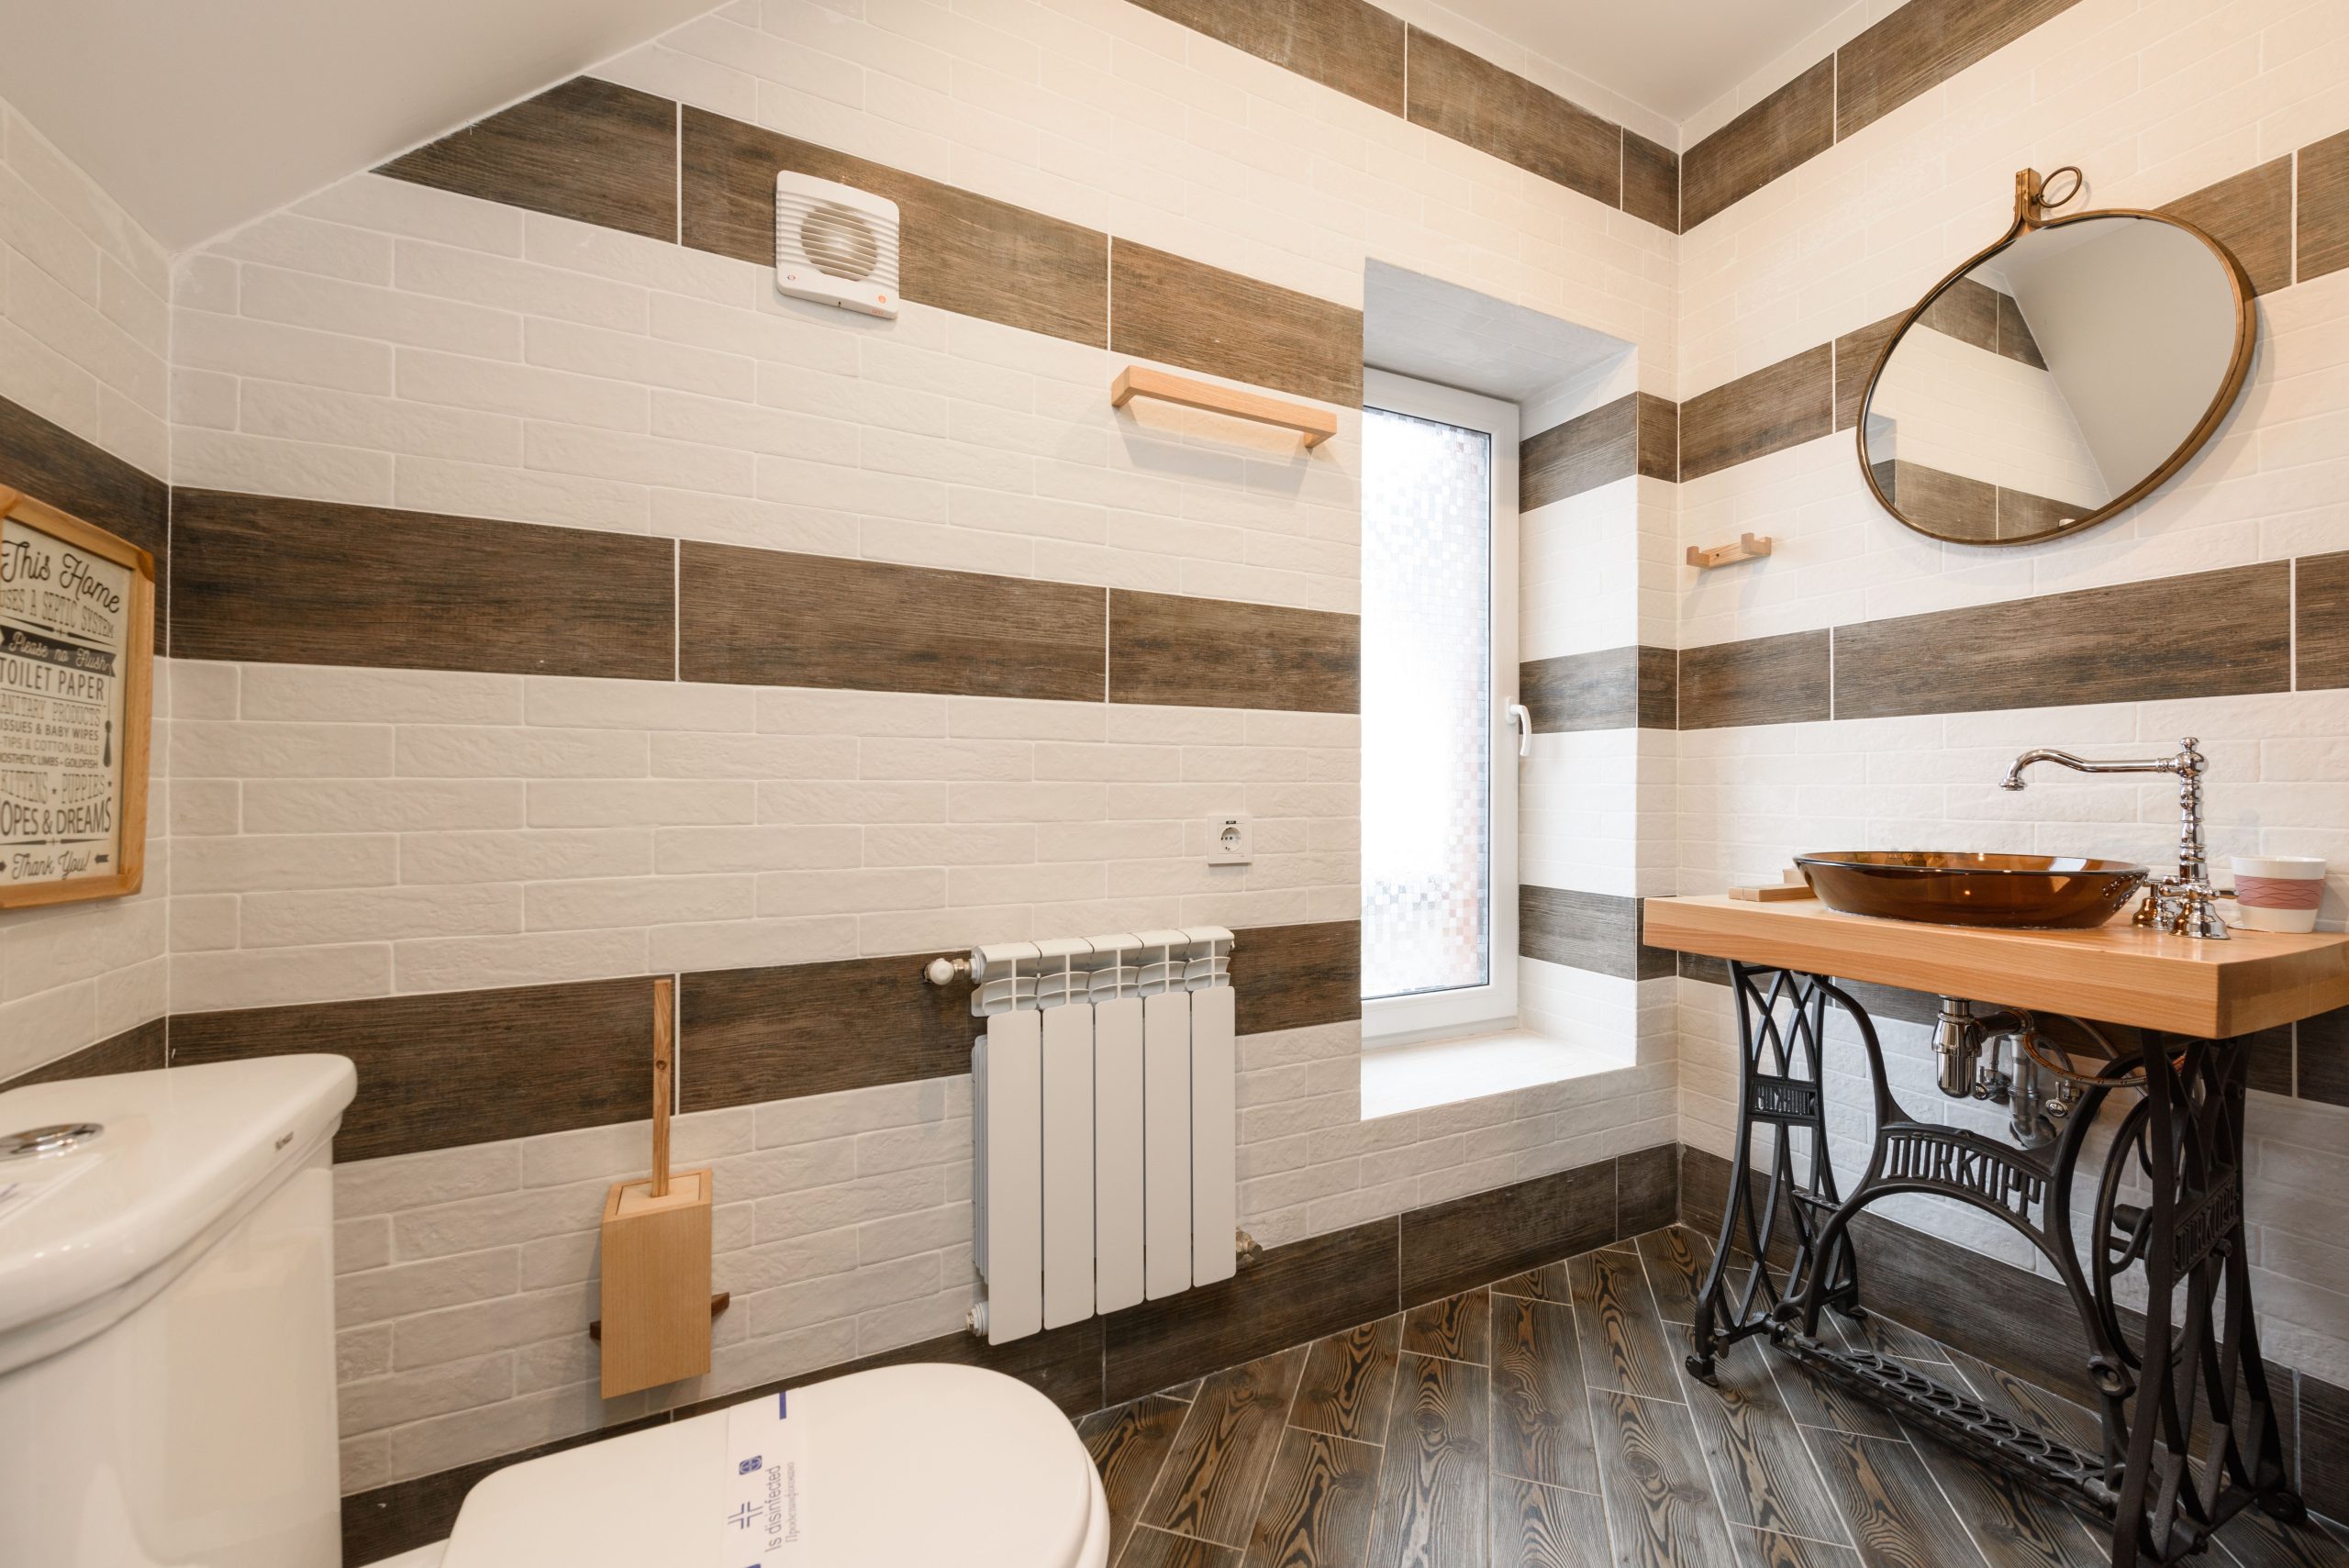
“A vanity made from an antique sewing machine base is a fantastic statement piece, but it offers zero storage.”
This is a powder room or guest bath solution, not a primary bathroom workhorse. Before you fall in love with this idea, be honest about your needs. Where will you store extra toilet paper, cleaning supplies, or toiletries? If you don’t have a nearby closet or another form of storage, this beautifully minimalist look can quickly become cluttered with daily necessities.
13. Panel a Small Bathroom with Warm Horizontal Wood Planks
In a small space like this, every detail matters. By running the wood planks horizontally, you create an optical illusion that makes the room feel wider. The choice of a compact corner sink is also brilliant; it uses an awkward, often-wasted space, freeing up valuable floor area and making the room feel more open. Lastly, the large, simple mirror reflects the light and the view from the window, doubling the sense of space and bringing the outdoors in.
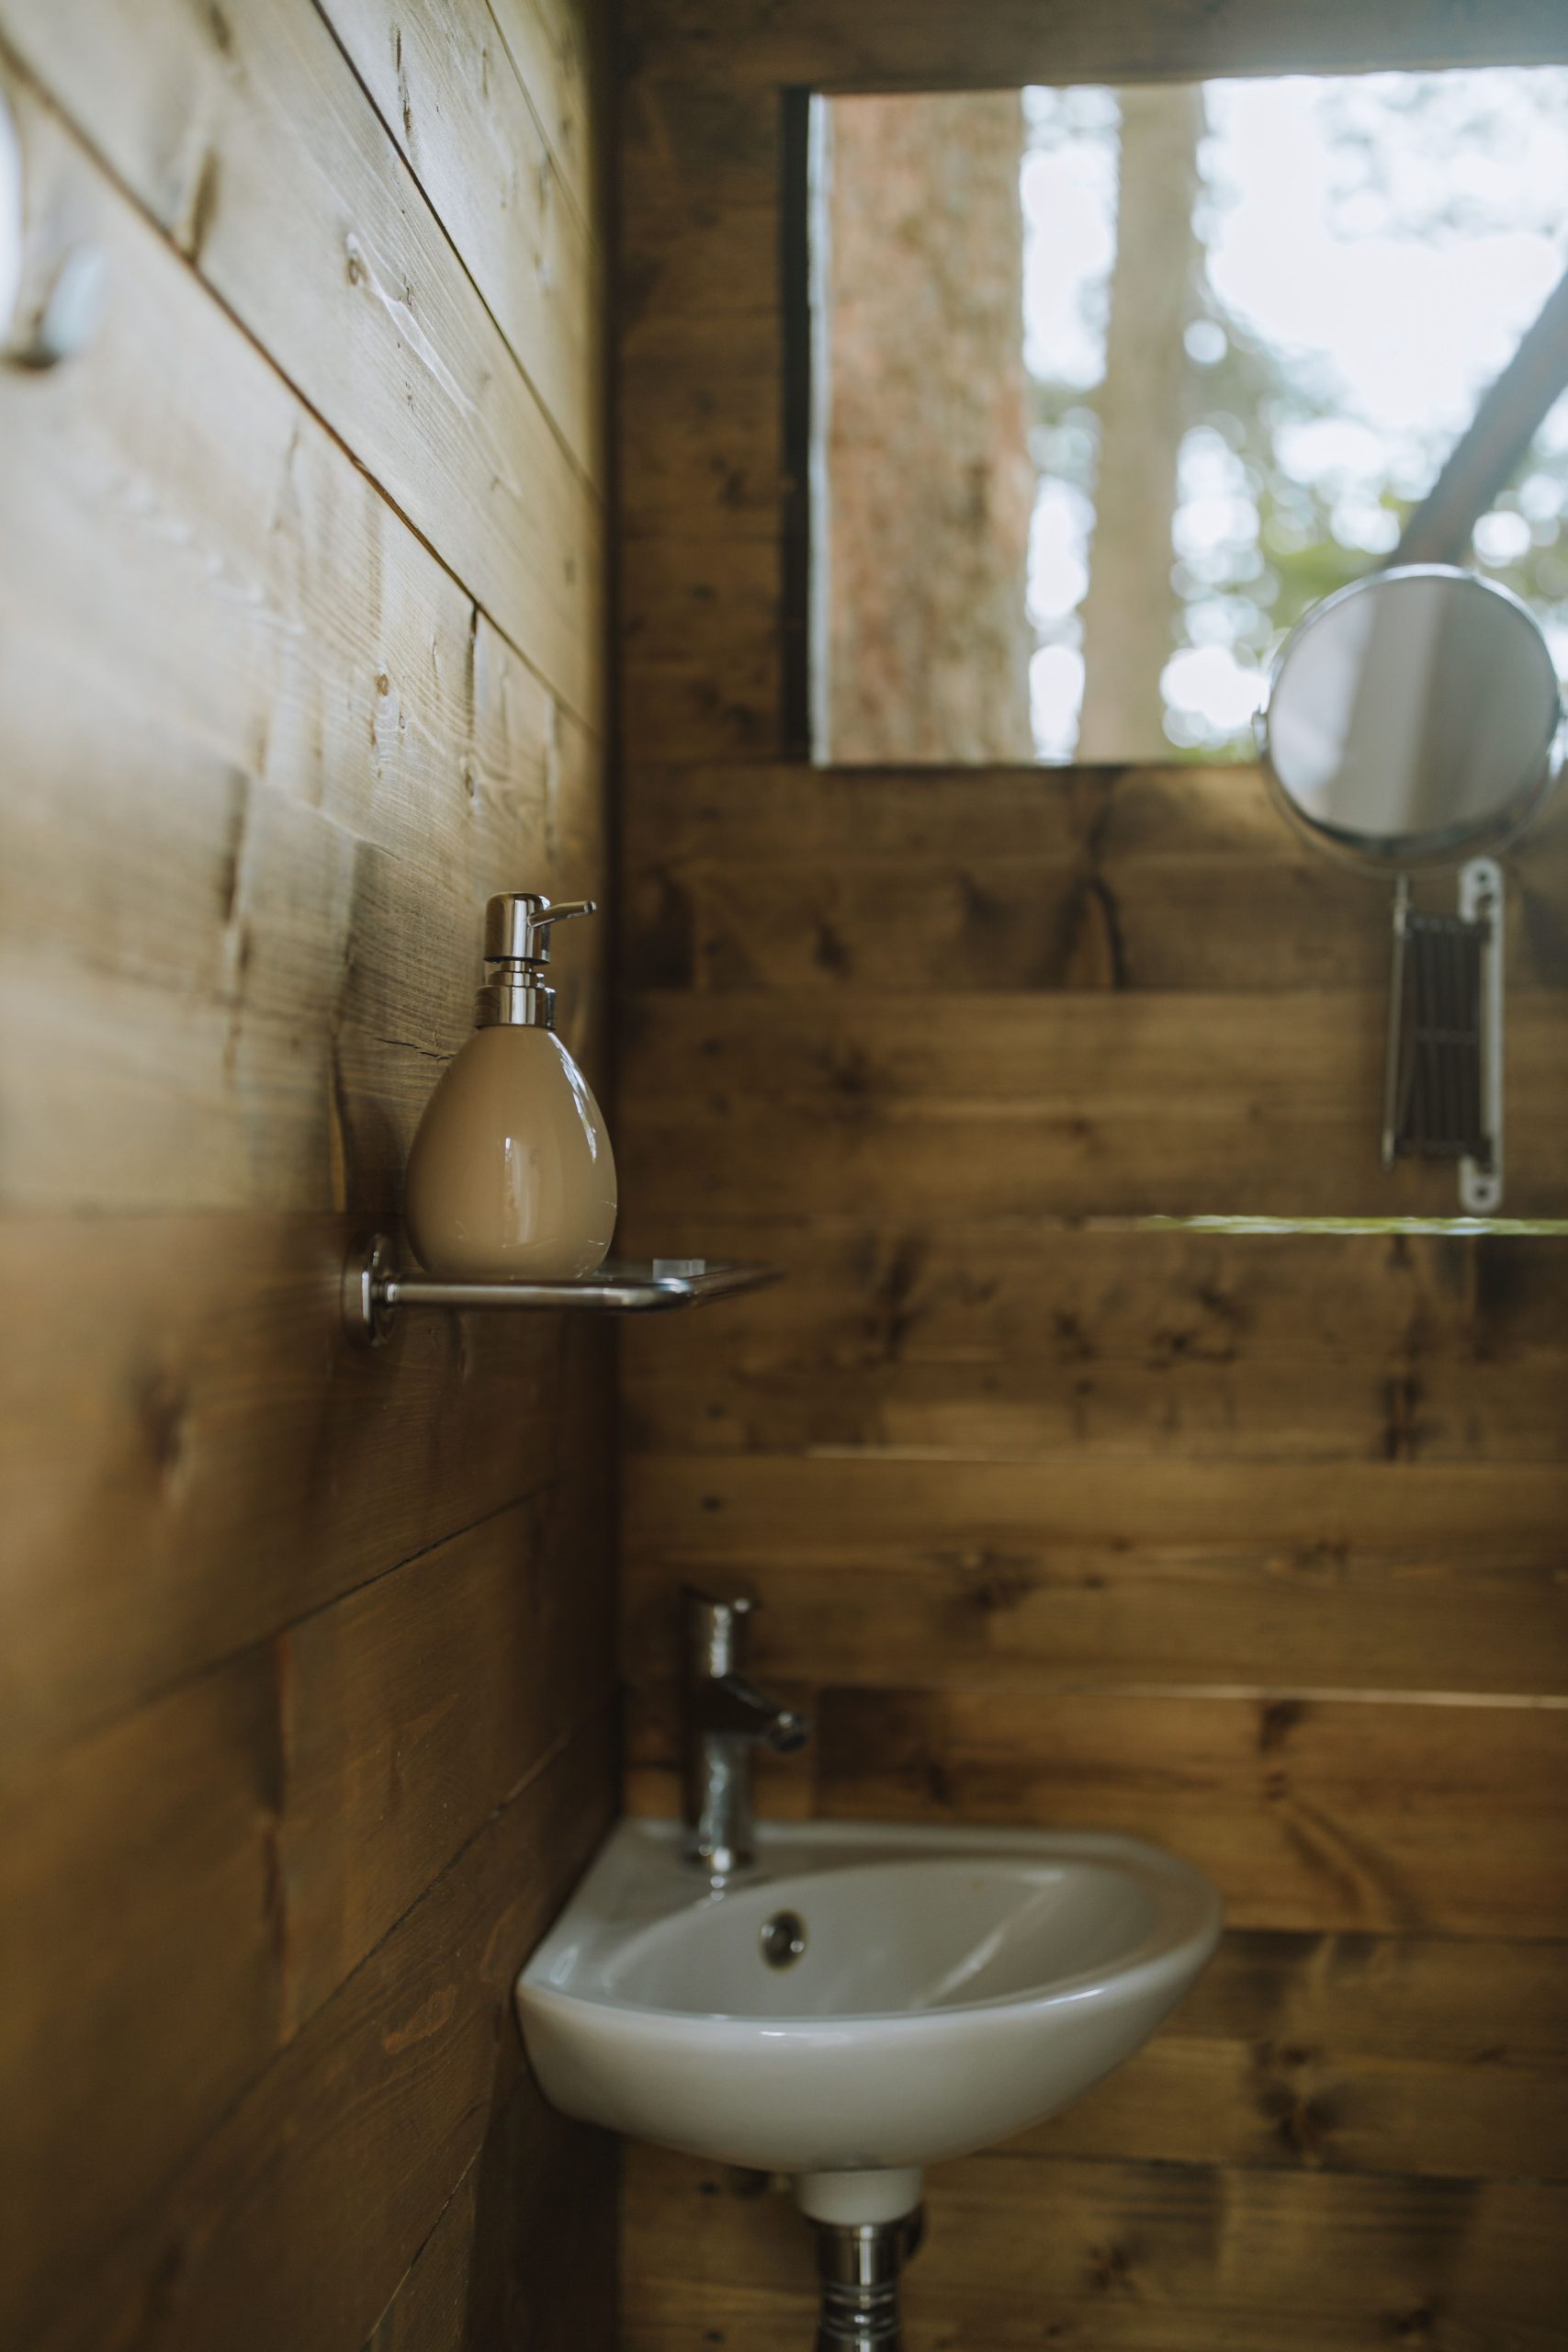
“This wood-paneled concept is a dream for spaces under 40 square feet, like a small powder room or a tight ensuite.”
The key is to use relatively thin planks (no more than 3/4 inch thick) to avoid losing too much precious square footage. It requires a minimum ceiling height of 7.5 feet to avoid feeling claustrophobic. For a larger bathroom, this full-wrap treatment might feel too overwhelming; consider a single accent wall instead, like in Idea #28.
14. Use Wood Paneling and Glass to Define a Modern Loft Bathroom
This design succeeds by masterfully blending openness and enclosure. The glass partition wall is the key: it separates the wet zone (bathtub) from the dry zone (the main loft area) without interrupting the visual flow of light or space. The consistent use of light wood on the walls and floor creates a continuous, unified canvas that makes the entire loft feel like a single, cohesive space, while the black frame of the glass wall adds a sharp, graphic element that defines the bathroom’s edge.
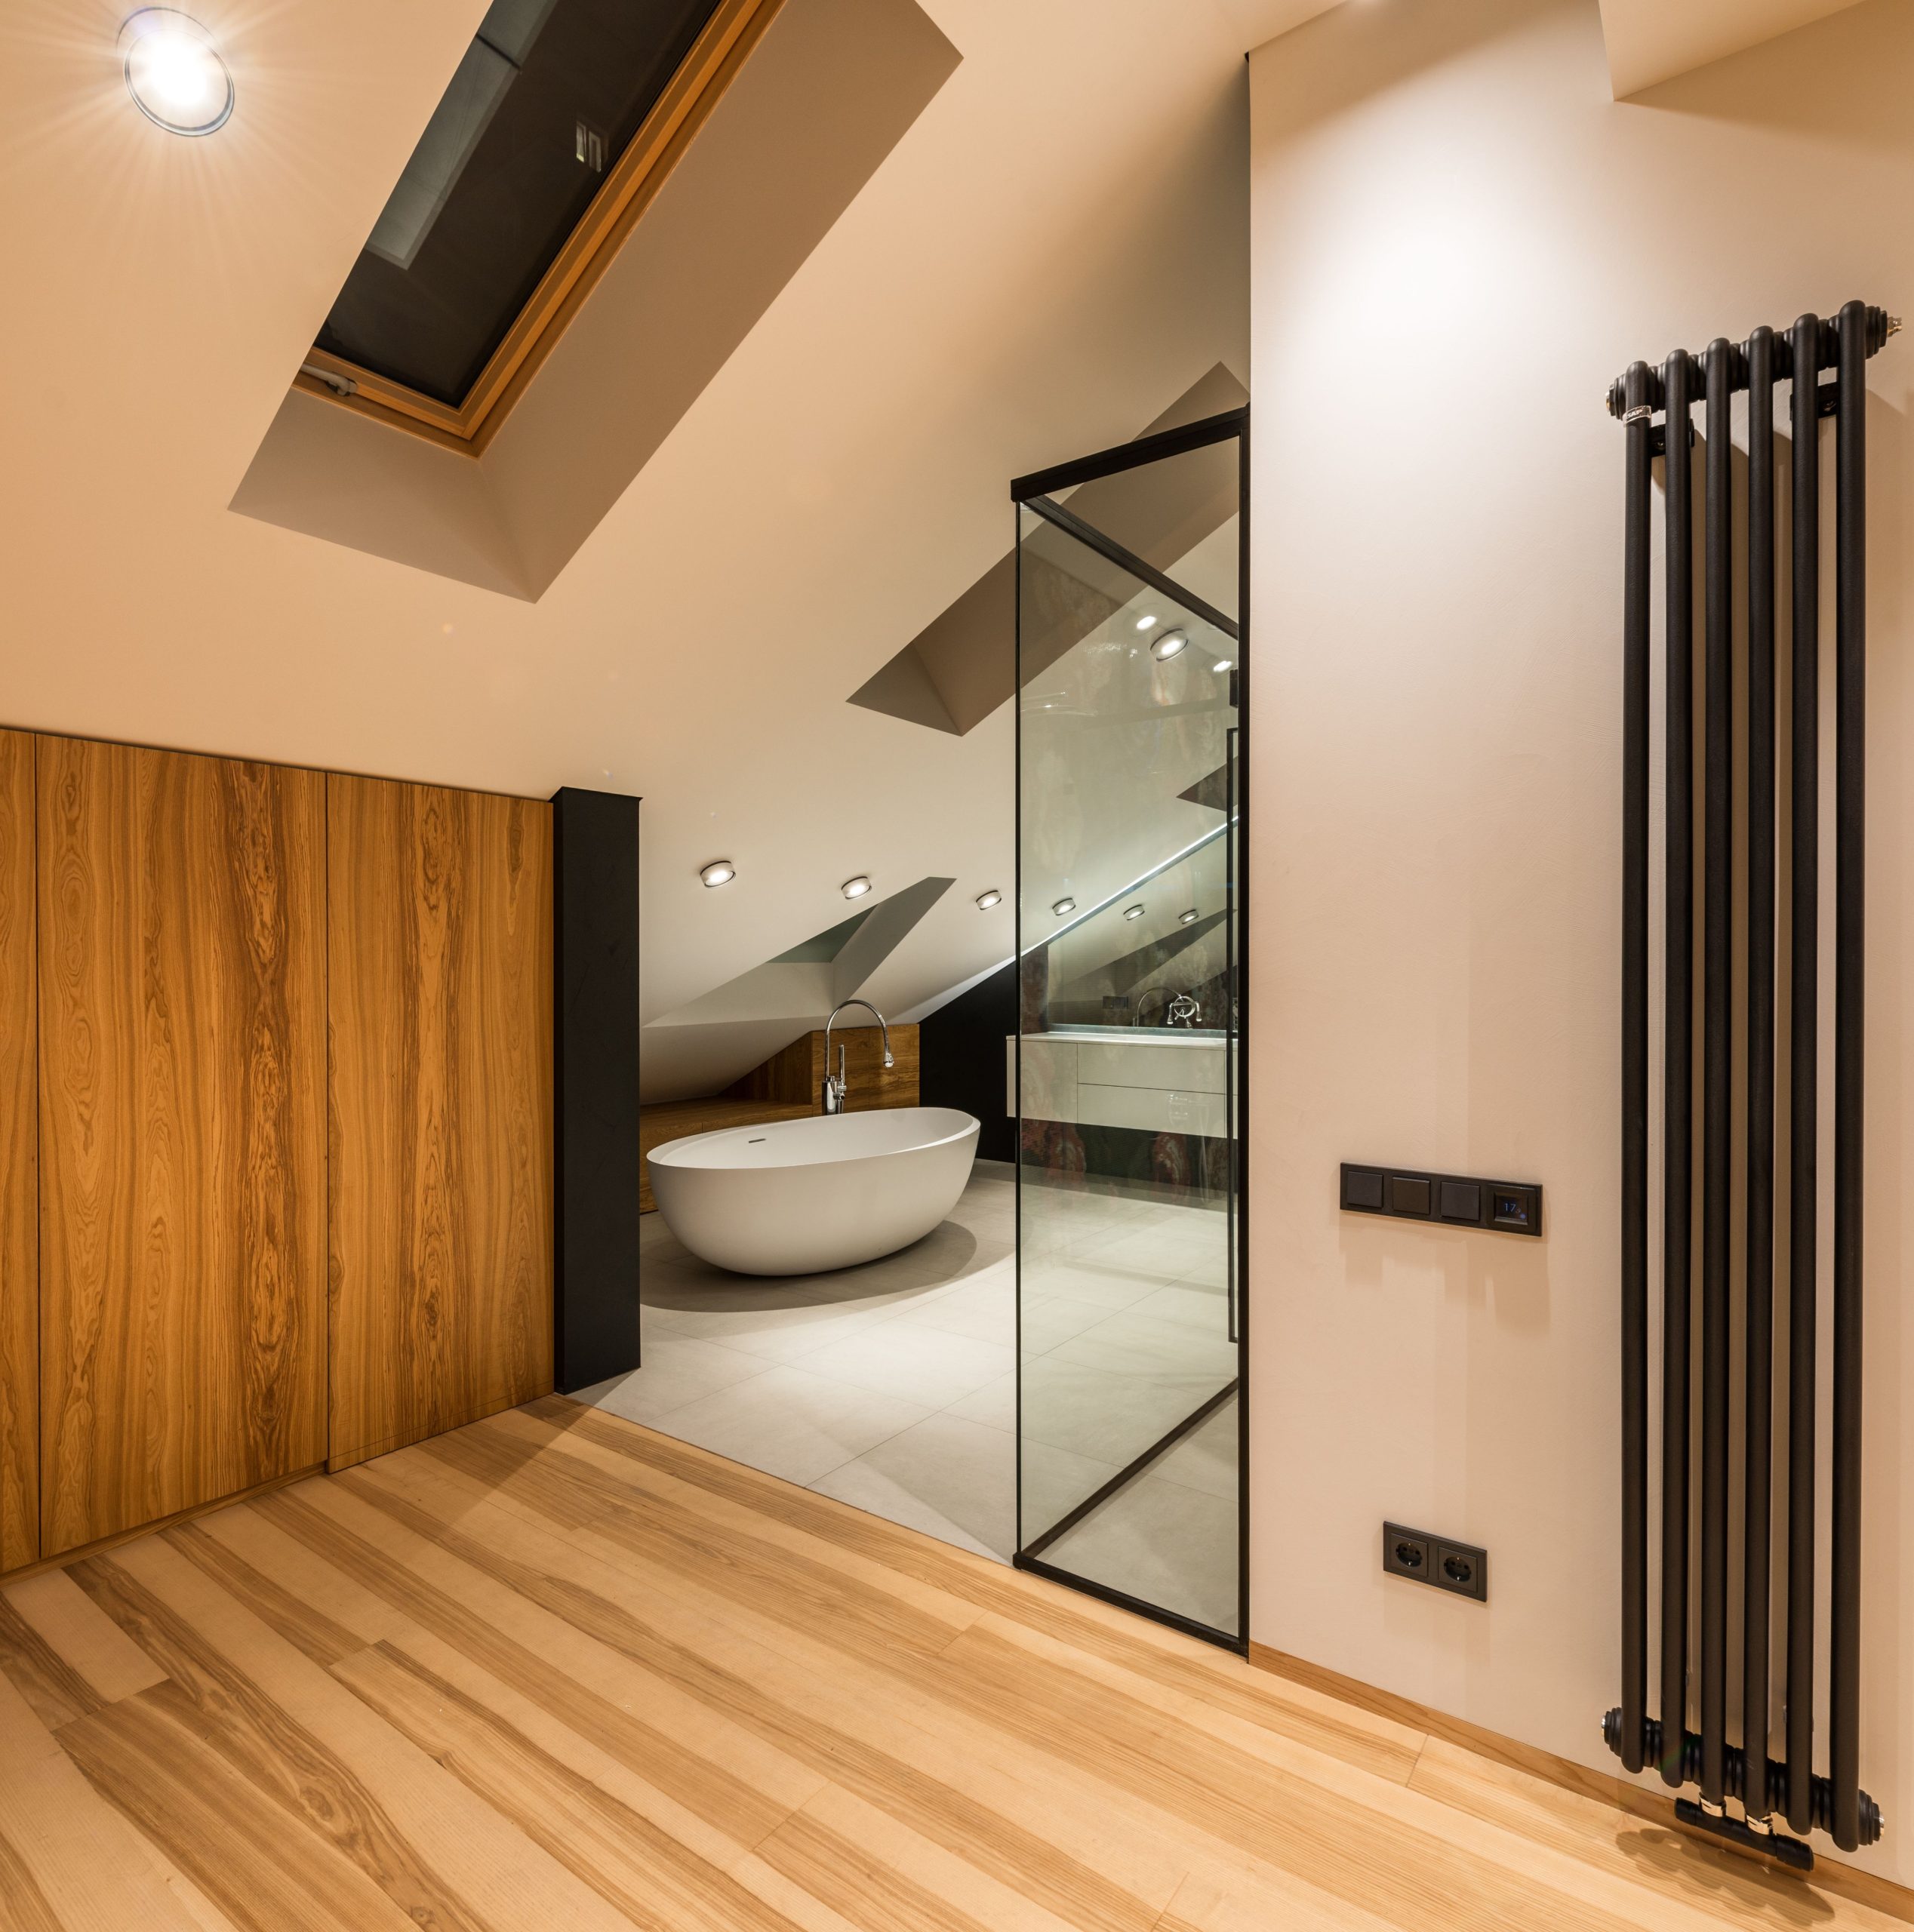
“The ‘broken-plan’ layout is a huge trend for 2026, offering a sophisticated alternative to the fully open-concept living of the last decade.”
People still want light and flow, but are craving a better definition of zones and a bit more privacy. Using architectural elements like glass walls, slatted partitions, or changes in floor material allows homeowners to create distinct ‘rooms’ without putting up solid walls, giving them the best of both worlds.
15. Achieve a Seamless Look with Wood-Look Wall and Floor Tiles
The most important decision here was using the exact same wood-look tile on both the floor and the accent wall. This continuity is what creates the serene, spa-like atmosphere. It wraps the space in a single, unbroken texture, which makes the room feel larger and more intentional. If a different tile were used on the floor, the effect would be jarring and the wall would look like a disconnected afterthought. The seamless transition is everything.
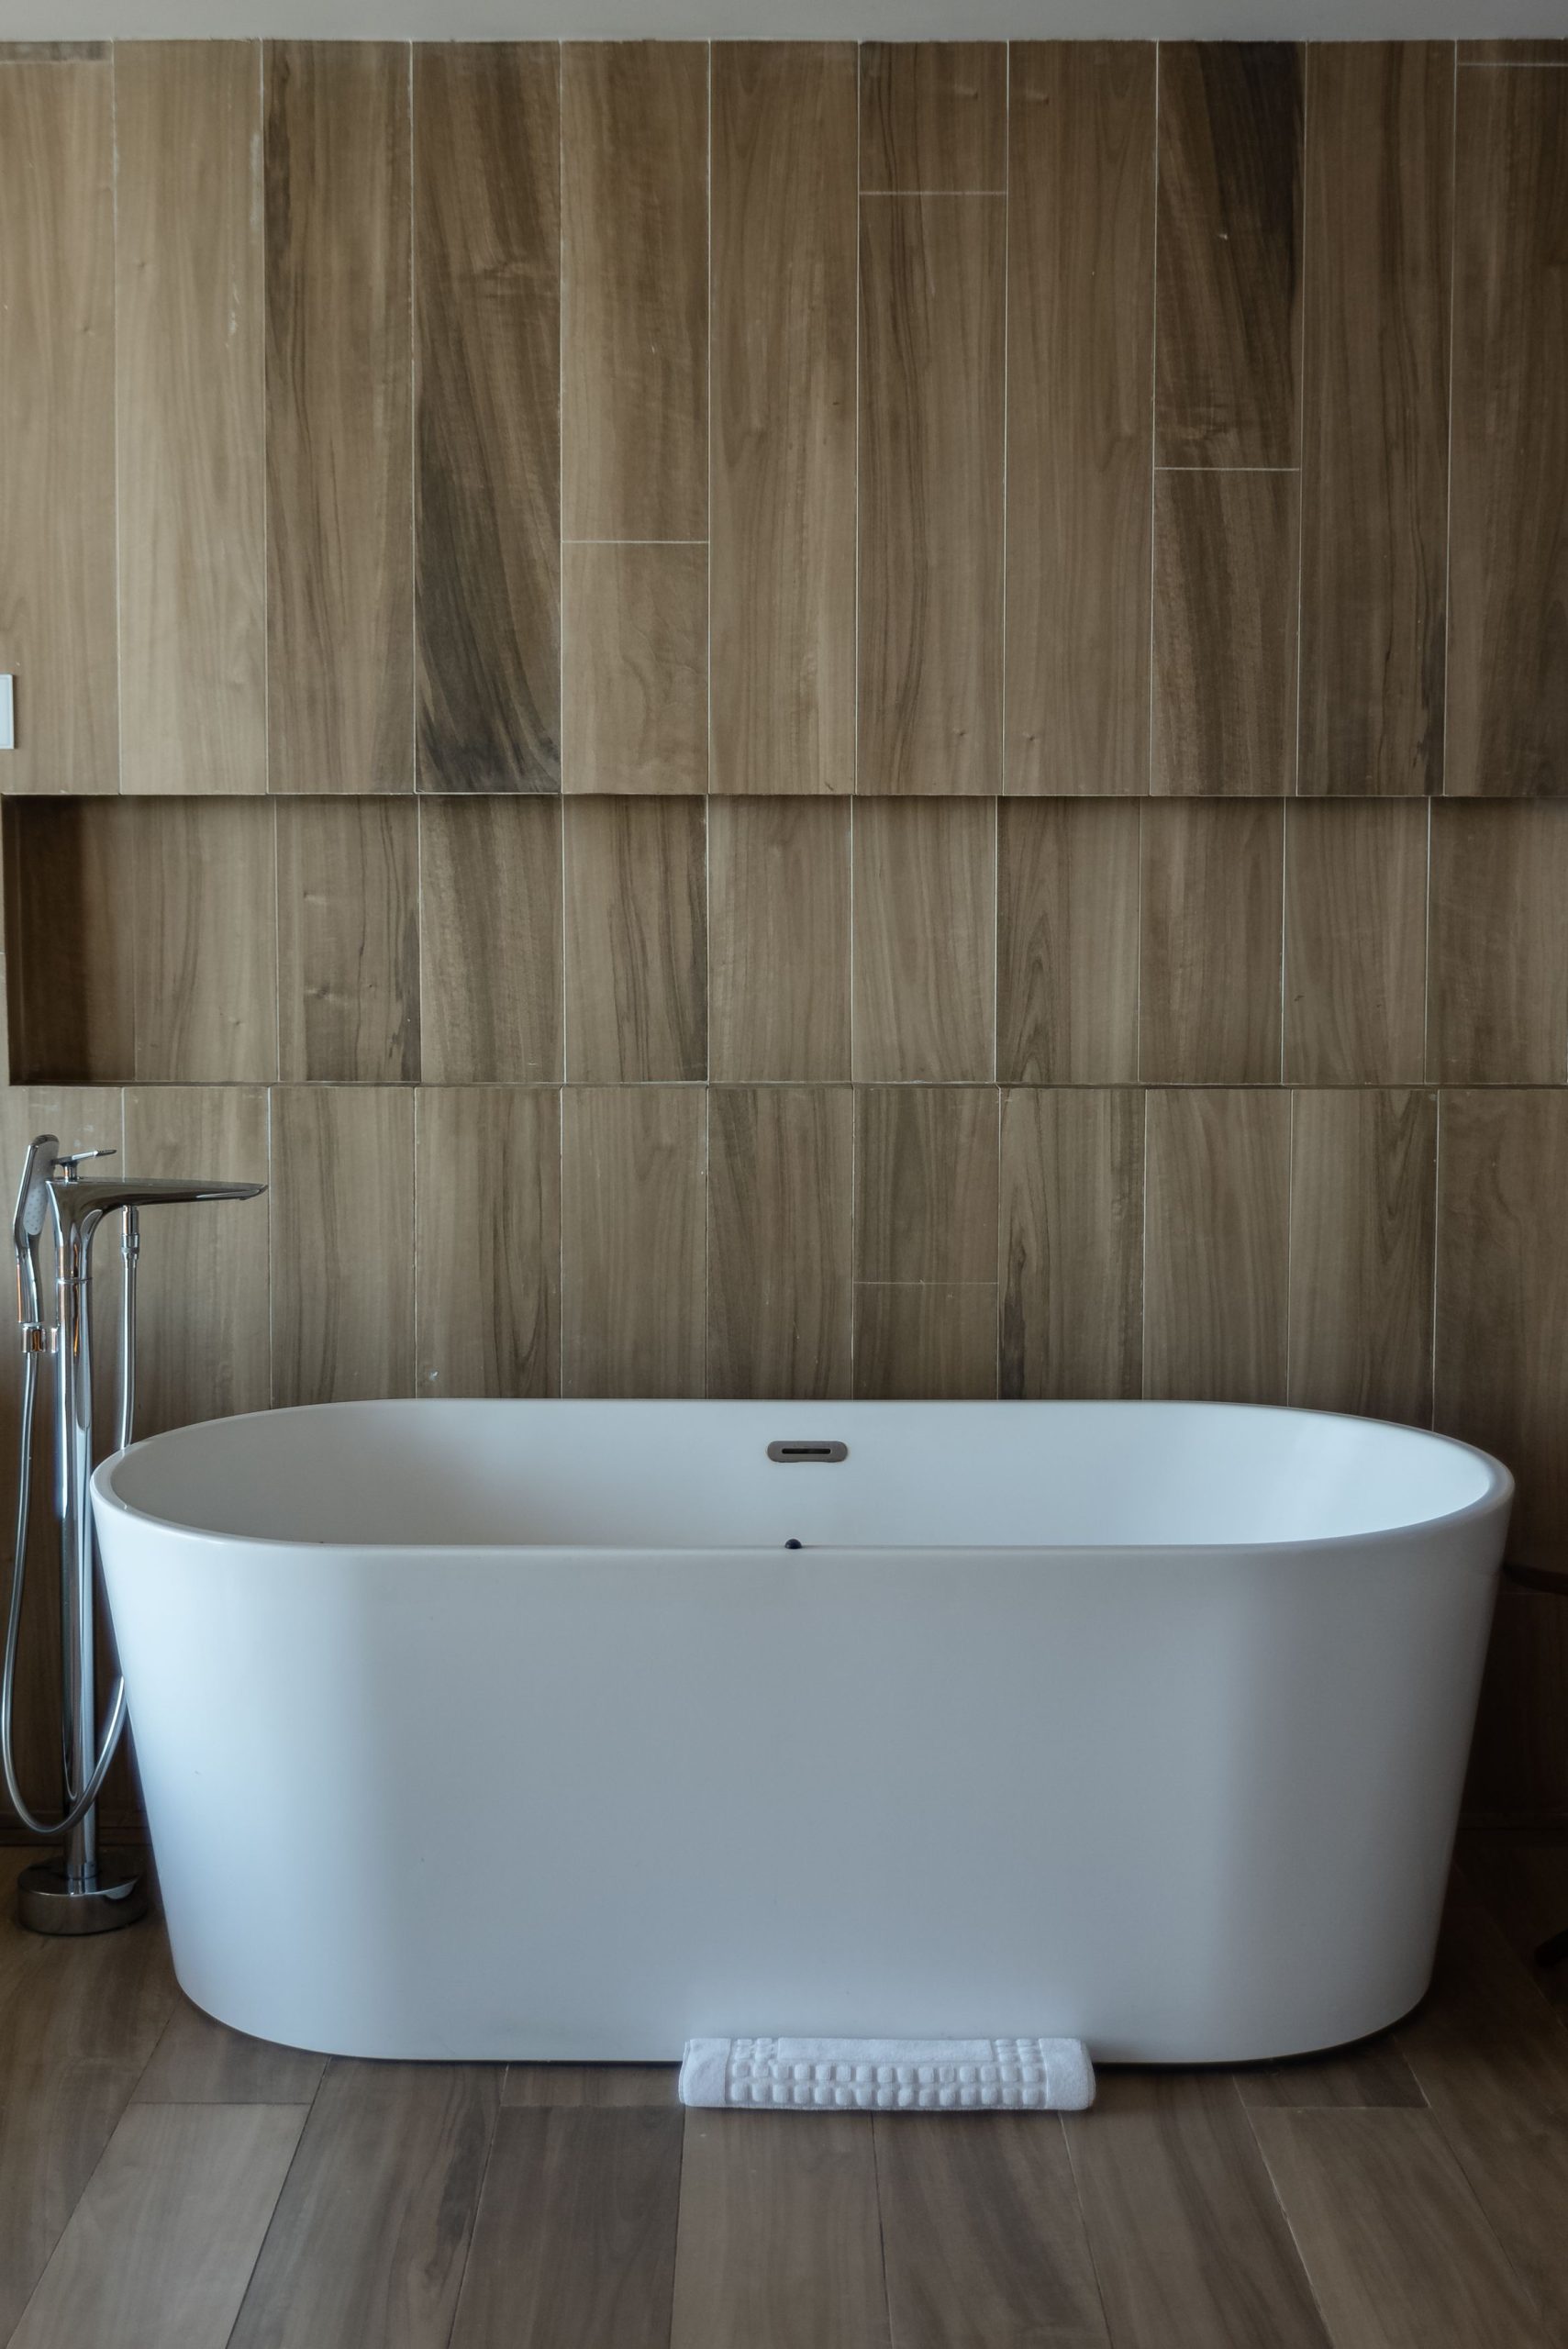
“Porcelain wood-look tile offers the best of both worlds: the warm, inviting look of wood with the durability and water resistance of tile.”
It’s incredibly easy to clean—just mop it like you would any other tile floor. However, be aware of grout. Lighter colored grout can stain over time, especially on the floor. Opting for a darker, coordinating grout color (like a taupe or warm gray) will hide dirt and keep your installation looking fresh for years with minimal scrubbing.
16. Create Calm with Earth Tones and a Black Ladder Shelf
This room’s serene formula is all about balancing contrast and texture. It’s roughly 60% light and airy (the off-white walls and light floor) + 30% dark and grounding (the black door and ladder shelf) + 10% natural warmth (the wooden vanity and woven basket). The textured wall adds a subtle layer of complexity without competing for attention. You could swap the black accents for a deep bronze or even a dark olive green to maintain the same sophisticated, low-contrast vibe.
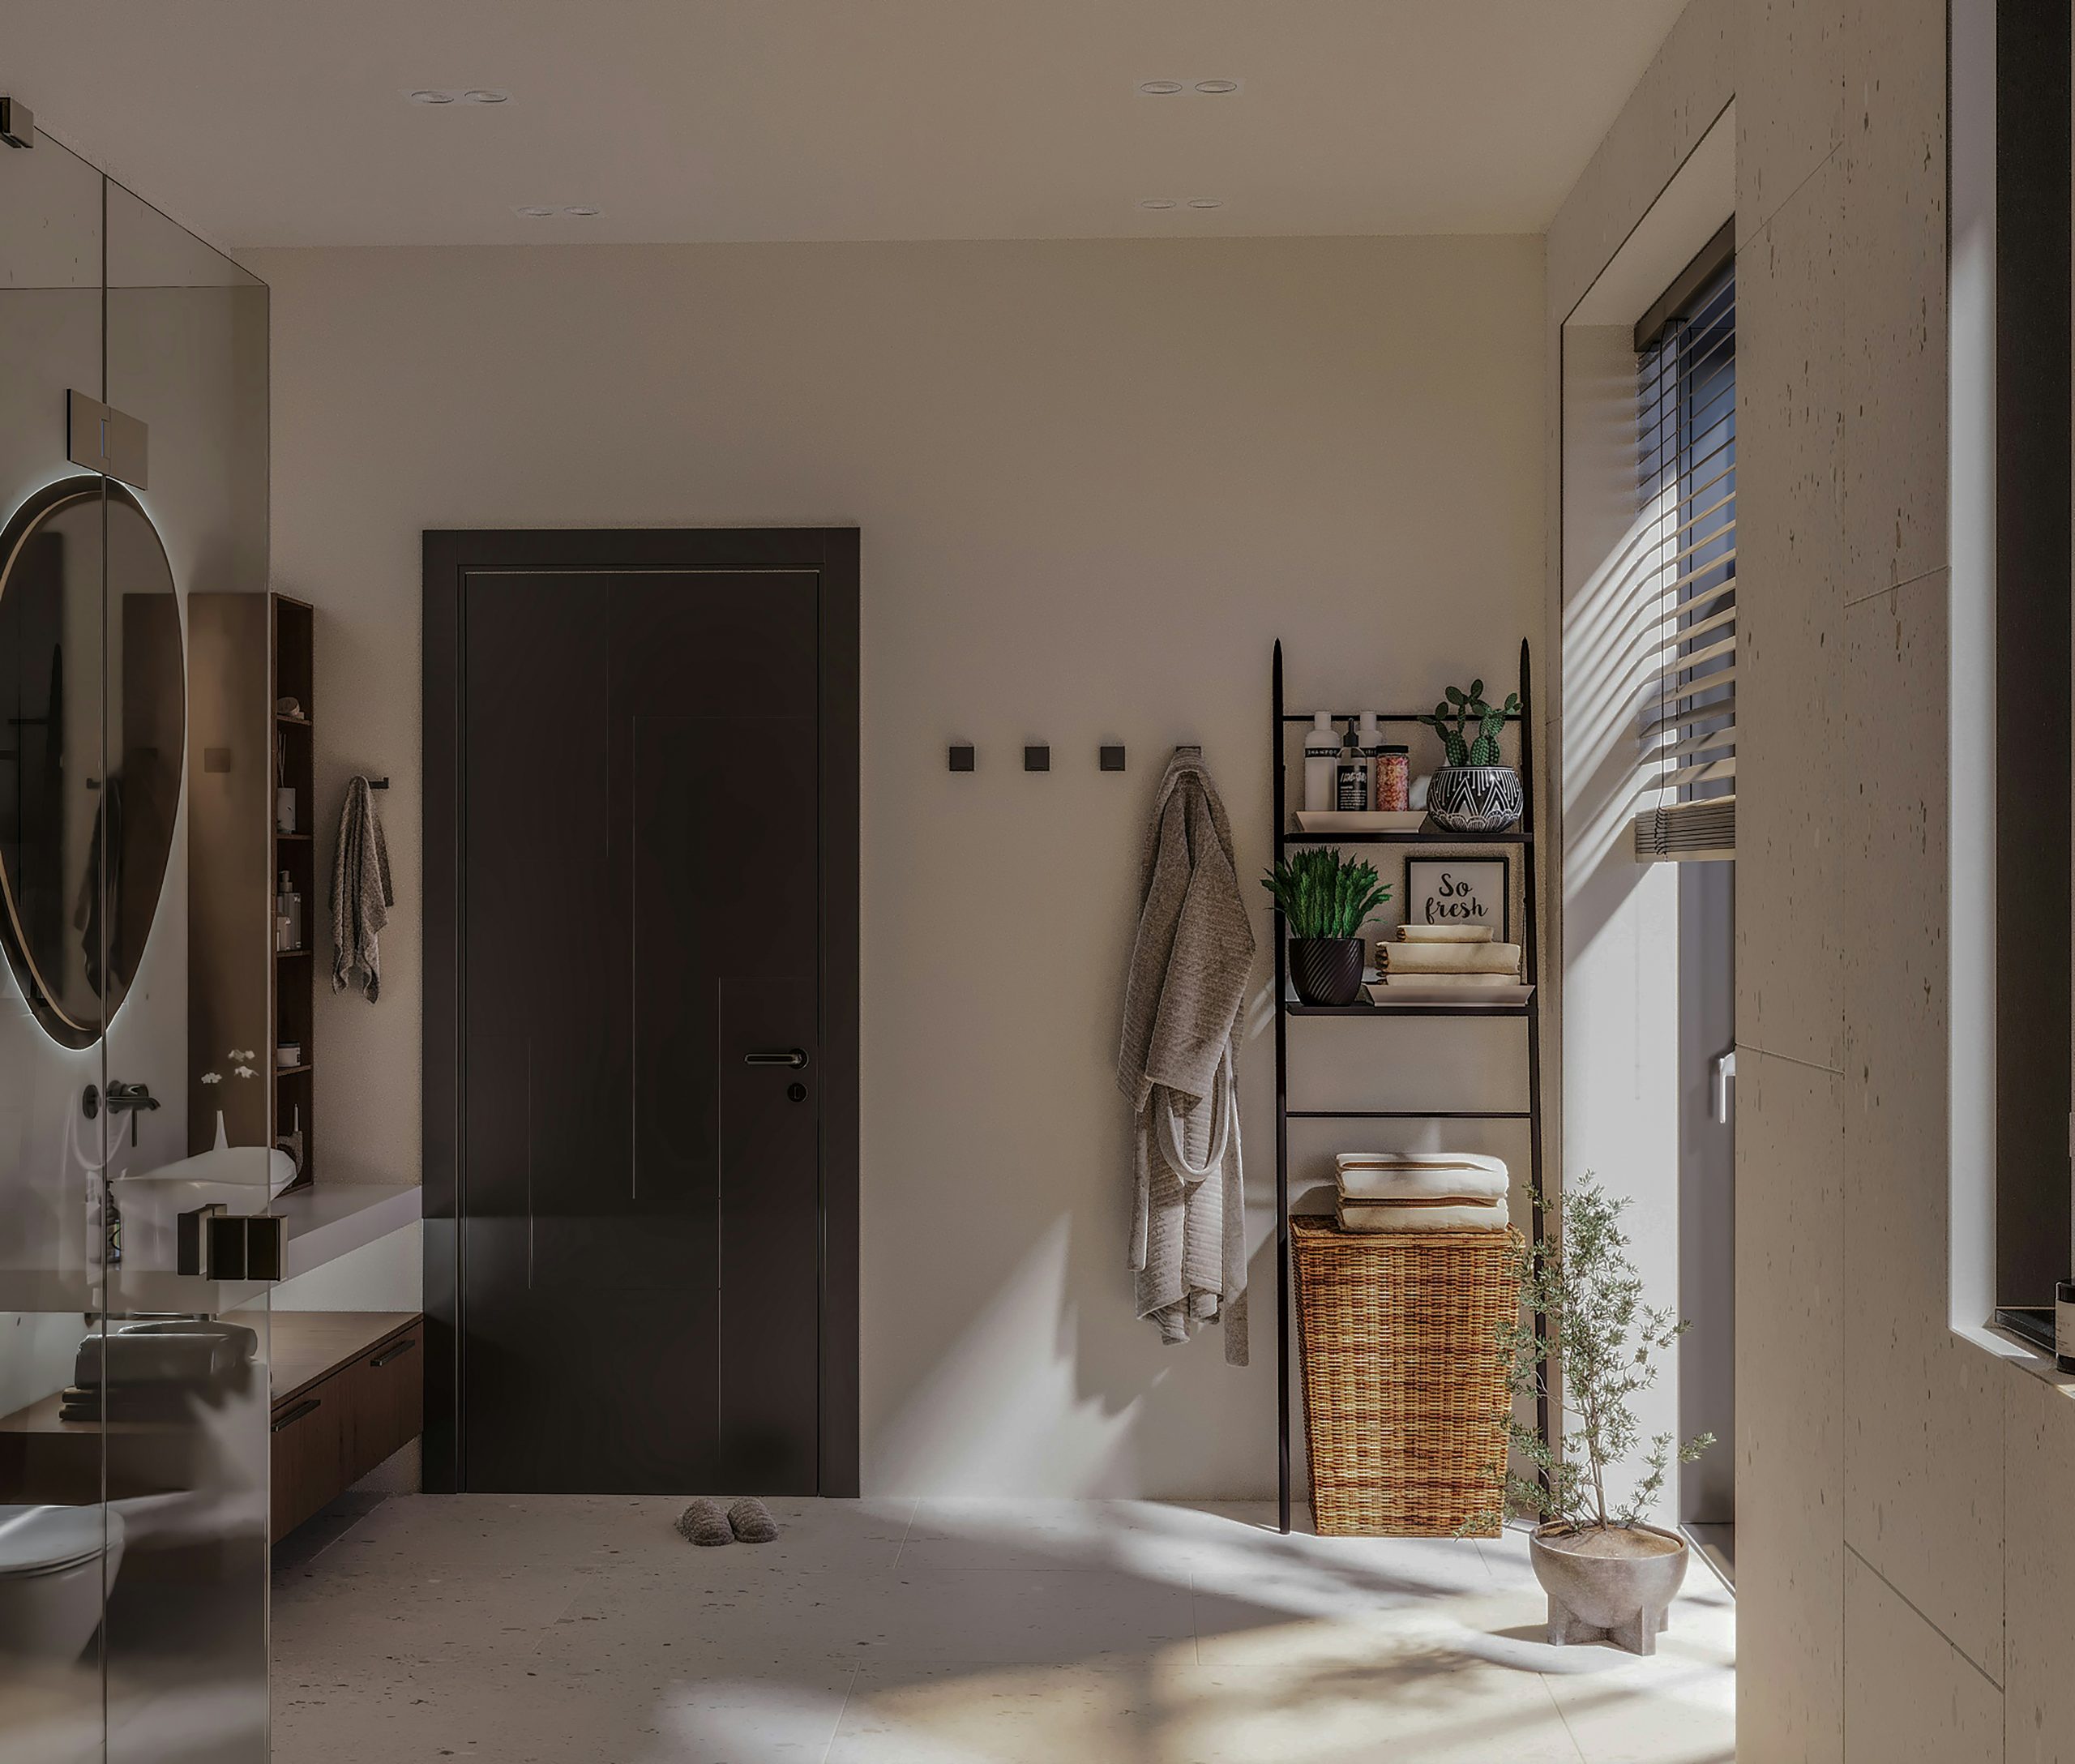
“Let’s be honest: a ladder shelf looks amazing when perfectly styled for a photoshoot, but can quickly become a dumping ground for clutter in real life.”
If you’re not naturally tidy, this might not be the storage solution for you. It requires discipline to keep it looking minimalist and chic. Also, the open nature of the storage means your less-than-aesthetic items (like that jumbo bottle of mouthwash) will be on full display unless you decant everything into pretty bottles.
17. Combine Rustic Wood with Modern Hexagonal Tiles
This bathroom nails the modern-rustic aesthetic by pairing warm, organic materials with cool, geometric patterns. The rich grain of the wooden vanity and mirror frame provides a natural, comforting texture. This is balanced by the clean, sharp lines of the hexagonal gray wall tiles. The contrast is what creates visual interest. The choice of matte black fixtures acts as a modern bridge between the two, tying the rustic and industrial elements together into a cohesive look.
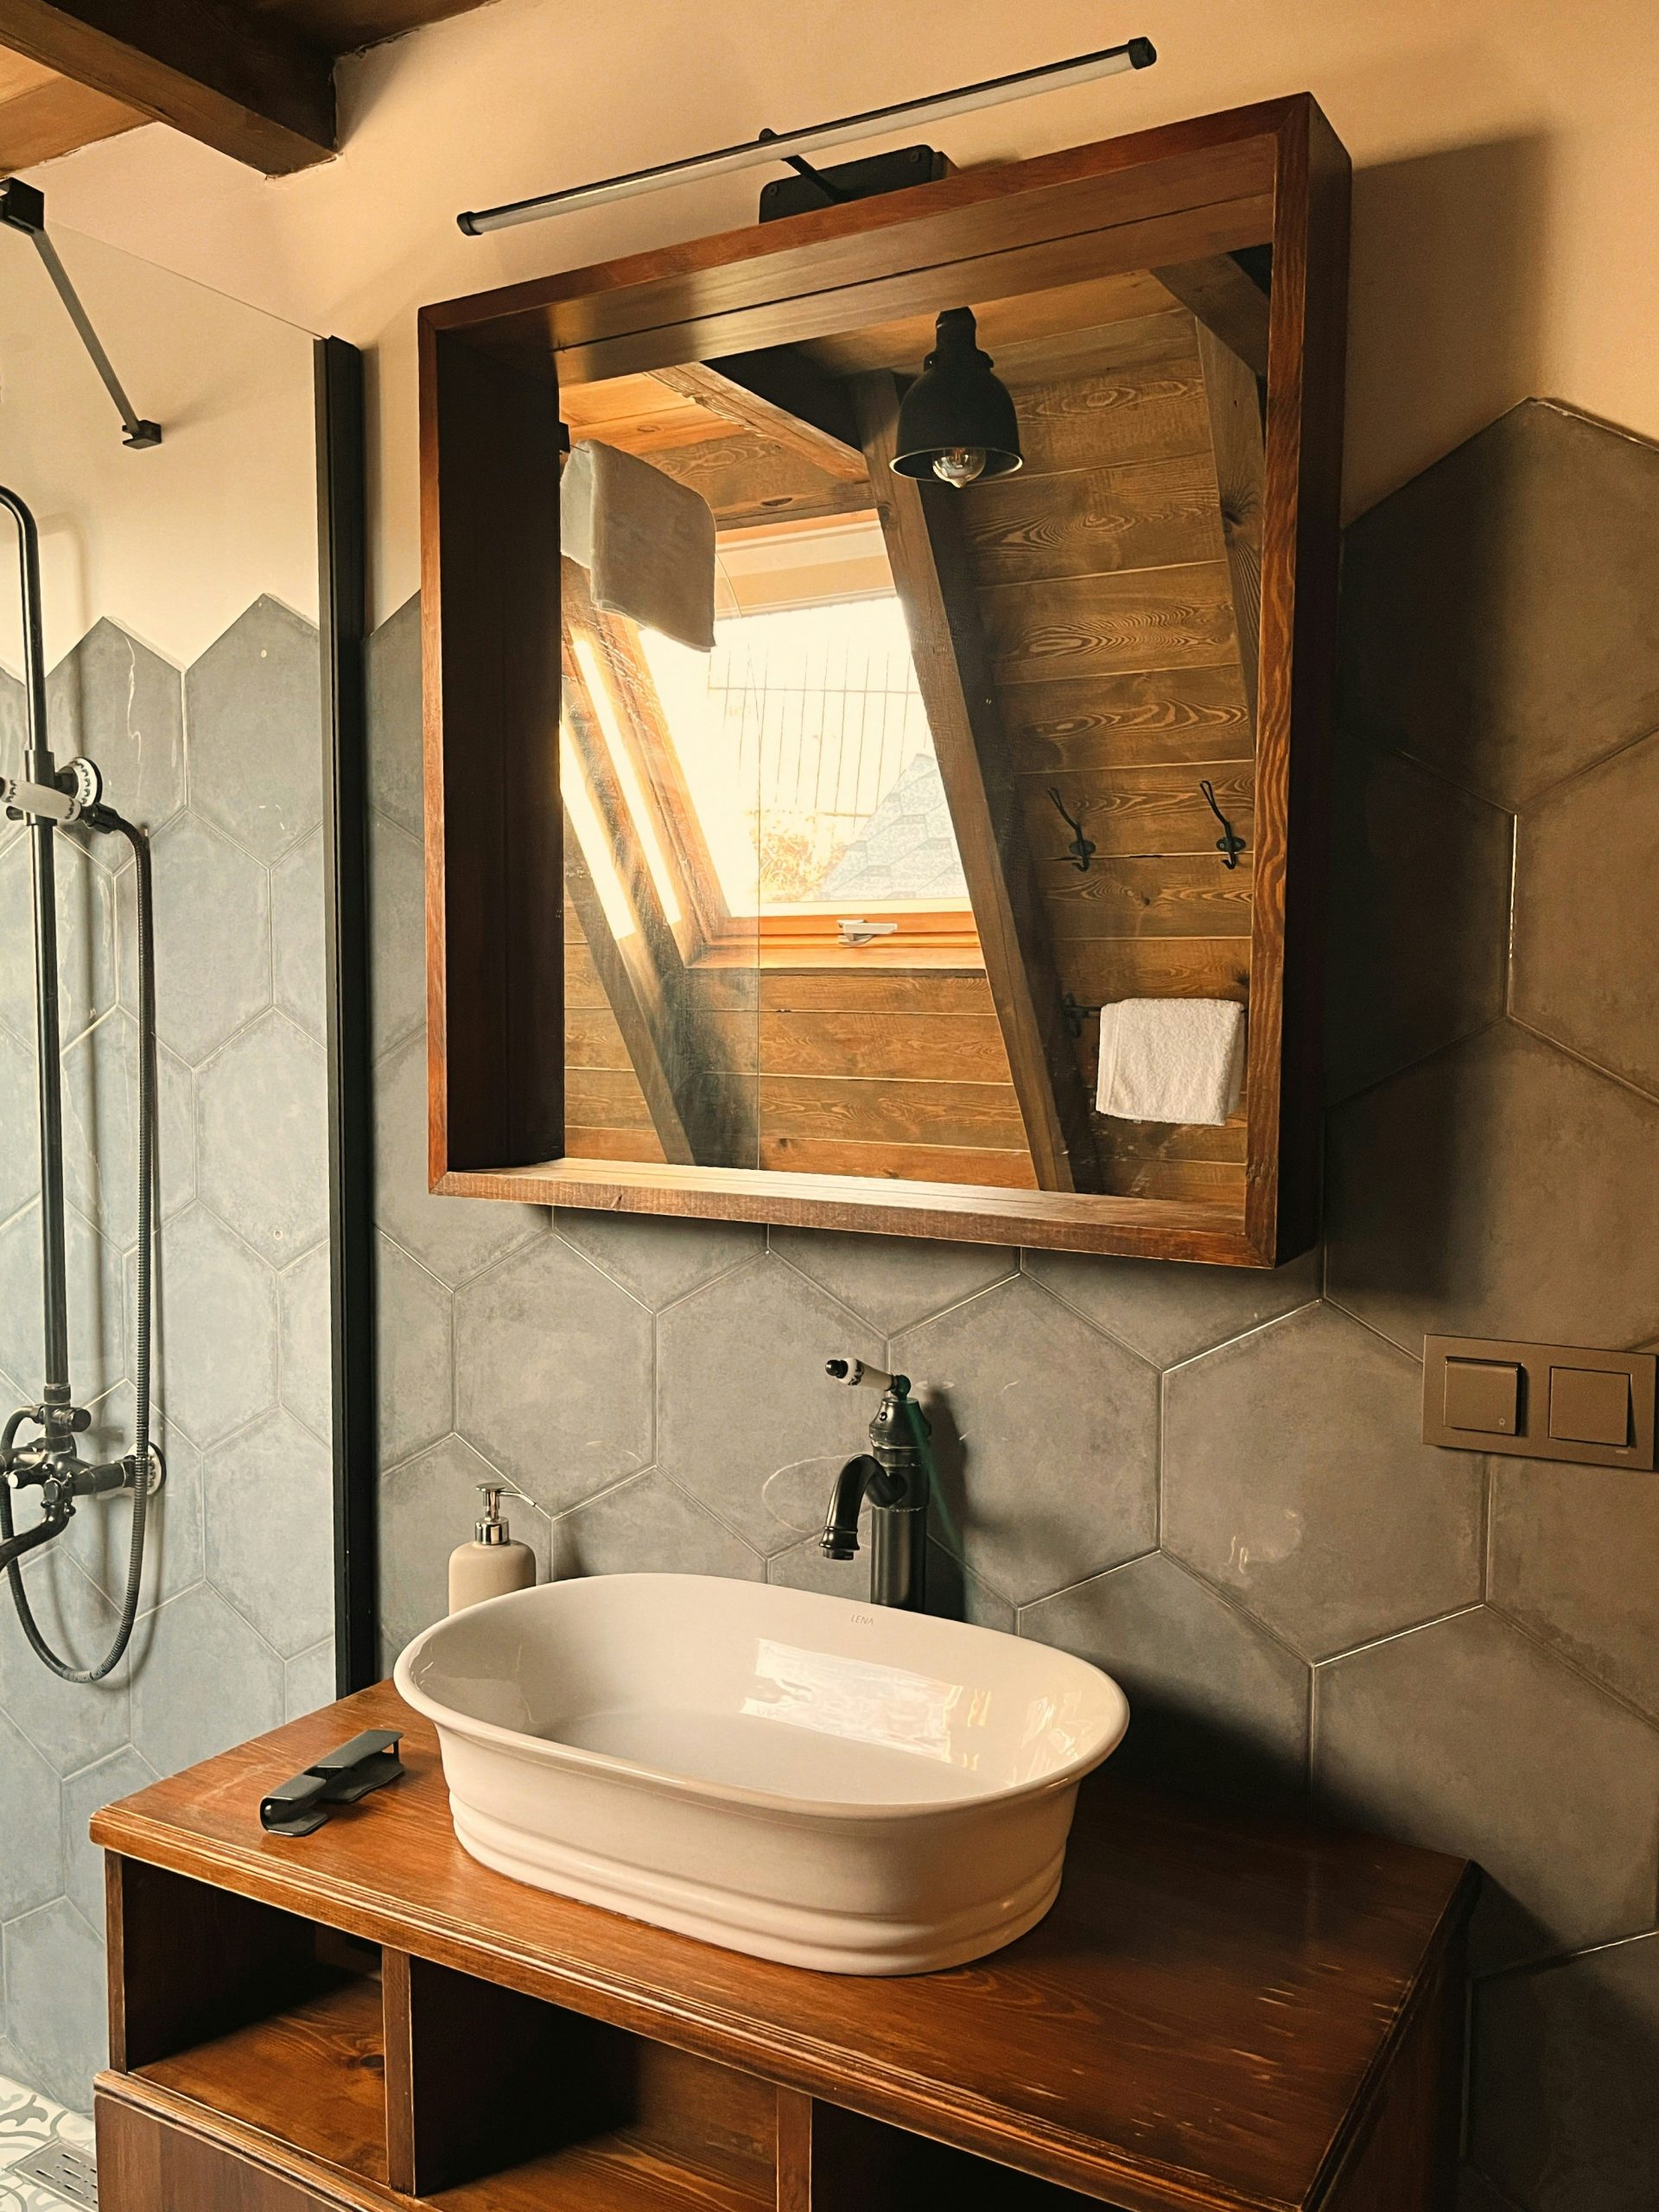
“When mixing materials like wood and tile, let one be the star.”
Here, the hexagonal tile is the main event. To ensure it shines, the vanity is a simple, clean-lined design. If you had a highly ornate vanity, it would compete with the tile and the whole look would feel chaotic. Pick your ‘wow’ moment—be it a patterned tile, a unique wood grain, or bold fixtures—and let the other elements play a supporting role. Simple, but it always works.
18. Go Lux with Wood-Wrapped Shower and Dark Tile
This is a high-end, custom look with a price tag to match. The key is the specialty material used in the shower—likely a waterproof laminate panel system with a photorealistic wood finish, not actual wood.
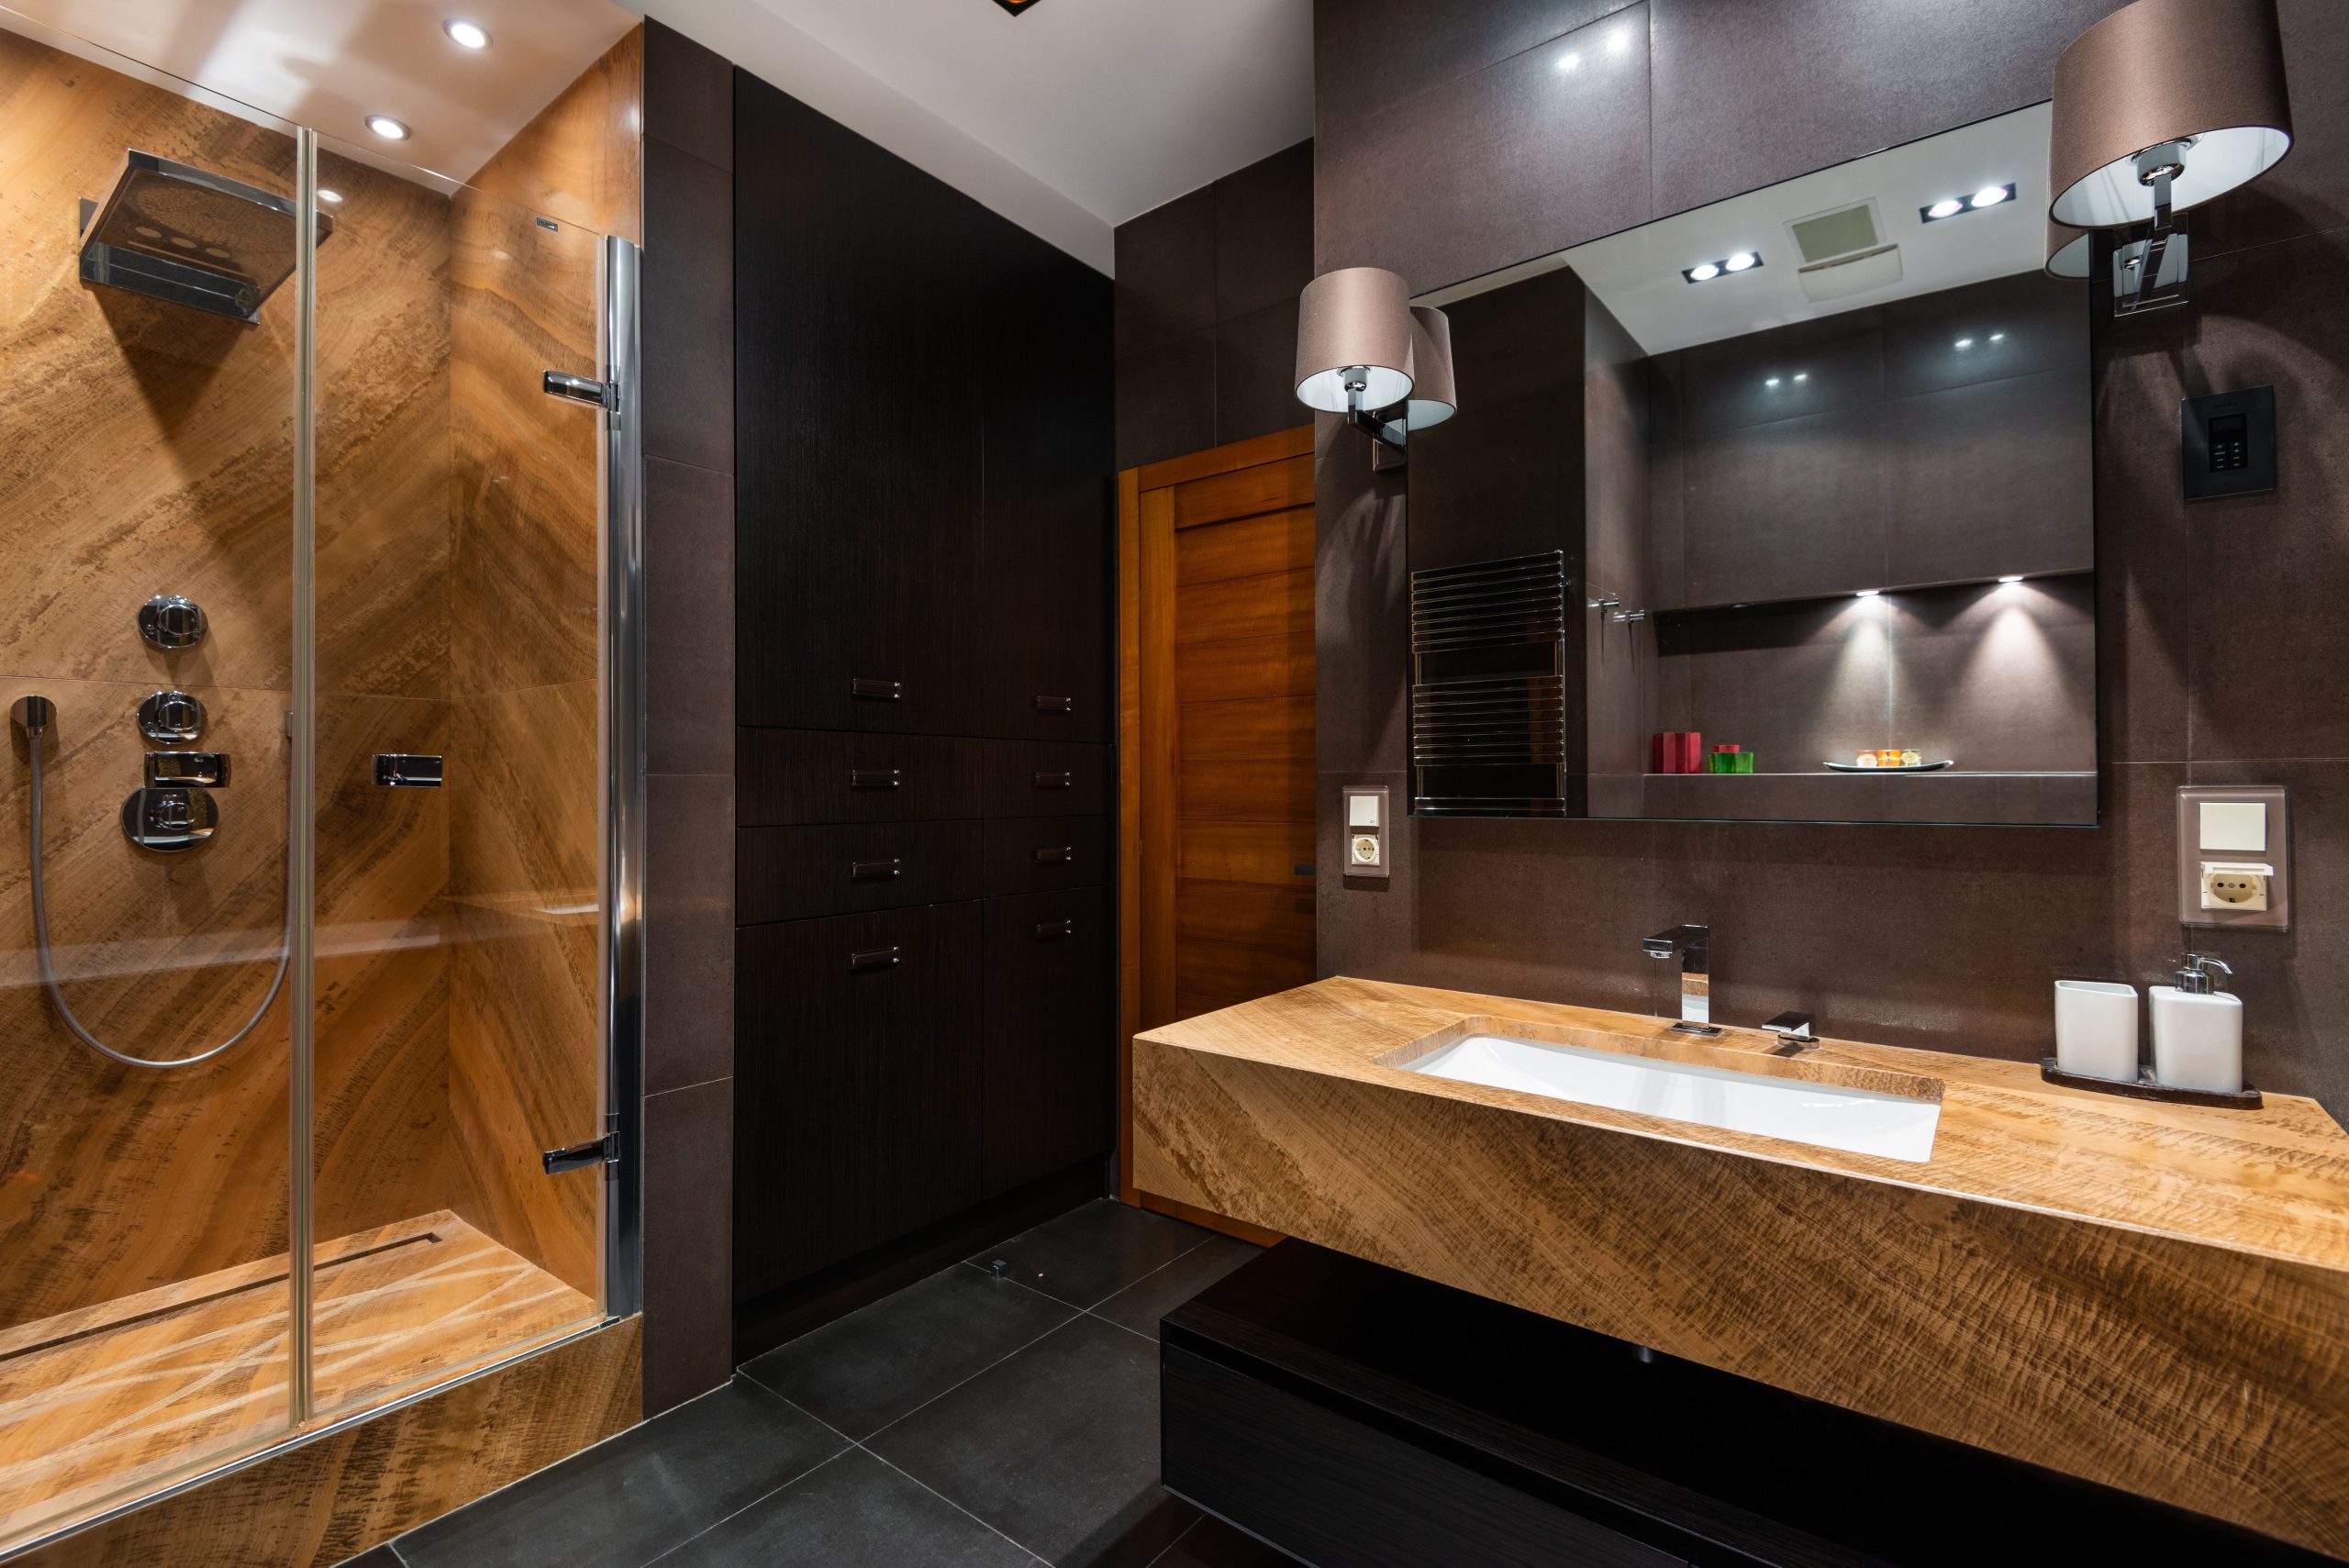
“Waterproof Shower Wall Panels (e.g., Fibo or similar): $1,000 – $2,500Custom Floating Vanity with Integrated Sink: $2,500 – $6,000+Large-Format Porcelain Wall Tiles: $15 – $30 per sq.”
ft.Tall Storage Cabinet: $1,200 – $3,000Large Backlit Mirror: $500 – $1,500TOTAL: $6,000 – $15,000+
Budget alternative: Get a similar vibe using wood-look porcelain tile in the shower and a standard vessel sink on a floating shelf from IKEA.
A vanity with an integrated sink and a seamless countertop is stunningly minimalist, but be aware of maintenance. Without a distinct sink lip, water tends to splash and sit on the flat counter space more easily. You’ll need to be diligent about wiping the counter down after each use to prevent water spots and mineral buildup, especially if you have hard water. The dark wall tiles will also show soap scum and water spots more readily than lighter tiles, requiring more frequent cleaning to look their best.
19. Add a Rustic Touch with a Simple Wooden Ladder Shelf
You don’t need to spend a lot to get this charming, rustic accent. You can build a similar ladder shelf yourself for about $20. All it takes is two 6-foot-long 1×3 pine boards and one 8-foot-long 1×4 pine board for the shelves. A few screws, a bit of wood stain (or leave it natural!), and an afternoon are all you need. It’s a fantastic beginner woodworking project. For styling, check out thrift stores for quirky pots and Target’s Bullseye Playground for inexpensive faux plants and decorative objects.
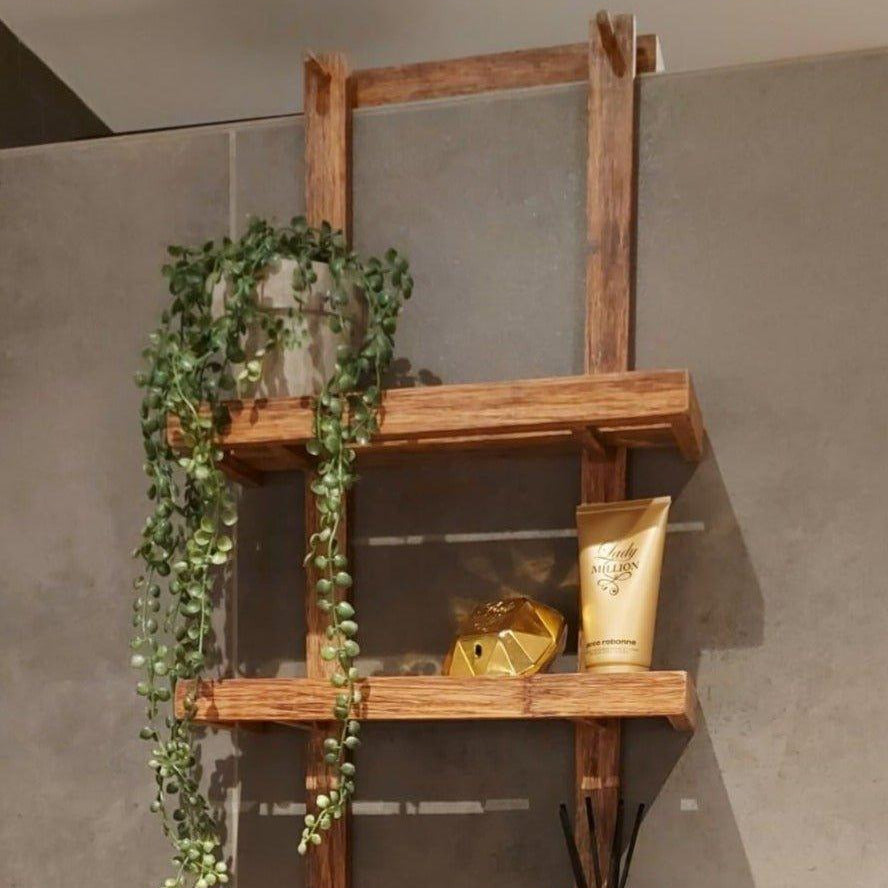
“How-To: Create a Rustic Finish on New Wood (Time: 1 hour.”
Cost: $15)
- Lightly sand your newly built ladder shelf to knock down any splinters.
- To create an aged look, ding up the wood a bit. Gently tap it with a hammer, press screws against it, or use a wire brush to add some texture. Focus on the edges.
- Brew a very strong cup of black tea and brush it all over the wood. Let it dry completely. The tannins in the tea will react with the next step.
- Create a solution of white vinegar and a piece of steel wool (let it sit for 24 hours). Brush this solution over the tea-stained wood.
- Watch as the wood almost instantly turns a weathered, grayish-brown. Finish with a clear matte wax or poly coat.
20. Maximize Storage with a Reclaimed Wood Vanity
This vanity is a masterclass in using every square inch of a compact space. It combines three types of storage into one small footprint: open shelving for attractive items like the woven baskets and folded towels, drawers for hiding away less sightly necessities, and a clear countertop for soap and daily-use items. The reclaimed wood provides immense character, making this highly functional piece also the primary decorative feature in the room. Compared to the no-storage option in Idea #11, this is a powerhouse of practicality.
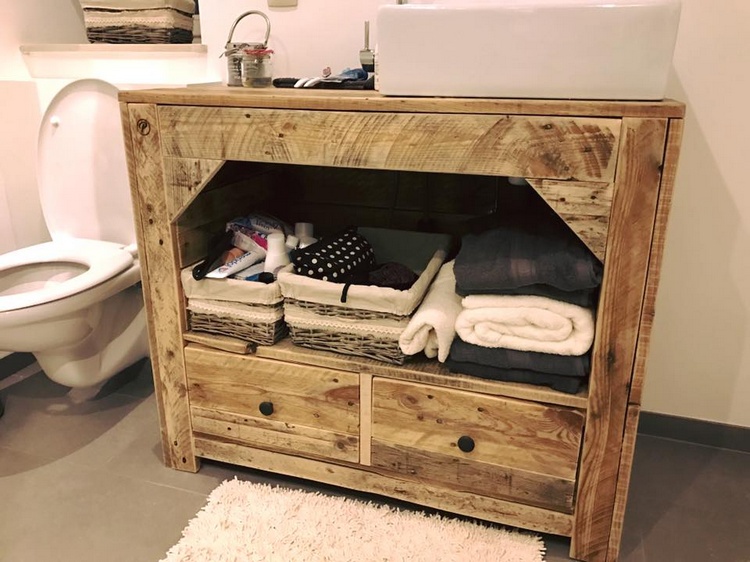
“A vanity like this is the perfect solution for a narrow bathroom, often found in older homes or apartments.”
This unit is likely no more than 18-20 inches deep, allowing for ample walkway space in a room that’s only 5 or 6 feet wide. The ideal width would be between 24 and 30 inches, leaving just enough room next to a standard toilet. A vessel sink, rather than an undermount, is a smart choice here as it requires less internal cabinet space, maximizing the room available for the drawers below.
21. Build a Log Cabin-Style Vanity with a Vessel Sink
The stacked log wall is the element that transports this bathroom from simply ‘rustic’ to a full-blown ‘log cabin’ experience. The vanity itself is nice, but placing it against that wall of round, natural log ends creates an immersive, deeply textured backdrop that’s impossible to ignore. It’s a bold architectural choice that defines the entire character of the room, celebrating the raw, unrefined beauty of wood in its most natural form.
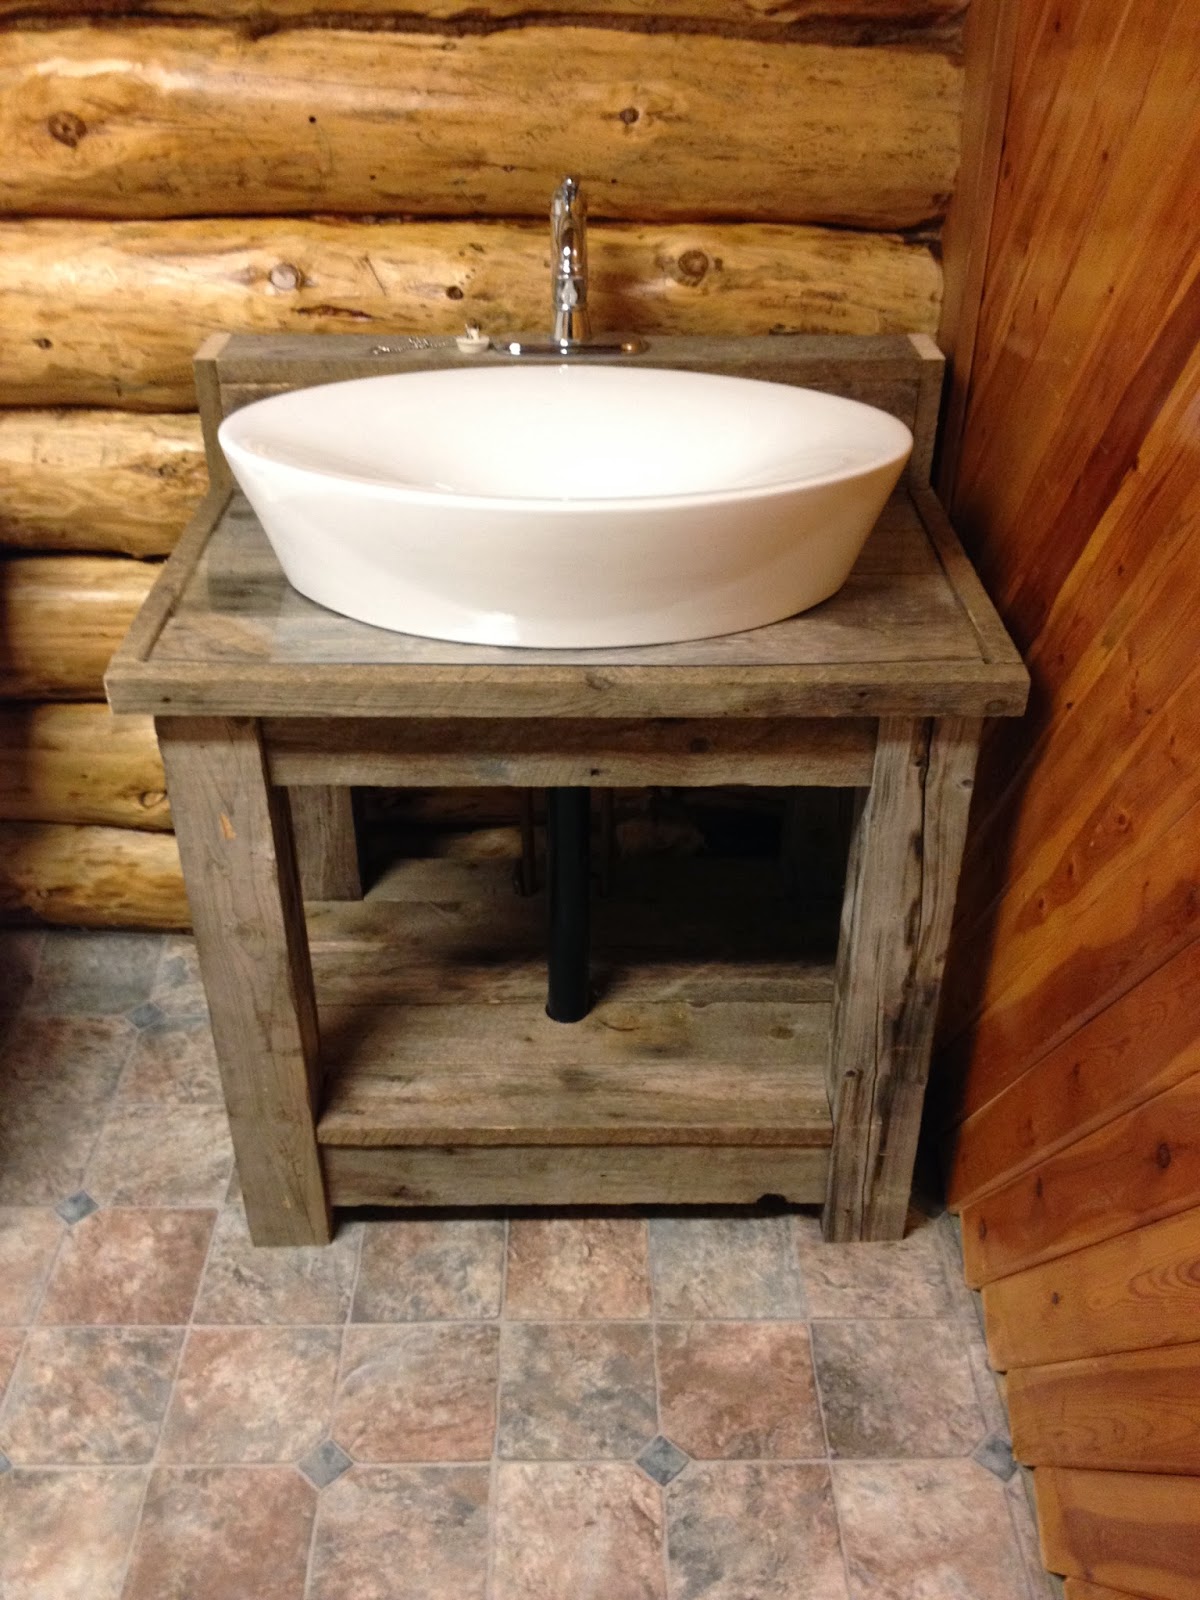
“While a stacked log wall is a stunning feature, it’s a dust and cobweb magnet.”
Those nooks and crannies are difficult to clean. You’ll need to regularly vacuum it with a brush attachment. More importantly, in a bathroom, you must ensure the logs are thoroughly dried and sealed with a penetrating, mold-resistant sealer *before* installation. Trapped moisture within or behind the logs can create a serious mold problem that you won’t see until it’s too late.
22. Look Up: A Distressed White-Washed Wood Ceiling
This ceiling treatment is the design anchor for the entire space. By carrying the same heavily distressed, white-washed wood from the ceiling down onto the tub surround, the design creates a powerful sense of cohesion and intention. It visually links the top of the room to the bottom, making the space feel thoughtfully designed. The dark wood vanities and warm taupe walls provide a quiet, elegant backdrop that allows the textured white wood to be the star of the show.
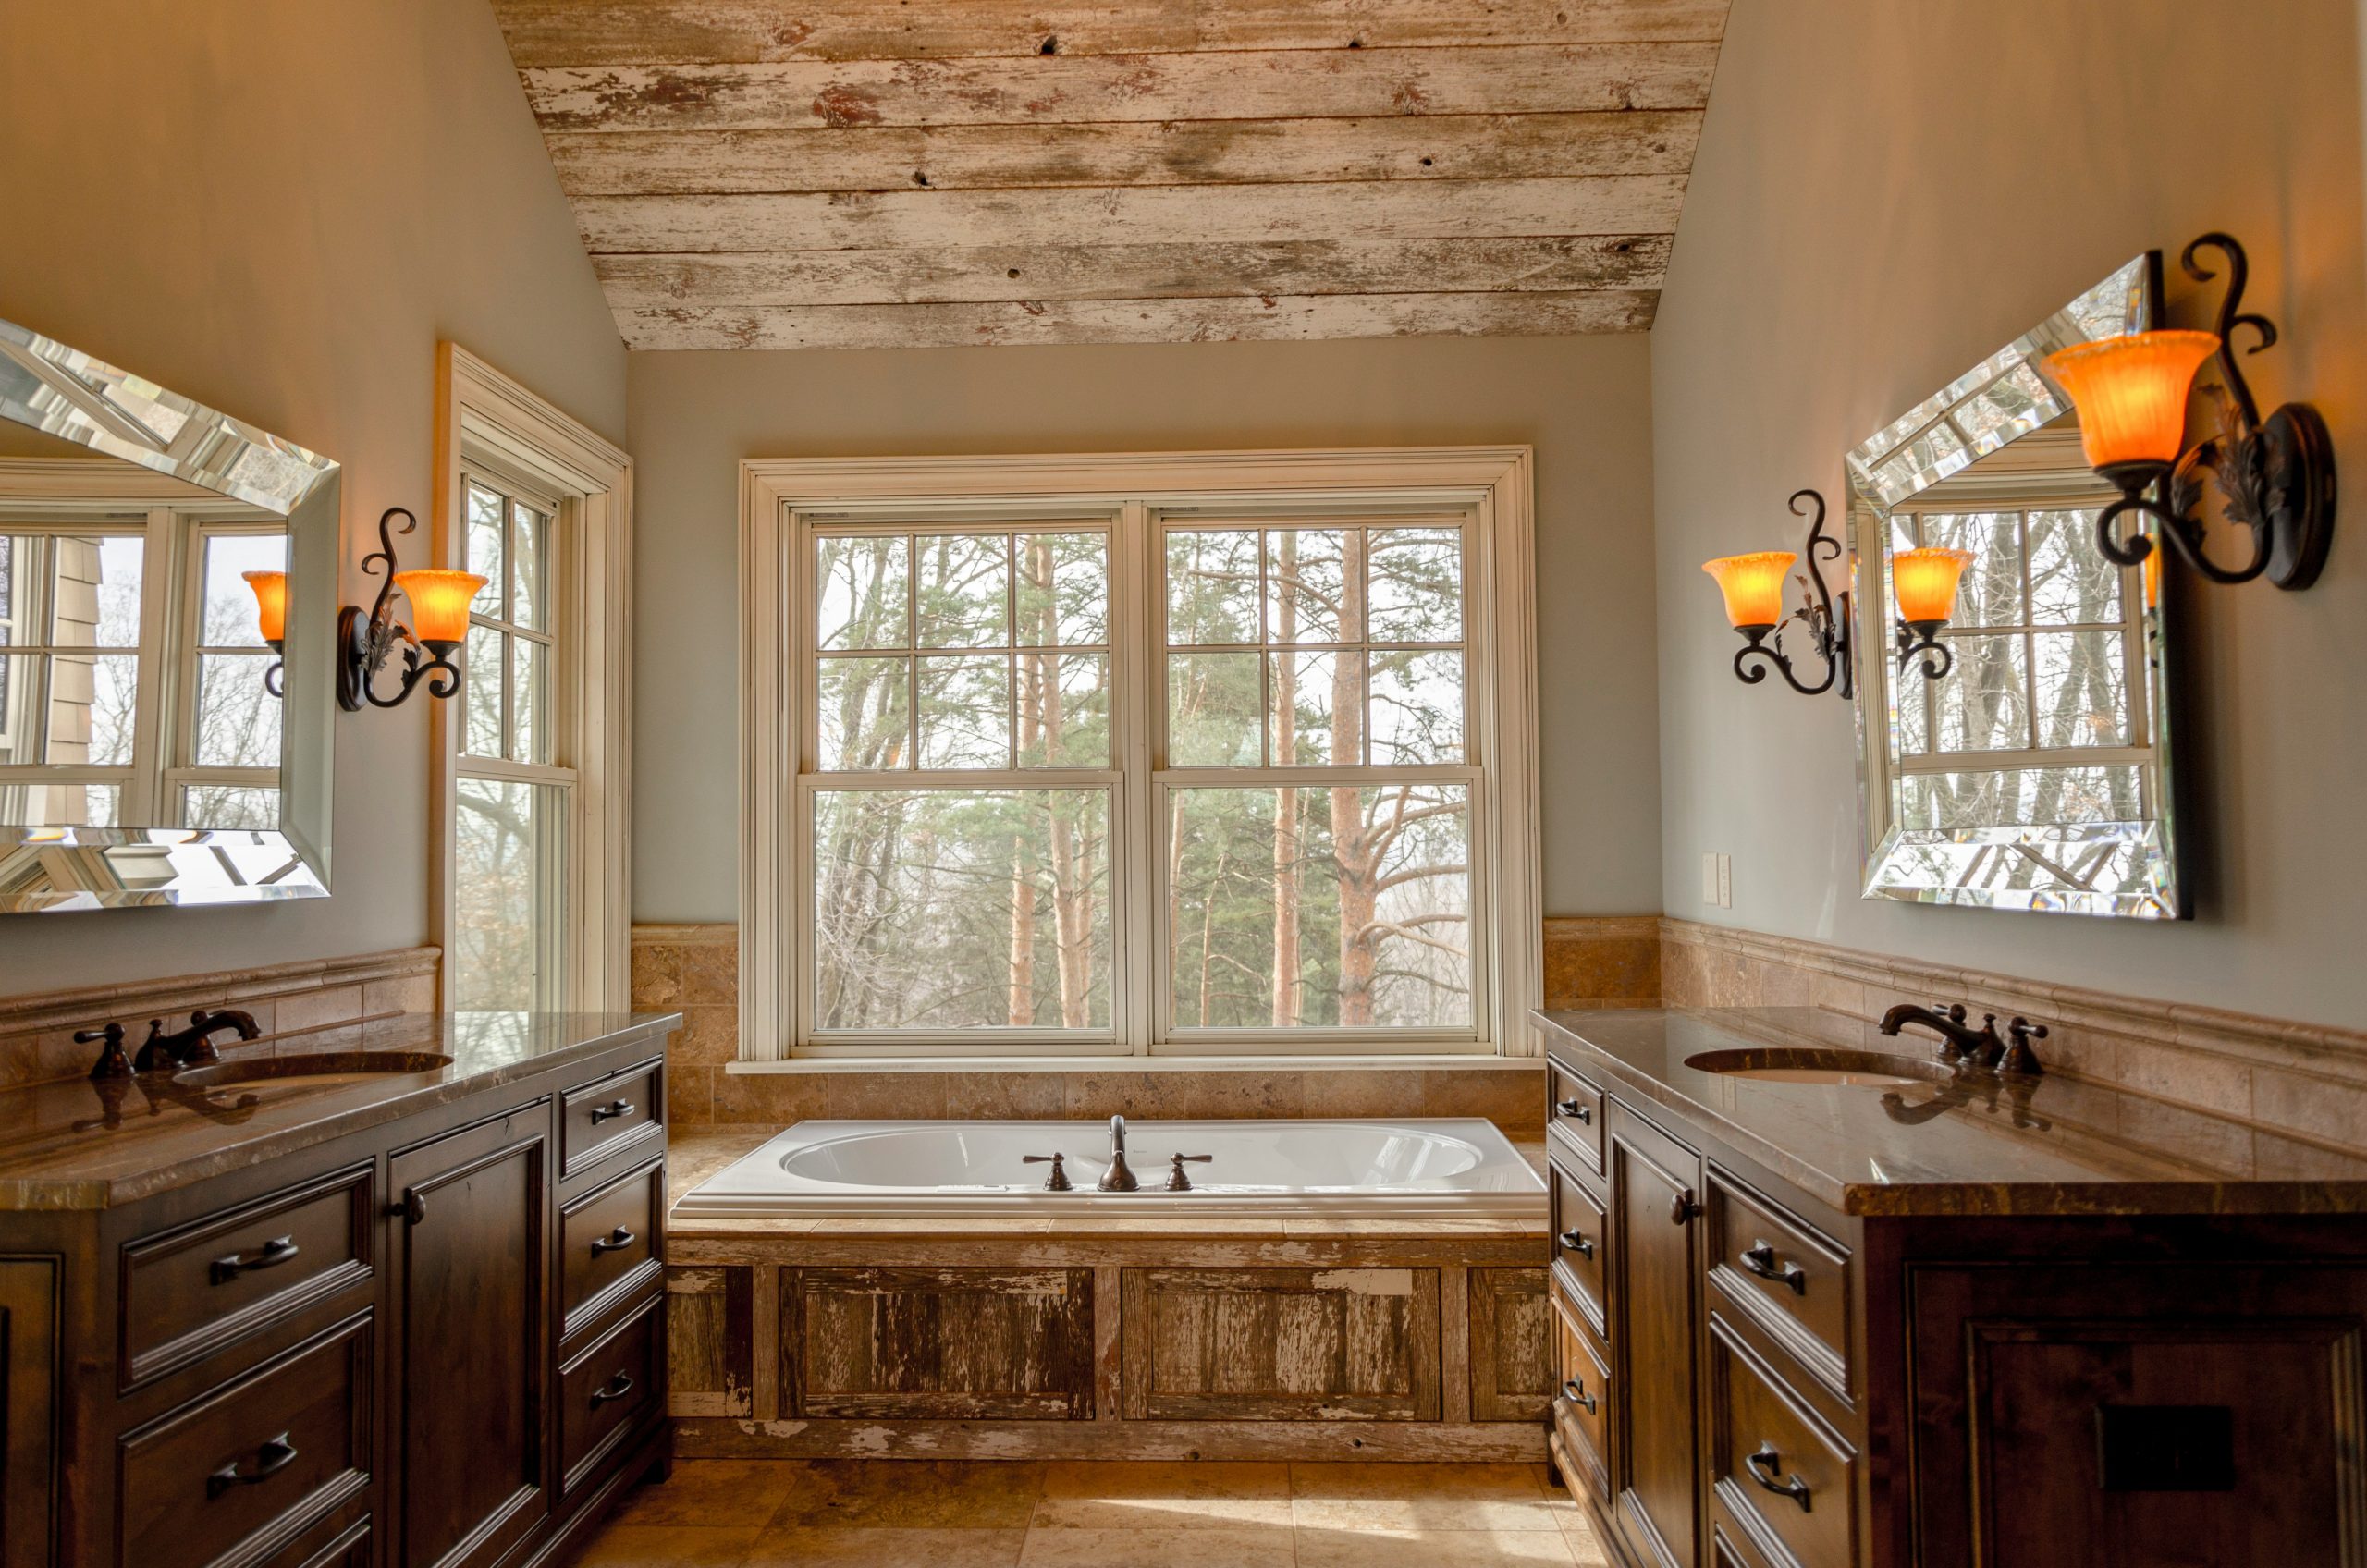
“To get this authentic, heavily distressed look, you can’t be timid.”
After painting your wood planks white, go at them with a variety of tools. Use a palm sander with 80-grit paper to remove paint on the edges and high points. Use a paint scraper to peel off sections of paint. You can even use a chain or a bag of screws to create dents and dings for a more rustic texture. The key is to make the distressing look random and naturally occurring, not uniform.
23. Go Moody with Dark Wood Paneling and a Marble Accent Wall
The recipe for this moody, elegant space is a play on darks and lights. It’s about 50% dark, textured surfaces (the wood paneling and marble) + 30% light, smooth surfaces (the floating vanity and sink) + 20% soft, ambient light (the illuminated mirror and candles). The key is the lighting; without the large, bright mirror, the dark walls could feel oppressive. The light bounces off the vanity and foliage, creating depth and preventing the room from feeling like a cave.
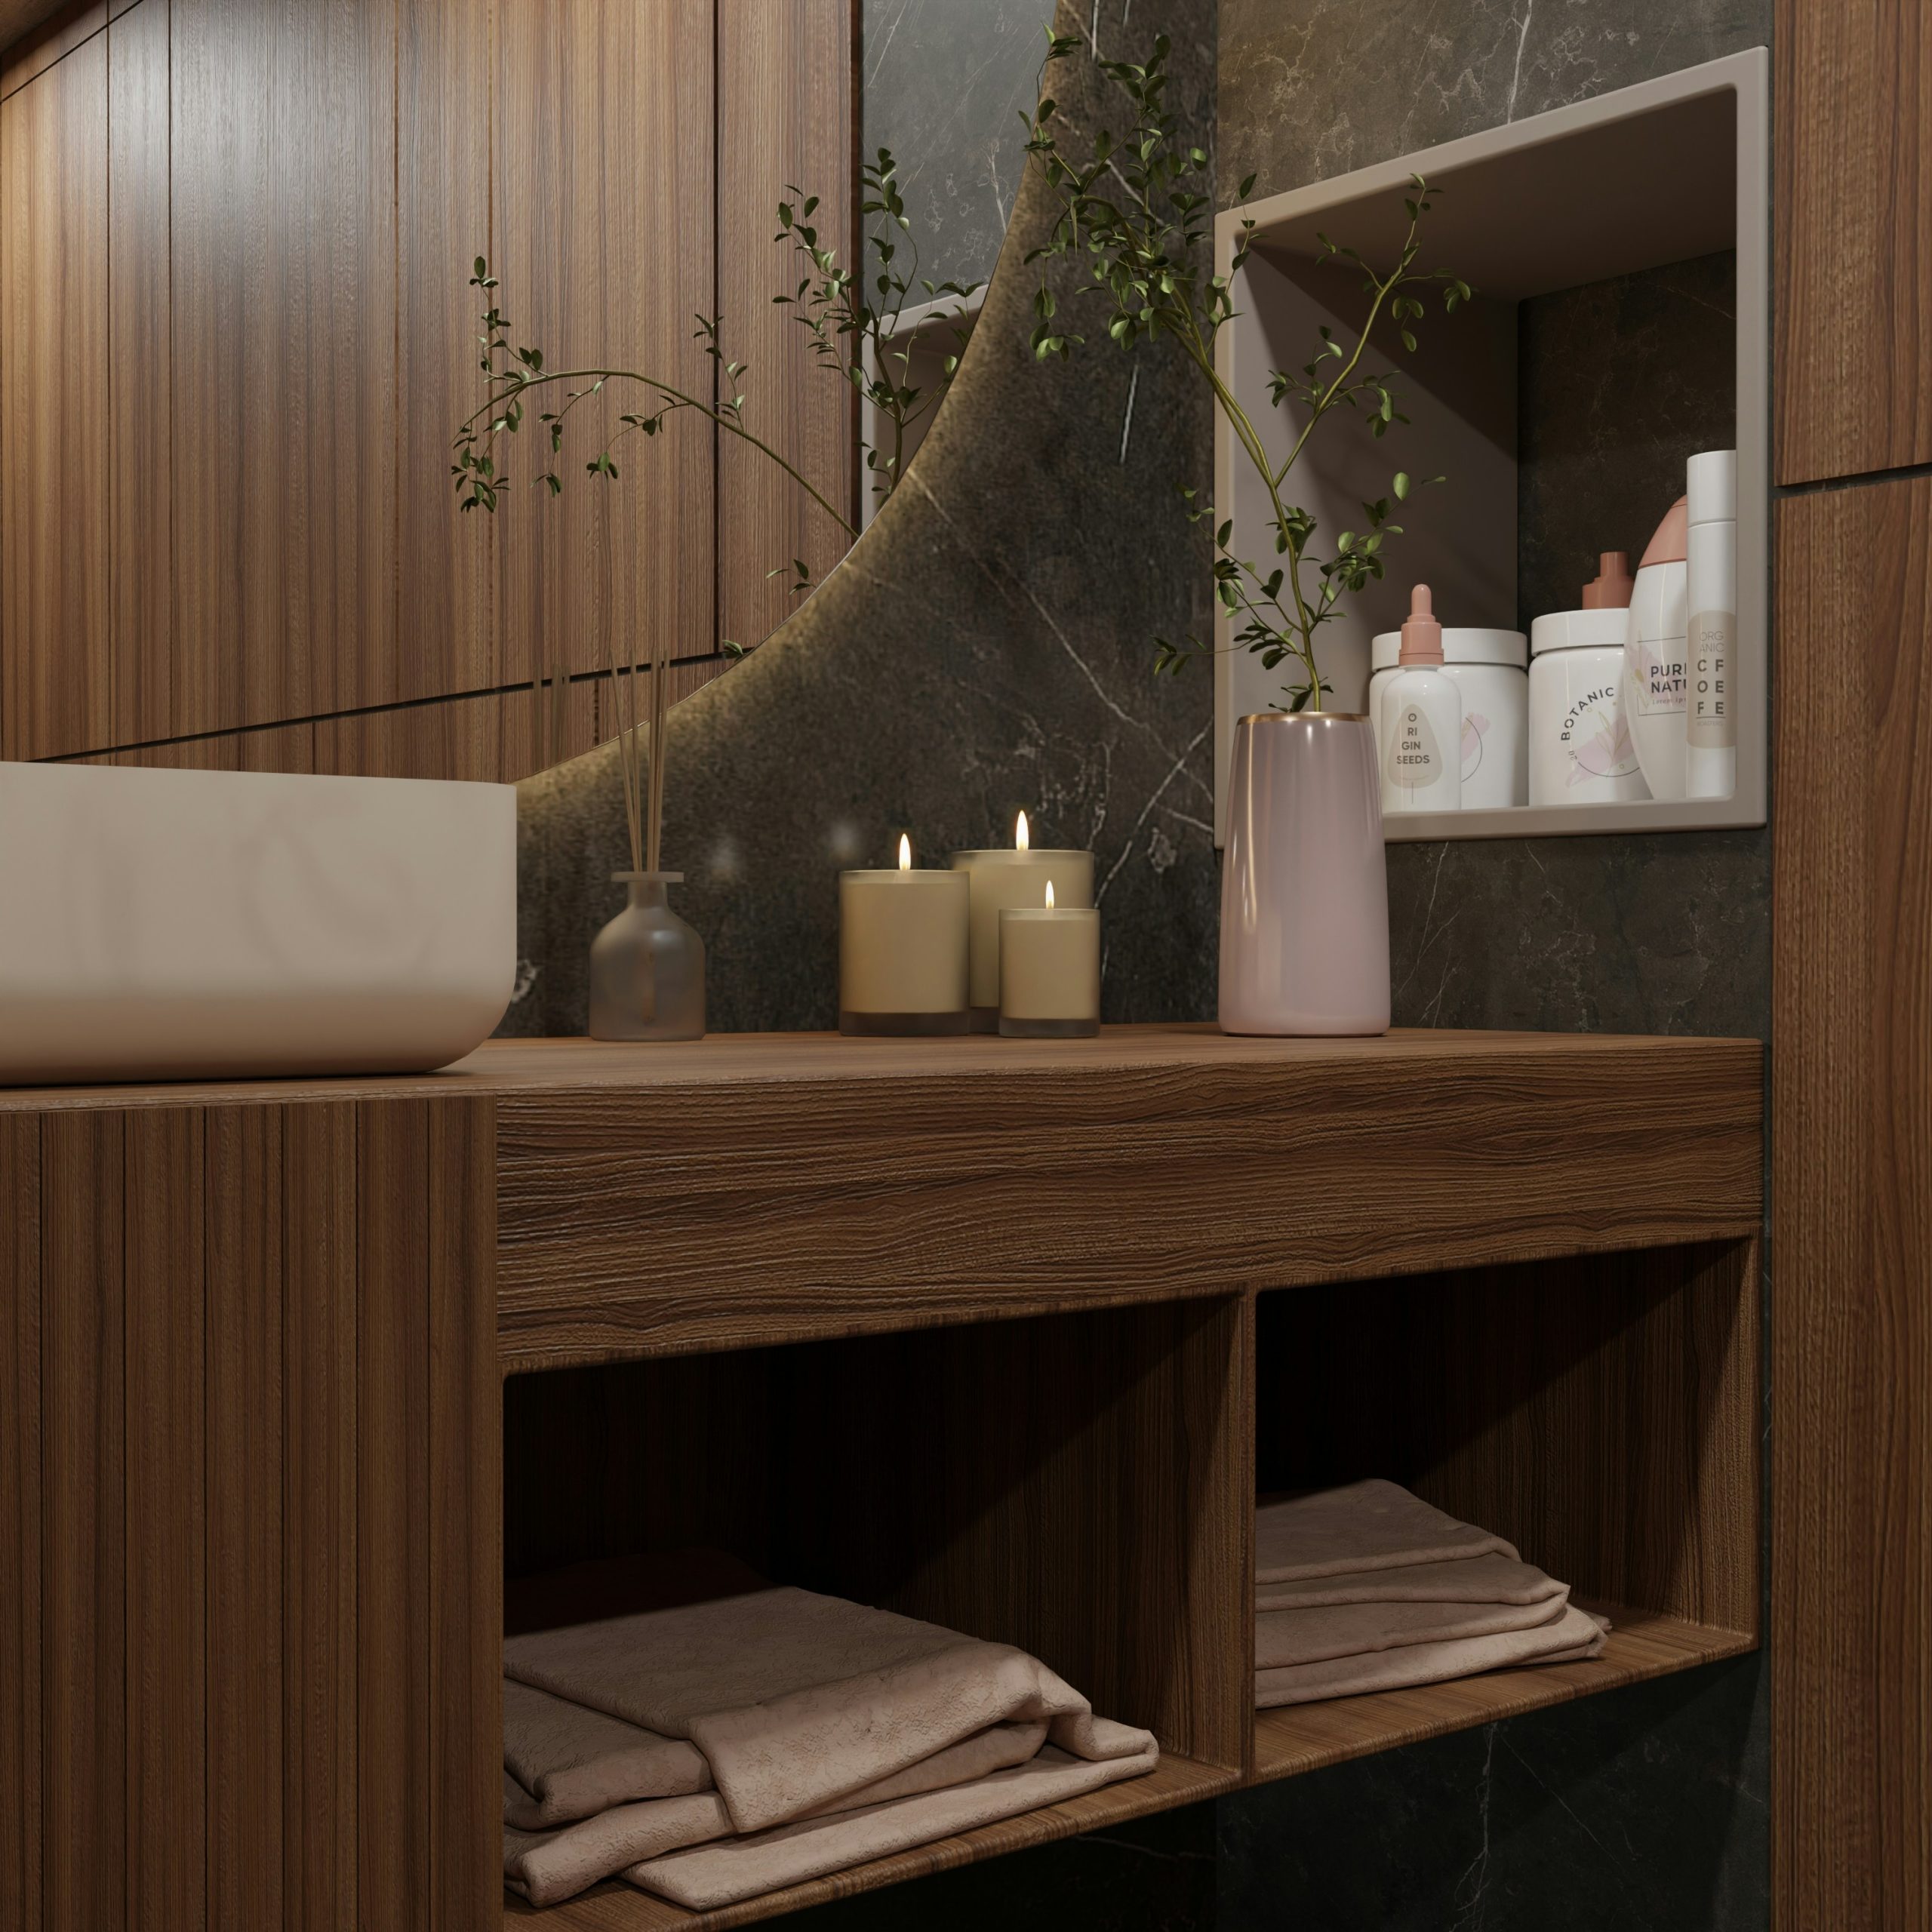
“Does this room have a large window that gets significant natural light?”
If not, you will need to invest heavily in layered artificial lighting.A single overhead fixture will not be enough. You’ll need ambient light (like the backlit mirror), task light (over the sink), and maybe even accent light (like a small lamp).Consider putting all lights on dimmers to control the mood throughout the day. Without proper lighting, your ‘moody’ bathroom will just be ‘dark’.
24. Tame Clutter with Rustic Over-Toilet Wood Shelves
Let’s talk about styling versus reality. This shelf looks charming and casual, but if your bathroom is used by kids, those neatly arranged items will last about five minutes. Towels will be pulled out, and the little decorative toys will end up in the toilet. For a family bathroom, consider using this kind of shelf for less-accessed items and use bins or baskets on the shelves to contain smaller things. It keeps the rustic look but adds a dose of much-needed practicality.
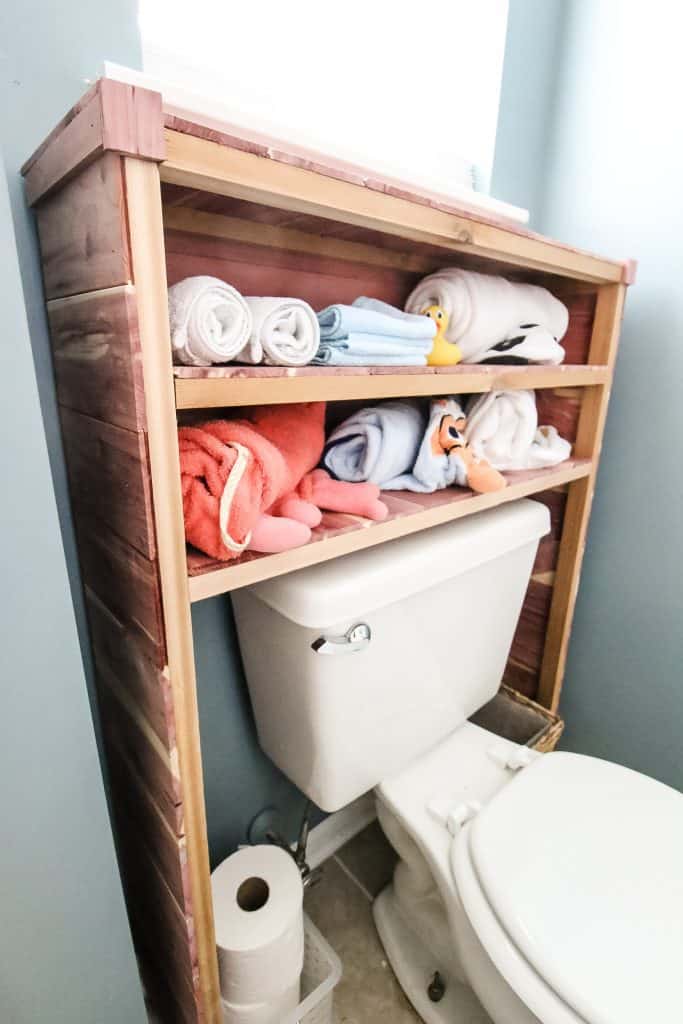
“What truly makes this simple project successful is the use of slatted side panels.”
Without them, it would just be basic planks on brackets. The slatted sides give the unit a finished, furniture-like quality. They add visual interest and structure, making it feel more like a purposeful piece of cabinetry rather than just some shelves screwed to the wall. It’s a small detail that makes a huge difference in elevating the final look from purely functional to intentionally designed.
25. Build a Simple Three-Tier Corner Shelf Unit
How-To: Building a Sturdy Corner Shelf (Time: 90 mins. Cost: $30)
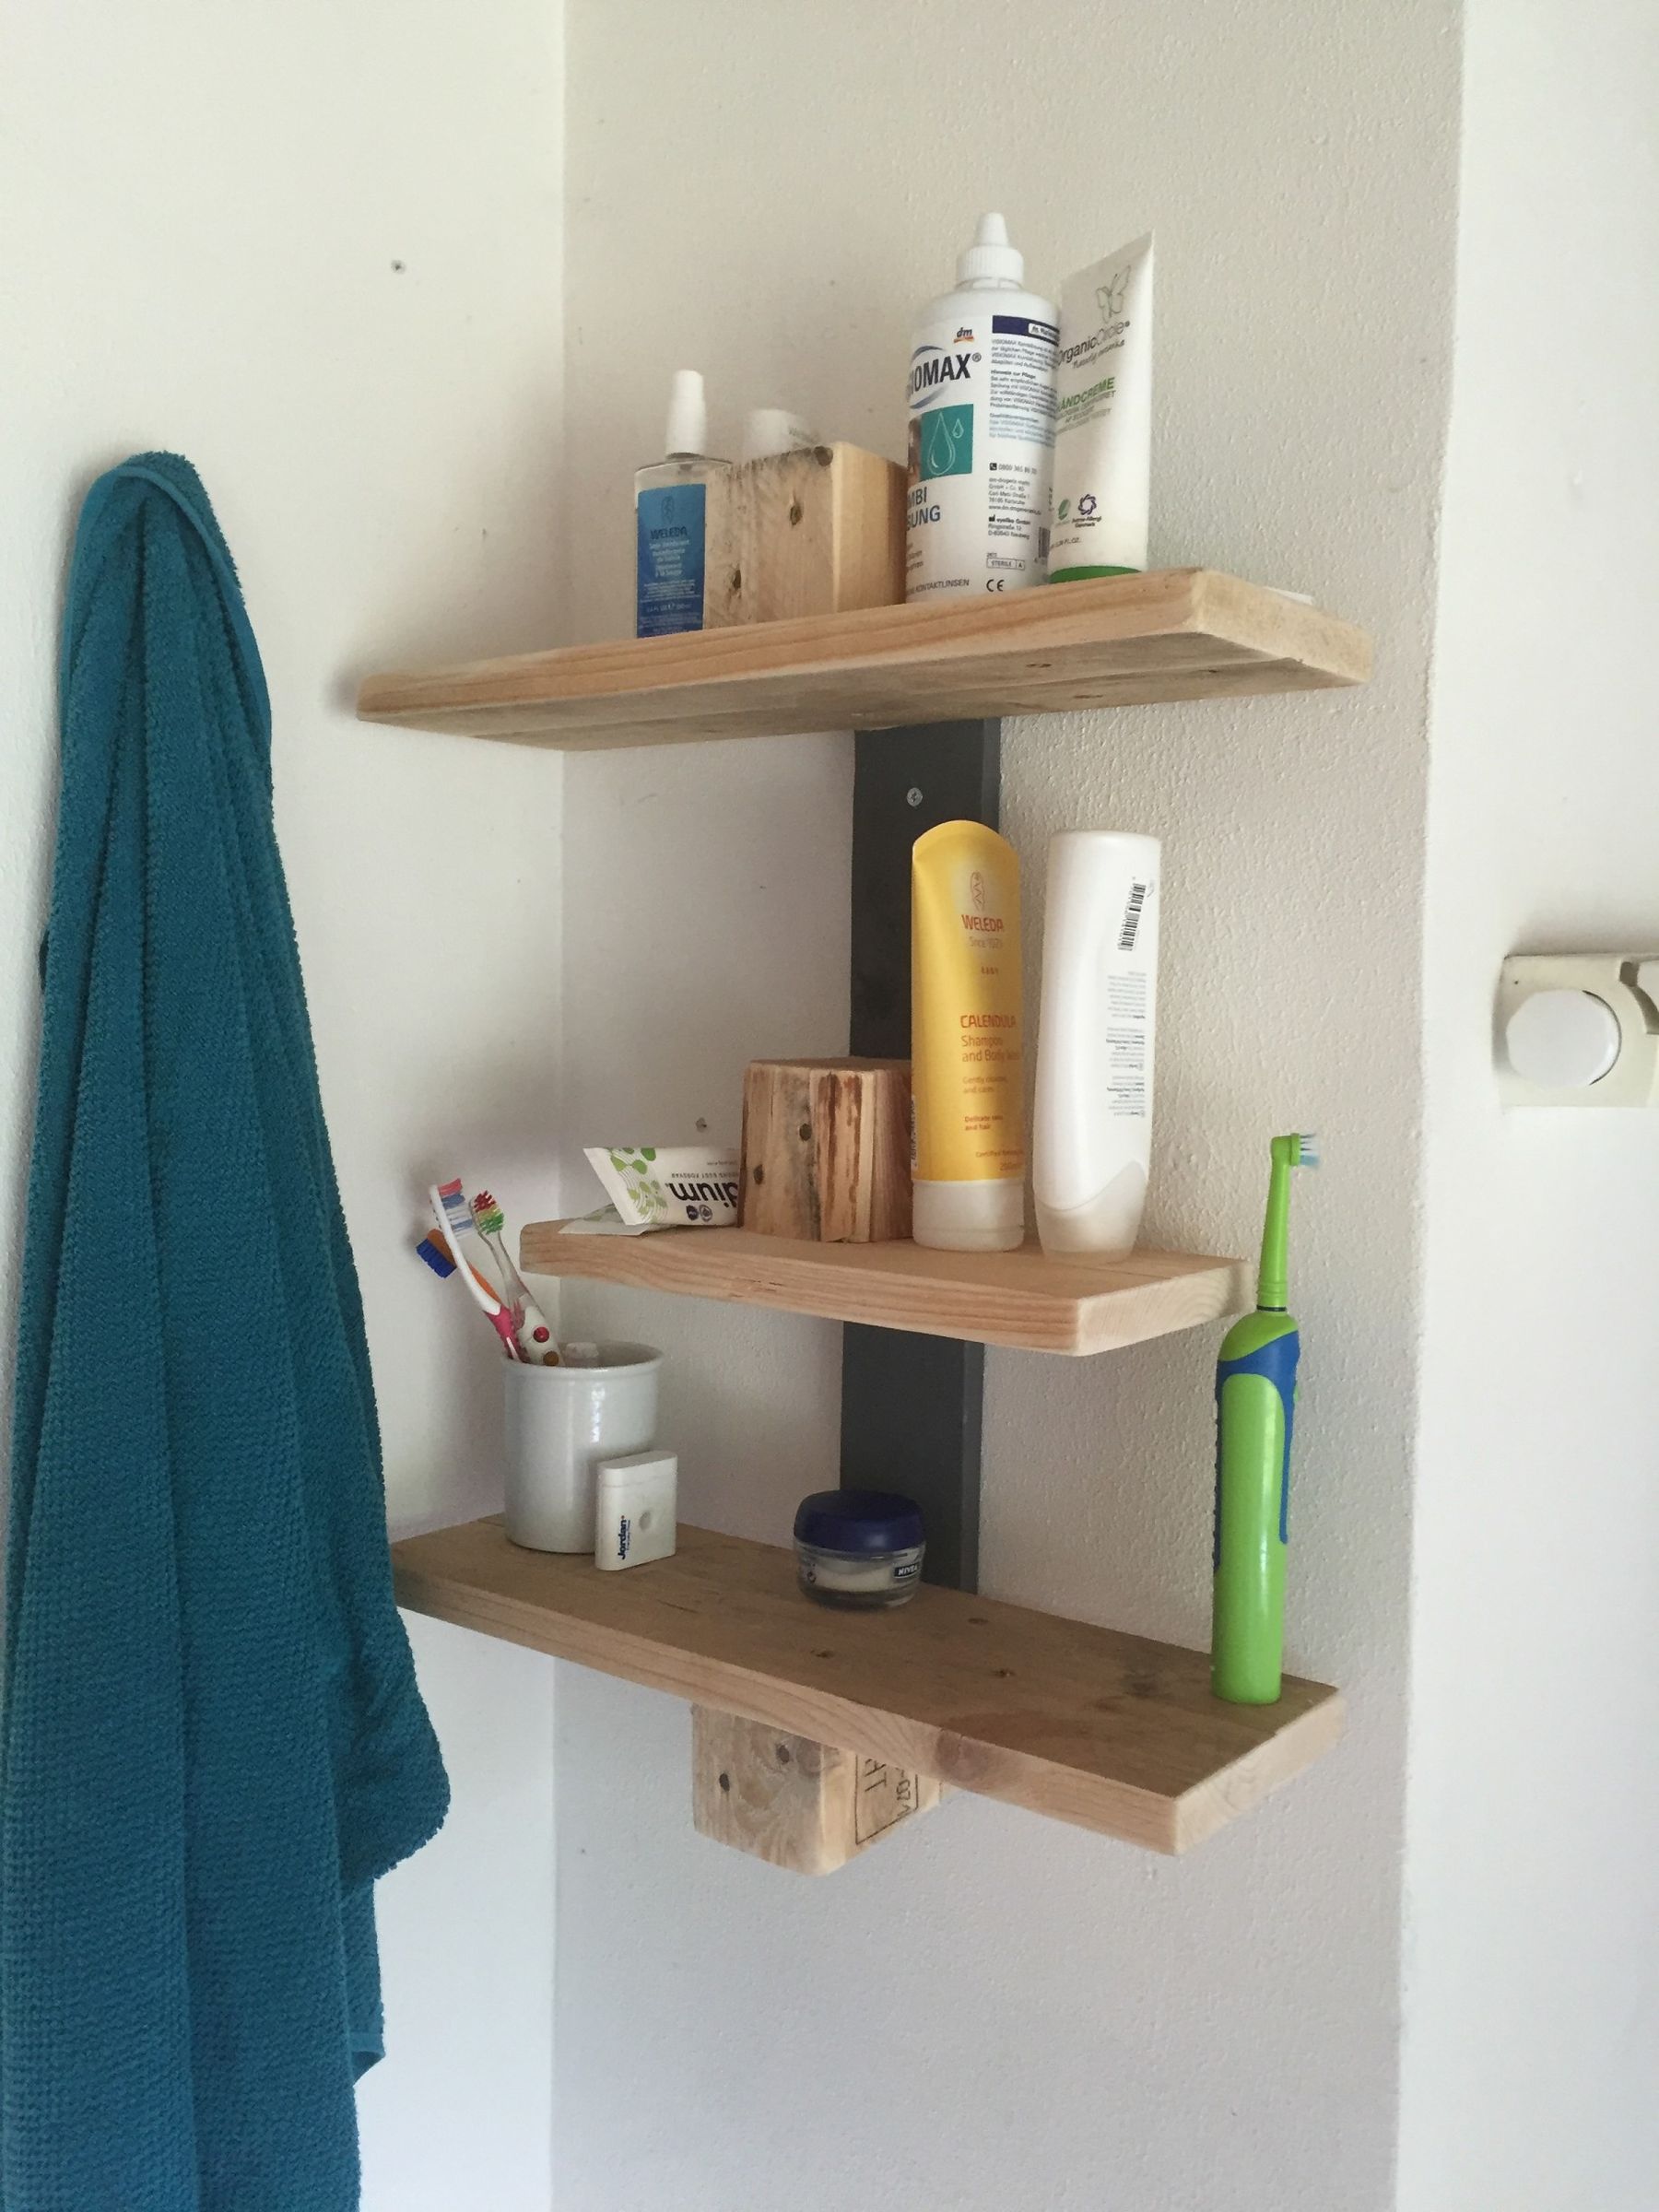
“Cut your three pallet planks to your desired length.”
Sand them smooth.Cut your main vertical support strip (the dark piece) from a 1×3 board. It should be tall enough to accommodate your shelf spacing.Cut your chunky wooden support blocks. Make sure they are all the exact same size for level shelves.Mount the main vertical support strip to the wall, making sure it’s perfectly plumb (straight) and hitting a stud.Glue and screw the support blocks to the vertical strip at your desired heights.Rest a shelf on a block, level it, and screw it into the wall stud on the other side. Repeat for all shelves.
This is a perfect example of a project where spending less actually gets you a better result. You could buy a plastic or cheap MDF corner shelf for $25-$40, but it will look flimsy and won’t have this rustic character. By using leftover pallet wood or a single $10 pine board from a hardware store, you can create a solid wood, custom-fit shelf that looks far more expensive than it is. The ‘perfectly imperfect’ nature of the pallet wood is what gives it charm that manufactured shelves lack.
26. Create a Cozy Vibe with Dark Wood Wainscoting
This room’s dramatic effect comes from a commitment to texture and a very specific formula: 80% dark, rustic wood + 20% crisp, graphic pattern. The wood paneling, running in different directions, covers most of the visual real estate, creating a cozy, enclosing feeling. The white and black hexagonal floor tile acts as a bright, sharp counterpoint, preventing the dark wood from feeling too heavy. The vintage-style sign adds a small pop of color and personality.
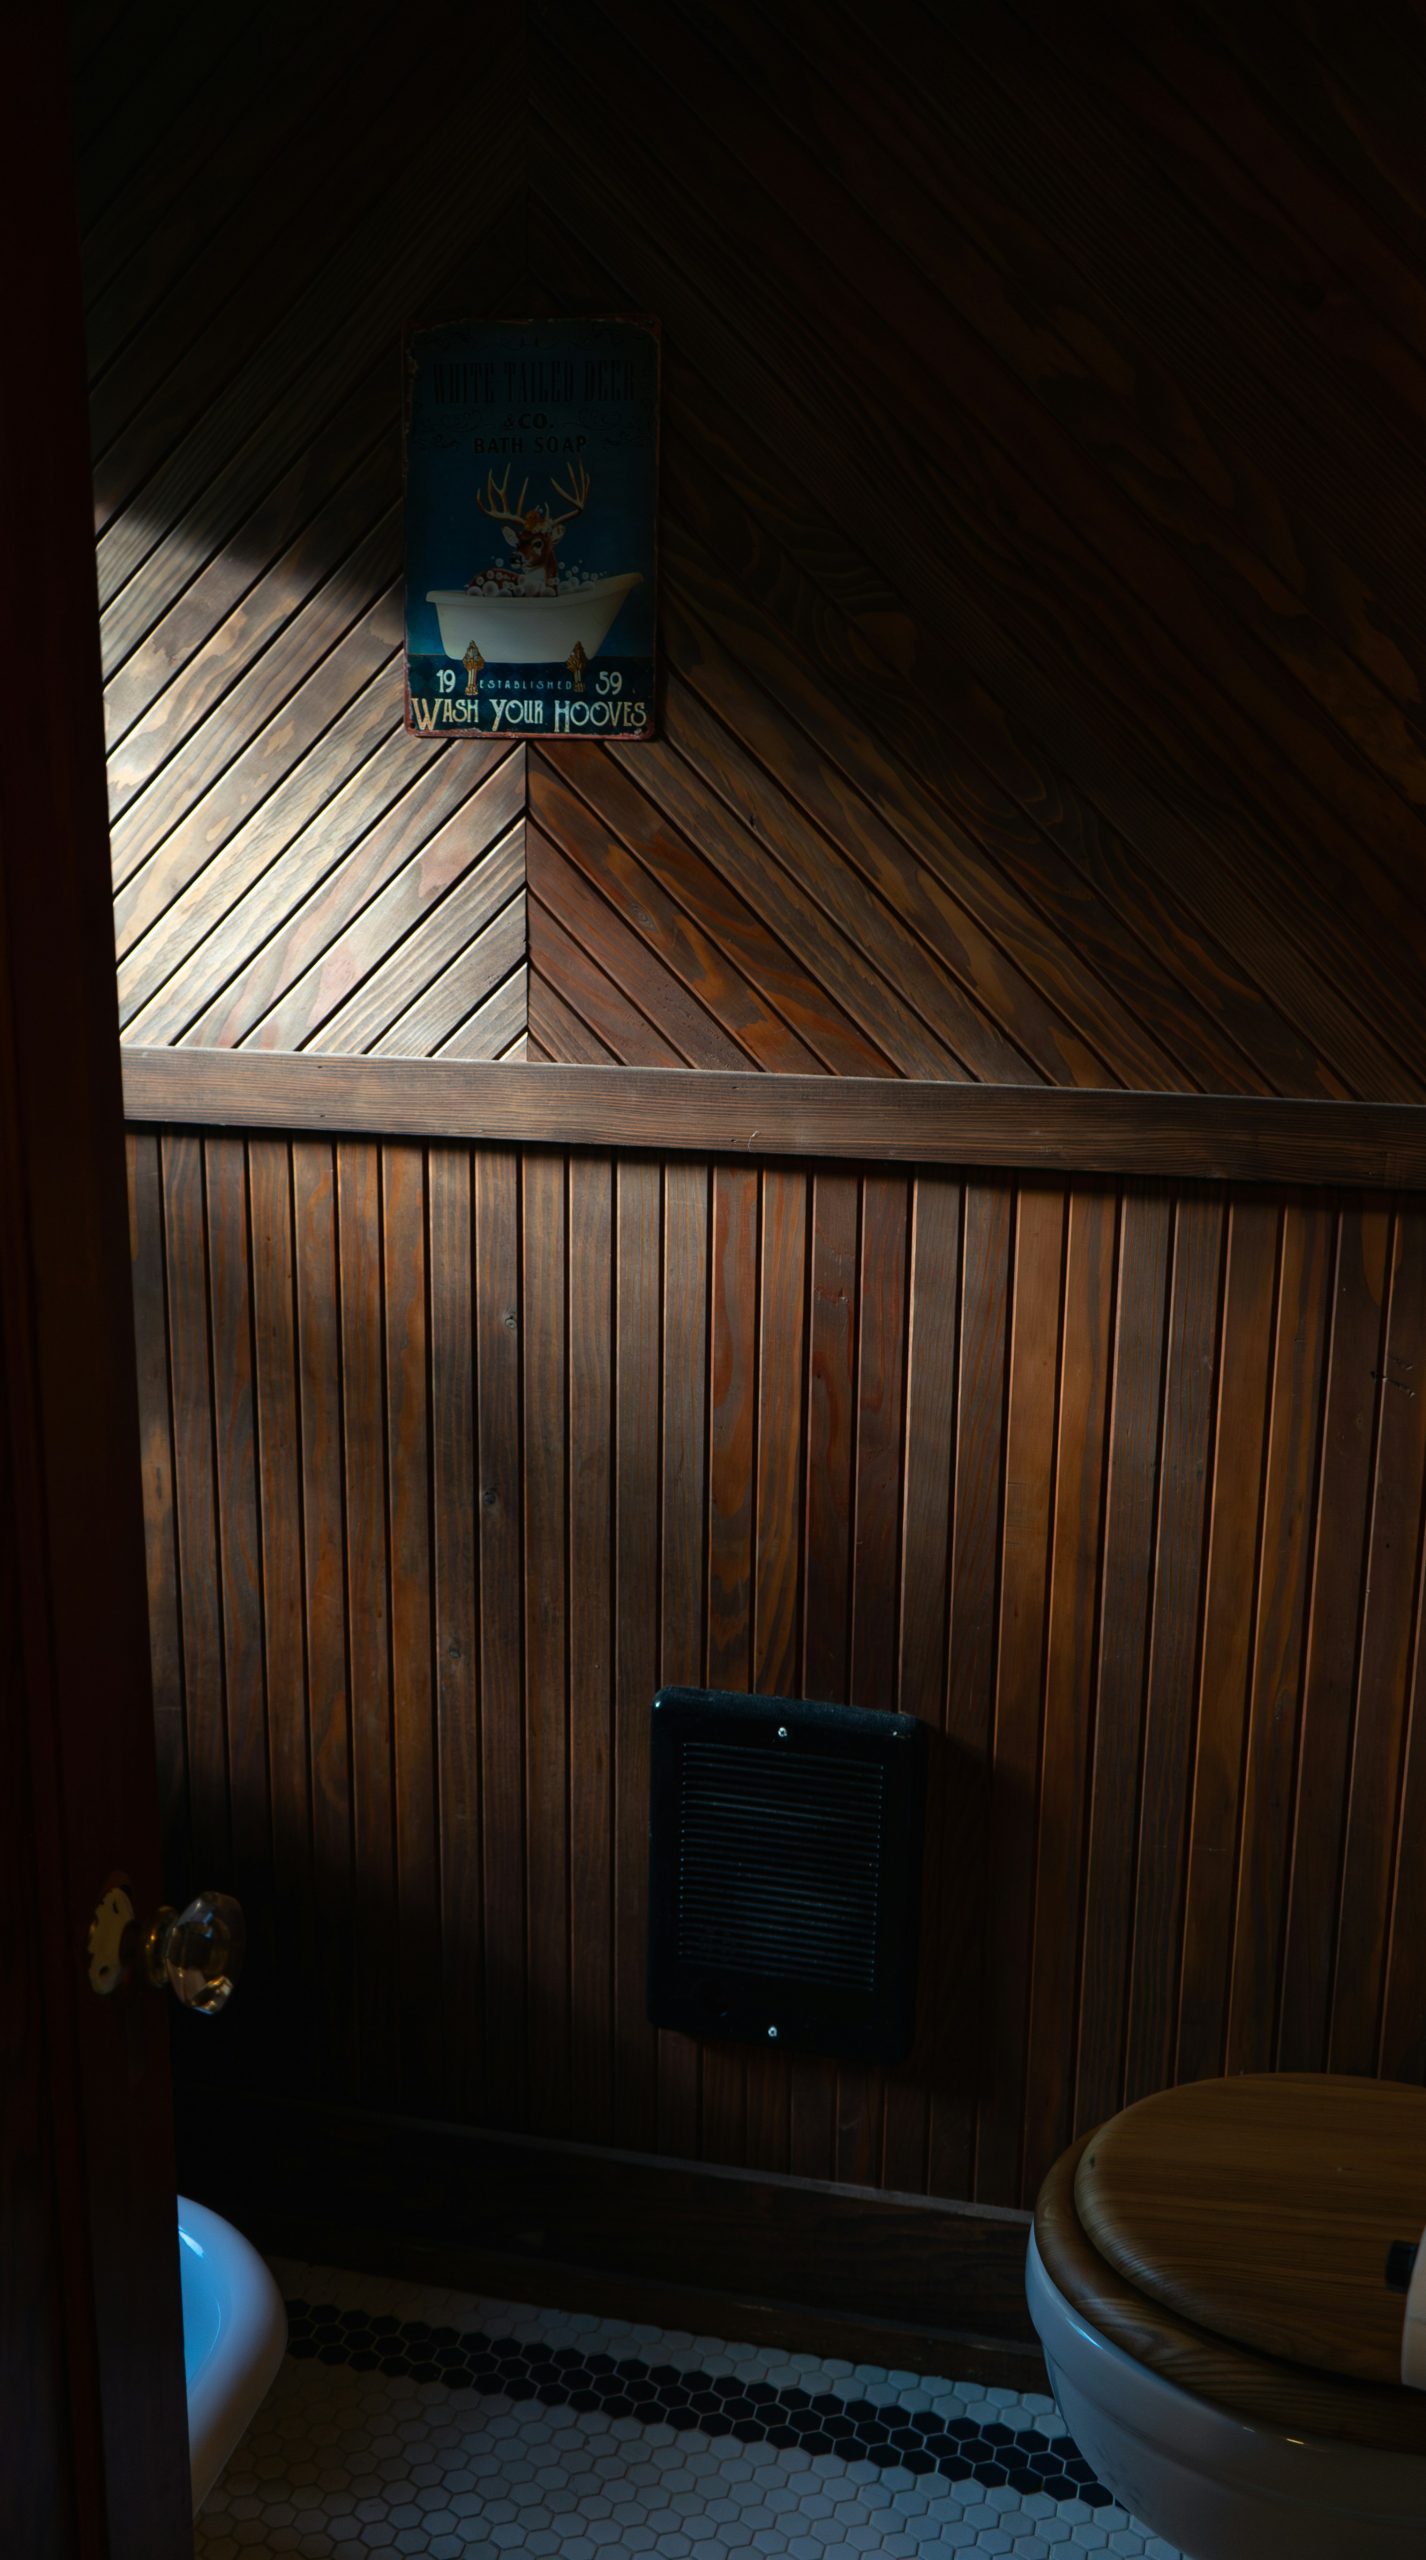
“There’s a growing trend called ‘dark academia’ and ‘gothic cabin’ on Pinterest and TikTok, and this bathroom hits all the right notes.”
It’s a move away from the all-white-everything farmhouse look that was popular for years. Homeowners are embracing darker, moodier spaces that feel cozy, historic, and a little mysterious. This isn’t about being gloomy; it’s about creating a rich, layered environment that feels like a warm hug. Expect to see more dark wood and vintage touches in 2026.
27. Pair a Distressed Wood Vanity with a Copper Sink
This combination of materials is a home run because they all share the same warm, earthy undertones. The medium brown of the distressed wood, the rich reddish-brown of the hammered copper sink, and the beige and brown speckles in the granite all belong to the same color family. This creates a harmonious, cohesive look that’s incredibly pleasing to the eye. The dark bronze faucet continues this theme, making the entire vanity feel like one unified, beautifully crafted piece.
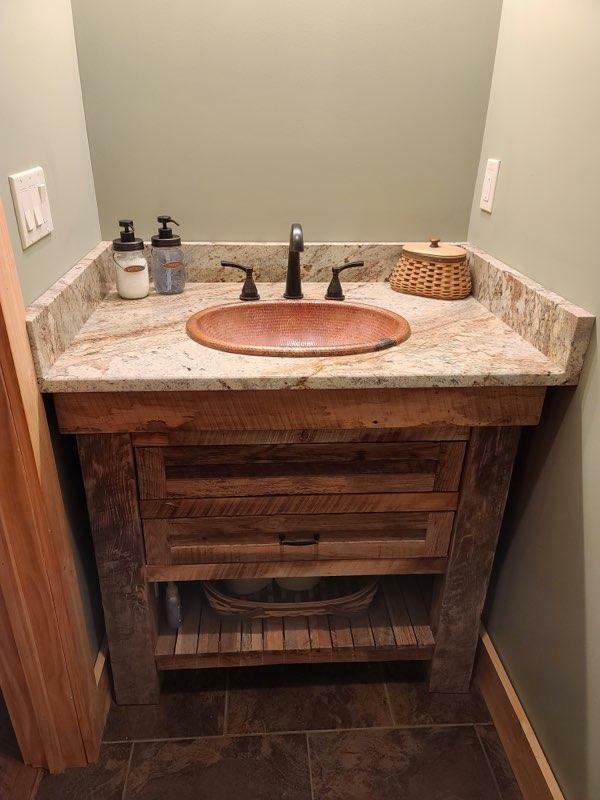
“A hammered copper sink is stunning, but it’s a ‘living finish’.”
It will change over time, developing a unique patina of darker and lighter areas. Acidic substances like lemon juice or certain toothpastes can strip the patina, leaving bright, shiny spots. Some people love this evolving character; others do not. To maintain an even color, you’ll need to periodically clean it with a copper-specific cleaner and apply a protective wax. It’s more like caring for fine furniture than a standard ceramic sink.
28. Mix Pale Wood Plank Walls and Stone-Look Tiles
When combining two strong but different wall finishes like wood planks and large-format tile, the transition between them is critical. Here, they meet at an inside corner, which is the easiest and cleanest way to do it. Avoid having two different, bold finishes meet on a flat wall—it will almost always look awkward. By stopping one material at a corner and starting the new one on the next wall, you create a natural, architectural break that feels intentional and clean.
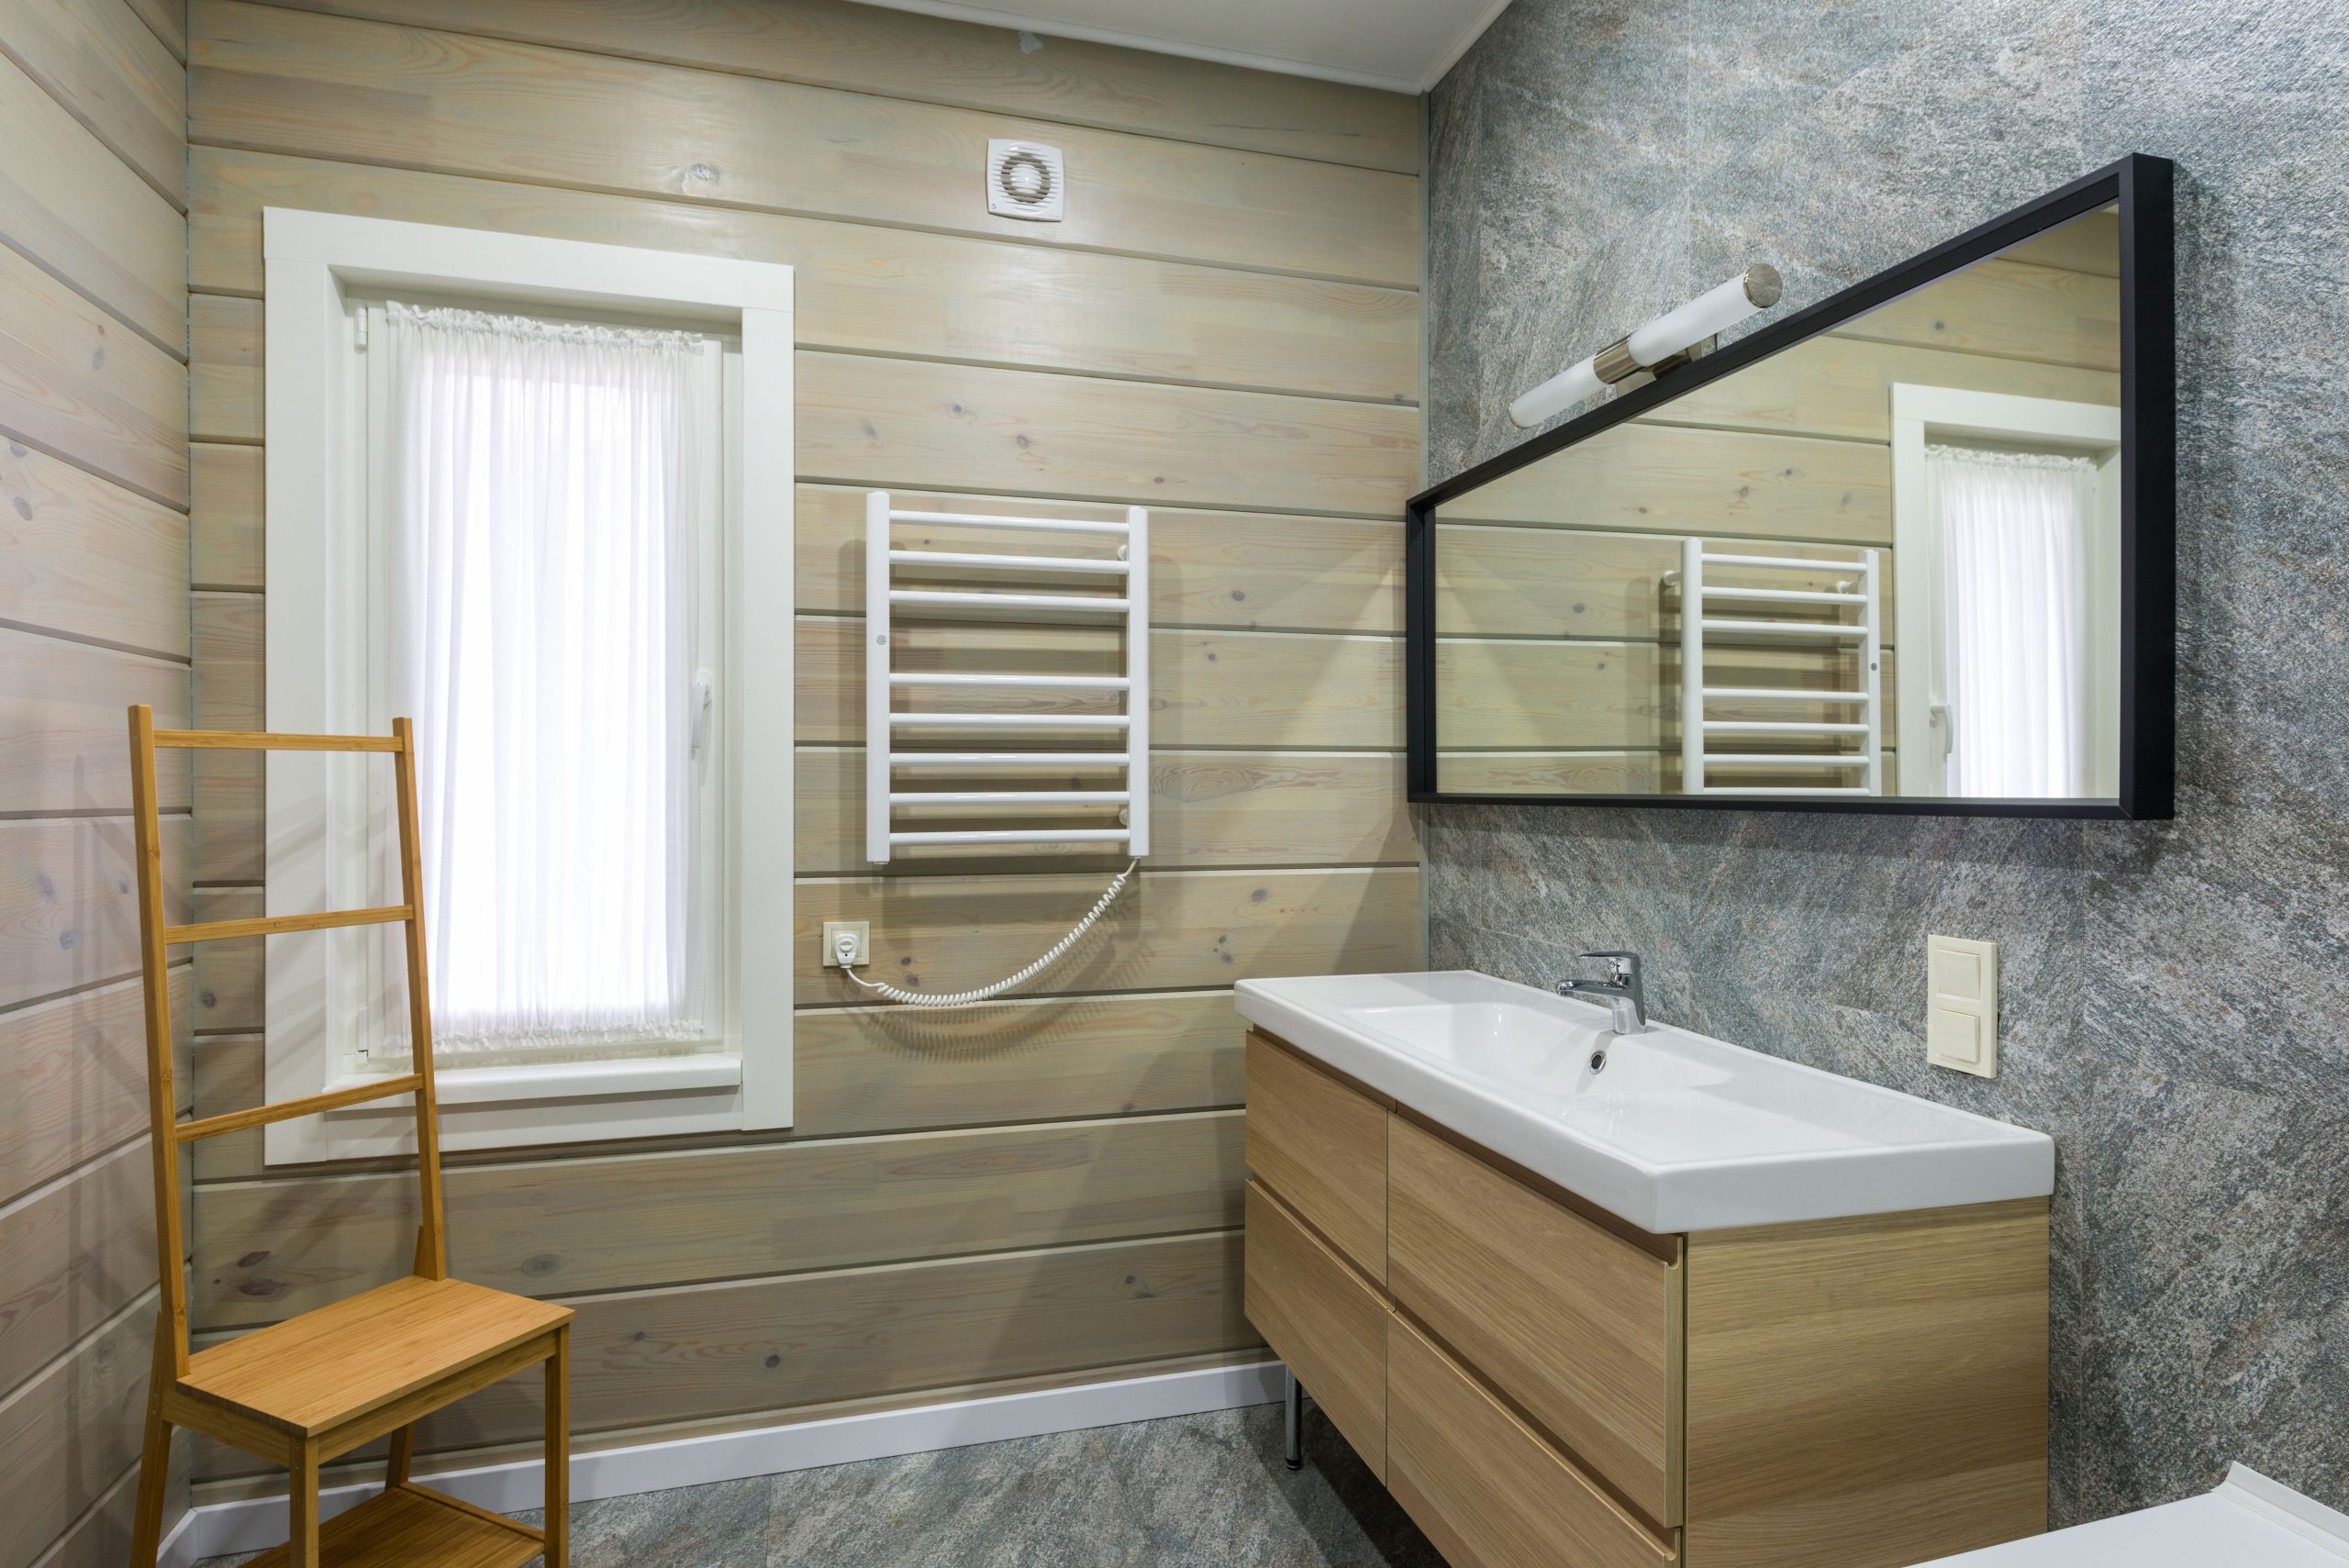
“The single most important element making this serene space work is the consistent color temperature.”
Notice that the pale wood walls, the grayish-brown stone-look tiles, and the light wood vanity all share a similar cool, slightly desaturated undertone. There are no warm, yellowy pines or rich, red cherries. This strict adherence to a cool palette is what makes the room feel so calm, modern, and cohesive, even with multiple textures in play. Compare it with the much warmer palette of Idea #1.
29. Install a Modern Farmhouse Double Vanity with Shiplap
- DIY Pallet Wood Double Vanity: $200 – $500 (wood, screws, stain)
- Marble-Patterned Laminate Countertop: $300 – $700
- Matte Black Faucets (2): $200 – $500
- Mirrors (2): $150 – $400
- White Shiplap Accent Wall: $4 – $8 per sq. ft.
- Hexagonal Floor Tiles: $6 – $12 per sq. ft.
- TOTAL: $1,200 – $3,000+
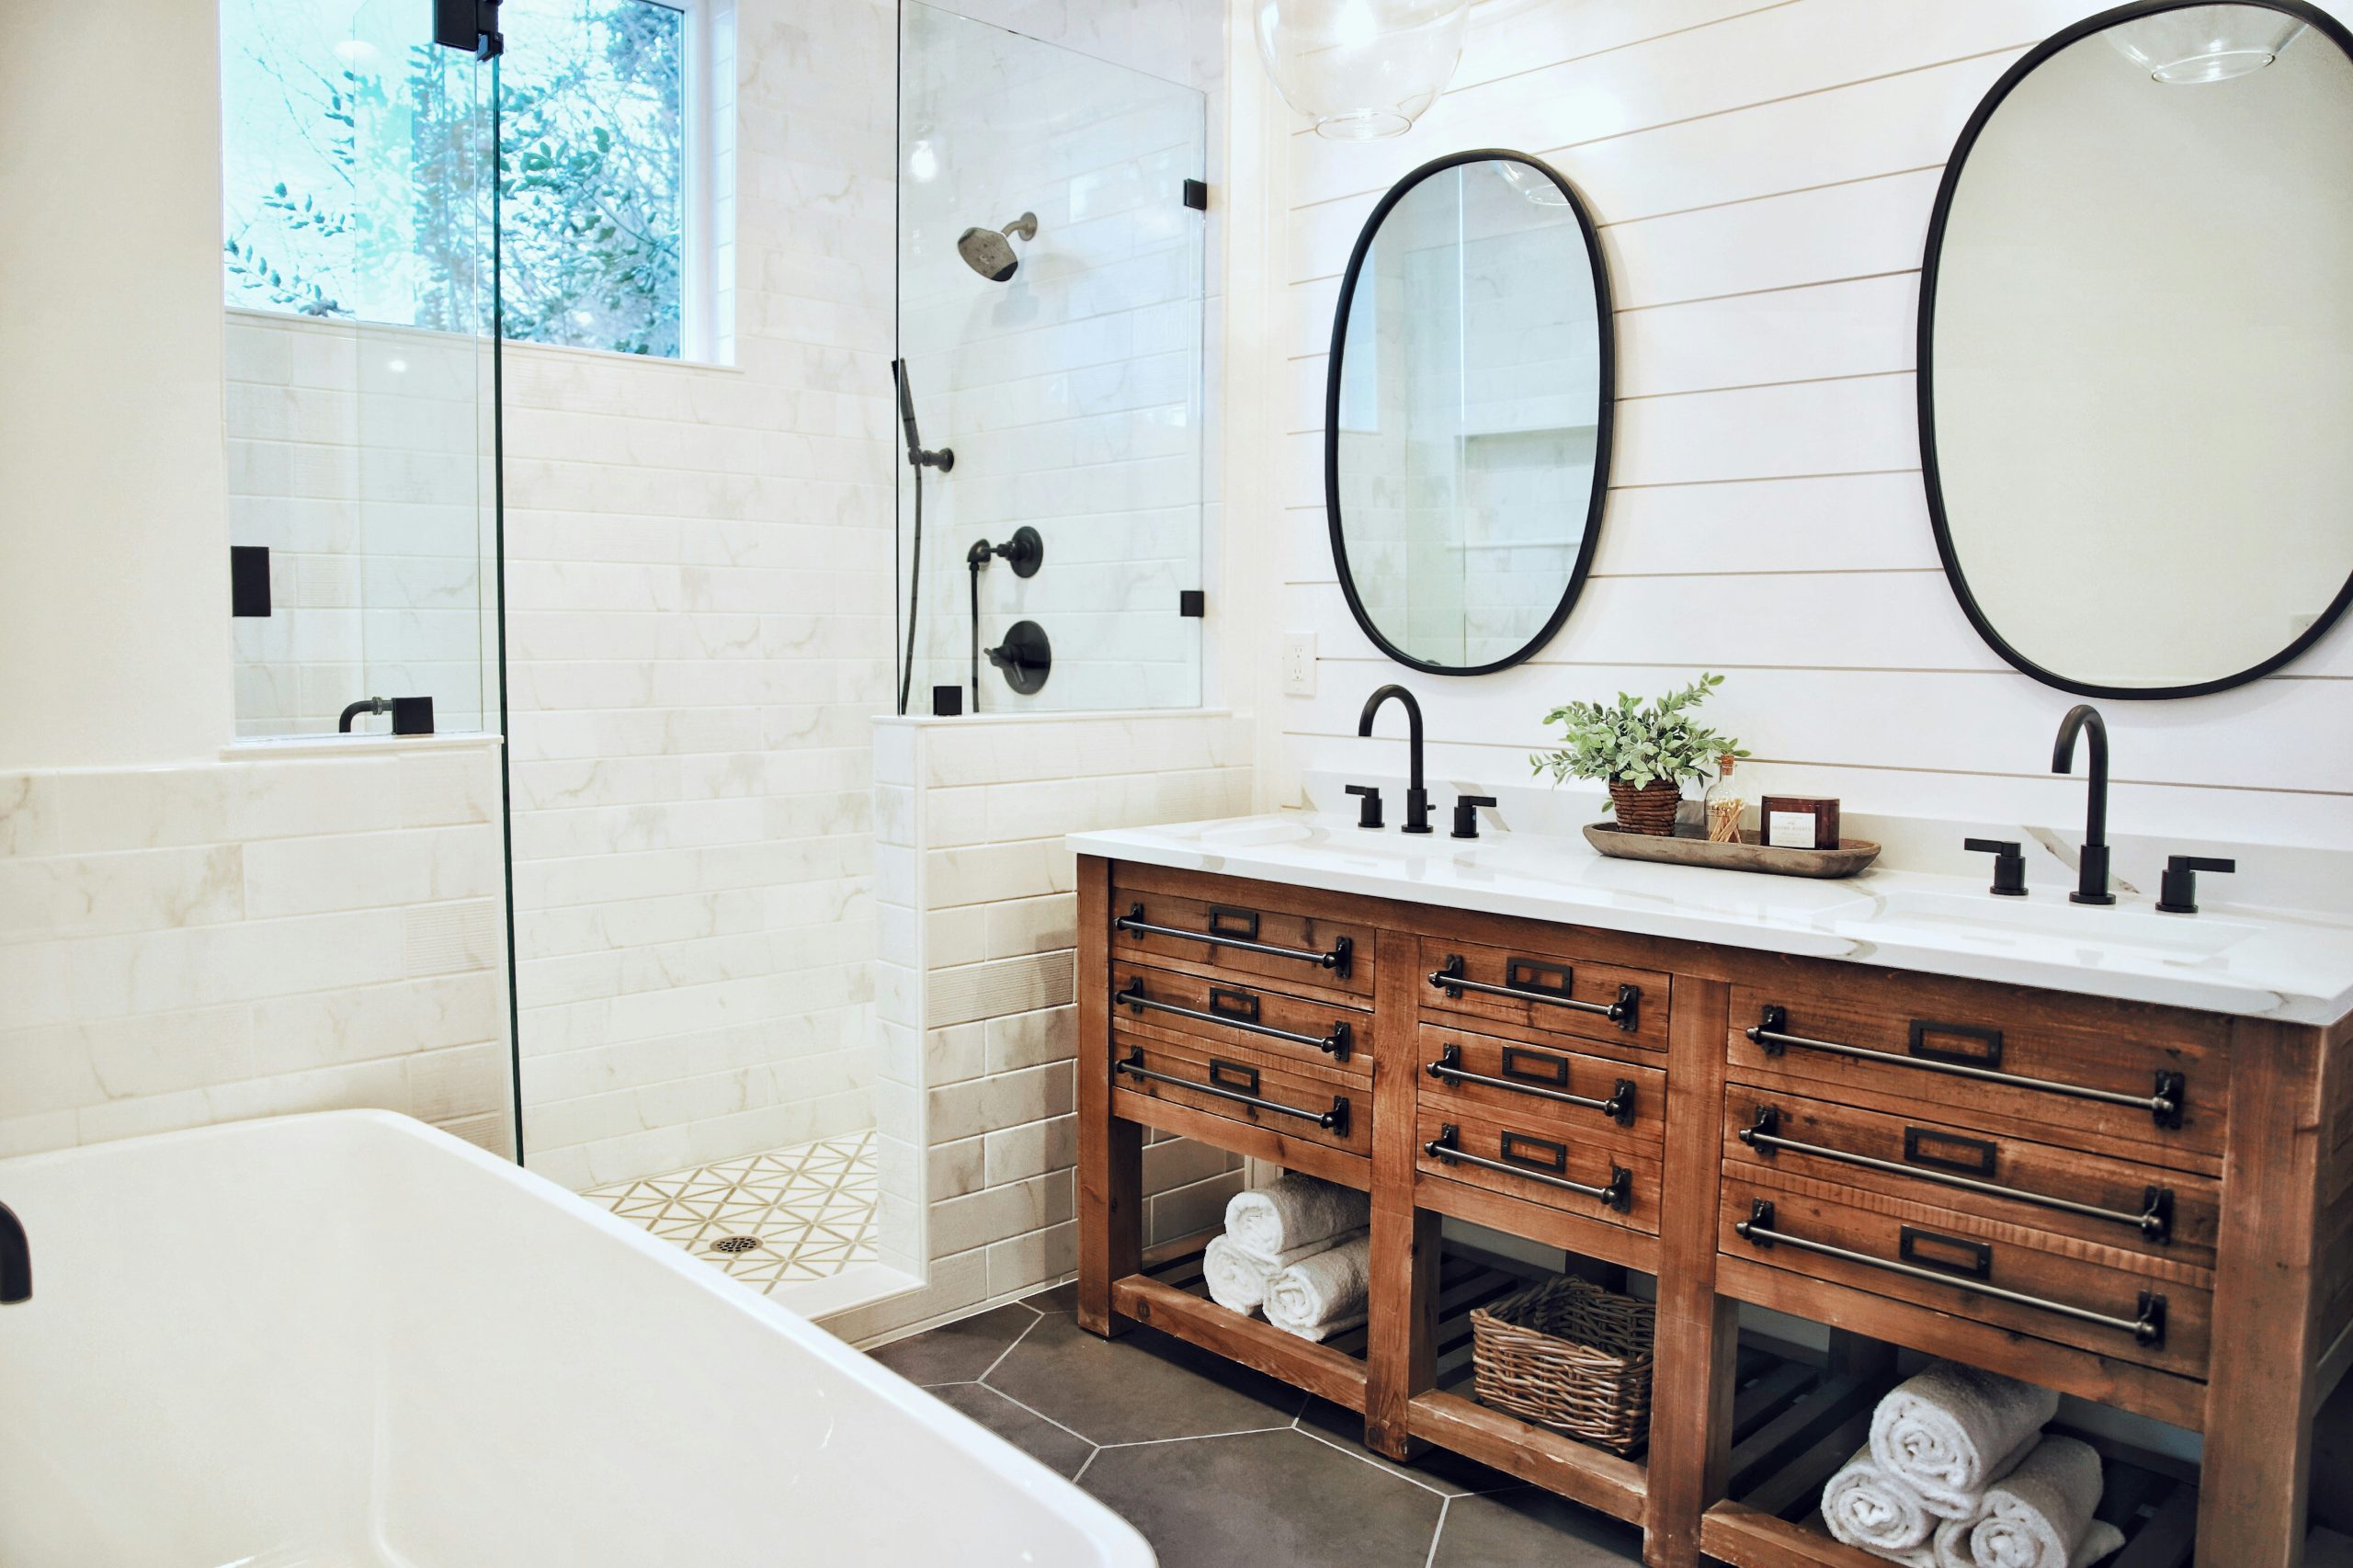
“Budget alternative: Use a simple butcher block countertop from a hardware store ”
Budget alternative: Use a simple butcher block countertop from a hardware store instead of the marble-look laminate and find affordable mirrors at stores like HomeGoods or Target.
This look nails the modern farmhouse aesthetic by balancing rustic and contemporary elements. The distressed wood of the vanity provides the rustic, found-object feel. This is immediately cleaned up and modernized by the crisp white shiplap wall, the sharp matte black fixtures, and the clean lines of the mirrors. The dark grey hexagonal floor tiles ground the entire space and add a graphic pattern that keeps it from feeling too quaint or old-fashioned. It’s a perfect blend of old and new.
30. Create a True Log Cabin Bathroom with a Live-Edge Counter
The live-edge countertop is the heart of this entire design. While the log walls and ceiling set the stage, the counter is the functional art piece that brings it all together. Its irregular, organic shape contrasts beautifully with the smooth, predictable ovals of the undermount sinks. It’s a celebration of wood in its natural form, serving as a reminder that the most beautiful things are often perfectly imperfect. Every other element in the room is designed to support and showcase this stunning centerpiece. A regular square countertop just wouldn’t have the same soul.
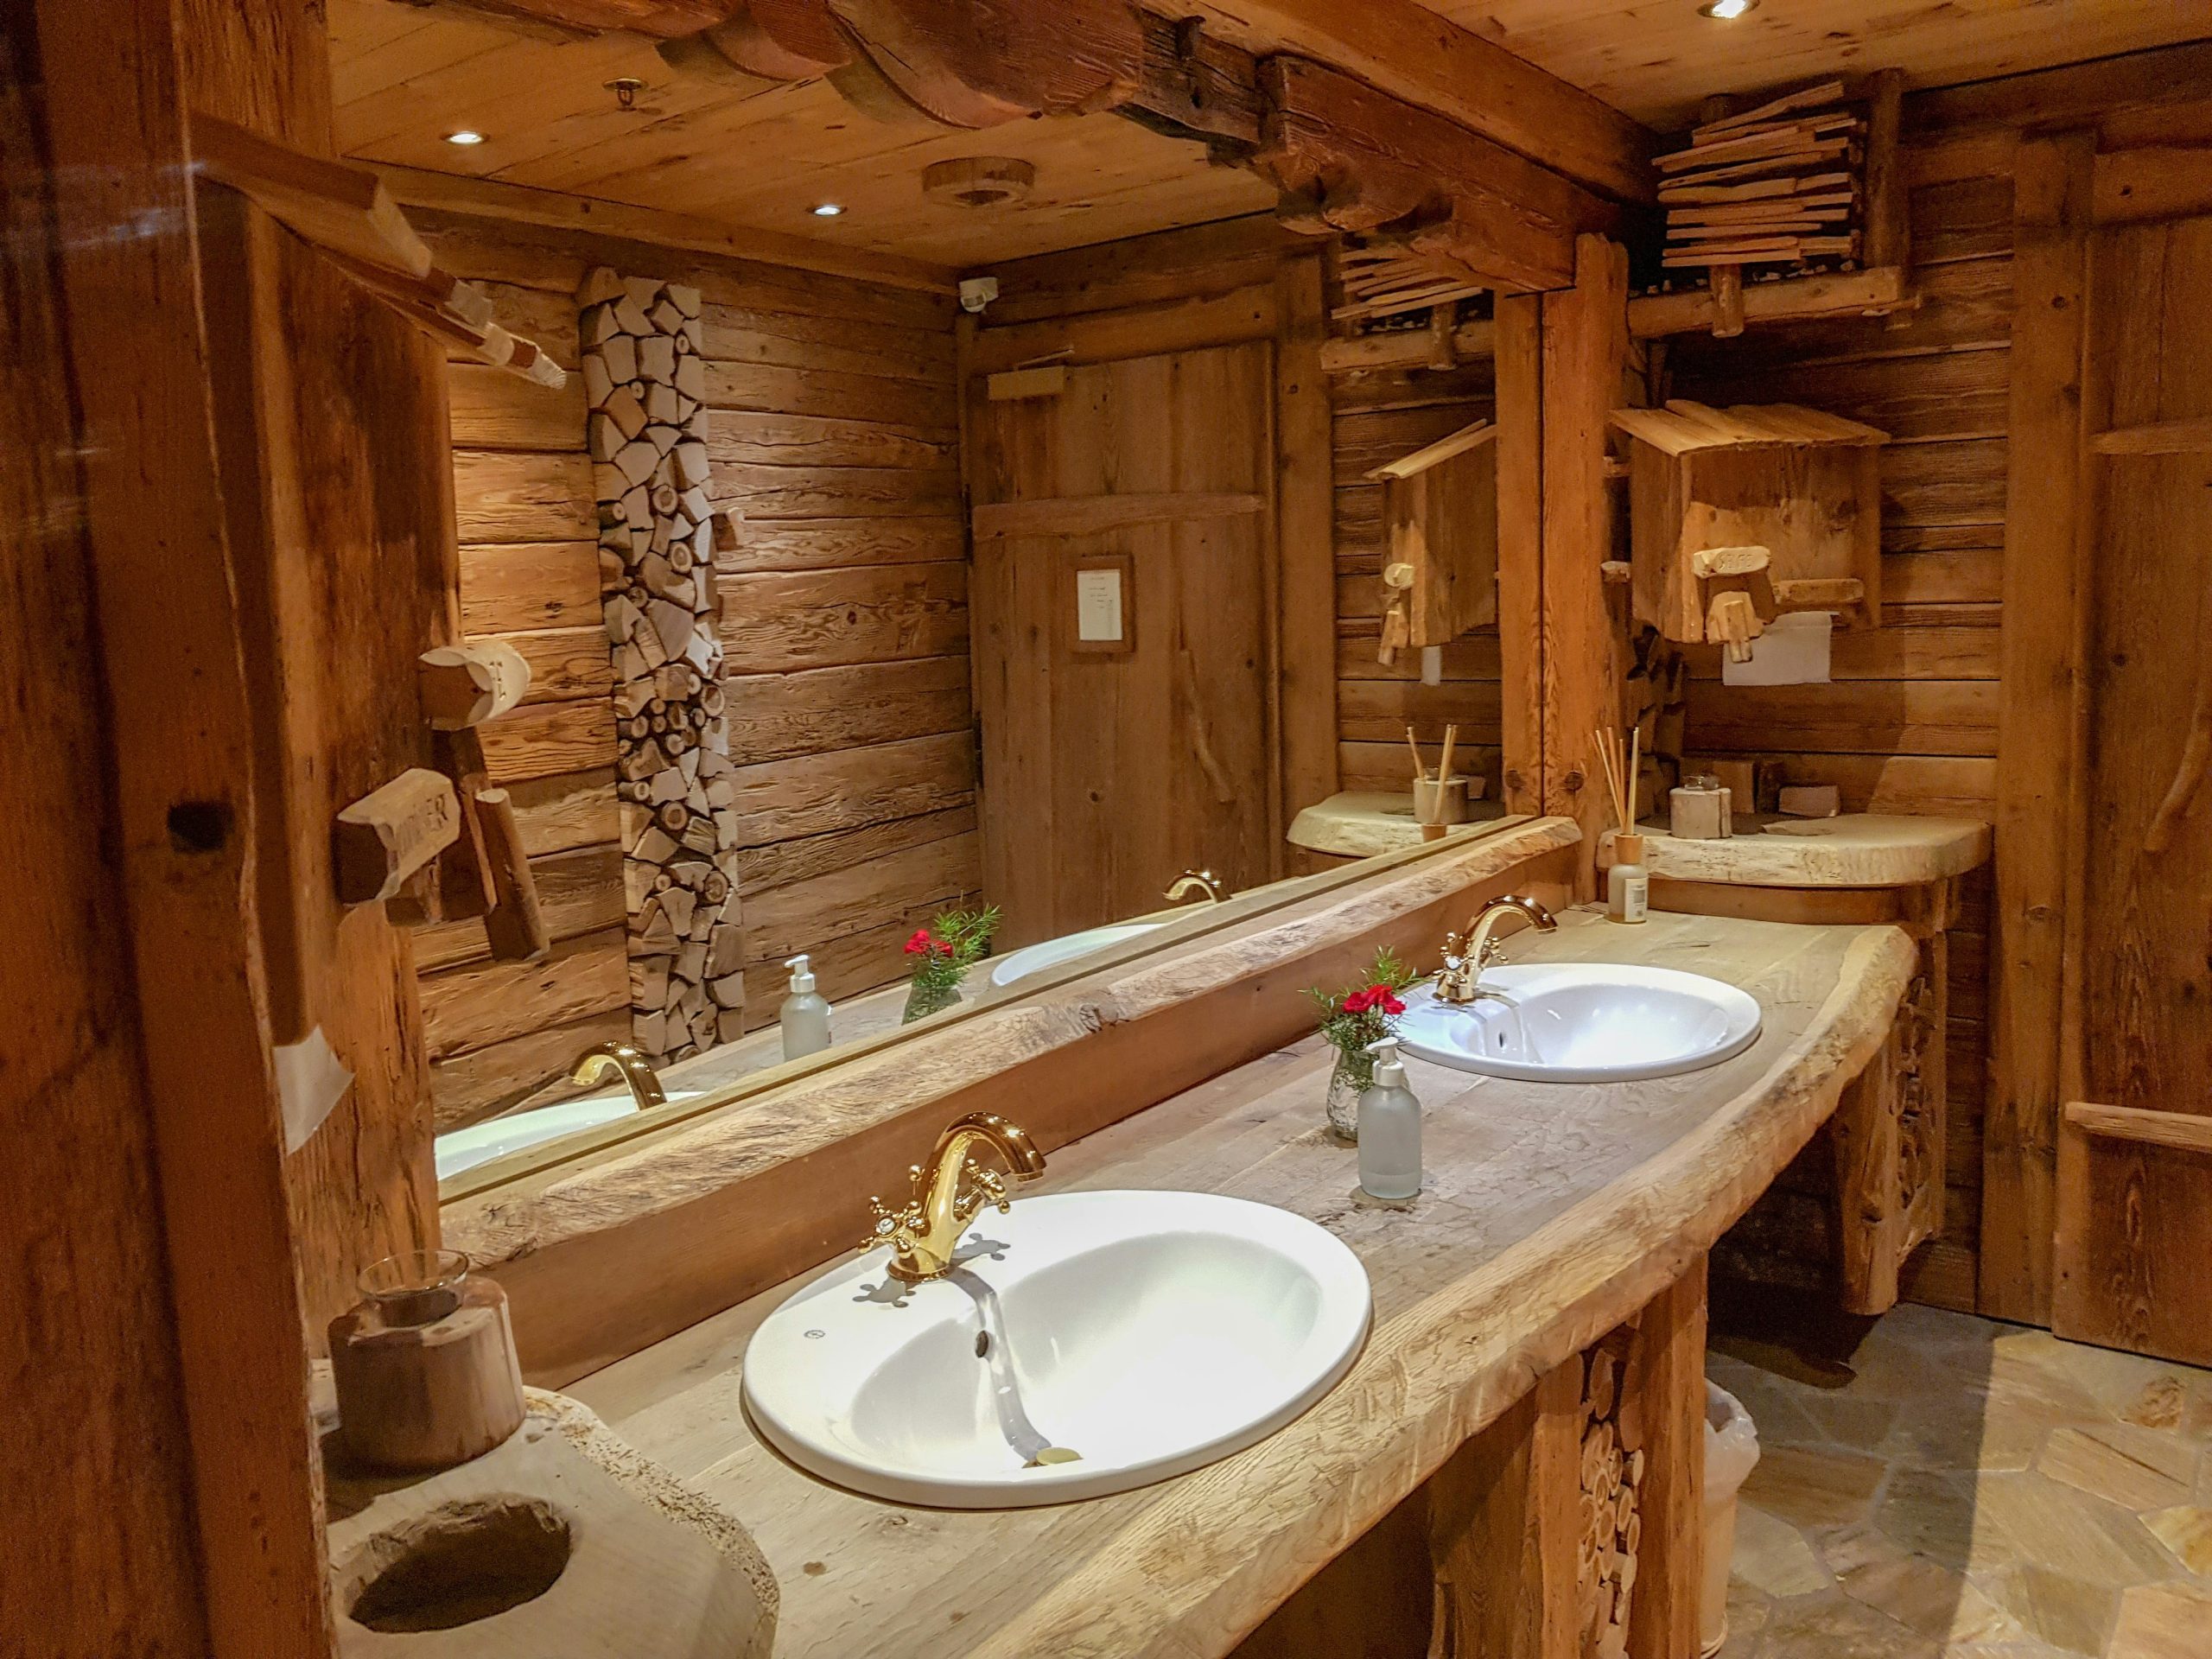
“A live-edge slab in a bathroom requires serious and meticulous sealing.”
This is not an optional step. The entire piece—top, bottom, front, back, and every little crevice in the bark (if you leave it on)—must be encapsulated in multiple coats of a waterproof finish like spar urethane or a two-part epoxy. Any missed spot is an invitation for water to seep in, which will cause the wood to warp, crack, and harbor mold. It’s a significant upfront effort to ensure its long-term beauty and stability.
Ready to Build Your Perfect Pallet Retreat?
That’s a wrap on our favorite pallet projects, but it’s just the beginning for your own bathroom refresh. The beauty of pallet wood is its versatility—it can be rustic, modern, or anything in between. Pick an idea that speaks to you, remember our tips, and have fun creating a space that feels truly personal.
Don’t forget to save your top picks to your Pinterest board to keep the inspiration flowing!