Still scrolling through Pinterest for “Diy Backyard Games 2026” and feeling totally overwhelmed? You save pin after pin, but when it comes to actually making a decision, you freeze. We get it. That’s why we did the hard work for you, filtering through hundreds of ideas to find the ones that are actually doable, fun, and look great in a real backyard. We’re talking about 31 amazing DIY game ideas that will make your house the go-to spot for every summer party, graduation, or casual sunny afternoon.
In this guide, you’ll find everything from rustic wooden classics to colorful modern playsets, with options for every skill level and budget. Forget generic ideas—we’re focusing on specific, trend-forward looks that are defining outdoor fun in 2026. The shift towards creating true outdoor living rooms—not just yards—means our games need to be as stylish as they are entertaining. And stay until the end — we break down the most common mistakes that can ruin these looks. 📌 Save this to Pinterest for later — you’ll want to revisit these ideas.
1. Essential Plans for a Kid-Friendly Backyard Play Structure
When you’re installing any kind of play structure, the ground beneath it is just as important as the structure itself. For safety, you need a loose-fill surface that can cushion a fall. Don’t just rely on grass. A professionally installed playground should have a minimum of 9-12 inches of wood chips, sand, or engineered wood fiber. For a DIY home setup, aim for at least 6 inches of double-shredded wood mulch, and be sure to rake it regularly to prevent compaction, which reduces its shock-absorbing qualities.
“A dedicated play structure needs more room than you might think.”
You need a clear “use zone” around the entire set—a safety buffer with no obstructions. The Consumer Product Safety Commission recommends a minimum of 6 feet of clear, level space in all directions. For a swing set, this zone is even larger: twice the height of the suspension bar, both in front of and behind the swings. This means a simple A-frame swing set could require a clear area of nearly 20 feet in length.
2. Festive Backyard Party with Lawn Games and String Lights
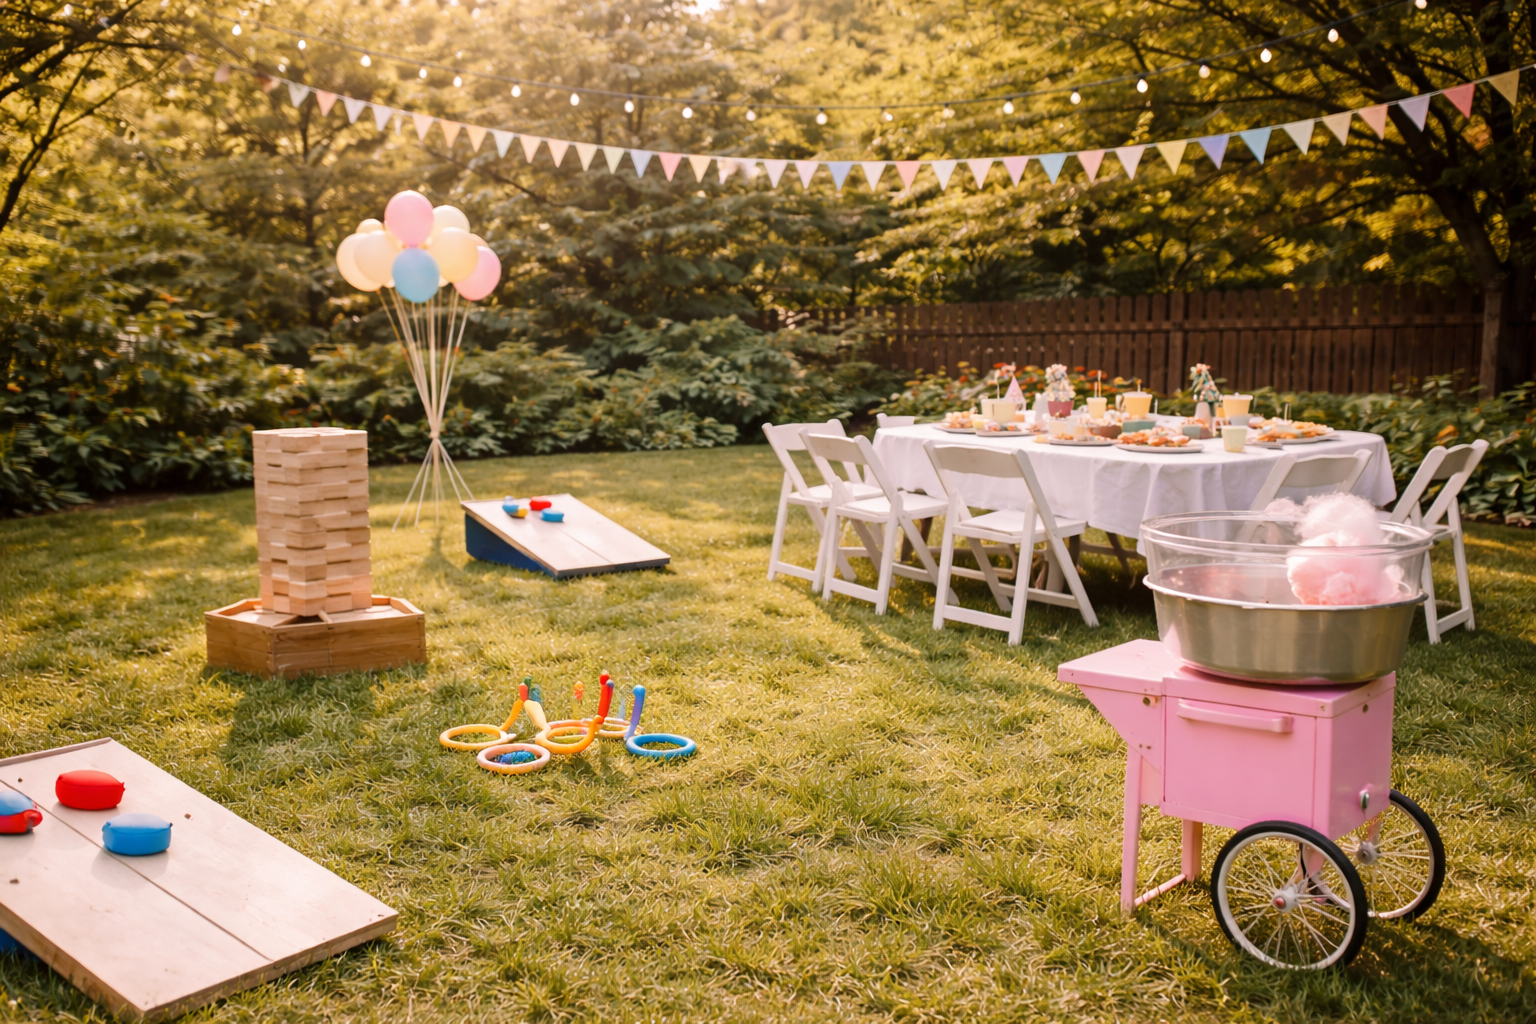
The magic of this party scene is all about balance. Think of it as a formula: 50% social hub + 40% play zones + 10% festive atmosphere. The social hub is your dining table and seating, the core of the gathering. The play zones, featuring games like giant Jenga and cornhole, are intentionally placed on the periphery to encourage movement and mingling without disrupting conversation. The final 10% is the overhead charm—string lights and bunting tie the whole space together visually and add that celebratory glow. For a more focused rustic game area, compare this with the setup in Idea #12.
“You can capture this lively party vibe without buying everything new.”
A crisp white tablecloth can make any old table look elegant. Instead of buying matching chairs, embrace a collected look with mismatched seating from around your house or borrowed from friends. You can find cornhole and Jenga sets on Facebook Marketplace for a fraction of the retail price. And the colorful bunting? That’s an easy DIY project with fabric scraps, scissors, and some twine, costing no more than $10.
3. Crafting Your Own Classic DIY Lawn Games
The enduring appeal of homemade lawn games lies in their nostalgic charm and tactile nature. In a world saturated with digital entertainment, the weight of a beanbag or the clatter of wooden blocks offers a satisfying, real-world experience. The visual appeal comes from their simplicity and craftsmanship. Unfinished wood, bright primary colors, and slightly imperfect, handmade details feel authentic and inviting. They signal a space designed for fun and connection, not just for show. The key is embracing materials that feel good to handle and have a bit of handcrafted character.
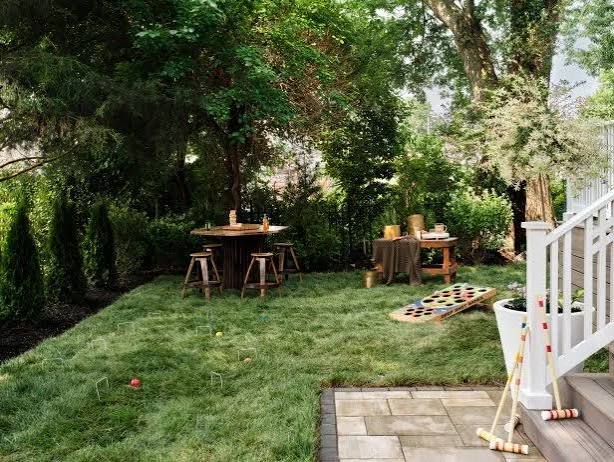
“There’s a growing movement toward analog and high-effort hobbies, and this trend has found its perfect home in the backyard.”
People are tired of disposable plastic and are looking for activities with more permanence and personality. Creating your own game set isn’t just about saving a buck; it’s about the process itself. It’s a weekend project, a story to tell, and an heirloom in the making. This is why you’re seeing so many tutorials for DIY cornhole, giant Jenga, and lawn dice popping up on Pinterest and TikTok—it connects to our desire for tangible, screen-free fun.
4. Patriotic Backyard Bash with DIY Obstacle Course
It’s the string lights. While the patriotic bunting, cornhole game, and picnic table set a classic summer scene, it’s the overhead string lights that truly elevate the atmosphere from a simple daytime barbecue to a magical evening event. They define the party space, creating a visual ‘ceiling’ that makes a wide-open backyard feel more intimate and intentional. Without them, the party would feel less like a curated event and more like a casual hangout that just happened to have games.
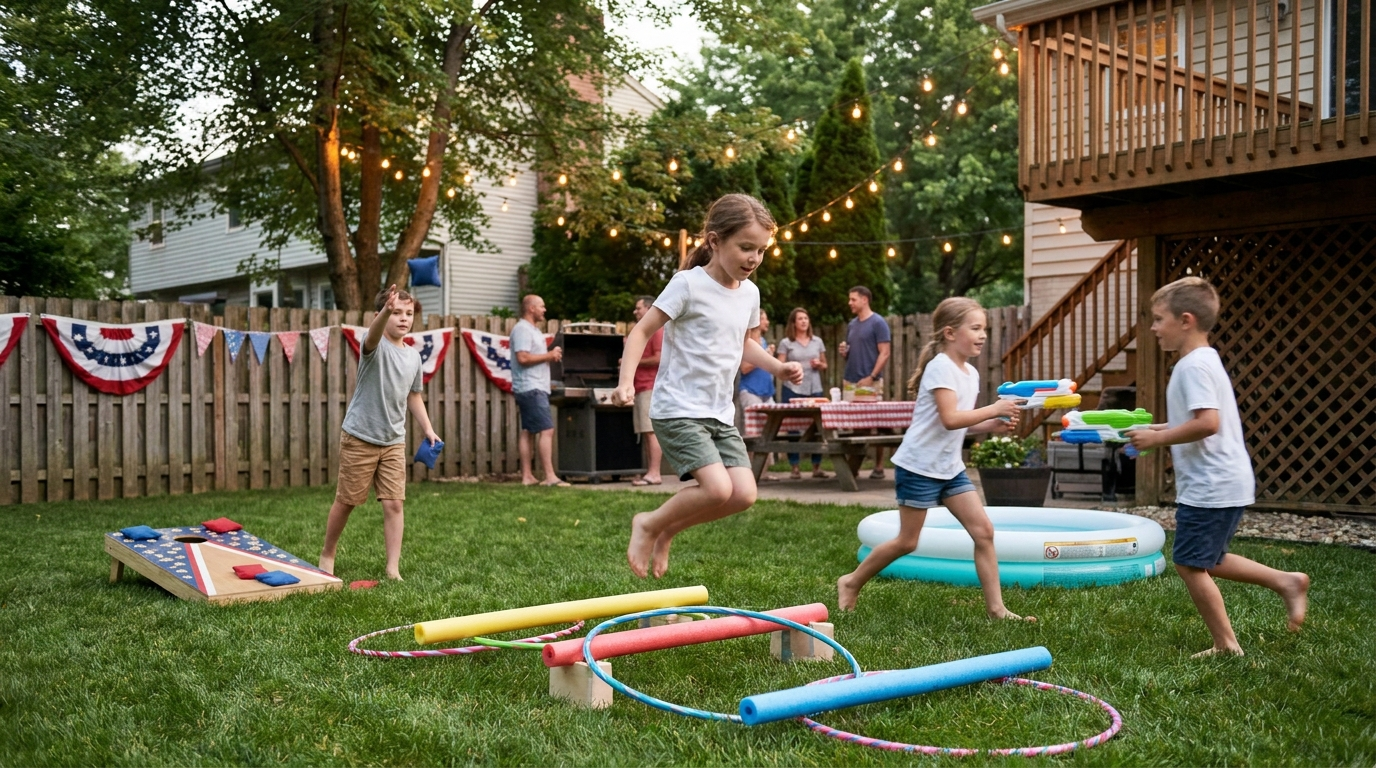
“A setup with this much activity requires some planning.”
The mix of a kiddie pool, active games like cornhole, and an open grill can be a recipe for chaos if not managed. Make sure to establish clear zones for different activities. Keep the water play area separate from the running games to avoid muddy, slippery messes. The grill should have at least a 10-foot radius clear of any foot traffic or flammable materials, including the festive bunting. It’s all fun and games until a stray beanbag lands next to the hot coals.
5. Charming Kids’ Party with a Low Picnic Table and Teepee
For a kid-centric party, a low picnic table is a game-changer. Standard tables and chairs are scaled for adults, which can feel intimidating and uncomfortable for little ones. A table set at 12-15 inches off the ground, surrounded by floor cushions, creates a space that is physically on their level. It empowers them to sit, stand, and move about freely and comfortably. It also encourages a more relaxed, communal vibe that’s perfect for a celebratory mood. You can easily make one from a few sanded pallets or a simple sheet of plywood on low blocks.
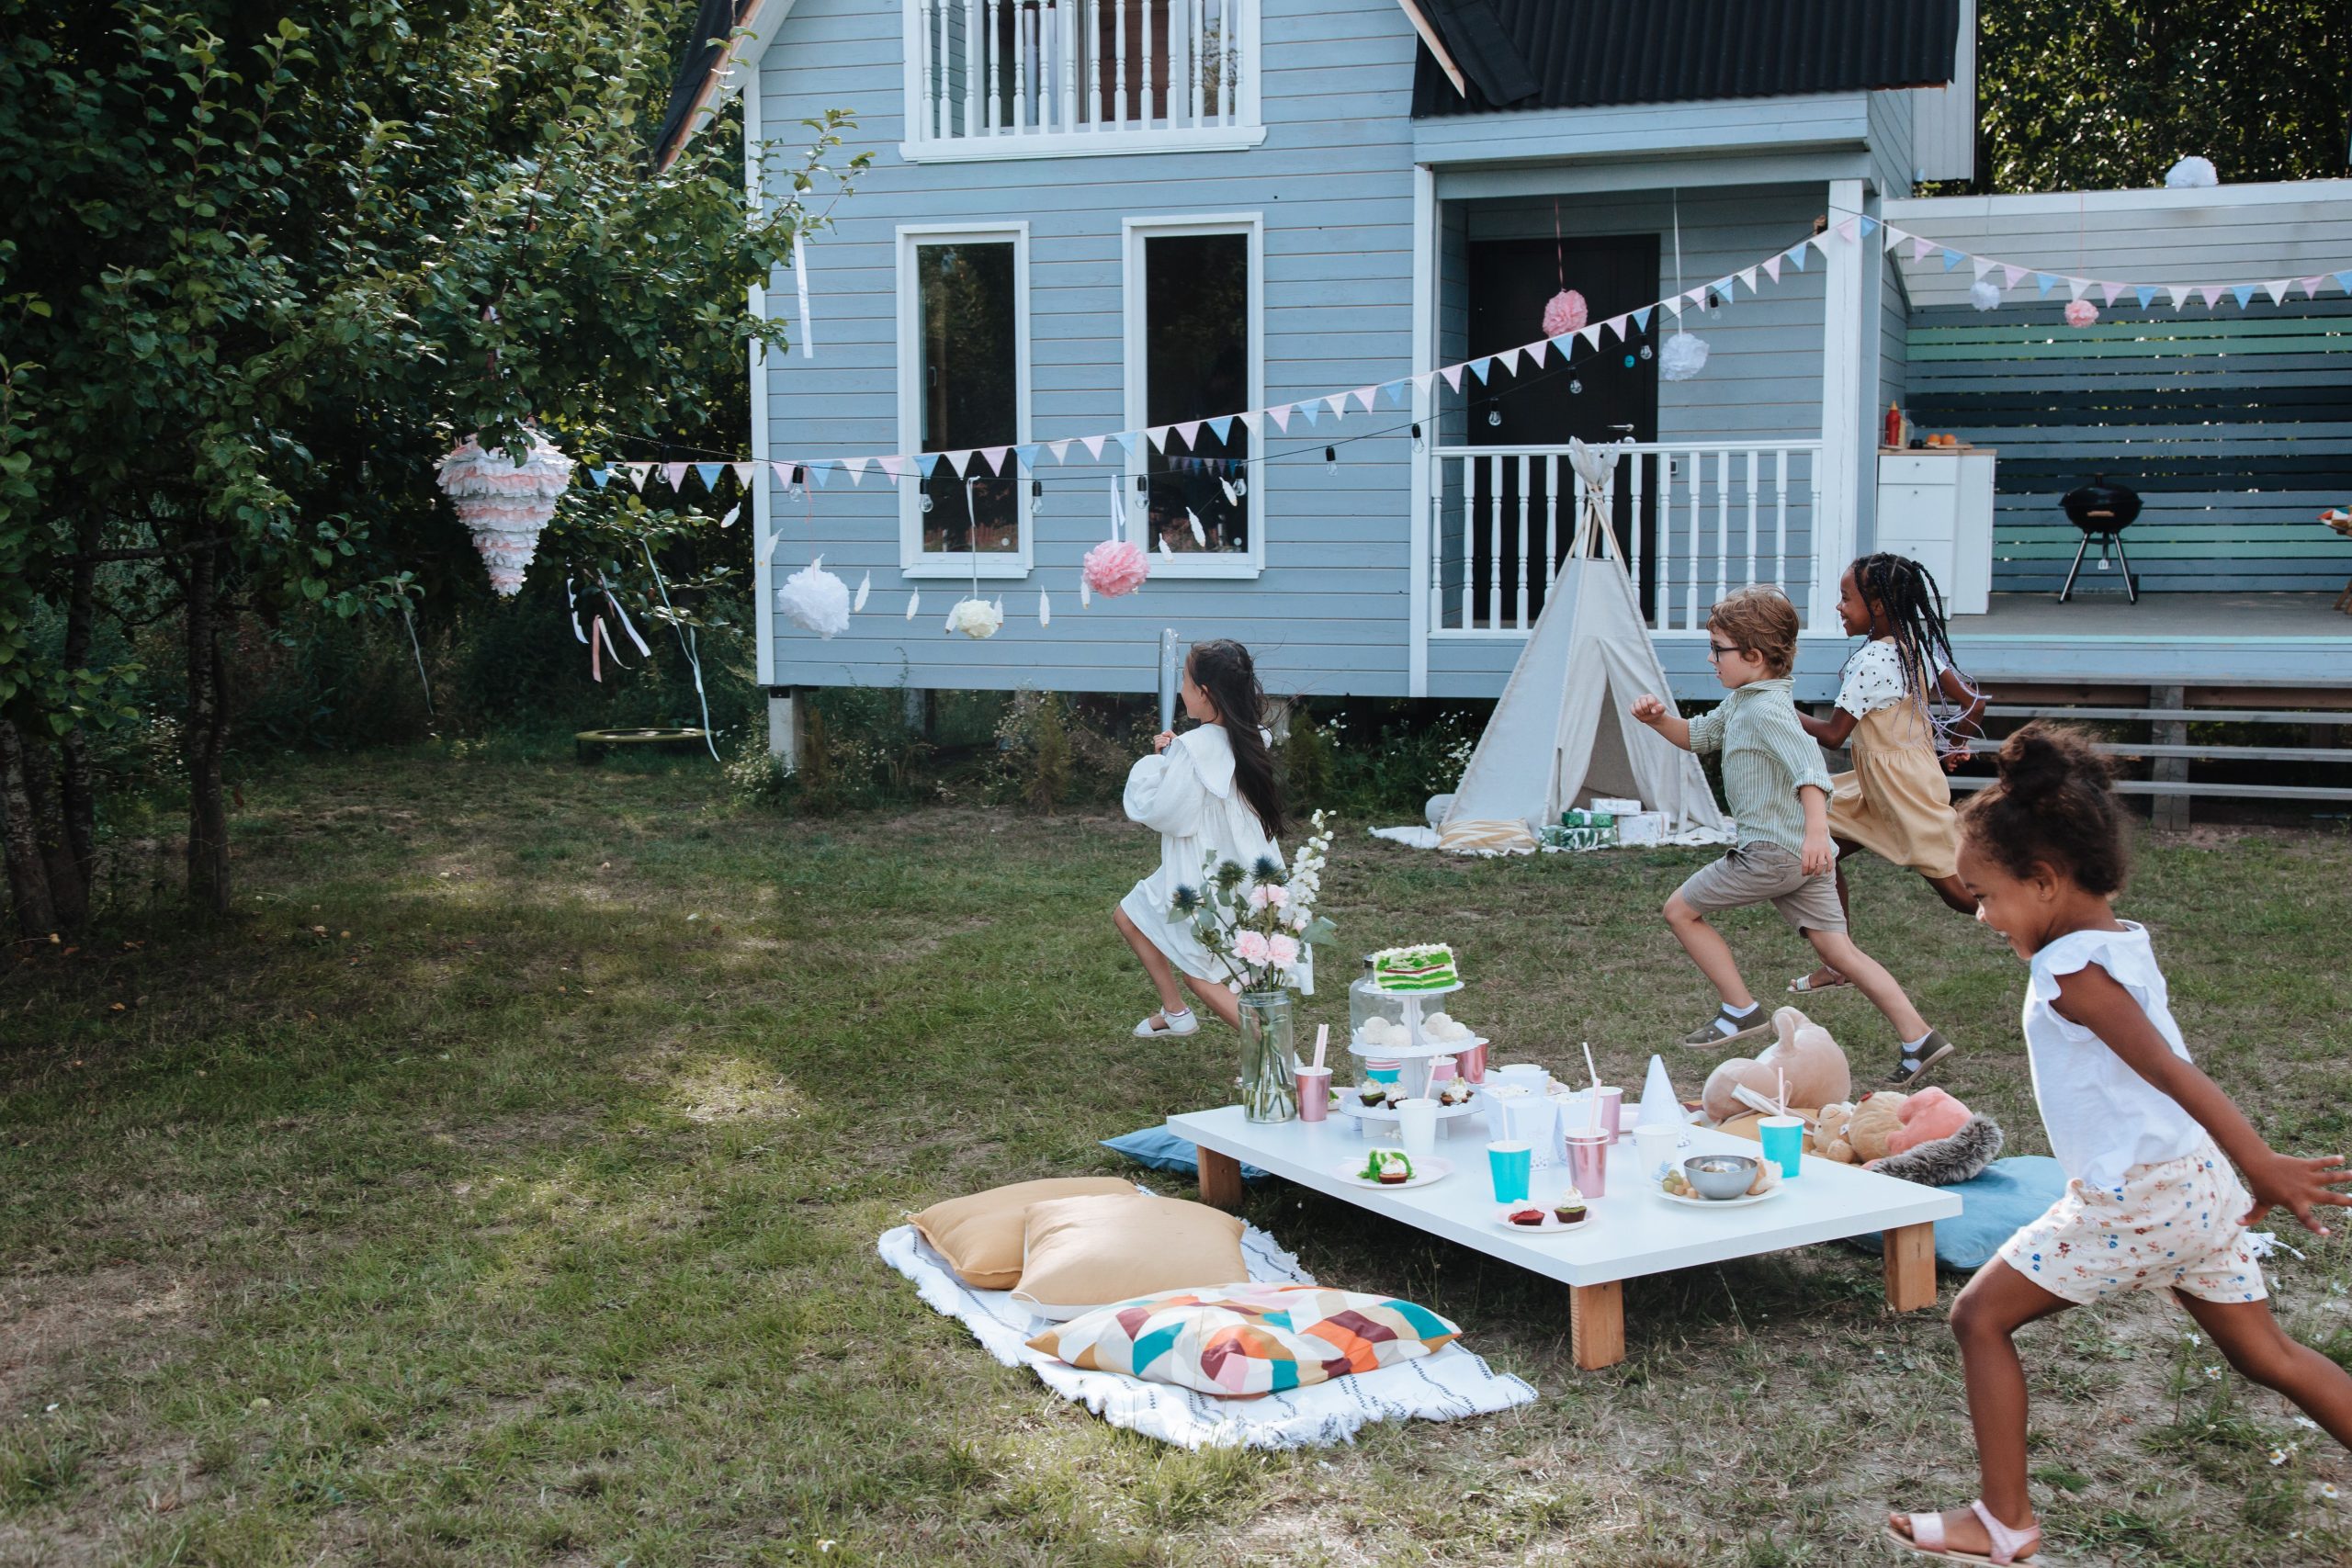
“This look is so charming because it plays with scale and texture in a sophisticated way.”
The low-slung picnic table creates an immediate sense of intimacy and fun. The design then layers textures to build comfort and visual interest: the soft blanket, the varied fabrics of the throw pillows, the paper pom-poms, and the canvas teepee. The color palette is also key—the calm, light blue backdrop of the house allows the brighter, warmer pinks and browns of the party decor to pop without overwhelming the scene.
6. Classic Rustic Wooden Cornhole Set on a Green Lawn
Want to make your own durable, all-weather beanbags? It’s easier than you think and ensures they last for years. This project takes about 1 hour and costs around $20.
- Cut two 7×7-inch squares of heavyweight duck canvas for each bag.
- With the fabric’s right sides facing each other, sew a 1/2-inch seam around three and a half sides.
- Turn the bag right-side out and fill it with 15-16 ounces of plastic pellets (not corn, which can rot).
- Carefully fold the raw edges of the opening inward and topstitch it closed, going over the seam twice for durability.
Repeat for all eight bags, and you’re ready to play!
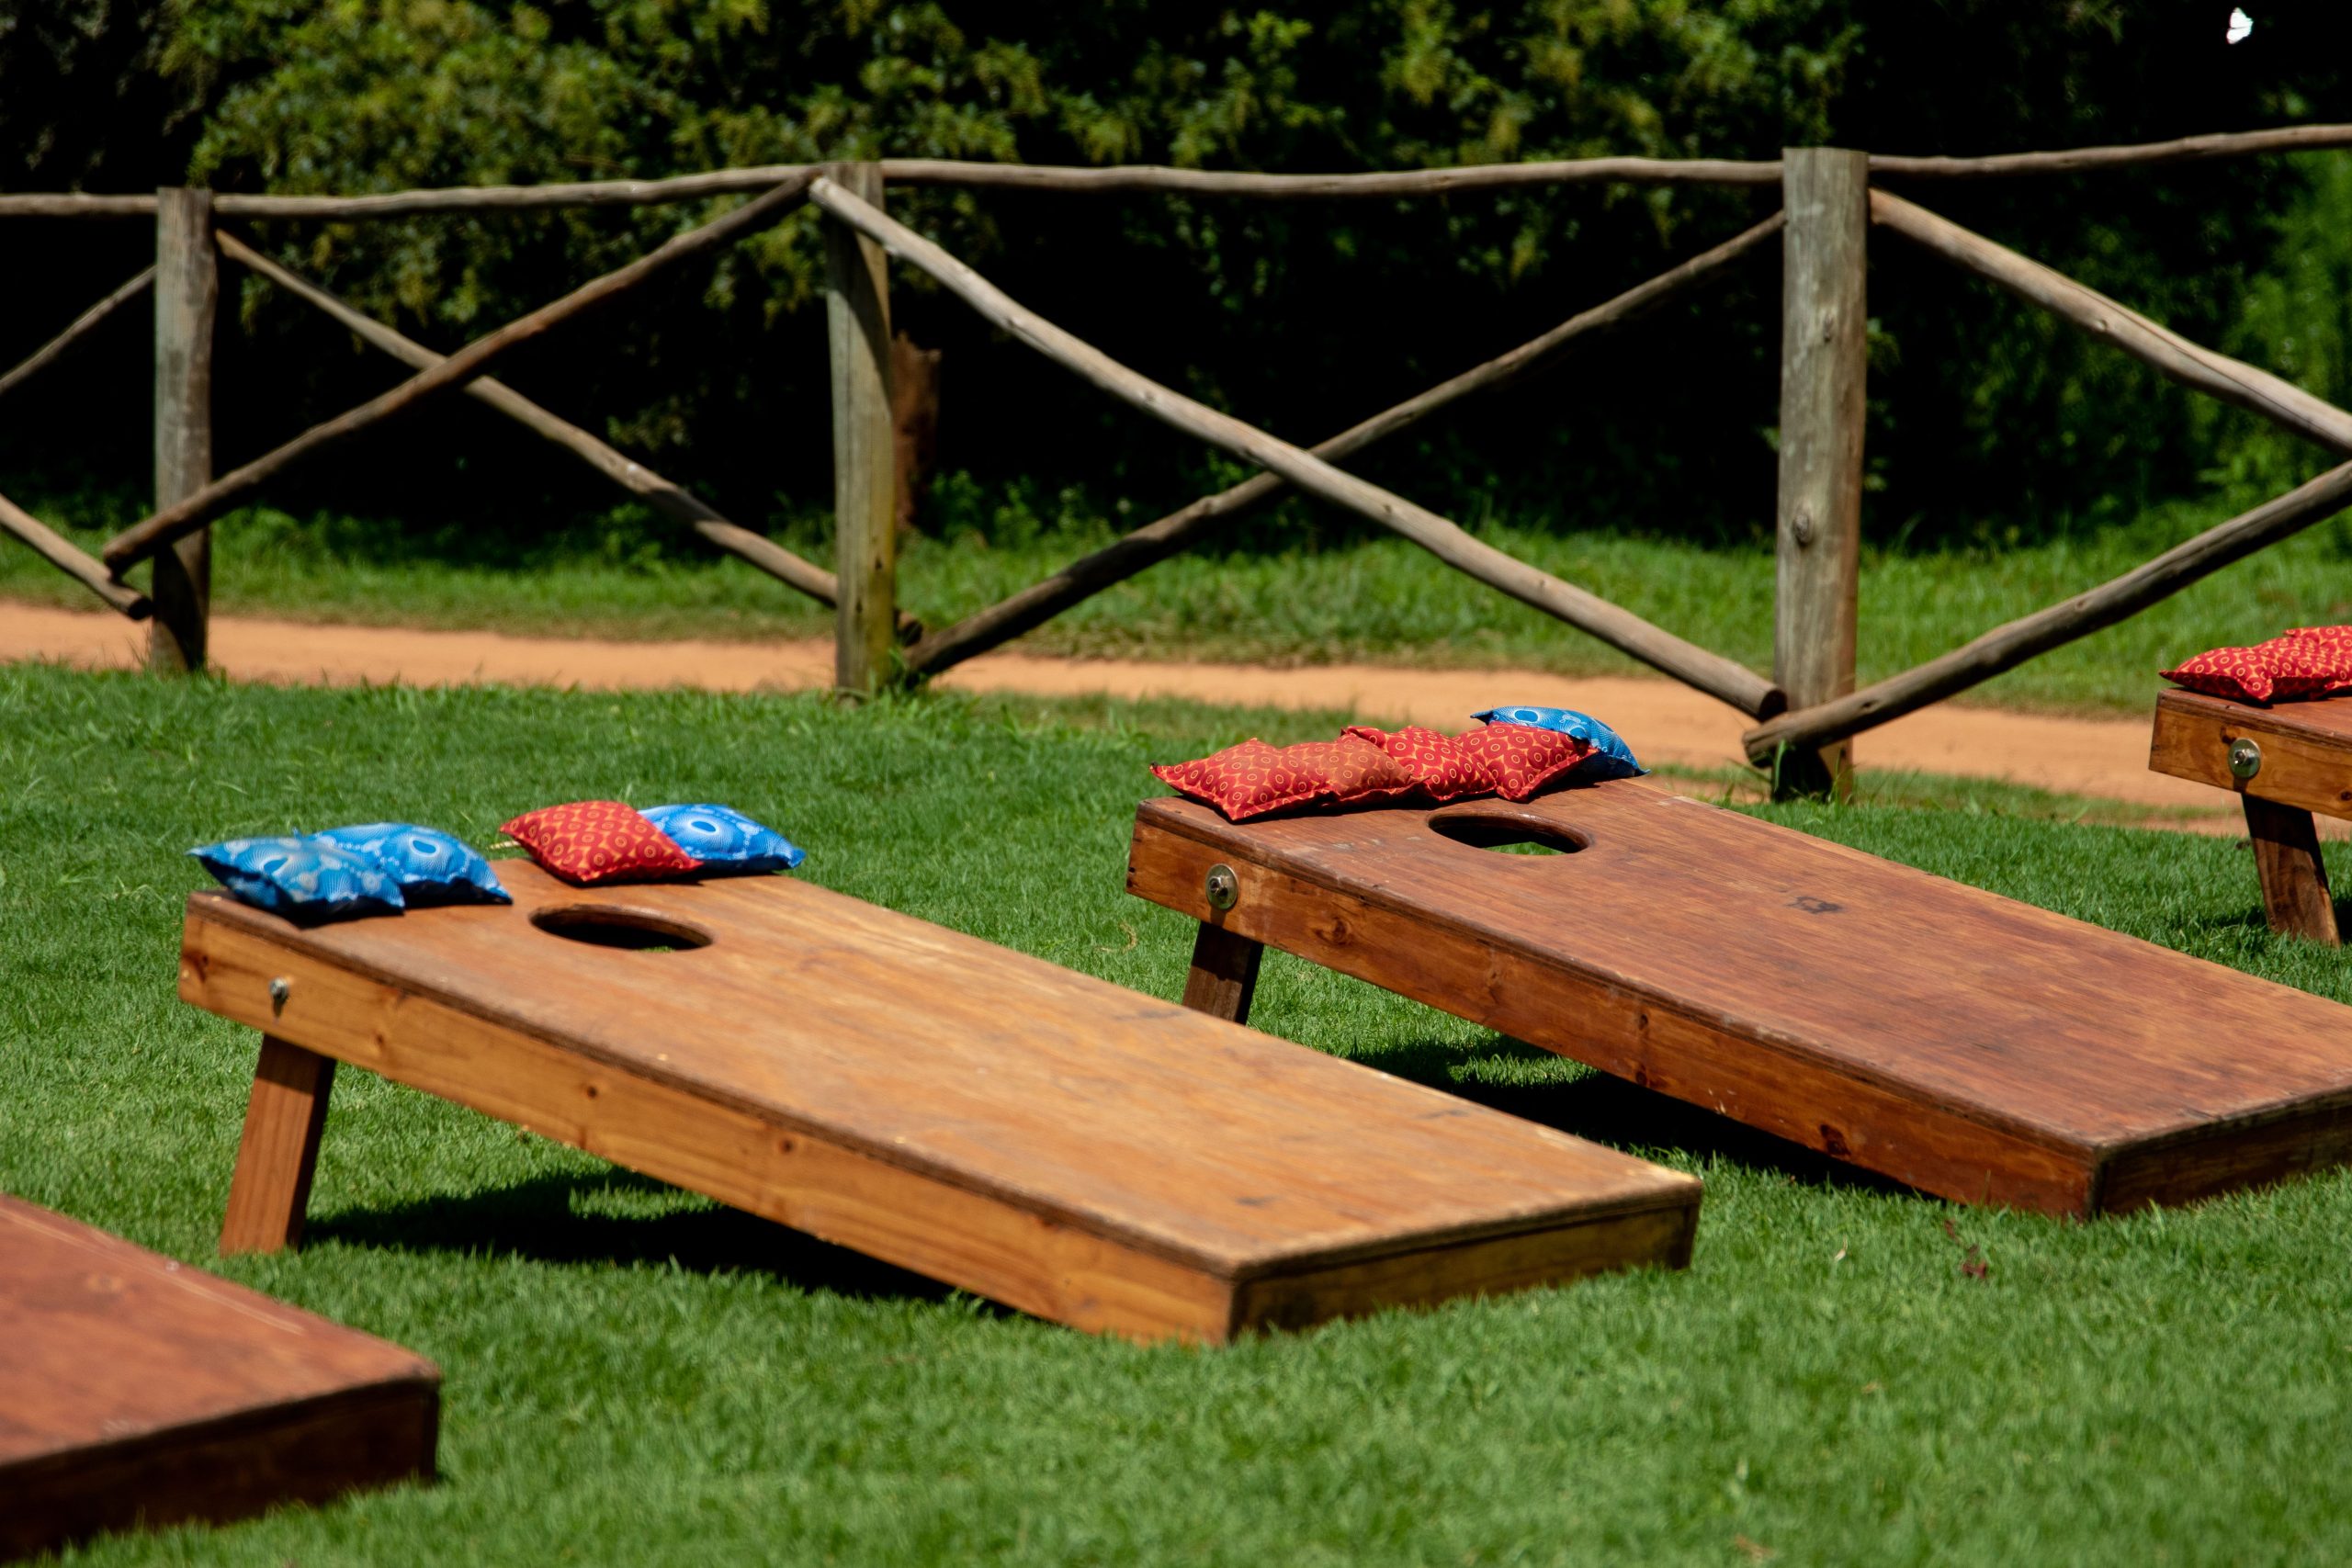
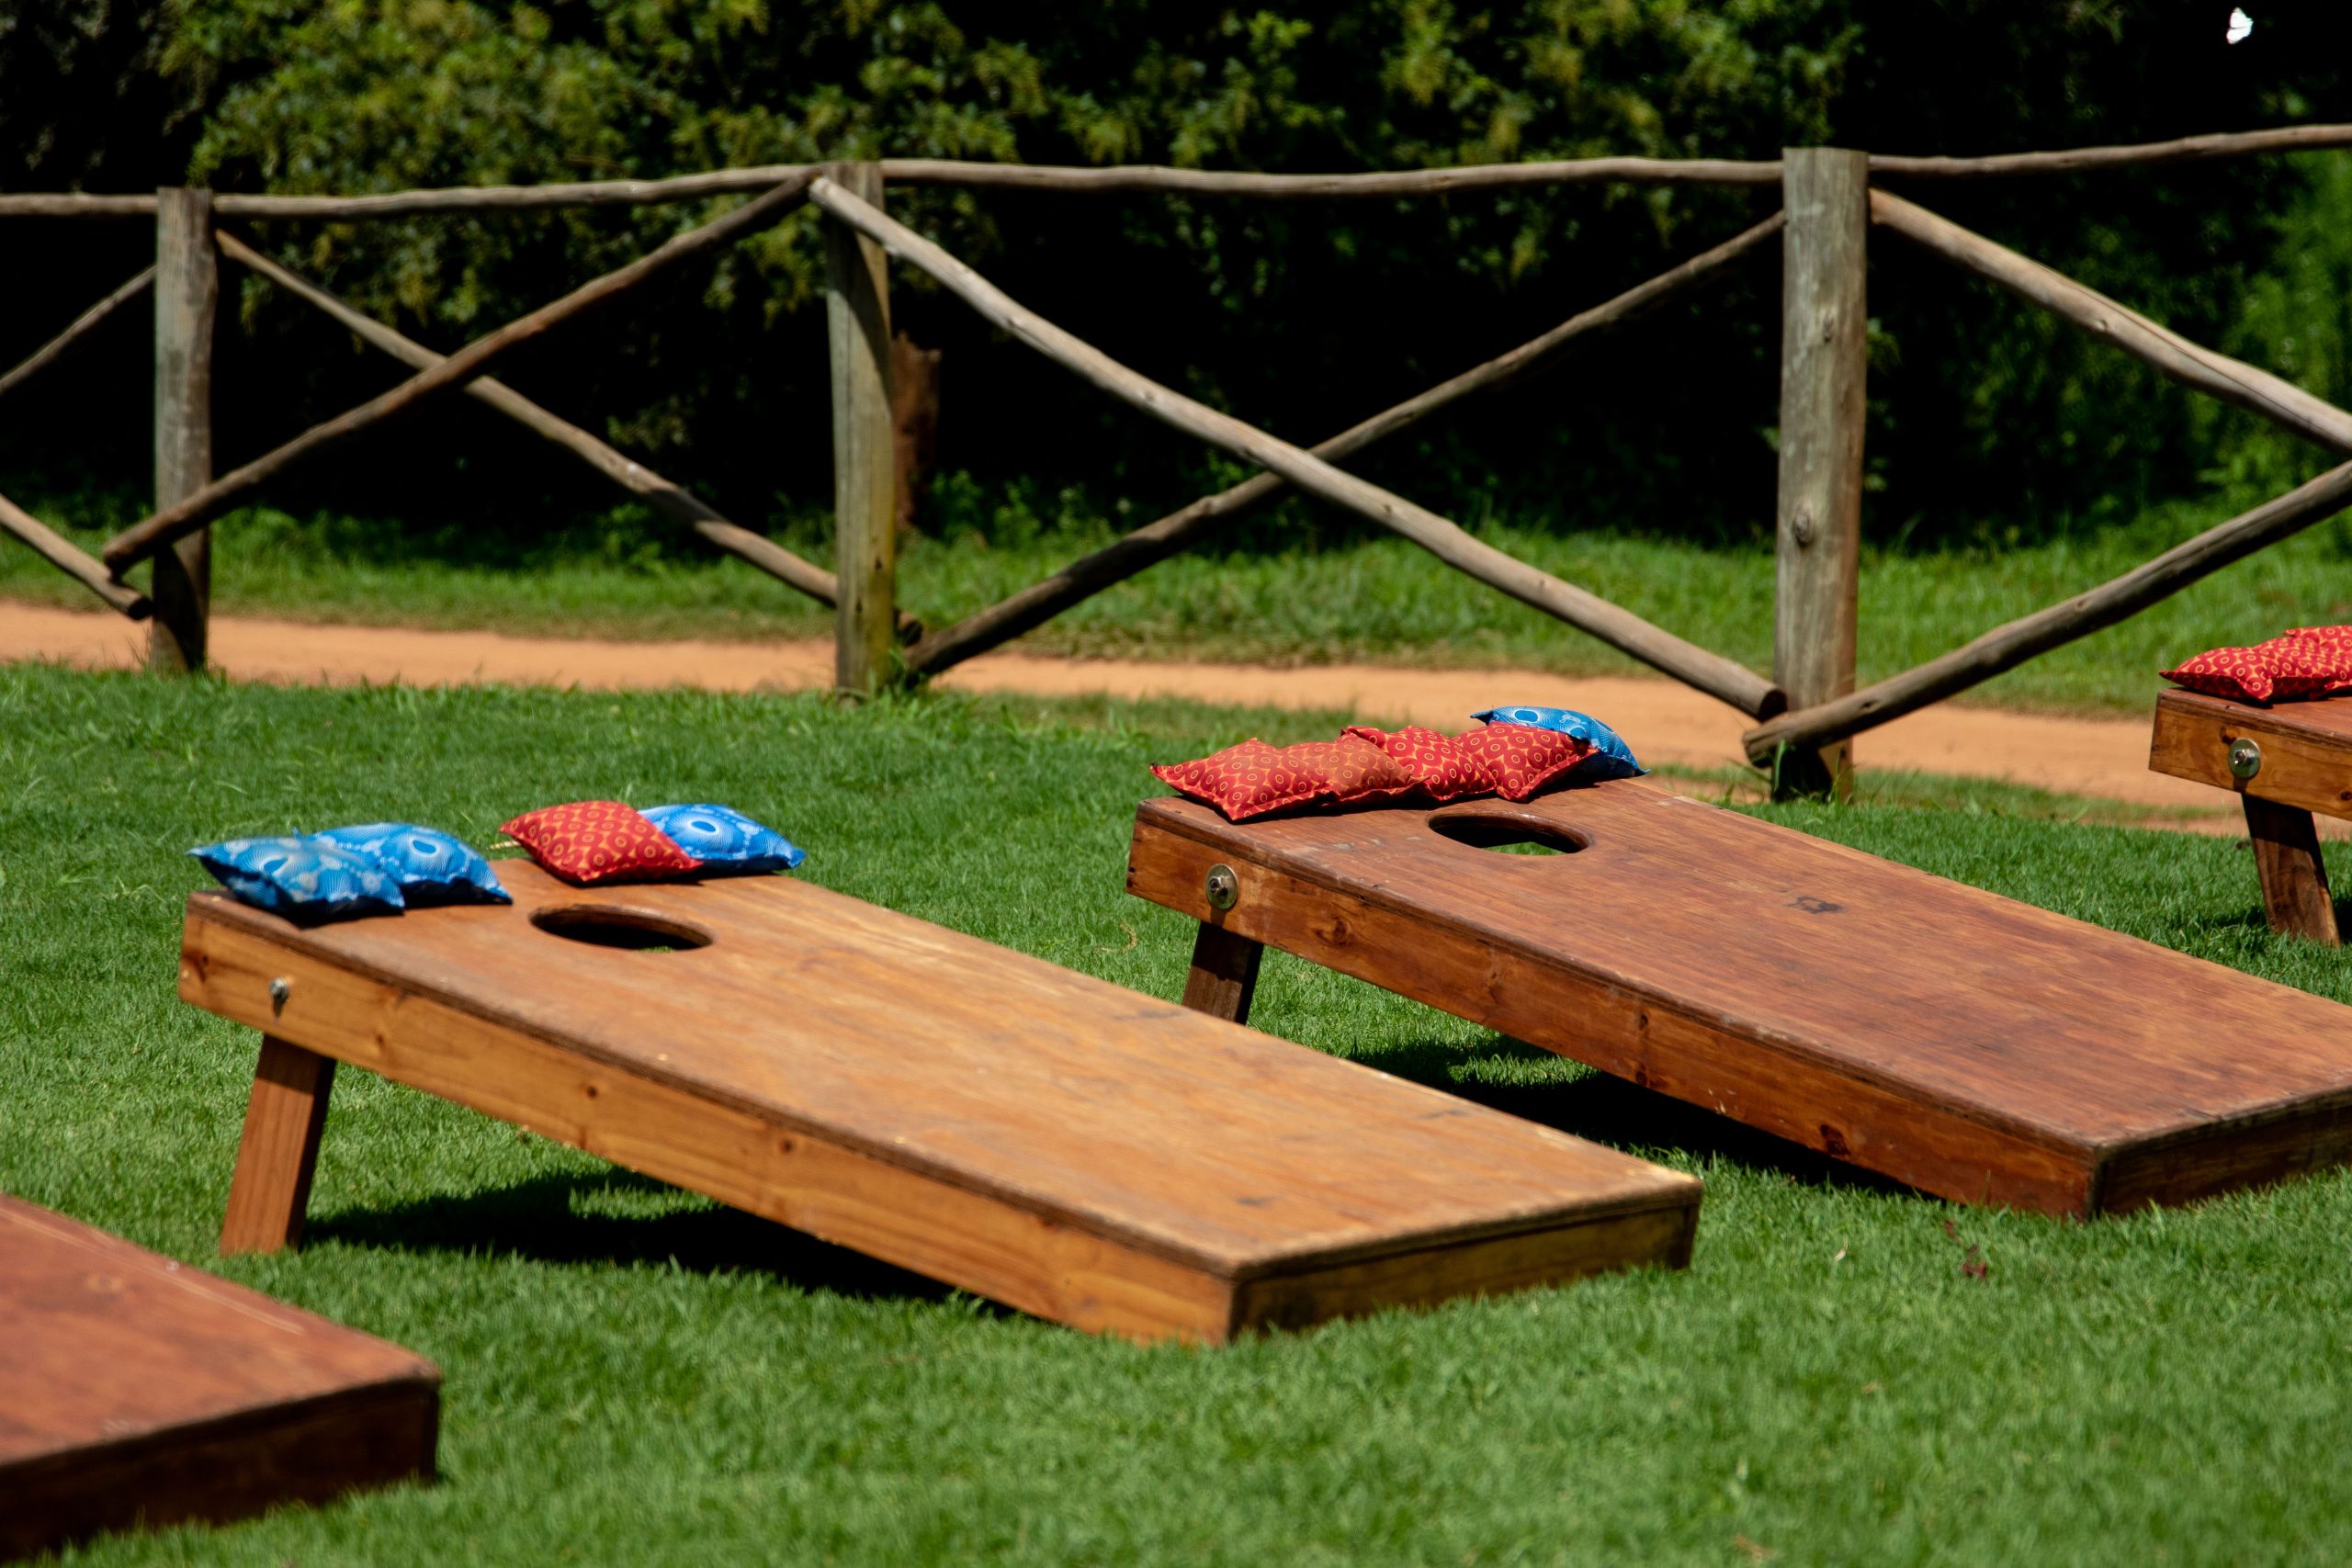
“Wooden cornhole boards look fantastic, but they are vulnerable to the elements if not properly cared for.”
Untreated wood will warp, split, and mildew when exposed to rain and humidity. To keep your set looking good, you must seal every surface—including the edges and inside the hole—with at least three coats of a high-quality outdoor-grade polyurethane. You’ll need to lightly sand between coats for a smooth finish. Plan to reapply a fresh coat every year or two, especially if the boards are stored outdoors. It’s a bit of work, but it’s the only way to protect your investment.
7. Backyard Footpool Game on Custom Artificial Turf
The single element that makes this setup feel so professional and exciting is the custom branding on the black border panels. Without the logos and text, it’s just a fun game. With them, it’s an *event*. This detail transforms a simple activity into a featured attraction, suggesting a special occasion like a corporate party, a wedding, or a major celebration. It shows a level of thought and investment that elevates the entire experience, making players feel like they’re part of something unique and memorable.
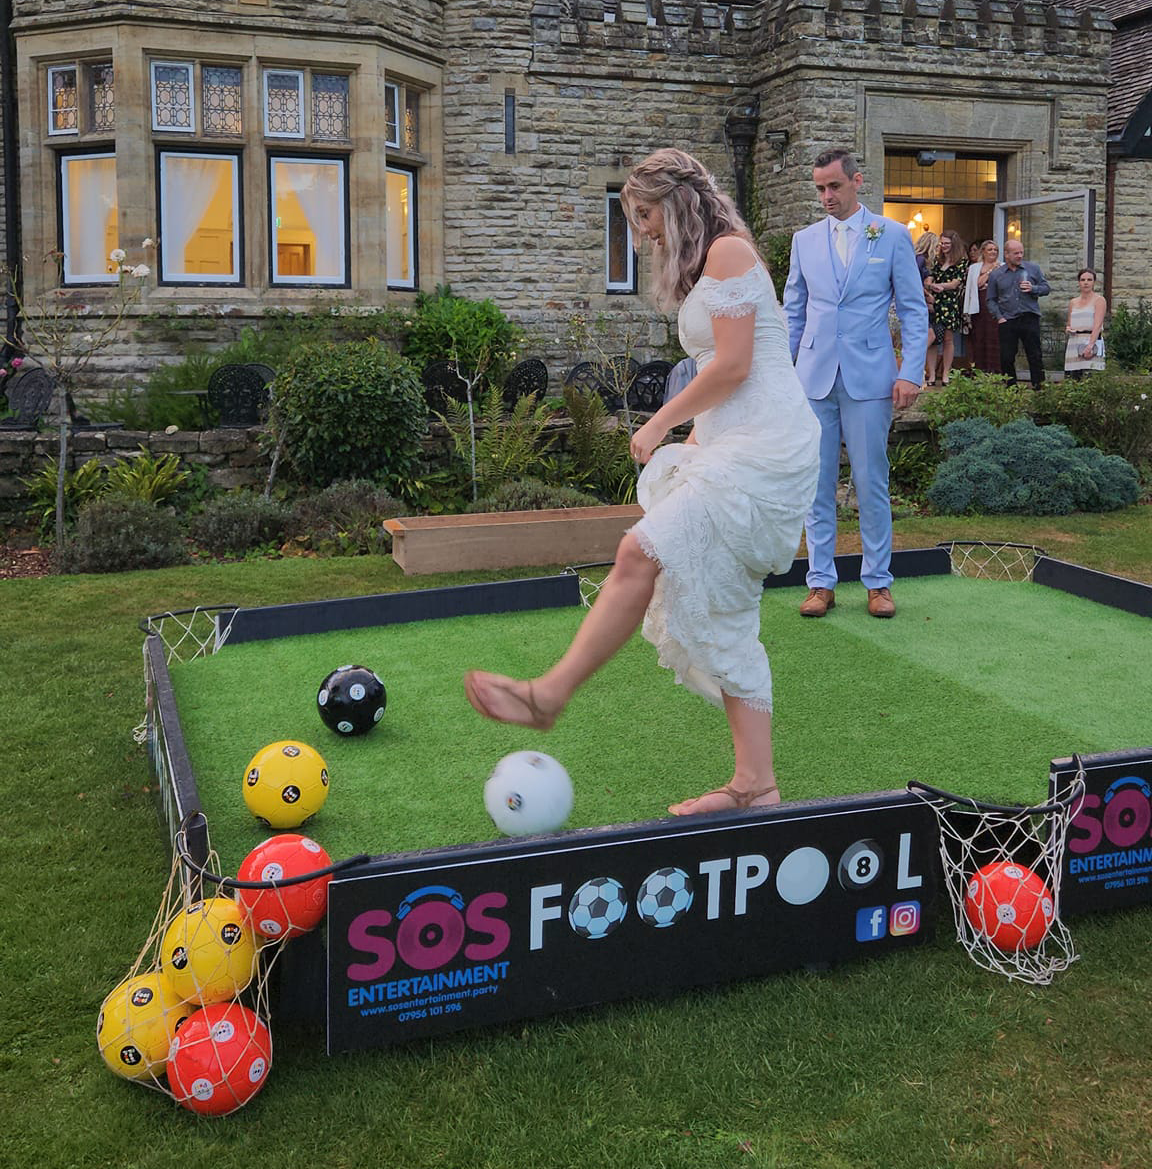
“You don’t need a custom-built arena to bring this idea home.”
You can create a convincing DIY footpool court right on your lawn. Use an inexpensive roll of artificial turf from a home improvement store as your playing surface. For the border, simple stained 2×6 lumber boards will work perfectly to contain the balls. Instead of professional printing, use stencils and white spray paint to add numbers or custom logos to the wooden border for that event-ready feel, all for under $200.
8. Simple and Colorful Backyard Ring Toss Game
When setting up a ring toss game for a mixed group of ages, create two different throw lines. Place one marker at a 10-foot distance for adults and older teens who appreciate a good challenge. Then, add a second marker at a 5-foot distance for younger kids. This simple adjustment ensures the game is fun and accessible for everyone, preventing frustration for little ones while maintaining a competitive edge for the grown-ups. Using different colored markers for each line also makes it easy for players to know where to stand.
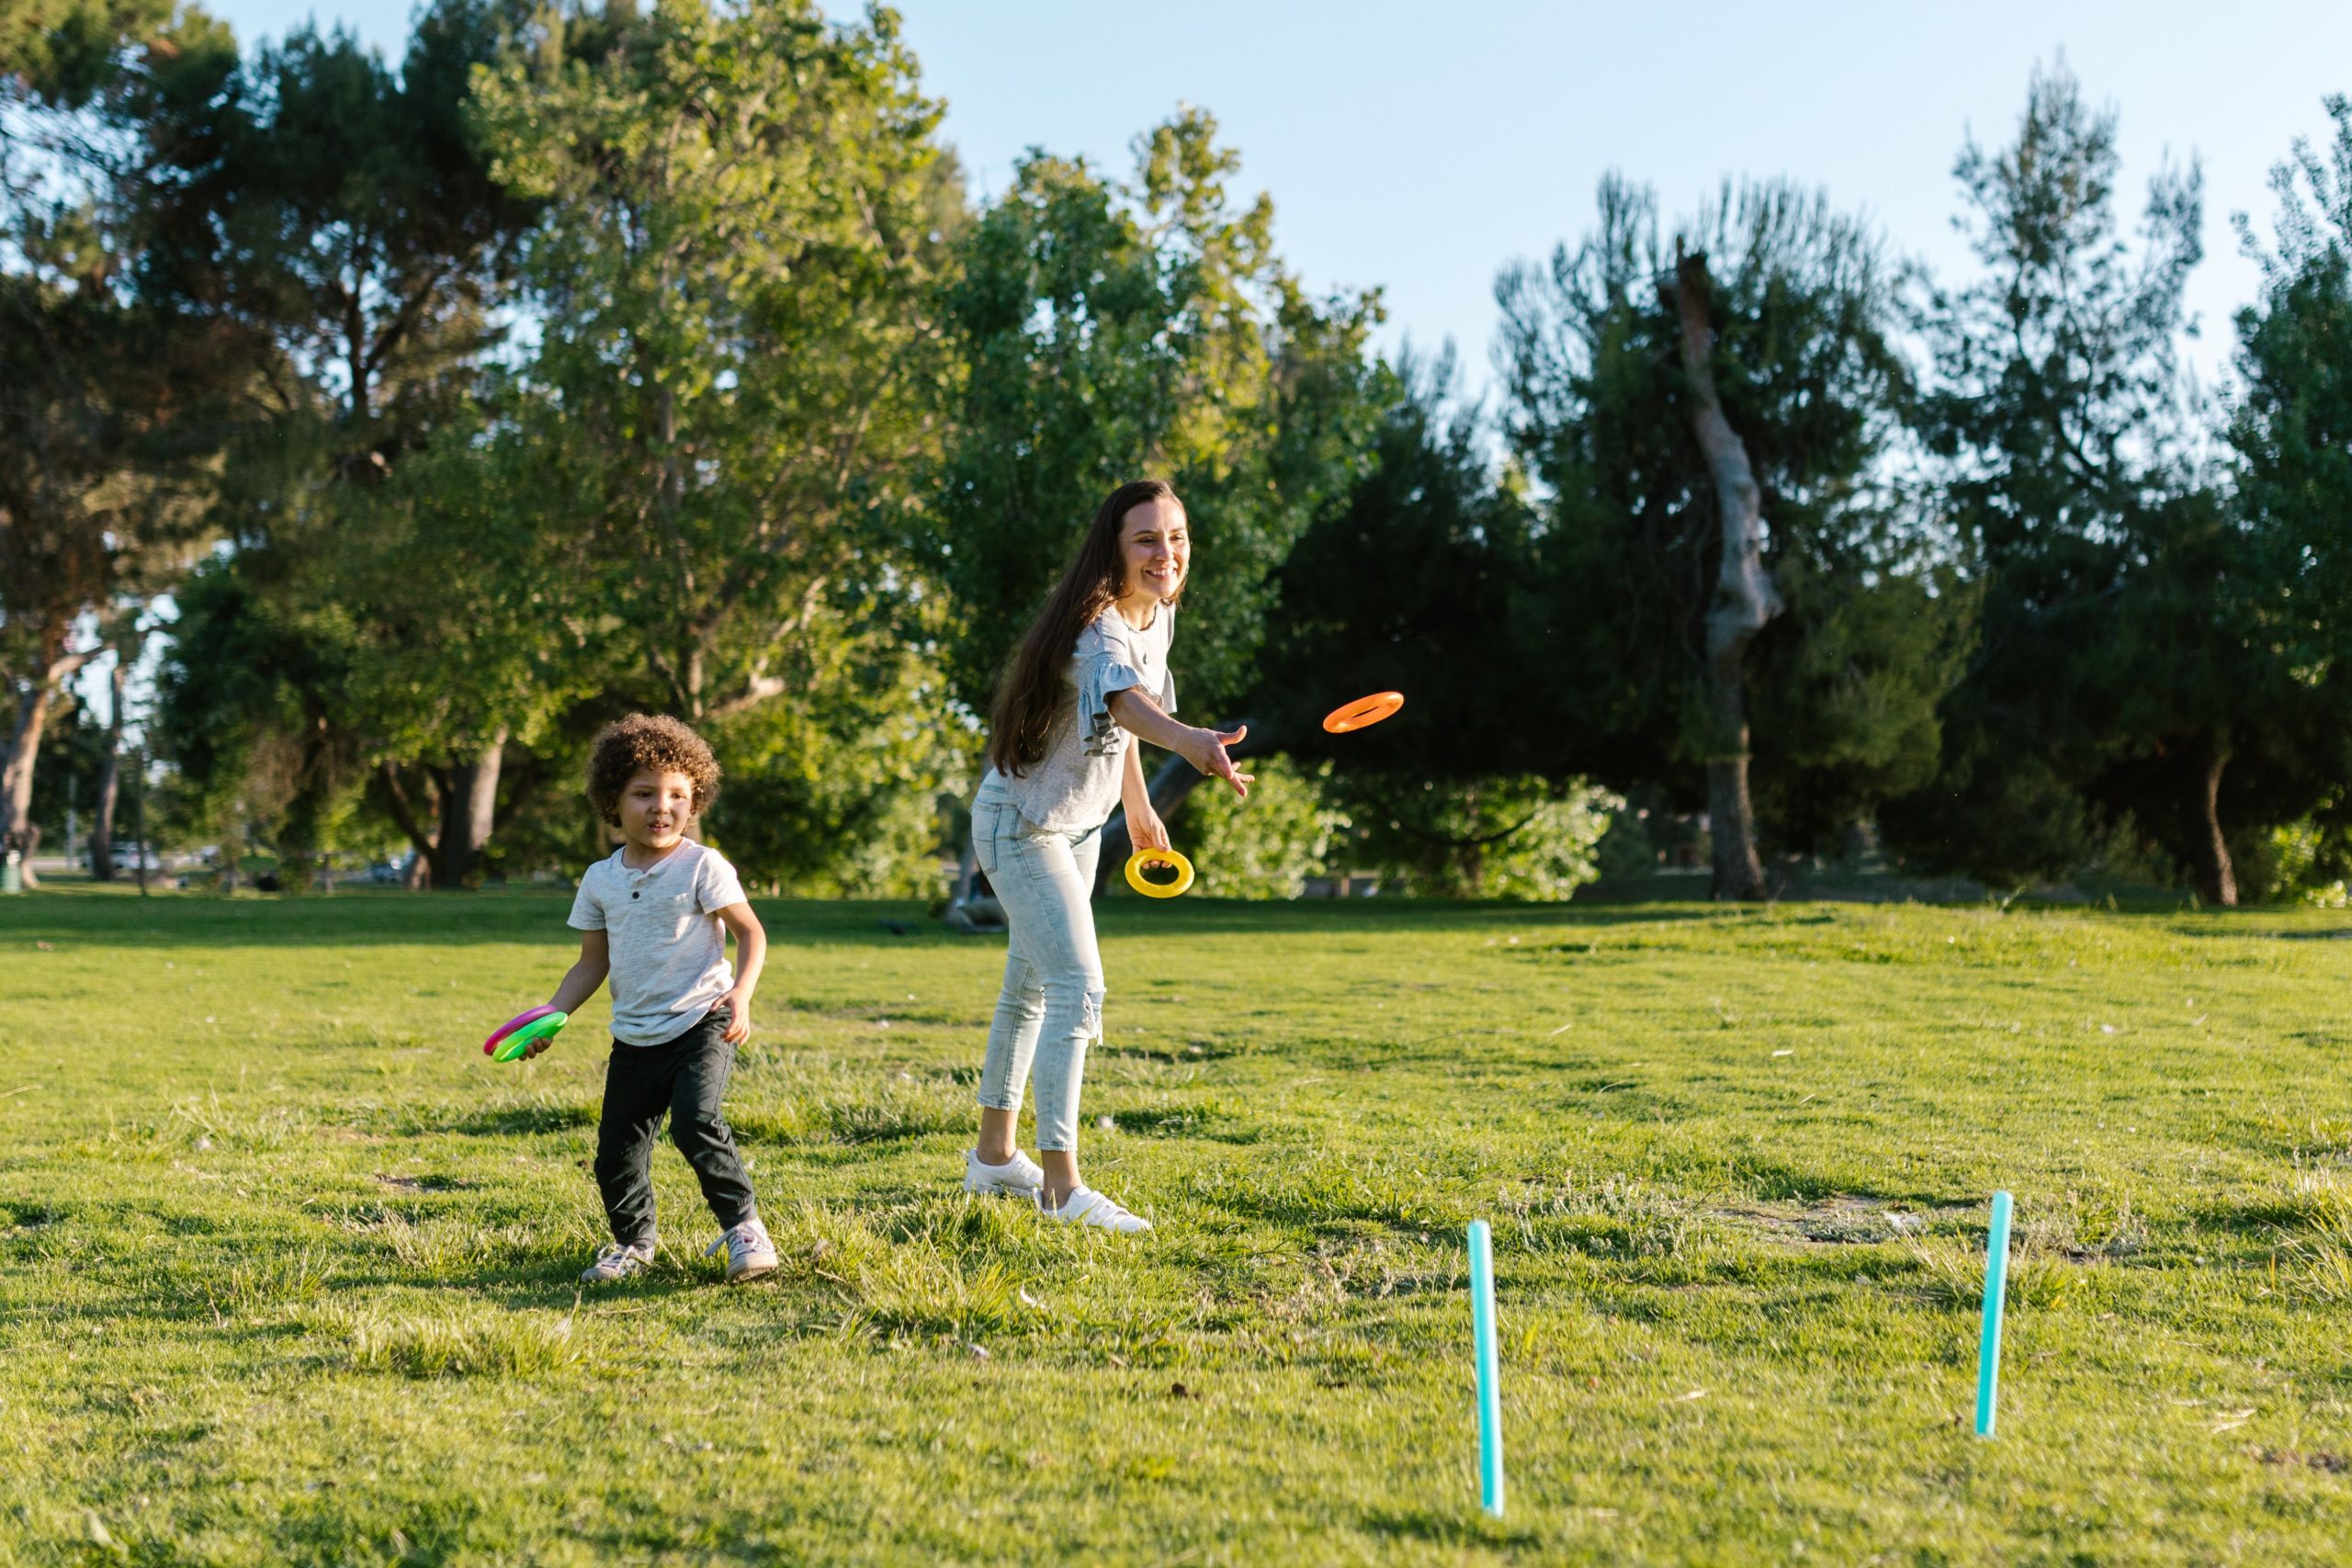
“This is the perfect game for smaller or irregularly shaped backyards where you can’t fit a large cornhole or volleyball setup.”
A simple ring toss game like this requires minimal space. All you need is a relatively flat patch of grass about 5 feet wide and 15 feet long to be comfortable. Because the components are so small and lightweight, you can easily set it up in whatever corner of the yard is available, making it incredibly versatile. For a more structured version that still saves space, see Idea #10.
9. Upgrading Your Lawn Games: A Parent’s Guide
Let’s be honest: many DIY game projects you see on Pinterest are more about the aesthetic than the actual playability. A beautifully painted lawn Twister looks great in a photo, but the first time you mow, it’s gone. A giant Jenga set made from construction lumber can be splintery and dangerously heavy for kids. Before you invest time and money, think about who will be using the game most. Prioritize durability, safety (sanded edges are non-negotiable!), and ease of storage over pure looks.
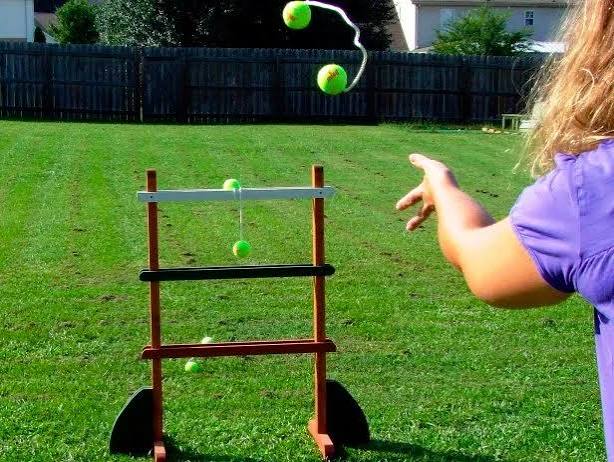
“Before you dive into a weekend DIY game project, run through this quick checklis”
Before you dive into a weekend DIY game project, run through this quick checklist to save yourself a headache later:
- Does this game require a perfectly flat surface? Check your yard for a suitable spot *first*.
- What is the plan for storage? Do you have a shed or garage space to protect it from the elements?
- Is the scale right for your primary players? A game built for adults might be too cumbersome or heavy for kids.
- Have you priced out the materials realistically? Sometimes, buying a pre-made set is cheaper than a complex DIY.
10. Family-Friendly Ring Toss with a Wooden X-Base
This DIY ring toss set is so appealing because it uses a classic primary color palette in a thoughtful way. The red, yellow, and blue pegs are instantly recognizable and playful, while the natural wood base keeps the whole thing from looking like a cheap plastic toy. The different point values assigned to each color add a strategic element that engages older kids and adults. It strikes the perfect balance between kid-friendly design and a more rustic, quality aesthetic that adults appreciate.
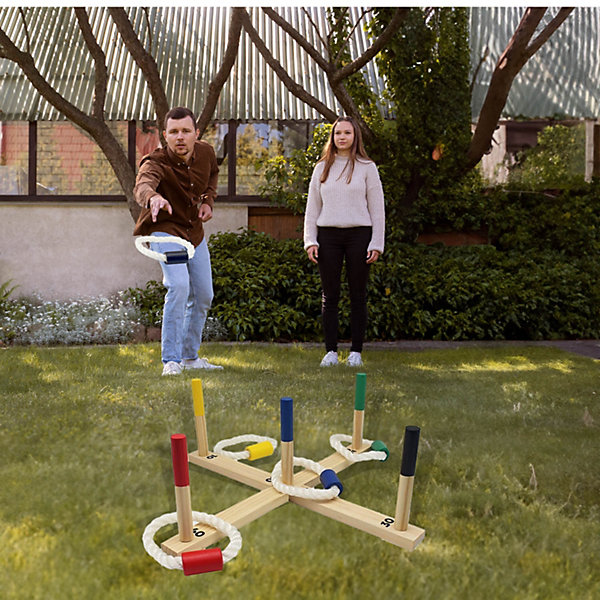
“Recreating this classic game is an easy and affordable weekend project.”
The cost is low, and the fun payoff is high. Here’s a quick estimate:
Lumber (for base and pegs): $15 – $25
Rope (for rings): $5 – $10
Sample pots of paint (for pegs): $10 – $15
Screws and wood glue: $5
TOTAL: $35 – $55
Budget alternative: Use leftover paint from other projects and source scrap wood for free to bring the total cost under $15.
11. Giant Wooden Four-in-a-Row Game for Outdoor Fun
A giant wooden game board like this is a fantastic centerpiece, but it requires diligent care. The biggest enemy is moisture. If left out in the rain, the wood will swell, and the game pieces will get stuck in their slots. You must store it in a dry, covered place like a garage or shed when not in use. Annually, inspect it for any signs of wear and tear, and re-apply a coat of clear, UV-resistant sealant to protect it from sun fading and moisture. This isn’t a ‘set it and forget it’ piece of equipment.
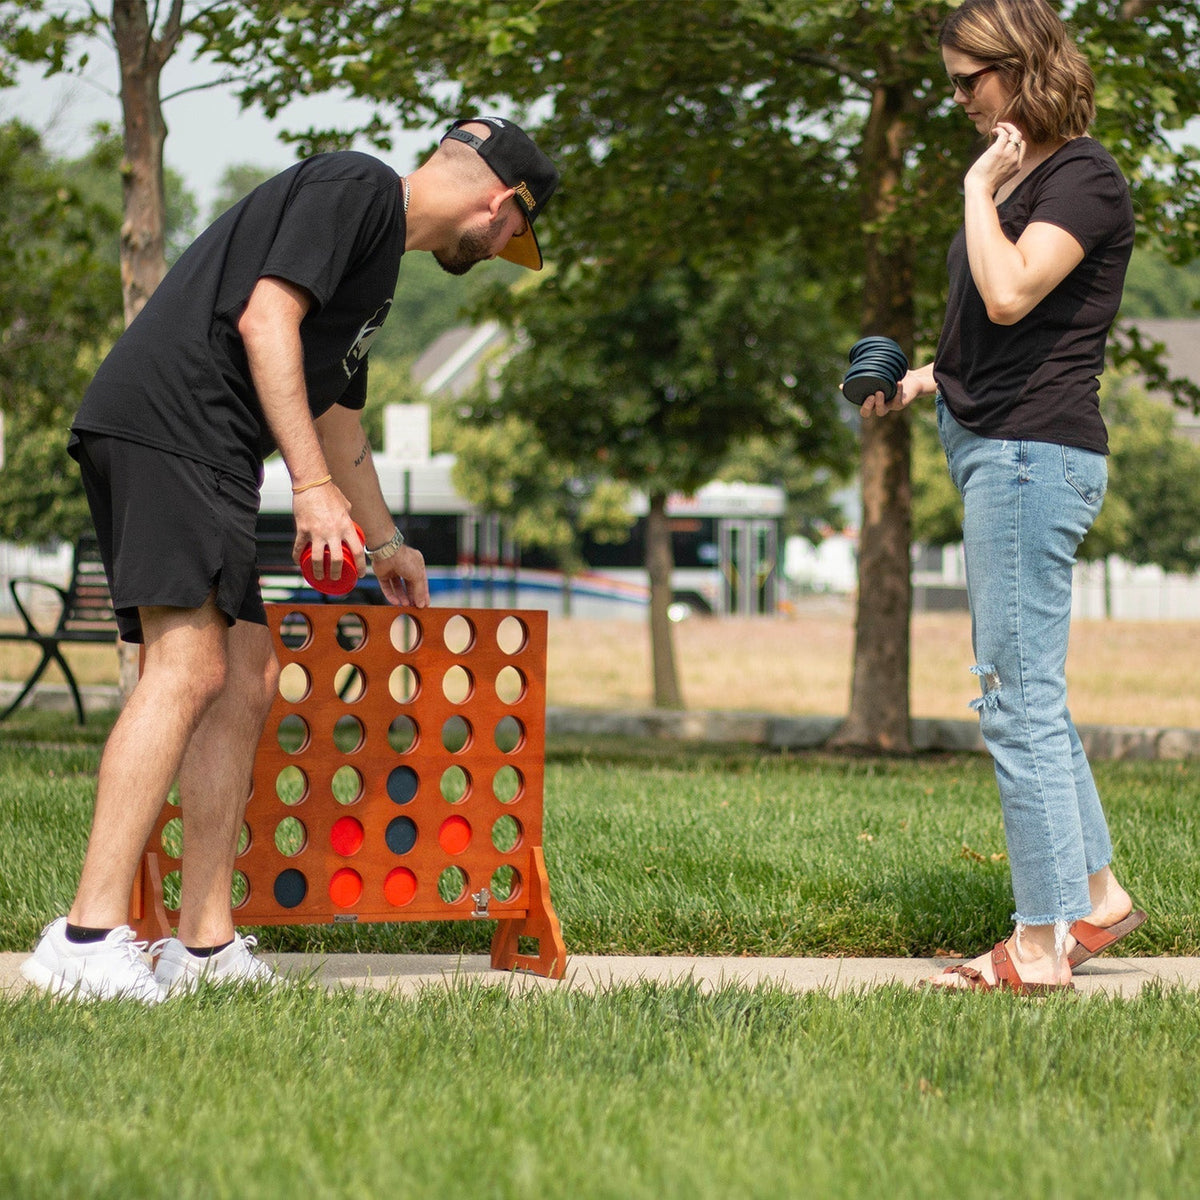
“The beauty of a giant four-in-a-row game is its verticality—it packs a lot of fun into a small footprint.”
Unlike cornhole or bocce that require a long, open area, this game only needs a flat space of about 5×3 feet to be playable. This makes it a perfect choice for patios, decks, or smaller urban backyards where ground space is at a premium. Its impressive height (often 3-4 feet tall) also gives it a strong visual presence, making it a natural focal point for a party. Compare its footprint to the large-scale chess set in Idea #14.
12. Rustic Industrial Game Corner with Giant Jenga
The clever use of stacked wooden pallets is the single element that defines this space. They serve a dual purpose: functionally, they create a level, solid platform for the giant Jenga game on the uneven grass. Aesthetically, their rough-hewn texture perfectly complements the industrial vibe of the concrete building and the rustic feel of the picnic tables. It’s a simple, low-cost solution that feels intentional and thoughtfully designed, bridging the gap between the building and the lawn.
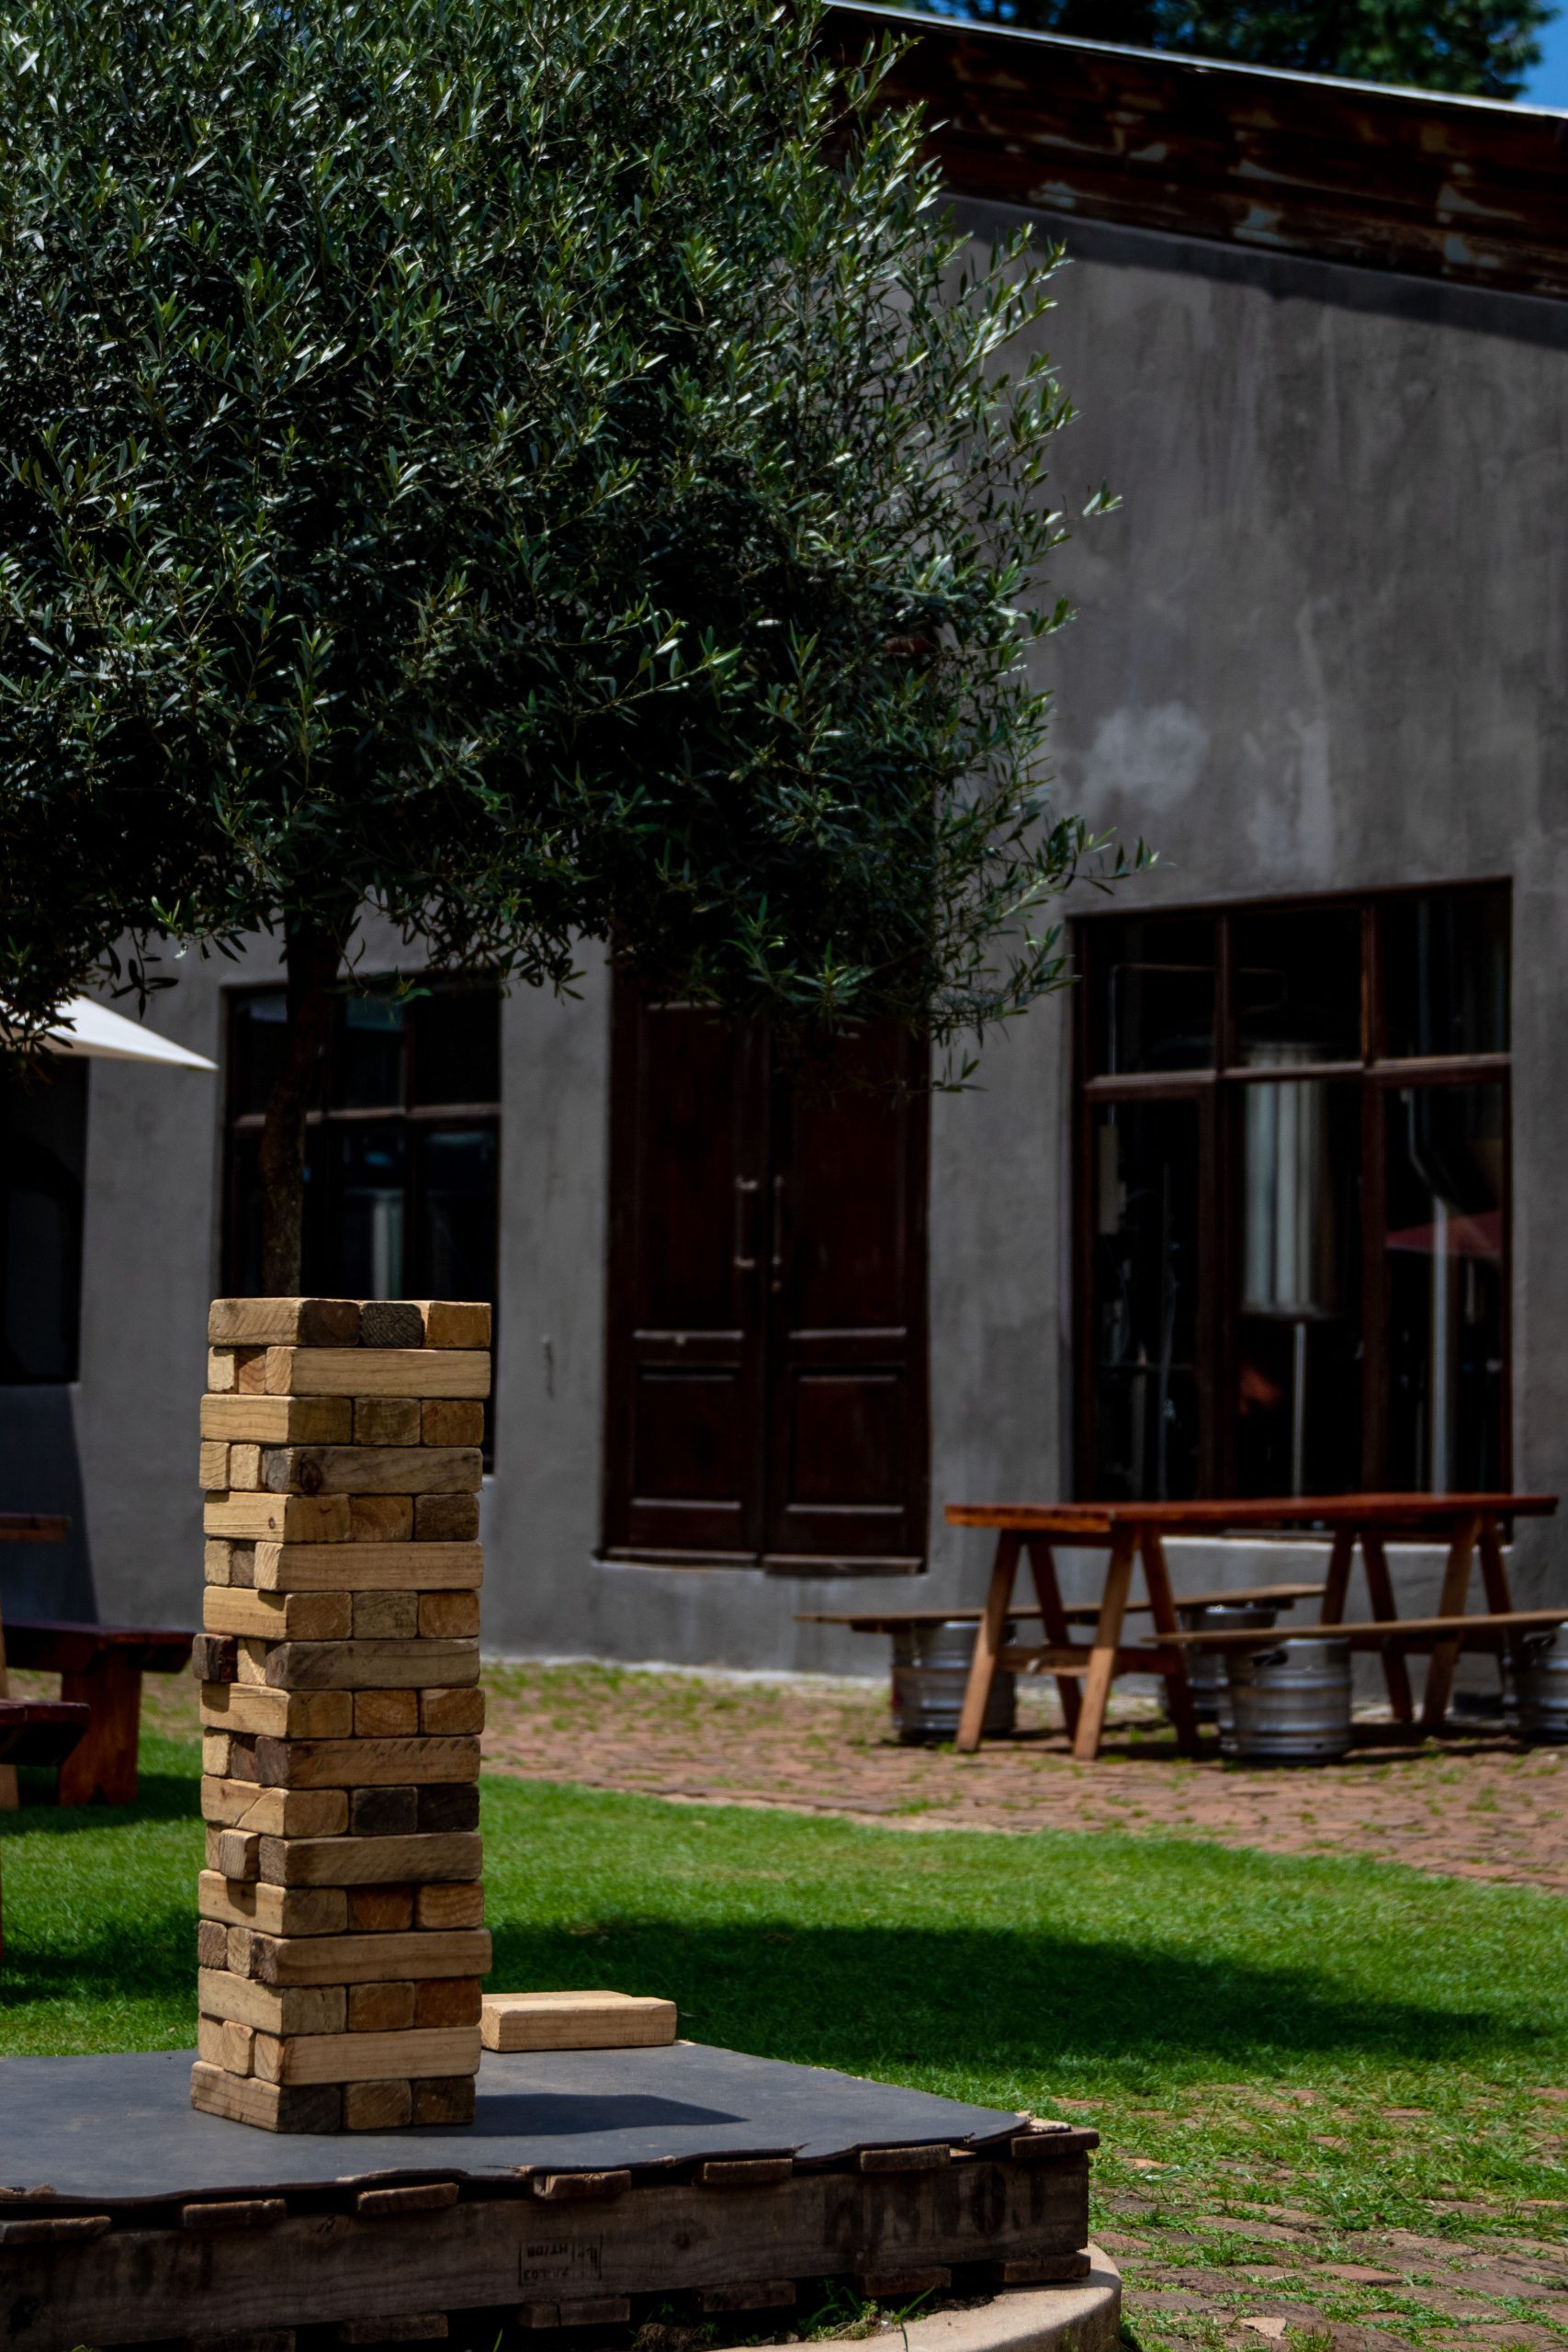
“This area works because it confidently mixes materials and textures.”
You have the hard, cool gray of the concrete building, the warm, rustic brown of the wooden pallets and picnic tables, and the soft, natural green of the grass. The giant Jenga blocks, in their light natural wood tone, act as a visual bridge between all these elements. The result is a space that feels layered and interesting, not just like a game was randomly plopped onto a lawn. It feels like a dedicated ‘game zone’ with its own distinct character.
13. Boho-Chic Poolside Picnic with a Low Pallet Table
This stunning boho look is a masterclass in layering. Here’s the formula: 60% cozy textures + 30% warm, earthy colors + 10% sculptural accents. The textures come from the plush faux fur rugs and assorted patterned pillows, which create an irresistible urge to lounge. The color palette is driven by the terracotta vases and peach-and-yellow pedestals, all grounded by the crisp white of the pallet table. The sculptural pedestals add height and sophistication, breaking up the low-slung arrangement and turning snacks into a design moment.
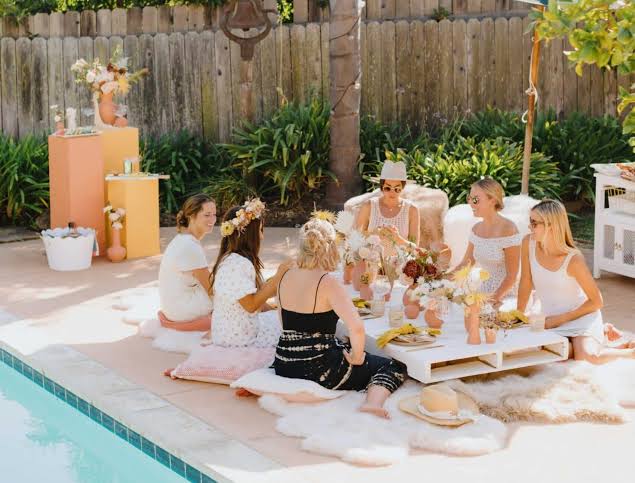
“You can achieve this high-end bohemian vibe on a surprisingly reasonable budget.”
It’s all about where you splurge and where you save.
Main Furniture (DIY Pallet Table): $40 – $70
Textiles (Rugs & Pillows): $150 – $250
Decor (Vases & Pedestals): $80 – $120
Florals: $30 – $50
TOTAL: $300 – $490
Budget alternative: Thrift the pillows and vases and build the pedestals from painted plywood to get this look for under $200.
14. Supersized Chess Board on a Paved Patio
An oversized chess set is a showstopper, but be realistic about how much it will actually get played. These games are often more of a conversation piece and a playful landscape feature than a game people will complete. The pieces can be cumbersome to move, and a full game can take hours. If you’re hoping for a high-action, fast-paced party game, this isn’t it. Think of it more as functional sculpture that invites casual, low-stakes interaction. It’s perfect for a glass of wine and a slow-moving match over an afternoon.
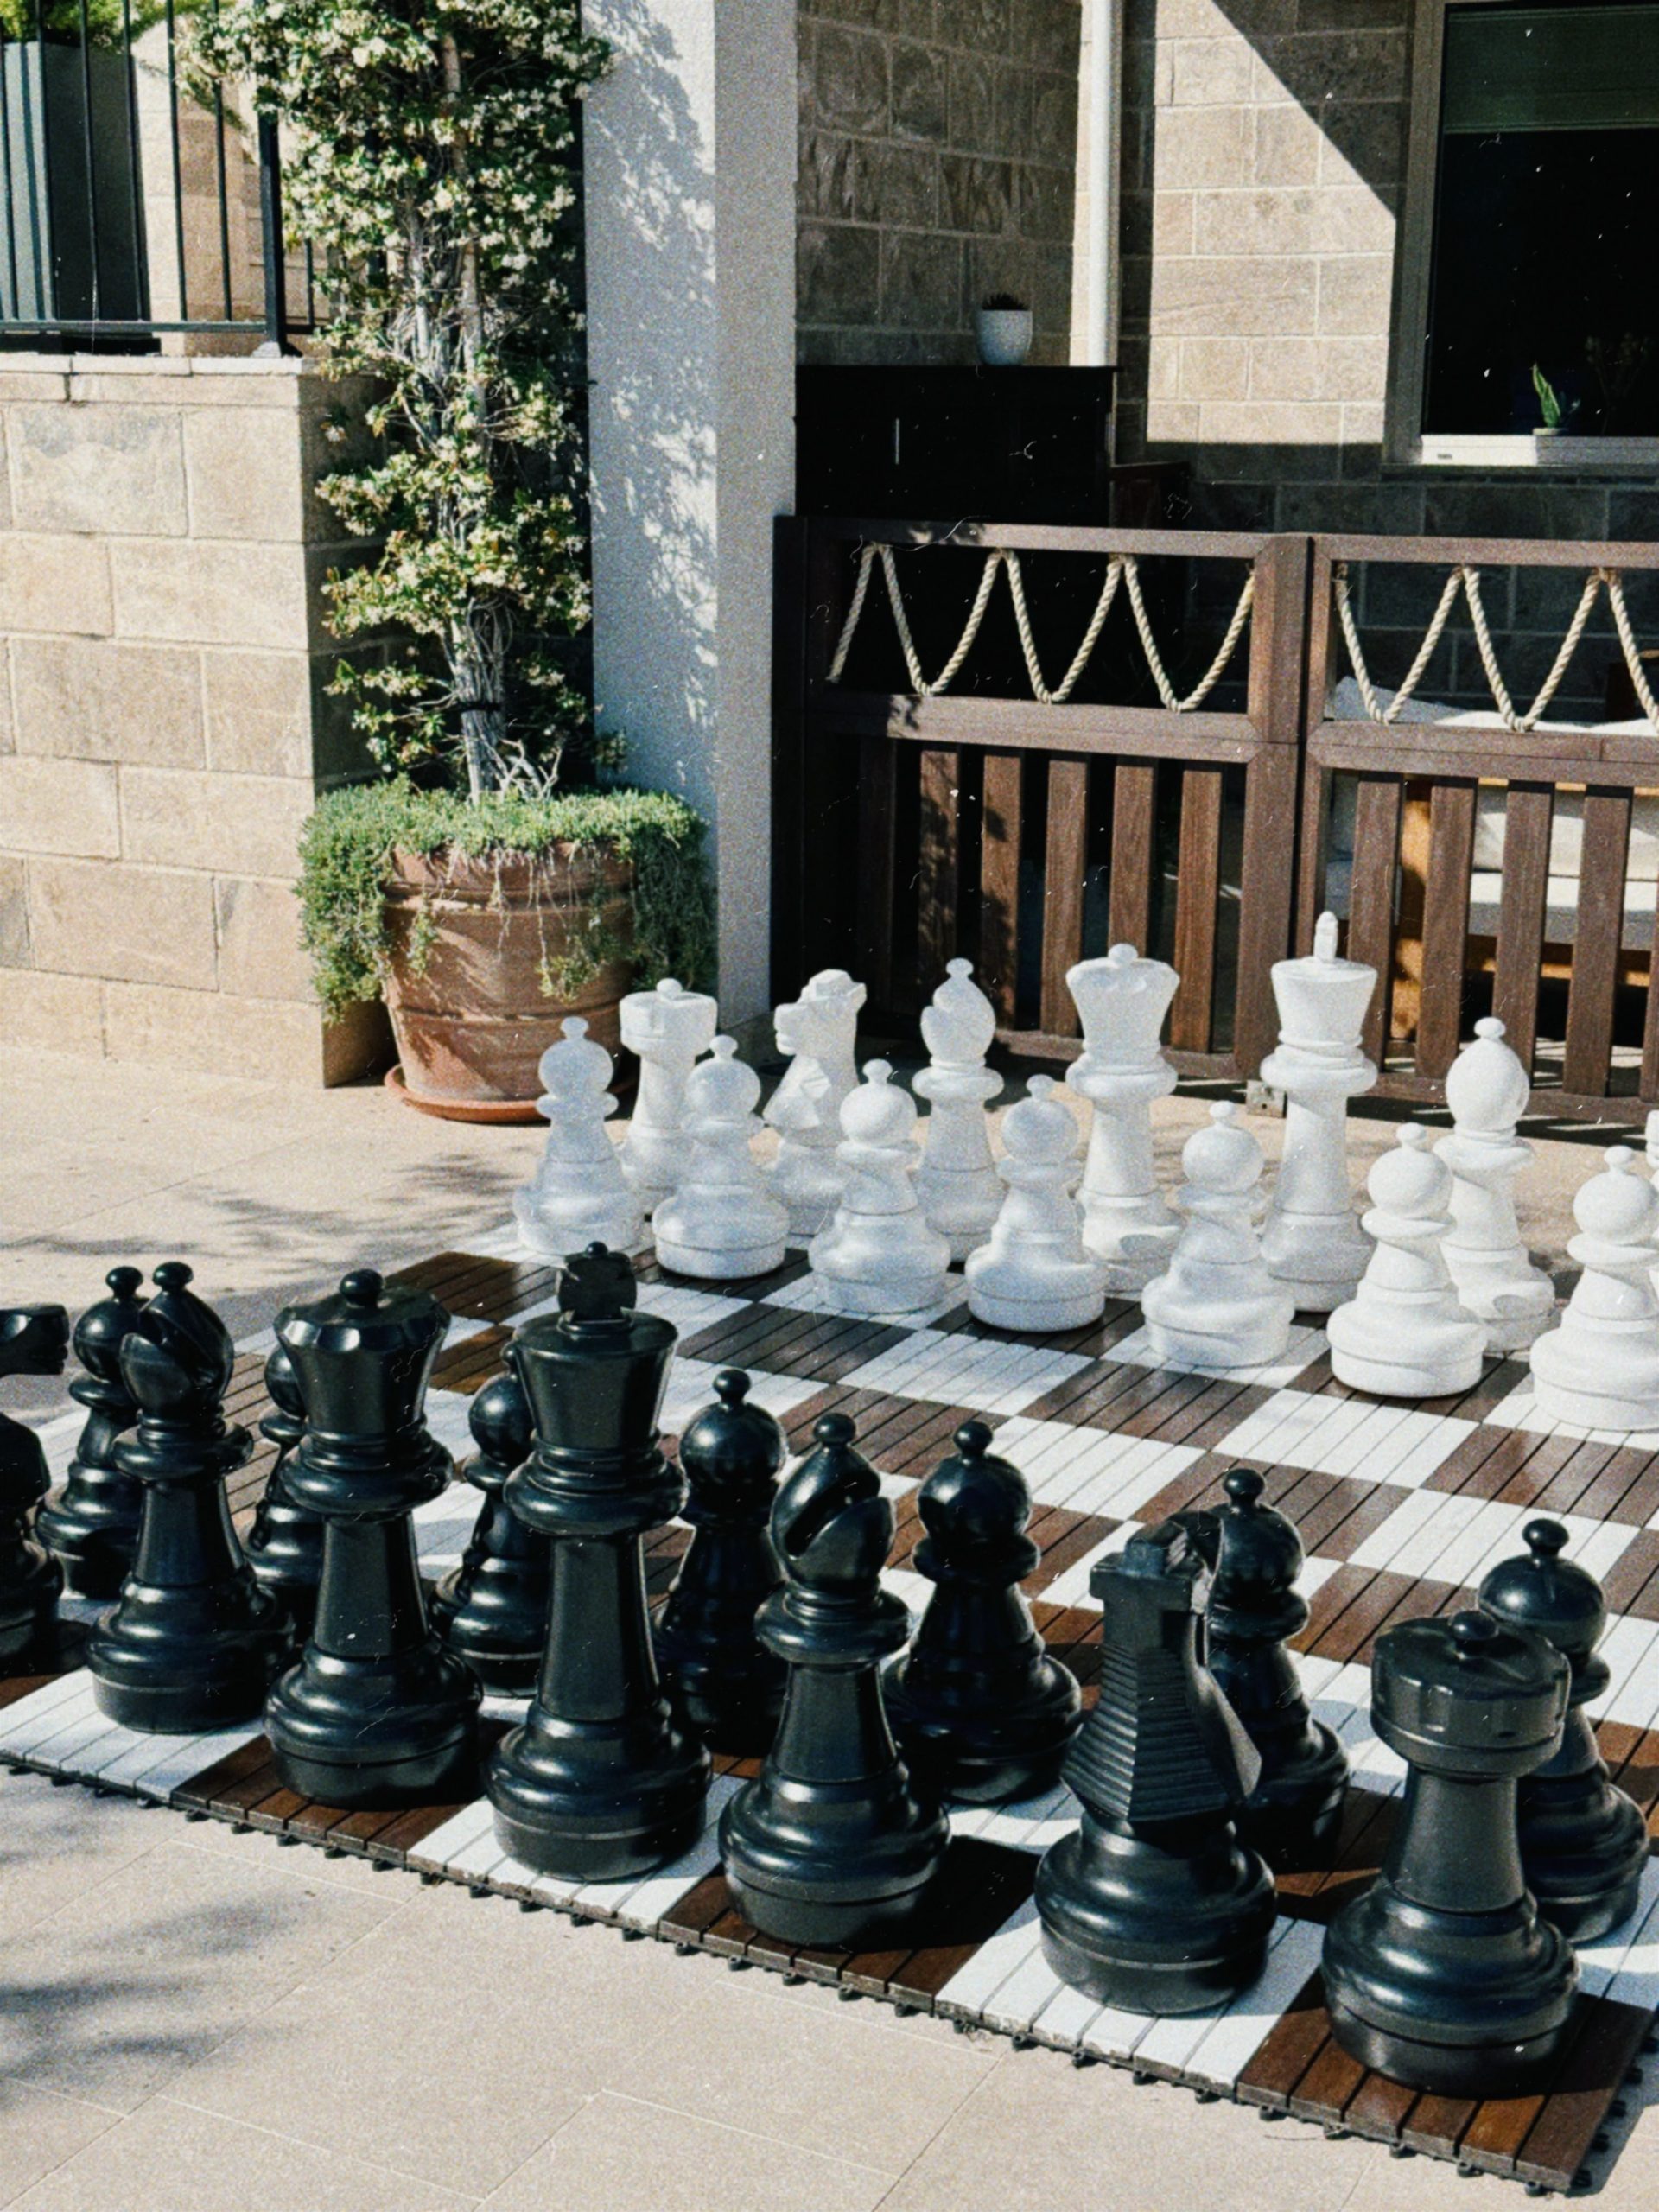
“The maintenance here depends entirely on your board.”
A painted concrete board will need to be cleaned and potentially repainted every few years to keep it crisp. A board made of alternating wood and tile, like the one shown, requires more care. The wood squares need to be sealed annually to prevent rot and warping, and you’ll need to watch for weeds growing in the seams between the squares. The plastic pieces themselves are low-maintenance, but they can fade in direct, intense sunlight over many years. Storing them in a deck box when not in use can prolong their vibrant color.
15. Modern Split-Level Yard with a Tree Swing and Concrete Walls
The single most impactful element here is the vibrant orange bench cushion. In a landscape dominated by the cool, neutral tones of raw concrete and deep green foliage, that sliver of intense color is everything. It draws the eye, adds a necessary touch of warmth, and injects a sense of playfulness into the otherwise structured, modern design. Without it, the space would risk feeling a bit cold or impersonal; with it, the yard feels instantly inviting and full of personality.
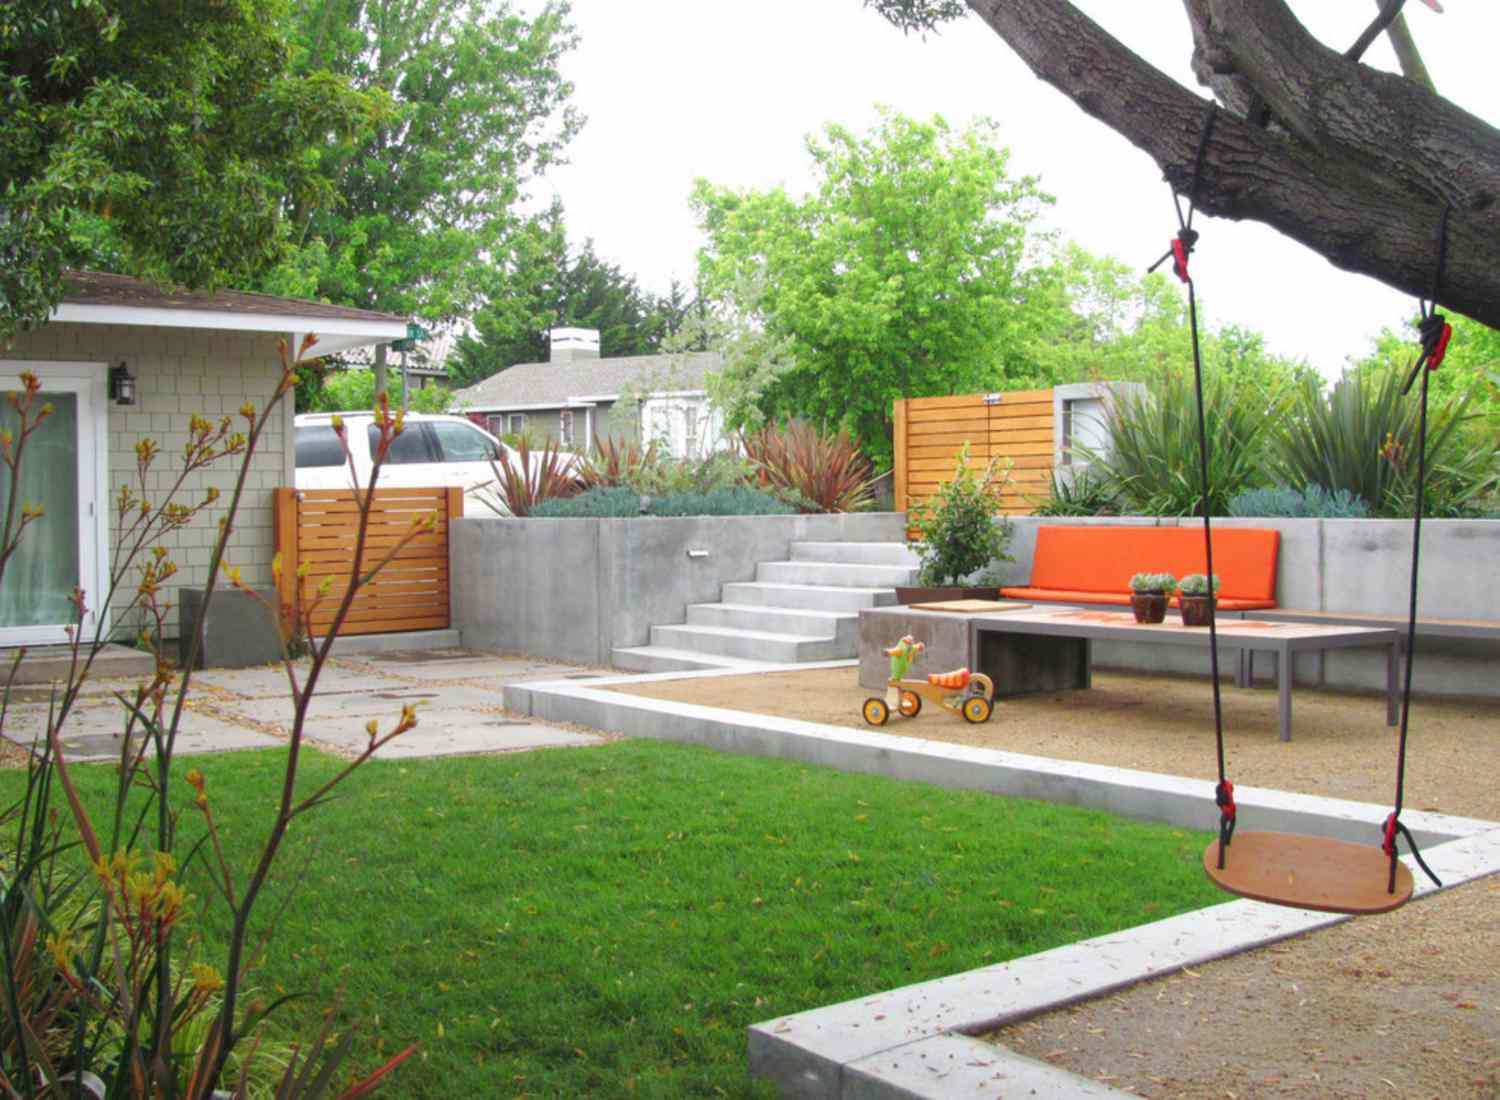
“This design is successful because of its brilliant use of contrast.”
It’s a study in opposites. You have the hard, rigid lines of the concrete retaining walls and steps against the soft, organic shapes of the plants and tree. The warm, natural texture of the slatted wood fence contrasts beautifully with the cool, smooth concrete. Finally, the natural, muted color palette is punctuated by that one bold stroke of orange. This is a much more architectural approach to a play space compared to the naturalistic feel of Idea #29.
16. Backyard Adventure Set with Climbing Wall and Fabric Huts
We’re seeing a big shift away from the monolithic plastic playsets of the past toward more modular, multi-functional wooden structures like this one. Today’s parents are looking for play equipment that encourages creative and physical challenges, not just simple swinging and sliding. The inclusion of elements like a climbing wall, a fabric teepee, and various targets reflects a trend towards ‘adventure-style’ play that helps develop motor skills and problem-solving abilities. It’s about creating a dynamic environment rather than a static one.
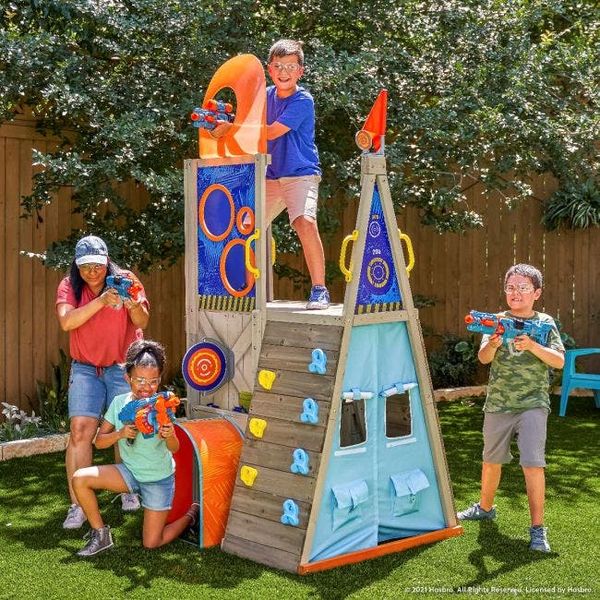
“When selecting a playset, look for one that offers a variety of activities to keep kids engaged long-term.”
A set with only a slide and swings will be boring in a year. A structure that incorporates a climbing wall, a fort or hut area for imaginative play, and maybe a built-in table or sandbox will grow with your child. The key is to provide different ‘play loops’: a physical loop (climbing and sliding), a creative loop (the fort), and a social loop (a place to sit and interact).
17. Grand Wooden Playset with Dual Green Slides and Swings
A large, multi-feature playset like this demands a significant amount of space. It’s not just the footprint of the structure itself, which can be 15×20 feet or more. You must also account for the safety ‘use zone’ around it. This means a clear, unobstructed area of at least 6 feet on all sides. The slide exits need even more room, and the swings require a clearance of at least twice the height of the swing beam, front and back. Realistically, you’re looking at a dedicated, level area of at least 30×35 feet for a set of this size.
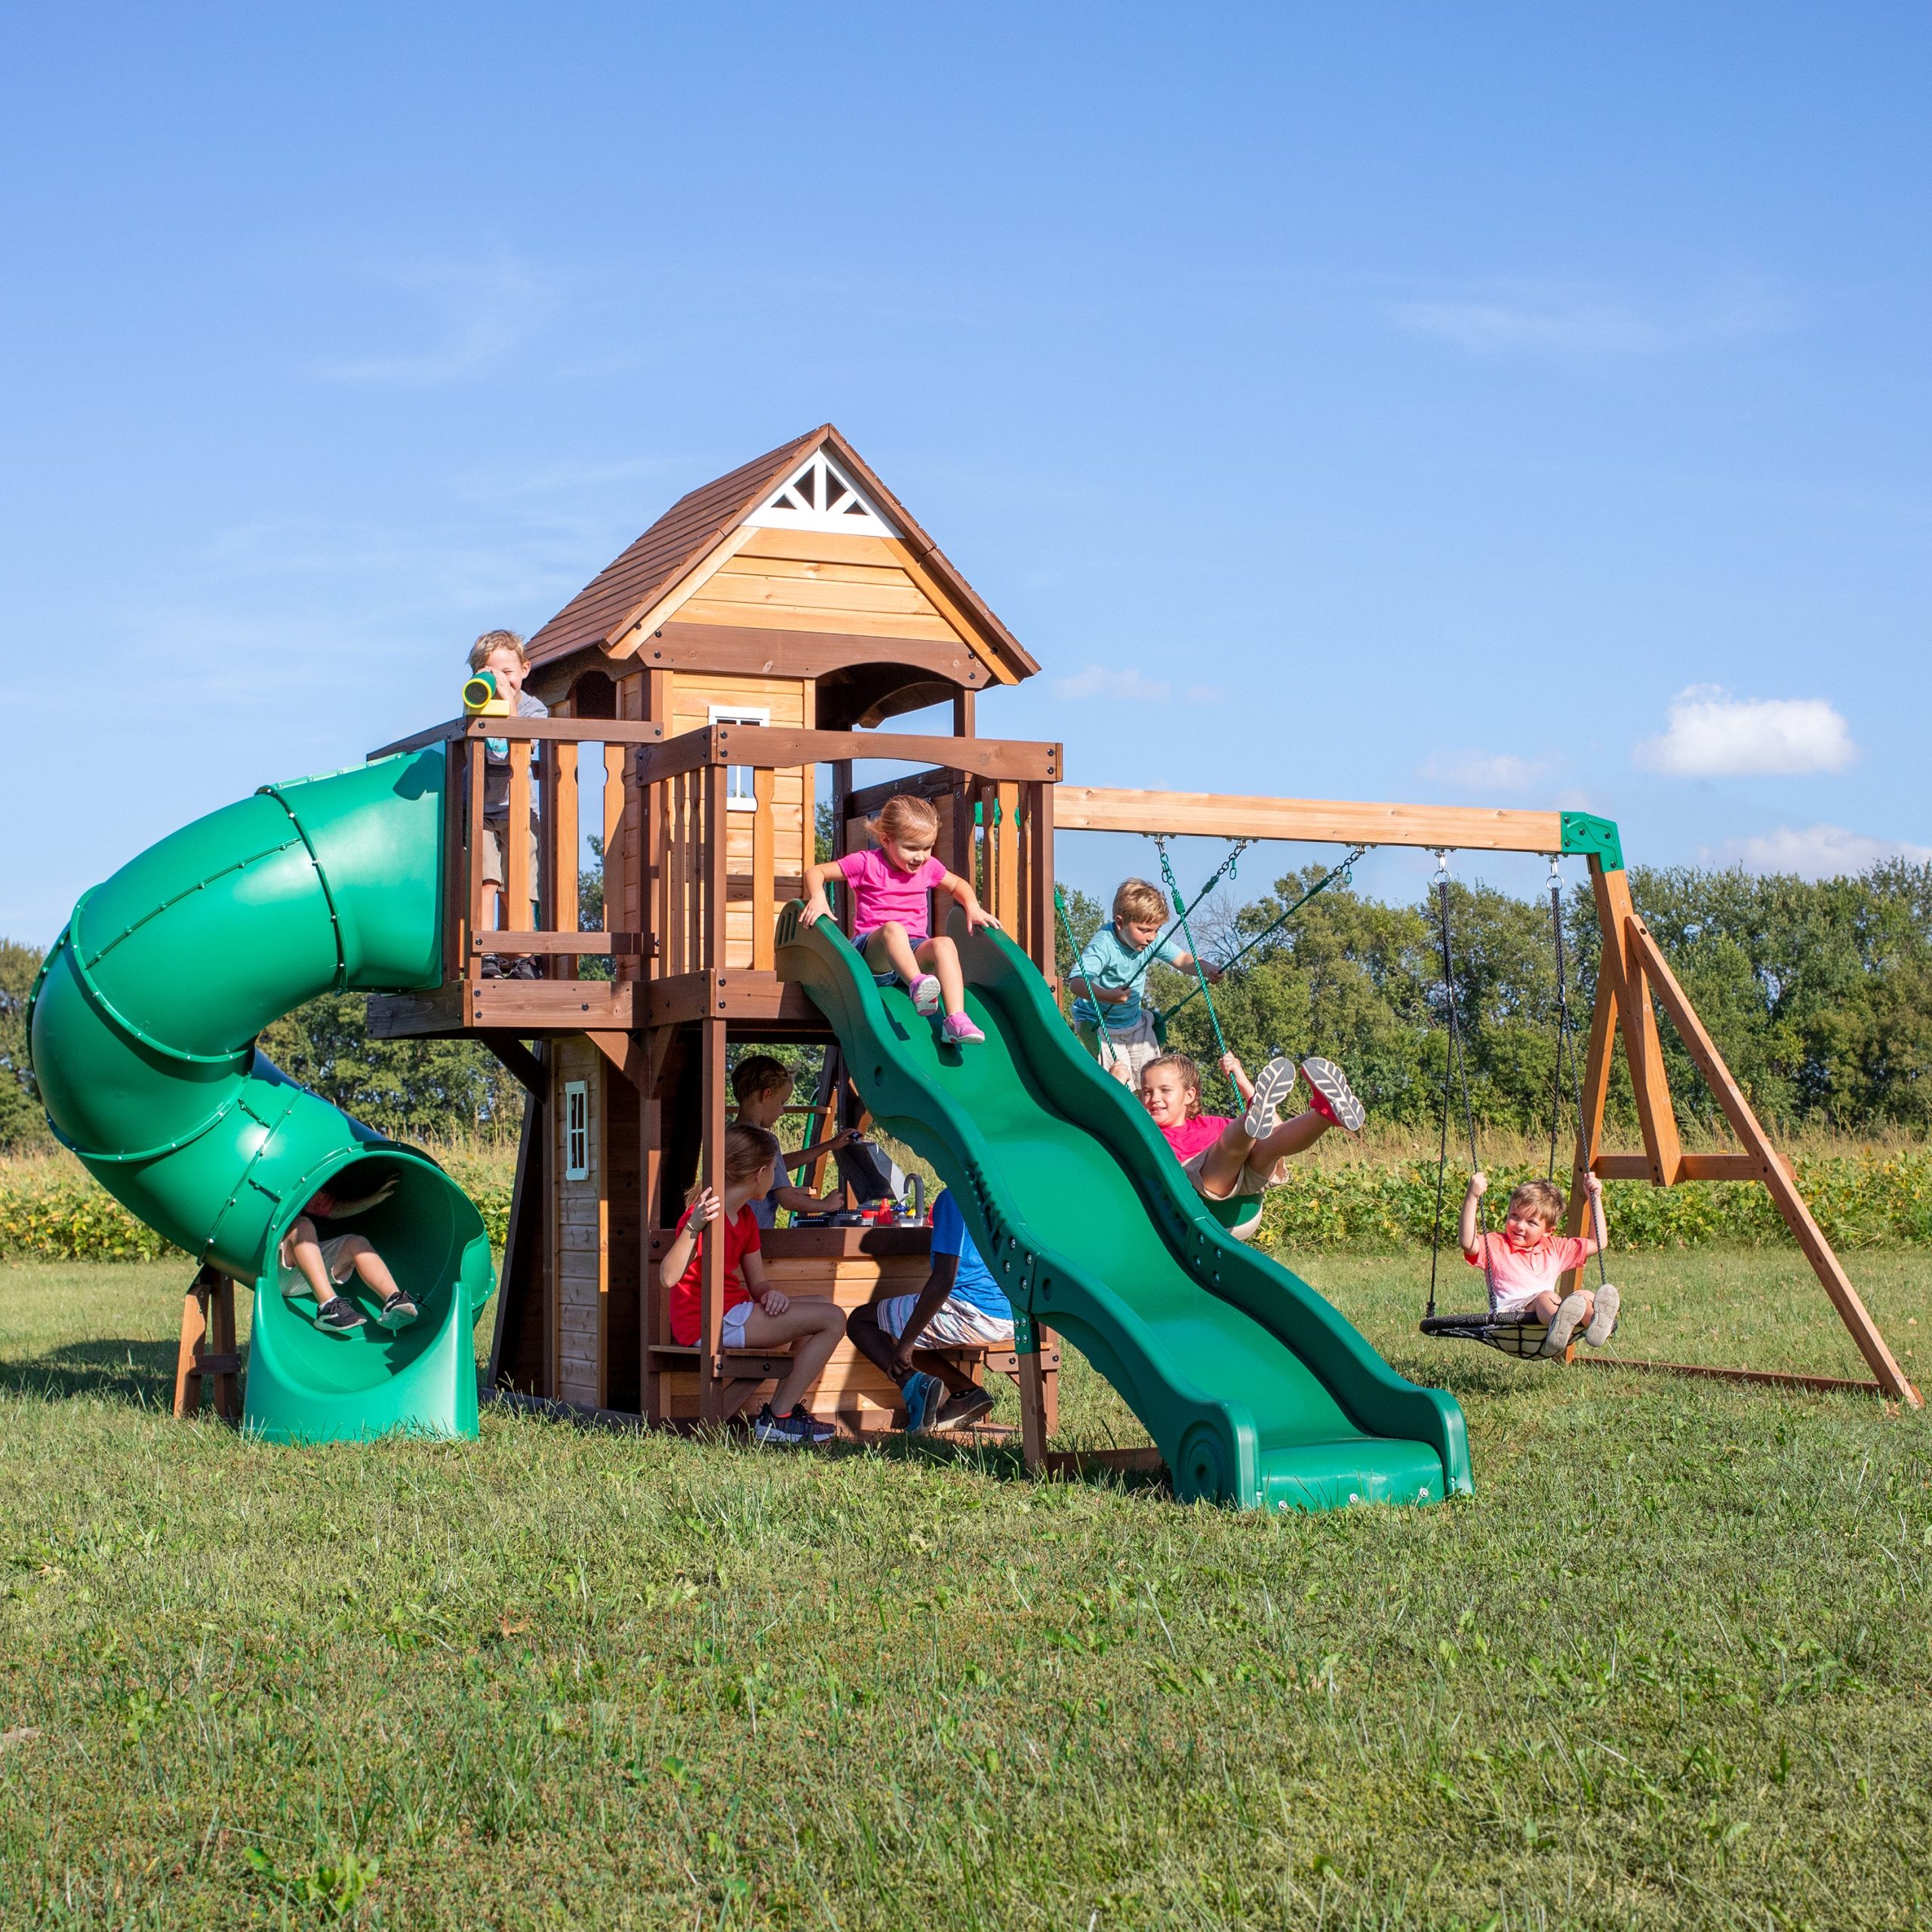
“A high-quality, large-scale wooden playset is a significant investment, but it can provide a decade of fun.”
Here’s what you can expect to spend:
Playset Kit: $1,500 – $4,000+
Safety Surfacing (Wood Mulch): $300 – $700
Professional Installation (optional, but recommended): $500 – $1,000
Stain/Sealant for Maintenance: $100 annually
TOTAL (DIY Install): $1,800 – $4,700+
Budget alternative: Look for secondhand sets on Facebook Marketplace in late fall, but be sure to inspect thoroughly for wood rot or structural damage before buying.
18. Multi-Level Blue and Wood Playset with Striped Canopies
A playset of this size and complexity is not a casual weekend project. The assembly can be incredibly time-consuming and often requires at least two adults. The instruction manuals are notoriously complex, with hundreds of pieces of hardware. Before buying, be brutally honest with yourself about your DIY skills and available time. Paying for professional installation can be well worth the money to avoid a multi-weekend headache and ensure the final structure is safe and secure for your kids. This isn’t the kind of project where you can ‘wing it’.
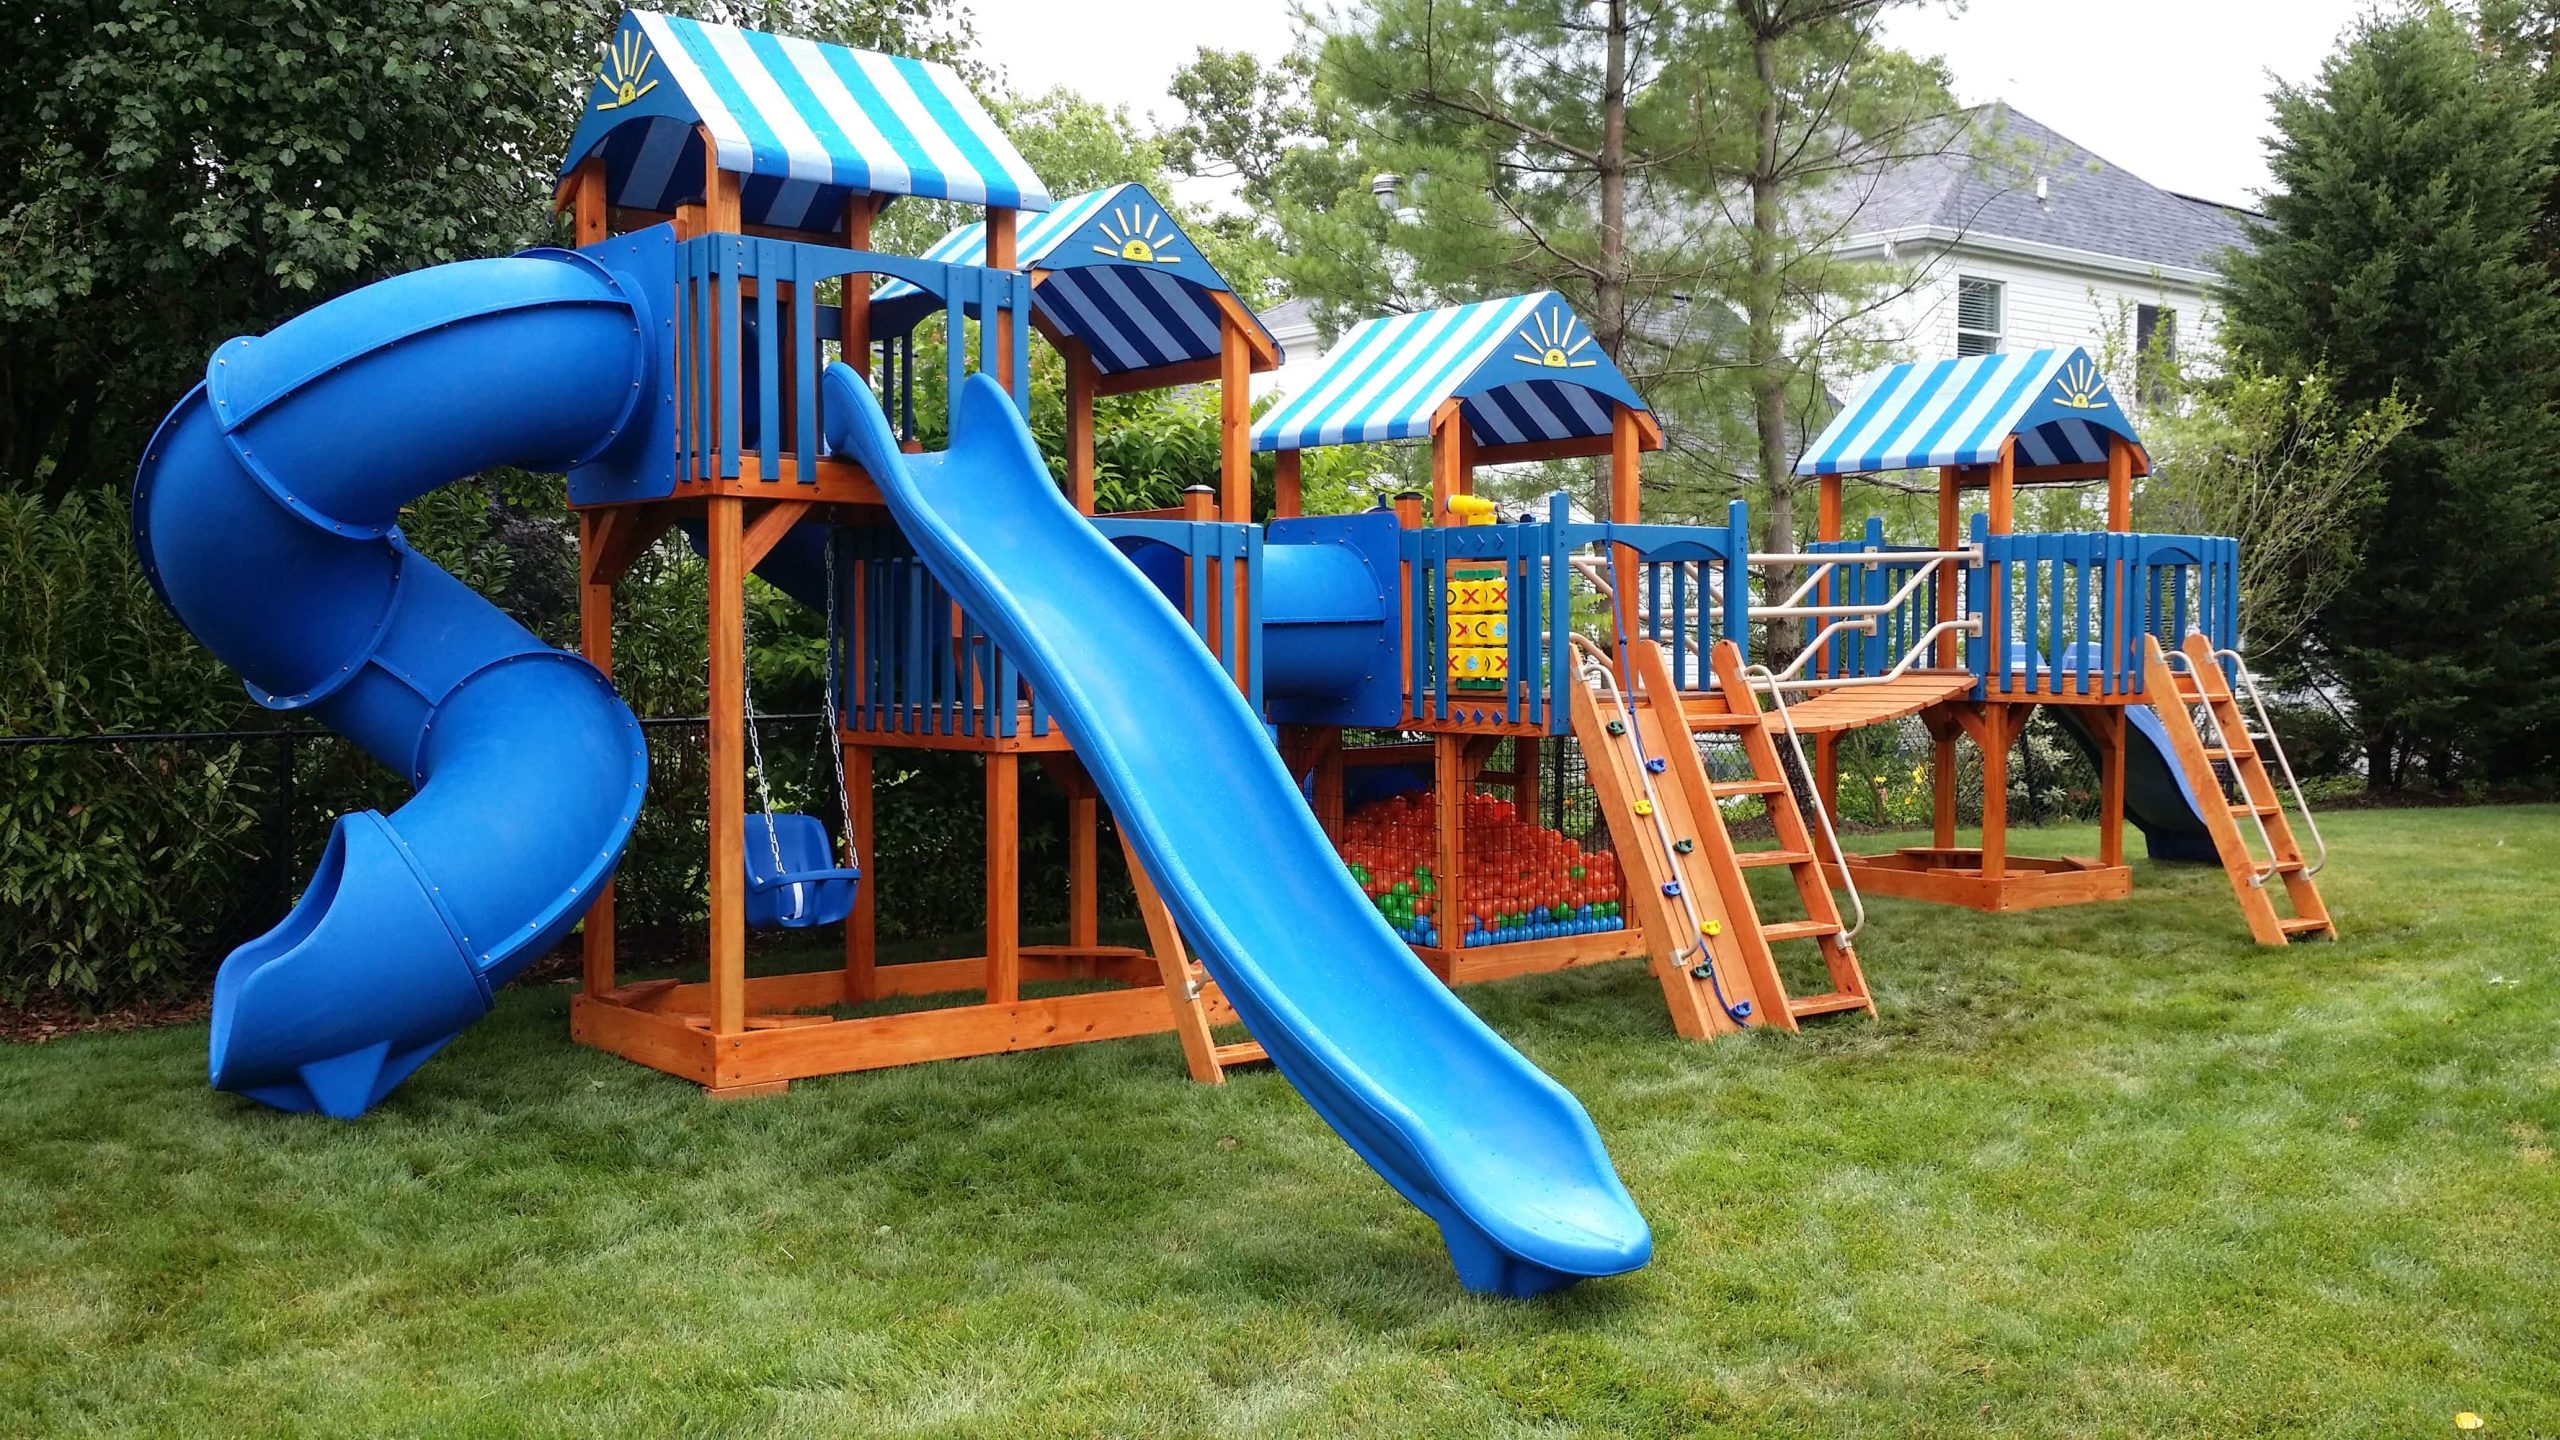
“The design of this playset works because it packs a huge amount of play value into a single structure.”
The combination of multiple slides (one curved, one straight), various climbing options (ladders, rock walls), and different levels with canopies creates a rich environment for imaginative play. The blue and white color scheme gives it a cohesive, almost nautical look that feels more deliberate than a random jumble of primary colors. For a different aesthetic, compare the bright plastic here to the all-metal and turf structure of Idea #19.
19. Vibrant Playground with Red and Yellow Slides on Artificial Turf
The single most important feature making this playground so successful is the artificial turf. It’s what transforms the area from a simple collection of equipment into a clean, dedicated, and always-ready play zone. The turf provides a consistently level and soft-ish surface, eliminates mud and grass stains, and gives the entire space a manicured, well-maintained look. The bright, uniform green also makes the red and yellow of the playground equipment pop even more vibrantly.
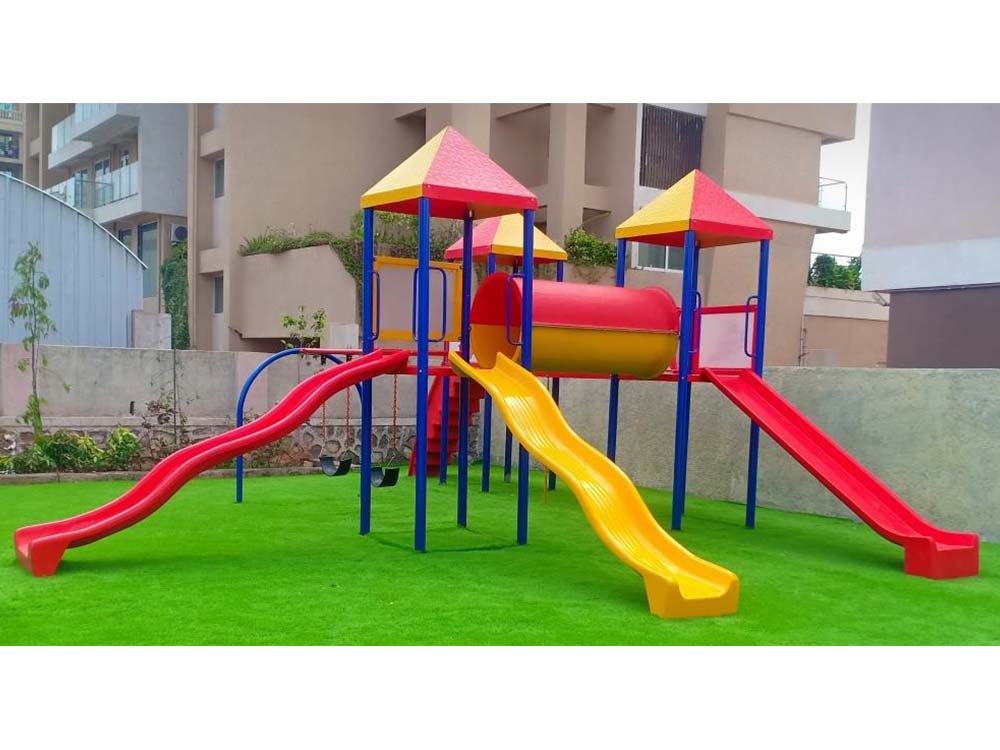
“While artificial turf is famously low-maintenance compared to a real lawn, it’s not ‘no-maintenance’.”
It needs to be regularly cleared of leaves and debris with a leaf blower. For a deeper clean, especially in a high-traffic play area, it should be rinsed with a hose to wash away dust and pollen. In areas with pets, it will require more frequent rinsing and occasional treatment with a specialized enzyme cleaner. The trade-off for no mowing is a different, but still necessary, cleaning routine.
20. Adventure Playset with Rope Bridge and Padded Slide Landing
The padded, built-in landing for the slide is a brilliant professional touch that’s worth emulating. Most home playsets just spit kids out onto the grass or mulch. Creating a dedicated, cushioned landing zone not only improves safety but also defines the end of the ride, preventing collisions with kids playing nearby. You can recreate this by digging out a shallow circular area at the base of your slide, lining it, and filling it with bonded rubber mulch or installing colorful foam gym tiles for a similar effect.
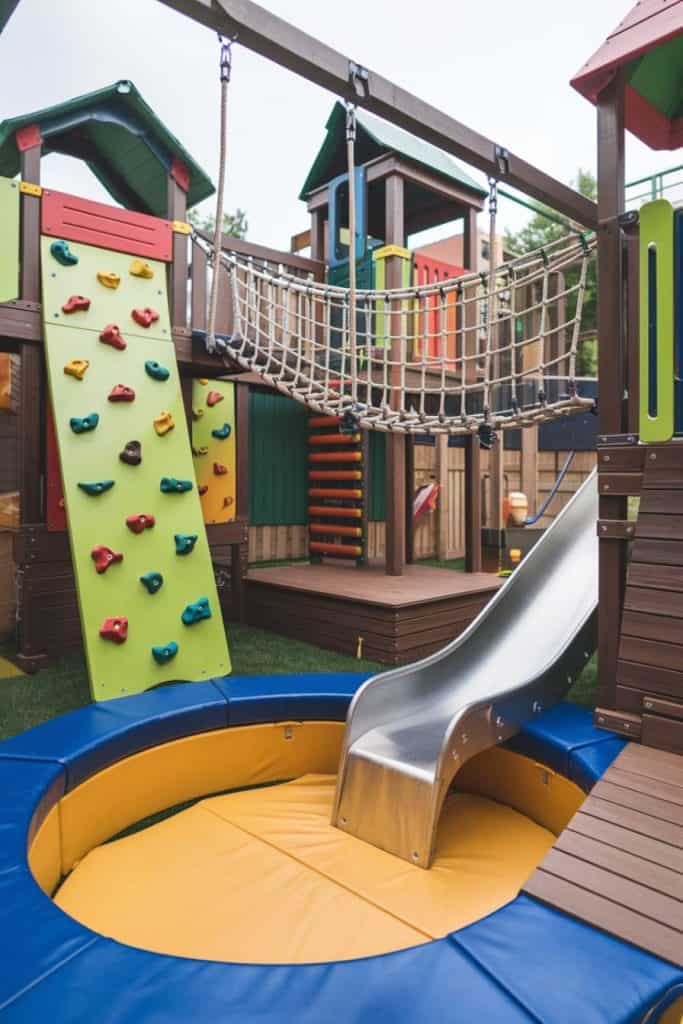
“This playset design is excellent because it encourages dynamic, non-linear play.”
Unlike a simple swing-and-slide combo, this structure with its rope bridge, multiple levels, and climbing wall offers various routes and challenges. Kids can create their own ‘courses’ and stories, which boosts creativity and keeps them engaged for longer. The mix of materials—wood, rope, metal, and colorful padding—also provides a rich sensory experience that is crucial for child development.
21. Action Shot of a DIY Cornhole Game in Progress
The perfect, casual lawn party has a simple recipe: 70% green space + 20% classic game + 10% social backdrop. The expansive, vibrant green lawn is the foundation, providing ample room to spread out and a beautiful natural canvas. The cornhole board acts as the focal point for activity, drawing people in. The final 10% is the blurred social scene in the background—the picnic table and people—which adds life and context, turning a picture of a game into a picture of a great time. To see a more rustic version of this game, check out Idea #6.
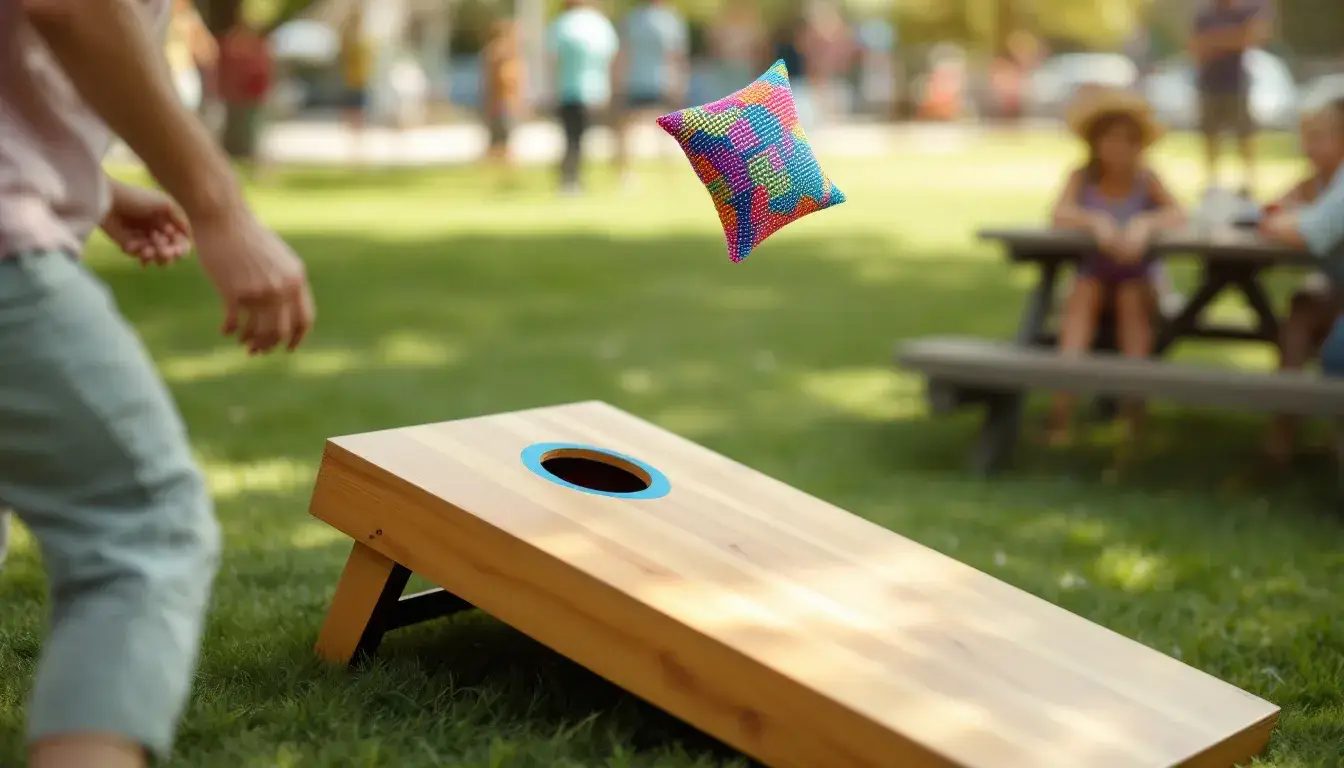
“A quality cornhole set can be pricey, but a DIY version delivers the same amount of fun for a fraction of the cost.”
Start by looking for ‘project panels’ at a hardware store—these are pre-cut, sanded boards perfect for the top. You can often find them in the lumber section for around $20-$30 each. Use standard 2x4s for the frame. For the beanbags, look for remnants of sturdy canvas fabric at a craft store and fill them with plastic pellets instead of corn to make them weather-resistant.
22. Evening Twister Game Illuminated by String Lights
Making a durable, reusable Twister mat is a fantastic DIY project. It will last for years and won’t kill your grass like lawn paint. This takes about 2-3 hours and costs around $40.
- Buy a heavy-duty canvas drop cloth (at least 9×12 feet) from a hardware store.
- Create a circular stencil from cardboard, about 10-12 inches in diameter.
- Lay the canvas flat and use your stencil to paint four rows of six circles using flexible acrylic or fabric paint in red, blue, yellow, and green.
- Let the paint cure completely for at least 48 hours before using or folding.
- For the spinner, simply download a spinner app on your phone to call out the moves!
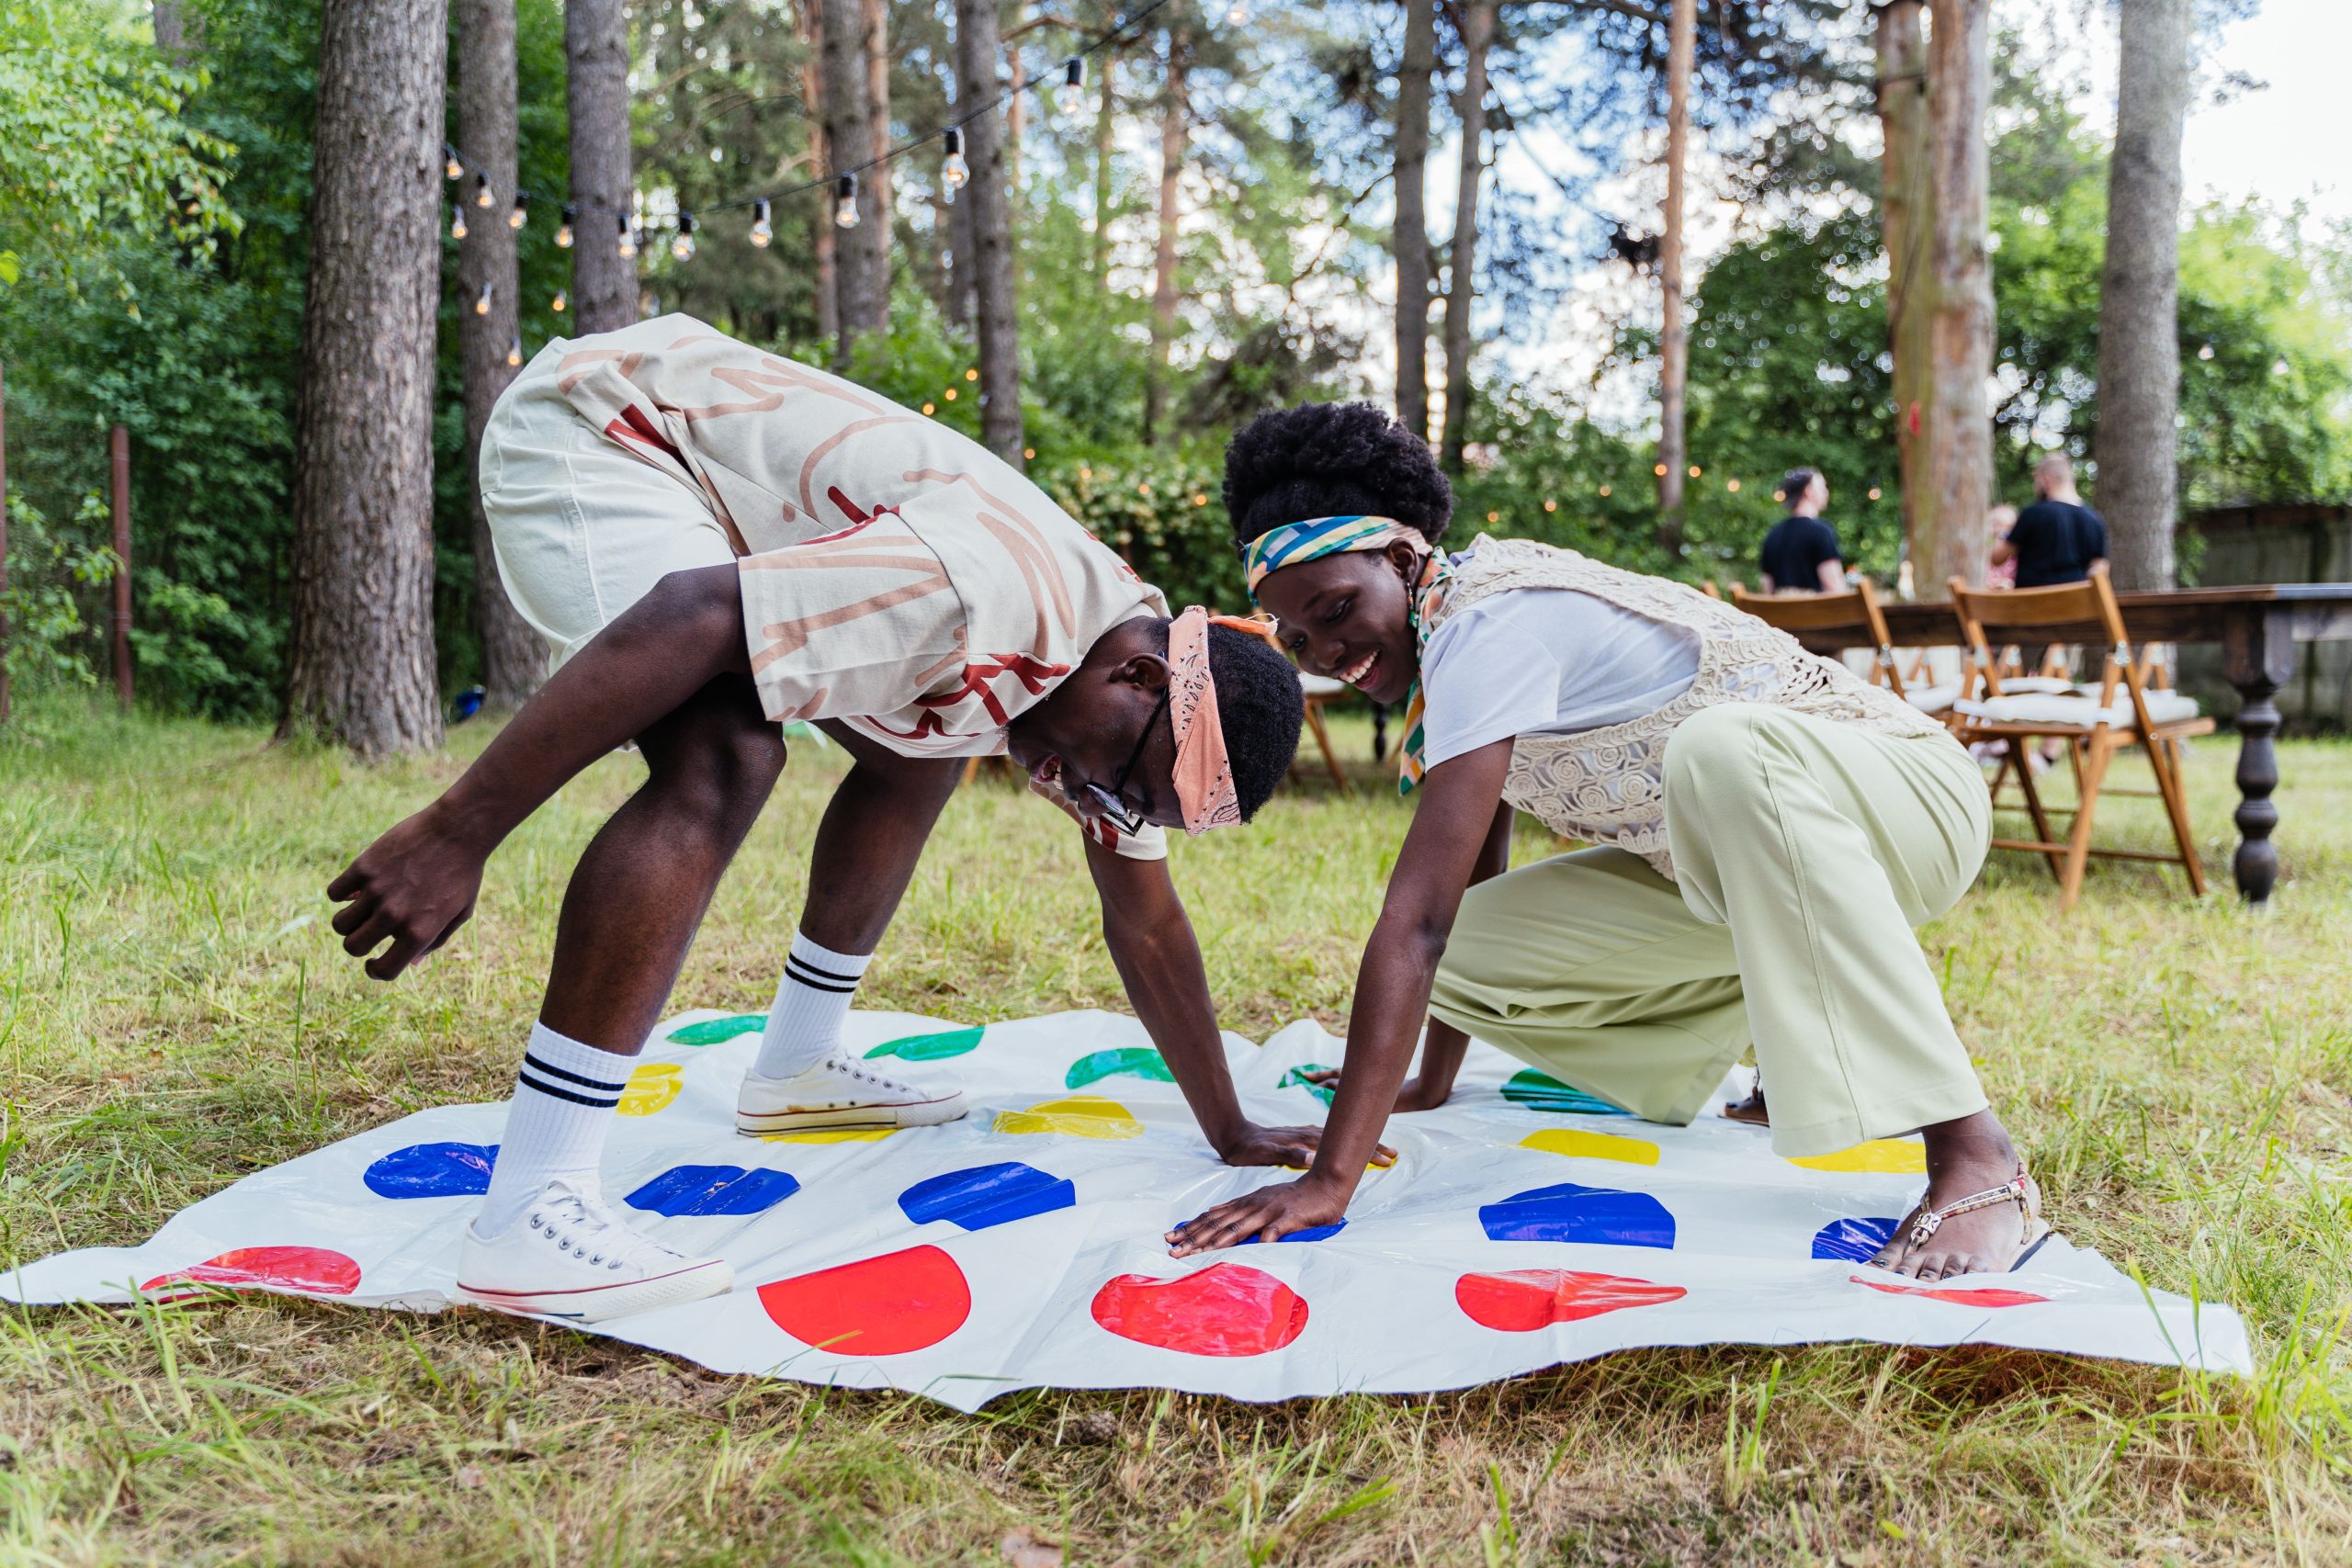
“A giant lawn game of Twister is a blast, but a few things can go wrong.”
First, if your lawn is even slightly damp, the back of the mat will get wet and potentially slippery on the grass. Make sure the area is completely dry before you lay the mat down. Second, most lawns aren’t perfectly flat. A few lumps and bumps can make balancing even trickier (and more hilarious), but be mindful of any major divots or sprinkler heads that could cause a twisted ankle. Smooth out the area as best you can before you start.
23. Freestanding A-Frame Climber with Tire and Rope Walls
This piece is so engaging for kids because it offers two distinct climbing experiences in one structure. One side, with its slatted wall and colorful holds, mimics a traditional rock-climbing wall, which is great for developing grip strength and planning movements. The other side, with its grid of tires and a rope net, provides a more playful, less rigid challenge. This variety prevents boredom and appeals to different skill levels and moods, making it a highly effective piece of play equipment.
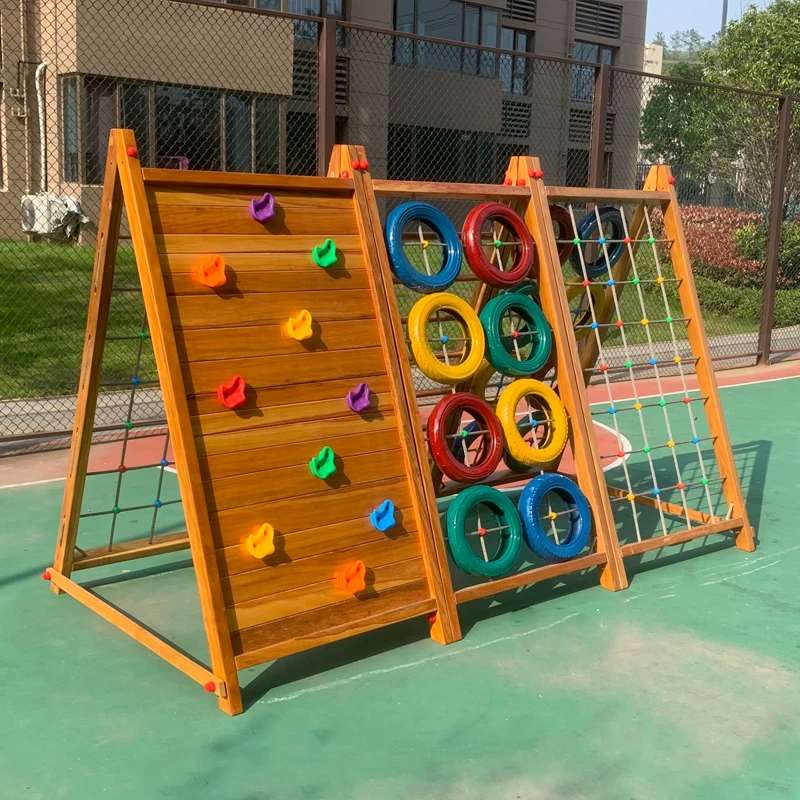
“An A-frame structure like this is sturdy, but its stability depends on the ground beneath it.”
Before you build or buy one, make sure you’ve addressed these points:
Have you identified a perfectly level spot in your yard? An A-frame on a slope is a tipping hazard.
What will the surface underneath be? Grass is okay, but a 6-inch layer of wood mulch is far safer for falls.
Do you have a plan to secure it to the ground? Most kits come with ground anchors that must be used.
Have you checked the dimensions against your available space, including the 6-foot safety zone around it?
24. Backyard Cornhole Setup with Contrasting Red and Blue Boards
When you’re painting your cornhole boards, use a semi-gloss or high-gloss exterior paint. This isn’t just for looks. A slicker surface is crucial for proper gameplay—the beanbags need to be able to slide up the board after they land. A matte or flat paint will create too much friction, causing the bags to stop dead on impact. For an official tournament-level slide, finish your painted surface with several coats of a water-based polycrylic, sanding lightly between coats for a super smooth finish.
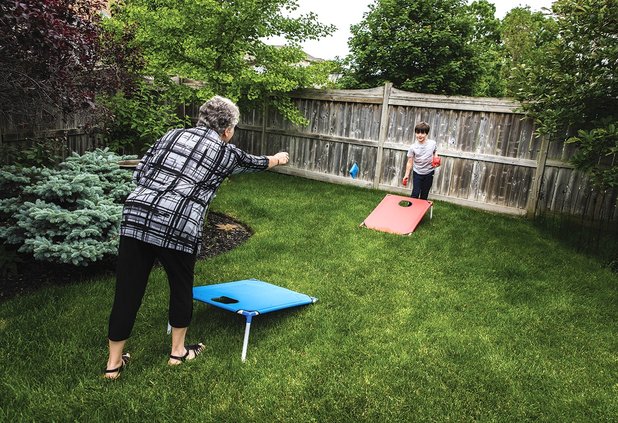
“The single thing that makes this scene feel complete is the wooden fence.”
It does more than just mark the property line; it acts as a perfect backdrop for the game. The warm, neutral brown of the wood makes the bright red and blue of the cornhole boards pop. It encloses the space, making the yard feel like a private, contained arena for the game. Without the fence, the game would feel like it was floating in an undefined space; the fence gives it a sense of place and focus.
25. Planning an Outdoor Graduation Party with Active Games
While high-energy games like Nerf battles seem like a great idea for a party, they can be tricky to manage in a mixed-age crowd. For a graduation party with grandparents and younger siblings present, you need to contain the chaos. Designate a specific ‘action zone’ at the far end of the yard for running-around games. Use cones or bunting to mark the boundaries clearly. This prevents stray foam darts from landing in the potato salad and keeps running kids from colliding with guests who are just trying to chat.
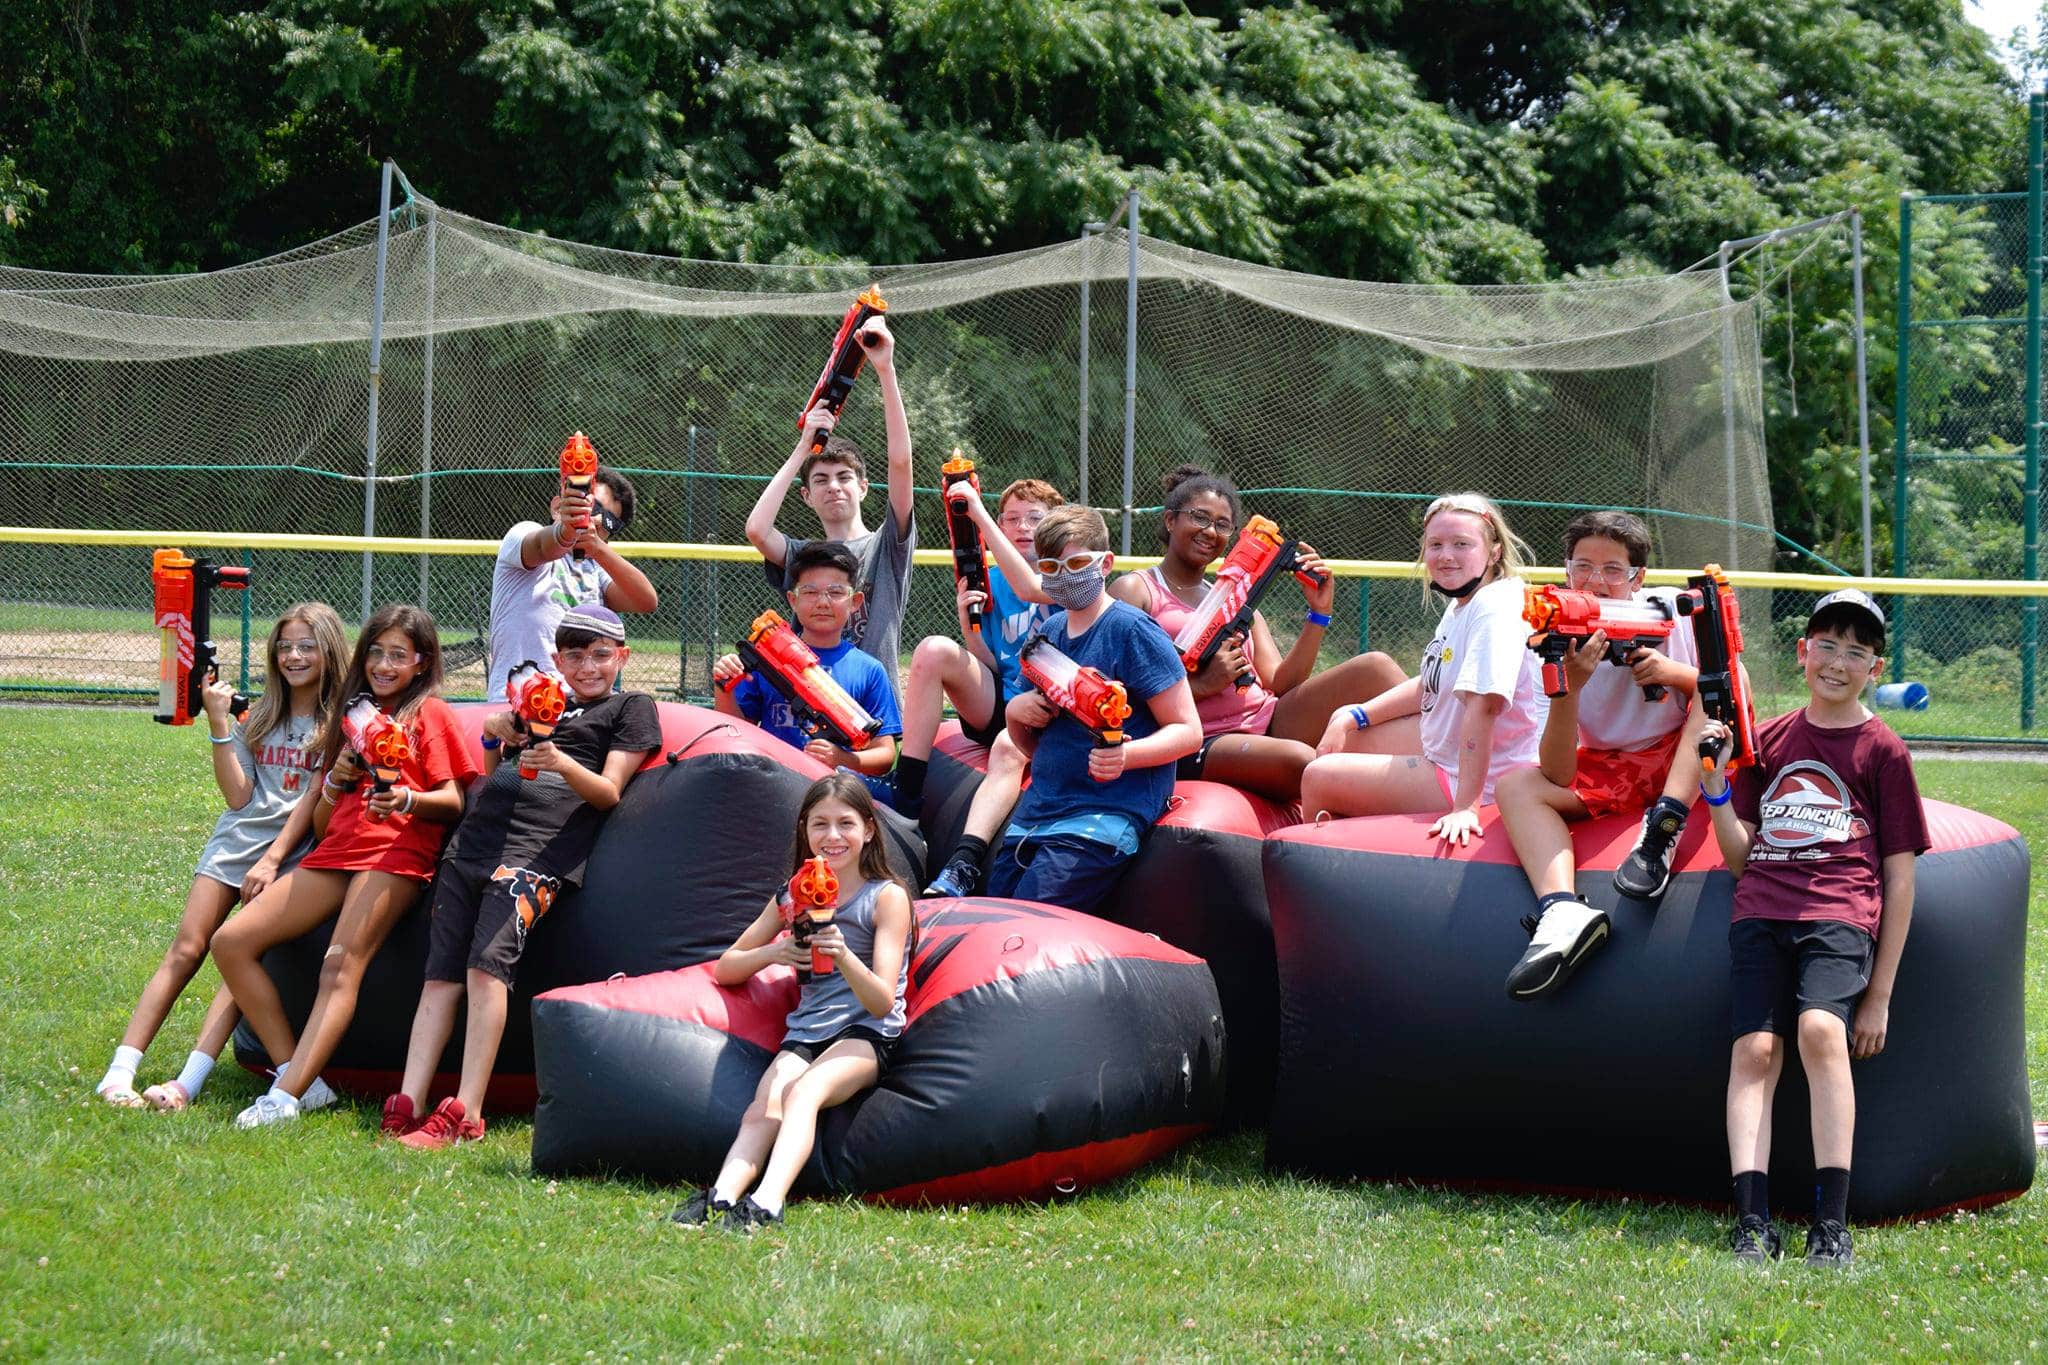
“Parties, especially for milestones like graduations, are becoming more experience-focused.”
Guests, particularly teens and young adults, have a lower tolerance for just standing around making small talk. They want activities. The rise of ‘game-based’ gatherings is a direct response to this. Offering structured fun, whether it’s a Nerf battle, a cornhole tournament, or giant Jenga, gives guests a purpose and a natural way to interact without feeling awkward. It’s less about the game itself and more about facilitating social connection.
26. Cozy Fire Pit Gathering with Dark Adirondack Chairs
This scene works so well because it nails the feeling of a rustic, intimate escape. The choice of dark Adirondack chairs is key—their deep color recedes into the background, making the flickering flames of the fire pit the undeniable star of the show. The circular arrangement encourages conversation, while the small, individual side tables are a thoughtful touch, giving each person their own space for a drink or a plate of s’mores. The gravel ground and dense woodland backdrop complete the ‘away from it all’ feeling.
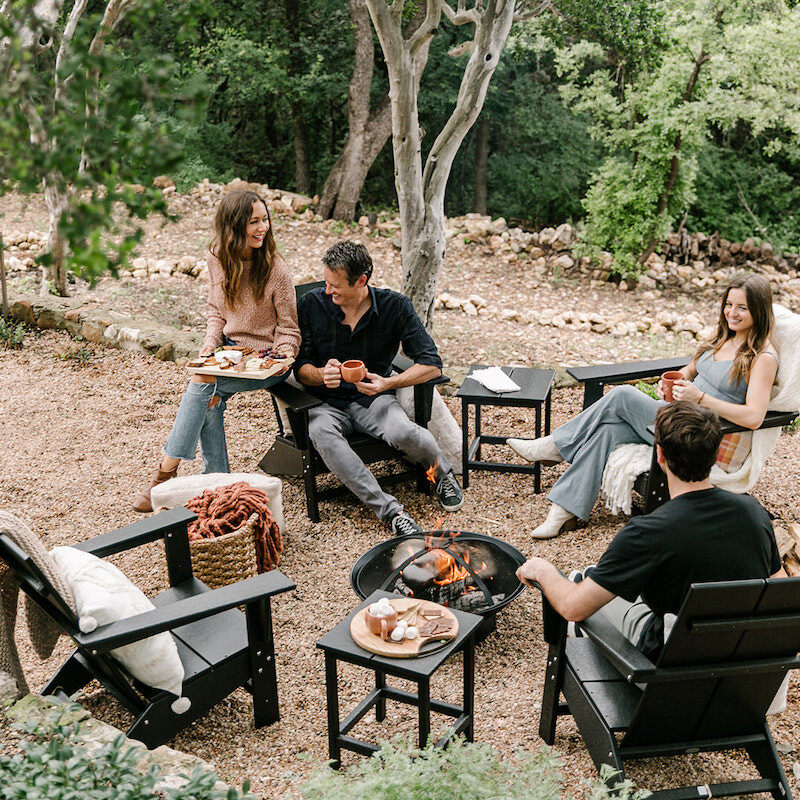
“The formula for this cozy vibe is simple: 50% natural elements + 40% dark, grounding furniture + 10% warm light.”
The natural elements are the gravel underfoot and the wall of trees, which create a rustic, immersive setting. The black chairs and tables ground the space and add a touch of modern sophistication. The final, and most important, 10% is the fire itself. The warm, dynamic light is what makes the whole scene come alive, creating a focal point and a welcoming atmosphere.
27. Playful Party Scene with Light Blue Cabins and Tug-of-War
The shared color palette between the decor and the architecture is what pulls this entire scene together. The light blue of the cabin siding is the foundational color that everything else plays off of. The bunting on the string lights and the teepee accents consciously echo this blue, along with complementary whites and beiges. This thoughtful color coordination makes the games and decorations feel like a planned, integral part of the space, rather than a random assortment of party supplies just set up for the day.
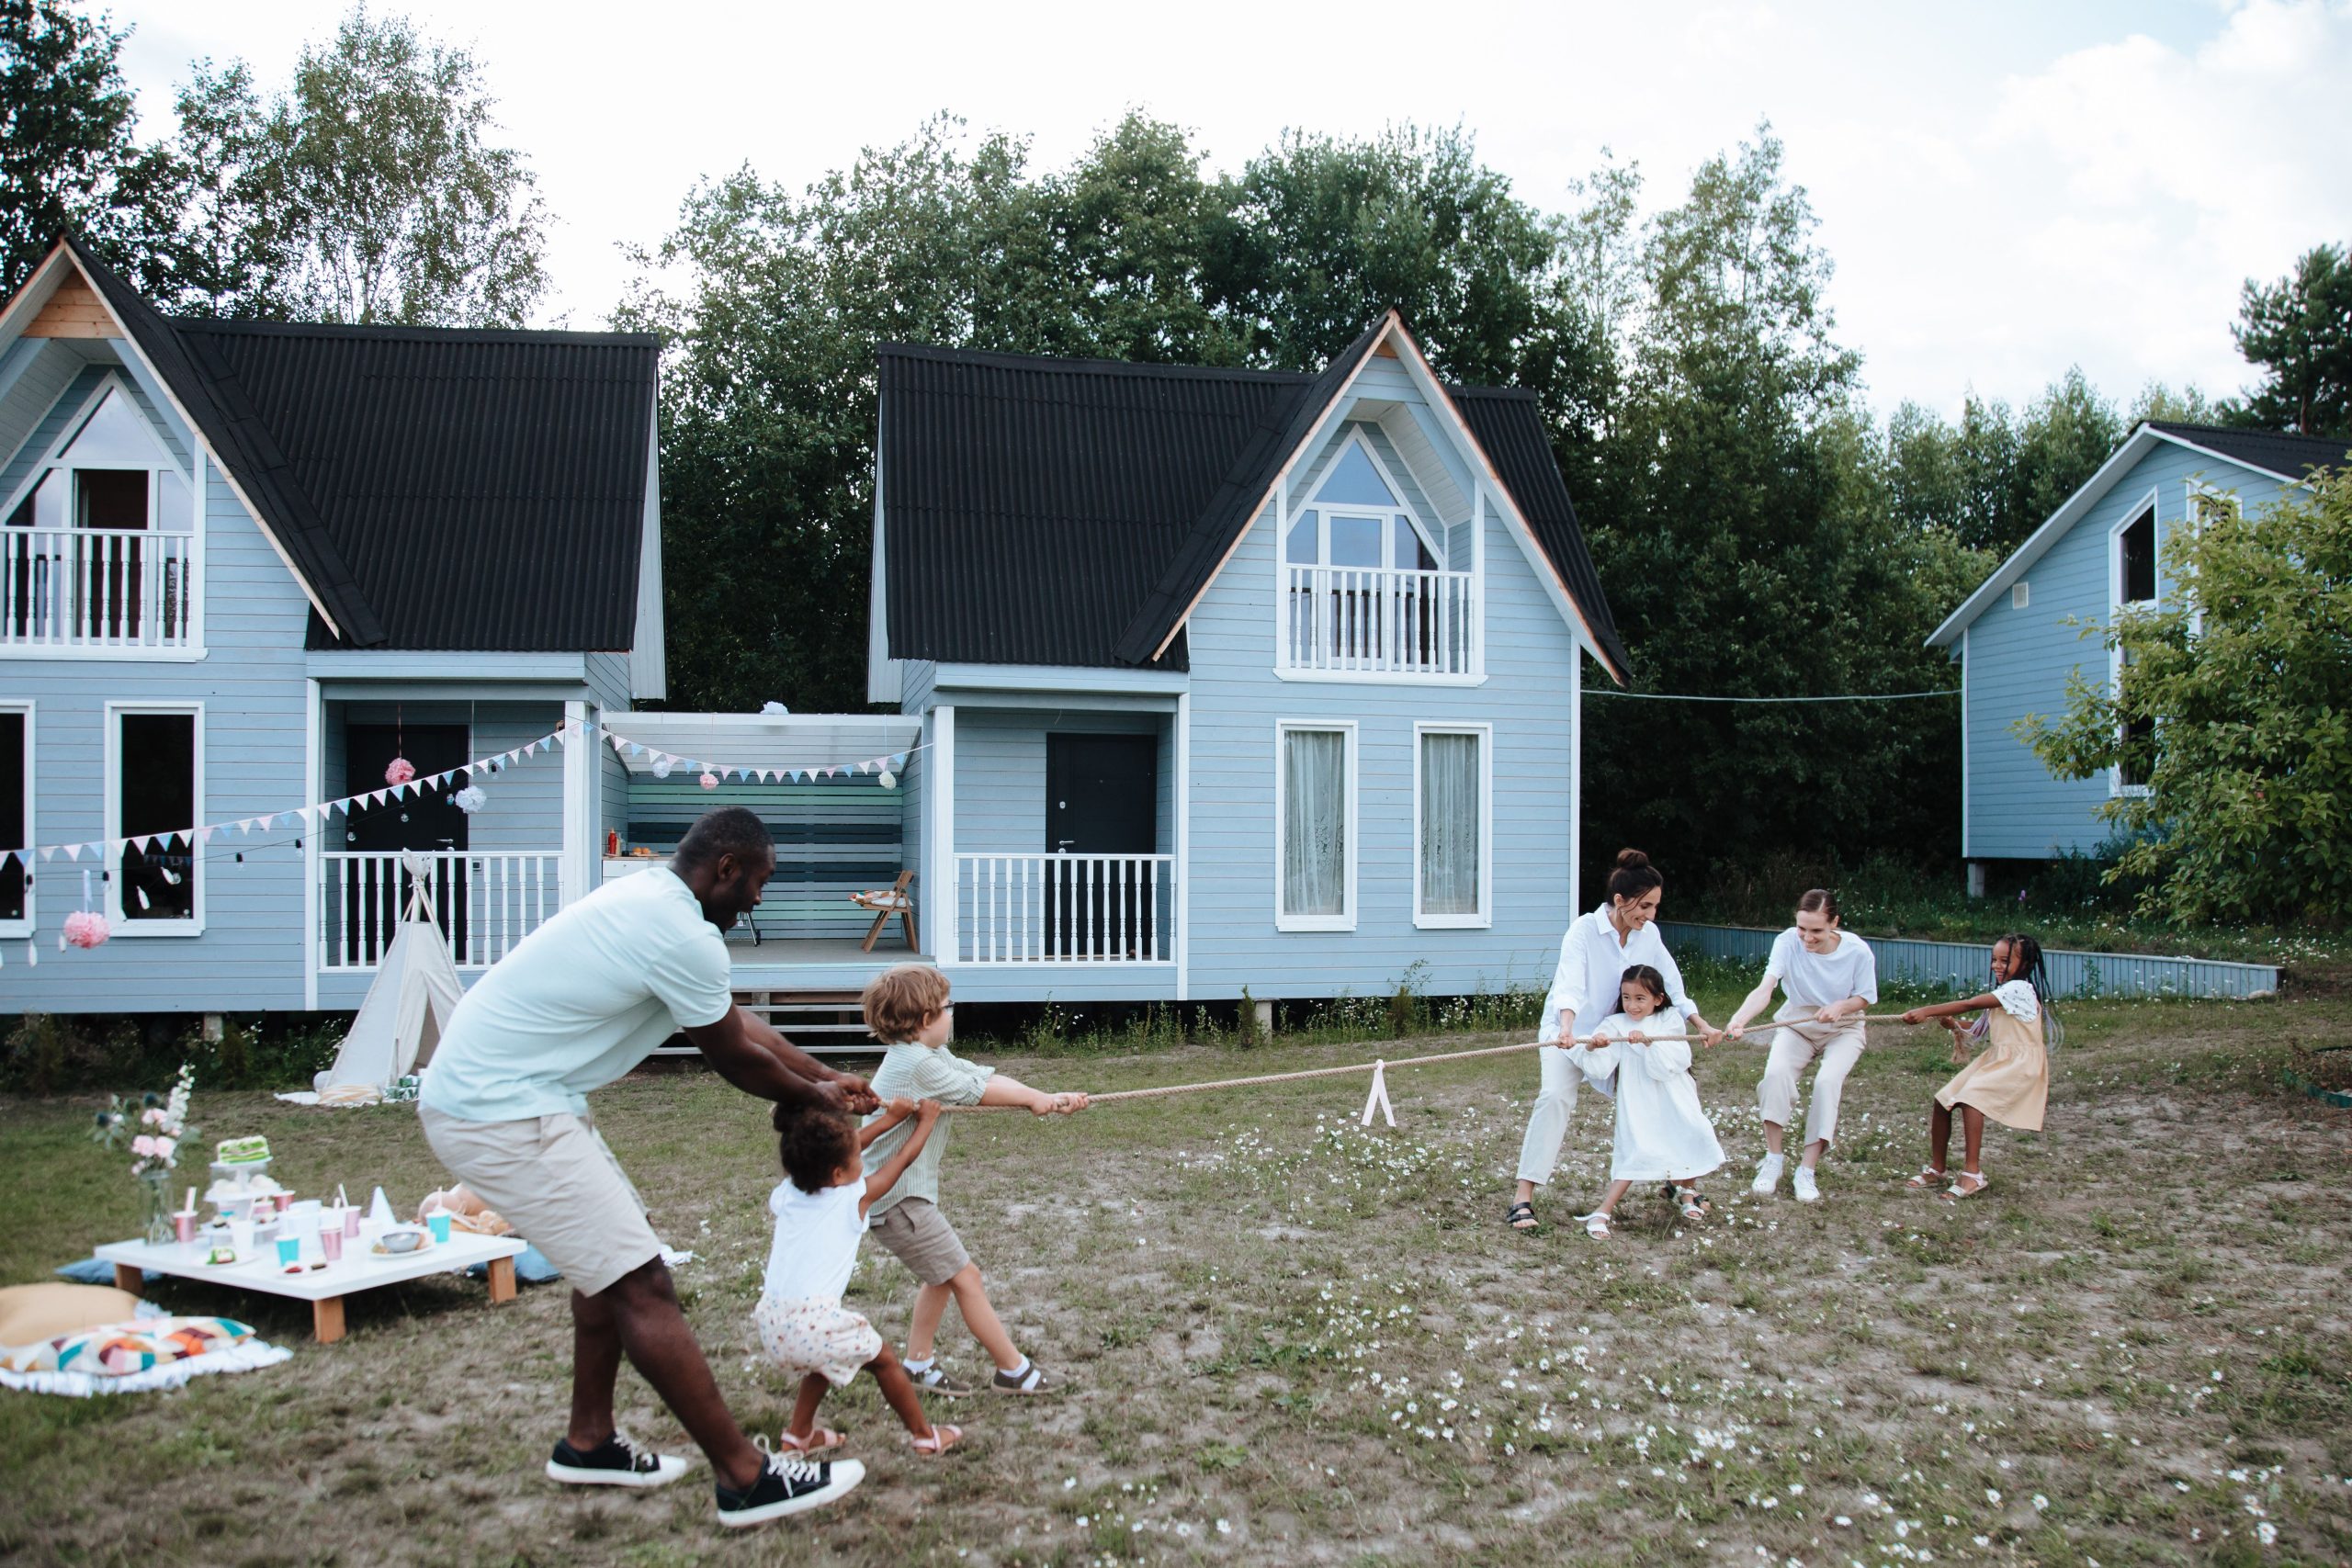
“If you’re hosting an event, don’t just decorate the party zone—add small decorative touches to the permanent structures in your yard.”
In this scene, the addition of simple string lights transforms the cabins from background buildings into key festive elements. You can achieve this by wrapping a porch railing with a garland, hanging a wreath on a shed door, or placing a festive banner on a fence. It’s a simple trick that makes the entire yard feel like it’s part of the celebration.
28. Vibrant Purple and Pink Inflatable Birthday Bounce Castle
A standard residential bounce castle is bigger than you might imagine. A typical 13×13 foot model needs more than just a 13×13 foot space. You need to account for the blower tube, which usually adds 4-5 feet to one side, and a clear safety zone of at least 3-4 feet on all other sides. You also need to consider overhead clearance—ensure there are no low-hanging tree branches or power lines. In total, you’re looking for a clear, flat, and level area of about 20×20 feet with at least 15 feet of vertical clearance.
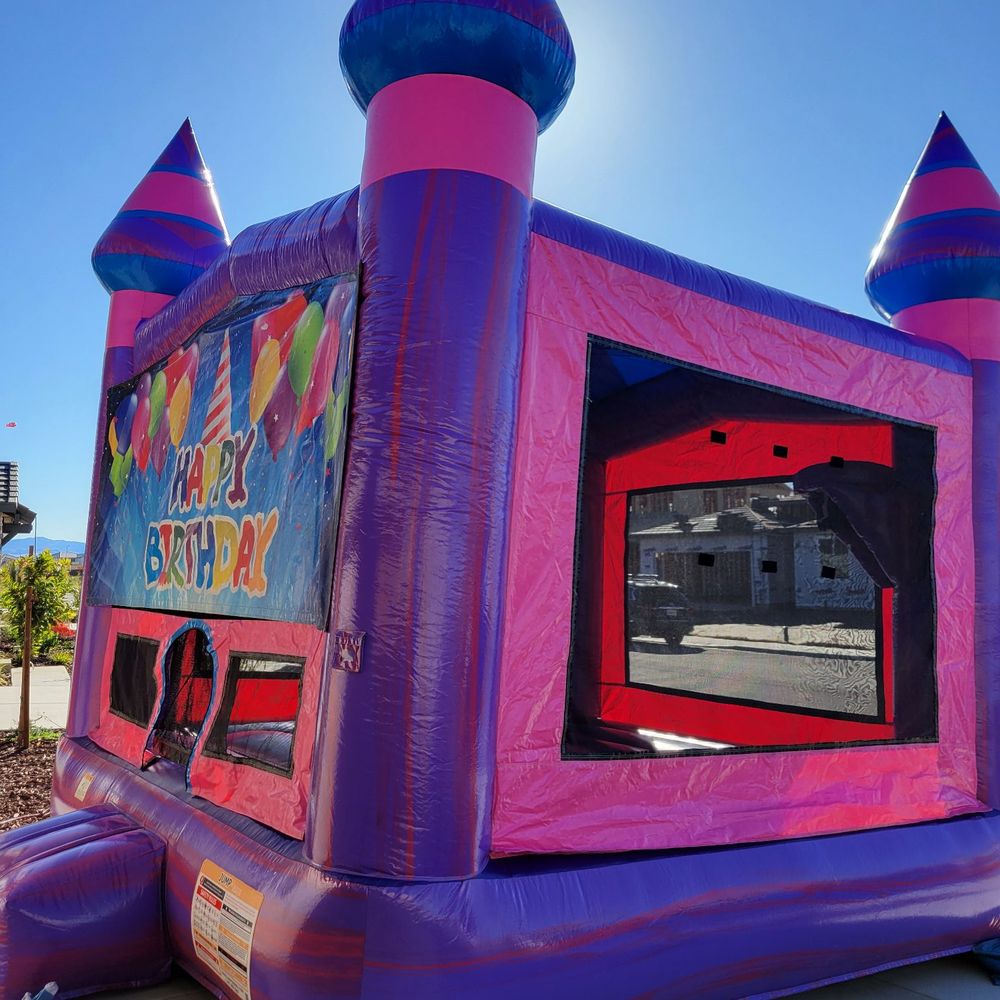
“Bounce castles are a guaranteed party win, but renting one comes with a checklist.”
Before the delivery truck arrives, confirm these details:
Is your setup area flat? Most companies will not set up on a noticeable slope for safety reasons.
Is there a dedicated 120v electrical outlet within 50 feet of the setup location? The blower needs continuous power.
Have you turned off your automatic sprinkler system? An unexpected watering can make the bounce house slick and dangerous.
Is the setup area clear of any sharp objects, rocks, or pet waste?
29. Backyard Play Area with Deck, Yellow Slide, and Natural Elements
This play area is so successful because it seamlessly integrates manufactured play equipment with natural elements. The bright yellow slide provides the undeniable ‘fun’ factor, while the surrounding tree stump seats and mulch ground cover ground the space in nature. The wooden deck and fence create a warm, cohesive backdrop. It doesn’t feel like a plastic playground was just dropped into a yard; it feels like a thoughtfully designed space where play and nature are meant to coexist. This feels much more organic than the hardscaped modern yard in Idea #15.
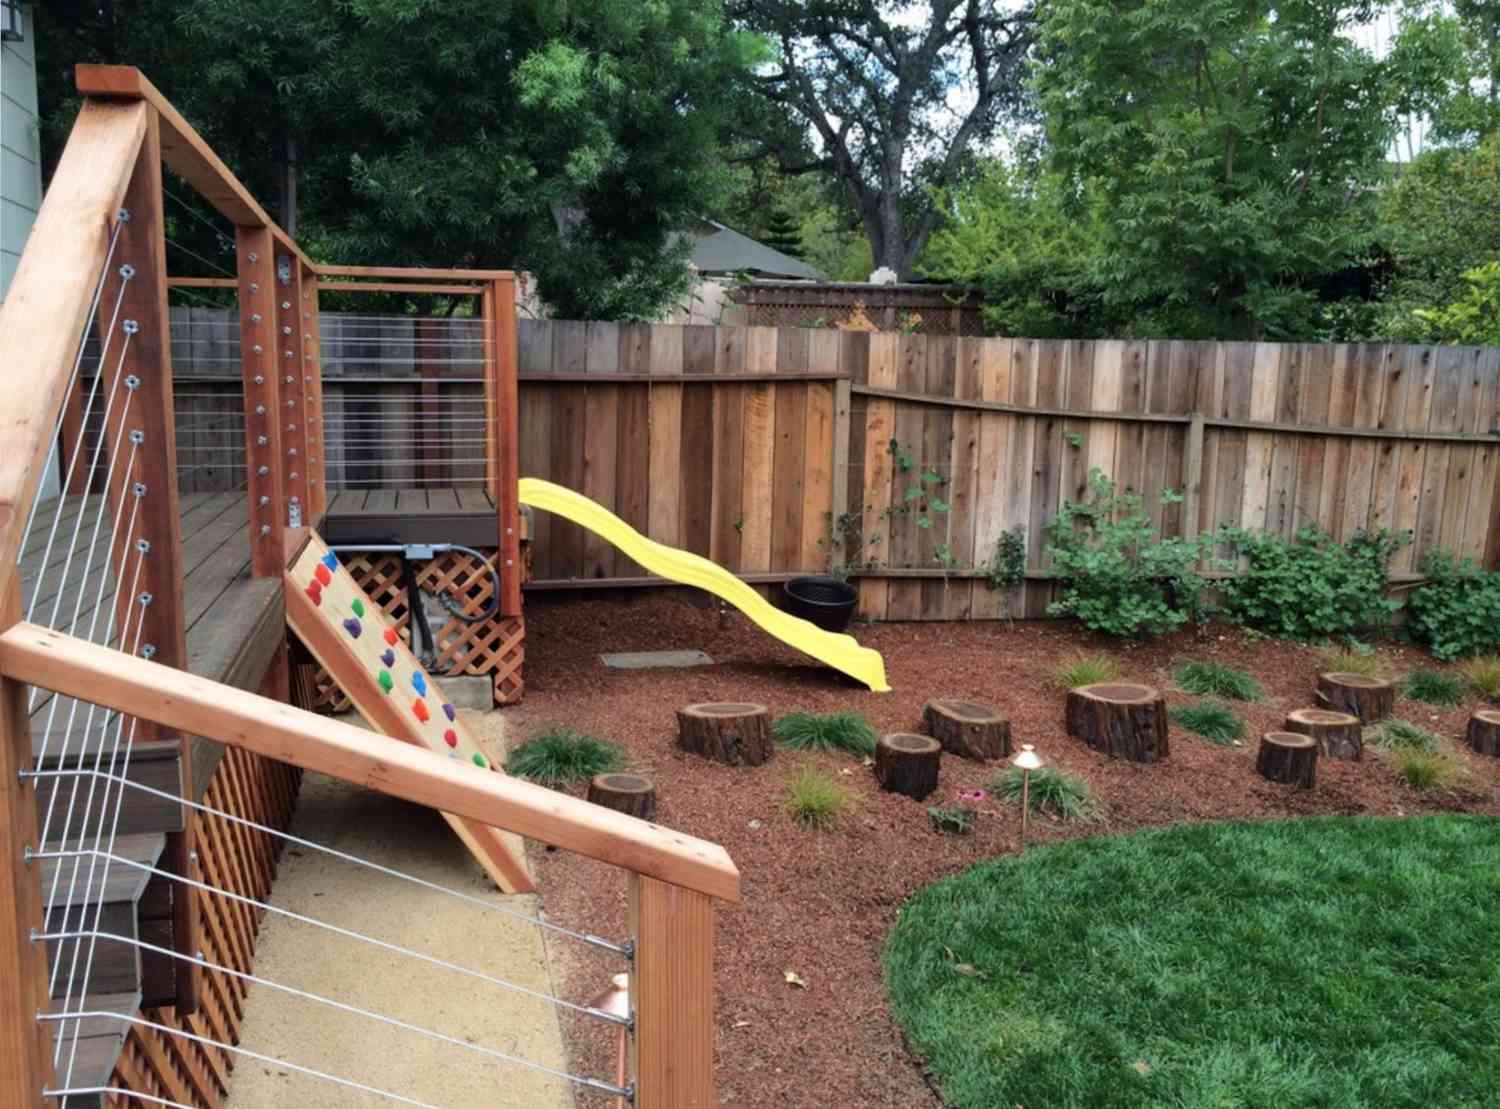
“Wood mulch is an excellent, natural-looking safety surface for a play area, but it’s not a one-and-done solution.”
It decomposes over time, so you’ll need to top it up with a fresh layer every 1-2 years to maintain the recommended depth for safety (at least 6 inches). It can also be a magnet for weeds. Laying down a layer of landscape fabric before you put down the mulch will save you a lot of weeding headaches down the road. It also helps to prevent the mulch from mixing with the soil below.
30. Active Badminton Game in a Lush Green Backyard
Badminton is a fantastic, lightweight game, but it has one major weakness: wind. Even a slight breeze can send the shuttlecock flying off course, making a real game impossible. If you live in a windy area, this might not be the most reliable backyard activity. For a more wind-resistant alternative that still involves rackets and a net, consider pickleball or paddle ball, which use a heavier, perforated ball that can better handle a breeze. It’s a small reality check that can save you a lot of frustration.
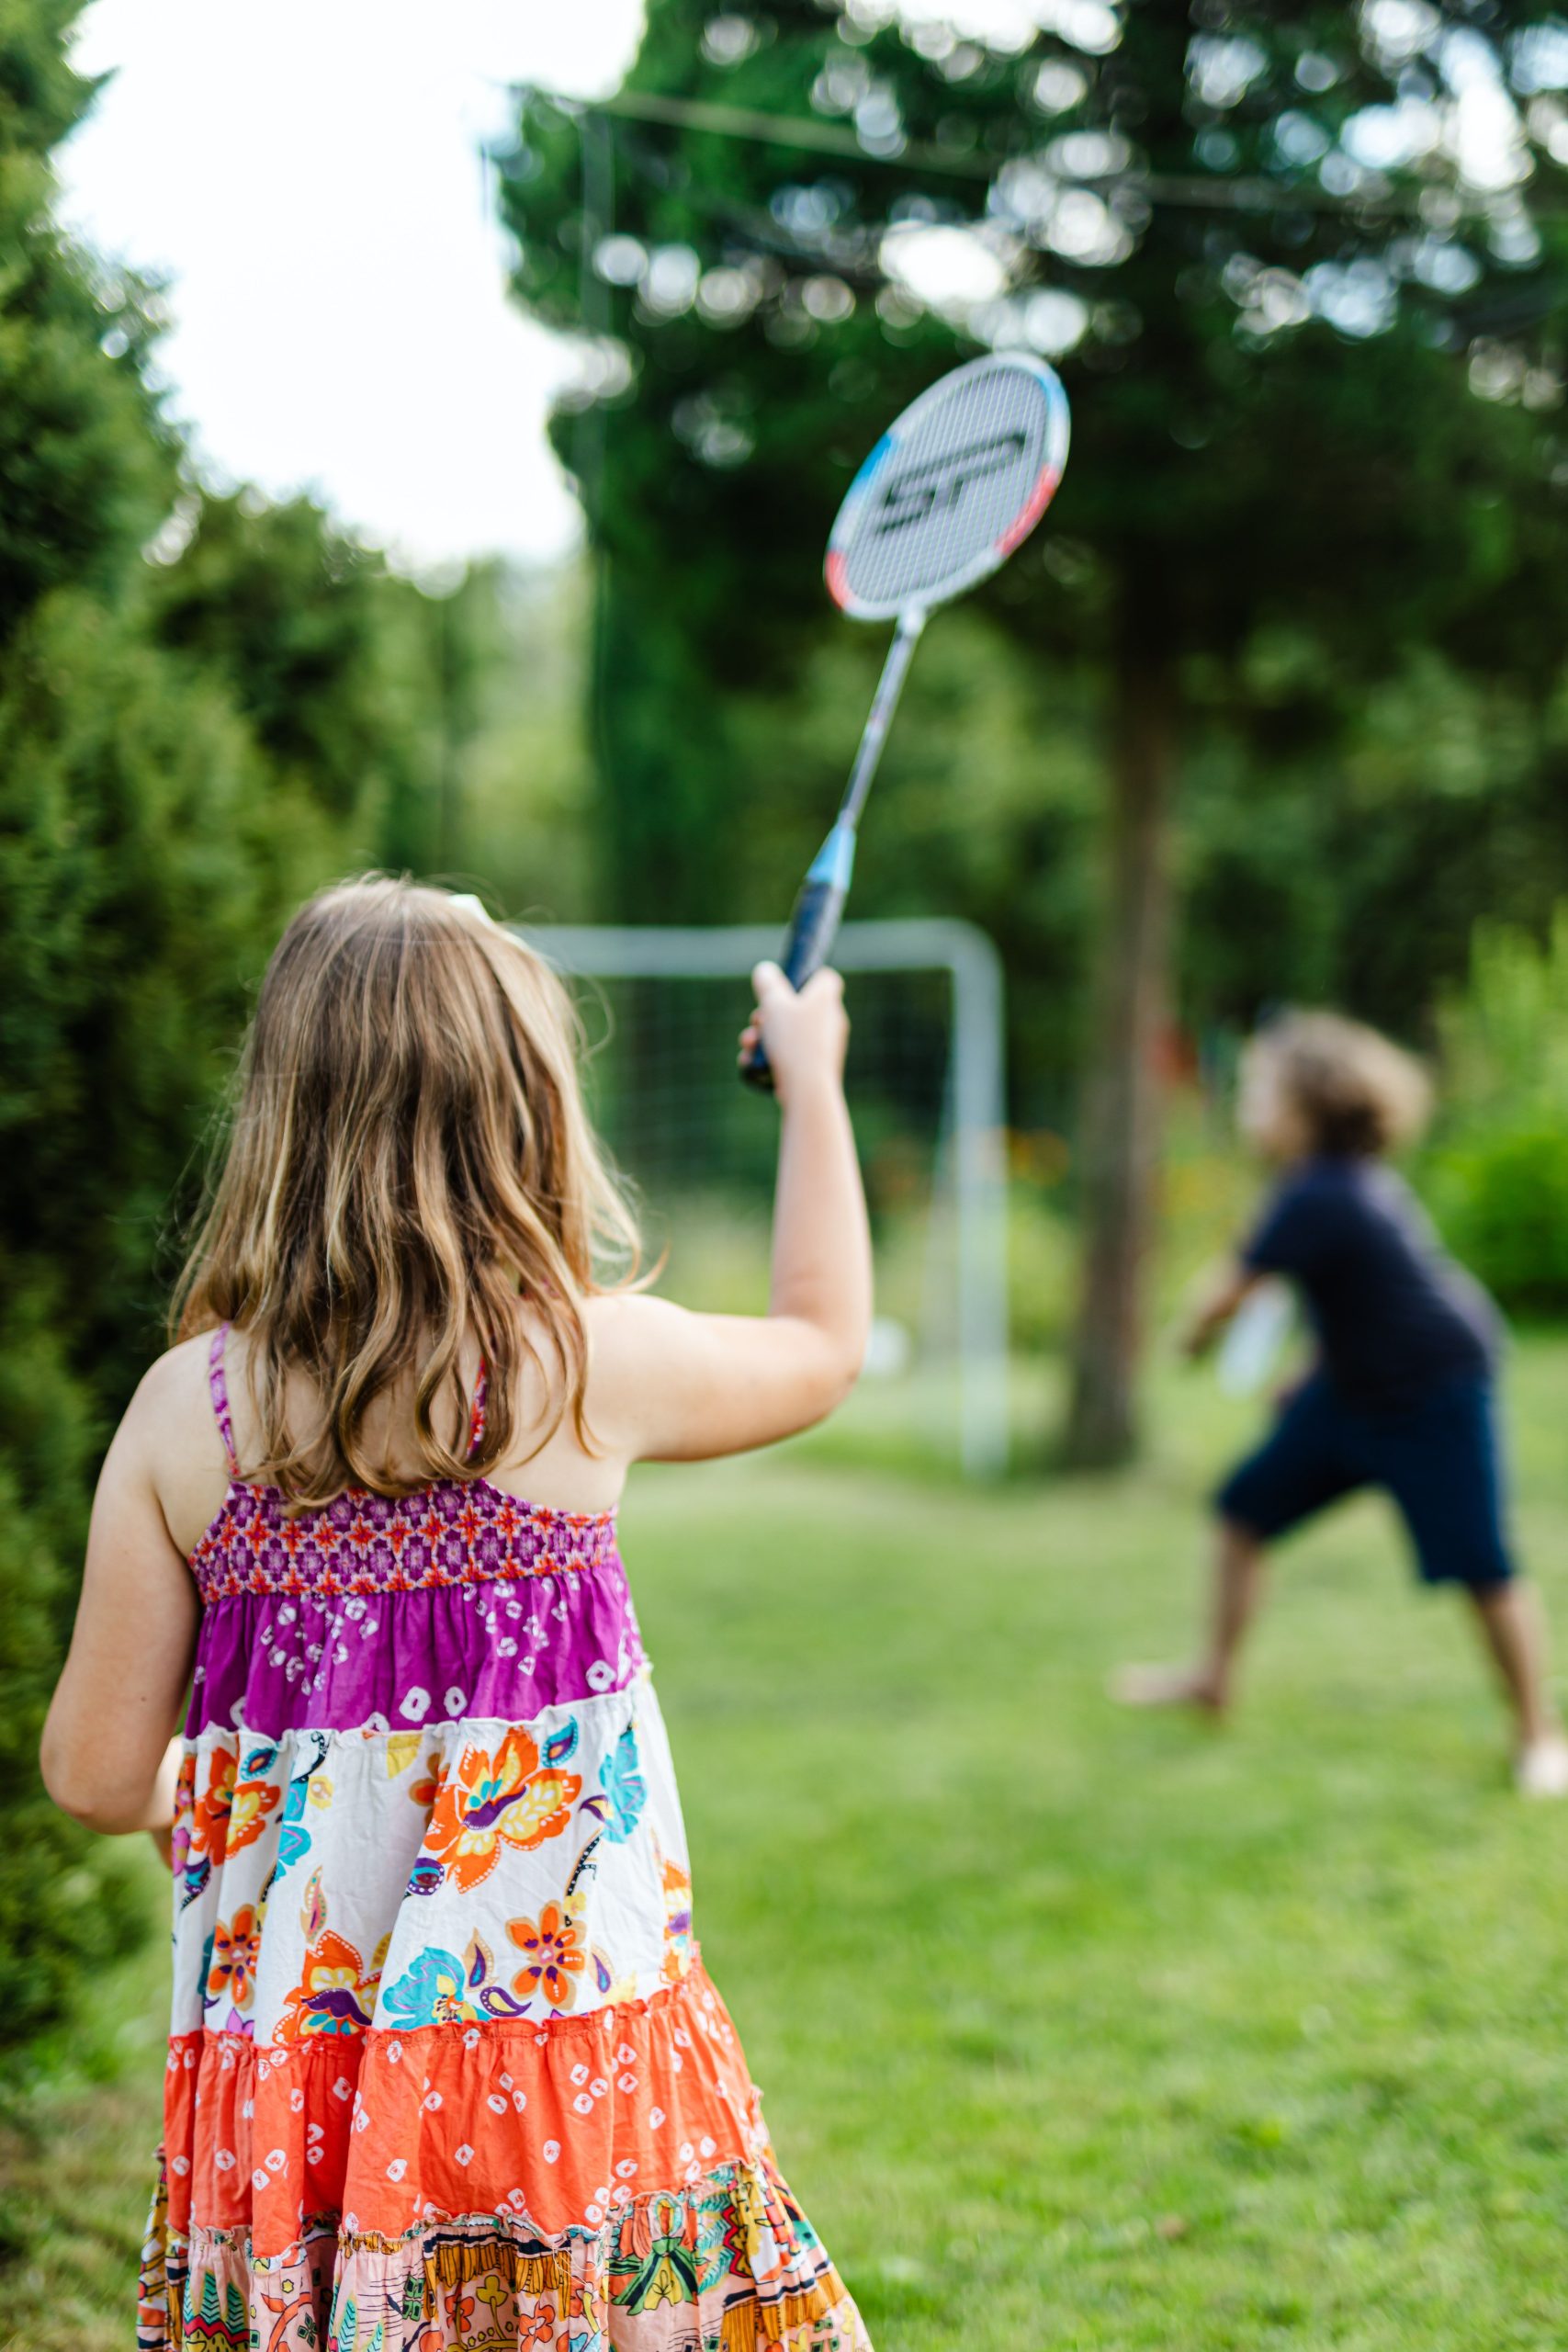
“While you can casually volley a shuttlecock in any open space, a proper game of badminton requires a specific court size.”
The official dimensions for a doubles court are 20 feet wide by 44 feet long. You also need some extra space around the perimeter for players to move without running into fences or furniture. For a casual backyard game, you can get away with a slightly smaller area, but you’ll still need a rectangular, flat patch of grass that’s roughly 15 feet by 40 feet to have a satisfying game.
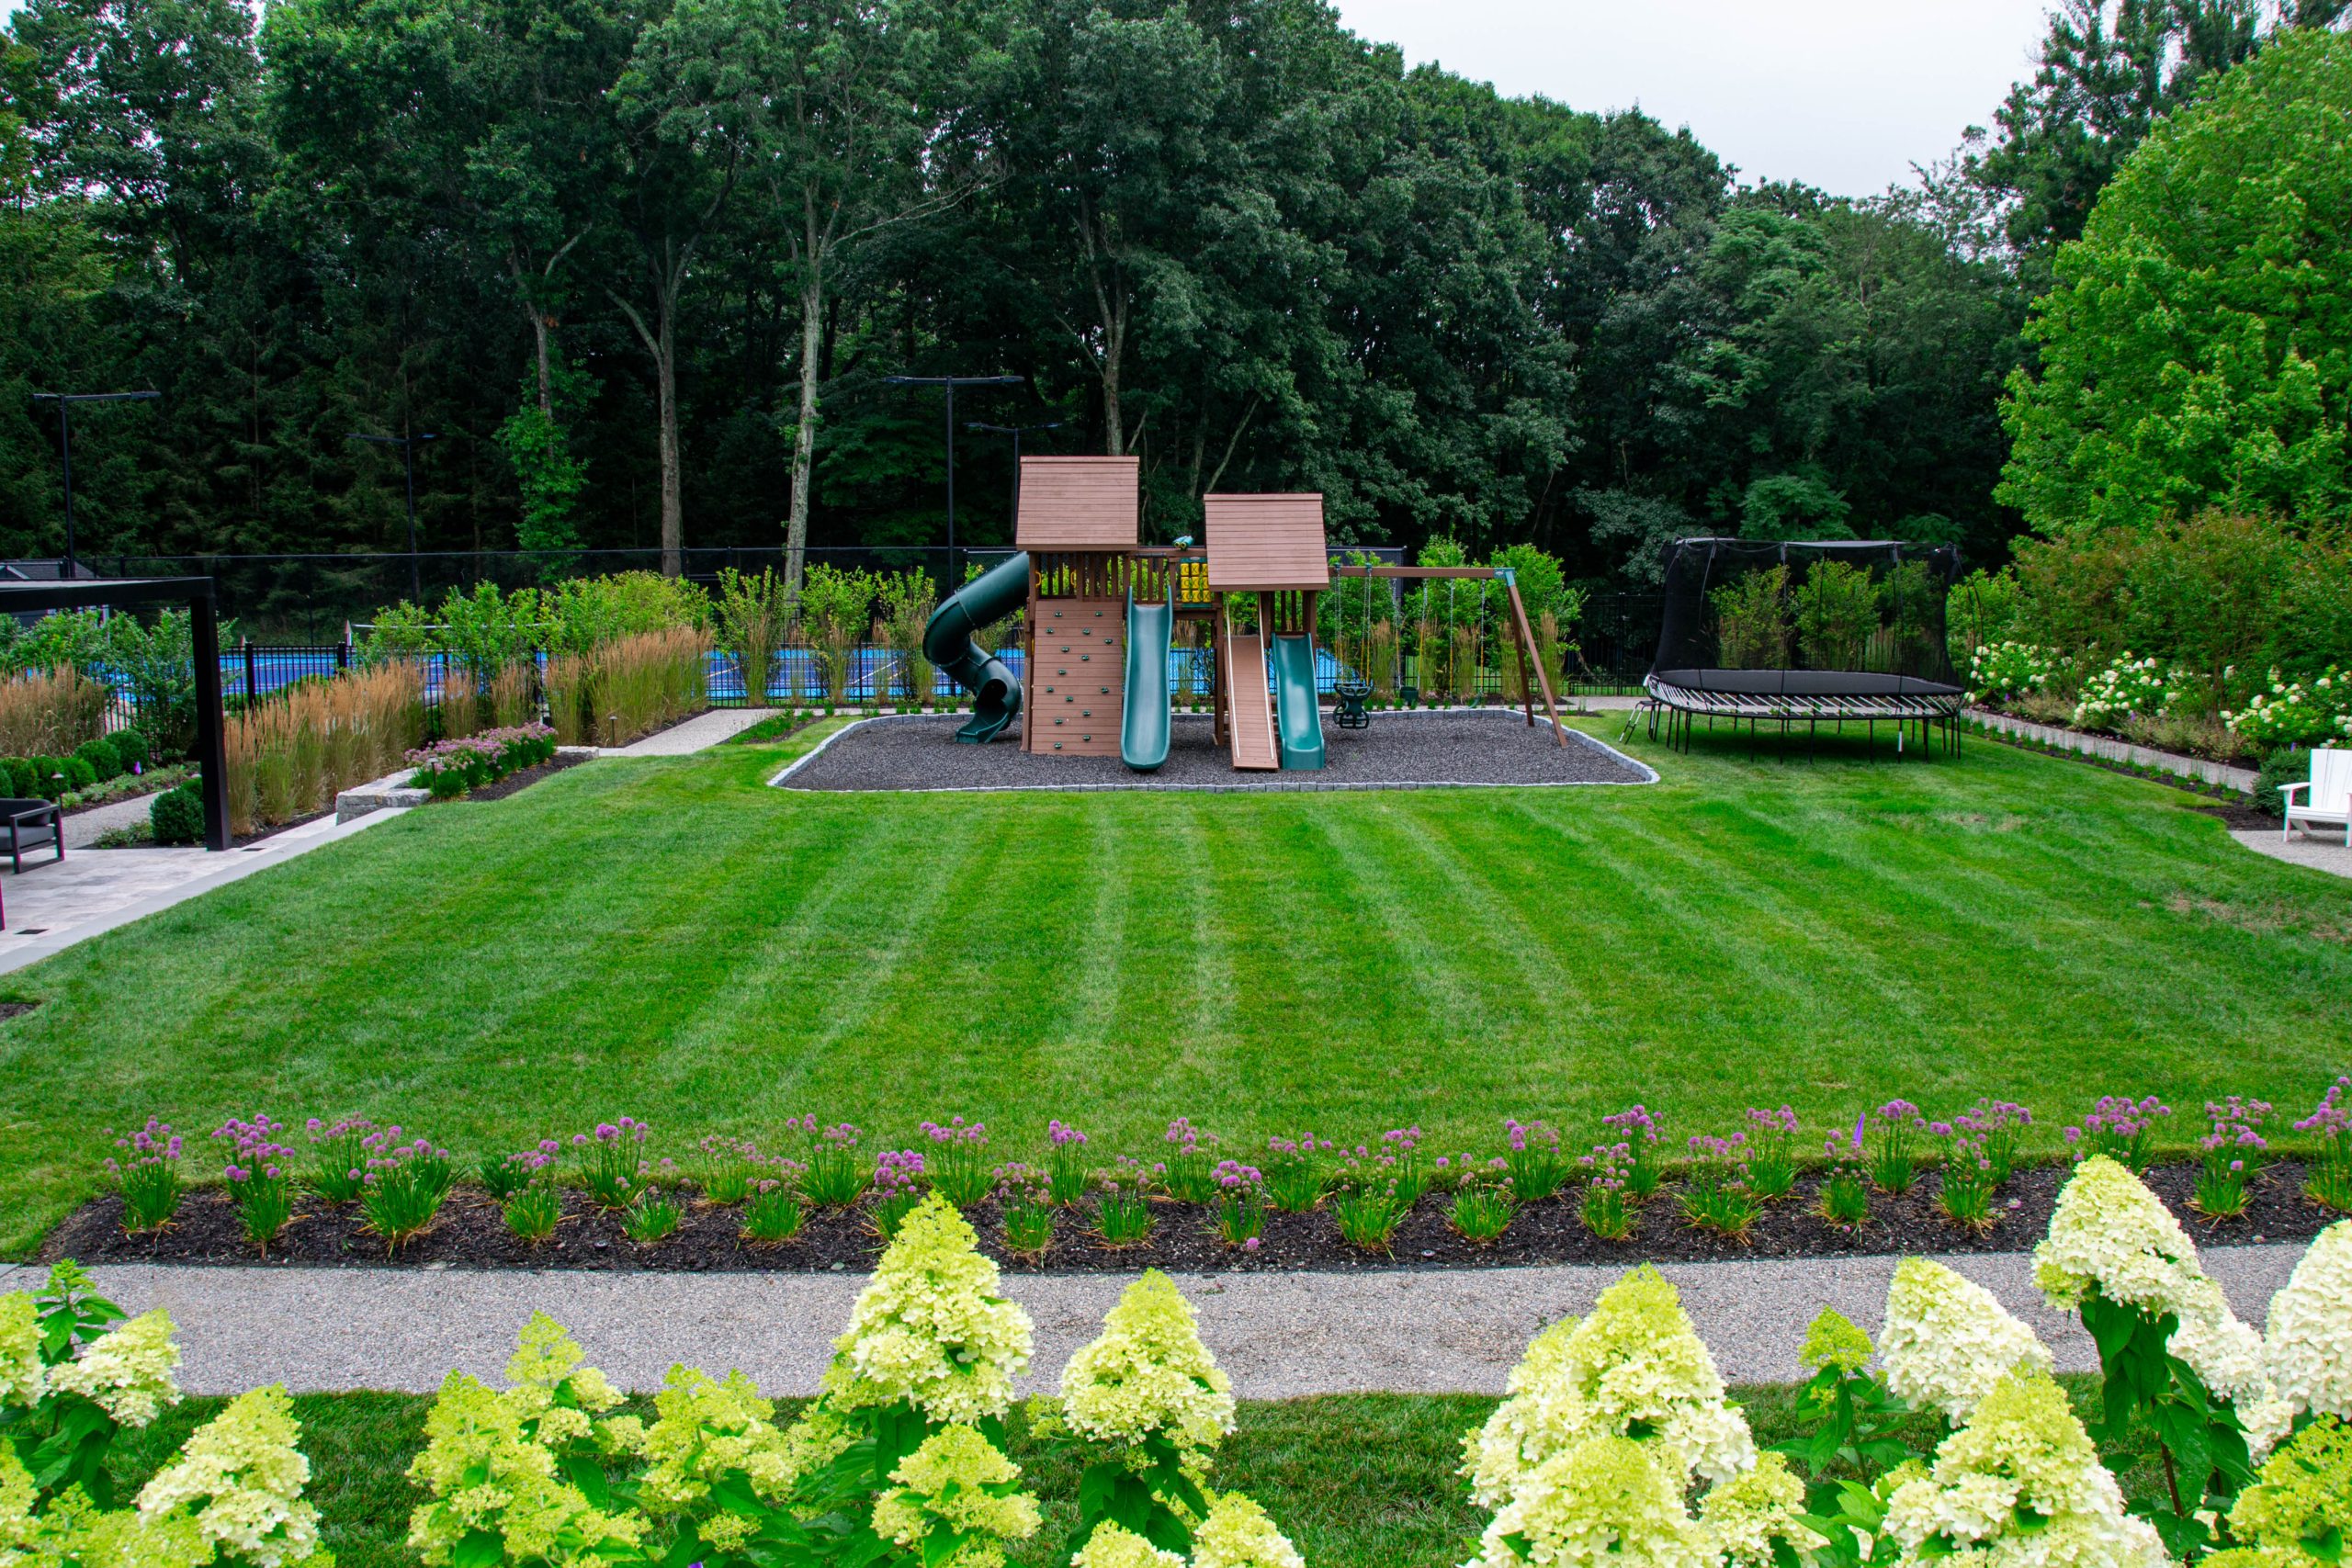
31. Ultimate Backyard with Playground and Putting Green
The secret ingredient that makes this multi-zone backyard work is the dark grey gravel border. It’s a subtle but crucial element. It cleanly separates the different ‘zones’ of the yard—the play area, the putting green, and the lawn—giving each one a crisp, defined edge. This separation prevents the yard from feeling like a chaotic jumble of activities. It’s a sophisticated landscaping choice that imposes order and makes the entire design feel cohesive and professionally planned.
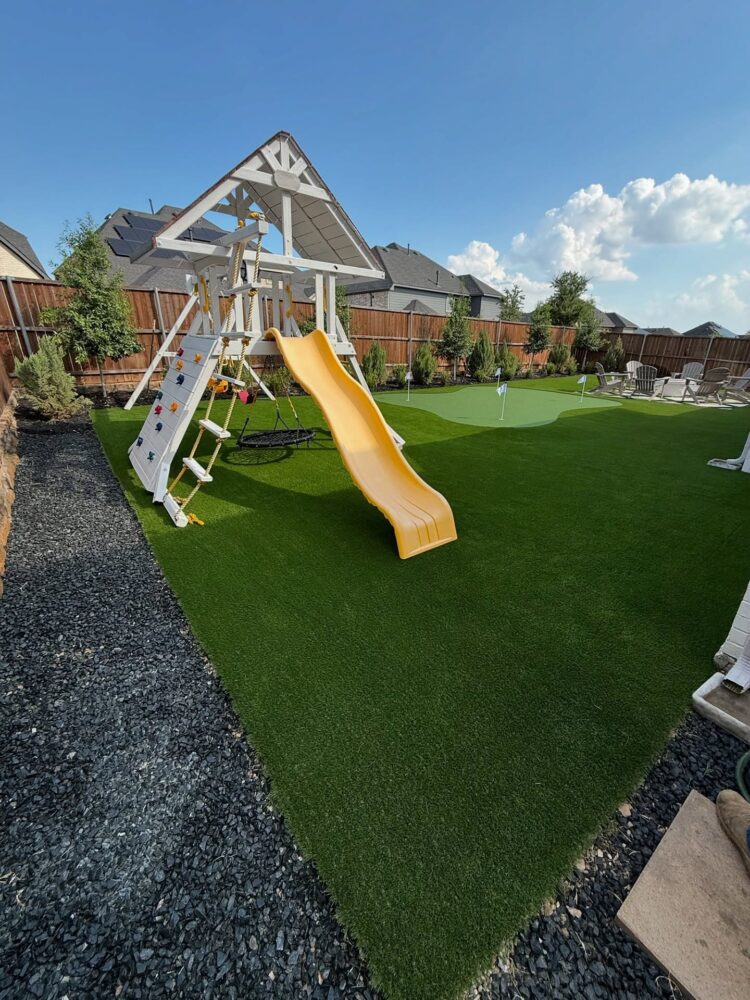
“Creating a backyard oasis with this many features is a high-end project, with the bulk of the cost going into the groundwork and artificial surfaces.”
This is a luxury build.
Playground Structure: $2,000 – $5,000
Artificial Turf (Lawn + Putting Green): $8,000 – $15,000+ (professionally installed)
Landscaping (Gravel Border, Edging): $1,000 – $2,500
Fencing & Lounge Chairs: $1,500 – $4,000
TOTAL: $12,500 – $26,500+
Budget alternative: Use real grass, build a simpler DIY playground, and create a small sand-filled chipping area instead of a full putting green.
Your Summer of Fun is Officially Planned
With a little bit of creativity and some elbow grease, you can turn your backyard into the ultimate destination for fun. Whether you go for a simple ring toss or a full-on adventure playset, the goal is the same: to create a space that brings people together and makes memories. Now stop scrolling and start planning!
Want even more inspiration for your outdoor space? Head over to our Pinterest page to see what else is trending.