You know that feeling when you finally find the Garden Step And Stair Ideas 2026 that looks exactly right for your space? That perfect pin that makes you want to start digging this weekend? We live for that moment.
After filtering through hundreds of designs, from high-end landscape architecture to brilliant DIY solutions you’d find on Facebook Marketplace, we narrowed it down to the ideas that deliver.
Get ready for 28 curated garden step and stair ideas covering everything from rustic timber risers and natural stone slabs to sleek, modern illuminated stairs. We’re diving deep into what makes each one work.
For 2026, it’s all about extending your living space outdoors with purpose and style, making even the functional parts of your yard feel like a beautiful escape.
📌 Save this to Pinterest for later — you’ll want to revisit these ideas.
1. Classic Stone Steps for a Traditional Garden
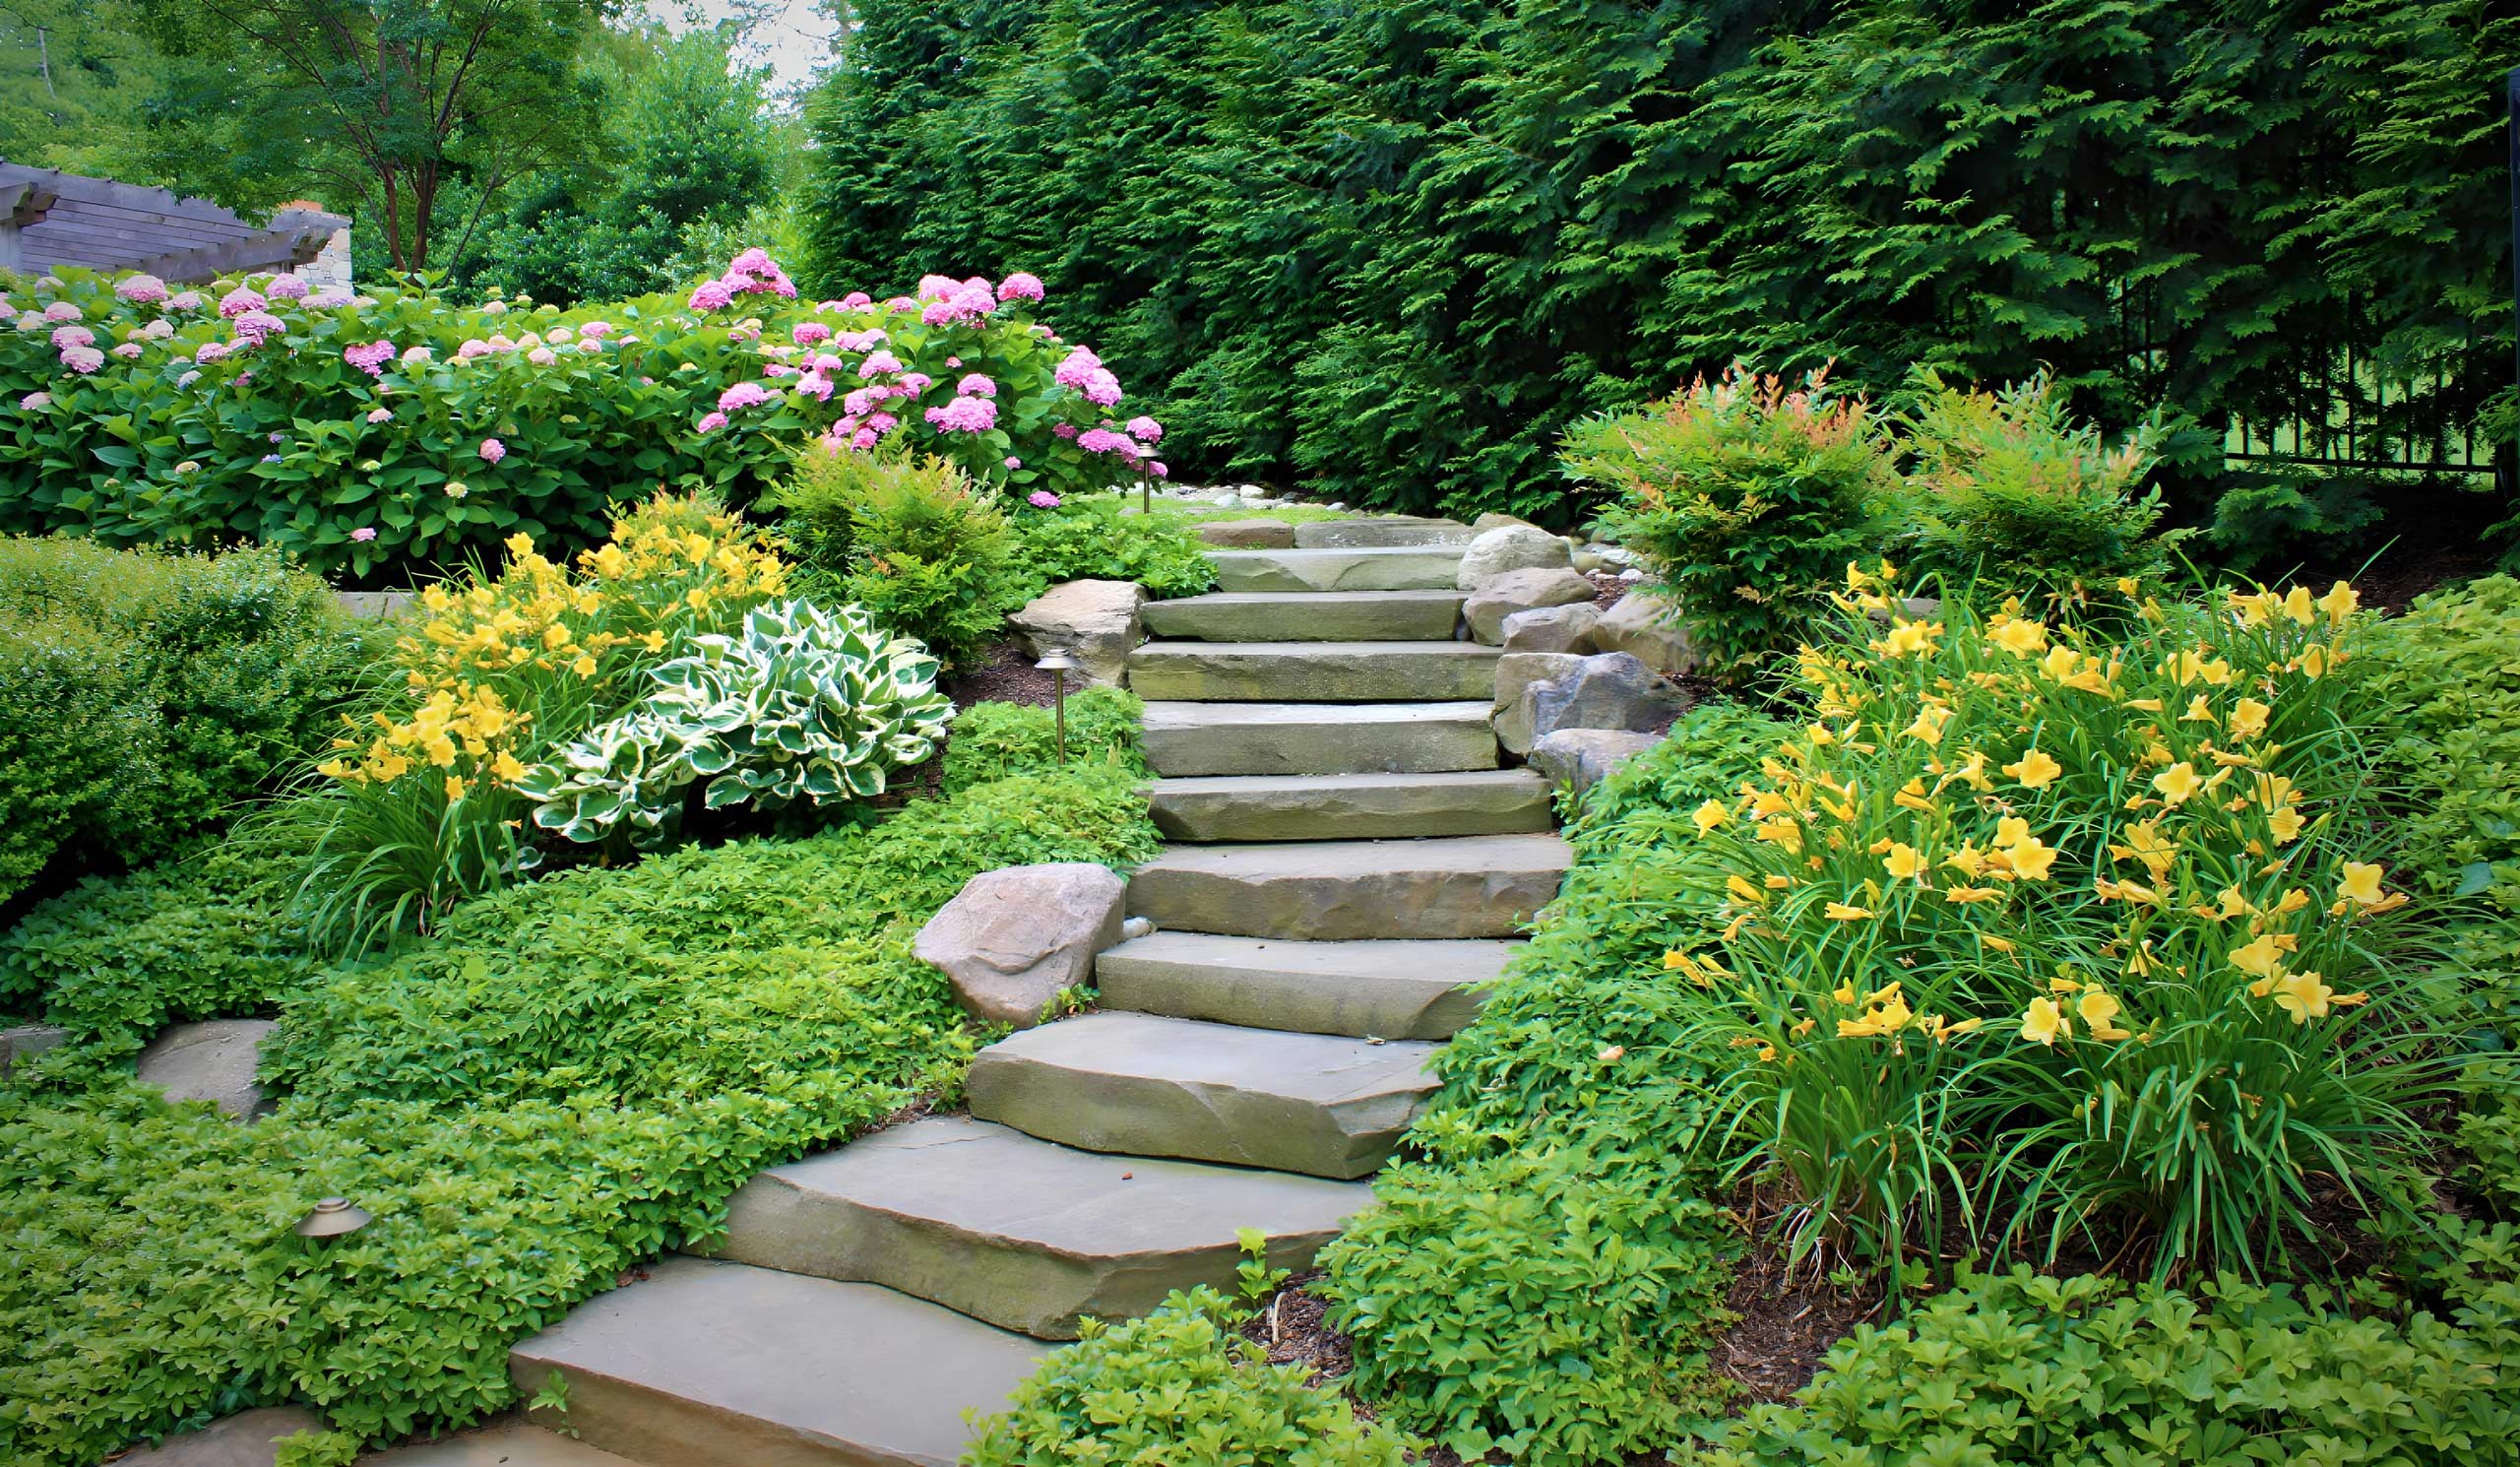
This traditional stone step design is a classic for a reason. The magic is in the simplicity and the use of natural, timeless materials. By using large, substantial stone slabs, the stairs feel grounded and permanent, as if they’ve always been part of the landscape. The informal planting along the edges softens the hardscape, preventing it from feeling too rigid or formal. This balance between strong structure and soft, organic elements is a fundamental principle of good garden design, creating a path that feels both intentional and completely natural.
“A look this sturdy feels like it will last forever, but stone on a slope requires a solid foundation.”
Without a properly compacted gravel base beneath each step, they can shift, tilt, or heave over time, especially in climates with frost. Creating a truly stable, long-lasting staircase like this is heavy work and requires significant ground preparation. If you’re not prepared for the excavation and labor, a simpler path with stepping stones on a gentler slope might be a more achievable DIY project.
2. Winding Stone Steps to a Distant Garden Arbor
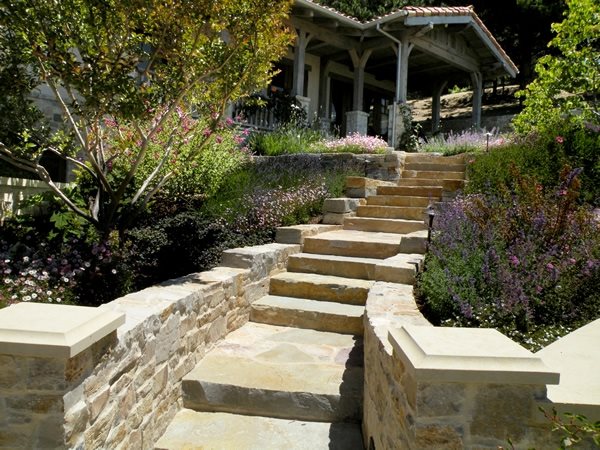
When creating a long, meandering staircase, vary the number of steps between landings. A pattern of 3 steps, then a landing, then 5 steps, then another landing, feels more organic and less monotonous than a uniform 4-4-4. The landings provide a moment of pause, allowing you to enjoy the view. For maximum comfort on a garden path, aim for a tread depth of at least 14 inches and a riser height of no more than 6 inches. This creates a gentle, leisurely pace perfectly suited for a stroll through the garden.
“that truly makes this design magical is the distant arbor.”
It creates a destination. Without that focal point at the end of the journey, the steps are just a way to get up a hill. But with the arbor, they become an invitation, pulling you forward and creating a sense of mystery and reward. Every garden path should lead somewhere, even if it’s just to a quiet bench or a beautiful view. This sense of purpose is what transforms a simple walkway into a meaningful garden experience.
3. Rough-Hewn Stone Steps on a Lush Hillside
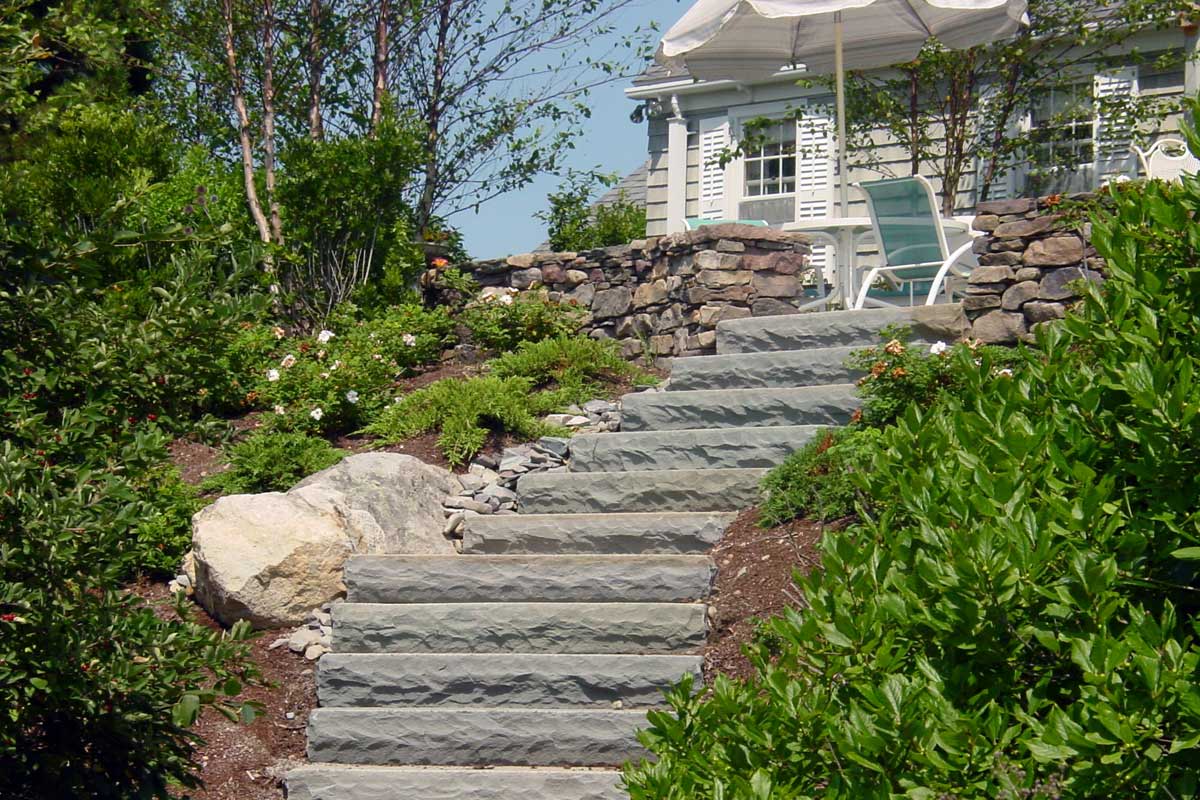
This beautifully rugged look follows a simple formula: 70% natural materials + 20% lush foliage + 10% architectural context. The heavy lifting is done by the rough-hewn stone steps and the stacked stone wall, providing texture and a sense of permanence. This is balanced by a riot of mixed greenery that softens the stone and integrates it into the hillside. The house siding visible at the top provides a clean, contrasting backdrop that makes the natural elements pop. You could swap the green foliage for autumnal reds and oranges and get a completely different, yet equally balanced, mood.
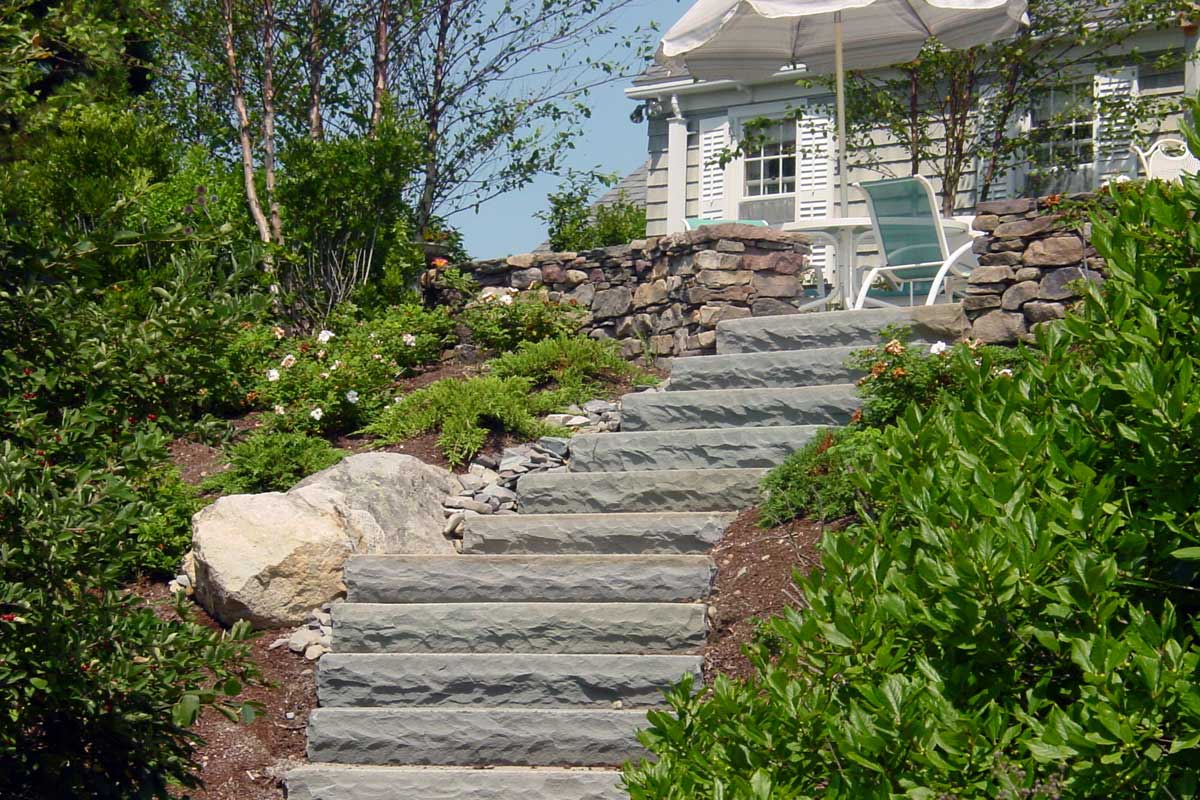
“You can achieve this rustic hillside vibe for much less.”
Instead of sourcing large, custom-cut stone slabs, look for reclaimed concrete pieces on Facebook Marketplace, often available for free. Break them into irregular shapes for a similar rough-hewn look. For retaining walls, consider treated landscape timbers or even gabion baskets filled with smaller, less expensive rocks instead of a fully mortared stone wall. The cost difference can be significant, bringing a $10,000 professional look down to a $2,000 DIY project.
4. Modern Drama with Illuminated Dark Stone Steps
The drama here comes from high contrast. The warm, soft glow of the under-tread lighting stands in sharp opposition to the dark, rough texture of the grey stone blocks. This pairing creates a powerful visual tension that is inherently modern and sophisticated. Furthermore, the clean, geometric lines of the stacked blocks provide a strong sense of order and rhythm, which is then softened by the organic shapes of the surrounding foliage. It’s a masterful play of light against dark, and geometry against nature. Compare this with the brighter, softer lighting in Idea #4.
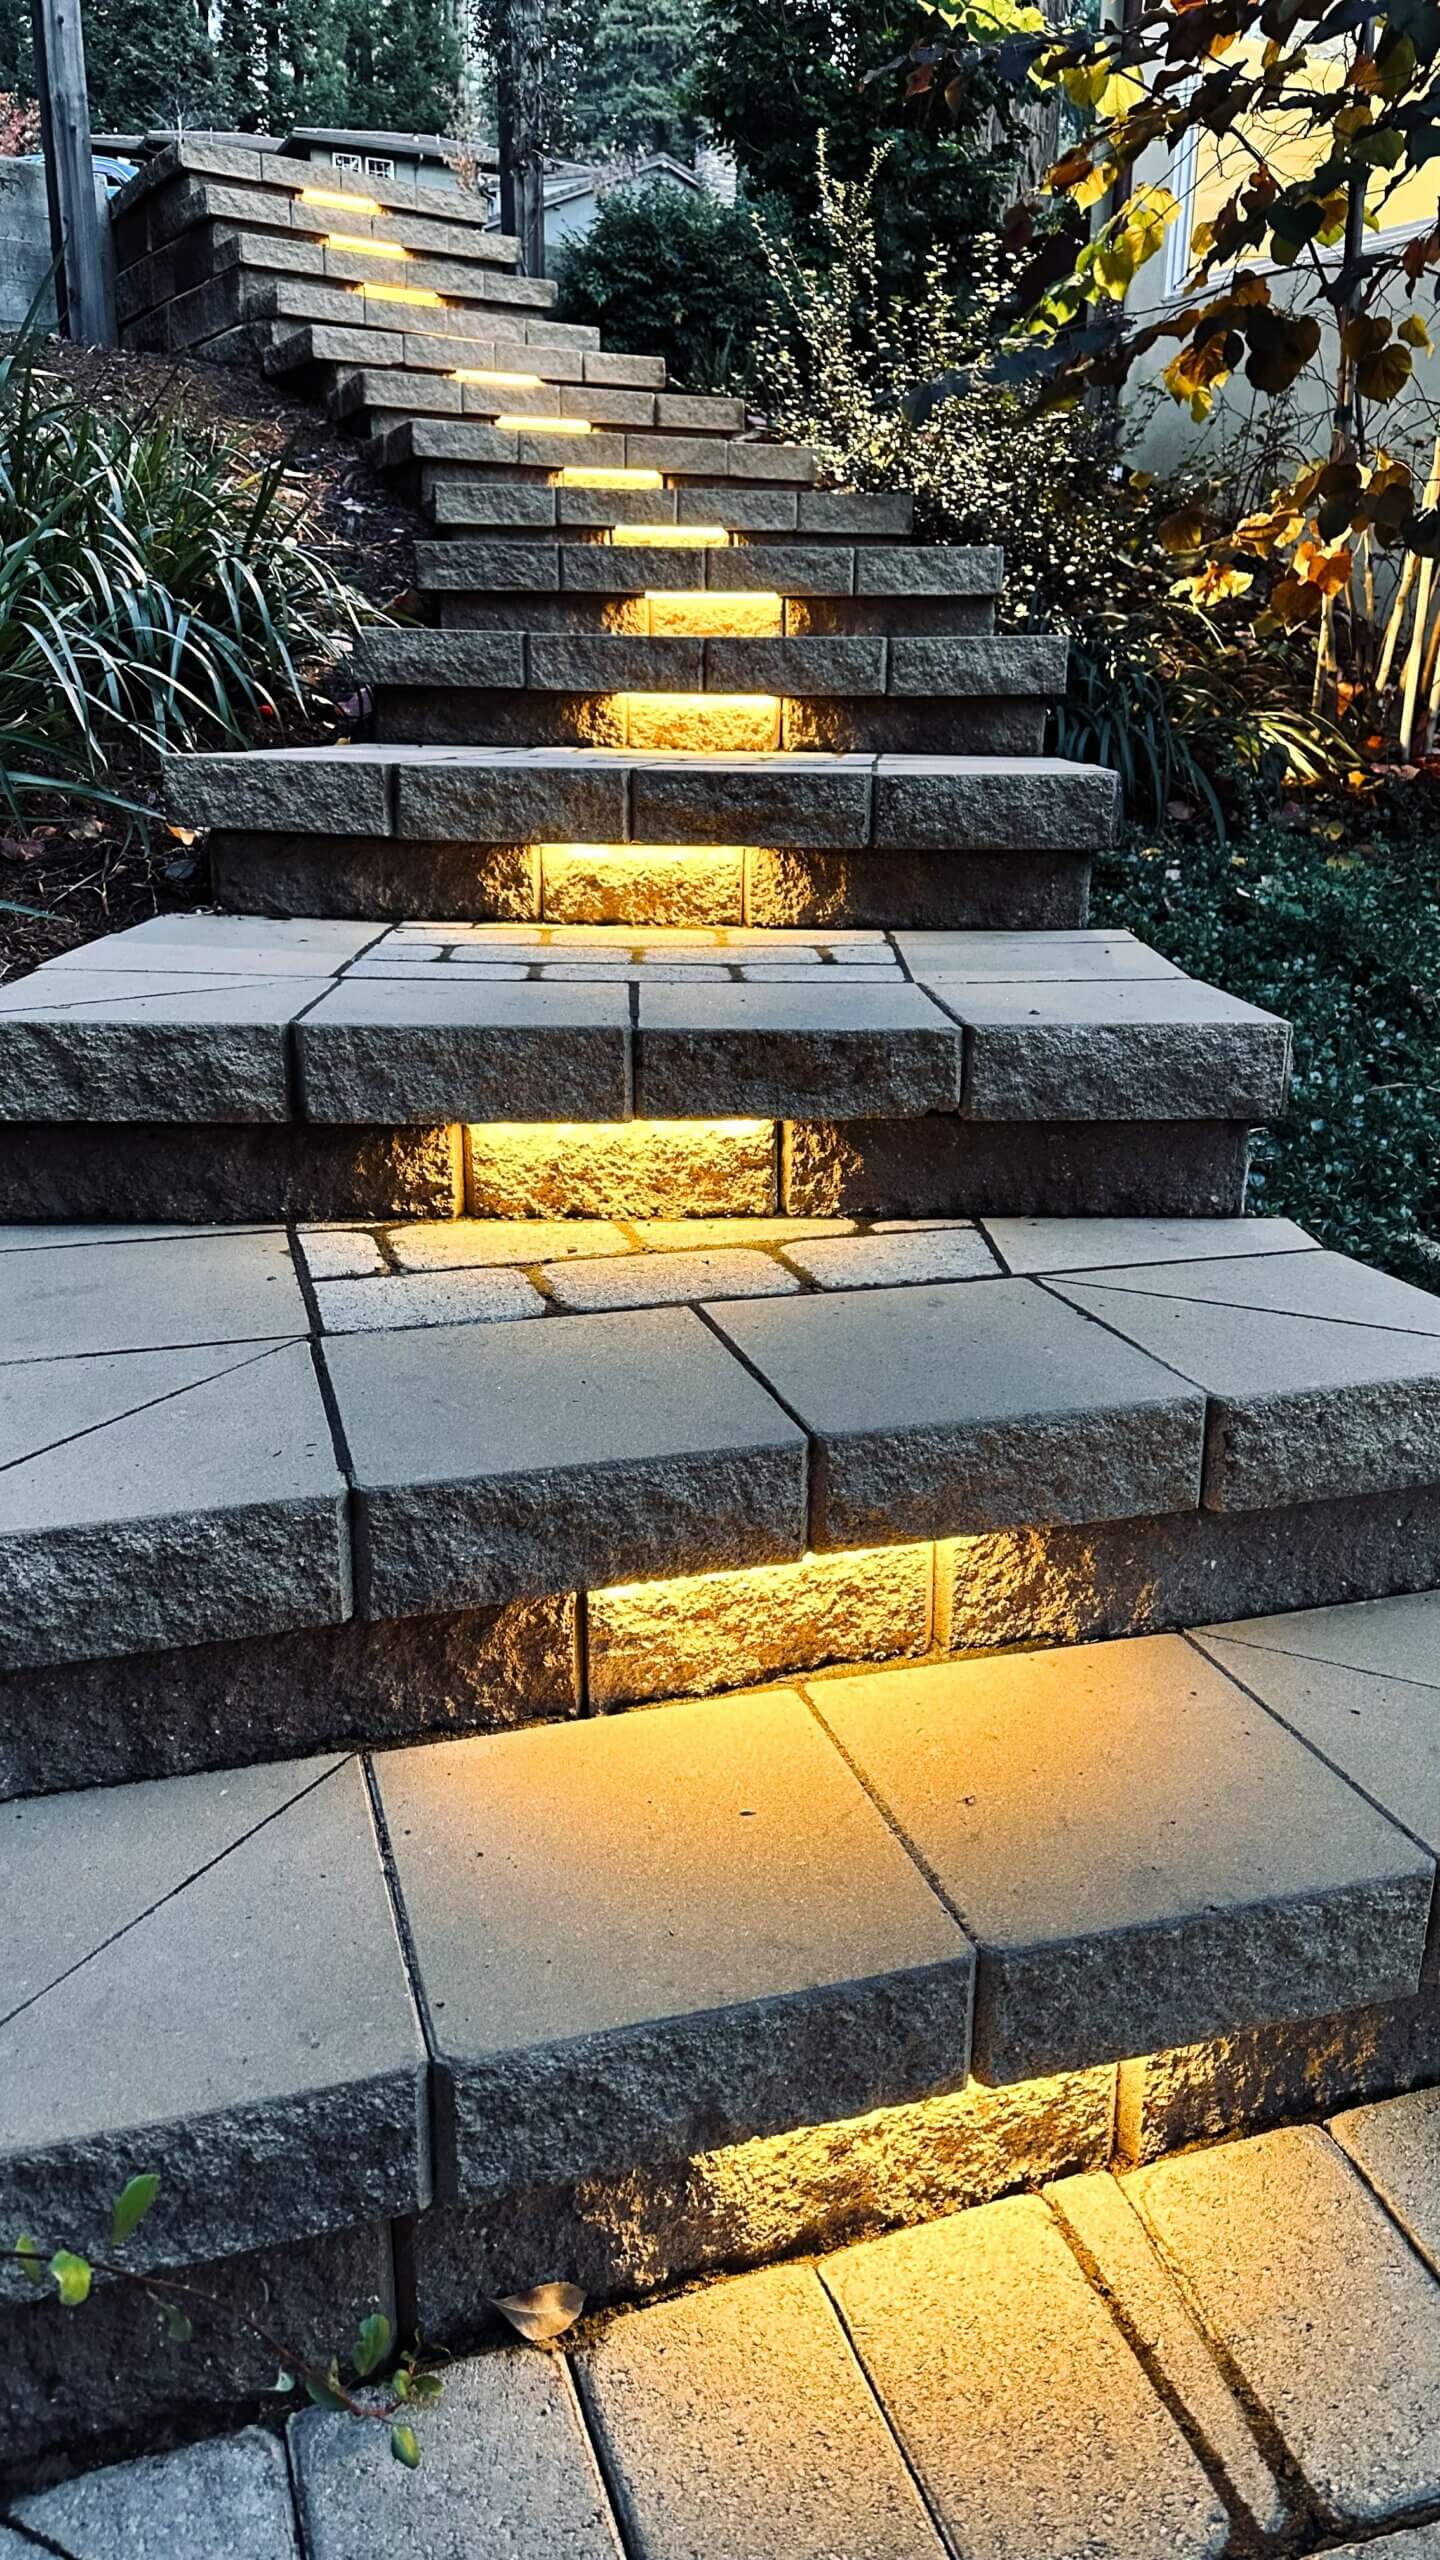
“While stunning, integrated step lighting requires a bit of planning and upkeep.”
You’ll need to ensure all wiring is outdoor-rated and properly buried or concealed according to local codes, which often means hiring an electrician. The fixtures themselves can accumulate leaves and debris, requiring occasional cleaning to maintain their warm glow. LED strips are energy-efficient, but replacing a failed section within a mortared stone structure can be a complex task. Plan for access and choose high-quality, long-life fixtures from the start.
5. Illuminated Stone & Wood Steps to a Modern Patio
This luxe, modern look blends expensive materials, but the result is a true outdoor living room. The integration of lighting and high-quality finishes is key to the high-end feel.
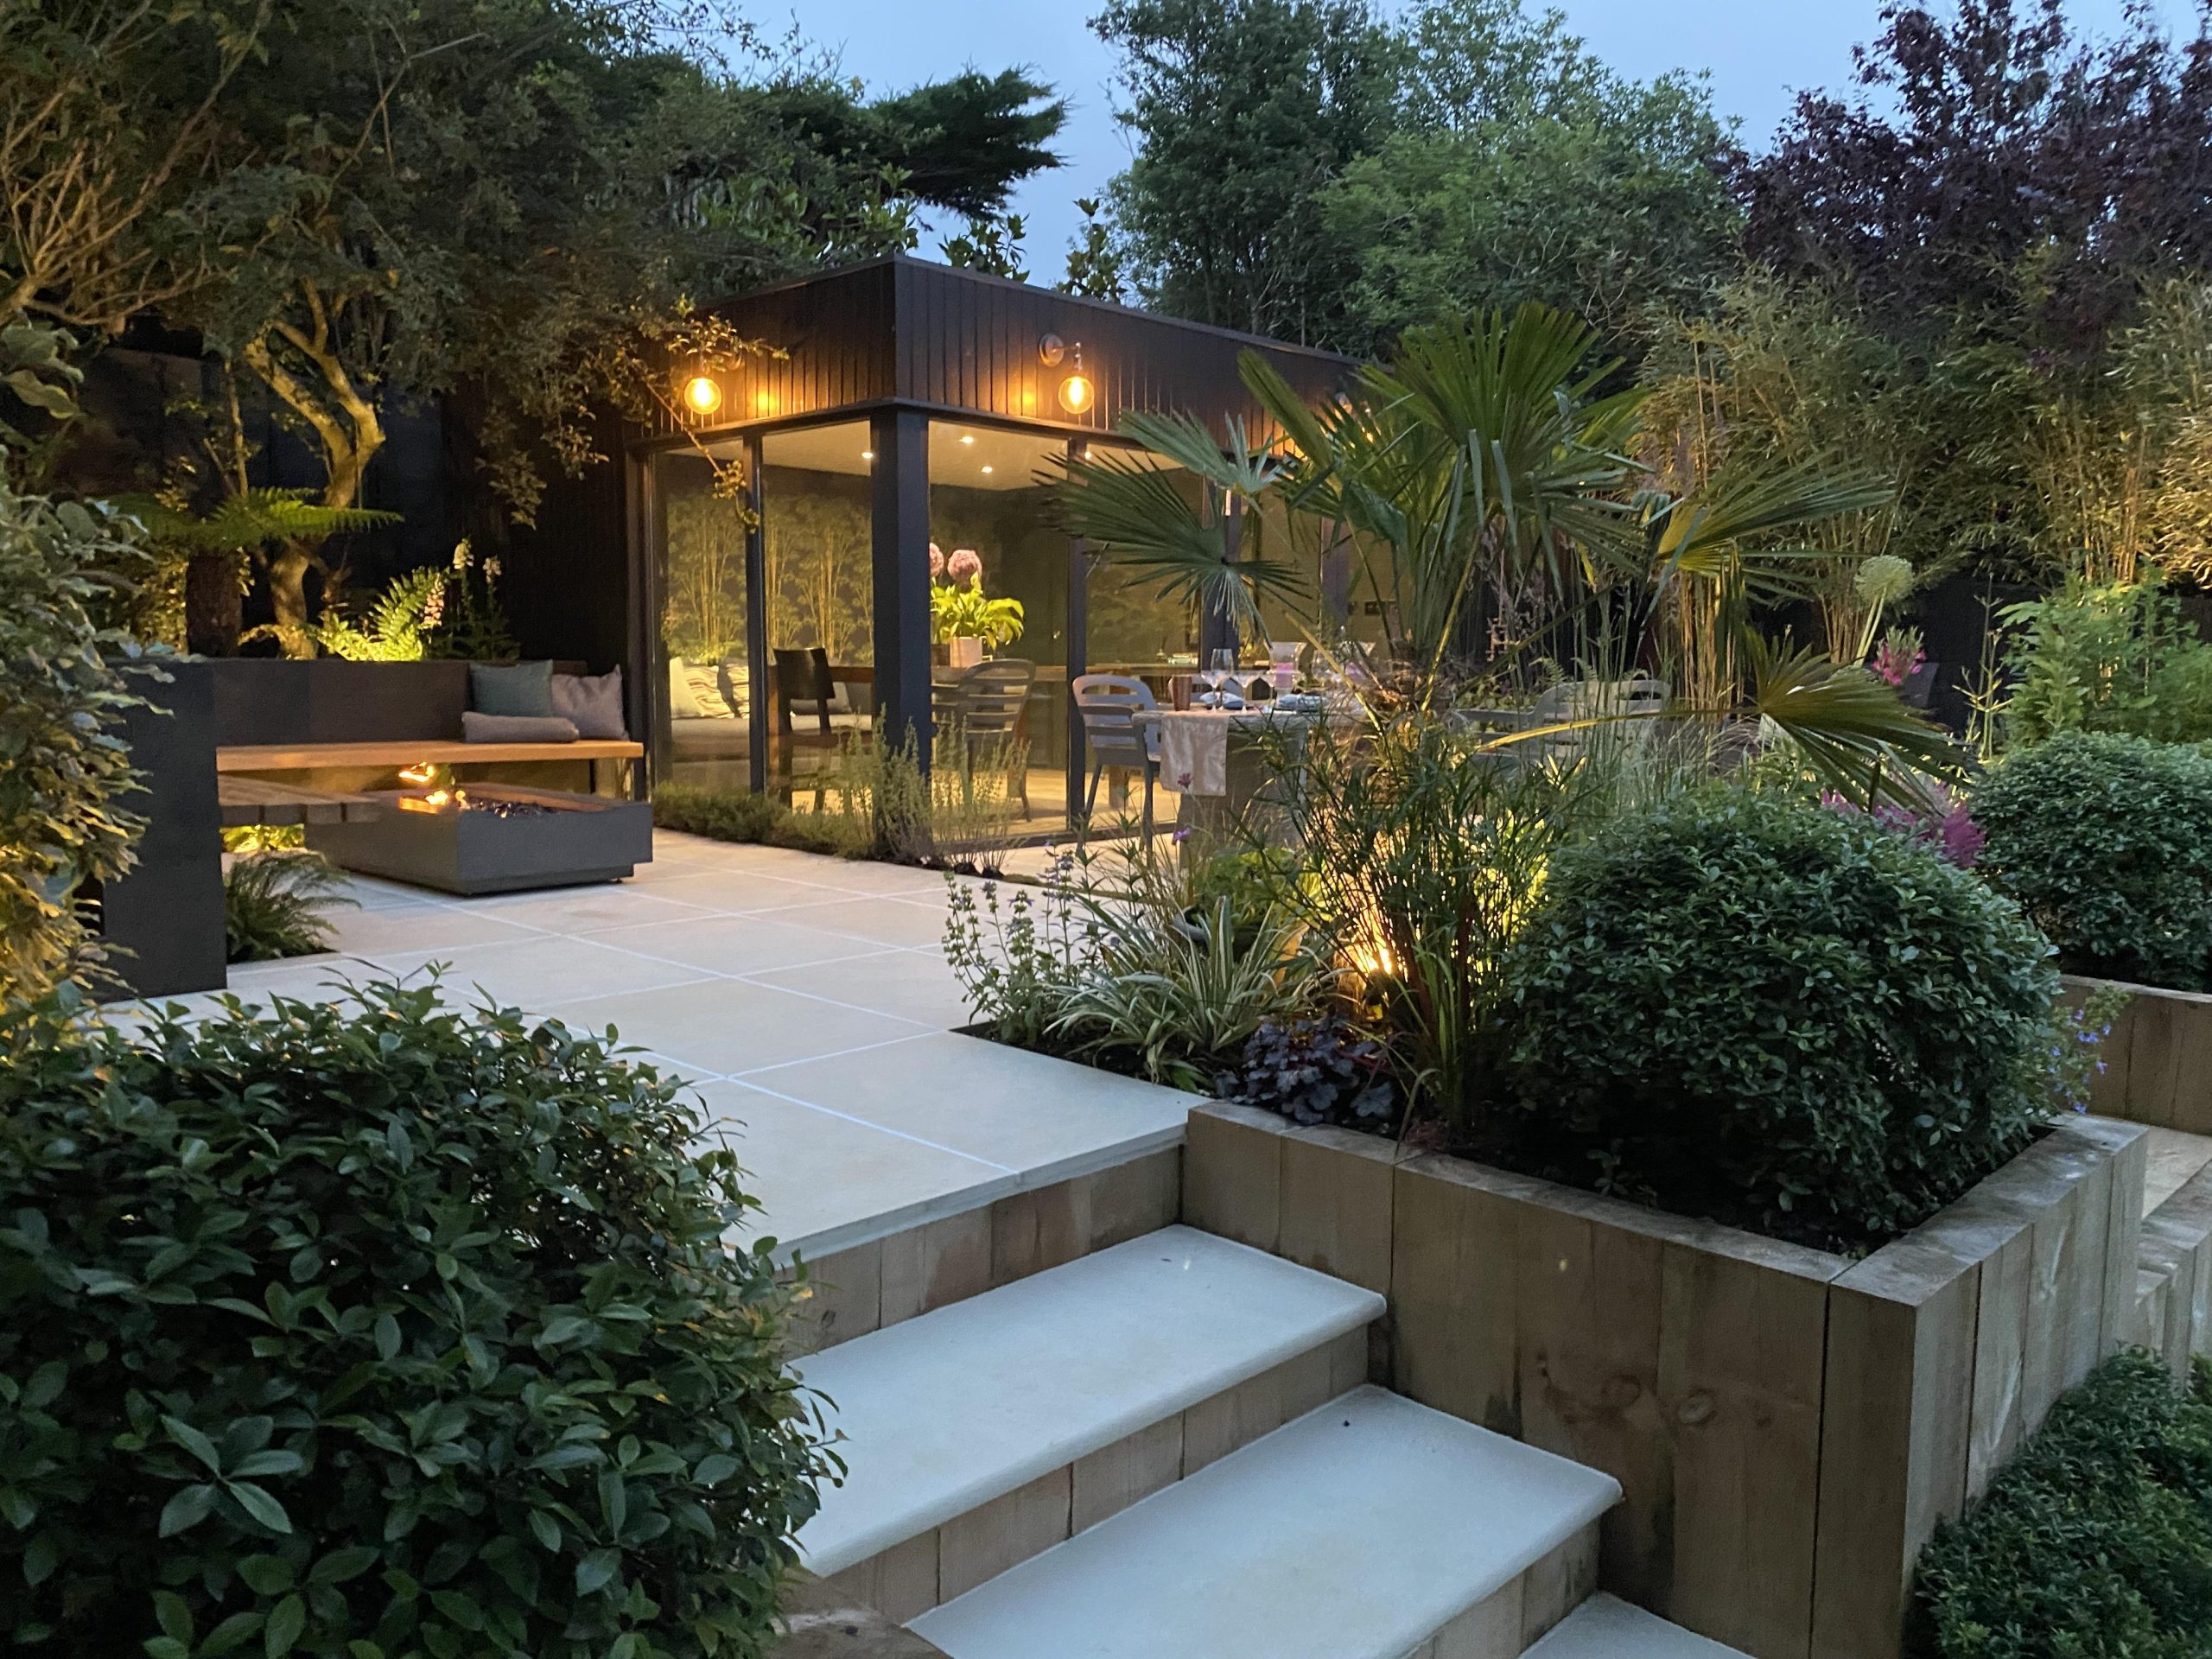
“Main Furniture (Bench, Fire Pit): $2,500 – $7,000
Lighting (Ground, Sconces,”
- Main Furniture (Bench, Fire Pit): $2,500 – $7,000
- Lighting (Ground, Sconces, Step Lights): $1,500 – $4,000
- Hardscaping (Stone Pavers, Steps): $8,000 – $20,000 (depending on area)
- Woodwork (Risers, Planters): $2,000 – $5,000
- Plantings: $1,000 – $3,000
- TOTAL: $15,000 – $39,000
Budget alternative: Use concrete pavers, composite decking for risers, and solar-powered stake lights to achieve a similar glowing effect for around 40% of the cost.
This design is perfect for connecting a house to a sunken or raised patio area that is between 24 and 36 inches lower or higher than the primary door. The wide, generous steps create a grand transition, making the two spaces feel like a single, cohesive unit. A design this substantial works best with a larger patio area, at least 15×15 feet, to ensure the grandeur of the steps doesn’t overwhelm the destination. For smaller transitions, consider reducing the width of the steps to maintain a sense of balance.
6. Rugged Stone Slabs Flanked by Natural Boulders
The single element holding this entire look together is the dark wood chip mulch. It may sound simple, but it’s doing three critical jobs at once. First, it provides a dark, uniform background that makes the light grey stone steps and the varied greens of the plants pop. Second, it suppresses weeds, which is essential for maintaining a clean look in such a natural, informal planting. Third, it retains moisture in the soil, helping the surrounding plants thrive. Without that dark, consistent mulch, the scene would look messy and unfinished.
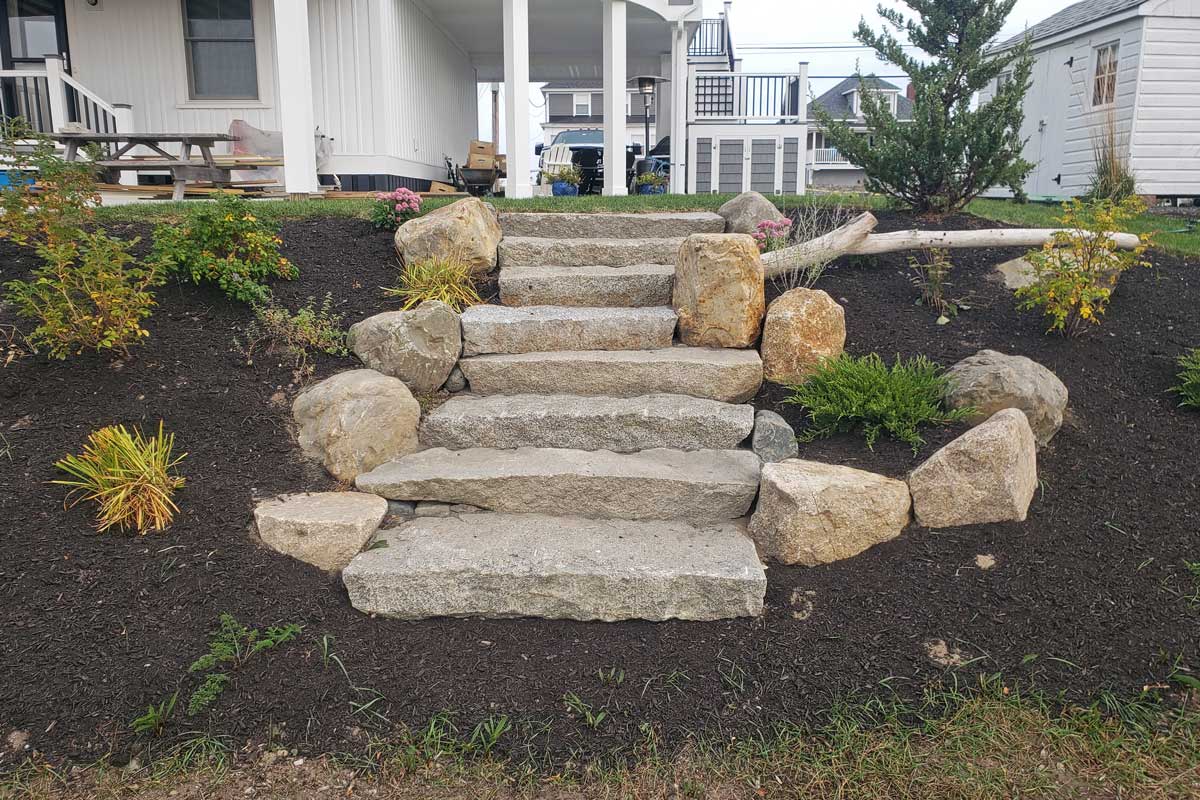
“You can create a similar long-lasting mulch bed in an afternoon.”
Here’s a quick guide:
- Clear the area: Remove all weeds, grass, and debris from the intended mulch bed. Time: 30 minutes.
- Edge the bed: Use a spade to create a clean, 4-inch deep edge around the perimeter. This prevents grass from creeping in and contains the mulch. Time: 20 minutes.
- Lay down a barrier: Place cardboard or several layers of newspaper over the soil. This provides an extra, biodegradable layer of weed suppression. Time: 15 minutes.
- Spread the mulch: Apply a 3-4 inch layer of dark wood chip mulch over the entire bed, pulling it back slightly from the base of plants. Time: 30 minutes.
Material Cost: Approx. $5-$8 per 2-cubic-foot bag of mulch.
7. Natural Stone Steps with a Hidden Waterfall
This design works because it fully mimics a natural discovery. The stone slabs aren’t perfectly uniform; they are irregularly shaped and placed, just as you might find them on a real mountain trail. The use of mulch and dense, varied plantings right up to the edge of the stones blurs the line between the path and the garden. The sound and sight of the waterfall in the background adds a sensory layer, rewarding you as you move through the space. It’s a design that engages more than just your sense of sight.
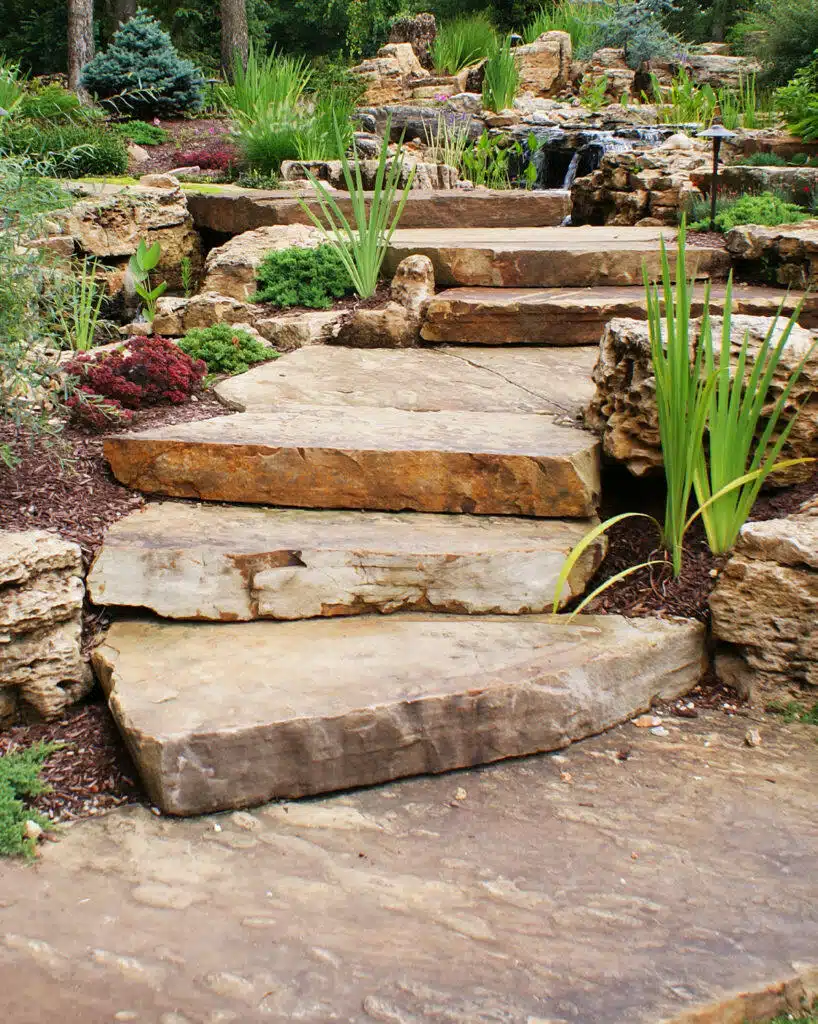
“Integrating a water feature is a stunning addition, but it comes with responsibilities.”
A pump is required to run the waterfall, which will add to your electricity bill and needs to be maintained. The water level must be monitored and topped up due to evaporation, and the entire system will need to be properly winterized in colder climates to prevent pipes from freezing and cracking. It also creates a potential attraction for wildlife, which can be both a blessing and a curse. Be prepared for the commitment beyond the initial installation.
8. Boulder Steps Winding Through Manicured Shrubs
The serene and inviting feel of this path is a result of a balanced design equation: 50% structured planting + 30% natural stone + 20% open lawn. The meticulously trimmed, rounded evergreen shrubs provide a strong, repetitive geometric element that feels orderly and calm. This structure is beautifully contrasted by the irregular, organic shapes of the large boulder steps. The vibrant green grass acts as a clean, negative space that ties the whole scene together and keeps it from feeling too busy. It’s a perfect marriage of formal and informal garden styles.
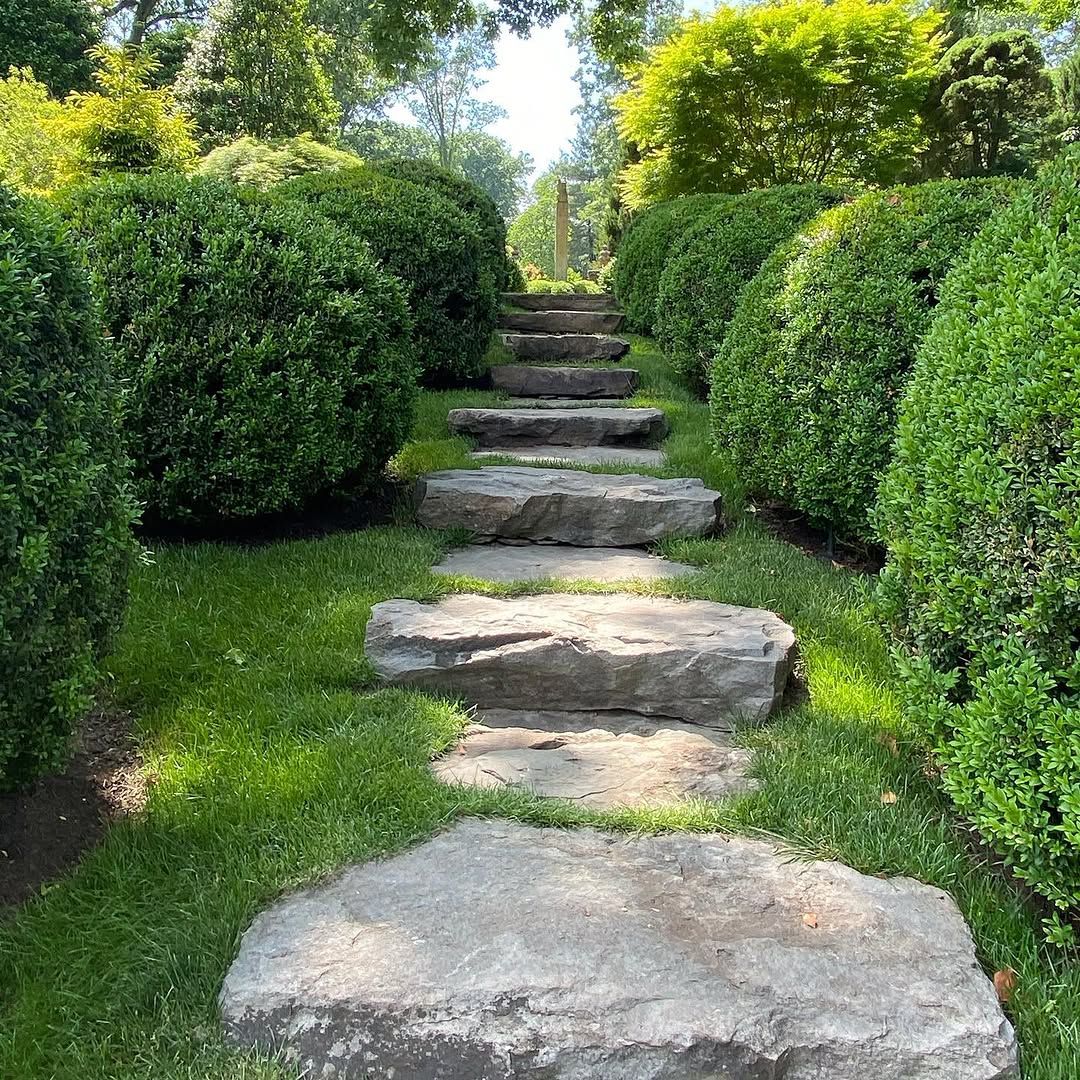
“When using large, irregular boulders as steps, the key to safety and comfort is creating at least one flat, walkable surface on each stone, about 12-15 inches deep.”
Don’t worry if the rest of the boulder is sloped or uneven. Your brain will automatically identify the flattest part to step on. The trick is to orient the boulders during installation to present that “best side” forward. This ensures the path is functional while retaining its rugged, natural aesthetic. Use a level during placement to be sure.
9. Timeless Stone Stairway for a Sloped Garden
There’s a major movement towards creating gardens that feel mature and established from day one, and this look taps right into that desire. As homeowners invest more in their “forever homes,” they are choosing materials like natural stone that have a sense of permanence and history. This isn’t about chasing fleeting trends; it’s about creating a landscape that will look just as good, if not better, in 20 years. This style has incredible staying power because it’s based on classic materials and a deep respect for the natural landscape.
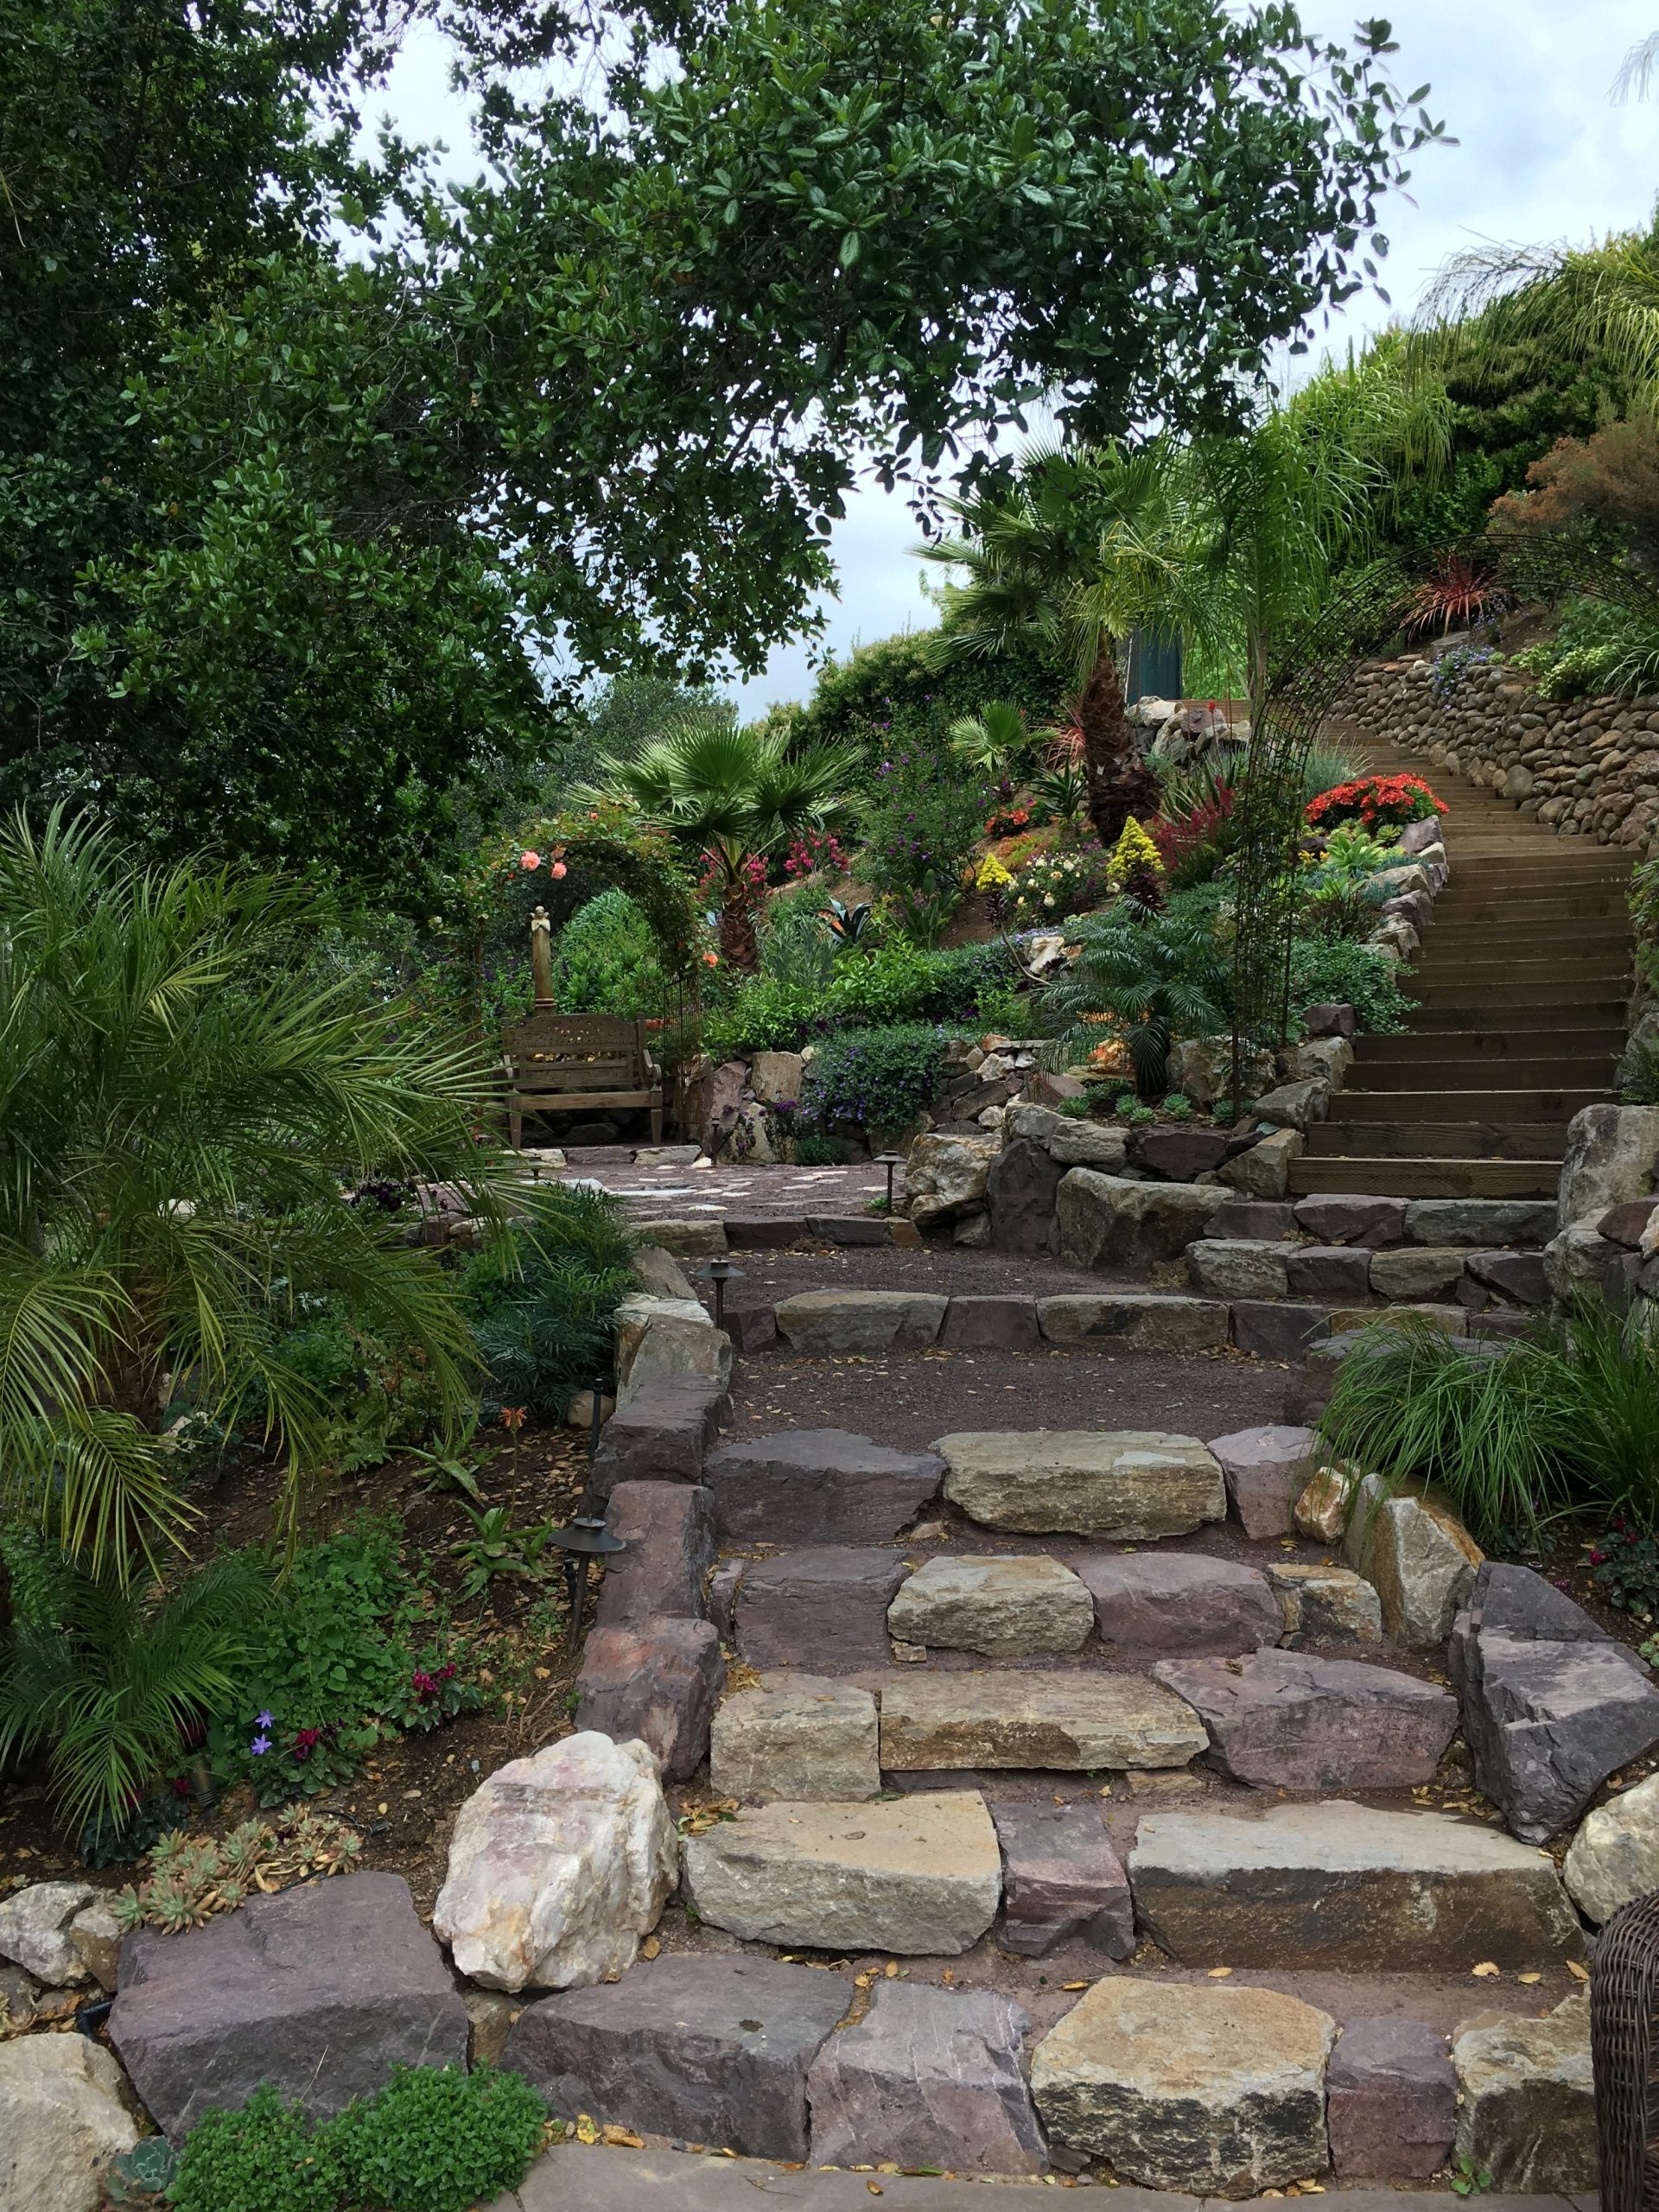
“A full stone staircase can be a major budget item, but you can get this established, classic feel for less.”
Look for “urbanite” – recycled broken concrete – which can often be sourced for free. When laid with the broken, irregular side up, it mimics the look of natural flagstone. For the risers, use simple treated wood landscape timbers, which are inexpensive and easy to work with. Once you encourage moss or groundcover to grow in the cracks, it will develop a convincing, timeless patina that looks far more expensive than it was.
10. Irregular Stone Steps in a Lush Rock Garden
This design is so successful because it embraces imperfection. The steps are irregular, the boulders are randomly placed, and the plants are allowed to spill over and grow between the rocks. This creates a rich tapestry of textures and forms that feels dynamic and alive. The repetition of the grey stone, from the large boulders to the flat steps to the retaining wall, provides a unifying visual thread that keeps the “overgrown” look from descending into pure chaos. It feels wild, but it’s secretly well-composed. Contrast this with the more aged look in Idea #14.
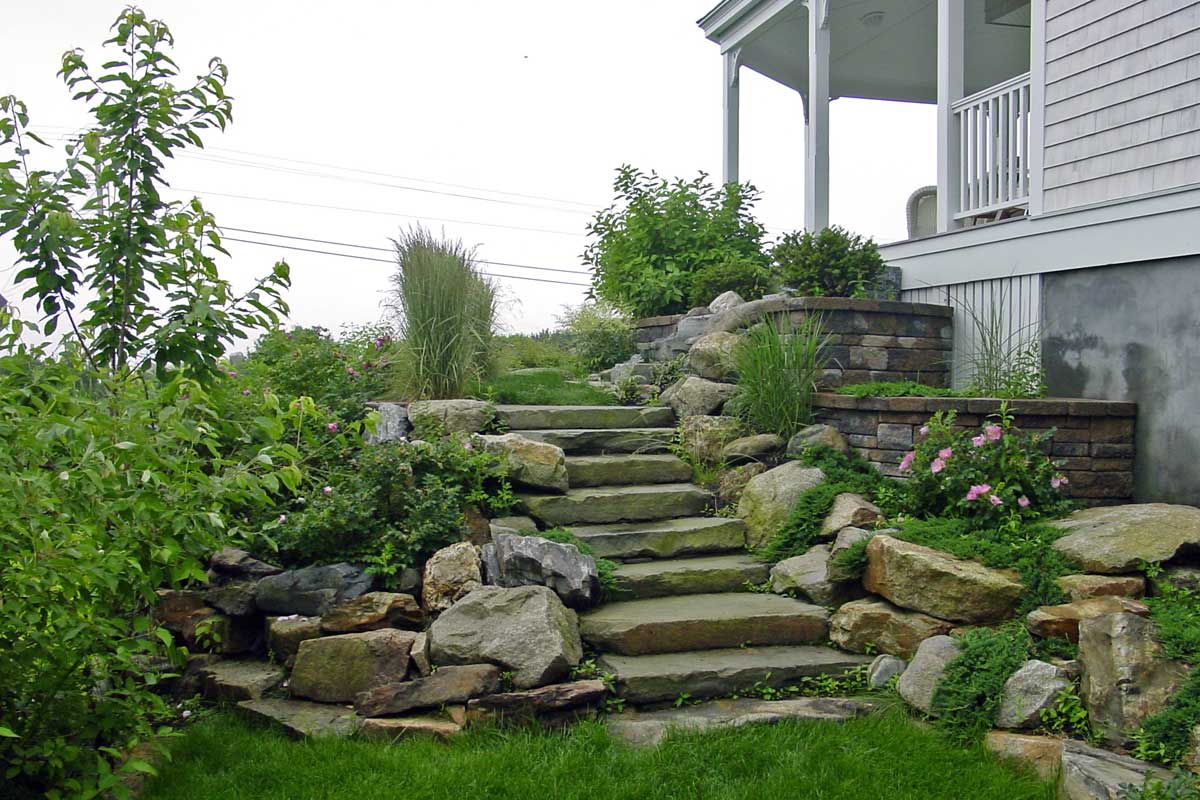
“An “overgrown” or naturalistic planting style looks effortless, but it requires mindful gardening to keep it looking good.”
You will need to do regular, selective weeding to ensure that desirable self-seeding plants aren’t choked out by aggressive weeds. It also requires a “little and often” approach to pruning, trimming back plants that are blocking the path or overwhelming smaller, more delicate species. This isn’t a no-maintenance solution; it’s just a different, more nuanced kind of maintenance than mowing a lawn.
11. Terraced Steps on a Grassy Slope
Before you commit to a terraced stone and grass design, run through this quick checklist:
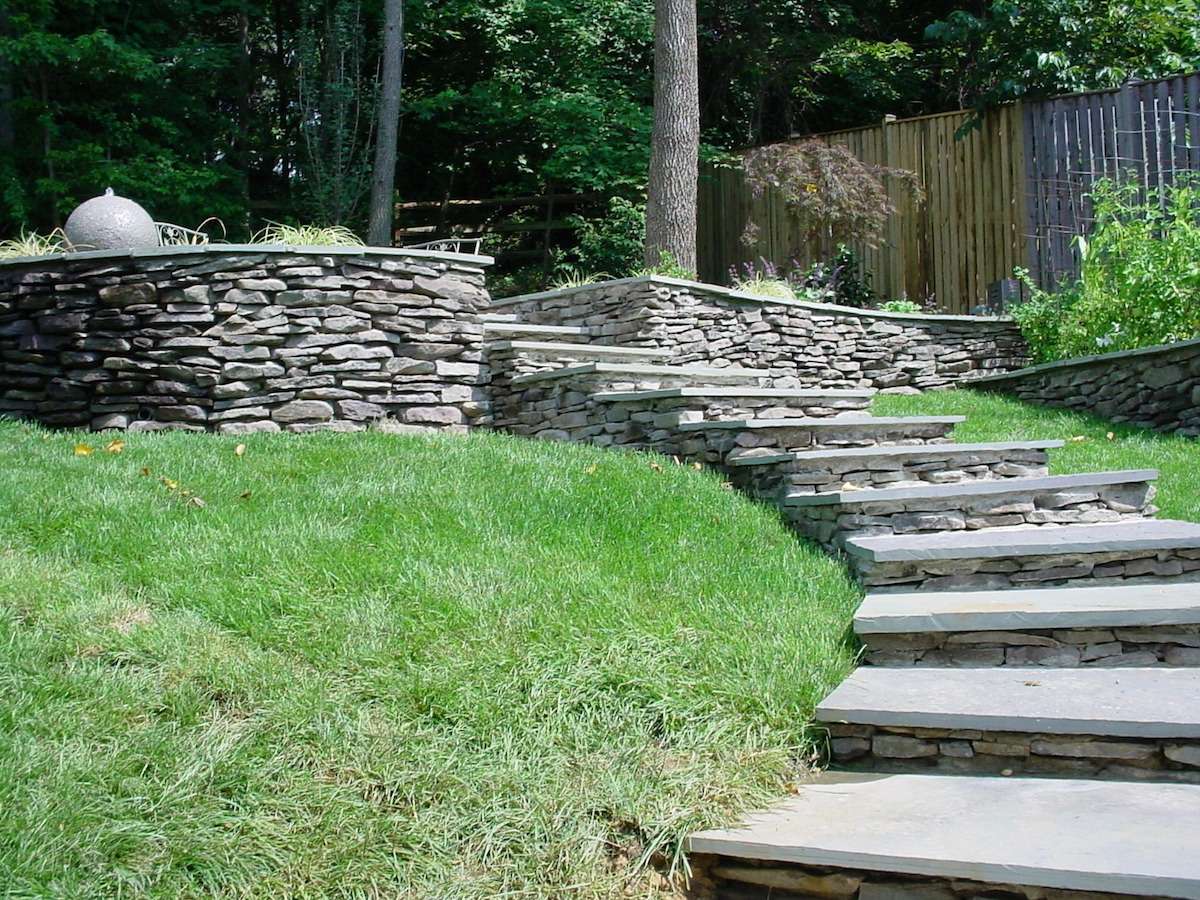
“Measure the slope: Is the incline gentle enough that grass sections won’t be a mowing nightmare?”
A slope over 15 degrees can be difficult and dangerous to mow.
Check your soil: Does your soil drain well? Poor drainage can lead to soggy, muddy grass patches and shifting stones. You may need to amend the soil or add a drainage layer.
Sunlight exposure: Is there at least 6 hours of direct sun? Most turfgrasses need plenty of sun to thrive and stay lush. Shady slopes may require a different groundcover.
Source your stone: Have you priced out both the flat grey steps and the irregular wall stones? The cost can vary dramatically by region.
The secret to making this look feel integrated is to “bury” the first step slightly into the grassy slope below it. The tread of the bottom step should be almost flush with the ground. This creates a smooth visual transition and makes the staircase look like it’s emerging from the landscape, rather than just sitting on top of it. For every subsequent step, ensure the retaining walls on either side are keyed into the hillside for stability, preventing them from being pushed out by the soil behind them.
12. Layered Grey Stone Steps in a Woodsy Landscape
A grand, multi-level installation like this is best suited for a large property with a significant and long slope to navigate. The ideal site would have a change in elevation of at least 8 to 15 feet over a run of 30 to 50 feet. The generous width and multiple landings require space to breathe and would likely overwhelm a small or narrow backyard. This is a solution for creating a major pathway or connecting two distinct areas of a large, wooded, or hillside lot, rather than a simple transition from a patio to a lawn.
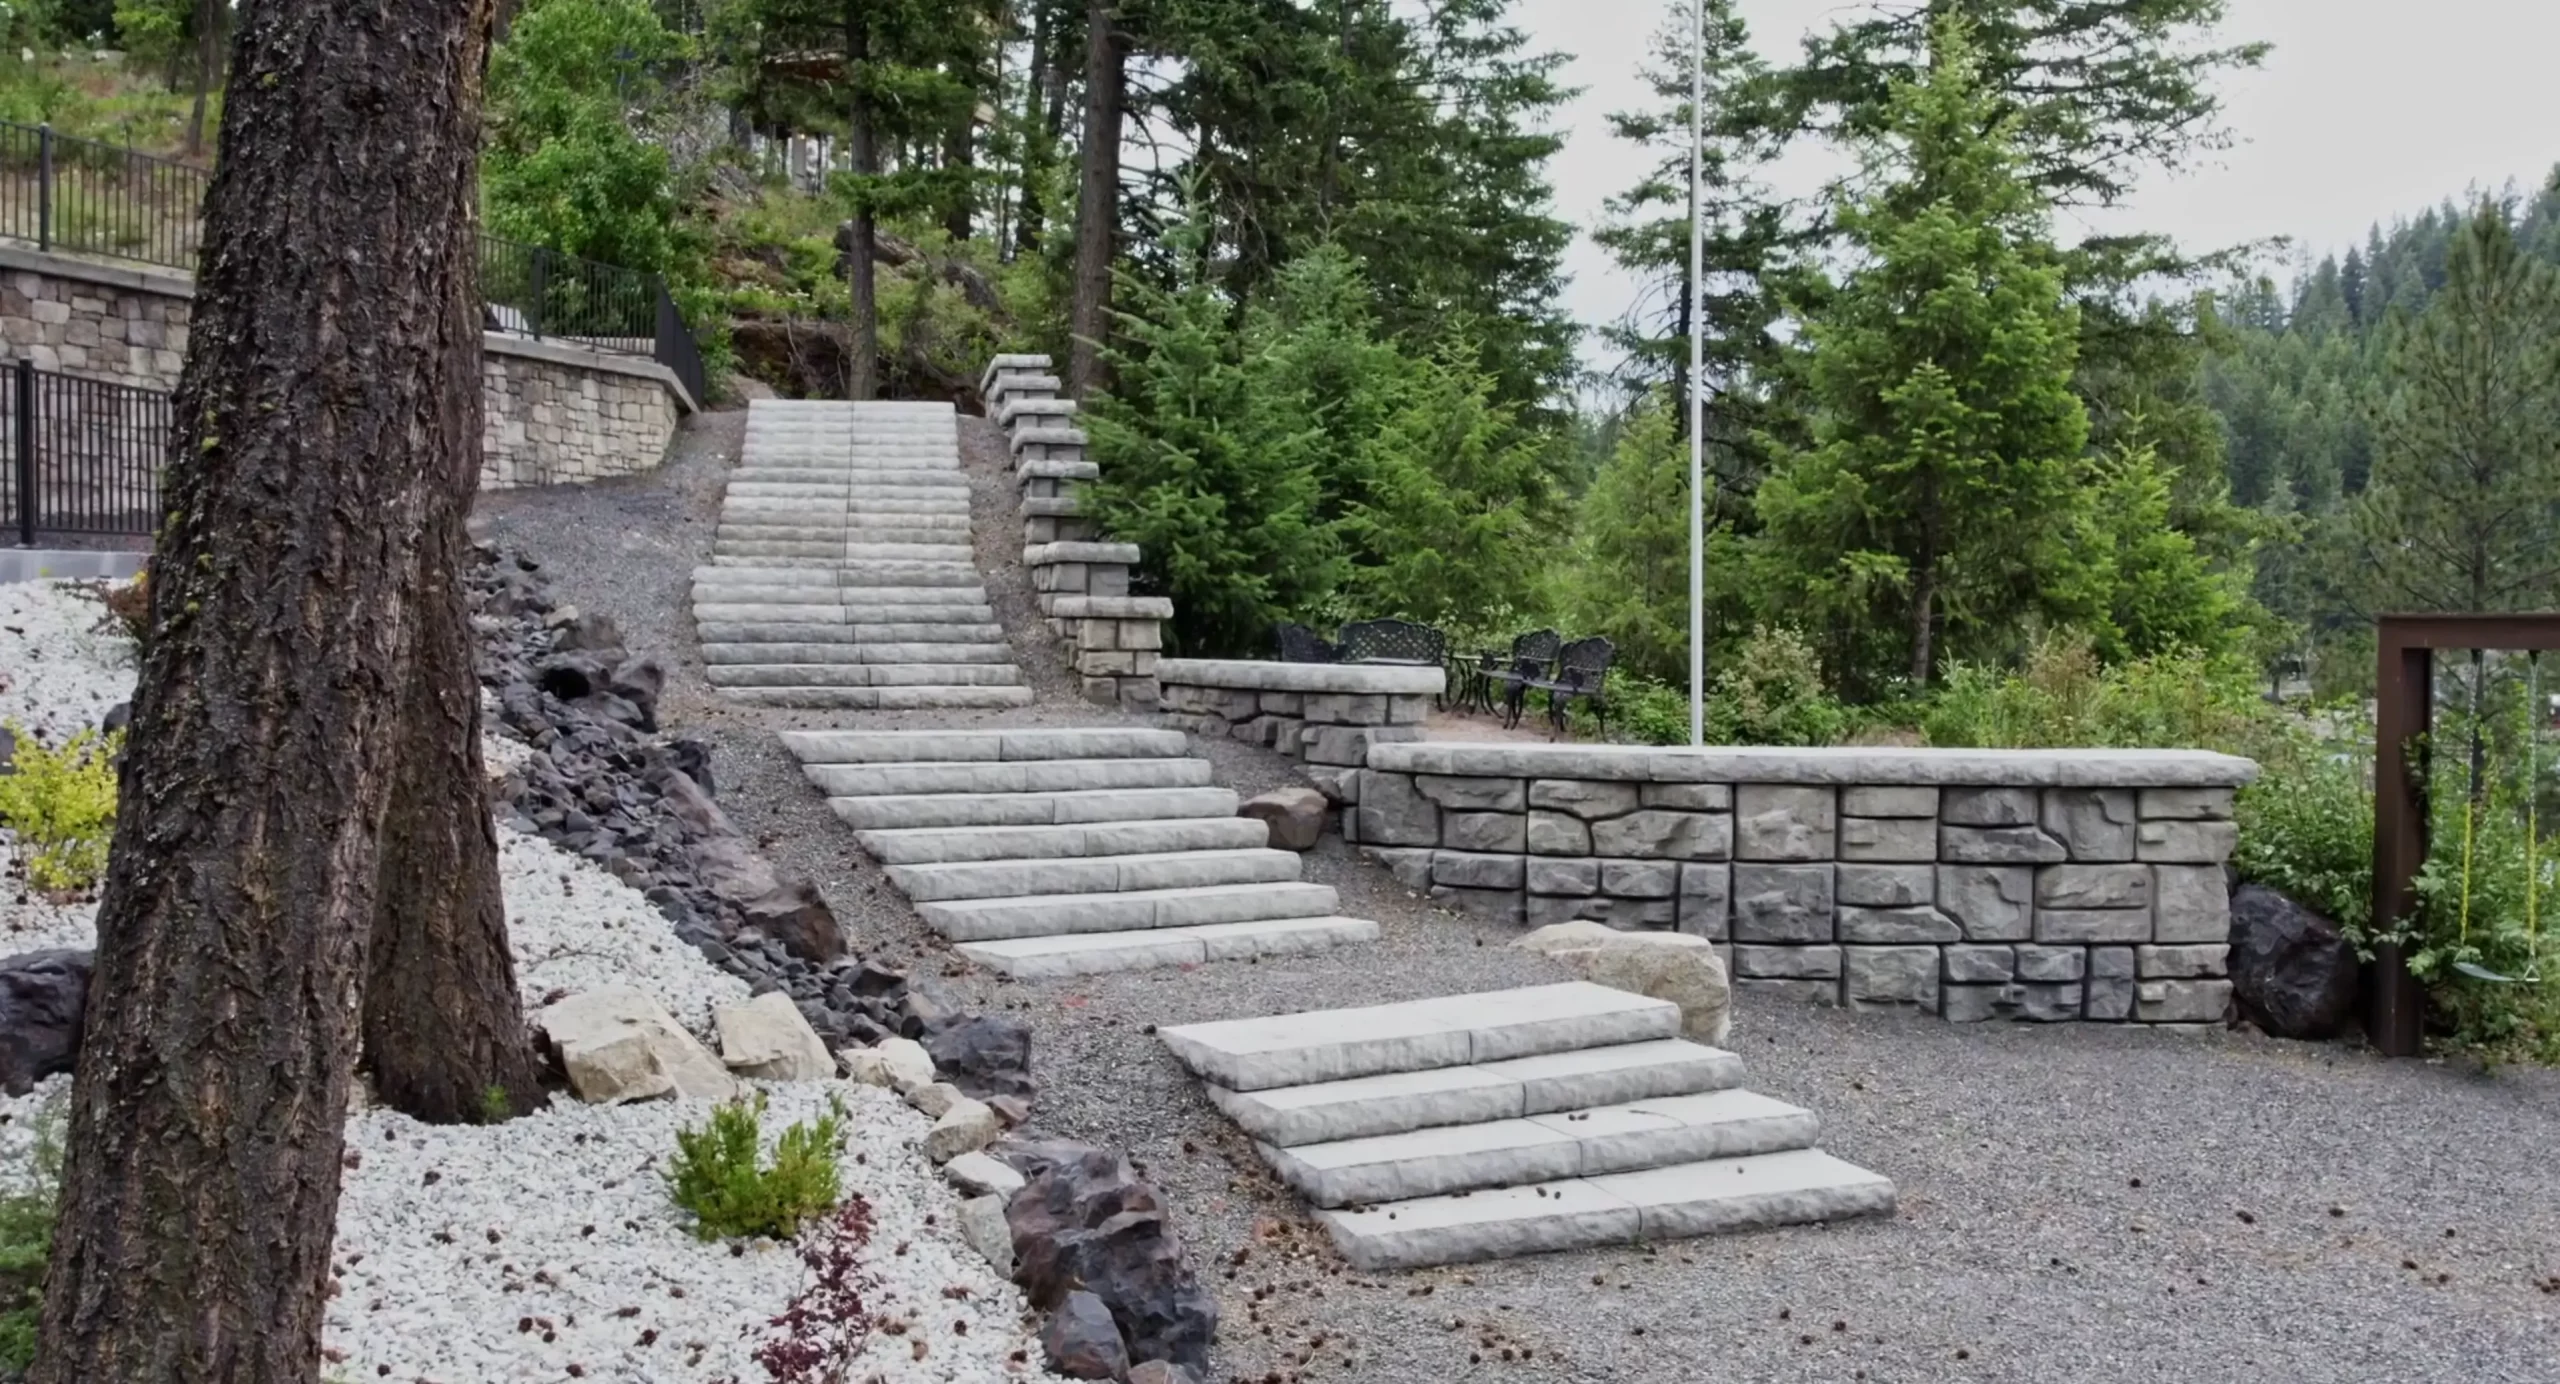
“This is not a weekend DIY project.”
A staircase of this scale and complexity is a major construction endeavor involving significant excavation, extensive masonry work, and potentially engineering oversight to ensure stability and proper drainage. The sheer weight of the stone and the force of the earth it’s retaining are immense. Attempting this without professional expertise can lead to structural failure, which is both dangerous and incredibly expensive to fix. Be honest about your skill level and be prepared to hire a qualified landscape contractor for this one.
13. Modern Entry with Natural, Rough-Hewn Stone Steps
This entry achieves a perfect modern-yet-natural balance with a clear visual recipe: 50% clean geometry + 30% raw texture + 20% lush greenery. The clean lines come from the white painted brick and the large, rectangular paving stones. The raw texture is delivered by those gorgeous, rough-hewn natural stone steps. The greenery and dark mulch then act as the softening agent that bridges the two. By keeping the plant choices simple and using a single, dark mulch color, the focus remains on the beautiful interplay between the smooth pavers and the rugged steps.
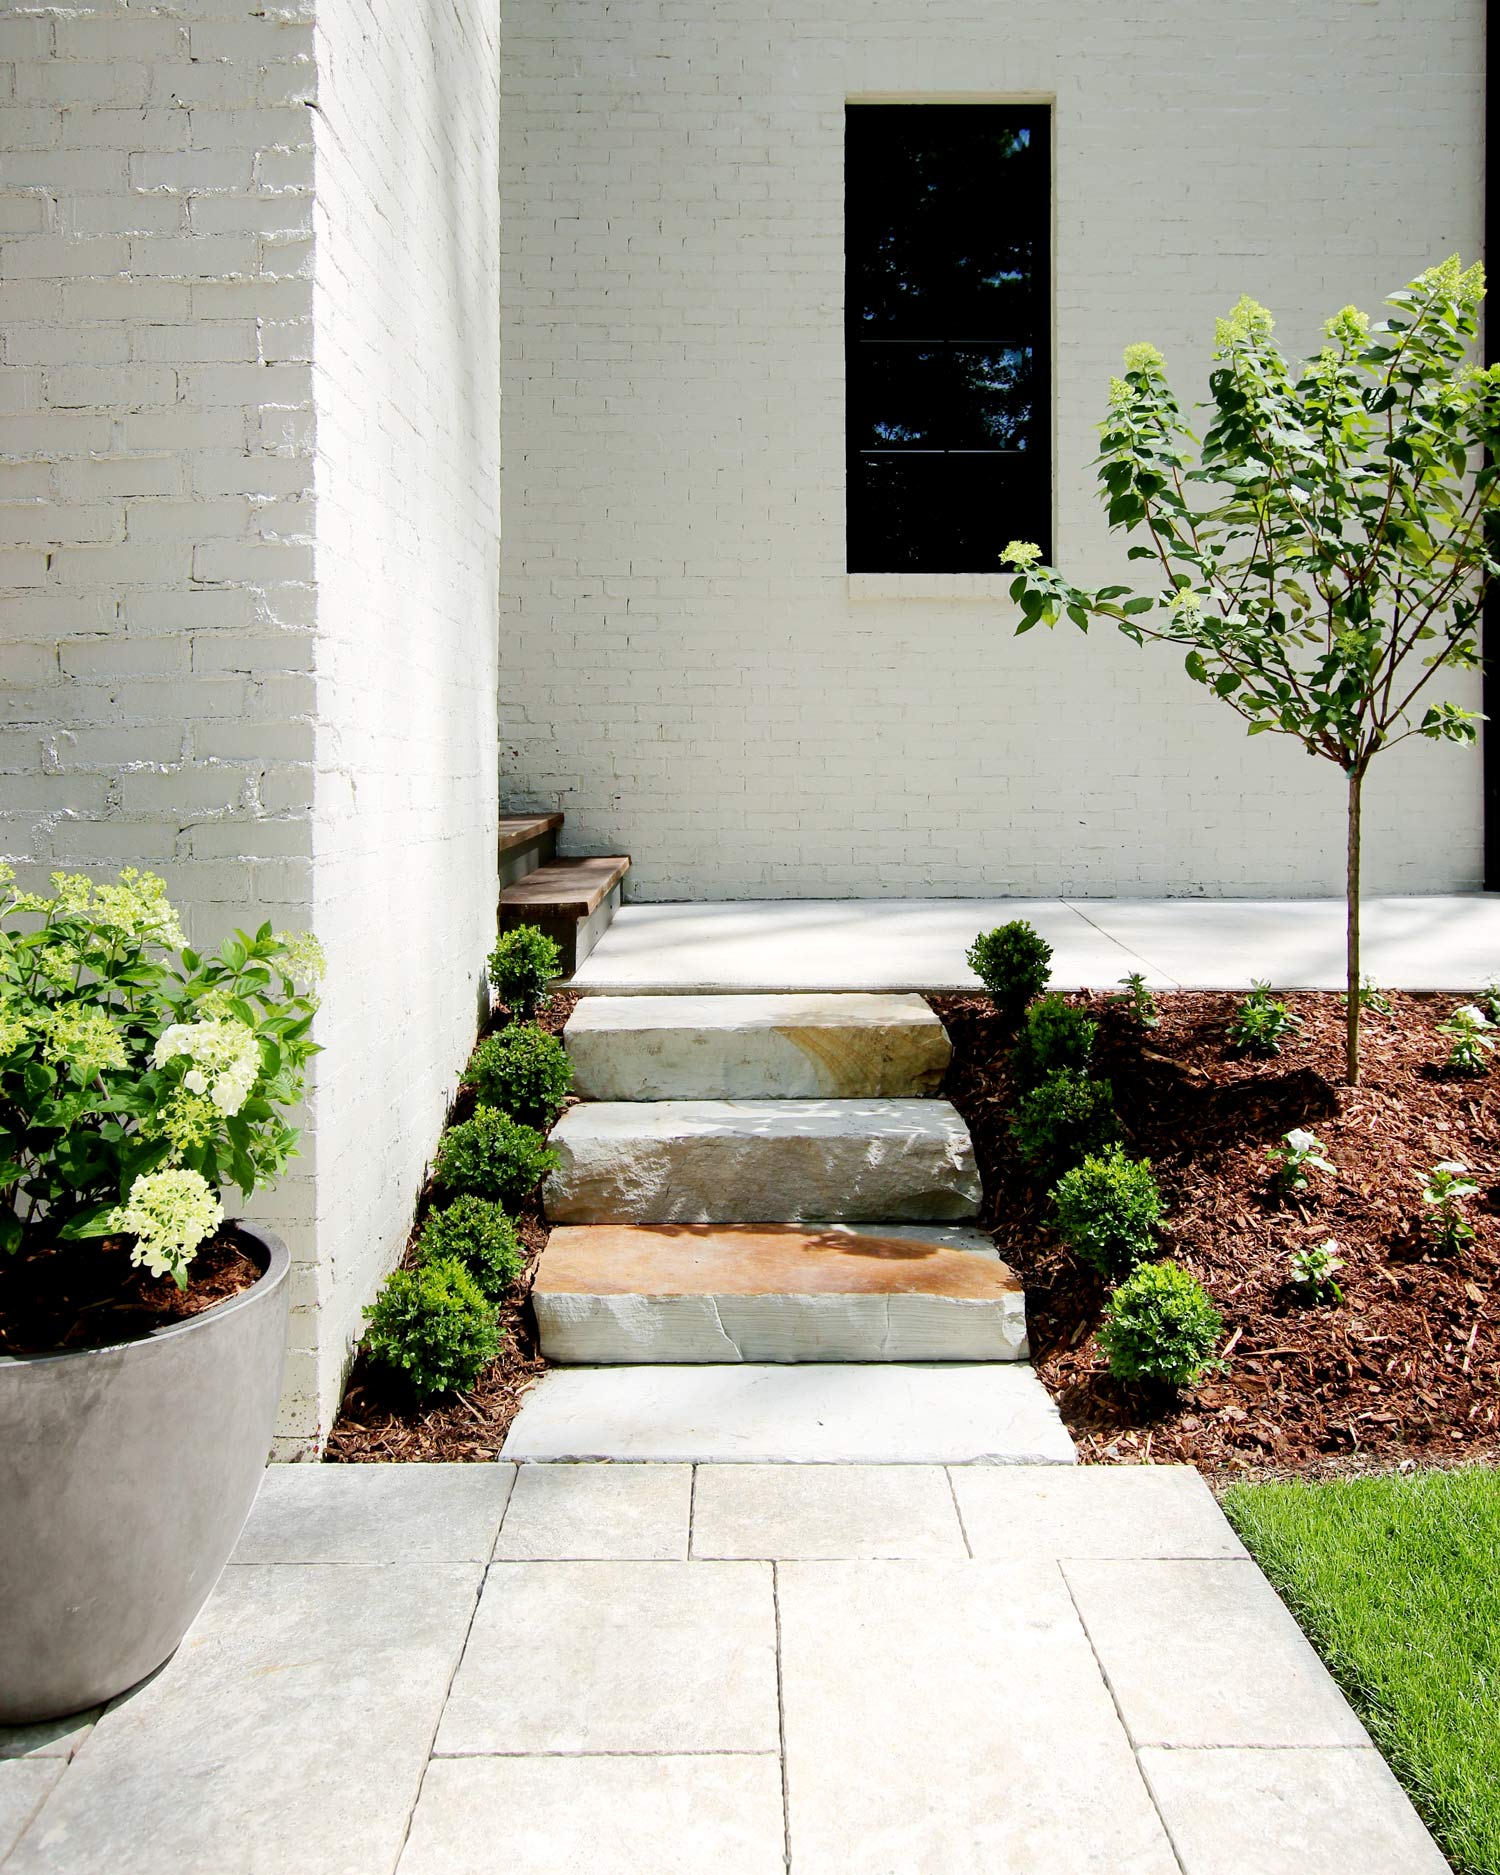
“The single element that makes this design work is the color variation in the three stone steps.”
If they were all a uniform grey, the entry would feel much colder and more generic. Instead, the mix of light grey, beige, and earthy brown tones in the stone introduces a natural warmth and character that directly contrasts with the monolithic white brick wall behind it. This subtle, natural variation is what gives the entrance its unique personality and keeps it from feeling sterile.
14. Moss-Covered Stone Steps Leading to a Stately Home
The beautiful, moss-covered patina on these steps is a double-edged sword. While it creates an incredible sense of age and timelessness, it can also become extremely slippery when wet. In shaded, damp areas, this is an almost unavoidable reality. Regular sweeping can help, but for a high-traffic entrance, you may need to periodically pressure wash the main walking path on each tread to remove the slickest patches. Alternatively, you can embrace it as part of the rustic charm and simply tread carefully on rainy days.
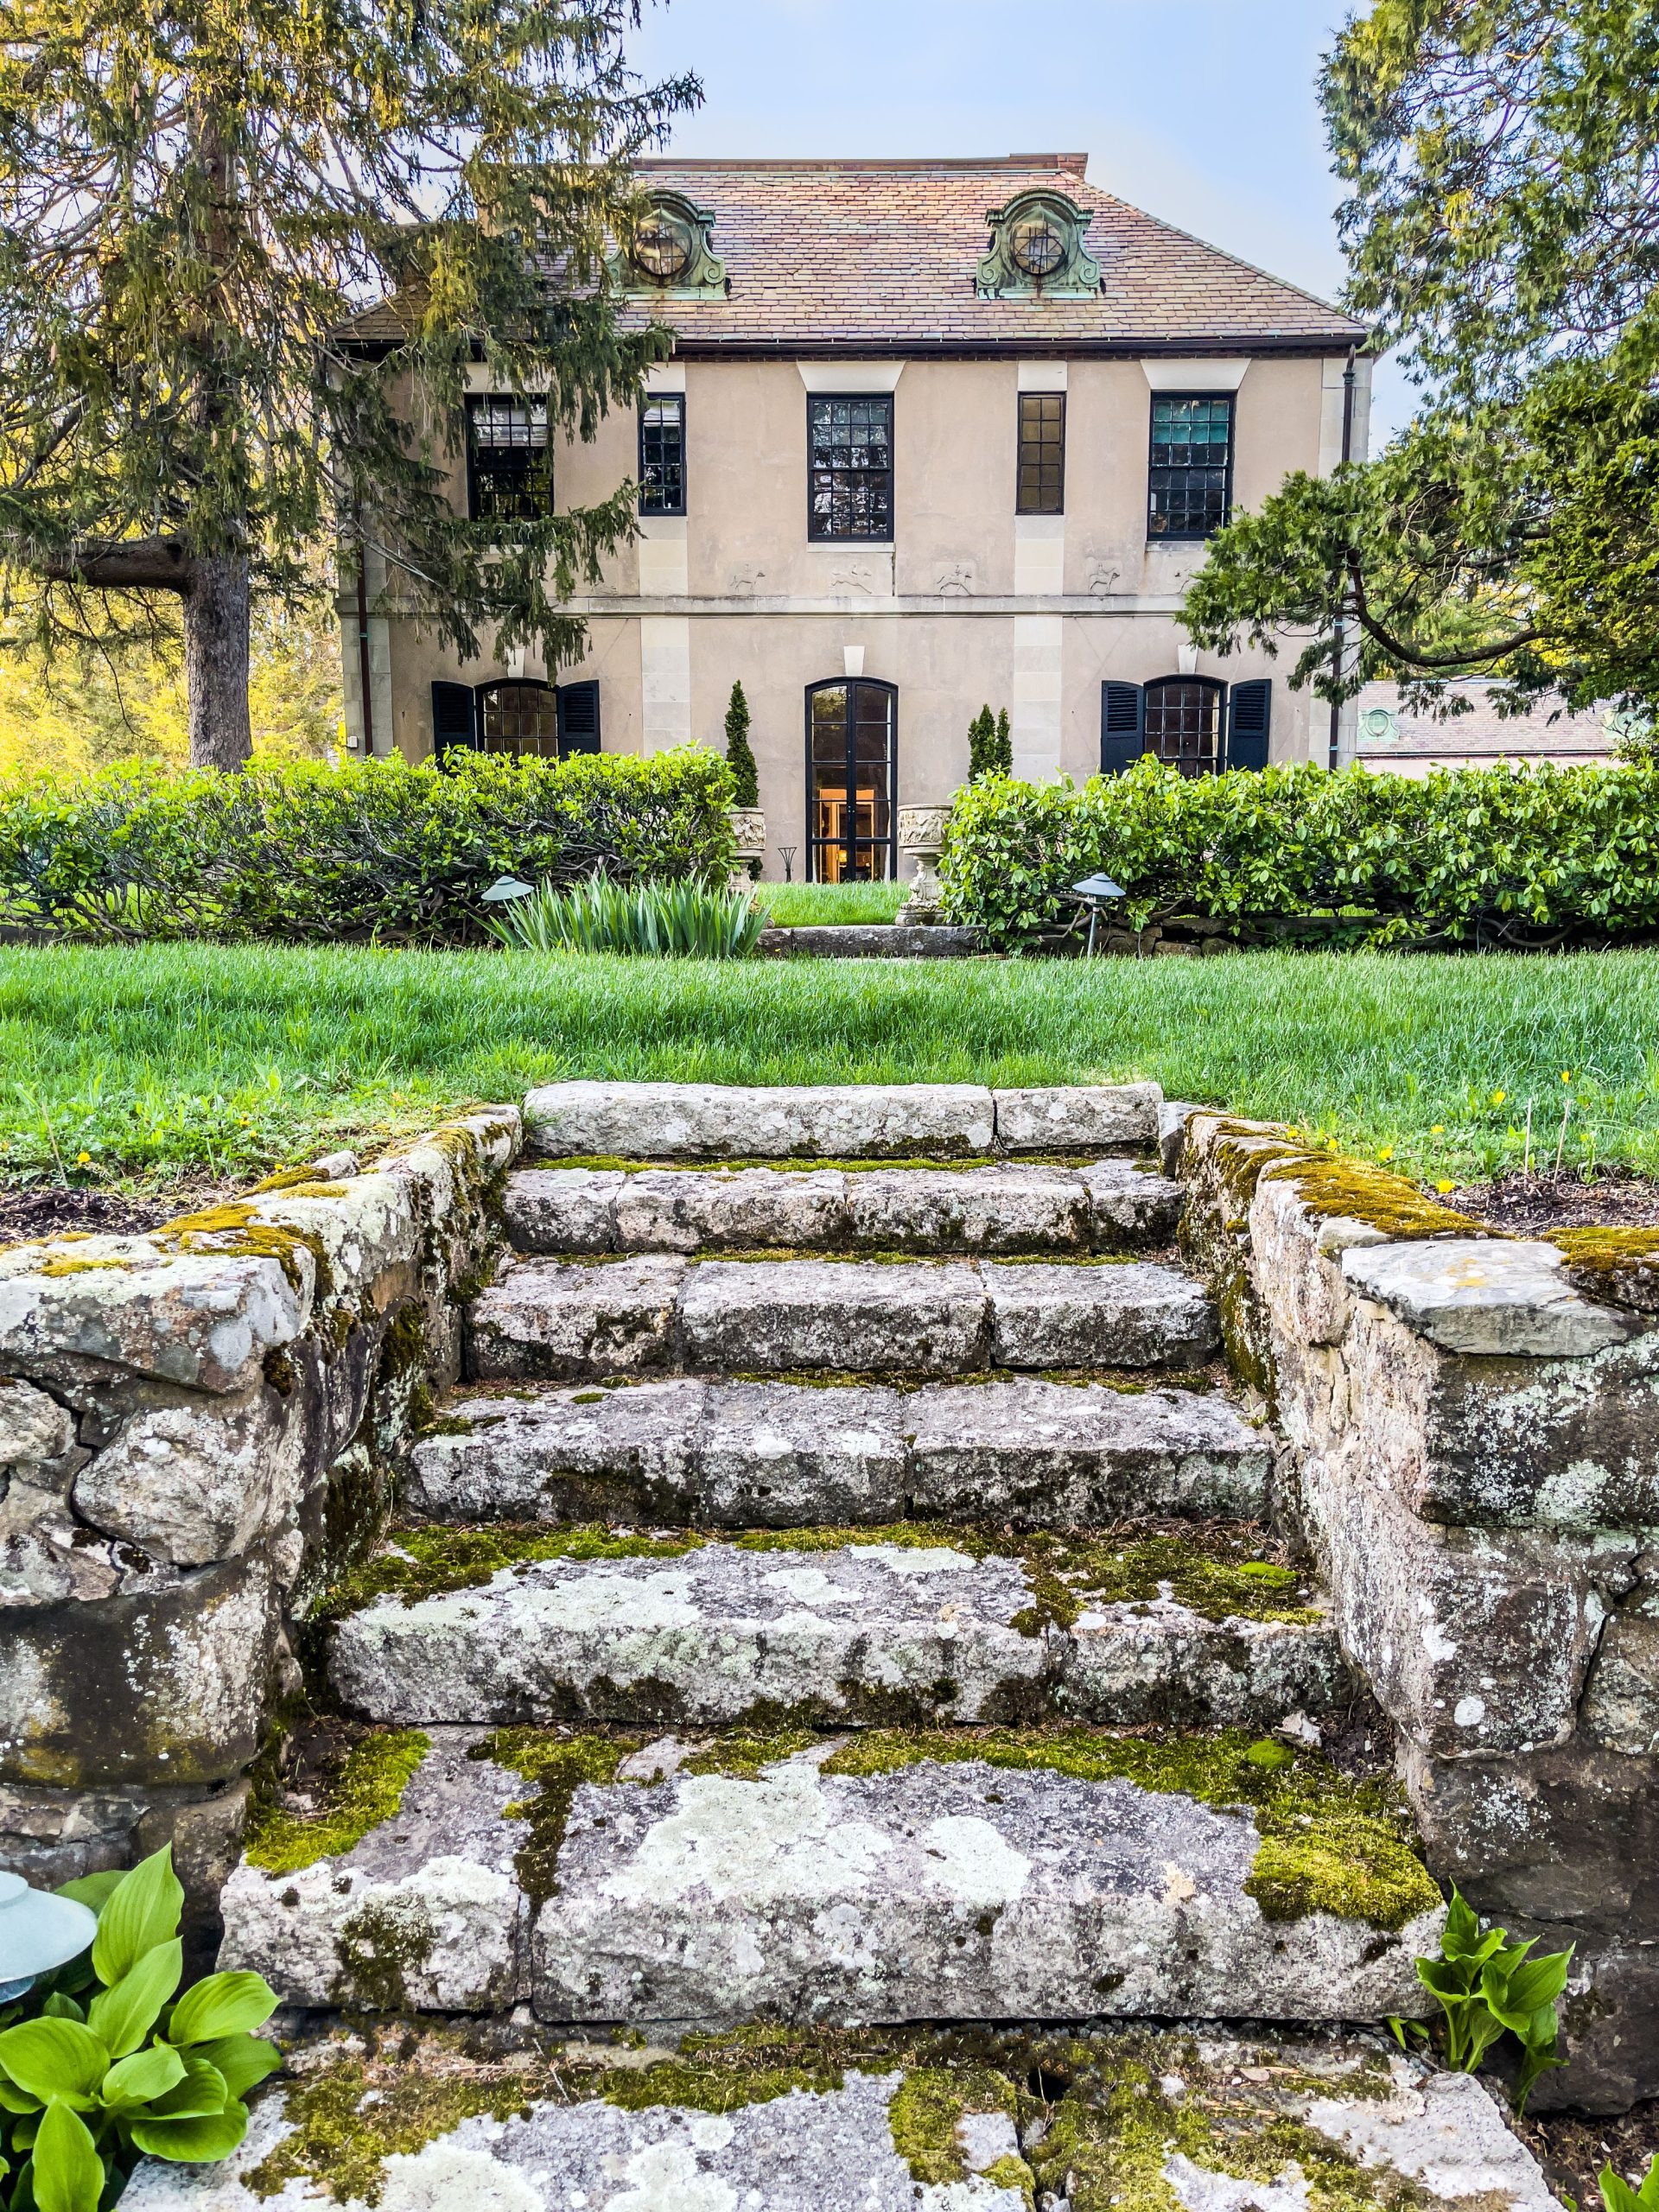
“This look is trending right now under the umbrella of “cottagecore” and “old money aesthetic.” It speaks to a desire for authenticity and a connection to history.”
People are tired of cookie-cutter new builds and are drawn to spaces that feel as though they have a story to tell. Letting moss and lichen naturally colonize your hardscaping is a way of fast-tracking that sense of history, creating a garden that feels rooted, peaceful, and has a graceful, aged character that can’t be bought off the shelf.
15. Aged Stone Steps Scattered with Autumn Leaves
This image is captivating because it perfectly captures a specific, fleeting moment in time. The composition works by layering textures and colors that all point to a single theme: natural decay. The hard, cold grey stone provides a base for the soft, green moss, which in turn is dotted with the brittle, warm-toned autumn leaves. It’s a study in contrasts—hard and soft, cool and warm, living and dying. This layering creates a scene that feels rich, complex, and emotionally resonant. For a similar aesthetic seen on a grander scale, see Idea #13.
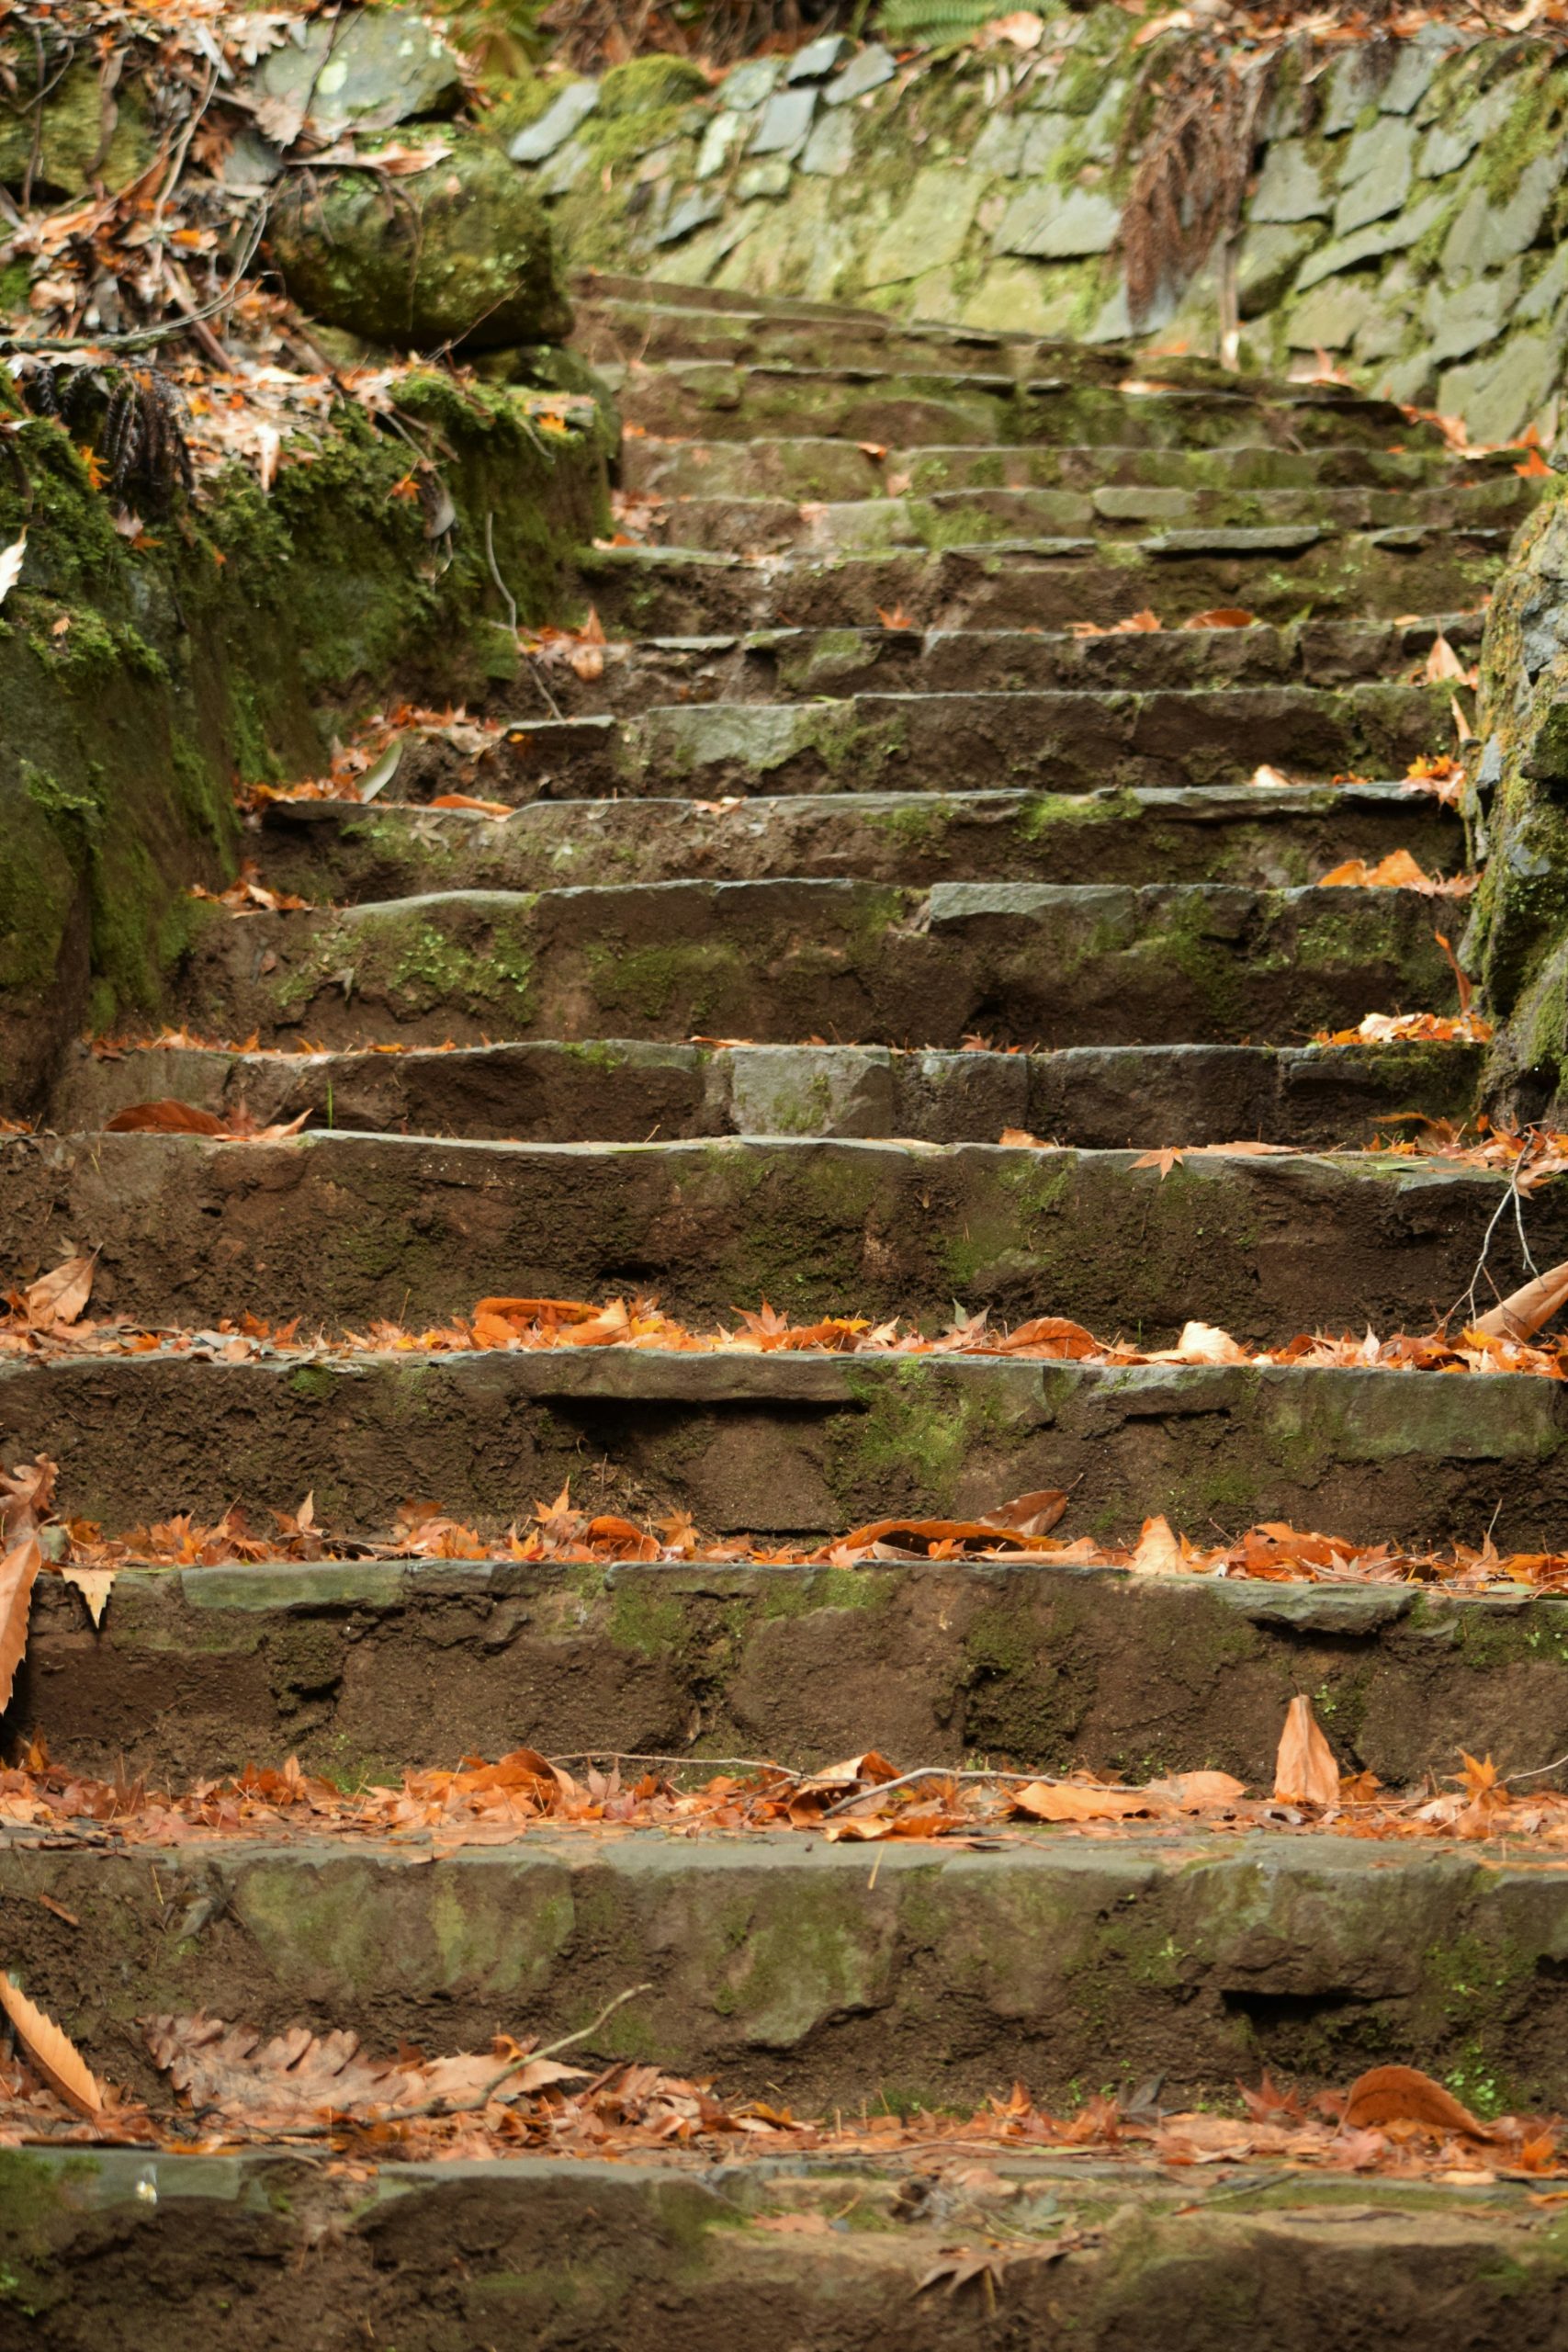
“You don’t need centuries-old estate stone to get this aged, romantic look.”
A surprisingly effective and affordable method is to encourage moss growth yourself. Find some moss already growing elsewhere in your yard (or a friend’s), and blend a few handfuls of it with a cup of buttermilk or yogurt and a cup of water. Paint this “moss smoothie” onto your new or existing concrete or stone steps in a shaded, damp area. Keep it moist for a few weeks, and you’ll be surprised how quickly the moss begins to establish itself, giving your steps an instant patina.
16. Weathered Stone Stairs Flanked by a White Garden Wall
When you have a long, straight run of stairs, even a subtle curve can make a huge difference. Notice how these steps have a very slight, gentle bend to them. A perfectly straight staircase can sometimes feel rigid and imposing, like a utility feature. By introducing a gentle arc, the path immediately feels more organic and inviting. It slows the eye and the feet, encouraging a more leisurely journey. This is a high-level design trick that subtly transforms the entire feeling of the space without requiring a major change in layout.
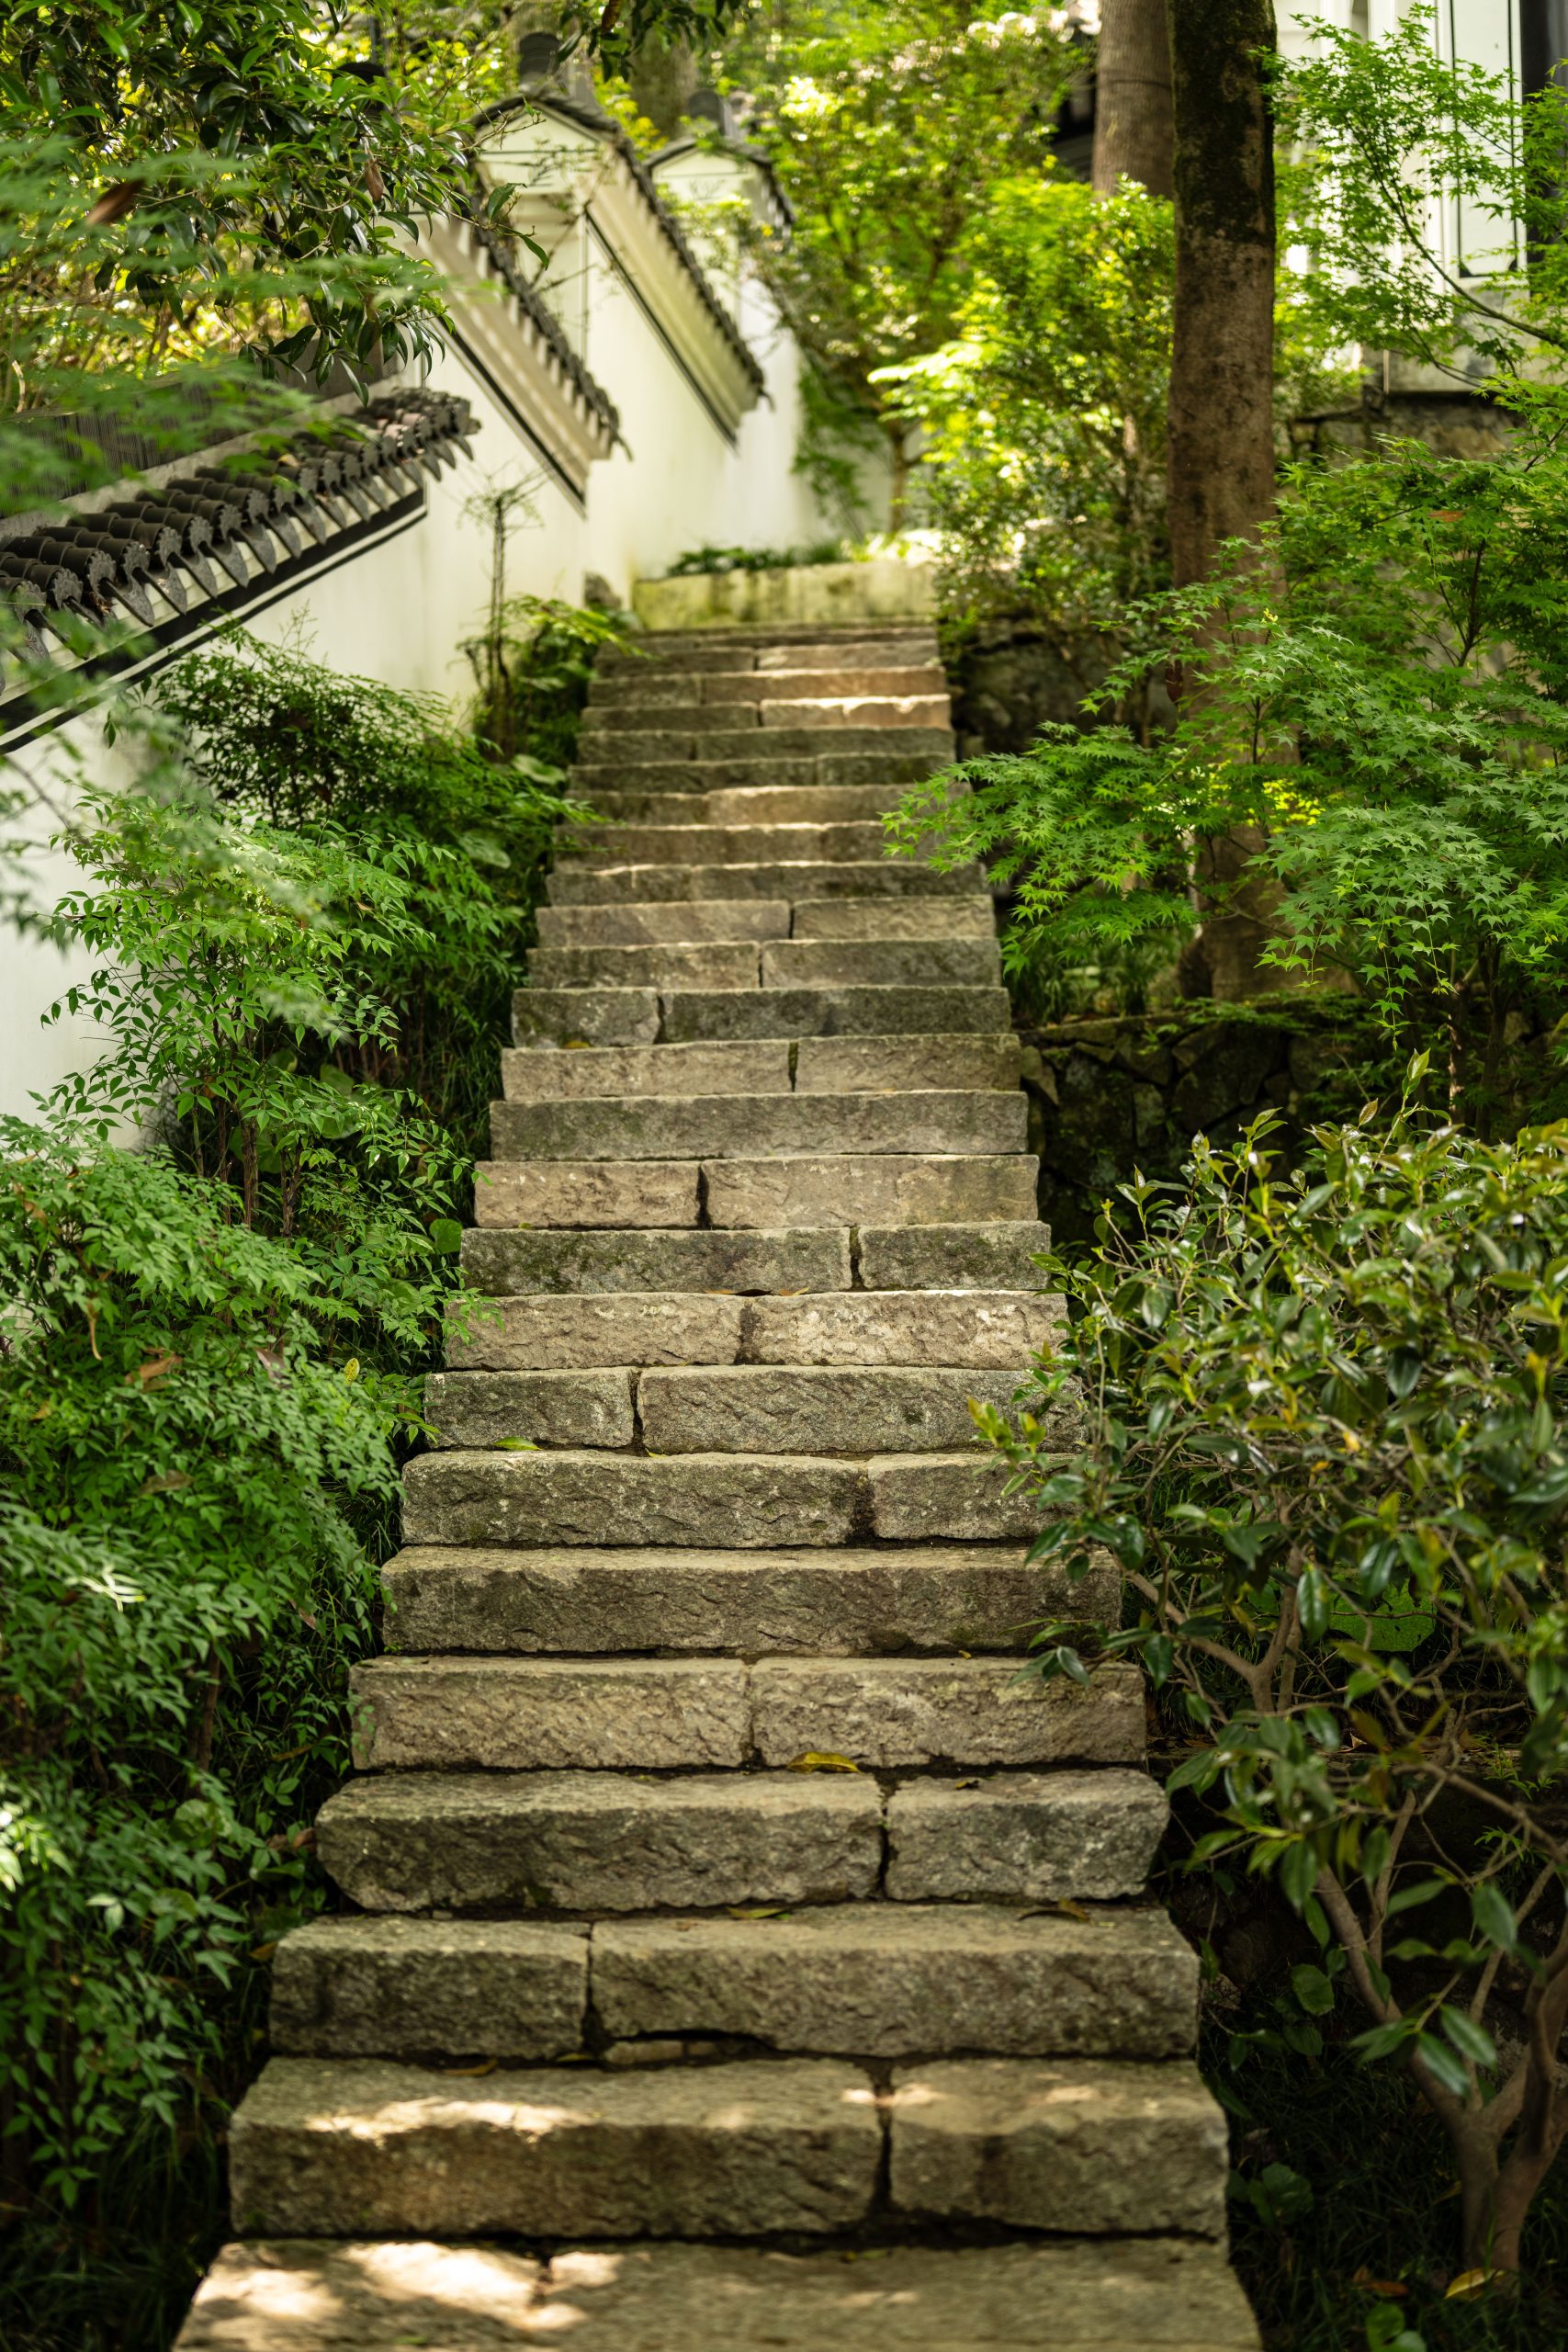
“The single most important element here is the white wall.”
It acts as a brilliant, reflective surface that bounces light back onto the otherwise shady and enclosed staircase. Without it, this path would feel much darker, narrower, and more tunnel-like. The white wall brightens the entire passage, highlights the lush green of the foliage through contrast, and provides a clean, structural line that guides the eye upward. It’s both a functional and an aesthetic hero.
17. Weathered Concrete Steps with Rustic Wooden Handrails
You can give plain concrete steps a weathered, aged look with a simple staining process. Here’s how:
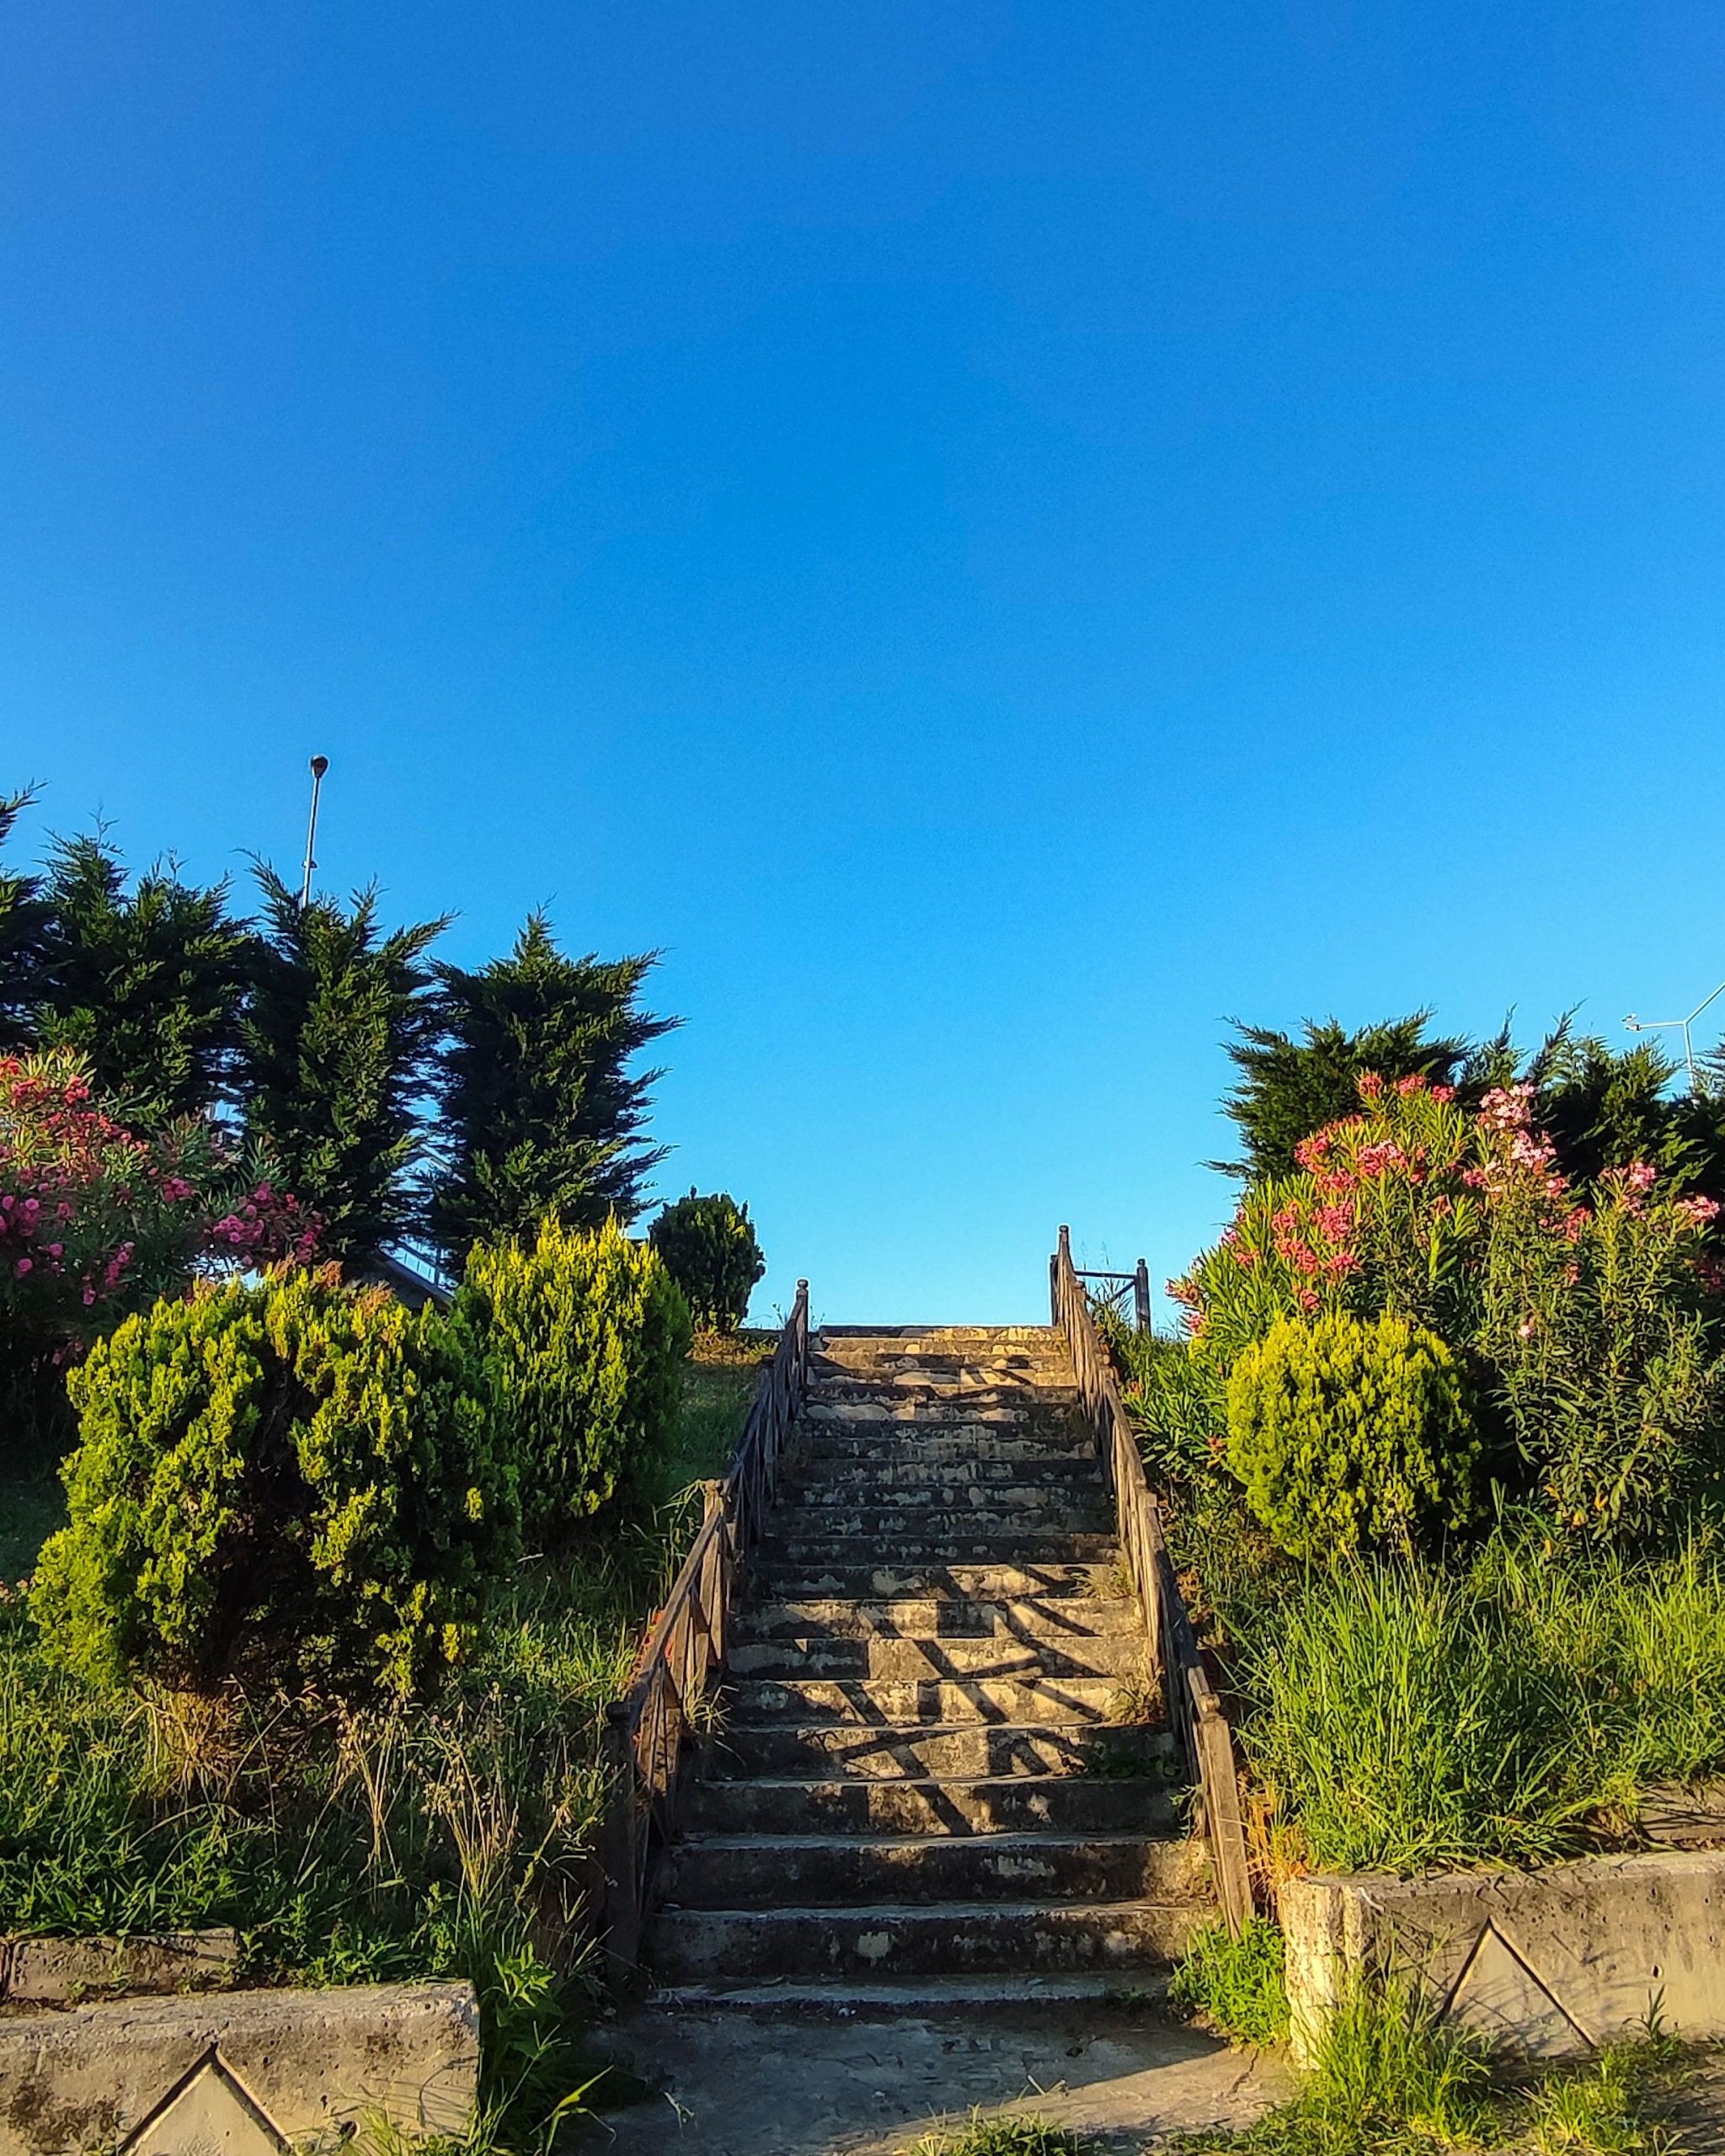
“Clean Thoroughly: Pressure wash or scrub the concrete steps with a stiff brush and concrete cleaner to remove all dirt and grime.”
Let it dry completely.
Choose Your Stain: Select a water-based concrete stain. For a natural look, get two similar colors (e.g., a medium grey and a charcoal).
Apply the Base Coat: Use a cheap spray bottle or a roller to apply a light, uneven coat of your main color. Let it be patchy.
Add Accents: While the first coat is still damp, lightly spray or dab the second, darker color in random spots to mimic natural aging and discoloration.
Seal the Deal: Once dry, apply two coats of a matte-finish concrete sealer to protect the finish.
This process should take about 3-4 hours, plus drying time, with material costs around $100.
If you choose to install wooden handrails in a garden setting, be realistic about maintenance. Wood is susceptible to rot, decay, and insect damage, especially the posts that are in contact with the ground. You must use pressure-treated lumber rated for ground contact, or even better, use metal post brackets that elevate the wood slightly above the concrete. Expect to clean and re-seal or re-stain the handrails every 2-3 years to protect them from the elements and keep them looking their best.
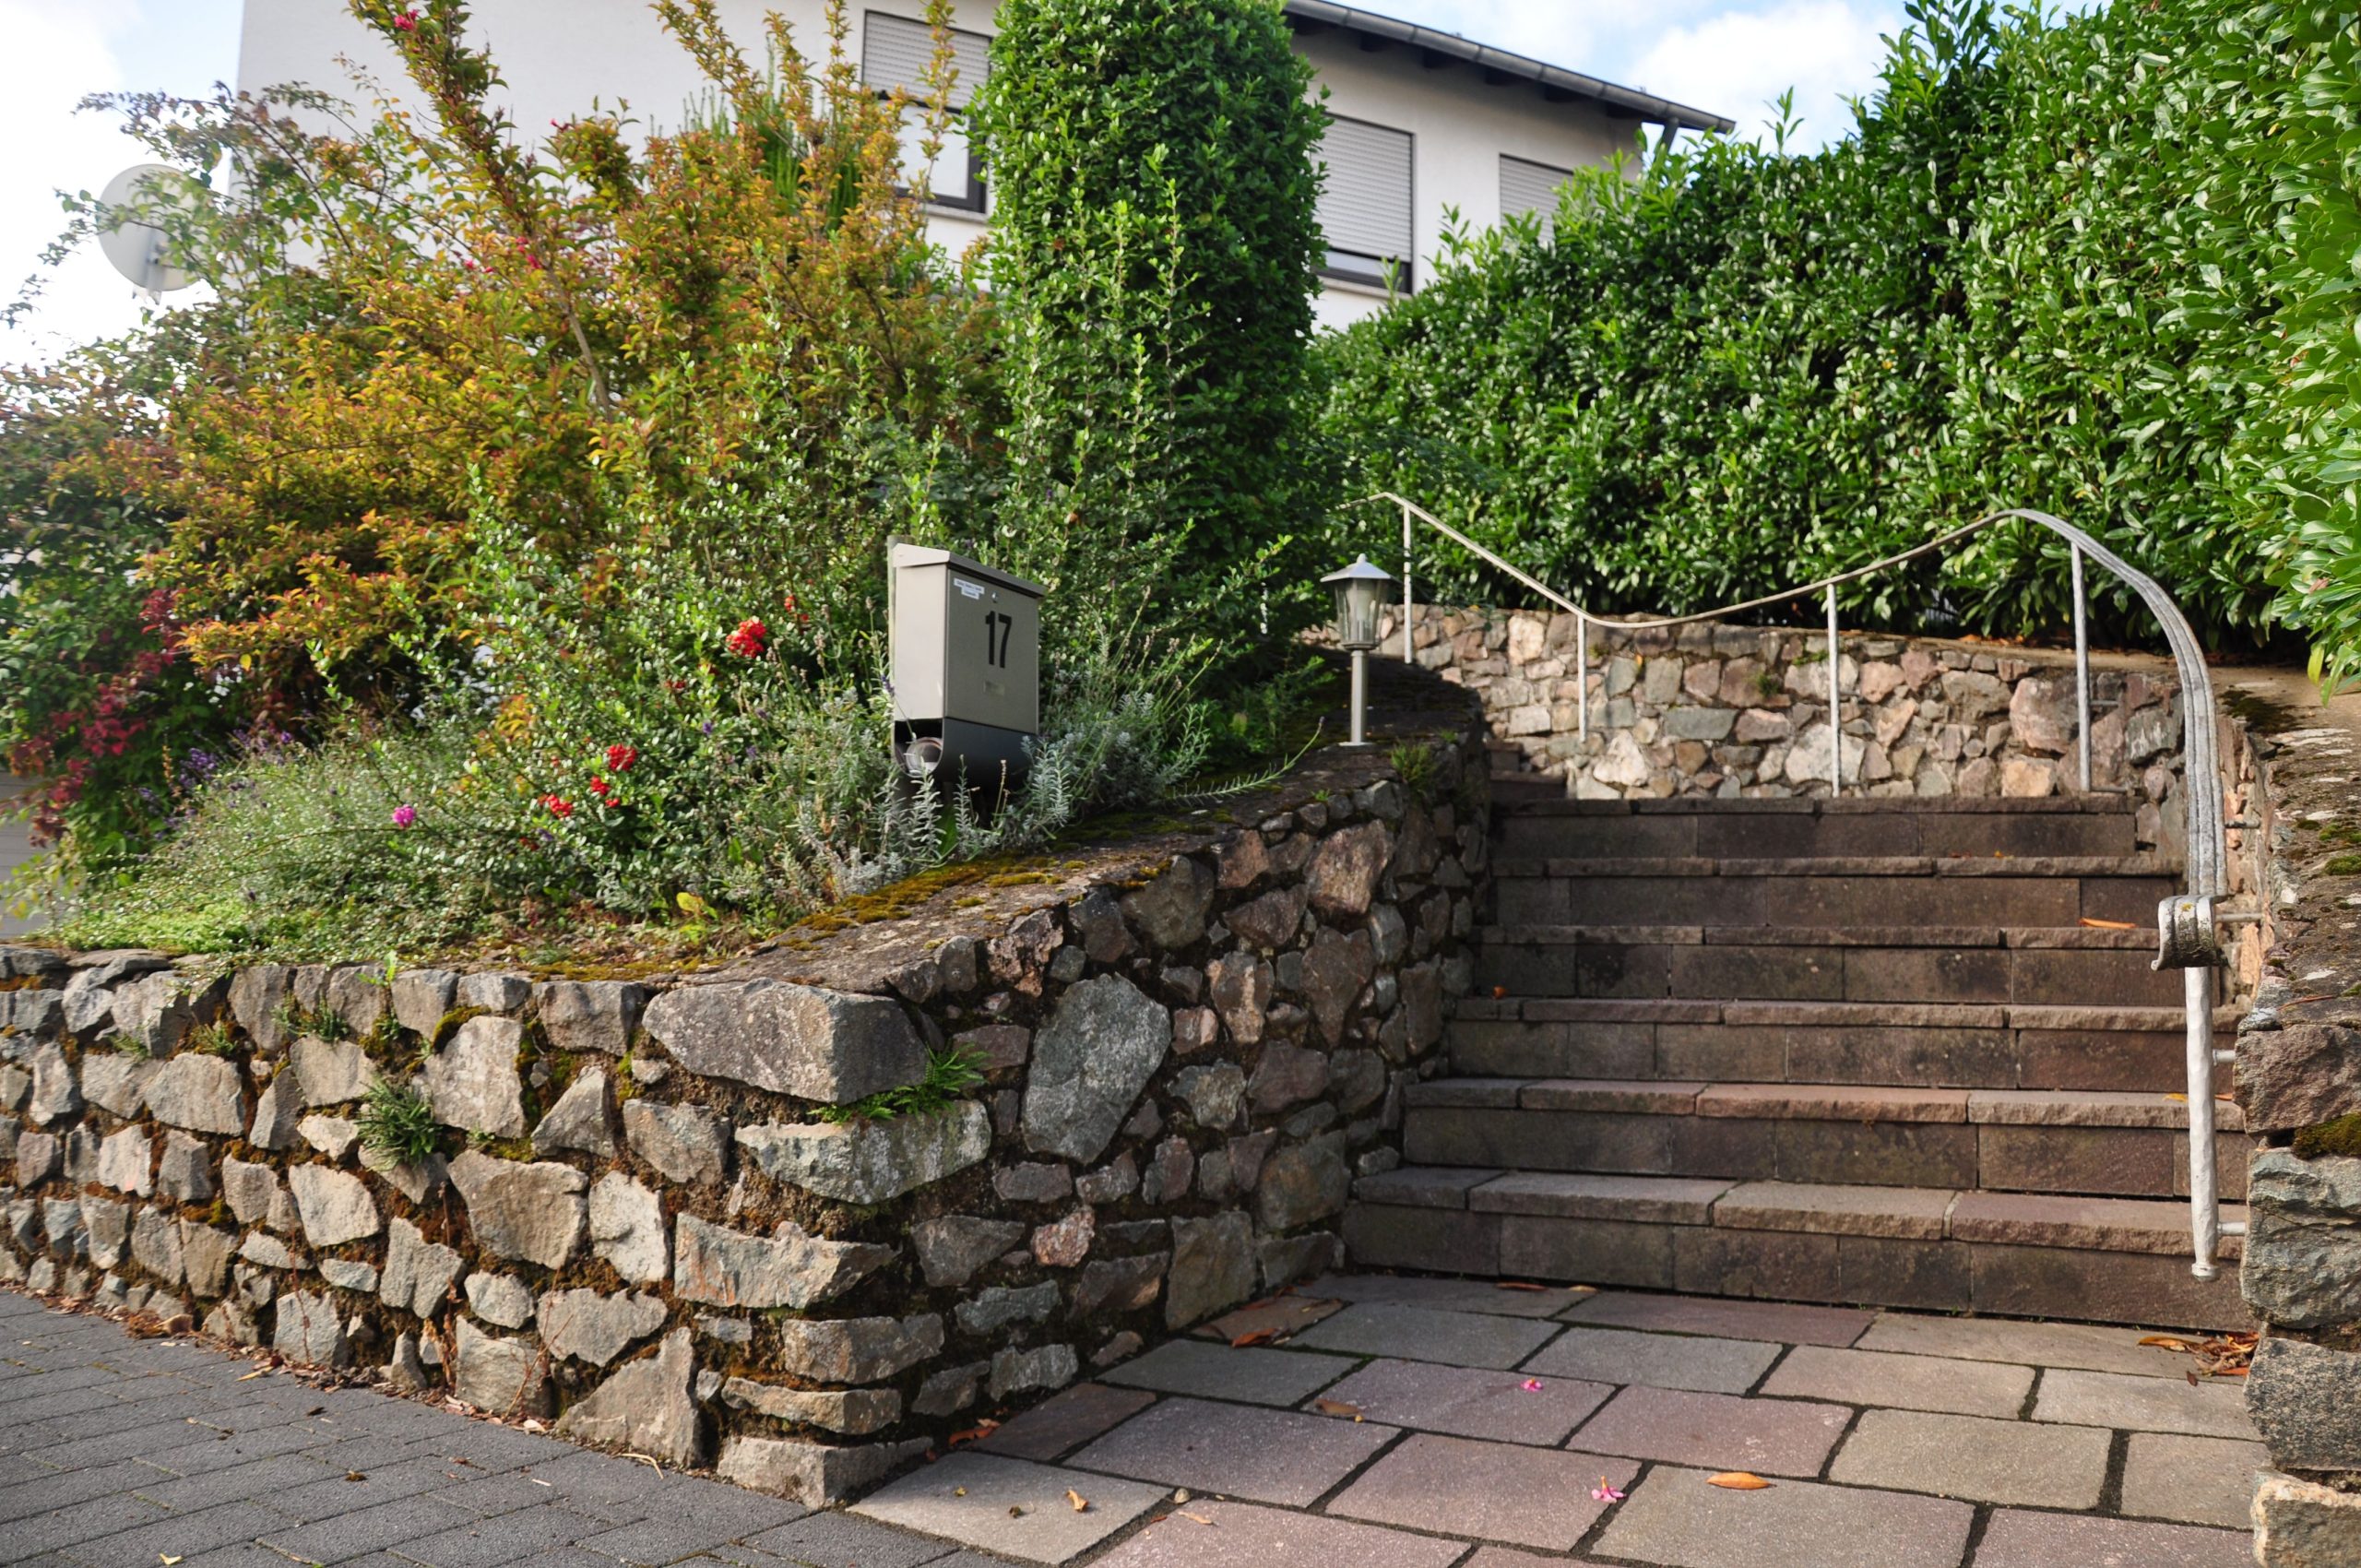
18. Stone Retaining Wall with Integrated Steps and Mailbox
Creating an integrated wall and step system is a labor-intensive project, but it solves multiple landscaping problems at once. The cost is primarily in the masonry labor and the stone itself.
“Stone & Mortar: $3,000 – $8,000 (for a wall of this size)
Labor (Professiona”
- Stone & Mortar: $3,000 – $8,000 (for a wall of this size)
- Labor (Professional Mason): $5,000 – $12,000
- Lighting & Mailbox Unit: $300 – $800
- Handrail: $400 – $1,500
- Plantings: $500 – $1,500
- TOTAL: $9,200 – $22,800
Budget alternative: Use pre-cast concrete retaining wall blocks (like those from Home Depot or Lowe’s) and matching step units. This can bring the total cost down by 50-60%, especially if you’re willing to do the labor yourself.
This type of integrated design is a perfect solution for a front yard with a steep slope down to the street. It elegantly handles the transition from the sidewalk or driveway level to the home’s entrance level, which might be a change of 4 to 6 feet. The wall itself creates a flattened, more usable front garden bed while also providing a clear and safe path for mail carriers and guests. It’s a highly functional design that solves a common suburban landscaping challenge.
19. Rustic Timber Steps with a Terracotta Herb Garden
This design is pure rustic charm, and it works because it feels alive and genuinely useful. The steps aren’t just a path; they’re a vertical garden. The repetition of the warm, orange terracotta pots creates a strong visual rhythm that leads the eye upward. This is contrasted beautifully by the weathered, grey-brown wood of the steps and the varied greens of the herbs. The little handwritten labels and the moss growing in the cracks add a layer of authenticity and care. It’s a perfect example of a functional, productive, and beautiful garden feature. The sleeper wood also echoes the retaining walls seen in Idea #21.
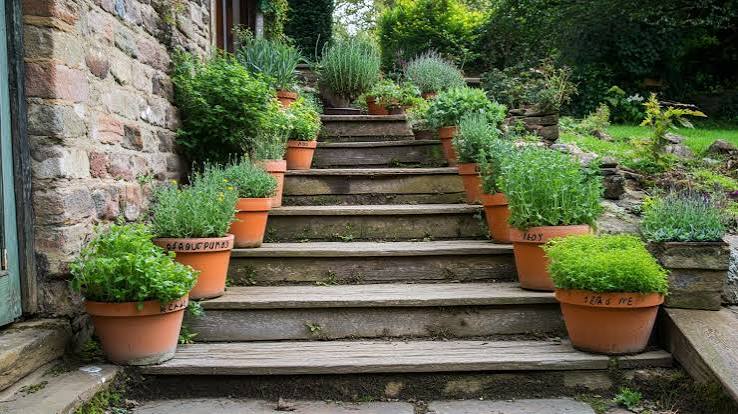
“You can create this look on a very tight budget.”
The steps themselves can be made from reclaimed landscape timbers or even old railway sleepers (check for creosote treatment if you plan to grow edibles). Visit thrift stores and garage sales for a mismatched collection of terracotta pots for pennies on the dollar. A bag of potting soil and some herb seeds or starter plants from a local garden center are inexpensive. This entire charming look could be recreated for well under $200 with some savvy sourcing and a bit of DIY spirit.
20. Modern Two-Tone Paver Steps with Yellow Accents
Here’s a simple formula for a clean, contemporary entrance: 60% neutral hardscaping + 30% dark accents + 10% bold color pop. The light and dark grey pavers form the neutral base, creating a subtle, geometric pattern. The black door and planters provide strong, dark anchor points that add depth and sophistication. Then, the vibrant yellow foliage of the plants delivers a powerful punch of color that brings the whole scene to life. You could easily swap the yellow for a bright pink or electric blue for a different but equally impactful result.
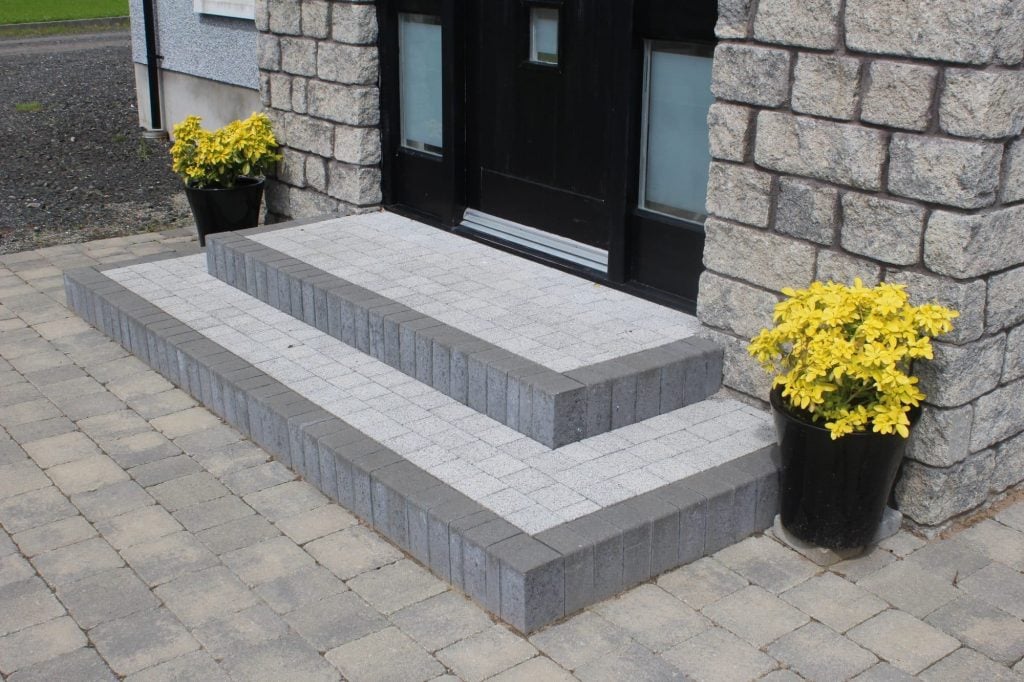
“When using two different colors of pavers for steps, use the darker color for the vertical risers and the lighter color for the horizontal treads.”
This is a subtle but effective trick that enhances safety. The darker riser creates a clear visual distinction between one step and the next, making the edge of each tread easier to see, especially in low light. This helps prevent trips and gives the staircase a crisp, defined look.
21. Winding Stone Steps with an Ornate Iron Railing
The single element that elevates these steps from merely rustic to truly special is the ornate metal railing. The rough-hewn stone and dense foliage feel ancient and natural, but the railing introduces a touch of human artistry and intention. The dark, sinuous lines of the metalwork, with its repeating circular motifs, contrast beautifully with the random, chunky texture of the stone. It suggests a history and a certain formality, transforming a simple woodland path into a stately and romantic walkway. Without it, the stairs would lose their unique character.
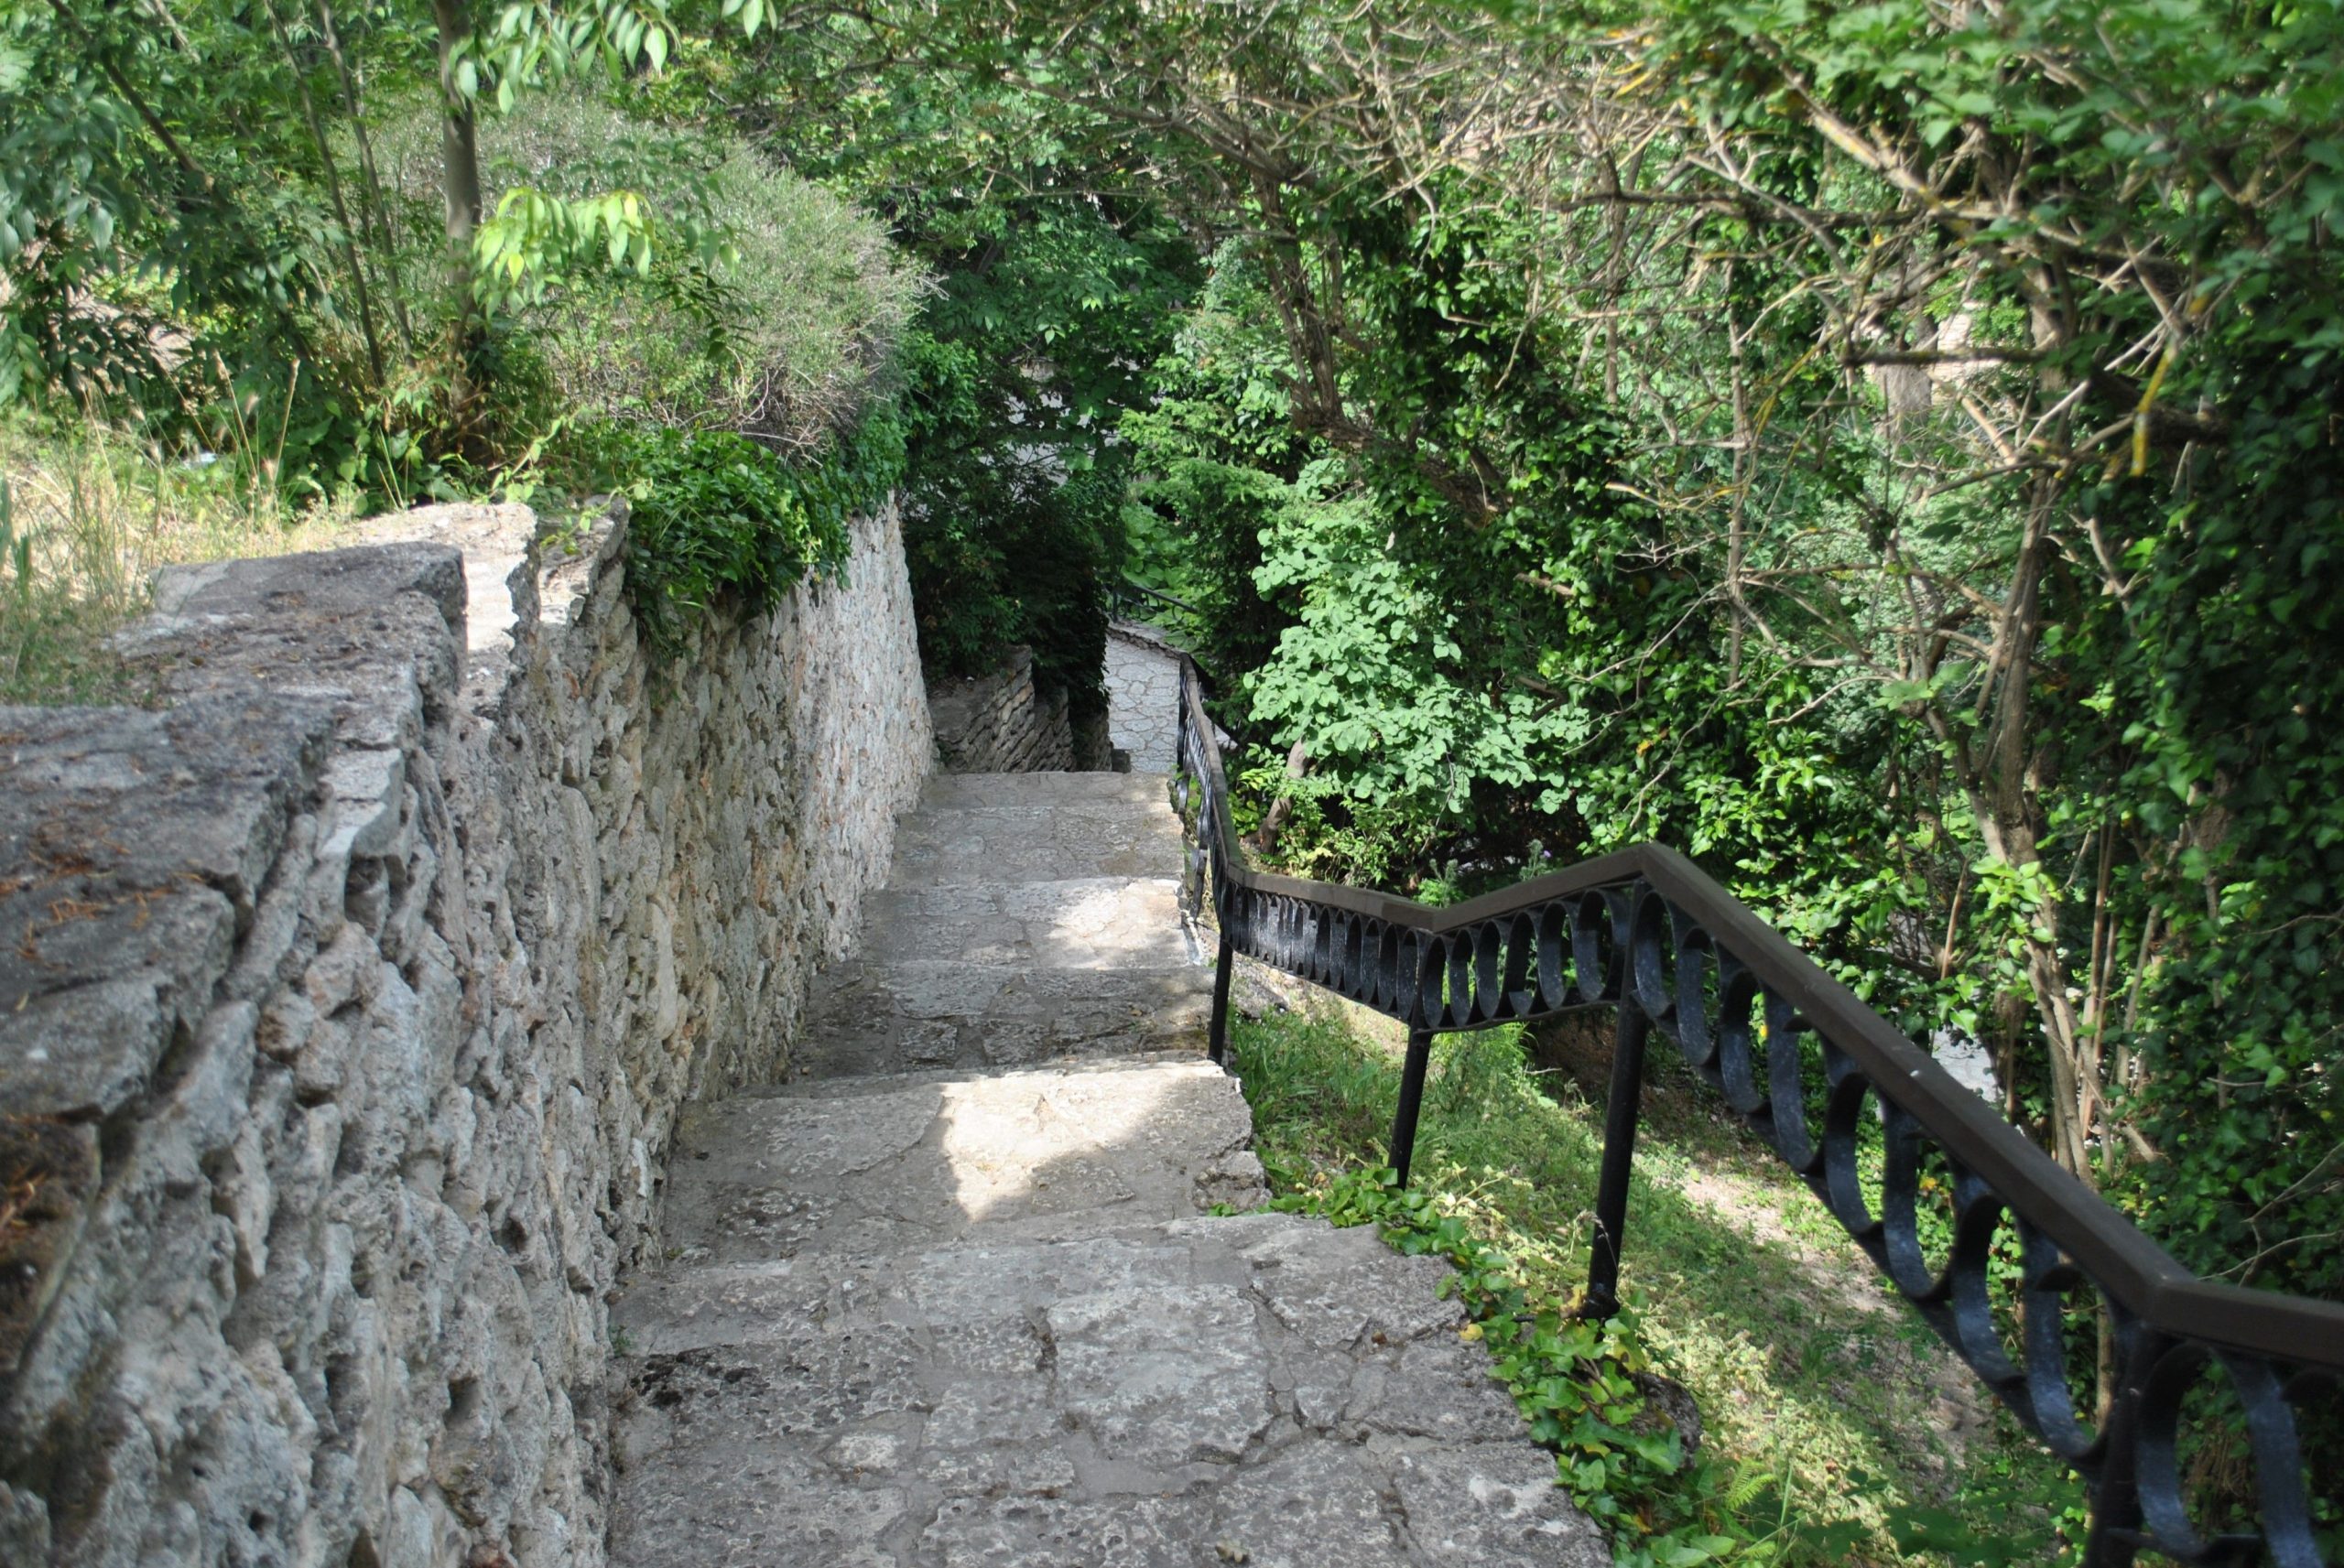
“A staircase this long and winding through a wooded area will be in constant battle with nature.”
The dappled sunlight is beautiful, but the shade and moisture create ideal conditions for moss and algae growth, which can make the stone steps incredibly slick. Furthermore, falling leaves, twigs, and branches will constantly litter the path, requiring frequent sweeping to keep it safe and clear. This isn’t a “set it and forget it” feature; it requires a commitment to regular maintenance to remain both beautiful and functional.
22. Weathered Timber Steps with Purple Flowering Shrubs
Building simple timber steps on a gentle slope is a great DIY project. Here’s a quick guide:
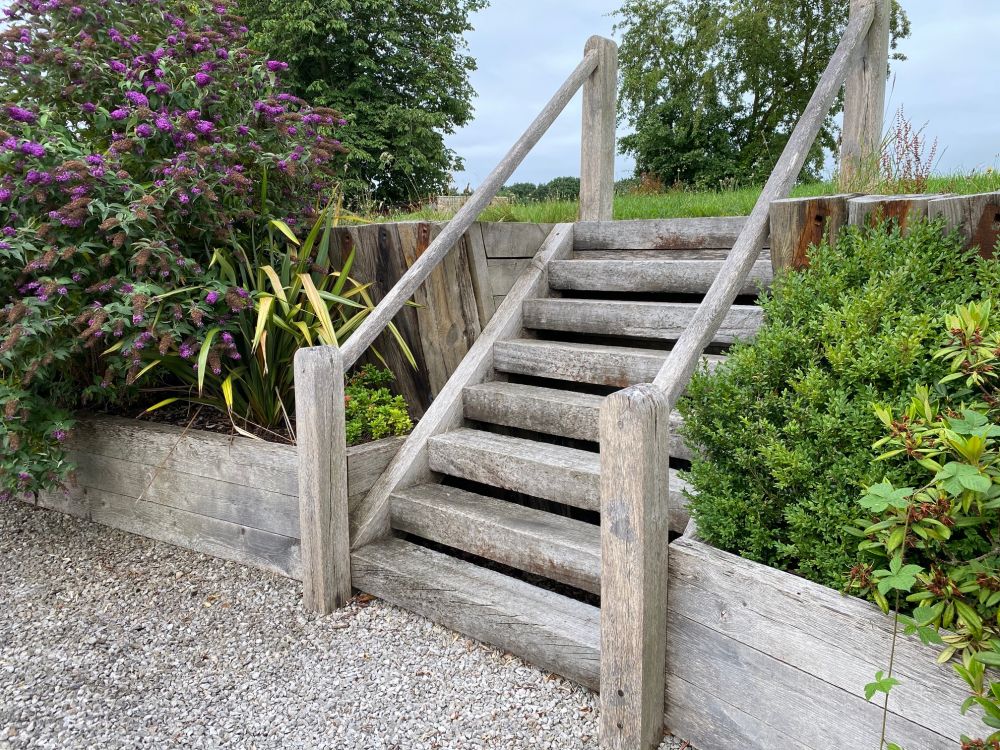
“Plan Your Risers: Cut 4×6″ or 6×6″ treated timbers to the desired width of your steps.”
Excavate the First Step: Dig a level trench for your bottom timber. It should be partially buried for stability.
Secure the Timber: Drill through the timber and hammer 2-foot sections of rebar down into the ground to anchor it in place.
Backfill and Tamp: Fill the area behind the timber with gravel for drainage and then top with soil, tamping it down firmly to create your first tread.
Repeat: Measure for your next step, maintaining a consistent rise and run, and repeat the process up the slope.
This project takes a weekend, with costs mainly for the timbers and rebar. For a more expansive timber look, check out Idea #22.
While beautiful, landscape timbers don’t last forever. Even pressure-treated wood will eventually succumb to moisture and insects. You can expect a well-built timber staircase like this to have a lifespan of 15 to 20 years. To maximize its life, ensure the area has good drainage so the wood isn’t constantly sitting in water. Applying a water-repellent sealer every few years can also help. When the wood does begin to show signs of rot, individual timbers can often be replaced without having to rebuild the entire structure.
23. Wide Timber Steps Terracing a Sloped Lawn
This design is a fantastic solution for a moderately sloped backyard where you want to create a more usable, level lawn area. It works best with a total elevation change of 4 to 8 feet. The steps themselves are exceptionally wide, functioning almost as a grandstand or informal seating, which requires a yard with ample width to accommodate them without feeling cramped. The central lawn area they lead to should be at least 20 feet deep to feel like a proper “room” rather than just a landing strip.
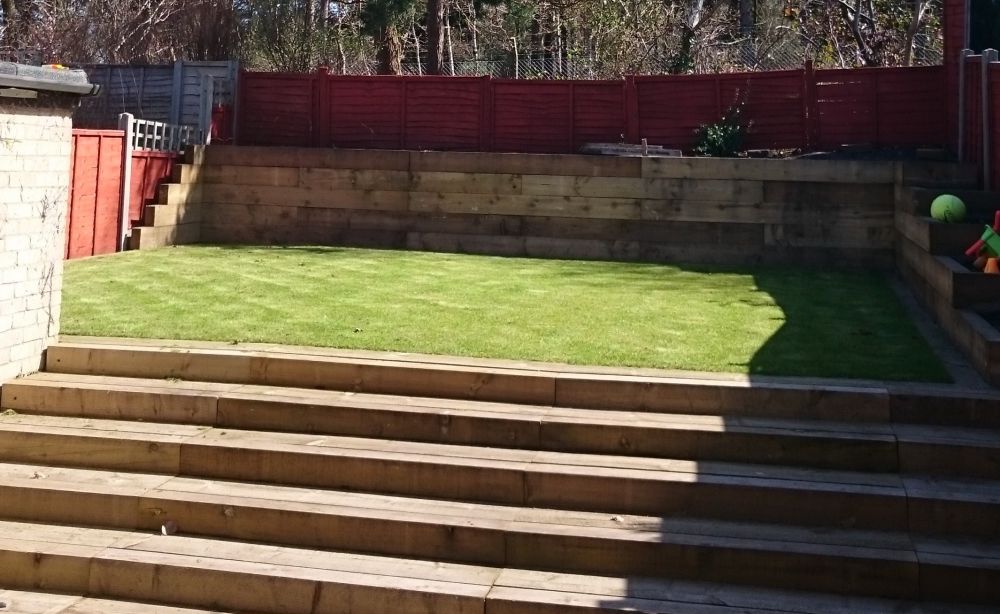
“While these wide steps are likely made from hefty, expensive timbers, you can get a similar tiered effect for less.”
Use standard pressure-treated 2×12″ boards to build simple box frames for each step-down. Face the frames with inexpensive composite deck boards for a clean, maintenance-free finish. Fill the interior of the boxes with compacted gravel. This construction method uses less material and is more DIY-friendly than maneuvering solid 6×6 timbers, giving you that grand, terraced transition on a much more manageable budget.
24. Sculpted Polygon Stone Steps in a Terraced Garden
The success of this modern design lies in its dynamic geometry. The asymmetrical, polygon-shaped stone steps create a sense of movement and visual interest that a standard rectangular path would lack. This organic, almost fractured geometry is then contained and contrasted by the smooth, unwavering lines of the poured concrete retaining walls. It’s a sophisticated conversation between two different modern forms: one natural and angular, the other industrial and linear. The soft, grassy plants are the final touch, preventing the scene from feeling too cold or stark.
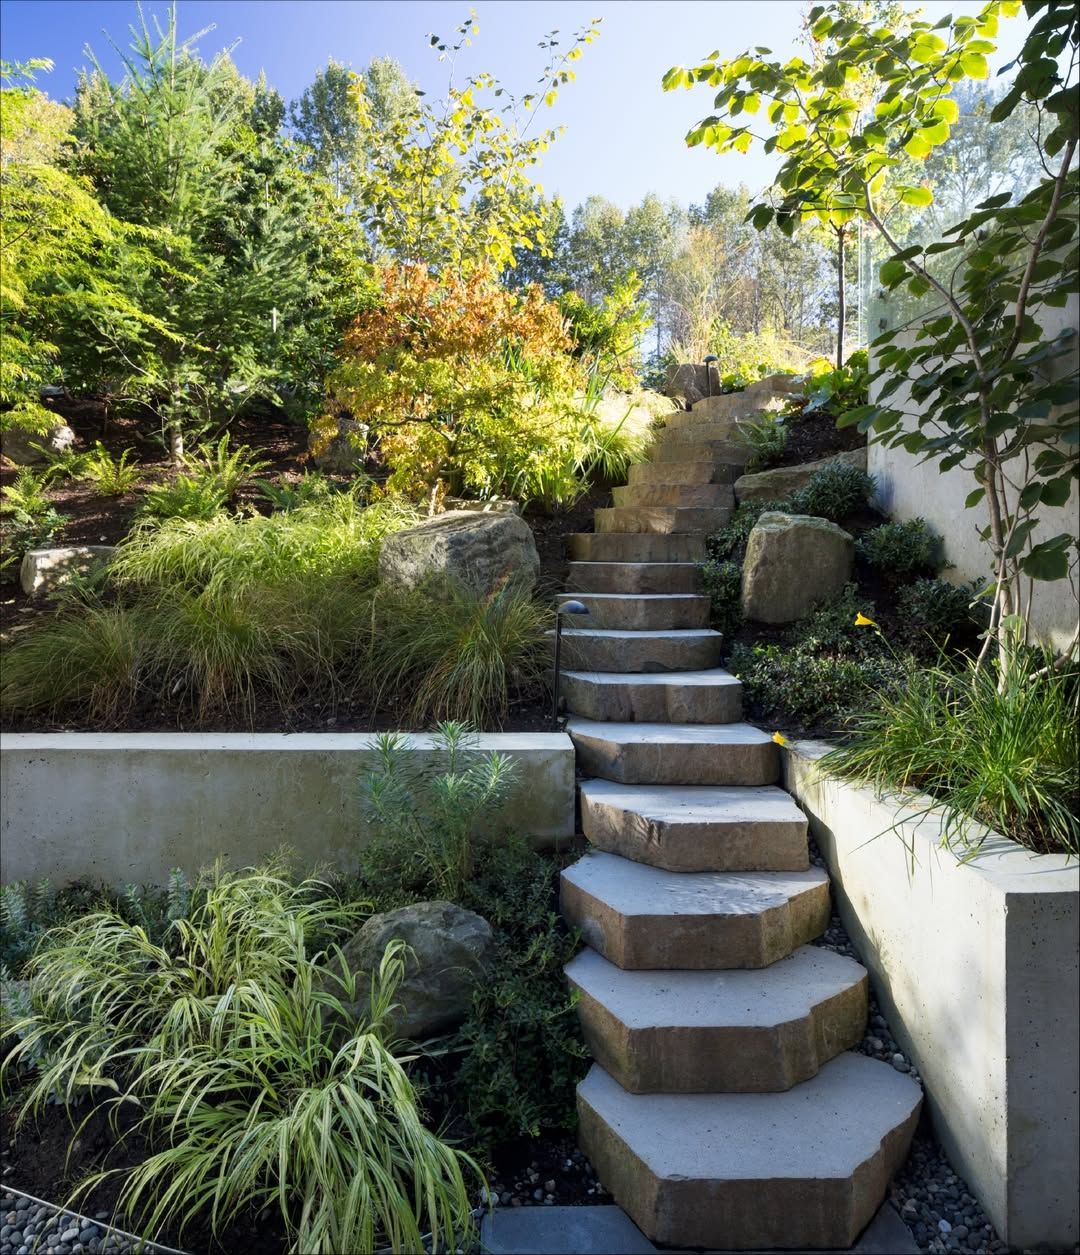
“When installing ground spotlights to illuminate a path, always aim them away from the viewer’s eyes.”
The goal is to light the path, not to blind the person walking on it. Position the fixtures behind or within planting beds, angled across the steps to highlight their texture and shape. Use a low-wattage, warm-toned bulb (around 2700K) to create a soft, welcoming glow rather than a harsh, security-light glare. One well-placed light washing over two or three steps is often more effective than trying to light each one individually.
25. Thick Granite Steps with a Cobblestone Path
Before committing to this classic, robust look, double-check these key factors:
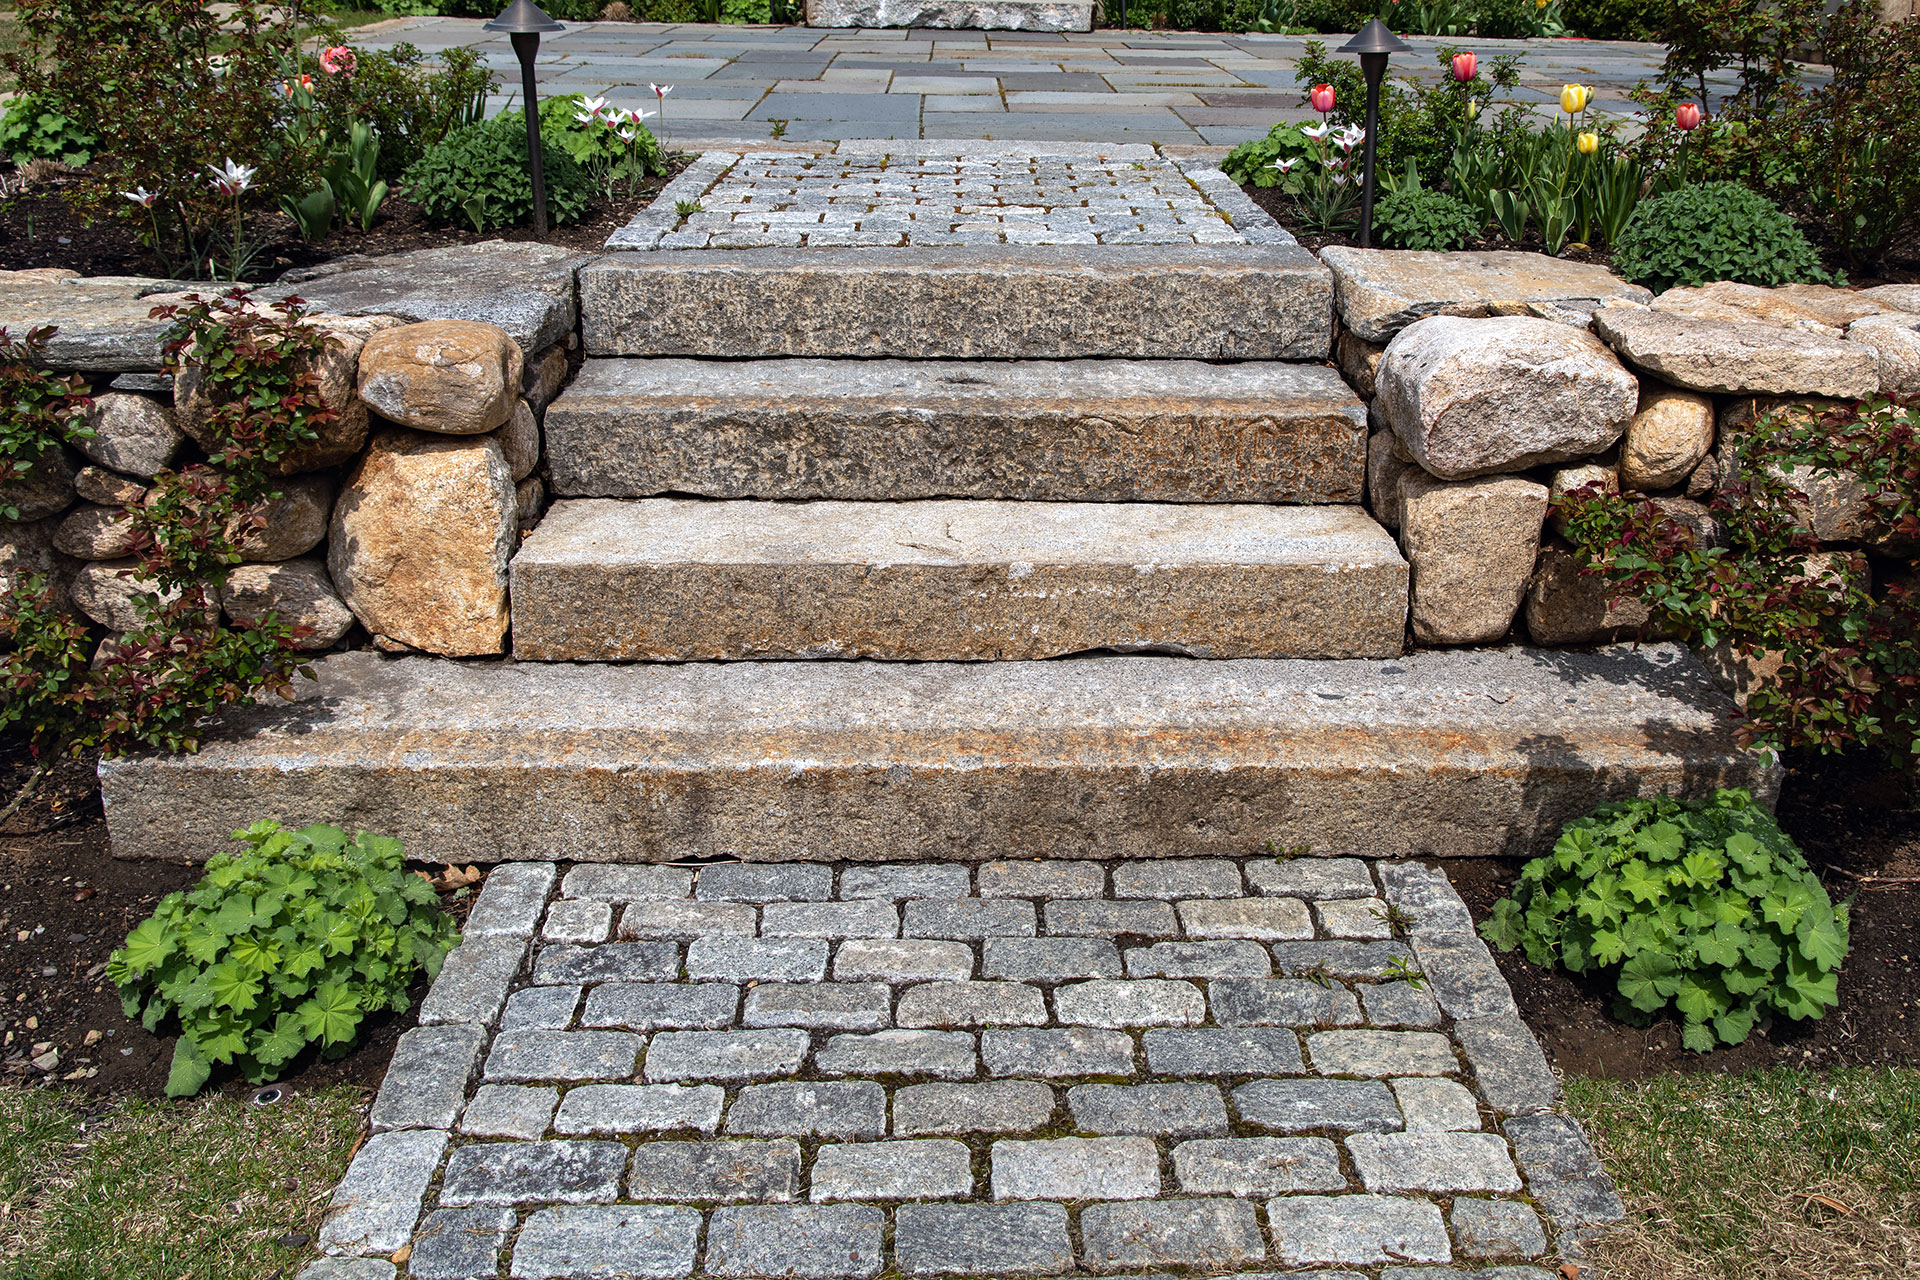
“Material Sourcing: Have you located a local supplier for thick granite treads and cobblestones?”
These are specialty items, and shipping costs can be prohibitive if they aren’t available nearby.
Foundation Plan: A path this substantial needs a serious foundation. Plan for at least 6-8 inches of compacted base material to prevent the stones from sinking or shifting over time.
Budget Reality: This is a premium materials project. Get quotes for the granite, cobblestones, and the necessary professional installation. It will likely cost 2-3 times as much as a standard paver or concrete path.
Weed Strategy: The gaps in cobblestones are a prime spot for weeds. Will you use polymeric sand, a groundcover, or commit to regular weeding?
The single most impactful element here is the sheer thickness of the granite steps. These aren’t thin veneers; they are solid, monumental blocks of stone. This conveys an undeniable sense of quality, permanence, and stability. If these steps were made from thinner pavers or standard 2-inch flagstone, the entire installation would feel less significant. The massive scale of the granite treads is what anchors the design and gives it its powerful, enduring character. It’s a “buy it for life” choice.
26. Curved Stone Steps Flanked by Trimmed Hedges
This inviting autumnal scene is built on a formula of repeating curves and contrasting textures: 40% curved hardscape + 40% linear structure + 20% soft plantings. The elegant curve of the stone steps is echoed in the interlocking brick pathway, creating a graceful, flowing line. This is contrasted by the straight, rigid lines of the rectangular retaining wall blocks and the vertical posts of the second wall. Finally, the soft, feathery texture of the ornamental grasses and the dense foliage of the trimmed hedges provide a natural counterpoint to all the hardscaping.
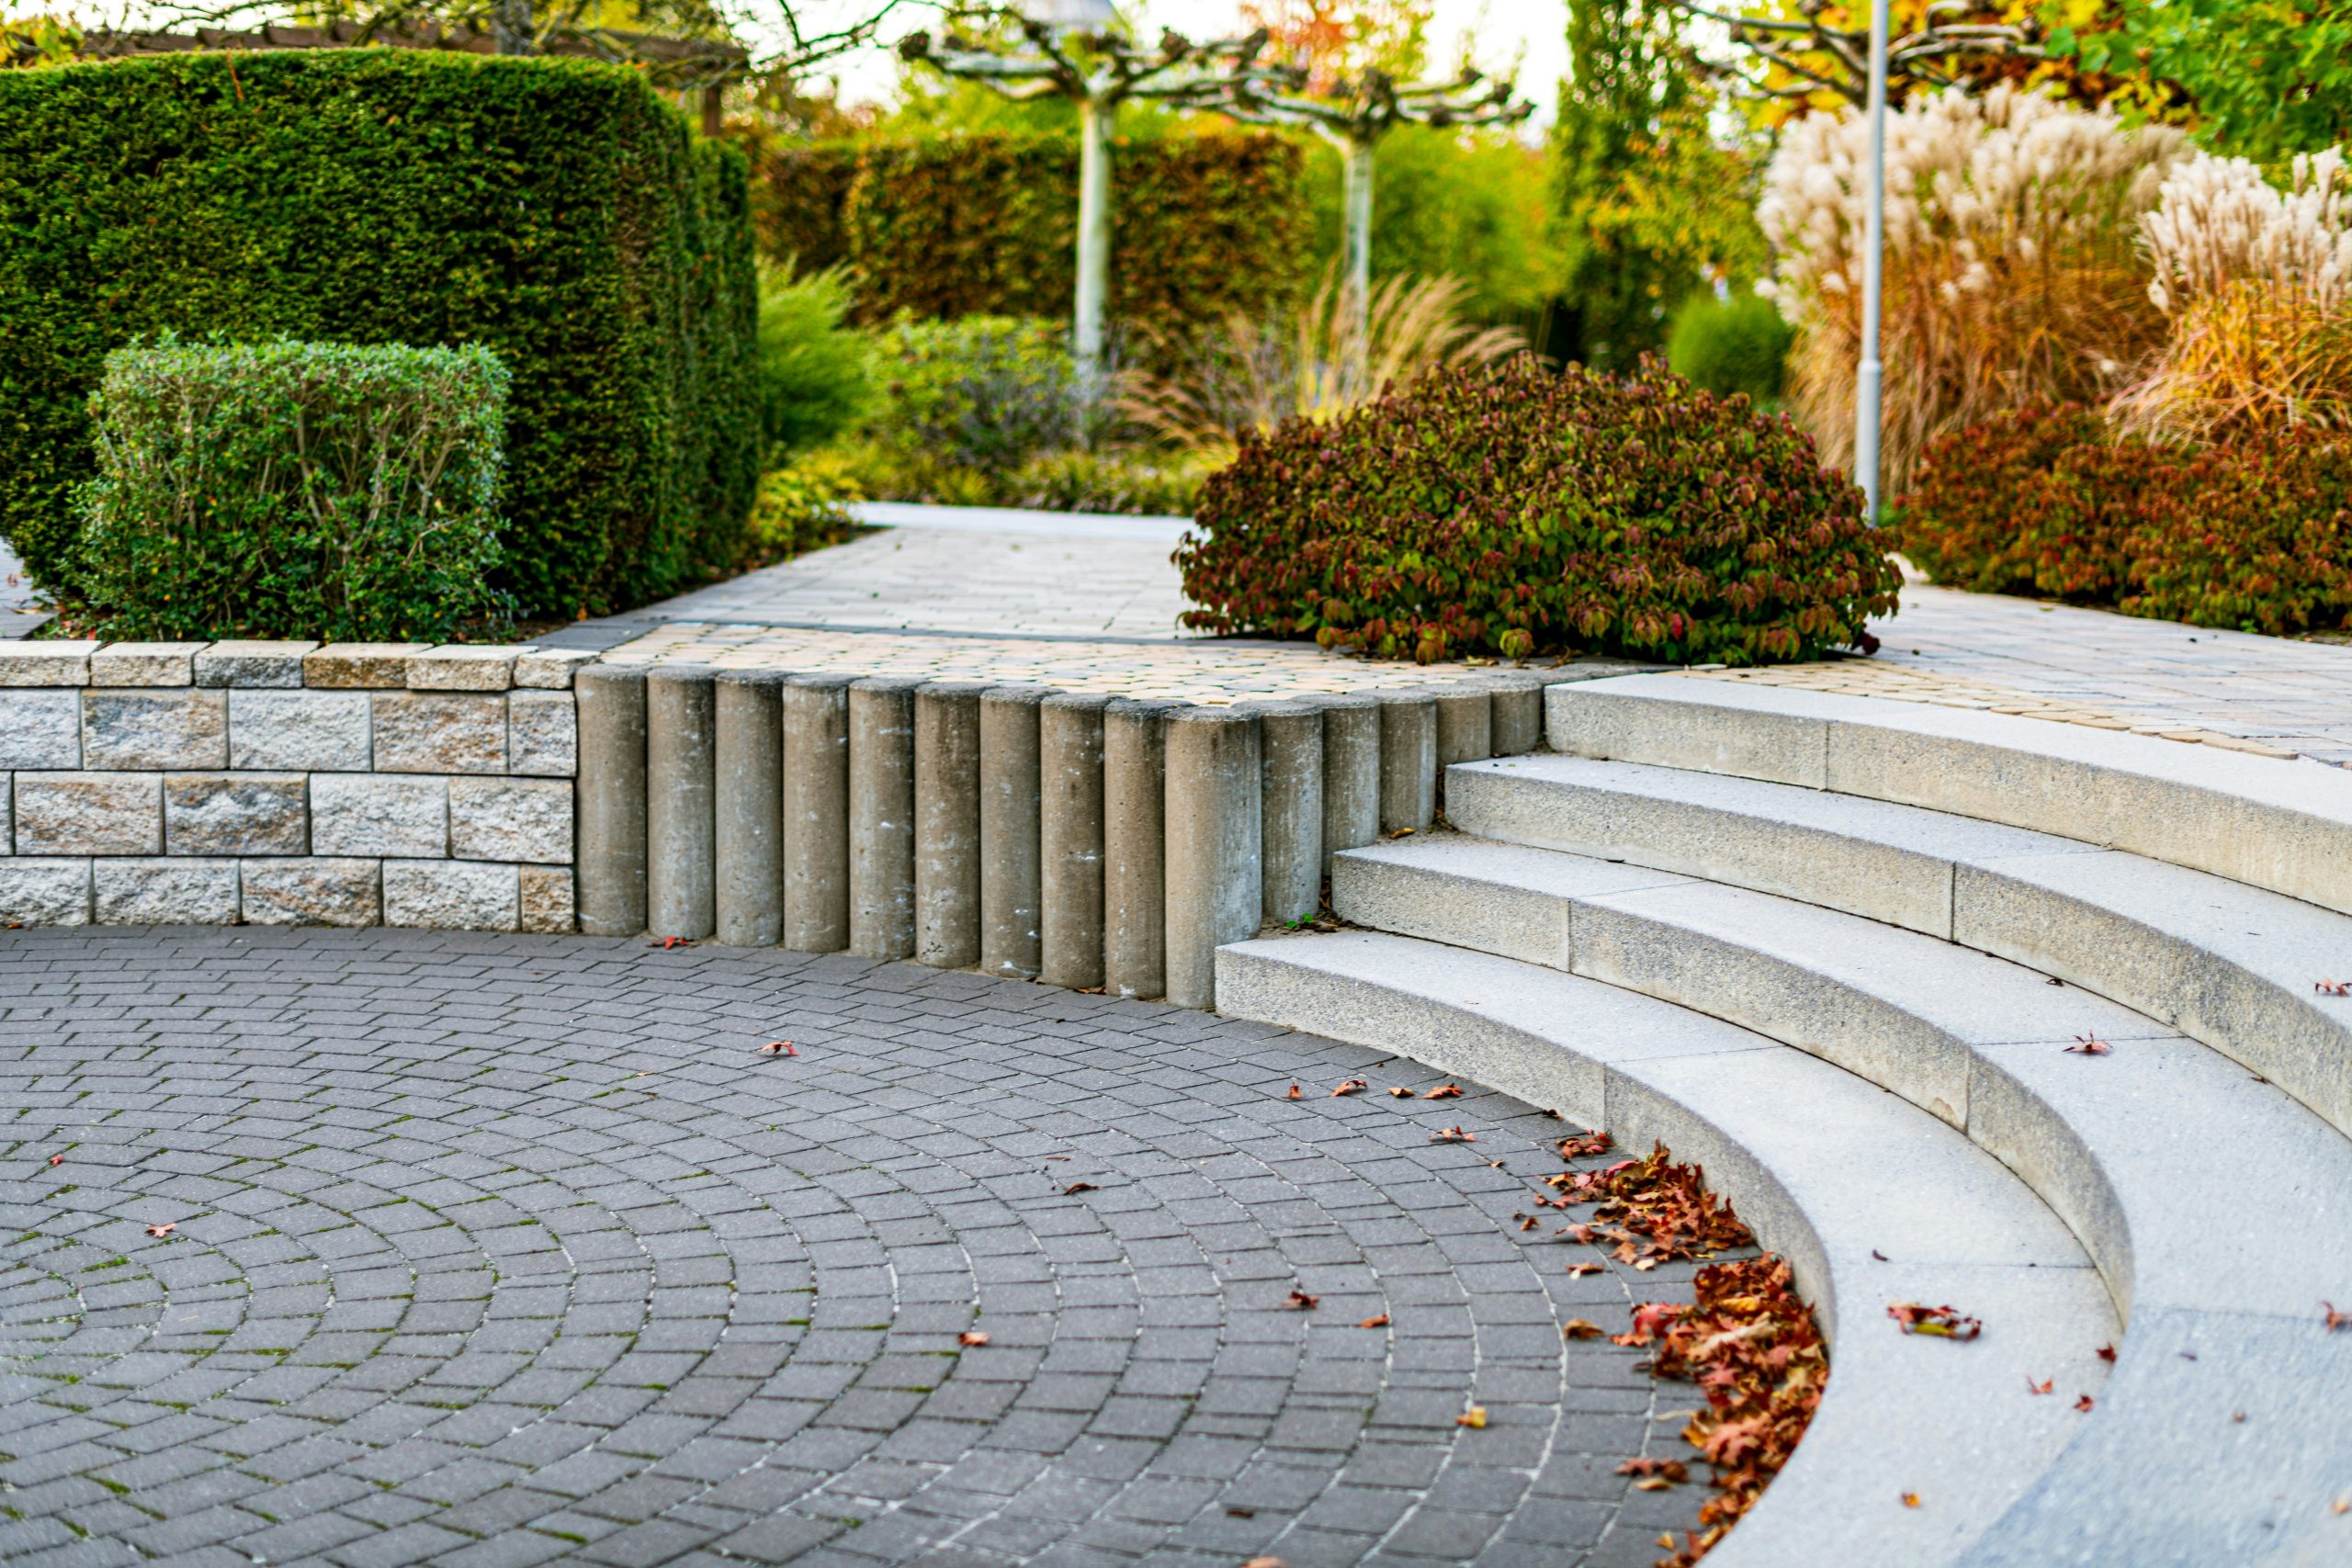
“Combining different types of retaining walls can be a design challenge.”
Here, a wall of rectangular stone blocks sits right next to a wall of vertical concrete posts. While it adds some visual interest, this kind of mix-and-match approach can sometimes look disjointed or like an unplanned afterthought. If you’re going to use multiple wall materials in a small space, try to find a unifying element, such as a shared color palette or a consistent capstone, to tie them together into a more cohesive design.
27. Curved Concrete Steps with a Mixed Paver Patio
When designing curved steps, the easiest and most professional-looking method is to use a flexible form, like hardboard siding or specialized plastic concrete forms. For the inside curve, drive stakes into the ground and screw the form board to the inside of the stakes. For the outside curve, place the stakes on the outside. Pouring concrete into a curved form is no different than pouring a straight one, but the setup takes a bit more patience to get the smooth, elegant arc just right. Using a trowel with a rounded edge will give you a clean finish. This is a much sleeker look than what you’d get with the blocky style of Idea #3.
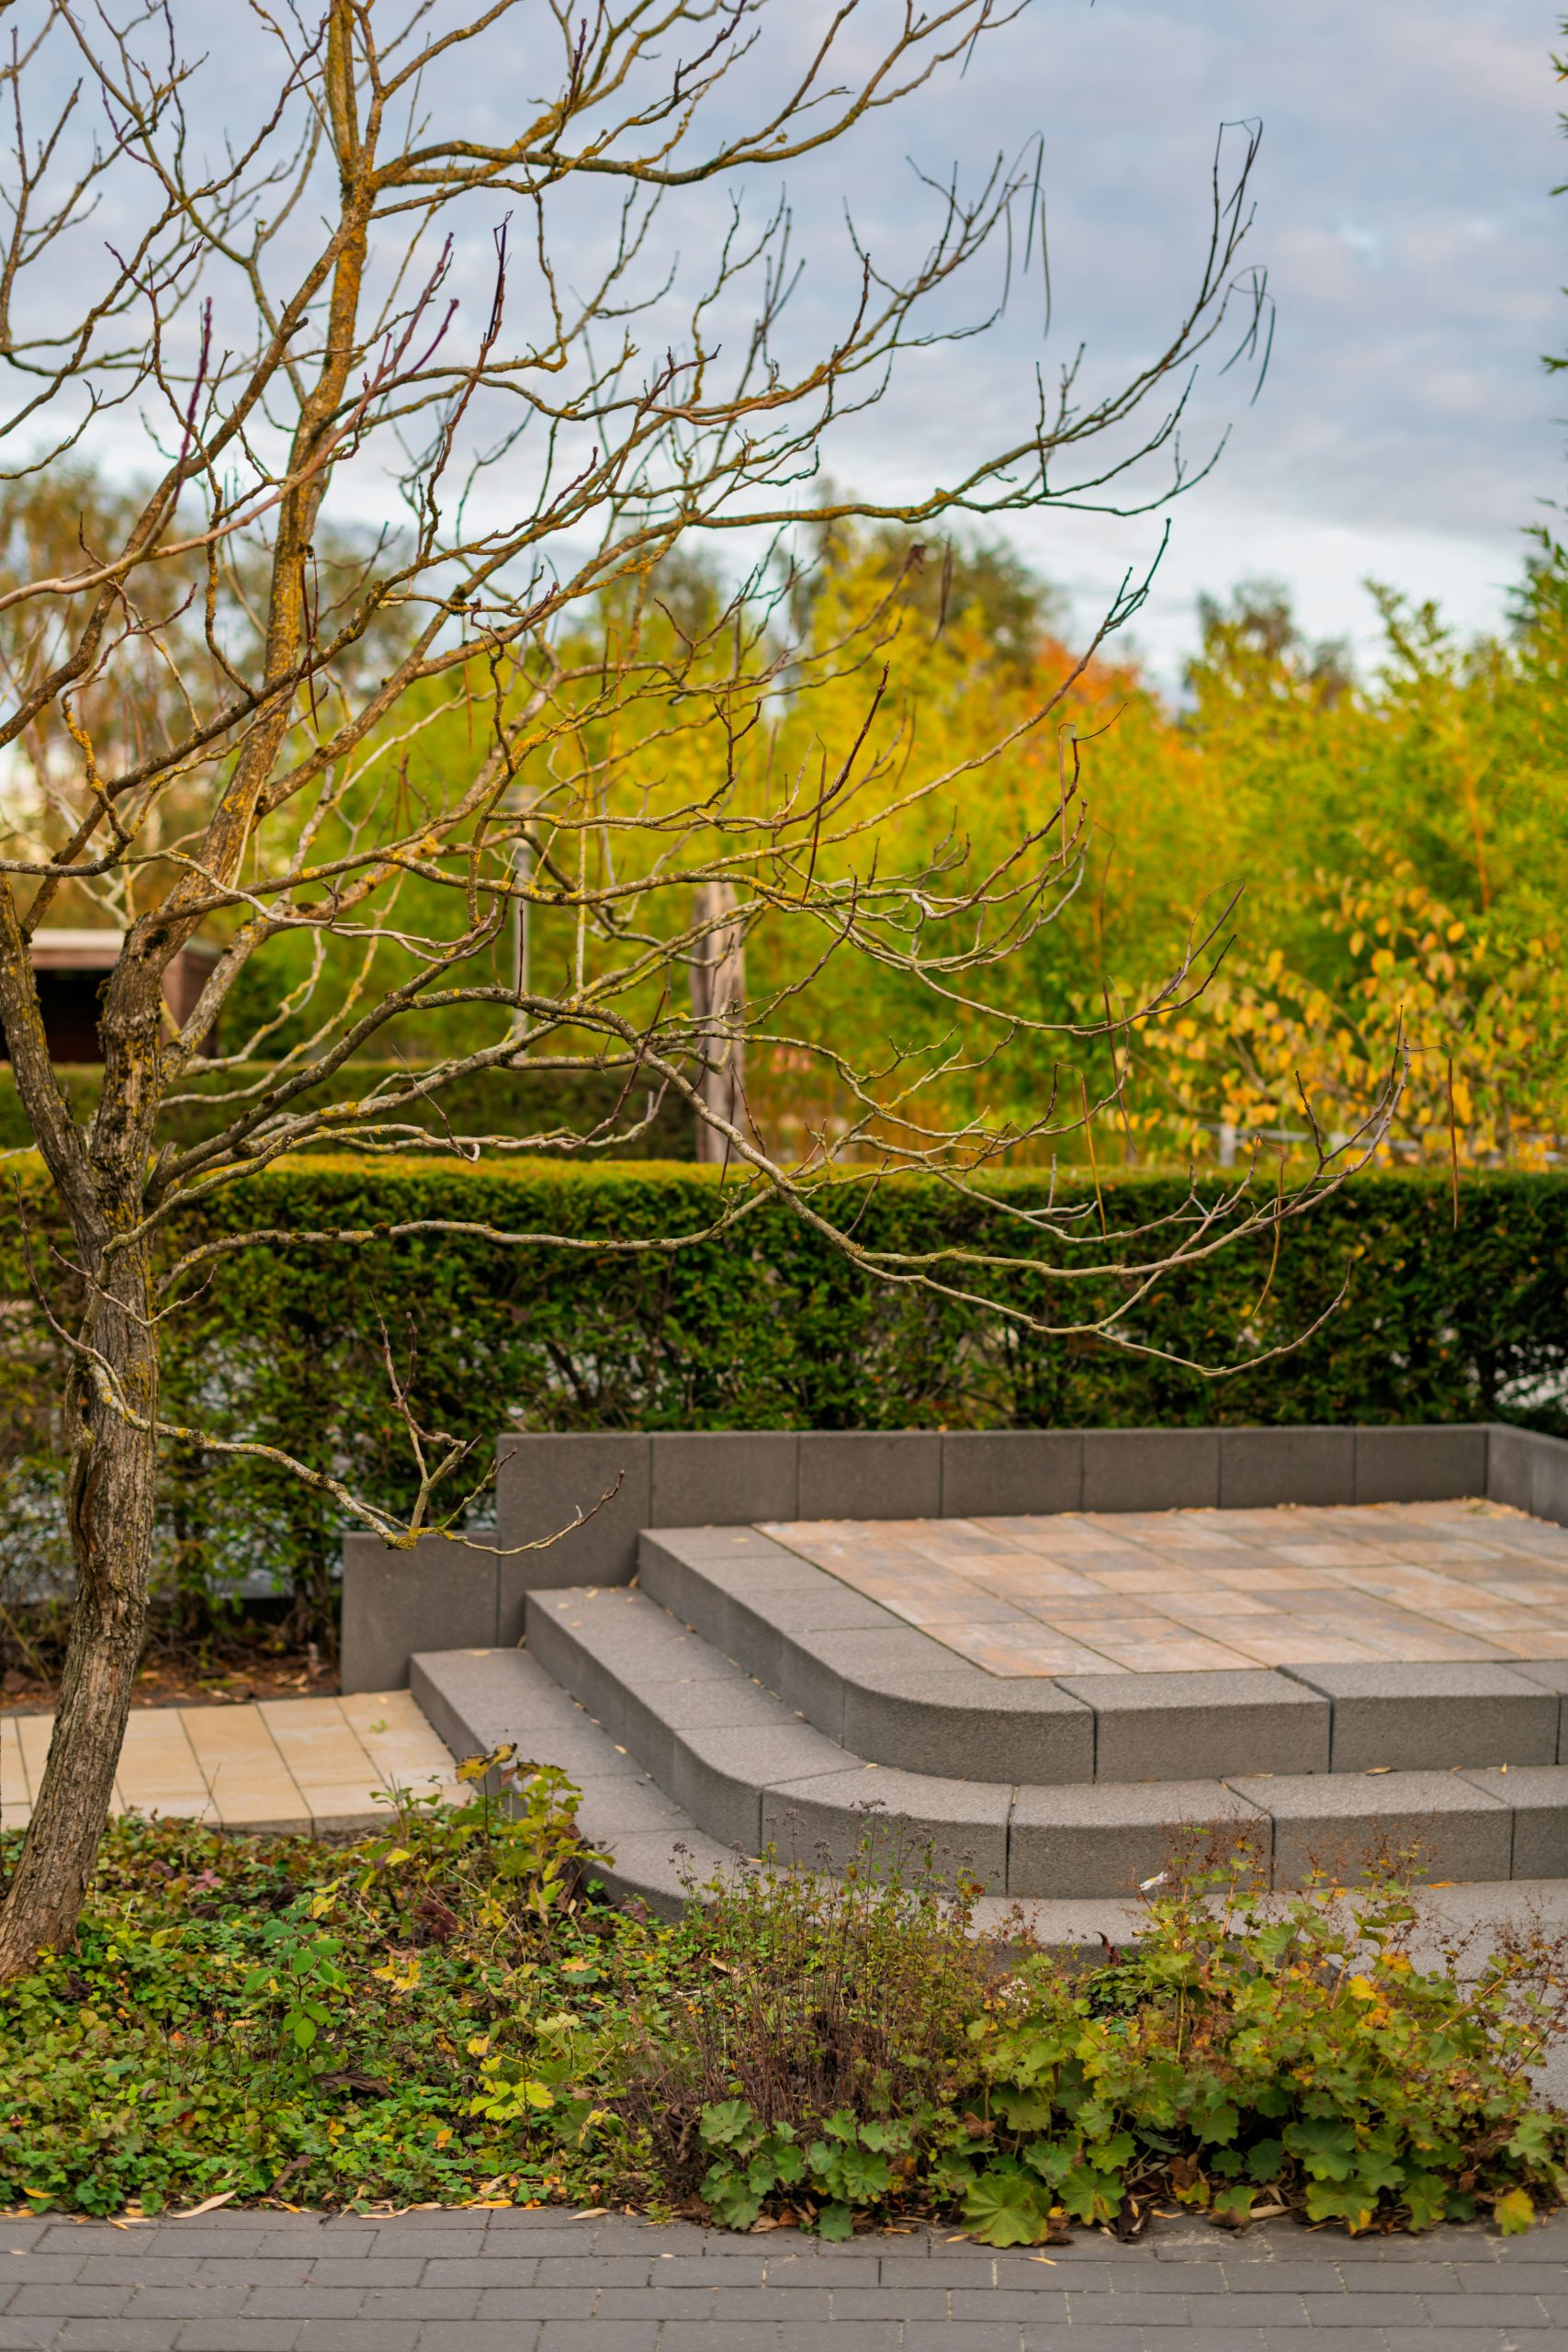
“A poured concrete patio and steps can be expensive, but you can achieve a very similar look on a budget.”
Instead of a solid concrete pour, use dark grey, curved concrete edging blocks to create the step forms and patio border. You can find these at any big-box hardware store. For the patio surface, use an affordable mix of tan and brown square pavers from a landscape supply yard. They often have overstock or discontinued styles for a significant discount. It gives you the same color palette and curved shape for a fraction of the price.
28. Stepping Stone Path Through a Wildflower Bed
This whimsical path works because it strikes the perfect balance between chaos and control. The plantings are dense, lush, and spilling over the edges, creating a “wildflower meadow” feeling. This beautiful chaos, however, is given direction and purpose by the clear, simple line of the grey stepping stones. The path provides a necessary visual break and a physical route through the riot of color and texture. The dark brown mulch and the simple black fence in the background act as quiet, neutral backdrops that make the flowers and foliage the undisputed stars of the show.
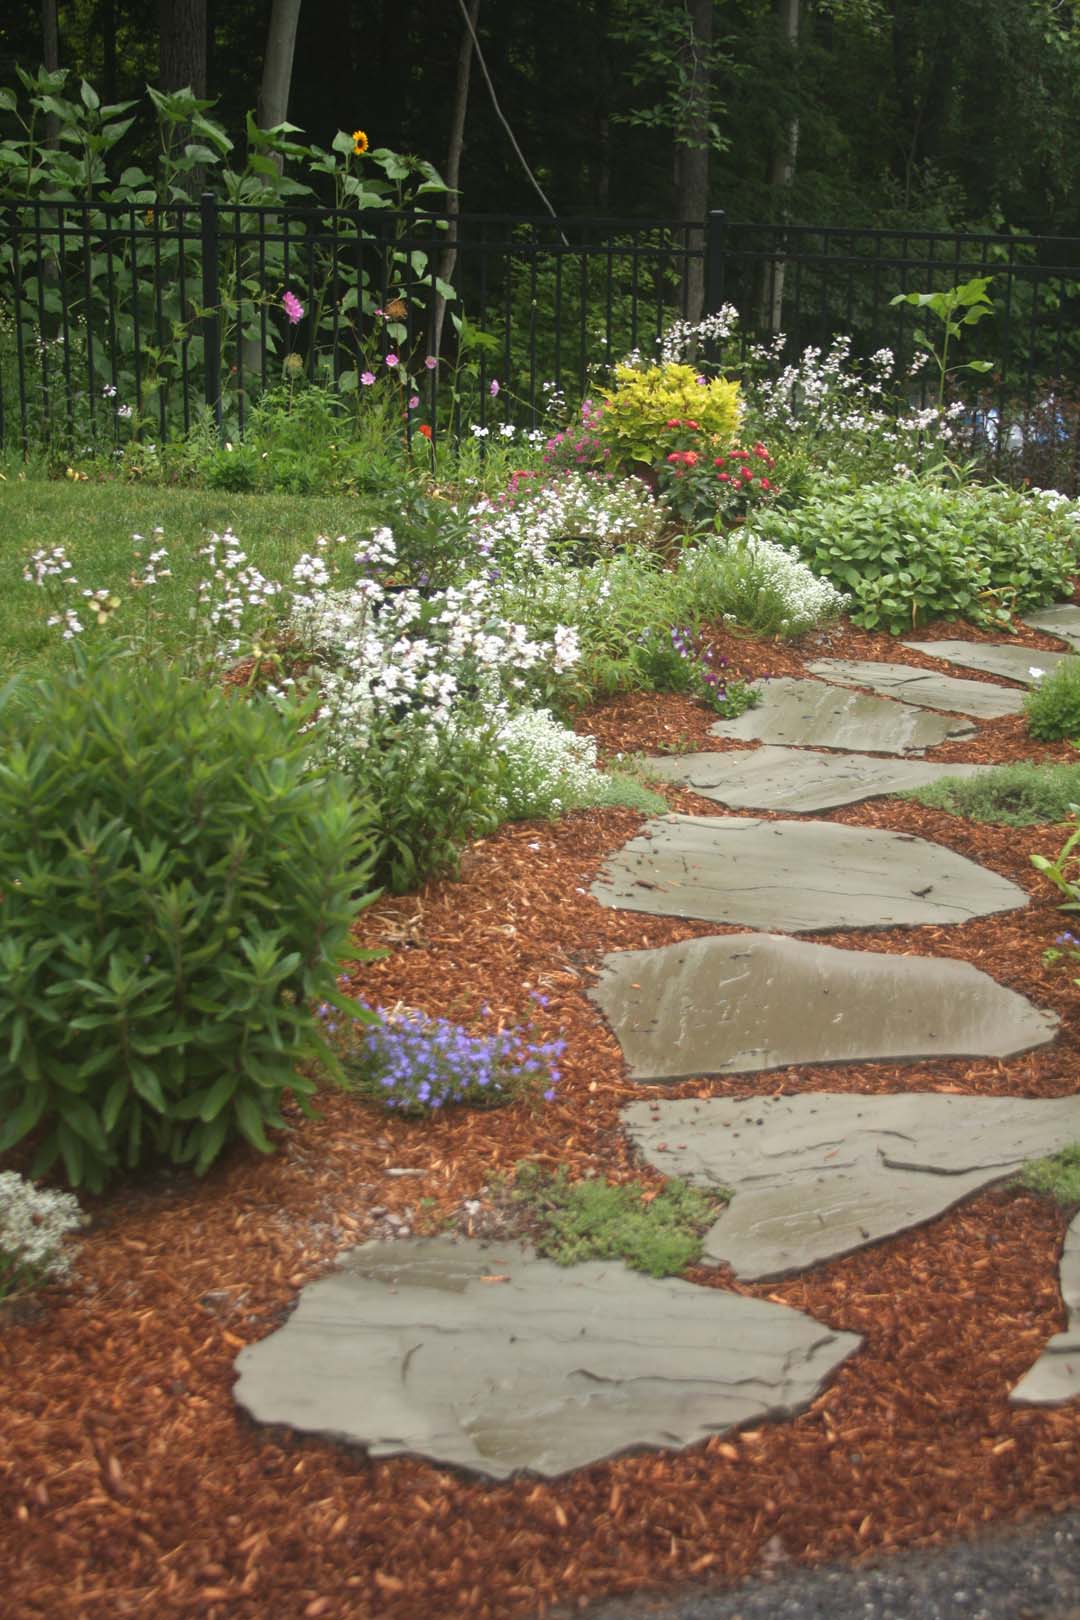
“Laying a stepping stone path is one of the easiest garden DIYs.”
Here’s a quick 4-step process:
- Lay out your stones: Arrange the stones on top of the ground, adjusting them until you have a comfortable, natural-looking stride between each one.
- Trace and excavate: Use a trowel to trace the outline of each stone. Set the stone aside and dig out enough soil so the stone will sit perfectly flush with the ground.
- Add a sand base: Pour about an inch of leveling sand into the excavated hole. This makes it easy to wiggle the stone into a stable, level position.
- Set the stone: Place the stone back in its spot, press down firmly, and check for wobbles. Add or remove sand as needed until it’s solid. Then, just add mulch around it!
This project takes 1-2 hours and costs are for the stones and a bag of sand.
Step Up Your Landscape Game
Your garden path is more than just a way to get from point A to point B; it’s a chance to add character, beauty, and function to your outdoor space. Whether you’re drawn to rustic charm or clean modern lines, the right steps can completely transform your landscape.
Feeling inspired? Save your favorite ideas to your Garden board on Pinterest and start planning your next chapter. Your perfect outdoor space is just a few steps away.