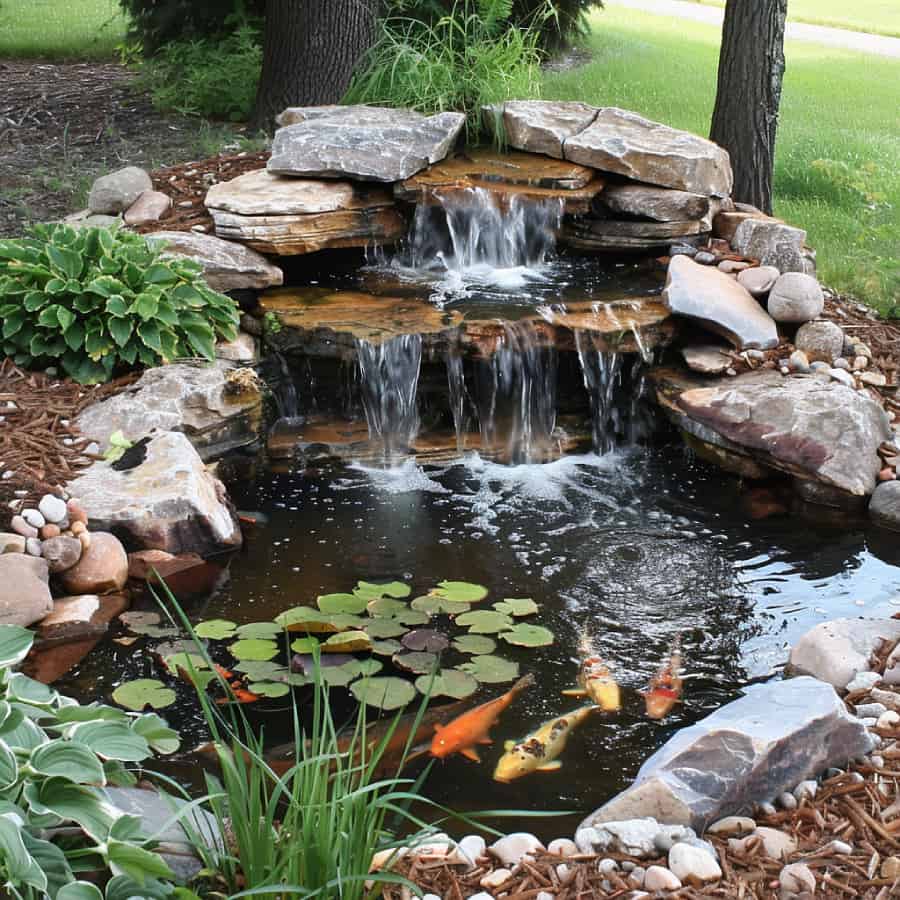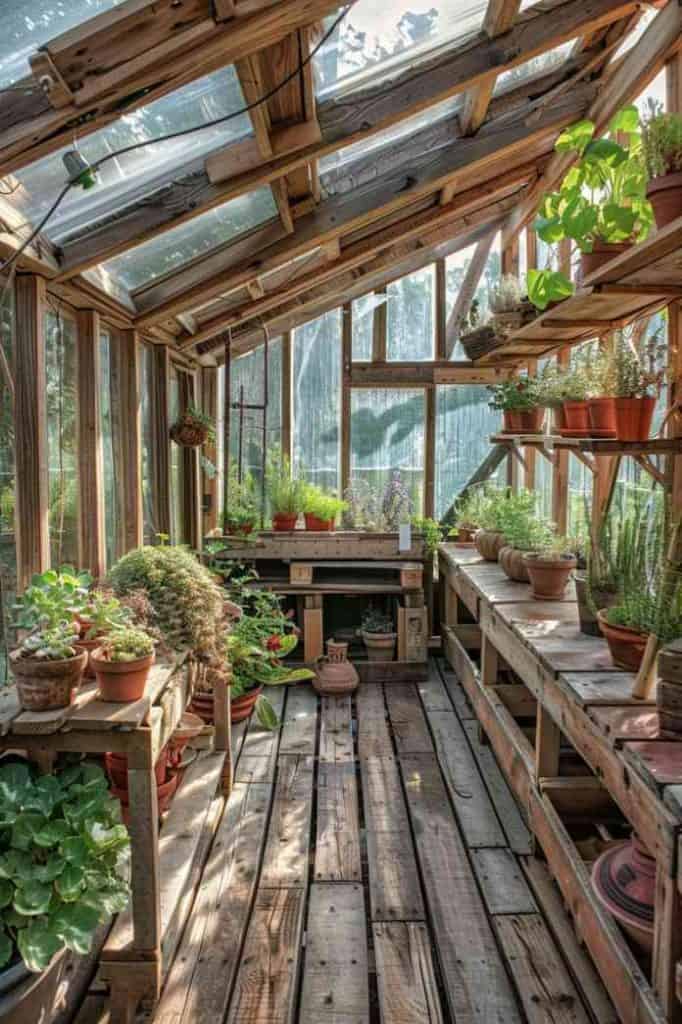
That moment when you find the perfect green house idea on Pinterest… and then another, and another. It’s easy to get lost in a sea of beautiful photos, but how do you turn that inspiration into a real, thriving green space? We’ve done the hard work for you, sifting through hundreds of DIY and designer projects to find the 26 most achievable and stunning green house ideas for 2026. This isn’t just a list of pretty pictures; it’s a practical guide covering rustic, modern, and indoor setups, with options ranging from a few hundred dollars to more significant investments. Biophilic design—our innate need to connect with nature—is more than a trend; it’s a lifestyle, and bringing a dedicated green space home is the perfect expression of it. And stay until the end — we break down the most common mistakes that can ruin these looks. 📌 Save this to Pinterest for later — you’ll want to revisit these ideas.
1. Embrace Whimsy with an A-Frame Glass Greenhouse and Stone Chimney
The magic here is all about the masterful blend of textures and shapes. The sleek, modern lines of the black-framed A-frame structure create a sharp, geometric silhouette that feels very current. This is then beautifully contrasted with the rustic, organic texture of the gray stone chimney. This pairing of old-world charm with contemporary design is what stops this from being just another glass box. The verticality of the A-frame draws the eye upward, giving the structure a sense of importance and grandeur, making it a true focal point in the garden rather than just a functional afterthought.
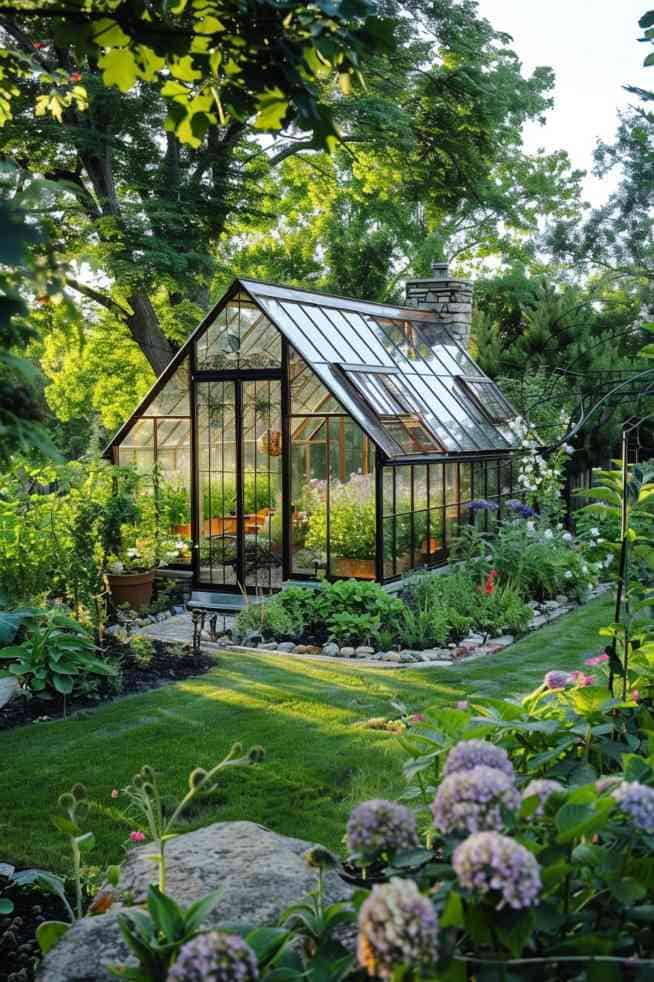
“Recreating this high-end look requires a significant investment, primarily in the structure itself.”
A custom or high-quality kit is a must for this architectural style and finish.
- A-Frame Greenhouse Kit (materials only): $5,000 – $15,000
- Stone Veneer & Chimney Masonry: $3,000 – $8,000
- Foundation & Stone Pathway: $1,500 – $4,000
- Mature Plants & Terracotta Pots: $800 – $2,500
- TOTAL: $10,300 – $29,500
2. A Modern Take: Wooden Frame Greenhouse with a Translucent Roof
This look achieves its bright, clean aesthetic by following a simple but effective formula: 50% natural wood + 40% lush greenery + 10% functional white/translucent elements. The medium-toned wood of the frame and paneled wall provides a warm, organic base. This is then nearly overwhelmed by the vibrant green of the plants, which becomes the main ‘color’ in the space. The final 10% is the translucent roofing and white board, which bounce light around and keep the space from feeling too dark or heavy, despite the density of the foliage and wood.
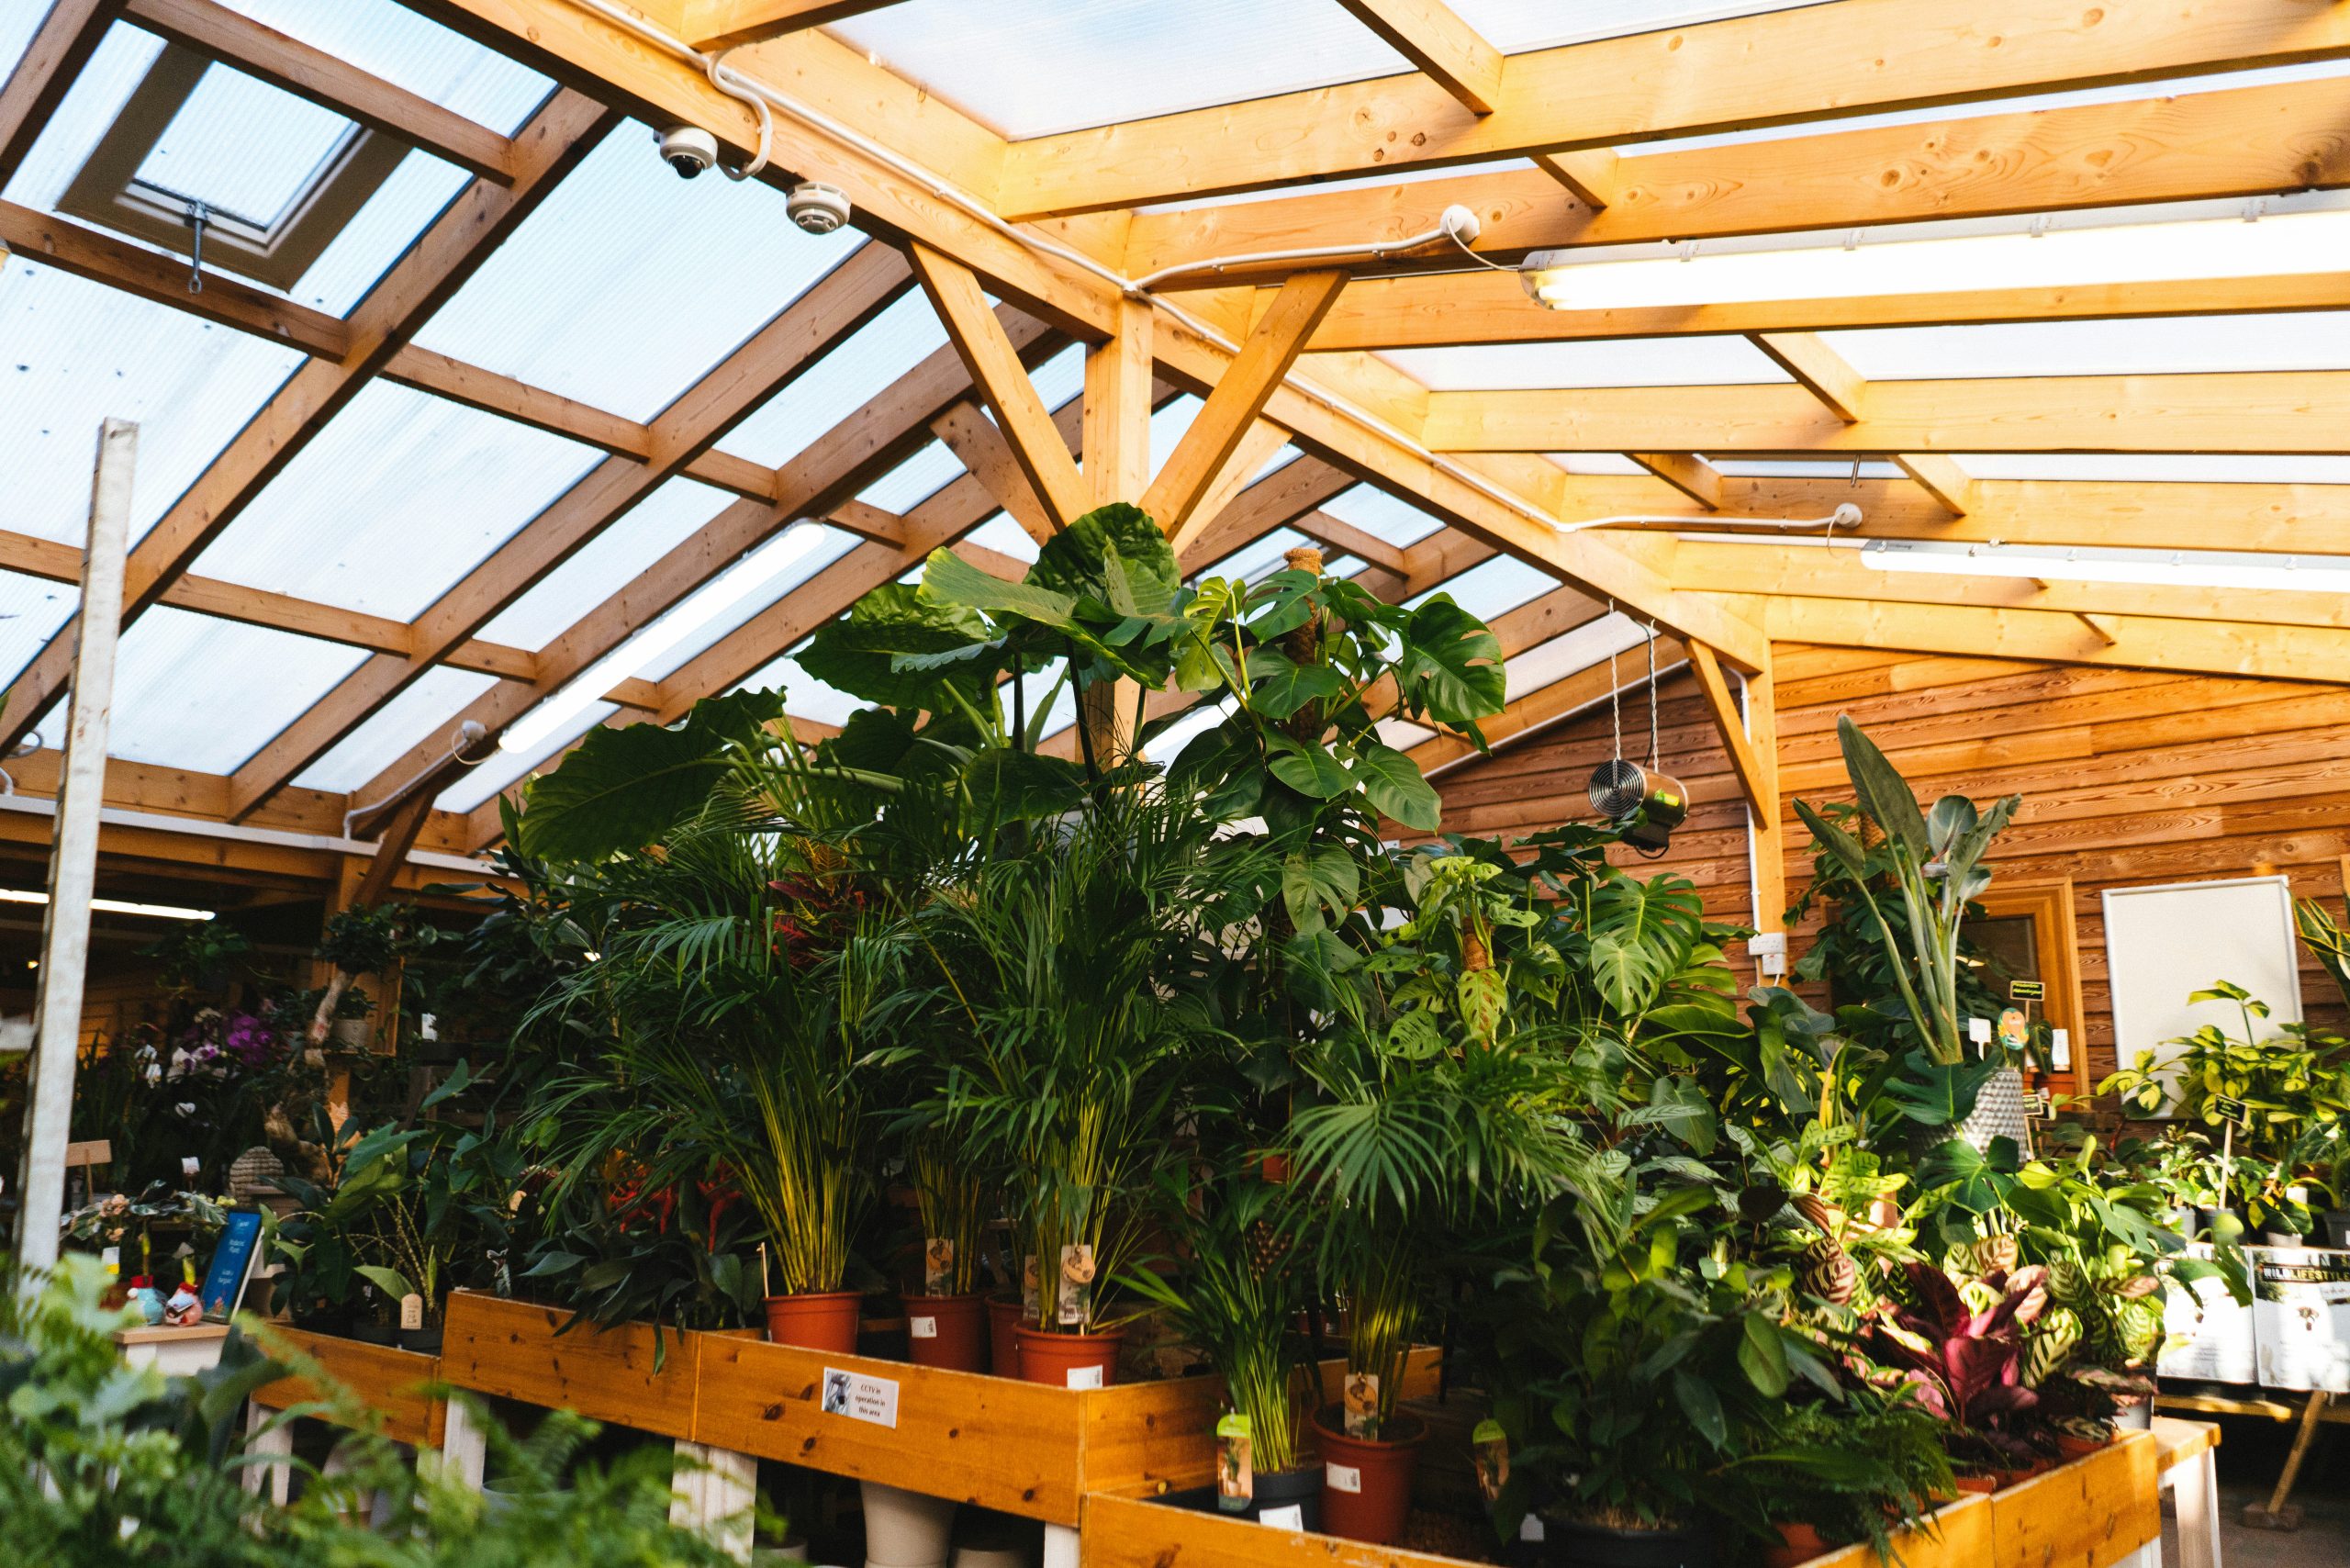
“When using translucent roof panels, pay close attention to their light diffusion rating.”
For a space that houses a wide variety of plants like this, you don’t want harsh, direct sunlight which can scorch leaves. Look for polycarbonate or fiberglass panels that offer 70-80% light transmission with high diffusion. This creates a bright, even light that minimizes shadows and hot spots, which is ideal for happy, healthy plants without needing to install complex shade cloths. This is especially important if your greenhouse is in a spot that gets intense afternoon sun.
3. Create a Grand Aisle with Terracotta Floors and Light Wood Shelving
This design thrives on length and symmetry. To get this grand, commercial-nursery feel, you need a space that is at least 20-25 feet long and 10-12 feet wide. The width is crucial for accommodating the shelves on both sides while maintaining a comfortable 4-5 foot central aisle. A ceiling height of at least 10 feet at the peak of the gable adds to the open, airy atmosphere. This idea is best suited for a dedicated backyard structure. For smaller spaces, consider the single-wall shelving approach seen in Idea #7 instead of a central aisle.
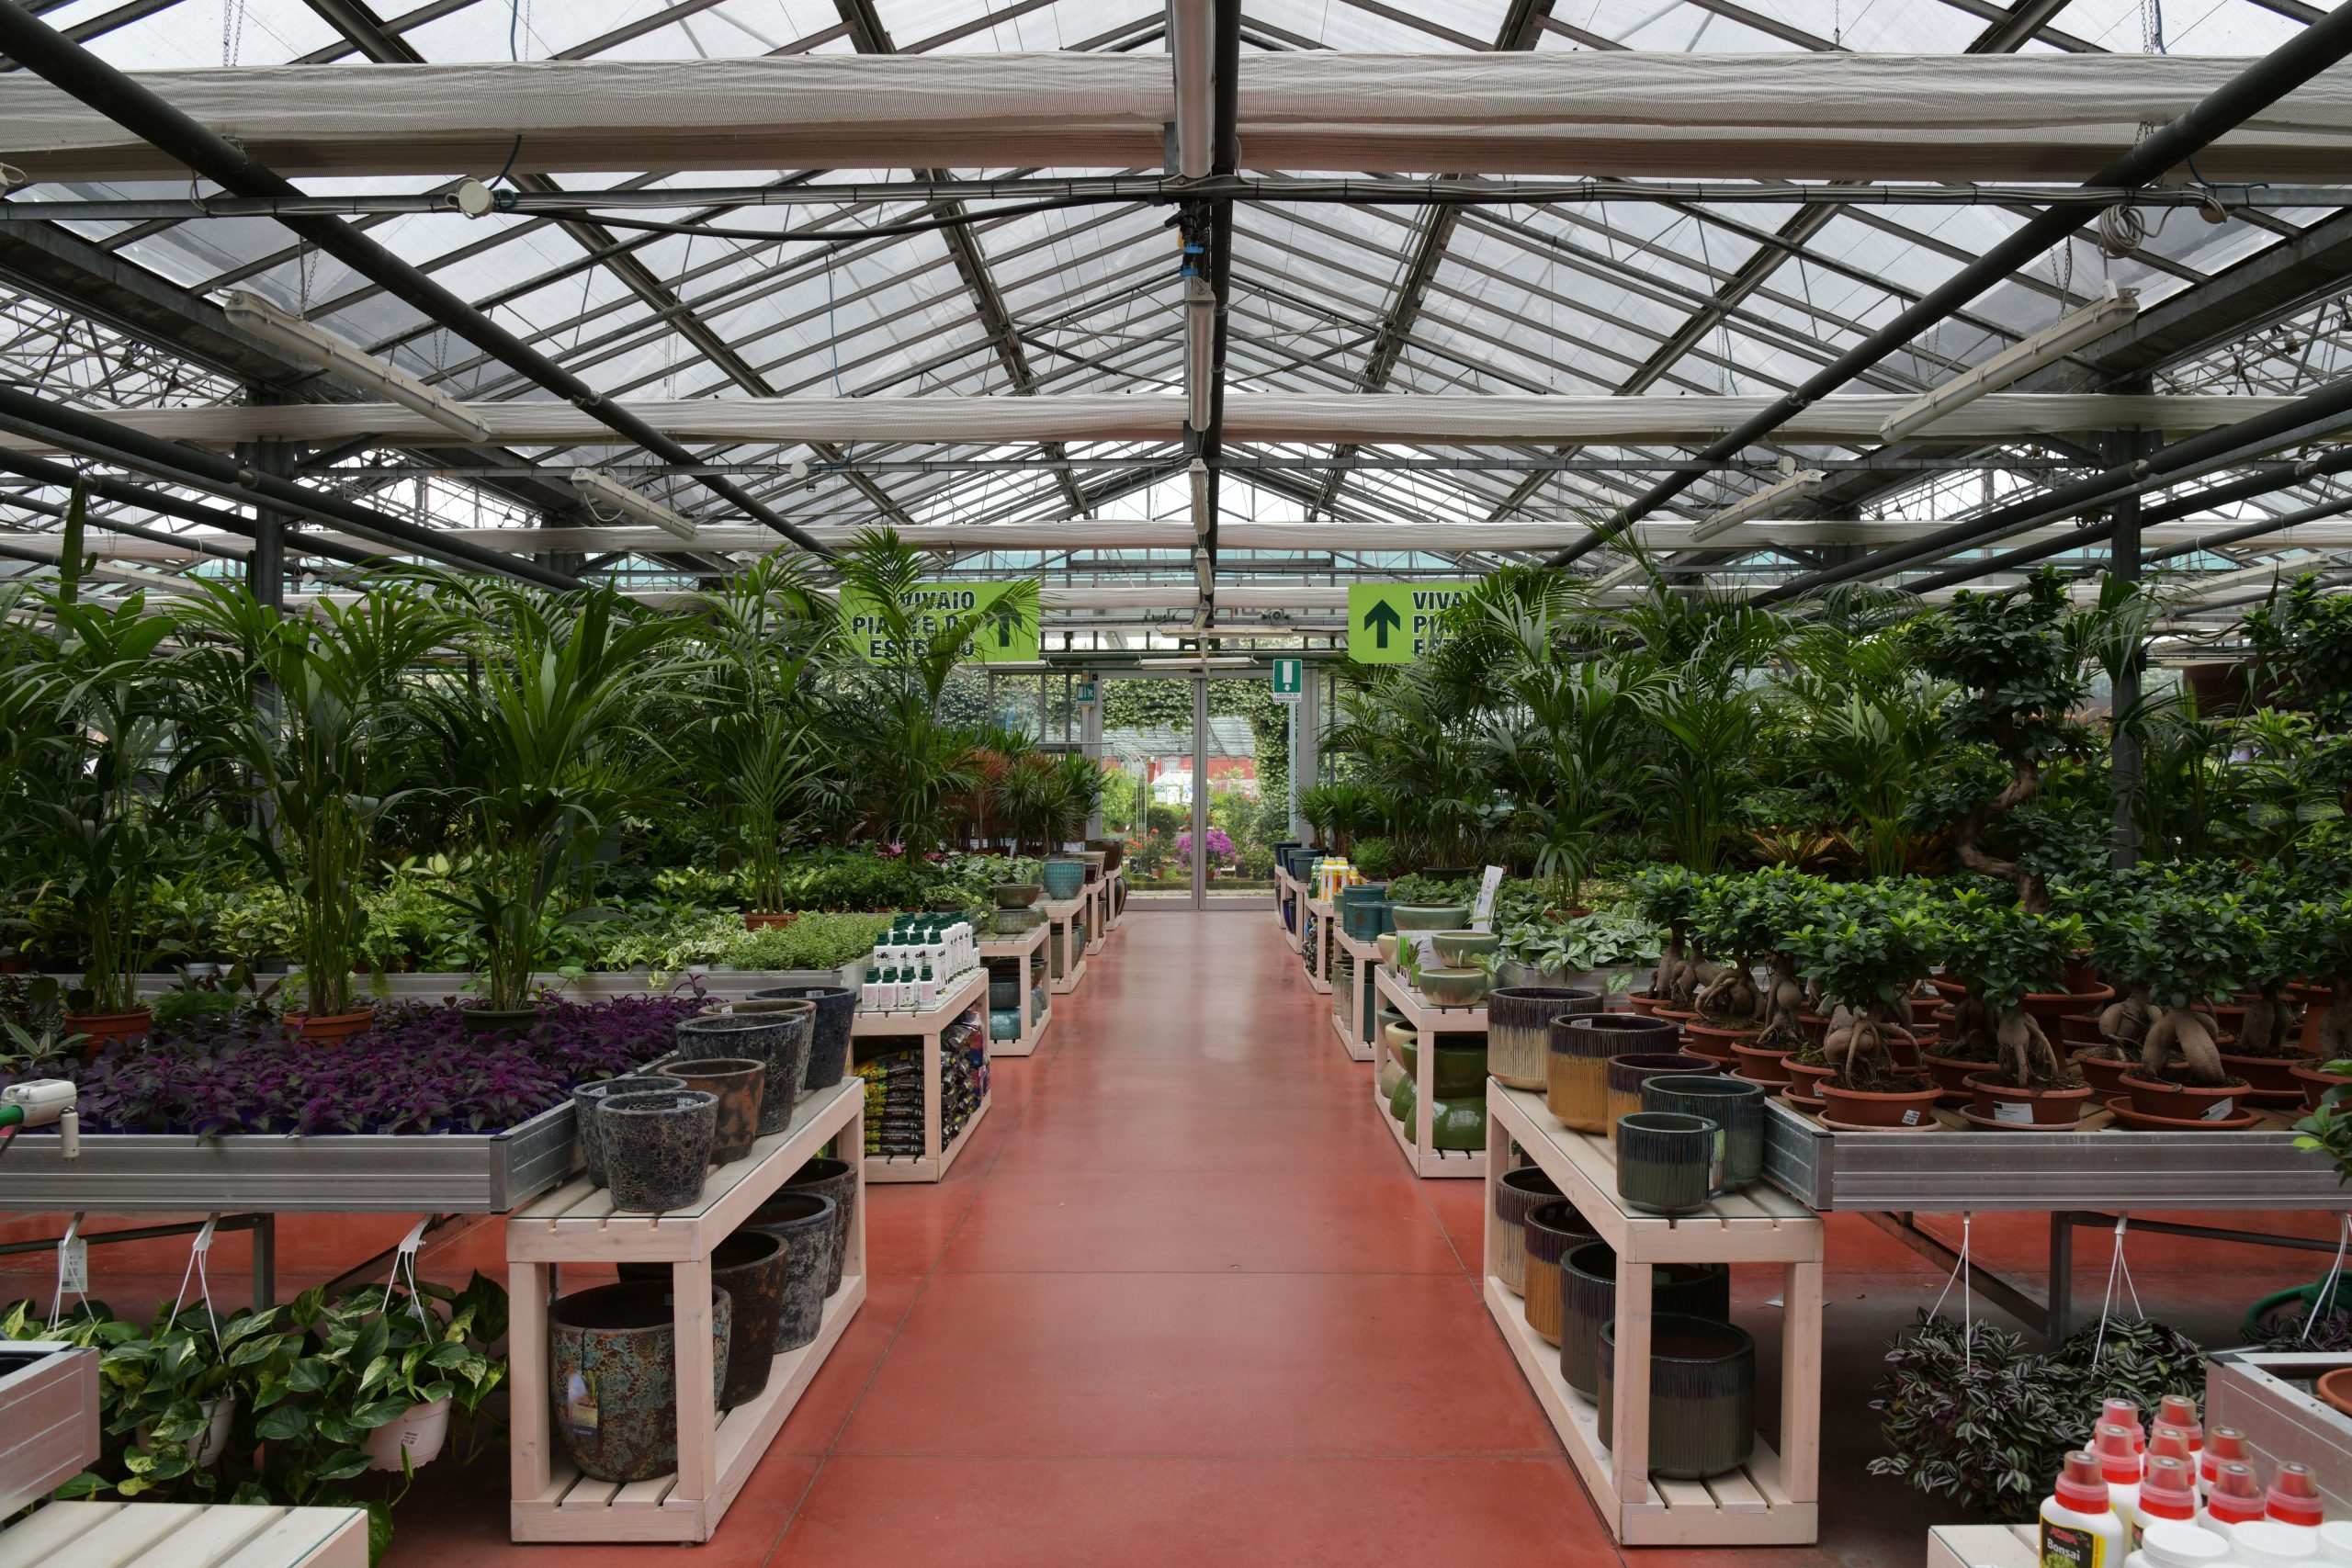
“A solid terracotta floor looks incredible, but it requires specific care.”
Being a porous material, untreated terracotta will easily absorb water, soil, and fertilizer, leading to stains and potential mildew growth. To keep it looking clean and vibrant, it must be properly sealed upon installation and resealed every 2-3 years. Regular sweeping is a must, and any spills should be wiped up immediately. For cleaning, use a pH-neutral cleaner, as acidic or alkaline detergents can damage the surface and strip the sealer over time. It’s a bit more work than concrete, but the warmth and color it brings are unmatched.
4. Go Rustic and Recycled with Wooden Pallet Shelving and Flooring
This entire look is the definition of ‘budget-friendly.’ It’s a high-impact design you can achieve for a fraction of the cost of custom shelving and flooring. You can often find wooden pallets for free from local businesses, classifieds, or on Facebook Marketplace. Even if you have to buy them, they are significantly cheaper than finished lumber. This is a much more affordable path to a rustic aesthetic than the mature, custom-framed greenhouse in Idea #5. It’s the perfect starter project for a DIY enthusiast.
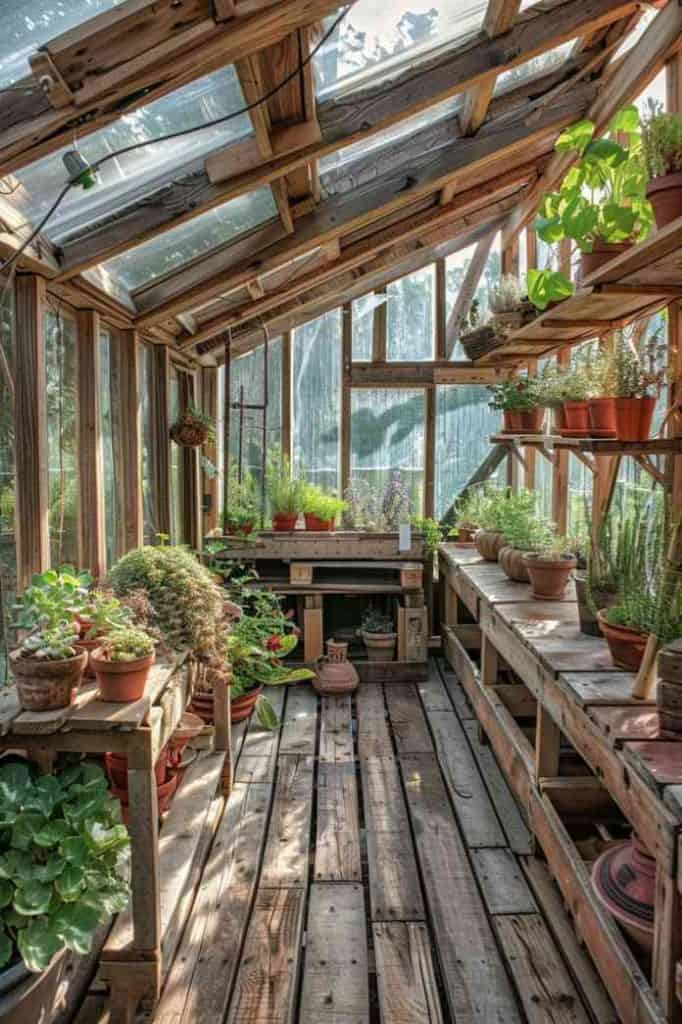
“Used Wooden Pallets: $0 – $100
Sandpaper & Sealant: $50
Basic Tools (saw, drill,”
- Used Wooden Pallets: $0 – $100
- Sandpaper & Sealant: $50
- Basic Tools (saw, drill, screws): $100
- Pots & Soil: $150
- TOTAL: $300 – $400
You can create flooring from pallets in an afternoon. This method works best for a level earth or gravel base inside your greenhouse.
- Time Estimate: 3-4 hours
- Cost: $20-$50 for screws/sealant
- Step 1: Source your pallets. Ensure they are heat-treated (marked with ‘HT’), not chemically treated.
- Step 2: Lay the pallets out in your desired configuration and screw them together for stability.
- Step 3: Use a reciprocating saw or pry bar to remove alternating top planks from some pallets.
- Step 4: Use the loose planks to fill in the gaps on your main floor pallets, creating a solid, continuous surface.
- Step 5: Give the whole floor a quick sanding to remove splinters and apply a water-based outdoor sealant to protect the wood from moisture.
5. Cultivate an Abundant, Mature Greenhouse with a Simple Dirt Path
The single most important element in this photo is the sense of untamed abundance. It’s not about neat rows or perfect pots. It’s the sheer volume and scale of the plants that makes this space breathtaking. The decision to plant directly into large soil beds, rather than using containers, is key. This allows the plants to grow to their full, impressive potential. Without this commitment to large-scale, in-ground planting, you’d lose the wild, immersive feeling that makes this greenhouse so special. The narrow dirt path almost forces you to brush up against the foliage, enhancing the feeling of being enveloped by nature.
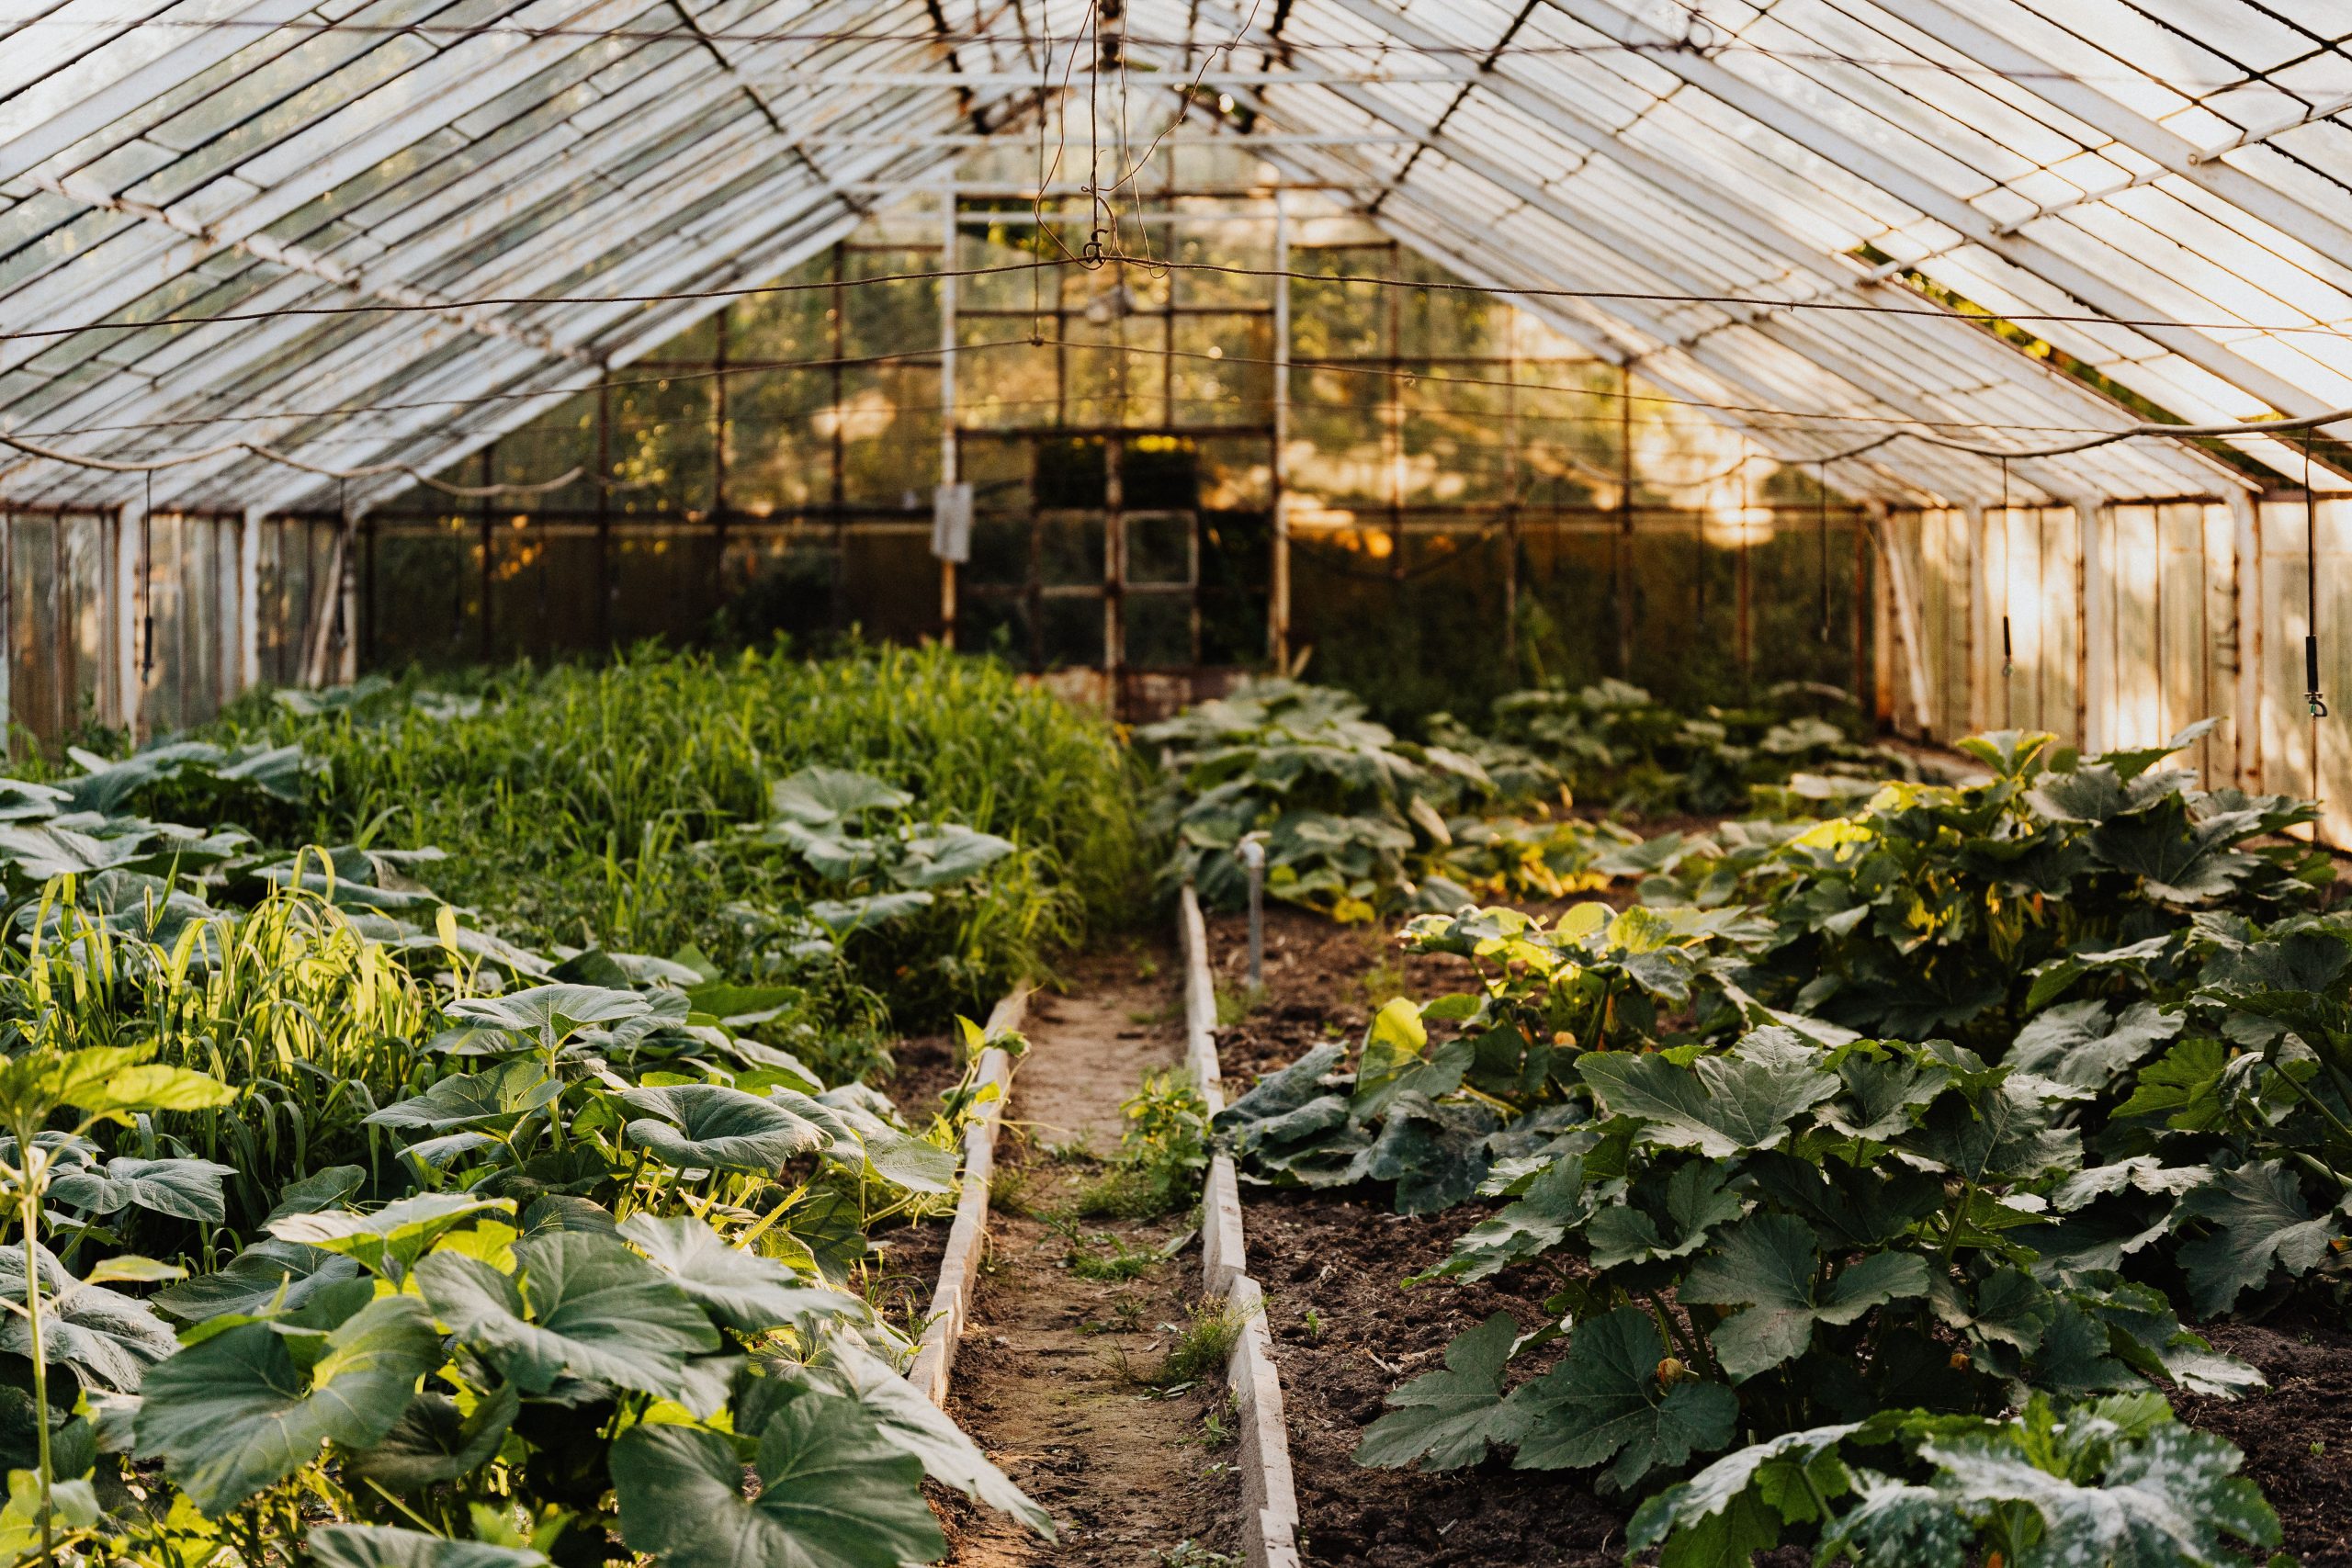
“Let’s be honest: this is what a *working* greenhouse looks like.”
It’s beautiful, but it’s also messy. That dirt path will turn to mud. The metal frame shows signs of rust, which is almost inevitable in a high-humidity environment. You will have bugs, and you will have plant diseases. This setup is for someone who truly loves the process of gardening—the weeding, the pruning, the pest management. It prioritizes plant health and yield over pristine aesthetics. If your primary goal is a clean, cozy spot to drink coffee, this level of raw, earthy cultivation might be more work than you’re bargaining for.
6. Maximize Your Yield with Gridded Metal Shelves and Grow Lights
When setting up a multi-tier shelving system like this, airflow is just as important as light. Gridded or wire mesh shelves are a non-negotiable feature for serious growers. Unlike solid shelves, they allow for vertical air circulation, which helps prevent fungal diseases and ensures that temperature and humidity are more evenly distributed from top to bottom. They also allow water to drain through freely without pooling and creating a mess. For even better results, add small, oscillating fans at either end of your greenhouse aisle to keep the air moving constantly across all levels.
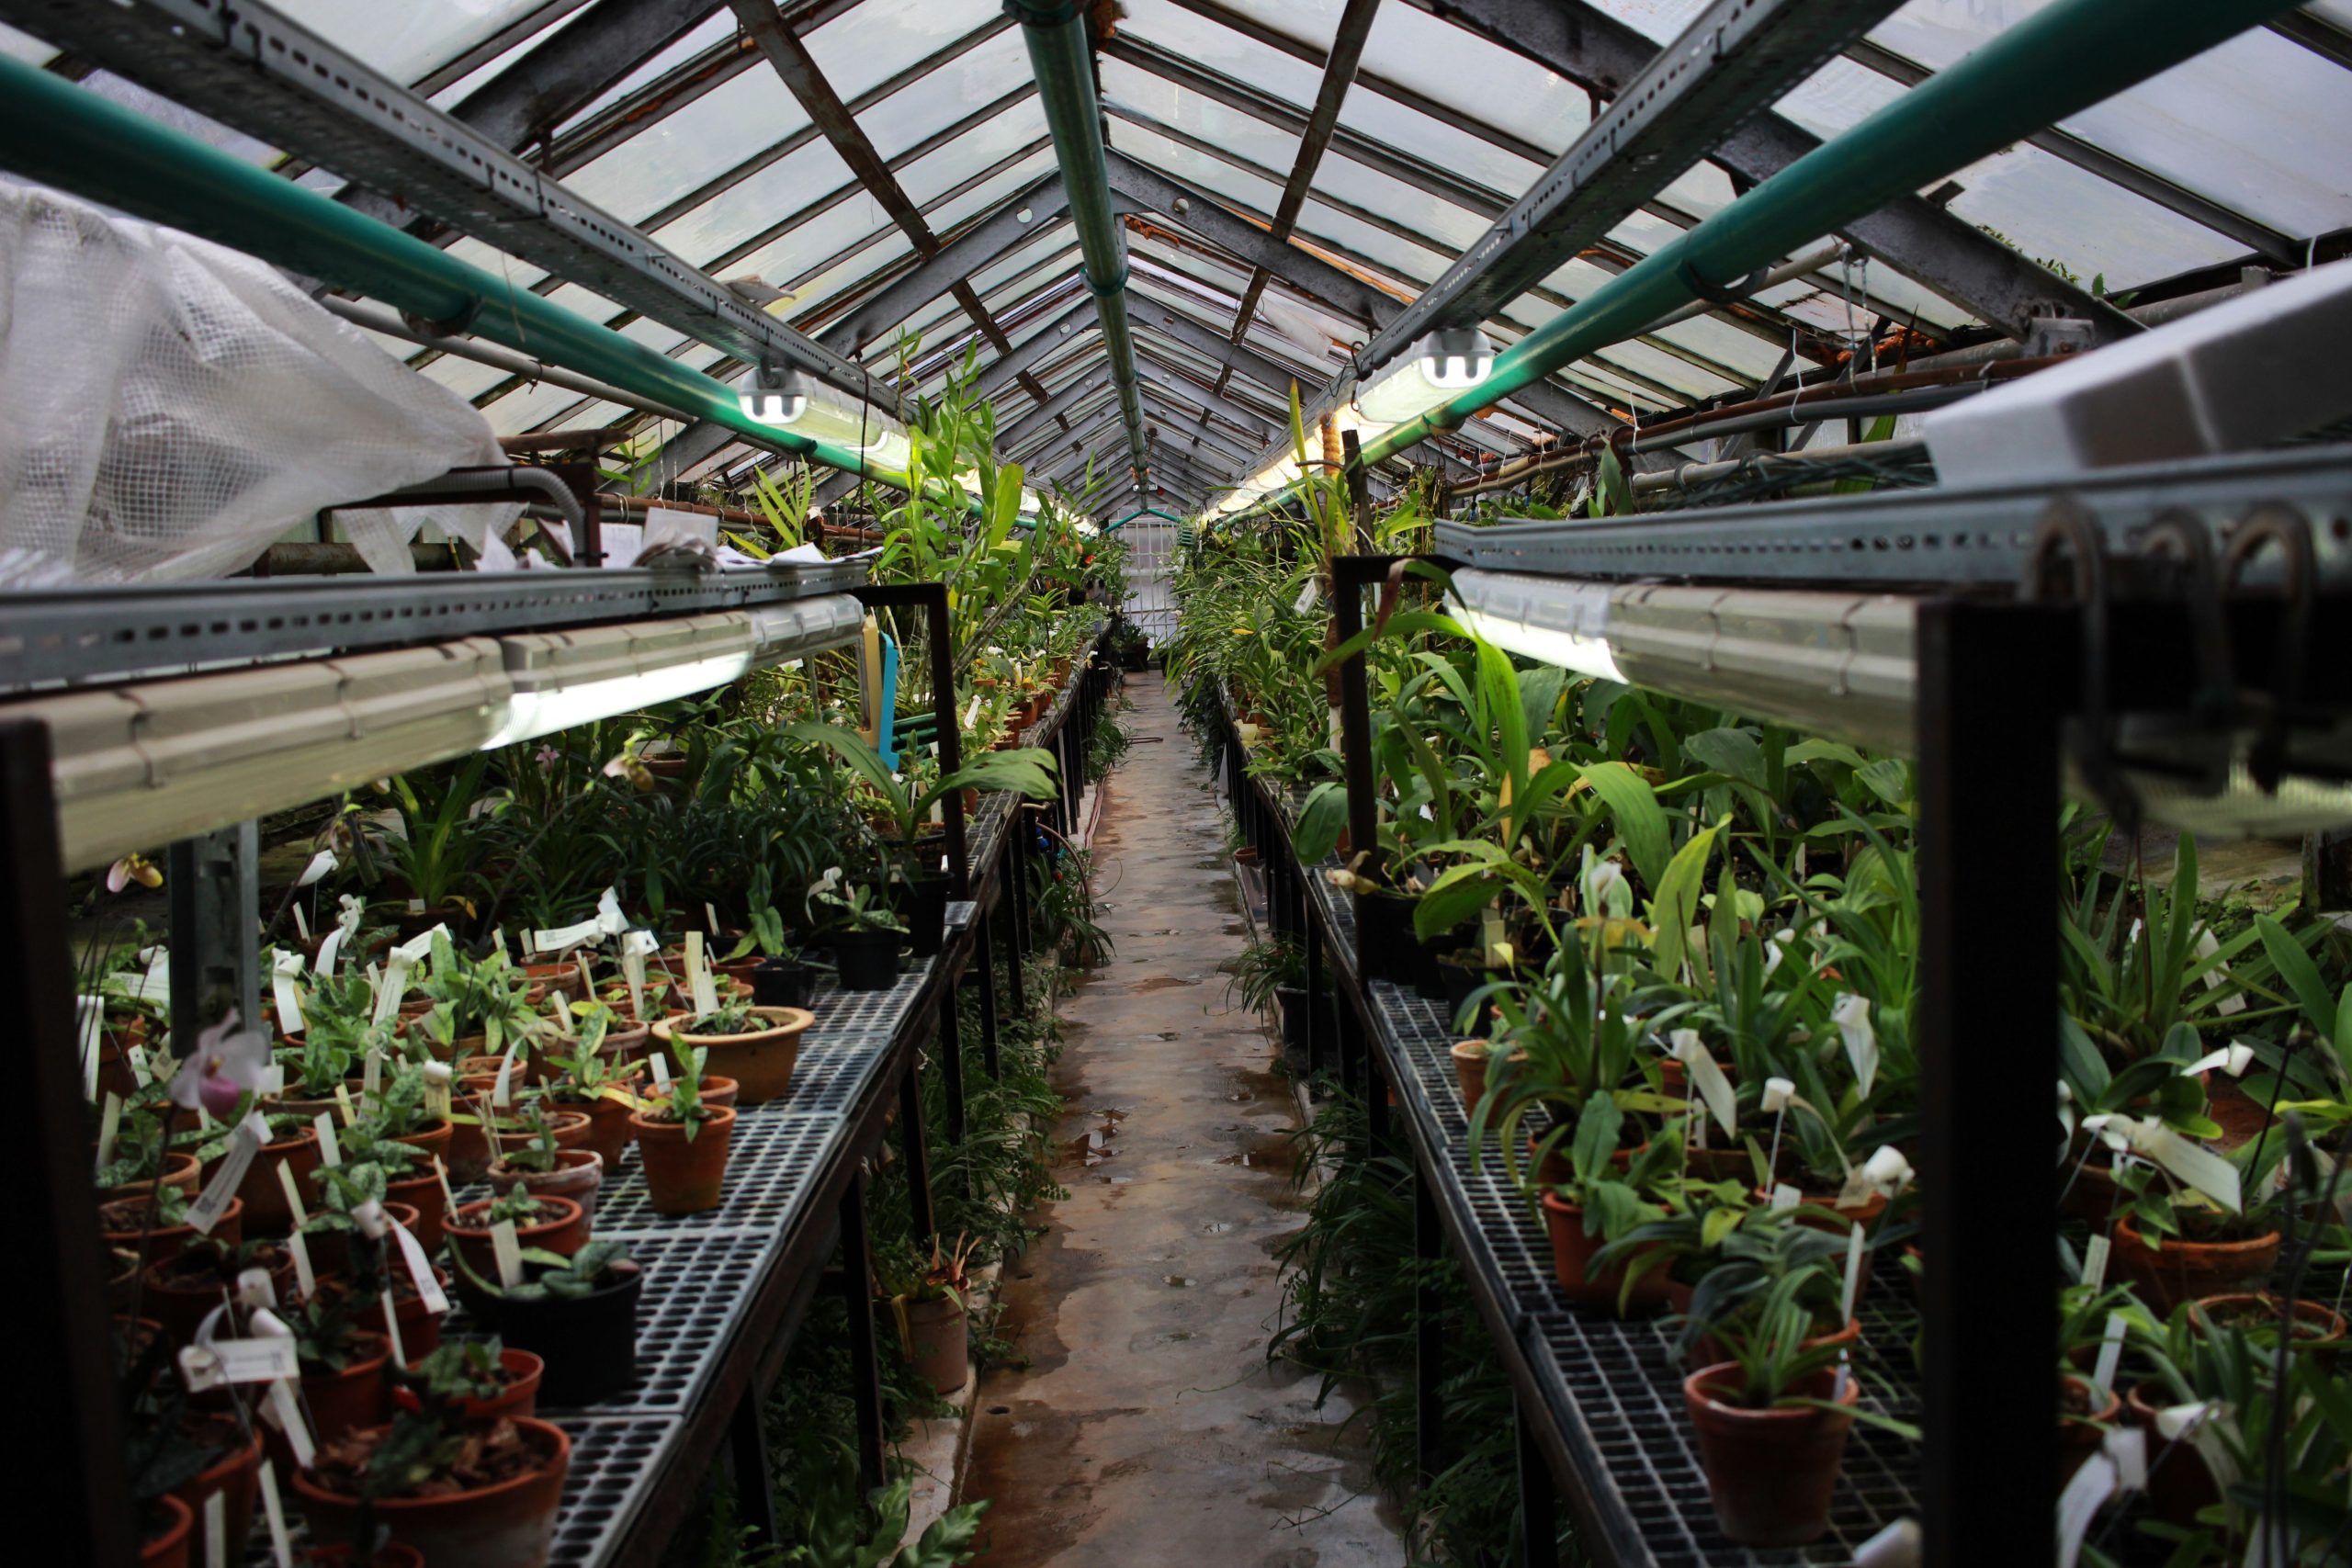
“This greenhouse design is a masterclass in functional efficiency.”
First, it uses vertical space to its absolute maximum potential, doubling or tripling the growing footprint with tiered shelving. Second, the combination of a glass roof for natural sunlight and precisely placed fluorescent grow lights creates a powerful dual-illumination system. This ensures that even the lower shelves get enough light for propagation and growth, solving a common problem in dense greenhouse setups. Finally, the clean concrete walkway provides a durable, easy-to-clean surface that can withstand water, soil, and heavy foot traffic.
7. The Practical Charm of an Arched Polycarbonate Starter Greenhouse
These smaller, kit-based greenhouses are fantastic, but don’t just place one in the yard without a little planning. Run through this quick checklist before you buy.
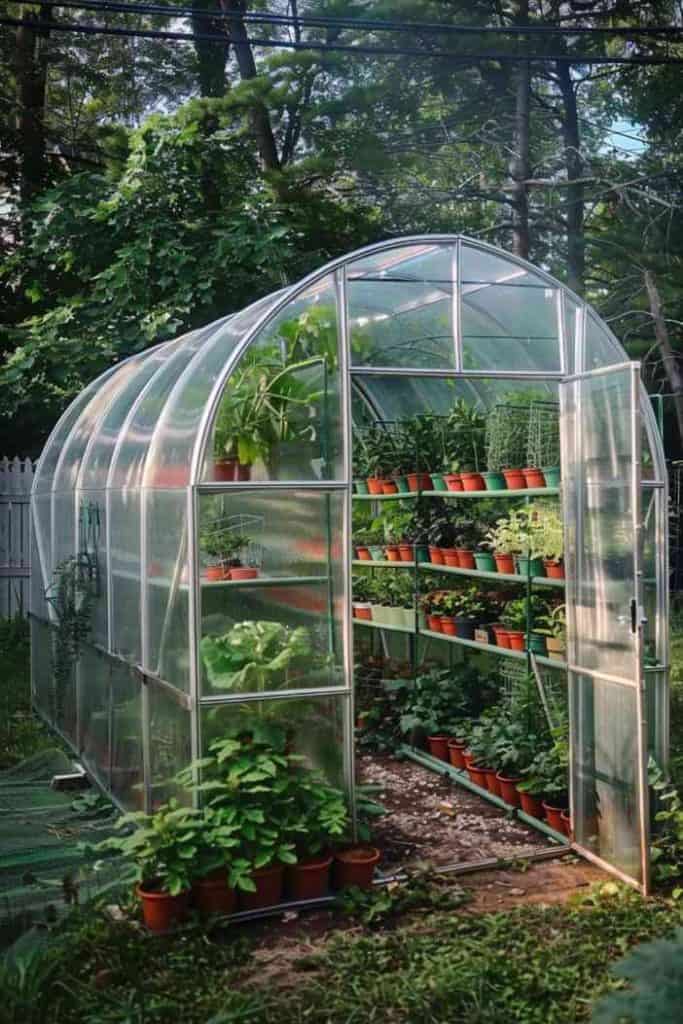
“Check Your Sun Path: Have you monitored the proposed spot for a full day to see how much direct sun it gets?”
Most vegetables and flowers need at least 6-8 hours.
Is the Ground Level?: Assembling the frame on uneven ground is a nightmare and can stress the panels. Level the spot with gravel or pavers first.
Do You Need Anchoring?: These structures are lightweight. Do you have a plan to anchor the frame to the ground to protect it from high winds? Most kits include anchors, but you may need something more substantial depending on your local weather.
Water Access: How far is the nearest spigot? Lugging a watering can back and forth gets old fast.
This type of greenhouse is one of the most accessible ways to get started. The costs are reasonable, and assembly is typically a one or two-person job.
- Arched Polycarbonate Greenhouse Kit: $300 – $900
- Tiered Metal Shelving: $50 – $150
- Foundation (Gravel/Pavers): $100 – $300
- Pots, Seeds, and Soil: $100 – $200
- TOTAL: $550 – $1,550
- Budget Alternative: Look for these kits secondhand on Facebook Marketplace at the end of the growing season. People often upgrade or move, and you can snag one for 40-60% off the retail price.
8. Create a Humid, Tropical Vibe with Rustic Metal Shelving
The lush, damp, and slightly wild feeling of this space comes from a specific recipe: 60% dense green foliage + 30% warm terracotta + 10% rustic metal. The sheer volume of plants, including large ferns and hanging moss, establishes the tropical base. The terracotta pots are crucial; their earthy color prevents the overwhelming green from feeling flat and provides a warm, unifying element. The final touch is the simple, almost crude, metal shelving. Its rustic, utilitarian finish suggests a working potting shed, preventing the space from feeling overly decorated and keeping the focus on the plants themselves.
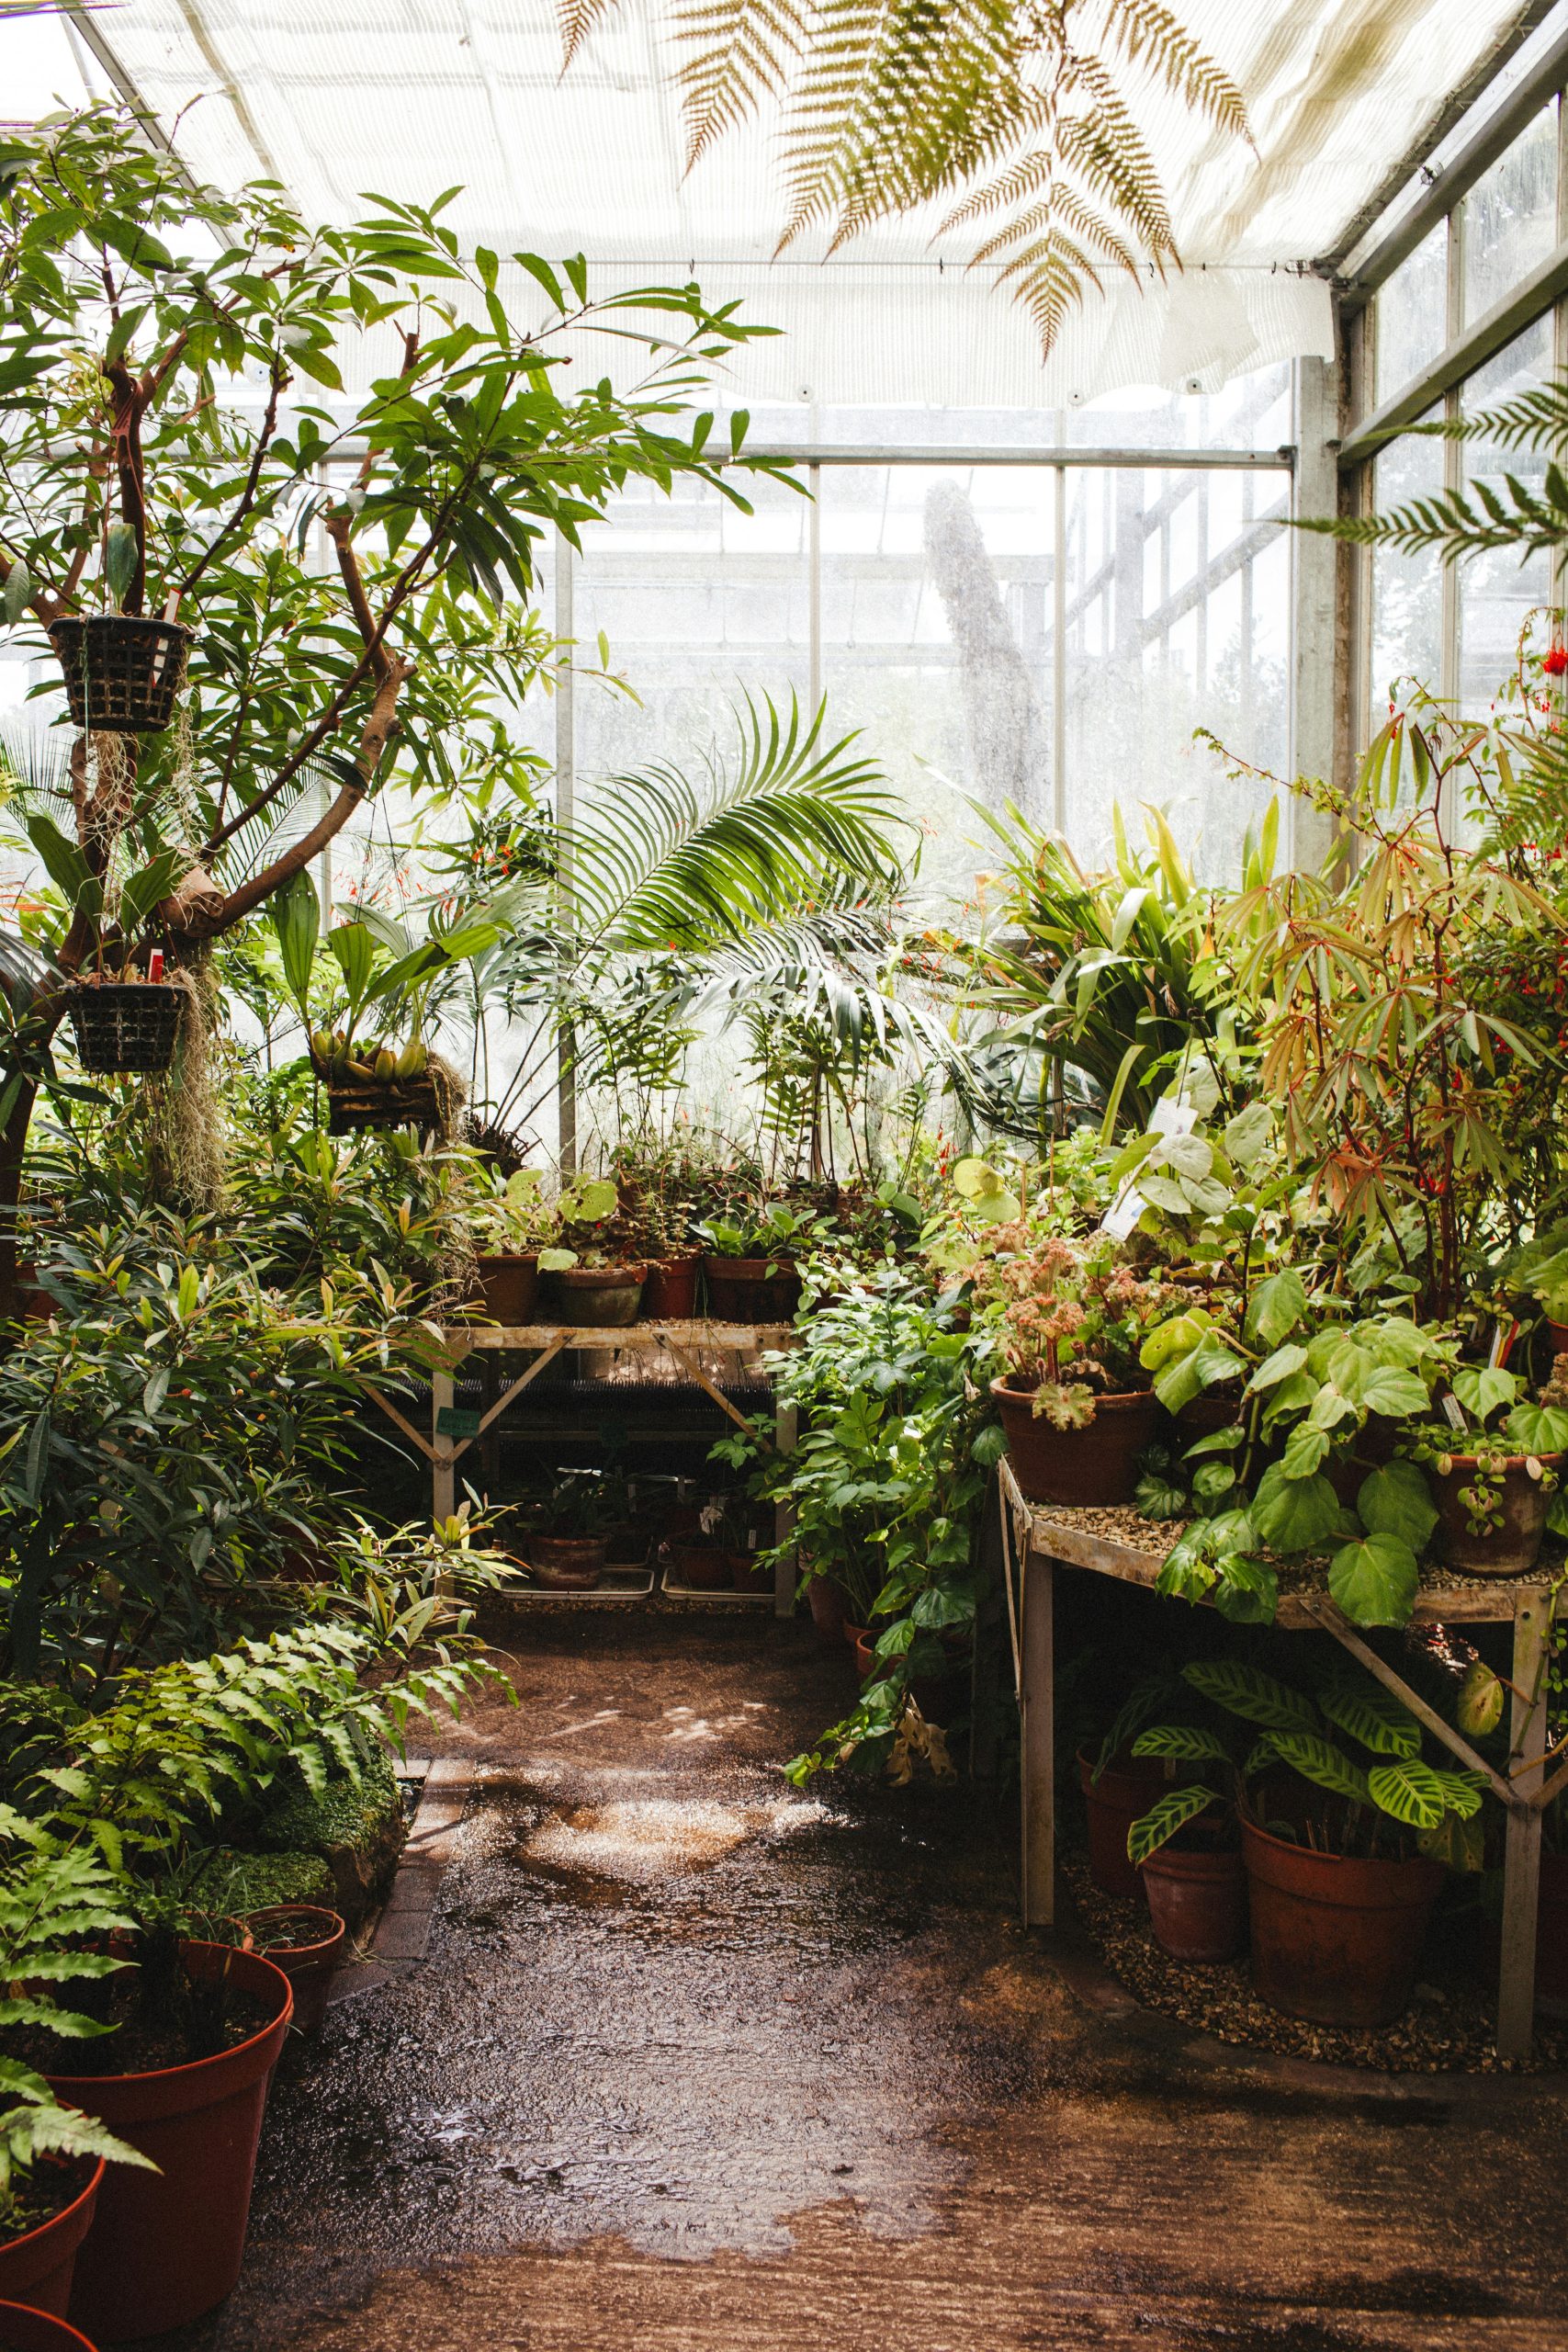
“A thriving tropical greenhouse like this is a high-humidity environment, and that means one thing: rust and moisture management.”
That rustic metal shelving will continue to rust, which can be a charming patina or a structural problem over time. To slow it down, you could apply a clear matte sealant. The wet floor, while atmospheric, indicates a need for excellent drainage to prevent root rot in your pots and to avoid creating a slippery, hazardous surface. Also, be prepared for constant pruning. In such a fertile environment, plants can quickly become overgrown, blocking light to their neighbors and reducing air circulation.
9. Build a Timeless Wooden Frame Structure for a Thriving Garden
The appeal of this design lies in its honesty and simplicity. The robust wooden frame isn’t hidden; it’s the main event, creating a beautiful and reassuring sense of structure. This classic post-and-beam construction provides a natural warmth that metal frames can lack. The choice to use clear panels on both the roof and walls allows for maximum light penetration, turning the entire space into a light-filled box where plants can thrive. The contrast between the strong, linear wood beams and the soft, organic shapes of the dense foliage is a timeless pairing that always feels right.
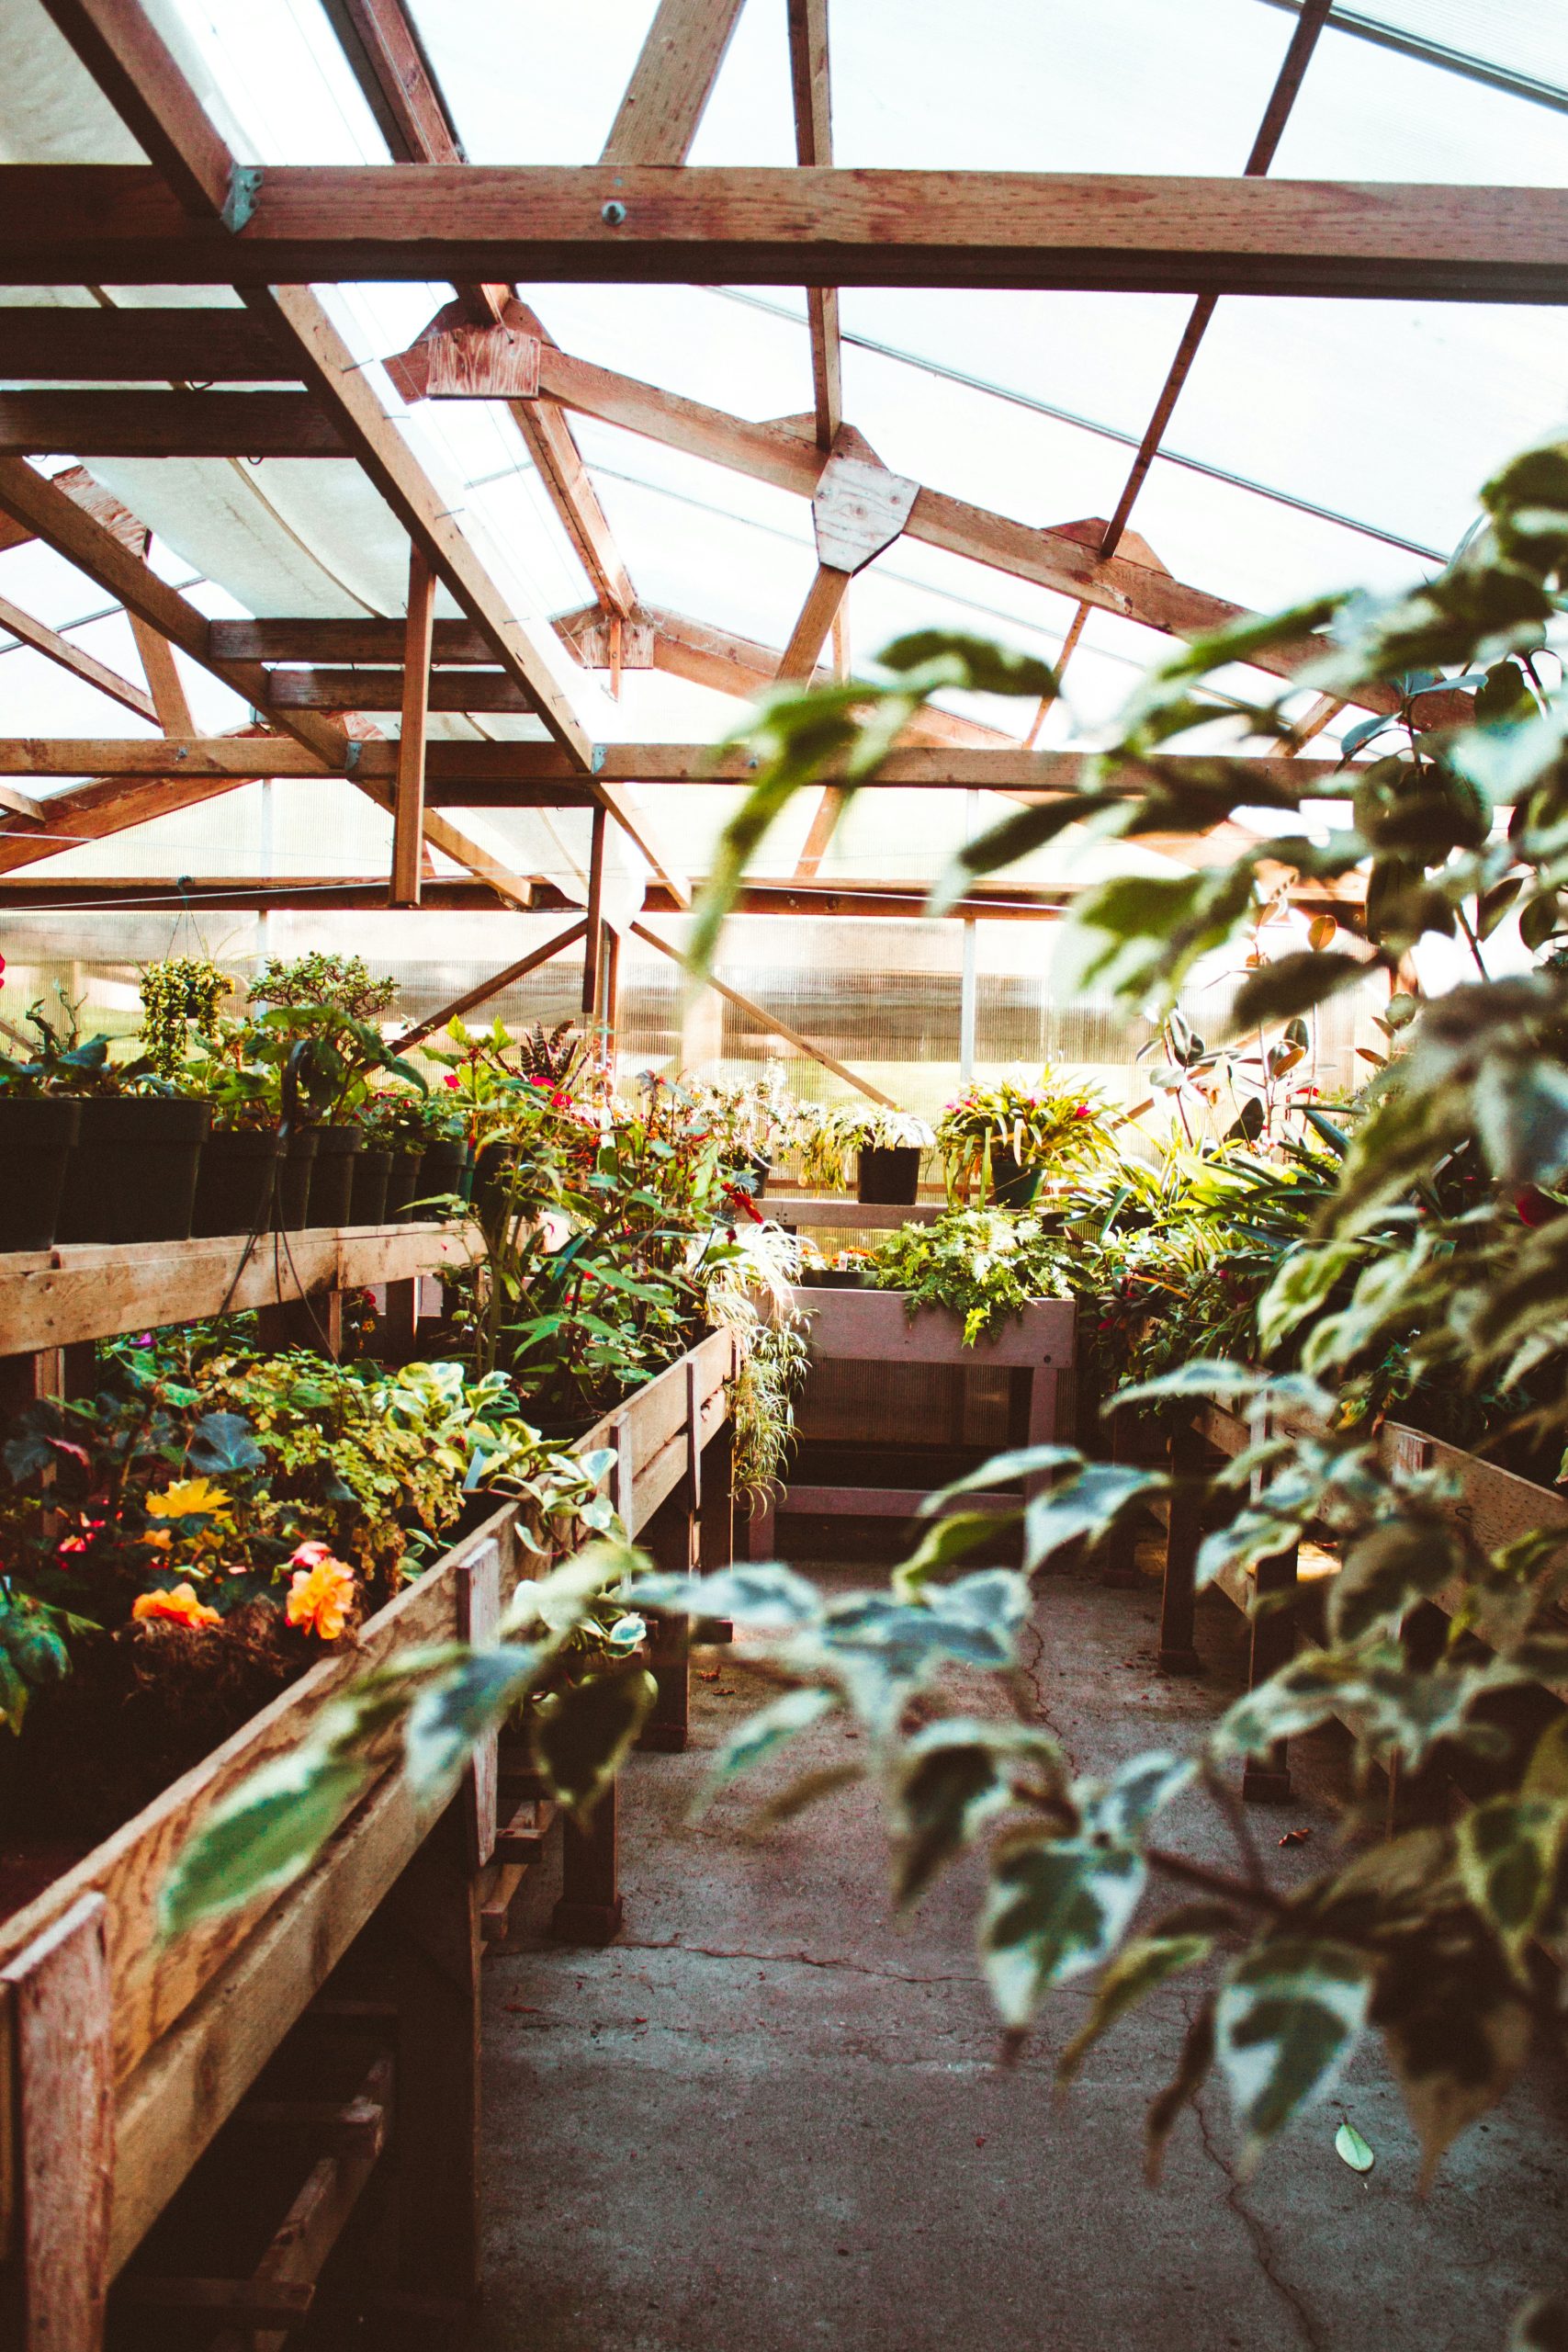
“When building a wooden greenhouse frame, the type of wood you choose is critical for longevity.”
Don’t just grab the cheapest pine from the hardware store. For a humid environment, you need a naturally rot-resistant wood. Cedar and Redwood are top-tier choices as they contain natural oils that repel insects and decay. For a more budget-conscious but still durable option, consider pressure-treated lumber rated for ground contact. Whichever you choose, make sure to seal all cuts and joints with a high-quality exterior wood sealant before assembly to prevent moisture from seeping into the grain.
10. An Inviting Rustic Greenhouse with an Open Door and Plank Pathway
It’s the open wooden door. Everything else—the rustic frame, the lush plants, the plank pathway—is lovely, but the open door is what transforms this from a structure *for* plants into a space *for* people. It’s an invitation. It says, ‘Come in, things are growing in here.’ It breaks the barrier between the garden outside and the garden inside, making the greenhouse feel like an integrated, accessible part of the landscape. Closing that door would turn it back into a functional box, but leaving it open makes it a destination. Compare it to the more formal, enclosed feel of Idea #13.
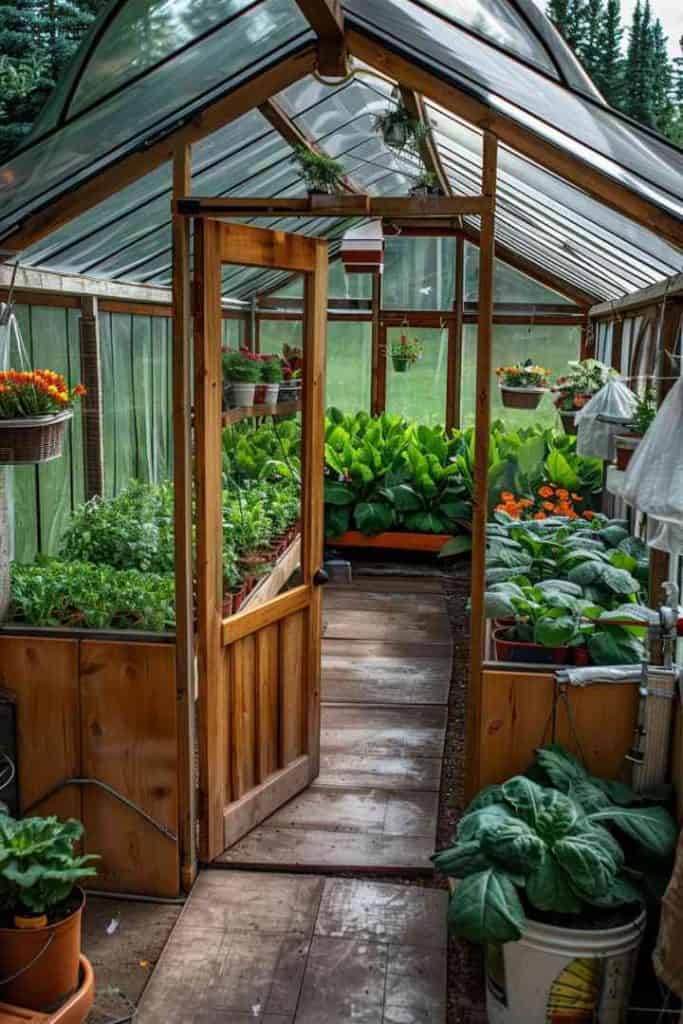
“This charming, rustic style works beautifully in small to medium-sized footprints.”
The structure pictured is likely around 8×10 feet or 10×12 feet. This is large enough to feel like a ‘room’ and accommodate raised beds on the sides with a central path, but not so large that it overwhelms a typical backyard. A minimum width of 8 feet is recommended to allow for a 2-3 foot path and decent-sized planting beds. The ceiling height can be modest, around 8-9 feet at the peak, which enhances the cozy, workshop-like atmosphere of the wooden frame.
11. Make a Statement with a Brown and White Checkered Floor
Checkered floors are having a major moment, and for good reason. They inject a dose of bold, graphic pattern into any space, and a conservatory or sunroom is a perfect place to use them. For years, design focused on quiet, neutral flooring, but there’s a collective desire now for more personality and historical charm. This pattern has roots in everything from classic European entryways to retro American diners. In a plant-filled space, the crisp geometry of the checkerboard provides a fantastic visual anchor, a structured counterpoint to the wild, organic shapes of the foliage. It feels both timeless and perfectly on-trend for 2026.
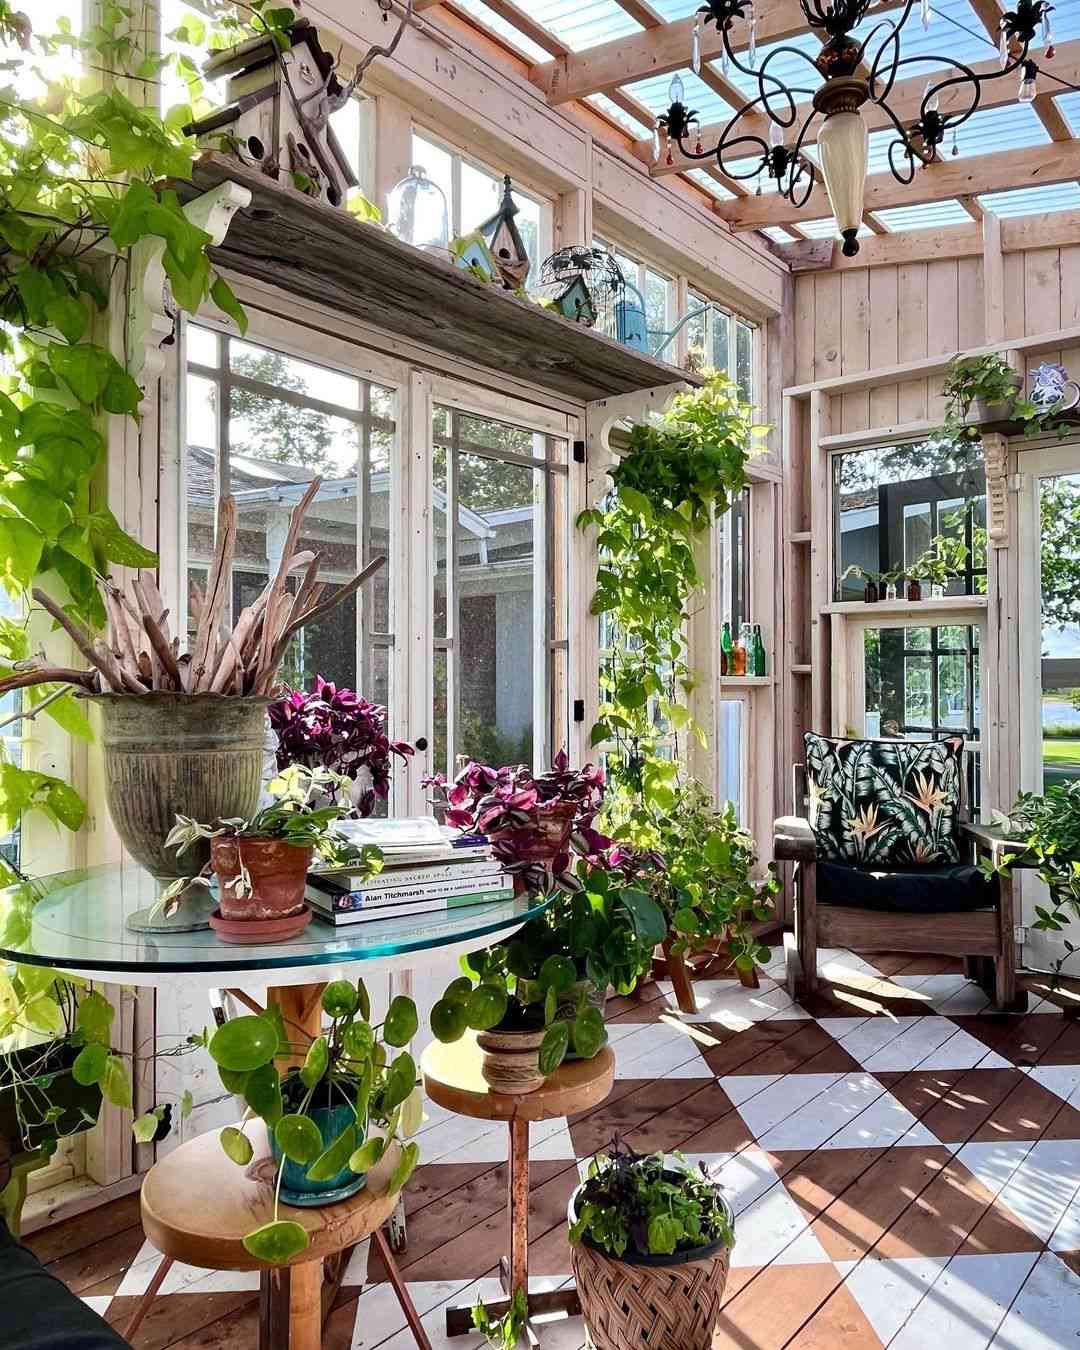
“While a checkered floor is a showstopper, keeping it that way requires some thought.”
In a conservatory with a corrugated roof and tons of plants, things can get wet and dirty. A painted wood floor will be prone to chipping and scuffing and will require regular touch-ups. Vinyl or linoleum tiles are far more durable and easier to clean, making them a more practical choice. Also, consider the grout if you go with tile: a darker grout (like a charcoal gray) will be much more forgiving of dirt and spills than a bright white one. Either way, expect to be sweeping and mopping regularly to keep the pattern crisp and clean.
12. Carve Out a Cozy Reading Nook with a Rattan Hanging Chair
Want to create this cozy, ‘Plant-stagram’ perfect corner? The formula is all about soft textures and a tight color story. It’s roughly 50% lush plants + 30% warm neutrals + 20% cozy textiles. The plants are the non-negotiable backdrop. The warm neutrals come from the terracotta pots and the tan rattan of the hanging chair. The final layer is the textiles: the stacked teal corduroy cushions, a faux-fur throw, and a patterned pillow. The teal provides a cool pop of color that complements the warm terracotta, creating a balanced and inviting palette. The string lights add that final touch of sparkle.
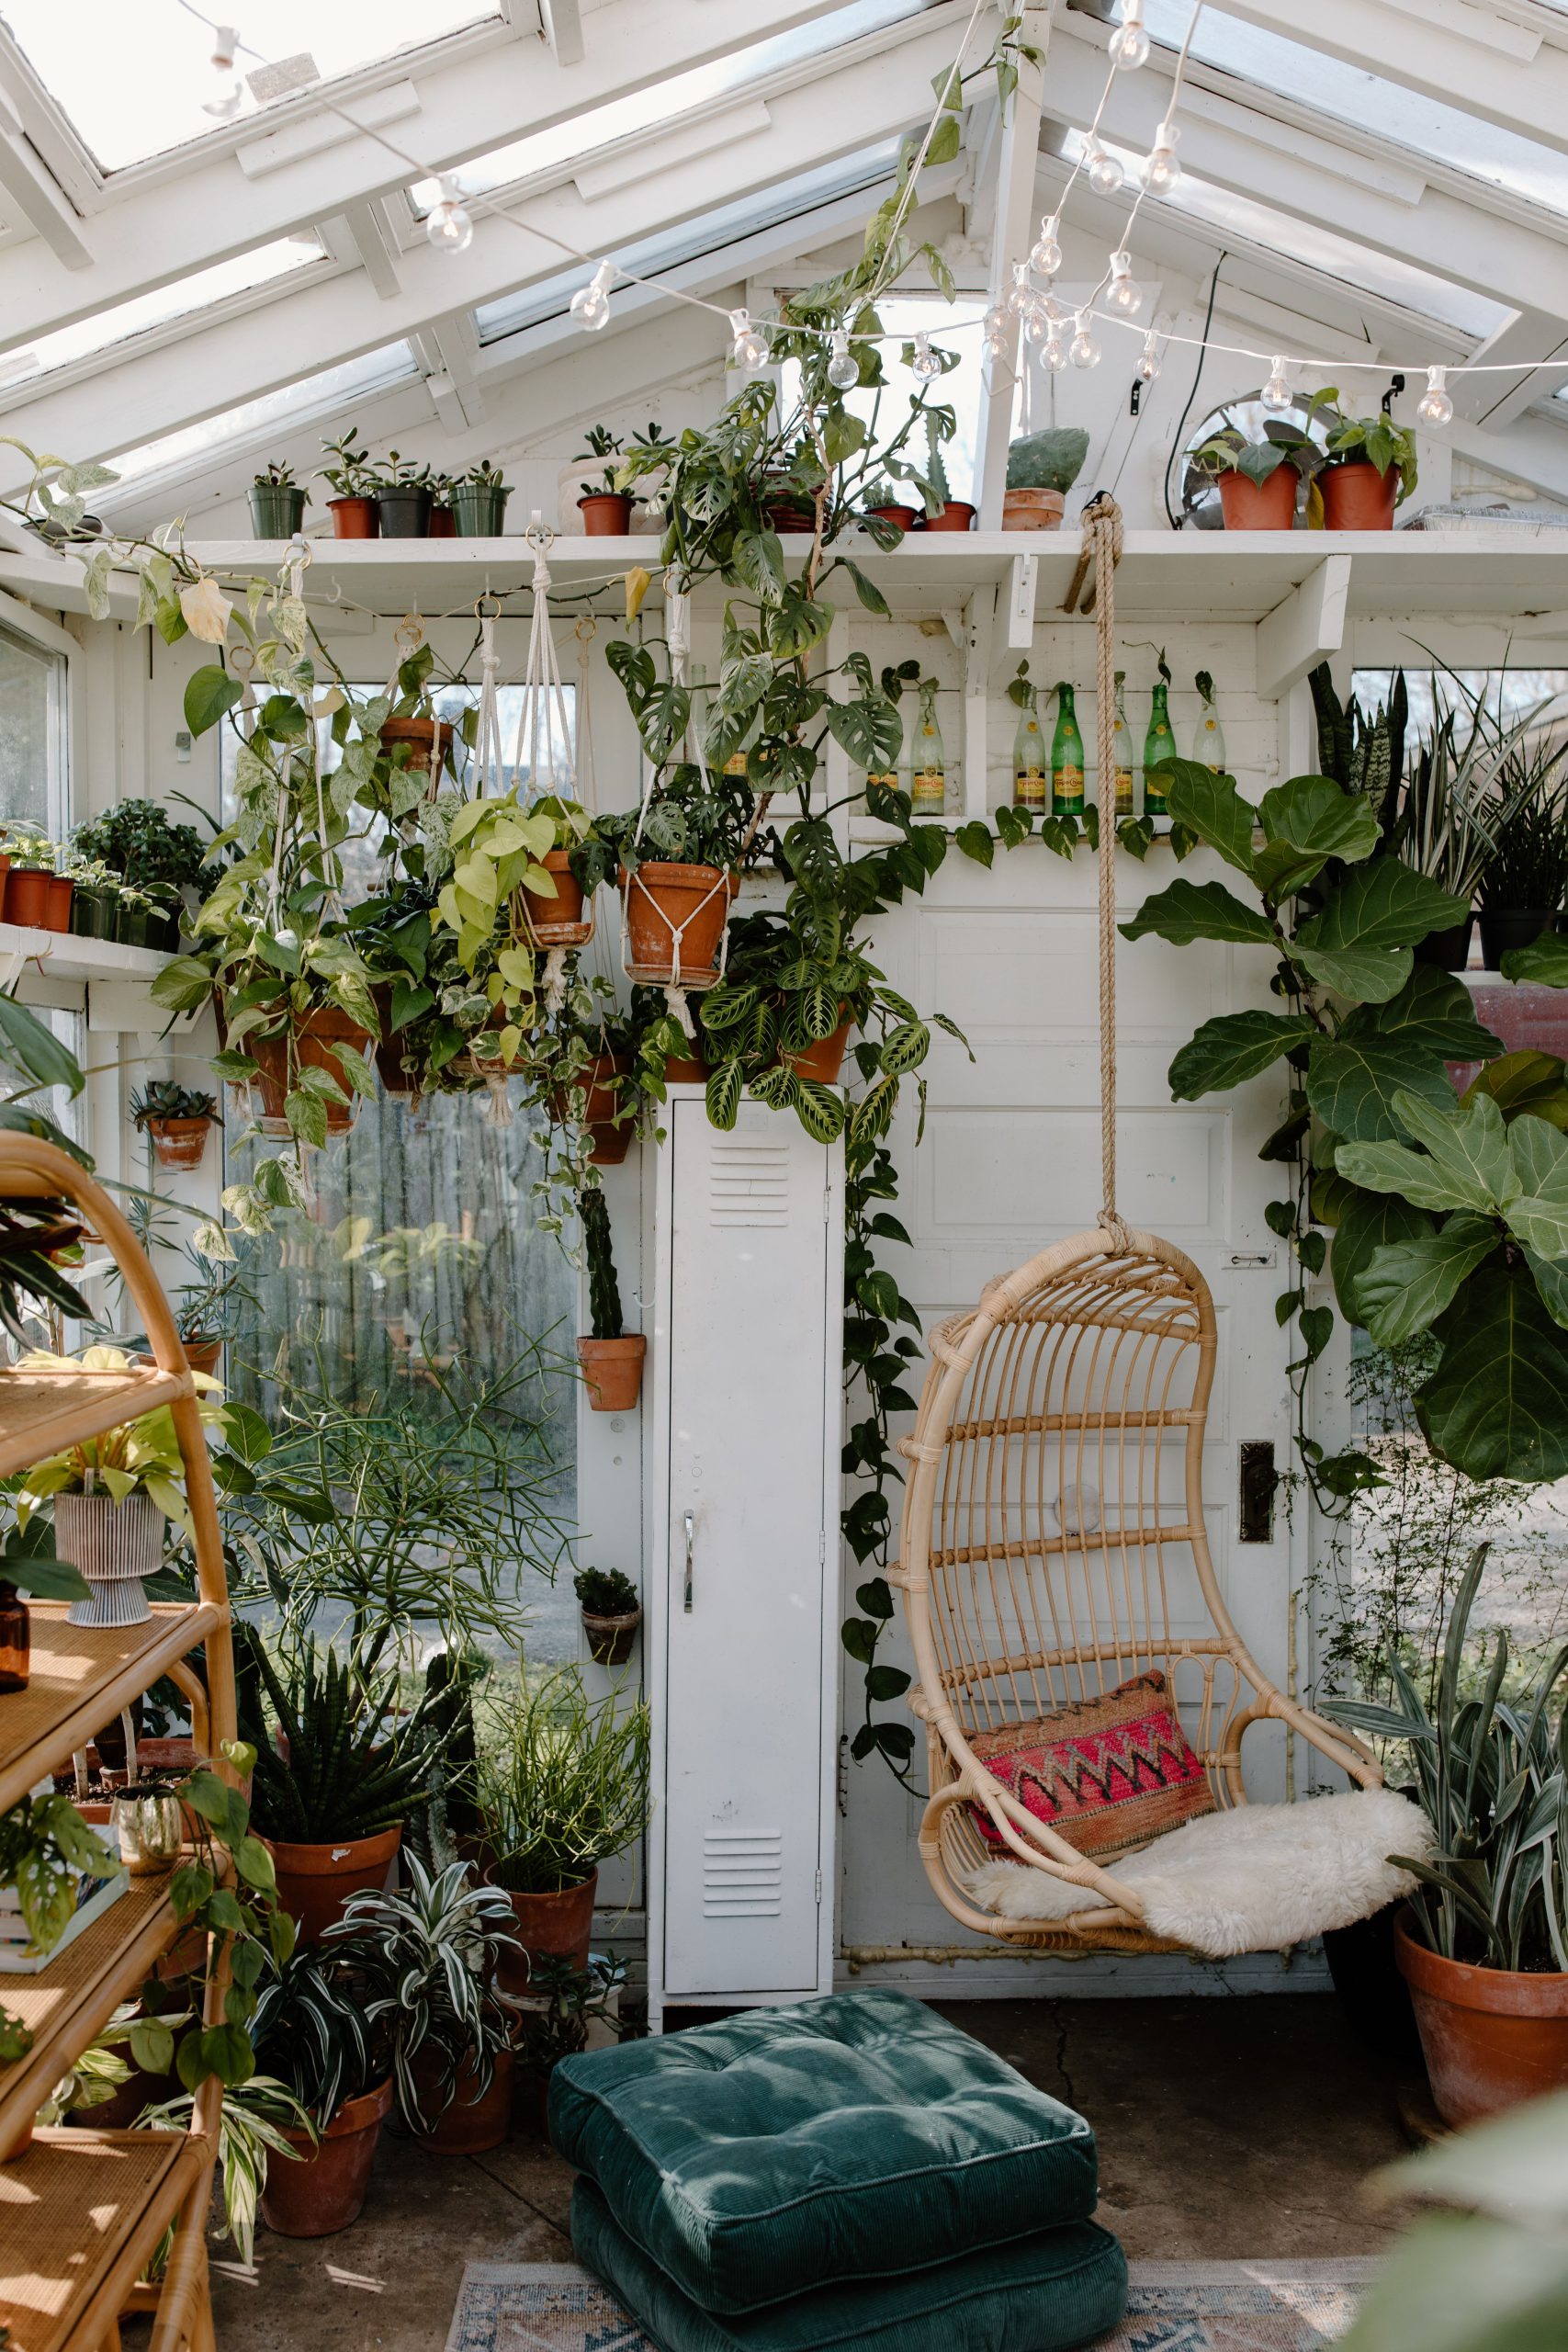
“You don’t need a custom-built greenhouse to get this vibe.”
You can recreate this cozy corner for under $500. A rattan hanging chair can be found for $150-$250 from places like Target, Wayfair, or even Walmart. Floor cushions are an easy find at stores like Urban Outfitters or World Market, but for a real bargain, check IKEA for their floor pillows and simple covers. The key is layering—lots of affordable plants from a local nursery, a cheap strand of string lights, and a cozy blanket you probably already own. The white structure can be any sunlit corner of your home with a white-painted wall.
13. Style a Polished Greenhouse Retreat with Woven Rattan and Jute
This space feels so cohesive and intentionally designed because of its expert use of texture and repetition. The woven texture of the rattan chairs, the ottoman, and the jute rug all speak the same visual language, creating a unified and calming base. The repetition of the dark green color—in the chair cushions, the olive tree leaves, and the foliage outside—ties the whole palette together. Finally, the strong, black lines of the window frames act as a bold counterpoint to all the soft, natural textures, adding a graphic punch that keeps the design feeling modern and crisp. It’s a much more ‘decorated’ feel than the charmingly cluttered vibe of Idea #12.
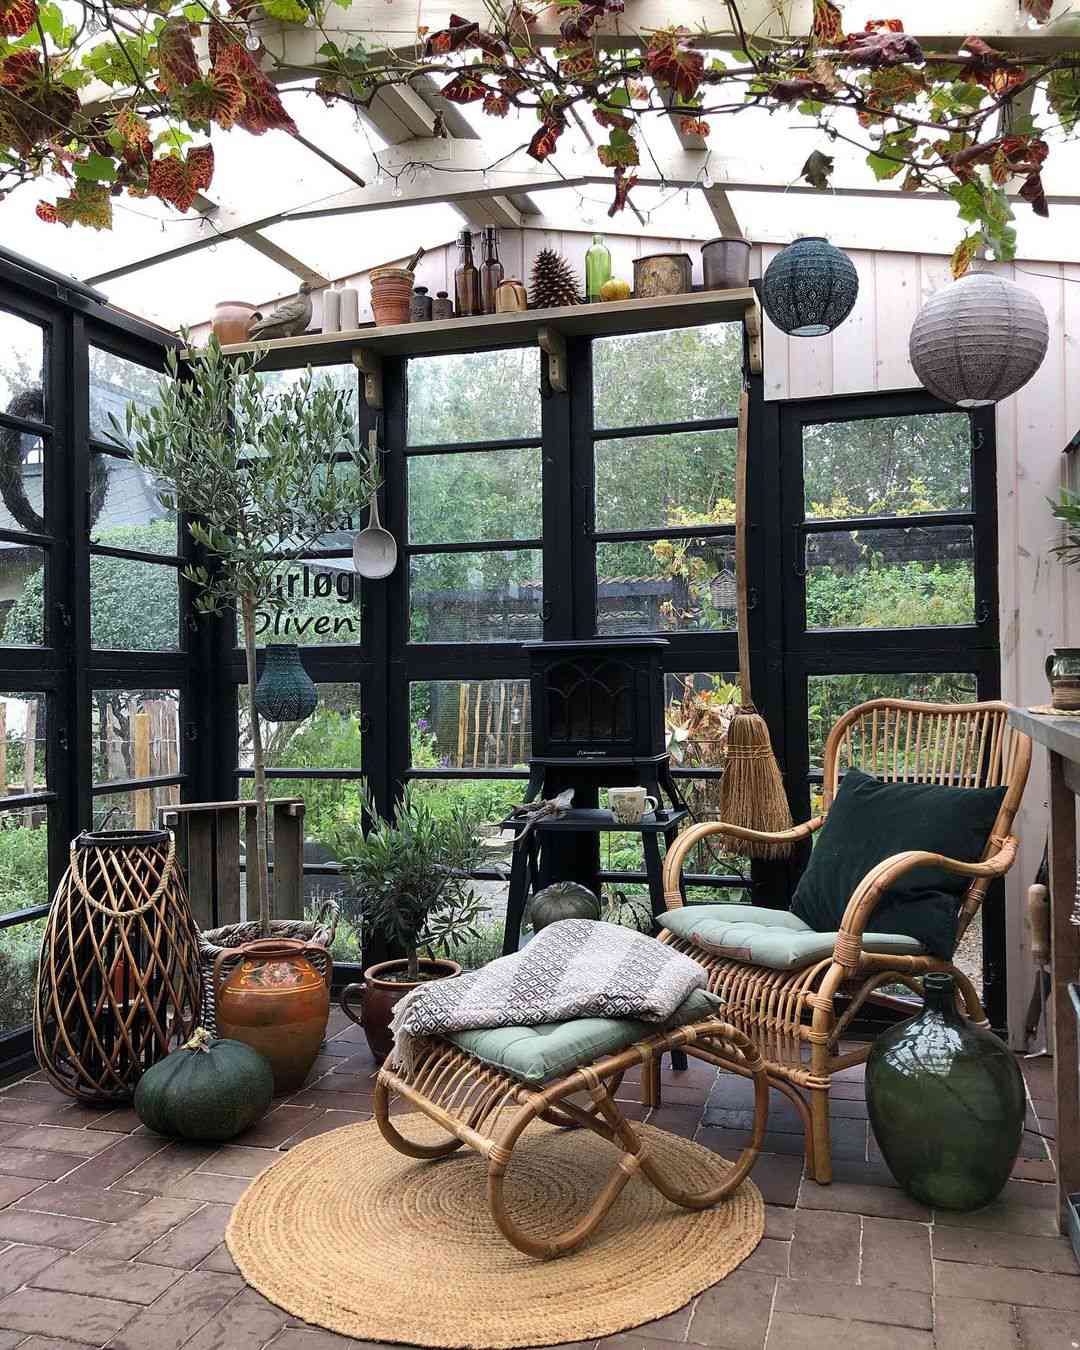
“When working with a limited color palette like this (black, green, brown, white), texture becomes your best friend for adding depth and interest.”
The key is to vary the scale of the textures. Notice the tight weave of the chairs, the chunky weave of the jute rug, the smooth surface of the terracotta pots, and the rough bark of the olive tree trunks. If all the textures were the same, the space would feel flat. By mixing smooth with rough and fine with coarse, the designer has created a rich, layered look that is sophisticated and inviting.
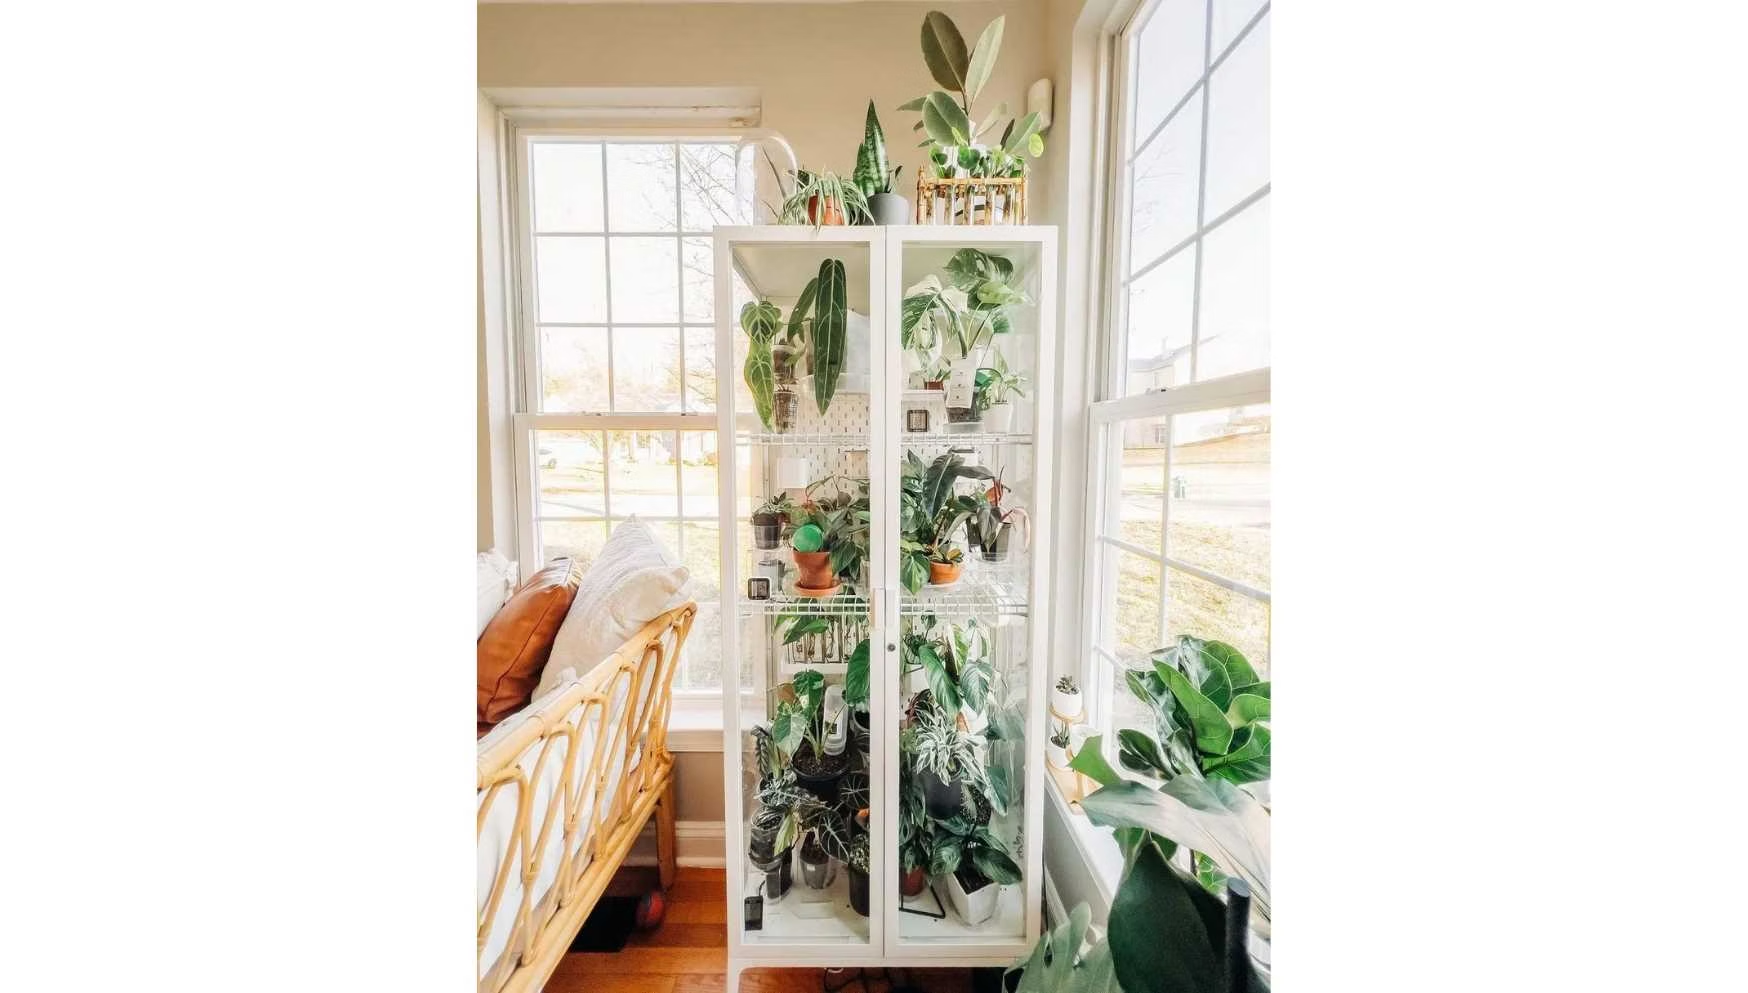
14. The ‘Greenhouse Cabinet’: A Perfect Indoor Planting Solution
Converting a simple glass cabinet into a thriving plant greenhouse is a brilliant DIY project for anyone short on outdoor space. It allows you to control humidity and lighting to grow more exotic or sensitive plants indoors.
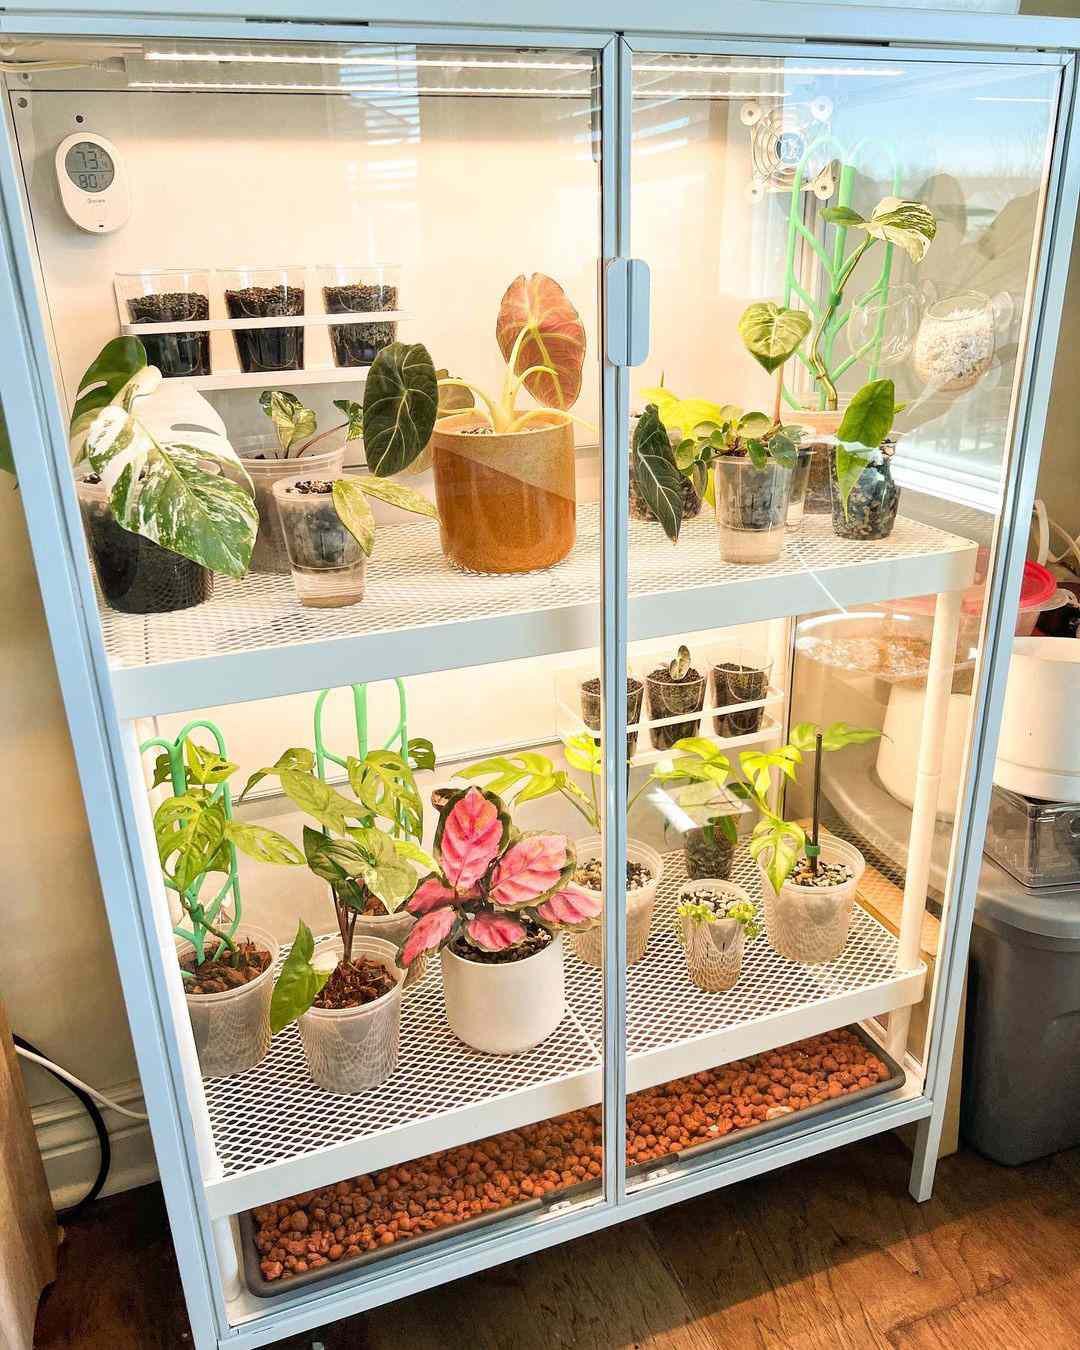
“Time Estimate: 2-3 hours
Cost: $50 – $150 (plus the cabinet)
Step 1: Start with ”
- Time Estimate: 2-3 hours
- Cost: $50 – $150 (plus the cabinet)
- Step 1: Start with a glass-door cabinet. The IKEA Milsbo or Fabrikör are popular choices. Assemble it according to the instructions.
- Step 2: Weather-strip the door gaps. Use clear foam or rubber weather stripping to seal the edges of the doors. This is the most important step for trapping humidity.
- Step 3: Install your grow lights. Use adhesive clips or magnets to attach full-spectrum LED strip lights to the underside of each shelf. Drill a small hole in the back or bottom of the metal cabinet to run the power cord through.
- Step 4: Add a small USB-powered fan for air circulation to prevent mold. Place a digital thermometer/hygrometer inside to monitor the conditions.
- Step 5: Arrange your plants and add trays of water or clay pebbles (leca) at the bottom to naturally increase the humidity.
buying plants for your new cabinet greenhouse, assess the light in its intended location. Even with grow lights, a cabinet placed in a dark hallway will struggle more than one near a bright window that gets ambient natural light. Also, consider your home’s baseline humidity. If you live in a very dry climate, you may need a small USB humidifier inside the cabinet to reach the 60-80% humidity that many tropical plants crave. Finally, make sure there is a power outlet nearby to handle the lights and fan without running unsightly extension cords.
15. Display Your Favorite Specimens in an Indoor Plant Hub
When grouping a large collection of plants indoors, think like a museum curator. Create rhythm and flow by varying height and scale. Place taller plants, like a Fiddle Leaf Fig or a large Monstera, in the back or on the floor. Use shelves and plant stands to elevate medium-sized plants, and place smaller specimens and trailing plants on the front edges of shelves so they can cascade down. This creates layers of foliage that draw the eye through the display, making the collection feel intentional and dynamic rather than just a jumble of pots.
“The key element that makes an indoor plant collection feel like a ‘greenhouse’ is density.”
It’s not about having five or six scattered plants; it’s about creating a critical mass of foliage in one concentrated area. By grouping many plants together, you not only create a powerful visual statement, but the plants also help each other thrive. Through transpiration, they collectively raise the humidity of the micro-environment around them, creating a little pocket of jungle-like air that benefits the entire group. Without this density, you just have a room with plants in it. With it, you have an indoor oasis.
16. DIY a Seedling Station with a Wooden Rack and Pink Grow Lights
You don’t need a fancy, all-in-one grow system to start seeds successfully indoors. This setup proves you can build a highly effective seedling station using affordable, repurposed materials. The core is a simple wooden utility rack, which you can find for $30-$60 at any home improvement store or even build yourself from scrap lumber. The key investment is the grow lights, but shop-style LED tube lights are a great budget alternative to expensive, specialized plant lights. Add some cheap plastic sheeting from the paint department and you’ve built a functional greenhouse for under $150.
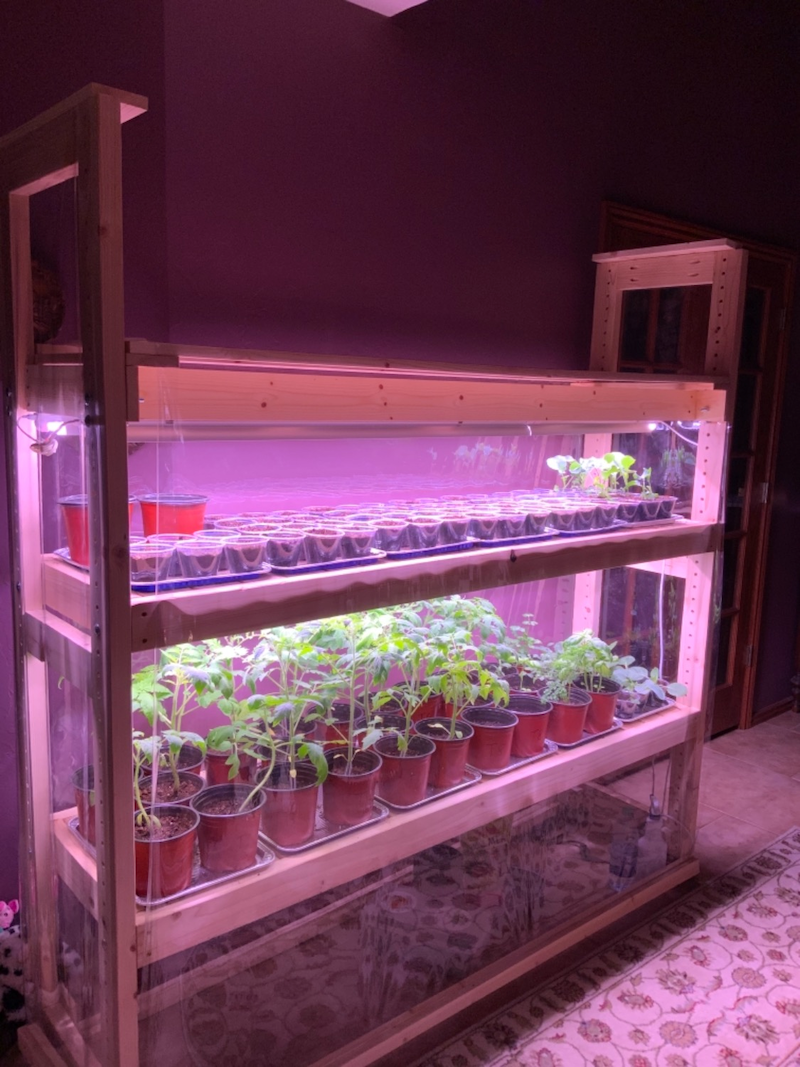
“Wooden Utility Rack: $40
LED Shop Lights (2-pack): $30
Seedling Trays & Domes: $”
- Wooden Utility Rack: $40
- LED Shop Lights (2-pack): $30
- Seedling Trays & Domes: $25
- Clear Plastic Sheeting & Tape: $15
- TOTAL: $110
Those pink/purple grow lights are popular, but what do they actually do? Here’s the briefest of explanations on how to use them effectively for starting seeds indoors.
- Time Estimate: 30 minutes for setup
- Cost: $30 – $80 for lights
- Step 1: Choose full-spectrum LED lights. The pink/purple color comes from a mix of red and blue light diodes, which are the primary wavelengths plants use for photosynthesis.
- Step 2: Hang the lights directly above your seedling trays, just 2-4 inches from the top of the seedlings. Any higher and the plants will stretch and become ‘leggy’.
- Step 3: Use chains or adjustable cords to hang the lights so you can easily raise them as the plants grow.
- Step 4: Plug your lights into a simple wall timer. Set it to run for 14-16 hours per day to mimic long summer days, which is ideal for vegetative growth.
17. Start Small with a Tabletop Metal and Glass Terrarium Greenhouse
A miniature tabletop greenhouse is adorable, but it’s a bit of a high-maintenance pet. These small, enclosed spaces can get very hot, very fast if placed in direct sunlight, effectively cooking the plants inside. That hinged roof isn’t just a cute feature; it’s a vital tool for ventilation that you’ll need to open daily. They also dry out quickly. You can’t just water these on a Sunday and forget about them for a week. Be prepared to monitor the soil moisture every day or two. They are better suited for humidity-loving plants that prefer bright, indirect light rather than sun-baking succulents.
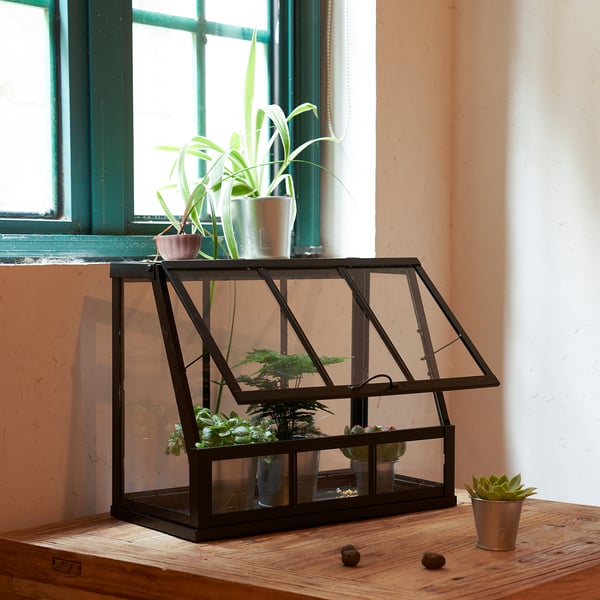
“This idea is perfect for anyone with zero yard space or those living in small apartments.”
The footprint is minimal, typically no more than 18 inches wide by 10 inches deep. It can live happily on a console table, a wide windowsill (as long as the sun isn’t too intense), or a kitchen counter. Its vertical design allows you to house 5-10 small plants in the space one medium-sized pot would occupy. While it can’t replace a full-size greenhouse, it’s a fantastic way to experiment with propagation or to create a focal point on a tabletop. It’s a much more contained approach than the cabinet-based system in Idea #14.
18. Layer Your Greens: A Greenhouse with Views to the Garden Beyond
The genius of this design is its transparency, which creates a stunning layering effect. The clear glass walls don’t just contain the plants inside; they frame the lush greenery of the garden outside. This dissolves the boundary between the indoor and outdoor spaces. The eye sees a continuous landscape of foliage, from the potted plants on the table, to the larger plants inside the greenhouse, to the trees and shrubs in the yard. This visual trick makes both the greenhouse and the garden feel larger and more interconnected. The mix of white and dark framing adds architectural interest without obstructing the view.
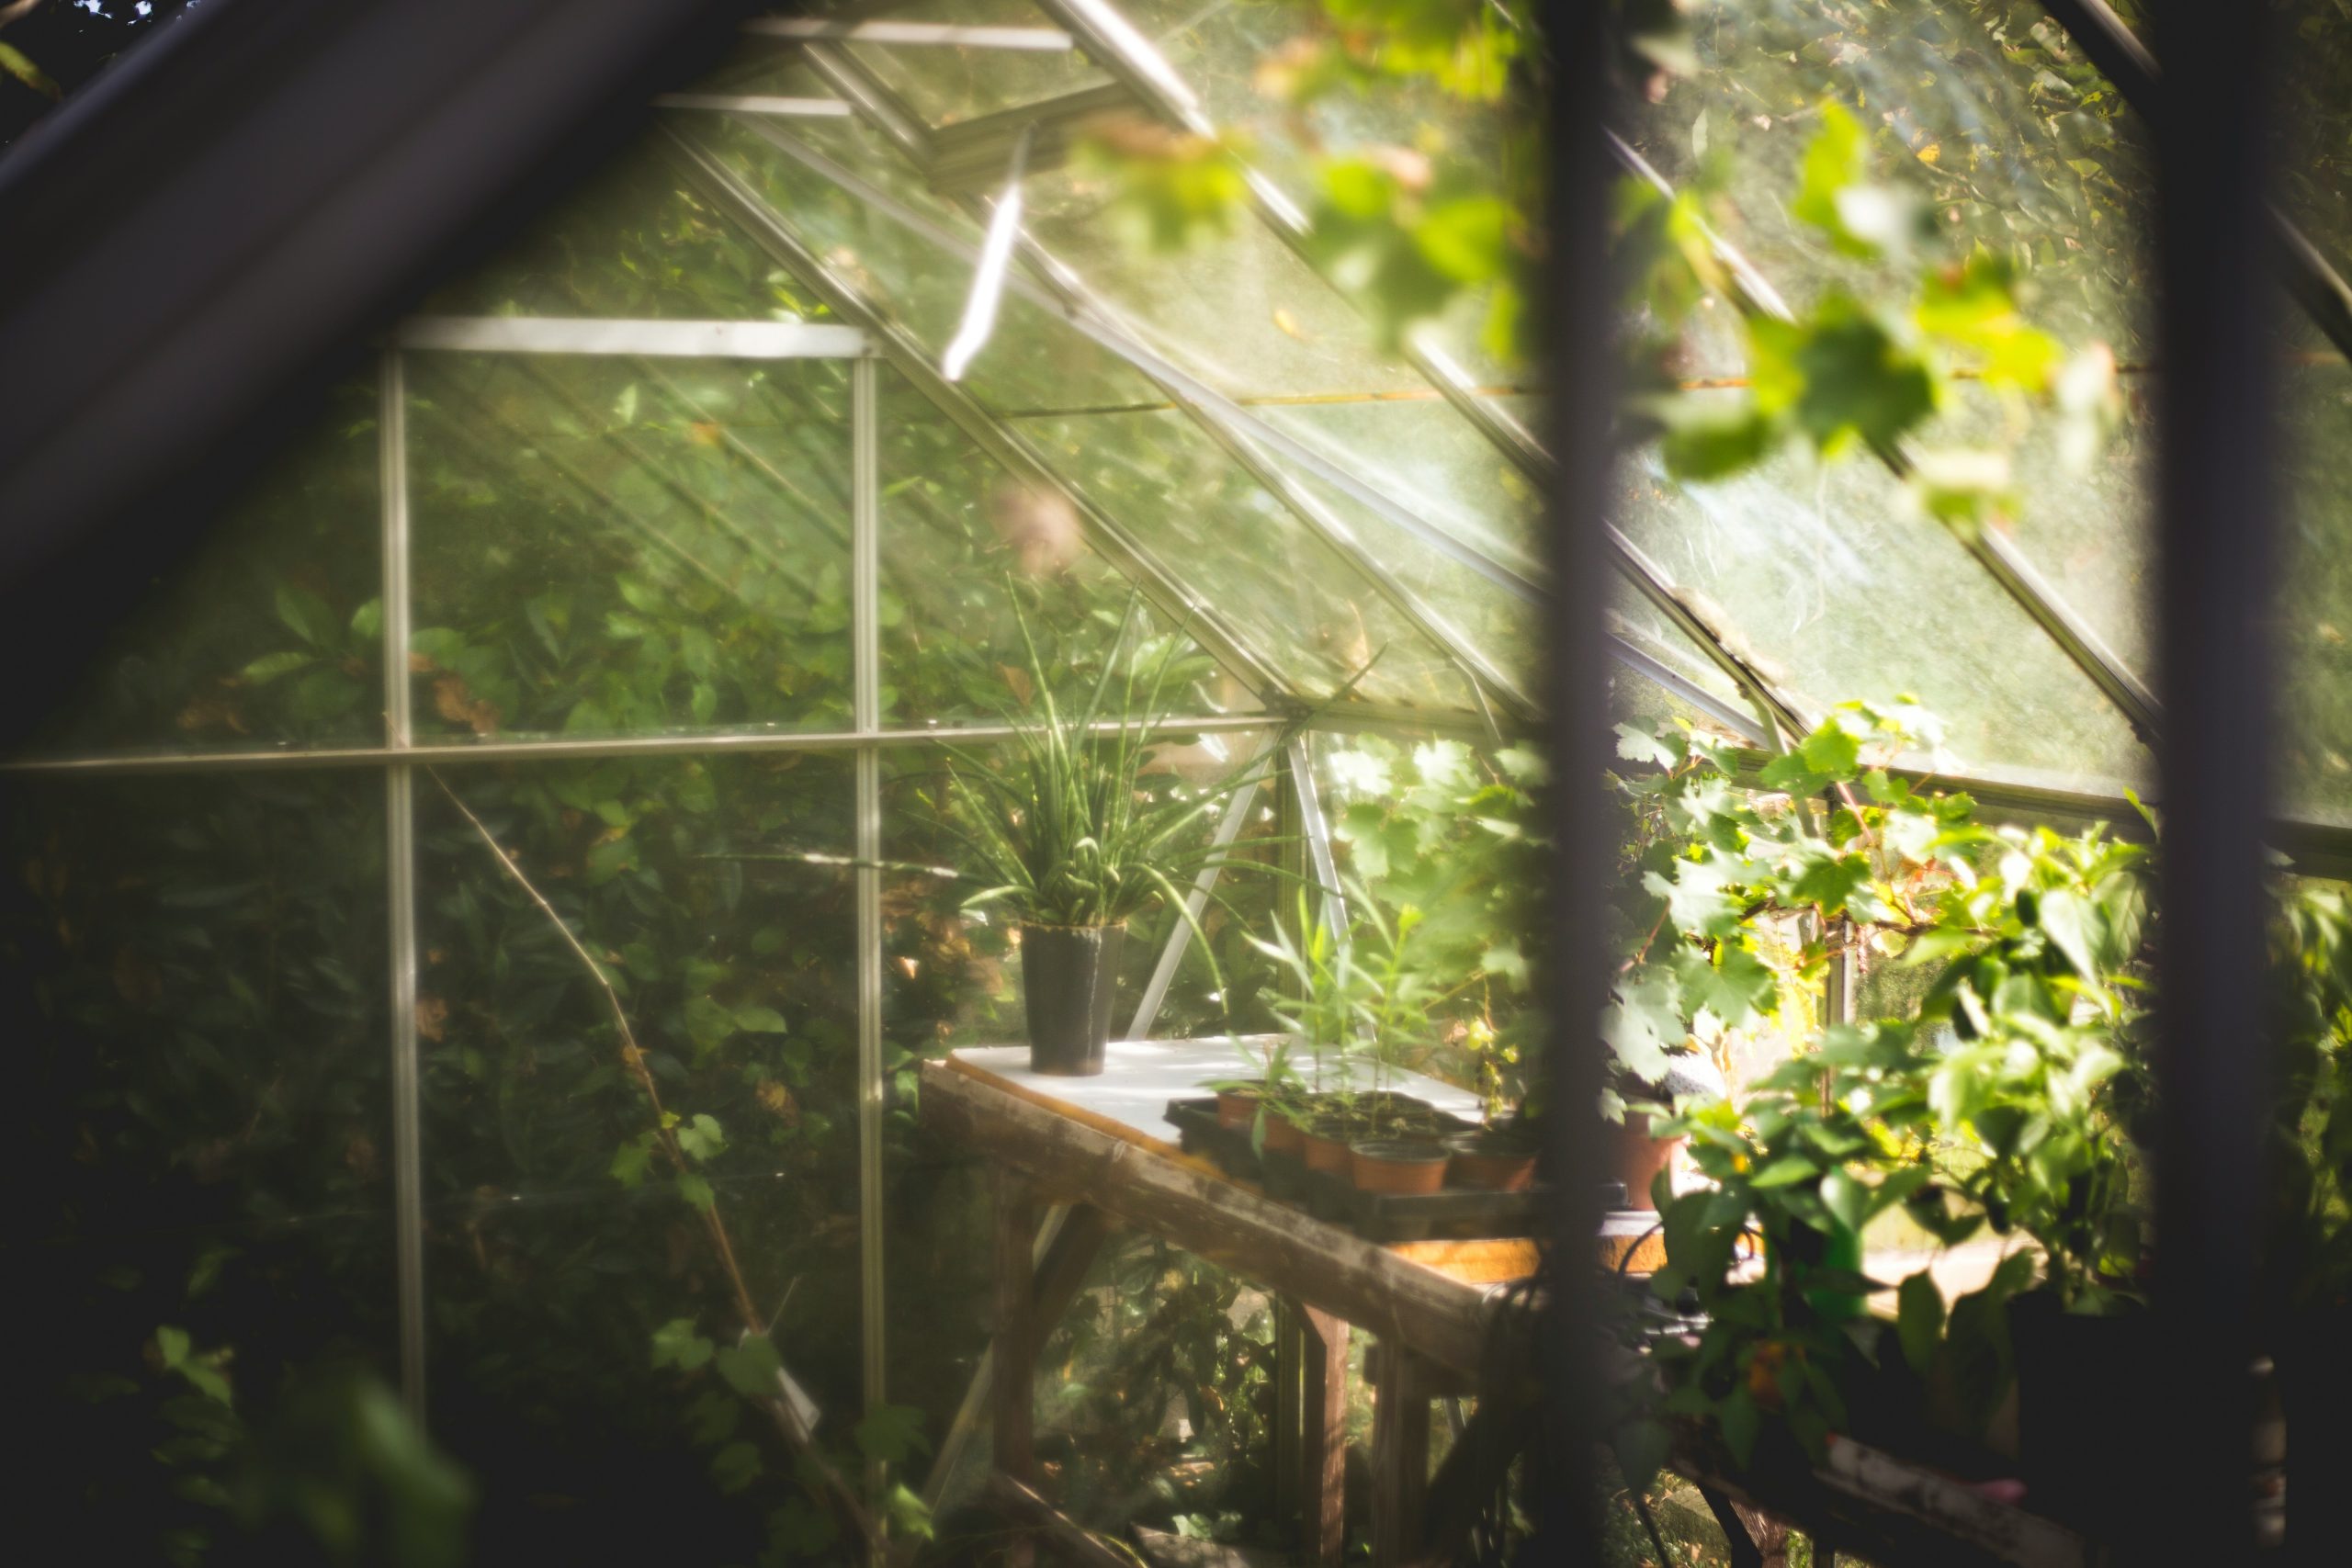
“The most critical element here is the view itself.”
This greenhouse concept is entirely dependent on having something beautiful to look at *through* it. The design is less about the structure and more about how the structure interacts with its surroundings. If you were to place this same greenhouse against a garage wall or a wooden fence, it would lose all of its magic. The success of this idea hinges on thoughtful placement within a garden, turning the greenhouse into a window onto a larger, living world. It’s a reminder that a greenhouse doesn’t have to be a standalone feature; it can be a portal to the rest of your landscape.
19. Fill Your Greenhouse with Romantic White and Pink Blooms
To achieve this soft, romantic, and immersive floral look, your design recipe should be heavily skewed towards the blooms themselves: 70% flowers + 20% green foliage + 10% dark structure. By massing the white and pale pink flowers together, you create large, cloud-like drifts of color that dominate the view. The green foliage becomes a supporting player, a backdrop that makes the blossoms pop. The dark metal frame of the greenhouse provides the final touch, its strong lines offering a subtle contrast that disappears into the background, ensuring the delicate flowers remain the undisputed stars of the show.
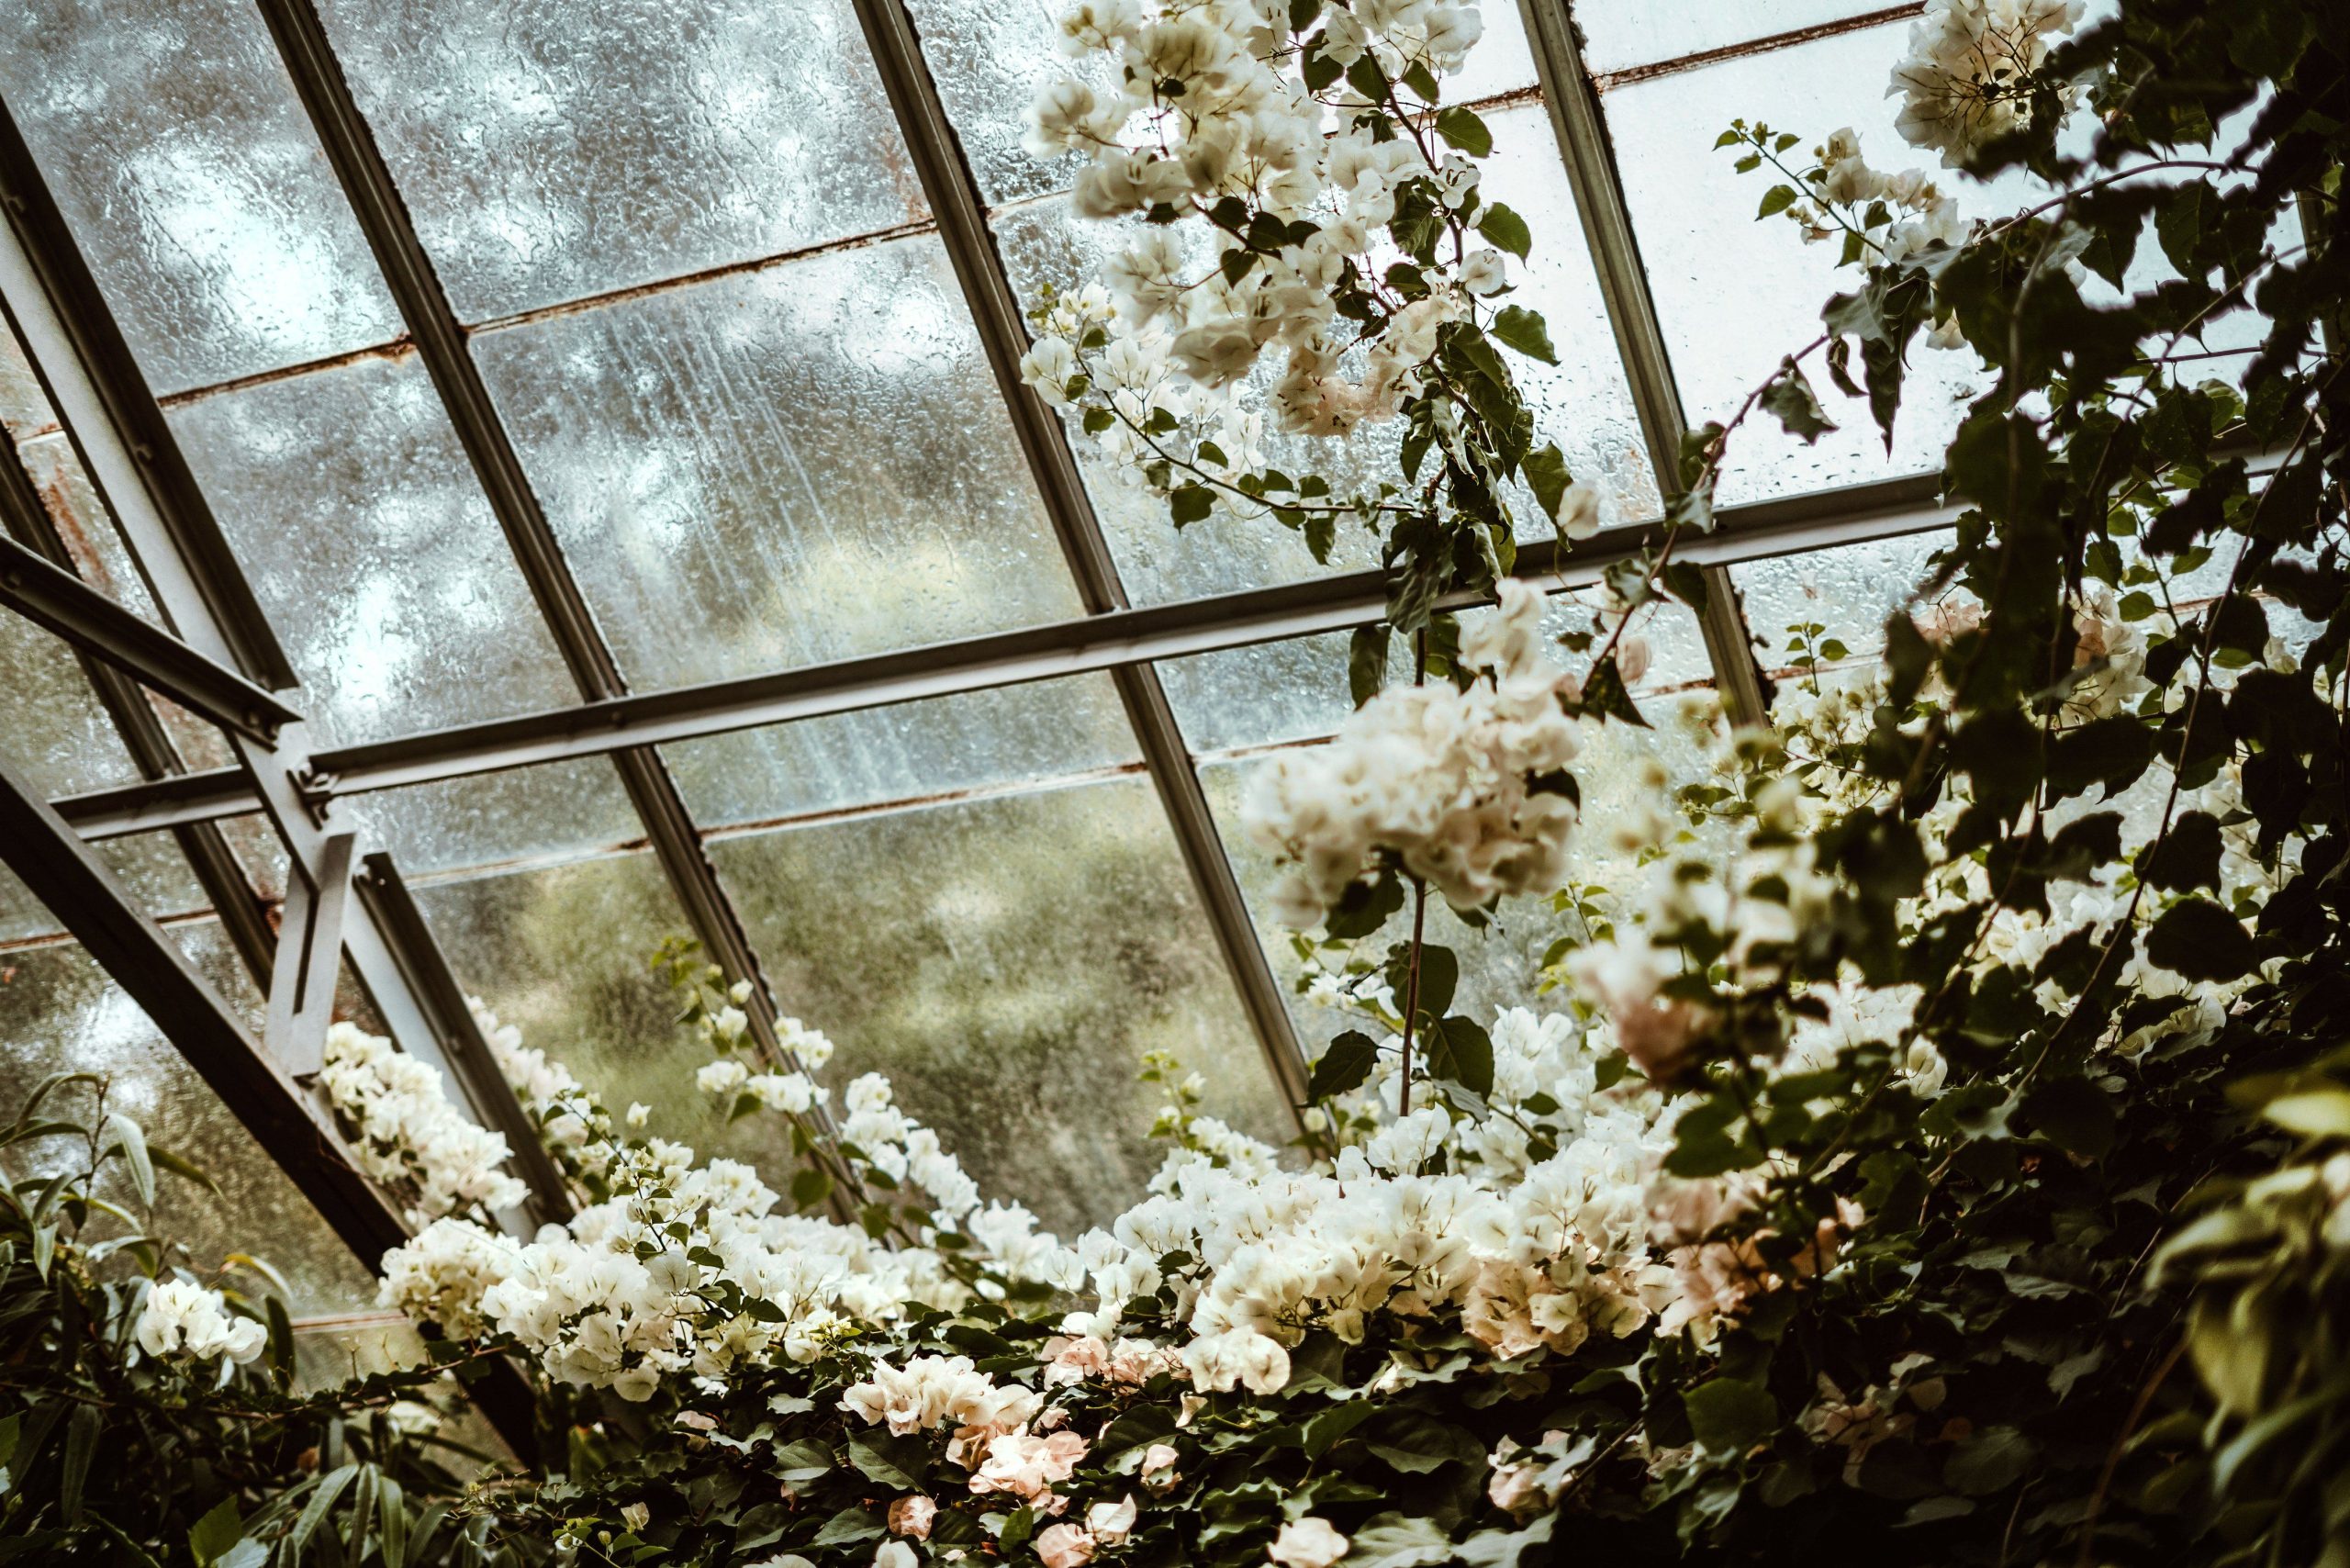
“A greenhouse filled with flowering plants like this is a paradise, but it’s a fleeting one that requires dedication.”
Deadheading will become your new hobby. To keep the plants producing new blooms and to prevent them from looking messy, you’ll need to meticulously pinch off spent flowers every few days. You’ll also need to manage humidity carefully; the condensation visible on the glass is a sign of high humidity, which is great for foliage but can encourage fungal diseases like botrytis (gray mold) on dense flower heads. Good air circulation is absolutely essential.
20. Design a Greenhouse Living Room with Built-in Bench Seating
If you’re designing a greenhouse as a relaxation space, not just for growing, think about seating from the very beginning. Building benches directly into the structure, as seen here, is a brilliant space-saving move. It keeps the floor plan open and uncluttered, providing more room for plants and people. A depth of 18-20 inches is ideal for a comfortable seat. Use exterior-grade wood like cedar or sealed pressure-treated lumber, and top with outdoor-rated cushions made from solution-dyed acrylic fabric that can withstand moisture and sun without fading or growing mildew.
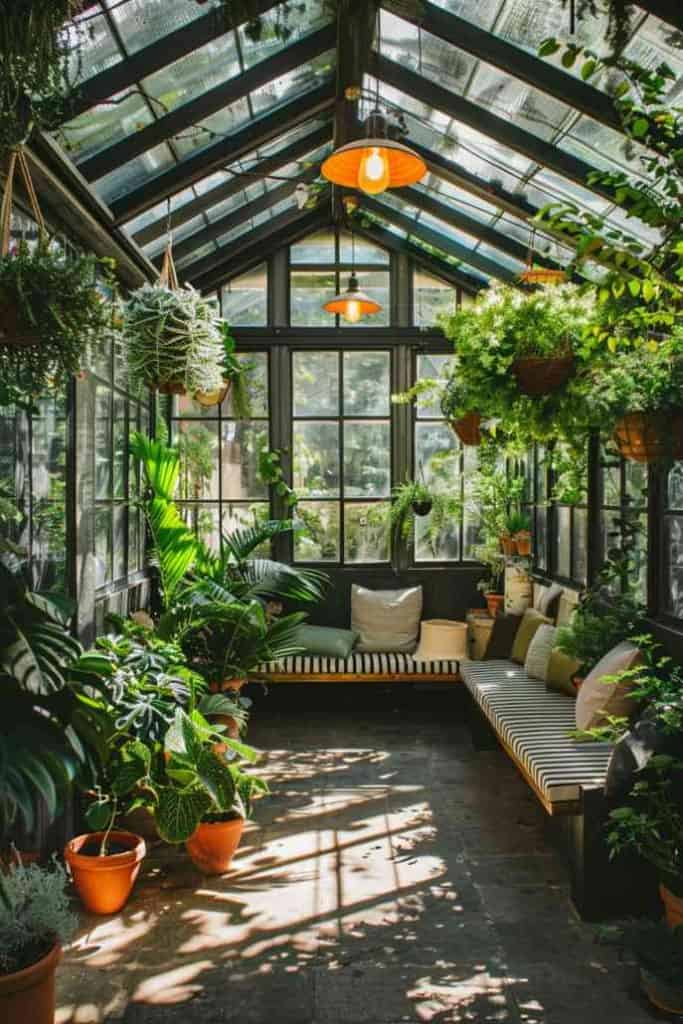
“Creating a hybrid living room and greenhouse involves costs from both construction and interior decorating.”
The black-framed glass structure is the biggest expense, followed by the custom built-in seating.
- Black-Framed Glass Greenhouse Structure: $8,000 – $20,000+
- Custom Built-in Wooden Benches: $1,500 – $4,000
- Outdoor Fabric Cushions: $800 – $2,000
- Lighting and Electrical: $700 – $1,500
- Plants, Pots, and Hanging Baskets: $500 – $1,200
- TOTAL: $11,500 – $28,700
- Budget Alternative: Use a standard greenhouse kit and furnish it with a simple, affordable outdoor wicker or metal bench from a big-box store.
21. A Sea of Color: Mass Planting Geraniums in Your Greenhouse
While an eclectic mix of plants is always popular, there’s a growing appreciation for the power of ‘monoculture’ planting in design, and this is a perfect example. Instead of a dozen different species competing for attention, the focus on a single type of plant—in this case, geraniums—creates an incredibly powerful and cohesive visual statement. It’s a trick used by professional garden designers to achieve high impact. On Pinterest and Instagram, where a strong, clear image is key, these bold washes of color are trending. It shows confidence and a clear design vision, transforming a simple greenhouse into a vibrant, immersive experience.
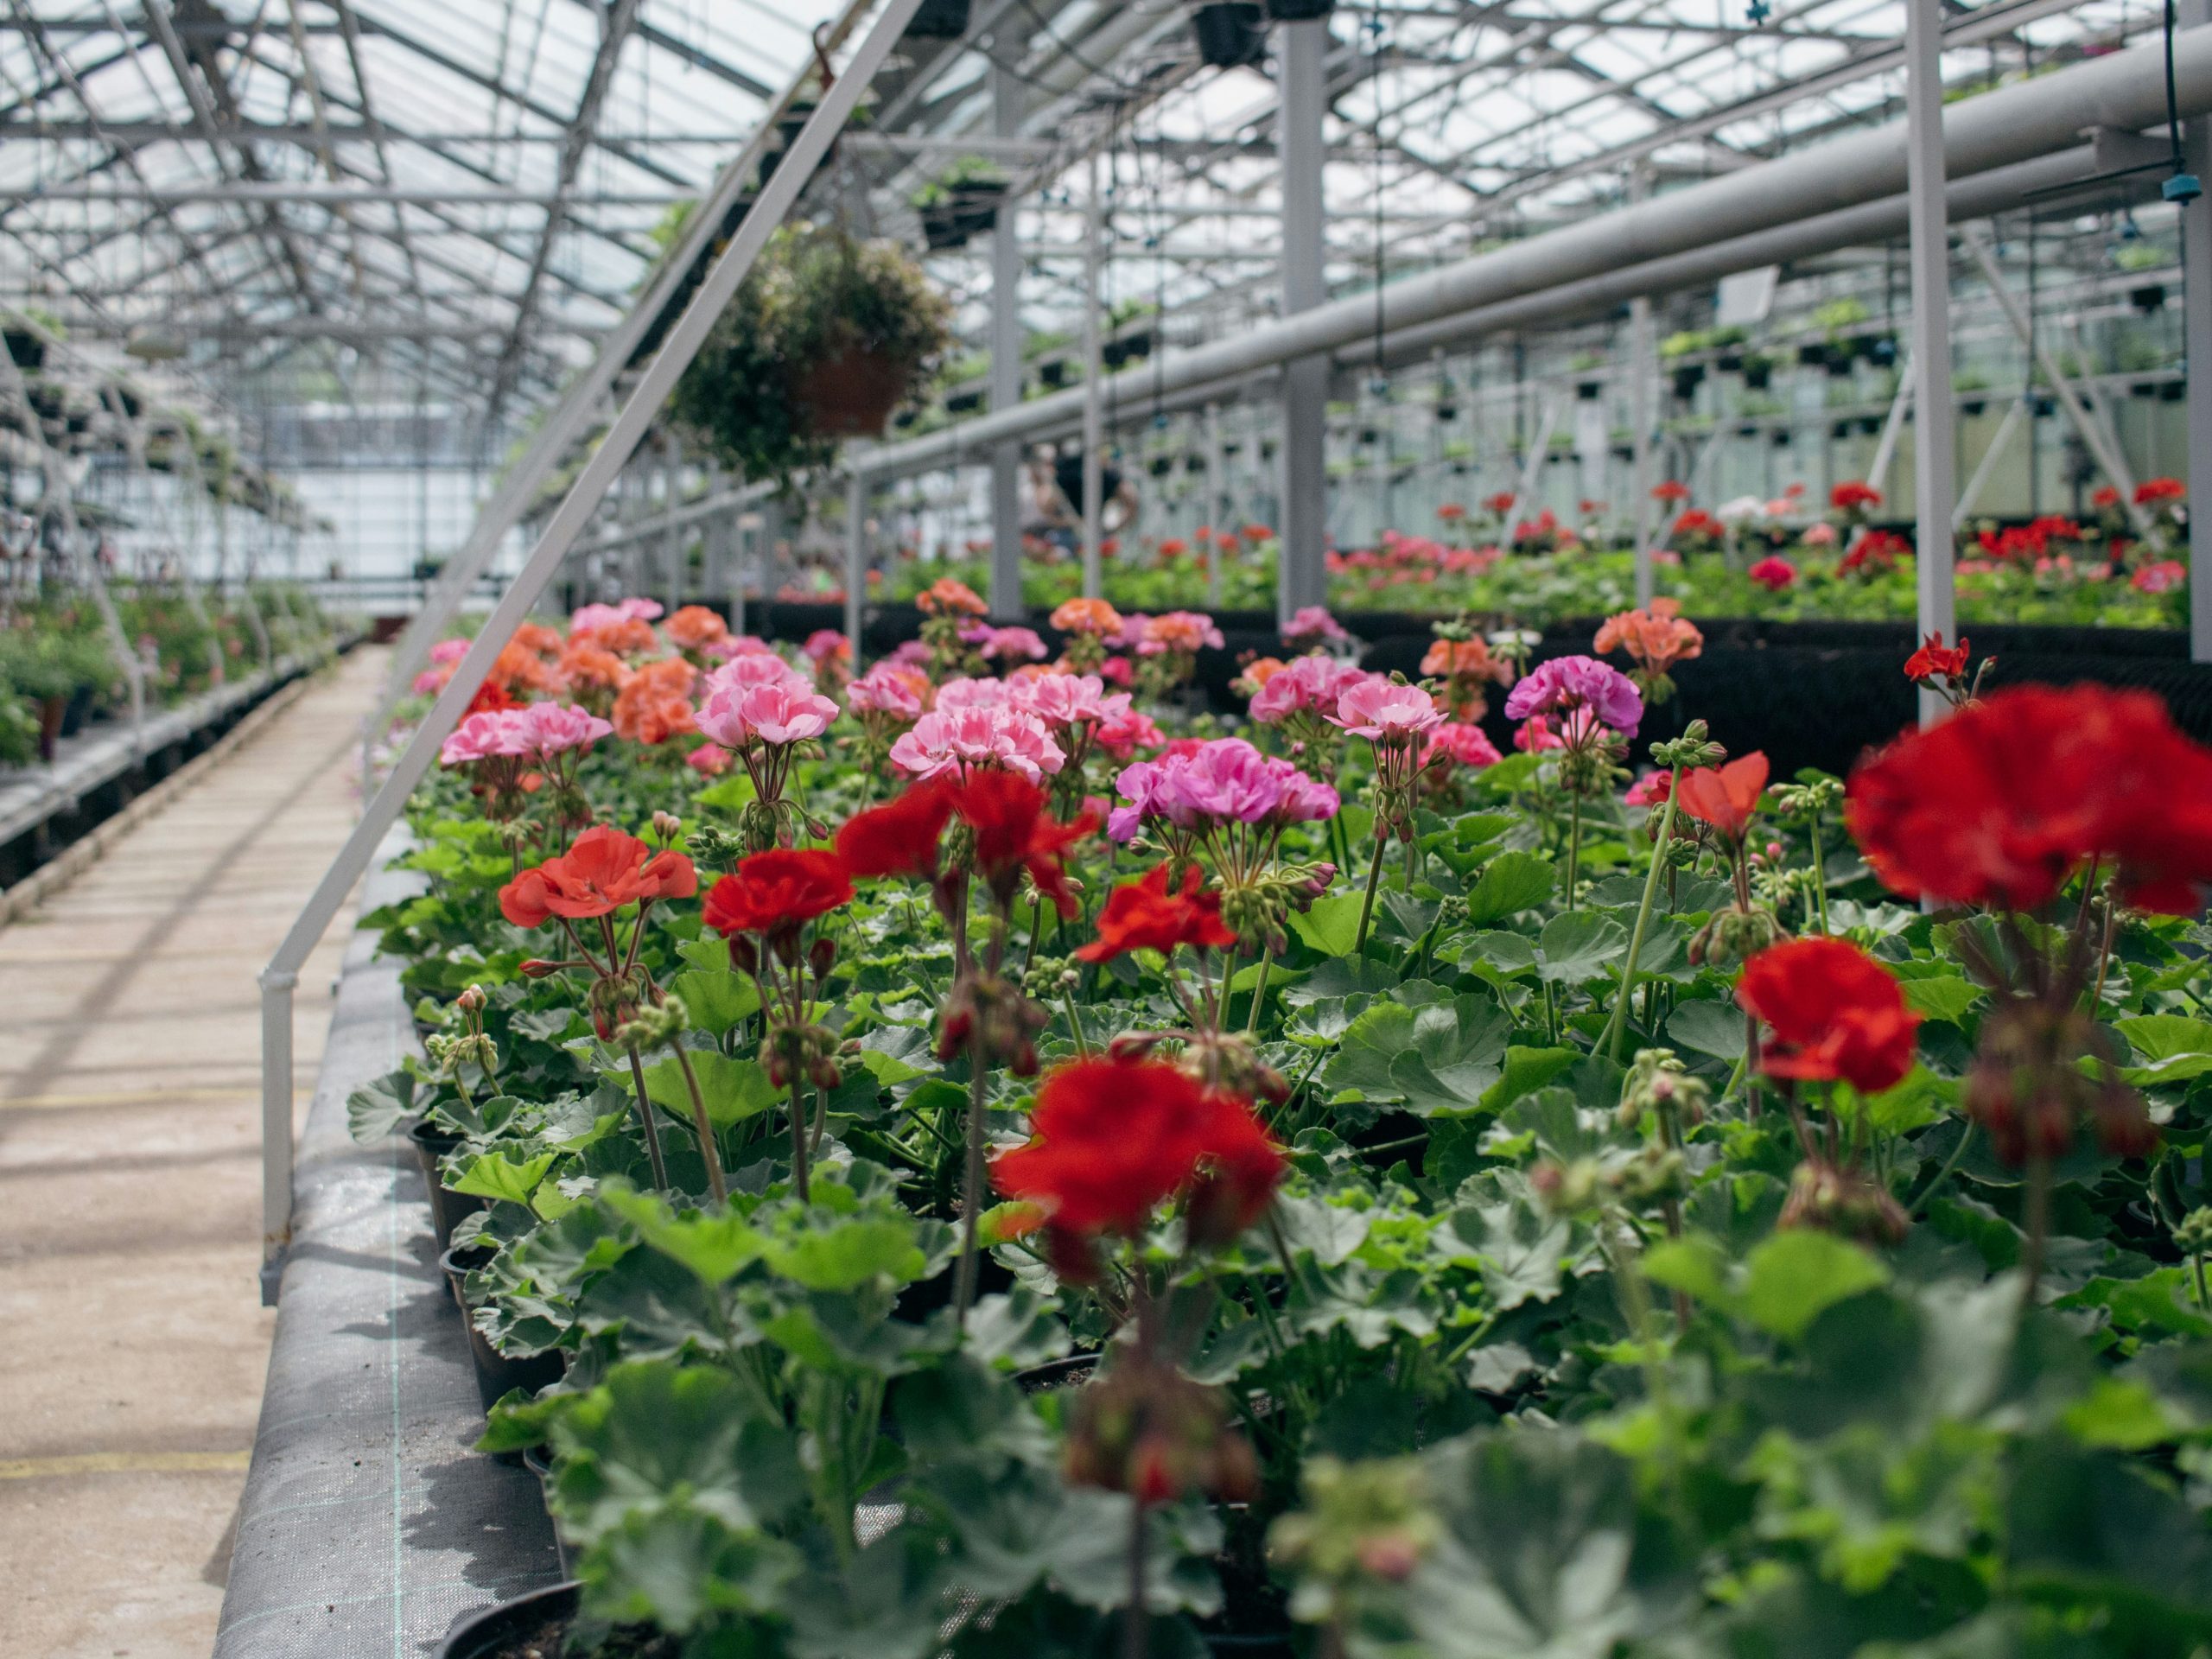
“Before you commit to filling your greenhouse with a single type of plant, you better be sure you can meet its needs perfectly.”
A monoculture is an ‘all your eggs in one basket’ situation. If a pest or disease that targets geraniums gets into this greenhouse, it could wipe out your entire display in short order. With a diverse collection of plants, pests might only target one or two species. This setup requires vigilant monitoring for specific pests (like geranium budworms) and diseases, as well as providing the exact right amount of sun, water, and fertilizer that this specific plant variety needs to thrive uniformly.
22. A Raised-Bed Mini Greenhouse for Your Tomato Plants
This style of raised-bed greenhouse is a game-changer for growing heat-loving vegetables like tomatoes in climates with shorter or cooler summers. Here’s a quick guide to setting one up.
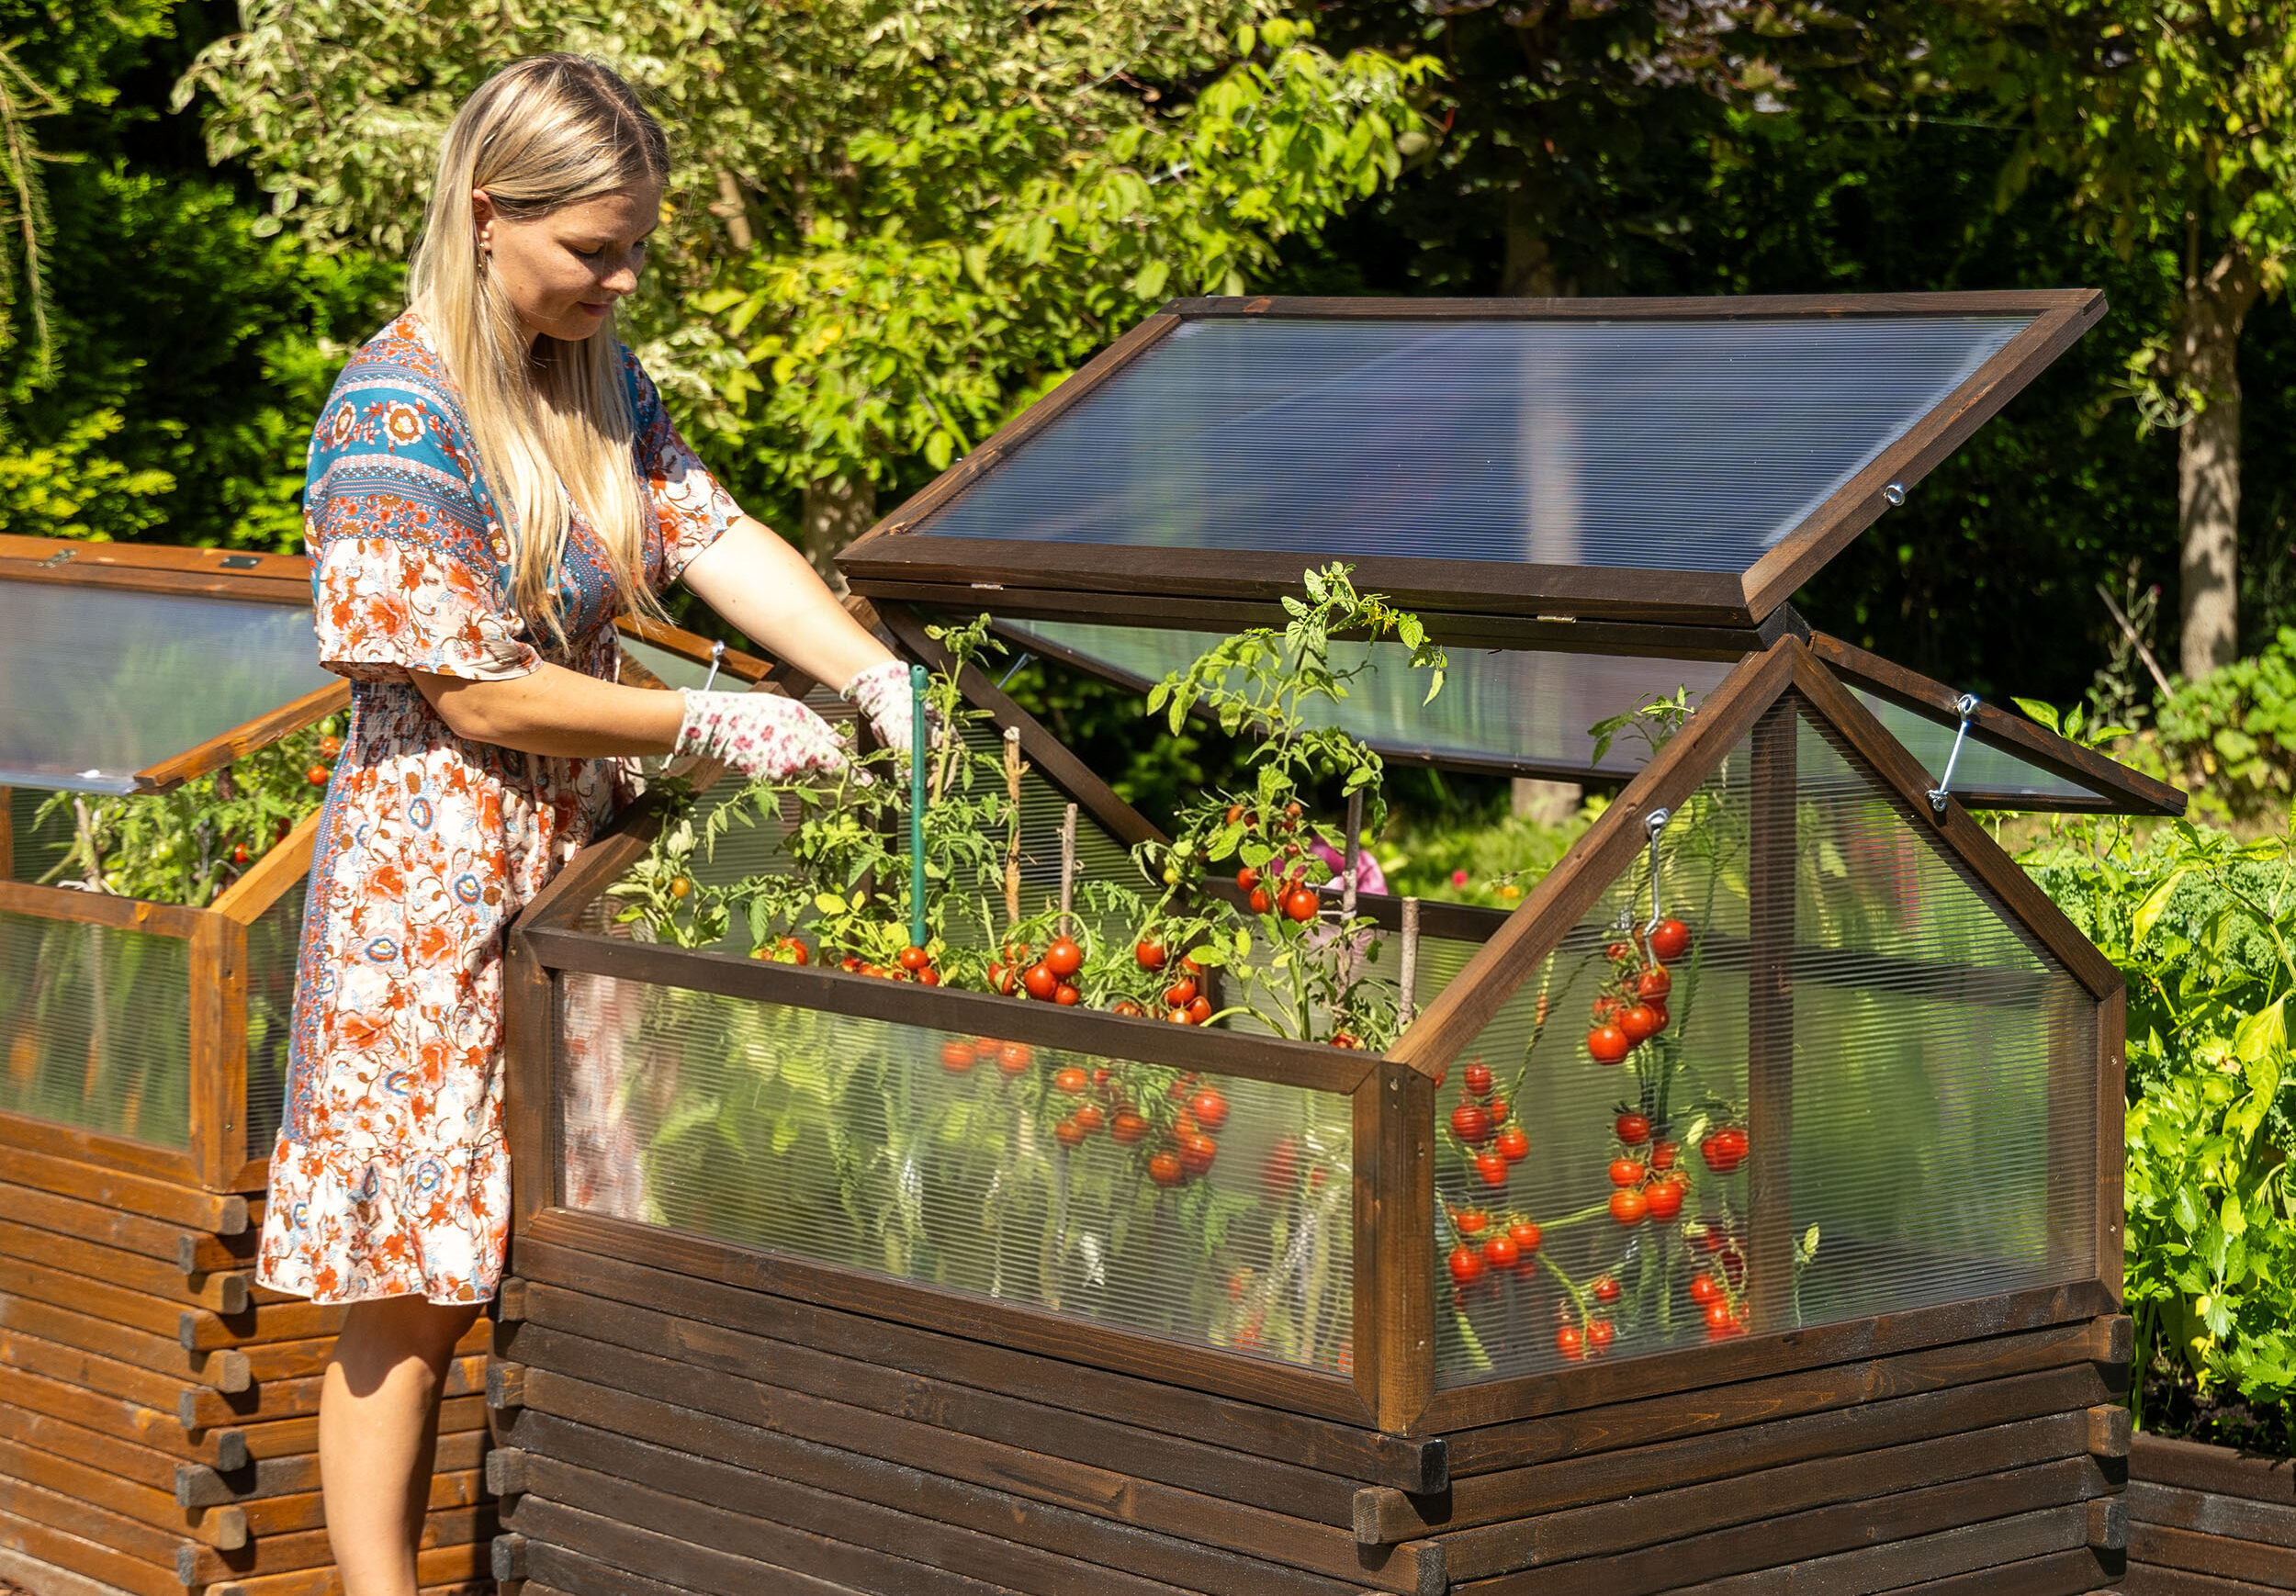
“Time Estimate: One weekend
Cost: $200 – $500
Step 1: Build or buy a raised garde”
- Time Estimate: One weekend
- Cost: $200 – $500
- Step 1: Build or buy a raised garden bed. A height of 18-24 inches is ideal for giving tomato roots plenty of room. Use untreated cedar or pressure-treated wood.
- Step 2: Build a simple wooden frame around the top edge of the bed to serve as the base for your ‘roof’.
- Step 3: Attach clear corrugated polycarbonate or plastic panels to the frame using roofing screws with rubber washers to prevent leaks. You can hinge one or more of the top panels for easy ventilation.
- Step 4: Add simple props (a stick of wood works great!) to hold the hinged panels open on warm days. Proper ventilation is crucial to prevent overheating and fungal diseases.
- Step 5: Fill with a high-quality soil mix designed for vegetable containers and plant your tomatoes!
This idea is all about maximizing a small space. The beauty of a raised-bed ‘cold frame’ or mini-greenhouse is that it can fit in almost any sunny spot in a yard. A standard size of 4×8 feet is perfect for growing 6-8 tomato plants, along with some basil or other companions. You just need a level area that receives at least 8 hours of direct sunlight per day. Its compact nature means you don’t need the large footprint of a full walk-in greenhouse, making it a perfect solution for urban or suburban gardens where space is at a premium.
23. Go Jurassic with an Arched-Roof Greenhouse Full of Ferns
The single element that defines this space is the army of ferns. By dedicating the majority of the planting space to different varieties of ferns, the greenhouse takes on a prehistoric, almost jurassic, quality. Their distinctive feathery fronds create a uniquely dense and textured canopy that you wouldn’t get from other plants. The hanging baskets, also filled with ferns, enhance this immersive, layered effect. If you were to swap the ferns for simple flowering plants or vegetables, the entire ancient, lush atmosphere of the room would be lost. Compare this to the more tropical, broad-leaf feel of Idea #8.
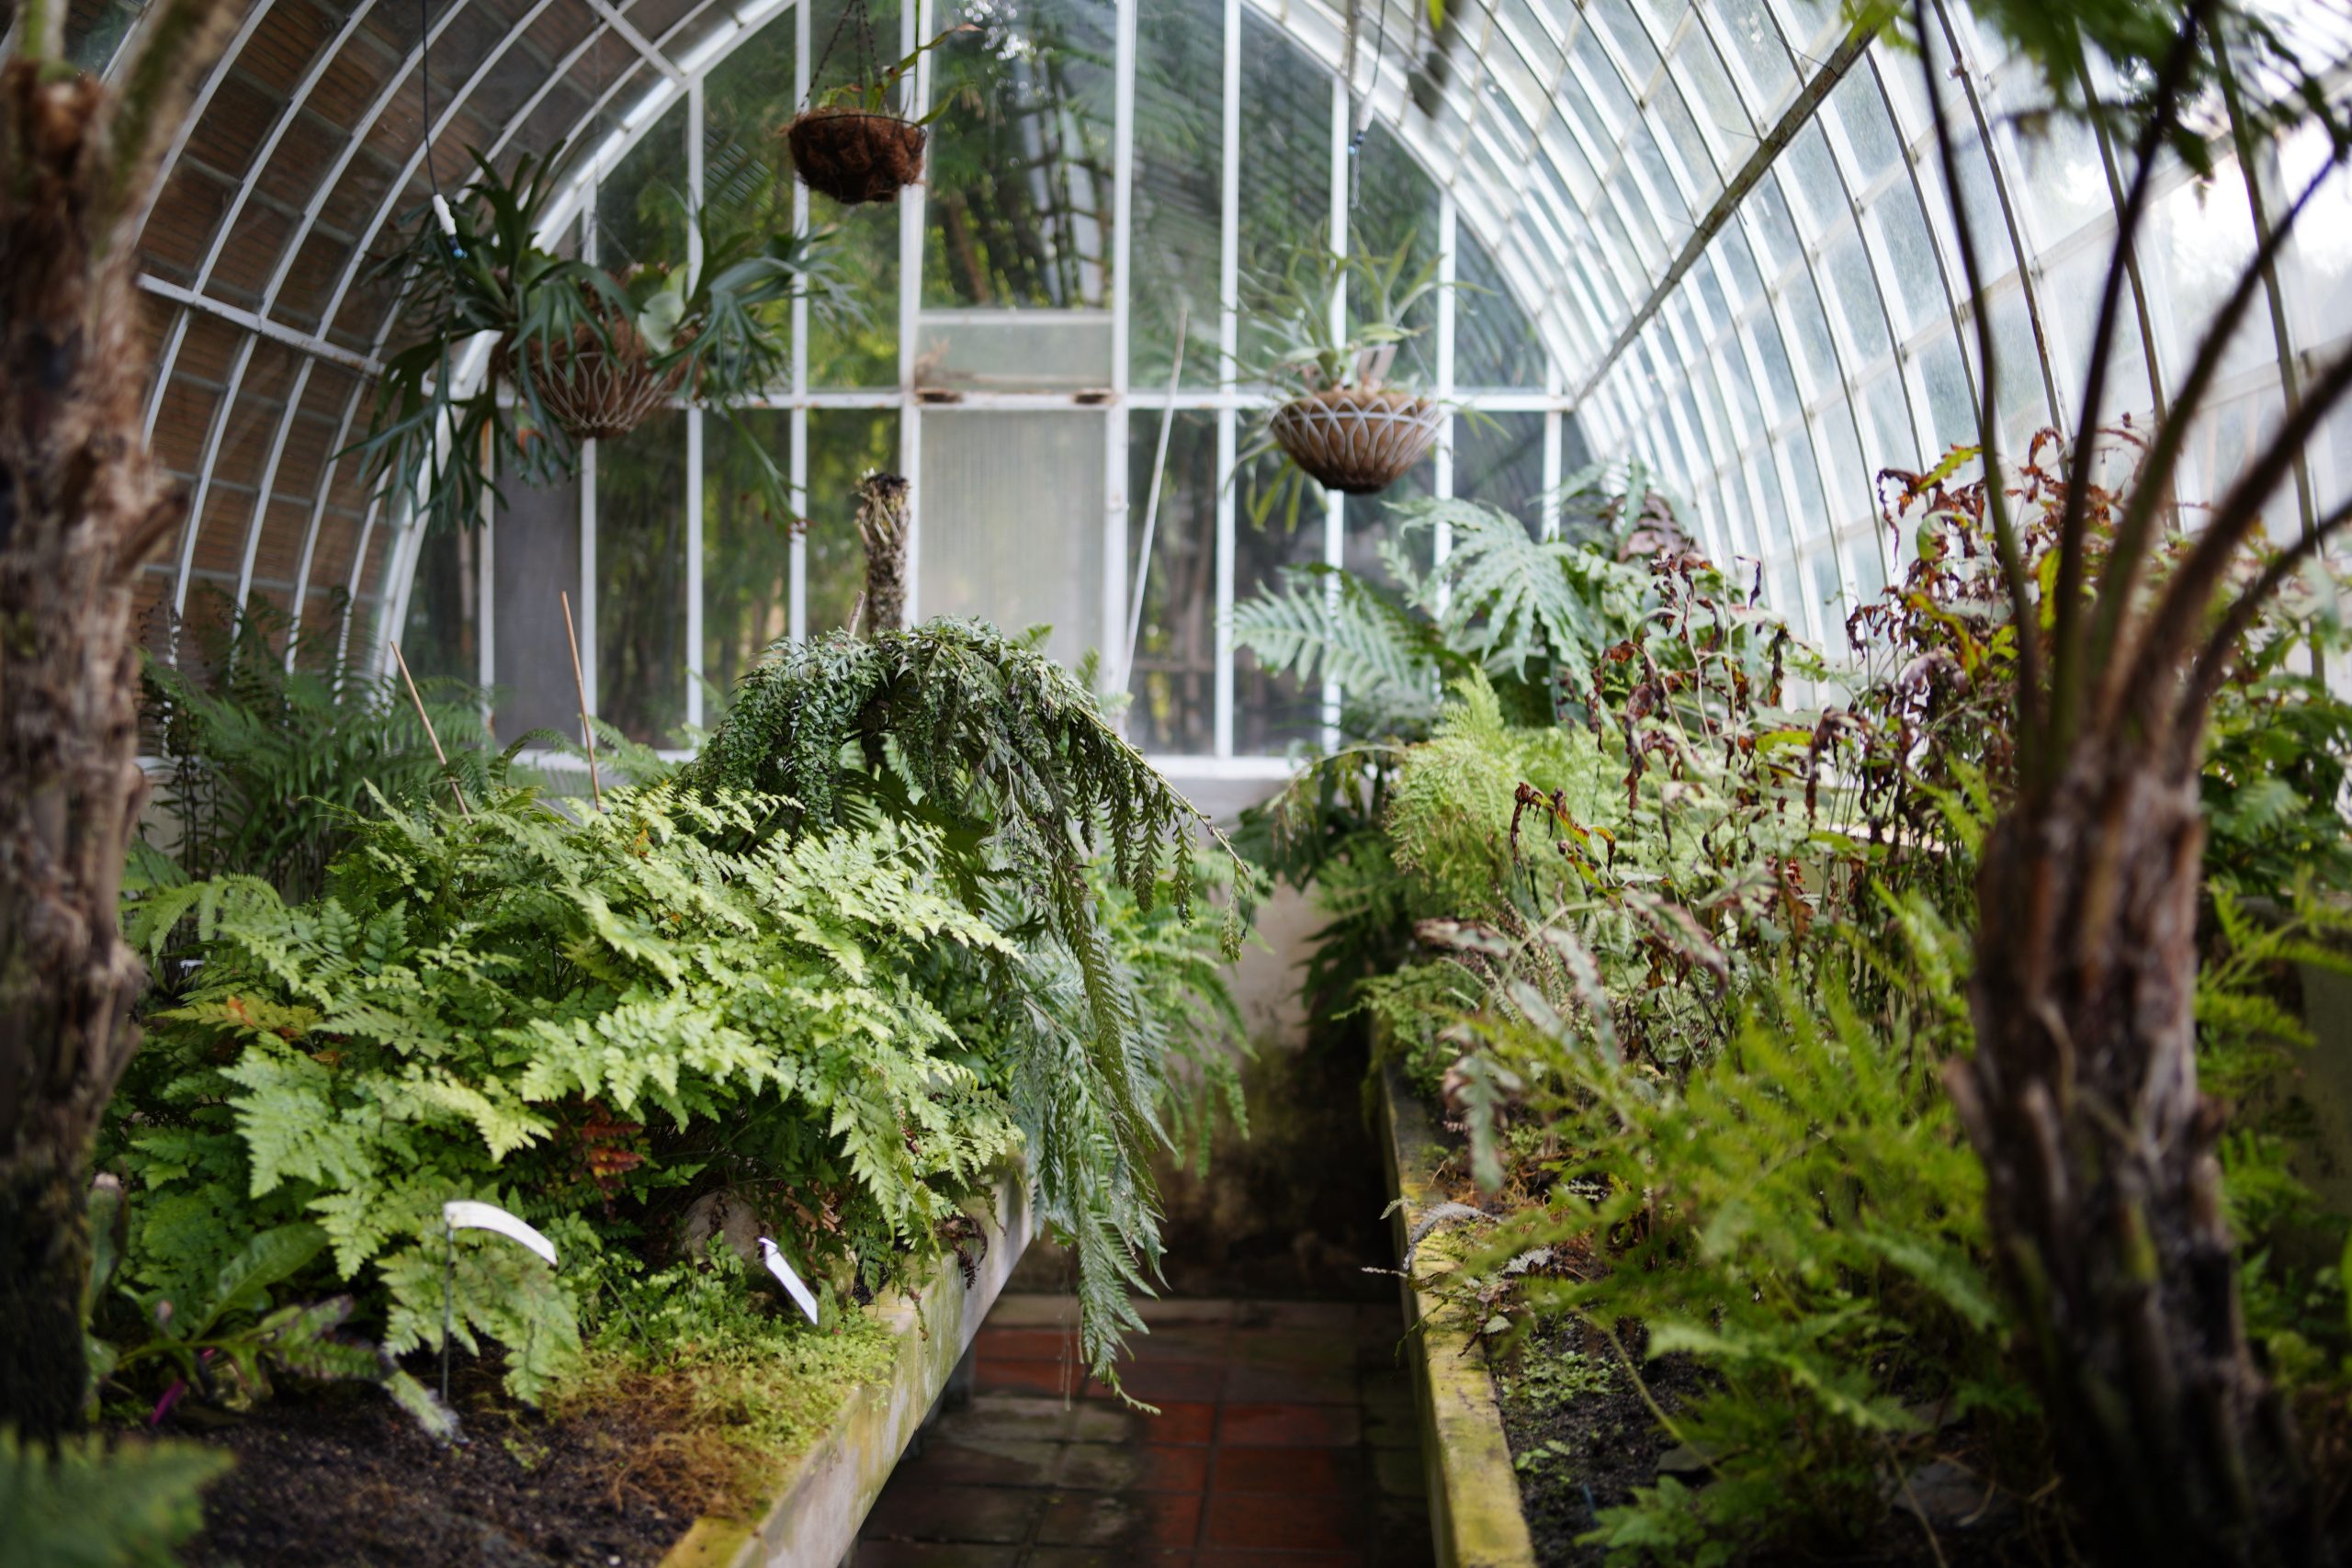
“This design is a study in texture and light.”
The arched roof with its repeating metal frames creates a beautiful sense of rhythm and structure overhead. This geometry is a perfect foil for the soft, chaotic explosion of the fern fronds below. The light filtering through the glass roof gets diffused by the upper layer of ferns, creating a dappled, forest-floor lighting effect for the plants on the lower level. Even the flooring contributes, with the terracotta-colored tiles providing a warm, earthy base that complements the vibrant green of the foliage.
24. Master the ‘Jungalow’ Look with Dense, Layered Planting
To get this incredibly dense and layered ‘jungalow’ aesthetic, you need to think in three dimensions. Don’t just place pots on shelves. The key is to use the vertical space. Start with your tallest plants in the back, then layer medium plants on shelves, and finally, add a fleet of hanging baskets. This creates a wall of green from floor to ceiling. The hanging plants are especially crucial, as they fill the upper visual field and make the space feel completely enveloped in foliage. Mix up your pot materials—terracotta, plastic, ceramic—to add another layer of subtle texture to the display.
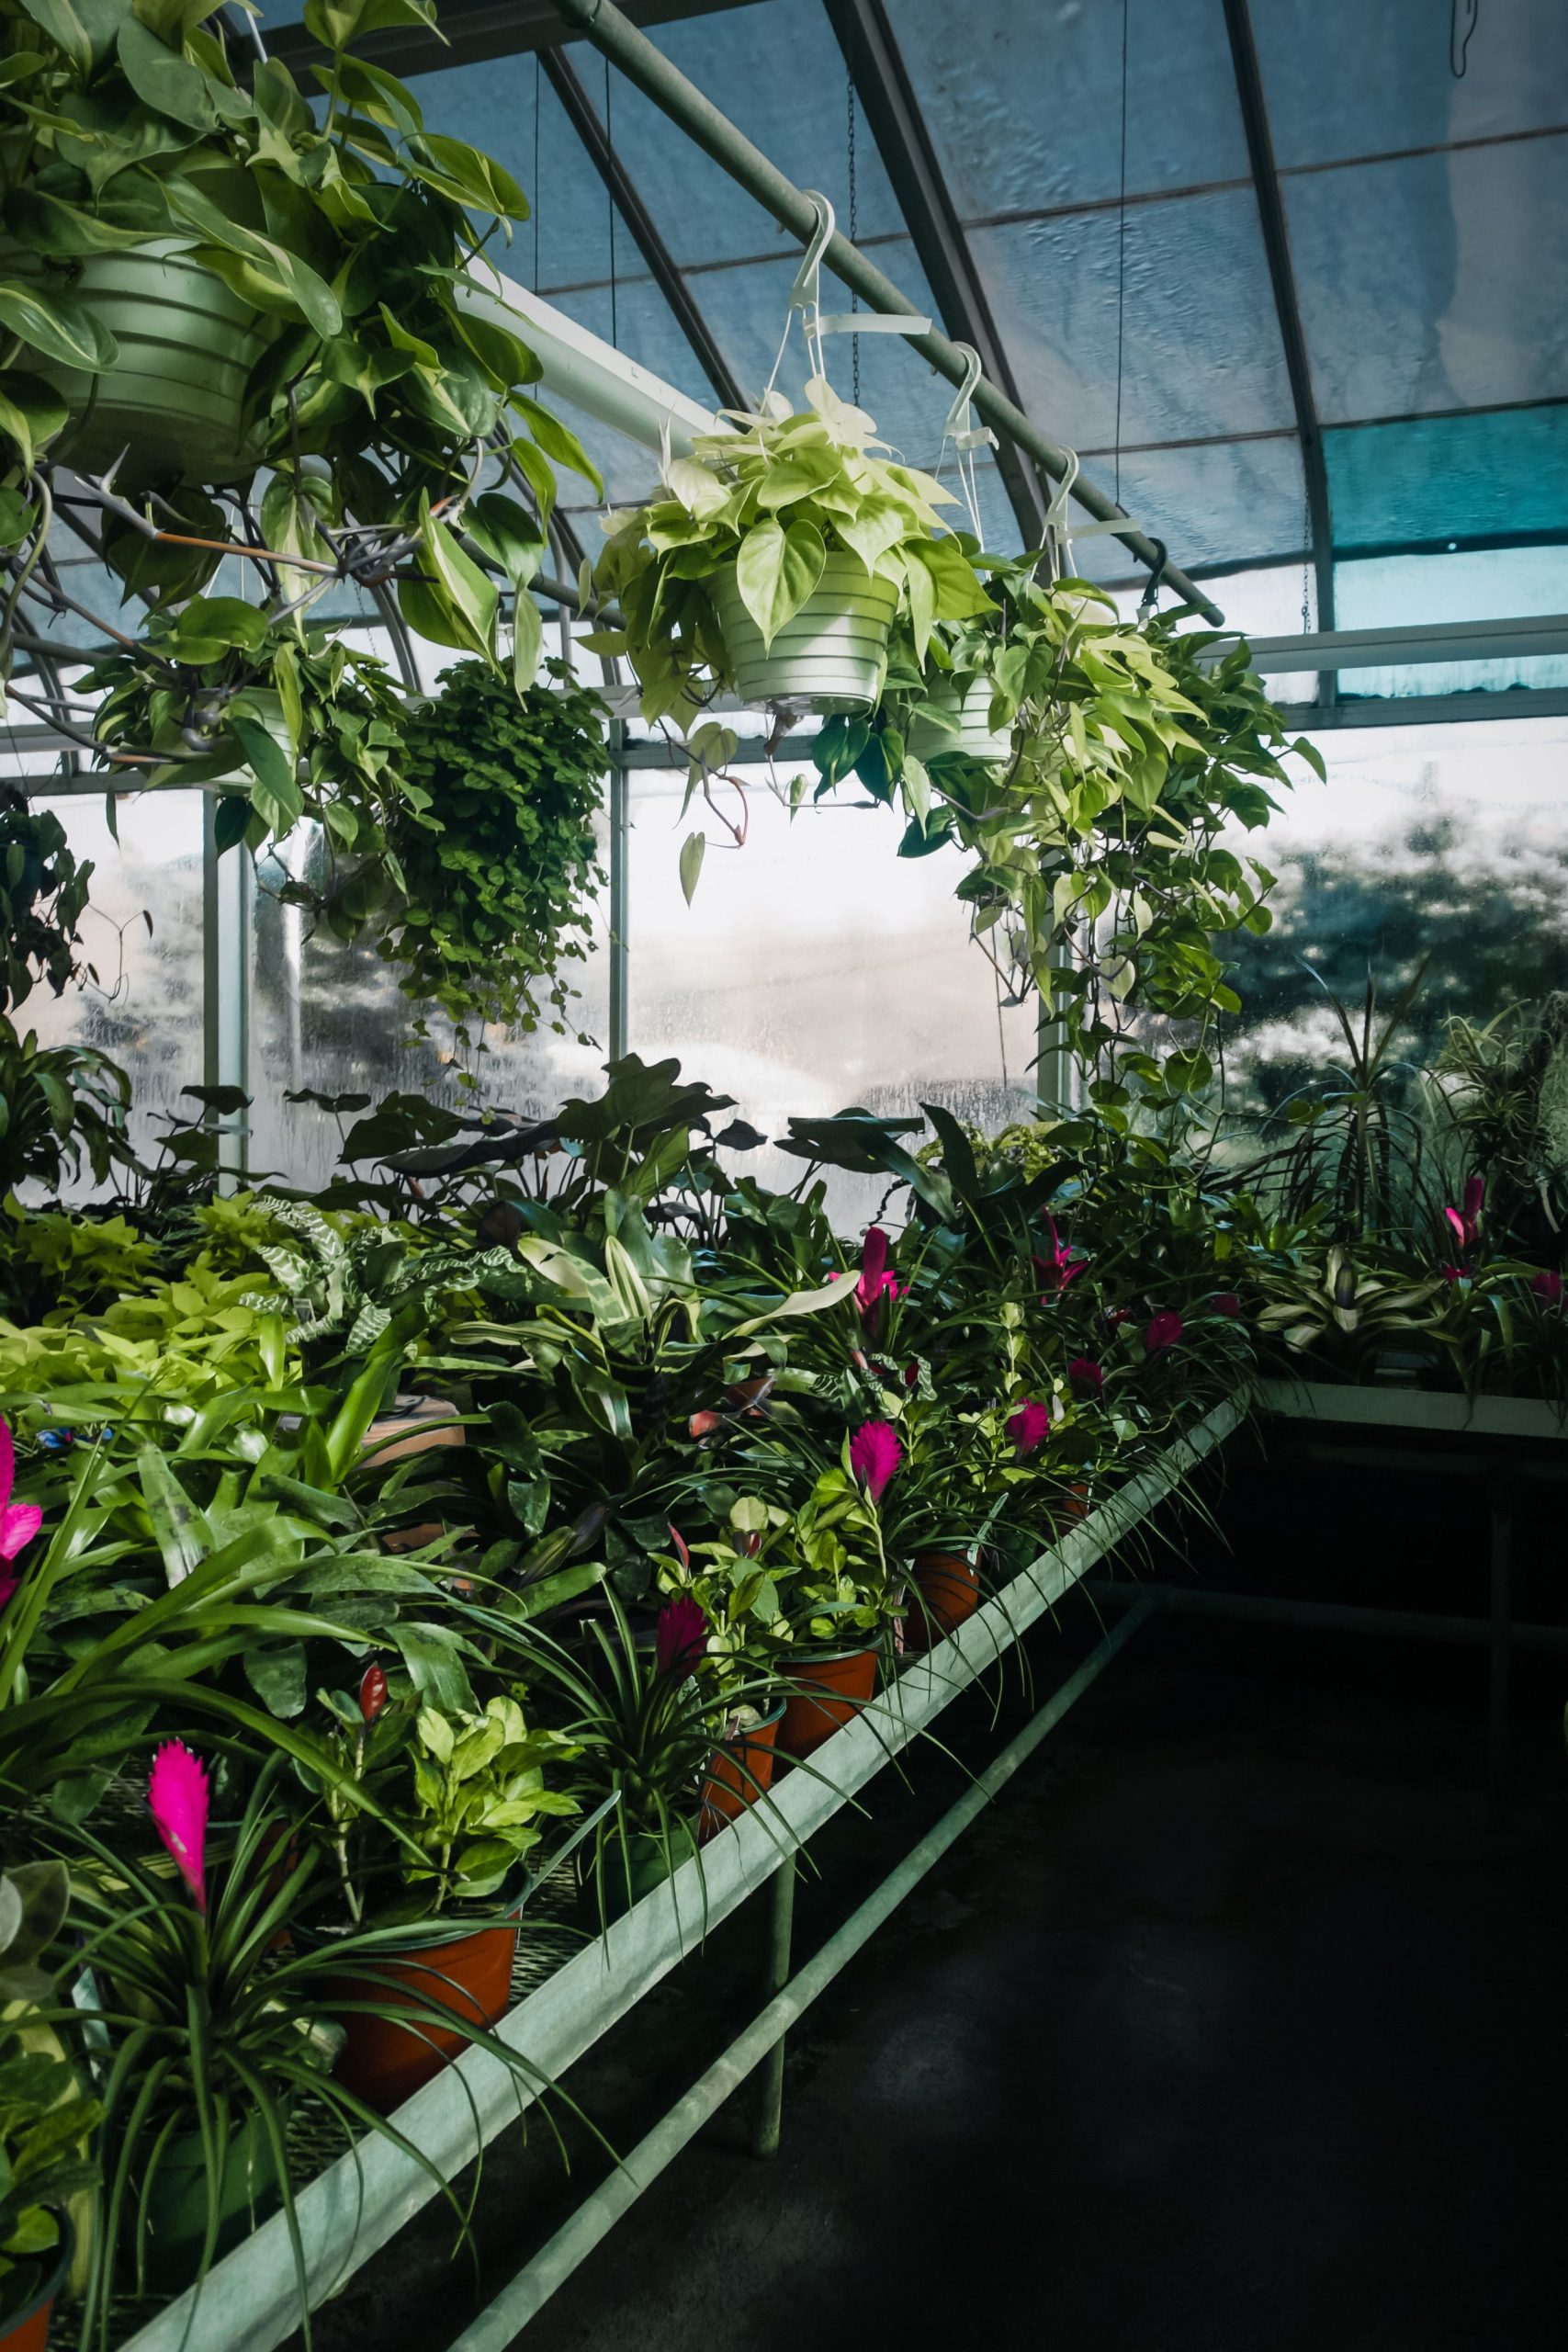
“A greenhouse packed this densely is a paradise for plants…”
and for pests. The reduced air circulation and the sheer number of hiding spots among the leaves create an ideal breeding ground for mealybugs, spider mites, and fungus gnats. You will have to be extremely vigilant with your pest management routine. Regular inspections (at least weekly) of the undersides of leaves are a must. Also, watering becomes a physical challenge. Reaching plants at the back of a deep shelf or navigating a forest of hanging pots without dripping on everything below requires patience and a good long-necked watering can.
25. Create an Eclectic Plant Corner with Mixed-Material Shelving
This vibrant, eclectic look is a masterclass in controlled chaos. The formula is: 40% lush green plants + 30% mixed wood tones + 20% bold wall decor + 10% dark metal accents. The plants provide the living, breathing base. The mix of dark stained wood on the main shelf and natural wood planks on the wall keeps the space feeling warm and varied. The colorful crosses and gecko art inject a huge dose of personality and a handmade, globally-inspired feel. Finally, the dark metal frame of the main shelving unit acts as a grounding element, its clean lines preventing the eclectic mix from feeling messy.
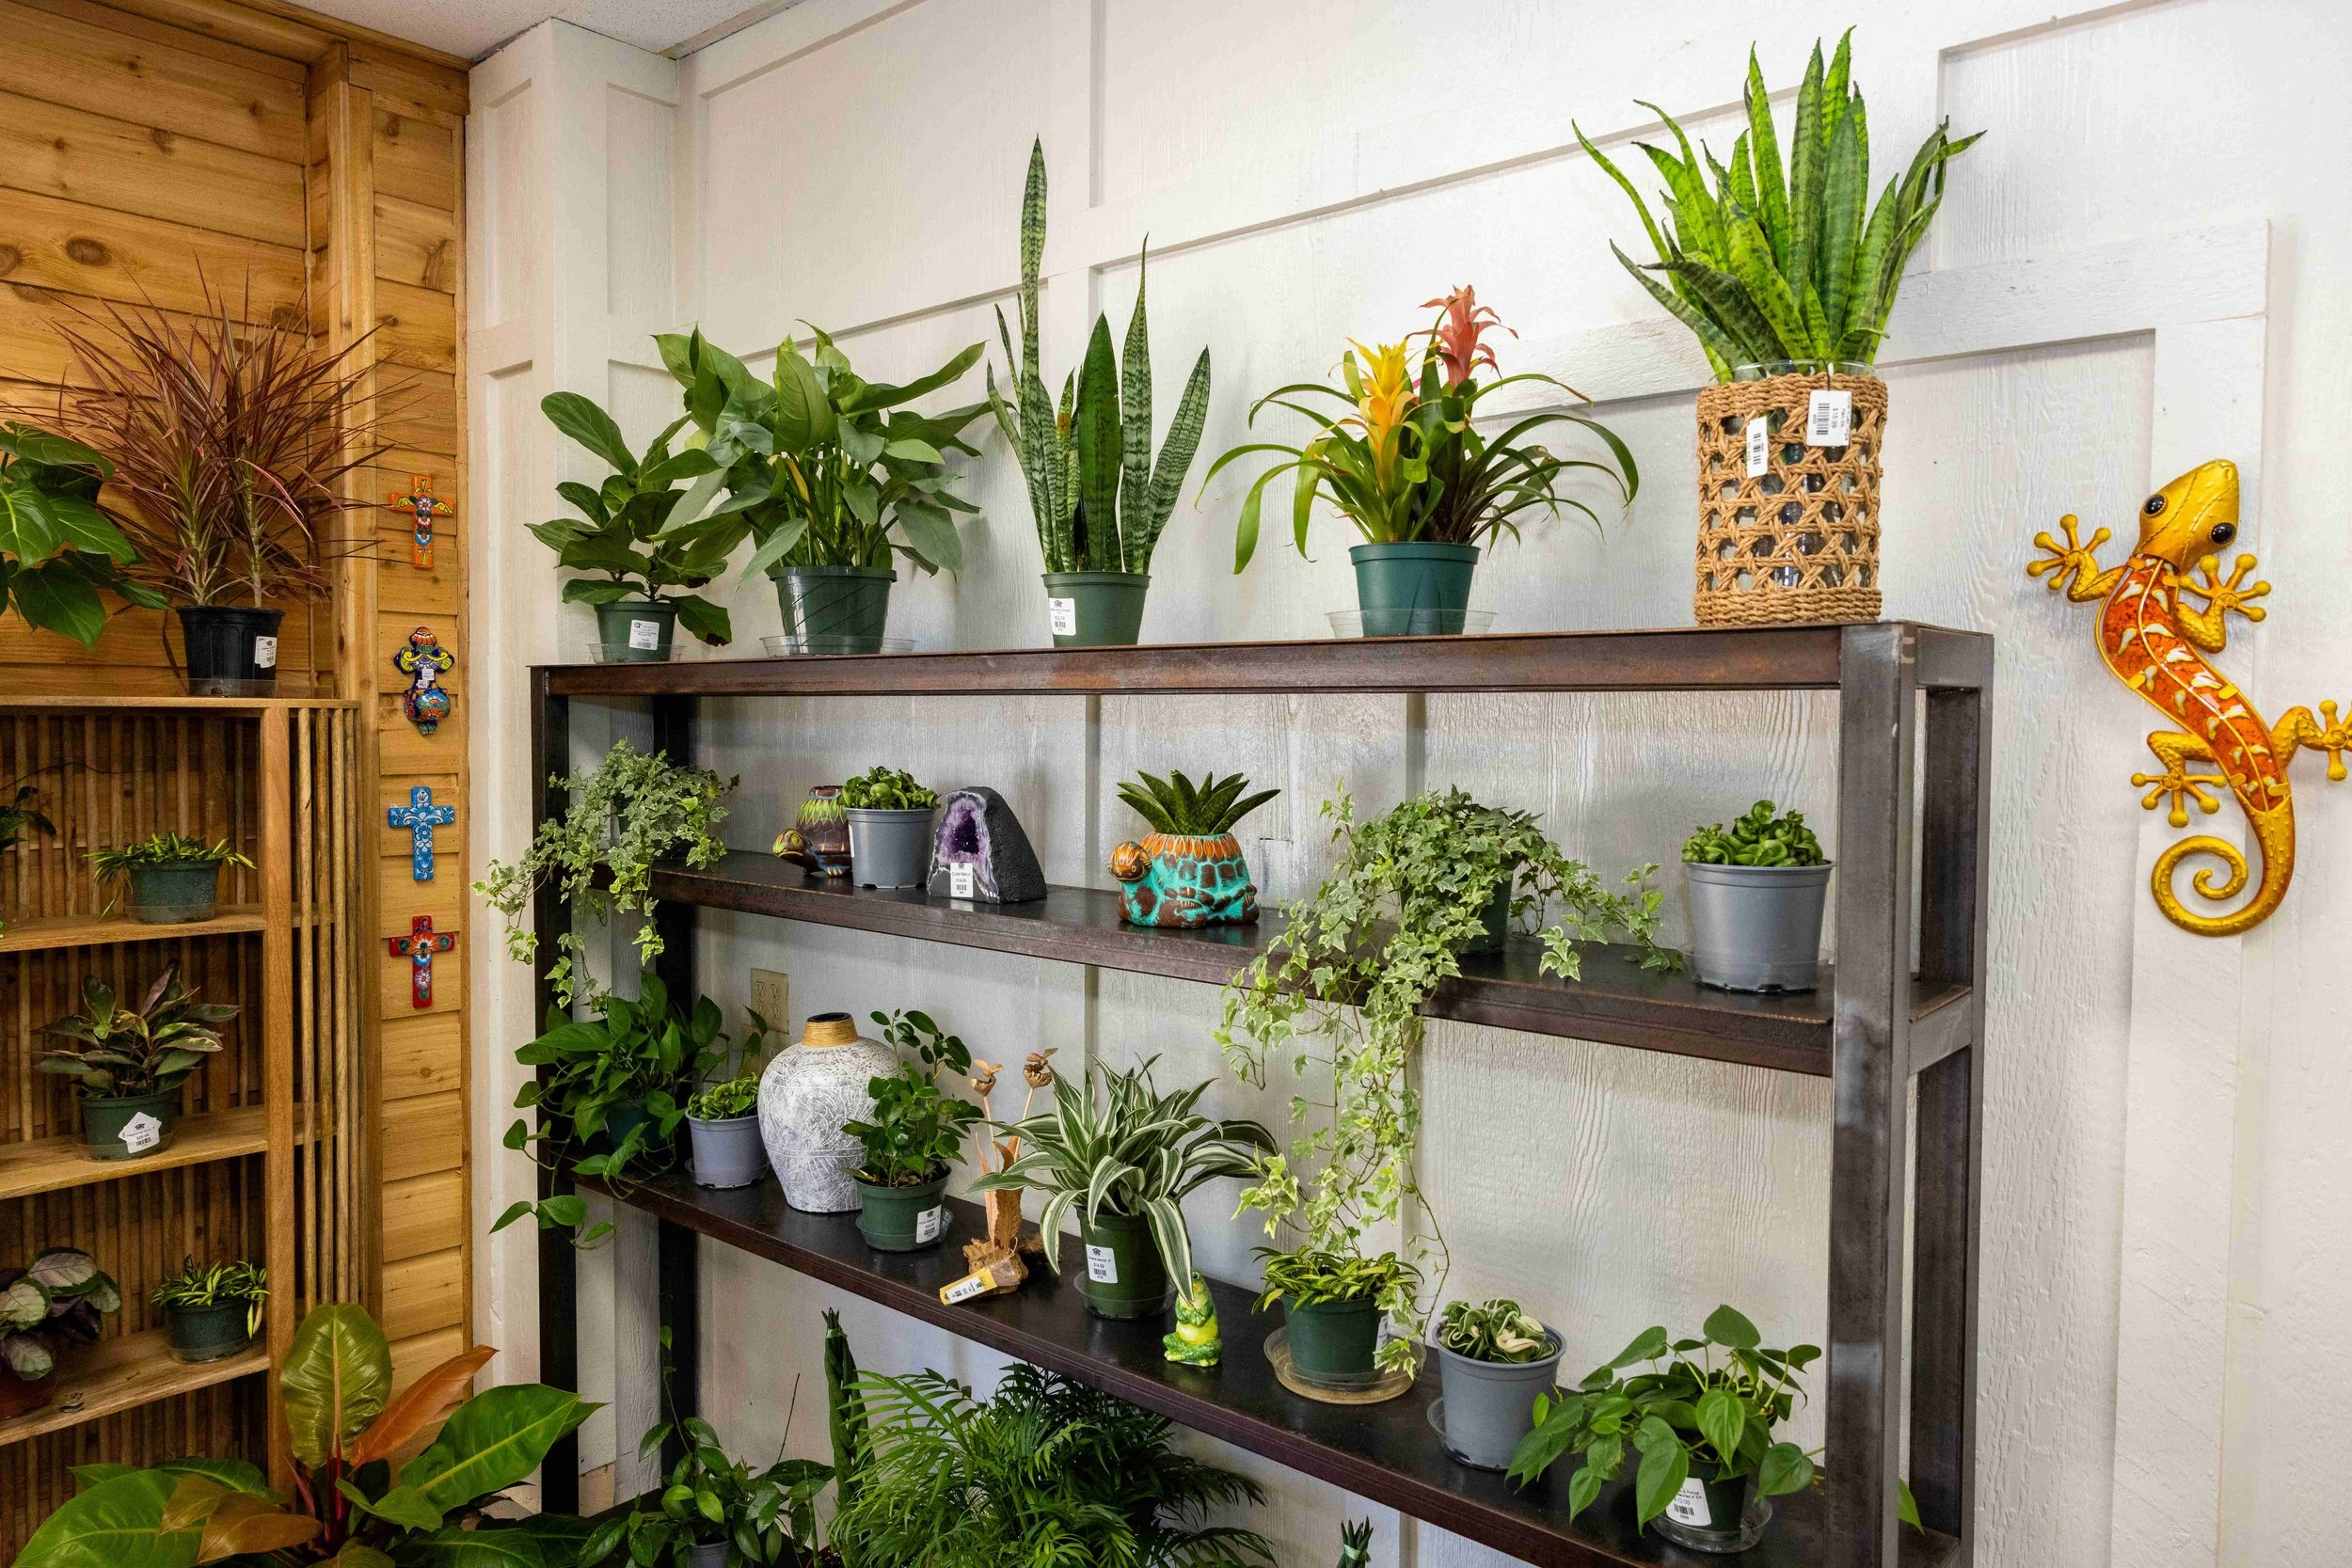
“You can easily get this look for far less than the cost of a dedicated greenhouse.”
The key is smart shelving and a bit of DIY decor. That main wood and metal shelf is a classic ‘industrial’ or ‘rustic’ style you can find at Target, Walmart, or on Amazon for $80-$150. The corner slat shelf could be a DIY project with a few pieces of lumber. The wall decor is where you can get creative with items from a craft fair, a thrift store, or by painting some simple wooden shapes yourself. It’s an affordable way to create a high-impact plant display in any sunny corner of your home.
26. Soak Up the Sun in a Bright Sunroom with Pink Bougainvillea
This sunroom feels so bright and inviting because it seamlessly blends the comfort of an indoor room with the wildness of a garden. The use of actual indoor furniture—like the upholstered sage green armchair and wicker seats with cushions—signals that this is a space for human relaxation, not just plant storage. The large potted trees and climbing bougainvillea bring a scale of nature typically reserved for the outdoors, inside. This is a crucial difference from a standard greenhouse. It’s not a workshop; it’s a living room that happens to be an ideal environment for stunning, oversized plants. It’s a more ‘finished’ version of the concept in Idea #11.
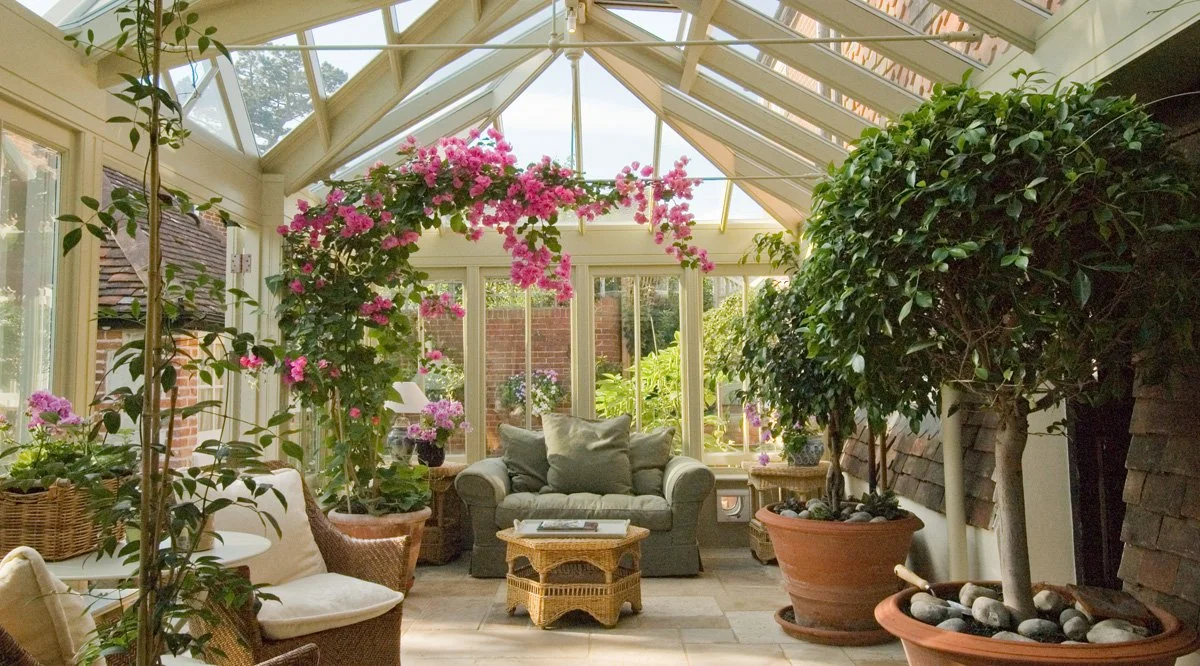
“That gorgeous pink bougainvillea is a showstopper, but it’s also a messy roommate.”
Bougainvillea drop their colorful bracts (the leaf-like parts that look like flowers) constantly, which means you’ll be sweeping the light stone tiles daily to keep them from looking littered. It’s also a fast-growing, thorny vine that will require aggressive and regular pruning to keep it from completely taking over the sunroom. The large potted trees will also need consistent watering and occasional root pruning or repotting, which is a major physical task for trees of this size.
Your Green-Thumb Era Starts Now
Whether you’re ready to build a backyard escape or just want to carve out a leafy corner in your living room, the perfect green space is within your reach. Don’t just let these ideas sit on your screen—pick one element you love and start planning. Your future self, surrounded by happy plants, will thank you. Now, go forth and grow!