You know that feeling when you finally find the *perfect* tree edging idea on Pinterest, but have no idea how to make it happen in your own yard? It’s a common scroll-hole, but your landscaping deserves better. After digging through countless options, we’ve curated 29 standout ideas that truly work for real homes. We’re covering everything from rustic stacked stone to sleek modern metal, with options for every aesthetic.
These aren’t just pretty pictures; they are real-world solutions. And stay until the end – we break down the most common mistakes that can ruin these looks. 📌 Save this to Pinterest for later — you’ll want to revisit these ideas.
1. Create a Lush, Layered Garden Bed Around Your Tree
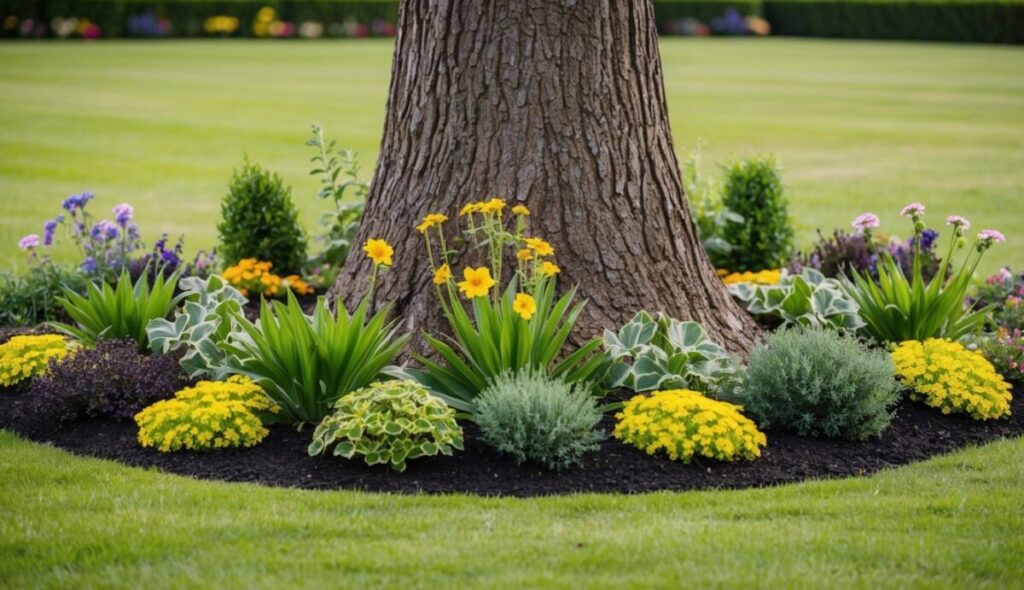
What makes this design so inviting is the masterful use of texture and color. The vibrant greens, soft purples, and sunny yellows create a living tapestry that feels both intentional and completely natural. It works because it avoids a flat, one-note look. The variety in plant height and leaf shape—from fine foliage to broad leaves—draws the eye in and adds a sense of depth and maturity, even if the garden is relatively new. The dark mulch acts as a perfect neutral backdrop, making the colors of the flowers and foliage pop dramatically.
“Putting this look together is more about time and plants than expensive materials.”
Here’s a rough idea of the cost for a similar 6-foot diameter bed:
- Starter Plants (perennials & annuals): $150 – $400
- Dark Mulch (4-6 bags): $30 – $50
- Soil & Compost: $40 – $75
- Edging (if desired, not visible here): $50 – $150
- TOTAL: $270 – $675
Budget alternative: Buy younger, smaller plants and let them grow in over a season or two. This can reduce your initial plant cost by 50-70%.
2. Define Your Garden with a Double Border of Stone and Gravel
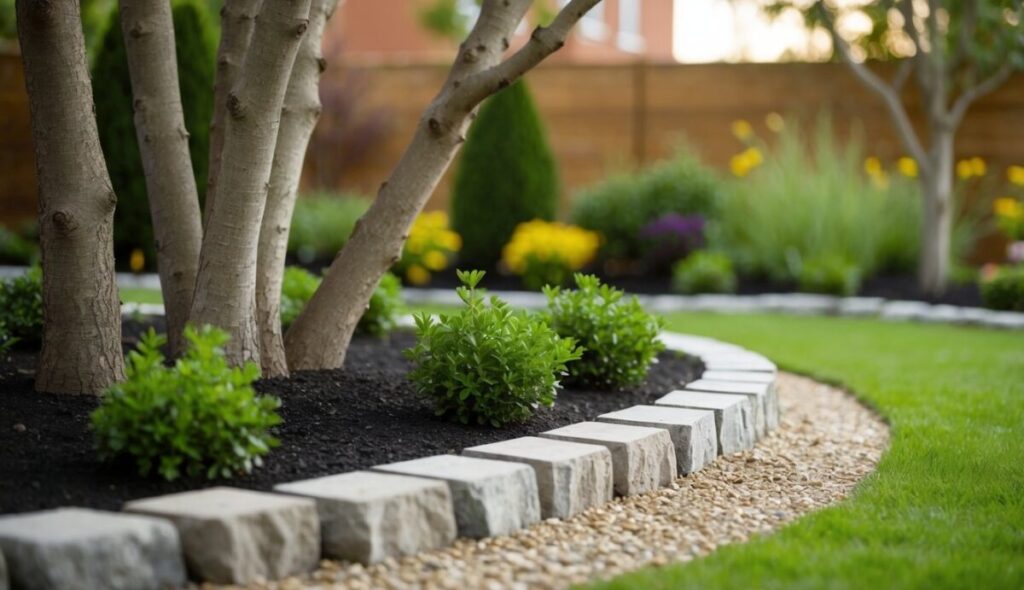
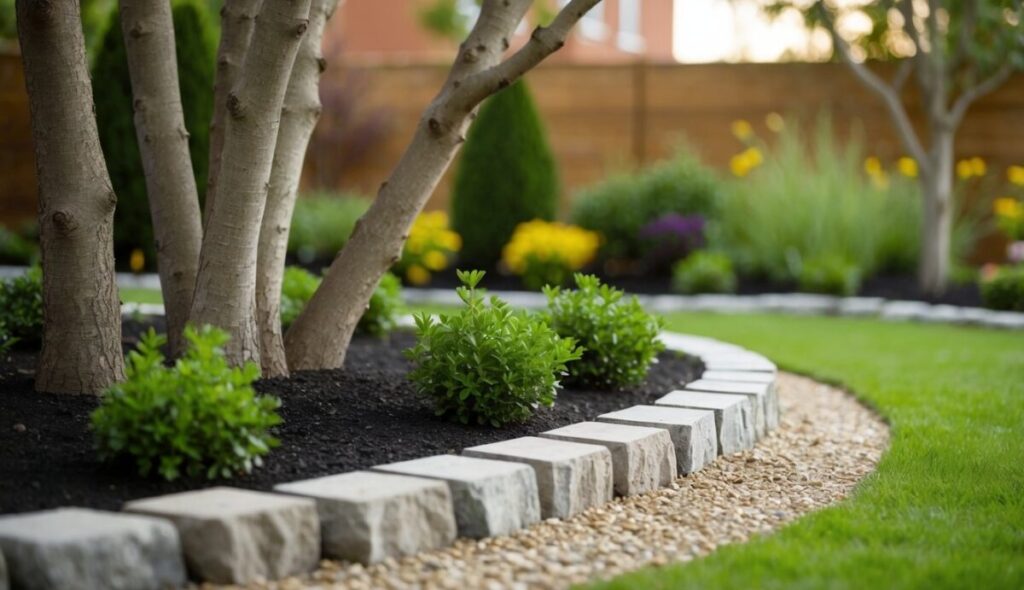
To keep this look clean and prevent the gravel from migrating into your lawn (and your lawn from creeping into the bed), install a physical barrier. Before laying down your stones and gravel, dig a shallow trench about 4-6 inches deep along the edge. Install a simple, flexible plastic or metal landscape edging in the trench. It should sit low enough that the top edge is almost completely hidden by the lawn on one side and the gravel on the other. This invisible line is the secret to a perpetually crisp edge with minimal maintenance.
“This design is all about proportional layers.”
Think of it as a recipe: 50% lush plantings, 30% protective mulch, 15% decorative gravel path, and 5% stone block border. The formula ensures no single element overwhelms the others. The stones provide a solid frame, the gravel creates negative space and a clean line, the mulch feeds the soil, and the plants bring the life. You can swap the materials—like using small wood chips instead of gravel—but keeping these proportions will maintain the balanced, polished feel.
3. Use Textured Concrete Blocks for a Pop of Floral Color
You don’t need a mason to get this structured, handsome look. Those light brown concrete blocks are readily available at big-box home improvement stores like Lowe’s or The Home Depot, often for just $2-$4 per block. A simple circular bed around a tree might only require 15-20 blocks, putting your total materials cost for the edging under $80. Look for blocks with a textured or ‘tumbled’ face, as they offer a more organic, stone-like appearance than perfectly smooth blocks, which can sometimes look too industrial.
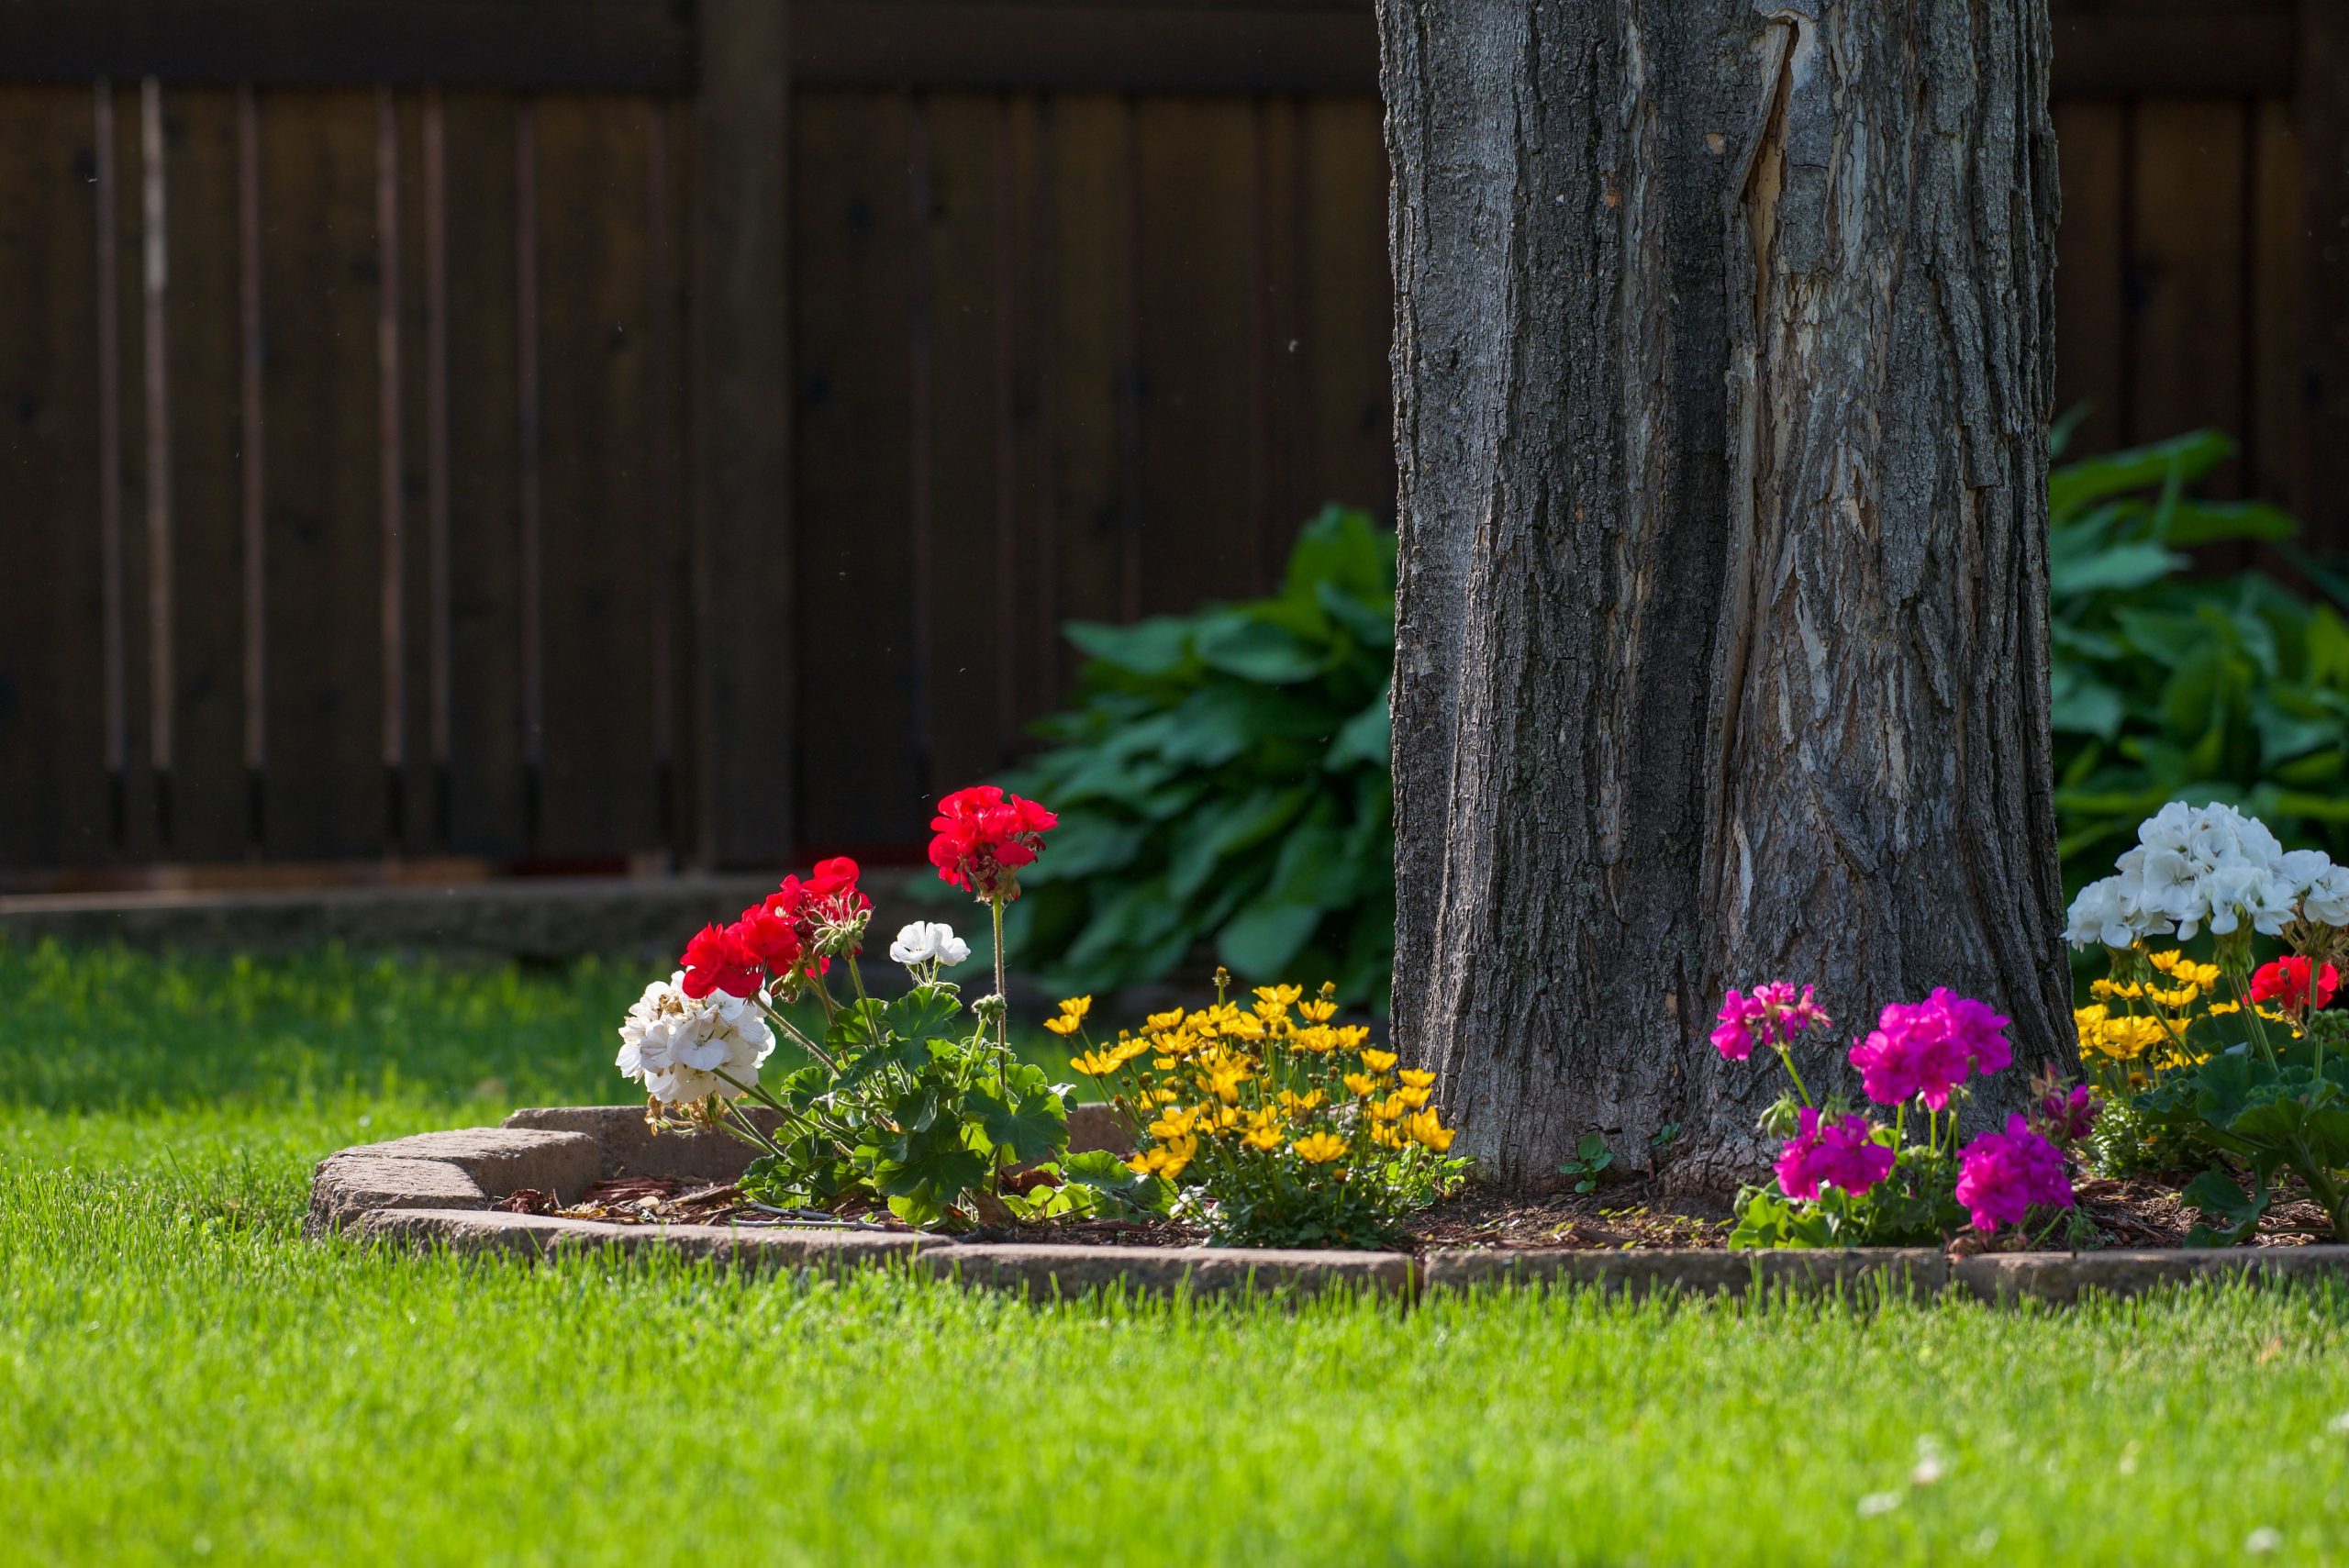
“Here’s a dose of honesty: achieving a perfect, stable circle with concrete blocks requires a perfectly level foundation.”
If your yard has a noticeable slope, you will need to dig a trench and level it with sand or crushed gravel before laying the first course of blocks. Skipping this step will result in a wobbly, uneven, and unprofessional-looking ring that can shift or topple over time. It’s a bit of extra sweat equity upfront that pays off for years.
4. Build a Structured Octagonal Planter for a Modern Feel
Creating this octagonal raised bed is a great weekend project. Here’s a quick guide:
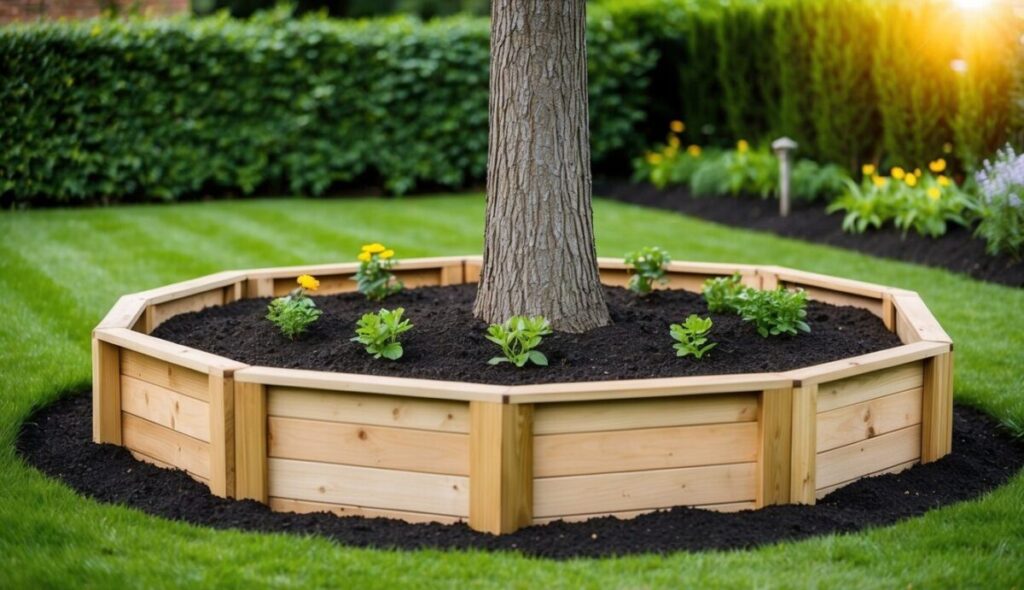
“Time Estimate: 4-6 hours
Material Cost: $100 – $250 (for wood, screws, soil)
”
- Time Estimate: 4-6 hours
- Material Cost: $100 – $250 (for wood, screws, soil)
- Step 1: Cut eight identical lengths of 2×6 or 2×8 lumber. To form an octagon, you’ll need to cut the ends of each board at a 22.5-degree angle.
- Step 2: Assemble the frame on a level surface, connecting the angled ends to form the eight-sided shape. Secure with exterior-grade screws.
- Step 3: Position the frame around your tree, ensuring it’s centered.
- Step 4: Fill with quality garden soil and your chosen plants.
This type of defined, geometric edging works best on a relatively flat lawn where its clean lines can really stand out. A minimum of 5-6 feet of clear, level lawn space around the tree is ideal to allow the octagonal shape to feel intentional and not cramped. It’s perfectly suited for small to medium suburban yards where you want to create a strong focal point. For massive yards or heavily sloped areas, a more organic shape, like the dry-stacked wall in Idea #5, might feel more integrated.
5. Embrace a Rustic Vibe with a Dry-Stacked Stone Wall
The single element that gives this design its magic is the imperfect, rustic nature of the dry-stacked stone wall. It’s not a perfectly uniform, mortared barrier. It’s irregular, with stones of different sizes and shapes fitted together like a puzzle. This allows small plants to spill over the top and nestle into the crevices, blurring the line between the hardscape and the garden itself. If you replaced this with a perfectly neat brick edge, you would lose all the romantic, established-over-time character.
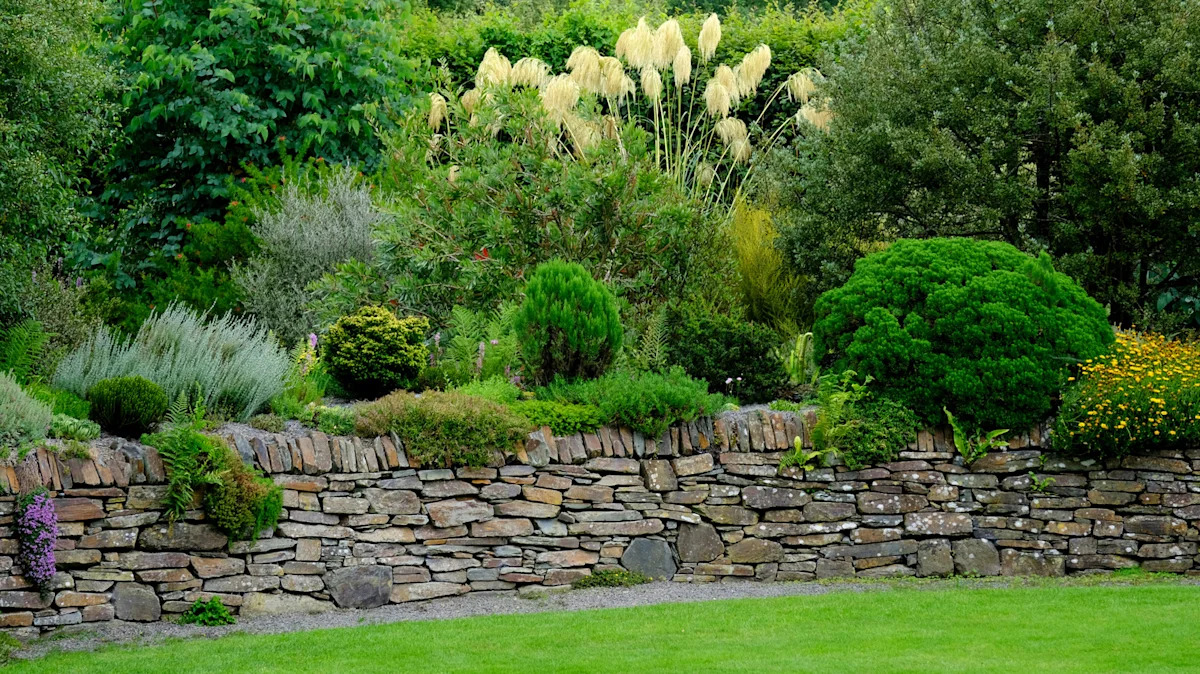
“A dry-stacked stone wall is beautiful but not a “set it and forget it” solution.”
Because there’s no mortar, weeds and grass will inevitably find their way into the little gaps and crevices between the stones. Plan on spending an hour or so every month during the growing season to pull these unwanted guests by hand. Additionally, over several years, the wall can settle or shift, especially if you live in a climate with freeze-thaw cycles. You might need to occasionally re-stack a section to keep it stable and looking its best.
6. Achieve a Clean, Modern Circle with Light Gray Pavers
This look is all about high contrast and clean geometry. The three key elements—the bright green lawn, the dark brown mulch, and the light gray pavers—create distinct, bold rings of color that are visually satisfying. The precise circular shape provides a sense of order and calm in the otherwise organic setting of a yard. It’s effective because it doesn’t try to blend in; it stands out as a deliberate and polished design choice that frames the tree like a piece of art. The simplicity is what makes it so strong.
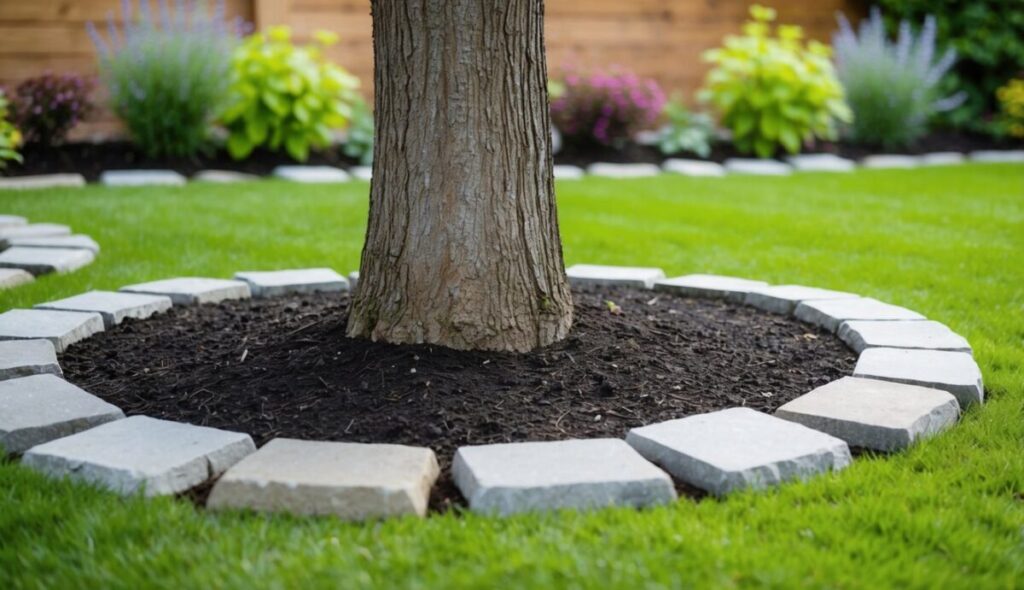
“To get that professional, long-lasting finish, never lay pavers directly on the soil.”
You must create a stable base. Dig a trench about 4 inches deep and 2 inches wider than your pavers. Fill it with 2-3 inches of paver base (a mix of gravel and sand), and compact it thoroughly. Then add a 1-inch layer of leveling sand on top. Set your pavers into the sand, tapping them into place with a rubber mallet. This prevents them from wobbling, sinking, or heaving over time.
7. Integrate Stone and Plantings for a Cohesive Landscape Design
Before you commit to a full landscape overhaul, run through this simple checklist to ensure your plan is solid. A little foresight prevents a lot of headaches later.
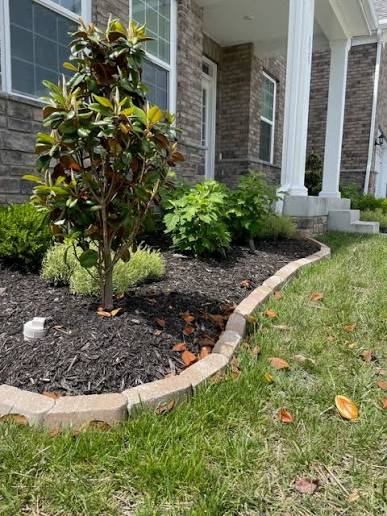
“Have I measured the final footprint?”
Make sure it doesn’t interfere with mowing paths, walkways, or kid play areas.
Do I understand the sun/shade pattern in this specific spot? Choose plants that will thrive in the actual light conditions, not just the ones you like at the nursery.
Is my budget realistic? Factor in the cost of stone, soil, mulch, and mature plants PLUS a 15% contingency for surprises.
How will this be irrigated? Is it close enough to a hose, or will I need to run a drip line?
There’s a major shift away from tiny, isolated “tree rings” toward more integrated, holistic landscape design. Homeowners in 2026 are thinking bigger, using edging to define entire garden beds that happen to contain trees. This approach makes the yard feel more cohesive and professionally designed. It reflects a desire for curb appeal that looks less like a DIY afterthought and more like a seamless extension of the home’s architecture, boosting property value in the process.
8. A Simple Stone Circle for a Young Tree
This simple, contained look is extremely budget-friendly. You can buy these scalloped concrete edgers for just a few dollars apiece at any home improvement store. For a small ring like this, you might spend as little as $30-50 on the materials. The dark mulch is also inexpensive, usually selling for $4-6 per bag. It’s a project you can complete in a single afternoon for less than the cost of a nice dinner out. For an even cheaper route, check Facebook Marketplace for people giving away leftover landscape blocks for free.
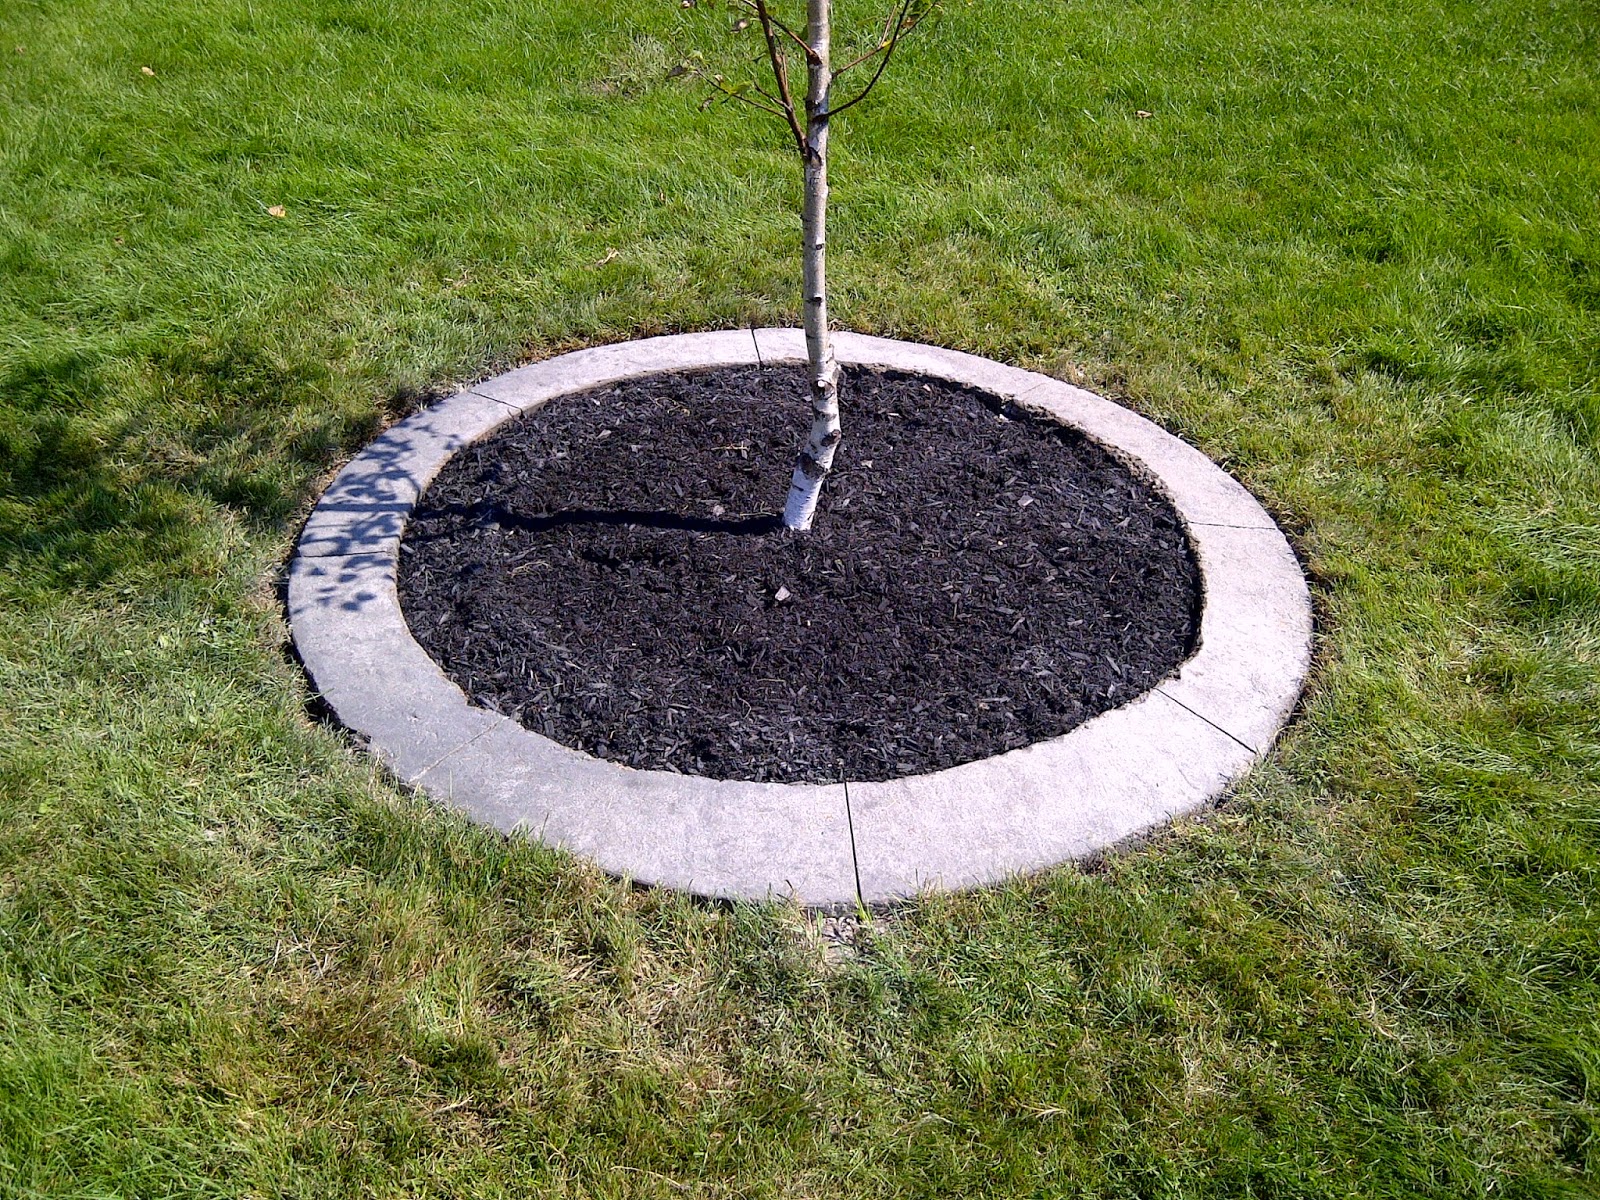
“While this is a great solution for a young tree, be prepared to expand it in the future.”
A tree’s roots grow outward, and a small ring can eventually constrict the root flare, potentially harming the tree. More importantly, the mulch serves to protect the trunk from lawnmowers and weed whackers. As the tree grows, you’ll want to widen the circle to keep that protective barrier. Think of this as a starter ring, and plan to graduate to a larger one, like the paver version in Idea #6, in 5-7 years.
9. Use Sleek Metal Edging to Frame a Variegated Tree
The beauty of this design lies in its minimalist formula. It breaks down to roughly 70% green lawn, 25% rich organic mulch, and just 5% sharp metal edge. That tiny sliver of metal is doing all the hard work, creating a crisp, clean separation that makes the whole arrangement feel deliberate and tidy. The star of the show is the variegated tree, and this formula ensures nothing distracts from it. By keeping the edging minimal, you put the focus squarely on the plant life.
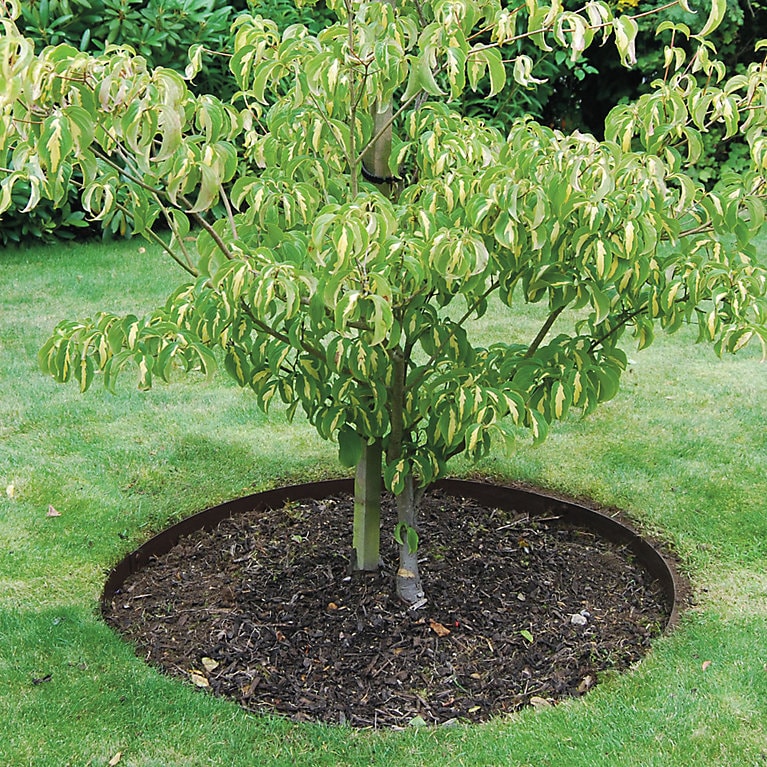
“Thin metal edging looks fantastic, but it requires careful lawn maintenance.”
You can’t just run a heavy ride-on mower over it. The edge can get bent, dented, or pushed down. You’ll need to use a string trimmer carefully along the metal line to get a clean cut without damaging the edging or the trimmer line. If the metal is steel, watch for rust over time, which can be a beautiful patina for some (Corten steel) or an eyesore for others (standard galvanized steel).
10. Frame Palm Trees with a Raised Masonry Planter
This design succeeds by creating a clean, architectural “frame” for the organic shapes of the palm trees. The straight lines and solid mass of the gray masonry block planter provide a strong visual anchor, a contrast to the feathery fronds and curving tree trunks. Using river rocks as a top dressing instead of mulch adds to the clean, structured aesthetic and ties in with the gray of the blocks. The consistent repetition of the palms and spiky accent plants down the line creates a pleasing rhythm.
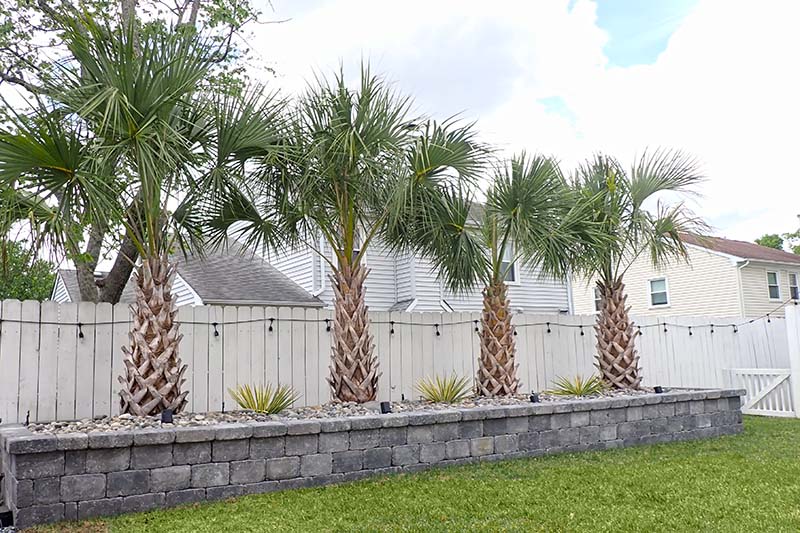
“A linear, raised planter like this is a powerful tool for defining spaces.”
It works brilliantly along a property line, driveway, or against a fence, as shown here. This idea is best for medium to large properties where you have a long, straight run to work with—at least 20-30 feet to get the full rhythmic effect of the repeating plants. For shorter spaces, a large, singular raised bed, like the octagon in Idea #4, might be a more suitable choice to avoid looking stunted.
11. Choose Stamped Concrete for a Custom, High-End Curve
The game-changer here is the stamped concrete. It’s not just any edging; it’s a custom-poured, continuous curb that has been textured and colored to mimic natural stone. This eliminates the seams and potential for weeds you get with individual blocks or pavers. It allows for graceful, flowing curves that are difficult to achieve with other materials. The result is a uniquely high-end, permanent, and integrated look that becomes part of the landscape itself rather than just sitting on top of it.
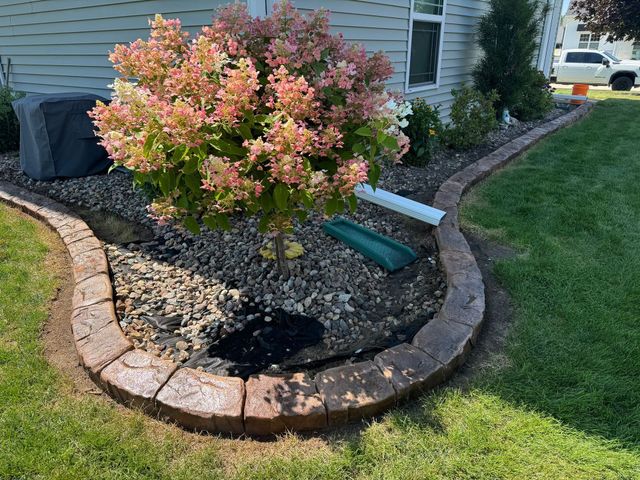
“Stamped concrete edging is a professional job, and the price reflects the custom labor involved.”
Here is a general cost estimate:
- Stamped Concrete Edging (professionally installed): $12 – $20 per linear foot
- Gravel/Rock Fill: $50 – $150 depending on size and type
- Hydrangea Bush & Other Plants: $75 – $200
- Weed Barrier Fabric: $20 – $40
- TOTAL (for a 25-foot bed): $445 – $890
Budget alternative: Mimic the curve with less-expensive steel or plastic edging and cover with decorative rock, saving 60-70% on the edging portion.
12. A Functional, DIY Ring for a Young Birch Tree
Let’s be honest: this is not a high-design statement, but a practical, in-progress solution. This setup is all about function over form. The concentric rings and wooden stakes are focused on protecting a young, vulnerable tree and stabilizing new edging. It’s the kind of temporary but necessary phase a landscape goes through. While it might not win any design awards today, it’s doing the important work of establishing a healthy tree and a defined bed that can be beautified later, once everything has settled.
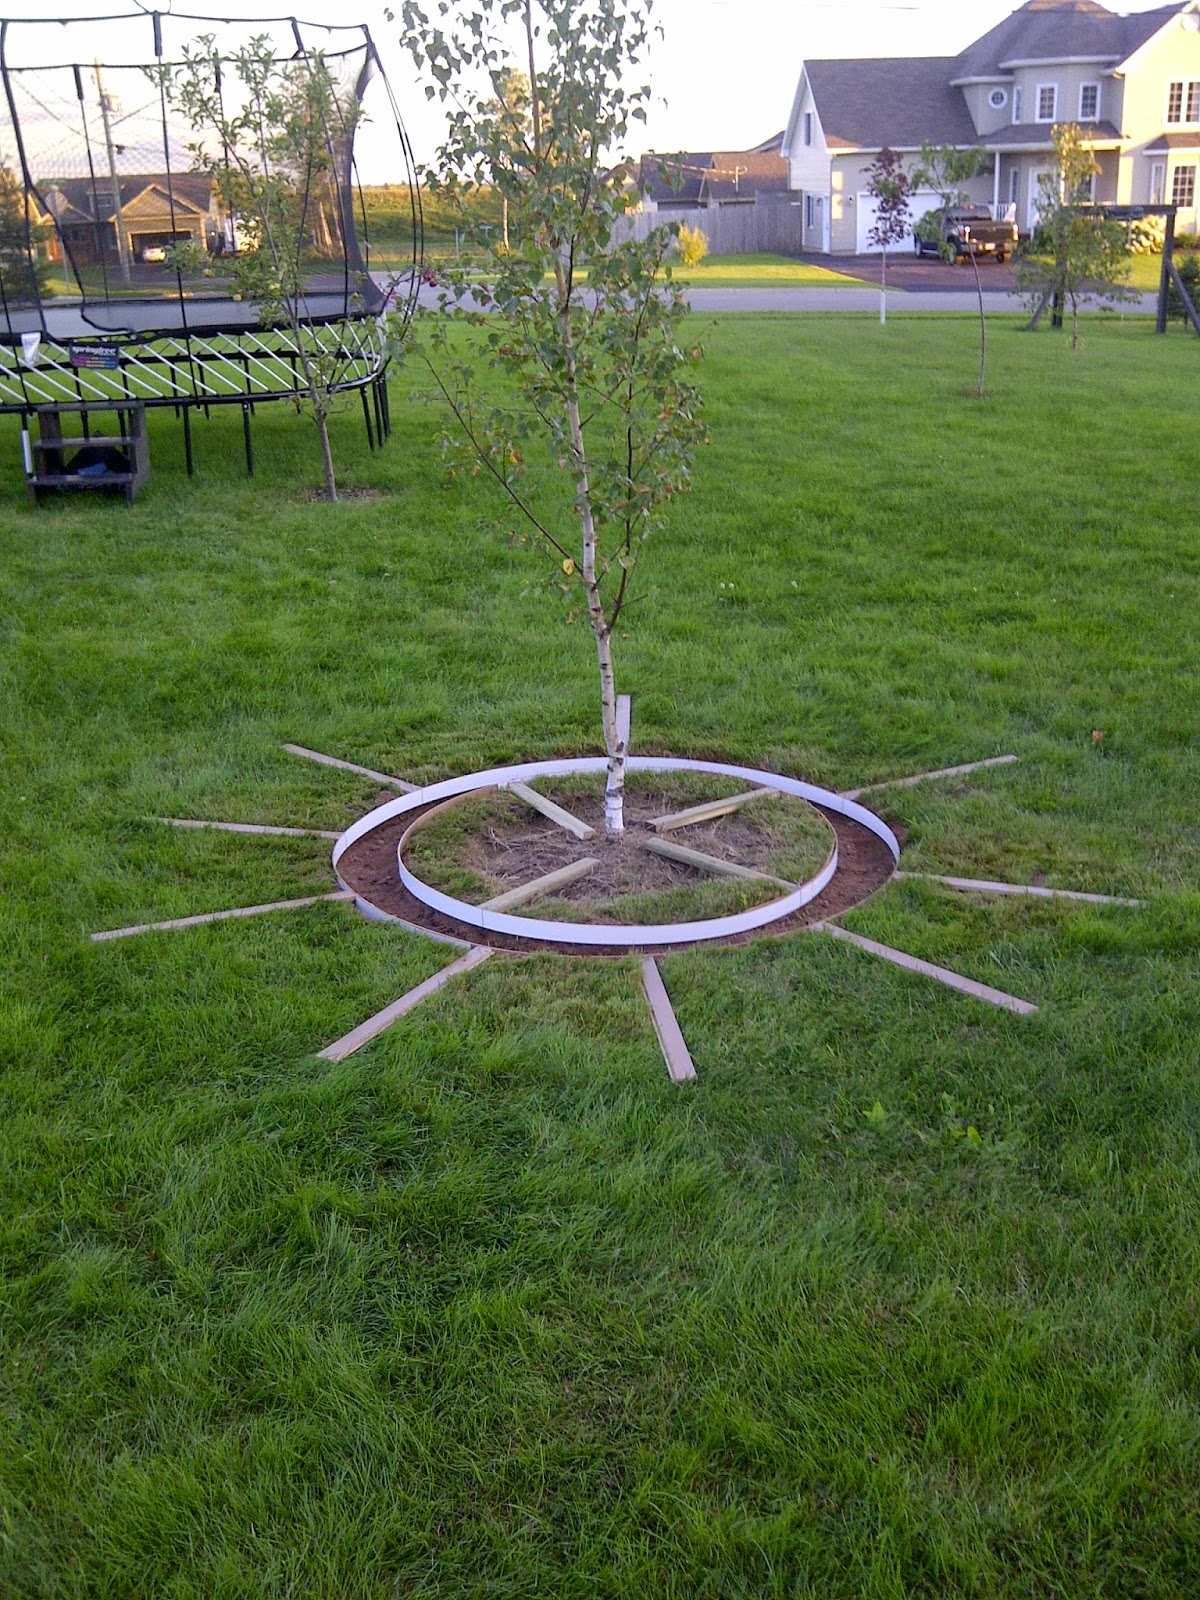
“This spoke-like stabilization method is a clever DIY trick for holding flexible plastic edging in a perfect circle while the soil settles.”
Here’s how to do it:
- Time: 1 hour
- Cost: ~$20 for stakes/scrap wood
- Step 1: Install your circular plastic edging, leaving it a bit loose.
- Step 2: Hammer in wooden stakes on the OUTSIDE of the ring, spaced every 2-3 feet.
- Step 3: Cut scrap wood planks to bridge the gap between the stakes and the edging ring.
- Step 4: Wedge the planks in, pushing the ring into a perfect circle. Once the soil and mulch are filled in and settled, the supports can be removed.
13. Install a Poured Concrete Curb for a Permanent Edge
The effectiveness of this tidy look comes from its permanence and mowing-strip functionality. The concrete curb creates an unbreachable barrier between the mulch bed and the lawn, ensuring that perfect circle stays perfect forever. Grass can’t creep in, and mulch won’t wash out. The curb is also set at a height that allows the wheel of a lawnmower to run right along it, creating a “mowing strip” that eliminates the need for tedious trimming or edging with a weed wacker. It’s a prime example of smart design that saves labor down the line.
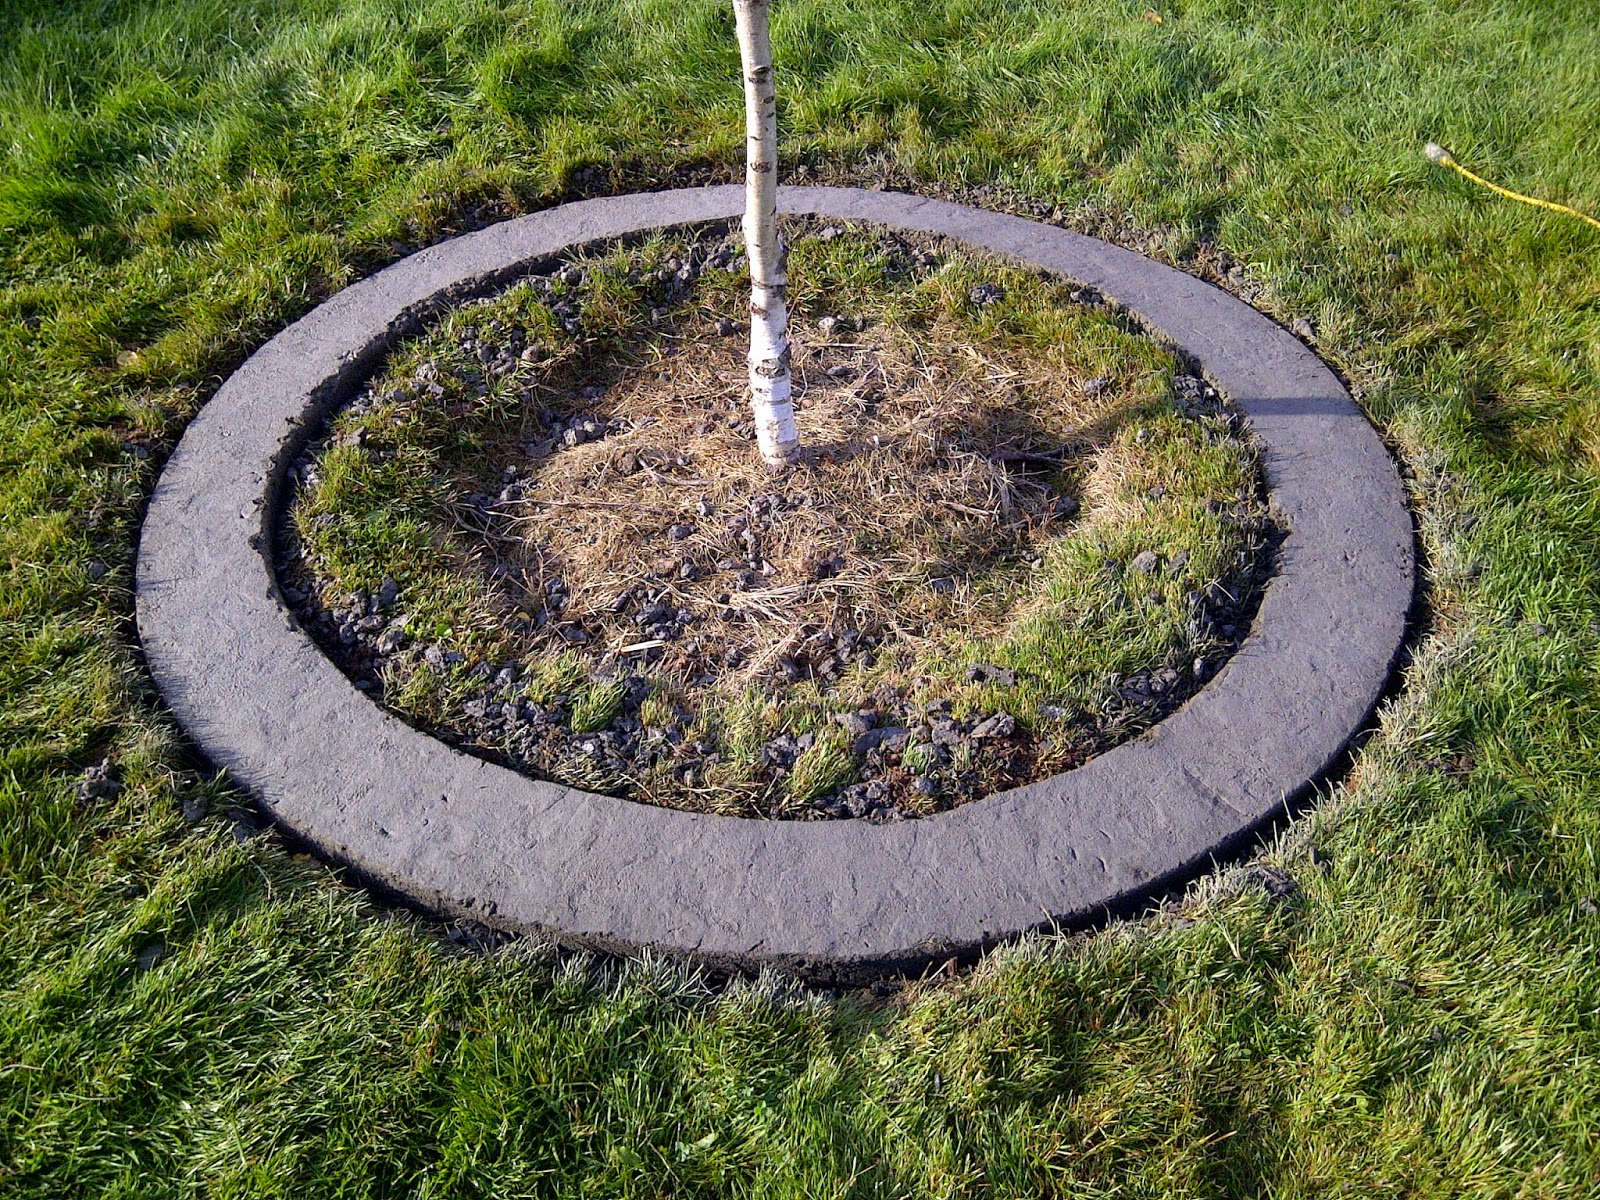
“If you’re having a professional install a concrete curb, ask them to add reinforcement wire or fiber mesh to the concrete mix.”
This is especially important in climates with cold winters. The small additional cost significantly increases the concrete’s tensile strength, helping it resist the cracking that can be caused by seasonal frost heave and soil movement. It’s a small upgrade that can add decades to the life of your landscape edging. For a simple circle, it’s an affordable insurance policy.
14. Use a Thin Metal Ring for a Minimalist Look on Artificial Turf
The crucial element here is the artificial turf. The perfectly manicured, unchanging green of the turf makes the simple metal ring and a small planting bed pop in a way that wouldn’t be possible with natural grass. There are no weeds, no uneven growth, and no discoloration to distract from the clean, graphic quality of the circle. This design is less about gardening and more about creating a piece of living sculpture. It works because the turf provides a flawless, maintenance-free canvas. This look is much harder to maintain with the messy reality of a real lawn.
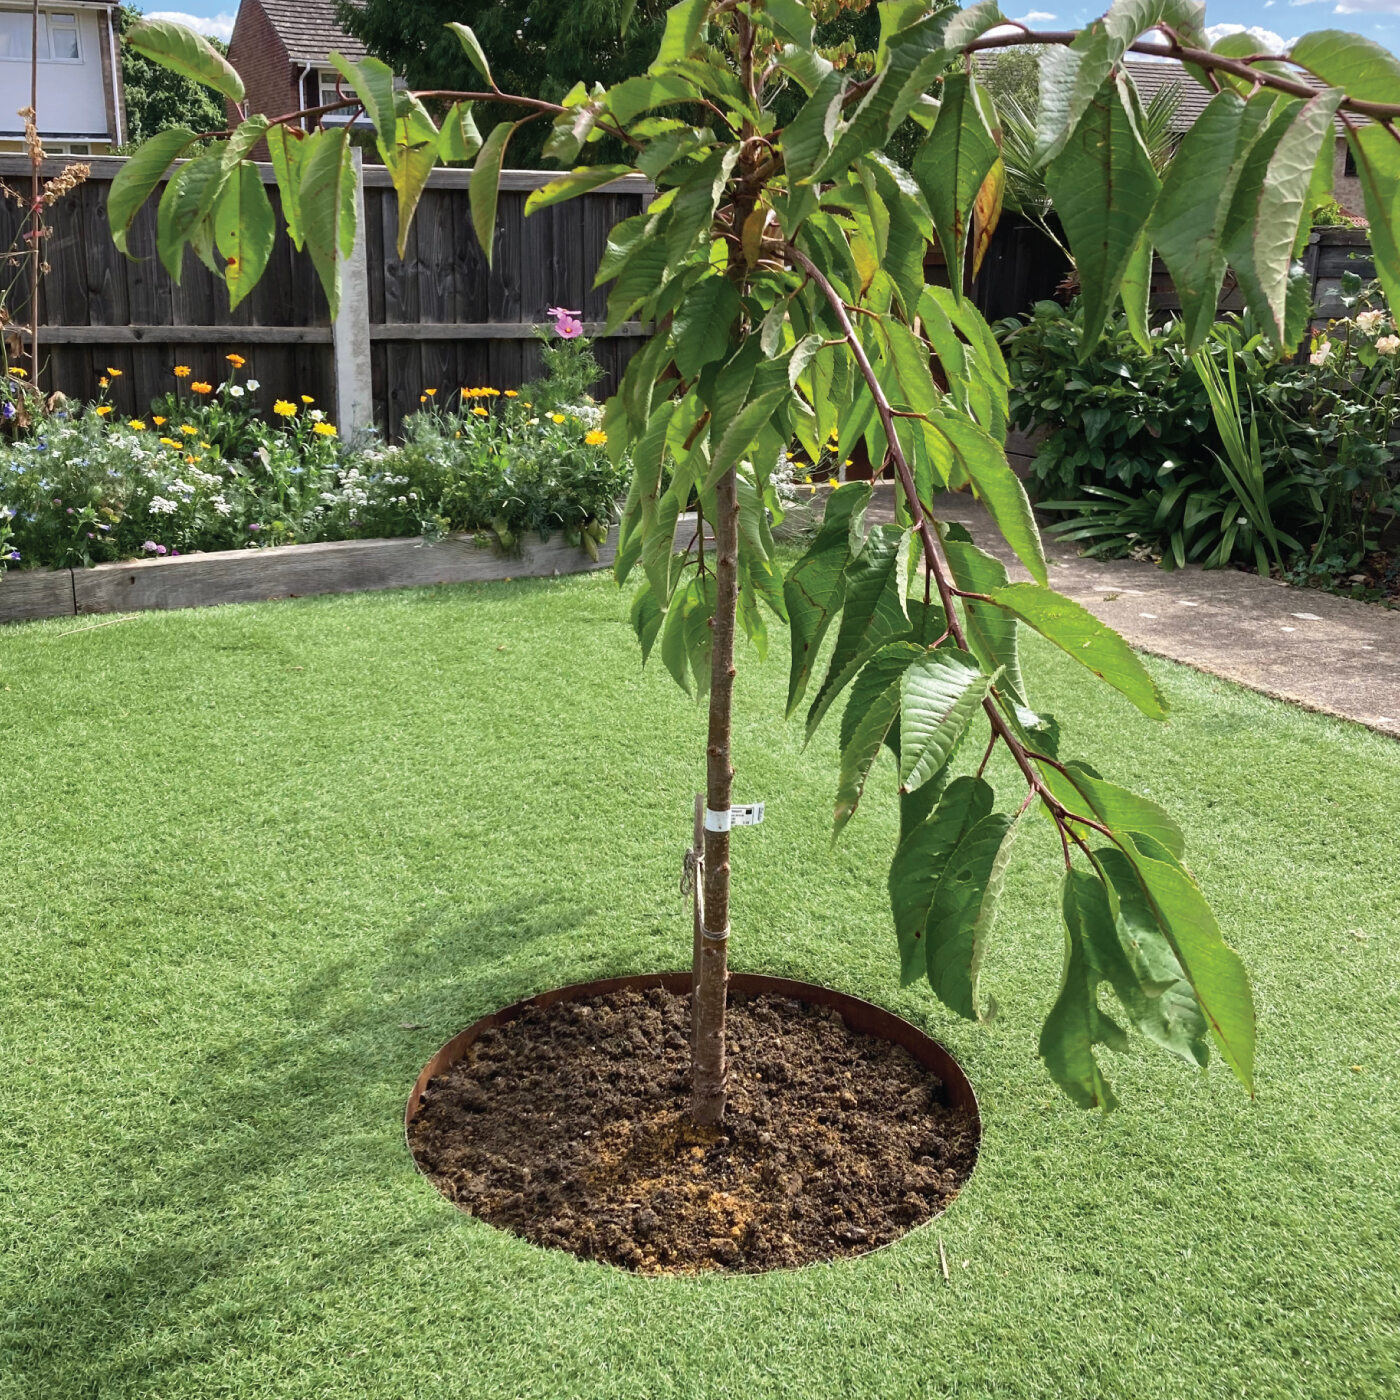
“This idea is tailor-made for smaller, contained outdoor spaces where cleanliness and low maintenance are top priorities.”
Think urban courtyards, rooftop patios, or small backyard designs where a natural lawn is impractical. The scale is intentionally small and precise. This would look lost and out of place in a large, rambling, naturalistic yard. It’s a perfect fit for a space under 500 square feet, where every design choice needs to be deliberate and impactful. Compare its tidy nature to the more organic feel of Idea #17.
15. Create a Decorative Tree Bed with Pavers and River Rocks
This highly decorative look combines several elements for a classic, manicured feel. Here’s a potential cost breakdown for a bed of this style:
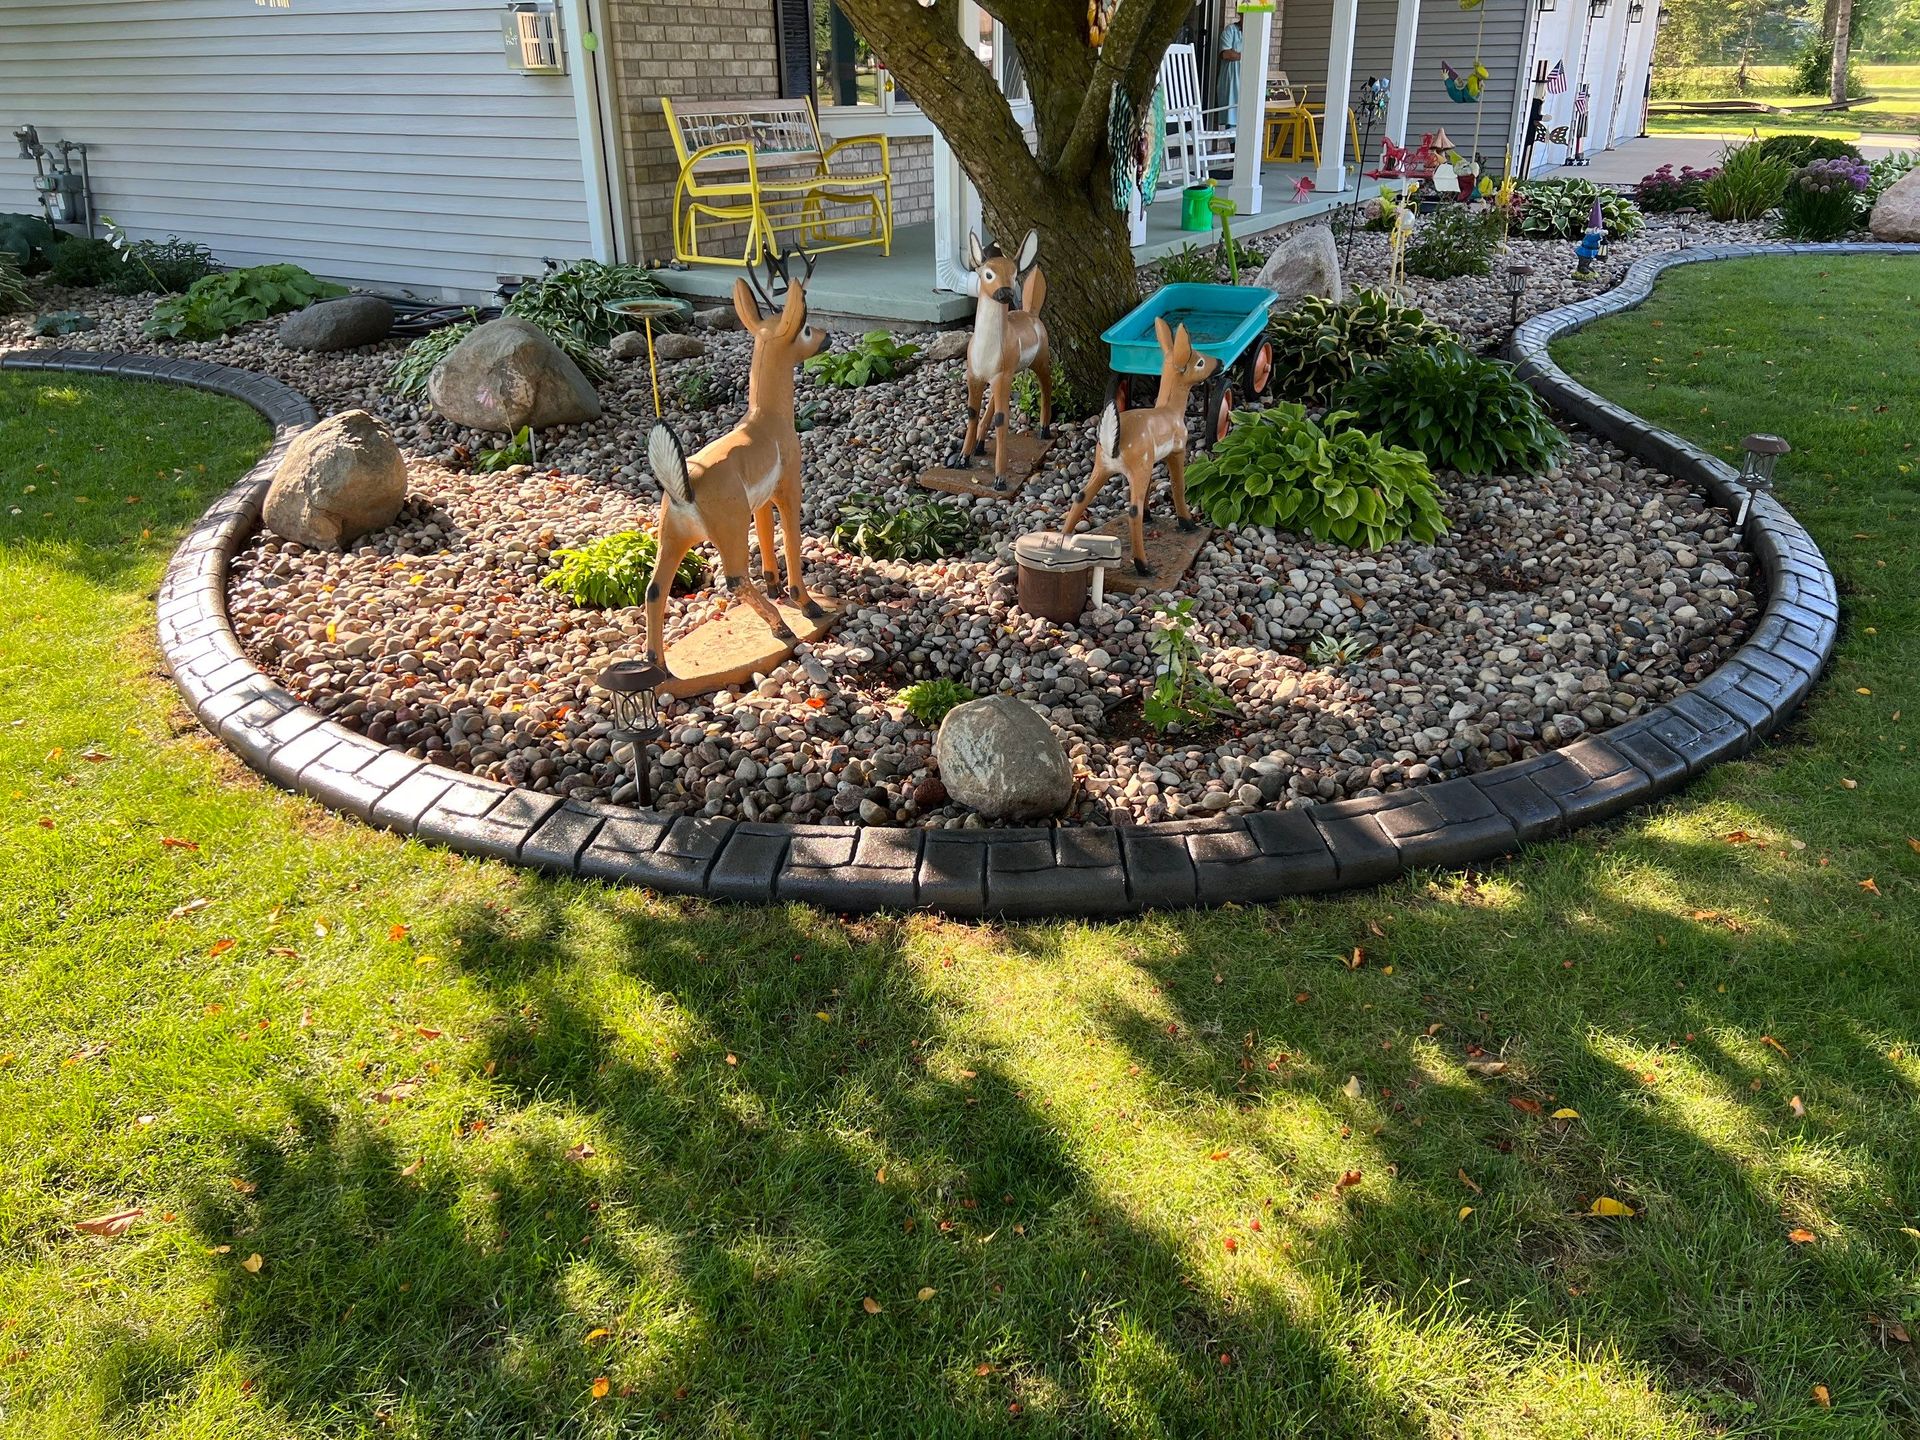
“Paver-style Edging Bricks (30-40 blocks): $60 – $120
Light-colored River Pebbl”
- Paver-style Edging Bricks (30-40 blocks): $60 – $120
- Light-colored River Pebbles (4-6 bags): $40 – $70
- Hosta Plants (2-3 mature plants): $45 – $90
- Landscape Fabric (under pebbles): $20 – $30
- Decorative Accents (figurines, lights): $30 – $75
- TOTAL: $195 – $385
Budget alternative: Source your river rocks and pavers from Facebook Marketplace or Craigslist, where people often give away leftovers for free. Propagate hostas from a friend’s garden.
A word of warning about using light-colored pebbles as mulch: they look fantastic when they’re first installed, but they are a magnet for dirt, stray grass clippings, and falling leaves. Unlike dark wood mulch that hides debris, every little bit of organic matter will stand out against the light stones. To keep this looking sharp, you’ll need to periodically rinse the rocks with a hose and use a leaf blower (on a low setting!) to clear away debris. It’s a higher-maintenance choice than a simple wood chip bed like in Idea #21.
16. Soften a Dry Lawn with Spherical Green Shrubs
This design is a brilliant lesson in using shape and color to overcome a challenging environment. The perfectly spherical, vibrant green shrubs create a stark, pleasing contrast against the dry, light-brown lawn. The repetition of these dome shapes provides a sense of rhythm and intentionality, turning the tree base into a deliberate sculptural arrangement. Without these shrubs, you would just have a lone tree on a struggling lawn. The shrubs add structure, life, and a touch of formality that elevates the entire scene.
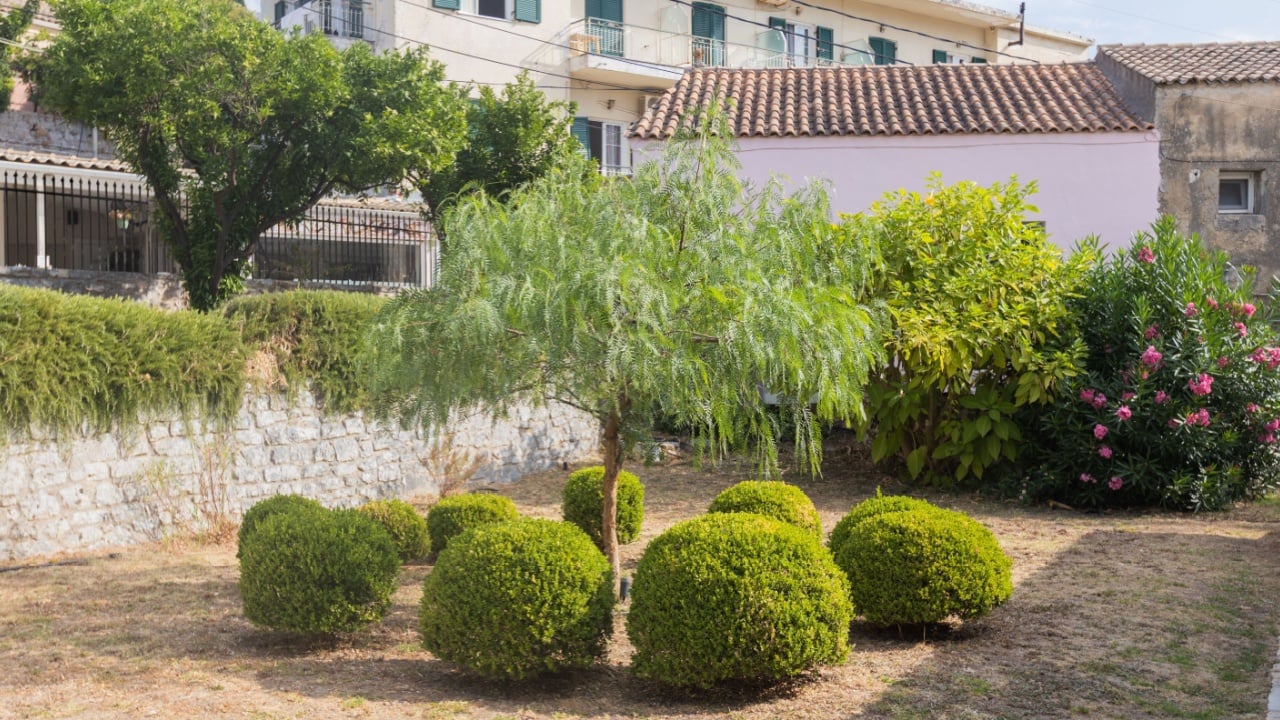
“As climates change and water conservation becomes more critical, especially in the American West and Southwest, xeriscaping—or designing with drought-tolerant plants—is moving from a niche category to a mainstream necessity.”
This look is a perfect example of that trend. It acknowledges the reality of a “golden” summer lawn instead of fighting it. The use of hardy, low-water shrubs that stay green without constant irrigation is both smart and beautiful, proving that sustainable landscaping doesn’t have to sacrifice style.
17. Integrate a Tree Directly into a Flagstone Patio
The single most important decision in this design was to preserve the existing tree and build the patio *around* it, rather than cutting it down. This choice instantly transforms the patio from a standard hardscape a to a unique space with character and history. The tree provides natural shade, a vertical element, and an organic focal point that manufactured materials can never replicate. Removing the tree would have made the patio installation easier, but it would have stripped the space of its soul.
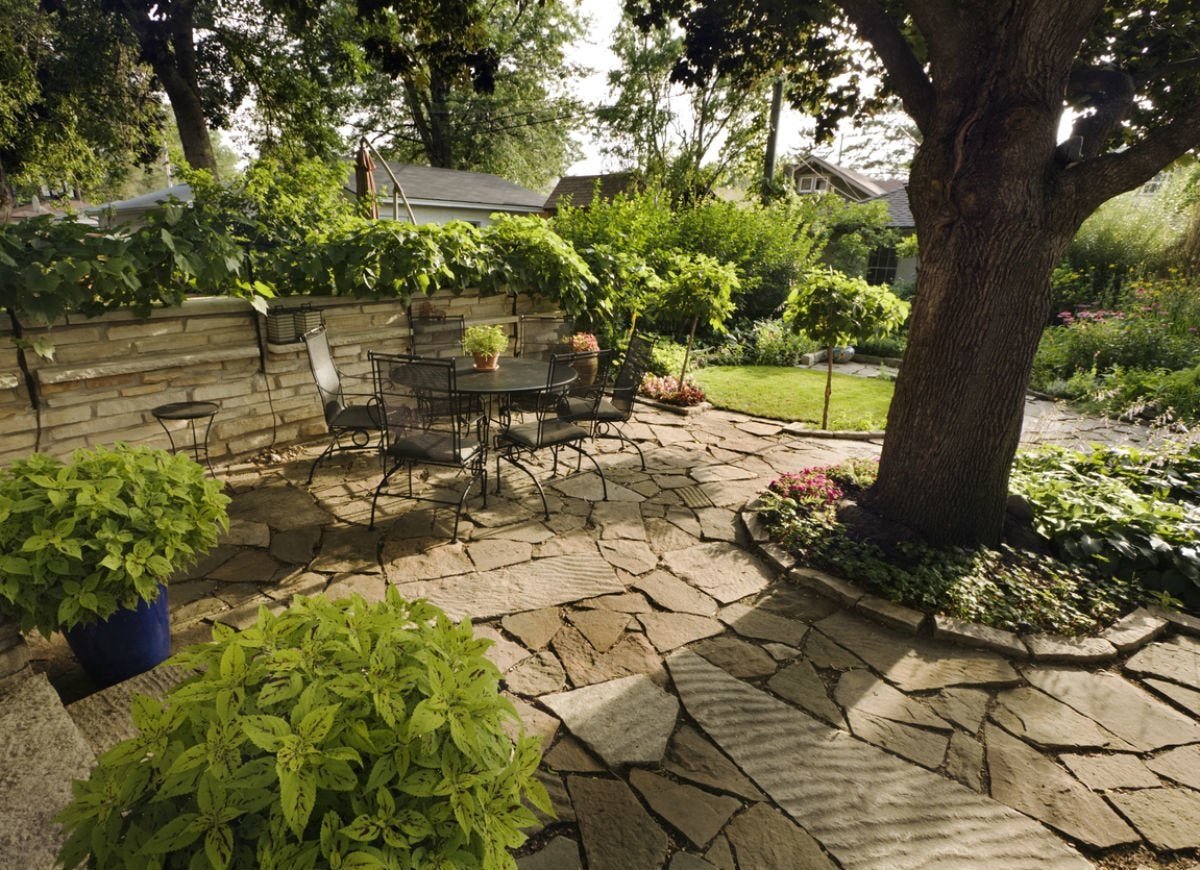
“When building a patio around a tree, giving the trunk enough room to grow is critical.”
A common mistake is to lay the stones too close to the base. As a rule of thumb, leave at least a 2-foot diameter of open ground around the trunk of a mature tree, and even more for a young tree that will grow significantly. This open area allows water and oxygen to reach the roots and prevents the expanding trunk from heaving and cracking your beautiful flagstone work in the future.
18. A Simple Brick Paver Ring for an Autumn Tree
This classic look is one of the most affordable and DIY-friendly options out there. A single layer of brick pavers laid in a circle is a timeless choice that never goes out of style. You can get pavers for under a dollar each at most hardware stores, making the total material cost for a 4-foot diameter ring as low as $20-$30. For an even more budget-savvy approach, look for reclaimed bricks on local marketplaces; their weathered patina often looks even better than new ones. It’s a simple, high-impact upgrade you can do in an hour.
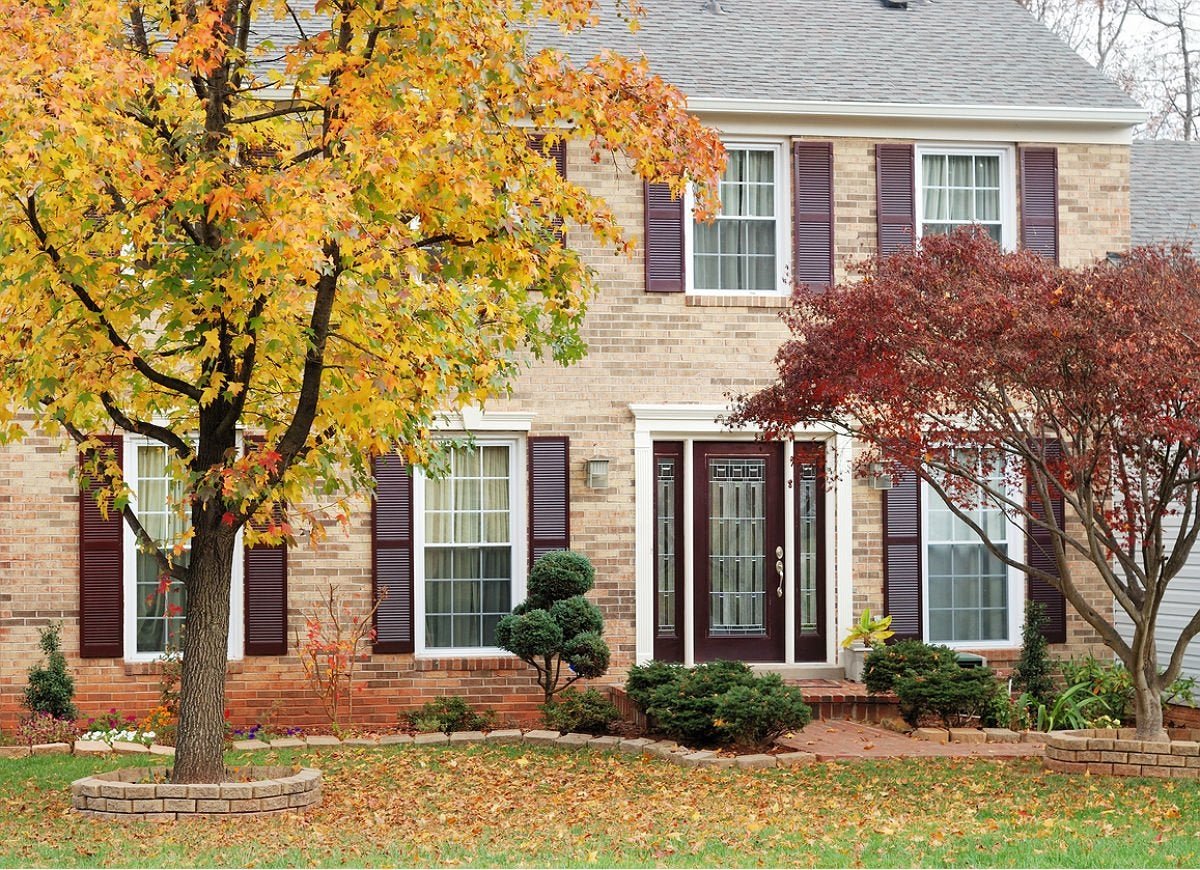
“A single, un-mortared layer of bricks laid flat on the grass is a temporary solution at best.”
Over time, the grass will grow between the bricks, and they will shift and sink into the soil, especially if you run a lawnmower over them. For this to last, you need to dig out the turf underneath, create a level base of sand, and set the bricks properly. It’s not a huge amount of work, but skipping that prep step means you’ll likely be re-doing it every year. This is a perfect example of how a little prep work saves a lot of future frustration.
19. Frame a Front Yard Tree with Stacked Stone Blocks
This design works because it matches the scale of the tree and the house. A large, mature tree requires a more substantial edging than a simple strip of plastic or metal. These chunky, stacked stone blocks have a visual weight that stands up to the thick trunk and broad canopy. The circular bed is large enough to feel proportional to the tree, giving it presence in the front yard. A tiny ring around such a big tree would look comical and out of place. The choice of warm, tan-colored stone also complements the light yellow siding of the house.
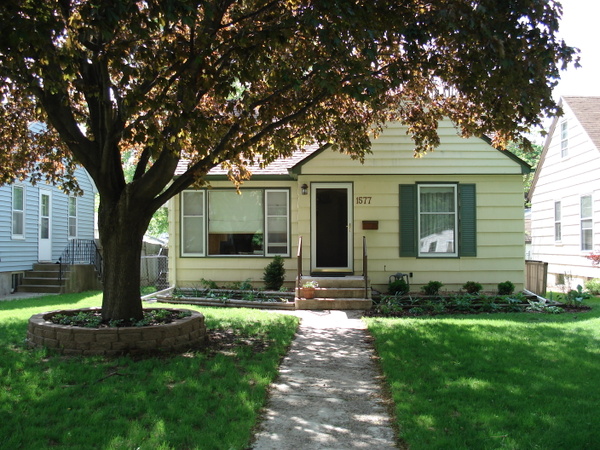
“This type of robust, block-style edging is ideal for medium-to-large front yards where the tree is a major feature.”
The bed itself should have a diameter of at least 8-10 feet to feel balanced with a mature tree. For smaller yards or smaller trees, this look can be overwhelming. If you have a smaller space but love the stone look, consider the more rustic, lower-profile wall in Idea #5, which provides texture without as much bulk.
20. Layer a Curved Bed with Begonias and Ornamental Grasses
The secret to a lush, professional-looking planting like this is “massing.” Instead of planting one of everything, the designer planted large, dense groups of the same plant—a swath of pink begonias, a drift of white ones, a cluster of dark ornamental grass. This creates blocks of color and texture that have a much greater visual impact than a random jumble of individual plants. When in doubt, buy more of fewer varieties. Plant them in groups of 3, 5, or 7 for a natural-looking cluster.
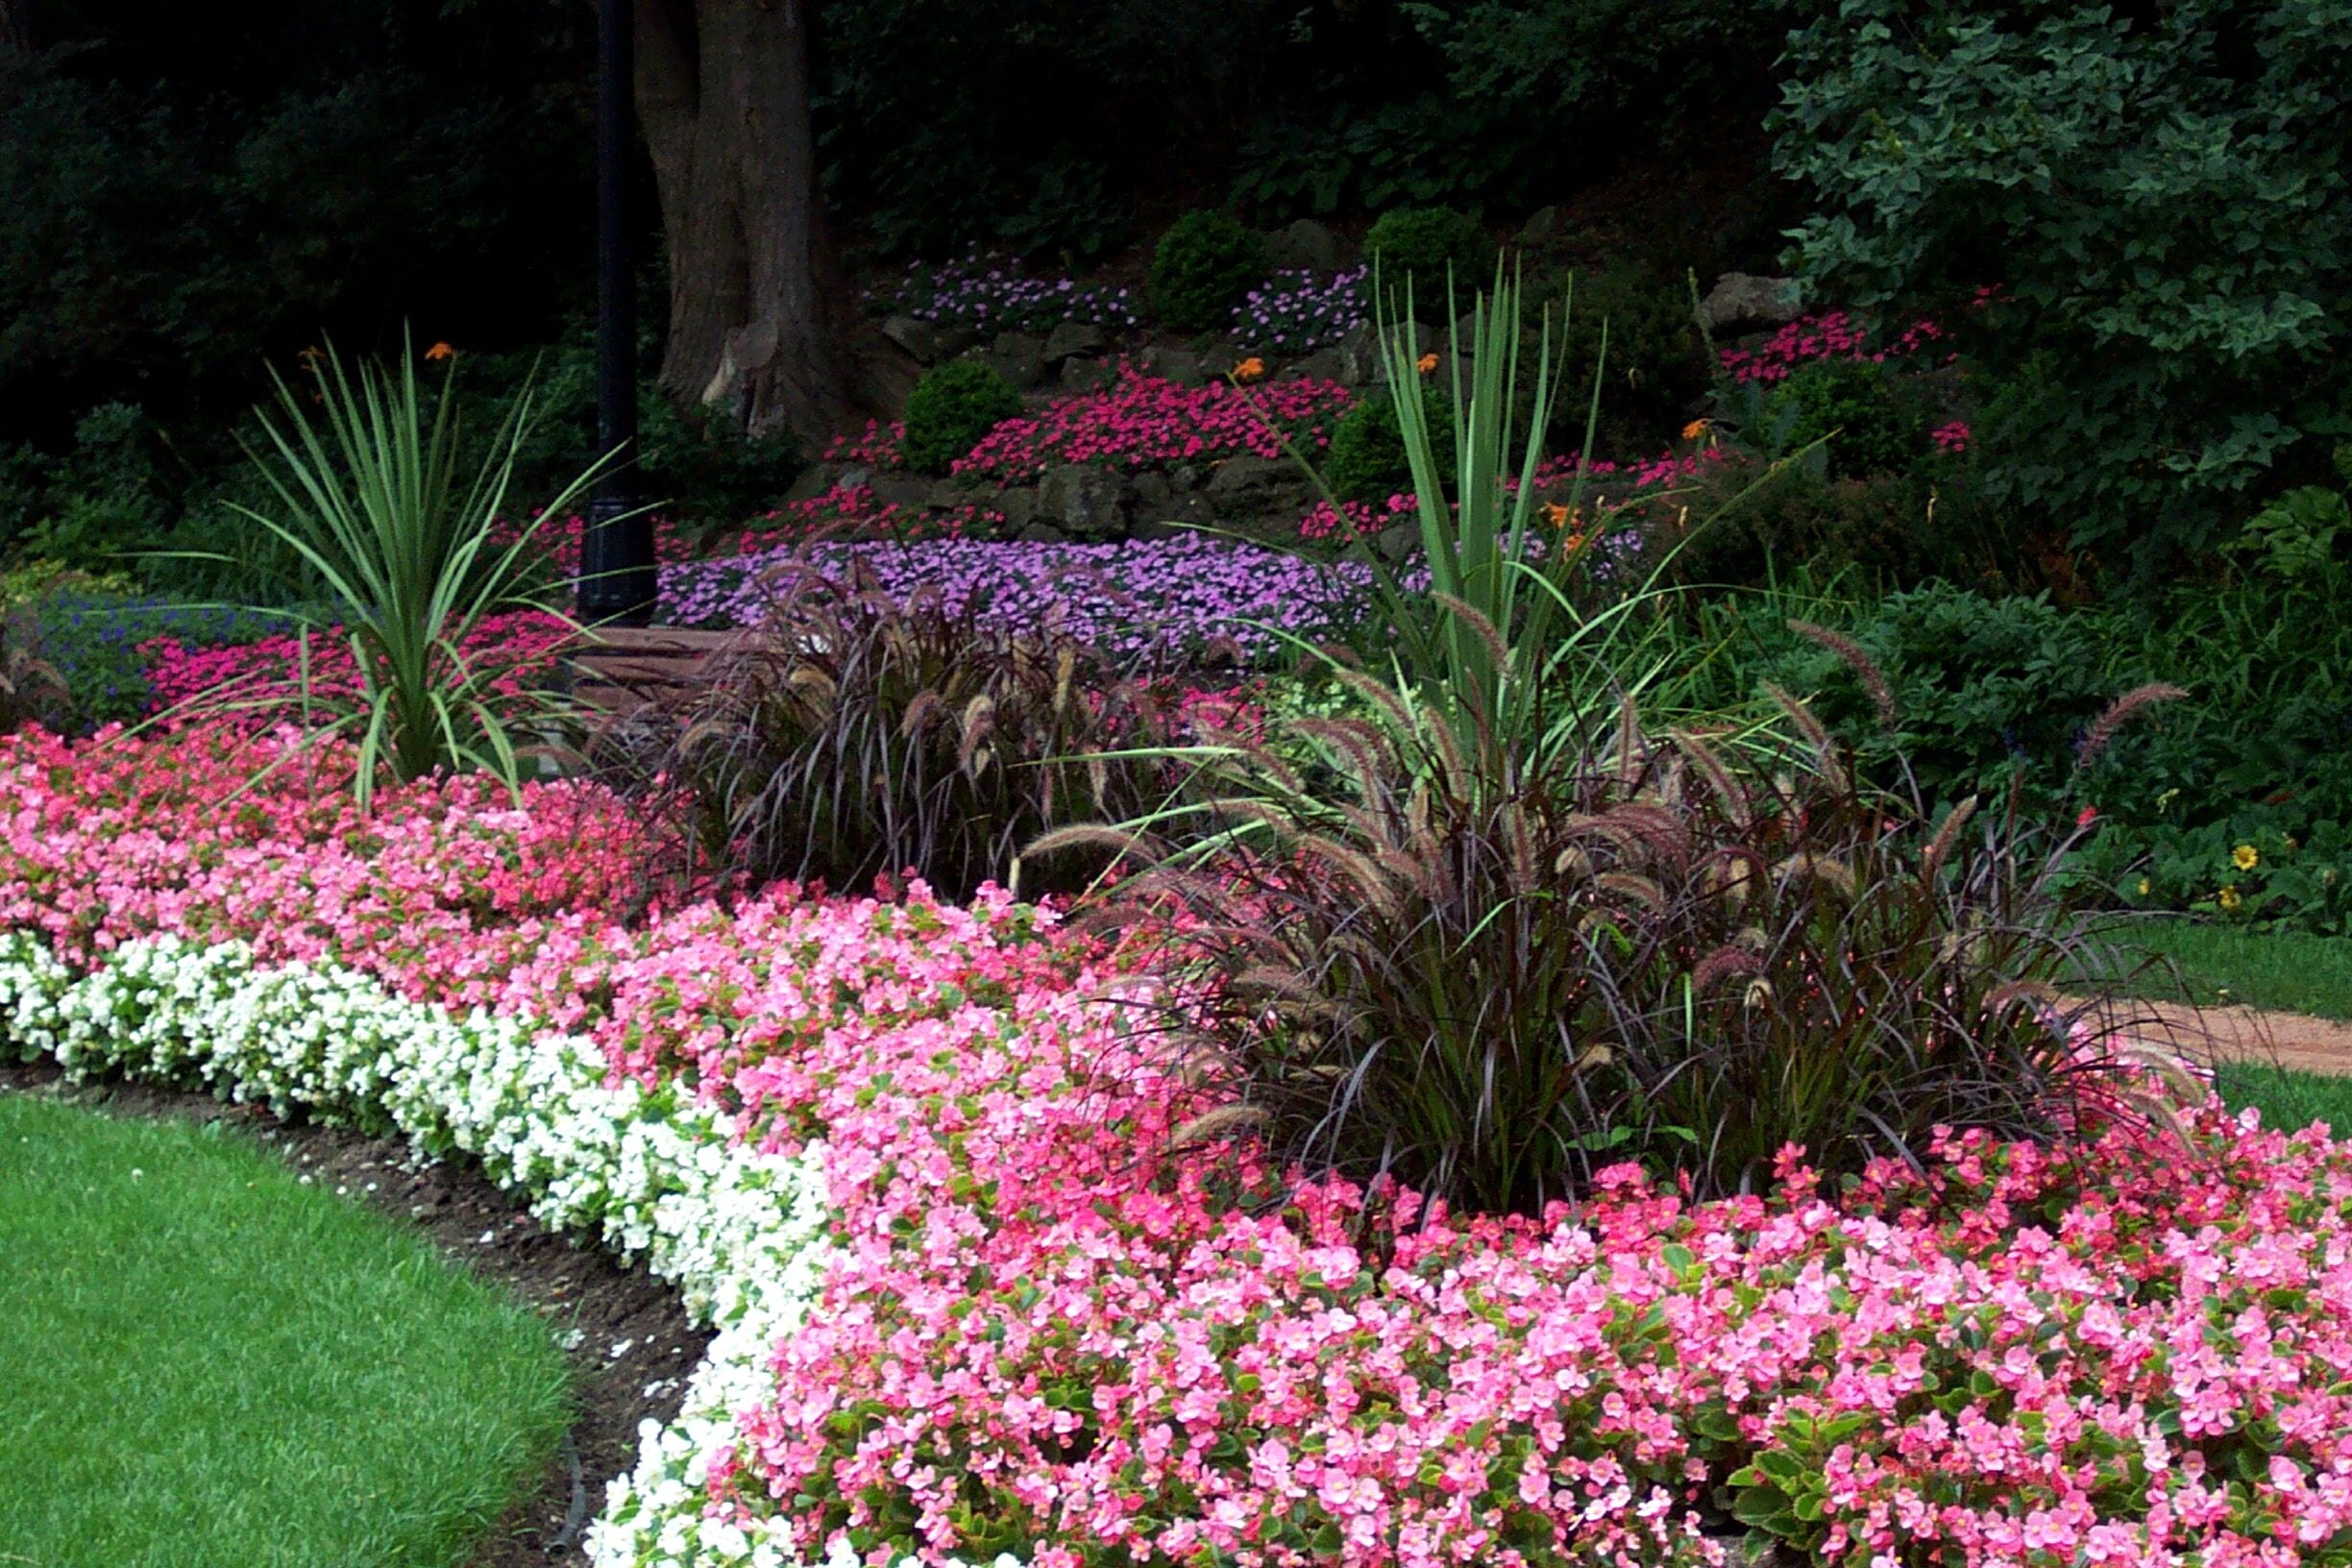
“This vibrant garden bed follows a classic planting formula: 40% “Spiller” (the low-growing begonias that edge the border), 40% “Filler” (the taller ornamental grasses that add texture and bulk), and 20% “Thriller” (the large tree and spiky green plants that provide the main structure and height).”
This “Thriller, Filler, Spiller” recipe is a time-tested way to create balanced, multi-dimensional garden beds and container plantings. You can easily adapt it with your own favorite plants.
21. Define a Simple Tree Ring with Natural Wood Chips
The key to this look is its absolute simplicity. There is no expensive stone, no complicated brickwork, no metal barrier. The entire “edging” is created simply by the crisp contrast between the dark brown wood chips and the healthy green lawn. It’s a testament to the power of a well-maintained edge. This approach puts the focus on the health of the tree and lawn, celebrating a natural, unfussy aesthetic. It proves that you don’t need to spend a lot of money or time on hardscaping to create a clean, defined look.
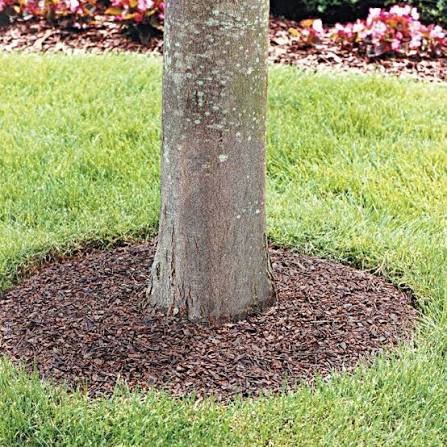
“This is, by far, the most budget-friendly way to edge a tree.”
A few bags of wood chips or mulch might cost $20-$30. The real investment is your time. To get that razor-sharp grass line, you’ll need to use a spade or a half-moon edger to cut the circle into the turf. Redefine this edge once in the spring and again in mid-summer to keep it clean. Many municipalities also offer free wood chips from their tree trimming programs, bringing your material cost down to zero.
22. Achieve a Perfect Circle with Dark Metal Edging
This design’s power comes from the precision of the circle. The thin, almost invisible dark edging creates a perfect, razor-sharp line between the mulch and the lawn that would be impossible to maintain with a spade alone. It’s this geometric perfection that elevates the look from a simple mulch ring to a deliberate design feature. The dark color of the edging helps it disappear, so you just see the crisp boundary it creates. It’s a subtle detail that makes a huge difference, similar to the minimalist ring in Idea #9 but on a larger scale.
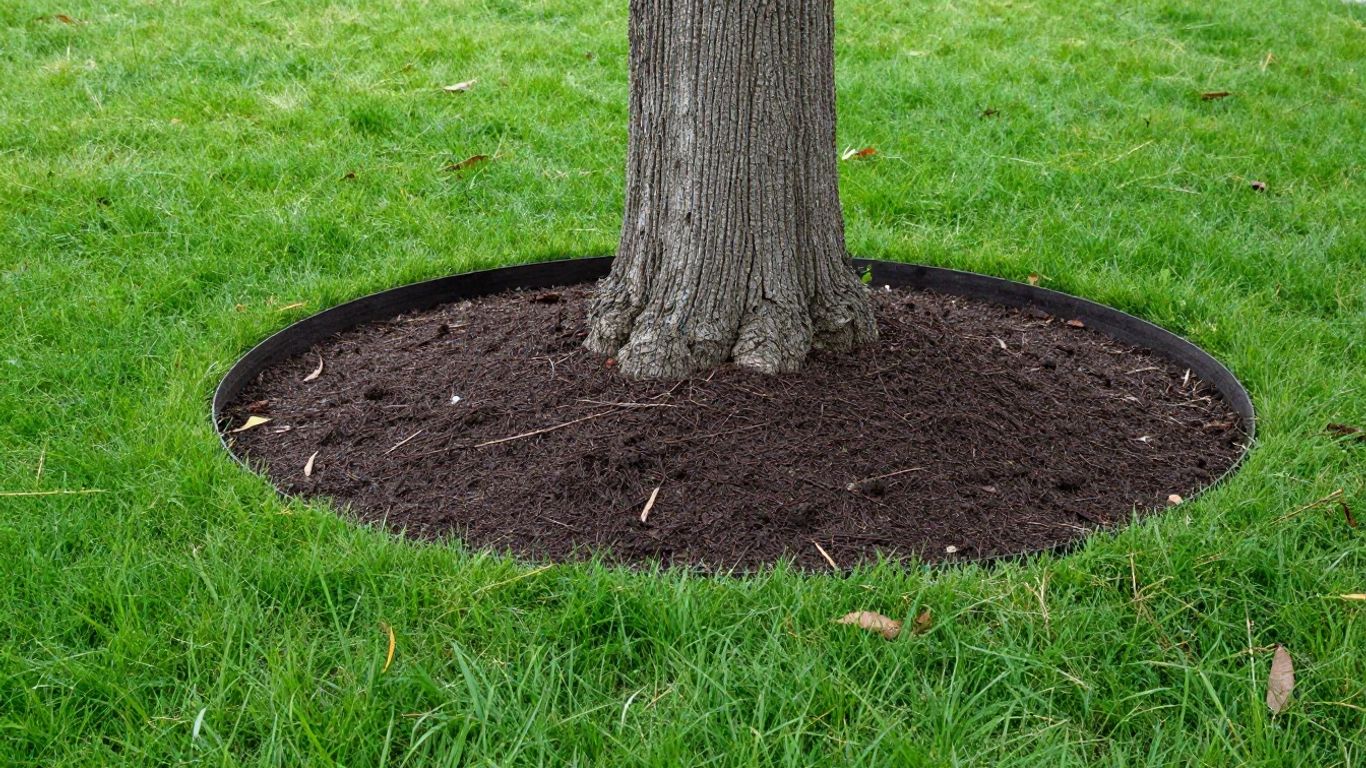
“Installing flexible metal or heavy-duty plastic edging is a straightforward task.”
Here are the basic steps:
- Time Estimate: 1-2 hours
- Material Cost: $50 – $150
- Step 1: Lay the edging on your lawn in the desired shape to let it warm up in the sun, which makes it more flexible.
- Step 2: Use a flat spade to cut a 4-inch deep trench along your marked circle.
- Step 3: Place the edging into the trench. Use a block of wood and a hammer to tap it down to the correct height—usually just at or slightly below the level of the mown grass.
- Step 4: Backfill the trench on both sides to hold the edging firmly in place.
23. Use Embossed Stone Blocks for a Formal, Rectangular Bed
A rectangular bed in the middle of a lawn can be tricky. It can look like a grave if not done carefully. This design avoids that by keeping the proportions right—it’s wide enough not to look like a narrow plot—and by using vibrant, colorful plants. The bright red flowers add life and energy, instantly signaling “garden bed” instead of something more somber. If you choose a rectangular shape, be sure to fill it with cheerful, lively plantings to counteract the formal geometry.
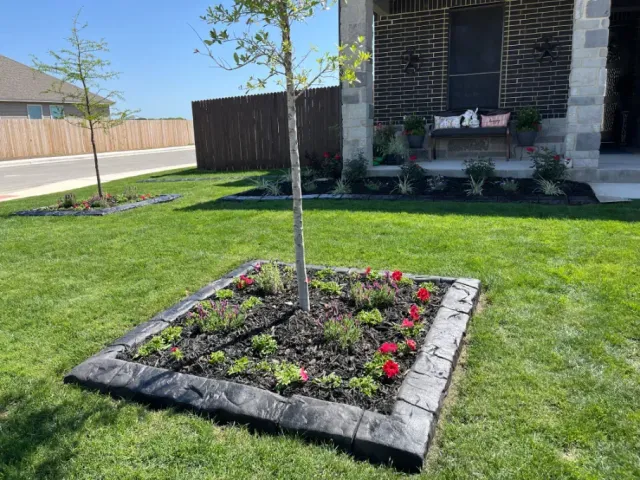
“The defining feature here is the choice of embossed, dark grey blocks.”
This isn’t your standard, plain-faced concrete. The textured, almost floral-like pattern on the blocks adds a layer of subtle decoration and refinement that elevates the entire look. It turns a simple border into a decorative frame. If this were done with smooth, utilitarian blocks, it would feel much more basic. The embossed detail gives it a touch of class and makes it feel like a more considered, high-end choice.
24. Embrace a Rustic Look with Rust-Patina Metal Edging
What makes this work so well is the harmony of the materials with the environment. The weathered, rust-colored patina of the metal edging perfectly complements the dry, sun-bleached grass and the mottled gray boulder. It doesn’t look new or shiny; it looks like it belongs there. The dark mulch provides a grounding contrast, and the whole composition feels rugged, natural, and beautifully suited to a more arid or rustic landscape. It’s a masterclass in choosing materials that echo the colors and textures of the surrounding nature.
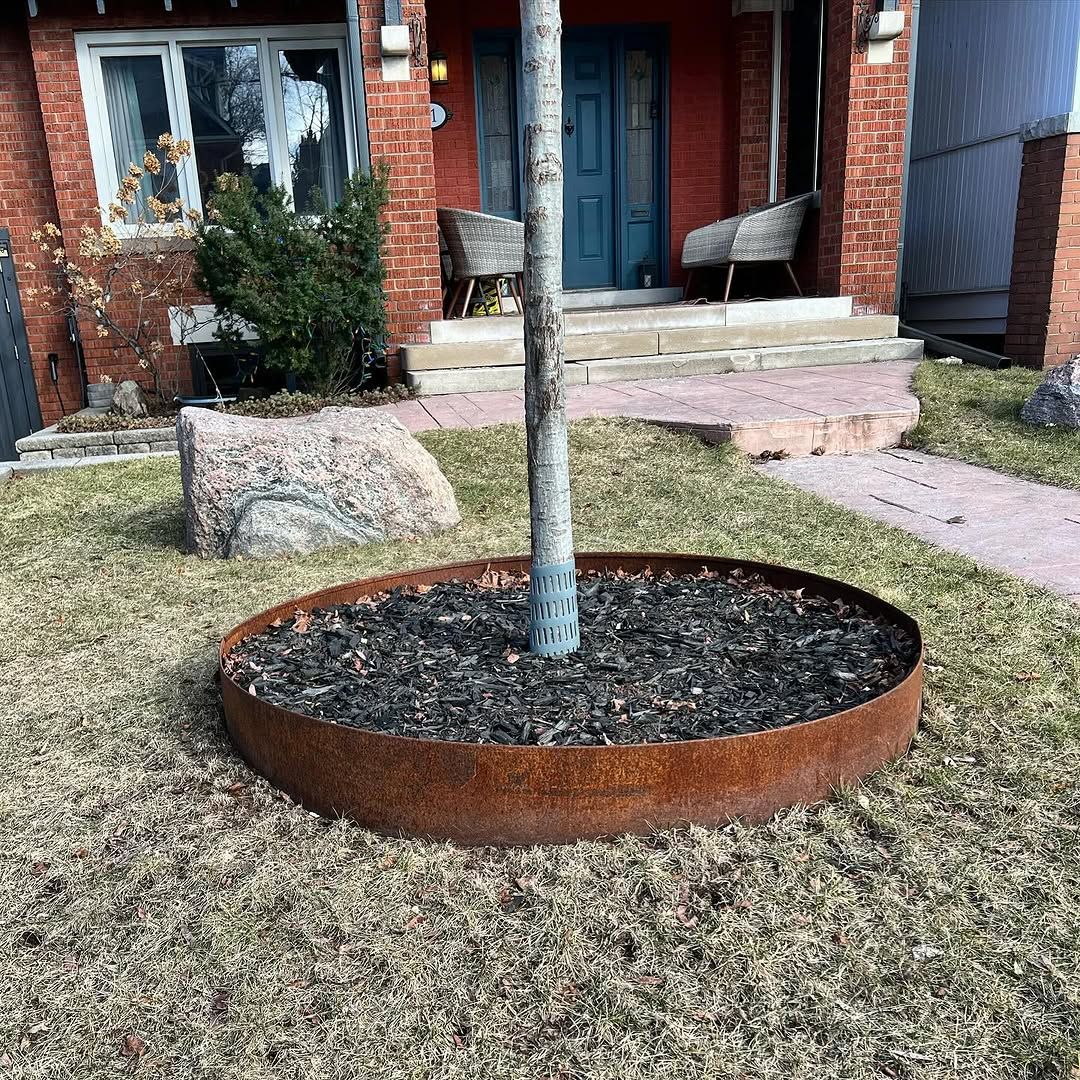
“This look uses Corten steel, or a similar weathering steel, which is designed to form a stable, rust-like protective layer.”
This is not a flaw; it’s the intended finish! The great thing about this material is that it requires zero maintenance. There is no painting, no sealing, no worries about scratches. However, be aware that during the initial weathering process (which can take several months), some rust runoff can occur, which may stain adjacent concrete patios or walkways light orange. Install it a few inches away from porous surfaces.
25. Create Sharp Geometric Lines with Metal and Gravel
The secret to keeping this multi-layered design looking crisp is what you can’t see. Underneath that strip of dark grey gravel is a layer of high-quality landscape fabric. This fabric is crucial for preventing weeds from growing up through the gravel and, more importantly, for keeping the gravel and the soil of the flower bed from mixing over time. Without that barrier, rain and foot traffic would quickly turn your neat gravel path into a muddy mess. Don’t skip the fabric!
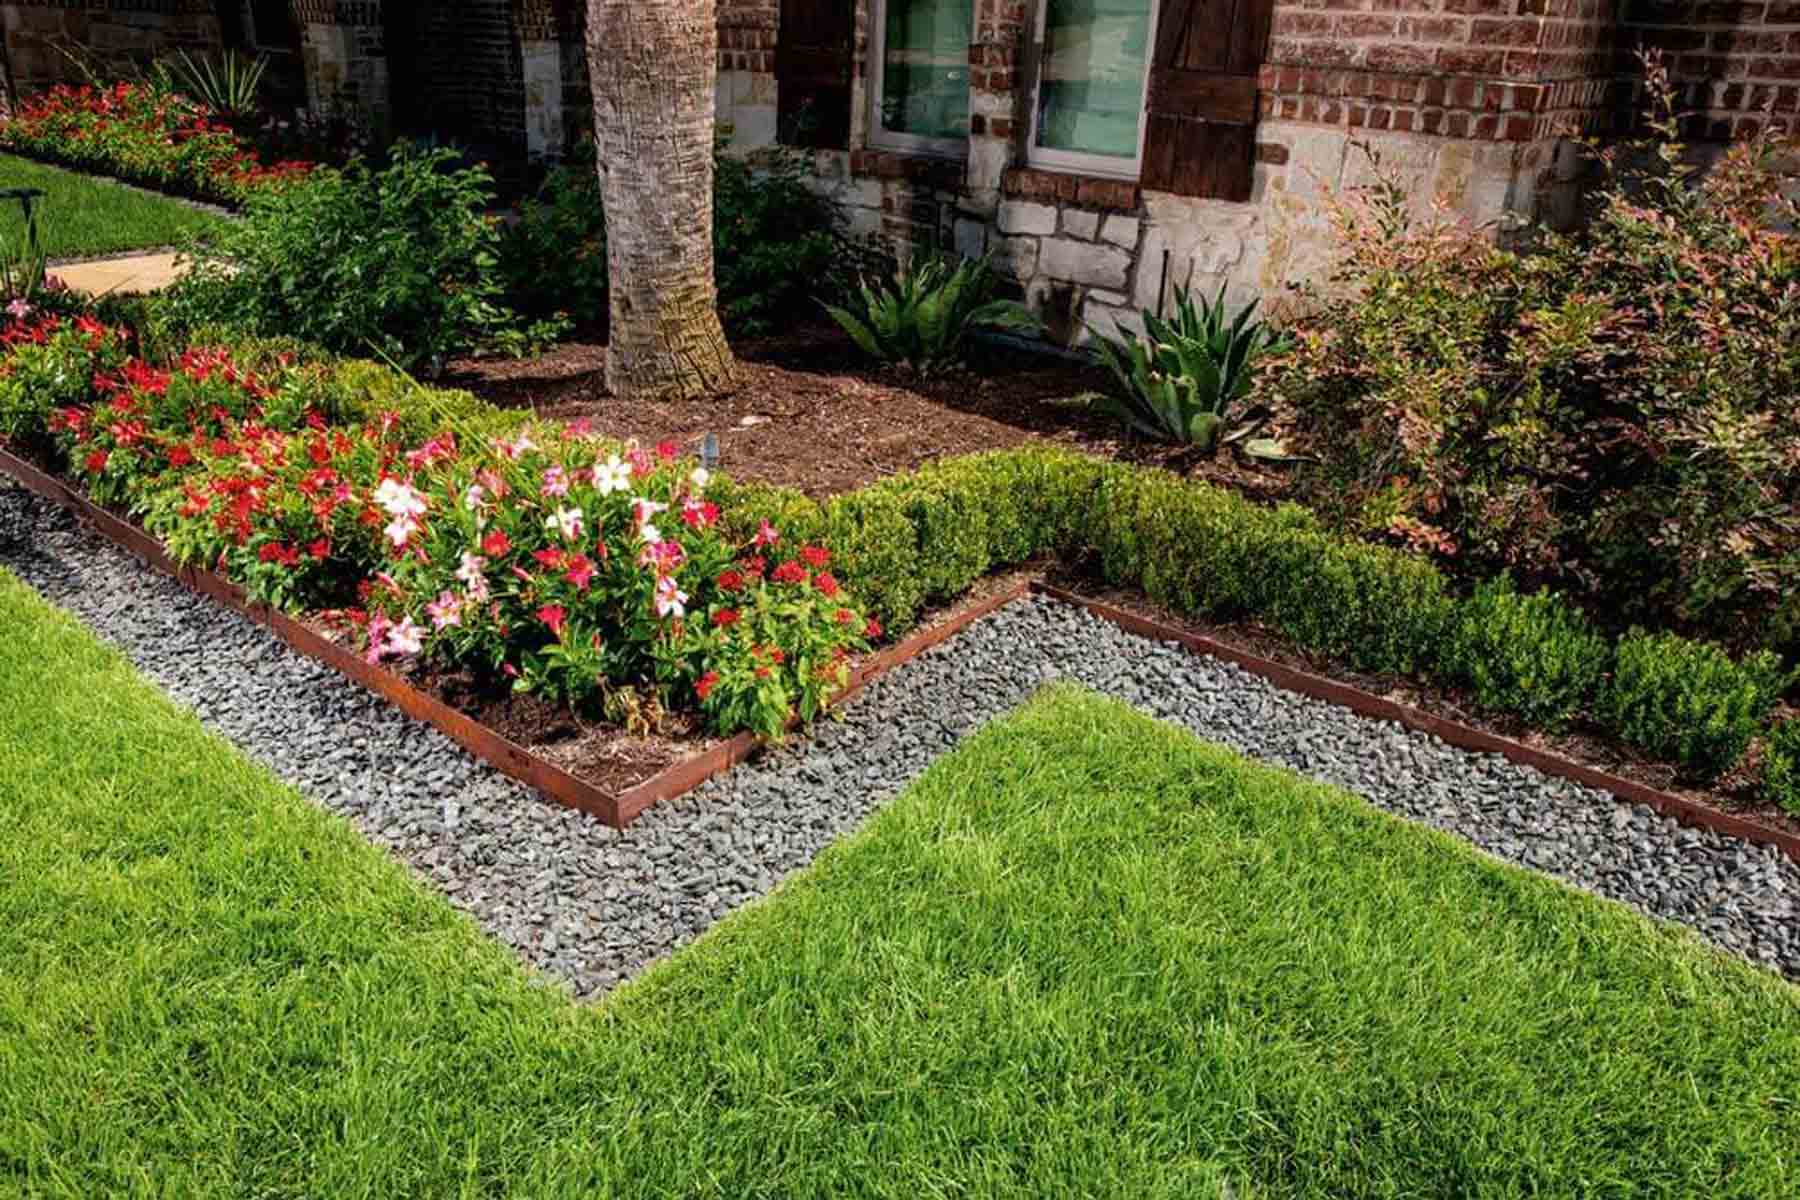
“This is a lesson in the power of the “negative space” created by the gravel path.”
The visual recipe is approximately 50% lush green lawn, 30% colorful planting beds, and 20% clean gravel pathway. That gravel strip acts as a visual “pause,” giving the eye a place to rest and helping to define the shapes of the lawn and garden beds more clearly. The thin rust-colored metal edging is the final 1%, the delicate spice that makes it all work. You could change the gravel to white pebbles, but keeping the proportions is key.
26. Use Black Mulch for a Bold, High-Contrast Tree Ring
The power of this simple tree ring lies in its dramatic color contrast. The deep, saturated black of the mulch makes the vibrant green of the lawn look even greener. It creates a bold, graphic circle that demands attention and looks incredibly sharp and tidy. Unlike brown mulch, which aims for a more natural look, black mulch is a deliberate, stylistic choice. It acts like a black frame on a painting, clearly defining the edge and making everything within and around it pop. It works precisely because it doesn’t try to blend in.
![5 UNIQUE Landscape Ideas for Around A Tree [TUTORIALS]](https://quotableideas.com/wp-content/uploads/2026/07/5-unique-landscape-ideas-for-around-a-tr-2.png)
“While black mulch provides stunning contrast, be aware that it can fade to a dull gray over time, especially in intense, direct sunlight.”
To keep that deep, rich black color, you’ll need to refresh it more often than natural brown mulch. This usually means top-dressing with a fresh layer every spring. Also, some black mulches are made from dyed recycled wood (like old pallets) and the dyes can sometimes stain driveways or patios if the mulch washes out of the bed during a heavy rain.
27. Weave a Cobblestone Path Around a River Rock Bed
The defining element of this enchanting garden scene is the winding cobblestone path. It does more than just edge the tree bed; it invites you on a journey. It slows you down, encourages you to meander through the garden, and creates a sense of discovery. If you replaced this with a straight concrete edge, the garden would instantly feel more rigid and less magical. The path introduces movement, texture, and an old-world charm that makes the entire space feel lush and inviting.
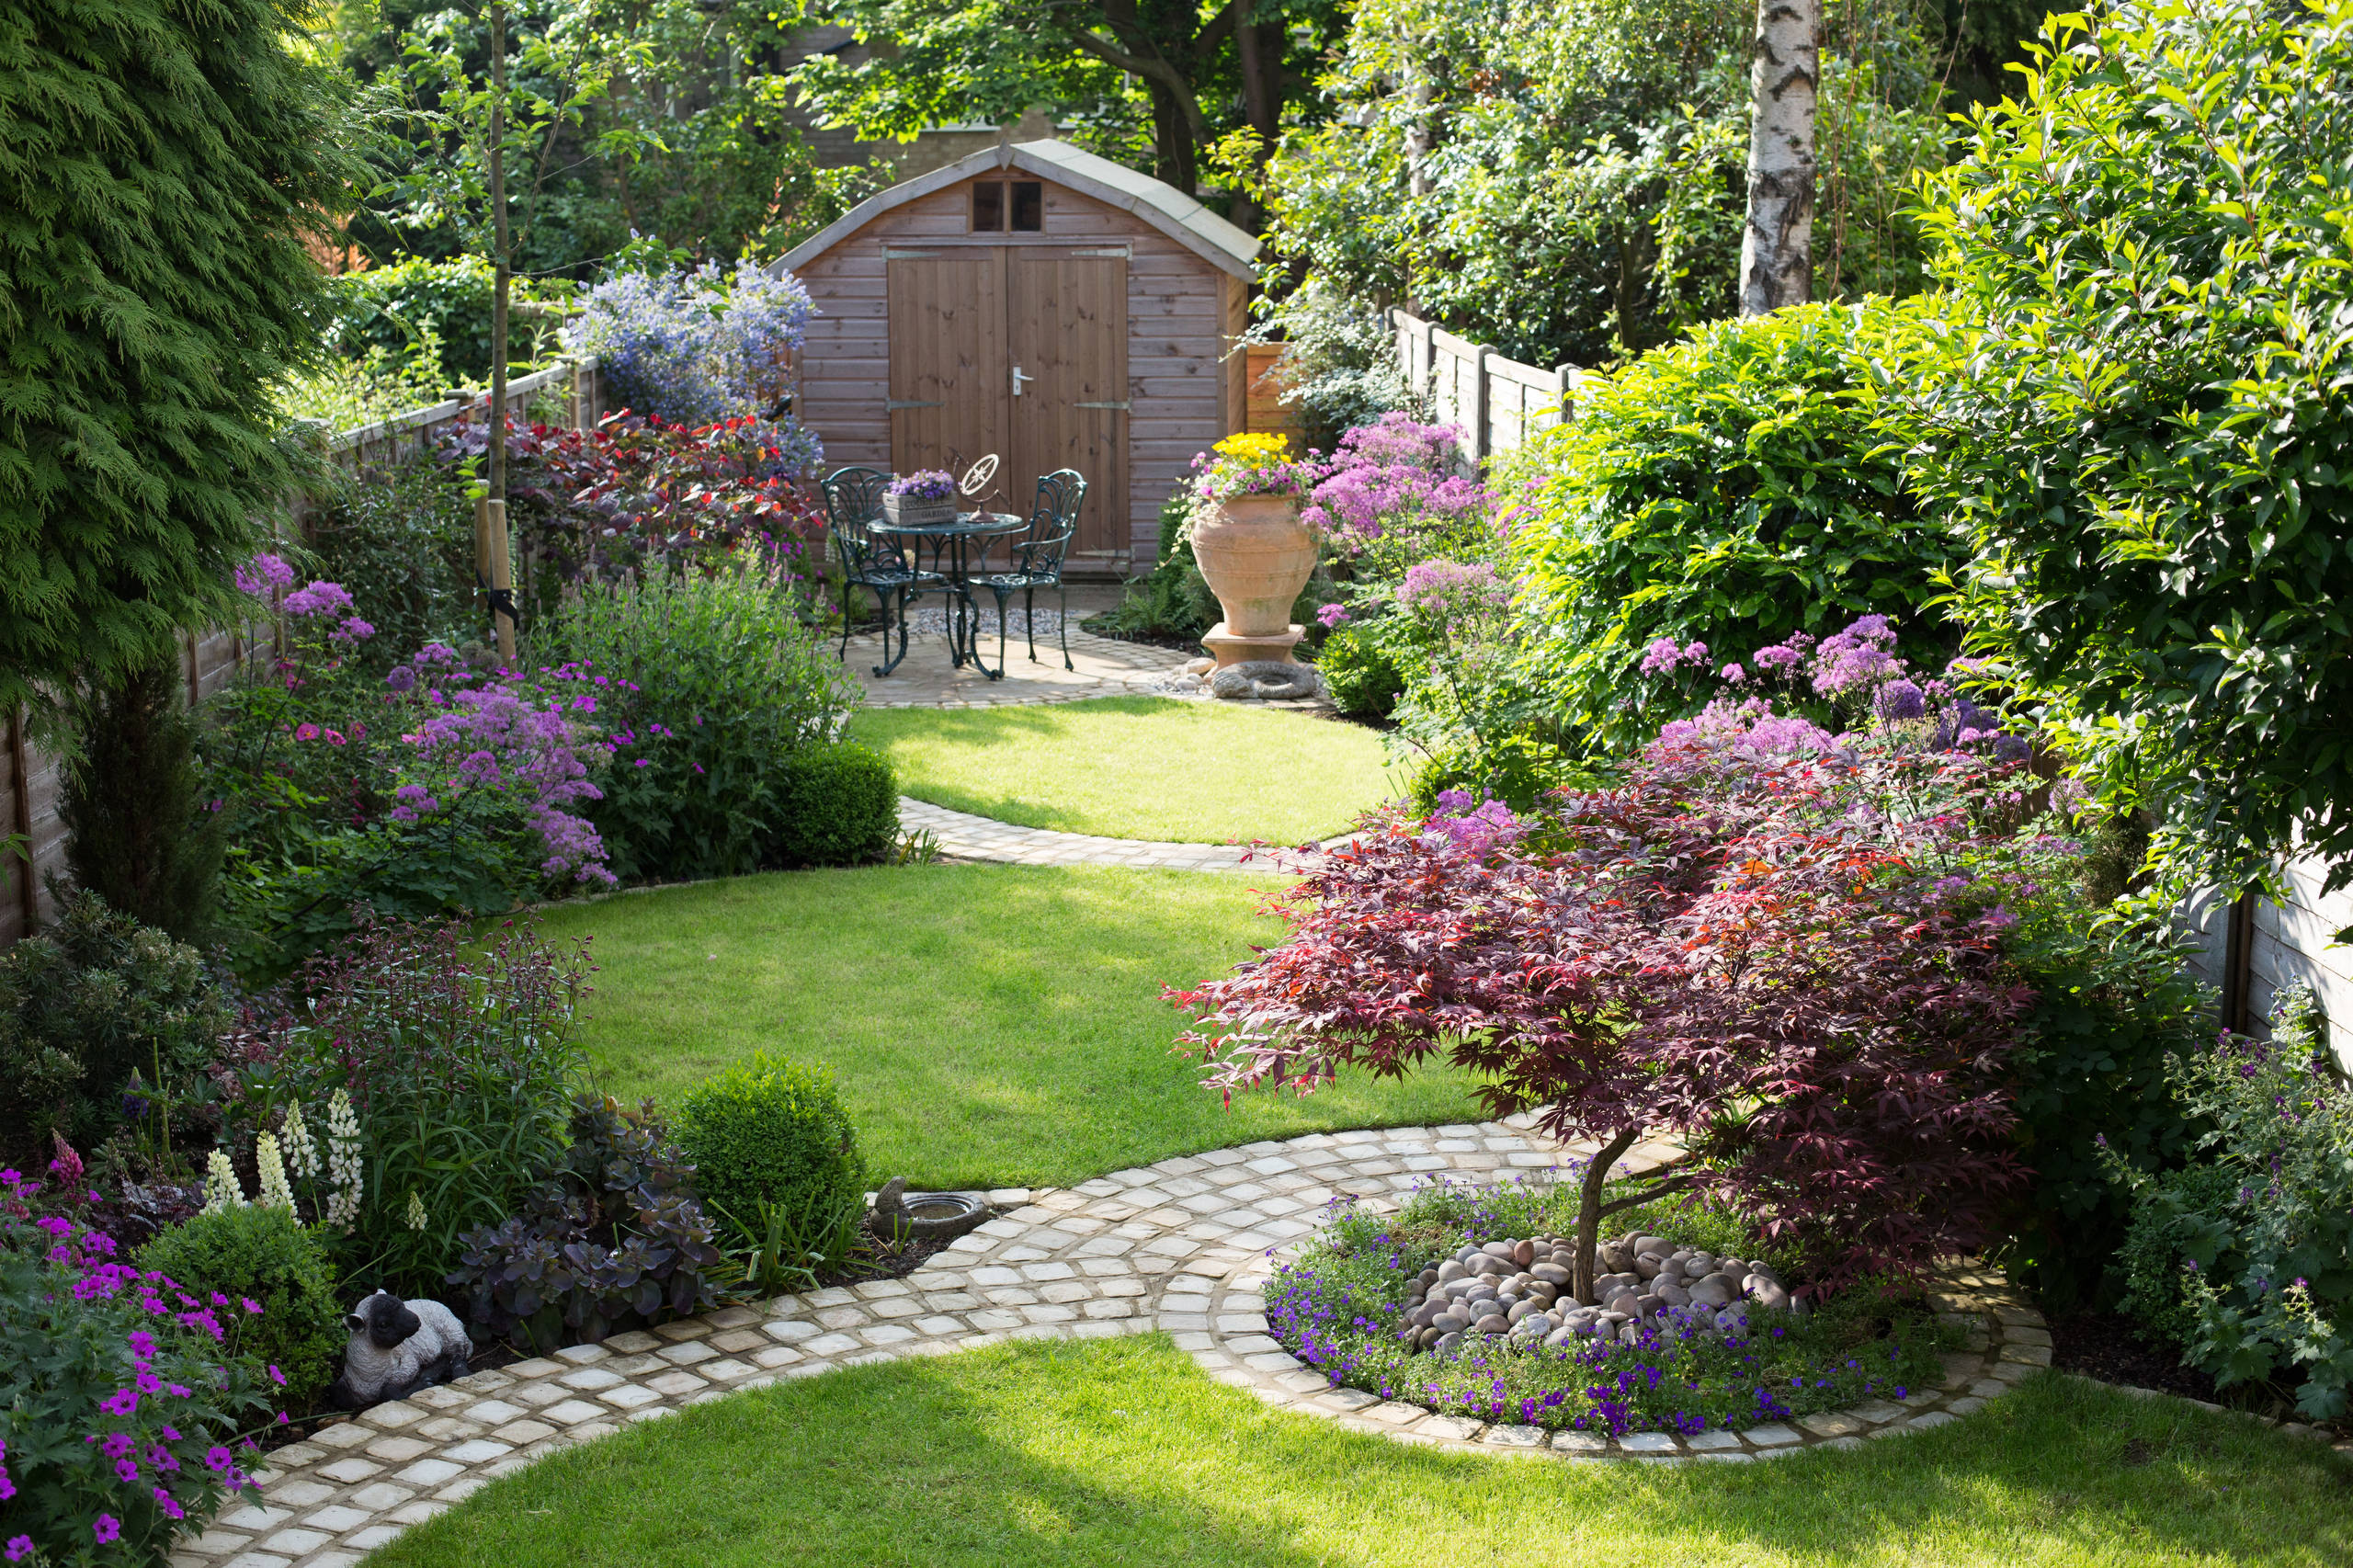
“We’re seeing a huge trend toward creating “garden experiences” rather than just static landscapes.”
People want their yards to be places they can walk through and interact with, not just look at from a distance. Winding paths, hidden seating areas, and a mix of textures underfoot are all part of this movement. This design, with its combination of cobblestone, river rock, and lawn, taps directly into that desire for a more immersive, multi-sensory backyard environment.
28. Edge a Manicured Lawn with Classic Brick Pavers
This timeless look works because of the clear and classic separation of materials. The warm, light-colored brick pavers create a visual “frame” between the two main textures: the soft, uniform green of the lawn and the complex, multi-layered foliage of the garden bed. This distinct border brings a sense of order and intentionality to the landscape. It tells the eye exactly where the lawn ends and the garden begins, resulting in a crisp, clean, and satisfyingly well-maintained appearance that boosts curb appeal.
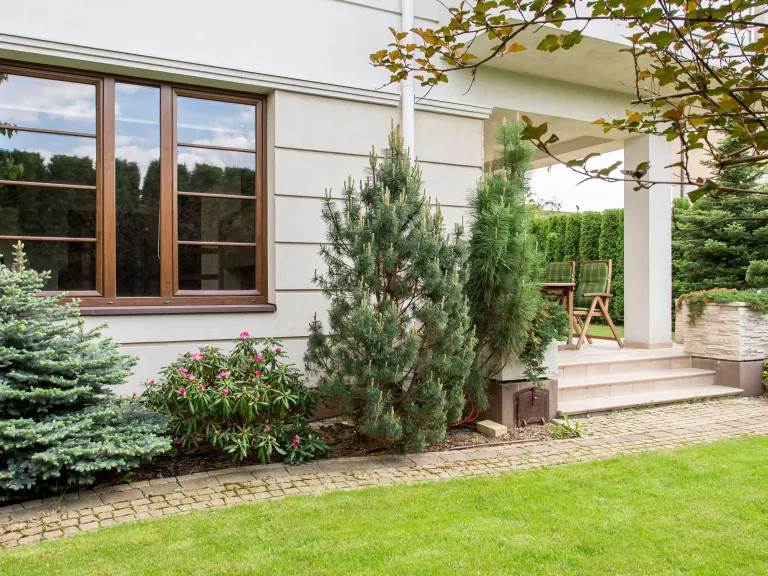
“Think of this as a simple, effective ratio for a classic landscape: 60% lush garden bed + 35% manicured lawn + 5% hardscape edging.”
The edging is the smallest component by area, but it does the crucial job of defining the other two. You can swap the materials—for example, use dark slate pavers instead of light brick—but maintaining that small, sharp border is what keeps the look grounded and classic. It’s a formula that has worked for centuries for a reason.
29. Combine Rounded Stone Pavers and Ornamental Grass
When using irregularly shaped pavers like these, the secret to a professional look is a tight fit. Don’t leave large, uneven gaps between the stones. Lay them all out first and puzzle them together to find the best arrangement with the most consistent, narrowest gaps possible. Then, sweep polymeric sand into the joints. This special sand contains a binder that hardens when wetted, locking the pavers in place and preventing weeds from growing between them. It’s the key to turning rustic stones into a clean, solid edge.
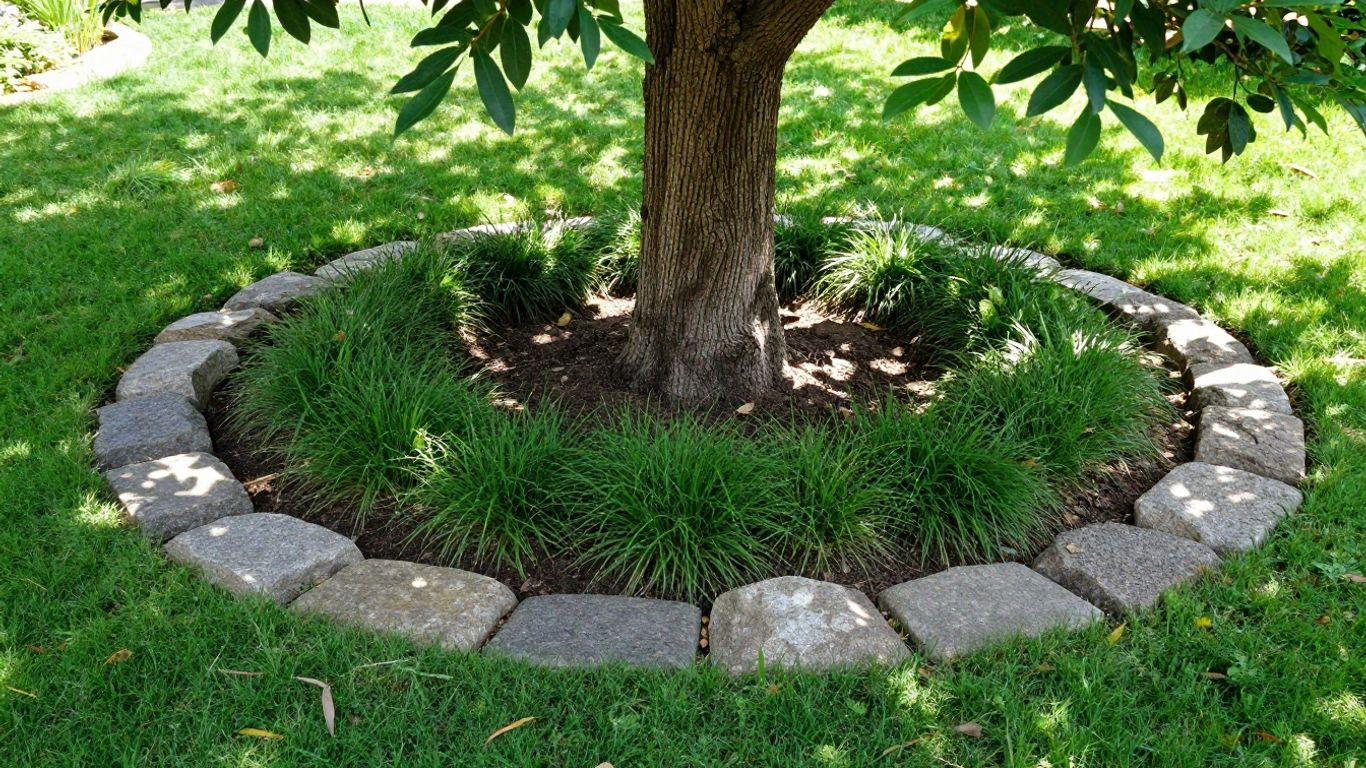
“The standout feature here is the addition of the bright green ornamental grass clumps within the mulch bed.”
Without them, this would be a fairly standard (though beautiful) design: tree, mulch, stone edge. The ornamental grass adds another layer of texture, a vibrant shot of color that mediates between the dark mulch and the green lawn, and a soft, flowing movement that contrasts with the hard, solid pavers. It’s this extra layer of planting that makes the design feel thoughtful and complete. Compare this to the similar but simpler paver look in Idea #6.
Frame Your Favorite Trees
A well-defined edge is the finishing touch that takes a yard from “in-progress” to “put-together.” Whether you go for a simple mulch line or a custom stone border, giving your trees a frame is a project that pays off in major curb appeal. Don’t be intimidated—start with one tree and see what a difference it makes.
Found your inspiration? Pin your favorite ideas to your landscaping board and get ready to start digging!