You know that feeling when you finally find the Diy Deck Railing Ideas 2026 that looks exactly right for your space? That little spark of “That’s it!” is what this guide is all about. After filtering through hundreds of options across home improvement stores and specialized suppliers, we narrowed it down to 32 ideas that actually deliver. We’re covering the most popular styles—from sleek modern cable and glass panel systems to timeless white balusters and functional privacy screens—with options that can work for various budgets. As outdoor living spaces become more important than ever for relaxing and entertaining, getting the railing right is key to defining your deck’s entire personality in 2026. Pin this guide for later—your future self will thank you when it’s time to actually build this thing. 📌 Save this to Pinterest for later — you’ll want to revisit these ideas.
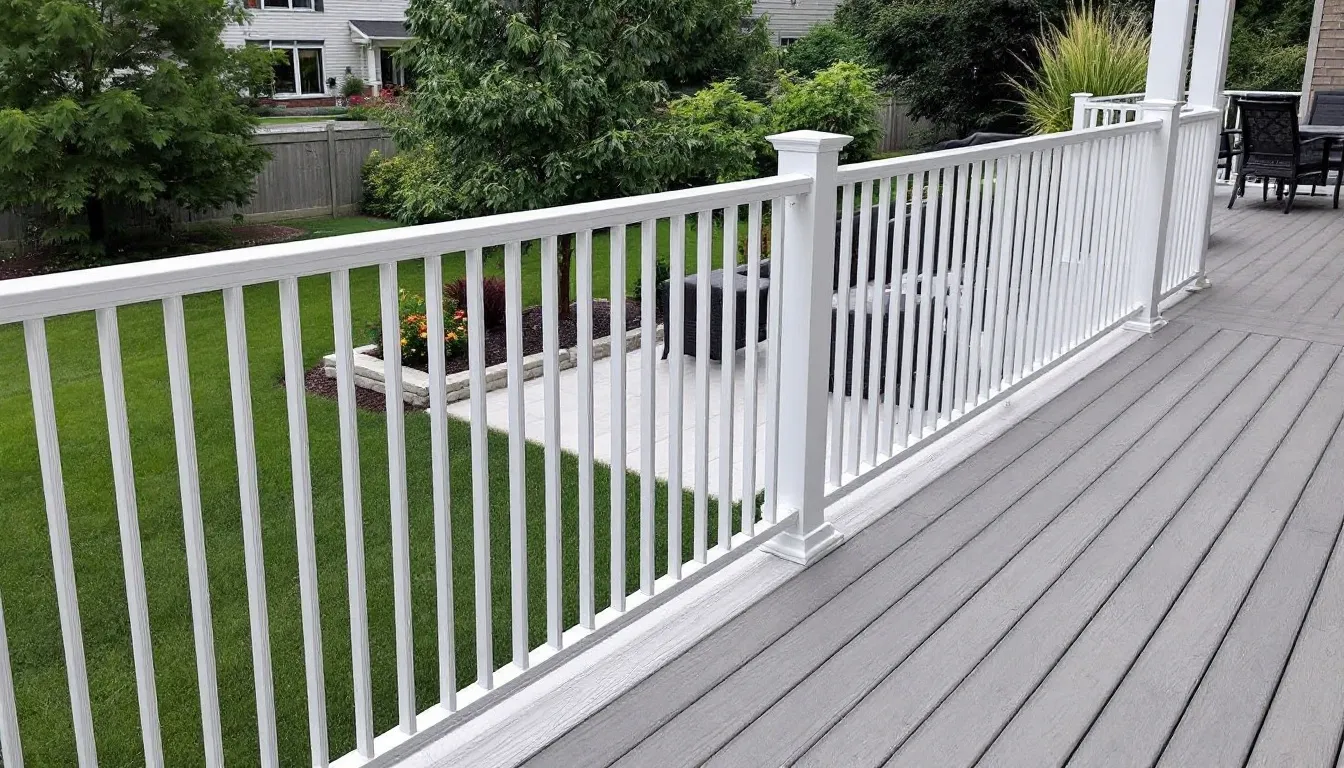
1. Classic White Baluster Railing on a Gray Composite Deck
What makes this look so timelessly appealing is the power of contrast. The crisp, clean white of the traditional balusters and rails pops beautifully against the soft, modern gray of the composite decking. This isn’t just a safety feature; it’s a design choice that frames the entire outdoor space. The vertical lines of the balusters create a sense of order and rhythm, making the deck feel polished and complete. It works because it doesn’t try to reinvent the wheel—it perfects it, providing a clean boundary that complements the home and the lawn without competing with them.
“When installing a classic baluster railing, always stick to the “Rule of 4.” Building codes universally mandate that the gap between your balusters must be less than 4 inches.”
This is to prevent a small child’s head from fitting through. To achieve this, don’t just measure the space between balusters. Instead, calculate your total run, account for the width of each baluster, and plan your spacing from the center-point of each baluster. For a 3.5″ wide baluster, spacing them 7″ on-center will give you a consistent 3.5″ gap.
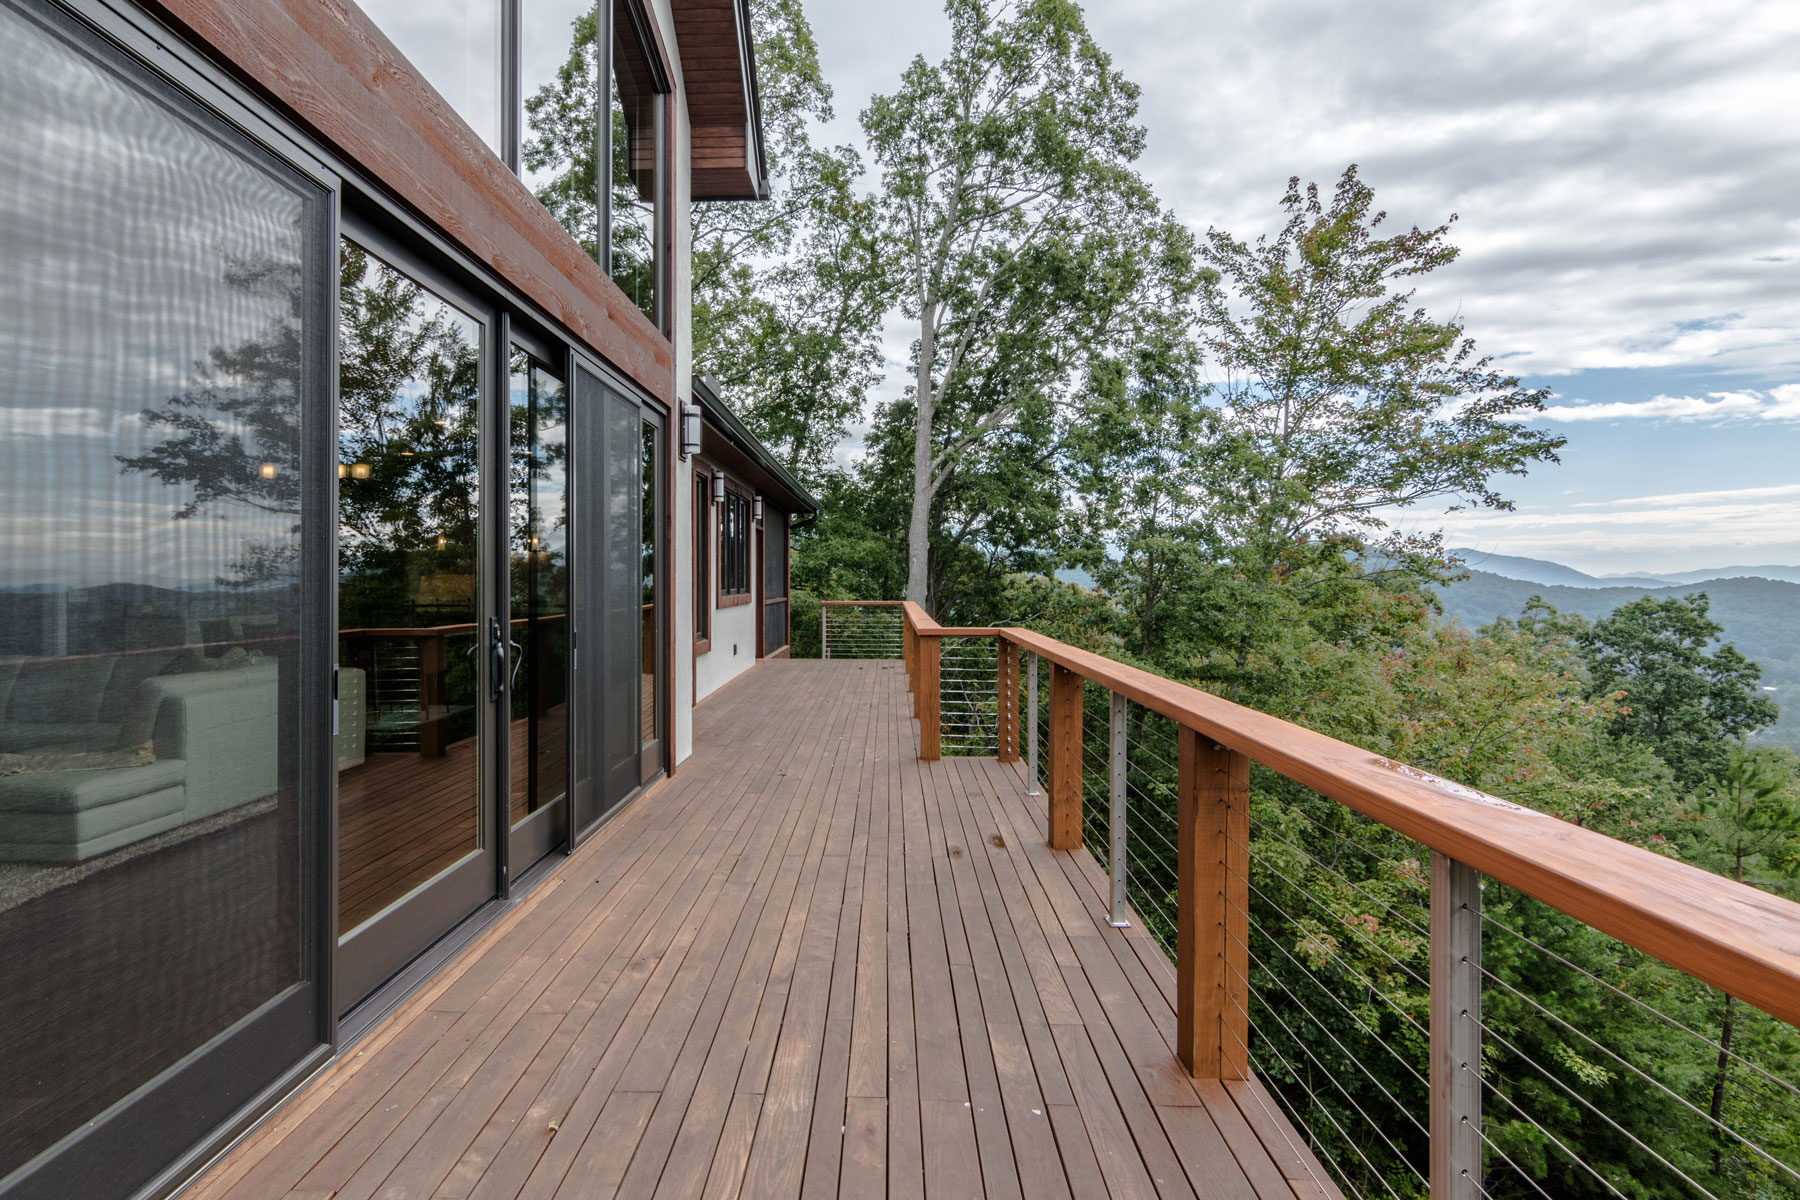
2. Modern Cable Railing with Warm Wood Posts and Top Rail
The single most important element here is the horizontal cable infill. If you were to replace those whisper-thin cables with traditional wood or composite balusters, the entire feeling of the space would change. You’d lose the expansive, almost uninterrupted view of the trees and mountains beyond. The cables provide safety and define the deck’s edge while maximizing transparency. They allow the natural surroundings to be the star of the show, making the deck feel like a part of the landscape rather than an enclosure separated from it.
“While cable railings offer an amazing, minimalist look, they are not a “set it and forget it” system.”
The cables are under high tension and will naturally sag or loosen over time due to temperature changes and settling. You’ll need to re-tighten them every year or two to maintain both safety and appearance. Be sure to invest in high-quality stainless steel (T316 grade is best for outdoors) to prevent rust, especially in humid or coastal climates. Also check your local building codes—some areas have specific requirements for cable tension and post spacing.
3. Serene Lakeside Views with a Glass Panel and White Frame Railing
Glass panel railings are stunning, but let’s be honest about the upkeep. To keep that crystal-clear, unobstructed view of the lake, you will be cleaning them. A lot. Dust, pollen, rain spots, fingerprints, and bird droppings are your new nemeses. Plan on squeegeeing the glass at least every 2-4 weeks, and more often if you’re near the water or have kids and pets. Using a rain-repellent treatment can help, but it’s not a magic bullet. For a lower-maintenance alternative that still feels open, consider the horizontal cable look in Idea #2.
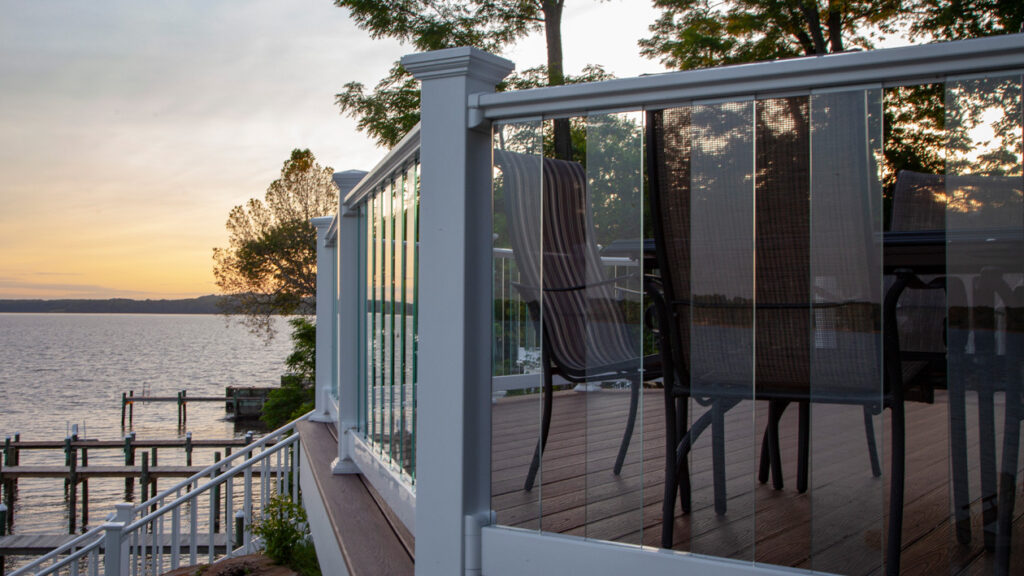
“This style is a showstopper, but it really shines on decks with a view worth showcasing.”
It feels most at home on a deck that is at least 150 square feet, allowing for ample seating without making the space feel crowded around the glass. The key is to have enough distance between your furniture and the railing to appreciate the seamless effect. A minimum ceiling height isn’t a concern here, but a minimum deck depth of 10-12 feet is ideal to prevent the area from feeling like a narrow glass hallway.
4. Multi-Level Deck with White Railing and a Slatted Wood Privacy Screen
This design is a masterclass in functional zoning. It works by clearly defining different areas for different purposes. The traditional white railing on the stairs ensures safety and maintains an open feel, guiding you up to the main level. Once there, the slatted dark brown privacy screen takes over, creating a more intimate, enclosed “room” for dining under the pergola. The contrast between the white and dark brown elements isn’t just for looks; it visually separates the public and private zones of the deck, making the entire space feel larger and more thoughtfully designed.
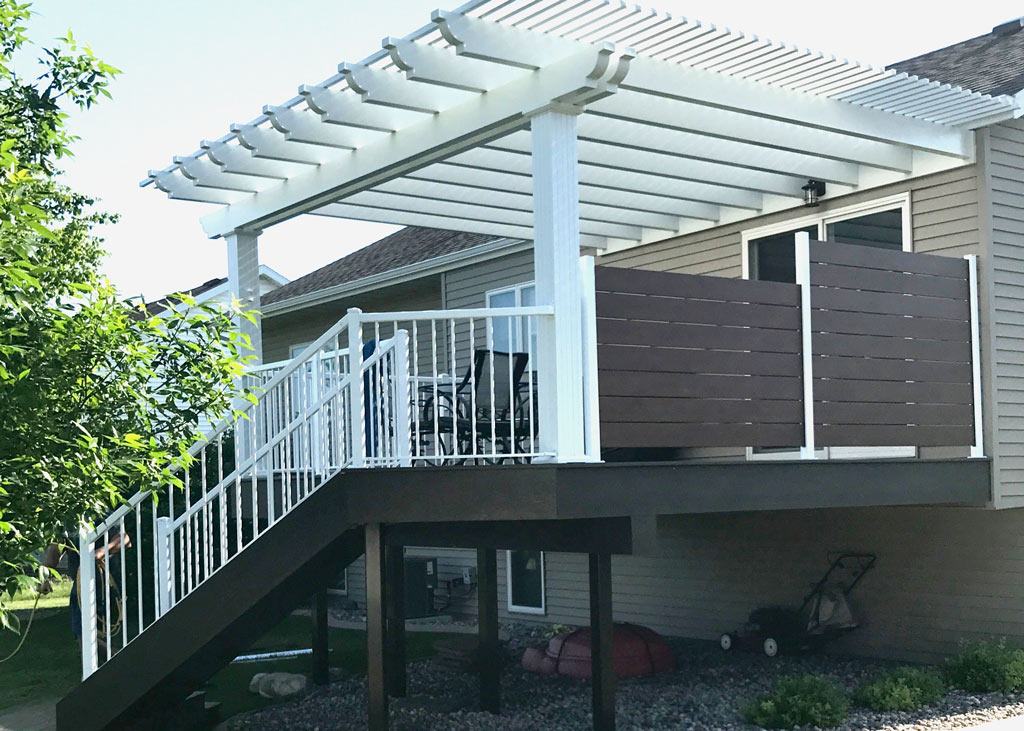
“Pergola & Privacy Screen: $2,500 – $6,000
Railing System (White Composite): $1,5”
- Pergola & Privacy Screen: $2,500 – $6,000
- Railing System (White Composite): $1,500 – $3,500
- Decking & Stairs (Composite): $4,000 – $9,000
- Outdoor Dining Set: $800 – $2,500
- TOTAL: $8,800 – $21,000
- Budget Alternative: Use pressure-treated wood instead of composite for decking and privacy screen, and opt for a simple wood railing painted white. Find a second-hand dining set on Facebook Marketplace. This could bring the total cost down to $3,500 – $7,000.
5. Sleek Aluminum Horizontal Slat Privacy Wall
When installing a horizontal slat privacy screen, the spacing of the slats is everything. For maximum privacy, a gap of 1/4 inch is ideal—it blocks the view but still allows for air circulation. If you want a more open, semi-private feel, expand that to a 1/2 or 3/4 inch gap. Before you install, create a small sample panel with your chosen spacing and hold it up at different times of day. You might be surprised how the light and shadows affect the level of opacity. Also, always use a spacer block for perfectly consistent gaps.
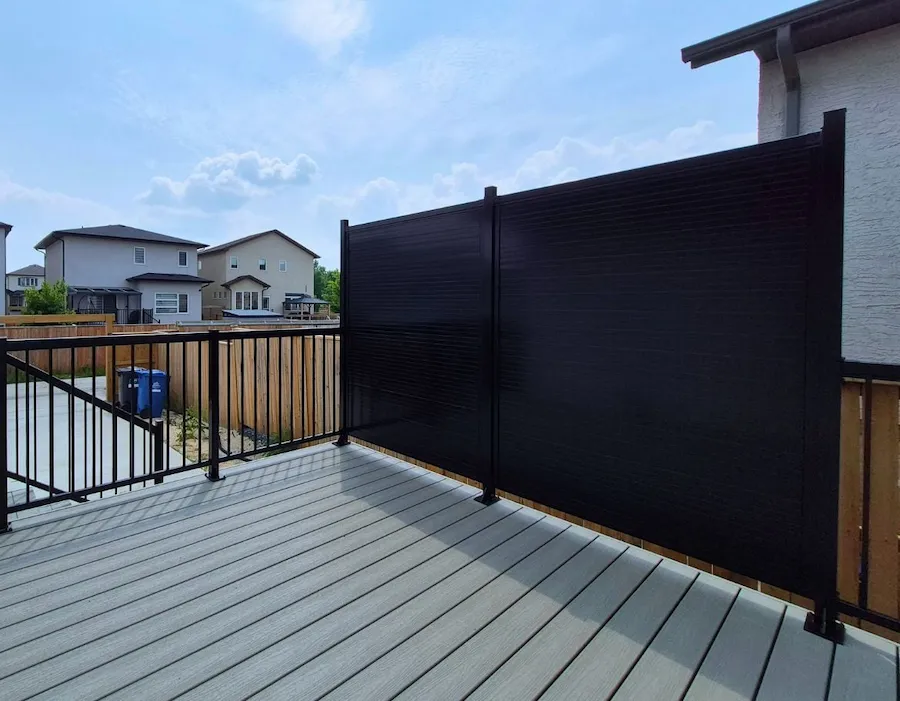
“The rise of the “outdoor room” is why these aluminum privacy screens are everywhere right now.”
People want their decks and patios to feel like true extensions of their indoor living spaces, and that requires a sense of enclosure and privacy from nearby neighbors. Aluminum is particularly hot because it offers a clean, modern look with virtually zero maintenance compared to wood, which needs regular staining or sealing. It aligns with the current trend towards durable, long-lasting materials that look sharp for years to come.
6. Contemporary Deck with Wood Posts and Horizontal Cable Railing
This look achieves its balance with a simple but effective formula: 60% warm natural material + 30% sleek industrial metal + 10% open space. The wooden posts and deck flooring provide a rich, organic base that feels inviting. The stainless steel cables and metal intermediate posts cut through that warmth with clean, modern lines. The final 10% is the view you preserve *through* the cables. You could swap the dark wood for a lighter cedar or even a grey composite and trade the stainless steel for black-coated cables to achieve a different mood while keeping the same successful ratio.
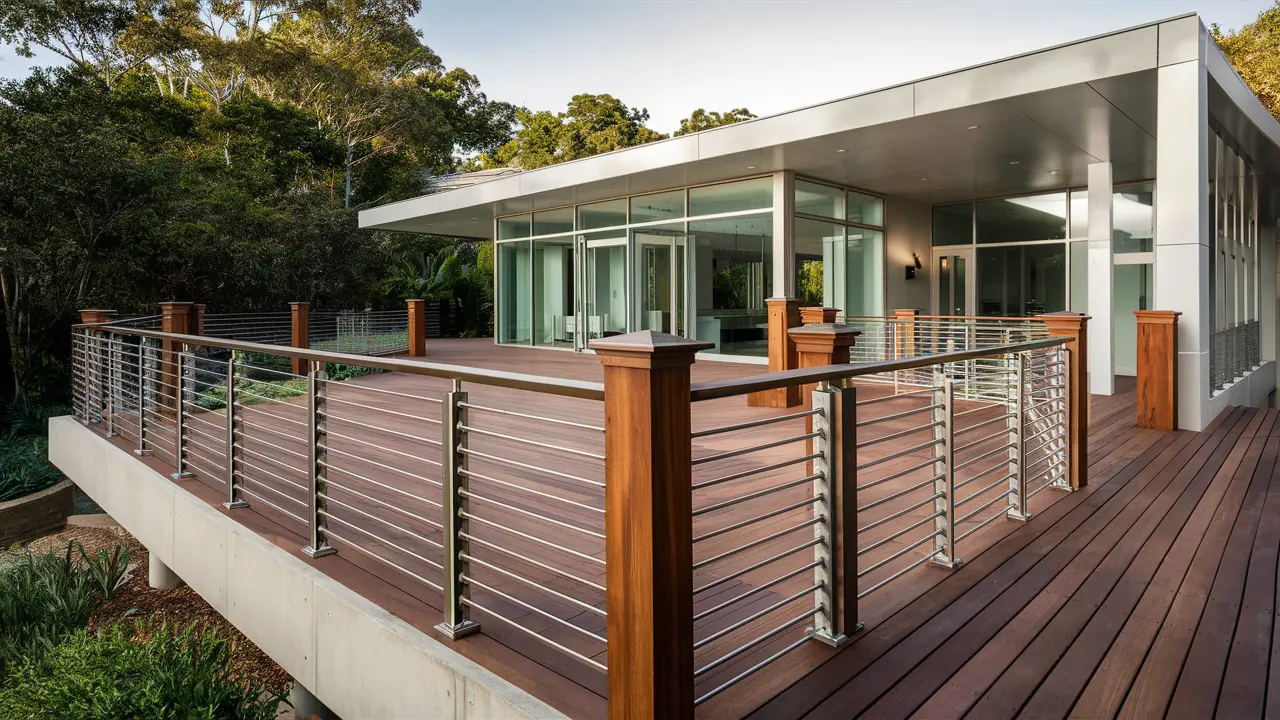
“A friendly warning: horizontal railings, whether cable or otherwise, can be an attractive nuisance for small children who may see them as a ladder.”
While most modern building codes approve horizontal and cable railings when installed correctly (with rigid, non-flexible cables and proper spacing), it’s a factor to consider for young families. Some local jurisdictions have stricter rules, so you absolutely must check with your local building department before committing to this style. It’s a fantastic look, but safety and compliance come first.
7. A Modern Mix: Glass Panels Meet Classic Wood Balusters
that makes this design stand out is the intentional blend of two different railing styles. It’s a deliberate choice to not choose. By placing glass panels in the primary viewing areas and using traditional wooden balusters on the side sections and lower tier, the design gets the best of both worlds. This move would be completely lost if the railing was uniform. It’s this thoughtful combination that gives the deck a custom, high-end feel without committing fully to the higher cost and maintenance of an all-glass system.
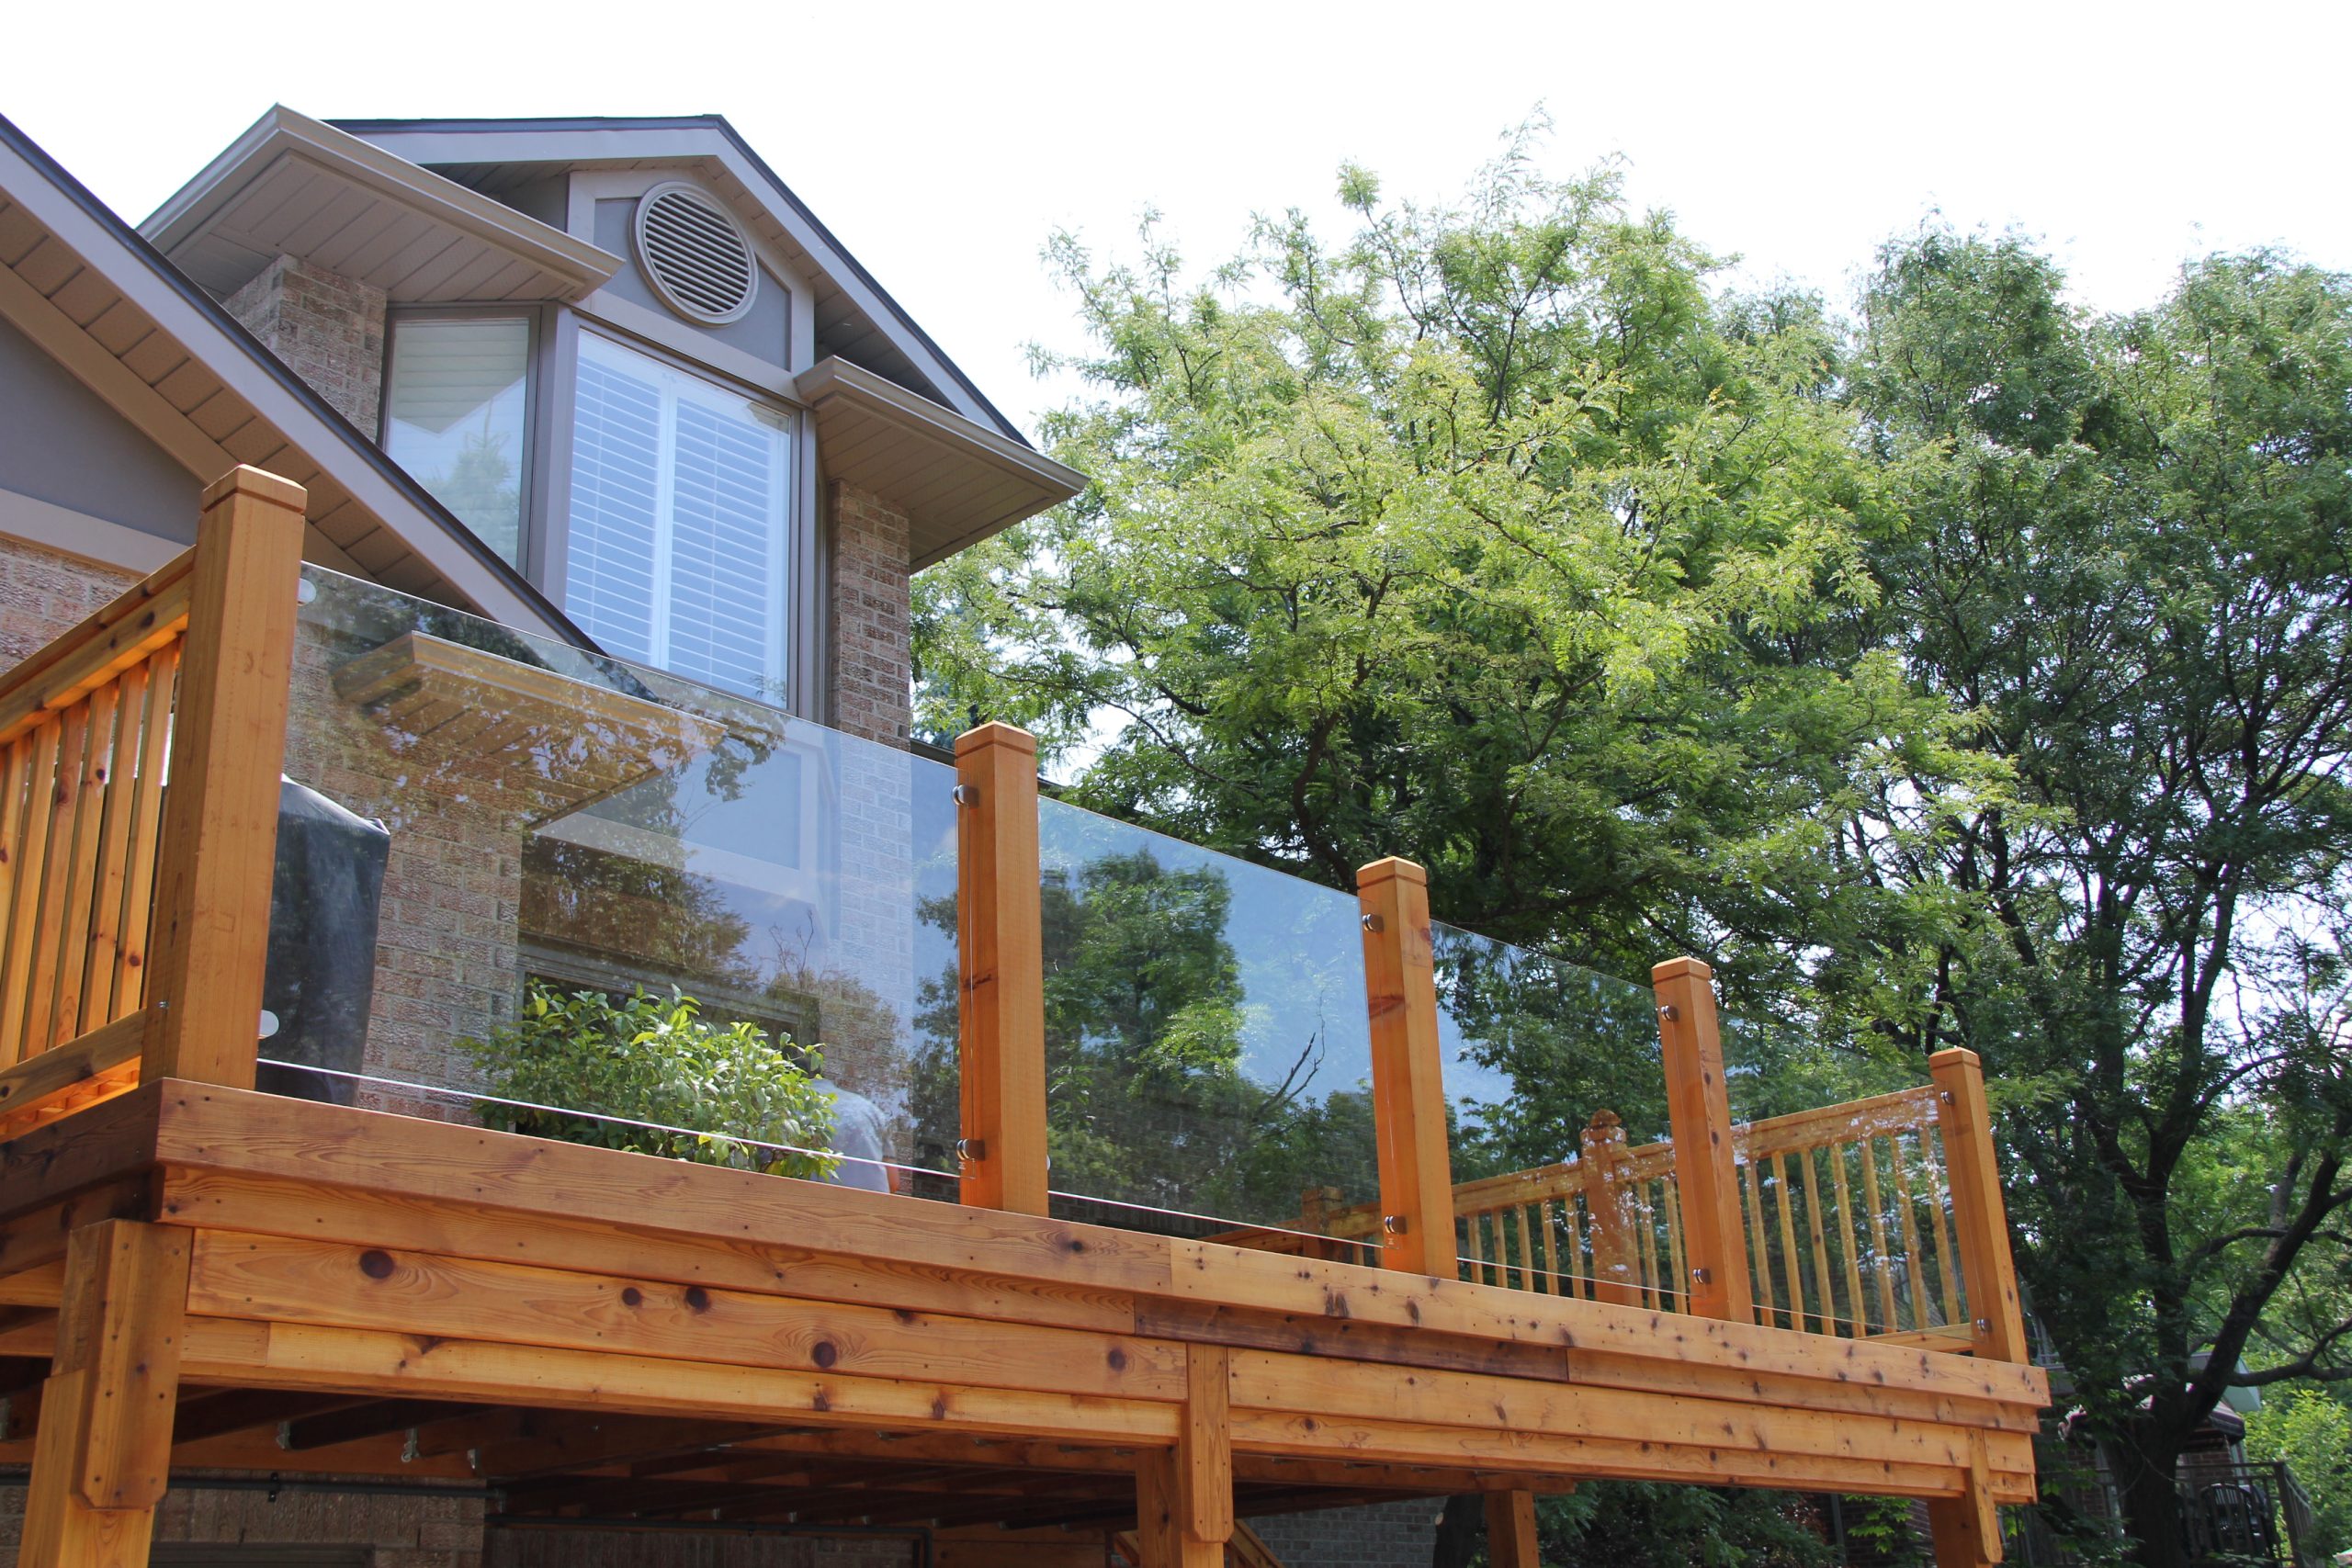
“This design succeeds by balancing opacity and transparency.”
The clear glass panels are strategically placed to preserve the best views of the backyard, making the main seating area feel open and connected to the landscape. The wooden baluster sections, conversely, provide a sense of structure and enclosure, particularly near the house and on the lower level. This material conversation—the warmth of the light wood against the cool, clean glass and the red brick—creates a dynamic and visually interesting facade.
8. Artistic Deck Railing with Custom Painted Mural Panels
This project is pure personality! To create your own mural panels, the key is preparation. This mini-project can transform a boring railing into a work of art in a weekend.
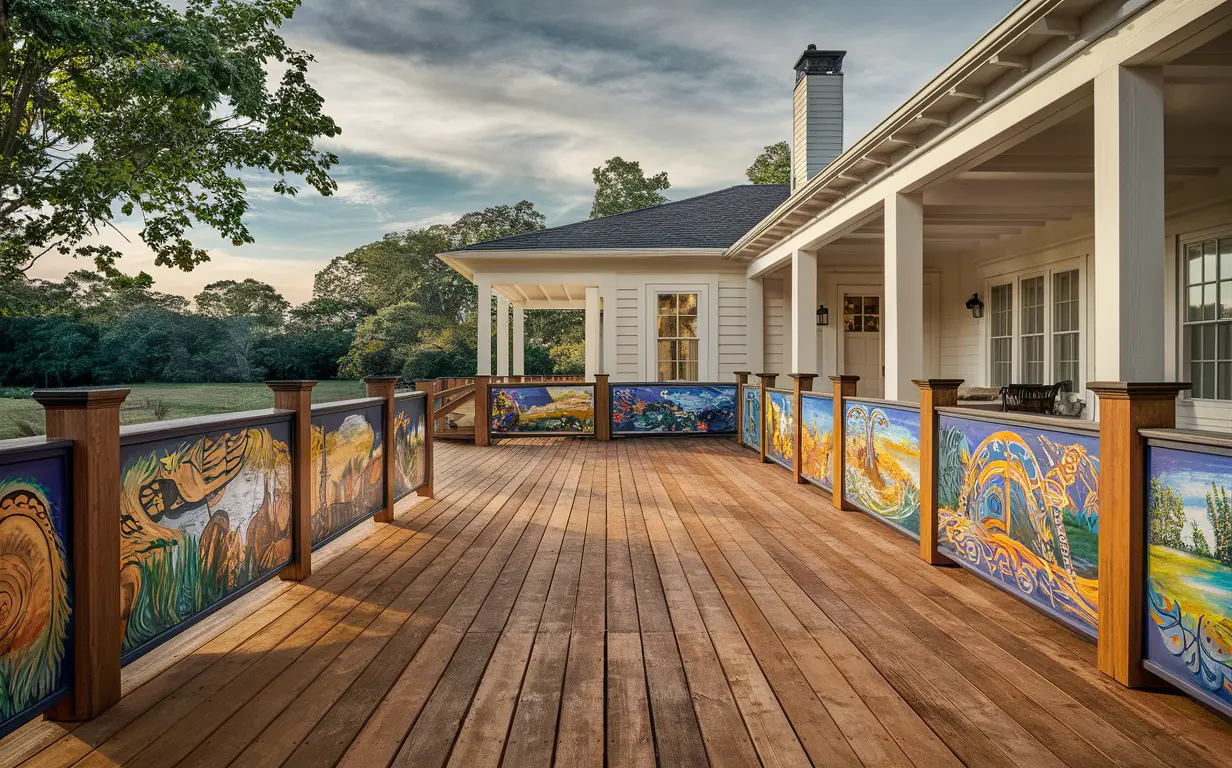
“Measure & Cut: Measure the openings in your railing and cut exterior-grade plywood or composite panels to size, leaving a 1/4″ gap on all sides for expansion.”
Prime Everything: Apply two coats of a high-quality exterior primer to the front, back, and all edges of your panels. This is crucial for longevity. Time estimate: 2-3 hours, including drying time.
Sketch & Paint: Lightly sketch your design in pencil, then bring it to life with durable exterior acrylic or latex paints. Let your creativity flow!
Seal the Deal: Once the paint is fully cured (check the can, this can take 24-72 hours), apply at least two coats of a clear, UV-resistant exterior polyurethane.
Install: Secure the panels to your railing posts using exterior-rated screws or mounting hardware. Material Cost: $150 – $400, depending on panel material and paint quality.
You don’t need to be a professional artist to get a similar, vibrant look. Instead of free-handing a mural, use stencils! You can buy large, reusable stencils online with geometric patterns, floral motifs, or abstract shapes. A simple two-color pattern can be just as impactful. Alternatively, you can use high-quality, weather-resistant vinyl decals on a painted panel. This gives you a crisp, graphic look for a fraction of the effort and cost, with a total project price closer to $100-$200.
9. Multi-Level Wood Deck with Glass and Cable Railing Details
This integrated glass and cable railing system is ideal for larger, multi-level decks, typically those over 300 square feet. The combination of materials helps to break up long spans of railing, preventing a monolithic look. On a smaller, single-level deck, mixing glass, cable, and wood might feel too busy. The beauty of this design is how it adapts to different levels: using glass for the primary seating area to preserve the view, and cable for stairways or secondary zones where a lighter feel is desired. This approach requires a strong architectural vision to feel cohesive.
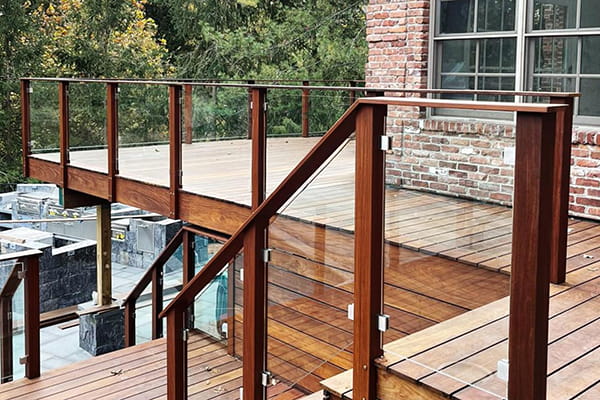
“When combining glass panels and cable railing, material consistency is your best friend.”
Notice how the reddish-brown wood is used for all the main posts and top rails, and the metal (glass clamps and cable tensioners) is all a consistent silver finish. This creates a unified language. Don’t mix and match wood tones or metal finishes. A black top rail with silver posts and bronze clamps will look chaotic. Stick to one wood and one metal color for a polished, intentional result.
10. Modern Cedar Deck with Black Posts and Cable Infill
The visual recipe here is all about bold contrast and vibrant accents. It’s roughly 50% warm wood tones + 40% sharp, dark neutrals + 10% playful color pops. The cedar decking provides a beautiful, natural base. The black posts and railing create a strong, graphic frame. The final touch comes from the lime green umbrellas and orange chair cushions, which inject energy and personality. You could easily swap the accent colors to a calming blue and white for a more coastal vibe, or go monochrome with gray and white for a minimalist take.
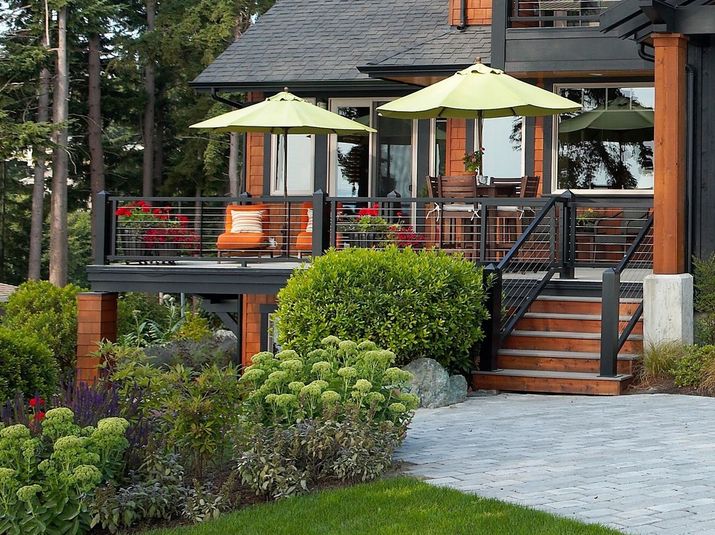
“A full composite deck with a professional cable railing system can be pricey.”
To get this look for less, use pressure-treated pine for the decking and stain it a warm cedar color. For the railing, you can find budget-friendly black aluminum post kits at big-box stores like Home Depot or Lowe’s for around $40-$60 per post. The cable and fittings can be sourced online for a significant discount compared to full kits. Hunt for colorful outdoor pillows and umbrellas at Target or Walmart at the end of the season for huge savings, bringing a similar vibe within a $2,000-$4,000 budget for a standard deck.
11. Raised Composite Deck With Black Metal Railing and a Privacy Screen
This design effectively carves out a functional outdoor room. The key to its success is the seamless material palette. The light brown-grey composite of the deck floor is echoed in a darker, richer tone on the vertical privacy screen. This repetition of material, just in a different shade and orientation, creates a cohesive, wrap-around feeling. The black metal railing and the black stripe on the screen act as a unifying accent, tying the horizontal and vertical planes together. It feels intentional and designer-led, not like a random assortment of parts.
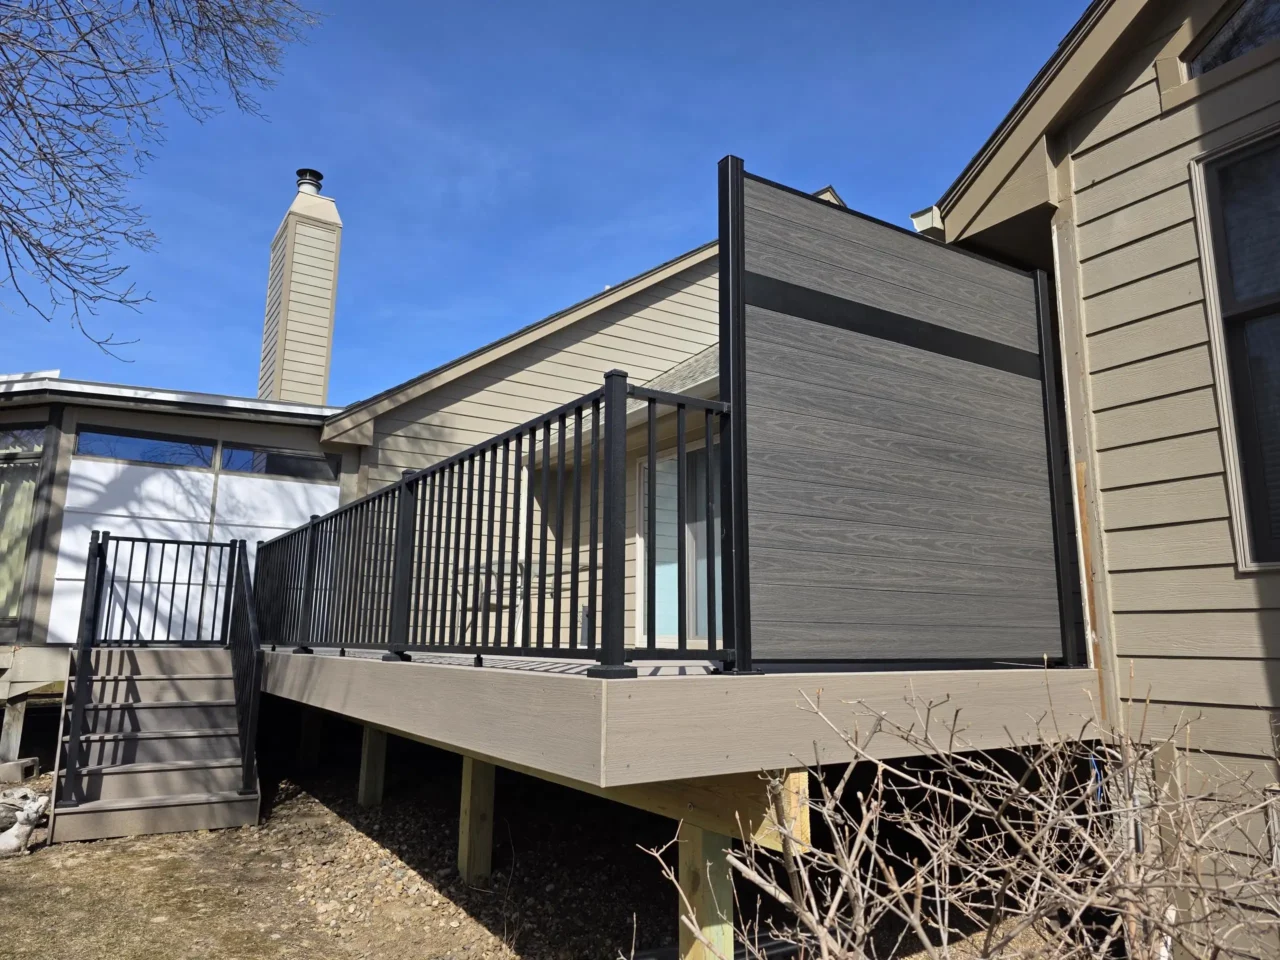
“Check Local Setbacks: Before planning a tall privacy screen, verify your city’s rules.”
Many communities have height restrictions or require a certain distance from the property line.
Confirm Sun Direction: Map out the sun’s path throughout the day. Does the screen provide shade where you want it, when you want it? You might need to adjust the placement or height.
Get HOA Approval: If you have a Homeowners Association, you absolutely need to submit your plans and material choices for approval before you buy anything. They often have strict rules on colors and styles.
12. Sleek Privacy Railing with Horizontal Boards
For a high-end, modern look with horizontal privacy boards, run a “picture frame” border around the main deck boards. This means installing one or two rows of boards parallel to the railing and house, framing the main field of decking. For this TimberTech design, it helps the railing feel integrated rather than just sitting on top. It’s an extra step that requires some careful miter cuts at the corners, but it elevates the final look from “good DIY” to “professionally designed.”
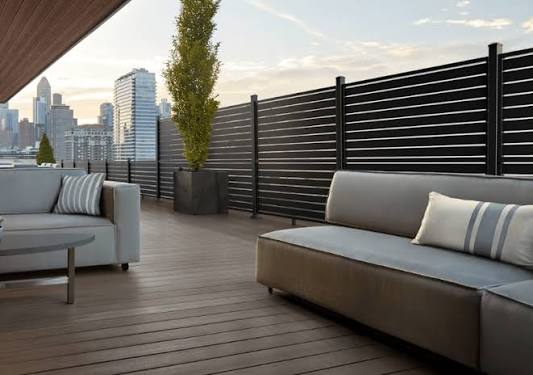
“Creating a horizontal board railing section like this is a great weekend project.”
Here’s a quick guide:
- Set Your Posts: Securely install your 4×4 or 6×6 wood or composite posts, ensuring they are plumb and spaced no more than 6 feet apart.
- Build the Frame: Attach 2×4 rails between the posts at the top, bottom, and middle. These will be the attachment points for your deck boards.
- Cut Your Infill Boards: Measure and cut your horizontal deck boards (the same ones used for your floor) to fit snugly between the posts.
- Attach the Boards: Starting from the bottom, attach the boards to the 2×4 rails using exterior-grade screws. Use a consistent spacer (a scrap piece of 1/2″ plywood works well) to create even gaps.
- Add a Top Cap: Finish the railing by installing a 2×6 or a flat deck board across the top of the posts for a smooth, finished handrail. Time Estimate: 6-8 hours for a 12-foot section. Material Cost: $200-$500.
13. Covered Deck with Dark Metal Spindles and Light Wood Posts
The distinguishing feature of this design is the high-contrast pairing of materials under a covered ceiling. It’s the dark, slender vertical spindles against the warm, light-toned wood posts that makes the look. If the spindles were also wood, or if the posts were dark metal, it would feel much more uniform and less dynamic. This intentional play between light and dark, thick and thin, is what gives the space its sophisticated, modern lodge character. The dark, slat-patterned ceiling further enhances this by adding another layer of texture and depth.
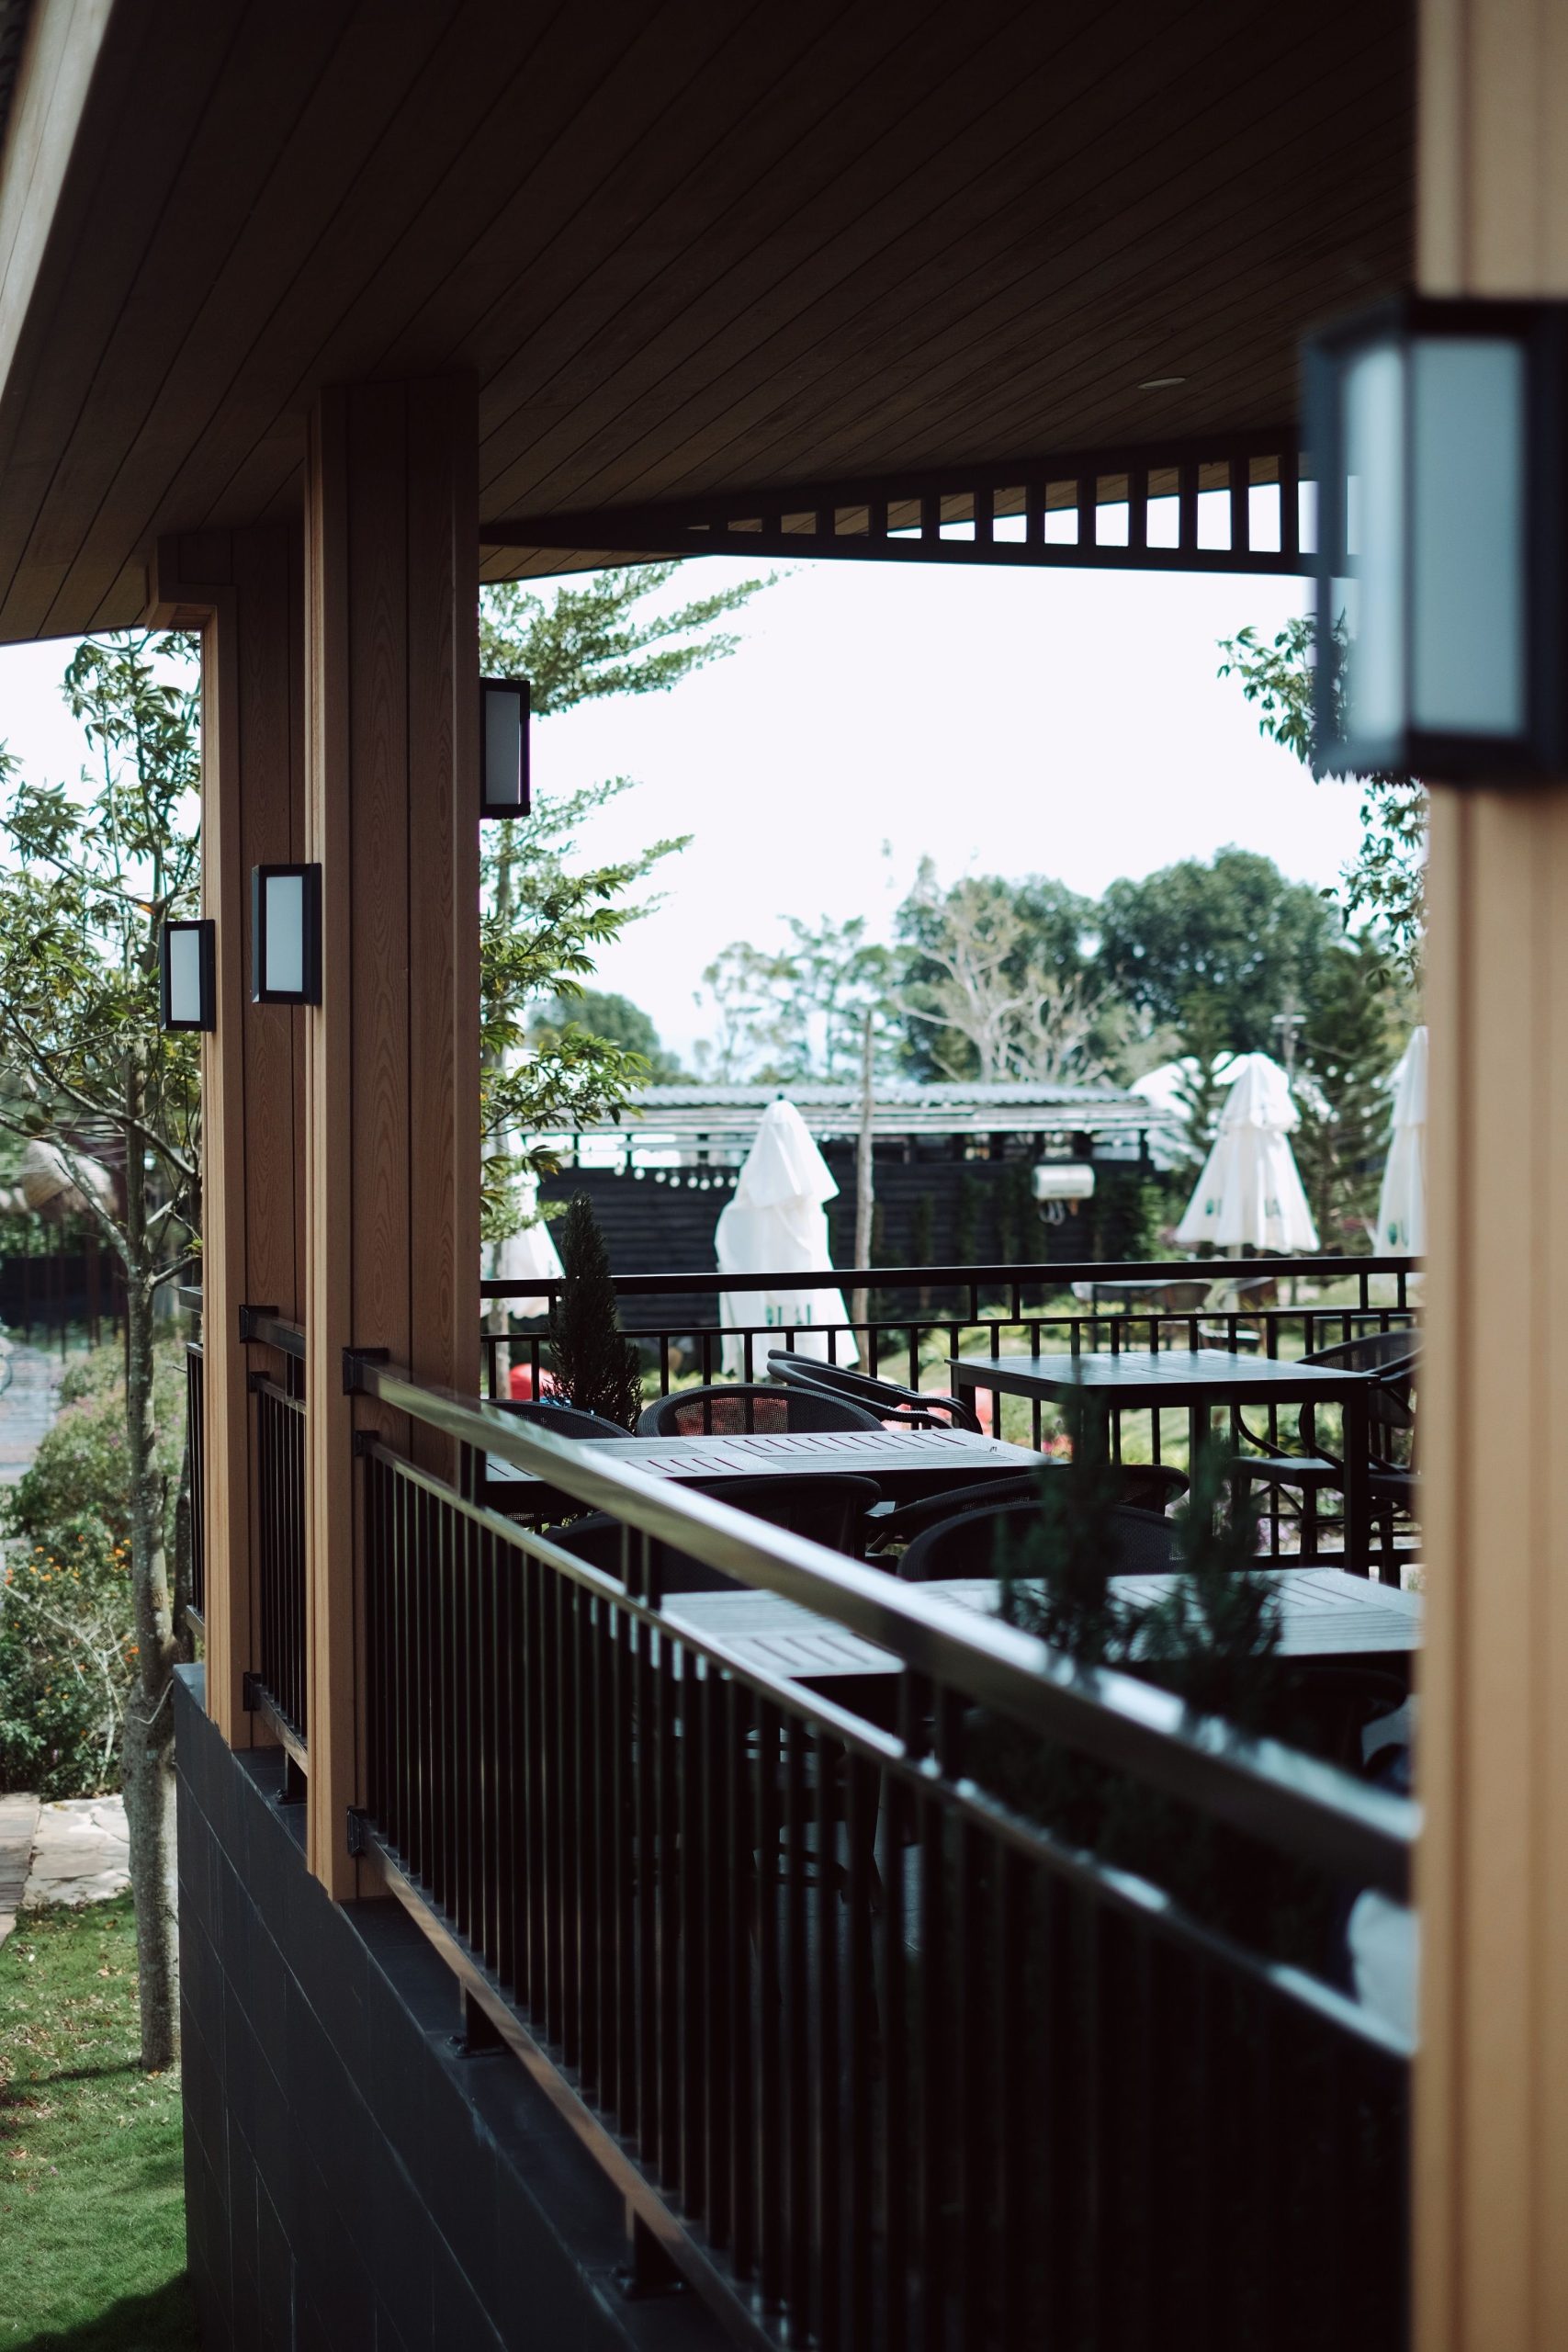
“This design is perfectly suited for a covered or second-story deck where you want to define the space without making it feel dark or heavy.”
The slender black spindles maintain a sense of openness, while the substantial wood posts provide a necessary feeling of structure and safety. It works well on rectangular decks from 120 to 300 square feet. A ceiling height of at least 8 feet is recommended to prevent the dark ceiling elements from feeling oppressive. Compare this to the totally open feel of Idea #2, which is better for maximizing sun and views.
14. Monochromatic Grey Composite Deck with Privacy Wall
This deck design is a successful study in monochromatic texture. By using the same weathered grey composite material for the deck floor, the balustrade railing, and the solid privacy screen, it creates an incredibly cohesive and calming effect. The interest comes not from color, but from form. The vertical lines of the balusters, the horizontal lines of the deck boards, and the solid plane of the privacy wall all play off each other. This thoughtful repetition of a single color/material makes the space feel like a purpose-built outdoor retreat.
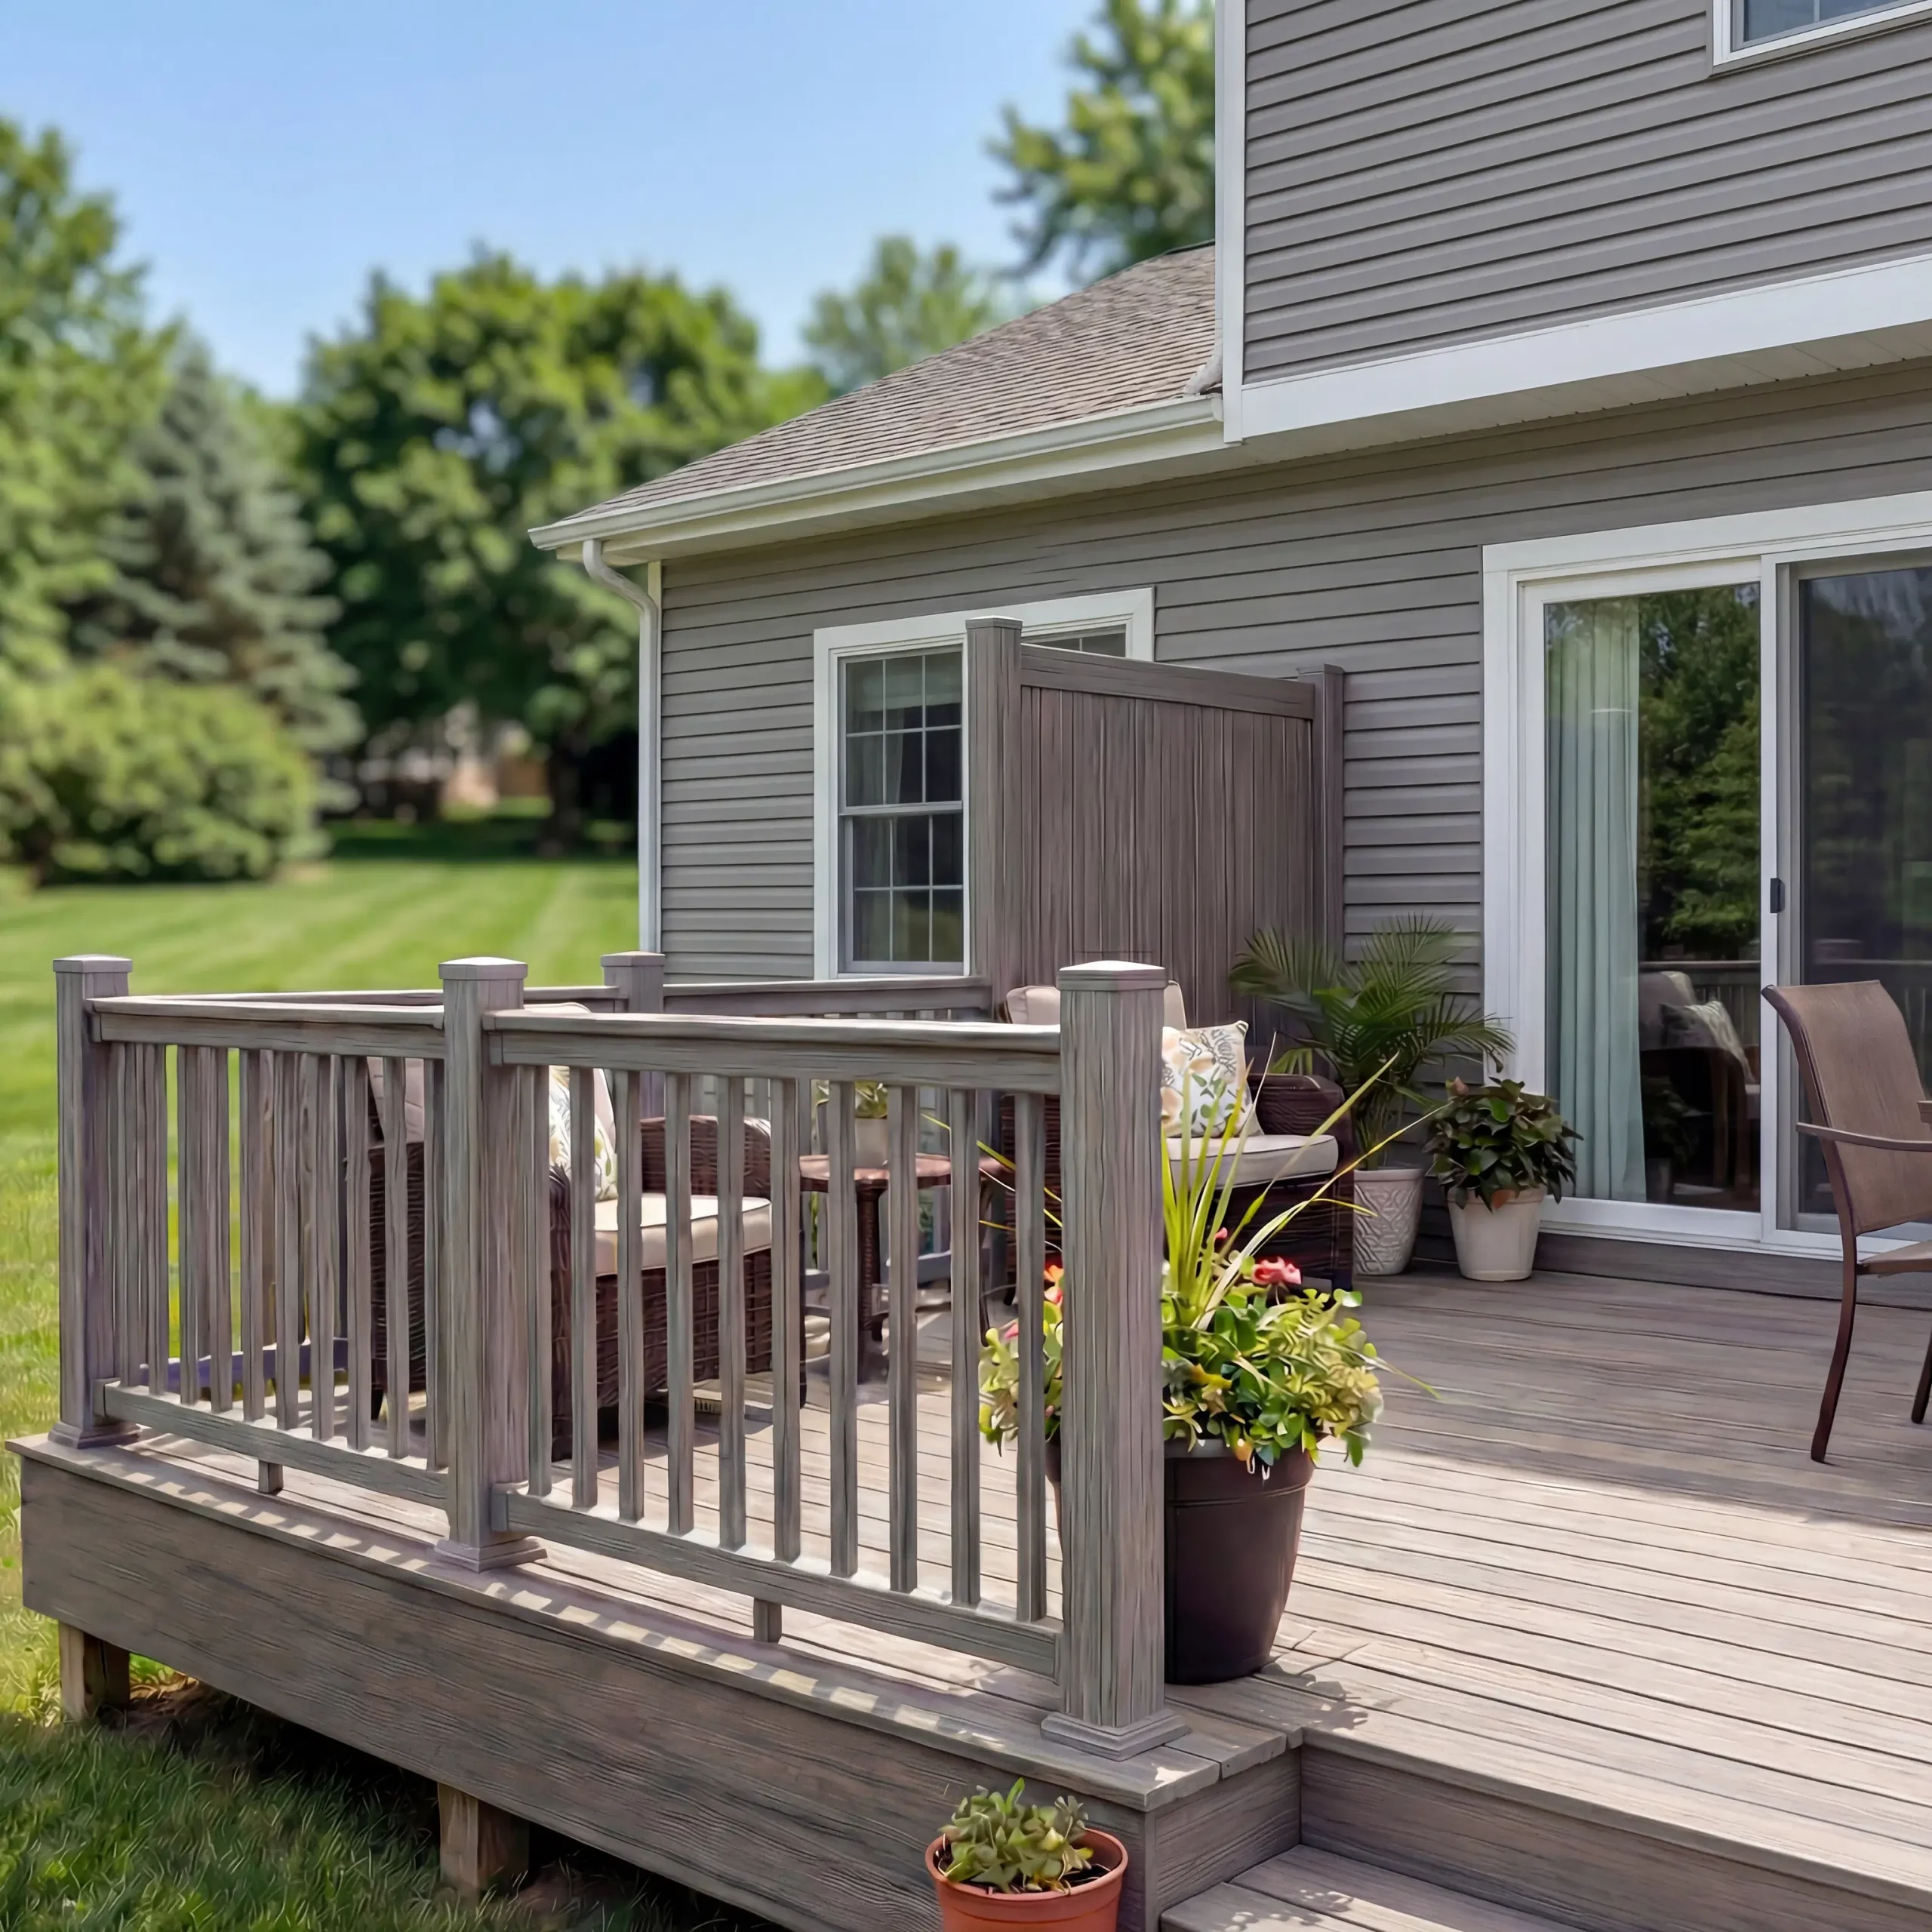
“Composite decking is famously low-maintenance, but “low” doesn’t mean “no.” To keep this weathered grey looking its best, plan for a good cleaning twice a year, in the spring and fall.”
Use a soft-bristle brush and a composite deck cleaner, or a simple soap and water solution, to scrub away any built-up pollen, dirt, or mildew. While it resists staining much better than wood, it’s still wise to clean up spills from things like greasy food or red wine quickly. Avoid pressure washing, as it can damage the surface and void the warranty.
15. Black Metal and Cable Railing on a Composite Staircase
Installing cable railing on stairs can seem tricky, but it’s all about precise angles. Here’s a simplified process:
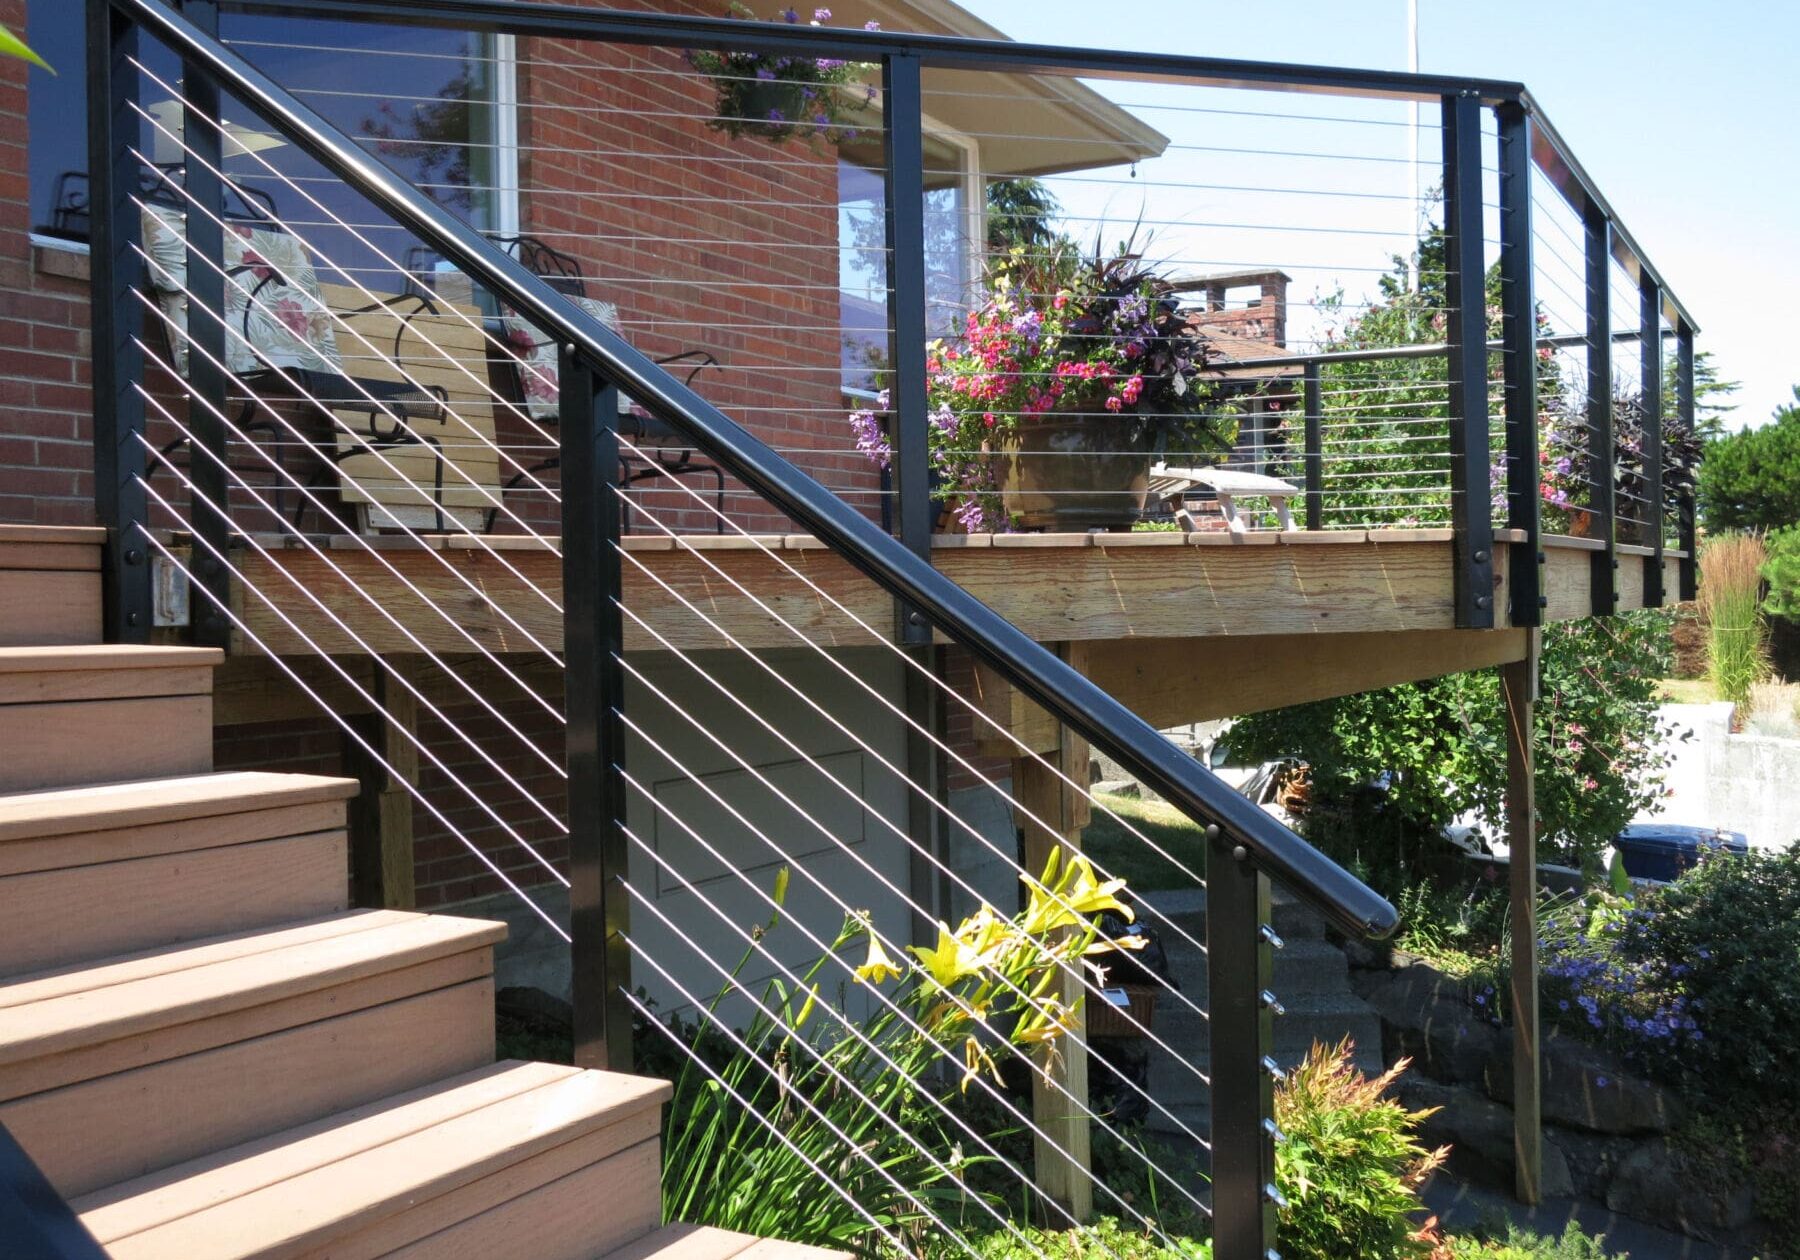
“Install Posts: Securely mount your main posts at the top and bottom of the staircase.”
Drill Holes: This is the crucial step. Use a drill guide set to the angle of your stairs to drill perfectly aligned holes through your posts. Most stair angles are between 30-35 degrees. Measure twice, drill once!
Cut Cables: Measure the distance for each cable run and cut your stainless steel cable to length, accounting for the hardware.
Attach Hardware & Feed Cable: Crimp or attach the terminal fitting to one end of the cable, feed it through all the posts, and then attach the tensioning hardware to the other end.
Tension the Cables: Starting from the middle cable and working your way out, tighten the cables until they are taut and have minimal flex. Time Estimate: 4-6 hours for a short flight of stairs. Material Cost: $50-$100 per linear foot.
- Metal Post & Railing Kit (8 ft section): $400 – $900
- Cable & Fitting Kit (for 8 ft): $200 – $450
- Composite Stair Treads & Risers: $300 – $700
- Planters & Decor: $100 – $300
- TOTAL: $1,000 – $2,350 per 8-foot stair section
- Budget Alternative: For a similar modern look, you can use pre-drilled black aluminum balusters instead of cable. You get the same dark, slim vertical lines but at about 30-40% lower cost and with an easier installation process.
16. Warm Wood Deck with Simple Horizontal Cable Railing
The make-or-break element in this serene setup is the simplicity. If the railing were more ornate, with decorative post caps or intricate metalwork, it would spoil the calm, natural vibe. If the deck were cluttered with furniture, the planter would get lost. The success of this design lies in its restraint. The clean lines of the wooden posts and the barely-there cables do just enough to ensure safety while letting the warmth of the wood and the pop of green from the single planter do all the talking. It’s an exercise in less-is-more.
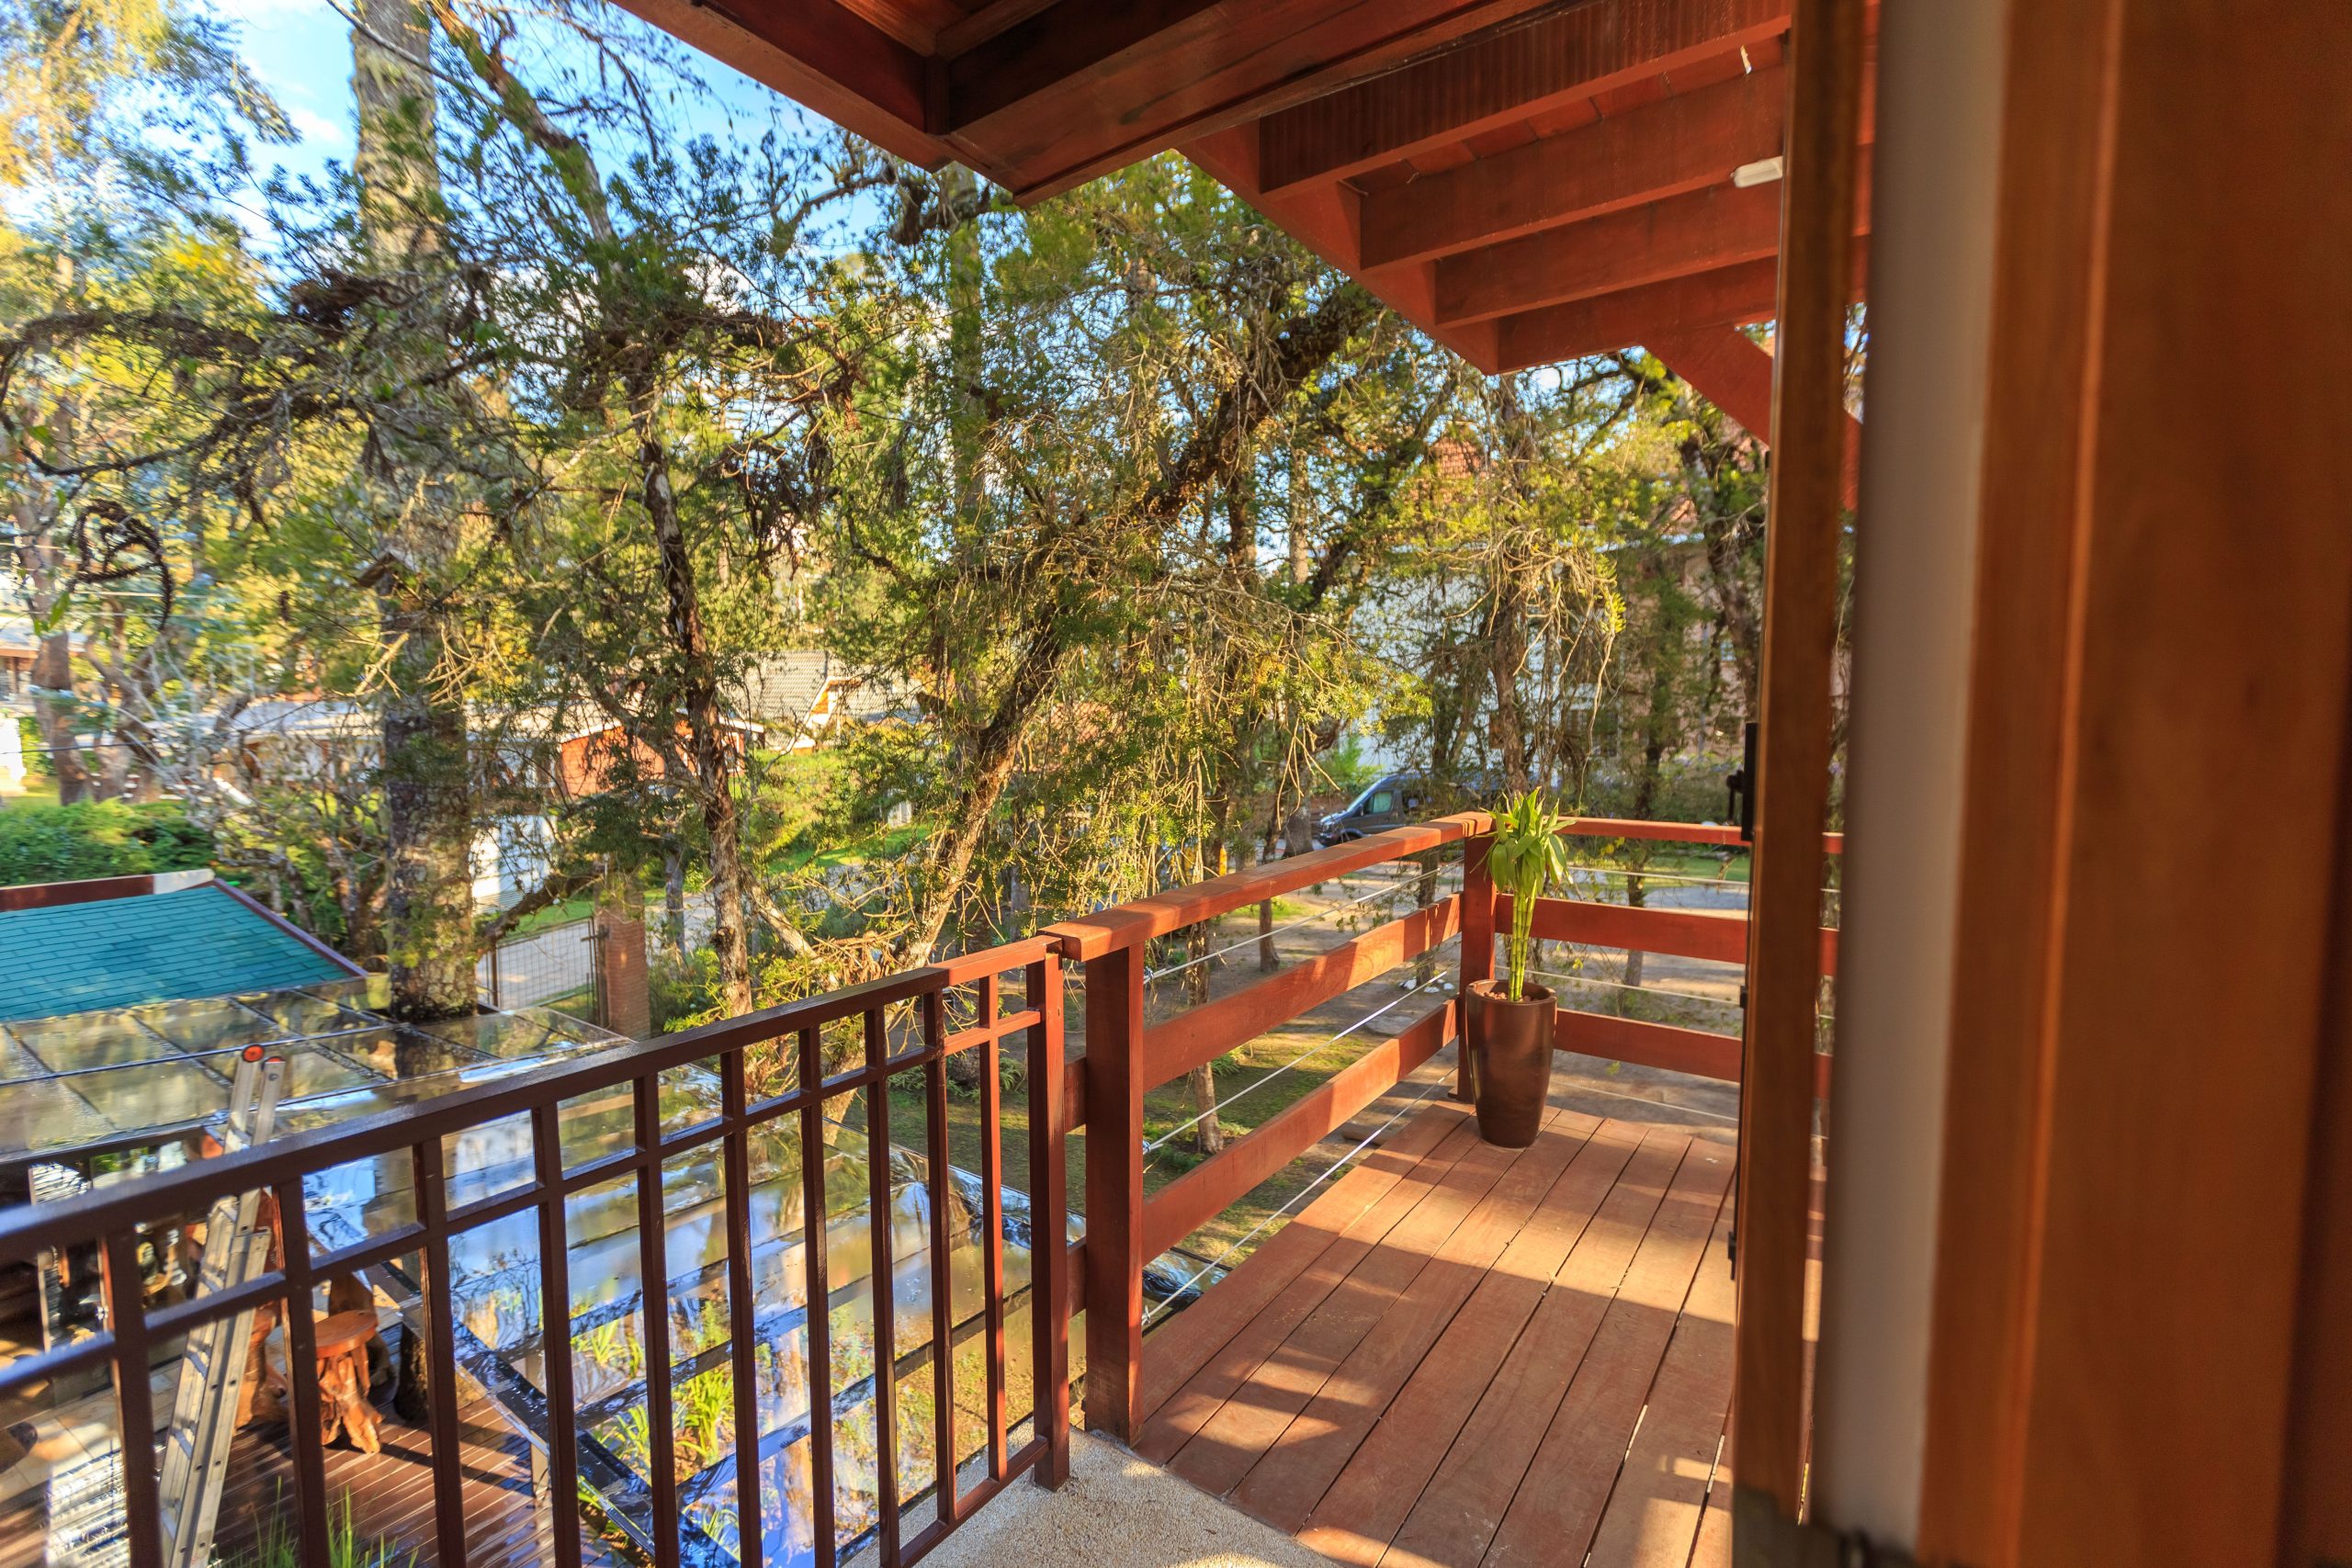
“To maximize the minimalist effect of a cable railing, pay attention to your end fittings.”
Instead of bulky, exposed turnbuckles and terminals, opt for sleeker, “hidden” hardware. Many brands offer fittings that are designed to be countersunk and concealed inside your wooden posts. This creates the illusion that the cables are simply emerging from the wood, which is a much cleaner, more professional finish. It costs a bit more, but it’s a detail that elevates the entire project.
17. Sleek Cable Railing with Dark Wood Posts and Top Rail
The success of this railing lies in its clean, repeating geometry. The strong vertical lines of the dark wooden posts create a steady rhythm, providing a sense of strength and stability. Cutting through that rhythm are the taut, precise horizontal lines of the stainless steel cables. This grid-like pattern is modern and orderly. The thin metal posts interspersed between the main wooden ones are a clever touch, providing necessary cable support without adding visual bulk, thus maintaining the open and airy feel of the design.
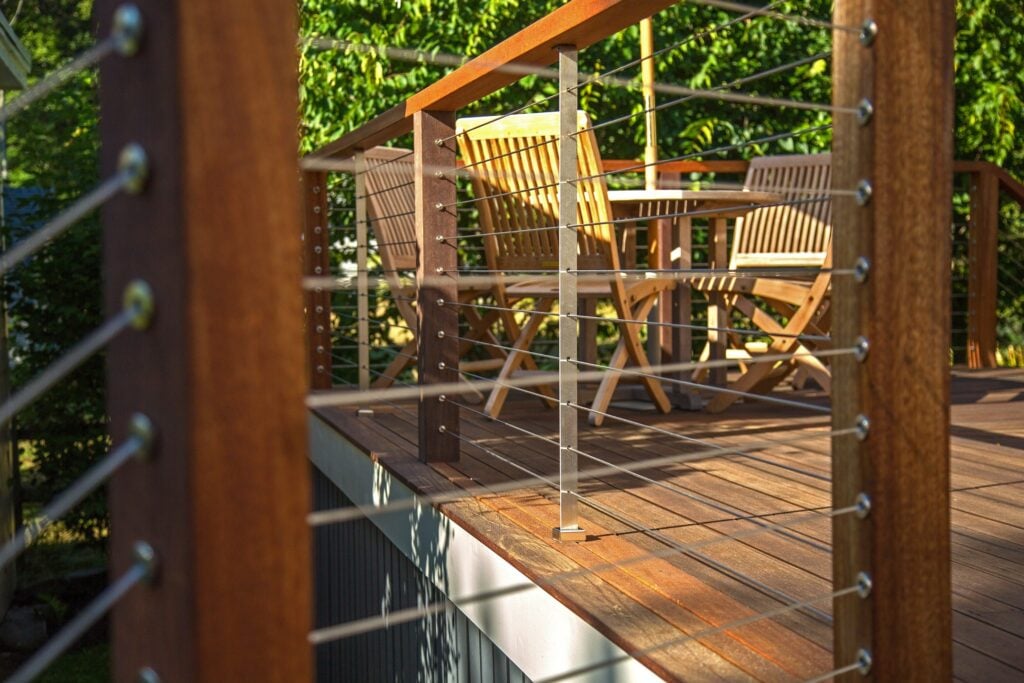
“Cable railings look amazing, but they require a very strong frame.”
The cables are pulled to a high tension (hundreds of pounds of force), which can cause flimsy posts to bow or bend over time, leading to saggy cables and a failed inspection. Your end posts, especially, must be substantial (at least 4×4, but 6×6 is better) and properly blocked and braced within the deck frame. Don’t skimp on the structure to save a few dollars; it’s the foundation of the entire system’s safety and longevity.
18. Rustic Deck Railing with Hand-Carved Wooden Balusters
The magic of this railing is all in the texture. Take away the hand-carved, faceted finish on the balusters, and you’re left with a standard, almost boring wooden railing. It is the rough, varied, and imperfect surface of the wood that tells a story of craftsmanship and nature. The faceted spindles catch the light in a way that smooth, machine-turned balusters never could. This celebration of the wood’s natural grain and the craftsman’s touch is what gives the deck its unique, earthy, and rustic character.
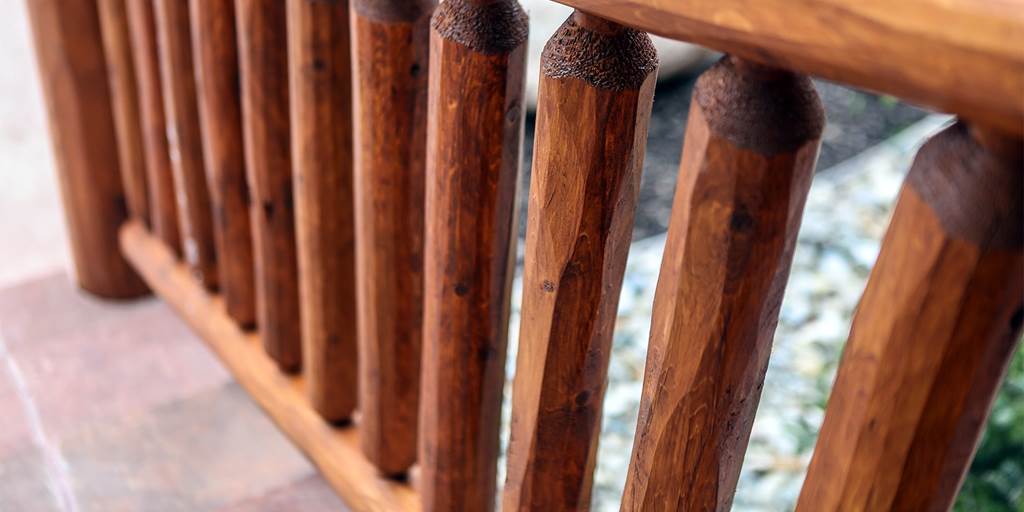
“A beautiful, rustic wood railing like this requires a commitment to maintenance to keep it from turning silver-gray and splintering.”
To preserve that warm brown tone, you’ll need to clean and re-apply a UV-blocking sealer or stain every 1-2 years, depending on your climate and sun exposure. The hand-carved texture means you’ll be working with a brush, not a roller, to get into all the nooks and crannies. If you love the look but not the labor, you could let it weather naturally to a silvery patina, but you’ll still want to apply a clear water sealer periodically to prevent rot.
19. Contemporary Deck Railing with Wood and Metallic Mesh Infill
Mesh infill panels are gaining traction as a chic, industrial-inspired alternative to glass or cable. As homeowners look for materials that feel both modern and durable, wire mesh hits a sweet spot. It offers more texture and opacity than glass but feels lighter and more contemporary than traditional wood or composite balusters. It taps into a commercial, urban aesthetic, but when framed in warm wood as it is here, it becomes perfectly suited for a residential backyard. It’s a trend that feels both fresh and built to last.
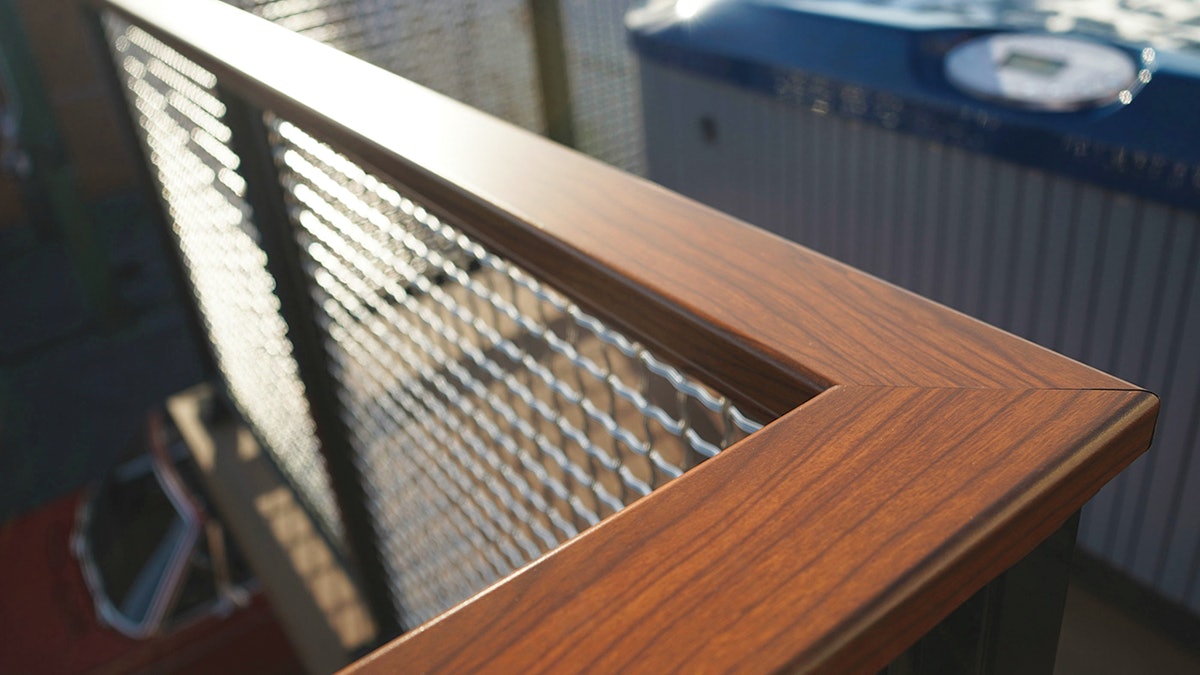
“This design works because it’s a study in contrasting textures.”
You have the smooth, organic grain of the mitered wood top rail paired directly with the cool, rigid, geometric pattern of the metallic mesh. One material is warm and natural, the other is cool and industrial. This juxtaposition creates a sophisticated visual tension. The dark vertical support post acts as a grounding element, containing the pattern and framing the entire composition. It’s a well-balanced blend of rustic and modern sensibilities.
20. Relaxing Dark Wood Deck with Light Rattan Chairs
Here, the style formula is simple and effective: 80% deep, moody neutrals + 20% light, airy texture. The dark wood of the deck and railing creates a rich, enveloping backdrop that feels cozy and private. The two light brown rattan chairs are the key counterpoint. Their open-work design and lighter color prevent the dark deck from feeling gloomy. They add a touch of breezy, bohemian texture that keeps the mood relaxed and inviting. The string lights add a final sparkle of magic to the scene.
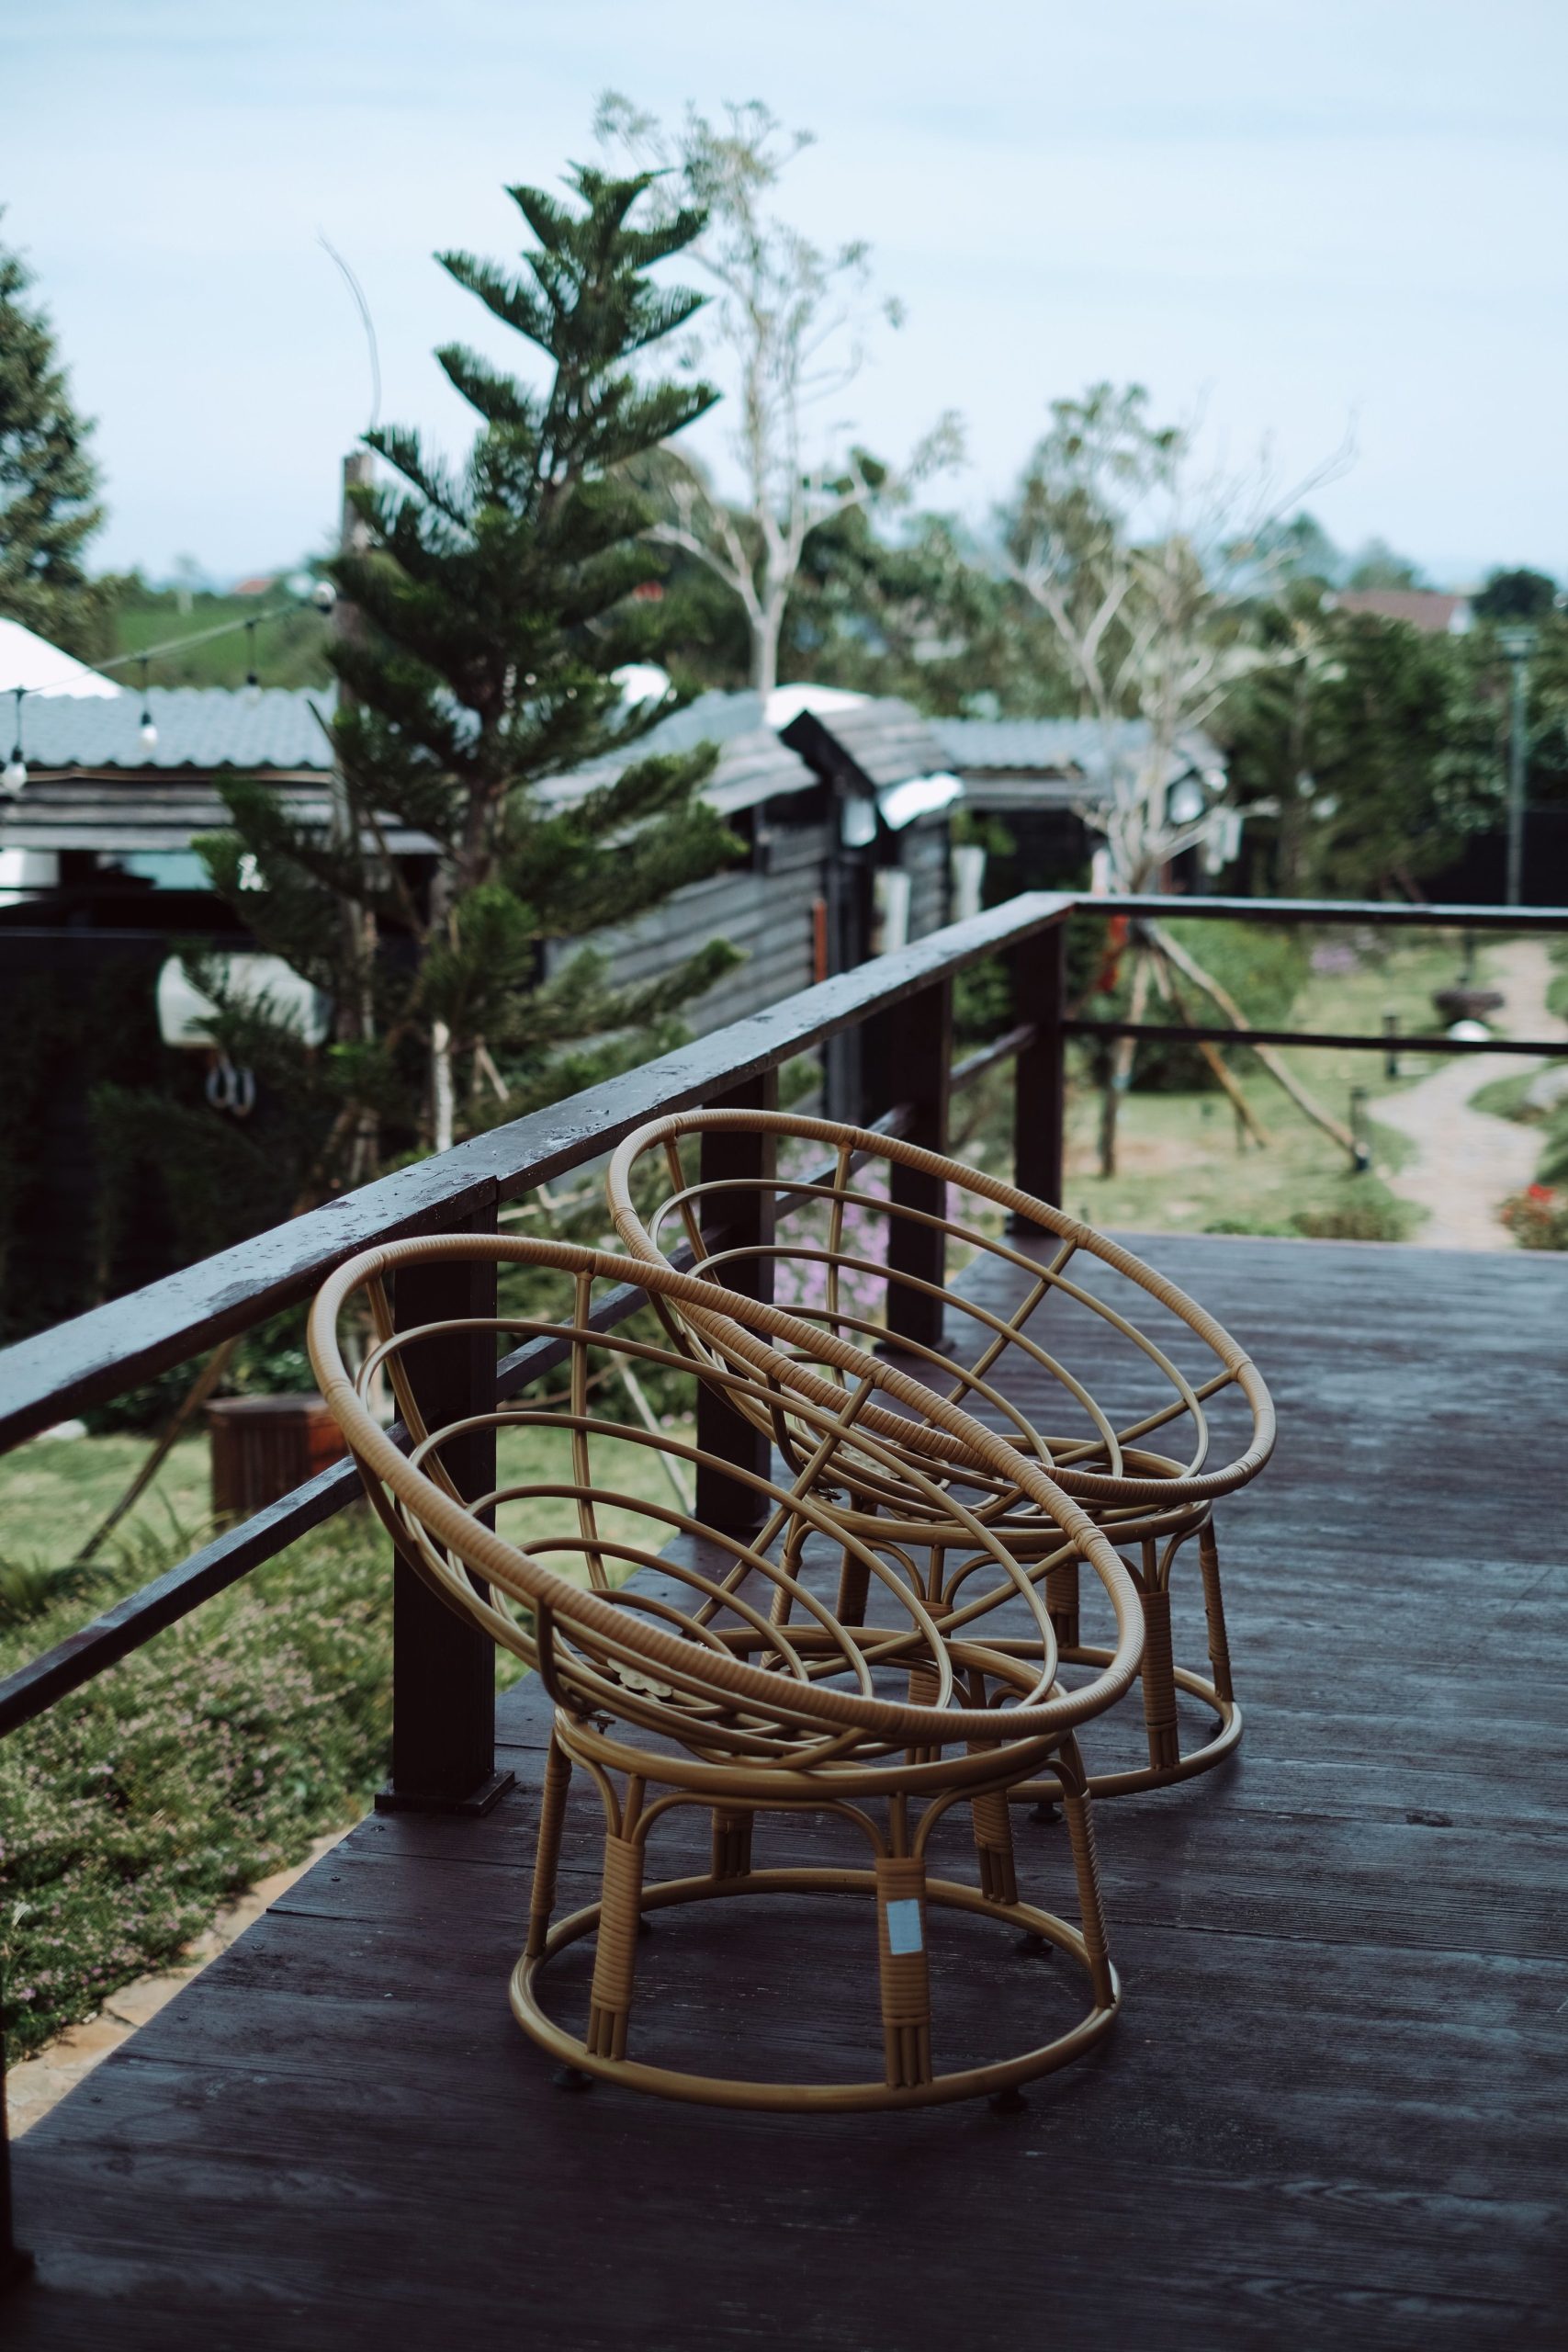
“A full dark-wood deck can be a major investment.”
To capture this vibe on a budget, focus on the “dark floor, light chairs” concept. Use a more affordable pressure-treated pine for your deck, but instead of a transparent stain, use a solid or semi-solid deck stain in a deep charcoal or espresso color. Then, search for your light-colored outdoor chairs on Facebook Marketplace, Target, or Wayfair during end-of-season sales. You can achieve this same cozy, high-contrast look for under $2,500, with most of that being the deck stain and prep.
21. Contemporary Cable Railing for Open Views
When planning a cable railing, don’t underestimate the importance of the top rail. While the cables provide the view, the top rail is what you’ll physically touch and lean on; it needs to feel sturdy and substantial. For a contemporary look like this, a 2×6 wood top rail or a rectangular metal profile with a width of at least 2.5 inches works best. It provides the necessary visual and structural anchor for the whisper-thin cables, making the entire assembly feel safe and robust, not flimsy.
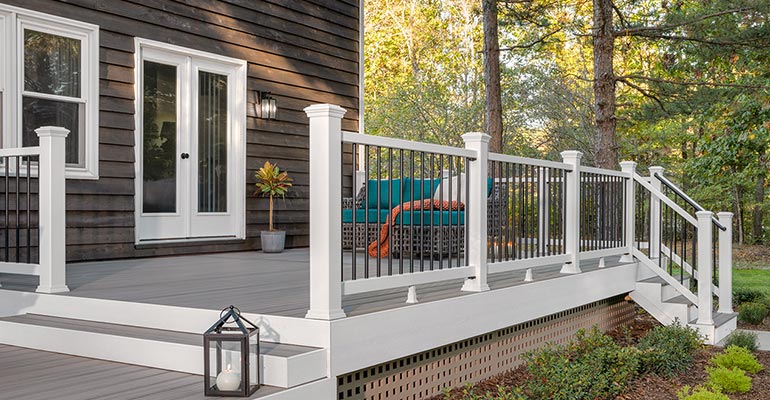
“Cable railings are exceptionally versatile and work well on decks of almost any size where the primary goal is preserving a view.”
They excel on smaller decks (under 150 sq ft) because their transparency prevents the space from feeling boxed-in. On larger decks, they create a seamless transition to the surrounding landscape. The one place they are less ideal is on very high second or third-story decks, where some people may feel psychologically more comfortable with a more visually solid barrier, like the glass panels in Idea #3.
22. Modern Beachfront Deck with White and Cable Railing
The power of this design comes from its deference to the environment. The materials were chosen to complement, not compete with, the beachy landscape. The light grey composite deck boards mimic the color of weathered driftwood or dry sand. The white posts and top rail are clean and bright, reflecting the sun and echoing the whitecaps on the water. Finally, the horizontal cables virtually disappear, offering an uninterrupted panorama of the dunes and sky. It’s a smart, site-specific design that feels perfectly at home.
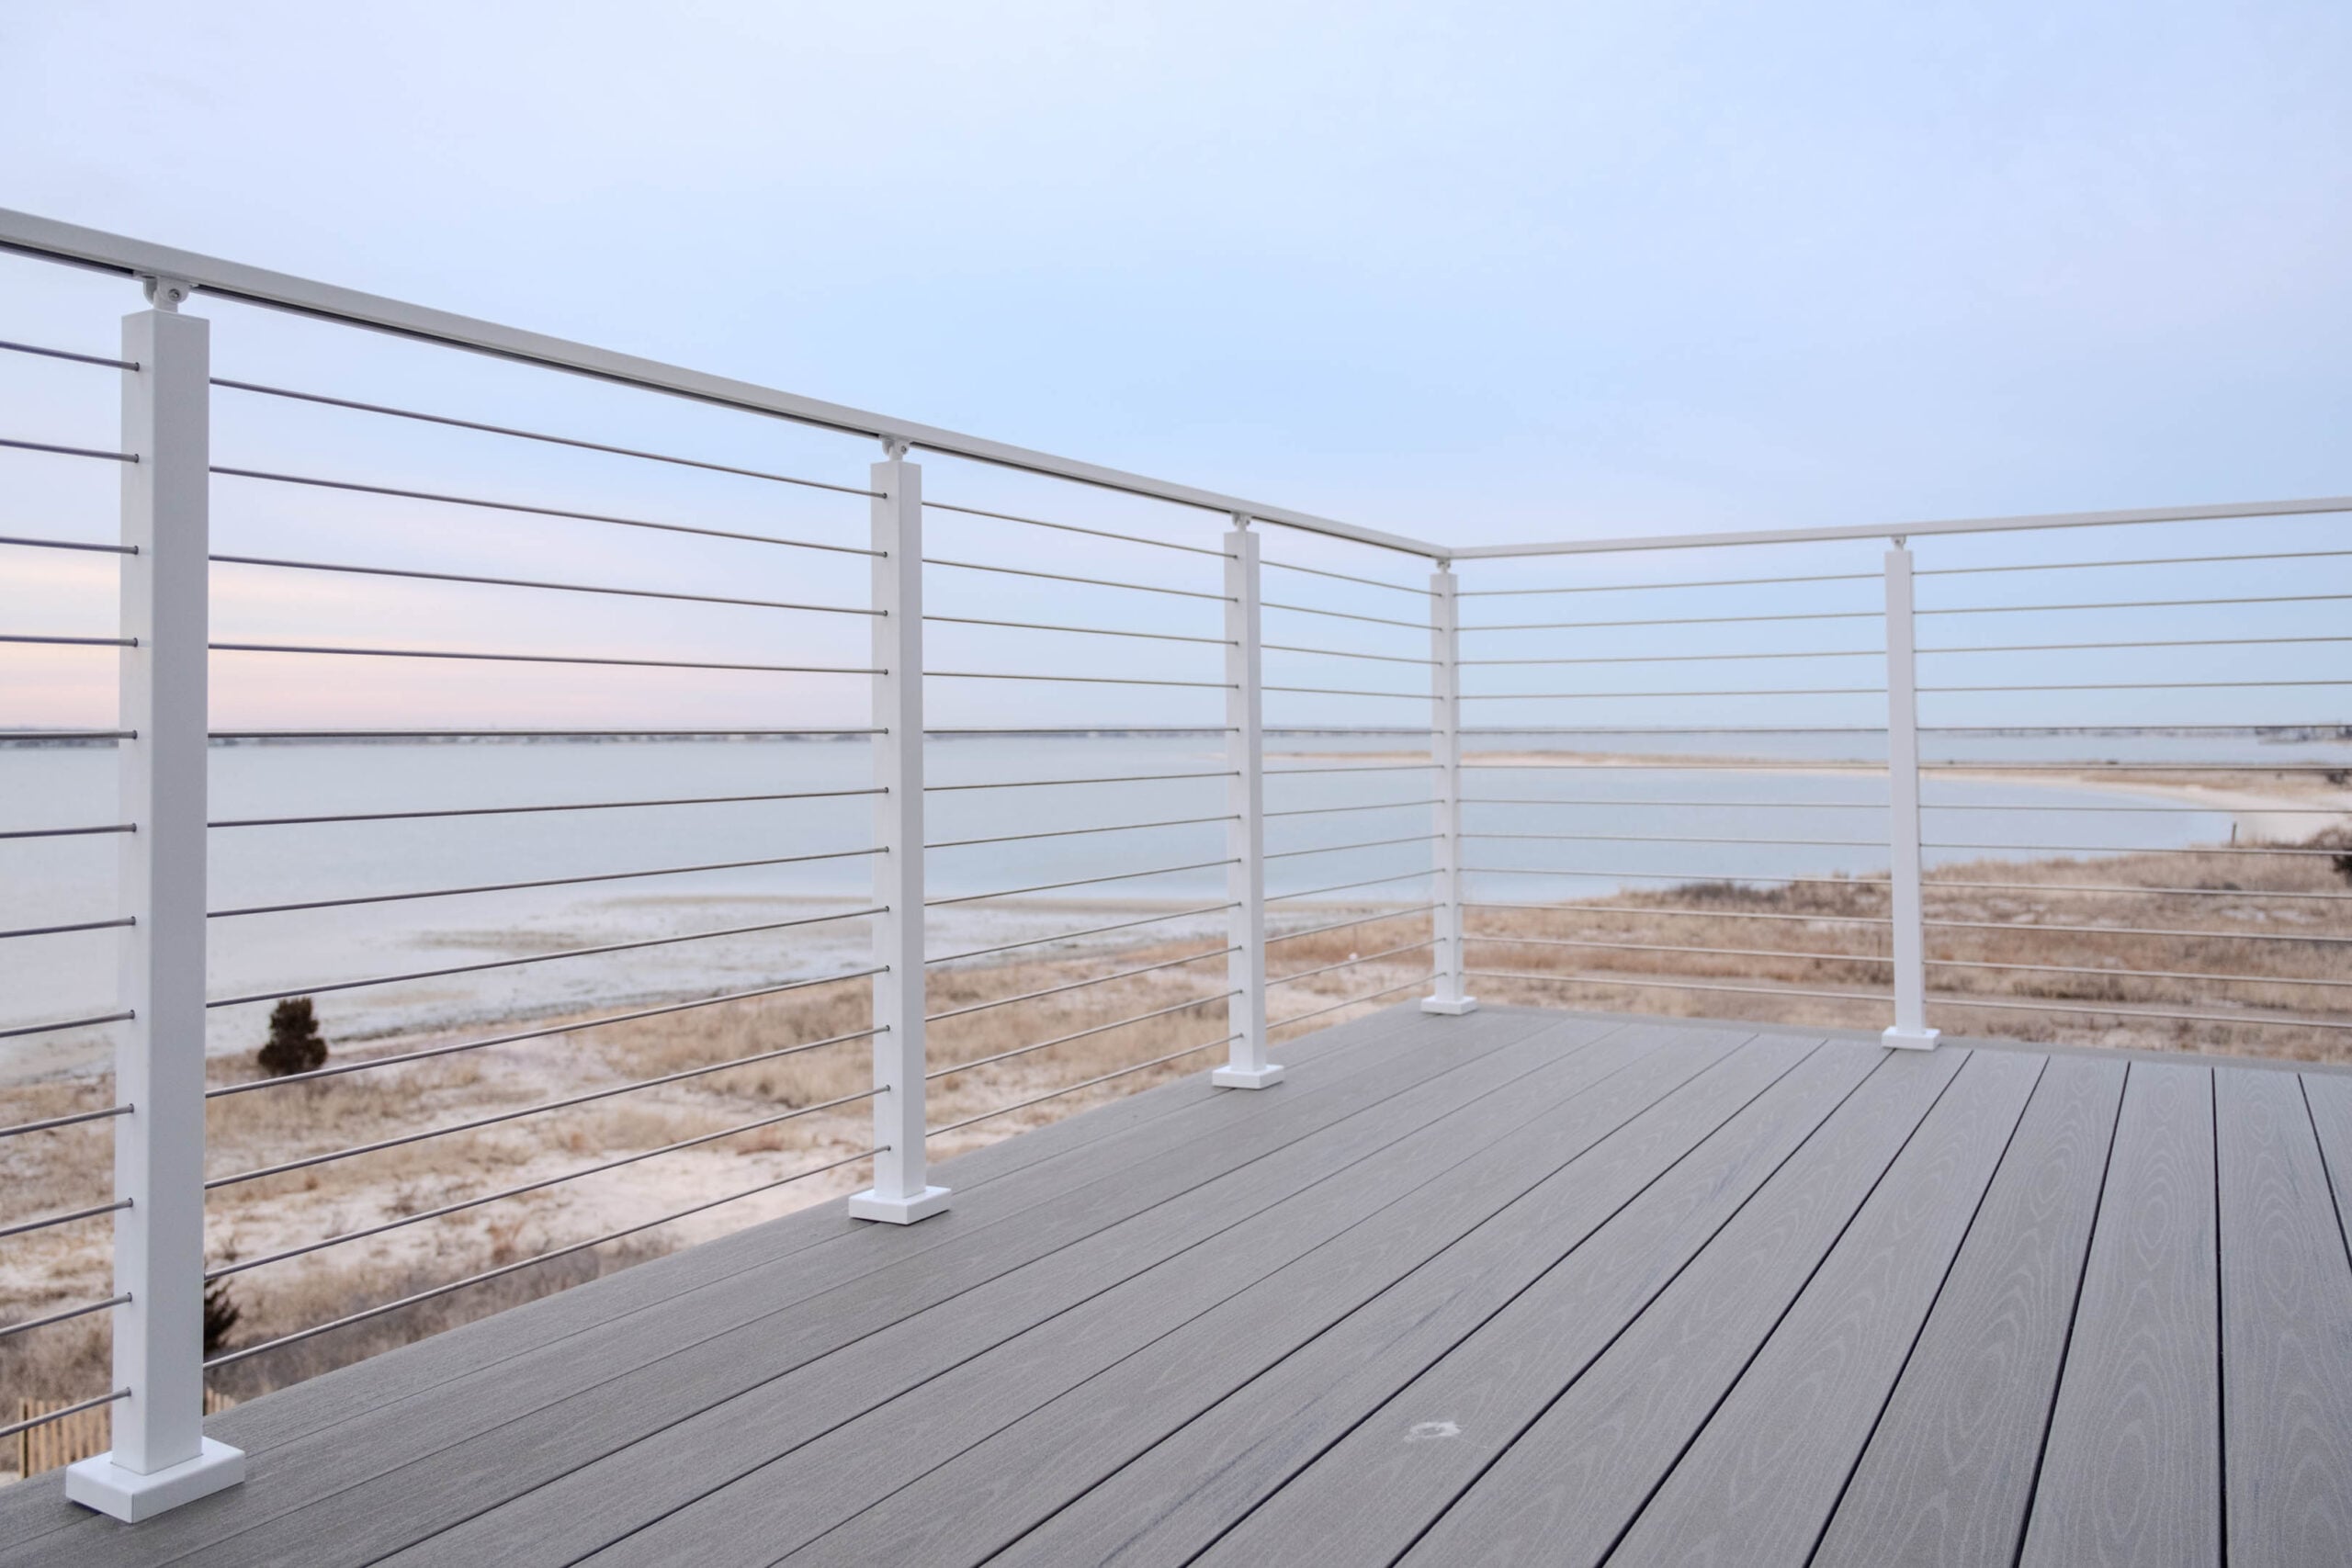
“If you are installing a cable railing in a coastal or salt-air environment, you absolutely must use marine-grade T316 stainless steel for all your cables and hardware.”
A lower grade, like T304, will inevitably show signs of surface rust and corrosion within a few years. T316 has added molybdenum, which provides superior corrosion resistance. Even with T316, you should plan to rinse the cables and posts with fresh water a few times a year to wash away salt deposits and keep them looking pristine.
23. Elegant Multi-Level Home with Mixed Railing Styles and Stone Pillars
The single element that pulls this entire exterior together is the repetition of the stone-clad pillars. They appear on the lower retaining walls, as structural supports for the deck, and as anchor points for the railing. If these were simple wooden posts, the design would feel far less cohesive and luxurious. This consistent use of a single, high-quality material across different levels and functions creates a powerful sense of unity and permanence. The small lanterns on top are the perfect finishing touch.
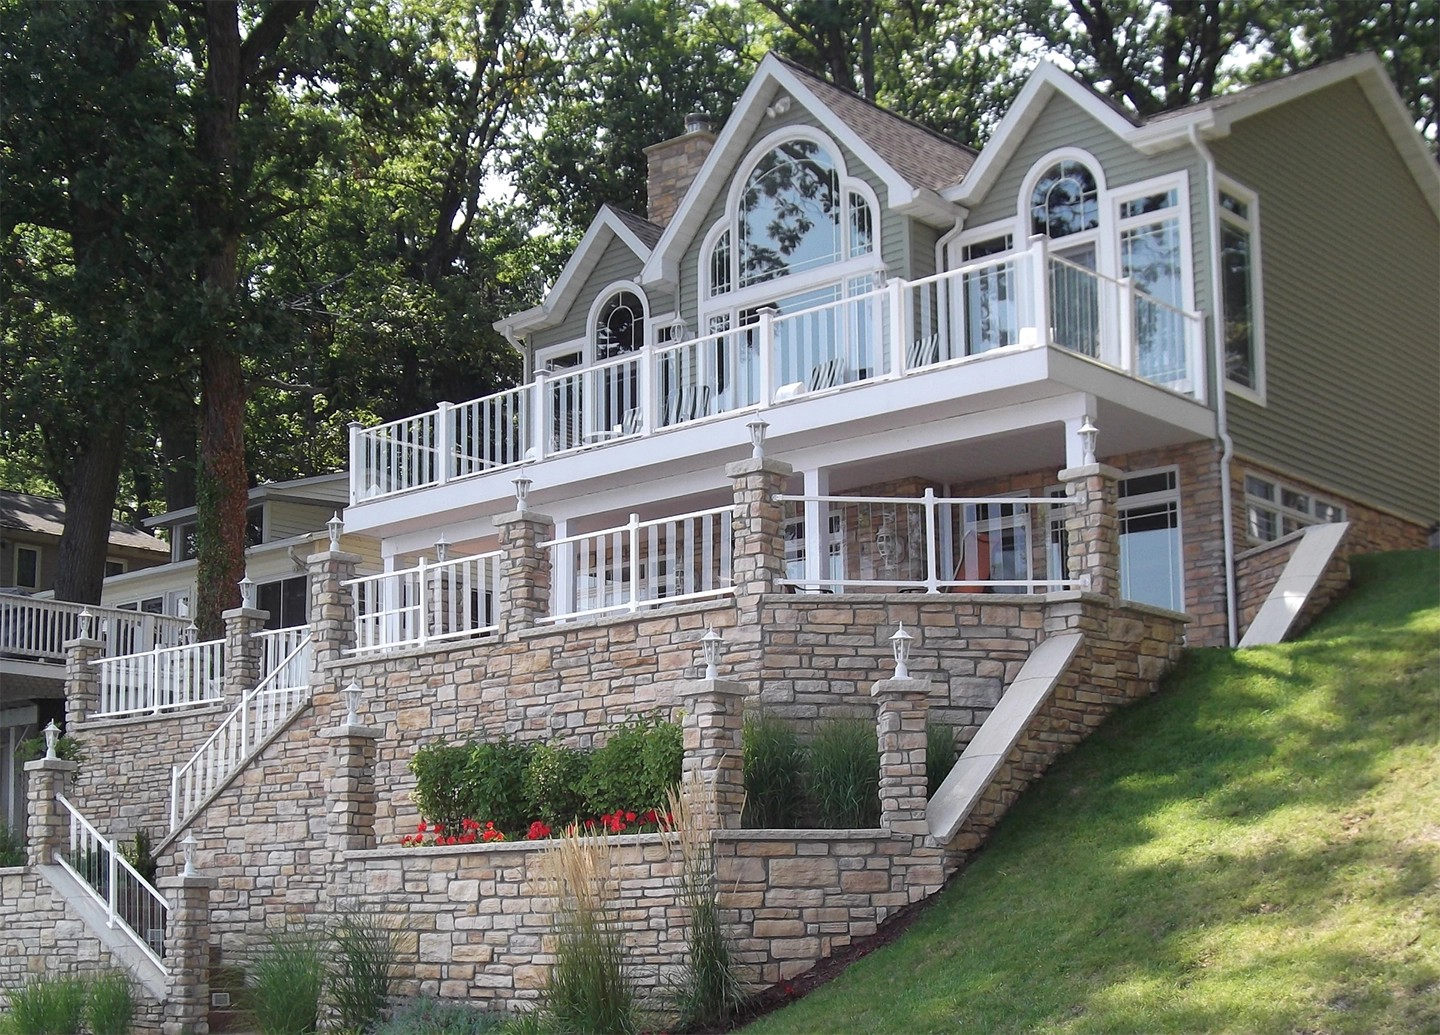
“The design equation for this elegant facade is: 50% traditional elements + 30% natural stone texture + 20% modern transparency.”
The white baluster railings and the home’s green siding provide a classic, familiar base. The stone-clad pillars and retaining walls introduce a heavy, rustic texture that grounds the entire structure. Finally, the glass panels on the upper deck add a touch of modern lightness, opening up the view from the most important vantage point. It’s a sophisticated mix that feels both established and current.
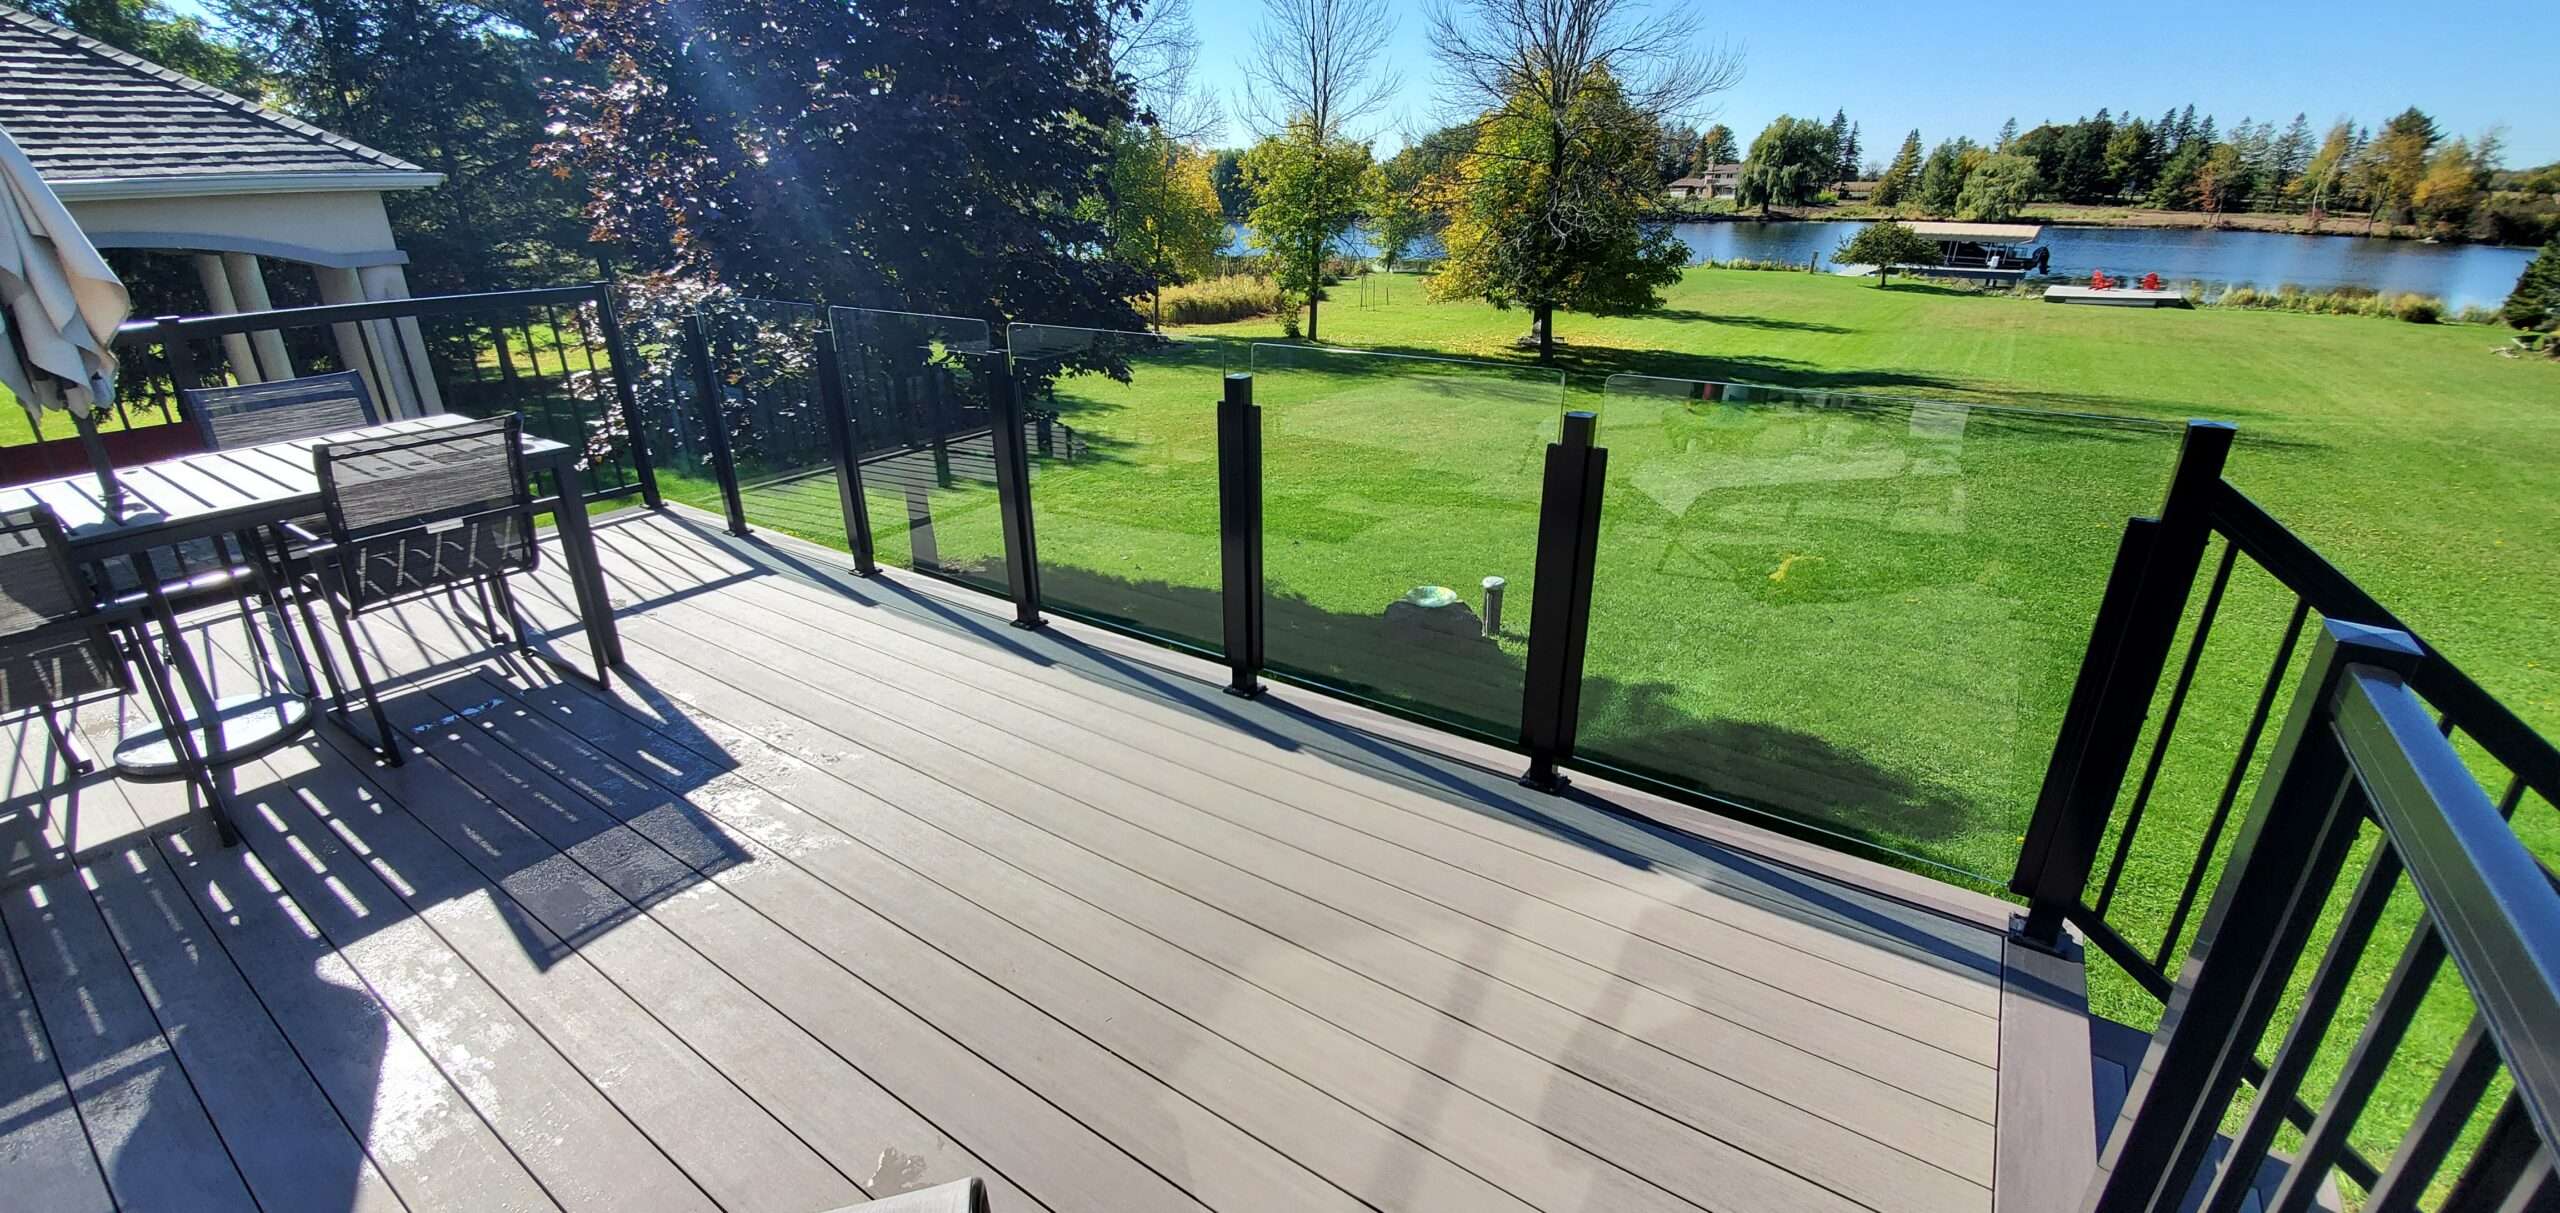
24. Modern Glass Panel Railing for an Unobstructed View
Glass railing offers a million-dollar view, but be prepared for the cost. Tempered glass panels required for safety are expensive, and the specialized mounting hardware (posts, clamps, or standoffs) adds up quickly. Professional installation is highly recommended due to the weight of the glass and the precision required, which adds to the overall ticket price. A full glass railing system can easily cost 2 to 4 times more than a standard wood or composite baluster railing. It’s a luxury choice with a price tag to match.
“Glass Panels (1/2″ Tempered): $40 – $90 per square foot
Mounting Posts & Hardwar”
- Glass Panels (1/2″ Tempered): $40 – $90 per square foot
- Mounting Posts & Hardware: $150 – $400 per post
- Top Rail (if used): $30 – $80 per linear foot
- Professional Installation Labor: $50 – $100 per linear foot
- TOTAL: $200 – $450 per linear foot
- Budget Alternative: Get a similar “open-view” feel with a horizontal cable railing system, as seen in Idea #22. The total cost for a DIY-friendly cable system is often 40-60% less than professionally installed glass.
25. Rustic Modern Deck with Cable Railing and Natural Stone Steps
This look is all about the beautiful marriage of rustic and modern. It works because the design commits to both aesthetics fully. The railing is unapologetically modern, with its clean black metal posts, warm wood handrail, and sleek steel cables. The steps and foundation are unapologetically rustic, using large, irregular, natural stone blocks. Rather than creating a muddled compromise, this high-contrast pairing allows each element to shine. The clean lines of the railing pop against the organic texture of the stone, creating a rich, layered look.
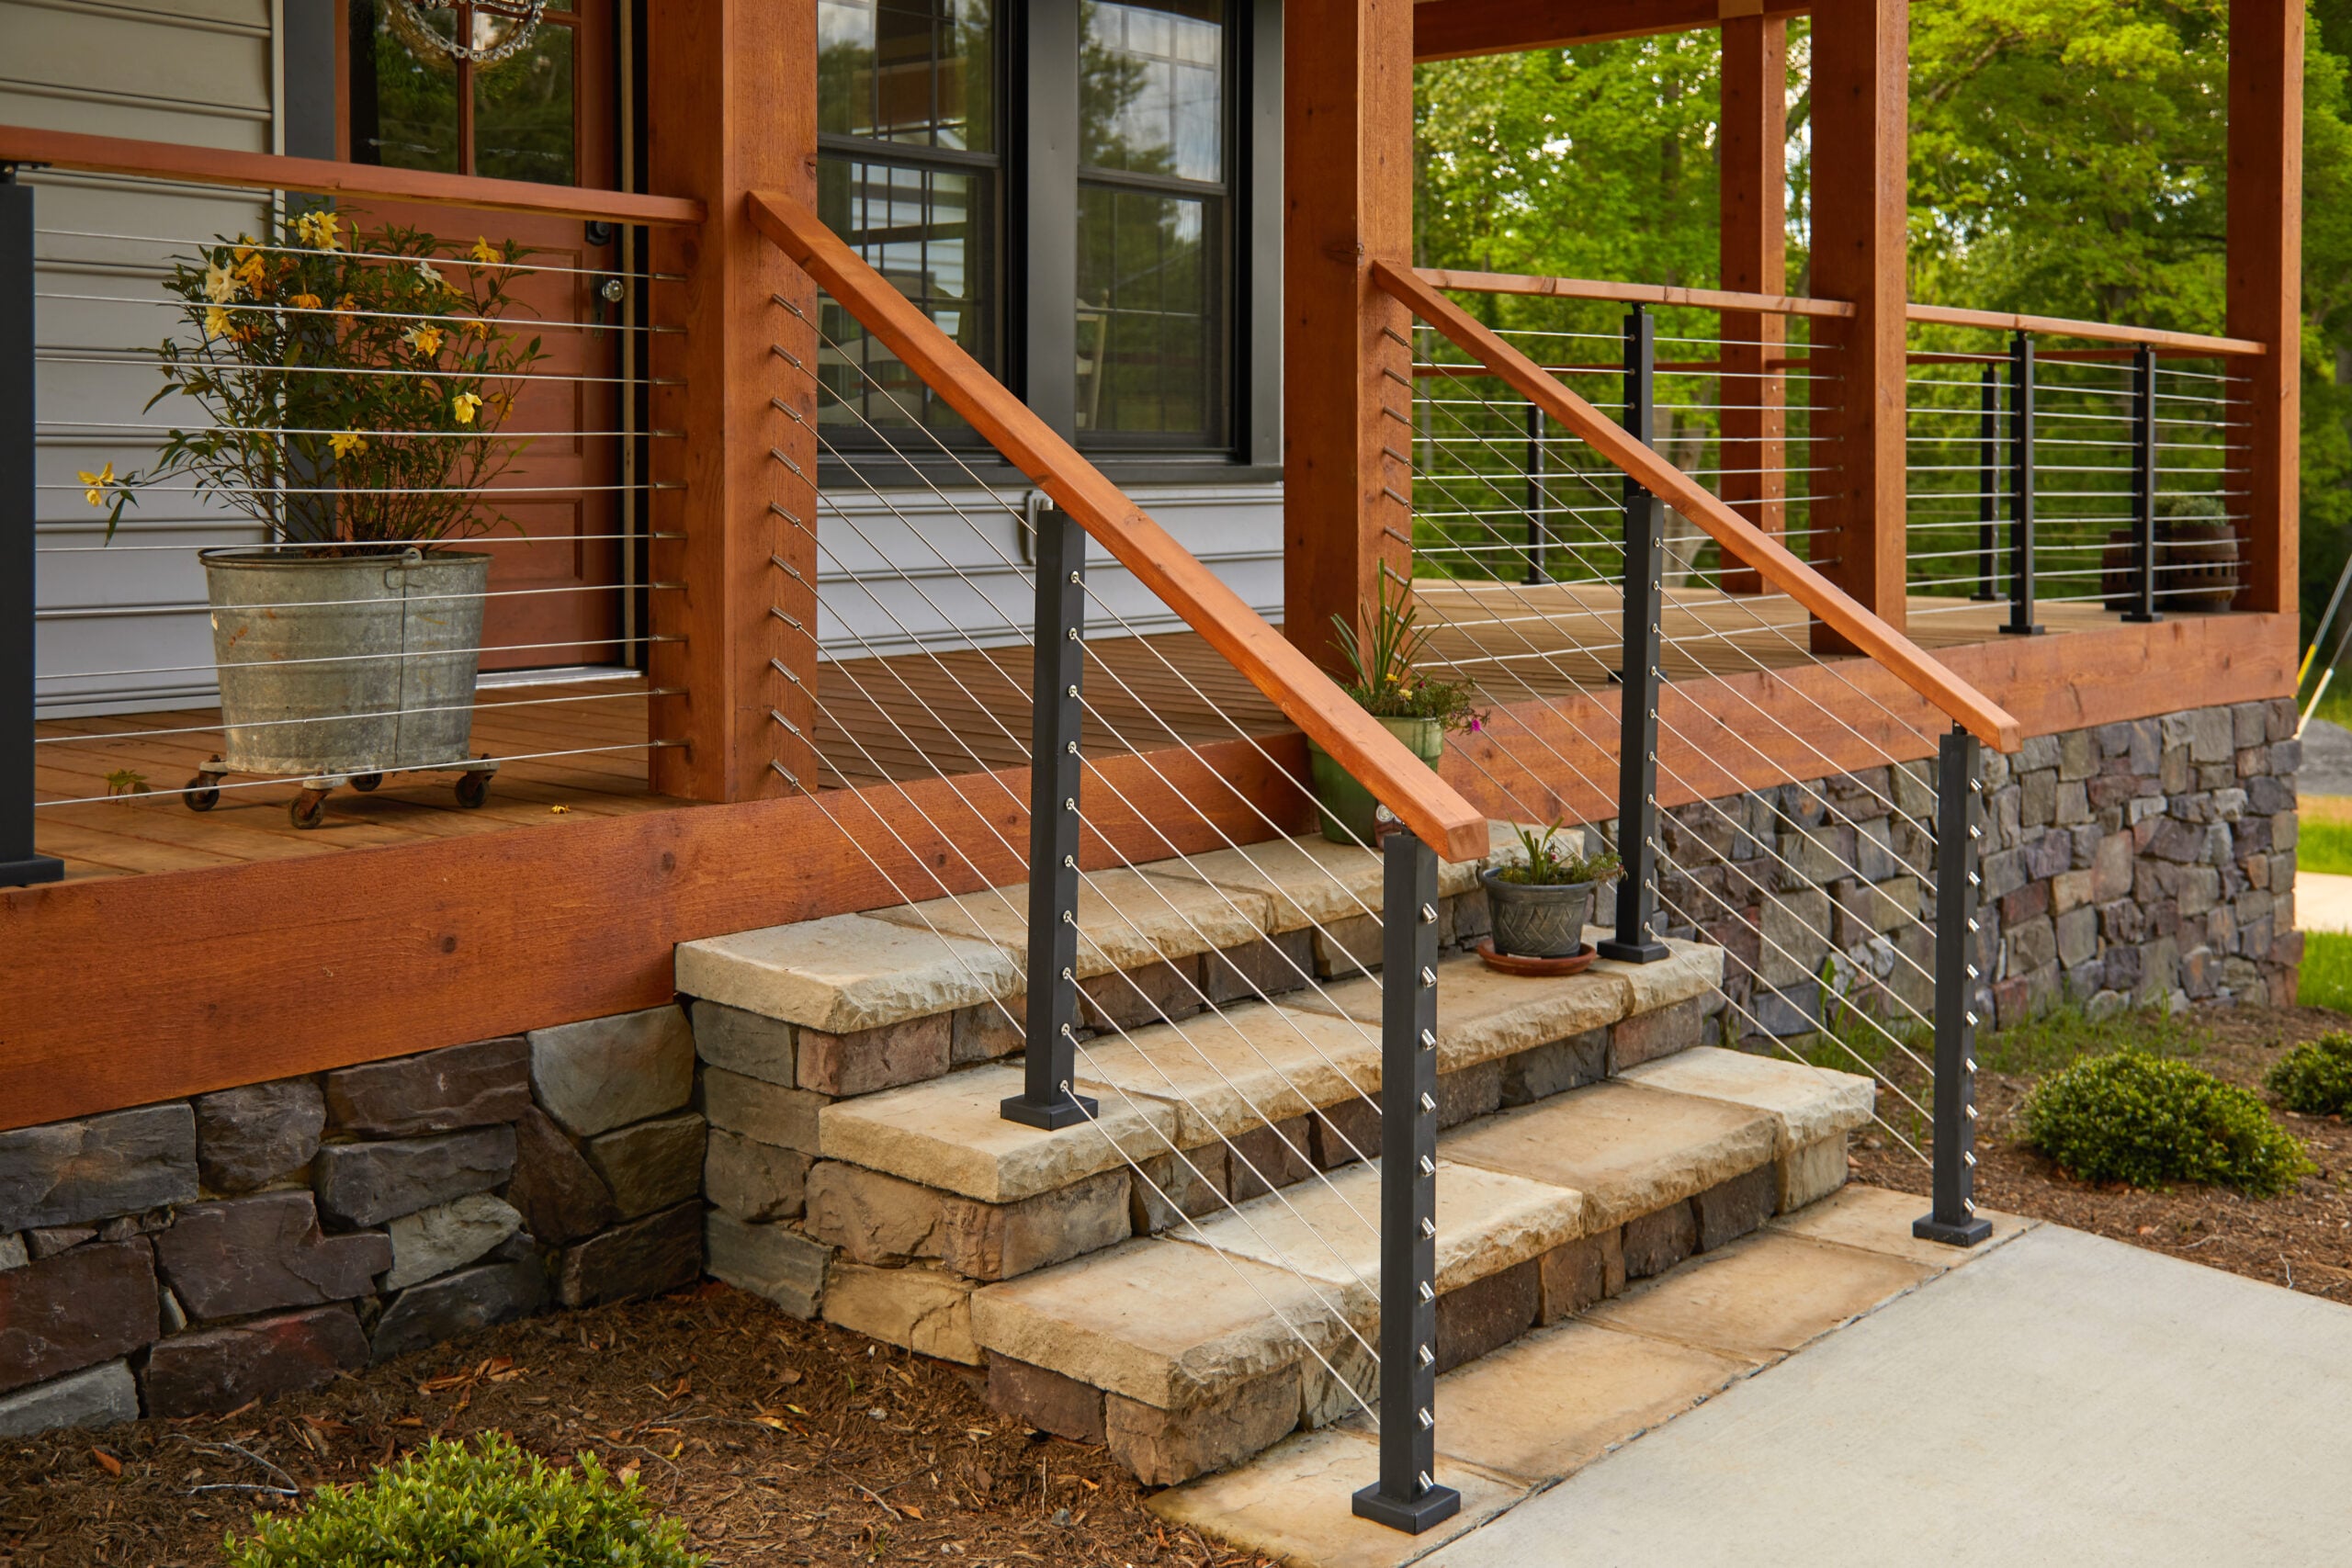
“The star of this show is undoubtedly the natural stone steps.”
If you were to replace them with standard wooden or composite stairs, the project’s entire character would be diminished. The steps provide a crucial textural and historical counterpoint to the new, clean lines of the deck and railing. They ground the structure in its natural setting and give it a sense of permanence and history. The modern railing is beautiful, but the stone steps are what make it special.
26. Minimalist Metal and Cable Railing with a Lakeside View
This railing’s design formula is one of pure minimalism: 90% view + 10% structure. The goal is for the railing to do its job and then disappear. The very thin horizontal cables and the slender dark gray metal posts are chosen specifically to fade from sight, allowing the serene view of the trees and lake to be the absolute focus. The light-colored deck tiles further enhance this by creating a neutral, non-distracting ground plane. There are no decorative elements, no contrasting colors—just the bare minimum required for safety, executed with elegance.
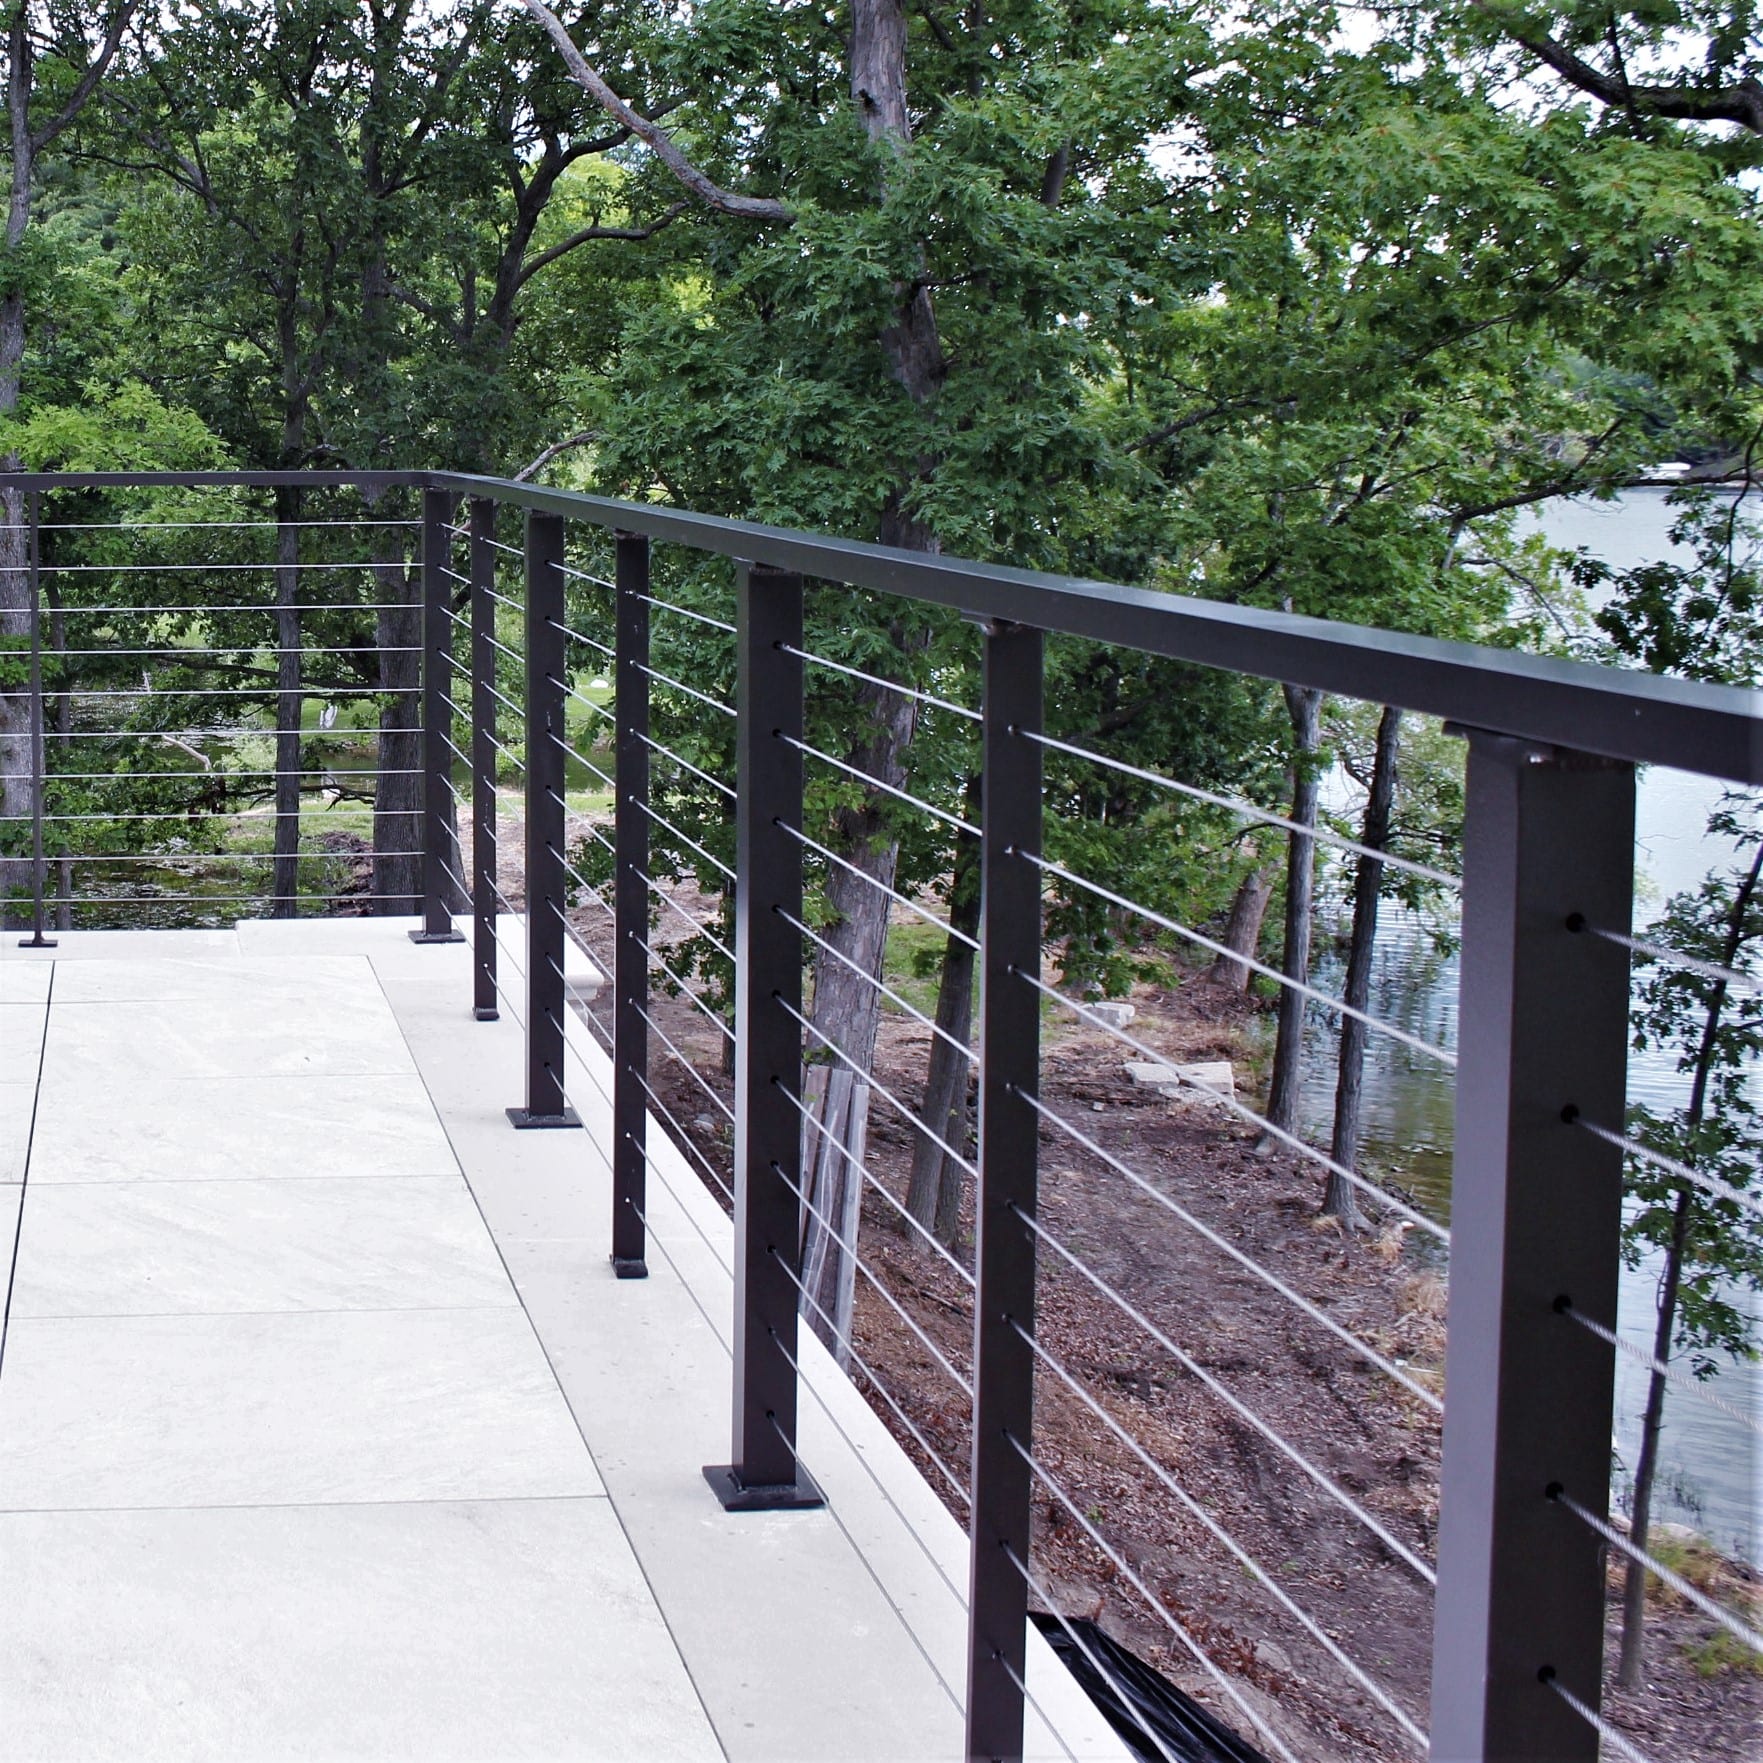
“A minimalist railing like this works best on a deck where the view is the main attraction, regardless of size.”
However, it feels most impactful on a ground-level or slightly elevated deck (up to one story). For very high decks, the extreme openness can sometimes feel unnerving to guests. It pairs particularly well with modern architecture. Minimum square footage isn’t the issue, but it does require a backdrop that’s worth showcasing—it might feel a bit stark overlooking a neighbor’s fence.
27. Sleek Black Post and Cable Railing on a Light Tile Deck
When mounting railing posts to a tile or paver deck, proper anchoring is non-negotiable. Don’t just screw the post flange into the tile. You must use a heavy-duty masonry anchor bolt (like a wedge anchor or concrete sleeve anchor) that goes through the tile and deep into the concrete substrate below. This ensures the post can withstand the high tension of the cables and the lateral force of someone leaning on it. Pre-drilling the tile with a diamond-tipped hole saw will prevent cracking and give you a clean installation.
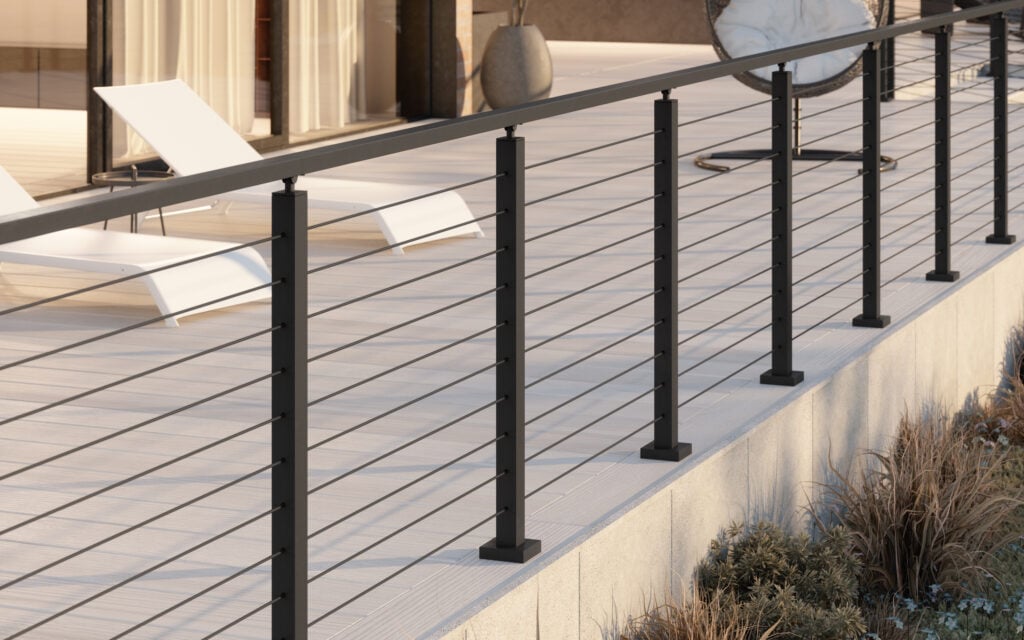
“The striking success of this design comes from its graphic contrast.”
The bold, black, square posts create a strong visual frame against the light, neutral grid of the large-format deck tiles. It’s a simple but powerful geometric statement: a dark, thin vertical grid overlaid on a light, wide horizontal grid. The horizontal cables add another layer of linear detail without adding any visual weight. This clean, high-contrast palette is the essence of modern, minimalist outdoor design.
28. Modern Deck with Black Cable Railing and Diagonal Planks
The most impactful detail in this design is the diagonal planking on the deck floor. Laying the boards at a 45-degree angle is a simple change that dramatically elevates the look of the entire space. It creates a sense of movement and custom craftsmanship that you don’t get with standard horizontal planks. It draws the eye across the space and makes the deck feel more dynamic. The simple, clean black railing is the perfect quiet partner to this more energetic floor pattern. It’s a great example of how a flooring choice can define a space, similar to the impact of the black posts in Idea #10.
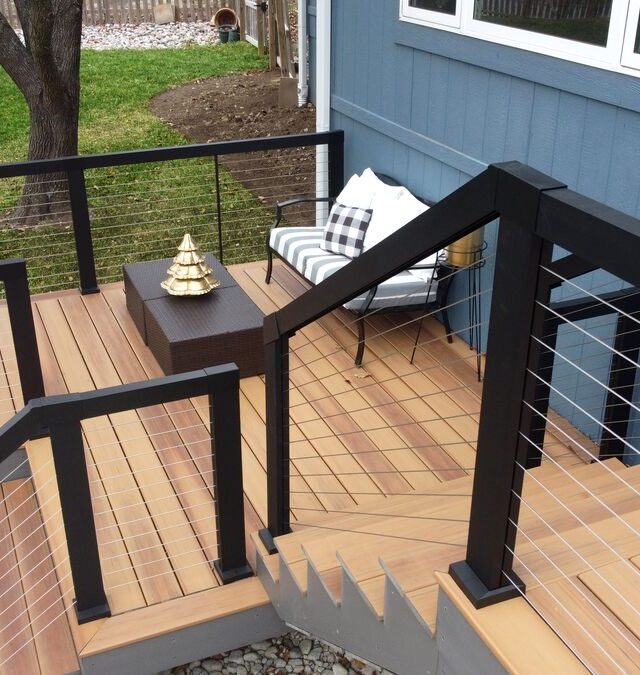
“Frame It Out: Diagonal decking requires more complex framing.”
You’ll need your joists to be closer together (typically 12″ on center instead of 16″) to support the angled boards properly. Factor this into your budget and plans.
Order Extra Material: Angled cuts create more waste. Plan on ordering 15-20% extra decking material, compared to the standard 10% for a rectangular deck.
Practice Your Cuts: If you’re DIY-ing, practice your 45-degree cuts on scrap pieces before you start cutting your expensive deck boards. Consistency is key to tight seams.
29. Adding a Privacy Screen with Classic White Lattice
A lattice privacy screen is a classic DIY project that adds charm and seclusion. Here’s the quick and easy way to do it:
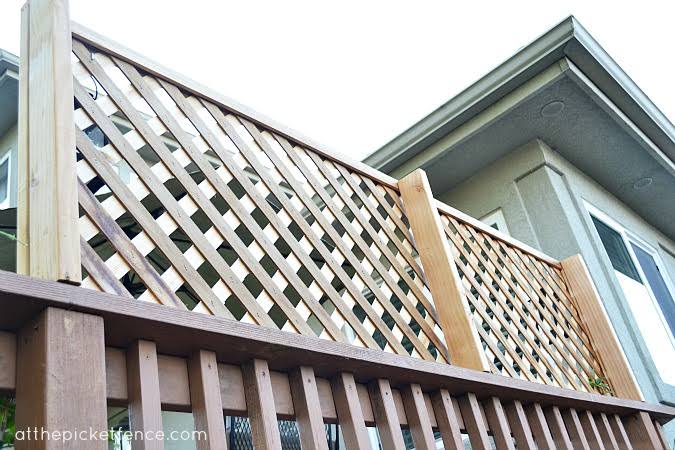
“Build a Frame: Construct a simple frame from pressure-treated 2x4s to the height and width you desire.”
A simple box with one central vertical support is usually sufficient for a 4×8 panel.
Attach the Lattice: Lay the frame on a flat surface and place the lattice panel on top. Secure the lattice to the frame using 1-inch exterior-grade screws or a pneumatic stapler every 12 inches.
Install on Deck: Securely attach your framed panel to your existing deck posts using heavy-duty exterior screws. Ensure the frame is plumb (perfectly vertical).
Paint or Stain: For a finished look, paint or stain the frame and lattice to match your deck or house trim. Time Estimate: 2-3 hours per panel. Material Cost: $50 – $100 per 4’x8′ panel.
The classic diamond-pattern vinyl lattice from stores like Home Depot or Lowe’s is the most budget-friendly option, often costing under $40 for a 4×8 sheet. For a slight upgrade, look for “privacy” lattice, which has smaller, tighter openings. If you want a more modern look, you can create a similar effect by installing thin wood furring strips horizontally across your frame instead of using a pre-made lattice panel. This gives you the linear look of expensive screens for the cost of basic lumber.
30. Deck with Multi-Tone Wood and Dark Metal Balusters
This deck is visually dynamic because it embraces variation. The use of multi-toned wood planks, laid in different directions, creates a rich tapestry of color and pattern on the floor. This could easily look chaotic, but it’s held together by the strong, simple structure of the railing. The railing—with its substantial wood posts and simple, dark, thin balusters—acts as a unifying frame. It contains the energy of the floor, creating a look that is interesting and custom but not overwhelming. It’s a great way to add character, especially if you are using reclaimed or mixed batches of wood.
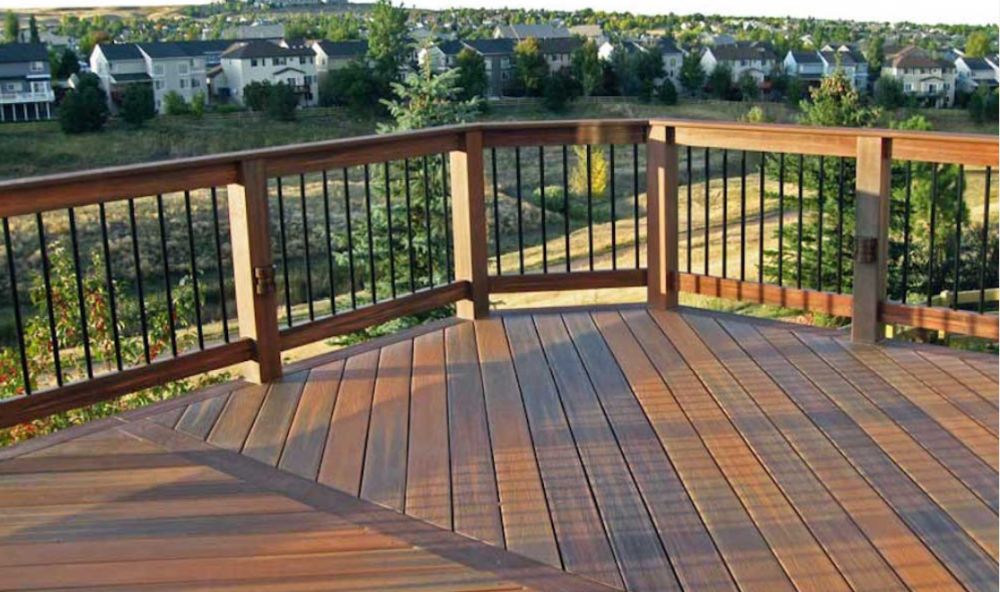
“When you have a busy floor pattern like this, keep the railing simple.”
If you were to add ornate post caps, a decorative top rail, or intricate balusters, you would create visual noise. The designer here made a smart choice: a clean, almost minimalist railing profile that allows the deck floor to be the star. The lesson? You can have one “loud” element (the floor) or one “loud” element (the railing), but you can’t have both. Pick your hero.
31. Classic Black Aluminum Baluster Railing Kit
The single best thing about a classic railing kit like the Trex Select is its accessibility for the average DIYer. While custom-fabricated railings require specialized skills and tools, these kits are engineered to be straightforward. The brackets are designed for common angles, the balusters are pre-cut, and the instructions are made for homeowners, not just professional contractors. This removes a huge barrier to entry, allowing you to get a durable, professional-looking black aluminum railing without the high cost and long lead times of a custom job.
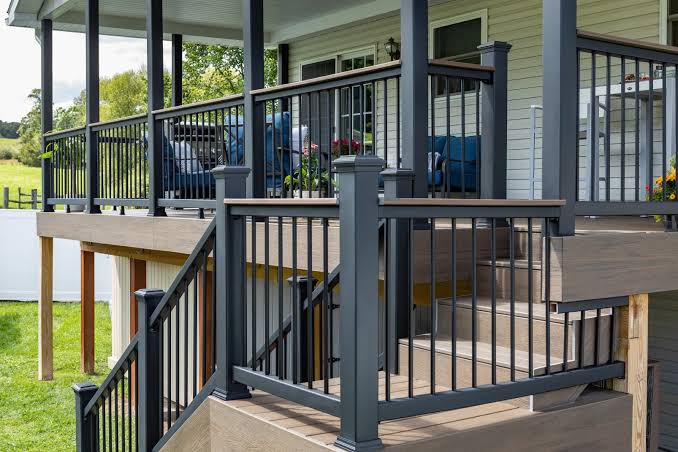
“While branded kits from companies like Trex offer convenience and proven quality, you can assemble a nearly identical look for less.”
Big-box stores sell the component parts—posts, rails, balusters, and connectors—individually. By purchasing the parts and cutting the rails yourself, you can often save 20-30% compared to the all-in-one box kit. This is especially true if your deck sections aren’t standard 6-foot or 8-foot lengths, as you’ll be able to minimize waste by buying only what you need.
32. Adding a Woven Privacy Screen to an Existing Railing
Let’s be honest: these attachable privacy screens are a practical, budget-friendly solution, but they can sometimes look like a temporary afterthought. Their success depends heavily on the fit and color choice. A screen that is too loose, wrinkled, or in a color that clashes with the deck will look cheap. To make it work, pull the screen as taut as possible during installation to eliminate sagging. Choose a color that closely matches your deck railing or house trim to help it blend in and look more integrated and intentional.
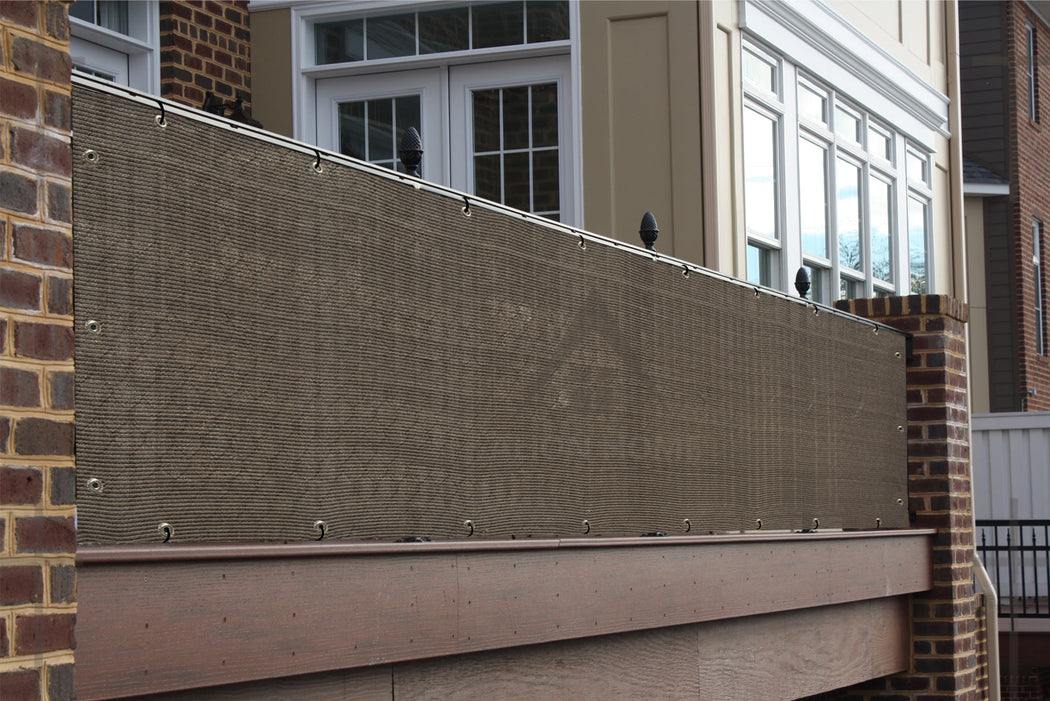
“Installing a roll-up privacy screen is one of the easiest DIY projects you can do.”
It’s a 1-hour job that requires no special tools.
- Measure Your Railing: Measure the length and height of the area you want to cover. Buy a screen that is the closest size, or slightly smaller.
- Start at One End: Using the included zip ties or grommet hooks, securely attach the first corner of the screen to your top and bottom rails and a vertical post.
- Work Your Way Across: Move along the railing, attaching grommets every 12-18 inches. Pull the screen taut as you go to prevent wrinkles and sagging.
- Secure the Final End: Pull the screen tight one last time and secure the final corner to its post. Trim any excess from the zip ties. Material Cost: $30 – $80 for a 15-25 foot roll.
Your Perfect Deck Is Just a Project Away
That perfect deck railing isn’t just a safety feature; it’s the finishing touch that defines your entire outdoor space. Whether you’re drawn to the clean lines of cable or the classic appeal of white balusters, the right design is waiting for you. Don’t be afraid to mix materials or add a personal touch!
Feeling inspired? Save your favorite ideas to your Pinterest board and start planning. Your dream deck is closer than you think.