
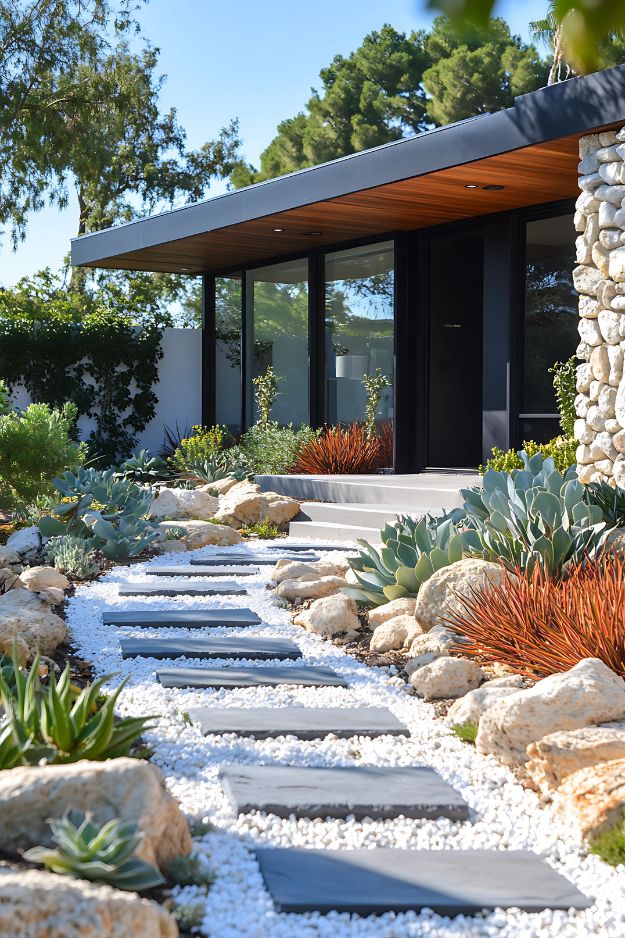
You know that feeling when you finally find the white gravel idea that looks exactly right for your space, but you’re not sure how to pull it off? It feels like every beautiful landscape on Pinterest is either wildly expensive or impossibly complicated. We spent serious time browsing Home Depot, Lowe’s, and local garden centers to bring you only what’s worth your attention this year. After filtering through hundreds of options, we narrowed it down to 30 ideas that actually deliver.
From modern minimalist designs to lush, natural pathways, this guide covers the best white gravel looks, with options ranging from starter projects under $500 to complete transformations costing over $15,000. As we move into 2026, the trend isn’t just about clean aesthetics; it’s about creating beautiful, low-maintenance outdoor zones that extend our living space. And stay until the end — we break down the most common mistakes that can ruin these looks. 📌 Save this to Pinterest for later — you’ll want to revisit these ideas.
1. Modern Garden Pathway with White Pebbles and Varied Greenery
The magic here is in the contrast. The bright, light-colored pebbles create a crisp, clean line that makes the surrounding greenery pop. This isn’t just a path; it’s a visual guide for your eyes, pulling you through the space. The winding shape adds an organic, flowing feel, preventing the modern materials from feeling too harsh or sterile. By pairing the smooth pebbles with the rougher texture of dark mulch, the design feels layered and intentional, giving it a professional finish.
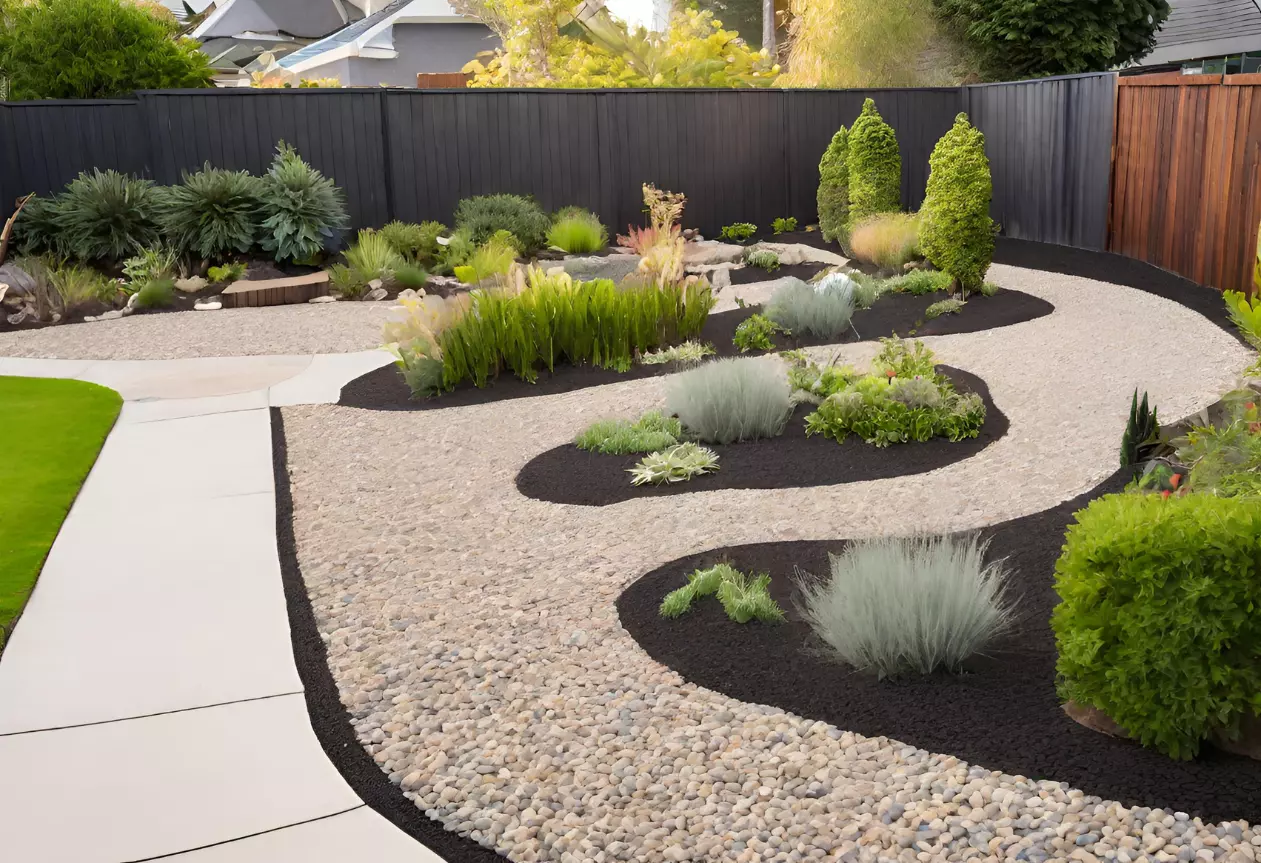
“For a pathway that feels comfortable underfoot and stays put, choose pebbles no larger than 1/2 inch in diameter.”
Anything bigger can feel unstable to walk on, like trying to cross a rocky beach. For high-traffic areas, aim for a depth of at least 2 inches to ensure full coverage and minimize the chance of the underlying landscape fabric showing through. This depth also helps suppress weeds more effectively, saving you maintenance time later.
2. Layered Gravel Garden Beds with Mixed Stone
Think of this look as a recipe: 50% white gravel for brightness, 30% brown lava rock for earthy texture, and 20% natural flagstone for structure. The key is using strong borders, like the dark gray paver curbs, to keep each “ingredient” in its place. This creates a clean, quilt-like effect. You can swap the materials—for example, use black pebbles instead of brown lava rock—but keeping the proportions similar will maintain the balanced, multi-textured feel that makes this design so compelling.
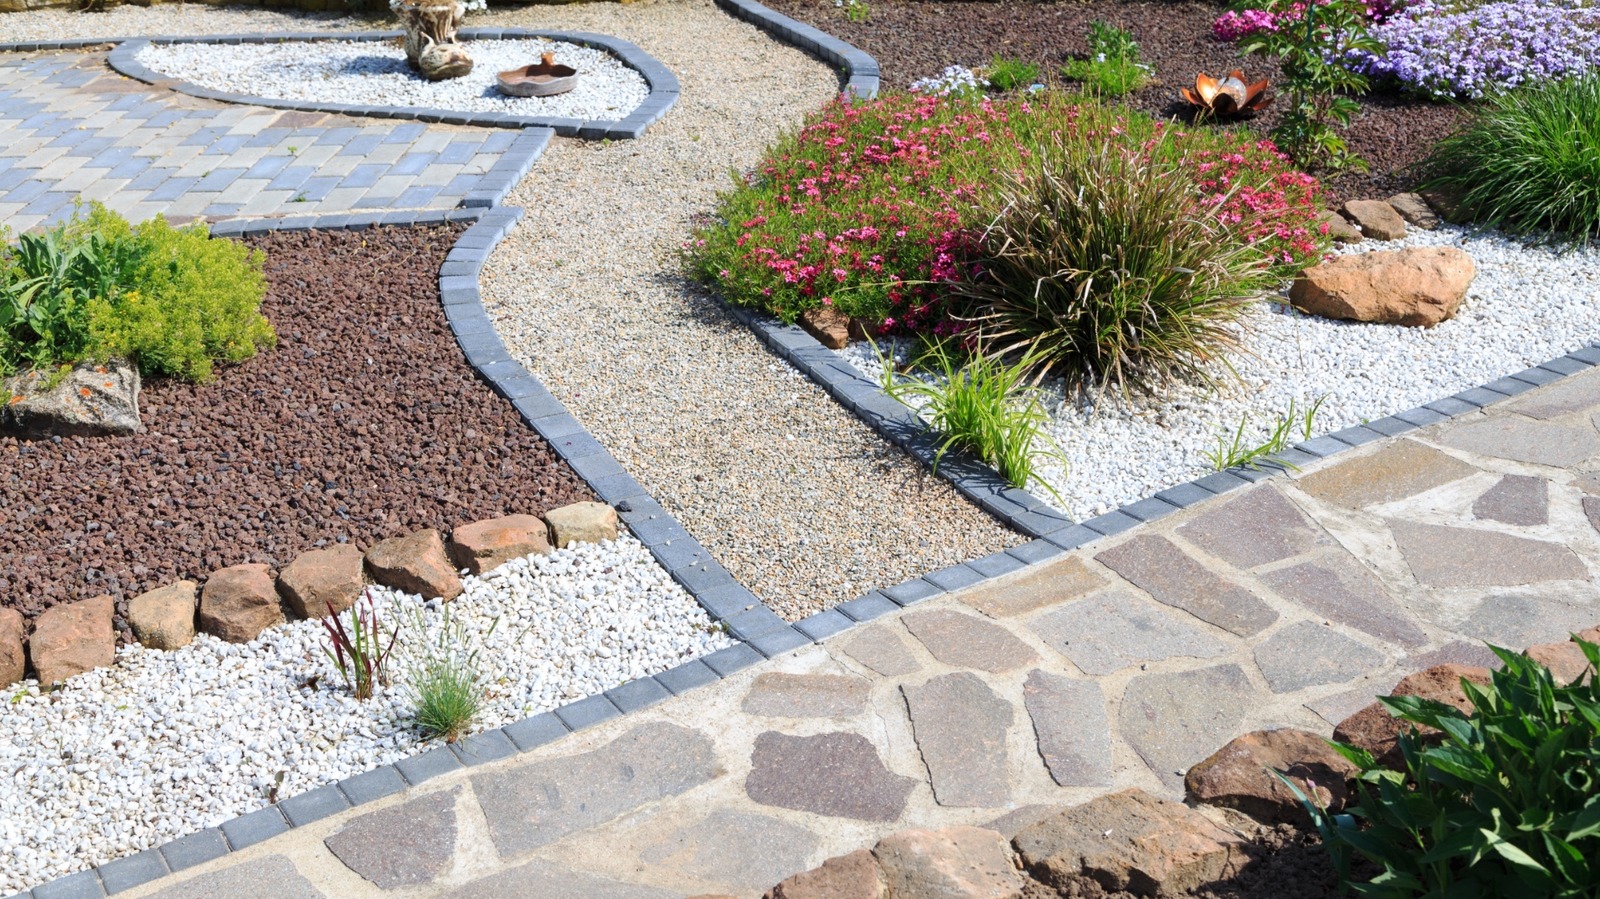
“Let’s be honest: keeping these different gravel types perfectly separated is a challenge.”
Over time, with rain, foot traffic, and leaf blowers, the stones will start to mingle. The secret is a high-quality, rigidly installed edging that goes at least 2 inches deep into the ground. Cheap plastic edging will warp and fail. Also, be prepared for some tedious weeding right at the border lines where a weed whacker can’t reach without sending stones flying everywhere.
3. Illuminated Garden Path with Slate Stepping Stones
The single element that elevates this entire design is the lighting. Without the soft glow of the lanterns, this would just be a nice path. With them, it becomes a magical, inviting journey. The light glances off the white gravel, making the whole walkway luminous and creating a sense of safety and serenity. It highlights the texture of the dark slate and the shapes of the plants, turning a simple garden into a nighttime destination. The warm light against the cool tones of the stone is a masterclass in mood-setting.
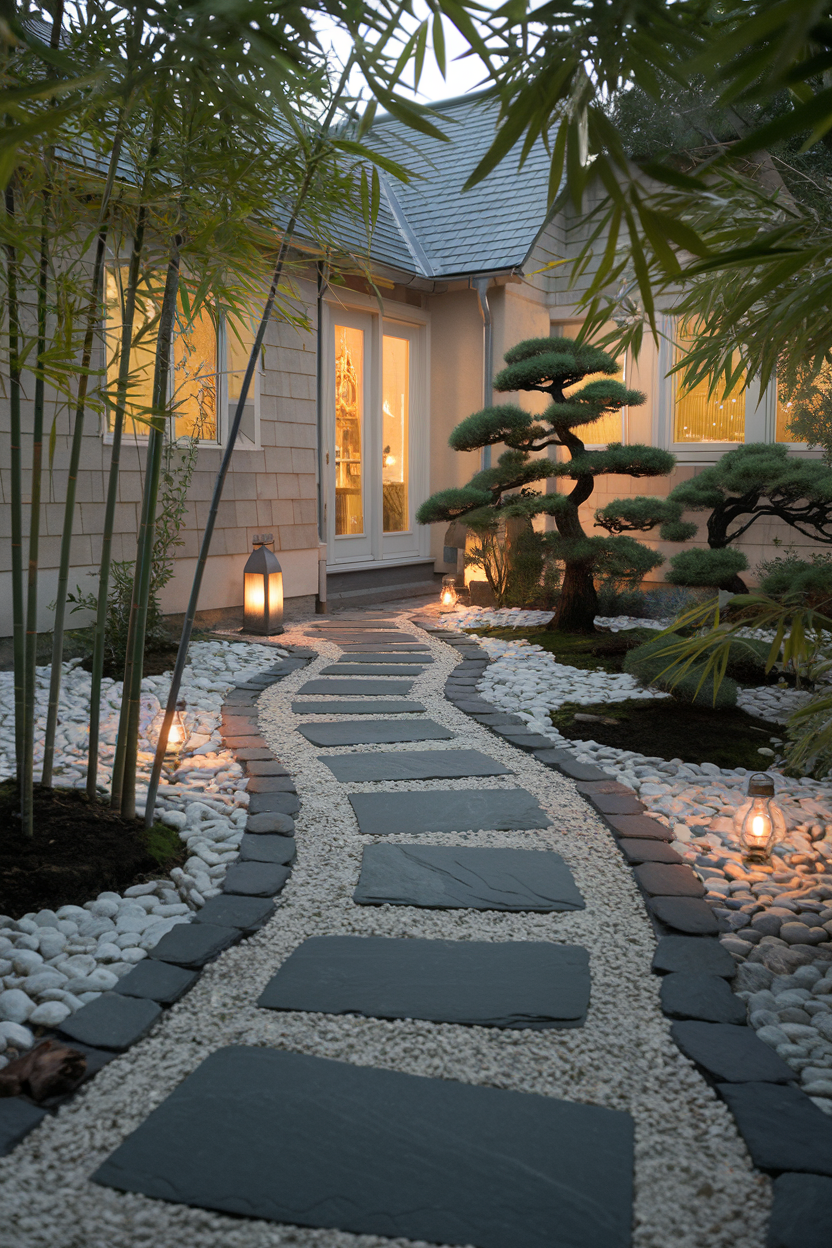
“Stepping Stones (Dark Slate): $400 – $900
White Gravel & River Rocks: $300 – $70”
- Stepping Stones (Dark Slate): $400 – $900
- White Gravel & River Rocks: $300 – $700
- Low-Voltage Lighting (Lanterns & Wiring): $500 – $1,200
- Plants (Evergreens, Bamboo): $400 – $1,000
- TOTAL: $1,600 – $3,800
- Budget alternative: Use cast concrete stepping stones you make yourself, solar-powered lanterns, and smaller, less mature plants to achieve a similar vibe for about $700 – $1,500.
4. Modern Succulent Garden with White Gravel Path
This clean, modern look is incredibly flexible, but it shines in smaller, contained spaces from 50 to 250 square feet. It’s perfect for a side yard, an entryway courtyard, or a townhouse back patio. The key is defined edges; it needs to be bordered by a house, a fence, or a concrete edge to feel intentional. For larger areas, consider breaking up the gravel with more substantial planter beds or decking, like in Idea #6, to avoid a “sea of white” effect that can feel stark and empty.
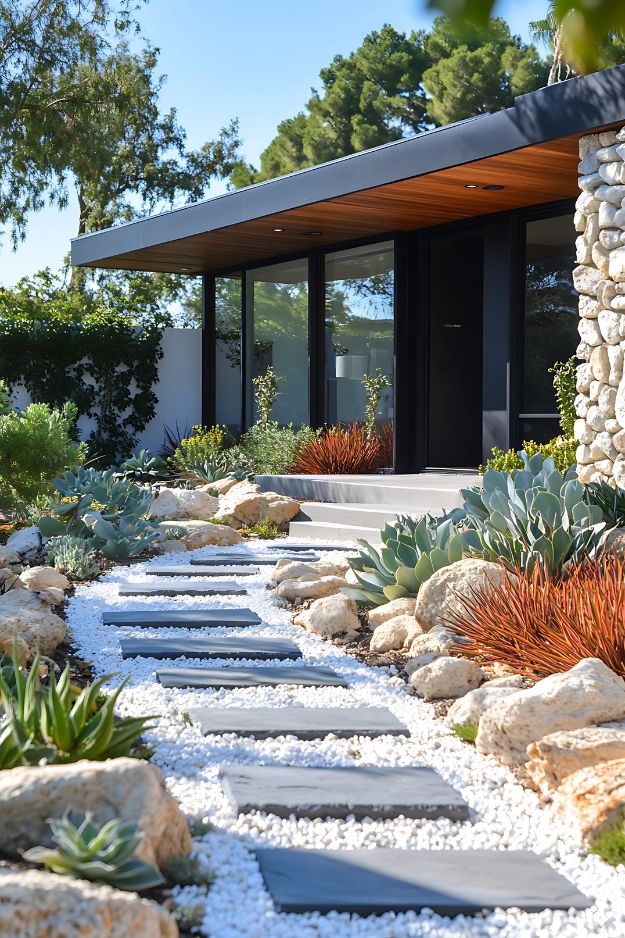
“While succulents and gravel are famously low-maintenance, they aren’t zero-maintenance.”
White gravel will show every fallen leaf, twig, and bit of dirt. Plan on using a leaf blower on its lowest setting every week or two to keep it looking crisp. Be aware that the white color comes from marble or quartz, which can raise the soil pH over time, so it’s best paired with plants like succulents that aren’t too sensitive. It can also get quite bright in direct sun, so sunglasses are a must!
5. Pergola-Covered Gravel Patio with Climbing Roses
This space works because it brilliantly combines hard and soft textures. The crunchy, bright white gravel and solid stone pavers provide a firm, structured base. Then, the design layers on softness with the deep outdoor sofas, the delicate fairy lights, and the romantic, cascading pink roses. The wooden pergola adds a natural, architectural element that defines the “room” without walls, making it feel both open and cozy at the same time. The color palette is simple but effective: neutral base, green life, and one strong floral accent.
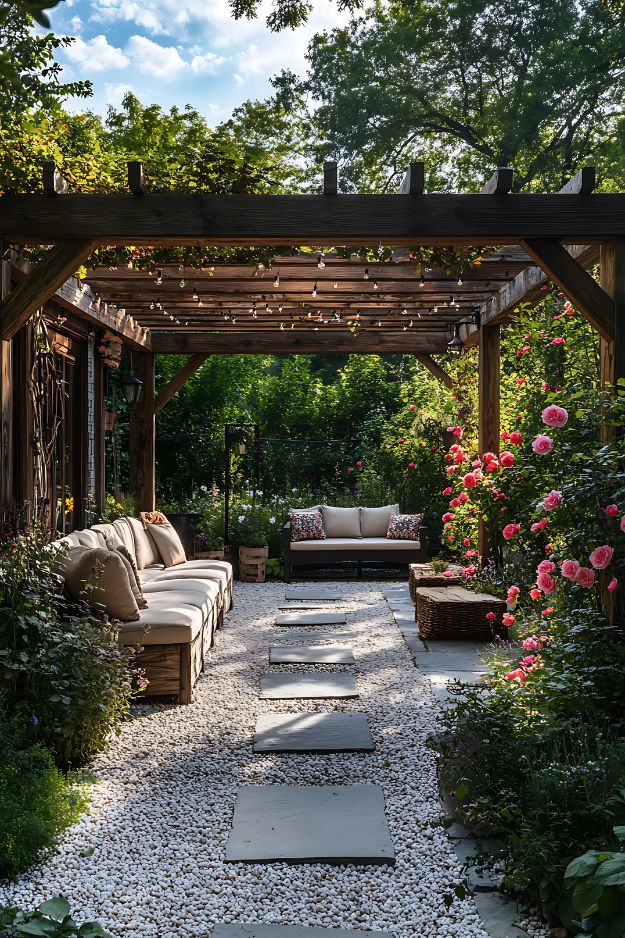
“You don’t need a custom-built pergola to get this look.”
An off-the-shelf version from Target or Walmart can run you $400-$800. For seating, search Facebook Marketplace for used outdoor sofas, which can often be found for under $500. Instead of expensive stone pavers, you can buy concrete paver molds for around $30 and make your own for a fraction of the cost. Bagged white marble chips from a big-box store are an affordable gravel option. You can create a similar enchanting space for under $1,500.
6. Sprawling Modern Yard with Gravel Living Zones
This design is for those with a larger property, ideally 1,000 square feet or more of open space to work with. The use of large gravel expanses helps to unify different functional zones—a dining area, a lounge space—without chopping up the yard with different materials. However, it requires a relatively flat or gently graded area. On a steep slope, the gravel would shift and wash out, creating a maintenance nightmare. A minimum 10-foot ceiling height for the pergolas is needed to keep them from feeling oppressive.
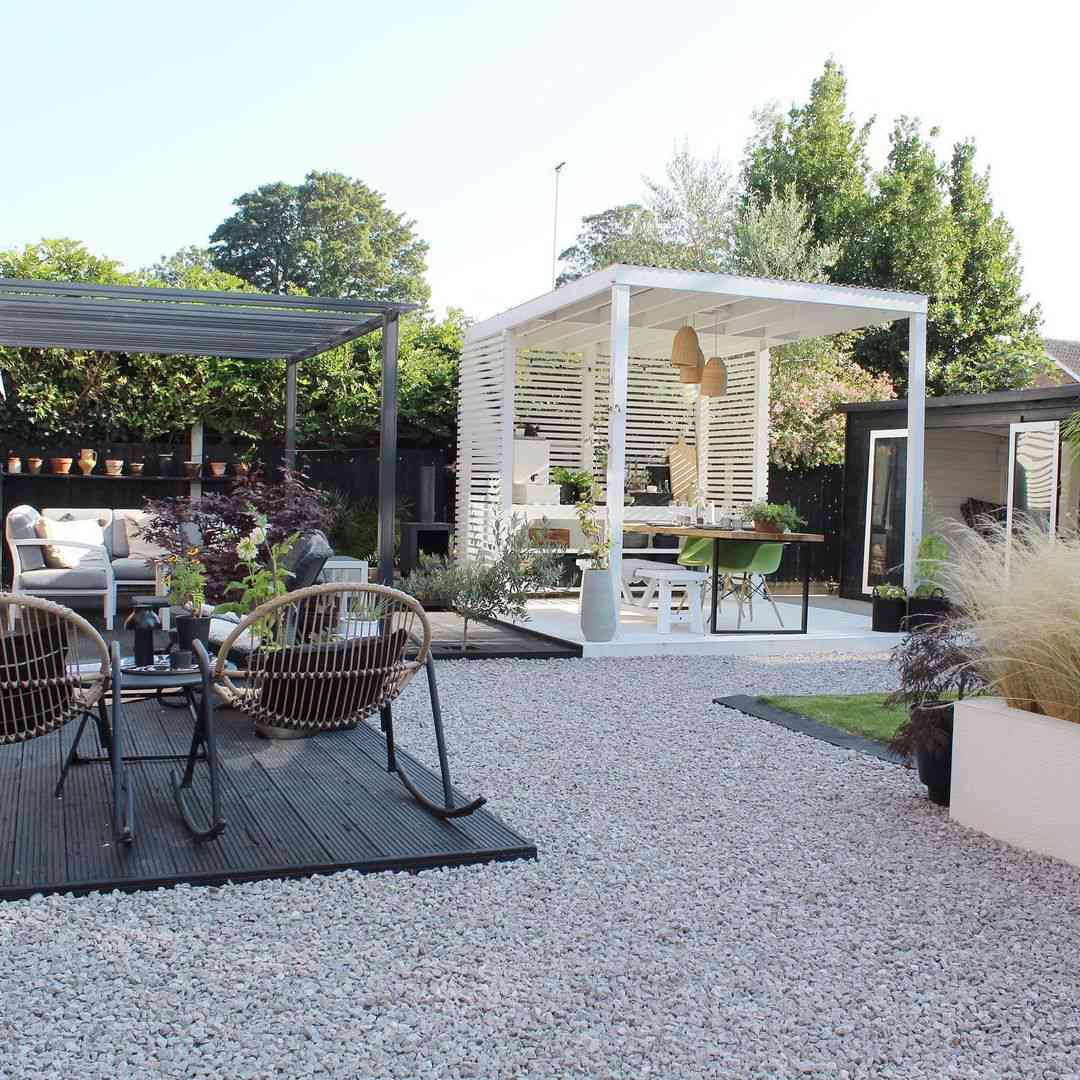
“that makes this entire concept successful is the clear definition of zones.”
The gravel isn’t just filler; it’s the canvas upon which distinct outdoor rooms are built. The black decking platform creates a visual and physical shift for the lounging area, while the white pergola carves out a separate “room” for dining. Without these designated zones, it would just be a vast, uninviting field of rocks. The key is using other structures to give the gravel purpose.
7. Modern Courtyard with White Gravel and a Charcoal Fence
This look is a simple but powerful equation: 60% light neutral (gravel and cushions) + 30% dark anchor (the charcoal fence and black mulch) + 10% natural wood and greenery. This high-contrast formula is what gives the space its crisp, modern energy. You could swap the charcoal fence for a deep navy or a dark olive green, but the principle remains the same. The key is to have a dark, uniform backdrop to make the light furniture and ground cover feel intentional and chic.
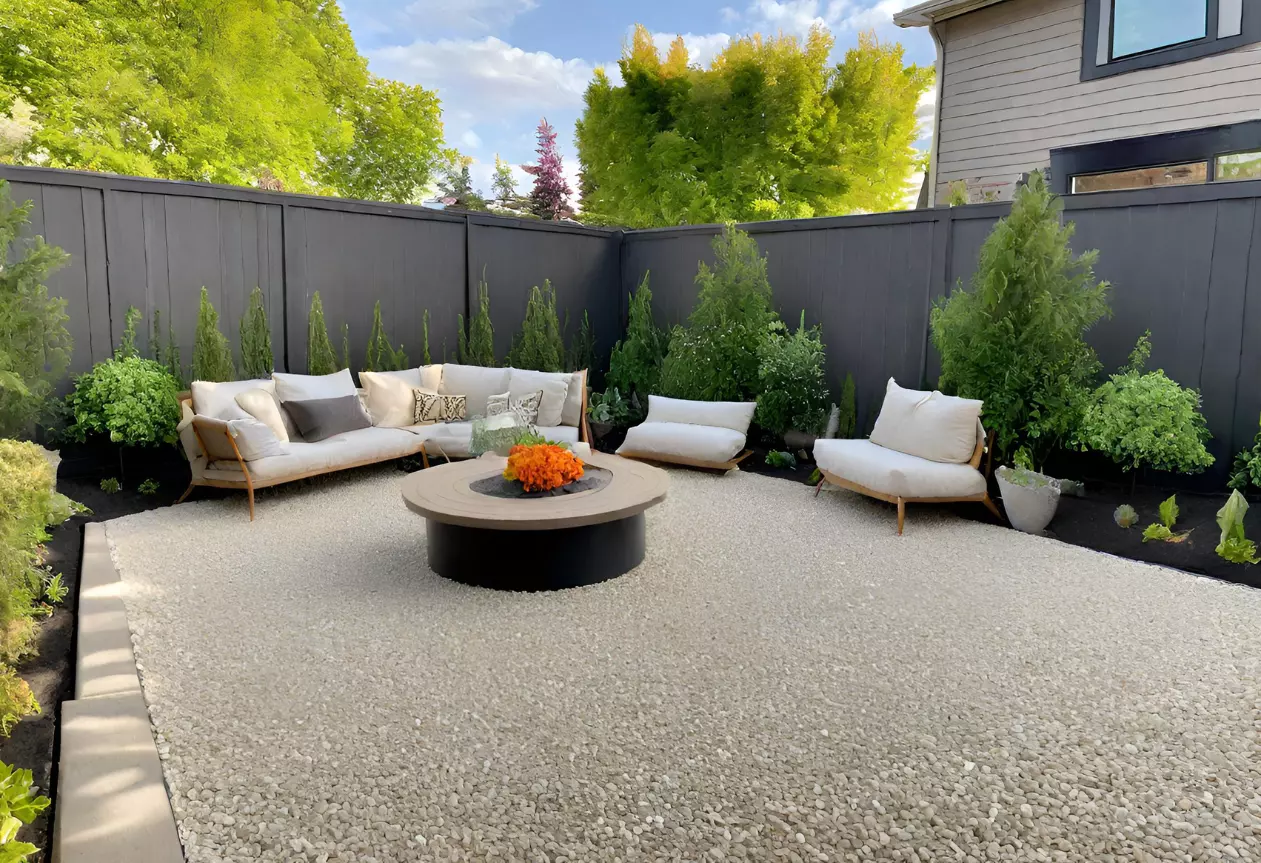
“When selecting outdoor furniture for a gravel surface, look for pieces with wide, flat feet or a sled-style base.”
Avoid furniture with narrow, pointed legs, as they will dig into the gravel, become unstable, and make it impossible to slide a chair in or out. Blocky, substantial frames like the ones shown here feel much more stable and prevent you from constantly having to level your chairs. This small detail makes a huge difference in how usable the space feels.
8. High-Contrast Landscape with Dark Wood and White Gravel
This design is a masterclass in visual balance. The shocking white of the gravel and the deep, rich tones of the slatted wall and decking are at opposite ends of the spectrum, creating a powerful tension. The dark stepping stones act as a bridge, grounding the composition. Then, the single, vibrant green plant is placed strategically to break the symmetry and add a point of organic focus. It proves you don’t need a lot of elements when the ones you choose are this bold and well-balanced.
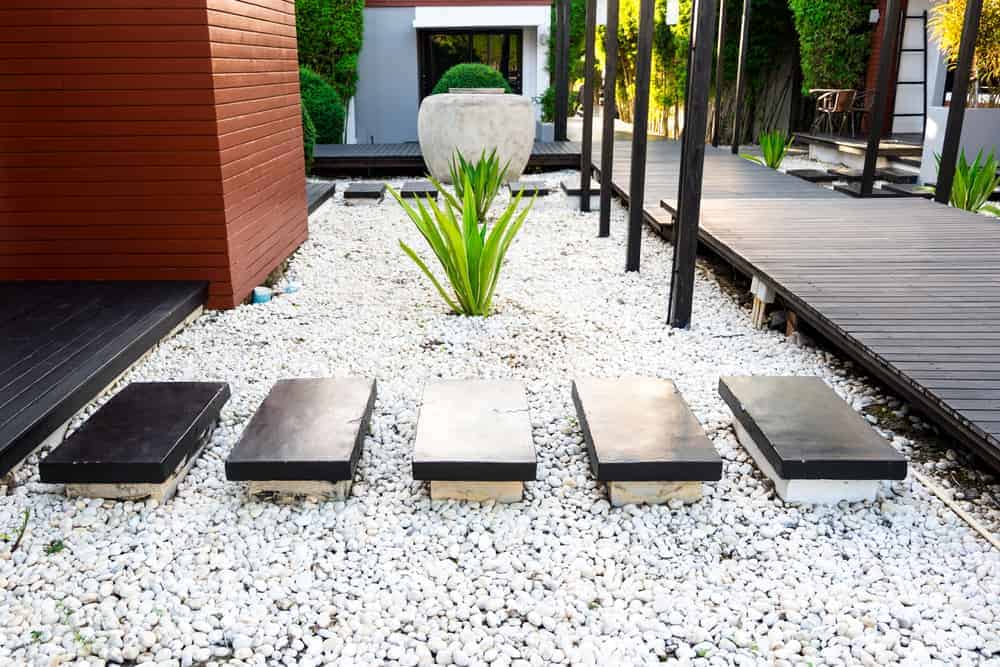
“A slatted wood wall like this is stunning, but it requires commitment.”
Depending on your climate and the type of wood used, you’ll need to clean and re-seal it every 1-3 years to prevent it from fading to a silvery gray or developing mildew. The white gravel at its base will also show any dirt or stain splashes during this process. Be sure you’re up for the recurring maintenance before you fall in love with the look. A composite material could be a lower-maintenance alternative.
9. The All-White Gravel Ground Plane
What makes a simple patch of gravel compelling? Uniformity. By using a single, unbroken texture and color, the ground becomes a minimalist canvas. This treatment draws extreme attention to the shape of the space and any object placed upon it. It simplifies the visual field, creating a sense of calm and order. It’s a bold choice that works by subtracting, rather than adding, elements. This is a tactic often used in galleries to make the artwork—or in this case, the landscape—the hero.
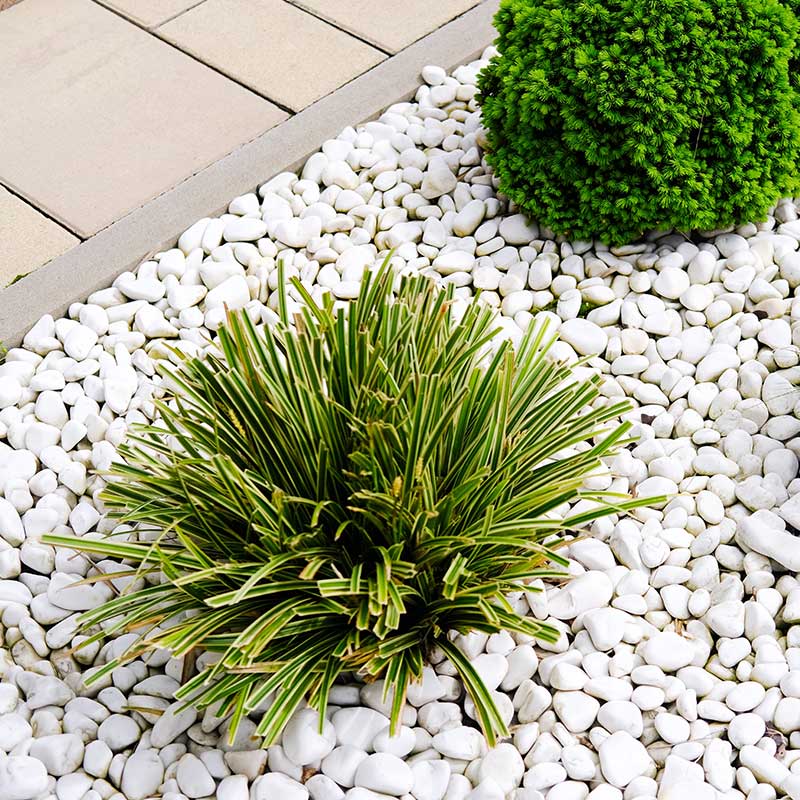
“The move toward minimalist, almost monastic, outdoor spaces is a direct reaction to our cluttered digital lives.”
In 2026, we’re seeing a huge trend toward “design subtraction”—finding beauty in what you take away. A pure white gravel field is the landscape equivalent of a decluttered room. It offers a meditative quality and a clean slate, which is something many people are craving. This trend has staying power because it’s rooted in a desire for peace and simplicity, not just aesthetics.
10. Desert Modern Pathway with Driftwood and Agave
The weathered driftwood is the soul of this design. While the gravel, stones, and succulents are beautiful, the gnarled, silvery wood adds a crucial element of age and organic sculpture. It tells a story of time and nature that manufactured materials can’t. Removing the driftwood would leave a perfectly nice, but somewhat sterile, desert landscape. With it, the space feels curated yet wild, like a slice of a natural arroyo transported to a modern home. It’s the perfect, imperfect piece.
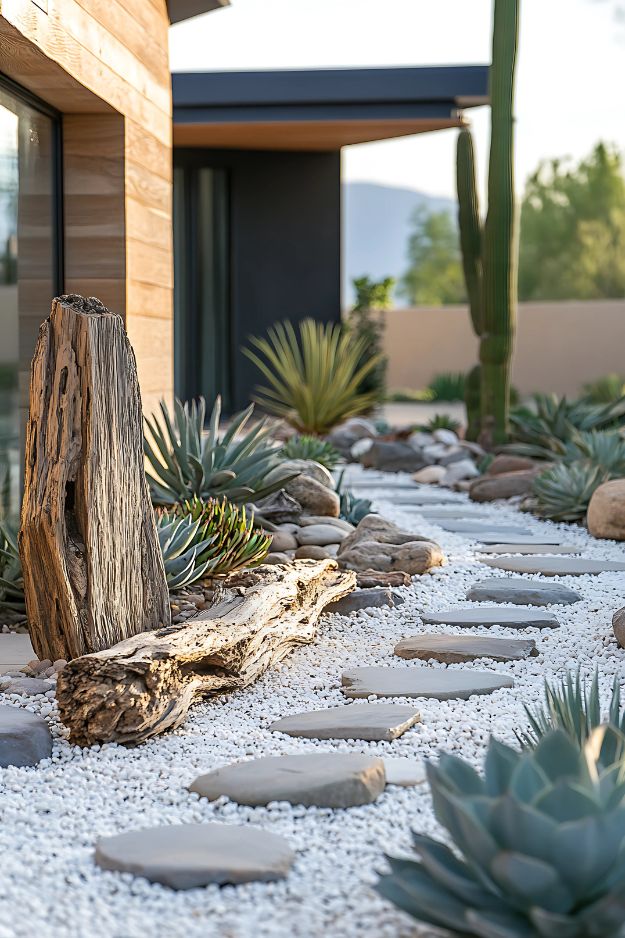
“This is a genuinely low-maintenance dream, but there are a few things to watch for.”
White gravel in a hot, arid climate can reflect a stunning amount of heat and light, essentially baking the plants around it. Make sure you choose truly heat-loving, drought-tolerant species like agave and cacti that can handle the reflected glare. Also, critters love to make homes in and under driftwood, so be prepared to share your space with lizards and other desert dwellers.
11. Curved Path with Black Stepping Stones on White Gravel
The formula here is all about graphic contrast: 70% bright white gravel as the base, 20% bold black accents (the stepping stones and fence), and 10% lush green foliage to soften the edges. The result is a clean, contemporary look that feels almost like a two-dimensional pattern brought to life. The key is the strict color limitation. Adding another color would dilute the impact. The large white boulders are a clever touch, reintroducing the “white” element at a different scale to add interest without breaking the formula.
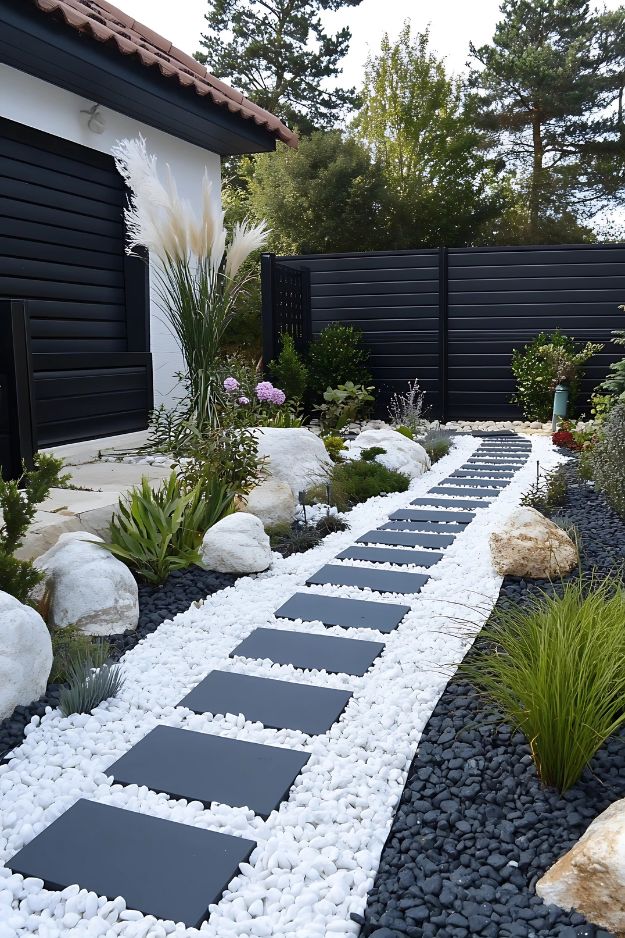
“Lay the Path: Mark the curved shape of your path and lay down commercial-grade landscape fabric to block weeds.”
Place Steppers: Arrange the black rectangular stones, leaving about 4-6 inches of space between them for a comfortable stride.
Add Gravel: Pour the white gravel, filling the spaces between the steppers and the path edge to a depth of 2-3 inches.
Rake and Level: Use a hard rake to spread the gravel evenly, ensuring it’s level with the top surface of the stepping stones for a smooth walking surface. Total time: 3-4 hours. Cost: $10-$15 per square foot.
12. Natural Winding Path with Golden Grasses and Boulders
This path feels so natural because it mimics what you’d find on a real hiking trail. The mix of small white and light brown gravel looks like decomposed granite, the boulders feel like natural outcroppings, and the tall grasses look like they grew there on their own. The success of this design lies in its imperfection. The path isn’t a perfect geometric shape, and the boulders are arranged irregularly. This “planned randomness” is what makes it feel serene and organic, not fussy or over-designed.
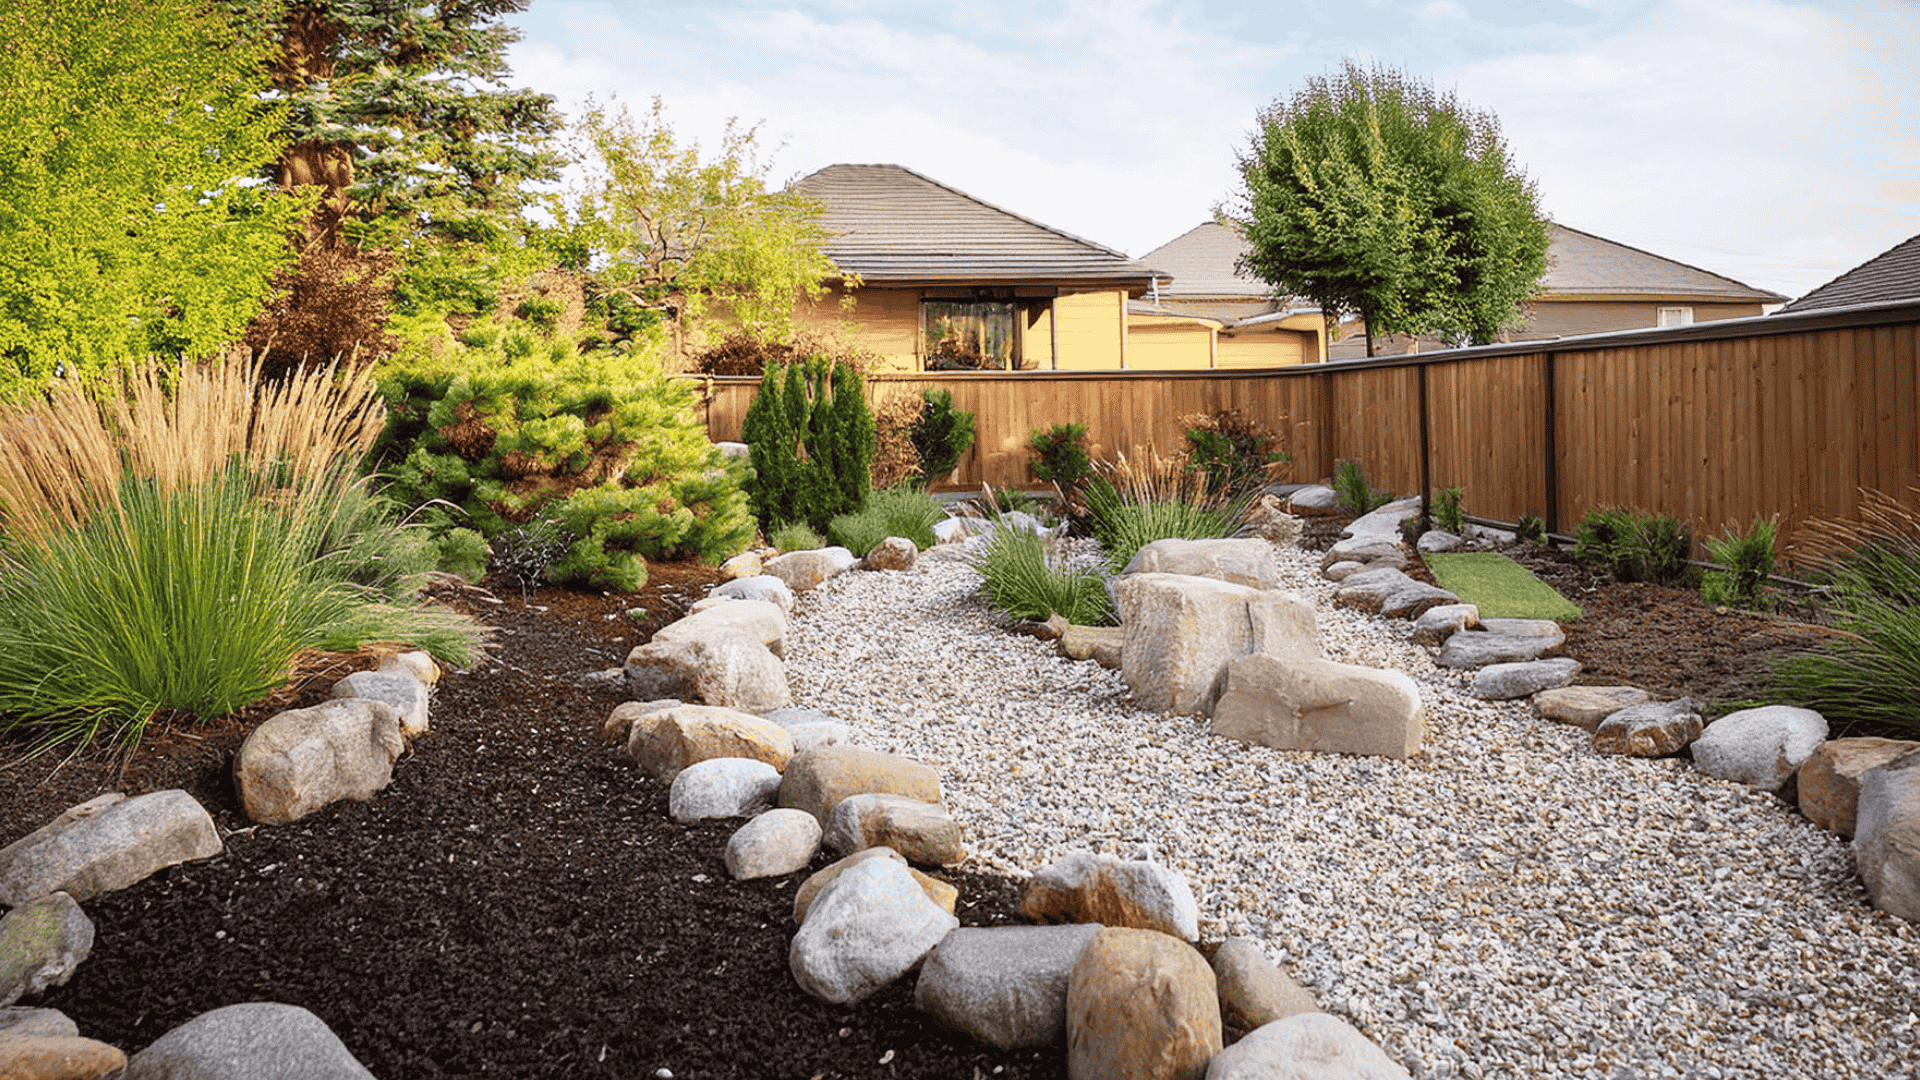
“Large natural boulders can be pricey and require heavy equipment to move.”
You can get a very similar effect for much less by visiting a local stone yard and asking for “remnants” or smaller, more manageable rocks that you can move yourself. For the path, “crusher fines” or “decomposed granite” often provide a similar multi-toned, natural look for less than decorative white pebbles. Look for native grasses at your local nursery; they’ll be cheaper and will thrive with less care. This look is more about thoughtful placement than expensive materials.
13. Serpentine Garden Path with a Dark Gravel Border
When creating a two-toned gravel path, the key to a crisp look is the edging material used to separate them. Instead of plastic, use 1/8-inch thick steel edging. It’s more expensive upfront but holds a clean, sharp curve and won’t get wavy over time. For a serpentine path like this, install the steel edging first, securing it with stakes every 4 feet. Then, backfill with your different gravel types on either side. This ensures the line between the light beige and dark grey gravel stays perfect for years.
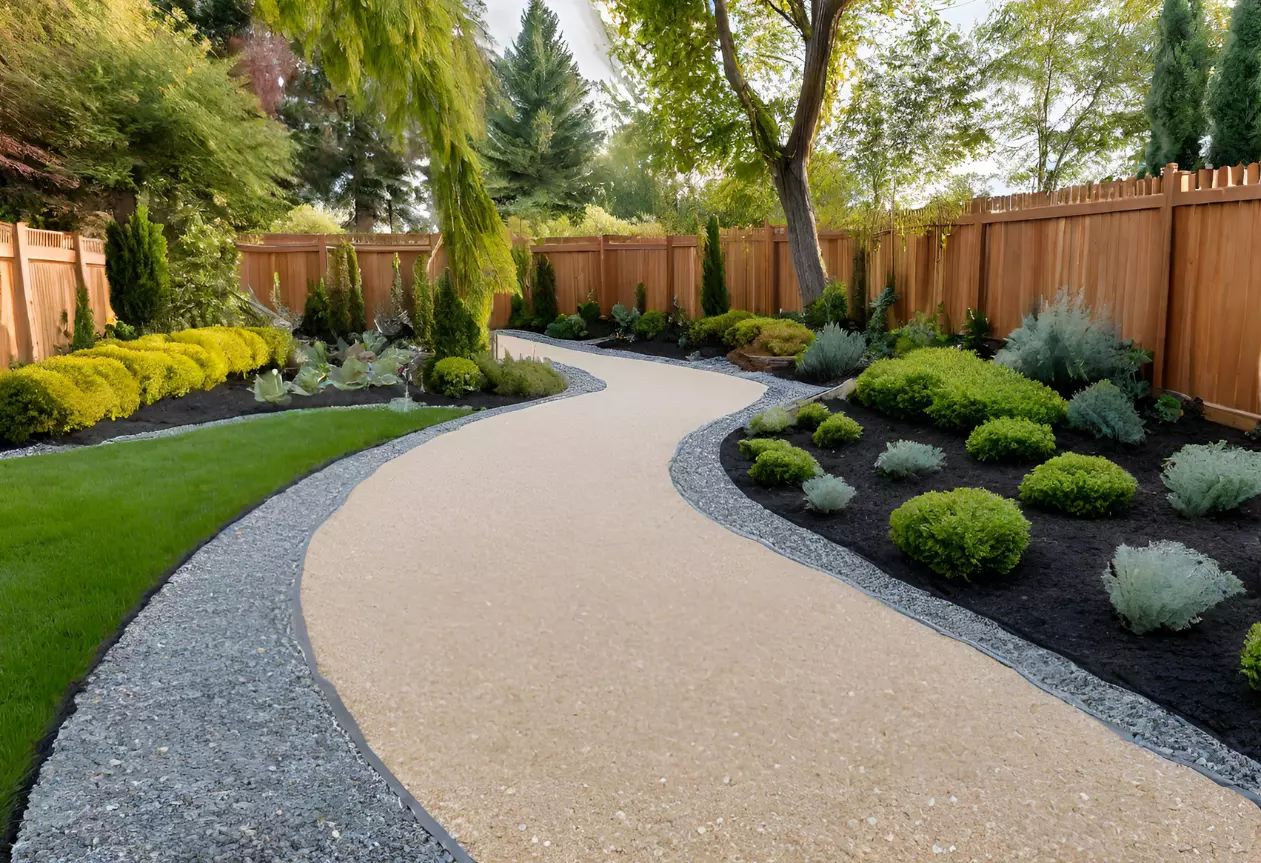
“The most important element here is the dark gravel border.”
It acts like a frame for a picture, containing the lighter-colored path and making it stand out against the lush green plantings and dark groundcover. If the path was just light gravel fading into the planting beds, it would look unfinished and messy. This small, dark gray ribbon gives the entire design a sharp, tailored feel that elevates it from a simple backyard path to a deliberate design feature.
14. Curved White Gravel Patio Edging a Lush Lawn
A gravel patio right next to a lawn can be a beautiful contrast in textures, but be prepared for a constant battle. The gravel will inevitably find its way into the lawn, and the lawn will constantly try to creep into the gravel. The stone edging helps, but it’s not foolproof. The biggest risk? Mowing. Your lawnmower can easily pick up a stray piece of gravel and fling it, posing a risk to windows, siding, or people. You’ll need to be diligent about keeping the edge clean before you mow.
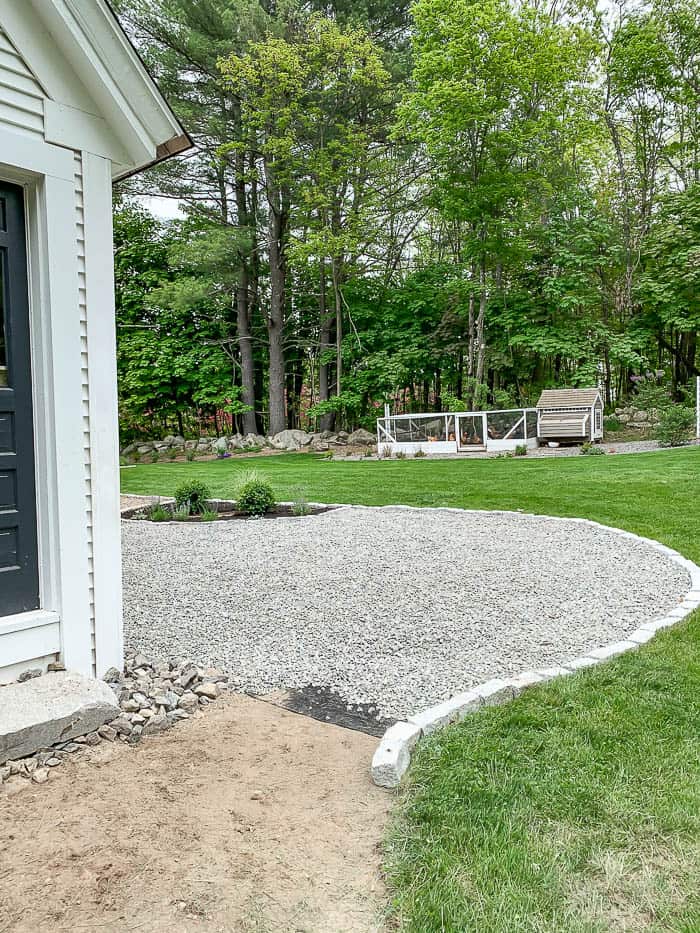
“Verify your lawn is healthy and dense enough to resist weeds that might spread to the gravel area.”
Choose a stone or steel edging that can be installed at least 3-4 inches deep to create a robust barrier.
Confirm the area has good drainage. Water pooling at the edge of the gravel can create a muddy mess and encourage lawn creep.
Plan to install a high-quality landscape fabric under the gravel to prevent weeds and stop the gravel from mixing with the soil below.
15. Modern Outdoor Bar on a White Gravel Patio
The brilliance of this design is how it creates distinct “rooms” without any walls. The large concrete pavers create a solid, stable floor for the main traffic areas—from the bar to the seating group—while the surrounding white gravel provides a soft, textural “rug” that ties everything together. This mix of materials is both practical and visually interesting. The consistent color palette of whites, grays, and natural browns ensures that even with different textures, the whole space feels cohesive and intentionally designed.
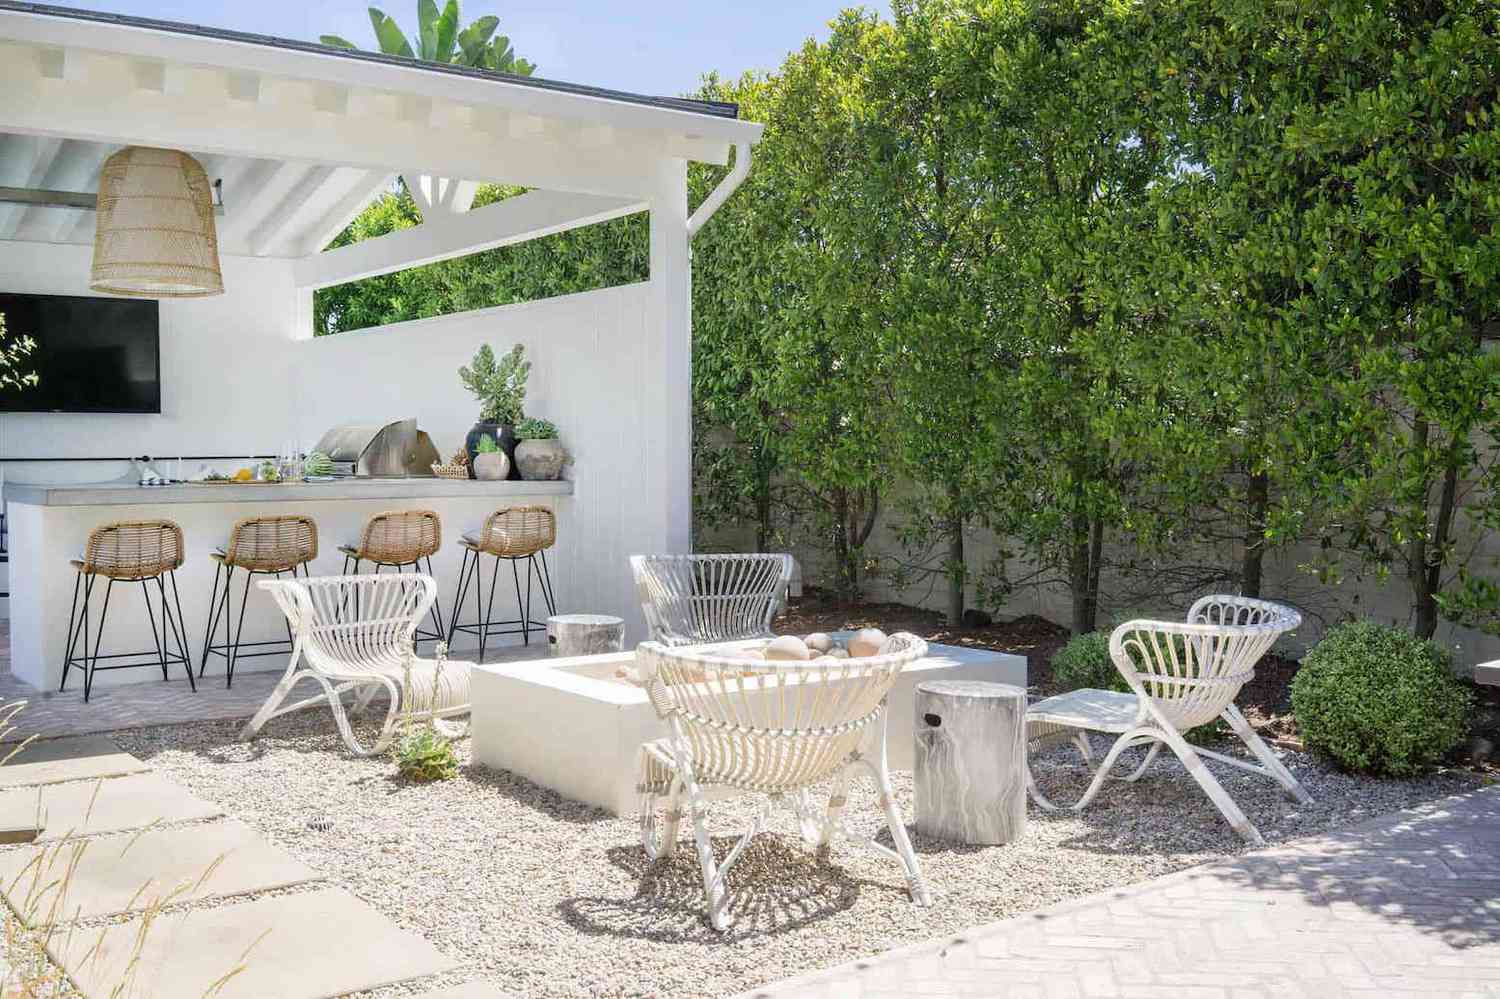
“Outdoor Bar Structure & Countertop: $1,500 – $5,000
Furniture (Bar Stools, Chair”
- Outdoor Bar Structure & Countertop: $1,500 – $5,000
- Furniture (Bar Stools, Chairs, Side Tables): $1,200 – $3,500
- Rectangular Fire Pit: $800 – $2,000
- Ground Cover (Gravel & Concrete Pavers): $700 – $1,800
- TOTAL: $4,200 – $12,300
- Budget alternative: Build a bar frame from wood and use a pre-fab laminate countertop, search for second-hand furniture, and use more gravel and fewer pavers to get the look for $1,800 – $4,000.
16. Dark Stone Facade with White Gravel & Spherical Planters
This is a study in geometric harmony. The formula: 50% rectilinear forms (the stacked stone facade, the steps, the sofa) + 30% organic texture (the white gravel) + 20% spherical shapes (the black planters). The stark, straight lines of the architecture are deliberately softened by the random texture of the gravel bed, while the perfectly round planters provide a repeating graphic element that feels both modern and playful. This balance of shapes is what makes the design feel so sophisticated and complete.
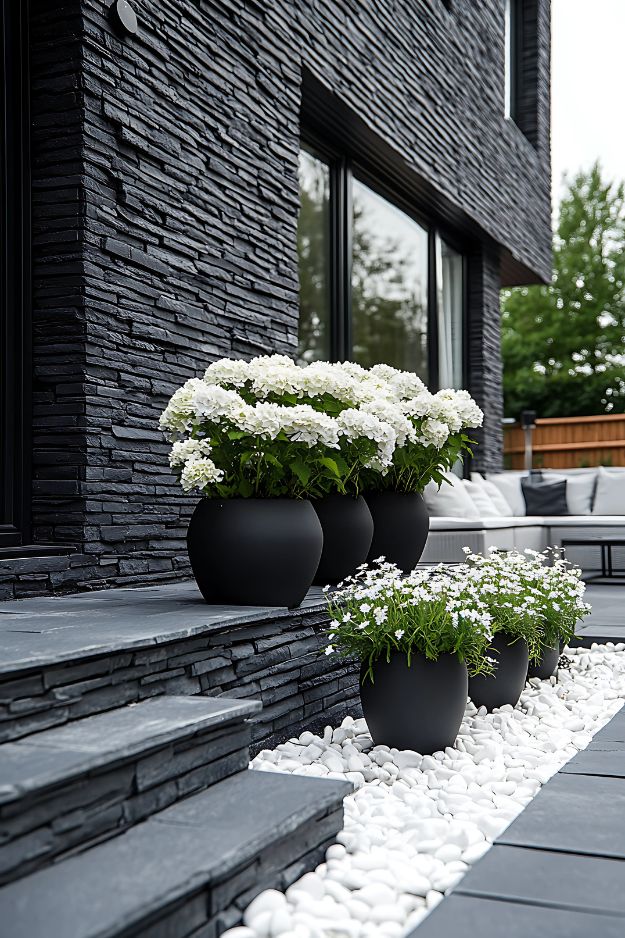
“The black spherical planters are the element that truly makes this design sing.”
They are the perfect bridge between the angular, hard architecture and the soft, natural plants they contain. Their bold, simple shape provides a focal point and a sense of rhythm along the pathway. If you replaced them with standard square planters, the design would instantly feel more conventional and less special. The spheres add a sculptural quality that feels like a deliberate art installation.
17. Garden Path with Corten Steel Edging and a Gabion Wall
Corten steel, with its stable, rust-like appearance, continues to trend in landscape design for its ability to look both industrial and natural at the same time. Paired with the rustic look of a gabion wall (a cage filled with rocks) and the clean finish of white gravel, this look hits a major 2026 sweet spot: “crafted industrial.” It feels bespoke and thoughtful, blending raw materials in a way that’s structured yet deeply connected to the earth. This isn’t a fleeting trend; its durability and timeless materials give it serious staying power.
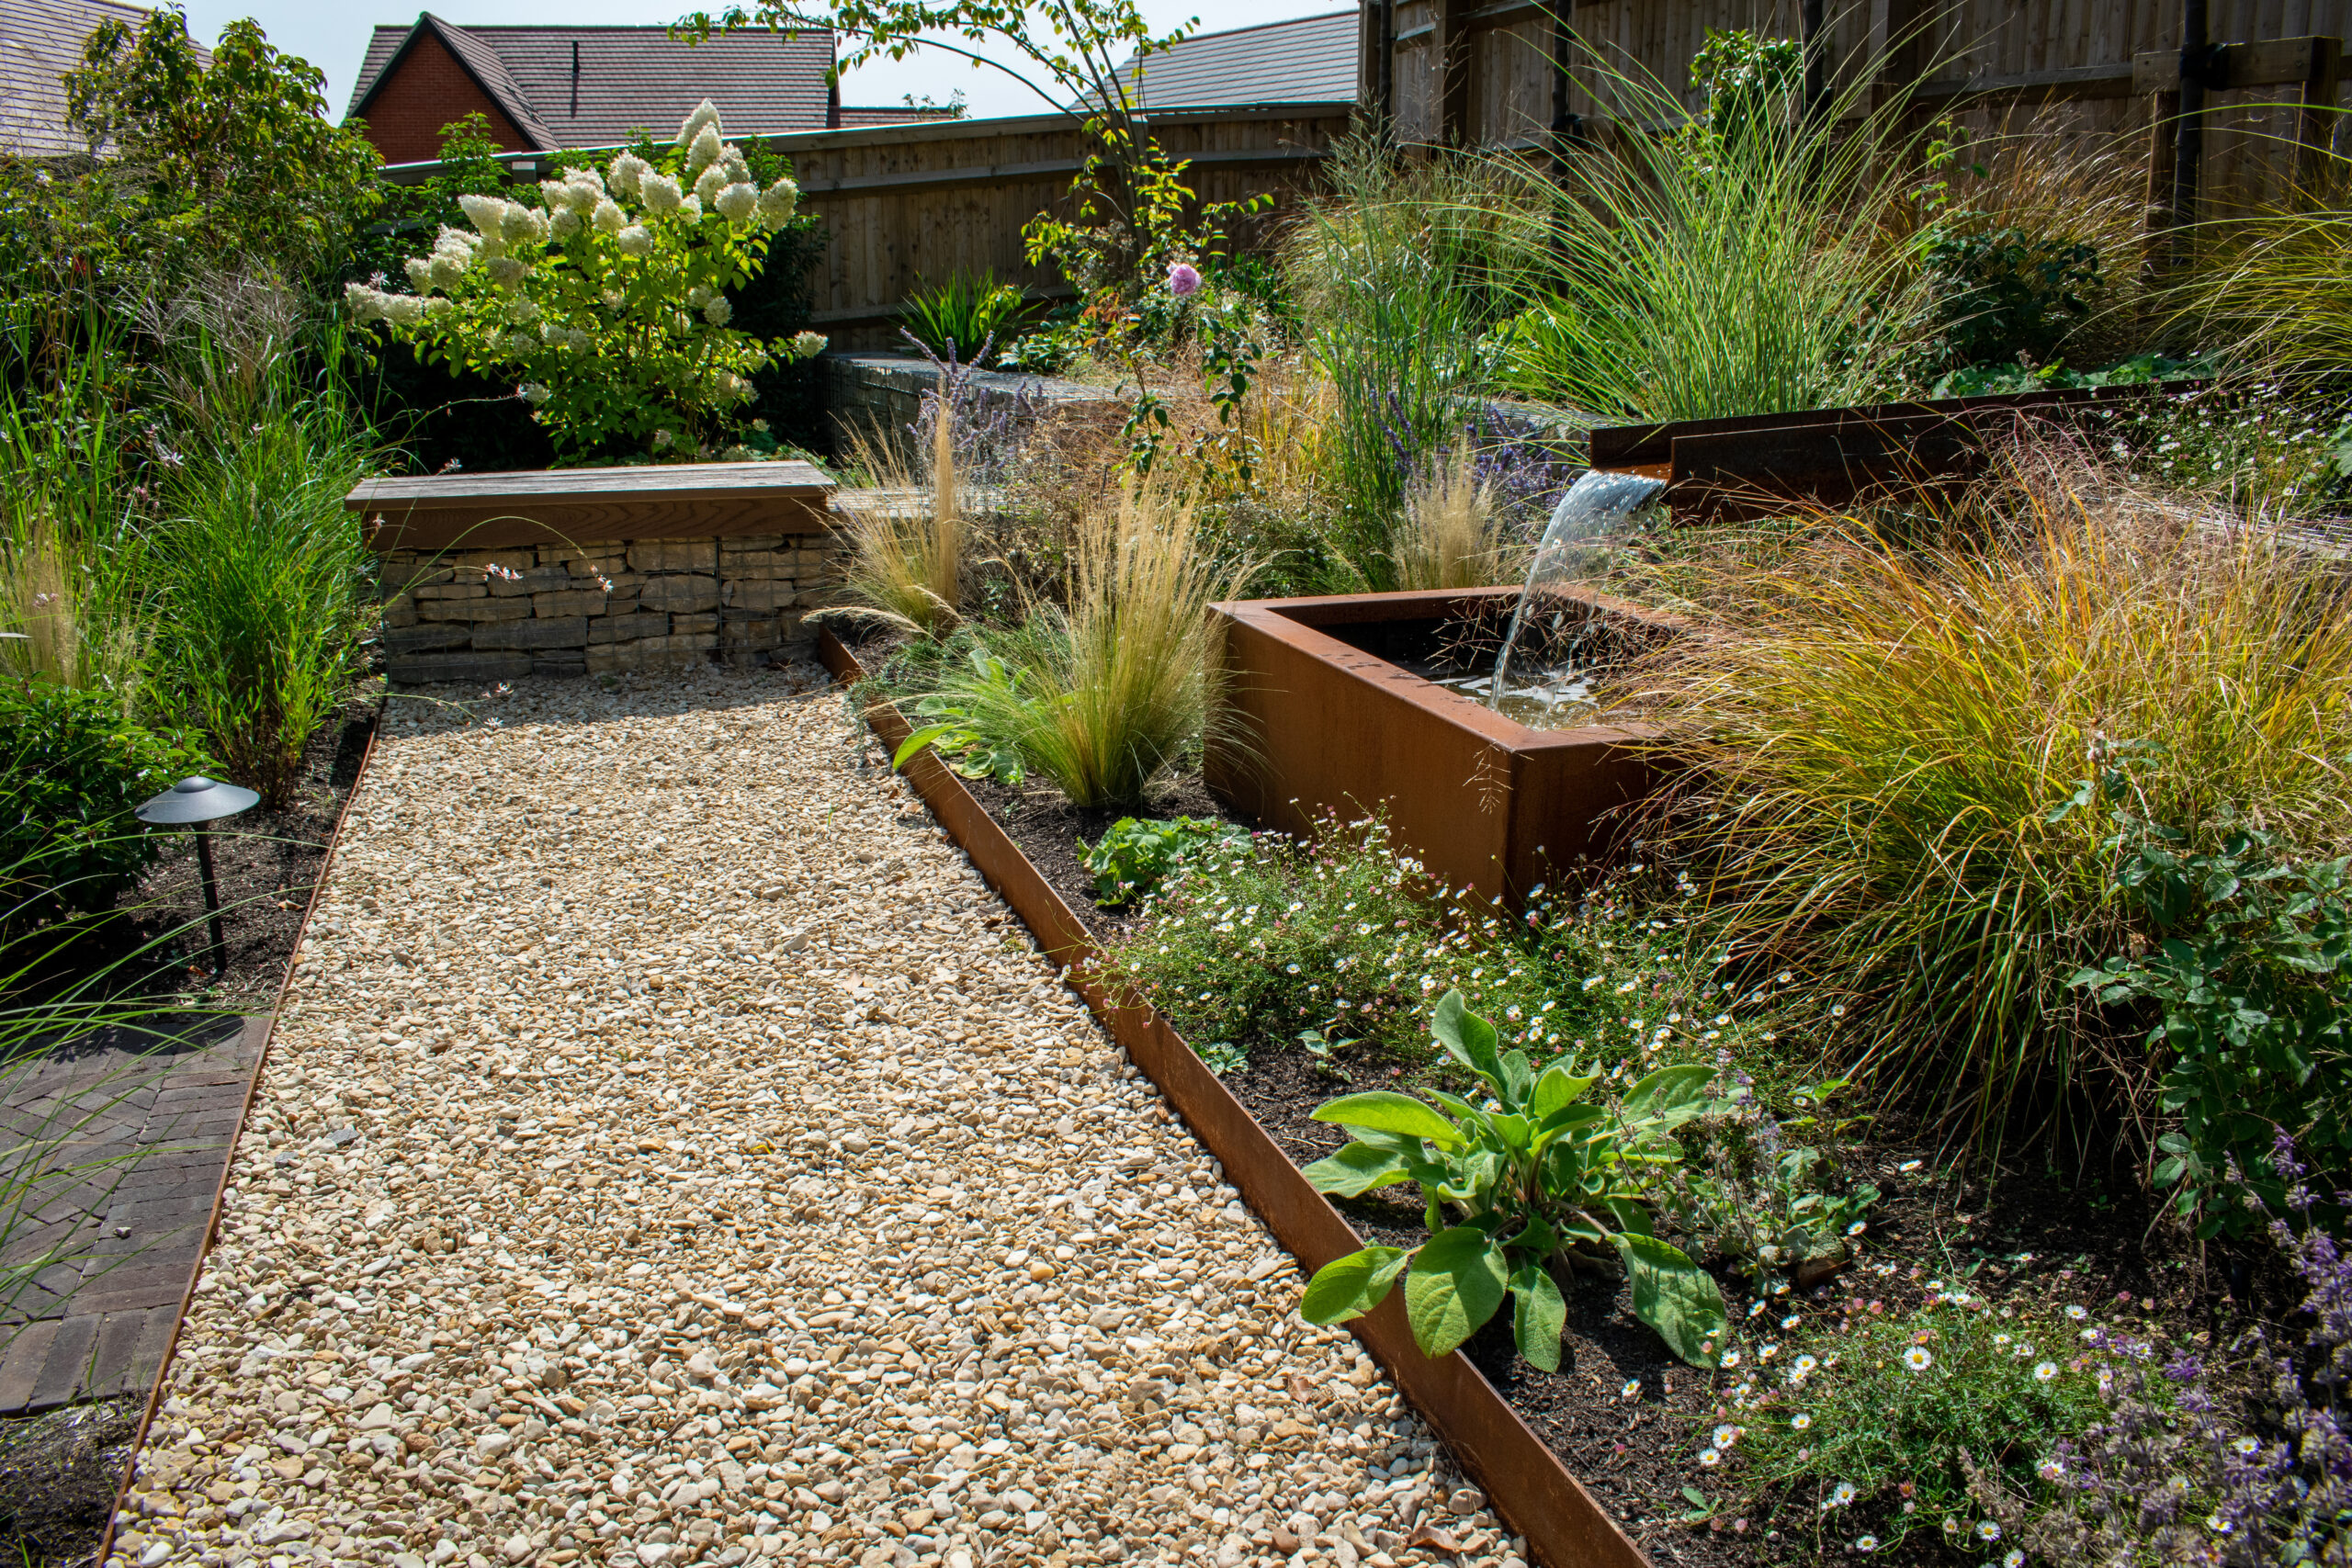
“Corten steel is designed to form a protective rust patina and then stop, so it doesn’t require painting or sealing.”
However, during the initial weathering process (which can take several months), rust-colored runoff can stain adjacent surfaces like the white gravel or any concrete. It’s wise to either allow it to weather before installation or to install a temporary barrier to protect the gravel. The wooden bench top on the gabion wall will need to be sealed annually to protect it from the elements and prevent splinters.
18. Lush Cottage Garden Path with Light Gravel
This works because the simple, light-colored gravel path acts as a quiet, neutral ribbon running through a riot of color and texture. If the path were made of fancy brick or patterned stone, it would compete with the plants. The gravel path doesn’t ask for attention; its only job is to provide a clean, bright line that makes the purples, whites, and dense greens of the foliage appear even more vibrant. It’s the calm in the middle of a beautiful storm, guiding you through the space without distracting from the main event: the plants.
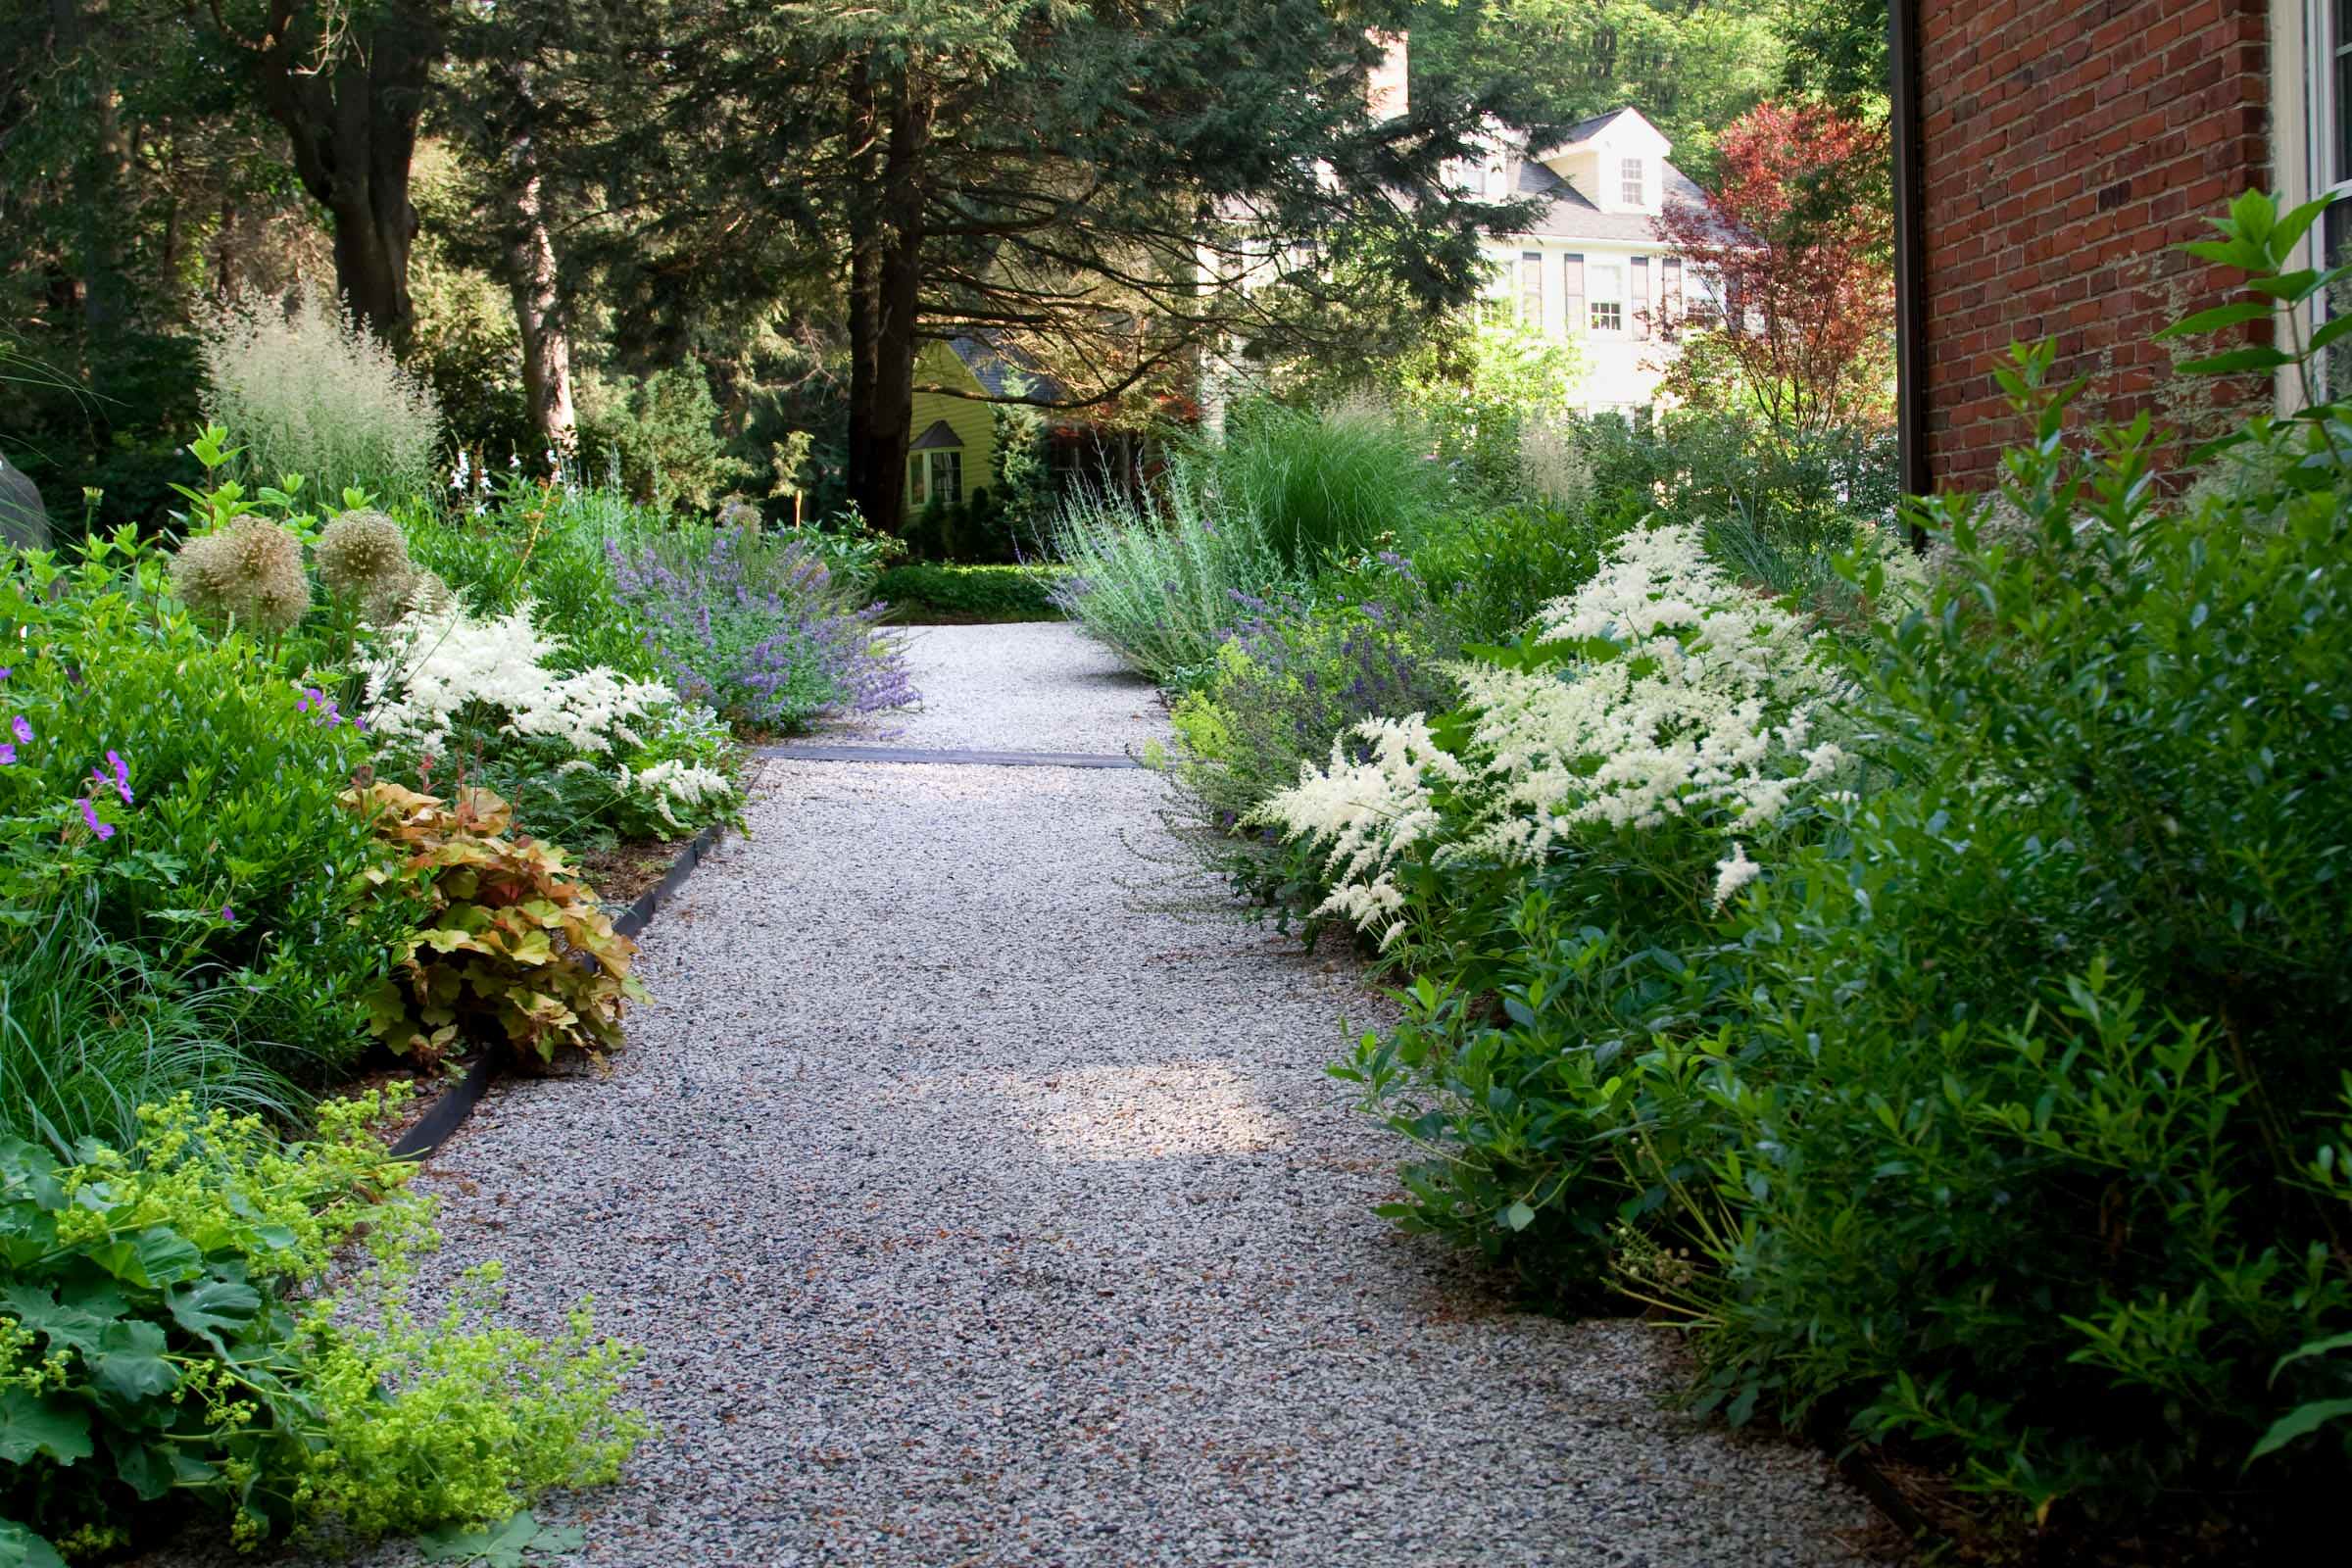
“A gravel path next to such dense planting beds requires diligent editing.”
Plants will constantly try to spill over and self-seed into the gravel. You’ll need to spend time each month trimming back the edges and pulling up volunteer seedlings. If you don’t, your crisp path will quickly become an overgrown, messy-looking trail. A solid, deep-set edging can help, but with a cottage style like this, the maintenance is part of the charm and the commitment.
19. The Classic White Gravel Walkway
To achieve that satisfying crunch underfoot and ensure proper drainage on a gravel walkway, layering is key. Don’t just dump decorative gravel on top of dirt. Start by excavating 4 inches. Then, add a 2-inch layer of compactable base rock (like crusher fines) and tamp it down firmly. Cover this with high-quality landscape fabric. Finally, add your top layer of 1/2-inch to 3/4-inch white decorative gravel, about 2 inches deep. This creates a stable, long-lasting path that resists weeds and puddles.
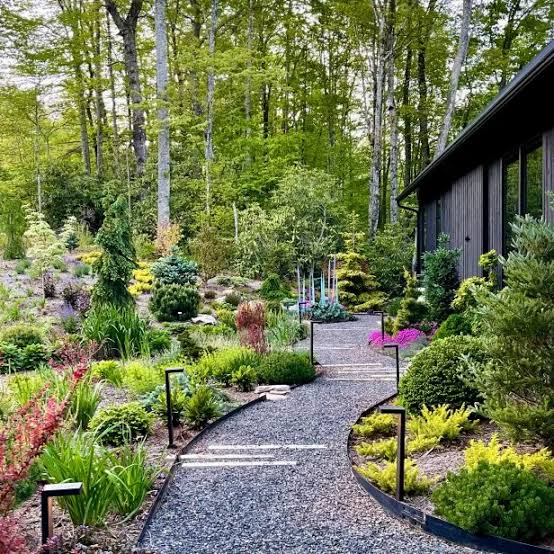
“The power of this classic design lies in its simplicity and functionality.”
A gravel walkway is one of the most honest expressions of a path—it is simply a durable, permeable surface to get from one point to another. By using white gravel, the path becomes more than just functional; it becomes a bright, reflective design element that can lighten up shady areas and provide a clean, visual line through the landscape. It’s a timeless look that works with almost any home style for a reason.
20. Curved Pathway with White Flagstone and Gravel Inlay
- Set the Stones: Lay out the irregular white flagstones on the prepared path base, creating your desired curve. Leave gaps of 1-3 inches between them.
- Adjust for Level: Ensure each stone is stable and sits at the same height. Use sand or stone dust underneath to adjust and prevent wobbling.
- Install Edging: Add a discreet plastic, metal, or stone border along the edges of the path to contain the gravel filler.
- Fill the Gaps: Carefully pour the white gravel into the gaps between the flagstones, using a broom to sweep it into all the crevices.
- Top It Off: Fill the path until the gravel sits just slightly below the surface of the flagstones. Total time: 4-6 hours. Cost: $15-$25 per square foot.
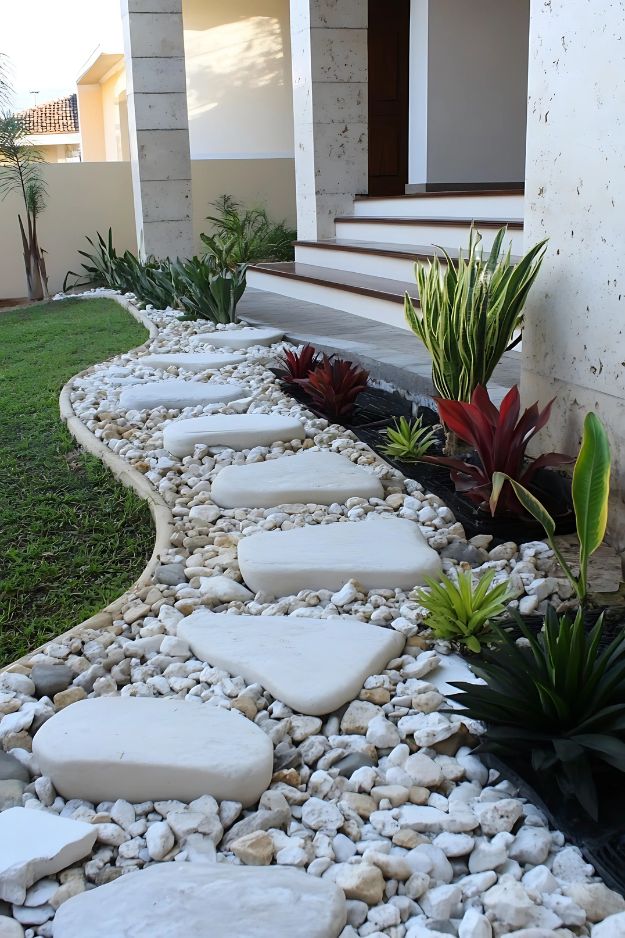
“that makes this idea special is the tone-on-tone color palette.”
Using white flagstone with white gravel filler creates a subtle, sophisticated texture rather than a high-contrast look (like in Idea #11). The path reads as a single, cohesive unit with interesting texture, rather than “stones on top of gravel.” This monochromatic approach feels elegant, serene, and incredibly high-end, allowing the surrounding plant colors to take center stage.
21. Bright White Gravel Bordering a Raised Wooden Flower Bed
The success of this design is all about framing. The wide, bright white band of gravel acts like a mat around a vibrant painting. It creates a zone of visual rest between the lush, colorful flower bed and the rest of the garden (or lawn). This separation makes the colors of the purple, white, and orange flowers appear even more saturated and intense. The natural texture of the wooden flower bed provides a warm, rustic contrast to the cool, smooth stones, creating a perfect balance.
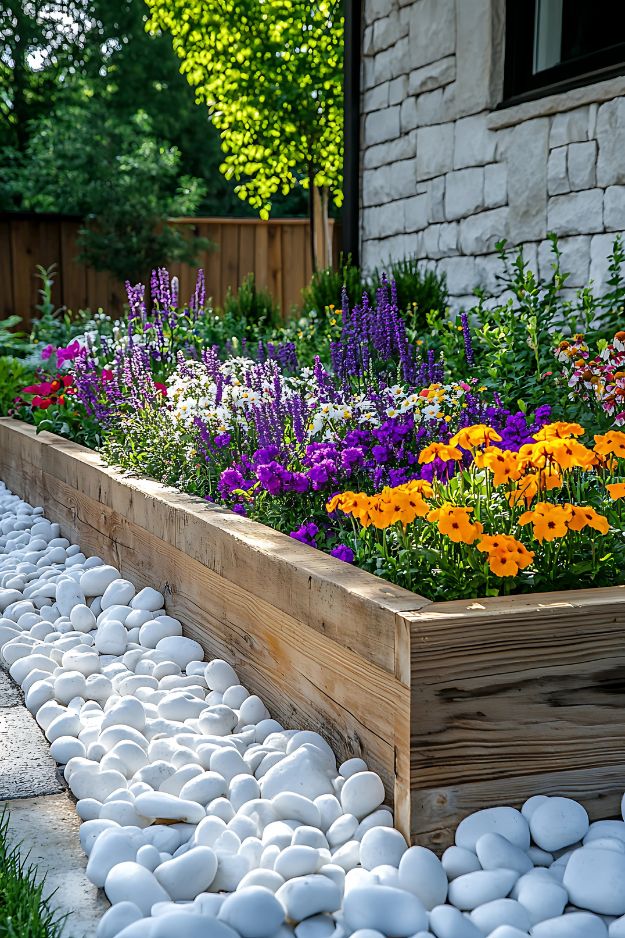
“You can achieve this joyful look on a tight budget.”
Use reclaimed pallet wood or simple pine boards to build the raised bed frame instead of expensive cedar. For the flowers, buy younger, smaller plants or even grow them from seed for a fraction of the cost of mature blooms. Instead of premium polished white gravel, look for bags of white marble chips, which are often sold as a commodity at big-box hardware stores for a much lower price per square foot. The key is the color and texture contrast, not the price tag of the materials.
22. Succulent Garden with White Gravel and a Dark Wood Fence
Here’s the visual recipe: 50% light gravel ground plane, 30% dark vertical backdrop (the fence), 15% sculptural elements (the succulents and reddish-orange rock), and 5% contrasting ground texture (the dark pebble path). The dark fence is crucial—it provides the necessary contrast to make the light gravel and green succulents stand out. The repetition of natural textures in the wood fence, the large rock, and the dark pebbles ties it all together beautifully.
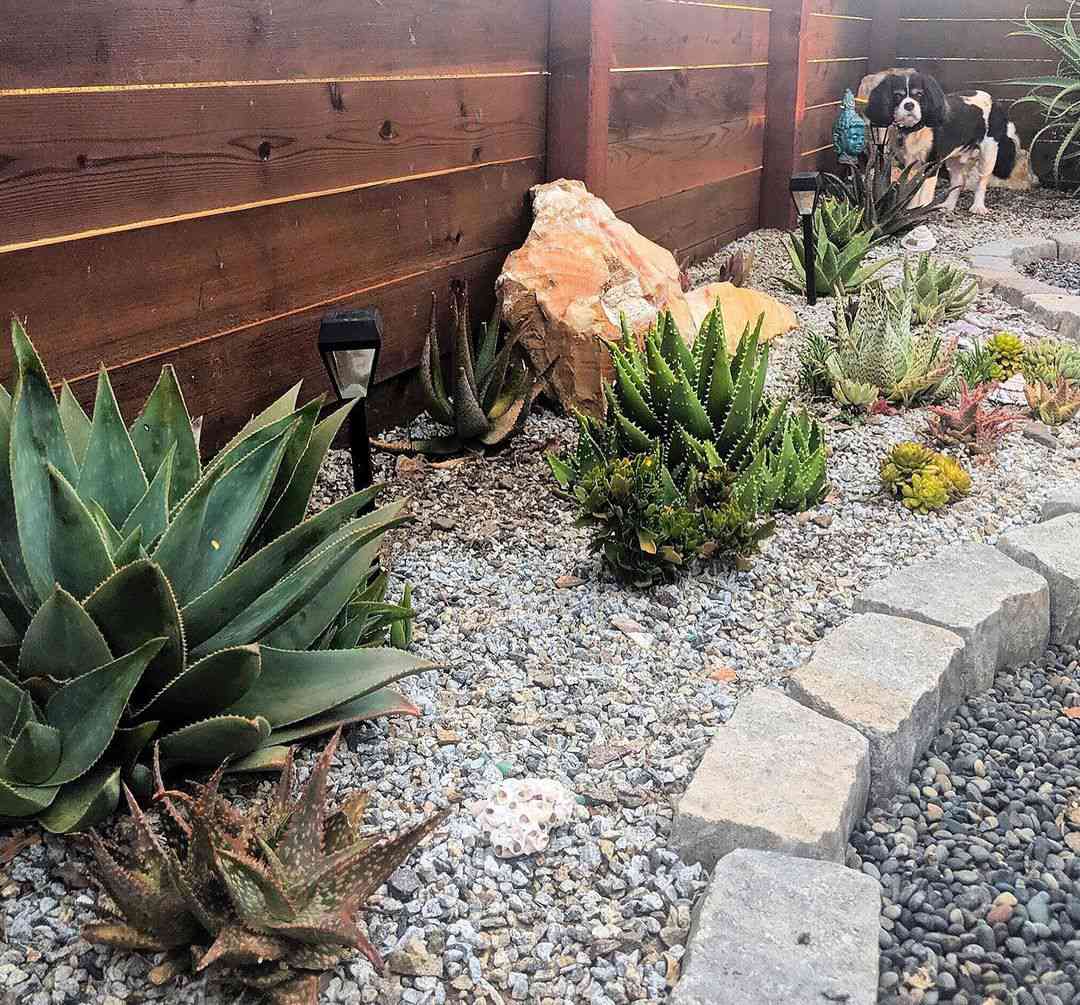
“This is a fantastic solution for a narrow side yard or a long, skinny patch of land—anywhere from 3 to 8 feet wide.”
The white gravel helps the narrow space feel brighter and wider than it is. The vertical lines of the fence draw the eye upward, adding a sense of height. It’s also great for areas with poor soil where planting in the ground is difficult, as succulents thrive in the excellent drainage that a gravel bed provides. It’s a big-impact look for an often-neglected space.
23. Minimalist Architecture with White Gravel and Lavender
This exterior works because of its extreme restraint. The design uses a very limited palette of materials and colors: white stucco, dark gray panels, light gray gravel, and the green/purple of the plants. This minimalism allows the clean lines and geometric forms of the architecture to be the star. The rows of lavender and ornamental grasses aren’t just decoration; they are arranged in neat, linear plantings that echo the geometry of the building, reinforcing the clean, structured, and serene aesthetic.
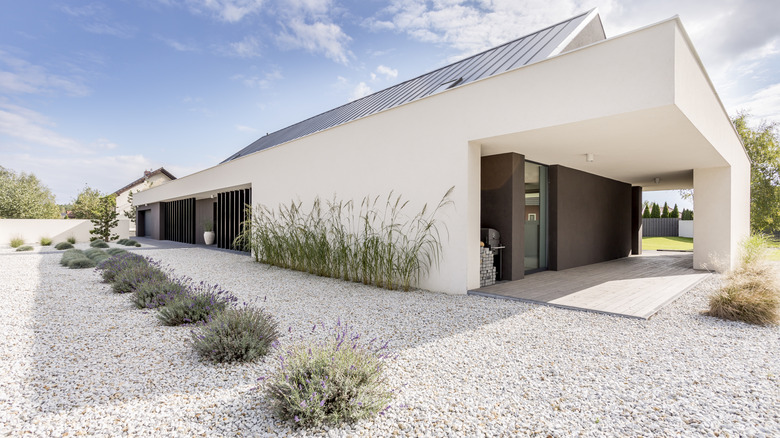
“White gravel is the perfect partner for lavender, as both thrive in full sun and well-drained soil.”
However, be aware that lavender plants shed small leaves and flowers. On a dark mulch, this is unnoticeable, but on pristine white gravel, it can create a slightly messy look up close. A quick pass with a leaf blower on low will usually solve this. The ornamental grasses will also need to be cut back hard once a year in late winter or early spring to encourage fresh growth.
24. Modern Fire Pit with White Gravel Floor
The single most important element making this design work is the paver border. Without that clean, light gray edge, the white gravel area would look unfinished, spilling randomly into the surrounding mulch and grass. The border defines the fire pit zone as an intentional “outdoor room,” giving it crisp edges and a sense of purpose. It also provides a stable, level surface for the chair legs to rest on, preventing them from sinking unevenly into the gravel. It’s a small detail that provides all the structure.
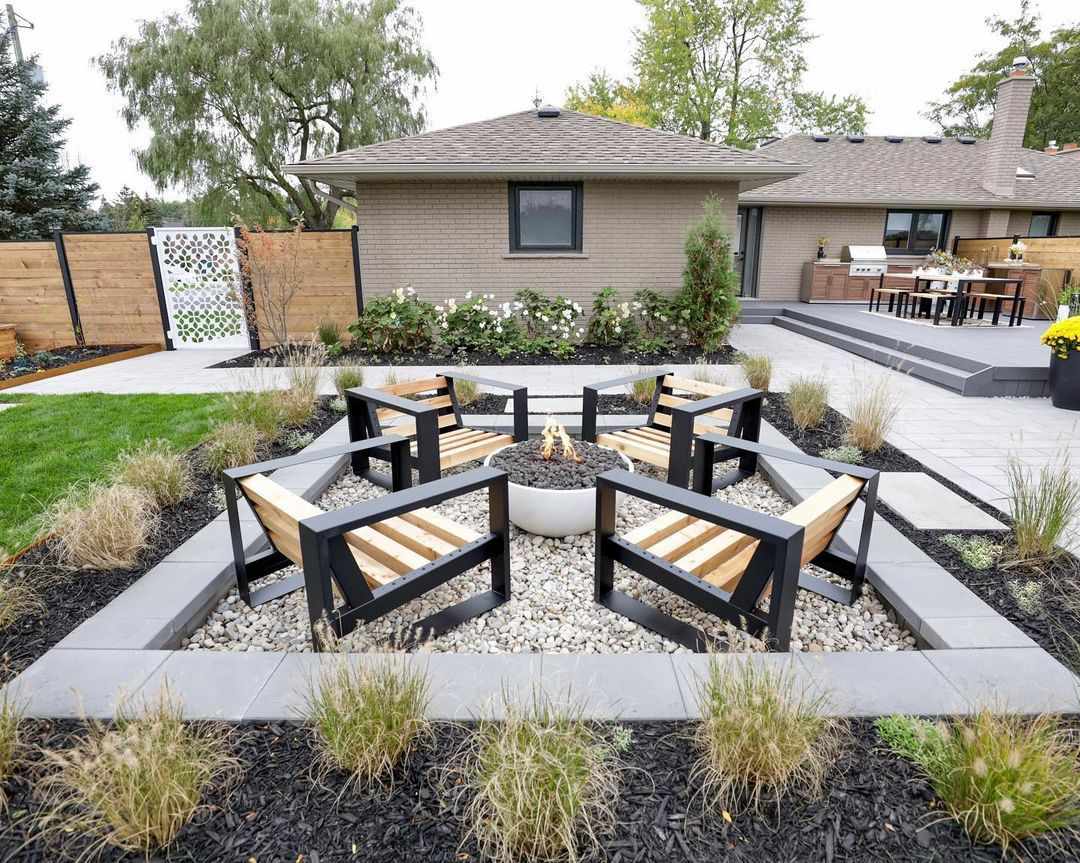
“Check local building codes for regulations on fire pit placement, including required distances from fences, structures, and trees.”
Ensure the area is perfectly level before you start. An uneven fire pit area is uncomfortable and can be a safety hazard.
Decide on your fuel source beforehand. A wood-burning pit has different requirements than a gas-powered one, which needs a buried supply line.
Confirm there is enough space for comfortable seating and safe passage around the pit—a minimum of a 12-foot diameter circle is a good rule of thumb.
25. Japanese-Inspired Garden with Raked Gravel and Maple
This design is effective because it’s a living sculpture. The raked circular patterns in the white gravel are a form of active meditation and artistry, meant to be contemplated. The contrast is key: the organic, fiery color of the Japanese maple is balanced by the rigid, spherical shape of the trimmed shrubs and the serene, monochromatic gravel. Every element is placed with incredible intention. The bamboo provides a simple, vertical backdrop that contains the scene. It’s a space that’s more about feeling and focus than function.
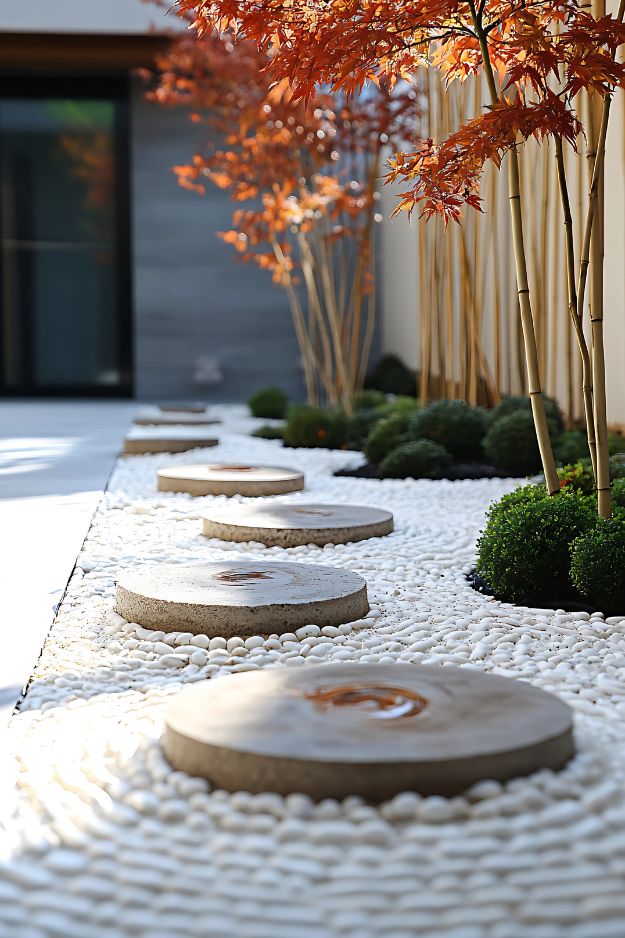
“Choose Your Gravel: Select small, angular crushed gravel (3/8-inch is ideal) as it holds patterns better than rounded river pebbles.”
Create a Base: Rake the entire gravel bed smooth and flat to create a blank canvas.
Make Your Mark: Place a circular stepping stone on the gravel.
Rake the Pattern: Using a special wooden zen garden rake or a regular garden rake, slowly and deliberately pull the tines in concentric circles around the stone.
Overlap Gently: Start the next circle slightly overlapping the last to create a continuous, flowing pattern. Time: 15-30 minutes of raking. Cost: A zen rake is about $30-$50.
26. Tiered Garden Steps with White Gravel Treads
When filling stair treads with gravel, use a smaller, more angular variety—1/4 inch to 3/8 inch is perfect. This type of gravel, often called “crushed stone,” locks together when compacted, creating a much more stable and solid surface to walk on than round, pea-gravel-style stones which can shift underfoot like marbles. Ensure the stone risers are at least an inch higher than the gravel fill to prevent the stones from washing out in heavy rain.
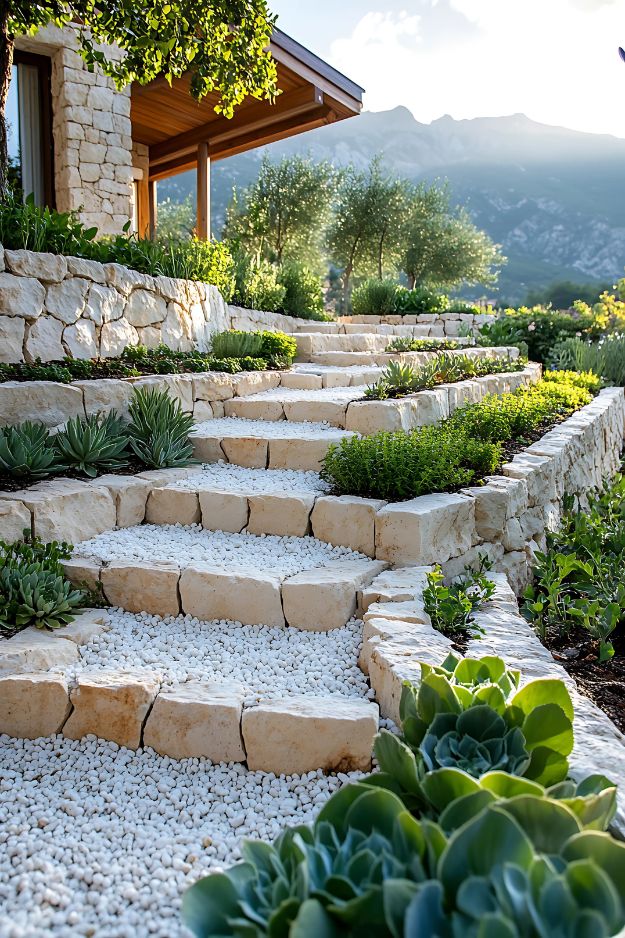
“This design is a brilliant solution for a moderately steep to steep hillside that would be difficult to mow or plant directly.”
The tiered structure turns an unusable slope into a beautiful and functional pathway. It works best on a slope with a rise of at least 4-5 feet over a run of 10-15 feet. For a gentler slope, a simple winding path like Idea #1 might be more appropriate. The grandeur of the steps is directly proportional to the steepness of the terrain.
27. Garden with Contrasting White, Grey, and Black Gravels
The one indispensable element in this design is the metal edging. It is the silent hero doing all the hard work. Without those crisp, clean metal lines separating the different colors and textures of gravel, the entire concept would fail. Within a single season, the white, grey, and black stones would bleed into each other, creating a muddy, chaotic mess. The edging is what allows the distinct, curving shapes to exist, turning a simple mix of rocks into a graphic, organized landscape.
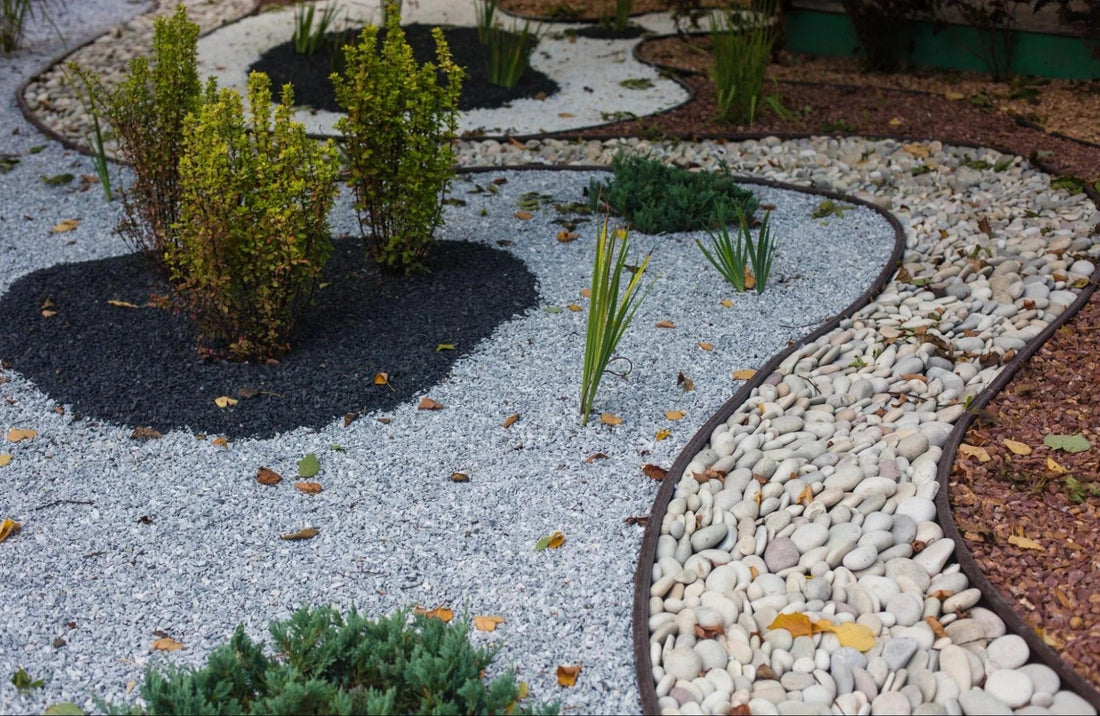
“While this looks amazing when first installed, it is a high-maintenance design.”
The distinct color zones mean you can’t just use a leaf blower on the whole area; you risk blowing dark mulch onto the white pebbles. You’ll likely need to clean the white and light grey sections by hand or with a shop vac on reverse. Weeds will also love to pop up right along the metal edging. This is a garden for someone who genuinely enjoys meticulous upkeep and finds joy in perfection.
28. Outdoor Chess Patio with Gravel Ground Cover
This space is successful because it commits fully to its theme. The ground isn’t just gravel; it’s a neutral, textured floor that makes the special furniture the focus. The dark granite chess table is the undeniable hero, and the gravel provides the perfect, quiet backdrop. The use of slatted wood on the chairs and stools is repeated in the lounge chairs in the background, creating a cohesive material palette that ties the recreational and lounging zones together, even though they serve different functions.
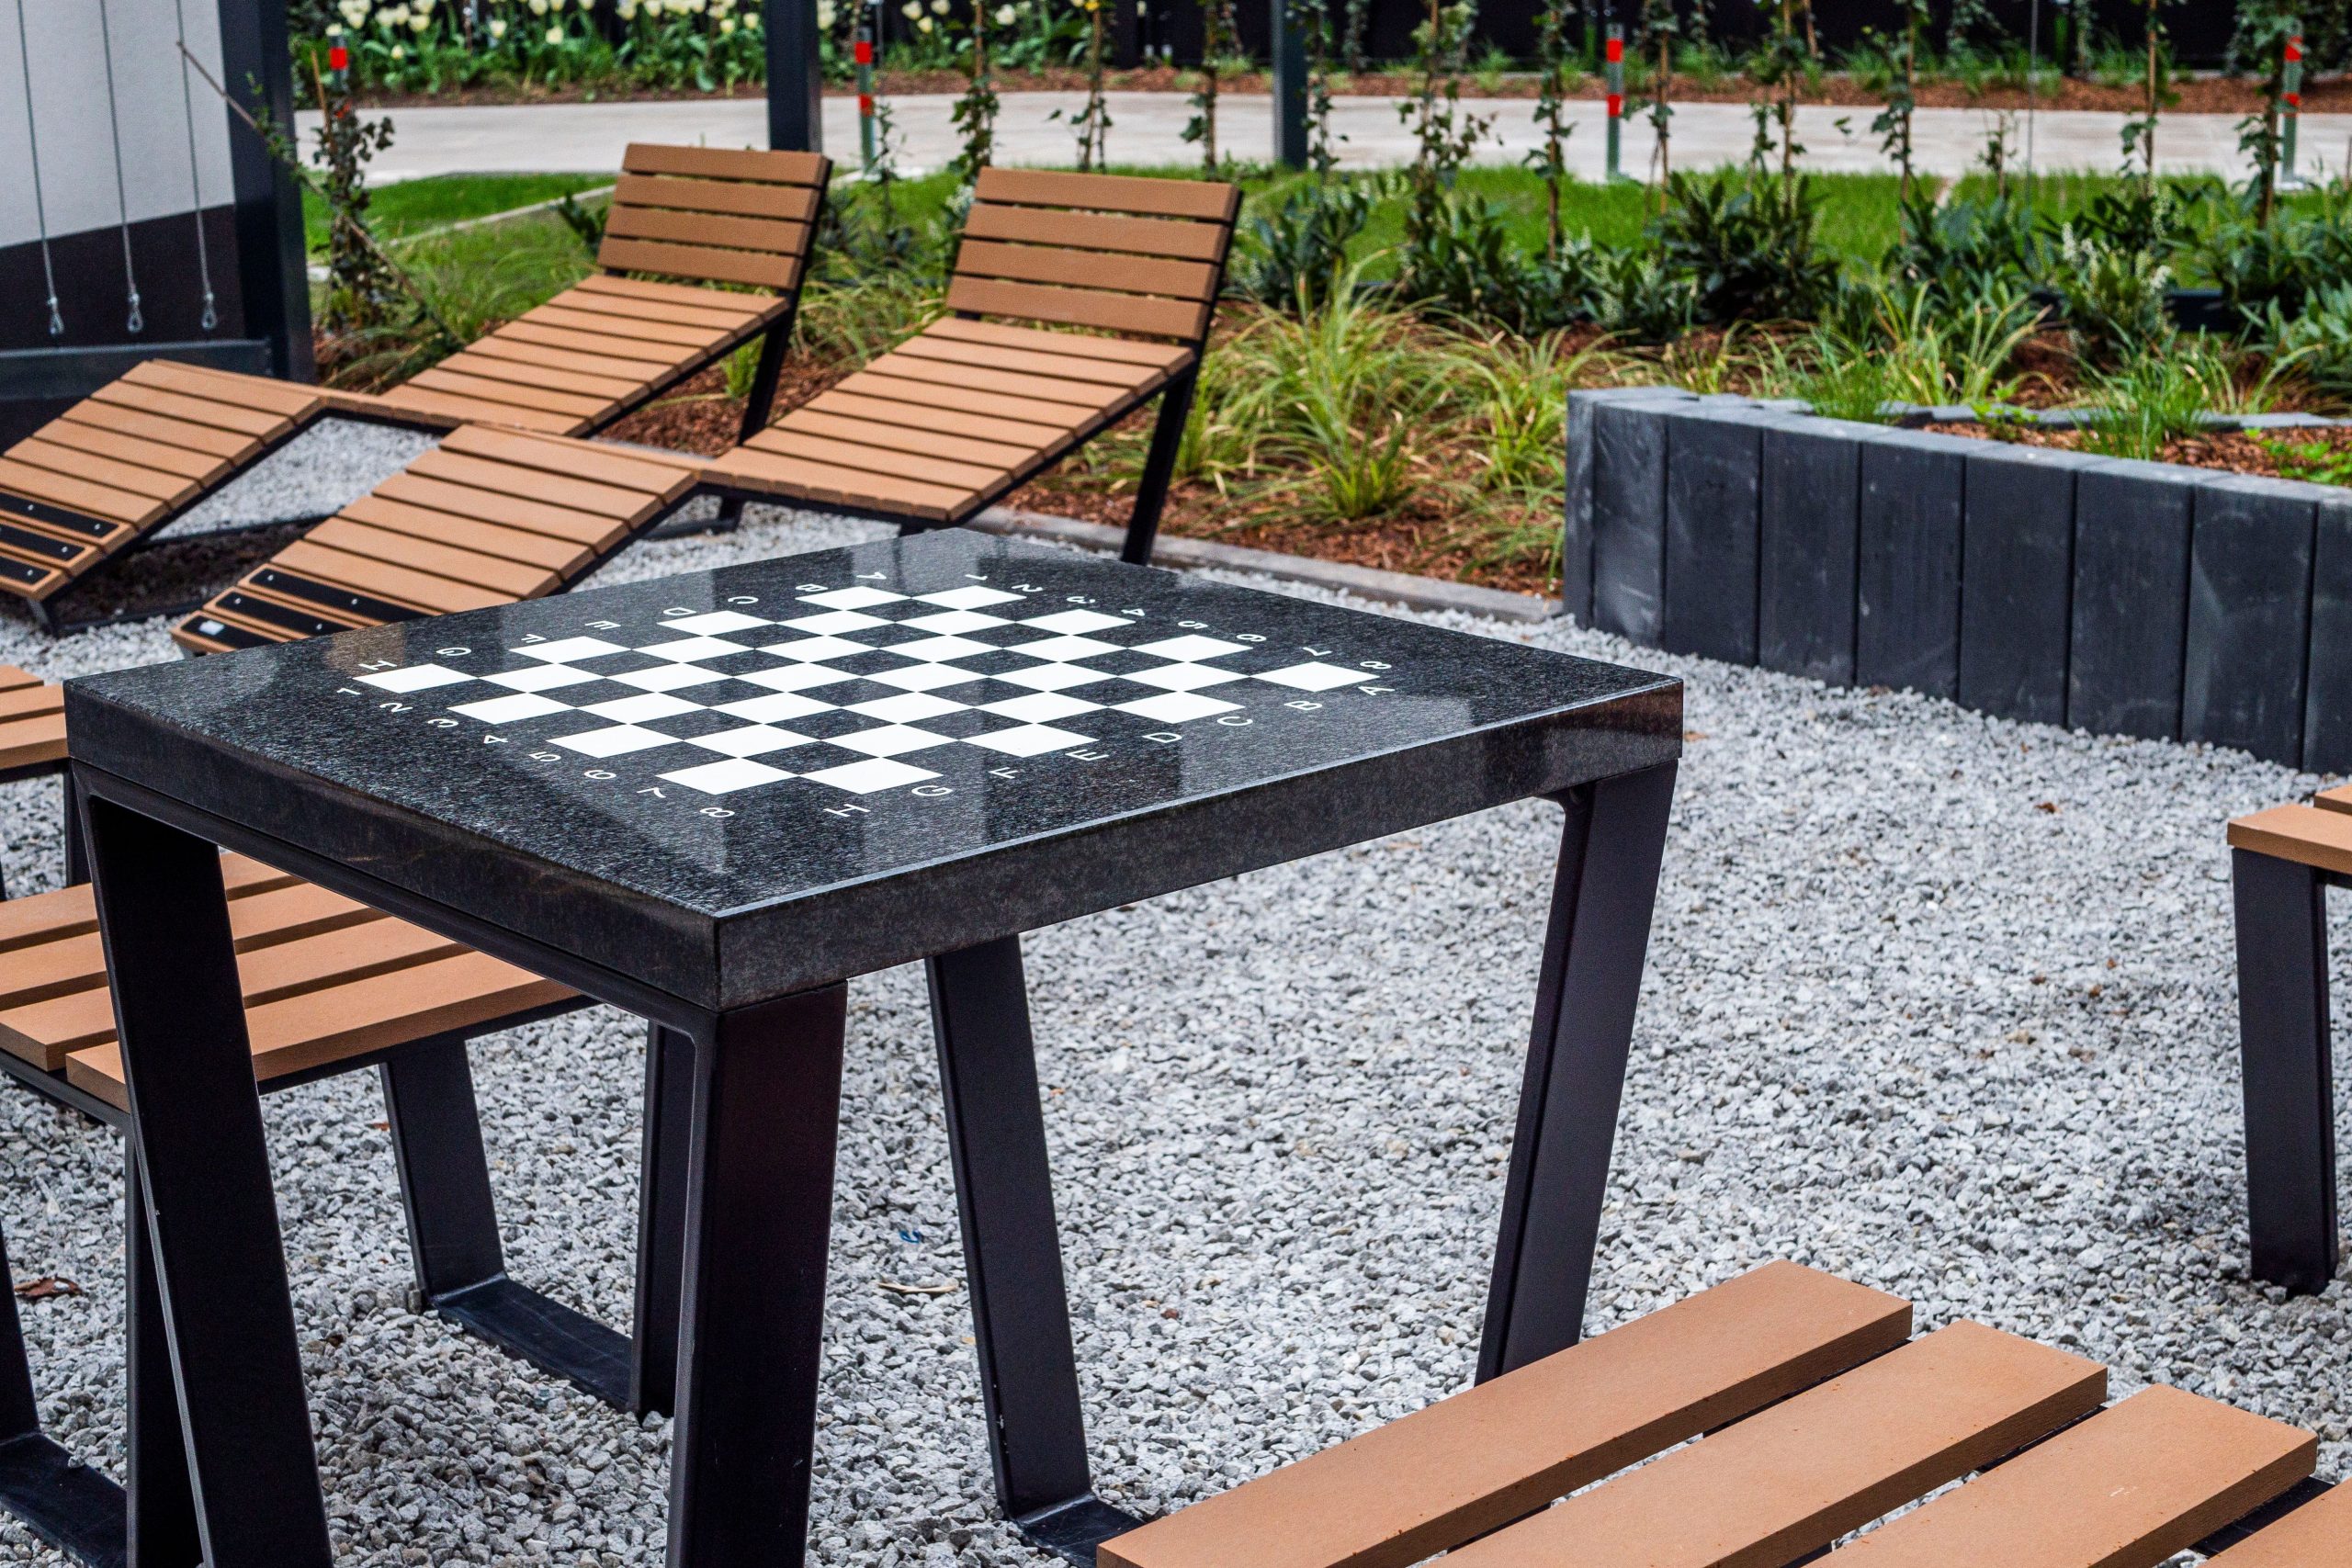
“Chess Table & Stools: $1,200 – $3,000+ (can be very high-end)
Lounge Chairs: $60”
- Chess Table & Stools: $1,200 – $3,000+ (can be very high-end)
- Lounge Chairs: $600 – $1,500 for a pair
- Ground Cover (Gravel): $400 – $900 for the area
- Planter Boxes & Plants: $300 – $800
- TOTAL: $2,500 – $6,200+
- Budget alternative: Create a DIY chess table using a concrete top and outdoor-rated tile. Find used lounge chairs on Facebook Marketplace and use affordable cinder blocks for the planters for a total cost of $800 – $1,800.
29. Charming Front Yard with Contemporary Gravel Accents
When using gravel in a front yard, a little goes a long way. The key to a charming, contemporary look is to use gravel as an accent or a “river” that connects different elements, rather than as a total lawn replacement. Limit the gravel to a specific zone, like a dry creek bed feature or a clean border along a walkway. A good rule is to keep gravel to no more than 30% of the total softscape area. This ensures it looks like a thoughtful design feature, not like you gave up on growing a lawn.
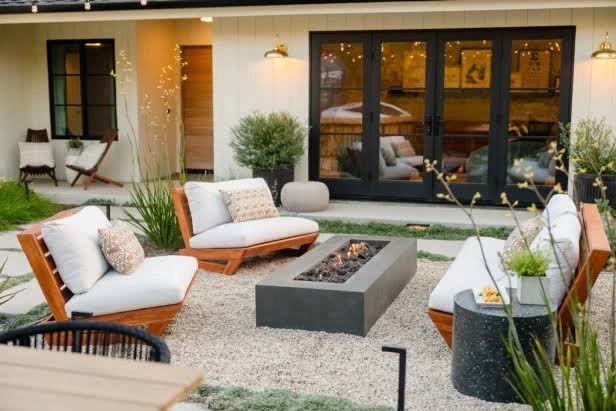
“This design feels both charming and modern because it pairs the timeless appeal of a lush lawn and full plantings with the clean, crisp lines of a defined gravel path.”
The gravel acts as a contemporary counterpoint to the traditional greenery. It signals that the landscape is intentionally designed and cared for, while still feeling welcoming and lush. This blend of styles—a bit of cottage charm, a bit of modern minimalism—is very appealing and gives a home fantastic curb appeal.
30. Modern Paver Patio with Stone Fire Pit and Gravel Borders
The formula for this inviting space is about balancing textures: 50% smooth pavers for the main patio floor, 30% rough/stacked elements (the stone fire pit), and 20% loose, fine textures (the white and dark gray gravel sections). This variety is what makes the patio feel custom and visually rich. The dark Adirondack chairs act as a solid anchor in the composition, their dark color grounding the lighter tones of the pavers and white gravel. The patterned cushions add a final, soft touch to break up the hard surfaces.
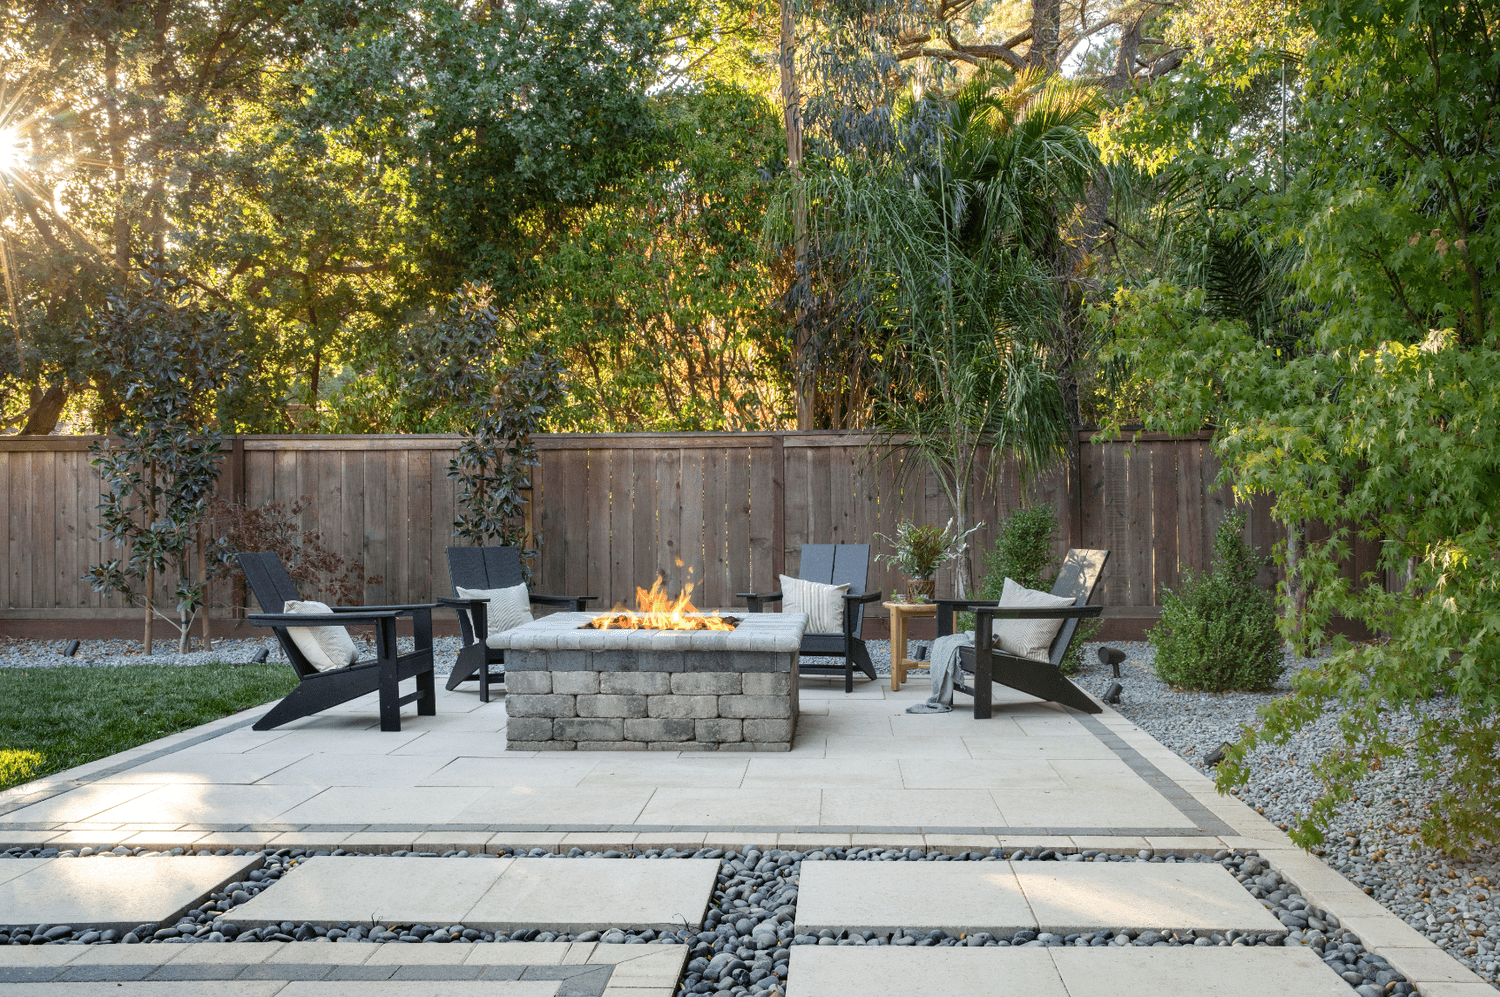
“Be careful when integrating loose gravel or pebbles within a paved patio.”
The small stones will absolutely get kicked onto the main patio surface, creating a tripping hazard and a gritty feeling underfoot. If you have kids who love to run around, this might not be the best choice. It also makes sweeping the patio more difficult. If you love the look, consider using larger, flatter river stones that are less likely to travel, or check out the fixed pebble mosaic tiles which give a similar look with zero loose parts.
Your Garden’s Next Chapter Starts with Stone
White gravel is more than just a ground cover; it’s a design tool that can define spaces, create contrast, and bring a clean, modern feel to any outdoor area. Whether you’re starting with a small pathway or planning a full backyard renovation, the right stone can set the stage for a landscape you’ll love for years to come. Now, which idea are you pinning first? 📌
