You know that feeling when you finally find the outdoor patio shade idea that looks exactly right for your space? That perfect blend of function and style that makes you want to live outside all summer long. After filtering through hundreds of options across Wayfair, Home Depot, and IKEA, we narrowed it down to 31 ideas that actually deliver. We pulled the best patio shade solutions across every price point—from $200 DIY setups to $8,000 architectural statements. Inside, you’ll find 31 curated ideas covering everything from modern louvered pergolas to rustic gazebos and simple, budget-friendly shade sails. And stay until the end — we break down the most common mistakes that can ruin these looks. 📌 Save this to Pinterest for later — you’ll want to revisit these ideas.
This post may contain affiliate links. As an Amazon Associate, we earn from qualifying purchases at no extra cost to you.
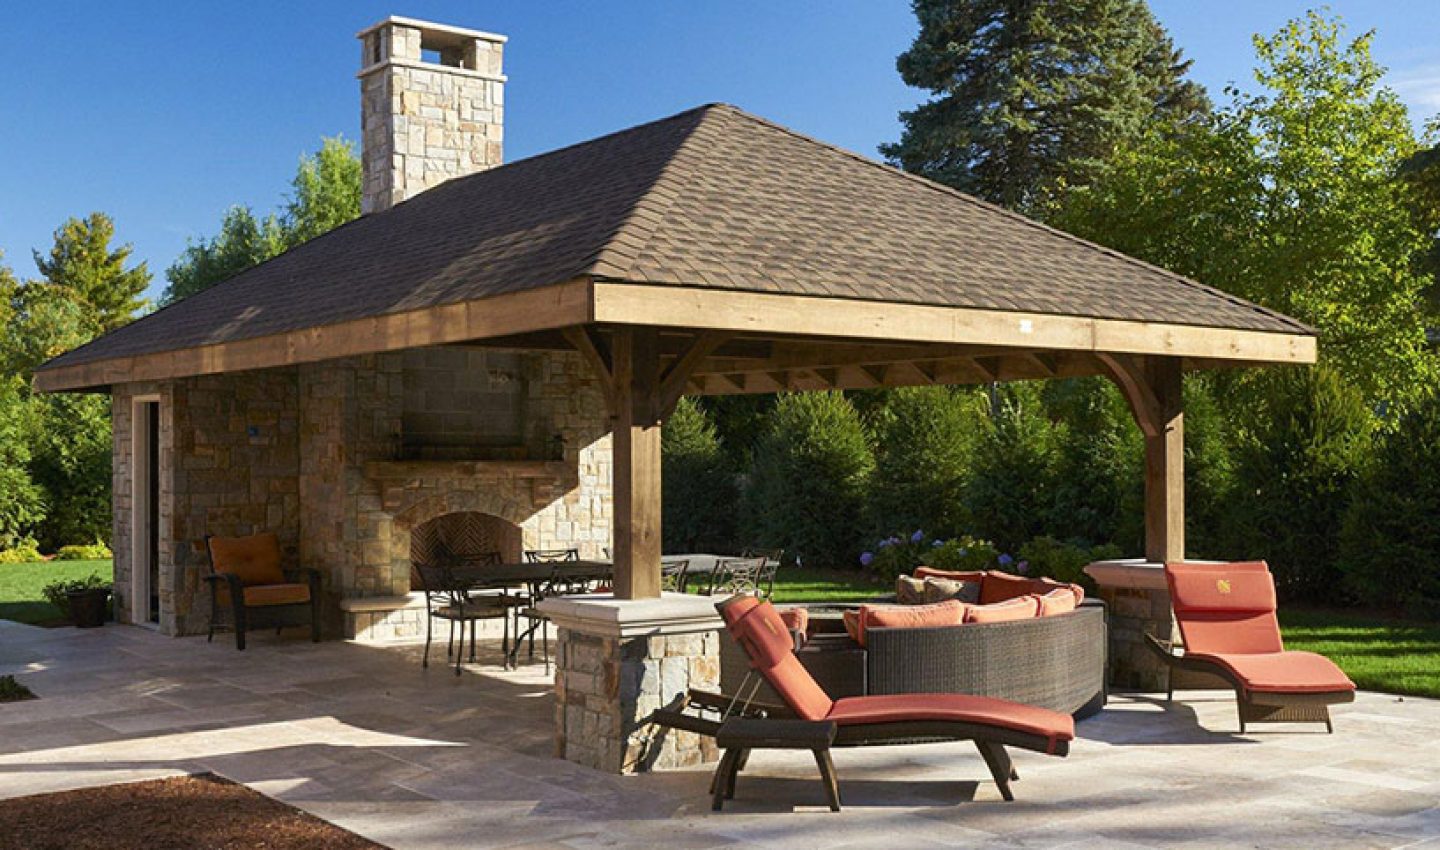
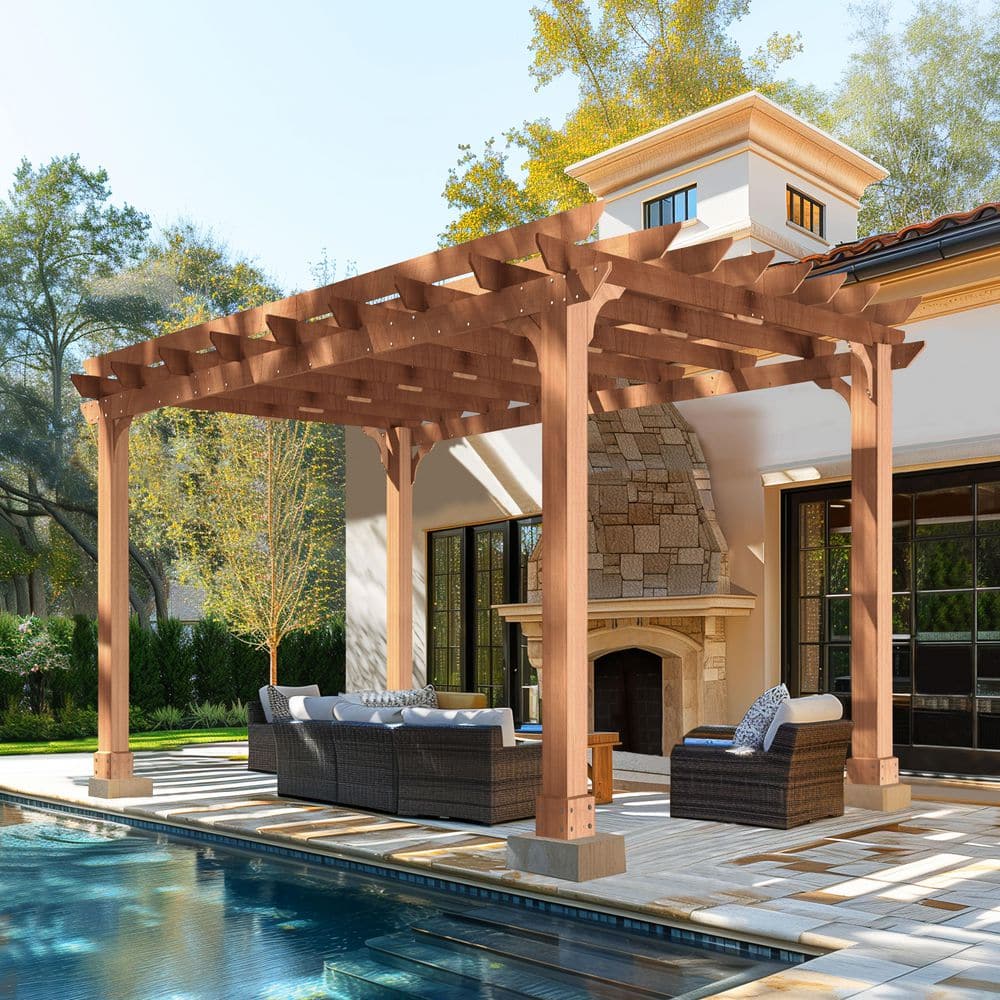
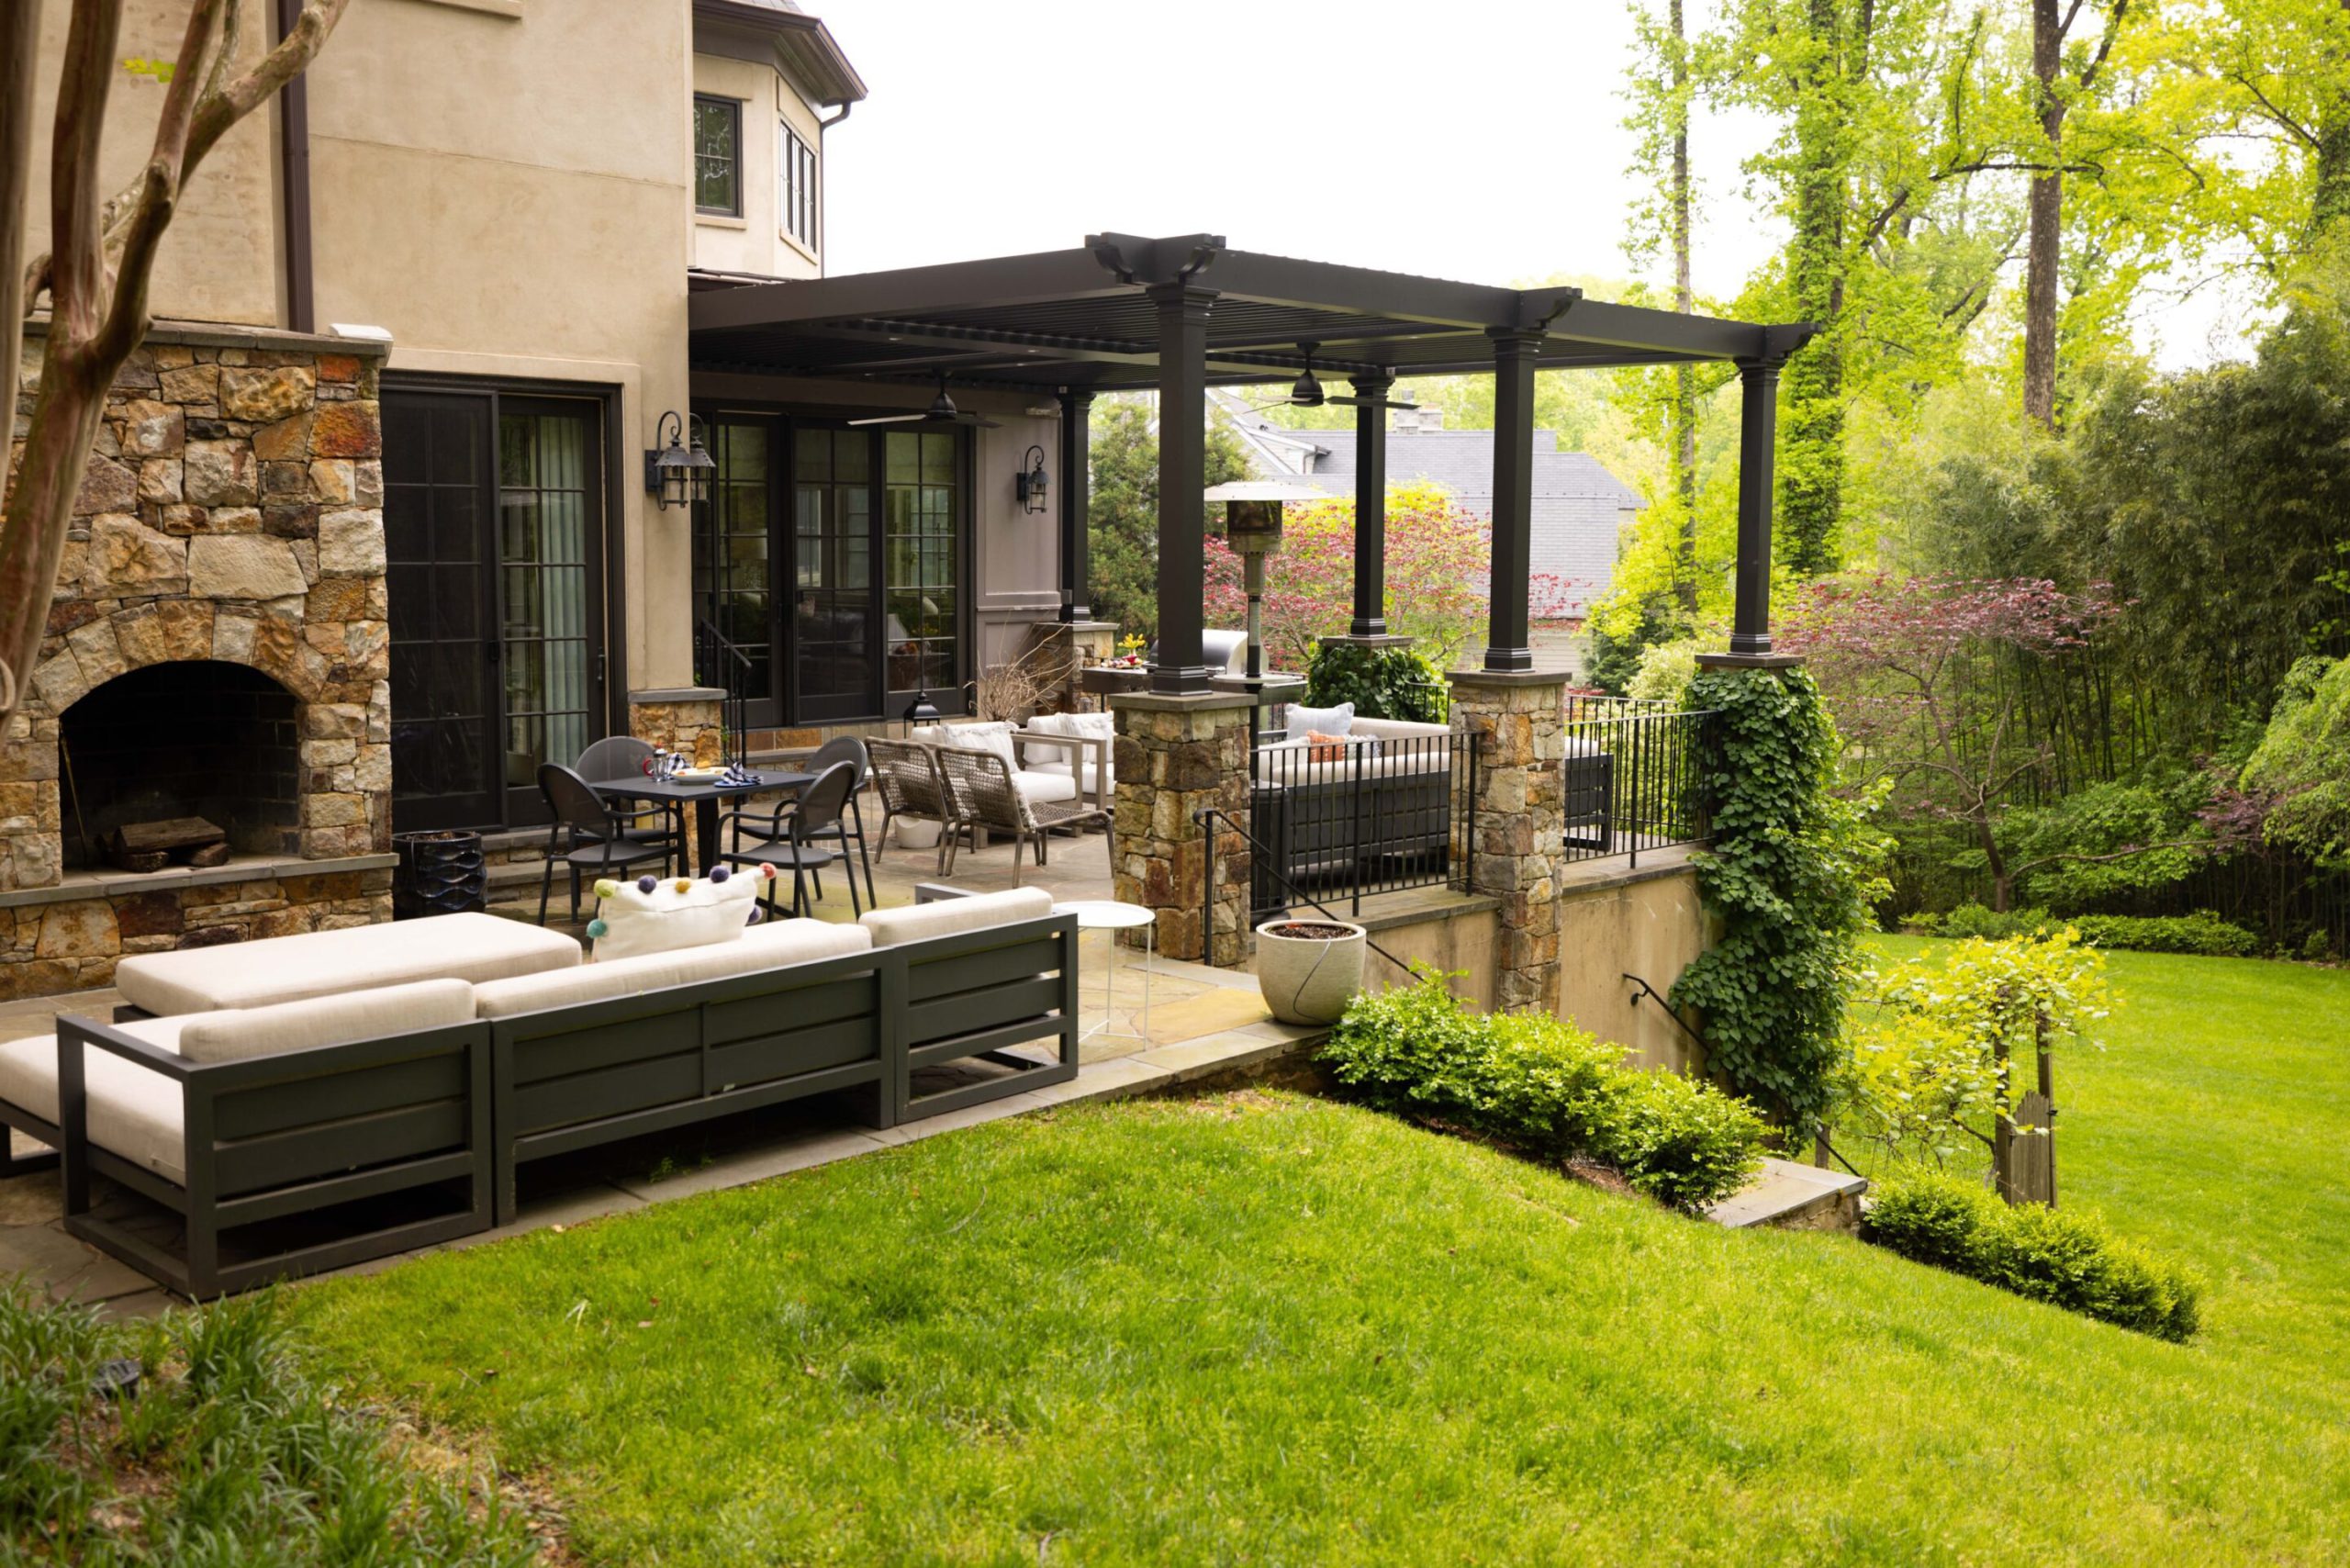
1. Build a Grand Outdoor Room with a Pavilion and Stone Fireplace
This isn’t just a patio cover; it’s a full-on outdoor living room. What makes it work so well is the perfect marriage of materials and scale. The heavy, grounding presence of the stone fireplace provides a focal point and a sense of permanence, while the soaring wooden beams of the pavilion keep the space feeling open and airy, not closed-in. It successfully defines a “room” without walls, using the roofline and the fireplace to anchor the furniture arrangement in the middle of a large patio.
|
$1,467.68
|
$547.39
|
$487.00
|
$4.48
|
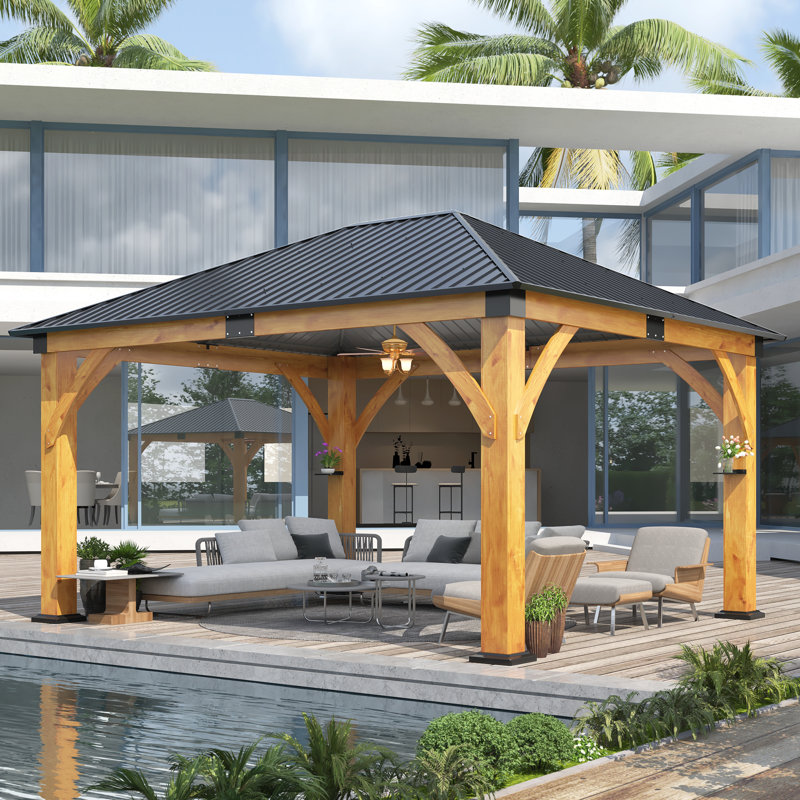


“Recreating a permanent structure of this scale is a significant investment, but it creates a true extension of your home.”
The budget here is largely driven by materials and labor for the pavilion and stonework.
- Pavilion Structure (materials & labor): $15,000 – $30,000
- Stone Fireplace & Chimney (materials & labor): $10,000 – $25,000
- Sectional Sofa & Lounges: $4,000 – $8,000
- Paver Patio (if not existing): $5,000 – $12,000
- TOTAL: $34,000 – $75,000+
- Budget alternative: A pre-fabricated metal gazebo ($1,500) and a standalone fire pit ($400) can give a similar zone for about 90% less.
2. Create a Social Hub with a Stonework Kitchen and Wooden Pergola
that truly elevates this space is the textural consistency. The stacked stonework isn’t just an accent; it’s the foundational element used for both the bar and the handsome pergola supports. This repetition creates a cohesive, high-end custom look that a simple post-and-beam structure couldn’t achieve. Removing the stone would make this a standard pergola, but with it, it becomes an architectural feature that feels completely integrated and resort-like.

|
$250.70
|
$118.11
|
$1,199.00
|
$3.18
|


“When designing an outdoor kitchen under a pergola, plan your task lighting from the start.”
Don’t rely on ambient light. Install at least two weatherproof spotlights directly over the key work zones: one above the grill and one over the main prep counter or sink. This ensures you can actually see what you’re cooking after the sun goes down, without casting shadows over your own hands. It’s a functional detail that makes all the difference for evening entertaining.
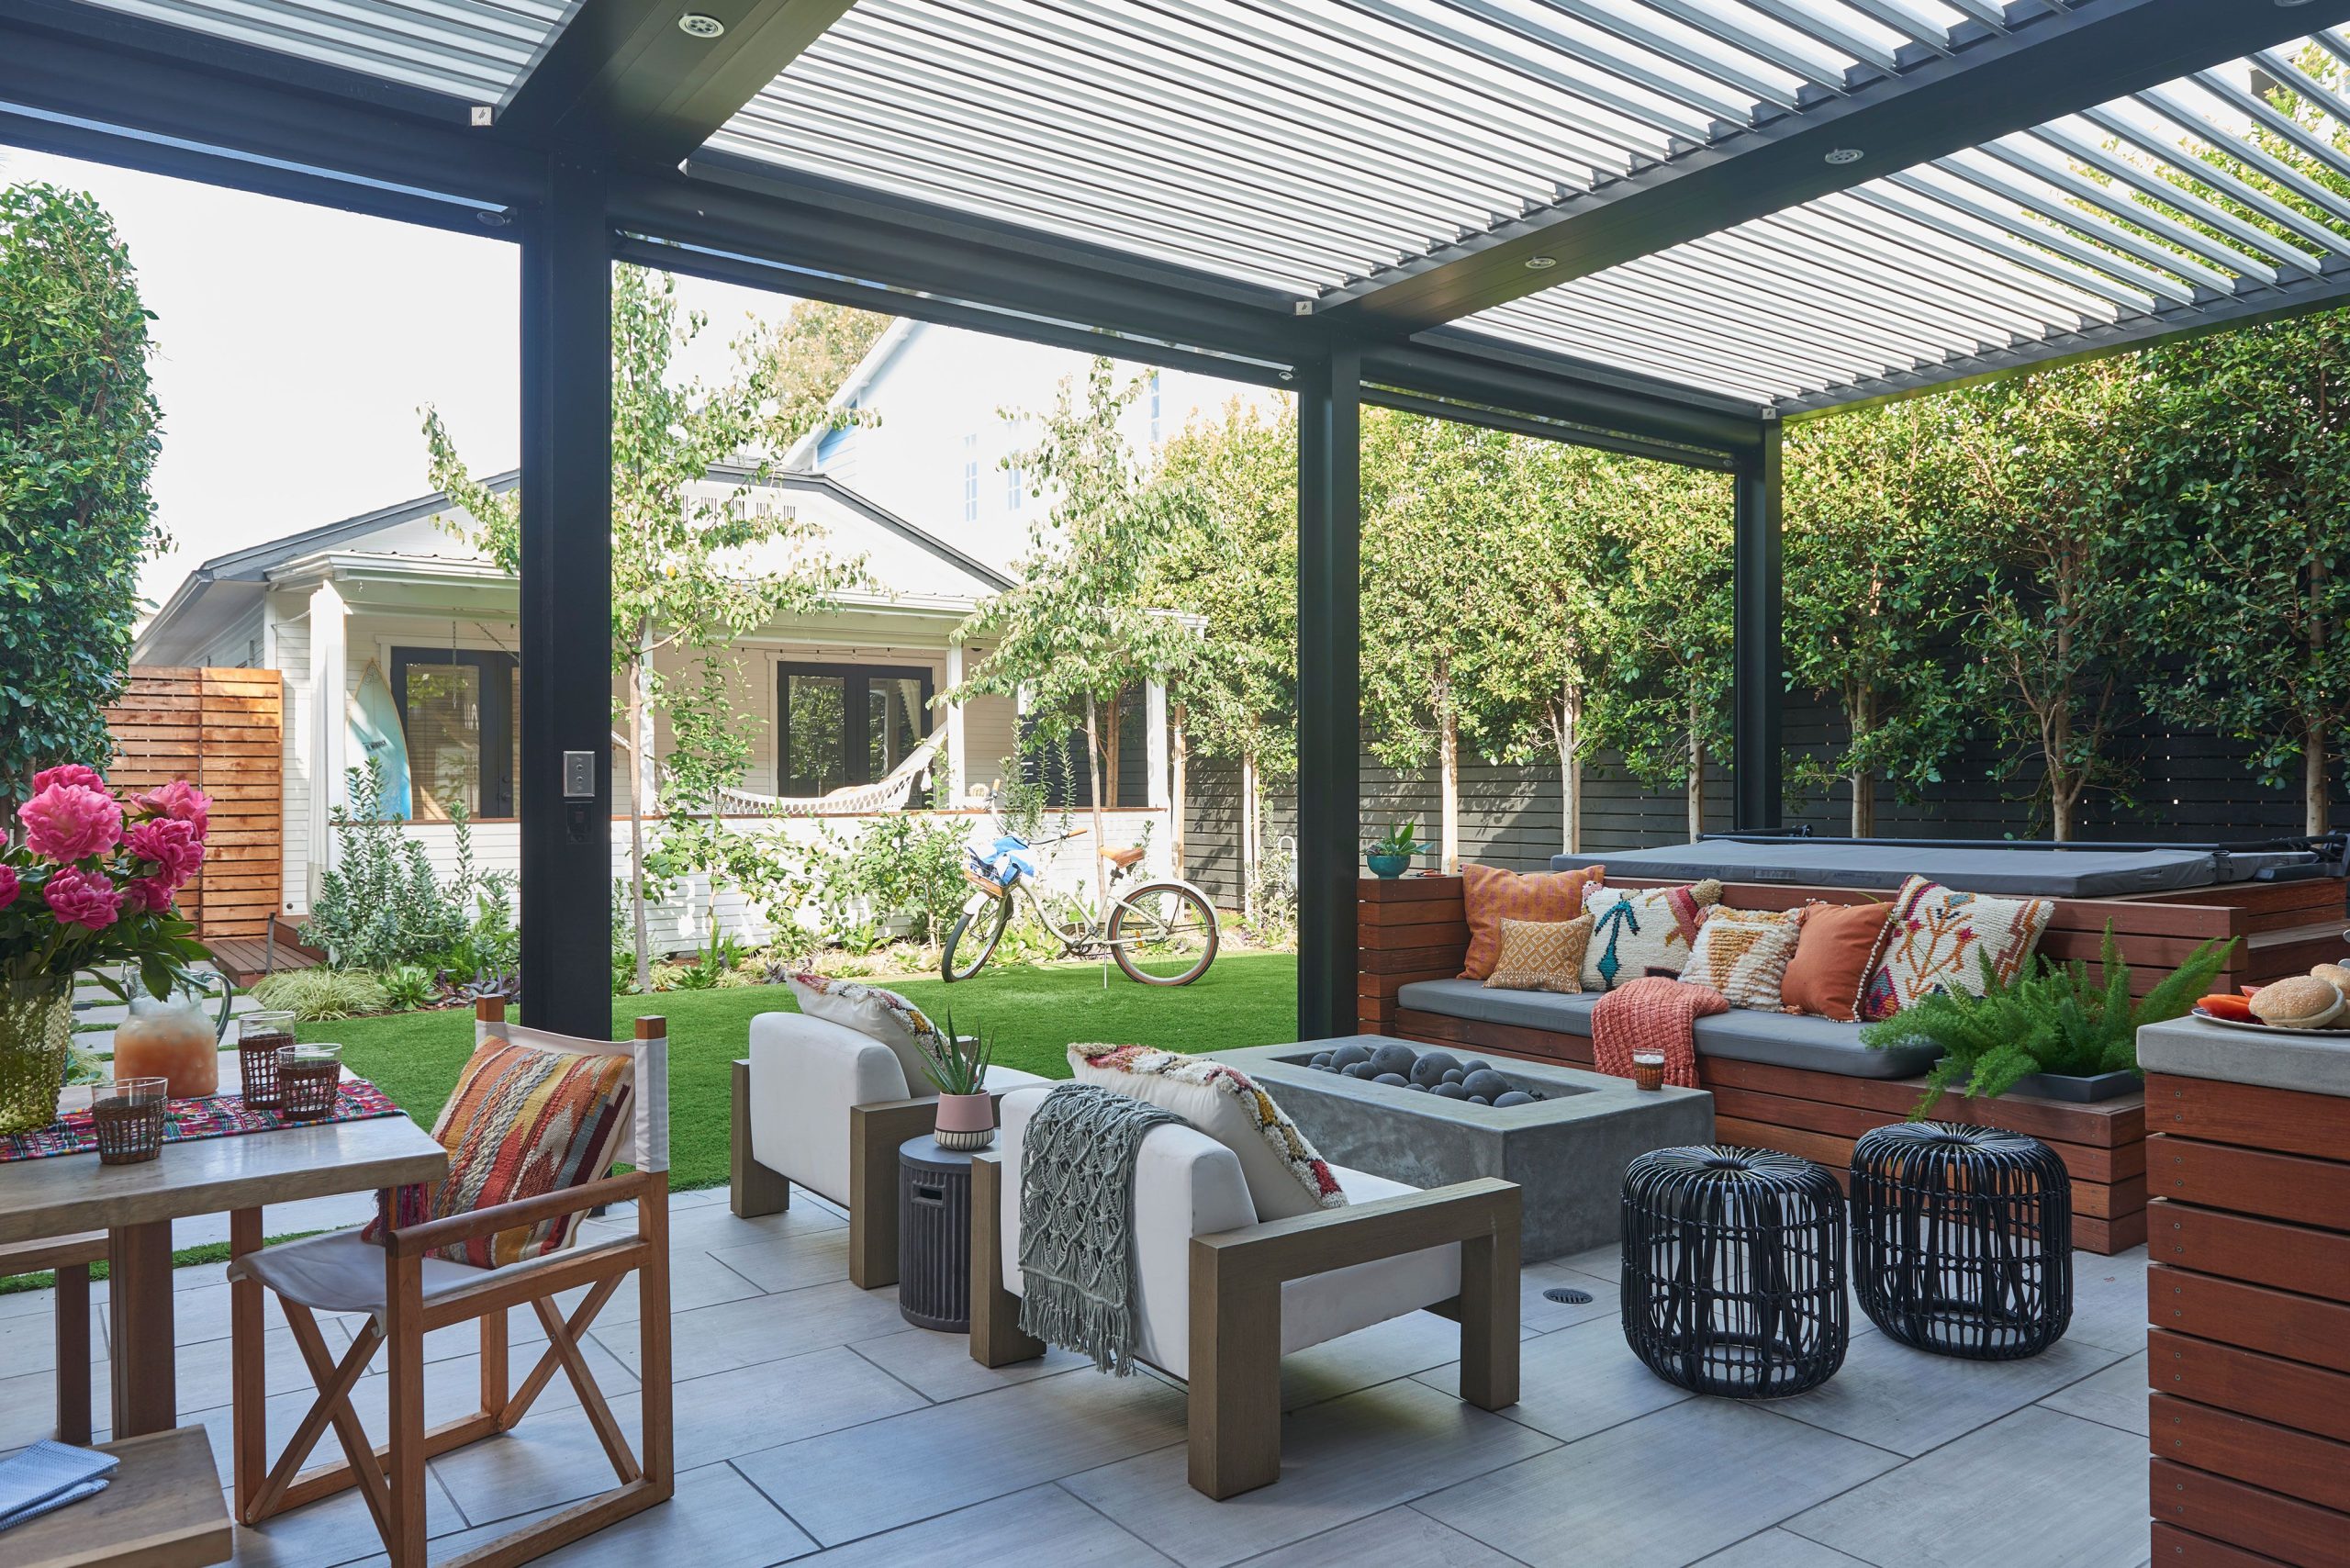
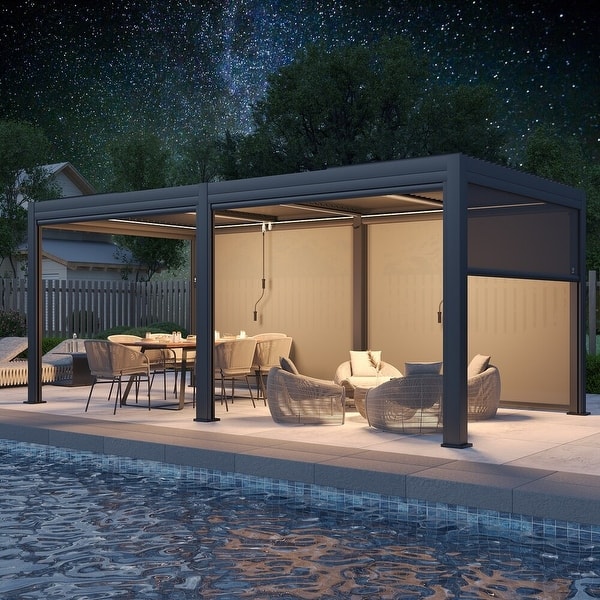
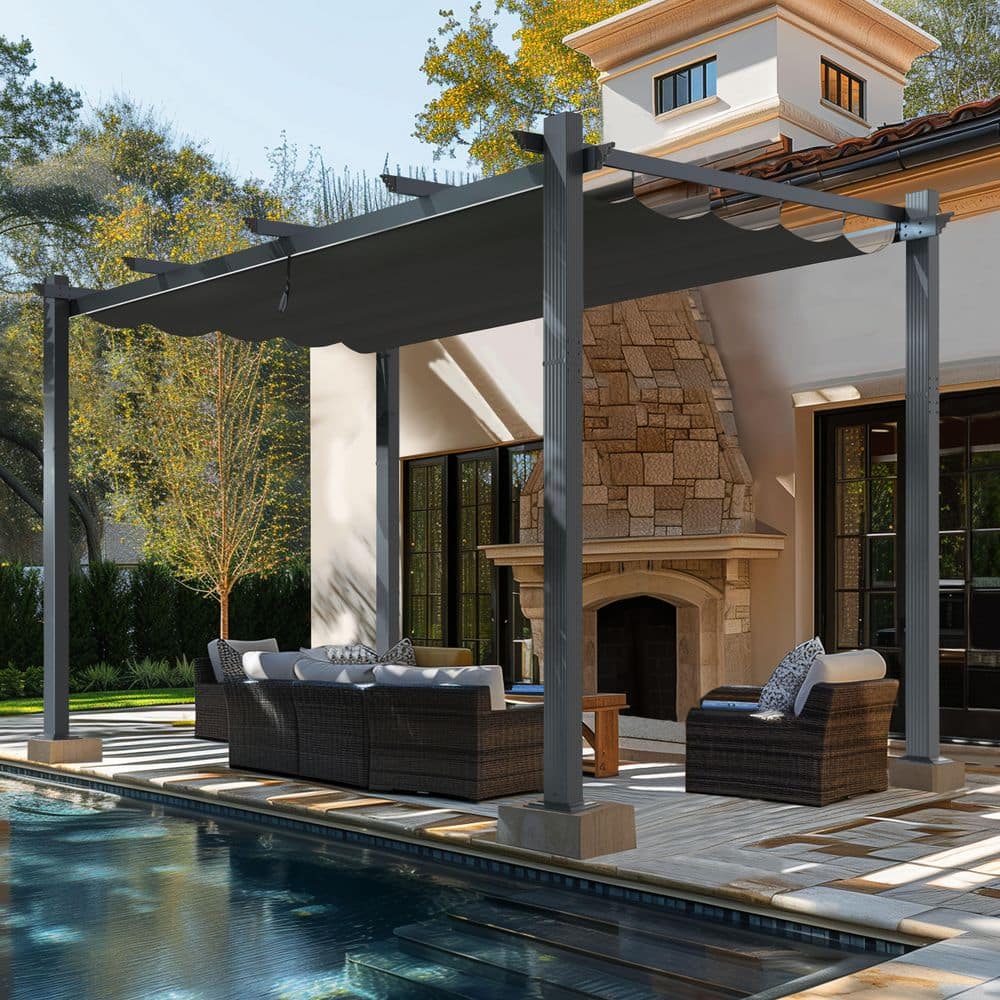
3. Embrace Sleek Lines with a Black Retractable Louvered Pergola
The louvered, retractable pergola is one of the biggest trends in outdoor living right now, and this is a perfect example of why. It speaks to our desire for ultimate flexibility—you get full sun when you want it, and complete shade or rain protection when you need it, all with a clean, minimalist aesthetic. Unlike a fixed roof, it adapts to the weather and the mood. The black finish adds a graphic, modern punch that contrasts beautifully with the warm wood and soft textiles.
|
$1,025.00
|
$766.99
|
$395.09
|
$12.50
|

“This idea works best for patios with a footprint of at least 150-300 square feet.”
A structure this visually strong needs room to breathe. The minimum ceiling height for a louvered pergola should be around 8 feet, but 9-10 feet is ideal to maintain an open, airy feeling, especially when the louvers are closed. It’s a fantastic solution for medium to large rectangular patios where you want to define a specific zone for seating or dining.
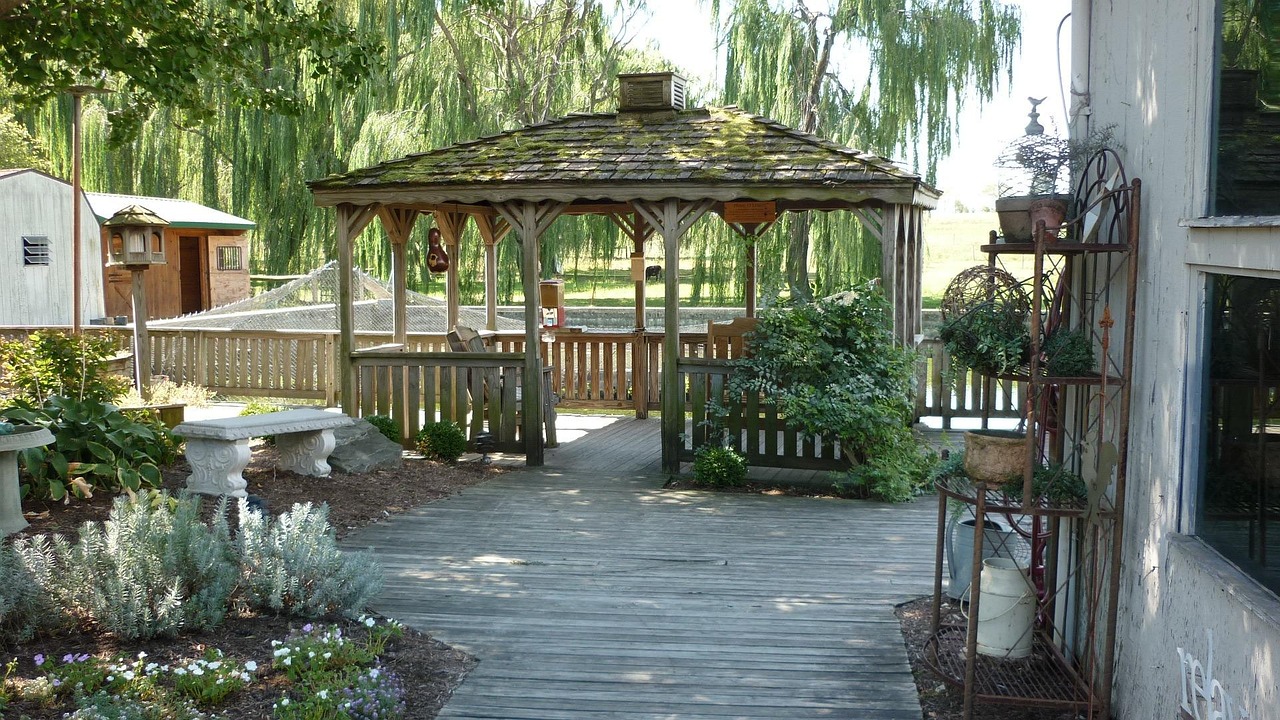
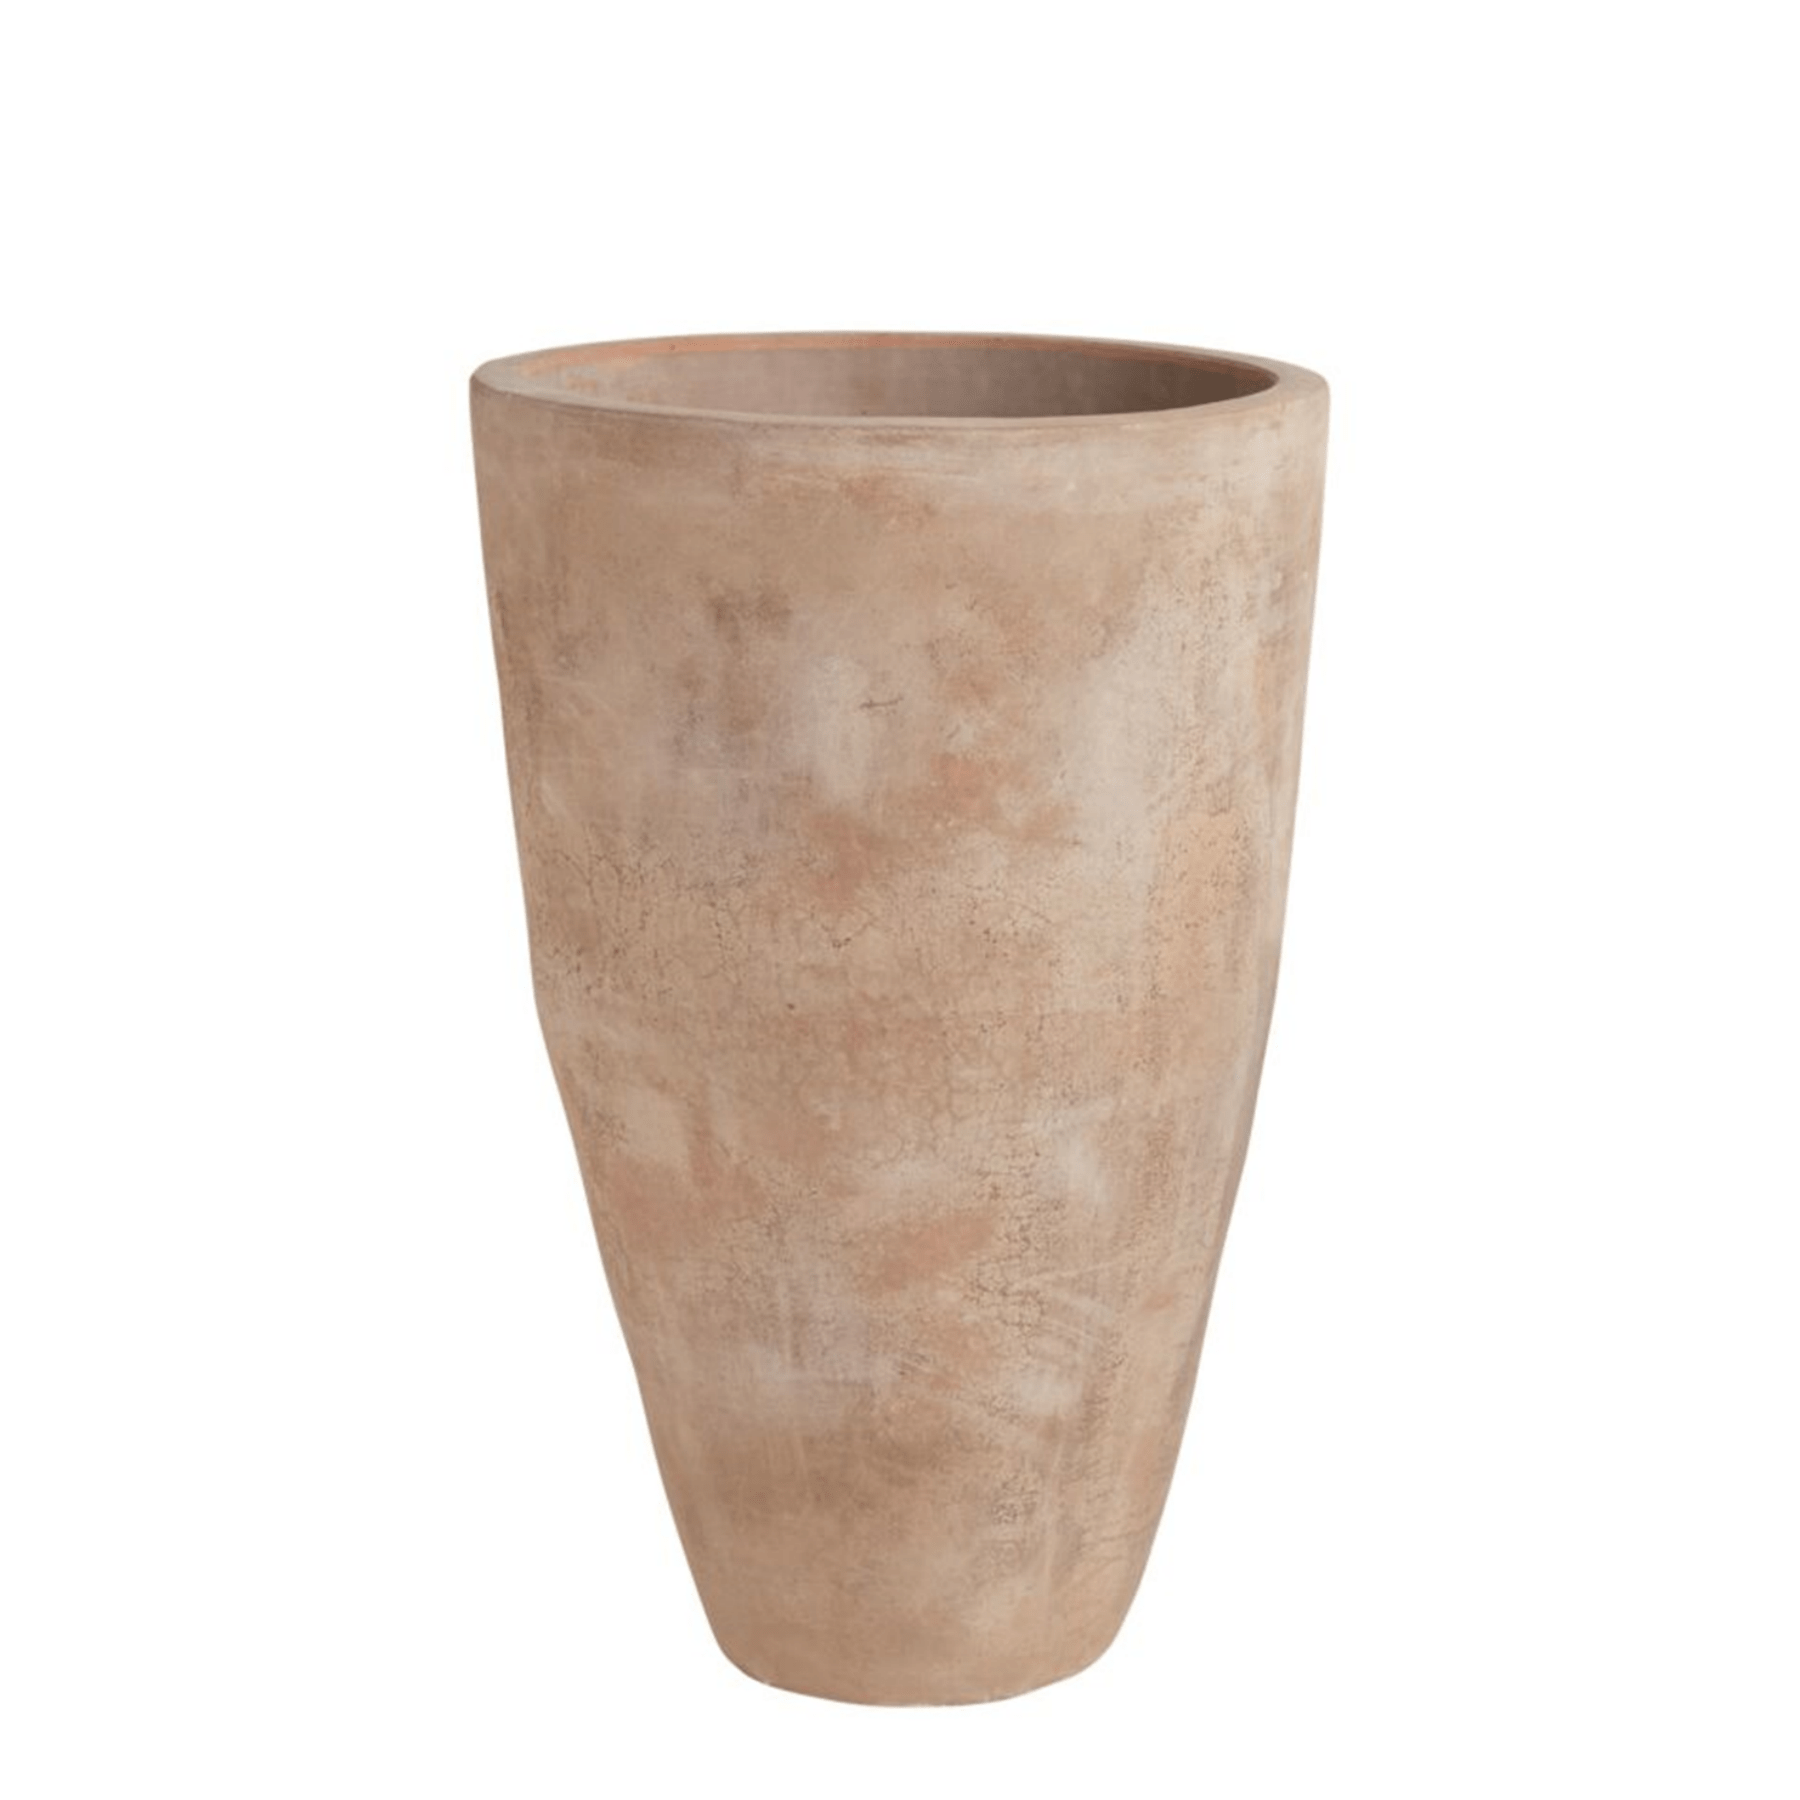
4. Cultivate a Rustic Retreat with a Weathered Wooden Gazebo
The charm of weathered wood and mossy shingles comes with a specific set of maintenance tasks. To keep this looking charmingly rustic—and not just neglected—the wood will need to be cleaned and resealed every 2-3 years, especially in a damp climate. The moss on the roof, while atmospheric, can trap moisture and accelerate decay. A yearly gentle sweep with a stiff brush and an inspection for any loose or damaged shingles is non-negotiable to ensure the structure remains sound.
|
$399.99
|
$126.19
|
$1,680.00
|
$9.97
|

“The visual formula here is a masterclass in texture.”
It’s about 70% natural, weathered materials (grey wood, dark shingles, stone) + 20% lush, untamed greenery + 10% refined details (the smooth stone benches, the simple structure of the metal shelf). If the modern look of Idea #3 isn’t for you, this is its complete opposite, focusing on organic shapes and the beauty of materials that age gracefully.
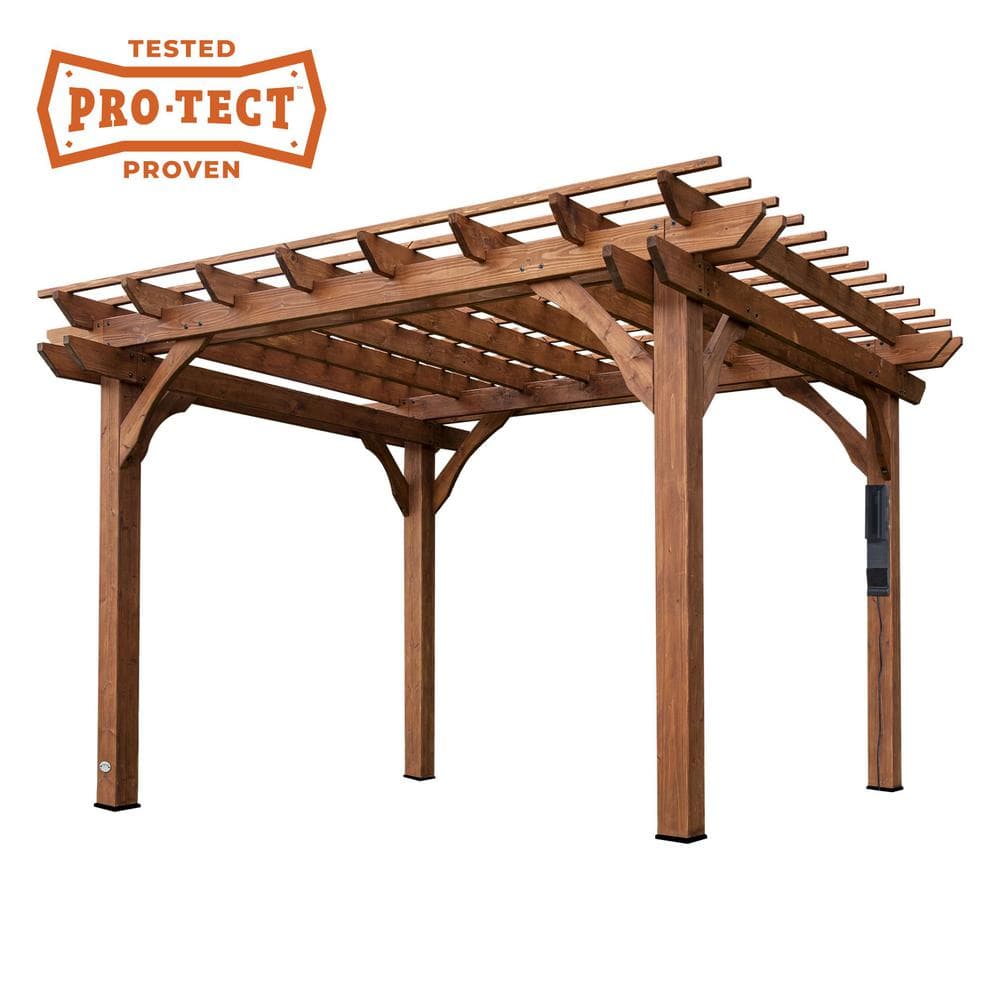
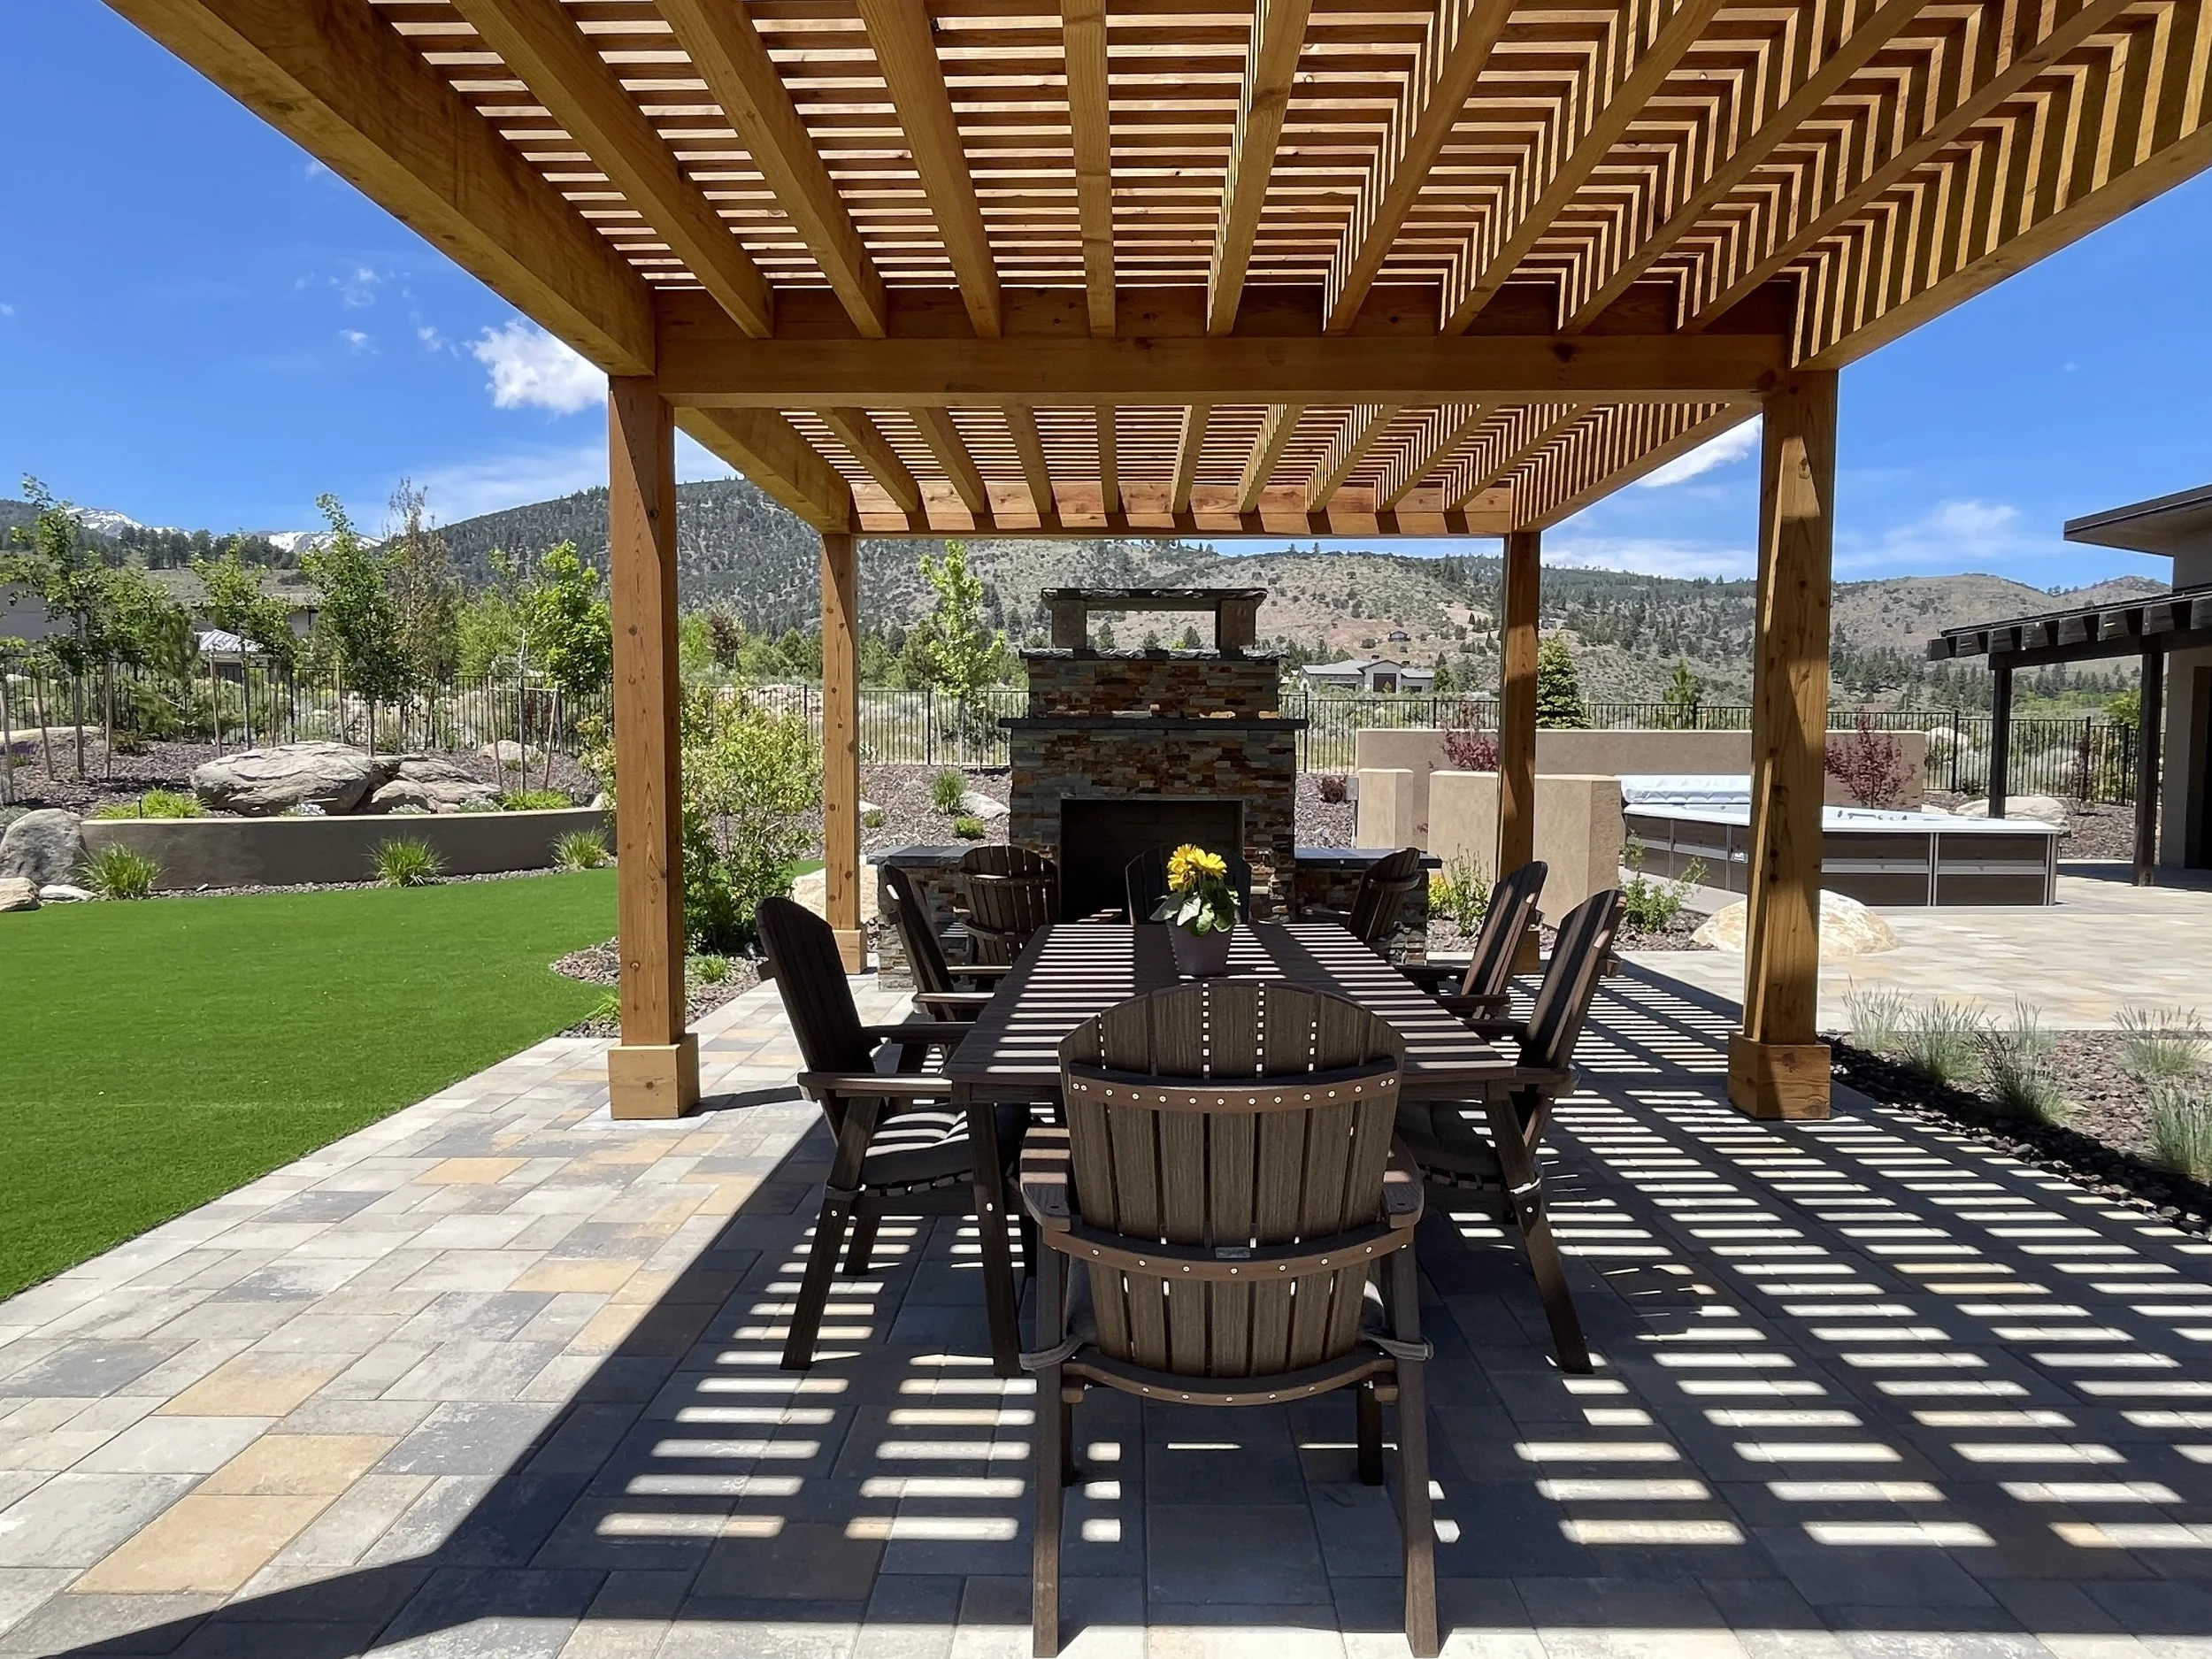
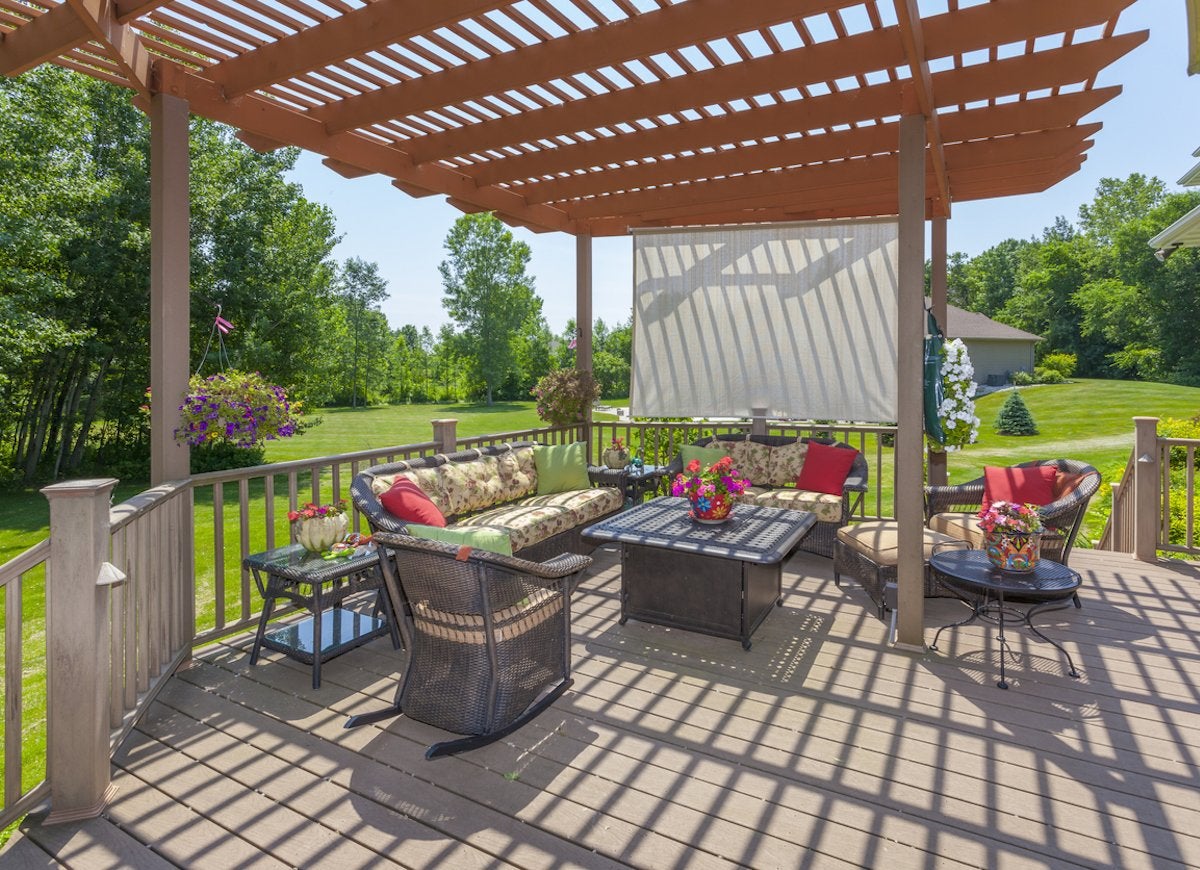
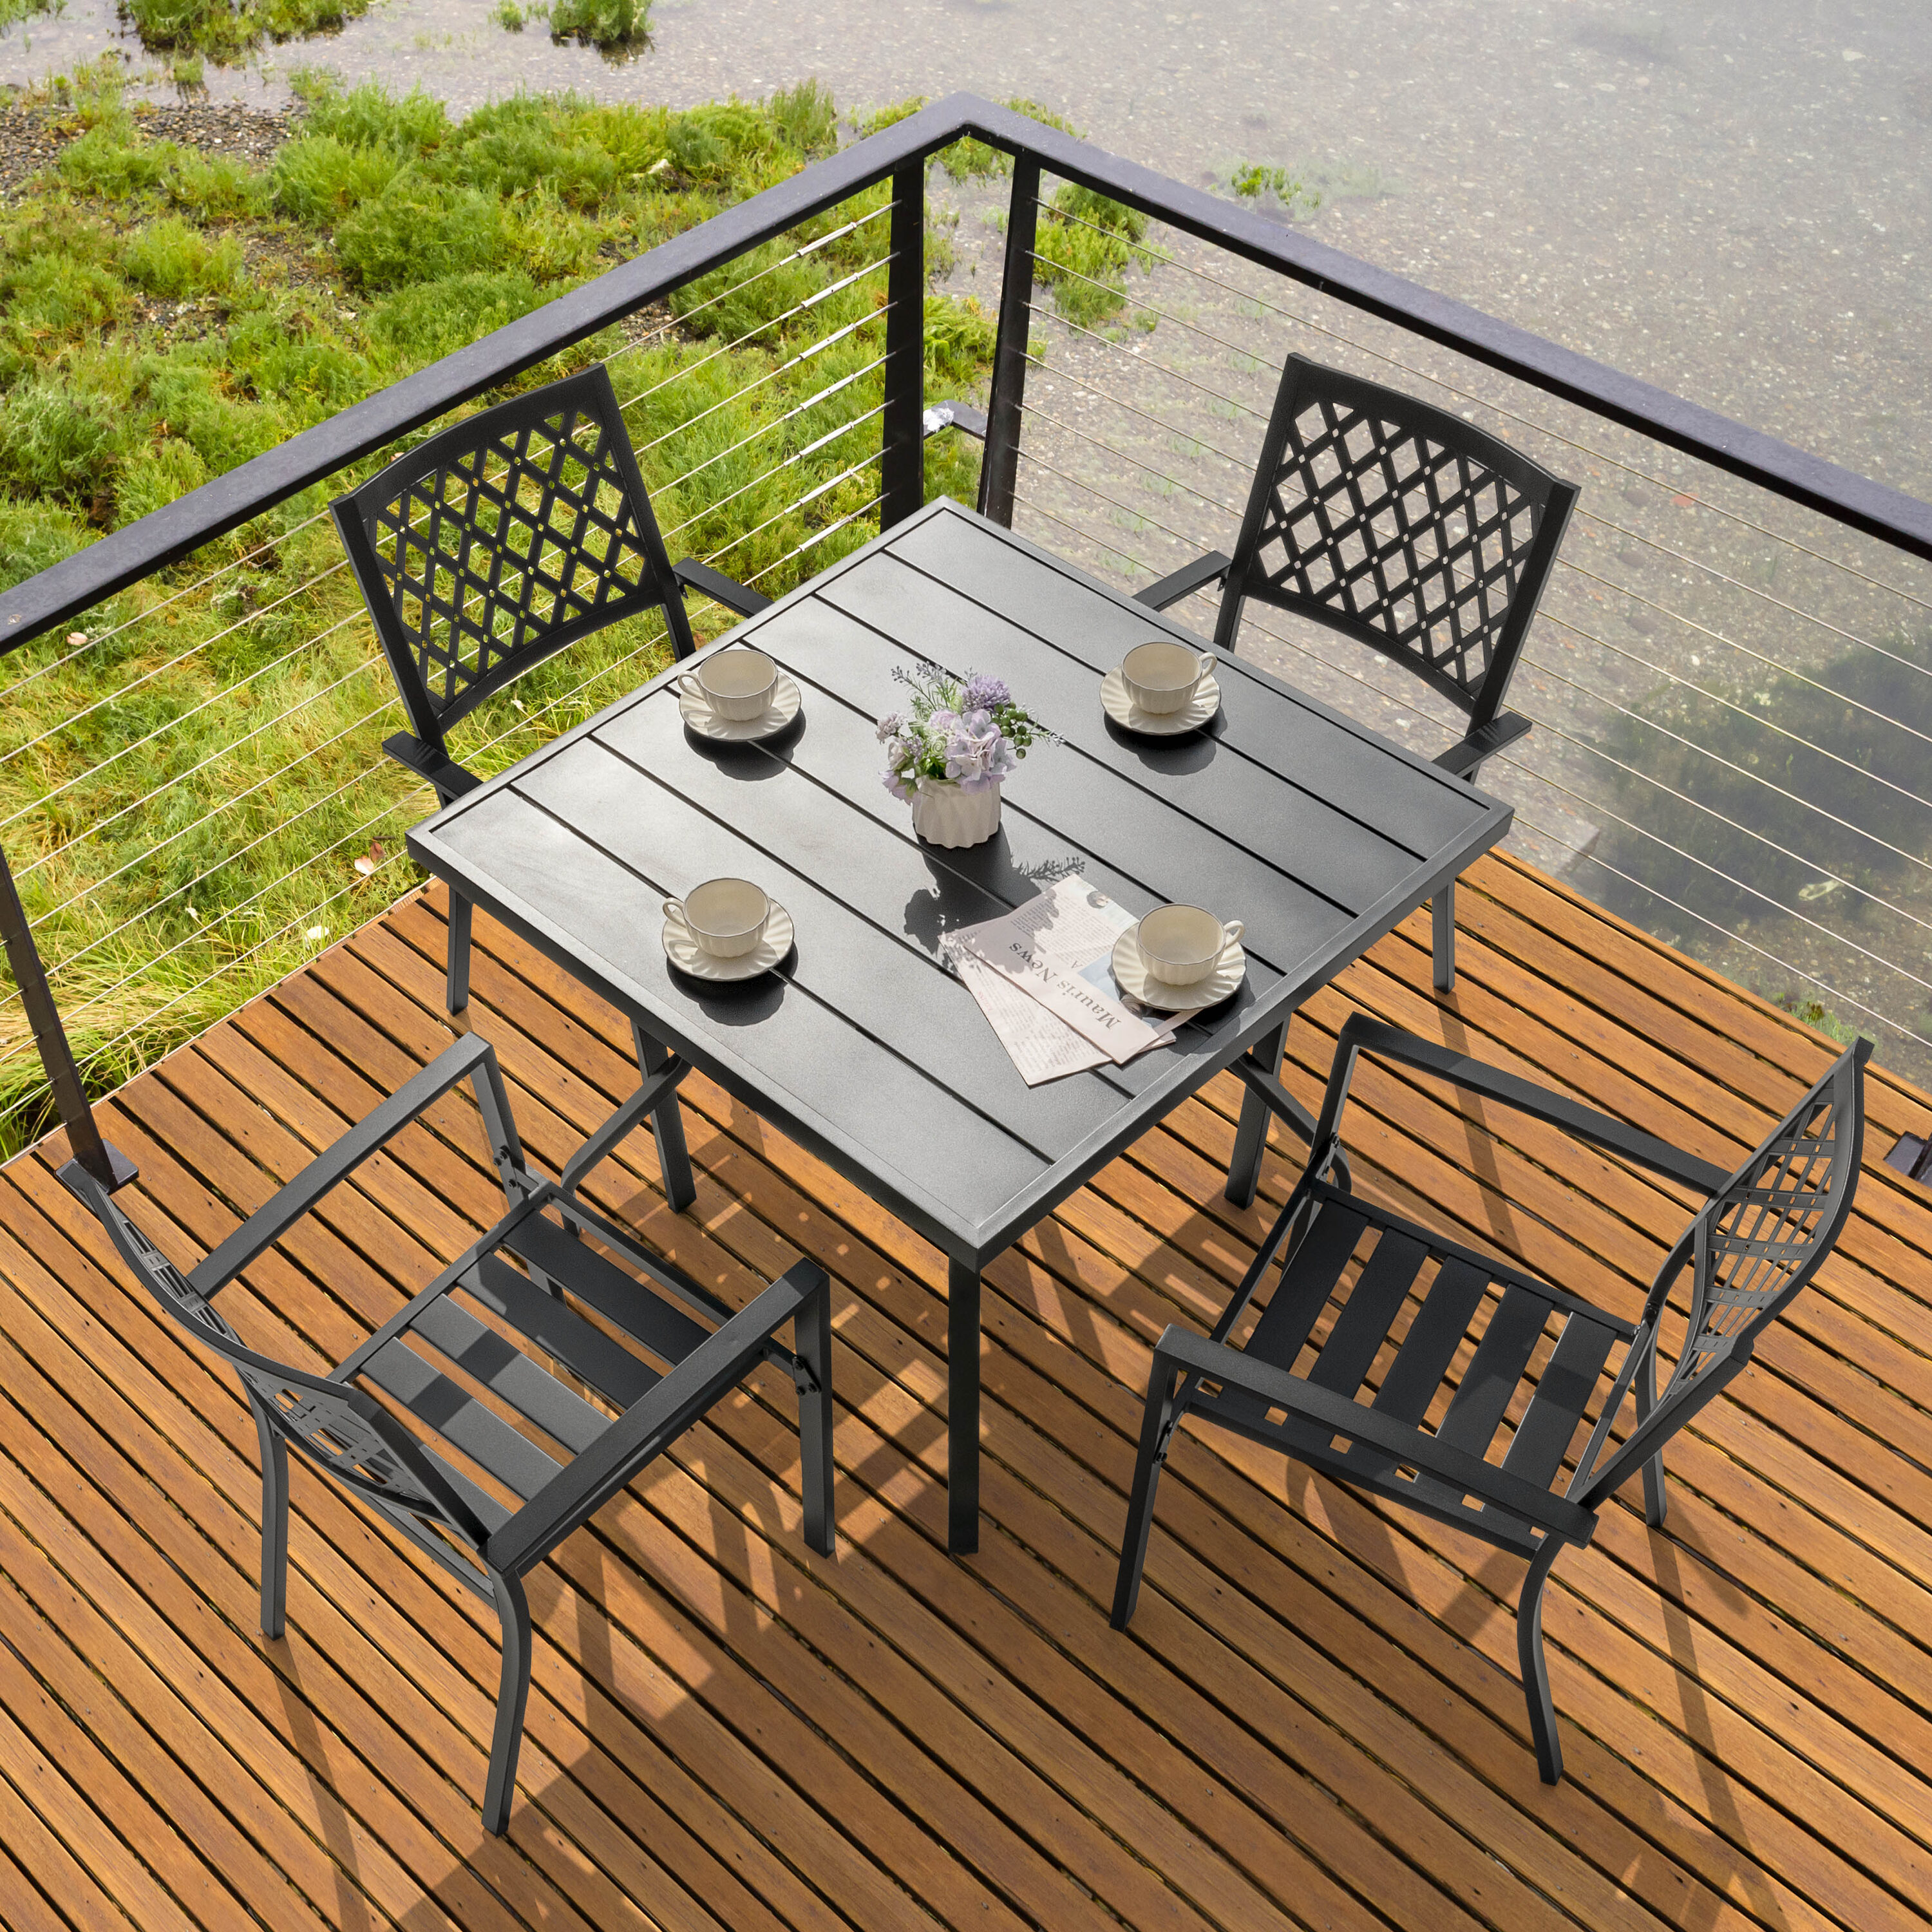
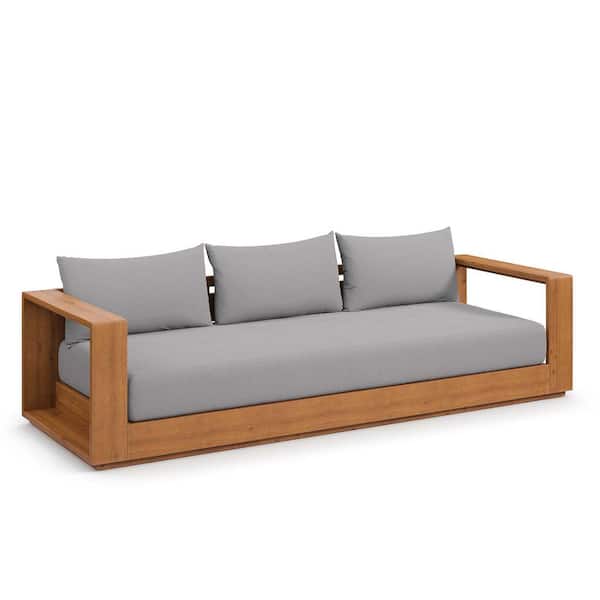
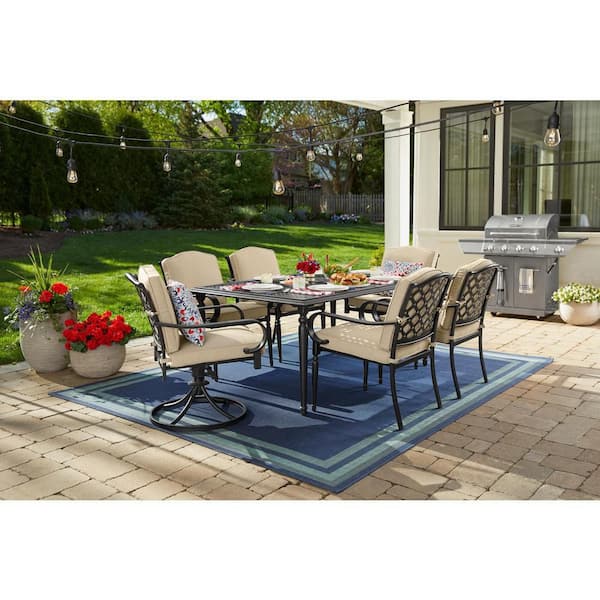
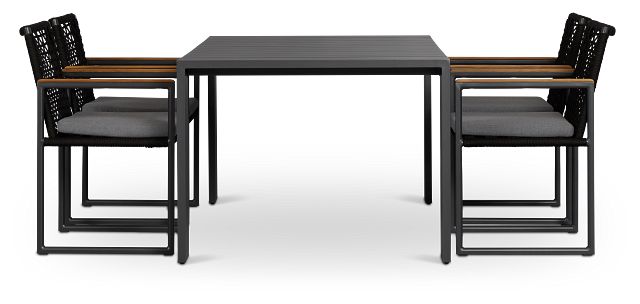
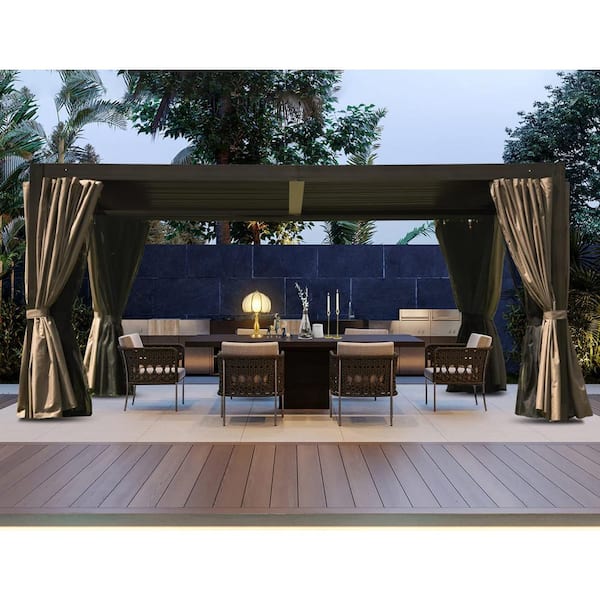
5. Define Your Dining Space with an Expansive Wooden Pergola
When placing a dining set under a large pergola, orient the table to match the direction of the overhead slats. In this design, both the table and the pergola’s main beams run parallel to the house. This creates a pleasing sense of order and visual flow, drawing the eye from the home out towards the fireplace and lawn. If the table were turned 90 degrees, it would feel disruptive and cramped, even in a large space.
|
$1,279.99
|
$704.00
|
$1,699.00
|
$225.00
|
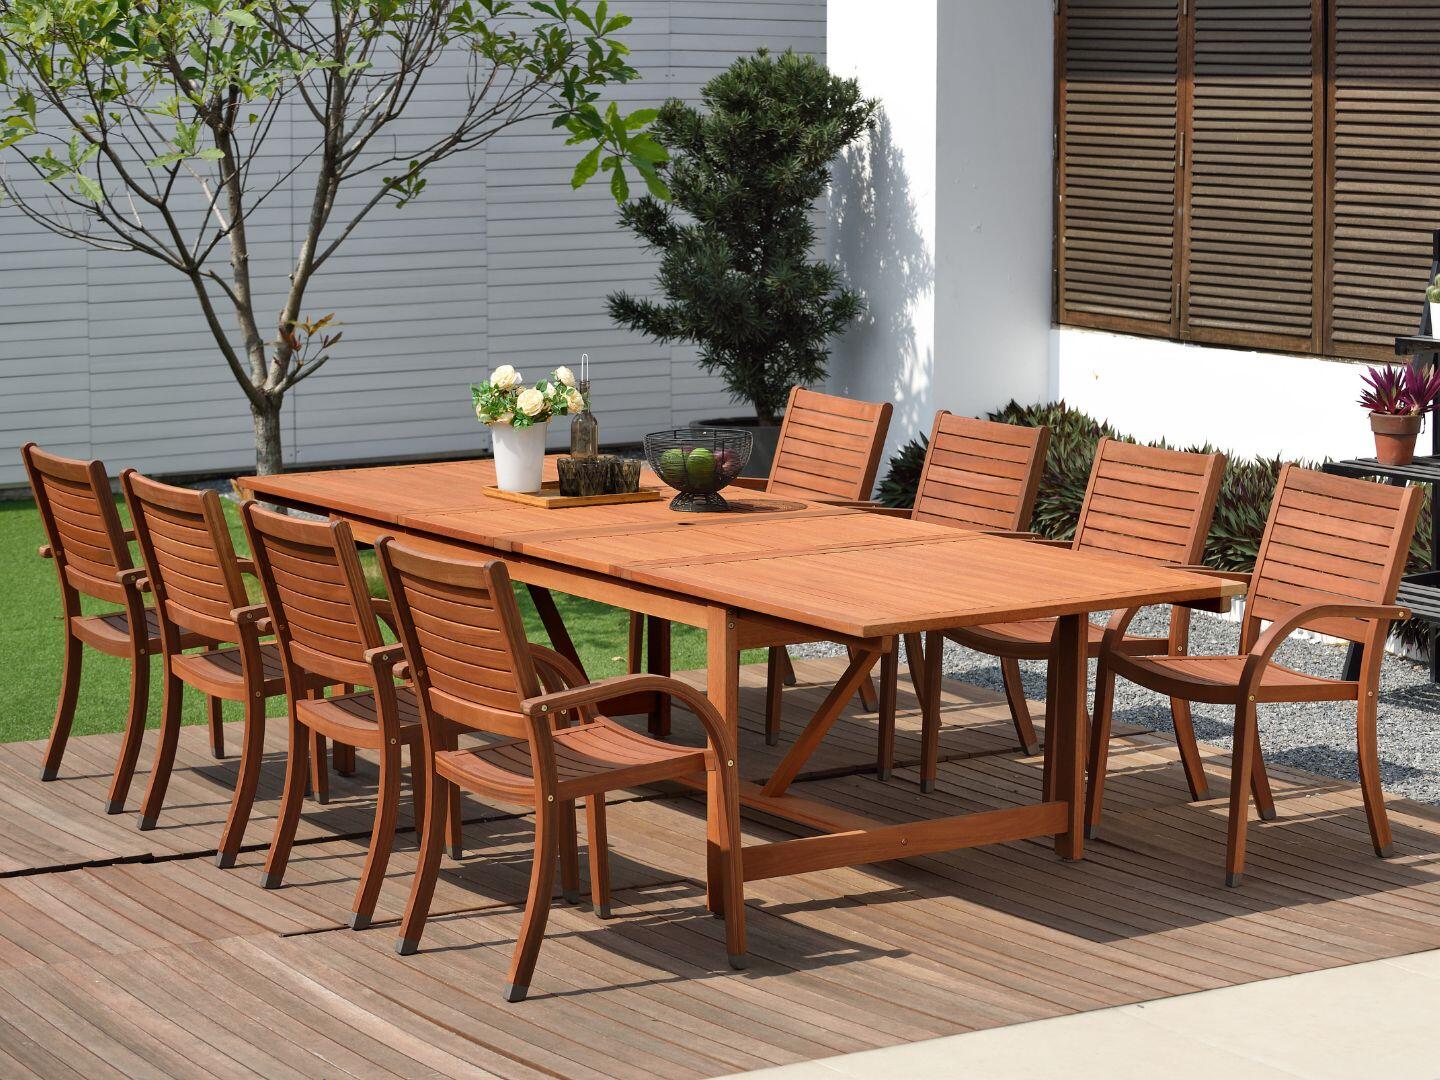

“A pergola with deep, widely spaced slats like this one is beautiful, but it provides partial, moving shade—not full sun protection.”
The stripes of sun and shadow will move across your patio throughout the day. This is lovely for creating ambiance, but be warned: if you need consistent, all-day shade for a dining area, this isn’t it. Your guests (and your lunch) will be in and out of direct sun. For full protection, you’d need to add a retractable canopy or grow vines overhead.
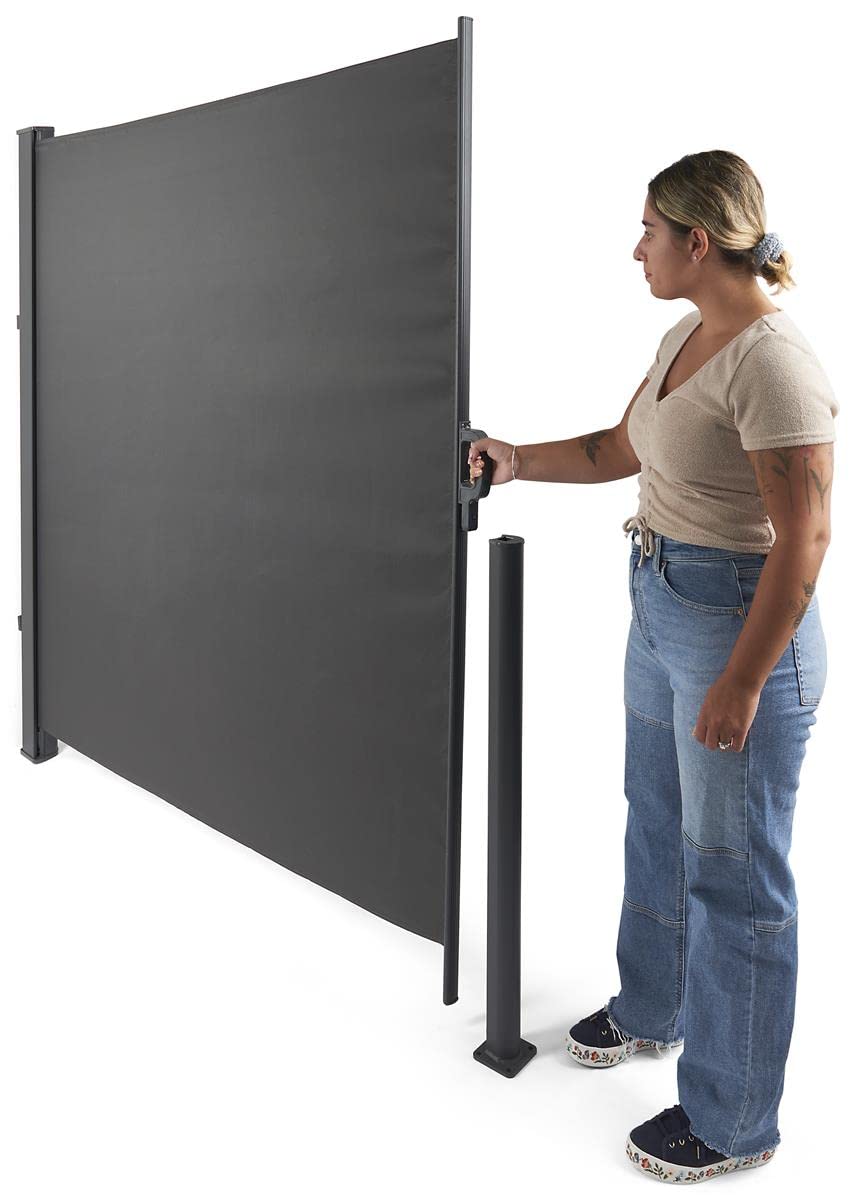
6. Add Flexible Shade with a Pergola and Retractable Side Screen
Adding a retractable side screen to an existing pergola is a fantastic weekend upgrade. It’s perfect for blocking low afternoon sun or adding a bit of privacy.
|
$9.99
|
$79.31
|
$177.00
|


“Time: 2-3 hours
Cost: $150 – $400
Measure the opening of your pergola bay, from ”
- Time: 2-3 hours
- Cost: $150 – $400
- Measure the opening of your pergola bay, from the inside of one post to the other. Purchase a retractable screen kit that matches this width.
- Mark the placement for the housing unit on the overhead beam and the anchor points for the side channels on the vertical posts. Use a level to ensure they are perfectly aligned.
- Mount the main cassette/housing to the underside of the pergola beam using the included hardware.
- Attach the vertical guide channels to the support posts.
- Slide the screen down to test the mechanism and ensure it moves smoothly within the channels. Adjust if needed.
You don’t need a custom-built pergola to get this effect. A standard metal or vinyl gazebo from a big-box store can be easily upgraded. Pair it with a more affordable wicker-look resin sectional from Target or Walmart. Use thrifted cushions and re-cover them yourself with a durable, colorful outdoor fabric. You can achieve this welcoming, shaded vibe for under $1,000, which is likely less than the cost of the wooden pergola structure alone in this image.
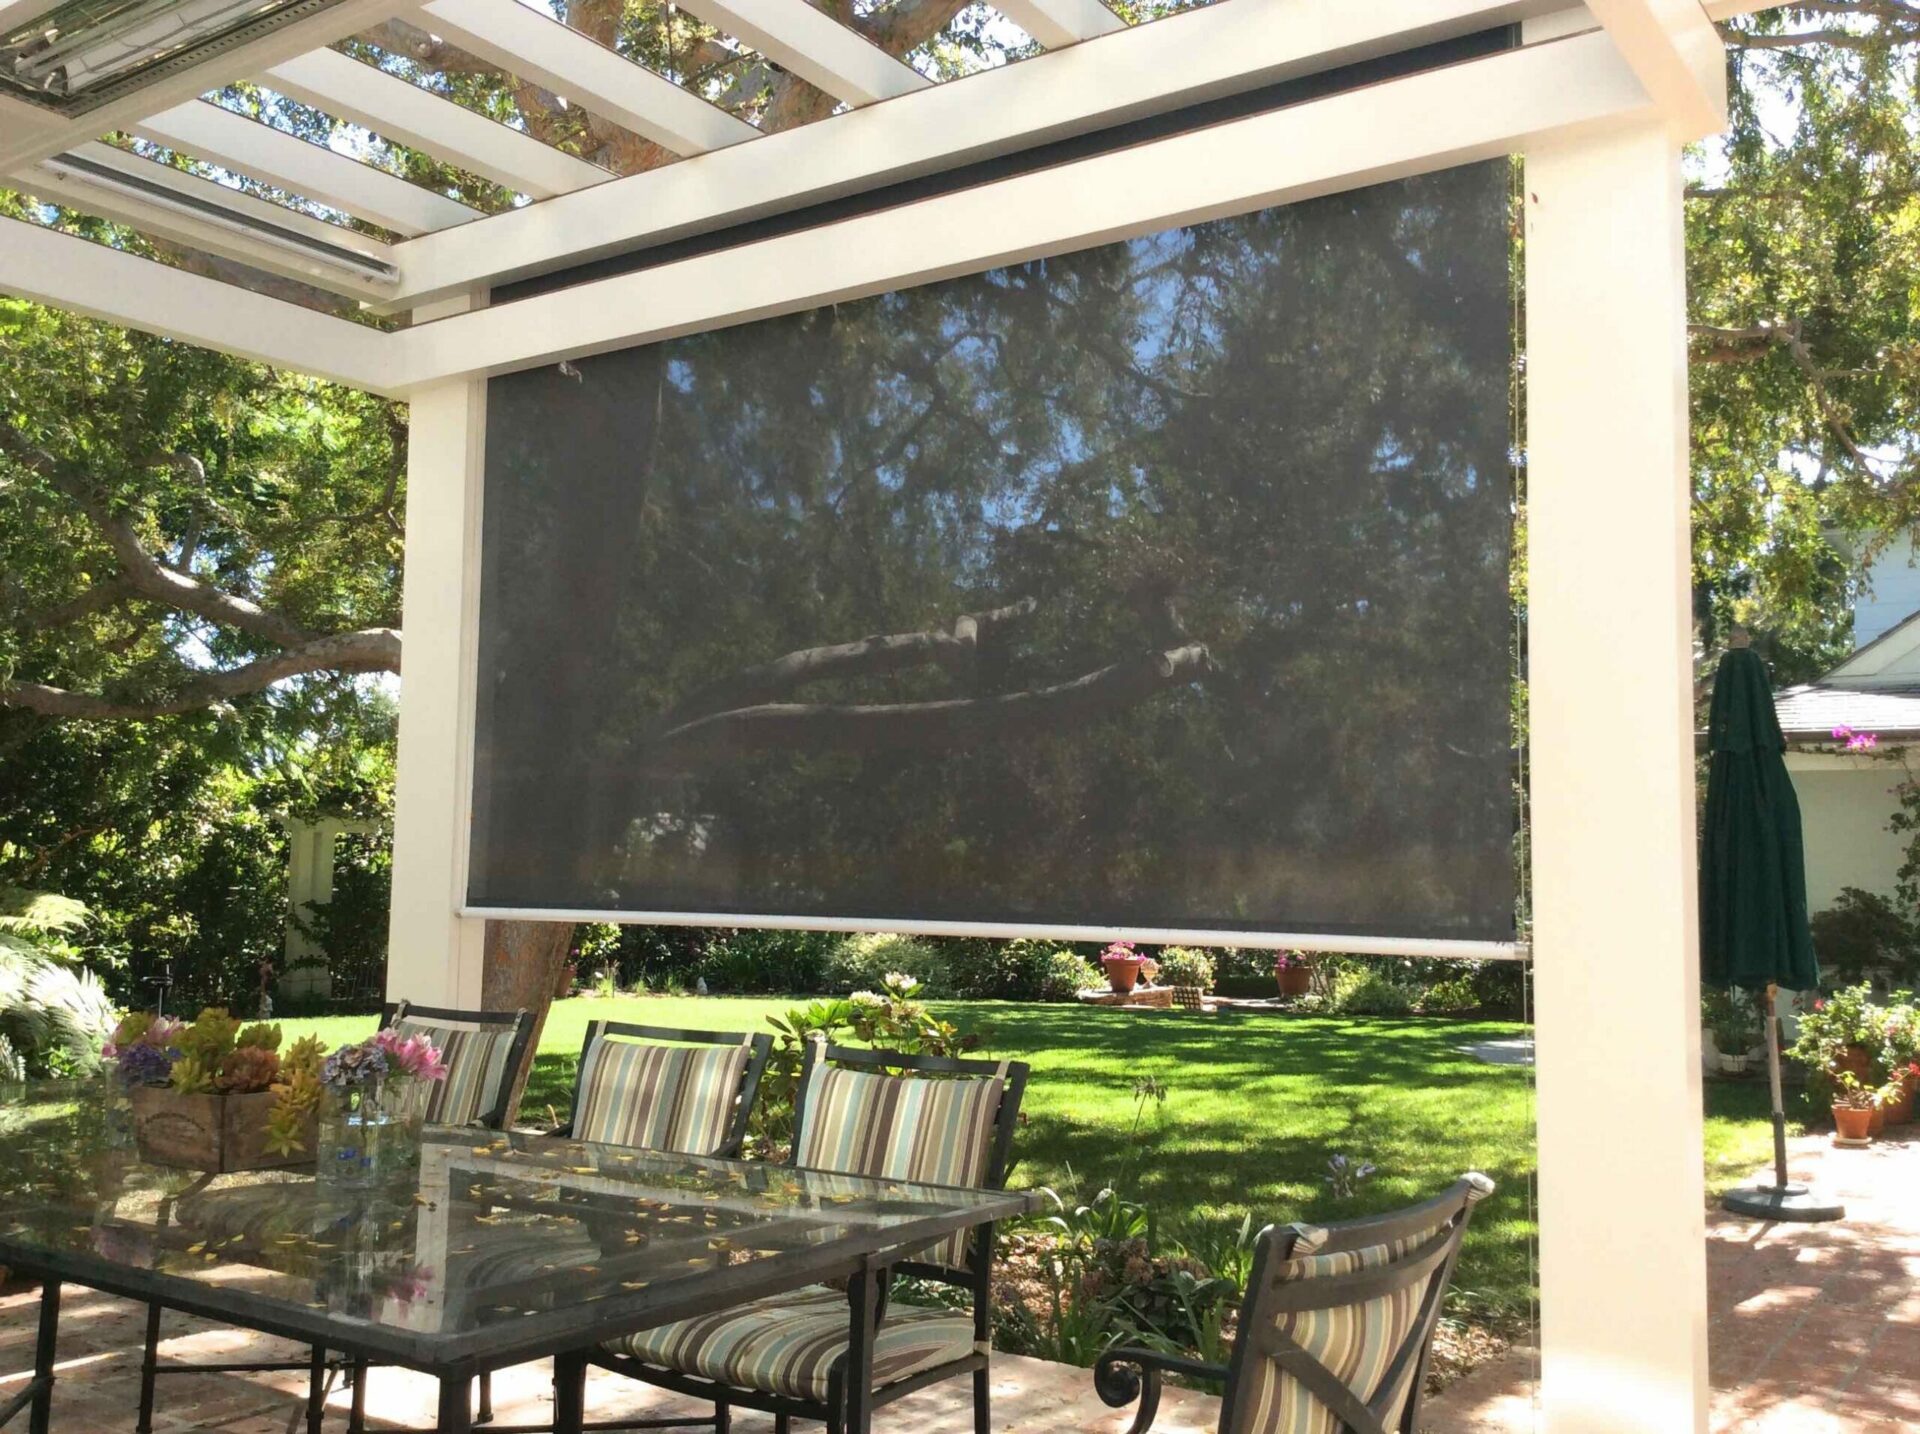
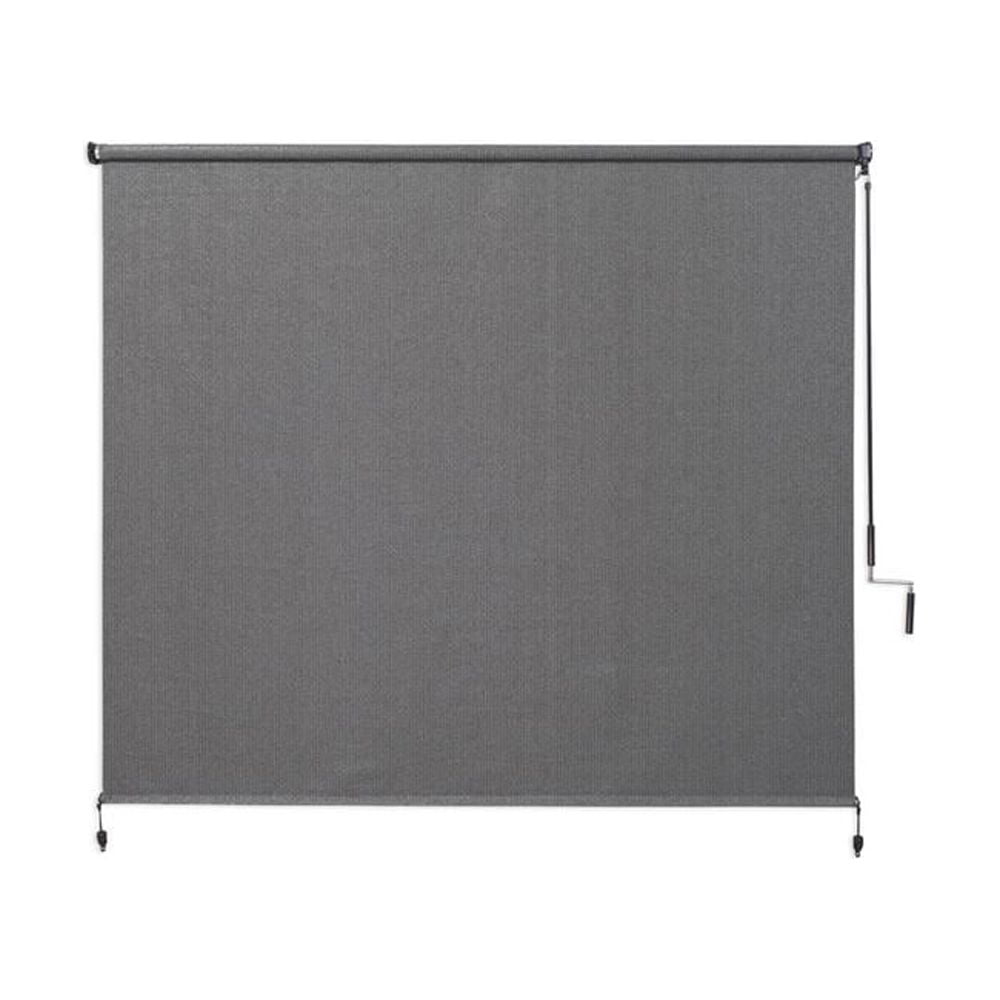
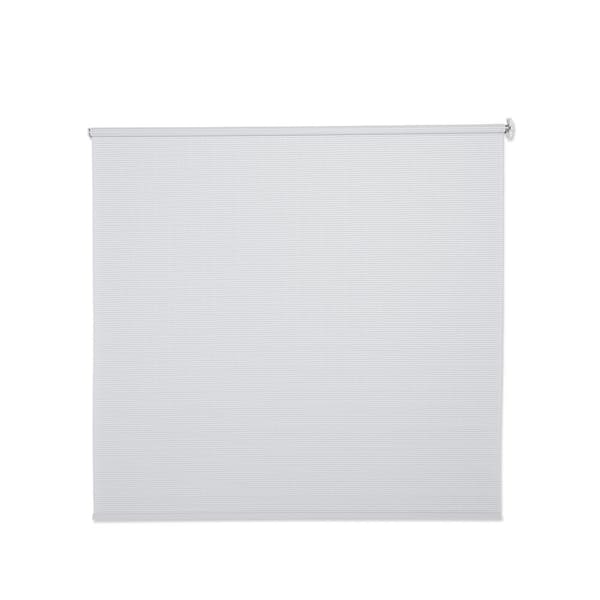
7. Install a Simple Black Mesh Roller Shade on a White Pergola
The success of this shade solution lies in its high-contrast simplicity. The crisp white of the pergola acts as a clean, bright frame, making the black mesh of the roller shade pop. This creates a sharp, graphic look that feels intentional and modern, rather than like a clunky afterthought. The dark color of the mesh also has a practical benefit: it cuts down on glare and provides a clearer view of the garden beyond compared to a lighter-colored screen.
|
$95.17
|
$1,179.99
|
$108.14
|
$179.28
|

“making this setup so effective is the roller shade itself.”
Without it, this is just a standard pergola offering minimal protection from angled sun or prying eyes. The shade is what transforms the structure from purely decorative to truly functional, adding a layer of privacy and targeted sun-blocking that makes the dining area far more comfortable and usable throughout the day. It’s a relatively small addition that dramatically increases the utility of the space.
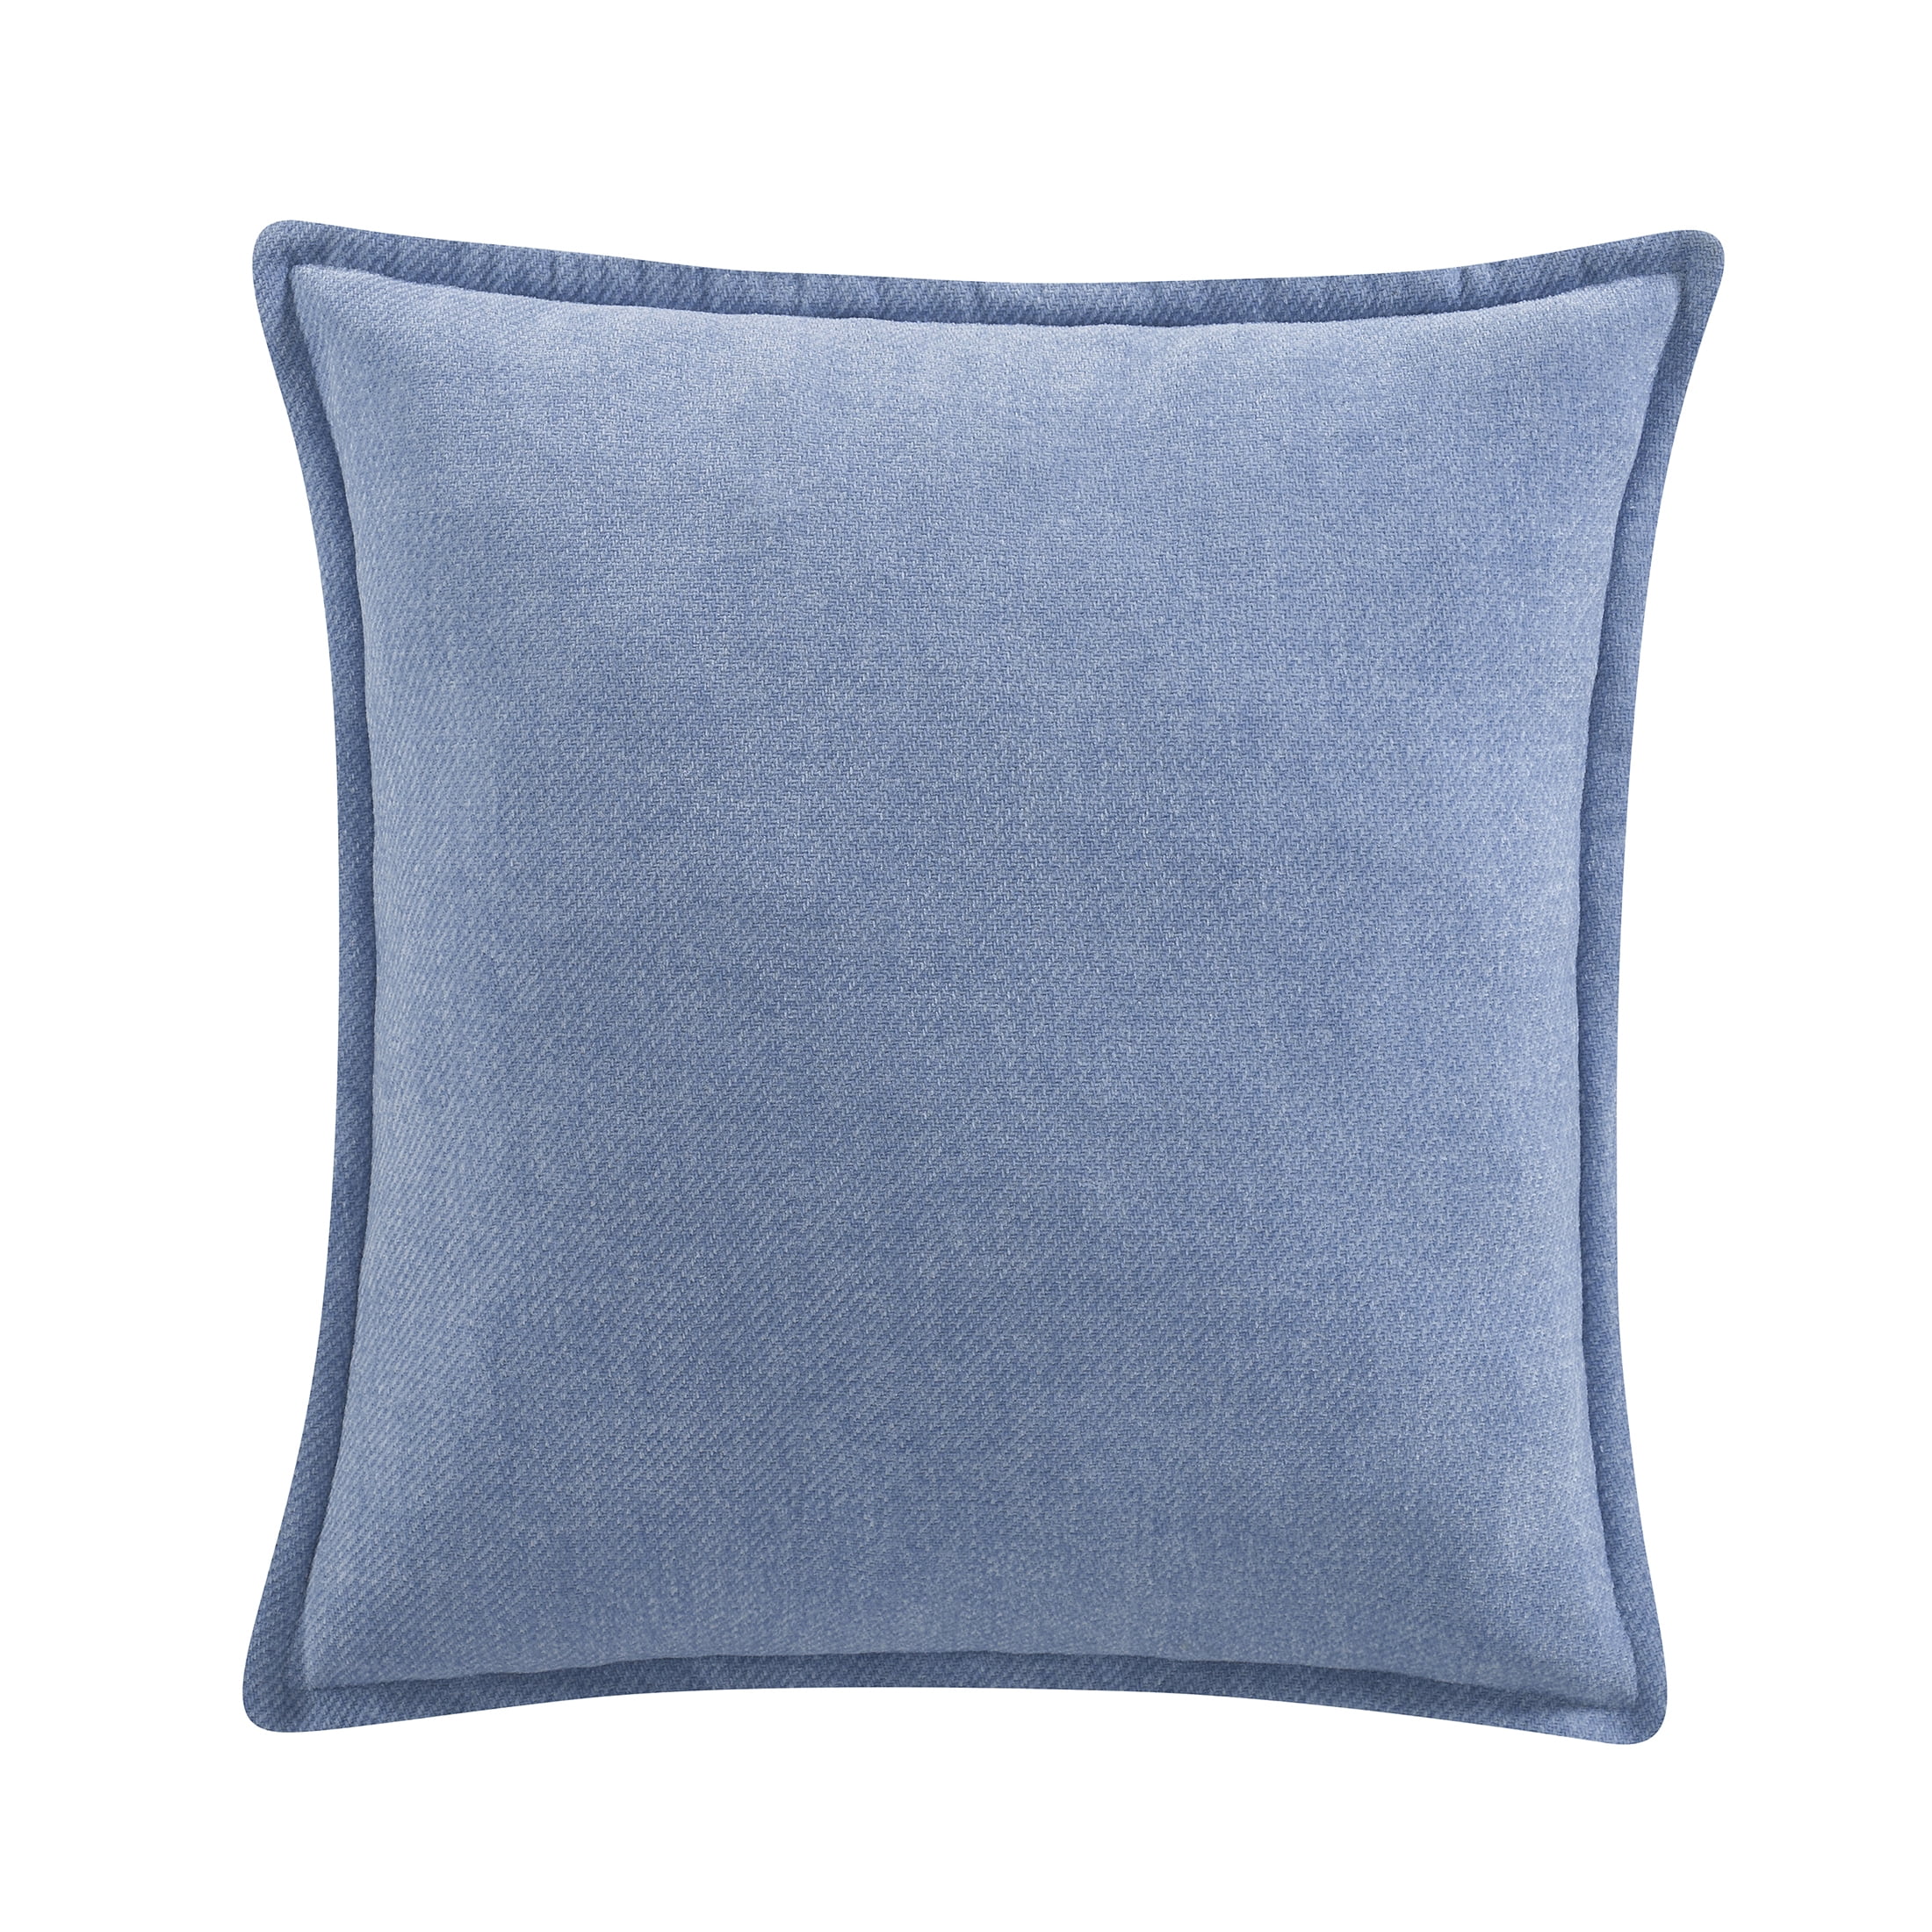
8. Get High-Tech Shade with a Motorized Dark Blue Outdoor Screen
A motorized shade is an amazing convenience, but be realistic about the color. A dark blue mesh like this is stunning, but it will cast a distinct blue-ish light onto your patio. This will alter the color of your furniture, your flooring, and even your food. If you are very particular about maintaining a warm, neutral color palette in your outdoor space, you might be better off with a black, charcoal, or bronze mesh, which tend to have a less noticeable color-casting effect.
|
$5.97
|
$219.99
|
$569.00
|
$179.99
|

“Large-format motorized screens are ideal for wide patio openings, typically from 8 feet up to 20 feet or more.”
The key is that they require a sturdy, permanent overhead structure to mount the housing—like the covered patio ceiling shown here. This is not a solution for a flimsy gazebo or a simple shade sail setup. It’s best for homes with integrated covered porches or robust, custom-built pavilions where the hardware can be securely and discreetly installed.
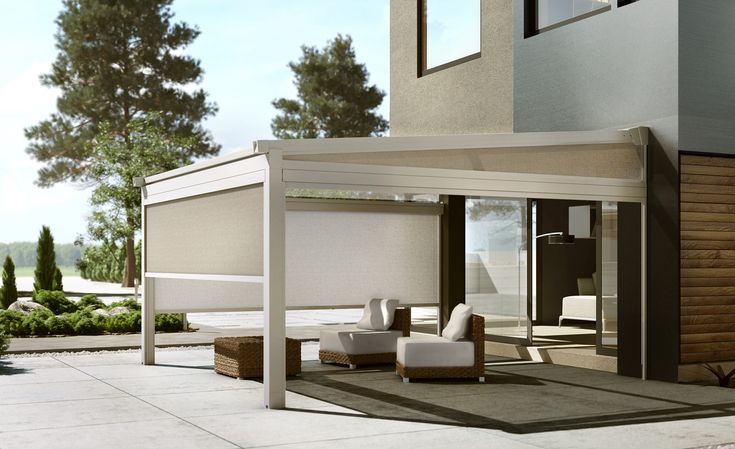
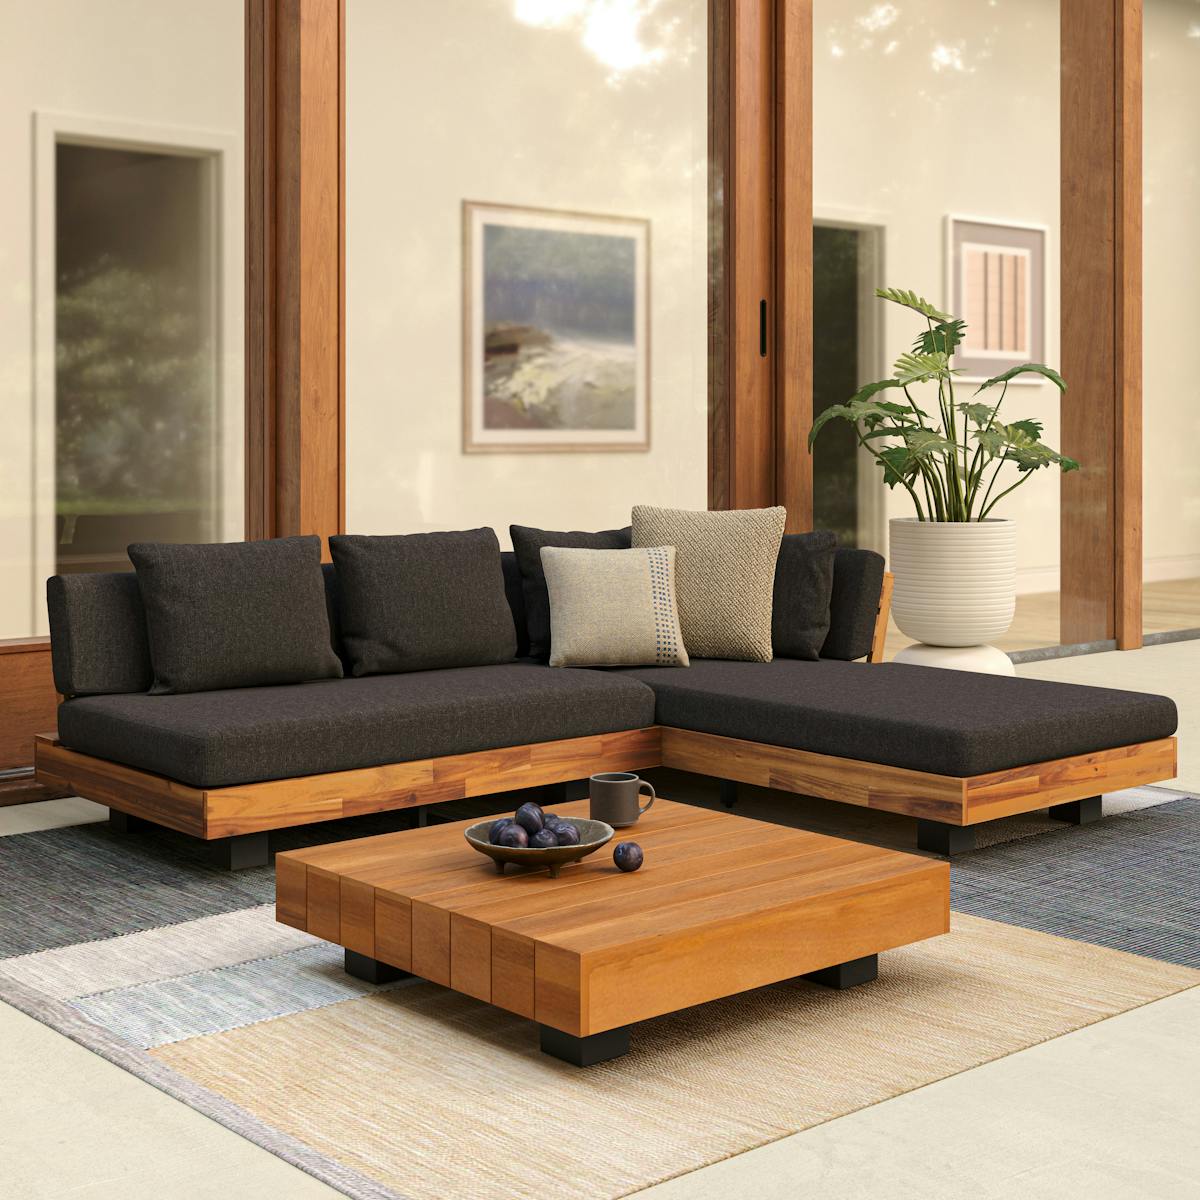
9. Achieve Total Control with Retractable Ceiling and Side Shades
This look is a study in soft minimalism. The formula is roughly 80% monochrome neutrals (light grey pergola, beige shades, white cushions) + 20% natural texture (woven chairs, coffee table, and rug). Keeping the large structural elements and fabrics in a tight, muted palette allows the rich textures to stand out without creating visual clutter. The result is incredibly serene and sophisticated. You could swap the beige for a soft white or tan and still maintain the same calm vibe.
|
$480.00
|
$89.99
|
$559.00
|

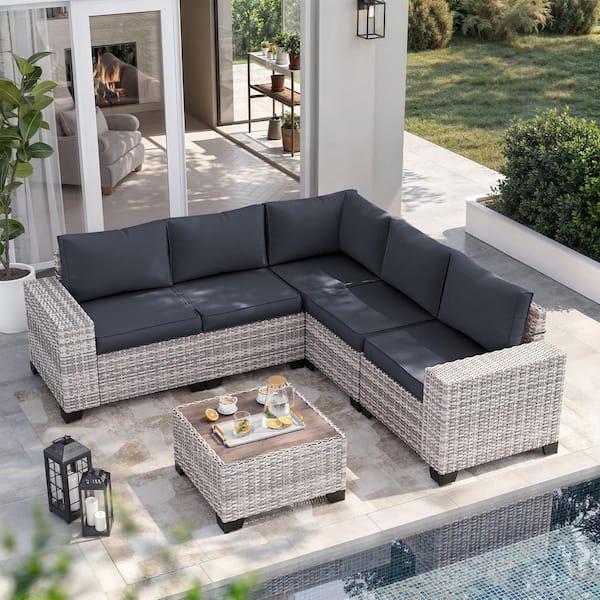
“When installing a full system of retractable shades like this, always opt for the same fabric color and material for both the overhead and side panels.”
Even a slight variation in the beige or grey will be glaringly obvious. This takes the concept from Idea #6 to the next level, creating a unified, tent-like enclosure. Ordering them all from the same manufacturer at the same time is the only way to guarantee a perfect match.
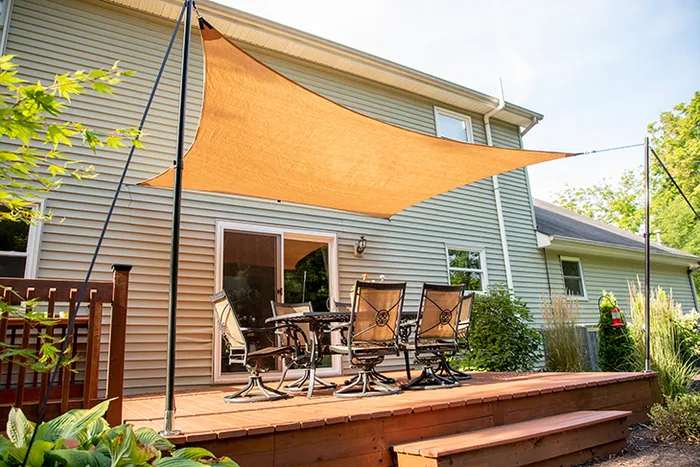
10. Make a Statement with a Bold Orange Triangular Shade Sail
Shade sails are the undisputed champion of budget-friendly shade. You can buy a quality triangular sail like this for $50-$150, depending on size. The main cost is in the anchor points. If you have existing structures (like the house wall and a sturdy fence), you might only need one or two new posts, which you can set in concrete yourself for about $100 in materials. It’s one of the most stylish and effective ways to shade a deck or patio for under $300.
|
$11.99
|
$908.00
|
$39.98
|
$9.87
|

“Before you commit to a shade sail, you absolutely must verify your anchor points.”
Don’t just screw them into anything!
- Identify at least three anchor points. Are you attaching to a house wall? Make sure you hit a stud, not just siding. Using a tree? Be sure it’s mature and healthy.
- Check the sun’s path. Use a compass app to see where the sun is at the hottest part of the day (usually 2-4 PM). Position your sail to block THAT angle.
- Plan for tension. Shade sails need to be pulled incredibly taut to prevent sagging and water pooling. This puts immense strain on anchor points. Are they strong enough to handle it, especially in wind and rain?
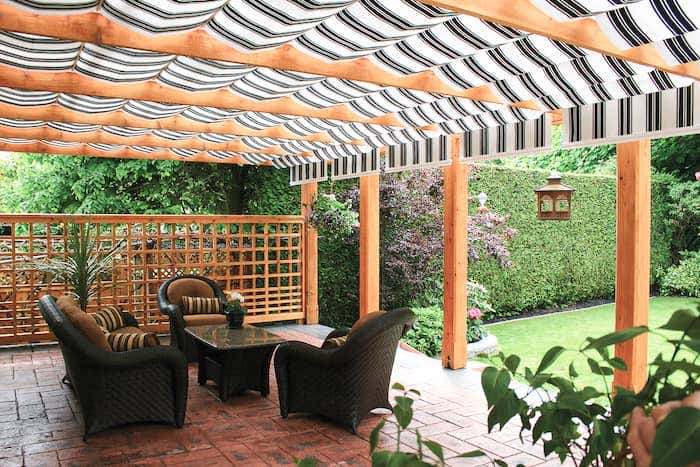
11. Add Personality with a Retractable Black and White Striped Canopy
It’s all about the canopy. The black and white striped fabric is the undeniable star of this patio. Without it, you have a nice, standard wooden pergola and wicker furniture. With it, you have a chic, Parisian-cafe-inspired retreat. It injects a dose of graphic personality that elevates the entire space from simply “pleasant” to “purposefully designed.” This single element sets the entire tone and color palette.
|
$73.72
|
$56.97
|
$2,119.46
|
$476.99
|
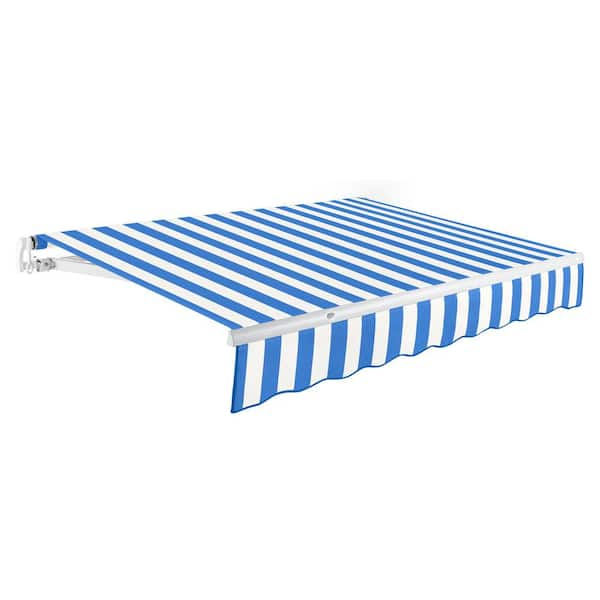

“What makes this work so well is the power of a bold pattern.”
The wide, graphic stripes of the canopy create a strong visual statement that stands up to the surrounding lush greenery and the texture of the brick patio. A smaller, fussier pattern would get lost. The canopy’s undulating, soft folds also provide a pleasing contrast to the rigid, straight lines of the pergola beams and the lattice fence, adding a touch of softness and movement to the scene.
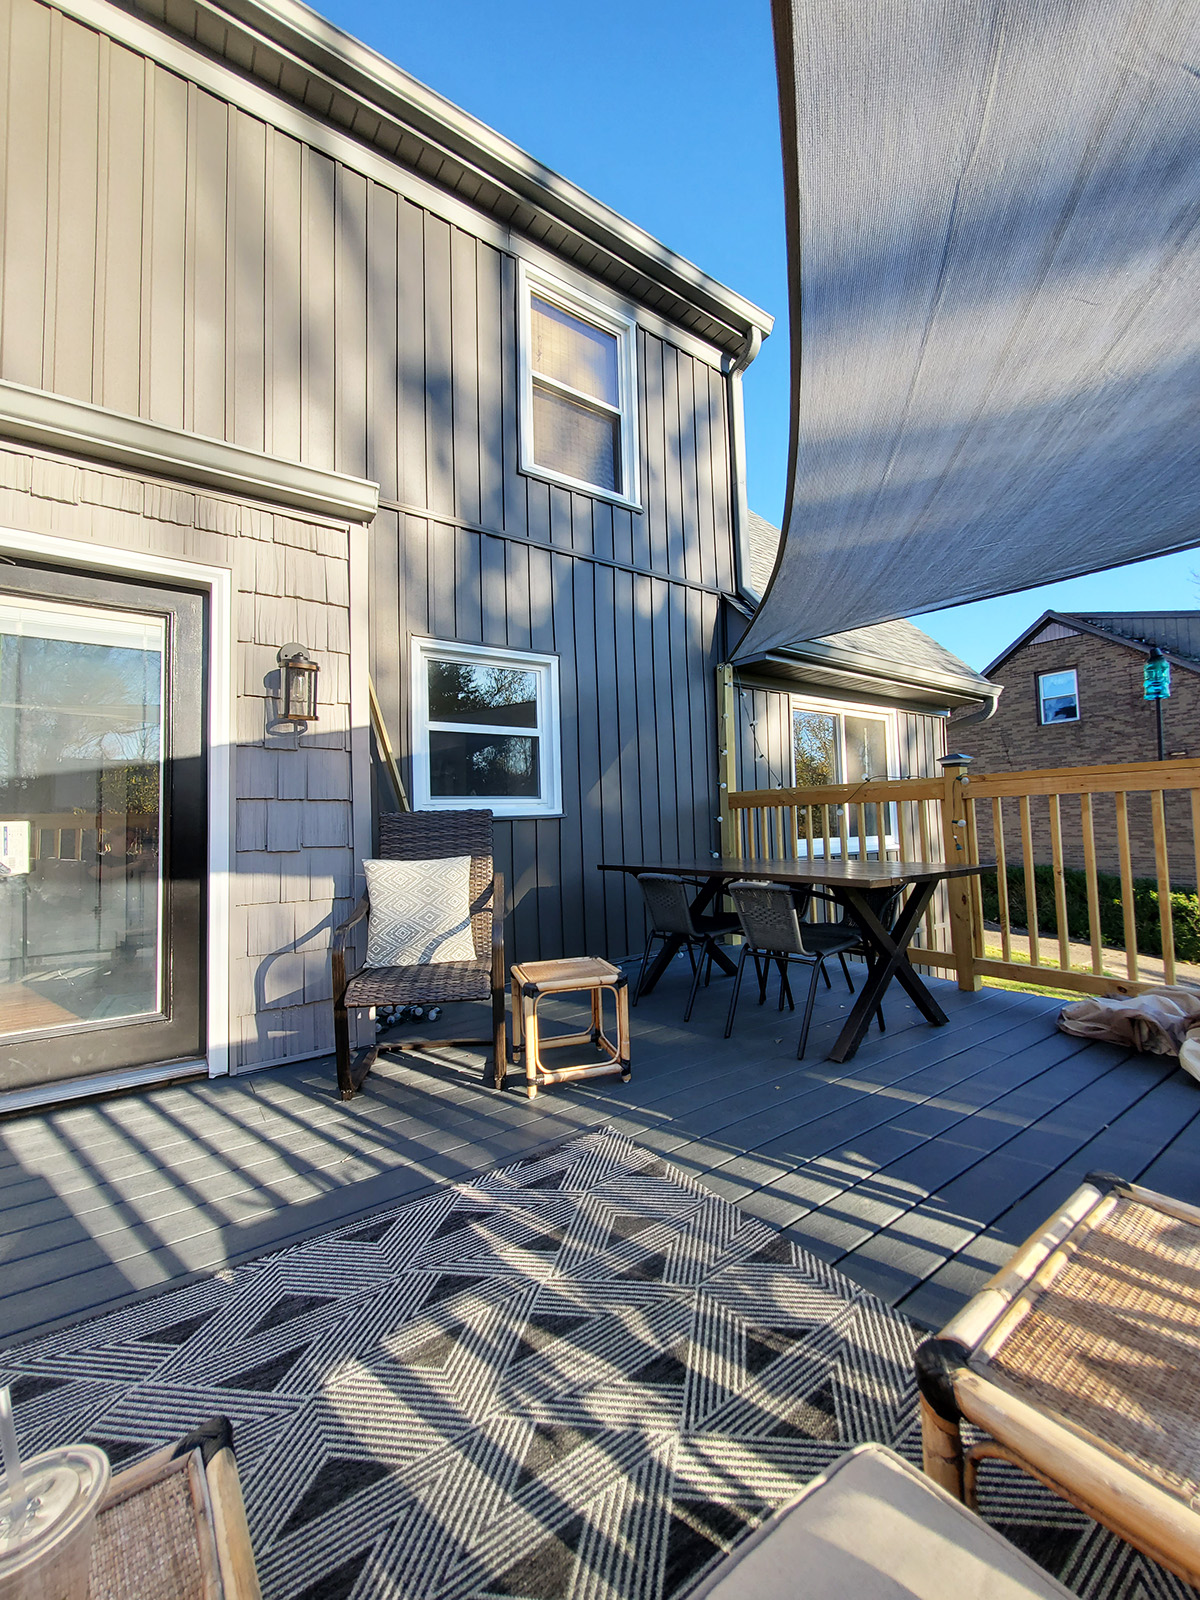
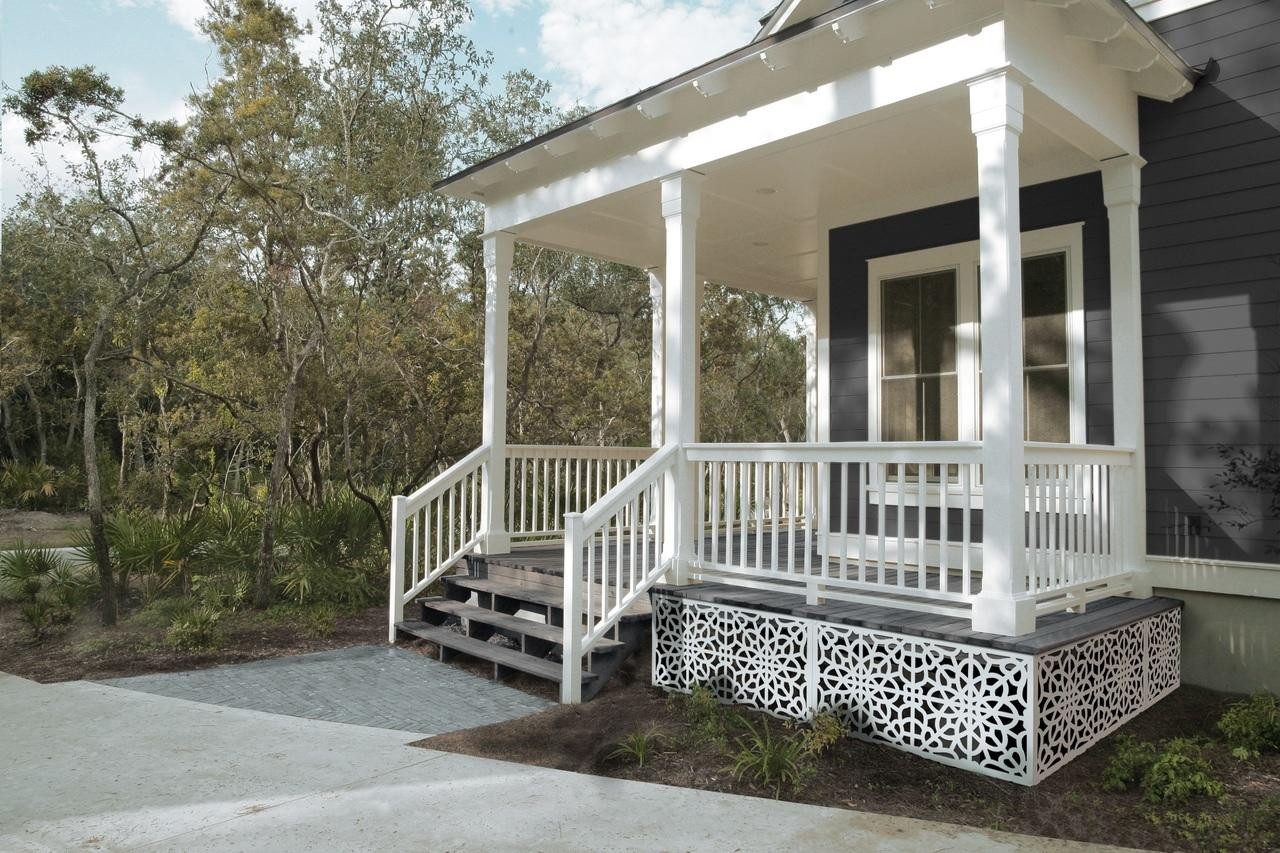
12. Complement a Modern Exterior with a Light Grey Shade Sail
This is a fantastic example of a restrained, tonal color palette done right. The style math is simple: 50% medium grey (siding, deck paint) + 30% light grey (shade sail) + 20% black and white accents (rug, chair frames). The result is cohesive and contemporary. The key is that the shades of grey are different enough to create layers, but close enough to feel unified. The natural wood of the dining table provides a single point of warmth in the otherwise cool scheme.
|
$111.06
|
$69.99
|
$62.44
|
$654.98
|

“Here’s the reality of a light-colored shade sail: it will show dirt.”
Bird droppings, pollen, and mildew will be much more visible on a light grey, beige, or white sail than on a darker color like charcoal or navy. To keep it looking crisp, you’ll need to plan on taking it down and scrubbing it with a mild detergent at least once or twice a season. If you live in an area with a lot of trees or birds, a darker color might be a more practical choice.
13. Go Green with a Vine-Covered Pergola and Retractable Screens
A living shade solution is beautiful, but it requires patience and care. In the first 2-3 years, you’ll need to actively train the vines to climb the pergola posts and spread across the top. Once established, it requires annual pruning in the dormant season to keep it from getting too heavy and to encourage healthy growth. You’ll also need to be vigilant about clearing leaves and debris from the retractable screen mechanisms to prevent them from jamming.

|
$11.99
|
$837.29
|
$78.40
|
$35.00
|

“Combining a living element like climbing vines with a mechanical one like retractable screens can be tricky.”
Choose your vine species carefully. Avoid overly aggressive or thick-stemmed varieties like Wisteria, which can damage the structure and interfere with the screens. Opt for a lighter vine, such as a Clematis or a climbing rose, and plan to prune it back from the screen housing each year to ensure the mechanism has clear space to operate.
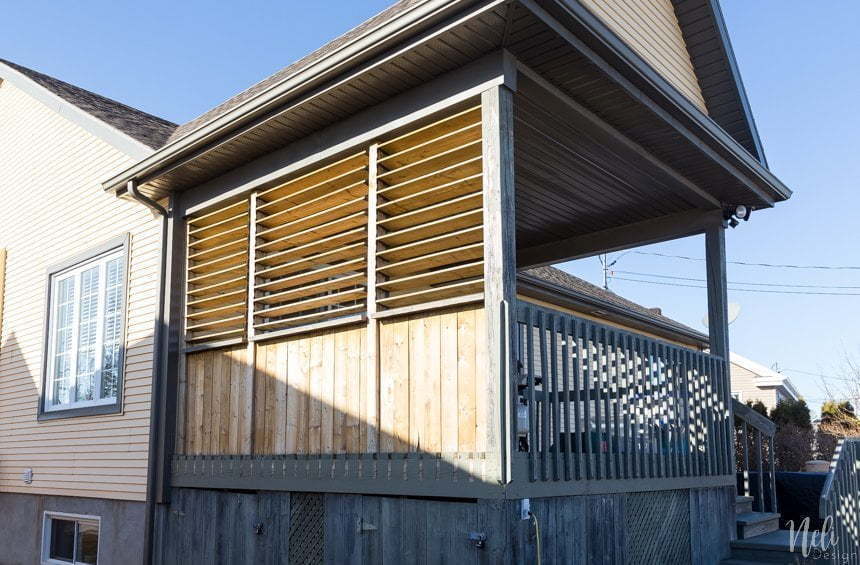
14. Integrate Privacy with Vertical Wood Slat Wall Panels
This design works because it treats the shade and privacy elements as an integral part of the architecture, not an add-on. The light wood slats are repeated in the paneling beneath the railing, creating a cohesive visual language. The contrast between the light, warm wood and the dark grey structural posts gives the design depth and a modern edge. It feels airy and open while still providing a real sense of enclosure and separation from the neighboring house.
|
$371.00
|
$10.14
|
$36.99
|
$135.00
|


“Vertical slat shades are a brilliant solution for second-story decks or patios that are close to neighbors.”
They provide excellent privacy without completely blocking airflow or light. This style is best suited for structures with strong, defined vertical posts that the panels can be installed between. It works particularly well on rectangular decks that are 8 to 12 feet deep, where the slats can create a sense of an elongated, room-like space.
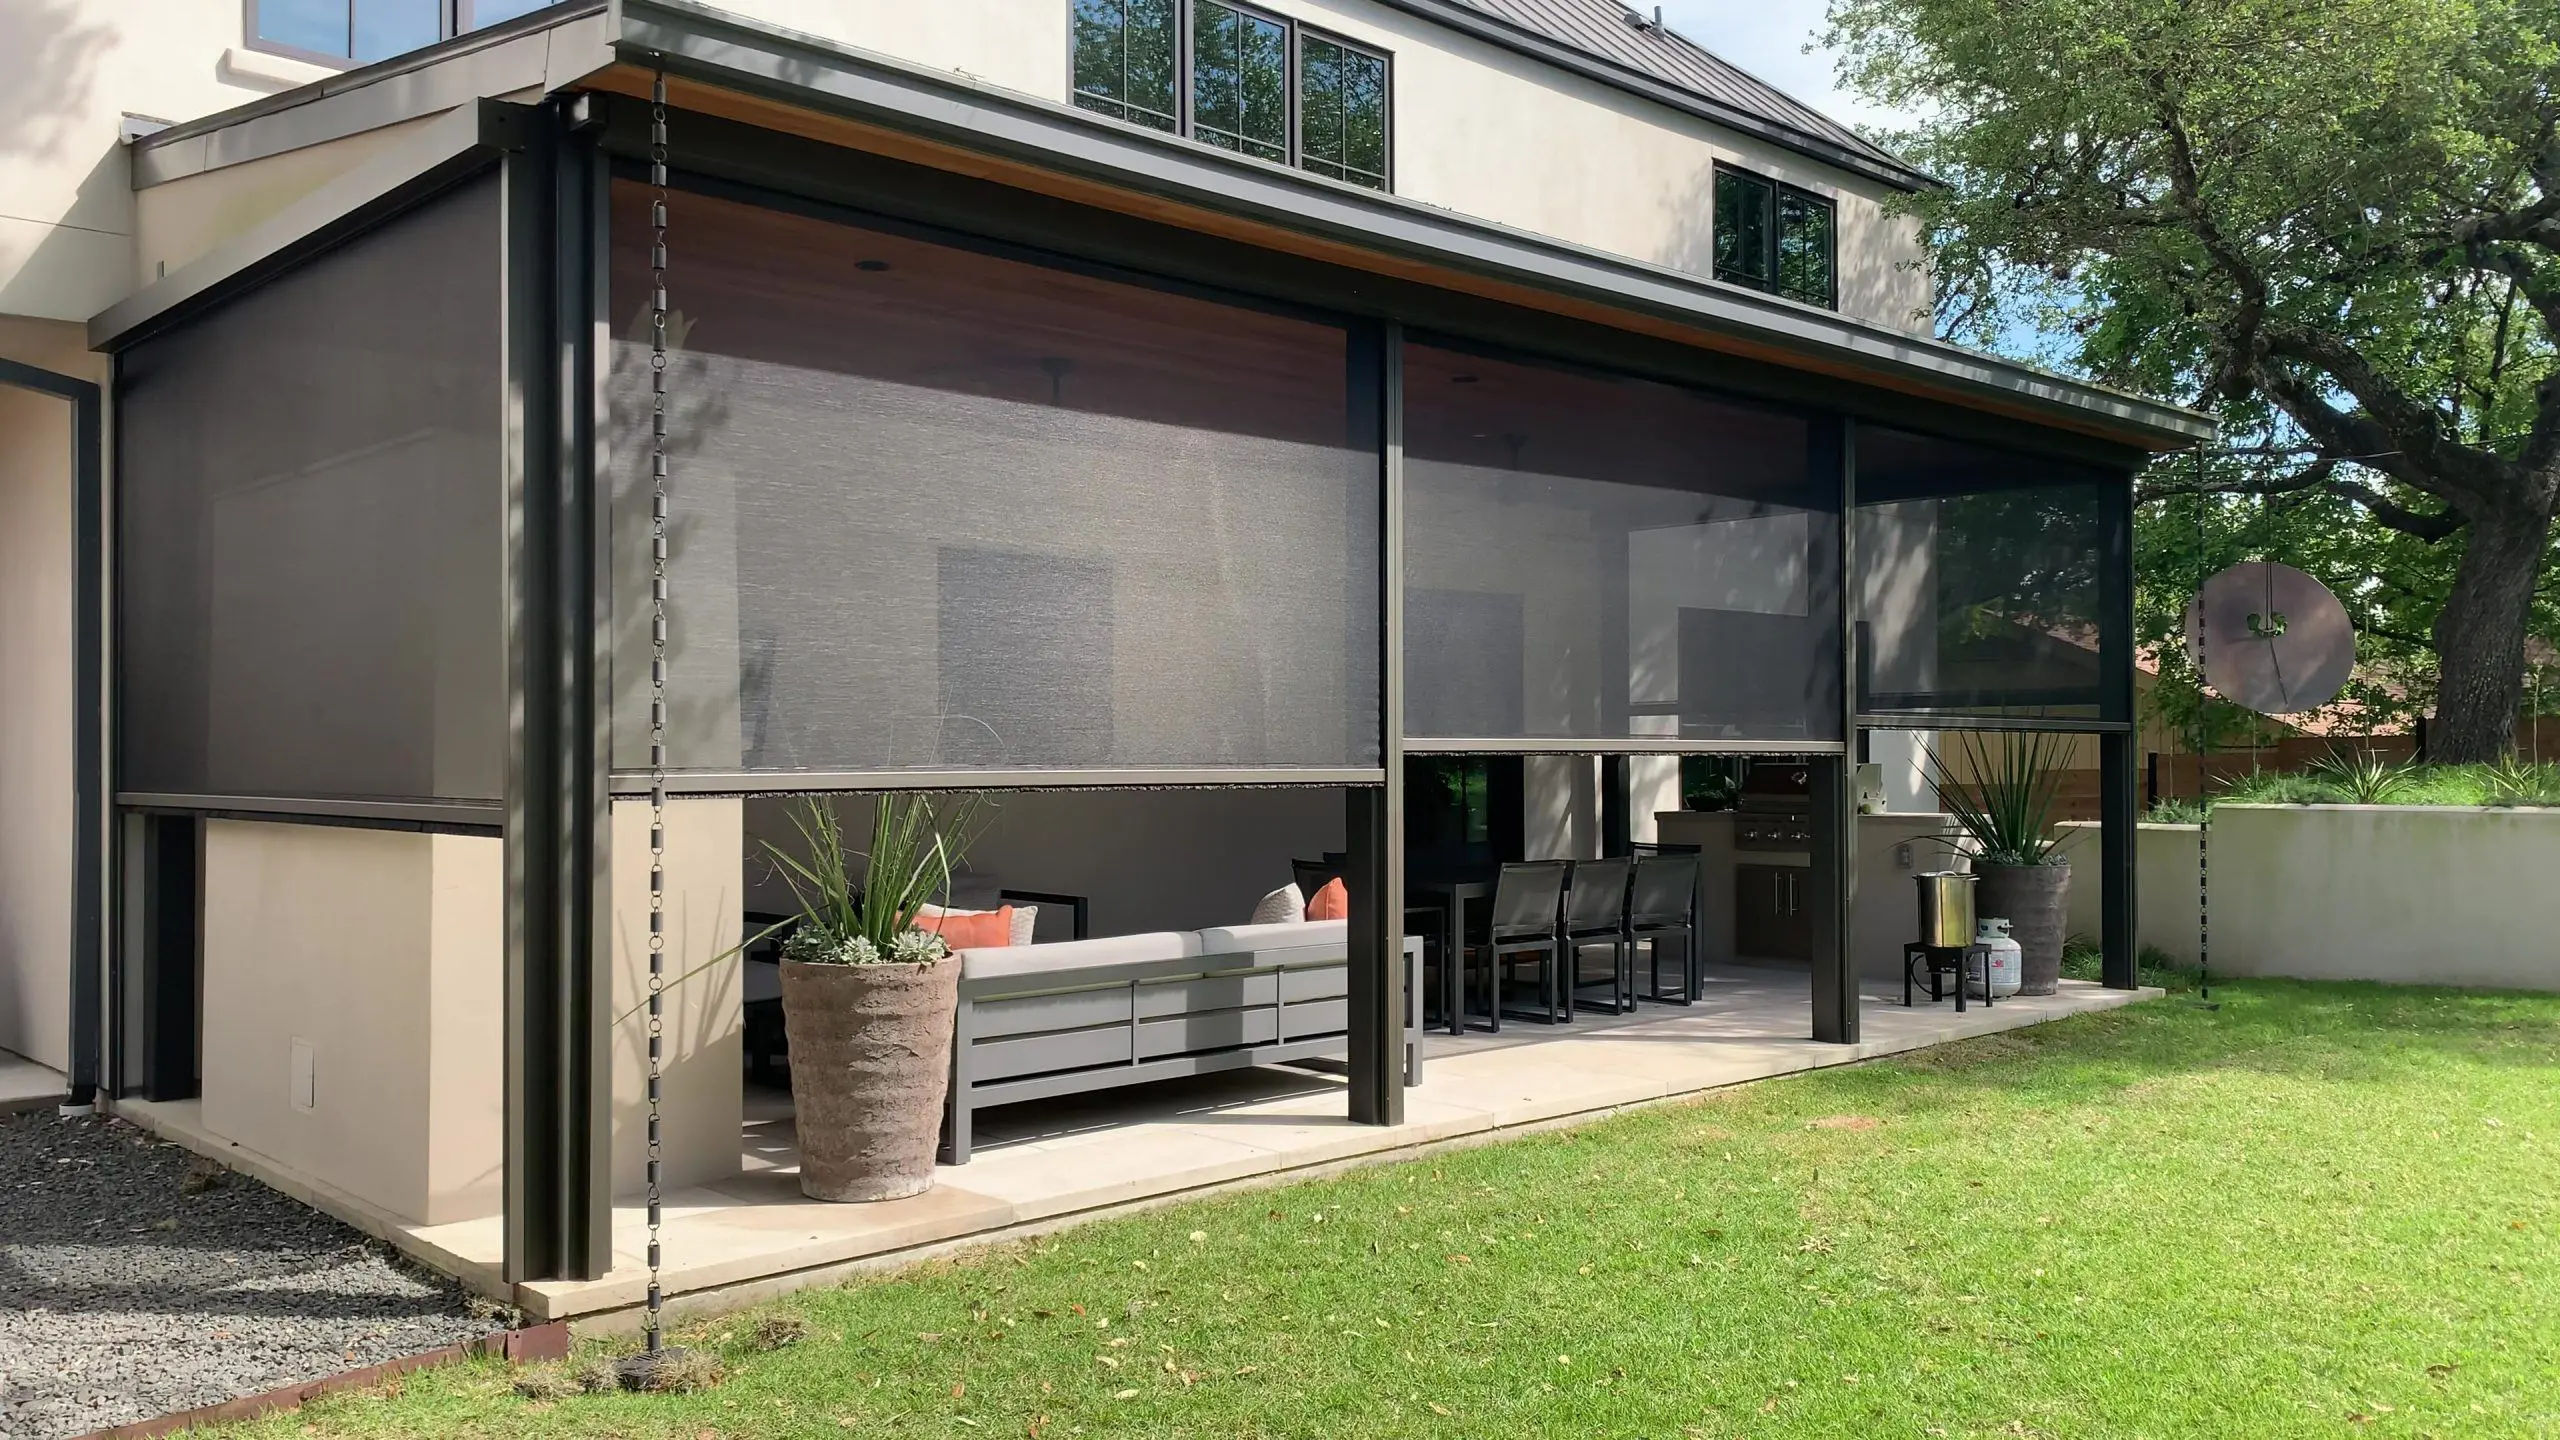
15. Create an All-Weather Room with Black Retractable Screens
The “indoor-outdoor” living trend is stronger than ever, and fully enclosing a patio with motorized screens is the ultimate expression of it. This allows homeowners to essentially gain a new room—one that can be a breezy, open-air lounge on a perfect day, or a protected, bug-free space when conditions are less ideal. The black mesh offers a sleek, modern look that doesn’t obstruct the view, making the transition between the house and the garden feel seamless. While this focuses on a living area, see how the same screens create a different mood for a bar in Idea #16.
|
$1,072.00
|
$298.00
|
$982.56
|
$499.99
|


“Motorized screens are a premium product, often costing thousands.”
For a similar effect on a budget, look into static screen panels or even outdoor curtains made from heavy-duty, weather-resistant fabric. You can build simple wooden frames and stretch screen material over them yourself, installing them with hooks for easy removal. Or, hang a ceiling-mounted curtain track around the perimeter of your patio and use tie-backs to keep them open. It provides the same sense of enclosure for a fraction of the cost.
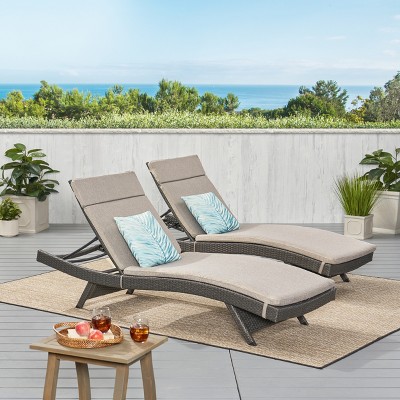
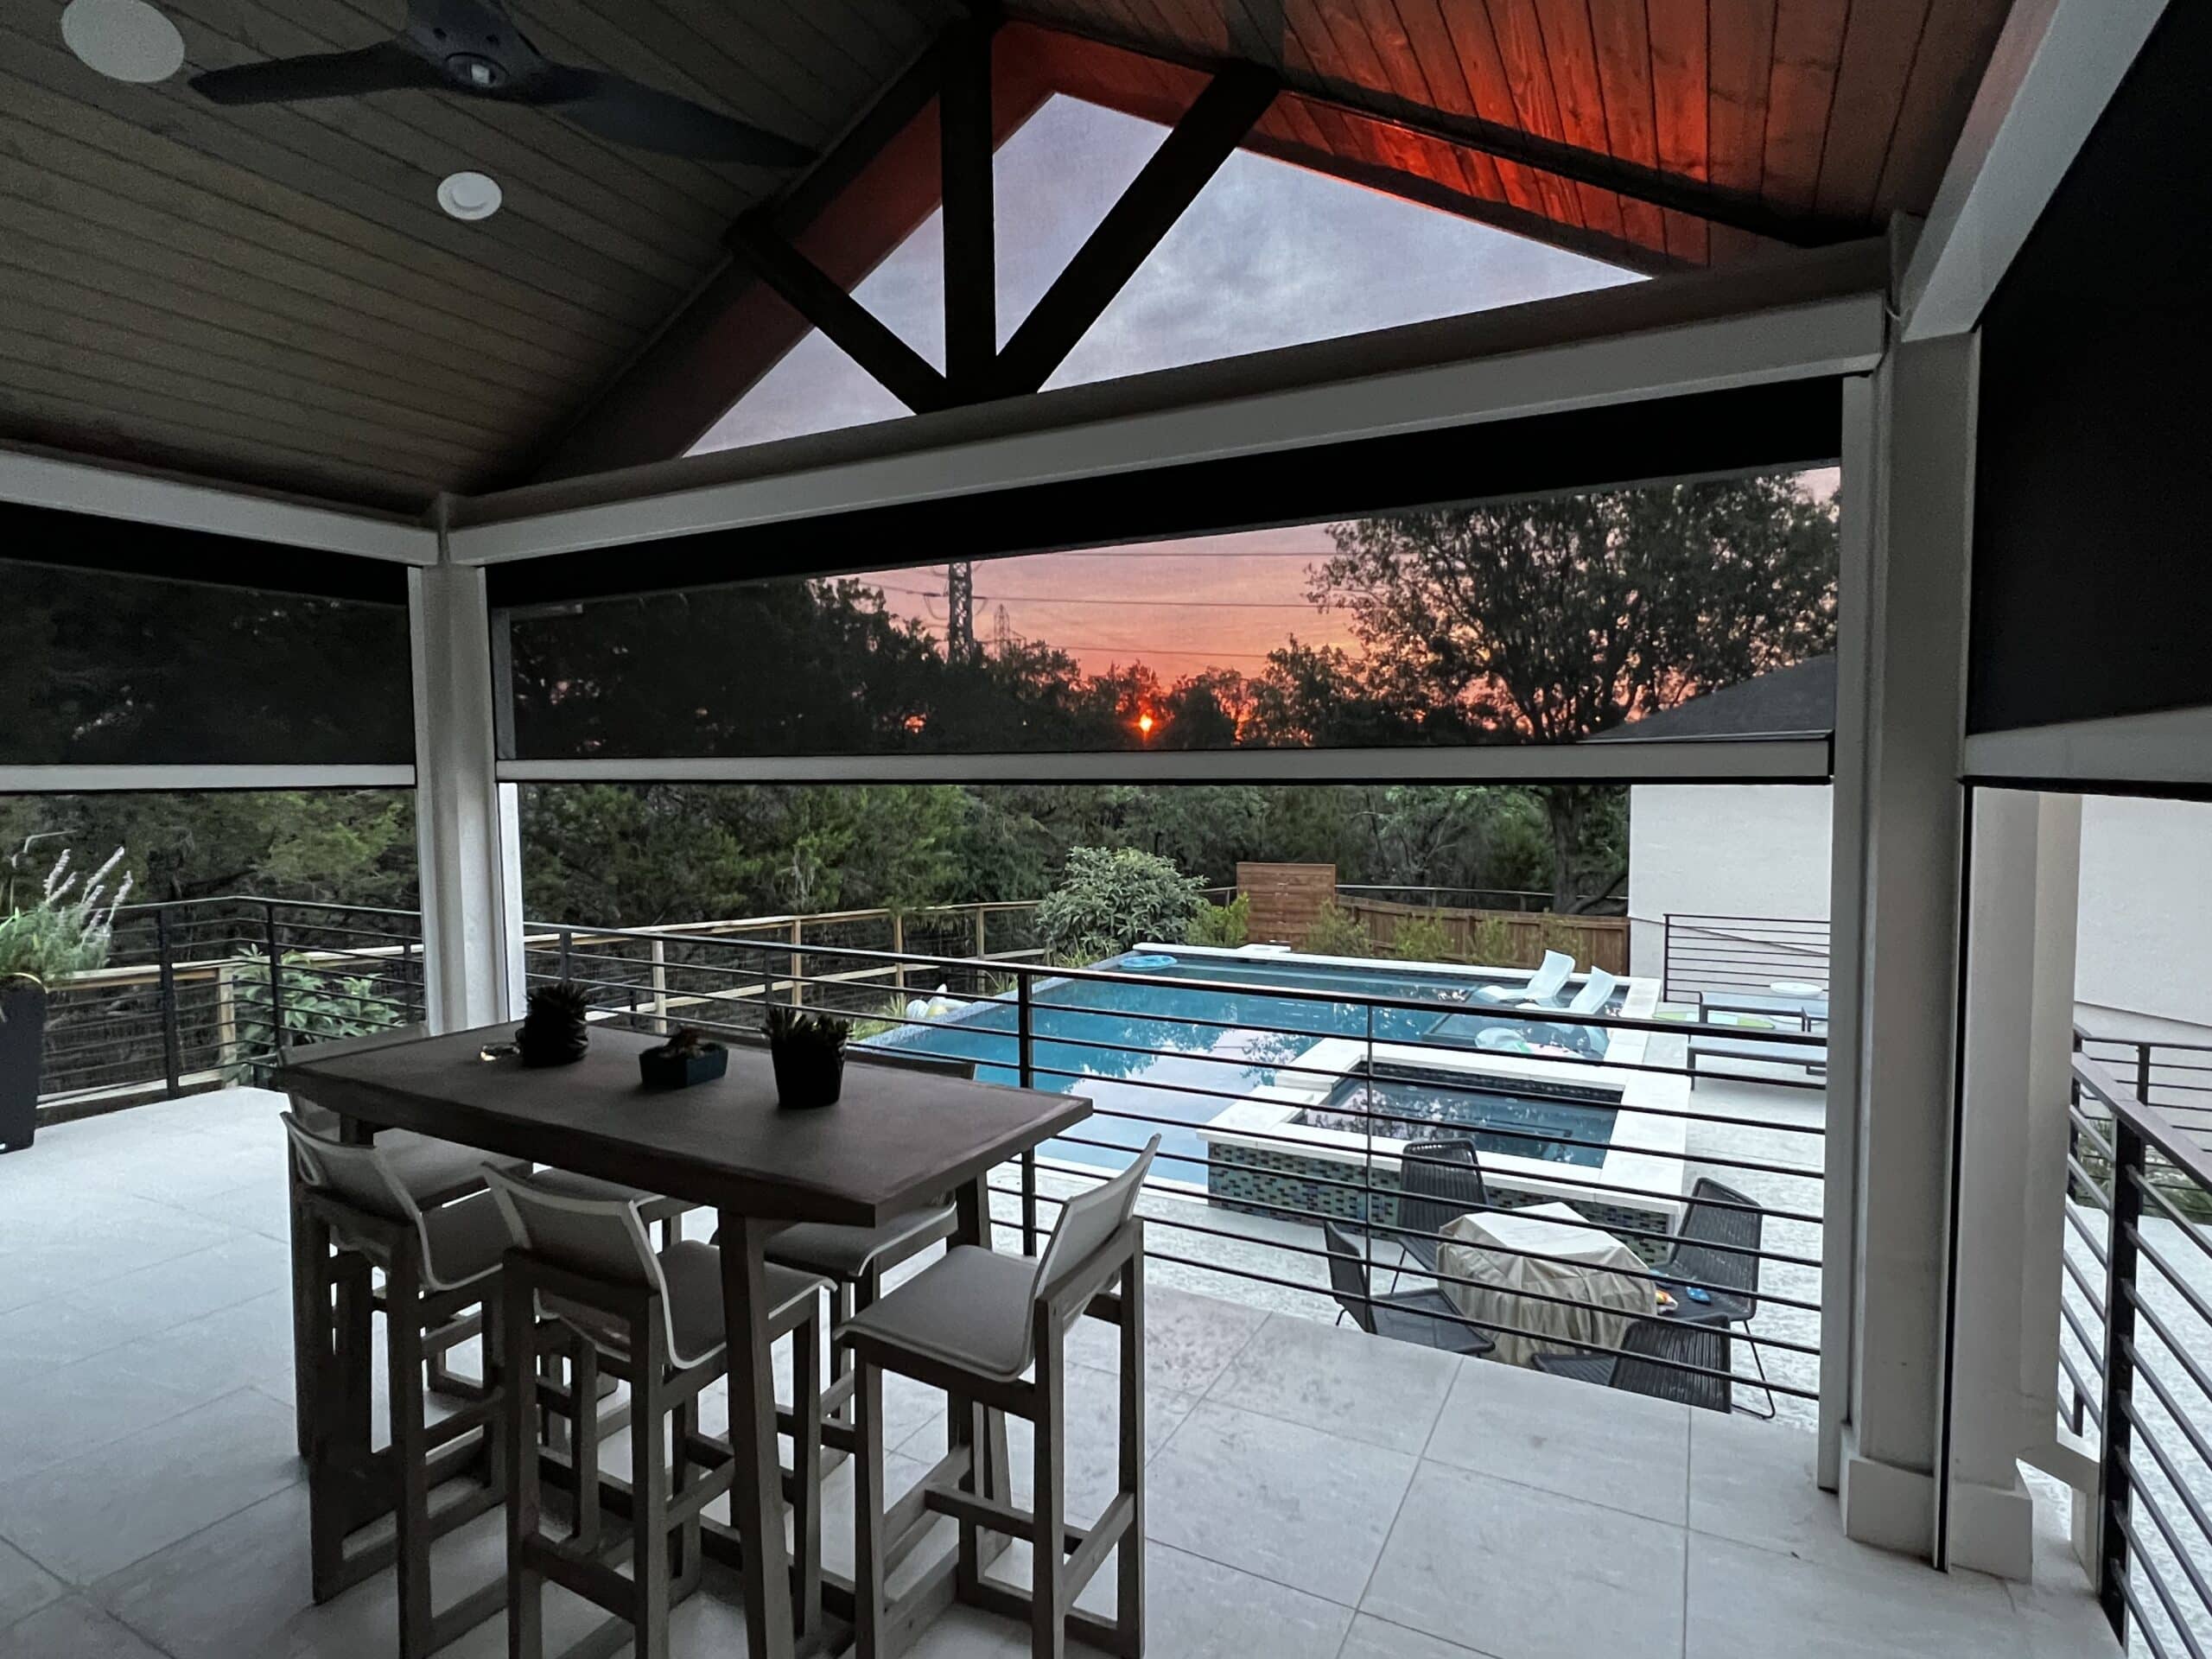
16. Frame a Sunset View with a Screened-In Patio Bar
The single element that makes this space magical is the unobstructed view, perfectly framed by the dark structure. The retractable screens, dark ceiling, and black railing all work together to create a visual frame, making the vibrant colors of the sunset and the blue pool feel even more vivid. It’s like looking at a living painting. Without that open, expansive view, the dark colors could feel heavy, but here they make the scenery the undeniable star.
|
$459.99
|
$199.00
|
$27.98
|
$99.98
|


“If you have a west-facing patio with a great view, orient your primary seating to face it directly.”
This seems obvious, but it’s often missed. A long, bar-height table like this is a perfect choice because it keeps sightlines open and encourages people to sit side-by-side, all looking in the same direction. It turns the daily sunset into a shared event. Don’t place a conversational sofa arrangement here; lean into the “viewing platform” concept.
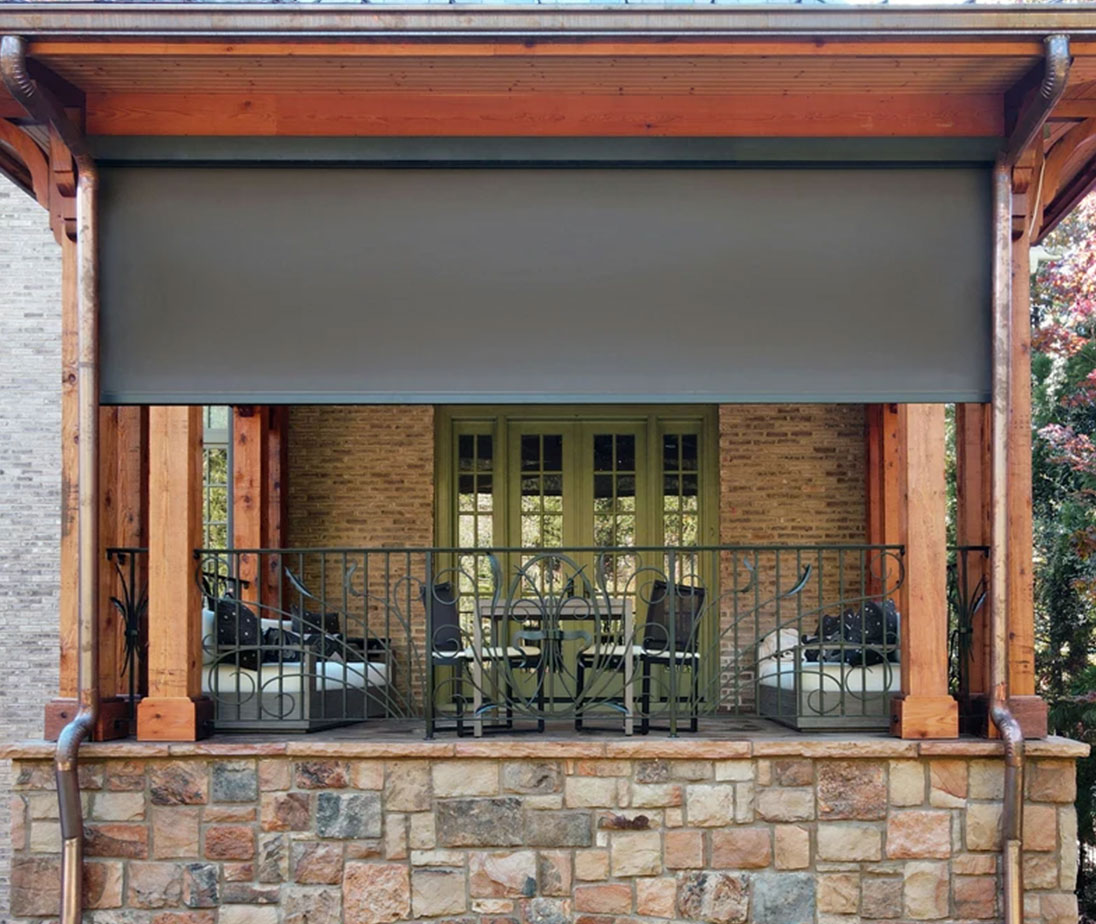
17. Blend Shade and Structure with a Retractable Awning and Wrought Iron
This patio’s success comes from its balanced mix of textures. It’s a formula of roughly 40% rustic wood (beams and posts), 30% traditional masonry (brick and stone), and 30% classic metalwork (iron railing and awning hardware). The dark grey of the modern retractable shade acts as a quiet, neutral element that bridges the gap between all the traditional, textured materials. It’s a clever way to add modern function without disrupting the rustic, cozy character of the space.
|
$1,601.40
|
$179.99
|
$91.85
|
$39.99
|


“A retractable awning is fantastic for sun, but it offers very limited protection from rain.”
Most awnings are designed for water runoff, not heavy downpours, and need to be retracted in high winds to prevent damage to the fabric and arms. Don’t expect an awning to create a truly dry space for storing outdoor cushions or furniture that isn’t fully waterproof. It’s a sun solution, first and foremost.
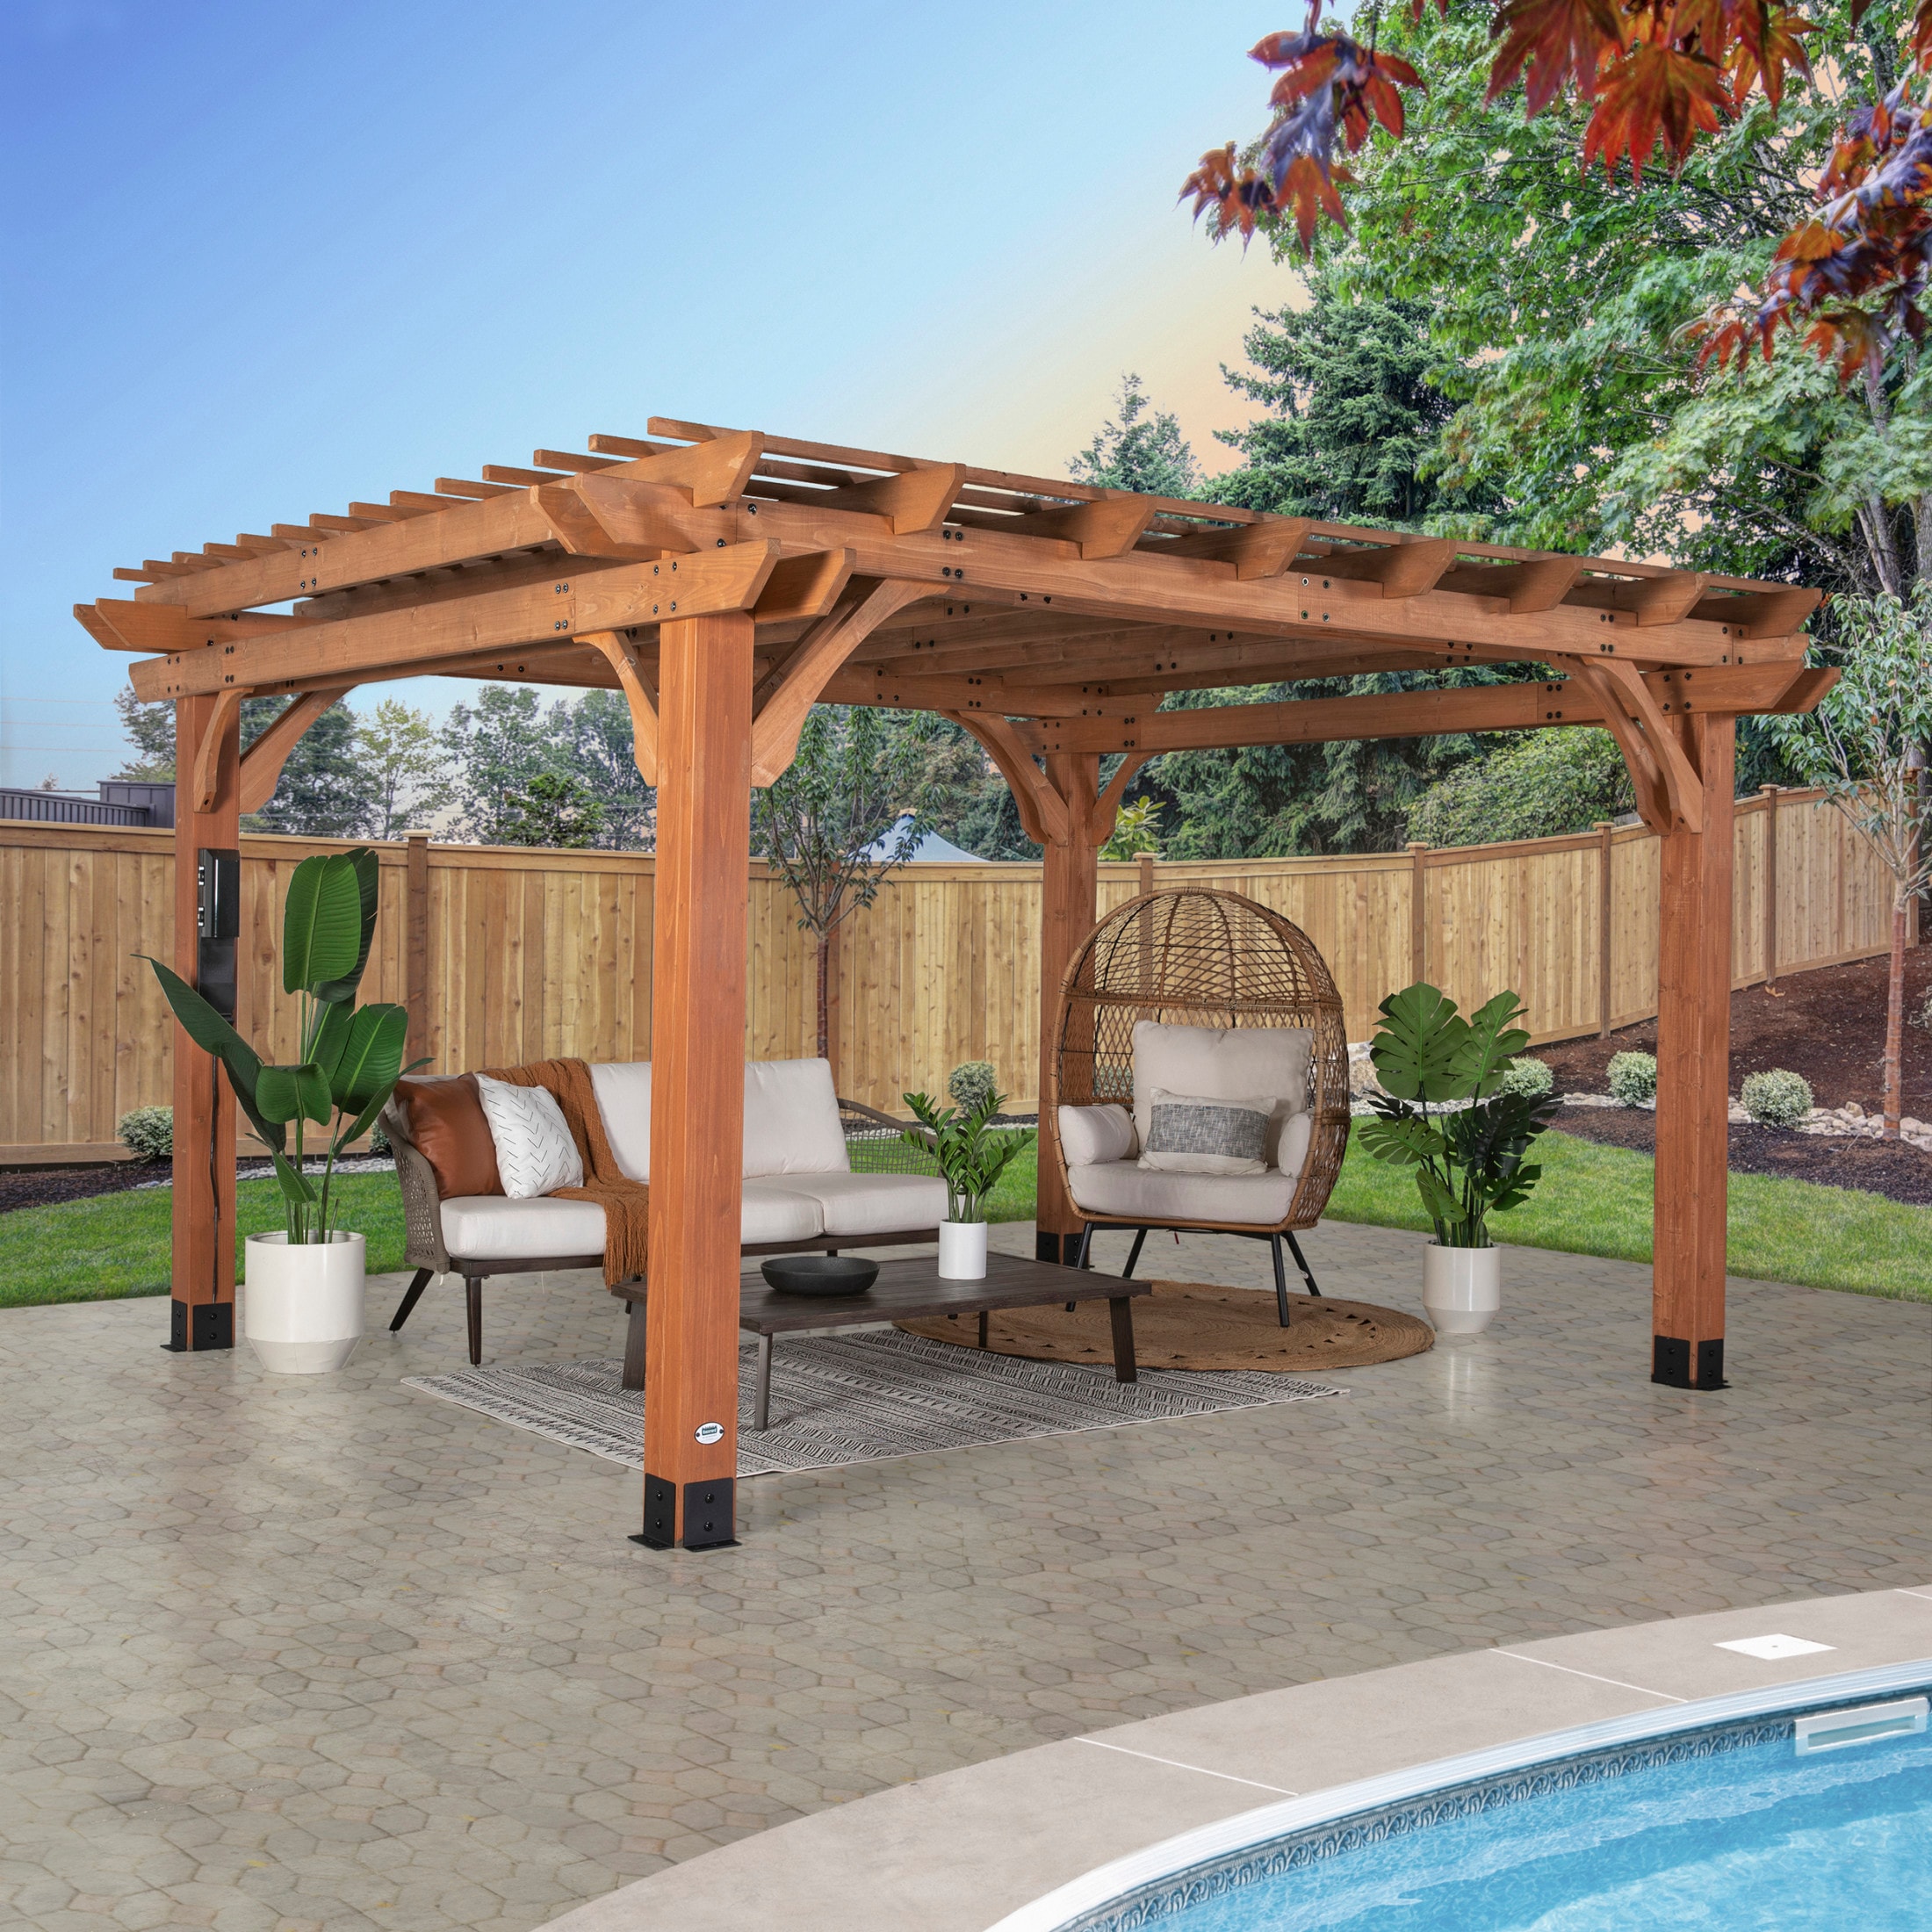
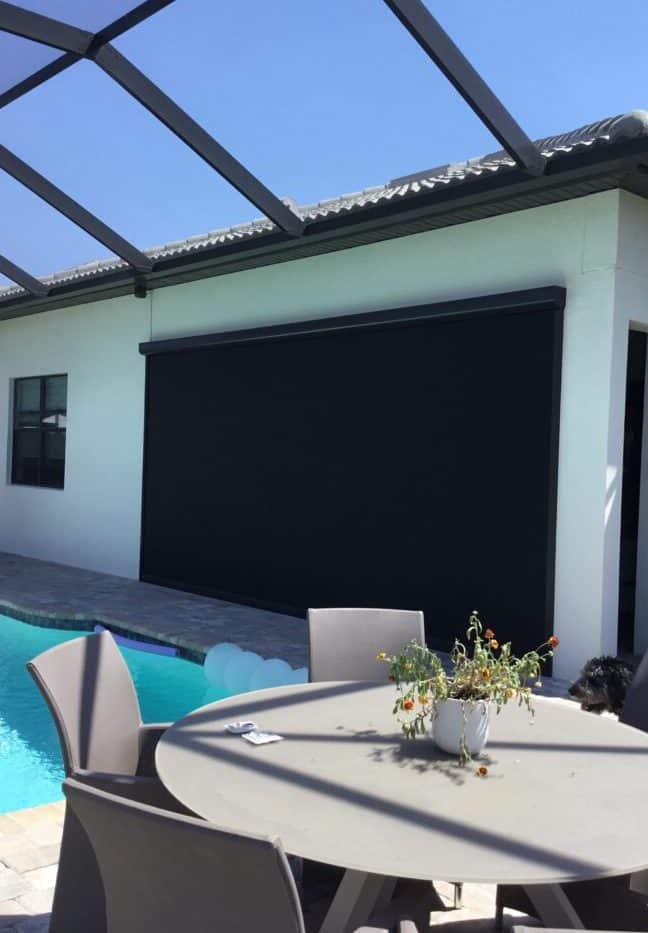
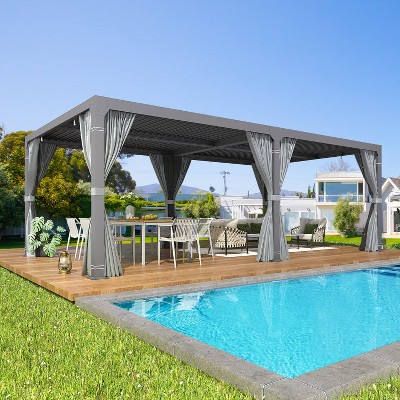
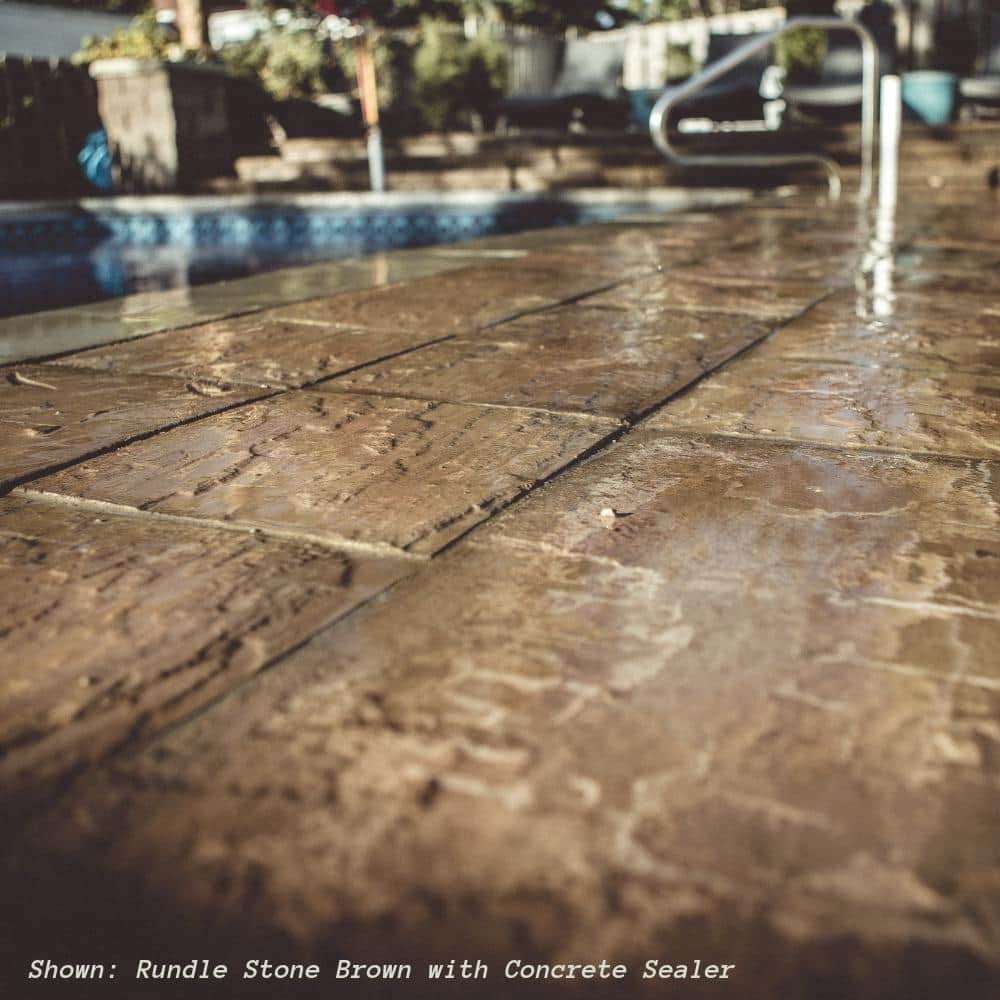
18. Install a Sleek, Black Retractable Awning by the Pool
A wall-mounted retractable awning is an excellent solution for shading defined, smaller zones like a poolside dining area or a seating group right next to the house. They typically project from 8 to 14 feet out from the wall, making them ideal for patios of that depth. The key is you need a long, structurally sound wall for mounting—at least 8-10 feet high with no windows or doors in the way of the housing unit.
|
$124.00
|
$329.00
|
$81.98
|
$14.34
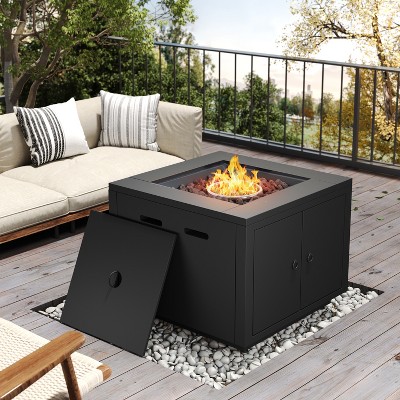
|


“This is a more focused and affordable project than a full pergola.”
The cost is mainly the awning unit itself, with professional installation being a significant component to ensure it’s secure.
- Retractable Awning (12’x10′): $1,500 – $4,000
- Professional Installation: $500 – $1,000
- Outdoor Dining Set: $800 – $2,500
- TOTAL: $2,800 – $7,500
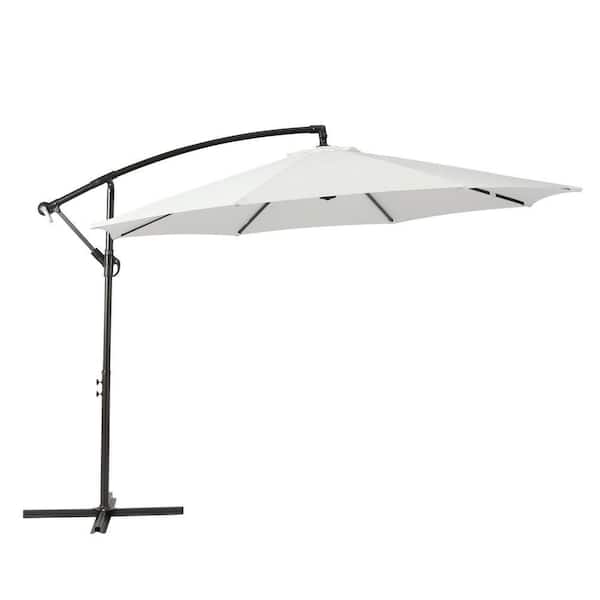
- Budget alternative: A large cantilever umbrella ($400) can provide similar, adjustable shade for the dining table for about 85% less than the installed awning.
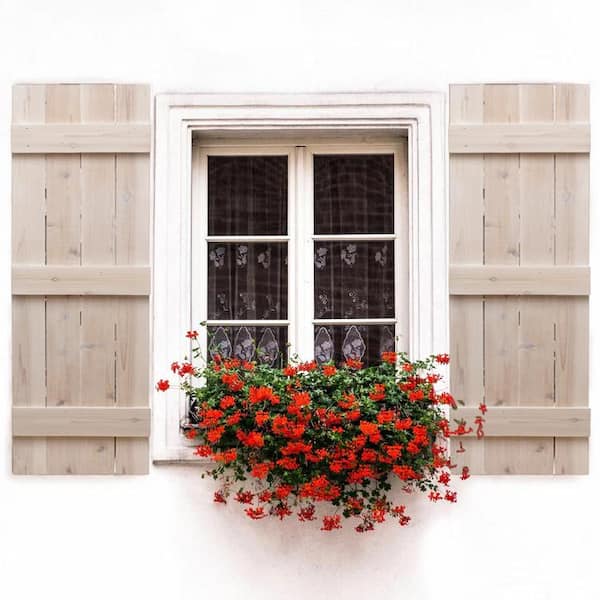
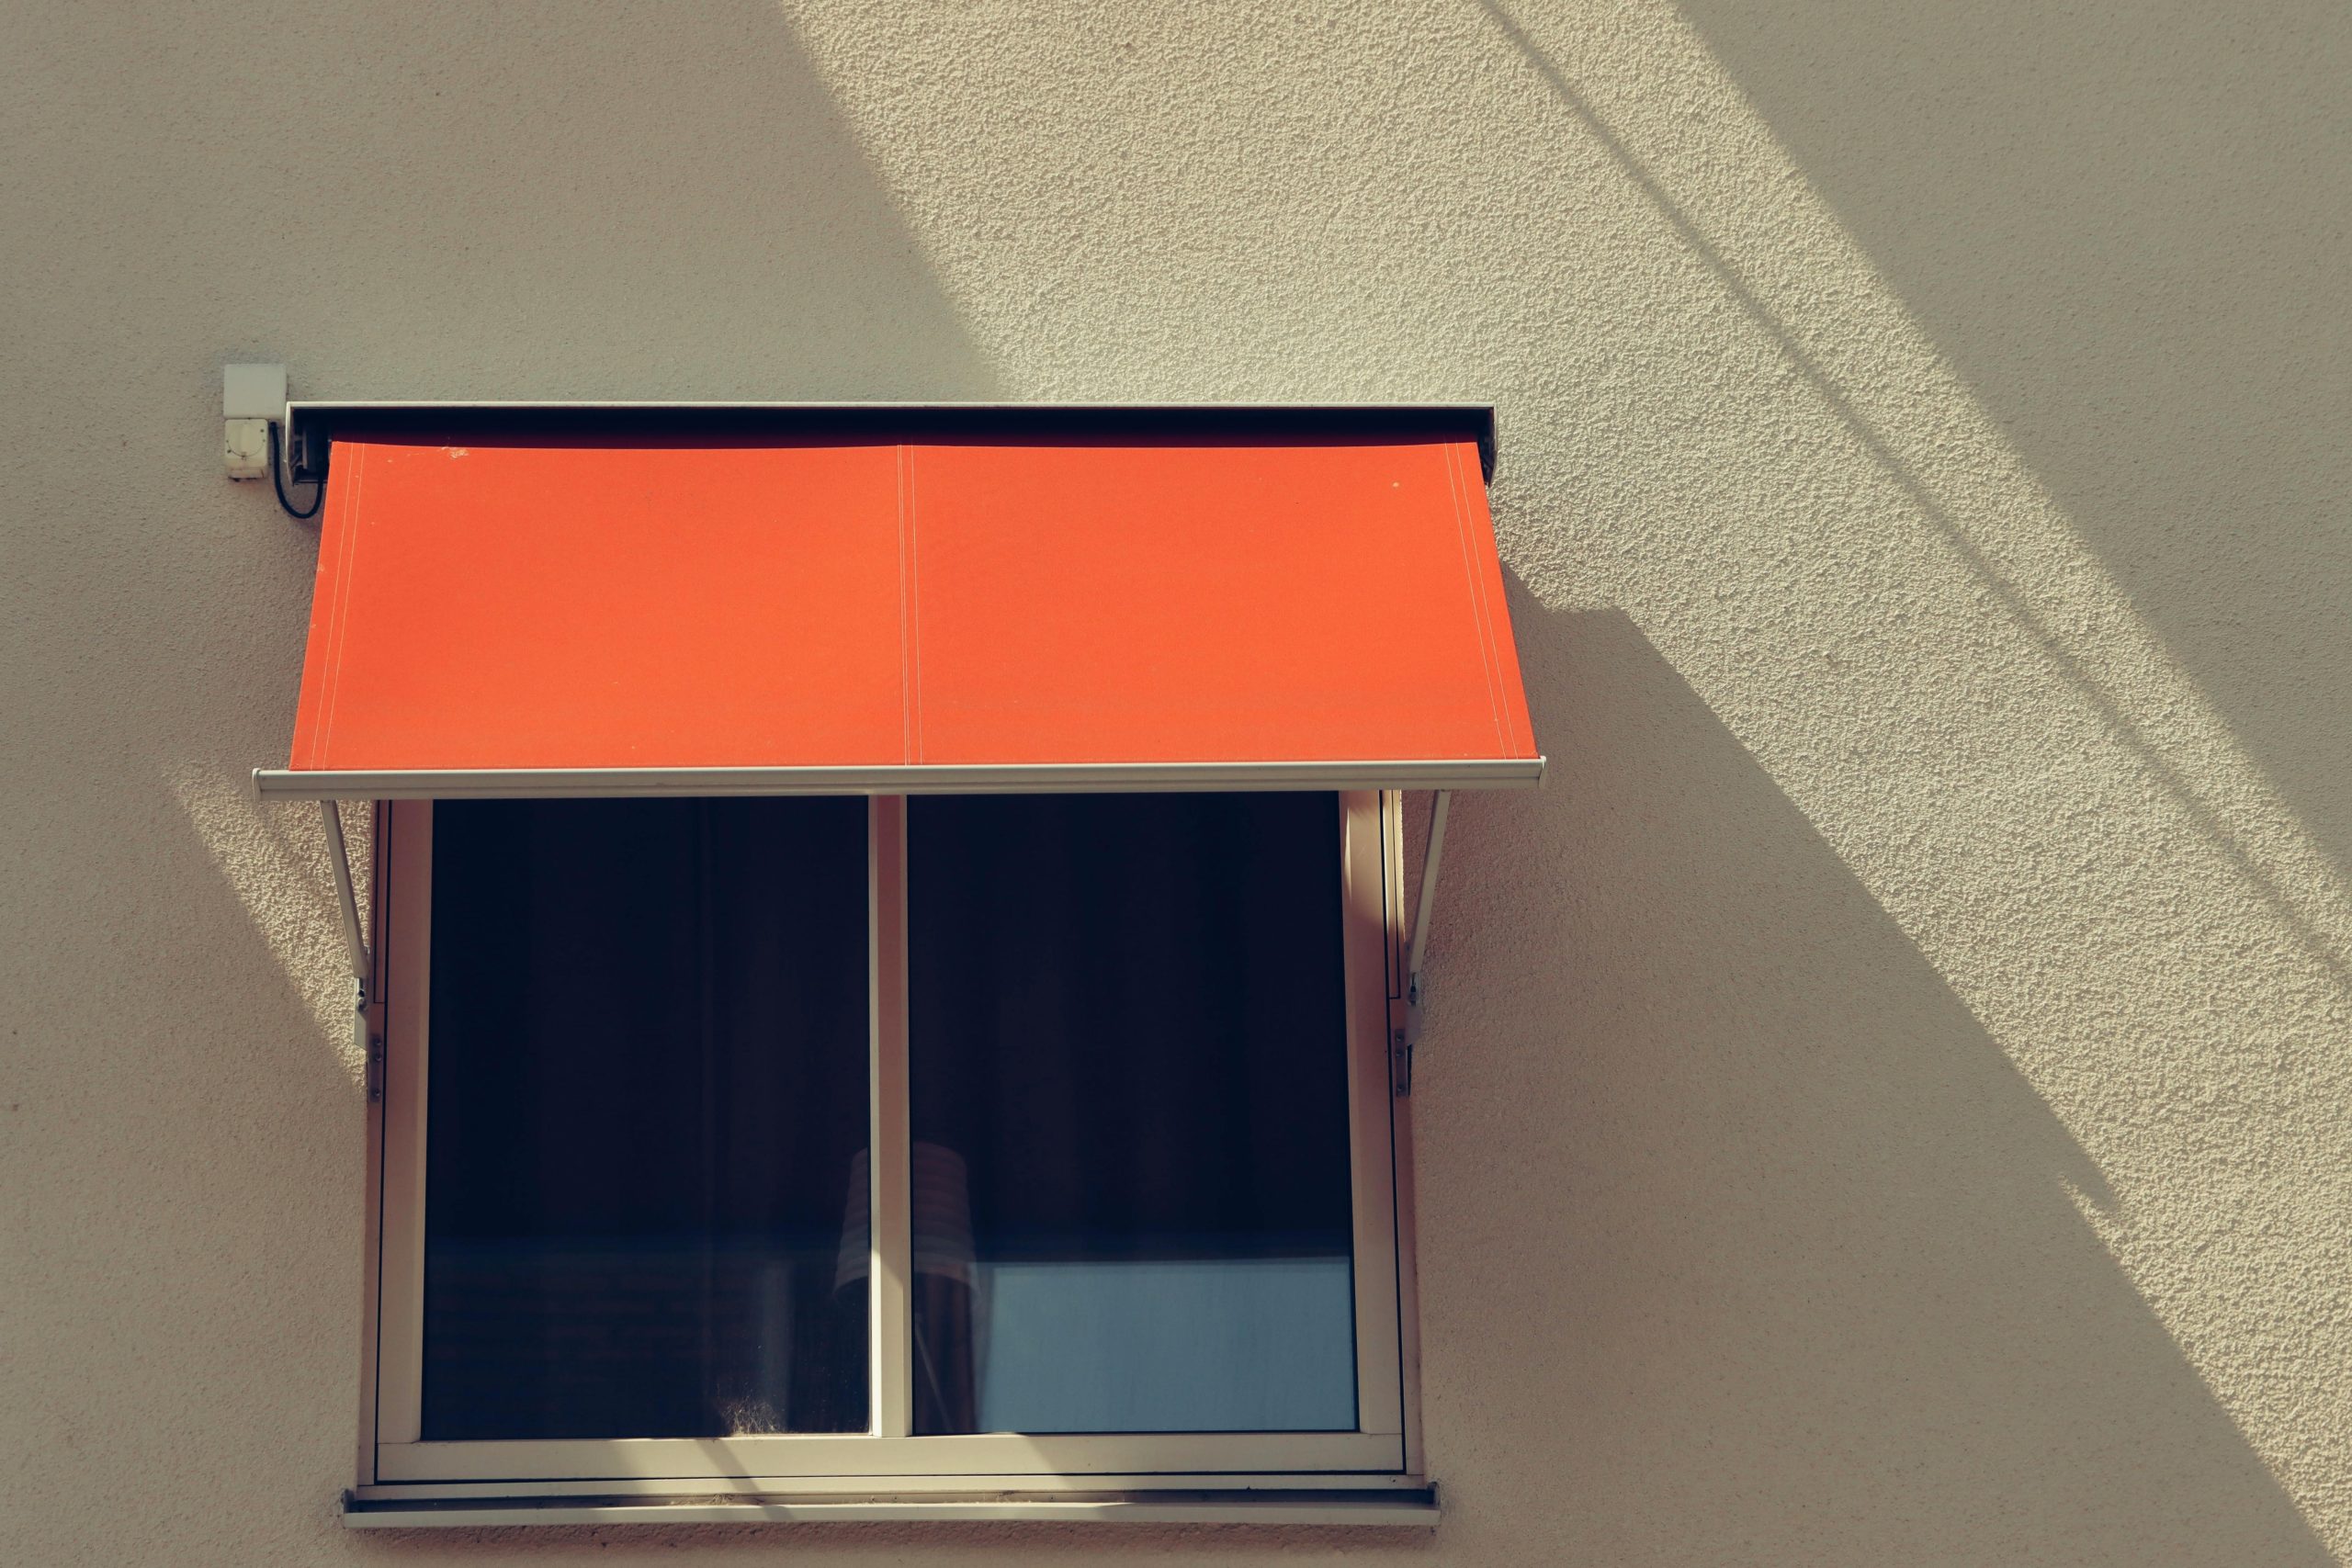
19. Add a Pop of Color with a Bright Orange Window Awning
This simple addition has such a big impact because of the power of color theory. The bright, warm orange is a complementary color to the cool blue sky, making it appear even more vibrant. Against the neutral, textured cream wall, the orange acts as a bold, singular focal point. The clean white of the hardware keeps the look fresh and modern, preventing the bright color from feeling overwhelming. It’s a small detail that broadcasts cheerful confidence.
|
$438.00
|
$38.98
|
$88.44
|
$32.81
|
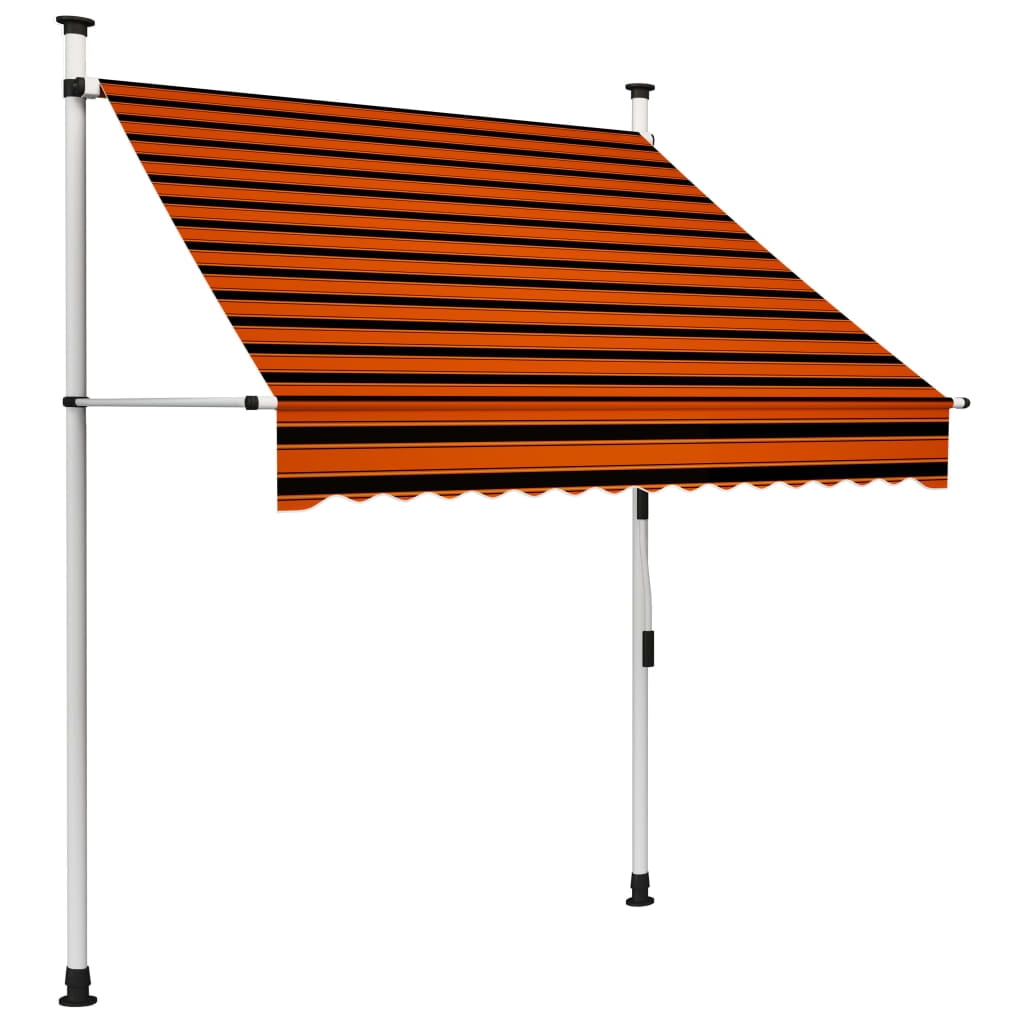
“You can get this high-impact look for less.”
While custom awnings can be pricey, you can find ready-made window awnings online for $150-$300. The color is what matters most. If you can’t find the perfect orange, buy a standard white or beige canvas awning and paint it yourself using a high-quality outdoor fabric paint like Rust-Oleum Outdoor Fabric Paint. A quart will cost you about $20 and give you this exact custom-color look. Love the bold orange? See a larger-scale version in Idea #10.
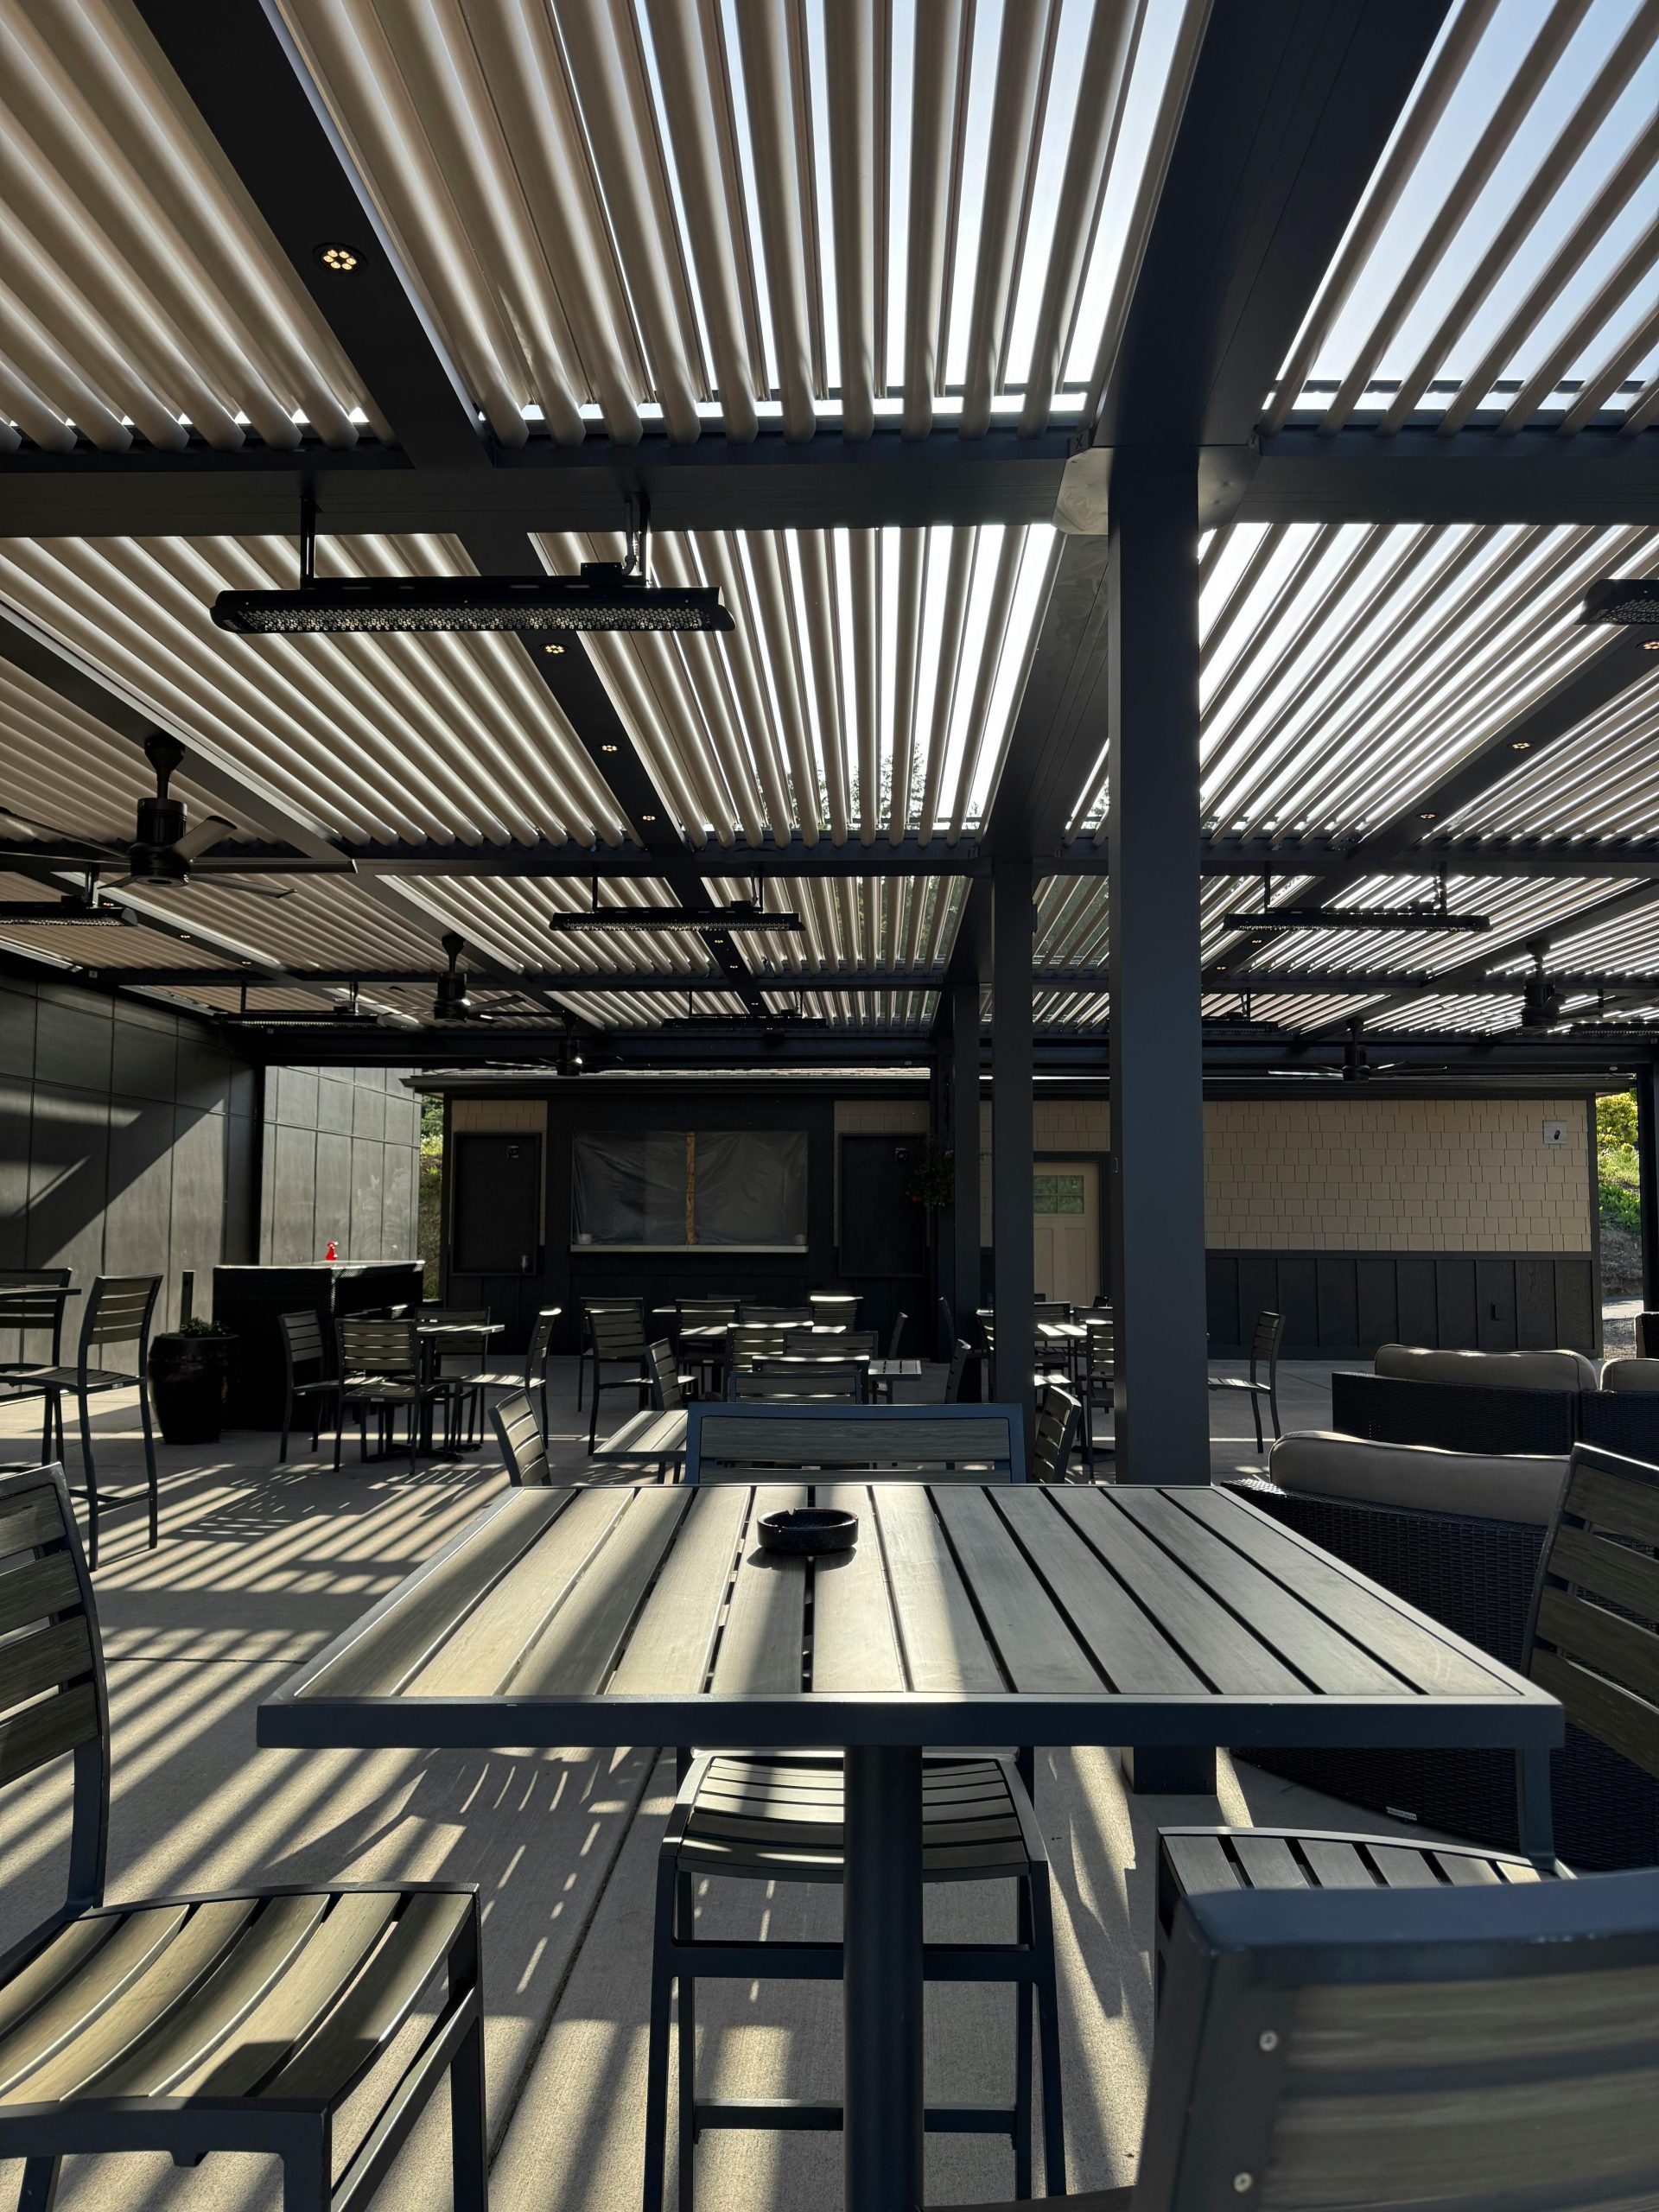
20. Build a High-Tech Oasis with an Integrated Pergola System
The defining feature here is the complete integration of technology. This isn’t just a pergola; it’s an all-in-one outdoor comfort system. The heaters, lights, and fans aren’t bolted on as an afterthought—they are designed into the structure itself. This creates an incredibly clean, streamlined look that feels luxurious and intentional. Removing the tech would leave you with a stylish pergola, but it’s the seamless integration that makes it a true outdoor room for all seasons and times of day.
|
$175.00
|
$3,722.39
|
$189.99
|
$91.22
|

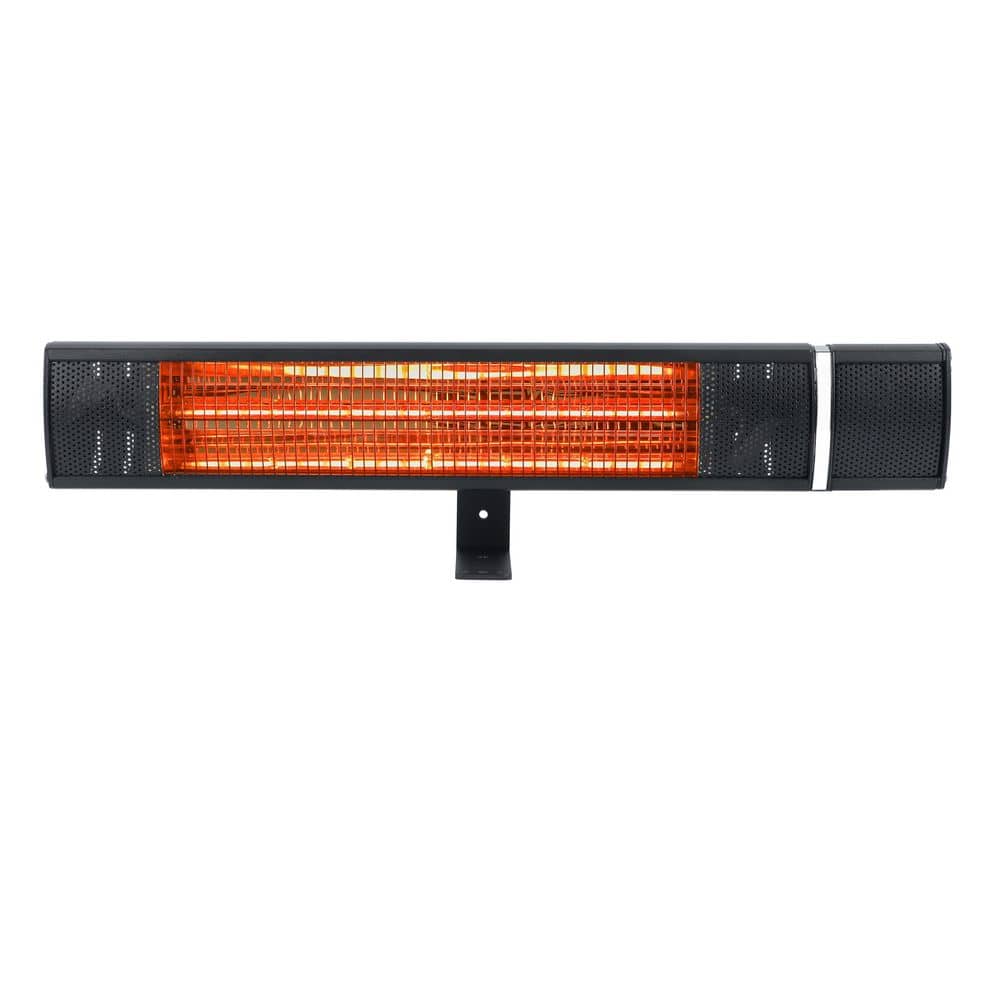
“An integrated system like this, especially with adjustable louvers, has more moving parts and electrical components than a simple structure.”
The louver tracks need to be cleared of leaves and debris seasonally to prevent jamming. The electrical components for heaters, fans, and lights should be inspected annually by a professional to ensure all connections are watertight and safe. Think of it less like a piece of furniture and more like an appliance; it needs regular check-ups to function properly.
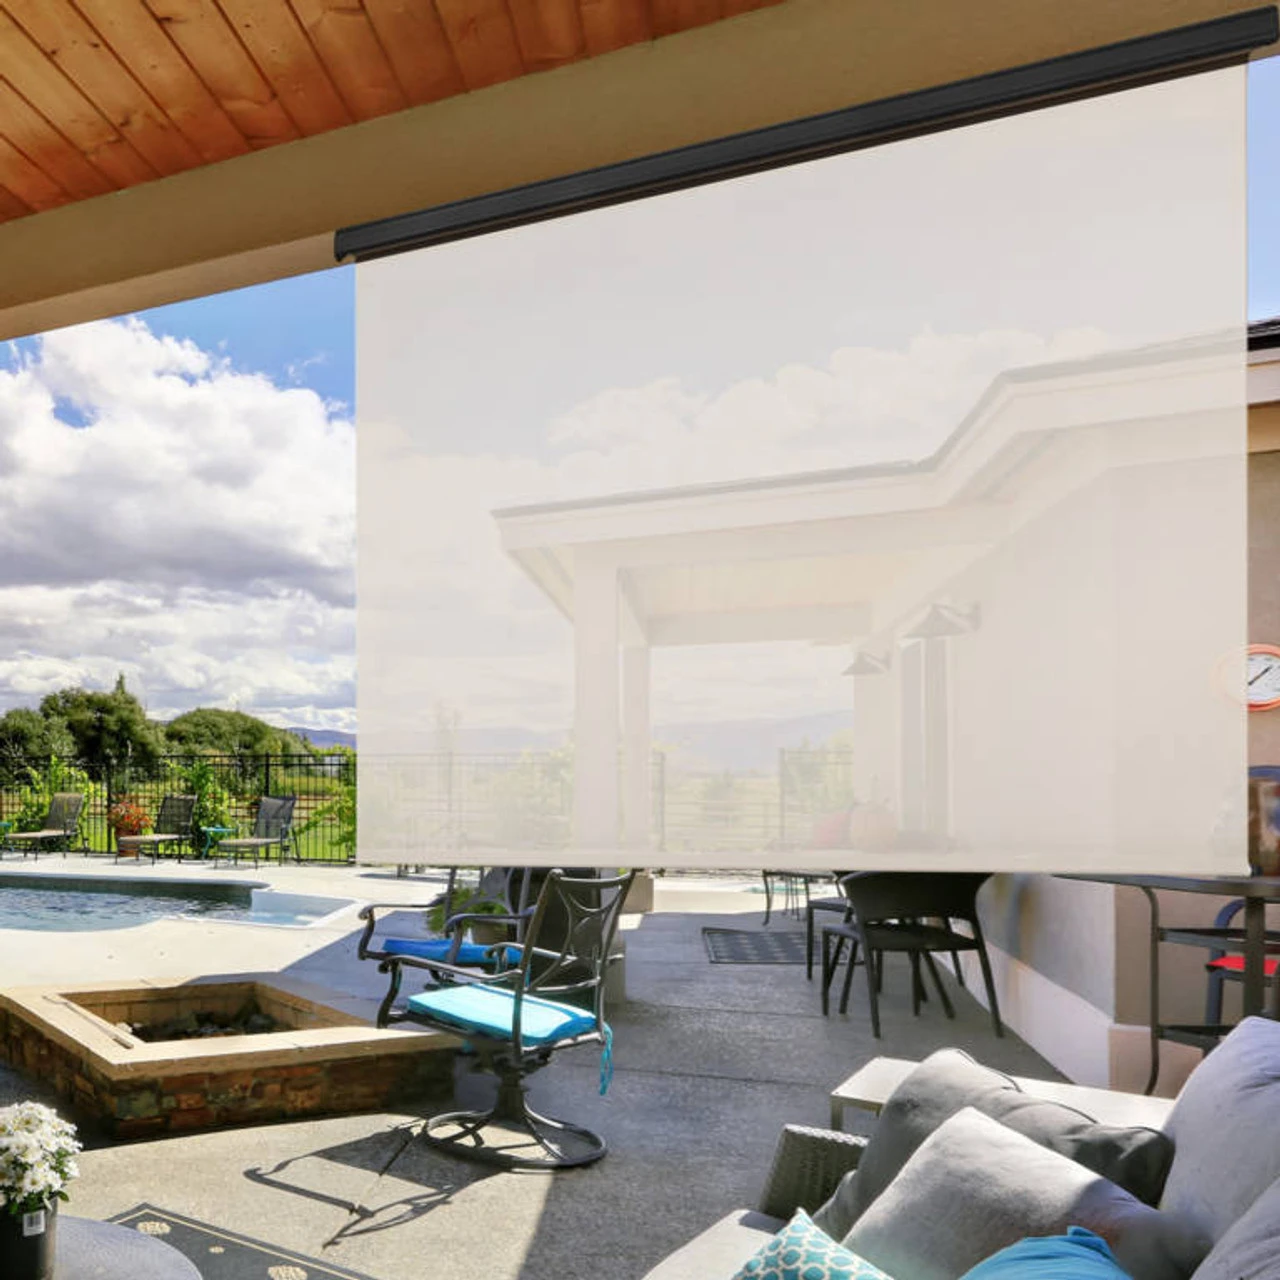
21. Soften the Sun with a Translucent Horizontal Roller Shade
When installed on a ceiling, a translucent shade fabric is almost always a better choice than an opaque one. It allows you to cut the harsh glare of the overhead sun while still letting in a lovely, diffuse light. An opaque fabric would create a dark, cavernous feeling under the patio cover. The translucent material provides the necessary sun protection without sacrificing the bright, airy quality that makes you want to be outdoors in the first place.
|
$54.97
|
$1,689.00
|
$16.22
|
$34.98
|
“A horizontal or “skylight” roller shade is a brilliant solution, but it is not a DIY-friendly project.”
These systems operate under constant tension to prevent sagging, and the installation is complex and requires precision. This is one of those jobs where paying for professional installation is well worth the money to ensure it operates smoothly and safely for years to come. An improper installation can lead to sagging, jamming, or failure of the tension mechanism.
22. Get Diffused Light with Mesh Panels on a Dark Wood Pergola
Attaching simple mesh panels to the top of a pergola is a quick way to add shade without the cost of a retractable system. It creates a pleasant, diffused light.
|
$92.92
|
$153.99
|
$466.99
|


“Time: 2 hours
Cost: $100 – $300
Measure the sections between your top pergola be”
- Time: 2 hours
- Cost: $100 – $300
- Measure the sections between your top pergola beams and purchase a roll of outdoor-rated shade mesh.
- Cut the mesh to size, leaving about 1-2 inches of excess on all sides.
- Lay the first panel over a section and use a heavy-duty staple gun to attach one edge to the side of a beam, pulling it taut as you go.
- Move to the opposite side, pull the fabric very tight, and staple it to the other beam. There should be no sagging.
- Finish by stapling the other two sides. For a cleaner look, you can attach wood laths over the stapled edges.
This top-down shade solution is perfect for pergolas of any size, but it’s particularly effective for those with deep beams (6 inches or more). The deep beams help conceal the edges of the fabric and the staples, resulting in a cleaner, more professional finish. It allows you to create shade zones, covering just the seating area while leaving a dining area open to the sky, for instance.
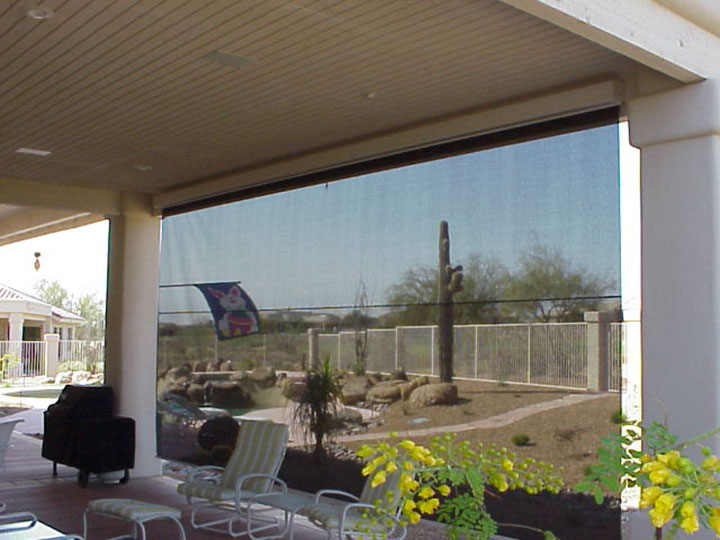
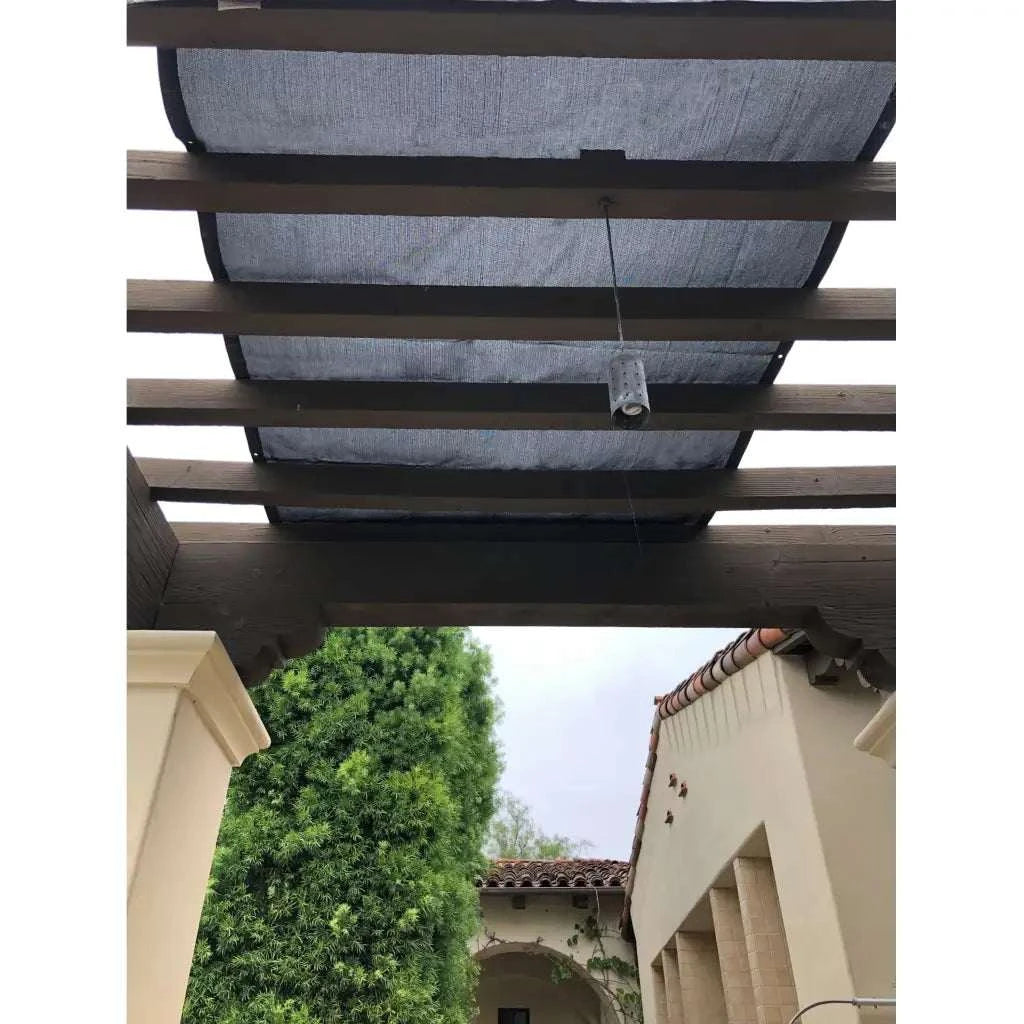
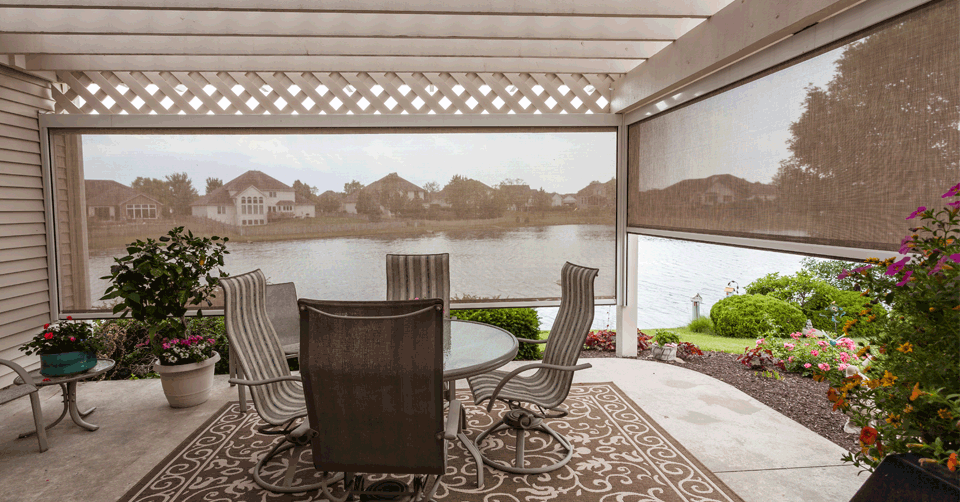
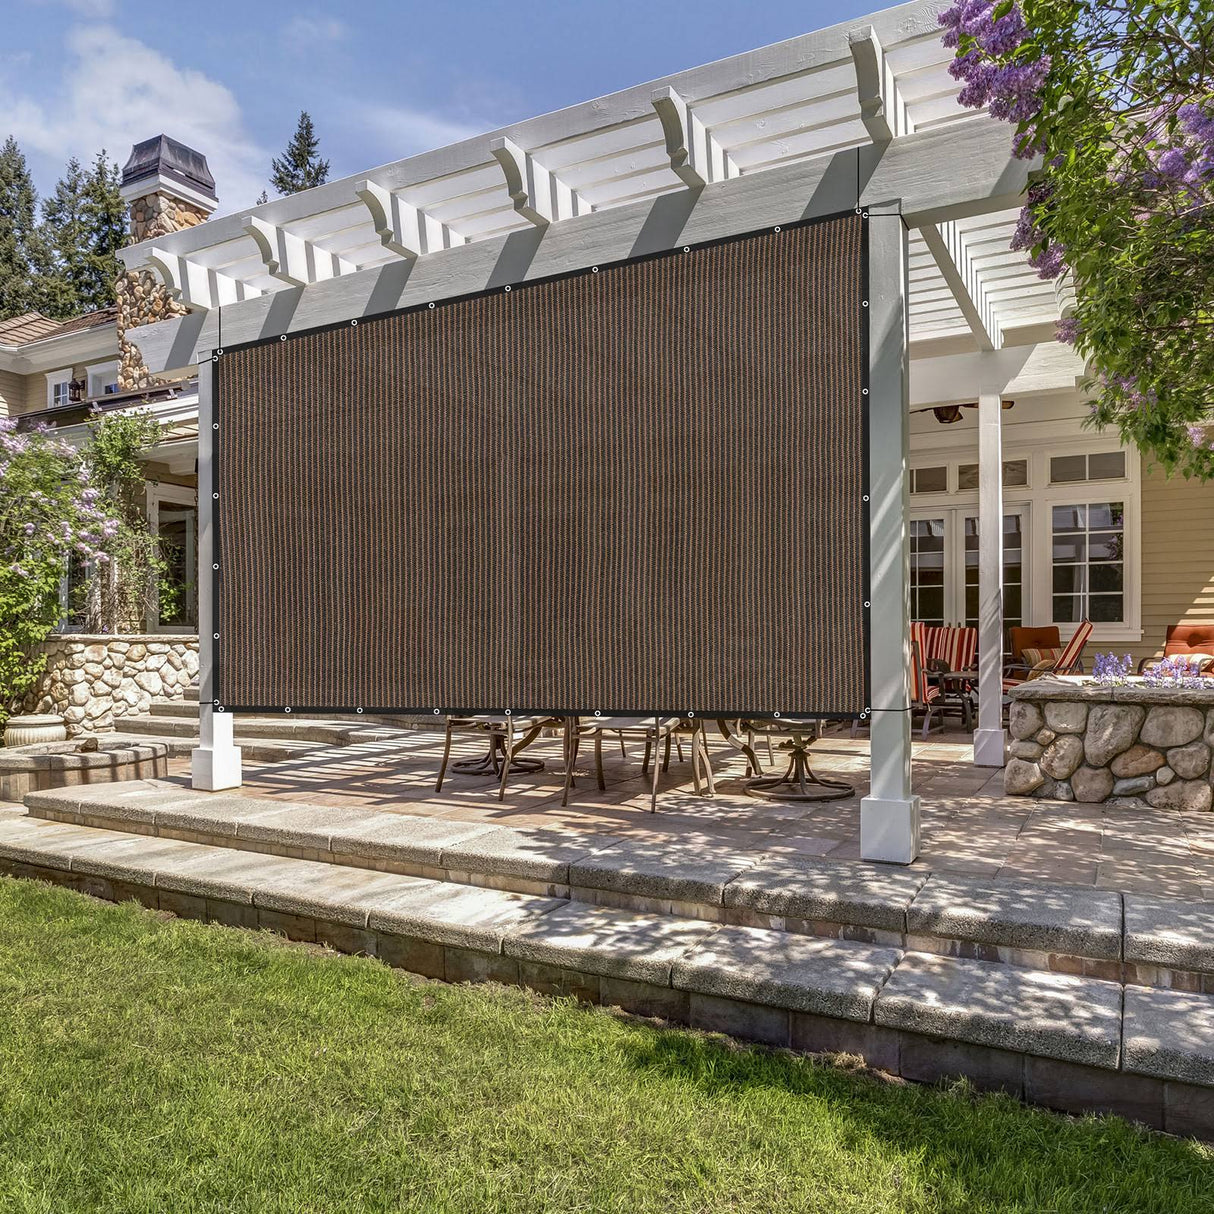
23. Preserve Your View with Brown Mesh Screen Shades
This setup masterfully balances protection and openness. The key is the “openness factor” of the brown mesh fabric, which is likely in the 10-15% range. This means it blocks 85-90% of UV rays—providing excellent shade and cooling—while still allowing for a clear view out to the lake. The brown color of the mesh also helps to reduce glare, much like a pair of sunglasses, making the view even more crisp and vibrant than it would be with the naked eye.
|
$1,512.00
|
$35.00
|
$124.00
|


“If retractable screens aren’t in the budget, you can get a similar view-preserving effect with outdoor curtains made from “solar screen” fabric.”
You can buy this fabric by the yard and either sew simple panel curtains yourself or take it to a local tailor. Hang them from a simple galvanized pipe or outdoor curtain rod. They won’t retract with the push of a button, but they will provide the same glare reduction and shade while keeping your scenic view intact for a third of the price.
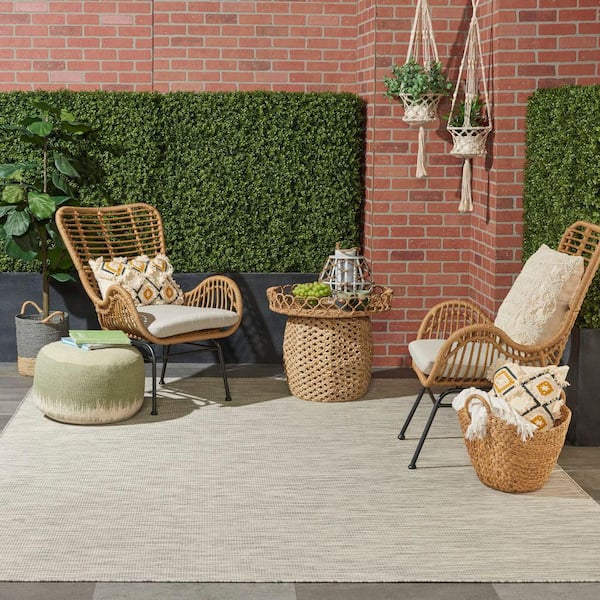
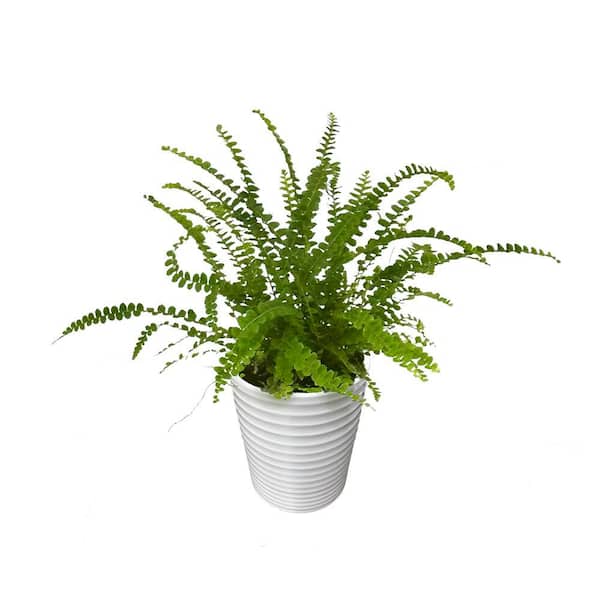
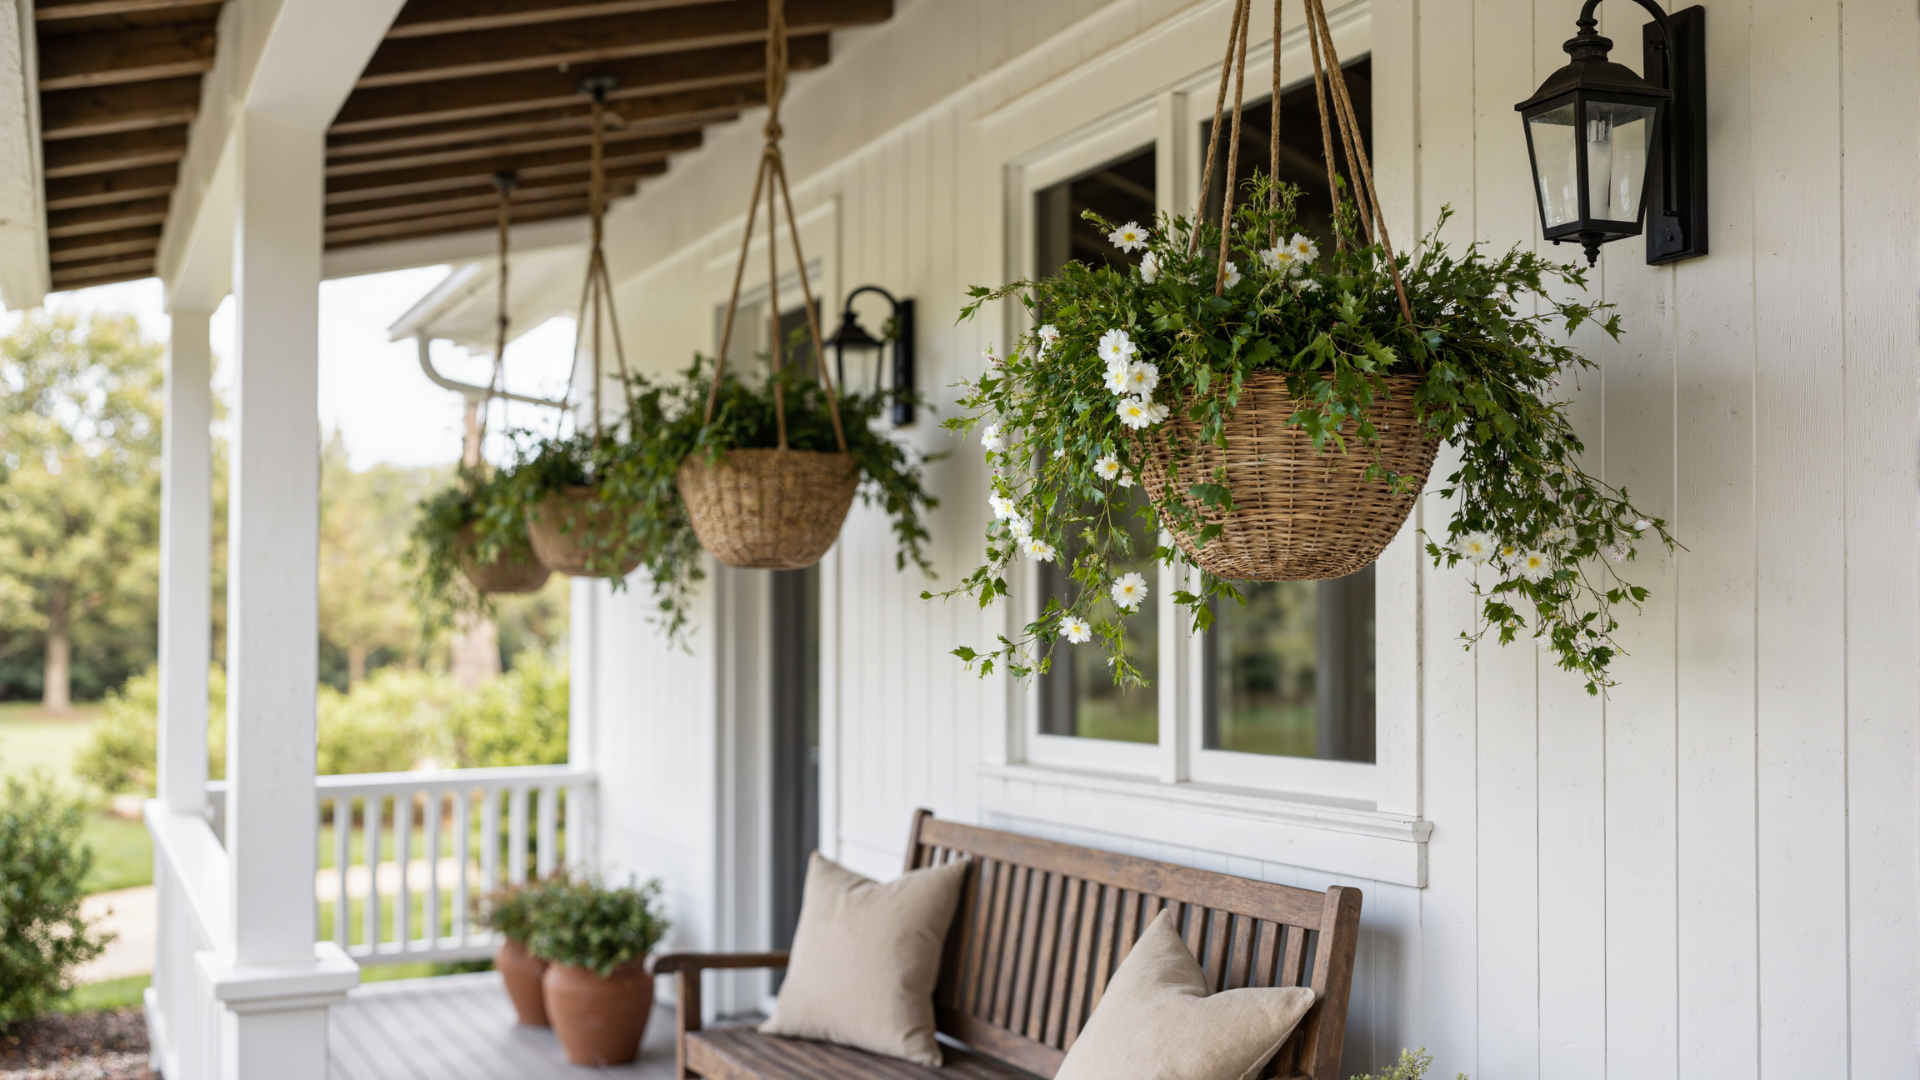
24. Layer Natural Shade with Hanging Baskets on a Farmhouse Porch
The inviting look of this porch comes from a simple style equation: 40% crisp white structure (walls, windows) + 40% warm, dark wood (ceiling, bench) + 20% lush, layered greenery. The stark contrast between the white and dark brown creates a strong graphic foundation, while the hanging baskets and potted plants add softness, life, and a vital layer of natural texture. The beige pillows bridge the gap between the white walls and brown wood.
|
$264.99
|
$19.99
|
$124.00
|
$12.99
|

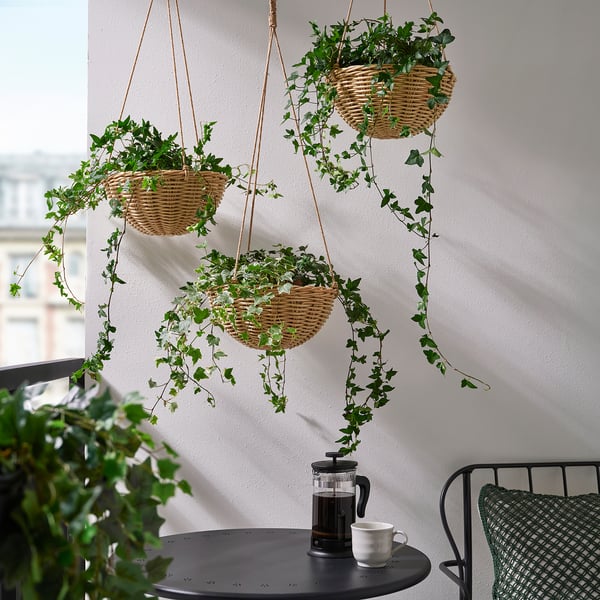

“that truly brings this porch to life is the hanging baskets.”
Without them, it’s a perfectly nice, but somewhat static, arrangement of wall, bench, and ceiling. The baskets introduce a dynamic, slightly wild element. Their round shapes break up all the straight lines, and their cascading foliage adds a layer of shade and visual interest at eye level, making the space feel instantly more lush, lived-in, and welcoming.
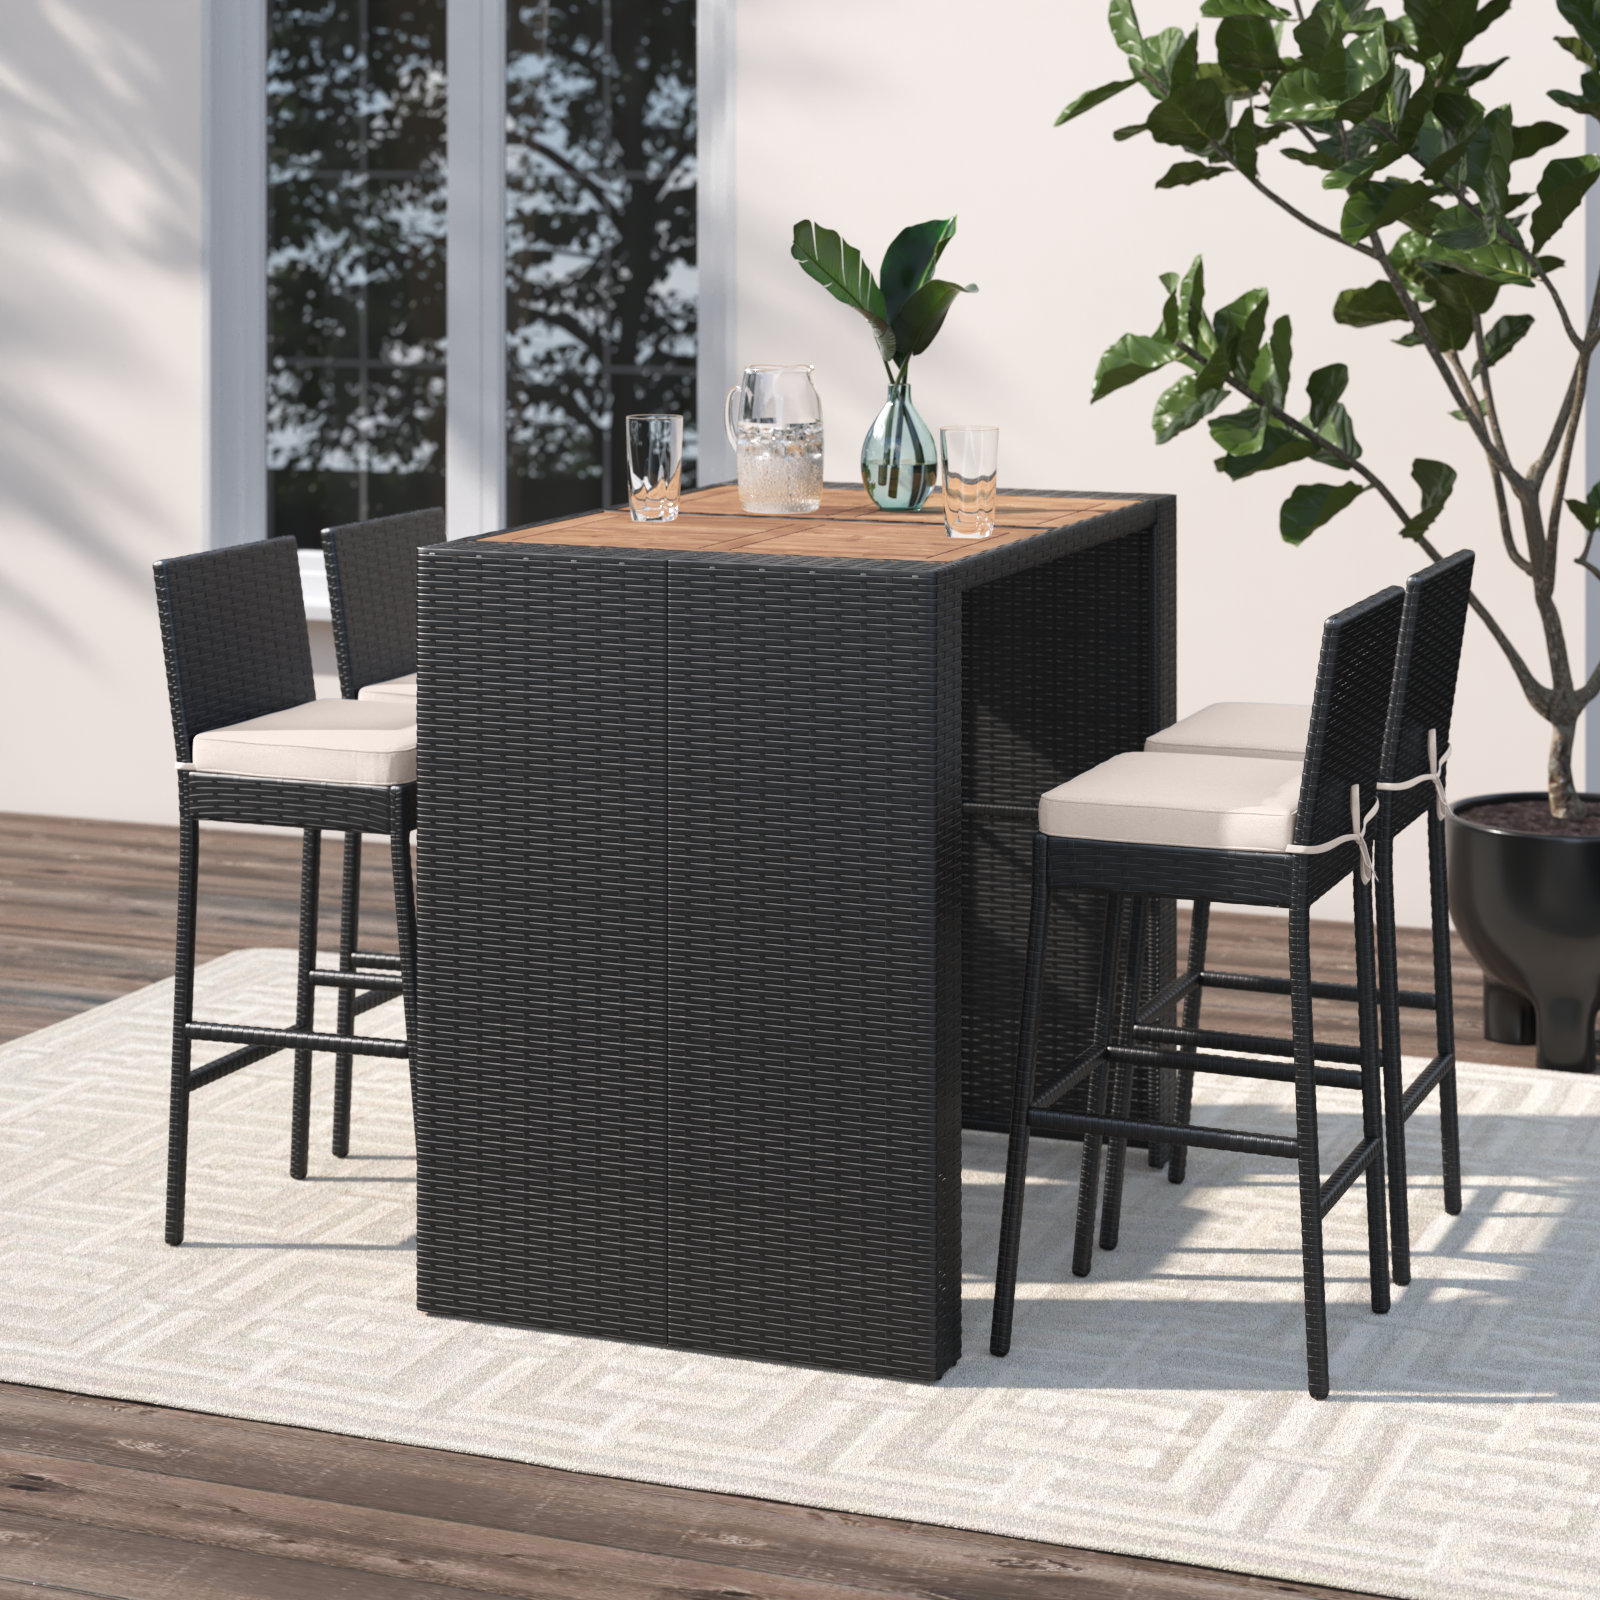
25. Add Quick Privacy with a Grommeted Screen Panel
This is one of the fastest and most affordable ways to add significant privacy and shade to an existing pergola or porch. Ready-made privacy screens like this are available at most home improvement stores and online for $40-$100. They are designed to be installed in minutes using zip ties or bungee cords through the built-in grommets. You can create a more private dining nook or block the view of a neighbor’s yard in less than an hour.
|
$49.49
|
$250.00
|
$448.00
|
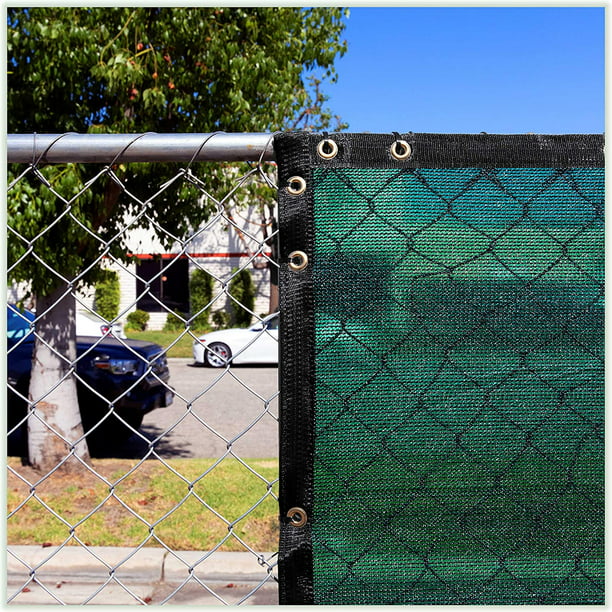
“When installing a grommeted screen, always use all the grommets provided.”
Skipping some to save time will cause the screen to sag and will put too much stress on the grommets you do use, especially in the wind. Use ball bungees instead of standard zip ties; the slight flex they provide allows the screen to absorb wind gusts rather than fighting against them, which will make the screen and its anchor points last much longer.
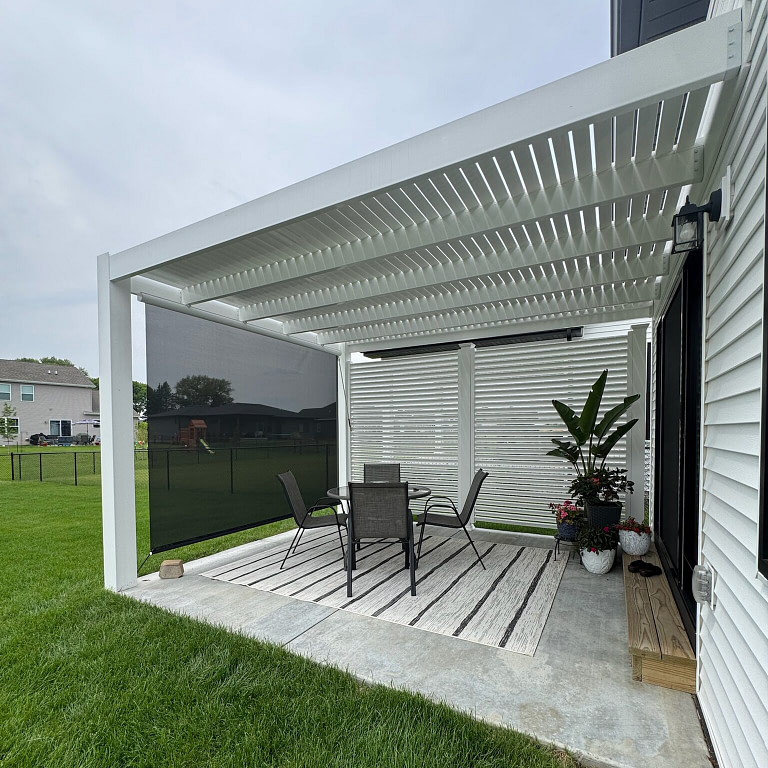
26. Mix Structures with a White Louvered Roof and a Dark Mesh Screen
This combination works beautifully because it layers different types of shade control. The white louvered roof provides adjustable overhead protection from sun and rain, while the dark mesh roller screen tackles the low, angled sun of the late afternoon and adds a level of privacy. They solve two different problems. The high contrast between the white structure and the dark screen also adds visual interest, giving it a sharp, contemporary look. This is a great alternative to the all-black look in Idea #3, offering a lighter, airier feel.
|
$3,023.98
|
$1,399.75
|
“This two-part system is ideal for small to medium-sized patios (around 100-250 sq ft) that get intense, direct sun from multiple angles throughout the day.”
A simple roof or a simple screen might not be enough. It’s a perfect fit for patios off a main living area, where the flexibility to have full sun, partial shade, or full enclosure makes the outdoor space vastly more usable.
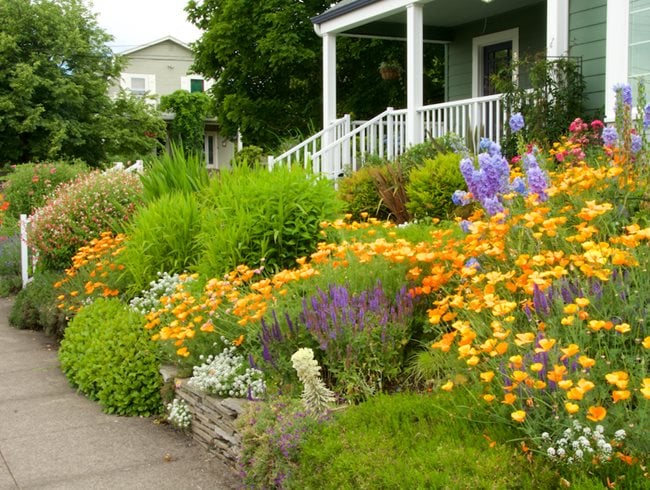
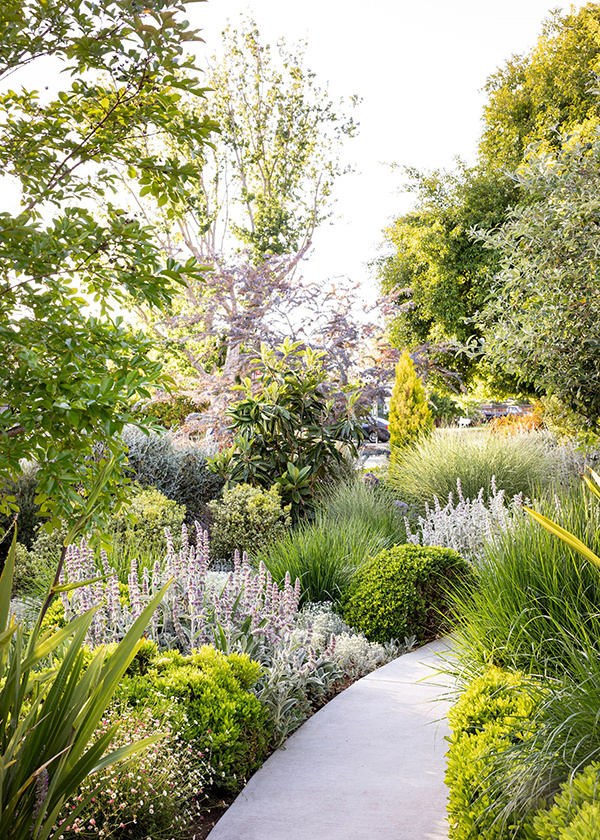
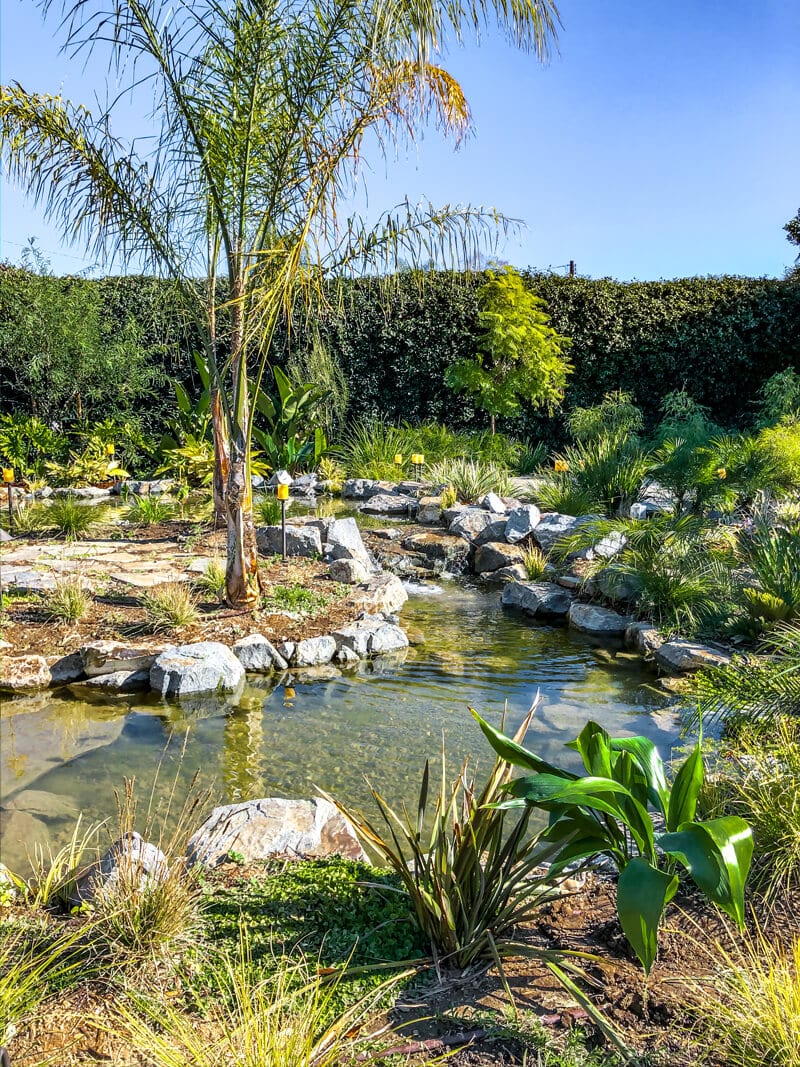
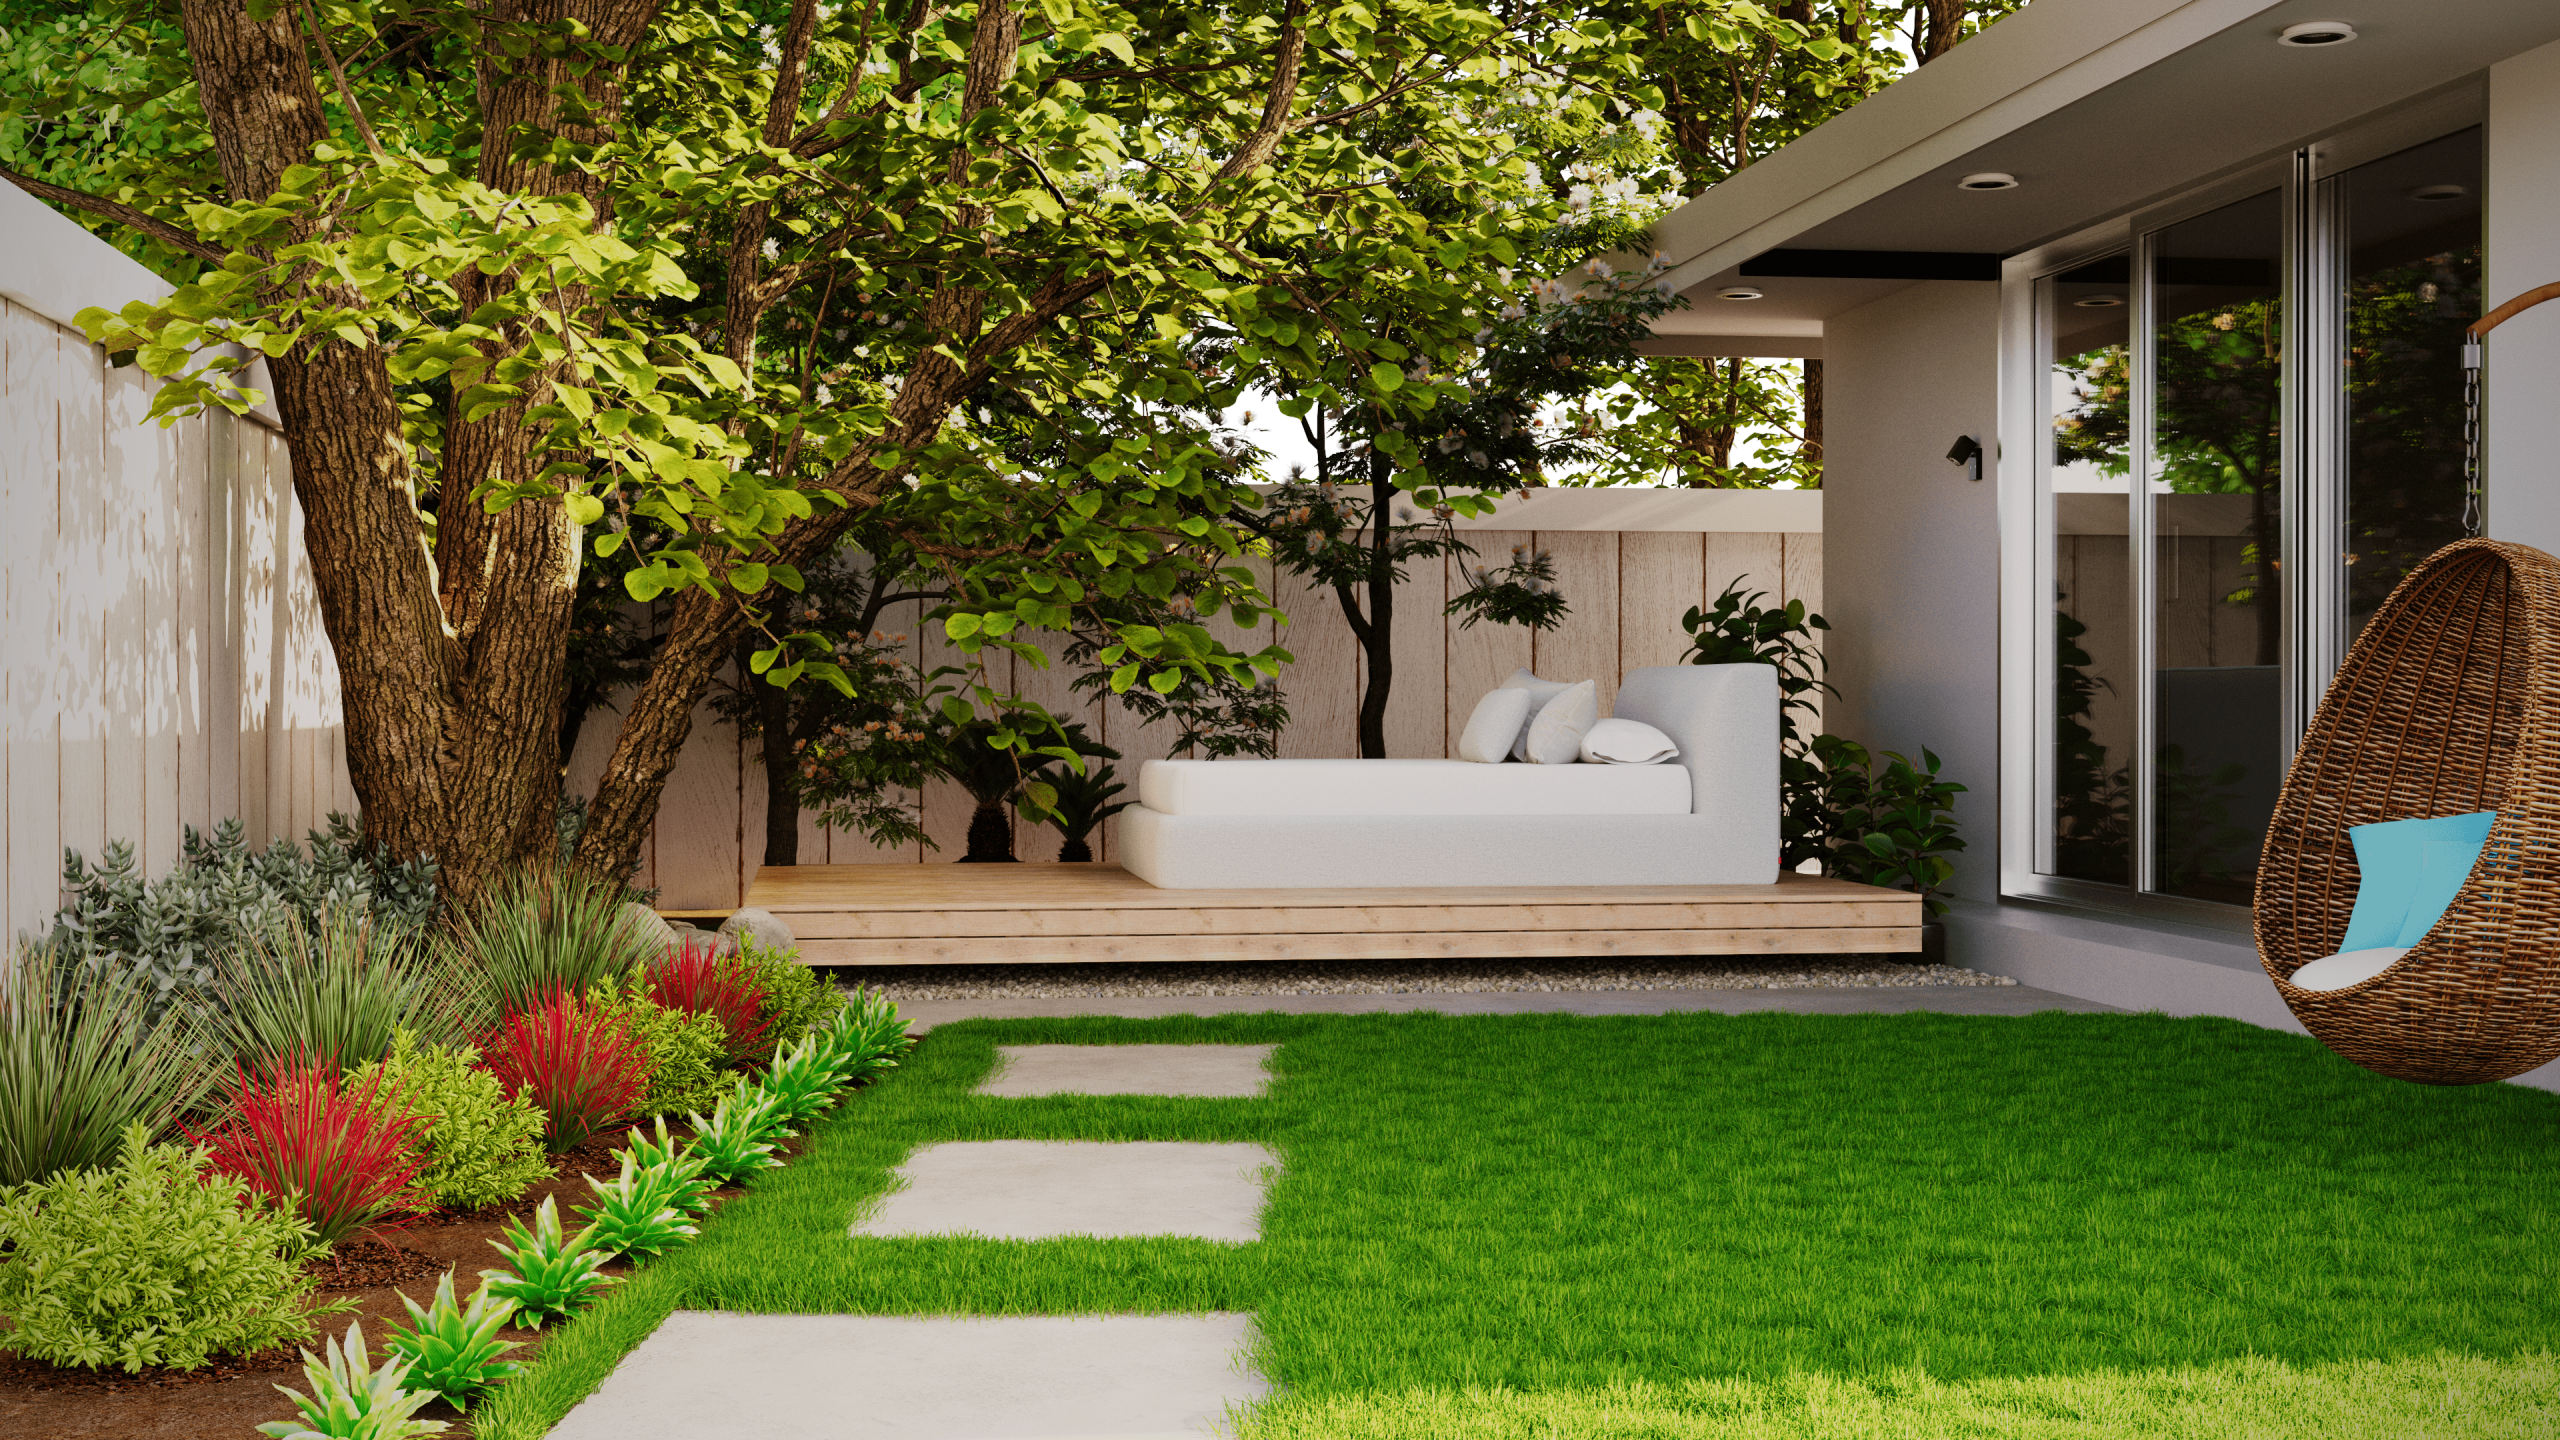
27. Design with Nature: A Lounge Deck Shaded by Greenery
Let’s be honest: this solution requires either a significant amount of patience or a hefty landscaping budget. Creating natural shade with trees and large shrubs is a long-term project. It can take 5-10 years for newly planted trees to provide meaningful shade. If you want this look now, you’ll be paying a premium for mature, transplanted specimens. It also requires an ongoing commitment to watering, pruning, and general garden maintenance.
|
$3,499.00
|
$7.52
|
$139.00
|
$31.04
|
“There’s a major movement in garden design towards creating “biophilic” spaces—environments that connect us directly with nature.”
This is a perfect example. Instead of building a man-made structure for shade, the design uses living plants. This approach is gaining popularity as people look for more sustainable, life-affirming ways to design their outdoor spaces. It’s less about imposing a structure on the landscape and more about curating the landscape itself to provide comfort.
28. Anchor a Large Patio with a Dark Wood Slatted Pergola
This pergola successfully anchors a very large, multi-zone patio by serving as a unifying visual element. Its dark color provides a strong contrast against the lighter stone and cushions, and its slatted structure is repeated over both the lounging and dining areas, tying them together. The structure is substantial enough to match the scale of the stone fireplace and pillars, creating a balanced and harmonious composition that feels grand but not empty.
|
$925.00
|
$900.00
|
$2,038.50
|
$169.99
|

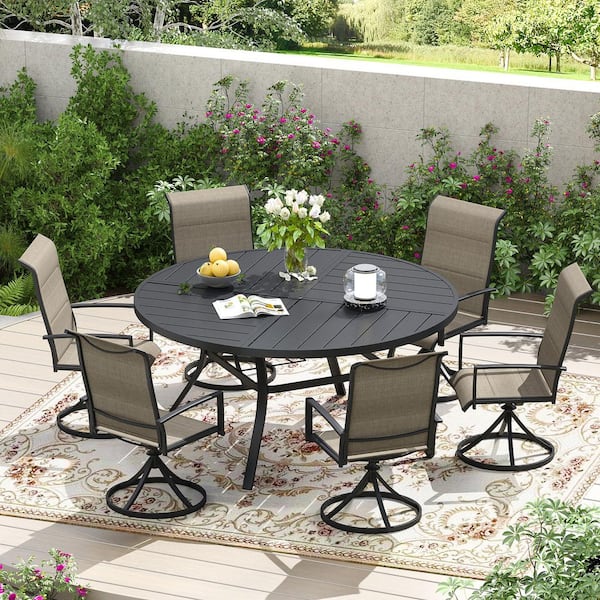
“On a large patio with multiple zones, use a single large rug to anchor the main seating area, as seen with the grey modular sofa.”
Don’t try to put a small, separate rug under every zone. The large rug defines the “living room” space, while leaving the dining area and other spaces with bare pavers. This creates clear visual separation and avoids a cluttered, choppy look.
29. Get Rain Protection and Diffused Light with a Clear Corrugated Roof
A clear roof is fantastic for keeping rain out while letting light in, but it will show every bit of dirt, pollen, and bird droppings. To keep that clear, clean look, you’ll need to hose it down every few weeks and give it a good scrubbing with a long-handled brush and soapy water at least two or three times a season. The corrugations can also trap leaves and debris, so clearing those out is essential to prevent discoloration and water-damming.
|
$59.99
|
$778.53
|
$377.99
|
$2,342.21
|

“If a full wood pergola is out of your budget, you can achieve a very similar result for much less.”
Use standard pressure-treated posts and a simpler frame structure. The key element is the clear corrugated roofing, which is very affordable at stores like Home Depot or Lowe’s. By focusing the budget on the functional roofing and simplifying the wooden frame, you can get a rain-proof, light-filled patio cover for under $1,000 in materials.
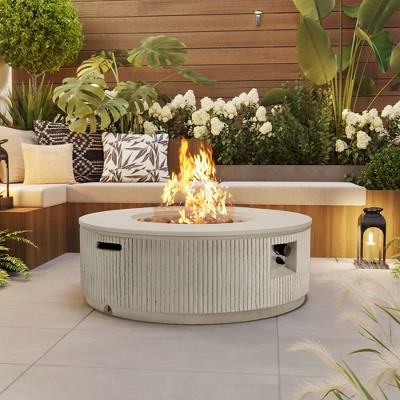
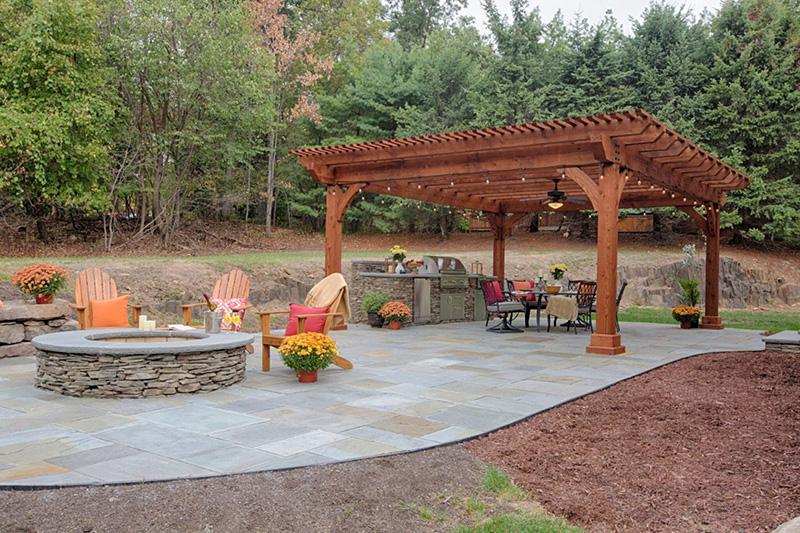
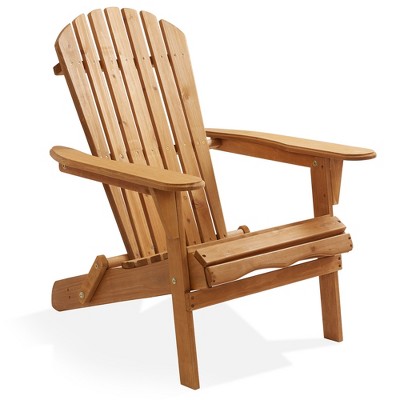
30. Combine Cooking and Lounging Under a Brown Wooden Pergola
This inviting space is all about warm, natural balance. The formula is roughly 50% warm wood and earth tones (pergola, mulch, Adirondack chairs) + 40% cool neutrals (grey pavers and stone) + 10% vibrant accents (greenery, orange cushions). This balance of warm and cool tones is what makes it feel both cozy and fresh. The string lights and orange accents provide just enough of a color pop to add energy to the otherwise neutral palette.
|
$6.19
|
$64.99
|

“A multi-functional setup like this, combining dining, cooking, and lounging, requires a generous footprint.”
You’ll need a minimum of 350-500 square feet to accommodate everything without feeling cramped. The key is to have at least 4-5 feet of clear walkway space between the different zones—the fire pit circle, the dining table, and the outdoor kitchen—to allow for comfortable flow and safe access.
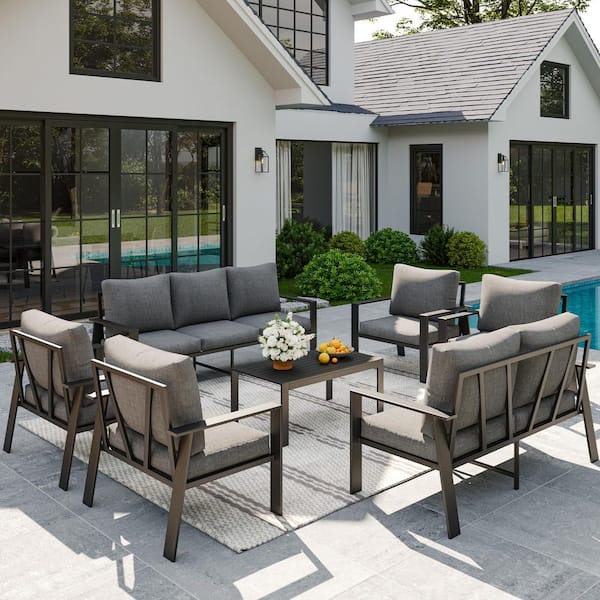
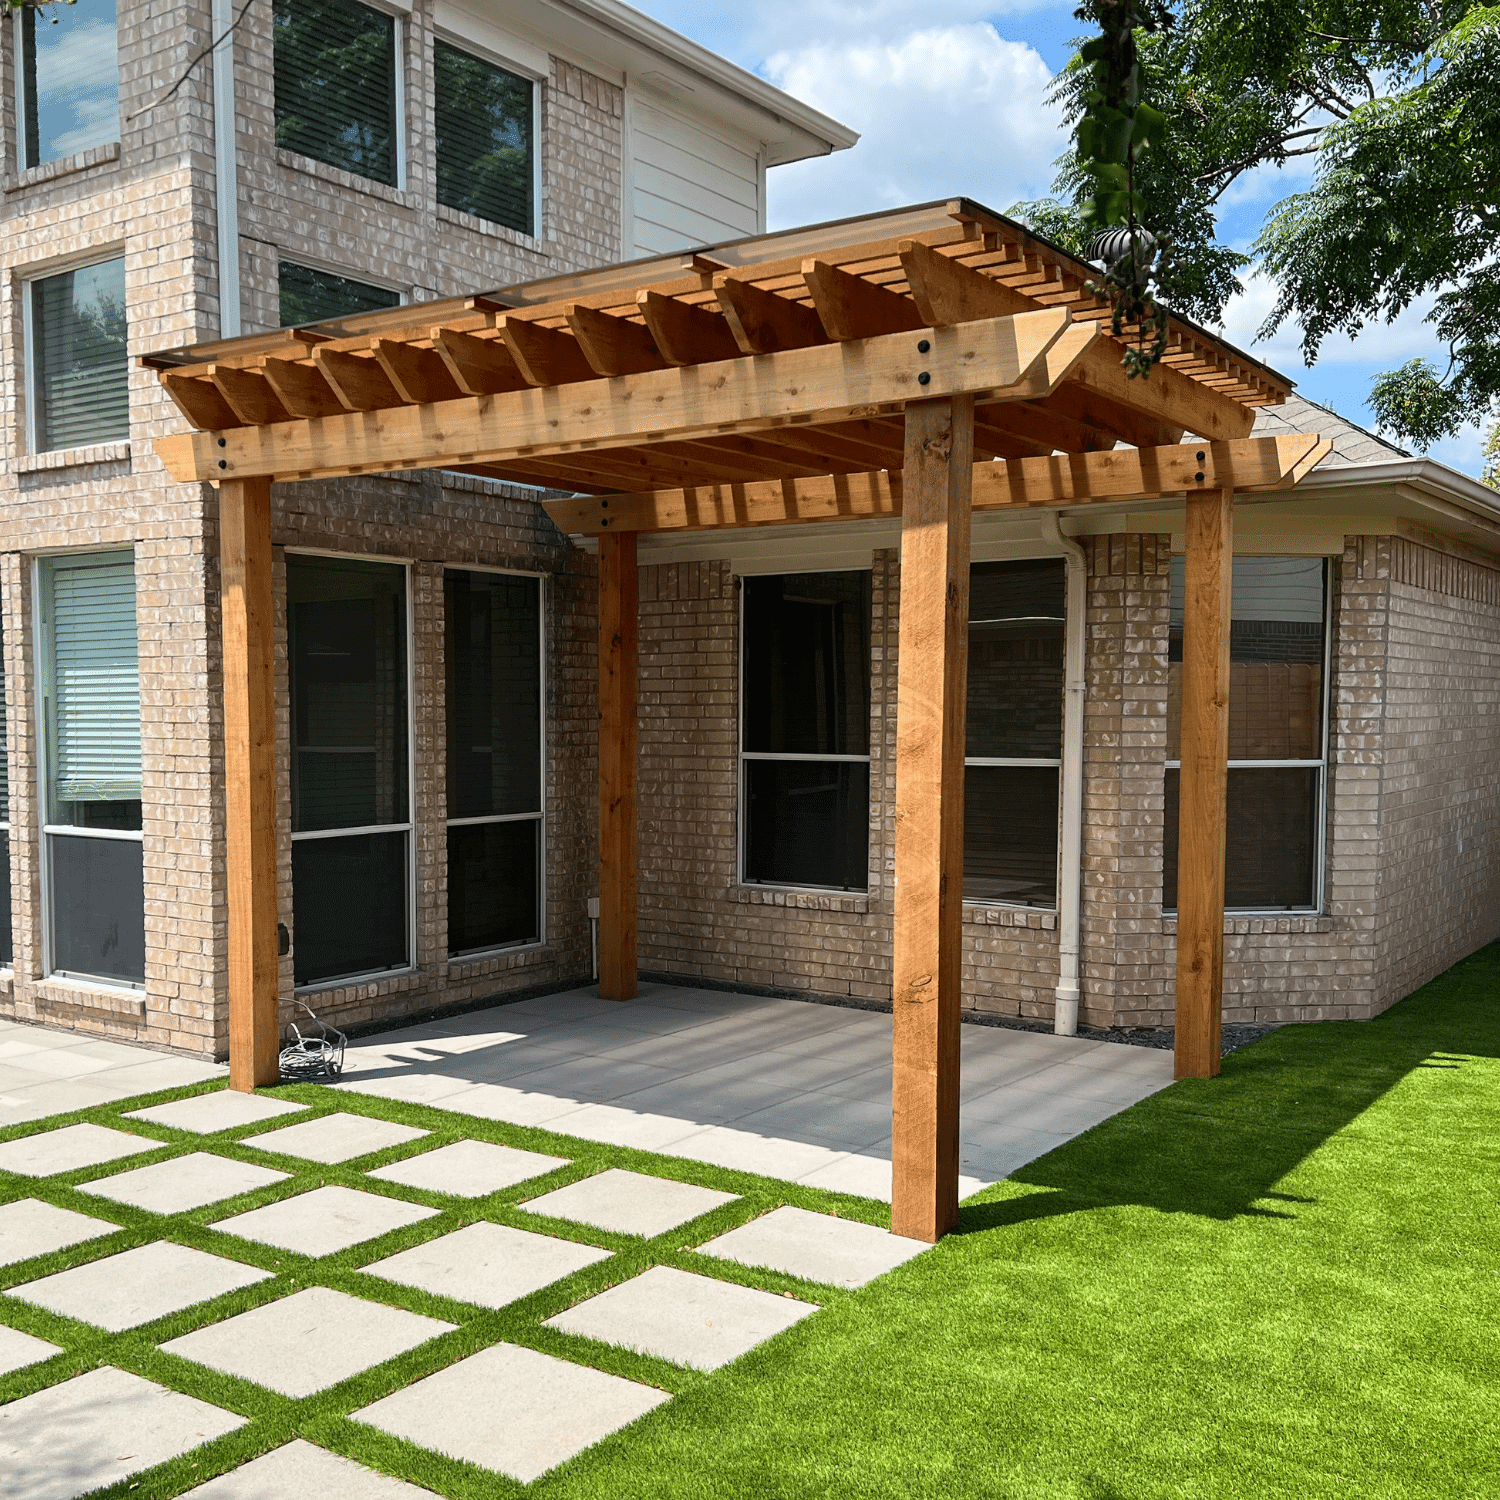
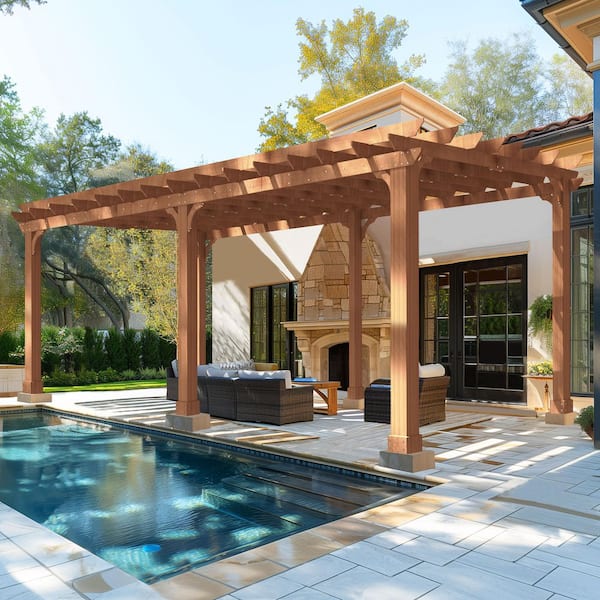
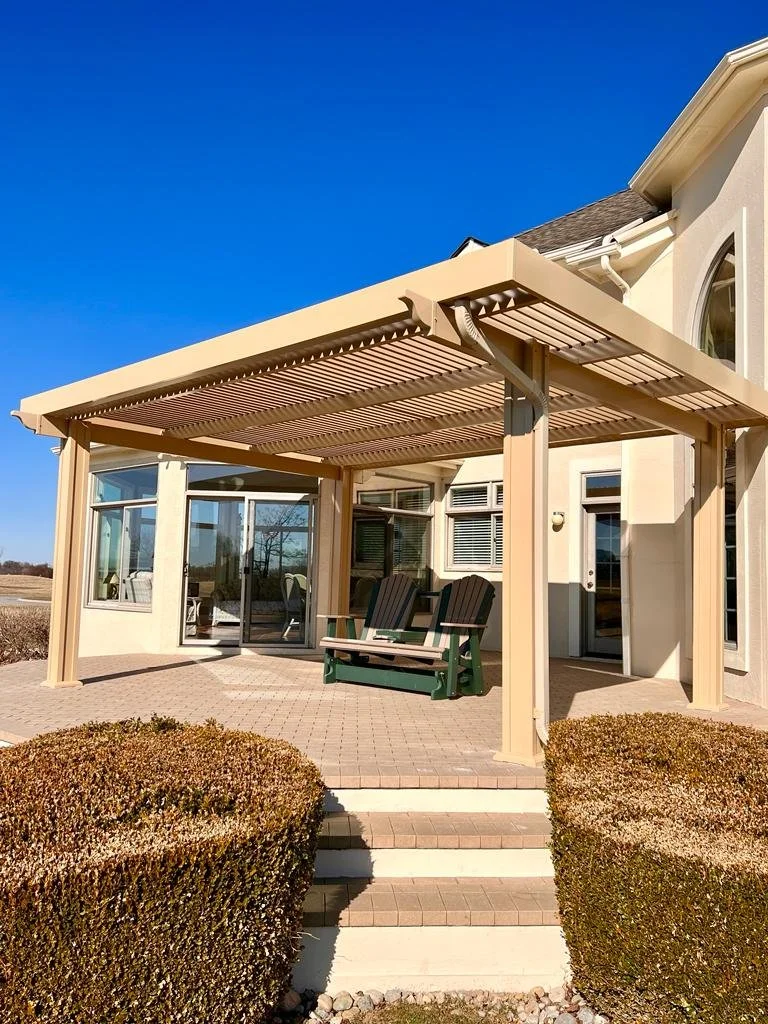
31. Go for Architectural Elegance with a Beige Louvered Pergola
The single thing that sets this apart is its substantial, architectural quality. This isn’t a simple post-and-beam kit; it’s a piece of architecture. The thick frame, the integrated louvers, and the clean connection to the house make it feel like a deliberate and permanent extension of the home itself. It has weight and presence. This provides a more substantial, architectural feel compared to the simpler wooden pergola in Idea #5.
|
$338.00
|
$599.00
|
$166.75
|
$28.17
|

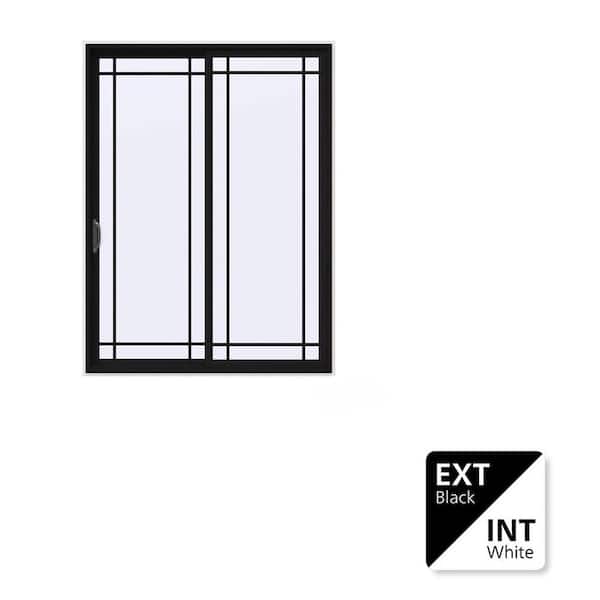
“This design works because of its seamless integration.”
The beige color of the pergola is carefully chosen to match or complement the light stucco of the house, so it doesn’t look like a foreign object that landed in the backyard. This tonal approach creates a serene, sophisticated, and unified aesthetic. The clean lines of the pergola also echo the modern lines of the large glass sliding doors, further reinforcing the connection between inside and out.
Shade That’s Made for You
With so many options, from simple DIY sails to fully integrated architectural pergolas, the perfect shade solution for your patio is within reach. Think about how you want to live in your space, and choose an idea that solves for the sun, rain, or privacy you need. Then, get ready to enjoy your most comfortable outdoor season yet.
Found your inspiration? Pin your favorite ideas to your “Outdoor Living” board on Pinterest and start planning!
Photo credits: Efrem Efre, Christian Ventura, Jan Canty / Pexels, Shading Texas, Sailrite, Blind & Shade Products, Craftivity Designs, FireSky Outdoor, Bob Vila, W.A. Zimmer Company, Vicllax Outdoor, Heartland Pergolas, StruXure, Baytown Deck Builders, Patio Covers Ohio, Made in the Shade San Antonio, Sunbrella, Transcend Blinds & Shutters, Houston Landscape Pros, George Constructions, NeliDesign, B&L Woodworking, American Awning, Sunair Awning, O’Keefe Built, SPF Screens & Awnings, Metro Screenworks, Formosa Covers, Artera Home, Better Homes & Gardens / Web, ljlabarthe / Pixabay