You know that feeling when you scroll past a photo and it just stops you? That little bit of magic you want to capture for your own home? That’s the power of a well-crafted fairy jar. After filtering through hundreds of options across Etsy, Target, and even Facebook Marketplace, we narrowed it down to the looks that really deliver. Inside, you’ll find 31 distinct ideas, from rustic wall sconces to enchanting terrariums, that prove mason jar crafts are more sophisticated than ever.
This isn’t just about plopping some lights in a jar; it’s about creating a mood. In 2026, the biggest trend is this kind of personalized, ambient lighting that feels both handmade and high-end. And stay until the end — we break down the most common mistakes that can ruin these looks. 📌 Save this to Pinterest for later — you’ll want to revisit these ideas.
1. Three Glowing Jars of Captured Starlight
The One Thing: The distinct, otherworldly color in each jar is what makes this idea so captivating. It’s not just about a warm glow; it’s about creating a trio of mysterious, contained nebulas. The vibrant purple, cyan, and yellow don’t blend but stand apart, each telling its own little story. If you made them all the same color, you’d lose that playful, alchemical feeling of having bottled different kinds of magic. The internal particles catching the light are the key to this effect, making the glow feel textured and deep, rather than just being a colored bulb.
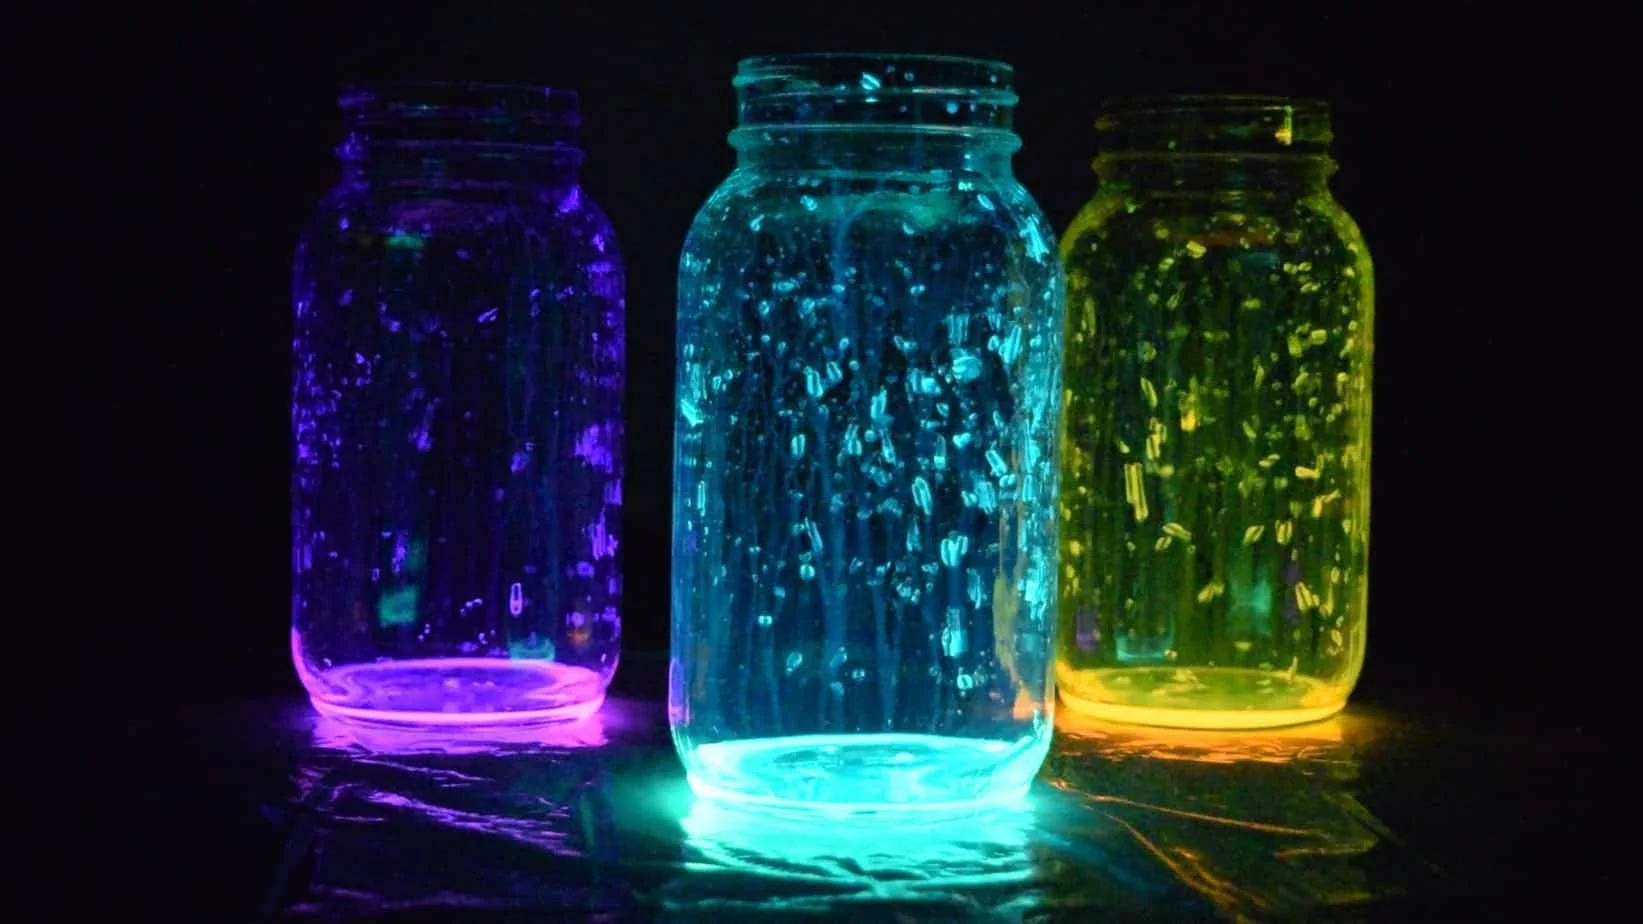
“What Makes It Work: This design is a masterclass in contrast and suggestion.”
The completely dark background forces your eye directly to the three points of light, making them feel intensely vibrant. There’s no distraction. Secondly, the use of a reflective surface below adds a layer of depth and sophistication. It’s not just three jars on a table; it’s a glowing scene that continues into its own reflection, doubling the visual impact without adding clutter. The irregular shapes of the glowing particles inside also create a natural, organic feel, preventing the lights from looking like simple, uniform LEDs.
2. Rustic Mason Jar Sconces with Floral Toppers
Designer Tip: When hanging sconces like these, placement is everything. Don’t hang them so high they feel disconnected from the room. A good rule of thumb is to place the center of the wooden plank at 60-65 inches from the floor, which is average eye level. If you’re flanking a piece of furniture, like a headboard or a console table, ensure the sconces are about 4-6 inches wider than the furniture on each side to give the arrangement proper visual breathing room. This frames the space instead of just occupying it.
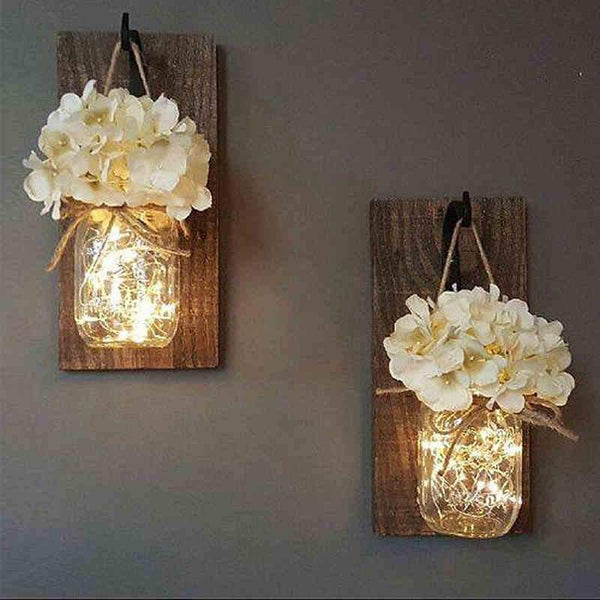
“How-To Brief: You can totally pull this look together yourself in under an hour.”
Here’s a quick guide:Time Estimate: 45 minutesCost Estimate: $30-50Start with a pre-stained wooden plank (around 6″x12″). Screw a decorative black metal hook into the top third.Wrap jute twine securely around the threads of the mason jar’s neck, leaving two long tails.Tie the tails into a sturdy loop or knot for hanging.Gently feed a string of warm, copper-wire fairy lights into the jar.Arrange a small bundle of white faux flowers and tuck them into a twine bow wrapped around the jar’s neck.Hang the jar from the hook and mount the whole sconce to the wall.
3. A Soft Row of Floral-Topped Light Jars
Style Math: This look is all about a gentle, romantic formula. Think of it as 50% soft illumination + 30% rustic texture + 20% delicate floral. The base is the warm, inviting glow from the string lights inside the clear jars. Then, you layer on the rustic texture with the jute twine bows—nothing too polished. Finally, the light pink artificial hydrangeas provide that soft, feminine touch. You could swap the florals for lavender or baby’s breath and the twine for a silk ribbon to shift the mood from rustic to classic romance, but the core formula remains.
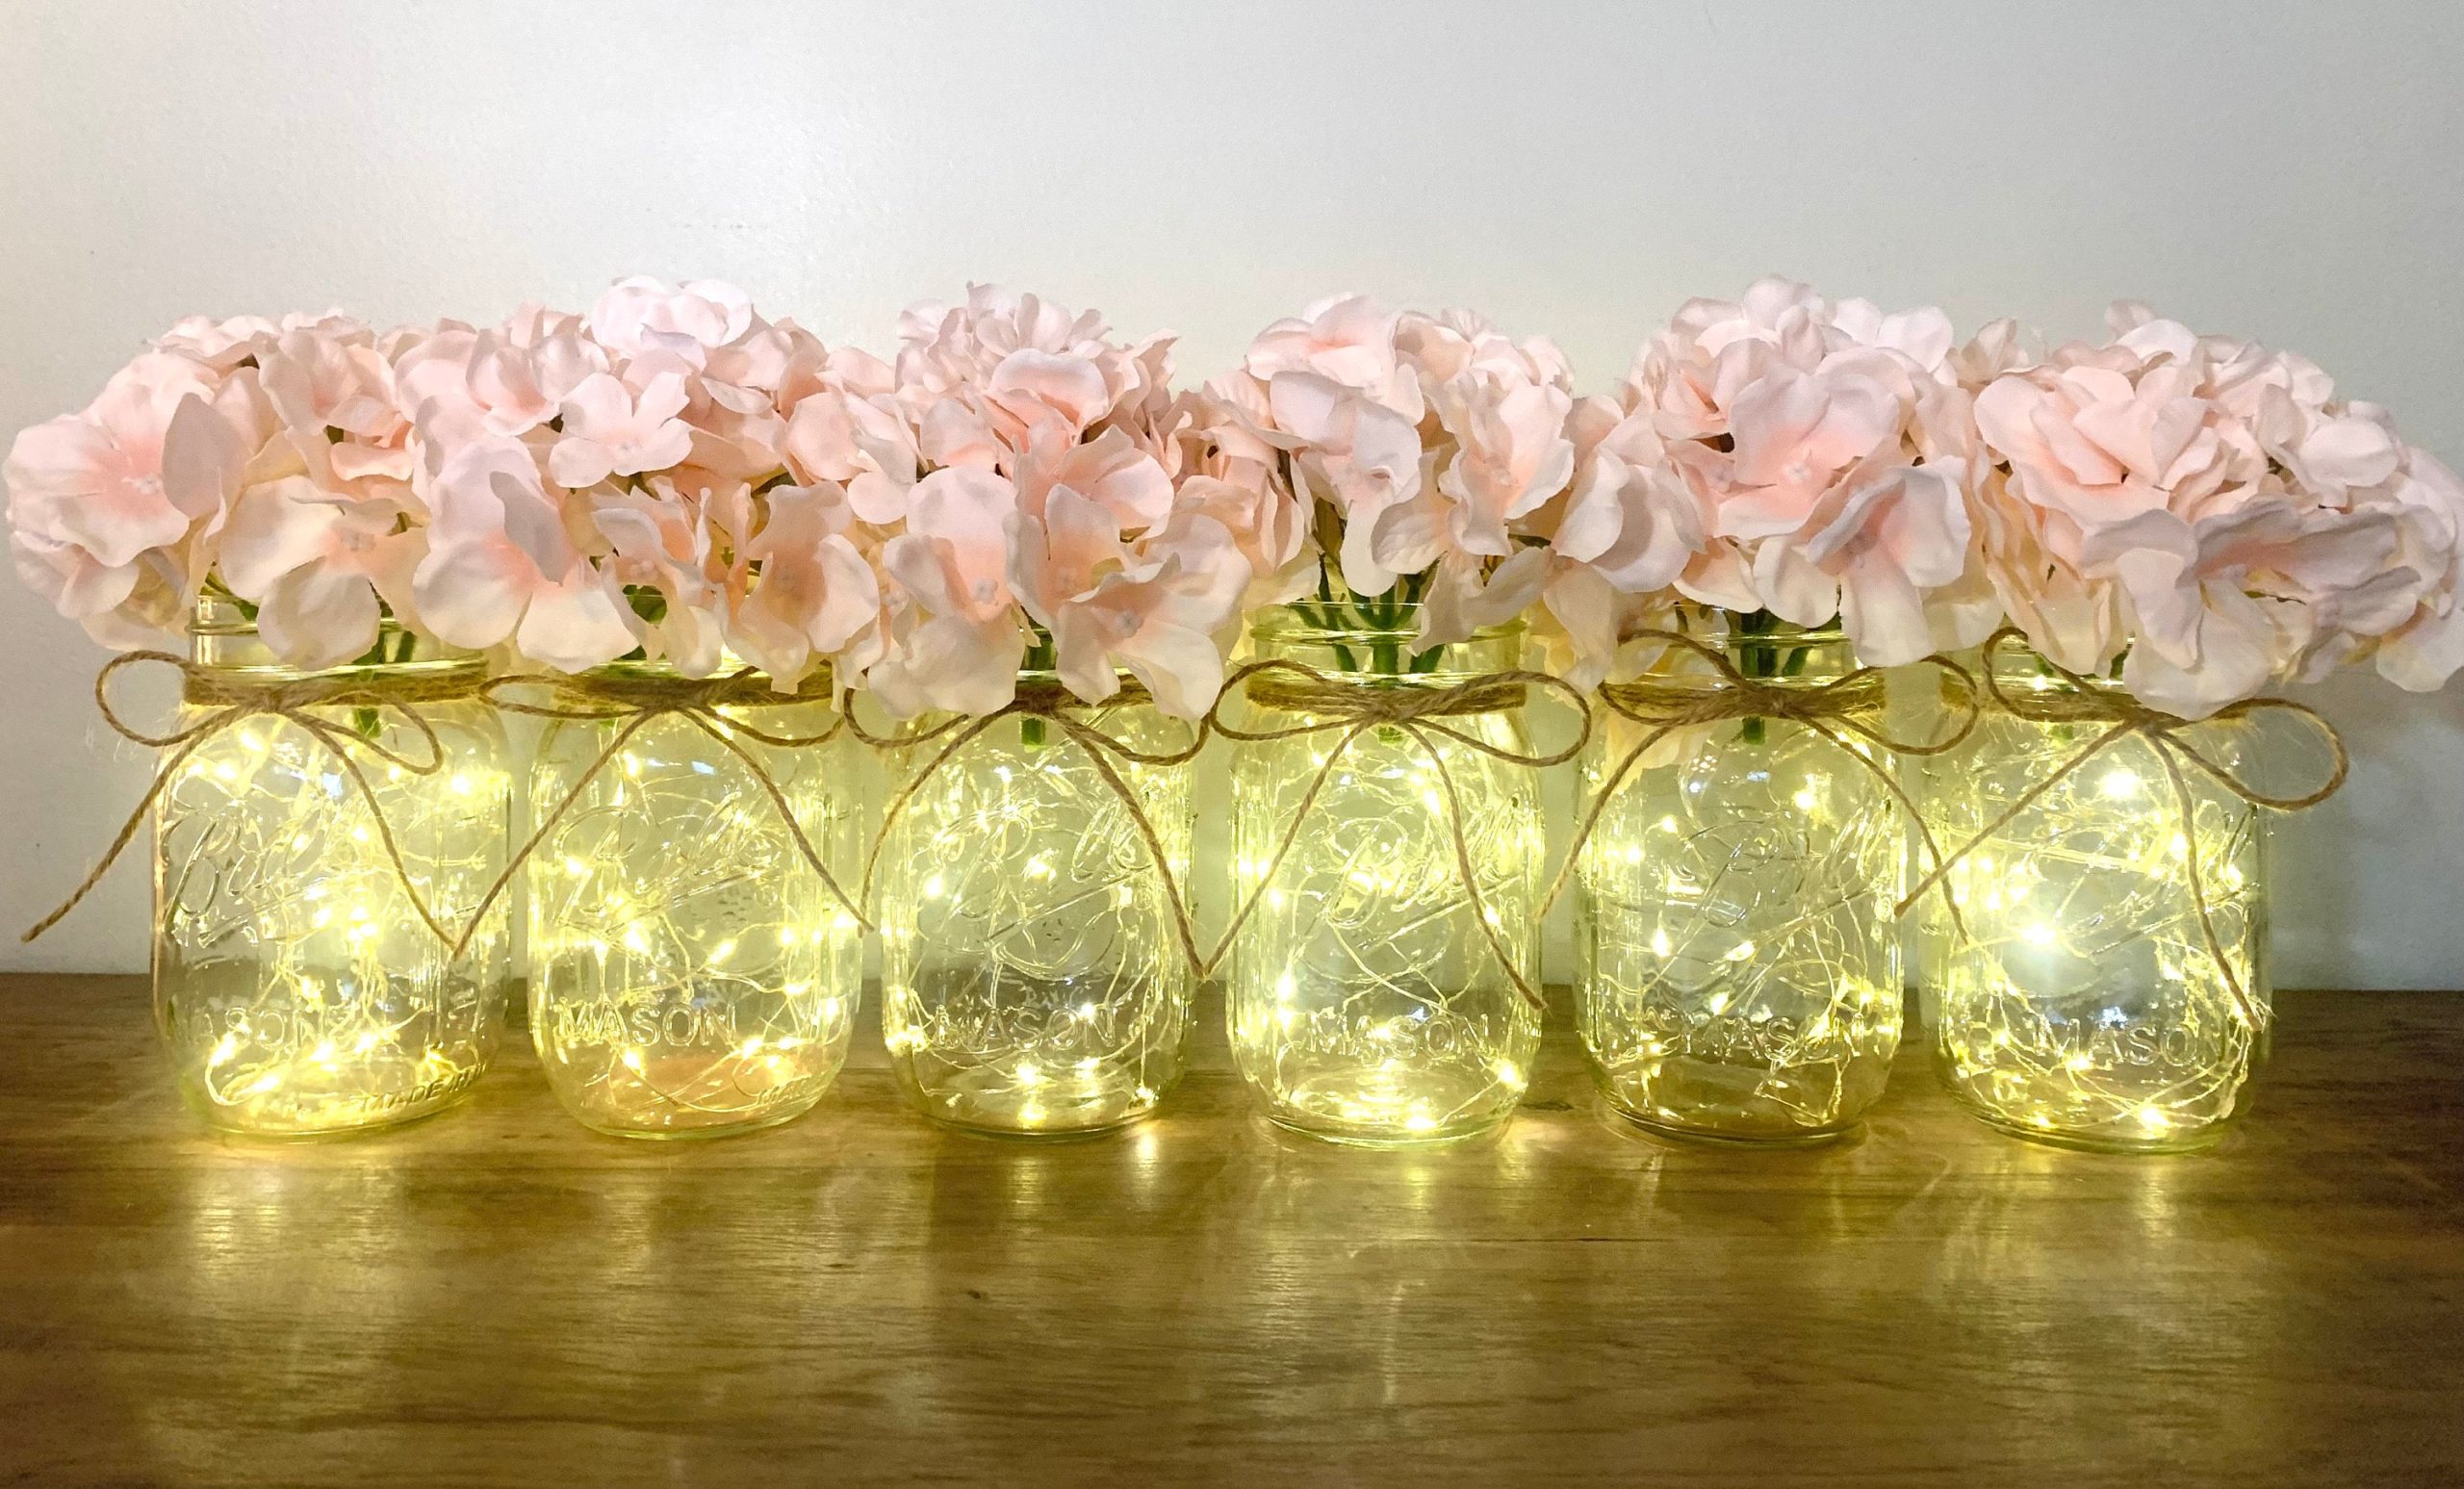
“Get This Look For Less: There’s absolutely no need to buy pre-made floral jar lights.”
The core components here are wonderfully affordable. A case of six mason jars is often under $15. You can find bulk packs of battery-operated fairy lights on Amazon for about $1-2 per strand. For the toppers, hit up a craft store like Michaels or JOANN for a single bunch of artificial hydrangeas (around $10, and you’ll have plenty) and a roll of twine for $3. All in, you could recreate all six of these for under $40, which is likely what you’d pay for just one or two pre-assembled versions online.
4. Festive Heart-Lit Jars with Ruffled Trim
Before You Start Checklist: Before you jump into this adorable project, make sure you’ve got your ducks in a row. It’s more than just lights in a jar!
- Do you have jars with an interesting texture? The diamond pattern here adds a lot of dimension, so a plain jar might not have the same impact.
- What are you using for the heart decal? You can find pre-made vinyl ones on Etsy, or use a stencil and some white paint pen for a more hands-on approach.
- Measure the opening of your jars. You’ll need to cut your ruffled fabric trim about 1.5 times the circumference of the opening to get a nice, full look.
- Check your light color. These jars have a distinct red and pink hue, so using warm white lights is essential to complement those tones instead of clashing with them.
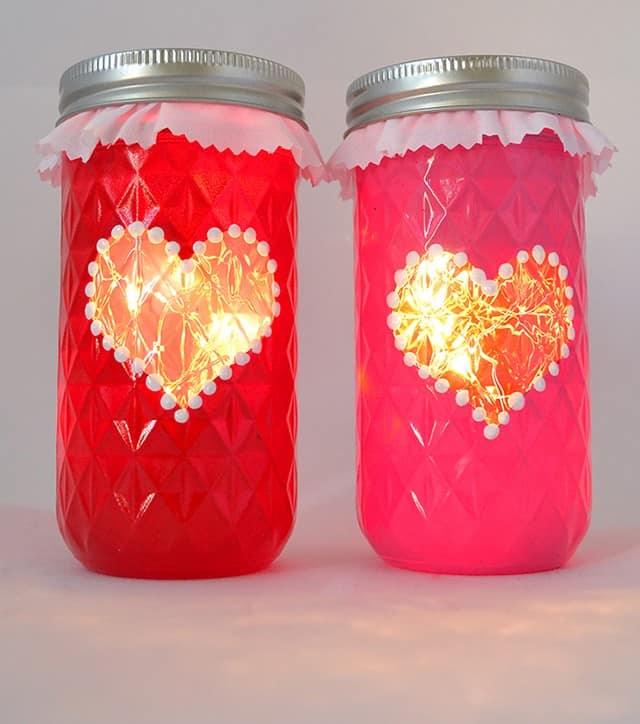
“Real Talk: While super cute, that ruffled fabric trim under the lid can be a bit fussy.”
If you’re planning to use these jars where they might get bumped or need frequent dusting, the fabric can easily get crushed, dusty, or dislodged. It’s also not the most practical choice for an outdoor setting where it could get damp. For a more durable but similar vibe, consider swapping the fabric for a trim of faux pearls or a simple painted scallop pattern around the rim. It gives a decorative edge without the delicate fabric maintenance.
5. Enclosed Butterfly Terrarium with a Wish
What Makes It Work: This little world-in-a-jar works because it masters the art of layering and focal points. Your eye is drawn in by the bright pop of the orange monarch butterfly, which is perfectly placed to be the star. The green moss provides a lush, natural base, while the delicate pink flowers add a touch of softness without competing for attention. The string lights are cleverly woven throughout, not just dumped at the bottom, creating pockets of light that make the whole scene feel alive. The final touch—the ‘always BELIEVE’ tag—transforms it from a craft into a story.
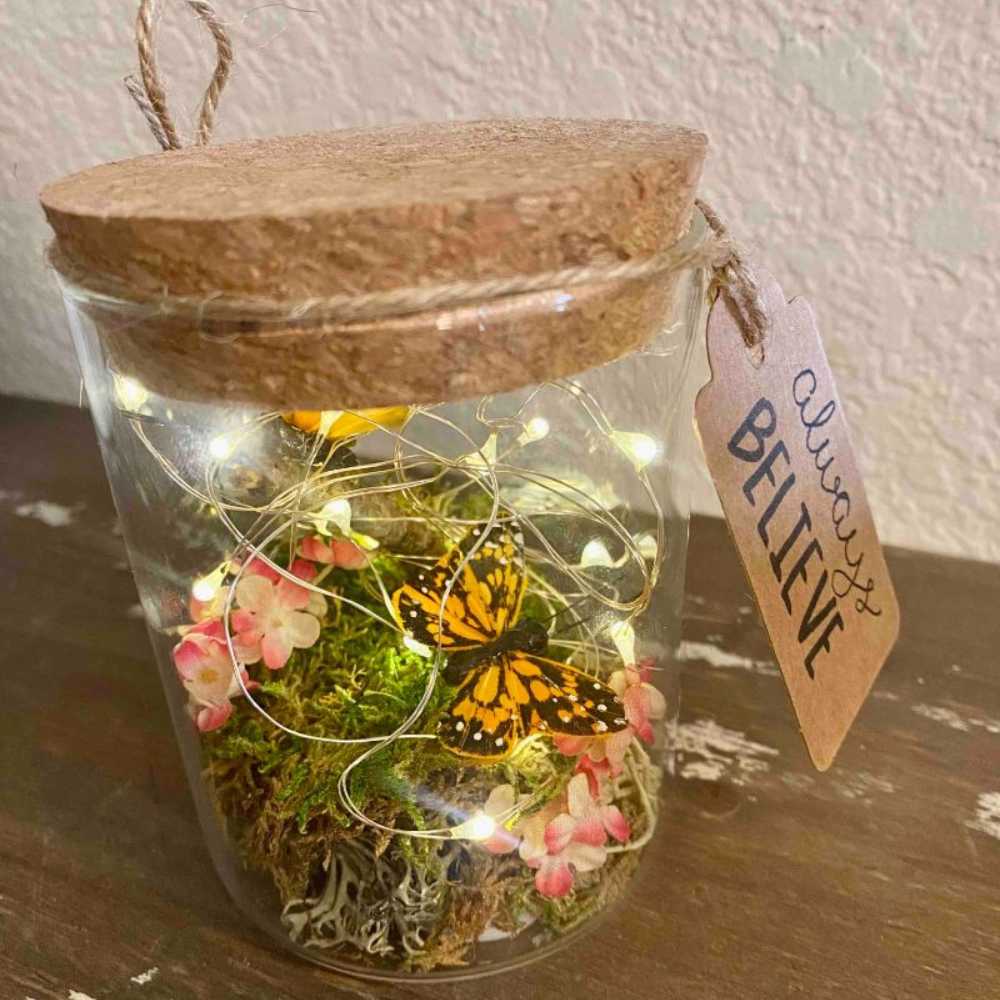
“Maintenance Reality: A sealed jar terrarium seems like a zero-effort piece, but they do have their quirks.”
The biggest issue is dust—not on the outside, but *inside*. Over time, tiny particles from the moss and artificial florals can settle on the glass interior, making it look cloudy. A gentle wipe-down of the inside every six months or so might be necessary, which means carefully removing and rearranging the contents. Also, be mindful of direct sunlight. Even with faux elements, strong UV rays can cause the colors of the butterfly and flowers to fade over a year or two.
6. A Gnome’s Whimsical World in a Clamp-Lid Jar
The One Thing: It’s the cast of characters. The entire charm of this piece comes from the miniature figurines—the little gnomes, the tiny unicorn, the miniature mushrooms. Without them, you just have moss and lights in a jar. But with them, you have a narrative. You can’t help but lean in closer to see what they’re doing. They spark imagination and transform a simple decoration into a tiny, magical diorama. The choice of whimsical, slightly quirky figures is key; they set a playful, storybook tone that is utterly enchanting.
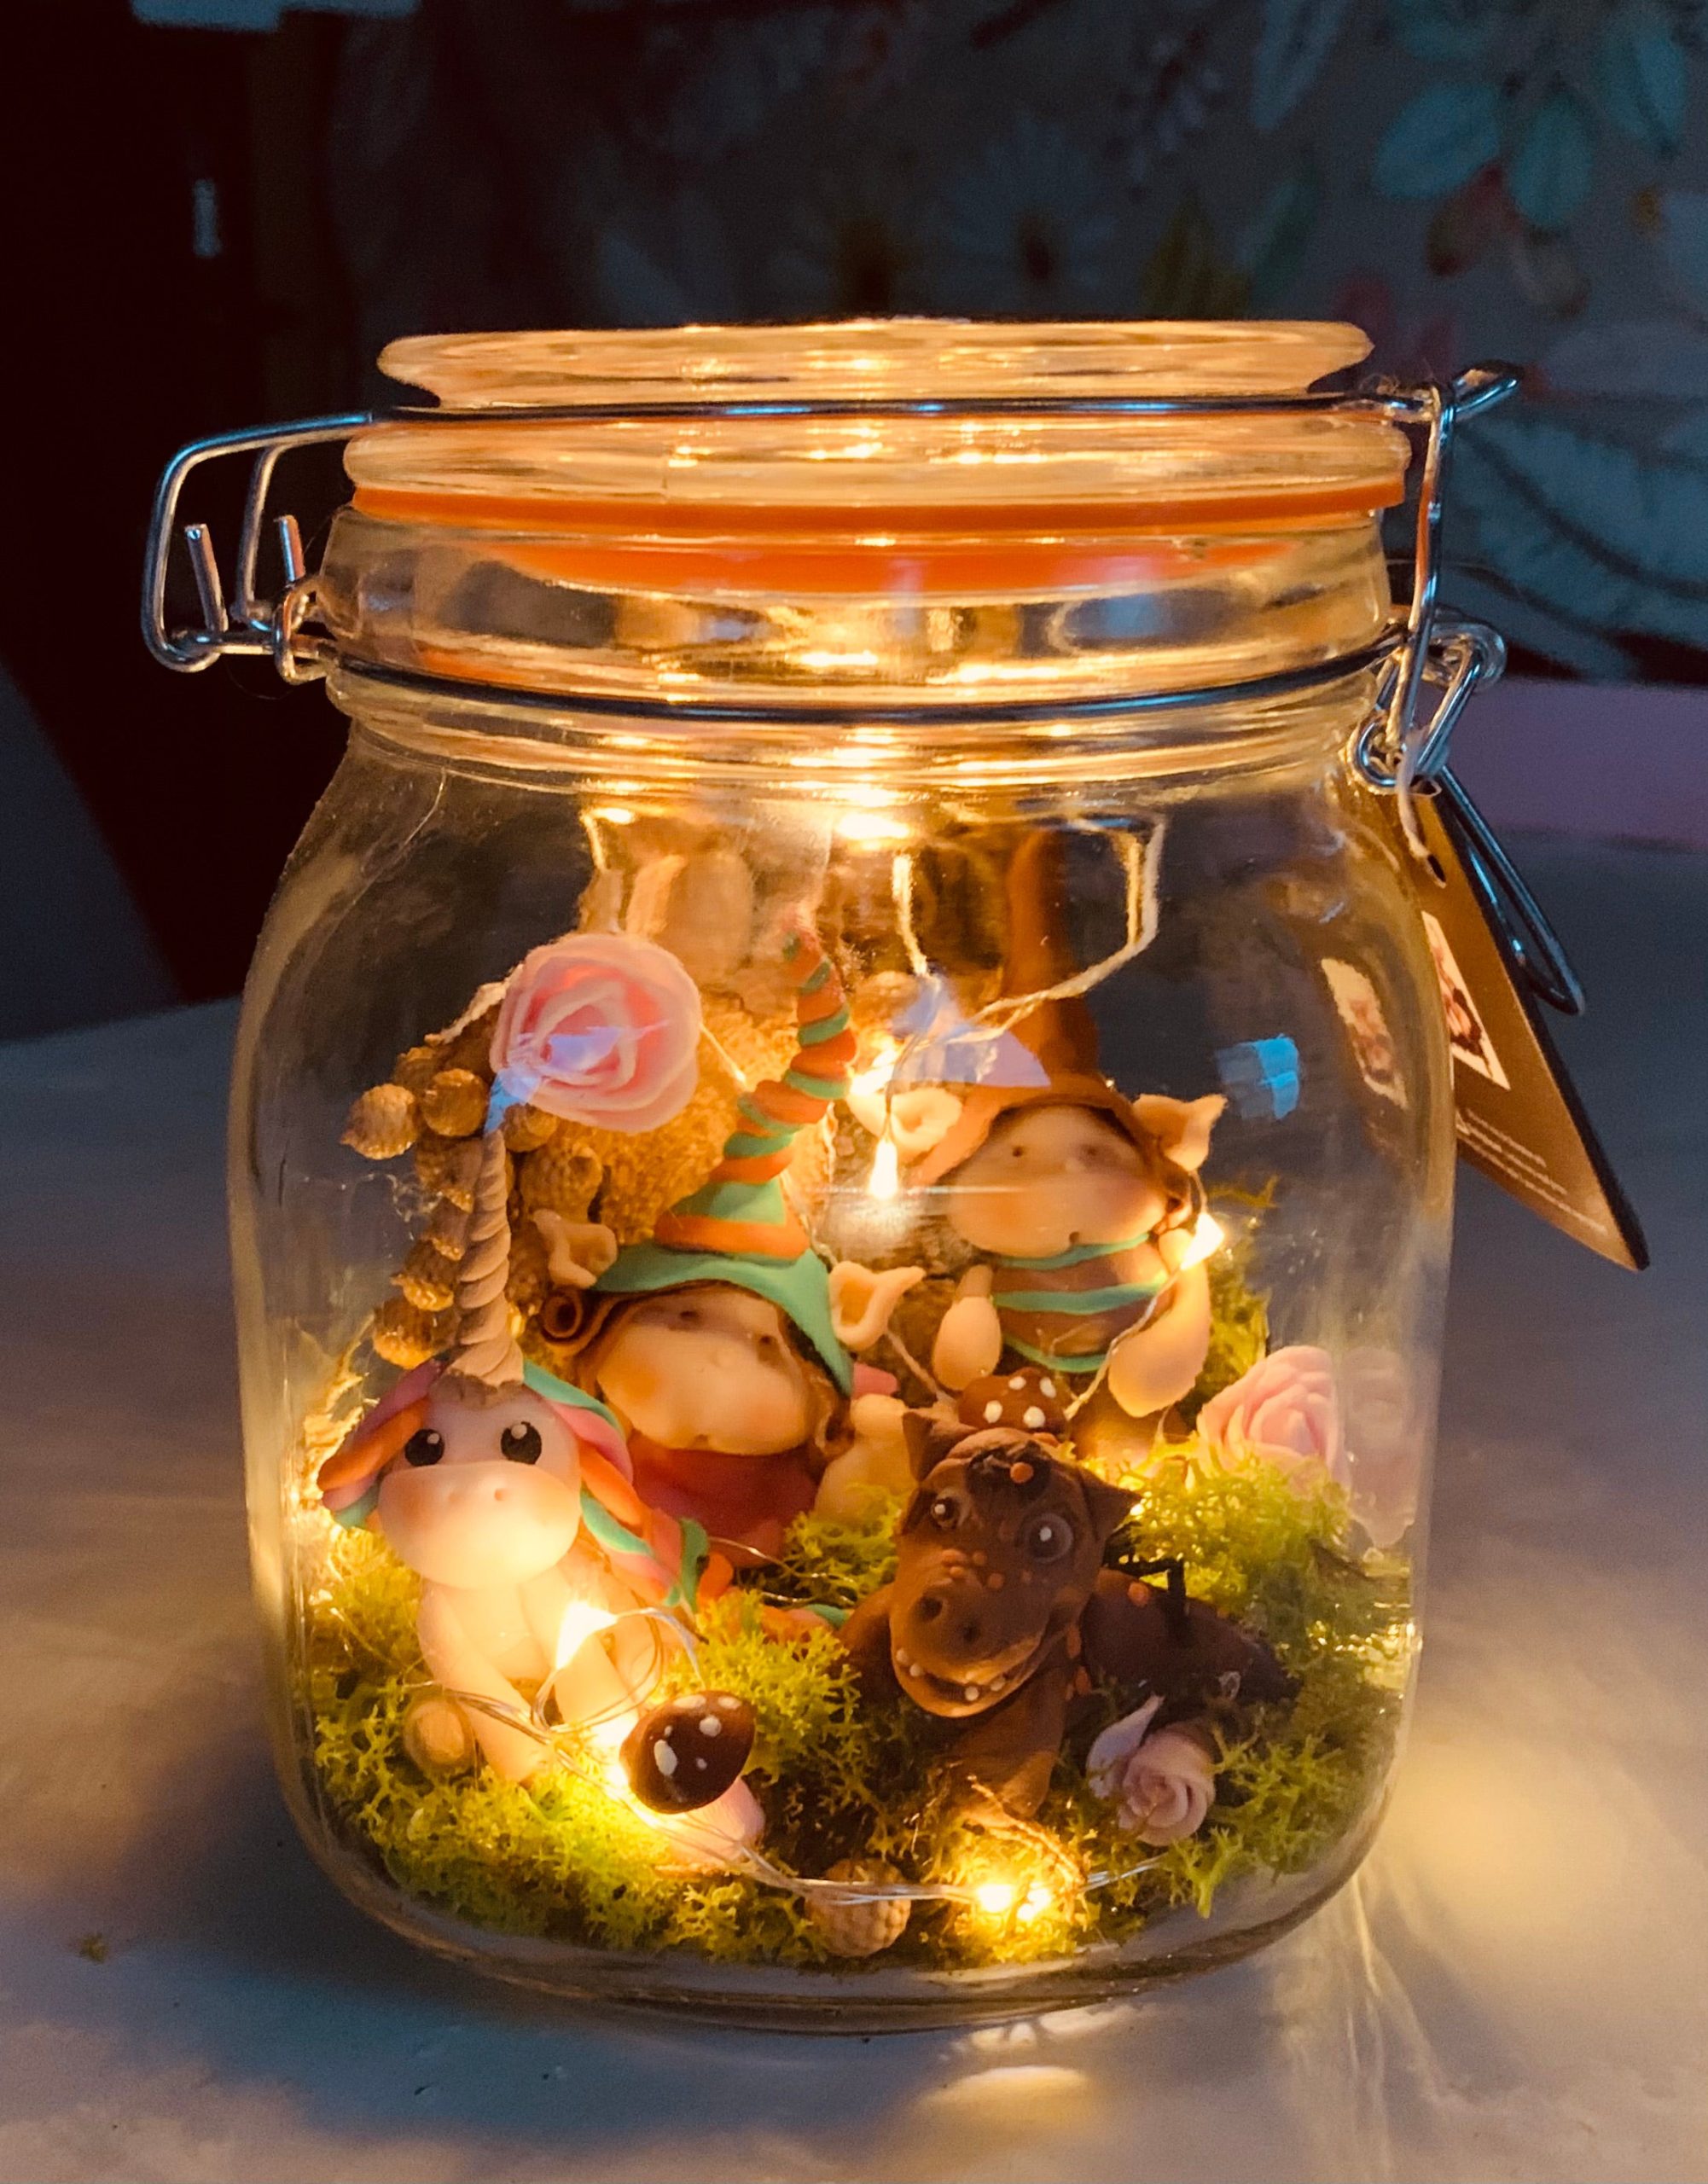
“Scale Guide: This idea is perfect for small-space decorating.”
It’s designed for close-up viewing on a bookshelf, a tiered tray, or a bedside table. It would be completely lost in a large, open-plan living room or on a high mantelpiece. Its ideal home is a surface with a minimum depth of 8 inches to feel stable and a space where people will be within a few feet of it. The magic is in the details, so it needs to be placed where those details can actually be seen and appreciated. It’s a personal piece of decor, not a grand statement.
7. Frosted Jar Lantern with Dancing Fairy Silhouettes
How-To Brief: That beautiful frosted silhouette effect is surprisingly achievable. Here’s a 30-minute crafting guide.
- Time Estimate: 30 minutes (plus drying time)
- Cost Estimate: $15-20 (if you have the jar)
- Start by cleaning your mason jar thoroughly with alcohol to remove any oils.
- Find a fairy silhouette you like online and print it onto sticker paper or vinyl. Carefully cut it out and apply it firmly to the jar, smoothing out any bubbles.
- In a well-ventilated area, spray the entire outside of the jar with 2-3 light coats of frosted glass spray paint. Let it dry completely.
- Once dry, carefully peel off the vinyl sticker. You’ll be left with a perfect clear silhouette against the frosted glass. Fill with lights and you’re done!
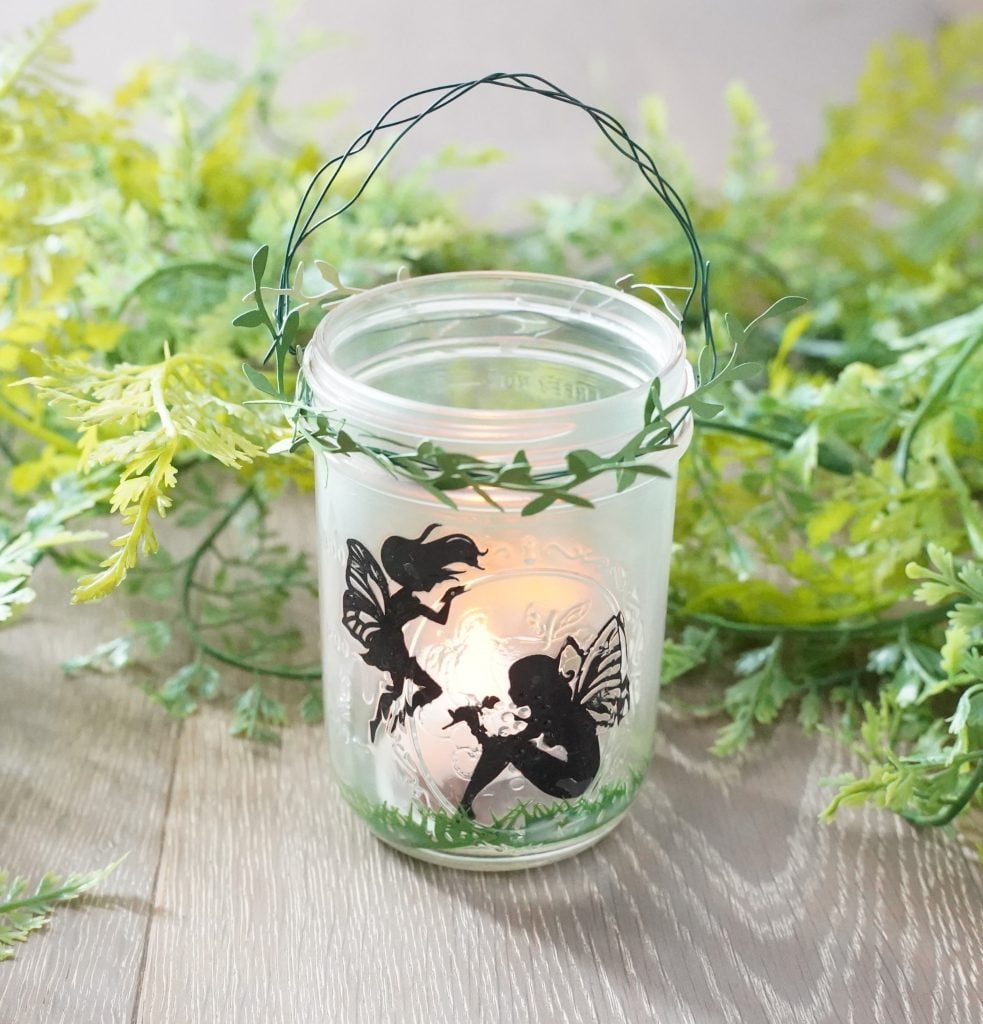
“Trending Context: Why are silhouettes making such a comeback?”
In a world of hyper-realistic imagery, there’s something so calming and imaginative about a simple silhouette. It suggests a story rather than showing you every detail, leaving more to the imagination. This trend connects to the broader ‘cottagecore’ and ‘goblincore’ aesthetics popular on Pinterest, which celebrate folklore, magic, and a return to nature. A fairy silhouette feels more timeless and a little more mysterious than a detailed figurine. For a different take on this trend, see the colorful version in Idea #14.
8. A Cozy Jarred Scene with Miniature Friends
Designer Tip: When creating a terrarium scene with figurines, think like a theater director. Don’t just place them in the middle. Create depth by placing some elements (like a small mushroom or a tuft of moss) in the foreground, your main figurines in the mid-ground, and more moss or lights in the background. Position the figures so they seem to interact with each other or with their environment. Here, the two figures feel like they are in a shared space, making the scene feel alive and connected, not like dolls on a shelf.
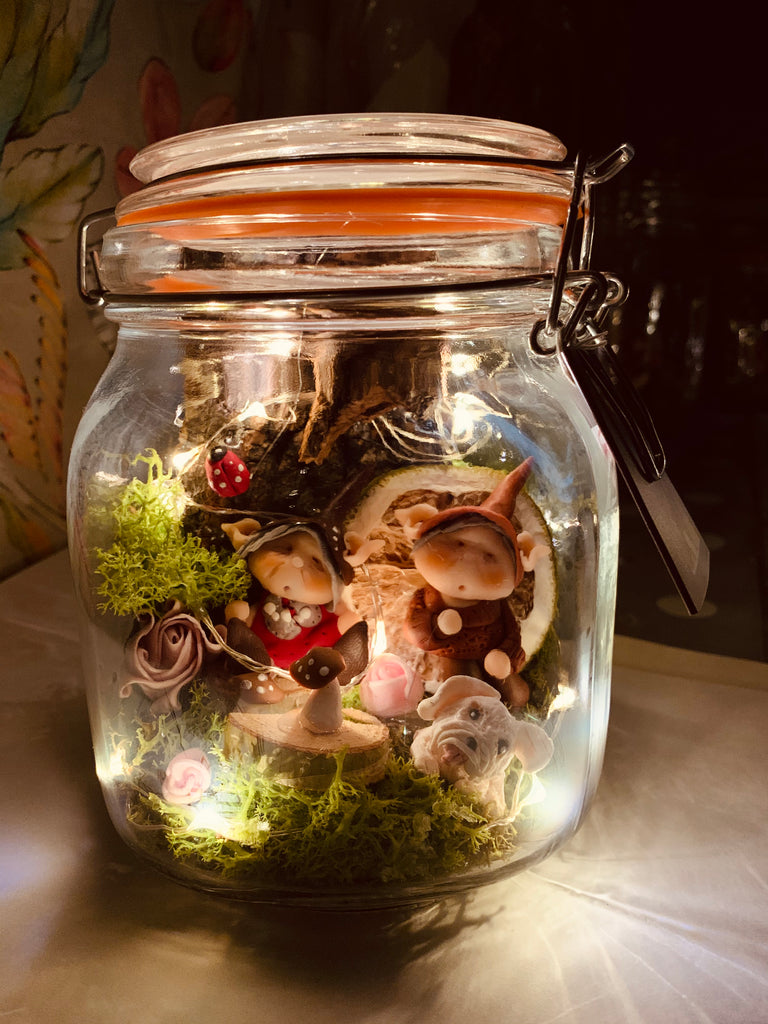
“Real Talk: Be prepared for the ‘ship in a bottle’ challenge.”
Arranging tiny figurines, moss, and delicate string lights inside a narrow jar opening requires patience and the right tools. Long tweezers or craft forceps are your best friend here. It’s easy to knock things over or get the light string tangled. It’s a project that looks simple, but the execution can be frustrating if you’re rushing. Set aside more time than you think you’ll need, put on some music, and embrace the slow, deliberate process.
9. Miniature Fairy Garden Houses in a Jar
Style Math: The formula for a successful jar garden is about balancing the ‘natural’ and the ‘narrative’. This look is roughly 60% base nature + 30% architectural feature + 10% whimsical detail. The lush green moss is your foundation, filling most of the visual space. The miniature house or door is the focal point that tells you this is a ‘fairy’ garden. Then, the tiny details—the little mushrooms, the acorn house—are the delightful surprises that reward a closer look. Keeping the moss as the dominant element prevents the scene from looking like a cluttered toy set.
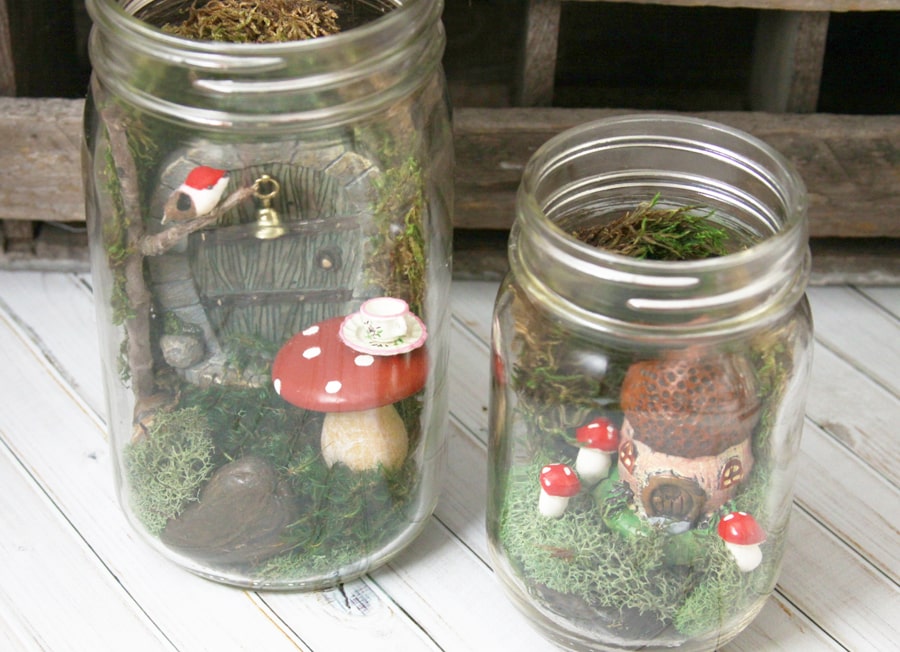
“Get This Look For Less: You don’t need expensive, pre-made fairy garden kits.”
The most charming pieces are often found or made. Look for interesting twigs, small stones, and acorn caps in your own backyard to build tiny furniture or pathways. The miniature houses and doors can be found for a few dollars each at craft stores or online on sites like Etsy. For the ultimate budget version, you can craft a door from popsicle sticks and paint it. It’s more about the creativity than the cost.
10. Glittered Lantern Jar with a Purple Rose Topper
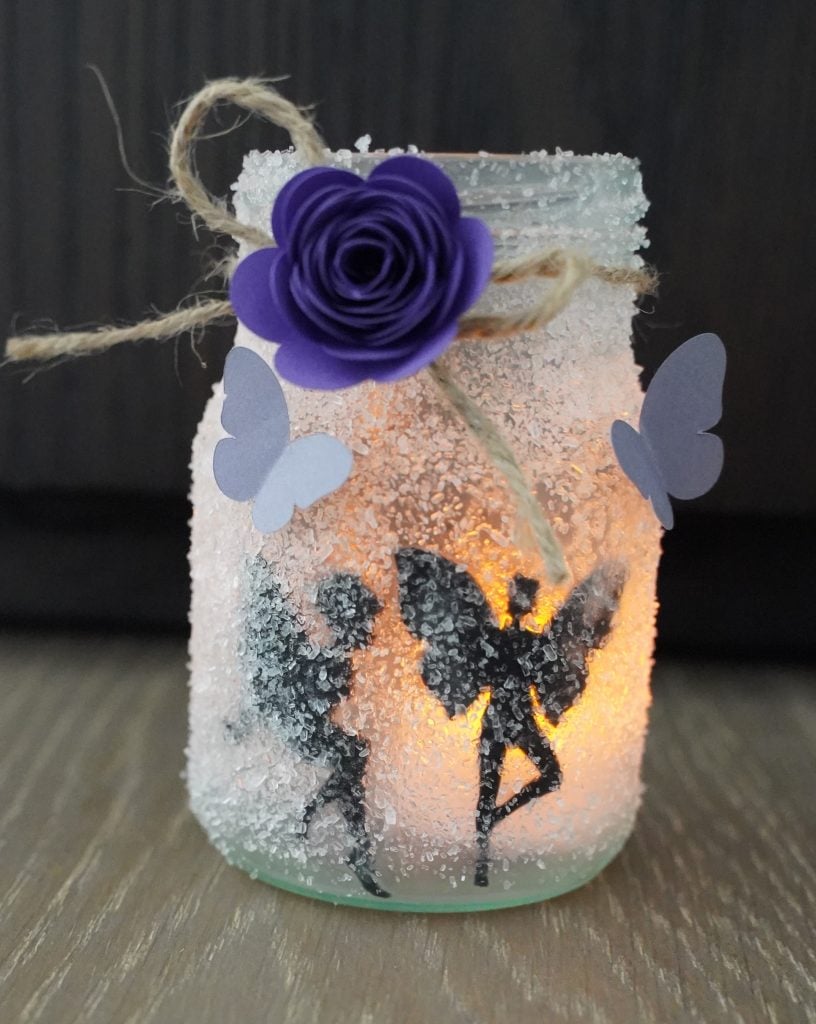
The One Thing: The magic here is the texture of the glitter. It’s not just a sparkly jar; the thick, uneven coating of white glitter completely transforms the glass, making it look like it’s been encased in sparkling frost or snow. This texture is what catches the internal orange light so beautifully, creating a diffused, ethereal glow rather than a direct shine. It elevates the piece from a simple craft to a truly decorative object. Remove the glitter, and you’d just have a plain jar with a silhouette inside.
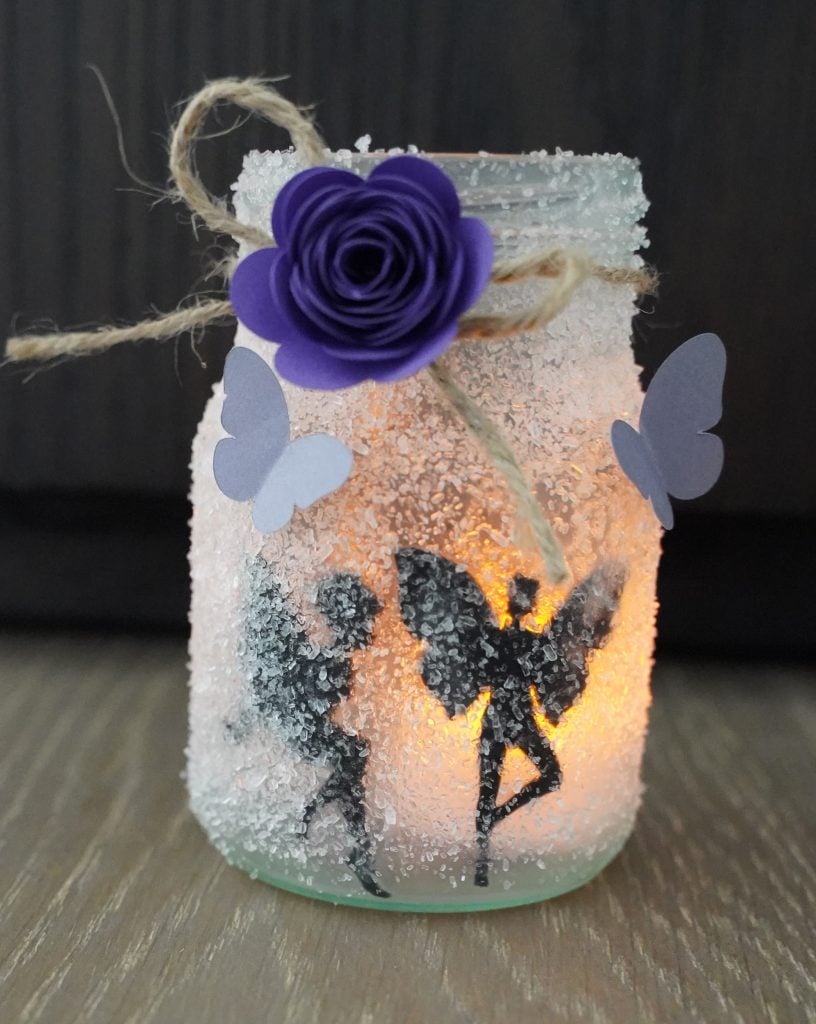
“Maintenance Reality: Let’s be honest: glitter is the confetti of the craft world—it gets everywhere.”
A jar coated this heavily is bound to shed, especially when handled. Applying a clear spray sealant over the top can help lock the glitter in place, but you might still find sparkles on your tabletop. The paper rose and butterflies on top are also magnets for dust and are quite delicate. This is a ‘handle with care’ piece, best placed on a shelf where it won’t be disturbed often.
11. A Handful of Starlight Against the Night
What Makes It Work: This image is powerful because of its use of a single, brilliant focal point against a dark, ambiguous background. The jar of bright white lights is the undeniable hero. The bokeh effect in the background adds a sense of place and magic without being distracting. Furthermore, the act of holding the jar makes the scene feel personal and intimate, as if someone has just captured this light. It’s not just a product shot; it’s a moment. The composition feels spontaneous and deeply enchanting.
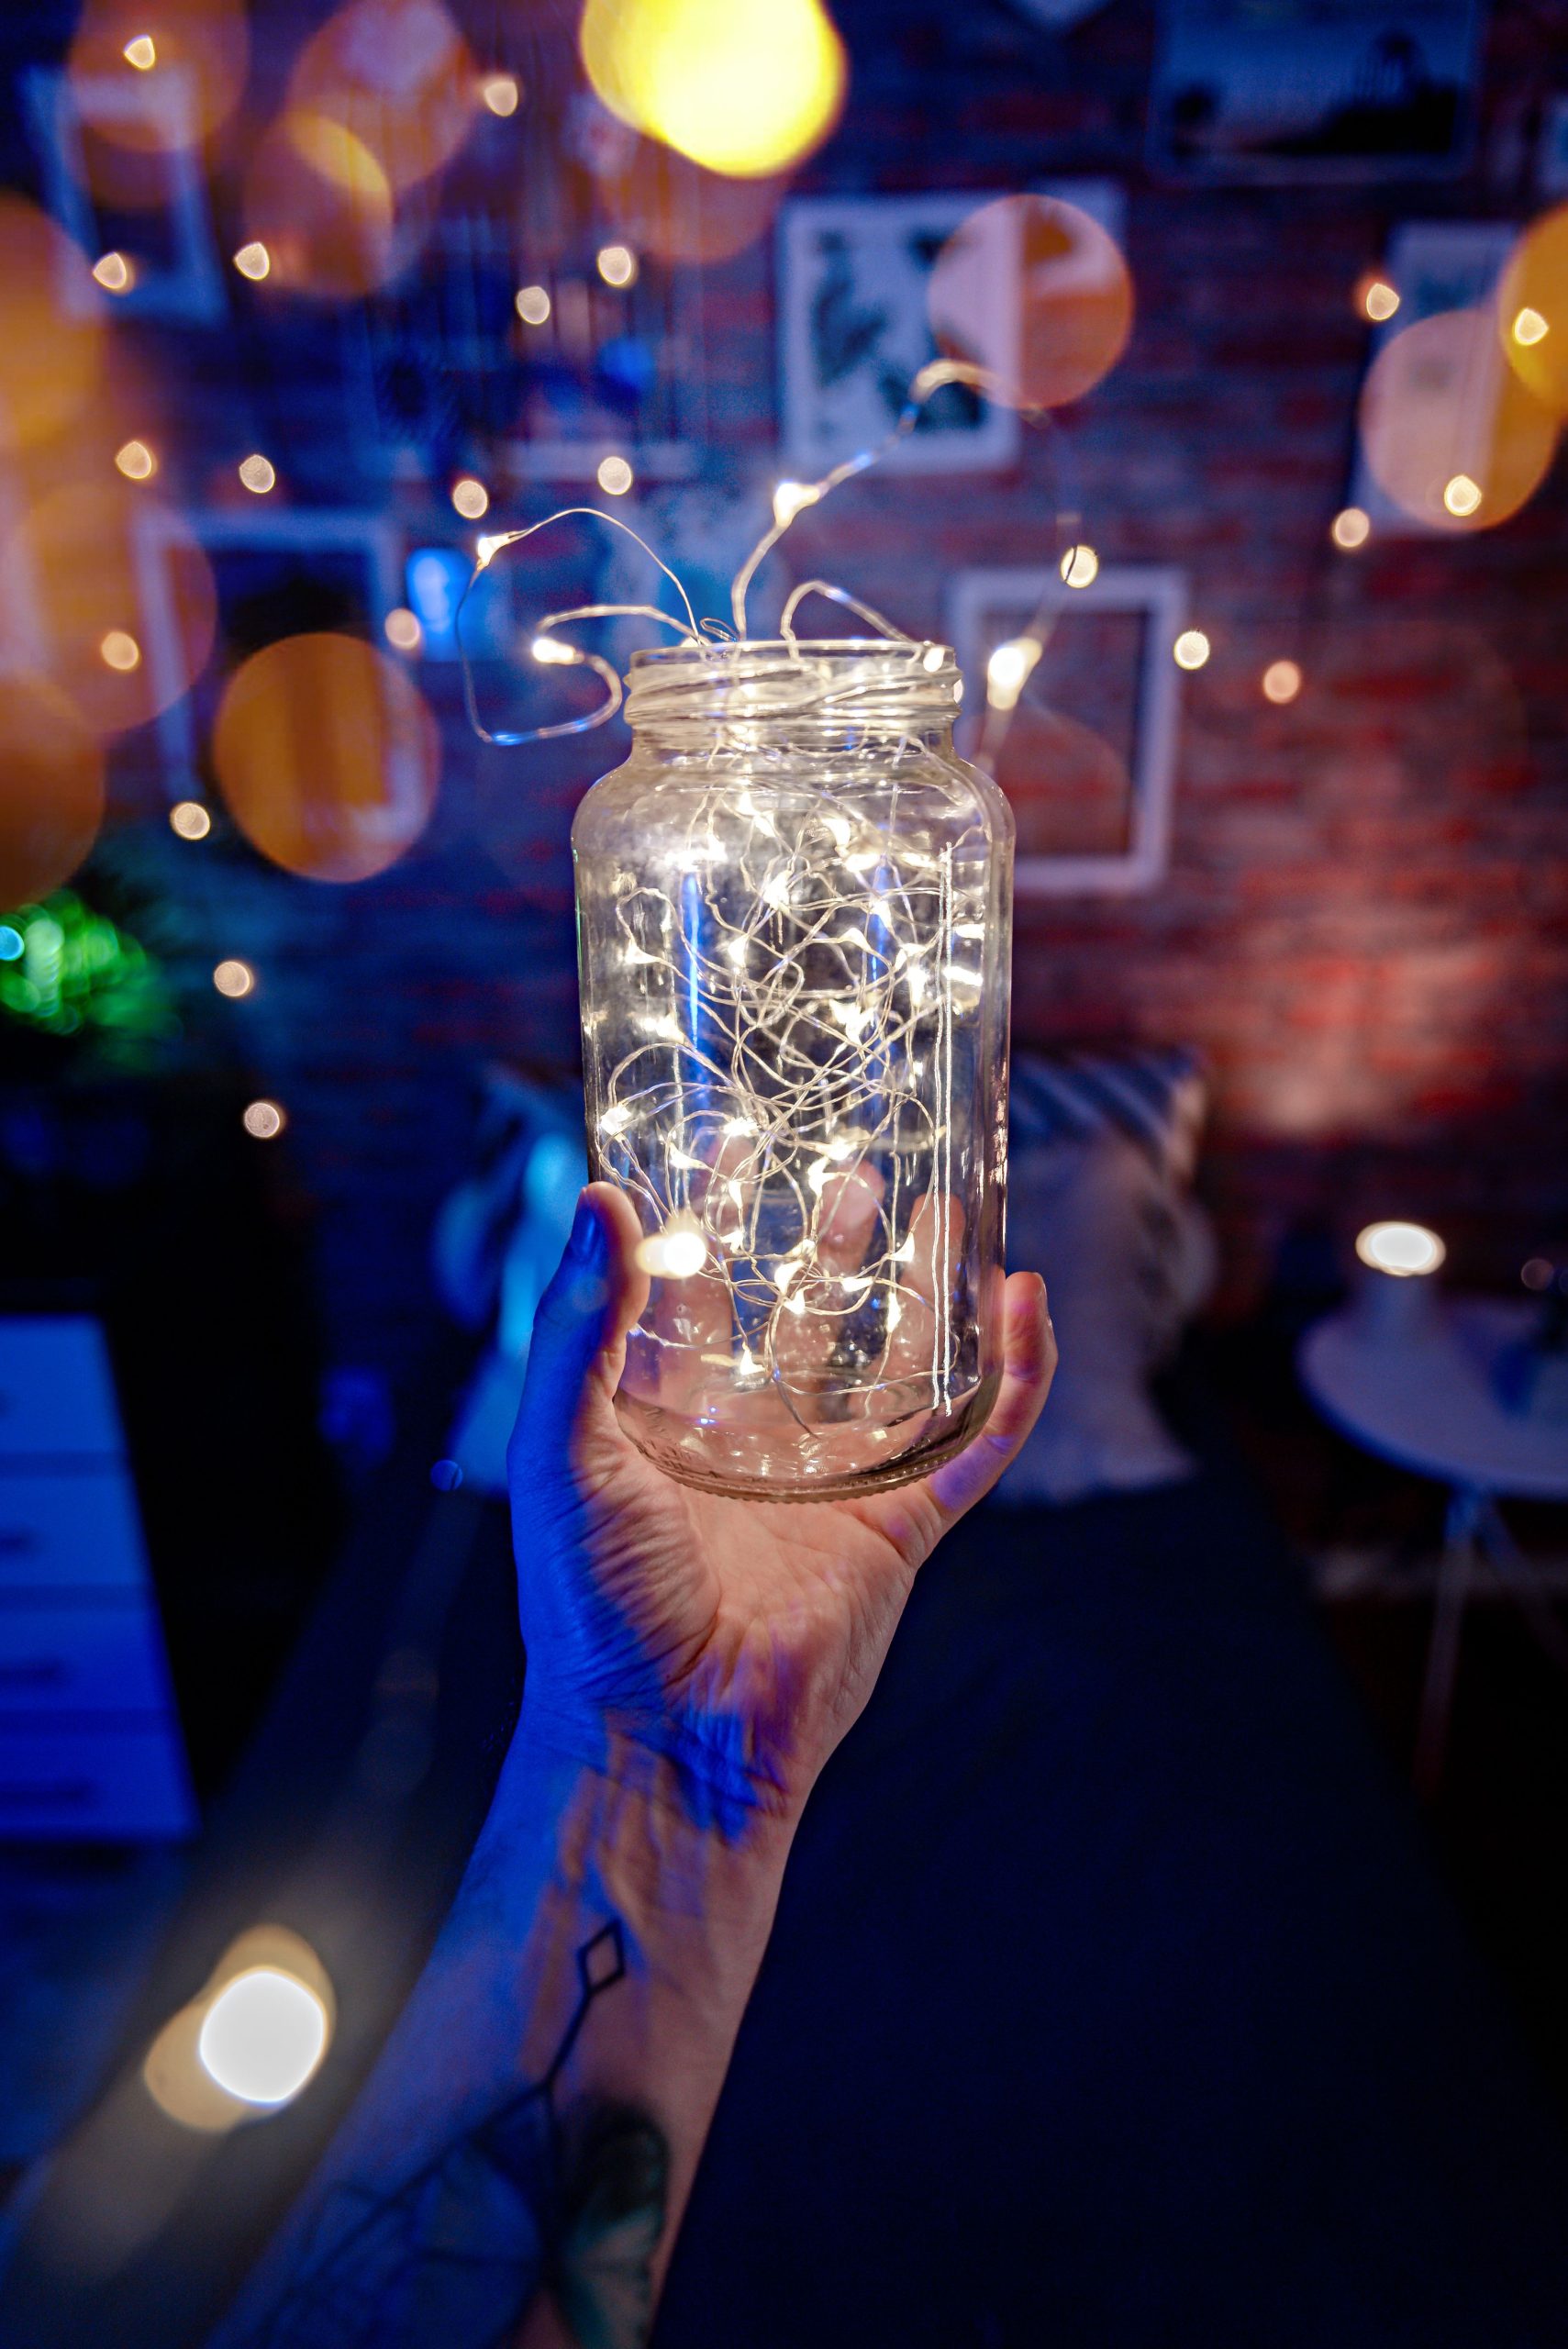
“Designer Tip: If you’re trying to photograph your own fairy jars for Pinterest or Instagram, learn from this image.”
Don’t just place your jar on a table. Interact with it! Hold it, place it in an unexpected setting, and play with your camera’s focus. A shallow depth of field (where the background is blurry, creating that ‘bokeh’ effect) will make your jar pop and look way more professional and magical. It’s the secret to making your creations look as good online as they do in person.
12. Winter Botanical Lanterns with Frosted Pinecones
Budget Breakdown: Recreating this cozy winter look is very manageable. The charm comes from the combination of simple elements.
- Mason Jars (2): $5 – $10
- Fairy Light Strings (2): $4 – $8
- Faux Botanicals (Pinecones, Berries, Branches): $15 – $25
- Twine: $2 – $4
- TOTAL: $26 – $47
- Budget Alternative: Forage for pinecones in your local park (and bake them on low heat to de-bug them) and use trimmings from your own yard. This could bring your botanical cost down to almost zero, making the whole project under $20.
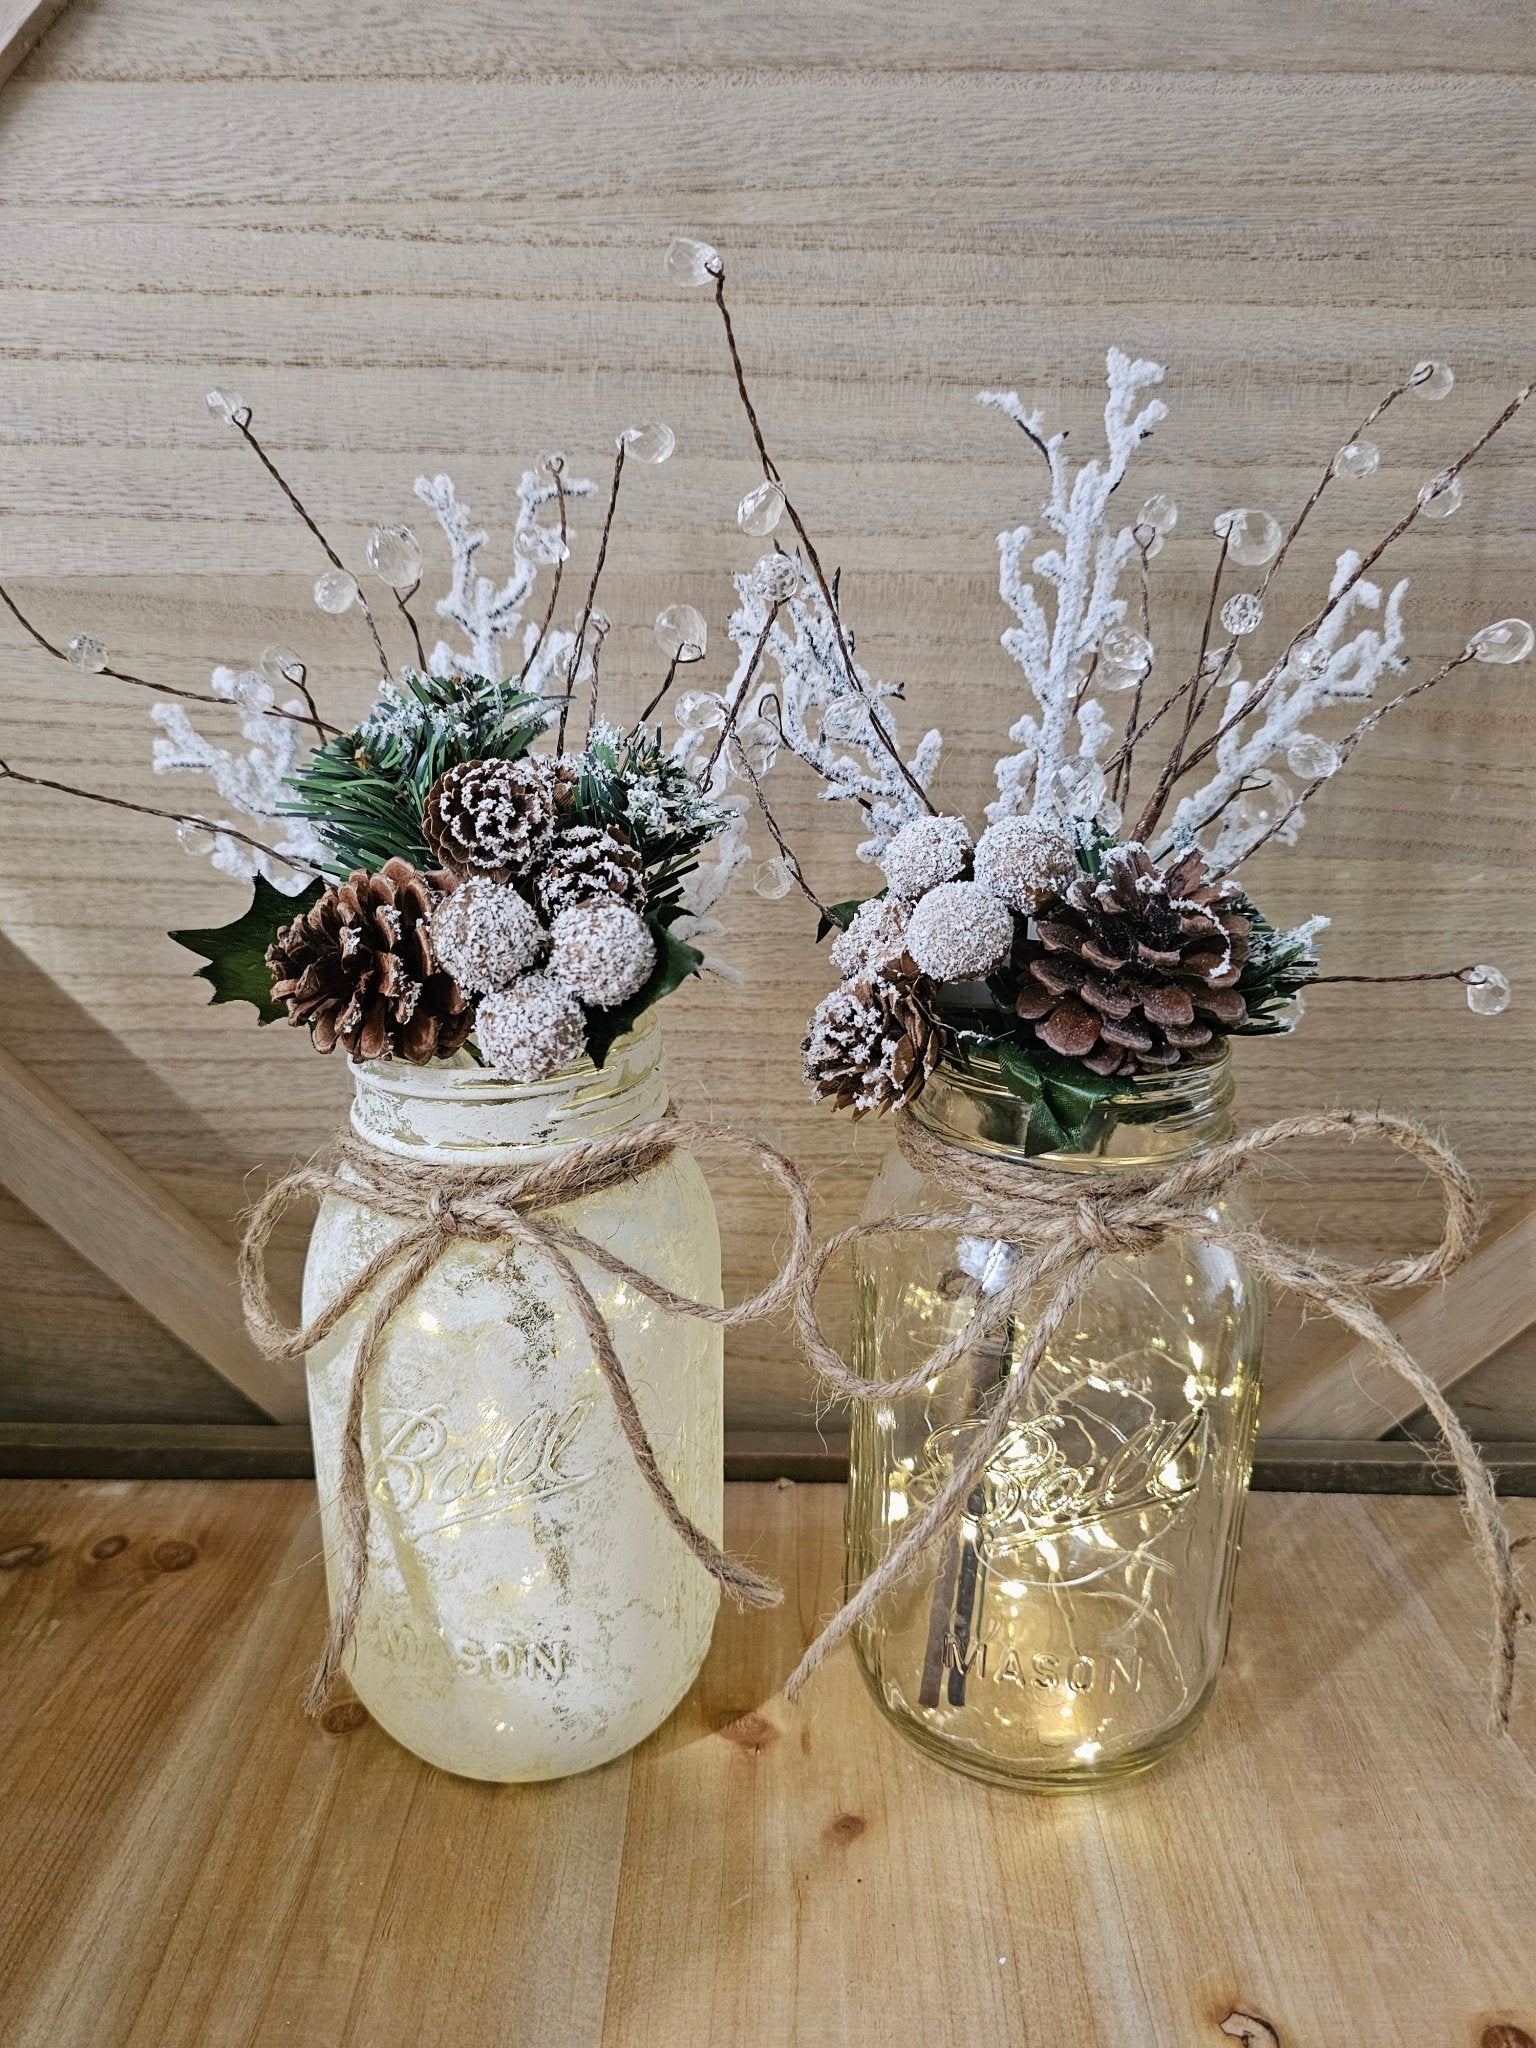
“How-To Brief: Assembling these festive toppers is the fun part.”
It’s like creating a tiny winter bouquet for your jar.Time Estimate: 20 minutes per jarCost Estimate: $15-25 (for the topper elements)Start by creating a loop of twine and tying it tightly around the neck of the empty jar.Feed your fairy lights into the jar, leaving the small battery pack near the rim for easy access.Select your largest elements first, like the pinecones. Use a hot glue gun to attach them to the twine base.Fill in the gaps with the smaller pieces—the frosted berries, the translucent beaded branches, and any faux greenery.Continue adding layers until you have a full, balanced arrangement. Let the glue set completely.For another take on a winter theme, check out Idea #21 and Idea #26.
13. Glowing Mason Jar Wedding Centerpiece
Designer Tip: When using lighted jars as a centerpiece for an event like a wedding, volume is key. A single jar can look a little lonely on a large round table. Group them in clusters of three or five, varying the height slightly if possible. To elevate the look and stretch your budget, place the cluster of jars on a round wood slice or a mirrored charger. This creates a defined ‘centerpiece zone’ and reflects the light beautifully, making the whole tablescape feel more intentional and substantial.
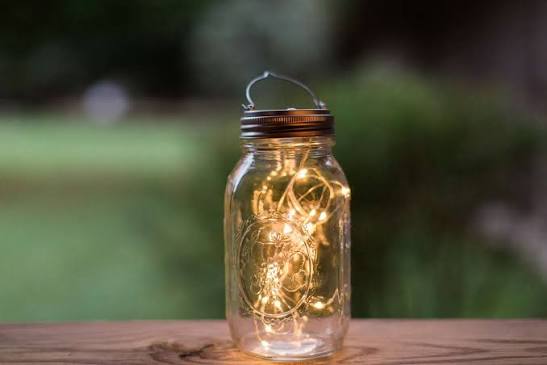
“Scale Guide: A centerpiece like this works best on tables that are 48 to 72 inches in diameter, where it can be a focal point without overwhelming the place settings.”
For a long, rectangular banquet table, don’t just put one cluster in the middle. Instead, create a runner effect by placing a single jar every 18-24 inches down the center of the table. This distributes the light and charm evenly for all the guests to enjoy, ensuring no one is left in the dark.
14. Solar-Powered Frosted Jars with Colorful Fairy Lights
What Makes It Work: The frosted glass is the secret weapon here. Instead of just seeing the individual dots of the colored lights, the frosted surface diffuses them into a soft, ethereal glow. The silhouette of the fairy is crisp and clear, but the light itself is blended and magical, like a watercolor painting. The use of multiple colors (purple, blue, pink) within the jars adds a layer of playful energy. This is a great example of how a simple material choice—frosted versus clear glass—can completely change the mood of a project. Compare this to the single-color version in Idea #7.
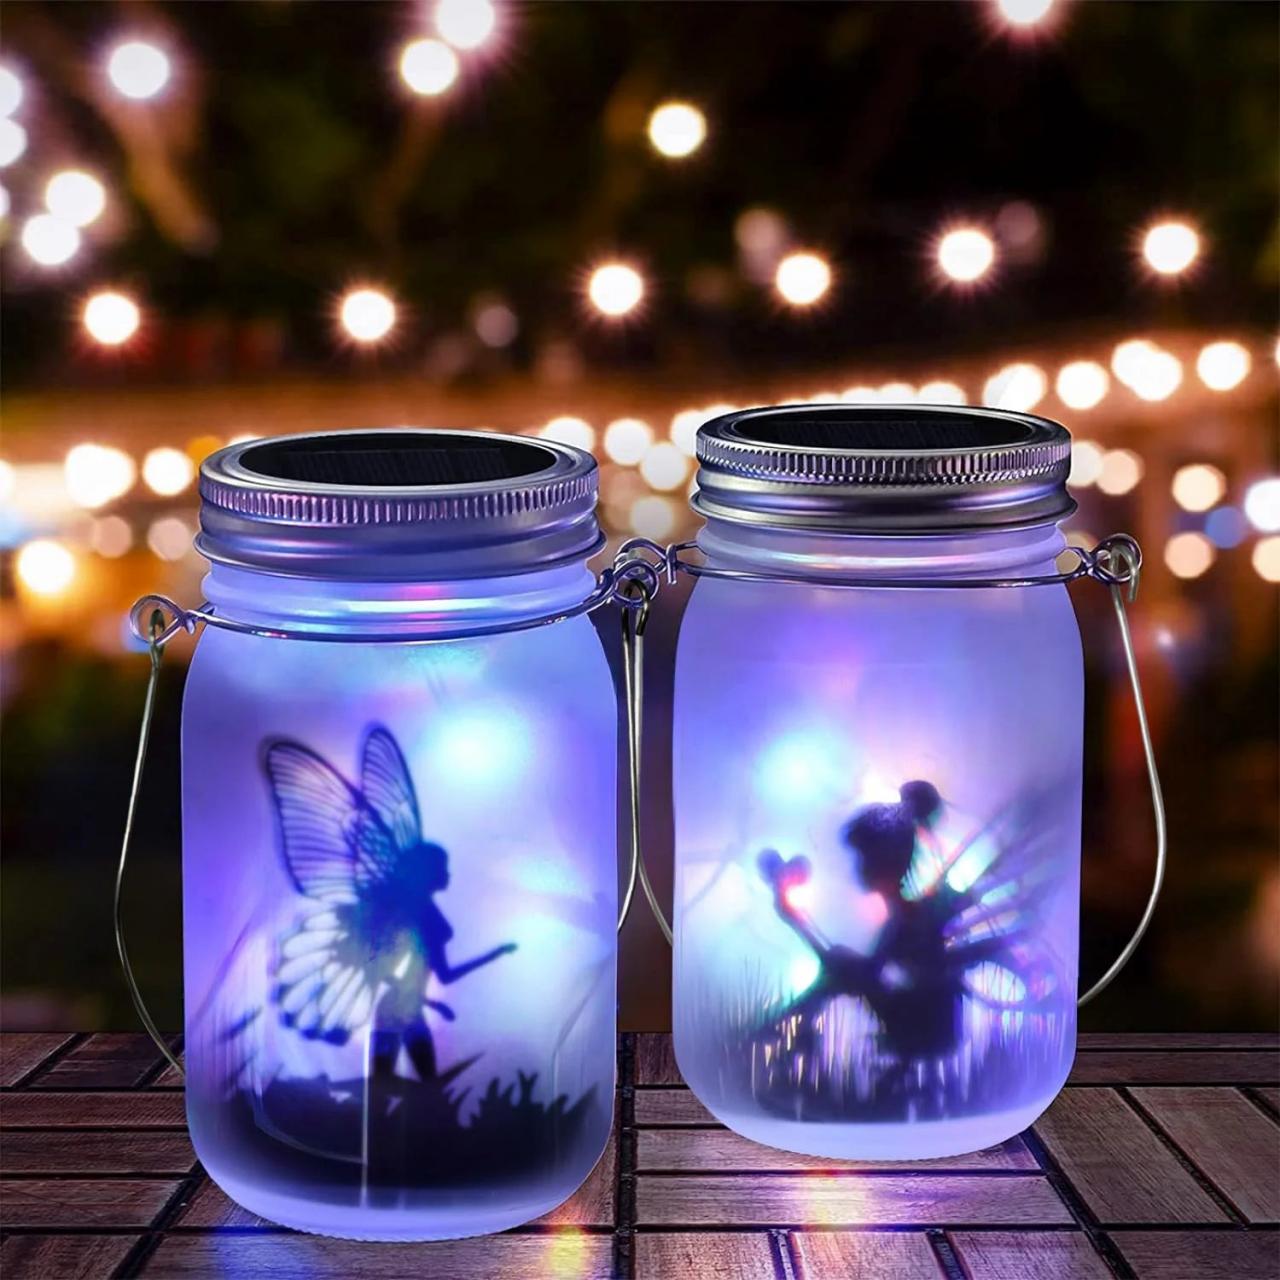
“Real Talk: Solar-powered lids are fantastic in theory, but their performance can be hit or miss.”
They need several hours of direct, bright sunlight to charge fully for a decent glow time (typically 6-8 hours). If you plan to use these in a shady part of your yard or during overcast winter months, you might be disappointed with the brightness and duration of the light. It’s wise to have a backup plan, like battery-powered lights, if you need guaranteed performance for an event.
15. Cozy Fairy Lights on a Wooden Deck Railing
Scale Guide: This look is all about creating pools of ambient light. For a standard deck (say, 10×12 feet), you don’t need to line the entire railing. Placing two or three jars clustered at each corner provides enough of a glow to define the space without it feeling like an airport runway. The goal is atmosphere, not floodlighting. If you have steps, placing one jar on the side of every other step is a classic designer trick for safety and style. The scale is intimate, making it a perfect complement to the similar outdoor setup in Idea #20.
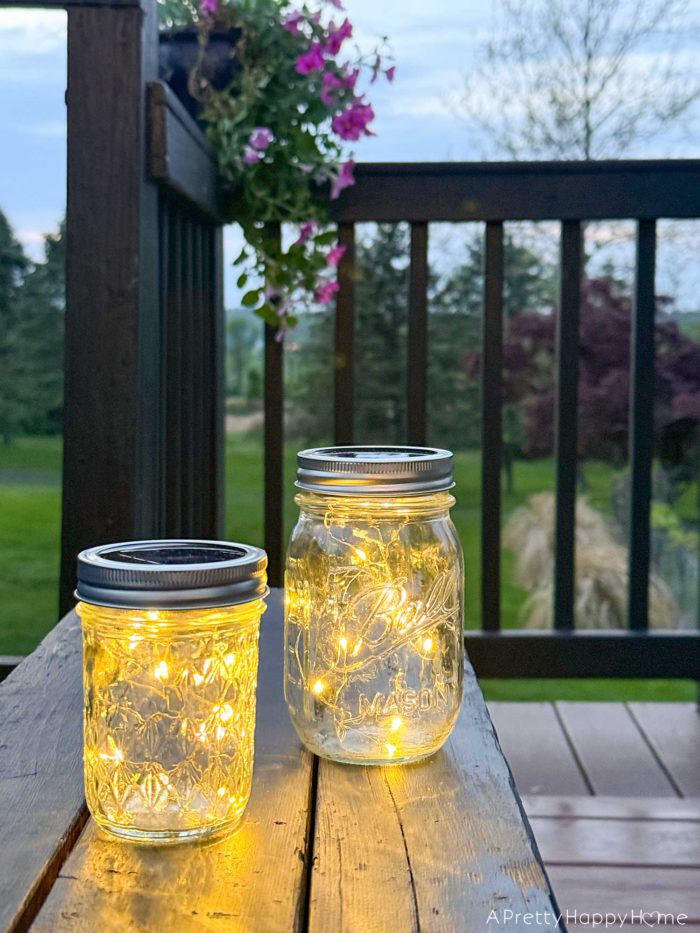
“Get This Look For Less: Solar-lidded mason jars can be pricey, sometimes $10-15 each.”
You can get the exact same look for a fraction of the price. Buy a case of classic Ball mason jars and a bulk pack of solar-powered stake lights from a hardware or dollar store. More often than not, the round solar top of the stake light can be popped off and will fit perfectly inside the metal ring of a standard mason jar lid. A little hot glue can secure it, giving you a DIY solar light for just a few dollars.
16. Rustic String of Jar Lights on a Weathered Fence
What Makes It Work: The magic of this idea lies in the contrast of materials. You have the smooth, clear glass and the warm, delicate light set against the rough, weathered, and dark texture of the wooden fence. It’s a perfect pairing of rustic and refined. The repetition of the jars creates a pleasing rhythm that draws your eye along the fence line. It feels curated but not overly perfect. The visible metallic lids and embossed glass add to the authentic, slightly vintage farmhouse charm. For a more modern take on outdoor string lights, see the pergola version in Idea #22.
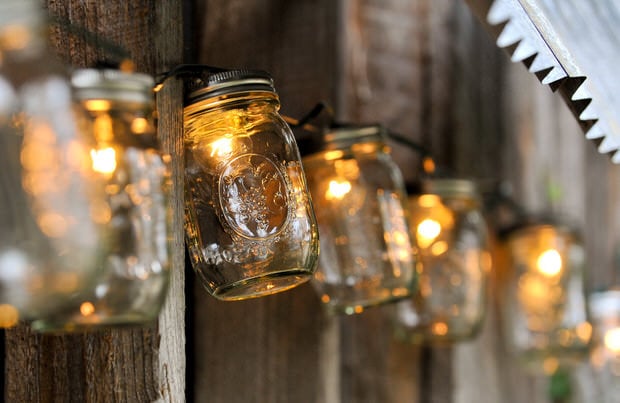
“Real Talk: Hanging glass jars outdoors requires some thought about safety and weather.”
Ensure you’re using sturdy hooks and outdoor-rated wiring. The biggest challenge? Rain. While a little water won’t hurt most outdoor light strands, the jars can collect rainwater, which can become a breeding ground for mosquitos or damage the light sockets over time if submerged. Drilling a small drainage hole in the bottom of each jar before assembly is a pro move that will save you a lot of hassle later.
17. Industrial-Chic Pendant Lights from Mason Jars
Trending Context: This look has been a cornerstone of the modern farmhouse and industrial decor trends for years, and it’s not going anywhere. Why? It’s the perfect blend of high and low. It takes a humble, everyday object—the mason jar—and elevates it into a chic piece of functional lighting. In 2026, as we continue to value authenticity and repurposed materials, this style feels more relevant than ever. It’s a nod to the past without feeling dated. You can see a similar use of Edison bulbs in the clustered version in Idea #19.
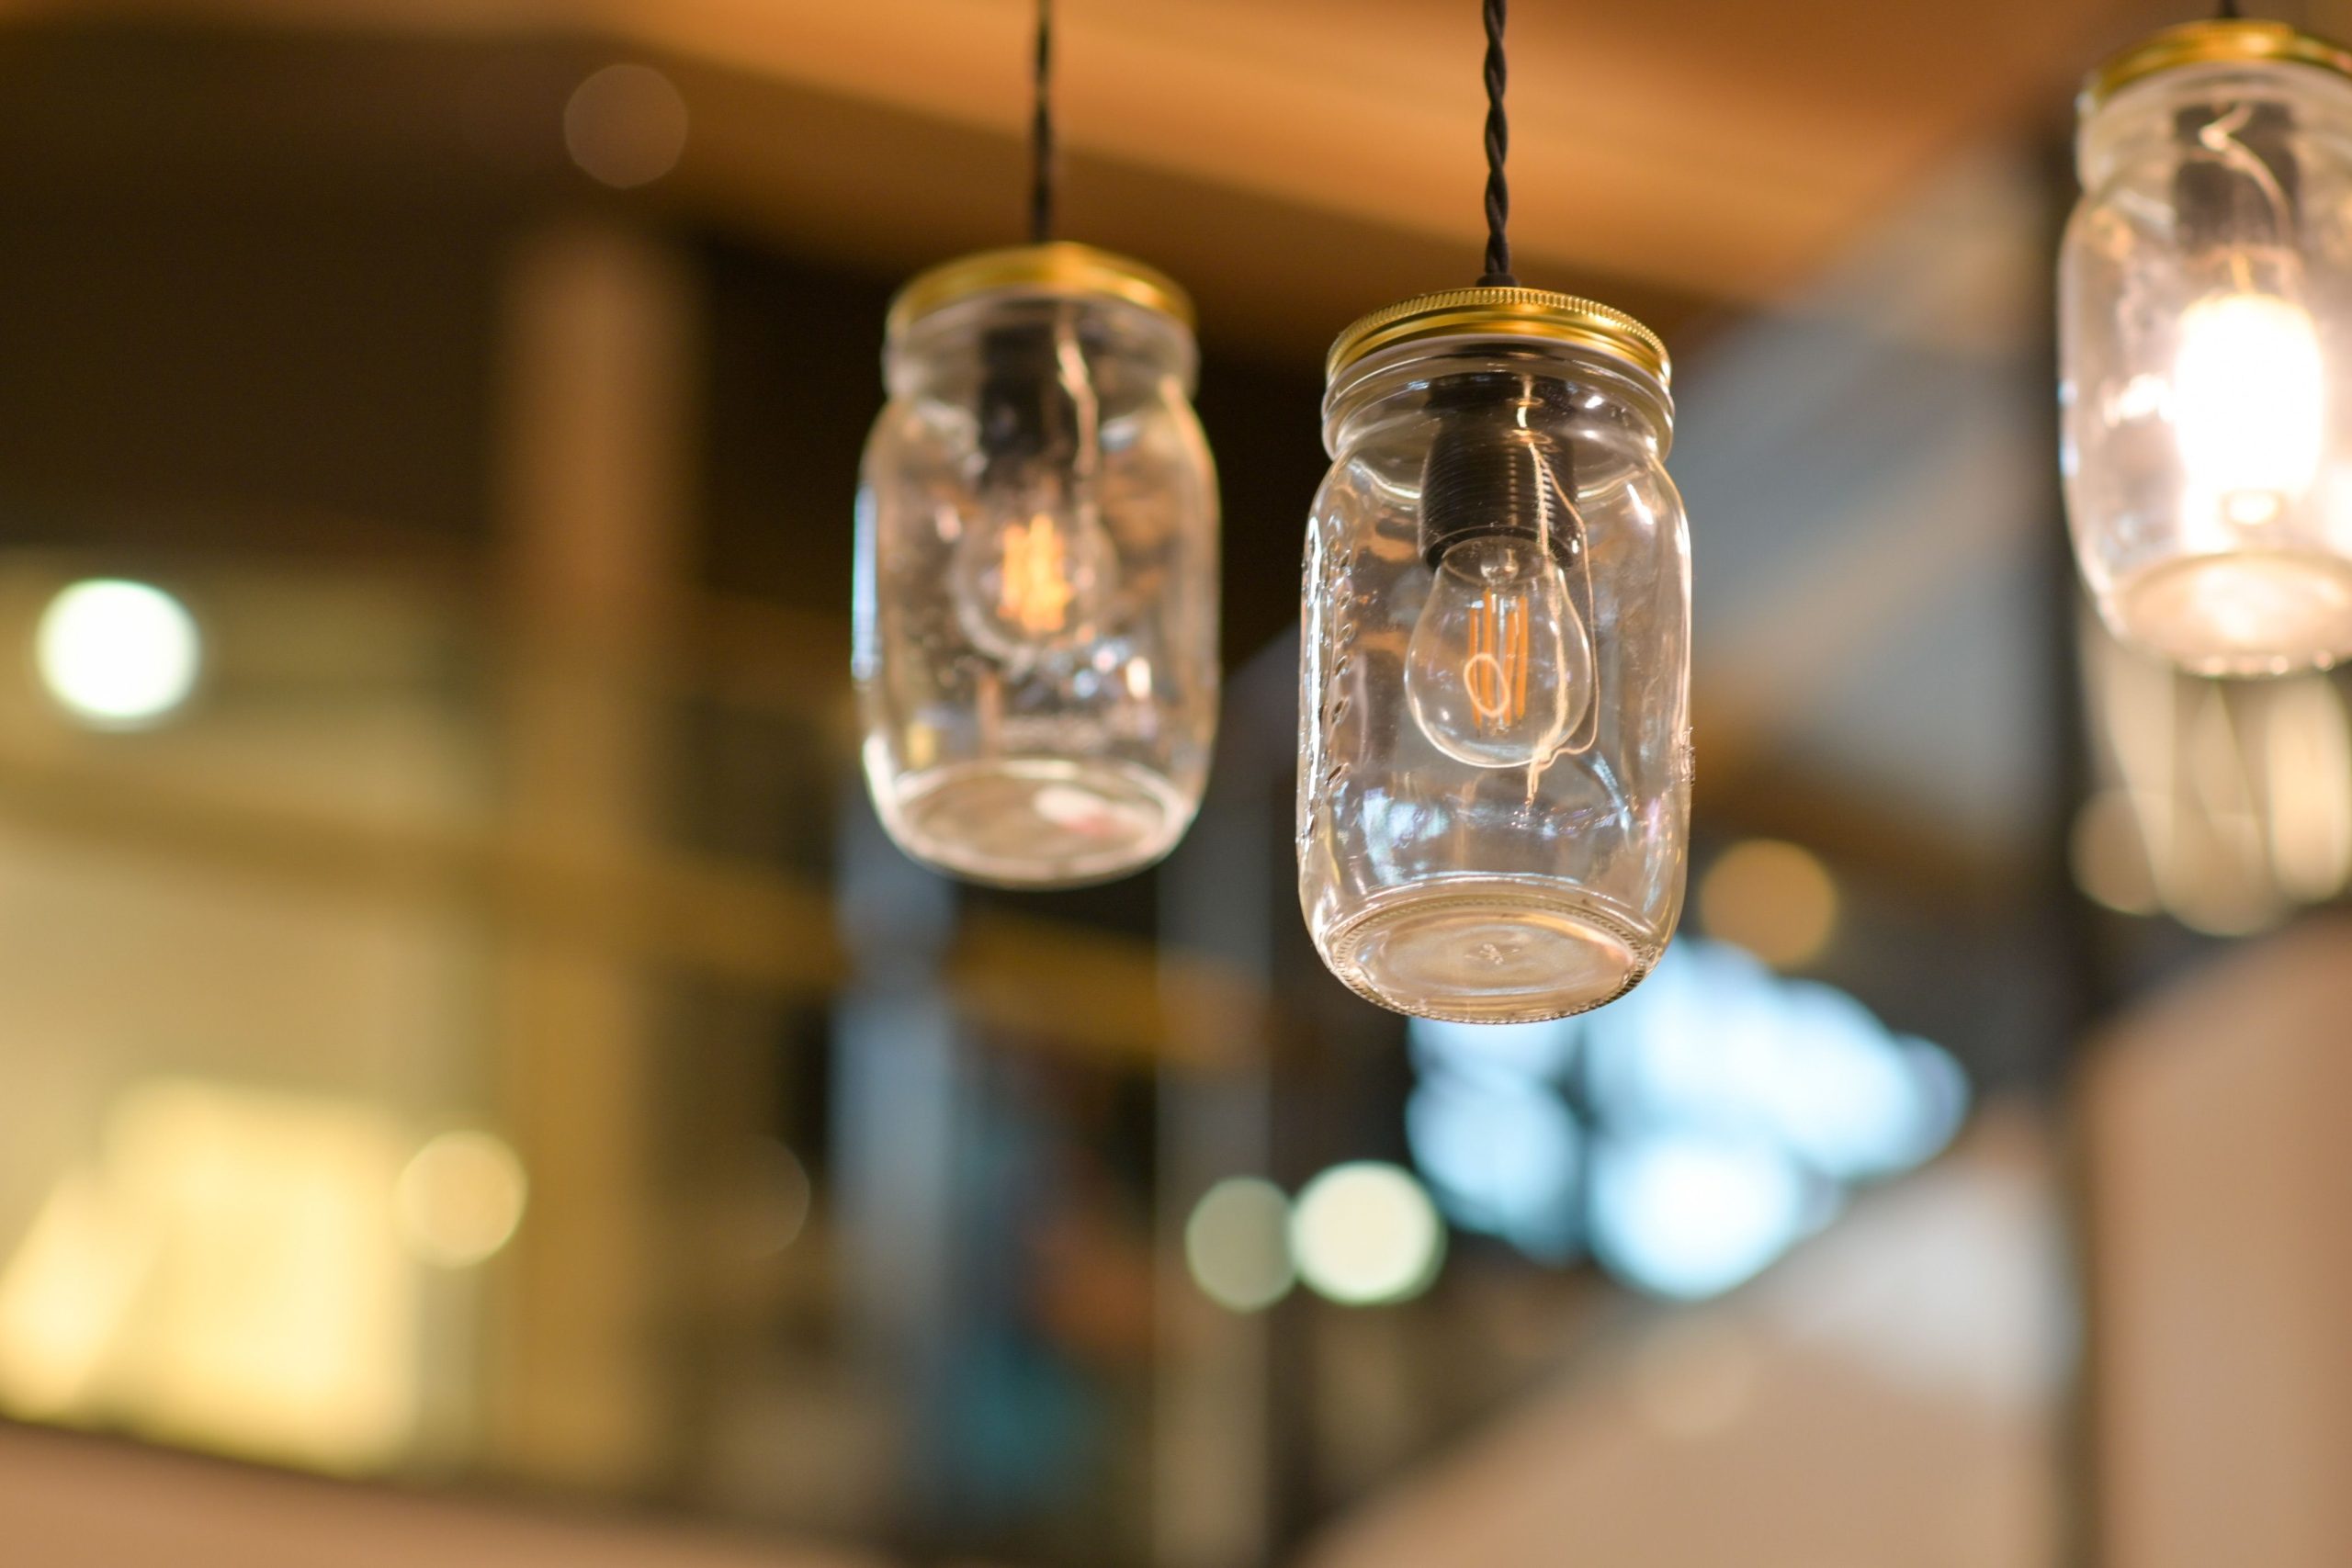
“Designer Tip: The key to making these pendant lights look high-end is in the details you don’t immediately notice.”
Pay attention to the cord—a fabric-wrapped braided cord will always look more polished than a standard plastic one. Also, choose your bulb wisely. The exposed filament Edison bulb is essential to this aesthetic. For task lighting (like over a kitchen island), choose a brighter, clearer bulb. For ambient light (in a dining nook or hallway), a warmer, amber-toned bulb will create a cozier glow.
18. A Cozy Jar of Light Held in Two Hands
The One Thing: The most powerful element here is the human touch. The simple act of the hands holding the jar transforms it from a decorative object into a source of warmth and comfort. It evokes feelings of coziness, safety, and offering. The light isn’t just in the jar; it’s being held, protected, and shared. This emotional connection is what makes the image so resonant and memorable. Without the hands, it would be a nice photo of a lighted jar. With them, it tells a story.
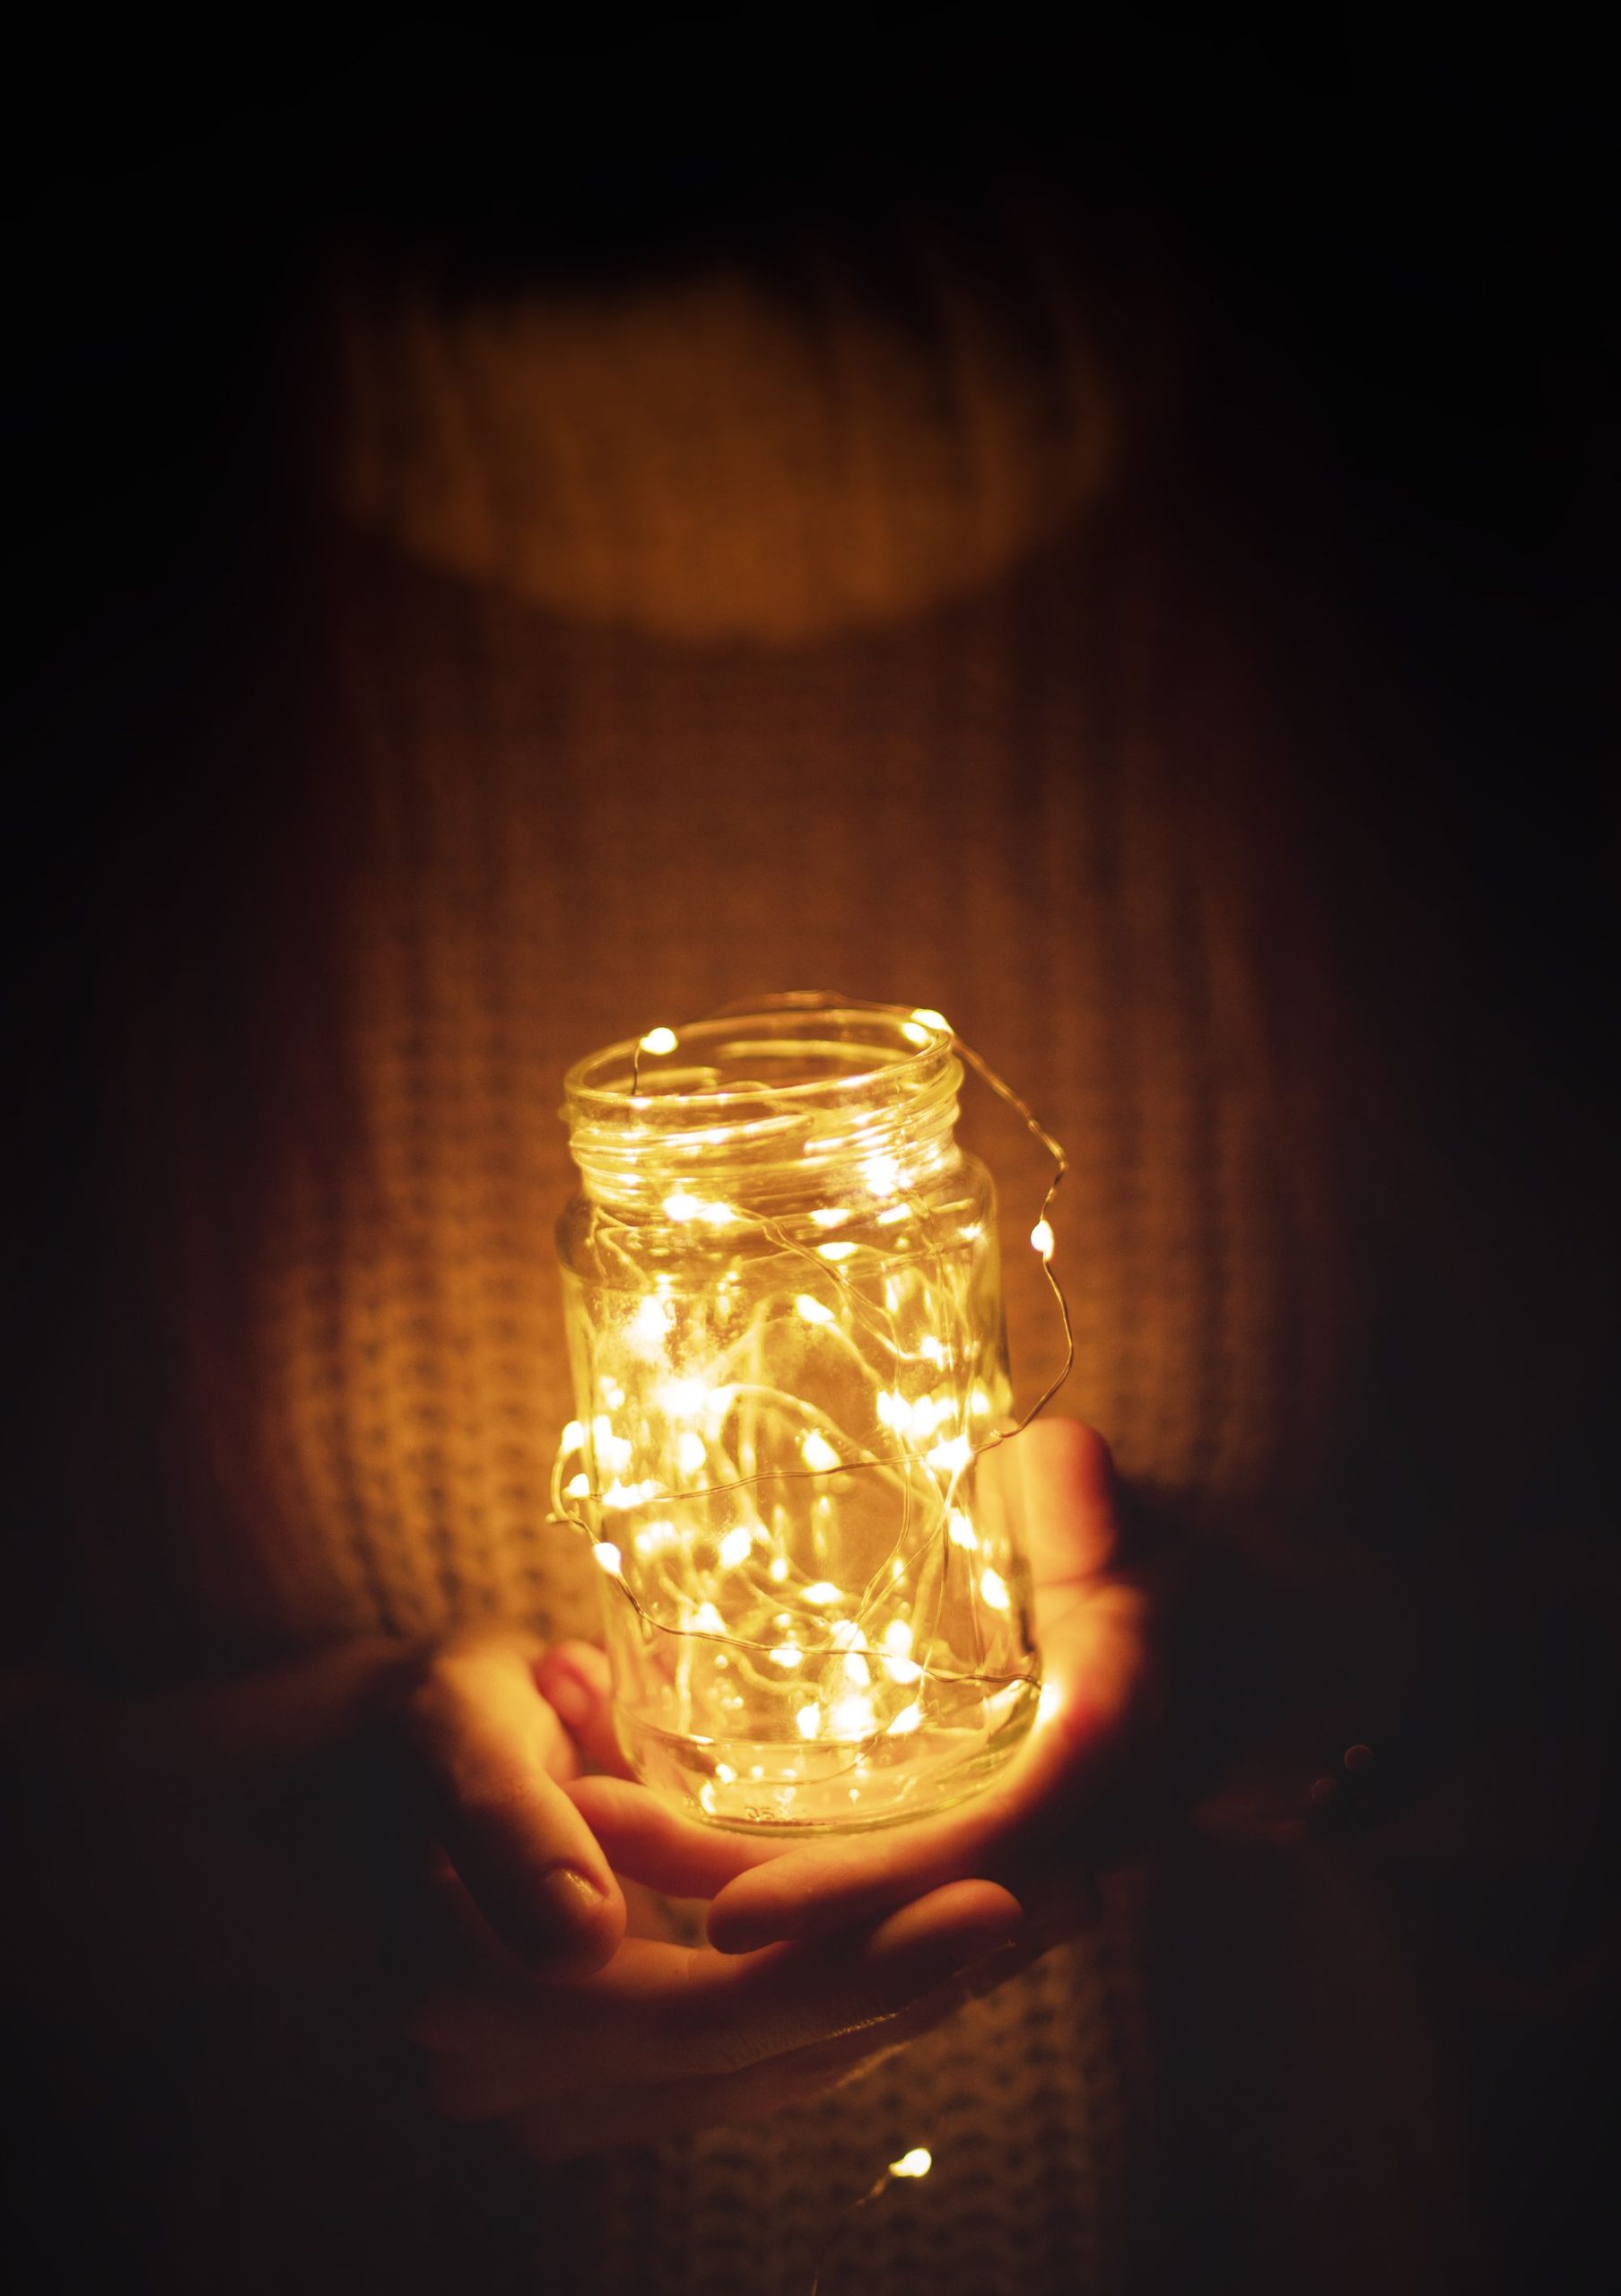
“What Makes It Work: The composition is brilliant in its simplicity and focus on texture.”
The warm glow of the fairy lights is the primary light source, beautifully illuminating the hands and the details of the glass jar. But the secret star is the background. The soft, knitted texture provides a tactile contrast to the smooth glass and adds to the overall feeling of warmth and comfort. The limited color palette—just the warm light, skin tones, and soft brown—keeps the mood intimate and cohesive. It feels incredibly gentle and inviting.
19. A Cluster of Hanging Edison Bulb Jar Lights
Style Math: This dramatic lighting feature is all about texture and repetition. The formula is approximately 40% warm ambient light + 40% industrial hardware + 20% delicate glass. The exposed Edison filaments provide the majority of the mood. The black cords and dark lids add that raw, industrial edge that keeps it from being too sweet. The clear glass jars act as the diffusers, softening the light just enough and adding a hint of rustic charm. The magic is in clustering them together; a single one wouldn’t have nearly the same impact. Compare this to the more linear setup of Idea #17.
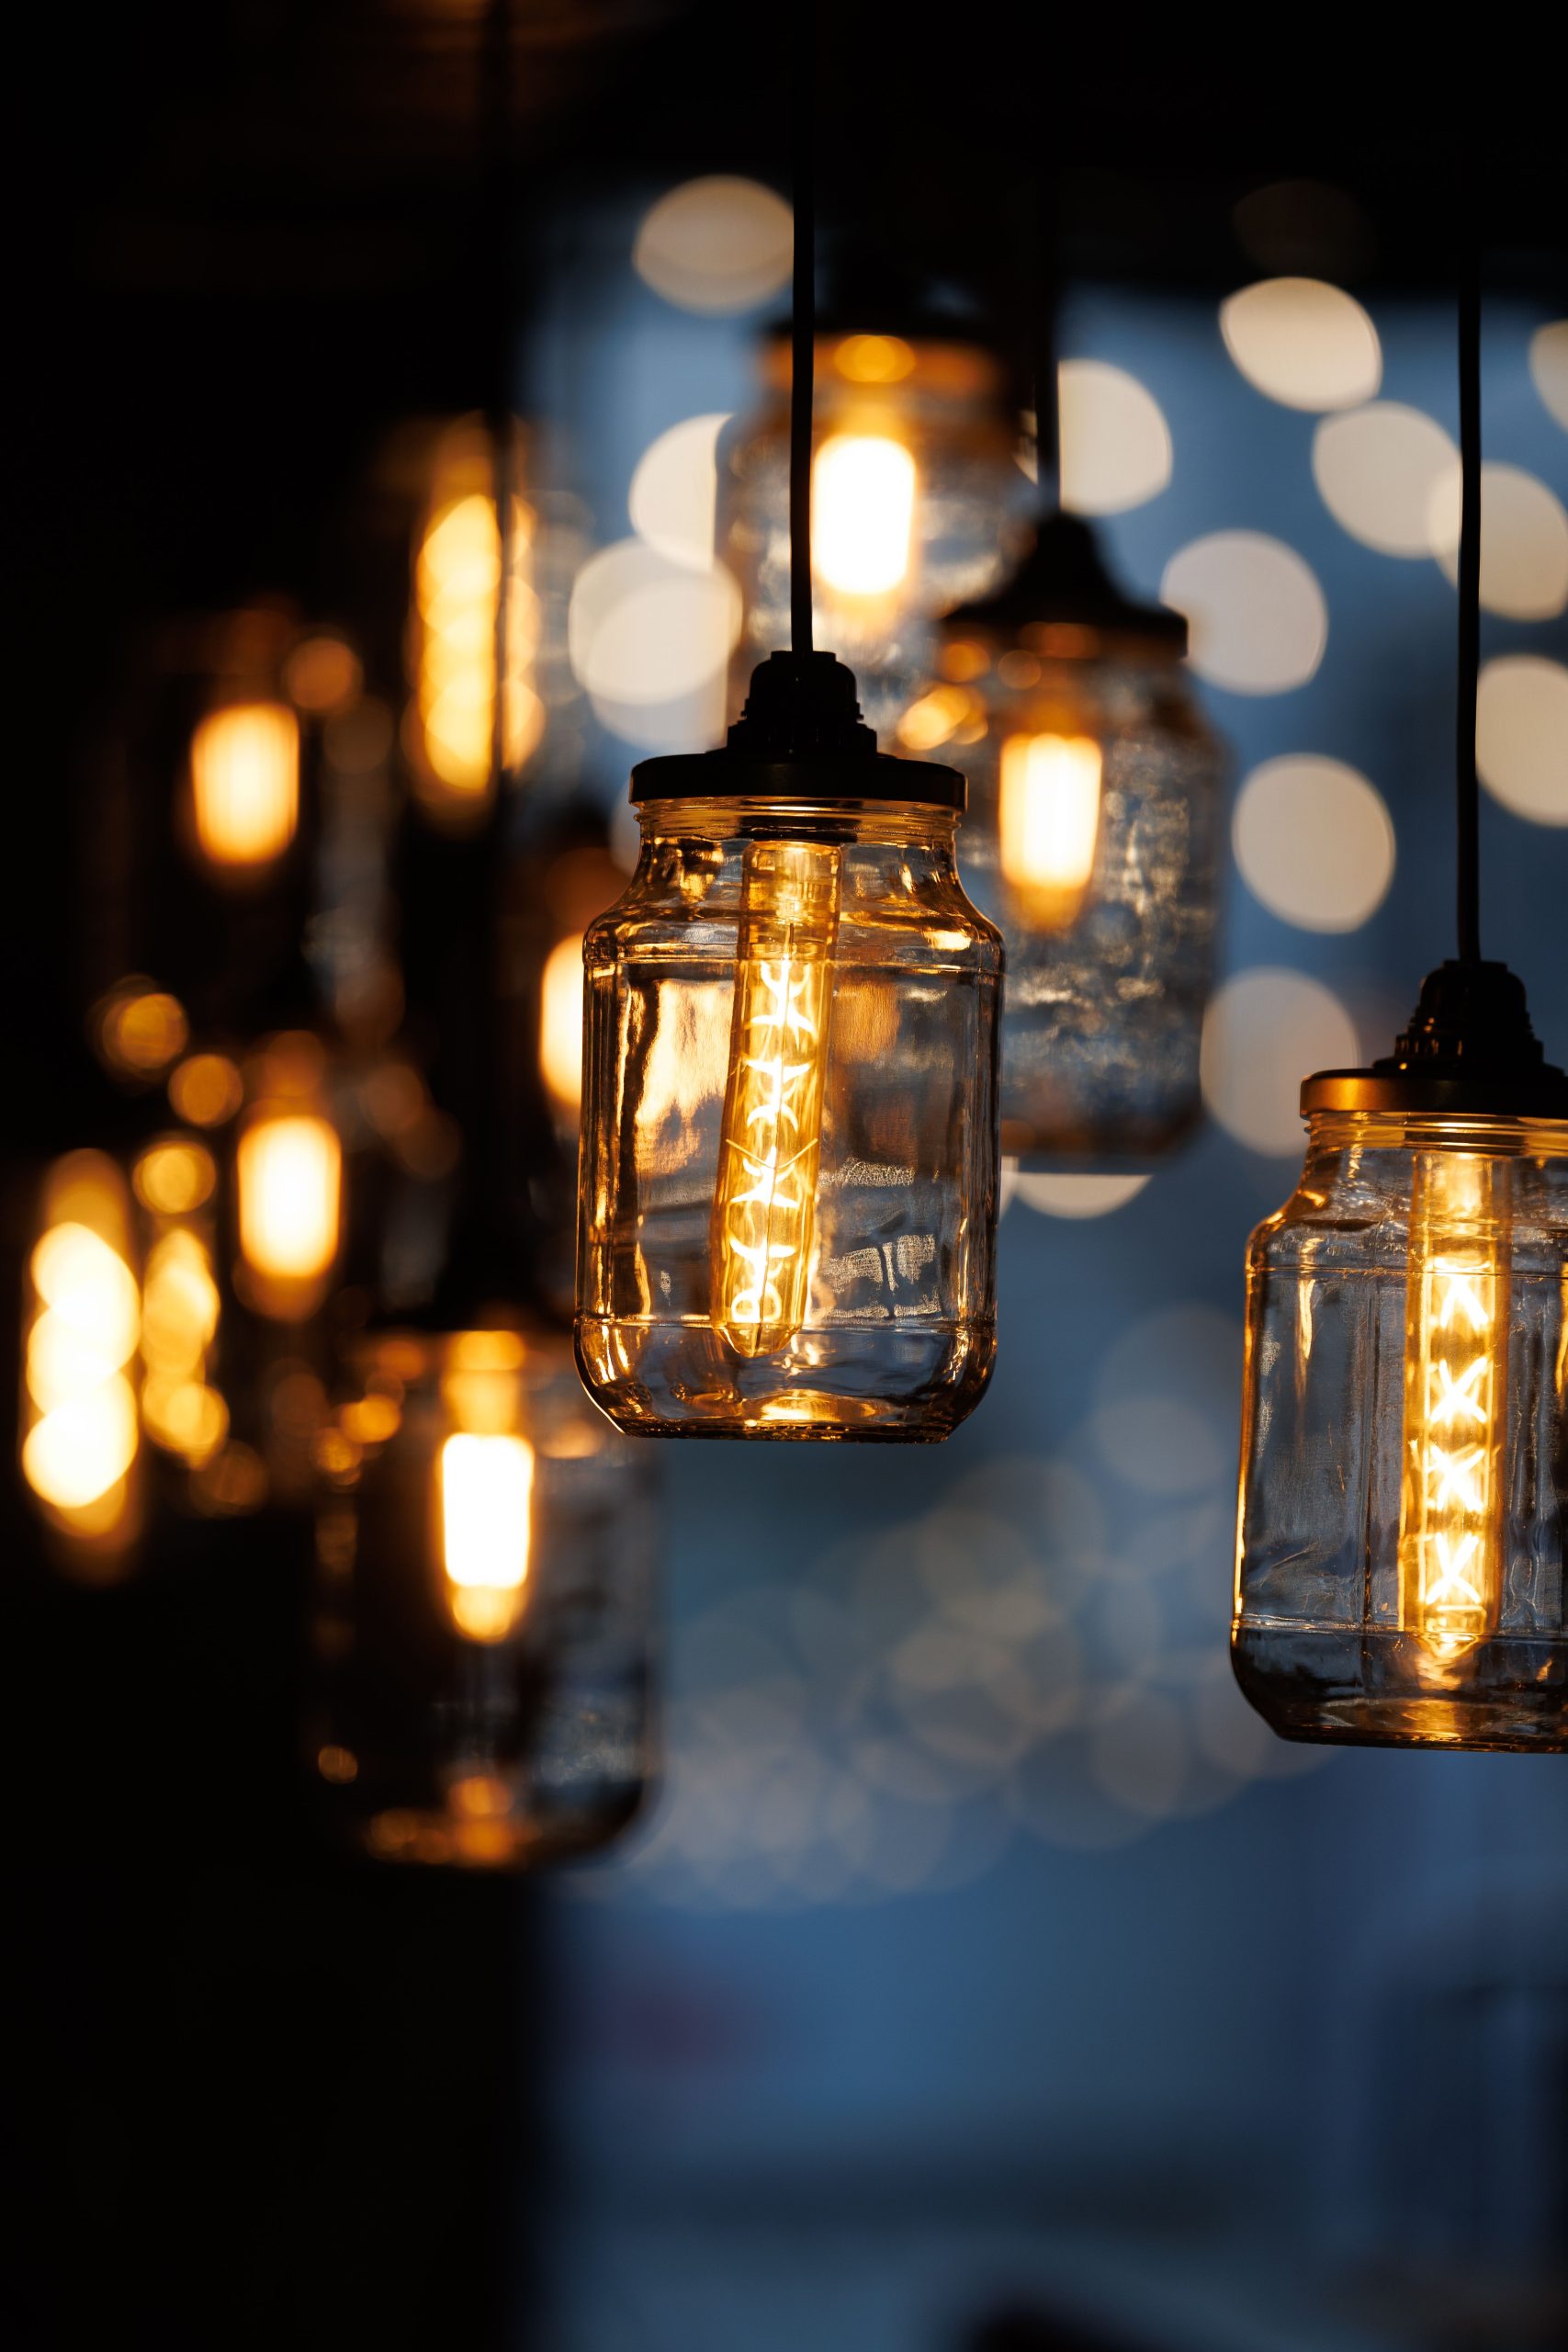
“Scale Guide: A cluster of lights like this is a statement piece, perfect for a space with high ceilings.”
It needs vertical room to breathe. Hang it in a stairwell, a room with a vaulted ceiling, or above a dining table where it can be a true focal point. A minimum ceiling height of 9-10 feet is recommended. To get the look right, vary the hanging lengths of the cords, with the lowest jar hanging no closer than 30-36 inches above a tabletop or 7 feet from the floor in a walkway.
20. Solar-Powered Jar Lights on a Weathered Patio Table
What Makes It Work: This scene perfectly captures the feeling of a lazy, cozy evening outdoors. The warm, golden light from the jars contrasts beautifully with the cool, weathered gray and brown tones of the wooden table. The placement is casual and un-fussy, which makes it feel inviting and real. The out-of-focus background with the pop of pink from the petunias adds a soft layer of color and depth, reminding us this is a living, breathing garden space. This is how you create an atmosphere, not just add light. It’s a more intimate version of the deck lighting seen in Idea #15.
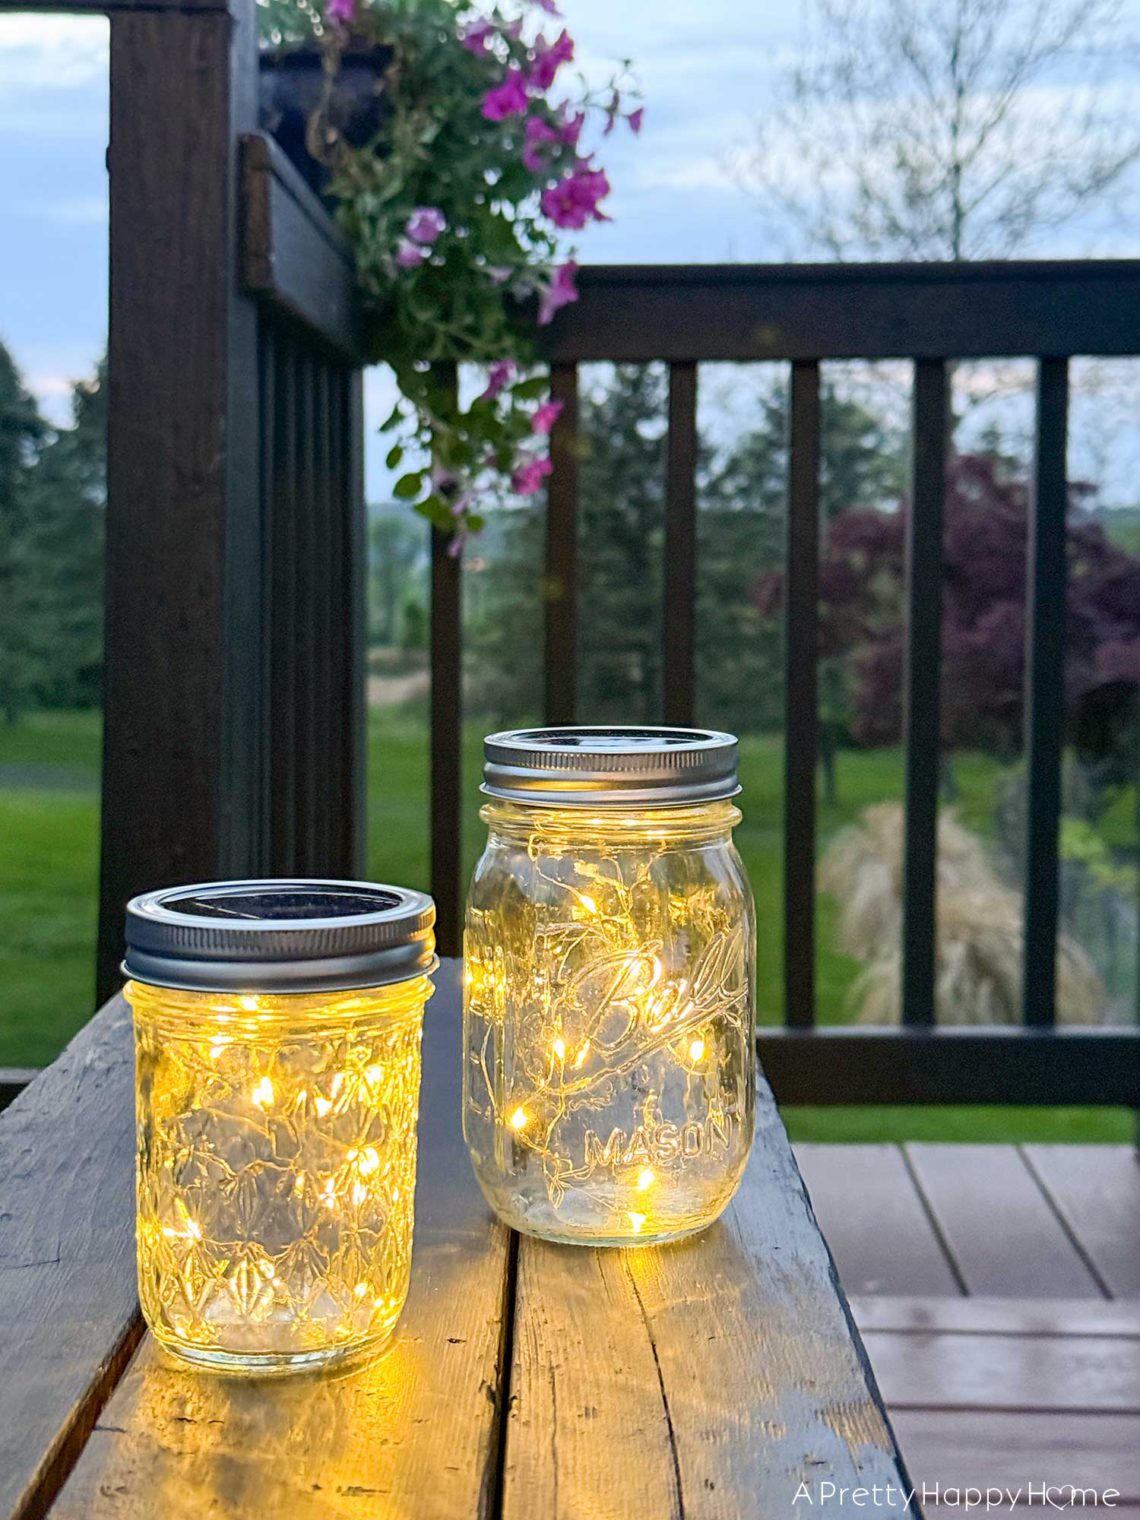
“Get This Look For Less: Pre-made solar jar lights can be surprisingly expensive.”
To get this exact vibe on a shoestring budget, head to a dollar store or Walmart and look for their cheapest solar-powered garden path lights. Often, the top part containing the solar panel and light can be easily removed. This part frequently fits perfectly into the opening of a standard mason jar, resting right on top. You can create a whole set of these for the price of one or two store-bought versions.
21. A Winter-Themed Jar with a Festive Botanical Topper
The One Thing: The star of this show is the textural arrangement on top. Without the festive faux floristry, it’s just lights in a jar. But the combination of frosted pinecones, clear beaded branches that look like icicles, and the simple twine bow transforms it into a piece of true winter decor. It’s a study in texture: the smooth glass, the rough twine, the bumpy pinecone, and the slick, shiny beads. This multi-sensory appeal is what elevates the piece and gives it its cozy, sophisticated holiday charm. You can see similar concepts in Idea #12 and Idea #26.
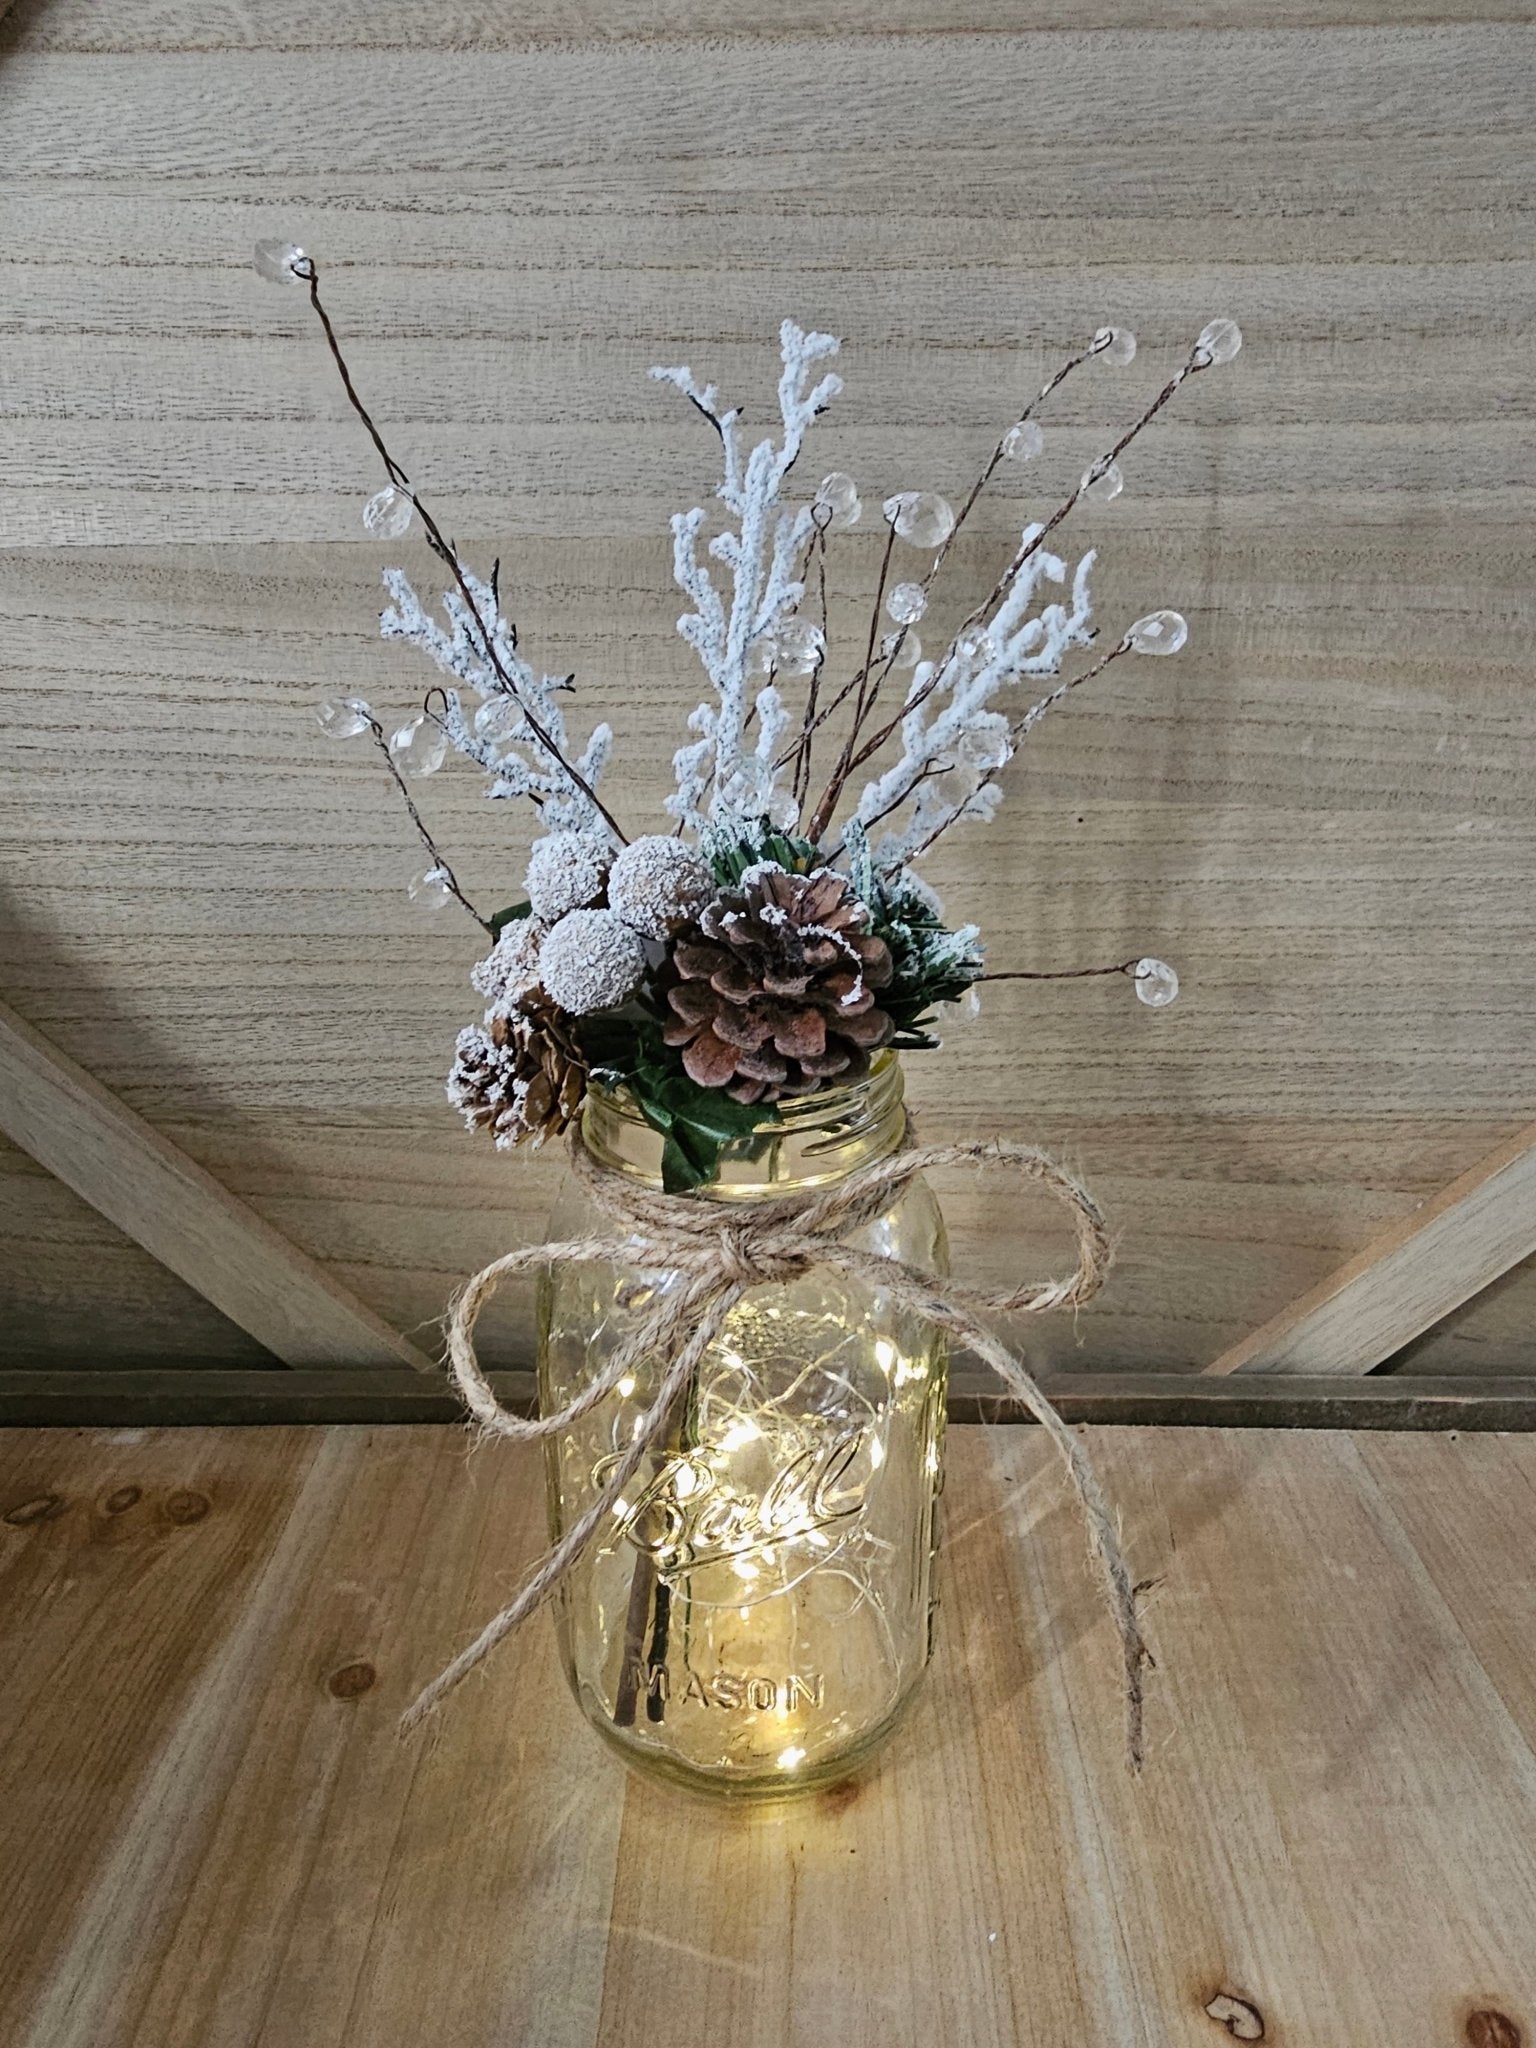
“Style Math: The success of this wintery jar comes down to a well-balanced recipe: 50% warm glow + 30% rustic texture + 20% icy sparkle.”
The fairy lights provide the foundational warmth. The pinecones and twine bow deliver that essential rustic, natural feel. Then, the frosted and beaded branches add that touch of icy, wintery sparkle that makes it feel festive. If you wanted to lean more rustic, you could add more pinecones and greenery. For more glam, add more beaded elements. The core formula holds the look together.
22. Pergola-Hung Jar Lights Over a Blooming Garden
What Makes It Work: This design creates a magical ‘ceiling’ of light, defining the outdoor space and making it feel like a true room. The contrast between the dark, strong lines of the pergola and the delicate, glowing jars is visually compelling. What really makes it spectacular, though, is the context. Hanging the lights above a bed of vibrant purple and yellow flowers connects the decor to the natural environment, making the whole scene feel integrated and alive. The warm glow of the setting sun echoing the warm light of the bulbs is the perfect finishing touch. A similar, more rustic vibe is seen on the fence in Idea #16.
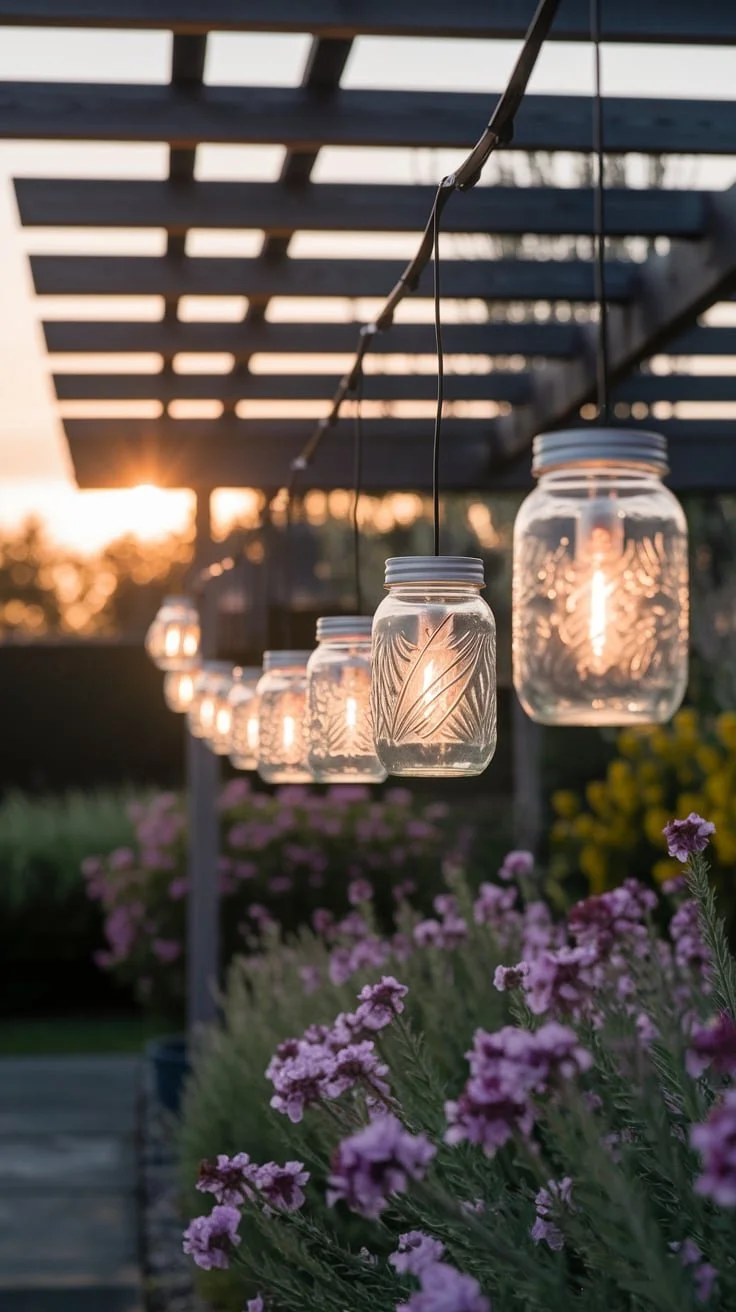
“Maintenance Reality: An outdoor installation like this is stunning, but it’s not a ‘set it and forget it’ project.”
The jars will collect dust, pollen, and water spots, requiring a wipe-down a few times a season to keep them sparkling. You’ll also want to check the bulbs and wiring periodically for weather-related wear and tear. The biggest nuisance? Spiders a-love- to build webs in and around the jars. A quick pass with a long-handled duster every couple of weeks during the summer will keep them looking their best.
23. A Simple Hanging Jar Candle Lantern
The One Thing: The simplicity. In a world of complex fairy light arrangements and elaborate terrariums, the simple, solitary flame of a single candle inside a plain glass jar has a unique power. It’s timeless, a little mysterious, and deeply calming. The golden ribbon is the only adornment needed, adding a touch of elegance without distracting from the main event: the living, dancing flame. This idea is a reminder that sometimes the most effective design is the most elemental.
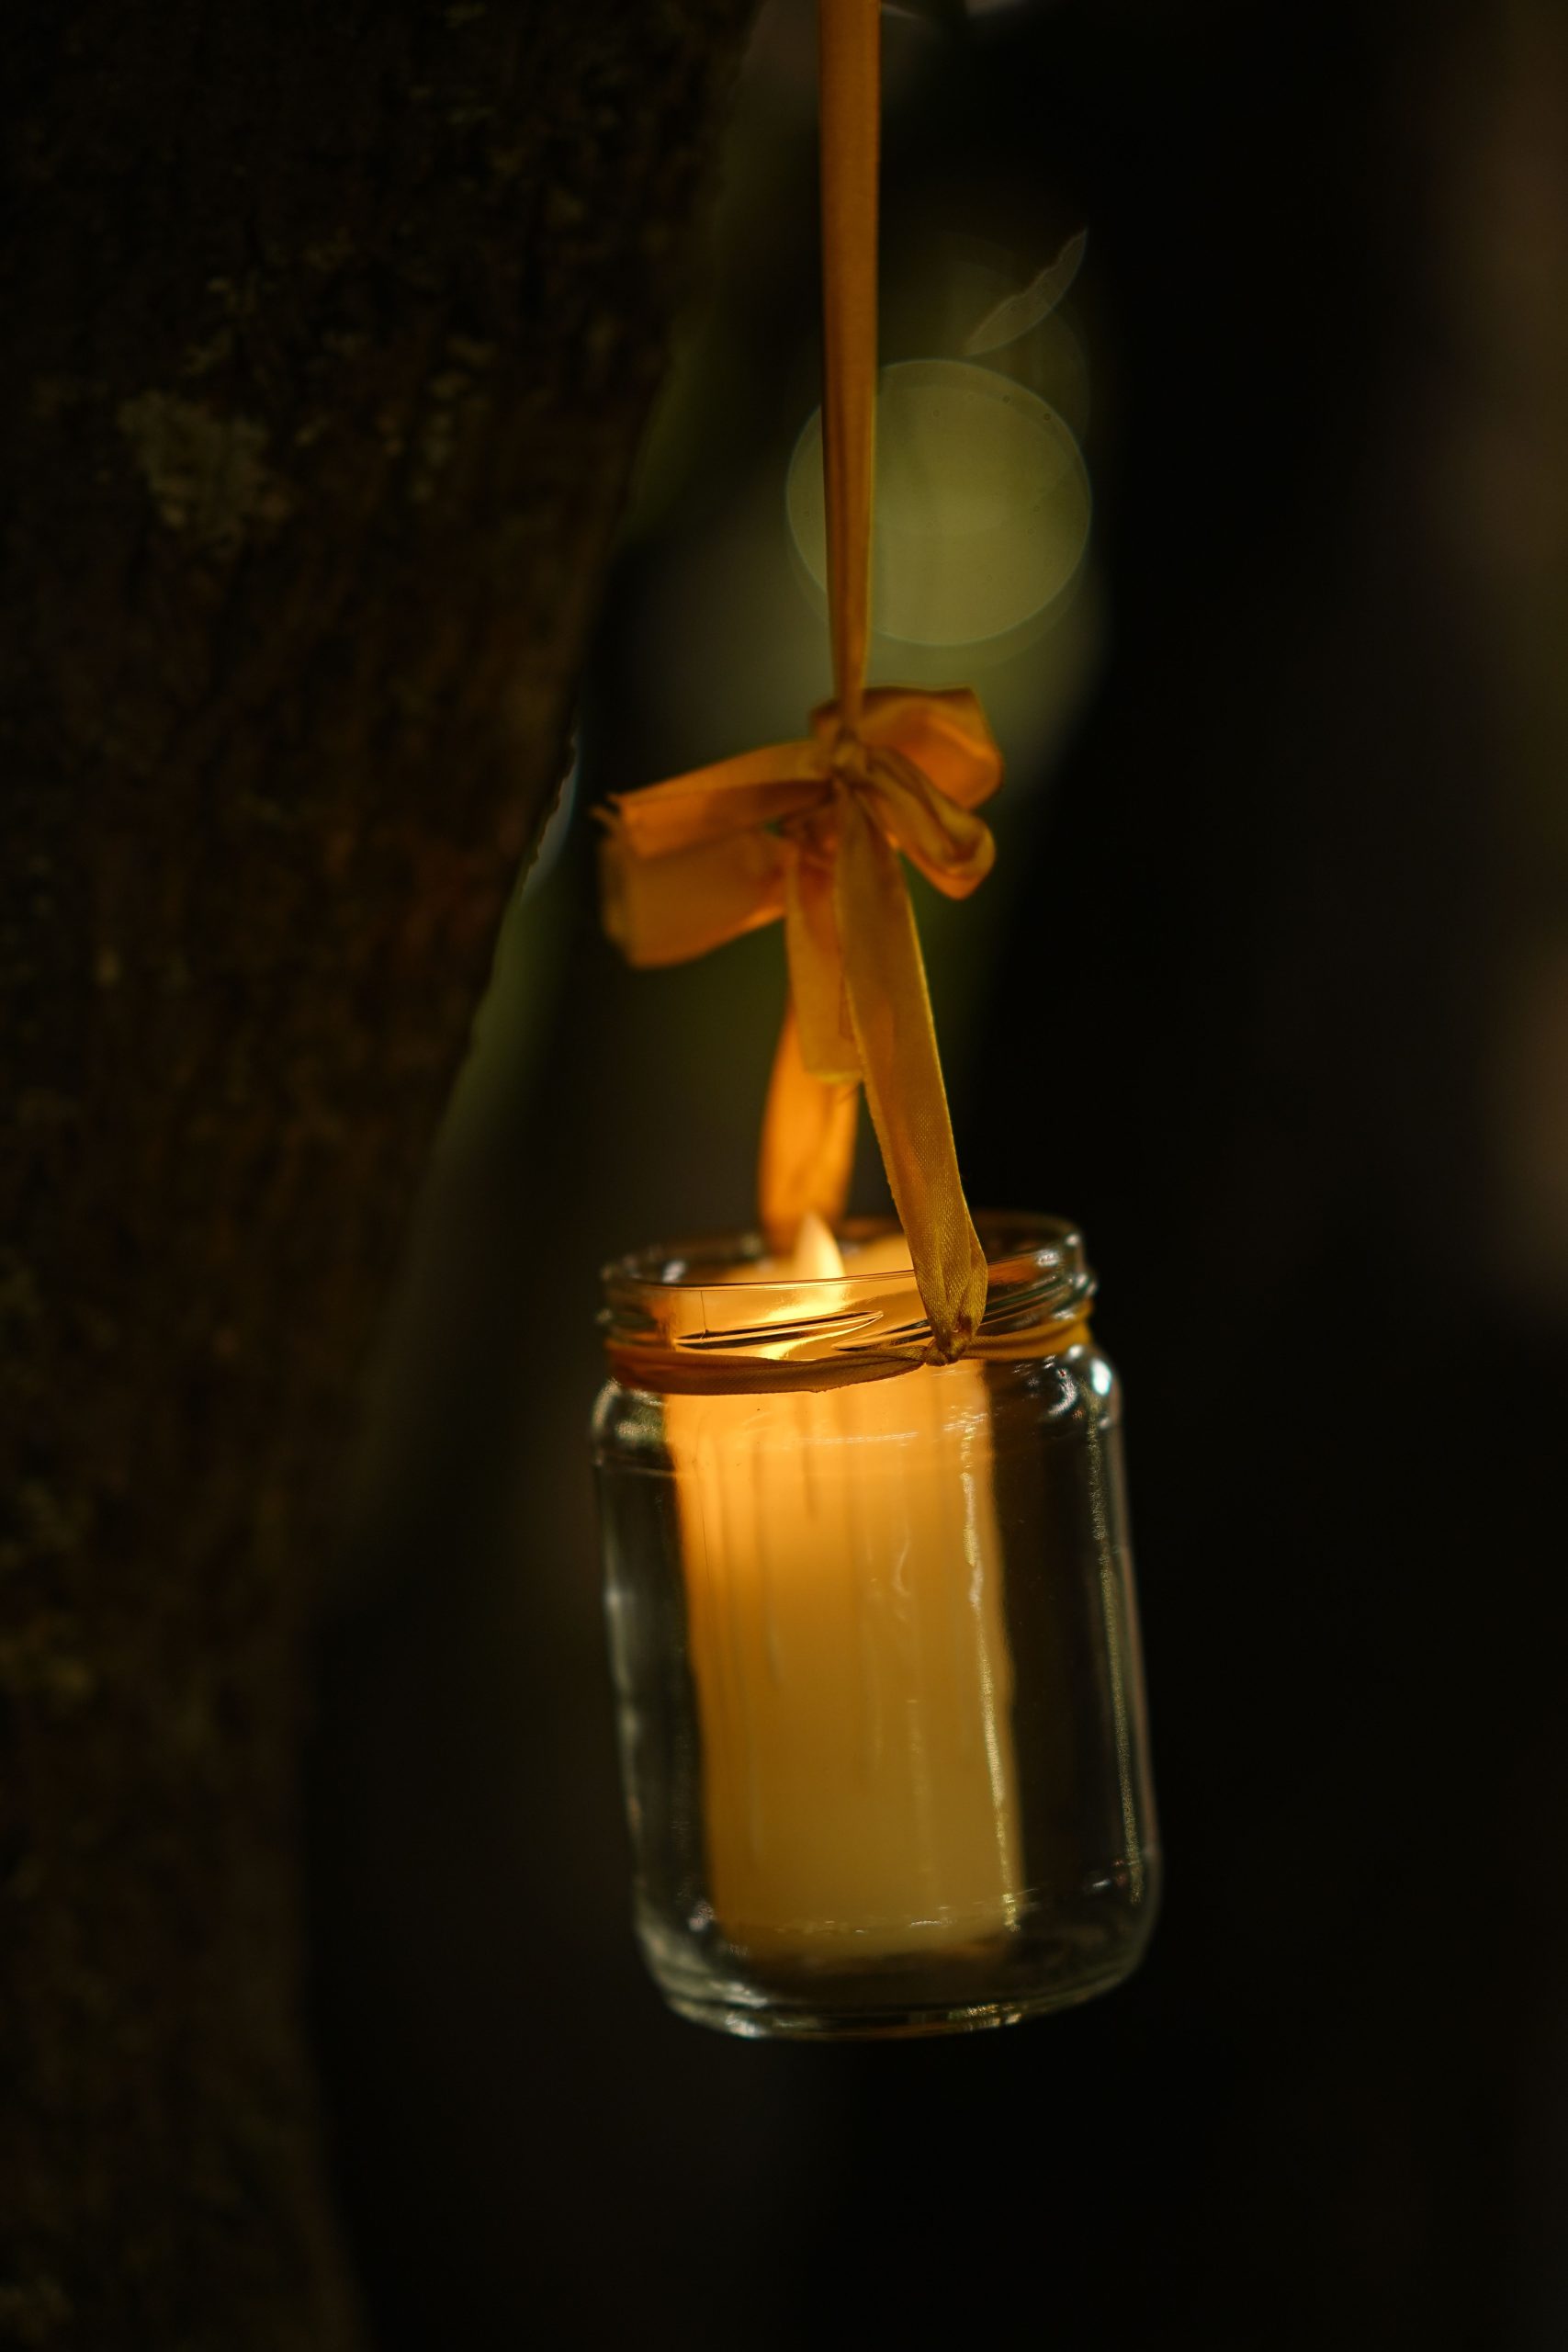
“Real Talk: Using a real candle in a hanging glass jar is beautiful, but it requires serious caution.”
The glass can get extremely hot. Never leave a burning candle unattended. Ensure the jar has some ventilation so the flame gets oxygen and doesn’t extinguish itself or overheat the glass too quickly. Use a sturdy ribbon or wire for hanging, and keep it far away from flammable surfaces like tree branches, curtains, or siding. For a worry-free version, a single flickering LED candle can provide a very similar, and much safer, effect.
24. A ‘Good Luck’ Jar with a Passionflower Companion
What Makes It Work: This composition is all about the power of juxtaposition. The simple, rustic charm of the ‘GOOD LUCK’ mason jar filled with warm lights is placed next to the incredibly intricate, almost alien-like beauty of a passionflower. It’s a pairing of the handmade with the natural wonder. The dark, bokeh-lit background creates a nocturnal, magical mood, suggesting this is a secret moment discovered in a garden at night. The lighting is perfect, with the jar illuminating the details of the nearby leaves and flower.
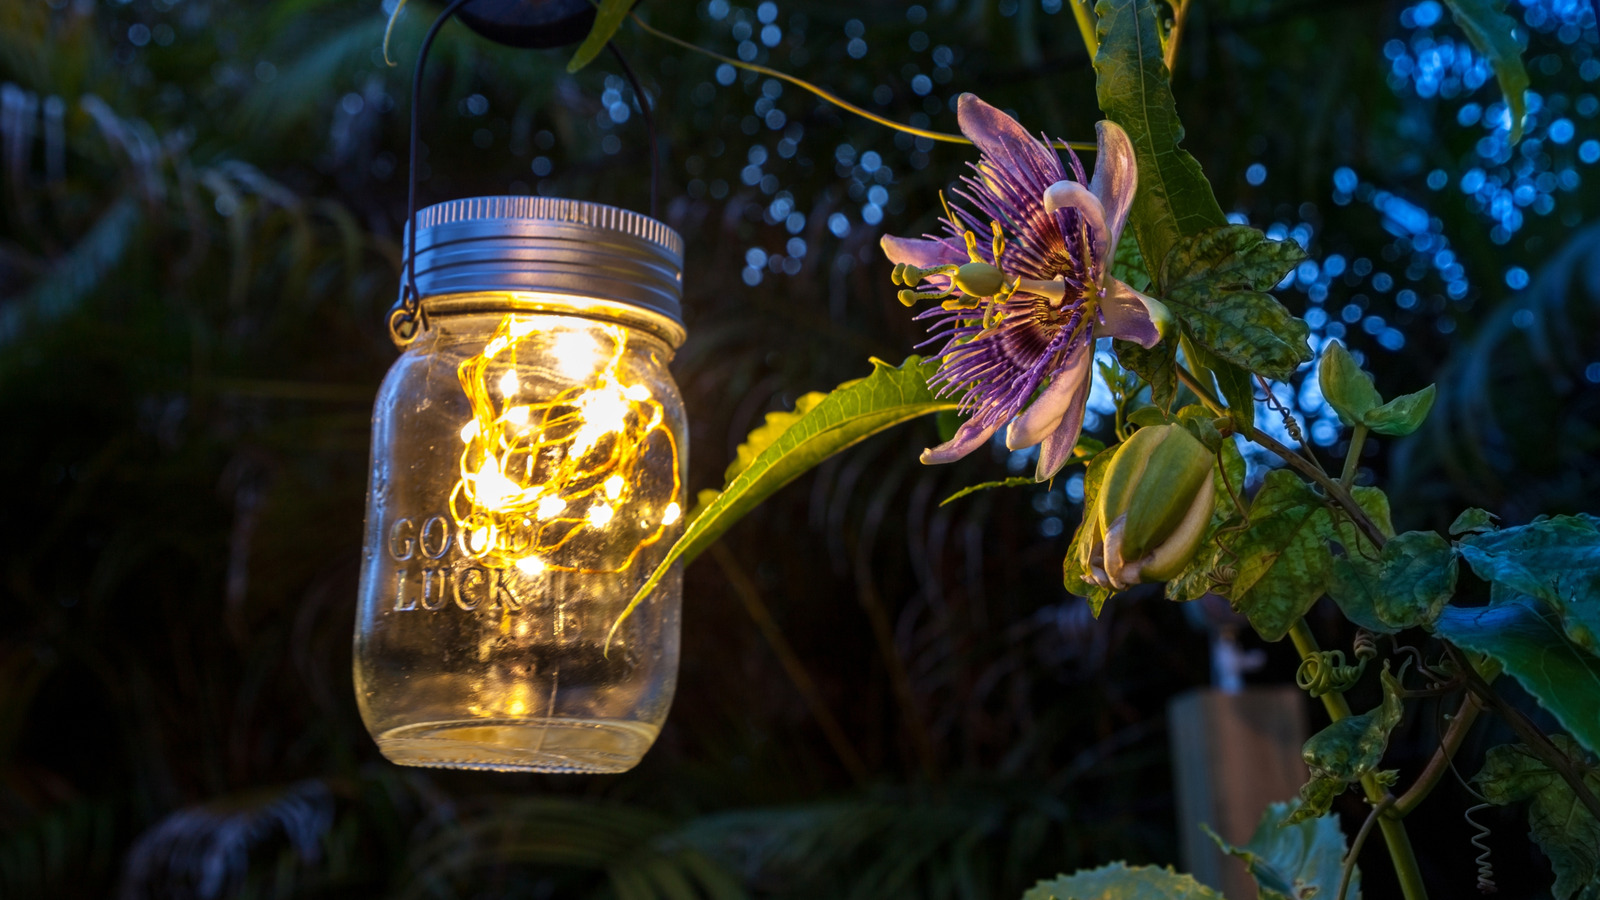
“Trending Context: This image taps directly into the ‘dark naturalism’ trend we’re seeing on Pinterest.”
It’s a move away from bright, airy photos and towards moodier, more atmospheric scenes that celebrate the beauty of nature at night. It’s less about a whole garden and more about focusing on one perfect bloom or one beautiful moment. The combination of the warm, artificial light from the jar with the cool, dark tones of the night creates a dynamic and emotionally resonant image that feels both modern and timeless.
25. Rustic Chic Centerpieces with White Flowers and Eucalyptus
Budget Breakdown: This popular wedding and event look is gorgeous and surprisingly budget-friendly when you DIY it.
- Ball Mason Jars (3): $6 – $12
- Fairy Light Strings (3, warm white on copper wire): $5 – $9
- Faux White Flowers (e.g., roses or hydrangeas): $10 – $20
- Faux Eucalyptus Stems: $8 – $15
- Jute Twine: $2 – $4
- TOTAL: $31 – $60
- Budget Alternative: Buy your faux florals in bulk from online craft suppliers or wait for the 50% off sales at stores like Michaels or Hobby Lobby. This can cut your floral costs in half and bring the total for all three well under $40.
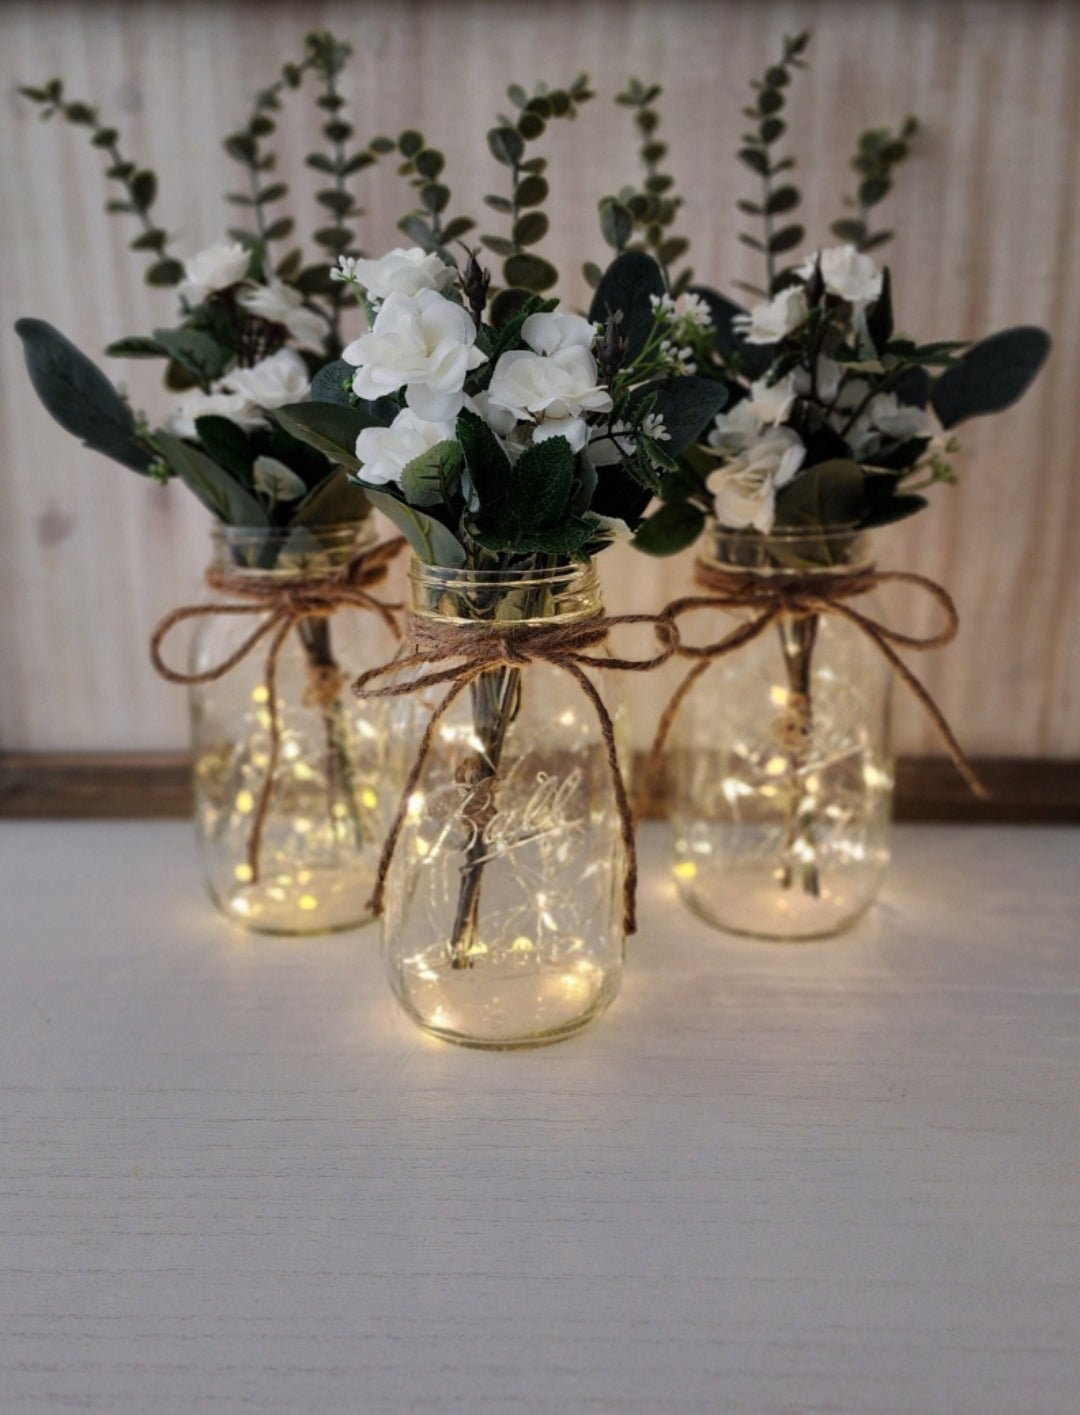
“Designer Tip: The key to making faux florals look lush and believable is to ‘fluff’ them.”
Don’t just stick them in the jar straight out of the packaging. Gently bend the wired stems and separate the leaves and petals to give them a more natural, open shape. For the eucalyptus, a slight bend in the middle of the stem will give it that graceful, weeping look. Also, don’t be afraid to mix and match. Using two types of white flowers and two types of greenery, as seen here, adds depth and realism.
26. Cozy Winter Jar with Snow-Dusted Pinecones
What Makes It Work: This design succeeds because it perfectly balances warm and cool elements. The fairy lights inside the jar cast a warm, golden glow that feels incredibly cozy and inviting. This warmth is contrasted with the ‘cool’ elements of the topper—the faux snow on the pinecones and berries, and the frosty-looking branches. This push-and-pull between cozy warmth and icy winter imagery is what makes the piece so evocative of a snug winter’s night. The twine bow acts as a perfect rustic bridge between the two. See also: Idea #12 and Idea #21 for similar takes.
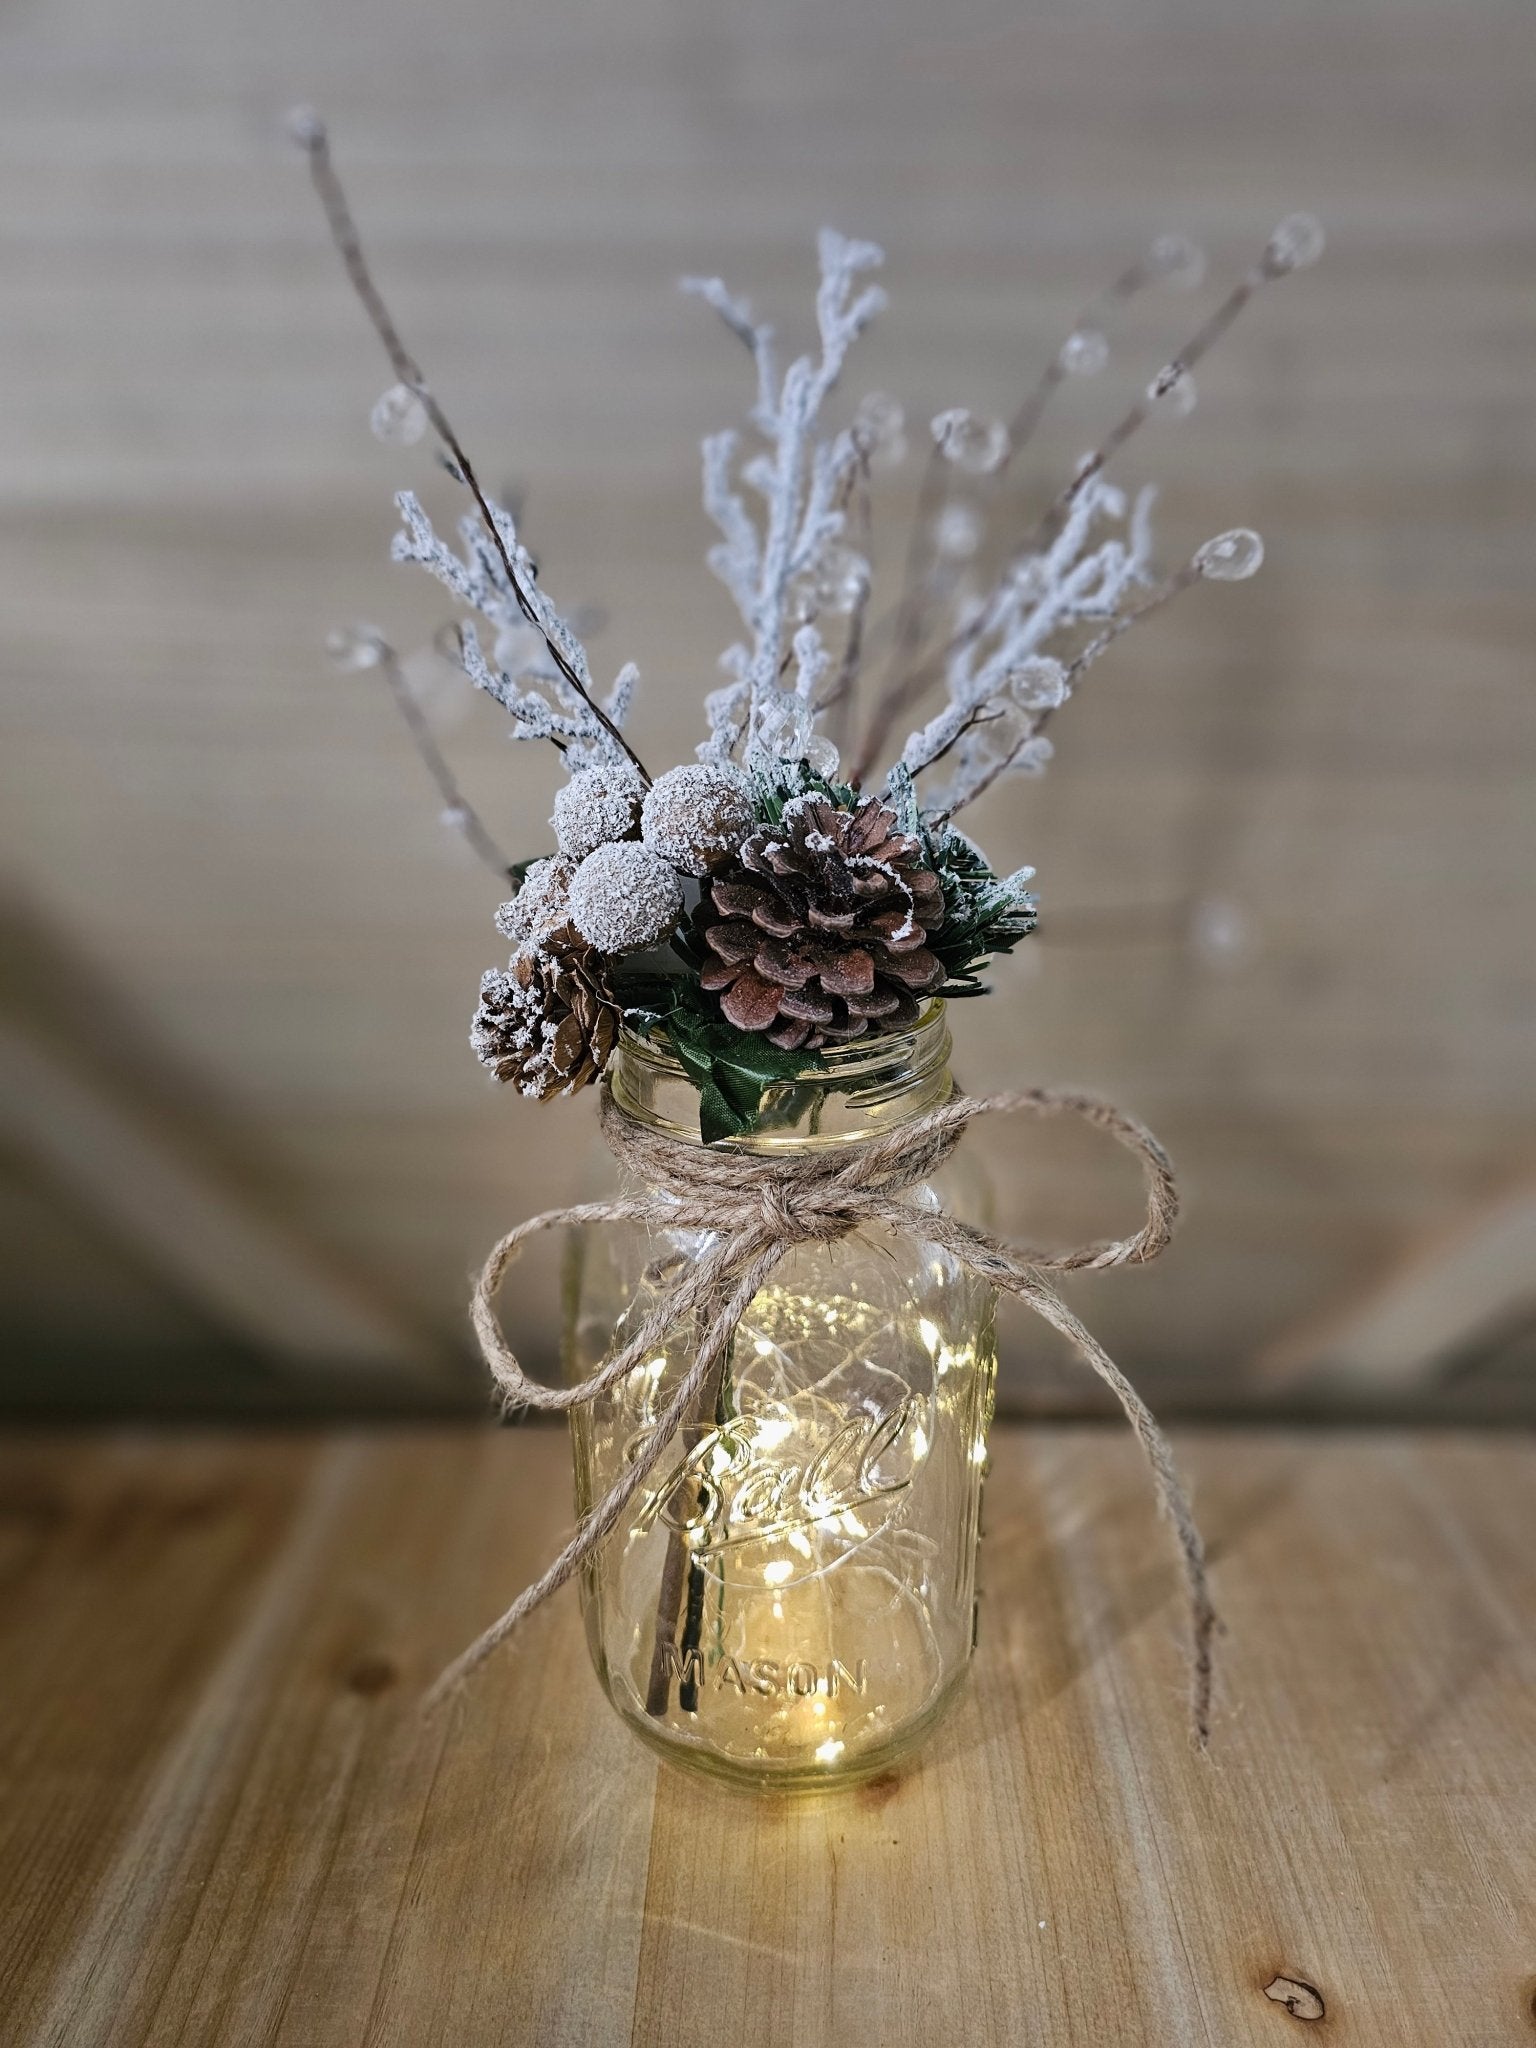
“How-To Brief: That ‘snow-dusted’ effect is a classic holiday craft trick, and it’s super easy to do yourself.Time Estimate: 30 minutes (plus drying)Cost Estimate: $10 for suppliesGather your pinecones and faux berries.In a disposable container, mix white craft paint with a bit of water to thin it slightly.”
For extra texture, you can mix in some coarse salt or white glitter.Using a stiff paintbrush or a toothbrush, dab the paint onto the edges of the pinecone scales and onto the berries. Don’t aim for perfect coverage; you want it to look like snow has naturally settled.While the paint is still wet, you can sprinkle on a little extra glitter for sparkle.Let everything dry completely before assembling your jar topper.
27. An Ambient Tablescape of Frosted Jars and Fresh Flowers
Style Math: This beautiful, glowing arrangement relies on a formula of varied textures and light sources. It’s about 50% diffused light + 30% rustic surfaces + 20% delicate florals. The frosted jars provide the main ambient glow, creating a soft, warm foundation. The rustic wooden table adds essential texture and warmth, grounding the entire display. Finally, the fresh orange roses and other small flowers in clear vases provide a pop of organic color and delicacy. The key is the mix: not everything is a light, and not everything is a flower. The variety is what makes it feel curated and rich.
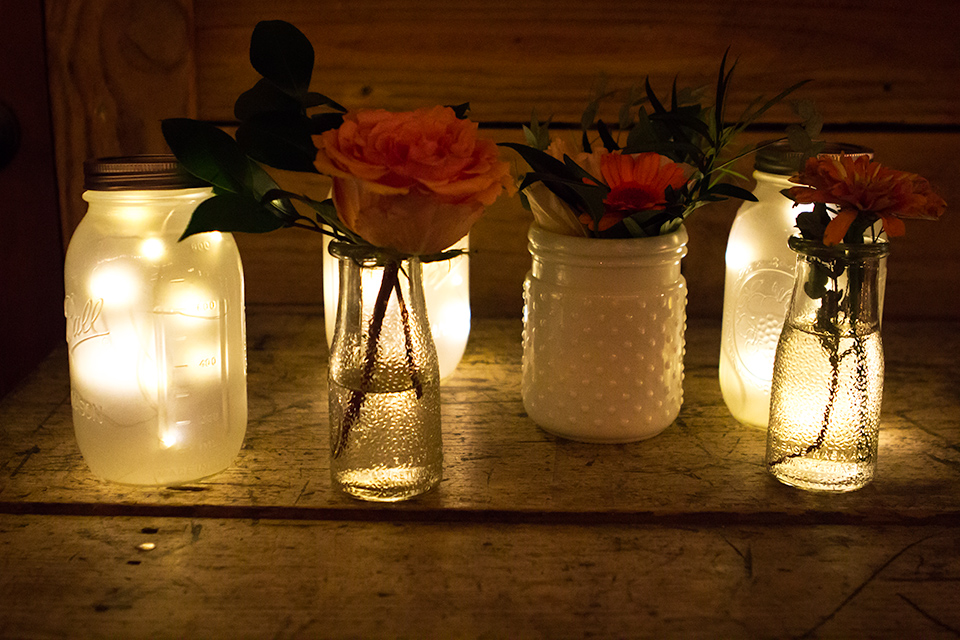
“Designer Tip: To create a dynamic, layered tablescape like this, always vary the height and texture of your objects.”
Notice how there are tall frosted jars, a medium hobnail-textured jar, and small, short clear vases. This variation keeps your eye moving and makes the arrangement feel more organic and less like a static row of items. Start with your tallest item in the center or slightly off-center, and then build out from there with shorter pieces to create a pleasing visual flow.
28. Romantic Jar Centerpieces with Deep Red Florals
The One Thing: The color. That deep, velvety red of the faux flowers is the absolute heart of this design. It’s a bold, romantic, and slightly dramatic choice that instantly sets a sophisticated mood. Paired with the warm white lights and the rustic twine, the color feels rich and inviting, not overwhelming. If you were to swap the red for a lighter color, like the pink in Idea #3, the entire feeling would shift from romantic and cozy to sweet and pretty. The deep red makes it feel special.
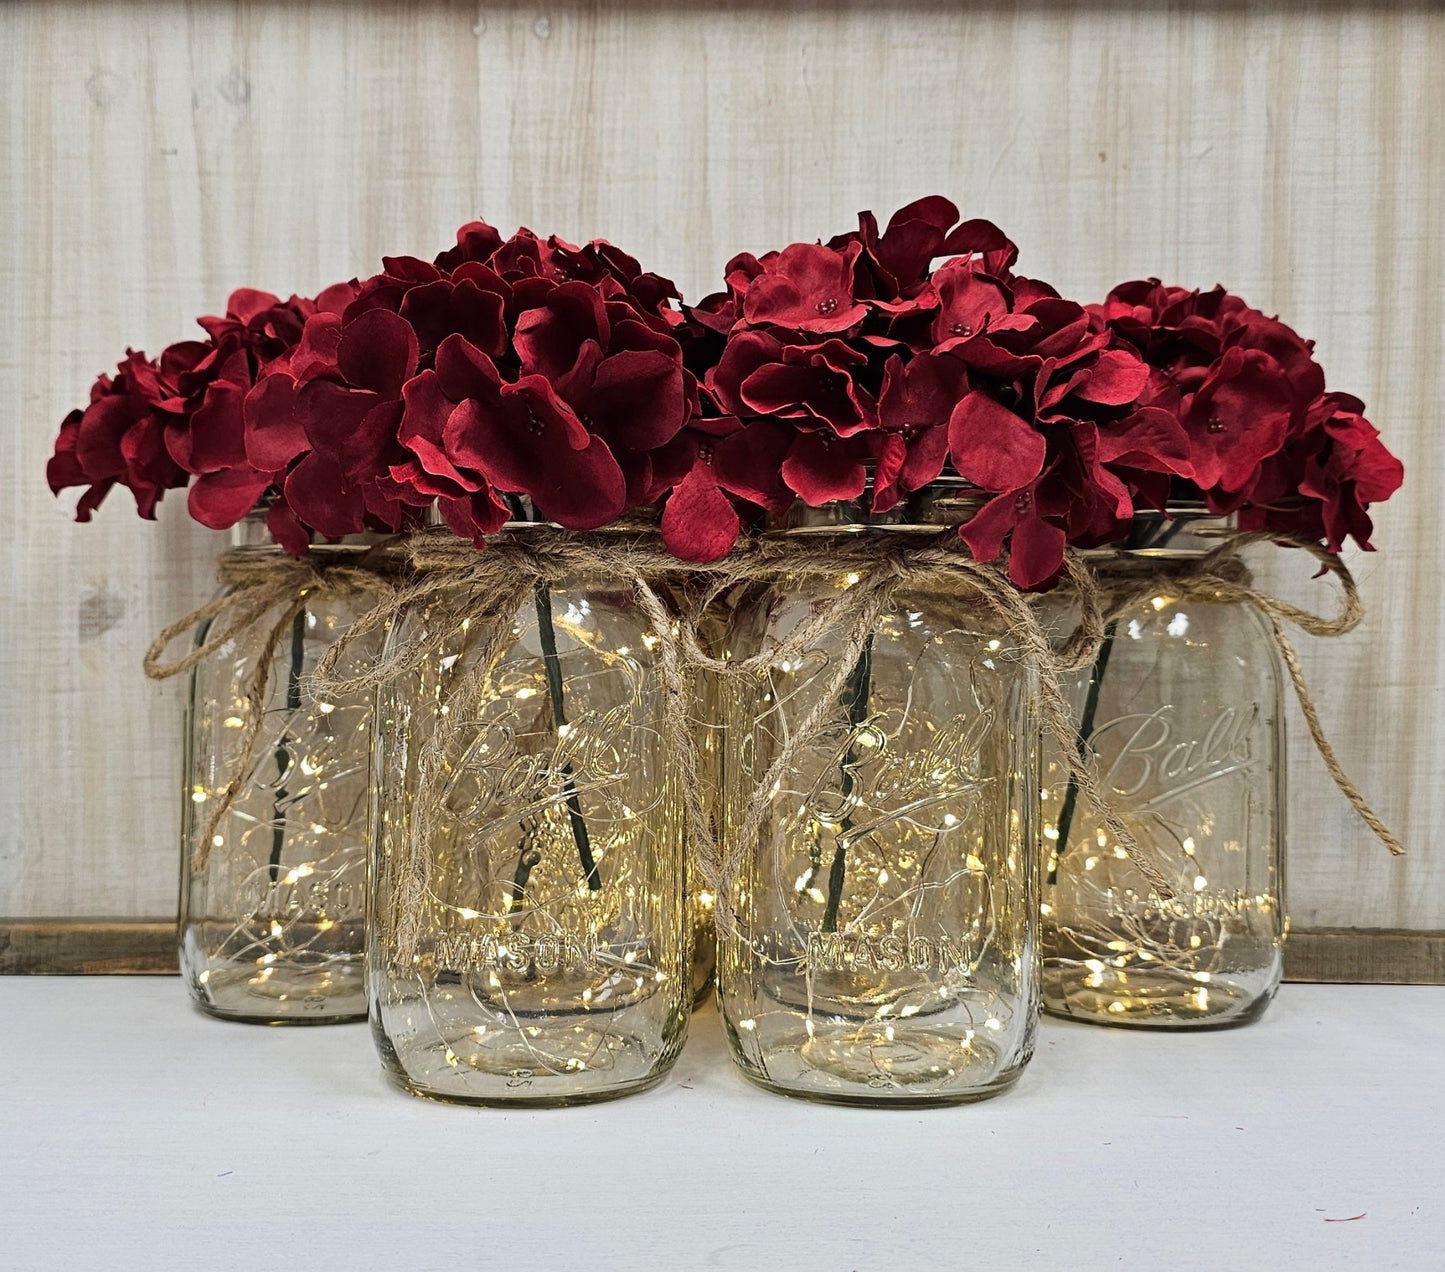
“What Makes It Work: This design is a lesson in elegant repetition.”
By using four identical jars, each styled in exactly the same way, it creates a look that is cohesive and impactful. The arrangement feels intentional and clean. The contrast between the simple, clear glass jars and the lush, full red flowers on top is key. The jars serve as a quiet, glowing base that allows the dramatic florals to take center stage. The whitewashed wood background provides a neutral, slightly rustic canvas that makes the red and the warm light pop.
29. Autumnal Mantelpiece Display with Floral Jars
Scale Guide: A vignette like this is perfectly scaled for a fireplace mantel, a console table, or a wide, floating shelf. The key is the tray: it corrals the items and makes them read as a single decorative statement. The tray itself should be about 18-24 inches long to have this kind of presence. Notice how the height of the floral arrangements varies—this is crucial for a dynamic look. Your tallest arrangement should be no more than two-thirds the height of the space between the mantel and any art or mirror hanging above it.
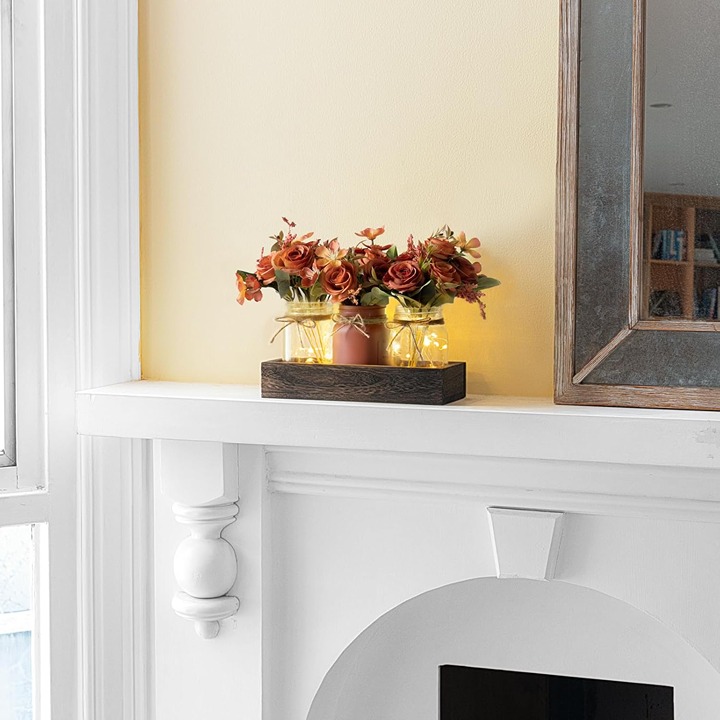
“Get This Look For Less: The tray is the secret to making this look cohesive, but you don’t need a fancy one.”
A simple wooden serving tray from Target or Walmart can be transformed with a quick coat of dark wood stain. For the florals, hit up a dollar store or a craft store’s clearance section. You can often find bunches of autumnal faux flowers for just a few dollars. The mix-and-match jar approach is also very budget-friendly; you can use any clear jars for the lights and an opaque, painted one you already own.
30. Cozy Autumn Evening Jars with Gourds
What Makes It Work: This scene excels at telling a seasonal story with just a few simple props. The warm glow of the fairy lights in the jars immediately establishes a cozy mood. The addition of the small pumpkin and decorative gourds instantly places you in an autumn evening, maybe on a porch or at a fall festival. The light-colored tablecloth acts as a perfect neutral base, making the warm lights and the orange of the gourds stand out. It’s an effortless-looking setup that is actually very thoughtfully composed to evoke a specific feeling.
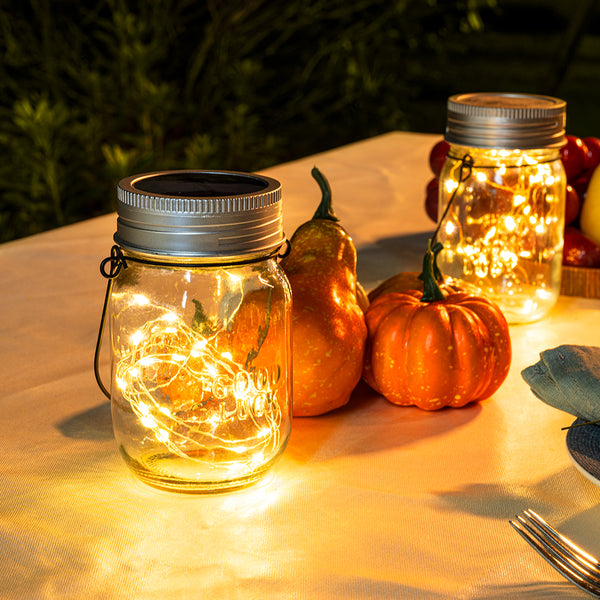
“Before You Start Checklist: To recreate this cozy autumnal scene, a little prep goes a long way.Will this be indoors or outdoors?”
If outdoors, you’ll want to use jars with solar lids for convenience, so they charge during the day and turn on automatically at dusk.Check your surfaces. A simple cream or beige tablecloth is key here; a busy pattern would ruin the simple, cozy vibe.Gather your seasonal decor. You don’t need a whole pumpkin patch. Just two or three interesting gourds or mini pumpkins are enough to set the mood without creating clutter.Make sure your fairy lights are ‘warm white’. A cool white or blue-toned light would completely clash with the warm, harvest-time aesthetic.
31. A Simple Glowing Bottle with a Green Vine
The One Thing: The simplicity of the silhouette is what makes this so elegant. It’s not a mason jar; it’s a tall, clear glass bottle with clean lines. This subtle shift in shape lends it a bit more of a refined, almost potion-bottle-like quality. The cork stopper enhances this feeling. The design is confident in its minimalism—just the bottle, the lights, and a single green vine. It’s a testament to the idea that you don’t need a lot of elements to create something beautiful and enchanting.
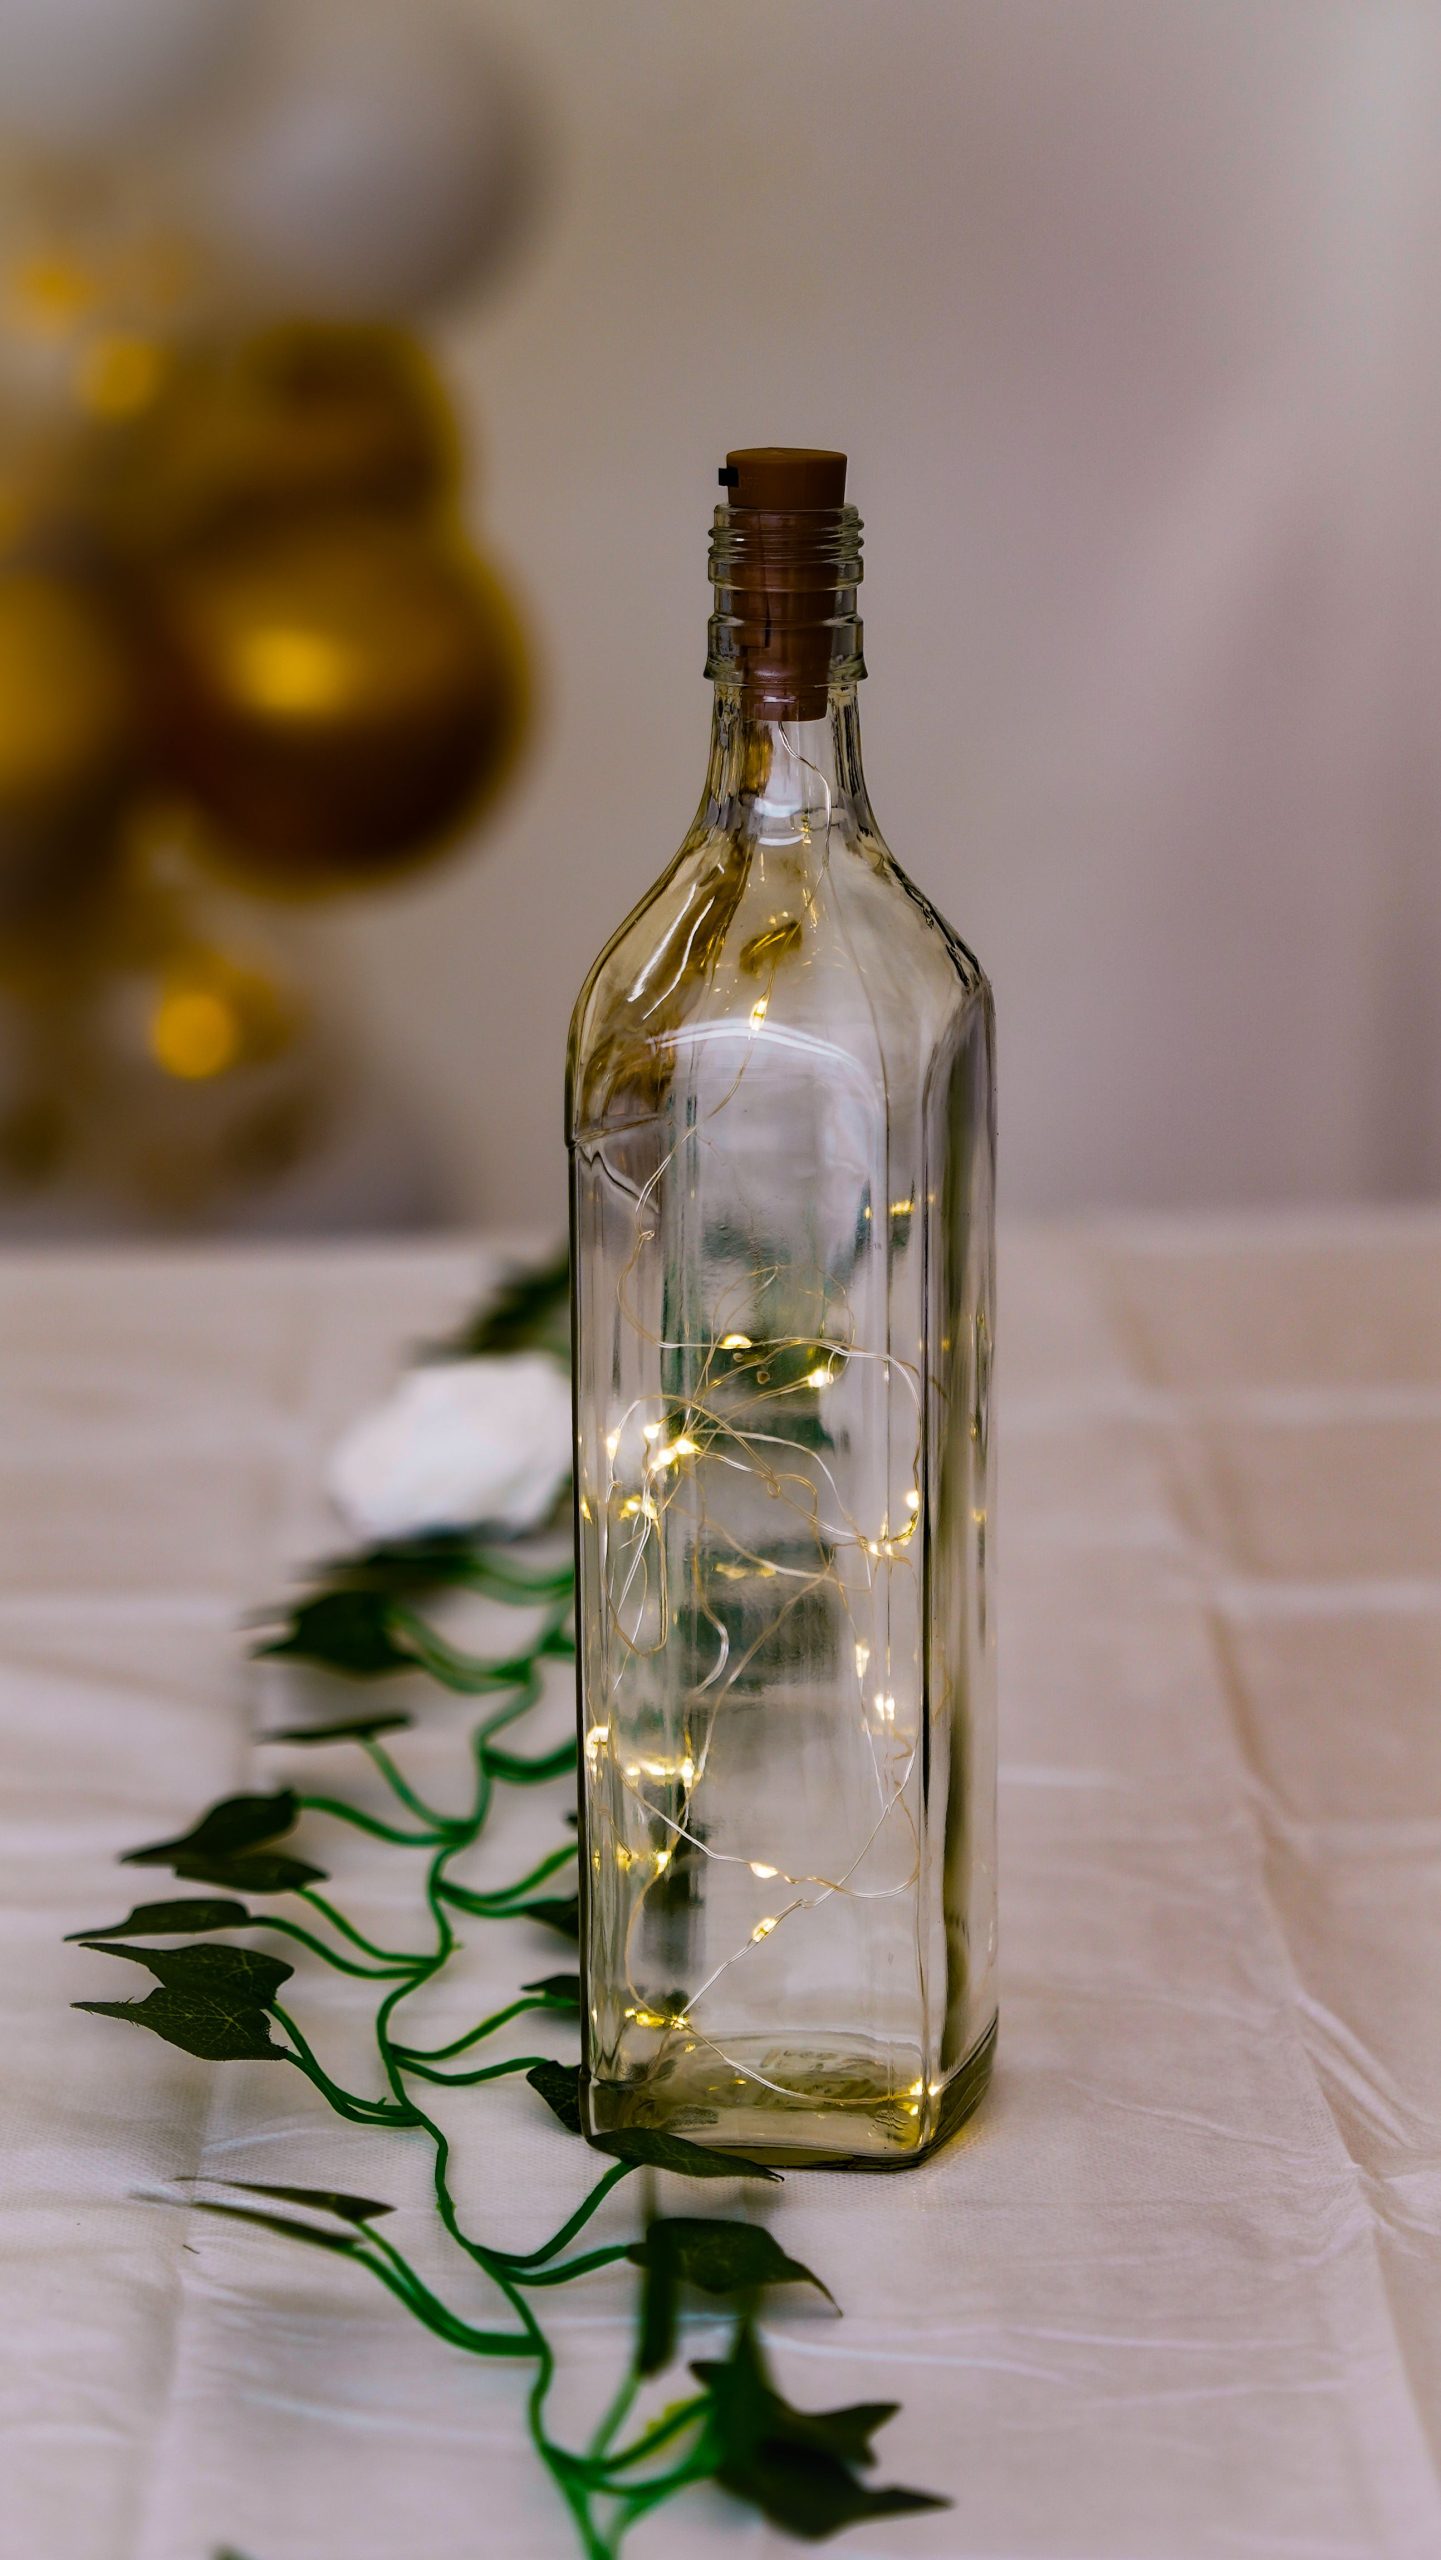
“Get This Look For Less: This is one of the most budget-friendly ideas on the list.”
Instead of buying a new decorative bottle, simply soak an empty wine or sparkling water bottle in hot, soapy water to remove the label. A good scrub will leave you with a perfectly clear vessel. A strand of battery-powered fairy lights can be had for just a couple of dollars online or at a craft store. A small artificial vine from a dollar store or craft shop is the only other element you need. You can create this elegant piece for less than $5.
Your Little Jar of Magic Awaits.
See? It’s not just about lights in a jar; it’s about creating a tiny world that tells a story. Even the simplest glowing bottle can bring a surprising amount of warmth and personality to your home. Pick an idea that sparked something in you and make it your own this weekend. We’d love to see what you create—be sure to tag us in your photos on Pinterest!