You know that feeling when you finally find the perfect inspiration photo on Pinterest, but the reality of your backyard includes a clunky AC unit, overflowing recycling bins, or a view of the neighbor’s less-than-lovely shed? That’s where we come in. Hiding the not-so-pretty parts of your outdoor space is less about demolition and more about clever disguise. We spent serious time browsing sites like Wayfair, Home Depot, and even high-end sources to bring you only what’s worth your attention this year.
We’ve curated 32 brilliant, real-world ideas that go way beyond just planting a few bushes. Inside, you’ll find solutions covering modern, rustic, and natural styles, with options ranging from simple DIY projects to full-scale professional installations. And stay until the end — we break down the most common mistakes that can ruin these looks. 📌 Save this to Pinterest for later — you’ll want to revisit these ideas.
1. Frame a Patio with a Living Wall of Greenery
This setup is so successful because it uses a classic design trick: layering. Instead of just a fence, you have three distinct layers creating depth and interest. First, the light gravel patio floor acts as a bright, textured base. Next, the raised planting bed with dark mulch provides a rich, dark contrast. Finally, the combination of the wooden fence and the lush foliage on top of it creates a tall, living backdrop. This layering makes the space feel thoughtfully designed, not just plopped down.
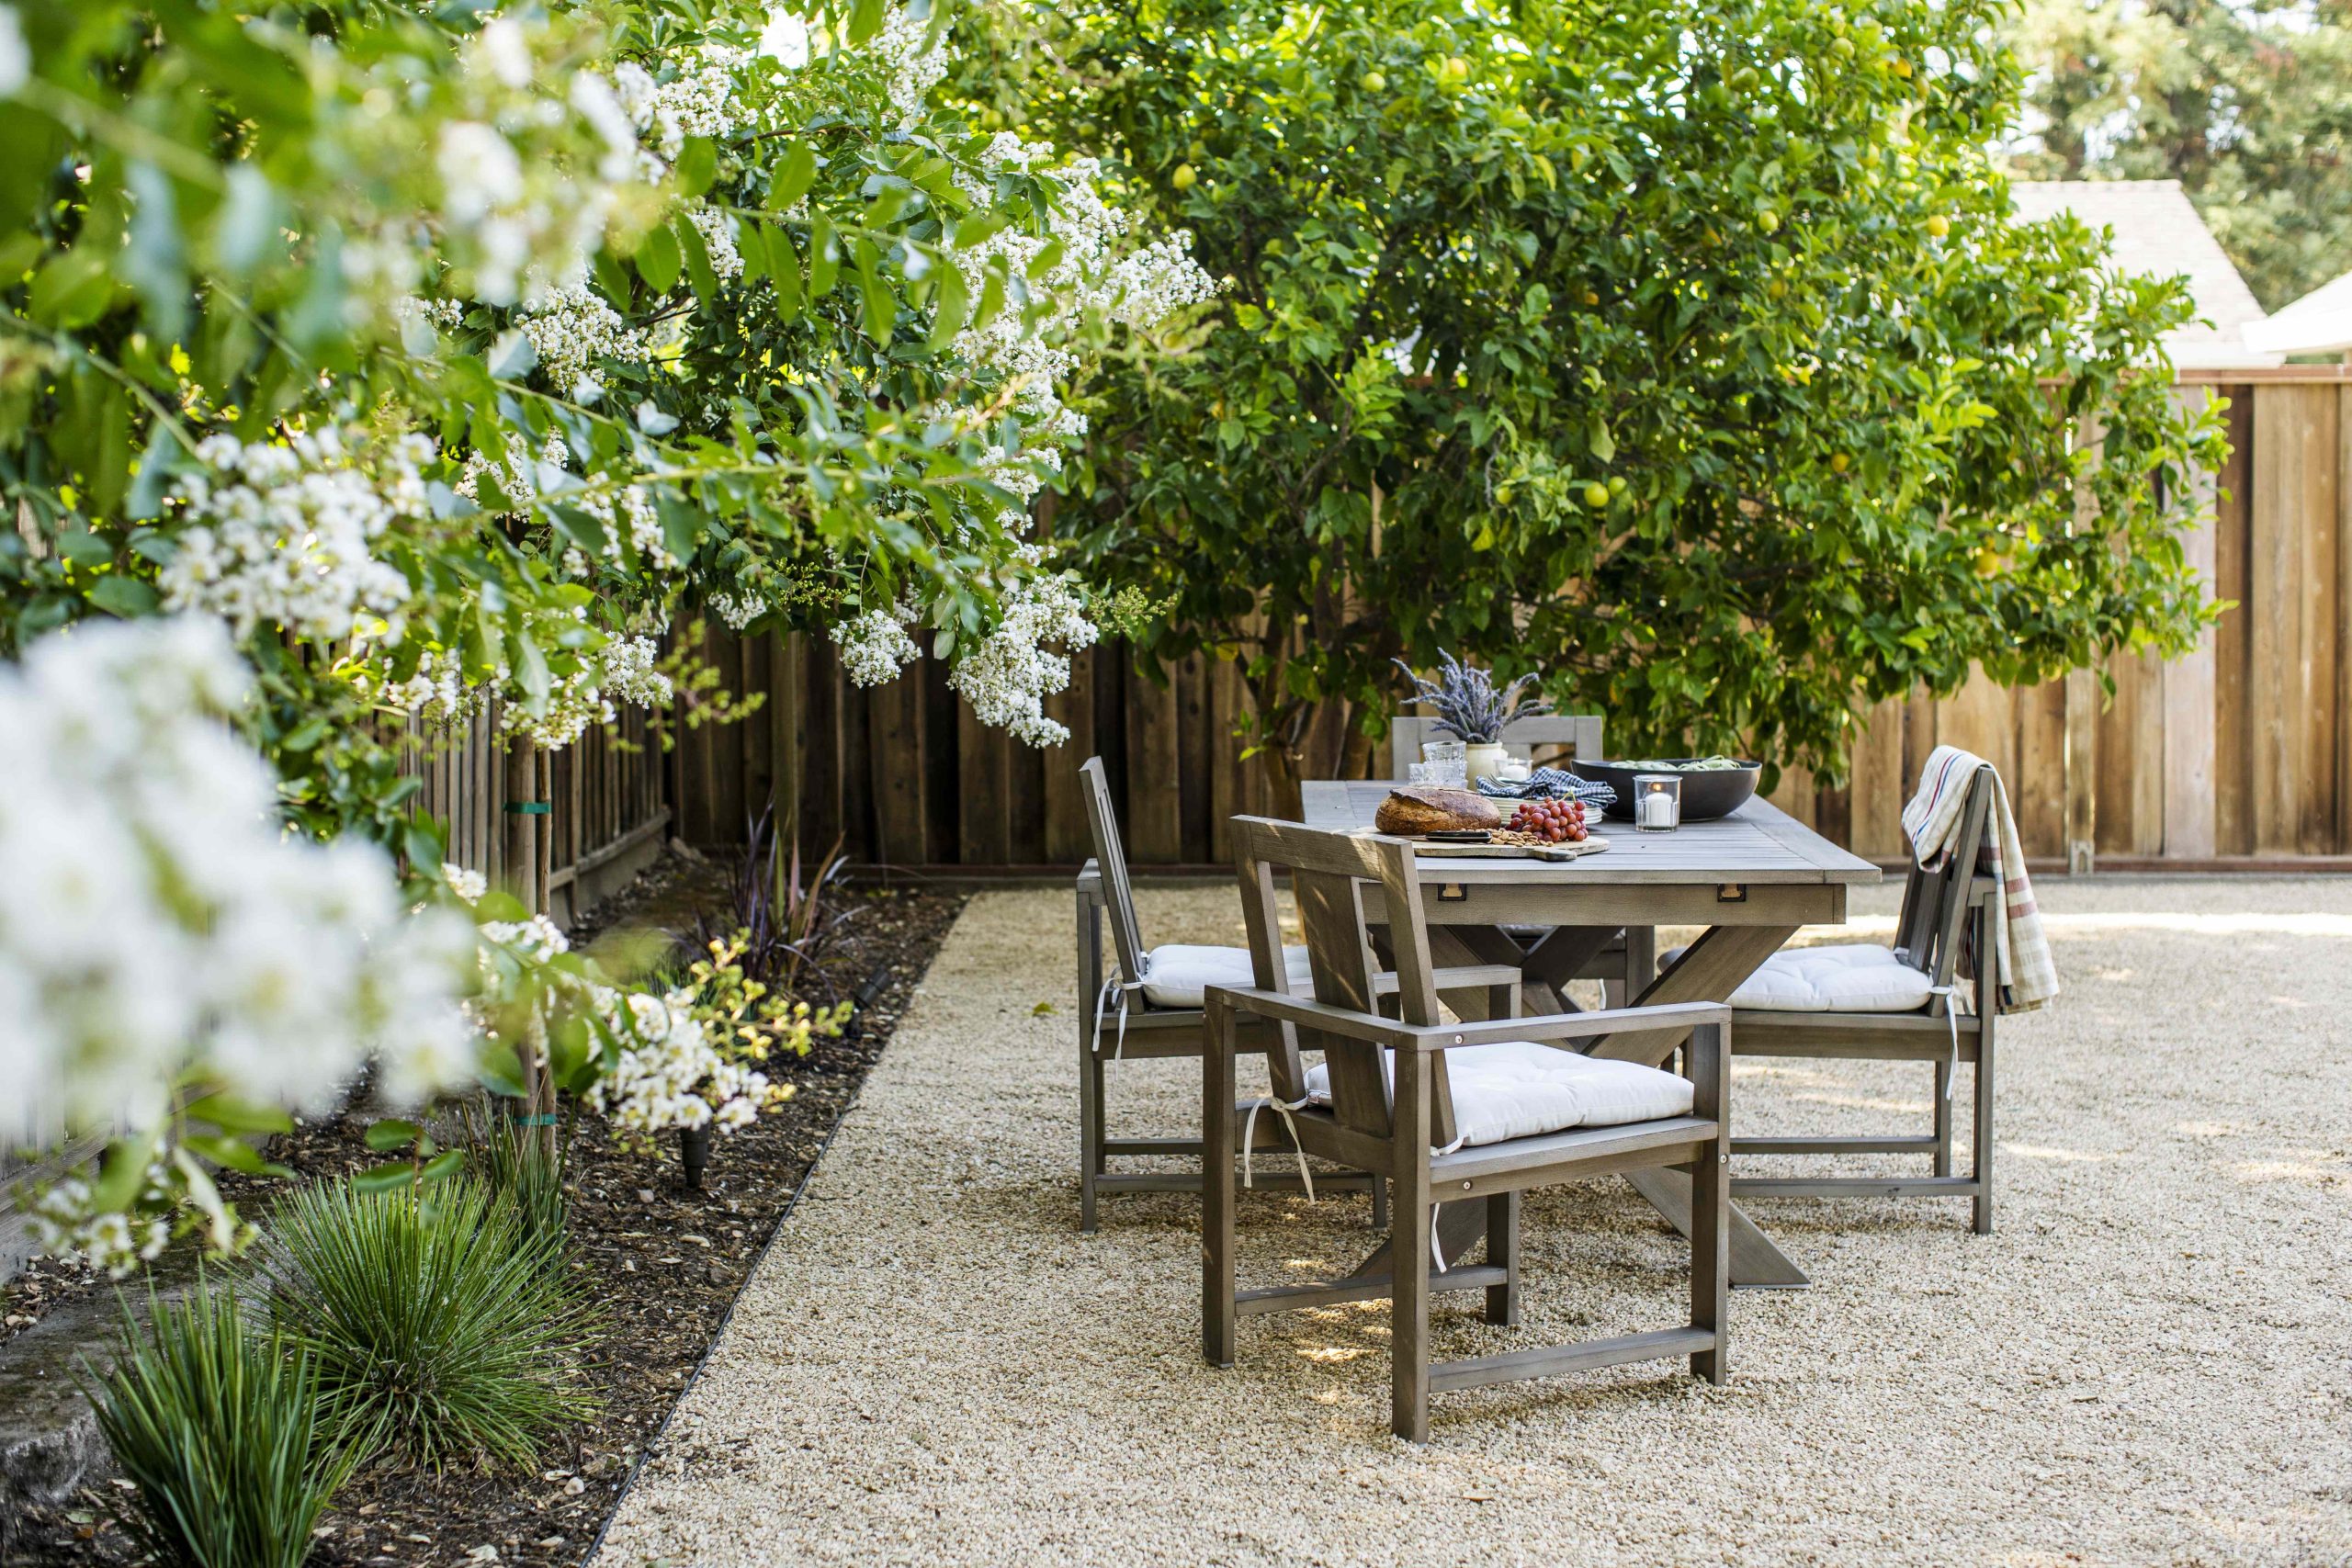
“When creating a plant screen in front of a fence, don’t plant everything in a single, soldiers-in-a-row line.”
Mix up the depths. Place your tallest, most structural plants (like the larger shrubs here) about 18-24 inches from the fence. Then, add a middle layer of slightly shorter plants about 12 inches in front of those. Finish with your shortest ground cover or flowering bushes in the front. This creates a much more natural, dense, and visually interesting screen that feels organic, not forced.
2. Create a Lush, Layered Garden to Soften Hardscapes
The visual harmony here comes from a balanced formula: 50% foundational greenery (like the vibrant lawn and hostas), 30% structural shrubs and small trees (like the Japanese maple), and 20% pops of seasonal color (the pink and red annuals). This ratio ensures the yard feels lush and established, while the color accents add energy without overwhelming the senses. You can swap the palette—imagine swapping the reds for purples and blues—and the composition will still hold strong because the underlying structure is sound.
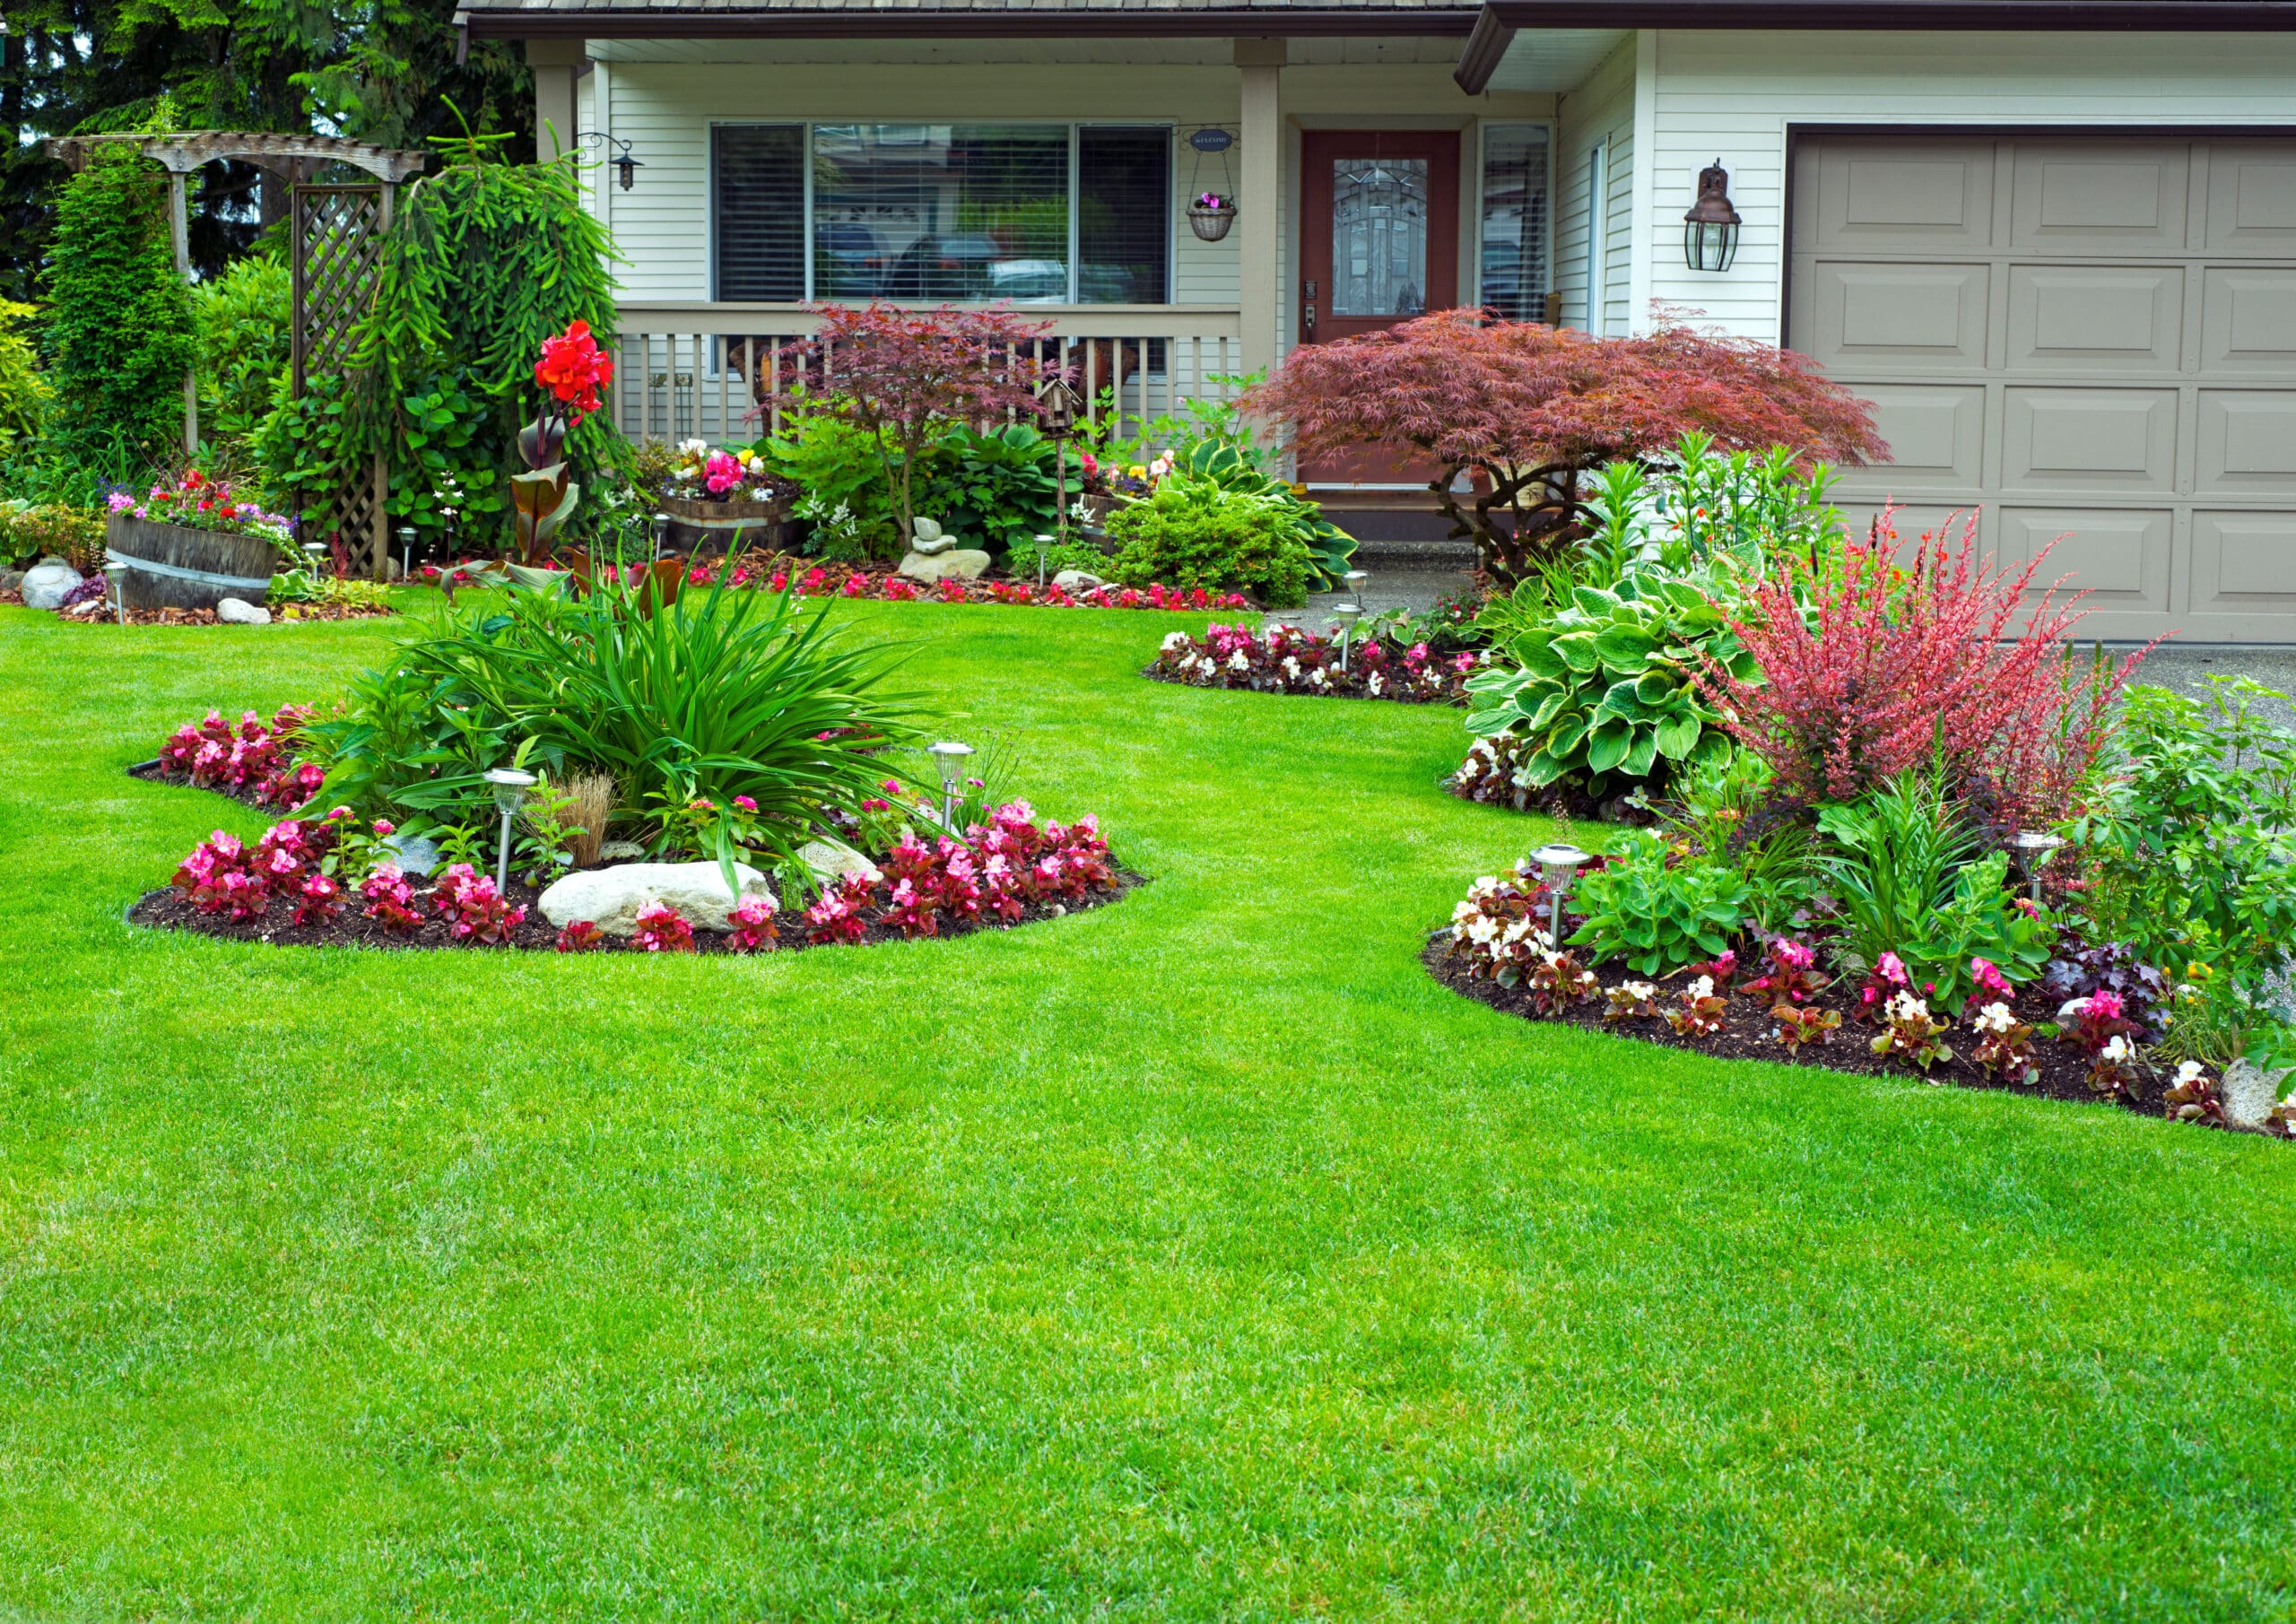
“A garden this lush and layered is stunning, but it isn’t a “plant it and forget it” project.”
The variety of plants means varying water, sun, and pruning needs. That Japanese maple needs protection from harsh afternoon sun, the annuals will need replacing every year, and the hostas will be a magnet for slugs and deer. Be honest with yourself about the 2-4 hours of weekly maintenance this kind of landscape requires during the growing season. If you’re not a passionate gardener, a simpler design might be a better fit.
3. Use an Open-Brick Wall for Textured Privacy
The single element that makes this garden feel special is the open-brick wall. Without it, you’d just have a standard hedge and fence—pretty, but predictable. The brick adds a layer of architectural interest and a touch of rustic, old-world charm. Its perforations allow light and air to pass through, preventing the boundary from feeling like a harsh fortress. It provides privacy while still feeling connected to the world beyond, lending a sense of established permanence that a simple wooden fence can’t replicate.
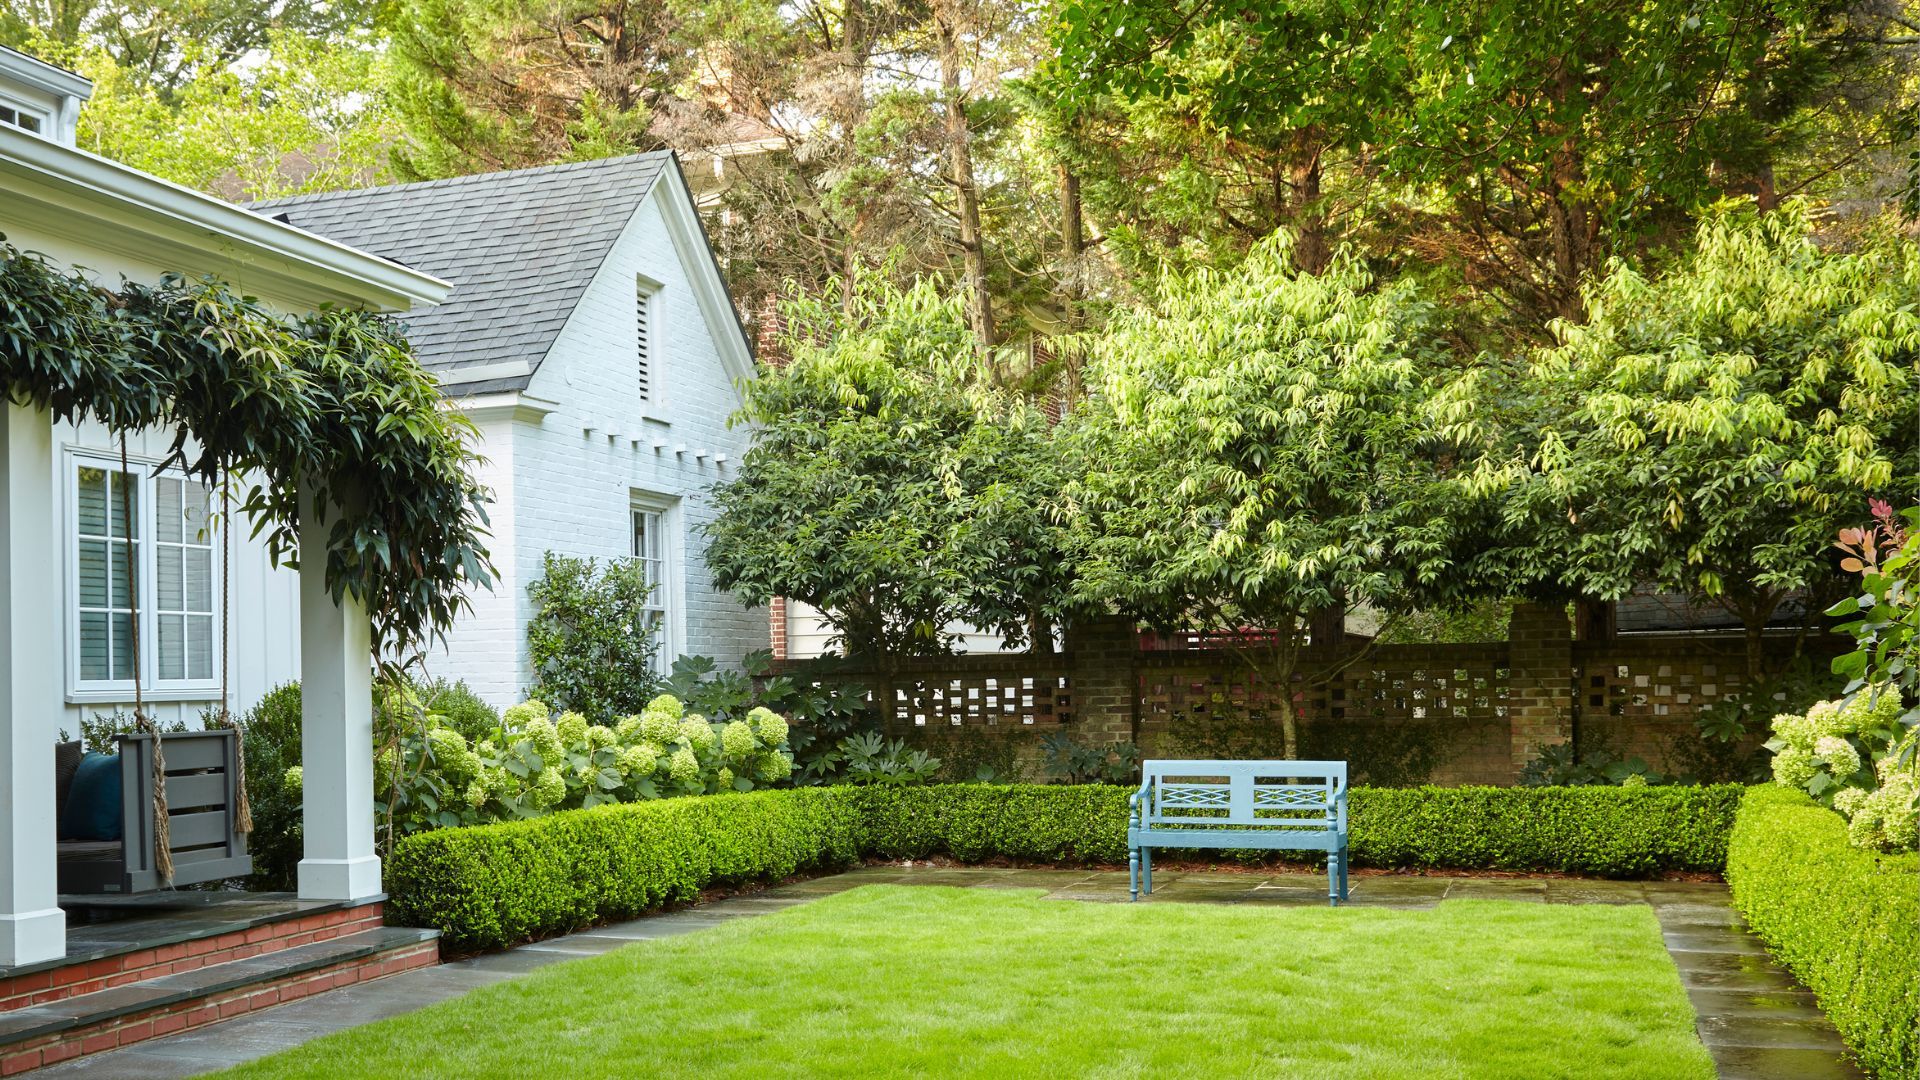
“This approach is ideal for medium-to-large-sized yards, typically those 50 feet or wider.”
The key is having enough space to layer the elements without making the area feel cramped. You need a minimum of 4-5 feet of depth for the combination of the path, the hedge, and the wall itself. In a smaller yard, a tall, decorative brick wall like this could feel overwhelming and cast too much shadow. For tighter spaces, consider the vertical planting ideas seen in Idea #29.
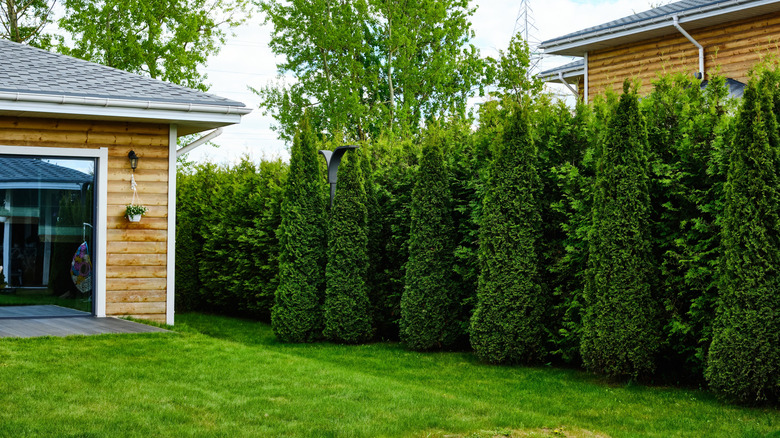
4. Mix Arborvitae Heights for a Natural Privacy Hedge
Arborvitae are popular for a reason—they grow fast and dense—but they aren’t invincible. The biggest issue is ‘bagworm,’ a pest that can defoliate and kill a tree in a single season. You’ll need to inspect your trees each spring and fall. They also require consistent watering for the first two years to establish a strong root system. Finally, while they look dense here, a heavy snow or ice storm can bend or break branches, creating gaps in your privacy screen that take years to fill back in, requiring strategic pruning to manage.
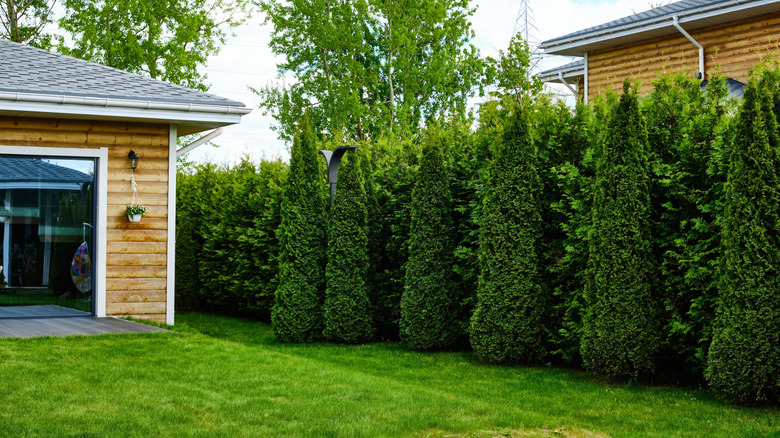
“A mature hedge of 15-foot arborvitae can cost thousands of dollars.”
To get this look for a fraction of the price, buy smaller 3-4 foot trees. They may only cost $30-$50 each. Yes, you’ll have to wait 3-5 years for them to reach a mature height, but the savings are significant. While you wait, you can install a simple and inexpensive roll of bamboo or reed fencing behind the young trees for immediate privacy. The fast-growing arborvitae will quickly cover it within a few seasons.
5. Define a Luxury Patio with a Dark Wood Pergola and Firepit
This design works because of its strong, cohesive use of color and geometry. The dark wood of the pergola, the black base of the firepit, and the dark frames of the furniture create a unified, modern palette that anchors the space. This is contrasted beautifully with the soft, light gray pavers and cushions. The strong rectangular shapes of the pool, pergola, and firepit are repeated throughout the design, creating a sense of order and intentionality that feels incredibly calming and luxurious.
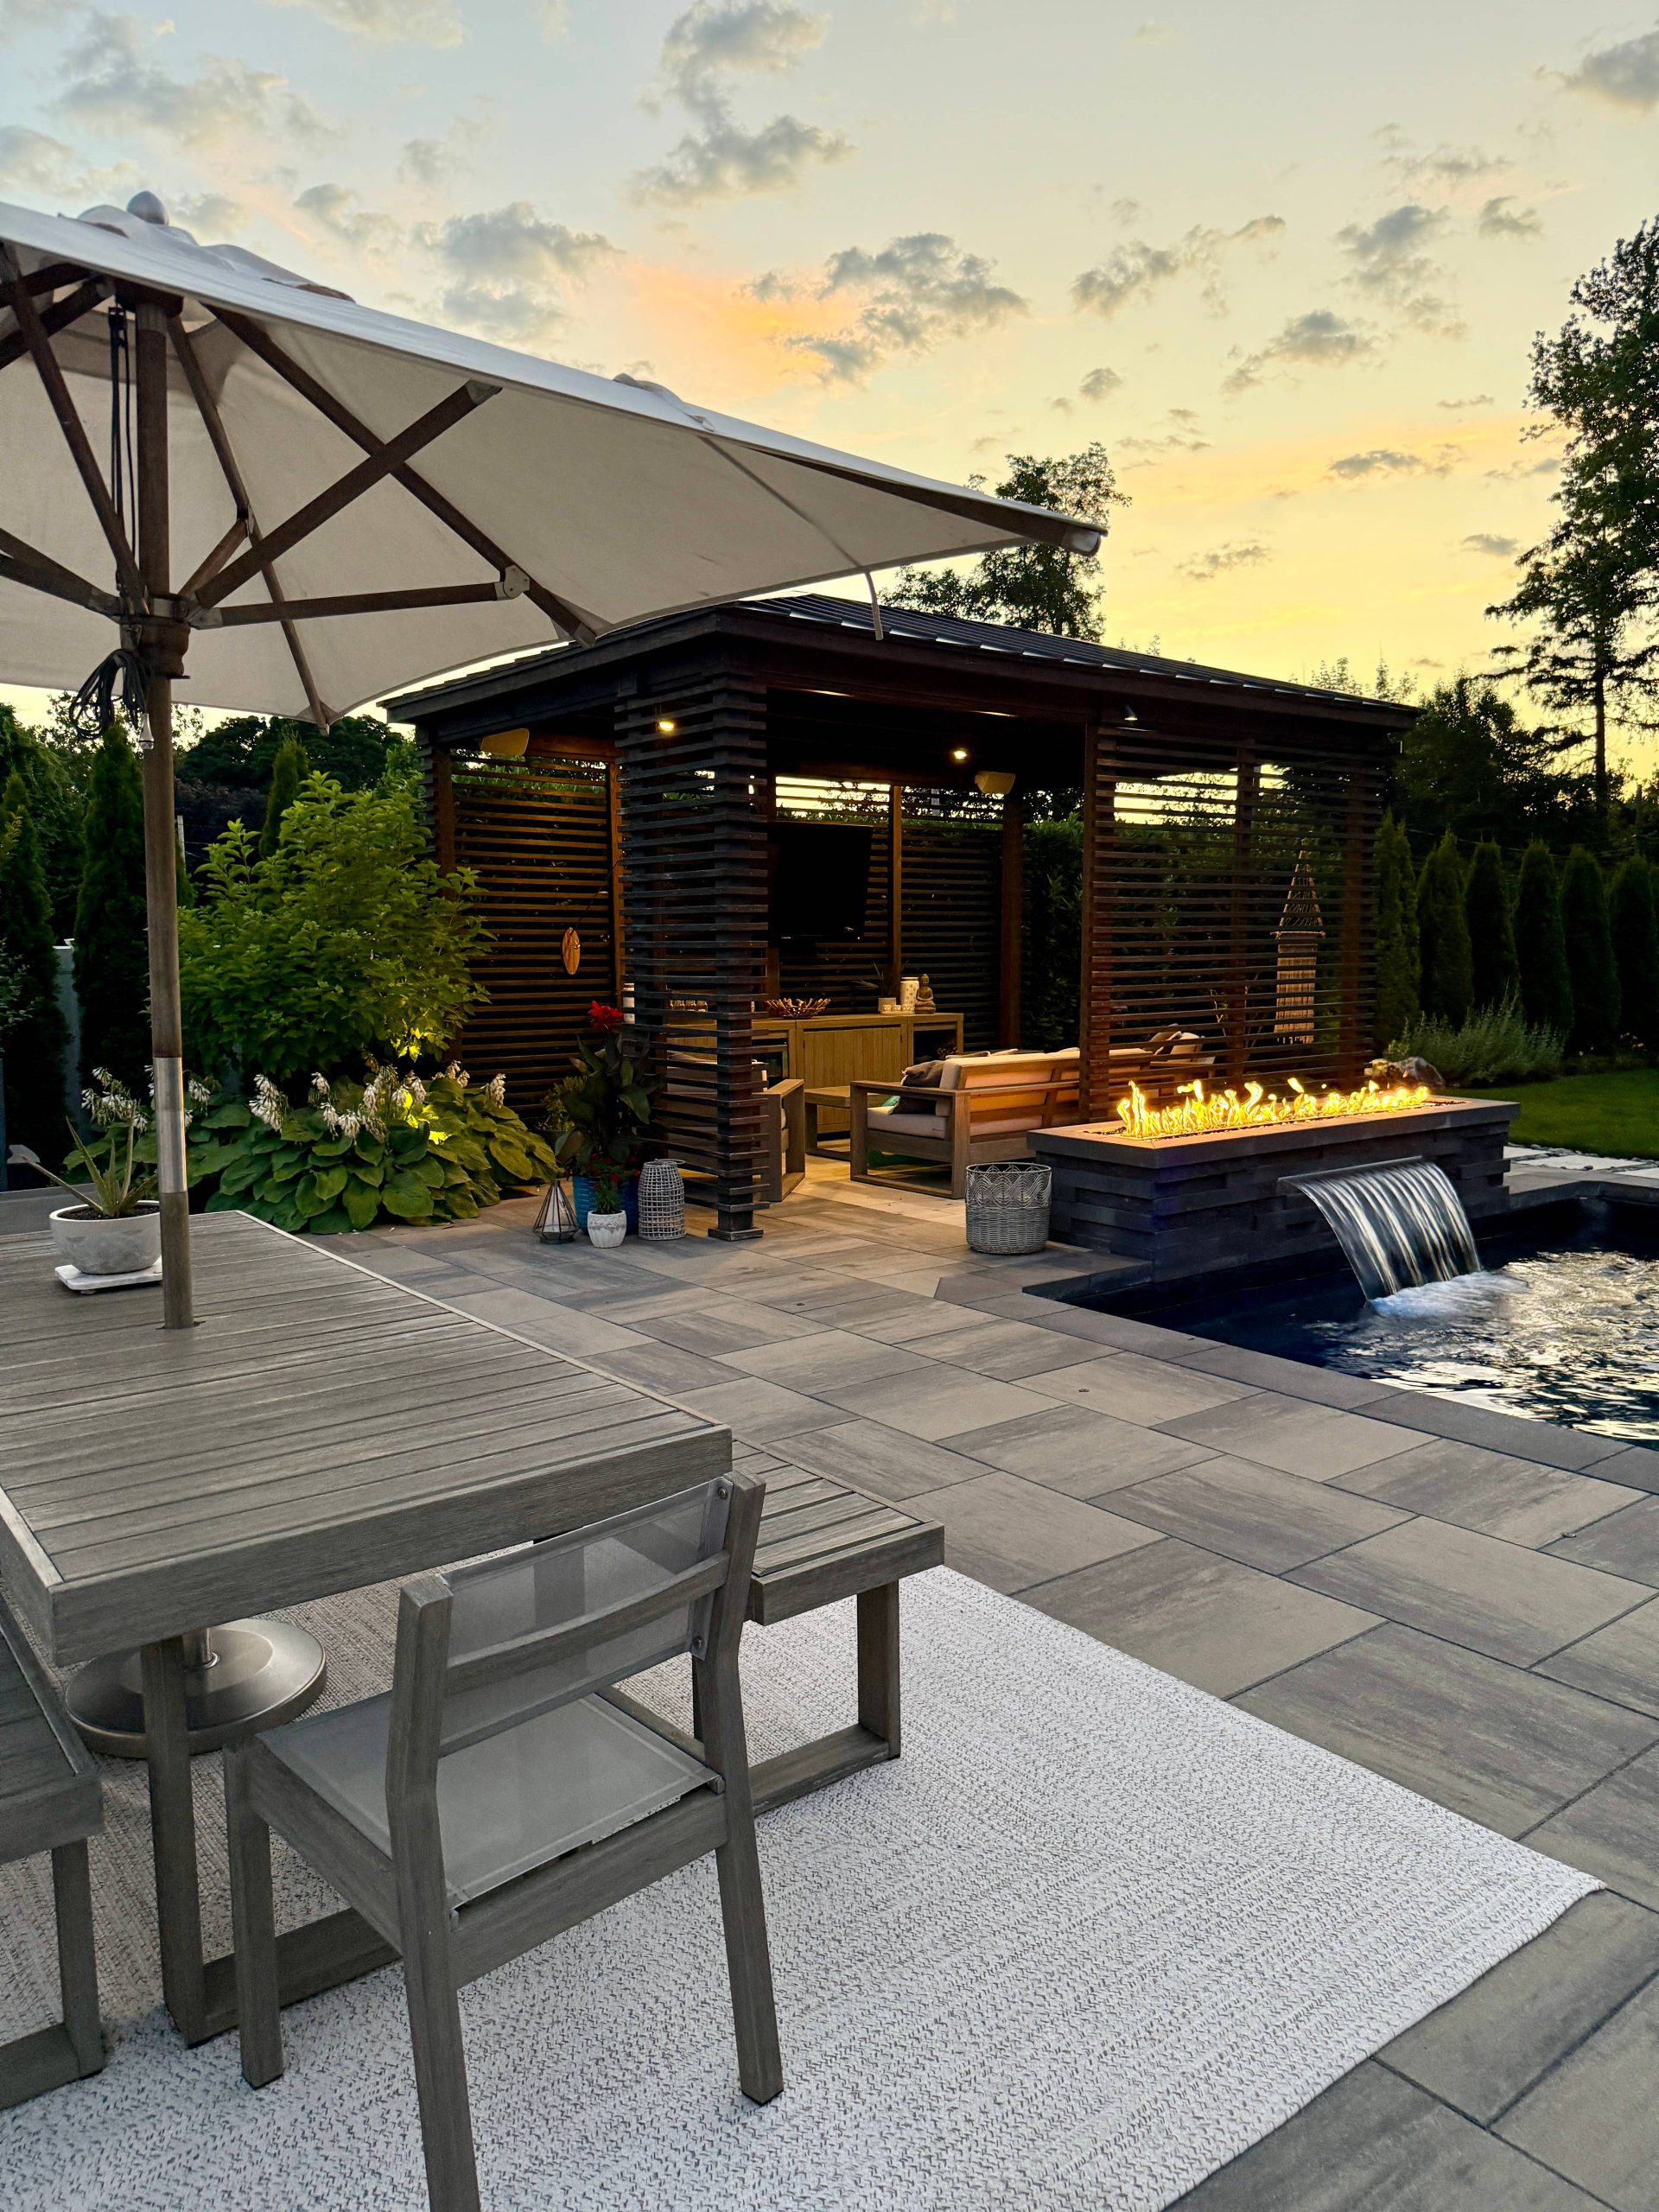
“Main Furniture (Dining Set, Sofa): $4,000 – $9,000
Structures (Pergola, Pool/Wat”
- Main Furniture (Dining Set, Sofa): $4,000 – $9,000
- Structures (Pergola, Pool/Waterfall): $25,000 – $70,000+
- Firepit Feature: $3,000 – $8,000
- Textiles (Rug, Cushions, Umbrella): $1,000 – $2,500
- Decor & Landscaping: $2,000 – $5,000
- TOTAL: $35,000 – $94,500+
- Budget alternative: An aluminum pergola kit ($2,000), a propane firepit from a big-box store ($400), and a marketplace-sourced dining set can give a similar vibe for around $4,000.
6. Create a Cozy Corner with an Outdoor Sofa and Natural Greenery
The movement to treat outdoor areas as true extensions of our indoor living rooms is why this look feels so relevant right now. People aren’t just putting a few plastic chairs outside anymore. They’re investing in comfortable, stylish furniture like this wooden sofa, adding soft textiles with throw pillows, and using plants to create a sense of enclosure and privacy. It’s about crafting an outdoor “room” that serves a real function, whether it’s for morning coffee or evening cocktails, blurring the lines between inside and out.
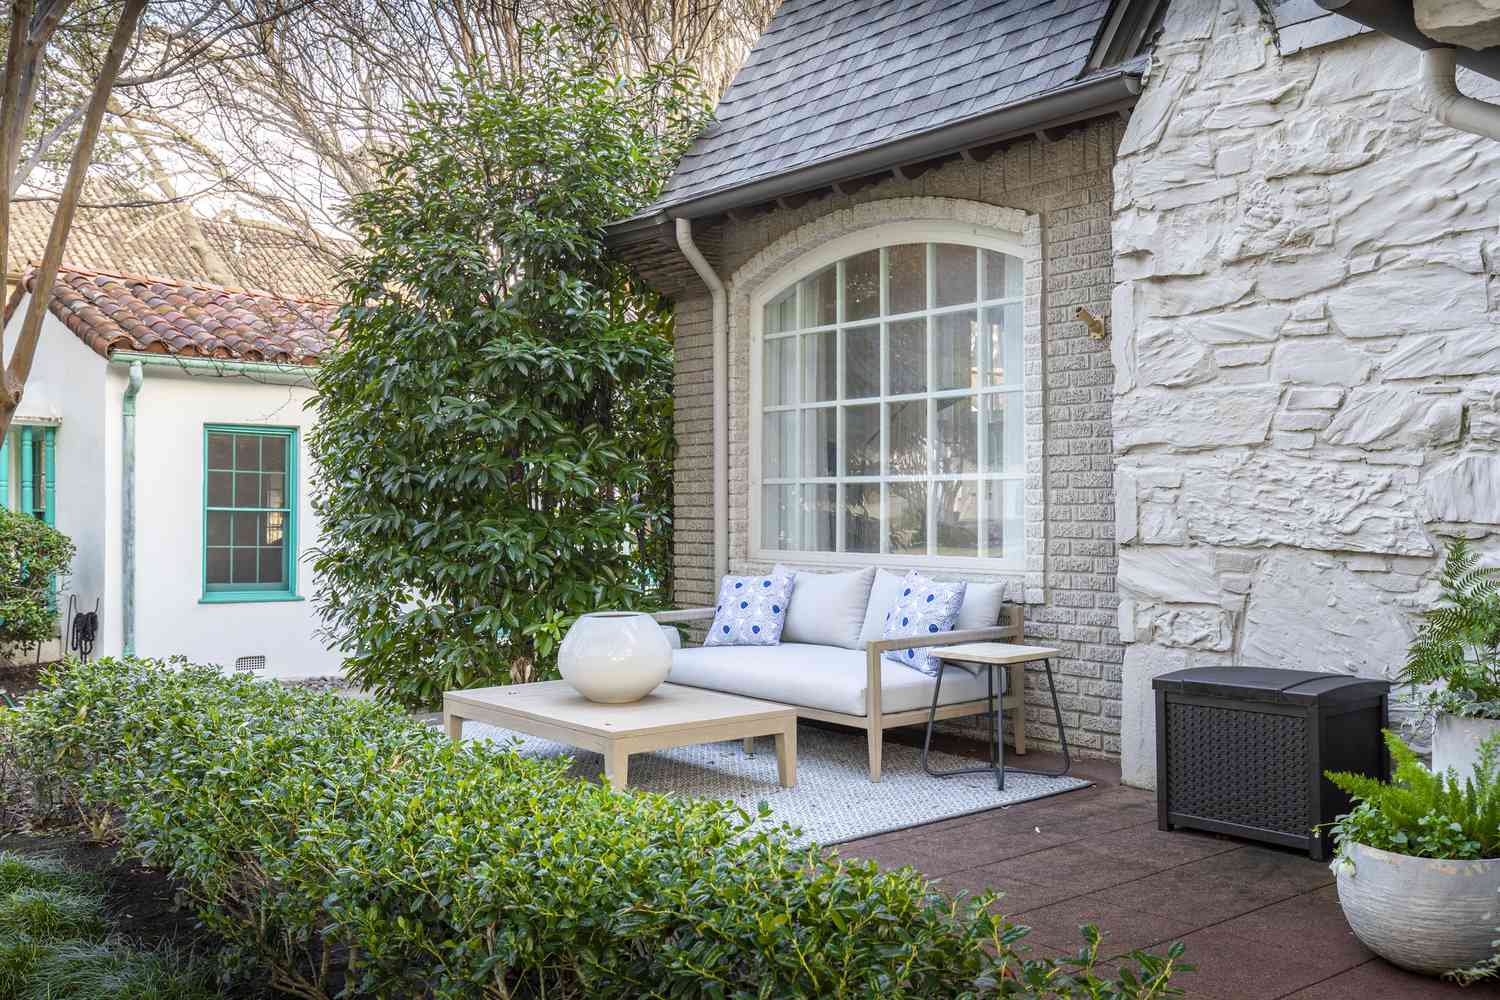
“The key to making outdoor furniture feel truly inviting is in the styling.”
Don’t just rely on the cushions that come with the set. Bring in at least two different patterns of throw pillows—like the complementary blue and white ones here—to add personality. And don’t be afraid to use an actual coffee table, not just a little side table. It makes the space feel more permanent and usable, inviting you to actually sit down and put your feet up. A small outdoor rug would complete the “room” feel.
7. Install Retractable Screens for On-Demand Privacy
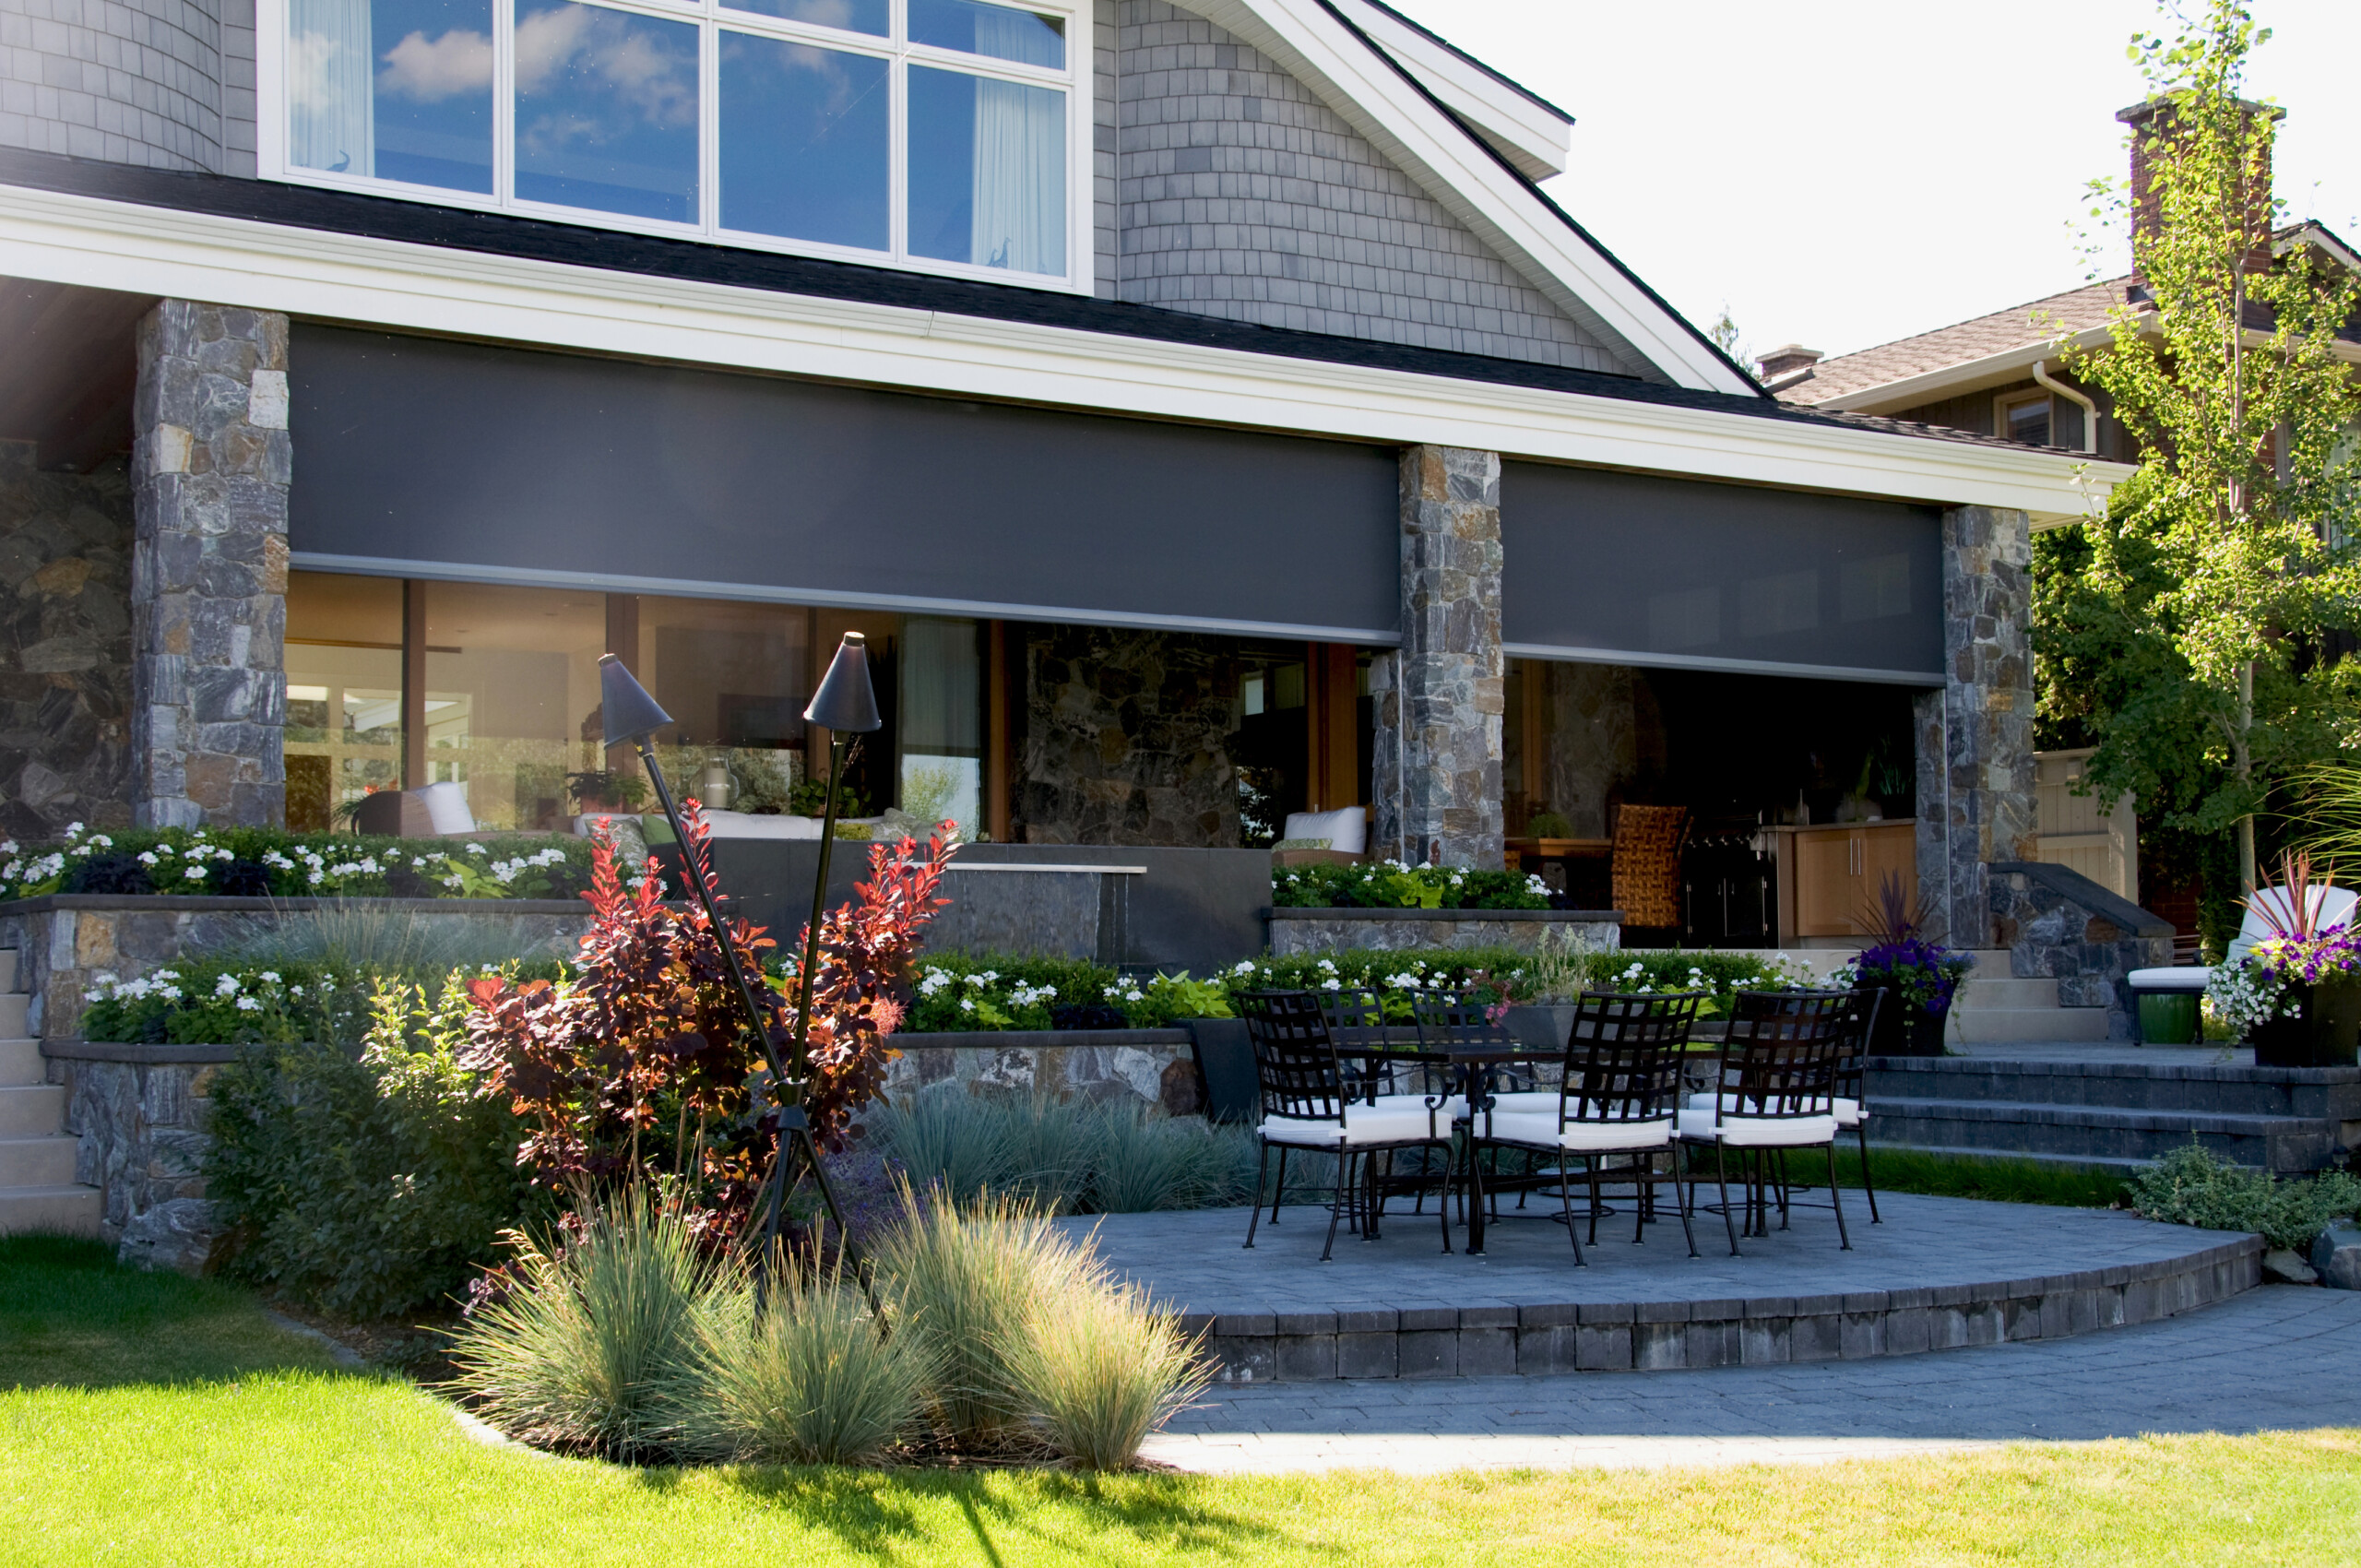
Retractable screens are fantastic for flexibility, but they do have limitations. While they are great for sun, bugs, and light privacy, they are not sound barriers. You will still hear your neighbors clearly. They also aren’t completely weatherproof; a driving rain will still get your patio wet. The tracks can also get clogged with dirt, leaves, and pine needles, requiring regular cleaning with a hose and a soft brush to ensure they operate smoothly. Think of them as 3-season solutions, not impenetrable walls.
“Installing tiered landscaping on a slope doesn’t have to be intimidating.”
Here’s a basic plan for one level: 1. Mark out the curved shape of your new tier with landscape paint. 2. Dig a trench about 6 inches deep and 8 inches wide along the line. 3. Fill the trench with 2-3 inches of gravel and tamp it down to create a level base. 4. Lay your first course of stones, using a rubber mallet to set them. 5. Backfill behind the stones with soil, then lay the next course, staggering the joints like bricks. This project might take a weekend and cost $200-500 in stones.
8. Use Motorized Retractable Screens to Conceal an RV or Large Vehicle
A system like this is built for large-scale applications. Motorized screens, such as those from brands like Mirage Screen Systems, can span significant widths—often up to 25 feet or more—with a single screen. This makes them one of the few viable options for hiding something as large as an RV, a boat, or a work trailer without building a permanent, code-restricted garage. They are best suited for properties with a substantial side yard or a dedicated parking pad where the screen housing can be securely mounted to the house or a custom-built frame.
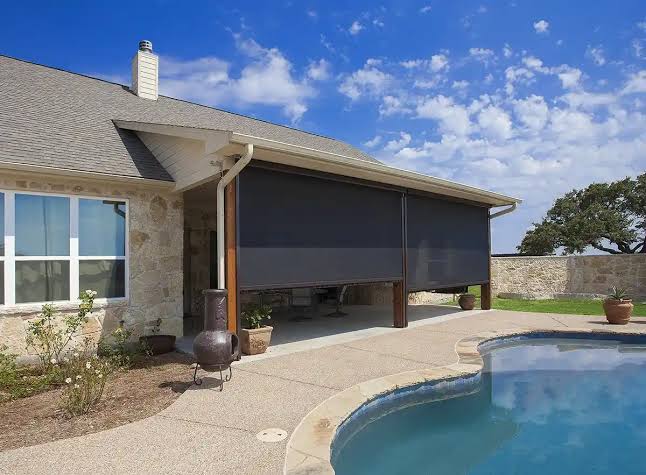
“Before you commit to a large-format retractable screen, there are a few critical checks to make.”
First, verify local zoning laws and HOA restrictions around permanent vs. temporary structures, as these screens can sometimes fall into a grey area. Second, ensure you have a solid mounting surface—be it the house wall or professionally installed posts—that can handle the tension and weight. Finally, you will need a dedicated electrical source to power the motor, which may require hiring an electrician.
9. Soften a Shed’s Edges with a Hedge and Climbing Roses
The single most important element here is the deliberate use of asymmetry. Instead of trying to perfectly center the shed or surround it uniformly with plants, the design embraces imperfection. A dense, solid hedge hides one side, while the other is softened by the more delicate and romantic climbing roses on a lattice. This makes the entire scene feel more natural and less staged, as if the garden simply grew up around the shed over time. It’s a lesson in letting go of perfect symmetry to achieve a more charming result.
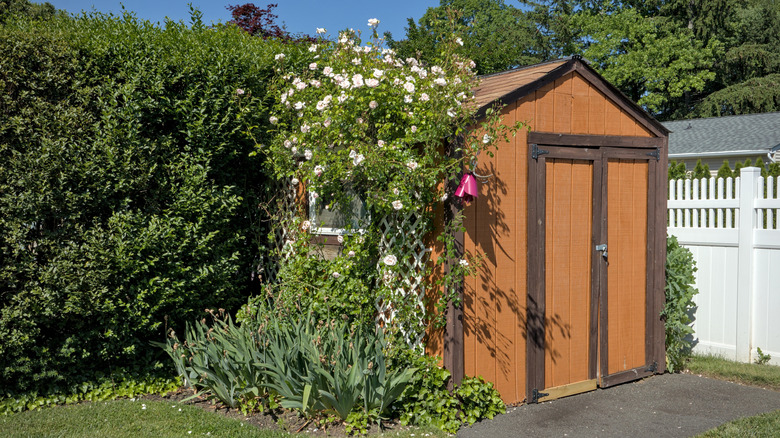
“This charming, cottage-garden look follows a simple formula: 50% solid structure (the shed and dense hedge), 30% delicate climbers (the roses on the lattice), and 20% soft, low-lying ground cover.”
The solid elements provide the functional screen and backdrop, while the climbers add the romance and color. The ground cover at the base visually anchors everything and prevents the taller elements from looking like they’re floating. It’s a balance of strong lines and organic forms.
10. Nestle a Small Shed Against a Fence for a Rustic Look
This is a fantastic budget-friendly approach compared to building a custom enclosure. By using two existing elements—a simple pre-fab shed (around $500-$1500) and a basic wooden fence—you can create a storage spot that feels integrated. The key is to paint or stain both the shed and the fence a similar dark color, as shown here. Then, let natural, fast-growing vines and foliage do the heavy lifting of blurring the lines between them. A few bags of mulch and some perennial vines are a tiny investment for a huge impact.
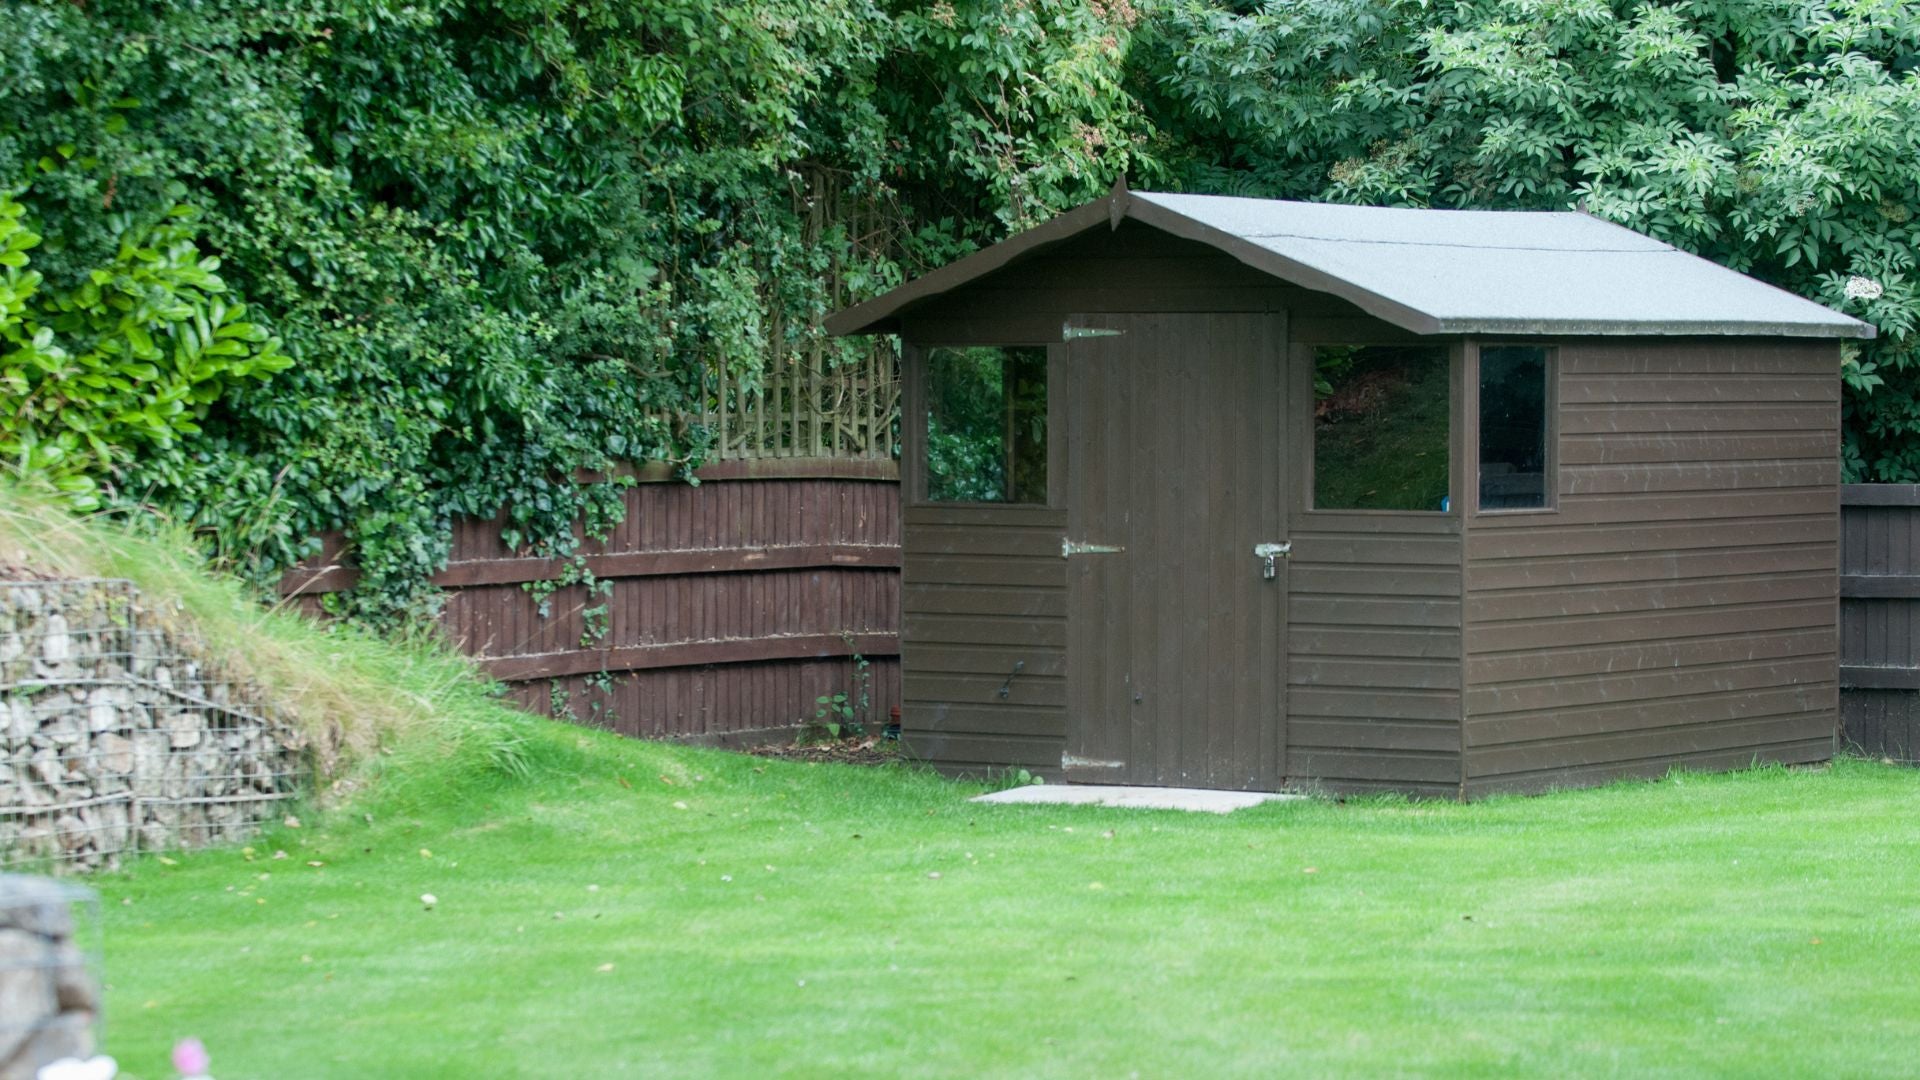
“The success of this vignette lies in its monochromatic color scheme and use of texture.”
By staining the shed and the fence a similar dark brown, neither one jumps out visually. Instead, they recede into the background, creating a single, unified backdrop. This allows the vibrant green of the grass and the varied textures of the climbing foliage to become the stars of the show. Your eye is drawn to the life and color of the plants, not the hard lines of the functional structures behind them.
11. Frame a Garden Shed with Arches and Orange Doors
When you have a functional structure like a shed, don’t just try to hide it—make it a destination. The designer here used black metal garden archways to create a formal entrance, guiding your eye (and your feet) toward the shed. Painting the doors a bold, unexpected color like this dark orange turns the shed from an afterthought into a deliberate focal point. This technique, called “highlighting,” is often more effective than camouflage because it shows confidence and intention in your design choices.
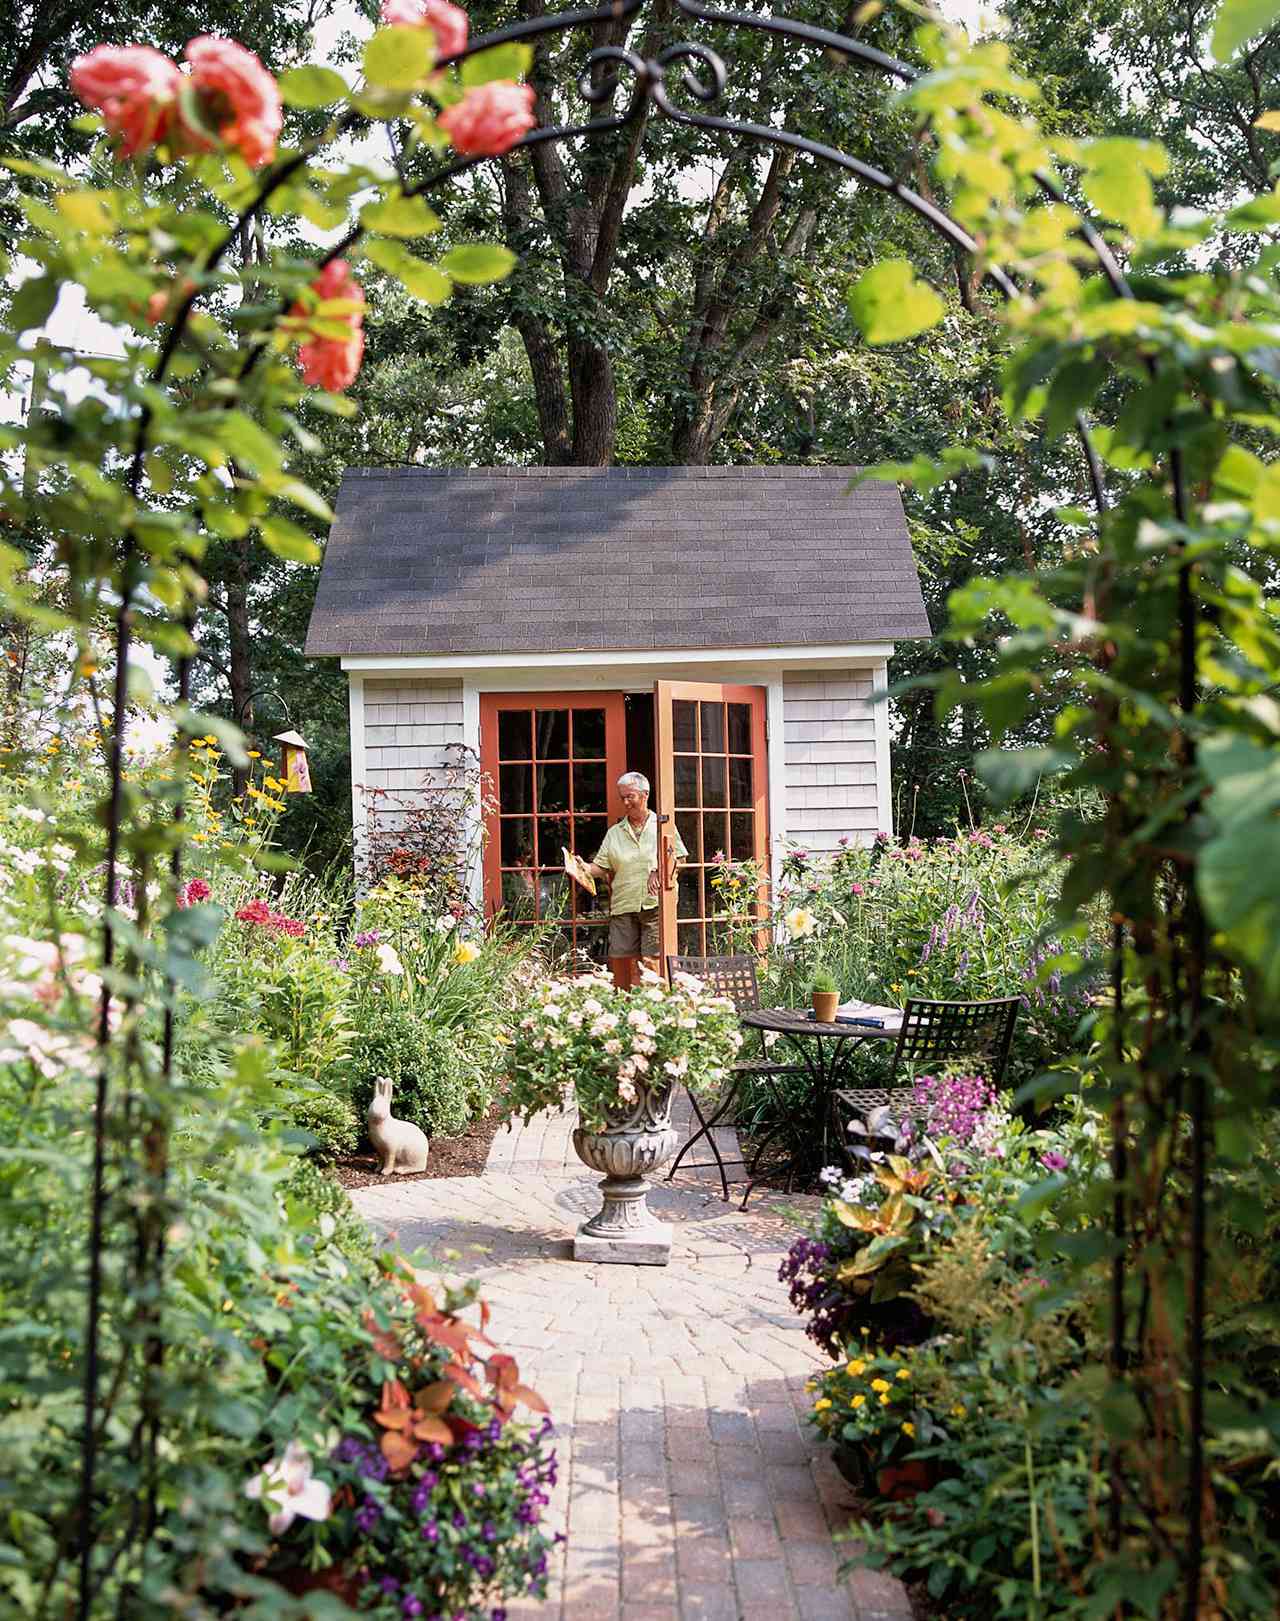
“A charming, plant-filled look like this requires a commitment to gardening.”
The brick pavers will need regular weeding and sweeping to keep them clear. informal, cottage-style planting beds with mixed flowers can quickly become overgrown and messy without consistent deadheading, thinning, and pruning throughout the growing season. If you don’t enjoy spending a few hours in the garden each week, you might want to opt for a simpler planting scheme with fewer, more robust perennials and shrubs that require less maintenance.
12. Use Black Roller Blinds for a Modern Outdoor Kitchen
While outdoor-grade roller blinds are designed to be durable, they aren’t zero-maintenance. In a kitchen environment, they can accumulate a film of grease and dust from cooking. Plan to wipe them down with a mild soap and water solution at least twice a season. The mechanisms can also collect debris, so it’s wise to gently vacuum the housing and tracks periodically. In high-wind areas, it’s crucial to retract the blinds to prevent them from getting damaged or putting stress on their mountings. Choose a material that is specifically rated for UV and mildew resistance.
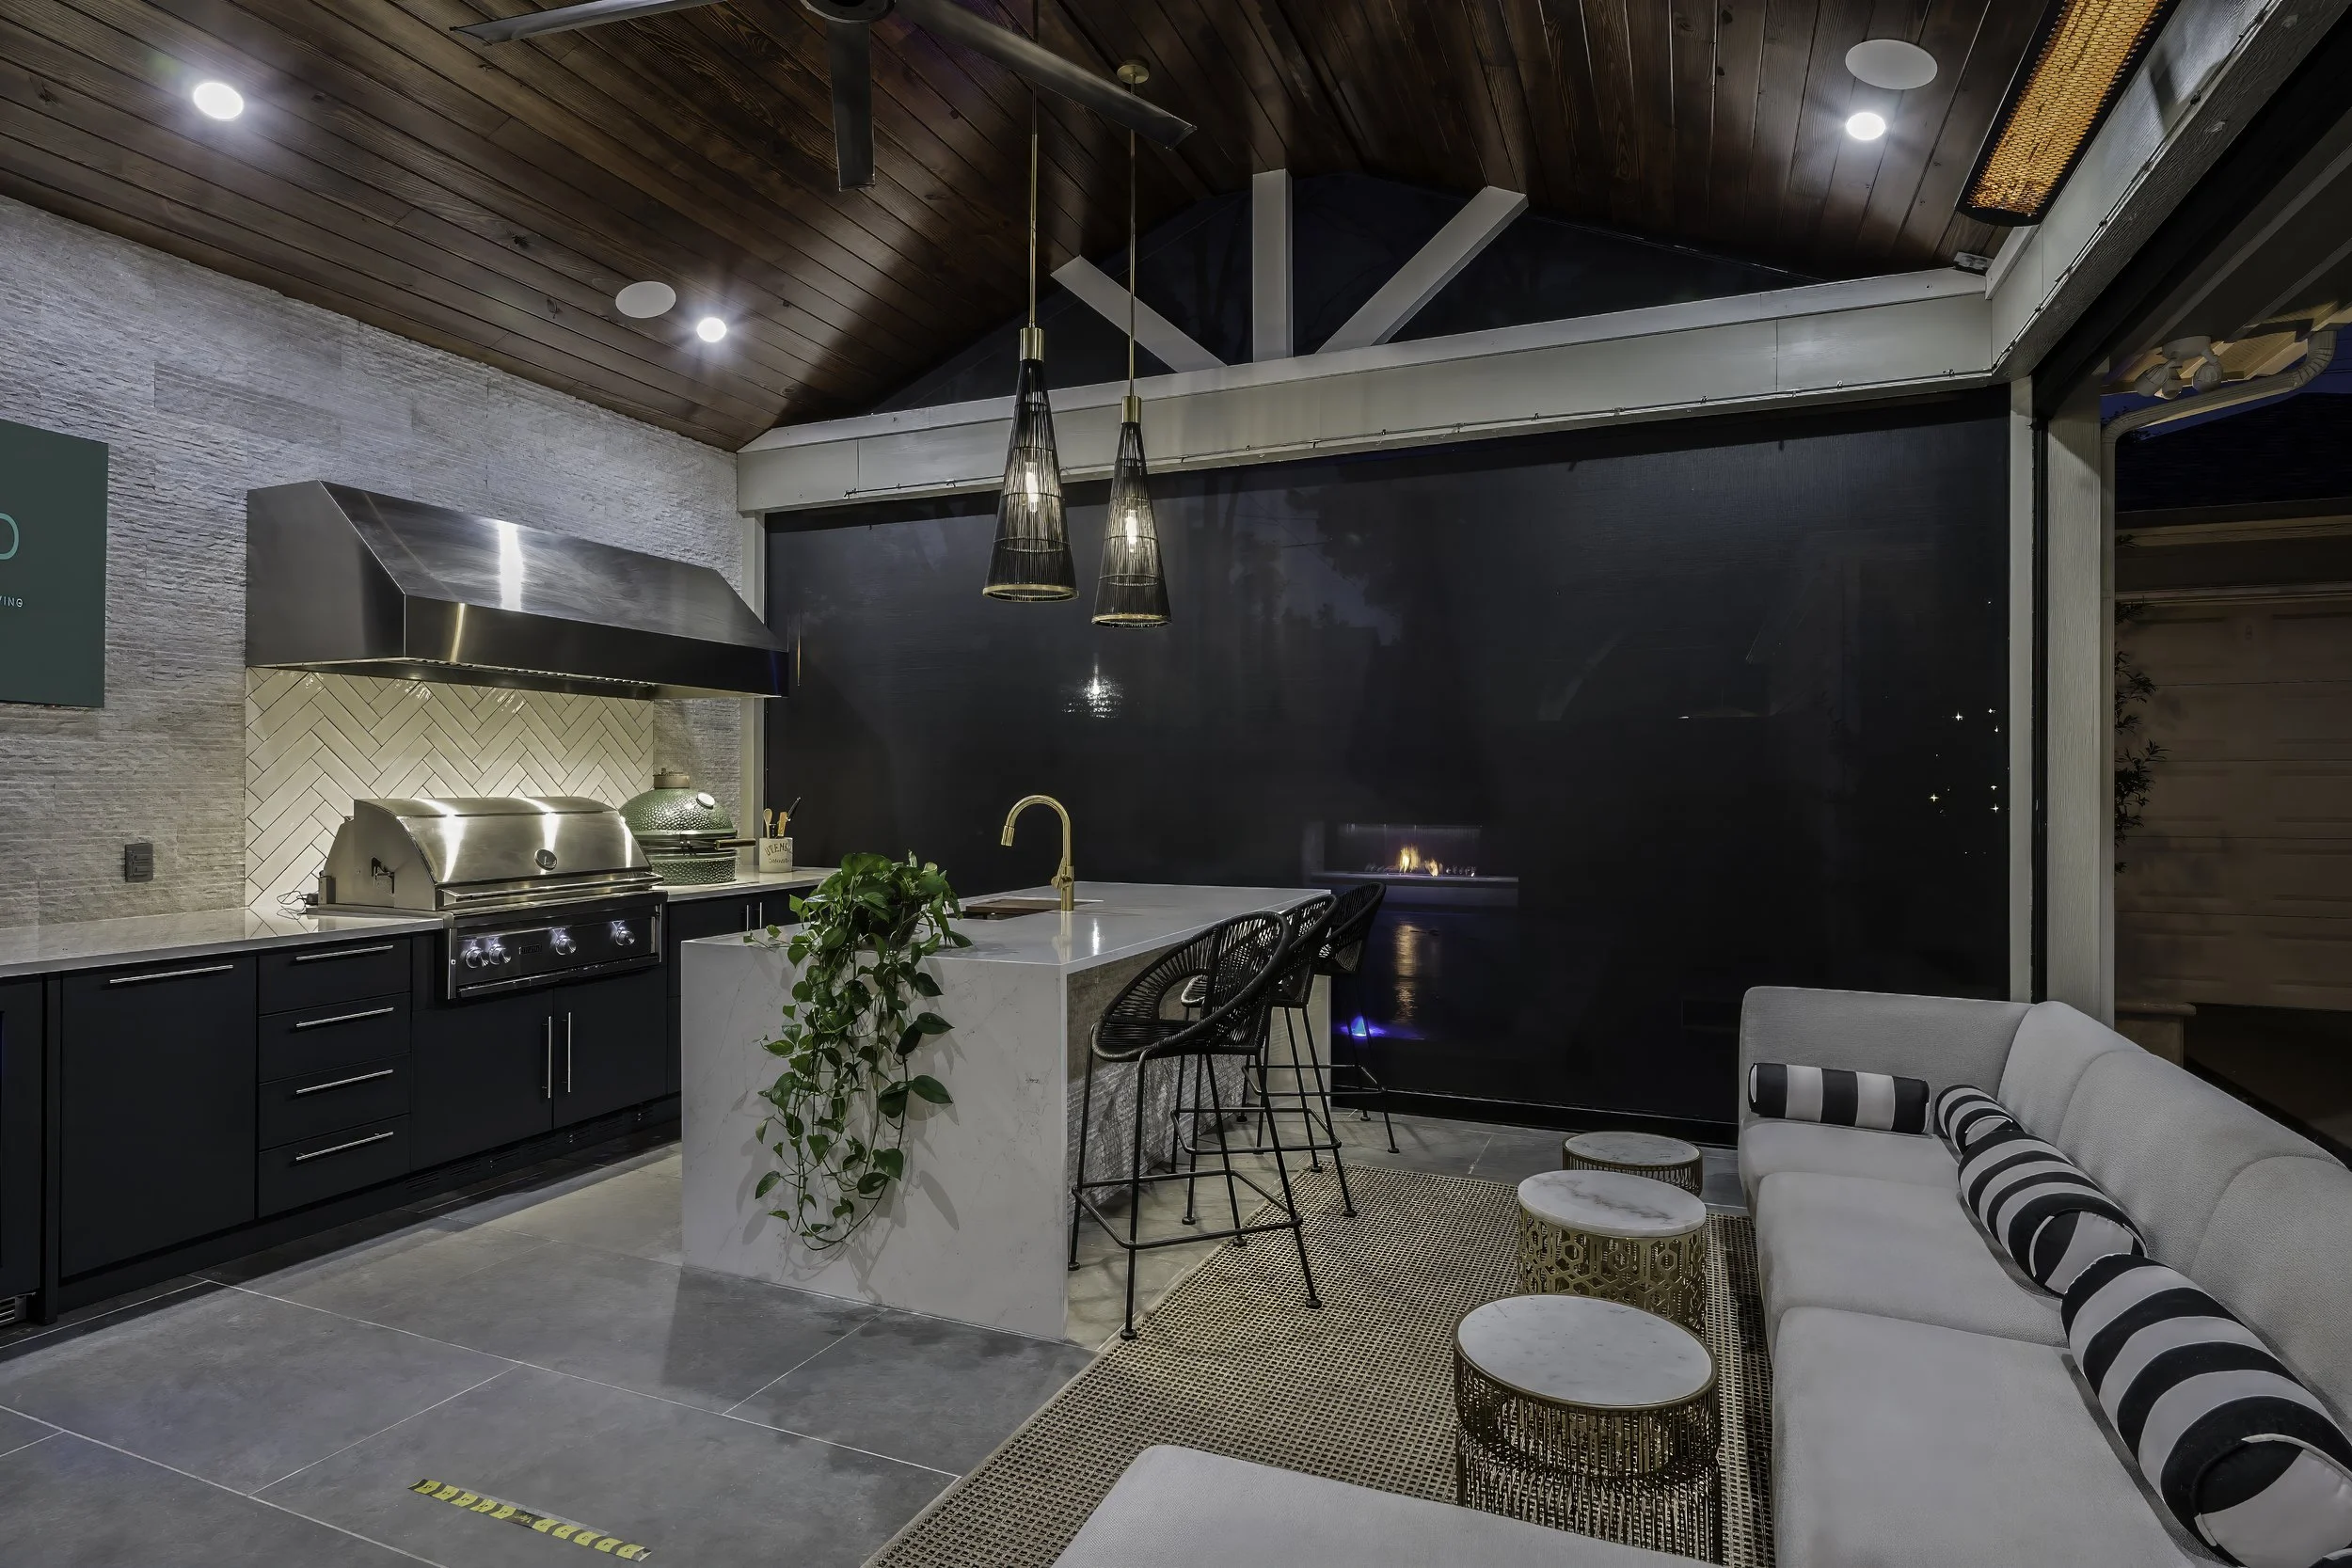
“This space feels so sleek and high-end because of the clever use of materials to create contrast.”
The dark, organic texture of the wood planked ceiling is a perfect counterpoint to the clean, white herringbone tile backsplash. The matte black of the cabinetry and bar stools provides a modern, grounding element, which is then lifted by the strategic pops of metallic glamour from the gold-toned faucet and pendant lights. It’s a masterclass in balancing warm and cool, dark and light, and matte and shiny finishes.
13. Screen Trash Bins with a Weathered Wood Fence and Roses
The single element that elevates this from a purely functional screen to a beautiful garden feature is the climbing pink roses. Without them, you’d have a perfectly fine—if unremarkable—fence hiding some bins. The roses do two things: they introduce a vibrant, welcome splash of color, and their soft, organic form completely distracts from the hard, utilitarian lines of the fence and the bins behind it. Your eye goes straight to the flowers, and the eyesore you’re trying to hide becomes secondary.
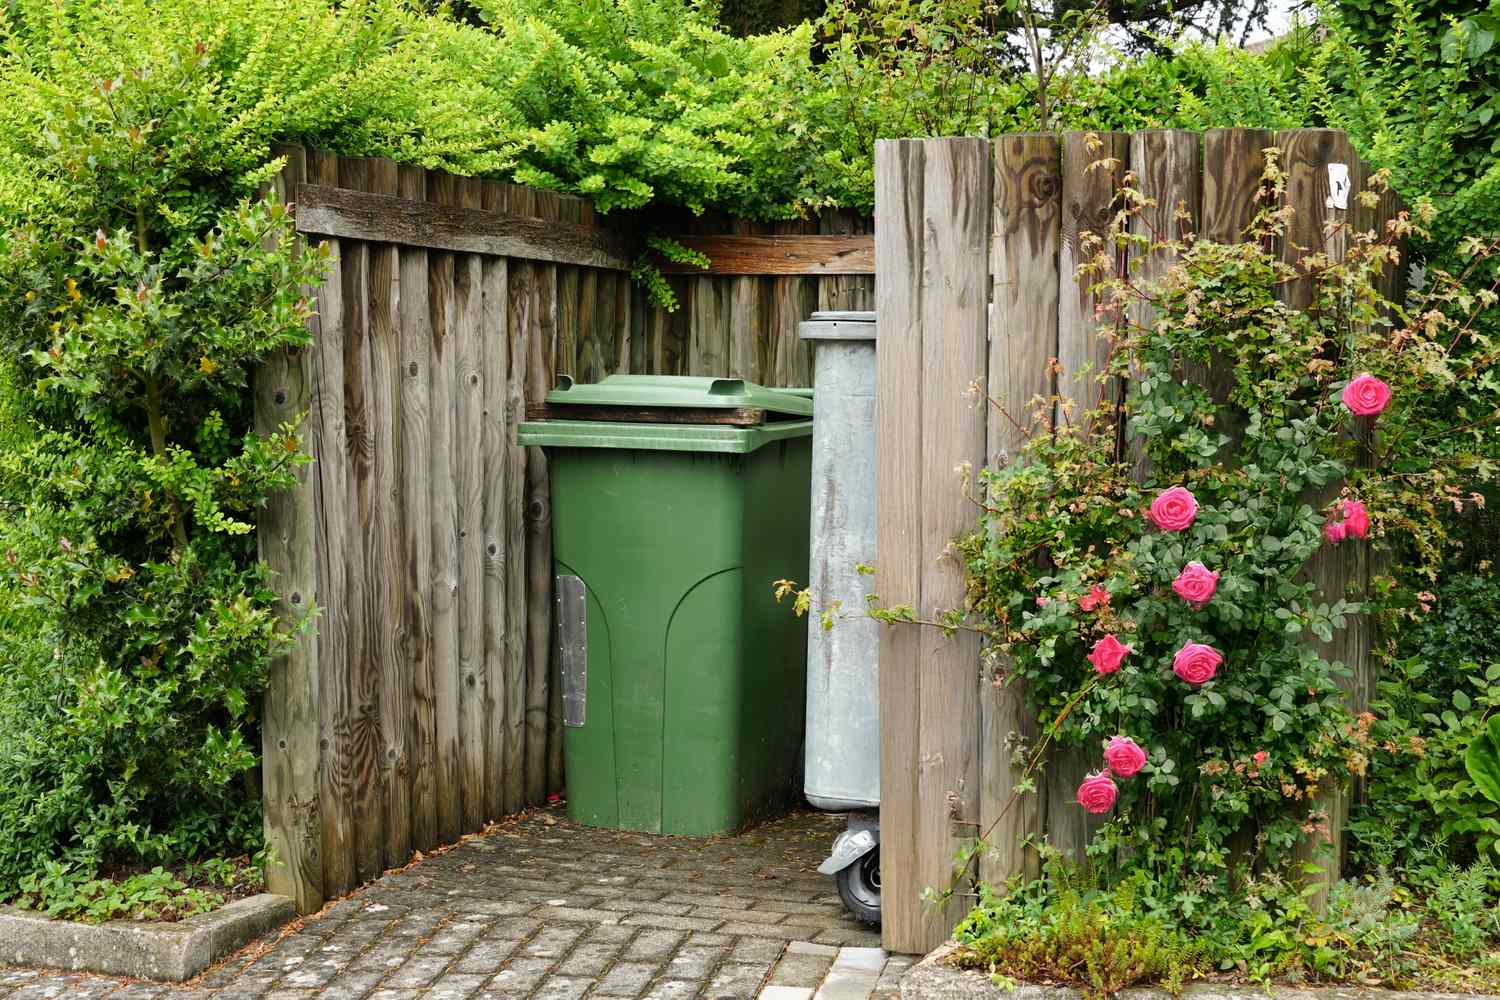
“The visual recipe here is simple and effective: 70% rustic structure + 30% flowering camouflage.”
The weathered wood fence panels provide the bulk of the coverage and set a relaxed, natural tone. The climbing roses and other green foliage make up the other 30%, serving as the decorative element that softens the entire vignette. You could easily swap the weathered wood for a dark-stained modern fence or swap the roses for clematis, and the formula would still work perfectly. It’s all about a simple structure beautified by nature.
14. Hide Bins with a Simple White Lattice Screen
This is one of the most classic and affordable solutions for a reason—it works. A couple of 4×8-foot white vinyl lattice panels from a store like Home Depot or Lowe’s will cost you less than $100. All you need are a few wooden or vinyl posts to connect them and create a simple L-shaped screen. It’s a project you can easily complete in an afternoon. While it’s not as integrated as a custom-built enclosure (like Idea #32), it’s a clean, tidy, and cost-effective way to immediately improve your curb appeal.
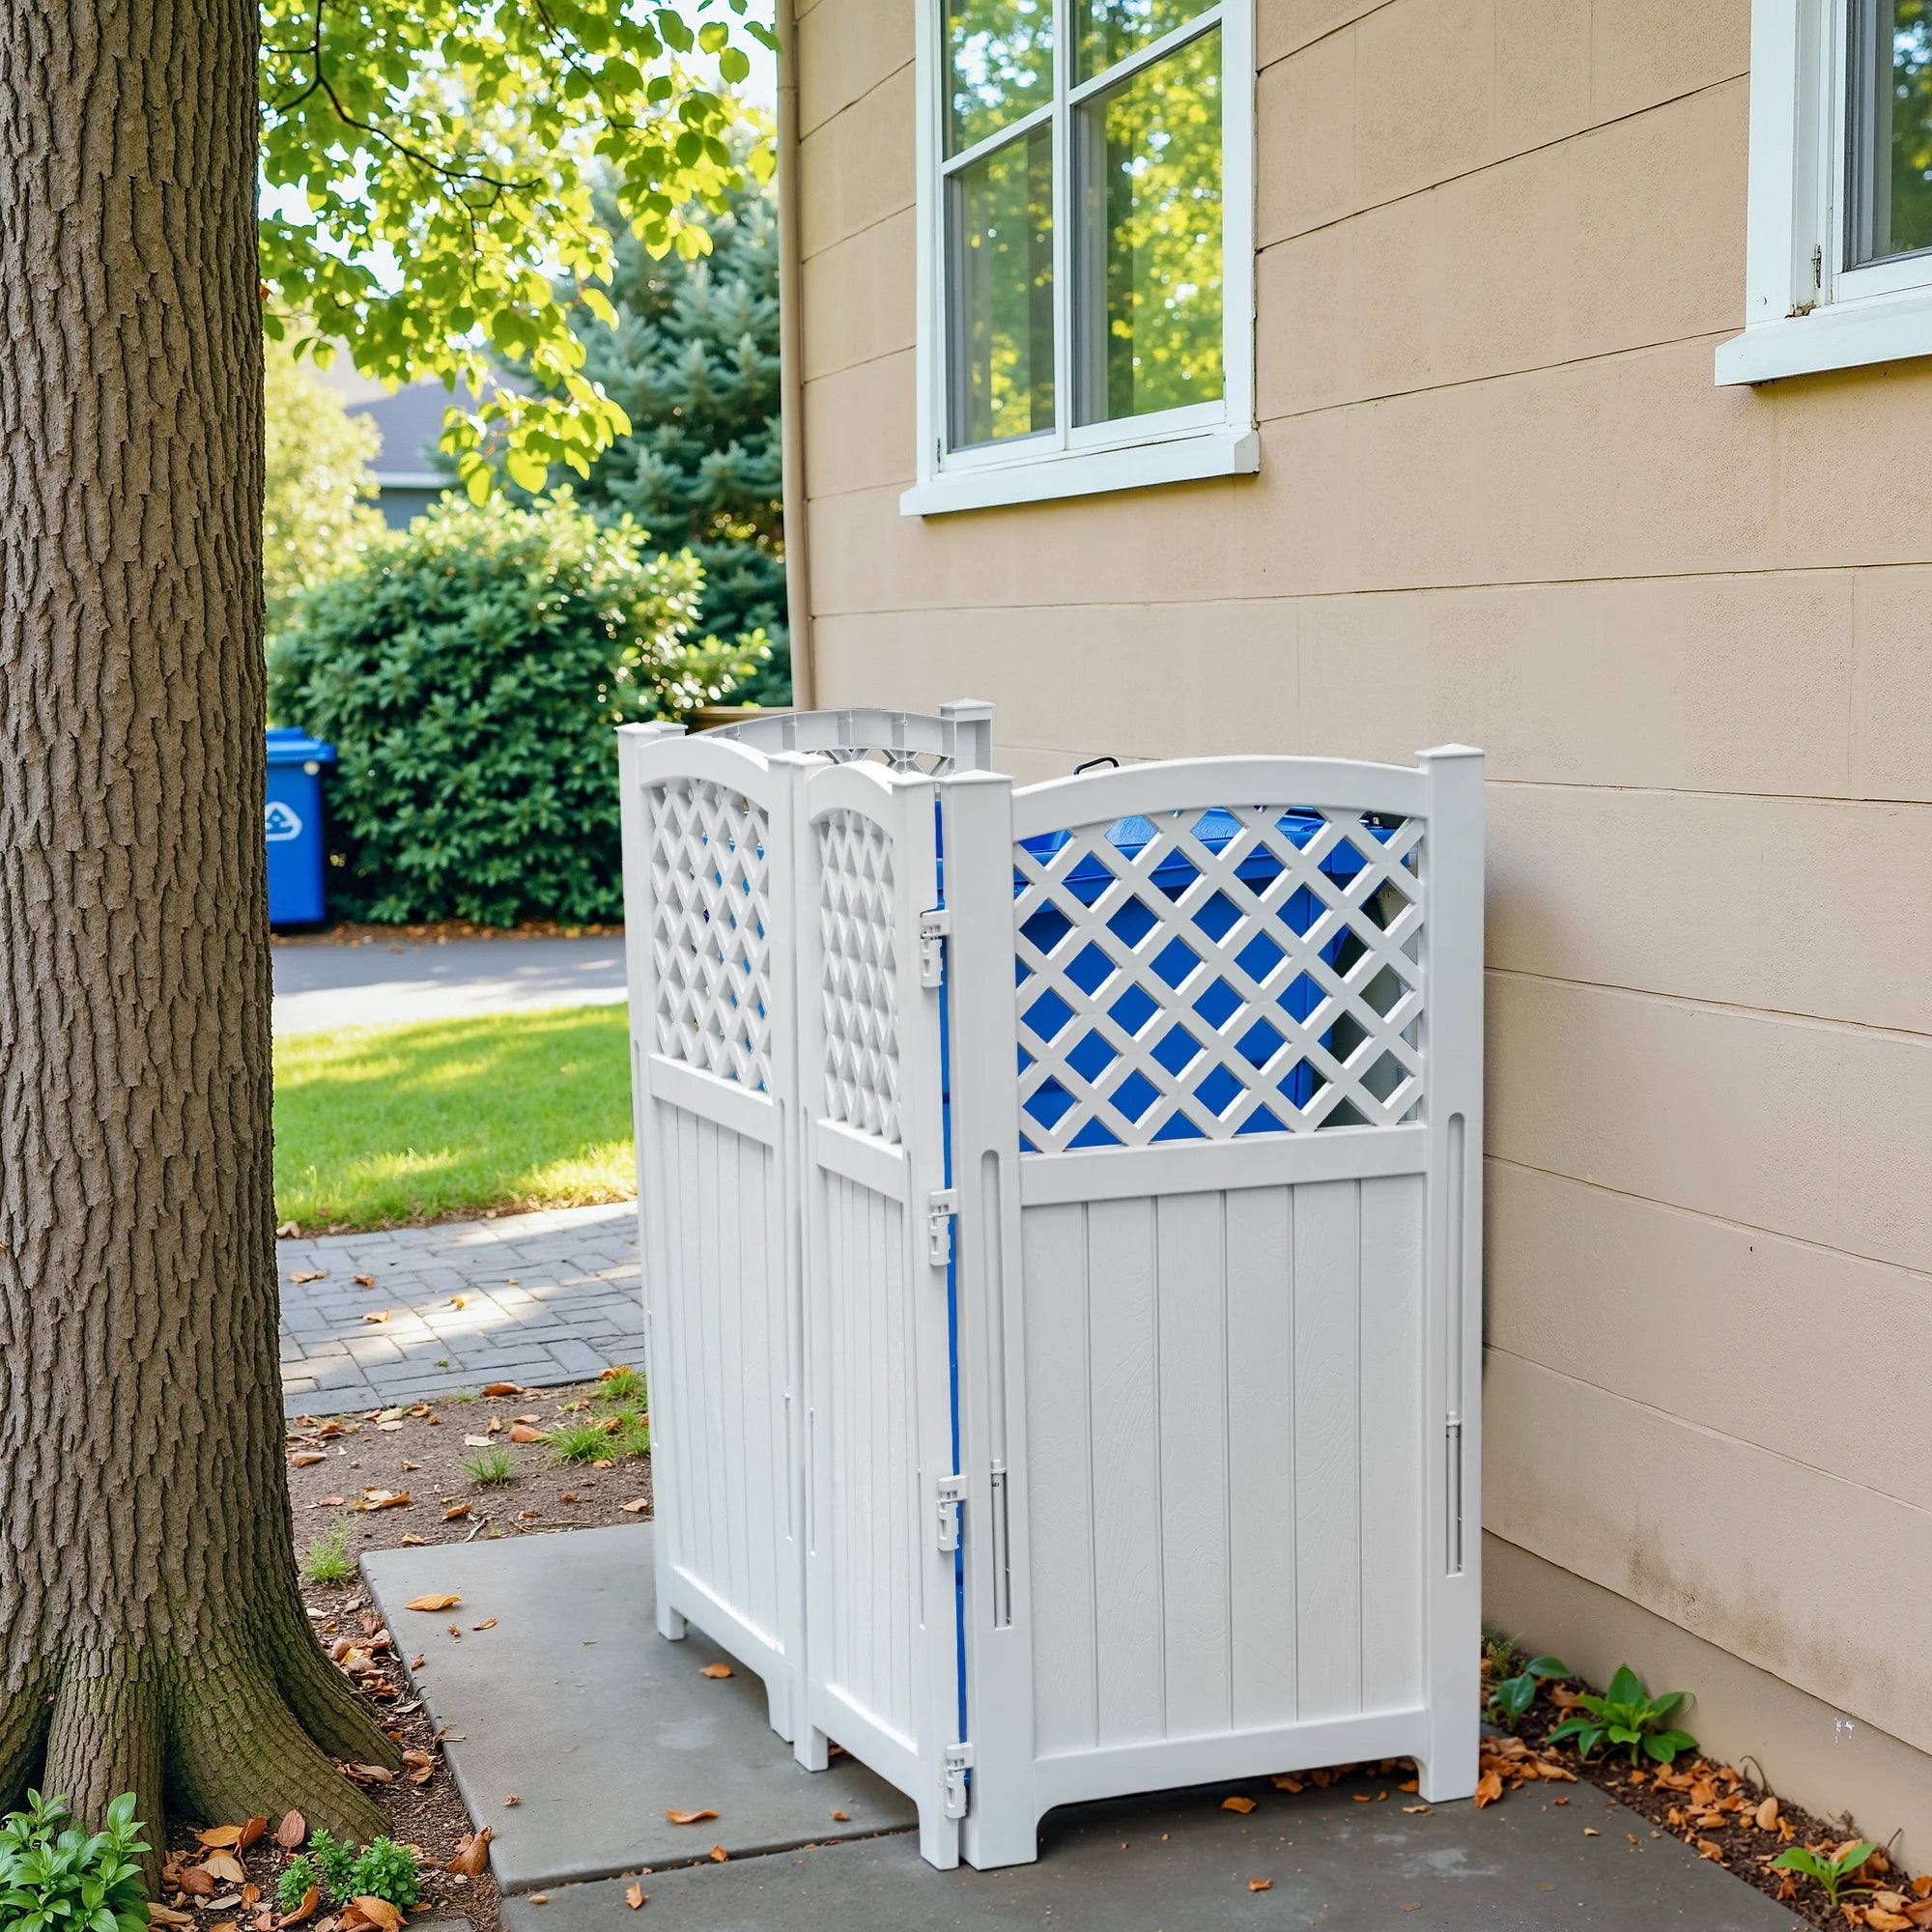
“Here’s how to build a simple lattice screen in an afternoon.”
Time: 2 hours. Cost: $80-$150. 1. Purchase two lattice panels and three matching posts. 2. Get two metal spikes for driving the posts into the ground. Hammer them into the ground where you want your screen corners. 3. Insert the posts into the spikes and check that they are level. 4. Attach the first lattice panel to the house wall and the first post using exterior-grade screws. 5. Attach the second panel to the first post and the end post to form an “L” shape. Done!
15. Use a Modern Perforated Screen with Integrated Planters
- Check the Airflow: Before buying any cover for an AC unit, check the manufacturer’s specifications for required clearance on all sides. Most units need 12-24 inches of unobstructed space for proper airflow. A screen like this with perforations is great, but it still needs to be sized correctly.
- Measure for Maintenance: How will a technician service the unit? Ensure one side of the screen is easily removable or hinged for access. Don’t just build a permanent box around it.
- Consider Drainage: The planter boxes on top are a great touch, but make sure they have drainage holes that direct water away from the AC unit’s electrical components.
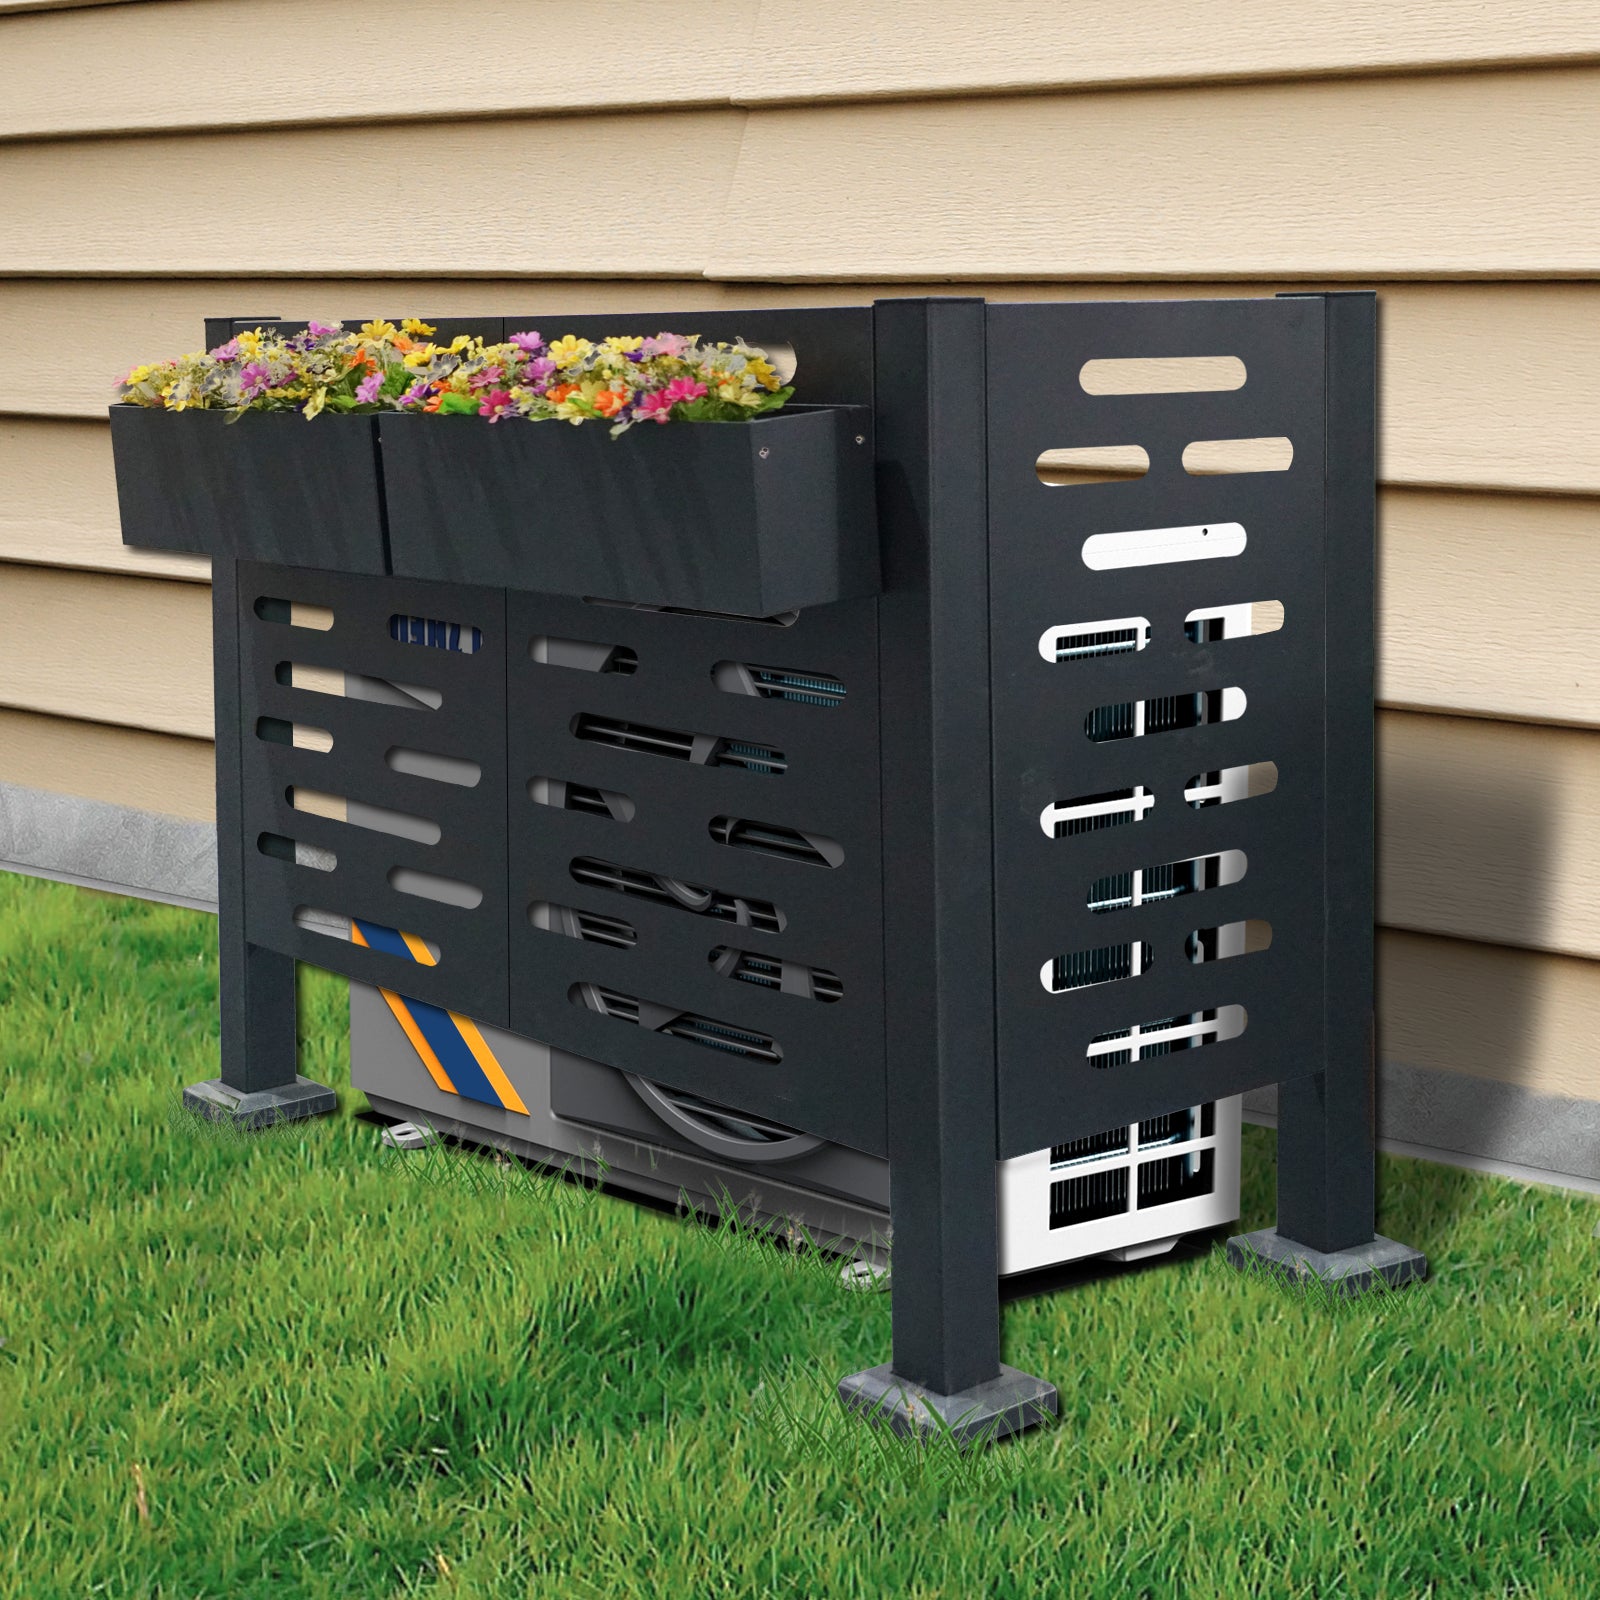
“The key to making a screen like this work is integration, not just placement.”
By choosing a screen color that is almost identical to the planter boxes, you create a single, cohesive visual unit. This makes it look like one intentional piece of modern garden decor. The second trick is filling the planters with a riot of color. The vibrant flowers draw the eye upward, focusing attention on the beautiful part (the plants) and away from the functional part (the screen).
16. Combine a Black Fence, Lush Plants, and a Gravel Path
This design is so effective because of the high contrast between its three main elements. The black slatted fence acts as a dramatic, dark backdrop that makes the vibrant green of the foliage pop. The light grey gravel path provides a bright, textured foreground that clearly defines the space. This separation of black, green, and grey creates clear, clean lines and makes each element stand out, resulting in a look that feels both lush and incredibly structured. The red flowers in the pot are the perfect final touch of color.
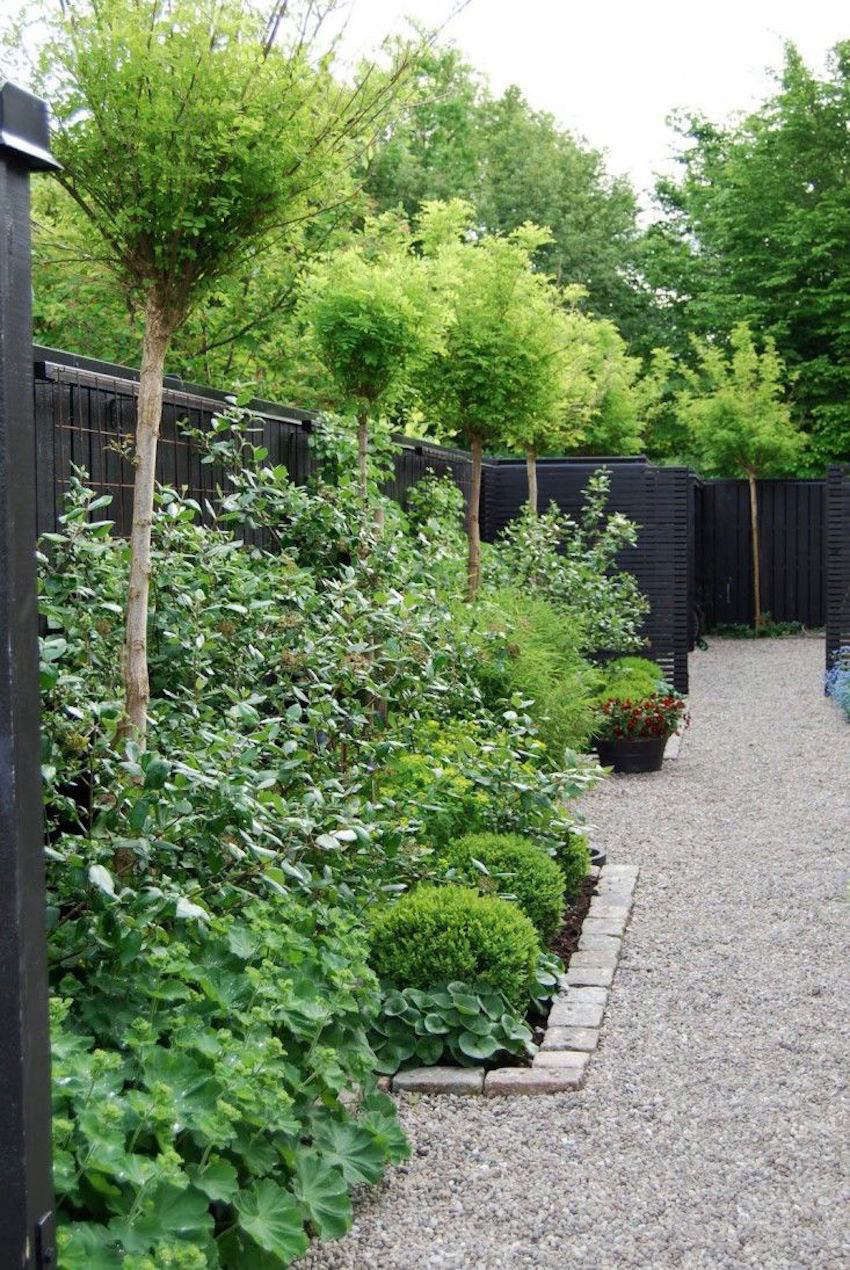
“A layered planting bed like this works best in a side yard or along a property line where you have a long, relatively narrow space to fill.”
This arrangement is perfect for a depth of about 4-6 feet. This allows for the fence, a row of taller shrubs or topiaries, a layer of lower bushes, and the gravel path with its stone border. It’s a brilliant way to turn a boring walkway into a major garden feature. For a much smaller space, you’d be better off with simple climbing vines like in Idea #17.
17. Layer a Pergola and Lattice with Deep Purple Foliage
We’re seeing a huge trend towards ‘garden maximalism,’ and this look is a perfect example. Instead of sparse, minimalist planting, homeowners are embracing dense, overlapping, and slightly wild-looking gardens. The use of deep, dramatic foliage colors—like the rich purples and burgundies seen here—is a key part of this trend. It adds depth, moodiness, and a touch of gothic romance that feels like a reaction against years of all-white-and-green gardens. It’s about creating a personal, immersive oasis.
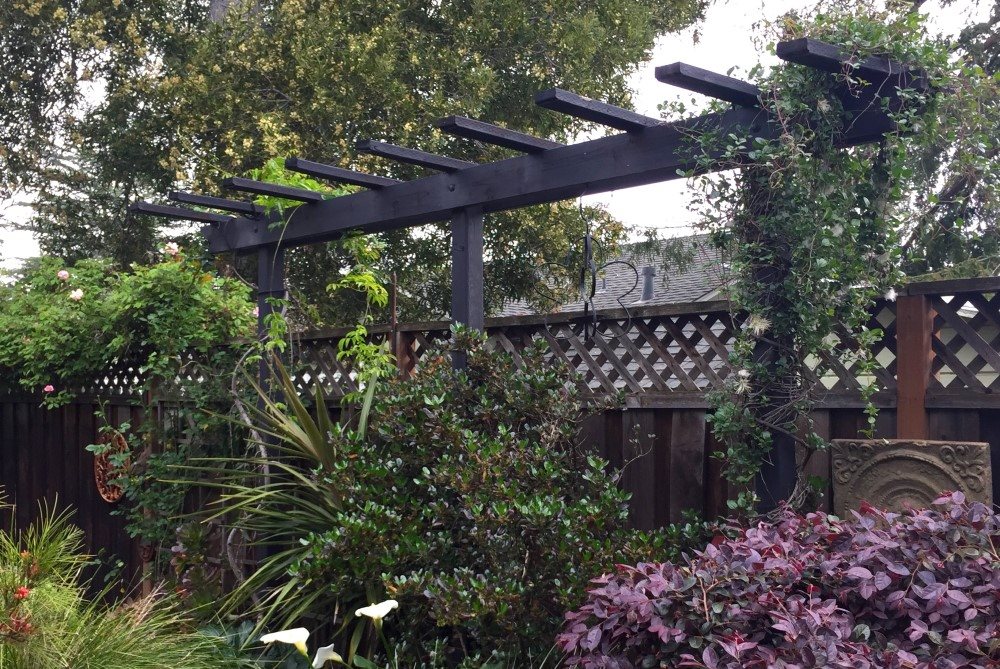
“A lush, jungle-like look is gorgeous, but it can be a haven for pests like mosquitoes, spiders, and rodents who love the cool, damp, and shady environment created by the dense foliage.”
If you live in an area where these are a problem, you may need to be extra vigilant. Consider using a professional pest control service or incorporating natural deterrents like citronella (which is what those calla lillies might be) or lavender into your planting scheme. Regular pruning to improve airflow can also help discourage unwanted guests from moving in.
18. Define a Modern Patio with a Sectional and Tall Planter Grasses
This comfortable, modern look is achieved with a clear visual recipe: 60% cozy textiles + 30% natural elements + 10% hard structure. The bulk of the visual real estate is the inviting sectional with its dark blue cushions, making comfort the priority. The natural elements—the tall green grasses and the warm wood tones of the sofa frame and table—soften the look. The final 10% is the dark fence and flooring, providing a solid, structural backdrop that makes the other elements pop.
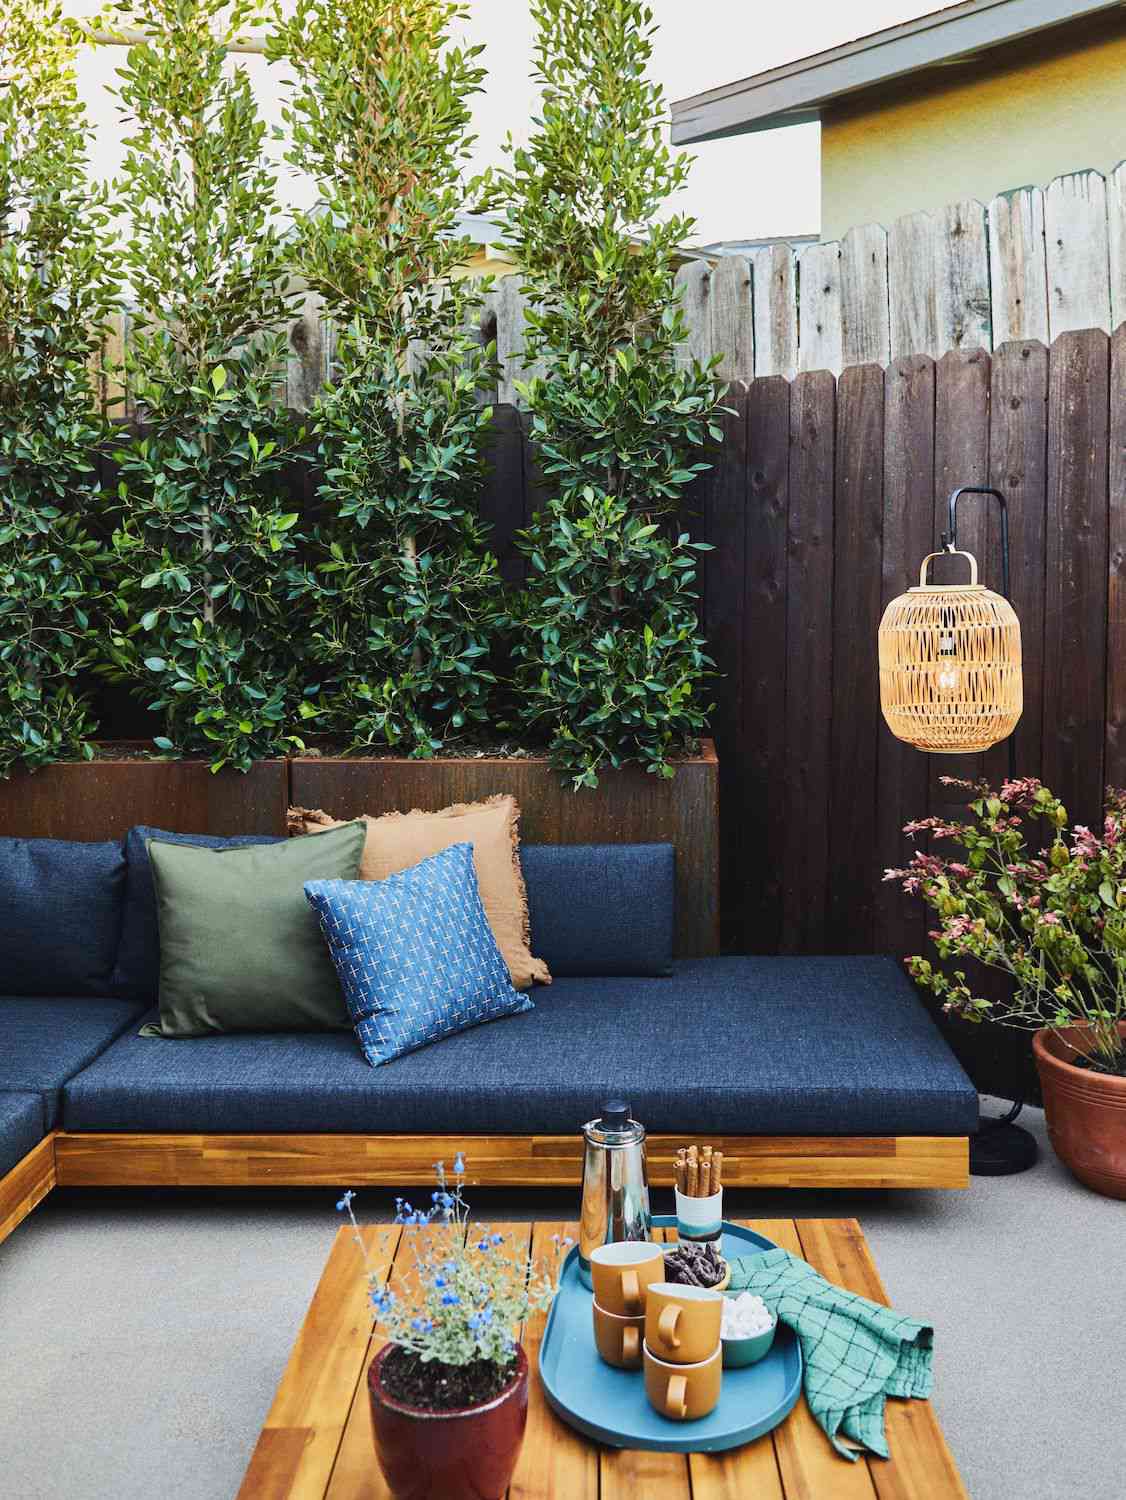
“To create an effective plant-based privacy screen with planters, height is everything.”
Choose planters that are at least 24 inches tall and select plants that will grow at least 3-4 feet above the top of the planter. This ensures the visual barrier starts at the right height to actually screen the view from a seated position. Using tall, narrow plants like the ornamental grasses here is a great choice because they provide density without taking up a huge footprint on your patio.
19. Create a Cozy Nook with a Slat Fence and String Lights
that transforms this from a simple patio set into a truly magical space is the string lights. They are the element that adds warmth, ambiance, and a sense of occasion. Without them, the fence and furniture would look fine during the day, but the lights give the nook its nighttime personality and turn it into an intentional destination after the sun goes down. They are proof that sometimes the smallest, most affordable addition can have the biggest impact on the overall mood.
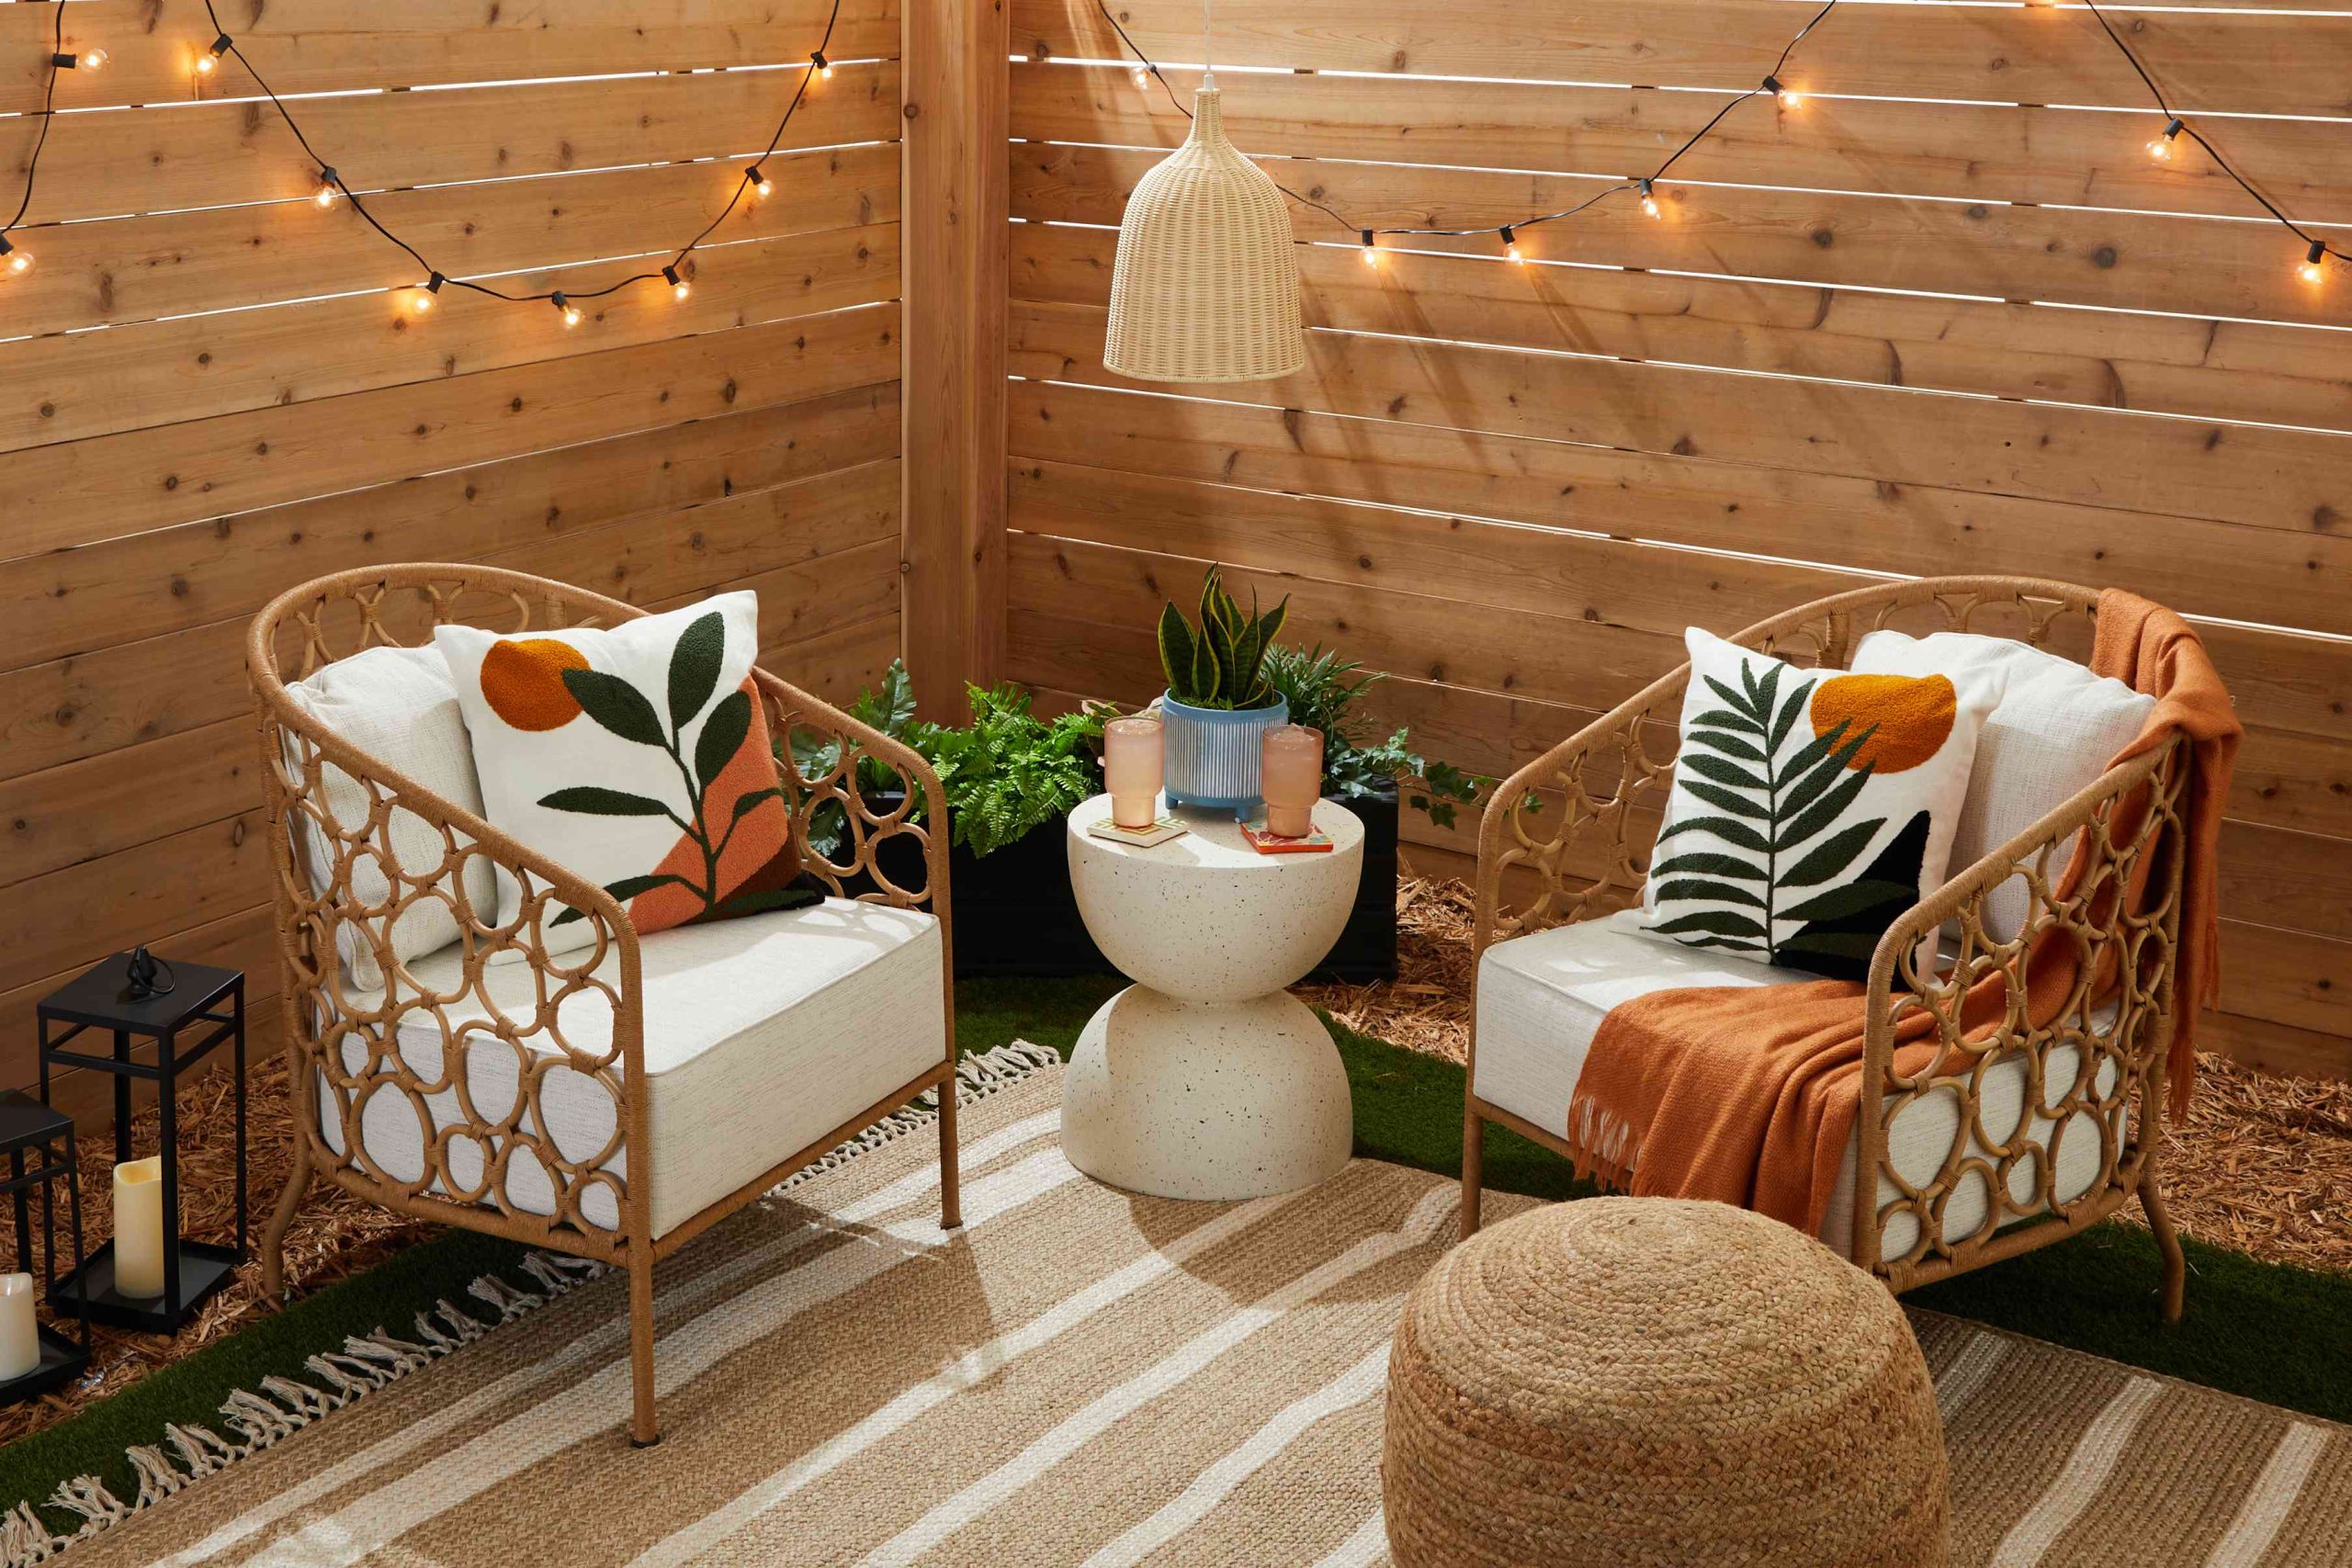
“You can achieve this entire vibe for under $500.”
The key is to shop smart. Look for rattan-style armchairs at stores like Target or Walmart ($250-$350 for a pair). The concrete pedestal table can be a DIY project using a simple mold and a bag of concrete mix for under $40. A natural fiber rug and a set of string lights can be found for under $50 each at most big-box retailers. The horizontal slat fence itself can be a DIY project using standard lumber, often for less than the cost of pre-made panels.
20. Shelter a Patio with a Pergola and Retractable Screens
This dual-structure solution—part solid roof, part slatted pergola—is ideal for larger patios, typically 200 square feet or more. It allows you to zone the space, providing full sun and rain protection over a dining or cooking area while offering filtered light and airflow over a lounging spot. The addition of retractable screens requires a robust frame, making this a better fit for substantial, well-built structures rather than lightweight patio covers. It’s a significant investment that pays off on large, multi-use outdoor spaces.
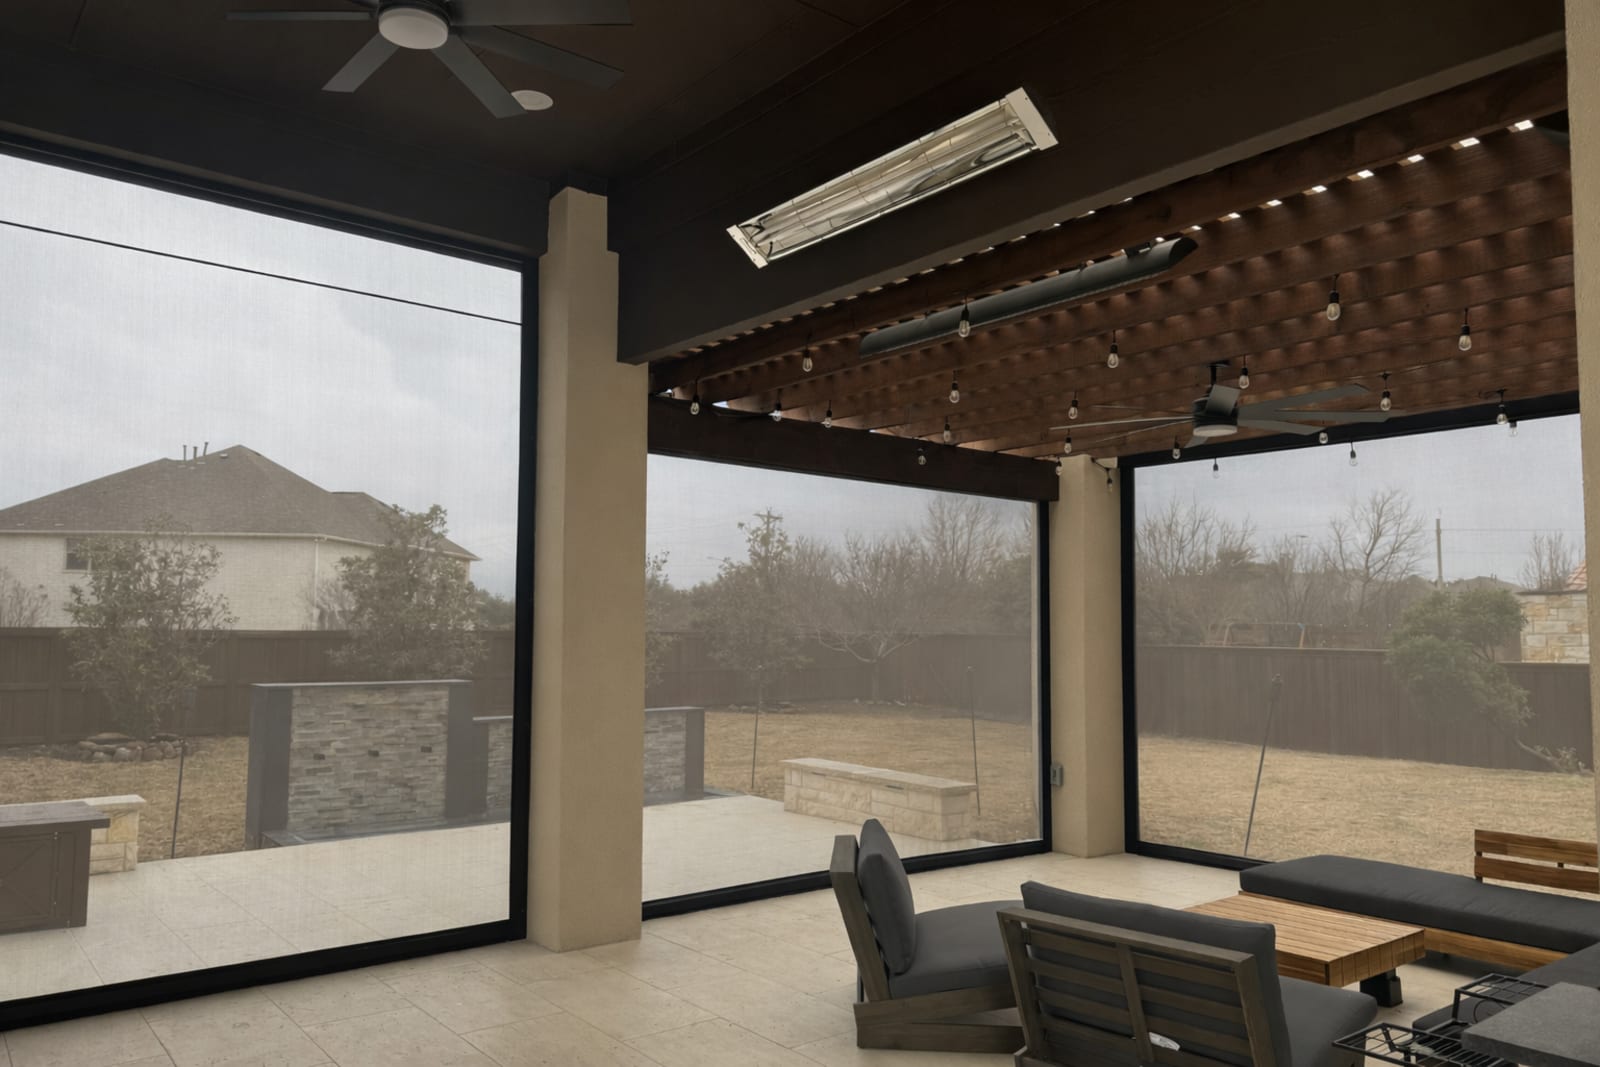
“While retractable screens are great for bugs and shade, it’s important to understand their limitations in wind.”
Many motorized screen systems have wind sensors that will automatically retract them in high gusts to prevent damage, but cheaper or manual versions do not. A strong wind can turn a large screen into a sail, potentially ripping the fabric or damaging the tracks and housing. If you live in a windy climate, investing in a high-quality system with wind sensing is not a luxury, it’s a necessity. Compare this with the more permanent stone structure in Idea #23.
21. Integrate an Enclosure with Green Slats and Lush Planting
This is a brilliant example of camouflage that leans into color instead of trying to be invisible. By painting the slatted enclosure a vibrant lime green, the designer made a bold choice. It works because the color is directly pulled from the surrounding foliage, particularly the lighter green leaves. This helps the structure blend in, in an unexpected way. The brain registers the color as part of the garden palette, and the climbing vines and surrounding shrubs further blur the lines, making it a feature rather than a flaw.
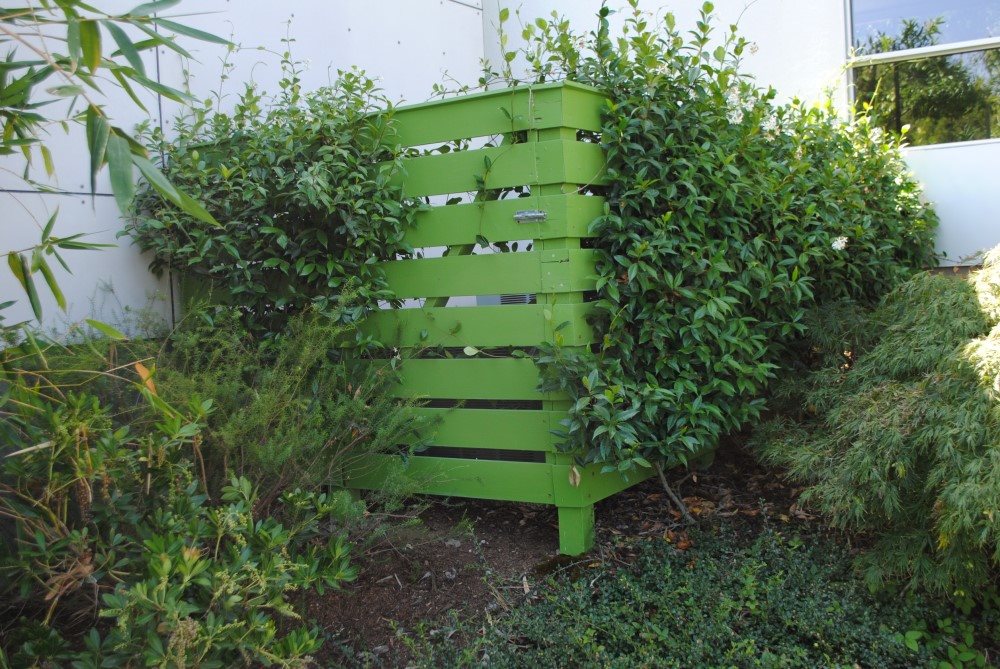
“Want to recreate this integrated look?”
Here’s a quick guide. Time: 4 hours. Cost: $150. 1. Build a simple cube-shaped frame out of 2x4s. 2. Cut 1×4 boards to size and attach them as horizontal slats, leaving a 1-inch gap between them for airflow. 3. Prime the entire structure. 4. Paint it a bold green that matches some of the foliage in your garden. 5. Place it over your eyesore (like a pool pump). 6. Plant a climbing vine like clematis or jasmine at the base and encourage it to grow up and through the slats.
22. Hide a Fence with a Wall of Lush, Mixed Greenery
If you have an ugly fence but can’t afford to replace it, this is your solution. Forget expensive fence panels; invest in plants instead. A mix of fast-growing evergreen shrubs, perennials, and even a small ornamental tree can completely obscure a chain-link or dilapidated wooden fence within two to three seasons. A trip to the local nursery for a dozen healthy, young plants will cost a few hundred dollars—a fraction of the thousands you might spend on a new fence—and the result is far more beautiful and natural.
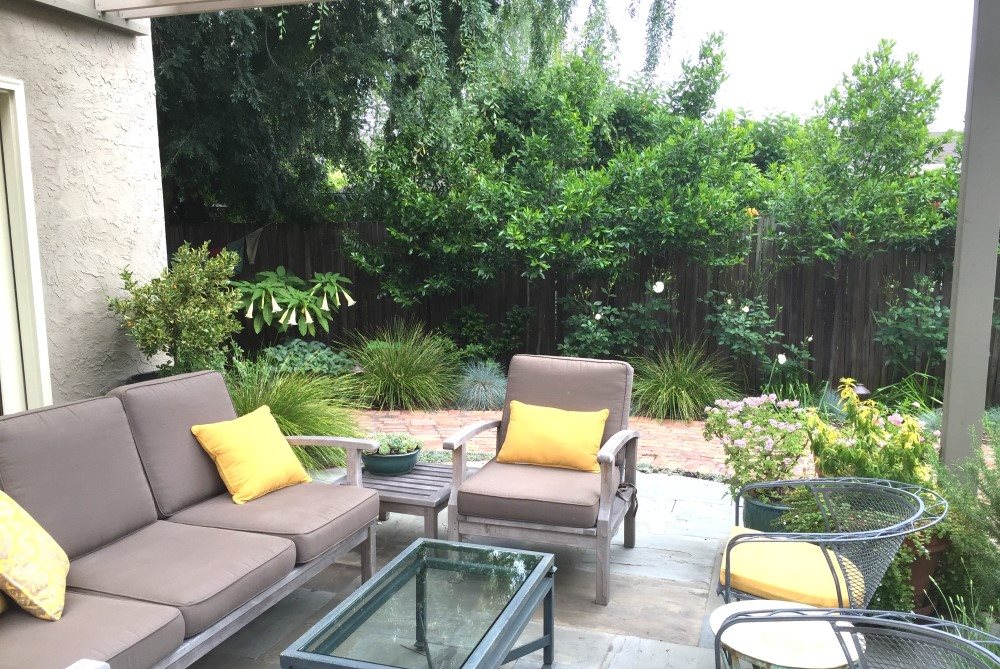
“The secret to making a plant screen look full and lush is to vary the texture and color of the greens.”
Notice how this garden combines the dark green of some background shrubs, the lighter, feathery green of others, and even some silvery-green foliage. This variety is what gives the planting depth and stops it from looking like a boring, flat green wall. When you’re at the nursery, grab at least 3-4 different types of green foliage to create a more sophisticated and natural-looking tapestry of plants.
23. Add Retractable Shades to a Stone-Clad Outdoor Room
The defining feature of this structure isn’t the beautiful stone or the impressive scale; it’s the retractable fabric shades. They are what give the space its ultimate flexibility. With the shades up, it’s an open-air pavilion, connected to the surrounding patio and landscape. With the shades down, it becomes a cozy, private room, protected from the sun, wind, and prying eyes. This ability to transform from open to enclosed in seconds is what makes the structure so incredibly functional and luxurious.
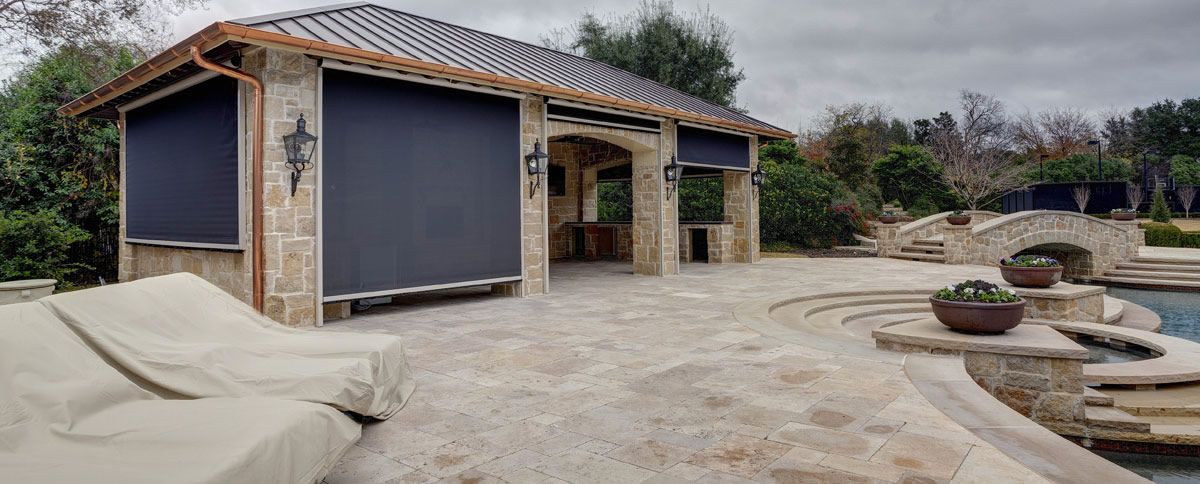
“A high-end setup like this comes with a maintenance checklist.”
The stone pavers and structure should be professionally cleaned and sealed every 2-3 years to prevent staining and mildew, a service that can cost $500-$1000. The copper gutters will develop a patina (which is often desired), but they need to be cleared of leaves twice a year to prevent clogs. The retractable shade fabric should be cleaned annually with mild soap and water, and the mechanical components may need occasional lubrication or professional adjustment to ensure smooth operation.
24. Build a Tiered Slat Enclosure for an Air Conditioner
This clean, tidy solution follows a simple visual formula: 80% classic materials + 20% natural elements. The screen itself, painted crisp white, and the traditional blue siding and red brick of the house make up the classic, all-American base palette. The two slender conifer shrubs, with their dark green color and vertical shape, provide just the right amount of organic texture and color to soften the hard lines of the enclosure and house, preventing the scene from feeling too sterile or plasticky.
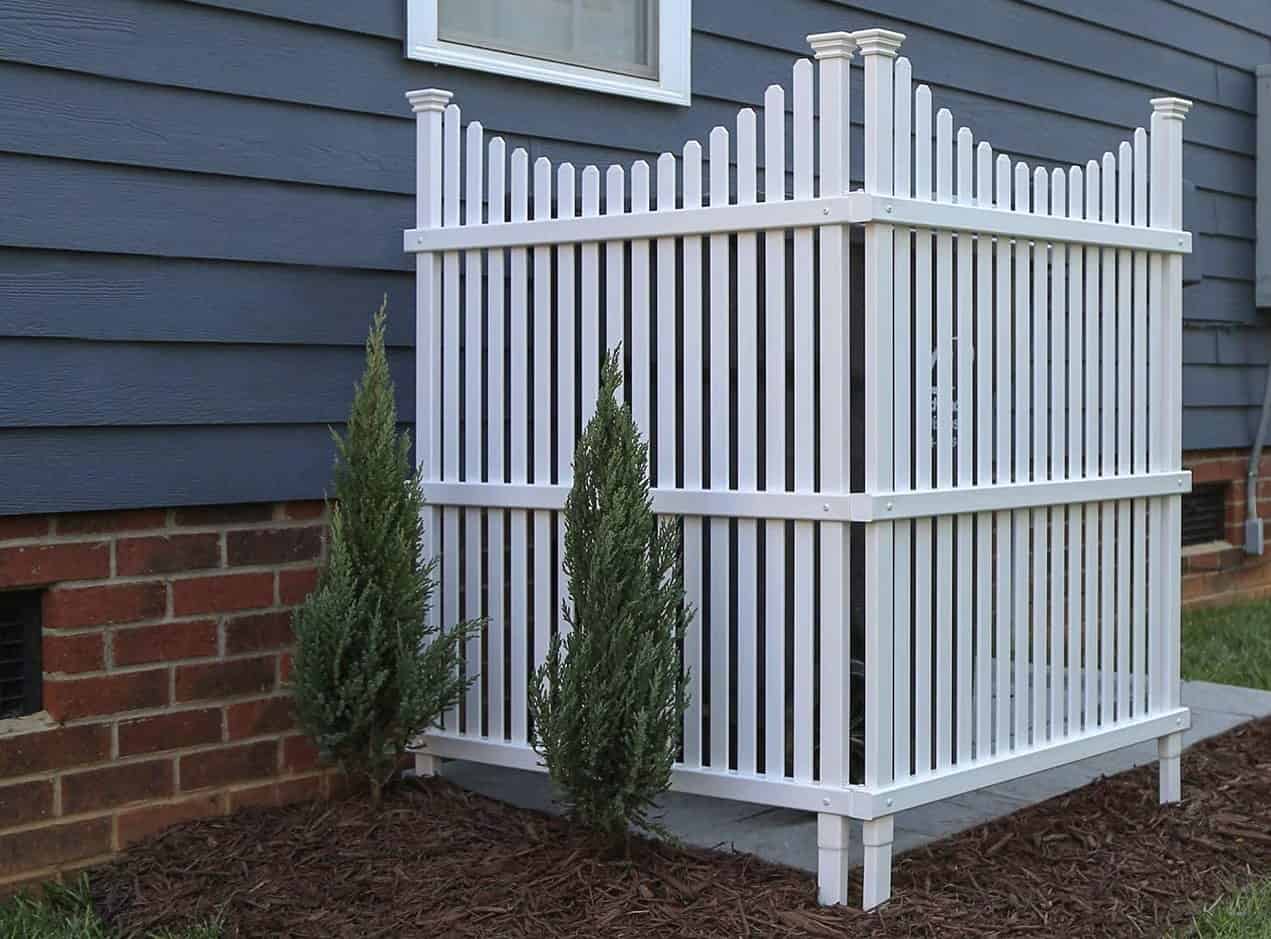
“While this enclosure looks neat, planting shrubs this close to an AC unit can be a problem.”
The shrubs will restrict airflow, making the unit work harder and less efficiently, which can drive up your energy bills and shorten the lifespan of the appliance. Furthermore, the roots can potentially interfere with the concrete pad or electrical lines over time. A better solution would be to place potted plants there, which can be easily moved for servicing, or to ensure the shrubs are a dwarf variety that won’t grow any larger.
25. Use a Classic White Lattice Screen Beside a Blue House
- Screen Materials (Vinyl Lattice Panels, Posts): $80 – $200
- Labor (if DIY): $0
- Plants (Annuals/Perennials): $30 – $75
- Mulch/Soil: $20
- TOTAL: $130 – $295
- Budget alternative: This entire look *is* the budget alternative! For even more savings, you can often find free or cheap used lattice panels on Facebook Marketplace.
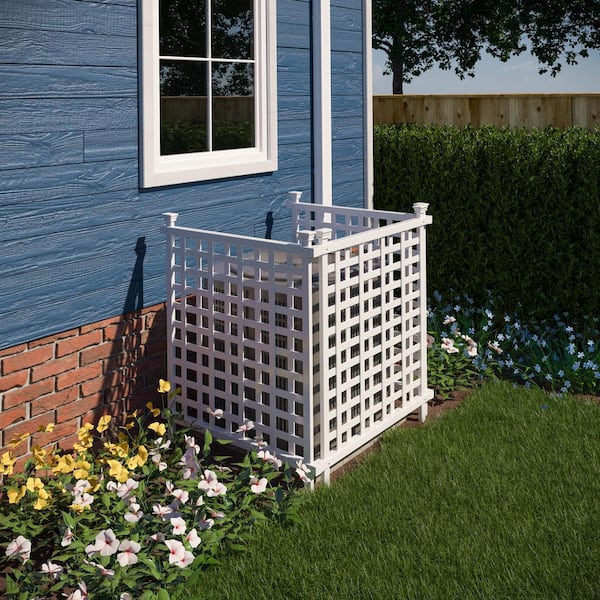
“This classic combination is so visually pleasing because it relies on a timeless color palette.”
The crisp white of the lattice, the deep blue of the siding, and the warm red of the brick foundation create a classic, almost nautical, primary color scheme. The green of the grass and the yellow of the flowers act as fresh, natural accents. It works because it’s balanced and familiar. It’s a tidy, all-American look that feels appropriate for the style of the house. Compare it to the similar white screens in Idea #14 and Idea #26.
26. Add Decorative Finials to a White Lattice Screen
The small details are what elevate a simple project from functional to finished. Adding decorative post caps or finials, like the egg-shaped ones seen here, is an inexpensive way to make a standard lattice screen look more like a custom piece of garden architecture. It’s a trick designers use to add a touch of polish and personality. When you’re buying your posts, spend the extra $5-$10 per post for a decorative cap. It’s a tiny cost that makes the entire project look 50% more expensive.
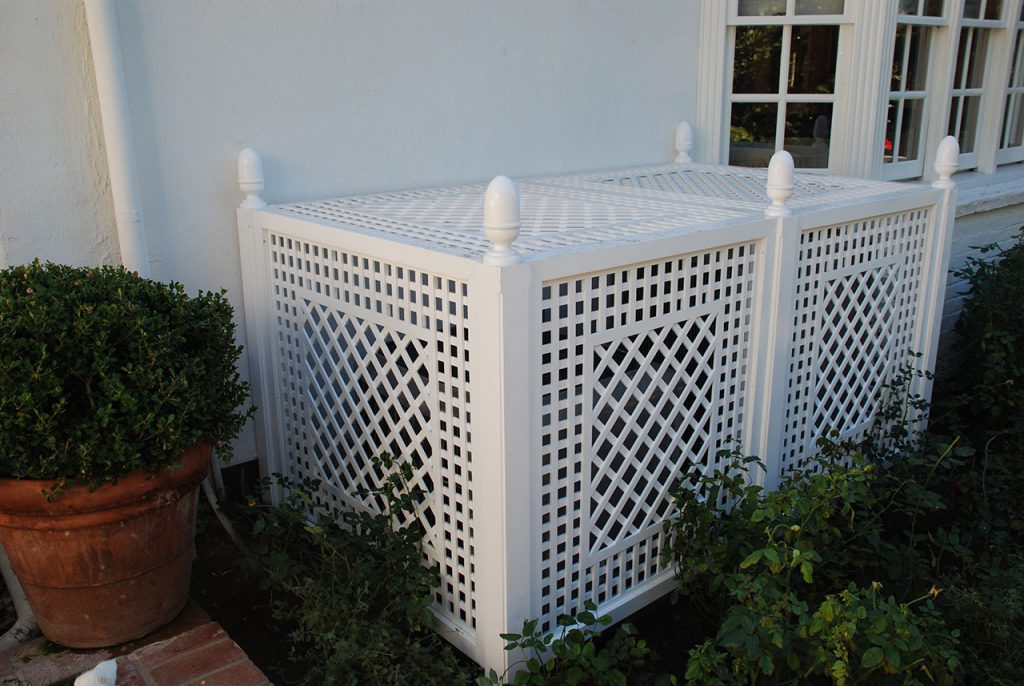
“A pre-made lattice screen kit can be surprisingly pricey.”
To get this look for less, buy individual 4×8 vinyl lattice sheets and standard 4×4 vinyl posts from a big-box store. You can construct a three-sided box for a fraction of the cost of a kit. The finials can be found in the fence aisle and usually slip right over the top of the posts. This DIY approach allows you to customize the size and shape to perfectly fit your needs, all while saving you money. The potted plant is another great touch for adding color and hiding the base.
27. Hide an AC Unit with a Laser-Cut Metal Screen
The element that truly makes this solution stand out is the laser-cut leaf pattern. A plain, solid metal box would have worked, but it would have been severe and industrial. A basic slatted screen would have been fine, but predictable. The organic, nature-inspired pattern turns a purely functional object into a piece of art. It cleverly acknowledges the garden setting while maintaining a modern edge. It proves that even the most mundane utility screen can be an opportunity for beautiful design.
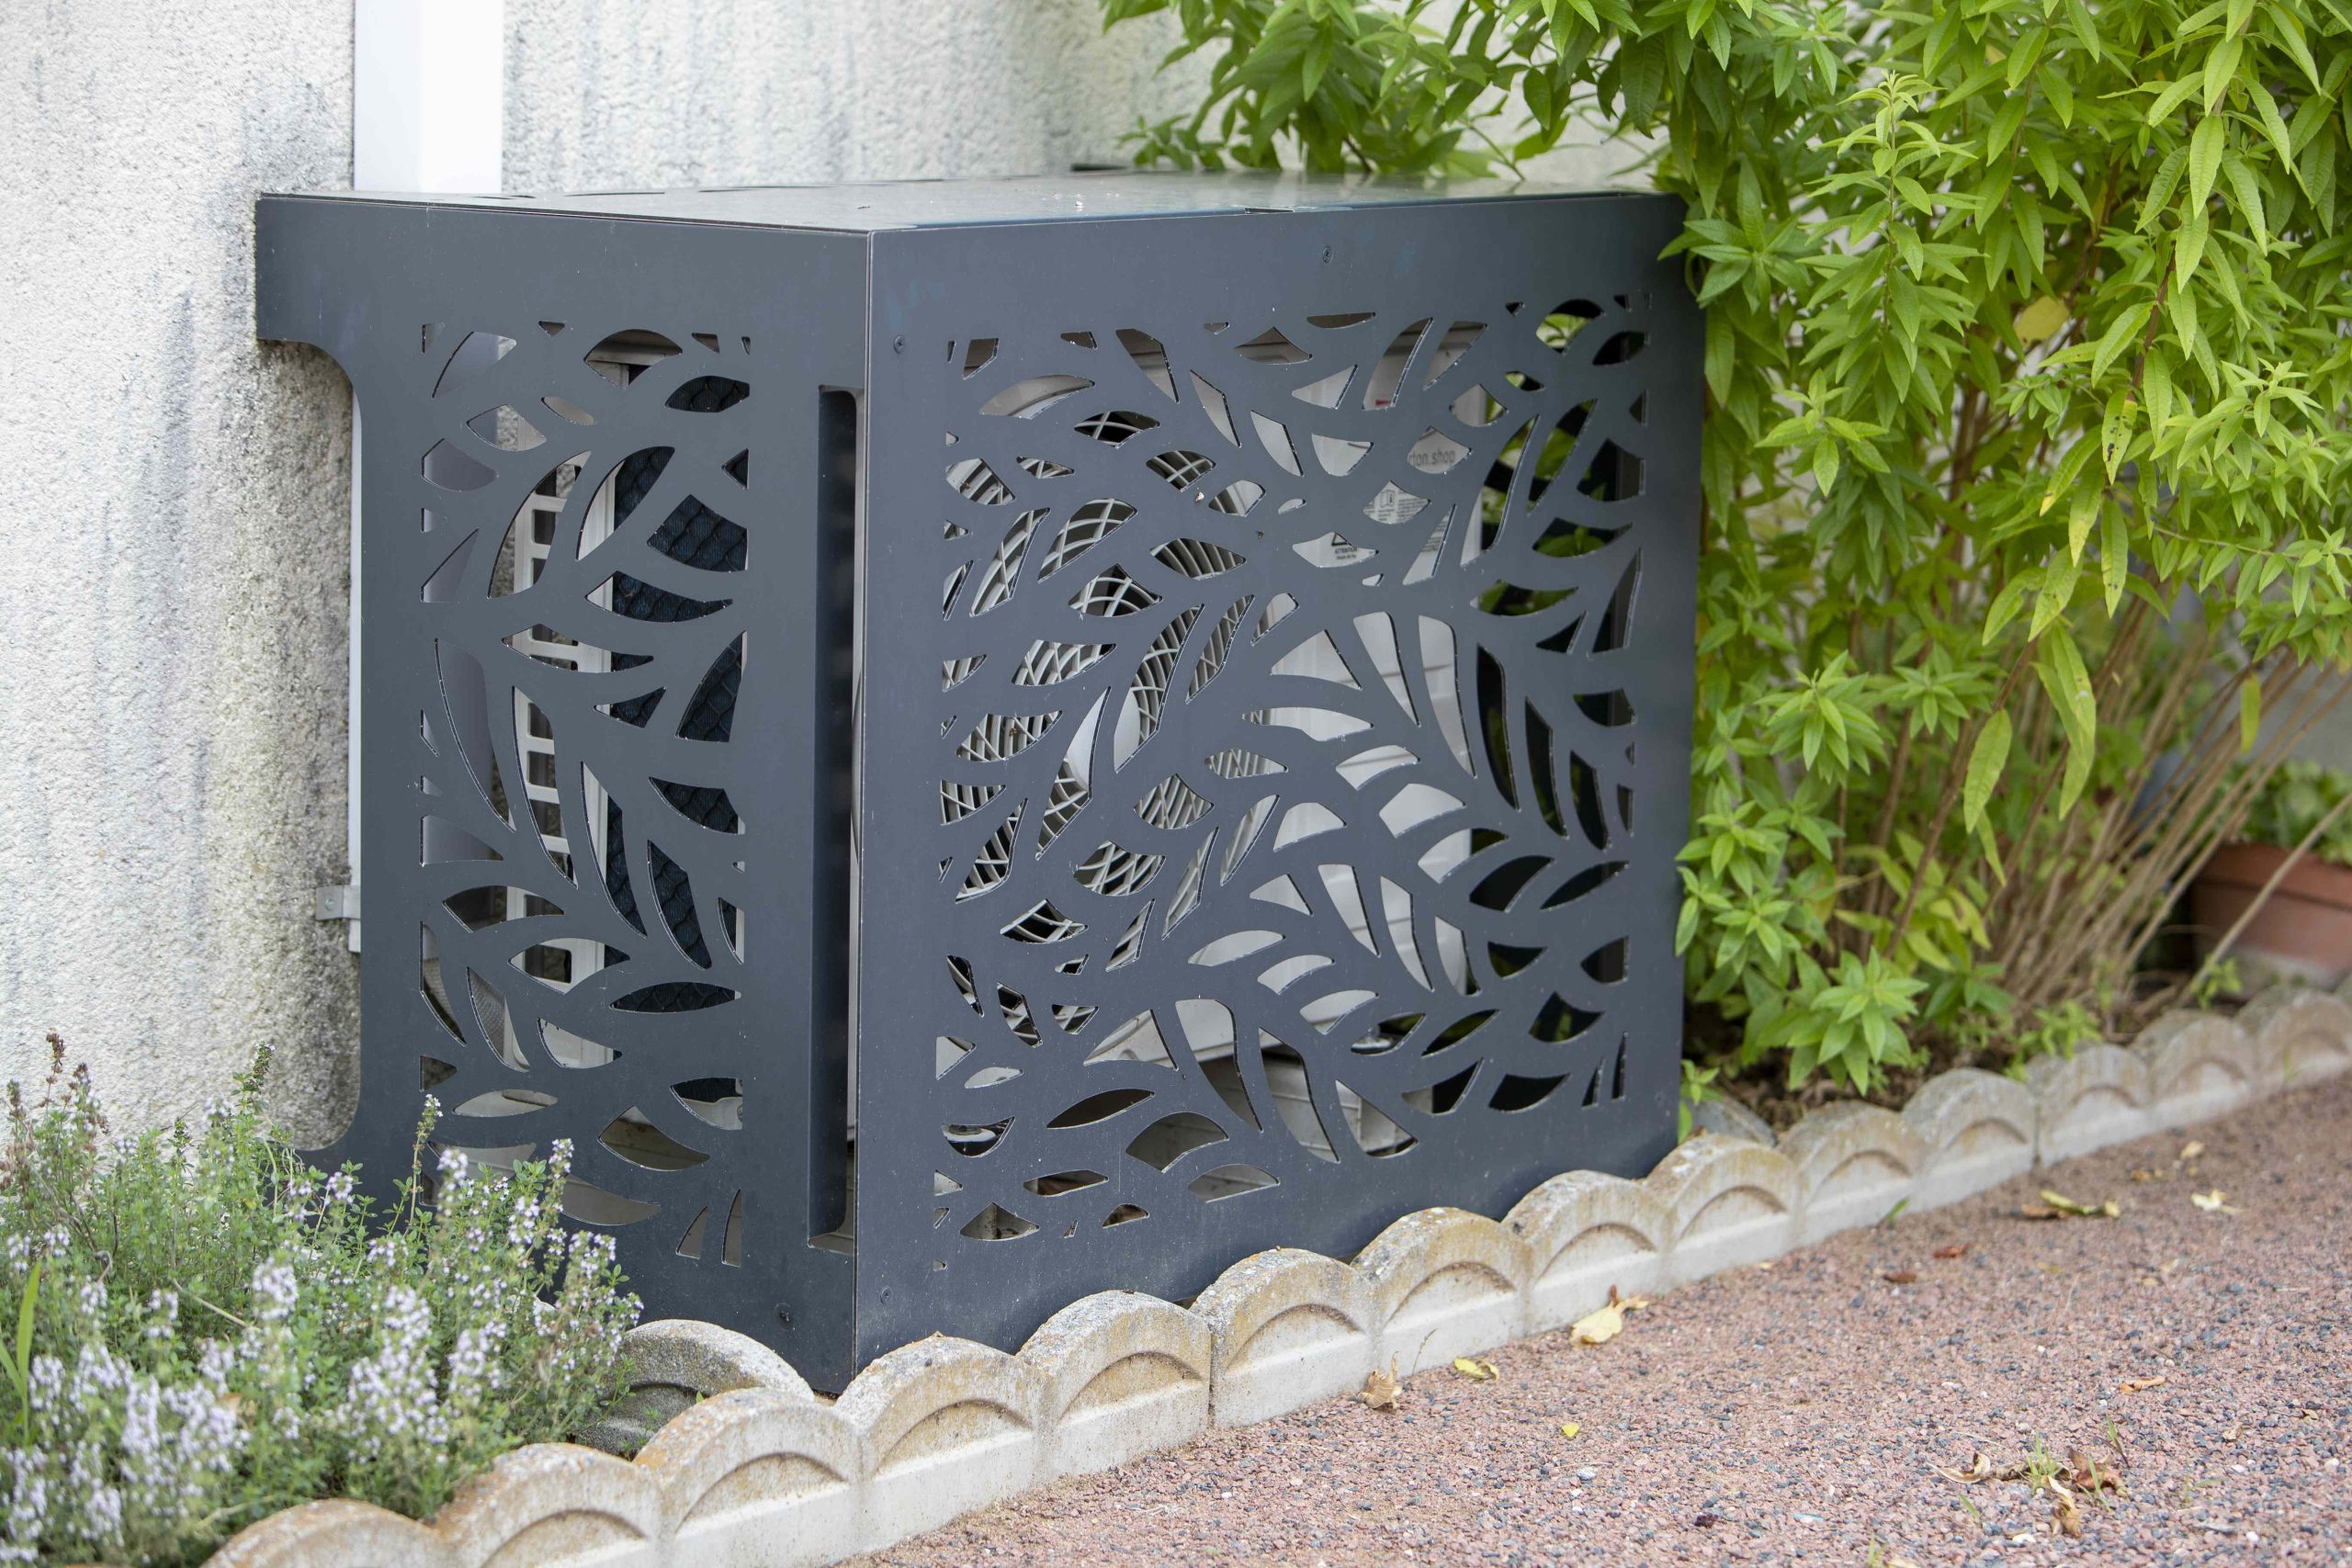
“A decorative metal screen like this is an ideal solution for tight spaces where planting a hedge isn’t feasible.”
The screen itself has a very small footprint, often only taking up 2-3 inches of depth. This one is perfectly scaled for a narrow side yard or a small patio where every square inch counts. It provides full concealment for an object up to 4 feet tall and wide, while still allowing for necessary ventilation through the cutouts. This is a compact, high-impact solution for small-footprint homes or townhouses.
28. Use a Dark Slat Screen With Built-In Flower Boxes
You can create a similar screen with integrated planters in one weekend. (Time: 5 hours, Cost: $200-$350). 1. Build three simple frames from 2×2 lumber to your desired height and width. 2. Attach horizontal 1×4 composite decking boards (which are weather-proof) to the frames, leaving 1/2-inch gaps. 3. Hinge two of the panels together to create a corner. 4. Build two simple rectangular planter boxes from the same decking material. 5. Attach the planters to the front of the screen panels. 6. Set in place and fill with flowers!
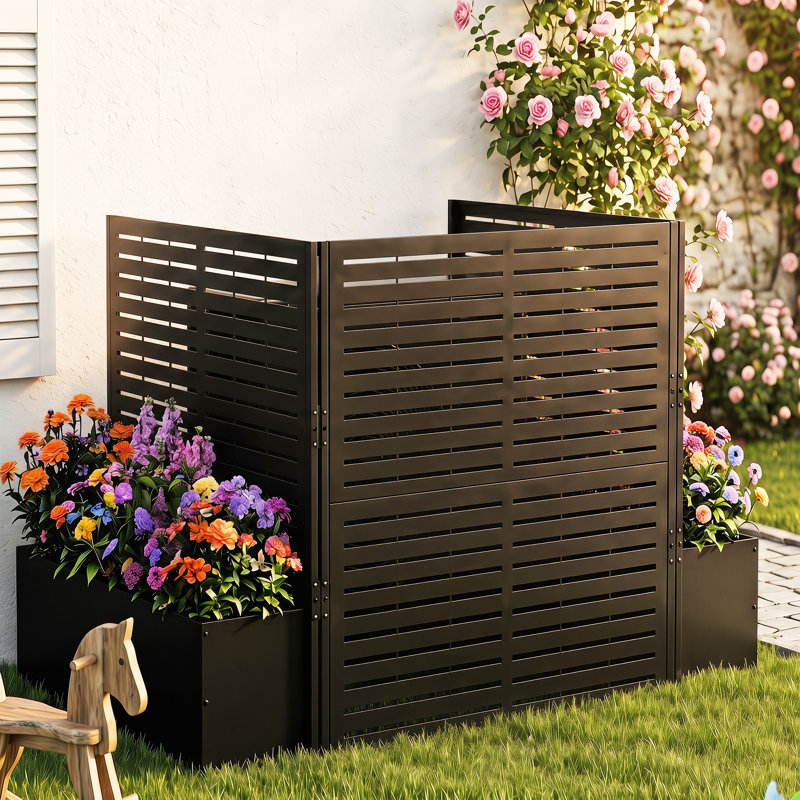
“Those vibrant, beautiful flowers are the star of the show, but they require consistent care to look this good.”
The small volume of soil in the rectangular planters will dry out very quickly in the summer sun, likely requiring daily watering. You will also need to fertilize them every 2-3 weeks to promote continuous blooming. Be prepared for this regular maintenance. If you’re a low-maintenance gardener, consider filling the boxes with drought-tolerant succulents or even high-quality artificial plants for a similar pop of color without the daily chores.
29. Create a Living Wall with Tiered Slat Planter Screens
This design is so effective because it combines function, beauty, and verticality. The L-shape of the screens provides a solid, structural barrier that can hide a compost bin or utility meter. But by integrating planter boxes at the base, along the sides, and hanging from the top, the screen itself becomes a lush, living garden wall. Your eye is so captivated by the cascading colors and textures of the flowers that you barely notice the functional structure behind them. It turns a screen into a vibrant focal point.
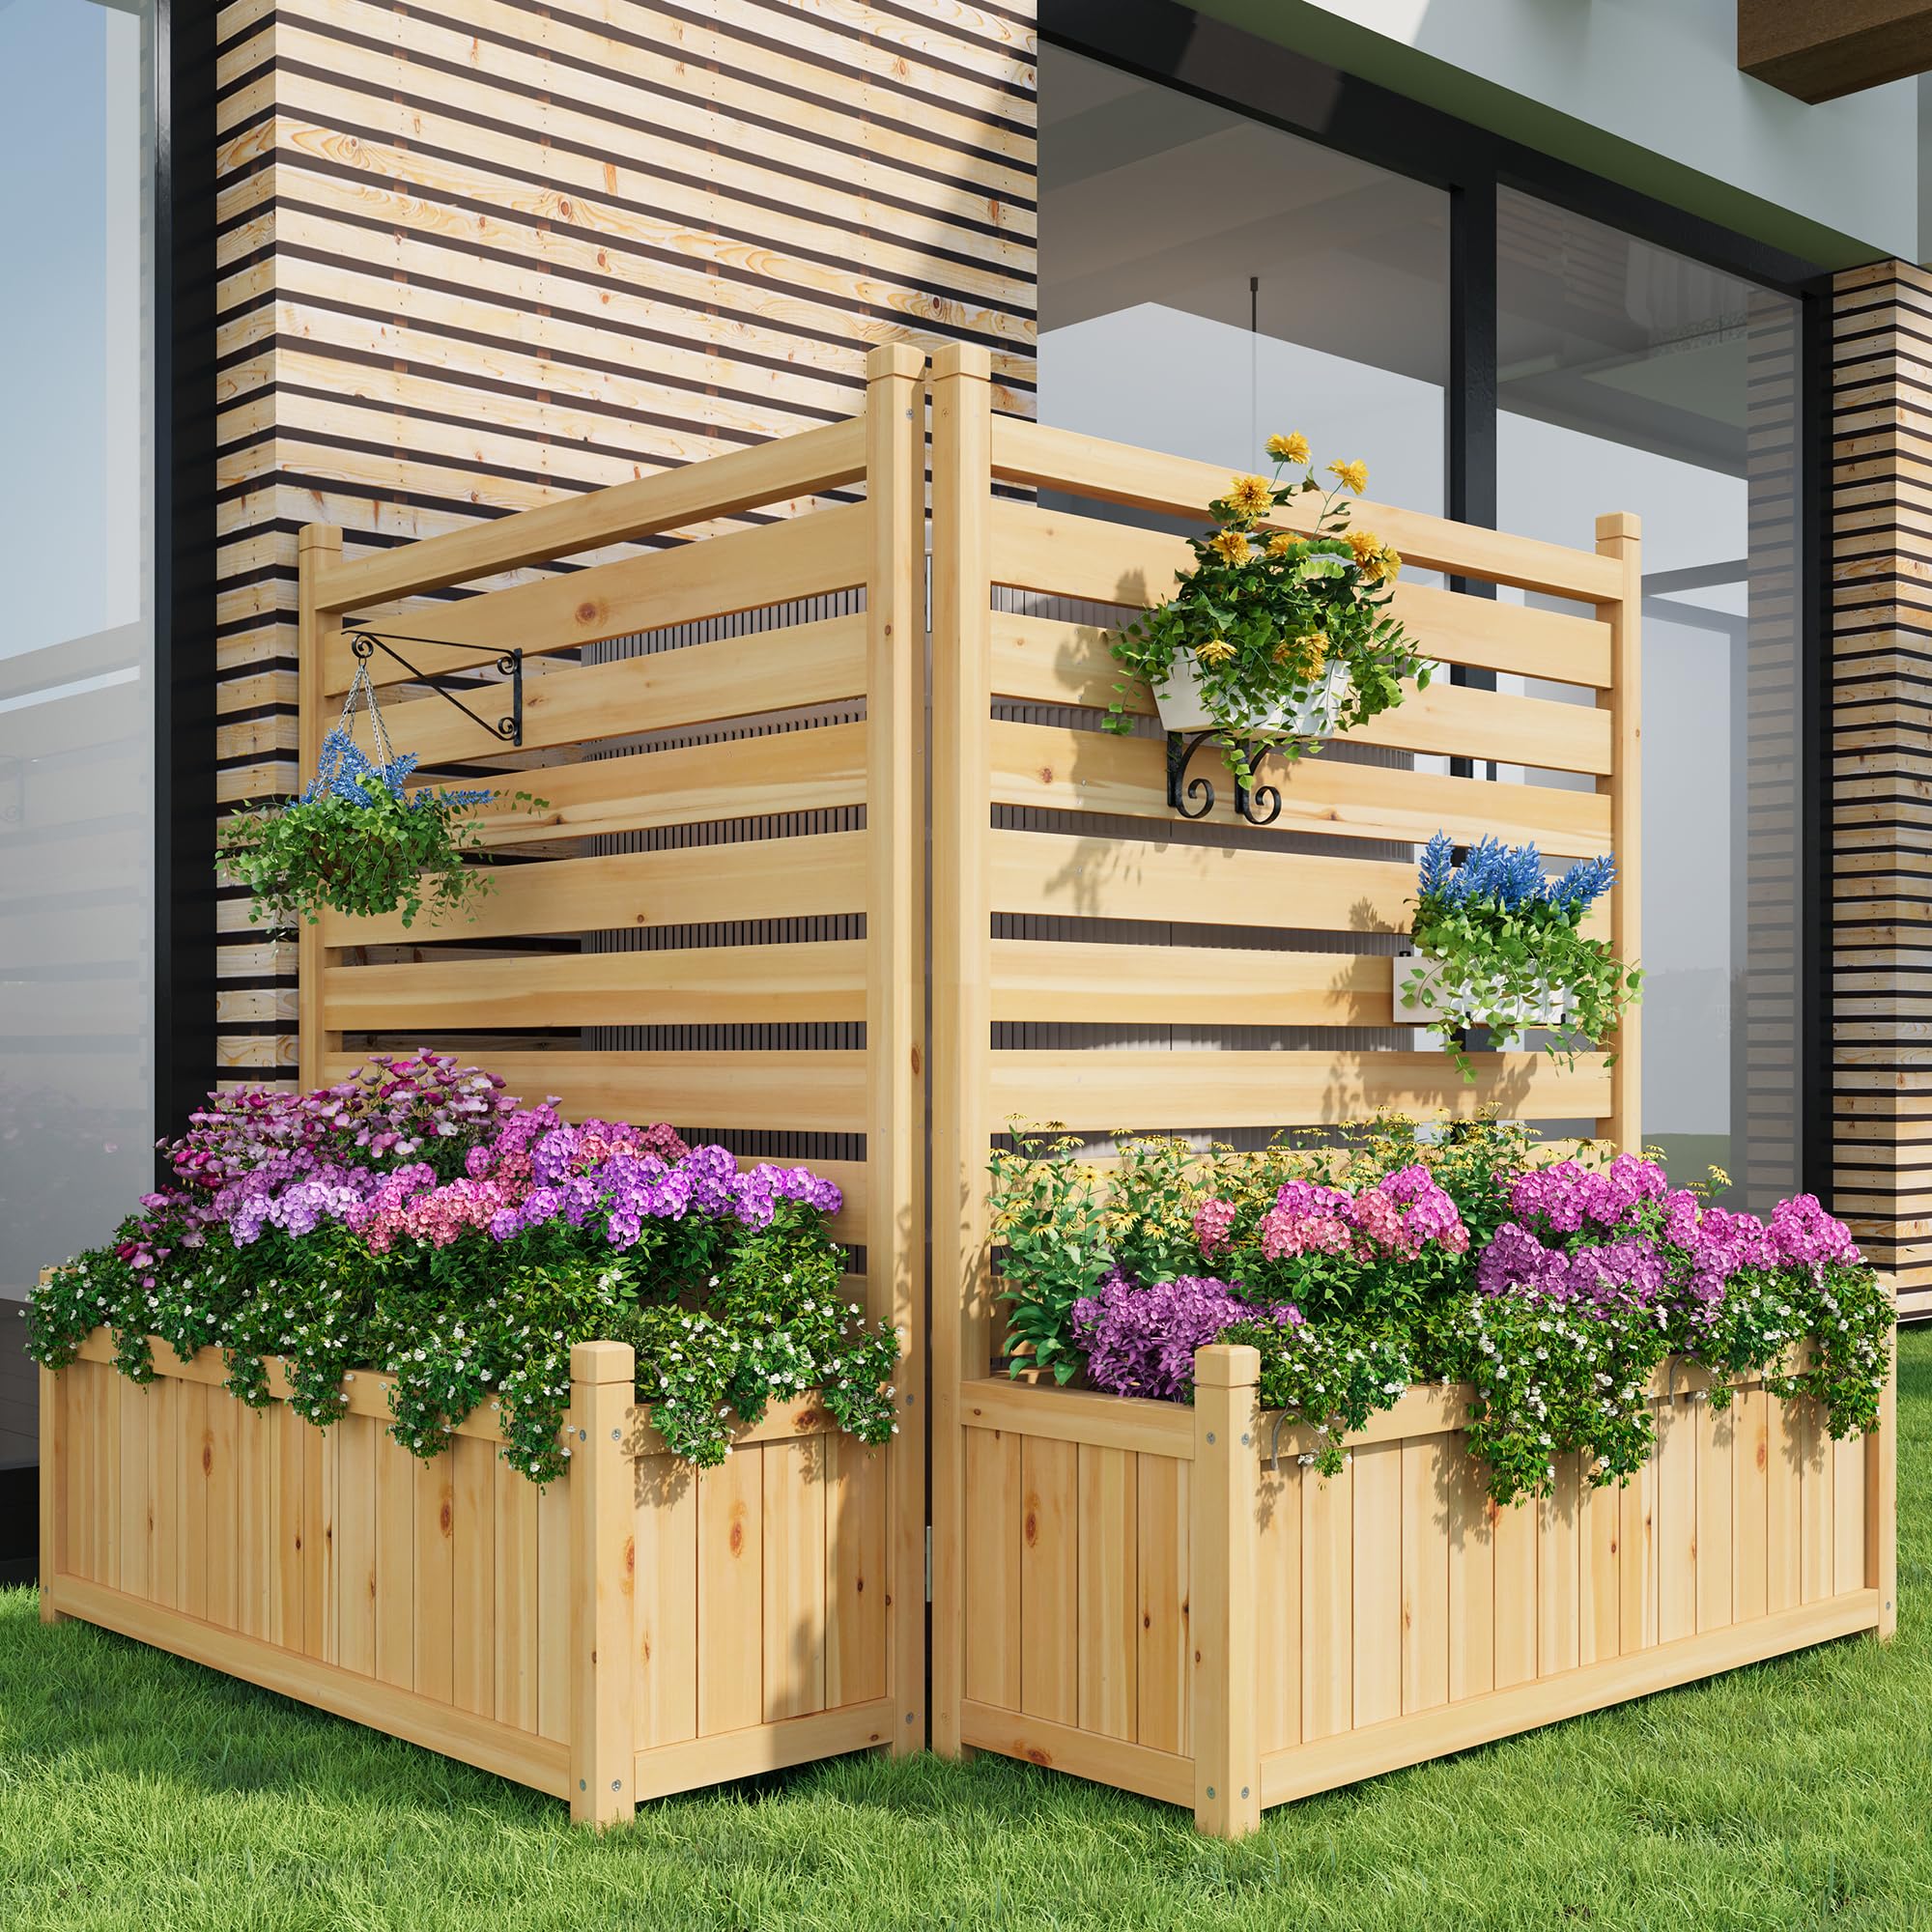
“While custom-built planter screens like this are stunning, you can get a similar effect on a smaller budget.”
Purchase two simple wooden lattice panels and attach them in an L-shape. Instead of building integrated boxes, buy several inexpensive railing planters or hanging baskets from a garden center. You can hang them at various heights on the lattice to create that same tiered, lush feeling. A few cans of spray paint can make all the plastic pots a uniform color, giving you a more cohesive look for a fraction of the cost.
30. Mix Stone and Brick for a Textured Courtyard Patio
This look taps into the ‘European courtyard’ or ‘old-world garden’ trend that is gaining popularity on Pinterest. Homeowners are craving outdoor spaces that feel established, timeless, and a little bit romantic. By mixing materials like irregular stone pavers and classic red brick, you create the impression that the space has evolved over time. The lush, slightly overgrown greenery climbing the stone walls adds to this feeling of permanence and history, creating a perfect escape that feels worlds away from a modern suburban backyard.
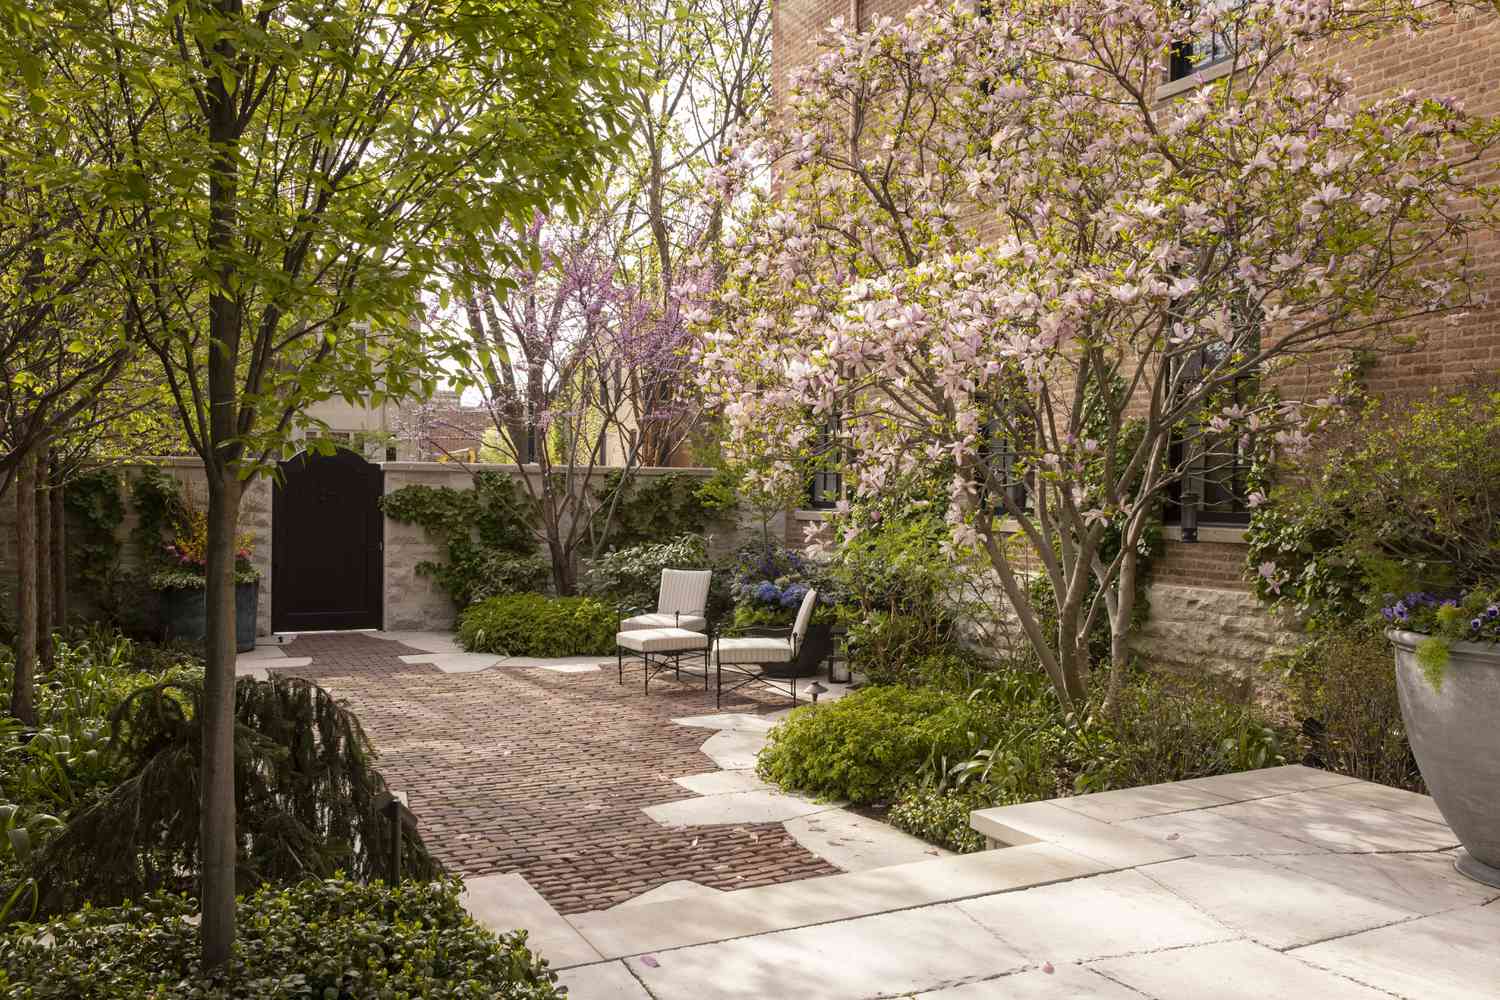
“The visual formula for this secluded garden is about balancing hardscape and softscape: 50% structured hardscape (the stone and brick patio) + 50% lush, dense greenery (the climbing vines and surrounding shrubs).”
The hardscape provides the usable living space and architectural backbone, while the plants provide the privacy, color, and romantic atmosphere. The key is to allow the greenery to spill over and onto the hardscape, softening the edges and creating a seamless connection between the two.
31. Anchor a Deck with a Modern, Dark Slat Shed
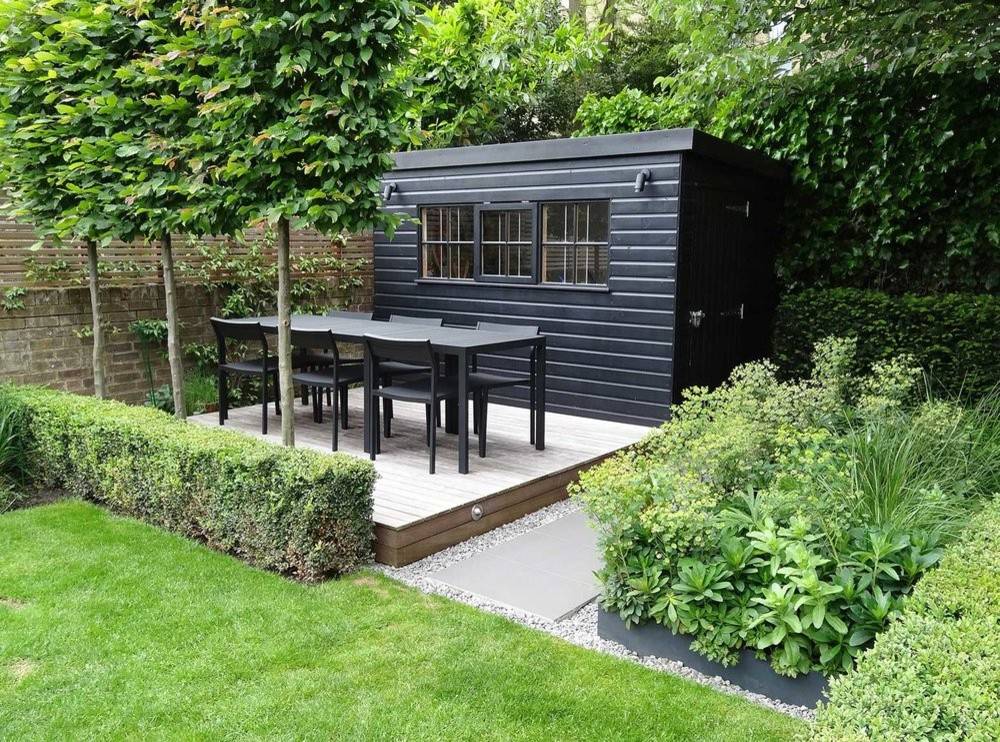
When you have a large, functional structure like a shed, don’t place it in a far-off corner. Instead, treat it like an architectural feature. Here, the dark, slatted shed acts as a full-height accent wall for the outdoor dining area. By painting it a dramatic charcoal black, it becomes a sophisticated, modern backdrop that makes the light wood of the deck and the green of the hedge pop. The three square windows add a touch of intentional design, preventing it from looking like a boring, blank wall. It’s camouflage through confidence.
32. Hide Utilities with a Modern Mixed-Material Enclosure
- Confirm Access Needs: Before building or buying an enclosure, know exactly how your utilities need to be accessed. Do you need to open a door, lift a lid, or slide a panel? This enclosure’s sliding doors are perfect for front access, but wouldn’t work if you needed to lift something out from the top.
- Check Material Durability: If you’re hiding trash cans, look for materials that won’t absorb odors and can be easily hosed down. The metal and composite panels here are ideal. Avoid unfinished, porous wood for this specific use.
- Measure Twice, Build Once: Get the exact dimensions of your bins or equipment, including the clearance needed to open lids or doors. Build the enclosure at least 6 inches wider and taller than your largest measurement to avoid a frustratingly tight fit.
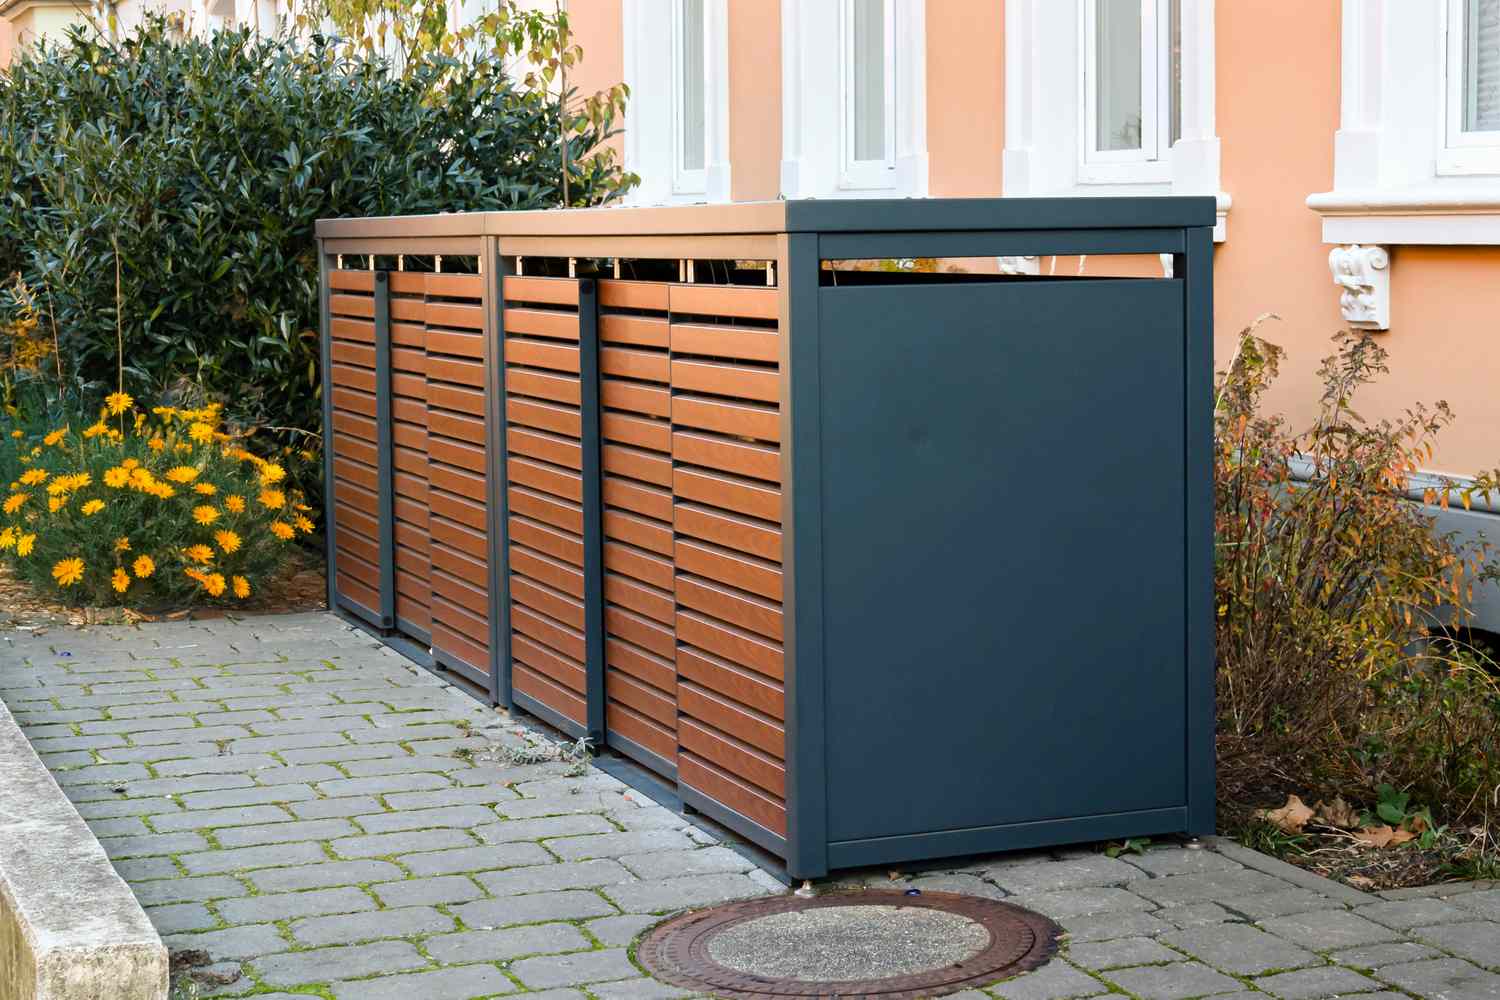
“The single element that makes this enclosure feel so polished and modern is the combination of materials.”
Instead of just using one material (like all wood or all metal), the designer mixed three: a dark gray metal frame, wood-look slatted panels, and a solid dark gray panel. This mixed-material approach adds visual interest and a custom-built look. It breaks up the monotony of the boxy shape and coordinates with different elements in the surrounding landscape, from the pavement to the house trim. It is a thoughtful detail that exudes quality. Compare this to the simpler rustic enclosure in Idea #13.
Your Backyard’s Best-Kept Secrets
Hiding the necessary, but less-than-beautiful, parts of your yard is the final step to creating a truly polished outdoor oasis. The goal is to make these solutions feel so intentional that no one would ever guess they were a cover-up. Now go ahead and get inspired to turn that eyesore into a highlight. Don’t forget to save your favorite ideas to your Pinterest board for when you’re ready to start your project!