You know that feeling when you finally find the whimsical pathway idea that looks exactly right for your garden, but have no idea where to begin? It feels like every scroll on Pinterest is a mix of enchanting and completely unachievable. We get it. After filtering through hundreds of options from garden centers and specialty online suppliers, we narrowed it down to 30 ideas that you can actually bring to life.
This guide dives into 30 curated pathways, covering everything from rustic flagstone trails and intricate brick patterns to magical light-filled installations and deep forest boardwalks. For 2026, it’s all about creating personal outdoor escapes that feel like a hidden world, right in your own backyard. And stay until the end — we break down the most common mistakes that can ruin these looks.
📌 Save this to Pinterest for later — you’ll want to revisit these ideas.
1. Craft a Whimsical Mosaic Masterpiece in Your Backyard
A mosaic path introduces an element of pure artistry and personality into a garden that standard pavers can’t match. What makes it work is the element of surprise and discovery. The texture and color variation draw the eye downward, turning the simple act of walking into an experience. It’s successful because it blends the line between hardscape and art, creating a functional feature that is also a central focal point, telling a story with every piece.
“You don’t need expensive imported tiles for a stunning mosaic.”
Head to your local ReStore or second-hand building supply for leftover tile boxes, which often sell for a few dollars. Another fantastic source is Facebook Marketplace, where people give away partial boxes for free. Even broken ceramic plates and colorful glass bottles (carefully broken and tumbled to smooth the edges) can be used. With a bag of exterior-grade mortar and some creativity, you can achieve this look for under $100.
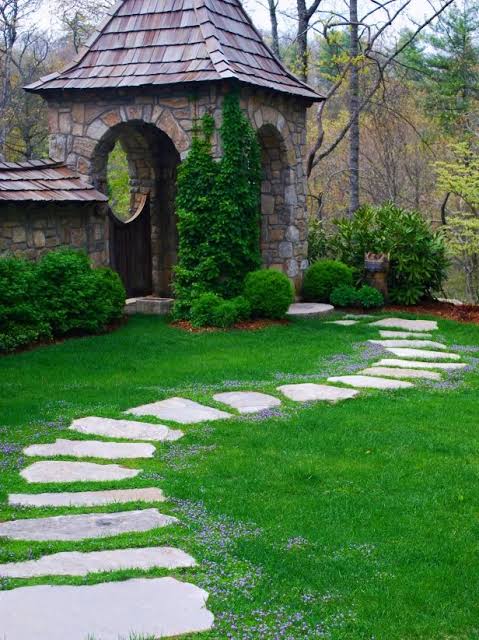
2. Follow a Winding Path of Stone Slabs and Boxwood Hedges
To keep a structured path like this feeling natural, the key is in the spacing. The distance between your stone slabs should be consistent but not perfect. Aim for a 3- to 4-inch gap filled with grass. This is wide enough to let the greenery thrive and soften the look, but not so wide that it feels disconnected. When mowing, you can run the mower right over the top, which makes maintenance surprisingly simple. Also, ensure each stone is set perfectly flush with the soil level to avoid tripping hazards.
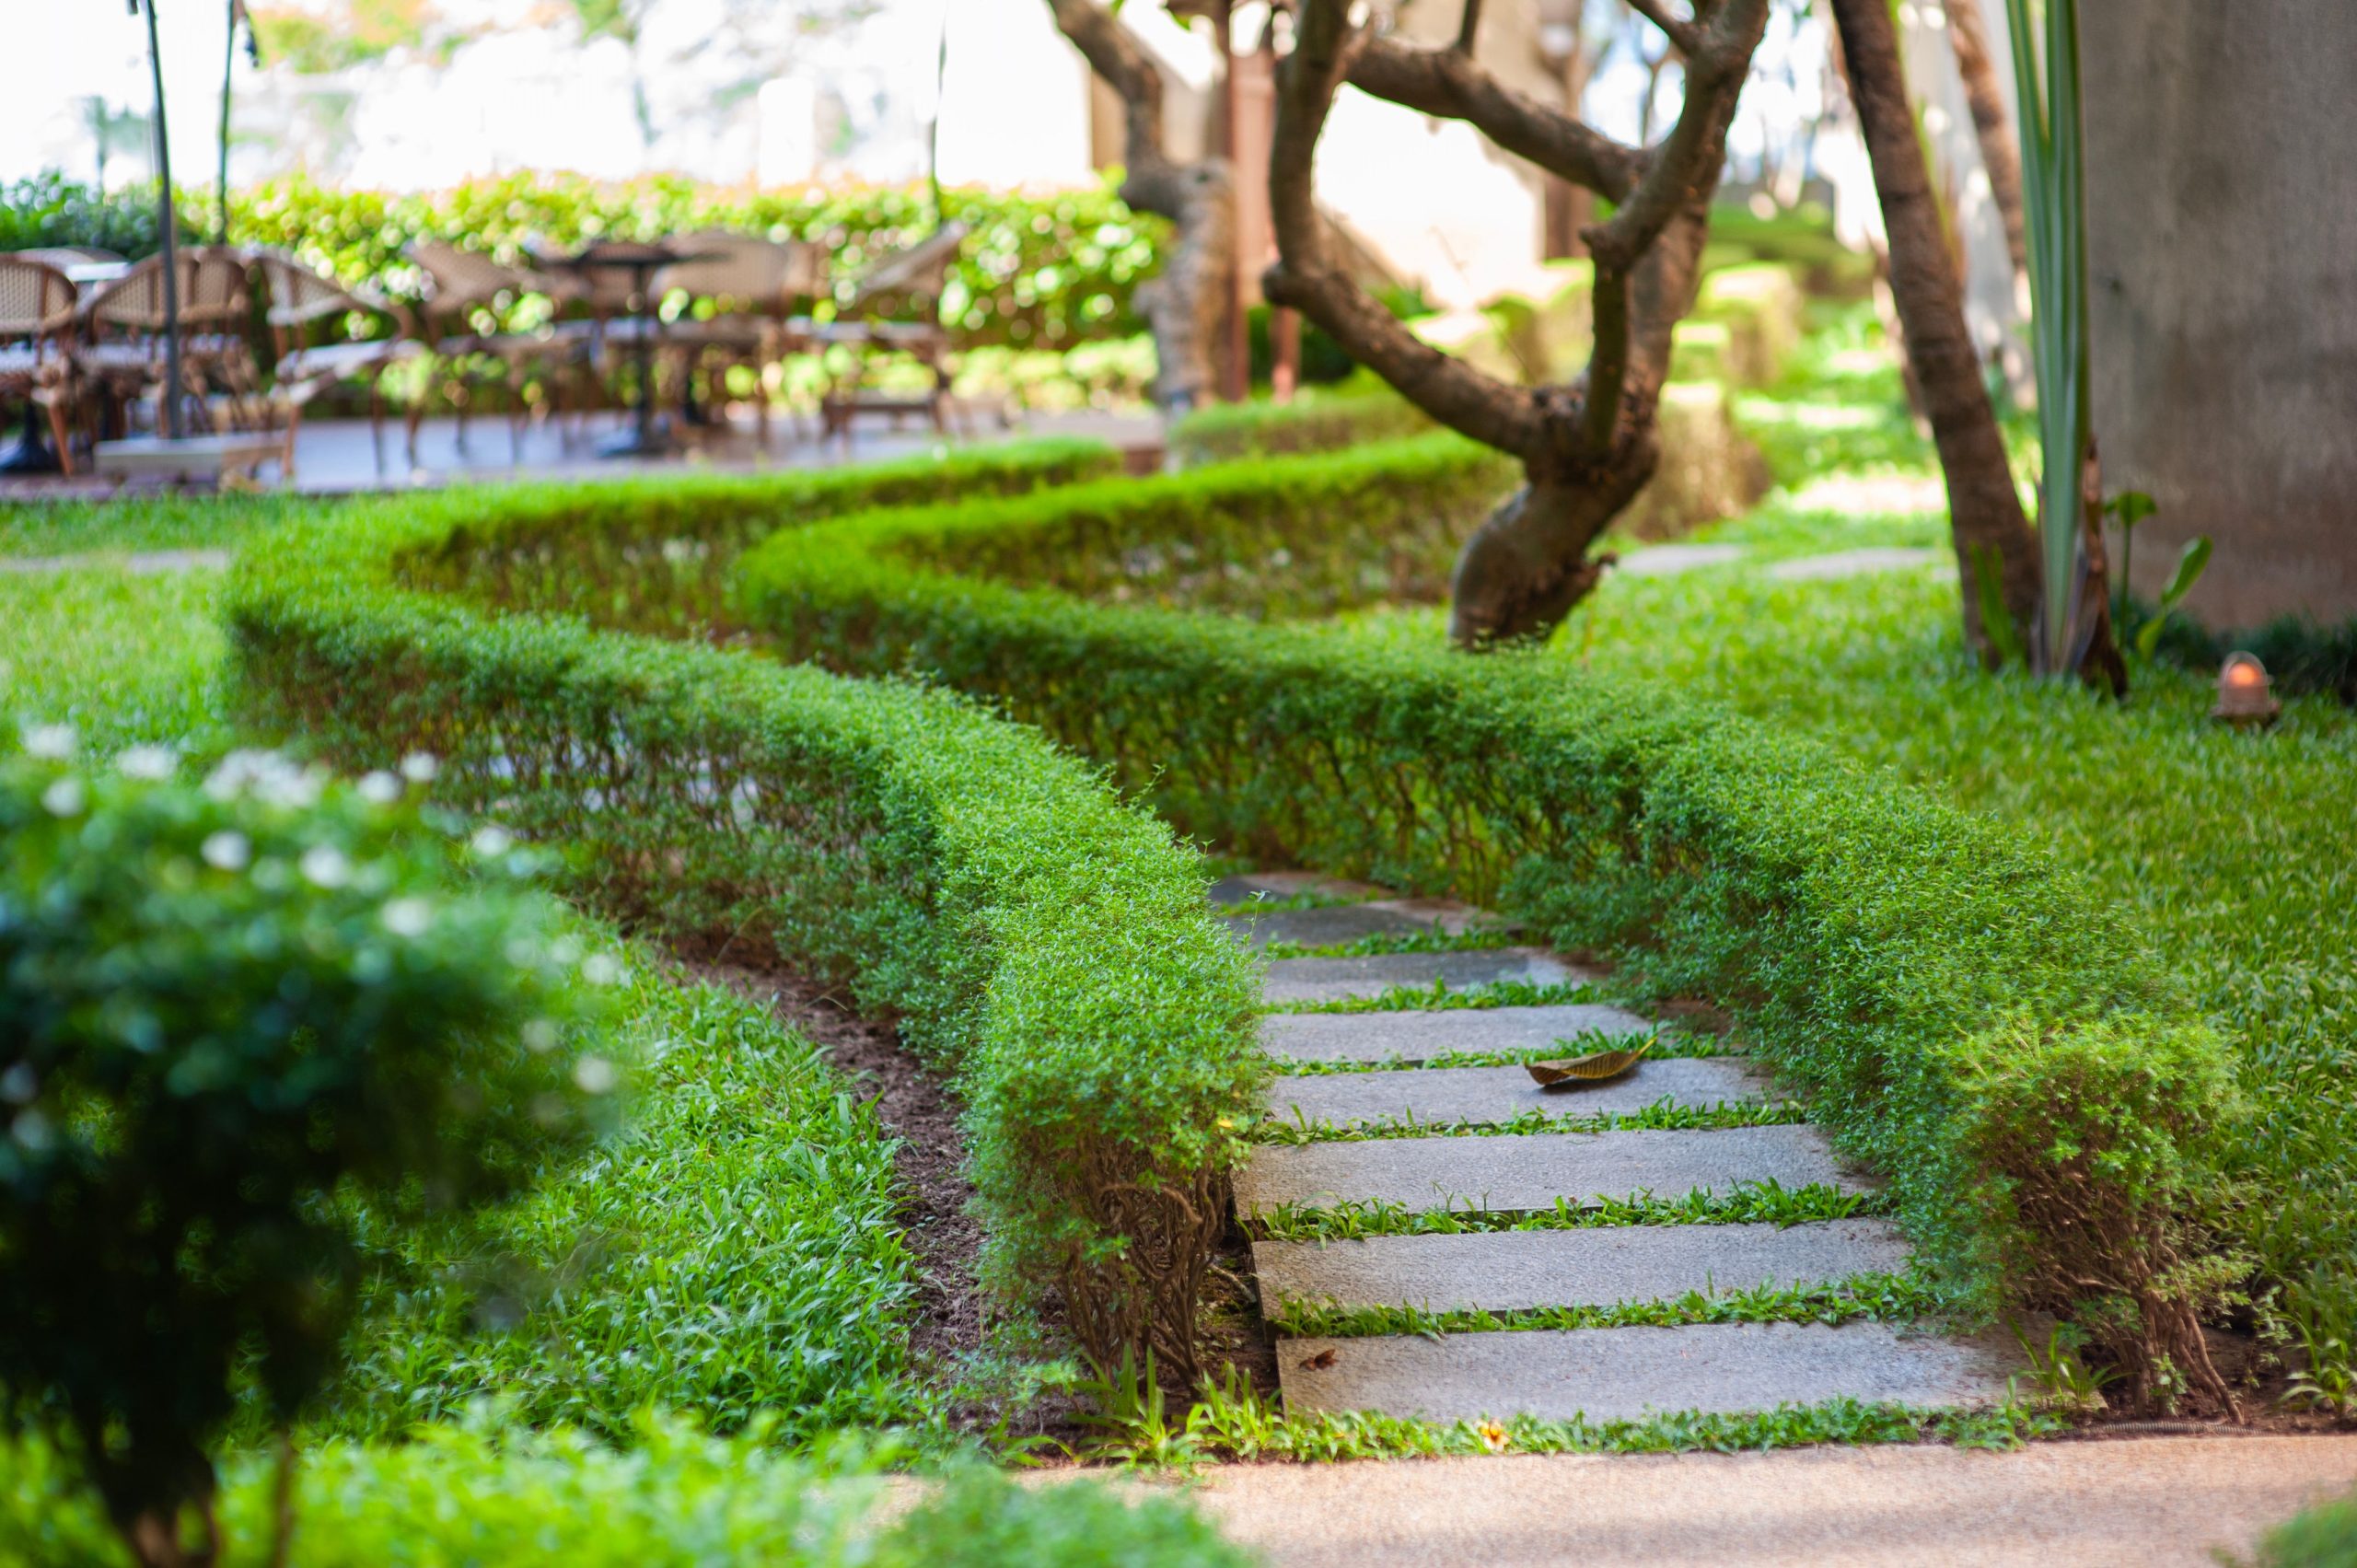
“This design is incredibly versatile, but it shines in medium-to-large backyards where the winding path has room to breathe.”
For this specific look, you need a stretch of at least 20-25 feet to appreciate the gentle curves. It won’t have the same impact in a very small or narrow side yard. The boxwood hedges require at least 2 feet of width on either side of the path, so a total width of 5-6 feet for the entire installation is a good minimum to plan for.
3. Carve a Serene, Shady Lane with Curved Stone Pavers
The single most important element here is the dense, enclosing foliage. Without the overgrown ferns and low shrubs hugging its edges, this would just be a simple stone path. The greenery creates a sense of intimacy and seclusion, making you feel like you’ve stepped into a hidden corner of the world. The way the leaves spill over the stone edges is crucial; it blurs the man-made line of the path and integrates it seamlessly into the wilder garden setting, delivering that serene, shaded vibe.
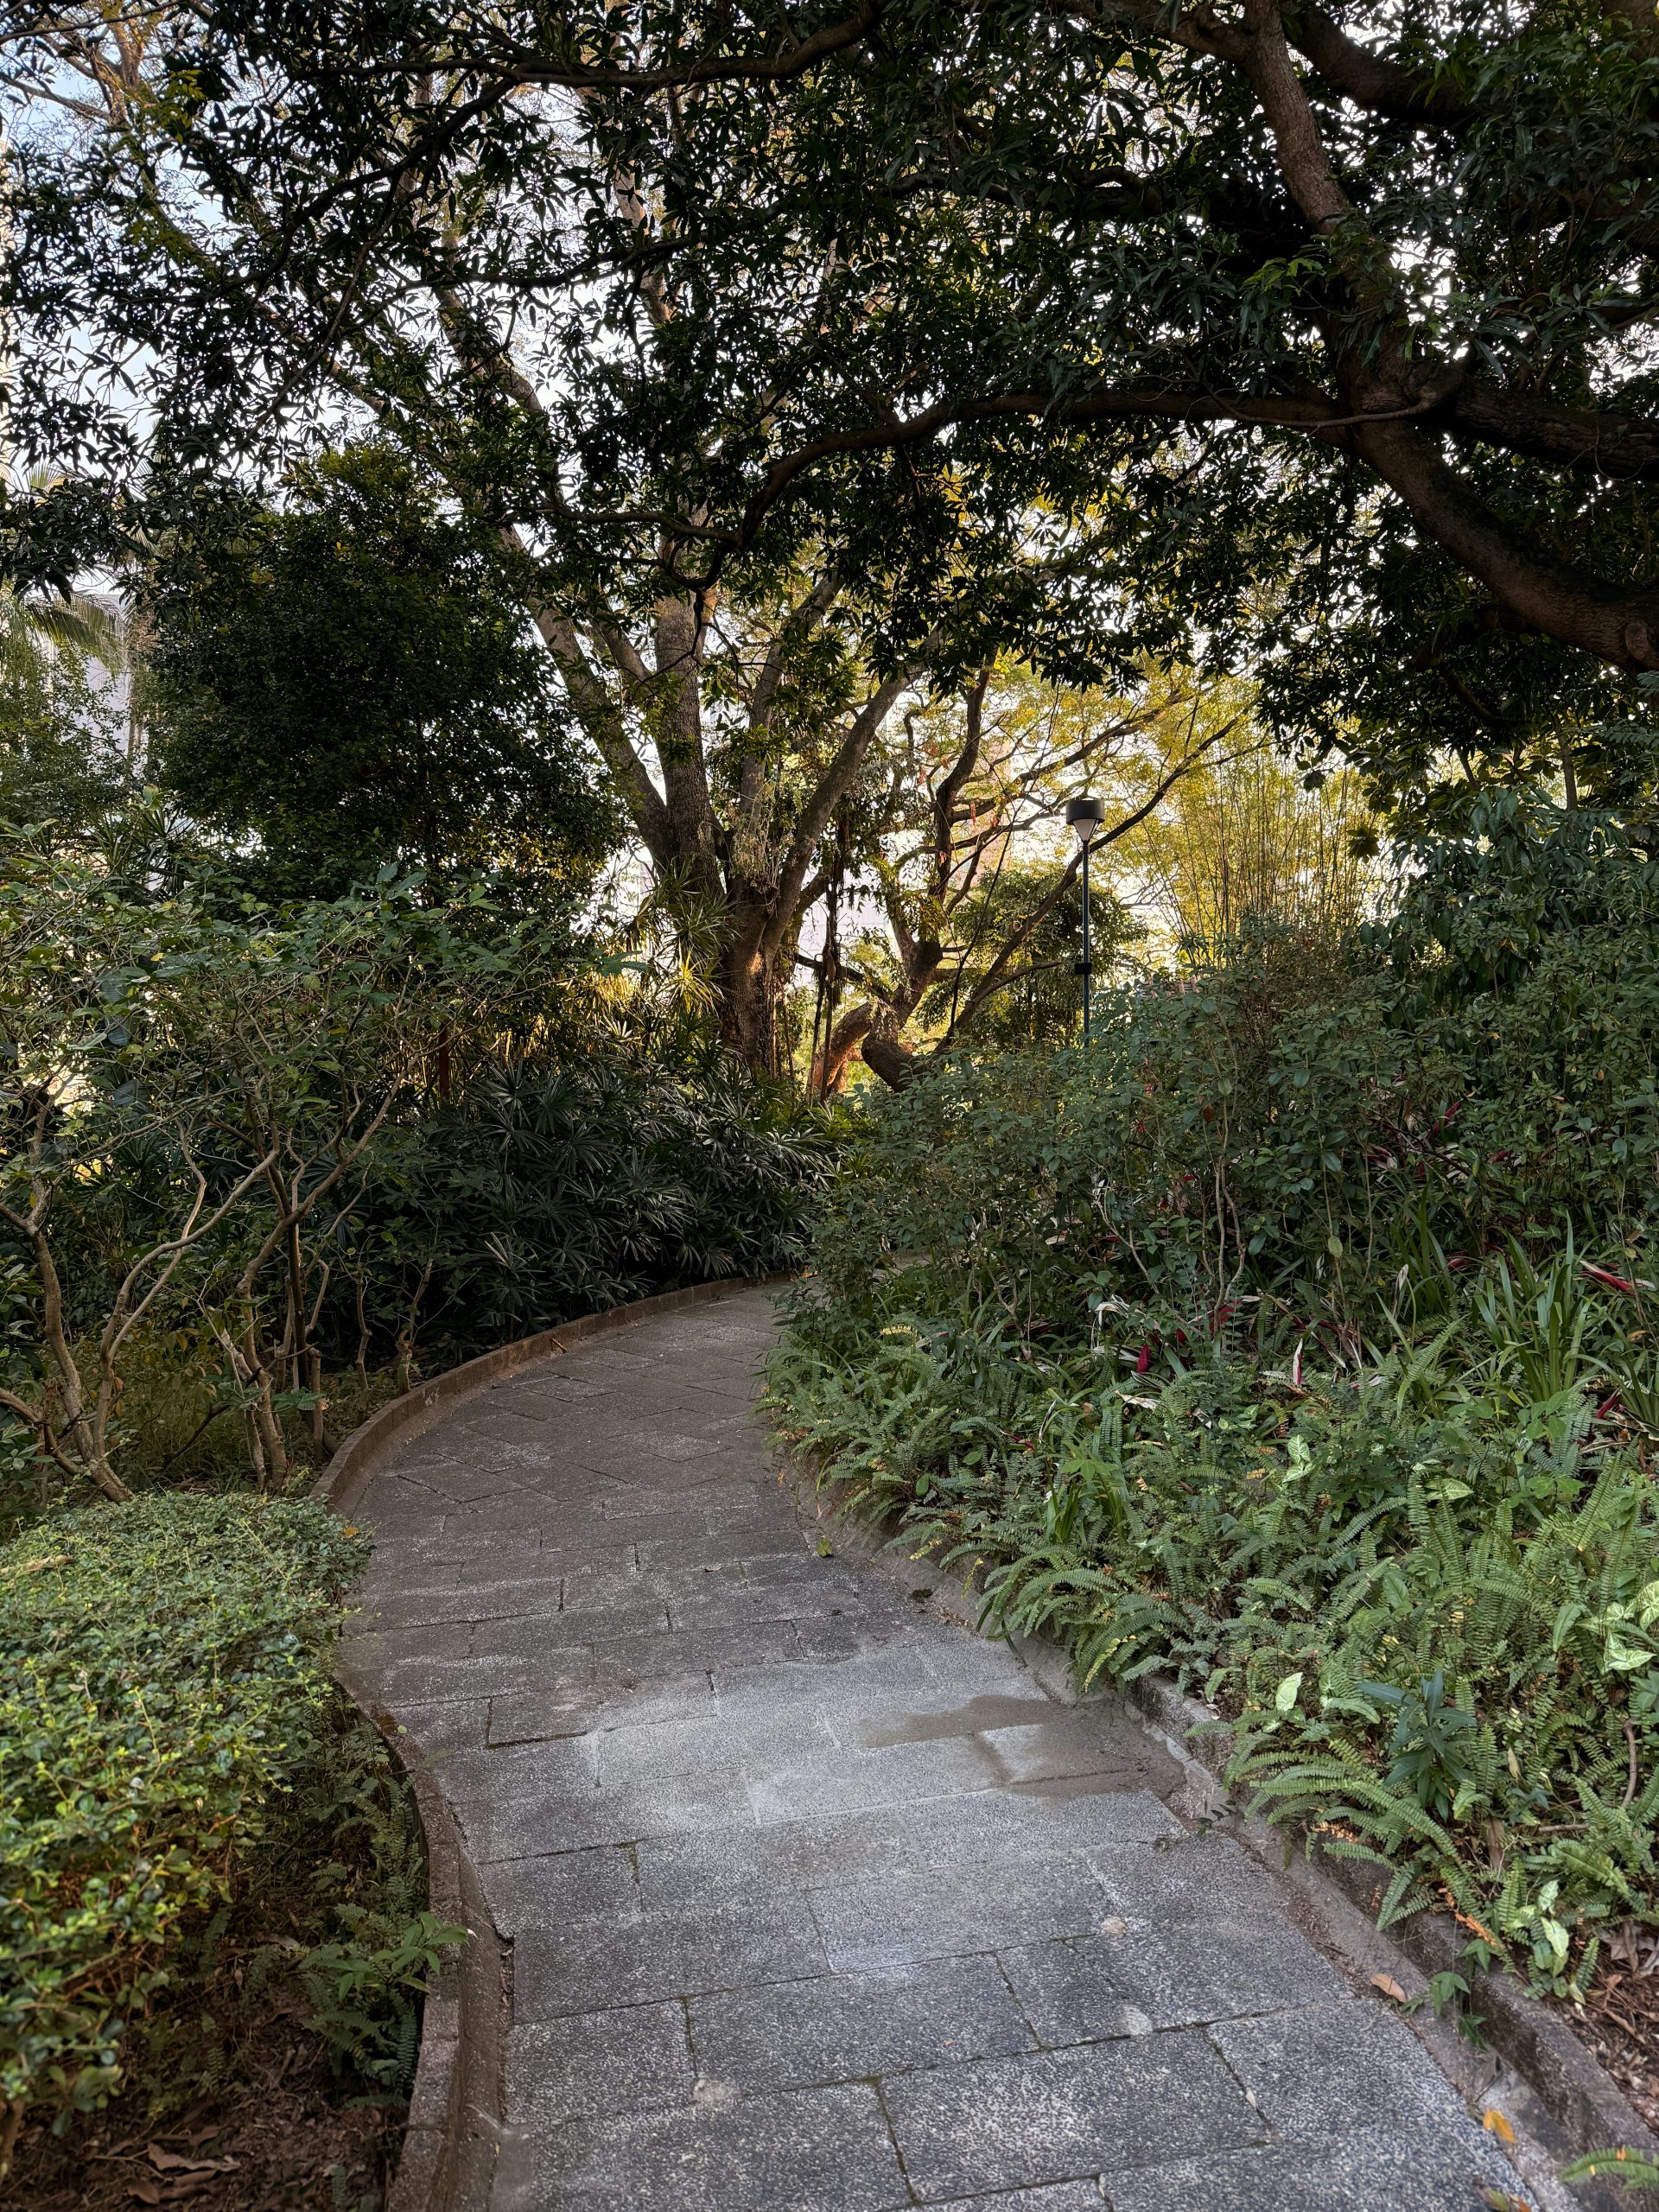
“A path this embedded in nature requires consistent upkeep.”
In shady, damp areas, moss and algae will grow on the stone pavers, making them slippery. Expect to scrub them with a stiff brush and a cleaning solution (or a pressure washer on a low setting) at least twice a year. You’ll also need to regularly trim back the encroaching ferns and shrubs, not just for aesthetics but to keep the pathway clear and safe to walk on. Fallen leaves will also gather here, so weekly sweeping or blowing during the fall is a must.
4. Lay a Storybook Stone Pathway in a Forest Setting
This look taps directly into the “cottagecore” and “fairycore” trends that are dominating Pinterest and landscape design. In 2026, homeowners are craving a deeper connection to nature and a sense of magic in their own spaces. An irregular stone path winding through a wooded area feels timeless and established, as if it has been there for centuries. It’s less about perfect construction and more about creating a mood—a gentle, whimsical journey rather than just a way to get from A to B.
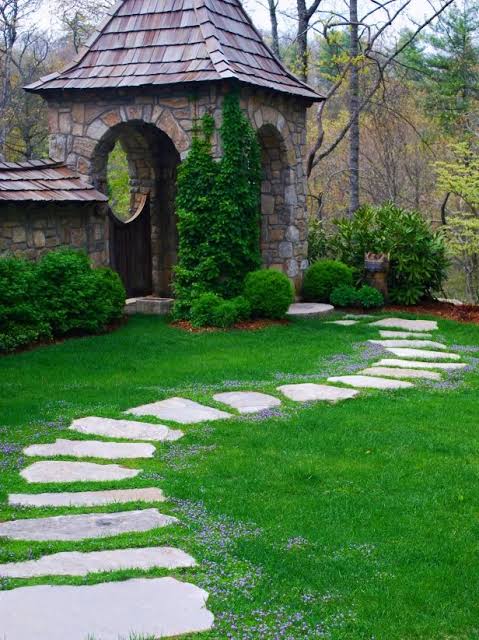
“The visual formula here is beautifully simple: 70% natural, uneven stone + 30% untamed greenery.”
The stones provide the structure and function, but the magic comes from allowing moss, grass, and tiny wildflowers to grow in the gaps and spill over the edges. To adapt this, you could swap the stone for reclaimed brick or even wood slices, as long as you maintain that 70/30 ratio. The key is to resist perfect, clean edges and let nature do at least a third of the design work for you.
5. Combine Flagstone and Gravel for a Rustic, Textural Walkway
A pathway made of flagstone and loose gravel looks fantastic, but be prepared for the realities. Gravel travels. It will get kicked into your lawn, onto the flagstones, and tracked into the house on the bottom of shoes. If you have kids or pets who love to run, you’ll be sweeping it back into place weekly. Weeds are also persistent and will find their way through the gravel. Using a high-quality landscape fabric underneath is non-negotiable, but you’ll still need to do some occasional weeding.
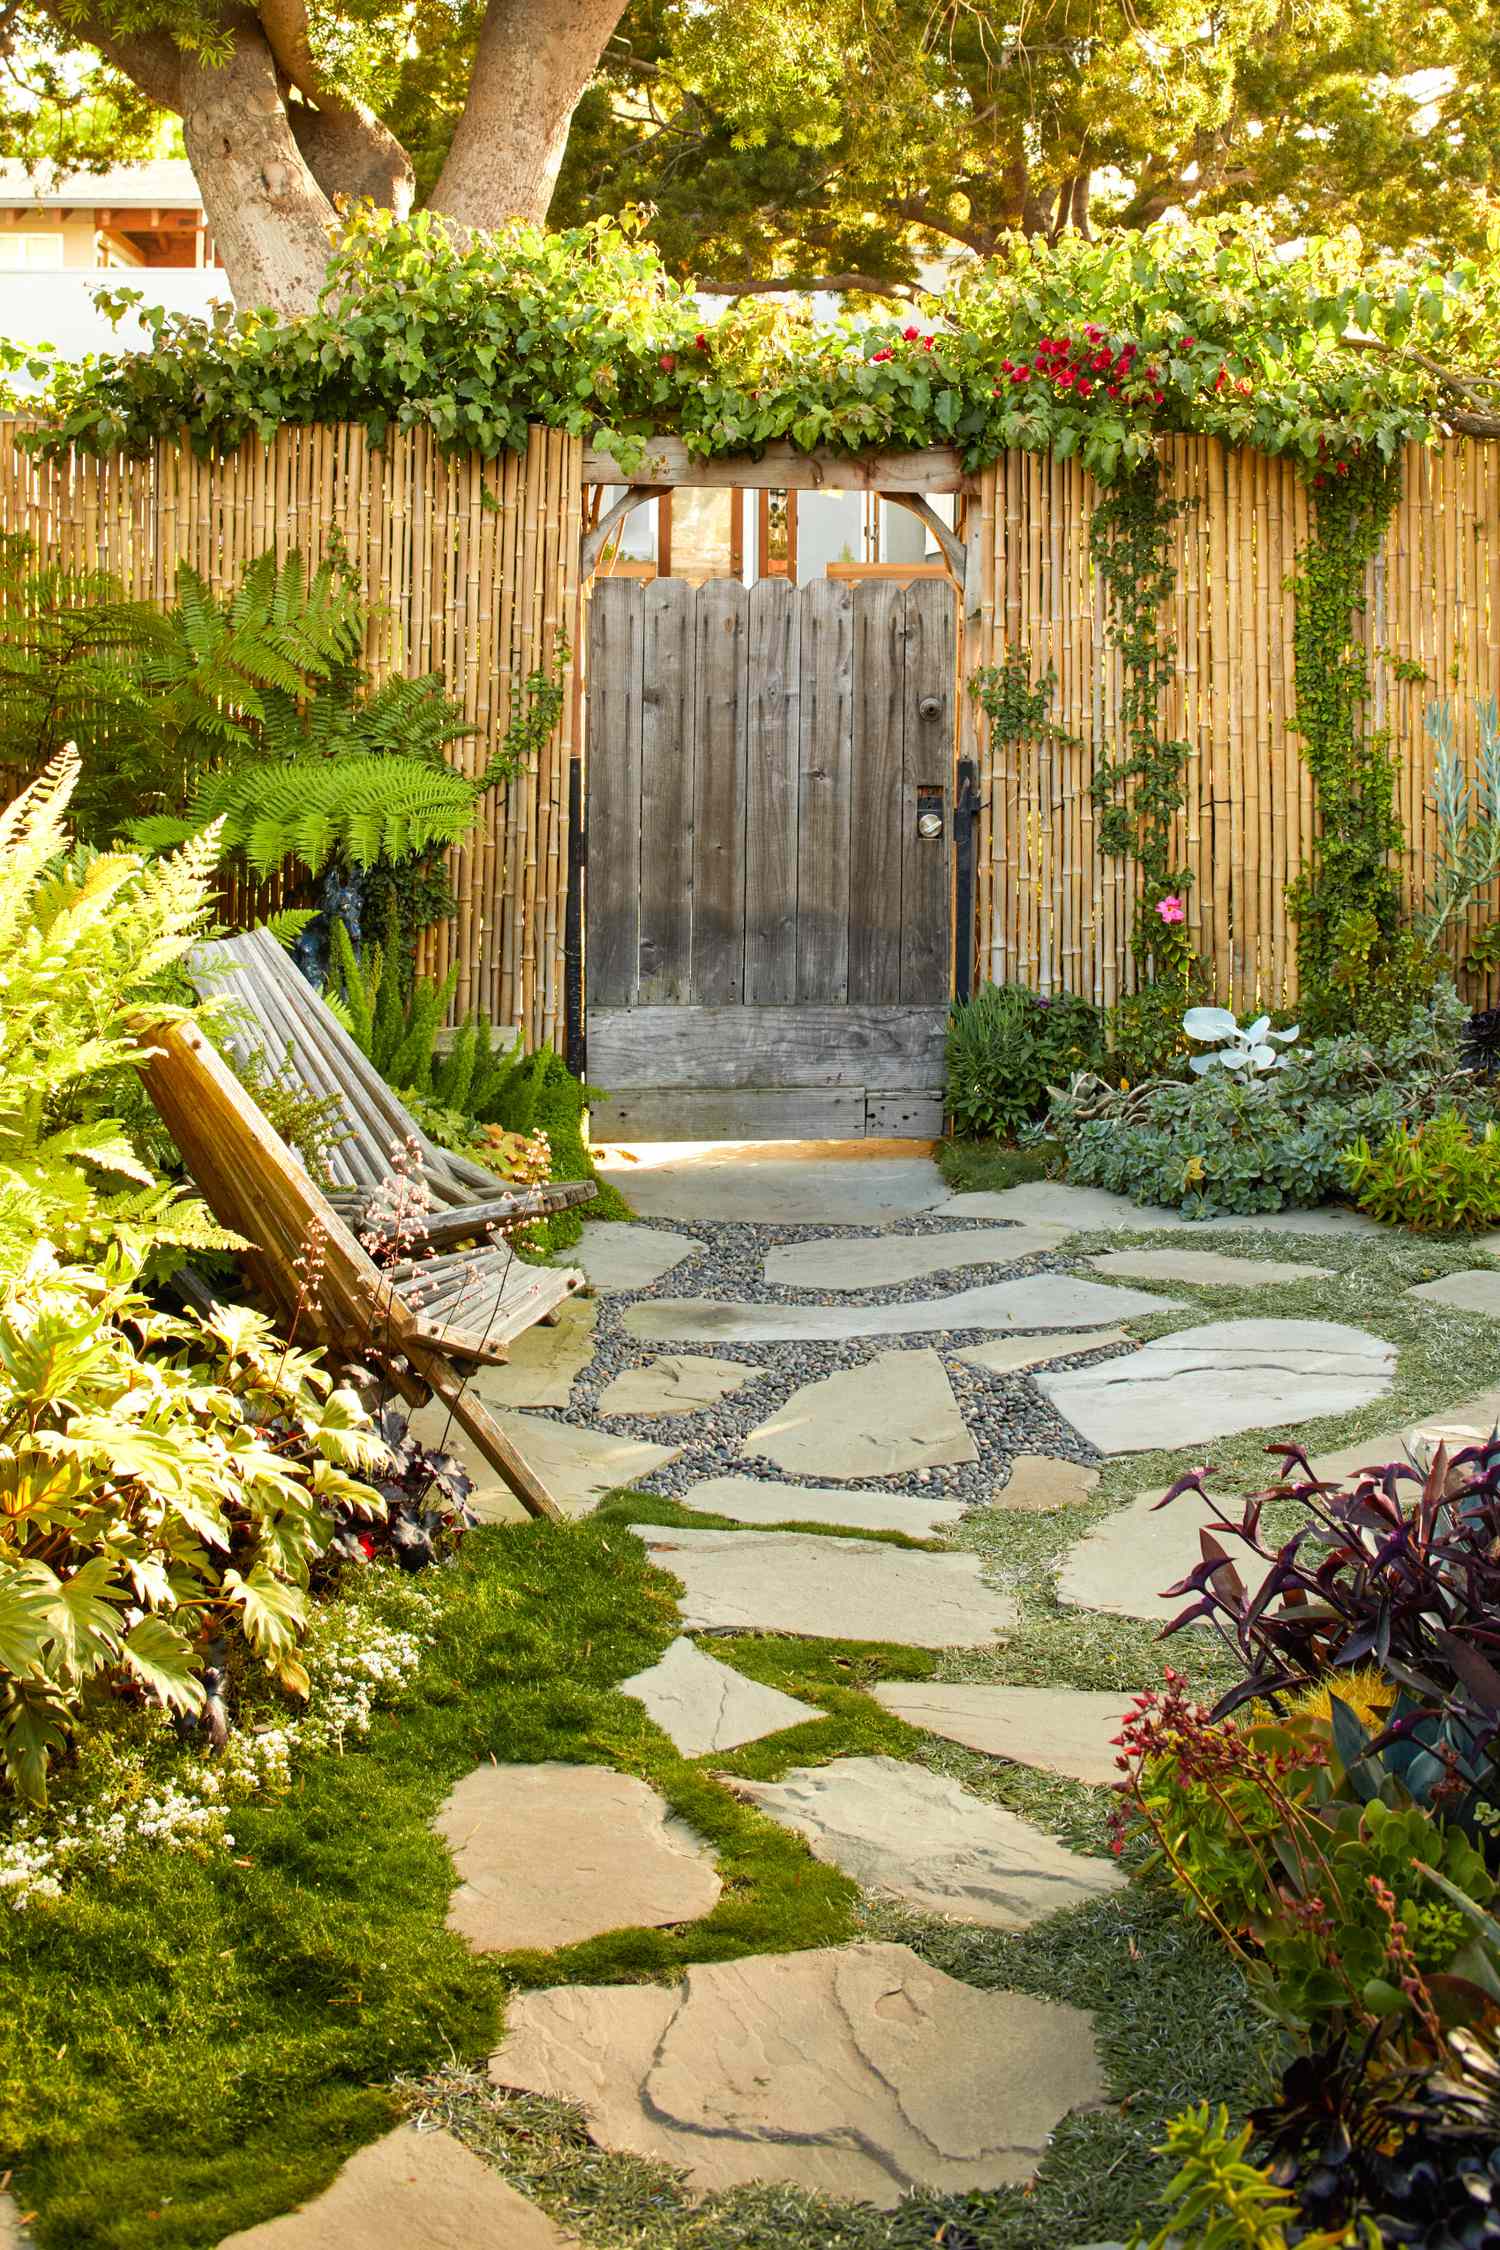
“Before you commit to this charmingly rustic path, run through this checklist:
H”
Before you commit to this charmingly rustic path, run through this checklist:
- Have you confirmed the path area gets enough sun? This look is best for sunny spots, as deep shade encourages moss on the stones and algae in the gravel.
- Do you have solid edging planned? A metal, brick, or stone border is critical to keep the gravel from migrating into garden beds.
- Is the pathway on a notable slope? Heavy rain can wash loose gravel downhill, so this style is best suited for relatively flat areas.
- Compare this to the more solid stone style in Idea #29 if you’re concerned about material scatter.
6. Let a Winding Flagstone Path Guide Through a Lush Garden
This pathway design works because of its masterful use of rhythm and flow. The irregular shapes of the flagstones create a natural, unforced pattern, while the gentle curves lead the eye forward, inviting you to see what’s around the bend. The contrast between the cool, hard stone and the soft, vibrant green lawn and foliage makes both elements pop. It’s a classic pairing that feels both intentionally designed and effortlessly part of the landscape, striking a perfect balance between structure and nature.
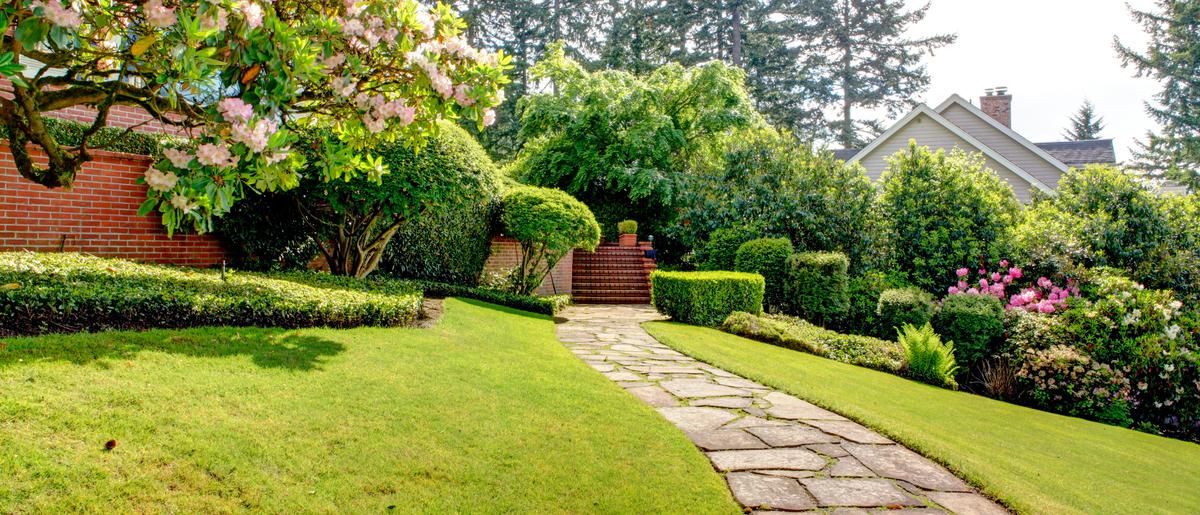
“Here’s a look at the estimated costs to bring this classic garden scene to life ”
Here’s a look at the estimated costs to bring this classic garden scene to life for a 30-foot path:
- Flagstone Pavers: $600 – $1,500 (depending on stone type)
- Edging & Base Material (sand/gravel): $200 – $400
- Flowering Shrubs & Perennials: $400 – $900
- Professional Labor: $1,500 – $3,000
- TOTAL: $2,700 – $5,800
Budget alternative: Use broken concrete pieces (urbanite) for the path and plant perennial seeds instead of buying mature shrubs to get this look for 50-60% less.
7. Place Stepping Stones in a Gentle Curve Through Tall Grass
The secret to nailing the stepping stone look is the “stride test.” Before you permanently set a single stone, lay them all out on the surface of the grass. Then, walk the path naturally. Are you stretching or taking mincing little steps? Adjust the spacing until it matches your average, comfortable stride. For most adults, this means the center of one stone should be about 20-24 inches from the center of the next. This ensures the path is not only beautiful but also genuinely comfortable to use.
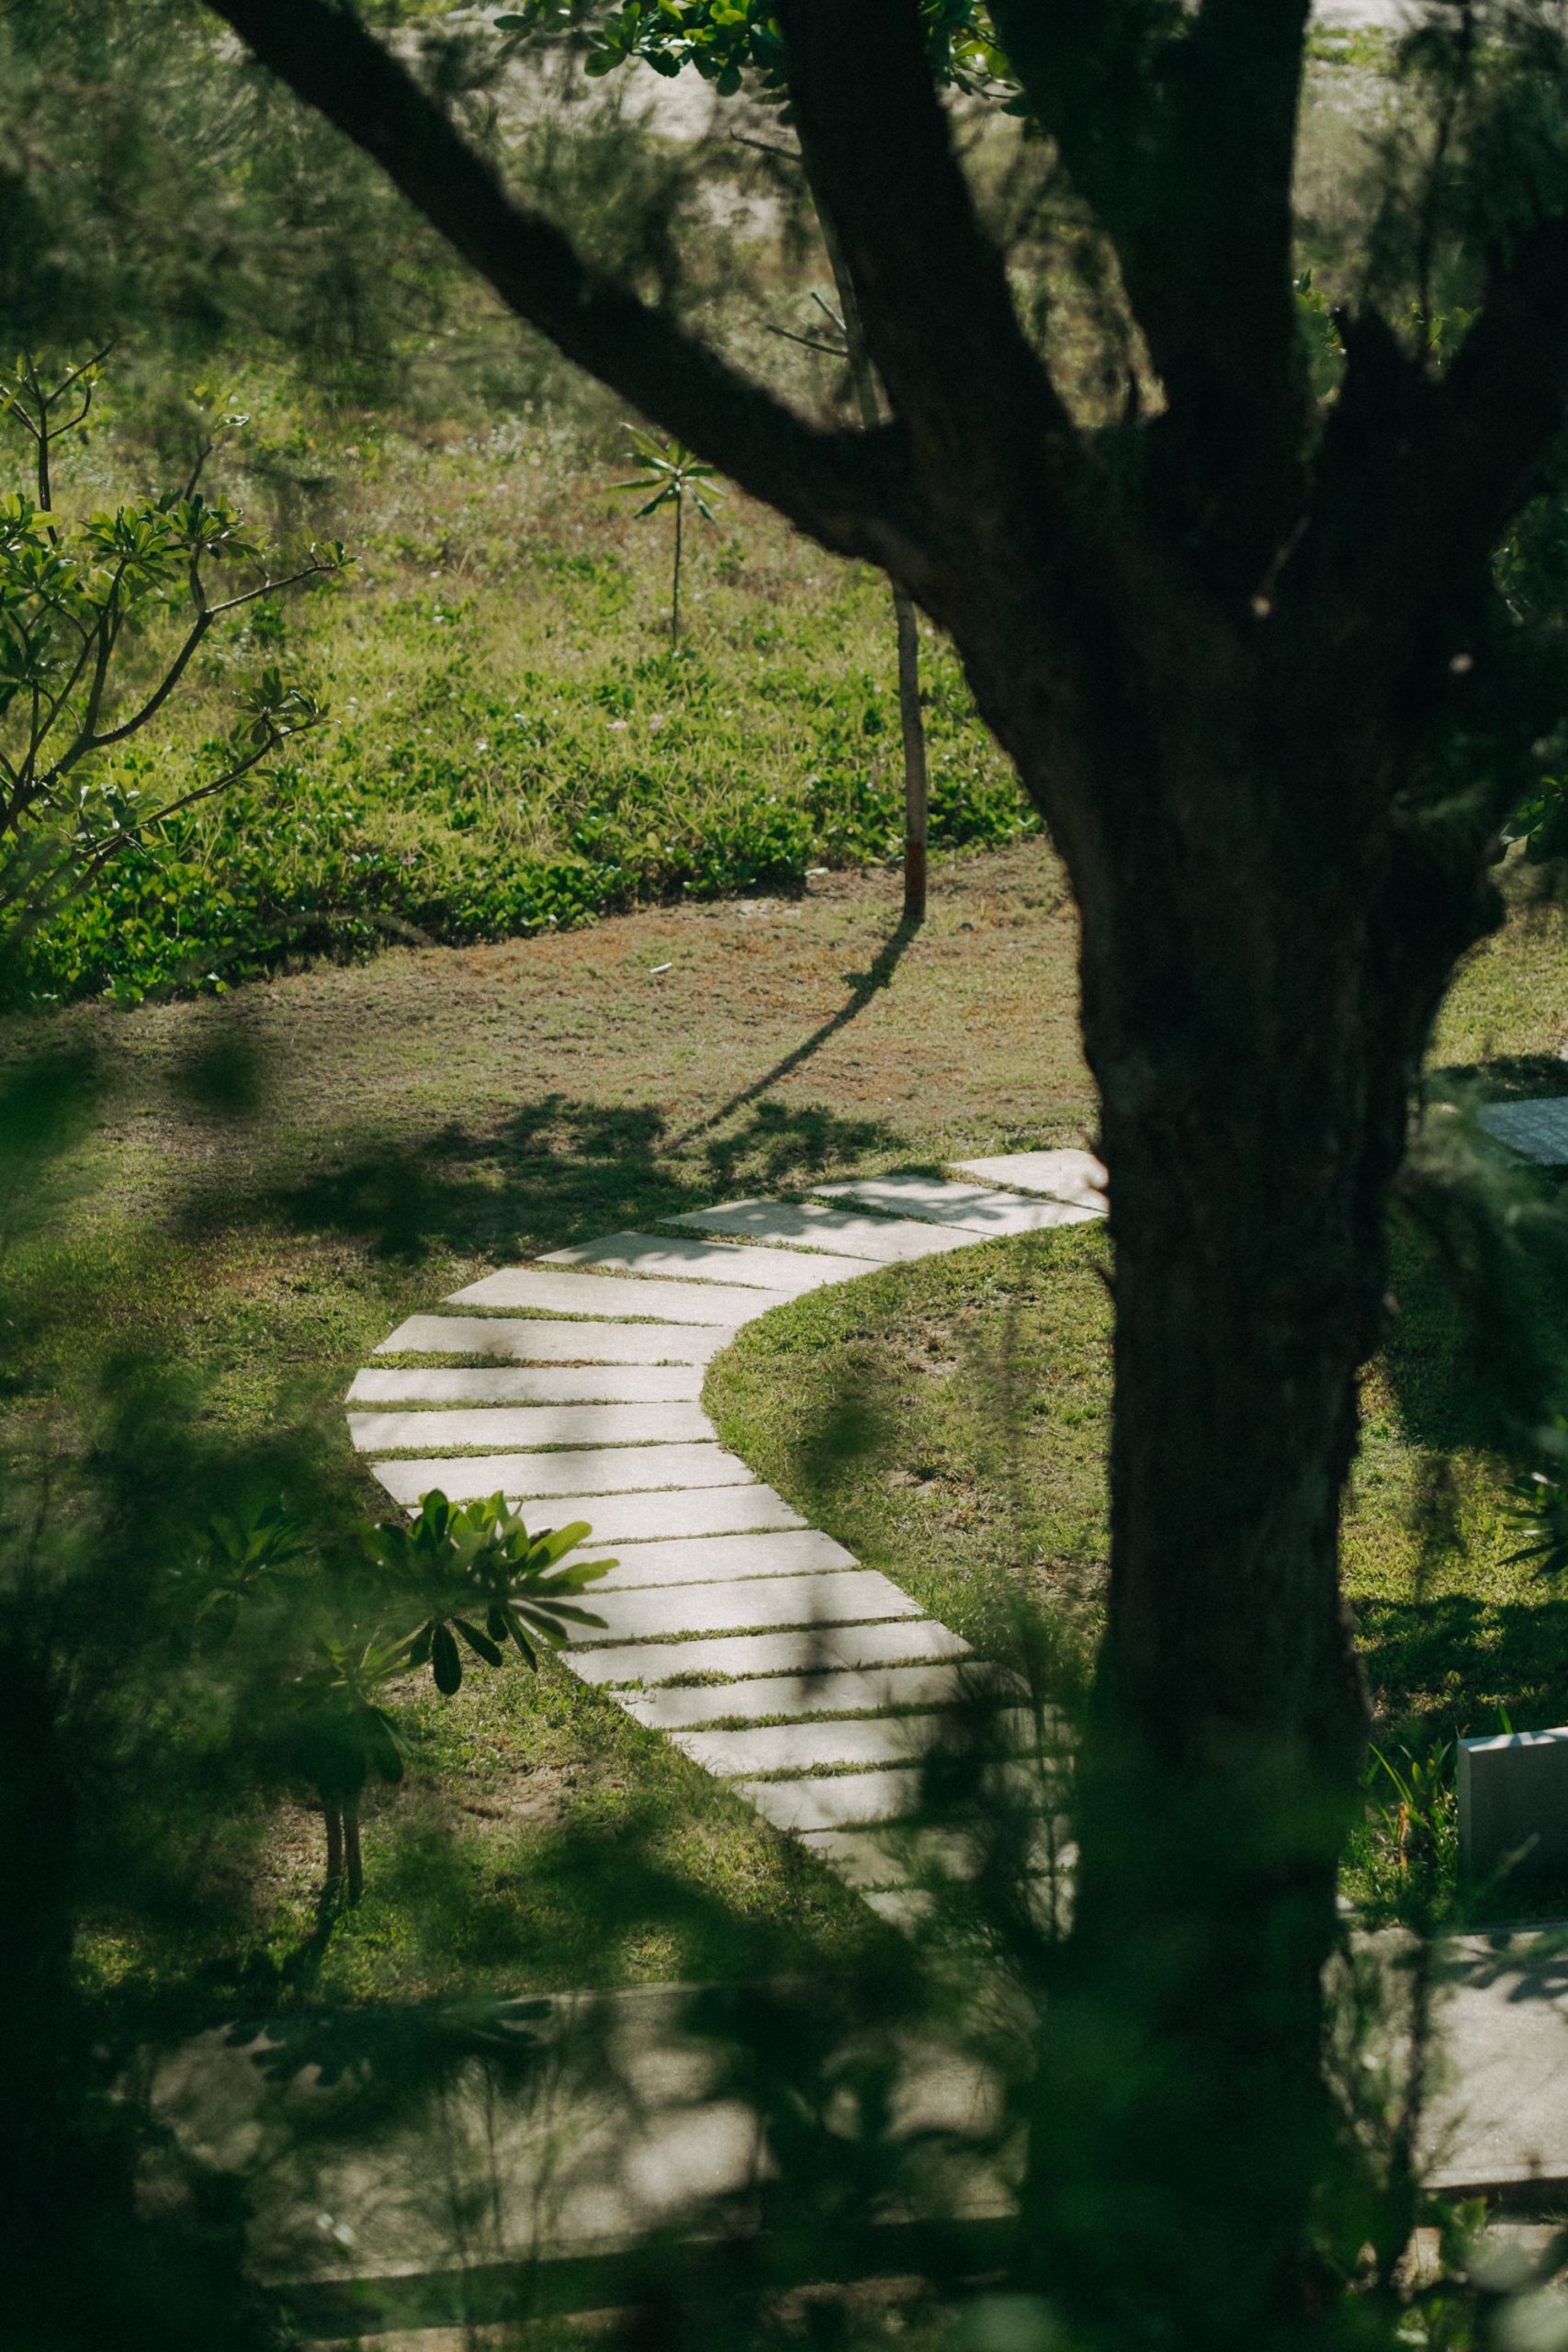
“This design is perfect for smaller spaces or for creating a secondary, more informal path in a larger yard.”
Because the footprint is so light—just the stones themselves—it doesn’t visually chop up a lawn the way a solid path would. It preserves the feeling of an open green space. It’s ideal for connecting a patio to a garden bed or leading to a quiet bench. Avoid using this for a primary, high-traffic entrance, as it’s less stable than a continuous surface, especially in wet or icy weather.
8. Weave a Herringbone Brick Path Through a Green Landscape
The herringbone pattern is, without a doubt, the element that elevates this path from simple to stunning. Laying the bricks at a 45-degree angle creates a sense of movement and energy that a standard running bond pattern lacks. This dynamic “zig-zag” effect draws the eye forward along the curve of the walkway, adding a layer of classic, sophisticated detail. If you used the same bricks in a simpler layout, it would still be functional, but it would lose all of its unique character and visual interest.
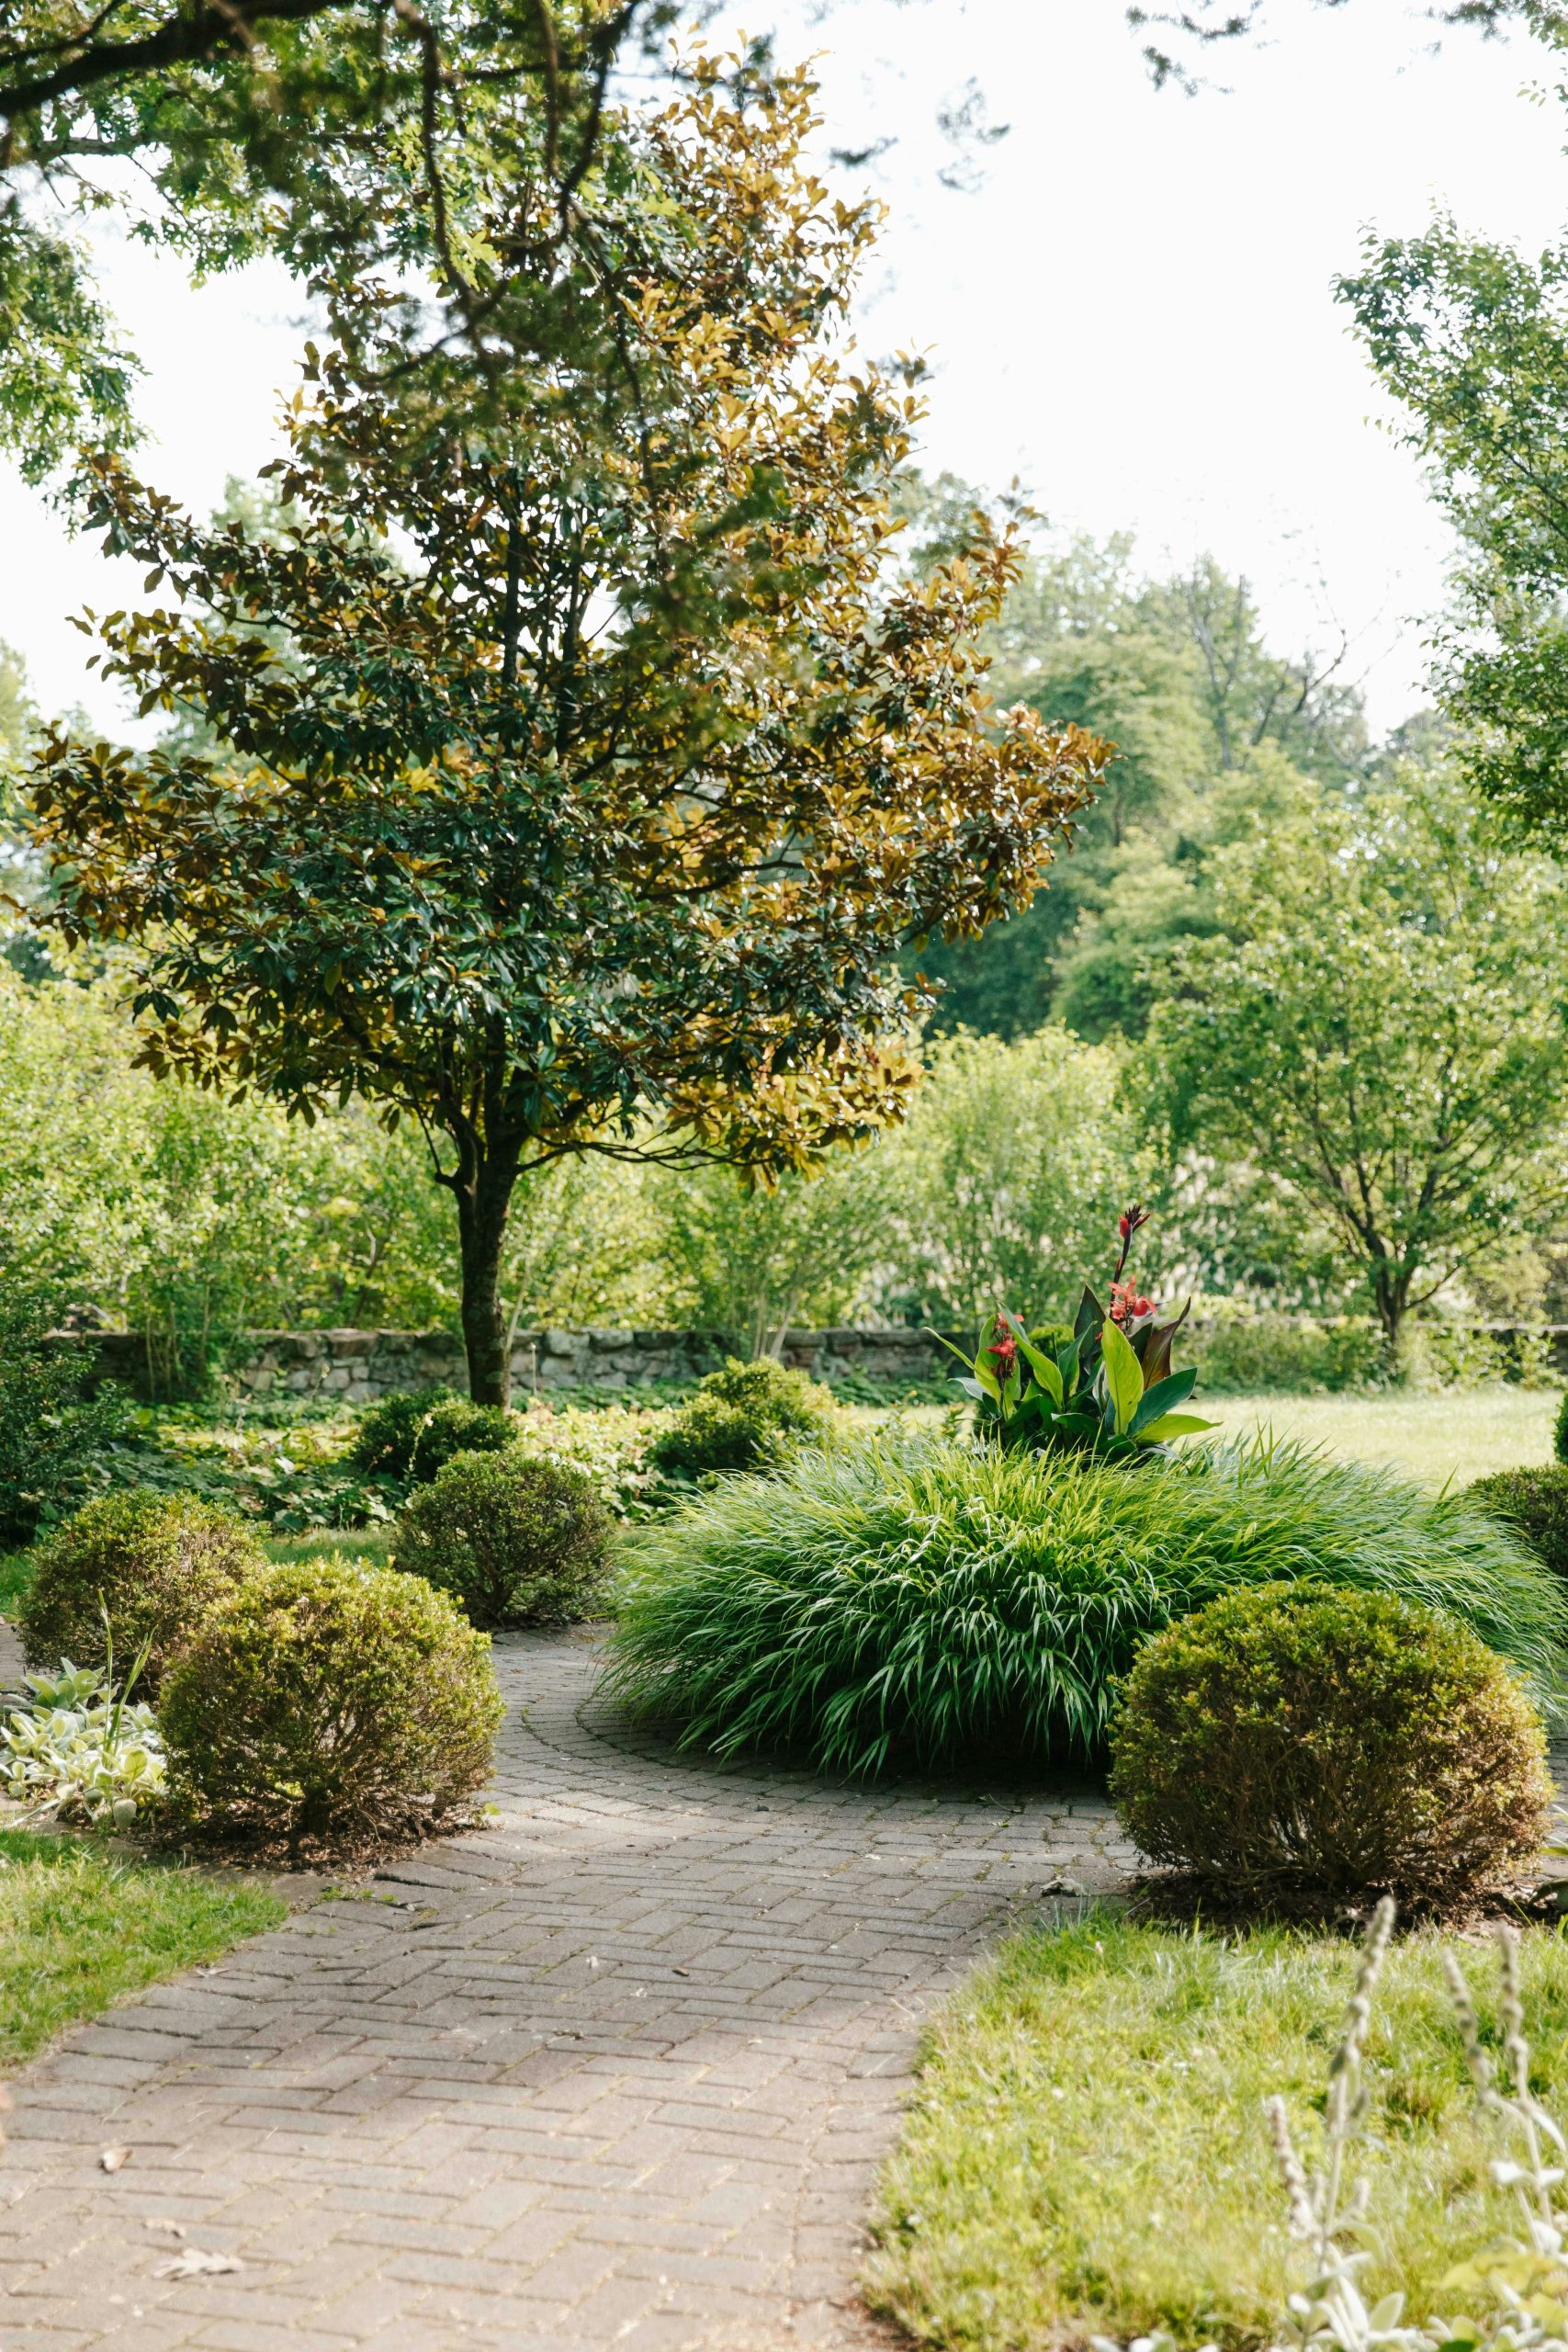
“Laying a small section of herringbone is a great DIY project.”
Time: 4-6 hours for a 10-foot section
Cost: Approx. $100-150 for bricks and sand
Step 1: Dig out your path area about 4 inches deep and lay down a 2-inch base of compacted paver sand.
Step 2: Set your border bricks first to define the edges of the curve.
Step 3: Start laying the interior bricks at a 45-degree angle to the edge, creating the “L” shapes of the herringbone pattern.
Step 4: Use a rubber mallet to tap them into place, ensuring they are level. Use a guide string to keep your lines straight.
Step 5: Once all bricks are laid, sweep polymeric sand into the joints and mist with water to set. Compare this pattern with the radial brick in Idea #10.
9. Contrast Gray Stone Pavers with Purple Flowers and Green Ground Cover
This garden path’s visual success comes down to a balanced color formula: 50% cool neutral stone + 40% vibrant, textured greenery + 10% bold color pop. The light gray pavers provide a calm, solid foundation. The dense green ground cover offers a lush, soft contrast. The final 10%—the purple flowers and earthy ceramic pots—is the accent that brings it all to life. You could easily swap the purple for bright yellow or deep red, or the gray stone for warm terracotta, as long as you keep that 50/40/10 ratio in mind.
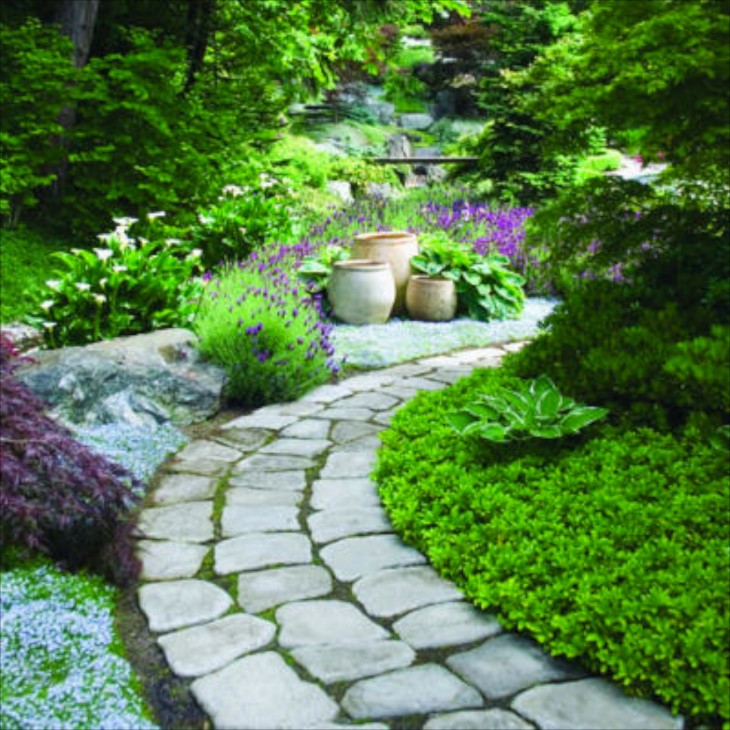
“While beautiful, that lush, dense ground cover growing right up to the edge of the pavers can be a maintenance headache.”
It will constantly try to creep over the stones, especially after a good rain. You’ll need to commit to crisping up that edge with a string trimmer or manual edger every couple of weeks to maintain the clean separation. It can also create a cozy home for slugs and other garden pests right next to your path, so be vigilant if you have delicate plants nearby.
10. Embrace an Aged Look with a Curving, Moss-Tinged Brick Path
The charm of this pathway lies in its appearance of age and permanence. The radial brick pattern, where the bricks fan out around the curve, is a subtle but powerful design choice that feels handcrafted and traditional. This isn’t a quick-and-easy pattern, and that complexity signals quality. Combined with the low brick edging and the hint of moss growing in the crevices, the entire installation feels like it has been part of the garden for generations, creating a sense of history and stability. For another take on brick, see the herringbone style of Idea #8.
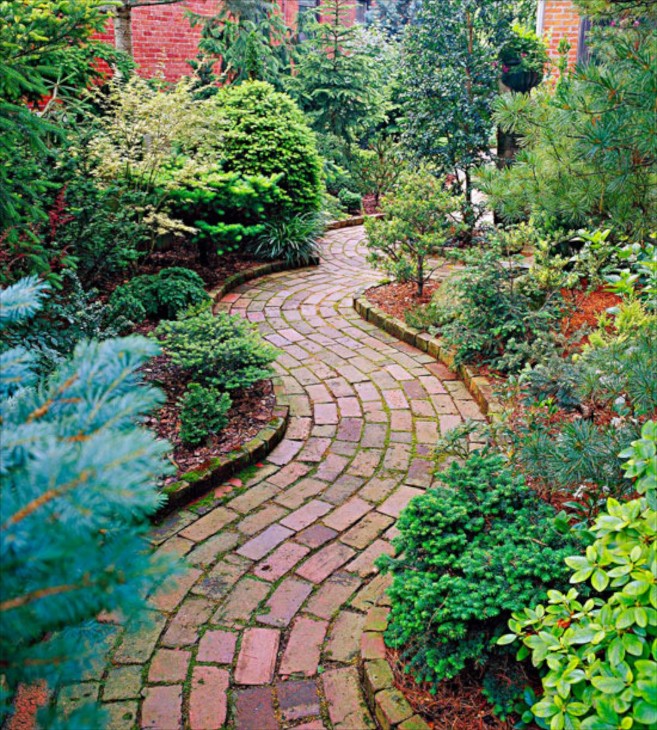
“An old brick path in a lush garden is romantic, but it’s not for the maintenance-averse.”
The uneven surfaces and wide joints are perfect environments for weeds to take root and moss to grow. While a little moss adds character, too much can make the bricks extremely slippery when wet. Expect to spend a few hours each spring and fall on your hands and knees with a weeding tool. You may also need to periodically top up the sand in the joints to keep the bricks from wobbling.
11. Let a Stepping Stone Path Grow Wild and Natural
This wonderfully wild look is one of the most budget-friendly pathway options available. You can often find simple concrete or light-colored pavers for $2-$4 each at big box stores like Home Depot or Lowe’s. For a 30-foot path, you might spend less than $75 on stones. The real savings is in the filler: instead of expensive gravel or mulch, you simply let your existing lawn and clover grow up between the stones. Adding a few packets of wildflower seeds to the gaps is a cheap way to get those beautiful pops of color.
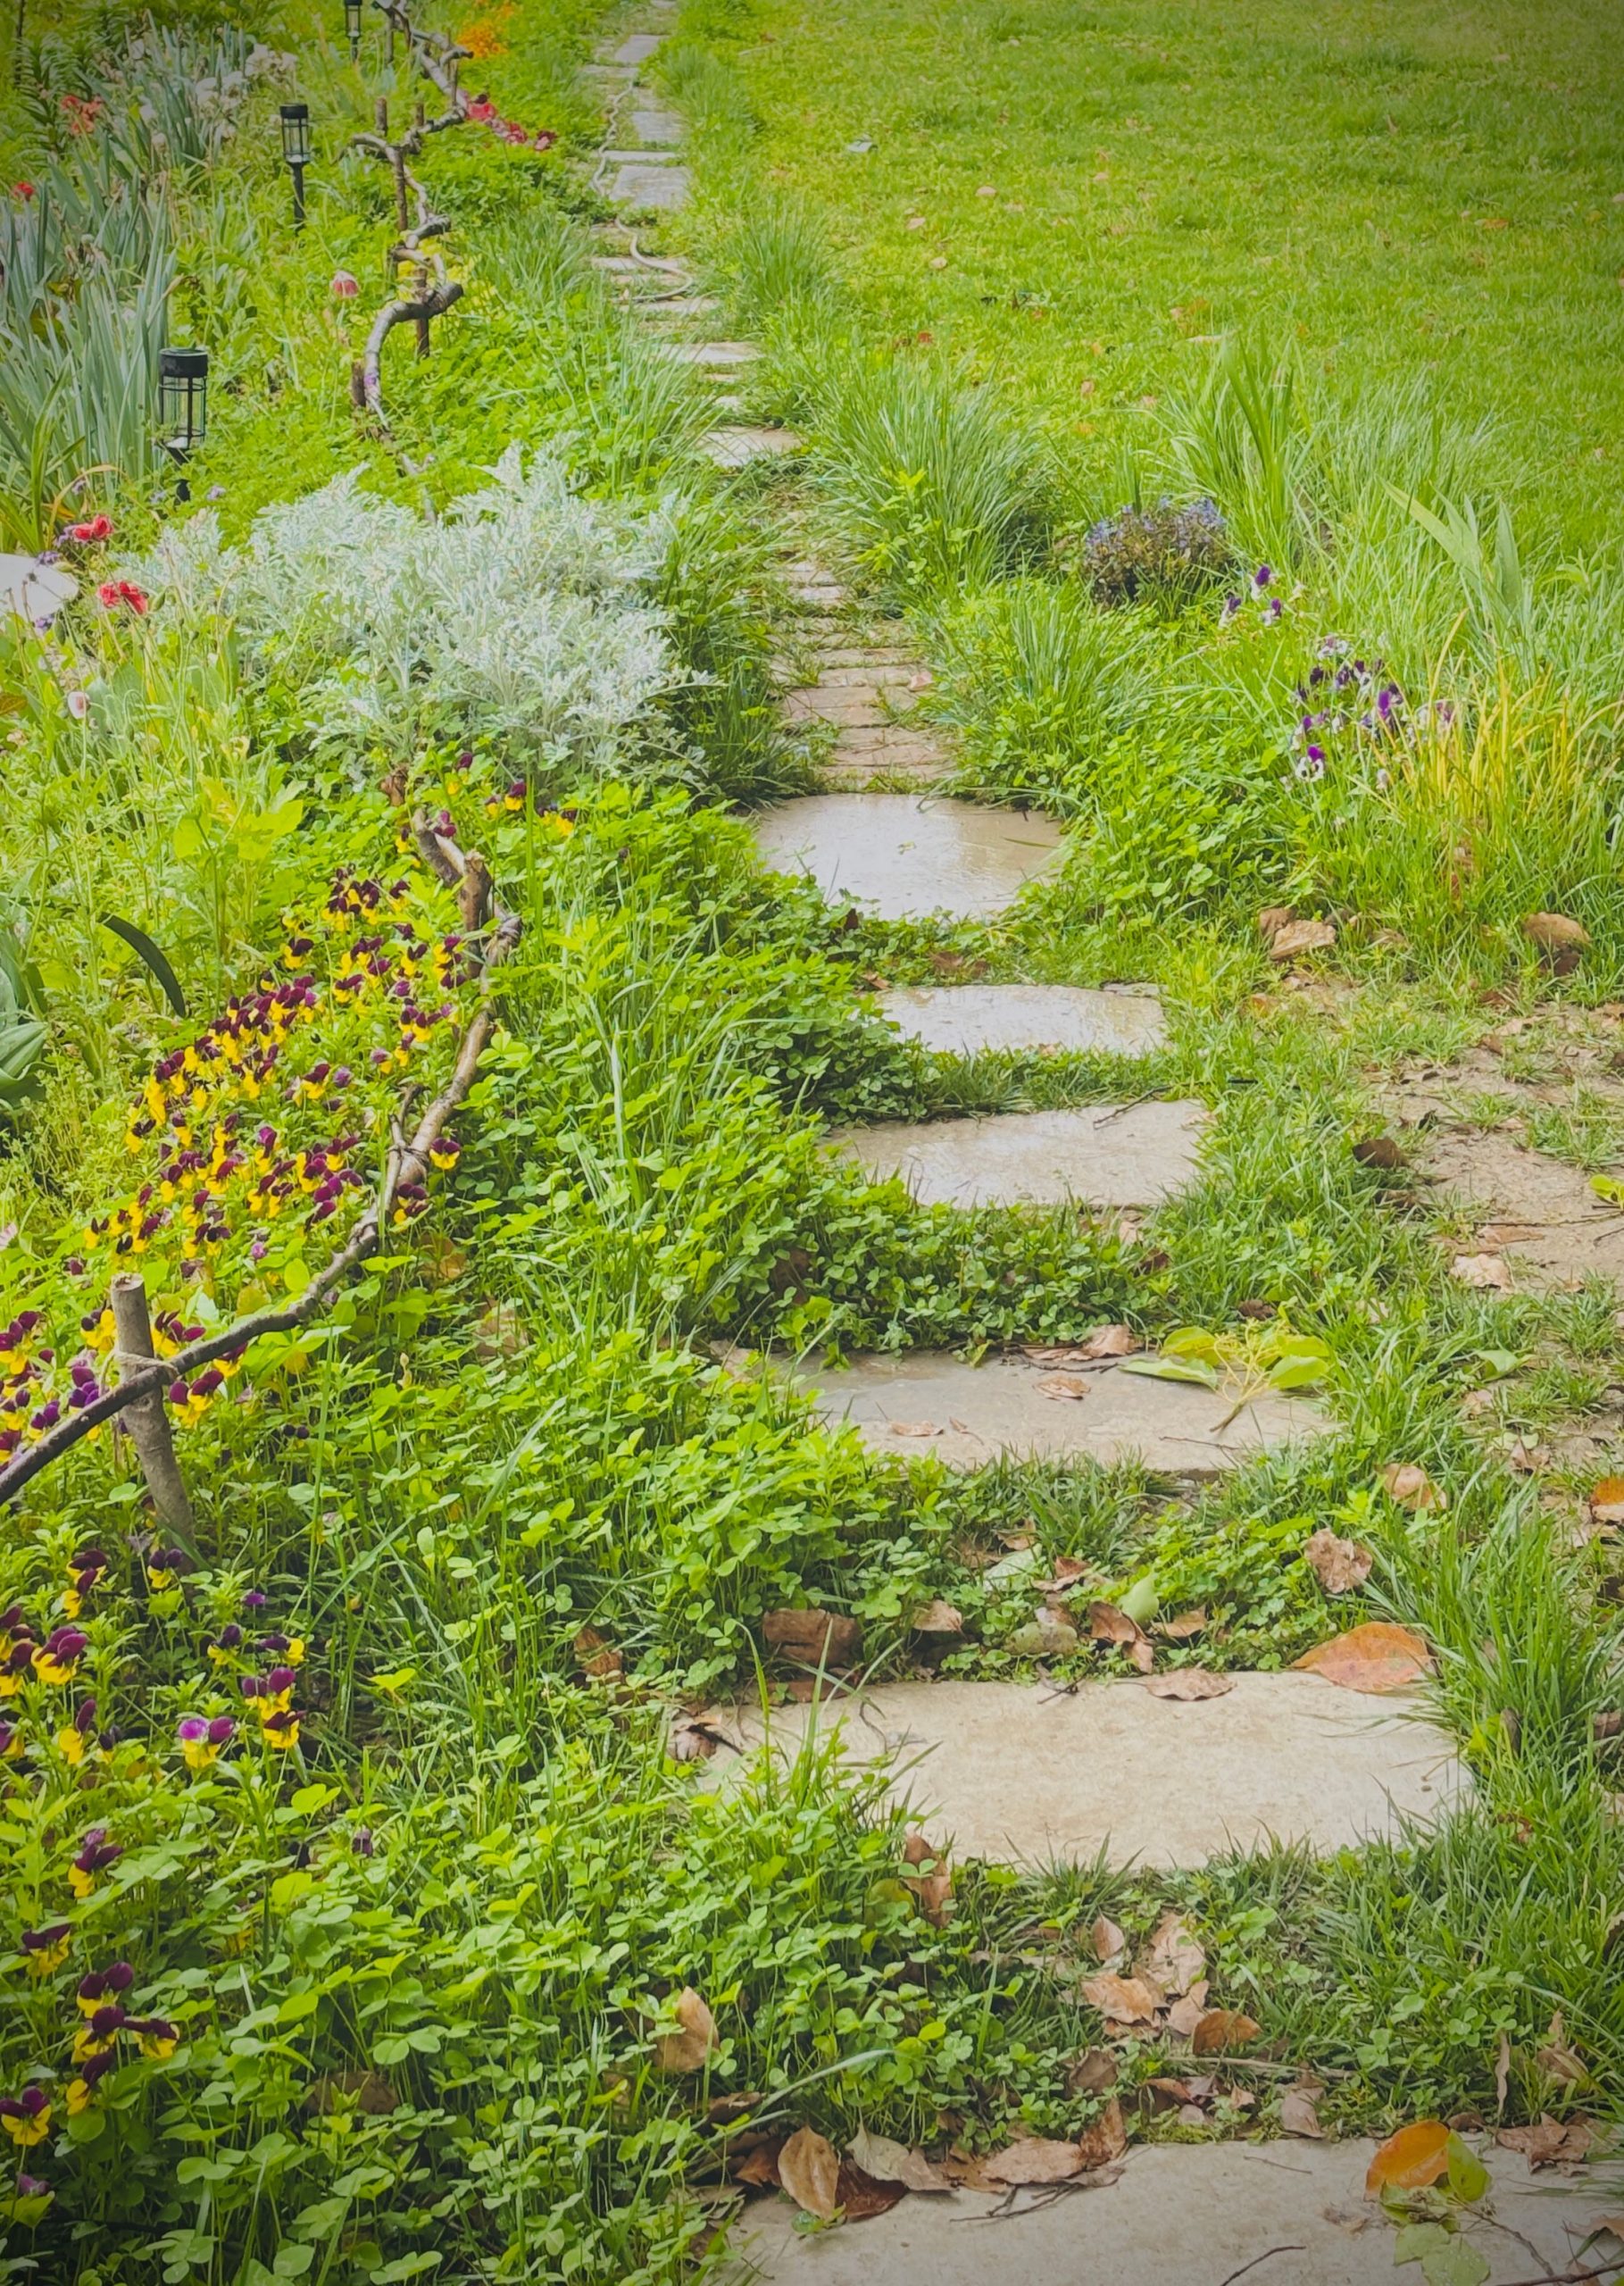
“To keep an “overgrown” path looking intentional rather than neglected, the secret is selective editing.”
Let the grass and clover creep over the edges of the stones—that’s where the charm is. However, you must be ruthless about removing any taller, scraggly weeds or invasive grasses that pop up. A quick pass once a week to pull out any unwanted growth is all it takes. This maintains the soft, natural vibe without letting it look messy. It’s a curated wildness, a balance seen in the more manicured look of Idea #2.
12. Integrate Natural Stone Steps with a Cascading Water Feature
The water feature is the undeniable soul of this design. The path itself, made of large stone slabs, is beautiful, but it’s the movement and sound of the water cascading alongside it that transforms the space into a multi-sensory experience. It turns a simple journey up a few steps into an event. The pond at the base acts as a destination, a place to pause. Without the water, you’d have a handsome stone staircase; with it, you have a living, breathing work of landscape art.
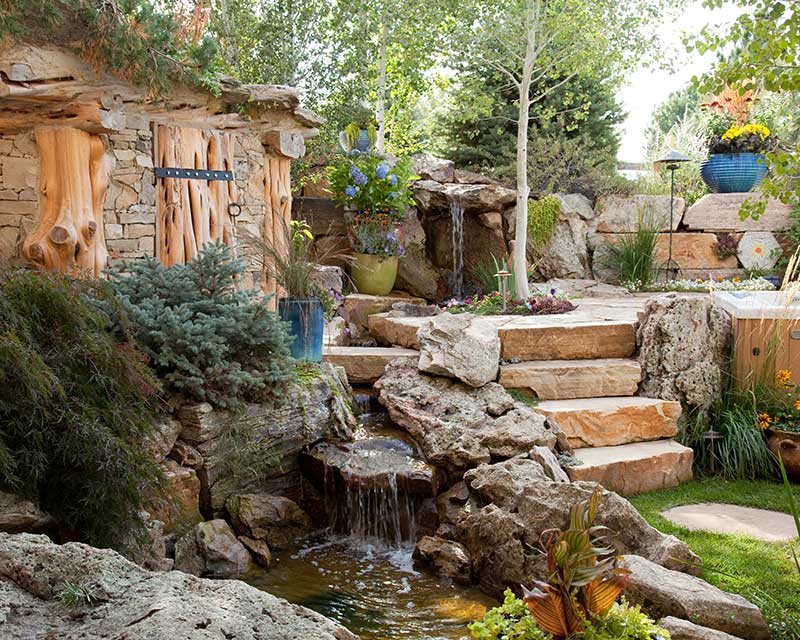
“Creating this type of integrated, high-end look is a significant investment, primarily in professional labor.”
Large Natural Stone Slabs (for steps): $1,500 – $3,500
Stone for Retaining Wall & Water Feature: $2,000 – $4,000
Pump, Liner & Plumbing for Water Feature: $800 – $1,800
Plants & Large Planters: $700 – $1,500
Professional Design & Labor: $8,000 – $15,000+
TOTAL: $13,000 – $25,800+
Budget alternative: Use pre-cast concrete steps and a self-contained fountain kit next to the path to get a hint of the vibe for under $2,000.
13. Ascend a Grand, Terraced Brick Staircase Through a Hillside Garden
This idea is specifically for homes with a significant slope or hillside in their yard. A terraced staircase like this requires a vertical elevation change of at least 8 to 10 feet to justify the grandeur and winding nature of the design. The overall length could easily be 50 to 100 feet or more. It’s a major landscape construction project, not a simple pathway. For flatter properties, attempting a scaled-down version might look awkward; consider a gently meandering path like in Idea #6 instead.
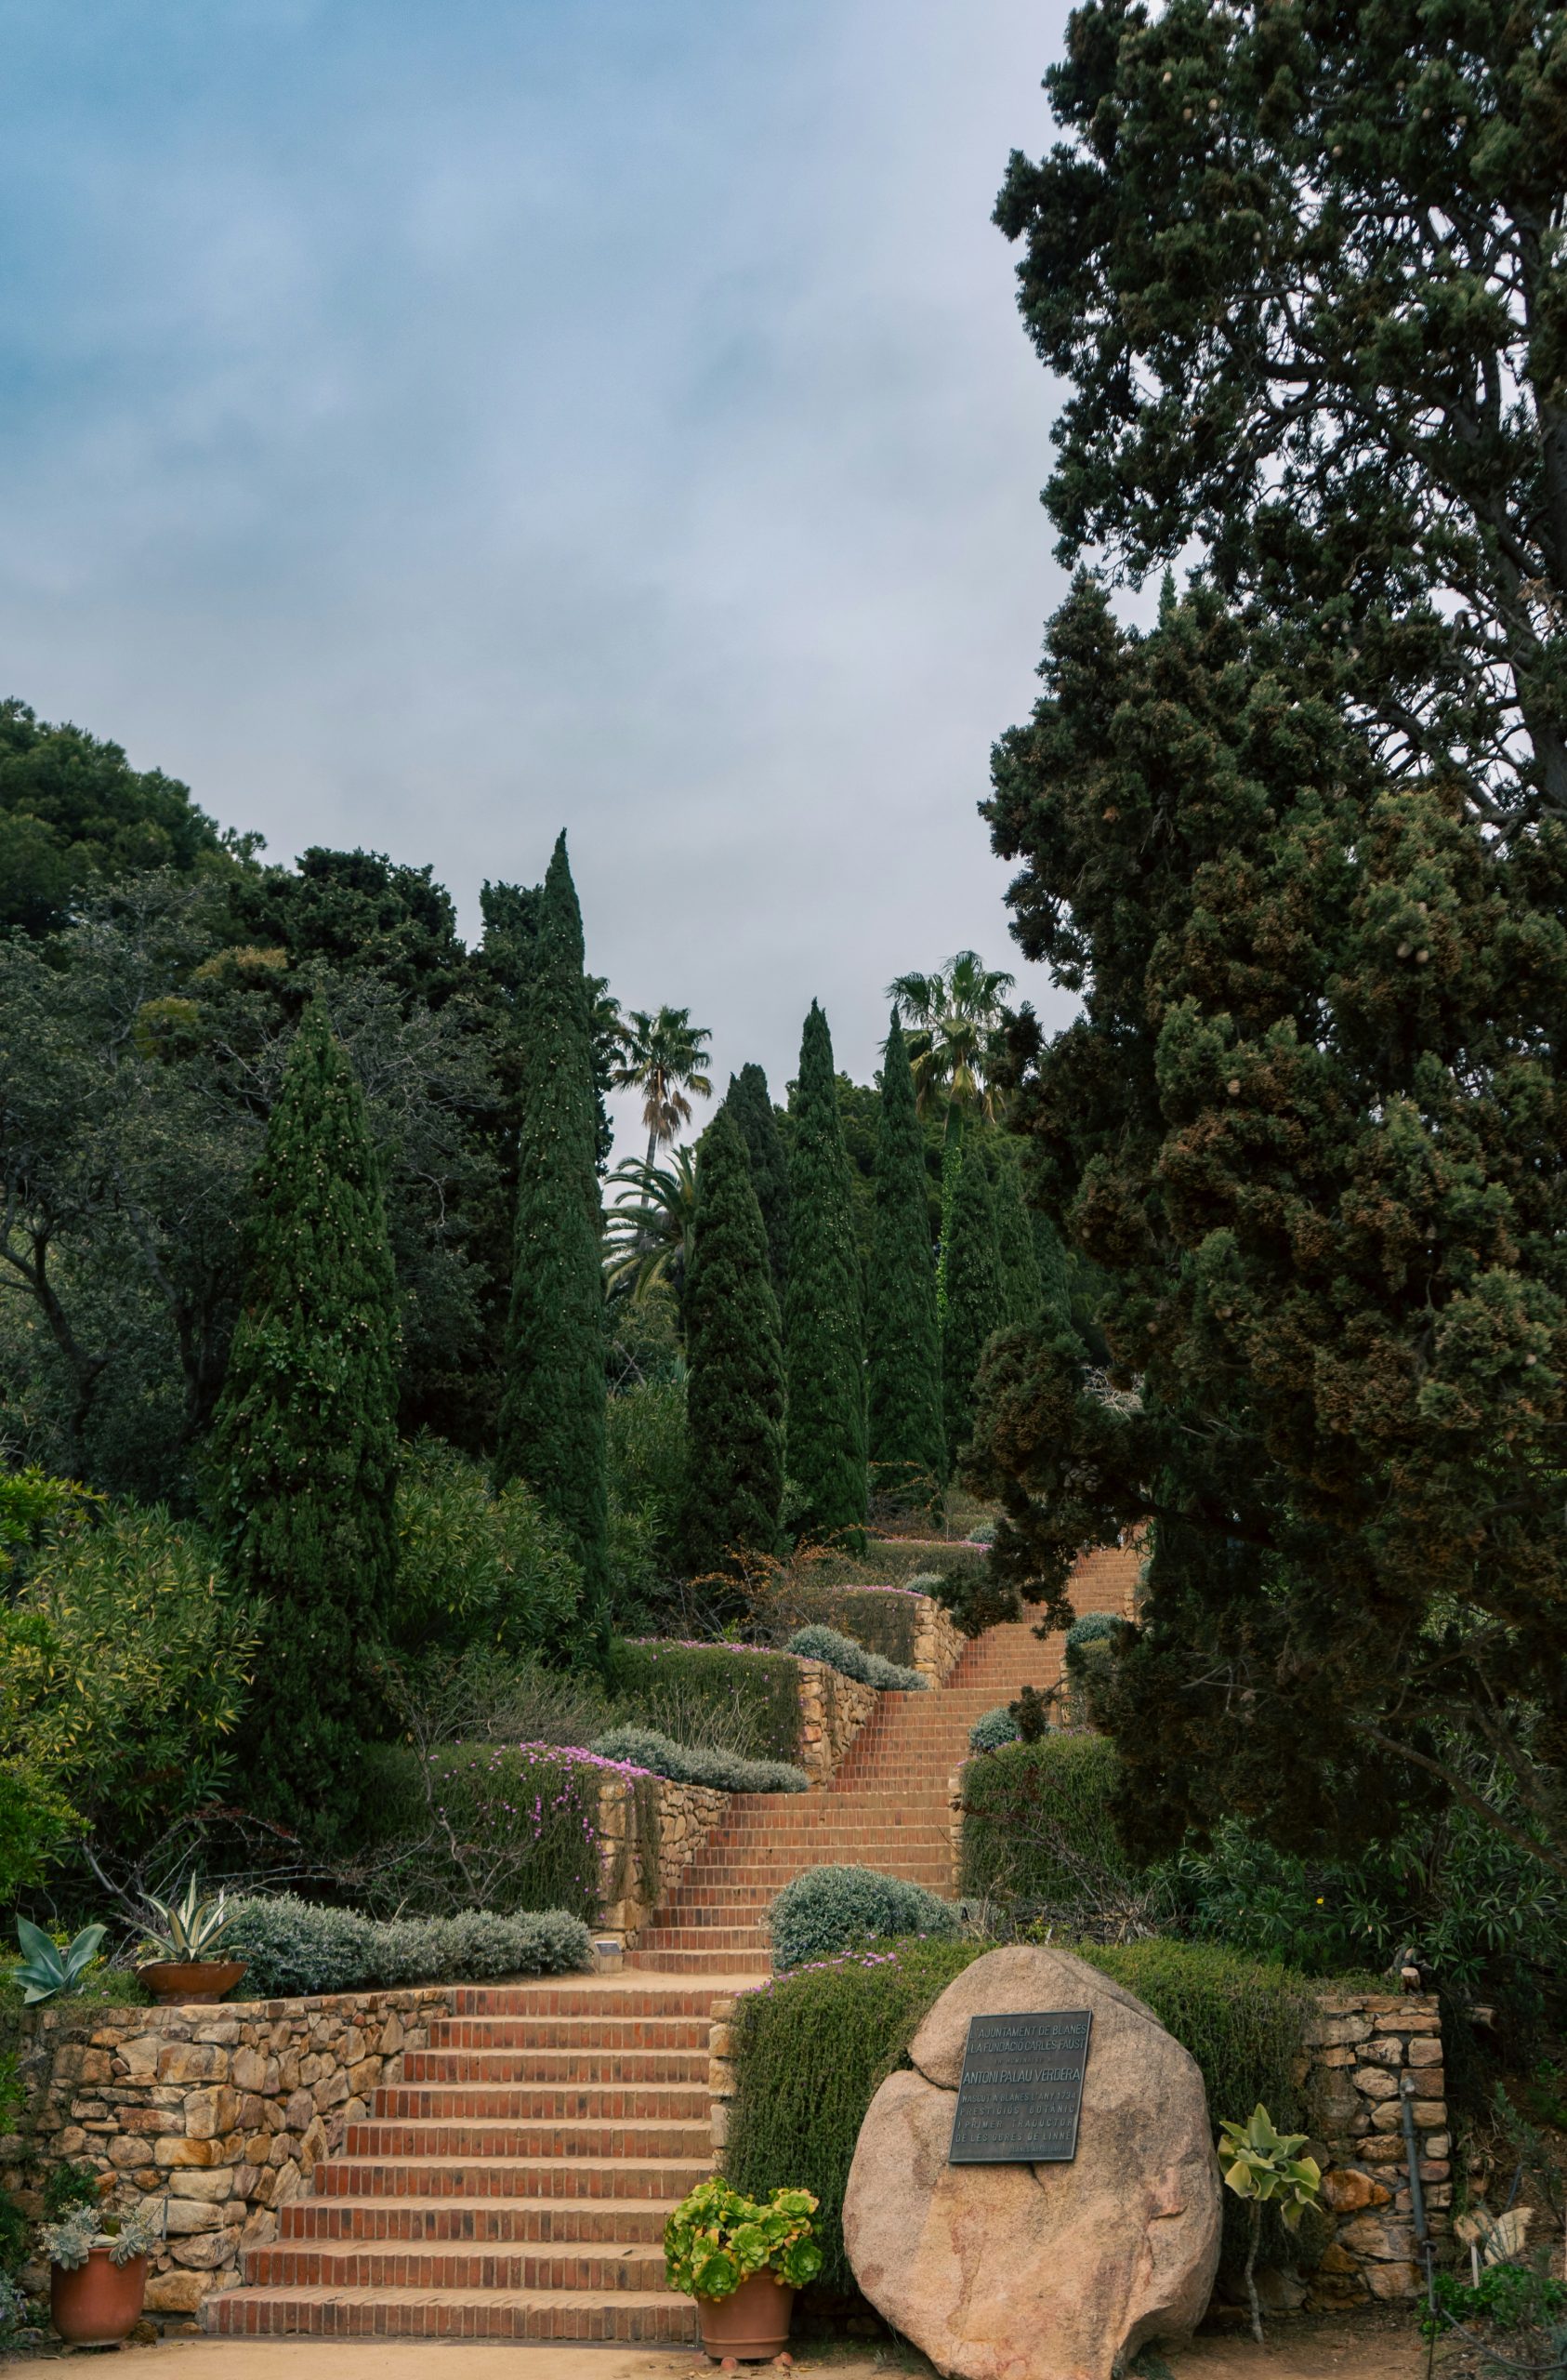
“The genius of this design is how it turns a problem—a steep, difficult-to-mow hill—into the property’s most stunning feature.”
The winding layout and multiple terraces break up the long ascent, making it feel like a journey rather than a chore. The repetition of the warm brick color creates a strong visual line that unifies the entire landscape, while the low stone retaining walls provide a beautiful textural contrast and define the lush planting beds that soften the structure.
14. Follow a Yellow Brick Road to a Whimsical Forest Structure
Let’s be honest: a look this specific and whimsical requires total commitment. This isn’t a subtle garden accent; it’s a bold, narrative feature. It will absolutely be the main topic of conversation for anyone who visits your garden. You have to be okay with that! It may not appeal to all home buyers if you plan to sell in the near future, as its style is so personal. Maintaining the vibrant color of the yellow path and mushroom-like elements will also require regular cleaning and potentially recoating or painting every few years.
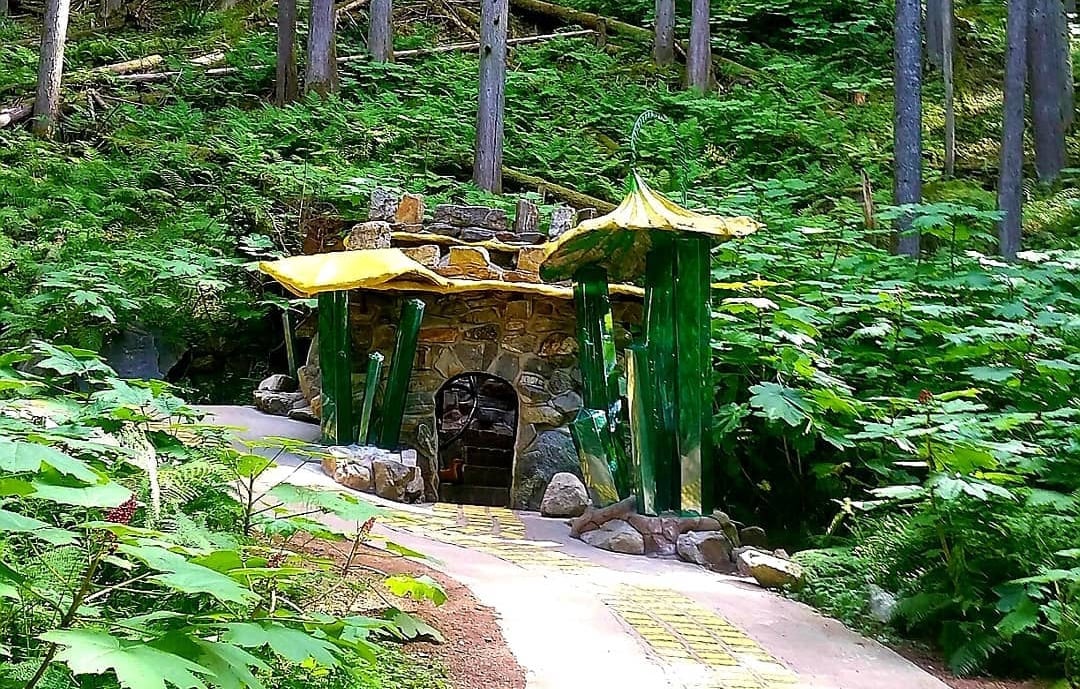
“The magic here is made with a playful formula: 40% enchanting structure + 30% vibrant color + 30% natural forest surroundings.”
The stone hut is the destination, the reason for the path. The bright yellow of the path and “mushrooms” provides the necessary whimsy and color contrast against the greens and browns. Crucially, the dense, natural foliage grounds the entire scene, keeping it from looking like a theme park installation and instead making it feel like something you discovered in the woods.
15. Drape Wisteria Garlands Over a Mystical Forest Path
As people look for ways to make their gardens feel more immersive and magical, “living” decor is a huge trend for 2026. Instead of just placing objects in the garden, we’re seeing a move toward integrating natural, growing elements in artistic ways. These wisteria garlands are a perfect example. They feel more organic and enchanting than string lights or fabric bunting, blurring the lines between garden and art installation. It responds to a desire for decor that changes with the seasons and feels truly alive.
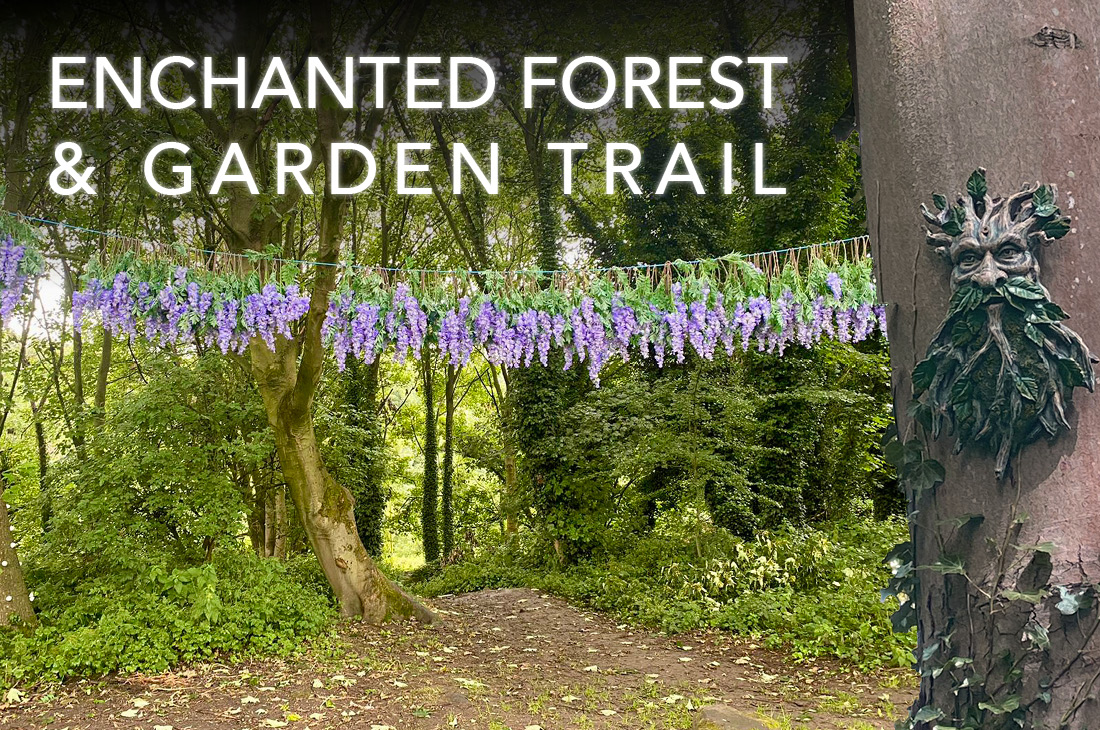
“The single element that breathes magic into this scene is the Tree Spirit carving.”
The path and the wisteria are beautiful on their own, but the addition of the “green man” face transforms the space from a pretty forest walk into a place with a story. It introduces a sense of myth, mystery, and ancient personality. It suggests the forest is watching, that there’s more here than meets the eye. Removing it would make the path lovely, but it would strip it of its powerful, enchanting soul.
16. Weave a Curving Cobblestone Path Through an Overgrown Garden
For a path meant to look a bit lost in nature, use smaller cobblestones or pavers. Large, flat flagstones can feel too dominant, but smaller stones (around 4-6 inches) create more texture and more joints for moss and groundcover to grow into. This makes the path look more integrated and aged. To enhance the effect, set the outer stones slightly lower than the center, allowing soil and plants to spill over the edges more easily, which is the key to achieving that perfectly imperfect, “overgrown” aesthetic.
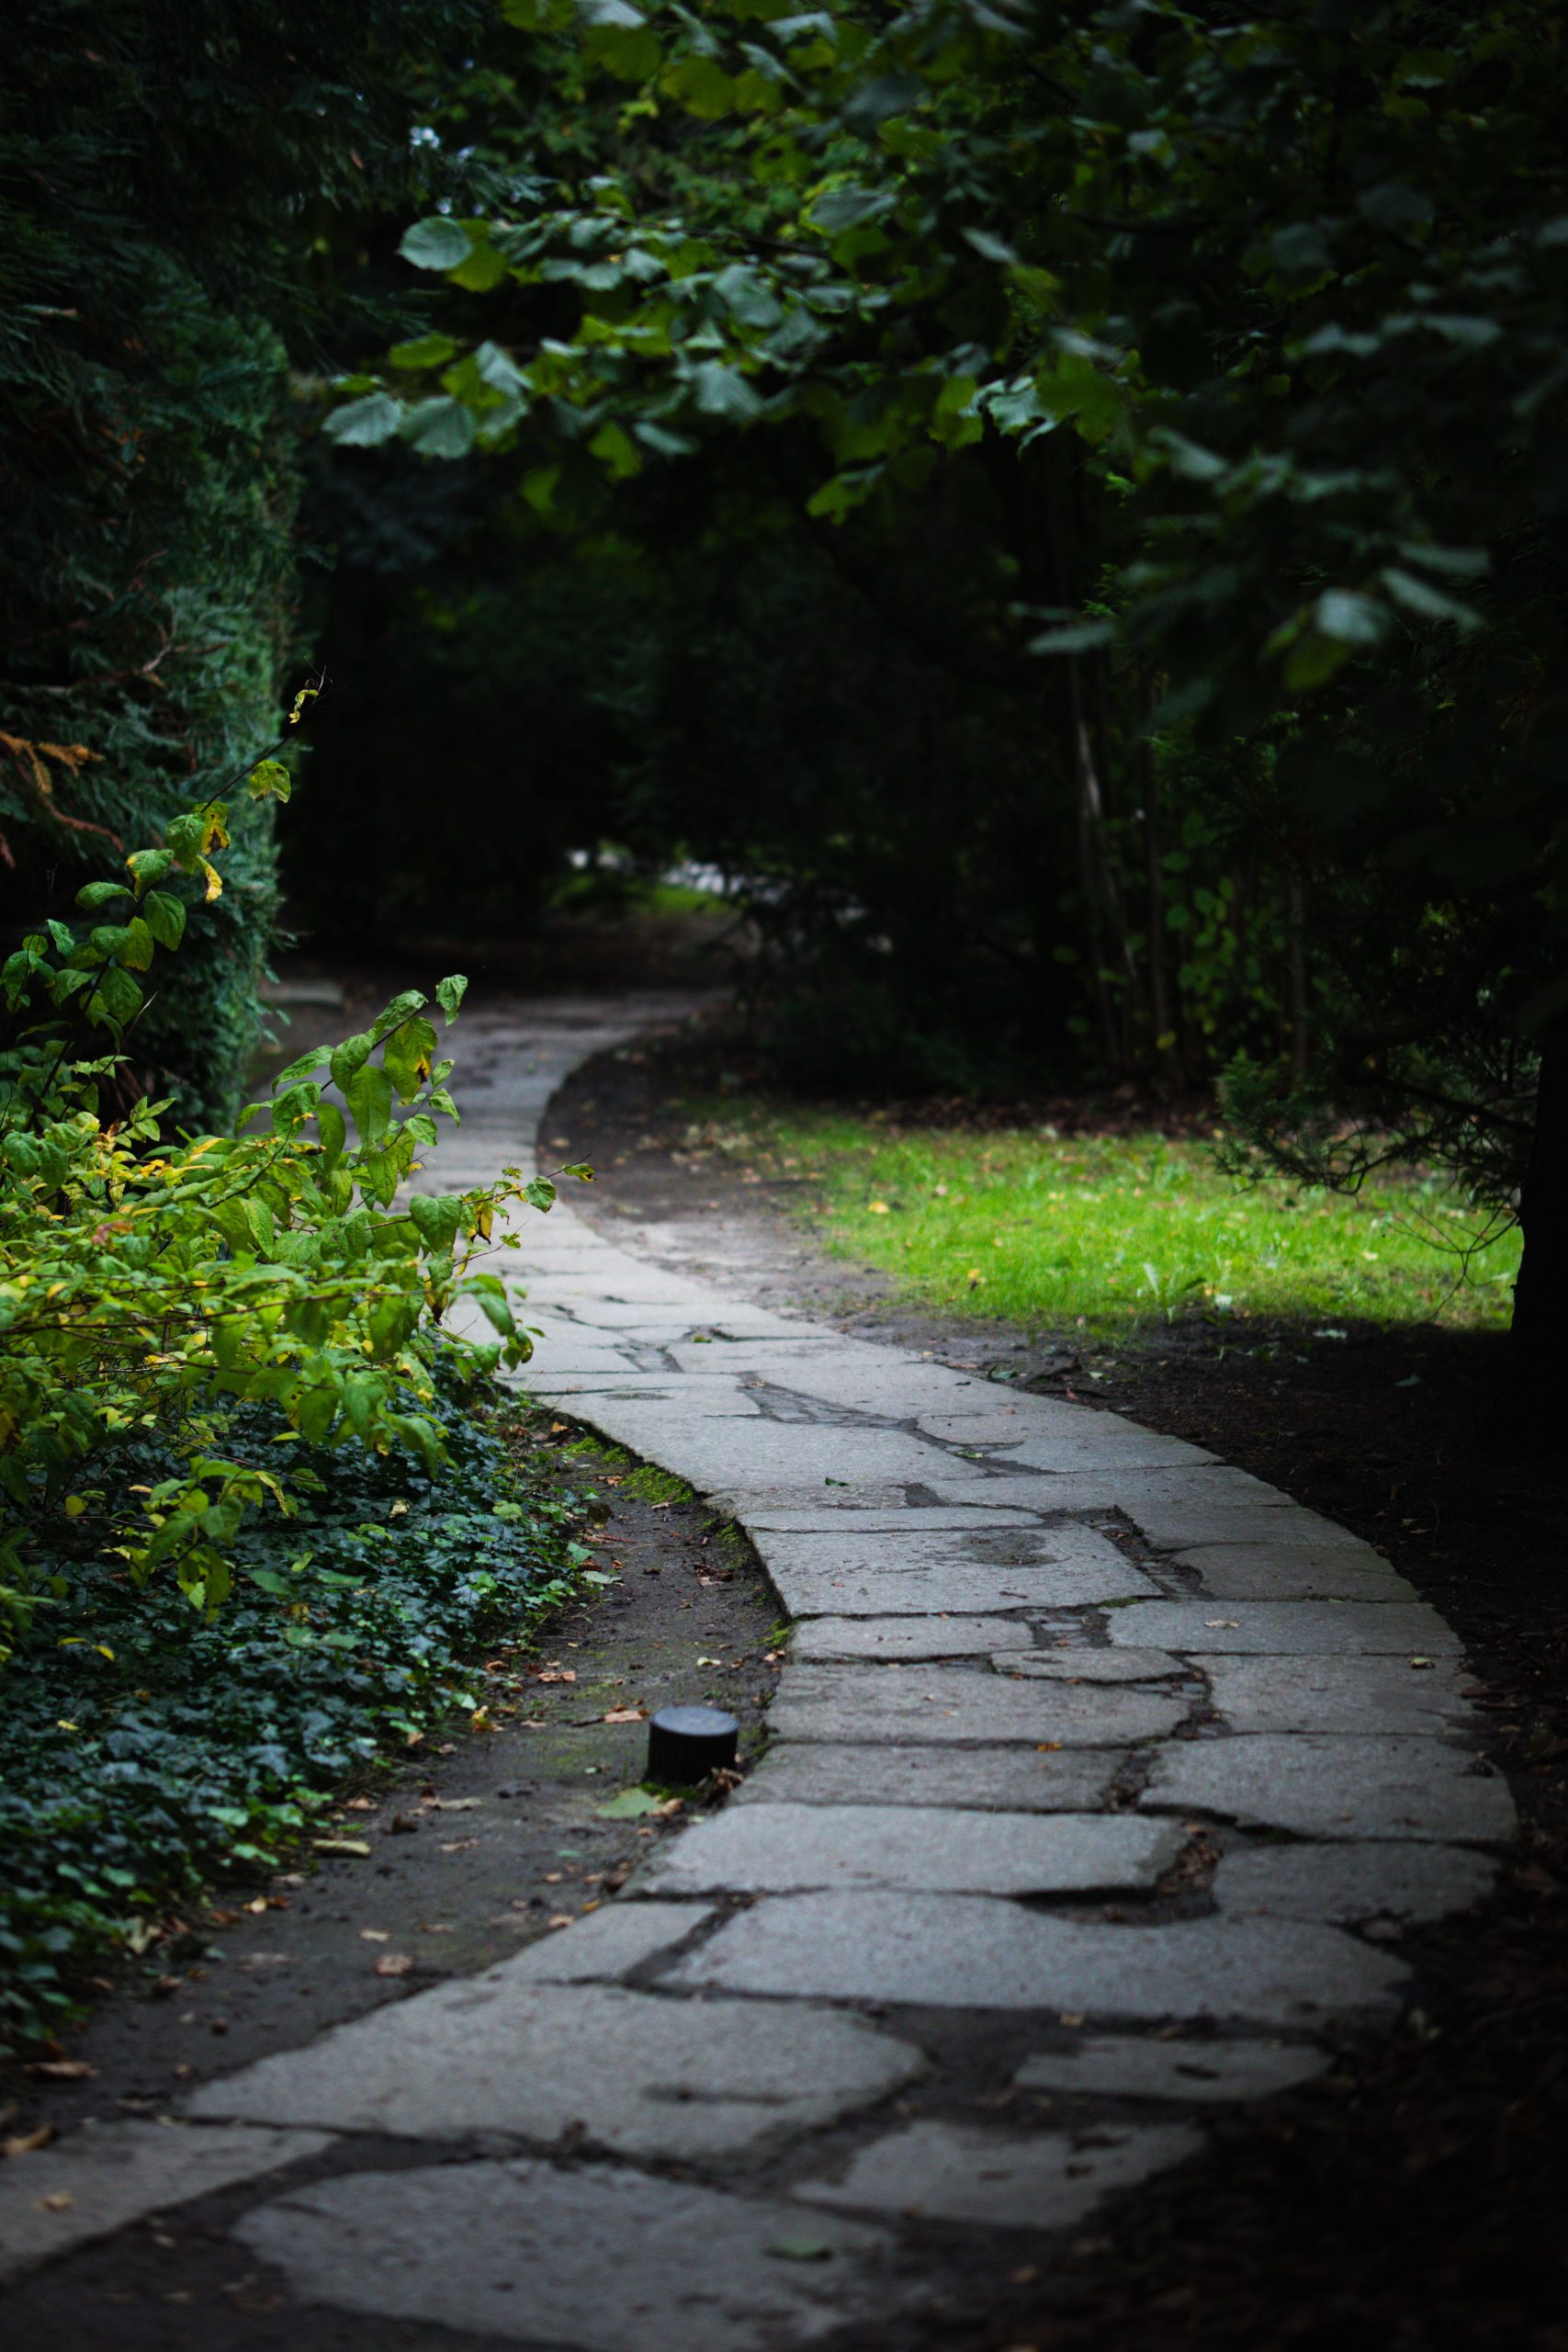
“Before you embrace this romantic, mysterious look, make sure it’s the right fit for your needs and your property.”
Check these items first:
Is this a main walkway or a secondary path? The uneven surface can be tricky for anyone with mobility issues, and it’s not ideal for wheeling garbage cans or strollers.
How much sun does the area receive? A shady spot is key for the lush, green, mossy look. In full sun, the path will look harsh and the plants will struggle.
Are you prepared for the “critter” factor? A dense, overgrown path edge is a paradise for snails, slugs, and insects.
17. Design a Functional Path with Stepping Stones, Gravel, and Brick
This pathway is a practical, hardworking solution, but let’s talk about that air conditioning unit. Placing a large, noisy appliance right next to a main walkway can detract from the serene garden vibe you’re trying to create. While sometimes unavoidable, consider screening it with a simple lattice panel and some climbing vines. Also, the combination of three different materials (brick, gravel, and stone) can look busy if not executed carefully. The clean lines and simple color palette here make it work, but it’s a fine line.
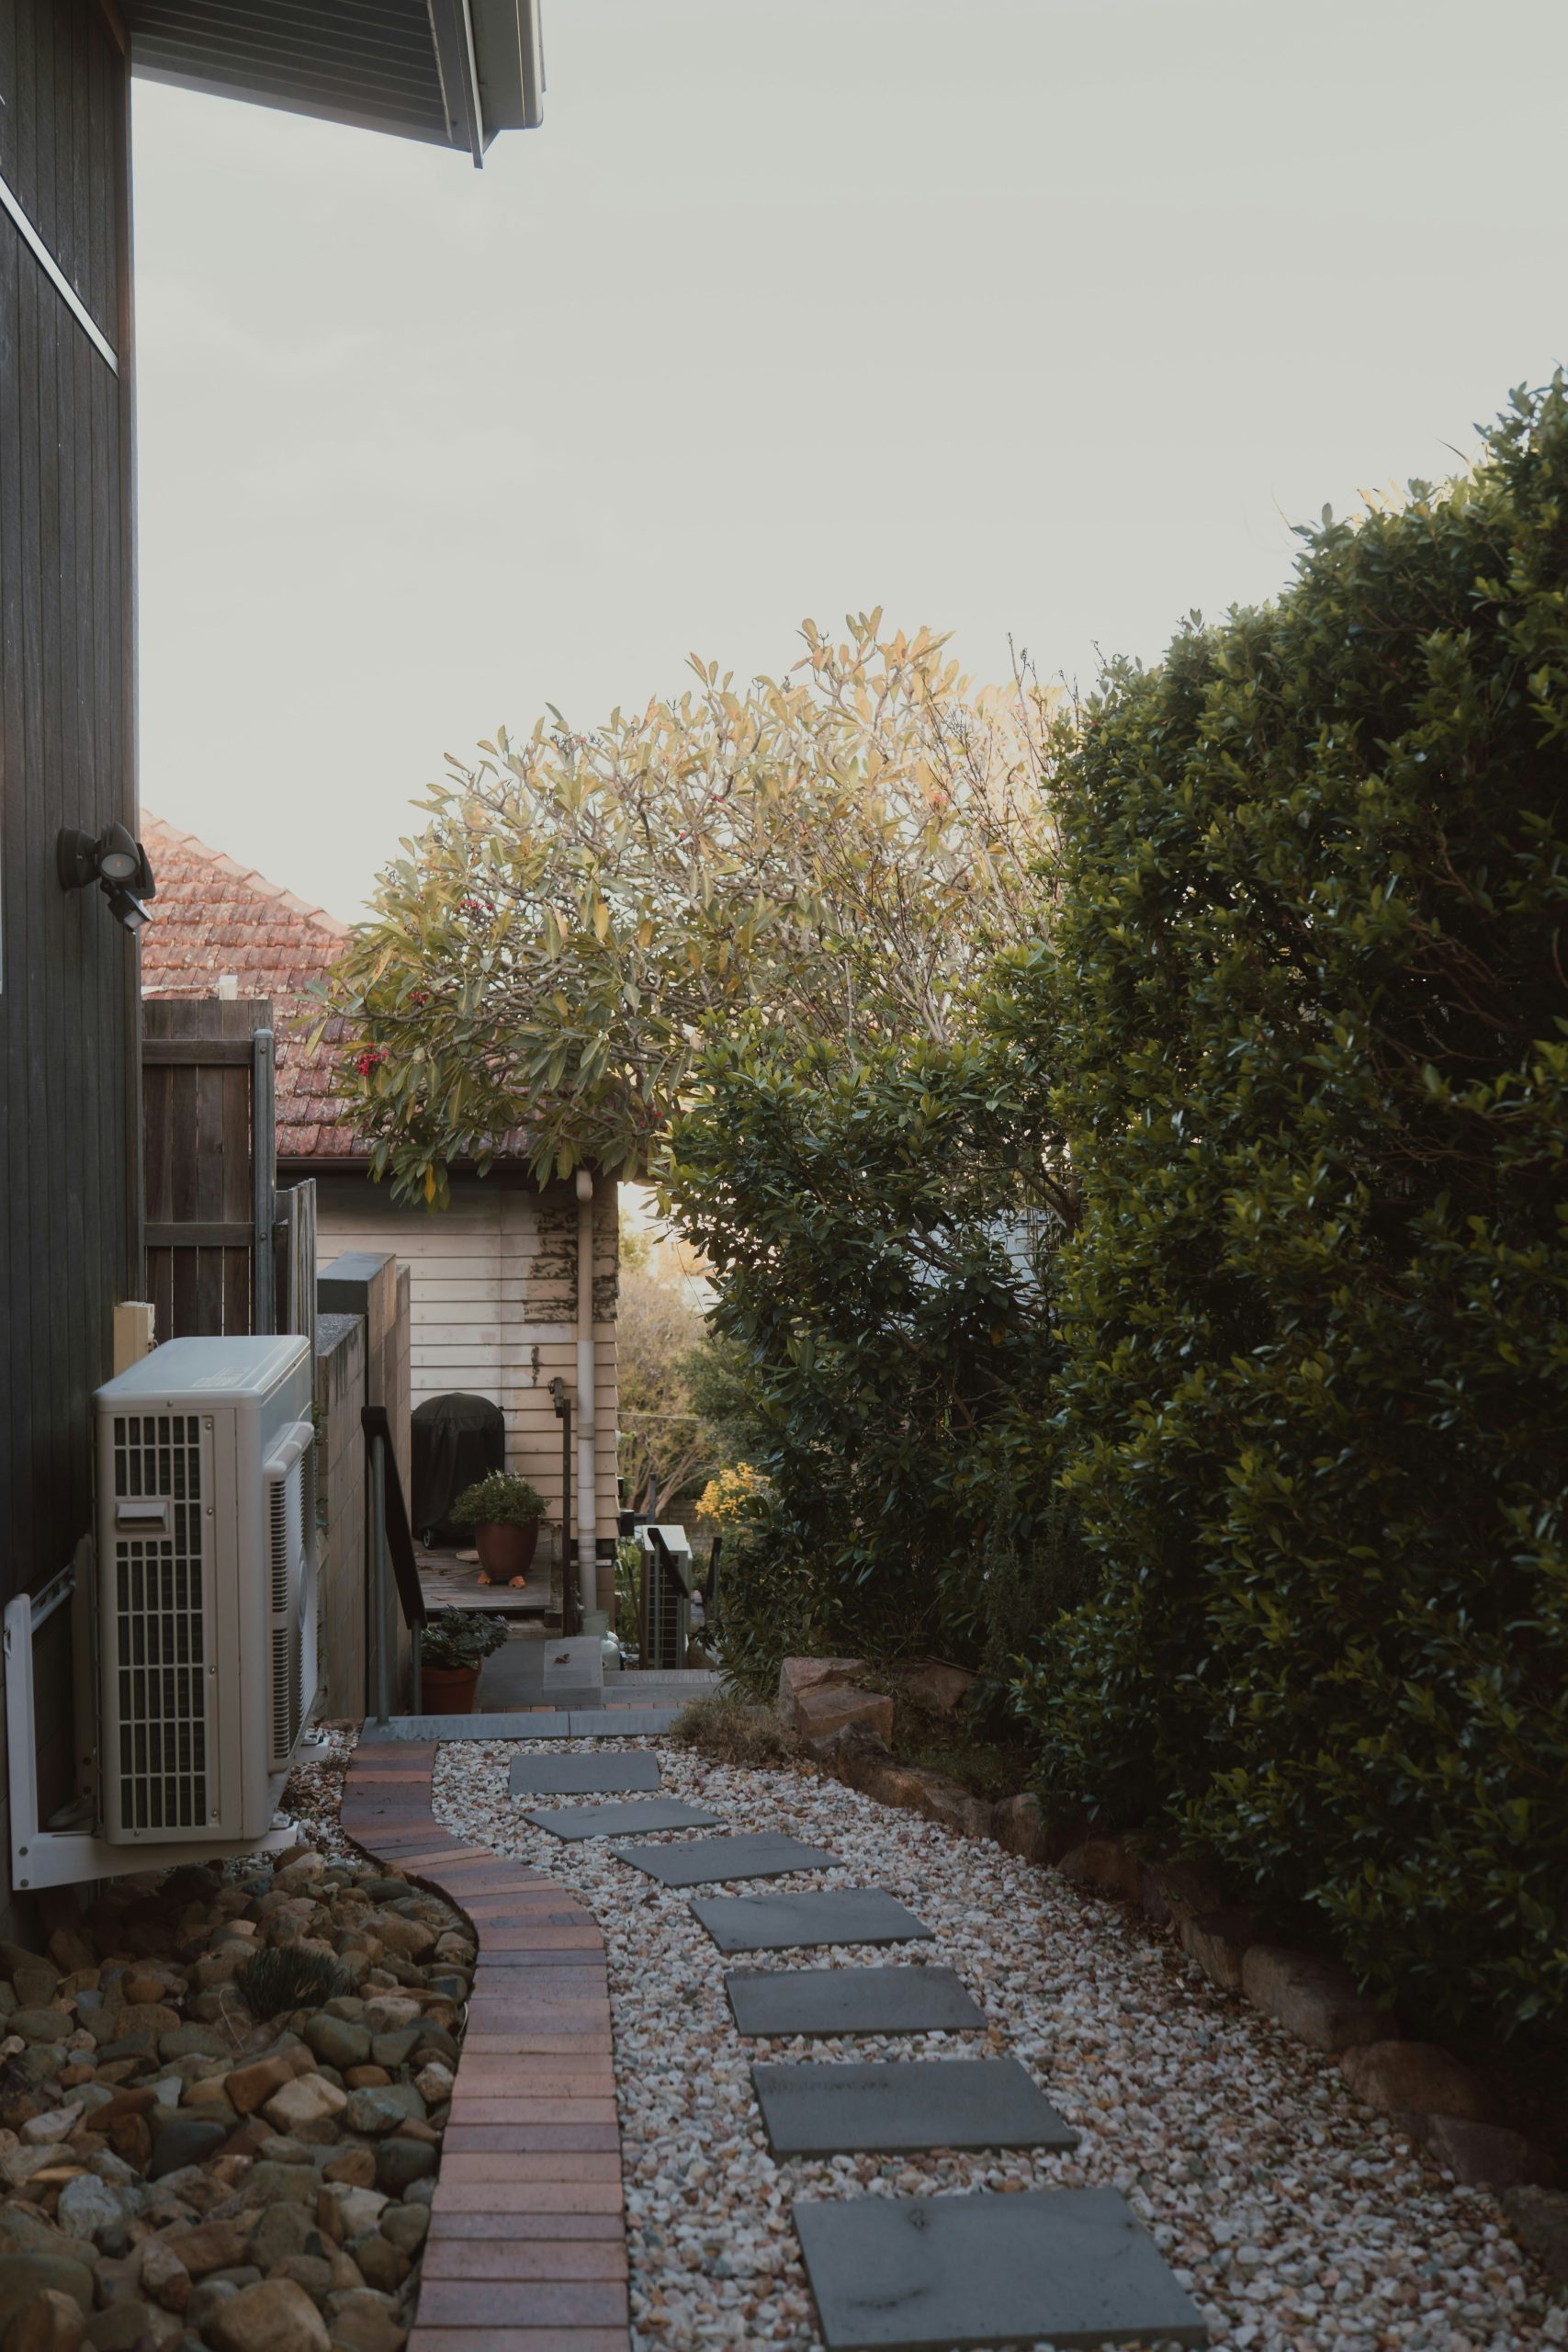
“You can get this multi-textured look for much less.”
Instead of new bricks, search for reclaimed bricks on Craigslist or Facebook Marketplace; they often have more character and are cheaper. For the stepping stones, pour your own! Buy a few bags of concrete mix and some simple square or rectangular molds for a fraction of the cost of quarried stone. The gravel is already a budget-friendly material, but choosing pea gravel over more specialized varieties will save you even more.
18. Create a Tunnel of Light with Blue and Purple Twinkle Arches
Creating an arch of light is easier than it looks. You’ll need flexible conduits (like PVC or metal) and lots of string lights.
- Time: 2-3 hours
- Cost: $50 – $150 depending on length
- Step 1: Measure the width of your path and cut two pieces of rebar (about 24 inches long) per arch. Hammer them 12 inches into the ground on opposite sides of the path.
- Step 2: Cut a length of flexible PVC pipe to create your desired arch height. The longer the pipe, the taller the arch.
- Step 3: Slide the ends of the PVC pipe over the two pieces of rebar to form the arch.
- Step 4: Tightly wrap the PVC arch with outdoor-rated twinkle lights, using zip ties to secure the start and end of the strands.
- Step 5: Connect to an outdoor power source and enjoy the magic! For a different approach see the lighted arches in Idea #20.
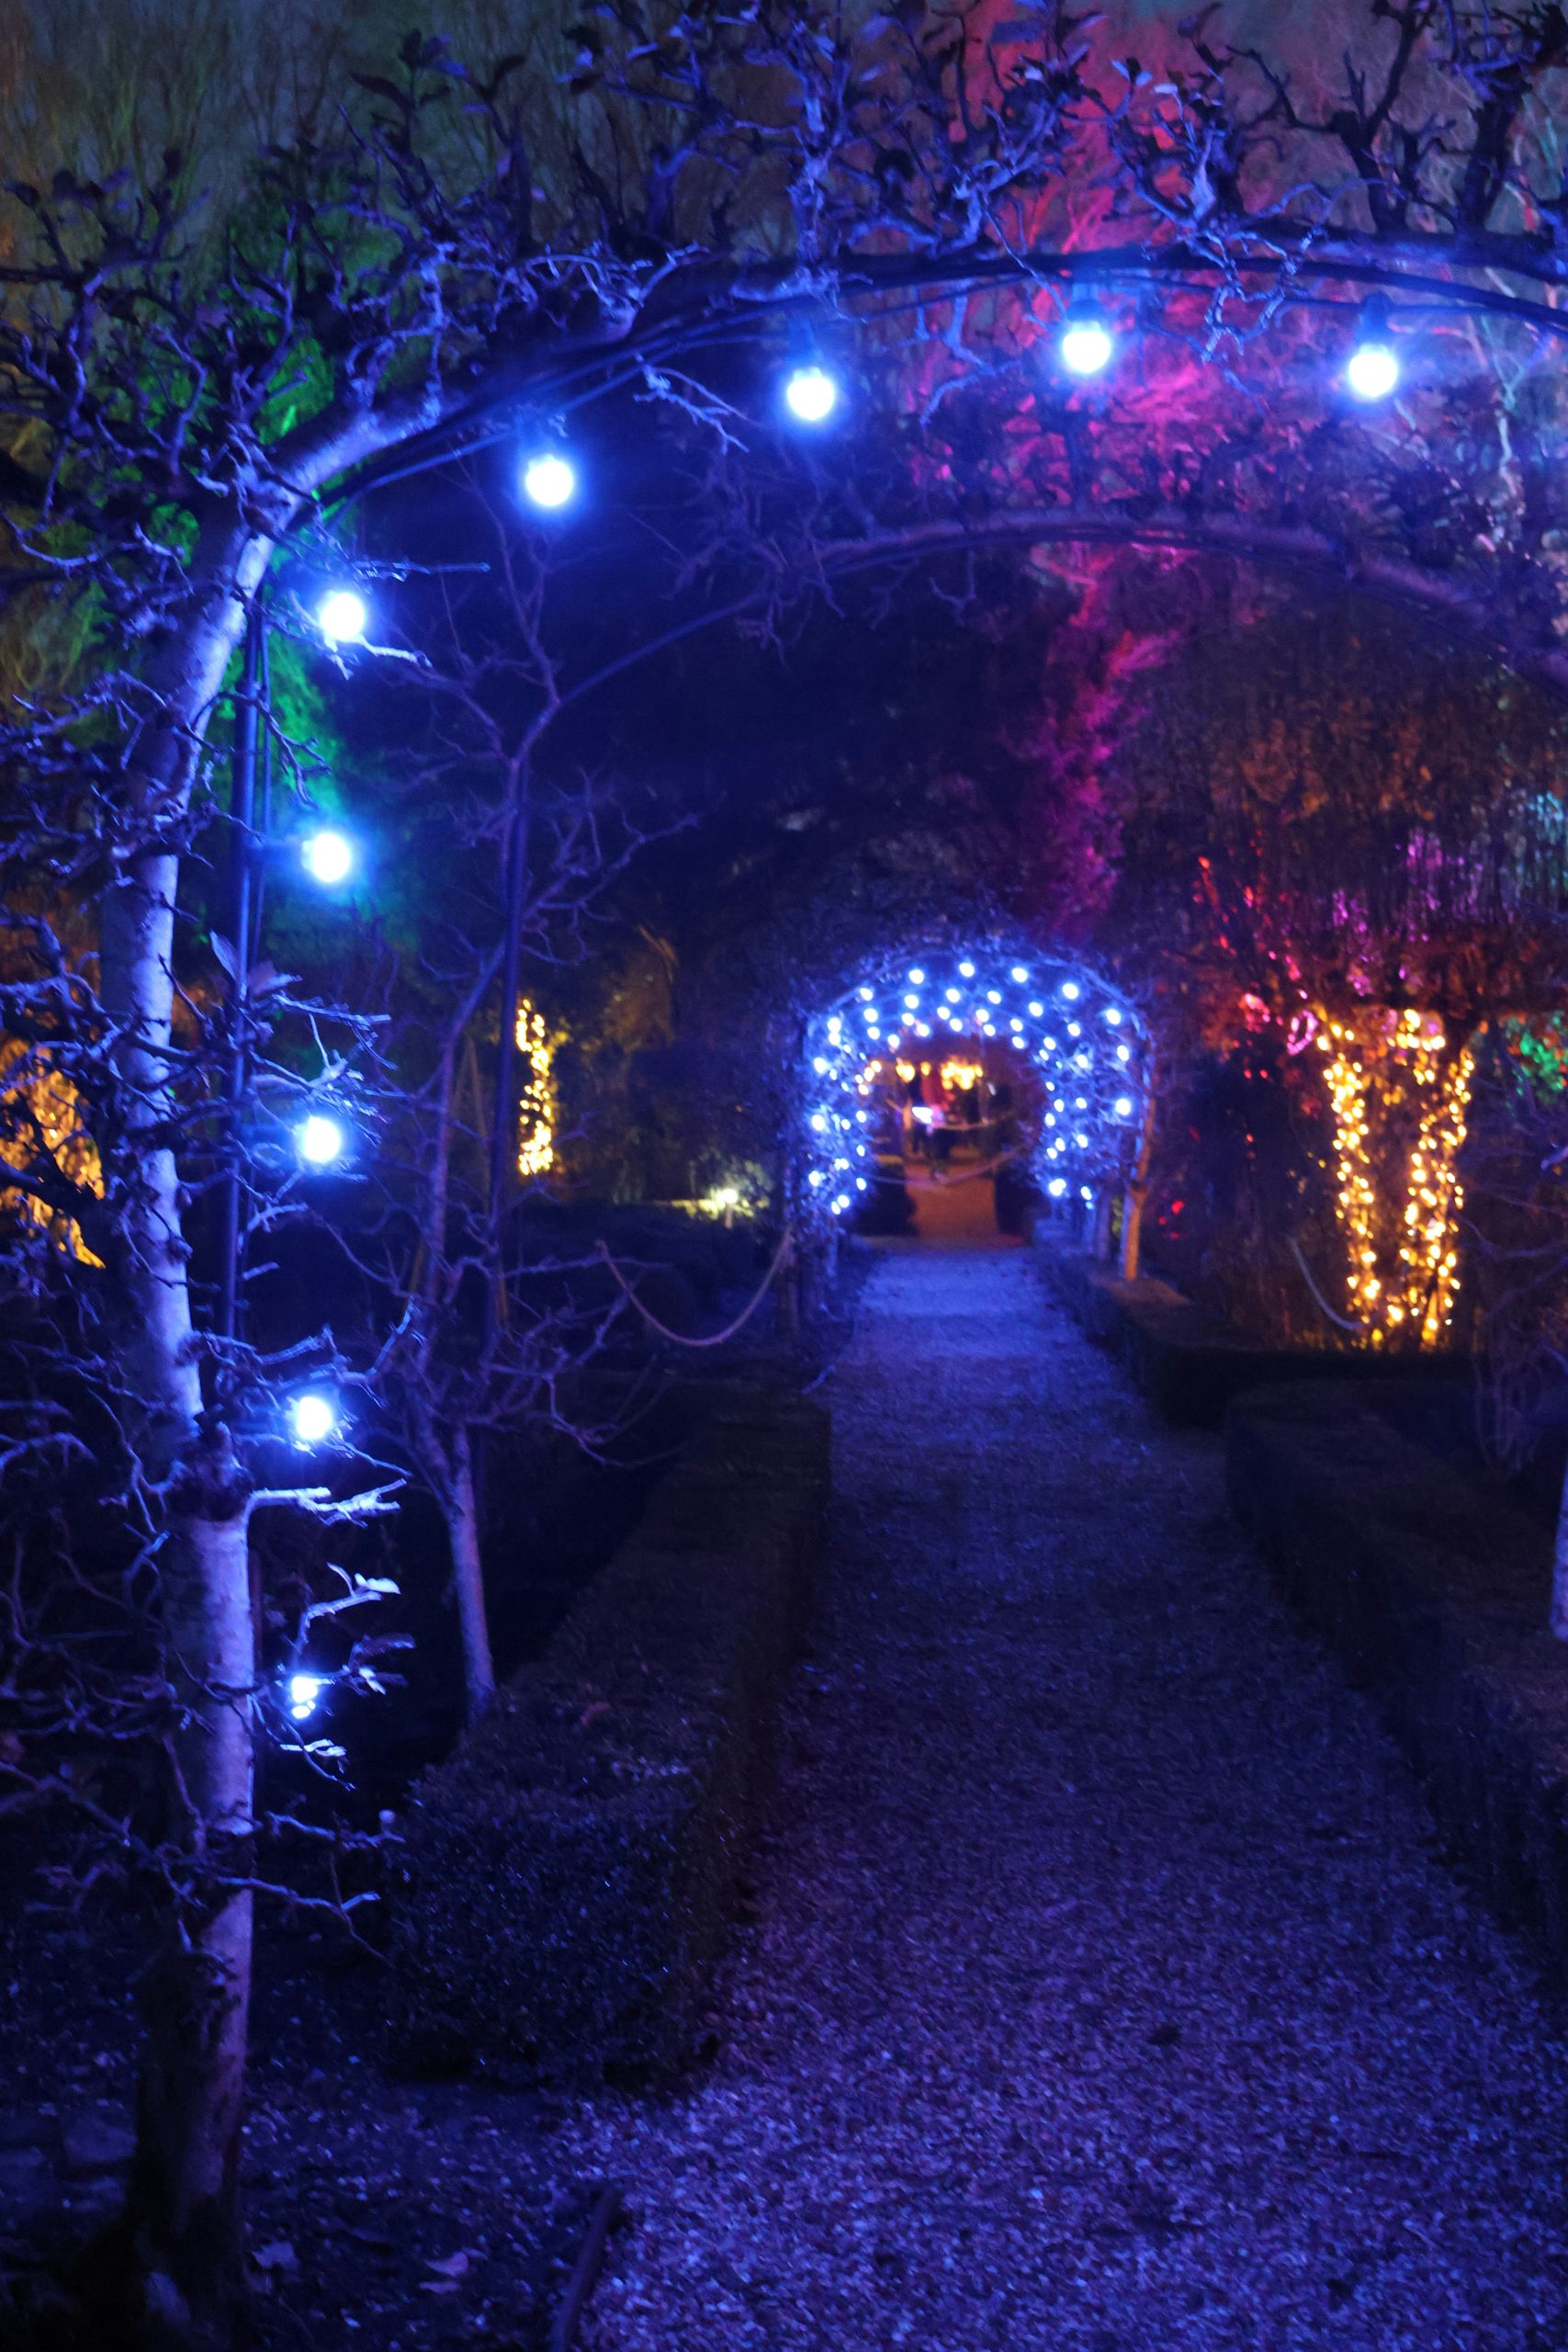
“This lighting scheme works because of its bold use of monochromatic color and repetition.”
By creating a tunnel almost entirely from blue lights, it creates an immersive, otherworldly experience. Your eyes aren’t distracted by multiple colors within the main feature. The repetition of the arch shape provides a strong sense of rhythm and depth, drawing you into the scene. The pops of other colors on the distant trees act as a beautiful backdrop, but the power of the design is in the focused, singular vision of the blue tunnel.
19. Line a Stone Path with Warm, Pebble-Like Embedded Lights
The embedded lights are what truly make this pathway magical. During the day, it’s a lovely stone and pebble walk. But at dusk, those warm, low-level lights transform the scene completely. They don’t just illuminate the path for safety; they cast a soft, enchanting glow upwards, backlighting the surrounding plants and making the textures of the pebbles and stones pop. This technique creates ambiance and mood, turning a functional path into the star of the evening garden.
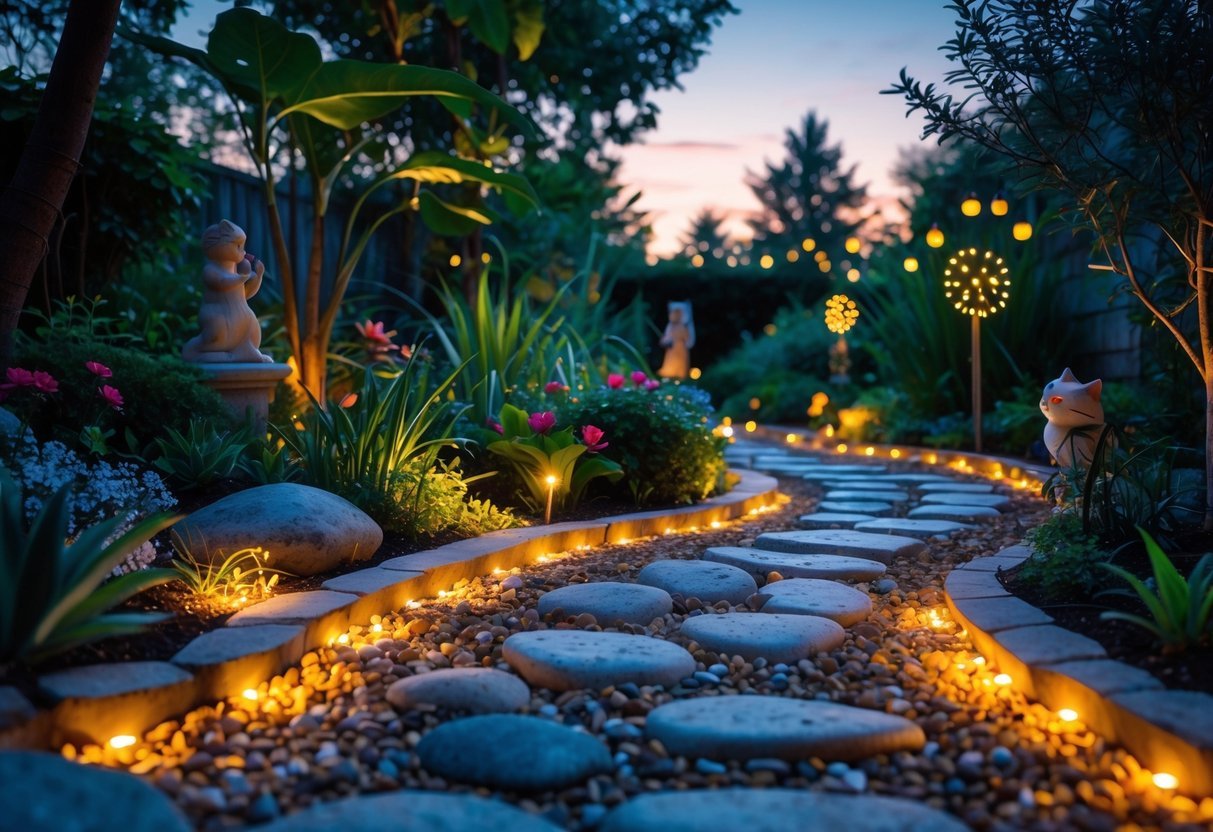
“When installing low-voltage landscape lighting, the golden rule is “See the light, not the fixture.” You want to hide the source of the light as much as possible.”
For a path like this, nestle the fixtures deep between plants or angle them so the bulb isn’t visible from the main viewing angles. The goal is to create soft pools of light on the path and gentle uplighting on the foliage, not to have glaring bright spots that cause you to squint as you walk.
20. Walk Through Glowing Archways on a Festive Garden Path
The formula for this magical lighting display is: 60% repetitive bright arches + 30% dramatic, colorful uplighting + 10% dark, silhouetted foliage. The brightly lit archways are the main event, creating a powerful sense of entry and procession. The trees lit in vibrant blues and purples in the background provide essential depth and a contrasting color story. Finally, the unlit dark foliage in the immediate foreground frames the view and makes the lighted elements appear even brighter and more magical.
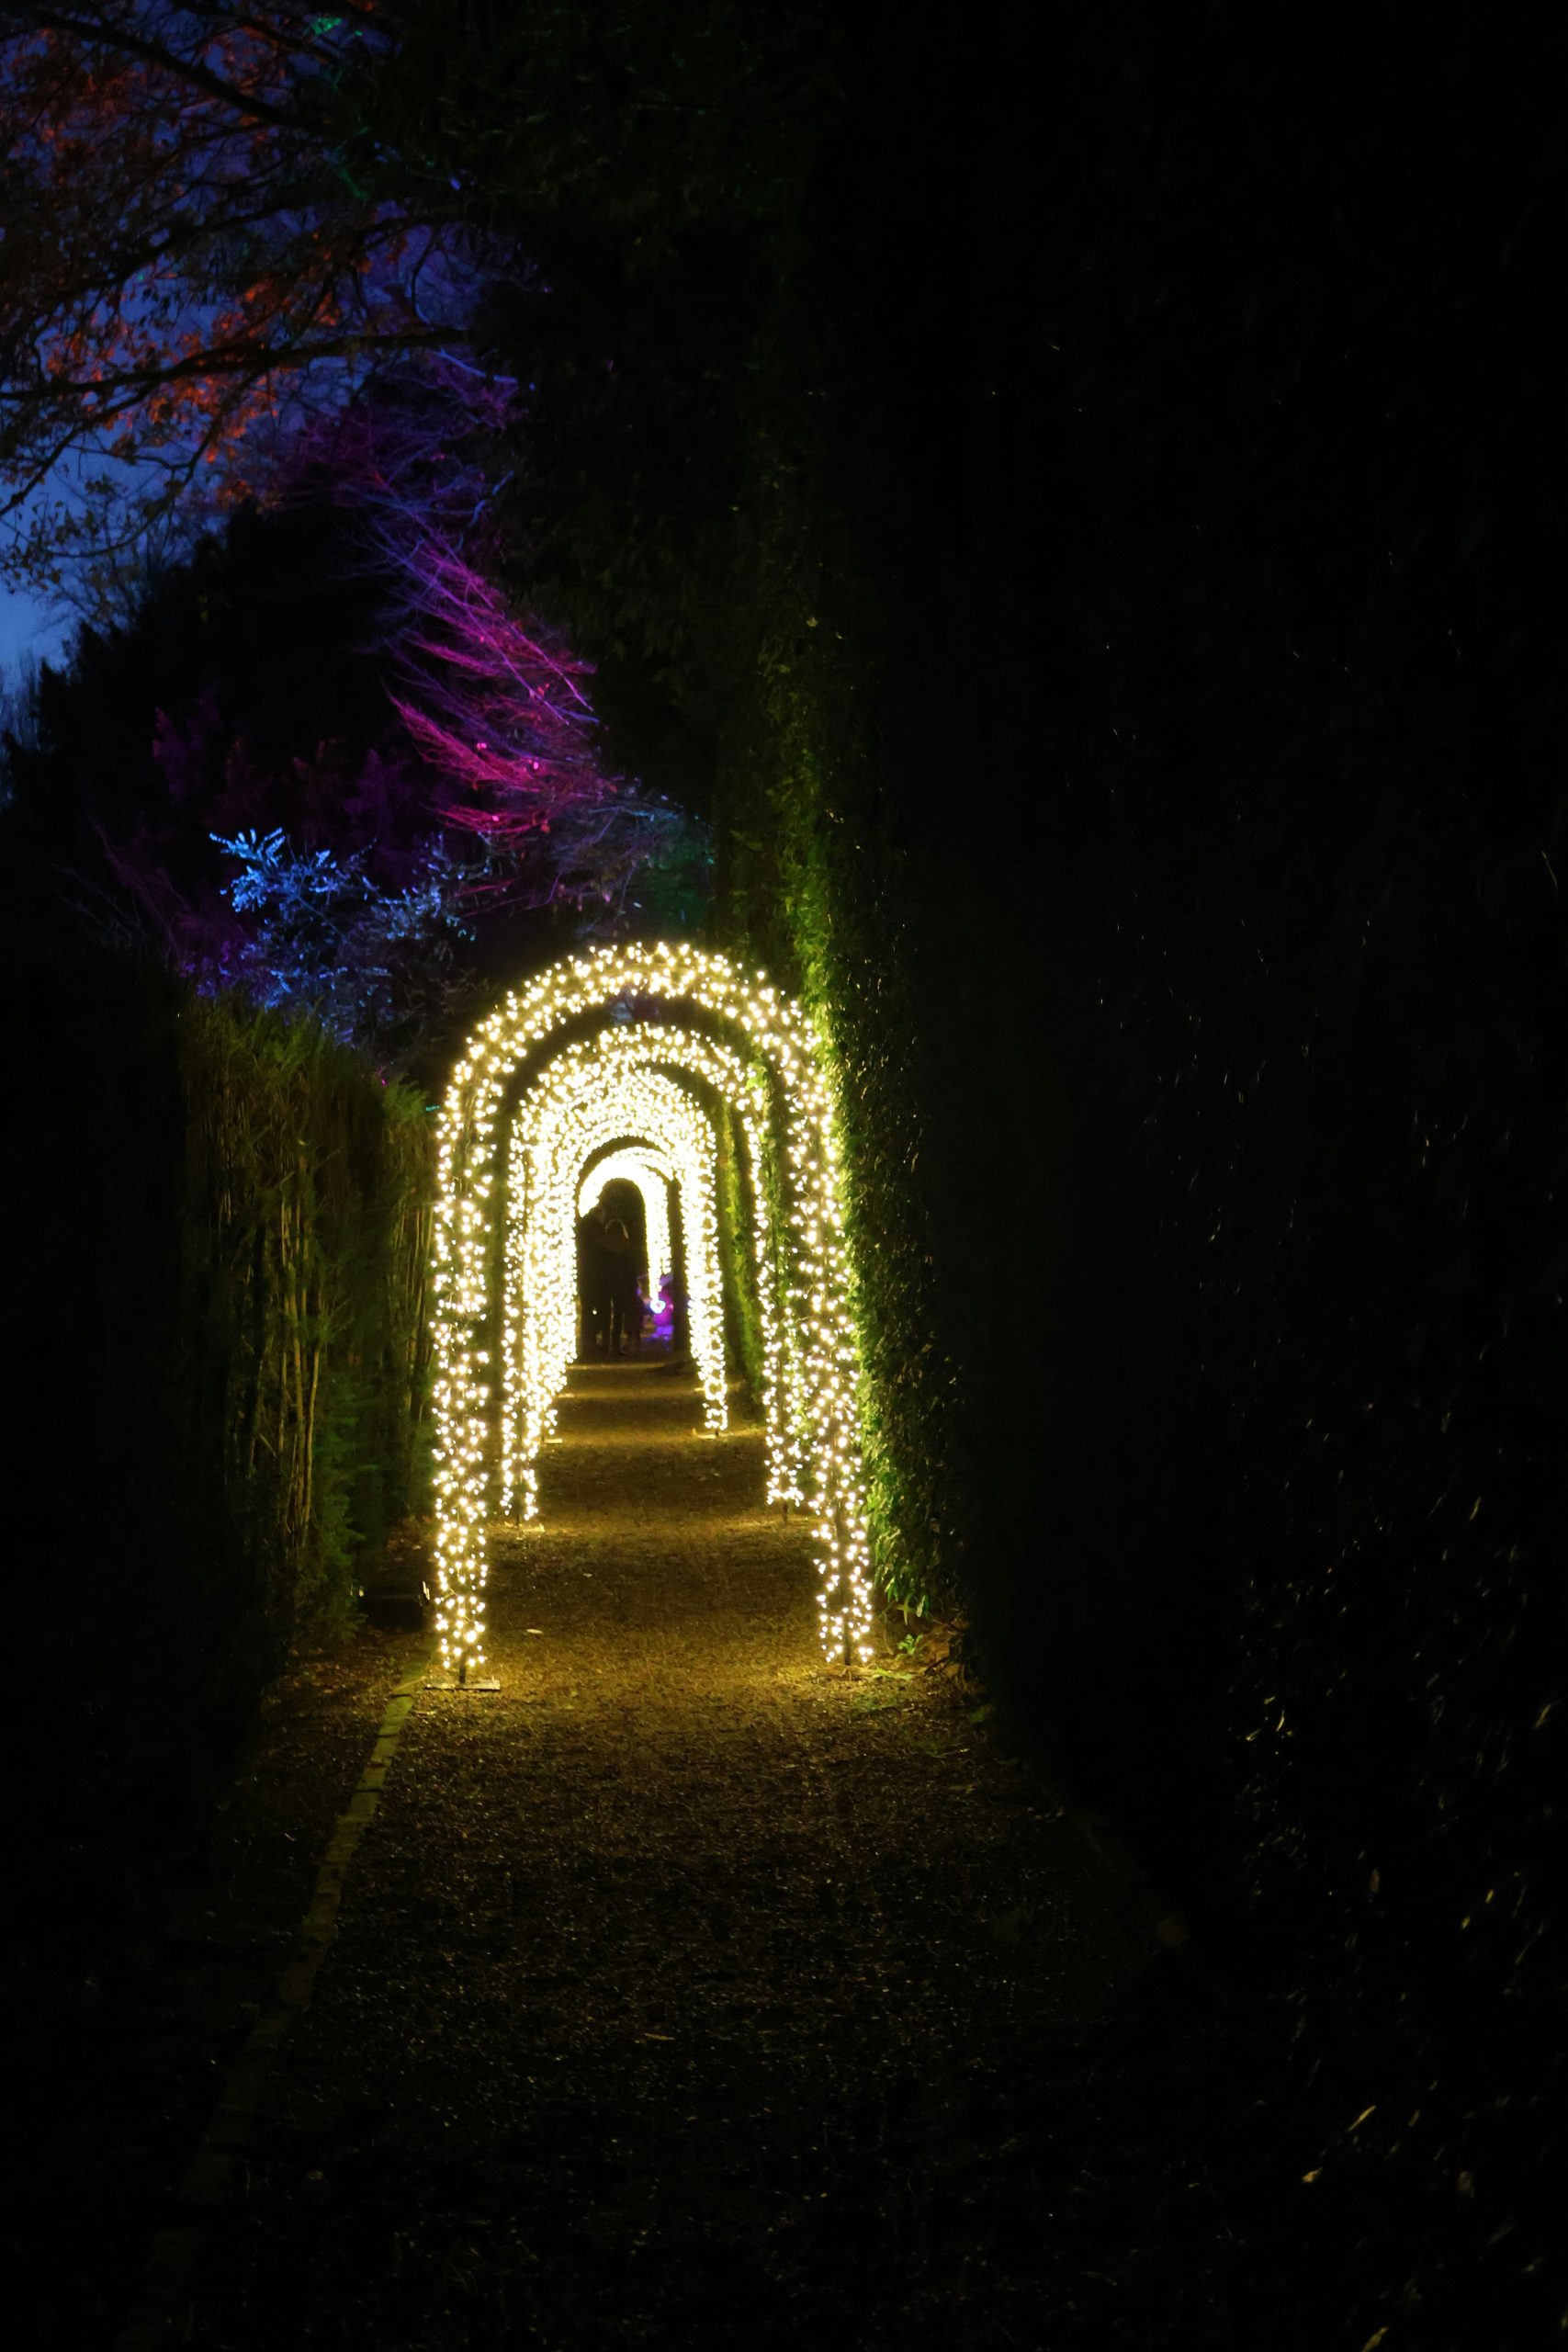
“A grand light installation like this needs space to be properly appreciated.”
This works best in a larger yard where you have at least 40-50 feet of pathway length to accommodate multiple arches and create that tunnel effect. You also need some distance—at least 20 feet—between the path and the trees in the background for the colorful uplighting to work effectively. Trying to cram this into a small, enclosed space would feel overwhelming and chaotic rather than enchanting. Compare with the sparser light arches in Idea #18 for smaller-scale inspiration.
21. Border a Winding Flagstone Path with a Riot of Colorful Flowers
This pathway feels so lush and inviting due to the “spill-over” effect. The designer hasn’t kept the plants neatly contained in their beds. Instead, the grass, flowers, and foliage are allowed to creep over the edges of the flagstones, softening the hard lines. This blurring of boundaries between the path and the garden makes the walkway feel like it’s an integral part of the landscape, not just something laid on top of it. The mix of textures, from the flat stones to the feathery foliage and bold blooms, adds to the rich, sensory experience.
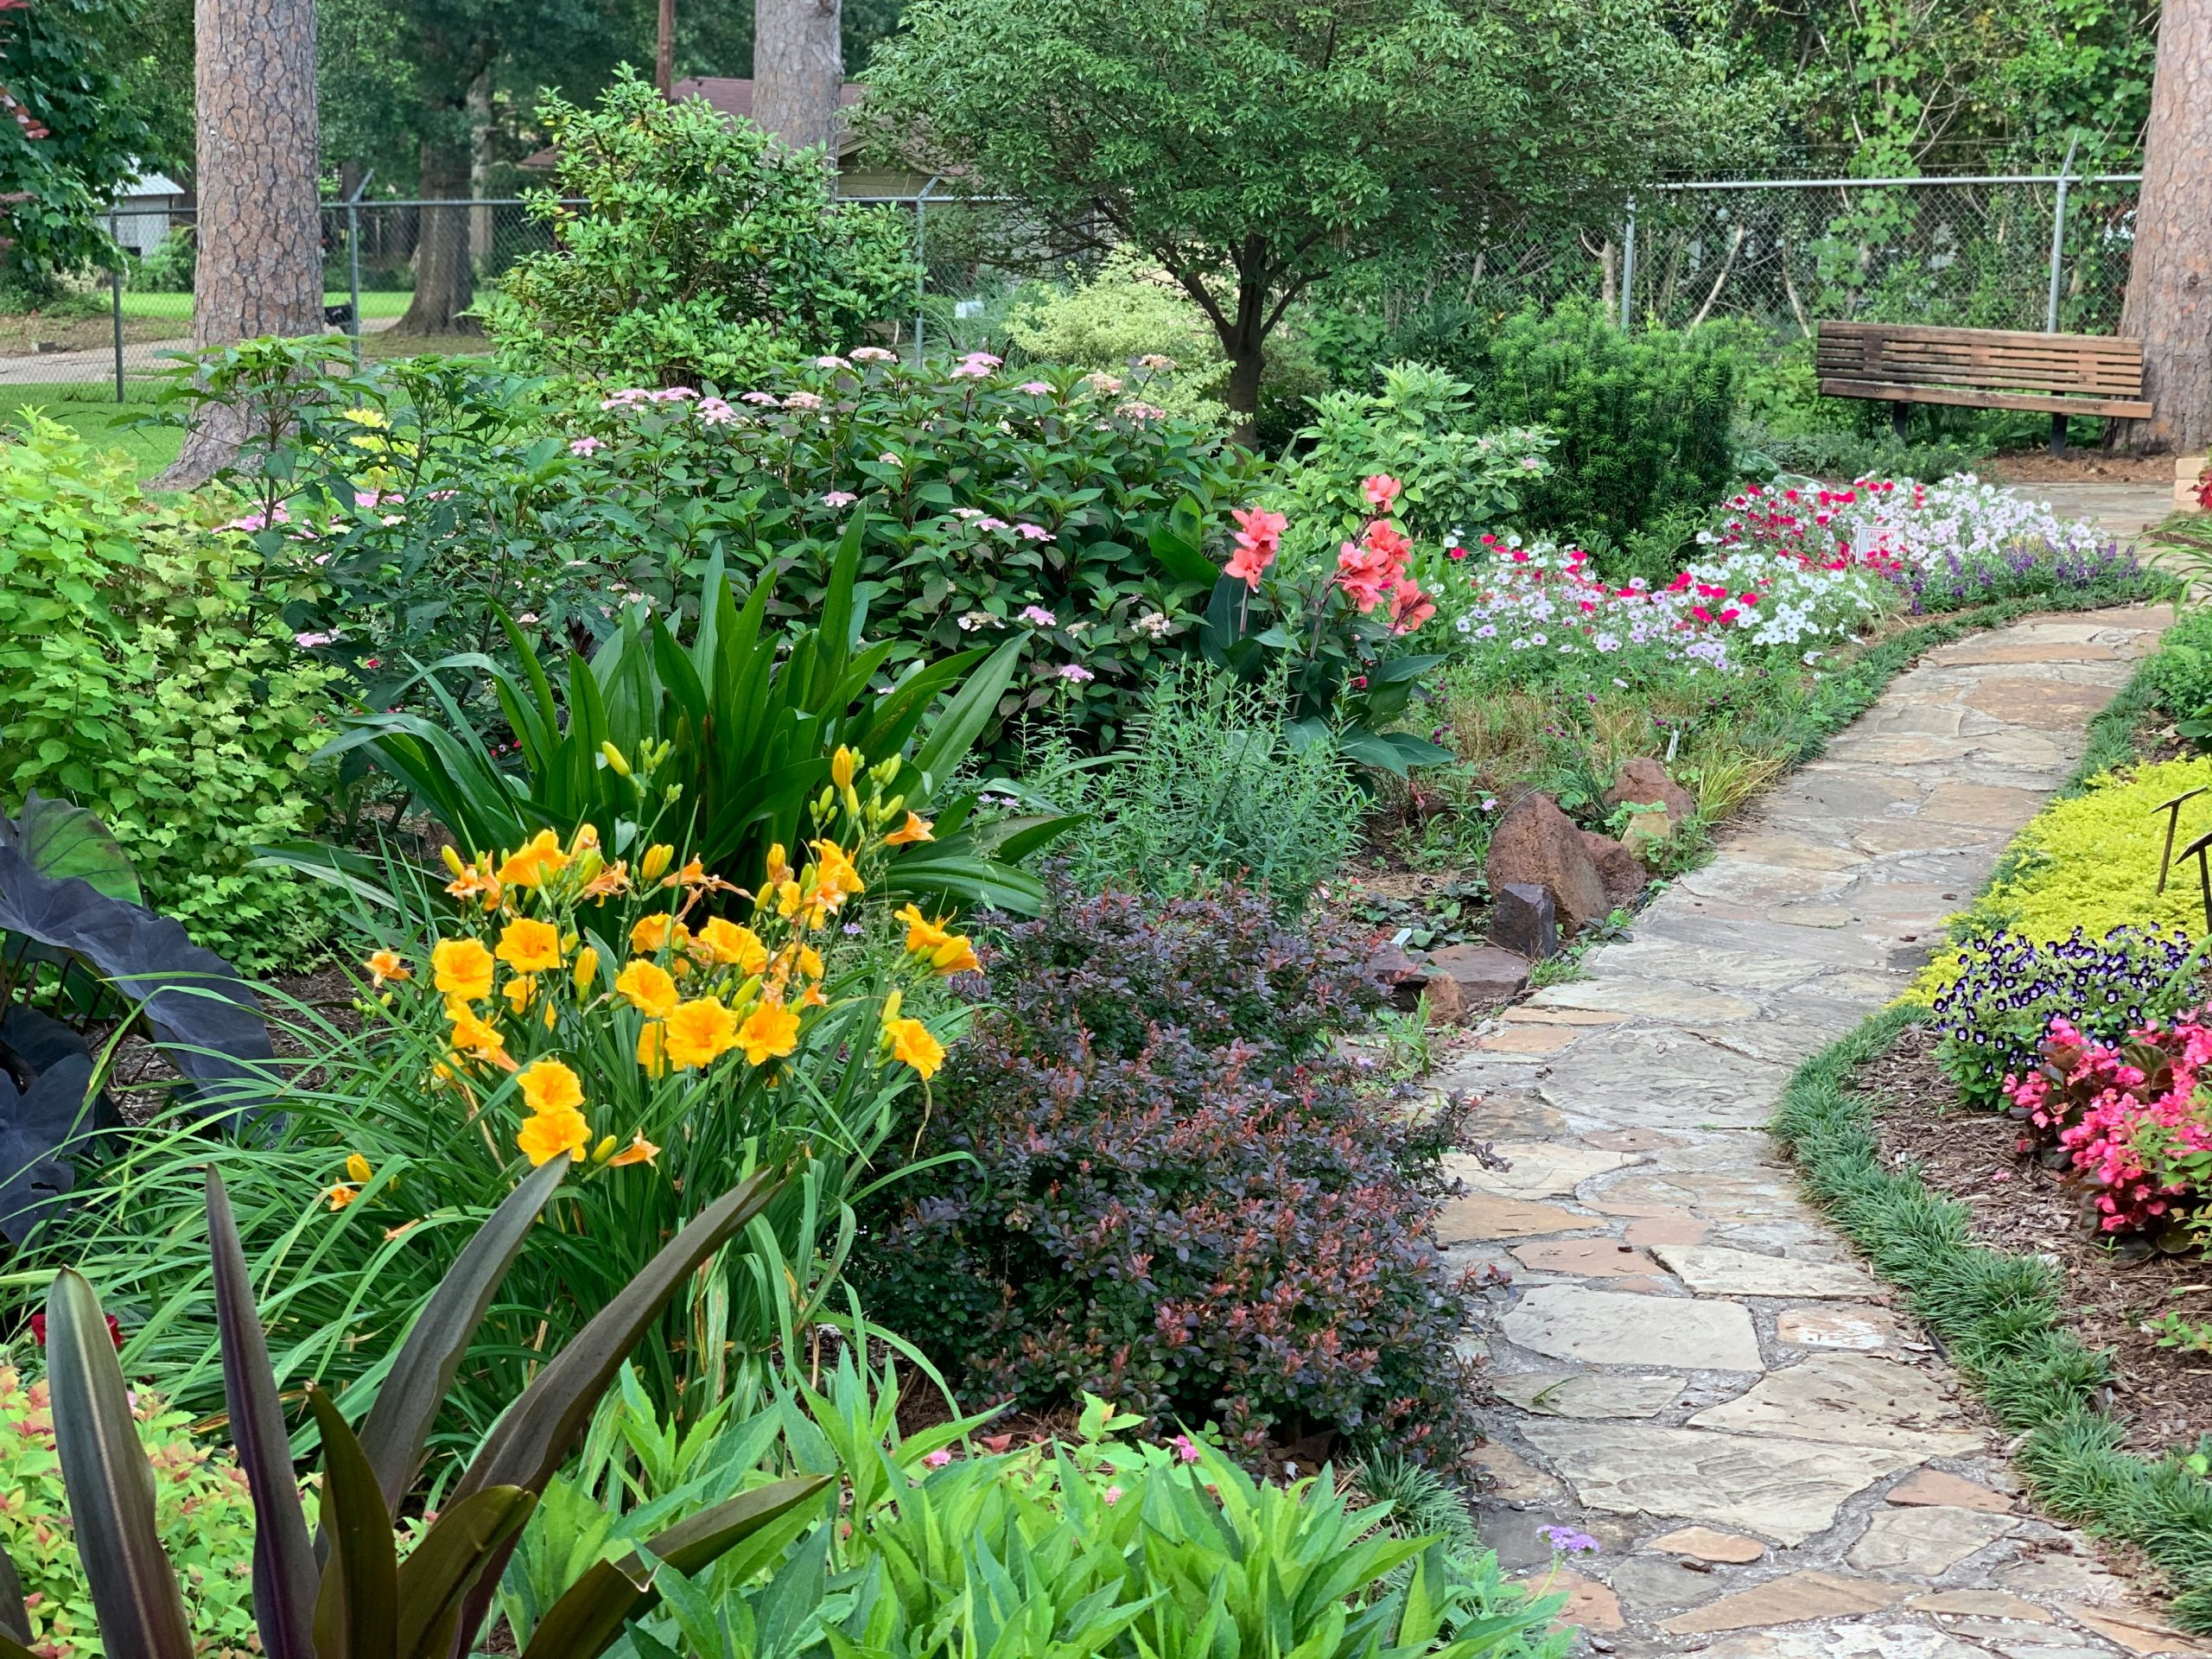
“A flower-heavy border can be expensive if you buy mature perennials and annuals from a nursery.”
To get this look for less, focus on seeds and self-sowing plants. Buy packets of seeds for hardy annuals like cosmos, zinnias, and marigolds for a few dollars. For perennials, look for varieties that spread easily, like creeping phlox or certain types of geranium. Ask friends with established gardens for cuttings or divisions—gardeners are almost always happy to share! This approach requires more patience but can save you hundreds of dollars.
22. Stroll Through Arches of Green Vines and Blooming Lavender
The most crucial element here is the powerful repetition of the vine-covered arches. A single arch would be a nice feature, but creating a long allée of them transforms the path into a grand, formal procession. This repetition creates a strong visual rhythm that draws the eye directly to the brick building at the end, making the destination feel more significant. It provides a sense of enclosure and intimacy within a larger garden space, turning a simple walk into a memorable experience.
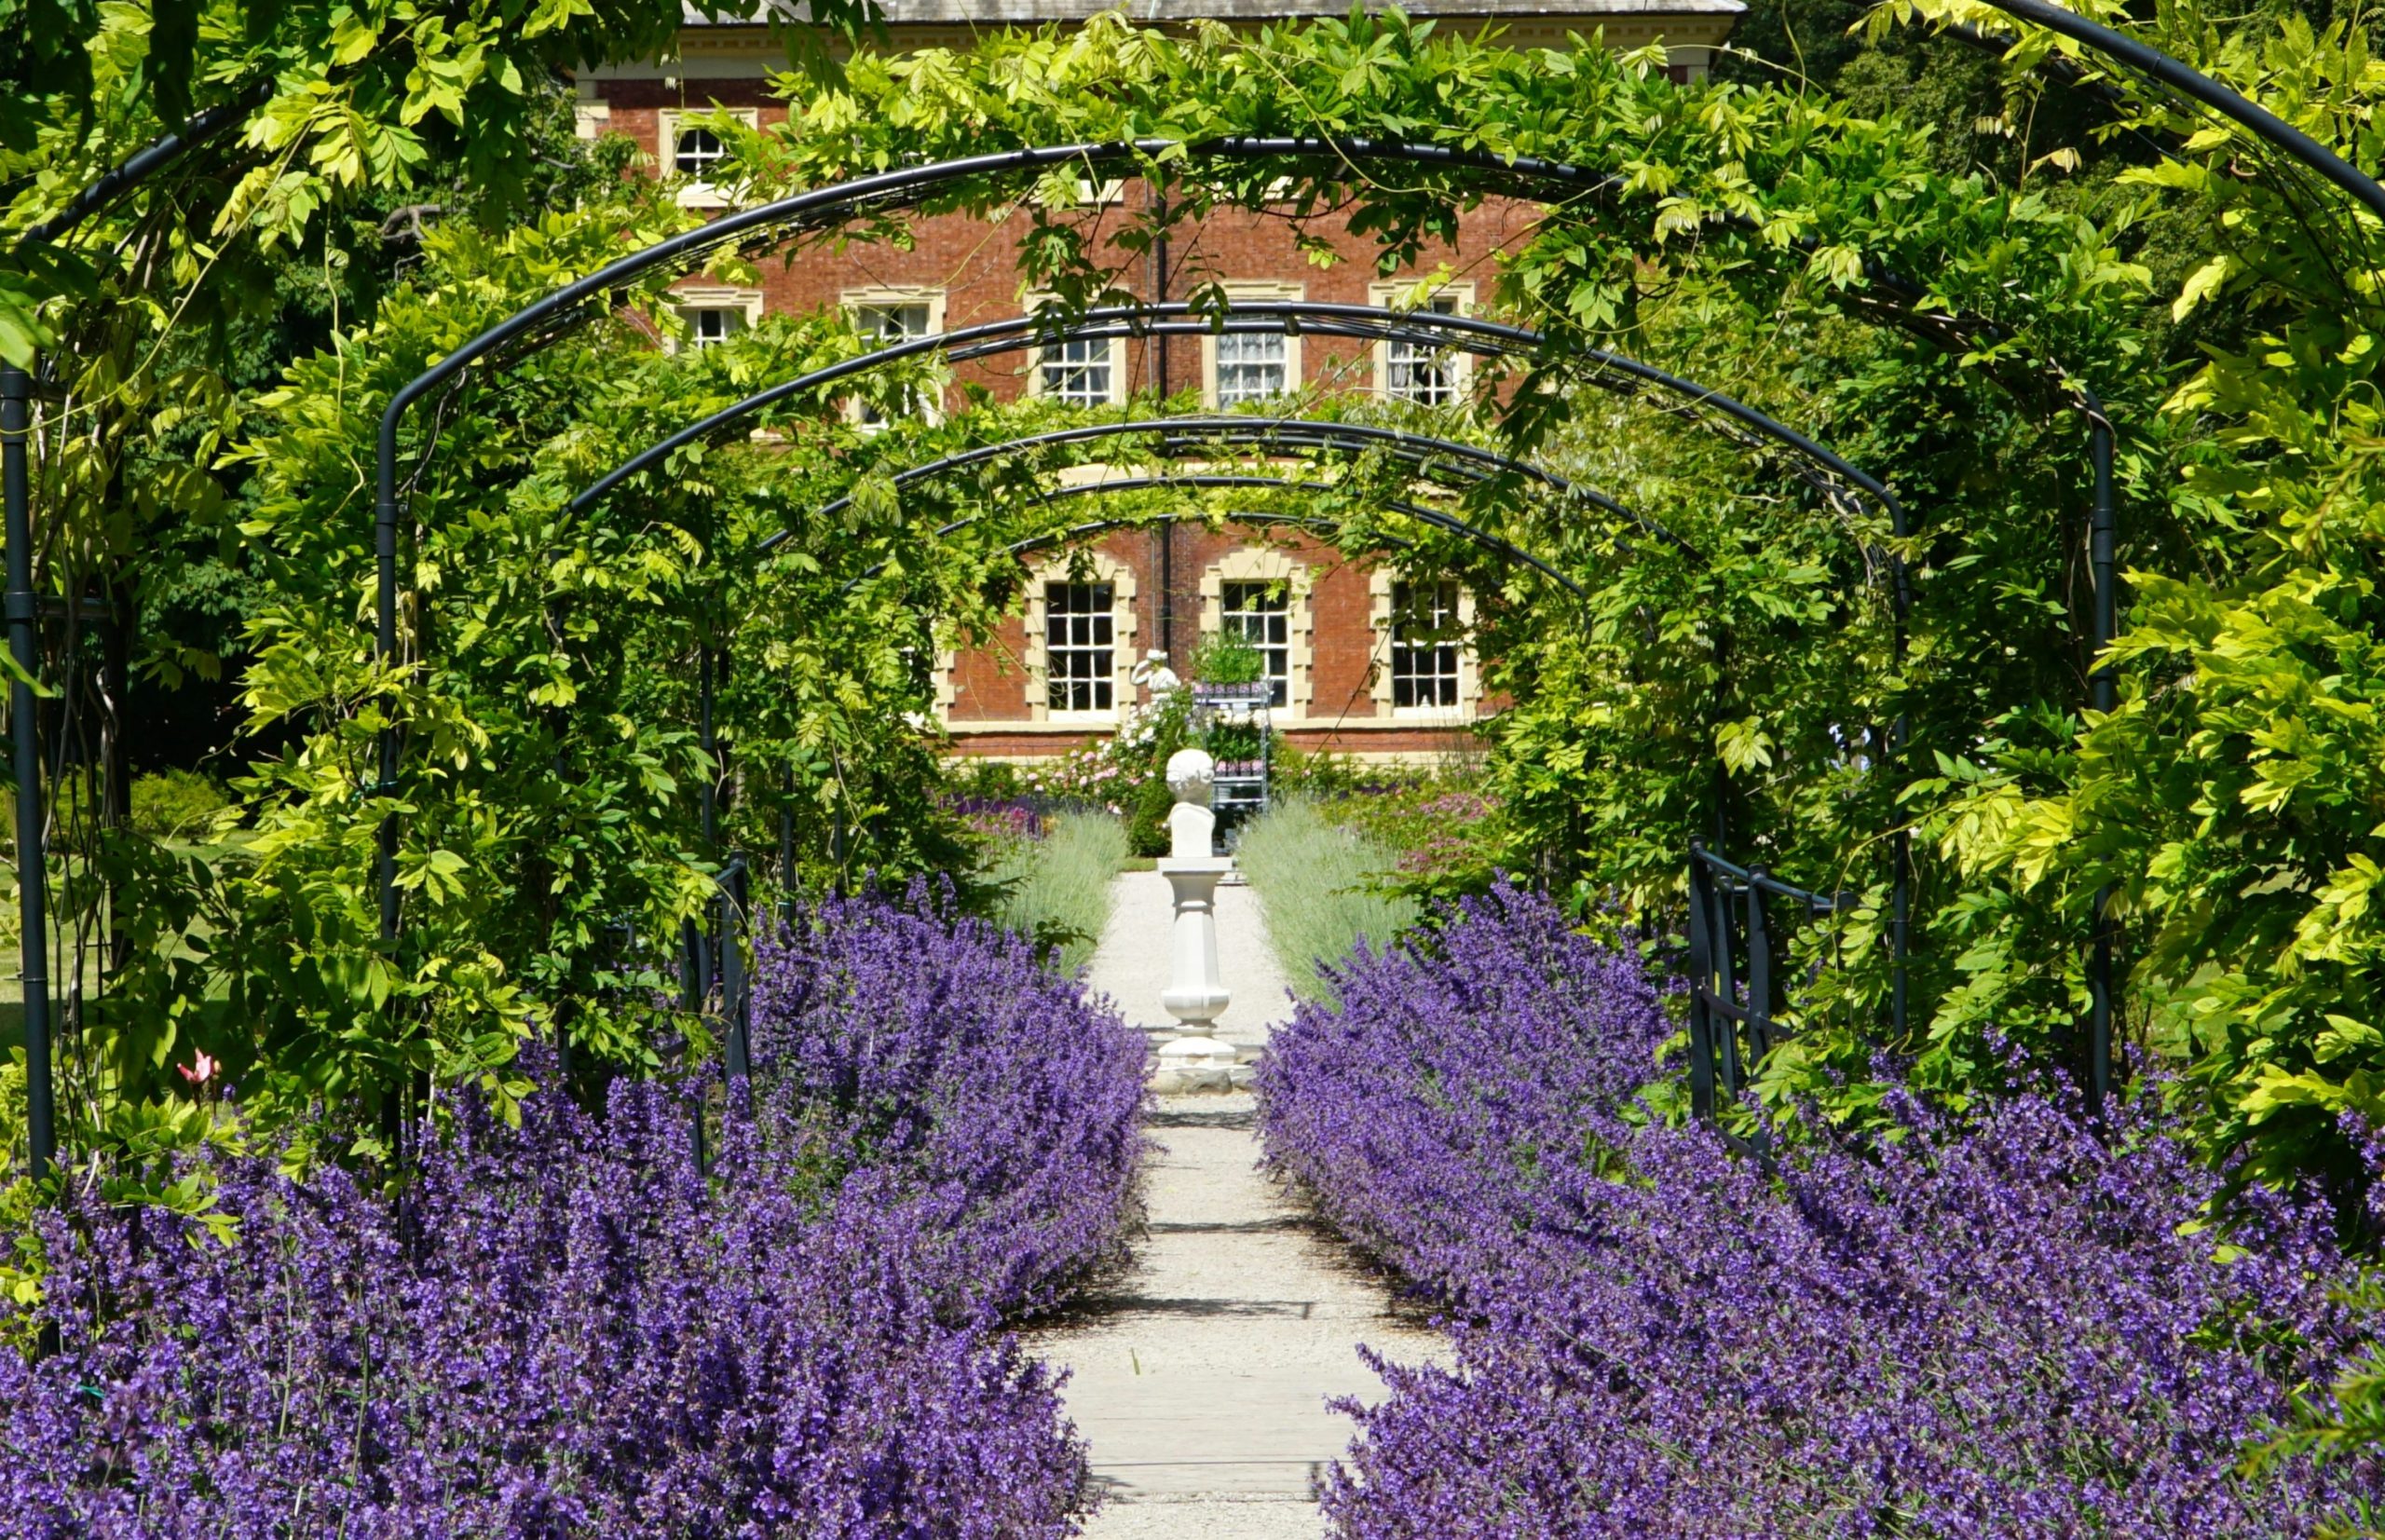
“An installation this stunning comes with significant maintenance.”
Those green vines need to be regularly trimmed and trained to keep them from becoming a tangled, overgrown mess. Lavender requires full sun and excellent drainage, so it may not be suitable for all climates or soil types. It also needs to be pruned back every year after flowering to prevent it from becoming woody and sparse. And be warned: all that lavender will be a paradise for bees. While generally a good thing, it’s something to consider if you have allergies or small children. This look might not be the best choice if you have material concerns, see our mistakes section for more on that.
23. Get Creative with an Arbored Path Edged with Upcycled Tires
This entire look is a masterclass in budget-friendly, creative gardening. The use of old tires, painted a unifying light color, is a brilliant way to create a sturdy, unique pathway border for almost no cost. You can often get old tires for free from local auto shops. The overhead arbor can be built from reclaimed wood or even sturdy tree branches. The lush vine coverage and decorative flowers at the end are the real stars, proving that a huge budget is not a prerequisite for a whimsical and impactful garden design.
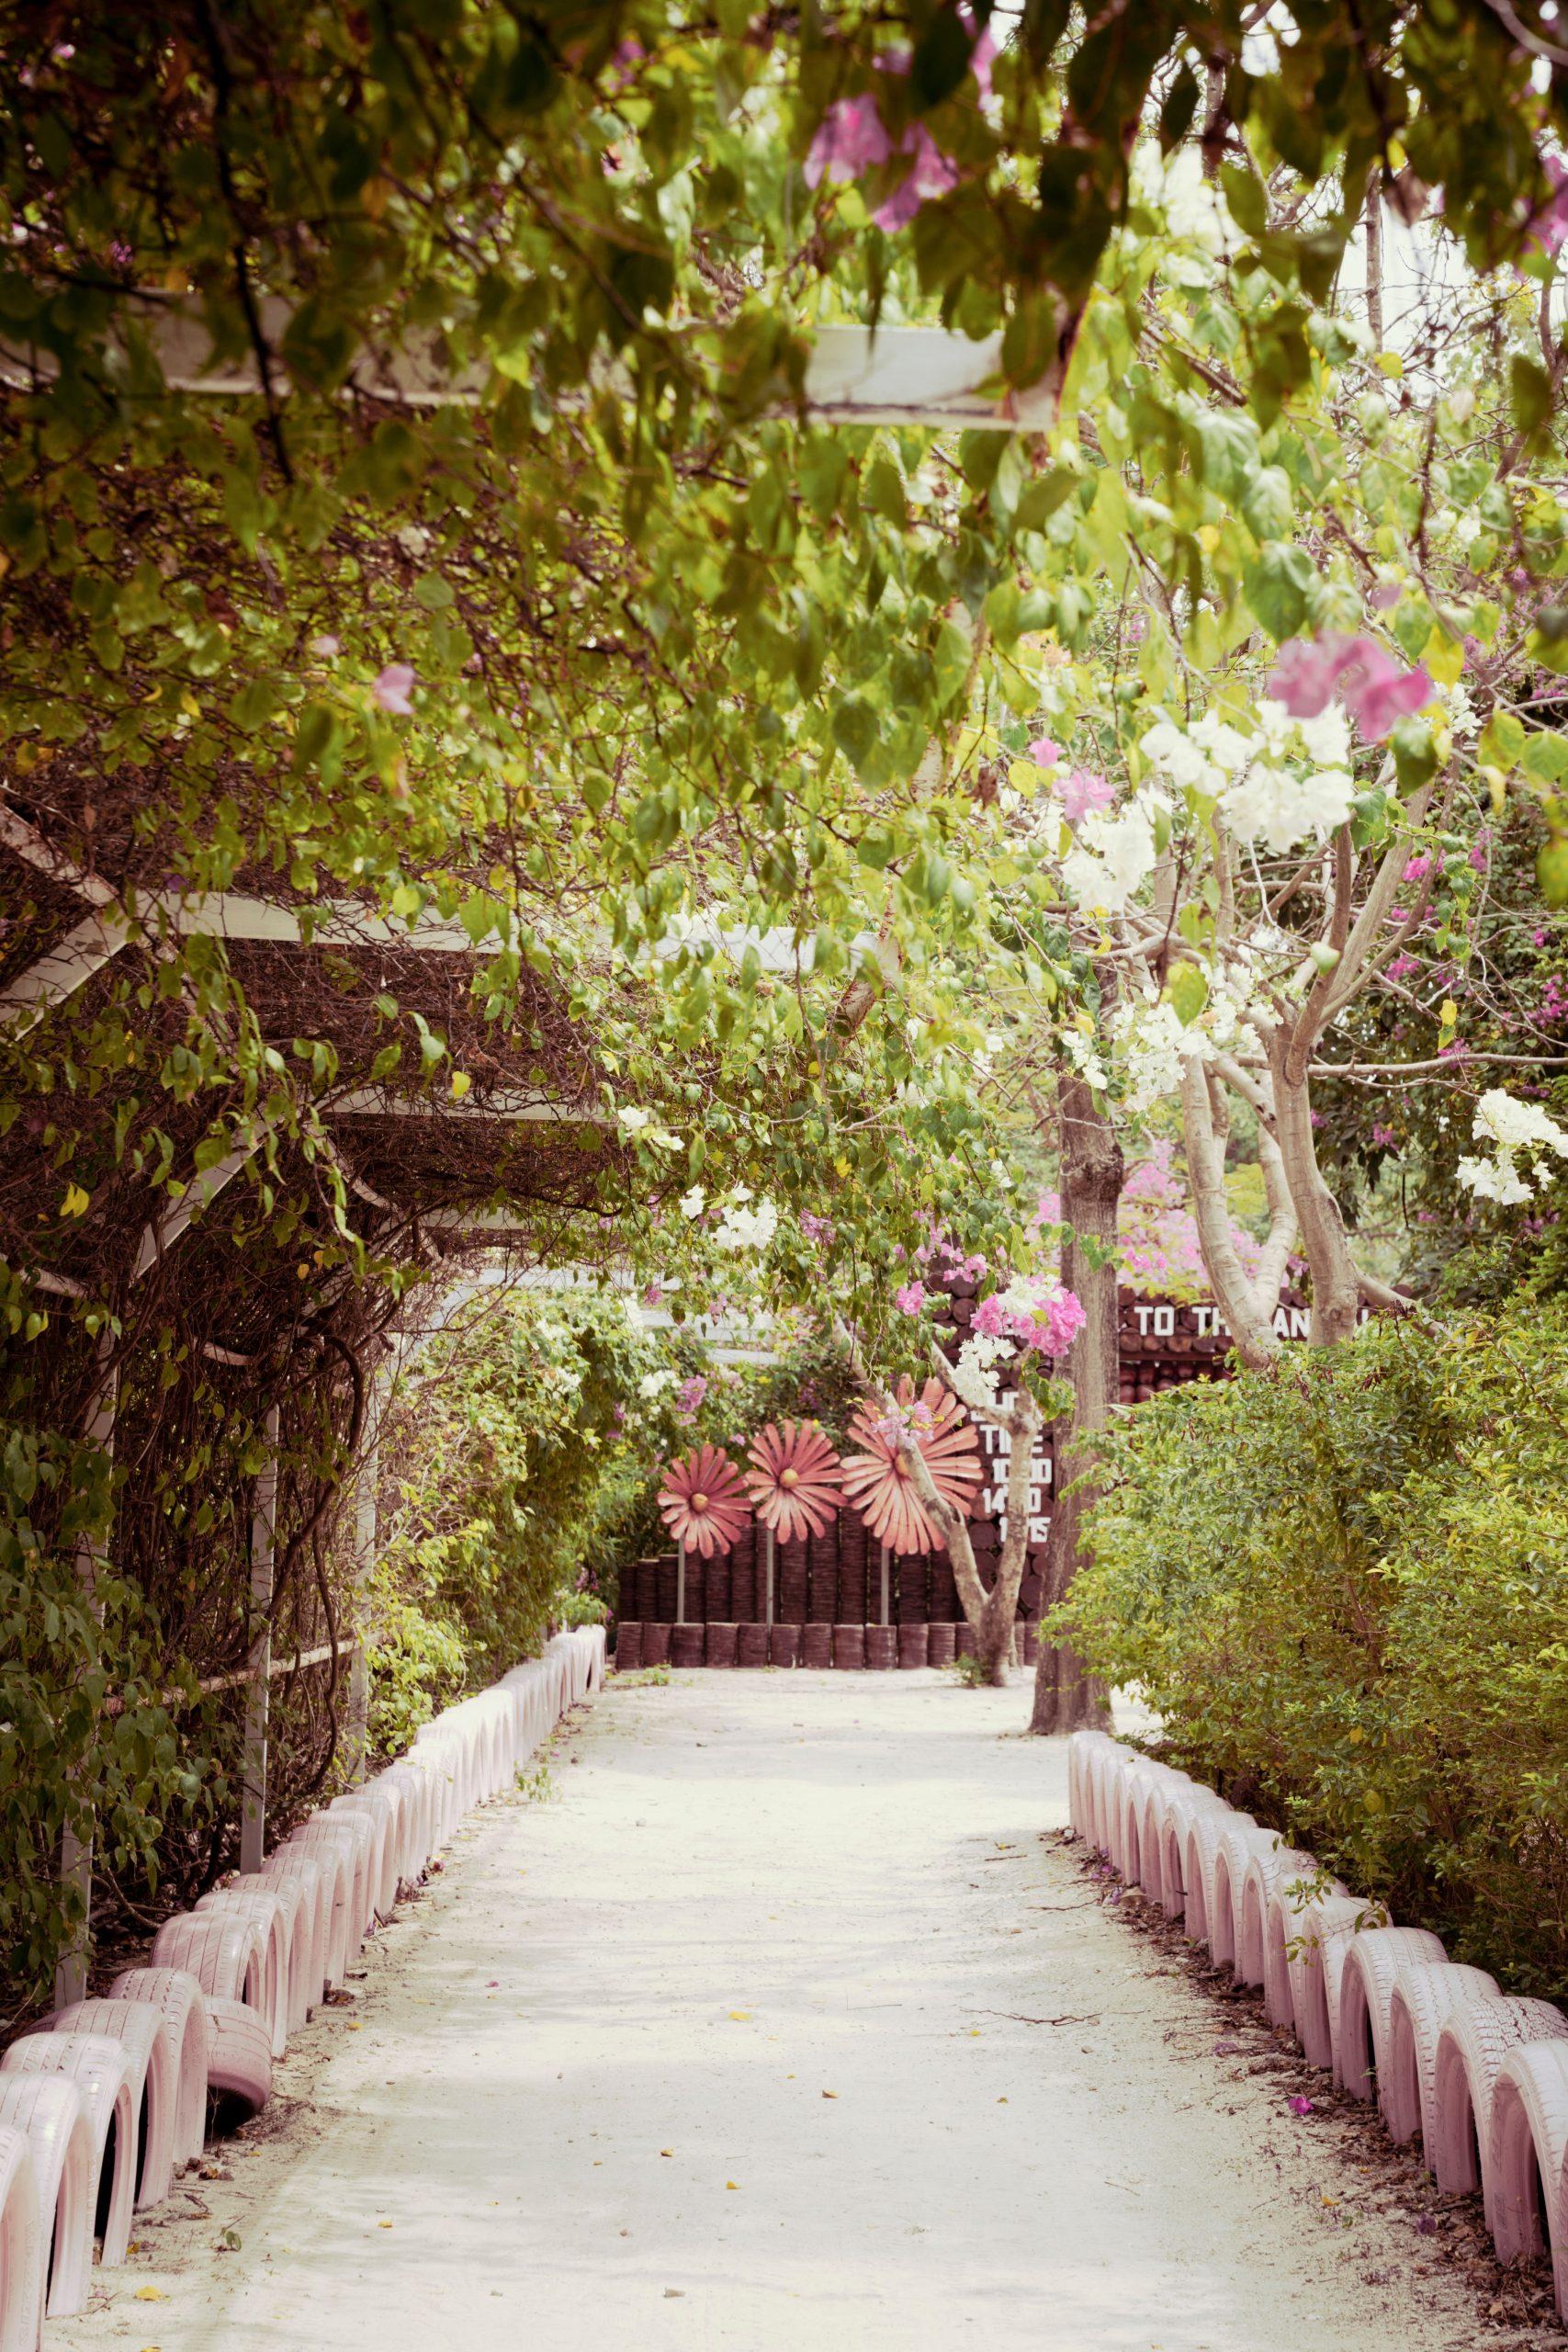
“Creating those decorative flower shapes is a fun, high-impact DIY project.”
Time: 2-4 hours
Cost: Under $30
Step 1: Source some old tires (ask a local garage, they may be happy to give them away).
Step 2: With a very sharp utility knife or a jigsaw, carefully cut a petal pattern around the top sidewall of the tire. Be cautious as tire treads can contain steel wires.
Step 3: This is the tricky part. You need to flip the tire inside out. It requires some muscle—stand on the bottom tread and pull the cut sidewall up and over.
Step 4: Once flipped, the tire will naturally form a flower shape.
Step 5: Clean it thoroughly and paint it with a durable outdoor spray paint in your chosen color.24. Mix Gray Stepping Stones with a Carpet of Purple and Pink Flowers
To achieve this “flower carpet” look, choose low-growing, spreading groundcover plants that can handle a bit of foot traffic. Creeping thyme, mazus reptans, or dwarf mondo grass are excellent choices to plant in the gaps between stones. For the colorful borders, use self-sowing annuals like alyssum or trailing lobelia. The key is to plant them densely. Don’t be afraid to pack them in. This will help them out-compete weeds and give you that lush, abundant look much faster.
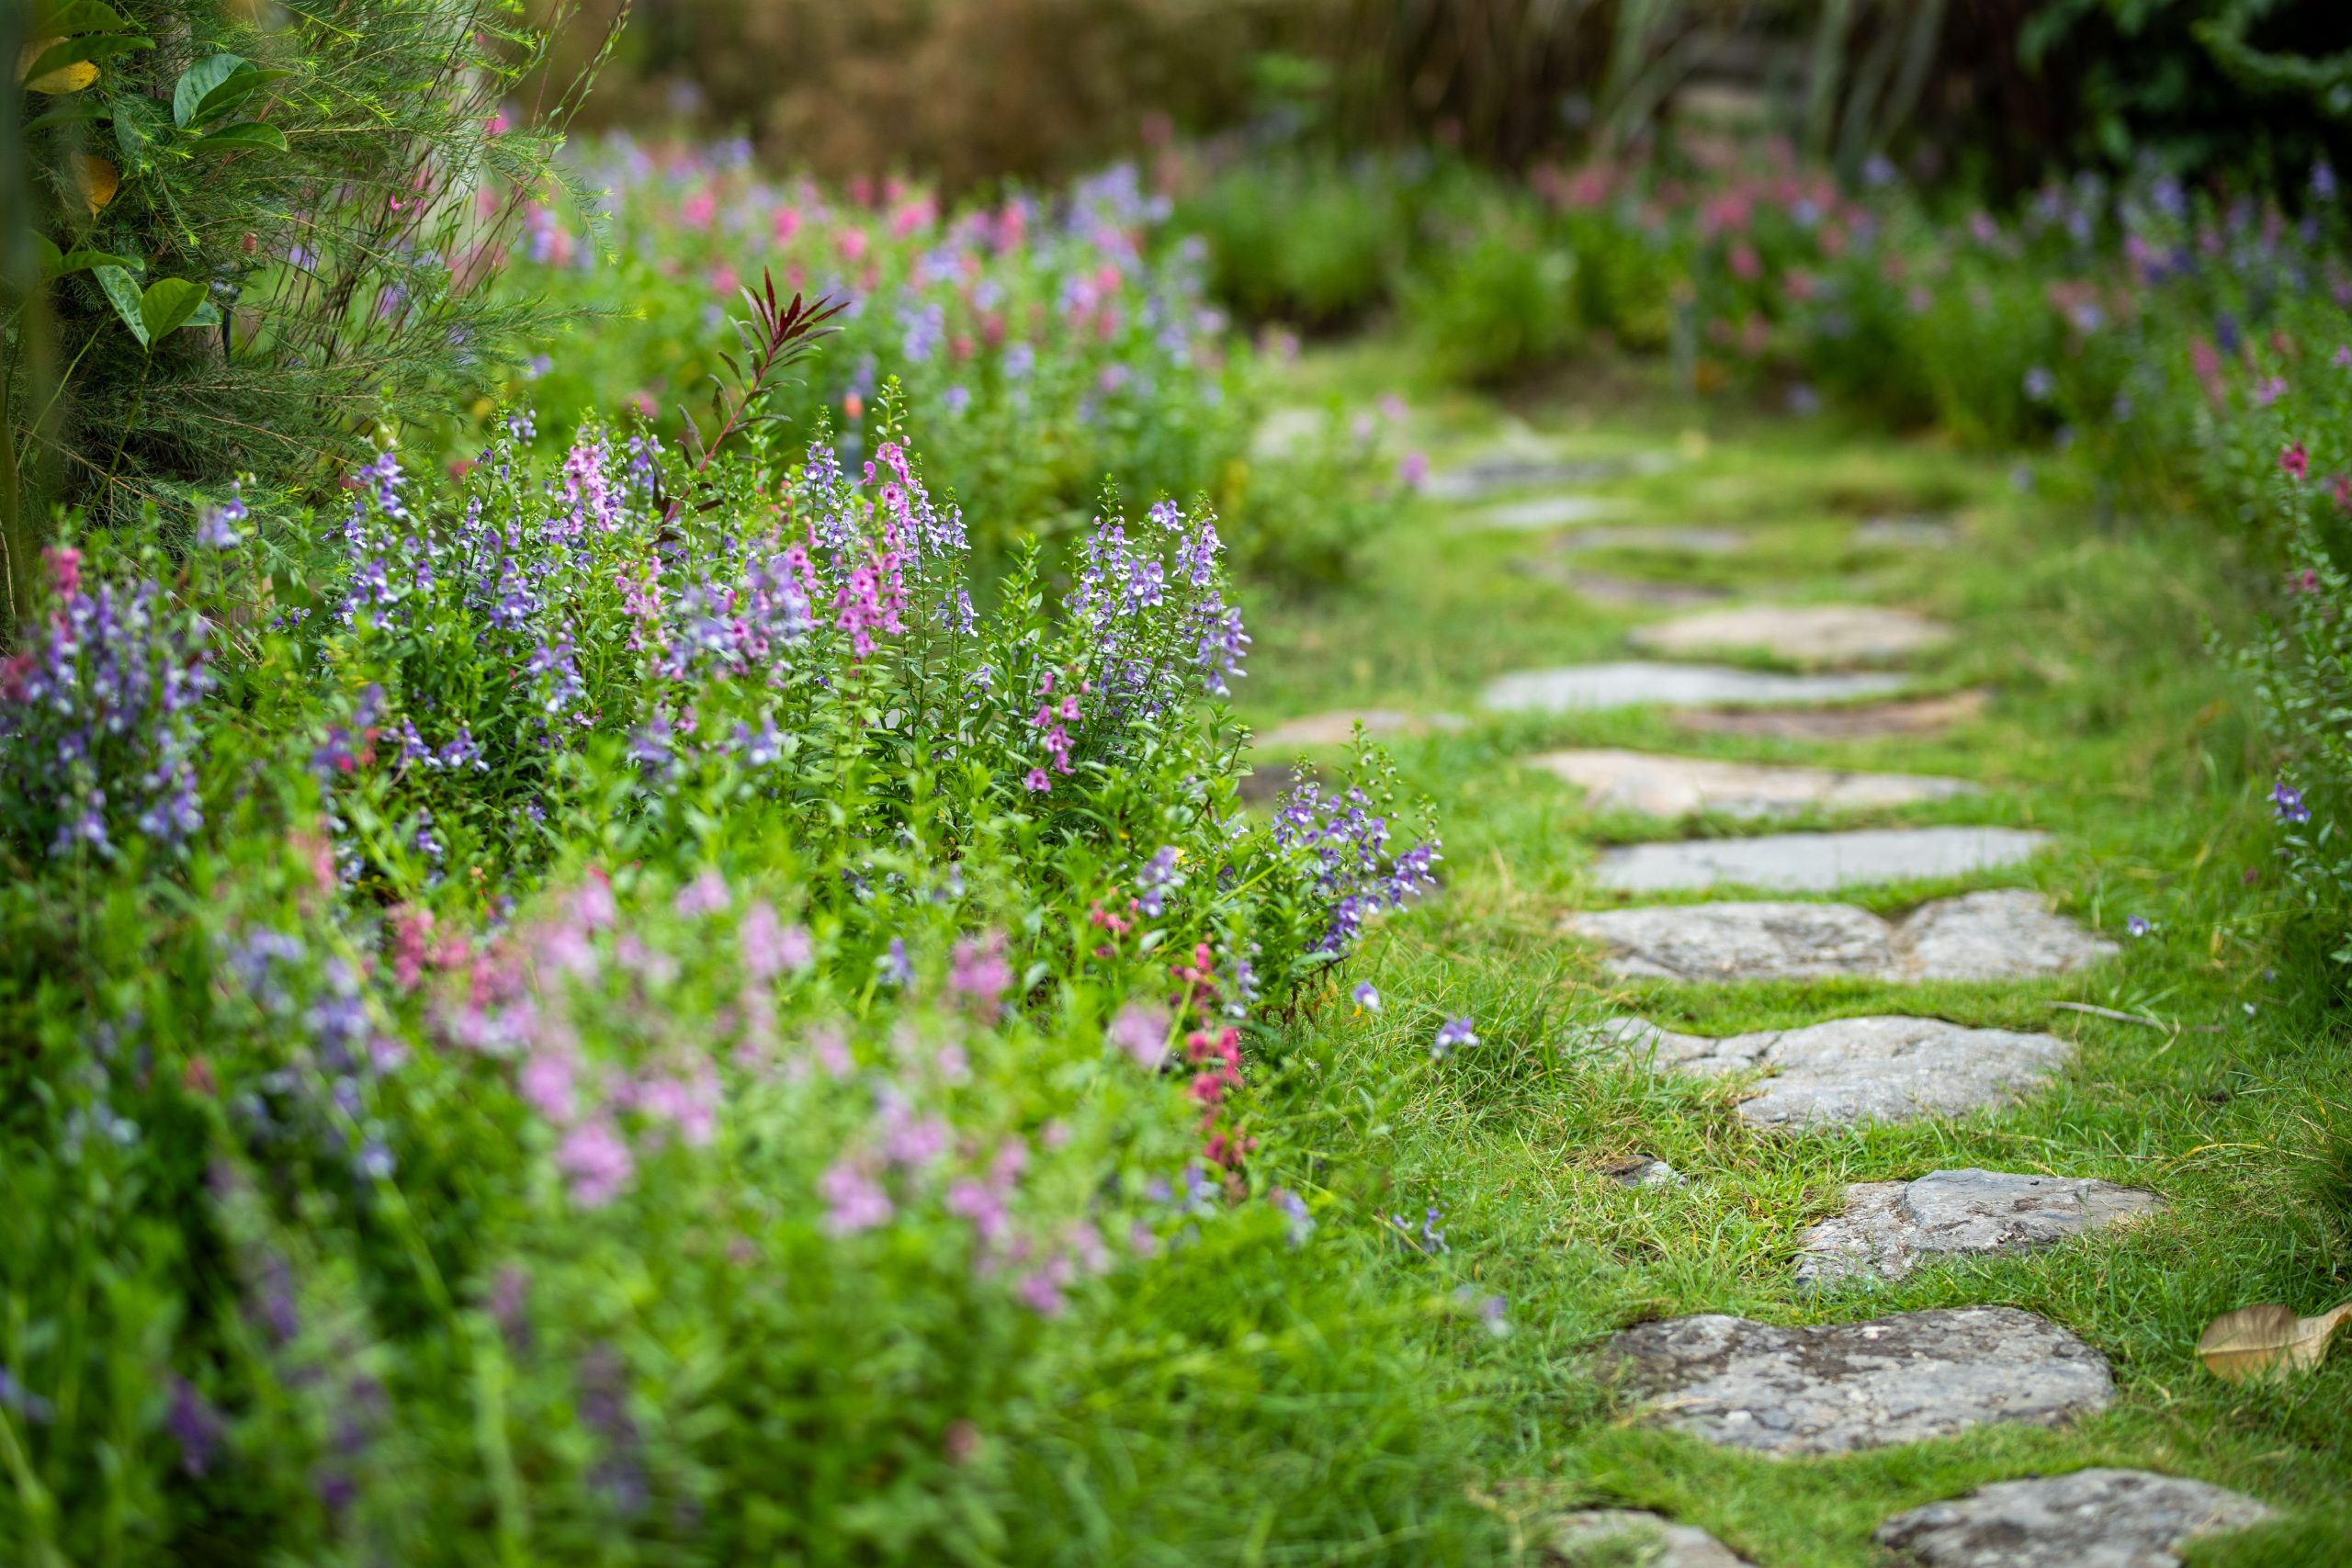
“This pathway’s visual appeal is built on a foundation of textural contrast.”
The formula is approximately: 40% hard, smooth stone + 60% soft, colorful botanicals. The gray stepping stones provide a neutral, solid surface for walking, their coolness balancing the visual heat of the flowers. The surrounding plants, with their mix of fine-leaved foliage and delicate purple and pink blooms, create a sea of soft texture. The success of the design hinges on this interplay between hard and soft, plain and patterned.
25. Lay a Geometric Pebble Mosaic Path Between White Garden Walls
A pebble mosaic is a true work of art, but it is not a low-maintenance surface. The countless tiny gaps between the stones are magnets for dirt, debris, and algae growth, especially in shadier spots. You can’t just sweep it clean; it will need to be regularly washed with a hose and a soft brush. Keeping those white pebbles bright white will require a yearly cleaning with a specialized outdoor cleaner. Also, if a stone comes loose, it can be tricky to repair seamlessly, so it’s best for moderate, not heavy, foot traffic.
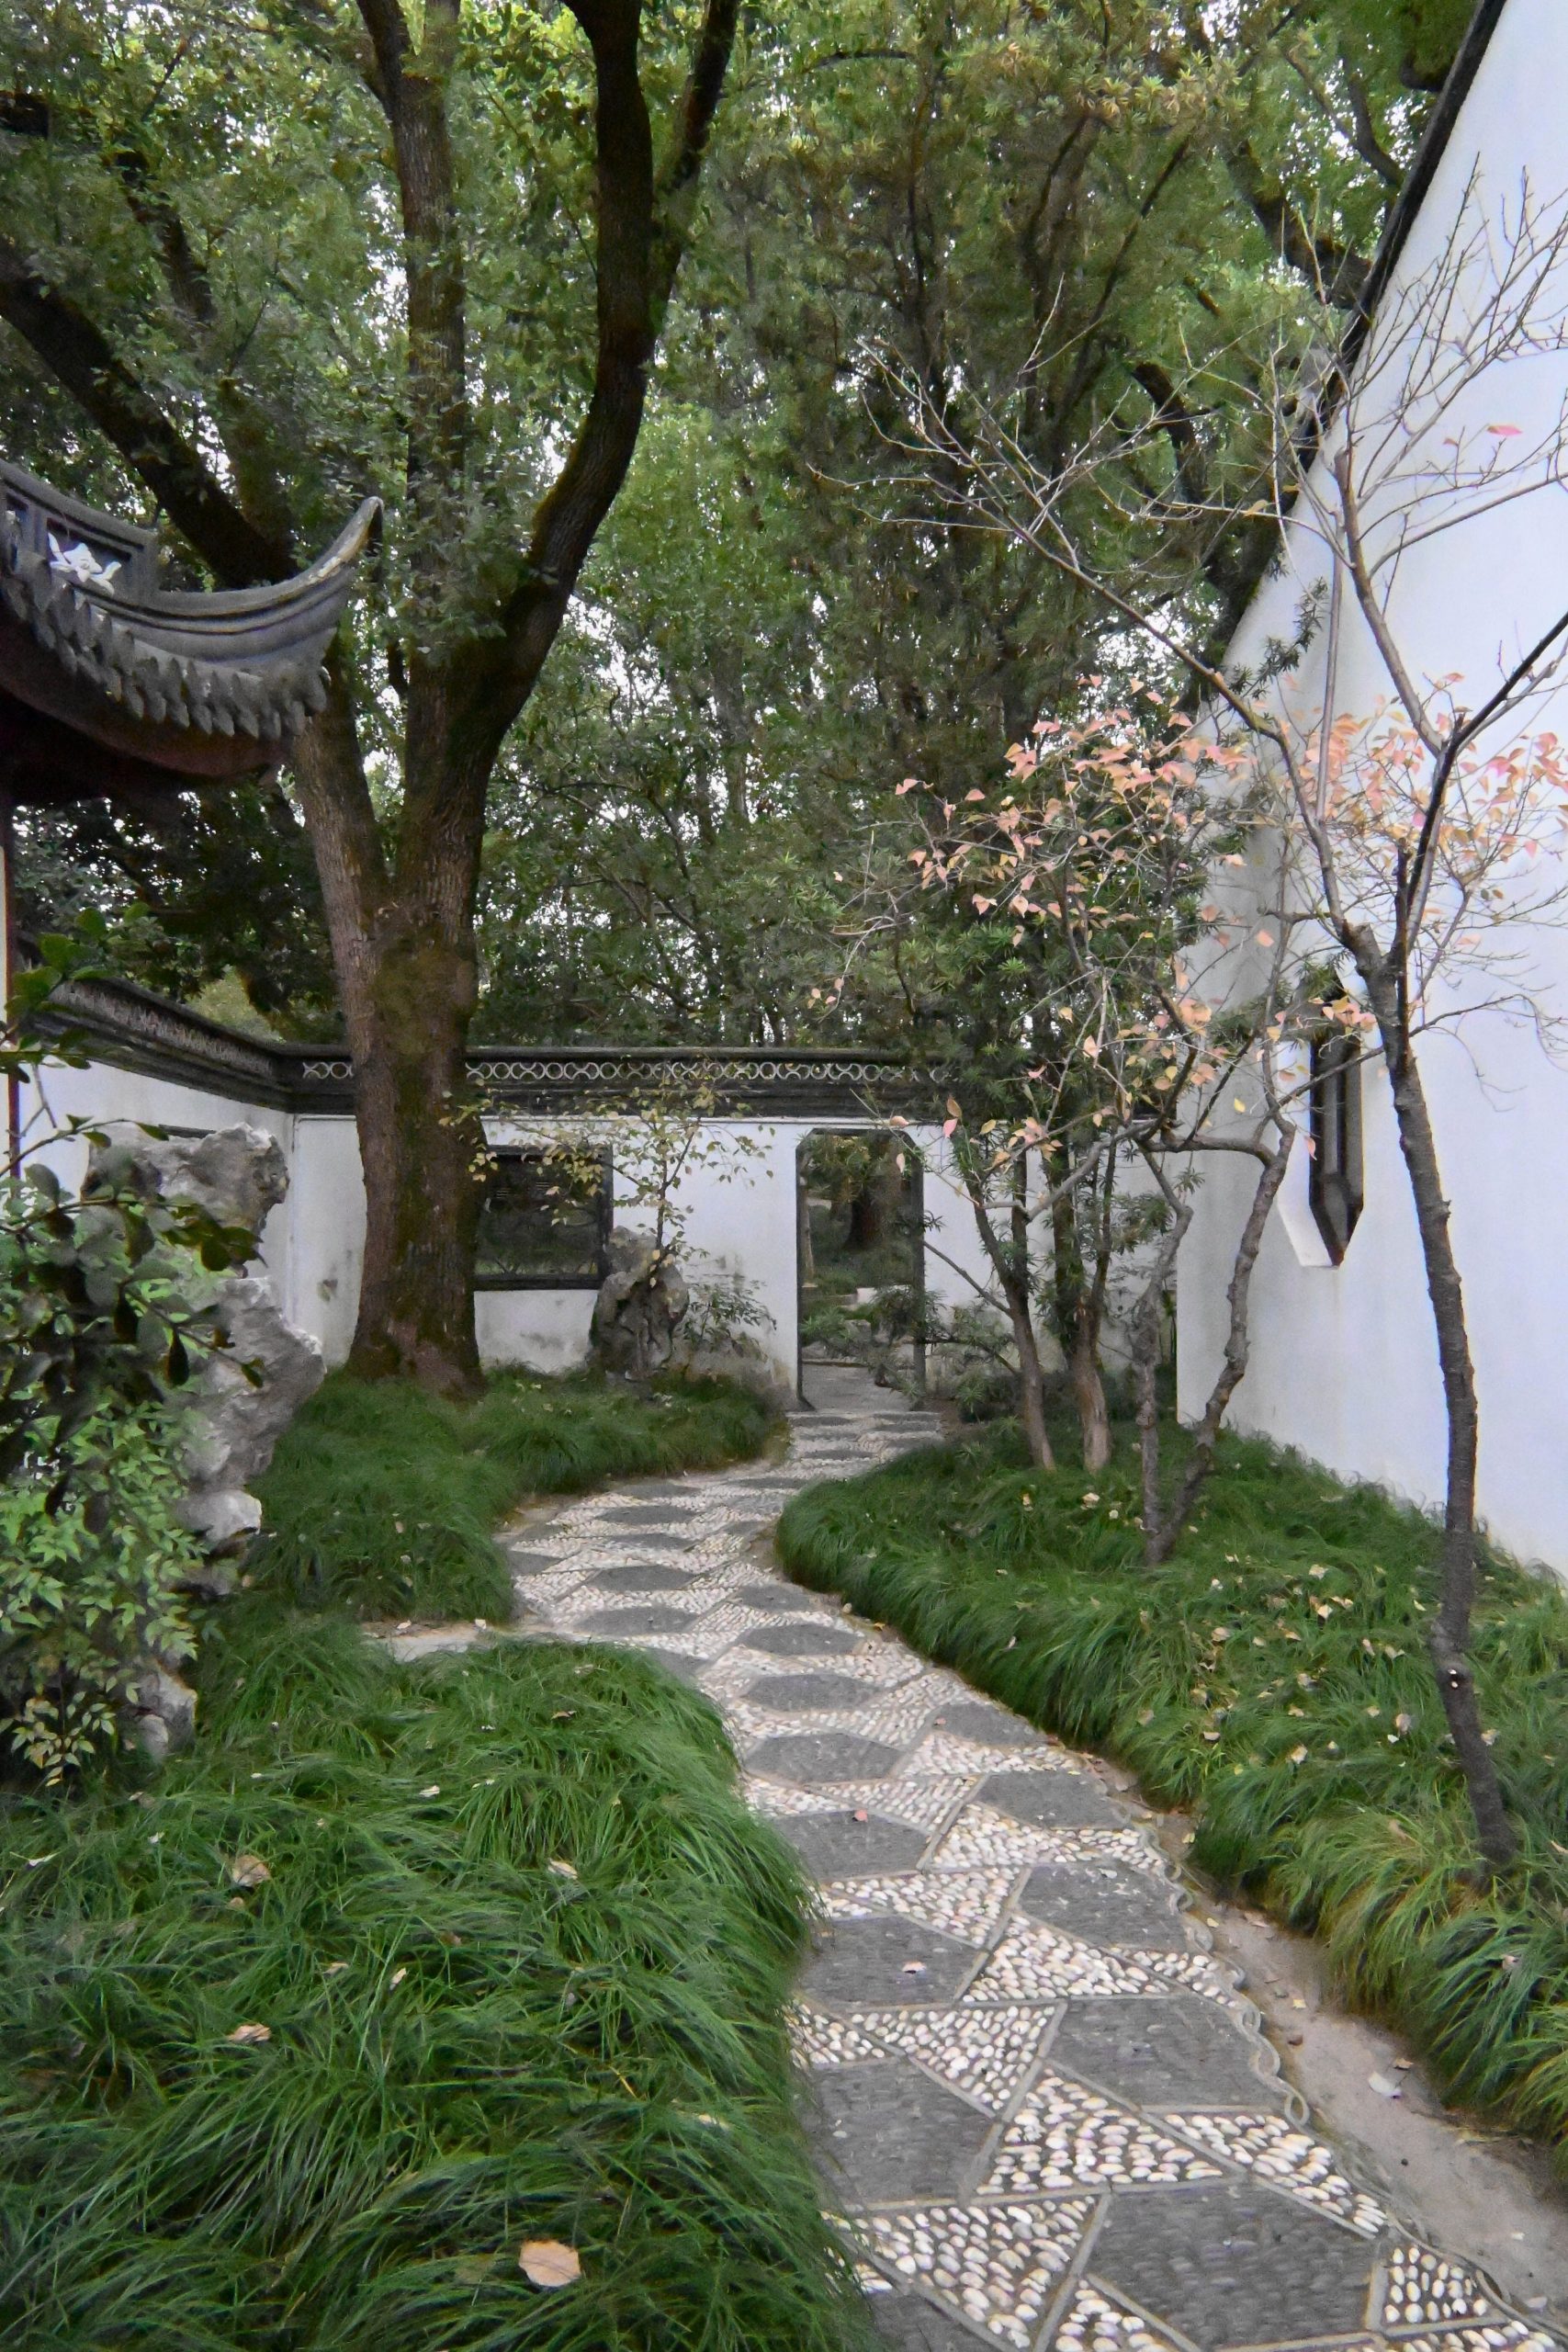
“This design is so effective because of its brilliant use of contrast and framing.”
The organic, irregular texture of the pebble mosaic is juxtaposed against the clean, smooth, bright white of the garden walls. This makes both surfaces stand out more dramatically. The dark grey coping on the wall and the dark tree trunks create a visual frame, while the arched openings provide a “peek-a-boo” effect that adds a sense of mystery and depth, enticing you to walk forward and see what lies beyond.
26. Create an Enchanting Tunnel with Leafy Arches and Hanging Flowers
that creates the enchantment here is the complete immersion in green. This isn’t just a path with some plants next to it; it’s a path that goes *through* the plants. The overhead arches, completely covered in foliage, create a true tunnel effect that makes you feel like you are entering a different world. The light filters through the leaves, the air feels cooler, and the sounds of the outside world are muffled. This total sensory enclosure is what elevates the design from a simple garden path to a magical experience.
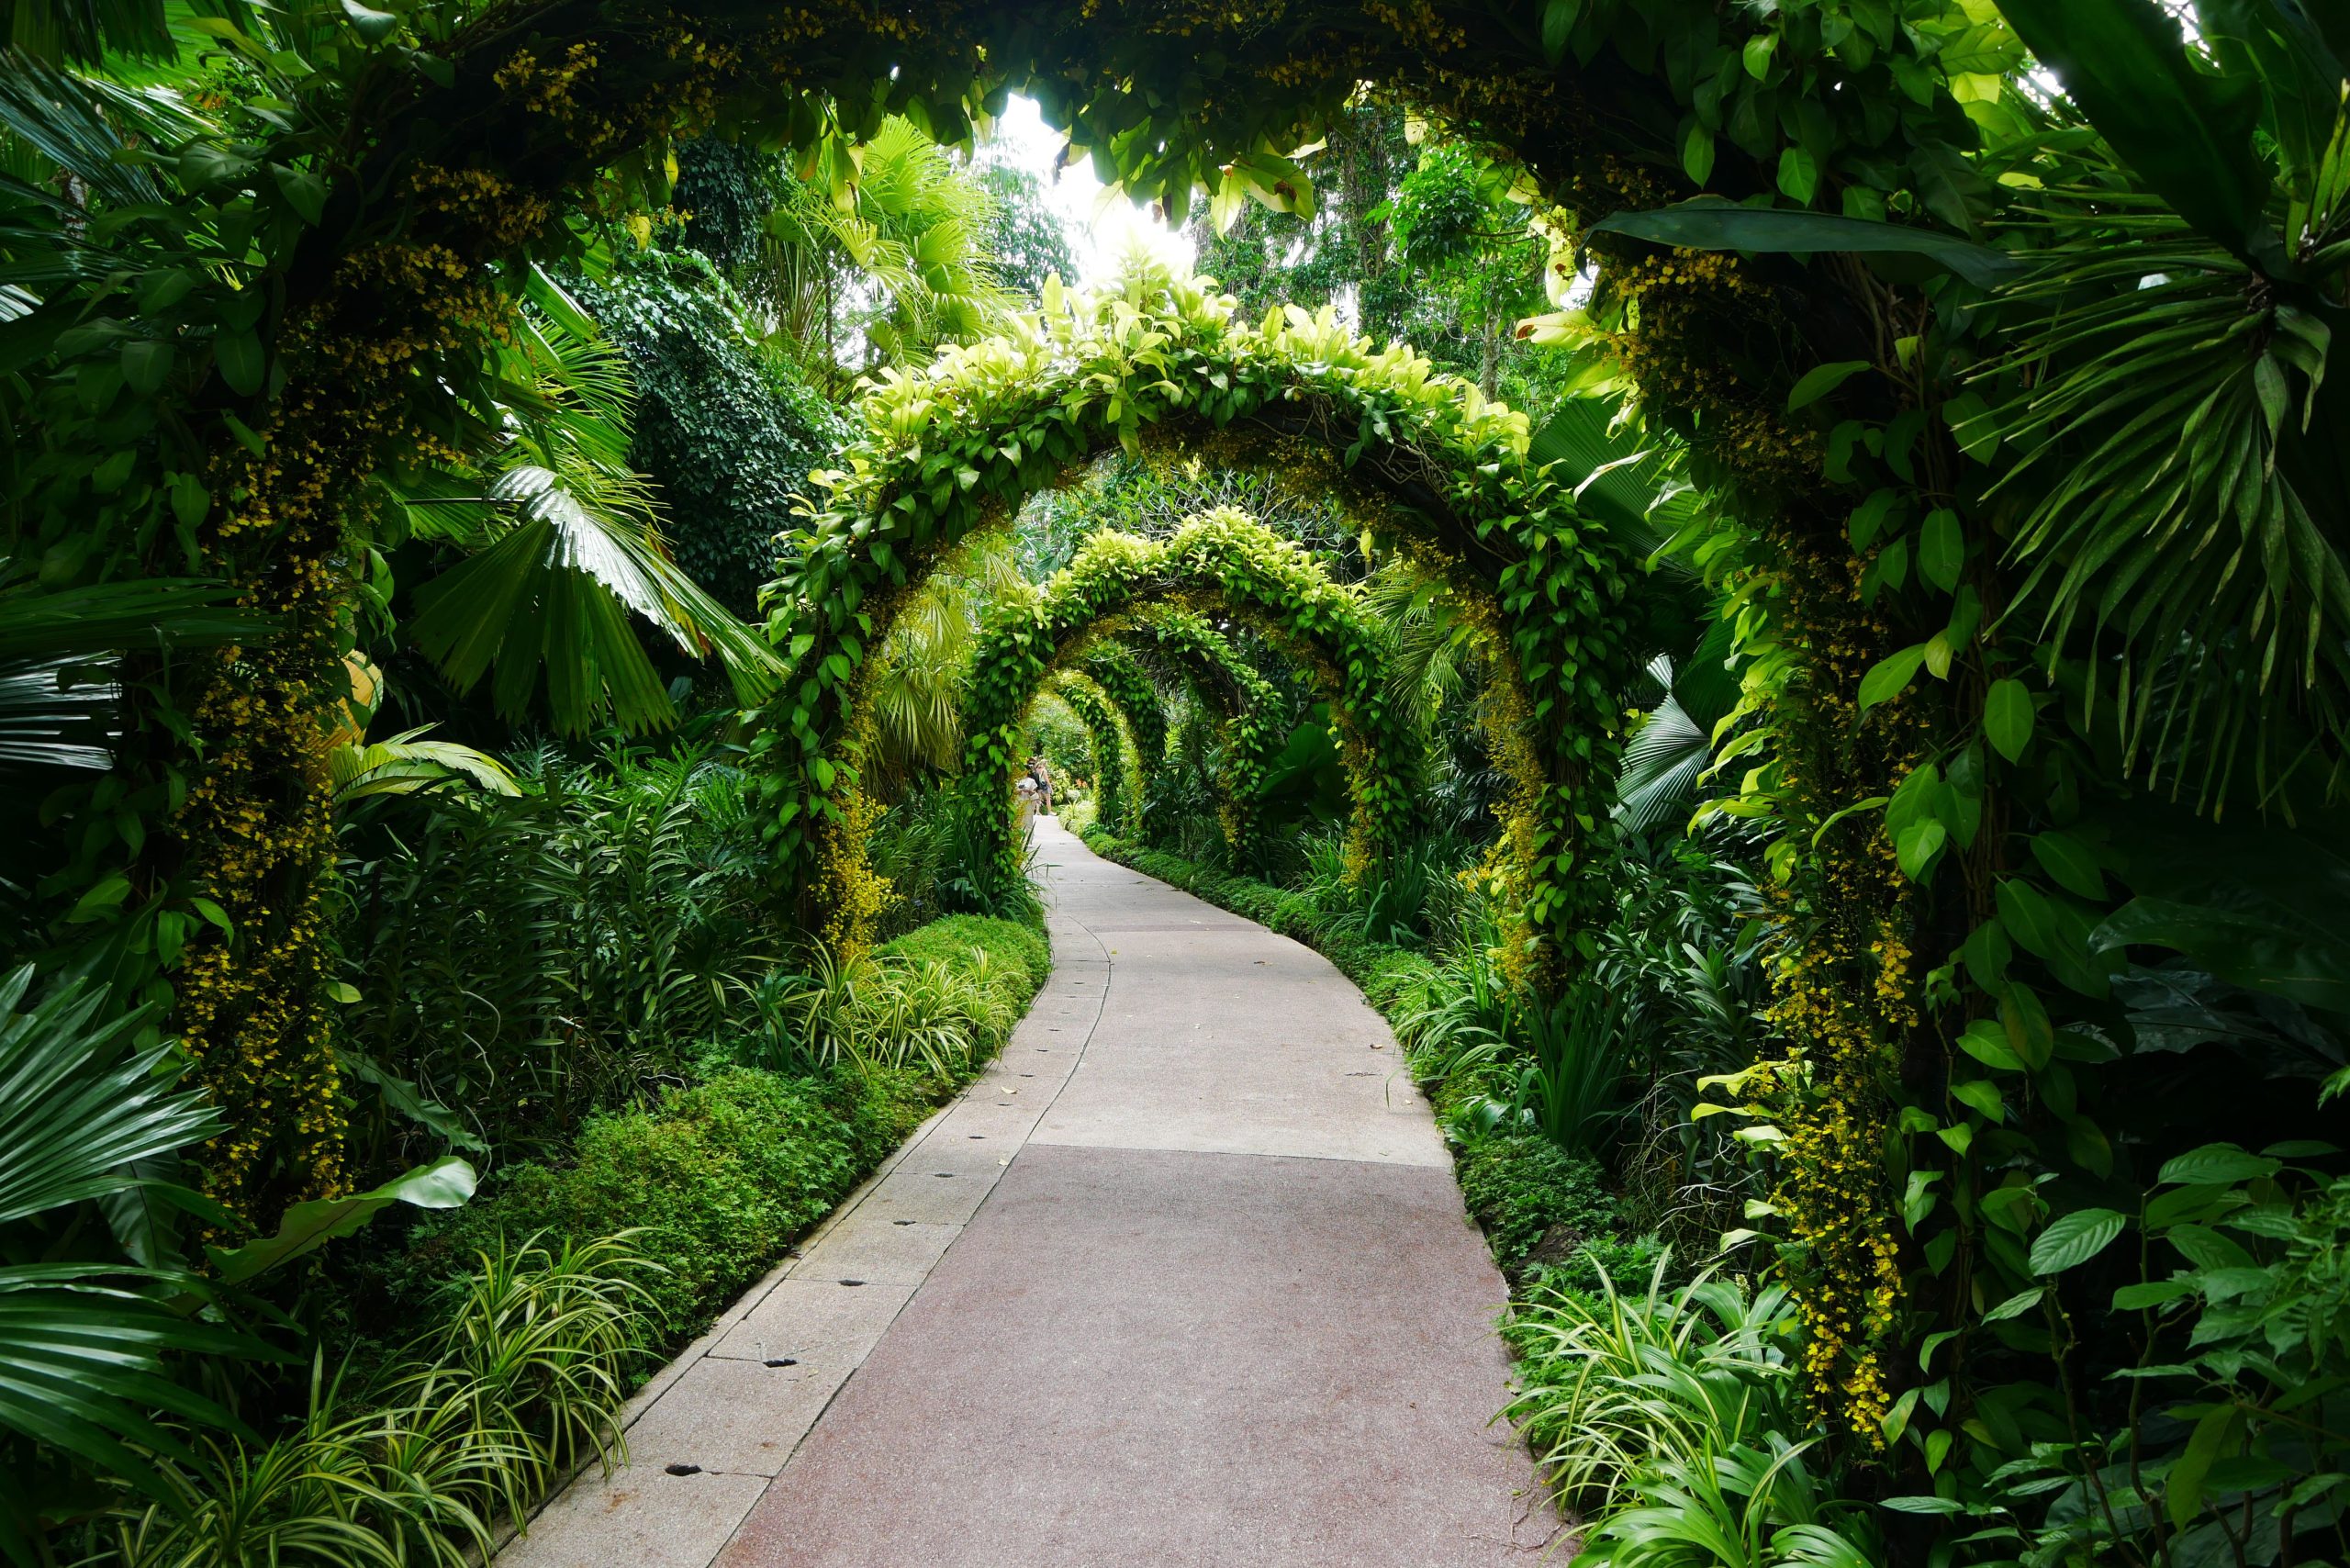
“This immersive tunnel effect requires a decent amount of length to be truly effective.”
Aim for a pathway that is at least 30-40 feet long to accommodate a series of 5-7 arches. The arches themselves should be tall enough for comfortable passage, so a minimum height of 7.5 to 8 feet at the center is ideal. This is a grand feature that is best suited for larger gardens where it can act as a stunning transitional space between two distinct “rooms” of the garden, like from a patio to a hidden seating area.
27. Build a Sunlit Wooden Boardwalk Through a Verdant Forest
When building a boardwalk, especially a curved one, use narrower planks. While wide planks are great for a standard deck, using 4-inch wide boards (or even 3-inch) will make it much easier to create a smooth, gentle curve. You can make finer adjustments with each board, avoiding the chunky, angular look you’d get trying to curve wider planks. It’s more cuts and more screws, but the elegant, flowing result is well worth the extra effort. For a fun comparison, see the dark wood boardwalk in Idea #28.
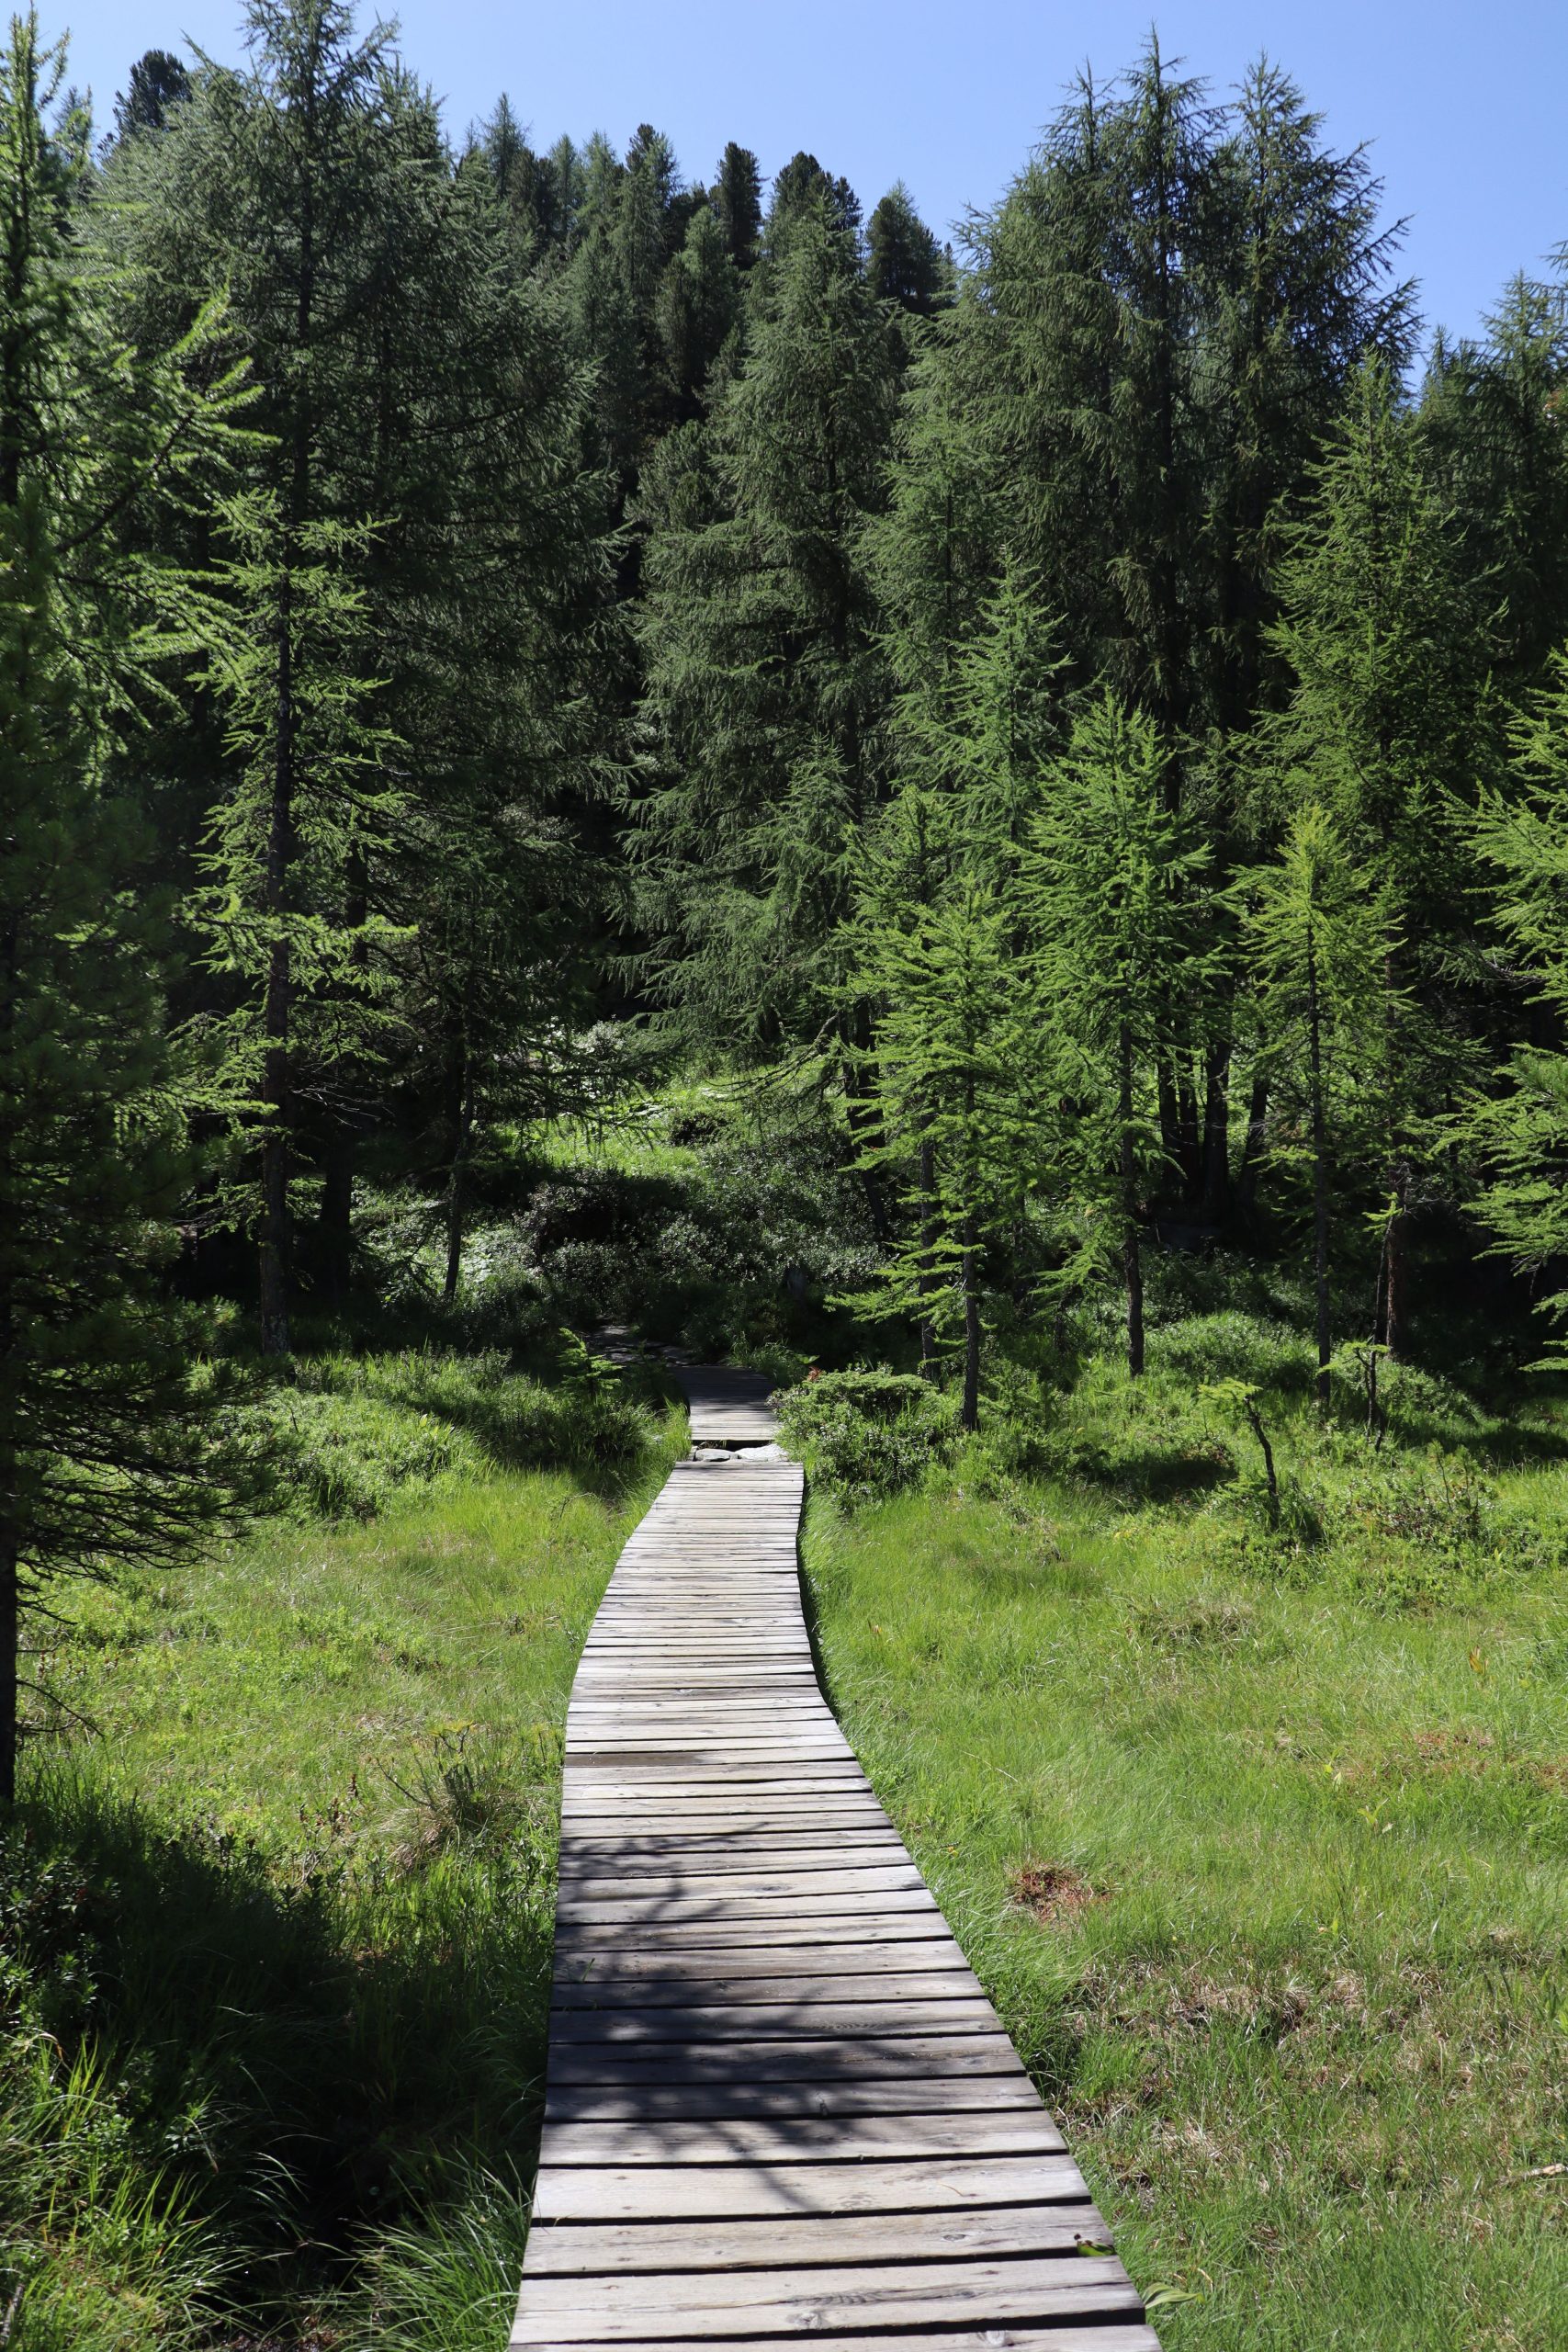
“A wooden boardwalk in a damp, forested area is beautiful, but it requires the right materials and some upkeep.”
In the shade and with fallen leaves, the wood can get very slippery from algae and moss. You will need to pressure wash or scrub it at least once a year. It is absolutely critical to use pressure-treated lumber rated for ground contact, or even better, a naturally rot-resistant wood like cedar or a composite decking material. Using untreated pine or fir will result in a rotted, unsafe path in just a few years.
28. Wind a Dark Wood Boardwalk Through a Shaded Tree Canopy
What makes this boardwalk so compelling is the sense of mystery and exploration it evokes. The dark wood helps it recede into the shadows of the dense forest, making it feel like a secret path. The curve of the path means you can’t see the end from the beginning, which sparks curiosity and encourages you to keep walking. The dappled sunlight filtering through the canopy above creates moving patterns on the path, adding a dynamic, ever-changing quality to the scene. This contrasts with the bright, open feeling of the boardwalk in Idea #27.
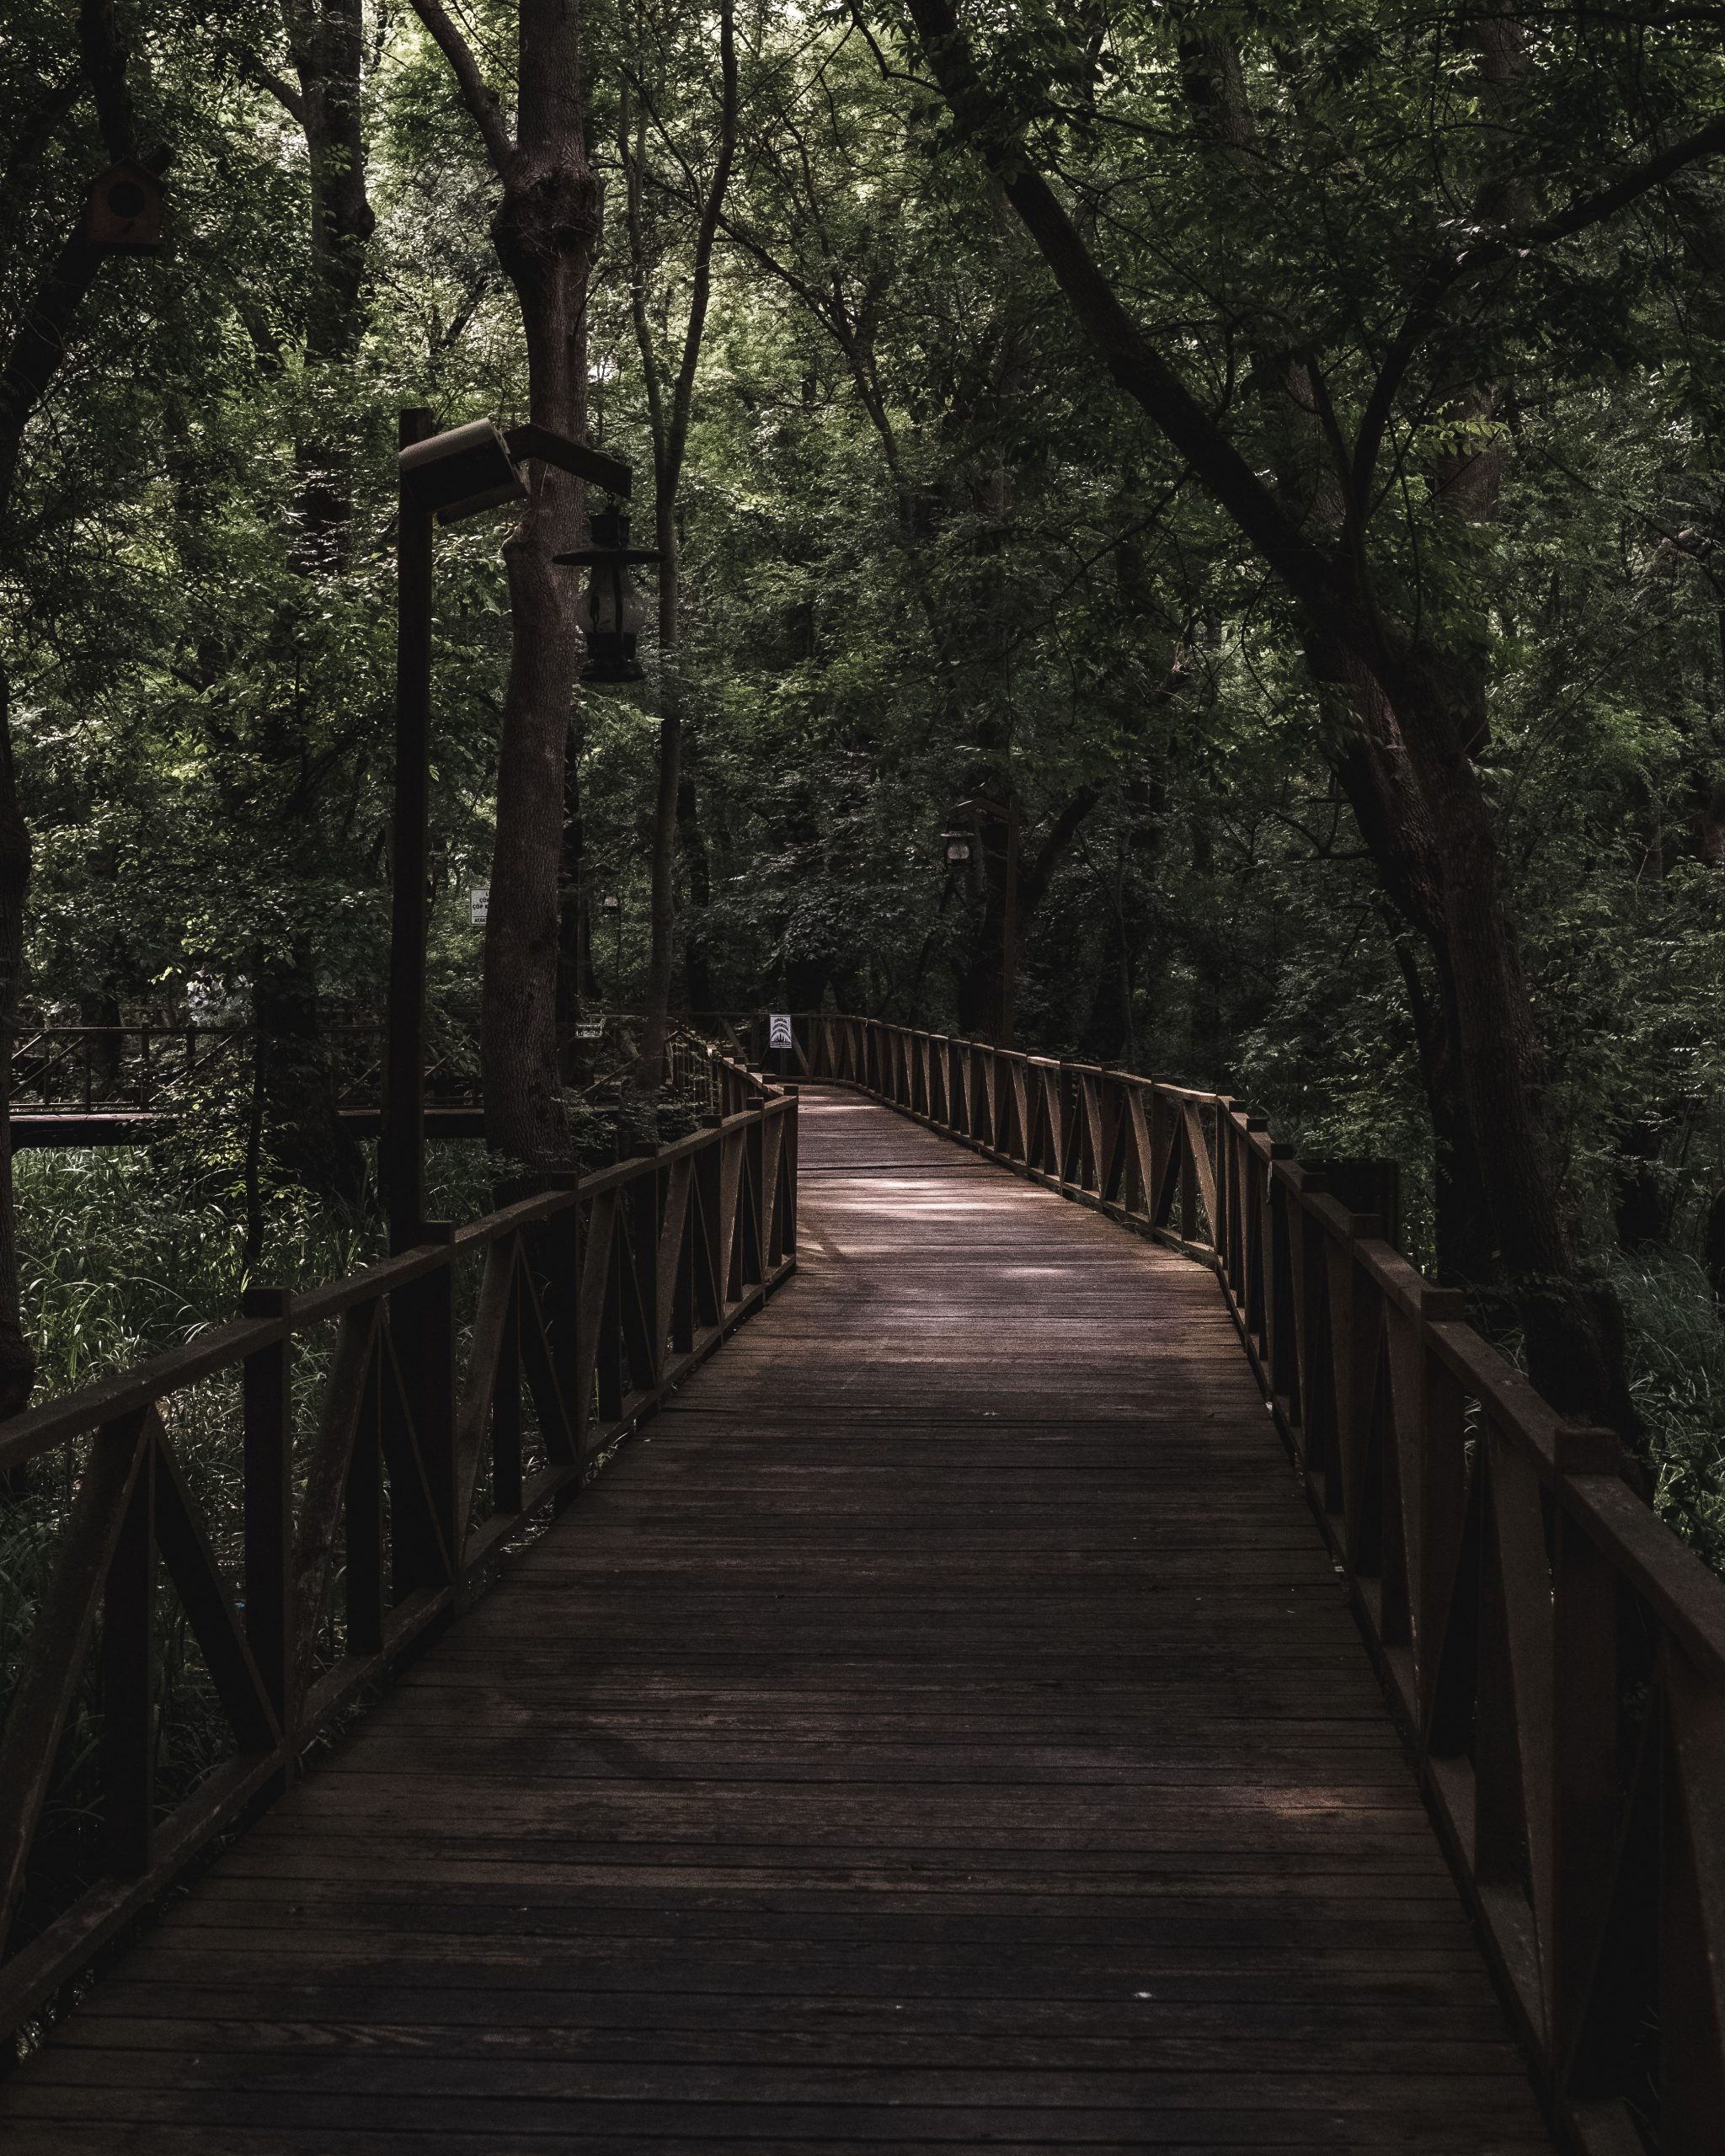
“Dark-stained wood looks incredibly rich and dramatic, but it shows dust, pollen, and dirt much more than lighter wood tones.”
In a forest setting, be prepared for it to look dusty quite often. The dark stain will also absorb more heat from the sun in the dappled spots, which can make it hot underfoot. Furthermore, maintaining that dark color will require re-staining every 2-3 years, as UV exposure will cause it to fade, especially in the sunnier patches along the path. It’s a higher-maintenance choice than letting the wood weather to a natural grey.
29. Lay a Coastal Bluestone Path with Rugged, Varied Landscaping
This is a high-end, professionally installed look that uses premium materials to achieve a rugged, coastal feel.
- Irregular Bluestone Pavers (approx. 150 sq ft): $1,800 – $3,000
- Stacked Stone for Retaining Wall: $1,500 – $2,500
- Boulders, Shrubs, and Perennials: $1,200 – $2,800
- Professional Masonry & Landscape Labor: $5,000 – $9,000
- TOTAL: $9,500 – $17,300
Budget alternative: Use concrete pavers tinted blue/grey, build a smaller wall with more affordable fieldstone, and use smaller, younger plants that will fill in over time.
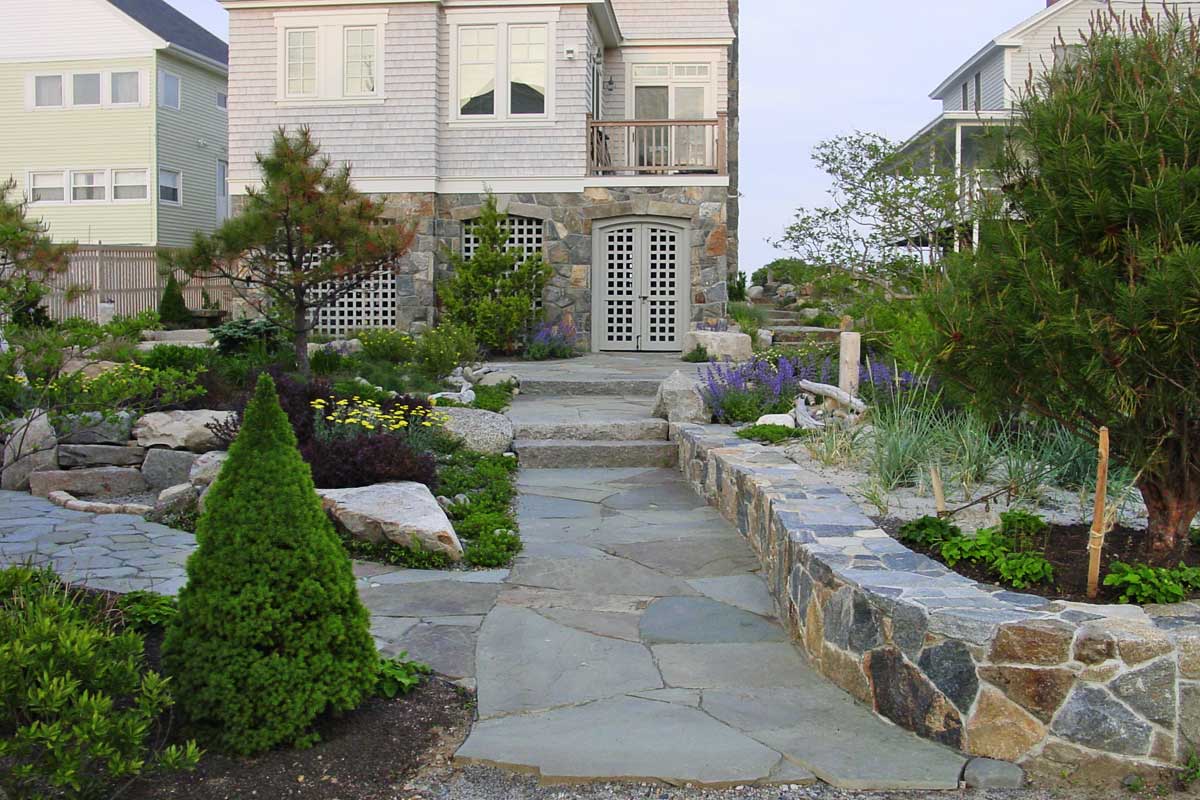
“A pathway with this much variety in planting and hardscaping needs room to spread out.”
This isn’t for a narrow side yard. The pathway itself is about 4-5 feet wide, but the flanking garden beds with their large boulders and layered shrubs need at least 6-8 feet of depth on each side. It’s best suited for a primary entrance walkway or a major path connecting a driveway to the front door of a larger property, where its scale feels appropriate and not cramped.
30. Design a Formal Garden Path with Symmetrical Lines and Gravel
The elegance of this formal garden path comes from a strict design equation: 50% linear hardscape + 40% manicured green shapes + 10% ornate details. The long, straight gravel path and its clean grass borders provide the strong, rigid lines. The perfectly spherical bushes and tall, clipped hedges are the counterpoint of soft but controlled geometry. The final touch comes from the ornate white benches, which act as jewel-like focal points, adding a hint of romance to the otherwise strict design.
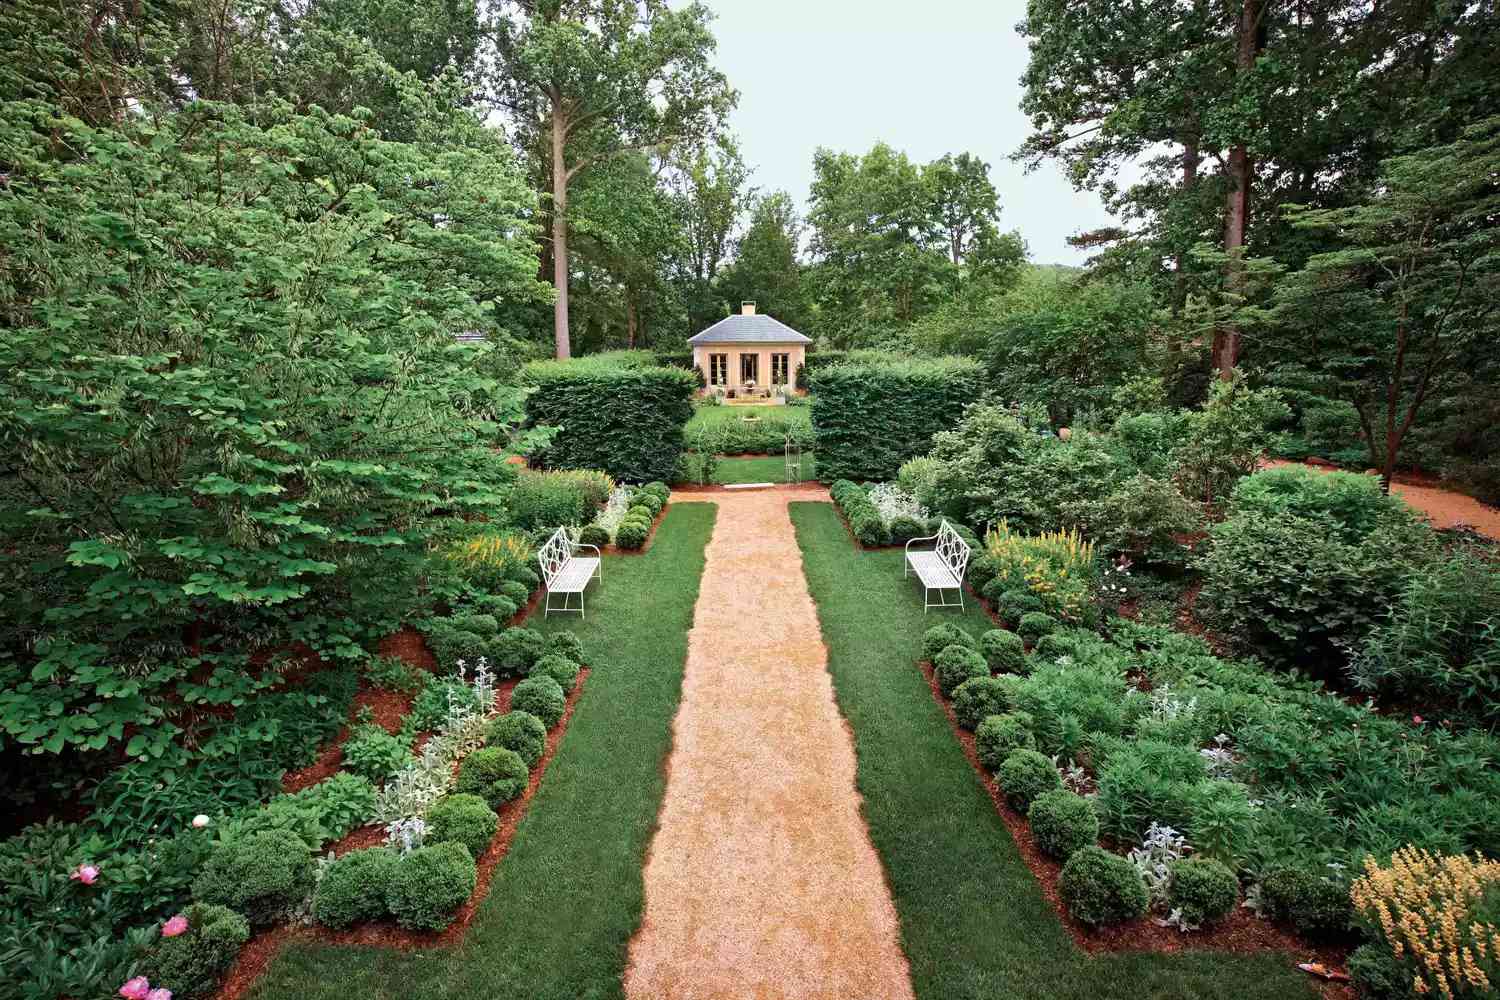
“To keep a long gravel path looking sharp and formal, the edging is everything.”
The crisp border between the gravel and the lawn is what makes this look intentional and high-end. Use a high-quality steel or aluminum edging strip installed perfectly straight. It should be barely visible, with the top edge sitting just at the soil level. This creates a clean line for mowing and prevents the grass from encroaching, but most importantly, it stops the gravel from spilling into the lawn, maintaining that perfect, clean separation.
Your Garden’s Next Chapter Begins Here
A pathway is so much more than a way to keep your shoes clean—it’s the narrative of your garden, guiding friends and family through the story you’ve created. Whether you’re drawn to wild, overgrown stones or the clean lines of a formal walkway, the right path can completely change how you experience your outdoor space.
Now that you’re full of ideas, take a look at your own Pinterest boards. Which of these styles truly speaks to you? Pick one, start small, and enjoy the journey.