Most guides to patio shade ideas get it wrong—they show you generic solutions without explaining what actually works for a real home. After spending days filtering through options from Wayfair, Home Depot, and custom fabricators, we’ve found the best of the best, with total project costs ranging from under $500 to over $15,000. Inside, you’ll find 31 curated ideas covering everything from modern louvered pergolas and retractable awnings to lush, vine-covered gazebos and clever DIYs. For 2026, the entire focus is on creating true “outdoor rooms” that feel like a seamless extension of your living space, a design shift that continues to dominate Pinterest. 📌 Pin this guide for later—your future self will thank you when it’s time to actually build.
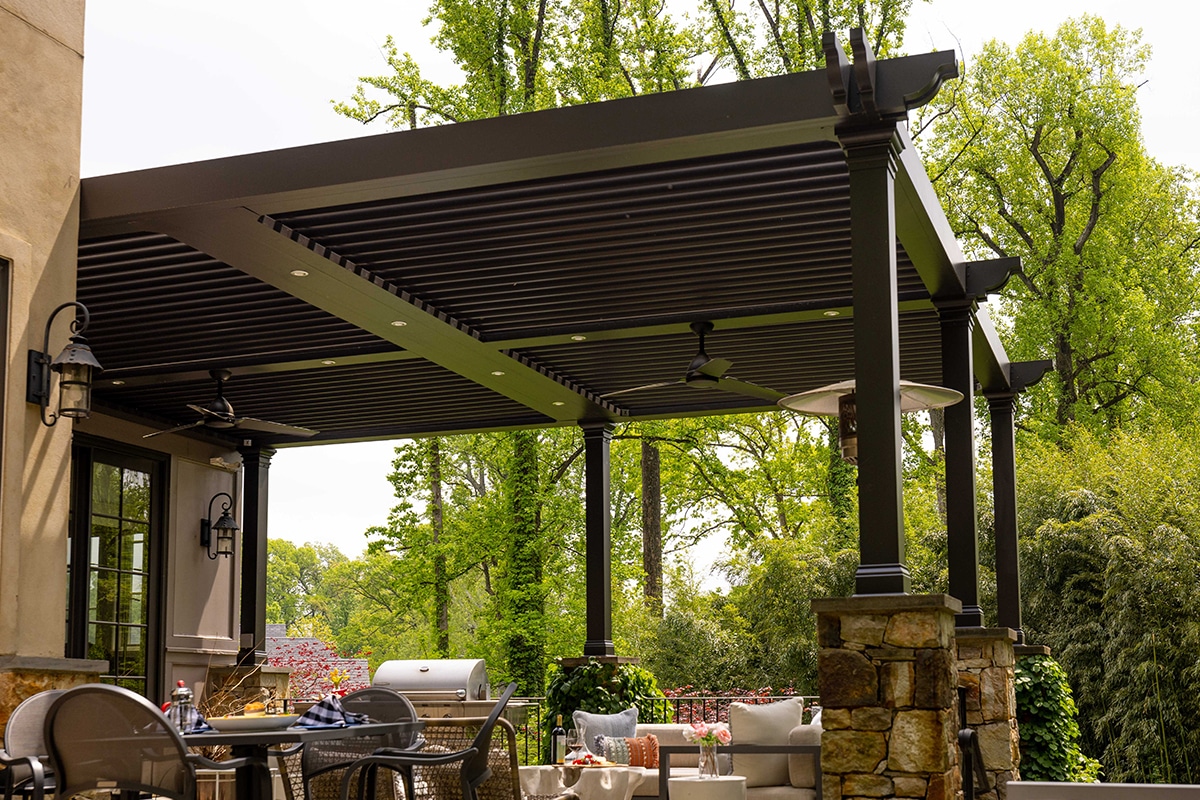
1. Sophisticated Louvered Pergola with a Retractable Privacy Screen
This setup is the ultimate in modern outdoor control. The magic lies in the dual-function shade system. The adjustable louvered roof lets you dial in the exact amount of sunlight, from fully open to completely closed for rain protection. But the real genius is the addition of the retractable side screen. It provides a vertical block against low-angle afternoon sun and adds a significant layer of privacy from neighbors, transforming the open patio into a secluded room. It’s a brilliant combination of architectural structure and flexible, fabric-based solutions.
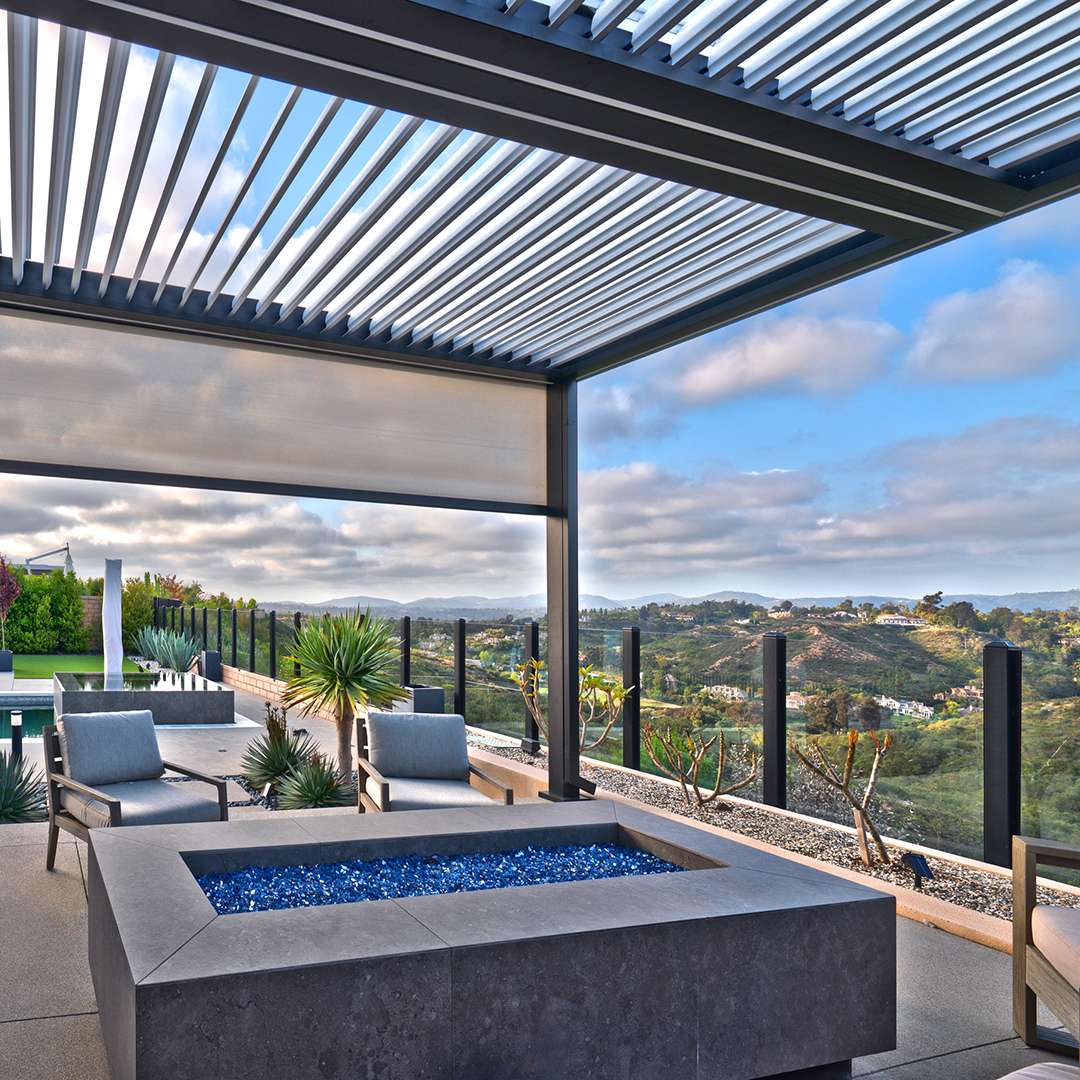
“Recreating this high-end look requires a significant investment, primarily in the pergola system itself.”
The integrated features and durable materials are what drive up the cost, but the result is a permanent, all-weather extension of your home.
- Louvered Pergola System: $9,000 – $20,000
- Retractable Screen: $1,500 – $4,000
- Outdoor Seating: $2,000 – $5,000
- Gas Fire Pit: $1,000 – $3,500
- TOTAL: $13,500 – $32,500
- Budget alternative: A standard wood pergola ($2k) with a manually-operated shade sail ($200) and outdoor curtains ($300).
2. Modern Pergola with a Louvered Roof and Vibrant Red Seating
This patio proves that “modern” doesn’t have to mean “monochromatic.” The visual formula here is a study in balanced contrast. Think of it as 60% sleek neutrals (the dark pergola frame, white louvers, light gray pavers) + 30% vibrant accent color (the bold red cushions) + 10% natural texture (the wicker-style furniture and surrounding greenery). You could easily swap the red for a bright turquoise or sunny yellow to completely change the vibe while keeping the sophisticated core intact. The key is committing to one strong accent color and using it confidently.
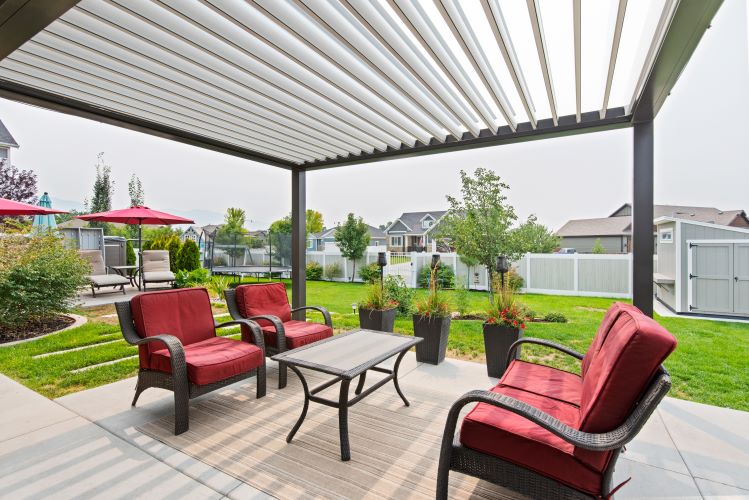
“When using a bold color like this vibrant red, fabric quality is paramount.”
Look for solution-dyed acrylic fabrics, like those from Sunbrella, for your outdoor cushions. The color is locked into the core of the fibers, not just printed on the surface, making them incredibly resistant to fading from UV exposure. Cheaper polyester cushions might look great for a season, but they will likely fade to a sad, pale version of their former selves by next summer, forcing you to replace them far sooner. It’s worth the upfront cost for longevity.
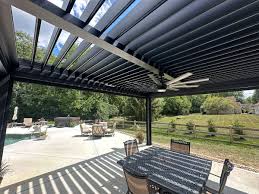
3. Poolside Louvered Pergola with an Integrated Ceiling Fan
The single element that elevates this poolside setup from merely functional to truly luxurious is the integrated ceiling fan. While the louvered roof provides excellent shade, it can also trap stagnant, hot air on a still day. The fan is the active component that guarantees comfort, creating a gentle breeze that makes lounging by the pool pleasant even during the hottest hours. It addresses not just light, but airflow—a crucial, and often overlooked, aspect of outdoor comfort. Without it, the space would be far less inviting on a sweltering summer afternoon.
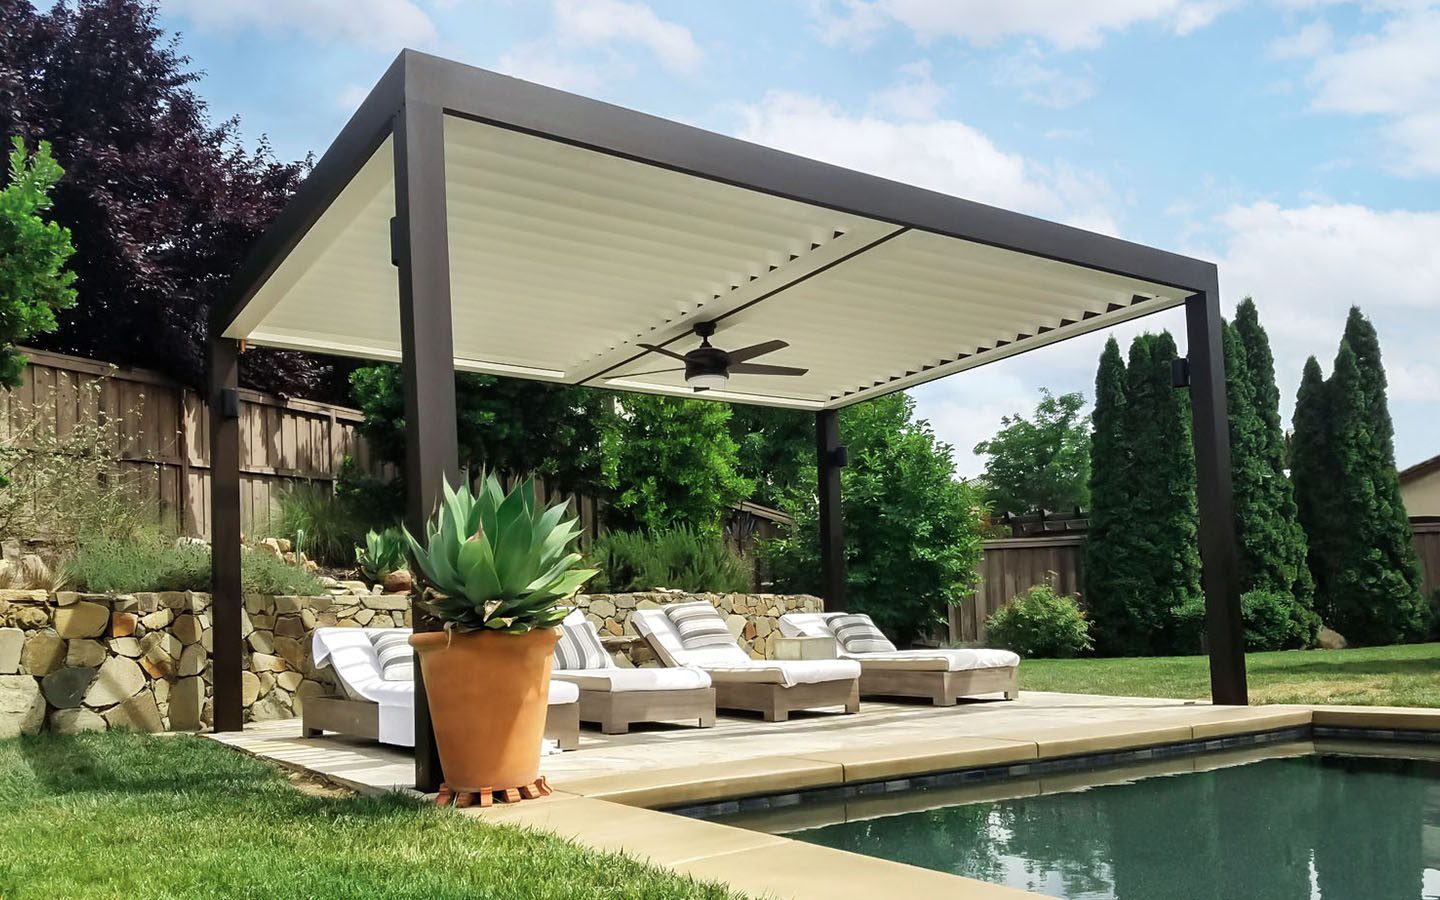
“A large, structured pergola like this is best suited for patios with generous proportions, typically a minimum of 12×16 feet, to avoid overwhelming the space.”
The visual weight of the dark frame and the full coverage requires a substantial footprint to feel balanced. It’s an ideal solution for defining a specific “room” within a larger open area, like the lounging zone of a multi-area pool deck. For smaller patios, consider the more open and airy lattice design of Idea #7, which provides shade without feeling as enclosed.
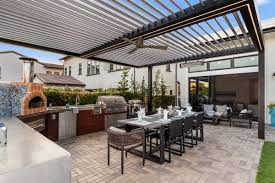
4. Retractable Fabric Roof Over a Multi-Zone Outdoor Living Space
This design works so well because it uses a single, massive shade element to unify multiple distinct living areas. The retractable fabric roof spans the entire space, creating a cohesive ceiling that ties the outdoor kitchen, dining table, and circular lounge together. This visual connection makes the whole patio feel like one grand, intentional room rather than a collection of separate furniture zones. The choice of a dark fabric also helps ground the space and making the vibrant accent pillows pop, drawing the eye and adding a layer of personality and energy.
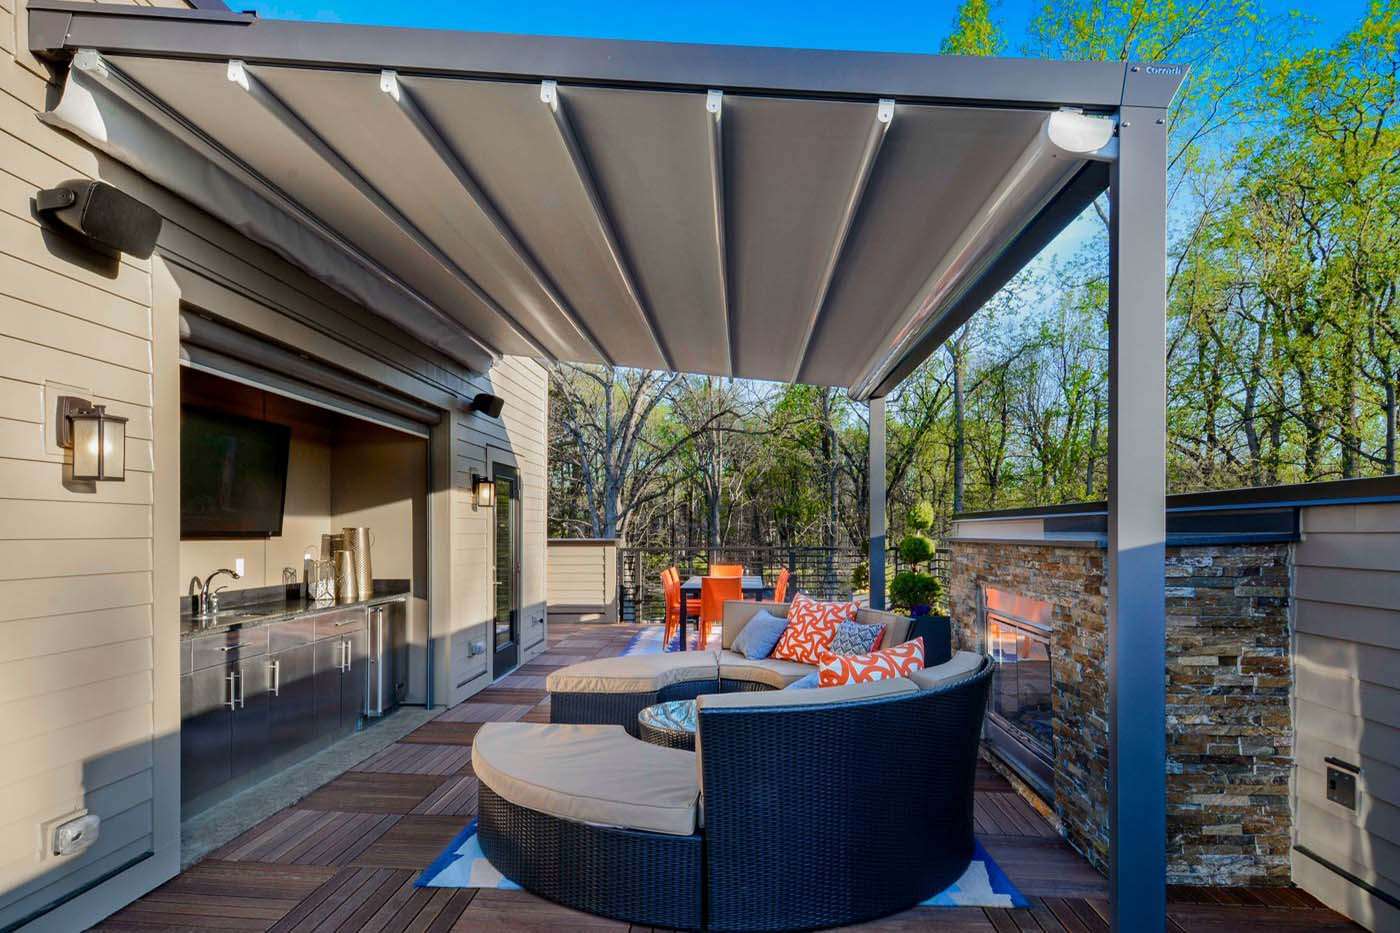
“A retractable fabric roof is a fantastic, flexible solution, but it’s not invincible.”
Most systems are designed for sun and light rain only; they are not meant to handle heavy downpours or snow. You must retract them in bad weather to prevent water from pooling and stretching or tearing the fabric, or worse, damaging the mechanical components. Also, be prepared for regular cleaning. Leaves, bird droppings, and pollen will collect on the fabric, so you’ll need to periodically clean it with a soft brush and mild soap to keep it looking its best.
5. Beige Gazebo Lounge with Lush, Vine-Covered Pillars
There’s a growing movement towards “soft-structure” and biophilic design in outdoor spaces, and this is a perfect example. People are craving backyard escapes that feel more integrated with nature. The combination of a standard metal gazebo with climbing vines softens the hard lines and makes the structure feel like it grew right there. The internal canopy panels add to this soft, tent-like feeling, creating a cozy, protected vibe that you just don’t get from a purely architectural pergola. It merges the desire for a defined room with the longing for a lush garden sanctuary.
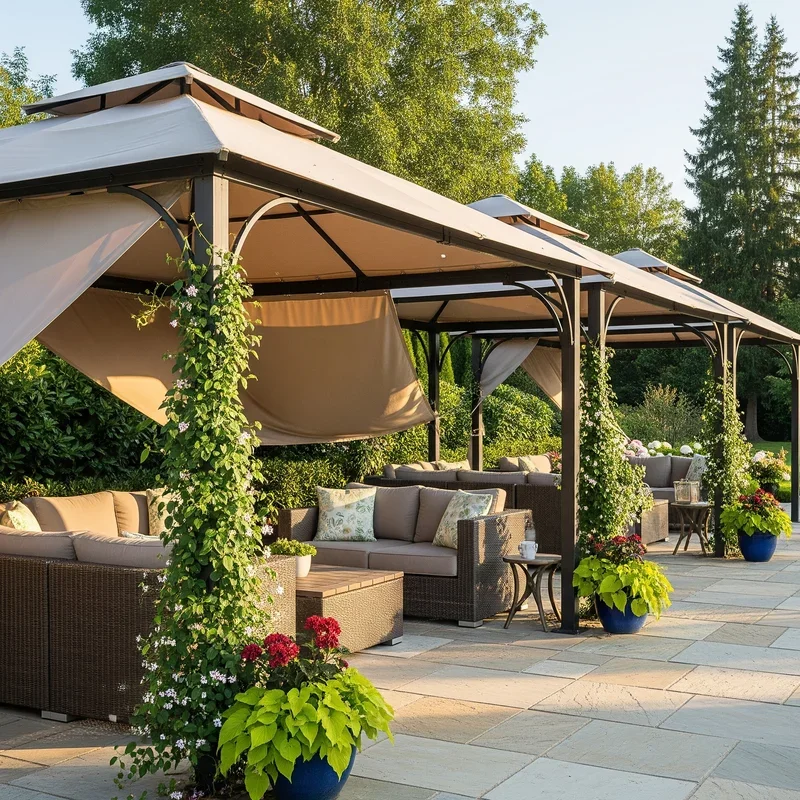
“While breathtakingly beautiful, maintaining a vine-covered structure requires commitment.”
Be prepared for annual pruning to keep the vines from overwhelming the structure or becoming too heavy for the fabric roof. You’ll also need to check for pests that might be attracted to the plants. The beige fabric roof will need seasonal cleaning to remove dirt, pollen, and mildew stains, especially in humid climates. If you love the look but not the work, consider high-quality artificial vines, which offer a similar aesthetic with virtually zero upkeep.
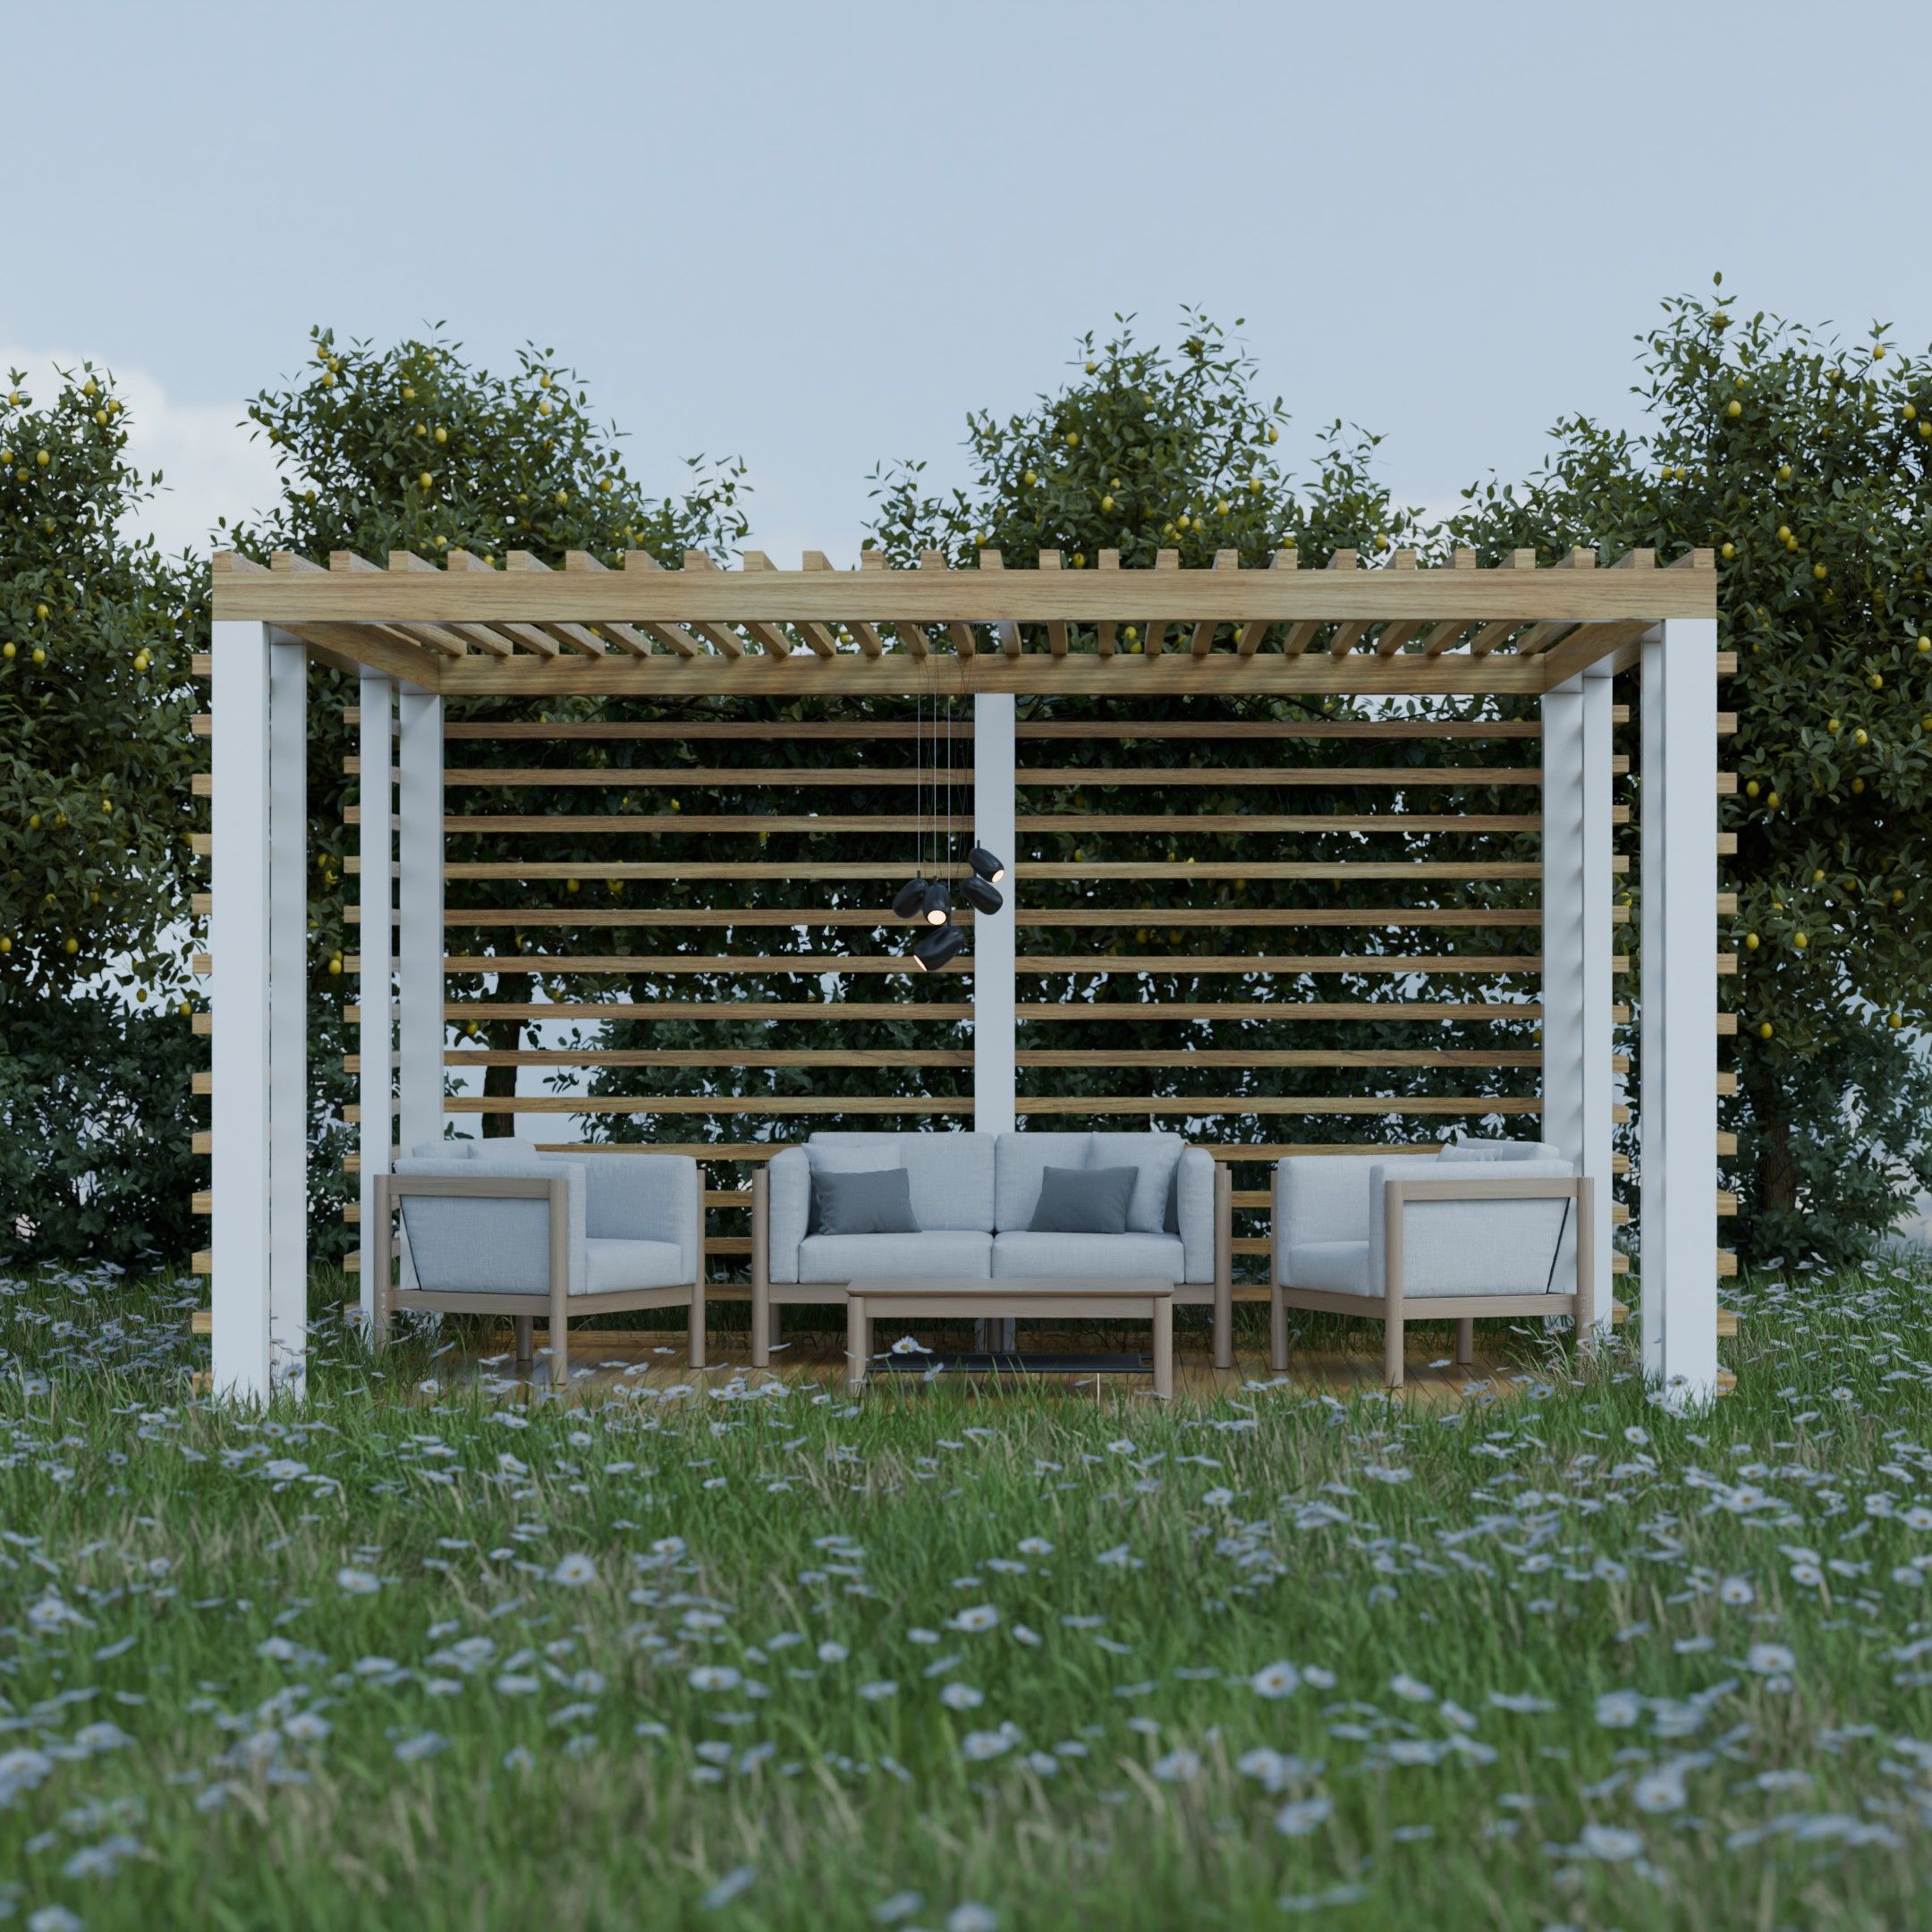
6. Modern Wooden Pergola with Slat Walls and Minimalist Furniture
Building a slatted privacy wall is a manageable weekend project that adds immense style. Here’s a quick guide to creating one panel:
“Time: 3-4 hours
Cost: $150-$250 in lumber & hardware
Measure & Cut: Measure the ”
- Time: 3-4 hours
- Cost: $150-$250 in lumber & hardware
- Measure & Cut: Measure the opening in your pergola frame. Cut 1×3″ cedar or pressure-treated boards to this length. Cut two vertical 2×2″ support pieces.
- Start Nailing: Lay the vertical supports on a flat surface. Position the first top slat flush with the top of the supports and nail it in place.
- Use a Spacer: Cut a scrap piece of wood to your desired gap size (a 1×3 on its side works well for a ~3/4″ gap). Place the spacer below the first slat and push the next slat snugly against it before nailing.
- Repeat: Continue this process down the length of the supports. This ensures your gaps are perfectly uniform.
The serene feeling of this space comes from a disciplined, natural palette. It’s roughly 70% warm wood tones (pergola, deck, coffee table) + 20% soft greys (upholstery) + 10% sharp black accents (pendant light). The repetition of the slatted wood on the roof and the side walls creates a powerful sense of rhythm and cohesion. By keeping the furniture minimalist and the colors muted, the focus remains on the beautiful play of light and shadow created by the architecture itself. The surrounding green grass acts as a clean, natural canvas for the entire composition.
7. Urban Patio with a Black Lattice Pergola and String Lights
When installing string lights under a pergola, avoid the common mistake of simply draping them in swoops. For a more polished, integrated look, run the wires tightly along the underside of the beams and rafters. Use black zip ties or insulated cable staples to secure the wire every 12-18 inches. This makes the wiring nearly disappear against the dark structure during the day. The goal is to see the bulbs, not the messy tangle of cables. This small detail elevates the installation from a temporary party decoration to a permanent architectural feature.
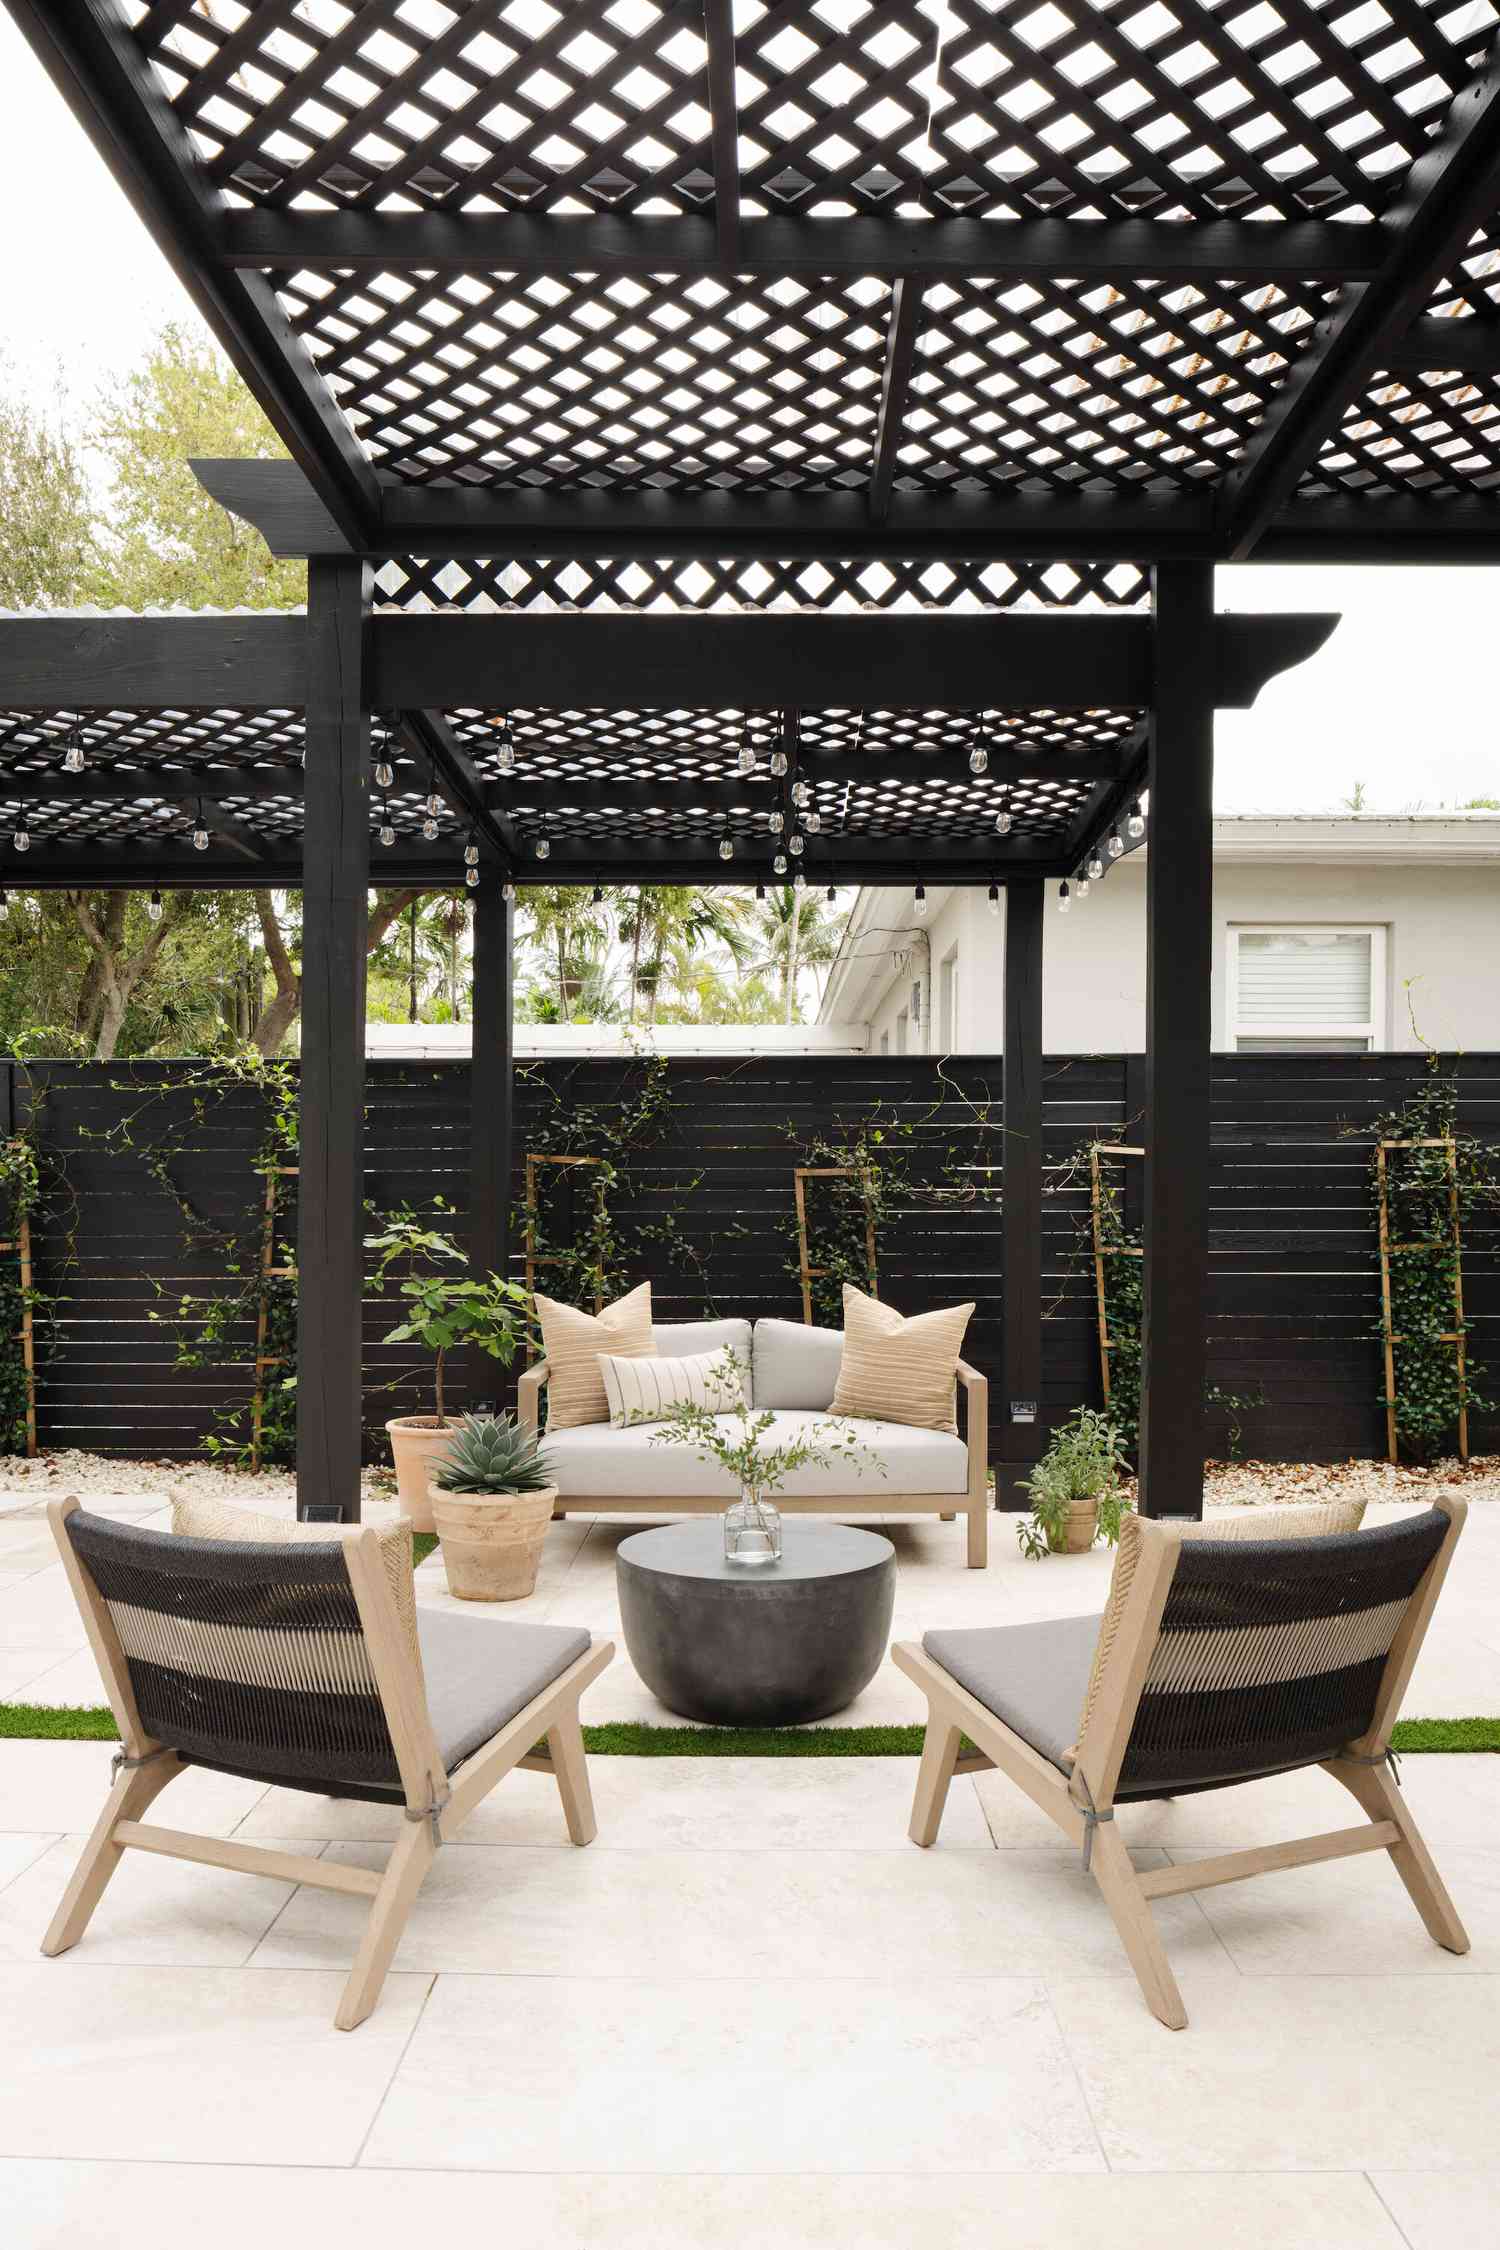
“The single element that makes this patio so inviting is the lattice roof.”
A solid roof would have felt heavy and dark, but the open grid of the lattice strikes the perfect balance. It provides a distinct sense of enclosure and filters the harsh midday sun, but it still allows for dappled light to pass through, preventing the space from feeling gloomy. The shadows it casts create dynamic patterns on the floor, and it provides the perfect framework for the string lights, which add a magical glow in the evening. It’s the key to the patio’s cozy-yet-open atmosphere.
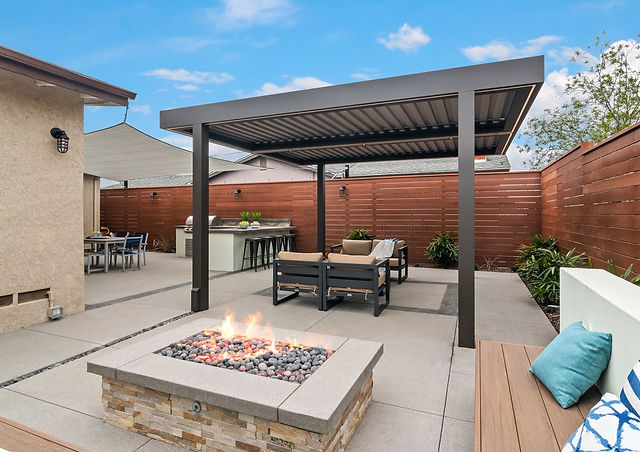
8. Multi-Zone Patio with a Perforated Pergola and Sail Shade
This design brilliantly solves the problem of shading a large, awkwardly shaped patio. Instead of trying to cover the entire thing with one massive structure, it designates zones. The heavy-duty louvered pergola defines the main seating area as a permanent “room,” complete with a fire pit and integrated lighting. Then, a lighter, more flexible sail shade is deployed over the dining area. This layered approach is both practical and visually interesting, breaking up the large expanse of concrete and creating distinct destinations within the same space. Compare this to the similar layout in Idea #24, which uses a different pergola style.
“You don’t need a five-figure budget to create a multi-zone shade plan.”
Start with your highest-priority area—usually seating or dining—and install a simple 10×12 foot wooden pergola kit from a big-box store (around $1,500). For the secondary zone, skip the custom structure and use a large cantilever umbrella ($400) or a triangular sail shade anchored to the house and a couple of sturdy posts ($250 for the kit). You get the same functional benefit of layered shade for a fraction of the cost.
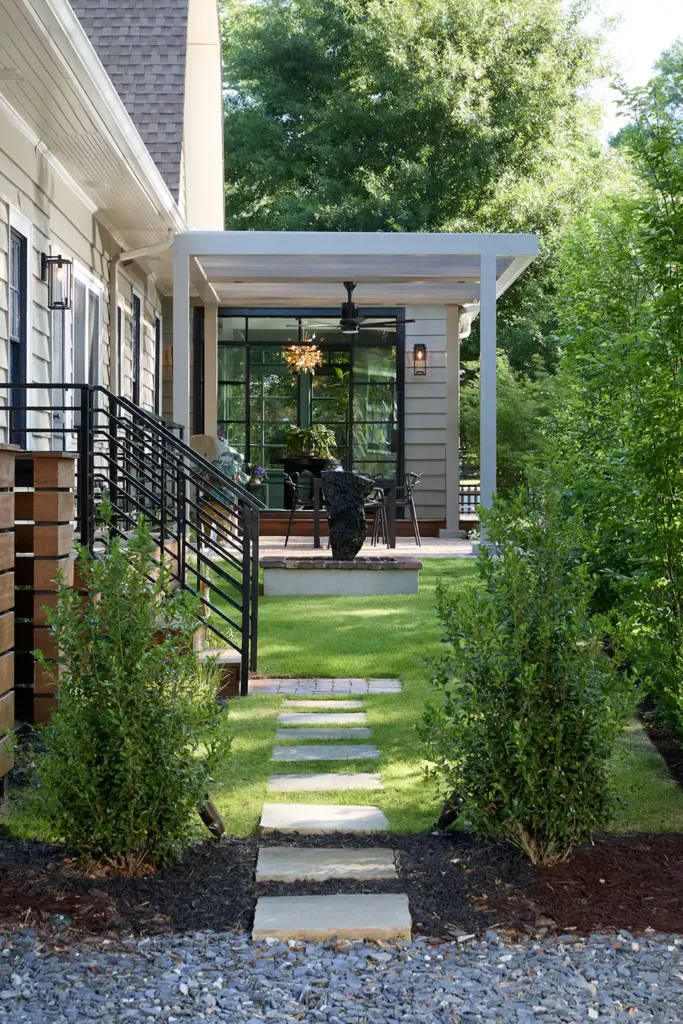
9. Modern Black-Framed Glass Doors Beneath a White Pergola
The success of this entire design hinges on the bold contrast between the black door frames and the white pergola. The stark black provides a strong, graphic anchor point that grounds the entire facade, while the bright white pergola feels light and airy overhead. This high-contrast black-and-white palette is a classic for a reason: it’s timeless, sophisticated, and clean. If the pergola were also black, or the doors white, the entire composition would lose its crisp, architectural definition and visual punch. It would be fine, but it wouldn’t be this striking.
“A white pergola looks stunningly fresh and clean…”
when it’s clean. Be prepared for a bit of maintenance to keep it that way. Being exposed to the elements, white-painted wood or vinyl will show dirt, pollen, and mildew more readily than a darker color. Plan on giving it a good scrub with a long-handled brush and some soapy water at least once or twice a year, especially if you live in a wooded area or a region with high humidity. It’s a small price to pay for the bright, airy look, but it’s a reality you should be aware of before committing.
10. Flexible Shade with a Retractable Screen and a Tilting Umbrella
This setup is a masterclass in adaptable, renter-friendly shade. It wisely combines two different types of solutions to tackle specific problems. The overhead structure with the roll-down mesh screen is perfect for blocking that low, intense “side sun” that arrives in the late afternoon, while also providing a welcome sense of privacy. The large, tilting umbrella, on the other hand, handles the high-noon, directly overhead sun. By using two separate, adjustable pieces instead of one fixed cover, the homeowner gains complete control over their comfort throughout the day.

“For a truly budget-friendly version of this, you can skip the permanent structure altogether.”
You can buy high-quality, weighted cantilever umbrellas with 360-degree rotation and tilt functions for $300-$600. For the privacy element, install a simple outdoor roller shade ($100-$200) directly to your home’s eaves or fascia board. This combination gives you the same dual-functionality—overhead shade and side-angle privacy—with no permanent construction and for a fraction of the cost of a custom-built frame.
11. Cozy Evening Ambiance with a Scalloped Pergola and Privacy Drapes
Before you commit to outdoor drapes, tick off these simple checks. They make all the difference between a chic cabana and a tattered mess.
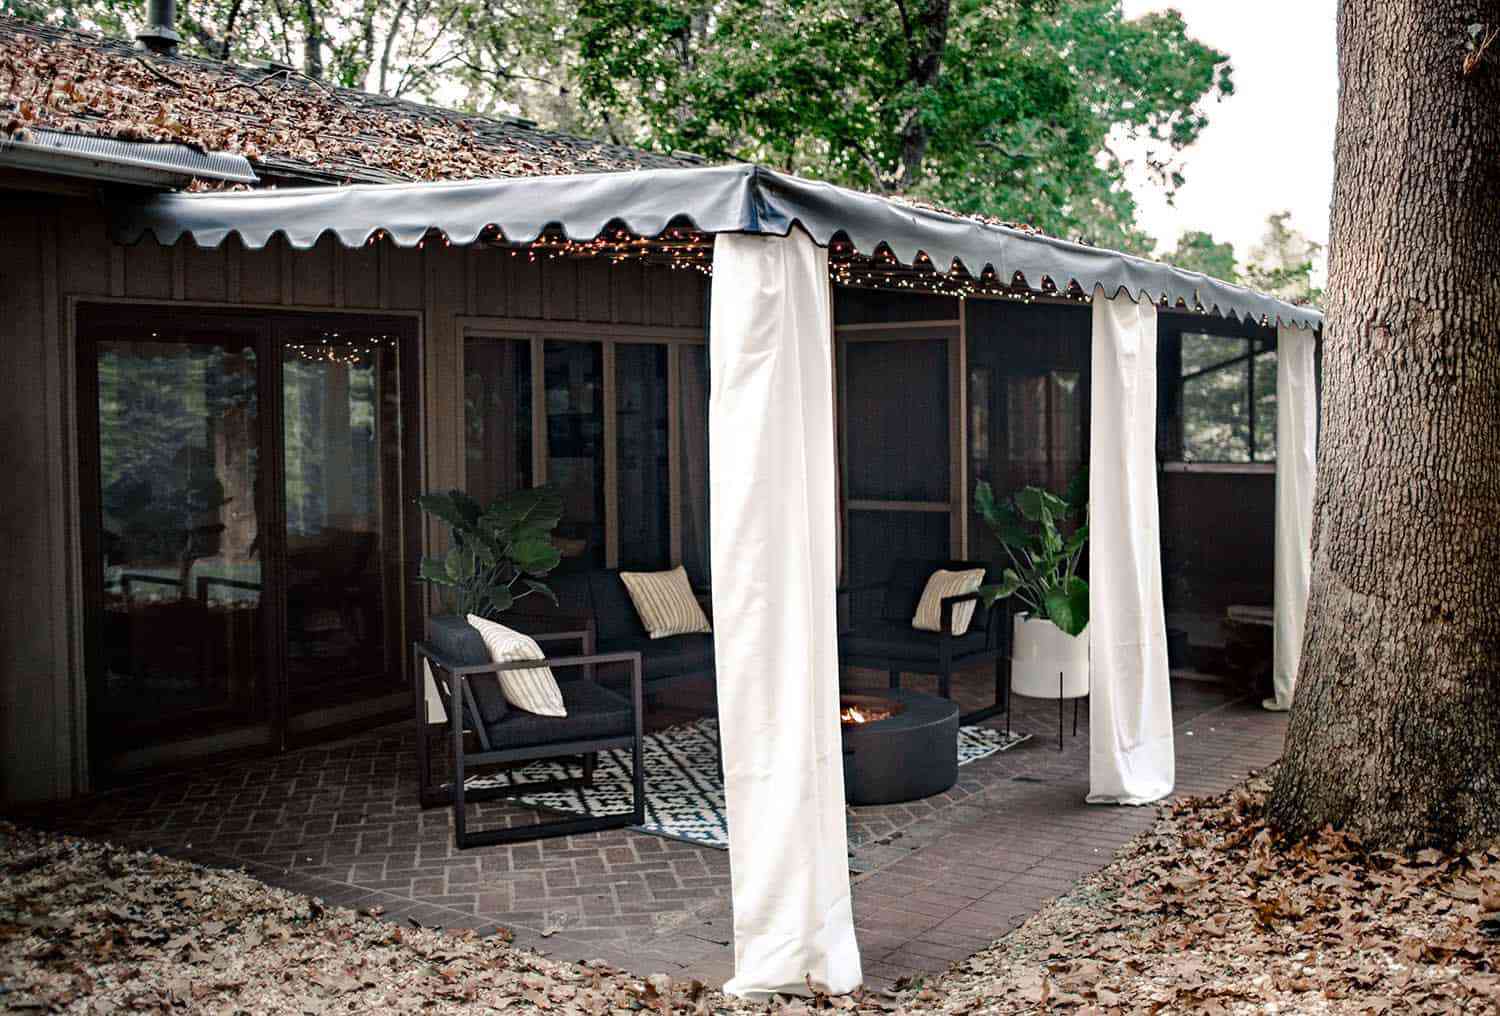
“Check Material: Are they specifically “outdoor” curtains?”
Indoor fabric will mildew and rot within a single season. Look for polyester, acrylic, or Olefin.
Verify Weight: Good outdoor curtains have weights sewn into the bottom hem to keep them from flying wildly in the wind. If they don’t, you’ll need to buy curtain weights separately.
Plan for Tie-Backs: You absolutely need a way to secure the drapes to the pergola posts when not in use. Simple velcro straps or decorative rope tie-backs are a must-have.
While the pergola provides the structure, it’s the white privacy drapes that truly define this space. They are the element that transforms a simple patio into a cozy, room-like enclosure. Pull them closed, and you have an intimate cabana, perfect for evening conversation around the fire pit. Even when tied back, they soften the hard lines of the dark metal pergola and add a touch of breezy, romantic elegance. The string lights are lovely, but the drapes are what create the feeling of a special, sheltered destination.
12. Relaxing Nook with a Wood Pergola and Striped Retractable Canopy
For retractable canopies, the fabric choice makes all the difference. The black and white stripes here are a classic, but the key to their success is the material. Always opt for a solution-dyed acrylic or marine-grade fabric. It might cost 20-30% more upfront than standard coated polyester, but it will resist fading and mildew for years, not months. Also, consider the hardware. Look for systems that use stainless steel cables and fasteners. They will withstand the elements without rusting and seizing up, ensuring your canopy glides smoothly season after season.
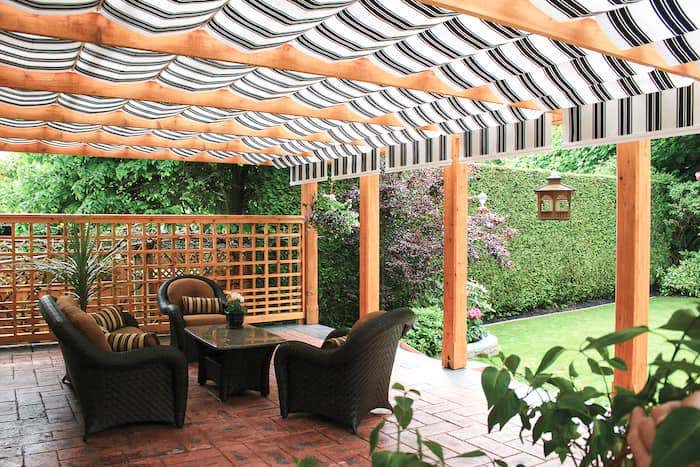
“A wooden pergola is beautiful, but it is not a “set it and forget it” feature.”
To keep it looking rich and prevent rot, you need to budget for regular maintenance. Plan to clean and re-stain or re-seal the wood every 2 to 3 years, depending on your climate’s harshness. This involves a thorough cleaning, possibly light sanding, and application of a quality outdoor sealant. This can be a weekend-long DIY project or cost $500-$1000 to hire out. Ignoring this upkeep will lead to graying, splintering, and eventually, structural decay.
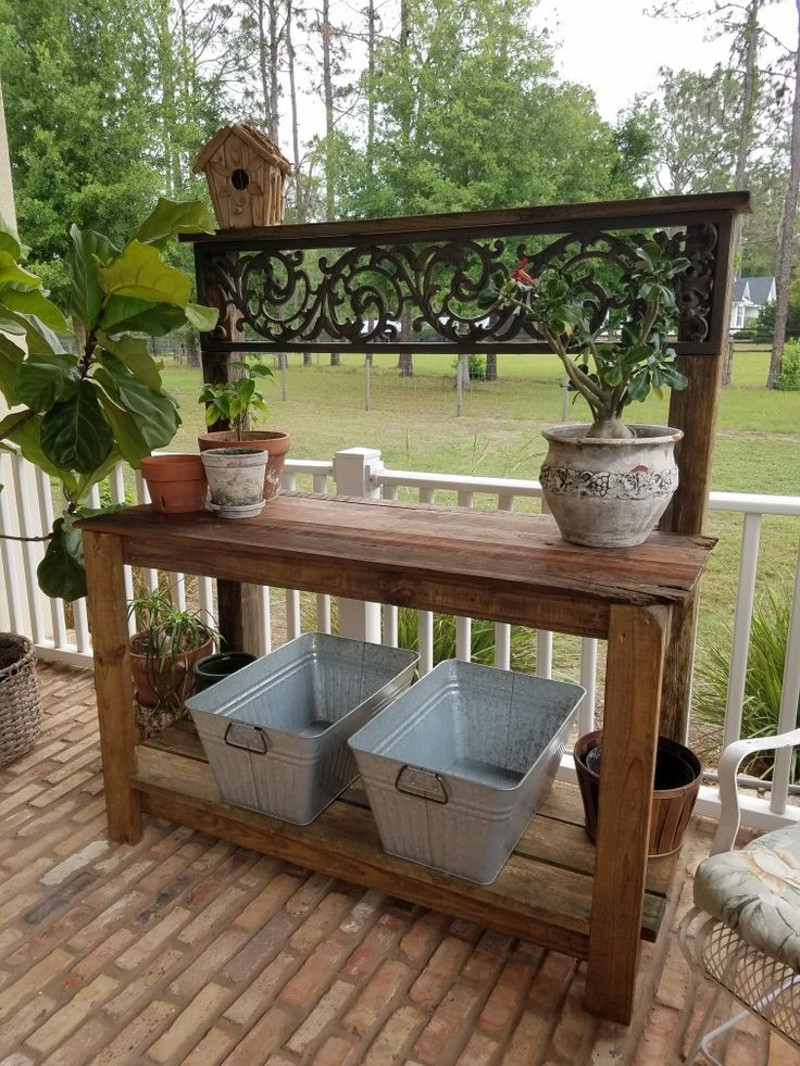
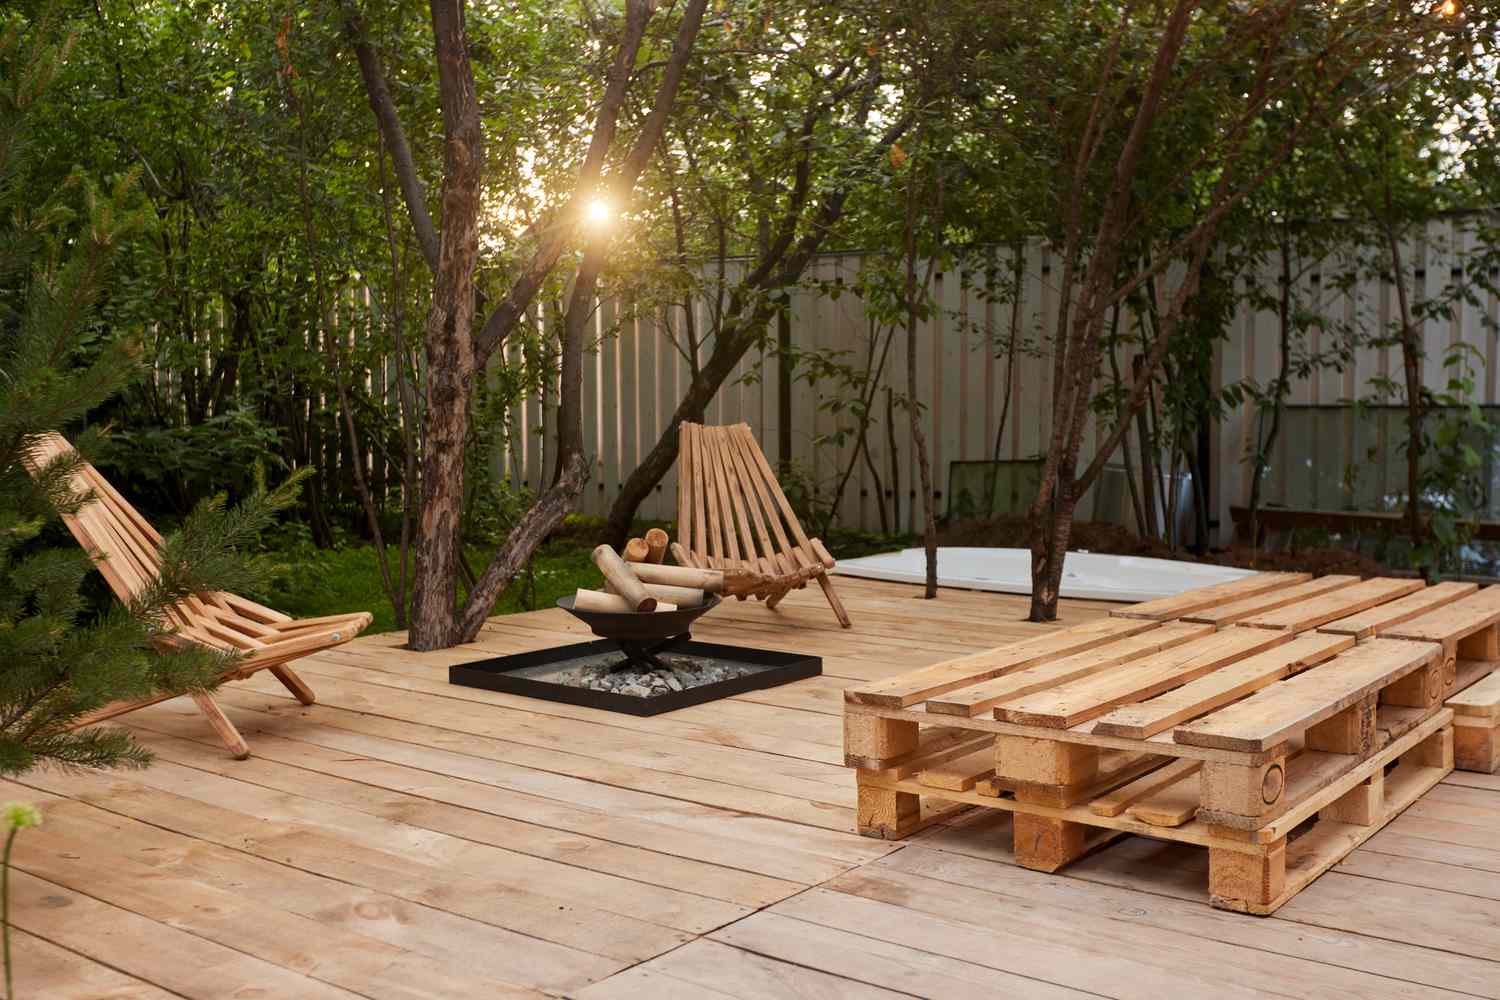
13. DIY Vibe with Pallet Furniture and a Natural Reed Shade Cover
Creating a reed or bamboo pergola cover is a fast and affordable way to get a breezy, bohemian look. It’s an ideal DIY project.

“Time: 1-2 hours
Cost: $100 – $300
Source Your Reeds: Buy rolls of reed or bamboo”
- Time: 1-2 hours
- Cost: $100 – $300
- Source Your Reeds: Buy rolls of reed or bamboo fencing from a home improvement store. One 6’x16′ roll is often enough for a small pergola.
- Unroll and Position: Simply unroll the fencing over the top of your pergola’s crossbeams.
- Secure Tightly: Use heavy-duty zip ties or galvanized wire every 12-18 inches to attach the reed mat securely to the pergola structure. Make sure it’s taut to prevent it from sagging or flapping in the wind.
- Trim Excess: Use wire cutters to trim any excess length from the roll for a clean finish.
This entire look screams resourceful style, and it’s the ultimate budget version of a high-end setup like Idea #1. You can source wooden pallets for free from many local businesses (just ask first!). A few coats of exterior paint, and you have a modular sofa frame. The cushions can be the biggest expense, but searching for “outdoor deep seat cushions” on Amazon or at Target can get you a full set for $200-$400. The reed-mat-over-pergola trick is a classic for a reason: it costs a fraction of a retractable canopy and provides beautiful, dappled light.
14. Classic Beige and White Striped Retractable Patio Awning
The simple effectiveness of this awning lies in its classic design and effortless functionality. The beige and white stripe is a timeless pattern that complements the home’s traditional yellow siding and white trim without competing with it. It feels like an integrated part of the house, not a modern attachment. Functionally, its brilliance is its on-demand nature. With the press of a button or the turn of a crank, a hot, unusable patch of patio becomes a comfortable, shaded living area. It solves the sun problem completely, then disappears when it’s not needed.
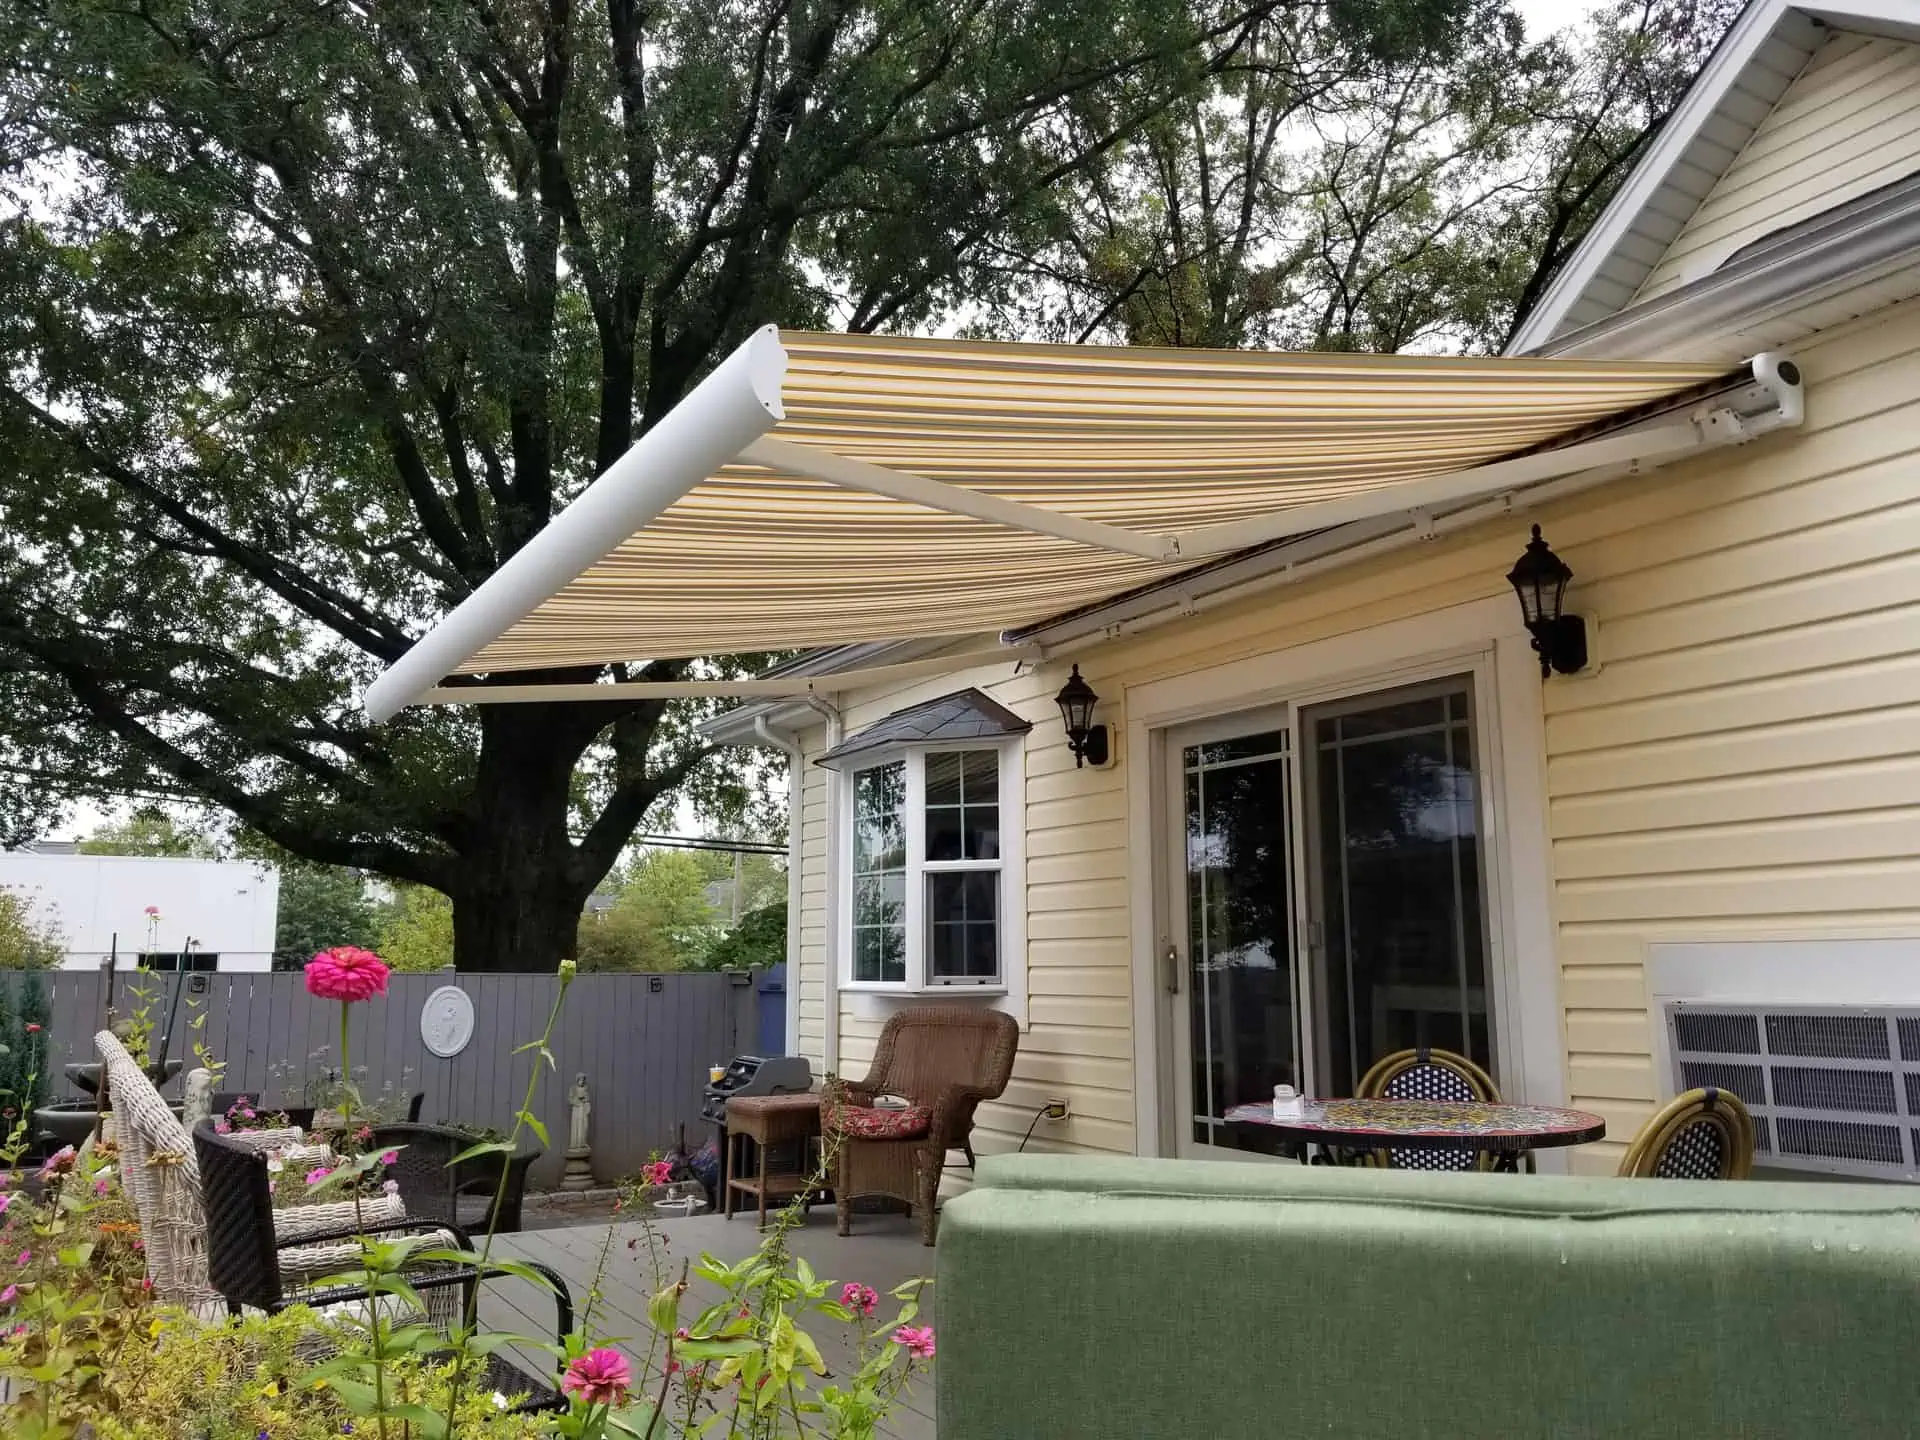
“Retractable awnings are incredibly versatile, but their size must be proportional to your house and patio.”
Standard sizes typically range from 8 to 20 feet wide with projections (how far it extends from the wall) of 7 to 13 feet. For a small seating area, a 10-foot wide awning with a 9-foot projection is usually perfect. For a larger dining set, you’ll want to go bigger, perhaps 16 feet wide with an 11-foot projection. Before buying, use painter’s tape to mark the desired coverage area on your patio to visualize the scale and ensure it’s adequate.
15. Bold Orange Retractable Awning Over a Rustic Stone Patio
This rustic scene masters the art of the accent color. The formula is beautifully simple: 80% earthy, natural textures (the multi-toned stone walls and pavers, the dark wicker chairs, the green foliage) + 20% high-energy, warm color (the vibrant orange of the awning and matching cushions). The orange doesn’t just provide shade; it injects life and personality into the otherwise muted, historic-feeling backdrop. It’s a modern touch that feels intentional and joyful. Compare this to the more classic, neutral awning in Idea #14 to see the difference a bold color choice makes.
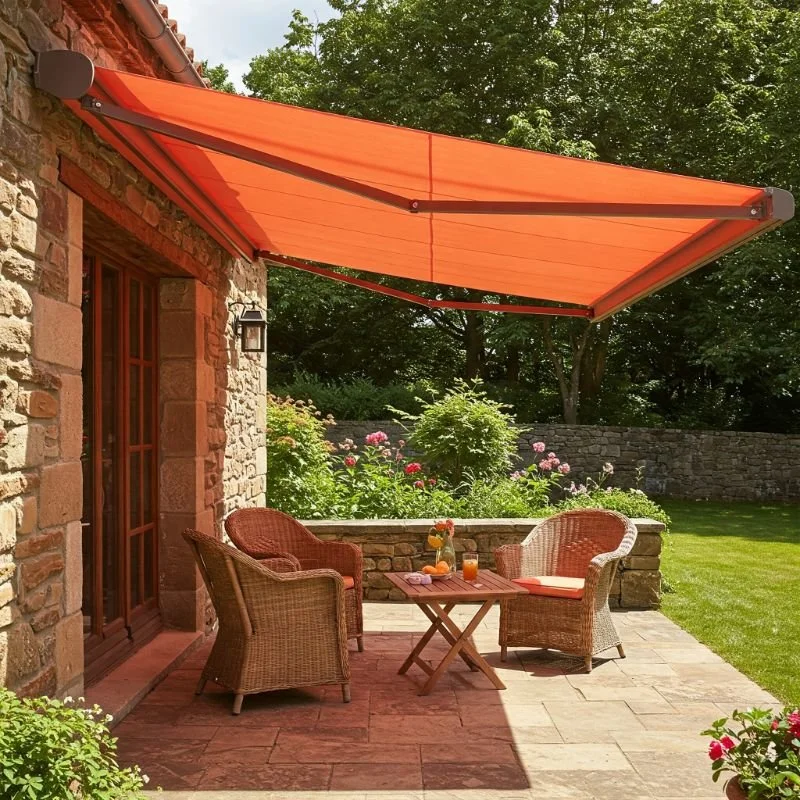
“A retractable awning is a fantastic shade solution, but be realistic about its limitations, especially in windy areas.”
Most awnings have a wind sensor that will automatically retract them in high gusts to prevent damage, but a sudden strong burst of wind can still bend the support arms or tear the fabric. It is not a permanent roof. If you live in a consistently windy location, a more rigid structure like a pergola or a permanently fixed sail shade might be a more durable (and less stressful) long-term solution.
16. Modern Grey House with a Retractable Black Awning
The key element that ties this entire outdoor spa area together is the choice of a solid black awning. In a composition dominated by the dark grey siding and the warm, natural wood of the sauna and hot tub, a patterned or light-colored awning would have introduced unnecessary visual clutter. The simple, monolithic black fabric acts as a quiet, sophisticated backdrop. It provides shade without demanding attention, allowing the beautiful textures of the wood and the clean lines of the house to remain the focal point. It’s a lesson in confident restraint.
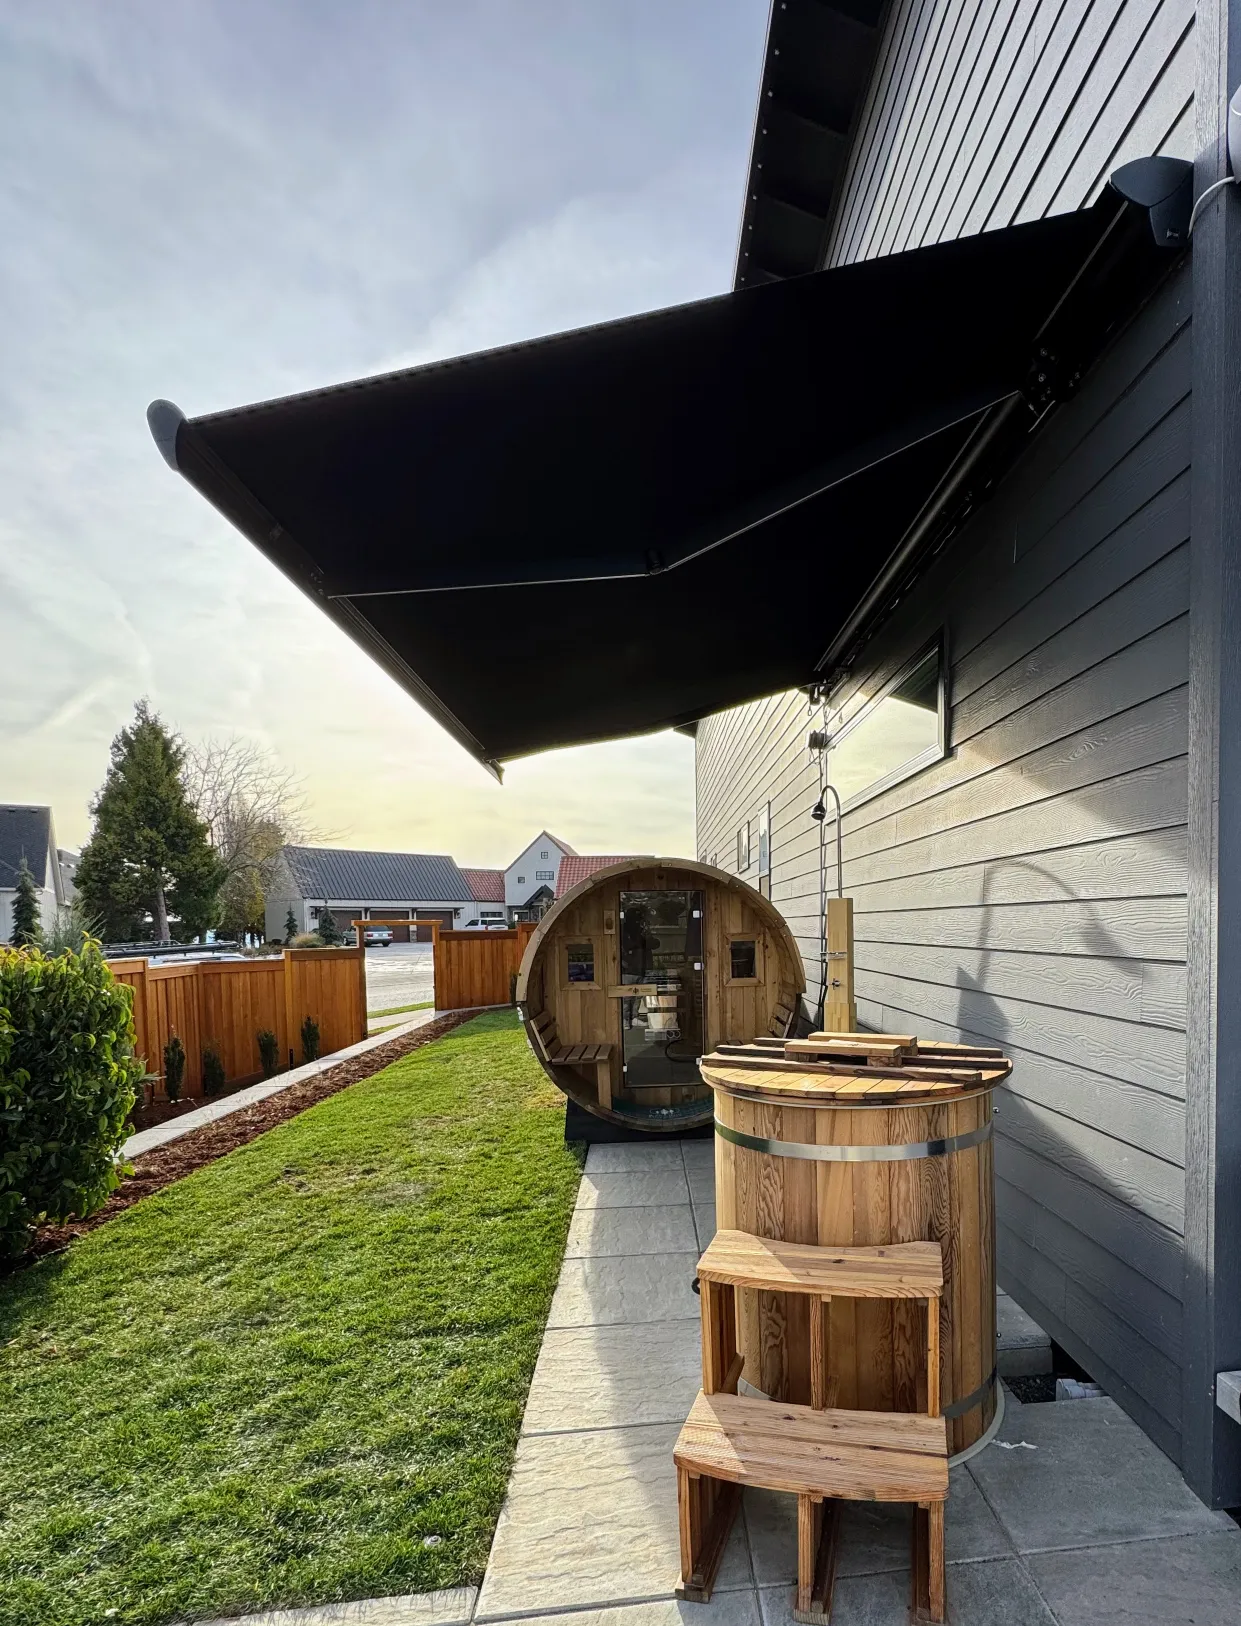
“This design is a masterclass in tonal harmony and material balance.”
The dark elements—the charcoal grey siding and the black awning—create a moody, modern shell. This allows the warm, organic wood of the barrel sauna and hot tub to stand out as features. The light grey pavers provide a neutral ground plane that prevents the overall scene from feeling too heavy or dark. The result is a space that feels both sleekly contemporary and warmly inviting, like a private Scandinavian spa.
17. Multi-Zone Shade for a Deck with Awnings and Roll-Down Screens
When combining multiple types of shade on one deck, color consistency is key to a cohesive look. Notice how the beige roll-down screen is a solid color taken directly from the striped pattern of the main awnings. This simple choice makes the different products feel like they were part of a single, intentional design package, rather than mismatched add-ons. If you can’t find an exact match, choose a neutral solid (like beige, cream, or grey) that complements your main patterned fabric. This prevents the space from looking chaotic and piecemeal.
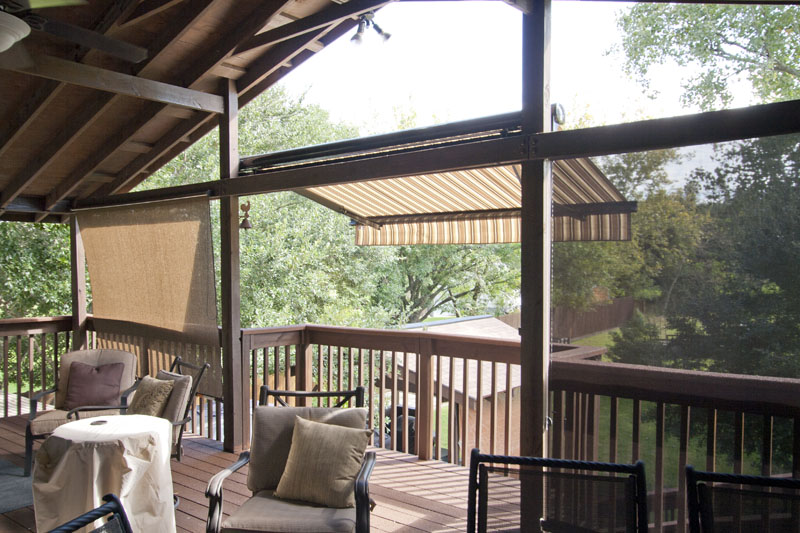
“This layered approach is perfect for large decks or L-shaped patios where a single solution won’t work.”
Retractable awnings are ideal for providing overhead cover for large, open areas (100-200 sq ft). Roll-down screens are the perfect problem-solvers for more specific issues, like blocking the low-angle afternoon sun that sneaks in under the main awning or adding privacy to one side of the deck. They work in tandem. Use the awnings for general shade and deploy the screens as needed for targeted protection.
18. Ornate Brown Pergola with a Louvered, Retractable Roof
This pergola successfully blends traditional aesthetics with modern functionality. The ornate, heavy beams and decorative columns give it a classic, substantial presence that complements the home’s traditional yellow stucco and tiled roof. However, the beige louvered roof is a modern marvel, offering adjustable shade and rain protection that a traditional wood-slat pergola could never provide. It’s this fusion of old-world style with new-world technology that makes the design feel both timeless and incredibly practical. The hanging lanterns are the perfect finishing touch, reinforcing the classic feel.
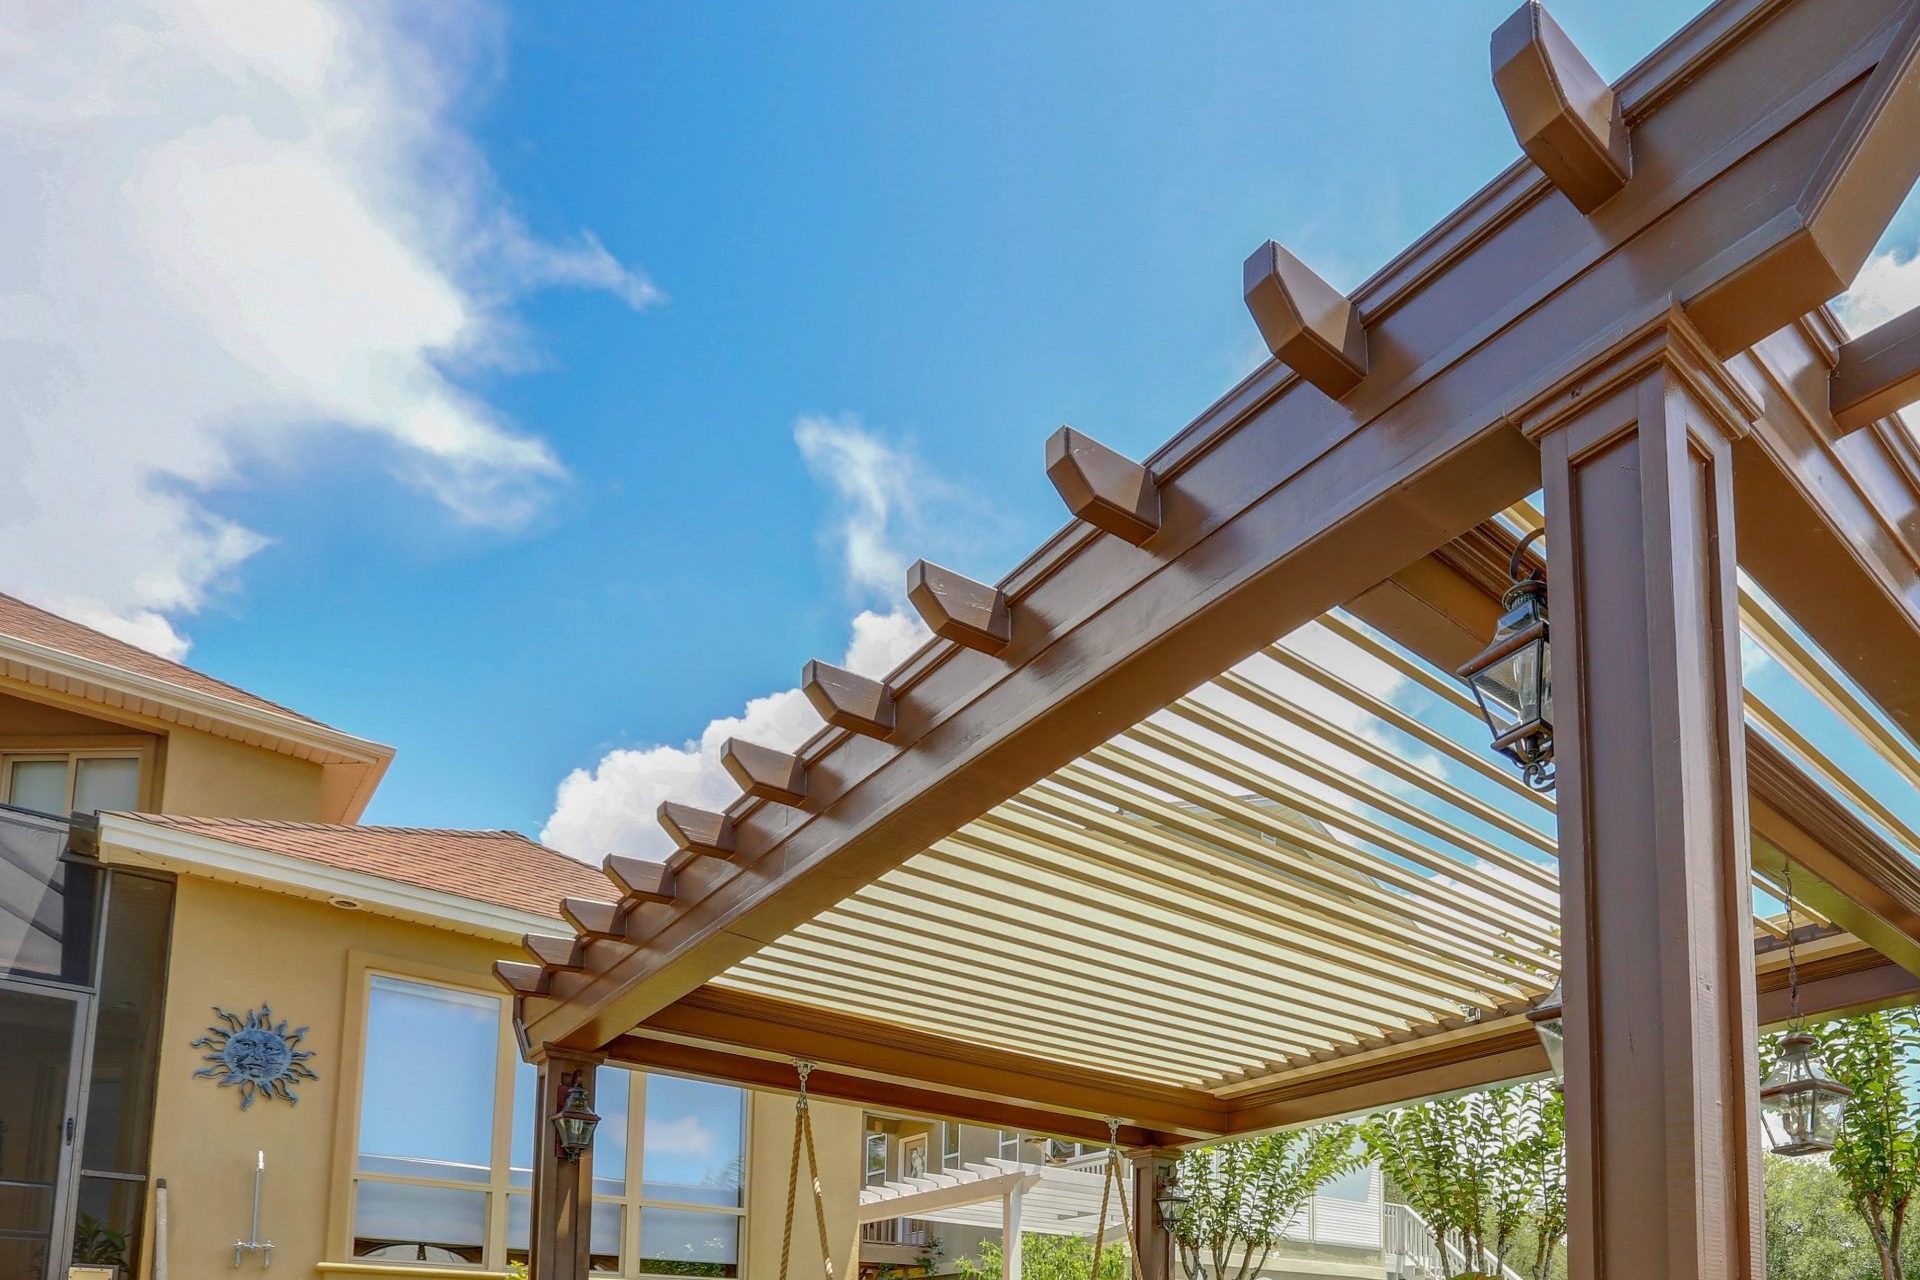
“A motorized, louvered roof is a complex piece of machinery exposed to the elements.”
To ensure it operates smoothly for years, you need to perform some basic annual maintenance. The tracks and moving parts should be cleared of any leaves, twigs, or debris that might cause them to jam. It’s also a good idea to lightly lubricate the pivot points and gears with a silicone-based spray. This simple 30-minute task each spring will prevent costly service calls and ensure your high-tech roof continues to function as intended.
19. Covered Patio with an Outdoor Kitchen and a White Brick Fireplace
This inviting space is a perfect example of the “80/20” rule in color palettes. About 80% of the space is a calm, neutral base: the white painted brick, the light wood furniture frames, and the dark grey floor tiles establish a clean and modern foundation. The remaining 20% is all about personality, delivered here through pops of lime green in the pillows and decor, and the bold black-and-white pattern of the rug. This formula allows you to easily (and affordably) change the entire mood of the space just by swapping out the accent pieces, without having to touch the expensive, permanent fixtures.
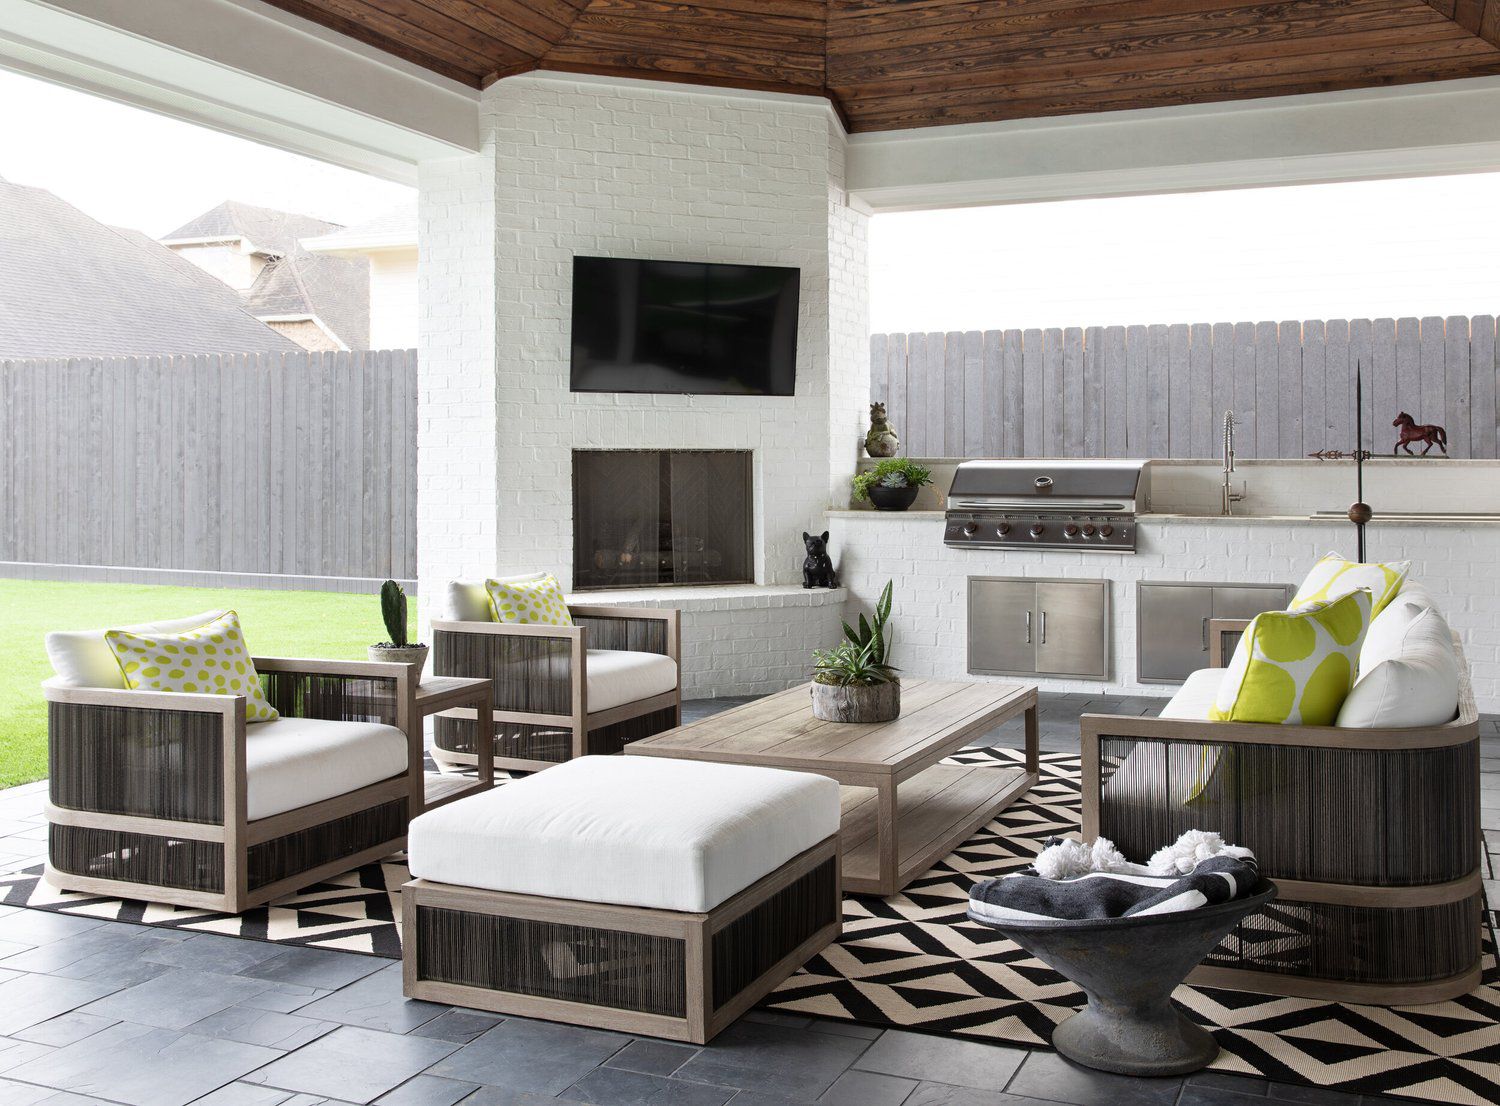
“A white brick fireplace and outdoor kitchen look incredibly fresh and stylish, but they are magnets for dirt, soot, and grease.”
The smoke from the fireplace can leave greyish stains on the white brick over time, and splatter from the grill is inevitable. Be prepared to scrub the brick and grout at least a couple of times a season with a masonry cleaner. For the seating, white cushions are beautiful but high-maintenance. Always choose performance fabrics like Sunbrella that are stain-resistant and easy to clean, and consider having a second set of cushion covers on hand.
20. Sunlit Wood Deck with Integrated Trees and Pallet Seating
The single most important design decision here was to build the deck *around* the existing trees, rather than cutting them down. This choice does more than just provide natural, dappled shade; it fundamentally defines the character of the space. It creates an immediate connection to the surrounding nature and gives the deck a soulful, organic feeling that can’t be replicated with a new structure. The trees are living sculptures that become the central feature of the design, making the deck feel like it has always been there. It’s a beautiful act of collaboration with the landscape. Check out Idea #6 for a more structured take on wood.
“This design taps directly into the huge trend of “rewilding” and sustainable design that’s all over Pinterest.”
Homeowners are increasingly looking for ways to make their outdoor spaces feel less manicured and more in tune with the natural environment. Building around existing trees, using reclaimed materials like pallets for furniture, and choosing a simple wood finish all speak to this desire for authenticity and a smaller environmental footprint. It’s less about imposing a design on the landscape and more about finding a way to live harmoniously within it.
21. Modern Rooftop Patio with a Wood Slat Ceiling and Pergola
The genius of this design is the layering of materials and light. The black metal pergola provides the main structure, but the inset wood slat panels are what create the feeling of a real ceiling. This brings a warmth and intimacy to the space that a simple open pergola would lack. Below, another layer of light is added with the string bulbs, which create a festive, ambient glow. Finally, the perimeter lighting around the fire pit adds a third, low-level light source. This multi-layered lighting scheme is what makes the patio feel so sophisticated and cozy after dark.
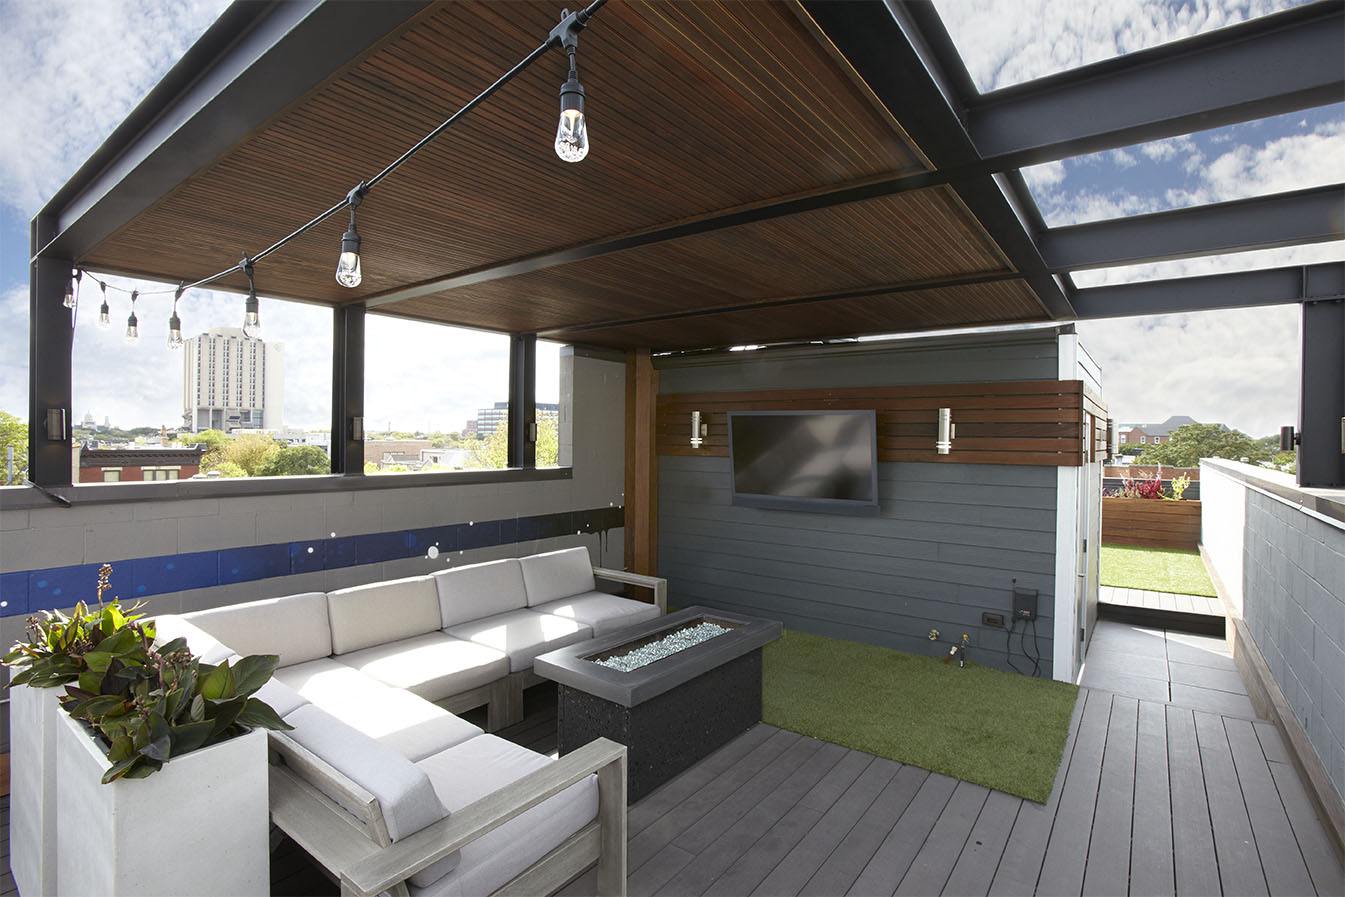
“Achieving this high-end look can be done for less.”
Instead of a custom metal and wood pergola, start with a standard black 10×10’ pergola kit ($800-$1,500). To create the wood ceiling effect, buy pre-made 4’x8’ lattice panels made of cedar or treated wood ($50 each). Cut them to fit and secure them to the underside of the pergola rafters. For lighting, use affordable outdoor-rated string lights ($50) and solar-powered LED strip lights ($40) around the base of your fire pit. The result is a similarly layered and inviting atmosphere at a fraction of the custom build price.
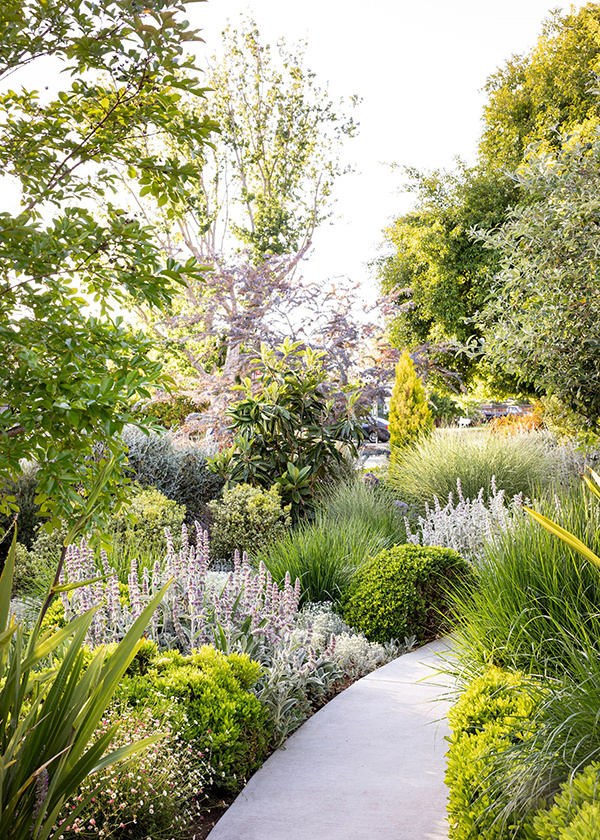
22. Lush Walkway with a Translucent Corrugated Roof
The hero of this design is, without question, the translucent corrugated roof. While an opaque roof would have plunged the walkway into deep shadow and killed the plants below, and an open roof would offer no protection, this material is the perfect compromise. It blocks harsh direct sun and rain while still allowing a soft, diffused light to filter through. This filtered light is what keeps the tropical plants in the integrated planter thriving and gives the entire space a bright, greenhouse-like feel. It’s a purely functional material used to create a beautiful, atmospheric effect. See a similar aporoach in Idea #25.
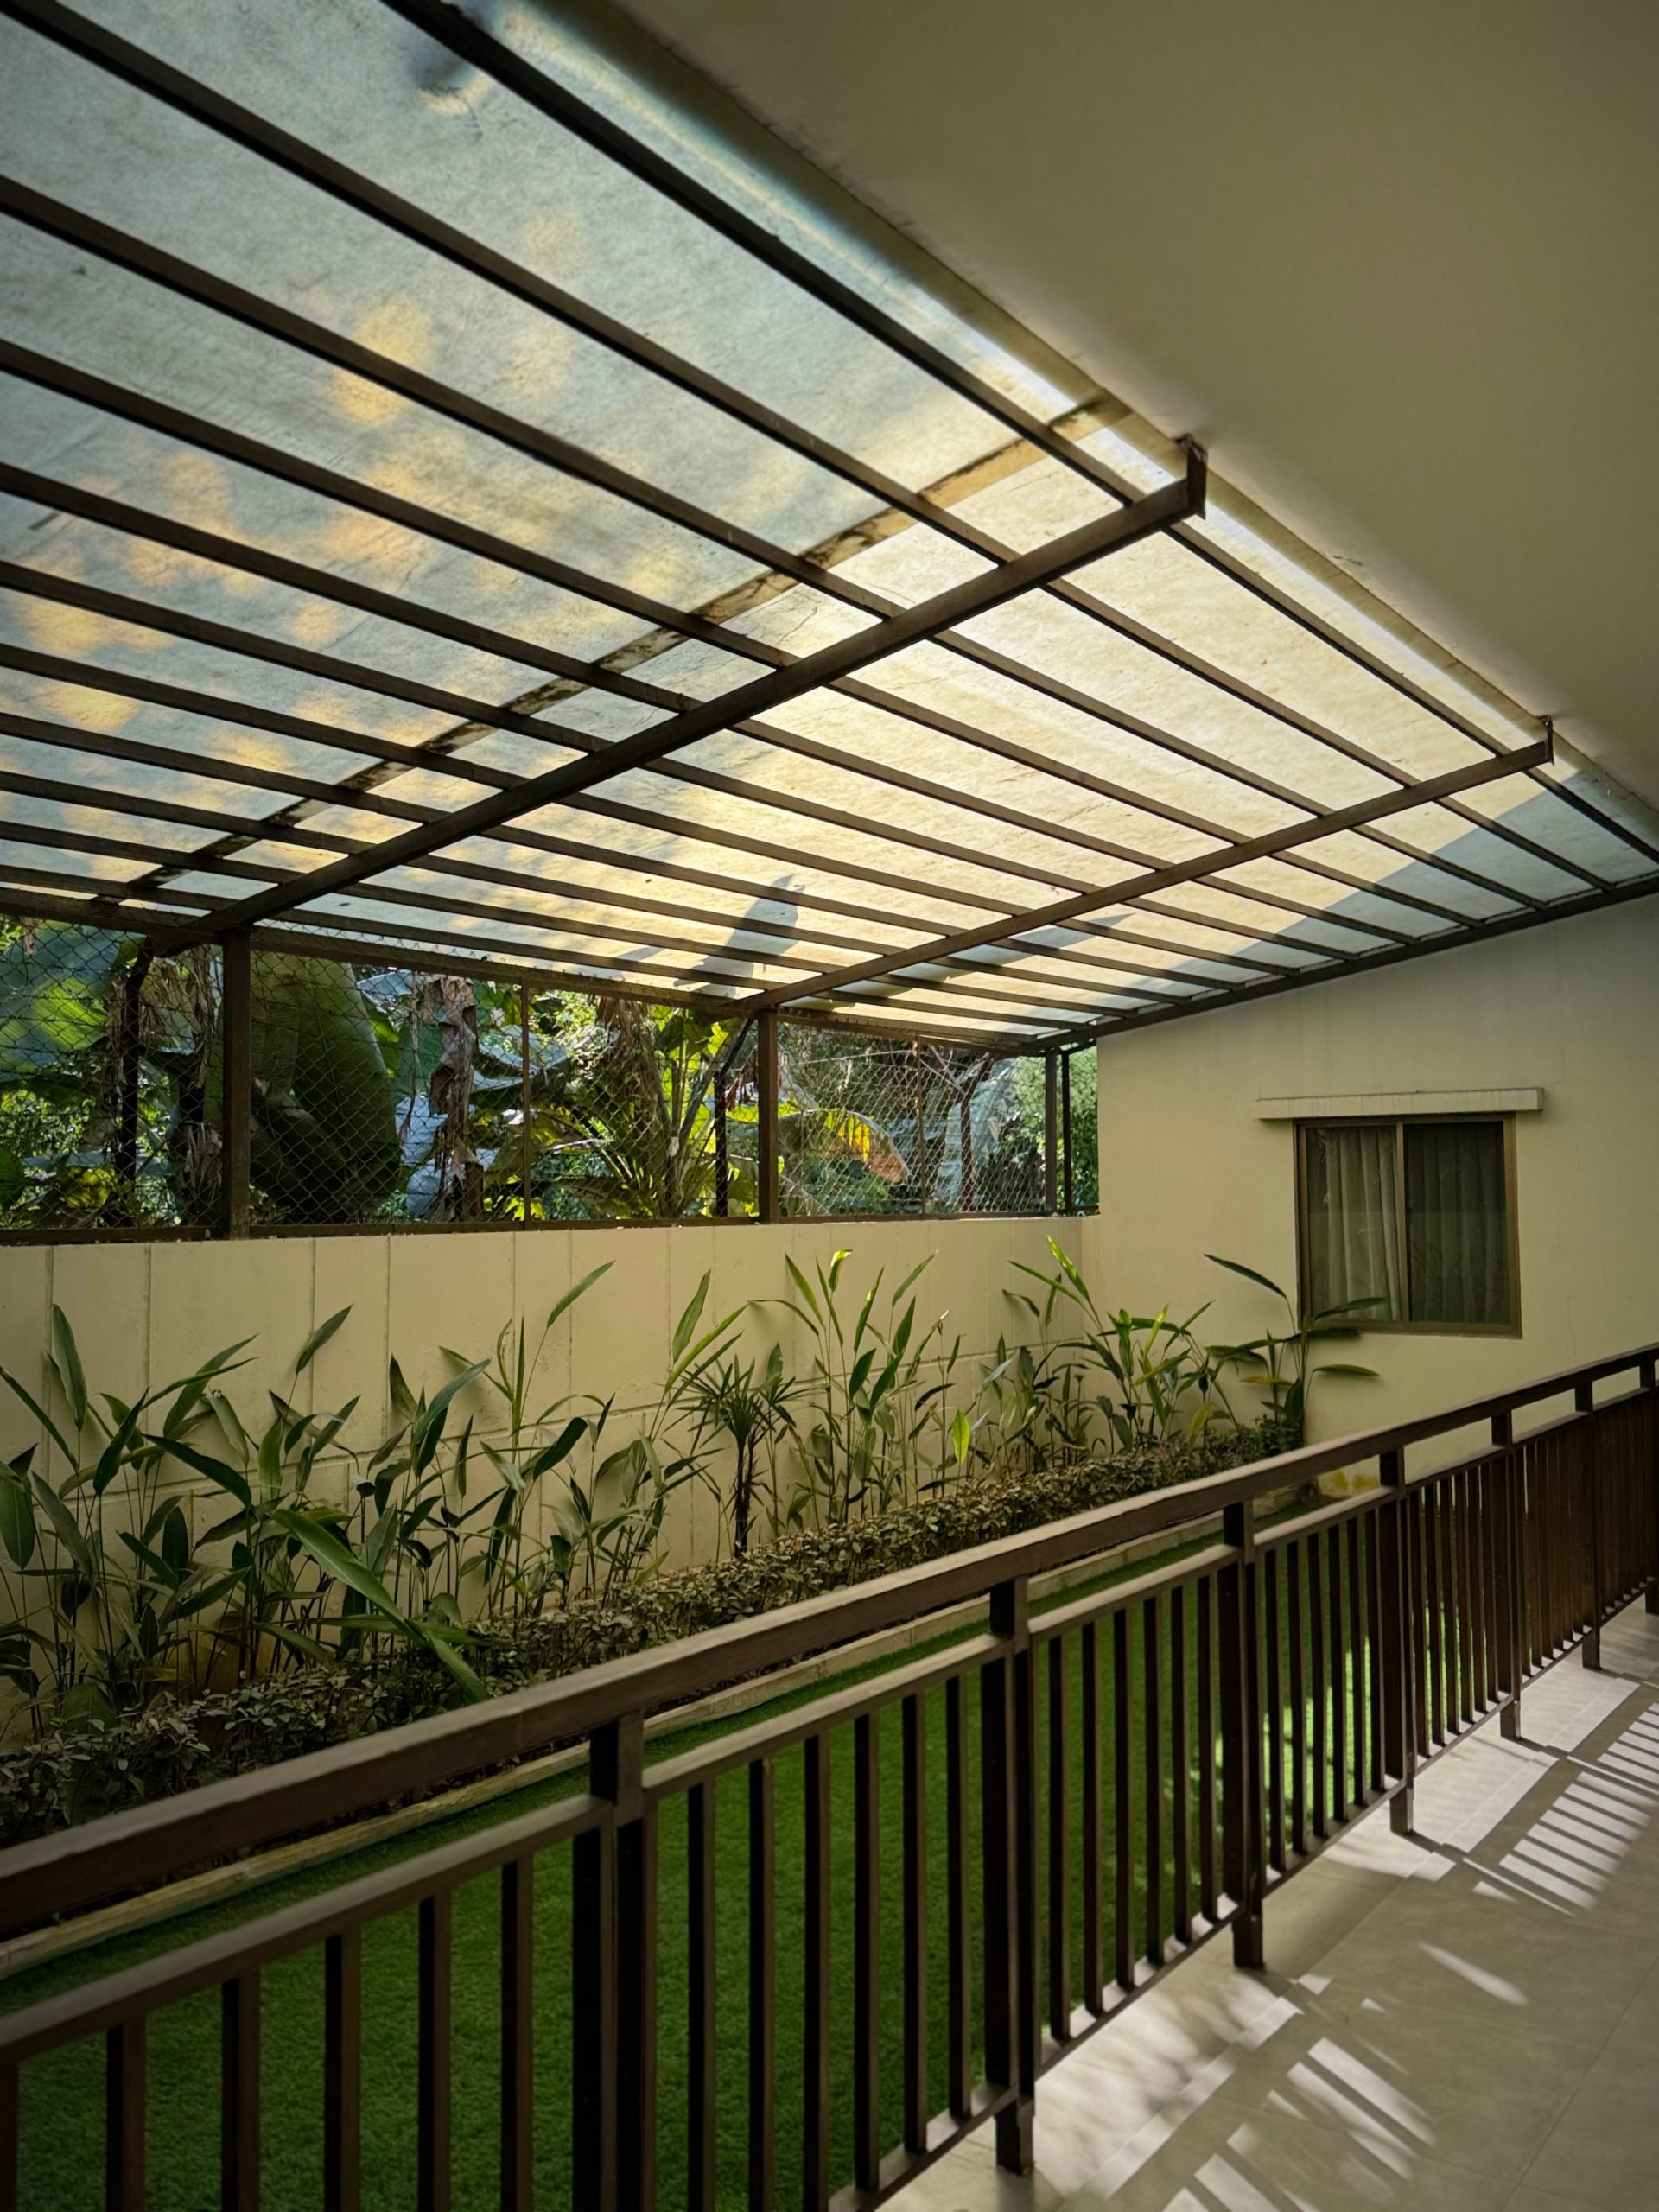
“A translucent roof is great for letting light in, but it does require cleaning to stay that way.”
The corrugations and the surface itself can trap dirt, pollen, and falling leaves, which can turn into a grimy, greenish film over time, reducing the amount of light that passes through. To keep it bright, plan on rinsing it down with a hose every month or so, and give it a more thorough scrubbing with a soft brush and mild detergent at least once a year. In areas with lots of trees, you may need to do this more frequently.
23. Modern Slatted Pergola Creating Rhythmic Shadow Patterns
This pergola is more than just shade; it’s a piece of kinetic art. The design’s power comes from the strong, repeating rhythm of the thin wooden slats. This repetition creates a mesmerizing pattern of sharp, parallel shadows on the concrete below. As the sun moves across the sky, these shadow lines shift and stretch, making the ground plane a dynamic surface. This focus on pattern and movement elevates the structure from a simple sunblock to a major architectural statement that interacts with light in a deliberate and beautiful way. The minimalist furnishing is a smart choice, as it doesn’t compete with the dramatic floor show.
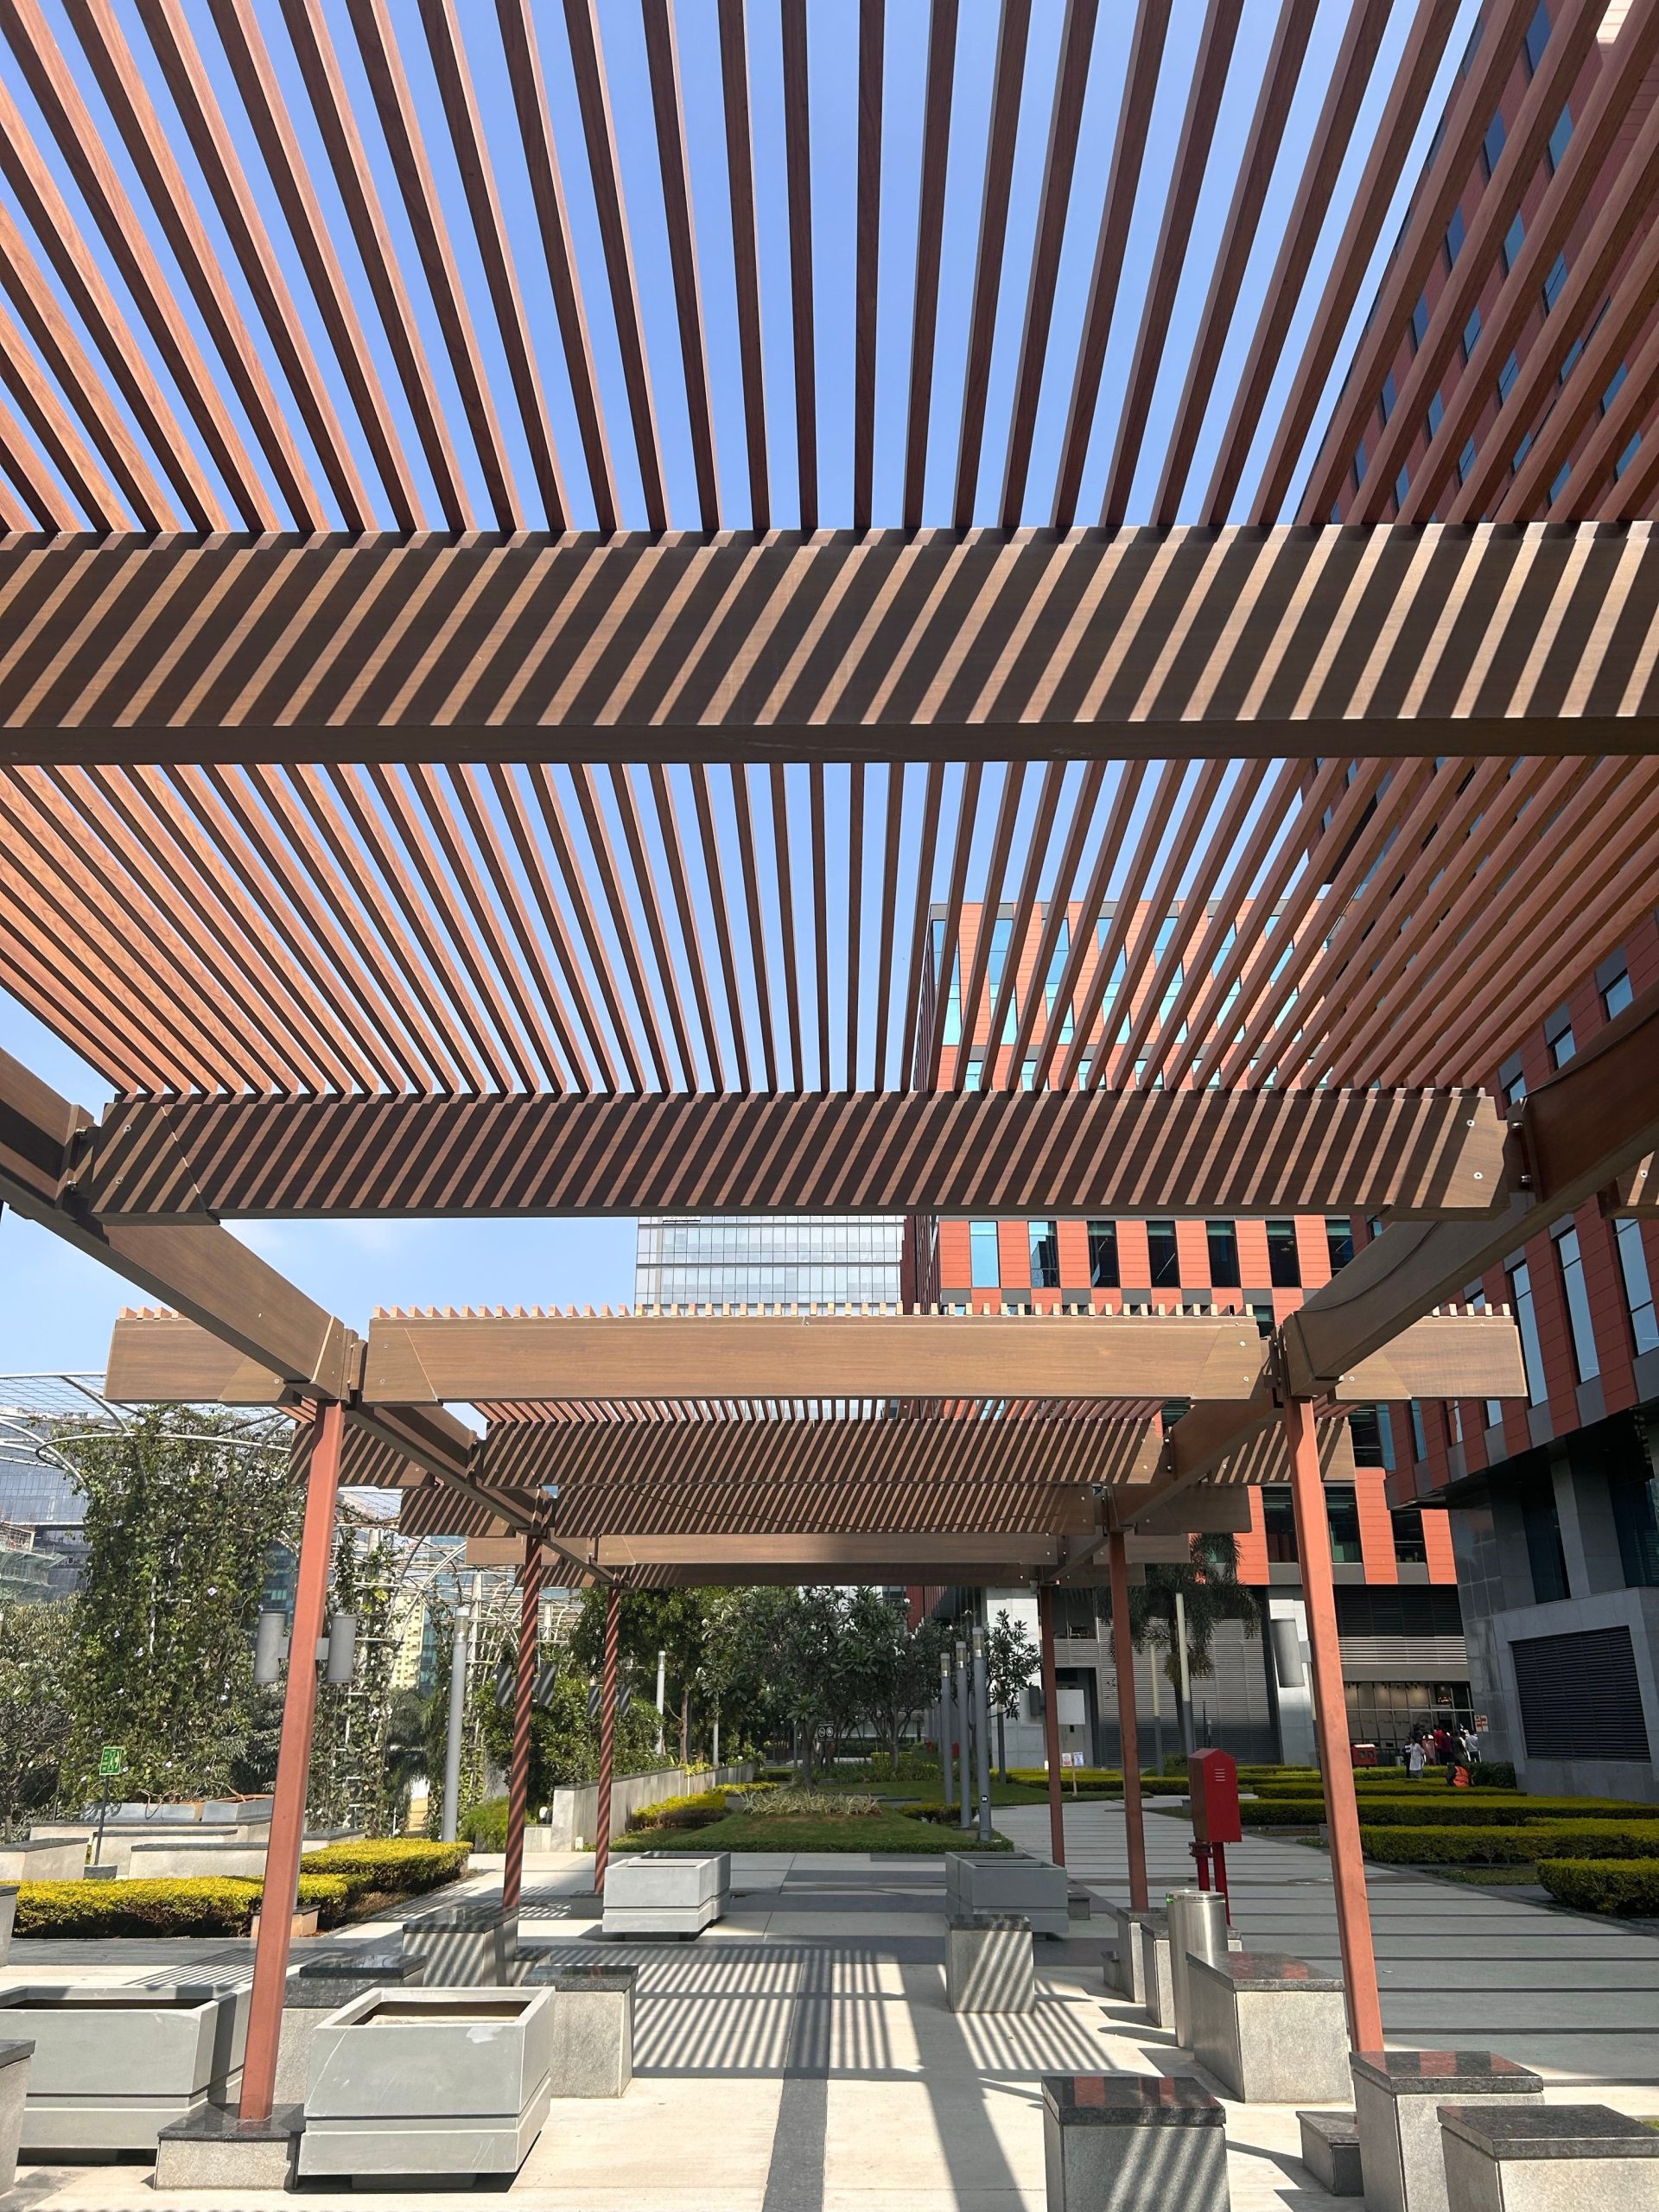
“When designing a slatted pergola, the spacing of the slats is the most critical decision.”
It determines both the amount of shade and the aesthetic. For strong, graphic shadow lines like these, use thinner slats (e.g., 1x2s) with a wider spacing (e.g., a 4-inch gap). For more shade and less pattern, use wider boards (e.g., 2x6s) with a narrower gap (e.g., a 2-inch gap). Before you build, lay a few sample boards out in the sun to see how the shadow patterns look and feel. Adjust the spacing until you get the perfect balance of light and shade for your needs.
24. Grey Pergola Shading a Multi-Zone Patio with Blue Accents
This patio uses a cool, contemporary color formula to create a relaxed yet polished look. The base is about 60% neutral grays (pergola, concrete pavers, furniture frames) and 30% natural greens and tans (artificial turf, house stucco, distant hills). The magic comes from the final 10%: a vibrant, saturated cobalt blue used for the cushions. This single, strong accent color electrifies the entire space. It’s a confident choice that proves you don’t need a riot of color to make a big impact. The blue feels both calming and energetic, perfect for a poolside lounge. A similar layout with a different feel can be seen in Idea #8.
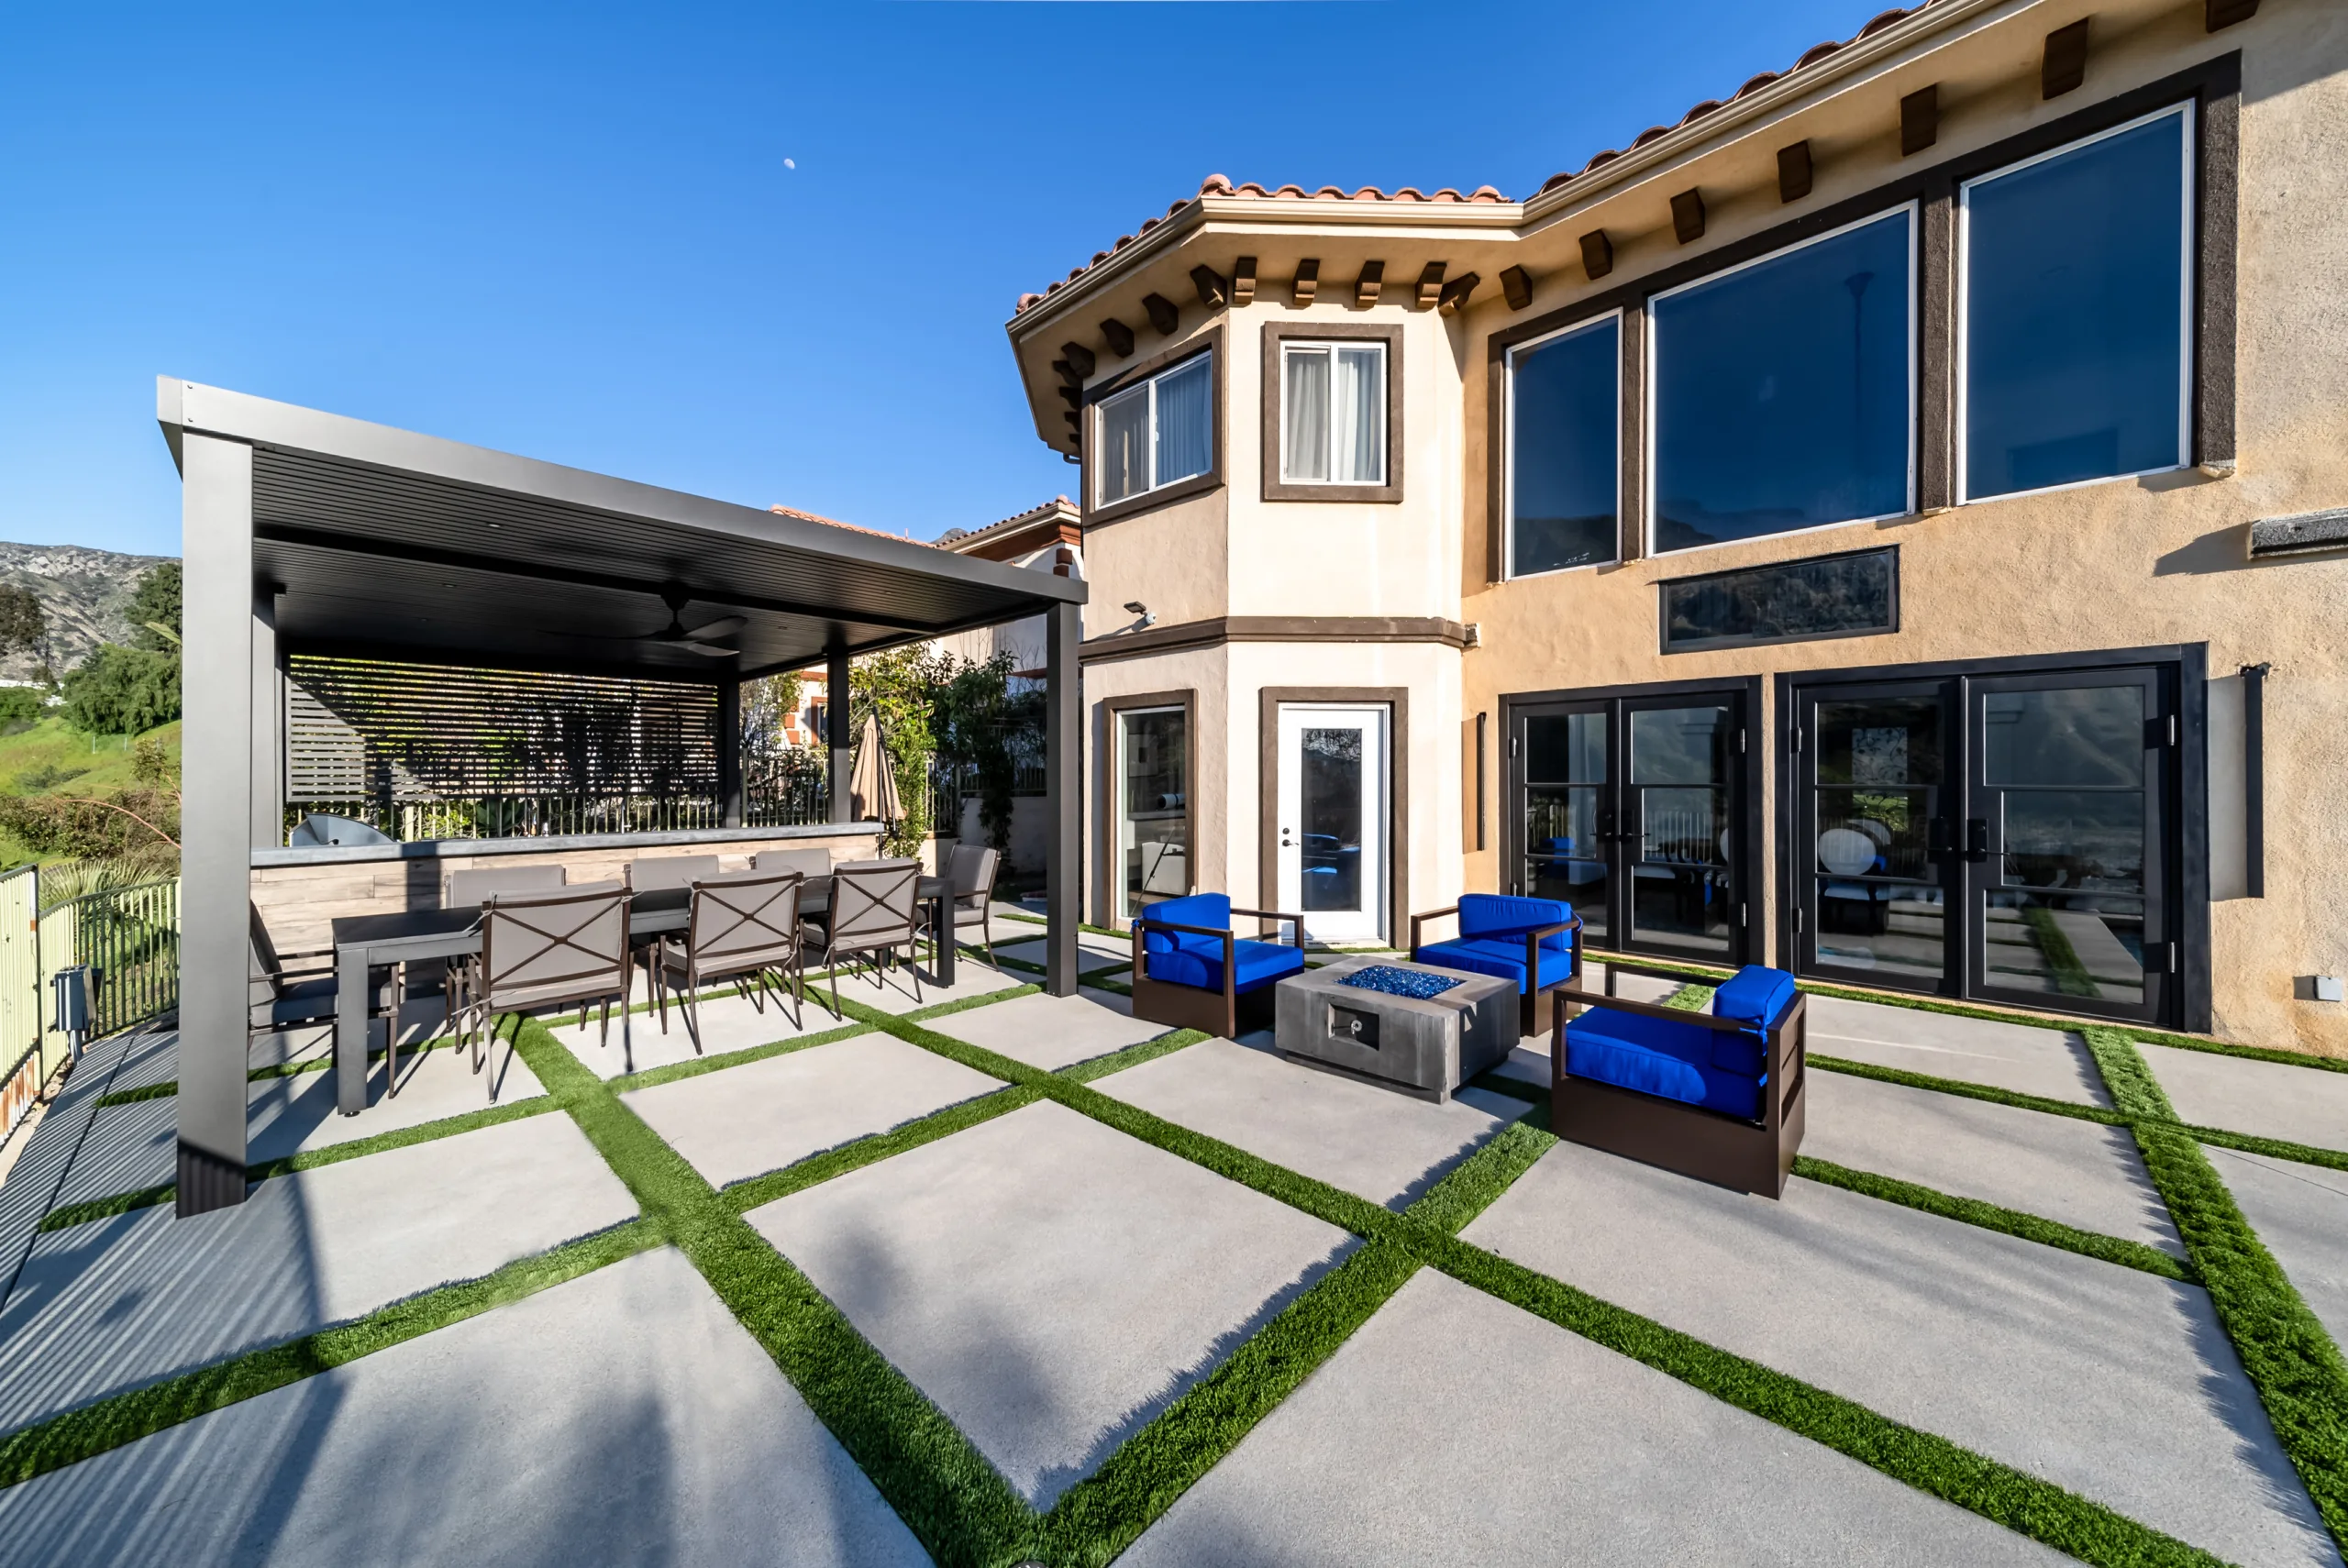
“This “zone” approach works best on patios that are at least 20 feet wide and 15 feet deep.”
This allows enough space for a dedicated dining area under the pergola (roughly 10×12 feet) and a separate, comfortable seating area (about 10×10 feet) without feeling cramped. A key detail that makes this work is the grid of artificial turf between the concrete pavers. It visually breaks up the large, hard surface, adding softness and preventing the patio from feeling like a vast concrete slab. This technique can make even a very large patio feel more intimate and grounded.
25. White Arched Pergola with a Translucent Grid Panel Roof
This pergola design succeeds by combining classic and modern elements. The arched supports and the bright white frame have a timeless, almost traditional garden feel. However, the roofing material—a translucent panel with a subtle grid pattern—is a contemporary touch. This pairing is what makes it so versatile. It provides the gentle, filtered light of a modern solution while maintaining a softer, more decorative aesthetic that blends perfectly with the lush, green backdrop. It feels sturdy and architectural, but not heavy or imposing. It’s a great example of transitional design.
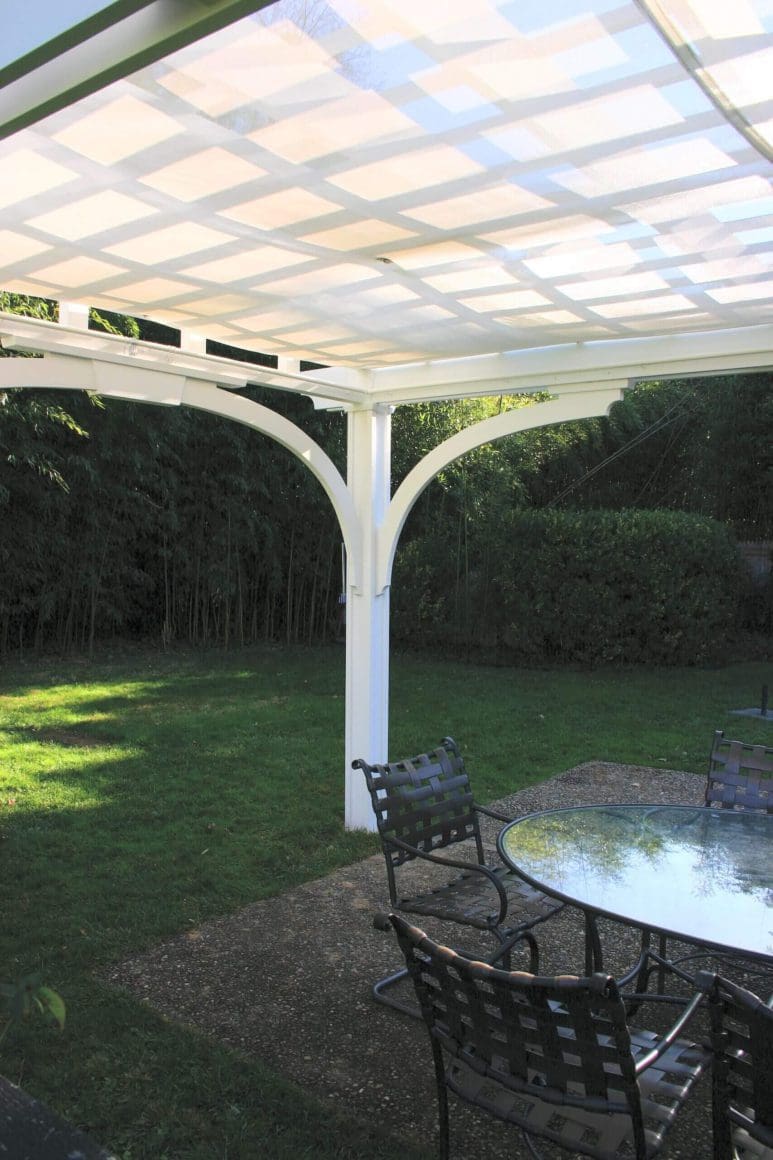
“Before installing a translucent patio cover, there are two key factors to consider.”
First, what is directly above it? If you have a large tree that drops a lot of leaves, seeds, or flowers, they will get trapped in the grid or on the surface, requiring frequent cleaning. Second, consider the heat. While these panels block UV rays, they can create a greenhouse effect, trapping heat underneath. If your patio is in full, intense sun all day, you might want to look for panels with a reflective or tinted coating to help reduce heat buildup.
26. Modern Patio Cover with Twin Ceiling Fans
When installing ceiling fans under a patio cover, don’t just guess on placement. For optimal air circulation over a large area, use multiple smaller fans rather than one huge one. A good rule of thumb is to center each fan over a distinct functional zone. For example, place one over the main seating group and another over the dining table. Ensure the blades are at least 18-24 inches away from any walls or beams and about 8-9 feet off the ground for safety and effectiveness. Also, always use “damp-rated” or “wet-rated” outdoor fans to prevent rust and electrical issues.
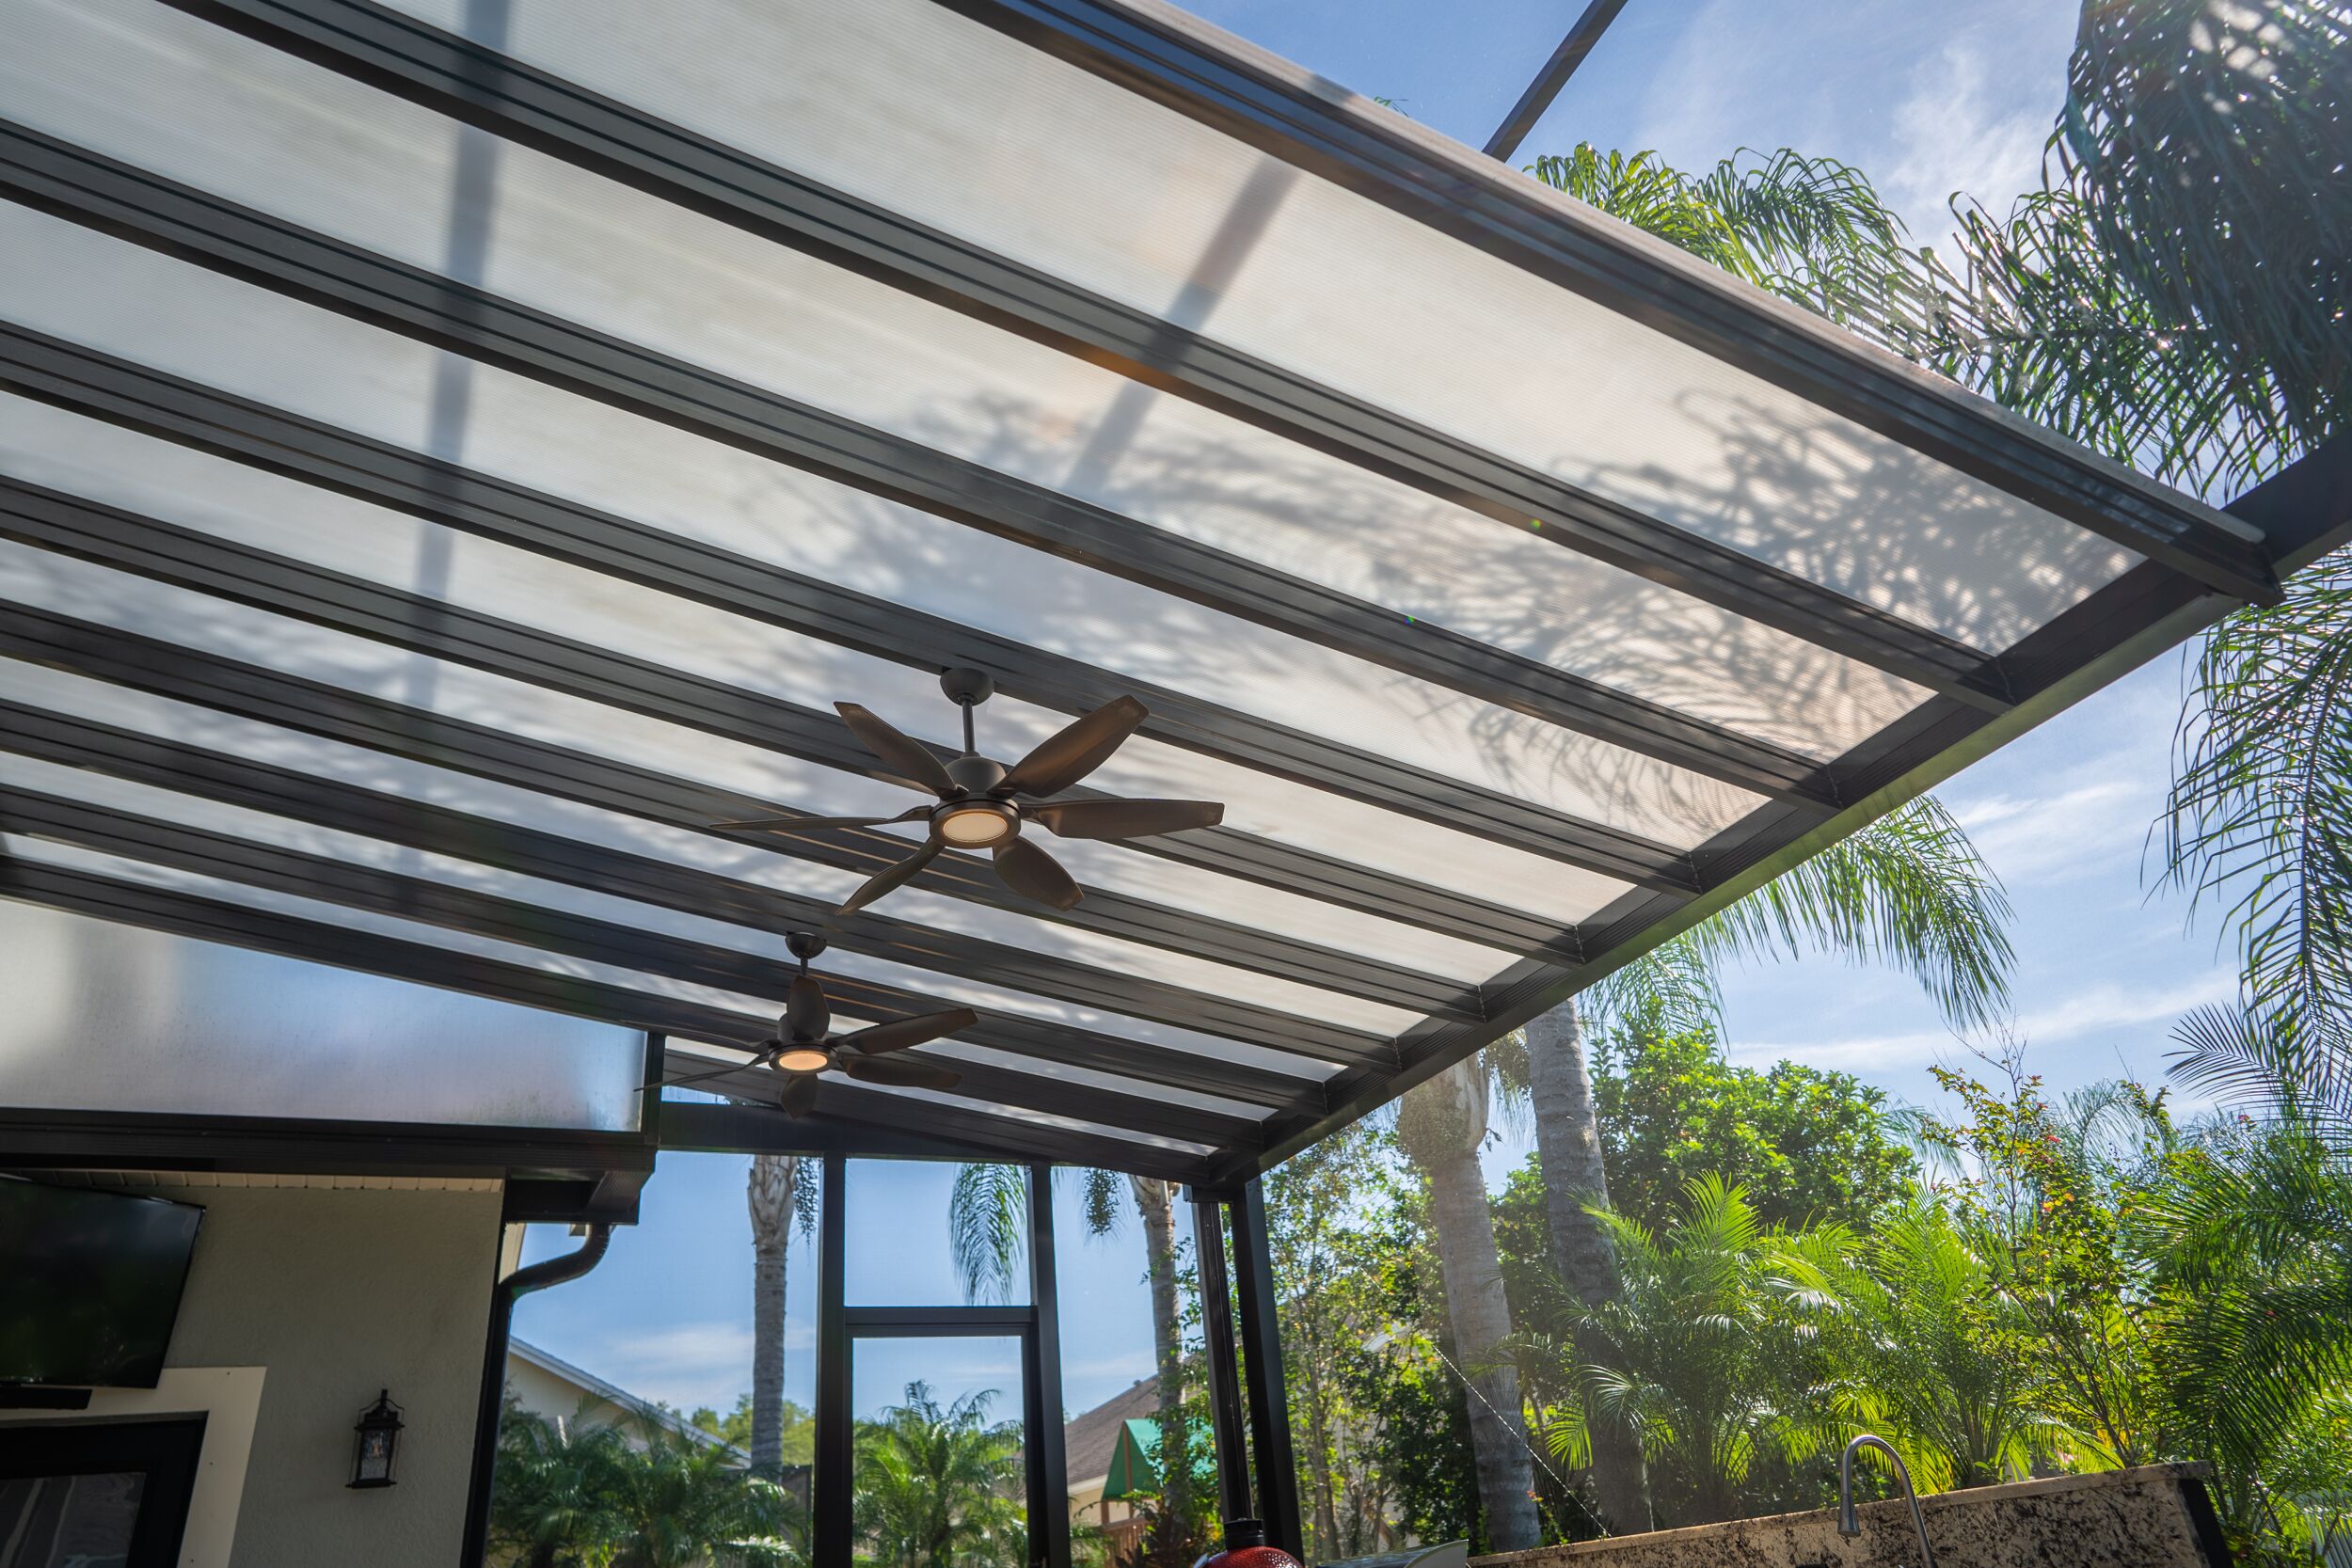
“The single thing that makes this setup truly usable in a hot, humid climate is the pair of ceiling fans.”
The translucent roof provides excellent shade from the sun, but on a still, 90-degree day, that shade can become a pocket of stagnant, oppressive heat. The fans are the “active” comfort element, constantly moving the air to create a cooling breeze and prevent the space from feeling stifling. They extend the hours and days you can comfortably use your patio, turning it from just a shaded space into a genuinely refreshing one.
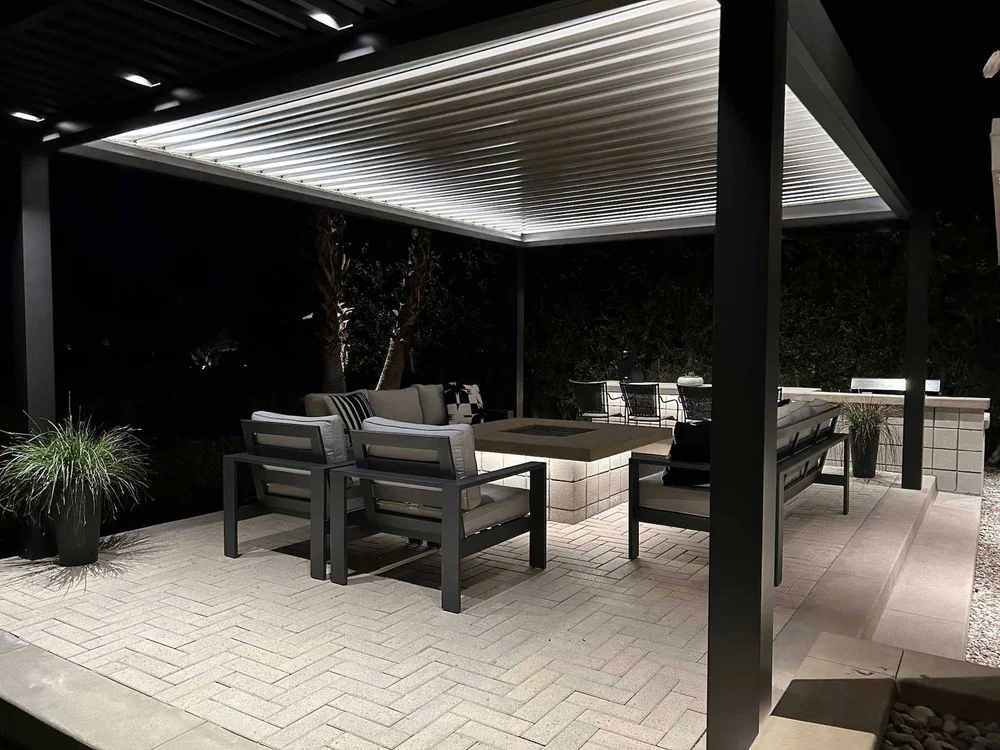
27. Black Pergola with Integrated LED Lighting and Herringbone Brick Patio
Adding integrated LED strip lighting to a pergola is a high-impact project that creates a sleek, custom look. It requires some basic electrical knowledge.
“Time: 4-6 hours
Cost: $200 – $500
Choose Your Gear: Purchase outdoor-rated (IP67”
- Time: 4-6 hours
- Cost: $200 – $500
- Choose Your Gear: Purchase outdoor-rated (IP67 or higher) LED strip lighting, a compatible transformer (driver), and aluminum channels with diffuser covers.
- Install Channels: Cut the aluminum channels to fit the length of your pergola beams. Screw them into a routed groove or directly onto the underside of the beams.
- Run Wiring: Plan your wiring path back to your power source. Drill small holes as needed to conceal the wires. This is the most crucial step for a clean look.
- Connect & Test: Adhere the LED strip inside the channel, connect it to the low-voltage wire from the transformer, and snap the diffuser cover on. Test before finalizing all connections.
This design feels so chic because of its cohesive, high-contrast palette and interplay of lines. The sharp, linear black pergola structure is echoed by the dark frames of the furniture. This is all set against the soft, warm texture of the light-toned herringbone brick floor. The diagonal pattern of the brick adds energy and visual interest, preventing the stark black and white scheme from feeling too sterile. Finally, the integrated lighting traces the architecture, turning the entire structure into a lantern at night.
28. Expansive Louvered Pergola Overlooking a Lush Landscape
A substantial, multi-zone pergola like this one commands a large footprint and is best suited for expansive patios or decks, think 400 square feet or more. The design uses stone-clad column bases and multiple ceiling fans and light fixtures, all of which add significant visual weight. This is a structure meant to anchor a very large outdoor living area, defining separate dining and lounging zones under one cohesive roof. In a smaller space, this would be overwhelming. It works here because it’s proportional to the grand scale of the patio and the wide-open view.
“The price of a large, high-end louvered pergola system is significant, reflecting its custom nature and durable, all-weather components.”
This is a permanent architectural addition to a home.
- Custom Louvered Pergola System (large): $25,000 – $50,000+
- Outdoor-rated Ceiling Fans (2): $800 – $2,000
- Integrated Recessed Lighting: $1,500 – $3,000
- Stone Column Bases: $2,000 – $5,000 (masonry work)
- High-end Patio Furniture (2 sets): $8,000 – $15,000
- TOTAL: $37,300 – $75,000+
29. Louvered Roof System with Integrated Outdoor Lighting
The brilliance of this setup is how it solves the day-to-night transition seamlessly. During the day, the louvered roof provides adjustable, practical shade. But as dusk falls, the integrated lighting transforms the structure itself into the primary light source for the patio. The light isn’t just an add-on; it’s part of the architecture. This creates a clean, sophisticated look with no need for separate, often clumsy-looking lamps or string lights. It ensures the patio is just as functional and inviting after dark as it is during a sunny afternoon.
“When planning for integrated lighting in a louvered roof, think in layers.”
Don’t just rely on one type of light. The best systems often include dimmable recessed lights for general, ambient illumination. Then, consider adding upward-facing strip lights on top of the main beams. This creates a beautiful, indirect glow by bouncing light off the ceiling. This layered approach gives you the flexibility to create a bright space for dining or a soft, moody glow for relaxing.
30. Custom Louvered Pergola with Motorized Privacy Screens
The motorized screens are the game-changer for this pergola. While the louvered roof controls the sun from above, the screens control privacy, wind, and low-angle sun from the sides. With the press of a button, you can transform an open-air patio into a screened-in porch, protected from insects and prying eyes. This dual-functionality radically increases the usability of the space, effectively creating a convertible indoor-outdoor room. It’s the ultimate investment in controlling your outdoor environment on all four sides, not just the top.
“A fully customized, motorized system like this is a significant investment, often running into the tens of thousands of dollars.”
It requires professional installation, including electrical work. Be aware that the screen material, while durable, is not indestructible. It can be damaged by sharp objects or extreme weather. The motors and tracks will also require occasional maintenance to ensure they run smoothly. This is a luxury feature with a corresponding price tag and level of complexity that isn’t for every budget or home.
31. Bright White Louvered Pergola for Dining and Entertaining
This design feels so bright and inviting because of the smart use of a light color palette. The white pergola structure reflects sunlight, making the entire area feel airy and open, even while providing shade. This effect is amplified by the light-colored patio flooring and the bright green of the surrounding hedge. The wood tones of the furniture provide just enough warmth to keep the space from feeling sterile. The integrated recessed lighting is another key feature, ensuring the bright, functional feel extends well into the evening for dinner parties.
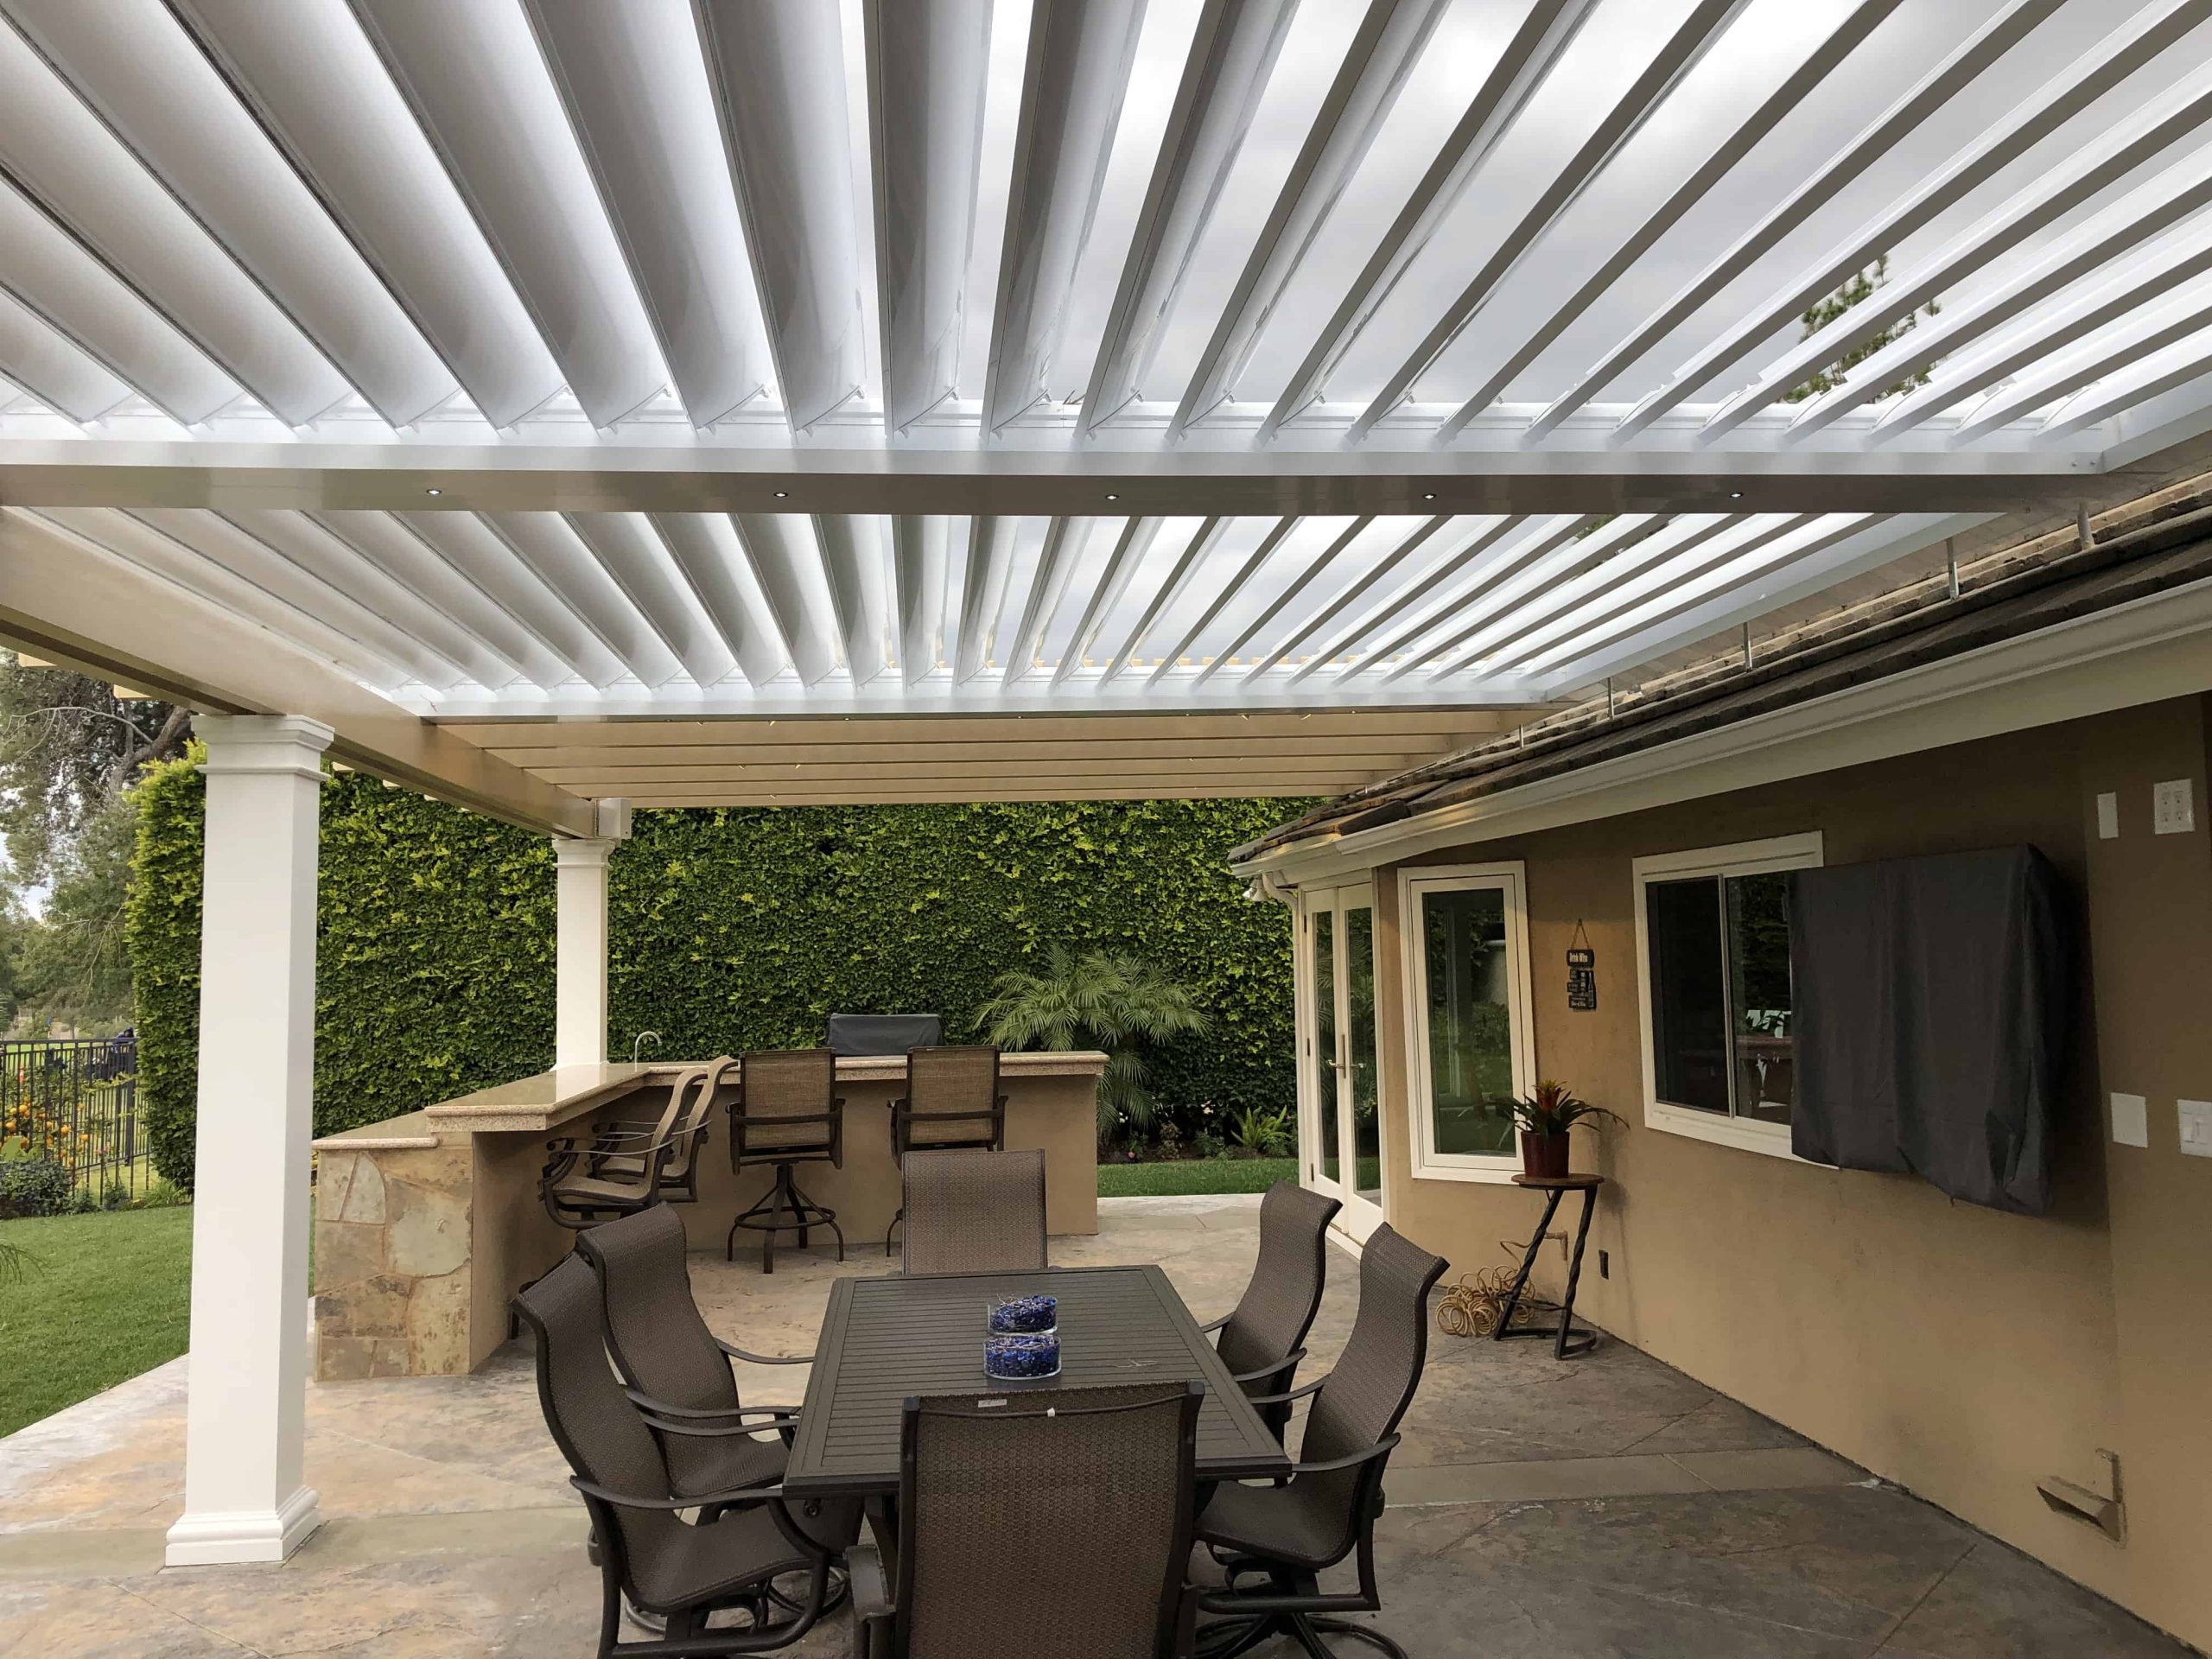
“Before installing a large, permanent structure like this, there are a few crucia”
Before installing a large, permanent structure like this, there are a few crucial checks to make.
- Check Local Codes: Does your municipality require a permit for a structure of this size? Many do. Check height and setback requirements from your property line.
- Verify Sun Path: Spend a day tracking how the sun moves across your patio. Will the pergola actually shade the areas you need it to, when you need it most?
- Confirm Foundation: A heavy structure like this needs a solid foundation. Can it be securely anchored to an existing concrete patio, or will you need to pour new concrete footings?
Your Perfect Spot in the Sun (and Shade)
Finding the right shade solution is about more than just escaping the sun; it’s about defining how you want to live outdoors. We hope these 31 ideas sparked some genuine inspiration for your own backyard retreat, whether it’s a sprawling deck or a tiny urban balcony. Now go create that perfect spot for yourself. Don’t forget to save your favorite ideas to your “Outdoor Living” board on Pinterest!