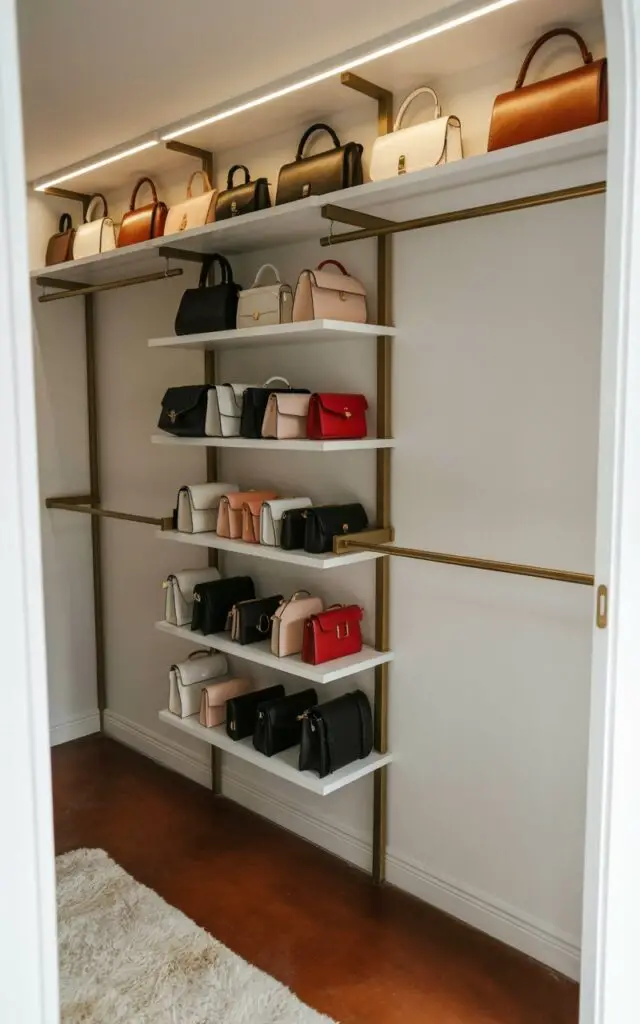
You know that feeling. You’ve scrolled through hundreds of purse storage ideas, pinning dozens to your “Dream Closet” board, but you’re still not sure where to start. It feels like you need a custom-built, million-dollar closet to get a handle on your collection. We’re here to tell you that’s not true. After filtering through countless options from IKEA, Target, and even Facebook Marketplace, we narrowed it down to the absolute best 32 ideas that work for real homes and real budgets in 2026.
Inside, you’ll find everything from luxurious walk-in closet displays to clever small-space solutions for your entryway or bedroom. We’re covering all the bases: modern, minimalist, functional, and just plain gorgeous. As the “cluttercore” trend fades, 2026 is all about organization that’s both beautiful and accessible—making your favorite pieces part of your home’s decor. And stay until the end—we break down the most common mistakes that can ruin these looks. 📌 Save this to Pinterest for later—you’ll want to revisit these ideas.
1. White Closet Island with Acrylic Purse Dividers and Integrated Lighting
What makes this setup so incredibly satisfying is how it transforms a functional storage space into a personal boutique. The central island doesn’t just store bags; it presents them. By elevating the collection, both literally and figuratively with lighting, you interact with your accessories differently. It stops being about stashing and starts being about curating. The combination of open display for the bags you love to see and concealed drawers for everything else is the perfect blend of form and function. This is what truly integrated design feels like.
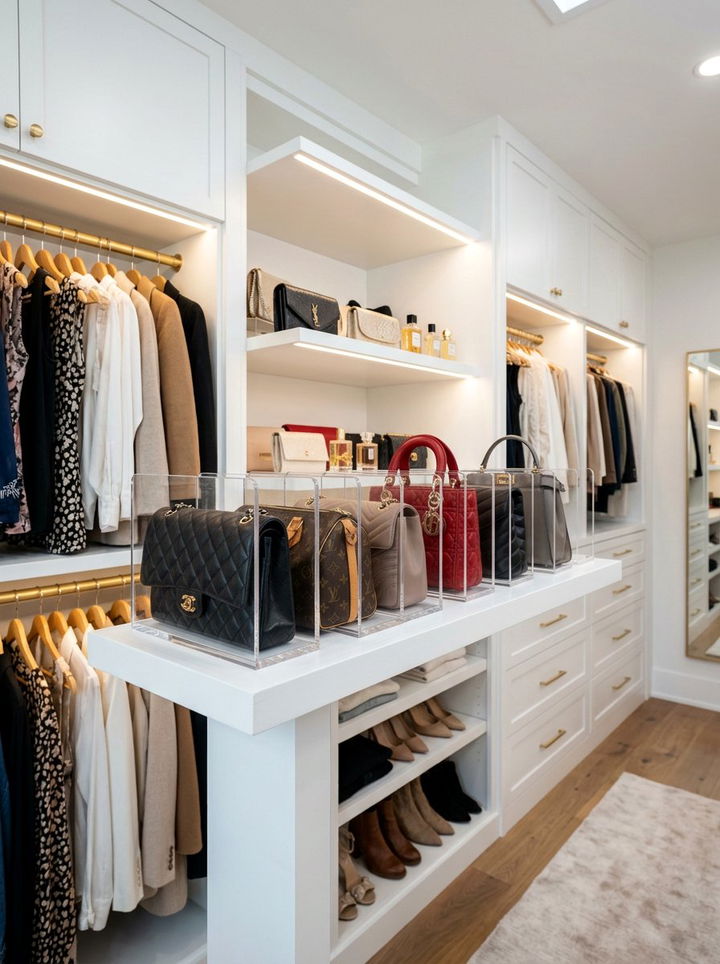
“Recreating this level of custom luxury requires a significant investment, but it’s a worthy one for a forever home.”
The costs are primarily in the custom cabinetry and electrical work. Budget alternatives can capture the vibe for much less.
Custom Cabinetry & Island: $7,000 – $15,000
Integrated LED Lighting: $800 – $2,500
Acrylic Dividers & Hardware: $400 – $900
Decor & Accessories: $200 – $500
TOTAL: $8,400 – $18,900
Budget alternative: Use two IKEA BESTÅ cabinet units back-to-back to form an island and add aftermarket acrylic dividers and battery-powered puck lights for a similar effect at around $1,200.
2. Illuminated White Shelves with Brass Supports for High-Contrast Display
When installing integrated shelf lighting, pay close attention to the color temperature of the LEDs. To get this warm, high-end glow that makes your bags look incredible, opt for LEDs in the 2700K to 3000K range. Anything higher (like 4000K+) will feel cool, blue, and clinical, like a pharmacy rather than a luxury boutique. Also, insist on a high Color Rendering Index (CRI) of 90+ to ensure the colors of your purses—that perfect burgundy or deep navy—read true and don’t look washed out or distorted by the artificial light.
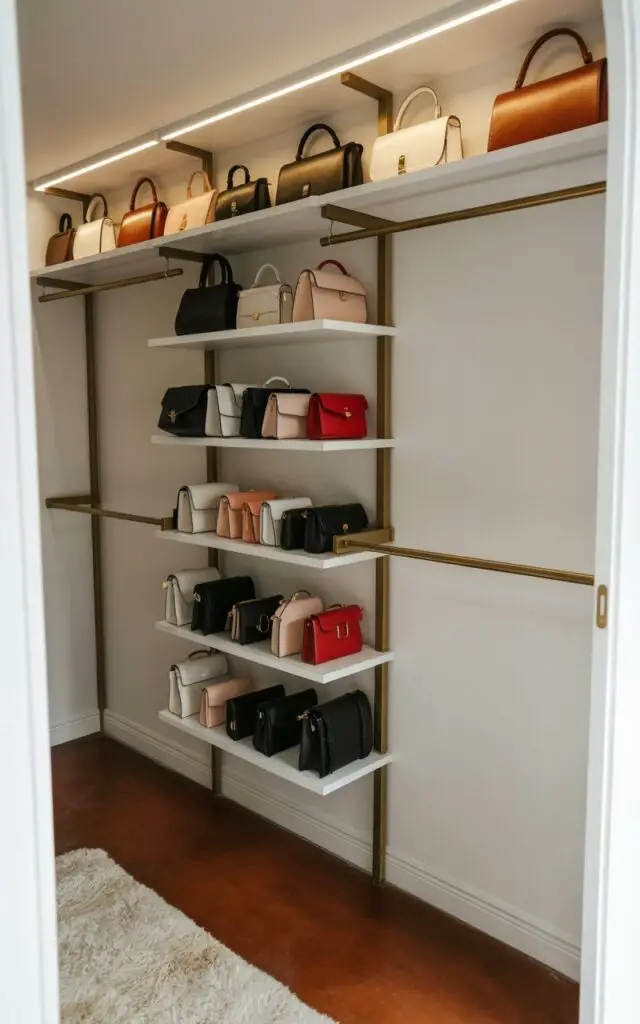
“The visual success of this closet comes down to a beautifully simple formula.”
It’s roughly 60% bright neutrals (the white shelves and walls), 30% warm metallics (the brass rods and supports), and 10% dark grounding elements (the dark brown floor). This ratio creates a look that is bright and airy but also feels substantial and warm. You could easily swap the palette while keeping the formula: try black shelves (60%), chrome supports (30%), and a light gray floor (10%) for a moodier, more modern take.
3. Floating Glass Shelves for a ‘Museum Quality’ Handbag Collection
The single element that makes this display breathtaking is the use of clear glass shelves. Remove them and replace them with wood or metal, and the entire feeling changes. The transparency creates the illusion that the handbags are floating in mid-air, giving them a sense of preciousness and importance, much like artifacts in a museum. It removes any visual bulk, focusing all attention on the craftsmanship and color of the bags themselves. The reflective quality of the glass also bounces light around, adding to the luxe, gallery-like atmosphere.
“While glass shelving delivers an undeniably chic, high-end look, the maintenance is no joke.”
Glass shows every speck of dust, which is amplified by any backlighting or overhead lighting. You’ll need to commit to dusting with a microfiber cloth at least once a week, and likely more often. Fingerprints are also an issue, so handling the display requires care. Tempered glass is a must for safety, but it can be more expensive. A lower-maintenance alternative would be high-gloss white or clear acrylic shelves, which offer a similar lightness with less constant cleaning.
4. Mixed-Material Display with Acrylic Shelving and Light Wood Built-Ins
This setup works so well because it demonstrates the power of mixing materials. The tall, clear acrylic shelving unit is cool, modern, and almost disappears, allowing the purses to be the heroes. In contrast, the light wood built-in shelving is warm, solid, and grounding. Combining the two prevents the space from feeling either too cold and sterile or too heavy and traditional. This contrast in transparency and solidity creates a visual dialogue that is sophisticated and custom. It’s a great example of how you don’t have to stick to just one material for your storage.
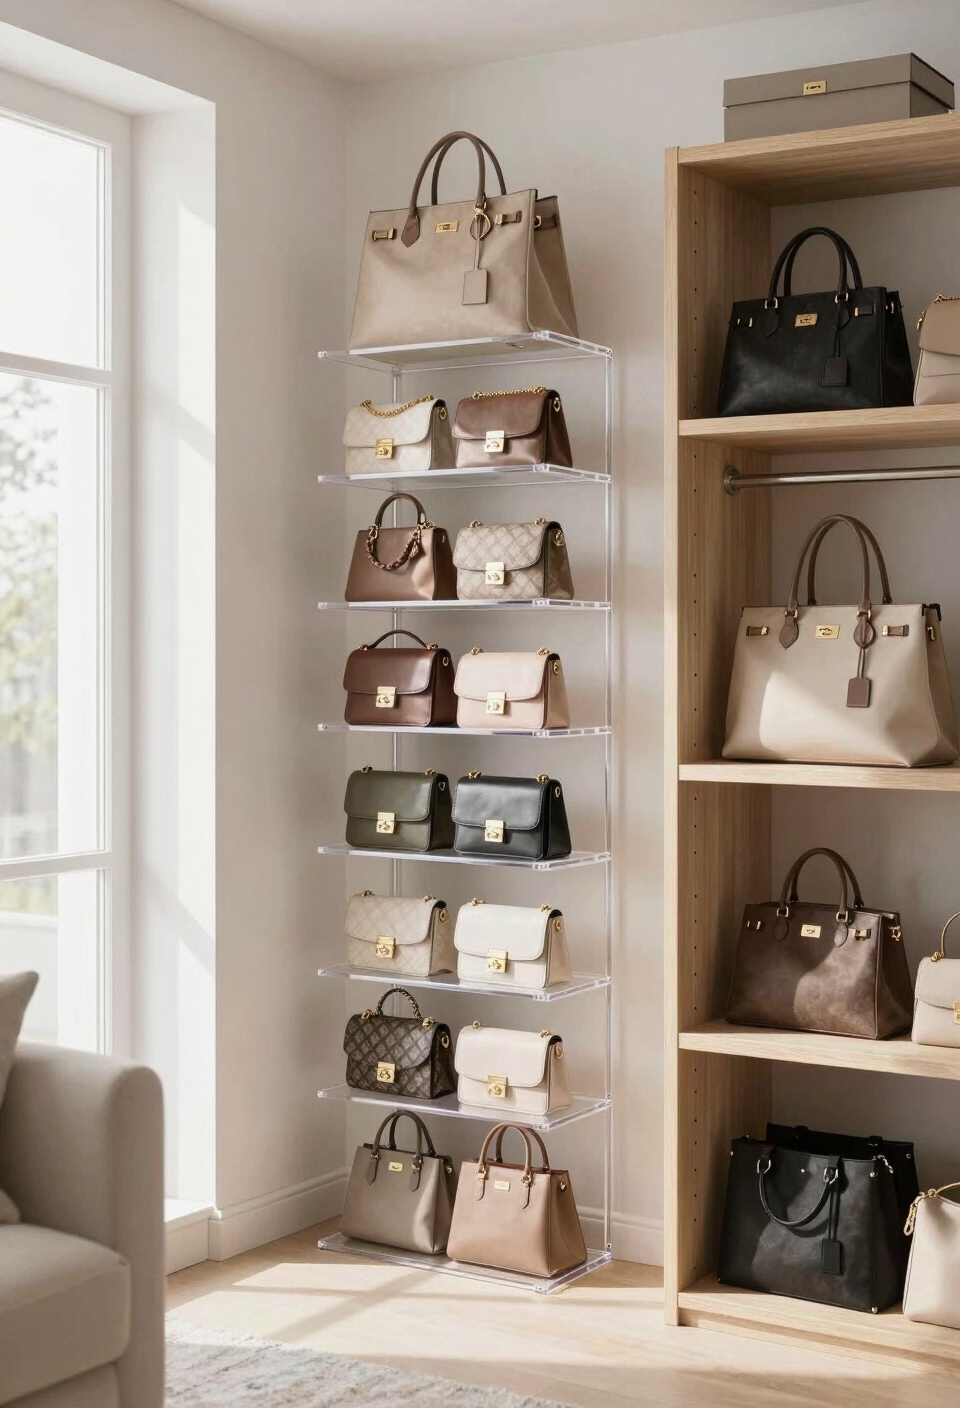
“This combination is surprisingly versatile for different room sizes.”
The acrylic tower, being transparent, has a very small visual footprint and can work even in a smaller dressing room corner—you’d need about 24″ x 18″ of floor space. The built-in wooden unit is more substantial and best suited for a dedicated walk-in closet or a bedroom with at least one 4-foot-wide clear wall. Unlike the large central island in Idea #0, this approach breaks the storage into separate, more flexible pieces that can be adapted to different layouts.
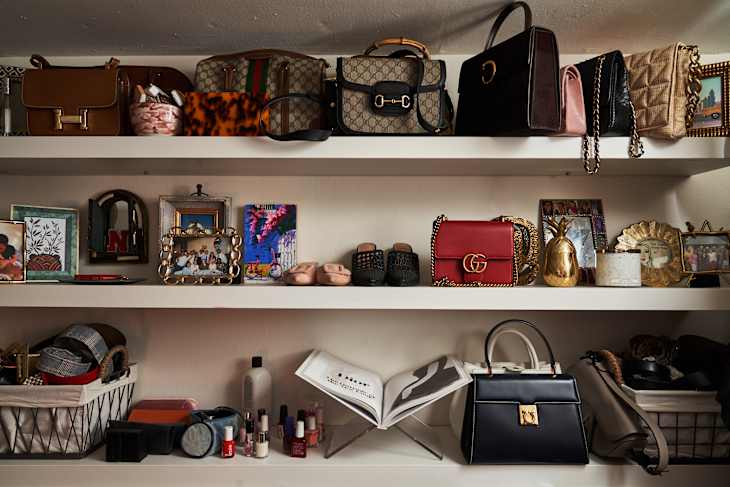
5. Curated White Shelves with a Mix of Purses and Personal Decor
Think of this as a styling recipe: 50% handbags, 30% art and books, and 20% decorative objects. The key isn’t just to line up your purses, but to treat the shelves like a personal mood board. By interspersing your bags with framed art, a favorite book, and a quirky object like that gold pineapple, you tell a story. The handbags become part of a larger personal narrative, not just inventory. This approach works best when you keep a consistent color story—here, it’s mostly black, white, and brown with small blips of color and gold.
6. Luxury Handbags Hung on Acrylic Hangers Over a Tufted Panel
The secret to hanging bags without damaging them is using hangers specifically designed for the job. Look for acrylic or padded hangers with a wide, gently curved shape. A width of at least 1.5 to 2 inches is ideal to distribute the weight evenly and prevent the handle from creasing, stretching, or misshaping over time. Avoid standard clothes hangers or thin metal hooks, as their sharp angles can create permanent indentations in delicate leather or fabric straps. This small detail preserves the investment you’ve made in your bags.
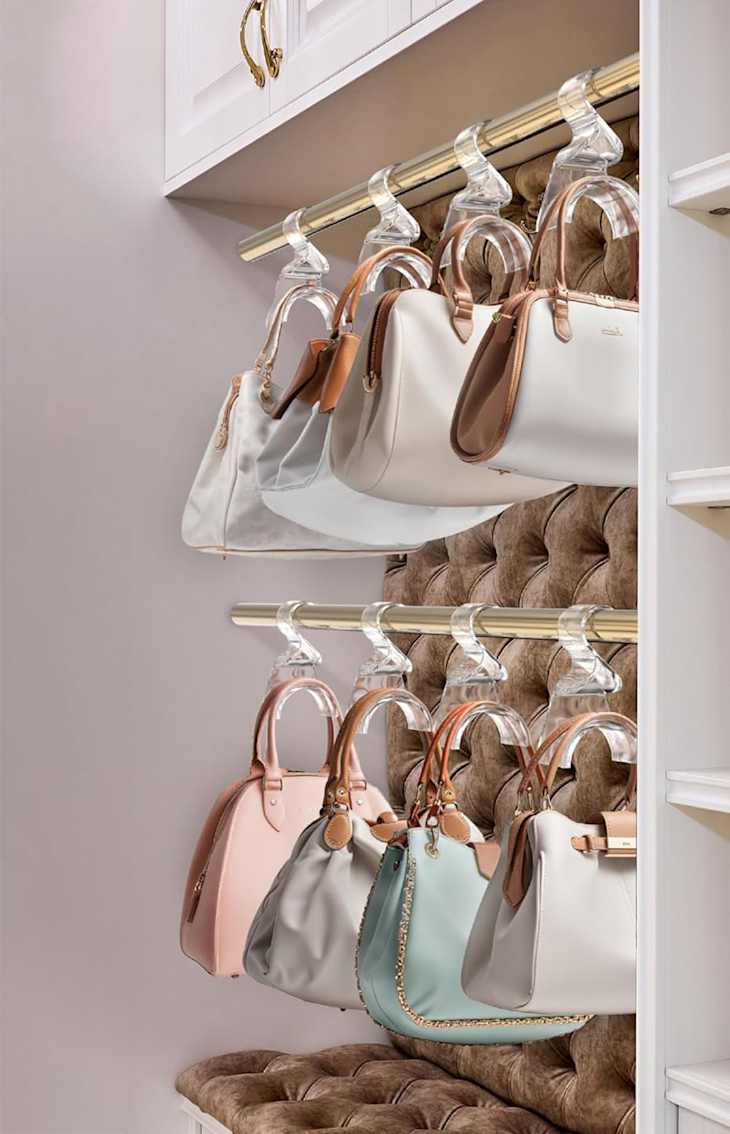
“You don’t need a custom closet builder to get this plush, boutique-inspired look.”
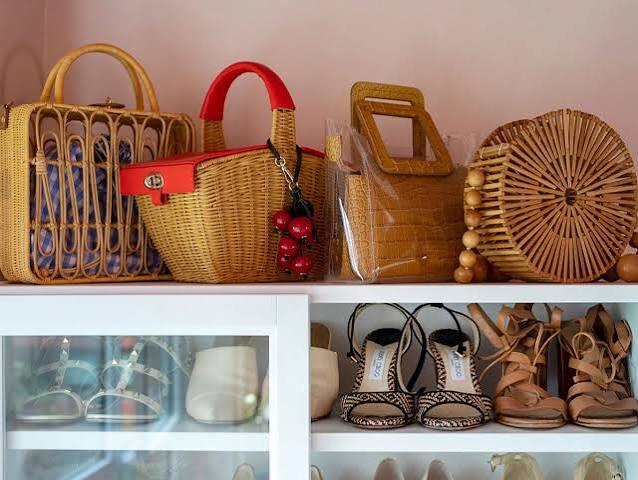
The key elements are the gold rod, the clear hangers, and the tufted background. You can find surprisingly chic gold-finish closet rods at The Home Depot or on Amazon for under $50. A pack of 5-10 acrylic handbag hangers costs about $25-$40 online. For the background, search Facebook Marketplace for a cheap tufted headboard (around $40-$80) and simply mount it to the wall behind the rod. You get 90% of the vibe for less than $150.
7. Modern Walk-In Closet with Dark Shelves and Integrated Mesh Bins
This design is a masterclass in functional, high-contrast organization. The dark brown frame of the shelving system provides a strong graphic outline, making the contents easy to see and assess. The use of translucent mesh for the pull-out drawers is brilliant; it keeps items contained and dust-free while still allowing you to vaguely see what’s inside, saving you from opening every single drawer. This marriage of open wire shelves for shoes and bulky items with semi-opaque drawers for smaller things creates a system that can handle every type of clothing and accessory with ease.
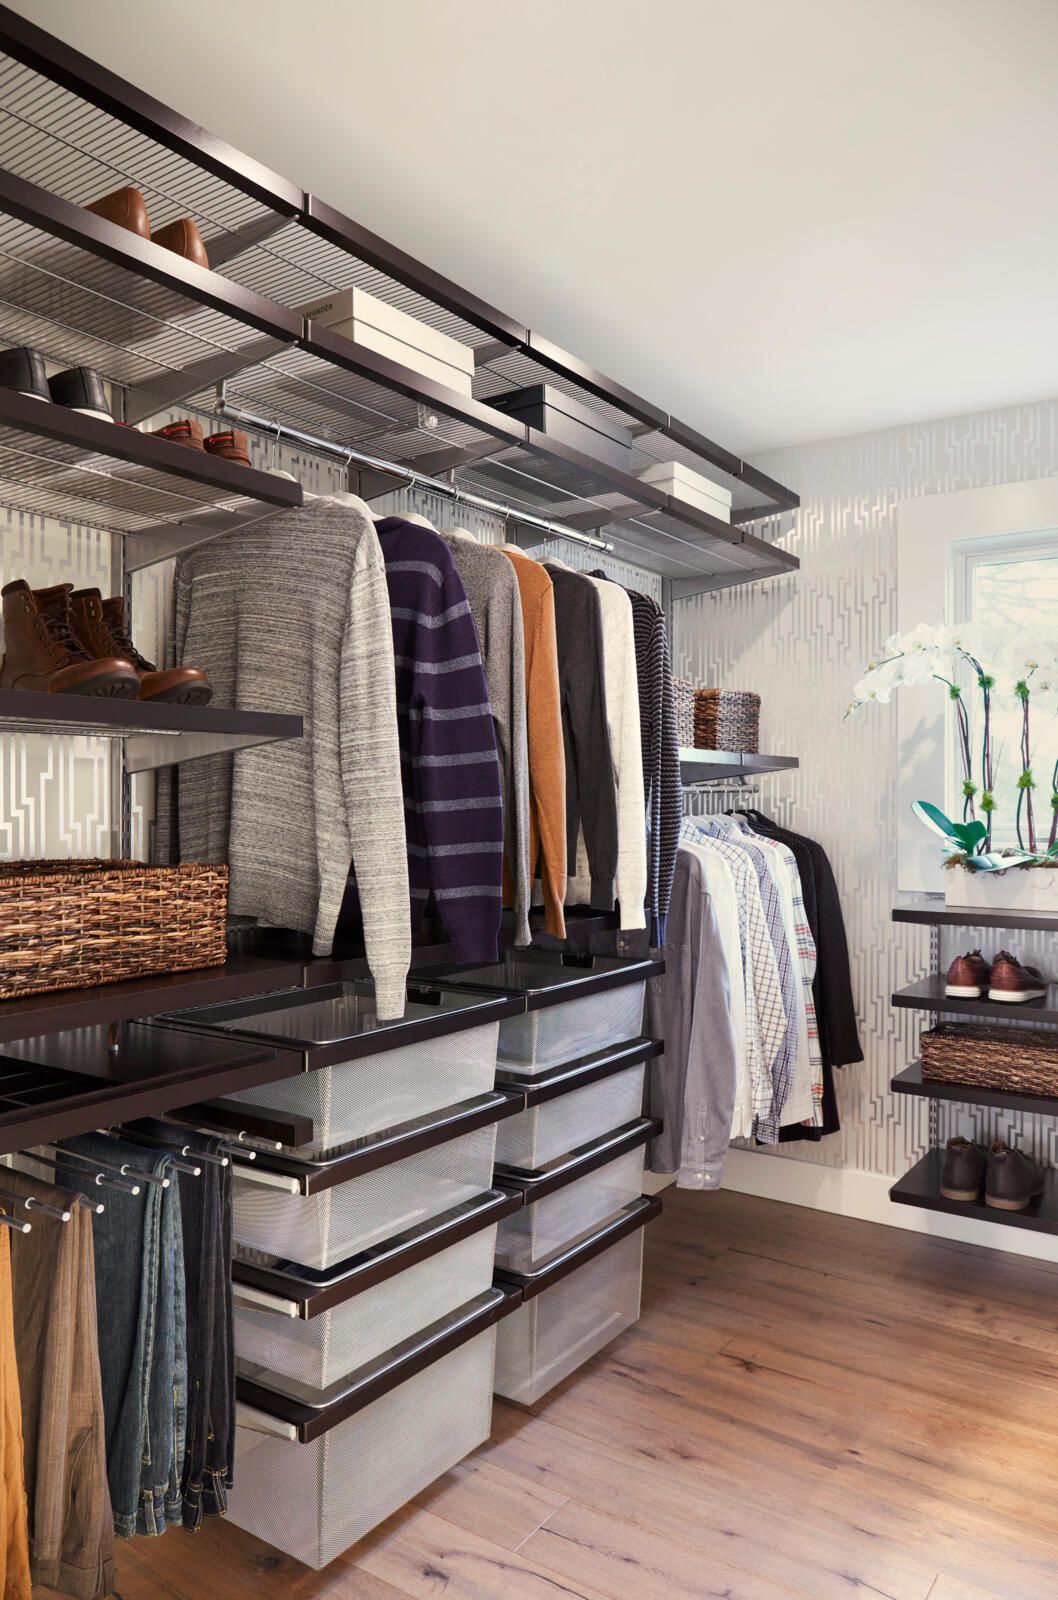
“A modular system like this is incredibly adaptable to different spaces.”
For a long, narrow walk-in closet (minimum 5 feet wide), you can run the system along one entire wall. For a wider, more squarish room (minimum 8×8 feet), you could install it on two adjacent walls in an L-shape. The key is to have a ceiling height of at least 8 feet to accommodate the vertical storage without it feeling cramped. Because it’s a component-based system, you can customize the mix of shelves, drawers, and hanging space to your exact inventory.
8. Creative Entryway Purse Display with Wall-Mounted Hooks
An entryway is prime real estate for purse storage, but you have to get it right. Before you drill a single hole, run through this quick checklist to make sure your plan is practical.
- Path Clearance: Is there at least 36 inches of clear walking space past where the hooks and bags will be? Anything less will feel cluttered and become an obstacle.
- Door Swing: Make sure the hooks aren’t placed where a door will swing open and constantly hit your bags.
- Stud Location: Use a stud finder to locate studs for your heaviest bags. Don’t rely on drywall anchors alone for that tote carrying a laptop.
- Sunlight Exposure: Is the area in direct sunlight for hours a day? This can cause leather to fade and dry out over time.
“Installing a sturdy hook rack is a 30-minute project that pays off daily.”
Here’s a quick guide.
Time Estimate: 30 Minutes. Material Cost: $20 – $60.
Use a stud finder to locate and mark the studs in your desired location. Aim to have at least one screw per stud.
Hold the hook rack up to the wall, and use a level to ensure it’s perfectly straight. Mark the screw holes with a pencil.
Drill pilot holes on your marks. If a mark doesn’t align with a stud, use a drywall anchor rated for at least 25 lbs.
Screw the rack tightly to the wall, starting with the screws that go into the studs.
Give it a firm tug to ensure it’s secure before hanging your collection.
9. Shelf Dividers Organizing Handbags Above a Clothing Rod
The clear acrylic shelf dividers are the undisputed hero of this scene. Without them, that top shelf would inevitably become a leaning, jumbled pile of purses. These simple panels are transformative, imposing order and giving each bag its own ‘parking spot’. This keeps them upright, protecting their shape and making it easy to grab the one you want without causing an avalanche. It’s a small, inexpensive addition that delivers an outsized impact on the functionality and neatness of a standard closet shelf. It’s the simplest way to upgrade a basic shelf to a genuine organization system.
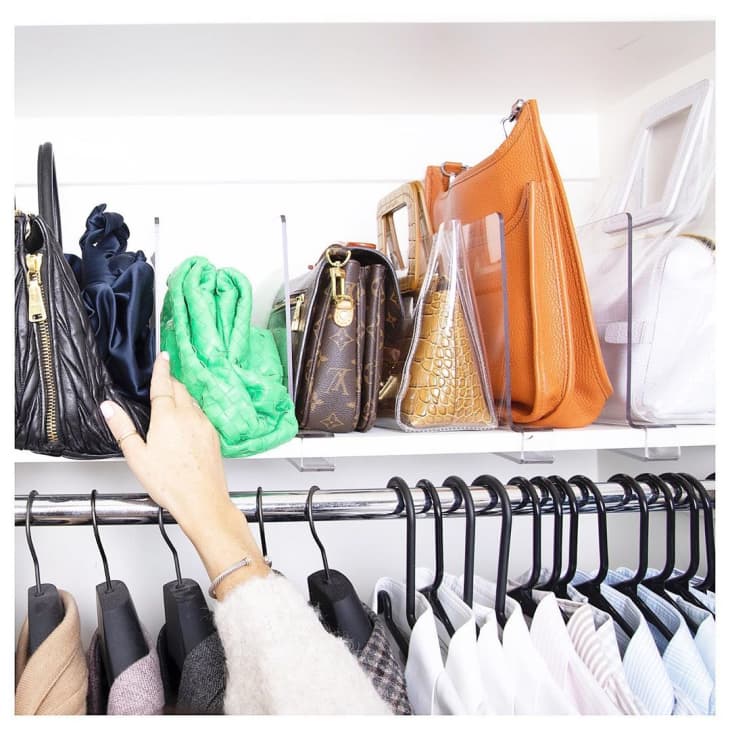
“This is one of the most accessible and affordable purse organization hacks out there.”
While you can buy high-end dividers, you can get this exact look for very little. A set of 4 to 8 clear acrylic shelf dividers costs between $20 and $35 on Amazon or at The Container Store. They typically slide right onto standard-thickness closet shelves with no tools required. For an even more budget-friendly option, repurpose clear bookends from a thrift store; they can often achieve a similar look, though they might not be as stable as the slide-on versions. Compare this to the built-in dividers in Idea #0 for a high-low comparison.
10. Stacked Clear Acrylic Boxes for a Pristine Purse Display
The psychology behind this storage method is fascinating. By giving each handbag its own transparent, dust-free enclosure, you’re essentially treating it like a collectible. It borrows the language of high-end sneaker or figurine collecting and applies it to luxury accessories. The clear boxes protect the items while keeping them 100% visible, and the stacking nature allows for a modular, customizable display. The front-opening doors are key, making items accessible without having to unstack the entire column. It feels organized, clean, and very intentional.
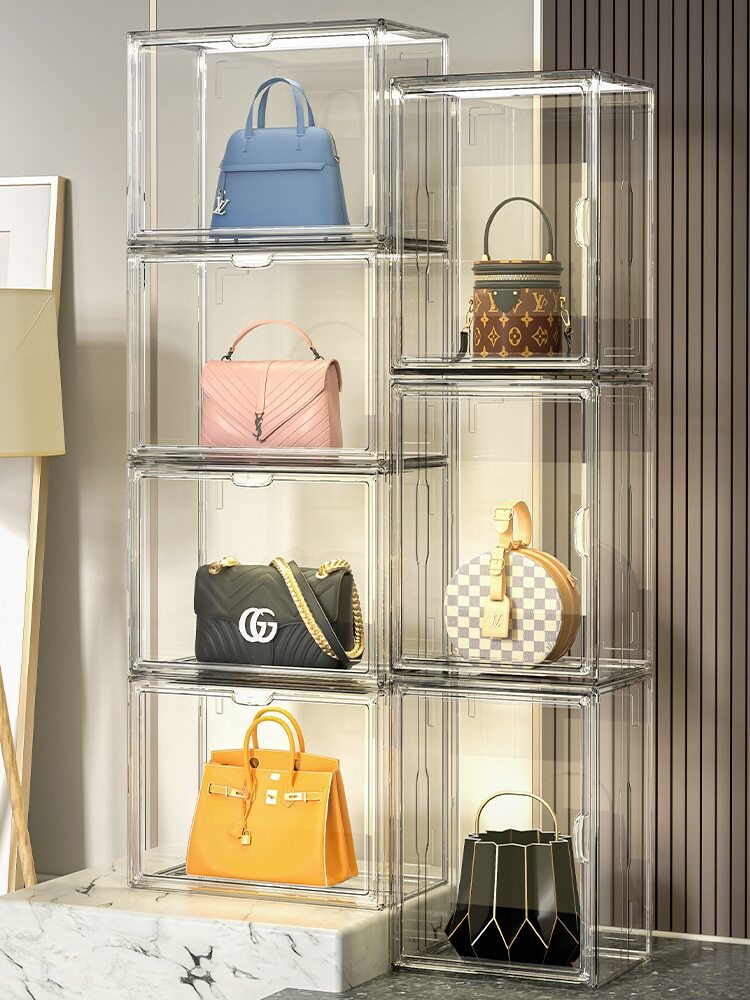
“Be aware that while these clear acrylic boxes look stunning, they can be prone to scratching.”
When cleaning, always use a soft microfiber cloth and a cleaner specifically designed for acrylic or plastic. Avoid paper towels, which can be surprisingly abrasive, and ammonia-based cleaners like Windex, which can cause the acrylic to become cloudy over time. Also, consider the weight. While fine for clutches and small-to-medium bags, stacking many heavy, structured totes on top of each other could put stress on the lower boxes, so place your heaviest items closer to the bottom.
11. Modern Wooden Cabinet with Glass Doors and Integrated Lighting
This look is gaining so much traction on Pinterest because it perfectly captures the shift away from completely open closets towards ‘curated concealment’. People still want to see their beautiful bags, but they also want the option to close a door on the visual clutter. A glass-fronted cabinet with integrated lighting is the perfect compromise. It feels more intentional and ‘designed’ than open shelves, protects items from dust, and the warm wood tones are a direct response to the all-white closets that dominated the last few years. It’s sophisticated and grown-up.
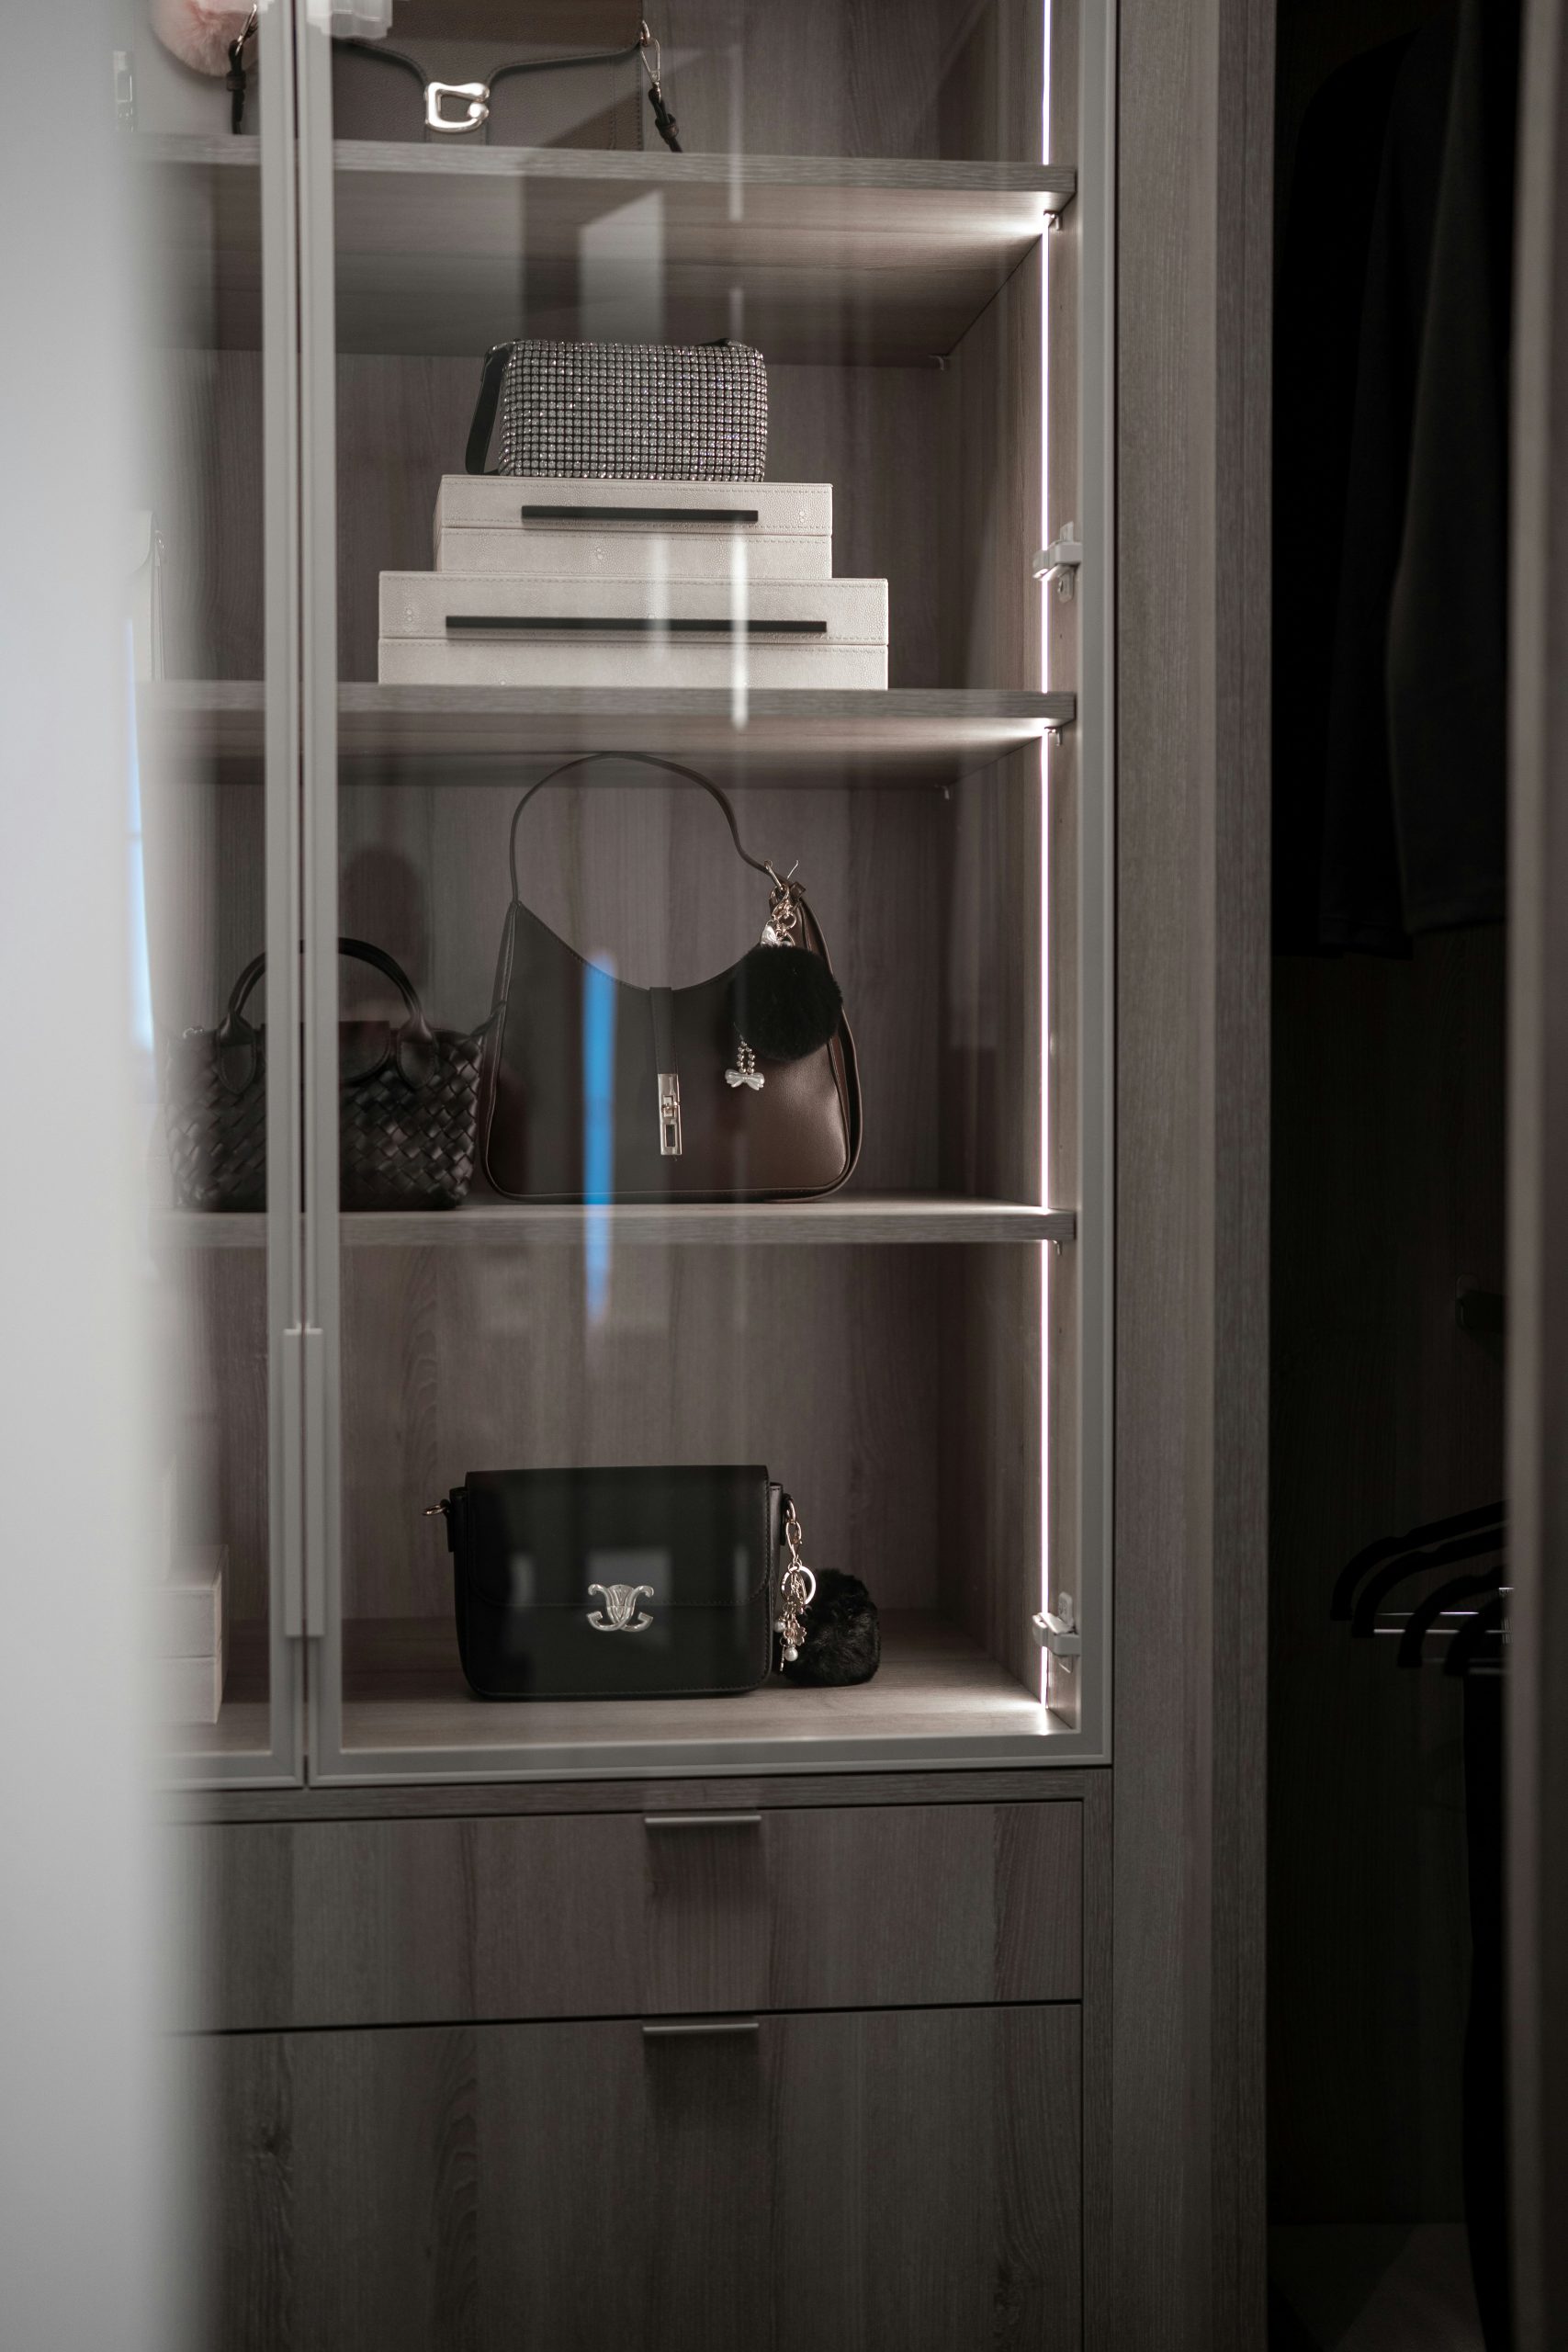
“If you’re opting for a cabinet with glass doors to display purses, the depth of the shelves is critical.”
You need a minimum interior depth of 12 inches to comfortably fit most clutches and small crossbody bags. For medium-sized totes and shoulder bags, a 14-inch to 16-inch depth is far more practical. Before you buy or build, measure the depth of your largest ‘must-display’ handbag when it’s sitting naturally. This will ensure you don’t end up with a beautiful cabinet that can’t actually hold your collection.
12. Translucent Hanging Organizer for Accessible, Casual Bag Storage
This is the quintessential budget-friendly and space-saving solution, perfect for a dorm room, a kid’s room, or the back of a closet door. A multi-pocket hanging organizer like this one typically costs between $15 and $30 from retailers like IKEA, Target, or Amazon. It makes use of vertical space that would otherwise be wasted. While it doesn’t offer the rigid shape protection of boxes or dividers, it’s an unbeatable method for keeping soft-structured bags, backpacks, and totes off the floor and easy to find. It’s a workhorse, not a show pony.
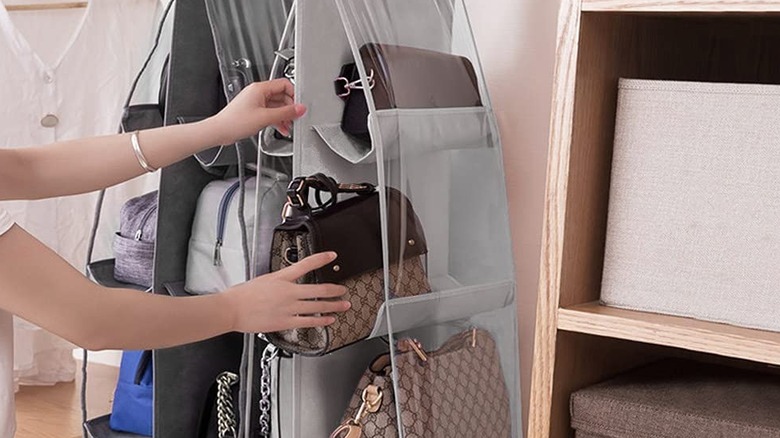
“Let’s be real: this is a fantastic solution for fabric totes, nylon backpacks, and casual purses, but it’s not the right home for your structured leather bags.”
The soft pockets don’t provide any structural support, meaning that stiff or shaped bags can get squished or lose their form over time. It’s also not ideal for very heavy bags, as the weight can put stress on the seams of the organizer. Use it for your grab-and-go, everyday bags, and give your investment pieces a more structured home, like the setups seen in Idea #25 or Idea #8.
13. Clear Over-the-Door Organizer for a Small Bedroom Closet
The single most important element here is the over-the-door organizer. In a small room where floor and wall space are at a premium, leveraging the back of a door is a non-negotiable storage hack. It adds significant capacity without taking up a single square inch of the room’s footprint. It’s the closest thing to ‘free space’ you can get. While shown here with shoes, these are absolutely perfect for storing small clutches, wallets, and crossbody bags, turning an otherwise blank surface into a powerhouse of organization.
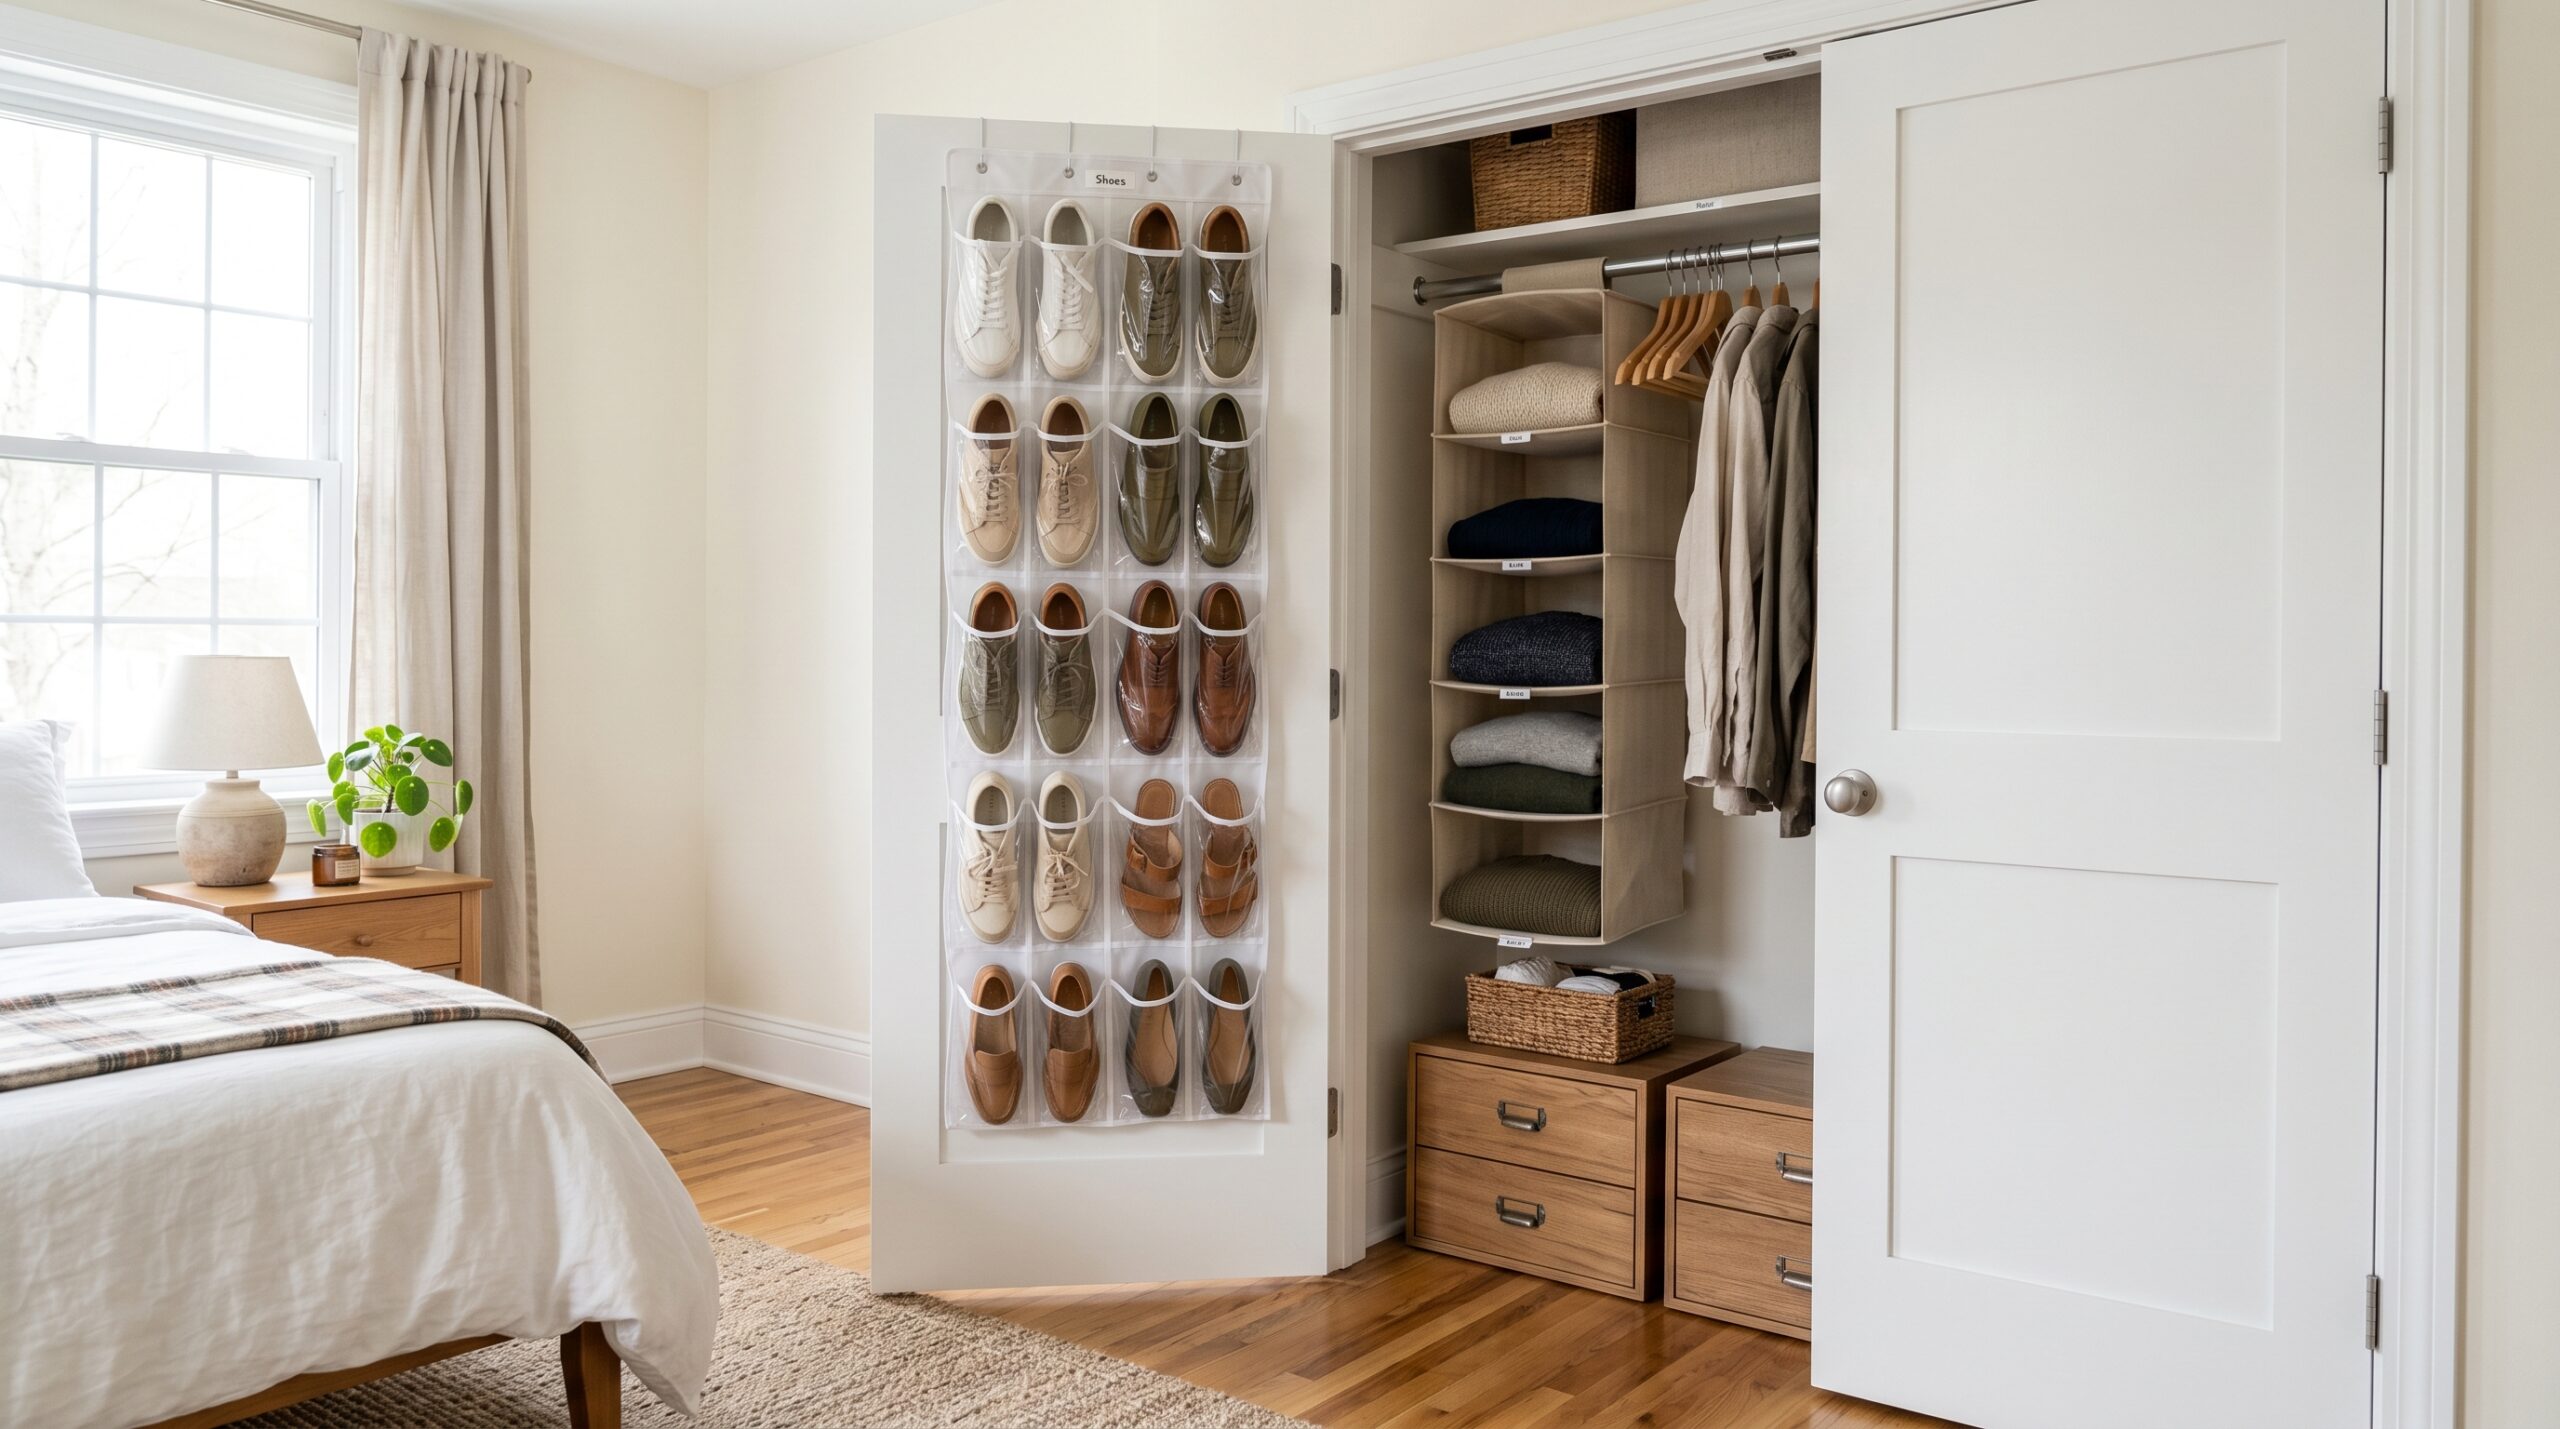
“This entire corner is a textbook example of maximizing a small space through smart, layered storage.”
It works because it utilizes different types of storage for different needs. The over-the-door organizer handles small, quick-grab items. Inside the closet, the hanging fabric shelves are for foldable items, while the wooden drawers with wicker baskets conceal messier things. This mix-and-match approach, combining open and closed storage, is far more effective than trying to find one single unit to do everything. It creates a calm, organized feeling in what could easily be a chaotic corner.
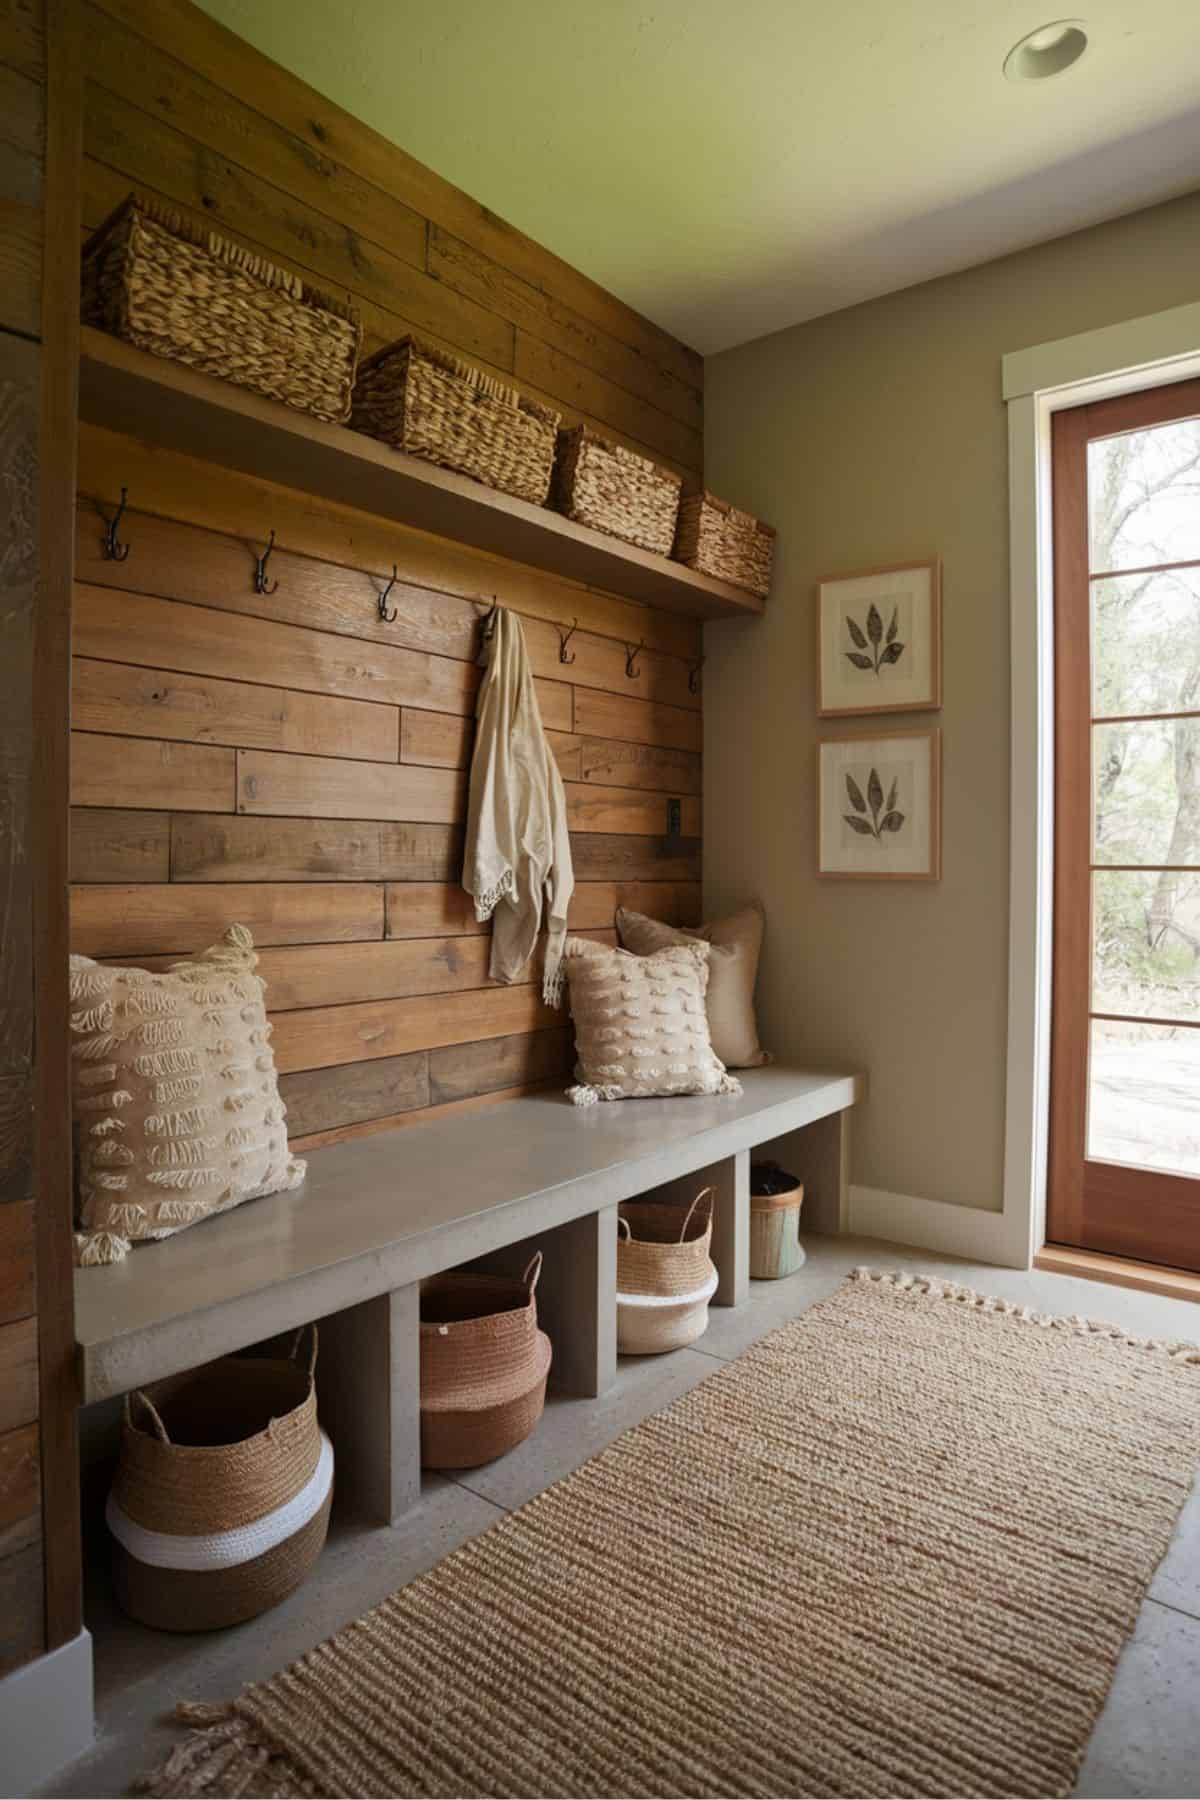
14. Dark Built-in Mudroom Bench with Purse Hook and Shoe Cubbies
A built-in mudroom unit is a game-changer, but planning is everything. Don’t just estimate—get specific about what you need to store. Before you start designing, do this:
- Count Your Coats: How many hooks do you actually need for the household’s daily outerwear? Add two for guests.
- Measure Your Boots: Measure the height of your tallest pair of boots. Your cubbies need to be at least an inch taller than that.
- Designate a Bag Hook: Assign one or two specific, sturdy hooks for daily purses or backpacks to prevent them from landing on the bench or floor.
- Check Your Landing Zone: Is there a spot for mail, keys, and sunglasses? A small integrated shelf or bowl is essential.
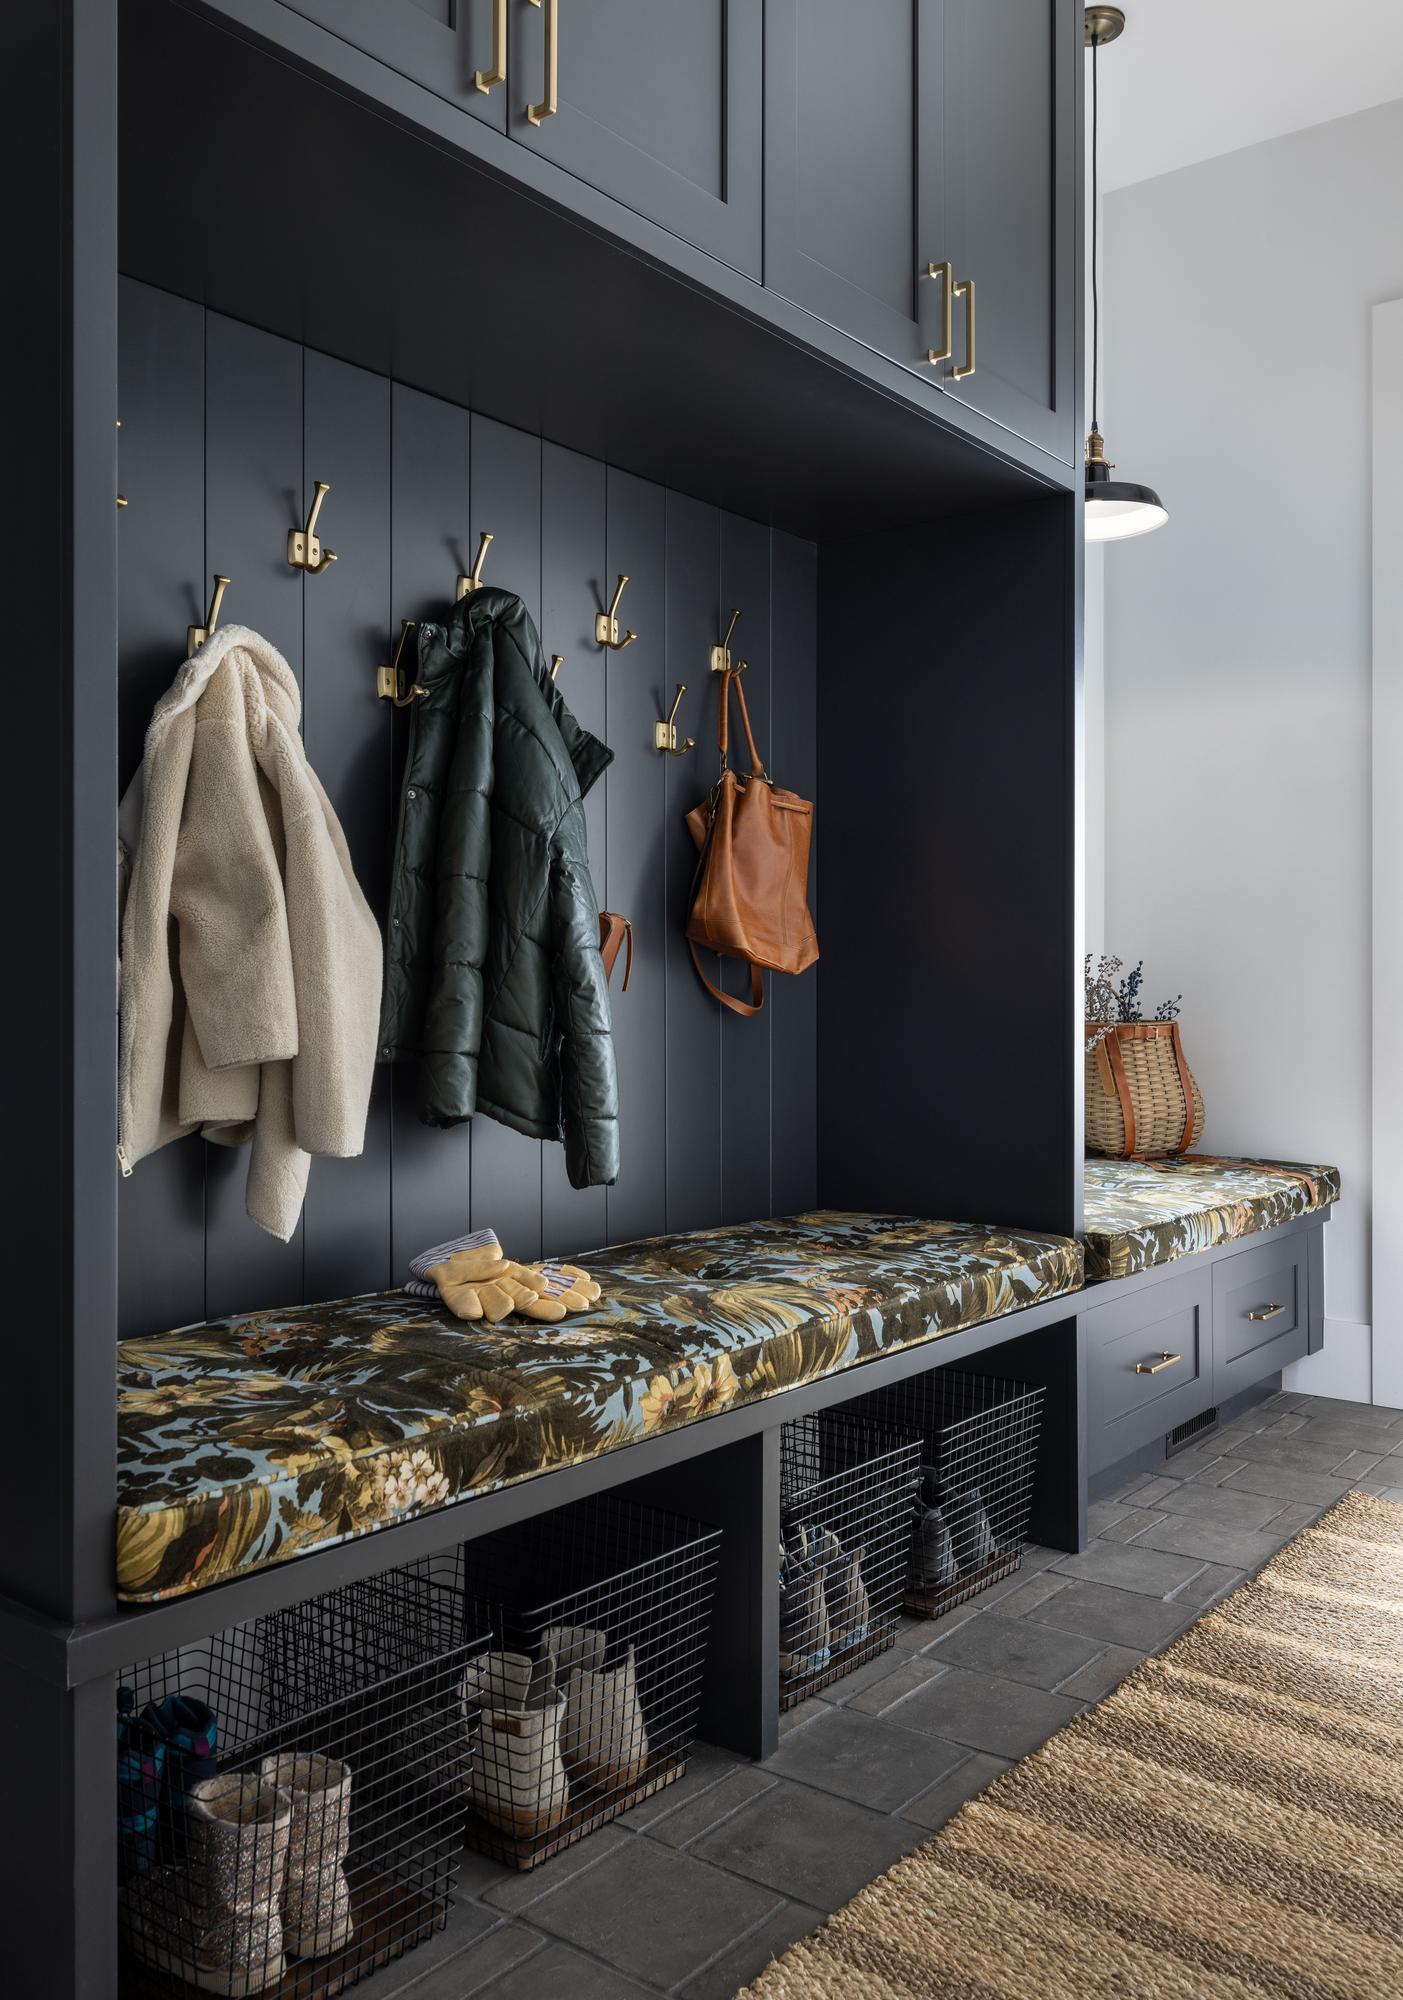
“When designing a mudroom bench, the standard seat height is 18 inches from the floor, which is comfortable for sitting to put on shoes.”
For the hooks above, the ideal height is between 60 and 72 inches from the floor. This provides enough vertical space for long coats to hang without pooling on the bench, and it’s still reachable for most adults. Placing the hooks at this height also leaves plenty of room for a purse to hang from a hook without it dangling awkwardly over the seating area, keeping it separate and clean.
15. Modern Black Metal Coat Rack for Entryway Purse Hanging
You can find minimalist coat racks like this one at a variety of price points. IKEA often has similar designs in their TJUSIG or PINNIG series for around $30-$70. For a slightly more robust version, check out stores like Target or Wayfair, where you can expect to pay between $80 and $150. The key is to look for a design with double hooks, which are far more versatile, allowing you to hang a coat on the longer hook and a purse or scarf on the shorter one. It’s a simple, affordable, and renter-friendly way to add storage to an entryway or bedroom corner.
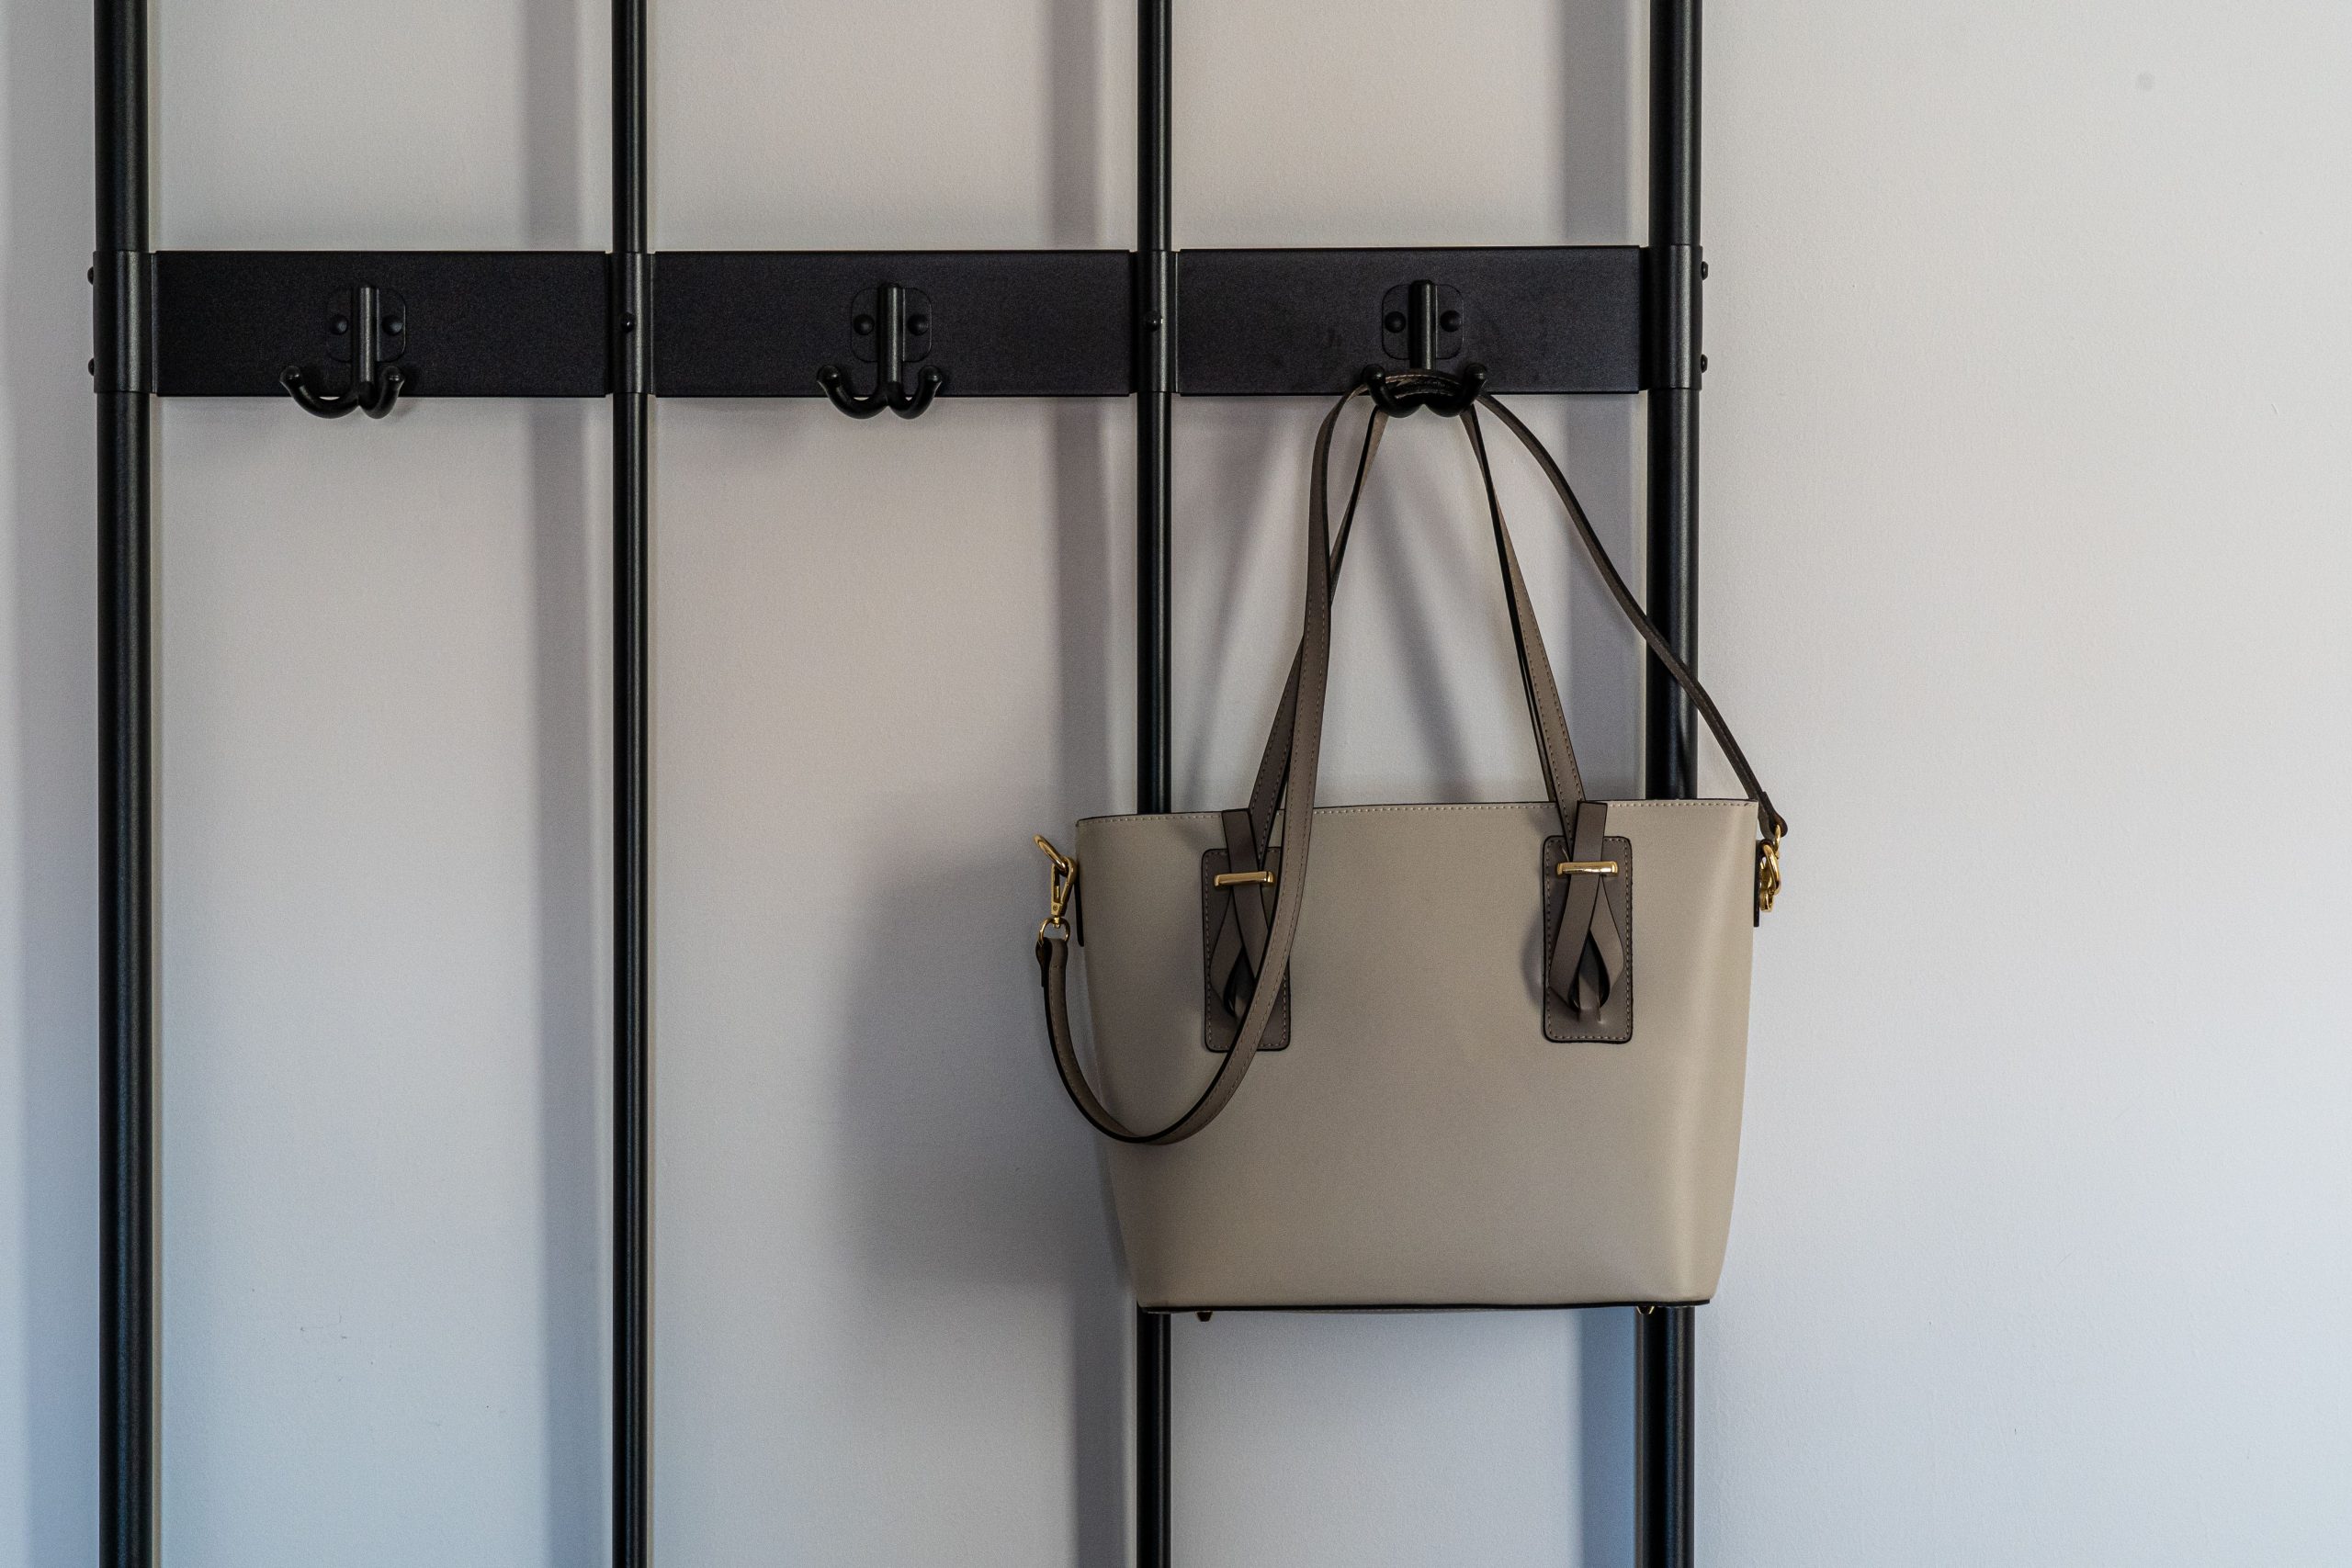
“A wall-mounted rack like this is a fantastic solution for narrow hallways or small entryways where a traditional coat tree or bench would be too bulky.”
Because it has virtually no depth, it can be mounted behind a door or in a tight corridor without impeding traffic flow. You need a clear wall space of about 24-30 inches wide to give it some breathing room. This is a much more space-efficient option than the beautiful but substantial built-in unit shown in Idea #13, making it ideal for apartments or smaller homes.
16. Ornate Brass Hooks for a Touch of Classic Wall-Mounted Storage
Installing decorative hooks is a quick and satisfying DIY project that instantly adds personality and function. Here’s how to do it right.
- Time: 15 minutes. Cost: $10-$30 per hook.
- Select your hooks. Look for ones with a wide enough projection to hold your purse straps without squishing them against the wall.
- Decide on the placement. Use a pencil to lightly mark where you want the screw(s) to go. Use a level if you’re installing more than one to ensure they are aligned.
- For heavier bags, use a stud finder to locate a stud. If no stud is available, you MUST use a drywall anchor. Drill a pilot hole slightly smaller than your screw.
- Tap the drywall anchor into the hole until it’s flush with the wall.
- Position your hook over the anchor and use a screwdriver to secure it tightly. Don’t over-tighten, or you could strip the anchor.
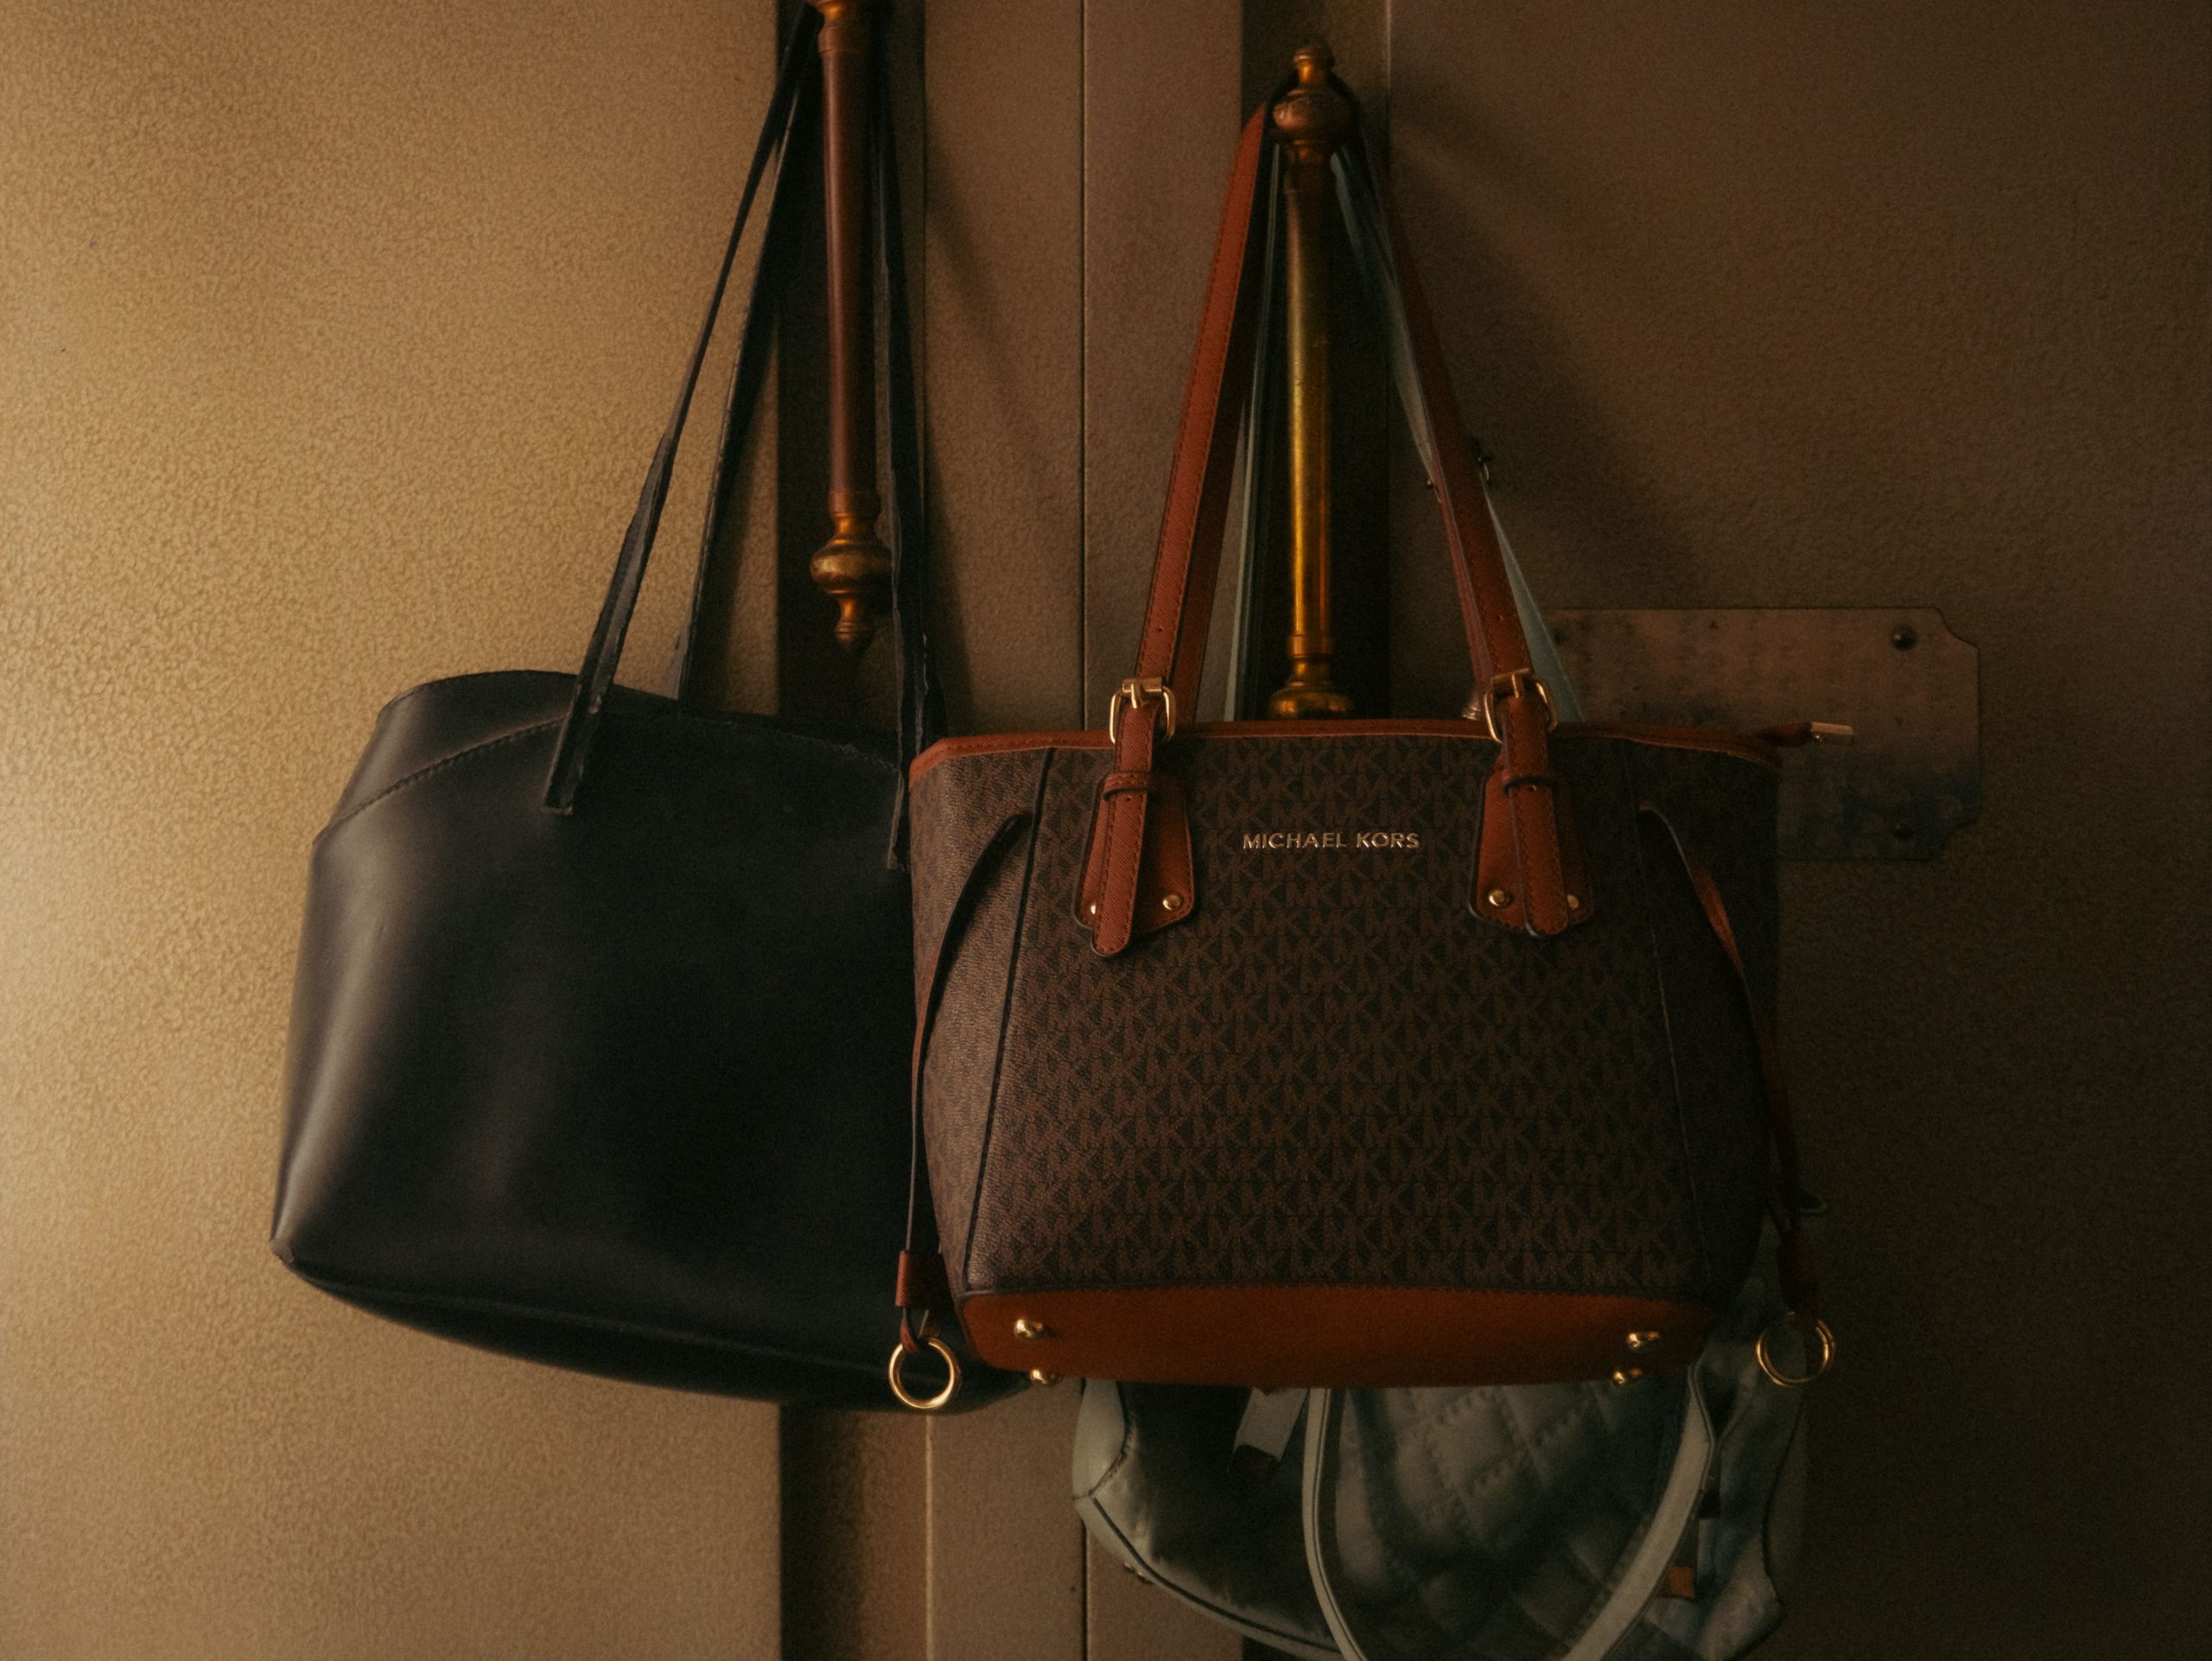
“While this is a lovely way to display a couple of go-to bags, be mindful of what you’re hanging.”
Constantly hanging a heavy leather tote from its top handles on a narrow hook can cause the handles to stretch, warp, or even crack over time. This method is best for lighter-weight bags or for bags you use infrequently. For your heavier, everyday workhorse totes, a wider support—like a dedicated handbag hanger on a rod or letting it sit on a shelf—is a much safer bet for preserving its shape and condition long-term.
17. Ceiling-Hung Chain Organizer for Vertical Bag and Hat Storage
This is a classic DIY storage hack that’s been popular for years for a reason: it’s cheap, effective, and uses zero floor space. You can recreate this look for under $25. All you need is a length of lightweight chain from a hardware store (sold by the foot), a C-hook to screw securely into a ceiling joist (this is critical!), and a pack of S-hooks to hook onto the chain links. You can then hang your bags from the S-hooks. It’s a perfect solution for a dorm room, a teenager’s bedroom, or any small space needing to maximize vertical storage.
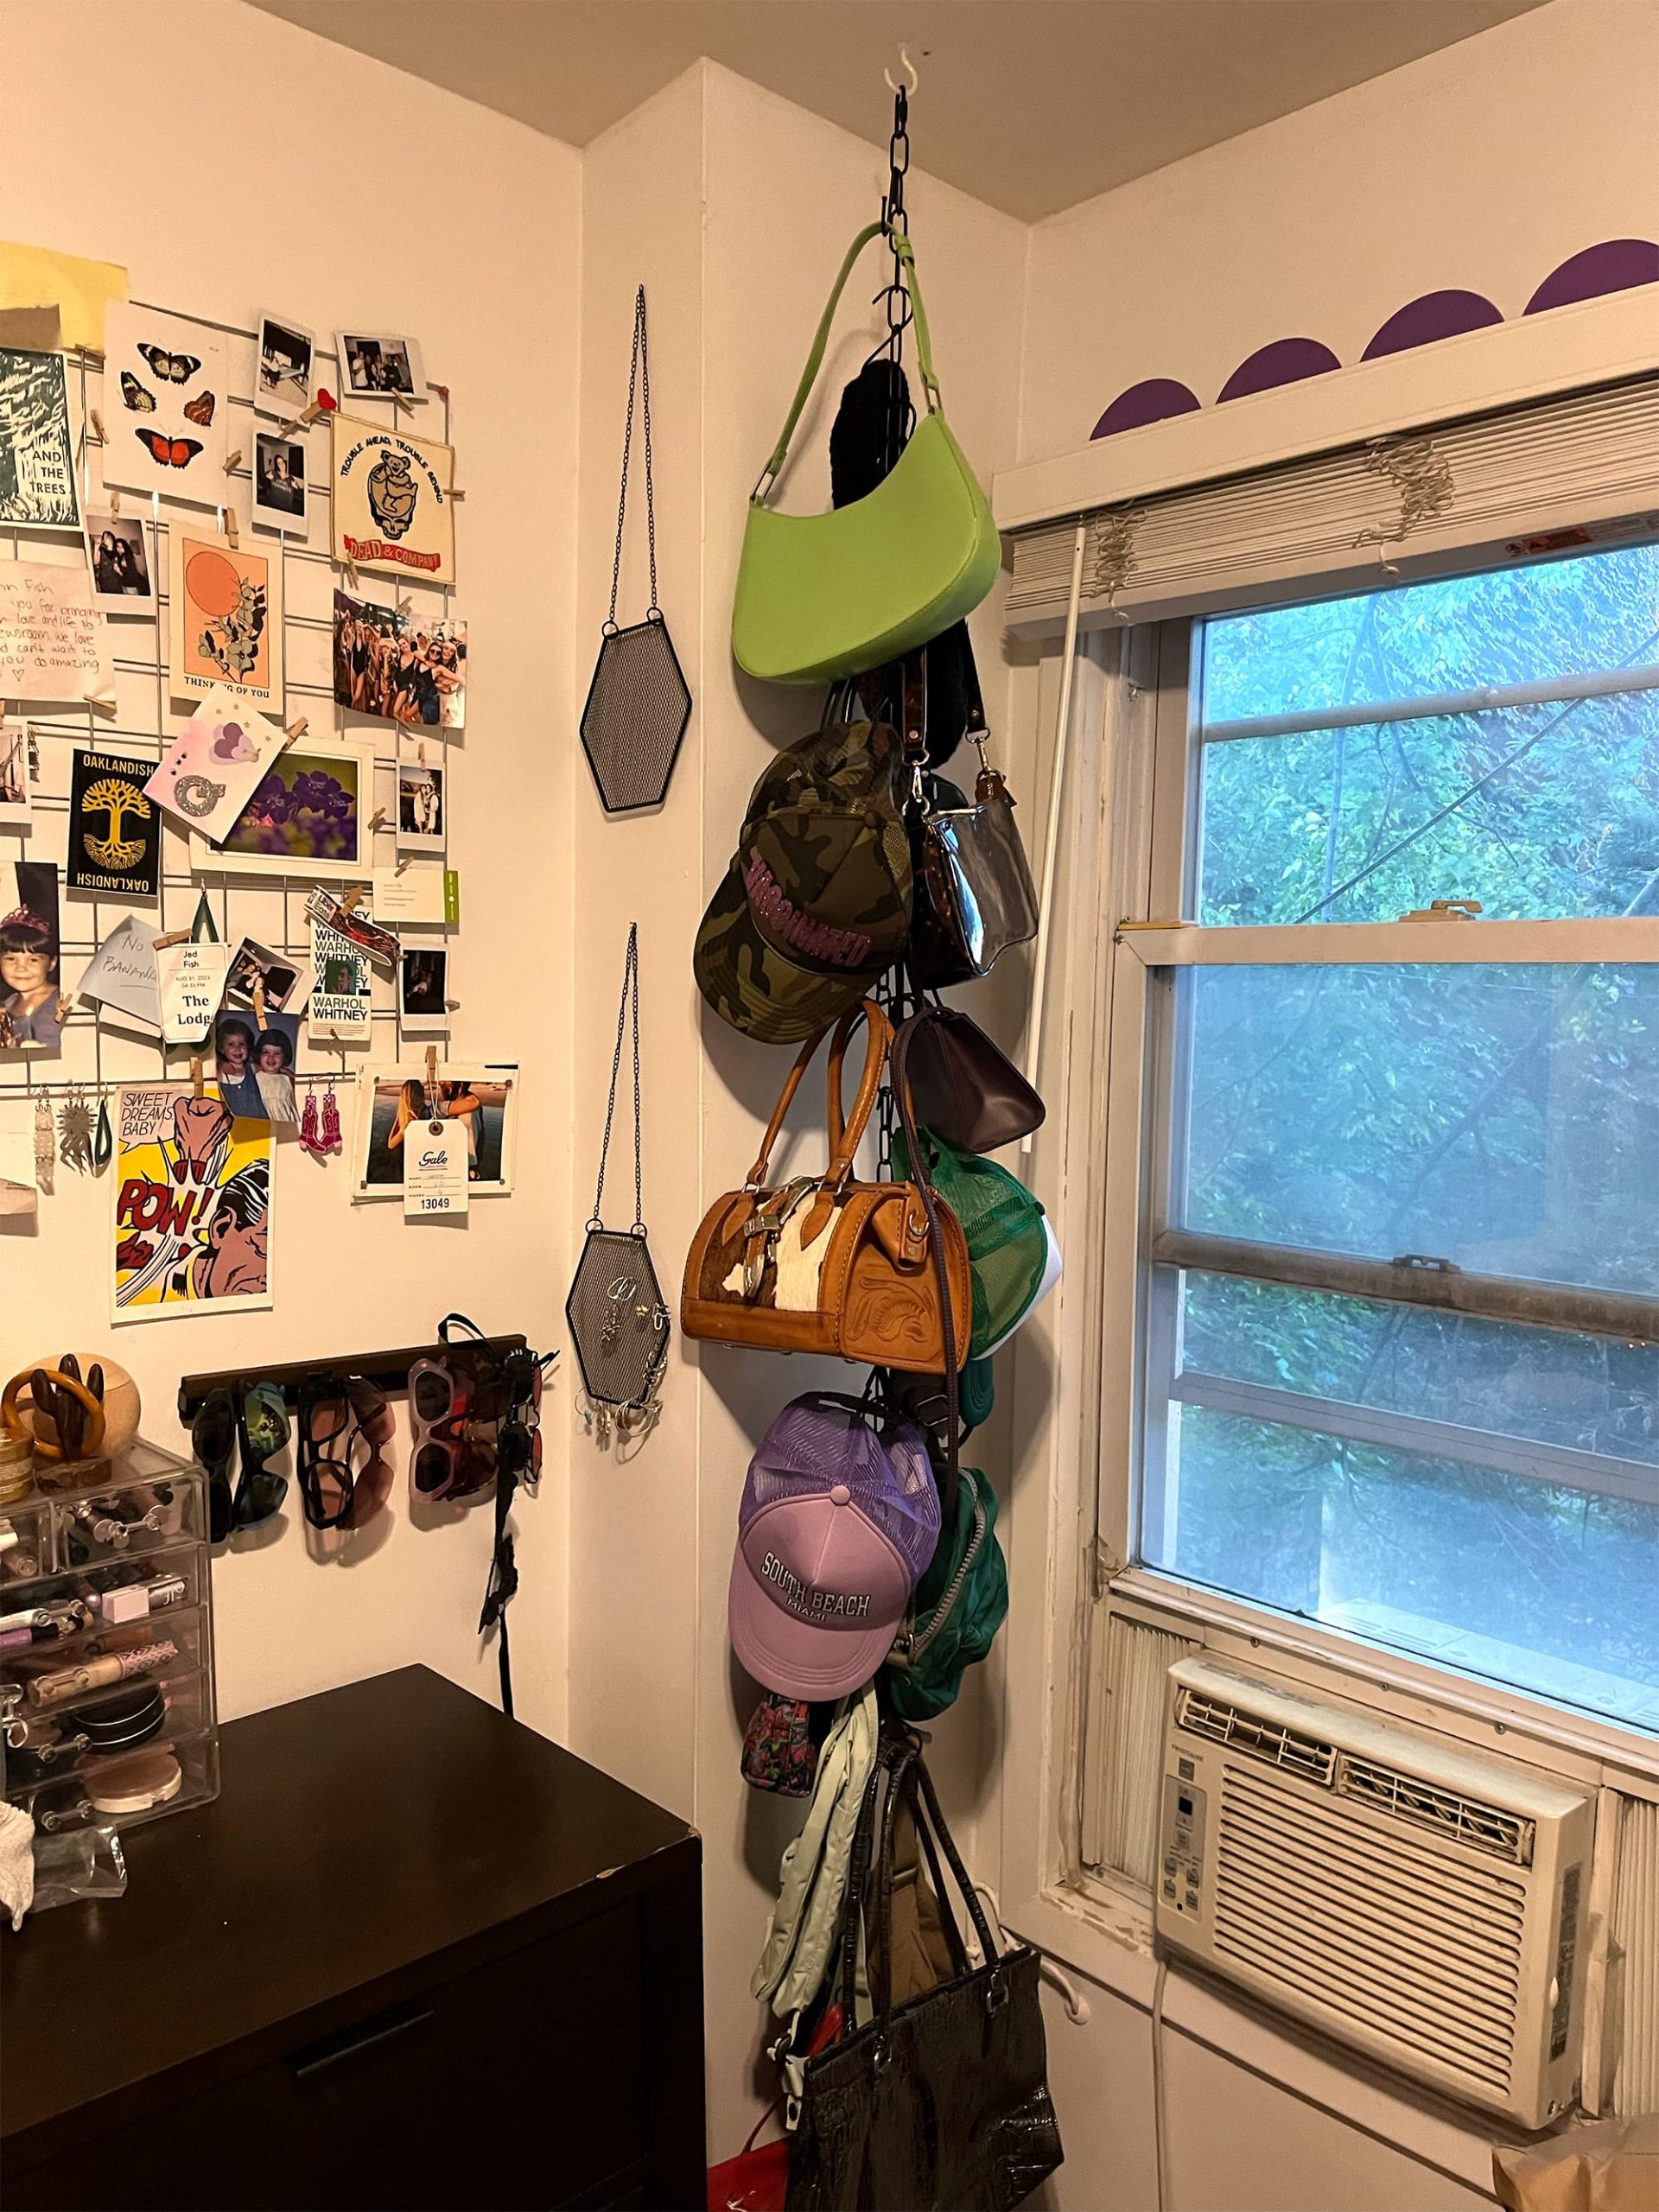
“This vertical chain organizer is a brilliant solution for tight corners where you couldn’t fit a piece of furniture.”
You only need about a 12×12 inch square of ceiling and floor space for this to work effectively. It’s ideal for a room with standard 8-foot ceilings. However, it’s not the best choice for high-traffic areas, as it can swing around and get in the way. Reserve it for a low-traffic corner of a bedroom or a dressing area where it won’t be constantly bumped into. It’s a vertical solution for a very specific spatial niche.
18. Modular Closet System for Flexible Handbag and Clothing Storage
A modular closet system, whether it’s from a brand like Elfa, ClosetMaid, or a custom company, is the ultimate in adaptable storage. It works in nearly any space because you buy the components—shelves, rods, drawers—piecemeal and arrange them on a tracked wall standard. For a small reach-in closet, you might use a single wall. In a large walk-in, you can outfit three walls. The key is the ability to adjust shelf heights and component locations as your needs change. This makes it a great investment that can evolve with your wardrobe over time.
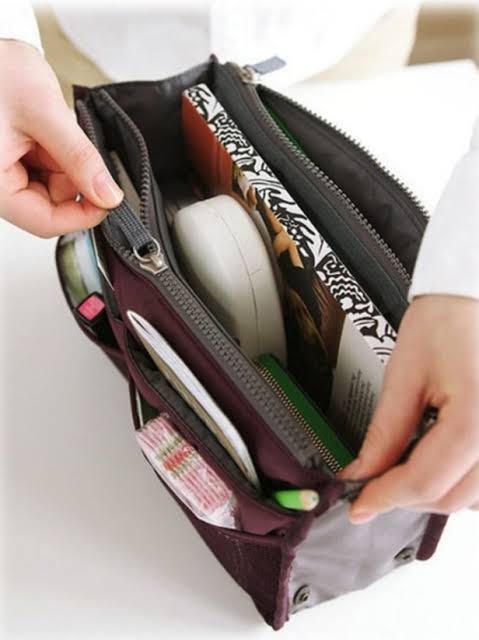
“The strength of a modular system is its ‘à la carte’ nature.”
It allows you to create dedicated zones for different items, which is a core principle of good organization. You can designate specific shelves just for handbags, using dividers for structure. You can have double-hung rods for shirts and jackets, and a single tall rod section for dresses. Drawers can be used for folded items or personal effects. This clear ‘zoning’ makes it intuitive to find what you’re looking for and, just as importantly, to put things away correctly. Everything has a logical home.
19. Modern Two-Tone Corner Wardrobe with Integrated Mirror
The corner unit is the absolute game changer here. Corners are notoriously awkward, often becoming dead space in a bedroom. A purpose-built corner wardrobe like this one doesn’t just use the space, it maximizes it, connecting two walls of storage seamlessly. It essentially doubles the utility of that corner, providing deep, accessible storage where you would otherwise have a gap or a poorly placed piece of furniture. The integrated mirror on the door is another space-saving win, eliminating the need for a separate, floor-standing mirror.
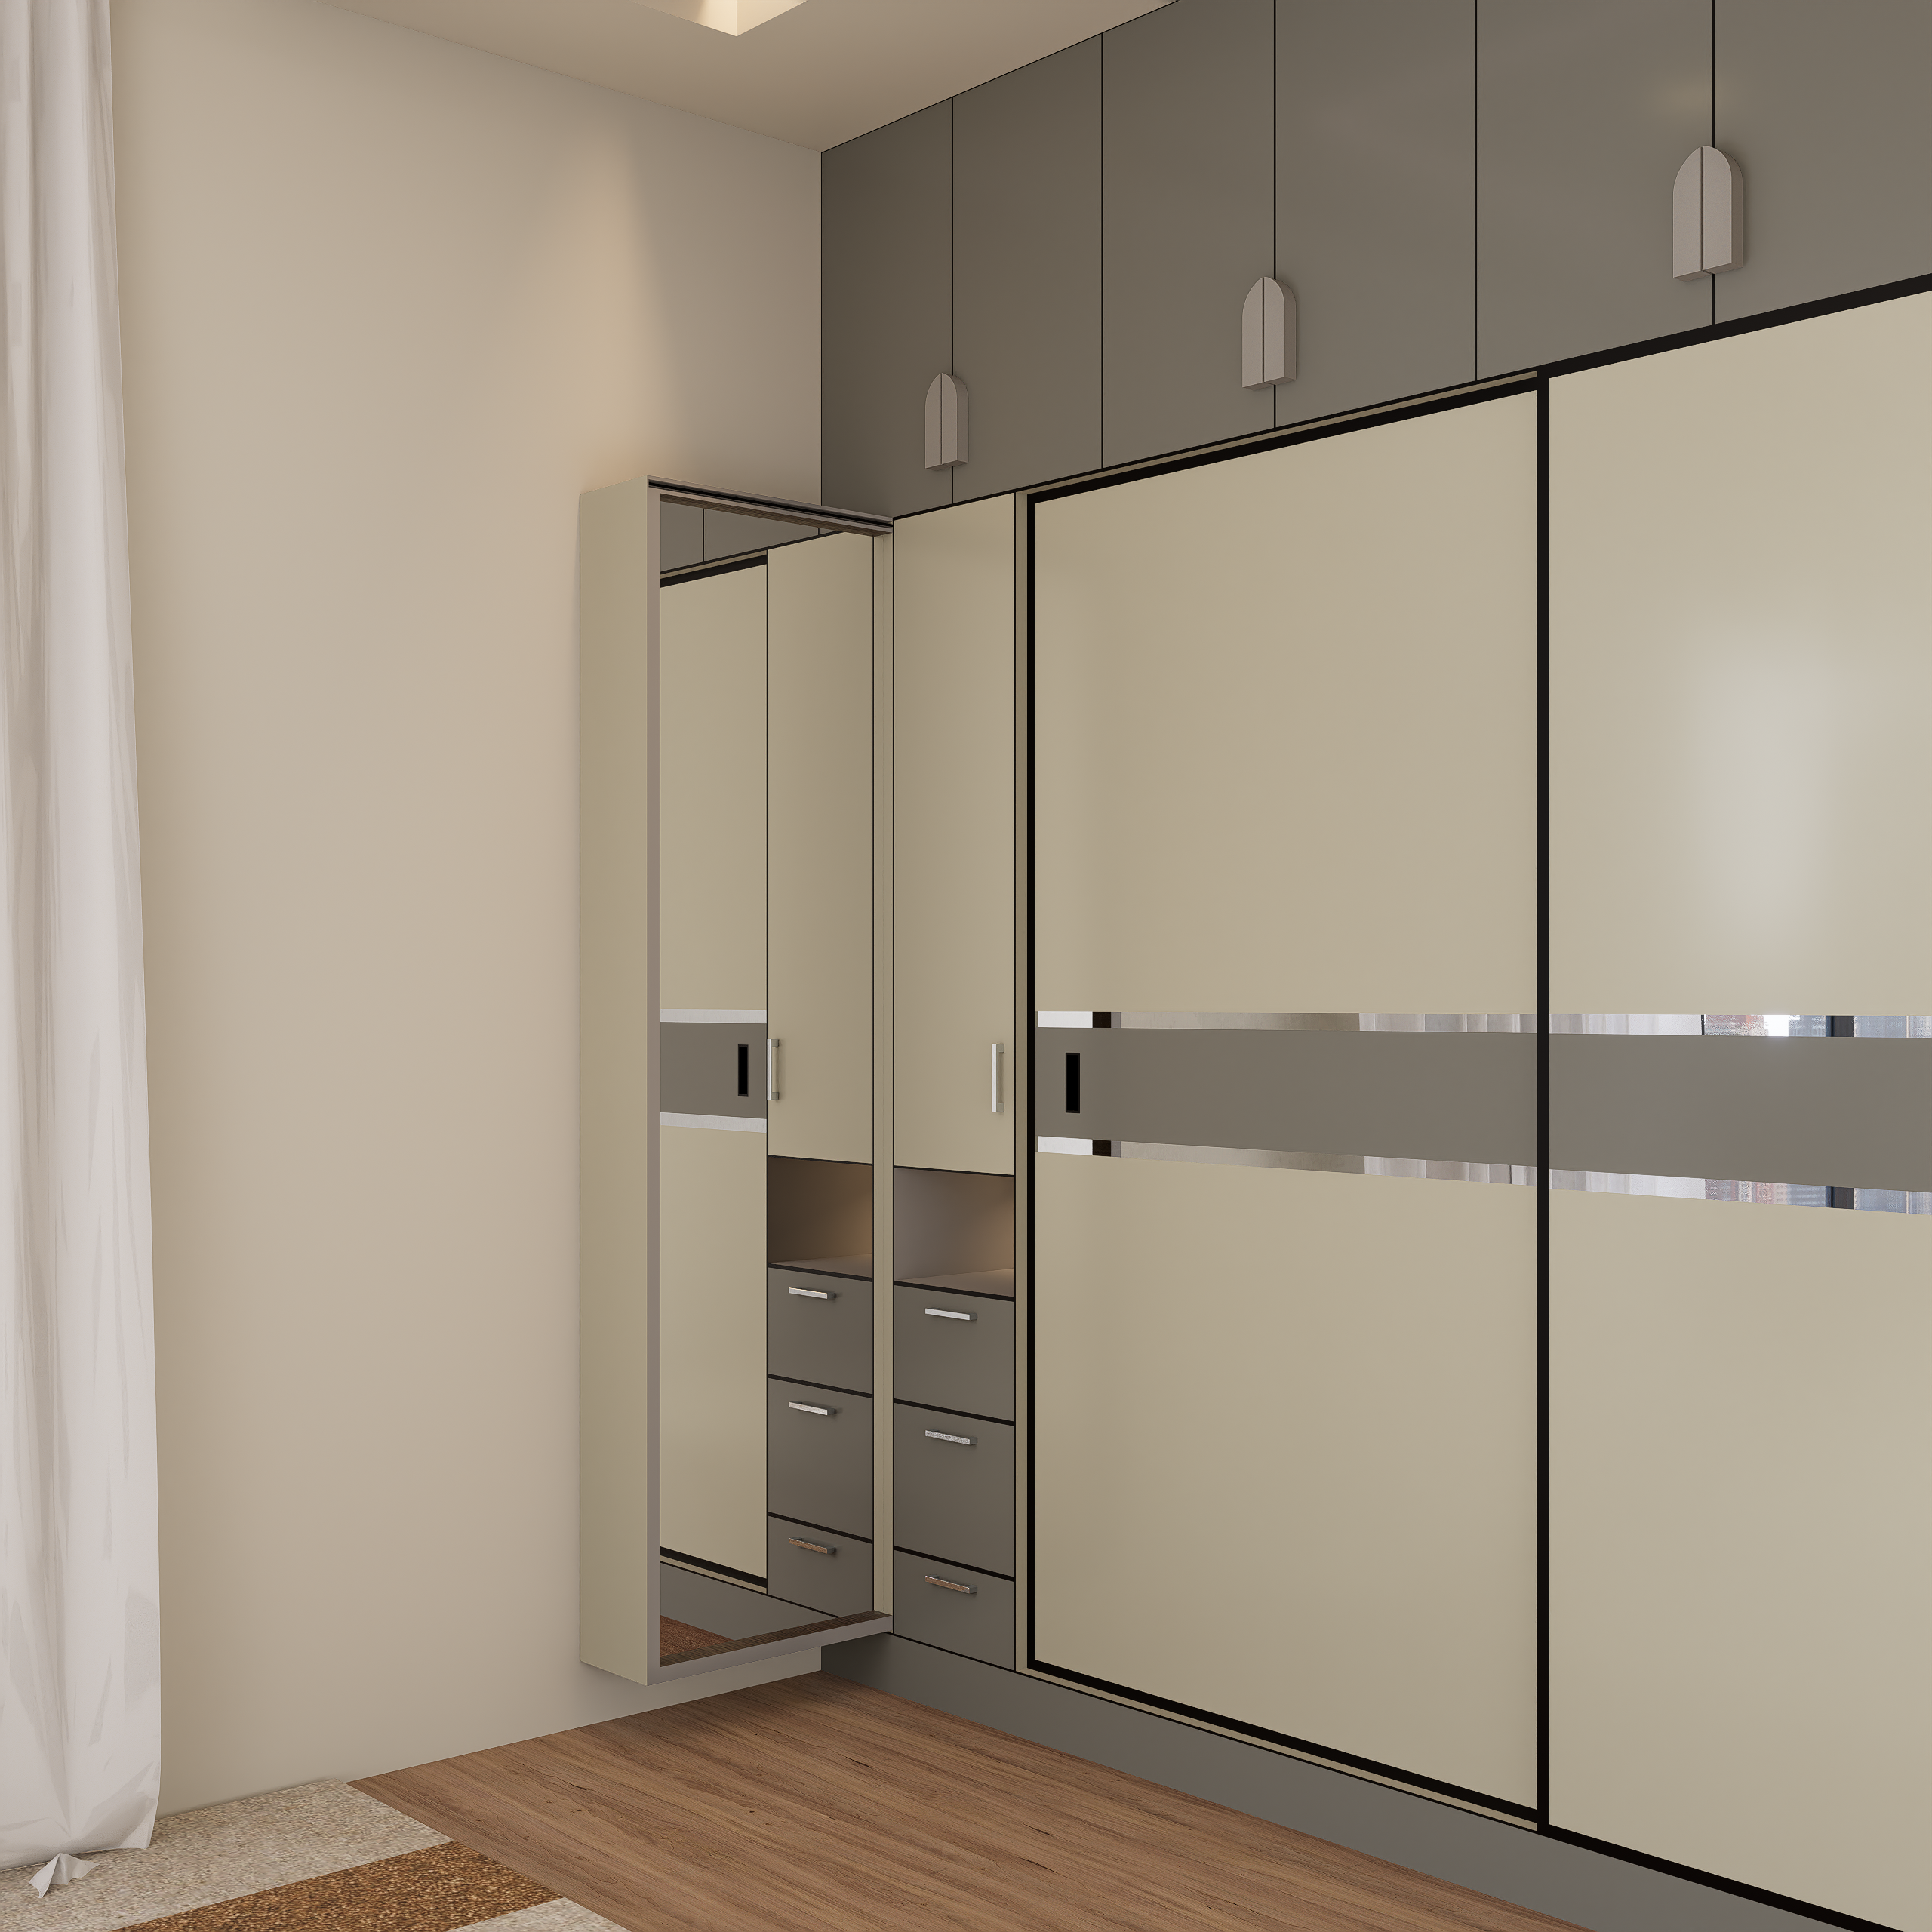
“A large, handleless wardrobe system like this one creates a stunning, minimalist look, but be prepared for a constant battle with fingerprints and smudges, especially on the darker gray panels and the mirrored surface.”
The smooth, matte finish that looks so chic in photos will show every touch. You’ll want to keep a microfiber cloth handy for frequent wipe-downs. Also, complex wardrobe systems with sliding doors and integrated lighting can be tricky to install. This is likely not a one-person job and might even be best left to a professional installer to ensure everything is level and glides smoothly.
20. White Wall-Mounted Closet System with Labeled Woven Bins
This closet system is a perfect example of balancing open and closed storage for a space that feels both organized and personal. The open shelves and hanging rods allow you to see your frequently used clothes and shoes at a glance. But the real genius is the use of labeled woven bins on the high shelves. These bins conceal the visual ‘noise’ of less-used items, seasonal accessories, or things you just don’t want to look at every day. The labels are crucial—they ensure you don’t have to pull down all five bins just to find your winter scarves. It’s the ultimate combination of accessibility and order.
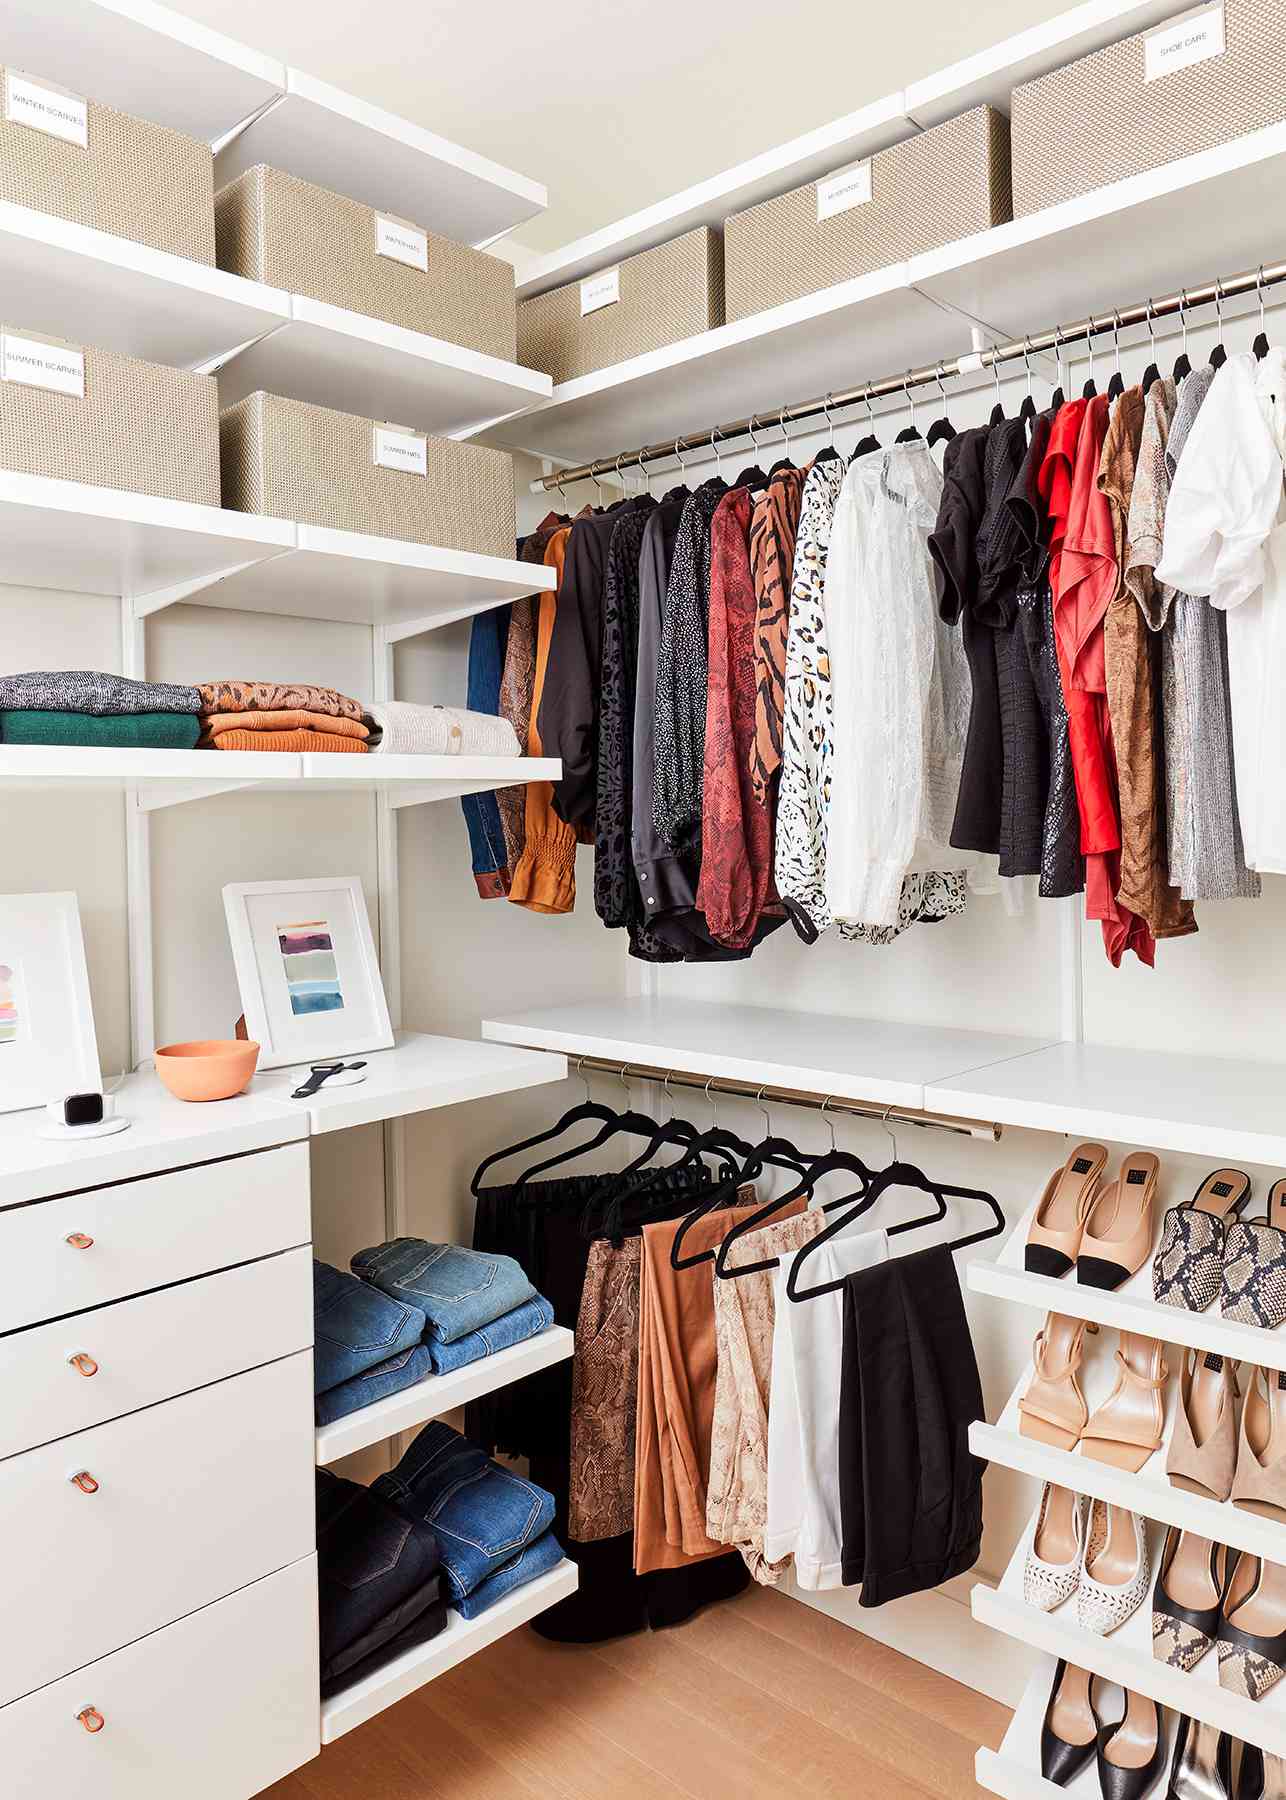
“A wall-mounted system like this offers a custom look at a more accessible price point than traditional built-ins.”
You can achieve this with systems from IKEA (the BOAXEL system) or The Container Store (Elfa).
Wall-Mounted Shelves & Rods: $400 – $1,200
Drawer Units: $200 – $500
Woven Bins with Labels: $150 – $400
Shoe Organizer & Accessories: $100 – $250
TOTAL: $850 – $2,350
Budget alternative: Use a simpler wall-mounted track system from a hardware store and buy cheaper fabric bins from Target or Walmart. The total could be as low as $300-$500 for a similar setup.
21. Bedroom with Glass-Front Walk-In Closet
The glass enclosure is what elevates this from a simple closet to a major design feature. It achieves several things at once. First, it puts your wardrobe on display, turning colorful clothes and accessories into a dynamic, evolving piece of wall art. Second, because it’s transparent, it doesn’t visually shrink the bedroom the way a solid wall would; it actually enhances the sense of depth and space. Finally, the internal lighting within the closet creates a beautiful, layered glow in the evening, adding warmth and sophistication to the entire room.
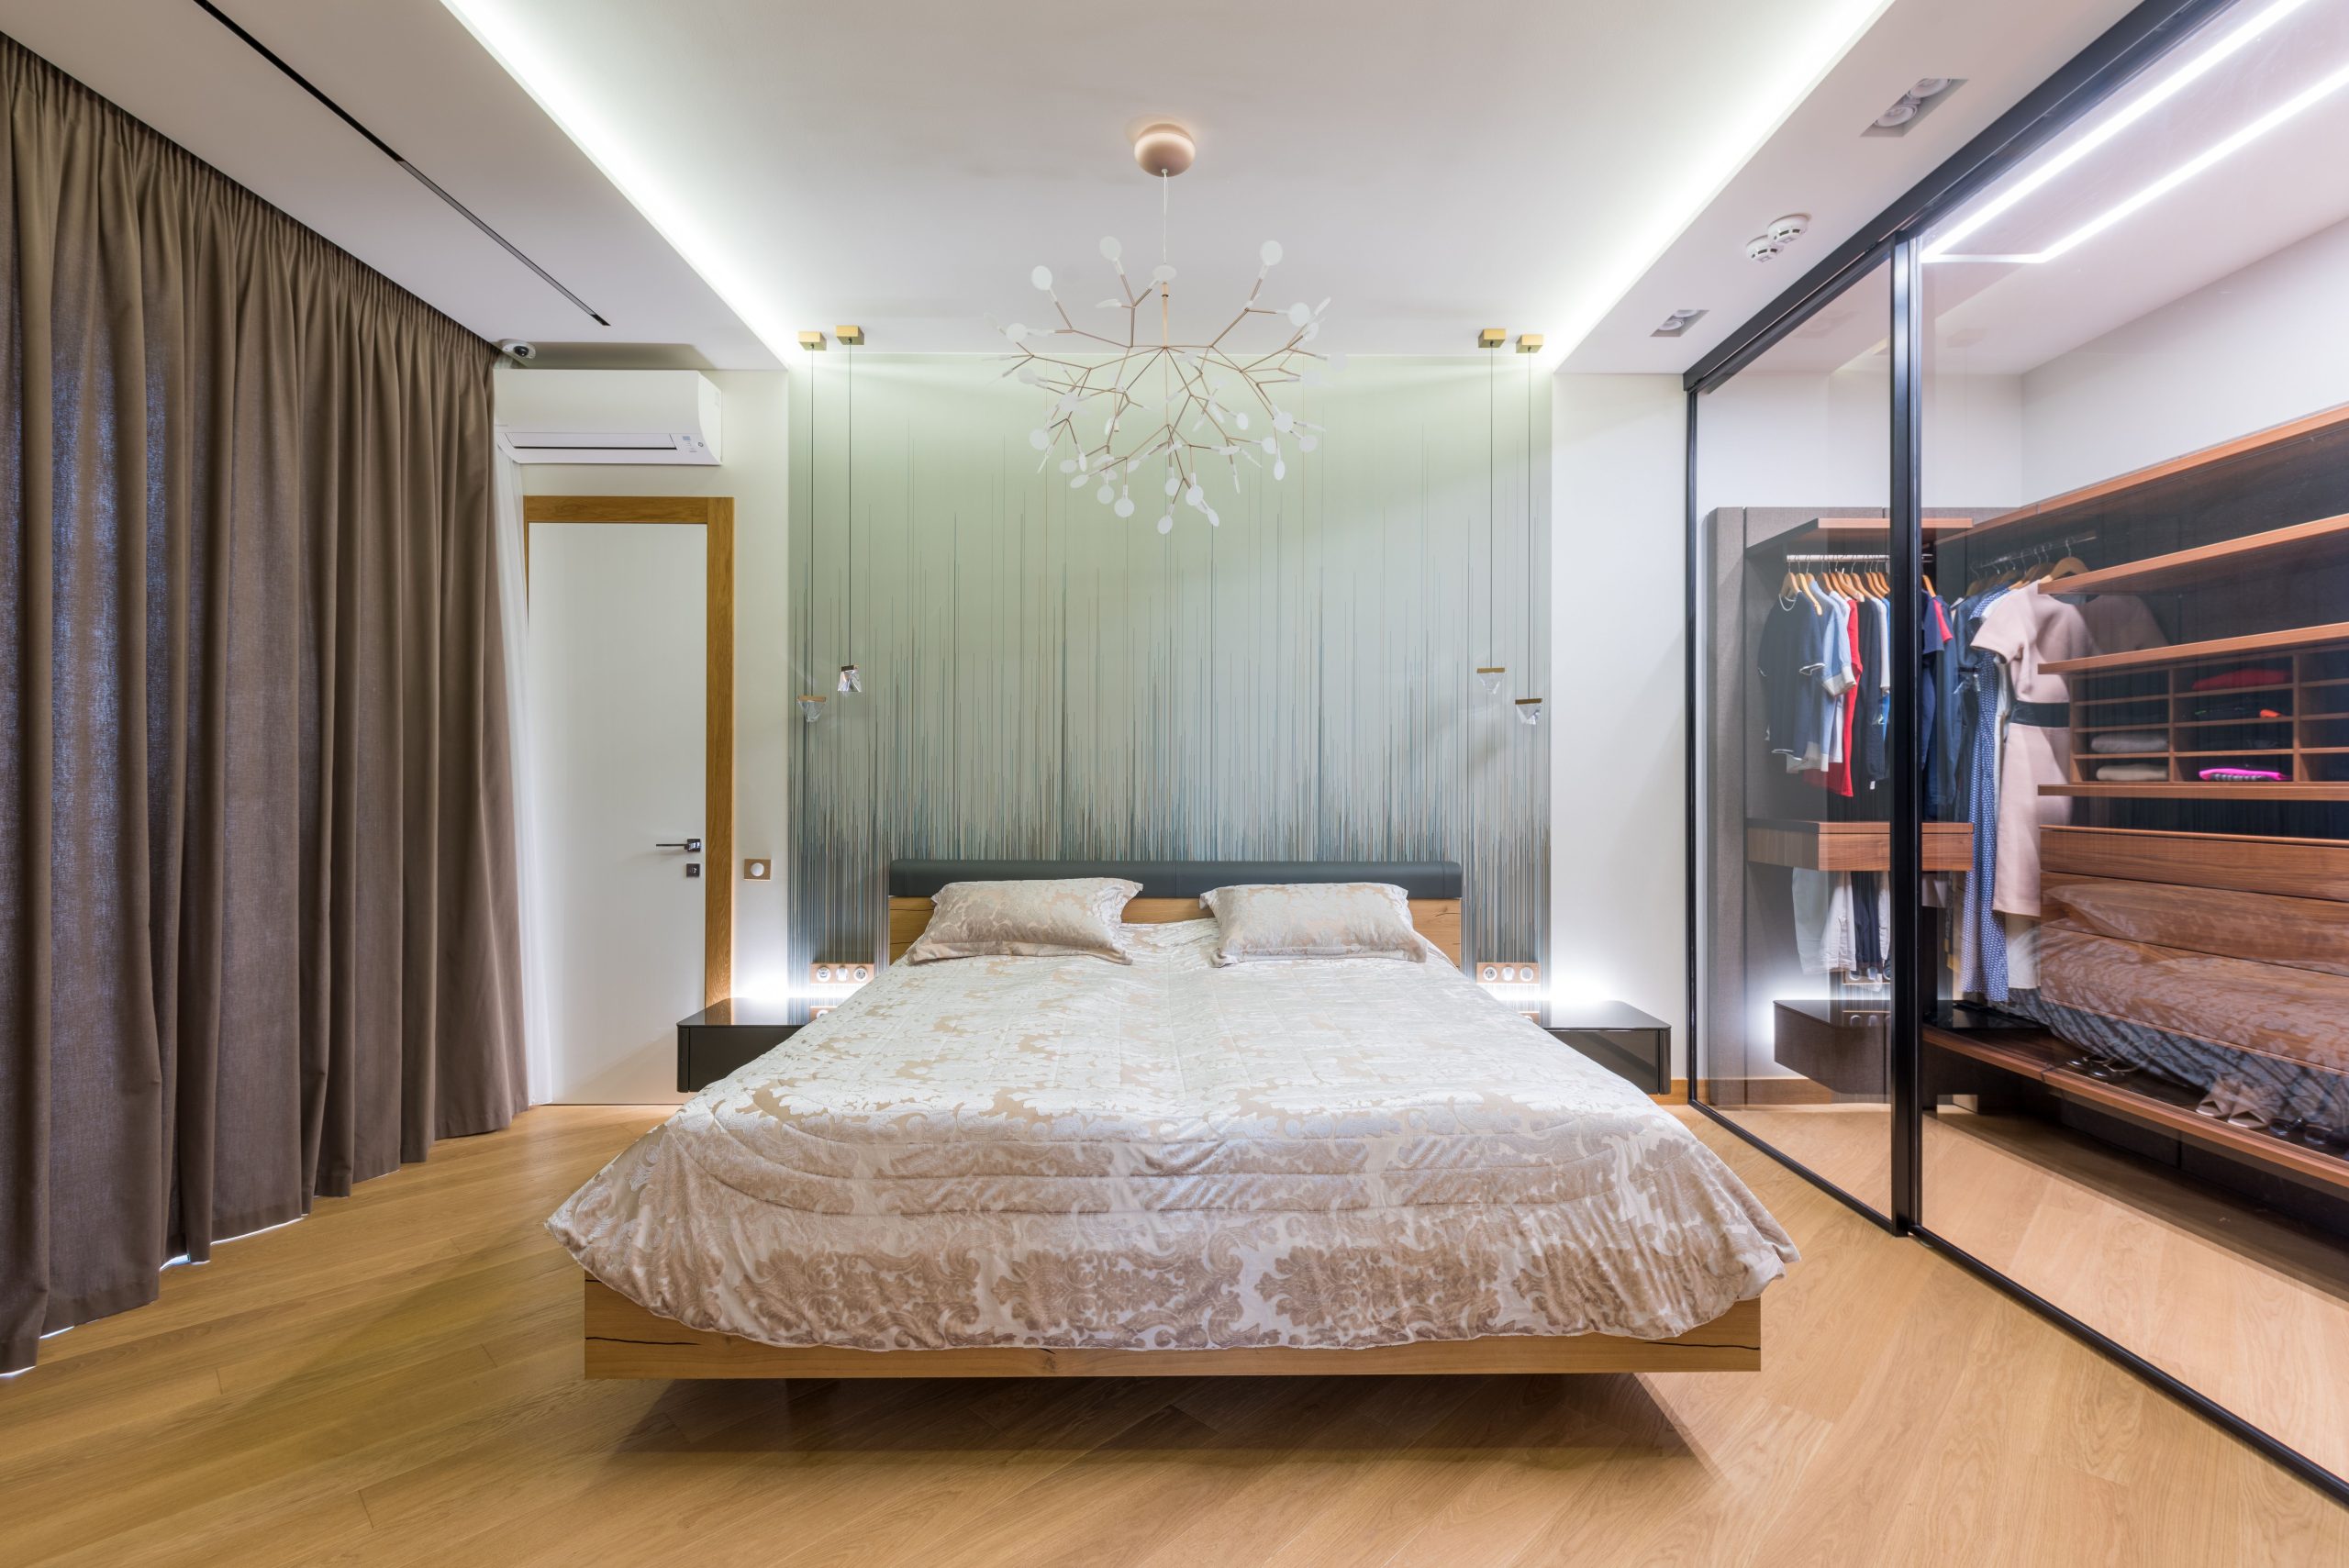
“This design is trending hard because it taps into the desire for our homes to feel more like boutique hotels.”
It’s a little bit decadent and a lot practical. As people invest more in curated wardrobes, they want to see and enjoy them, not hide them behind a solid door. The black metal frame of the glass also hits on the industrial-chic trend that’s been popular for years, but the warm wood shelving inside keeps it from feeling too cold. It’s the perfect fusion of minimalist enclosure and maximalist display.
22. Minimalist Bedroom with Floor-to-Ceiling Louvered Closet Doors
The louvered doors are the single element that defines the character of this room. By spanning the entire wall, they create a seamless, architectural feature that feels incredibly intentional and high-end. Unlike standard closet doors, the louvered design adds texture and shadow play, which brings warmth and interest to the minimalist space. They conceal the clutter of the closet while providing necessary ventilation, and their strong vertical lines make the ceiling feel taller. It’s a brilliant choice that is both practical and deeply stylish.
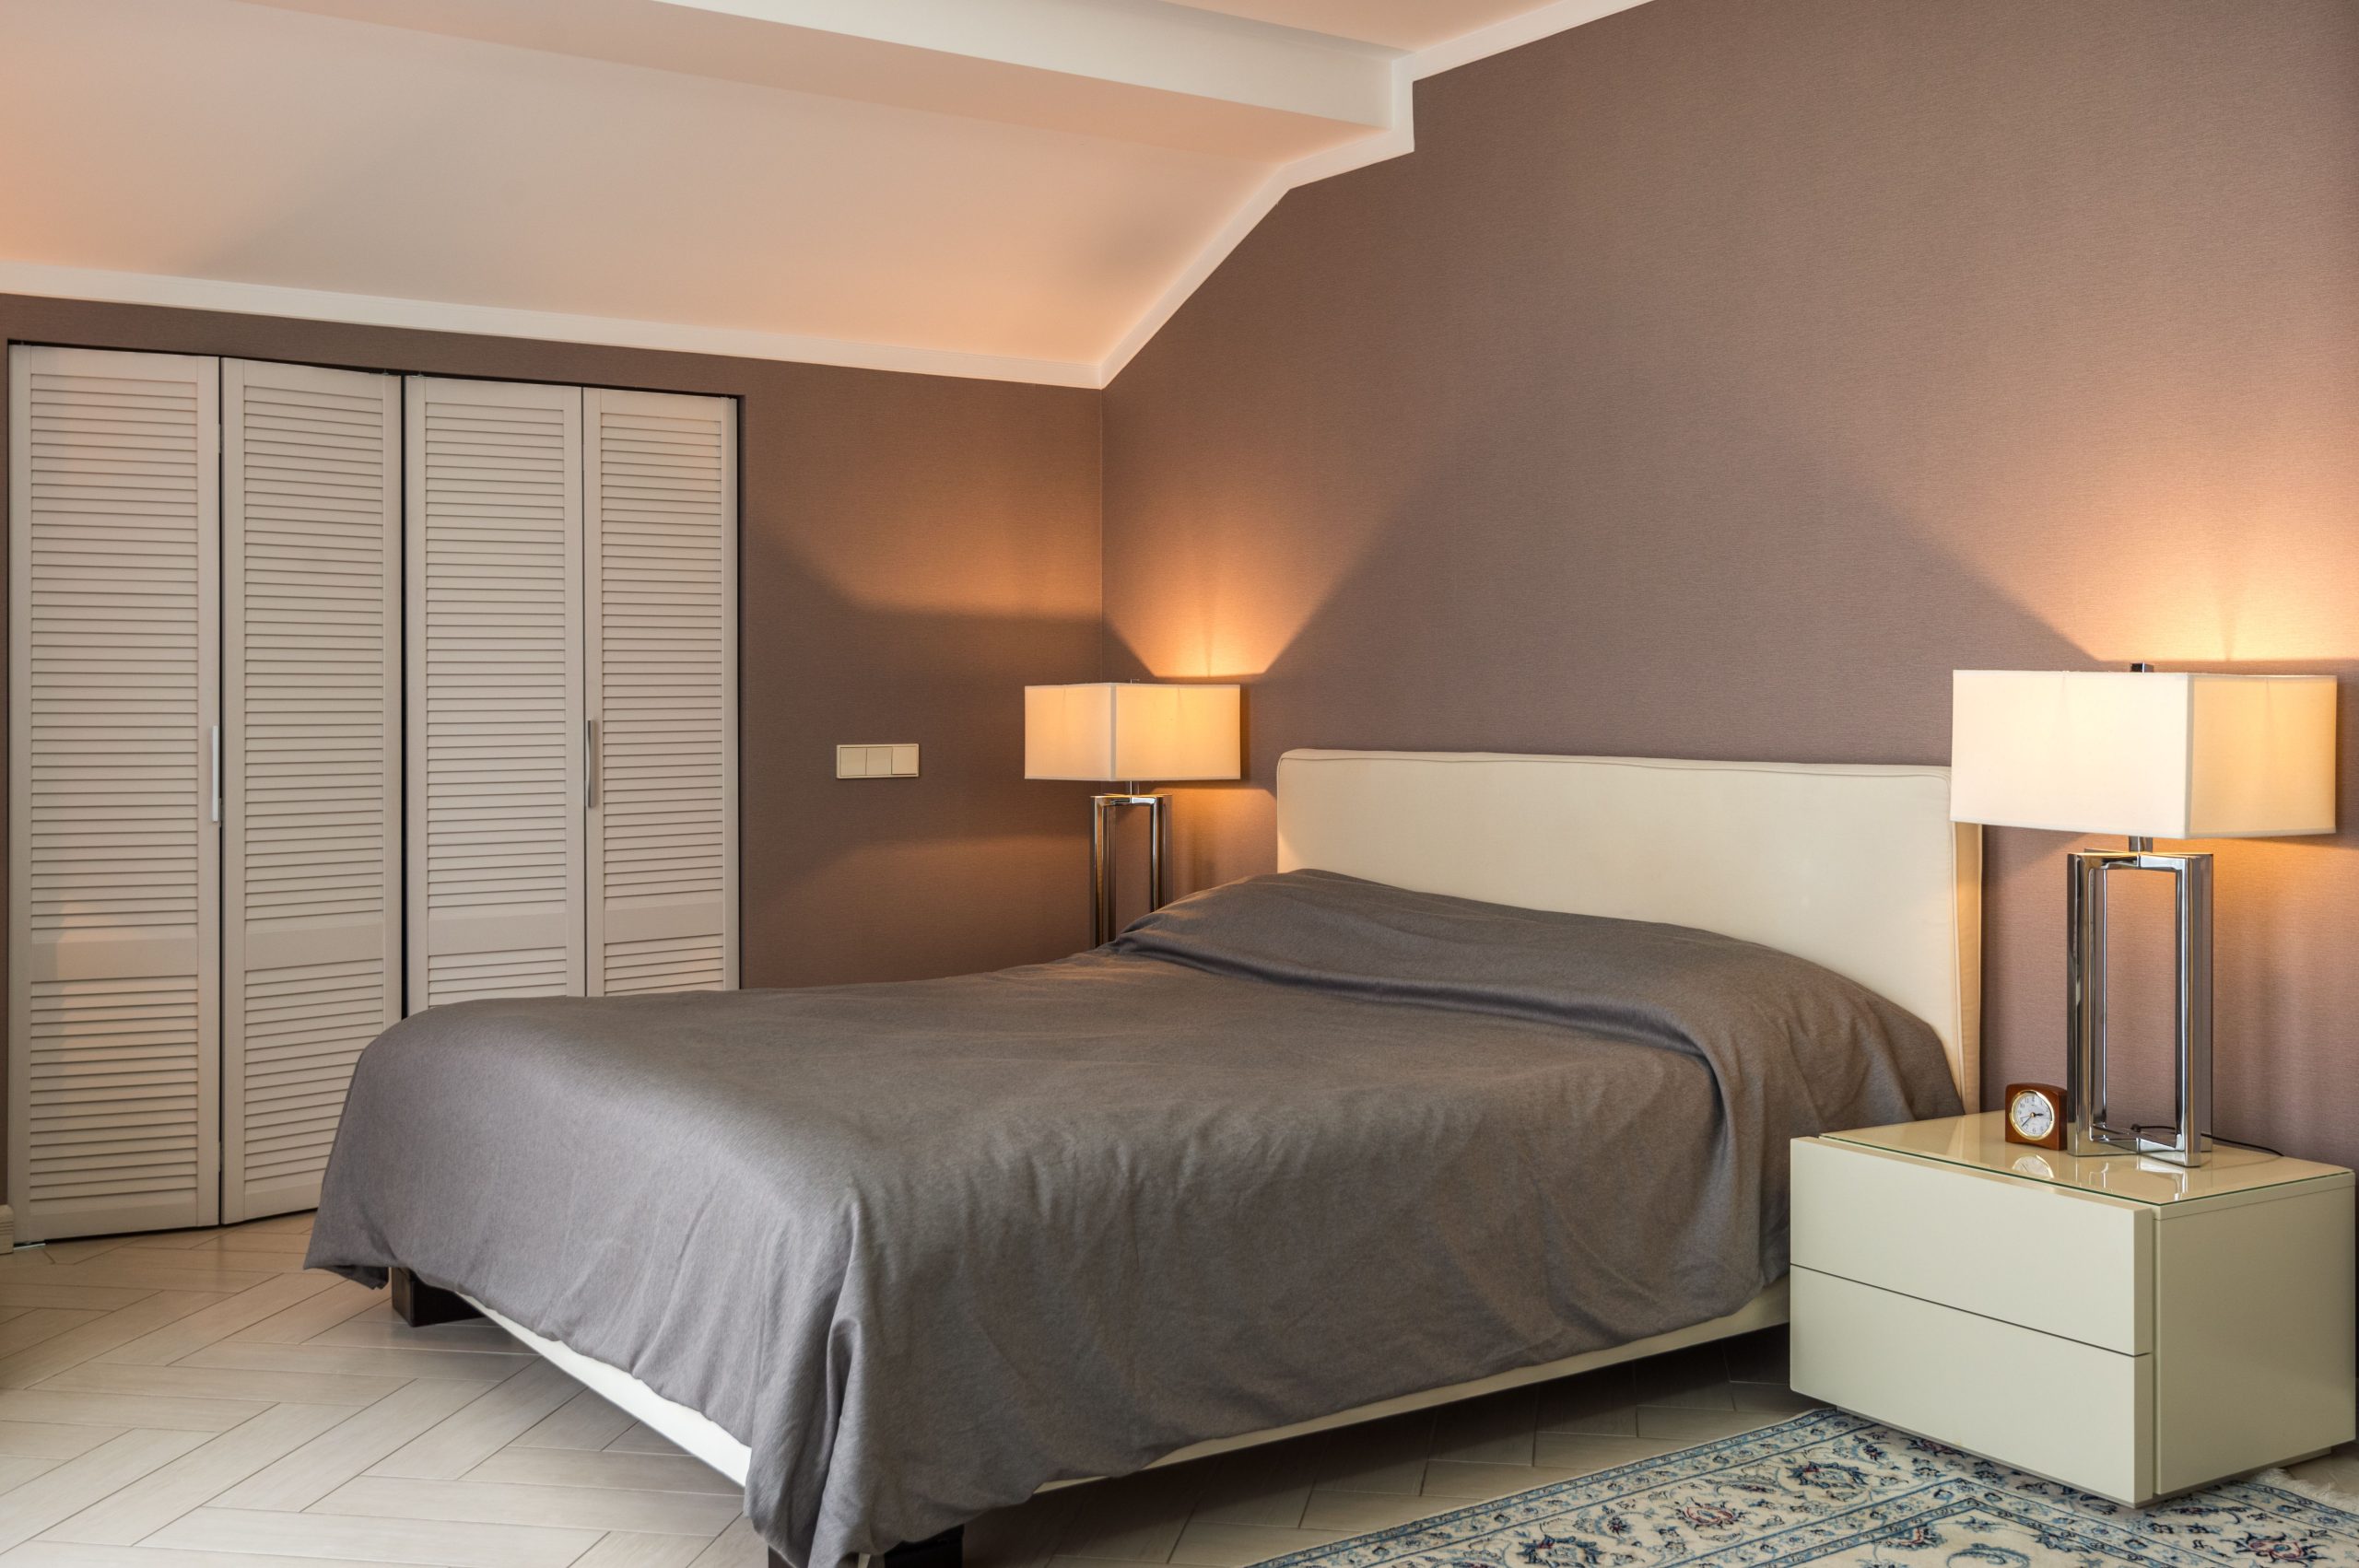
“For louvered doors to look this clean and architectural, they should be painted the exact same color and finish as your trim.”
Using a different shade of white will make them look like an afterthought rather than a cohesive, built-in feature. Opt for a high-quality satin or semi-gloss finish, which will be durable and easy to clean. Also, consider investing in high-quality hinges and handles; with such a large, repetitive bank of doors, the hardware becomes a key decorative element in its own right.
23. Discreet Purse Storage Within a White Built-In Cabinet System
This approach works for people who love organization but don’t necessarily want their accessories to be the focal point of the room. By dedicating a few open shelves within a larger, mostly closed cabinet system, you create a home for your bags that is both accessible and understated. It’s not a “display” in the showy sense; it’s just neat, logical storage. Placing the purses on shelves above the pull-out shoe racks keeps them easy to see and grab, integrating them perfectly into the dressing routine without demanding attention.
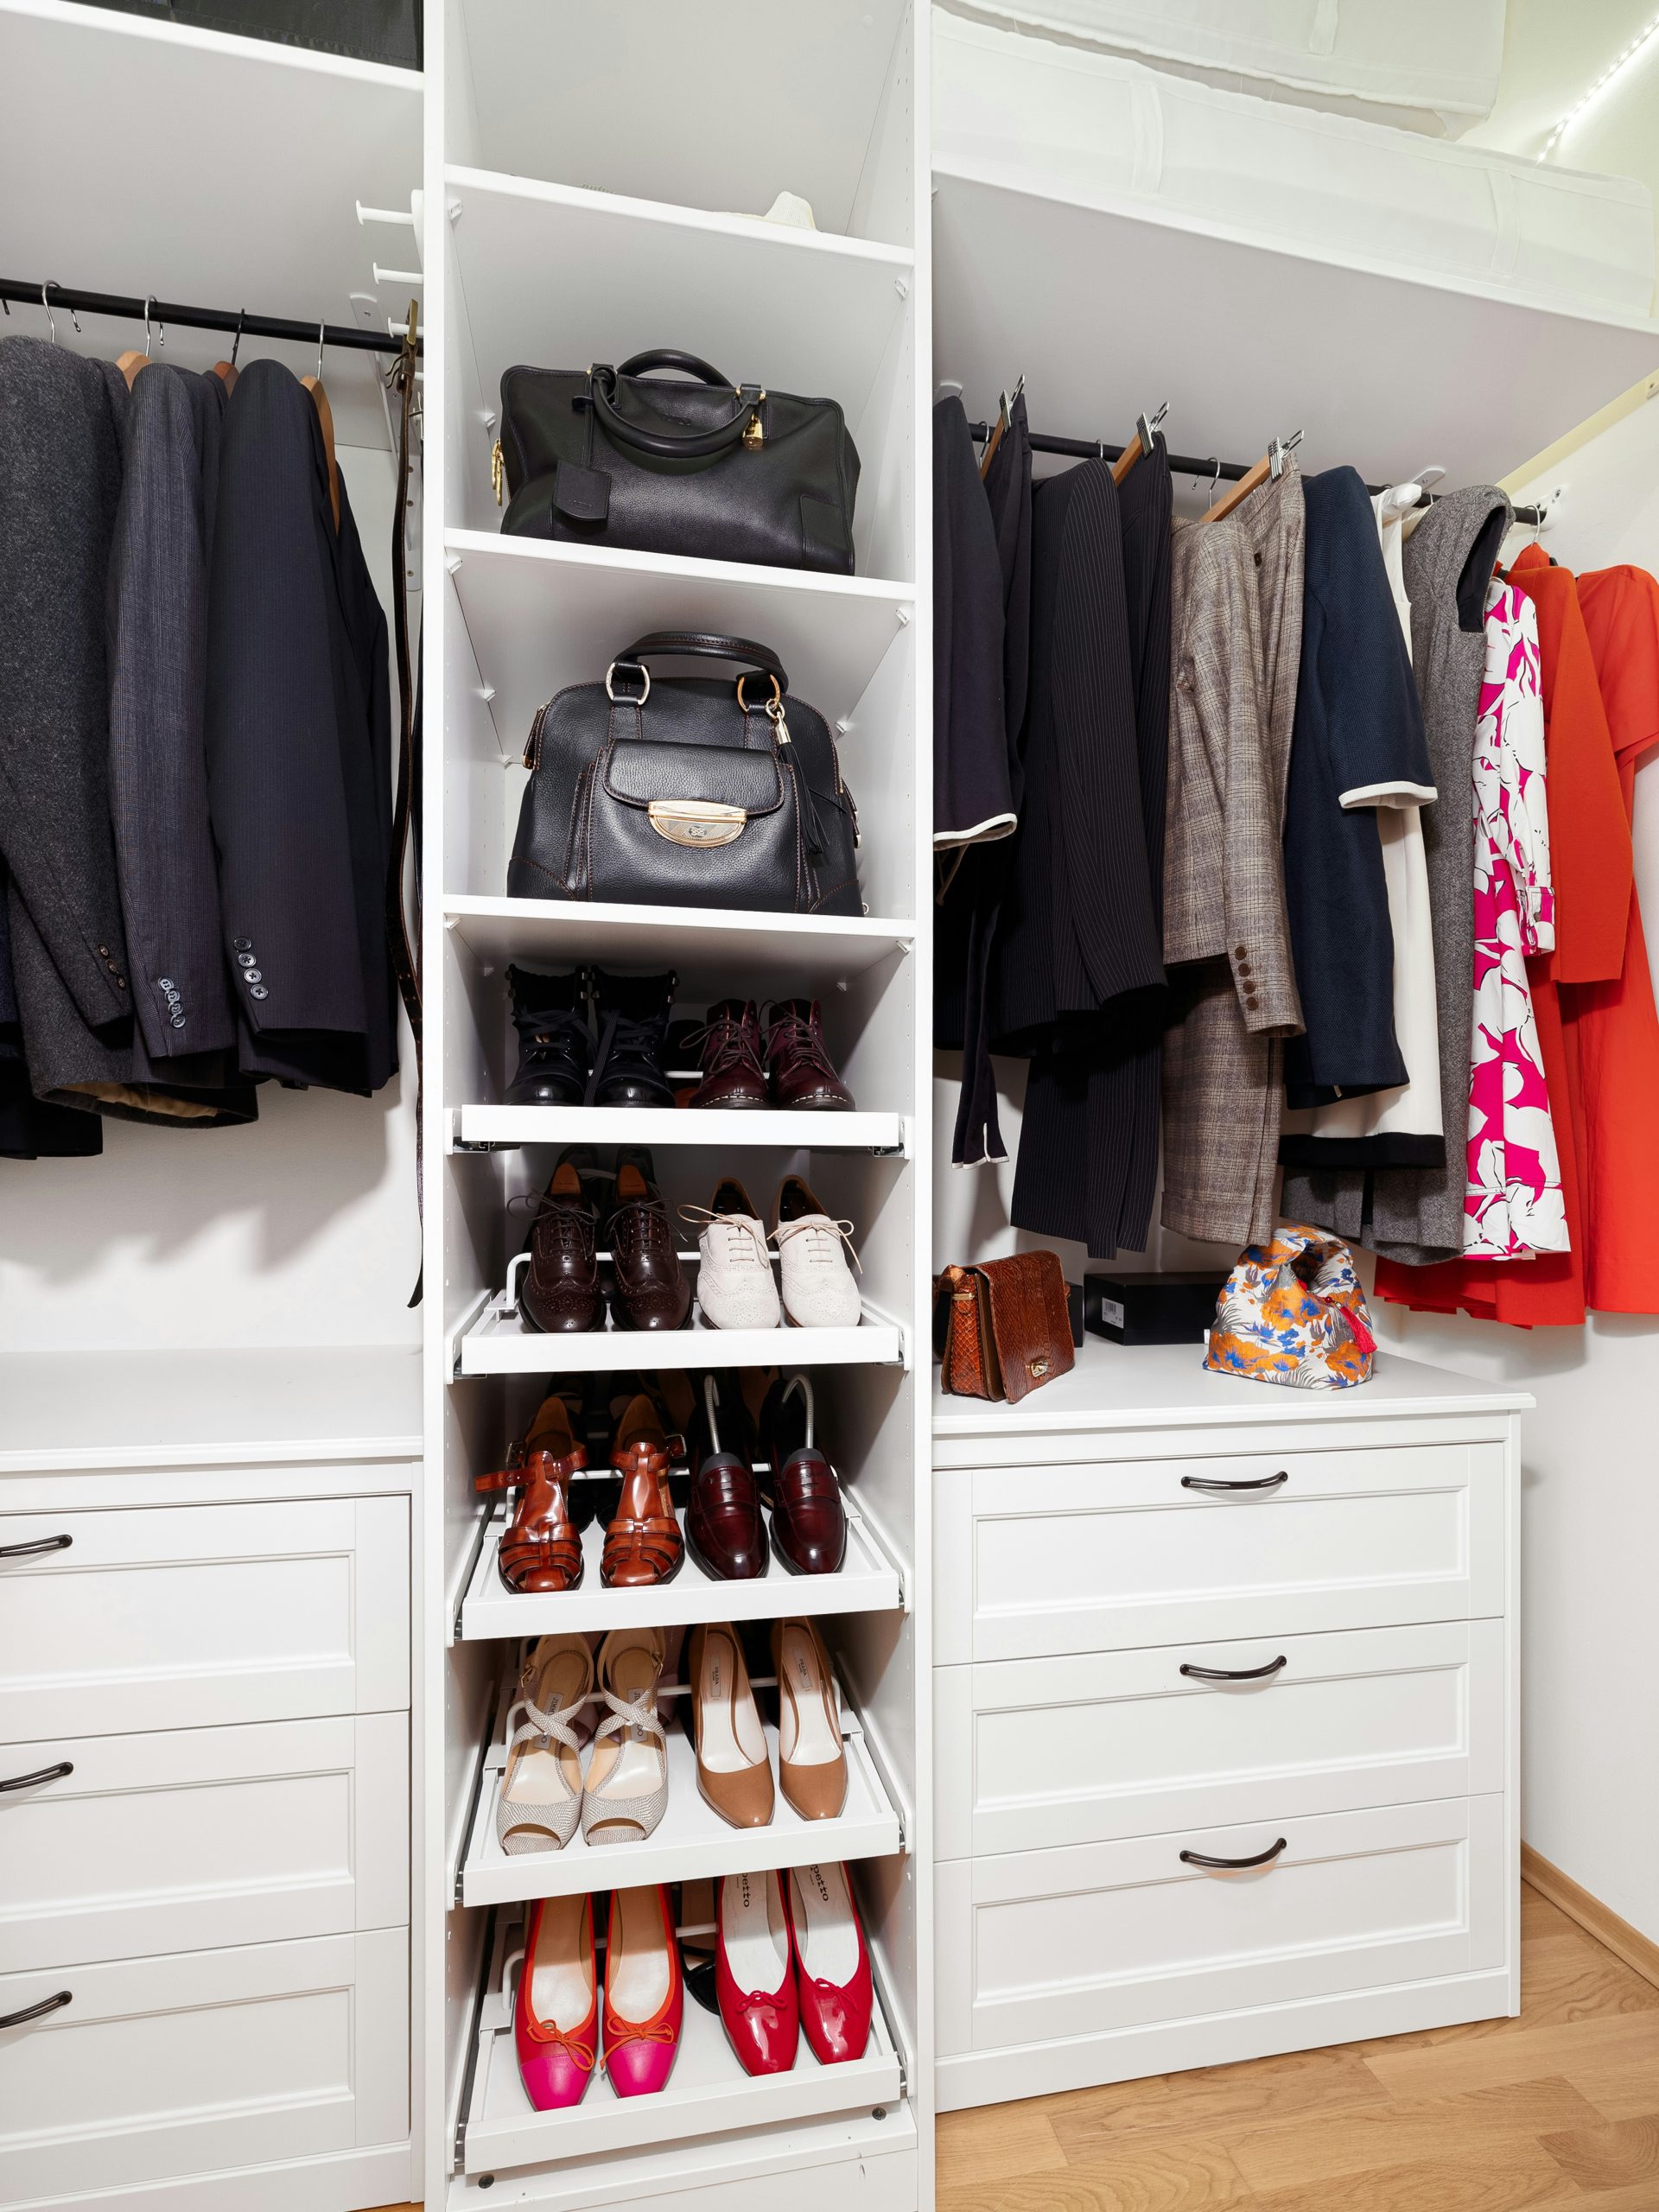
“This ‘hide-away’ method is great for maintaining a calm, minimalist aesthetic, but it only works if you are disciplined about it.”
This system provides a home for two, maybe three, larger purses on the open shelves. If you have a collection of ten totes, this is not the solution for you. It requires a certain level of curation and maybe even a ‘one-in, one-out’ policy to prevent the designated shelves from becoming overstuffed and messy, which would defeat the purpose of the clean, integrated design.
24. Dark Gray Closet with Dedicated Shelves for Woven Handbags
The formula for this chic, moody closet is all about texture and contrast. It’s approximately 70% dark, smooth surfaces (the gray cabinetry), 20% textural, natural materials (the woven handbags and wooden drawer top), and 10% bold pattern (the black and white marble floor). This balance is key. The smoothness of the cabinets makes the texture of the bags pop, while the graphic floor adds a layer of drama and keeps the dark gray from feeling flat. The result is a space that feels layered, sophisticated, and anything but boring.
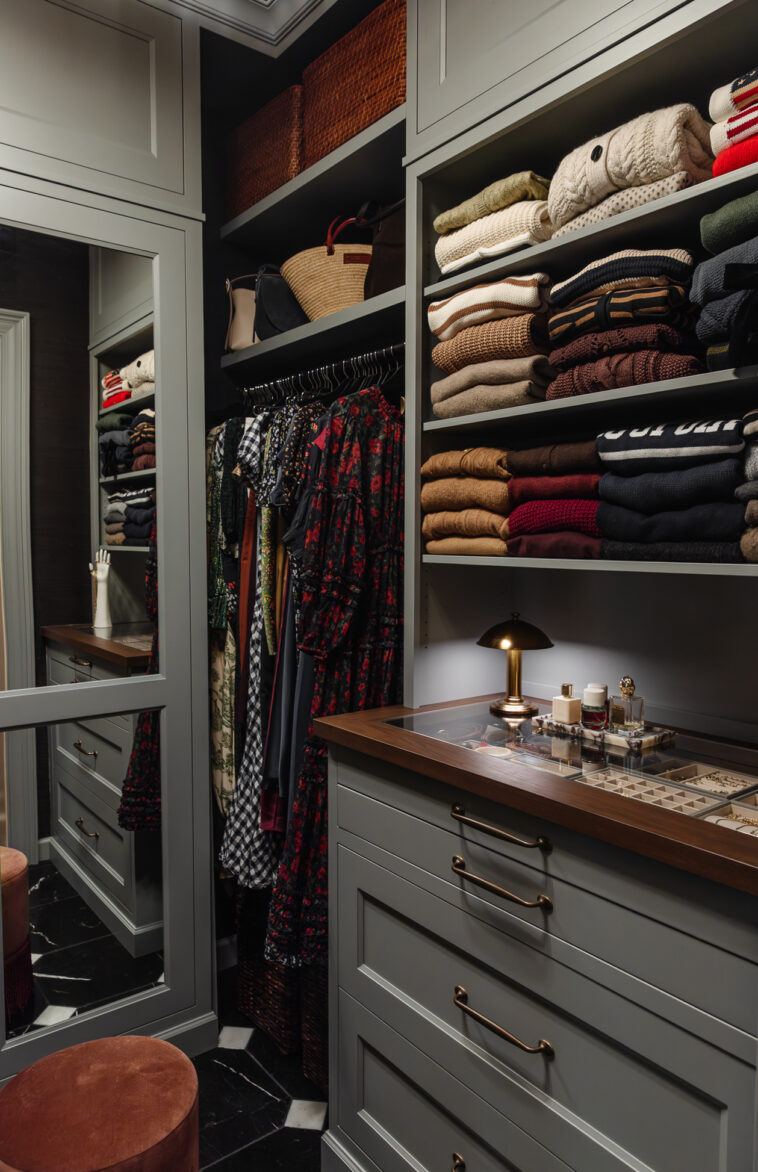
“Dark, matte cabinetry is undeniably sophisticated, but it’s the absolute worst for showing dust, lint, and fingerprints.”
Be prepared to wipe down these surfaces frequently with a soft, damp cloth. Woven bags, while beautiful, can also be dust magnets. Take them down once a season and use the brush attachment on your vacuum to gently clean them. The open shelving concept, while great for display, means your items are not protected from dust, which can accumulate quickly in a closet environment with lots of textiles.
25. Simple Wooden Peg Rack for a Clean Tote Bag Display
This is arguably one of the most stylish and affordable ways to organize a collection of tote bags. You can find simple wooden peg racks like this at IKEA (look for the KUBBIS series), Target, or on Etsy for anywhere from $15 to $50. It gets your bags off the floor, turns them into a neat wall feature, and makes them easy to grab on your way out the door. It’s a perfect example of functional design inspired by simple, Shaker-style utility. You don’t need a fancy system when something this straightforward works so well.
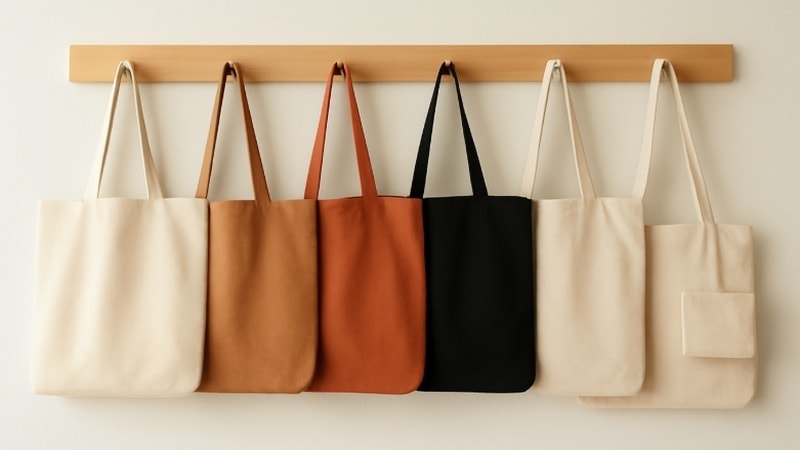
“Making your own peg rack is a fantastic beginner woodworking project.”
Here’s a super simple version:
Time: 1 hour (plus drying time). Cost: $20.
Buy a 1×4 poplar or pine board cut to your desired length at a hardware store, along with a wooden dowel (1-inch diameter).
Cut the dowel into 3-4 inch long pegs. Aim for a slight upward angle on the cut end if you can, but a straight cut is fine.
Use a spade bit to drill holes partially through your 1×4 board, spaced about 6-8 inches apart.
Apply wood glue to the end of each peg and insert them into the holes. Let dry completely.
Sand the whole piece smooth and finish with a coat of natural wax, stain, or paint.
Mount it to the wall, making sure to hit studs or use heavy-duty anchors.
26. White Cabinet Shelves Using Clear Dividers for Clutches and Purses
This is organization at its most satisfying. The reason this works so well is that the clear acrylic dividers create custom-sized cubbies for each item without adding any visual clutter. The transparency of the dividers keeps the look clean and bright, allowing the colors and shapes of the purses to be the focus. By standing clutches and small bags upright, you can fit significantly more into the space and see your entire collection at a glance. It’s a simple, brilliant trick for preventing the dreaded ‘purse pile’ at the bottom of the closet. Compare this to the similar dividers in Idea #8.
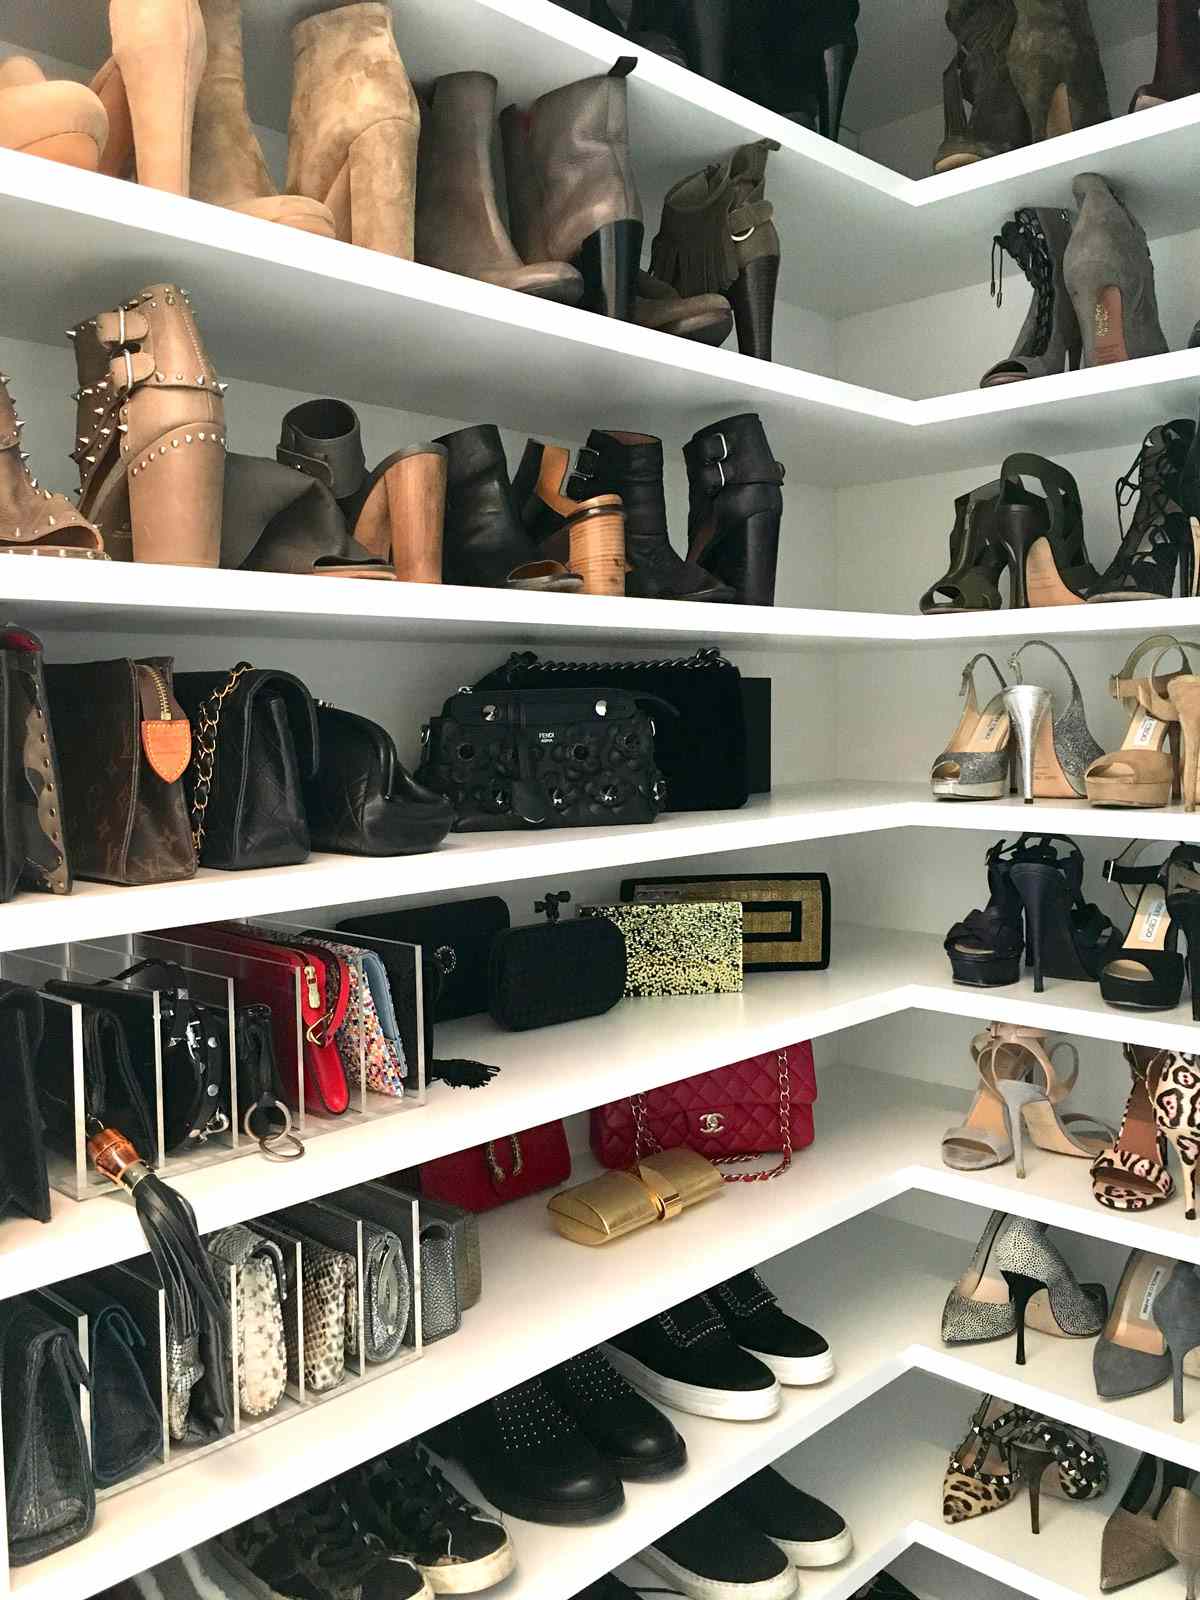
“When using shelf dividers for purses, the magic measurement is the spacing.”
For smaller clutches and wallets, place dividers 2 to 3 inches apart. This holds them snugly upright without squeezing them. For medium-sized shoulder bags or crossbody bags, you’ll want to space the dividers 4 to 6 inches apart. Taking a moment to measure and plan the spacing for your specific collection before you place all the dividers will result in a much tidier and more functional outcome. Don’t be afraid to mix and match spacing on the same shelf.
27. Eclectic Bedroom Corner with an Open Clothing Rack and Gallery Wall
The single element that makes this space feel authentic and personal is the gallery wall above the dresser and clothing rack. Without it, you’d just have a collection of furniture. The art is what ties everything together and gives the corner its unique personality. It’s a declaration that this is not just a storage area, but a curated part of the home. The eclectic mix of frame styles and art subjects is a reflection of the owner’s taste, making the entire vignette feel lived-in, loved, and completely one-of-a-kind.
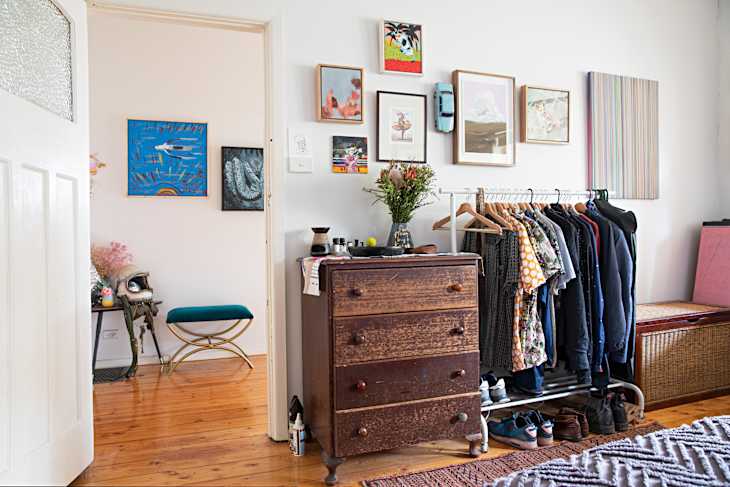
“An open clothing rack is a fantastic, budget-friendly solution for a room without enough closet space, but you have to be honest with yourself: are you a neat person?”
An open rack only looks chic and aspirational if the clothing on it is curated and tidy. If you tend to be messy, it can quickly become an eyesore and make the entire room feel cluttered and chaotic. It requires constant editing—only your best or most-used pieces should live here, and everything needs to be on matching hangers to look intentional.
28. Efficient Vertical Storage with Wall Hooks for Bags and Belts
This is a masterclass in using every square inch of vertical space. It works because it layers the storage by type and size. The larger totes and purses are on top, where they have room to hang freely. Below them, a separate row of hooks is perfectly positioned for belts, which require much less vertical clearance. This ‘high/low’ positioning is incredibly efficient, allowing two full rows of storage in a narrow space that might otherwise only accommodate one. It’s a simple but powerful demonstration of smart spatial planning in a tight spot.
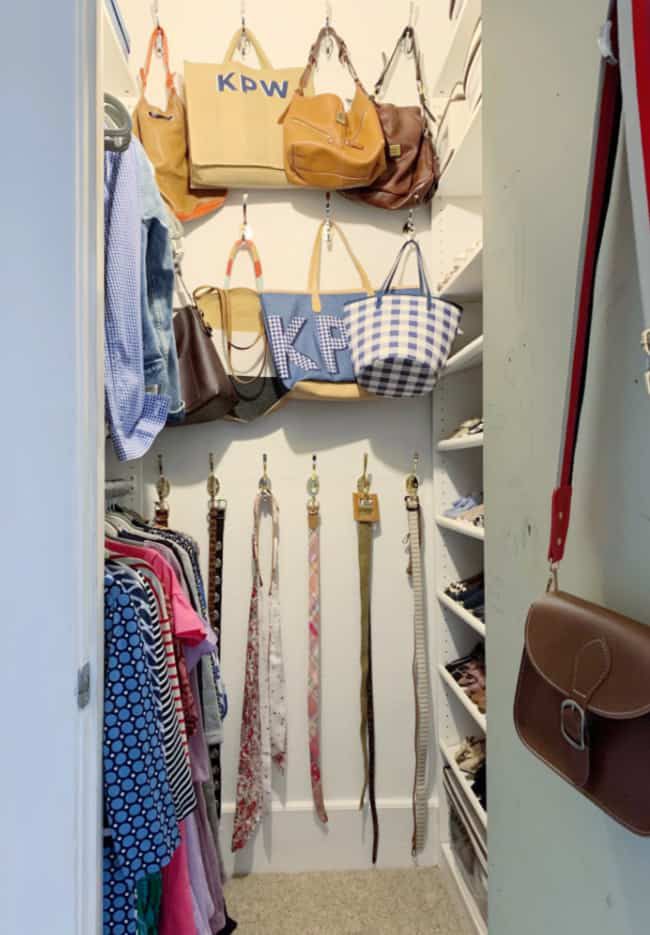
“This idea is tailor-made for the forgotten spaces in your closet or bedroom.”
Do you have a narrow strip of wall—even just 18 inches wide—next to a door frame or between the closet and a window? That’s the perfect spot for this vertical hook system. It’s also ideal for the inside walls of a reach-in closet, which are almost always underutilized. It requires virtually no floor space, only a bit of clear wall. This is one of the most universally applicable ideas for adding capacity to any size home, from a tiny apartment to a larger house.
29. Organized White Shelves with Dividers for an Eclectic Bag Collection
The clear acrylic dividers are, without a doubt, the single thing making this system work. Take them away, and this diverse collection of structured leather bags, soft fabric totes, and woven straw bags would become a chaotic, slumping pile. The dividers act like little soldiers, keeping each bag upright, visible, and in its designated spot. This is especially crucial for a collection with such varied materials and shapes, as it brings a sense of uniform order to a non-uniform group of items. It proves that a simple tool can create radical organization. See a similar use in Idea #8.
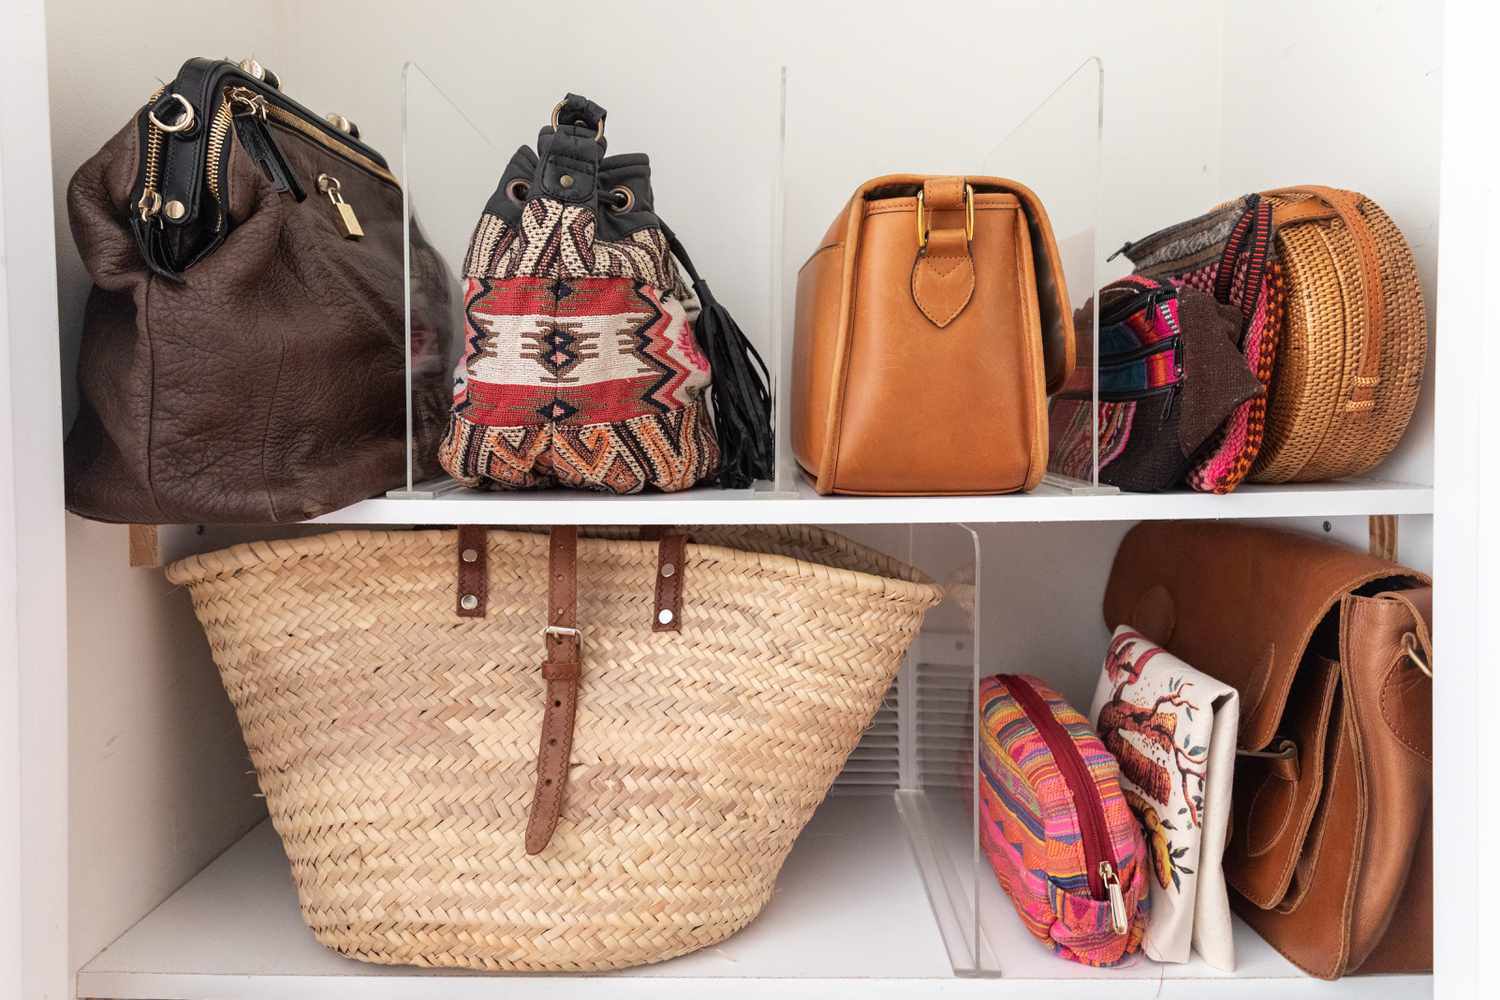
“For a collection that includes both leather and straw or fabric bags, it’s a good idea to create separate zones on your shelves.”
Don’t store a rough straw bag right next to a delicate lambskin leather clutch. The abrasive texture of the straw can cause microscopic scratches or scuffs on smooth leather over time. Use your acrylic dividers to create a clear boundary—leather with leather, wovens with wovens. This small organizational detail can go a long way in preserving the condition of your more delicate and valuable pieces.
30. Sage Green Walk-In Closet with Dark Wood and Mirrored Doors
The color and material formula here is what creates such a sophisticated, custom look. It breaks down to roughly 60% calming sage green (the cabinetry), 30% rich dark wood (the shelves and countertops), and 10% reflective surfaces (the mirrors and brass hardware). This recipe balances color with a grounding neutral and adds a touch of glamour with the reflective elements. The result feels balanced, intentional, and far more dynamic than a closet done in a single color or material. It’s a palette you won’t get tired of.
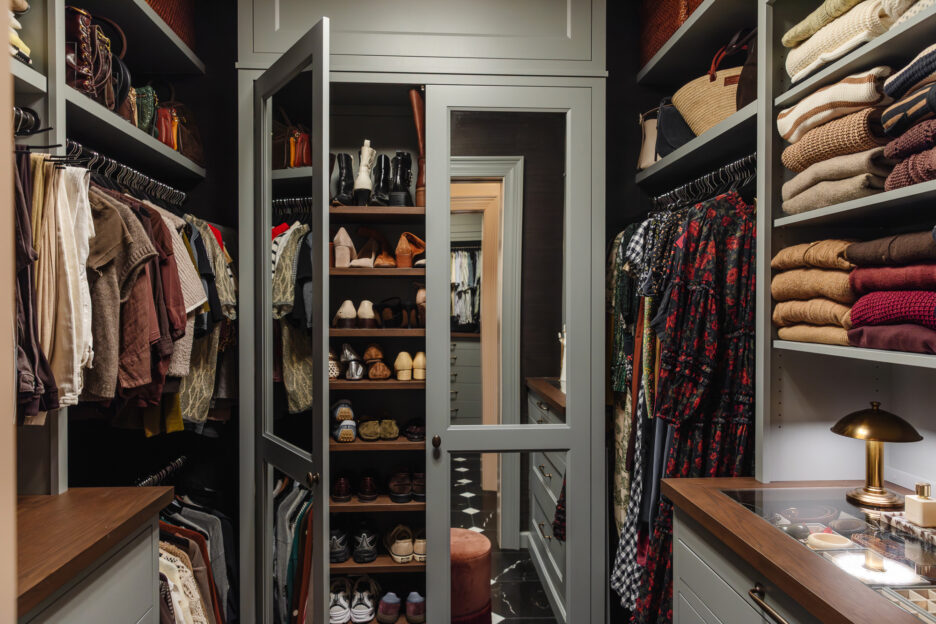
“This design cleverly uses mirrors to solve a common closet problem: narrowness.”
By paneling some of the cabinet doors with mirrors, the designer makes the space feel wider and brighter than it actually is. The mirrors bounce light from the fixtures and any natural light sources around the room, eliminating shadows and creating a sense of spaciousness. They also serve a practical purpose, providing multiple full-length views for getting dressed, eliminating the need for a separate free-standing mirror that would eat up valuable floor space. It’s a dual-function design element at its best.
31. White Cube Shelves and Clear Dividers for Sweaters and Purses
This setup is so effective because it combines two types of modular storage. The classic cube shelf unit is perfect for folded items like sweaters, especially when paired with labeled baskets to contain smaller things. But the real stroke of genius is using the flat top surface of the lower unit as a display shelf for smaller bags. Adding clear acrylic dividers to this surface, as seen in Idea #25, transforms it from a simple landing pad into a structured, organized display for clutches. It’s a brilliant way to layer two different organization systems into one cohesive zone.
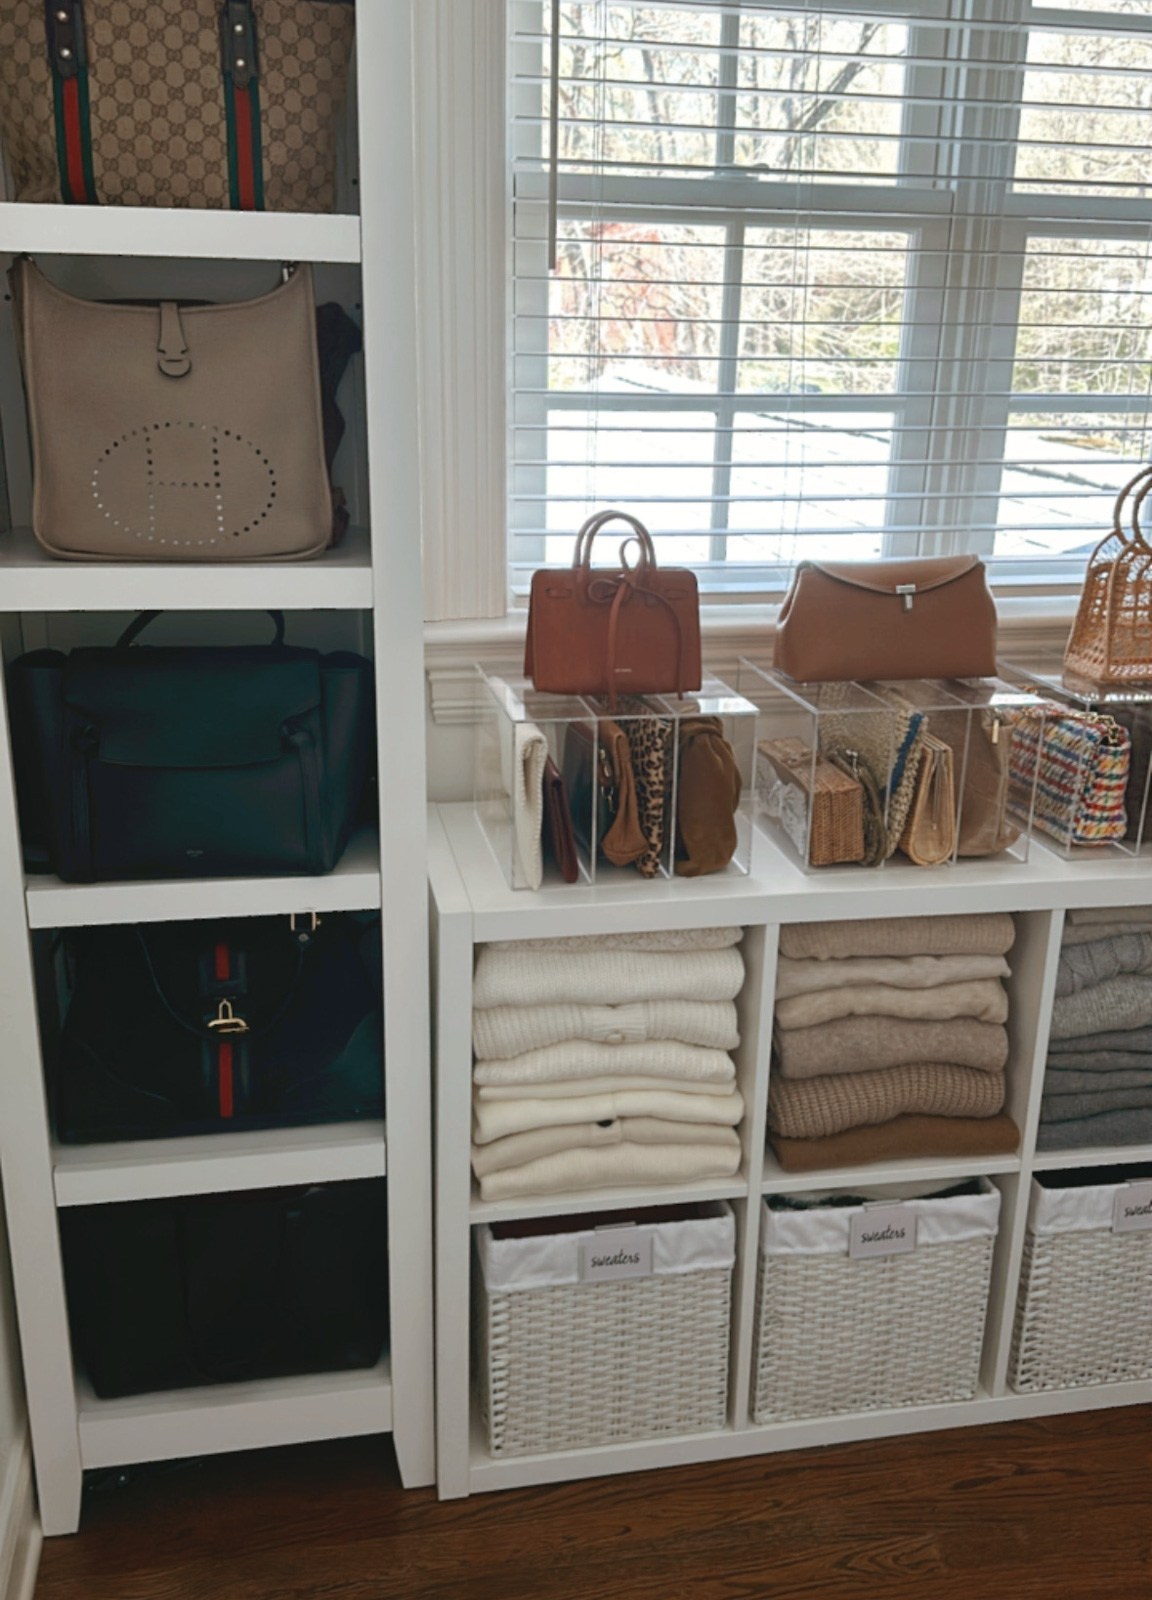
“The foundation of this entire look is the white cube shelving unit, a staple of budget-friendly design.”
You can get this exact piece—the IKEA KALLAX unit—for anywhere from $50 to $100 depending on the size. Woven bins to fit inside are available at IKEA, Target, or Walmart for about $10-$20 each. A pack of acrylic dividers for the top costs around $25. All in, you can recreate this highly functional and organized wall for under $200, making it one of the most affordable and impactful ideas on our list.
32. Eclectic Wall Organization with Hexagonal Shelves and Hanging Chains
This personalized and funky wall storage is incredibly easy to achieve on a dime. The hexagonal mesh organizers can be found on Amazon or at stores like Urban Outfitters, often for less than $30 for a set of two. The hanging chain is a classic DIY trick; you can buy a few feet of black plastic or metal chain from a hardware store for under $10, and a pack of S-hooks for another $5. It’s a renter-friendly, low-cost way to get small items and accessories up on the wall, freeing up dresser and desk space. Perfect for a teen’s room or a creative home office.
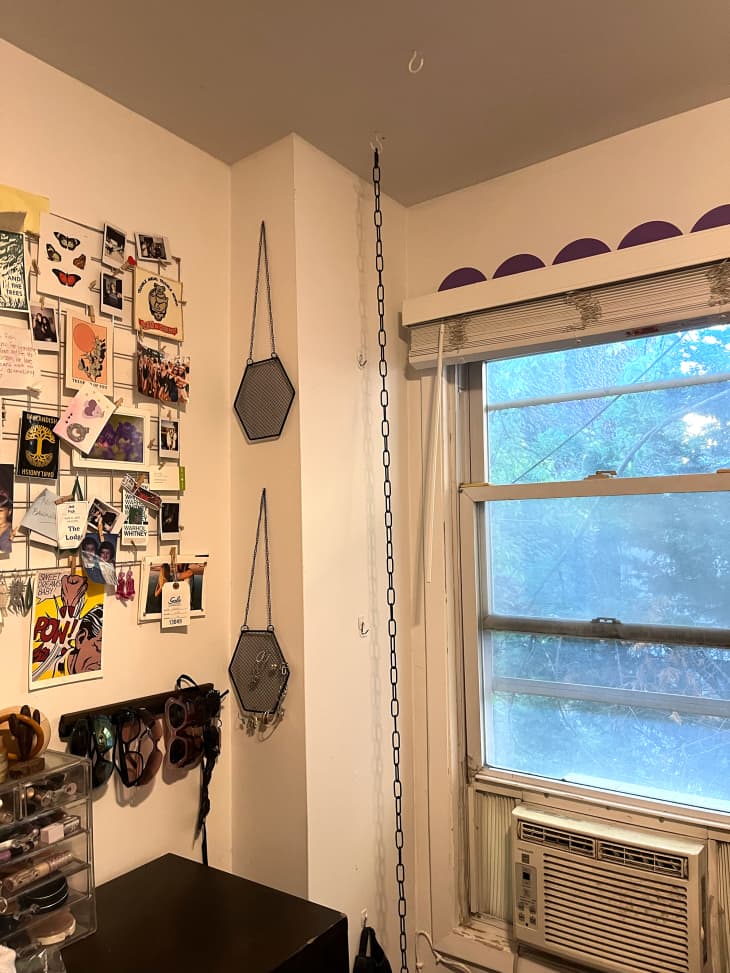
“This type of open, eclectic storage system is all about personality, but it’s not the best solution for protecting valuable items.”
The open mesh shelves and hanging chains offer no protection from dust, sunlight, or potential snags. This is a great spot for your fun, everyday accessories, hats, and scarves. However, you should not store your expensive leather handbags or delicate items here. Reserve this high-visibility, high-exposure storage for the sturdy and less precious pieces in your collection. It’s for fun, not for preservation.
Your Handbag Haven Awaits
There you have it—32 distinct ways to finally get your purse collection in order, from grand closet islands to simple, clever hooks. The right storage can truly change your relationship with your accessories, turning a cluttered mess into a source of daily joy. So pick an idea that speaks to you, take some measurements, and get ready to create a space that feels perfectly organized. Now, go save your favorites to your Pinterest board and start planning!