You know that feeling when you finally find the perfect cheap haunted house idea that feels both spooky and actually doable? That’s what this guide is all about. After filtering through hundreds of options from big-box stores to thrift shops, we narrowed it down to 30 ideas that deliver maximum spookiness for minimal cash. These aren’t just random photos; they’re curated concepts for every style, from playfully festive to genuinely eerie, that you can pull off this year. The 2026 take on Halloween is all about getting creative and hands-on without a massive budget. And stay until the end—we break down the most common mistakes that can ruin these looks. 📌 Save this to Pinterest for later — you’ll want to revisit these ideas.
1. Achieve the Classic Peeling Paint Farmhouse Vibe
The ‘abandoned-core’ aesthetic is huge on Pinterest right now, and this dilapidated farmhouse is the blueprint. It taps into a fascination with decay and history, making a space feel like it has a story to tell. Instead of jump scares, this look creates a slow-burn sense of unease. It’s less about monsters and more about the unsettling quiet of a place left behind. This trend works because it feels more authentic and atmospheric than a yard full of plastic props, leaning into psychological spookiness over overt horror.
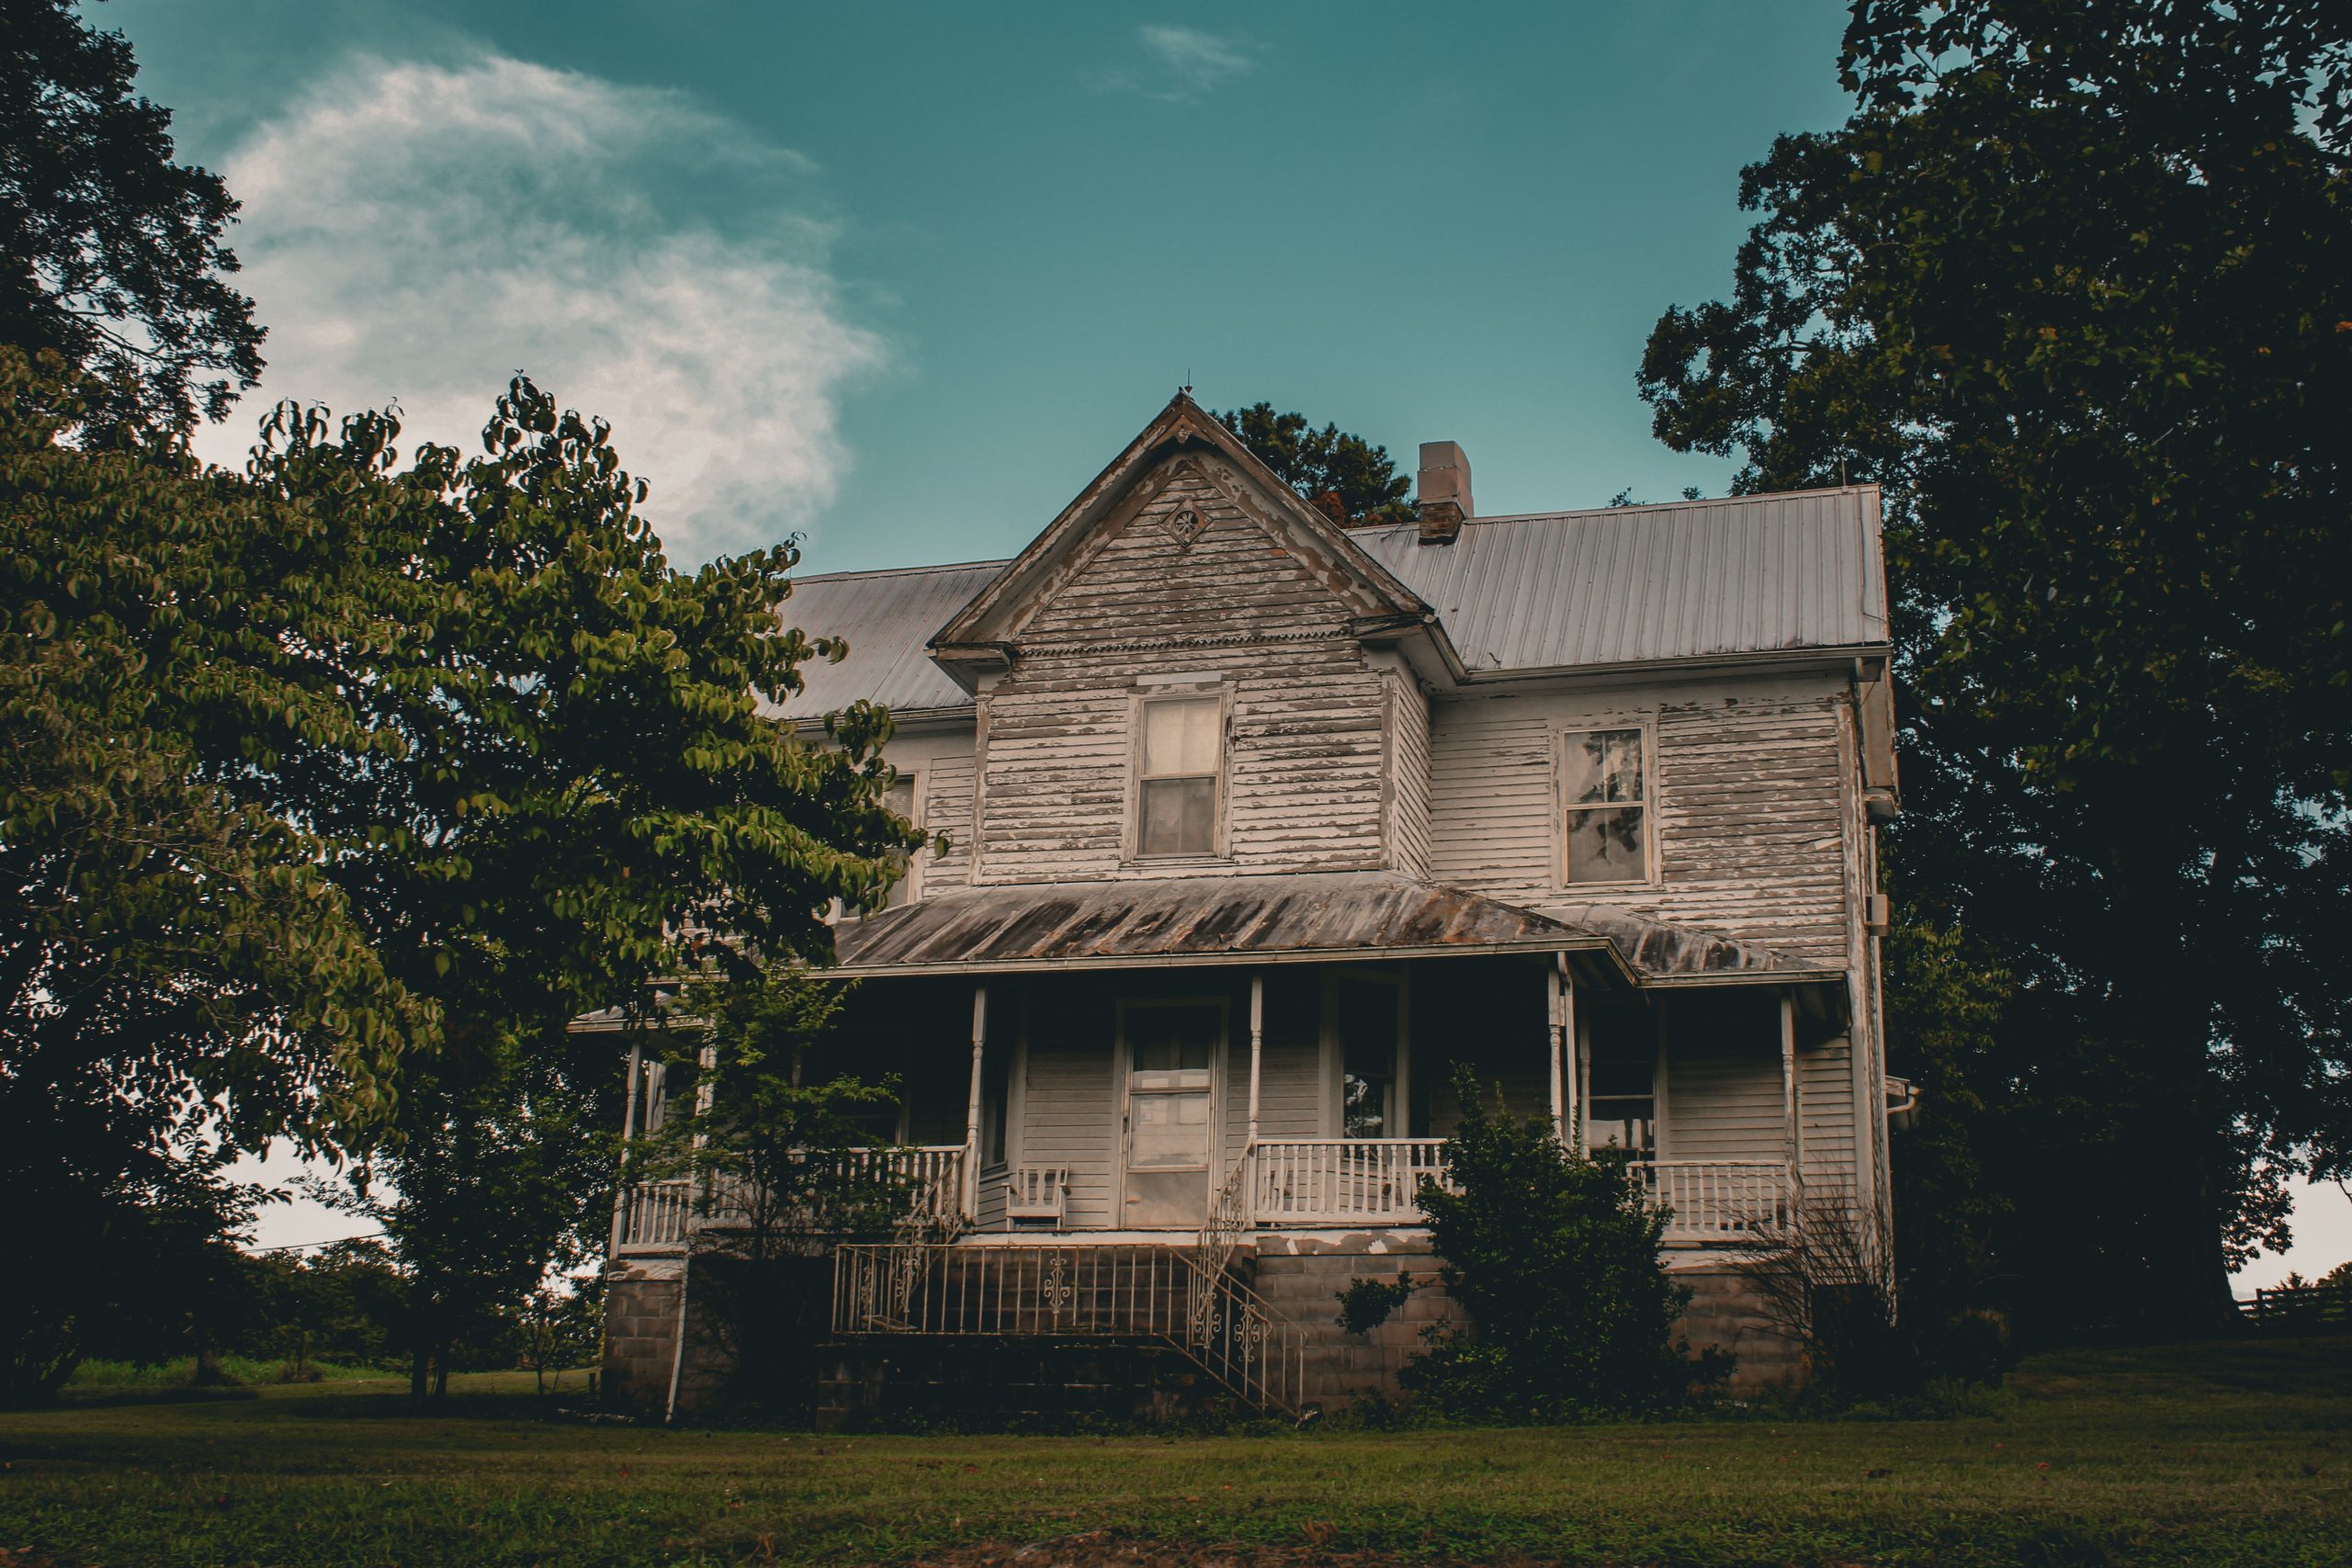
“Here’s the honest truth: achieving this look on a modern, well-maintained home is incredibly difficult and can go wrong fast.”
Real peeling paint is a sign of moisture damage. Faking it requires artistic skill with scenic paint techniques, using layers of flat latex paint and crackle medium. If you just slap on some paint and start scraping, you risk damaging your actual siding and creating a costly repair job. This is a high-effort, high-skill paint project, not a simple weekend task.
2. A Cheerful-Meets-Spooky Autumn Porch with a Monster Door
This look is a perfect formula for family-friendly spooky. Think of it as 60% autumn harvest, 30% classic Halloween, and 10% playful surprise. The base is all about warmth: vibrant orange pumpkins and colorful leaf garlands. Then, you layer in the Halloween classics like cobwebs and bats. The final touch—the monster face on the door—adds a dose of humor that keeps it from feeling too scary for little ones. You could swap the color palette to purple and black for a more gothic feel, but the ratio of ‘fall’ to ‘fright’ is what makes this so successful.
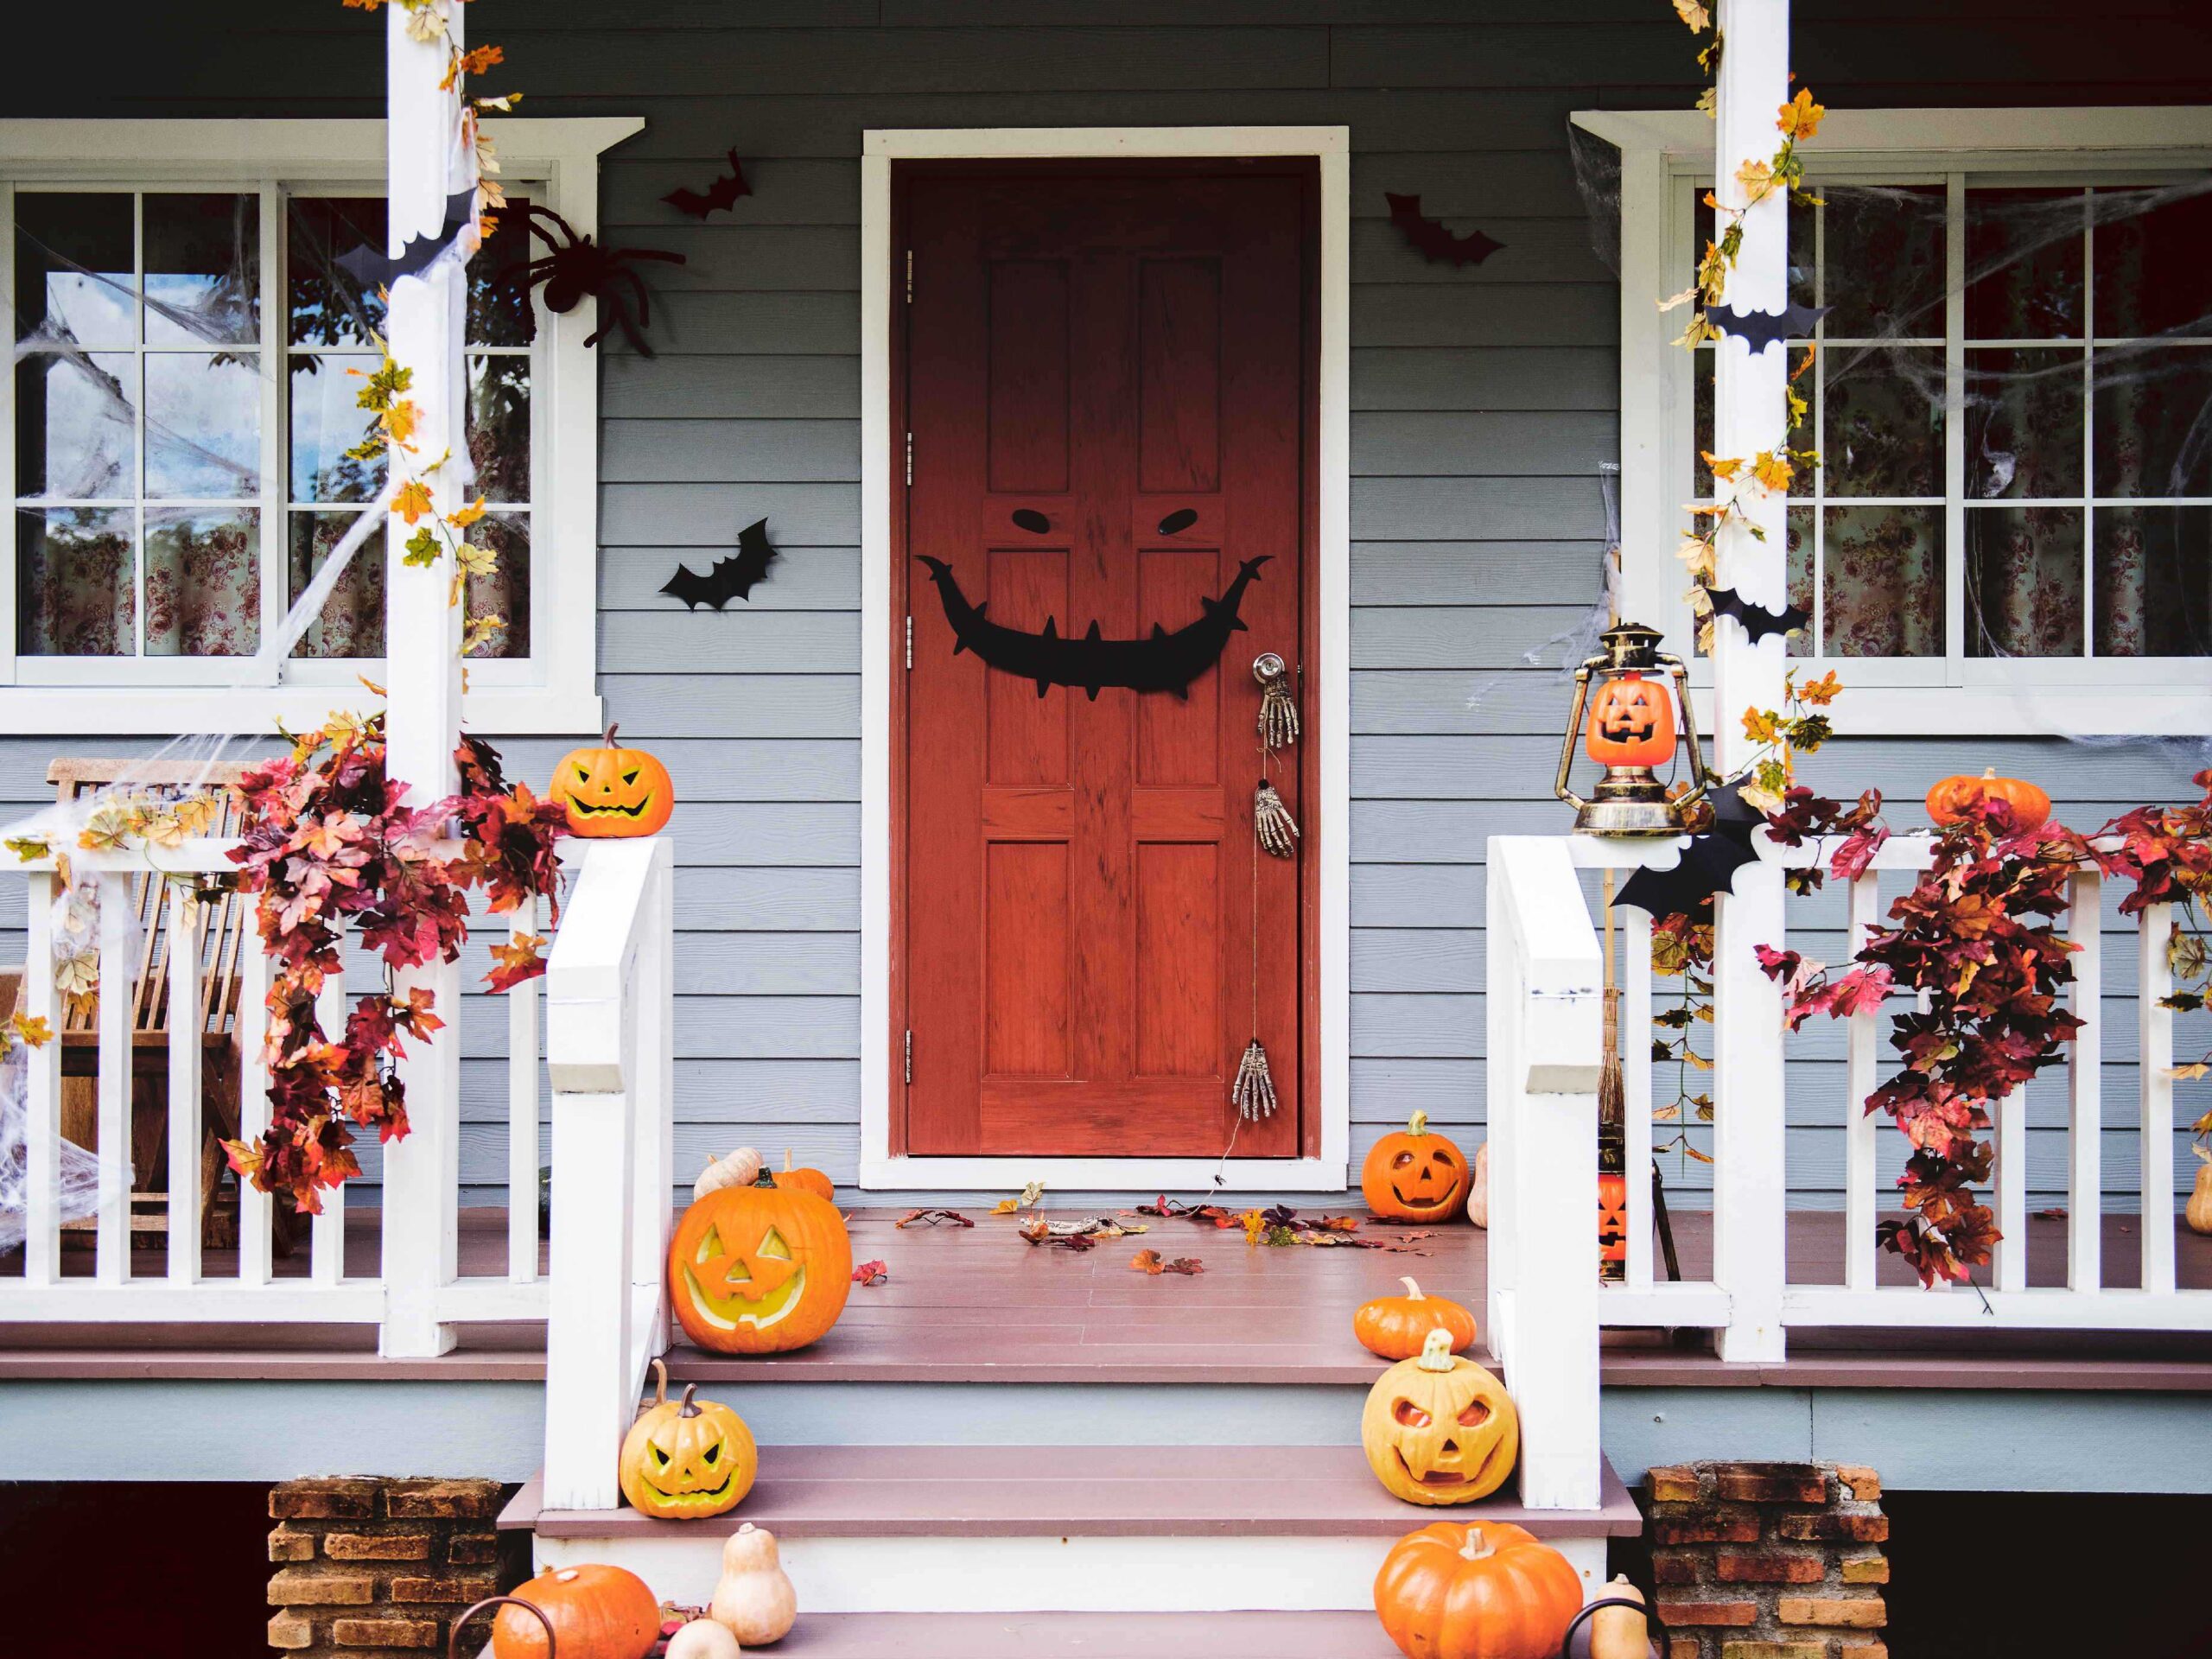
“You don’t need a huge budget for this.”
Get your pumpkins from a local farm or patch—they’re often cheaper than the supermarket. The monster face on the door can be made from black and white construction paper or poster board for under $5. For the autumn garlands, check the dollar store or Walmart’s seasonal aisle. Instead of buying pre-made cobwebs, you can get a giant bag of stretchy webbing for a few dollars and cover a much larger area. Total cost for this look could easily be under $50.
3. Create a Glowing Porch Corner with Crates and String Lights
What makes this little corner so magical? It’s all about layering and light. First, the use of wooden crates creates varying heights, which is far more interesting to the eye than just lining things up on the floor. This allows smaller items like the ‘BOO’ letters and little gourds to be seen. Second, the warm white string lights are the hero element. They unify the entire display, wrapping everything in a cozy, inviting glow that feels festive, not frightening. The limited color palette of orange, white, and natural wood keeps it feeling curated, not chaotic.
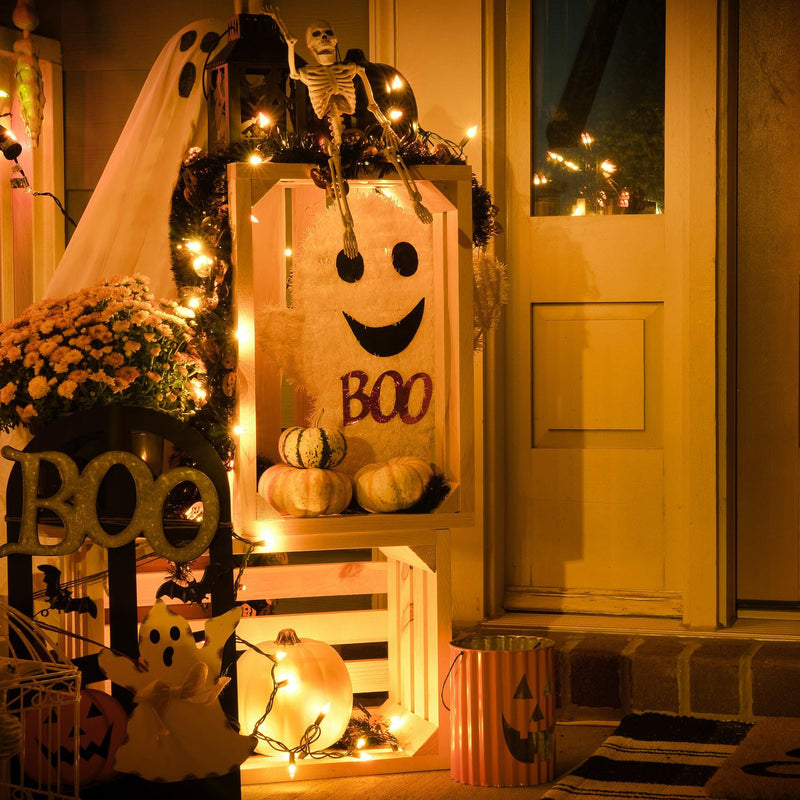
“When using string lights for a focused display like this, always choose a warm white color temperature (around 2700K).”
Bright, cool-blue LEDs can look harsh and cheap, killing the cozy vibe. For maximum impact, use at least two or three separate strands of lights. Weave one strand deep within the arrangement, around the base of the pumpkins, and wrap a second strand more loosely around the taller elements and crates. This creates depth and makes the entire vignette appear to glow from within.
4. Craft a Giant Spider Chandelier Over a Dining Nook
The single element that makes this room unforgettable is the spider chandelier. Without it, you have a lovely, neutral dining area with some bat decals. With it, you have a statement piece that is clever, spooky, and completely transforms the space. It’s a brilliant example of using what you already have—a light fixture—as the foundation for a major decorative moment. It draws the eye upward, adds a three-dimensional element that decals can’t offer, and serves as an instant conversation starter. Remove the spider, and the Halloween spirit deflates by 90%.
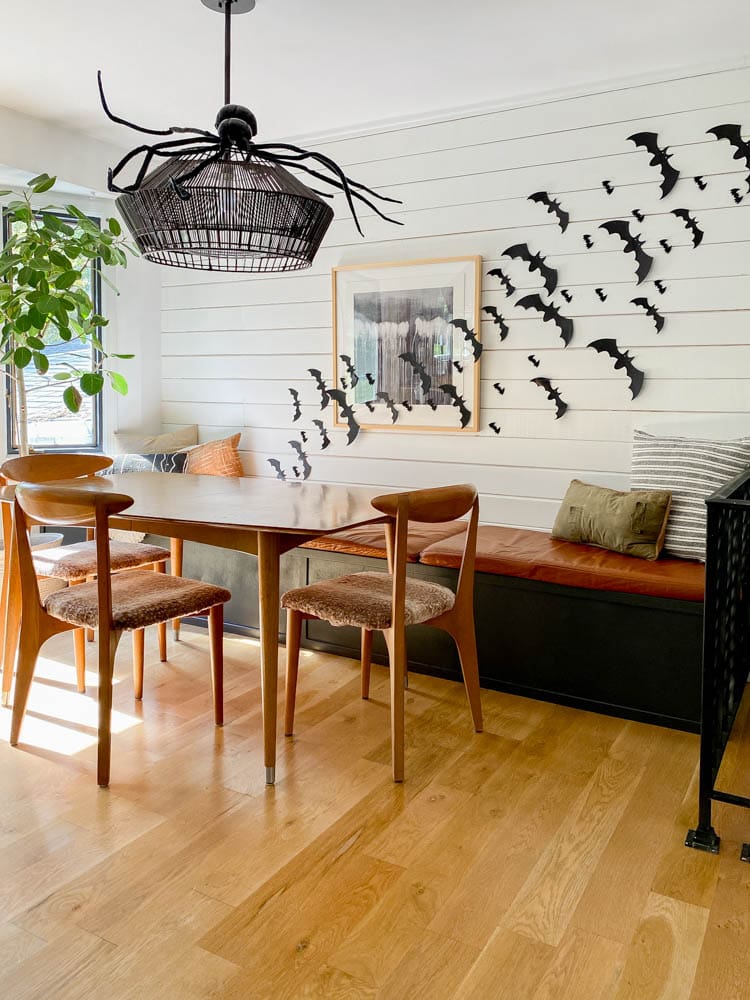
“Create the Legs: Cut 8 equal lengths of black foam pipe insulation (available at hardware stores).”
The length will depend on the size of your chandelier. Insert a piece of thick but bendable wire (like a straightened coat hanger) inside each foam tube.Attach to the Fixture: Group the legs in two sets of four. Securely attach the center of each group to the top or base of your existing chandelier using black zip ties or floral wire. Make sure not to interfere with any electrical components or bulbs.Shape the Legs: Bend the wires inside the foam tubes to create ‘knobby’ spider leg joints. Angle them out and down for a creepy, crawling posture.Final Touches: If your chandelier isn’t black, you can temporarily wrap the main body in black stretch fabric or cheesecloth to complete the look.
5. A Peeking Skeleton Greeter on a Grand Porch
This idea works so well because of its subtlety and character. Instead of a skeleton posed menacingly in the middle of the yard, this one is peeking from behind a column, almost as if it’s a shy or curious resident. This personification is what gives it charm. The act of waving is welcoming, which creates a fun contrast with the spooky nature of a skeleton. It’s a simple, single-prop setup that tells a small story, which is often more effective and memorable than a chaotic jumble of decorations. The overgrown vines add to the narrative of a place that’s a bit old and mysterious.
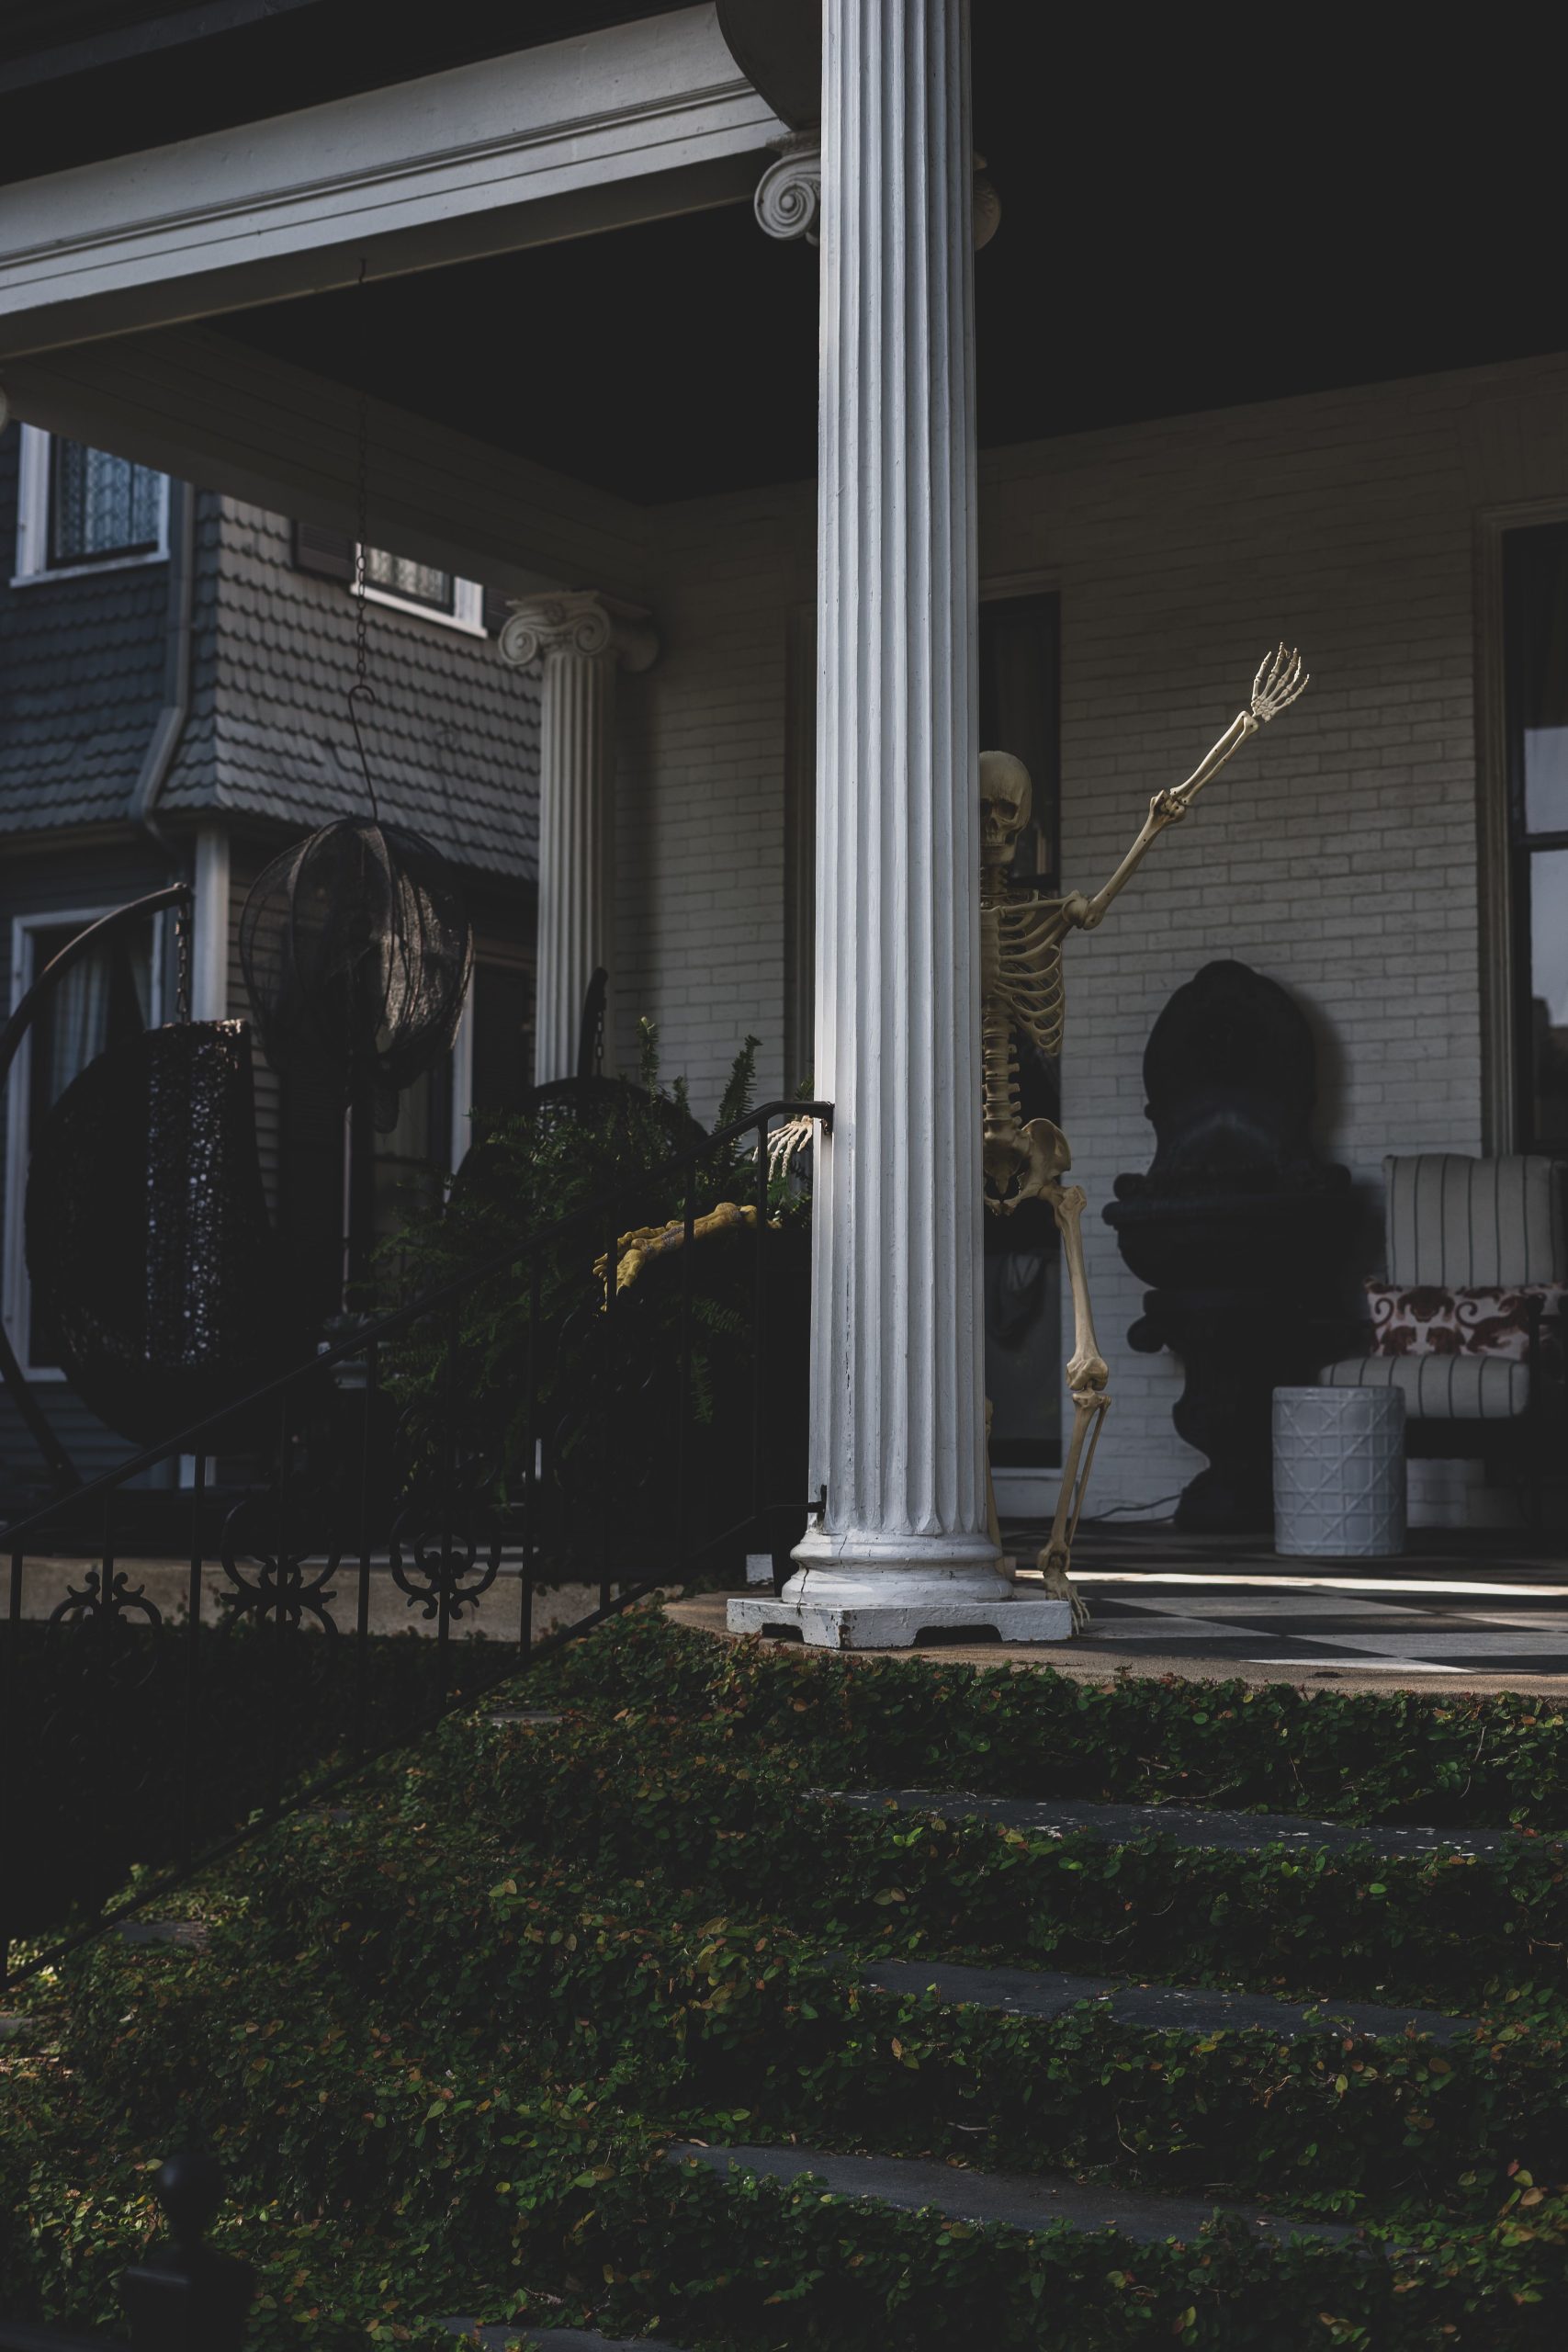
“This look is most effective with some architectural presence.”
It requires a porch column, a large entryway, or even a mature tree trunk close to your front door for the skeleton to peek from behind. The ideal space has at least a 4×4 foot area to give the skeleton some breathing room. For it to not feel lost, the column should be at least 10-12 inches in diameter. If your porch is very small or lacks columns, this can look forced. Try the layered decor in Idea #2 for a smaller porch space.
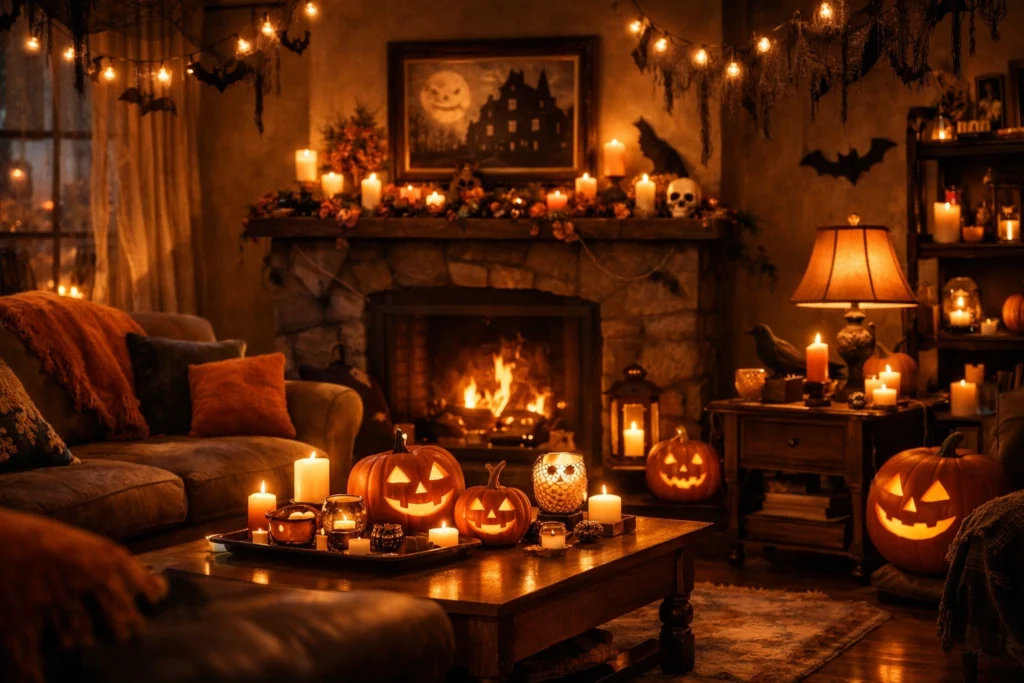
6. A Cozy Living Room Centered on a Glowing Fireplace
The formula here is simple and deeply effective: 50% fire and candle glow, 30% classic jack-o’-lanterns, and 20% subtle spooky accents. The overwhelming majority of the ‘light’ in the room comes from the warm, flickering sources: the fireplace, the pumpkins, and the pillar candles. This creates an incredibly cozy and inviting atmosphere. The secondary elements, like the bat string lights and haunted house painting, are just enough to solidify the theme without overwhelming the senses. It’s Halloween, but in a ‘curl up with a scary book’ way, not a ‘scream your head off’ way.
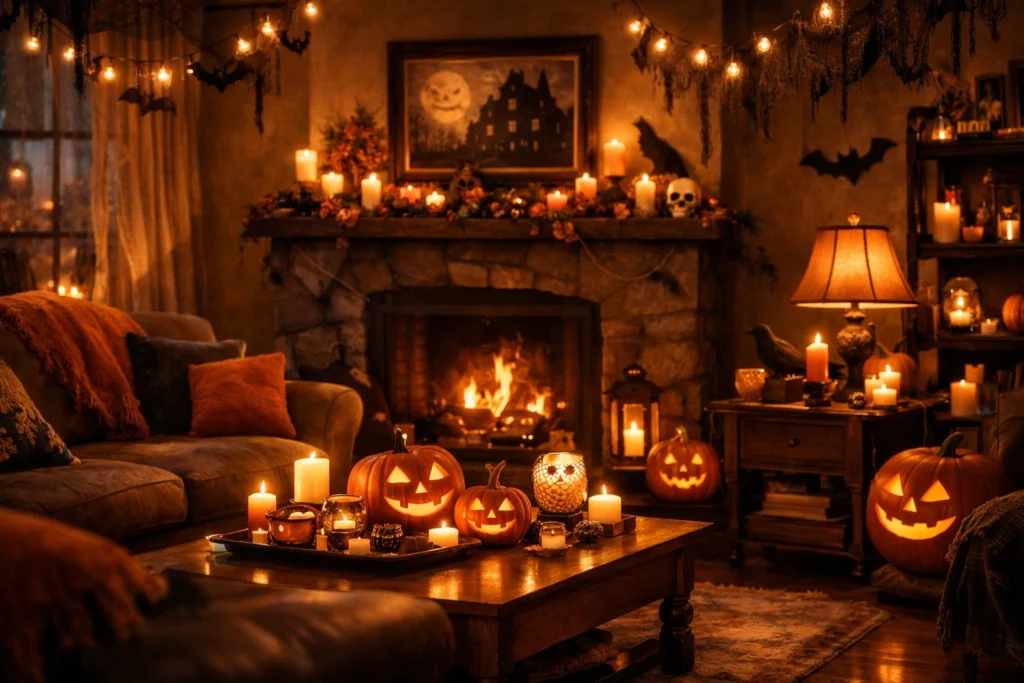
“A word of caution: this much open flame is a serious fire hazard.”
Never leave lit candles or a fireplace unattended, especially with flammable decorations like throw blankets and paper cutouts nearby. Use battery-operated LED candles for the majority of your display—you can get incredibly realistic flickering ones now. Reserve real flame for just one or two pillar candles in safe, sturdy holders on the coffee table, far from anything that could catch fire. For the jack-o’-lanterns, use LED puck lights instead of real tea lights to keep them from becoming a fire risk or cooking from the inside out.
7. Style a Skeleton Scarecrow with a Pumpkin Patch
that elevates this from a simple pumpkin display to a ‘scene’ is the prop. Giving the skeleton a rake immediately creates a story. He’s not just a skeleton; he’s a skeletal gardener or a creepy groundskeeper. This small act of adding a common tool gives the character a purpose and a personality. Without the rake, it’s just a skeleton standing in a field. With the rake, it’s a playful, slightly spooky tableau that feels clever and thought-out. It’s a perfect example of how one simple, inexpensive item can define an entire vignette.
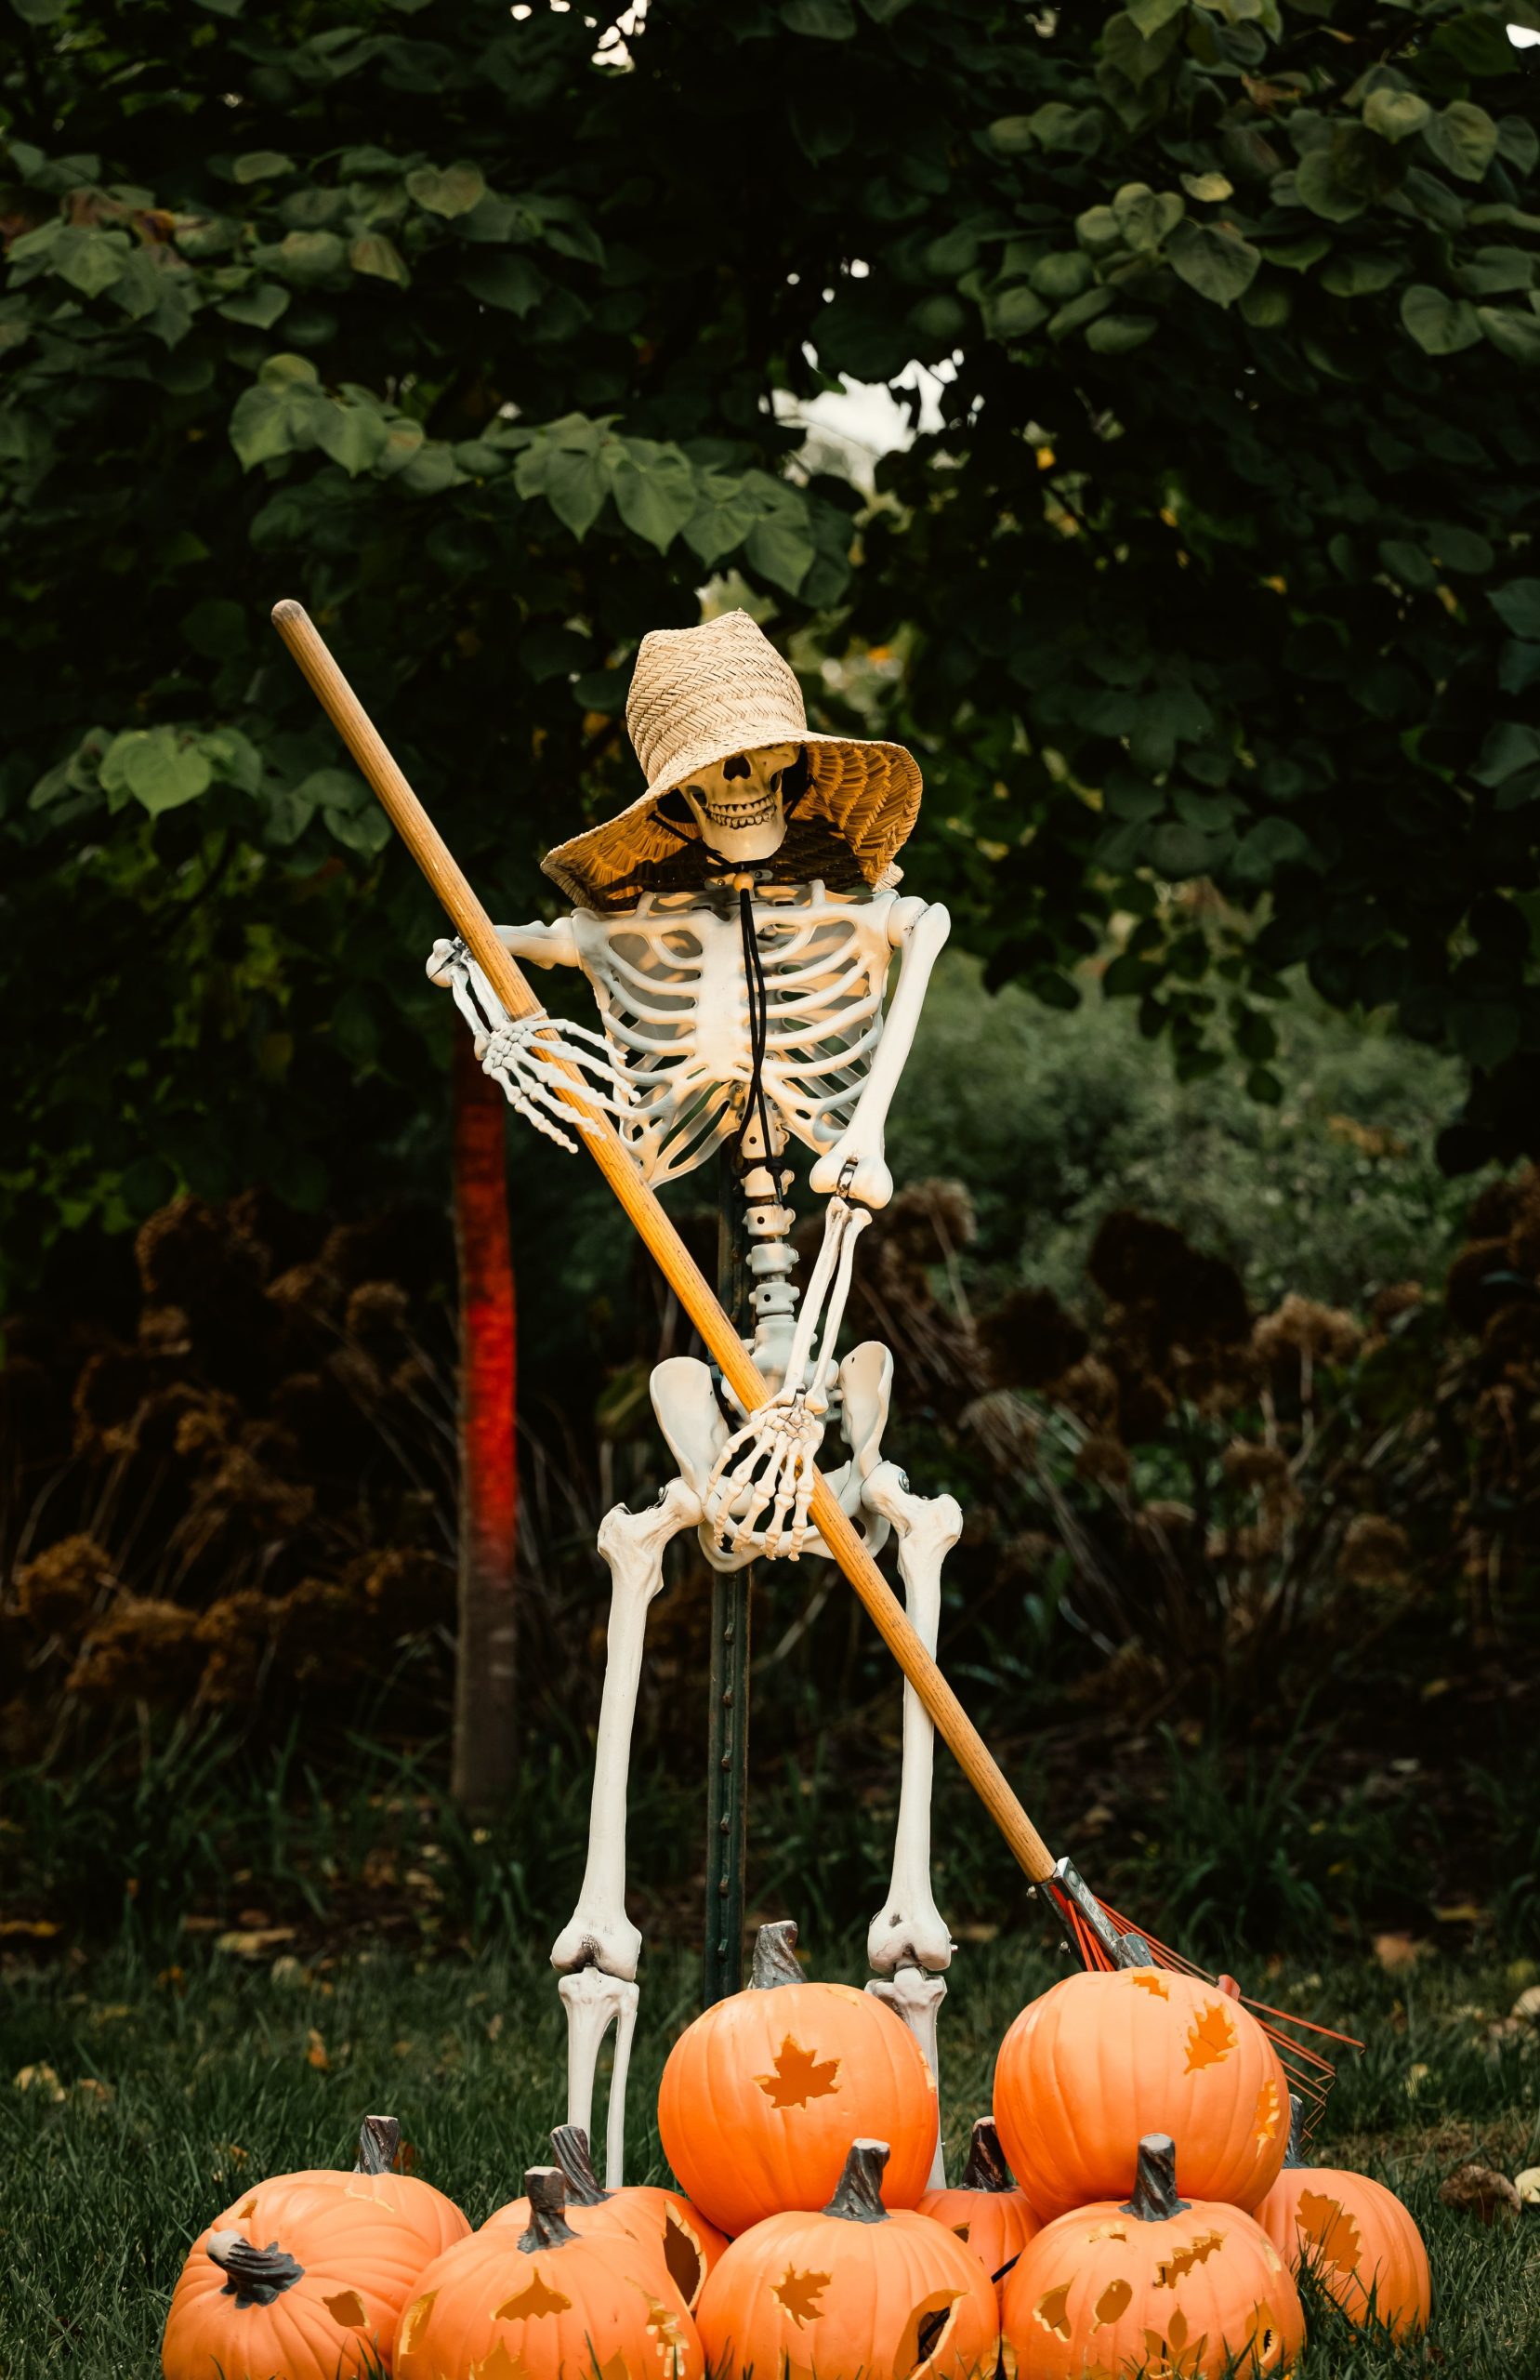
“A life-sized posable skeleton can run you $50-$100, but you can get this look for much less.”
Check Facebook Marketplace or local buy/sell groups in early October, as people often upgrade their decor and sell older models. A simple wooden rake can be found at a thrift store or garage sale for a couple of dollars. For the pumpkins, skip the grocery store and find a local farm stand for better prices on carving pumpkins. If real pumpkins are still too pricey, you can get a similar effect with a few foam ‘carvable’ pumpkins from a craft store, which you can reuse every year.
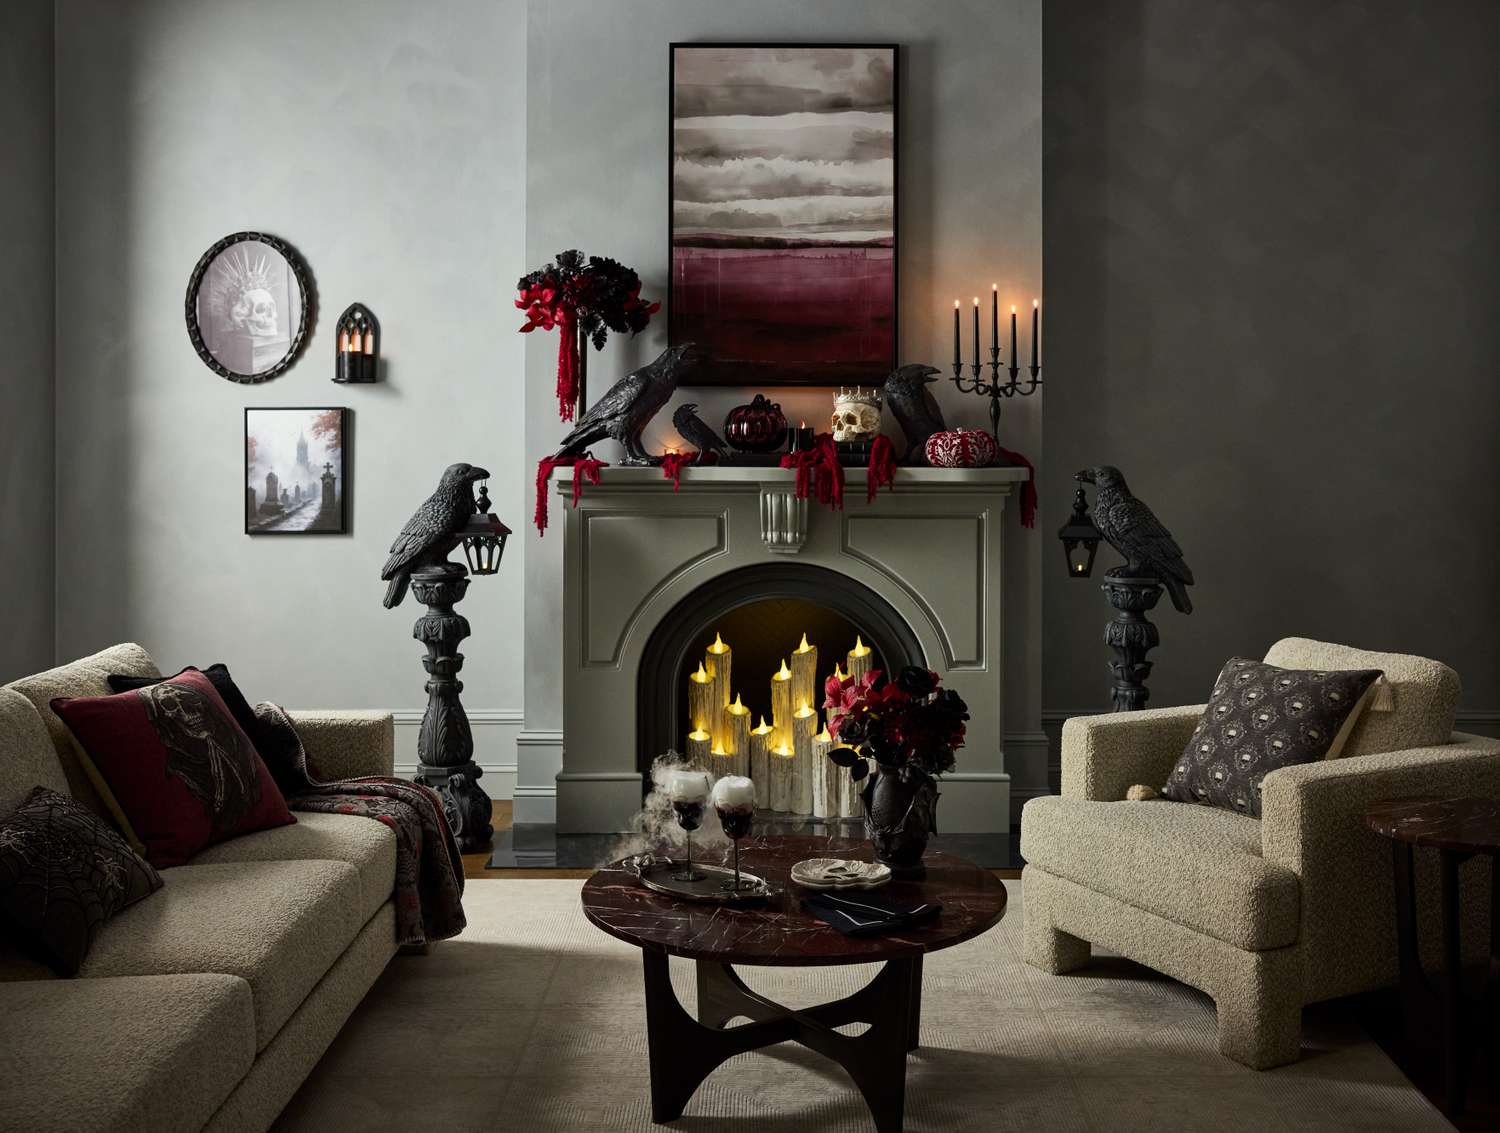
8. Create an Ominous Entryway with Shredded Fabric Drapes
To get this tattered, aged look, don’t just use one type of fabric. Buy the cheapest white or off-white cheesecloth you can find, an old flat sheet from a thrift store, and some medical gauze. Rip them all into strips of varying widths by hand for ragged edges. Then, brew a few bags of extra-strong black tea or cheap coffee, let it cool, and put it in a spray bottle. Lightly mist the fabric strips unevenly to create realistic water stains and an aged, yellowed appearance. Let them dry completely before hanging to avoid drips.
“This is a fantastic, high-impact look for a Halloween party or for trick-or-treat night, but it is not a practical decoration to leave up for the entire month.”
The draped fabric is a major trip hazard, especially in a dimly lit entryway. It’s also a magnet for dust, pet hair, and—if you have them—real spiders. Because the fabric is light and often synthetic, it can be a fire risk if placed near any heat source or open flame. Set it up the day of your event and plan to take it down the next day.
9. Ethereal Floating Ghosts Holding Lanterns
- Build the Frame: Start with a garden stake or a sturdy piece of rebar pushed into the ground. At the top, attach a styrofoam ball or a crumpled ball of newspaper for the head. For shoulders, zip-tie a short, horizontal stick (about 1.5 feet long) a few inches below the head.
- Drape the Fabric: Drape a large white flat sheet over the frame. To give it a billowy, non-uniform look, use a second, lighter fabric like cheesecloth draped over the first sheet.
- Add Starch: Mix liquid fabric starch with water (2:1 ratio) in a spray bottle. Thoroughly spray the draped fabric, shaping it into flowing, ghostly forms as you go. Let it dry completely; it will become stiff and hold its shape.
- Attach Hands & Lantern: Position skeleton hands (available at most Halloween stores) under the fabric and secure them to the ‘arm’ stick with wire. Hang a lightweight, battery-operated lantern from the hands.
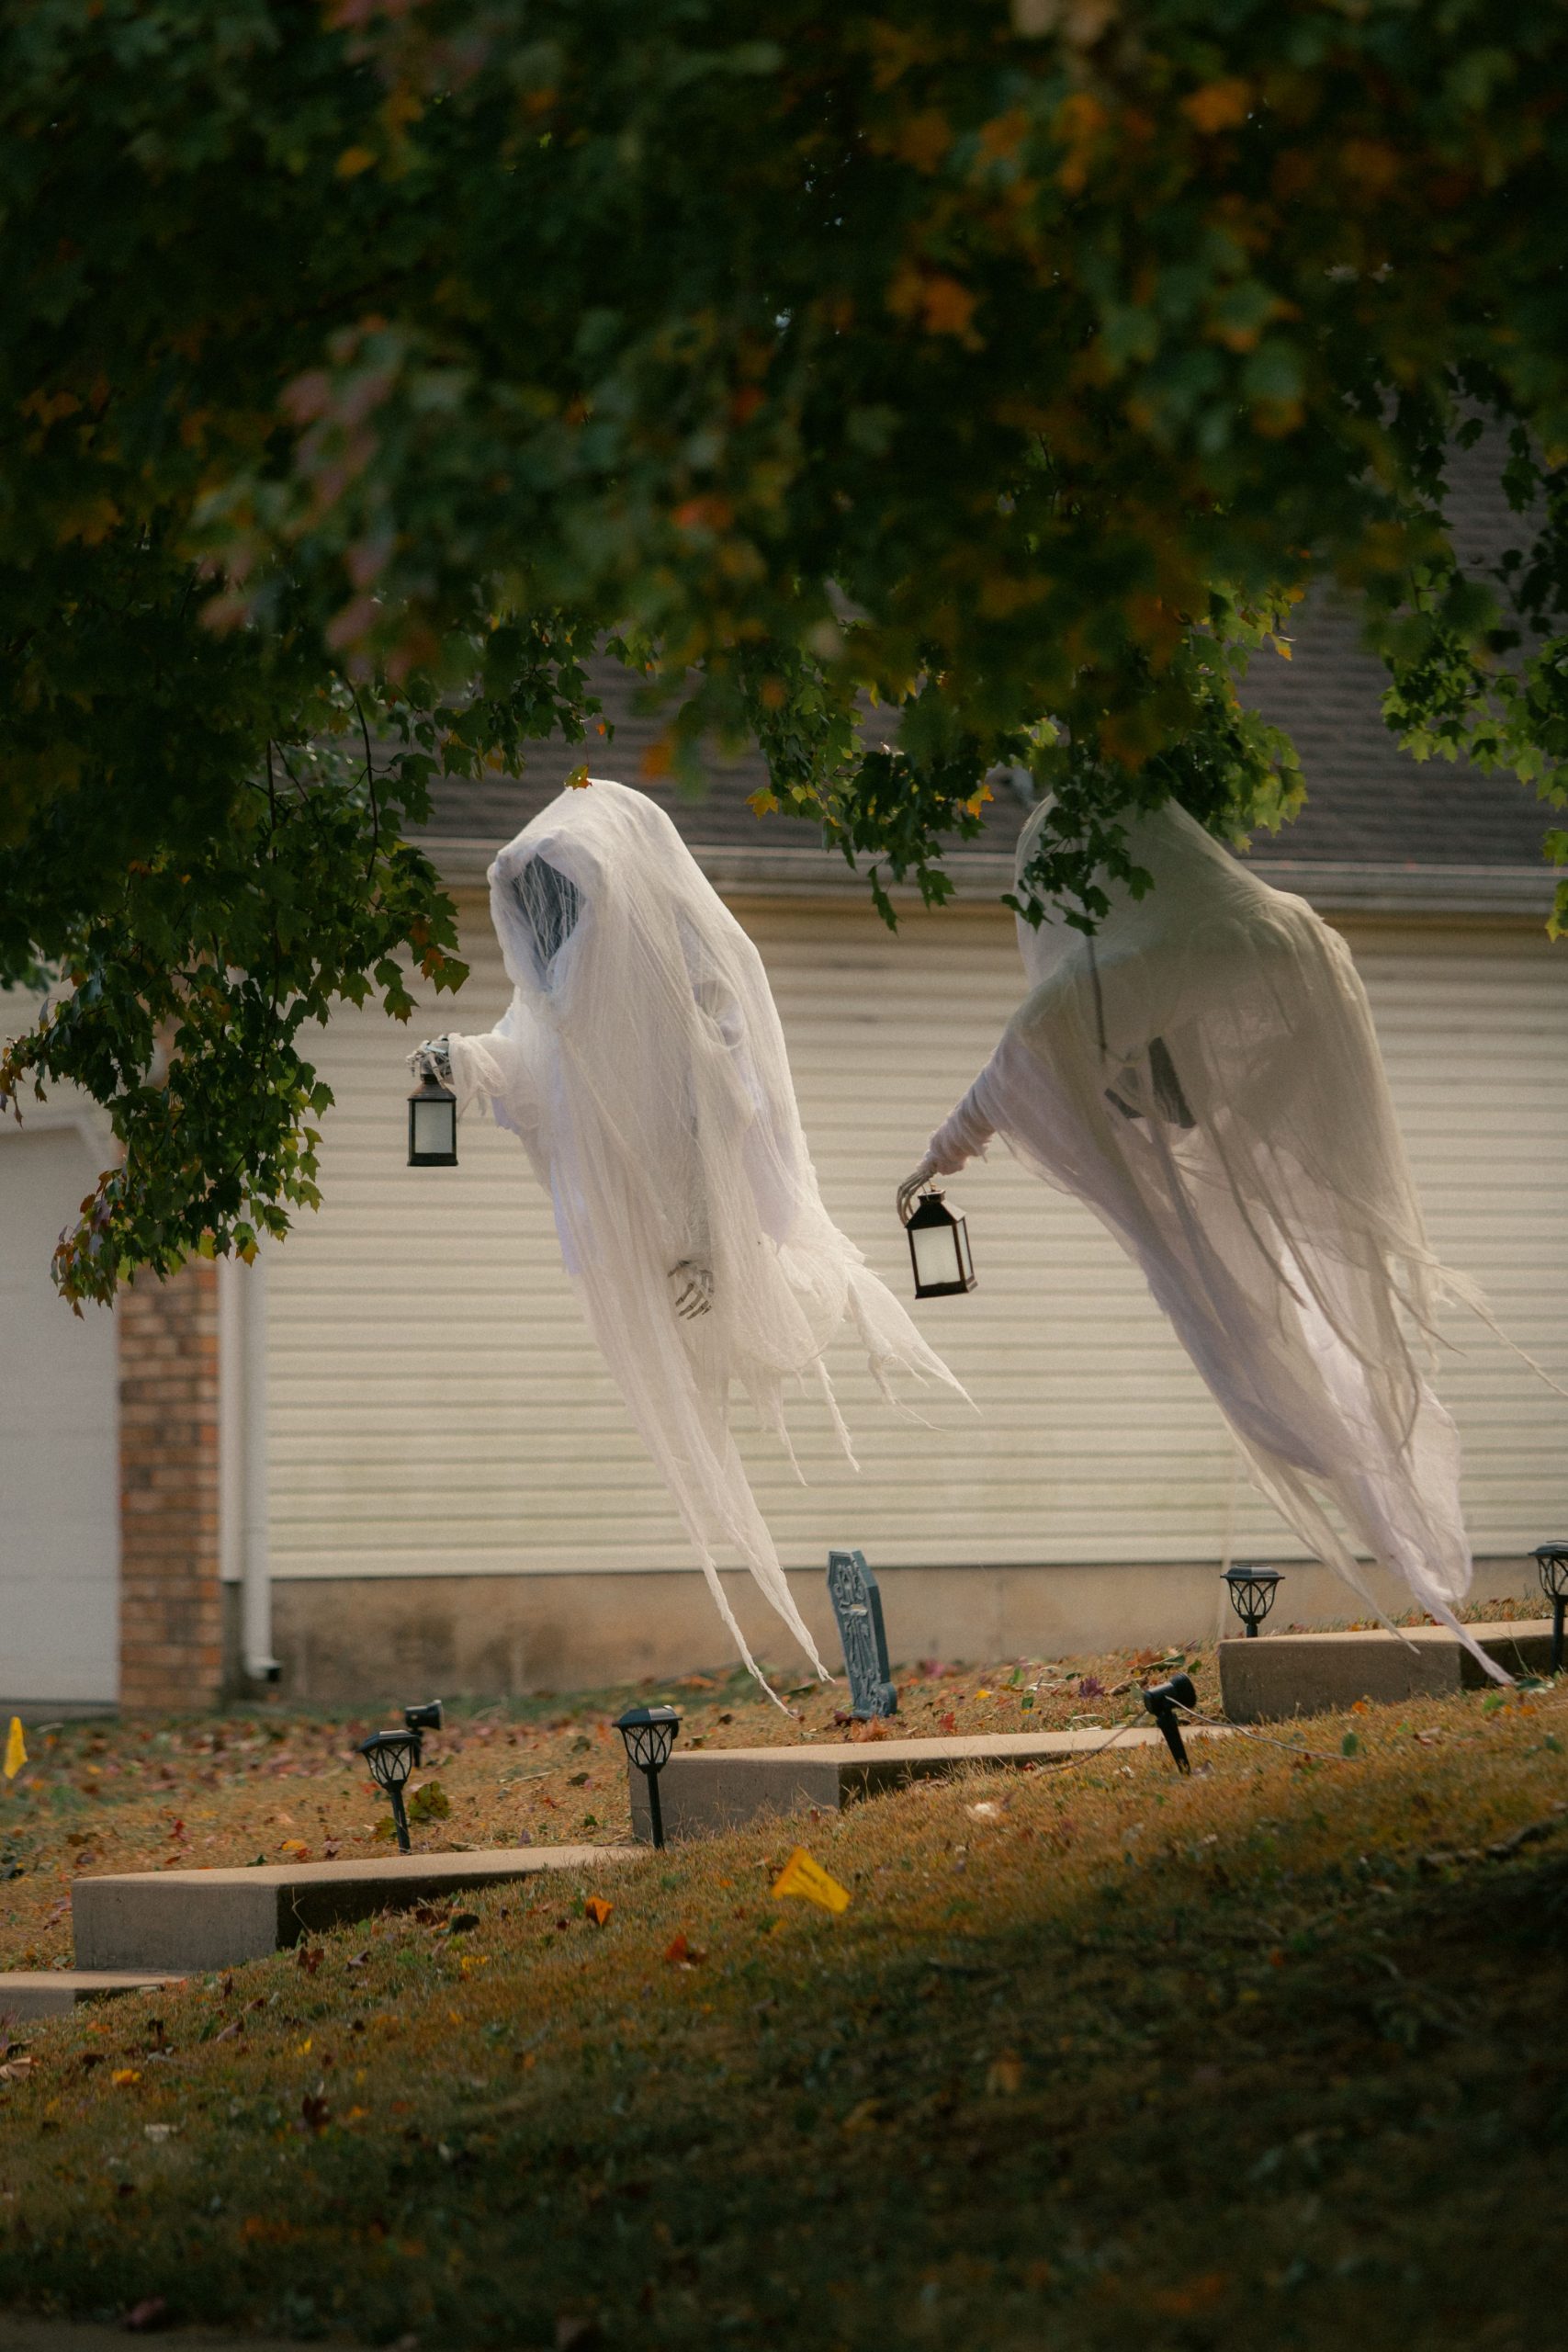
“This decoration is effective because it plays with the illusion of weightlessness.”
The stiffened, draped fabric makes the figures appear to be floating and windswept, creating a sense of ghostly movement even when they are static. The addition of the lanterns is a brilliant touch. It not only provides a spooky, low-level light source but also gives the ghosts a purpose. They aren’t just floating randomly; they are pathfinders, leading the way, which adds a layer of mystery and storytelling to your yard display.
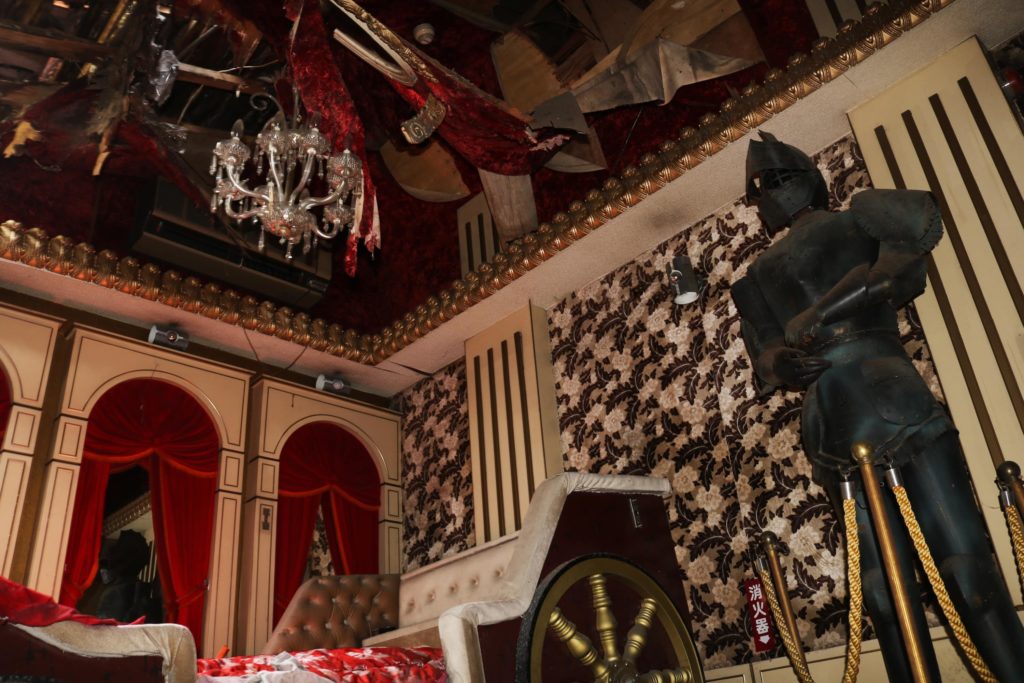
10. The Instant Haunted House: Sheet-Draped Furniture and Cobwebs
This is one of the oldest and most effective haunted house tricks for a reason. It works on a deep psychological level by taking the familiar and making it strange. We know the shapes of our own furniture—the sofa, the armchair, the dining table. By covering them in white sheets, you obscure the details and turn them into anonymous, ghostly mounds. The room becomes an uncanny version of itself. The extensive cobwebs add a layer of age and neglect, suggesting the space has been abandoned for a very, very long time. It’s cheap, easy, and genuinely unsettling.
“Gather Your Linens: Do you have enough old sheets, drop cloths, or white tablecloths to cover your main furniture pieces?”
Borrow from friends or hit up a thrift store if not.Plan for Lighting: This effect relies on dim, dramatic lighting. A single floor lamp aimed at the ceiling or a colored spotlight is perfect. Bright overhead lighting will ruin the mood completely.Clear the Pathways: Make sure there’s a clear, safe path to walk through the room. Draped sheets can easily become trip hazards in the dark.Commit to the Cobwebs: This look requires a generous amount of fake cobwebs. A tiny bit in a corner won’t cut it. Plan on using at least one large bag of the stretchy kind.
11. A Menacing Witch Figure with Glowing Red Eyes on the Porch
The glowing red eyes are the absolute key to this entire setup. In the dark, they are the first and often only thing someone will see clearly. Red is a universal sign of danger and malice, creating an immediate sense of unease. While the jack-o’-lanterns are festive and the purple lights are fun, the piercing red eyes of the witch are what provide the genuine fright. They make the static prop feel alive and watchful. If you’re on a tight budget and can only afford one electronic prop, make it one with glowing red eyes. The psychological impact is unmatched.
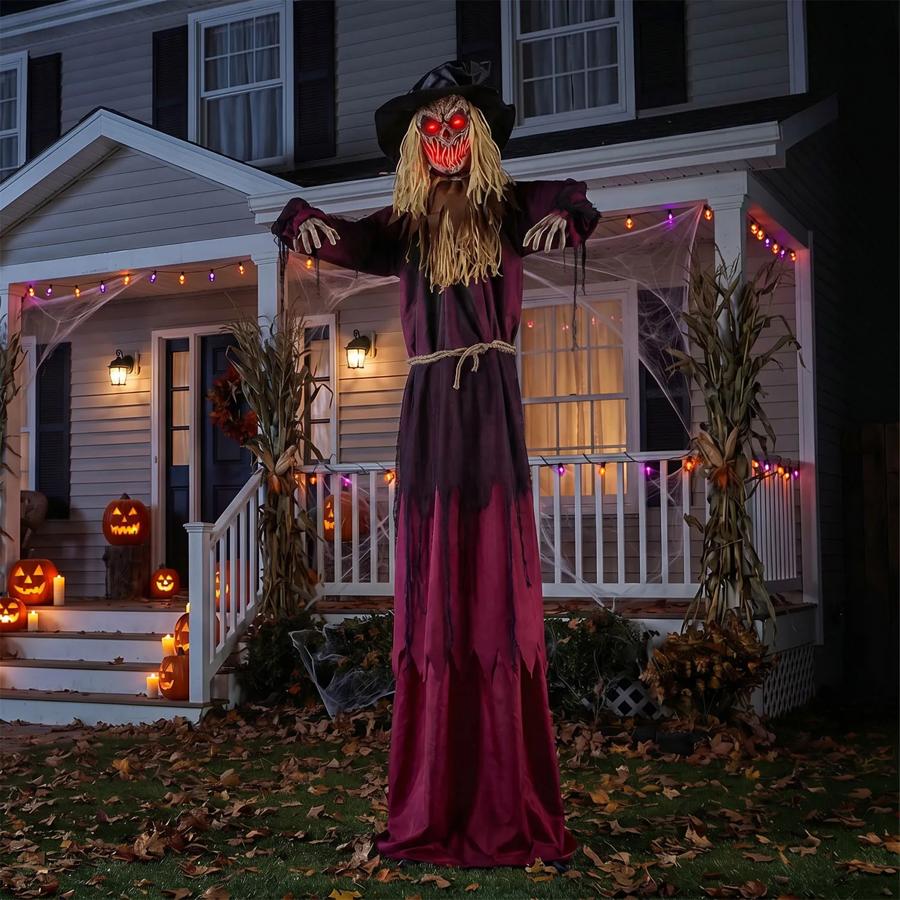
“A large, life-sized figure like this witch needs space to feel imposing.”
This idea works best on a medium to large porch (at least 6 feet wide) or in a front yard where it can be a focal point. If your porch is too small, a large figure can feel cramped and more silly than scary. For a small stoop or apartment balcony, consider a smaller ‘hanging’ witch prop or focus on a layered pumpkin and light display like the one in Idea #29 instead. The key is to match the scale of your main prop to the scale of your space.
12. Go Big with a Yard Full of Illuminated Inflatables
Before you commit to a yard full of inflatables, there are two realities to consider: noise and power. Each inflatable has its own internal fan that runs constantly to keep it inflated. One is a gentle hum, but five or six of them create a noticeable chorus of whirring. If your bedroom window is near the front yard, be prepared. Second, you’ll need a robust outdoor power situation with multiple extension cords and power strips, all of which must be rated for outdoor use to be safe. It can also cause a noticeable, if small, bump in your electricity bill for the month.
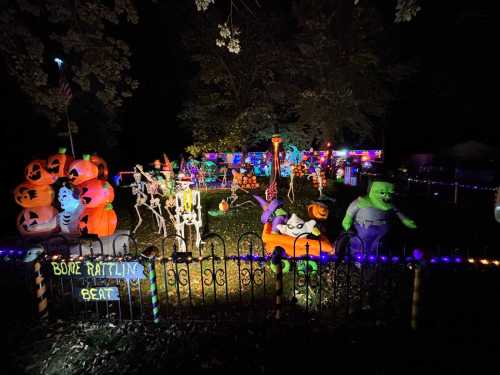
“Main Inflatables (3-4 large): $150 – $400Accent Lighting (Purple string lights): $20 – $50Skeletons & Small Props: $30 – $75Signage & Fence: $25 – $60TOTAL: $225 – $585Budget alternative: Get the same festive feel for about 40-50% less.”
Choose just ONE large, impressive inflatable ($50-$100) as your centerpiece. Surround it with DIY tombstones made from foam board and supplement with cheaper string lights and a few plastic skeletons from the dollar store.
13. Create a Whimsical Circle of Holding-Hands Ghosts
This is so effective because it uses repetition and narrative. A single one of these ghosts would be cute, but a circle of them holding hands creates an immediate story. Are they dancing? Performing a ritual? Protecting the tree? This sense of collective action is what captures the imagination. The internal lighting makes them glow, turning them into beacons in the dark yard, while the dramatic red uplighting on the tree creates a powerful, otherworldly focal point. The contrast between the whimsical white ghosts and the sinister red tree is design magic.
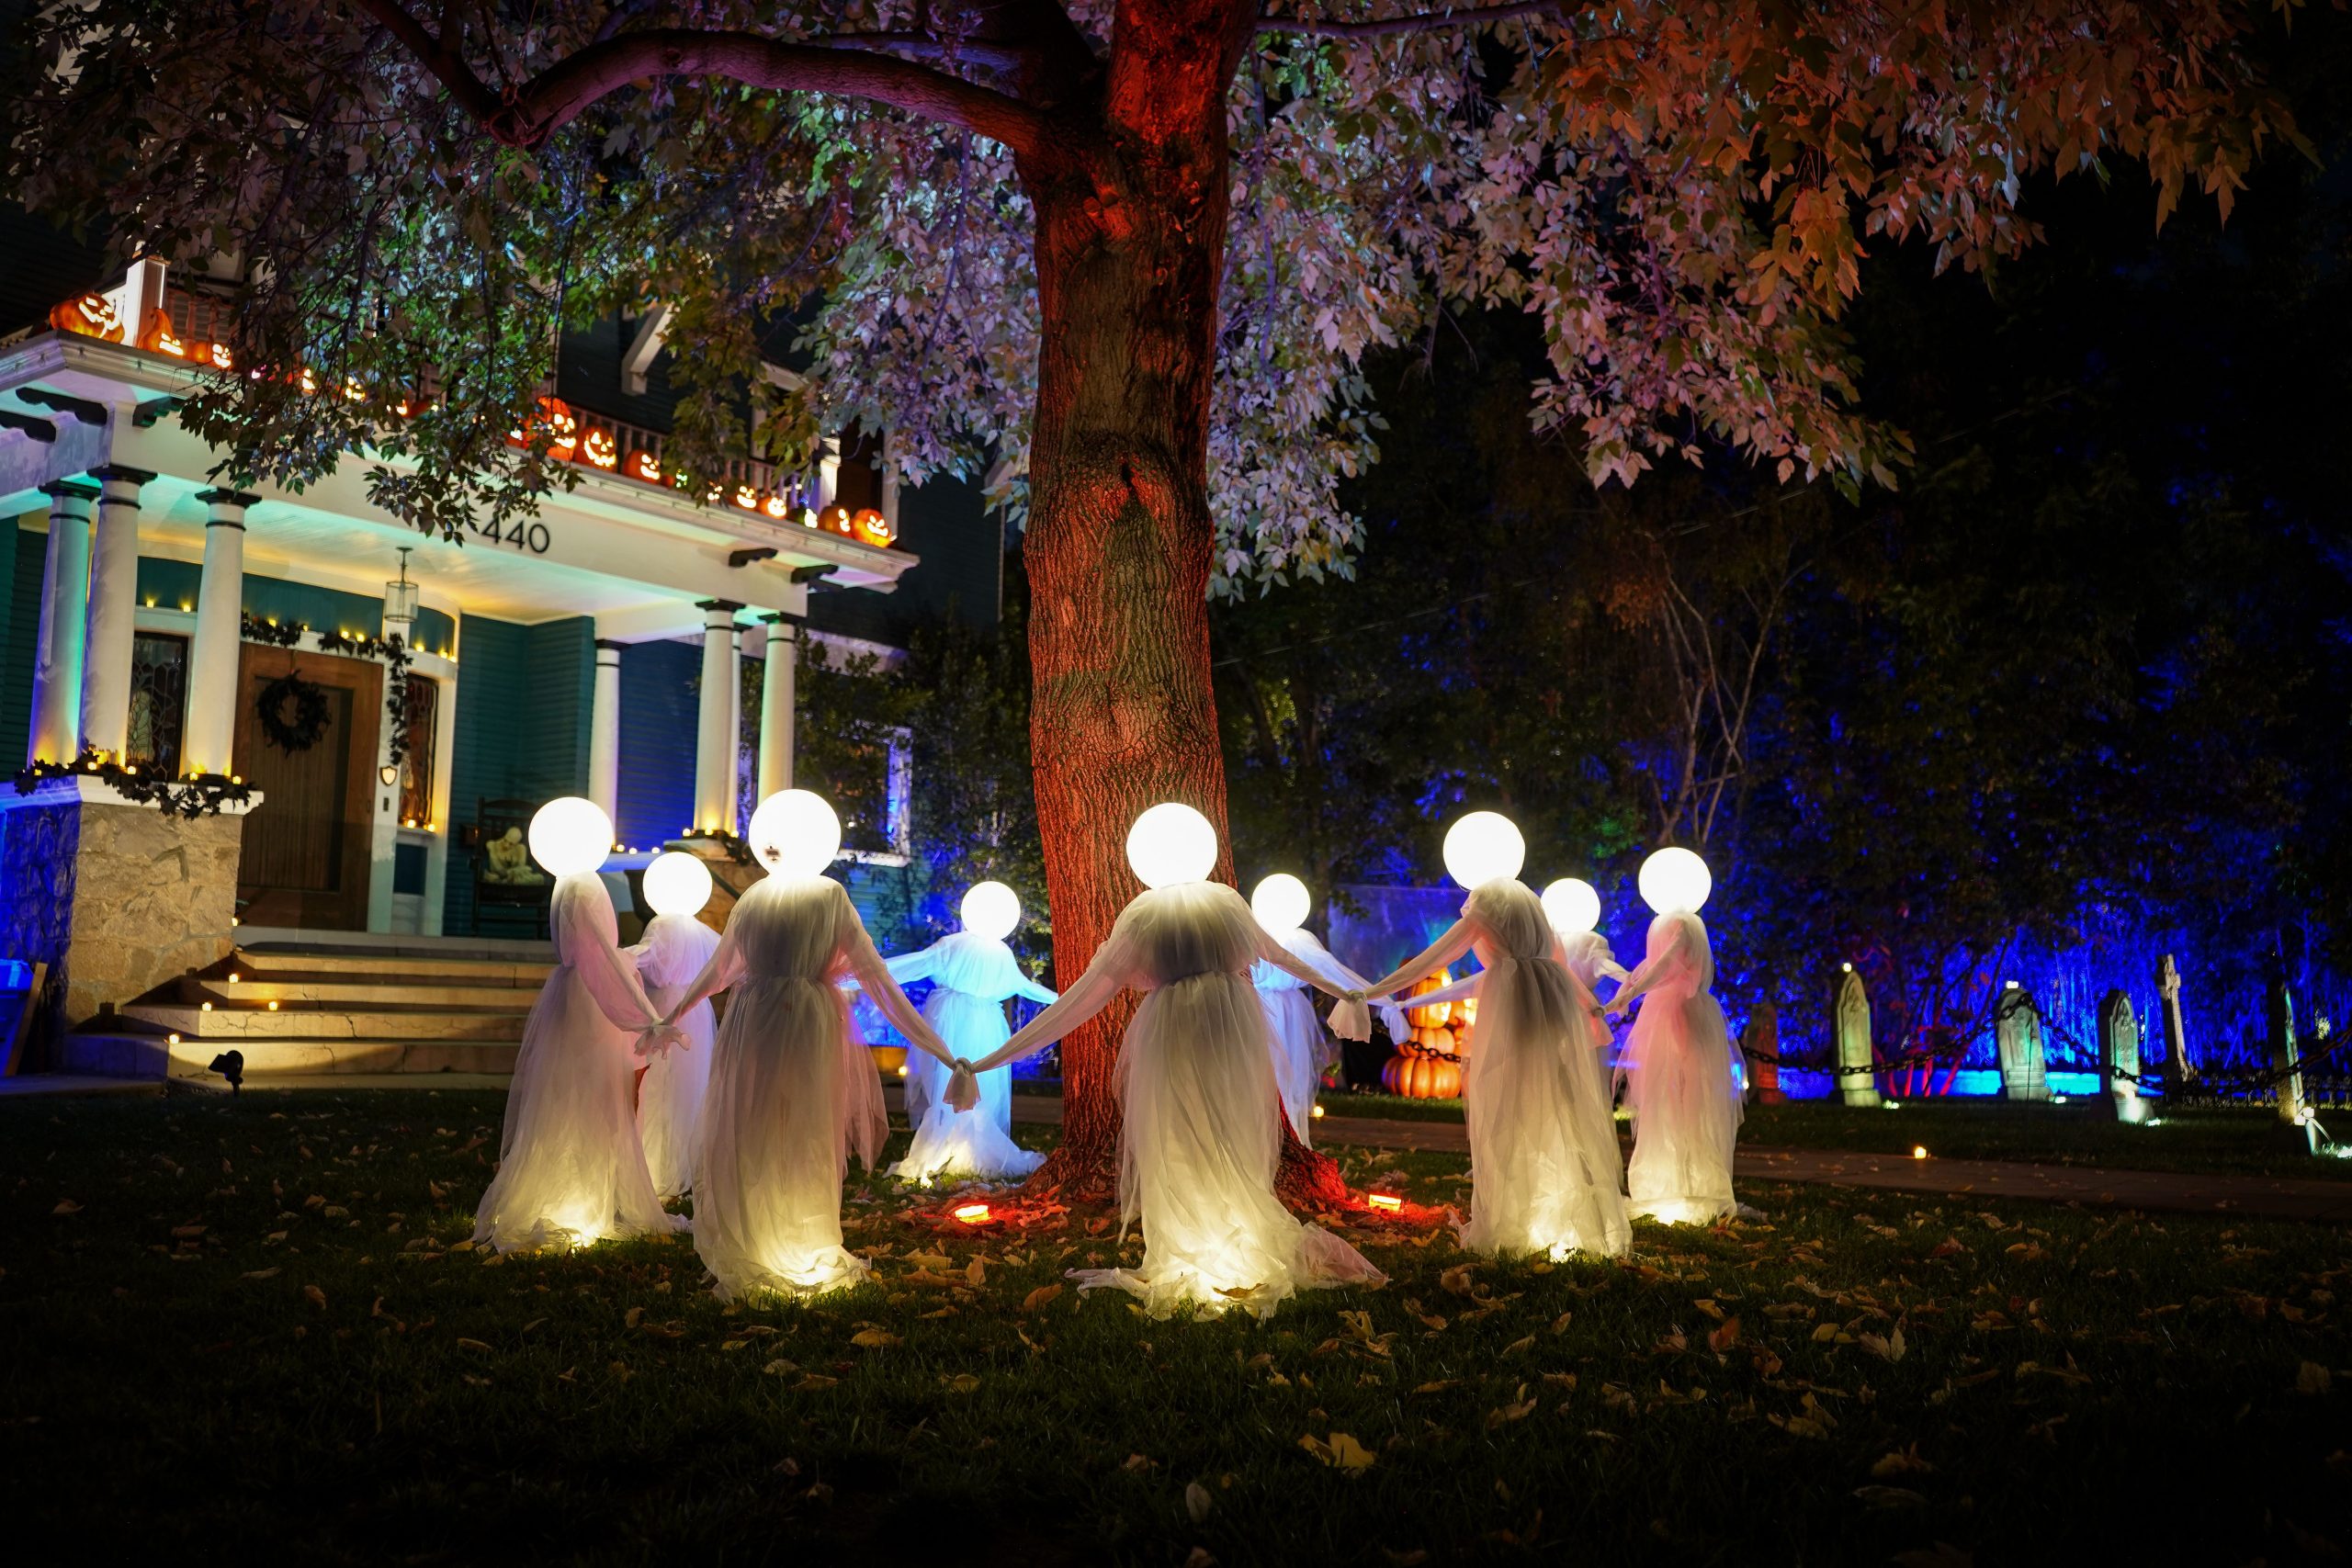
“The secret to making uplighting on a tree look professional and spooky is to use two light sources.”
Place one spotlight (with a red color gel or a red smart bulb) at the base of the trunk, aimed straight up to illuminate the bark and lower branches. Then, place a second spotlight a few feet away, aimed at the tree’s upper canopy. This combination lights the entire tree, creating a dramatic, layered effect with interesting shadows, rather than just a single, flat beam of light. A simple switch from one light to two makes all the difference.
14. Eerie Skeleton Scene with Dramatic Cobwebs and Lighting
This look is a masterclass in texture and shadow. The formula is roughly 50% props (skeletons), 40% texture (cobwebs), and 10% lighting. The skeletons provide the structure and focal point, but it’s the sheer volume of cobwebs that creates the atmosphere of age and decay. The webs catch the light and obscure details, making the scene feel more mysterious. The final 10%—the lighting—is crucial. A single, well-placed light source from a low angle creates long, spooky shadows that do most of the heavy lifting in terms of creepiness. Bright, flat lighting would completely kill this effect.
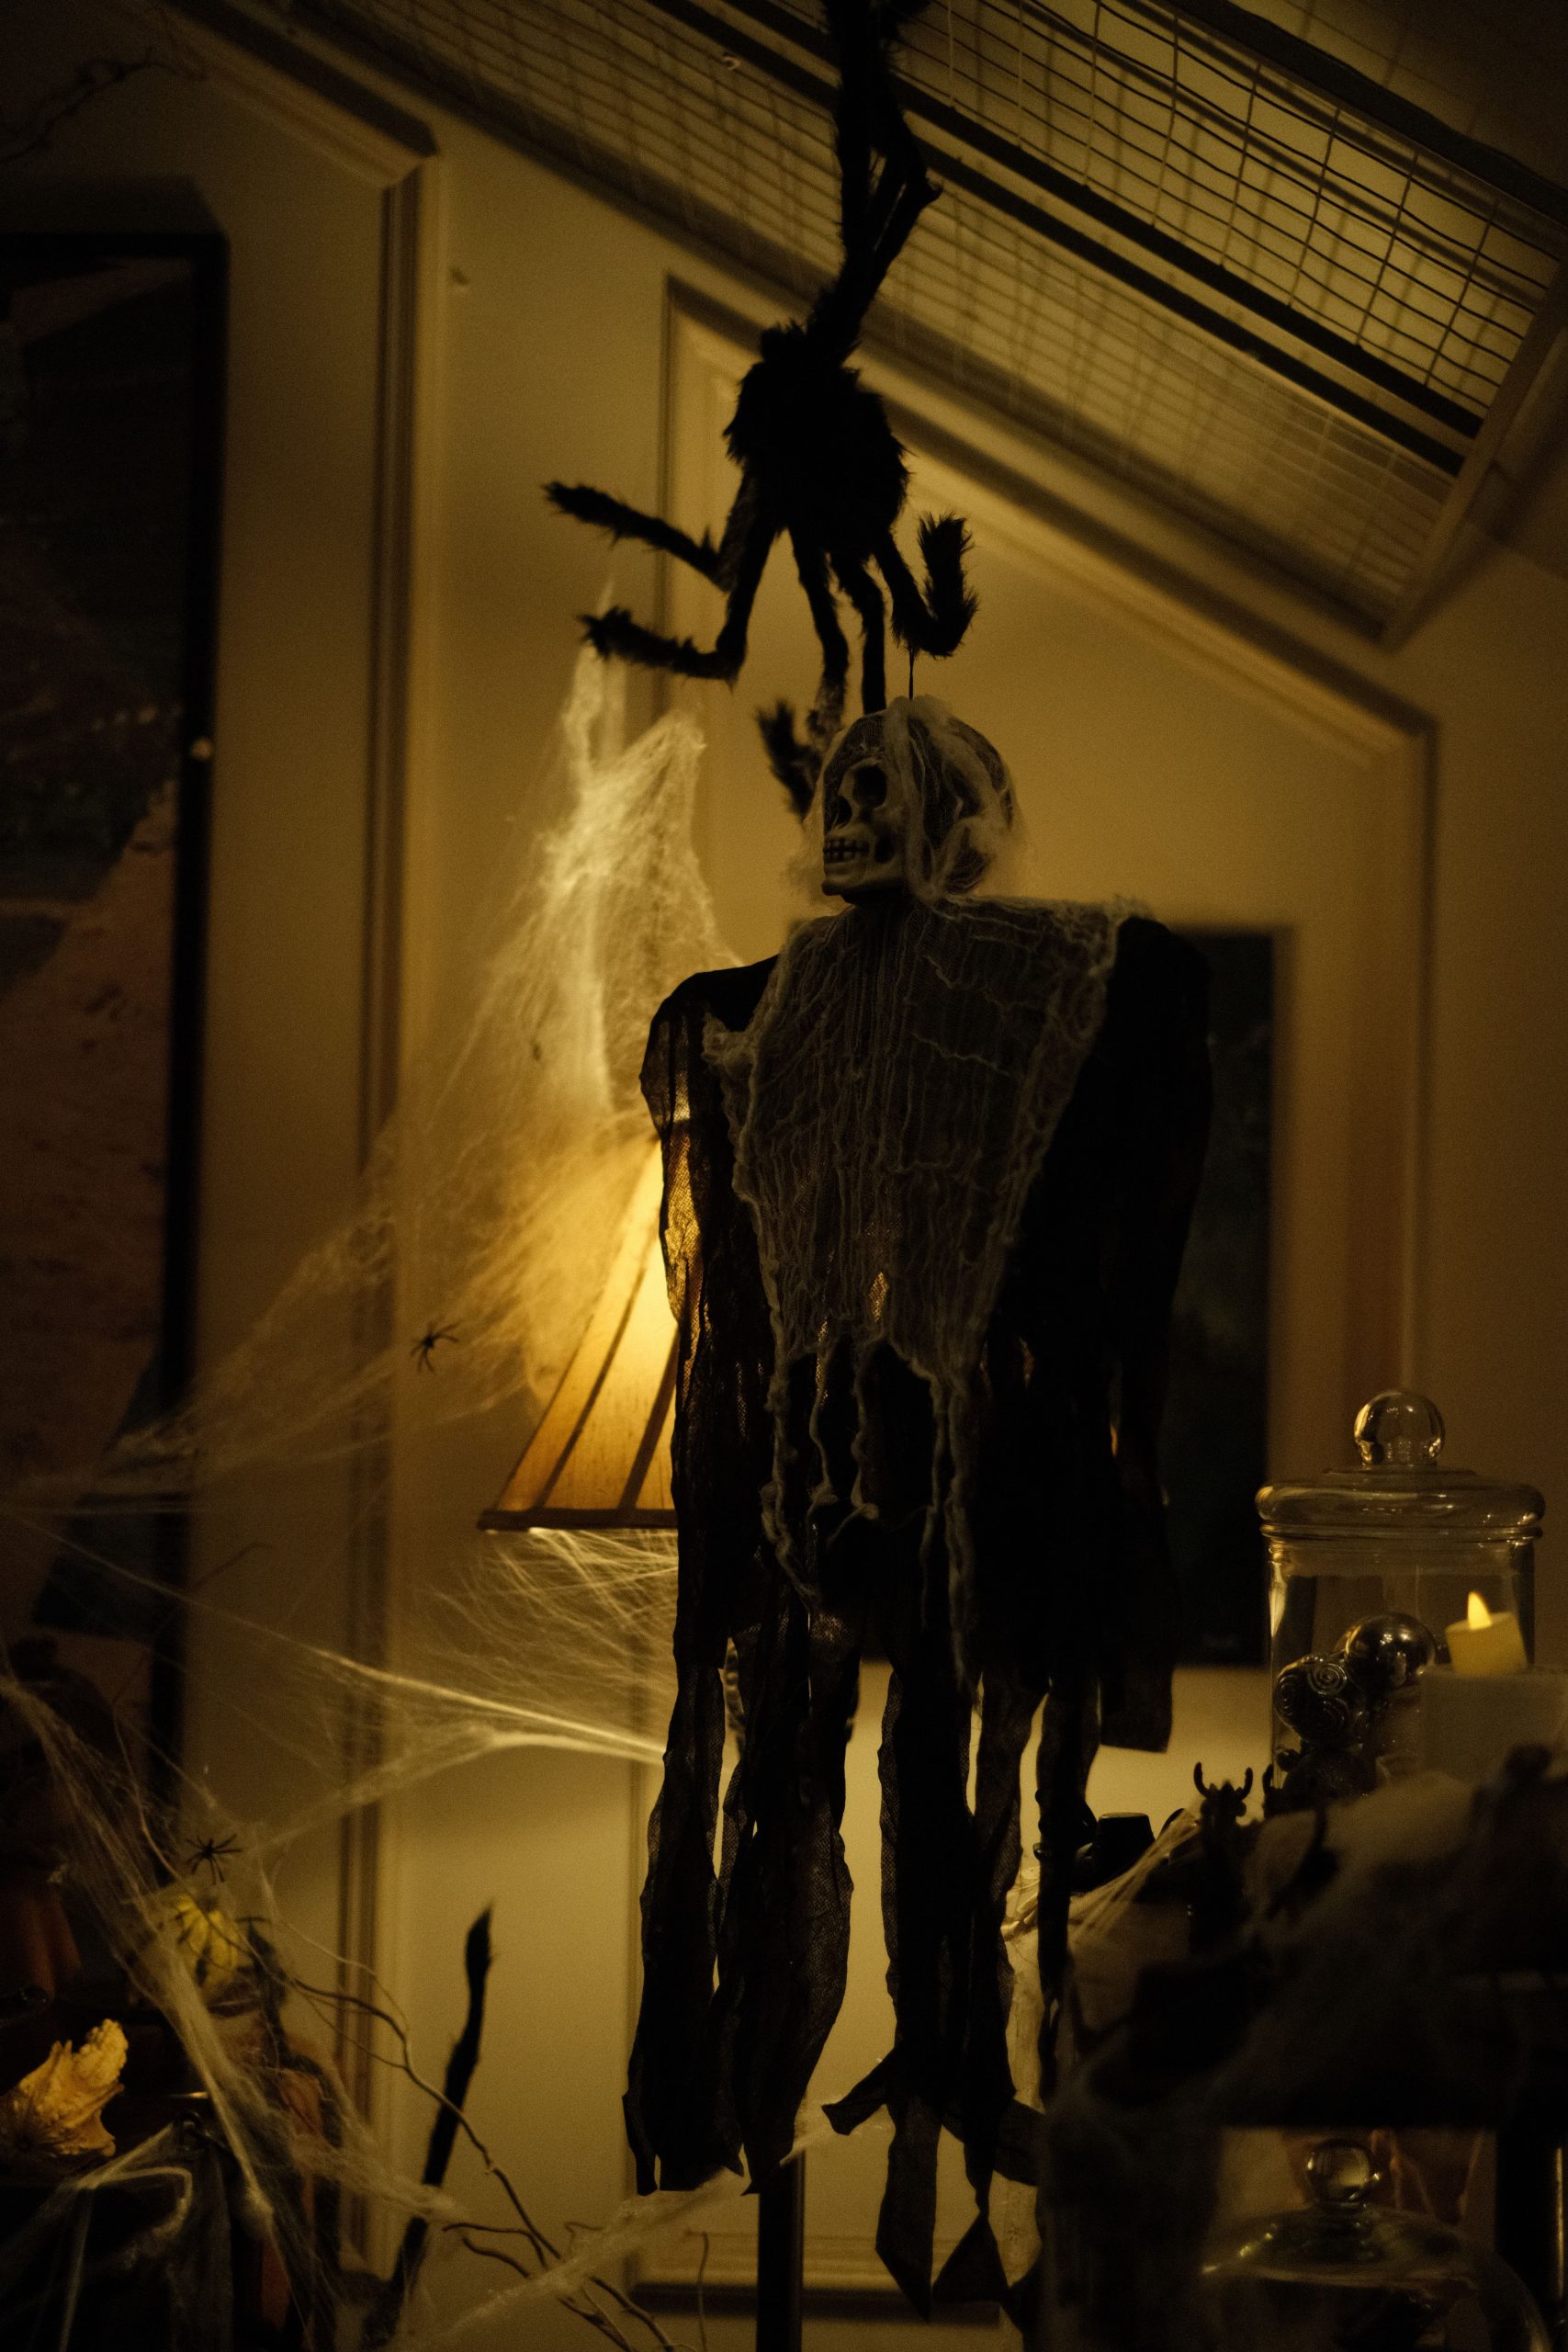
“Creating a look this dense with props and webbing means you’ll need to plan your pathway carefully.”
If this is for a haunted trail or a party, ensure there’s a clear, designated walkway that is free of trip hazards. Stretchy cobwebs can easily snag on costumes or feet, especially in low light. Use gaffer tape on the floor to mark the safe path or use stanchions and ropes to guide guests. Safety is paramount; you want to scare your guests with atmosphere, not with an actual trip to the emergency room. This setup is best for a corner or against a wall, not in the middle of a high-traffic area.
15. A Ghostly Figure in a Red-Lit Room with a Piano
The power of this scene comes from one simple, incredibly effective choice: the monochromatic red lighting. Without it, you have a sheet over a dummy and a piano. With it, you have a surreal, terrifying, and highly cinematic moment. The red light flattens the dimension of the room, turning everything into a silhouette and creating an oppressive, alarming atmosphere. It erases any sense of normalcy and plunges the viewer directly into a horror movie aesthetic. It’s not just lighting the scene; the lighting *is* the scene.
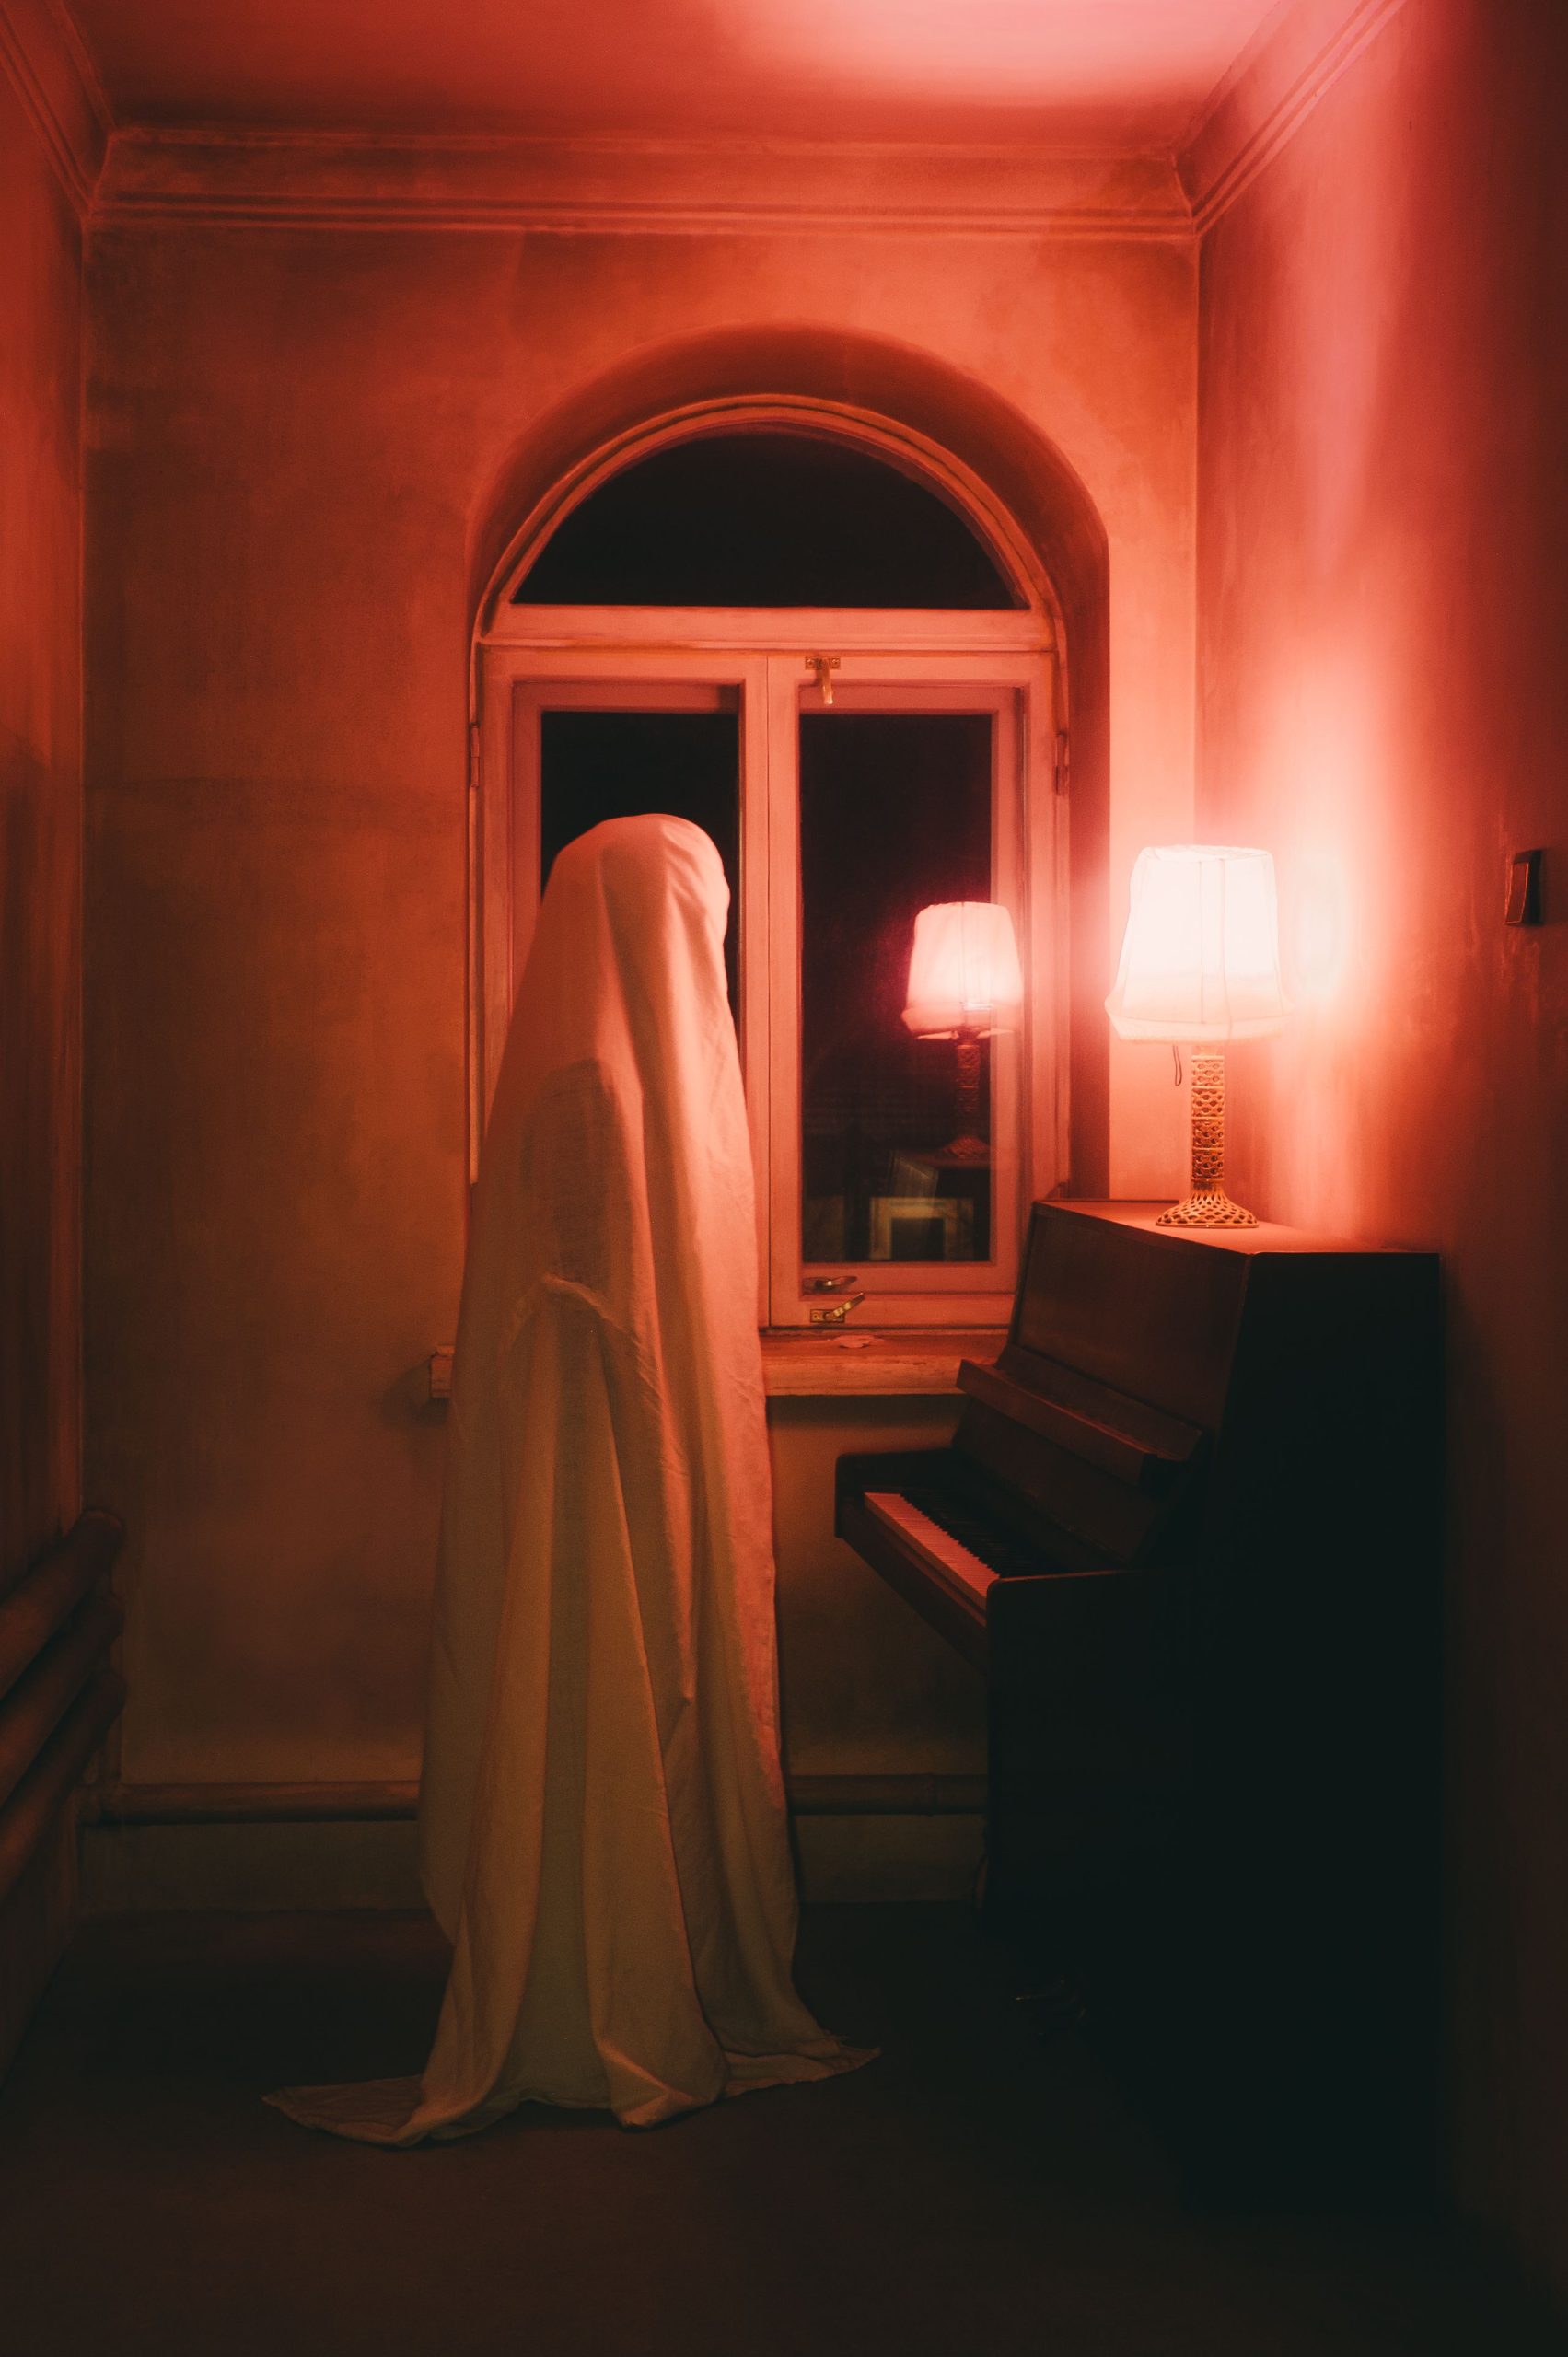
“You don’t need expensive theatrical lighting to pull this off.”
You can get this intense, saturated color for less than $20. The cheapest way is to buy a red party bulb (or a ‘bug light’ bulb) and screw it into an existing lamp or a simple clamp light from the hardware store. For more control, buy a single LED smart bulb. You can change it to any color you want via a phone app, allowing you to dial in the perfect shade of blood red. Place the light source on the floor and aim it upwards for the most dramatic shadows.
16. Simple and Sweet Sheer Ghost on a Door
This tiny decoration is charming because of its simplicity and the clever use of material. The sheer fabric is key—it gives the ghost a translucent, ethereal quality that a solid white sheet wouldn’t have. It feels more ‘ghostly’ because you can partially see through it. The addition of the witch hat is a playful touch that gives it personality and a bit of a story. Is it a ghost? A witch? Both? This is a perfect example of how you can create a festive and spooky mood with just a few inexpensive craft supplies and a little bit of imagination. It’s not trying to be terrifying, just fun.
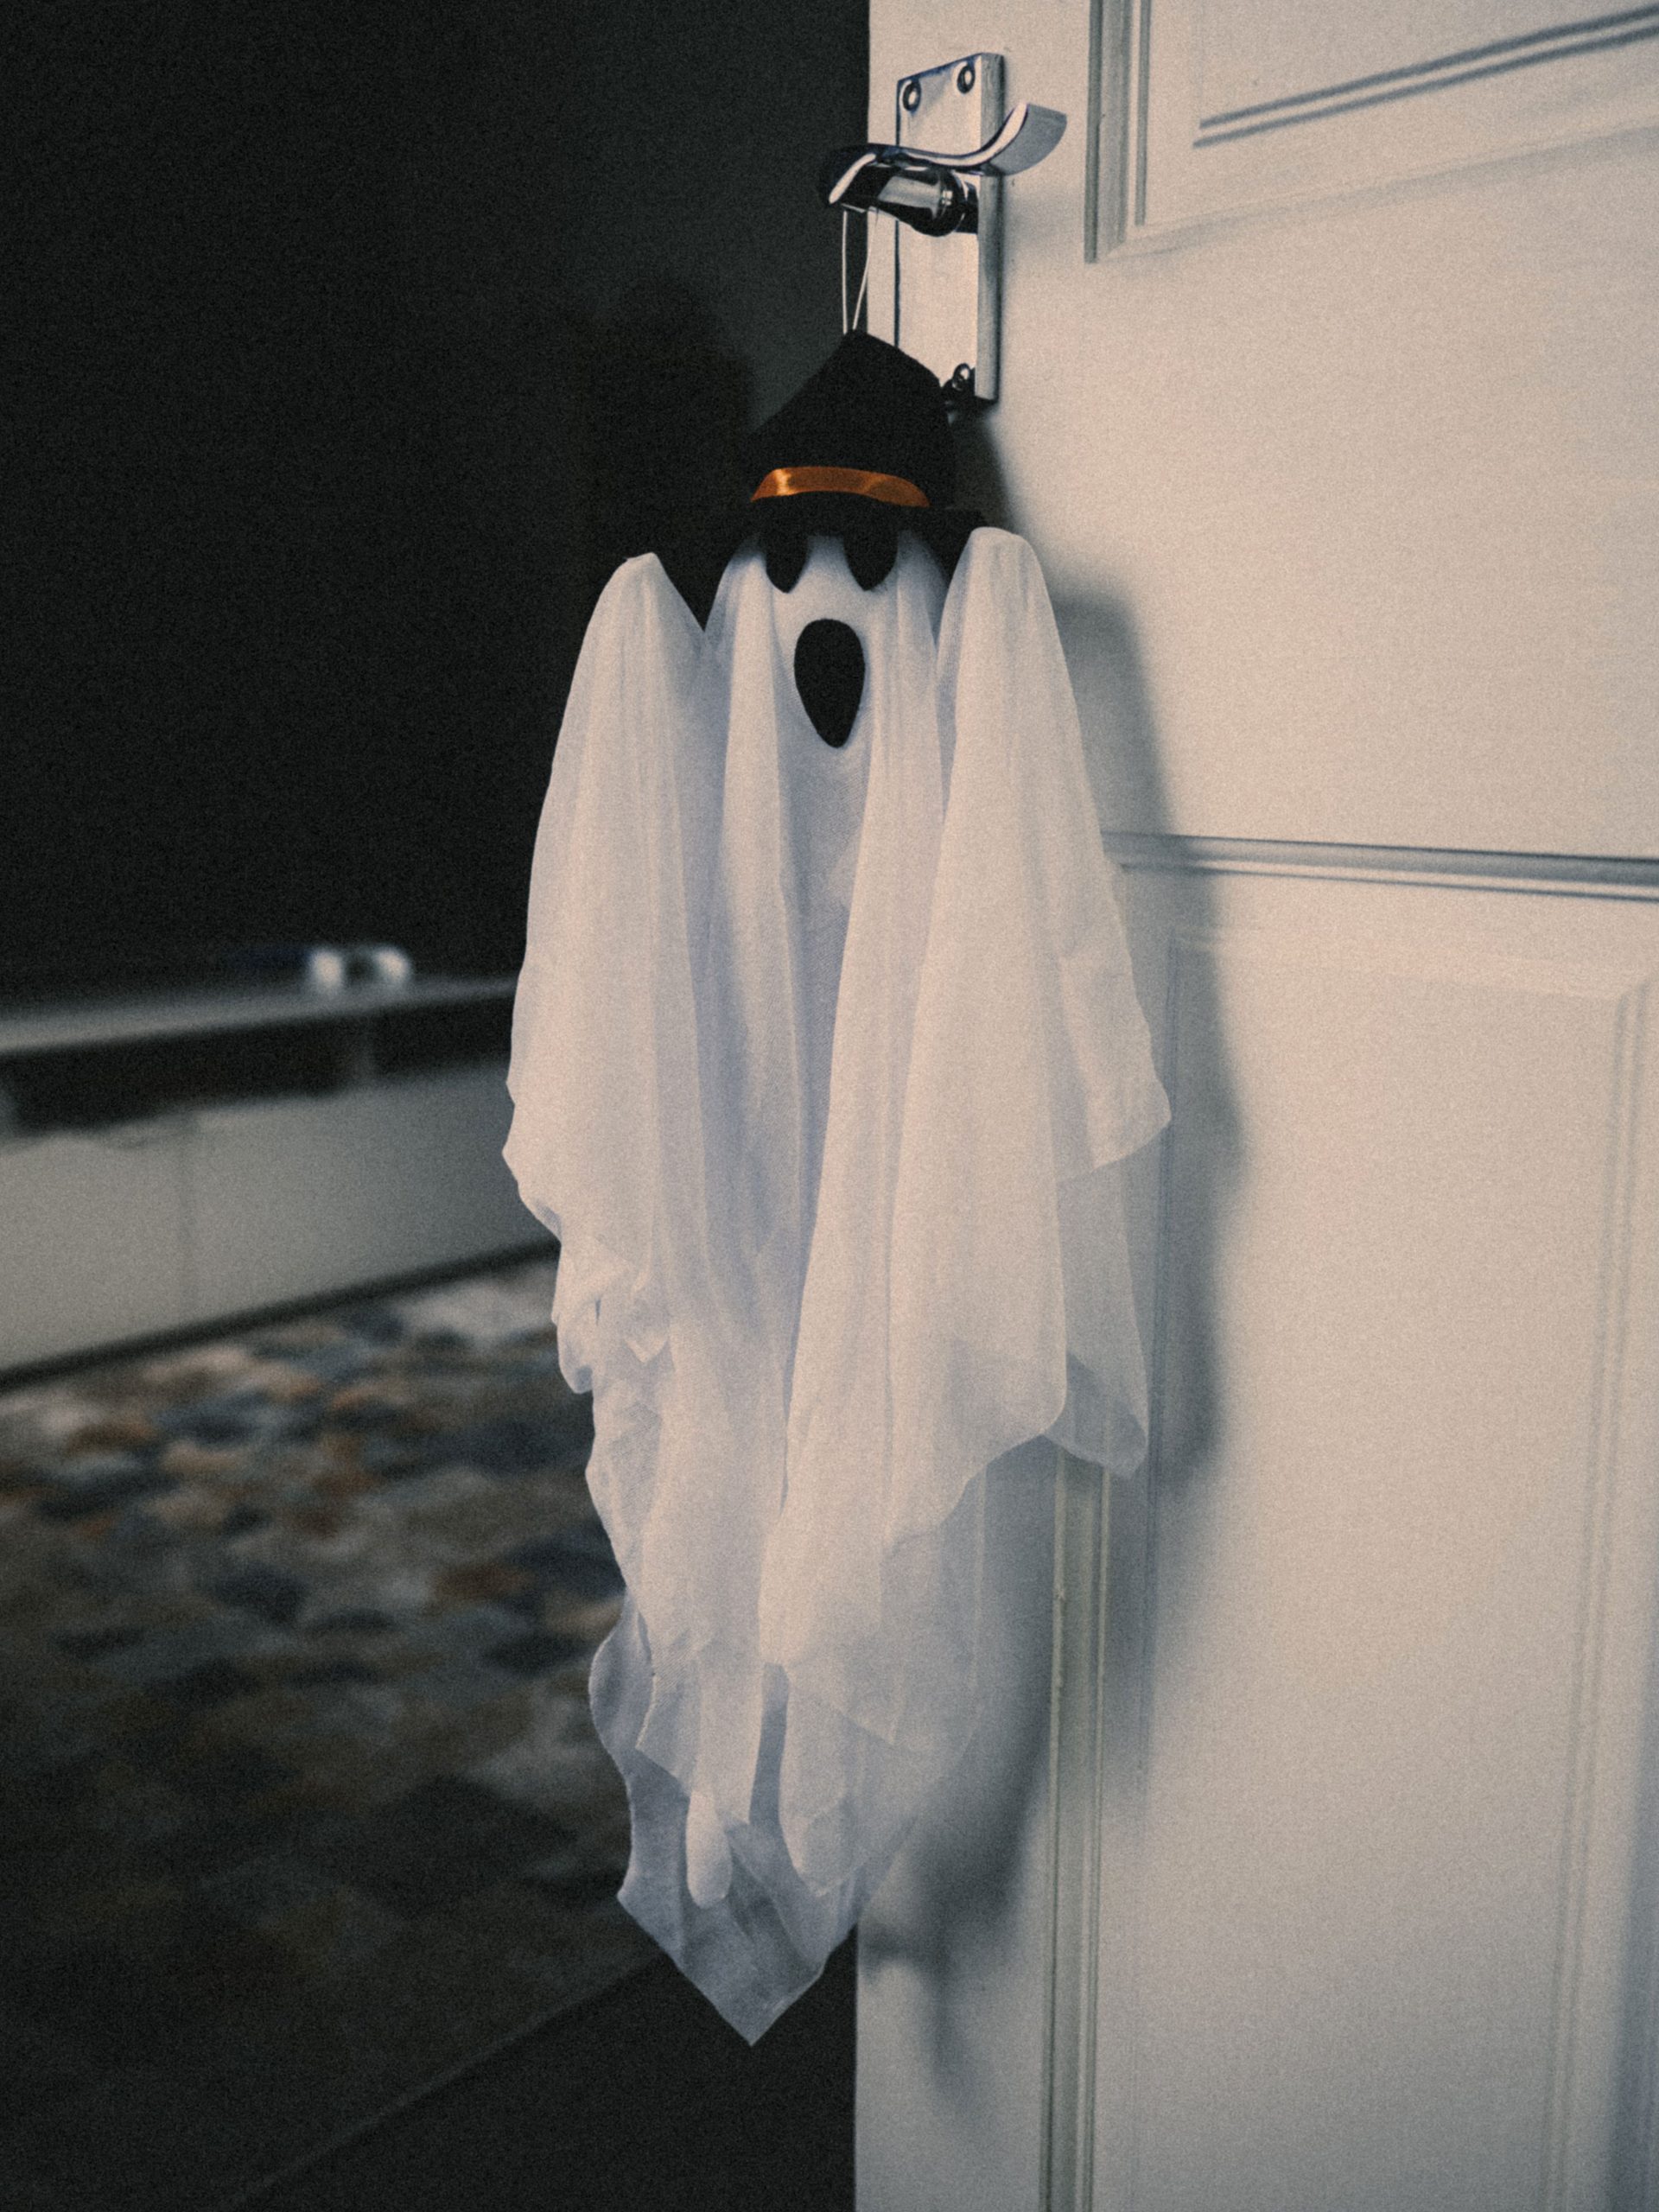
“Gather Materials: You’ll need a square of white sheer fabric (like tulle or organza, about 18×18 inches), a small styrofoam ball, a rubber band, a black marker, and a miniature witch hat (from a craft store).Form the Head: Place the styrofoam ball in the center of the fabric square.”
Gather the fabric around the ball and secure it underneath with a rubber band to form the head and neck.Add a Face: Use a black permanent marker to draw two simple oval eyes and a wobbly mouth. Don’t strive for perfection; a handmade look is part of the charm.Attach the Hat: Use a hot glue gun or a safety pin to attach the miniature witch hat to the top of the ghost’s head. Add a loop of string or thread to the back for hanging.
17. Elaborate Porch and Patio Dining Halloween Spread
This impressive display demonstrates a smart design principle: theme extension. The formula is 70% porch decor + 30% extended living space. Instead of containing the Halloween spirit to just the front door, the theme is carried down the steps and onto the outdoor dining table. This makes the decorated space feel much larger and more immersive. The consistent color palette of orange, black, and white across both zones is what ties it all together, making the porch and the patio feel like one cohesive, festive ‘room’.
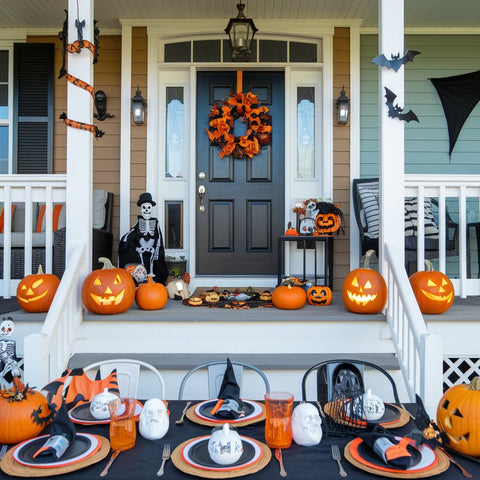
“When decorating a large area, create zones.”
Here, you have the ‘entry zone’ on the porch with the skeleton and wreath, and the ‘entertaining zone’ at the dining table. To make it feel connected, repeat elements in both areas. Notice how the jack-o’-lanterns appear in both zones, as does the core black-and-orange color scheme. This repetition guides the eye smoothly from one area to the next and makes the entire design feel intentional and professionally styled, rather than like two separate decorating ideas placed next to each other.
18. Giant Spider Taking Over the Side of the House
The effectiveness of this decoration lies in its absurd scale and placement. A spider is creepy; a spider the size of a fourth-grader is terrifying. By placing it on the side of the house and having it interact with an ordinary object like a chair, it creates a surreal and unsettling image. The extensive use of the stretchy cobweb material is also key. It sells the idea that this creature has been here for a while, building a massive nest. It breaks the flat plane of the house’s siding, adding dimension and a creepy, organic texture. The bright green eyes are the perfect final touch, making it feel alive.
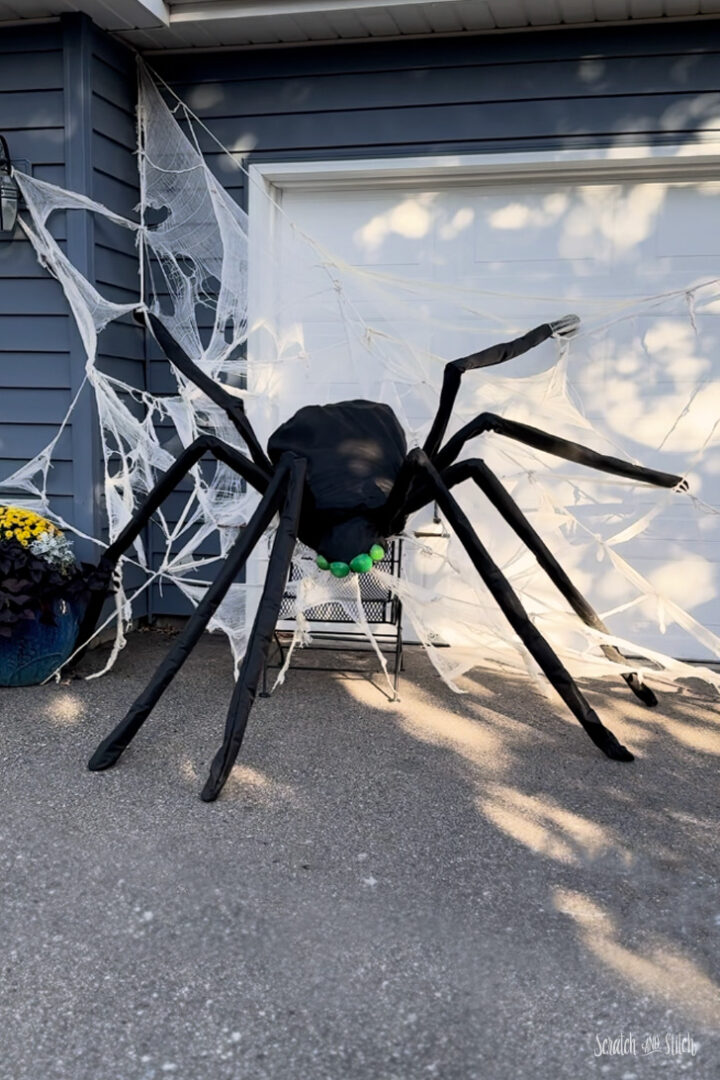
“Stretchy faux cobwebs are fantastic for effect but can be a real pain to clean up, especially from rough surfaces like siding, brick, or shrubbery.”
Wind and rain can cause the material to shred and tangle, leaving tiny synthetic fibers stuck everywhere for months. To make cleanup easier, try to anchor the main corners of the web to smooth surfaces (like window frames or gutters) with removable hooks or clips. When taking it down, roll it up slowly rather than pulling it off in one go to contain the fibers.
19. A Simple, Whimsical Fabric Ghost Hanging in a Tree
The single most important element here is the setting. The same simple fabric ghost hanging indoors would be cute, but against the backdrop of a bare tree and a brilliant blue sky, it becomes whimsical and almost poignant. The contrast between the stark, dark branches and the simple white form is what gives it visual power. The movement it gets from the breeze brings it to life. This is a powerful reminder that sometimes the ‘decoration’ is less about the object itself and more about where and how you place it. Nature is doing half the work here.
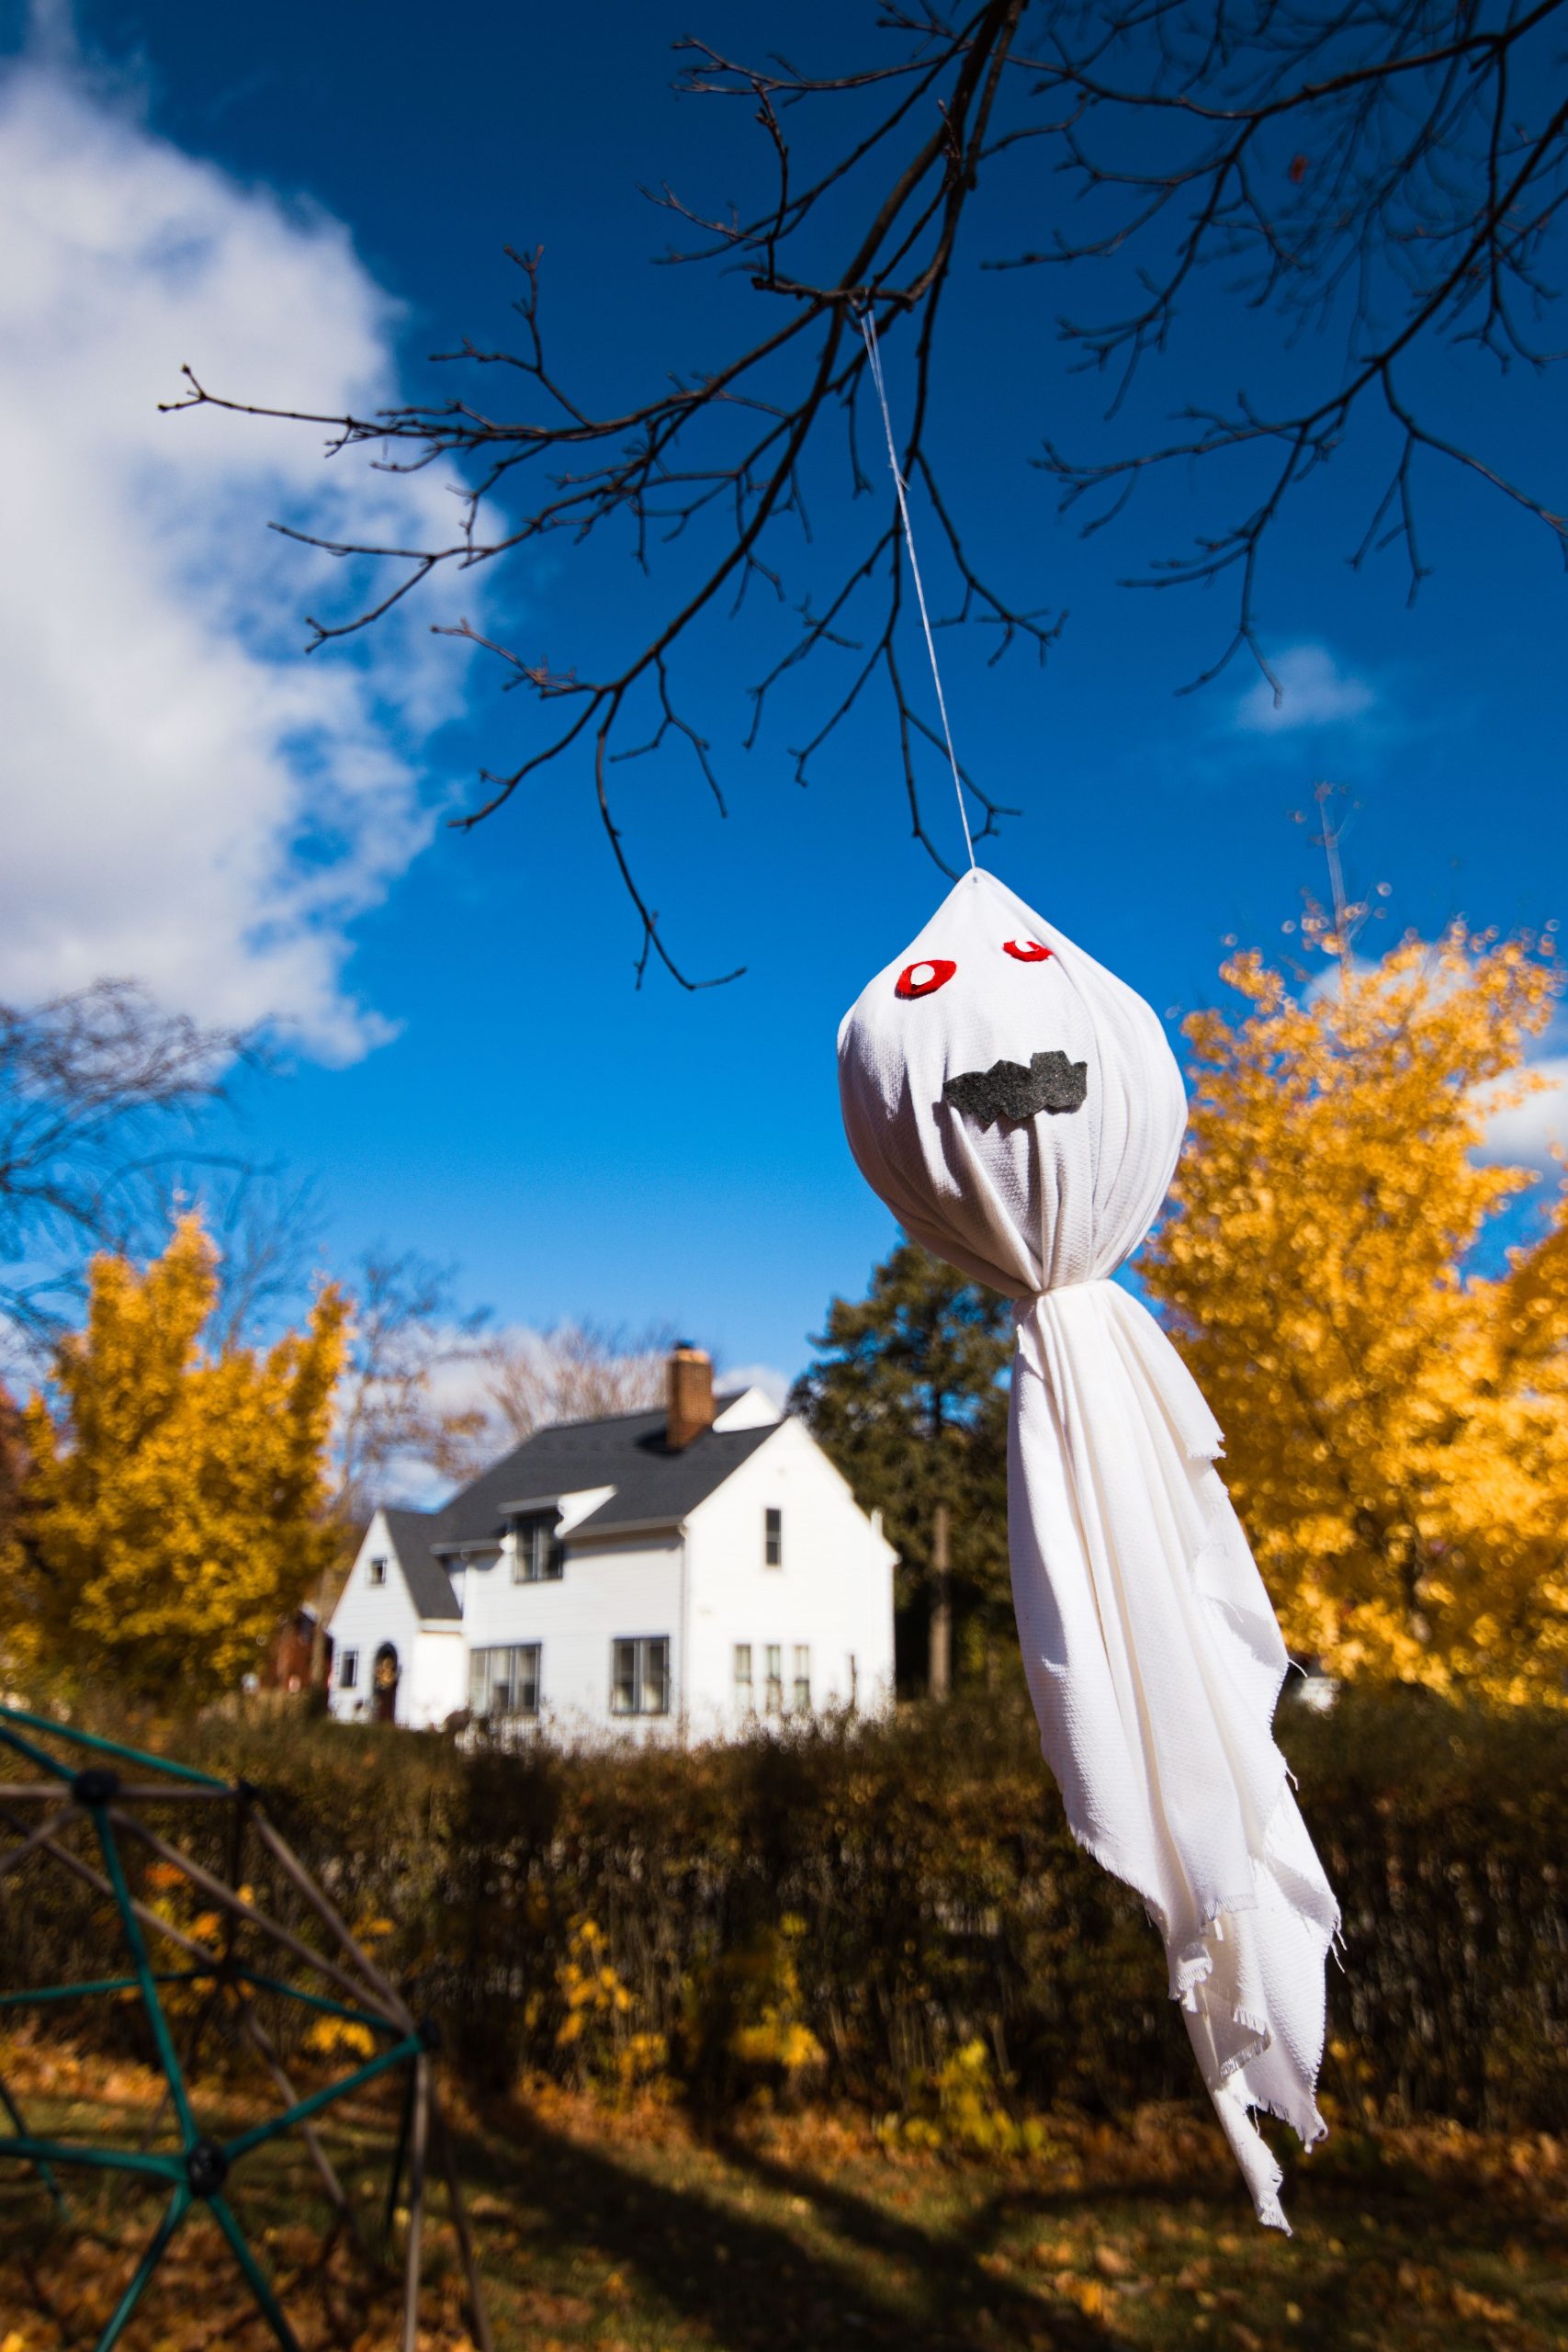
“This is the ultimate budget decoration.”
You likely already have everything you need. An old white pillowcase or a piece of a flat sheet is perfect for the body. The eyes and mouth can be drawn on with a marker or made from scraps of felt or electrical tape. A bit of string or fishing line is all you need to hang it. The total cost is effectively zero dollars. It’s proof that you don’t need to spend any money at all to create a bit of festive, spooky charm for your yard. For a more robust version of this idea, see the lantern-holding ghosts in Idea #8.
20. Create a Giant Spider Emerging from the Garage
A giant spider prop needs a giant canvas to look its best. A two-car garage door is the perfect location. The large, flat, typically neutral-colored surface makes the black spider stand out dramatically. A standard two-car garage door is about 16 feet wide, giving you plenty of room to splay the spider’s legs out for maximum impact. If you only have a single garage door (around 8-9 feet wide), you can still use a large spider, but pose it as if it’s crawling up or to the side, rather than straight-on, to fit the space better. This is a much better application than the front of the house, like in Idea #17, if you have the garage space.
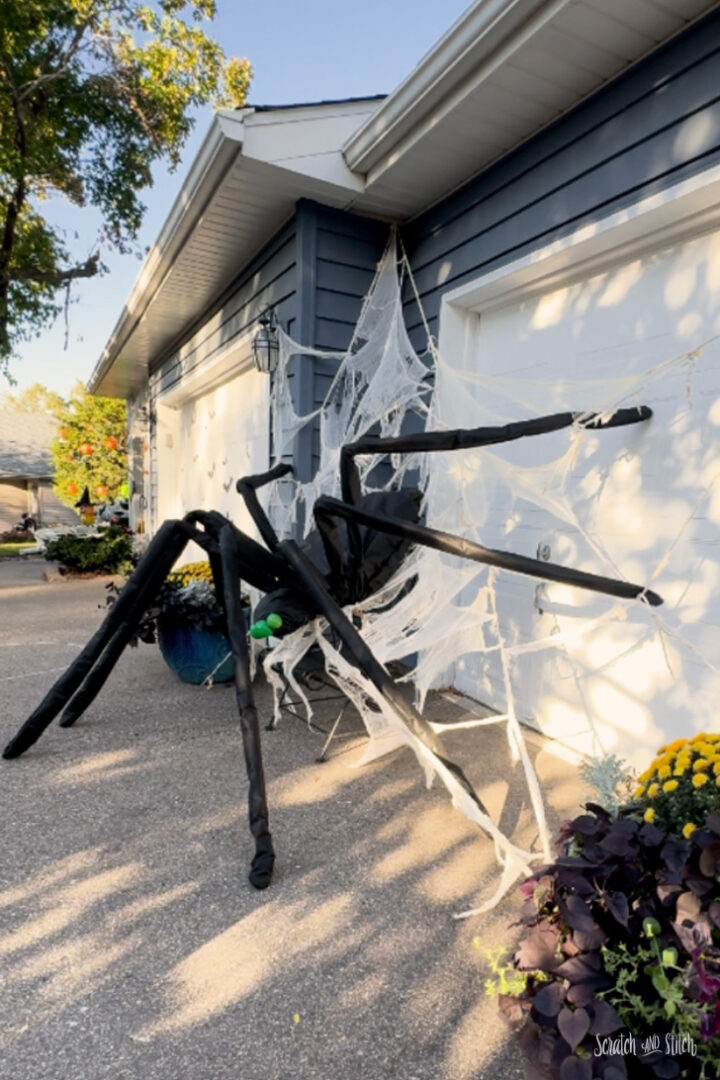
“Before you mount a giant, eight-legged creature to your garage door, make sure it won’t interfere with the door’s operation.”
The prop and webbing must be attached securely so they don’t get caught in the tracks, sensors, or the opening mechanism itself. Use lightweight materials and secure them with methods that won’t damage the door’s surface, like magnetic hooks or removable adhesive clips. Always test the door’s opening and closing sequence carefully after you’ve installed the decoration to ensure everything moves freely and safely.
21. A Skull Figure Lit with Intense Red Light
This image is terrifying for one reason: lighting. The single, intense red light source coming from below is a classic horror trope called ‘monster lighting.’ We are used to seeing faces lit from above (by the sun or overhead lights). Lighting a face from below creates unnatural shadows, hollowing out the eye sockets and emphasizing the mouth and chin, which our brains interpret as sinister and predatory. The complete blackness of the background isolates the subject, leaving nowhere else for your eye to go. It’s a masterclass in creating fear with light.
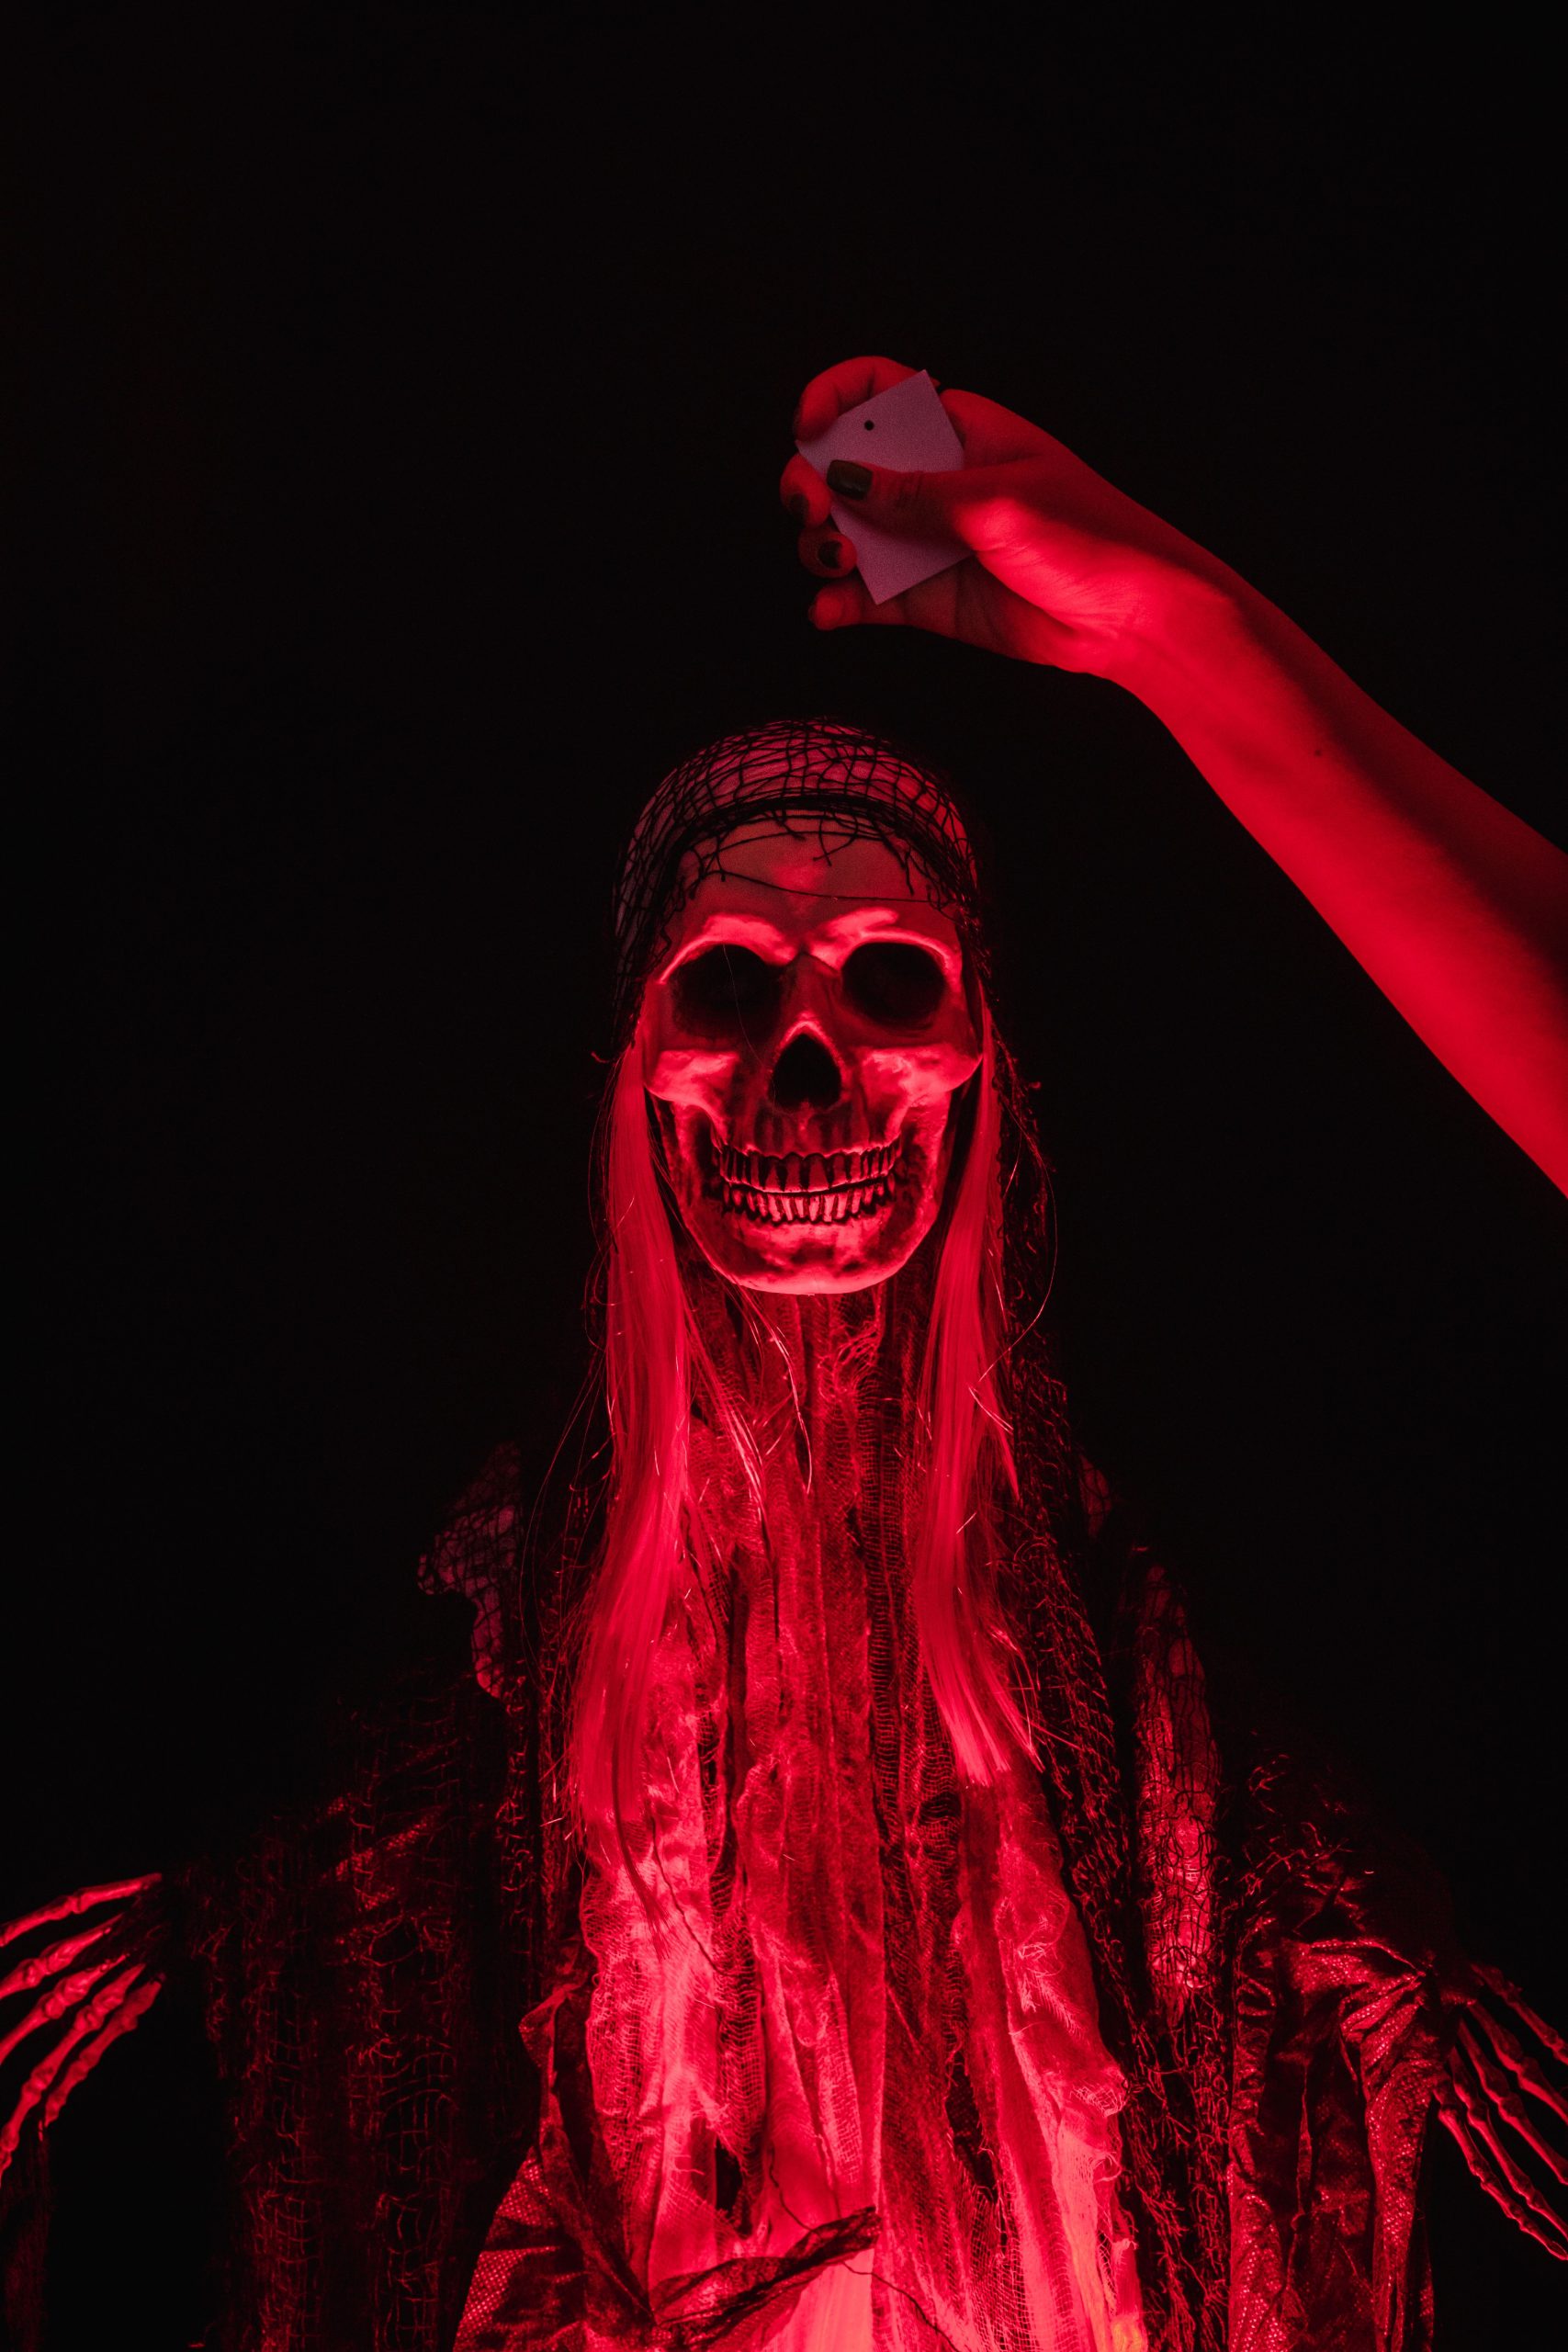
“To create this effect yourself, you need three things: a dark room, your prop, and a single light source with a red filter or bulb.”
A simple flashlight or a small LED puck light works perfectly. Place the light on the floor or a low table, aimed directly up at the ‘chin’ of your skull or mask. The key is to have the light be the *only* source of illumination in the room. Turn off all other lamps and block any ambient light from windows or other rooms. The darker the surroundings, the more dramatic and terrifying the effect will be.
22. Vibrant and Saturated Halloween Light Show on House Exterior
The formula for this high-energy display is all about color saturation. Think 40% purple, 30% red/orange, 20% blue, and 10% white accents. The key is using multiple types of lighting—string lights for outlines, spotlights for washing walls with color, and internally lit props for focal points. The purple acts as the spooky base color, covering large areas. The red and orange provide festive, fiery pops of contrast, while the blue adds a cool, ghostly counterpoint. The white from the smaller skeletons provides a neutral break that makes the other colors seem even more vibrant.
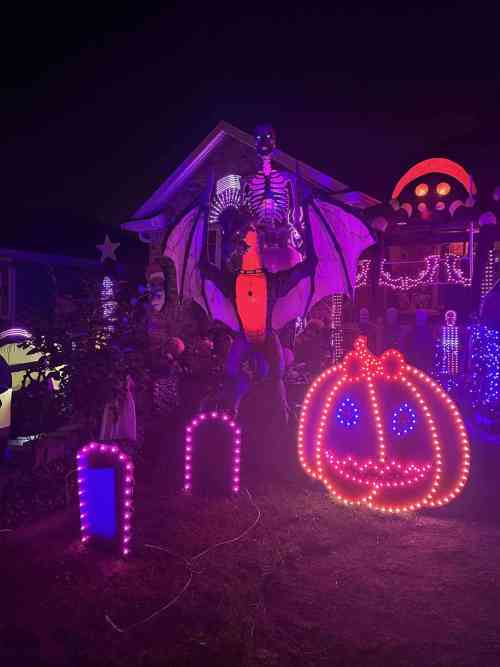
“Large roof figure (winged skeleton): $150 – $300Large ground prop (pumpkin): $80 – $150String lights (multiple strands, various colors): $60 – $120Arched tombstones & smaller skeletons: $50 – $100TOTAL: $340 – $670Budget alternative: You can get a similar vibrant look for under $100.”
Forget the giant props. Invest in three or four color-changing LED floodlights ($15-$25 each) and aim them at your house. Supplement with a few strands of purple and orange string lights draped on bushes or railings. You get all the color with a fraction of the cost and storage hassle.
23. A Gothic Halloween Room with Dark Purple Walls
The single element holding this entire gothic fantasy together is the wall color. The dark, textured purple paint creates an instant sense of moody, theatrical drama. Without it, the leather chair, witch hats, and skulls would just be Halloween props in a normal room. With the purple walls as a backdrop, they become part of a cohesive, immersive environment. It’s a bold choice that commits fully to the theme. It proves that sometimes the most impactful decoration isn’t an object you place in a room, but the color you wrap the room in.
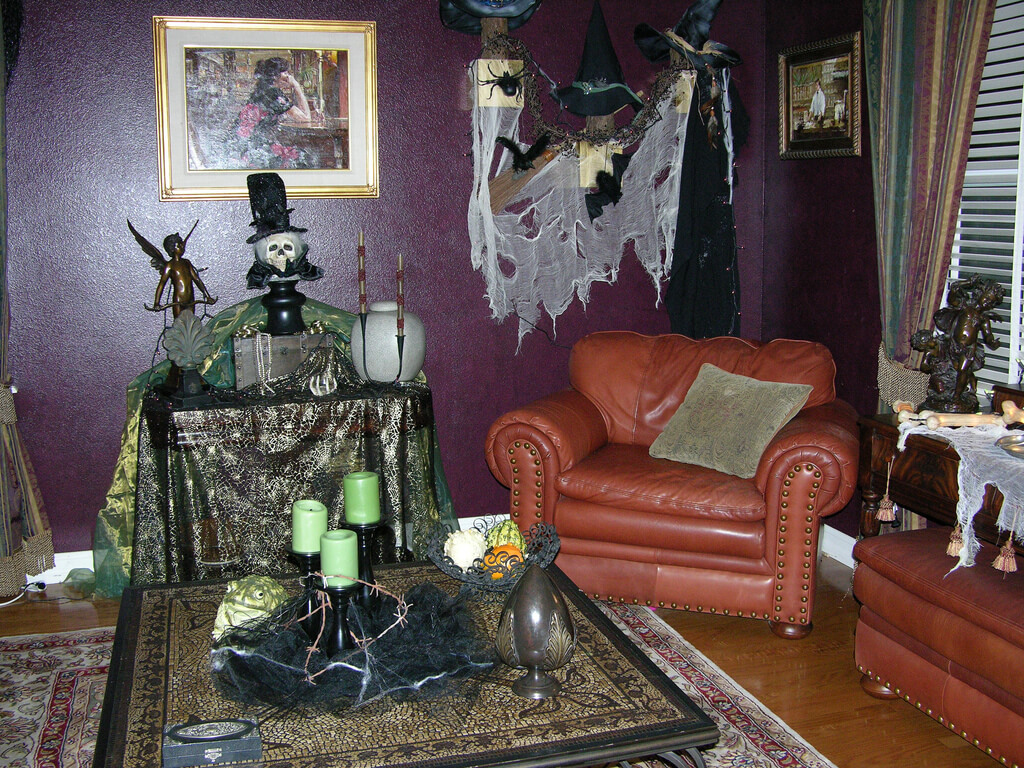
“Test Your Paint: Dark purples can look very different depending on the light.”
Paint a large swatch on your wall and observe it in daylight and at night with your lamps on before you commit to the whole room.Consider the Commitment: A dark, saturated color like this requires a good primer to apply and multiple coats of primer to cover up when you’re ready for a change. Are you prepared for that level of work?Lighting Plan: Dark walls absorb light. Do you have enough lamps and ambient lighting to keep the room from feeling like a cave when it’s not decorated for Halloween?
24. Add Oversized Spiders to an Ornate White Door Frame
This works because of the high contrast between the object and its location. An ornate, traditional, and very proper white portico is the last place you’d expect to see two giant, creepy spiders. The juxtaposition of the elegant architecture and the frightening props is what creates the visual tension and impact. The stark black of the spiders against the clean white of the columns makes them impossible to miss. It’s a simple, two-prop decoration that feels bold and slightly subversive, which is perfect for Halloween. This is a far more impactful approach than dozens of smaller props scattered about. Compare it to the similar spiders in Idea #24 which have a different feel due to the different background.
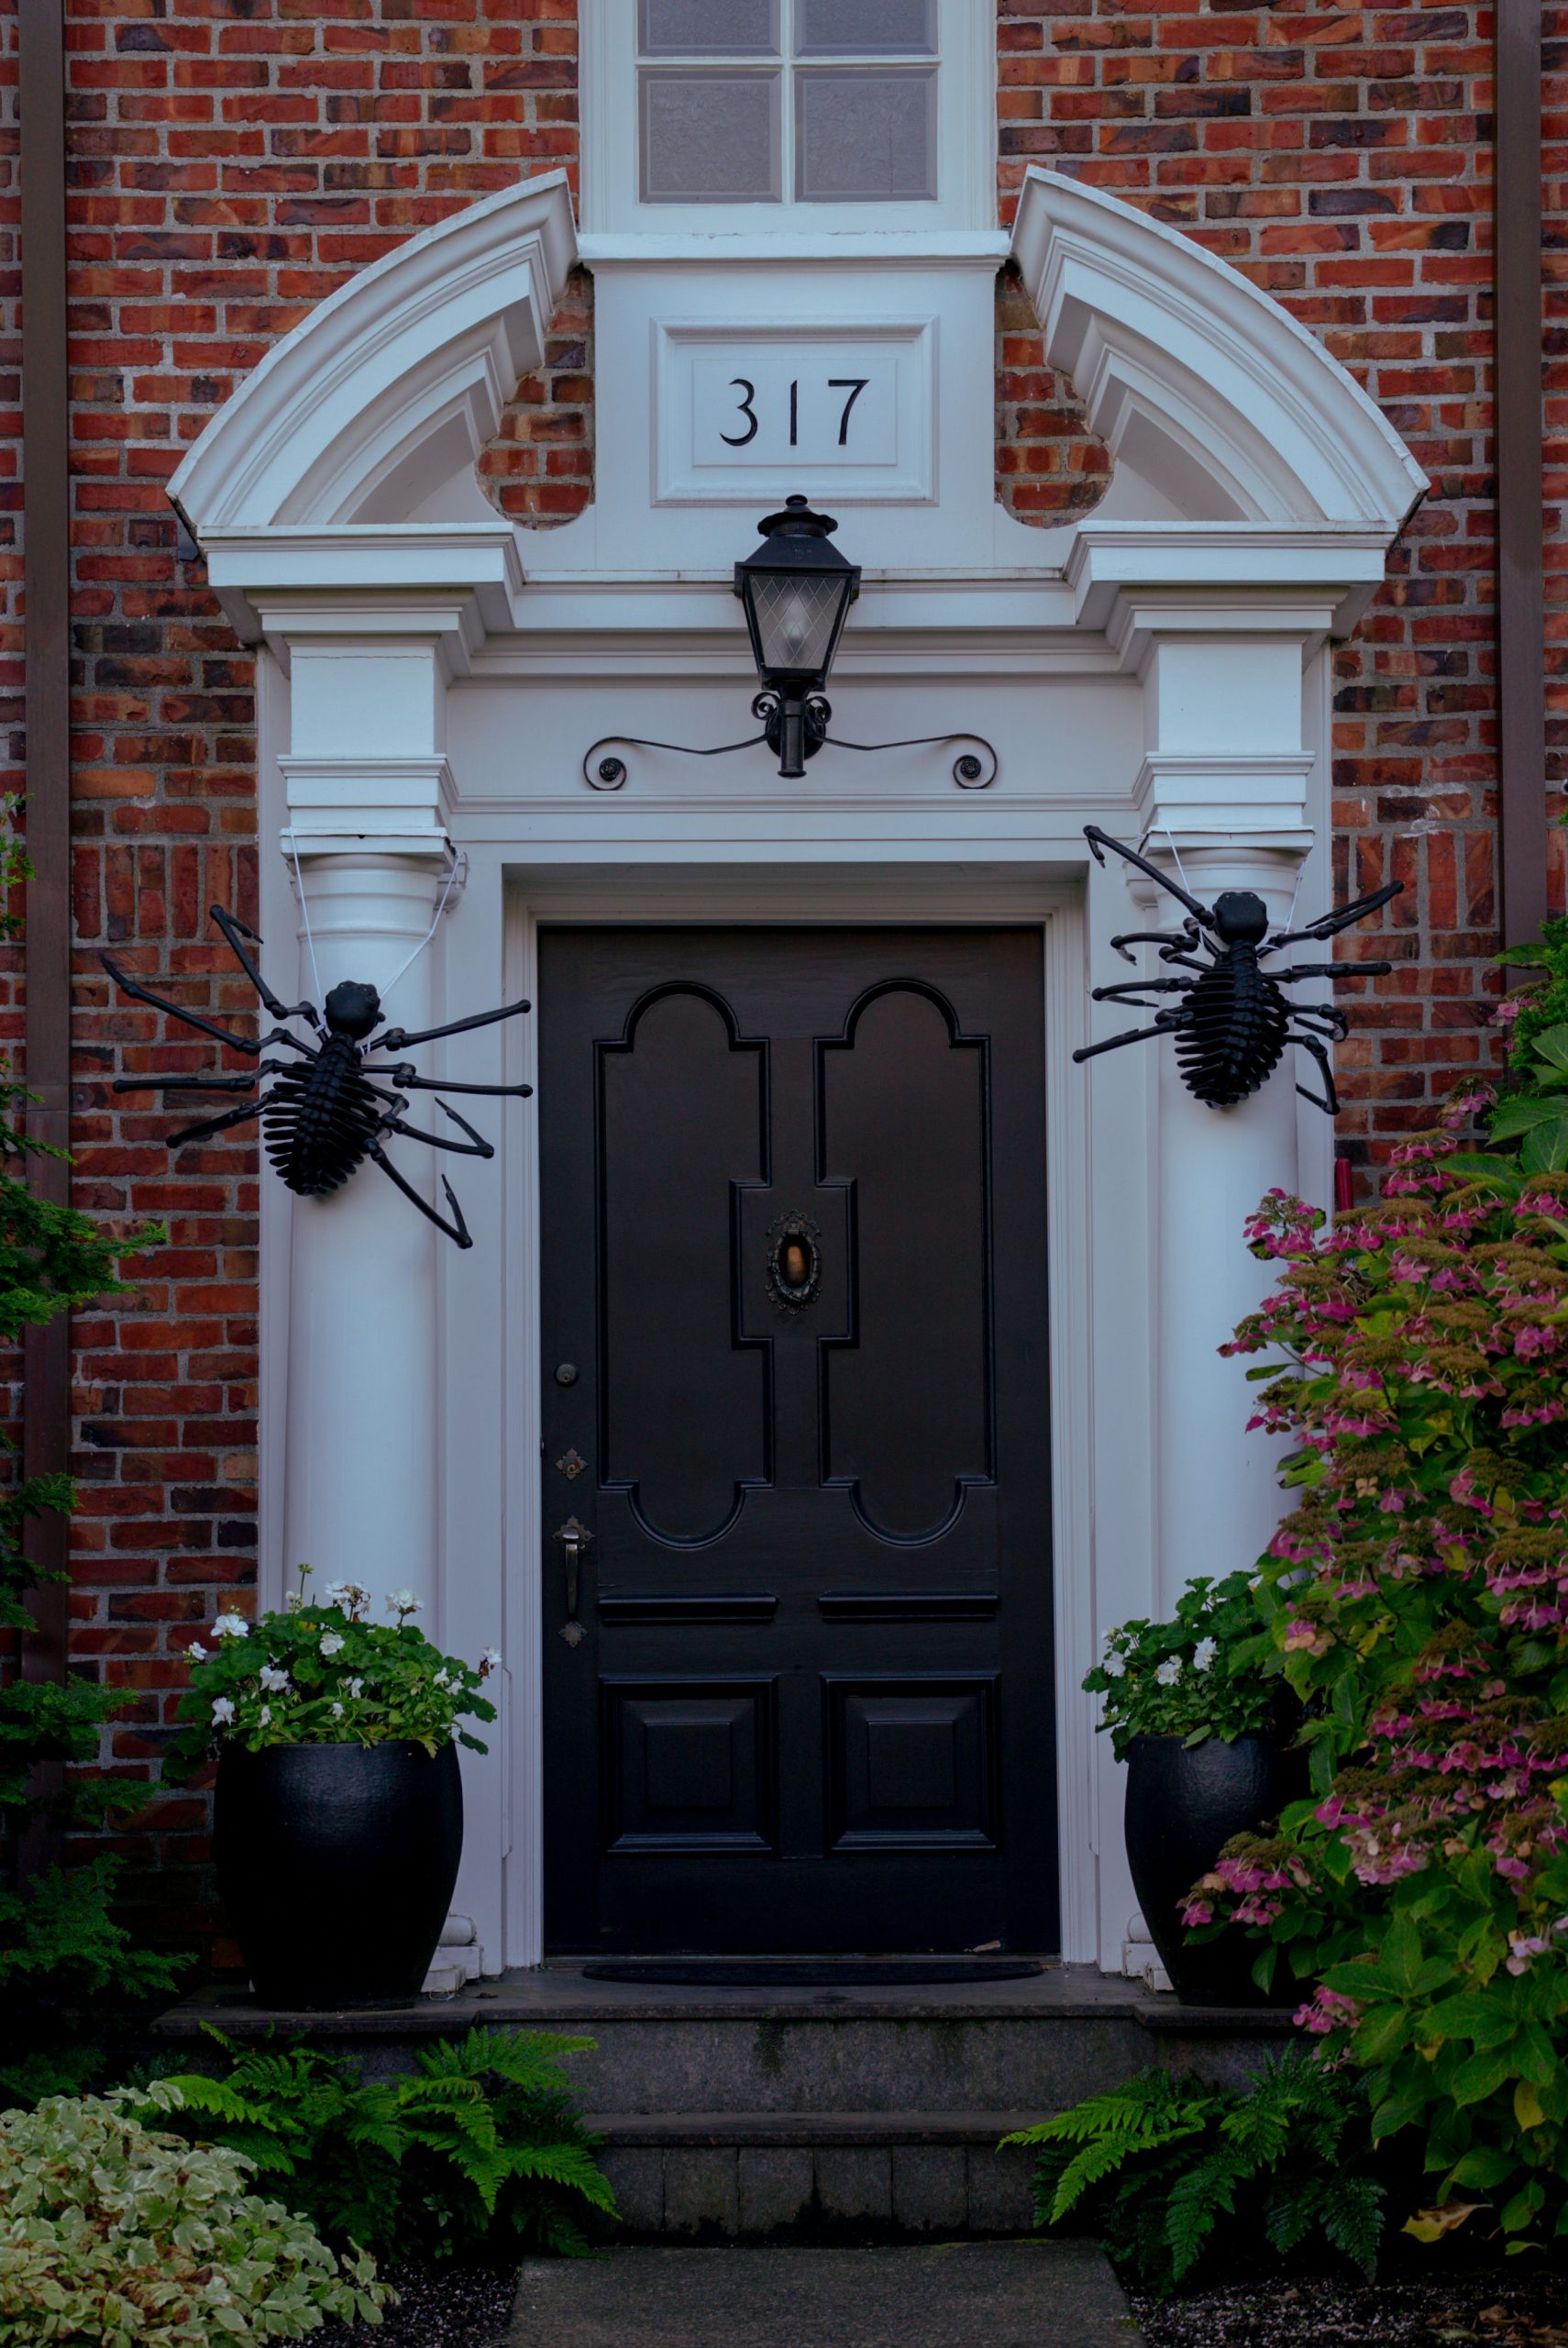
“Be mindful of how you attach these props.”
Drilling into or using strong adhesives on a painted wood or composite door frame can cause permanent damage that’s difficult and expensive to repair. For a non-destructive method, try using clear zip ties or heavy-duty fishing line wrapped around the columns. You can also use white temporary adhesive hooks that are rated for outdoor use and can be removed cleanly after the holiday. Always test removal in an inconspicuous spot first.
25. A Whimsical Spiderweb and Skeleton Entryway
This friendly-spooky look is a well-balanced equation: 40% classic black and white decor (webs, spiders, skeleton), 40% harvest elements (pumpkins in urns), and 20% humor (the skeleton’s face mask). The strict adherence to a black, white, and grey-green color palette gives it a polished, designer feel. The symmetry of the flanking urns and columns creates a sense of order, while the chaotic spiderwebs add a touch of Halloween fun. The face mask on the skeleton is a witty, topical nod that brings a smile and keeps the whole vibe light and welcoming.
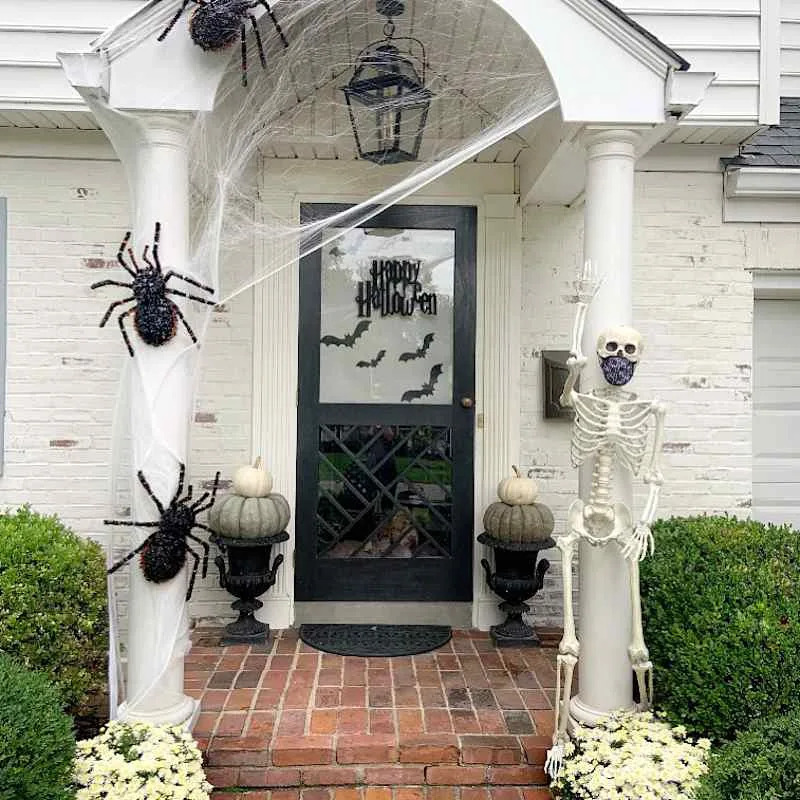
“To get that thick, layered spiderweb look, don’t just stretch one web over the whole area.”
Use multiple, smaller pieces of the webbing. Start by stretching one piece tightly to create the main ‘structural’ strands. Then, take other, smaller clumps of the webbing, and instead of stretching them thin, tease them apart gently and layer them on top of the first web. This creates pockets of dense, cottony-looking webbing that looks much more realistic and substantial than a single, thin layer.
26. A Classic Grim Reaper Prop with Tattered Robes
A store-bought Grim Reaper figure can be a great base, but you can make it look ten times better (and more expensive) with a little customization. The default robes are often thin and cheap-looking. Go to a fabric store and buy a yard of black cheesecloth and a yard of cheap black lining fabric. Use scissors to shred them into strips and then layer them over the existing robes, securing with safety pins or a hot glue gun. This adds texture, depth, and a much more convincing tattered look. A little bit of DIY effort can elevate a $30 prop into something that looks like it cost $100.
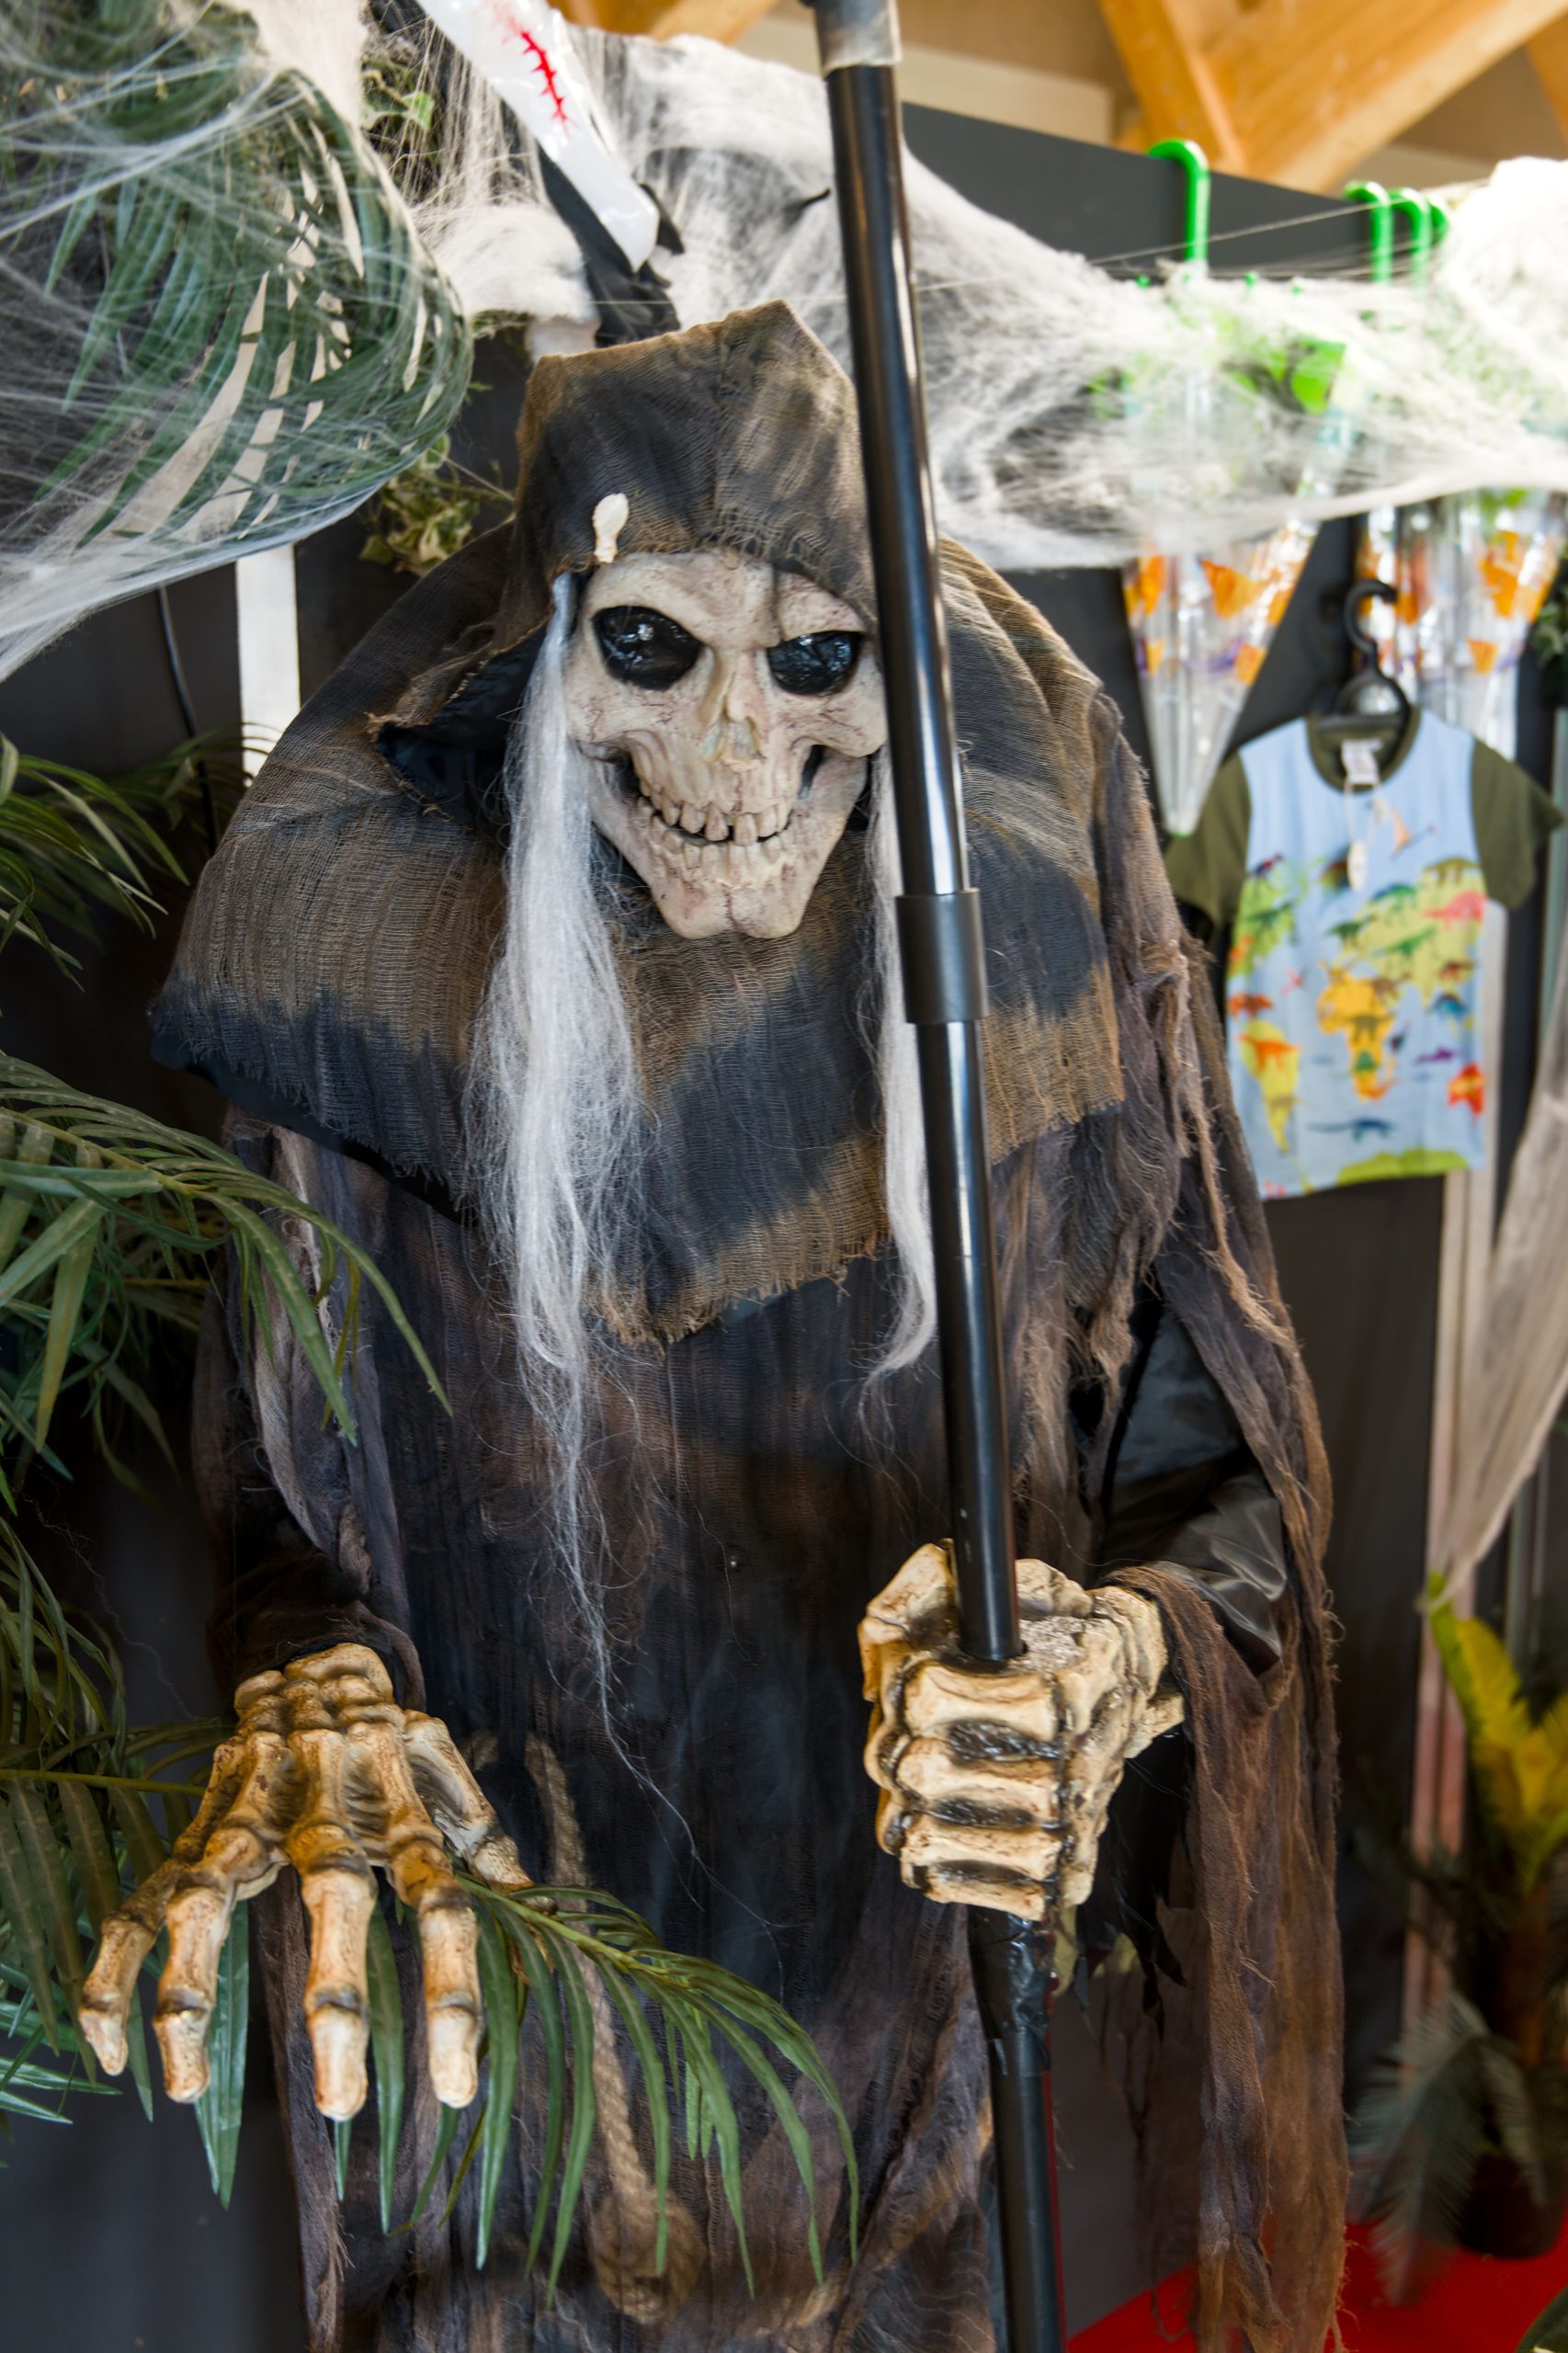
“Many of these cheaper, life-sized props are extremely lightweight.”
A strong gust of wind can easily send your Grim Reaper flying across the yard or into the street. If you’re placing it outdoors, you absolutely must secure it. If the prop has a stand, weigh it down with sandbags or bricks. If it’s just the figure itself, use tent stakes and fishing line to create discreet guy wires attached to the prop’s ‘waist’ or ‘shoulders’ and staked securely into the ground from several angles.
27. A Witchy Patio Scene with Pink and Blue Stage Lighting
The magic here is all about the unexpected color palette. Traditional Halloween lighting is orange, purple, and green. This display throws out the rulebook and uses a vibrant, almost neon, combination of hot pink and deep blue. This is what makes it feel modern and unique. The speckled light patterns create a disorienting, otherworldly effect on the familiar wooden deck. It transforms a normal patio into a magical, slightly sinister space. The props are classic—witch hat, cauldron, skeleton—but the lighting makes them feel fresh and new.
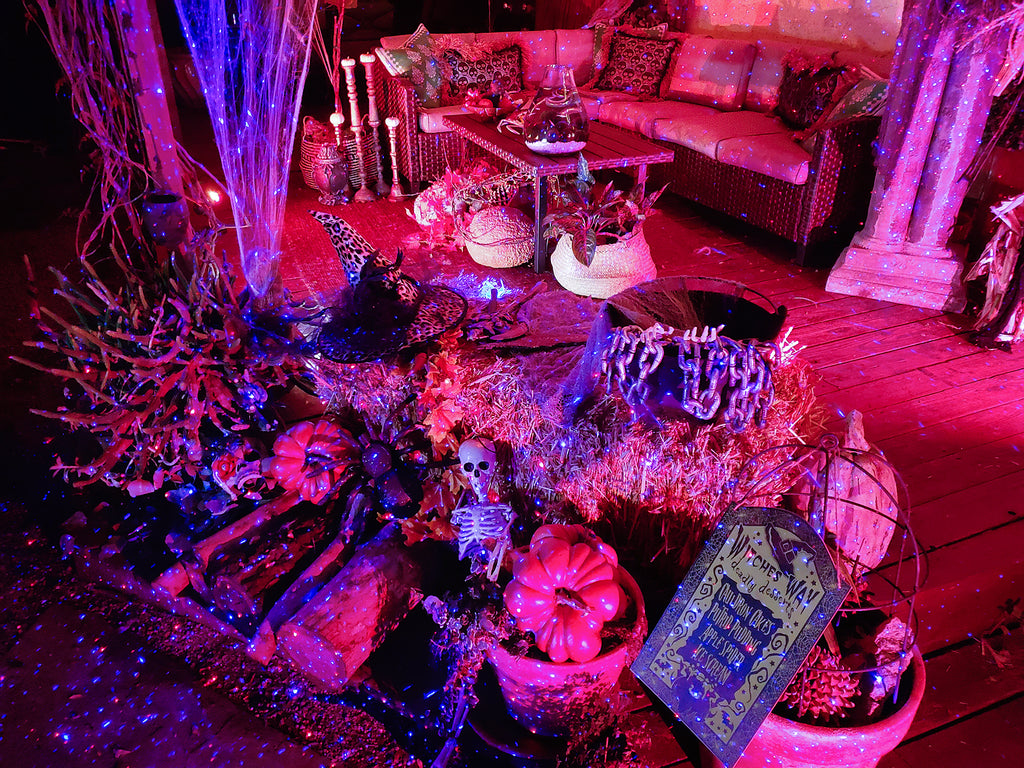
“We’re seeing a huge trend in holiday decorating that borrows from concert and stage lighting design, and this is a perfect example.”
Thanks to the affordability of LED projectors and smart bulbs, people are moving beyond simple string lights and embracing saturated, dynamic color washes. This ‘rave-goth’ aesthetic, with its pinks, purples, and blues, is all over TikTok and Pinterest. It’s a move away from traditional autumnal themes towards a more vibrant, high-energy, and personalized style of spooky.
28. An Unsettling Old Maid Mannequin with a Candy Tray
This decoration is pure nightmare fuel, and its power comes from a psychological phenomenon known as the ‘uncanny valley.’ The mannequin is *almost* human, but small imperfections—the lifeless eyes, the waxy skin, the fixed expression—create a profound sense of revulsion and fear. It’s not a monster or a ghost; it’s a distorted version of a person, which is infinitely more unsettling. The addition of the candy tray is a twisted genius move, forcing trick-or-treaters to confront their fear to get their reward. This is advanced-level haunting.
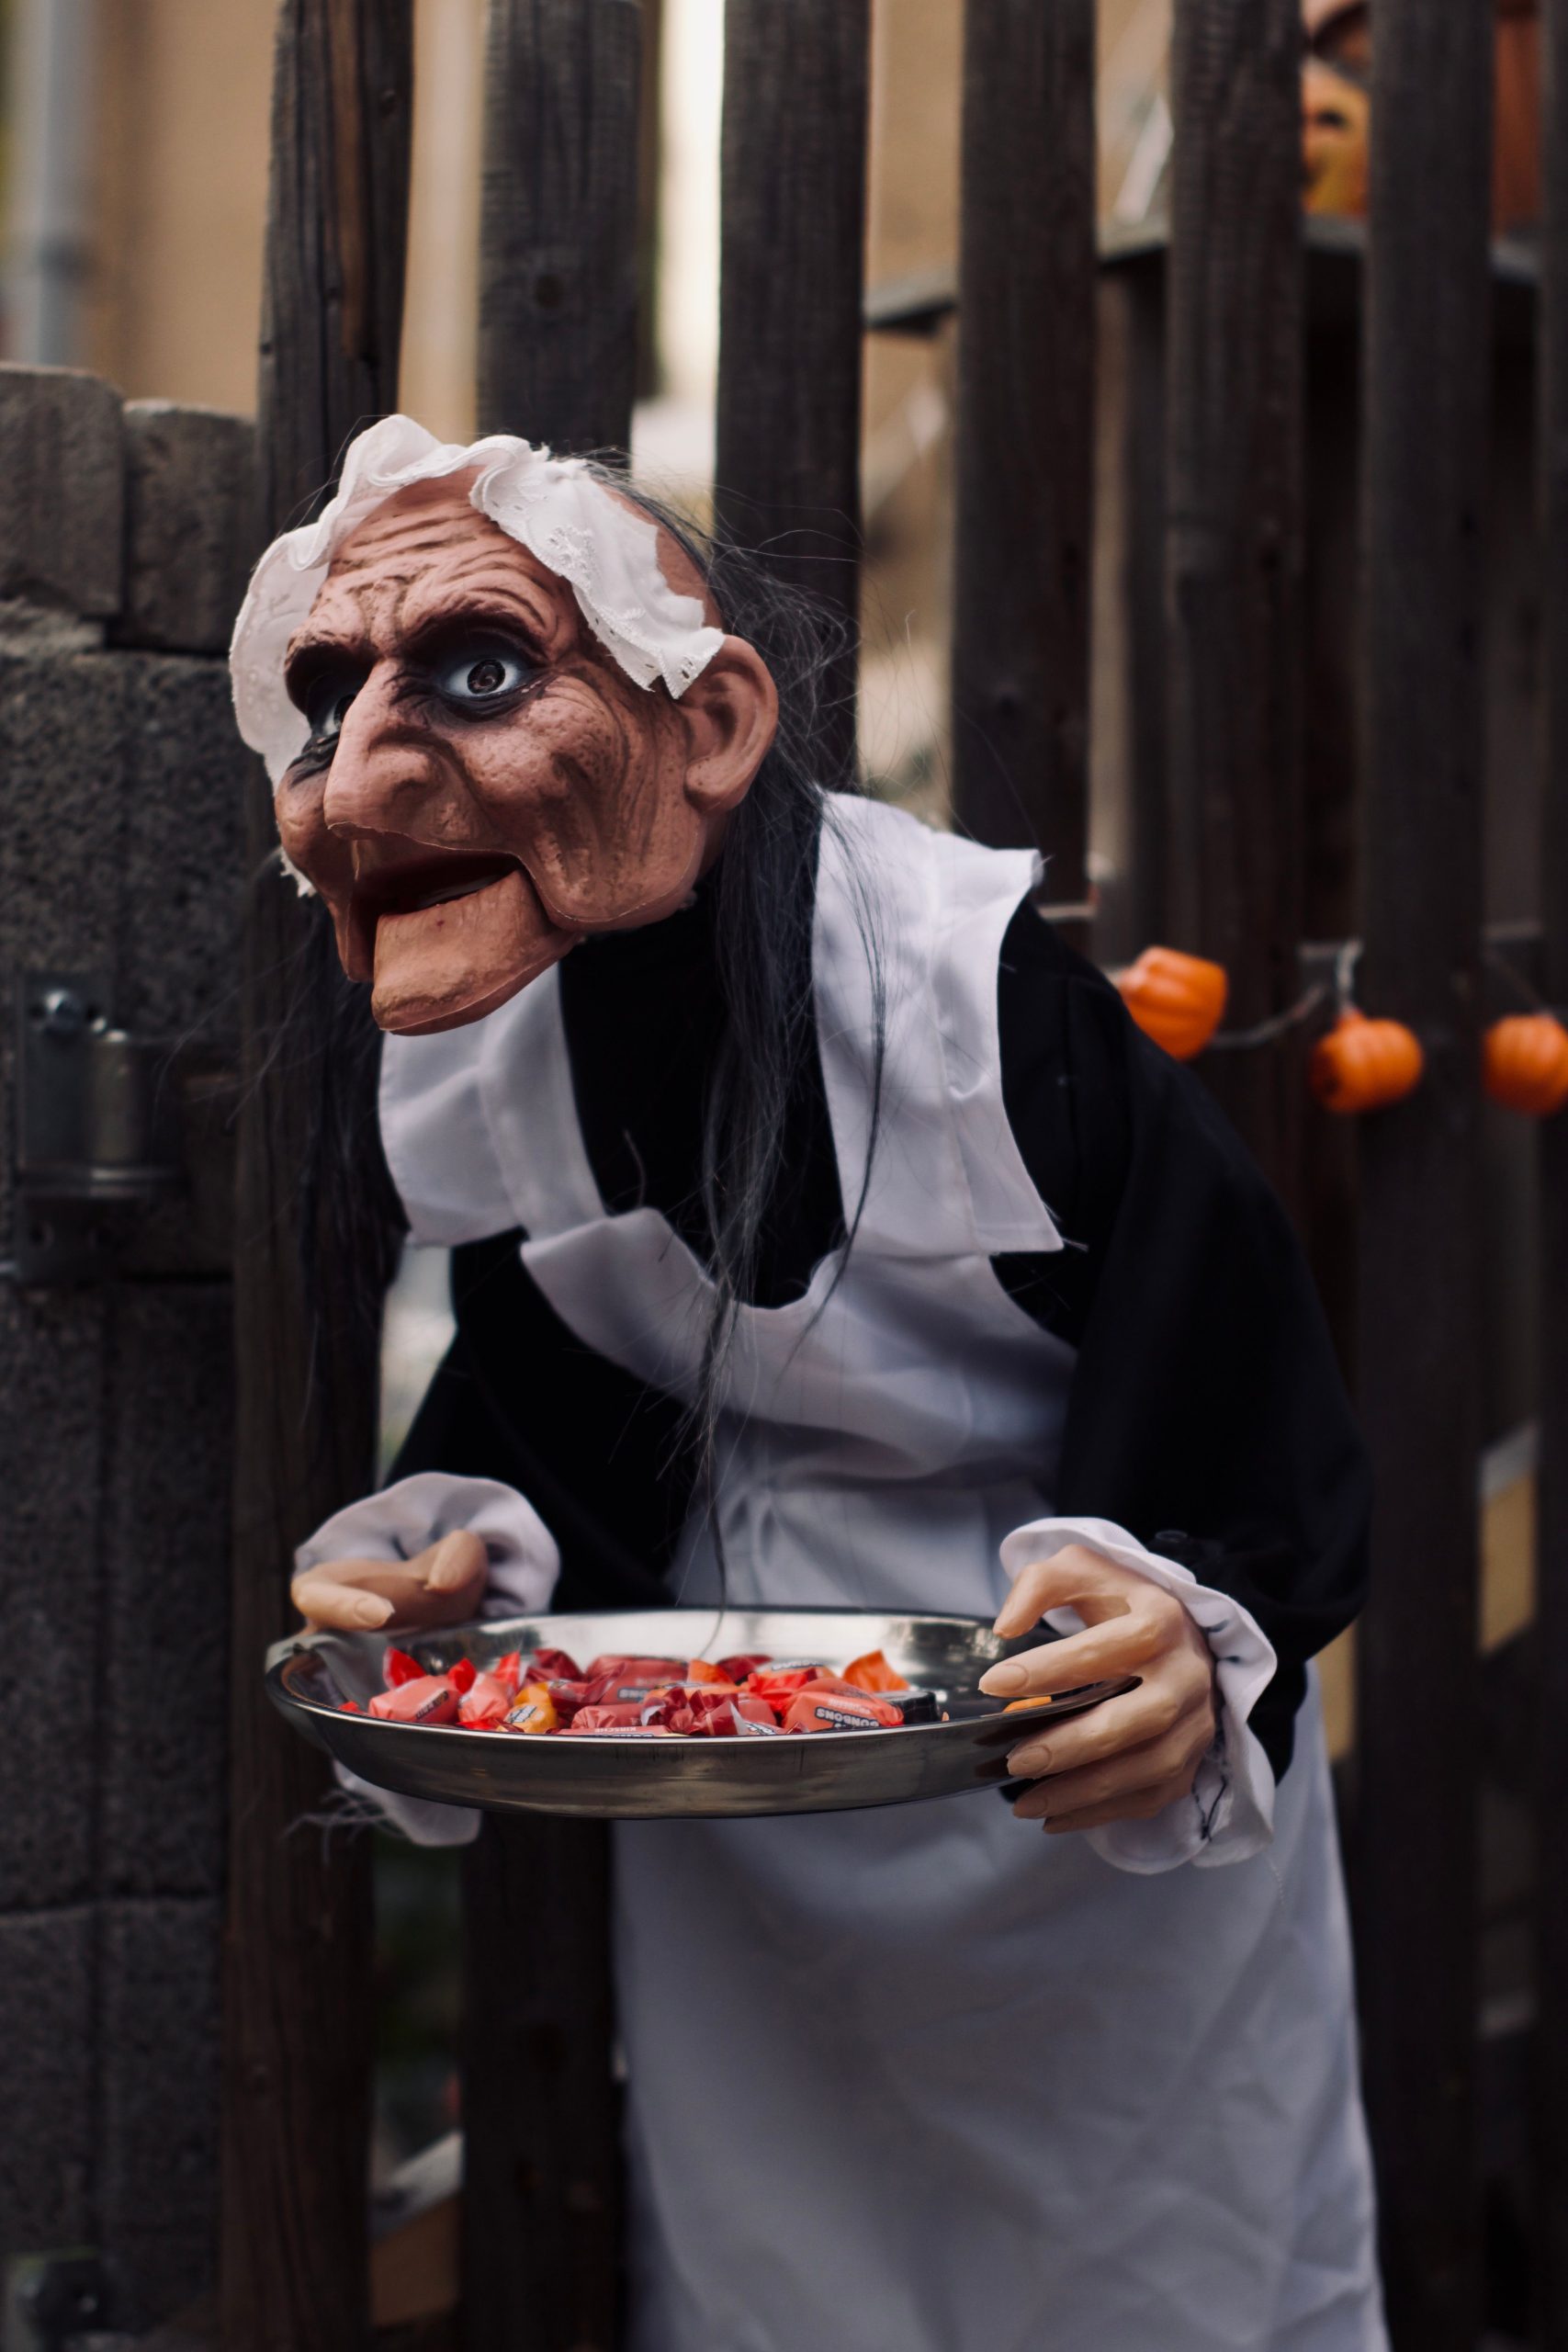
“A prop this genuinely terrifying might not be right for all neighborhoods or age groups.”
While older kids and adults might appreciate the sheer horror, it could be truly frightening for toddlers and young children. Consider your audience. If you live in a neighborhood with lots of little ones, you might want to opt for a friendlier greeter. This ‘old maid’ is perfect for an adult Halloween party or a haunted house aimed at teens and grown-ups, but she might be the reason the neighbor’s five-year-old decides to skip your house next year.
29. A Cozy Porch Illuminated by Warm String Lights and a ‘BOO’ Sign
This inviting display nails the ‘cozy spooky’ vibe, and it works because of one key principle: concentrated lighting. Instead of spreading lights out across the entire porch, they are densely clustered around a central vignette on the steps. This creates a powerful focal point that draws the eye in. The warm, orange-yellow glow from the string lights unifies all the different elements—the sign, the pumpkins, the skeleton—and bathes them in a soft, welcoming light. It feels less like a haunted house and more like a festive autumn harvest celebration, making it perfect for any neighborhood. Compare this to the more sprawling lights in Idea #12.
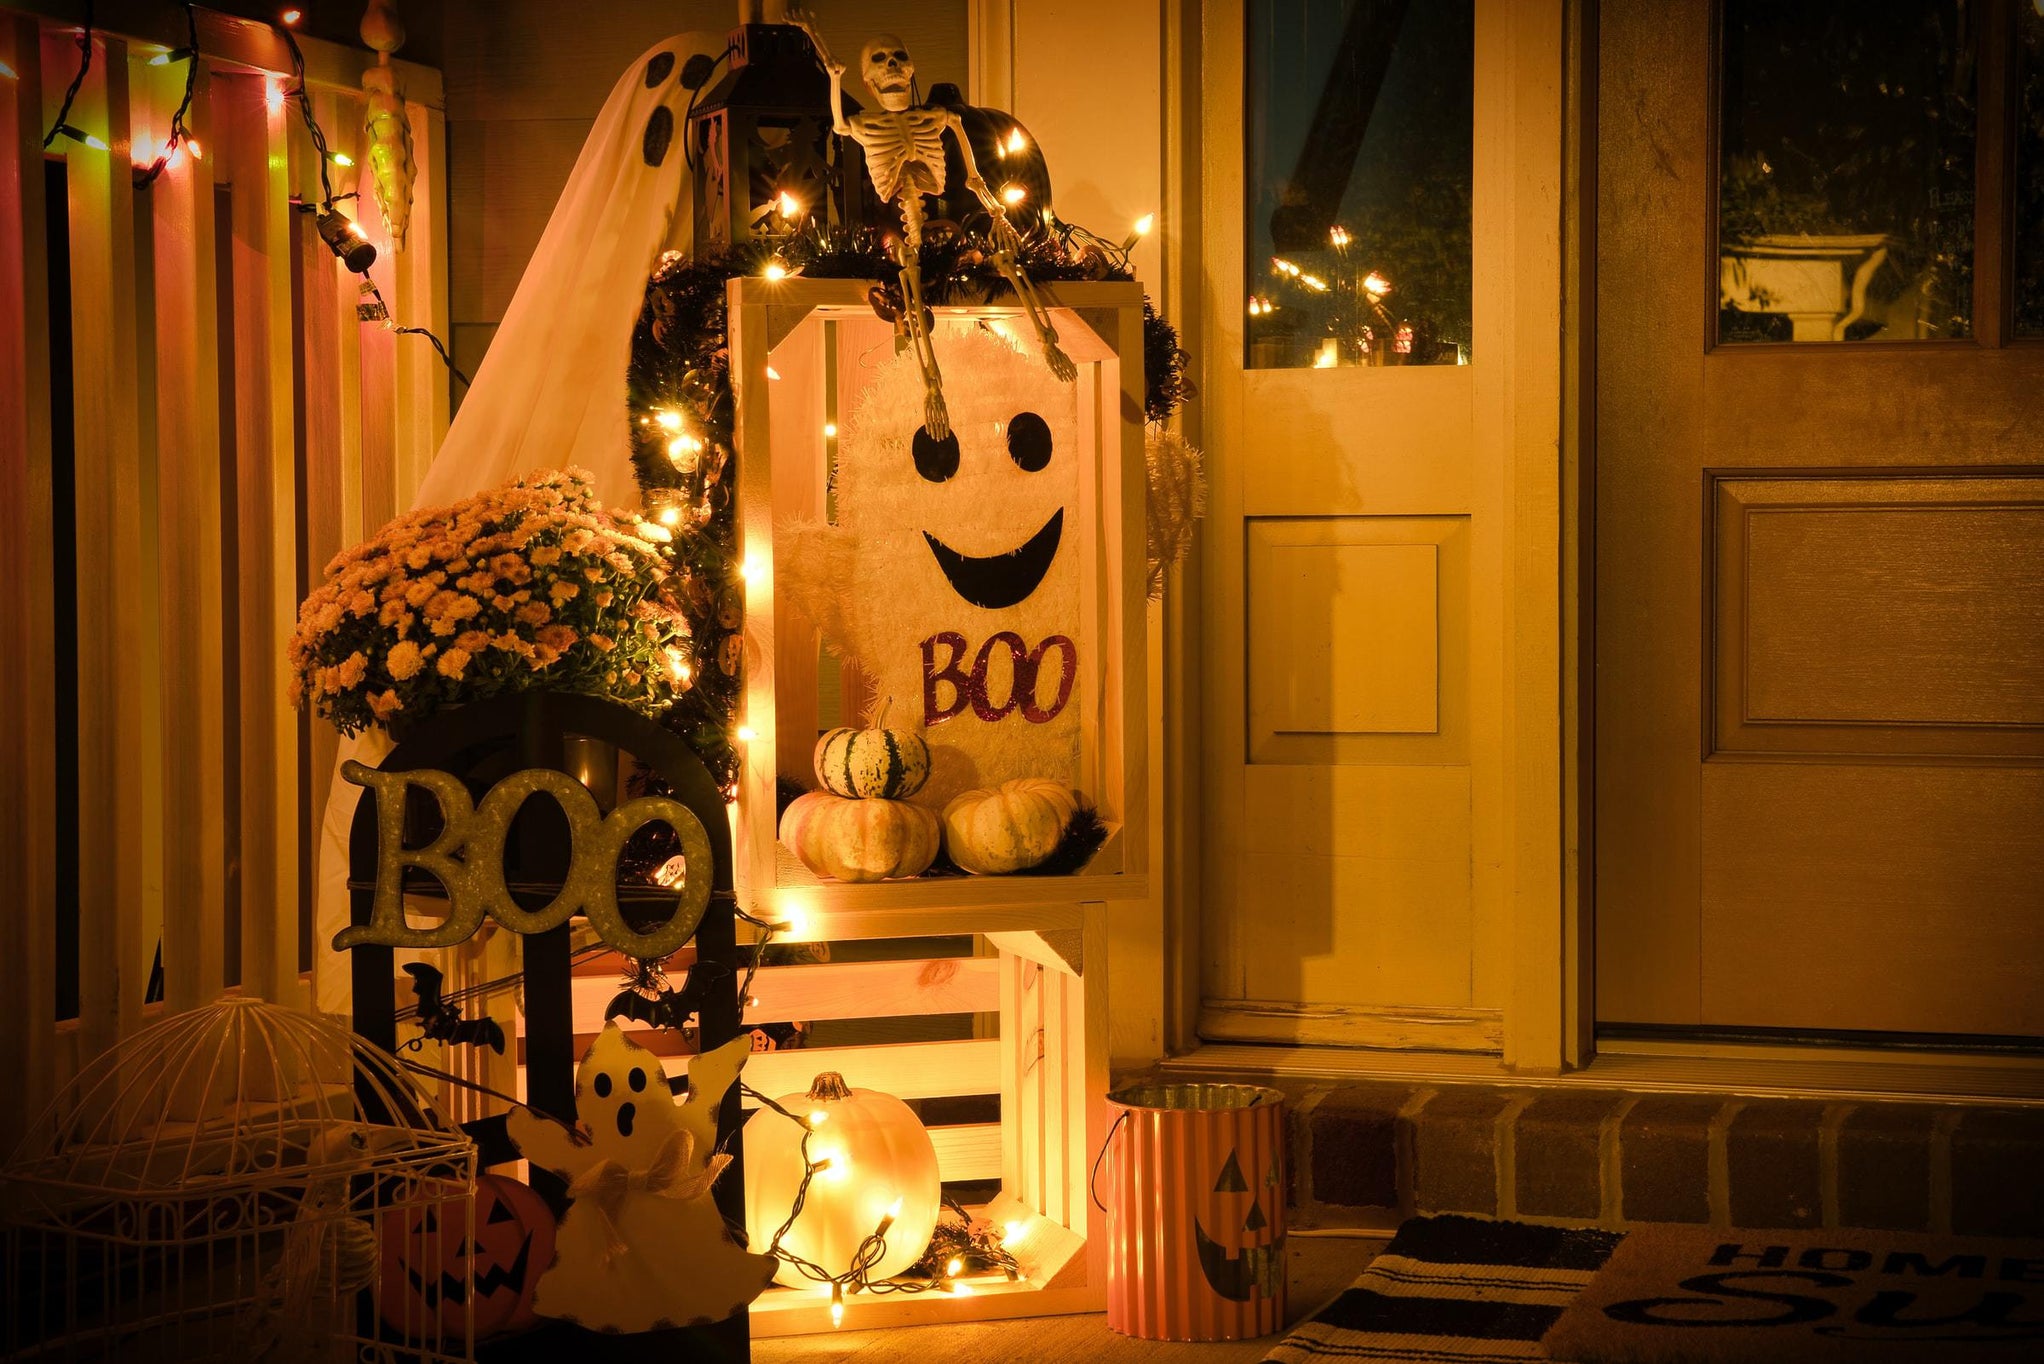
“This ‘concentrated vignette’ approach is perfect for small porches, stoops, or apartment balconies.”
You don’t need a huge amount of space to make a big impact. The core display here occupies an area of only about 4 feet wide by 3 feet deep. The key is using verticality, which is achieved with the wooden crates. By stacking your decor, you create a lush, full look in a compact footprint. This is a much more effective strategy for small spaces than scattering a few small items across the ground.
30. Classic Halloween Porch with Jack-o’-Lanterns and Bat Cutouts
This is the quintessential Halloween porch formula, and it’s a classic for a reason. The math is simple: 50% pumpkins, 30% spooky silhouettes, and 20% autumn foliage. The carved jack-o’-lanterns are the undeniable stars, providing both festive shapes and a warm glow. The black bat cutouts and spiderwebs provide a sharp, graphic contrast and are clearly read as ‘Halloween.’ The final layer of autumn leaf garlands helps to ground the look in the season and adds color and texture. It’s a balanced, can’t-go-wrong recipe for festive fun.
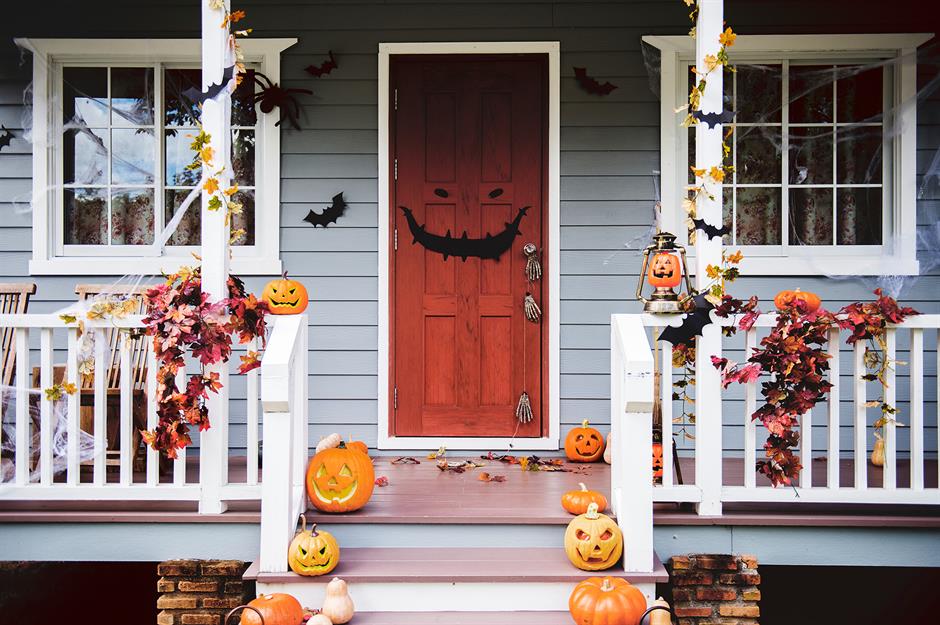
“Real carved pumpkins look and smell amazing, but they have a very short lifespan, especially in warmer climates.”
Expect a well-carved pumpkin to last anywhere from 3 days to a week before it starts to mold, soften, and collapse. To extend its life, wipe the inside and all cut surfaces with a cloth dipped in a bleach-water solution (1 tbsp bleach per quart of water) to kill mold spores. You can also coat the cut edges with petroleum jelly to slow down dehydration. For a display that lasts all of October, mix in a few foam or plastic pumpkins with your real ones.
Ready to Haunt Your Own Home?
Now you have 30 distinct, achievable ideas to make your home the spookiest on the block, without having to spend a fortune. Whether you’re going for a subtle, eerie vibe or a full-blown festive display, the key is to choose an idea that excites you and adapt it to your own space. Don’t be afraid to mix and match concepts to create your unique Halloween story. Now go get your spook on, and don’t forget to save your favorite ideas to your Halloween Pinterest board!