You know that feeling when you finally find the DIY outdoor project that looks exactly right for your space, saved on some forgotten Pinterest board? It’s time to stop scrolling and start building. We’ve seen all the dreamy backyards, and we know that a few smart, achievable projects can completely change how you use your outdoor space. After filtering through hundreds of options from home improvement stores like Home Depot and Lowe’s to decor havens like Target, we’ve narrowed it down to the very best. This isn’t just a list of pretty pictures; it’s a curated guide to 29 genuinely doable outdoor DIYs. We’re covering everything from rustic pallet gardens to modern pergola lounges, with ideas that work for sprawling yards and tiny patios alike. The real satisfaction of outdoor living is even better when you’ve built it yourself. And stay until the end — we break down the most common mistakes that can ruin these looks. 📌 Save this to Pinterest for later — you’ll want to revisit these ideas.
1. Multi-Zone Paver Patio with a Central Fire Pit
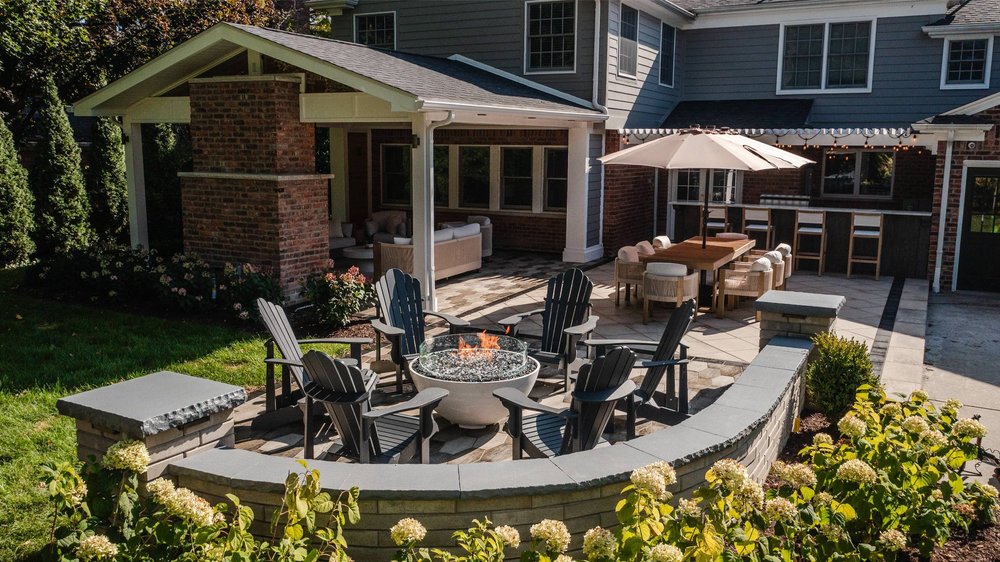
This layout is a masterclass in creating ‘rooms’ without walls. What makes it work so well is the clear definition of zones. The circular paver pattern for the fire pit area acts as a visual ‘rug,’ separating it from the linear dining space. This creates dedicated spots for different activities—chatting by the fire, enjoying a meal—without feeling disconnected. The use of a consistent paver style across all zones unifies the entire patio, while retaining walls add elevation and create cozy, enclosed-feeling nooks. It’s smart, functional design that encourages flow and makes a large space feel both grand and intimate.
“A project of this scale is a significant investment, but breaking it down shows where the money goes.”
Creating a multi-zone patio is less about a single purchase and more about layering materials and furnishings. Remember that labor can be a huge variable if you’re not doing the paver and wall installation yourself.Pavers & Base Materials (Gravel, Sand): $2,500 – $6,000Stone Veneer Retaining Wall: $1,500 – $4,000Fire Pit (White Bowl): $400 – $900Dining Set (Table & 6-8 Chairs): $1,200 – $3,500Lounge Furniture (Sofa & Chairs): $2,000 – $5,000TOTAL: $7,600 – $19,400+
2. Modern Tiered Yard with Wood Slats, Turf, and Concrete Planters
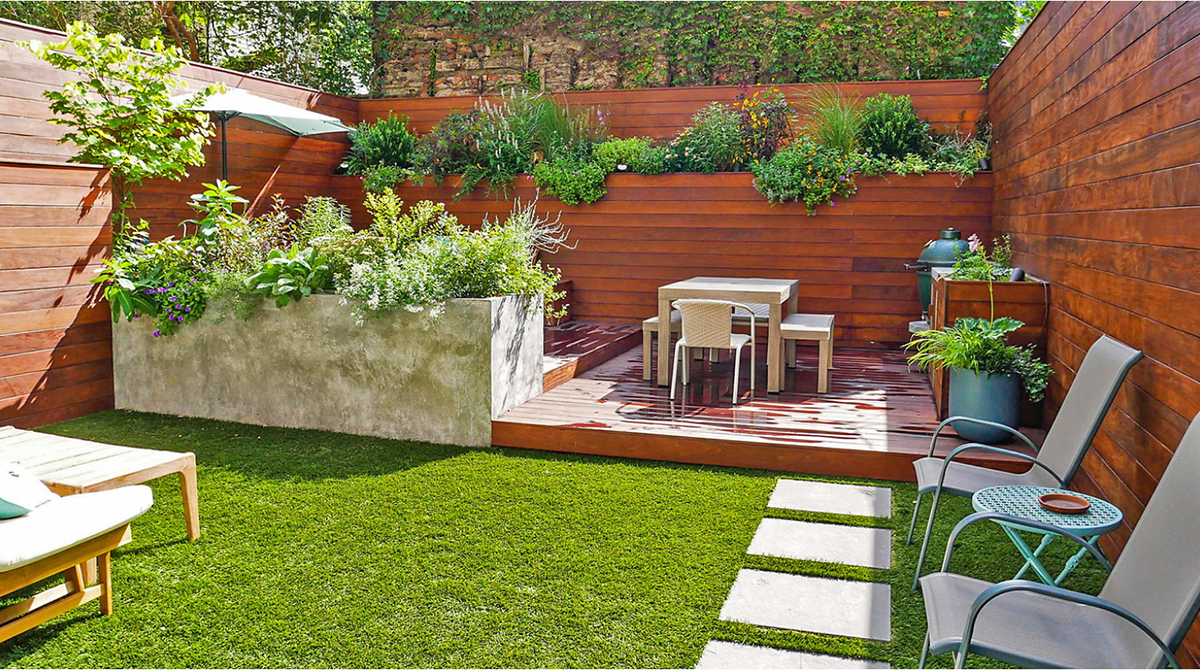
When you’re building tiered planters with horizontal wood slats, the details prevent it from looking like a simple fence. For a high-end, modern finish, use a consistent 1/4-inch gap between your boards. This creates clean shadow lines that emphasize the horizontal design. Use a spacer block made from scrap wood to ensure every gap is identical as you install the slats. Also, consider running a vertical ‘cap’ board along the exposed ends of the slats to hide the end grain and give the entire structure a polished, intentional frame. This small step elevates the project from rustic to architectural.
“This design is brilliant for yards with existing slopes, but it can also be used to create interest on a flat lot.”
It works best in a space that is at least 20 feet wide to allow for distinct tiers without feeling cramped. For the full effect with lawn, decking, and planters, you’ll want a minimum depth of 25-30 feet. The horizontal wood slats are a great visual trick; they make a narrow space feel wider. If your yard is smaller, say 15×20 feet, consider a simplified version with just two tiers: one raised planter bed and one level for turf or pavers.
3. Poolside Lounge with a Geometric Concrete Fire Pit
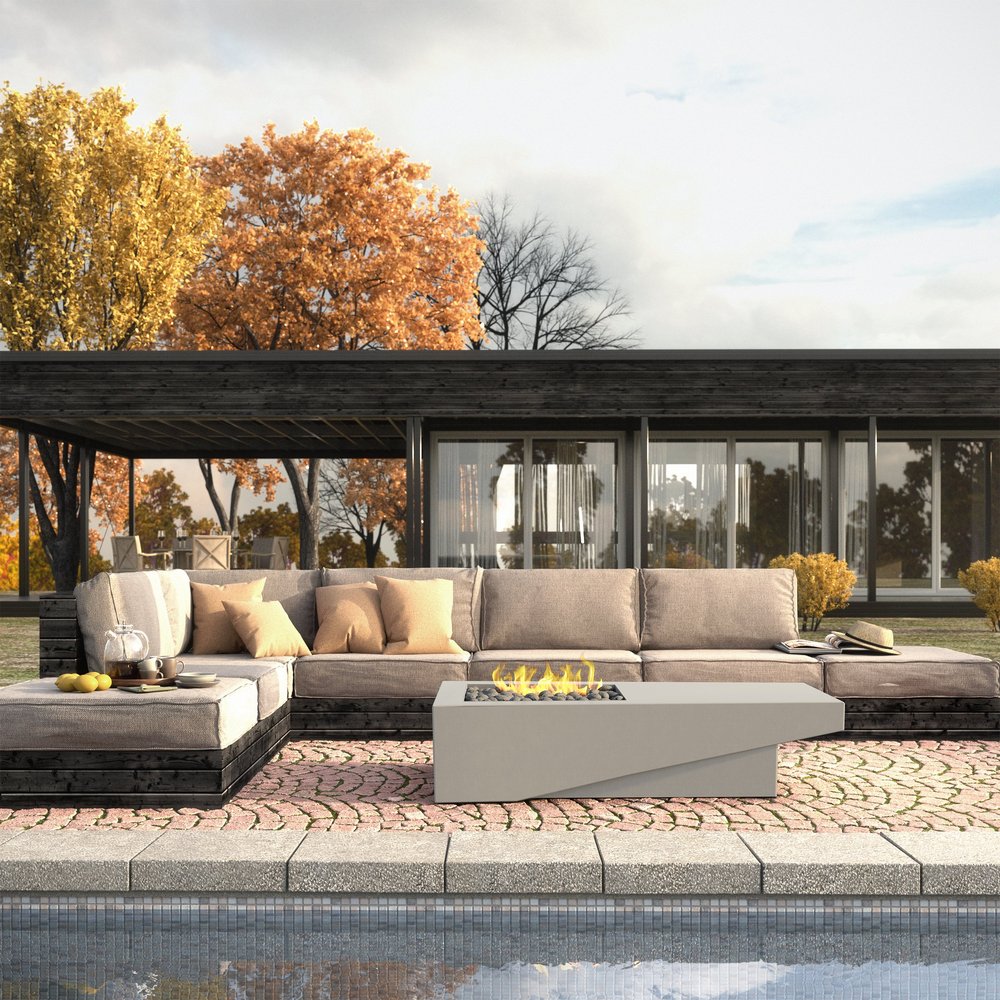
that absolutely makes this space is the geometric fire pit. Take it away, and you have a nice sectional by a pool. With it, you have a destination. Its sharp, faceted angles provide a sculptural contrast to the soft cushions of the sofa and the fluid water in the pool. The light gray concrete finish feels modern and substantial, grounding the entire seating area. It’s not just a source of heat; it’s a piece of art that acts as the undeniable focal point, drawing people in and creating a natural gathering spot day or night.
“Let’s have some real talk about light-colored outdoor upholstery.”
While that light gray sectional looks incredible, it’s a magnet for everything from pollen and bird droppings to spilled rosé. To keep it looking fresh, you absolutely must invest in furniture covers and use them religiously. Plan to deep clean the cushions at least twice a season with an outdoor fabric cleaner. And before you buy, confirm the cushions are made with a solution-dyed acrylic fabric (like Sunbrella) and have quick-dry foam cores. Otherwise, you’ll be dealing with mildew and fading within a year.
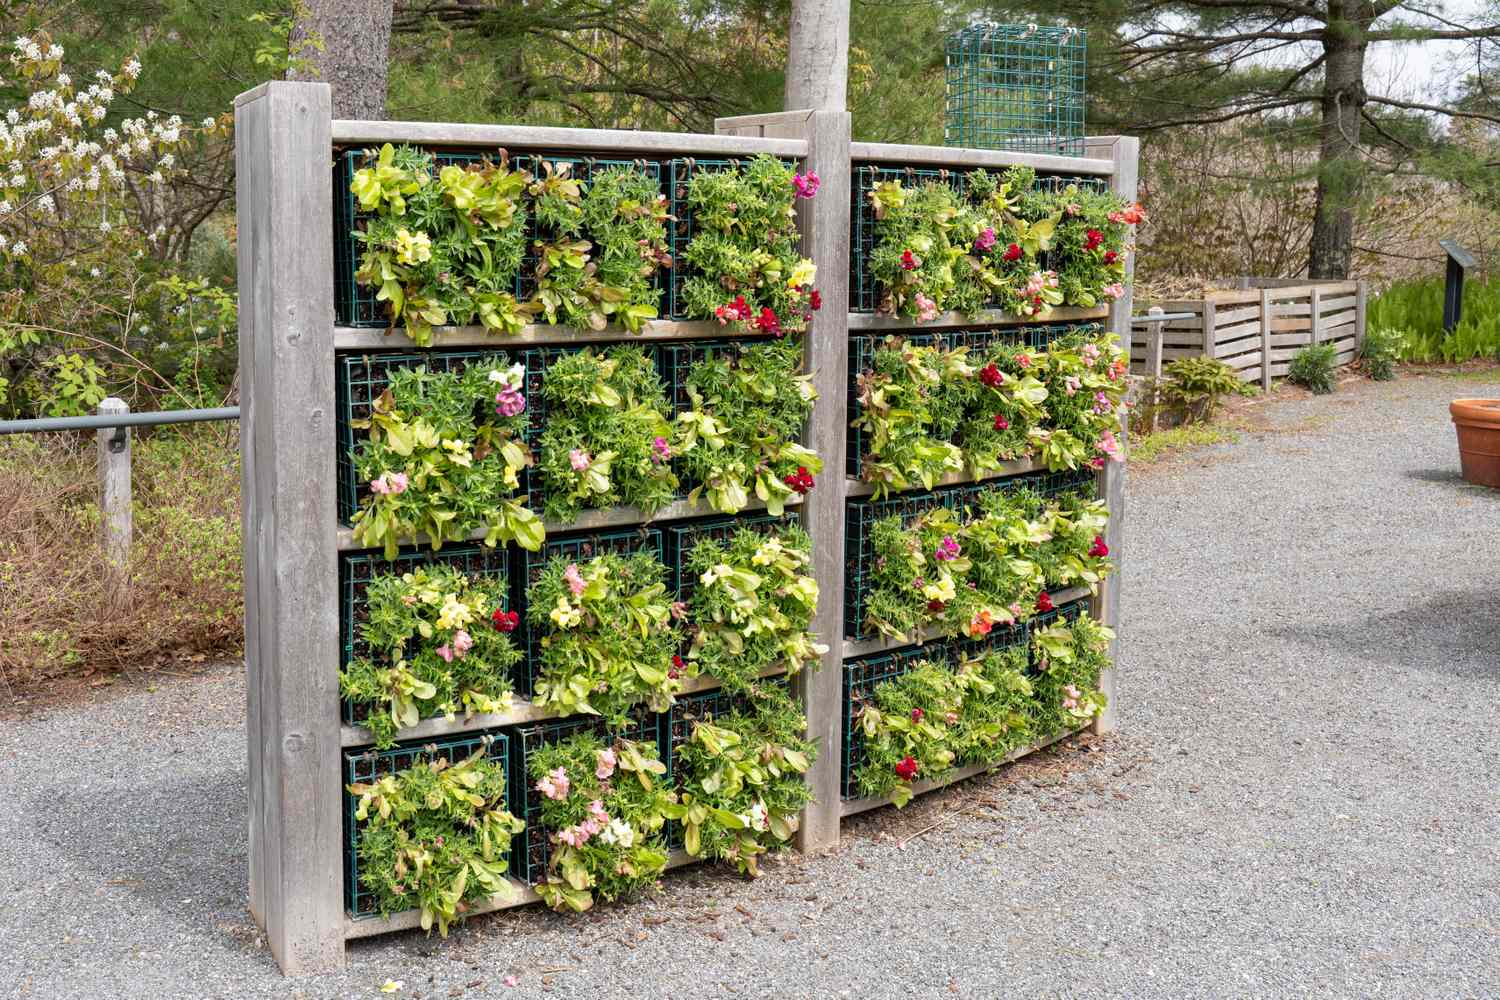
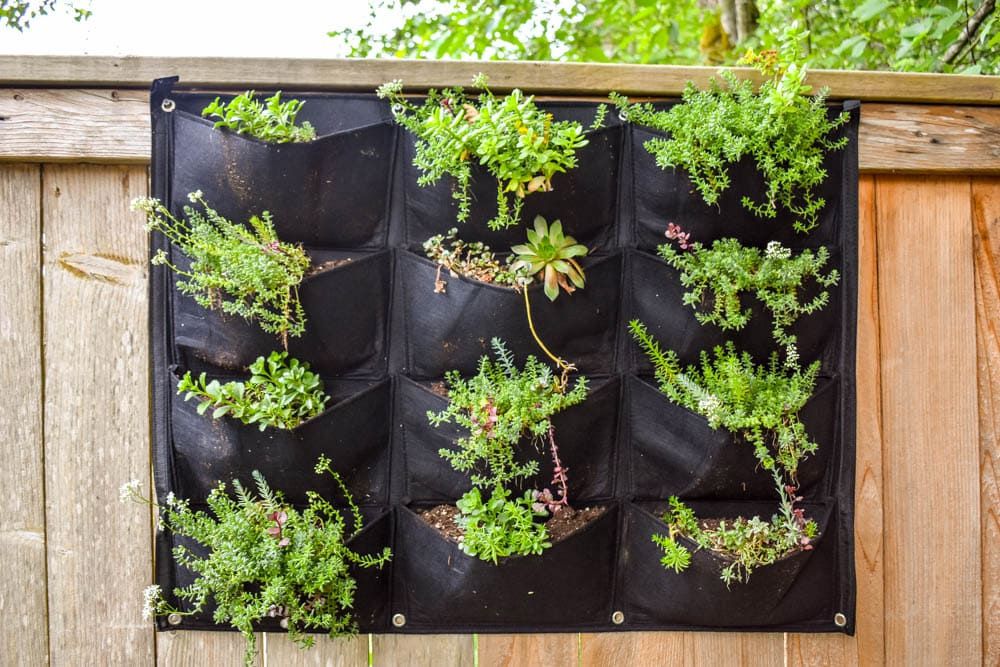
4. Vertical Pallet Garden with Edible Plants and String Lights
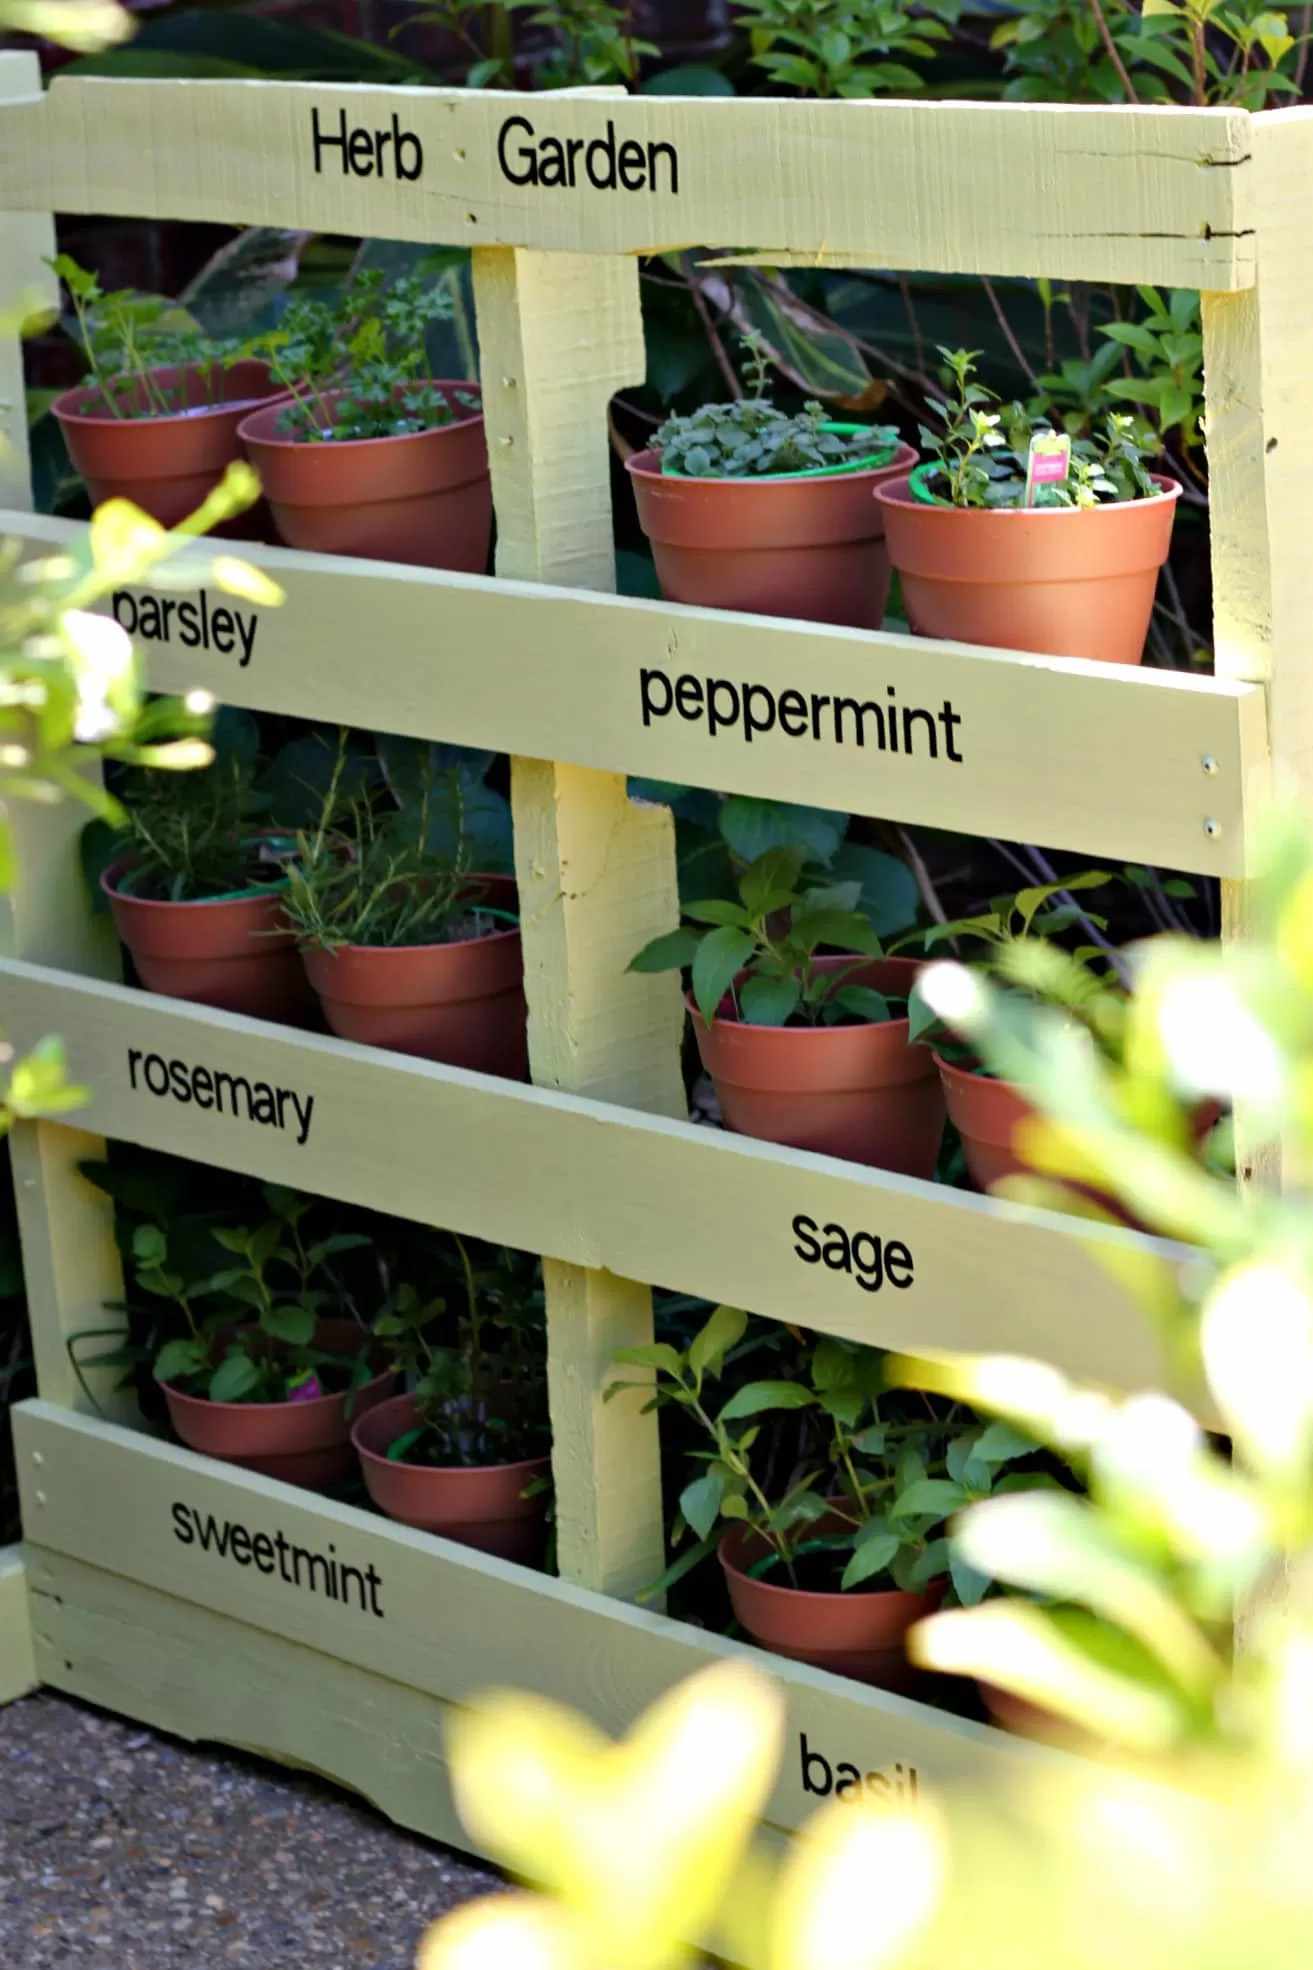
You can build your own vertical pallet garden in an afternoon. It’s a fantastic way to grow herbs and small vegetables if you’re short on space. This guide is for creating the planter pockets.
- Time Estimate: 2-3 hours
- Material Cost: $20-$40 (plus plants)
- Find a heat-treated (marked ‘HT’) pallet, not one treated with chemicals. Sand down any rough spots to avoid splinters.
- Decide which openings you’ll use for planting. You’ll essentially create fabric pockets inside the pallet.
- Cut sections of landscape fabric wide enough to be stapled to the front and back slats of an opening, and long enough to form a deep ‘U’ shape inside.
- Using a staple gun, secure the fabric inside the pallet cavity, creating a pouch to hold soil. Staple generously!
- Stand the pallet upright in its final location (it will be heavy once filled). Fill the fabric pockets with potting soil and add your plants.
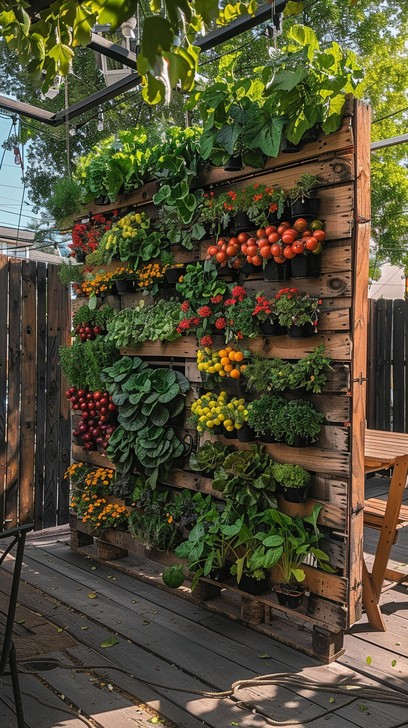
“The entire point of a pallet garden is that it’s resourceful and affordable.”
You can often get pallets for free from local hardware stores, garden centers, or businesses—just ask! Instead of buying dozens of new terracotta pots, save money by using recycled containers like tin cans (drill drainage holes!), yogurt cups, or even old coffee mugs. For soil, buying one large bag of quality potting mix is more economical than many small bags. And for plants, starting from seeds is always the cheapest route if you have the patience. This whole project can easily be done for under $50.
5. Slatted Wood Bench with Built-In Planter Boxes
The beautiful simplicity of this bench comes down to a clear formula: 80% Structure + 20% Nature. The bench itself, with its clean lines and light-toned wood slats, accounts for the majority of the visual weight. It’s functional and minimalist. The remaining 20% is the integrated greenery, which breathes life into the piece. You can change the ‘flavor’ of the bench by altering that 20%. Swap the simple green plants for vibrant, trailing flowers for a more romantic look, or use sculptural succulents for a modern desert vibe. The core structure remains the same, but the personality shifts with the planting.
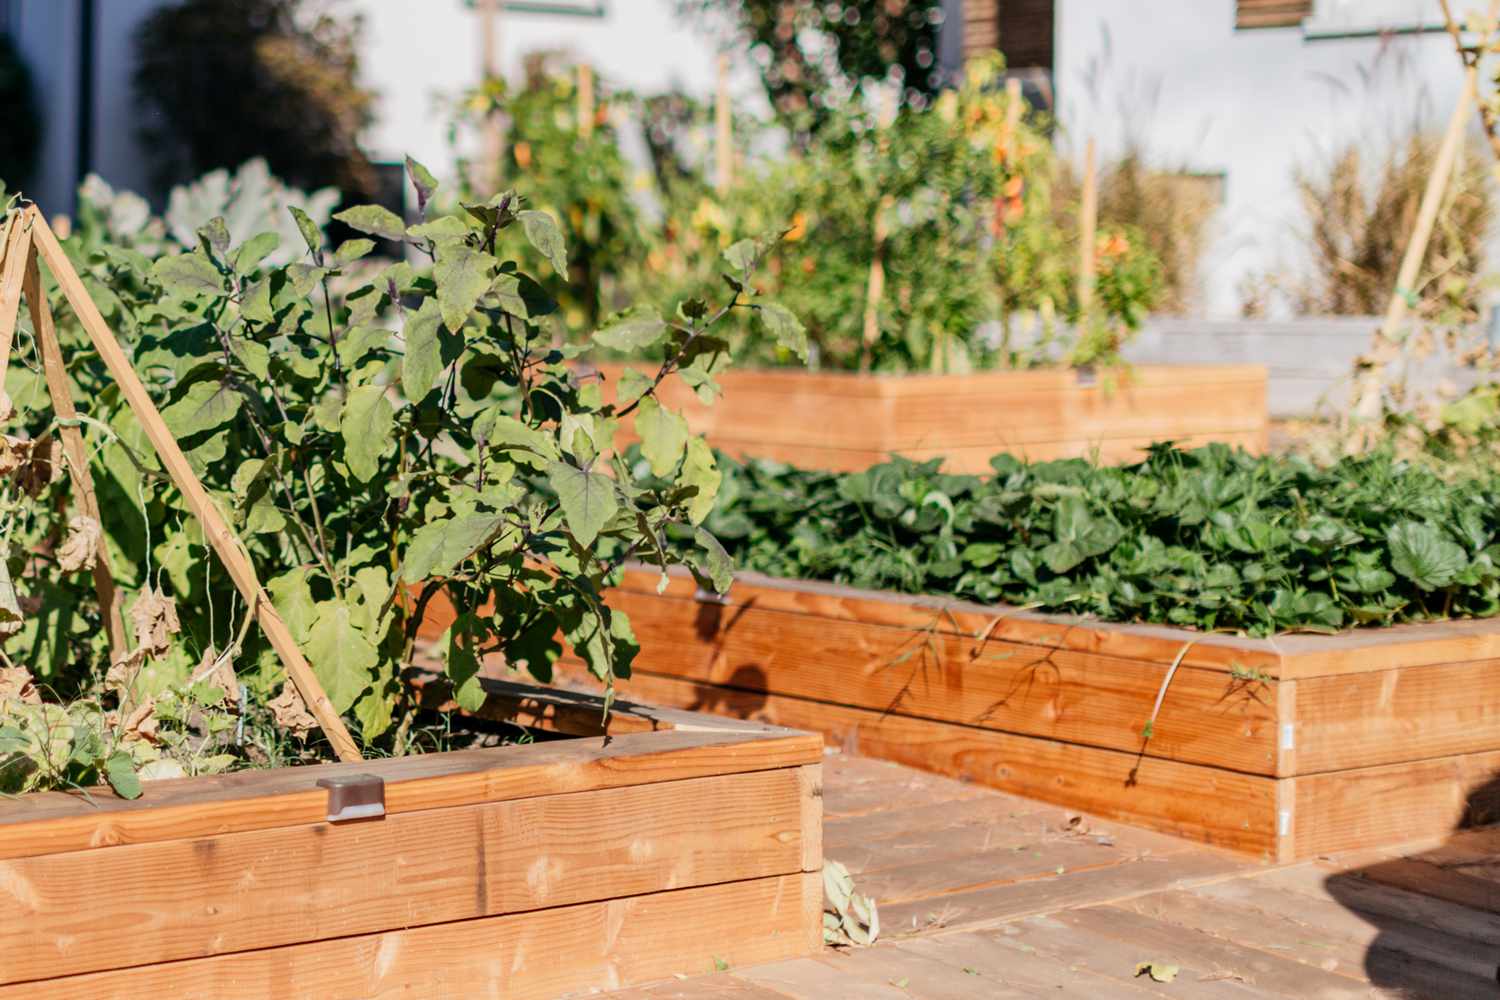
“A light, natural wood bench like this is gorgeous, but it won’t stay that way on its own.”
Unprotected wood outdoors will turn a silvery gray and can be prone to rot and splintering, especially a slatted top where water can pool. To keep that warm, light-toned look, you must seal it every single year with a quality outdoor sealant that has UV protection. If you live in a very wet or sunny climate, you might even need to do it twice a year. If that sounds like too much work, consider using cedar, which is naturally rot-resistant, or a composite material that mimics wood without the upkeep. Also check out the larger-scale built-in seating in Idea #25.
6. L-Shaped Black Slatted Bench with Coral and Pink Pillows
The secret to successfully using bold, colorful pillows outdoors is to choose a maximum of three coordinating colors and then vary the pattern and texture within that palette. Here, it’s coral, pink, and orange. Notice how there’s a mix of a large floral print, a tight geometric pattern, and a solid color. This creates visual interest without looking chaotic. For every two patterned pillows, add one solid pillow to give the eye a place to rest. This prevents the arrangement from becoming overwhelming and makes the patterns pop even more.
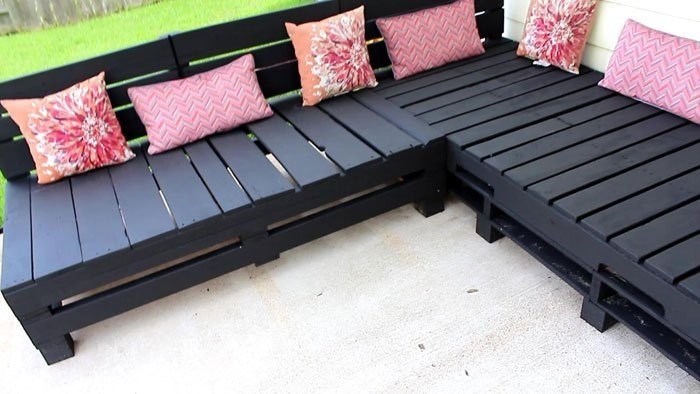
“This look is all about high contrast, and it works because the foundation is so simple.”
The black L-shaped bench acts as a strong, neutral anchor—almost like a black picture frame. Its dark color makes the vibrant pinks and corals of the pillows appear even more saturated and bright. The clean lines of the slatted wood provide a modern, graphic quality that keeps the floral and geometric pillow patterns from feeling fussy or dated. The light grey pavers offer a calm, neutral ground plane that doesn’t compete for attention. It’s a textbook example of using a dark base to make accent colors sing.
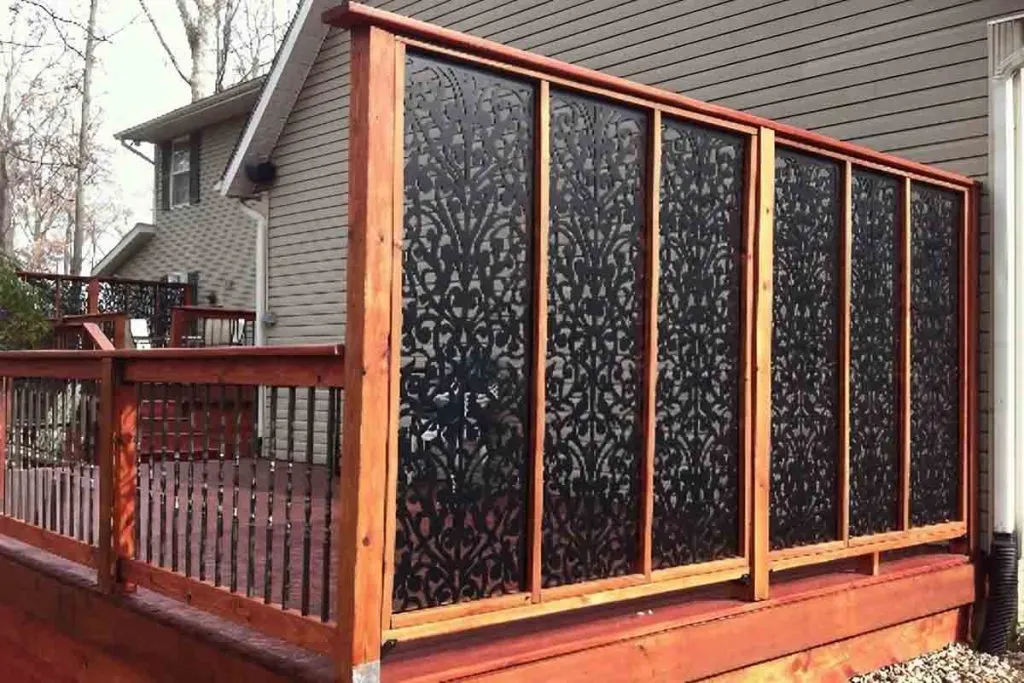
7. Slat Wood Privacy Trellis with Integrated Shelving
This project is all about the integrated shelves. Without them, it’s just a nice-looking privacy screen. But by adding a few small shelves directly into the trellis structure, the entire piece transforms from a simple barrier into a dynamic, vertical garden display. It creates depth and allows for a curated collection of pots at different heights, turning a flat wall into a living, three-dimensional feature. This single detail adds immense character and function, making the trellis a destination for the eyes rather than just something that hides the neighbor’s trash cans.
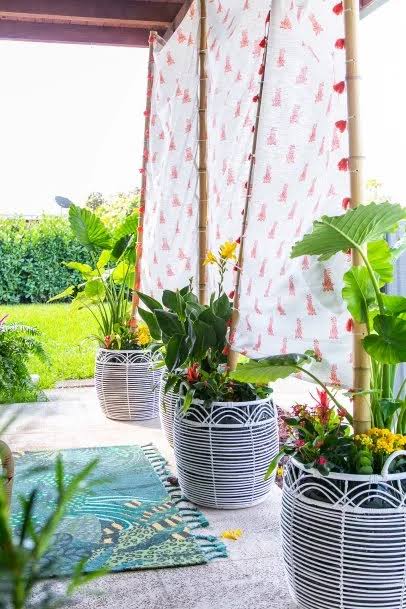
“A trellis wall is a fantastic project, but a little planning goes a long way.”
Before you even buy the wood, run through this checklist:Measure Your Spot: Get the exact height and width. Will it block a window or access path? Remember to account for the space plants will take up.Check Your Sun: What direction does the wall face? This will determine what kind of plants can actually survive there. A north-facing wall needs shade lovers; a south-facing wall will bake most plants without careful watering.Confirm Your Base: What will the trellis stand on? Pavers? A deck? Dirt? You need to plan how you’ll anchor the posts securely so a strong wind doesn’t turn it into a sail.Budget for Plants: The trellis is only half the project. Factor in the cost of the pots and all those beautiful plants needed to fill it out!
8. Cozy Pergola Nook with a Wicker Chair and String Lights
This is the perfect solution for a small, underused corner of a patio or deck. The magic happens in a compact footprint, roughly 6×6 feet to 8×8 feet. You need just enough space for a comfortable chair, a small side table for your drink, and a few potted plants to enclose the space. The pergola itself doesn’t need to be massive; an 8-foot ceiling height is plenty to feel airy while still being intimate. This setup proves you don’t need a huge backyard to create a dedicated, cozy escape. For a much grander take on the pergola concept, see the sprawling layout in Idea #15.
“You can capture this cozy vibe for a fraction of the cost of a custom-built pergola.”
Look for a simple, freestanding arch or a corner pergola kit online or at a big box store for around $200-$400. For seating, skip the pricey outdoor-specific stores and hunt for a secondhand wicker chair on Facebook Marketplace for under $50. A can of spray paint can work wonders! Instead of expensive nursery pots, use simple terracotta planters from a hardware store. Finally, a few sets of solar-powered string lights ($20-$30) will give you that warm glow without needing an electrician.
9. Rustic Pallet Planter with Terracotta Pots and Wire Hangers
Using raw, untreated pallet wood for outdoor projects has a wonderfully rustic look, but it comes with a maintenance reality. This wood is not meant for long-term weather exposure. It will absorb water, which can lead to rot, mold, and discoloration within a couple of seasons, especially at the base where it touches the ground. The rough surface is also prone to splintering. To prolong its life, you should at least apply a clear, water-repellent sealant. For better durability, especially in a wet climate, consider painting it with exterior-grade paint, though you’ll lose the natural wood look.
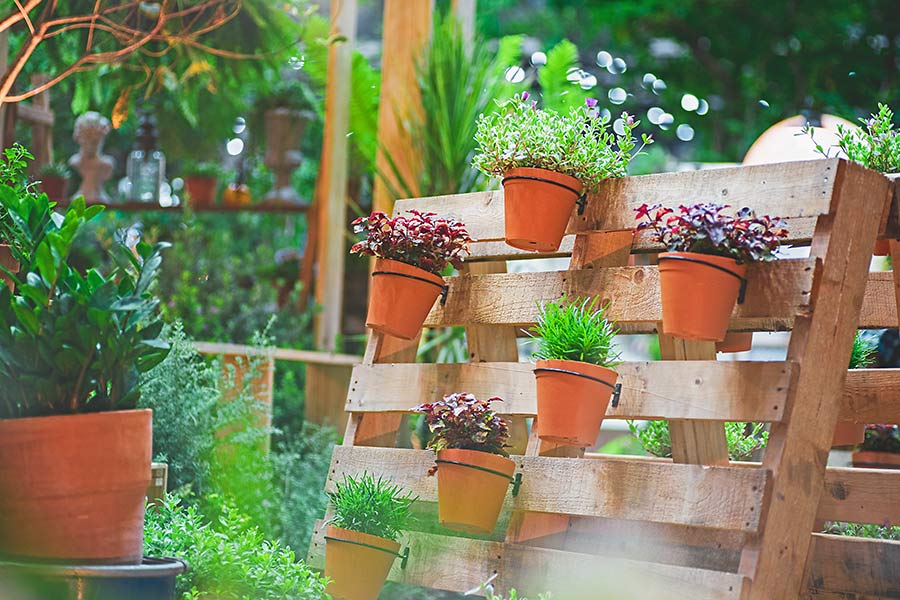
“There’s a reason pallet projects continue to dominate Pinterest boards: they tap directly into the desire for sustainable, resourceful, and character-rich design.”
This isn’t about a slick, mass-produced product; it’s about seeing potential in a discarded object. This trend, closely related to ‘upcycling’ and modern farmhouse aesthetics, celebrates imperfection and ingenuity. It feels authentic and achievable. As people look for more ways to personalize their spaces and reduce waste, the humble pallet remains a powerful symbol of DIY creativity. Compare this hanging-pot style with the built-in pocket version in Idea #4.
10. Woven Hanging Swing Chair on a Pea Gravel Patio
When installing a hanging chair from a wooden pergola or beam, safety is non-negotiable. Don’t just screw a hook into the wood. The dynamic load of a person swinging is much greater than their static weight. You must use a heavy-duty 1/2-inch or 5/8-inch eyebolt that goes all the way through the beam, secured on top with a washer and a nut. Pre-drill the hole to prevent the wood from splitting. This ensures the force is distributed through the entire beam, not just relying on the holding power of wood threads. Always check the weight rating of both the chair and your hardware.
“Pea gravel is a fantastic, budget-friendly option for a casual patio surface, but let’s be real about it.”
It travels. It will get kicked into your lawn, tracked into your house, and it’s a nightmare to roll anything over (like a grill or a stroller). Chairs can also feel a bit wobbly as their legs sink in. To minimize these issues, you must install a solid border or edging to contain it, and start with a level, compacted base with a layer of landscape fabric underneath to prevent weeds. It’s a great look, but it is not a zero-maintenance surface.
11. Wall-Mounted Potting Bench Made from a Pallet
This floating potting bench is a brilliant space-saver for a small patio or narrow side yard. It keeps all your supplies off the ground. Here’s how to mount it securely.
- Time Estimate: 1.5 hours
- Material Cost: $30-$60
- Find a heat-treated (HT) pallet and decide which side will be the ‘top’ surface. You may want to add a solid board across the slats for a more even workspace.
- Locate the wall studs. This is critical. You cannot mount this on siding alone. Use a stud finder.
- Attach a 2×4 ledger board horizontally to the wall, screwing it directly into the studs at your desired bench height.
- Rest the back edge of the pallet on the ledger board and screw it securely into the ledger.
- Attach your chains from the front corners of the pallet up to the wall at a 45-degree angle, making sure to anchor them into studs. Use heavy-duty eye hooks.
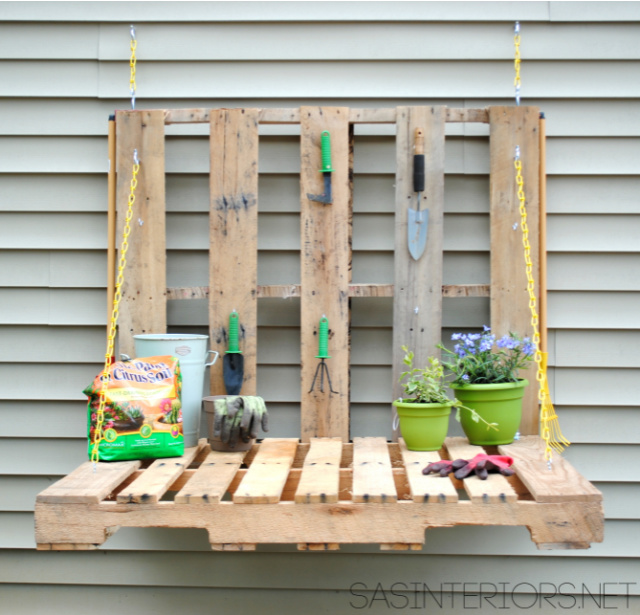
“This is a classic ‘scrap wood’ project where the main component should ideally be free.”
The costs are all in the hardware and finishing touches that make it functional and durable.Pallet: $0 (Find one for free!)Heavy-Duty Chain & Mounting Hardware (eye bolts, screws): $25 – $50Exterior Wood Sealant: $15 – $30Gardening Tools & Pots: $20 – $100+ (depending on what you already own)TOTAL: $60 – $180Budget alternative: Instead of buying chain, you can create two simple 45-degree support legs from scrap 2x4s that attach to the wall studs and the underside of the pallet.
12. Tiered Plant Stand Against a Teal and White Wall
The vibrant energy of this little corner comes from a bold but balanced recipe: 50% Natural Texture + 30% Bold Color + 20% Living Greenery. The rustic, stained wood of the plant stand and the earthy terracotta pots provide the foundational natural element. The star of the show is the 30% block of bright teal on the wall, which is what makes the whole scene pop. The look is completed by the varied green plants, which soften the composition. You could swap the teal for a sunny yellow or a deep magenta and achieve a totally different but equally dynamic mood, as long as you keep the wood and plant ratios consistent.
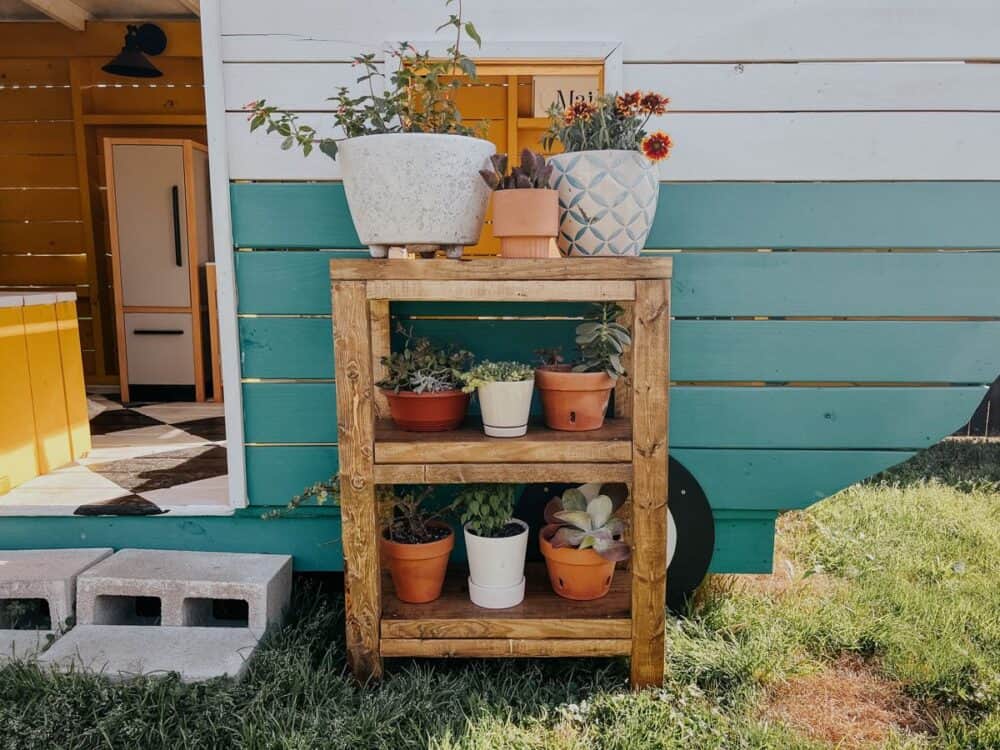
“This setup works because of the smart use of layering and color blocking.”
The two-toned wall is the secret weapon here. Painting the bottom third a bold color like teal grounds the scene and creates a deliberate backdrop for the plant stand. The white top half keeps it from feeling too heavy and reflects light back onto the plants. The tiered stand itself adds vertical interest, allowing a variety of plants to be displayed without looking cluttered. It’s a composition where every element has a clear purpose.
13. Modern Rectangular Planter with Colorful Foliage
The single element that elevates this planter from basic to beautiful is the mixed-material construction. The combination of a dark, thin frame with light, warm reddish-brown wood panels creates a sophisticated, modern look. If the entire box were made of one material, it would be far less interesting. This contrast highlights the planter’s clean, rectangular shape and gives it a ‘designed’ quality. It’s a small detail that makes a huge difference, turning a simple box for plants into a deliberate piece of outdoor decor.
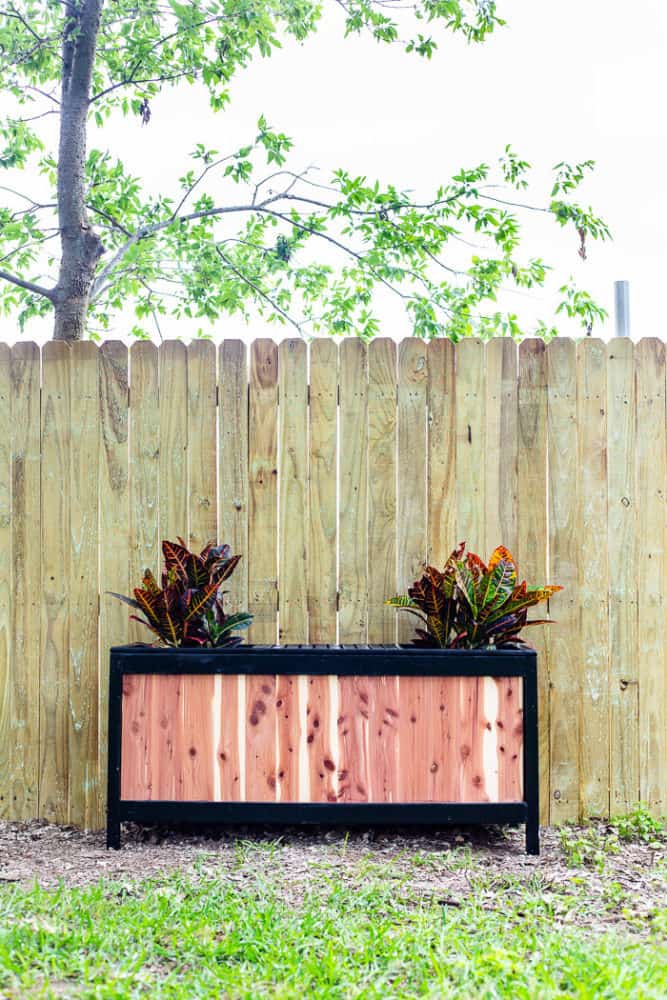
“Before you build or buy a planter box, think about where it will live and what will live in it.”
Here’s a quick mental checklist:Drainage is Everything: Does the planter have holes in the bottom? If not, you must drill some. No drainage is a death sentence for most plants.Material Matters: Is the wood you’re using rated for outdoor/ground contact? Untreated pine will rot in a season or two. Cedar, redwood, or pressure-treated wood are your best bets for longevity.Sun vs. Shade: Where will you place the planter? Full sun? Morning sun only? The answer determines which plants you should buy. Don’t put a shade-loving fern in a spot that gets blasted with sun all afternoon.
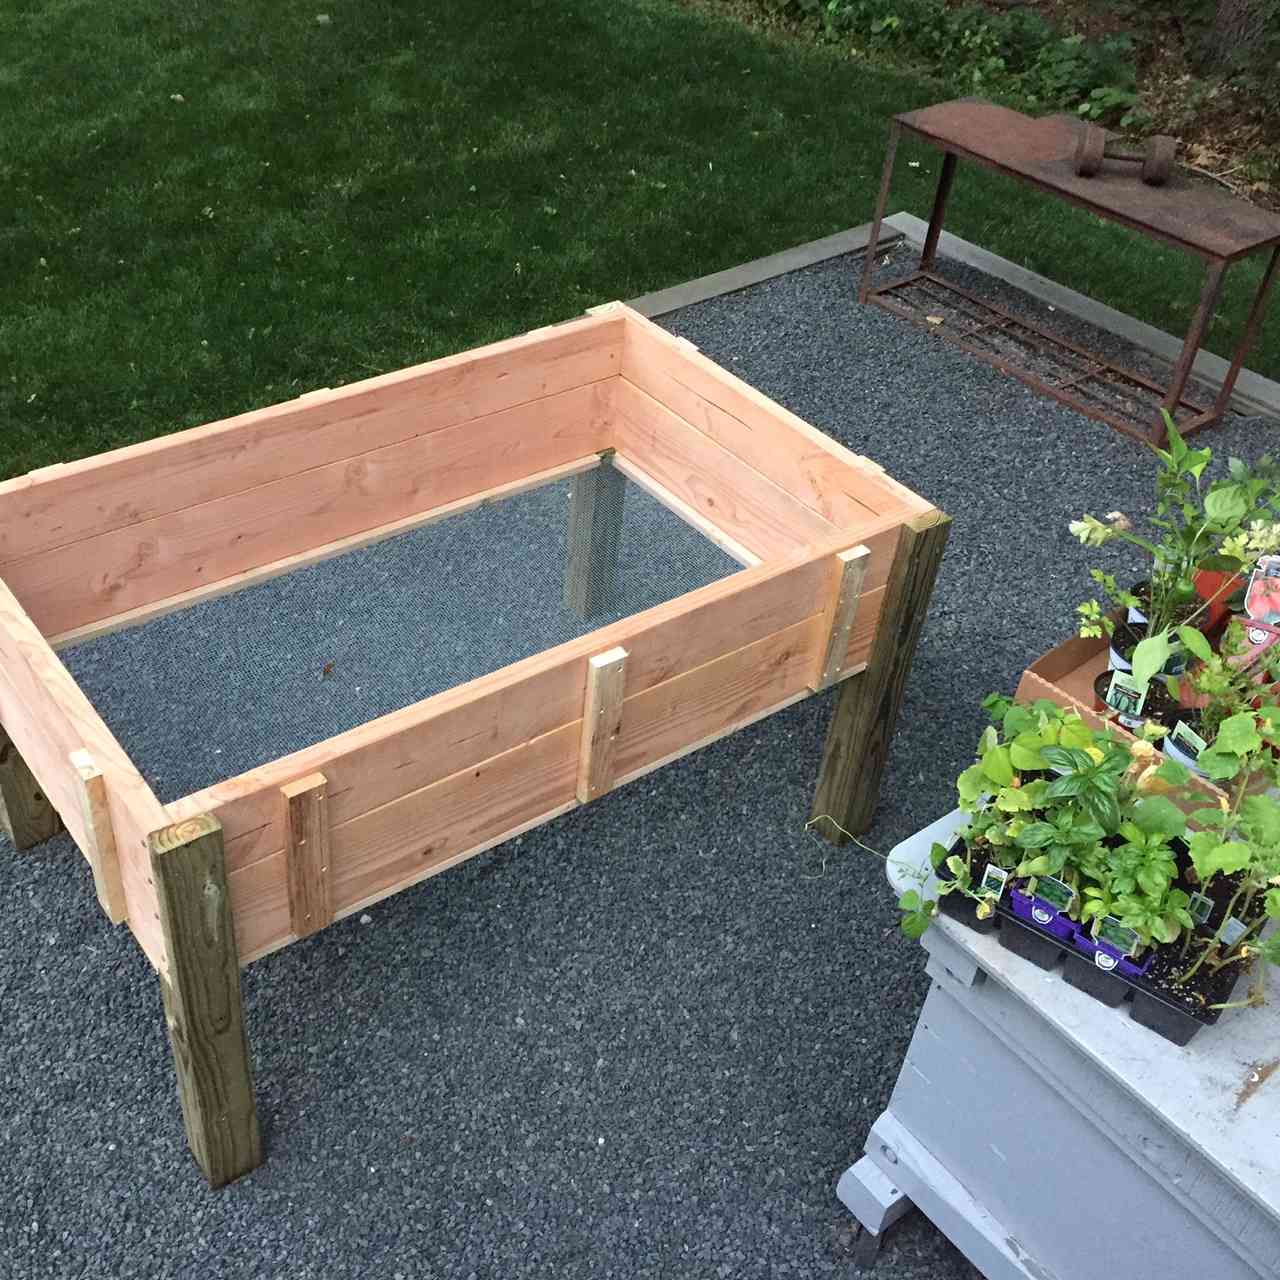
14. Elevated Natural Wood Garden Planter Box
When building or buying an elevated planter, pay close attention to the depth. A shallow box might look sleek, but it dramatically limits what you can grow. For small annual flowers, herbs, and lettuces, a soil depth of 6-8 inches is sufficient. However, if you want to grow root vegetables like carrots, or larger plants like tomatoes or peppers, you need a minimum soil depth of 12-18 inches. A deeper box holds more soil, which means it also holds more moisture and nutrients, making your plants happier and your watering chores less frequent.
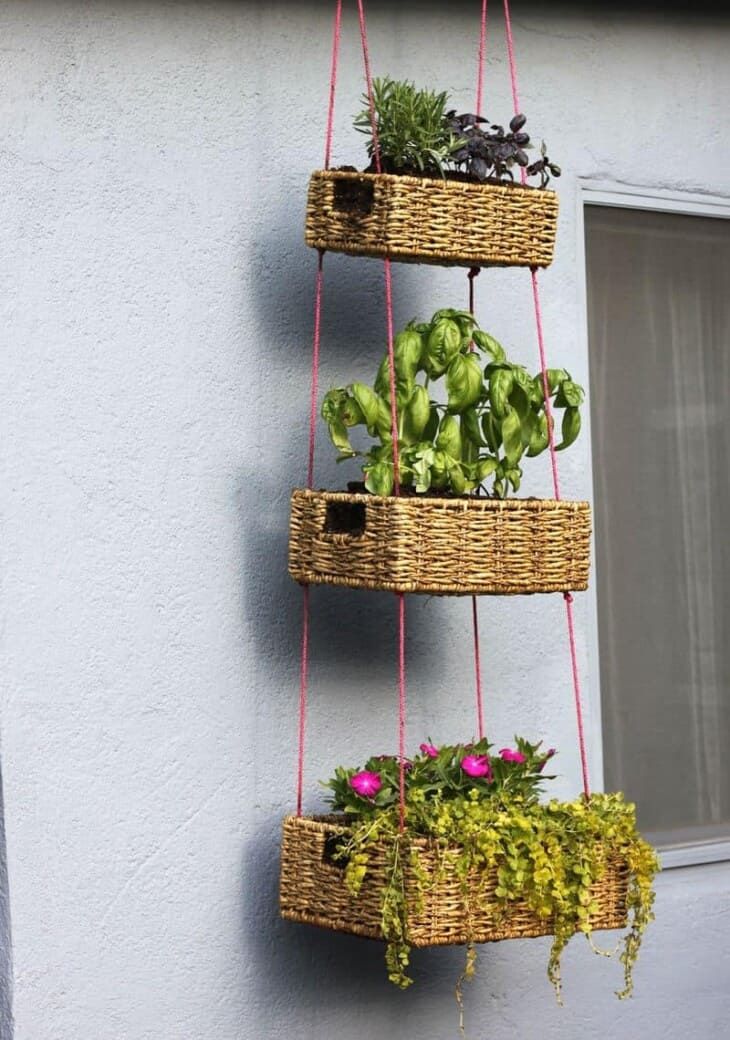
“An elevated planter like this is a perfect solution for adding a garden to a space where you can’t dig, like a patio, deck, or balcony.”
A standard size is about 2 feet wide by 4 feet long, which provides a good amount of planting space without being too bulky. This scale is ideal for a small urban backyard or a dedicated corner of a larger patio. Its raised design also makes it great for gardeners with limited mobility. For a larger-scale, in-ground version, check out the raised bed with a stone pathway in Idea #28.
15. Rustic Pergola Lounge with a Black Fire Pit
Creating this cozy fire pit lounge involves a few key purchases that together create a cohesive look. The pergola is the biggest investment, but you can find kits to simplify the process. The real charm comes from the comfortable seating and ambient lighting.
- Wooden Pergola Kit (approx. 10’x12′): $800 – $2,500
- Round Metal Fire Pit: $150 – $400
- Adirondack Chairs (set of 2): $250 – $600
- Outdoor Bench: $200 – $500
- Outdoor String Lights (commercial grade): $50 – $120
- TOTAL: $1,450 – $4,120
- Budget alternative: Build a simpler, smaller 8’x8′ pergola from scratch for about $400 in lumber. Source chairs from Facebook Marketplace and give them a fresh coat of paint.
“This space feels so inviting because it nails the concept of ‘enclosure’.”
The pergola structure acts as a ‘ceiling,’ defining the lounge area and making it feel like a distinct outdoor room. The arrangement of the chairs and bench in a rough circle around the fire pit encourages conversation and connection. Finally, the warm glow of the string lights overhead adds another layer of intimacy, lowering the perceived ceiling at night and casting a soft, welcoming light that’s much more pleasant than a single harsh floodlight. It’s a perfect blend of structure, comfort, and ambiance.
16. Modern Pergola with a Corrugated Translucent Roof
The absolute game-changer in this design is the corrugated translucent roof. A standard open-slat pergola provides partial shade, but this roof offers full protection from rain and harsh midday sun while still allowing bright, diffused light to pour through. It completely transforms the usability of the space, turning it from a fair-weather-only spot into a true three-season outdoor living room. It gives you the best of both worlds: the airy, open feeling of being outdoors with the practical shelter of a covered porch. This single feature dramatically increases the value and function of the patio.
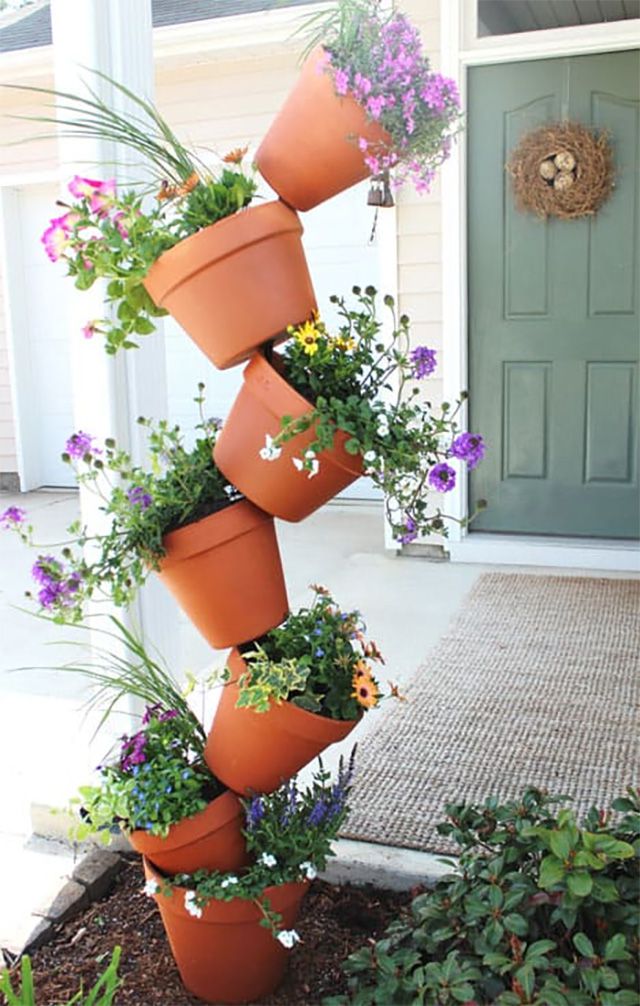
“That translucent roof is amazing, but it’s not a ‘set it and forget it’ feature.”
Over time, those panels will collect dirt, pollen, leaves, and bird droppings, which will turn that bright, airy light into a dingy, filtered gloom. To keep it looking its best, plan on a thorough cleaning at least once or twice a year. This usually involves getting on a ladder with a soft-bristled brush, a bucket of soapy water, and a hose. Depending on the quality of the polycarbonate or fiberglass panels, they can also become brittle and yellow with prolonged UV exposure over many years, eventually requiring replacement.
17. Brick Paver Patio with a Built-in Grill Station
A multi-functional patio with built-in features like a fire pit and grill station requires a generous amount of space. To comfortably accommodate distinct zones for cooking, dining, and lounging, you should be working with a minimum area of 400 square feet (e.g., 20’x20′). This allows for proper clearance around the hot grill, ample seating around the fire pit, and clear pathways between zones. Anything smaller and the built-in elements will overwhelm the space, making it feel cramped rather than luxurious. If you have less space, consider a portable grill and fire pit instead of permanent structures. For a simpler paver patio layout, look at Idea #0.
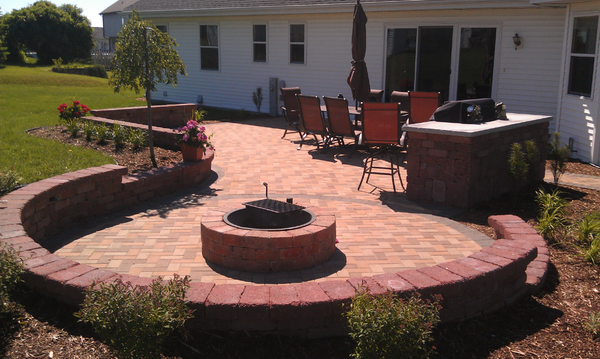
“A fully integrated hardscape like this is incredible, but let’s be honest about what you’re getting into.”
This is not a weekend DIY project. This is a major construction project that involves excavation, grading, and extensive masonry work. Unless you have professional experience, this is a job for a landscape contractor. It’s also a significant financial commitment—think five figures, not four. And it’s permanent. Unlike a set of furniture you can move, these brick walls and built-ins are there to stay. Make sure you are 100% certain on the layout before you break ground.
18. Weathered Wood Fence with Overgrown English Ivy
This look is the epitome of the ‘cottagecore’ and ‘biophilic design’ trends that have taken over home inspiration sites. It’s all about embracing the beauty of nature in its slightly untamed state. The overgrown ivy on a weathered fence speaks to a desire for spaces that feel established, romantic, and deeply connected to the garden. It’s a move away from sterile, manicured perfection and toward a more organic, living aesthetic. This look suggests a story and a sense of history, even if the fence was built just a few years ago. It’s popular because it feels both timeless and deeply personal.
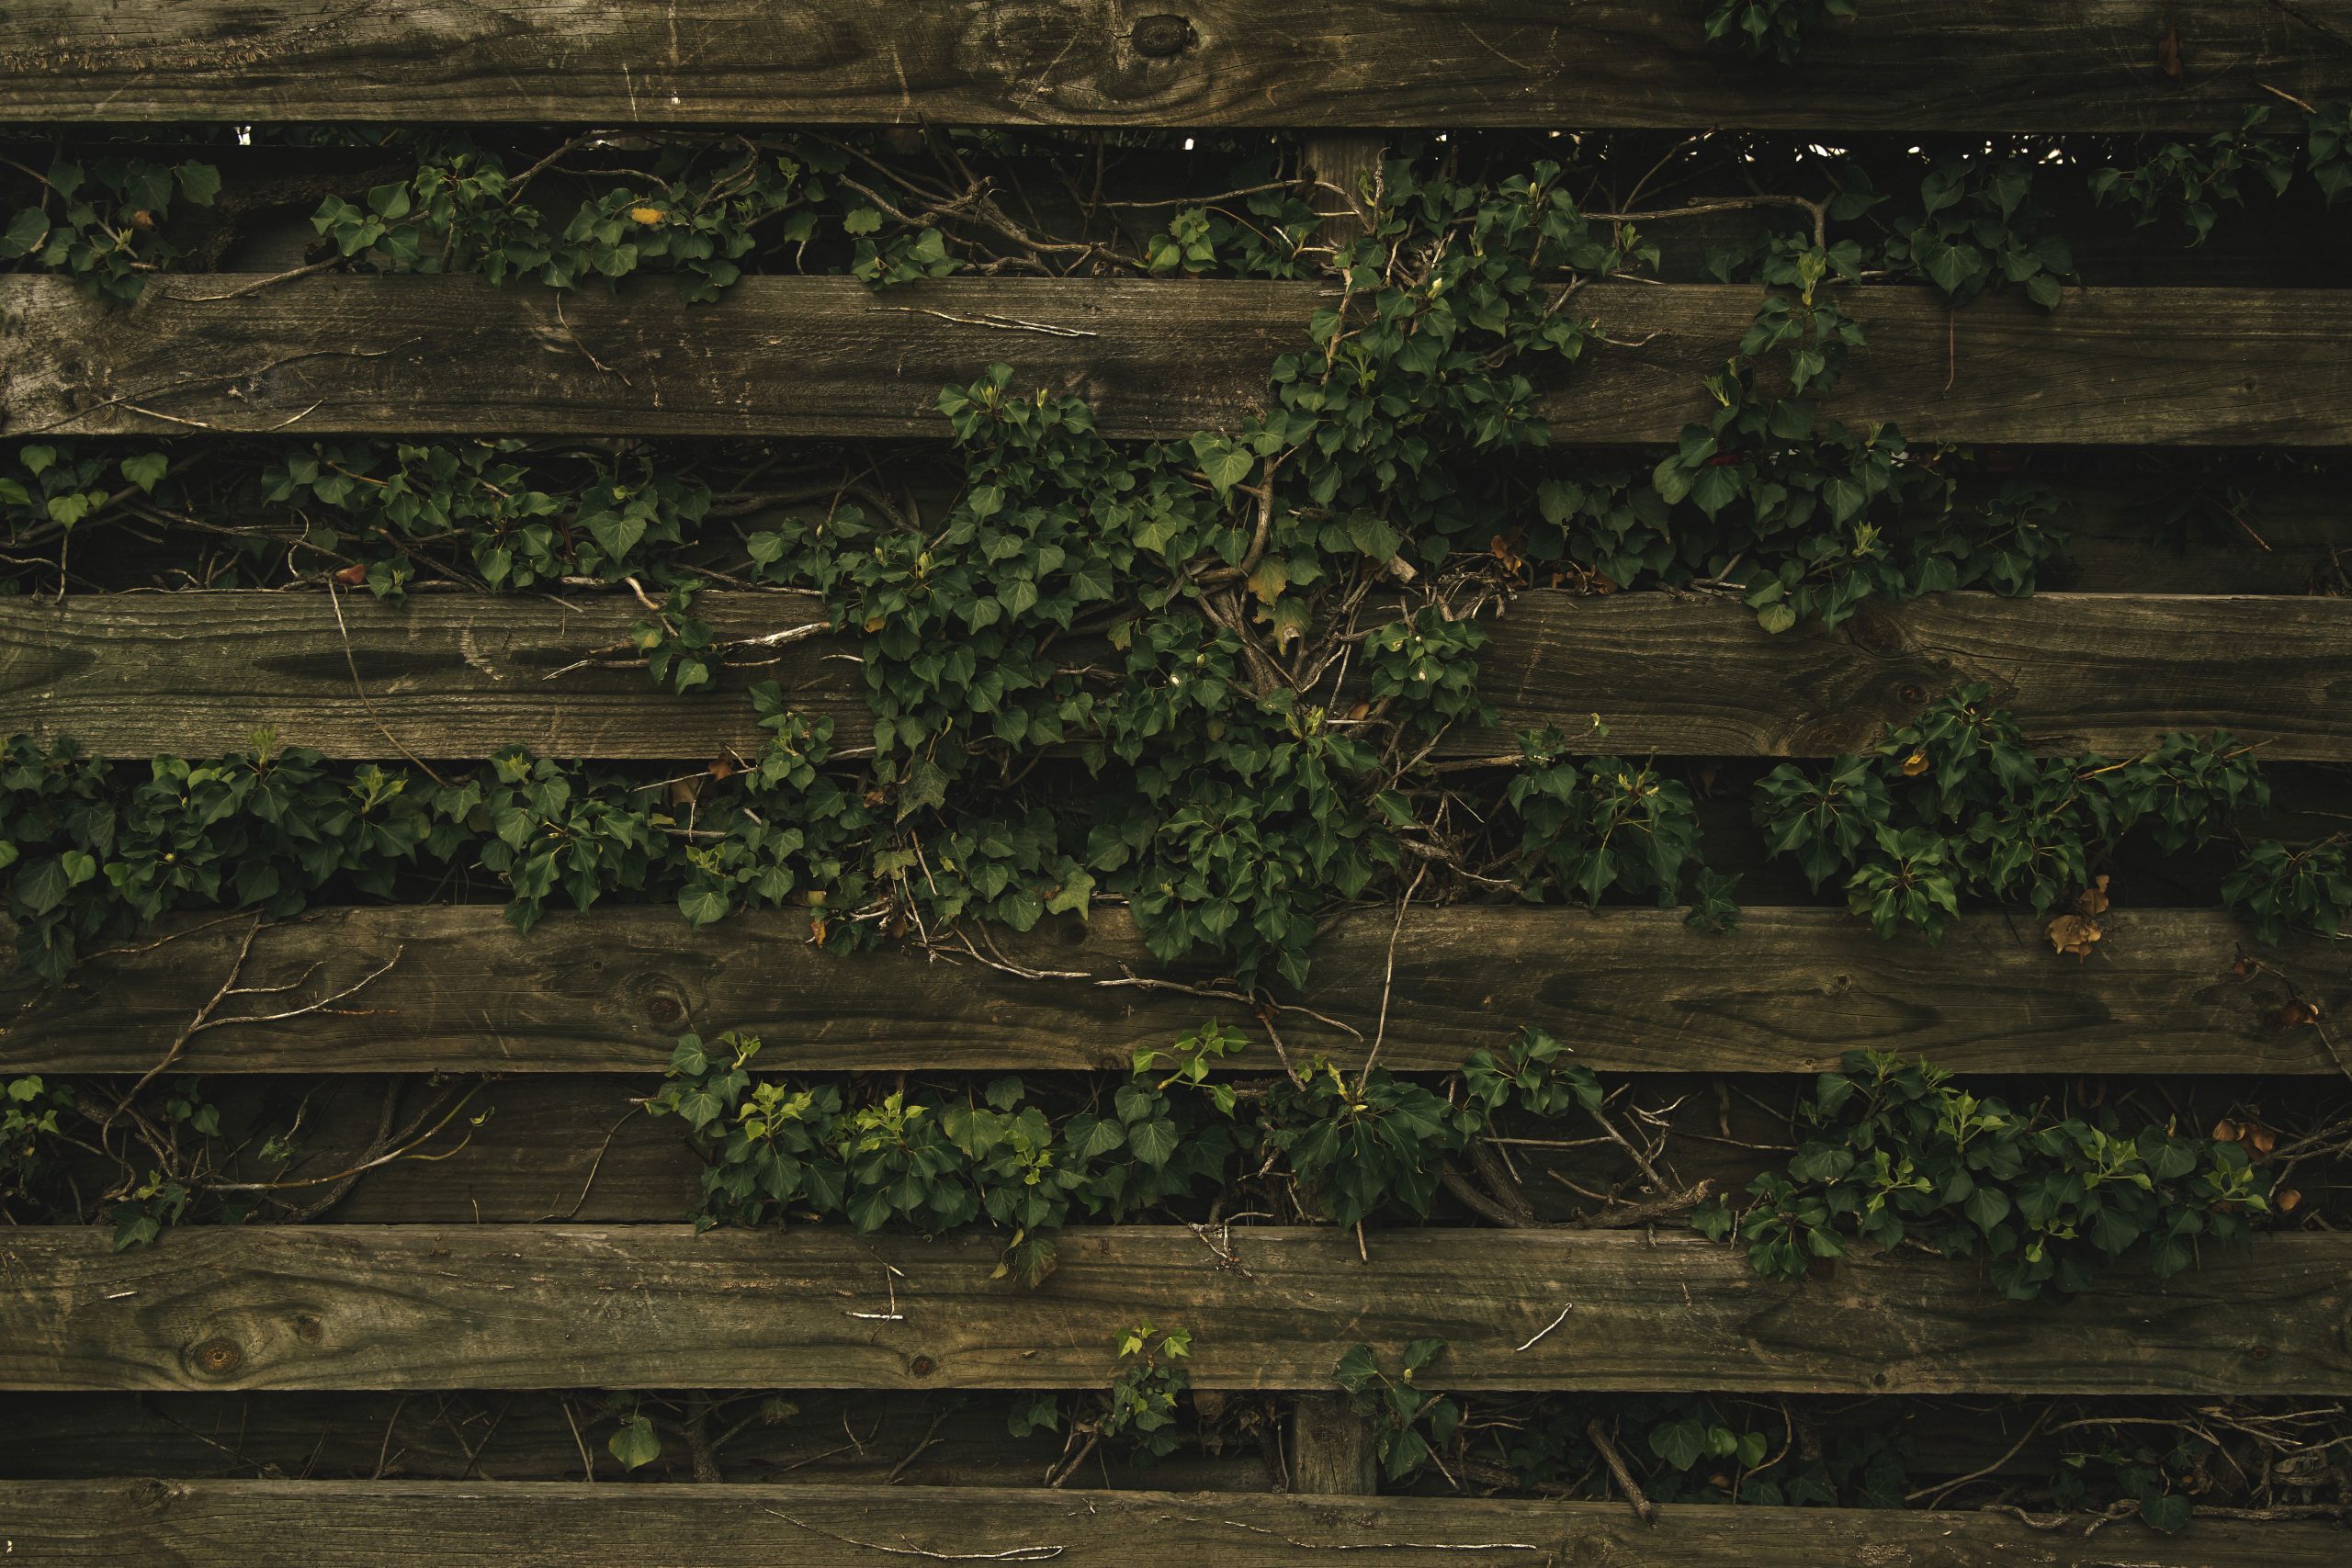
“An ivy-covered fence is undeniably romantic, but that beauty comes with a serious maintenance commitment.”
English ivy is an aggressive grower. It will not politely stay on your fence. It will try to climb your house, strangle nearby trees, and take over your garden beds. To keep it in check, you will need to commit to trimming it back hard at least two or three times during the growing season. Also, the vines work their way into the wood, holding moisture against the planks and accelerating rot. What you gain in charm, you will eventually pay for in fence longevity.
19. Hexagonal Planter Box from Multi-Toned Wood Planks
Building a hexagonal planter is easier than it looks; it’s all about cutting the correct angles. For a perfect hexagon, you’ll need to cut each end of your six side pieces at a 30-degree angle.
- Time Estimate: 3-4 hours
- Material Cost: $40-$80
- Decide the length of your sides. Let’s say 12 inches. Cut six identical pieces of your chosen wood.
- Set your miter saw to a 30-degree angle. Cut both ends of all six boards. The cuts should be parallel (both angled inwards).
- On a flat surface, arrange the six pieces into a hexagon shape. The angled ends should fit together snugly.
- Join the pieces using exterior-grade wood glue and screws. Pre-drill your screw holes to avoid splitting the wood near the ends.
- Once the frame is built, cut a hexagonal piece of plywood for the bottom and secure it from below. Drill several drainage holes in the bottom panel.
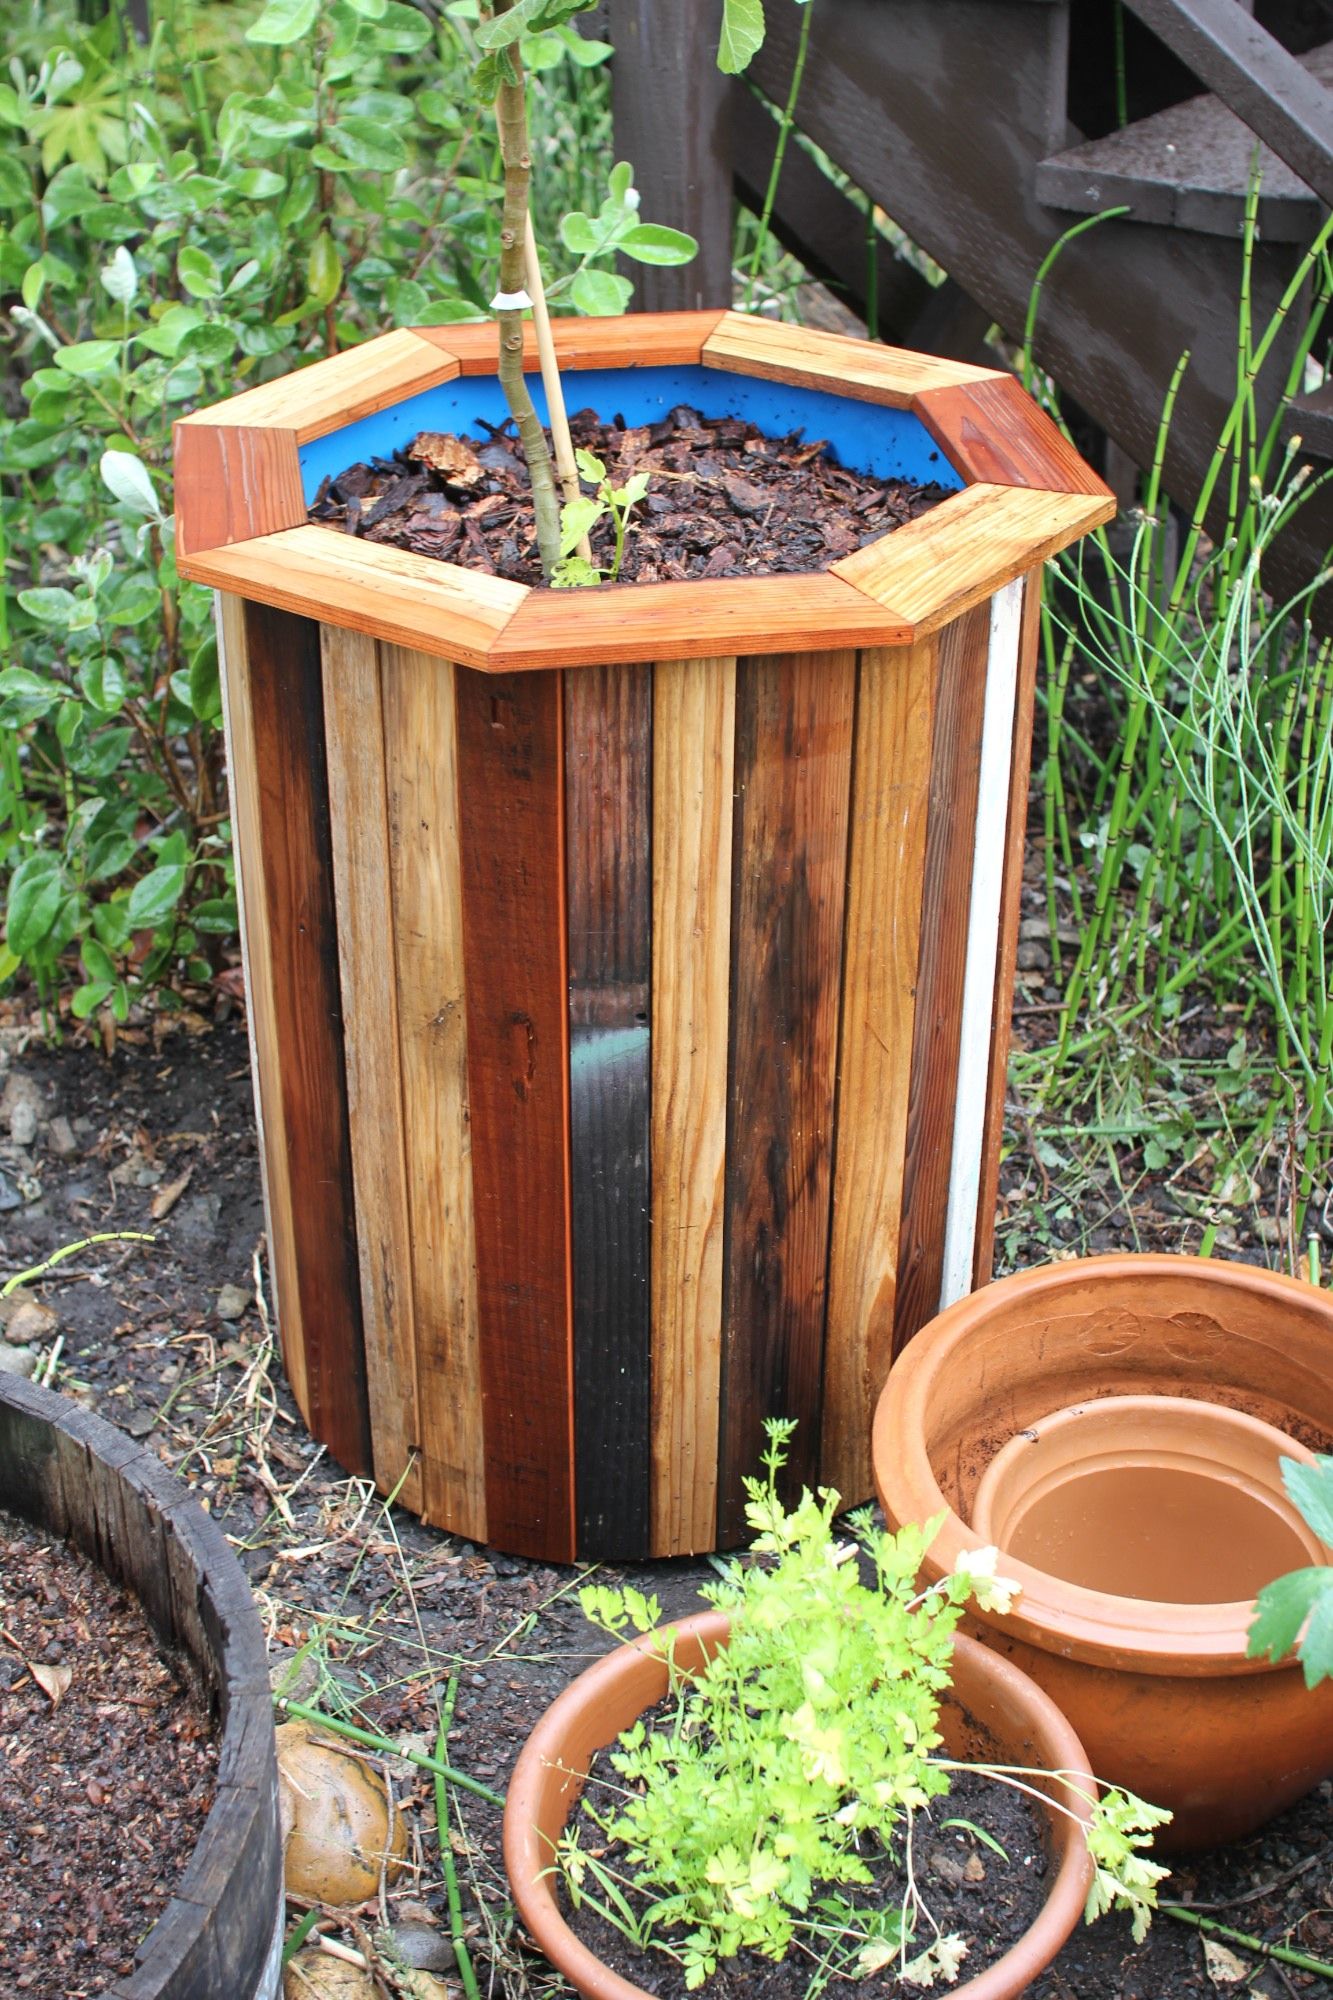
“The visual appeal of this planter is a function of deliberate contrast.”
The formula is: 70% Rustic Wood + 20% Unexpected Color + 10% Metal/Hardware. The mix of stained and natural wood planks provides a warm, textured base. The surprise comes from the bright blue interior liner, a pop of modern color that is only revealed up close. The final 10% is the subtle hardware and any support stakes, which add a touch of functional detail. You could swap the blue for a bright orange or lime green to change the mood entirely, proving the formula’s versatility.
20. Upcycled Herb Garden Using Boots, Cans, and Crates
This is the ultimate ‘get this look for less’ because it’s practically free. The entire concept is built around repurposing what you already have. That old pair of leather boots with a hole in the sole? Now it’s a planter. The tin cans from last night’s dinner? They’re perfect for herbs. An old wooden crate or a rickety ladder becomes a multi-level display stand. Scour your own garage, basement, and recycling bin before you buy anything. A can of spray paint ($5) can unify mismatched items. This charming, eclectic look is less about spending money and more about creative reuse.
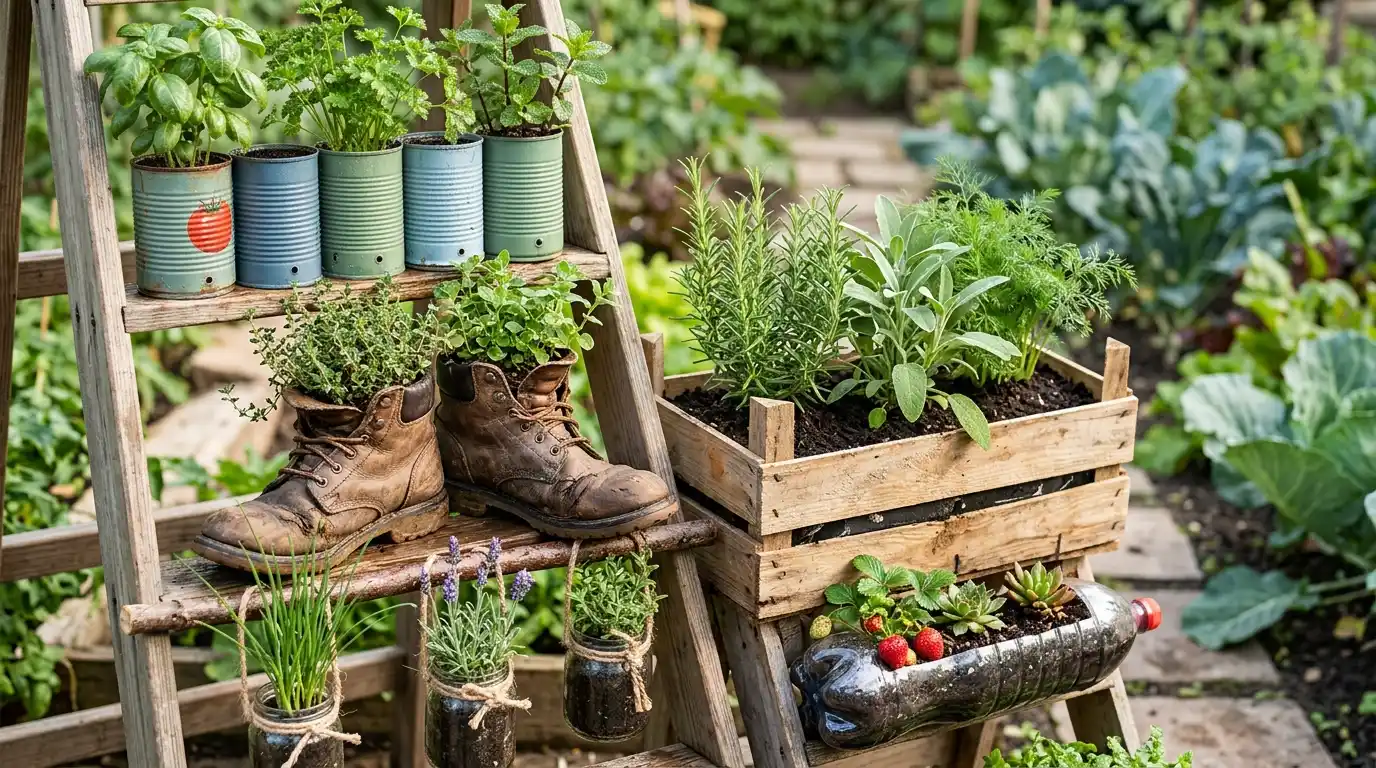
“When you’re using unconventional containers like tin cans, boots, or glass jars as planters, you have to add drainage.”
Without it, water will pool at the bottom and cause root rot, killing your plants. For metal cans or plastic bottles, use a hammer and a large nail or a drill to punch 3-5 holes in the bottom. For a leather boot, you can often just use a utility knife or an awl. For glass jars, it’s a bit trickier, but you can create a drainage layer by adding an inch or two of pebbles or gravel at the bottom before you add soil. This gives excess water a place to go.
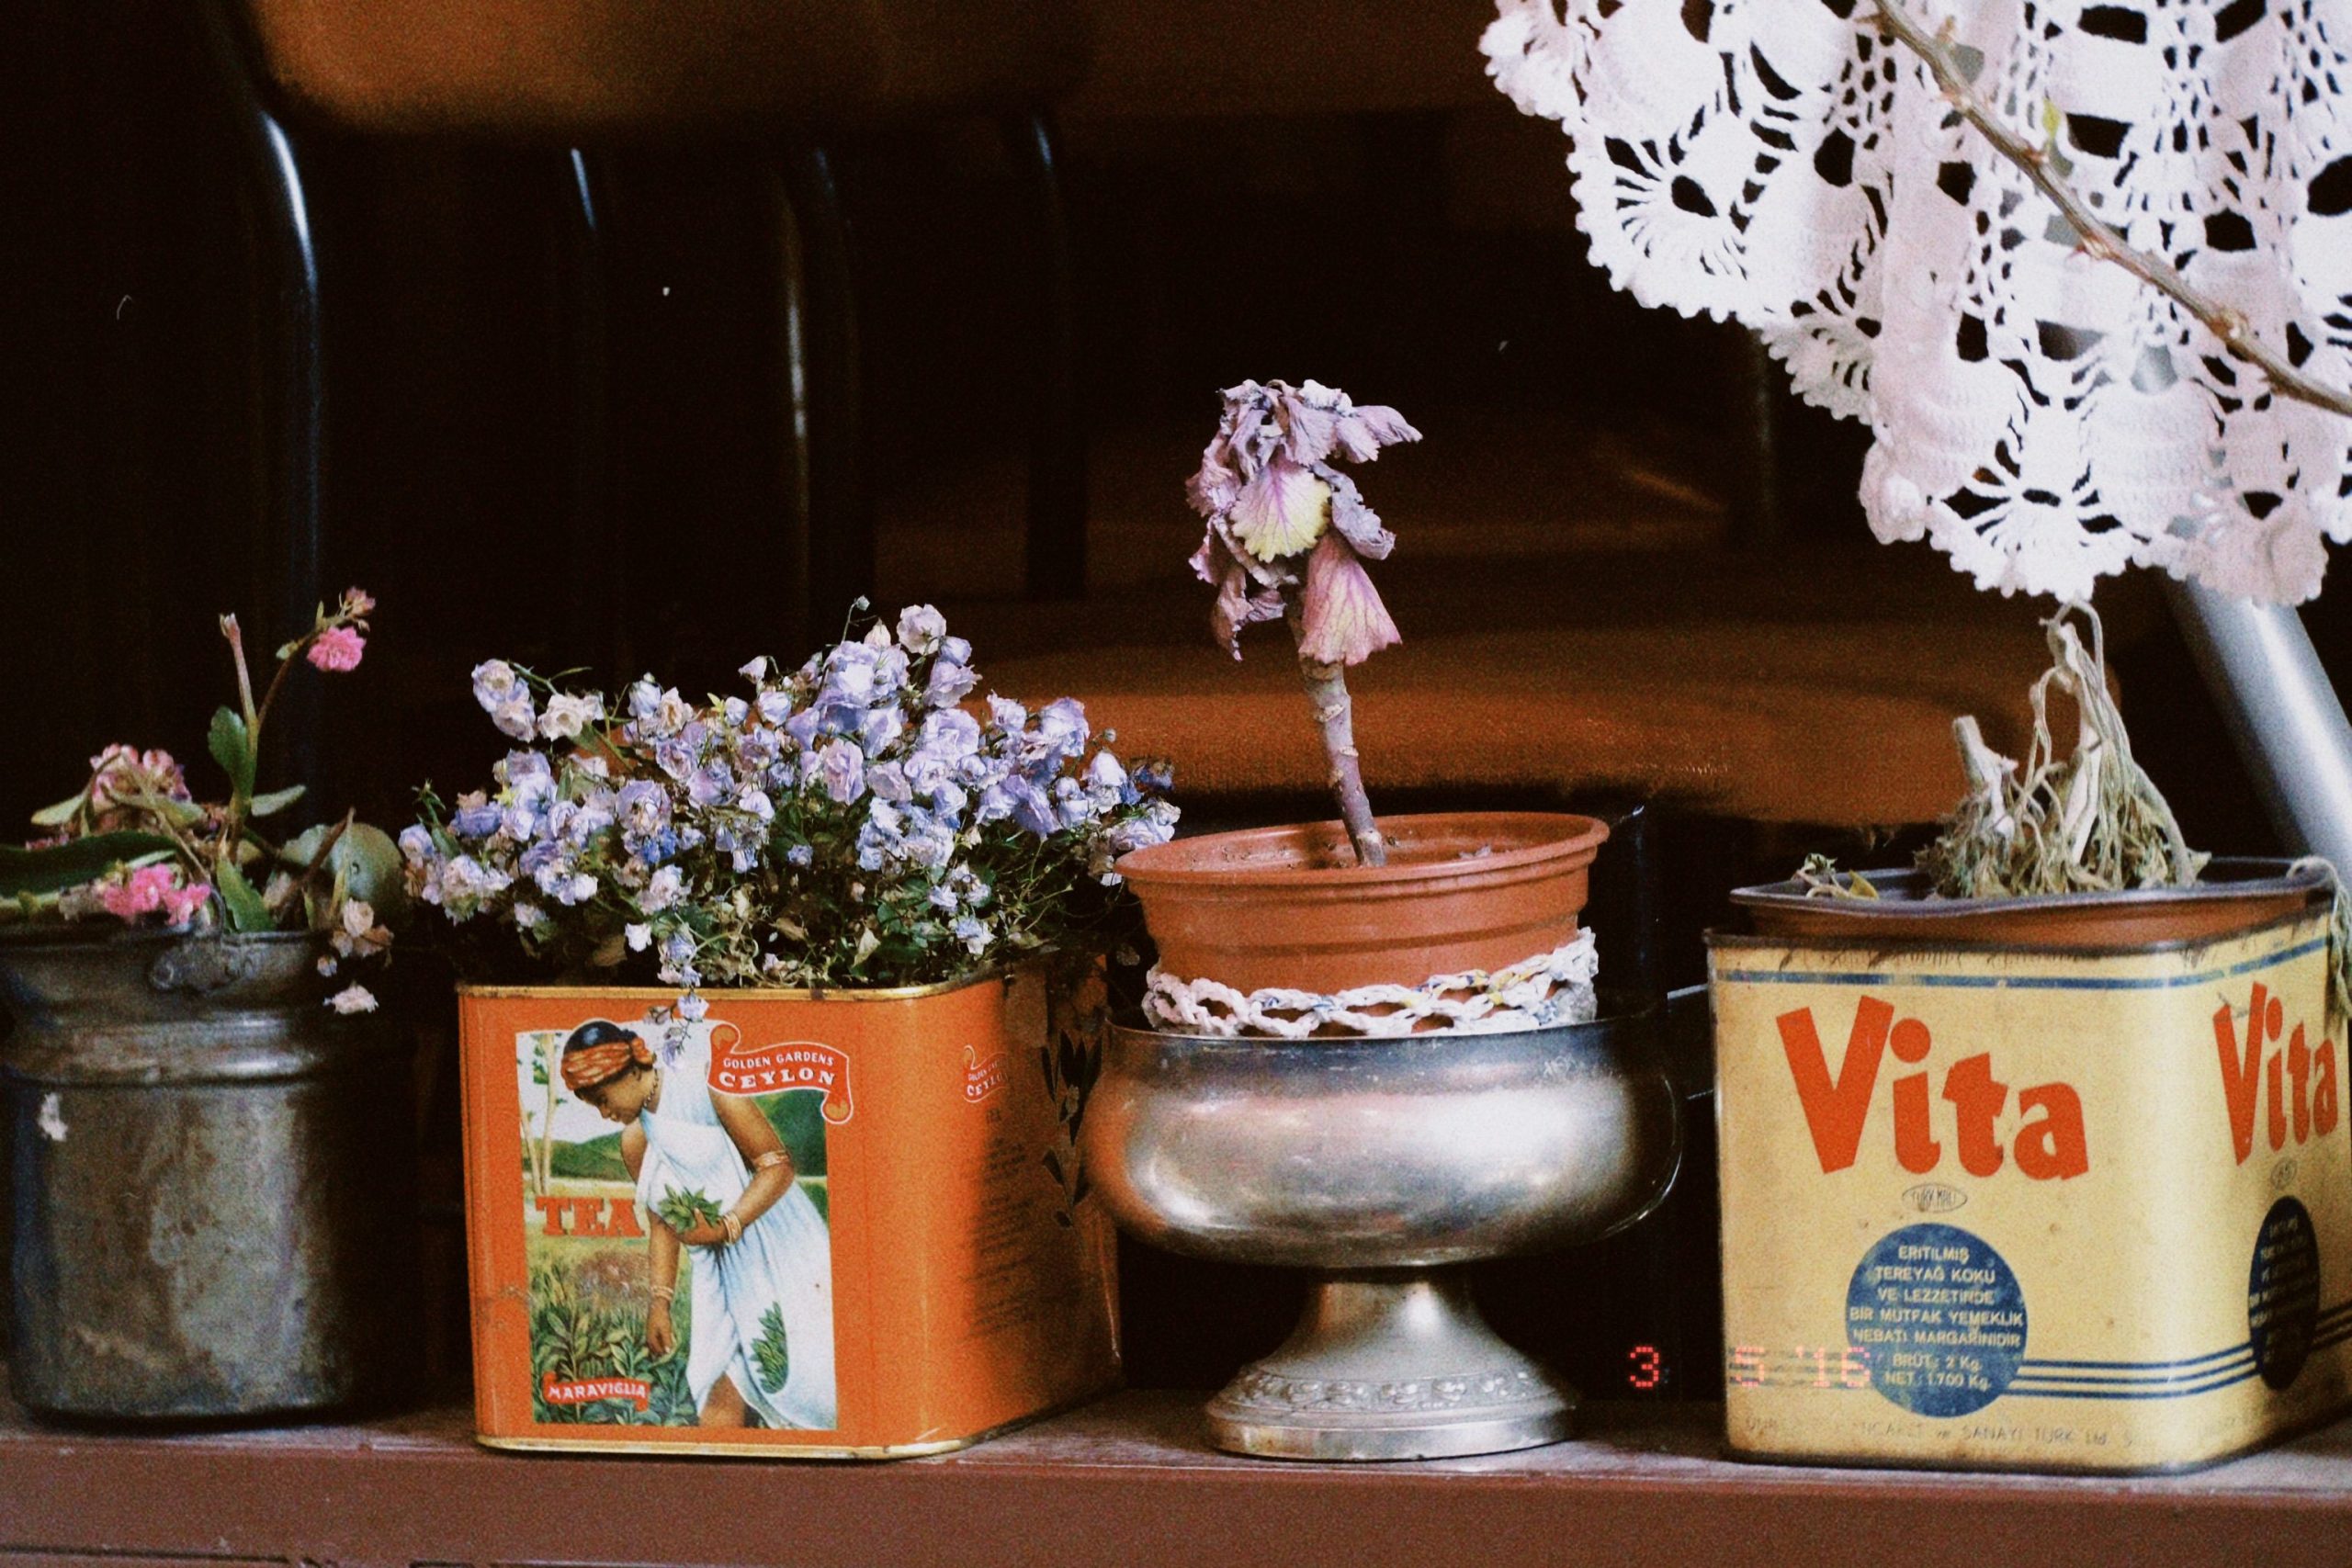
21. Creating a Curated Outdoor Decor Vignette
that makes a collection of outdoor objects feel like a deliberate ‘vignette’ is thoughtful grouping. It’s not about just placing items randomly in your yard. It’s about arranging them in a tight, considered cluster to create a single focal point. Think like a stylist setting up a photo shoot: group items of varying heights, textures, and shapes together on a small table, a tree stump, or a corner of your patio. This intentional clustering is what transforms a random assortment of ‘backyard decor’ into a cohesive and charming statement.
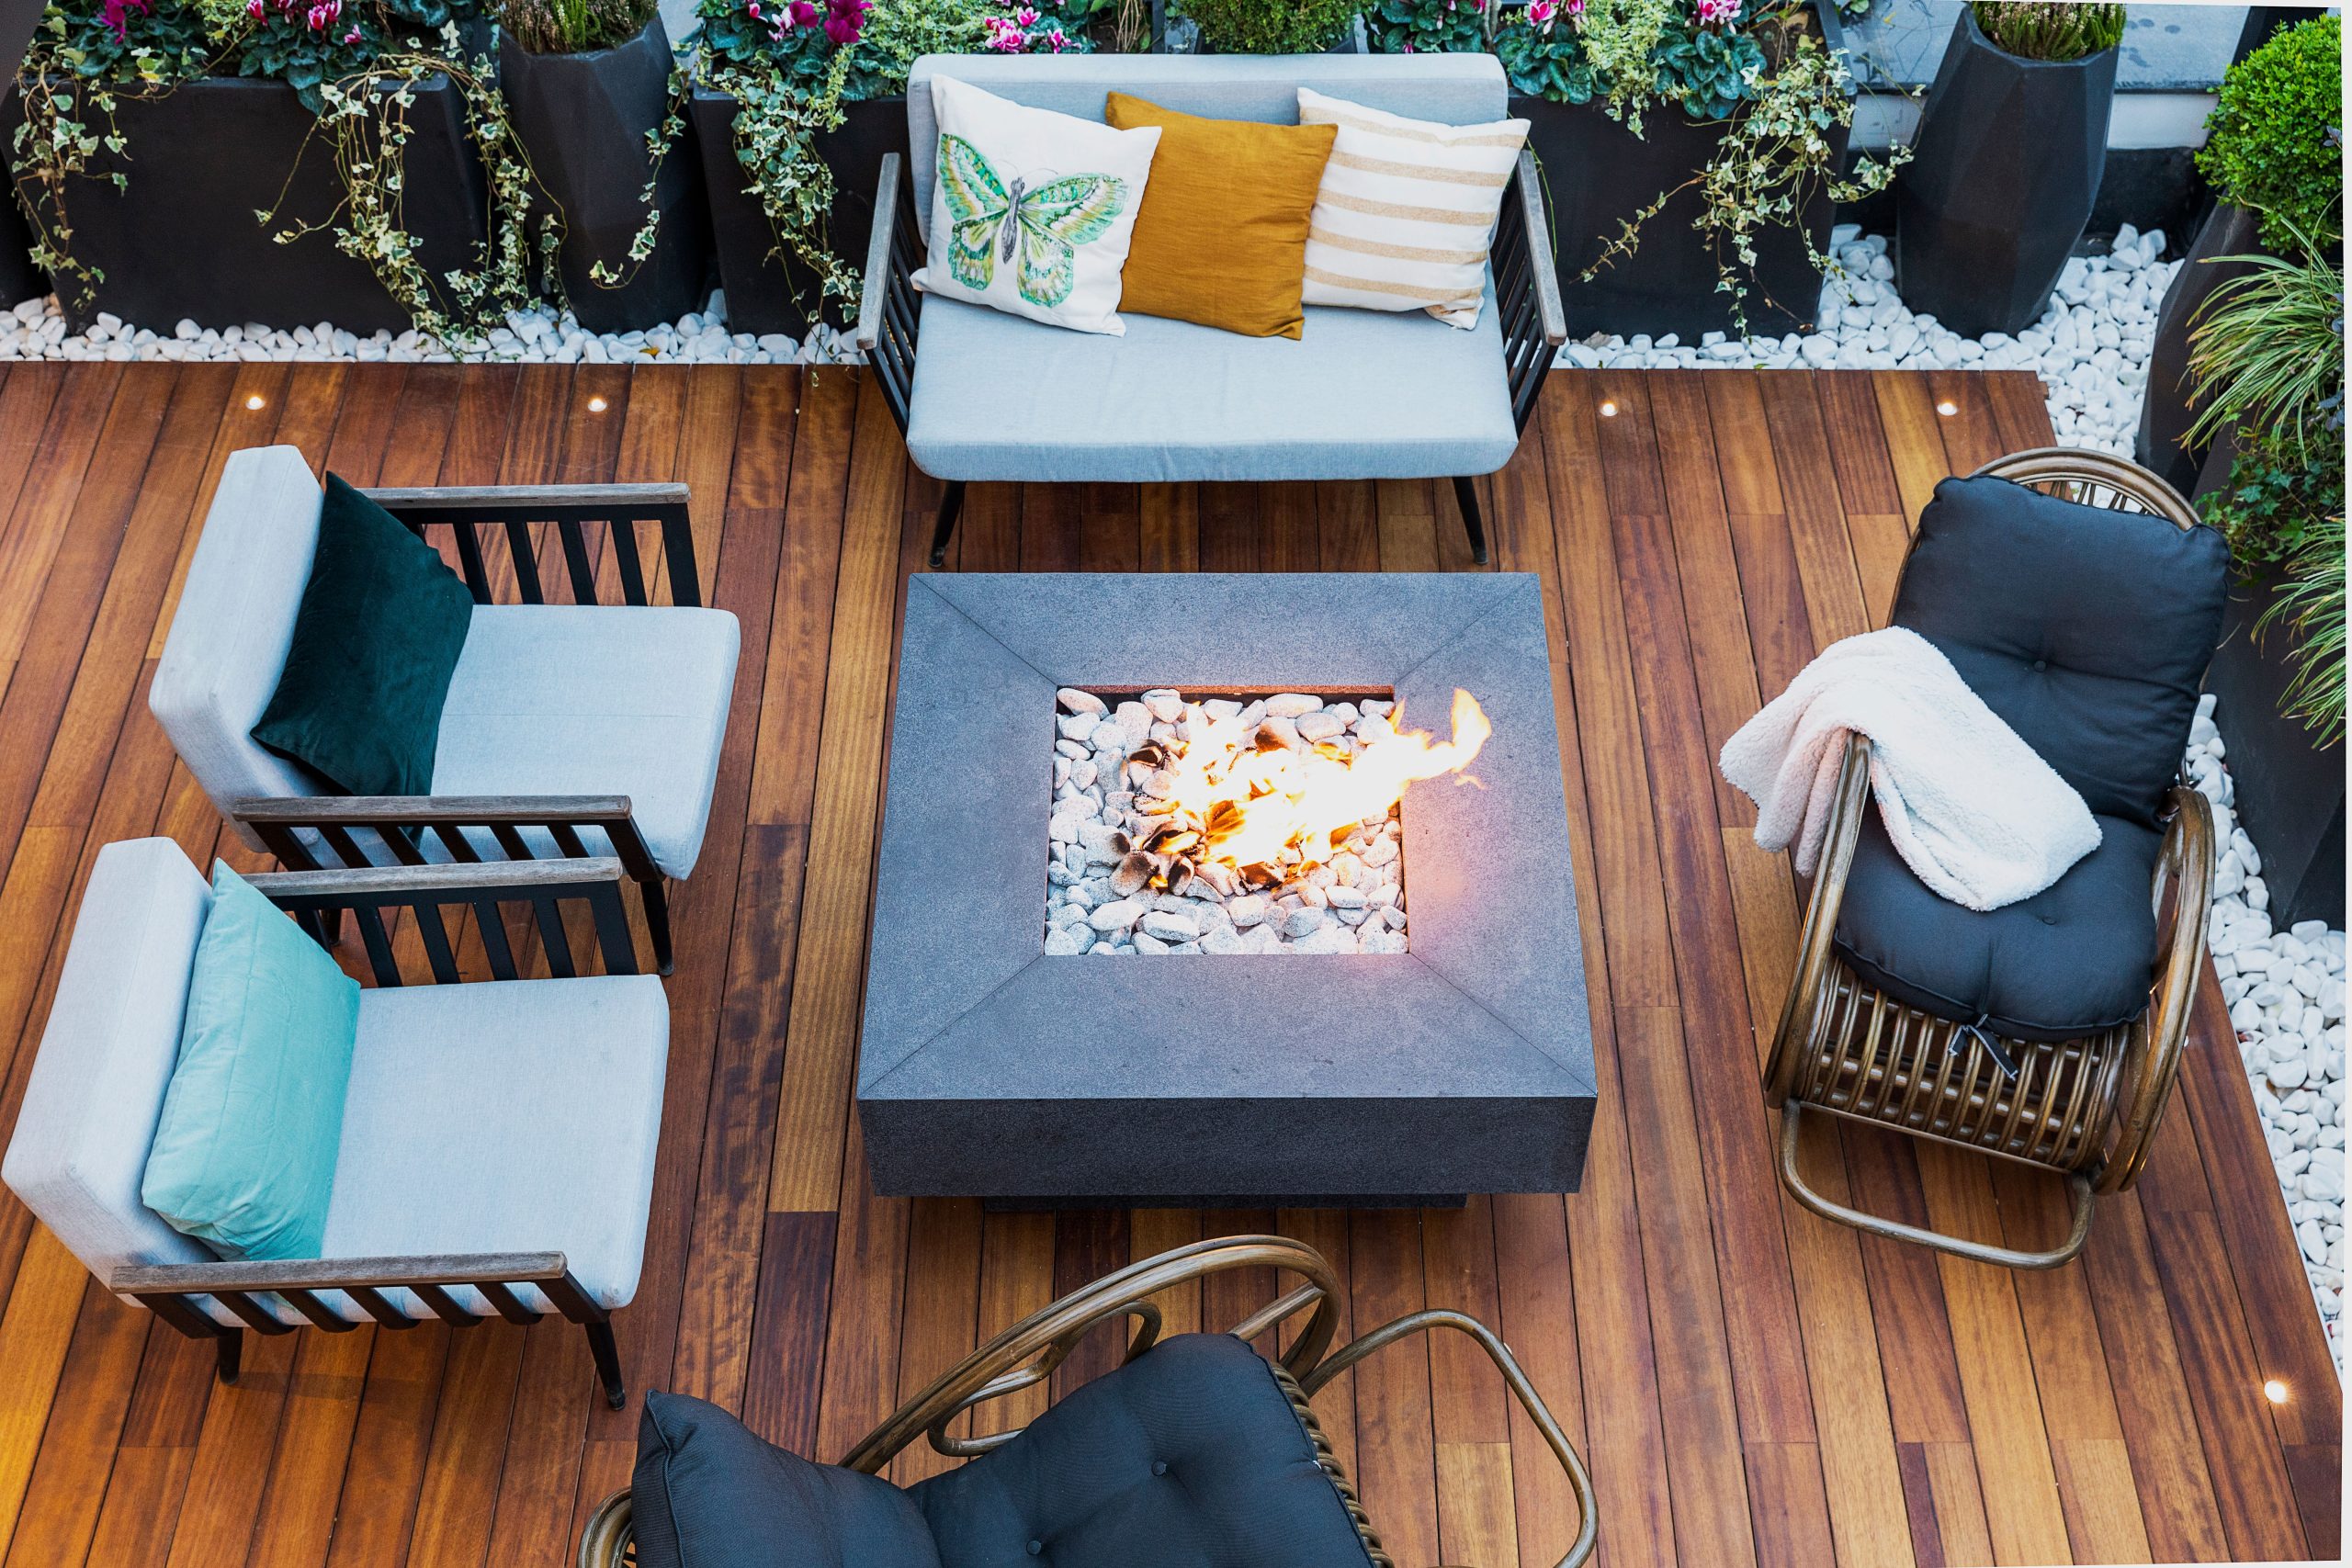
“This approach works because it applies interior design principles to the outdoors.”
By grouping items, you create visual weight and importance. The composition relies on the ‘rule of threes’ (or odds), which suggests that items arranged in odd numbers are more appealing and memorable. A mix of textures—like rustic wood, smooth ceramic, and living plants—adds depth and interest, while varying the height of the objects forces the eye to move around the arrangement, making it more dynamic. It’s about telling a small story in a small space.
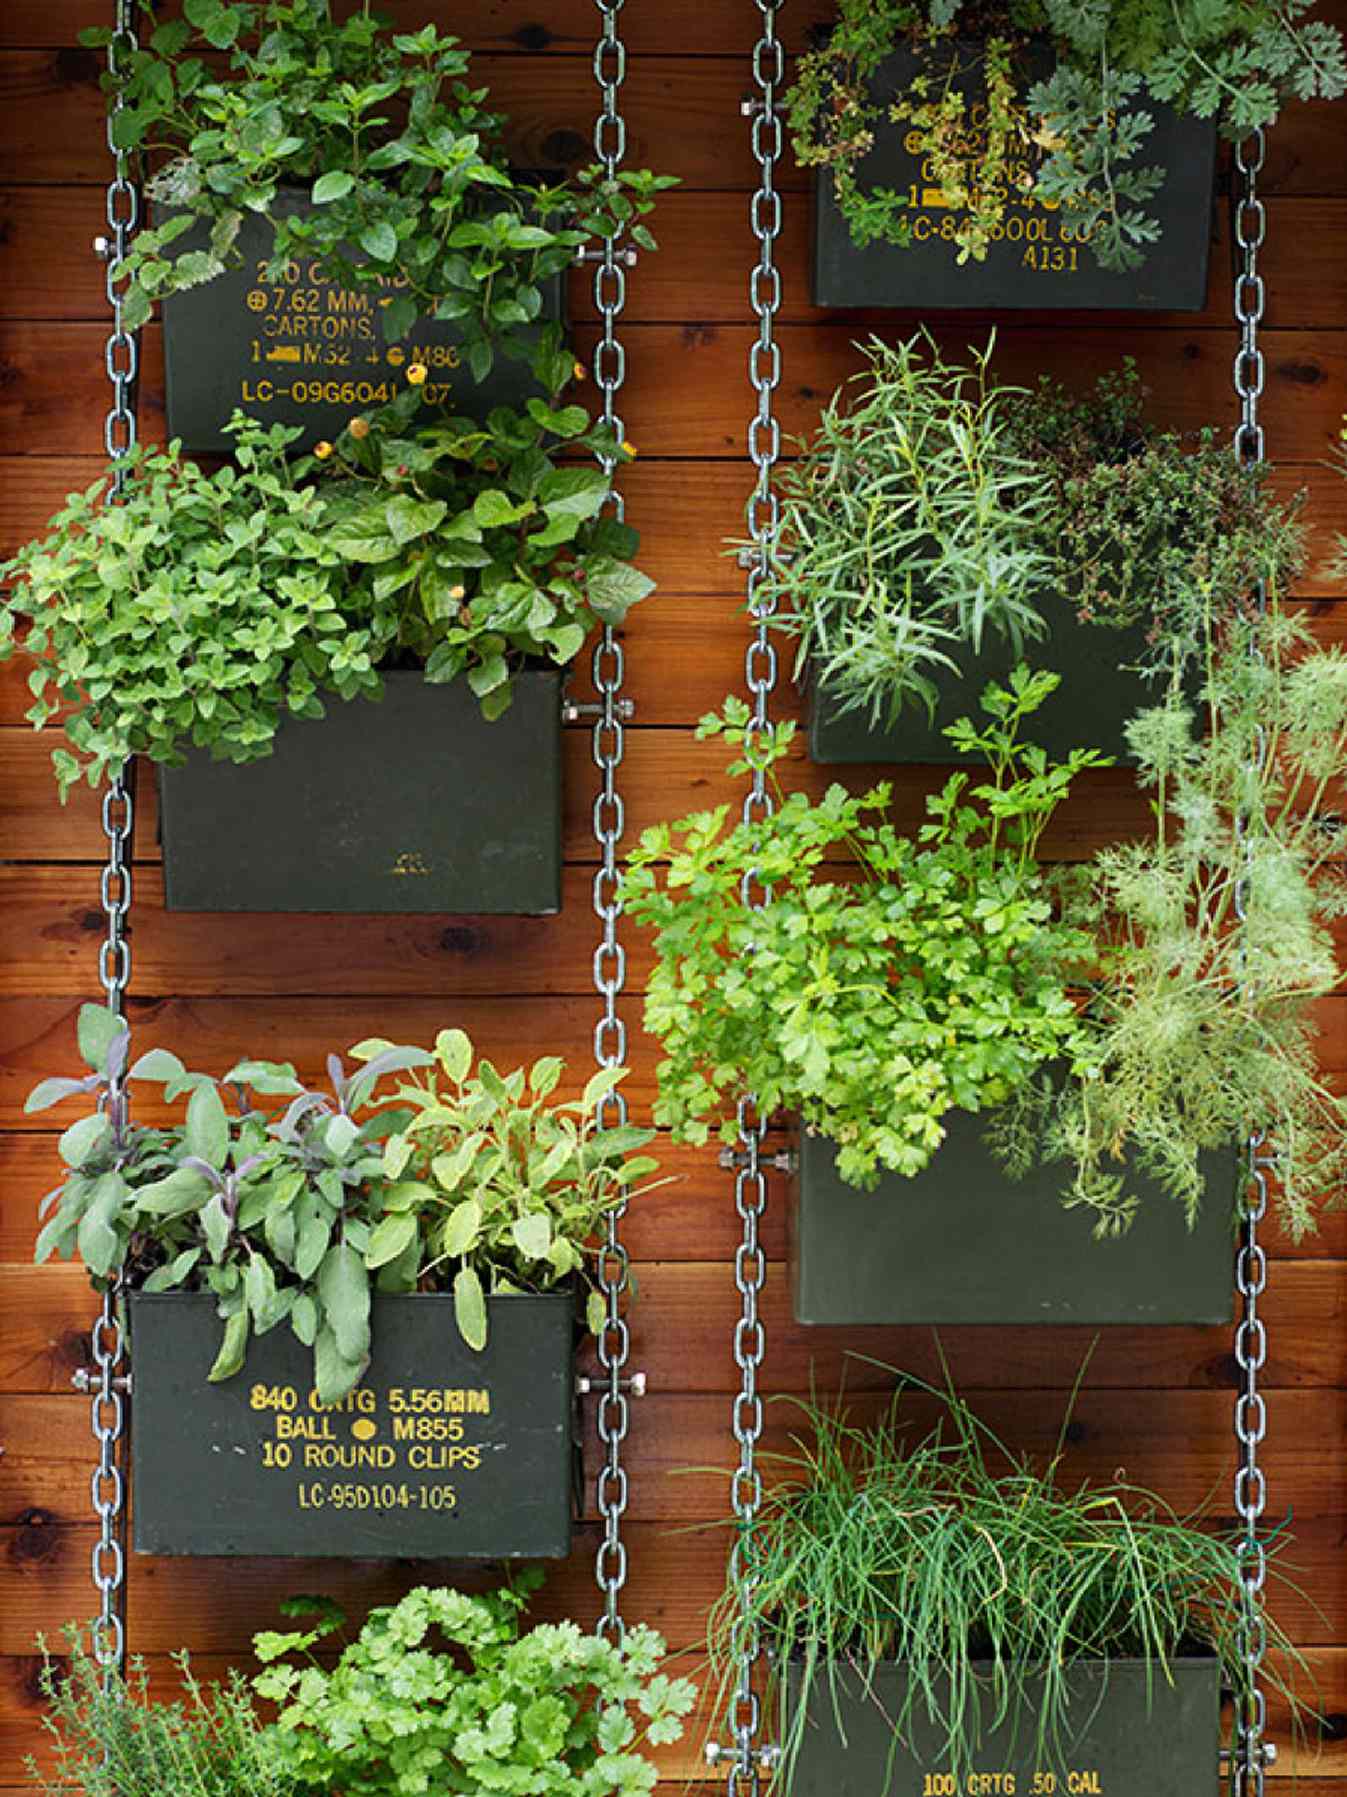
22. Vertical Garden Wall with Copper Half-Sphere Planters
This striking feature wall is a beautiful equation of contrasting elements: 50% Rustic Wood + 30% Polished Metal + 20% Lush Greenery. The warm, weathered wooden wall provides a textured, organic backdrop. The shiny copper planters introduce a touch of modern glamour and reflect light beautifully. The final 20% is the vibrant green foliage, which breathes life into the composition and prevents it from feeling too sterile. The magic is in the mix—the tension between the rustic and the refined, the natural and the man-made, is what makes it so visually compelling.

“Real copper or brass planters look stunning…”
at first. It’s important to know that they will change over time when exposed to the elements. The shiny, warm metallic finish will gradually develop a patina, turning darker brown and eventually a classic verdigris green. Some people love this aged look, but if you’re set on keeping them shiny, it will require regular polishing with a specialized metal cleaner. Also, metal planters can get very hot in direct sun, which can cook the roots of your plants. They are best used in a spot with morning sun or bright, indirect light.
23. Modern Fire Pit Lounge with Wicker Armchairs
When placing a rug on an outdoor deck or patio, the rule is to go bigger than you think you need. The rug’s job is to define the conversation area. At a minimum, the front legs of all your seating pieces should be on the rug. For a truly grounded, high-end look, the rug should be large enough that all the furniture—in this case, the two armchairs and the fire pit table—sits completely on top of it. This visually connects the pieces and makes the entire lounge area feel like a single, cohesive unit. A small ‘postage stamp’ rug just floating in the middle will make the space feel disjointed and smaller.
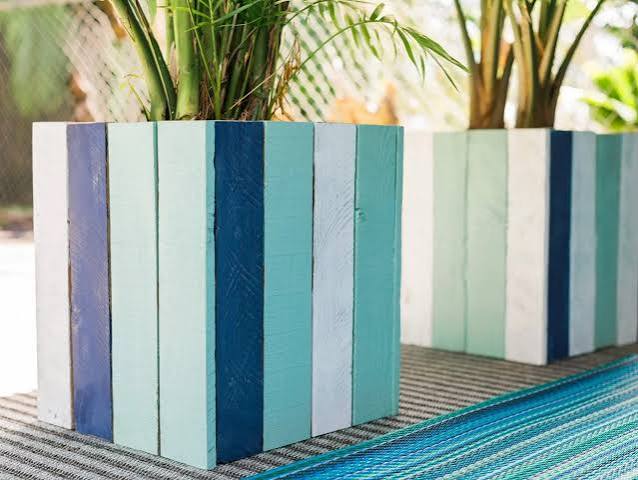
“This intimate lounge setup is ideal for smaller patios or a dedicated corner of a larger deck.”
You need a space of about 10×10 feet to recreate this look comfortably. This allows for two generous armchairs, the rectangular fire pit table, and enough space to walk around without feeling cramped. The use of armchairs instead of a large sectional keeps the scale manageable. This design is a great alternative to the larger, more sprawling fire pit arrangement seen in Idea #2, proving you can have a stylish fire feature even in a more compact space.
24. Organized Wooden Potting Bench with Galvanized Accents
that makes this potting bench so satisfying isn’t just the bench itself—it’s the organization. This isn’t a messy, chaotic workspace; it’s a beautifully curated station where everything has its place. The neatly stacked terracotta pots, the tidy row of hand tools, the accessible watering cans, and the labeled seed packets all contribute to a sense of calm and productivity. It transforms a purely functional object into an aesthetically pleasing feature of the garden. It’s the visual promise of happy, organized gardening, and that’s its true appeal. Compare this freestanding version to the wall-mounted pallet bench in Idea #10.
“A potting bench is a gardener’s best friend, but think through these points before you build or buy one.Location, Location, Location: Where will it live?”
It should be near a water source and close to your garden beds. Also, consider the mess—you’ll be dealing with soil and water, so placing it on a pristine white deck might not be the best idea.The Right Height: A standard workbench height is 34-36 inches. Make sure the height is comfortable for you to stand and work at without hunching over.Storage Needs: Do you need open shelves for easy access, or do you prefer drawers and cabinets to hide clutter and keep things dry? Be honest about your organizational style.
25. Pergola with Built-in Benches and a Stone Fire Pit
This design is so successful because the built-in elements create a powerful sense of permanence and intention. The wooden benches, integrated directly into the pergola’s support posts, define the perimeter of the ‘room’ and provide massive amounts of seating without the clutter of individual chairs. This makes the space feel larger and more cohesive. The central stone fire pit acts as a heavy, immovable anchor, reinforcing the idea that this is a dedicated, purpose-built destination for gathering. It’s architecture, not just decoration.
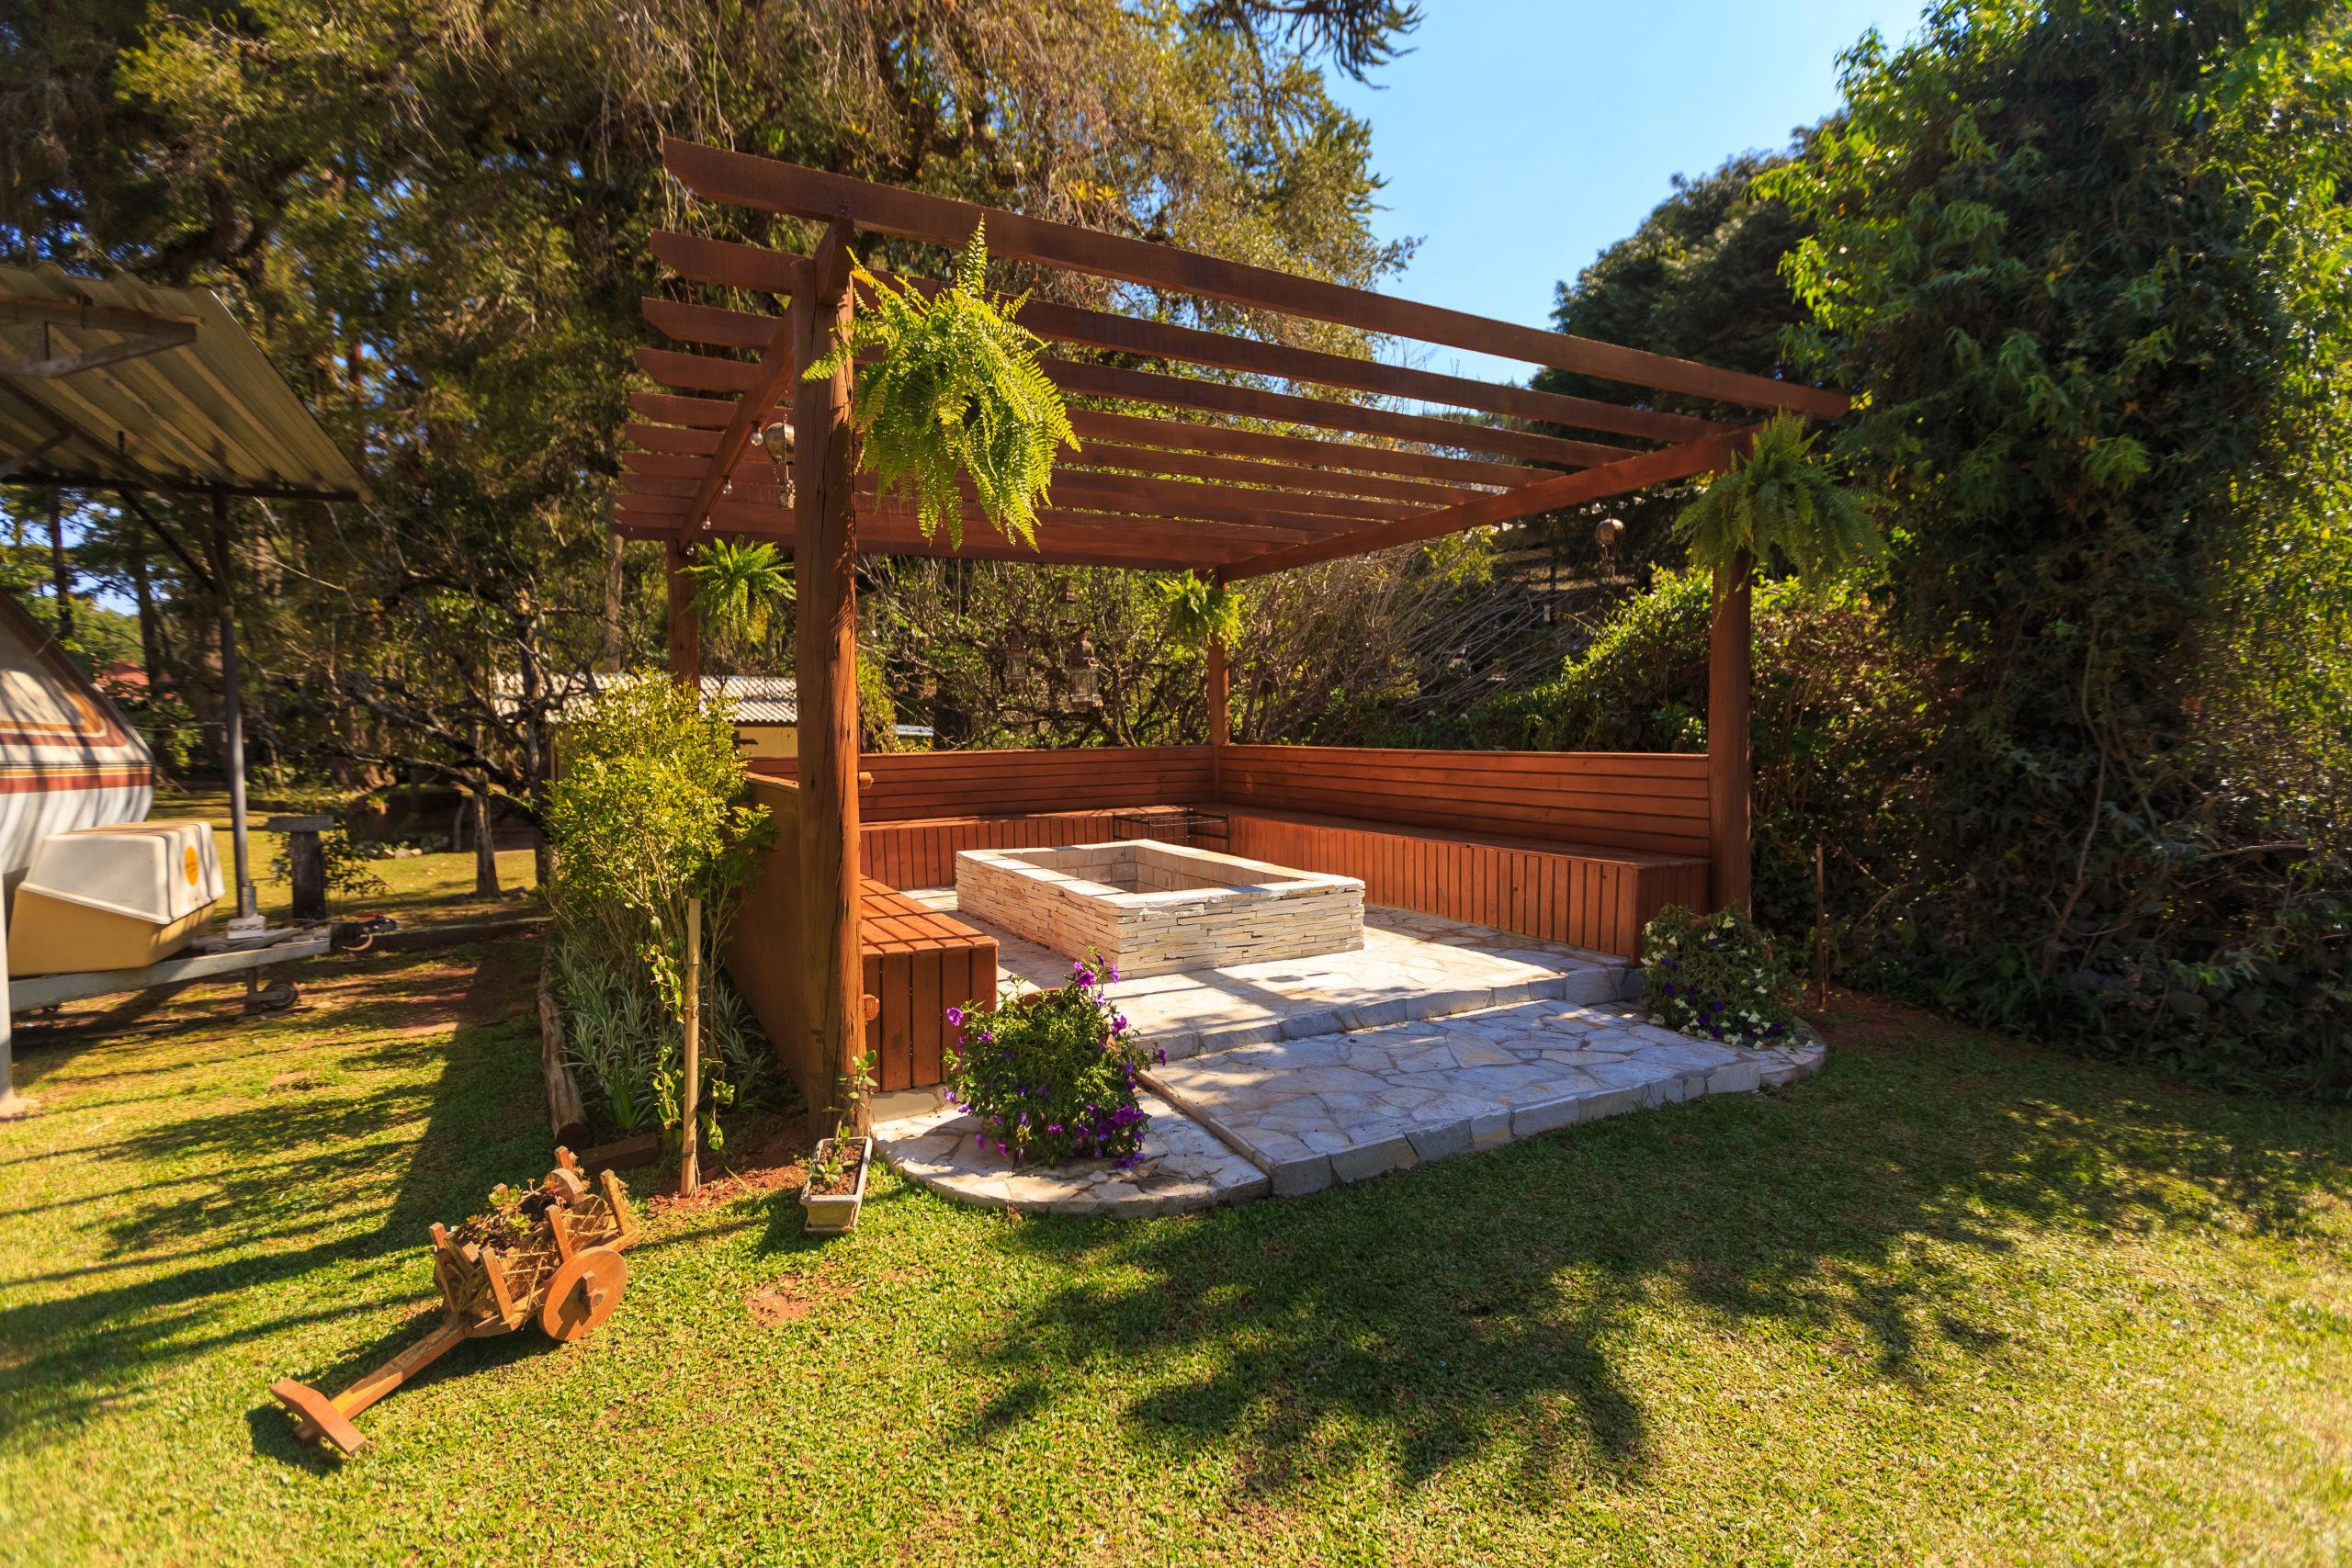
“A large-scale, custom project like this involves significant costs in both materials and, most likely, labor.”
The pergola and built-in seating are the main expenses, followed by the masonry for the fire pit.Lumber for Pergola & Built-in Benches (Cedar or Redwood): $2,500 – $6,000Stone Blocks & Mortar for Fire Pit: $500 – $1,200Flagstone Pavers (for a 12’x12′ area): $800 – $2,000Labor (if not DIY): $3,000 – $7,000+TOTAL (DIY): $3,800 – $9,200TOTAL (PRO-INSTALLED): $6,800 – $16,200+Budget alternative: Use pressure-treated pine instead of cedar and opt for a simple metal fire pit bowl instead of custom stonework.
26. Simple Pallet Wood Coffee Table on Patterned Pavers
A pallet coffee table is one of the easiest and most popular DIY projects, and for good reason. It’s fast, cheap, and functional. Here’s the simplest way to do it.
- Time Estimate: 2-3 hours (includes sanding time)
- Material Cost: $10-$30
- Source two pallets of the same size. Look for ones marked ‘HT’ (heat-treated).
- This is the most important step: Sand everything. And then sand it again. Pallet wood is notoriously rough and splintery. Use an orbital sander starting with 80-grit paper and finishing with 120-grit.
- Clean the pallets thoroughly with a stiff brush and soapy water. Let them dry completely.
- Stack one pallet on top of the other. You can leave them unattached for a simple look, or screw them together from the top for more stability.
- Optional: Add four caster wheels to the bottom corners to make it easy to move around.
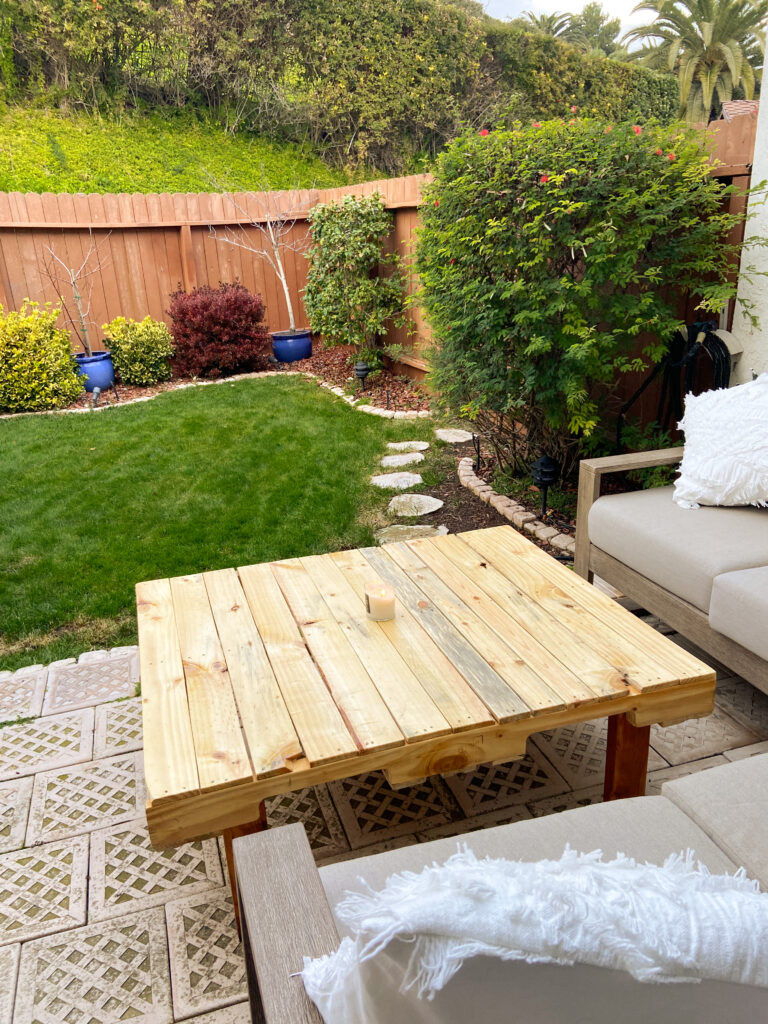
“Okay, real talk about pallet furniture.”
While it’s a great look, it has its downsides. Those splinters are no joke, especially if you have kids or pets. You must be incredibly thorough with your sanding. Also, unfinished, raw pallet wood will not last long outdoors. It will absorb water, warp, and start to rot. At a minimum, you must apply several coats of a heavy-duty outdoor sealant. The gaps between the slats can also be annoying—drinks can be tippy, and they become a collection point for dirt, leaves, and lost small items. It’s a vibe, for sure, but a very casual, rustic one.
27. Square Wood Planter with a Single Succulent
This is a perfect example of how a high-impact look doesn’t have to be high-cost. A small, simple planter box like this can be made from a single cedar or pine fence picket, which costs less than $5. You just need four side pieces and a bottom piece. A small succulent plant is also very affordable, usually $5-$10 at a garden center. The total cost for this project could easily be under $15, but the result is a chic, modern piece of decor that looks far more expensive than it is. It’s a great way to add a touch of green to your outdoor space without a big budget or time commitment.
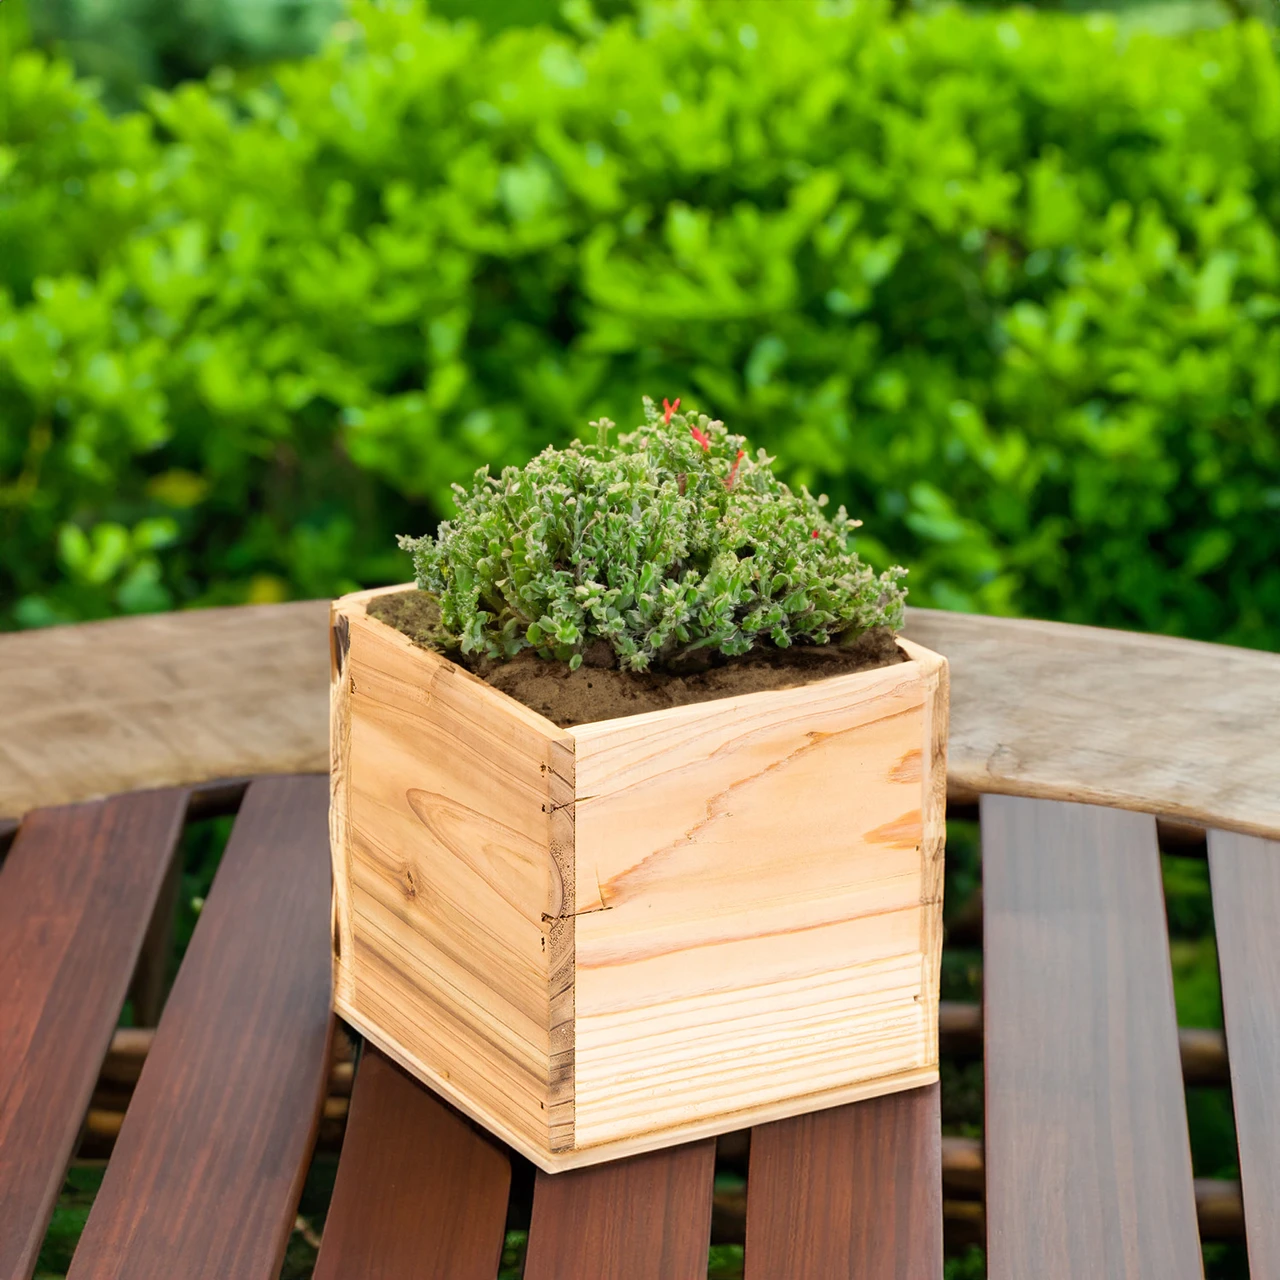
“The quiet elegance of this little scene follows a simple rule: One + One + One.”
It’s about focus and restraint. You have one simple geometric shape (the square planter), one feature plant (the succulent), and one contrasting surface (the dark slatted bench). By limiting the number of elements, each one is given importance. The natural wood of the planter pops against the dark bench, and the sculptural shape of the green succulent becomes the undeniable star. It’s a formula for creating a calm, zen-like moment in your outdoor space. Adding more plants or a more complex planter would dilute the impact.
28. DIY Raised Garden Bed with a Curved Stone Pathway
When designing a pathway, whether with pavers or stones, the width is critical to how it feels and functions. For a secondary path like this, which leads to a feature like a bench or a garden bed, the absolute minimum width should be 24 inches. This allows a single person to walk comfortably. However, for a more gracious and usable path, aim for 36 inches (3 feet). This width feels more inviting and allows for easier passage with something like a garden tote or small wheelbarrow. Anything narrower than 24 inches will feel cramped and purely utilitarian.
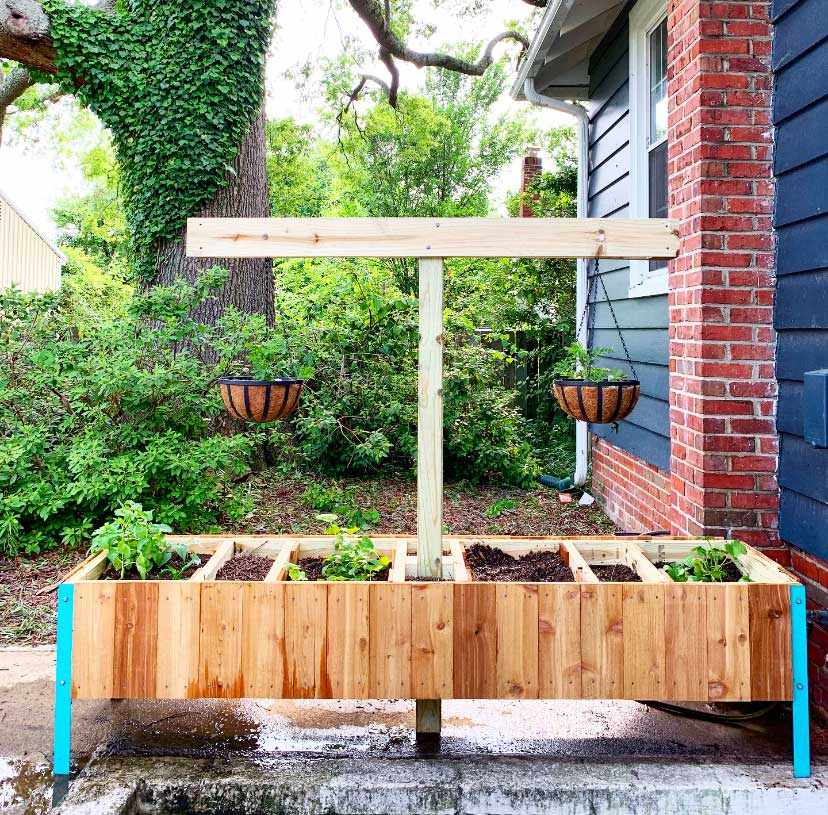
“This combination of a raised bed and pathway is wonderfully scalable.”
For a small suburban backyard, a single 4×8 foot raised bed with a simple path leading to it can become a beautiful and productive focal point. In a larger yard, you can expand the concept by creating a series of raised beds connected by a network of gravel or stone paths, effectively designing a full-fledged potager garden. The bench at the end of the path is a key element; it transforms the garden from a place of work into a destination for rest and enjoyment, regardless of its size.
29. Simple Rectangular Raised Timber Garden Bed
Building a basic raised garden bed is a perfect beginner’s woodworking project. This simple box design is straightforward and incredibly sturdy.
- Time Estimate: 2 hours
- Material Cost: $50-$150 (depending on wood choice)
- For a 4’x8′ bed, you’ll need two 8-foot boards and two 4-foot boards (e.g., 2×6 or 2×8 lumber). You’ll also need a 4×4 post cut into four 12-inch sections for the corner supports.
- Lay out your boards in a rectangle on a flat surface.
- Place one of the 4×4 corner supports on the inside of each corner.
- Attach the boards to the corner supports using 3-inch exterior-grade screws. Use at least two screws per board at each corner. Pre-drilling helps prevent splitting.
- Flip the frame over, place it in its final location, ensure it’s level, and you’re ready to fill it with soil!
Your Weekend Project Awaits
Feeling inspired? The best part about these projects is the satisfaction that comes from making them yourself. Start with one small idea—a planter box, a simple bench—and see how it transforms a corner of your yard. You’ve got this. Now, which project are you saving to your ‘Outdoor Dreams’ board on Pinterest first?