You know that feeling when you finally find the mini indoor garden idea that looks exactly right for your space? That little spark of “I can totally do that.” After filtering through hundreds of options, we narrowed it down to 30 ideas that actually deliver. In this guide, you’ll find everything from tranquil Zen gardens and whimsical fairy setups to high-tech hydroponic herb stations and classic terrariums. And stay until the end — we break down the most common mistakes that can ruin these looks. 📌 Save this to Pinterest for later — you’ll want to revisit these ideas.
1. Use a Single Large Plant to Anchor an Art-Filled Loft
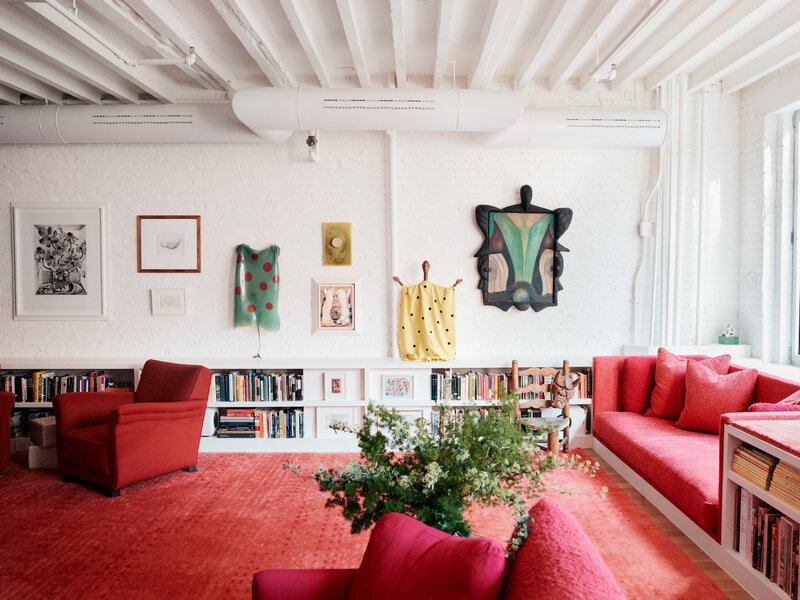
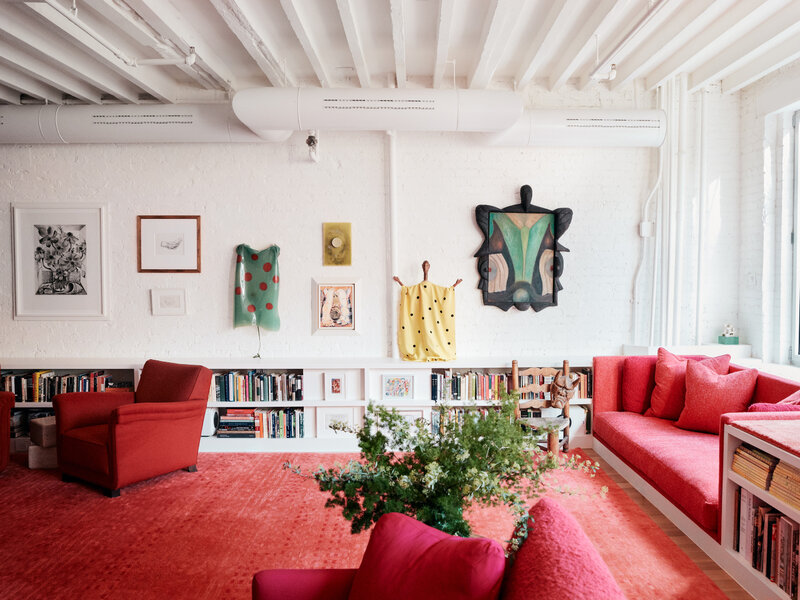
This approach works because it treats the plant not as an accessory, but as a piece of living furniture. The large green plant in the foreground provides a crucial organic element that balances the hard lines of the exposed brick and bookshelves. Its scale is what makes the statement; a smaller plant would get lost. The vibrant coral red of the rug and chairs creates a high-energy foundation, and the plant’s deep green color is a perfect complementary accent, preventing the red from overwhelming the space. It’s a masterclass in using color and scale to define a room.
“A large plant needs a large pot with proper drainage, which can be heavy and awkward.”
Make sure you have its final position decided before you pot it, as moving it will be a two-person job. Also, consider the light. While this loft looks bright, a plant of this size needs consistent, strong, indirect light. If your spot is too far from a window, you’ll need to supplement with a stylish grow light, or you risk the plant slowly failing. Be honest about your light conditions before committing to a large-scale plant.
2. Build a Serene, Glass-Enclosed Zen Garden with a Slender Maple
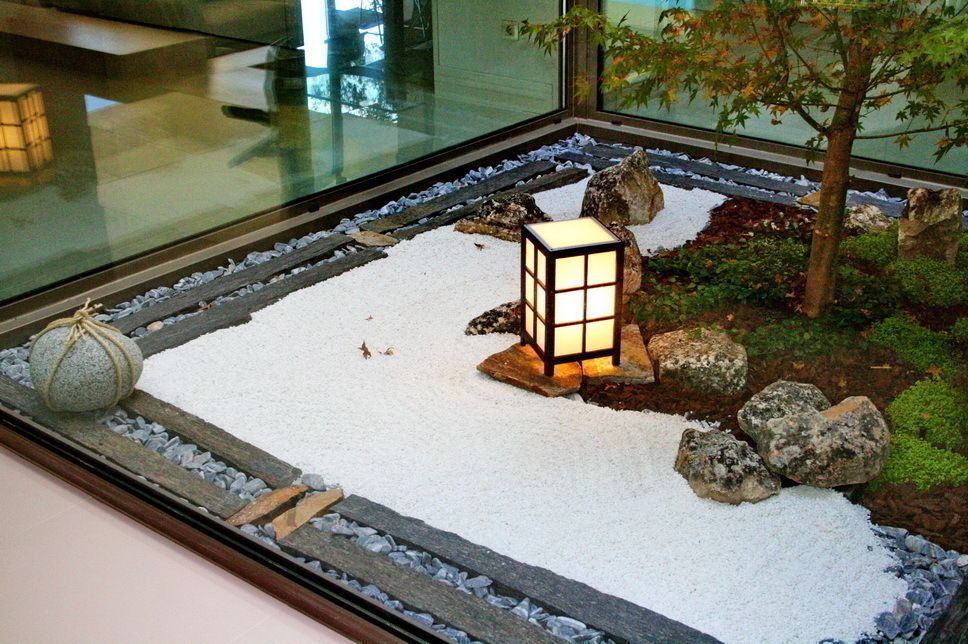
For a truly professional-looking Zen garden pattern, make your own rake. A standard garden rake is too large and clumsy for this scale. Instead, take a small block of wood (about 4-6 inches wide) and drill evenly spaced holes along one edge. Insert 3-inch wooden dowels into the holes and secure with wood glue. This allows you to create precise, delicate patterns in the white gravel that are perfectly scaled to the garden’s smaller footprint. Vary the pattern weekly—from straight lines to swirling waves—to keep the contemplative feel fresh.
“While a contained Zen garden seems low-maintenance, it’s not zero-maintenance.”
The glass enclosure will show every fingerprint and smudge, requiring weekly cleaning to maintain its pristine look. The white gravel can also become discolored over time from dust or decomposing organic matter from the tree. You may need to remove, rinse, and dry the gravel every 1-2 years. The maple tree will also require careful pruning to maintain its slender shape and prevent it from outgrowing the space.
3. Craft a Whimsical Fairy Village in a Bright Orange Planter
Create your own tiny stone bridge in about 30 minutes. Here’s a quick guide:
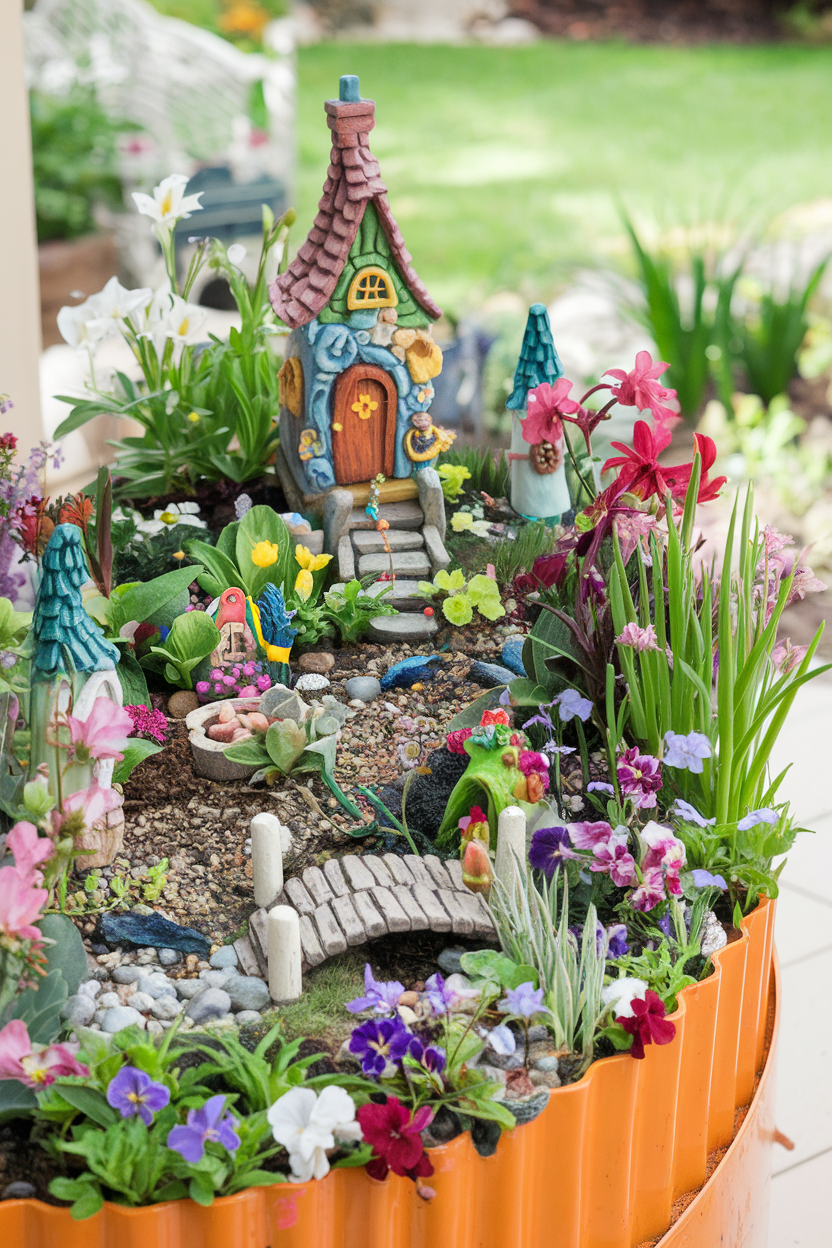
“Find a piece of sturdy but flexible cardboard or a thin plastic sheet and cut it into a rectangle (e.g., 2 inches by 4 inches).”
Gently bend it into an arch and secure the ends to a flat surface.
Use a strong, waterproof adhesive to glue small, flat pebbles or stones across the top and sides of the arch.
Let it dry completely for at least 24 hours to ensure it’s rigid.
Once dry, you can place it over a “river” of blue glass beads or contrasting pebbles in your fairy garden.
You can achieve this look for under $40. The key is to skip the expensive pre-made fairy garden kits. Find a colorful planter at a discount store like HomeGoods or even a thrift store ($10-$15). The miniature houses can often be found at craft stores like Michael’s or online for a few dollars each, especially after seasonal holidays. For plants, buy a single “sampler” pack of small succulents or sedums for about $15. The rest—pebbles, sand—can be sourced from a dollar store or a craft store’s floral section.
4. Style a Living Plant Collection in a Glass Curio Cabinet
The single element that makes this idea work is the curio cabinet itself. Without it, this is just a collection of pots on the floor. The cabinet elevates the plants, transforming them from simple decor into a curated collection. It imposes a sense of order and intention, turning the display into a living art installation. The glass doors and shelves keep the look light and airy, ensuring the plants remain the heroes while providing a protective barrier from dust, pets, or drafts. It’s a piece of functional furniture that says “I take my plants seriously.”
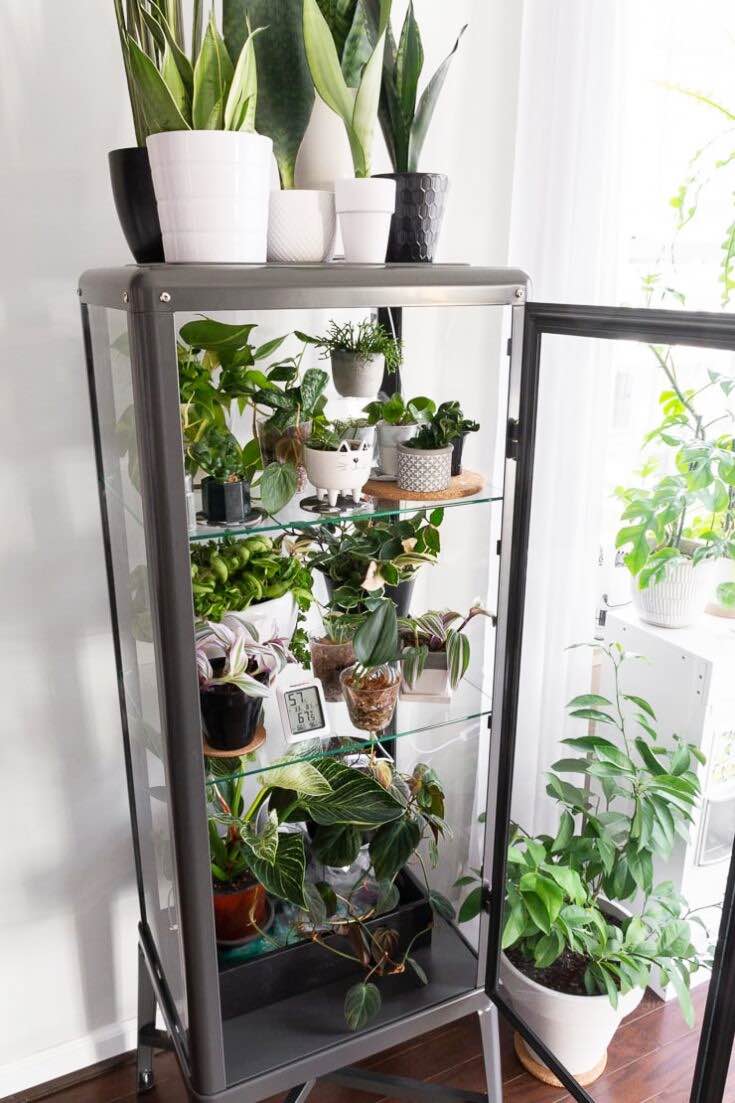
“This idea is perfect for smaller living rooms or awkward, narrow corners that can’t fit a standard piece of furniture.”
A tall, narrow curio cabinet like this one typically has a footprint of no more than 18-24 inches square. It draws the eye upward, creating an illusion of height, which is a great trick for rooms with standard 8-foot ceilings. However, avoid this in a room with very low ceilings (under 7.5 feet), as it might feel cramped. It’s an ideal solution for apartments and condos where floor space is at a premium.
5. Use Faux Trailing Plants Against a White Brick Wall
The visual success here is a simple formula: 70% textured neutral base + 30% organic green. The white brick wall provides a bright, tactile backdrop that prevents the look from feeling flat. The trailing faux plants add a soft, natural shape that contrasts beautifully with the grid-like pattern of the bricks. You can swap the elements while keeping the ratio. For example, try a dark charcoal wall (the neutral base) with bright, variegated pothos (the organic green) for a moodier, more dramatic take on the same concept.
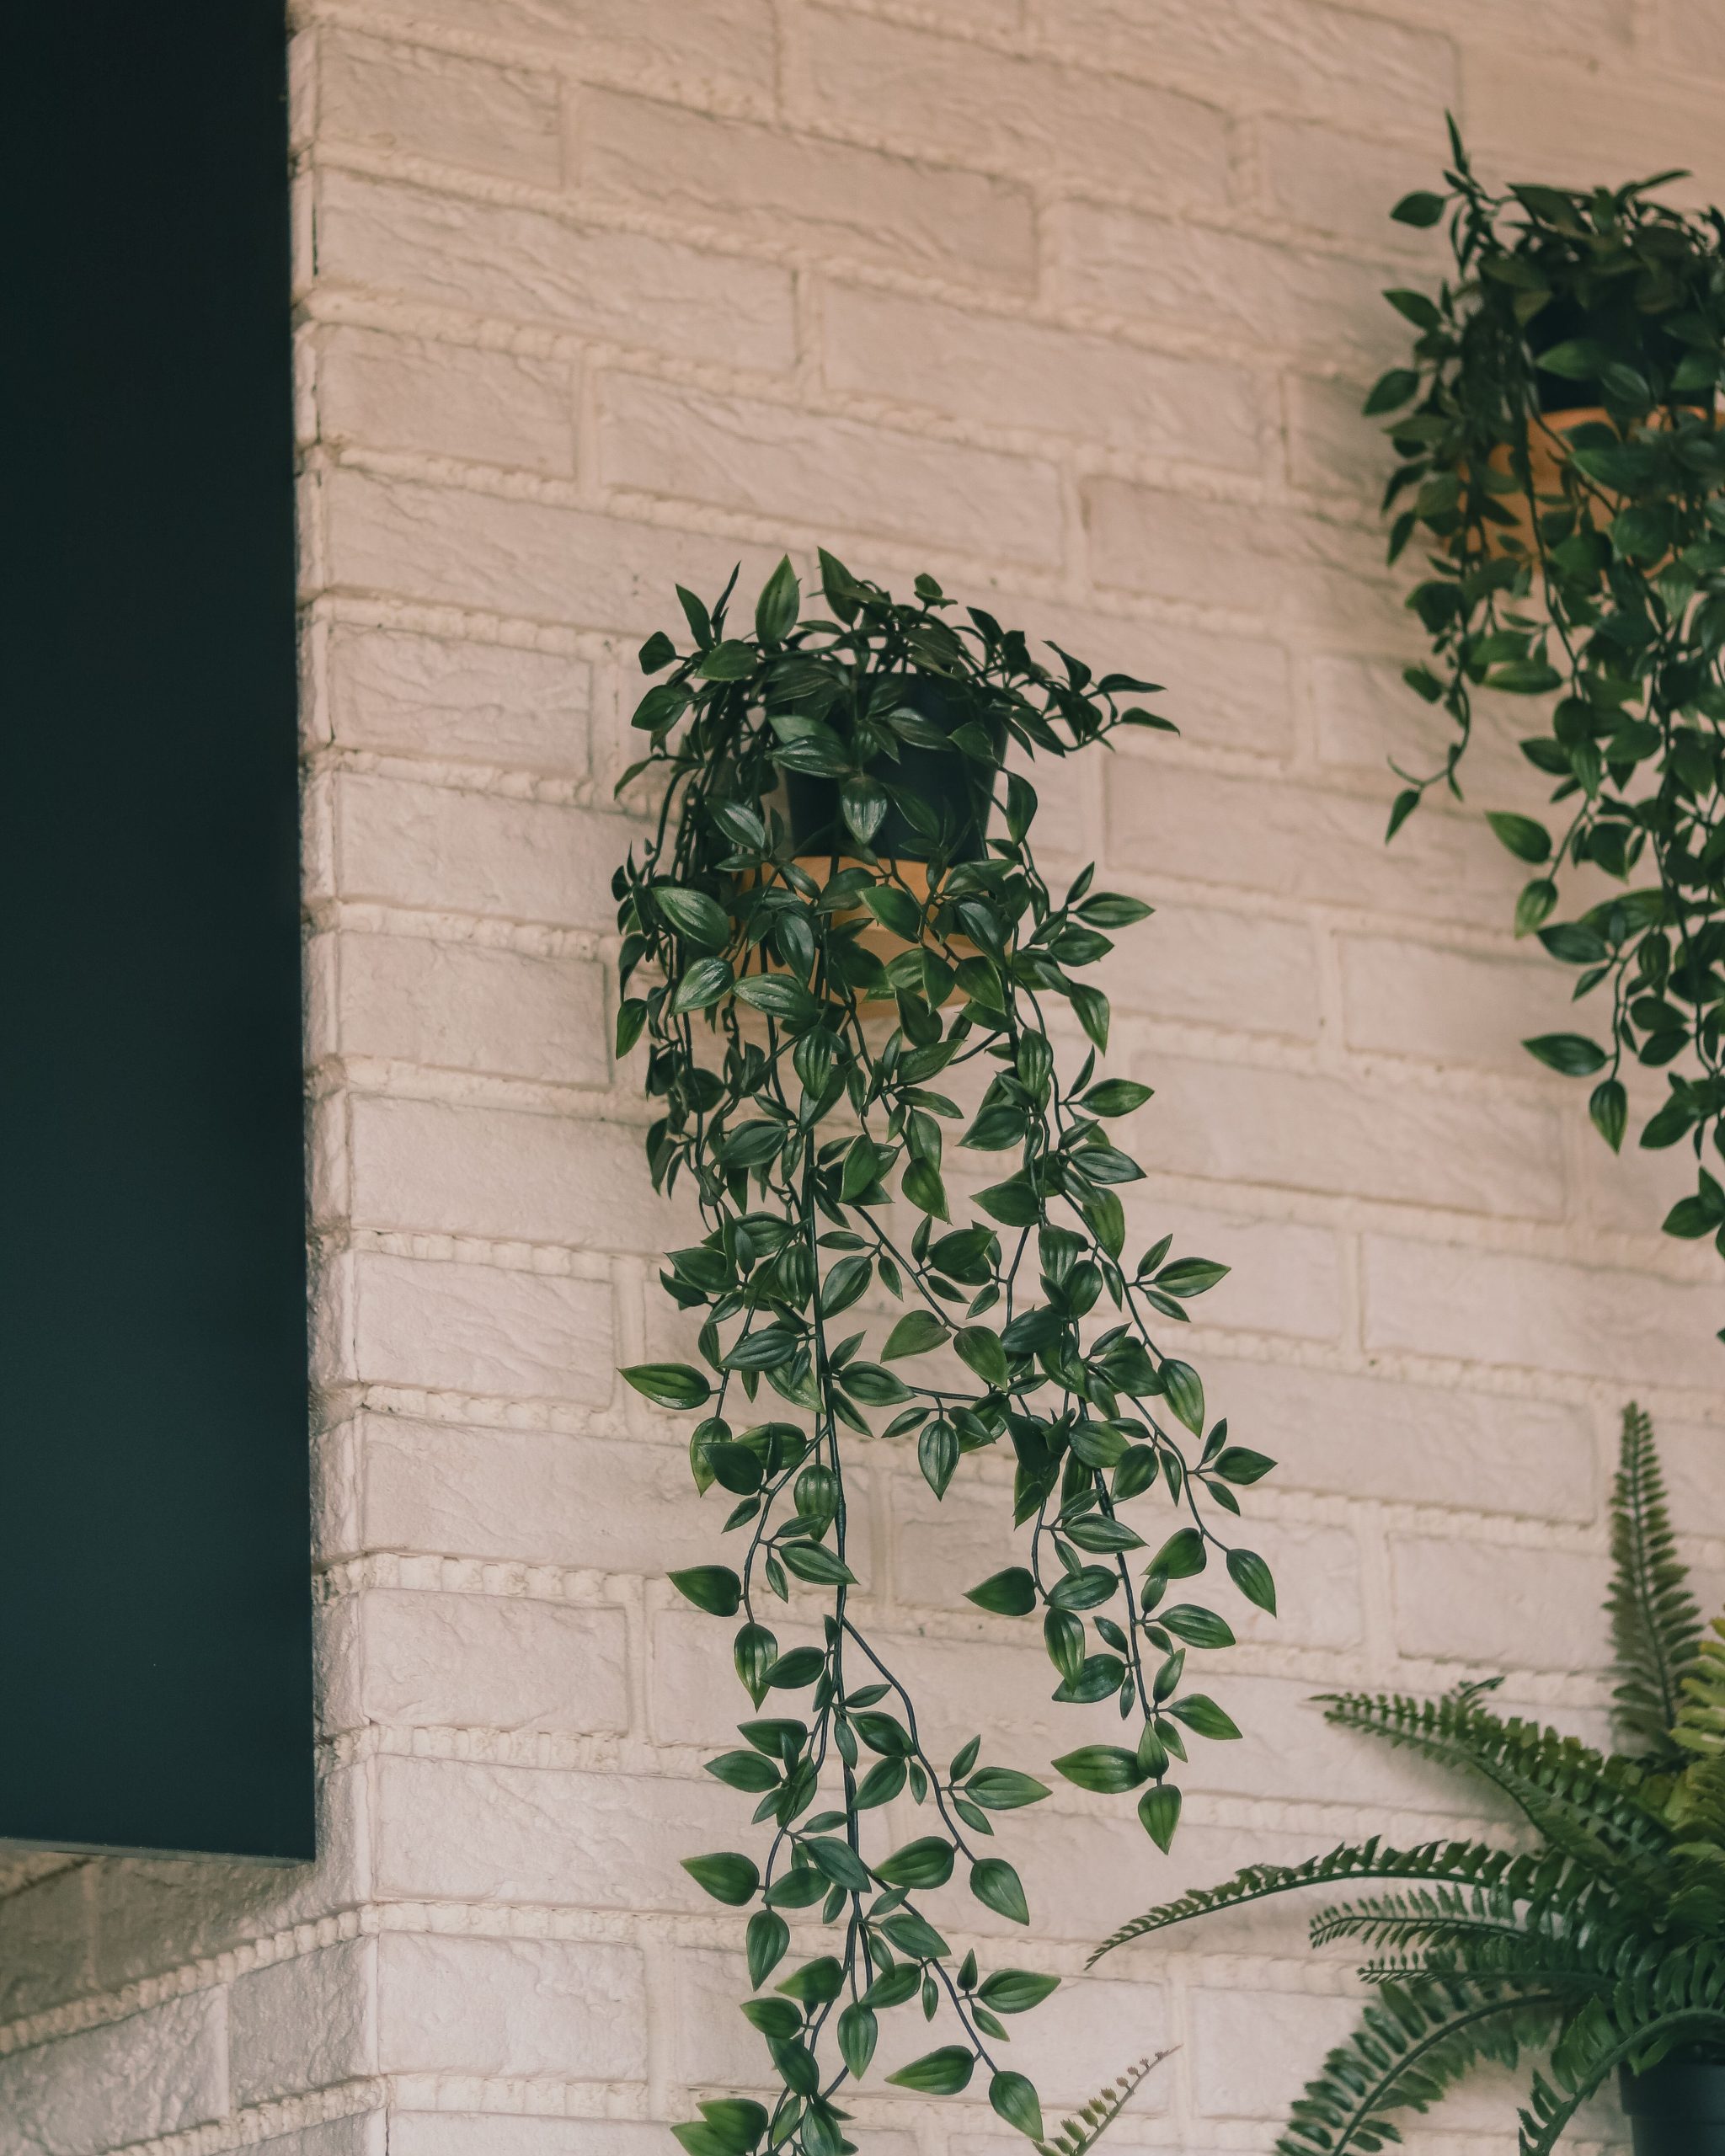
“Let’s be honest: high-quality faux plants can be surprisingly expensive, sometimes costing more than the real thing.”
Cheap, shiny plastic plants will instantly kill this vibe and look tacky. Invest in fauxs with realistic leaf variations and matte finishes. Also, remember that faux plants are not zero-maintenance. They are serious dust collectors! You’ll need to wipe down the leaves every few weeks to keep them looking fresh and realistic. If you want real greenery with a similar trailing effect, check out the hanging planters in Idea #9.
6. Set Up a Two-Tiered LED Herb Garden on Your Countertop
Here’s a potential cost estimate for a setup like this:
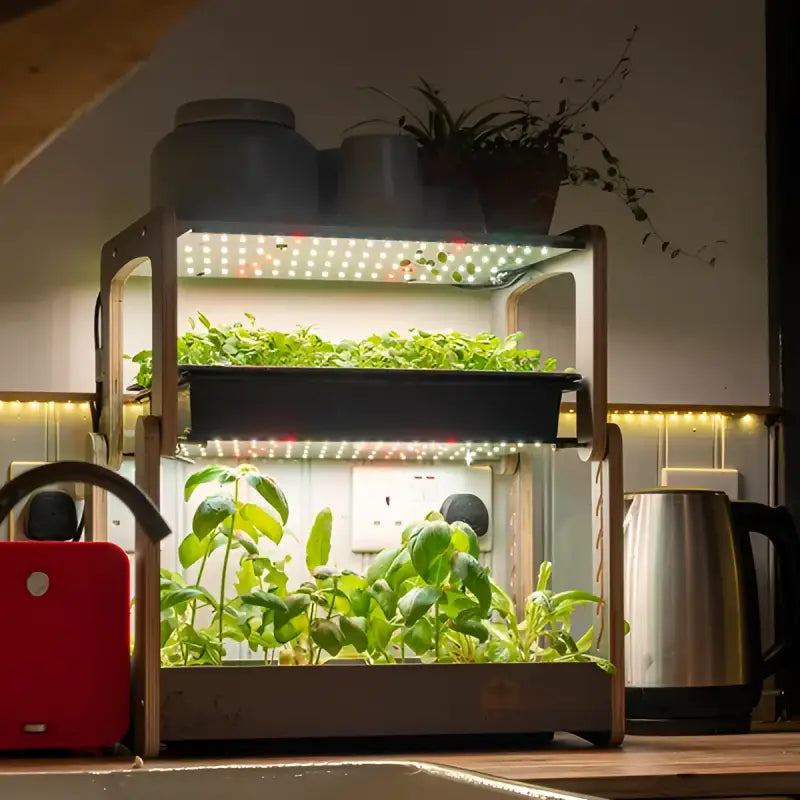
“Main Unit: A two-tiered indoor garden system with integrated lights can range from $80 – $200.”
Seeds/Seedlings: Starter herb kits or seed packets will cost $15 – $30.
Potting Medium: Specific pods or starter soil might be another $10 – $20.
TOTAL: $105 – $250
Budget alternative: For about 40% less, you can buy two separate LED grow light strips and simple planter trays, placing them on a basic wire kitchen rack.
This works because it’s a self-contained ecosystem that solves the biggest problem for indoor herb gardens: a lack of consistent light. By integrating bright, full-spectrum LED lights directly into the structure, you guarantee the plants get the energy they need to thrive, regardless of how dark your kitchen is. The tiered design is also incredibly space-efficient, doubling your growing capacity on the same countertop footprint. The warm wood frame helps it feel less like a sterile appliance and more like a piece of intentional decor.
7. Display a Bonsai on a Slatted Wood Table
The slatted wooden table is the detail that elevates this entire scene. It introduces a linear, architectural element that contrasts with the organic, irregular shape of the bonsai tree. More importantly, the gaps in the slats create a sense of lightness, allowing the tree to feel like it’s floating rather than sitting on a heavy, solid block. This choice of furniture is a nod to Japanese design principles, where the interplay of light and shadow, solid and void, is crucial. A simple, solid table wouldn’t have the same delicate, gallery-like effect.
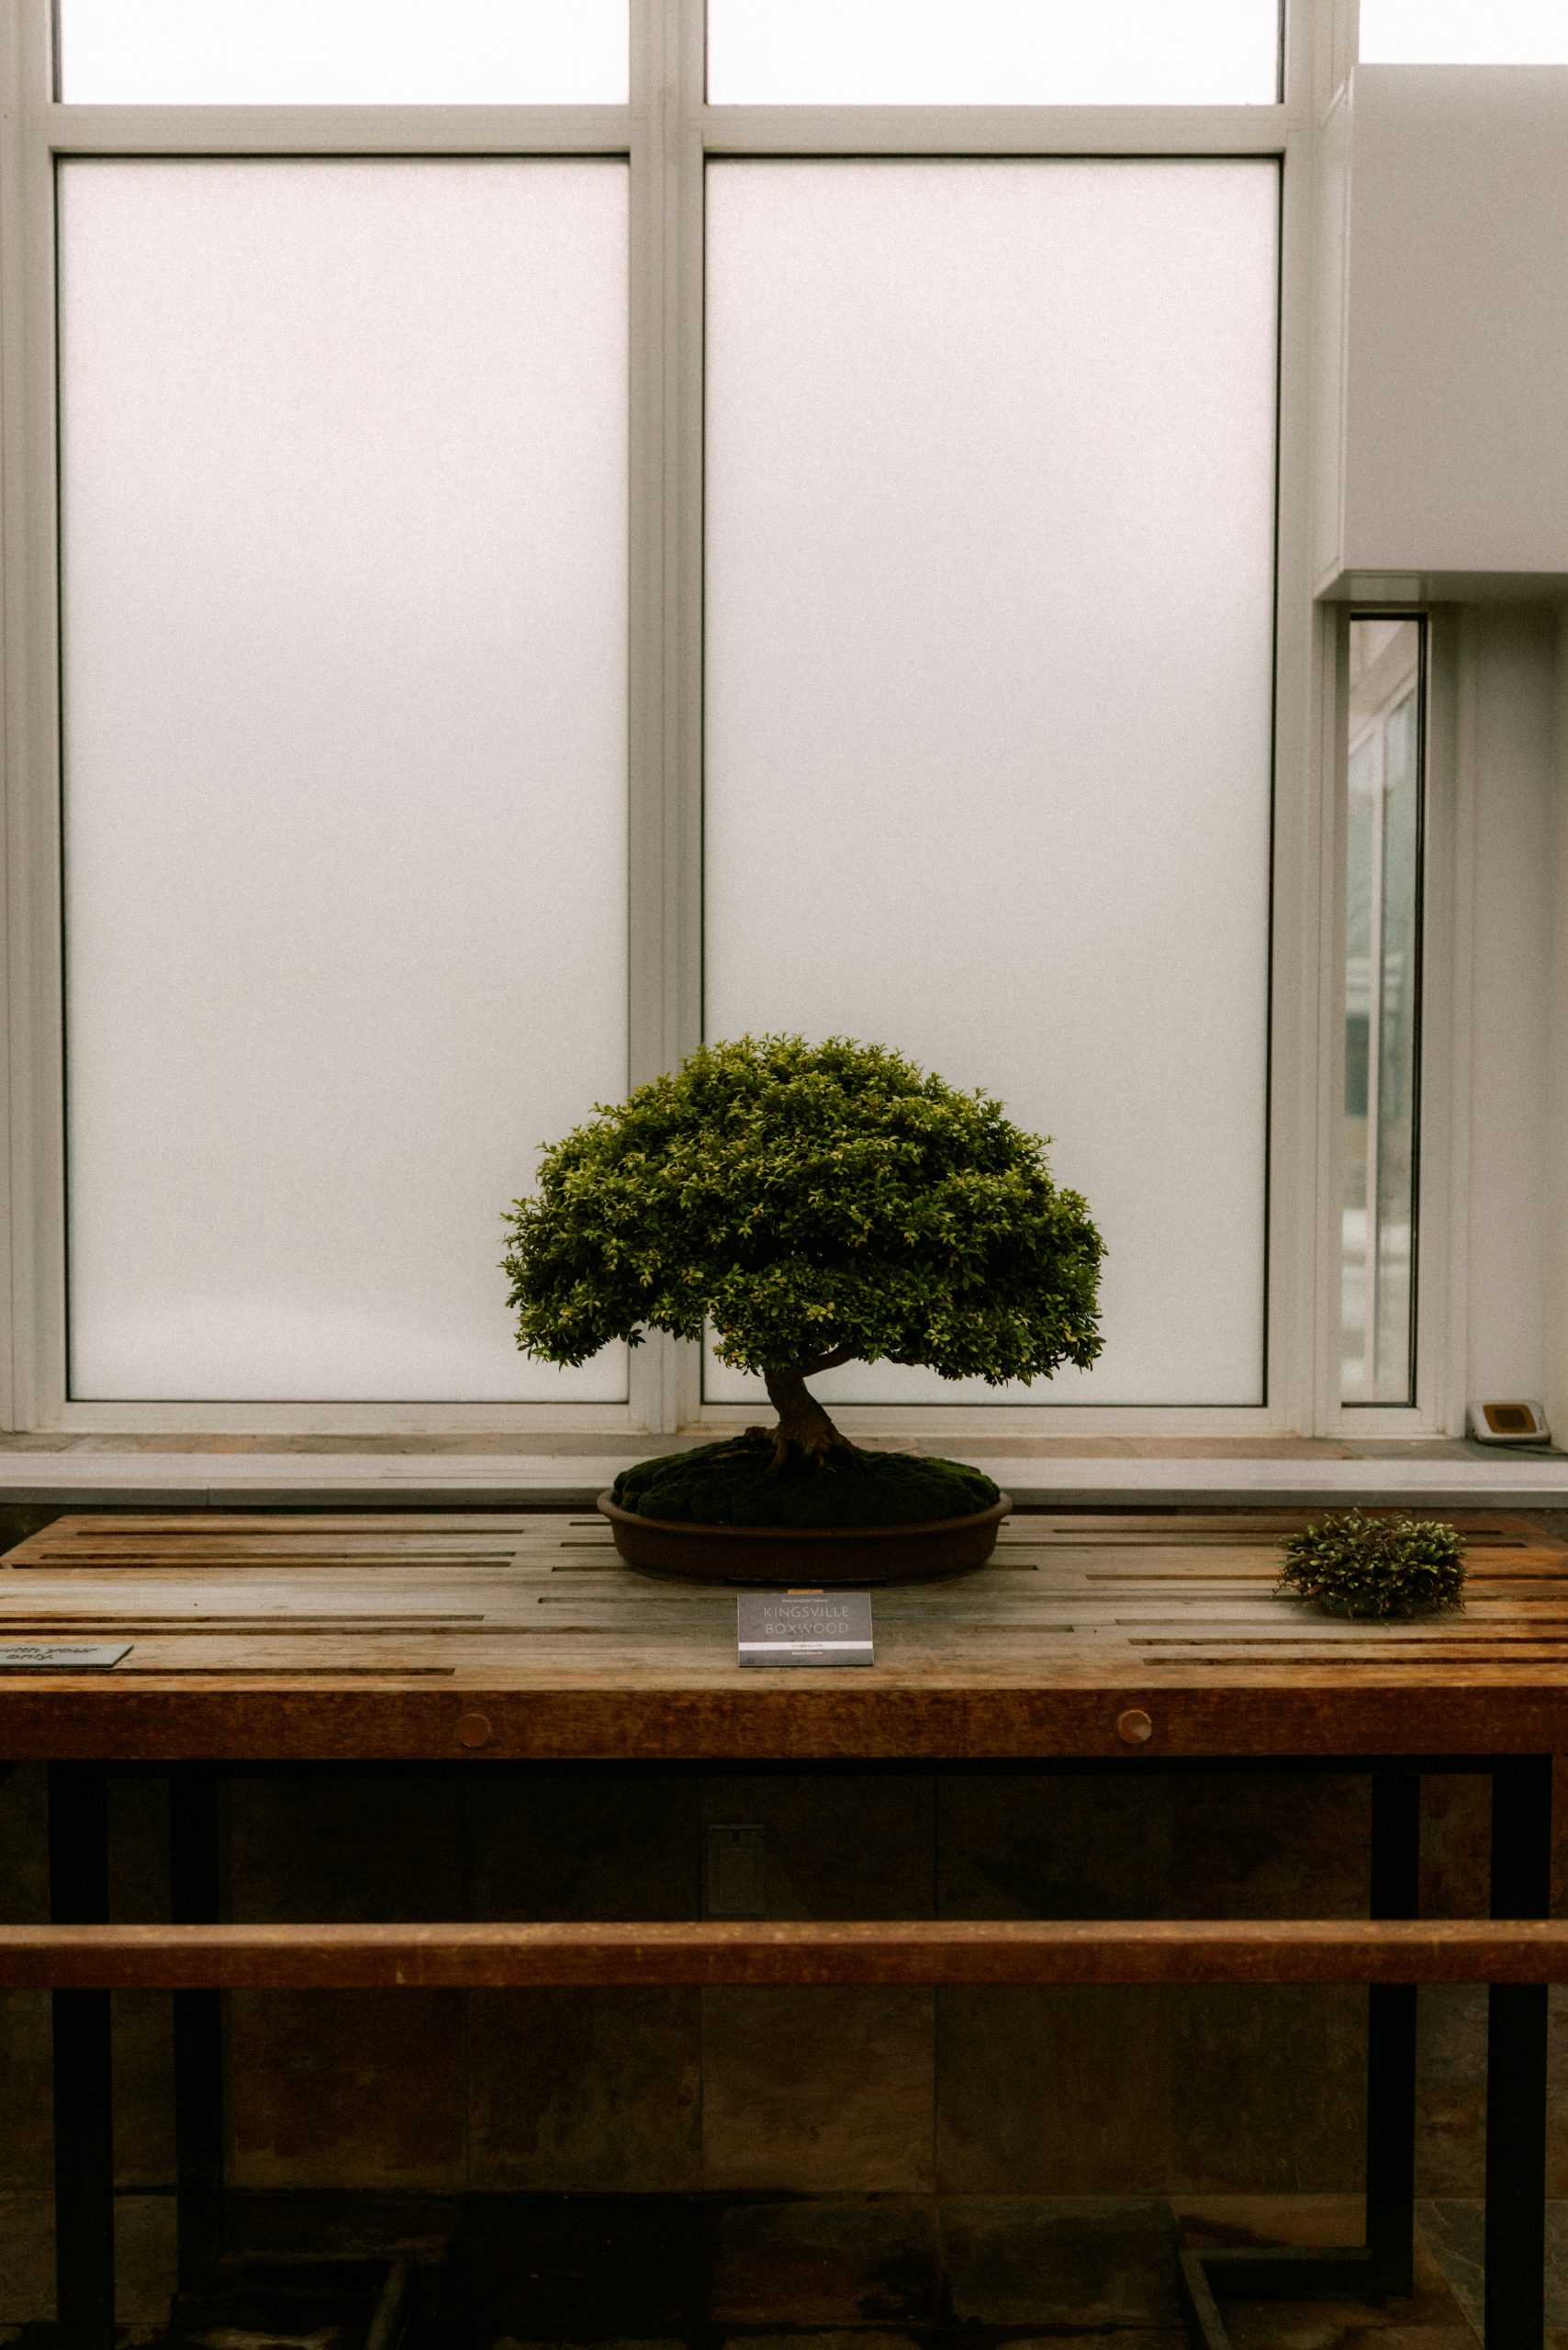
“Bonsai are not your average houseplants; they are a significant hobby commitment.”
They require regular and precise watering (never let the soil dry out completely), specialized fertilizing, and, most importantly, careful pruning to maintain their shape. Repotting every 2-5 years with specific bonsai soil is also necessary. A real bonsai is a living sculpture that requires daily attention. If you love the look but not the work, consider a high-quality faux bonsai. No one on your Zoom calls will know the difference.
8. Grow a Vertical Hydroponic Garden in a Bright Corner
Vertical hydroponic towers are surging in popularity because they perfectly intersect two major cultural shifts: the wellness movement (growing your own clean food) and the reality of smaller living spaces. As more people live in apartments and condos without access to outdoor land, these systems offer a hyper-efficient way to garden indoors. They use up to 90% less water than traditional soil gardening and, with integrated lights, can thrive in any corner, democratizing the act of growing food. They feel futuristic, practical, and beautiful all at once.
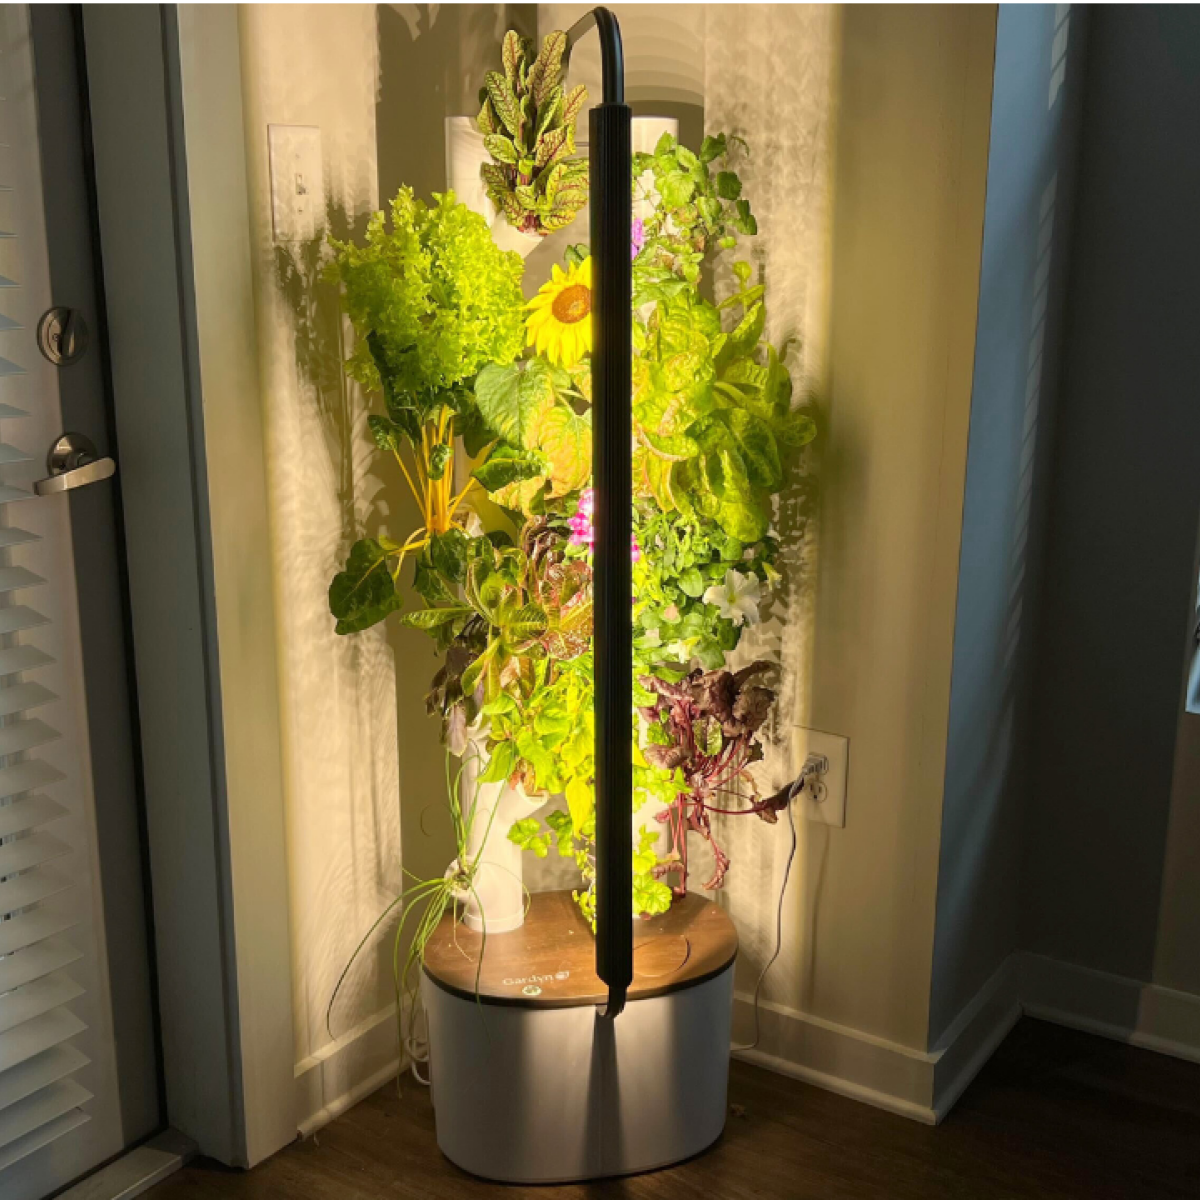
“To make a hydroponic tower feel like a design object instead of a science experiment, curate your plantings.”
Don’t just grow random lettuces. Mix in edibles with interesting colors and textures. Try purple basil, trailing strawberries, or even edible flowers like nasturtiums. Planting a single sunflower at the top, as seen here, is a brilliant touch that adds a joyful, sculptural element. Think of it as creating a living floral arrangement that you can also eat.
9. Hang Fresh Herbs from a Galvanized Rod in Your Kitchen Window
The key to making this look balanced and not chaotic is varying the hanging heights. Don’t hang all the pots at the same level. A good rule of thumb is to create a “visual triangle” by having one pot hanging lowest in the center, with the flanking pots hung progressively higher. The ropes for the five pots seen here create a gentle “V” and “inverted V” shape, which guides the eye naturally across the display. This intentional asymmetry feels dynamic and less rigid than a perfectly straight line of pots.
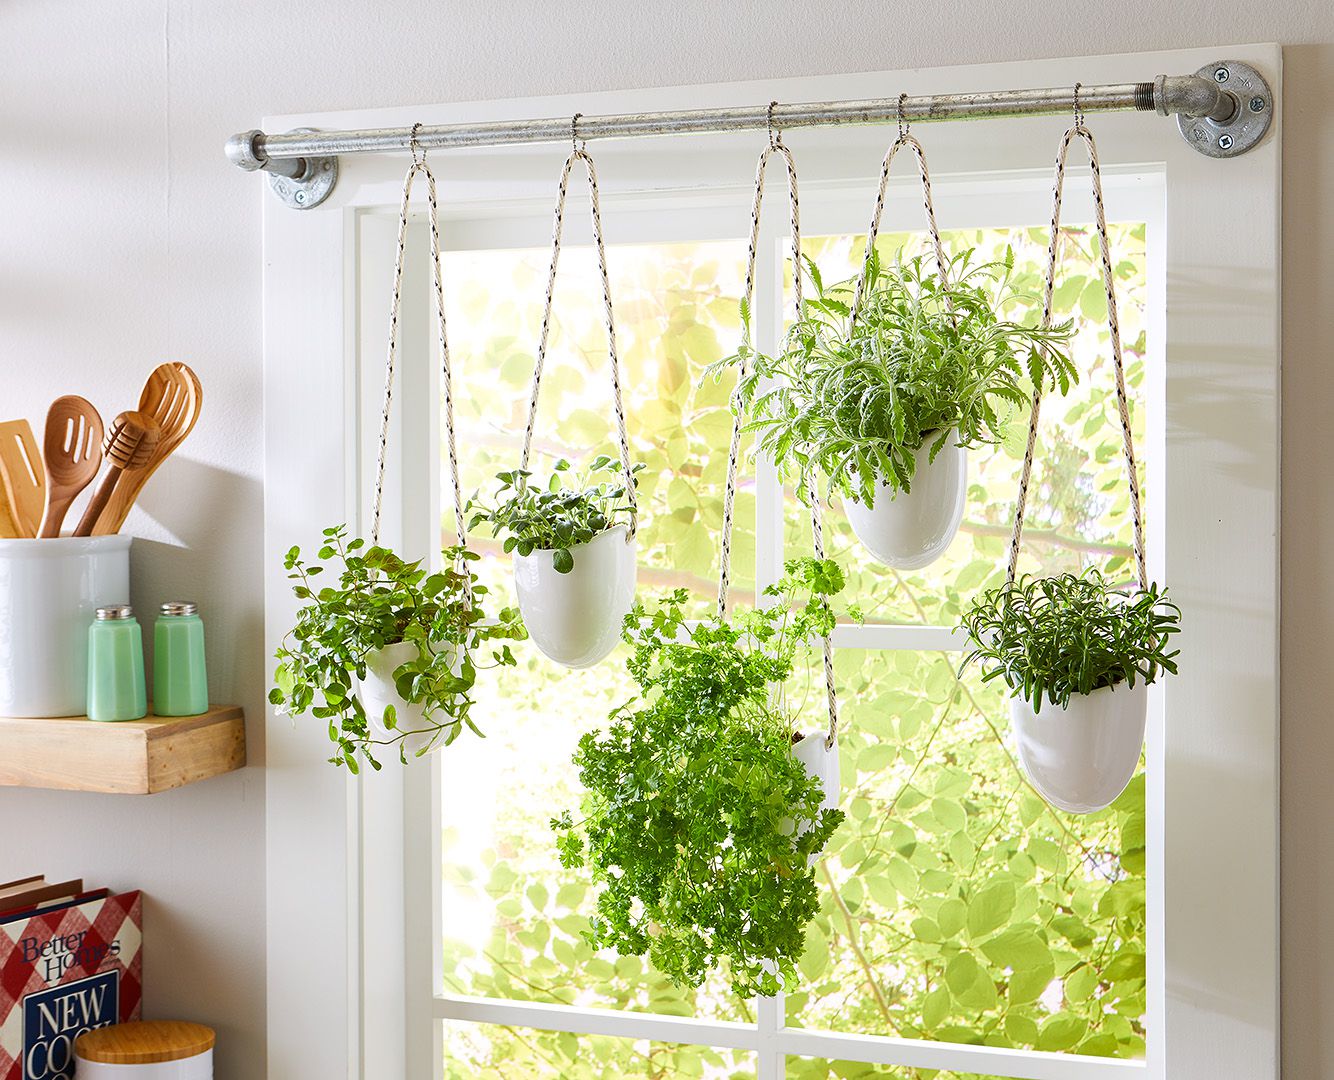
“Before you commit to drilling, check these things first:”
Before you commit to drilling, check these things first:
- Window Frame Integrity: Can your window frame support the weight? A rod with five pots filled with damp soil and plants can be heavy. Ensure you are drilling into solid wood or using appropriate wall anchors.
- Sunlight Direction: Most herbs need at least 6 hours of direct sun. Does this window actually get that much light, or is it obstructed?
- Watering Plan: How will you water these without dripping all over the counter and floor? Choose pots with attached saucers or have a plan for taking them down to water.
10. Use a Galvanized Planter for Kitchen Counter Herbs
The formula for this fresh, modern kitchen look is simple: 50% utilitarian hardware + 40% vibrant organic + 10% graphic pattern. The galvanized metal planter provides a cool, industrial-farmhouse feel. The lush, bright green herbs bring life and a promise of fresh flavor. Finally, the geometric tile backsplash adds a layer of sophisticated, modern pattern that keeps the whole scene from feeling too rustic. You could swap the galvanized planter for a simple white ceramic one for a more minimalist take, or use a terracotta pot for a warmer, more traditional feel.
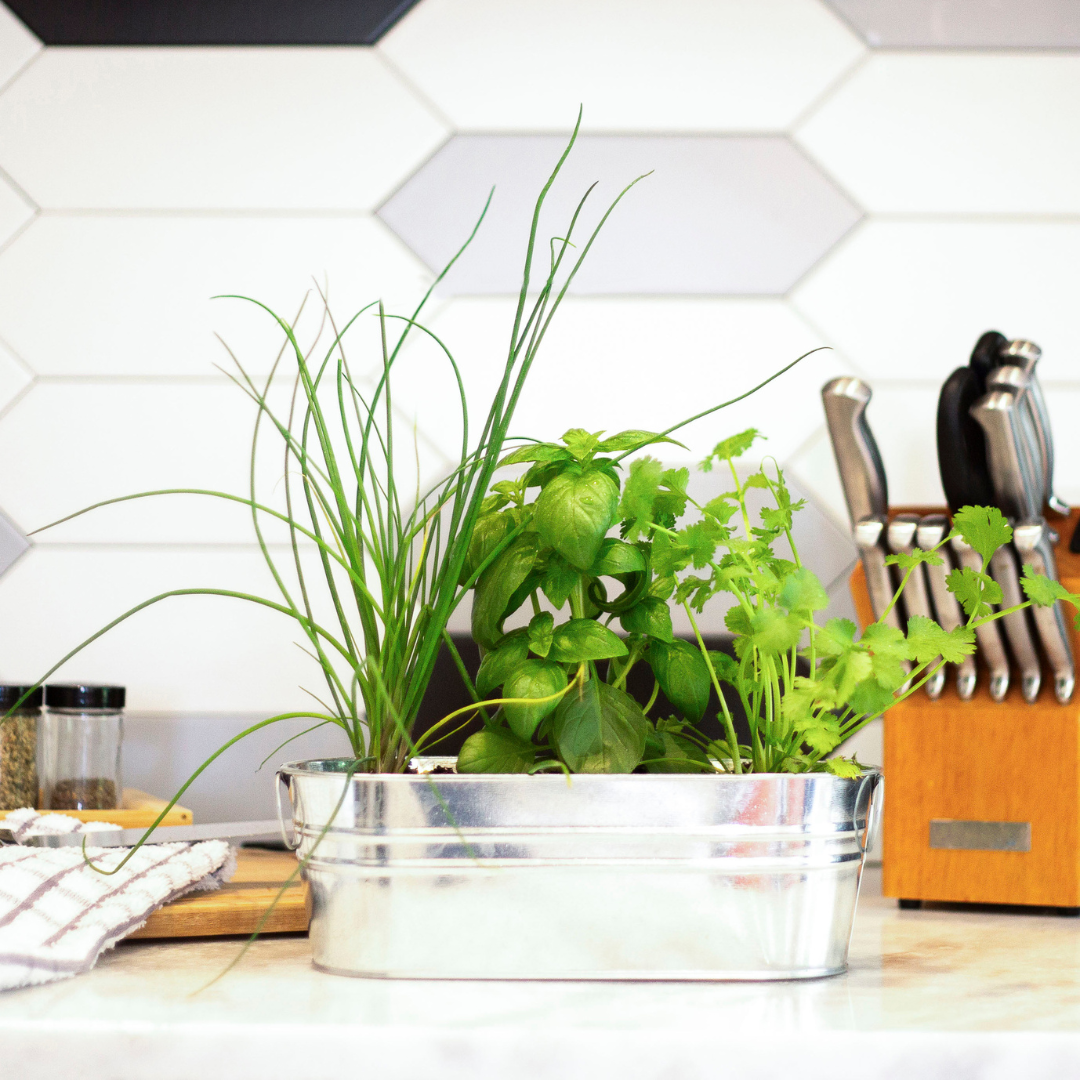
“A single long planter with multiple herbs looks great, but it can be tricky.”
Different herbs have different watering needs. Chives prefer consistently moist soil, while basil likes to dry out a bit between waterings, and cilantro can be fussy. If you’re a beginner, you might have more success planting each herb in its own small, inexpensive plastic pot (with drainage!) and then placing those pots inside the larger decorative galvanized planter. This allows you to water each plant individually according to its needs. This is much easier than what’s shown in the modern hydroponic system.
11. Style a Glass Terrarium with a Miniature Birdhouse
This miniature scene works because of its careful layering of natural textures. The base layer is dark, rich soil, which provides a grounding contrast. Above that, you have the smooth, rounded river rocks which have a different texture and color. Then, the varied green foliage adds a soft, living layer. The final touch, the miniature birdhouse, introduces a man-made shape and a lighter, smoother texture. This progression from rough to smooth and dark to light creates a sense of depth and realism within a very small space.
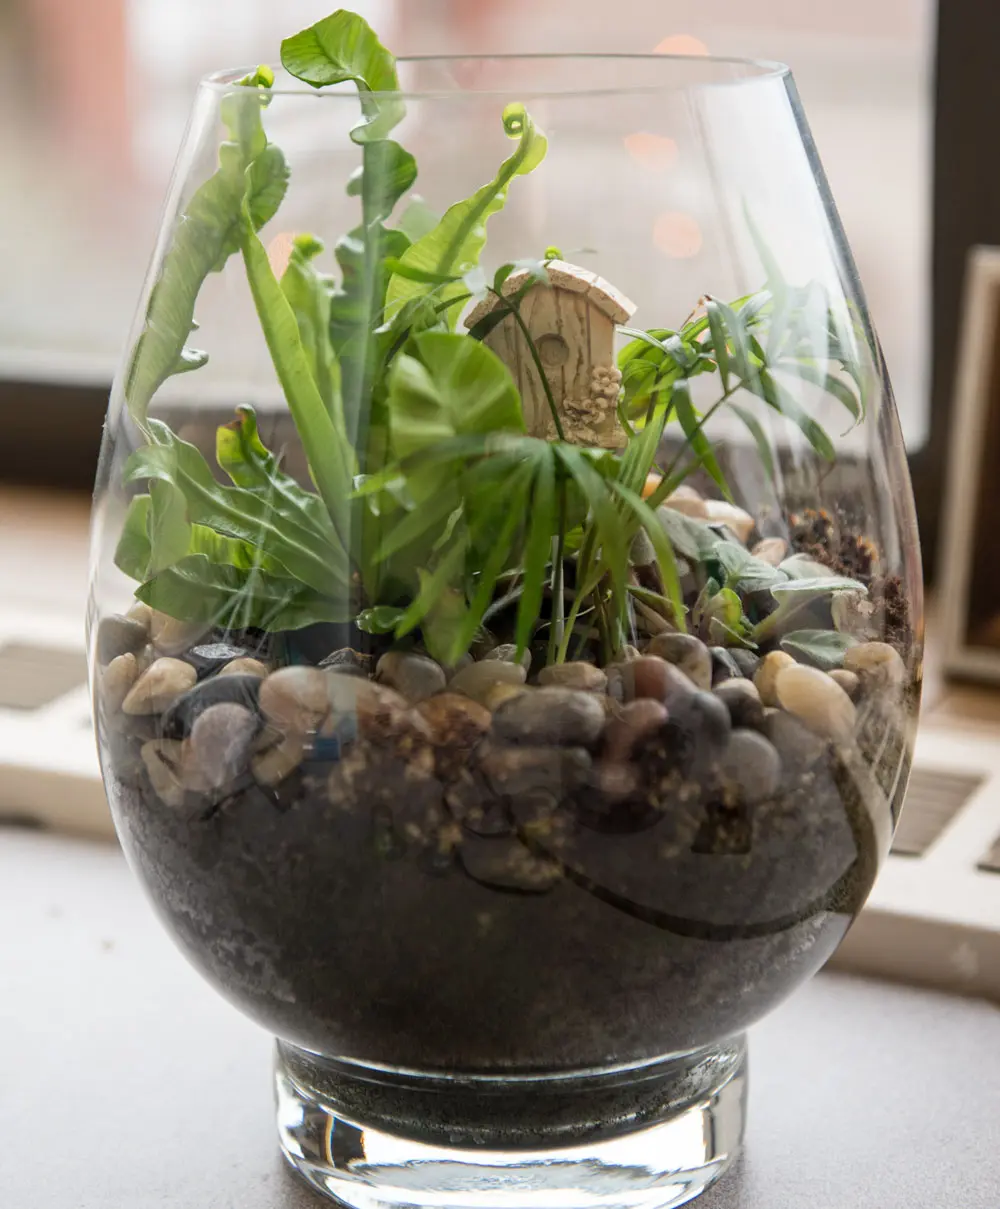
“The tiny birdhouse is the single element that tells a story.”
Without it, this is a perfectly pleasant, but standard, terrarium with nice plants. With the birdhouse, it becomes a world in miniature. It injects a sense of whimsy and narrative, inviting you to imagine a tiny creature inhabiting this little glass world. It’s the detail that transforms the terrarium from a simple plant display into a piece of decorative storytelling. It also provides a focal point for the eye to land on amidst the foliage.
12. Create a Moody Miniature Garden in a Glass Cloche
When working with a closed terrarium or cloche, activated charcoal is your best friend. Before you add your soil, place a thin, 1/4-inch layer of horticultural charcoal at the very bottom. You won’t see it, but it will work wonders for the health of your mini-garden. The charcoal acts as a filtration system, absorbing impurities and preventing odors that can build up in the humid, enclosed environment. This simple, inexpensive step can dramatically increase the longevity of your creation and keep the ecosystem fresh.
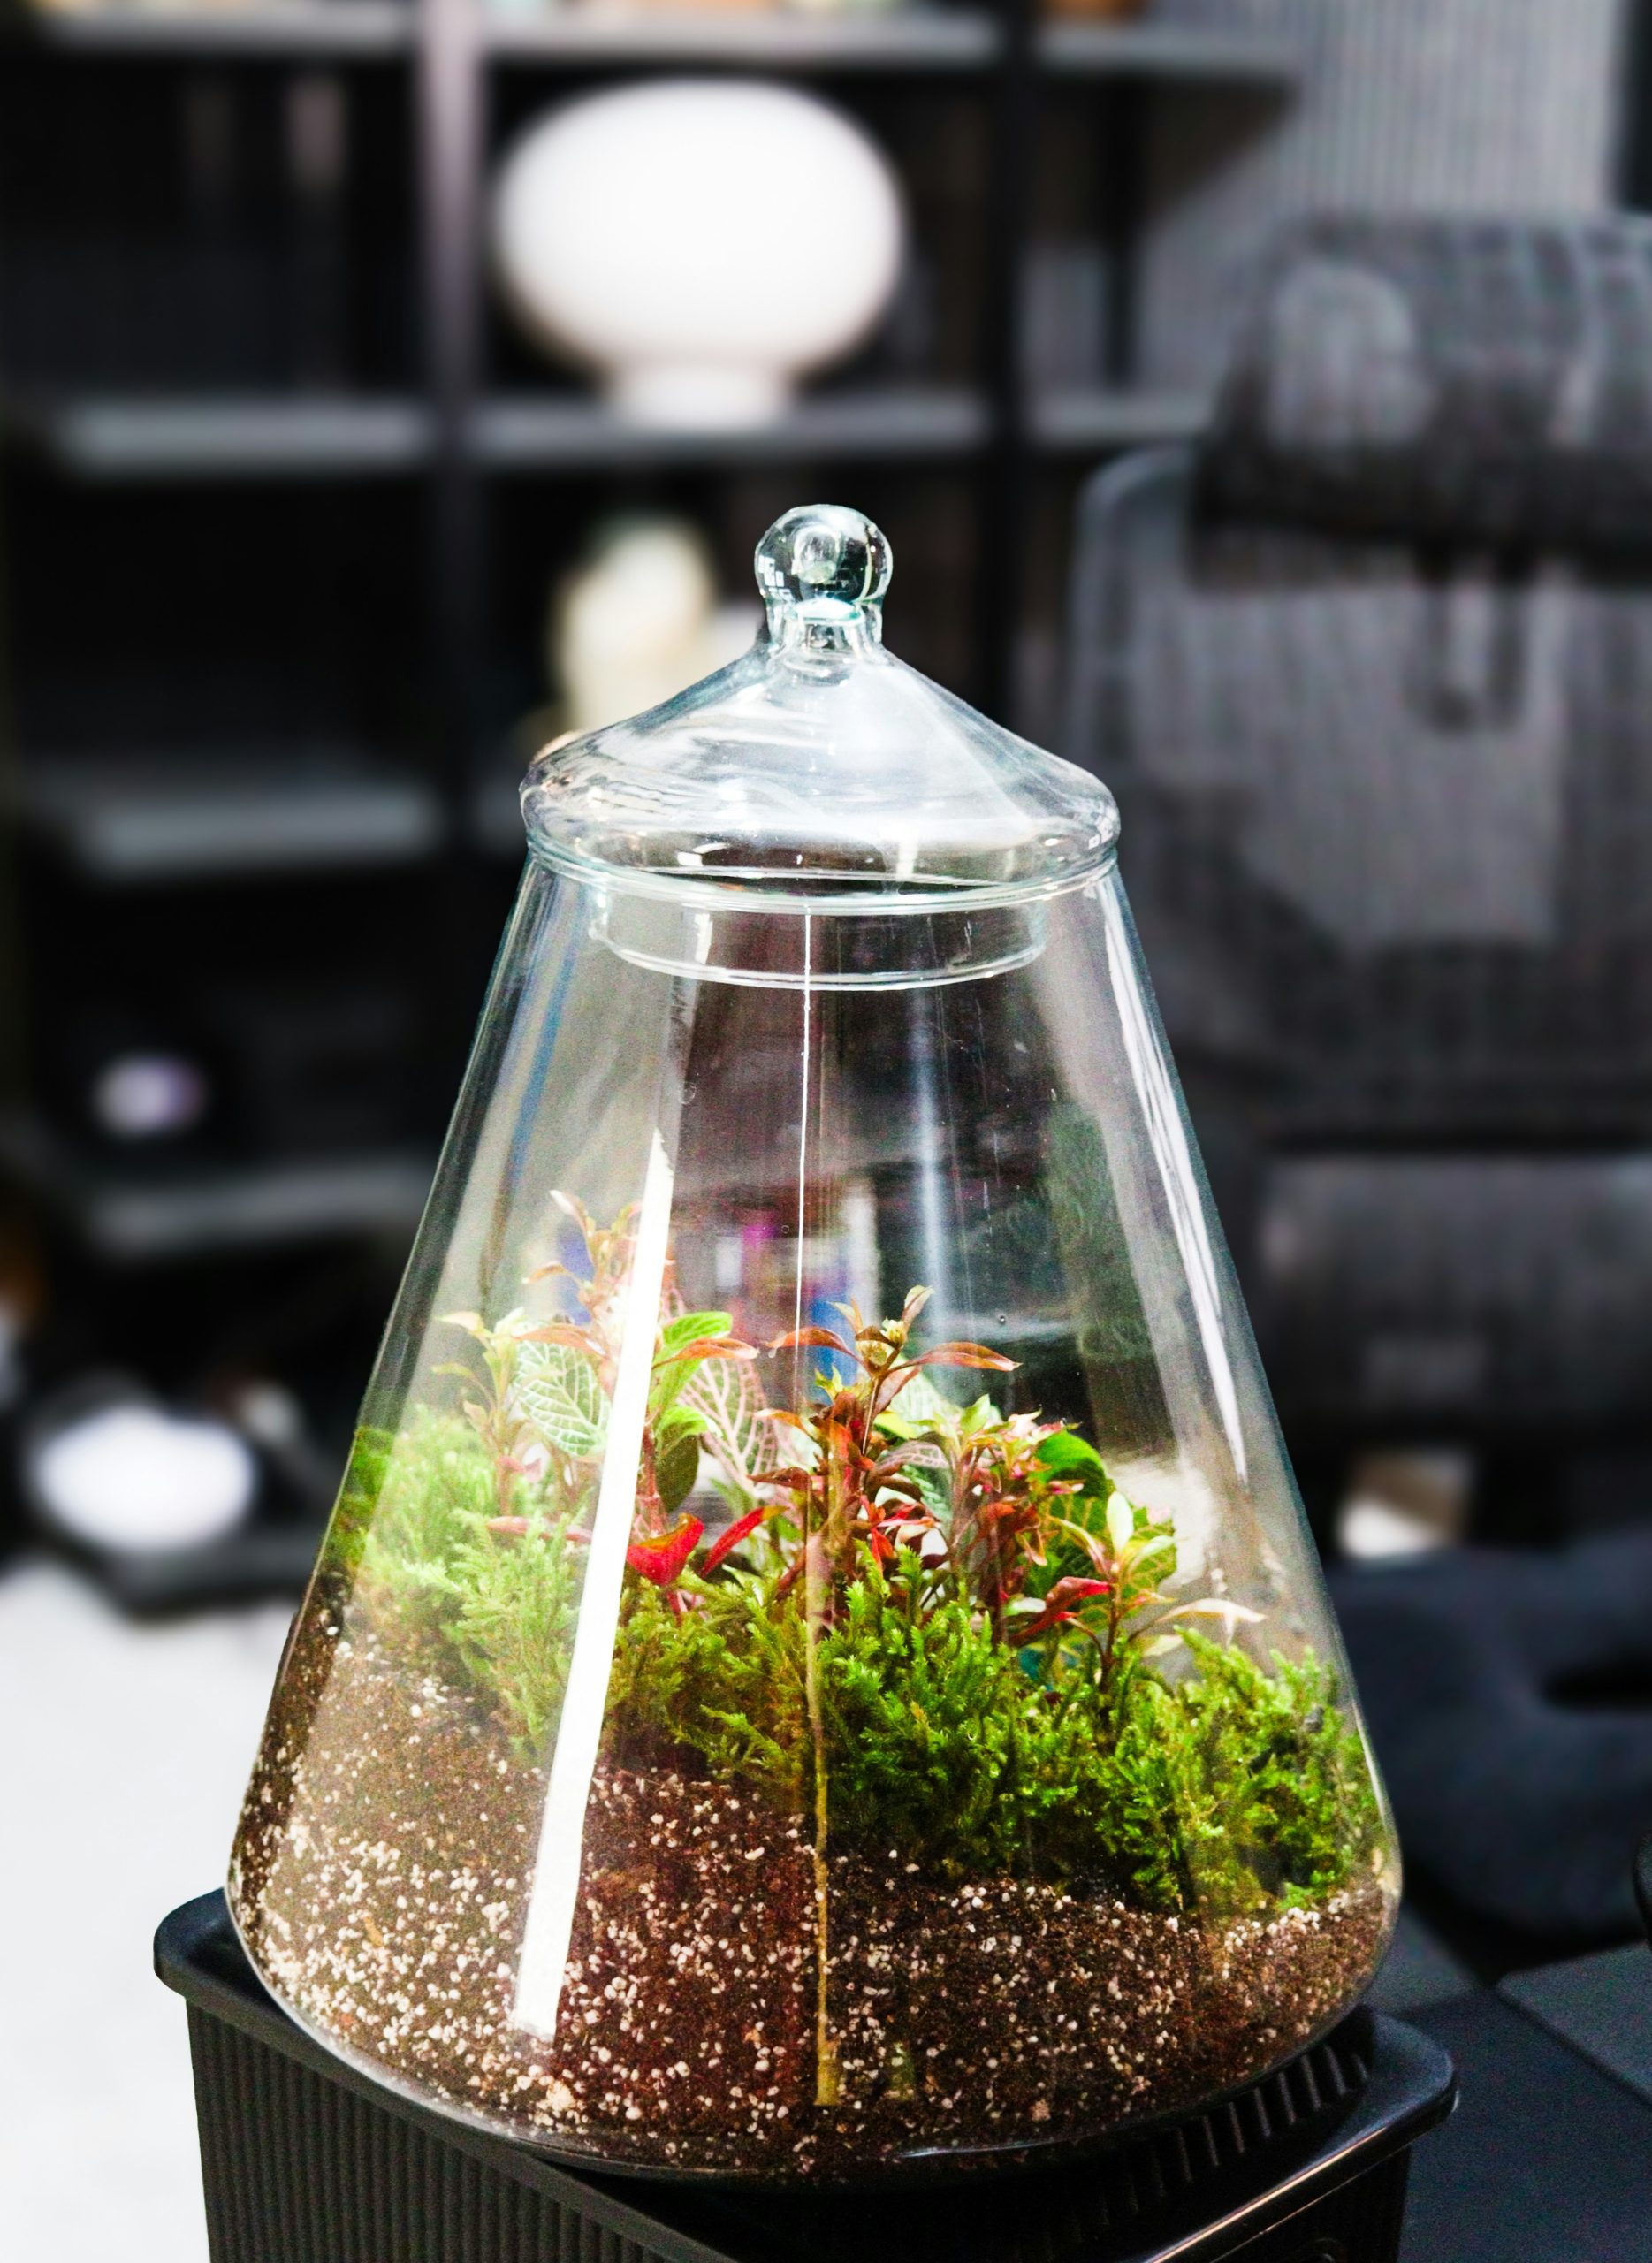
“A cloche garden is perfect for a desktop, a bedside table, or a narrow entryway console.”
This idea works best in small-scale applications, typically with a cloche that is between 8 and 15 inches tall. The visual power comes from the contained, jewel-box effect. Don’t try to replicate this on a larger scale; it would lose its charm and just look like a plant in an awkward glass dome. It’s a statement piece that invites close inspection, so place it where it can be appreciated at eye level.
13. Hang Glass Terrarium Ornaments with Twine and Tealights
Please, for the love of all things cozy, do not light real tealight candles inside these hanging terrariums, especially with plants or other flammable materials. The heat will build up quickly in the enclosed glass, creating a serious fire hazard and scorching any nearby leaves. Use battery-operated LED tealights instead. You can get a pack of a dozen for about $10, and they will provide the same warm, flickering glow without any of the risk. Safety first, style second!
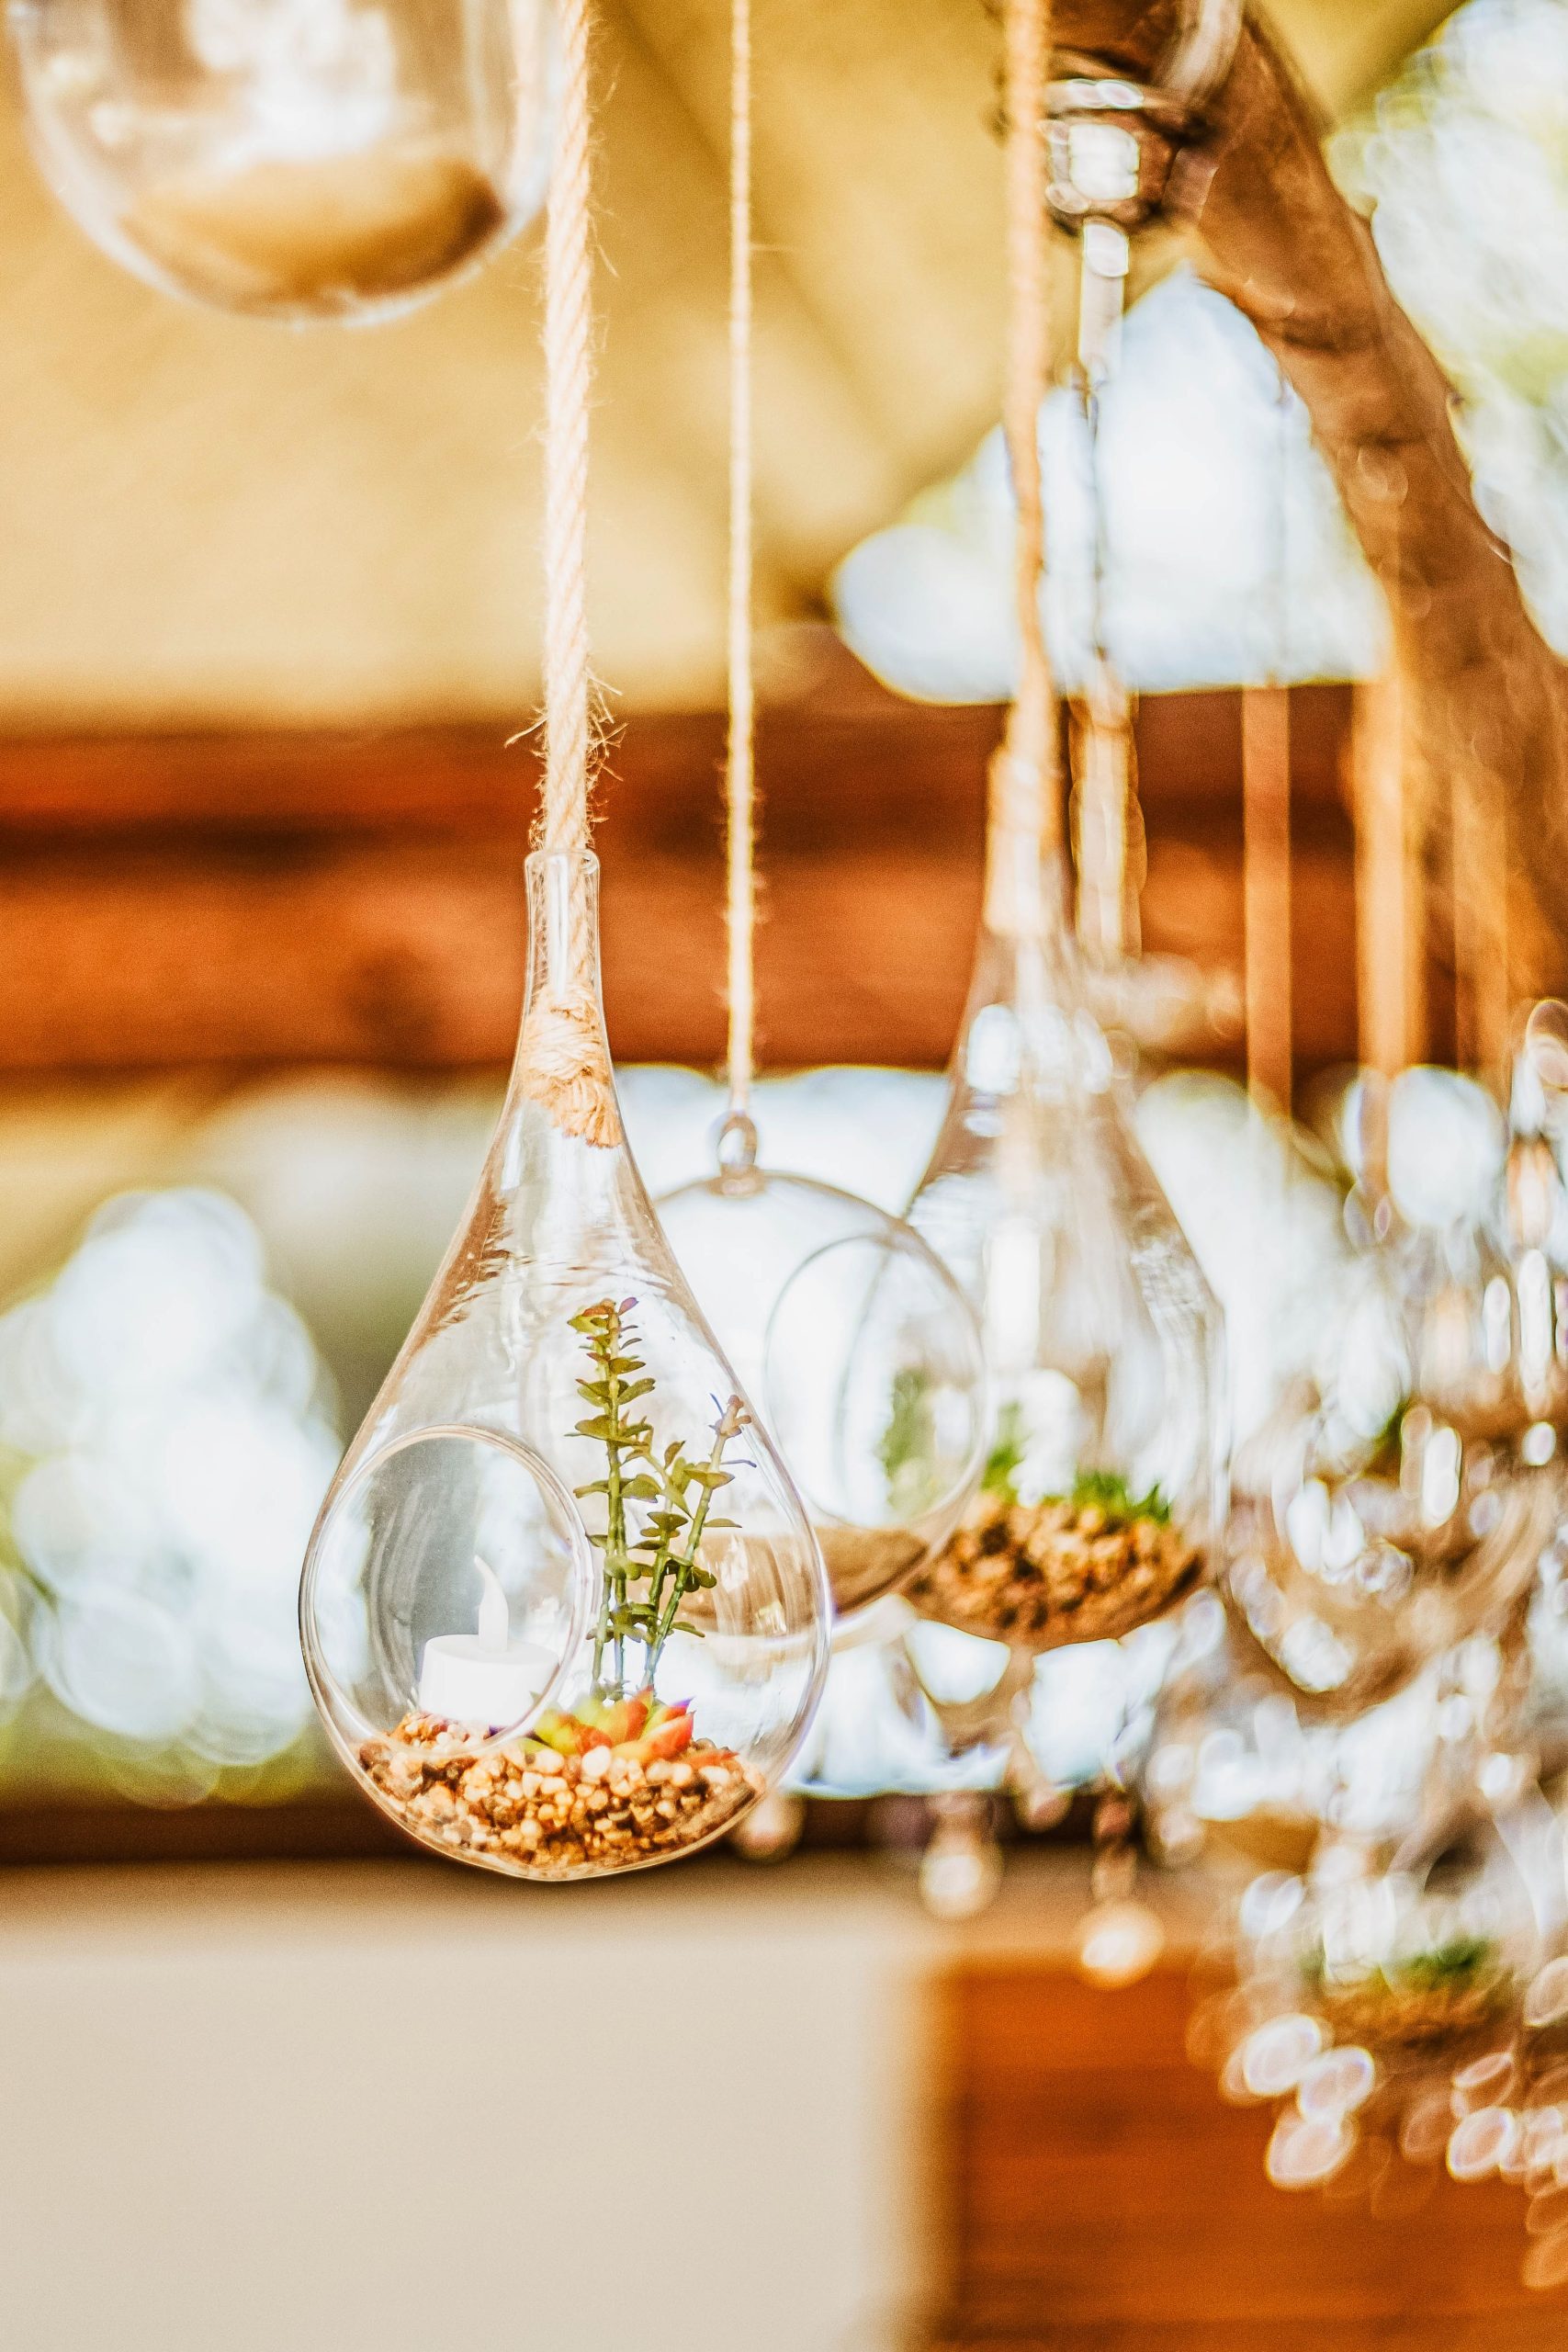
“This is a wonderfully budget-friendly idea.”
You can find hanging glass terrariums like these at craft stores, on Amazon, or even in the garden section of Walmart or Target, often for less than $5 each. A large spool of twine is a few dollars, and a bag of decorative pebbles or sand is similarly inexpensive. Use clippings from existing houseplants or small, affordable succulents to keep plant costs down. You could create a cluster of three for under $25, making it a very accessible way to add some warm, natural decor to a space.
14. Design a Geometric Terrarium with Succulents and Pinecones
This design is compelling due to the beautiful contrast between the man-made and the natural. The terrarium itself has a very precise, geometric frame with clean lines and sharp angles. Inside, everything is organic, soft, and irregular: the plump curves of the succulents, the rough texture of the pinecones, the scattered moss. This juxtaposition is what creates visual interest. The warm copper/bronze color of the frame also complements the greens and browns of the plants, tying the whole piece together.
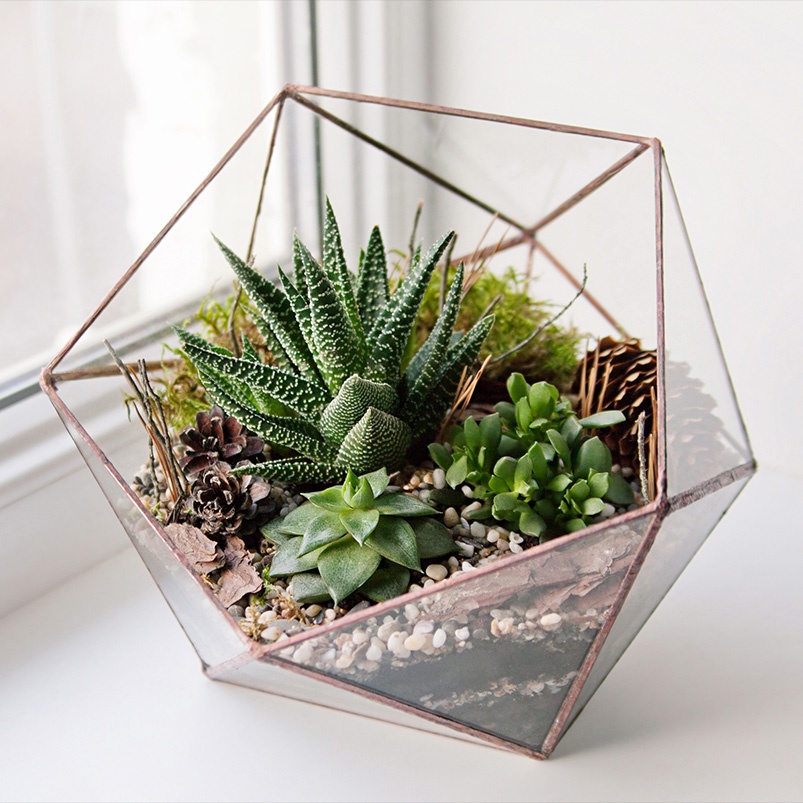
“An open terrarium like this one requires different care than a closed one.”
The open top means moisture escapes, so you’ll need to water it more frequently—typically every 2-3 weeks for succulents, or whenever the soil is completely dry. However, be very careful not to overwater, as there is no drainage hole. It’s better to underwater than to drown your succulents. The glass will also need regular cleaning, as dust can easily settle on the plants and pebbles, dulling the vibrant, clean look of the design.
15. Create a Miniature Tropical Jungle with a Tiny Pond
You can create a convincing miniature pond in just a few steps. It takes about 15 minutes (plus drying time).
- Find a small, shallow plastic lid or dish—a yogurt container lid or a small food storage top works well.
- Sink the dish into the soil of your planter until its rim is flush with the ground level.
- Fill the dish with water. For a darker, more realistic pond effect, you can place a piece of black plastic at the bottom or use water tinted with a tiny drop of black or blue food coloring.
- Arrange small pebbles and moss around the edge of the dish to conceal the plastic rim and integrate it naturally into the landscape.
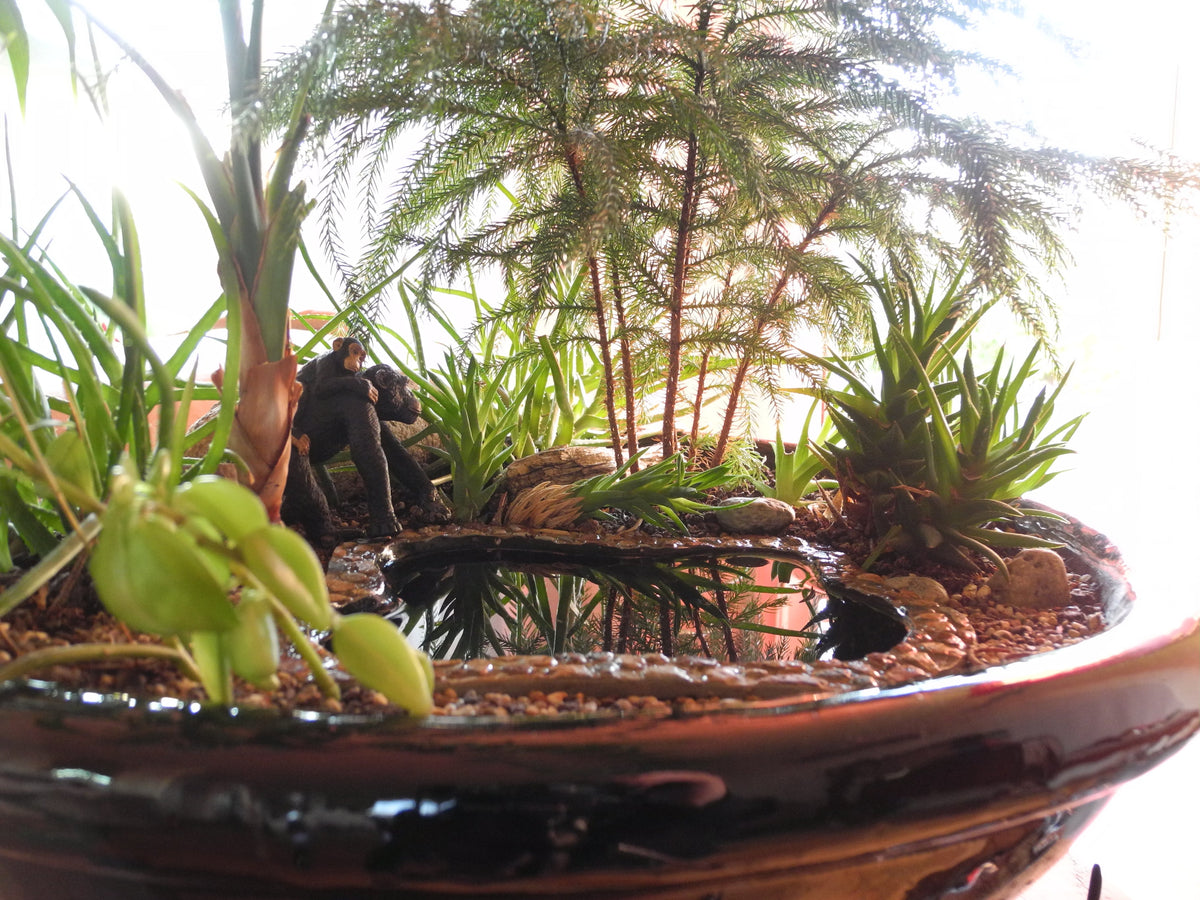
“The tiny pond is the element that brings this whole scene to life.”
Without it, you have a lovely, lush arrangement of small plants in a pot. With it, you have a miniature landscape. The reflection on the water’s surface adds a sense of depth and realism, tricking the eye into seeing more space than is actually there. It acts as a central focal point and transforms the collection of plants into a cohesive, narrative environment—a tiny jungle oasis. The playful monkey figures, as seen in this design, add another layer of story.
16. Craft a Miniature Garden with a Stepping Stone Path
The key to a believable miniature path is to use materials of varied scale. Don’t just use uniform sand or gravel. Here, a base of fine, light-colored sand creates the main path. Then, larger, irregular dark stones are set *into* the sand as stepping stones. This creates texture, contrast, and a sense of purpose. The final touch? Use a very fine brush to sweep the sand around the edges of the stepping stones, making them look settled and integrated, rather than just placed on top.
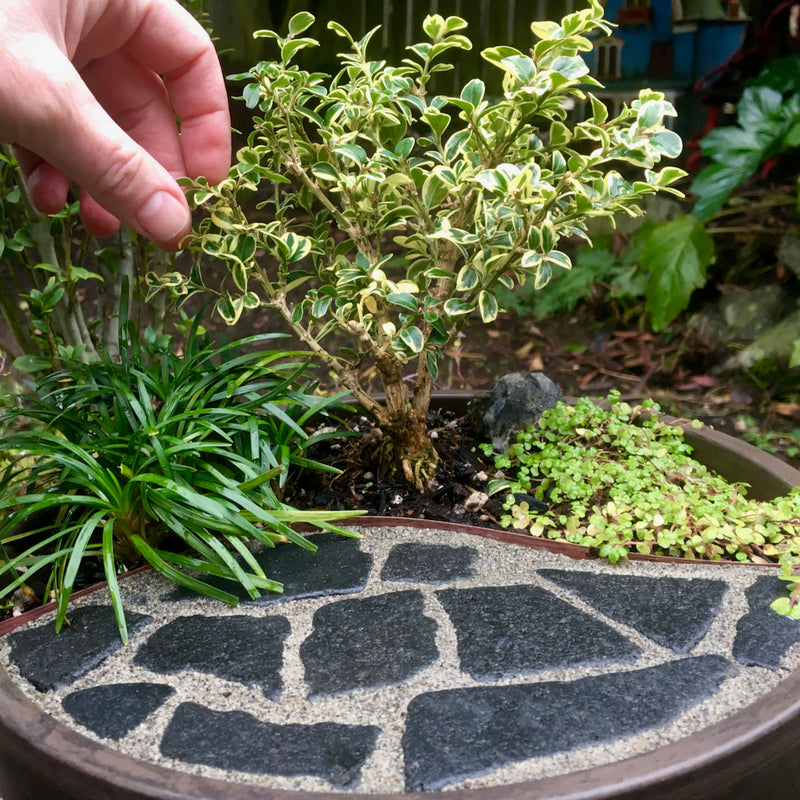
“This idea is all about the art of “table-scaping.” It’s designed for close-up viewing, making it a perfect centerpiece for a dining table, a coffee table, or an office desk.”
The ideal container size is between 8 and 14 inches in diameter. Any smaller, and it becomes difficult to create a convincing path and fit in diverse plants. Any larger, and it loses its “miniature” charm and just becomes a standard container garden. It is not meant to be a floor piece; it needs to be elevated to eye level to be appreciated.
17. Repurpose a Glass Teapot as a Whimsical Terrarium
This is an adorable idea, but repurposed containers like teapots require one critical modification: drainage. A glass teapot has no drainage hole, which is a death sentence for most plants, especially succulents. You have two options: either very carefully drill a hole in the bottom with a diamond-tipped drill bit (risky!), or create a false bottom. Do this by adding a 1-inch layer of pebbles or LECA at the bottom *before* you add soil. This creates a reservoir for excess water to pool, keeping it away from the plant’s roots and helping to prevent root rot.
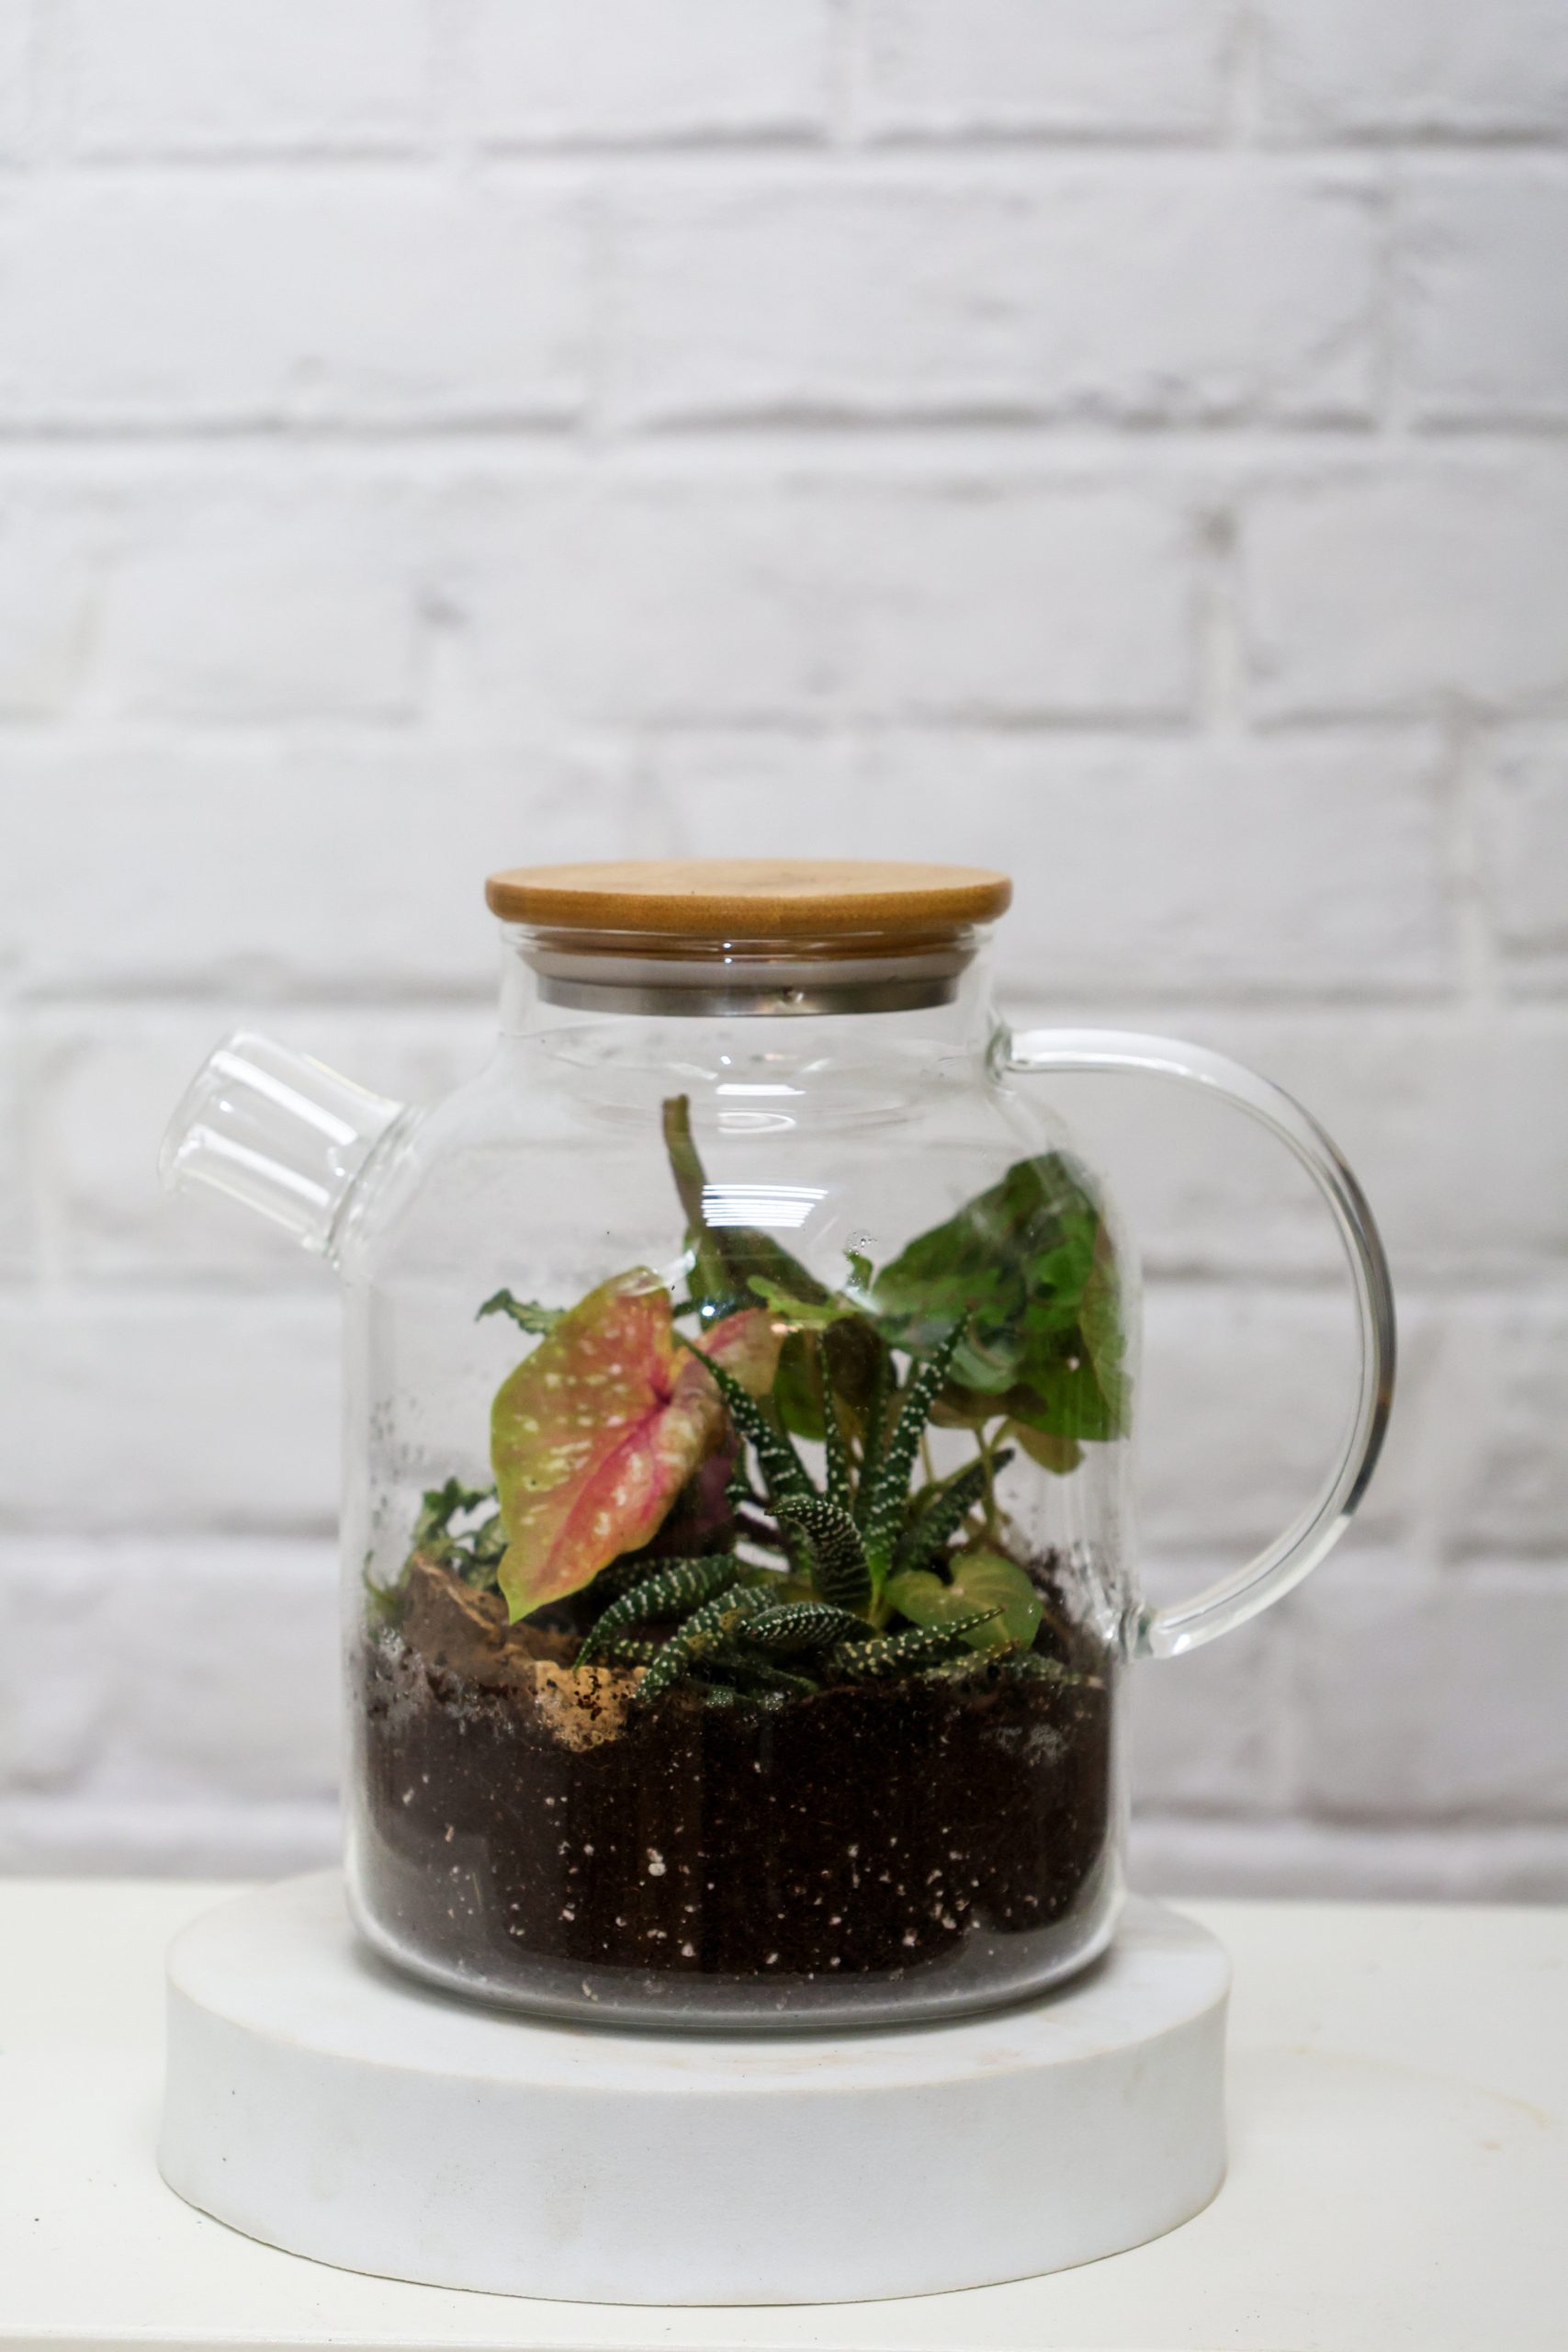
“The visual recipe here is about contrast: 70% transparent fragility + 30% robust life.”
The glass teapot is delicate, clear, and has a defined, hard shape. The plants inside are complex, organic, and bursting with color and texture—from the striking pink-patched leaf to the spiky succulent. The plain wooden lid adds a touch of natural warmth that bridges the gap between the slick glass and the earthy soil. The formula relies on placing something wild and alive inside something refined and man-made.
18. Curate a Sunlit Succulent Garden on a Marble Windowsill
This display works so well because of the curated variety. This isn’t just one type of succulent repeated; it’s a collection of different shapes, colors, and textures. You have tall, spiky cacti, rosette-shaped echeverias, and a branching, tree-like succulent. The pots are also varied but cohesive—they are all in a neutral palette of white, green, and brown, but with different textures. This “collected over time” look feels personal and authentic. The frosted window provides perfect, diffused light that succulents love, preventing their leaves from scorching.
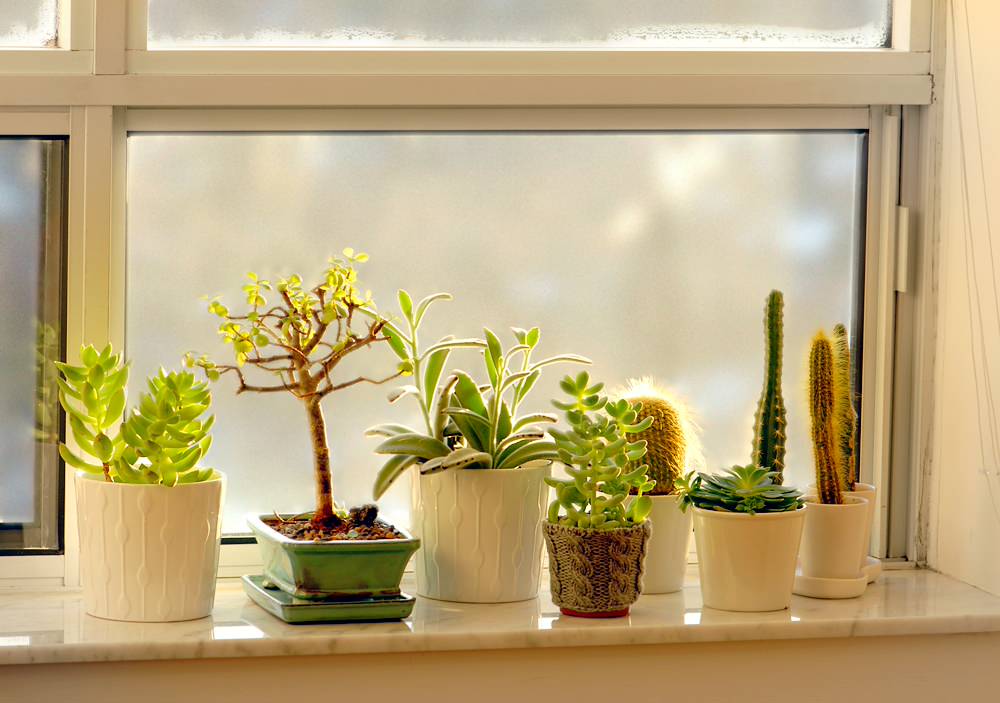
“”Plant shelfies” remain a dominant trend on Pinterest and Instagram, and this is a perfect example of why.”
It’s personal, achievable, and beautiful. In 2026, the trend has shifted from collecting just any plants to curating a specific color palette or type, like the diverse succulents seen here. It reflects a desire for our homes to be not just decorated, but filled with living things that we nurture and grow. The marble sill adds a touch of quiet luxury, elevating the simple pots into a high-style moment.
19. Arrange Pastel Succulents on Light Wooden Shelves
You don’t need a greenhouse to get this look. Simple light wood floating shelves from IKEA (like the MOSSLANDA or BEKVÄM) can create the same effect for under $20 each. The key is finding the right pots. Check out Etsy for small, handmade pastel ceramic pots, or visit your local garden center or even a store like Target, which often has surprisingly stylish small planters for $3-$5 each. Propagating your own succulents from leaves is the ultimate budget move for the plants themselves, letting you create dozens of new plants for free.
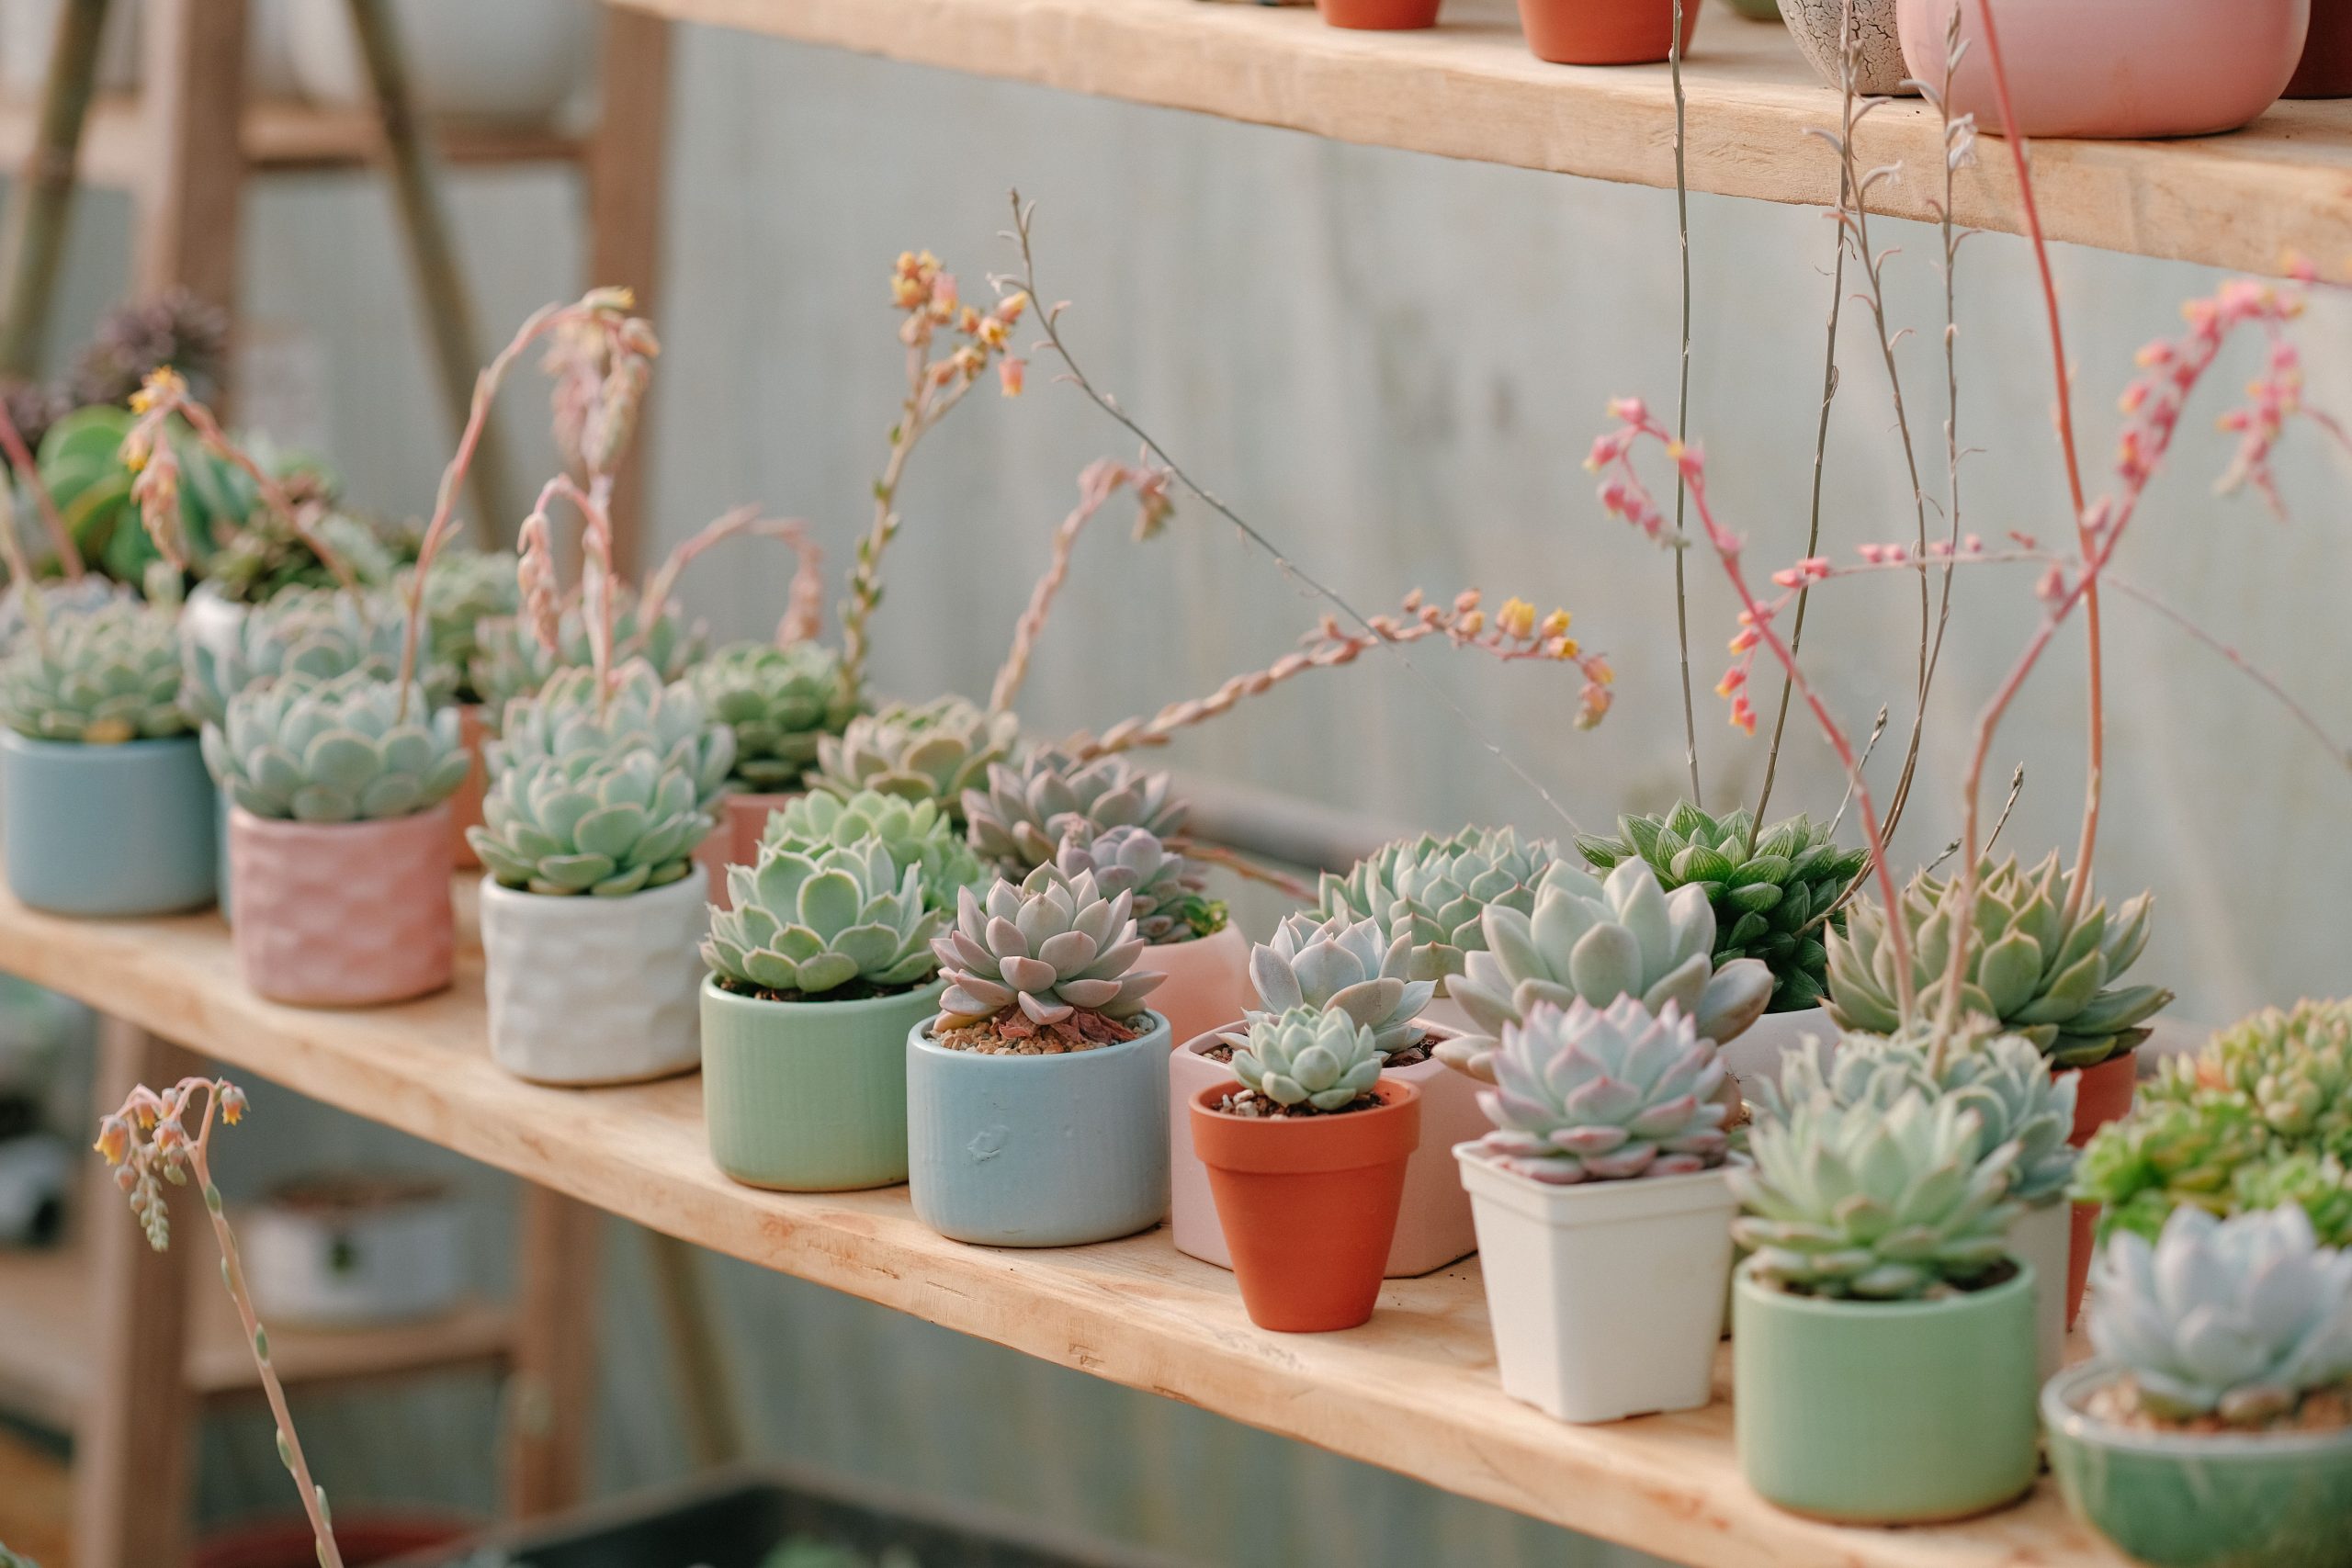
“This serene look is all about a soft, analogous color palette.”
The formula is: 60% warm wood + 40% pastel foliage. The light-colored wood shelving provides a neutral, warm base. The succulents themselves are the stars, with their soft, hazy greens, dusty pinks, and pale blues. The key is that all the colors are low-saturation and live in the same gentle color family. There are no harsh, contrasting colors here. Even the terracotta pots are a muted, earthy orange that fits right in, creating a cohesive and incredibly calming visual.
20. Create a Quirky Display with Paint-Splattered Succulents
To create this artistic, paint-splattered look safely, follow these steps:
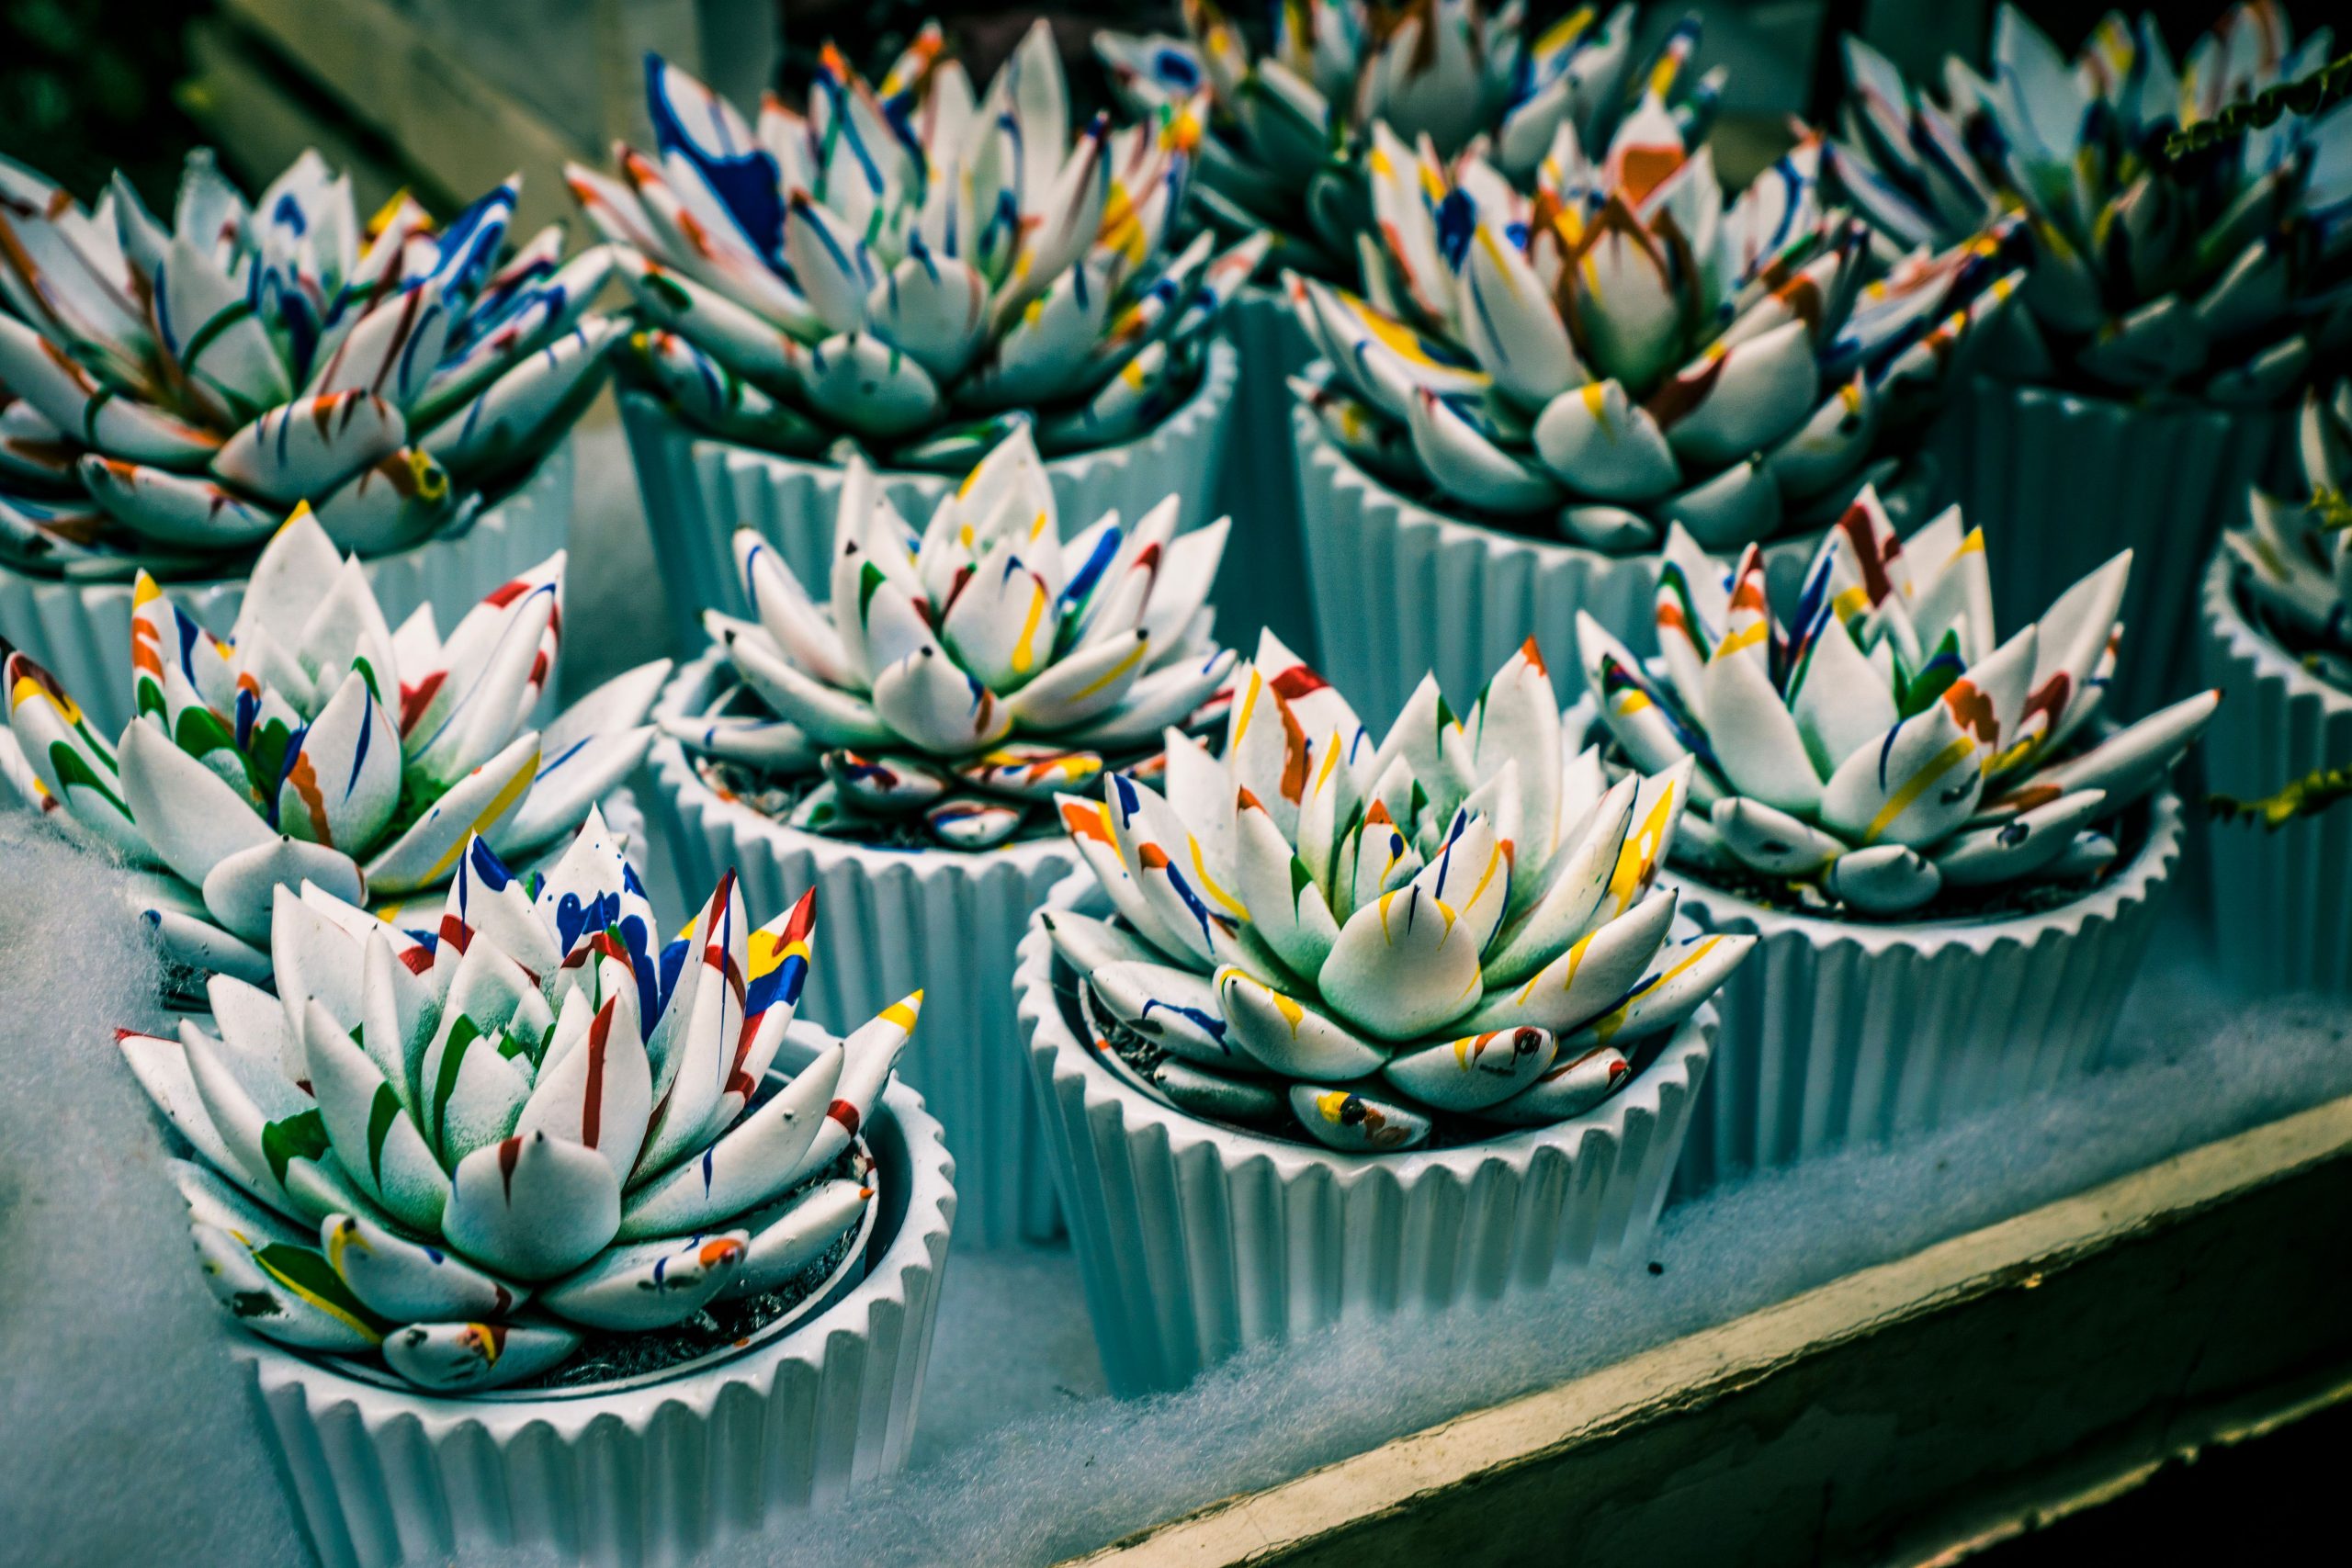
“IMPORTANT: Use only non-toxic, water-based craft paint.”
Do not use oil-based or spray paints, which can harm the plants.
Choose light-colored or white succulents for the best canvas.
Water your plants a day or two before painting.
Dilute your paint slightly with water to a fluid, flick-able consistency.
Dip a small, stiff-bristled brush into the paint, and gently flick the bristles with your thumb to splatter the paint onto the leaves. Repeat with different colors.
Let the paint dry completely before displaying.
Okay, let’s be real. While this looks fun and vibrant, putting paint on a living plant’s leaves is generally not a great idea. The paint can block sunlight and inhibit photosynthesis, which is how the plant feeds itself. This is a look best reserved for FAUX succulents. You can buy realistic-looking white artificial succulents and have a blast painting them without any guilt. If you absolutely must use real plants, consider it a very temporary decoration for a party or event, and be aware that it may shorten the plant’s lifespan.
21. Arrange a Peaceful Buddha Statue in a Pebble Garden
The single most important element here is the mix of pebbles. It sounds simple, but the combination of larger white pebbles with smaller, darker grey and black ones is a deliberate design choice. The white pebbles create a bright, clean canvas that makes the grey Buddha statue pop. The darker pebbles add visual texture and depth, preventing the ground cover from looking flat and monotonous. This careful blend of color and size is what gives the garden its professionally landscaped and serene feel, a detail you can replicate in your own space.
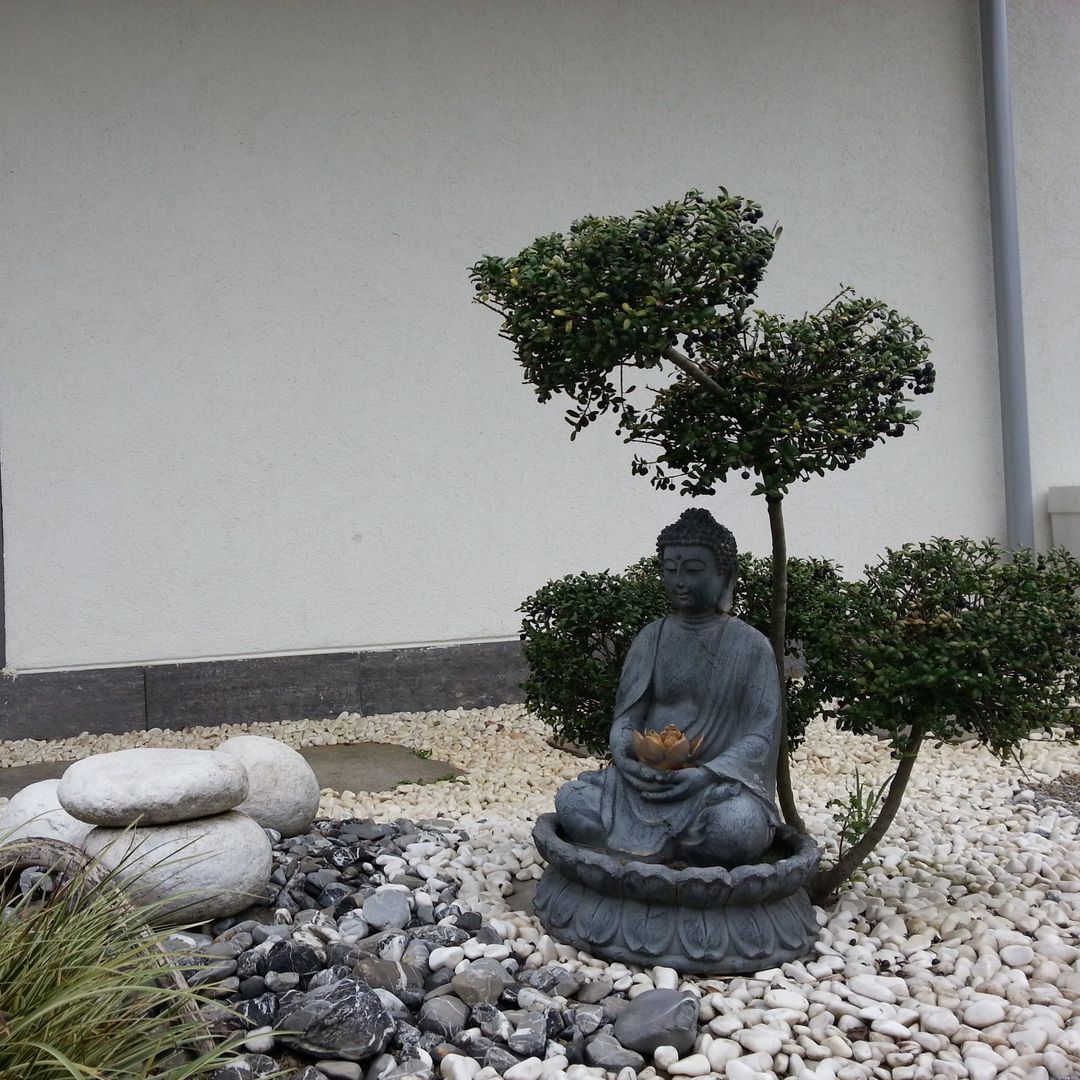
“This composition demonstrates the power of the “Rule of Thirds.” The Buddha statue is not placed dead center.”
Instead, it’s positioned off-center, creating a more dynamic and natural-feeling arrangement. The small tree provides a vertical element that balances the horizontal spread of the pebbles, and its canopy creates a protective, sacred space for the statue. The color palette is also deliberately restrained—mostly greys, whites, and greens—which contributes to the overall feeling of calm and tranquility. The single pop of gold is a perfect, tiny focal point.
22. Display Assorted Succulents in a Glass Bowl on a Rustic Wood Surface
When creating a succulent bowl, always use a specialty cactus/succulent potting mix, not standard potting soil. Standard soil is designed to retain moisture, which is deadly for succulents and leads to root rot. A proper succulent mix is much grittier and sandier, which allows water to drain through quickly, mimicking their natural arid environment. You can buy it pre-mixed or make your own by combining one part potting soil, one part perlite, and one part coarse sand. This is the most important step for long-term success.
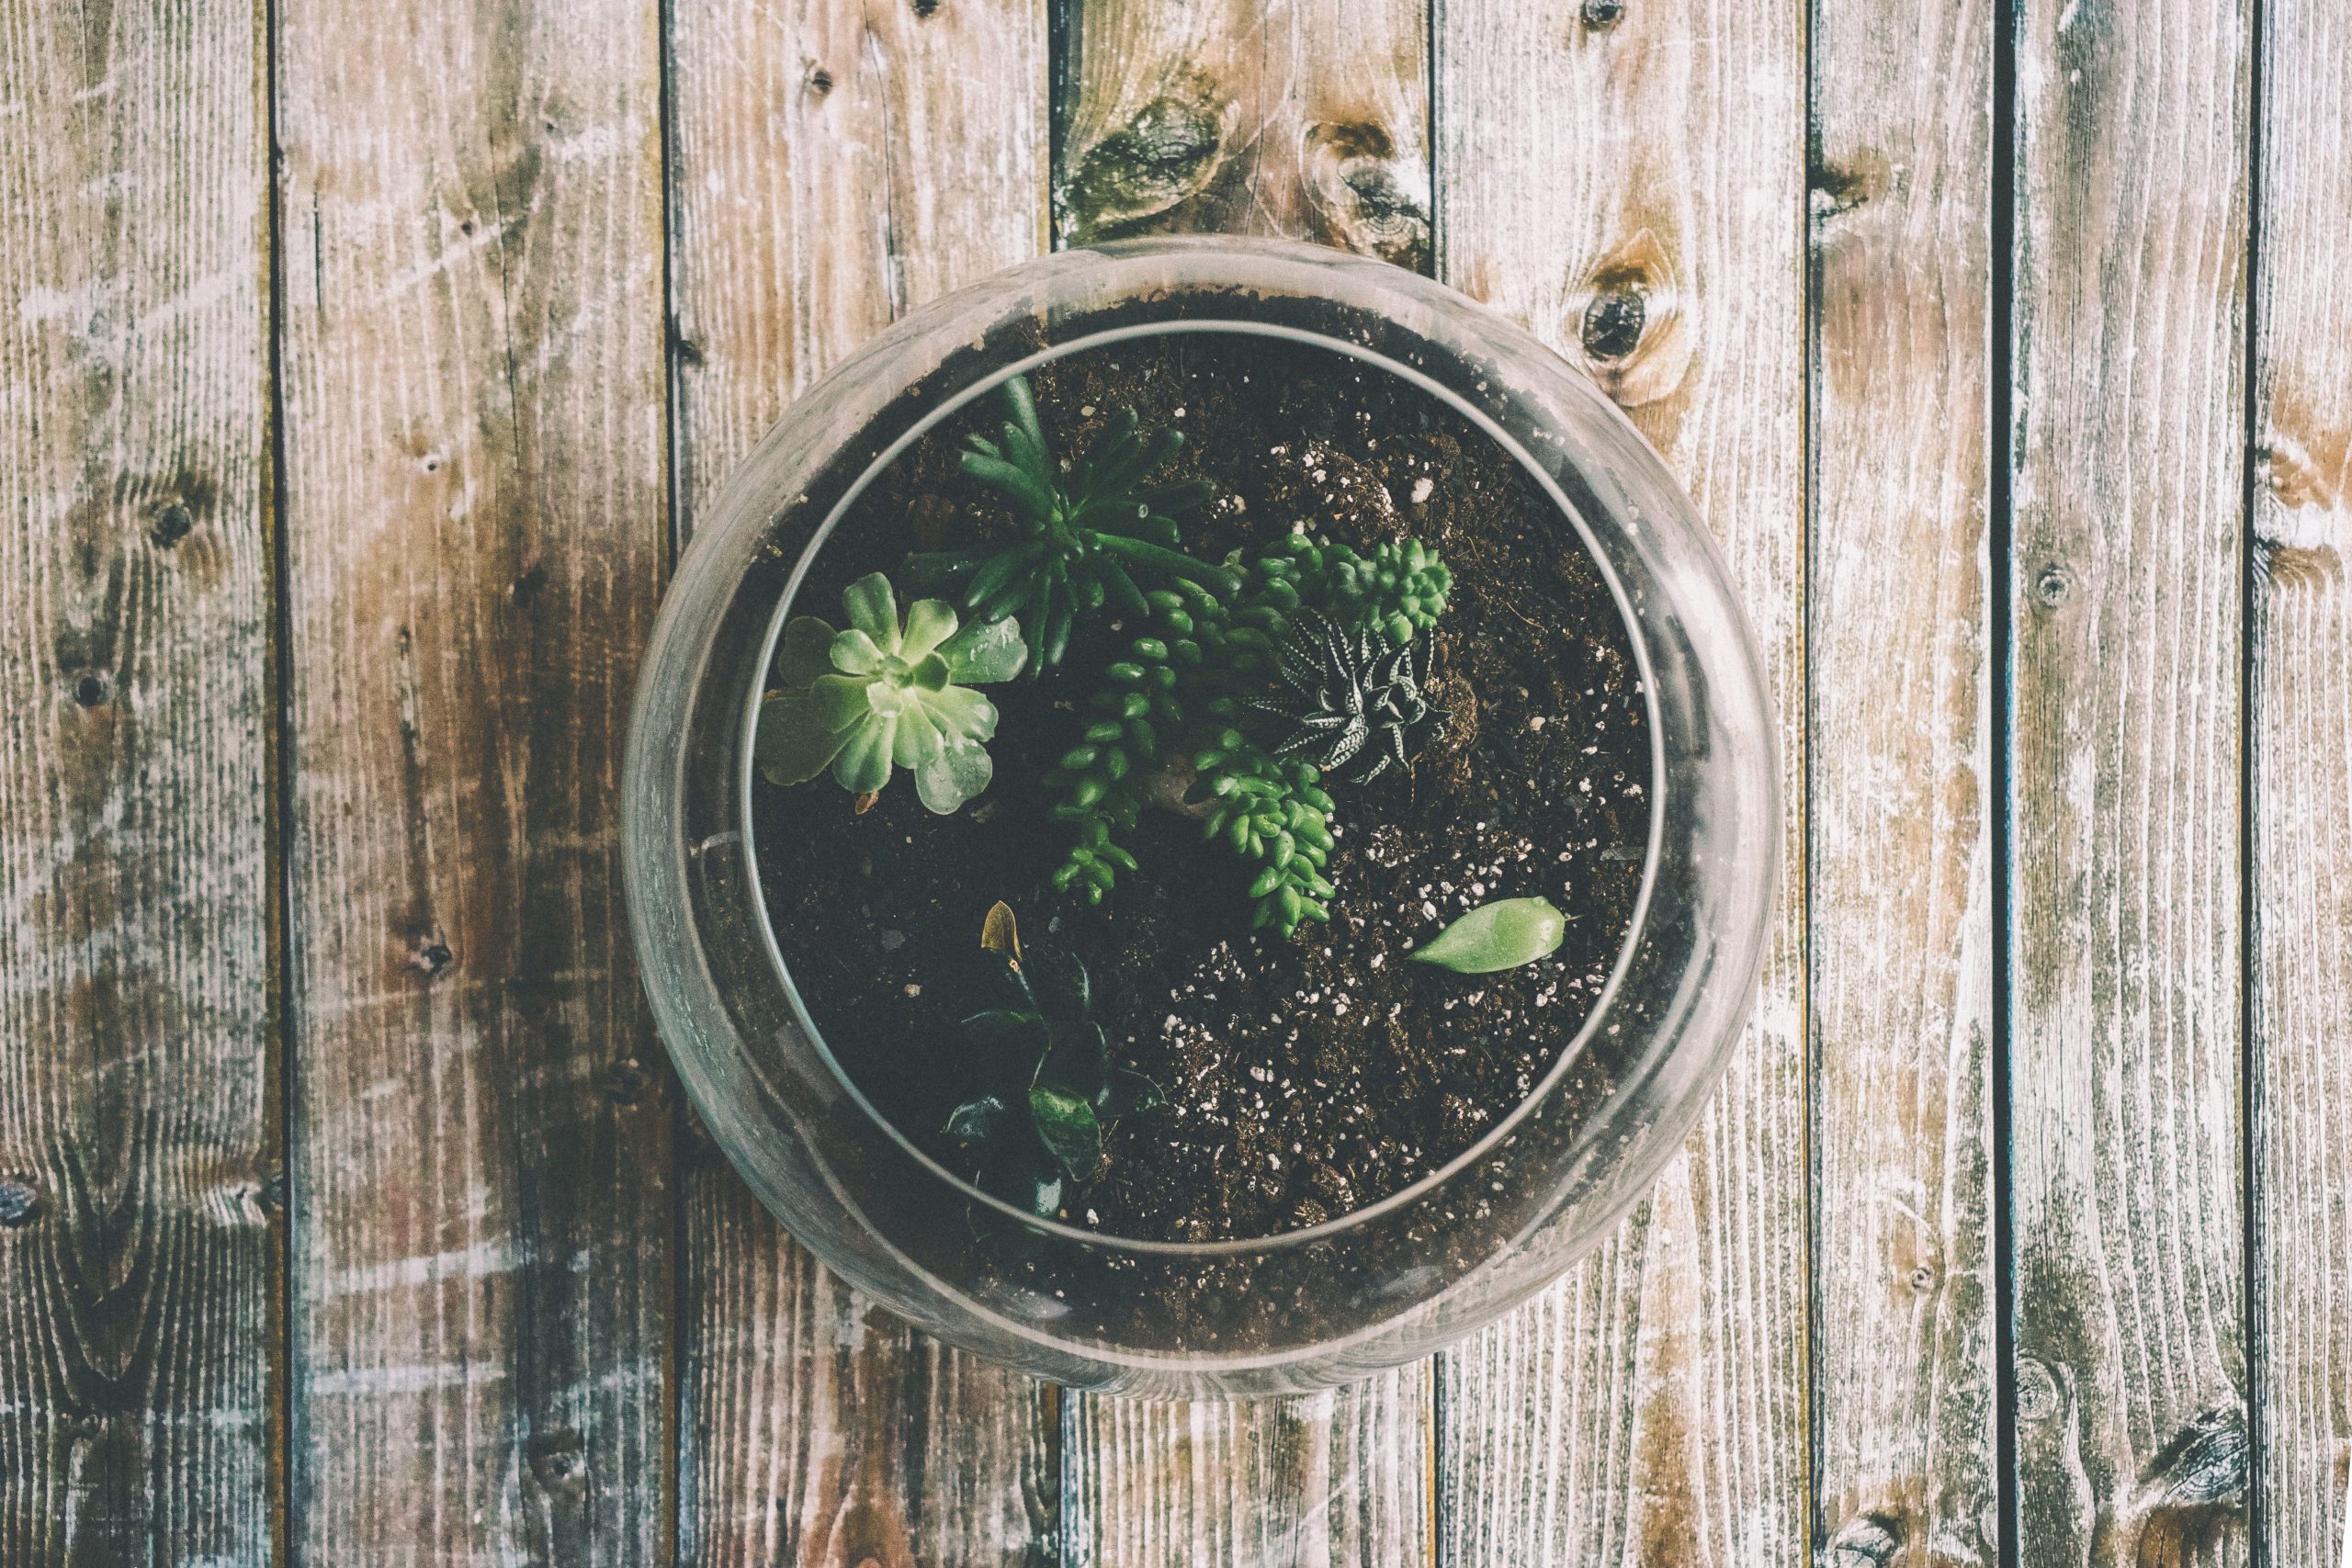
“A round glass bowl terrarium like this is a versatile centerpiece.”
This version, likely 10-12 inches in diameter, is perfectly scaled for a coffee table, a round dining table for four, or a credenza in an entryway. It’s substantial enough to be a standalone decor piece but not so large that it overwhelms the surface. For a smaller space, like a desk or a nightstand, scale down to a 6-8 inch bowl. The key is to ensure there are at least 2-3 inches of visual space around the bowl on all sides so it doesn’t feel crammed. For a similar bowl idea with different styling, see Idea #30.
23. Feature a Simple Closed Terrarium on a Modern Black Table
The condensation on the inside of the glass is the one thing that makes this scene feel truly alive and authentic. While some might see it as an imperfection to be wiped away, it’s actually a sign of a healthy, functioning closed terrarium. It shows the water cycle in action: moisture evaporates from the soil and plants, condenses on the cool glass, and “rains” back down to water the plants. This visible process turns a simple container into a fascinating, self-sustaining ecosystem and adds a layer of dynamic, ever-changing beauty.
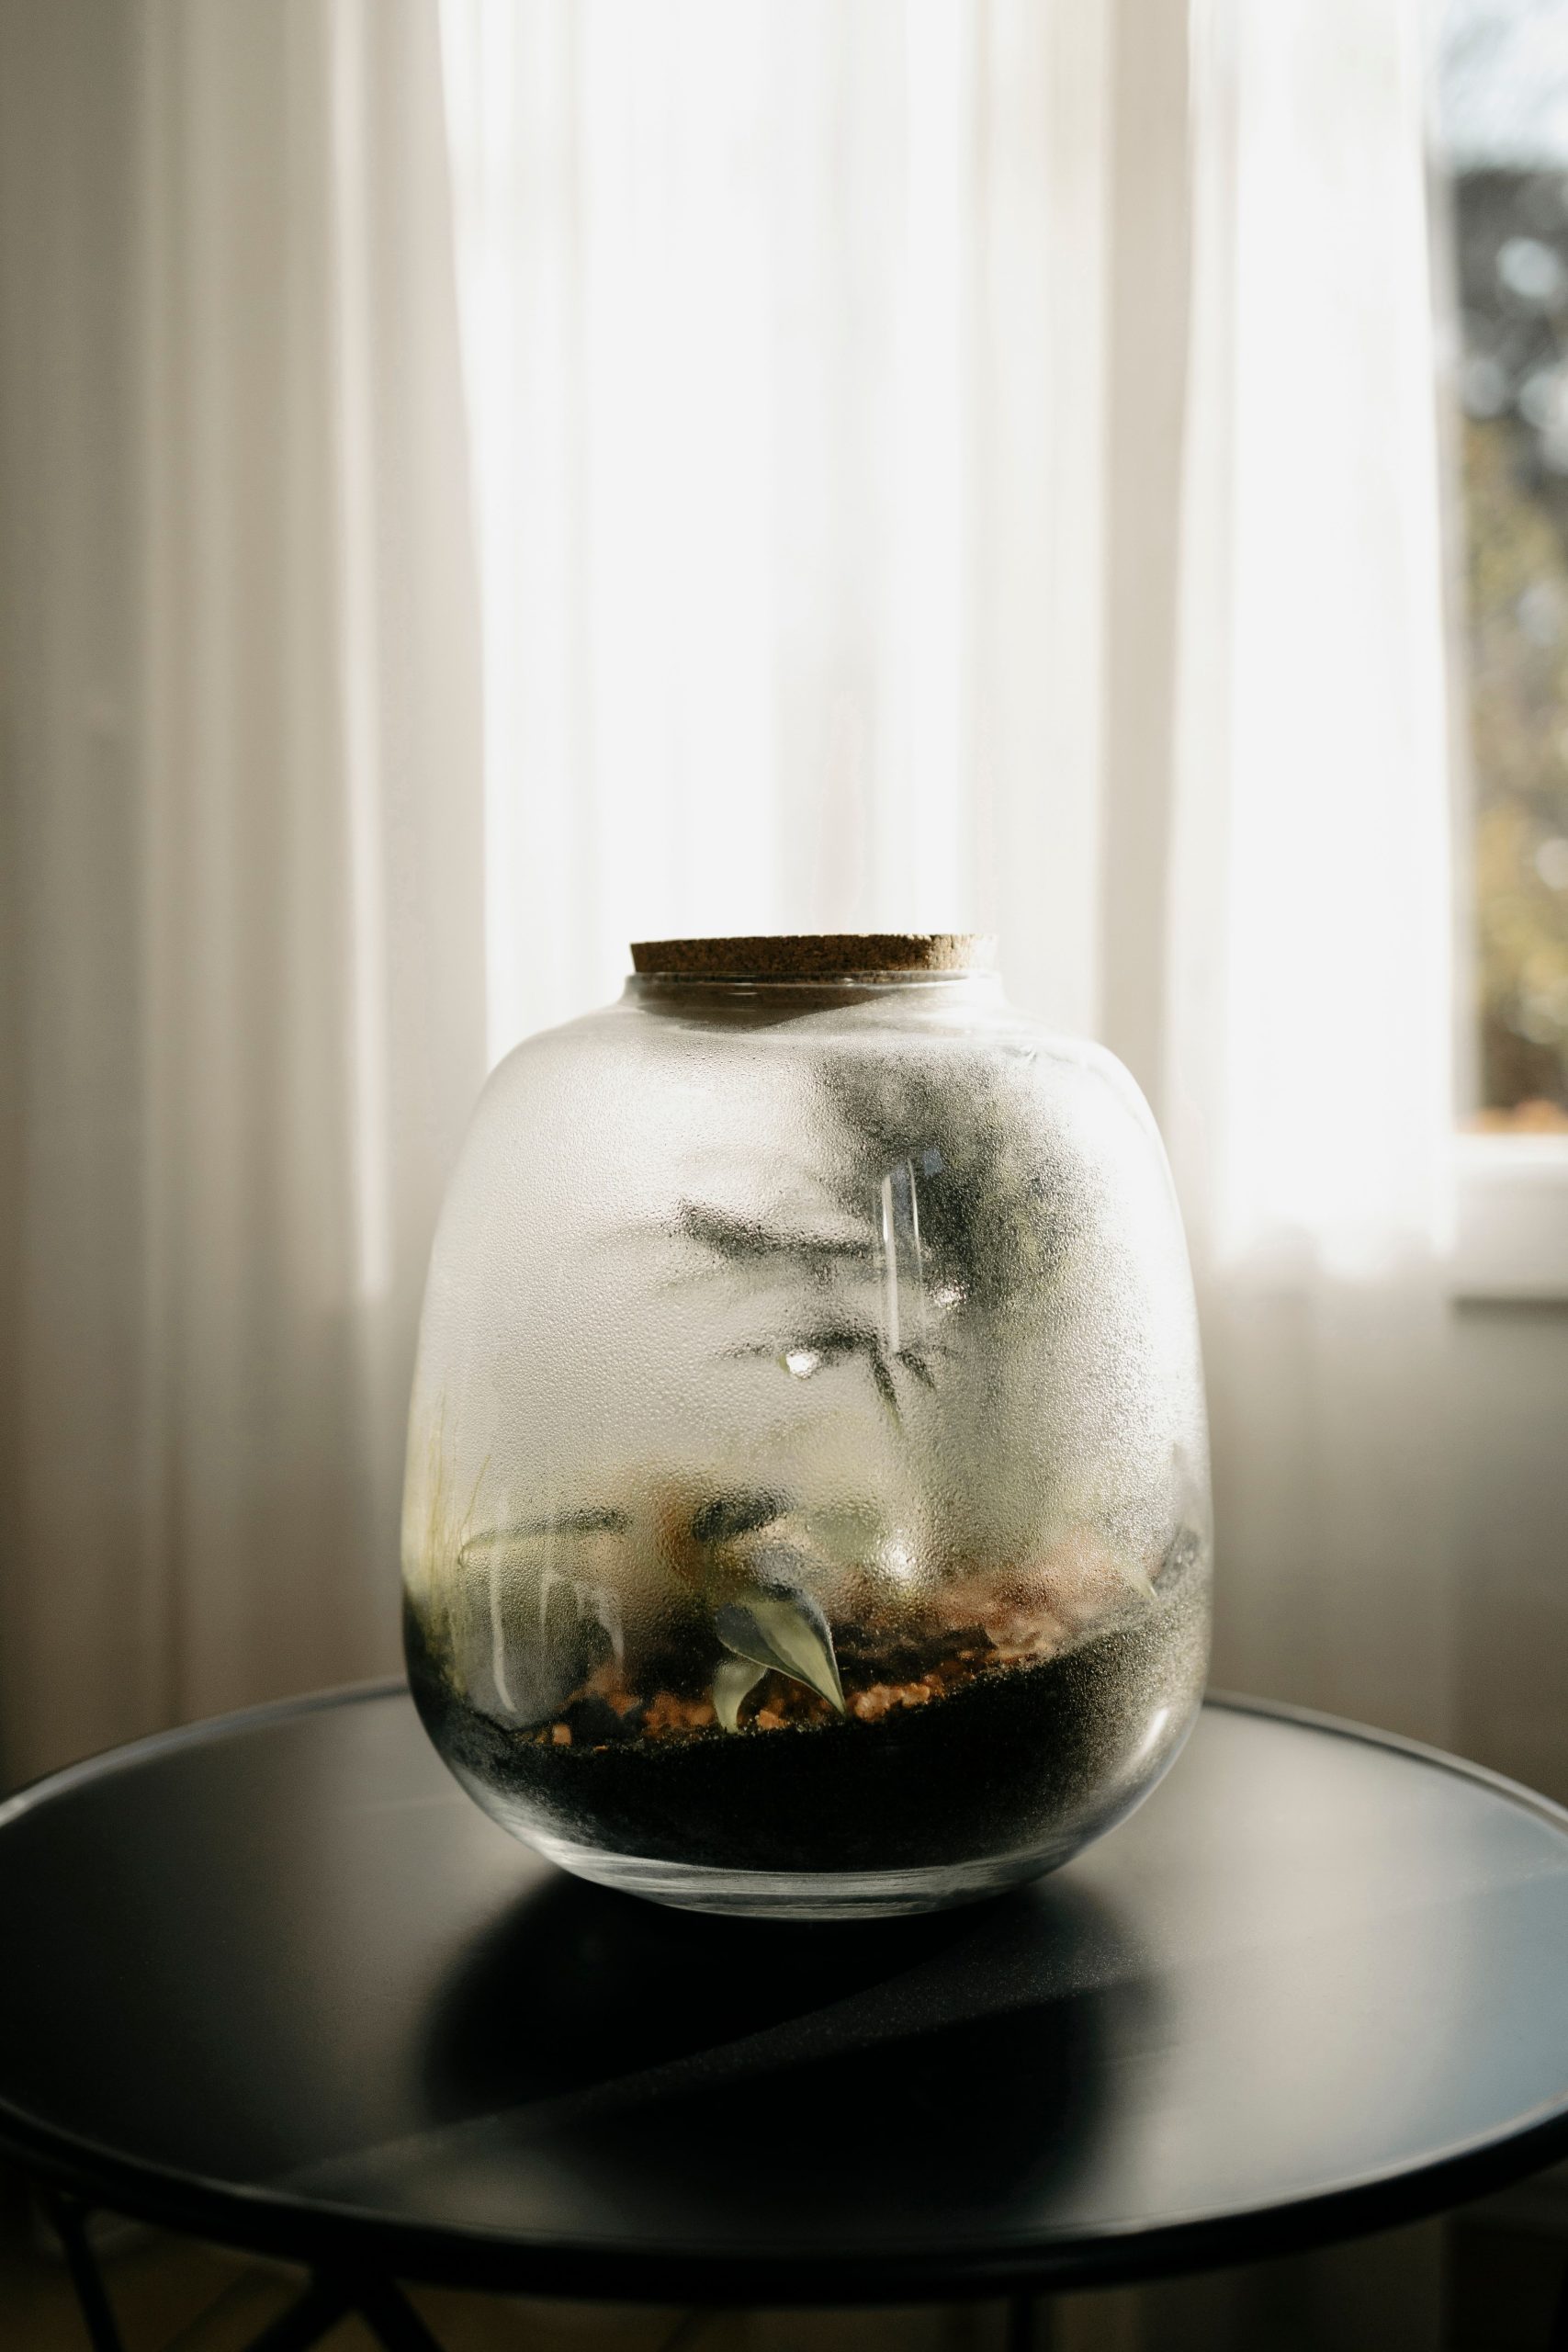
“A closed terrarium is a self-watering system, but it’s not “set it and forget it.” You need to manage the moisture level.”
If there’s constant heavy condensation and the soil looks soaked, you have too much water. Take the cork lid off for a day or two to let it air out. If you never see any condensation, it’s too dry and needs a light misting of water. You will also need to prune the plants inside occasionally to prevent them from getting overgrown and pressing against the glass. Wiping down the exterior glass will also be a regular task to keep it looking sharp.
24. Create an Illuminated Display with Multiple Terrariums on Wooden Shelves
The formula driving this glowing, lab-chic look is: 50% warm natural materials + 30% scientific glass + 20% architectural light. The light-toned wooden shelves provide a warm, organic base. The collection of glass terrariums in various shapes and sizes feels like a botanist’s specimen collection. The key is the integrated backlighting; the LED strip light transforms the display from a simple shelf into a glowing feature wall. The glass block backdrop enhances this effect, diffusing the light and adding another layer of texture.
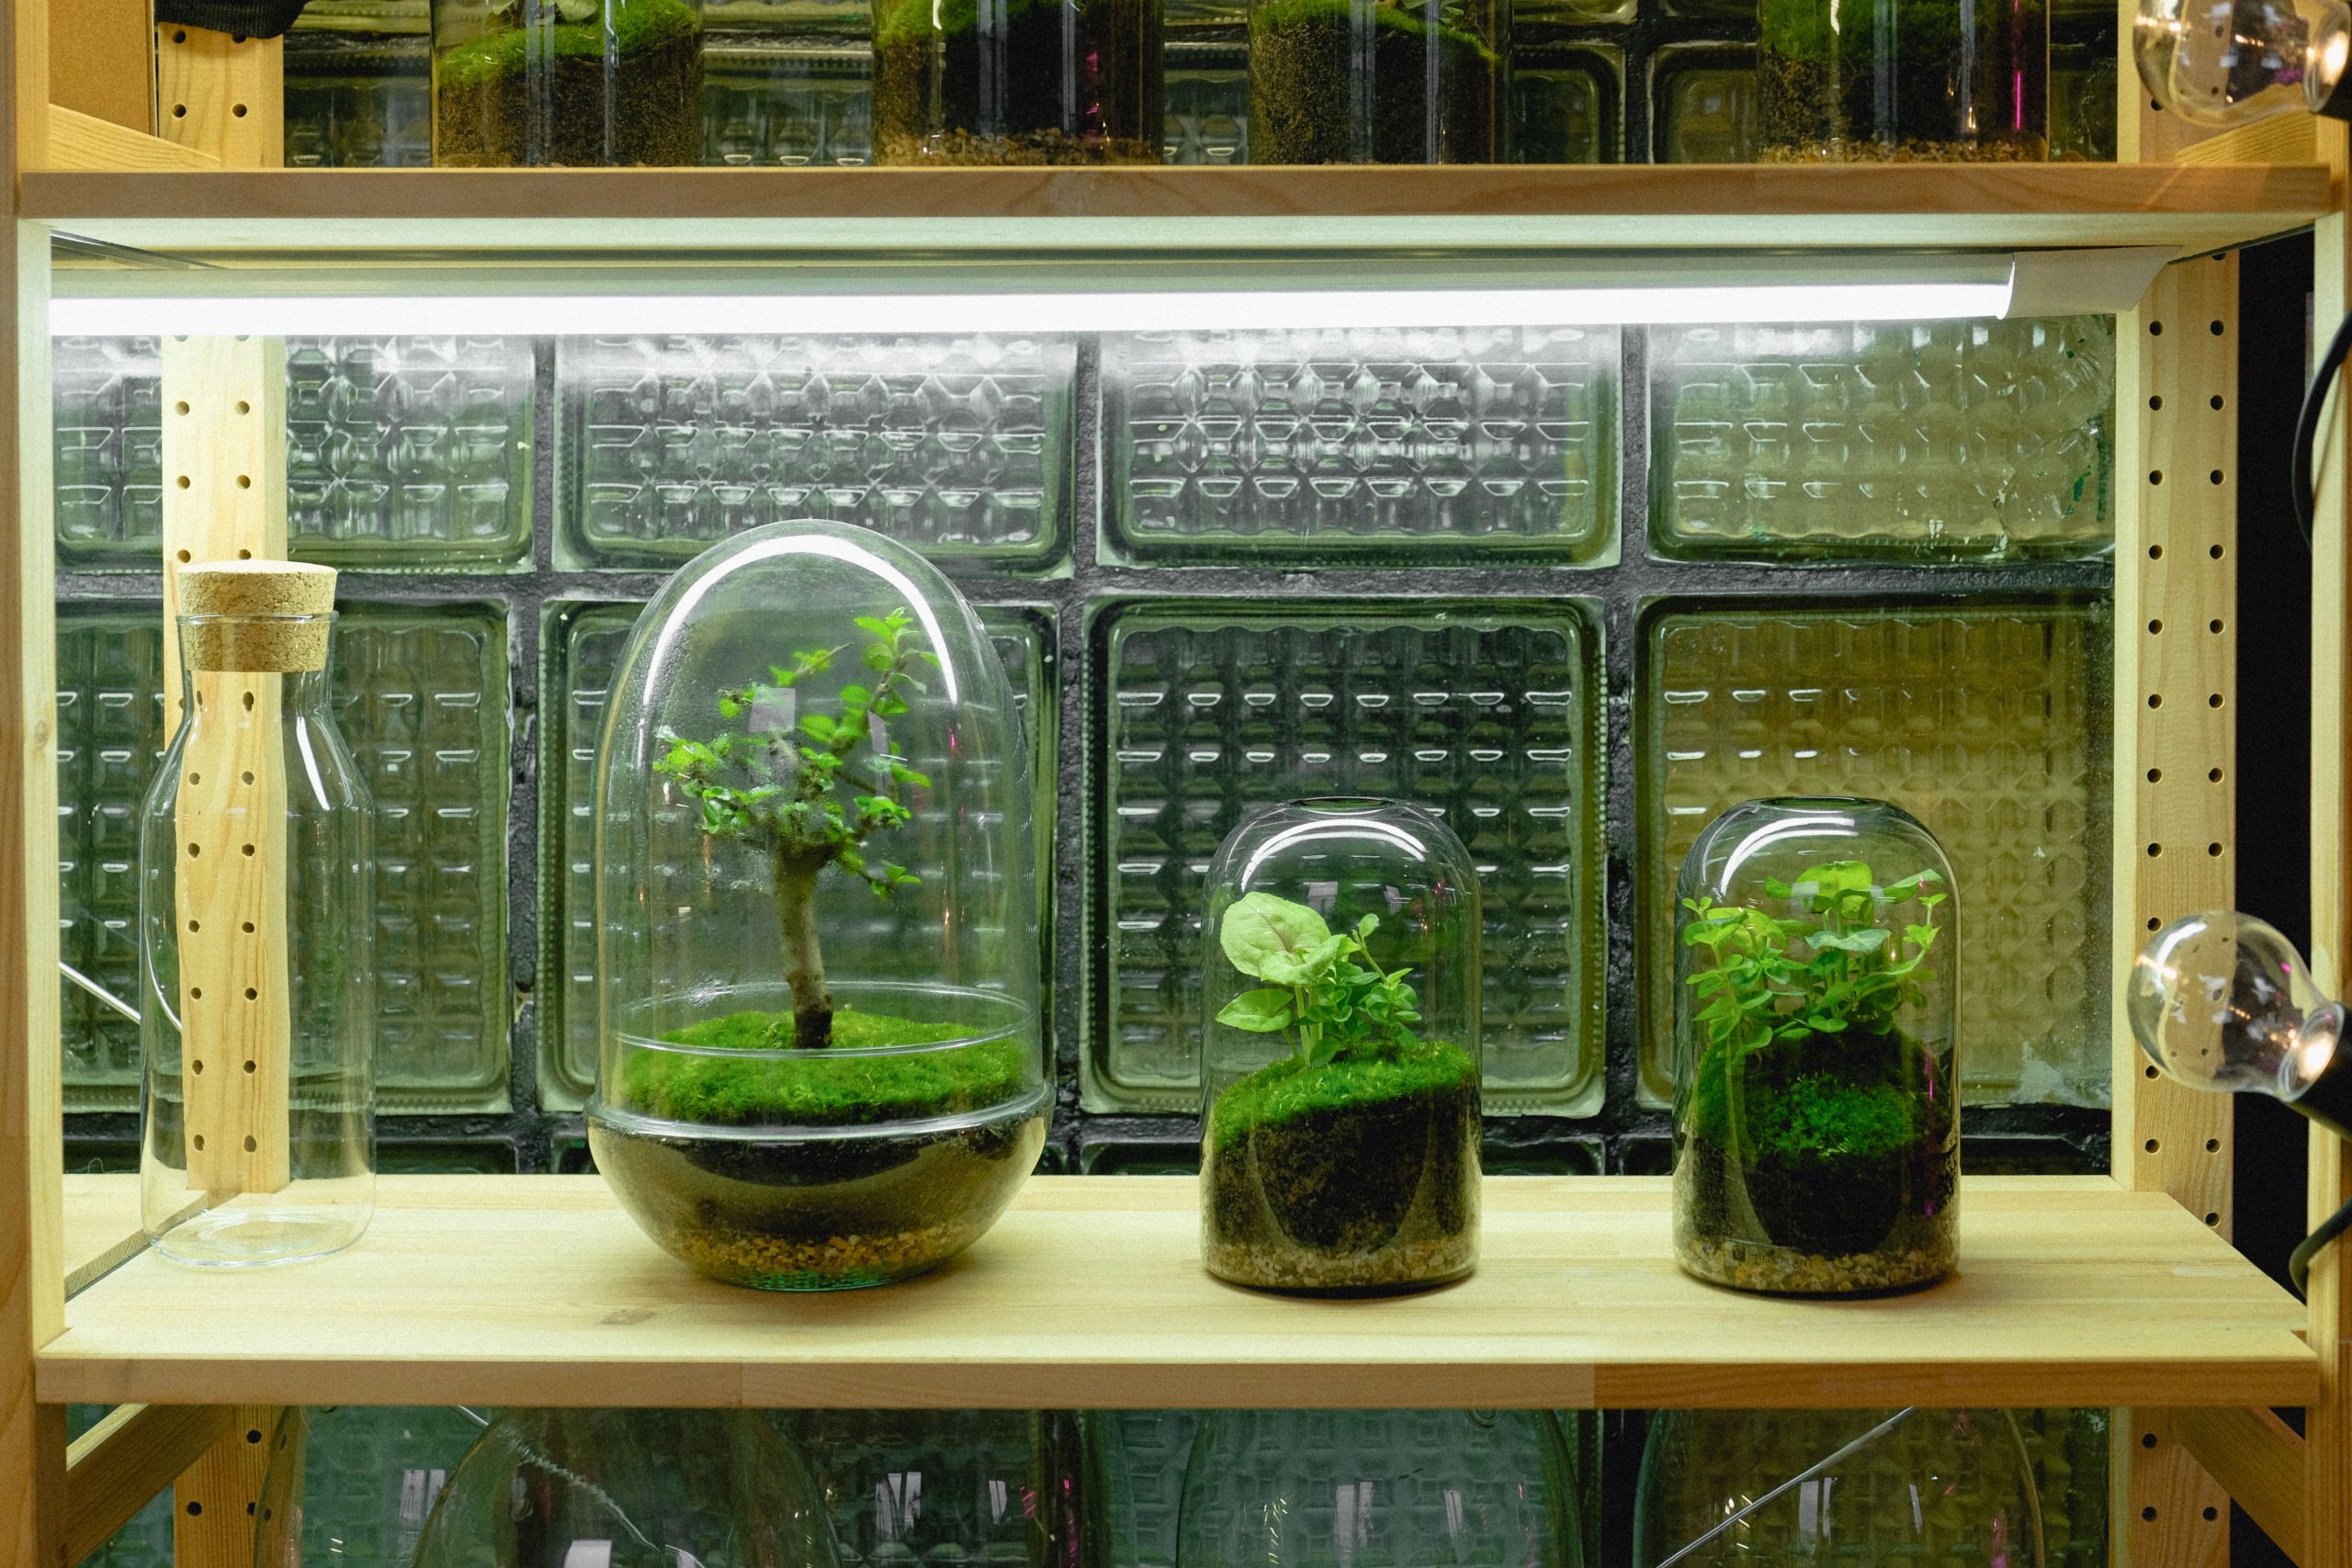
“While an integrated lighting strip looks incredibly sleek, it can be a hassle to install if you’re not comfortable with basic wiring.”
A much simpler, renter-friendly alternative is to use battery-powered, motion-activated LED light bars or puck lights. You can stick them to the underside of the shelves with adhesive strips. This gives you a very similar illuminated effect without requiring an electrician or permanent modifications. Just remember you’ll have to change the batteries periodically.
25. Arrange a Moody, Dramatic Plant Collection with Dark Lighting
To achieve this dramatic, high-contrast look, you need a single, strong light source. Don’t use general overhead room lighting. Instead, place one directional spotlight (a simple clip-on lamp or a small floor can light works perfectly) a few feet away from your plant arrangement. Position it so the light hits the plants from the side or at a 45-degree angle. This technique, known as “chiaroscuro,” creates deep shadows and bright highlights that emphasize the form and texture of every leaf and pot, turning your plants into a captivating still life.
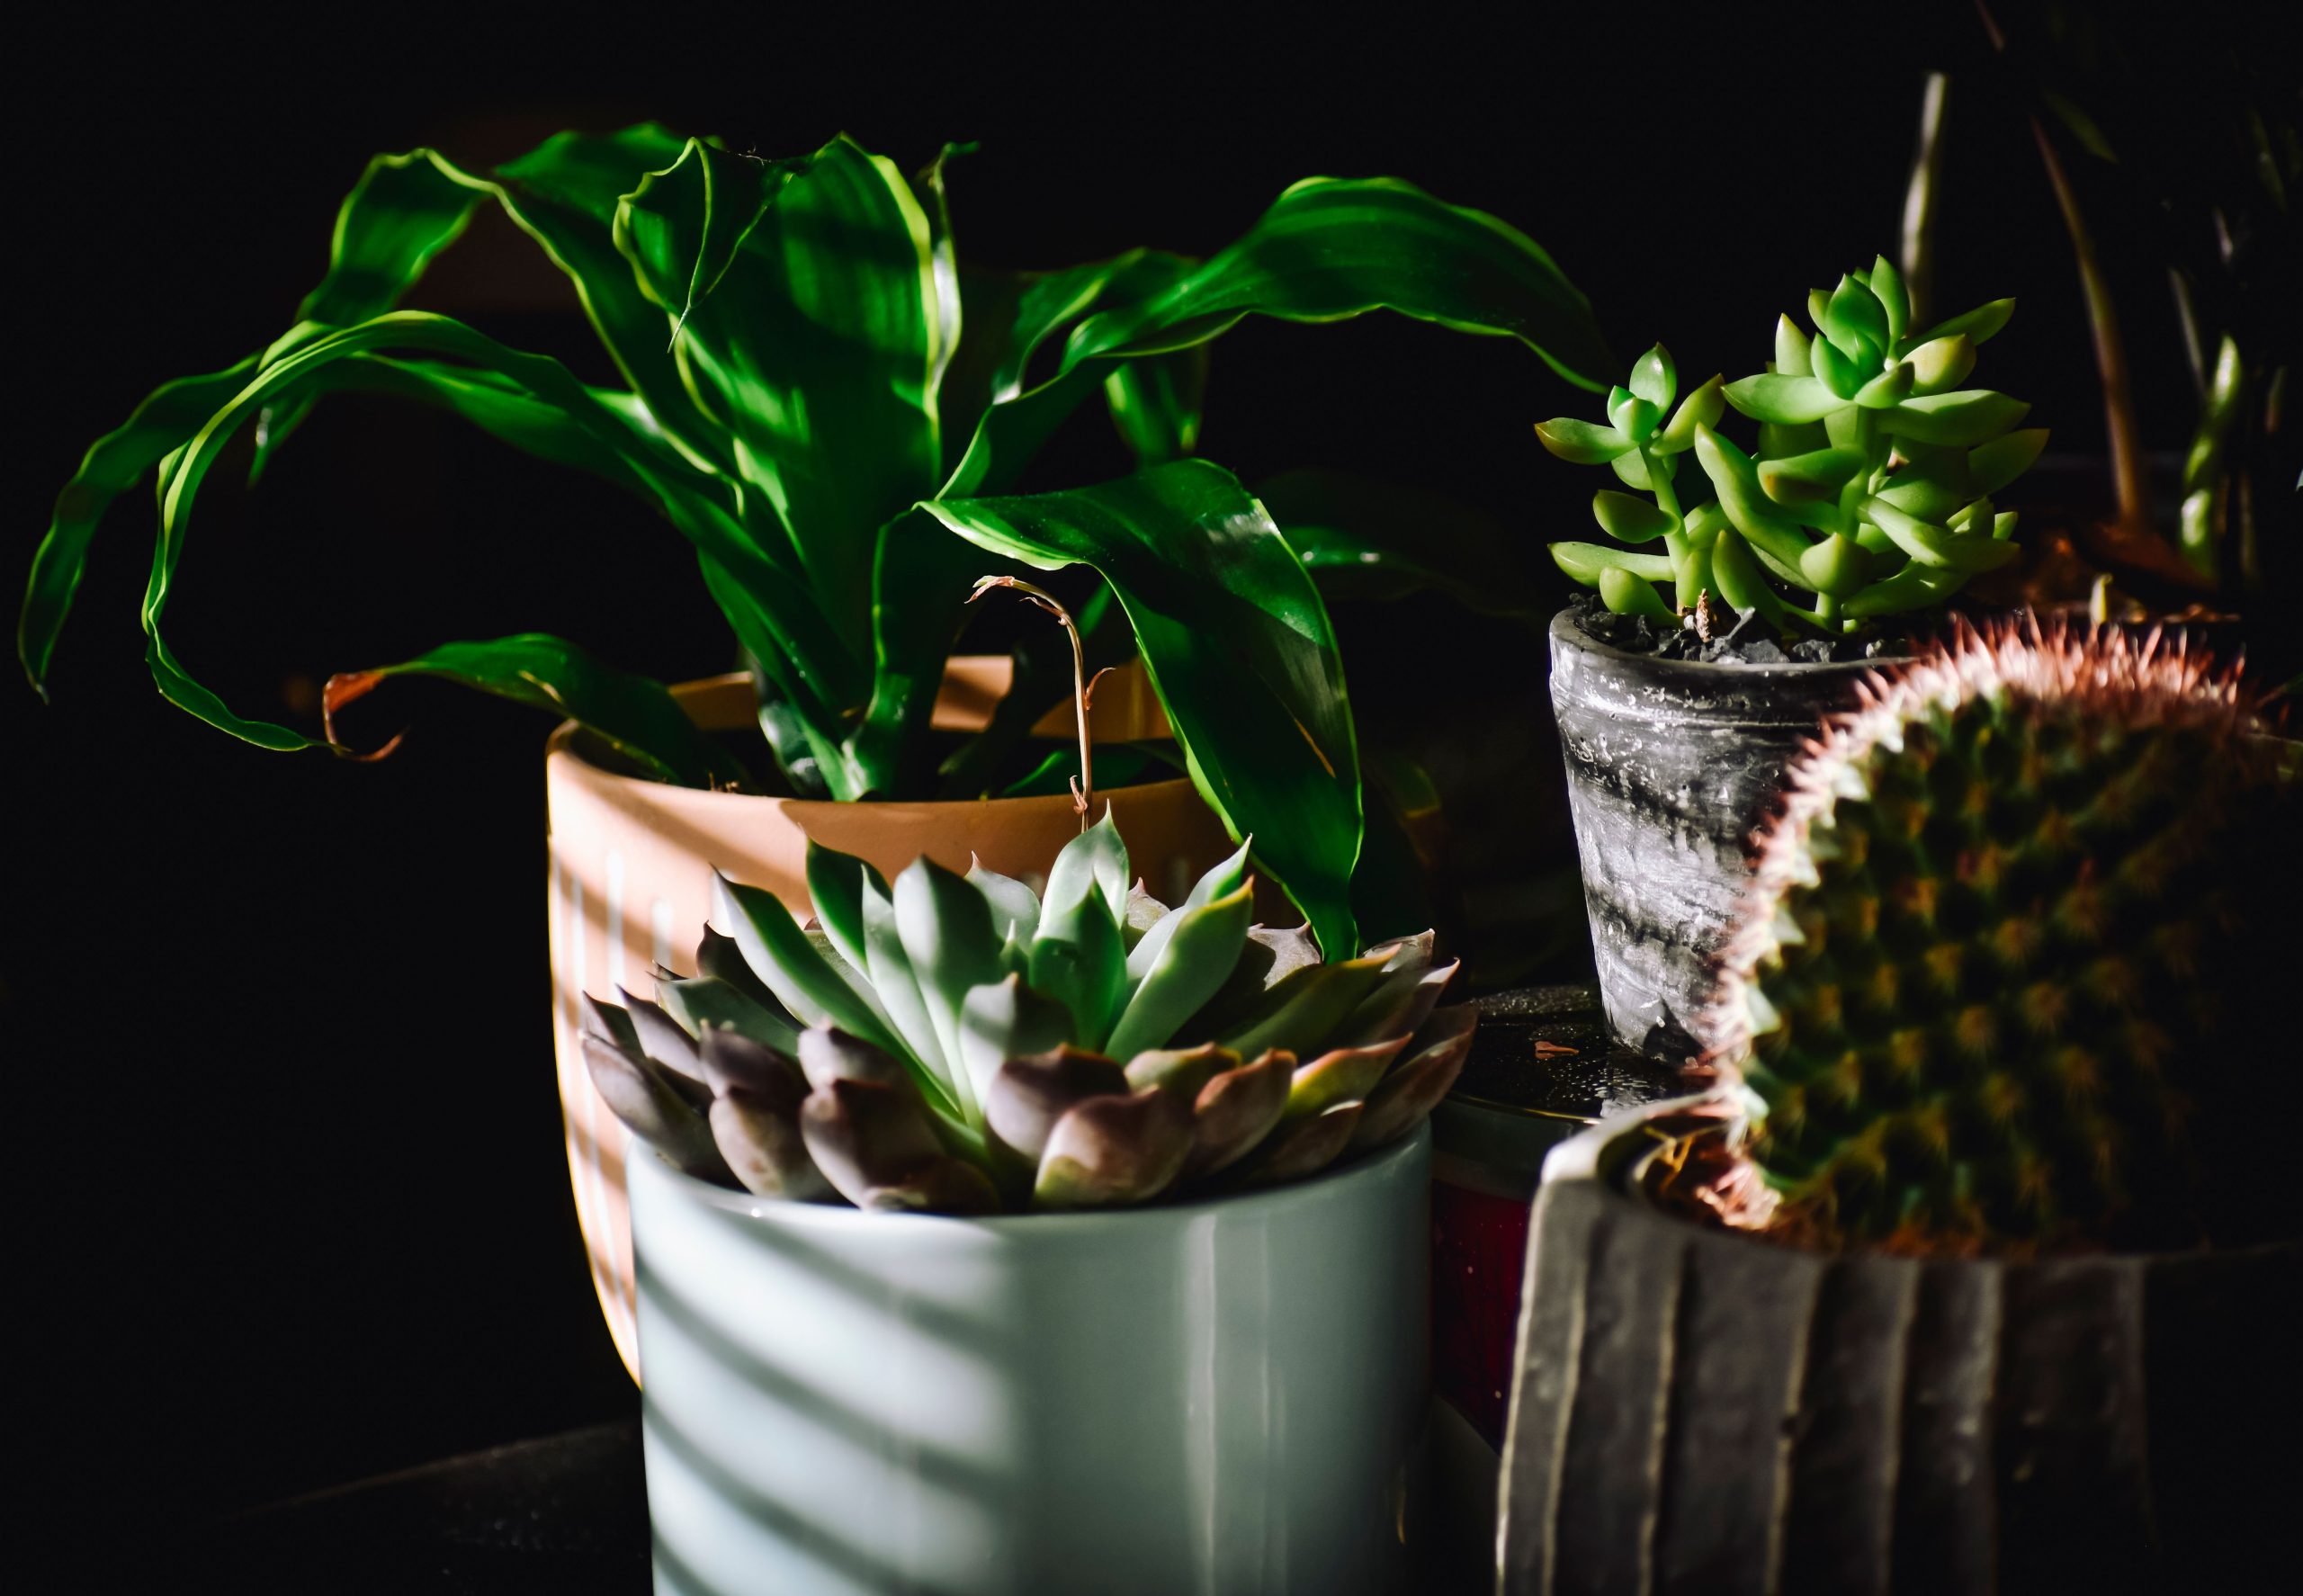
“The success of this arrangement lies in its masterful use of texture and a limited color palette.”
Notice how every element has a distinct surface feel: the smooth, broad leaves of the main plant, the bumpy texture of the succulent, the vertical stripes on the cream pot, and the rough surface of the gray pot. By keeping the colors restrained to greens, creams, and grays, the focus shifts entirely to these rich textures, which are beautifully revealed by the dramatic side lighting. It feels sophisticated and calming because it is visually complex yet chromatically simple.
26. Style a Wooden Shelf with a Plant in a Gray Metal Bucket
This rustic-modern look follows a clear recipe: 40% natural wood + 30% industrial metal + 30% lush greenery. The light wood of the shelf and the darker wood slats on the right provide a warm, organic foundation. The gray metal bucket introduces a cooler, more industrial element that adds a touch of edge. Finally, the variegated and deep green plants bring softness and life. This blend of warm wood, cool metal, and soft foliage is a classic combination that feels balanced and timeless.
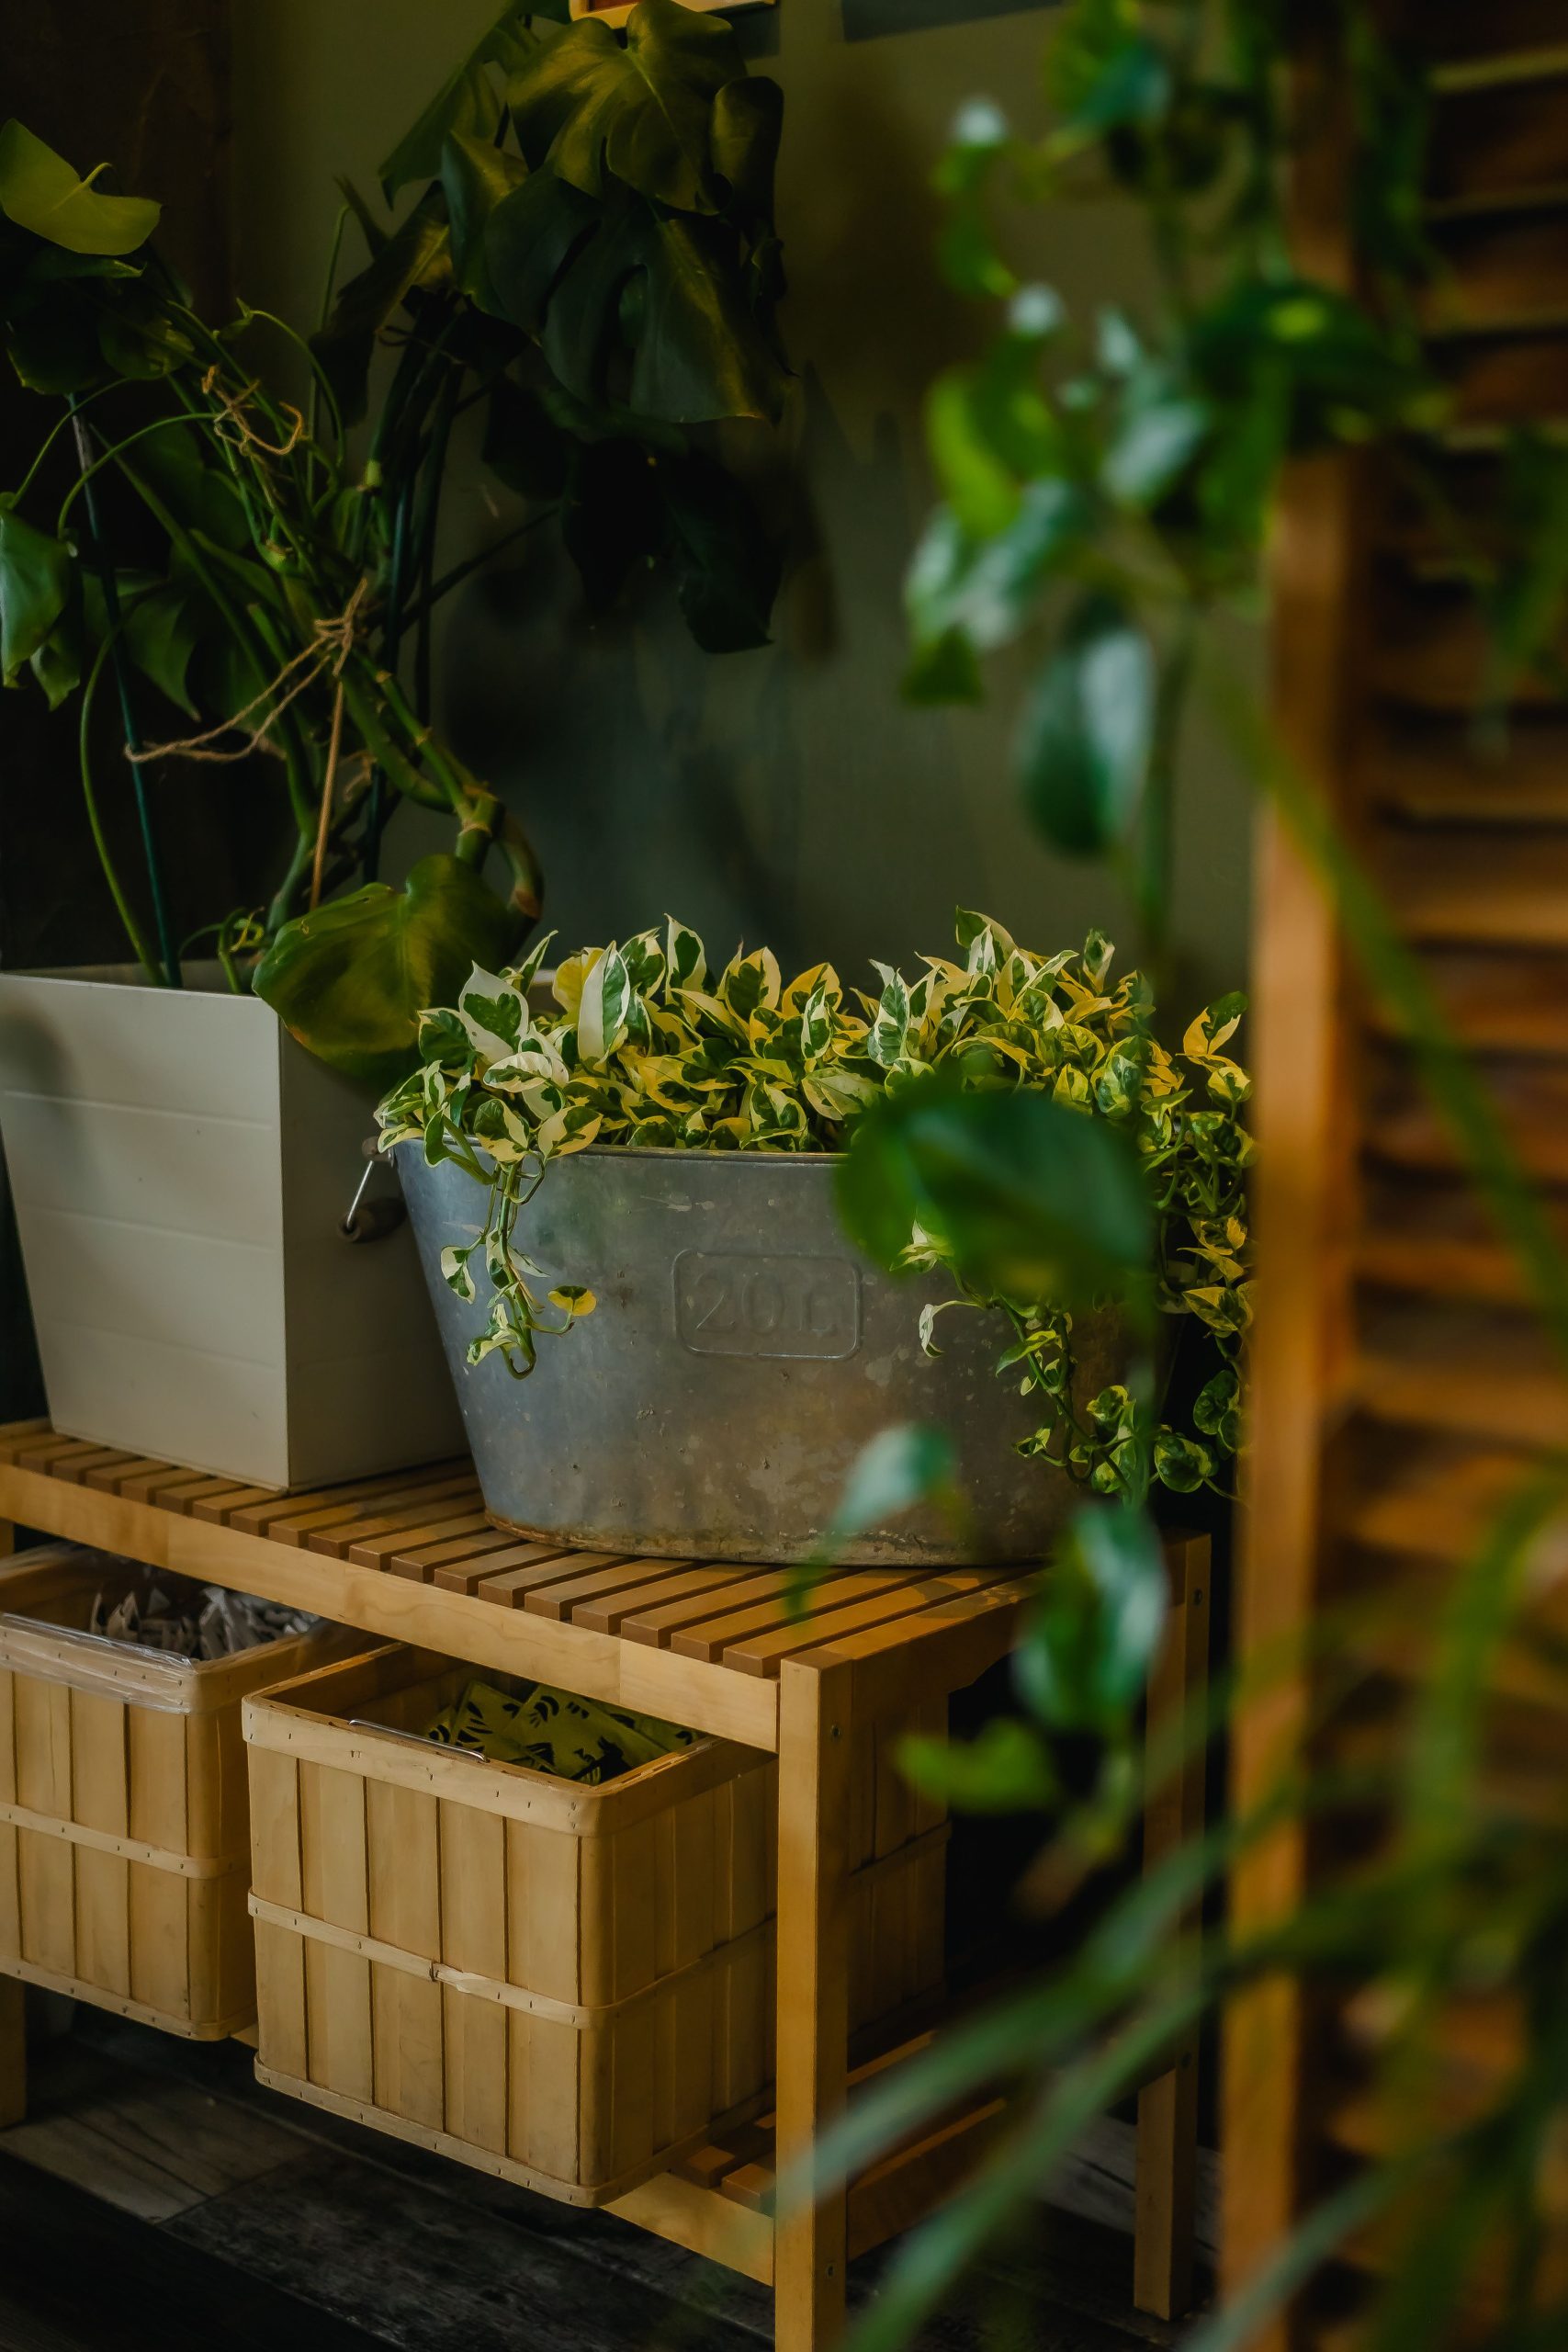
“You can get this look for less with a trip to a home improvement or farm supply store.”
Instead of a pricey designer planter, a simple galvanized steel bucket costs just a few dollars. It gives you the exact same industrial-chic vibe. The key is to make sure you drill drainage holes in the bottom before you add soil and plants. The wooden crates are often available at craft stores or even grocery stores for a low cost, and a simple slatted shelf can be a straightforward and inexpensive DIY project.
27. Design a Miniature Fairy Garden in a Galvanized Metal Bucket
The single element that makes this fairy garden feel truly magical and established is the moss. It’s used generously—not just on the ground, but also on the roof of the miniature house. This detail suggests age and a sense of belonging to the landscape, as if the house has been there for a long time. The vibrant green moss also provides a soft, lush carpet that unifies the different elements (the house, the plants, the fence) into one cohesive, enchanting scene. Without the moss, it would look like a collection of objects; with it, it becomes a world.
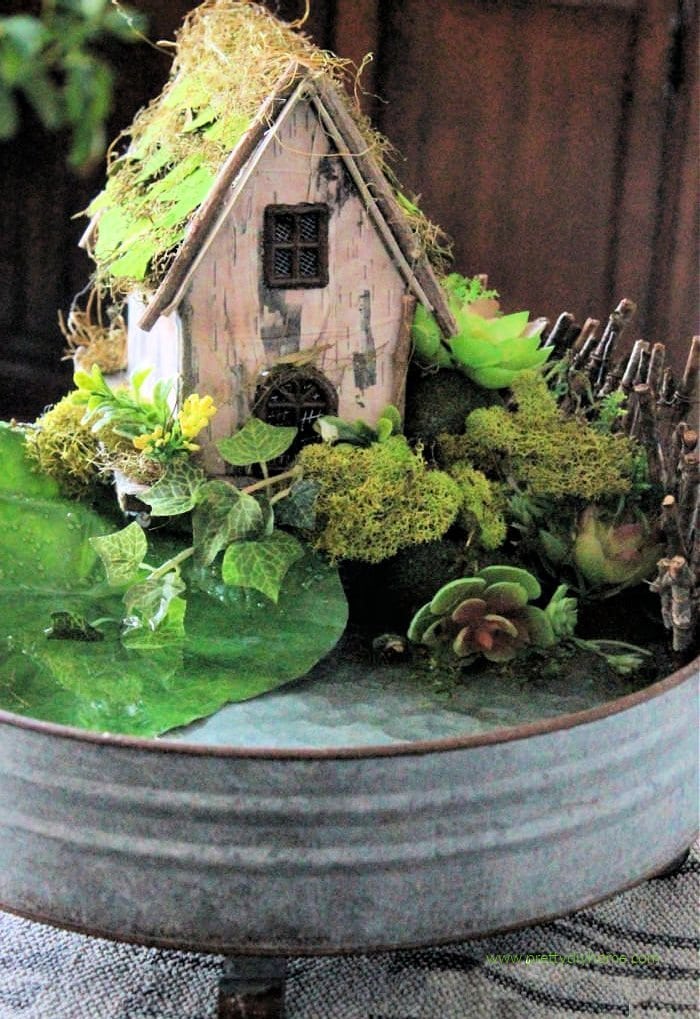
“building your fairy world, consider these points:Drainage is Key: A galvanized metal bucket does not have drainage.”
You MUST drill several holes in the bottom before you add anything else, or you will create a swamp that leads to root rot.Plant Selection: Choose plants that stay small and have similar light and water needs. Miniature ferns, small sedums, and creeping thyme are great options that fit the scale.Indoor or Outdoor? Decide if this will live inside or out. If it’s for indoors, place it near a bright window. If outdoors, ensure the miniatures you buy are weather-resistant.
28. Create a Whimsical Scene in a Fairy Garden Lantern
This idea works so well because the lantern acts as a miniature room or stage. The glass panels frame the scene perfectly, drawing your eye inward and focusing your attention on the tiny world inside. The structure of the lantern provides an immediate sense of enclosure and specialness. The addition of fairy lights is crucial; it brings the scene to life, adding a magical glow that makes it feel enchanting, especially at night. It transforms a decorative object into a captivating little diorama.
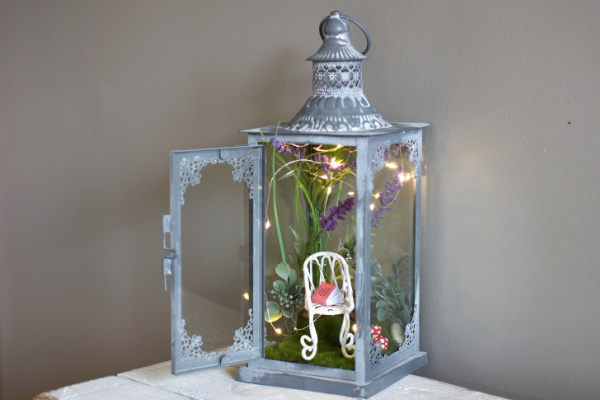
“Putting together a lantern garden like this is very affordable.”
Putting together a lantern garden like this is very affordable.
- Lantern: You can find distressed metal lanterns at craft stores like Michaels, or home stores like At Home or Target, for $20 – $40.
- Miniatures: The tiny chair, book, and mushrooms are classic fairy garden accessories, often sold in packs for $10 – $15.
- Lights & Greenery: A small string of battery-powered fairy lights costs about $5. Faux moss and greenery are also inexpensive, around $10 for a bag.
- TOTAL: $45 – $70
- Budget Alternative: Thrift stores are a goldmine for old lanterns that can be spray-painted for a few dollars.
29. Grow Fresh Basil in a Modern Hydroponic Countertop Garden
Smart indoor gardens like this are a direct response to a 2026 desire for hyper-local, tech-assisted sustainability. People want the satisfaction and flavor of homegrown herbs, but without the guesswork and potential for failure that comes with traditional pots. These systems, with their automated lighting and watering schedules, offer a near-guaranteed harvest. They appeal to both our craving for nature and our reliance on technology to make life easier, fitting perfectly into a modern, efficiency-oriented lifestyle. Compare this to the more rustic approach in Idea #10.
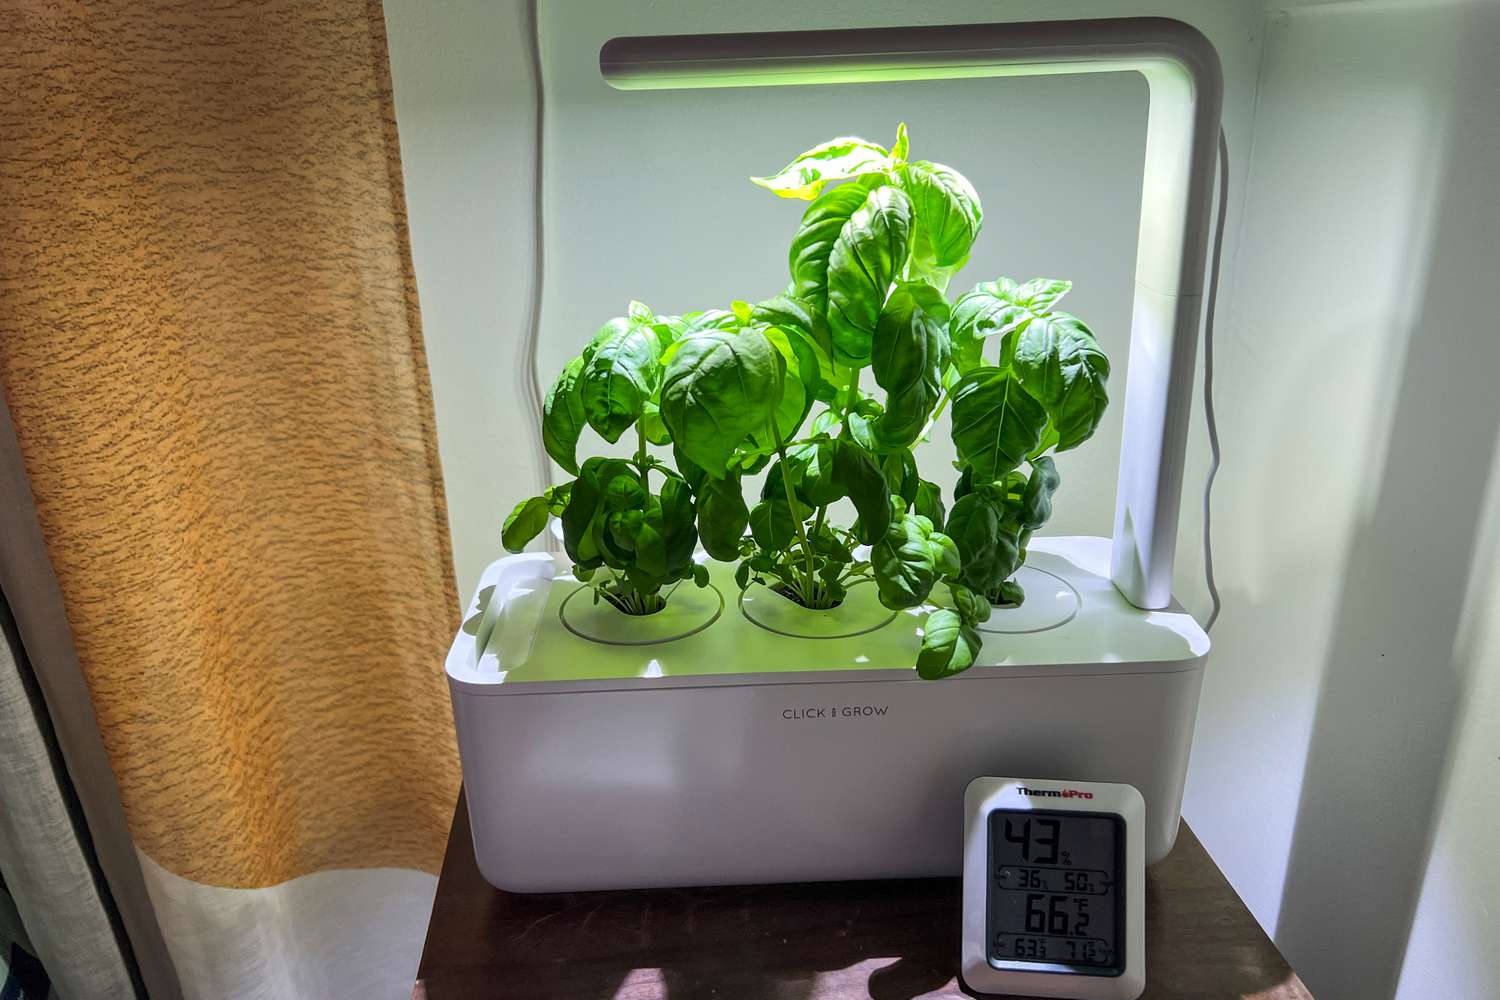
“While these hydroponic systems are incredibly convenient, they are not silent.”
The water pump that circulates nutrients to the roots will cycle on and off throughout the day, creating a gentle humming or trickling sound. For most people, it’s quiet background noise, but if you are very sensitive to sound and plan to place it in a silent office or bedroom, it’s something to be aware of. Also, the LED grow lights are bright. While great for the plants, you might find the light intrusive in the evening if it’s in your direct line of sight.
30. Assemble a Glass Bowl Terrarium with Shells and Driftwood
This composition is successful because it combines elements from different environments to create a unique miniature landscape. You have classic woodland elements like green plants and dark soil. But then, it unexpectedly introduces coastal vibes with the seashells and driftwood-like piece. This “forest meets the sea” approach creates a pleasing tension and a sense of discovery. The plaid cloth underneath adds another layer of texture and a touch of cozy, cabin-like charm, making the whole arrangement feel more styled and intentional.
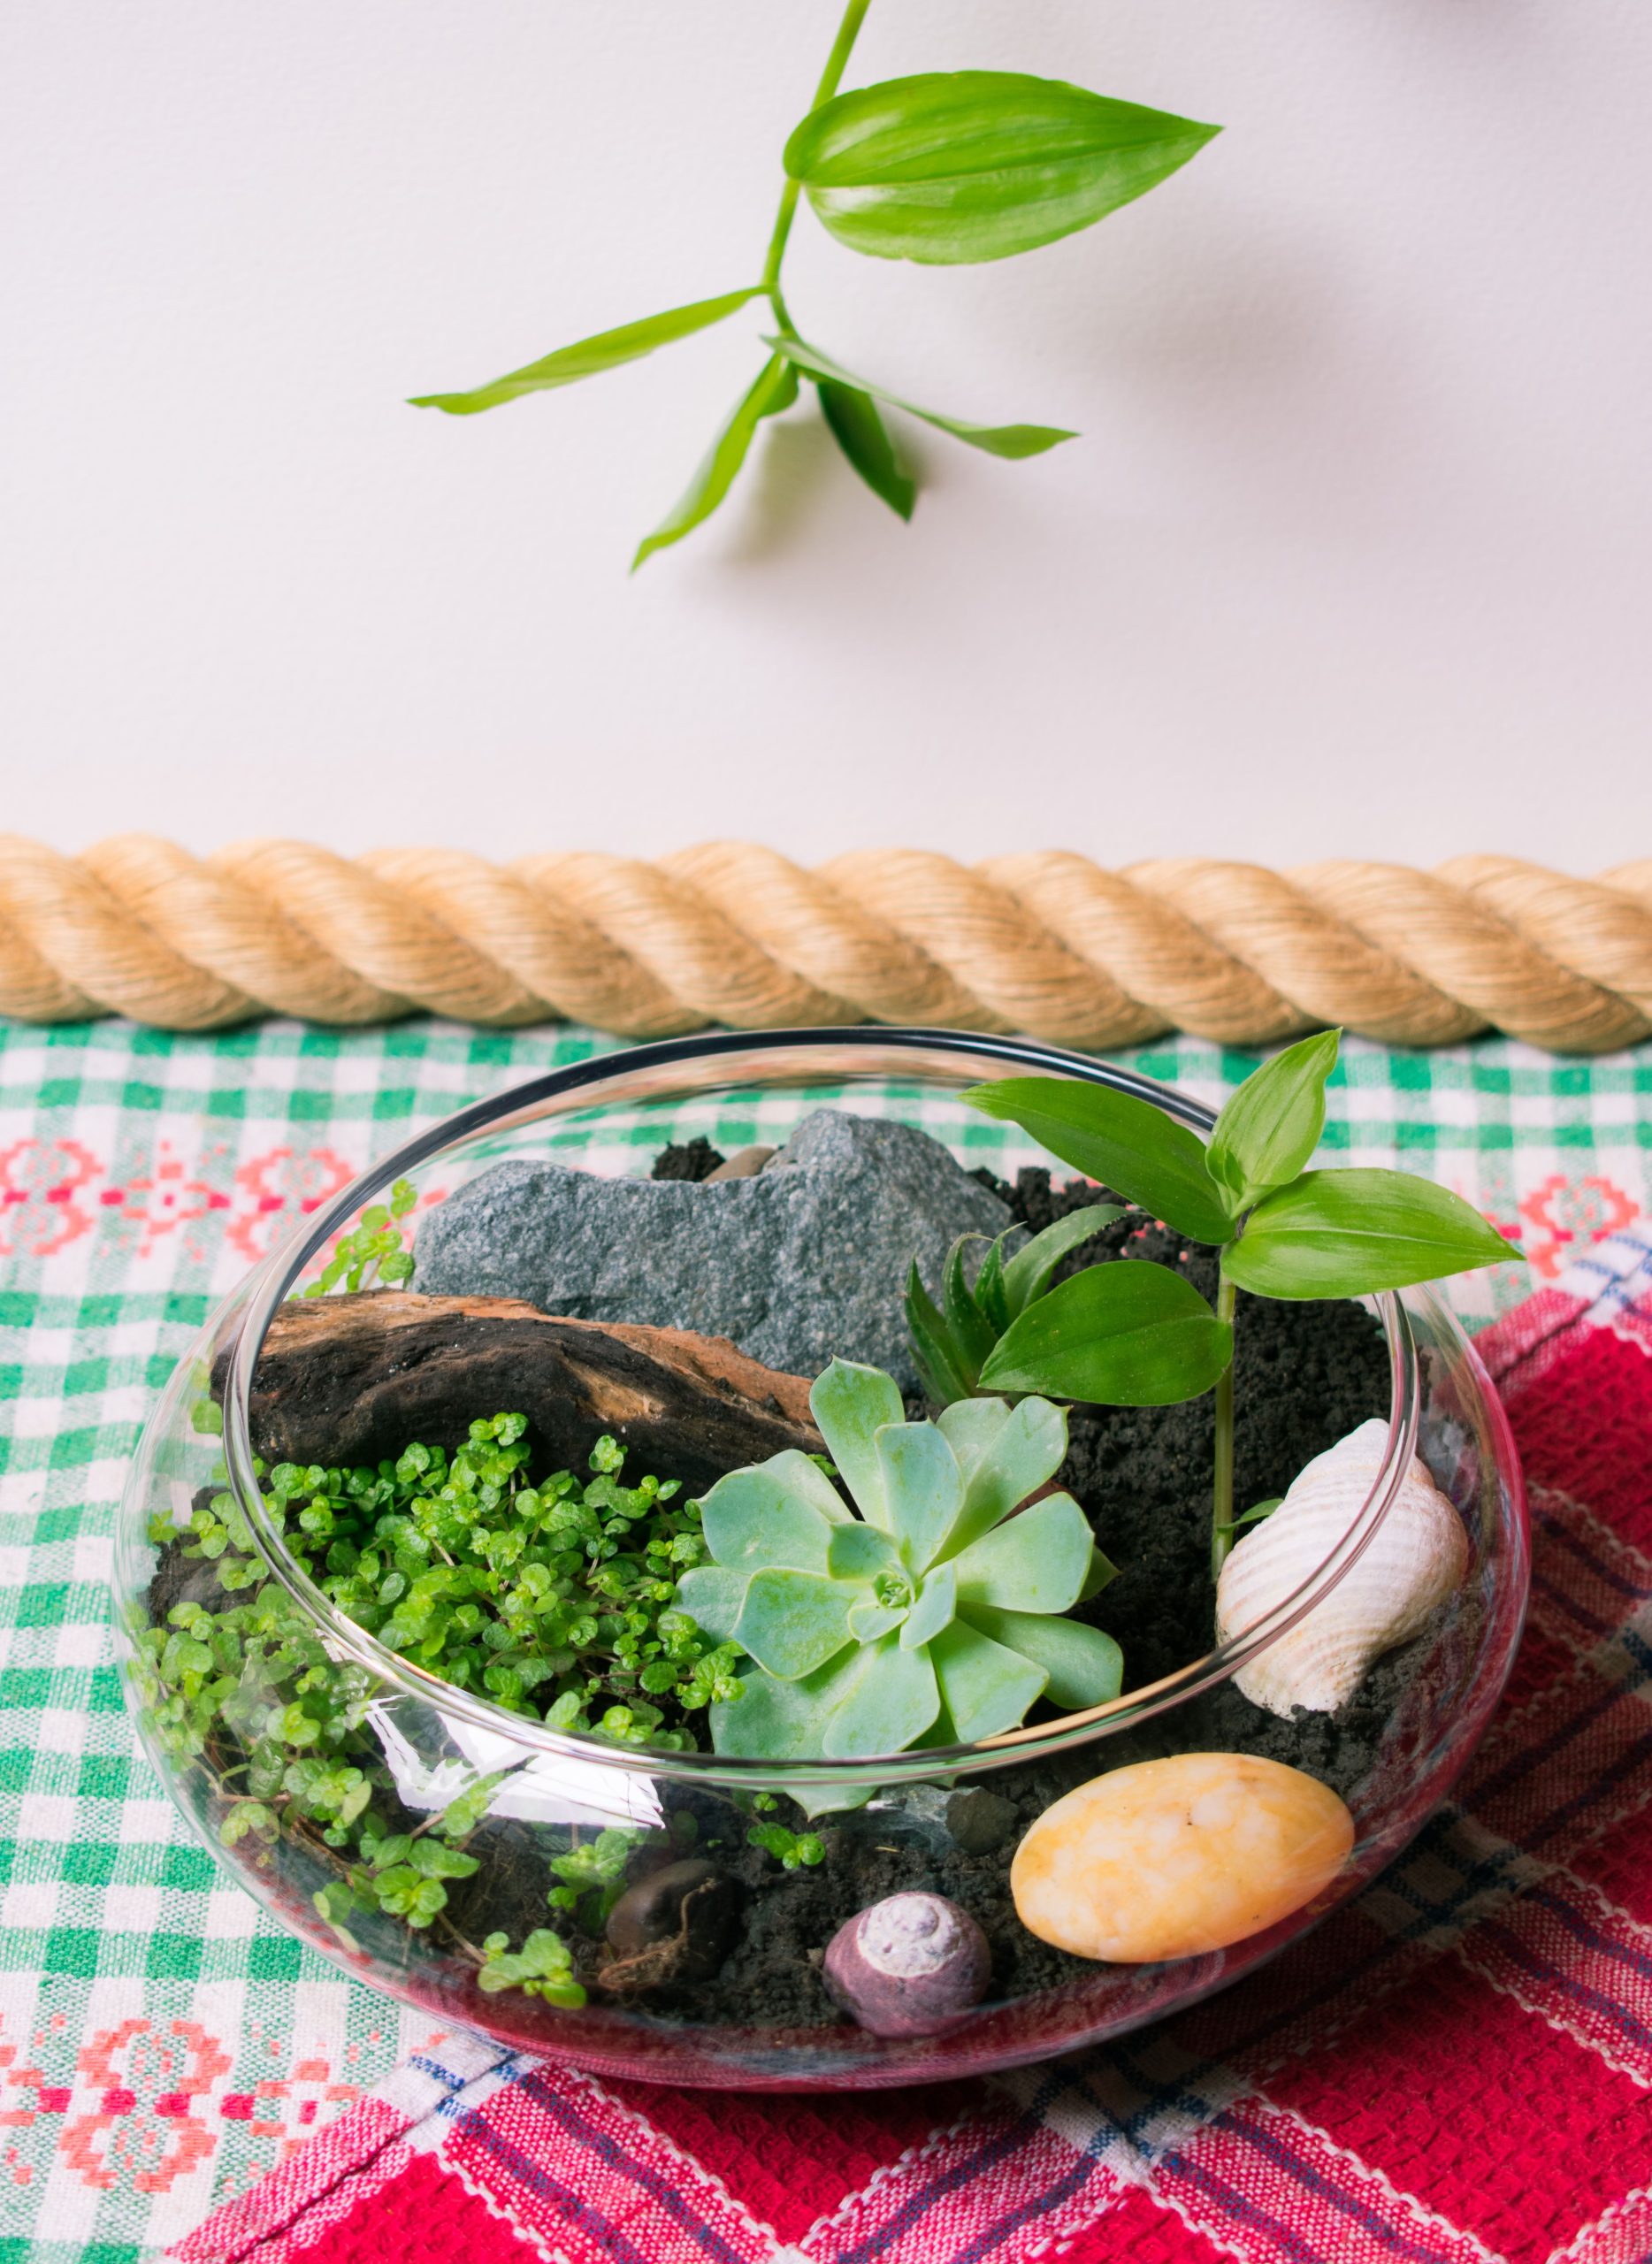
“Before you build your terrarium bowl, think through these checklist items:”
Before you build your terrarium bowl, think through these checklist items:
- Plant Compatibility: Are you choosing plants that thrive in the same conditions? Don’t mix a moisture-loving fern with a succulent that needs to be dry. For an open bowl like this, drought-tolerant plants are usually a safer bet.
- Drainage Layer: A glass bowl has no drainage. You must add a 1-2 inch layer of gravel, pebbles, or LECA at the bottom before your soil to prevent root rot.
- Light Source: Where will this live? Most terrarium plants need bright, indirect light. A spot near a window but out of direct sun is ideal.
Your Miniature World Awaits
Hopefully, these 30 ideas have sparked some inspiration for your own small-space sanctuary. The best part about a mini garden is that it’s a living piece of art that you can change and nurture over time. It’s a chance to get your hands dirty, play with scale, and create a tiny world that is all your own.
Now, head over to Pinterest and start creating a board for your project!