You know that feeling when you finally find the garden design that looks exactly right for your space? That little spark of “I can do that!” is what this guide is all about. After filtering through hundreds of options across Terrain, Home Depot, and Wayfair, we narrowed it down to the most inspiring looks of the year. We’ve curated 31 stunning ideas, from modern minimalist patios to lush, natural woodland paths that work for real yards and real budgets.
This post may contain affiliate links. As an Amazon Associate, we earn from qualifying purchases at no extra cost to you.
In 2026, our gardens are becoming true extensions of our homes—a trend driven by a desire for personal, nature-filled sanctuaries. And stay until the end — we break down the most common mistakes that can ruin these looks. 📌 Save this to Pinterest for later — you’ll want to revisit these ideas.
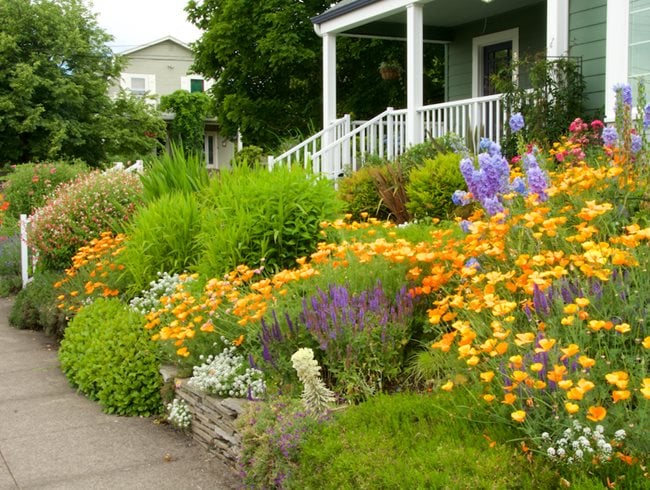
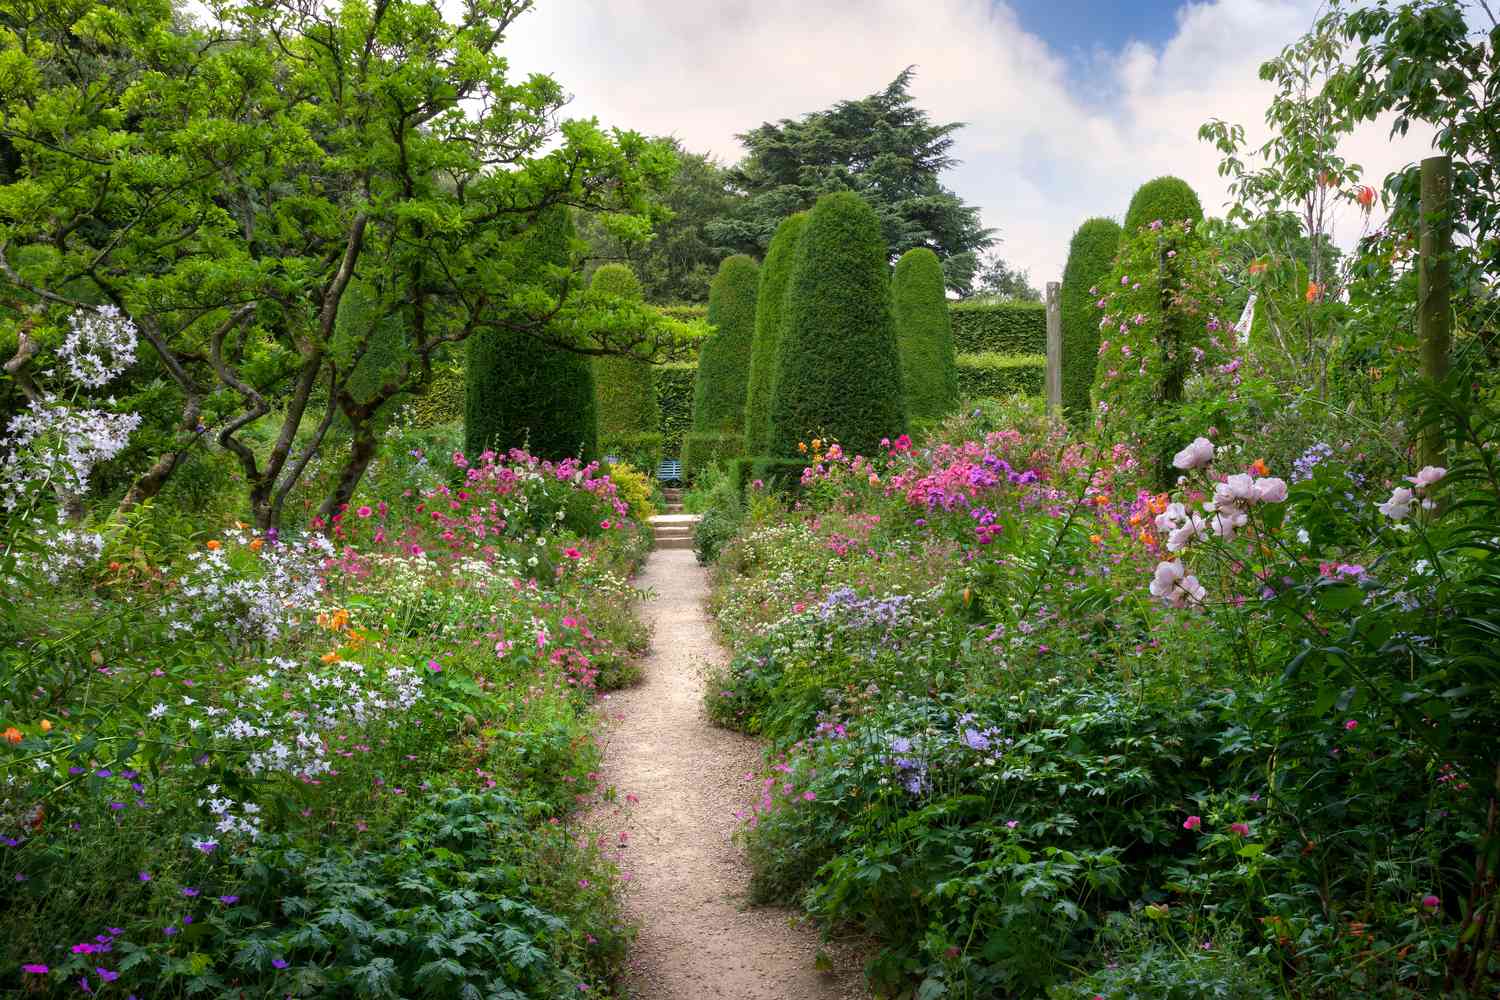
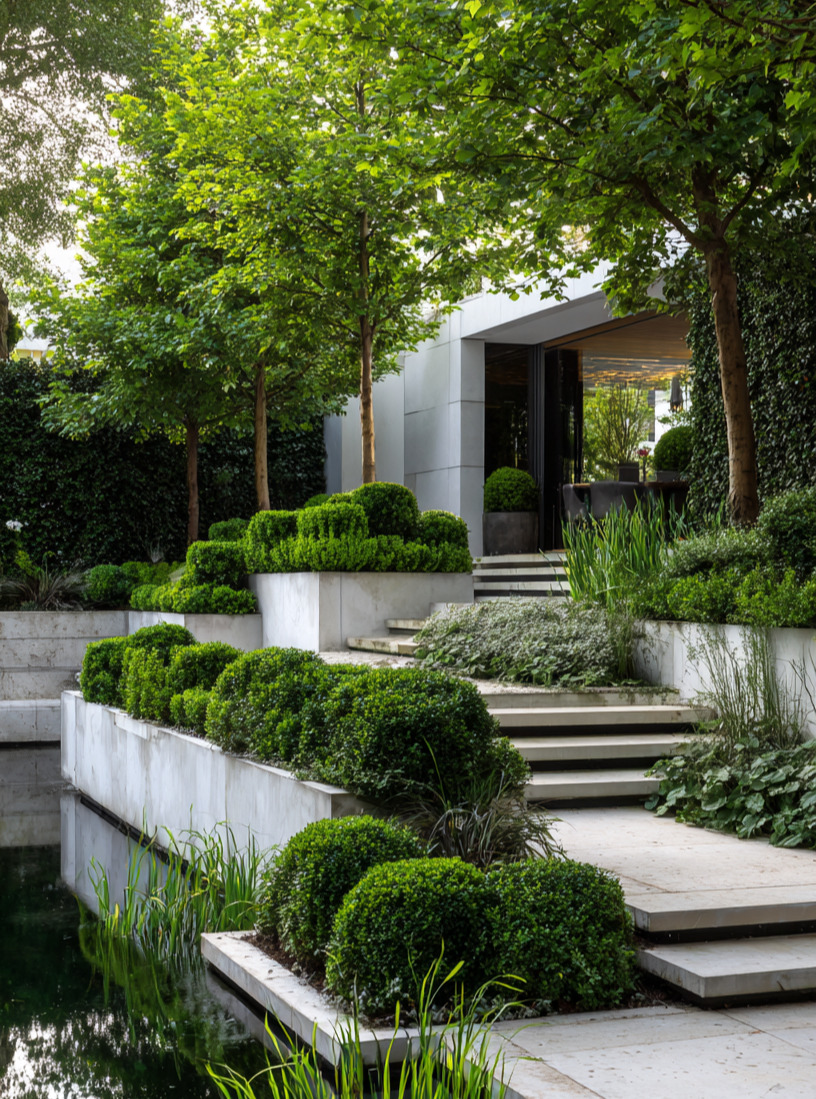
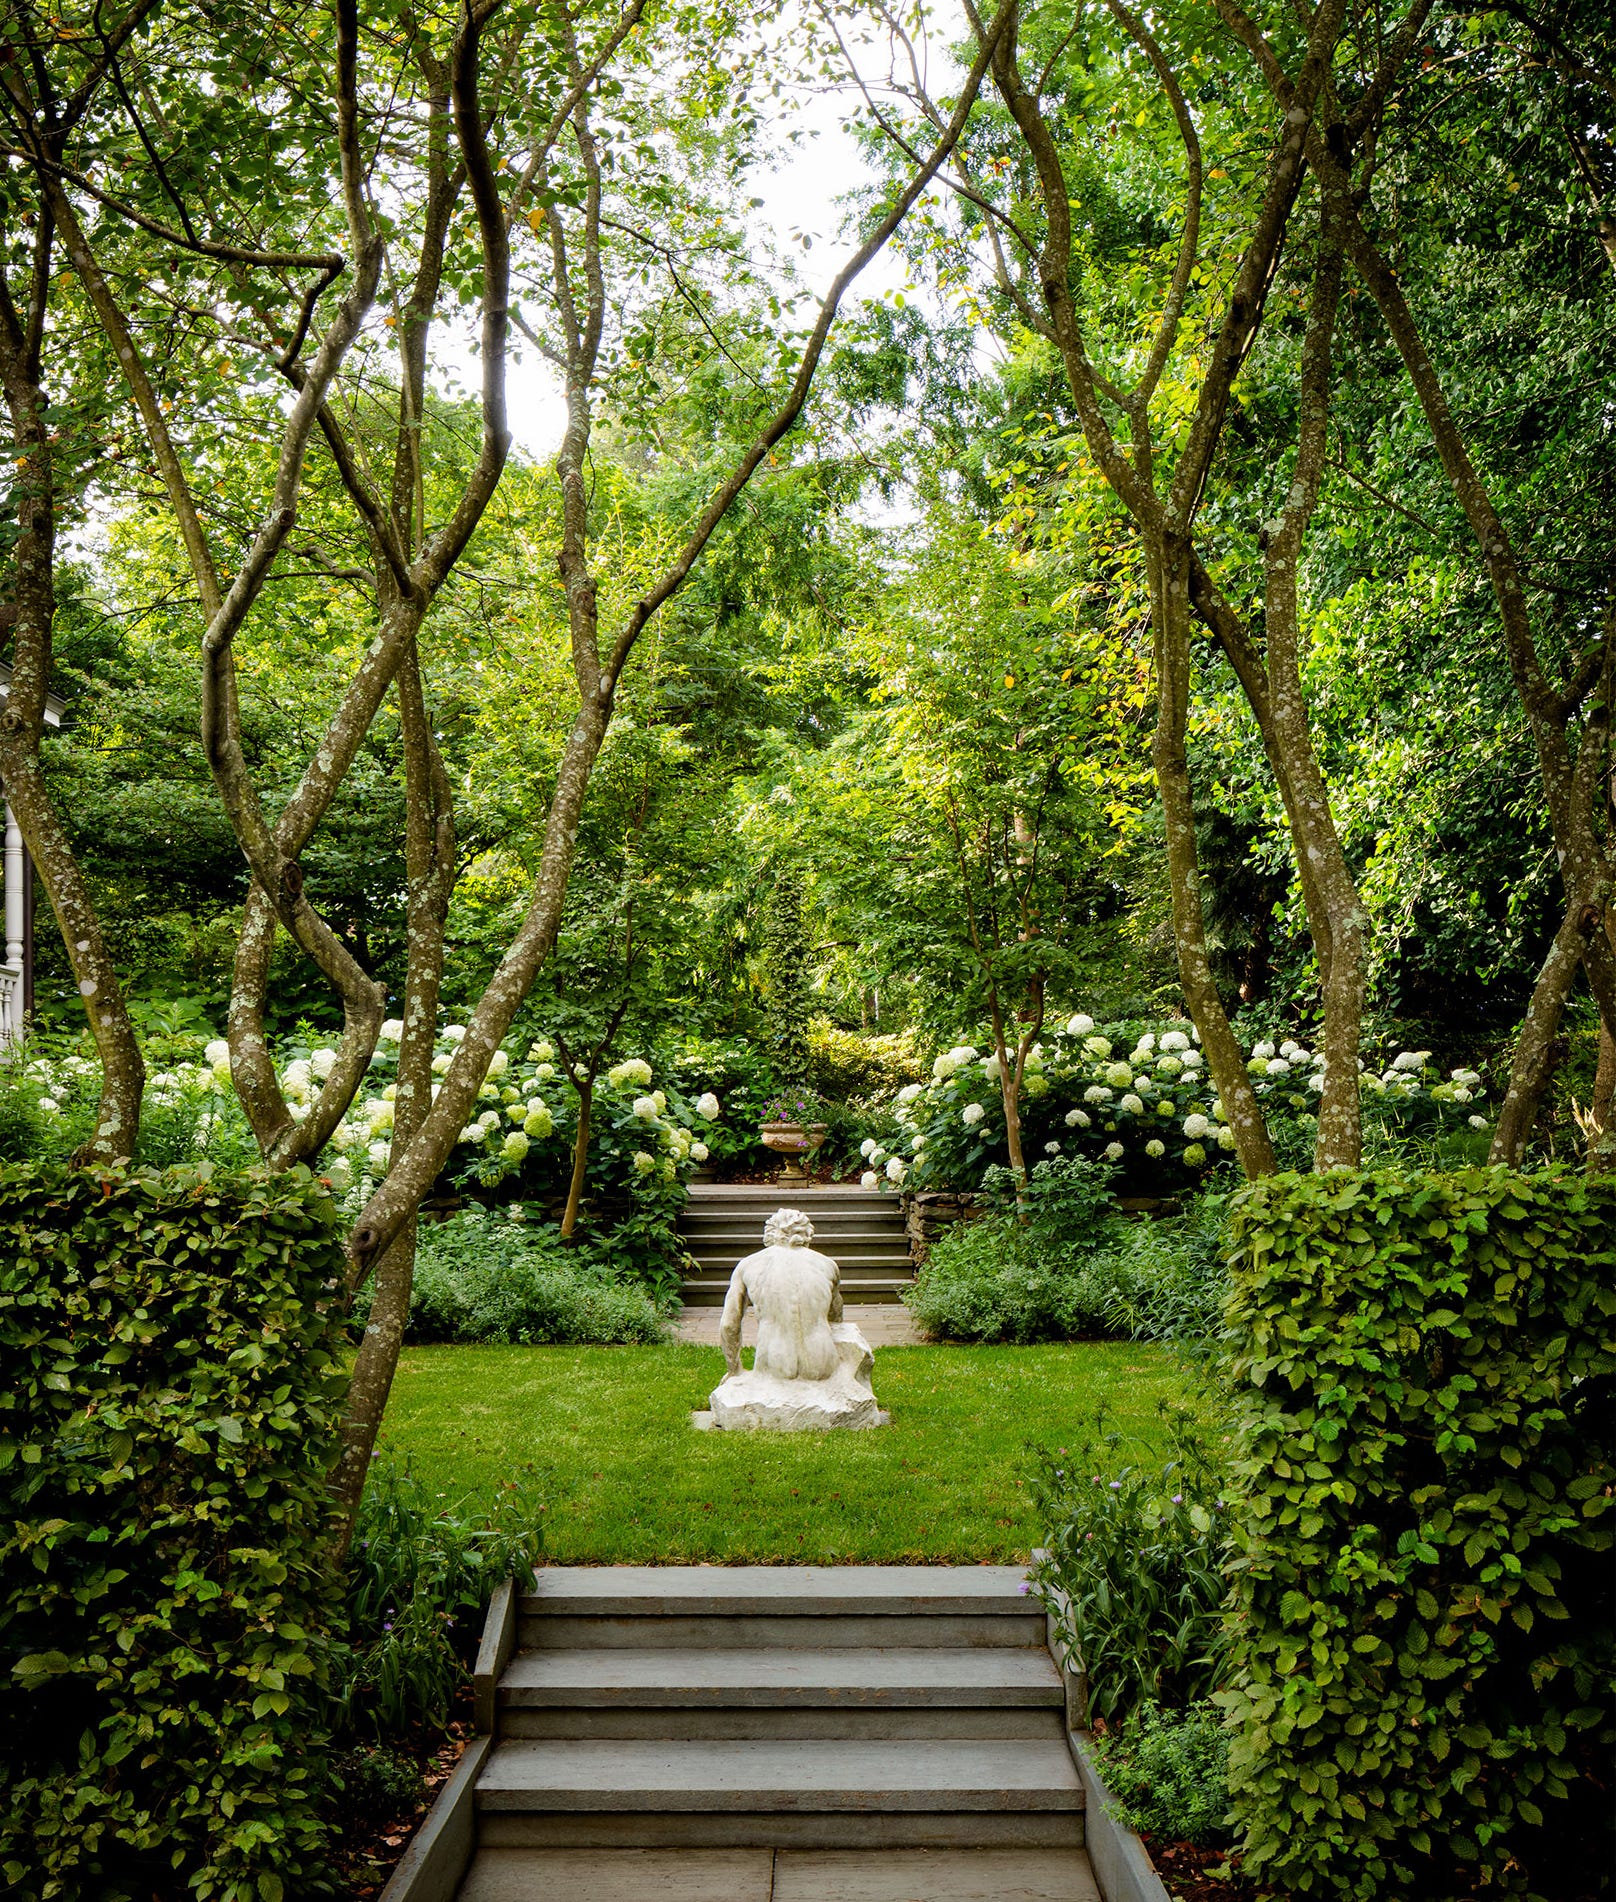
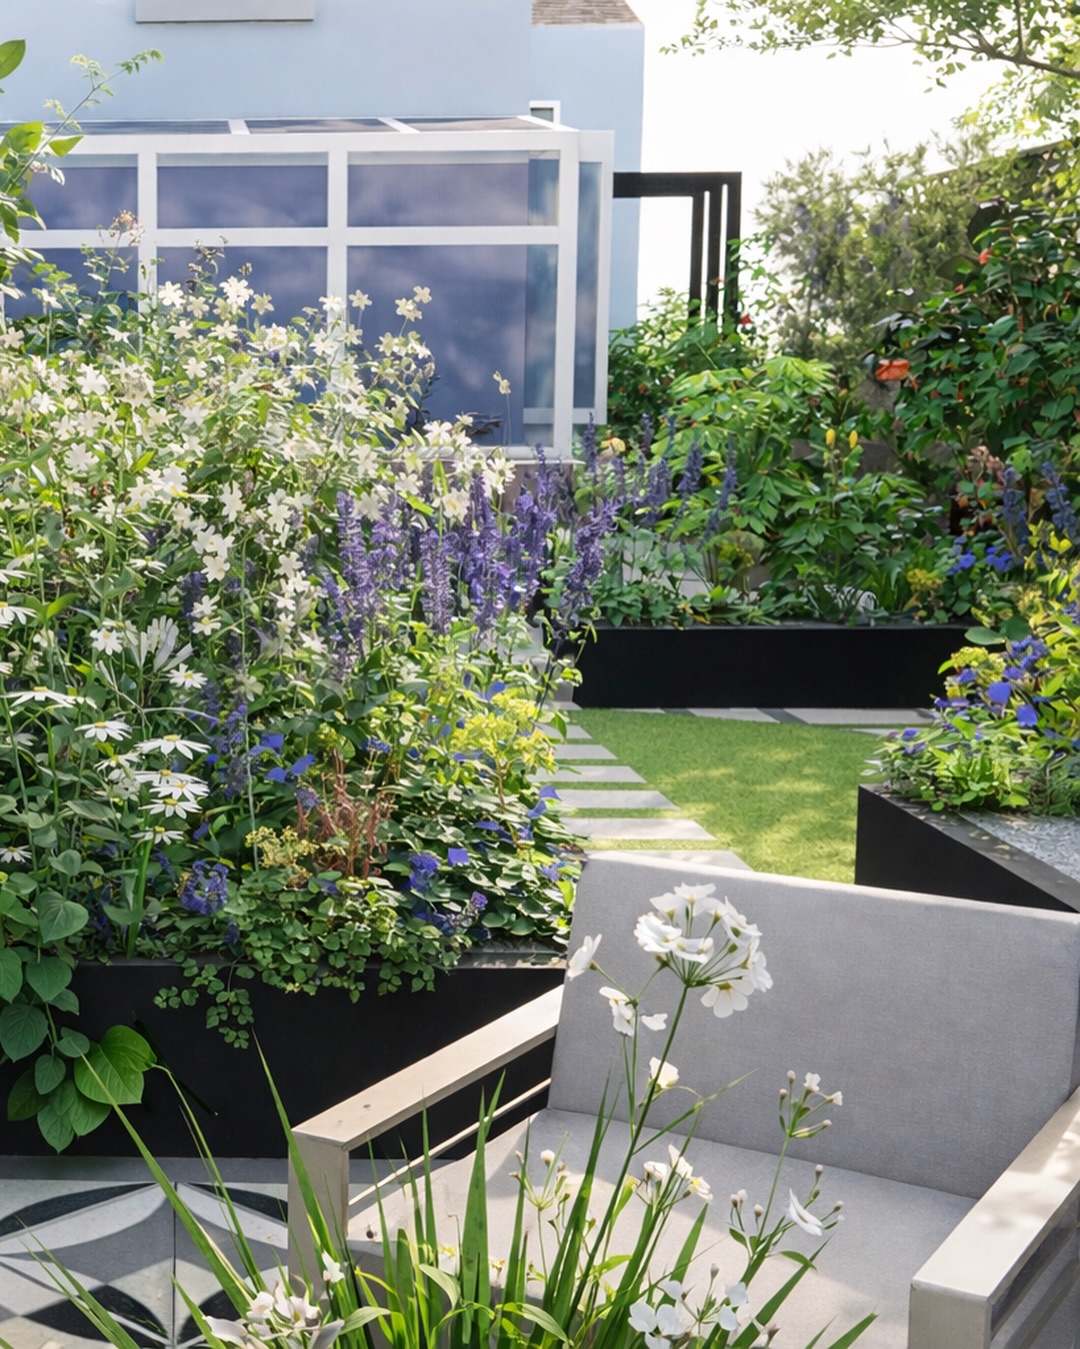
1. Follow an Irregular Stone Path Through a Lush Lawn
There’s a quiet magic to a garden that feels like it has always been there. The gentle curve of the irregular stone path invites you to stroll, rather than just walk, through the space. The visual weight of the dense, deep green shrubs is balanced by the soft, manicured lawn, creating a feeling of serene enclosure. It’s the contrast between the wilder plantings and the tidy grass that gives this garden its established, calming character.
|
$525.00
|
$14,500.00
|
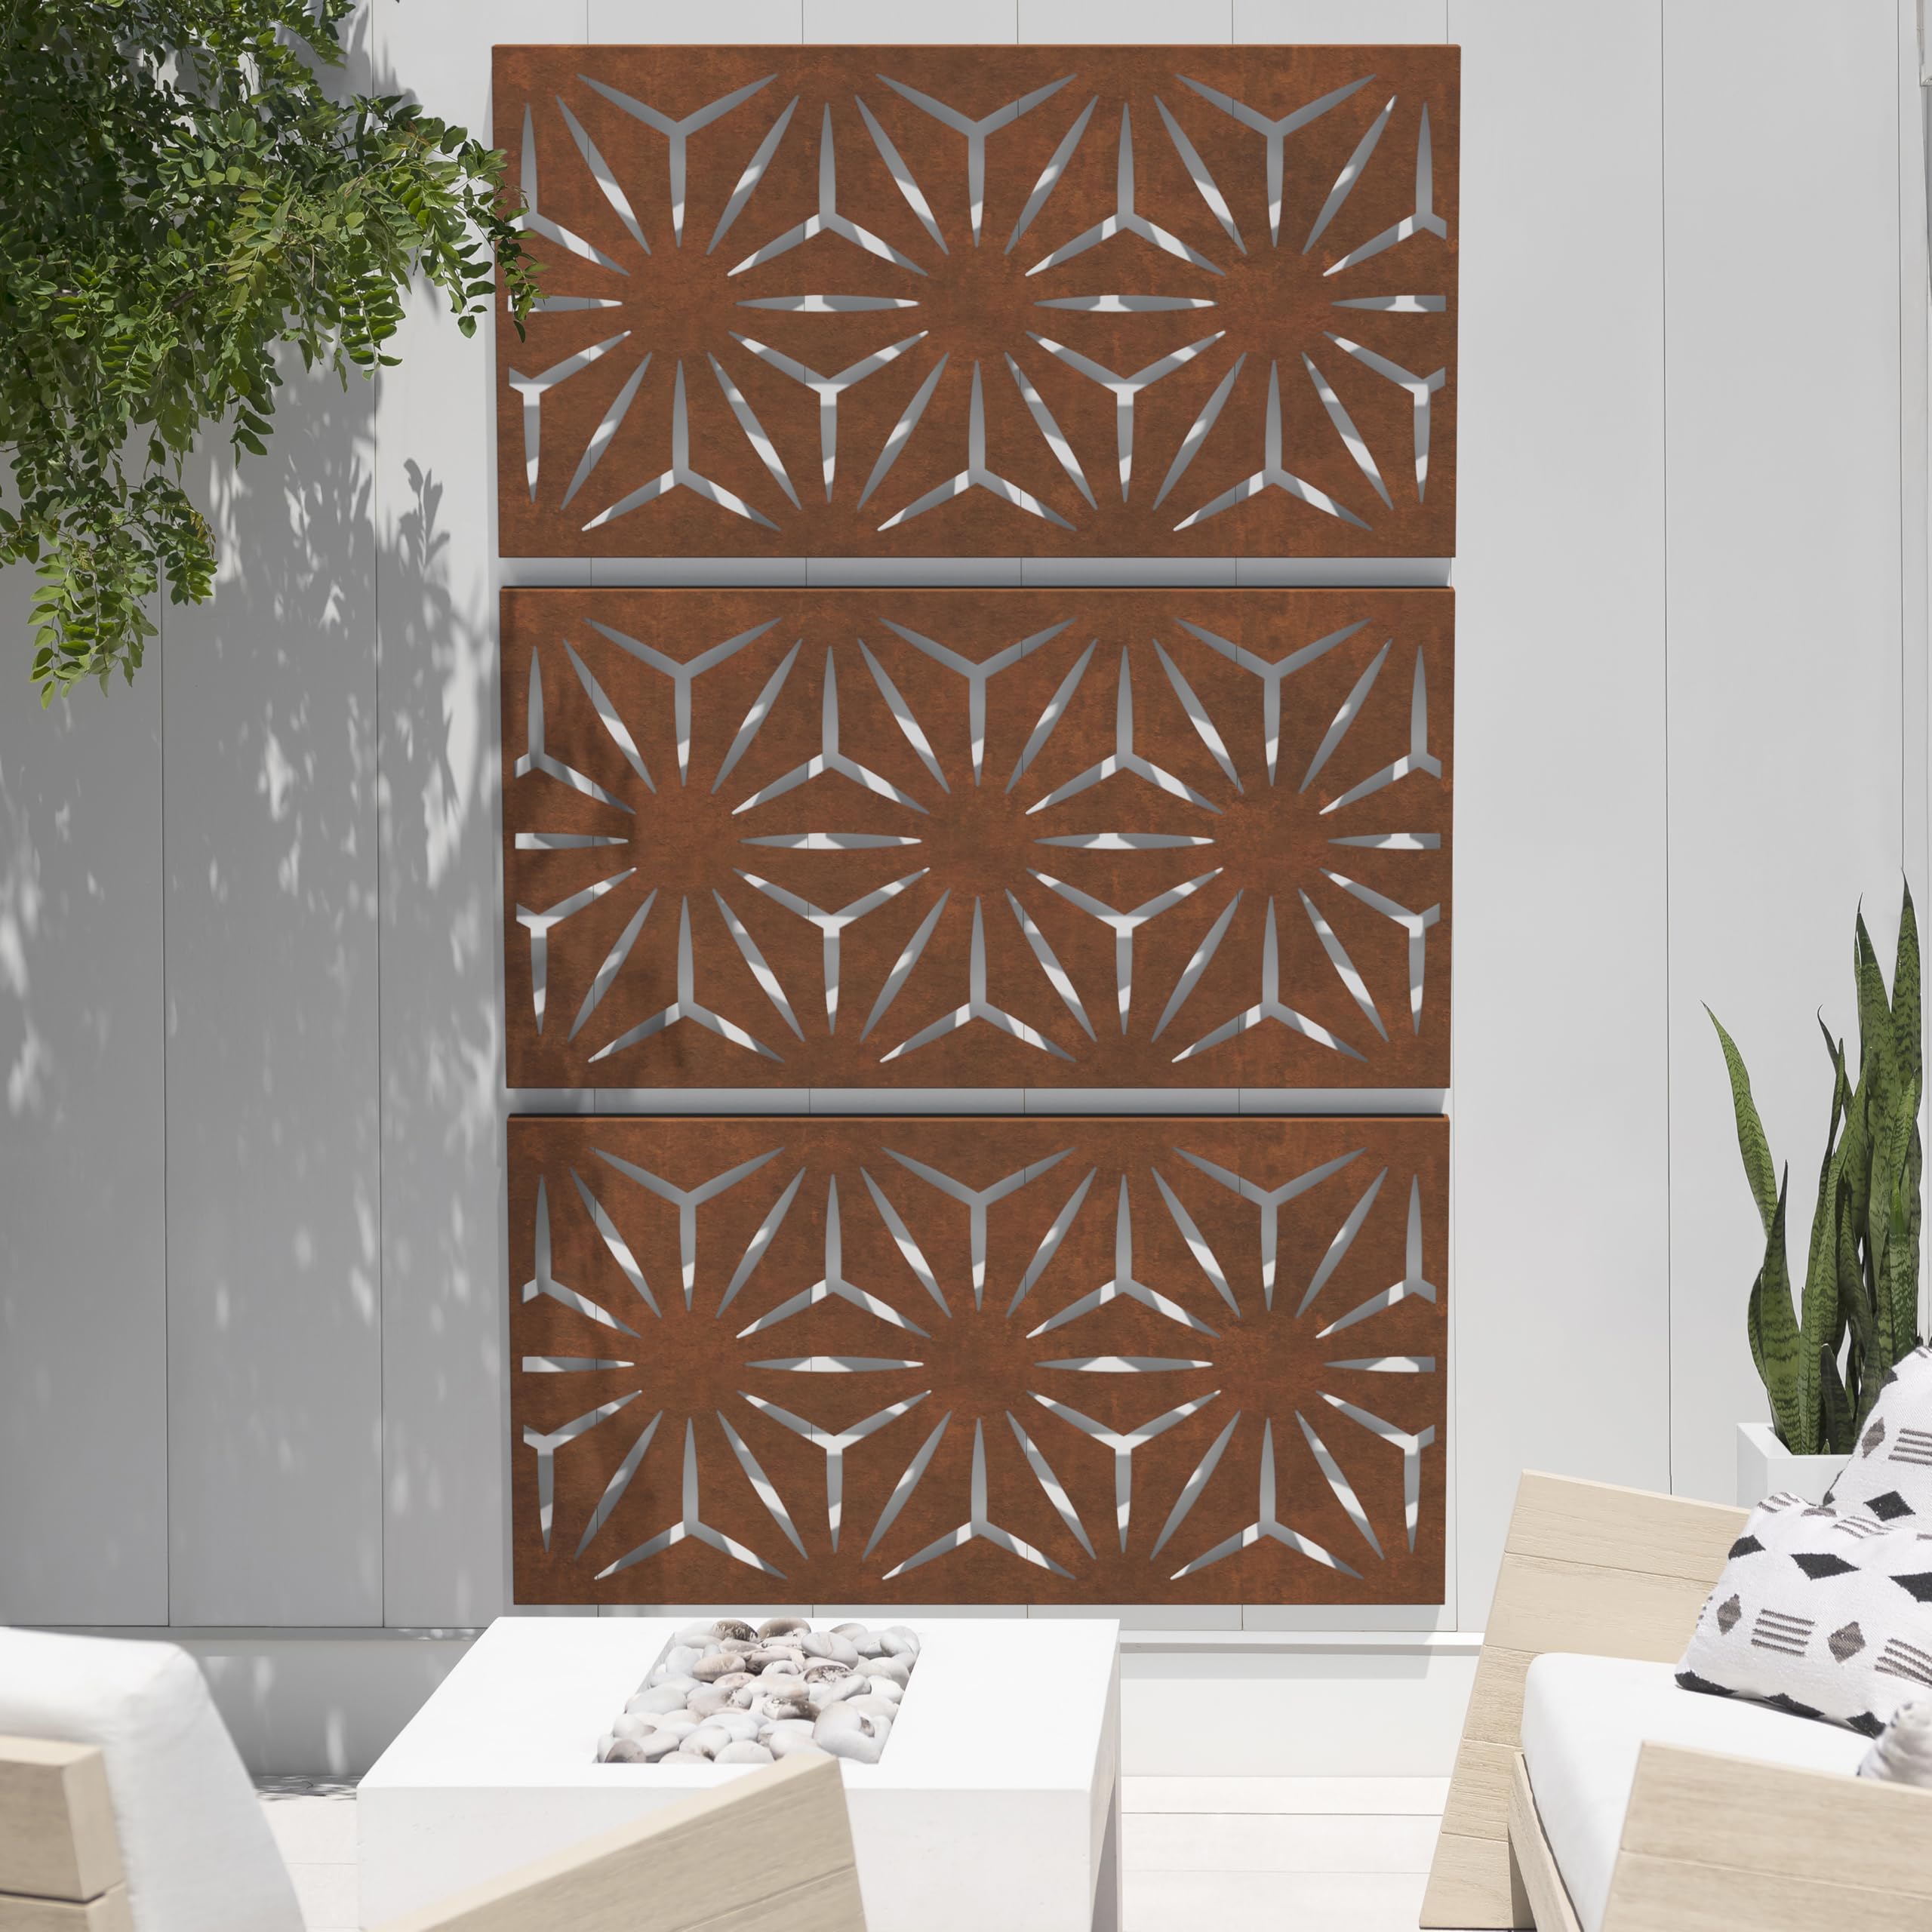
$161.99
|
$15.00
|


“When laying an irregular stone path, the key is in the spacing.”
Aim for a gap of 2 to 4 inches between each stone—this is crucial. Fill this gap with a fine gravel or, for a softer look like this one, a robust ground cover like Dymondia margaretae (Silver Carpet). This spacing is wide enough to create a beautiful mosaic effect but tight enough to ensure a stable, comfortable walking surface without wobbly stones.
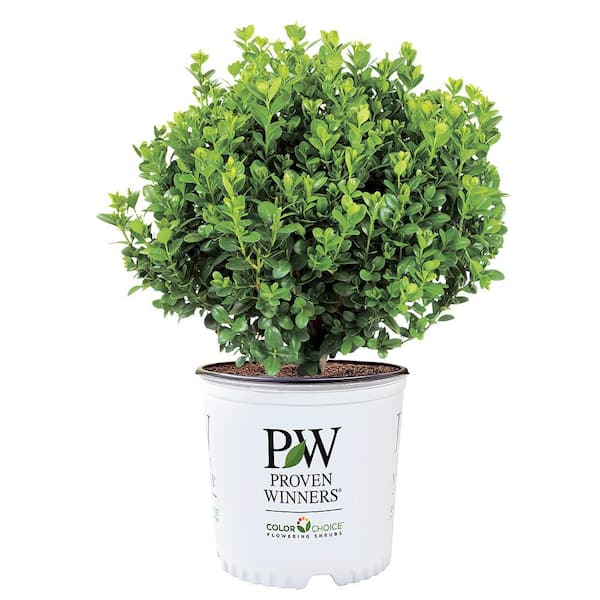
2. Frame a Gravel Path with Sculpted Topiaries and Flowers
This garden gets its classical, romantic feel from a clever visual recipe. Think of it as 50% structured evergreens, 40% loose, colorful perennials, and 10% natural texture. The tall, sculpted topiaries provide strong vertical lines and year-round greenery, acting as the formal backbone. The vibrant pink, purple, and orange flowers create a soft, joyful layer that changes with the seasons. Finally, the simple gravel path provides a humble, textural base that keeps it all from feeling too stuffy.
|
$45.99
|
$35.00
|
$119.95
|
$56.00
|


“Let’s be honest: while stunning, topiaries are a commitment.”
That perfect conical shape requires trimming at least twice a year, typically in early spring and mid-summer, to maintain its form and density. If you neglect them, they can quickly become shaggy and lose their sculptural quality. If you’re a low-maintenance gardener, consider Boxwood or Yew shrubs for a similar evergreen structure without the intensive shaping requirements.
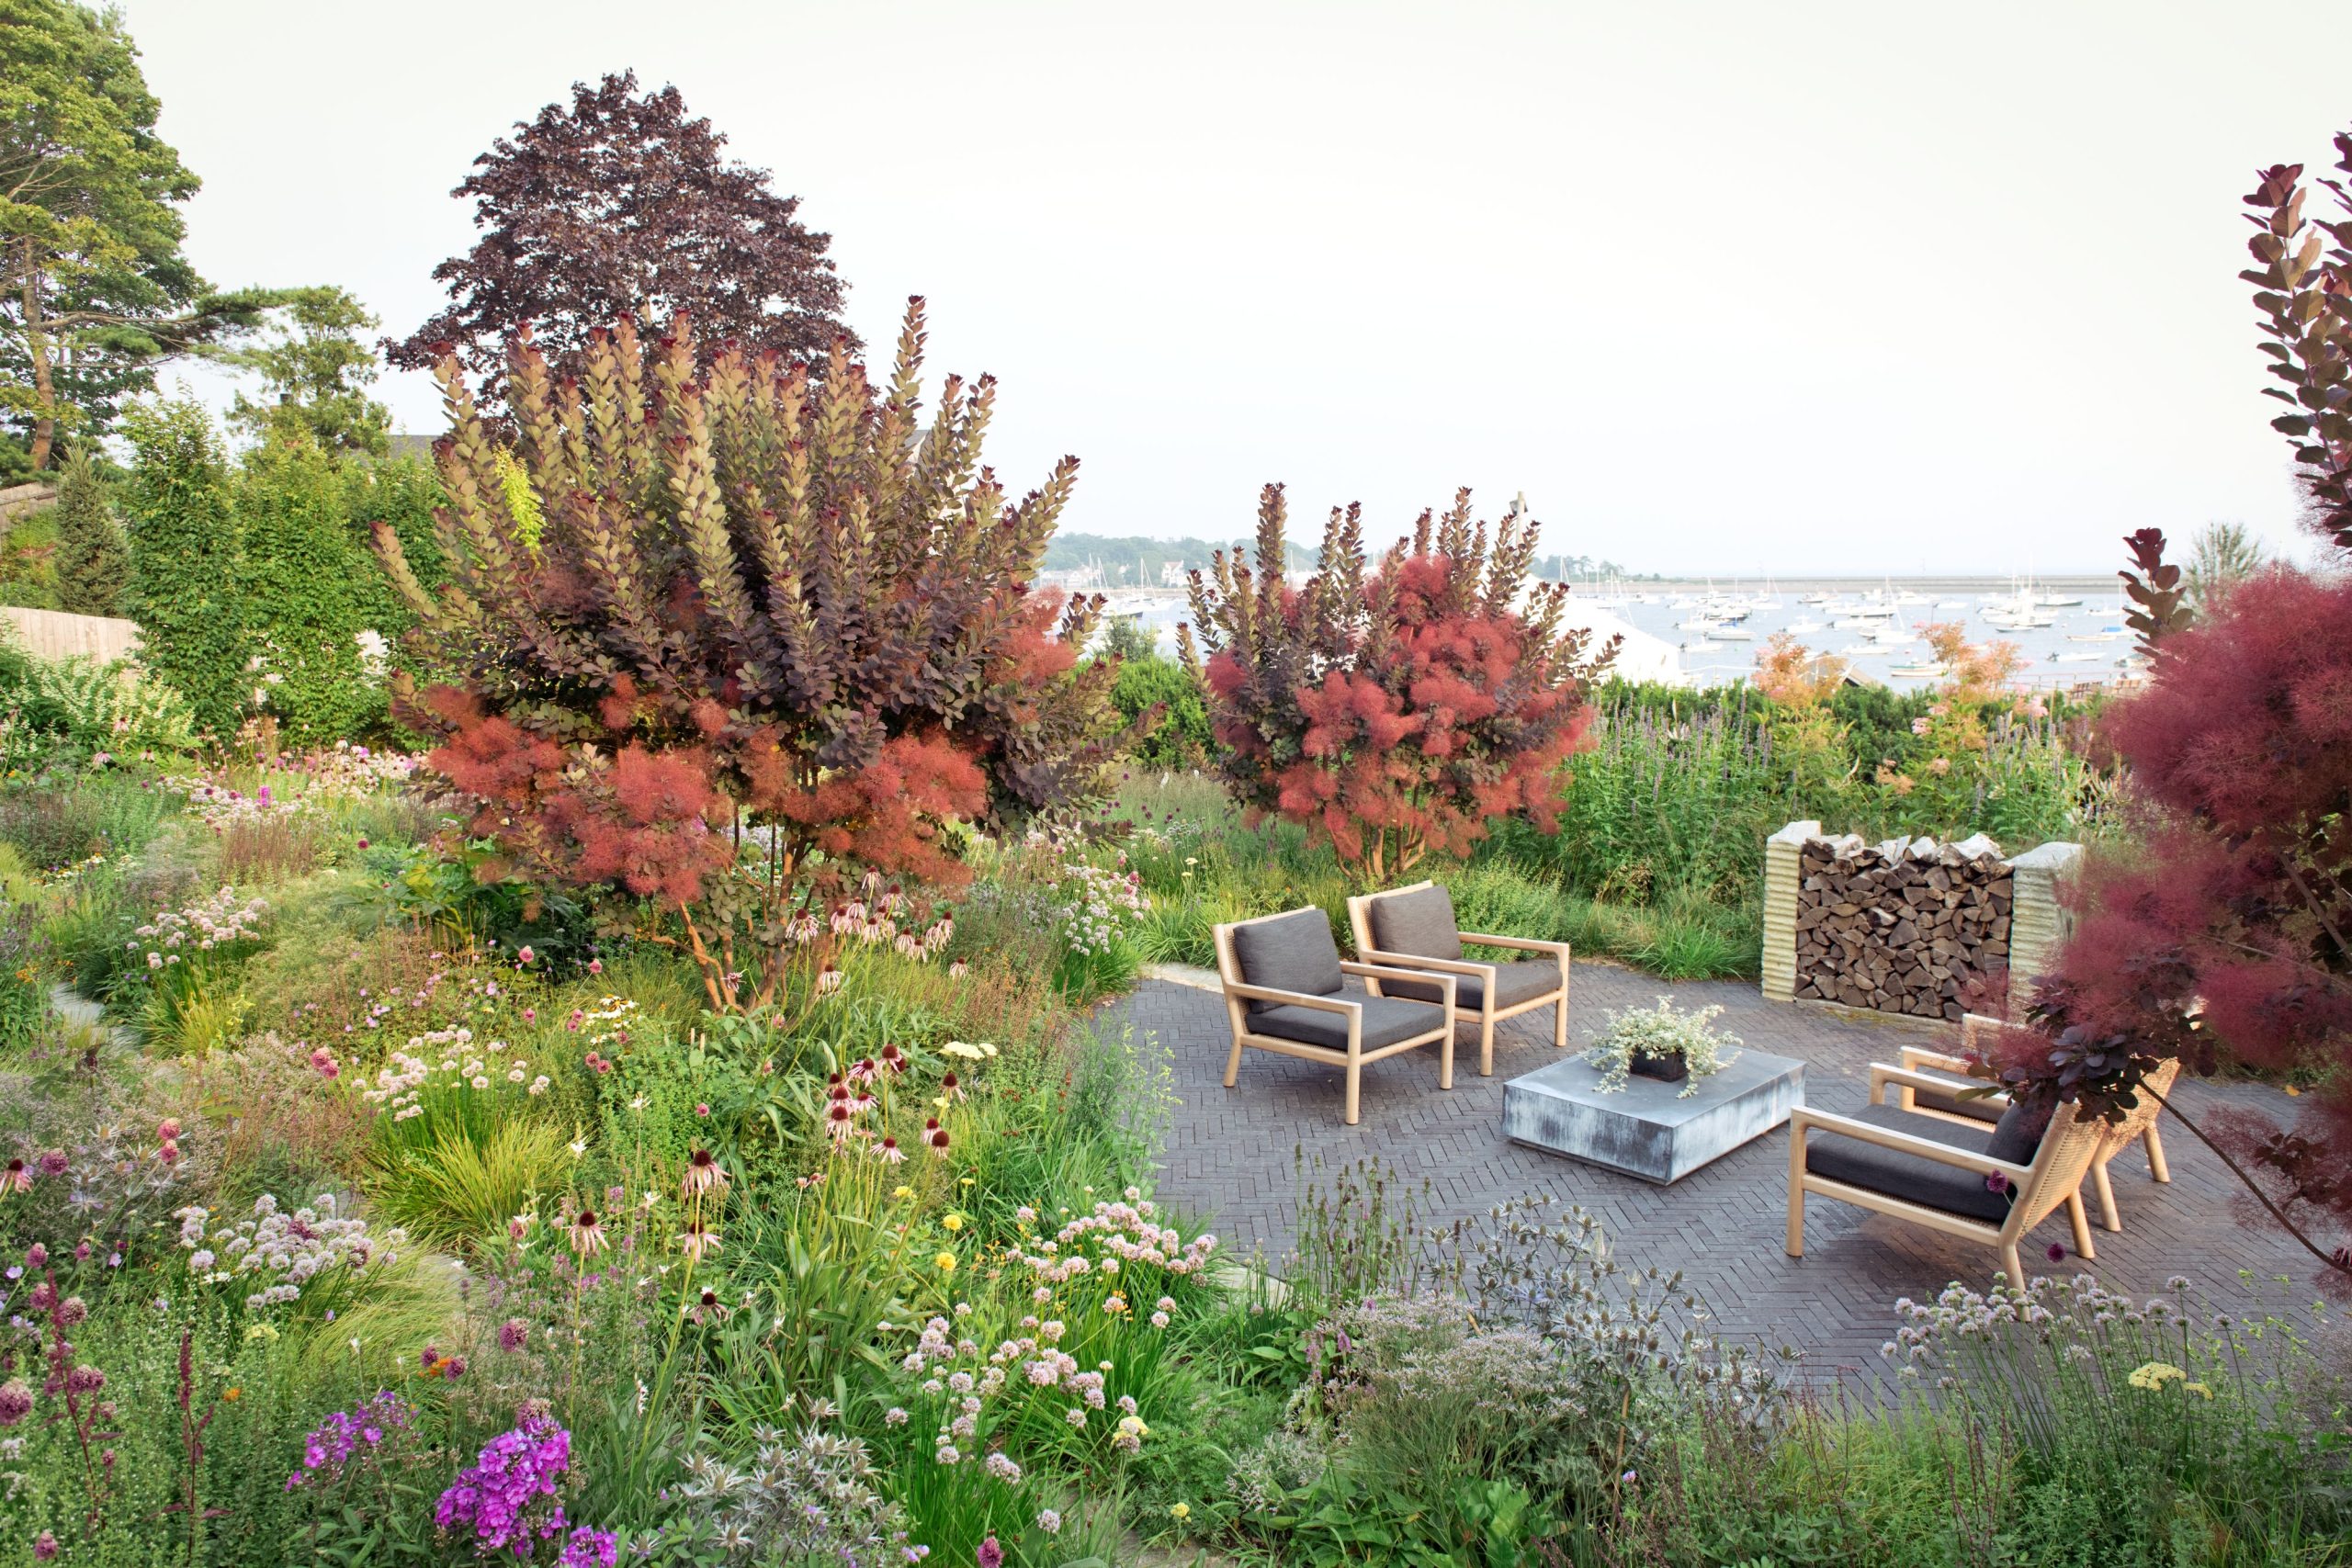
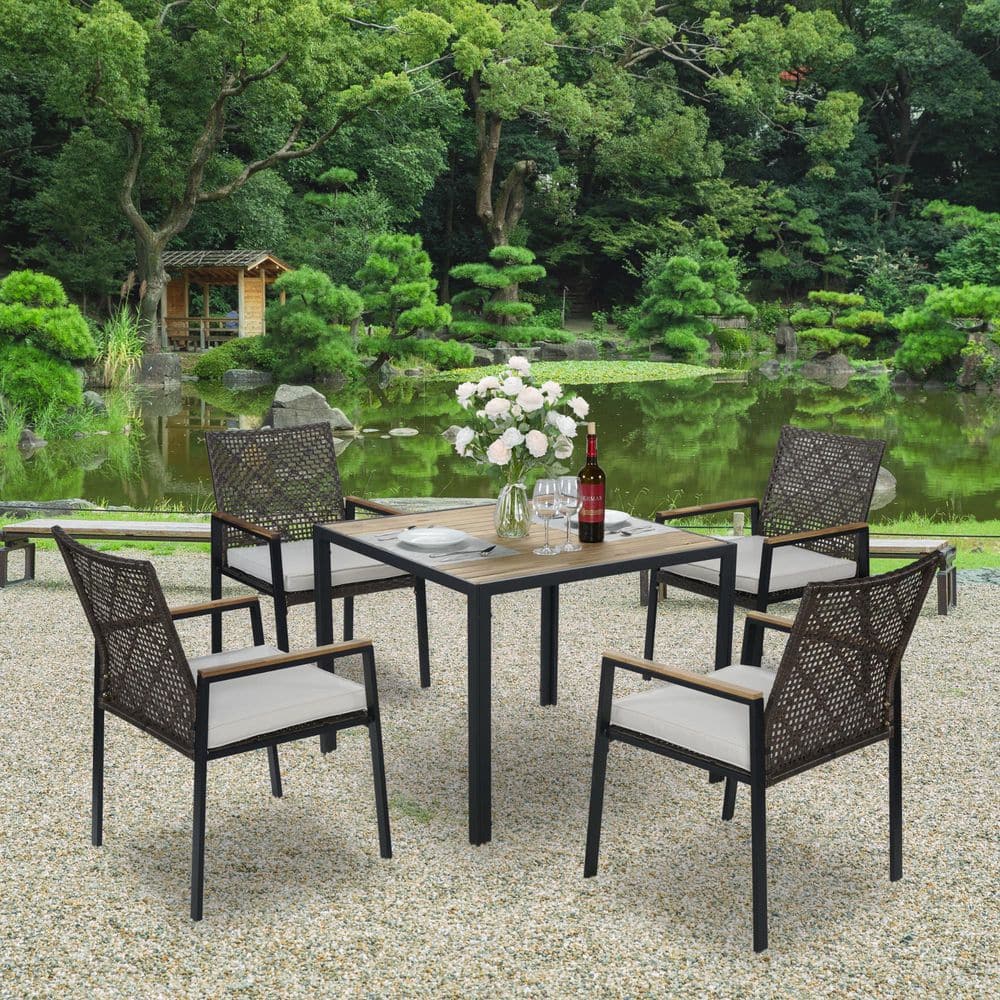
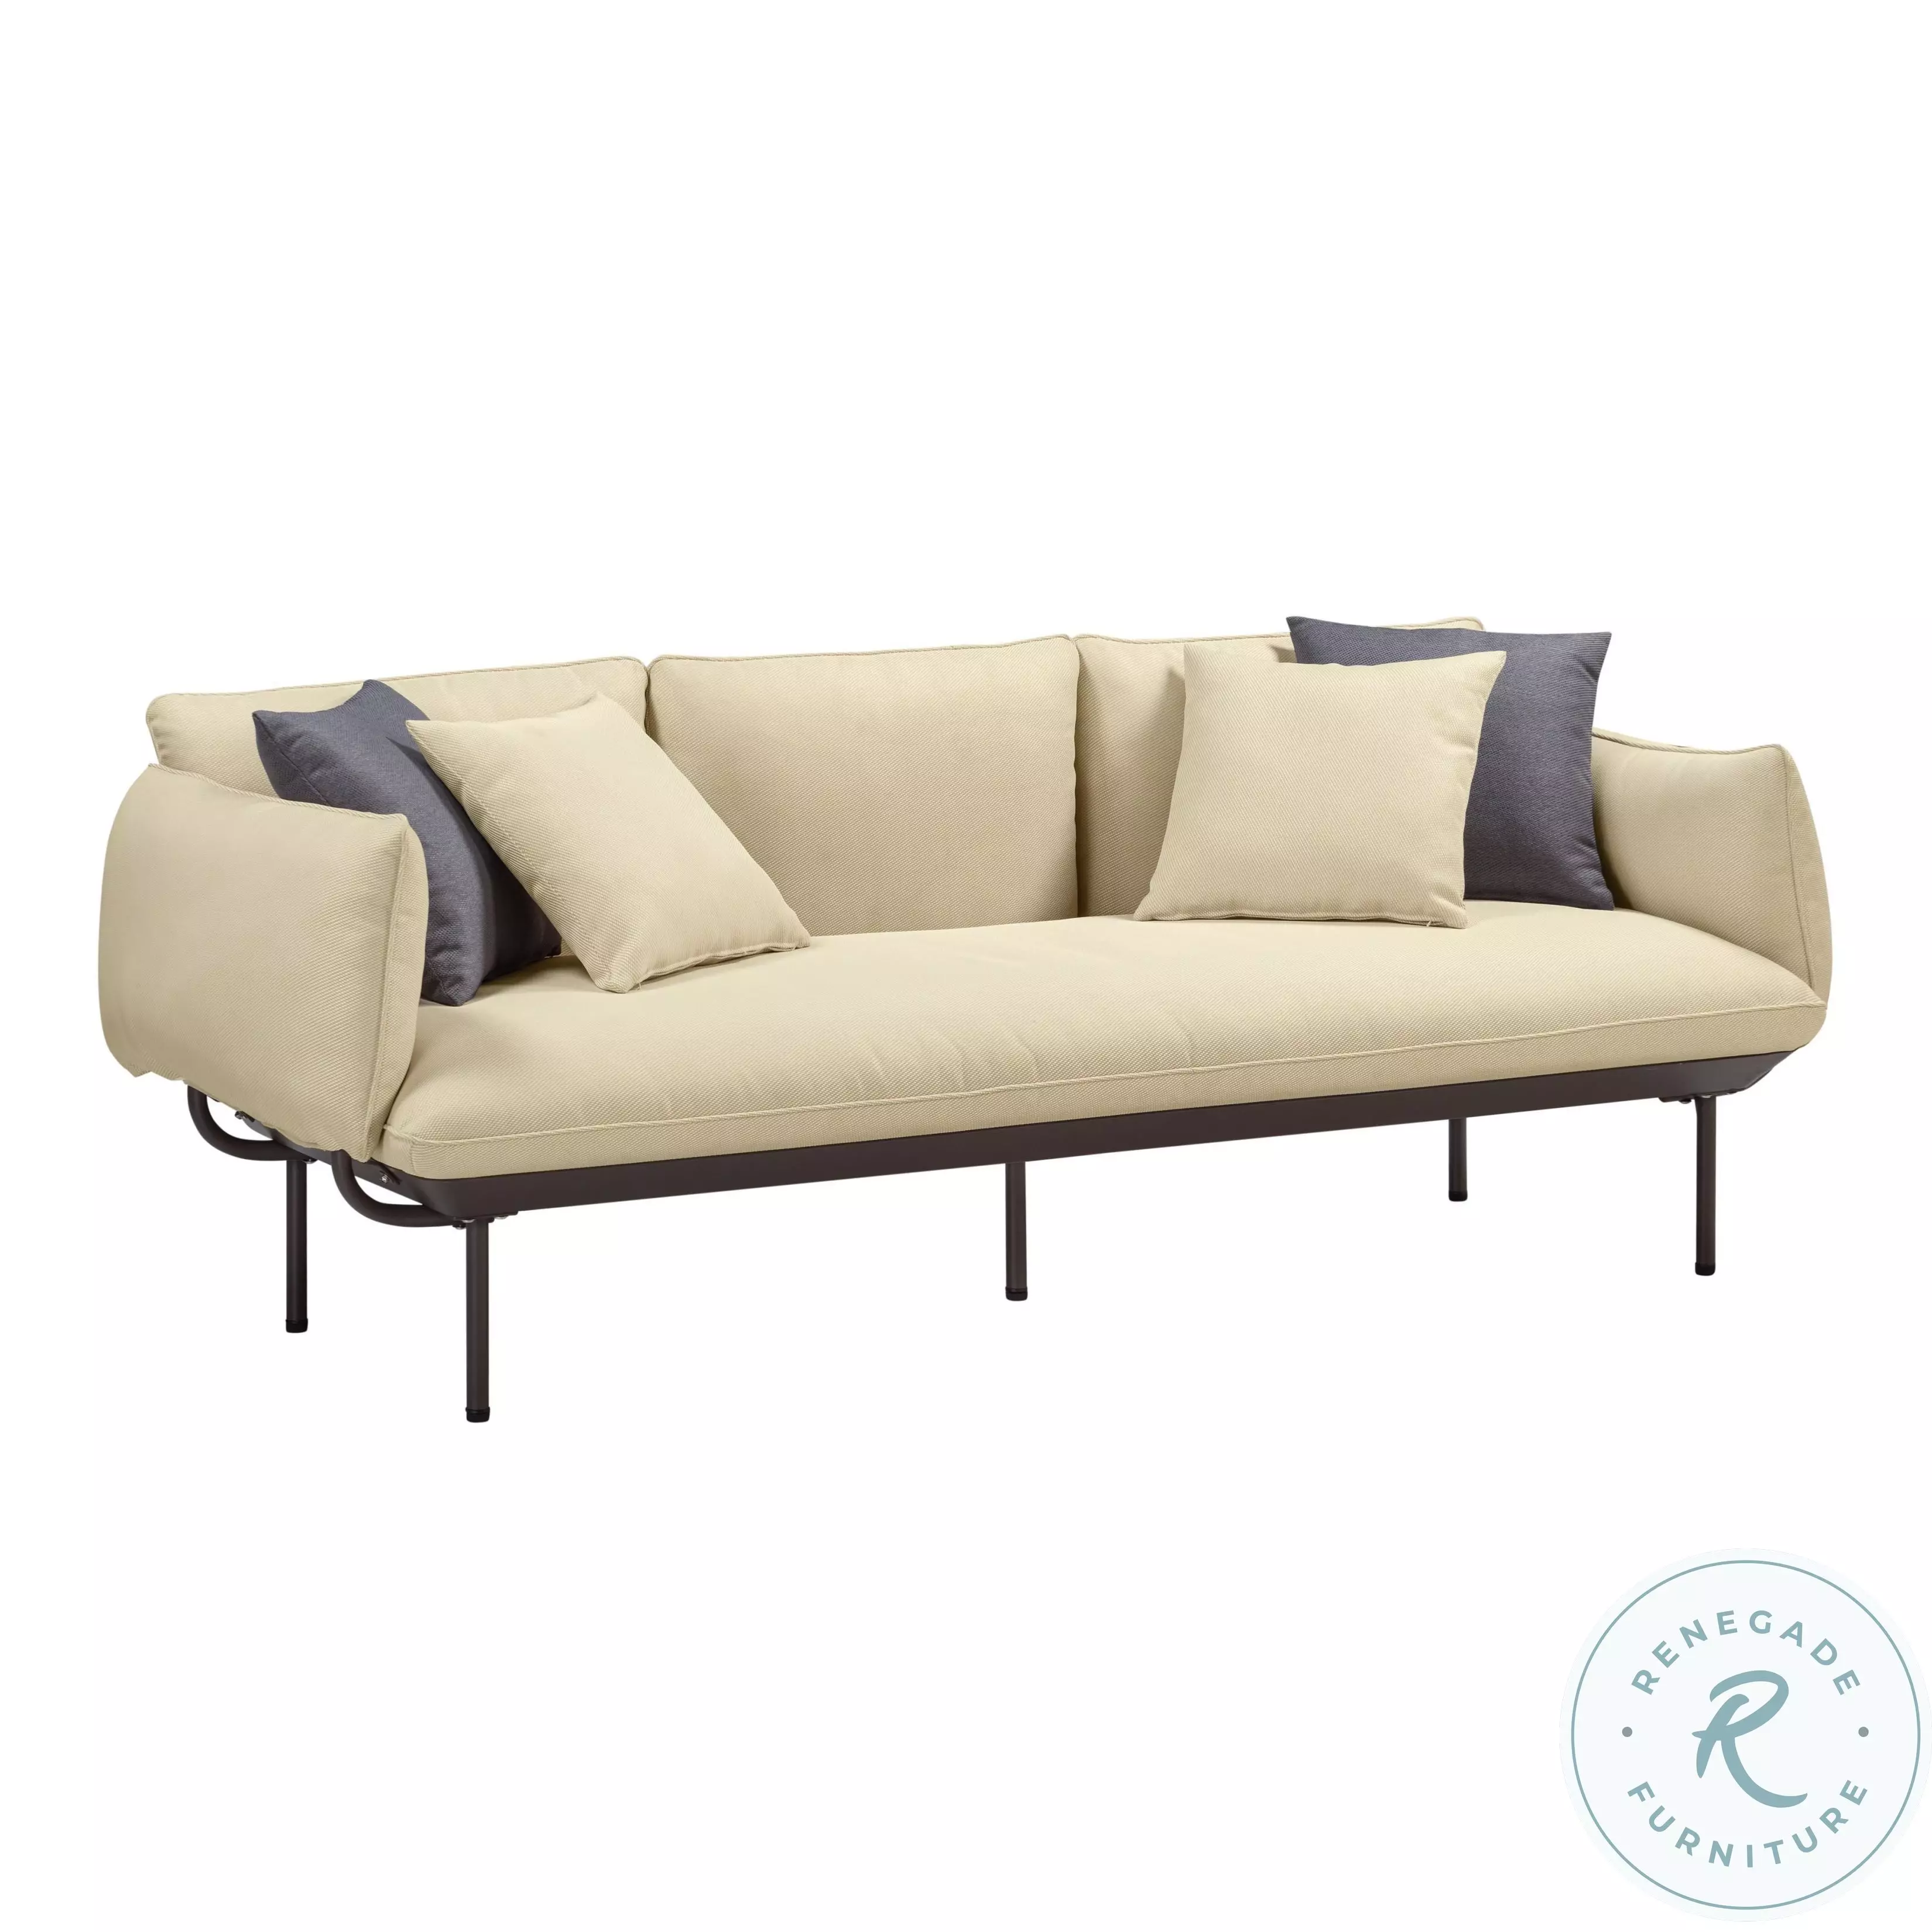
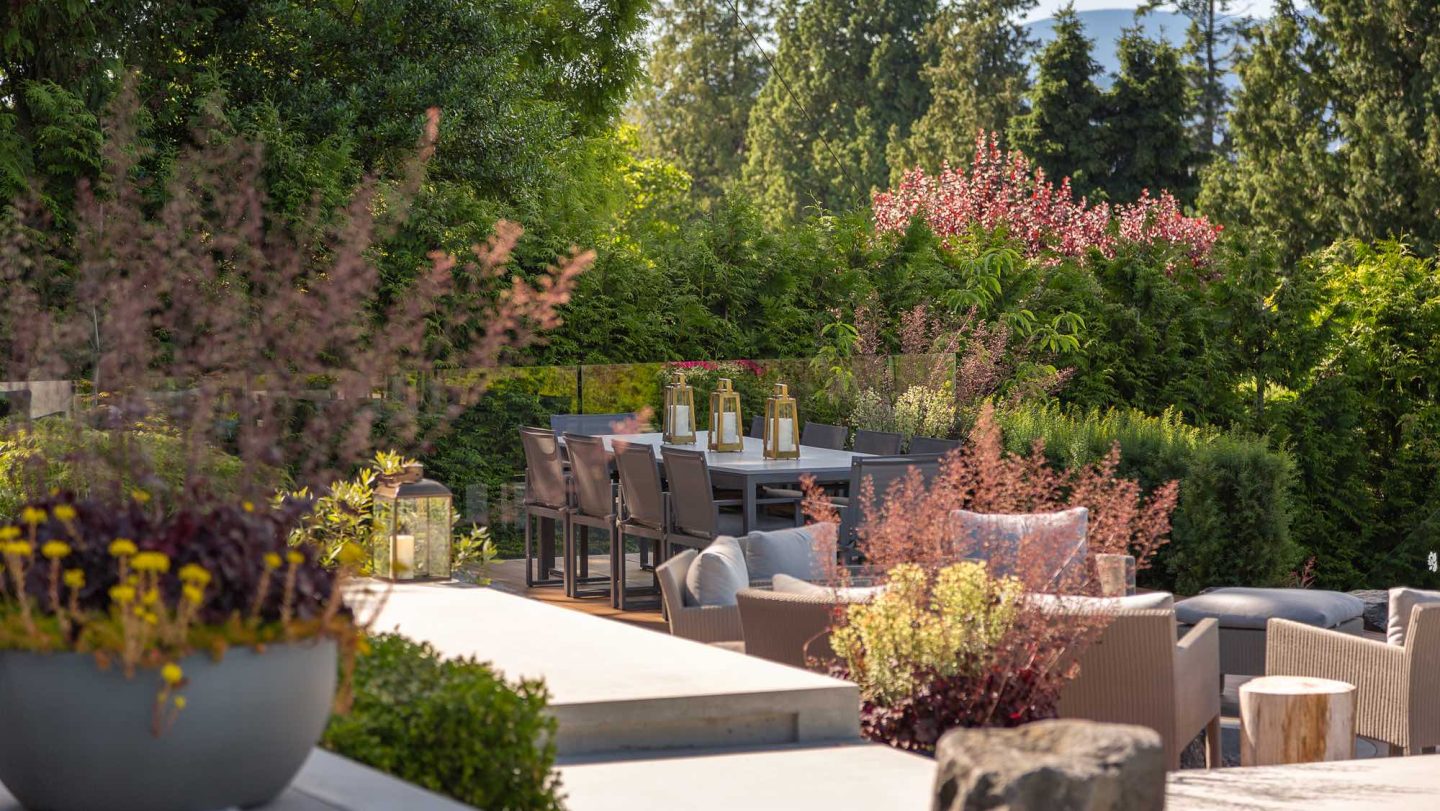
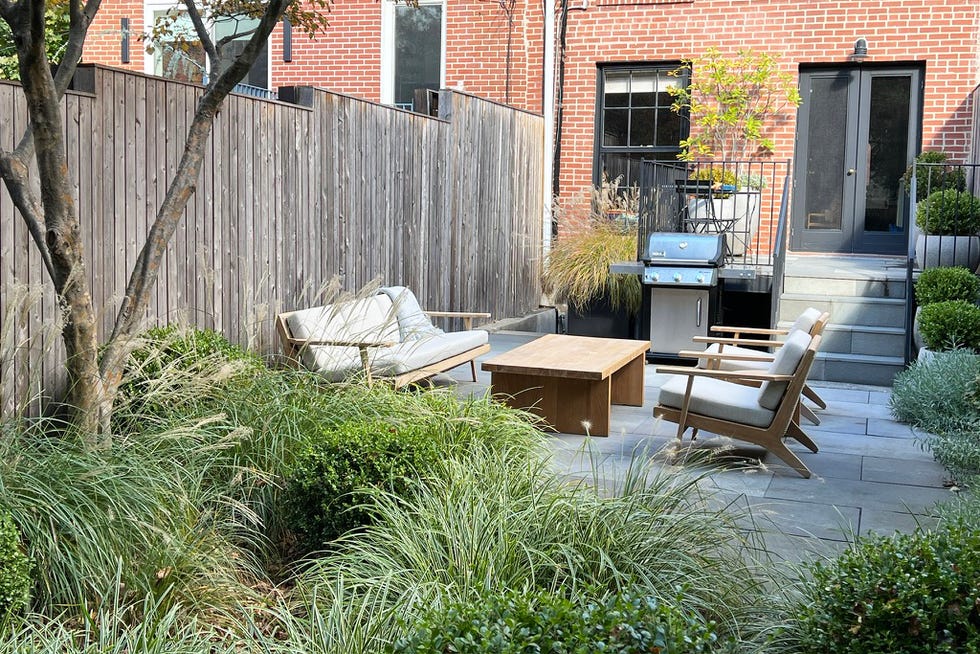
3. Combine Modern Grey Patio Furniture with Lush, Red-Purple Foliage
This is how you do modern without it feeling cold. The combination of clean lines and exuberant planting is just perfect. Here’s a rough breakdown of what a space like this might cost to put together.
|
$87.03
|
$579.00
|
$68.49
|
$22.44
|
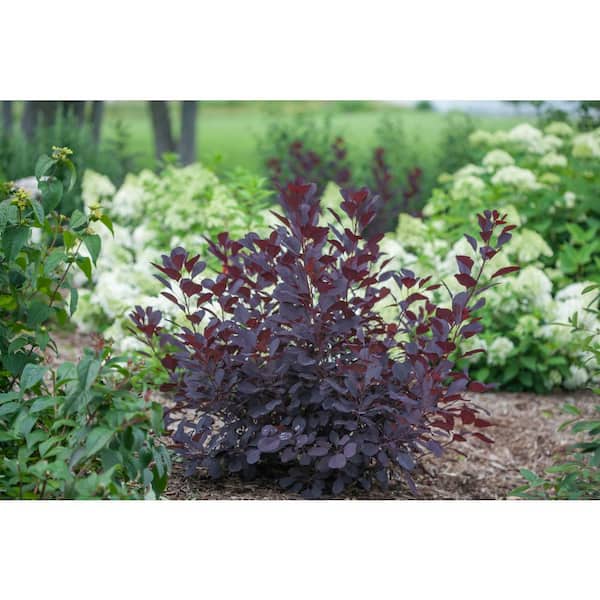
“Main Furniture (2 armchairs, 1 coffee table): $2,500 – $6,000
Textiles (cushions”
- Main Furniture (2 armchairs, 1 coffee table): $2,500 – $6,000
- Textiles (cushions): $400 – $900
- Hardscaping (herringbone brick patio, 200 sq ft): $4,000 – $8,000
- Key Plants (Smokebush, assorted perennials): $700 – $1,500
- TOTAL: $7,600 – $16,400
- Budget alternative: Swap brick for gravel and source chairs from Overstock or Wayfair for a similar vibe at around $3,500 – $6,000.
This look thrives in a medium to large space, ideally at least 15×15 feet (225 sq ft). The key is giving the large reddish-purple smoke bushes enough room to spread out—they can reach 10-15 feet wide! A smaller yard would feel overwhelmed. The generous herringbone patio also needs room to establish its pattern. If you have less space, consider the more contained approach in Idea #31.
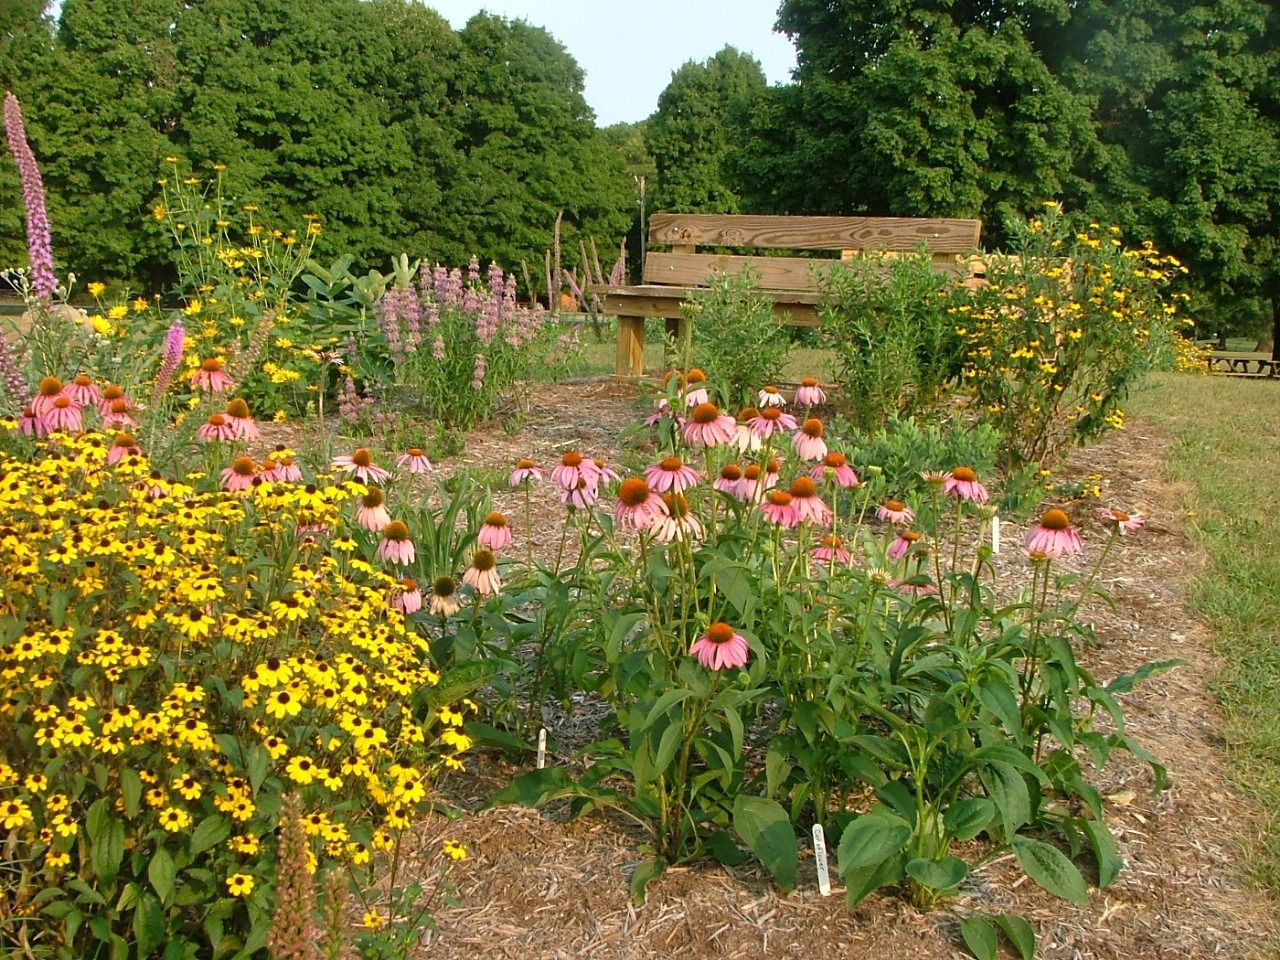
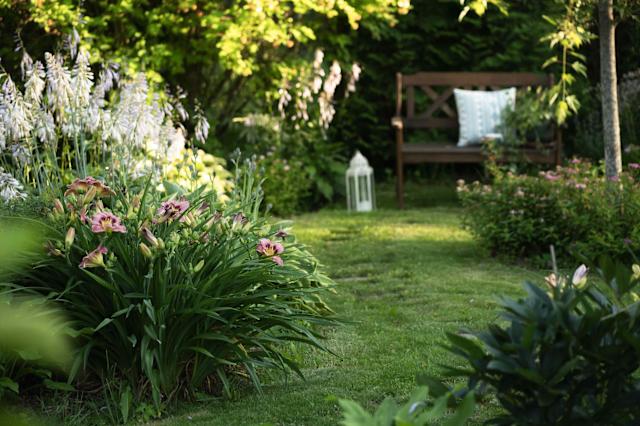
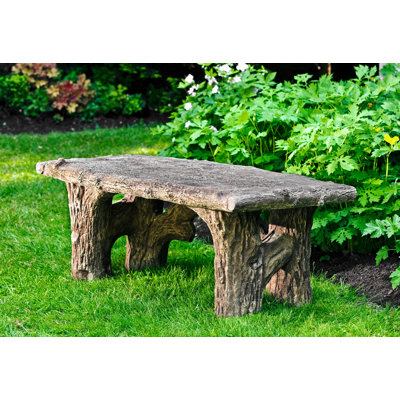
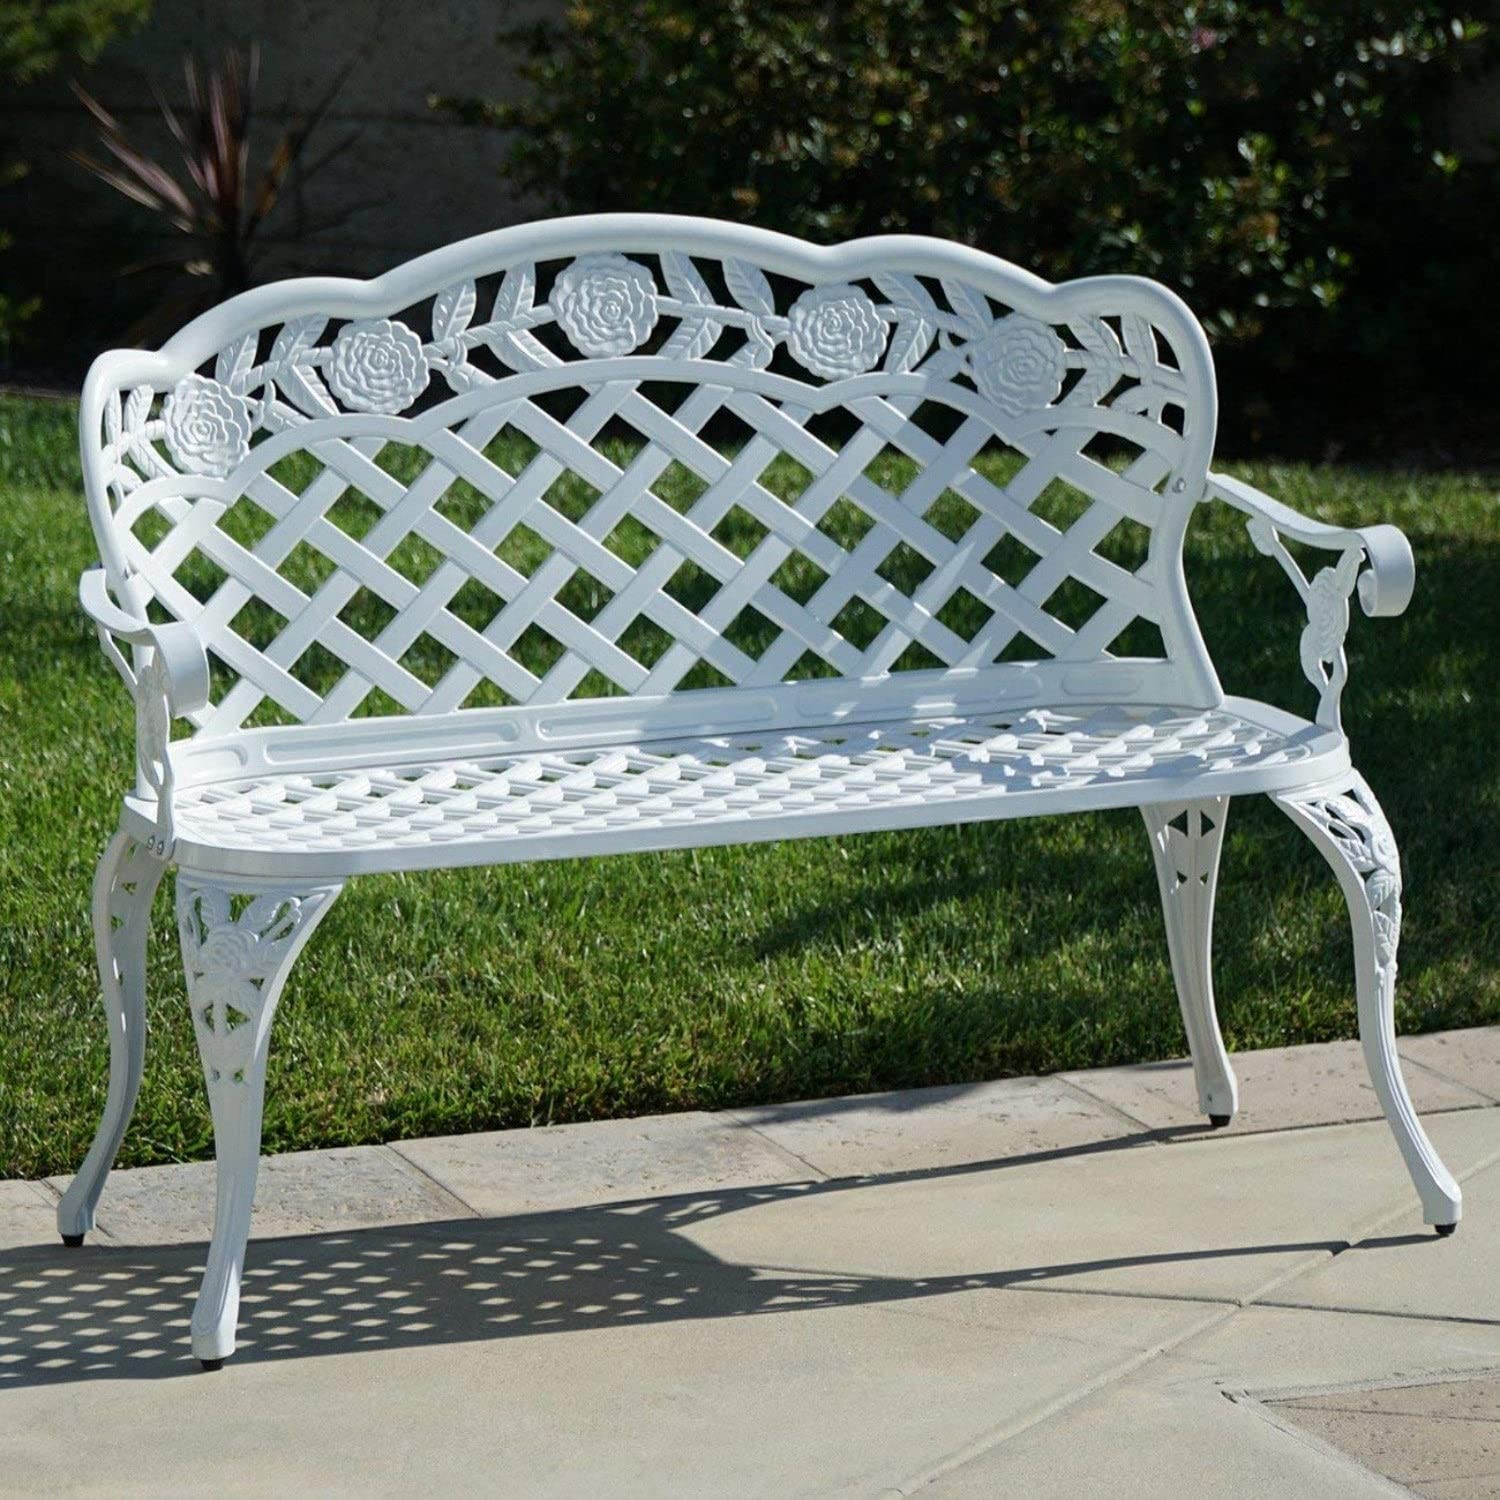
4. Anchor a Wildflower Bed with a Simple Wooden Bench
The single most important element here is the wooden bench. Without it, this is just a beautiful patch of wildflowers. With it, it’s an invitation. The bench provides a destination, a purpose for the grassy path leading to it. It transforms the scene from something you just look at into a place you can experience. It signals that this wildness is intentional, a garden to be lived in, not just admired from a distance.
|
$124.99
|
“A natural, wildflower-style garden is wonderfully low on daily effort, but it isn’t zero-maintenance.”
To keep it looking vibrant and not just weedy, you’ll need to do a major cutback once a year in late fall or early spring, removing dead stems. You’ll also need to be vigilant about pulling invasive weeds a few times a season before they go to seed. The wood chip mulch is your best friend here, as it suppresses weeds and retains moisture, but expect to top it up every 1-2 years.
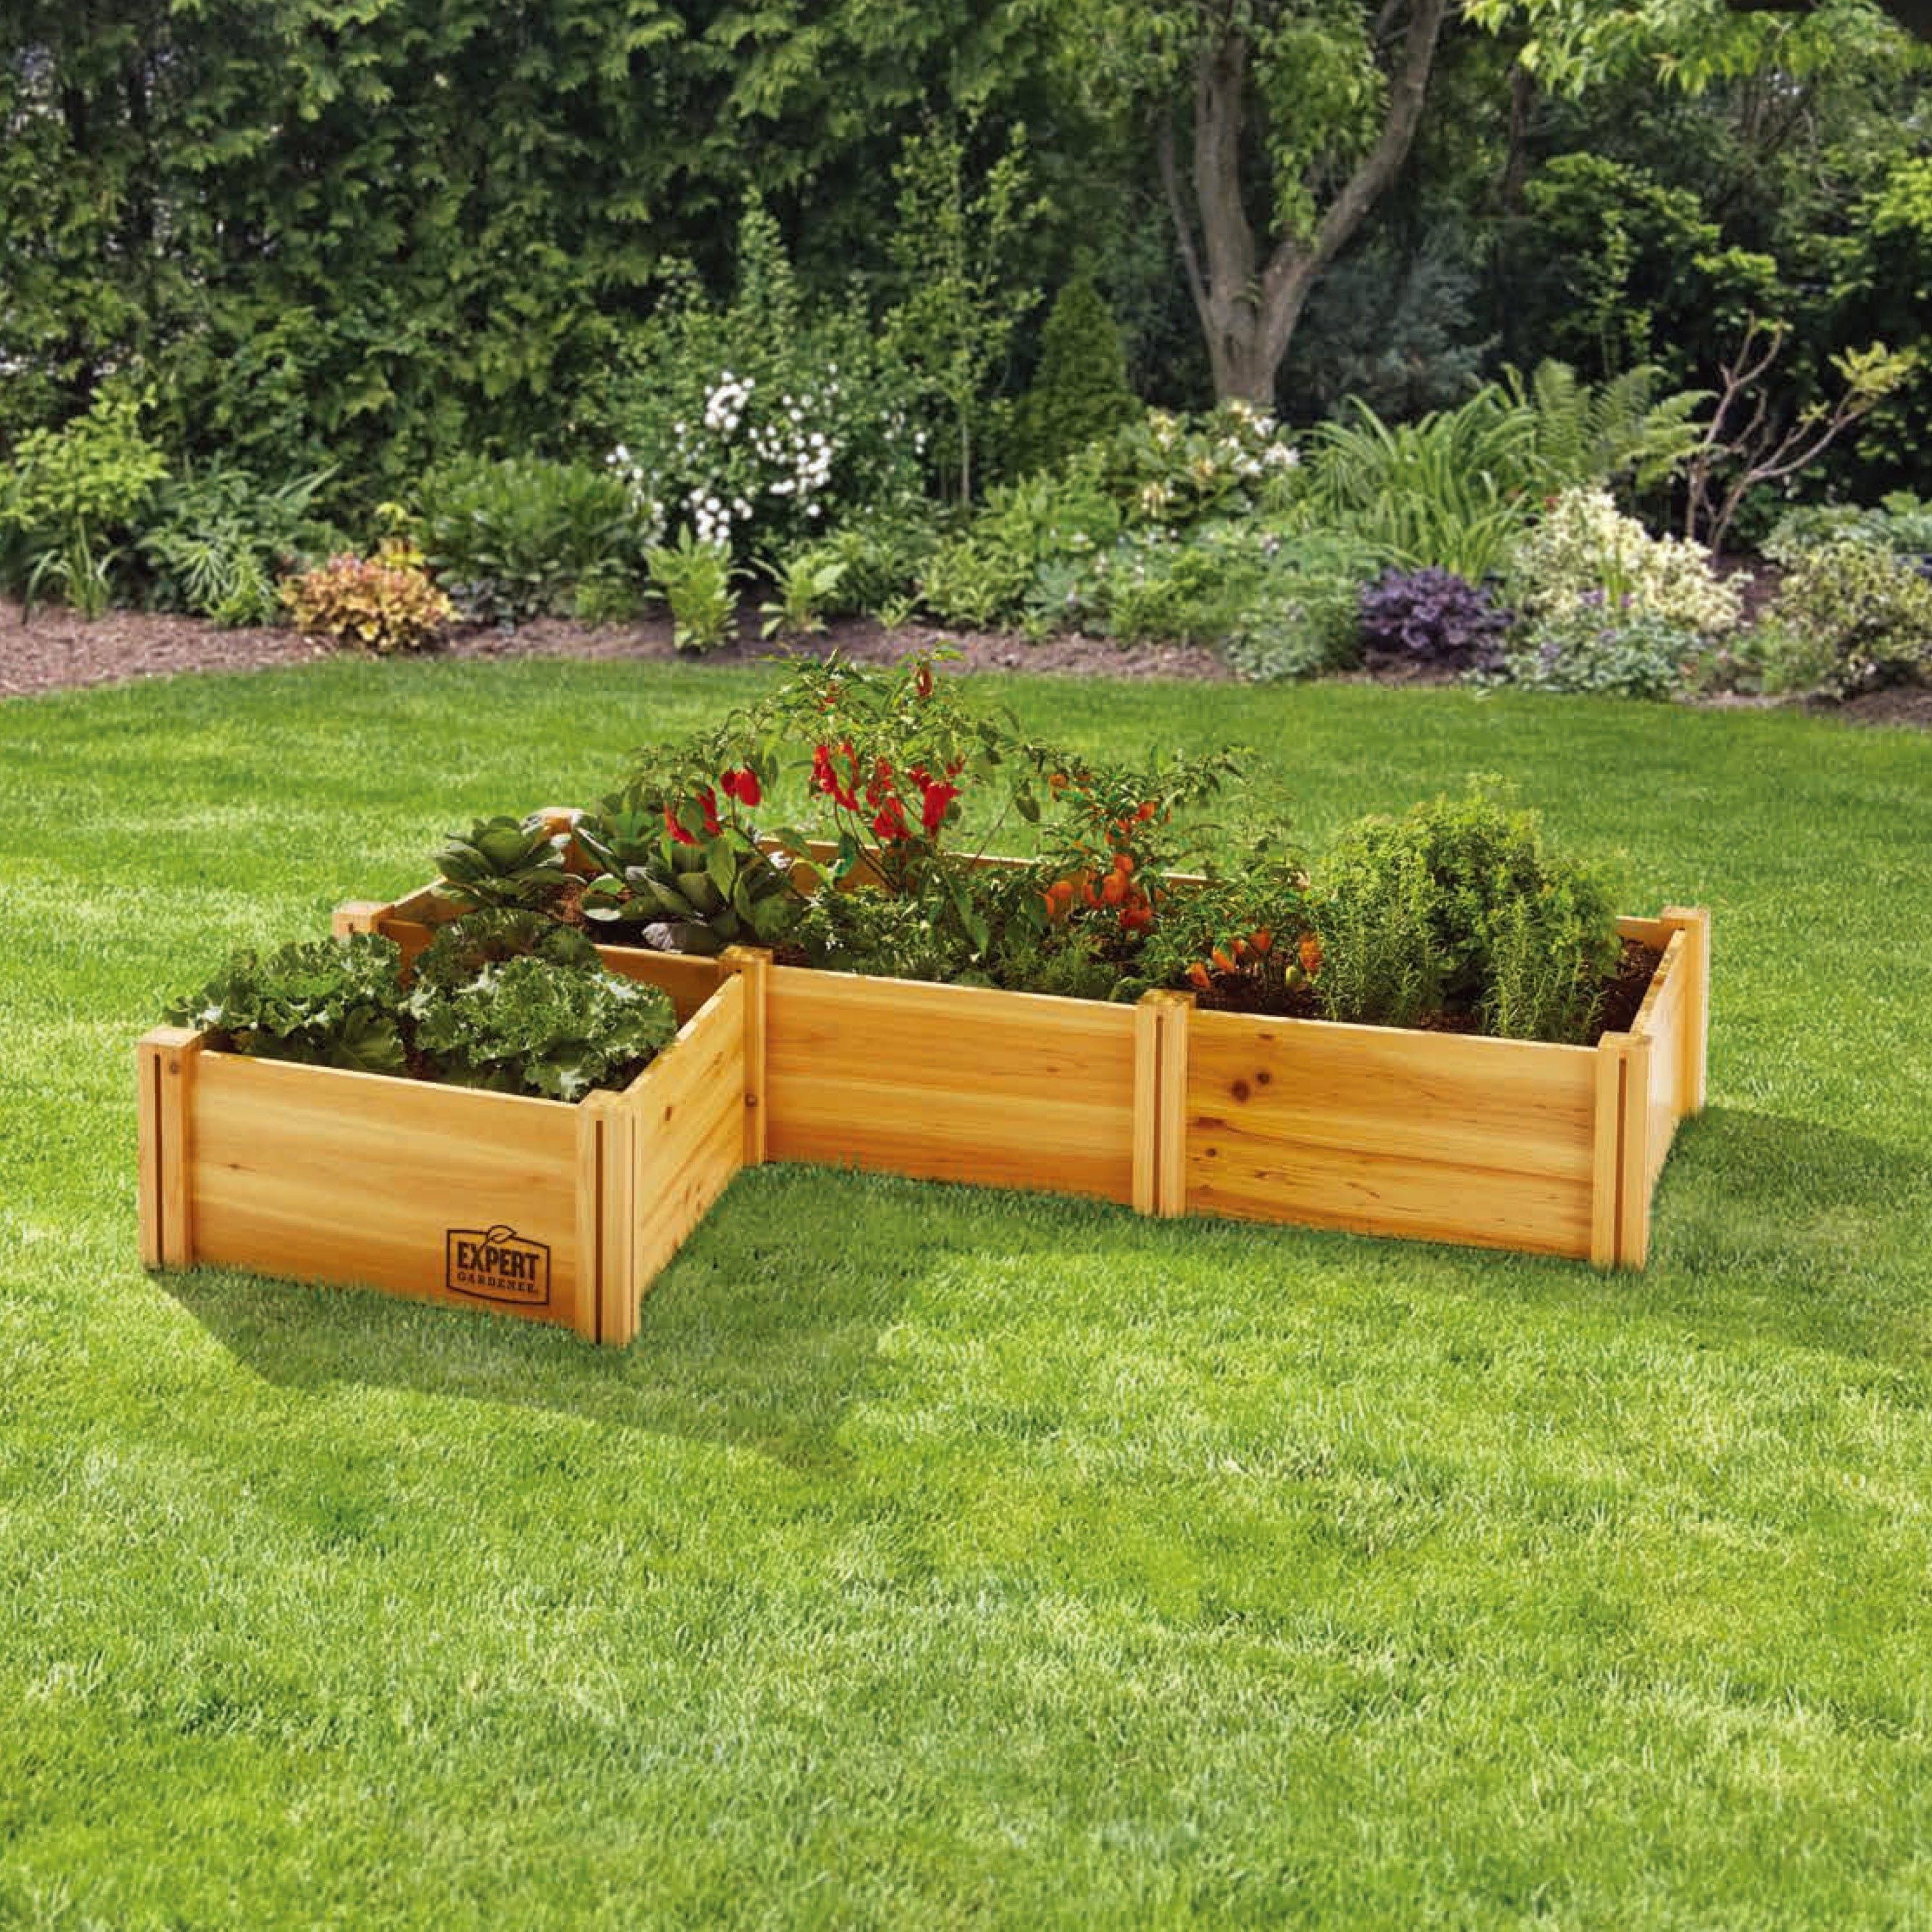
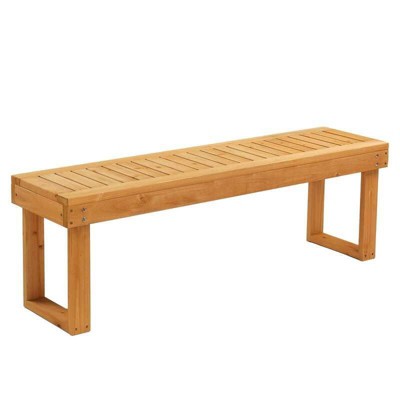
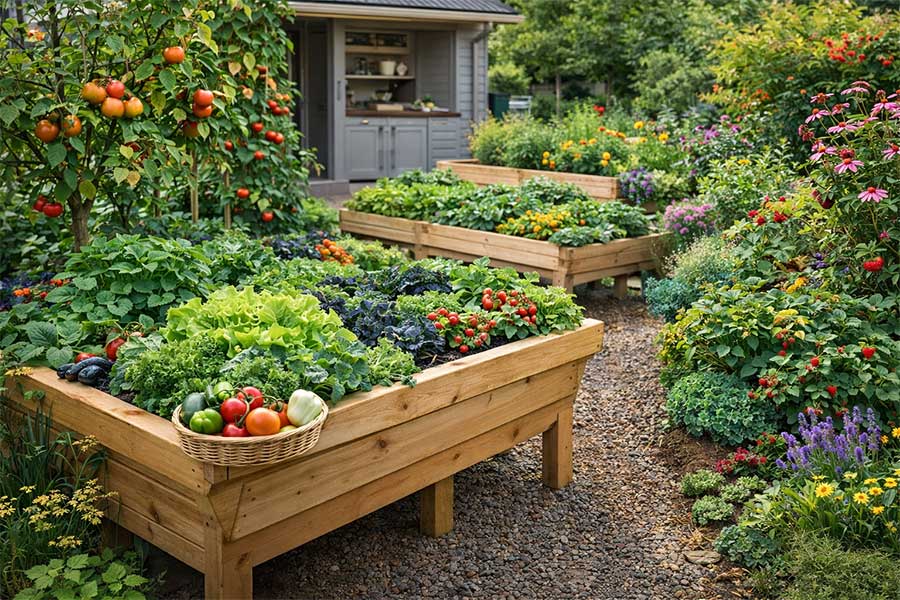
5. Organize Your Veggies in an Allotment-Style Garden with Mixed Borders
Creating productive raised beds is easier than you think. Here’s a quick guide to setting up one bed.
|
$50.49
|
$29.97
|
$40.00
|
$74.00
|

“Time: 2-3 hours.”
Cost: $100-$300.
Measure and mark a level spot for your bed (e.g., 4×8 feet).
Assemble your raised bed kit or build a frame from untreated cedar or pine.
Line the bottom with cardboard to suppress weeds. This will decompose over time.
Fill with a mix of 60% compost and 40% topsoil. Avoid using 100% bagged garden soil, as it can be too dense.
Plant your vegetable starts or seeds according to their spacing needs.
The “good life” ethos is making a huge comeback, and allotment gardens are the perfect expression of it. As we spend more time at home, there’s a growing desire to be more self-sufficient and connected to our food source. This isn’t just about saving money on groceries; it’s about the satisfaction of growing something with your own hands. Pinterest boards are overflowing with aesthetic kitchen gardens, showing that practicality and beauty can absolutely go hand-in-hand in 2026.
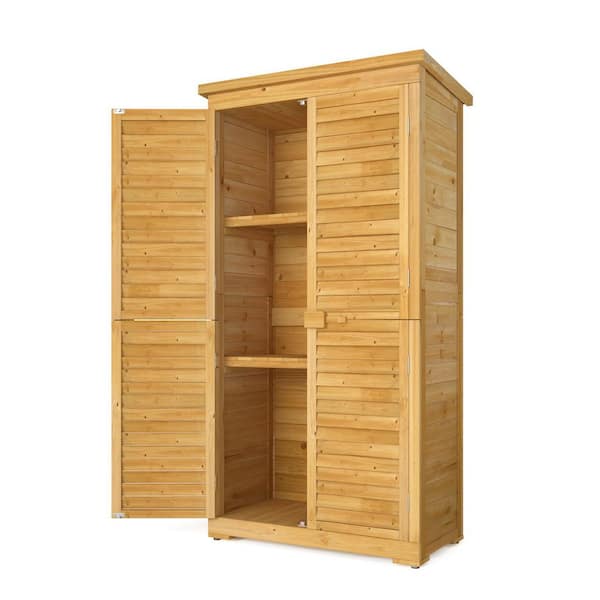
6. Build a Bountiful Edible Garden with Wooden Raised Beds and a Potting Shed
You don’t need a custom-built setup to achieve this productive garden vibe. You can get this look for much less. IKEA’s ÄPPLARÖ series has wooden outdoor storage that can mimic a potting station for around $150. For raised beds, skip the expensive kits and search for untreated pine or cedar boards at Home Depot—you can build a 4×8 bed for under $100. Check Facebook Marketplace for used garden sheds; a coat of paint can work wonders. This functional and beautiful setup is achievable for under $1,000. Compare this to the more organized allotment style in Idea #5.
|
$199.99
|
$24.47
|
$137.08
|
$32.42
|

“A gravel path is a fantastic, budget-friendly choice, but be prepared for the reality of it.”
Over time, weeds will inevitably start to poke through, even if you put down landscape fabric. You’ll need to spend some time weeding it every few weeks or hit it with a natural herbicide. Gravel also travels—it gets kicked into beds and onto lawns—so an edging of some kind (like the subtle wood shown here) is essential to keep it contained.
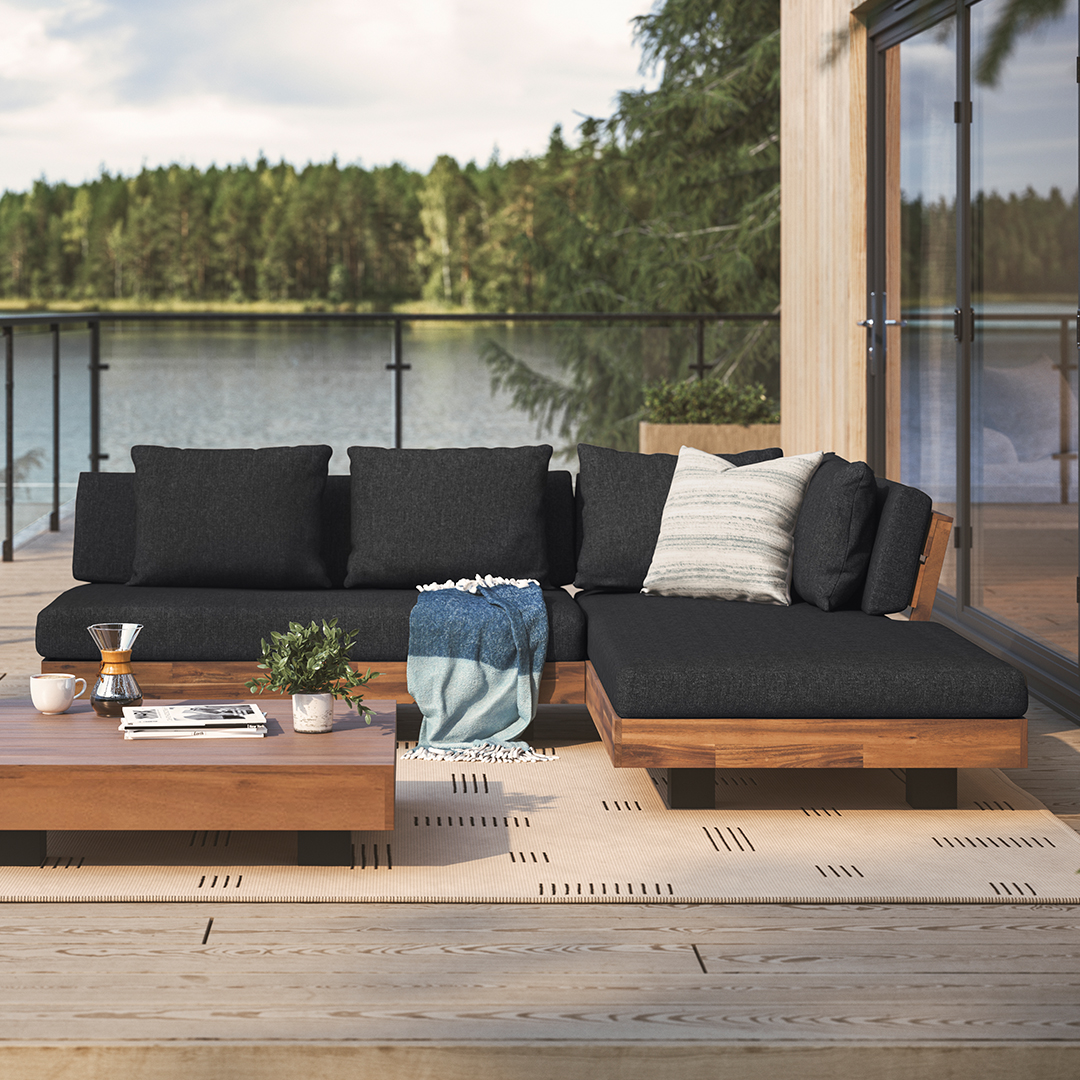
7. Curve a Wooden Deck Around a Modern Outdoor Sectional
This design really shines in a larger backyard, at least 30 feet wide. The grandeur of the curved deck and the generous size of the grey wicker sectional demand space to breathe. The path of large rectangular pavers also works best with a longer run to establish its rhythm. In a smaller space, the different elements—deck, stone path, lawn, pond—would feel chaotic and cramped. This is a look that relies on having enough negative space (the manicured lawn) to balance the feature areas.
|
$138.57
|
$629.99
|
$50.46
|
$1,613.11
|
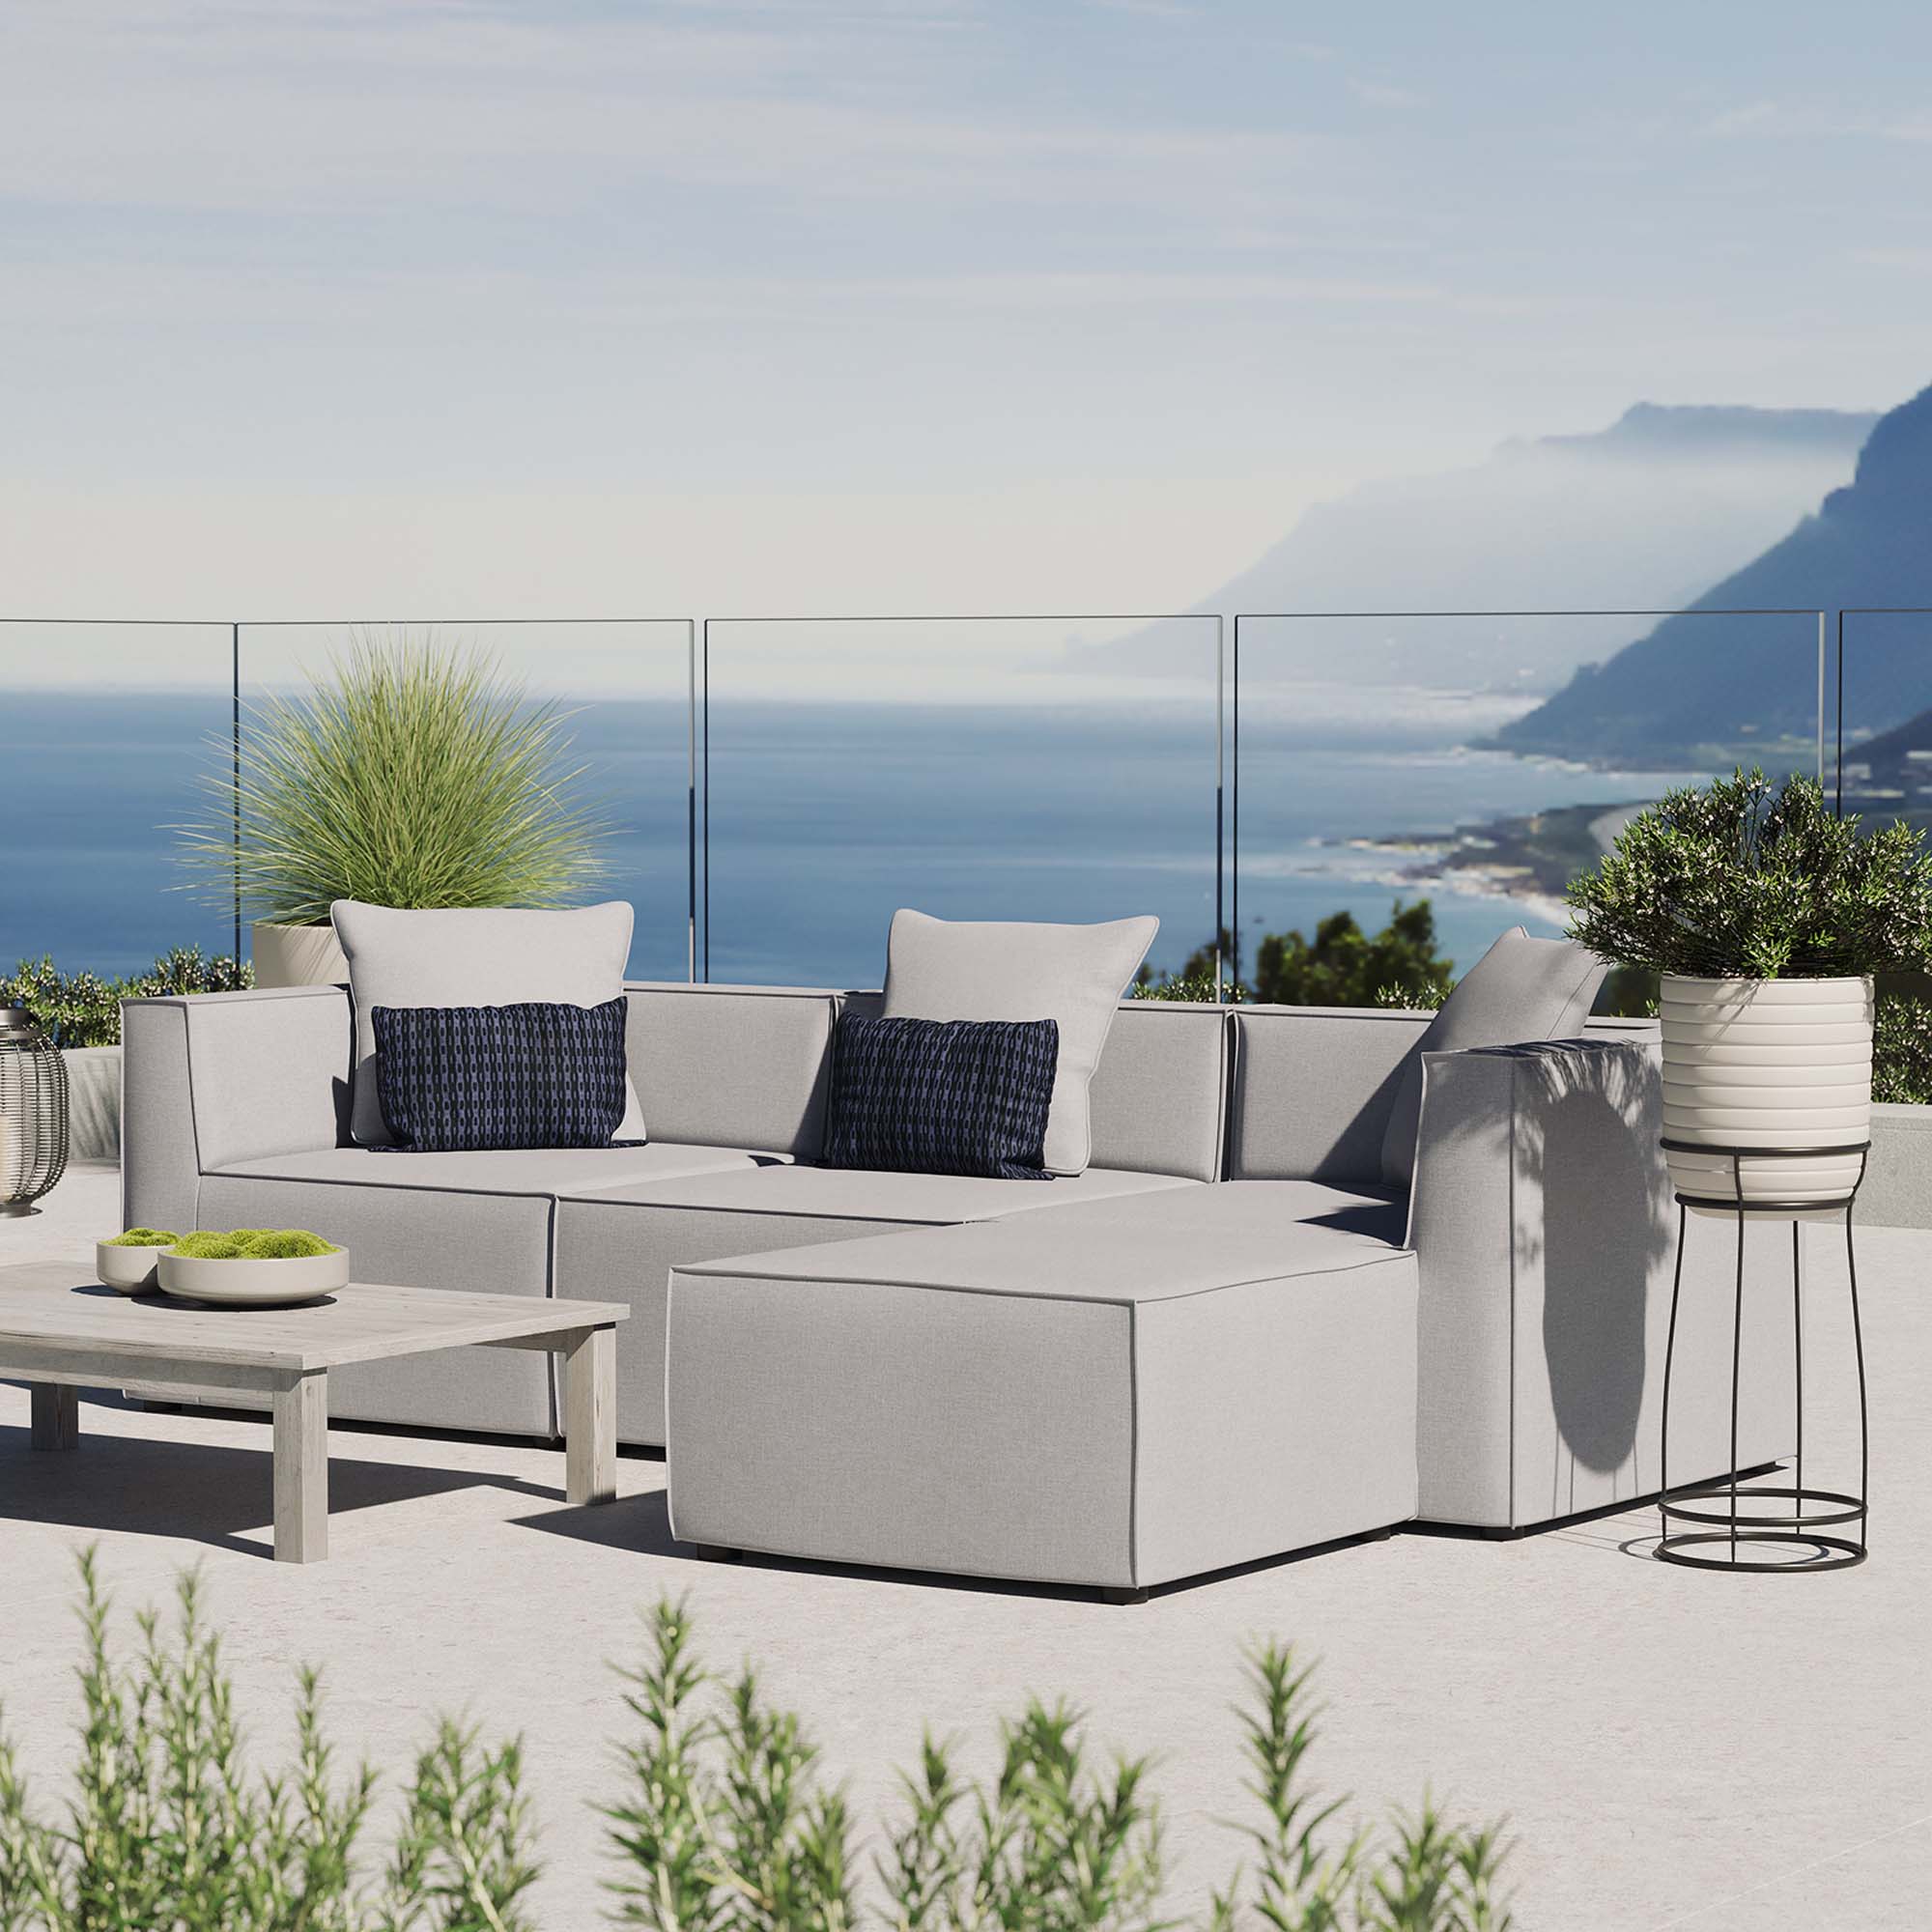
“What makes this garden feel so integrated and serene is the repetition of shapes and the high contrast of materials.”
The gentle arc of the sectional sofa is perfectly echoed in the curve of the wooden deck, creating a harmonious focal point. The design then plays with contrast: the smooth, light grey pavers are set against rough, dark river stones, and the soft, manicured lawn butts up against hard, stacked stone walls. This thoughtful combination of harmony and contrast is pure designer magic.
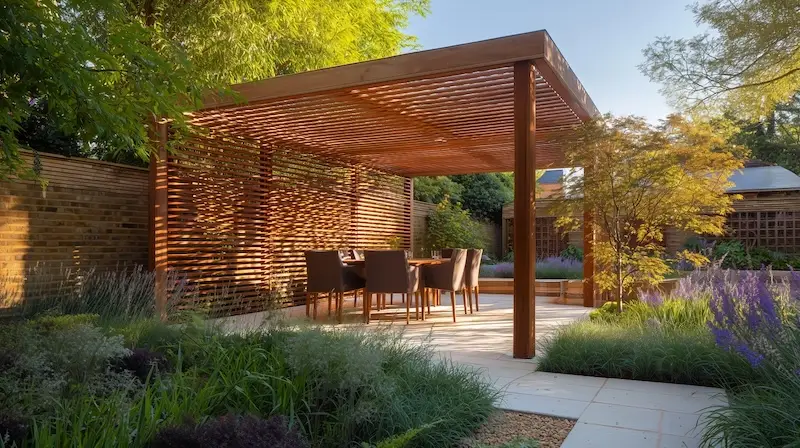
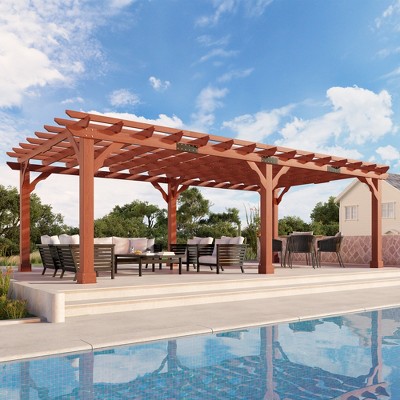
8. Create a Shaded Dining Nook with a Slatted Wooden Pergola
If you’re building a slatted pergola for shade, the spacing of the top slats is everything. For genuine relief from the afternoon sun, space your 2×6 boards no more than 4 inches apart. If you want a more open, airy feel with shifting light patterns, you can go as wide as 8-10 inches. The structure shown here uses a tighter spacing of around 3-4 inches, creating a true shaded room, which is essential for comfortable dining on a hot day.
|
$149.99
|
$1,199.00
|
$49.97
|
$448.00
|

“The star of this entire scene is the pergola’s integrated slatted sidewall.”
Without it, this would be a pleasant but standard patio. That single wall provides a sense of enclosure and privacy, making the dining area feel like a distinct outdoor room. It also offers a beautiful backdrop for the low plantings of lavender and grasses and makes the entire zone feel more intentional and intimate. It’s a brilliant move that adds architectural substance. For a slightly different take on a pergola, see Idea #9.
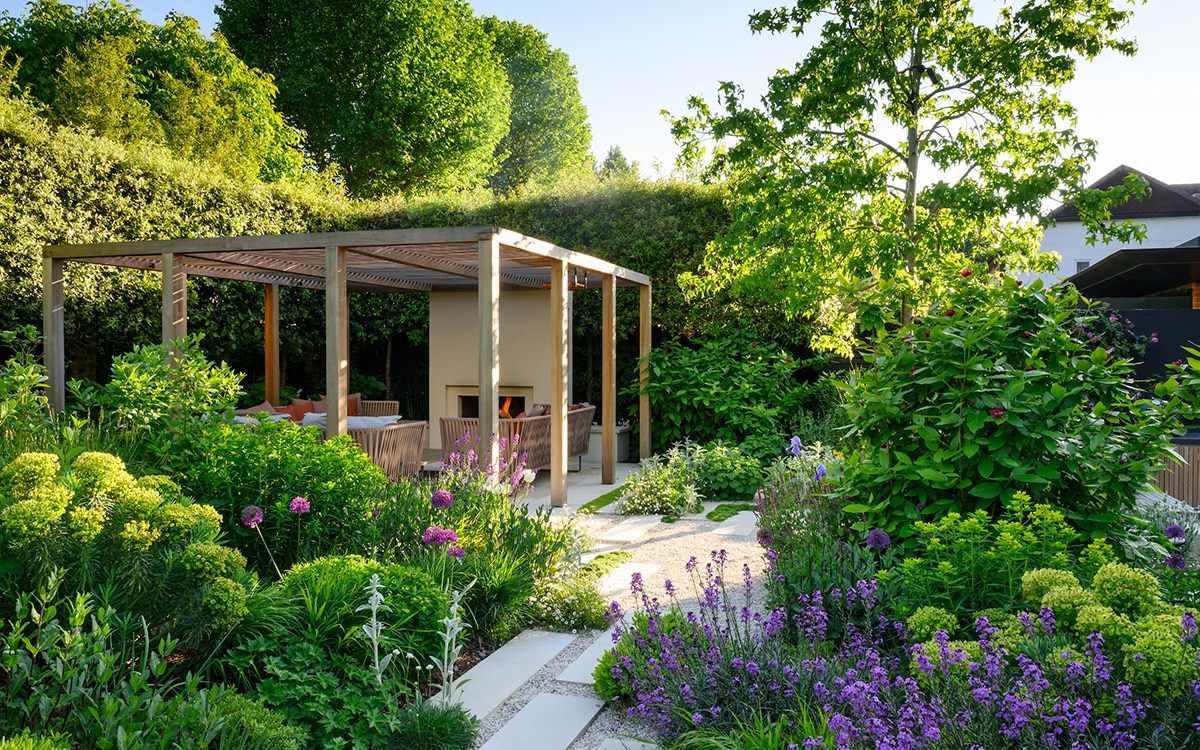
9. Nestle a Fireplace and Pergola Amidst Lush Purple Flowers
This cozy retreat follows a simple formula: 40% hardscaping + 60% lush planting. The hardscaping—the light wood pergola, cream fireplace, and stepping stones—provides the sturdy, architectural ‘bones’ of the space. The real hero, however, is the planting. An abundance of green foliage and a cloud of purple flowers spills over every edge, softening the structure and making it feel like it grew right out of the garden. The key is to let the plants be the star and the structure be the quiet, supporting actor.
|
$289.99
|
$699.99
|
$19.14
|
$899.99
|

“Want this vibe without the custom build?”
You can buy surprisingly stylish prefab pergolas from places like Wayfair or Overstock for $700 – $2,000. For the fireplace, a standalone chiminea or a propane fire pit table (around $300-$800 from Target or Walmart) can create the same cozy focal point for a fraction of the cost of a built-in. Use budget-friendly pavers from a big-box store for the base and spend the rest of your budget on packing the surrounding beds with perennial flowers.
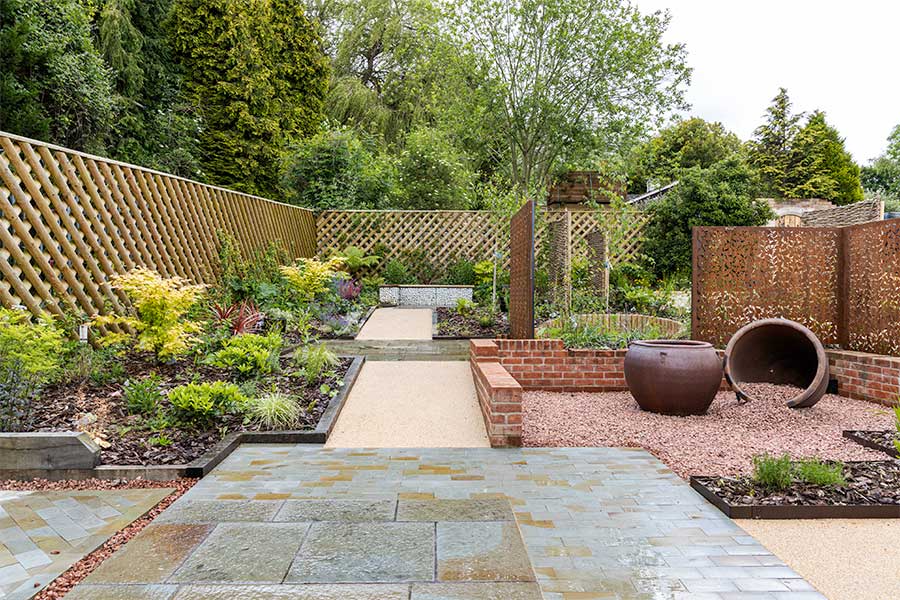
10. Layer Textures with Paving, Gravel, and Corten Steel Screens
A multi-textured garden requires careful planning. Before you buy a single paver, map it out.
|
$249.99
|
$65.99
|
$40.03
|
$2.99
|

“Measure your entire garden space and sketch it to scale on graph paper.”
Use different colors or patterns to designate areas for paving, gravel, and planting beds. How will you move between them?
Check your sun exposure. The area with light-colored block paving will reflect more heat—is this where you want to sit?
Get samples! See how the Corten steel, the light pavers, and the gravel colors look together in your actual garden light, not just online.
While Corten steel screens are prized for their beautiful, stable rust finish, they aren’t entirely inert, especially in the first 1-3 years of weathering. During this period, rainwater runoff can cause rust-colored stains on the light-colored paving stones below. To prevent this, you can either install a small French drain or a channel of decorative gravel along the base of the screen to catch the runoff, or simply accept the staining as part of the material’s rustic character.
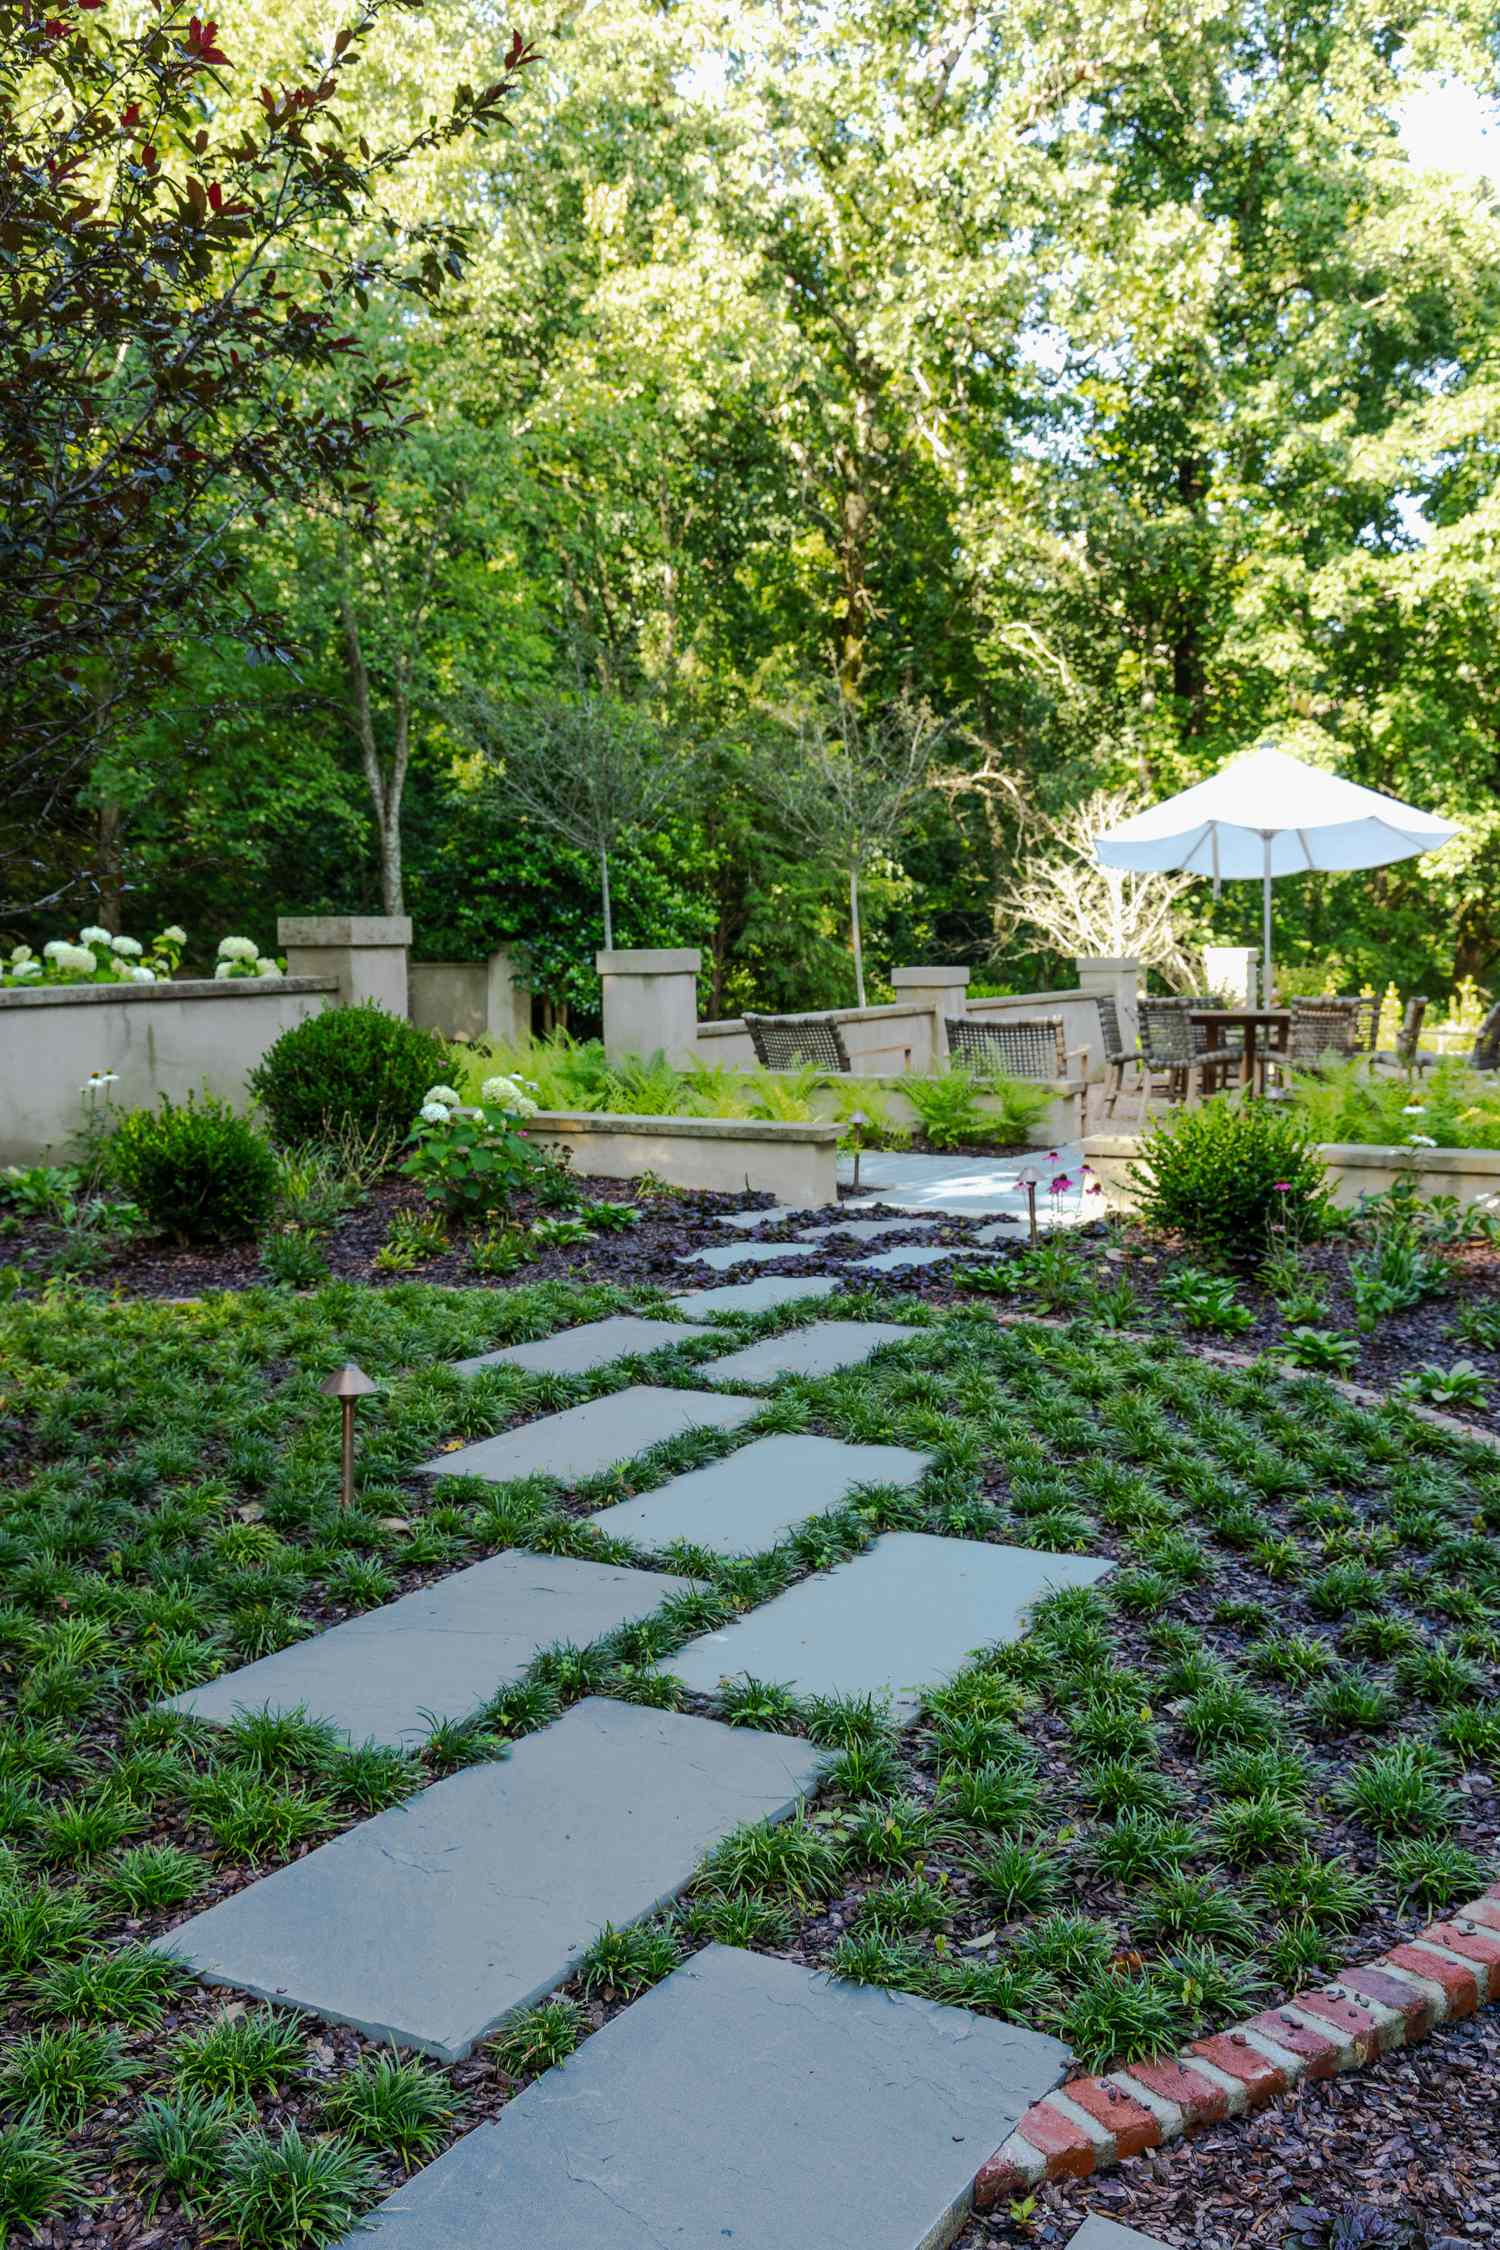
11. Weave a Stepping Stone Path Through Low Green Ground Cover
This garden feels so lush and full because of its masterful use of layering. In the foreground, you have the low, textured ground cover and dark mulch. Behind that, the rectangular stepping stones create a clean, graphic line. Further back, the concrete retaining walls add a mid-level layer of structure. Finally, the taller shrubs and the white umbrella provide height and a canopy. Every view has a foreground, middle ground, and background, which makes the space feel deep and complex. The path is similar in function to the one in Idea #1, but with a more modern feel.
|
$362.33
|
$17.97
|
$51.65
|

“A path made of individual stepping stones set in ground cover is gorgeous, but it’s not the most practical choice for a primary, high-traffic walkway.”
It can be tricky to navigate in heels, for elderly guests, or when you’re carrying something heavy. It’s also more difficult to shovel in the winter if you live in a snowy climate. Think of this as a secondary, meandering path for strolling, not a direct route from the back door to the garage.
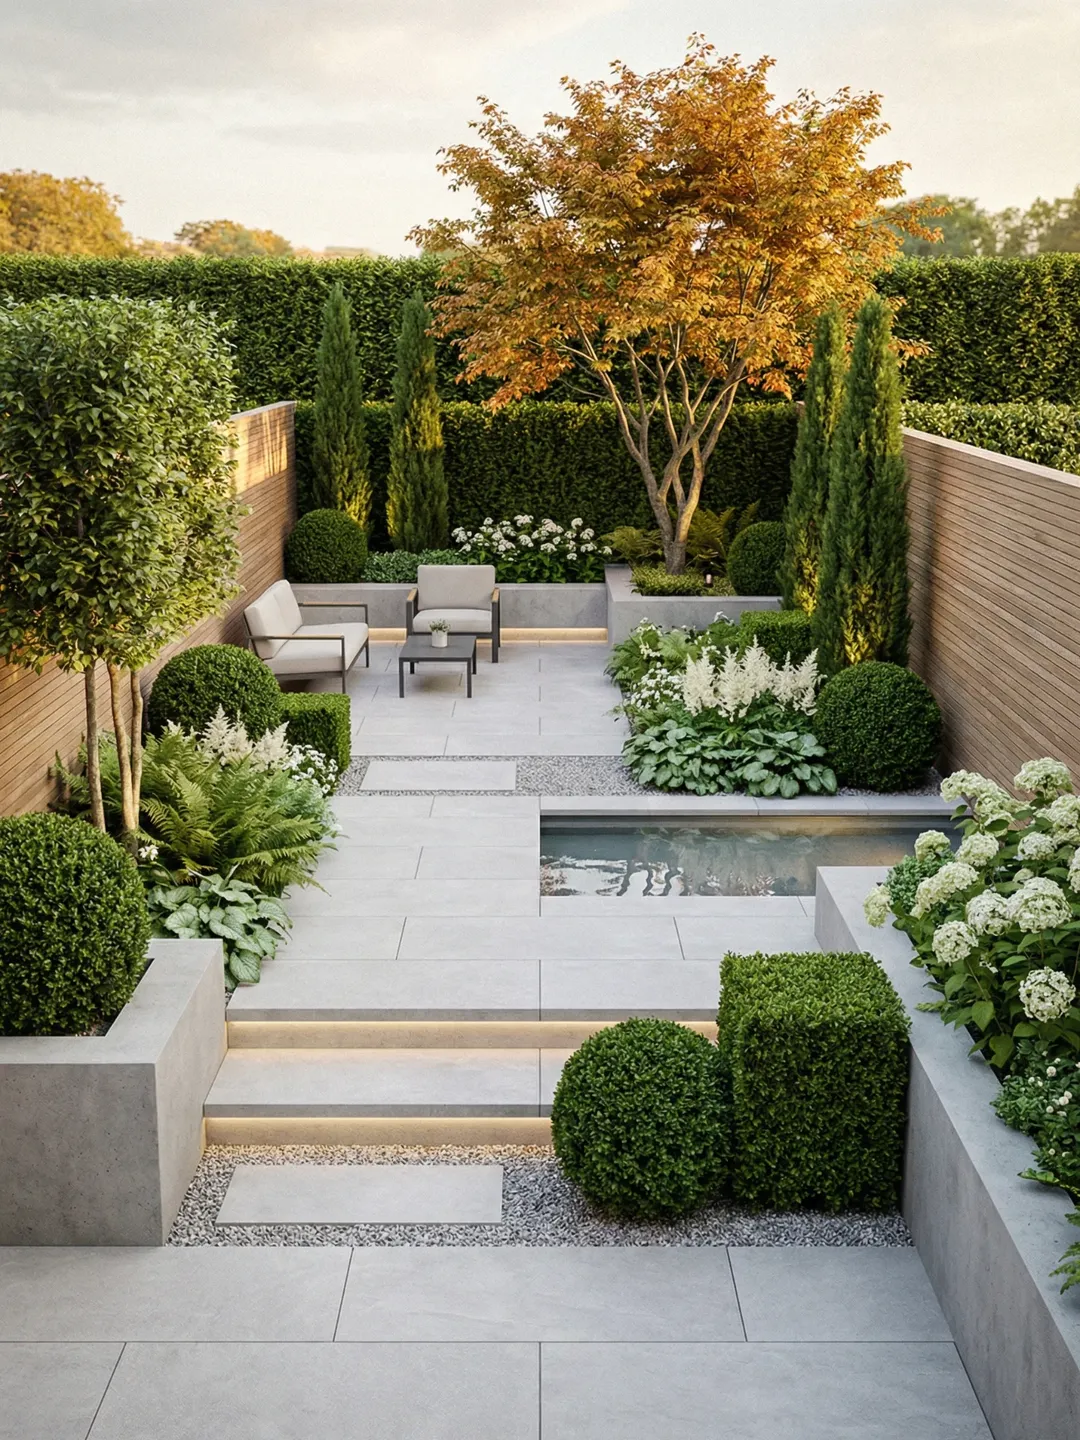
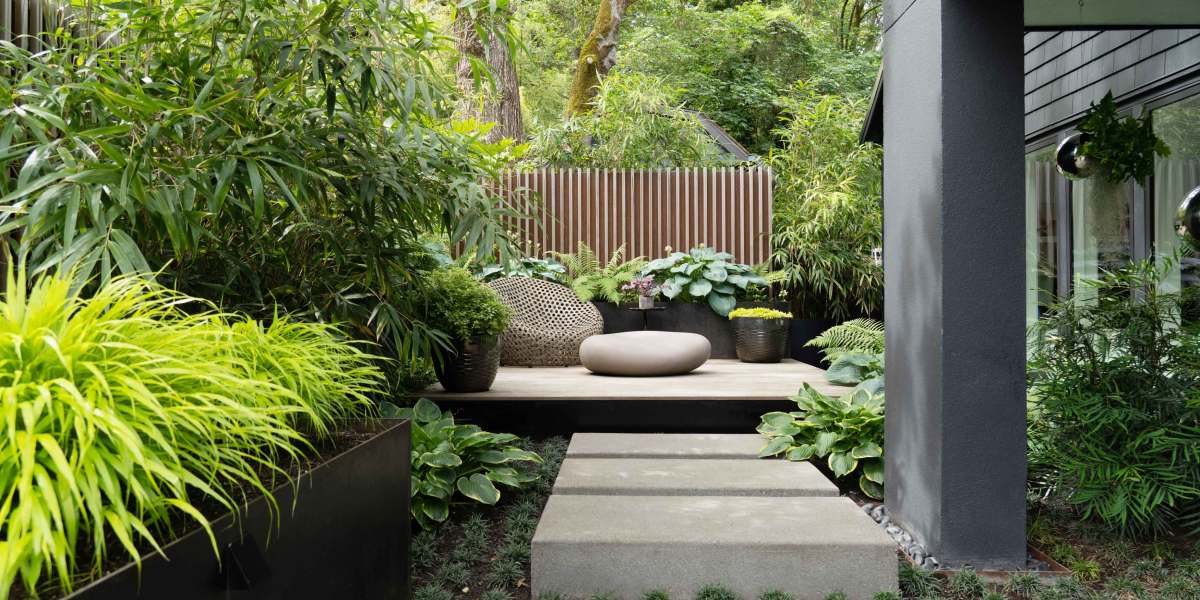
12. Use Multi-Level Concrete Planters for a Modern, Structured Look
When working with modern, monolithic planters like these, planting density is your secret weapon. You must over-plant. A few lonely shrubs will look stark and sad against the hard concrete. The goal is to fill the planters so densely that the foliage spills over the edges, softening the hard lines. Use a mix of textures—broad leaves, fine grasses, and cascading vines—but stick to a limited color palette (mostly greens here) to maintain the sophisticated, modern aesthetic.
|
$90.00
|
$128.00
|
$101.56
|
$20.32
|


“This bold, architectural style works best in a space that can handle its visual weight, so think medium to large yards (at least 25×25 feet).”
The tiered planters and integrated steps require significant changes in elevation to be effective. It’s a fantastic solution for a sloped backyard, as it turns a tricky grade into a stunning feature. On a completely flat lot, you would need to build up the entire area, which can be costly and look less natural.
13. Integrate a Sleek Water Feature into Modern Grey Paving
This high-end modern look is a masterclass in detail and materials. The cost is primarily in the hardscaping and custom features that make it so seamless. Here’s a potential breakdown for a project of this scale.
|
$1,749.00
|
$89.99
|
$315.50
|
$1,299.00
|
“Hardscaping (Large format pavers, concrete planters, steps): $15,000 – $30,000
C”
- Hardscaping (Large format pavers, concrete planters, steps): $15,000 – $30,000
- Custom Water Feature (including pump/filtration): $5,000 – $12,000
- Furniture (Modern outdoor set): $4,000 – $9,000
- Lighting (Integrated LED step lighting): $2,000 – $5,000
- Plants & Fencing: $3,000 – $7,000
- TOTAL: $29,000 – $63,000
The integrated water feature is the element that elevates this design from a nice patio to a true showstopper. It does more than just add visual interest; it brings life and sound to the otherwise quiet, static materials. The dark water provides a beautiful, reflective contrast to the light grey paving stones, and the subtle movement creates a constant source of calm. It makes the entire space feel more dynamic and luxurious.
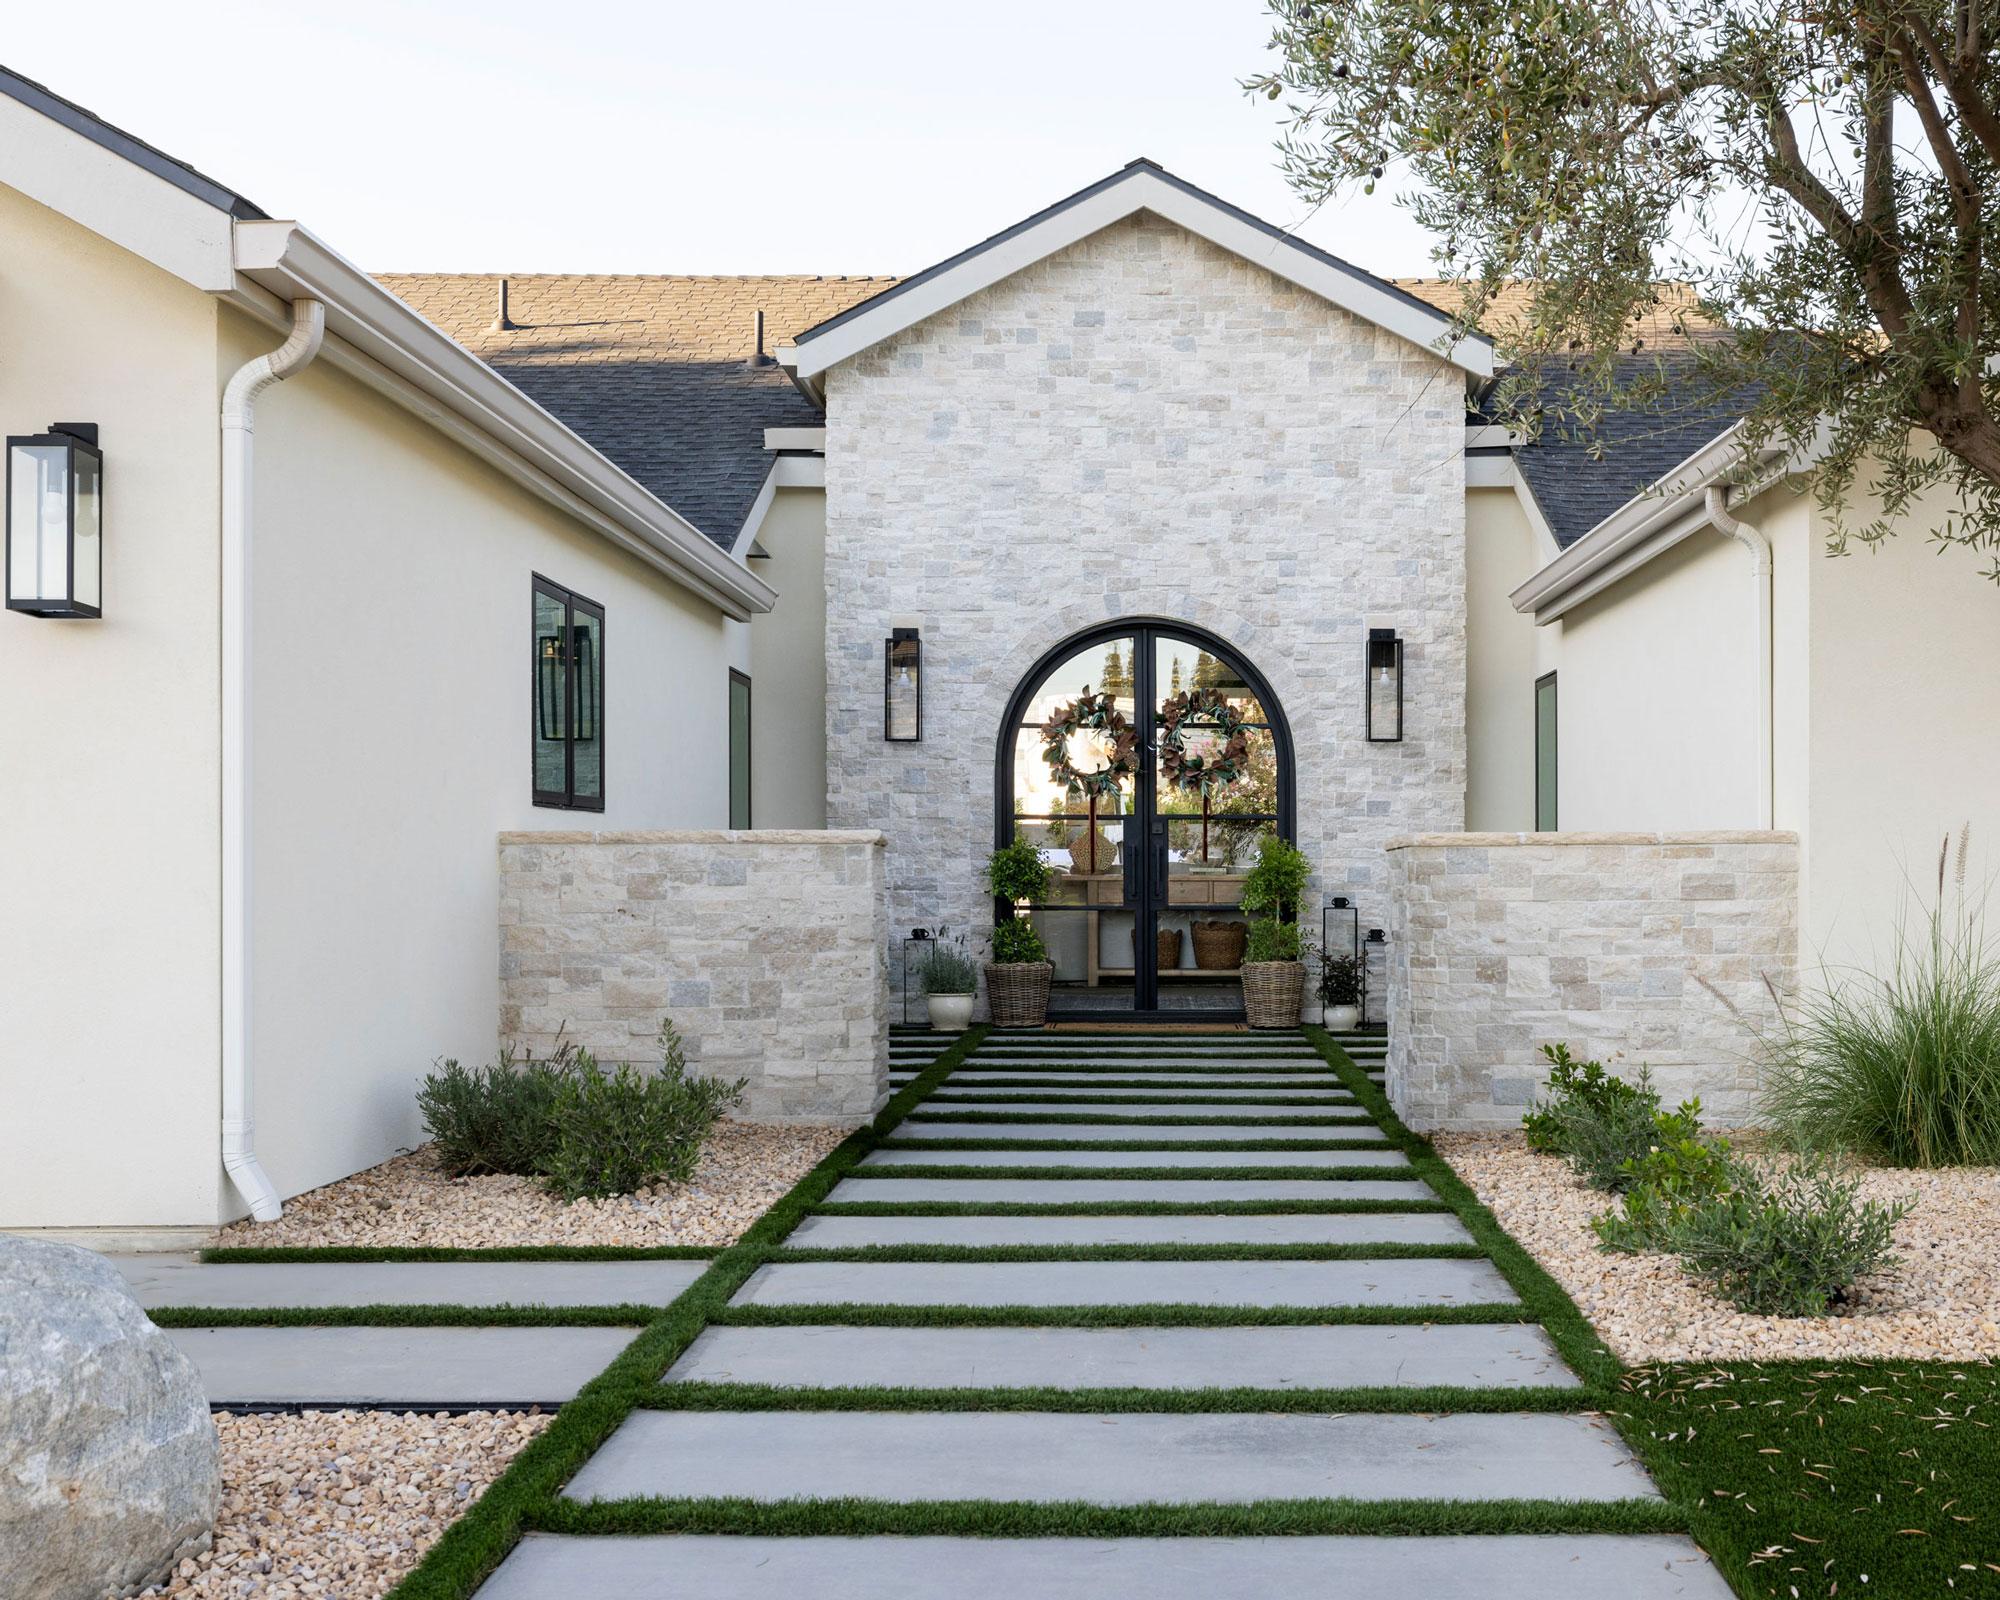
14. Soften a Minimalist Stucco Entry with Grass and Gravel
This entrance achieves its serene, clean look with a formula of contrasts. It’s roughly 70% hard, minimalist surfaces + 30% soft, natural textures. The creamy stucco, light stacked stone, and black metal of the doors and sconces provide a strong, geometric base. The magic happens when this is paired with the strips of dark green grass between the pavers, the low-lying plants, and the bed of light-colored gravel. This combination prevents the modern architecture from feeling sterile and unwelcoming.
|
$59.99
|
$5,384.94
|
$37.49
|
$24.97
|


“This design works because it masters the art of geometric repetition.”
The strong rectangular shape of the concrete pavers is echoed in the panes of the arched glass doors and the form of the black outdoor sconces. This repetition creates a sense of rhythm and cohesion. Even the stacked stone facade is made of small rectangular units. By sticking to a single dominant shape, the design feels incredibly intentional and visually calm, allowing the different materials to shine.
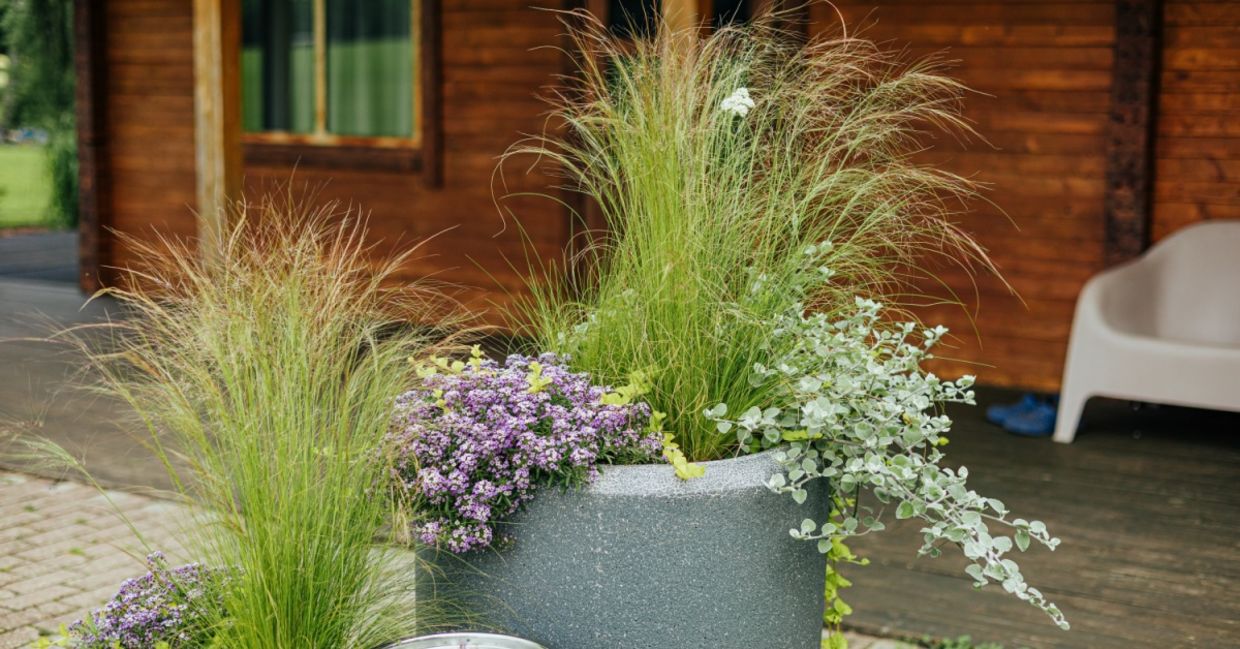
15. Combine Tall Ornamental Grasses and Spilling Flowers in a Grey Planter
This popular “Thriller, Filler, Spiller” container recipe is easy to master. Here’s how to create a similar look.
|
$44.98
|
$65.94
|
$4.78
|
$37.98
|

“Time: 30 minutes.”
Cost: $75-$150.
Choose a large pot (at least 20 inches wide) with drainage holes.
Add your ‘Thriller’: a tall, dramatic plant in the center. Here, it’s the ornamental grass.
Arrange your ‘Fillers’: mounding plants that fill the space around the thriller. The purple alyssum could be a filler.
Tuck in your ‘Spillers’: trailing plants that cascade over the edge. The silver-leafed plant is a perfect example.
Water well to settle the plants in.
You don’t need a pricey concrete planter to get this rustic, natural look. Check out stores like Target or Home Depot for their large, resin-based planters. They often have fantastic faux-concrete or stone finishes that are lightweight and cost a fraction of the real thing (typically $40-$80 for a large size). For plants, buy smaller starter sizes of ornamental grasses and perennials in the spring; they will grow quickly to fill the pot by mid-summer, saving you money over buying large, mature specimens.
16. Lead the Eye with a Winding Gravel Path to a Gated Archway
The single most captivating element in this garden is the black metal archway. It serves as a classic design trick: creating a destination and a sense of mystery. The path doesn’t just end; it leads you *through* to whatever lies beyond. Covering it in climbing foliage enhances this effect, making it feel like a magical portal into another part of the garden. It transforms a simple walk into a story.

|
$28.47
|
$22.48
|
$16.98
|
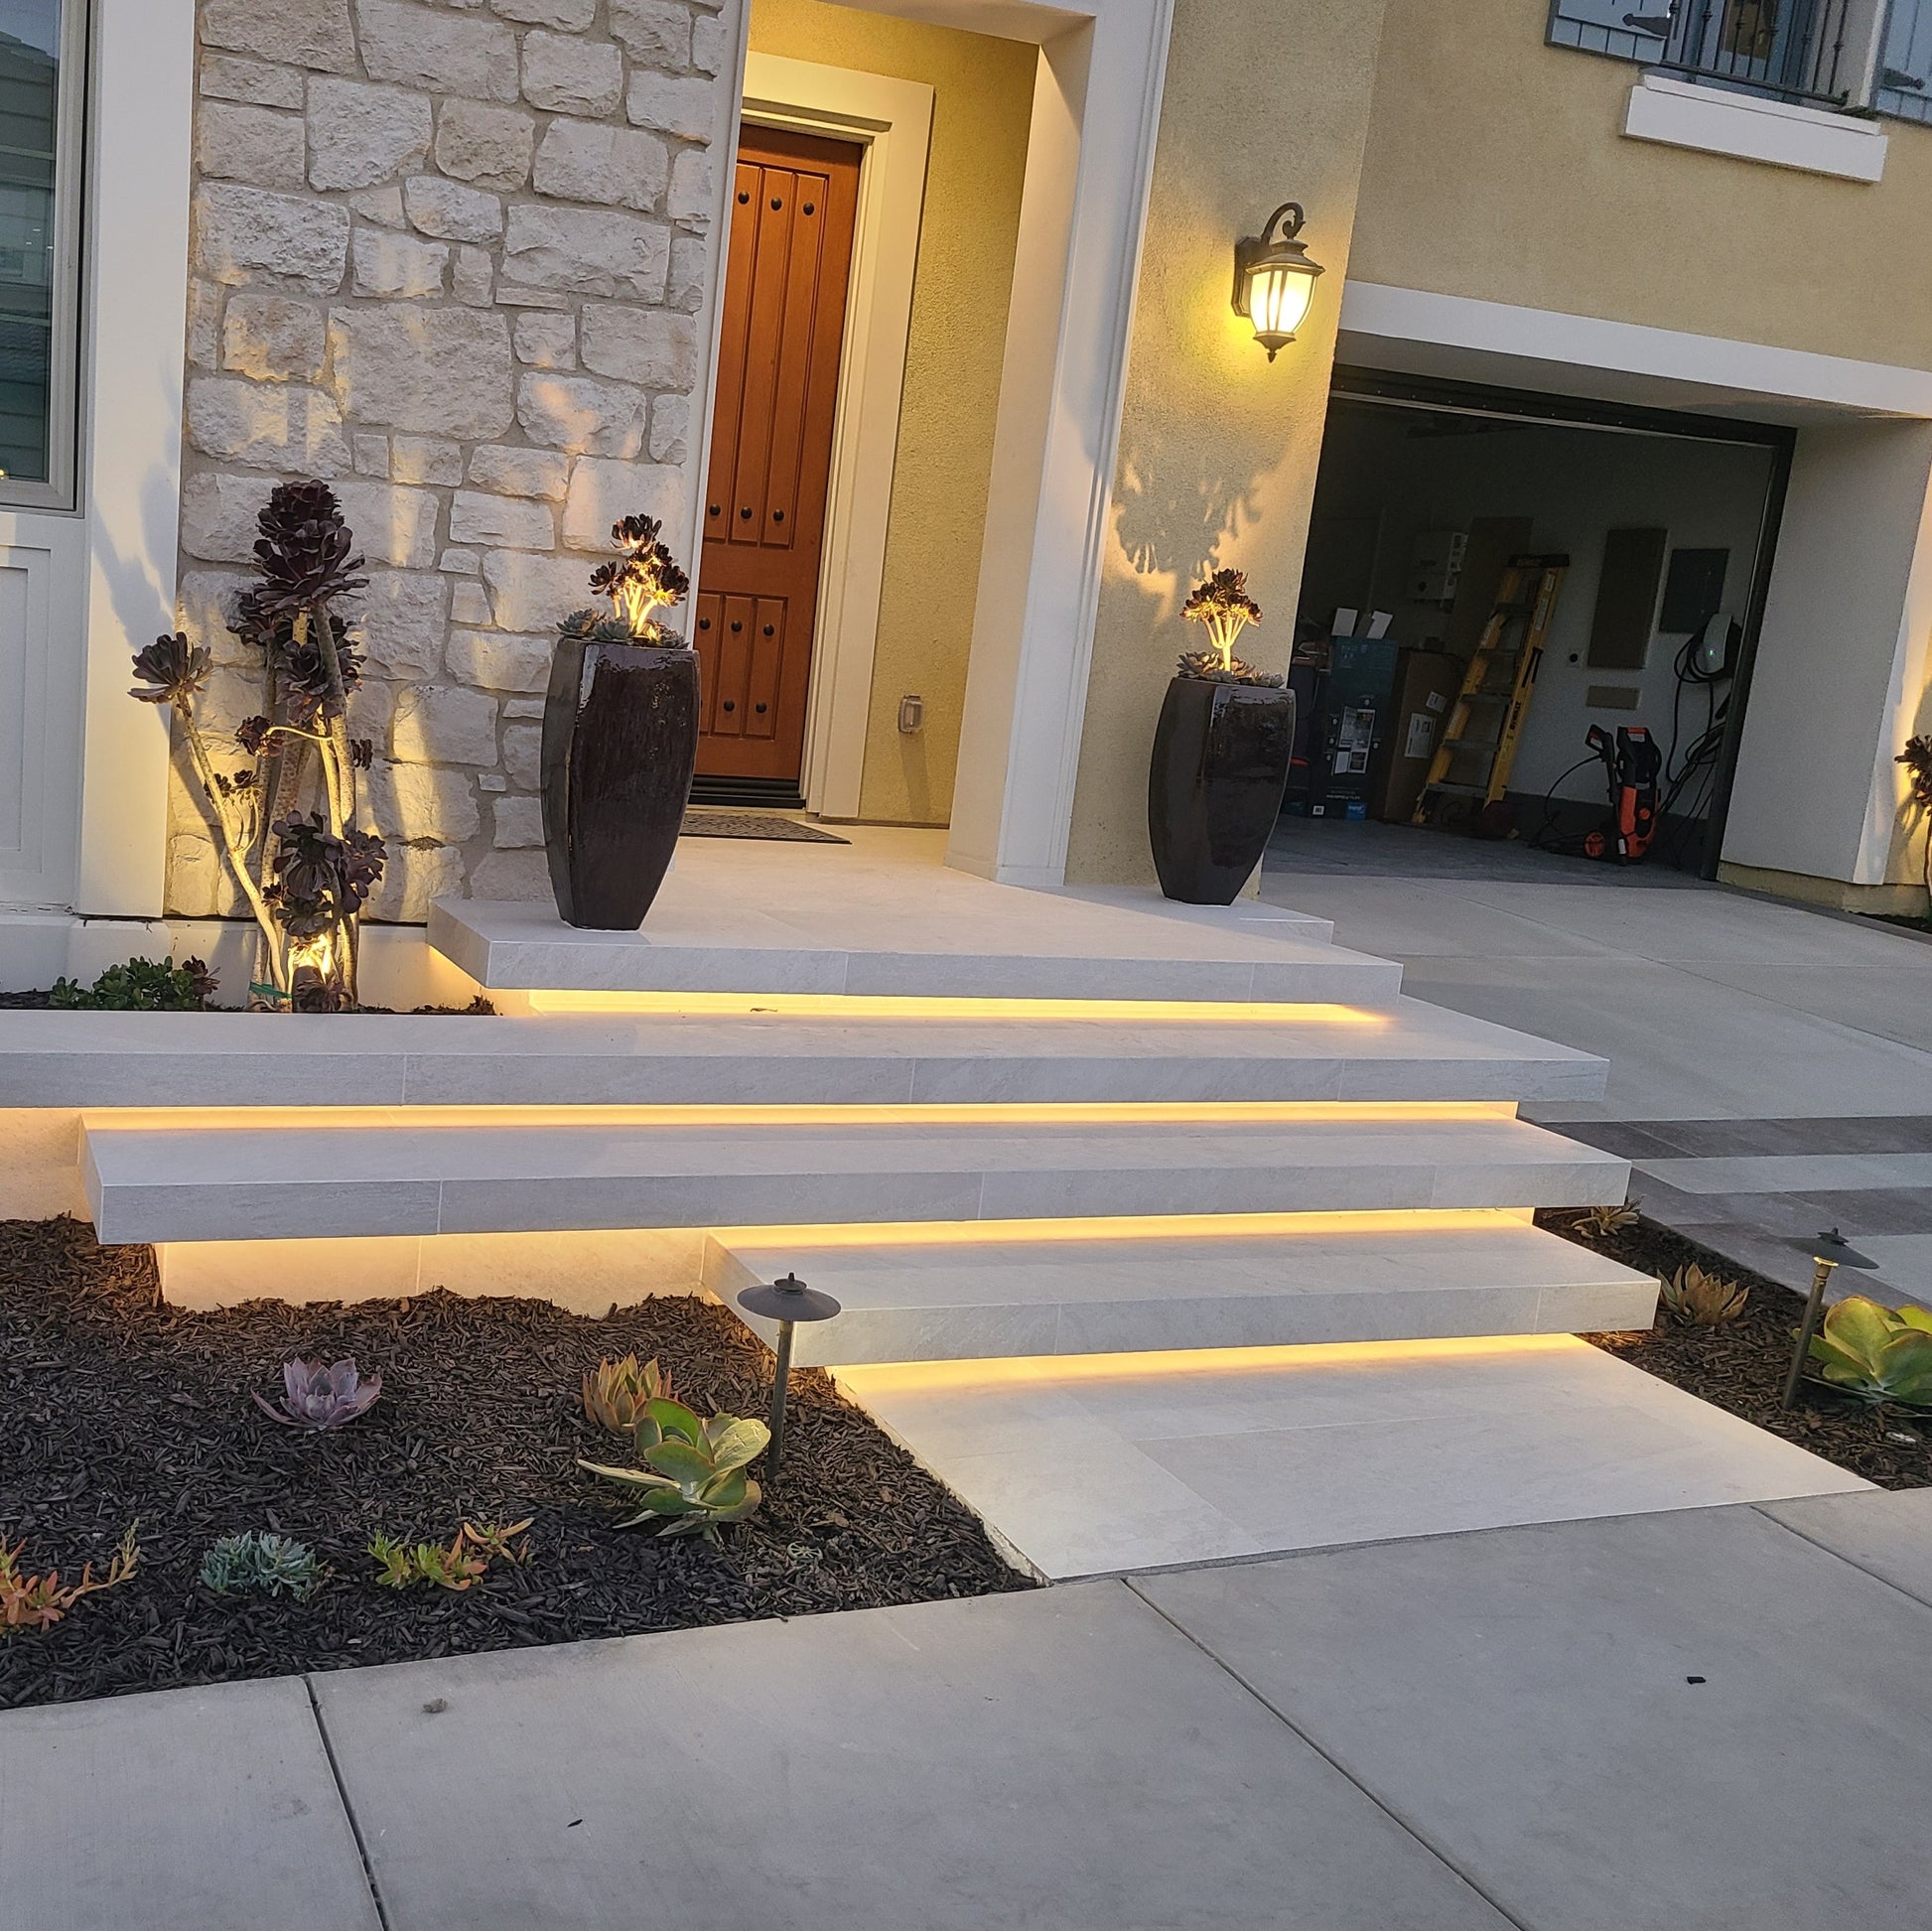
“When edging a gravel path, always set your pavers slightly lower than the surrounding lawn or garden bed, but slightly higher than the gravel itself.”
Aim for the top of the dark grey paver edging to be about 1 inch above the gravel. This creates a lip that effectively keeps the gravel from spilling out onto your lawn or into your plantings, which is a constant battle otherwise. It’s a small detail that makes a huge difference in long-term maintenance.
17. Weave a Stone Path Through Contrasting Burgundy and Lime Green Foliage
A lush, intensely planted garden like this is stunning, but it’s a haven for pests like slugs and snails, especially with all that low-lying foliage and the damp shade near the stone path. You’ll need a proactive pest management strategy. Consider using pet-safe slug bait, copper tape around the base of prized plants like hostas, or simply embracing a nightly
|
$69.99
|
$29,500.00
|


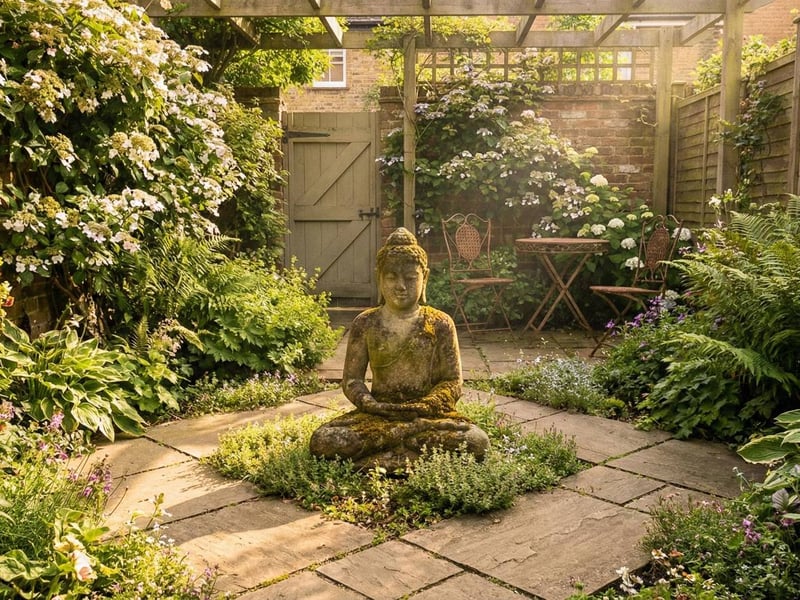
18. Create a Serene Nook with a Buddha Statue and Climbing Hydrangeas
This tiny space feels like a secret garden because it masterfully plays with age and texture. The moss growing on the stone Buddha statue, the aged brick wall, and the weathered wooden gate all tell a story of time passing. These rustic, tactile surfaces are softened by the lush green foliage and the delicate white blooms of the climbing hydrangeas. It’s this combination of rough, aged hardscaping and soft, vibrant life that creates such a powerful sense of tranquility and escape.
|
$149.99
|
$49.99
|
$21.99
|
$9.99
|

“This is the perfect example of a design that excels in a small, enclosed space.”
An area as compact as 8×10 feet could host this entire scene. The key is the verticality. By using the brick wall for the climbing hydrangea and tucking the bistro set into the corner, the design draws the eye upward and makes the most of the limited footprint. In a large, open yard, this intimate collection of elements would feel lost and out of scale.
19. Soften a Grassy Path with a Blue Cushion and a Tall White Lantern
This calm, inviting scene is a study in simplicity. Let’s break down the formula: 70% natural textures + 20% classic structure + 10% color pop. The dominant textures are the lush green grass and surrounding foliage. The classic structure comes from the dark brown, slatted wooden bench. The final, crucial 10% is that spot of color from the light blue cushion and the crisp white of the lantern, which lifts the whole scene and gives it a focal point. It’s simple, effective, and easily replicable.
|
$72.47
|
$19.99
|
$43.69
|
$168.00
|


“A grassy path is beautiful and soft underfoot, but it requires more upkeep than a stone or gravel alternative.”
It needs to be mowed just as often as the rest of your lawn, which can be tricky with the uneven edges of the flower beds. Foot traffic can also lead to compaction and bare spots over time. To keep it looking its best, you’ll need to edge it regularly and may need to aerate and overseed the path annually to keep the turf dense and healthy.
20. Pair a Modern Wooden Deck with a Woven Armchair and Slat Screen
You can create this modern, serene corner without splurging on high-end designer pieces. Look for faux-rattan or all-weather wicker armchairs from Target’s outdoor collection or on Wayfair; they offer the same woven texture for under $300. The privacy screen can be a DIY project using standard cedar or pine slats from a home improvement store. Instead of large concrete planters, lightweight fiberglass or resin alternatives from stores like Home Depot give a similar dark, moody look for a fraction of the weight and cost.
|
$528.75
|
$399.00
|
$499.00
|
$89.99
|


“The single most impactful element here is the wooden slat privacy screen.”
It does so much more than just block a view. It provides an architectural backdrop that defines the space, turning a simple patch of deck into a deliberate, room-like nook. The warm, striped pattern of the wood adds a layer of texture that contrasts beautifully with the lush green foliage in front of it and the clean lines of the deck below. Without it, the chair and plants would just be floating.
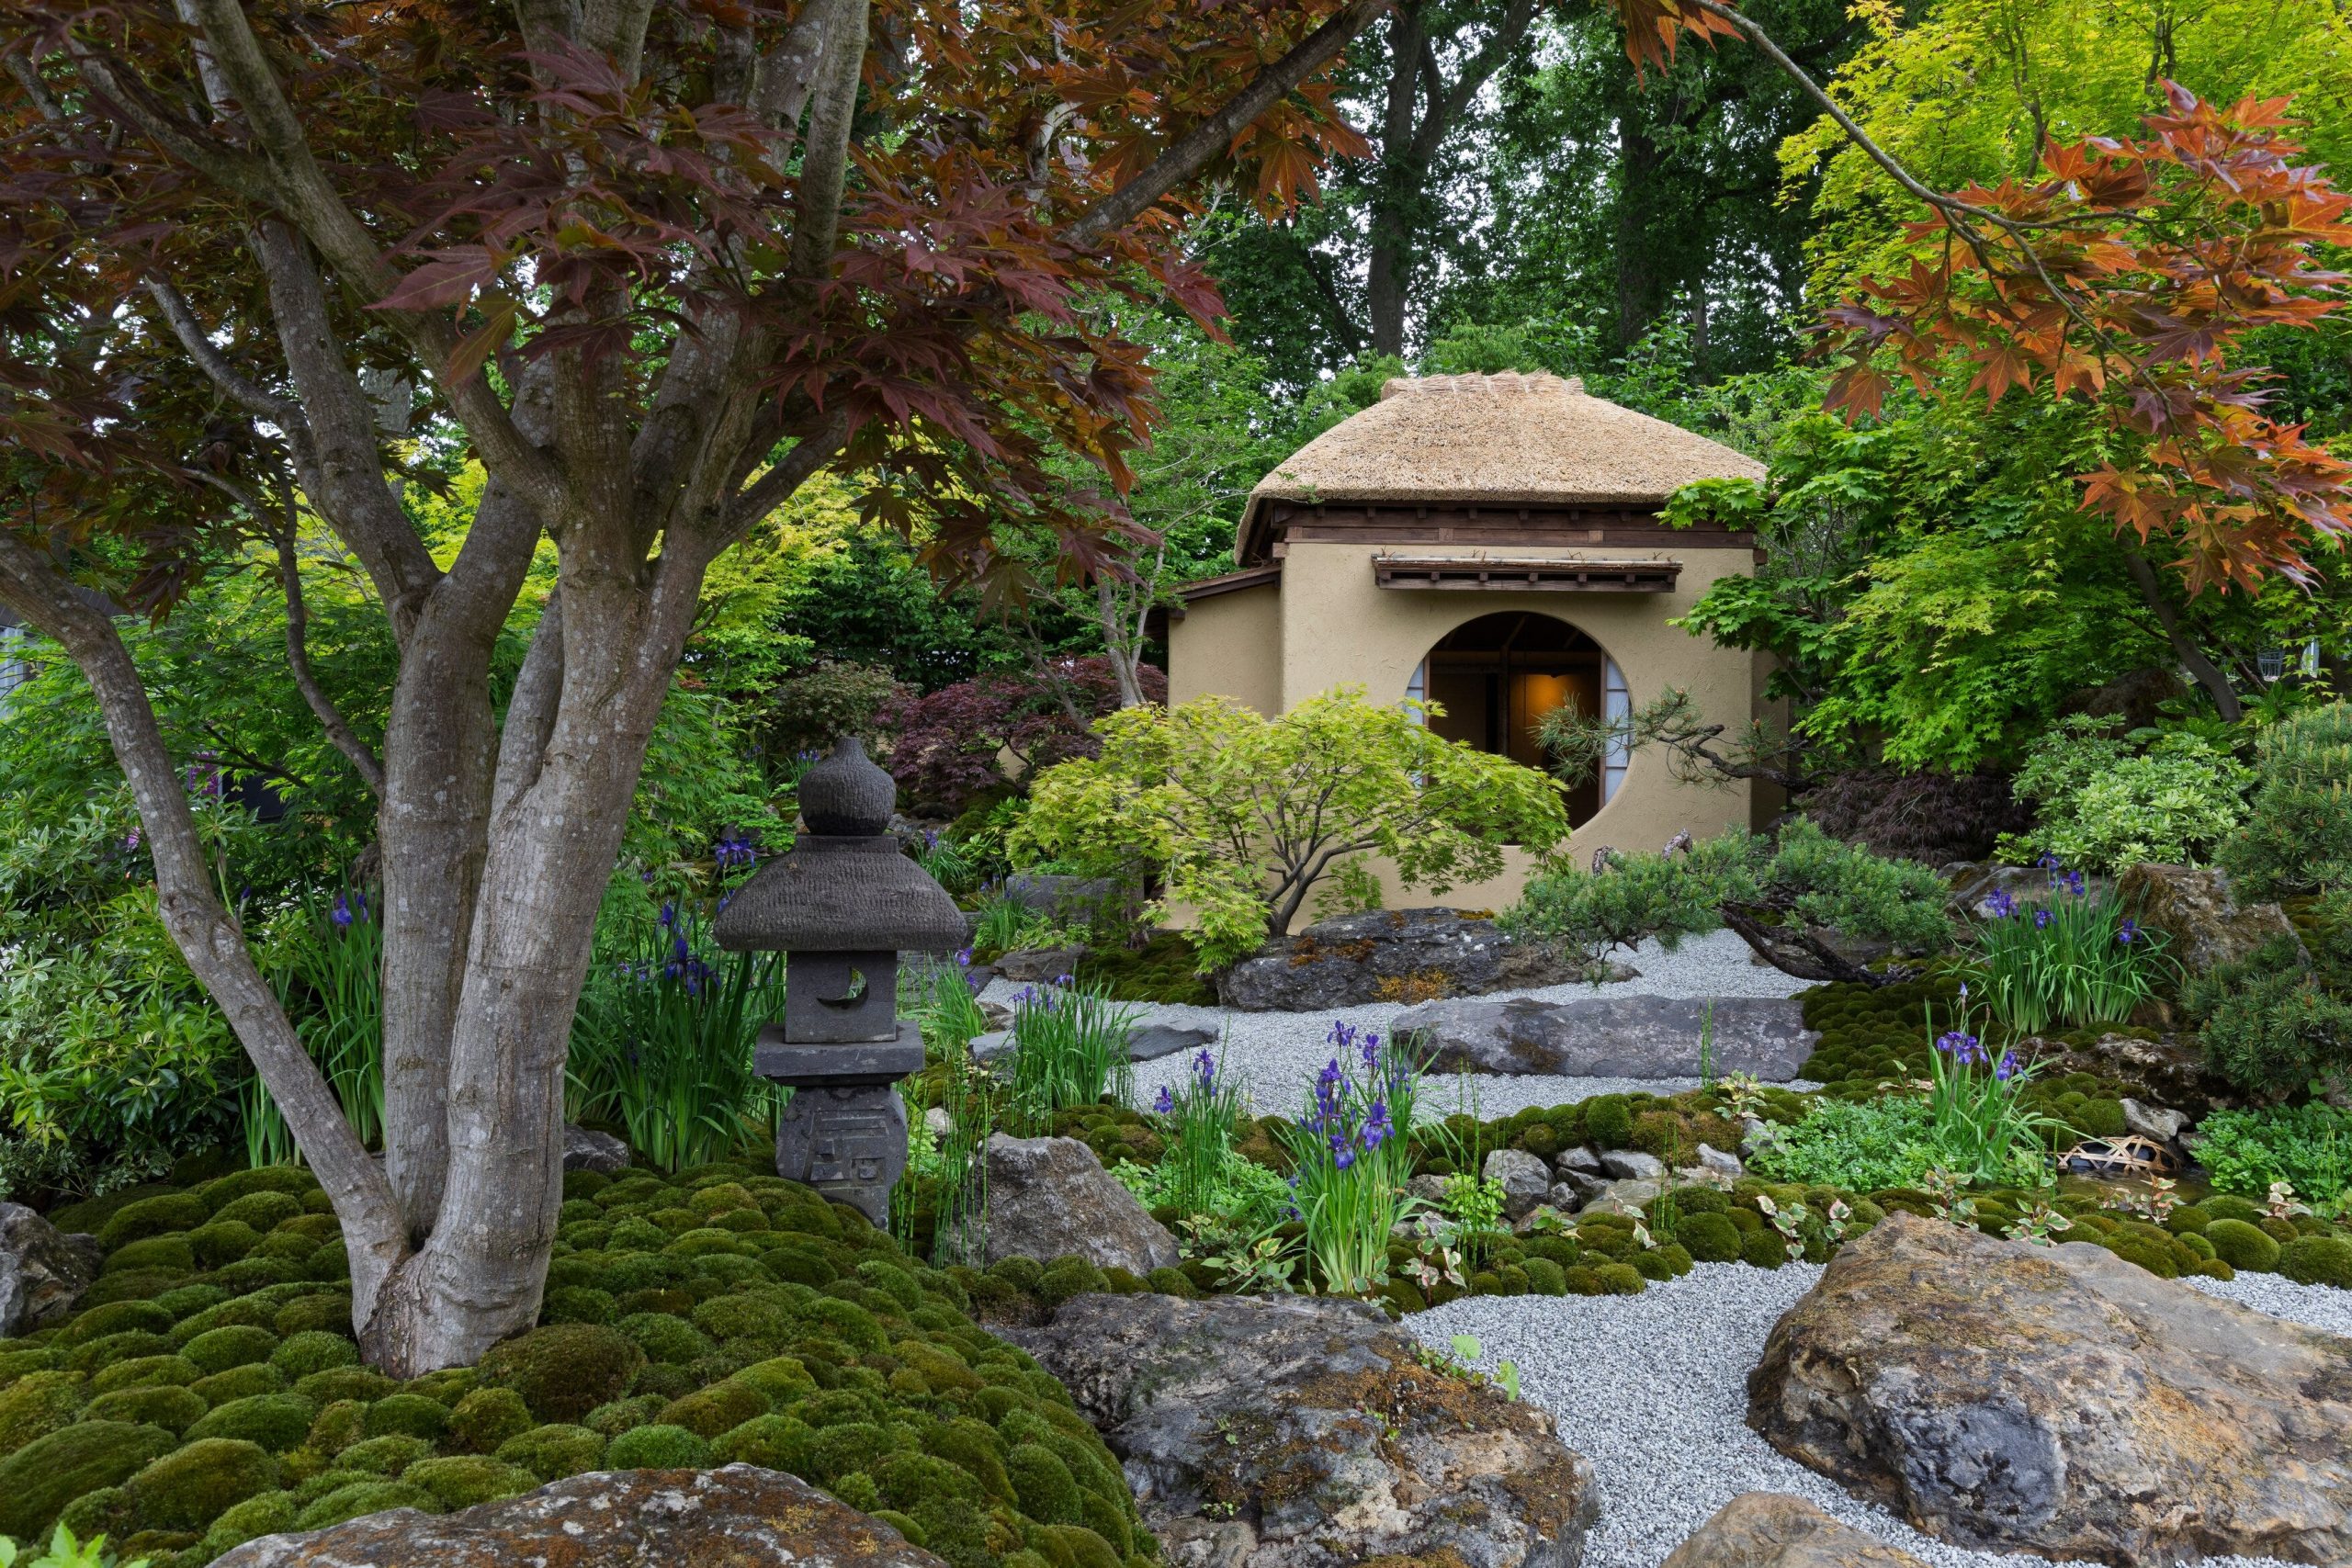
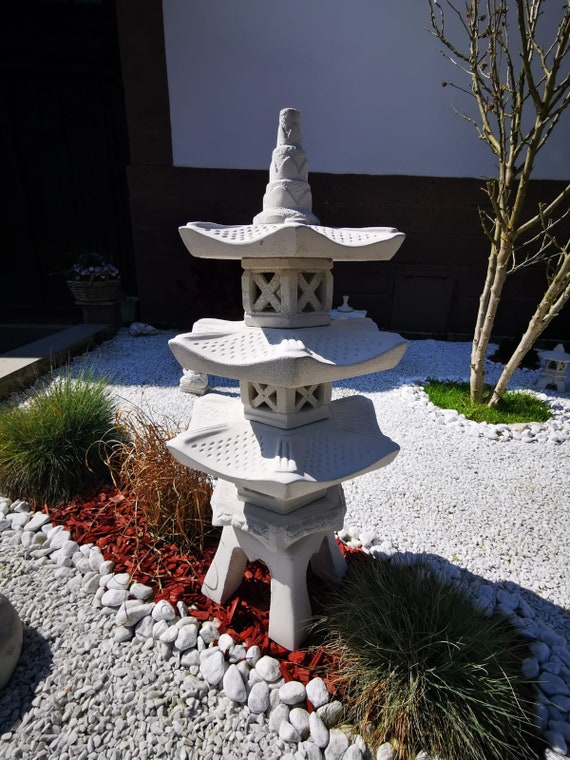
21. Design a Japanese-Inspired Garden Around a Tea House with a Round Window
This garden feels so profoundly peaceful because it’s a masterclass in controlled nature. The design balances several key principles of Japanese gardening. You have *Shakkei*, or “borrowed scenery,” with the trees in the background becoming part of the view. The dry gravel riverbed represents water, a core element. Finally, the careful placement of the stone lantern, the large rocks, and the pruned maple tree creates a sense of balance and composition that feels both natural and highly intentional. It’s a picture, not just a place.
|
$144.88
|
$10.99
|
$43.99
|

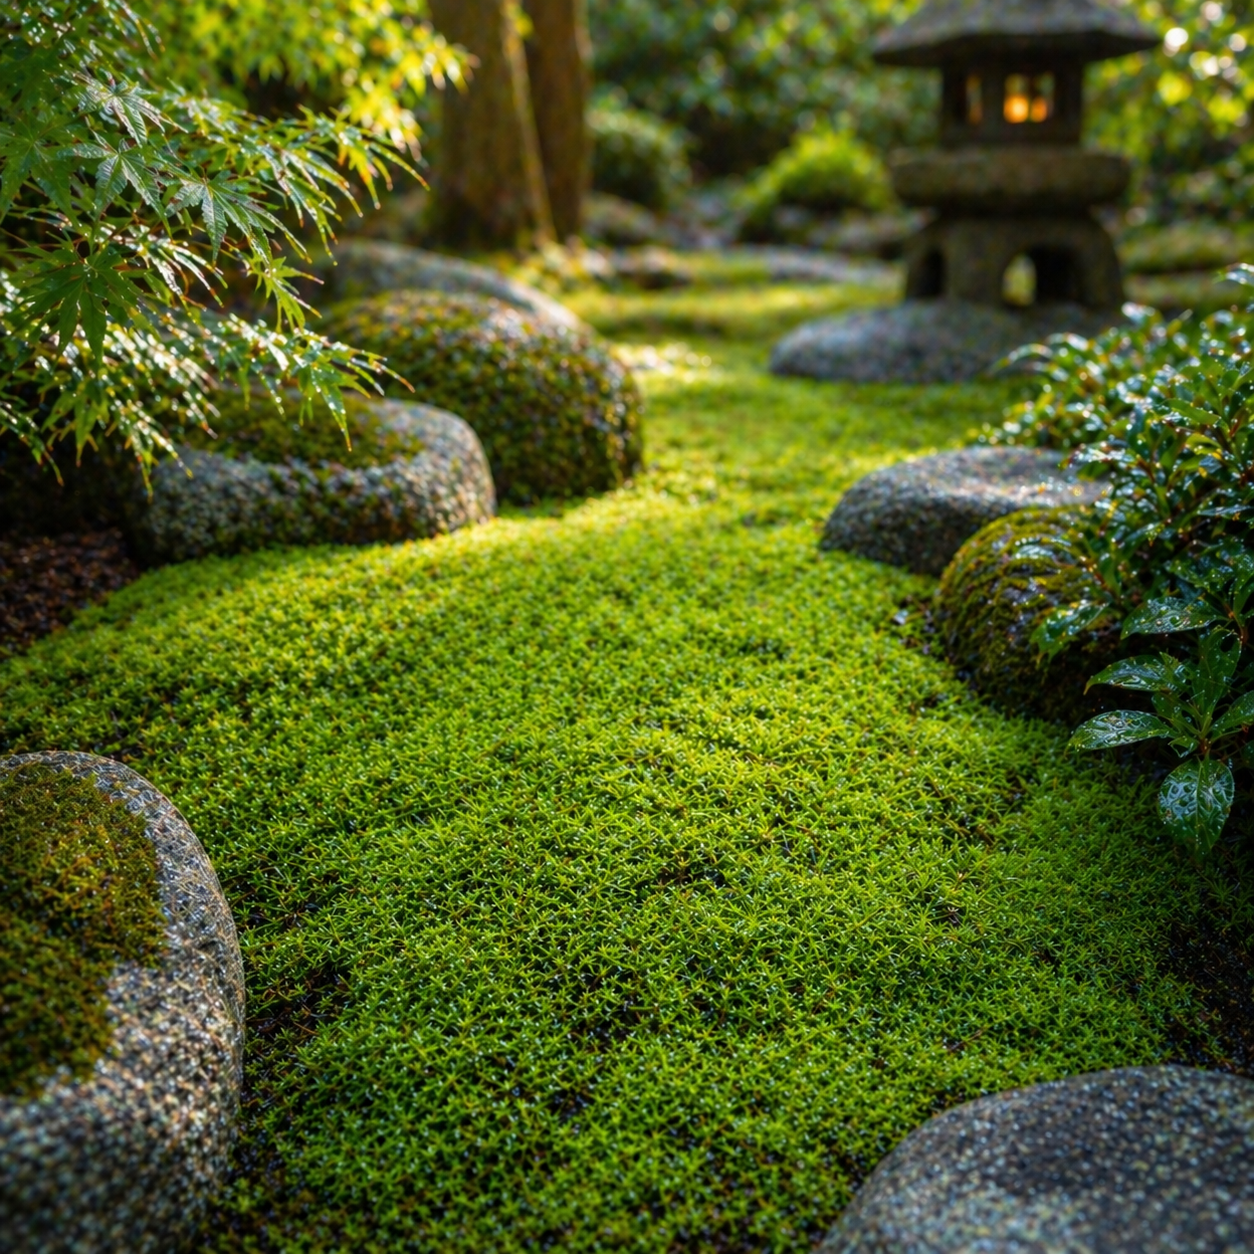
“A true Japanese-inspired garden is a significant long-term commitment.”
The pristine look of the moss mounds and the meticulously raked gravel requires daily or weekly attention. Moss needs specific shade and moisture conditions to thrive and must be kept free of fallen leaves. The red-leafed maple will require careful, artful pruning each year to maintain its shape. This is a garden for someone who enjoys the meditative process of gardening as a hobby, not for someone seeking a low-maintenance yard.
22. Create a Symmetrical Vista with Tiered Stone Stairs and a Classical Statue
When creating a formal, symmetrical garden, the key is to establish a strong central axis and stick to it. Here, the grassy path, the center of the stairs, the classical white statue, and the decorative urn all line up perfectly. This creates a powerful sightline that draws your eye through the space. To replicate this, use string and stakes to mark your centerline before you dig a single hole. Every major element should be placed at an equal distance from this line.
|
$170.96
|
$79.95
|
$22.46
|
“The formula for this classical, serene space is all about balance.”
Think of it as 60% structured green, 30% formal hardscape, and 10% decorative focal point. The manicured hedges and tall, slender trees provide a lush, green framework. The tiered stone steps add a sense of timeless elegance and structure. Finally, the white statue and urn act as the jewelry, providing a bright, compelling focal point that completes the formal picture. It’s a timeless recipe for garden grandeur.
23. Use Black Raised Beds and Geometric Paving for a Modern, Graphic Look
Laying a gridded paver path like this is a great DIY project that delivers a high-end look. Here’s how:
|
$10.73
|
$699.00
|
$4.49
|

“Time: 4-6 hours for a 10-foot path.”
Cost: $150-$400.
Excavate the path area to a depth of 4 inches.
Lay down and compact a 2-inch layer of paver base.
Add a 1-inch layer of paver sand and screed it perfectly level.
Carefully place your light grey pavers, using tile spacers (1/2 to 1 inch) to ensure perfect, consistent gaps.
Fill the gaps with decorative gravel or, for a softer look, plant a durable ground cover like thyme.
This graphic, high-contrast style is brilliantly suited for small to medium-sized urban or suburban backyards, from 150 to 500 square feet. The bold shapes—the black rectangular beds, the patterned tiles, the paver grid—create a strong sense of design and intention that can make a smaller space feel more significant. In a very large, sprawling yard, this contained, geometric approach might feel a bit lost or underscaled. It’s perfect for adding personality to a compact area.
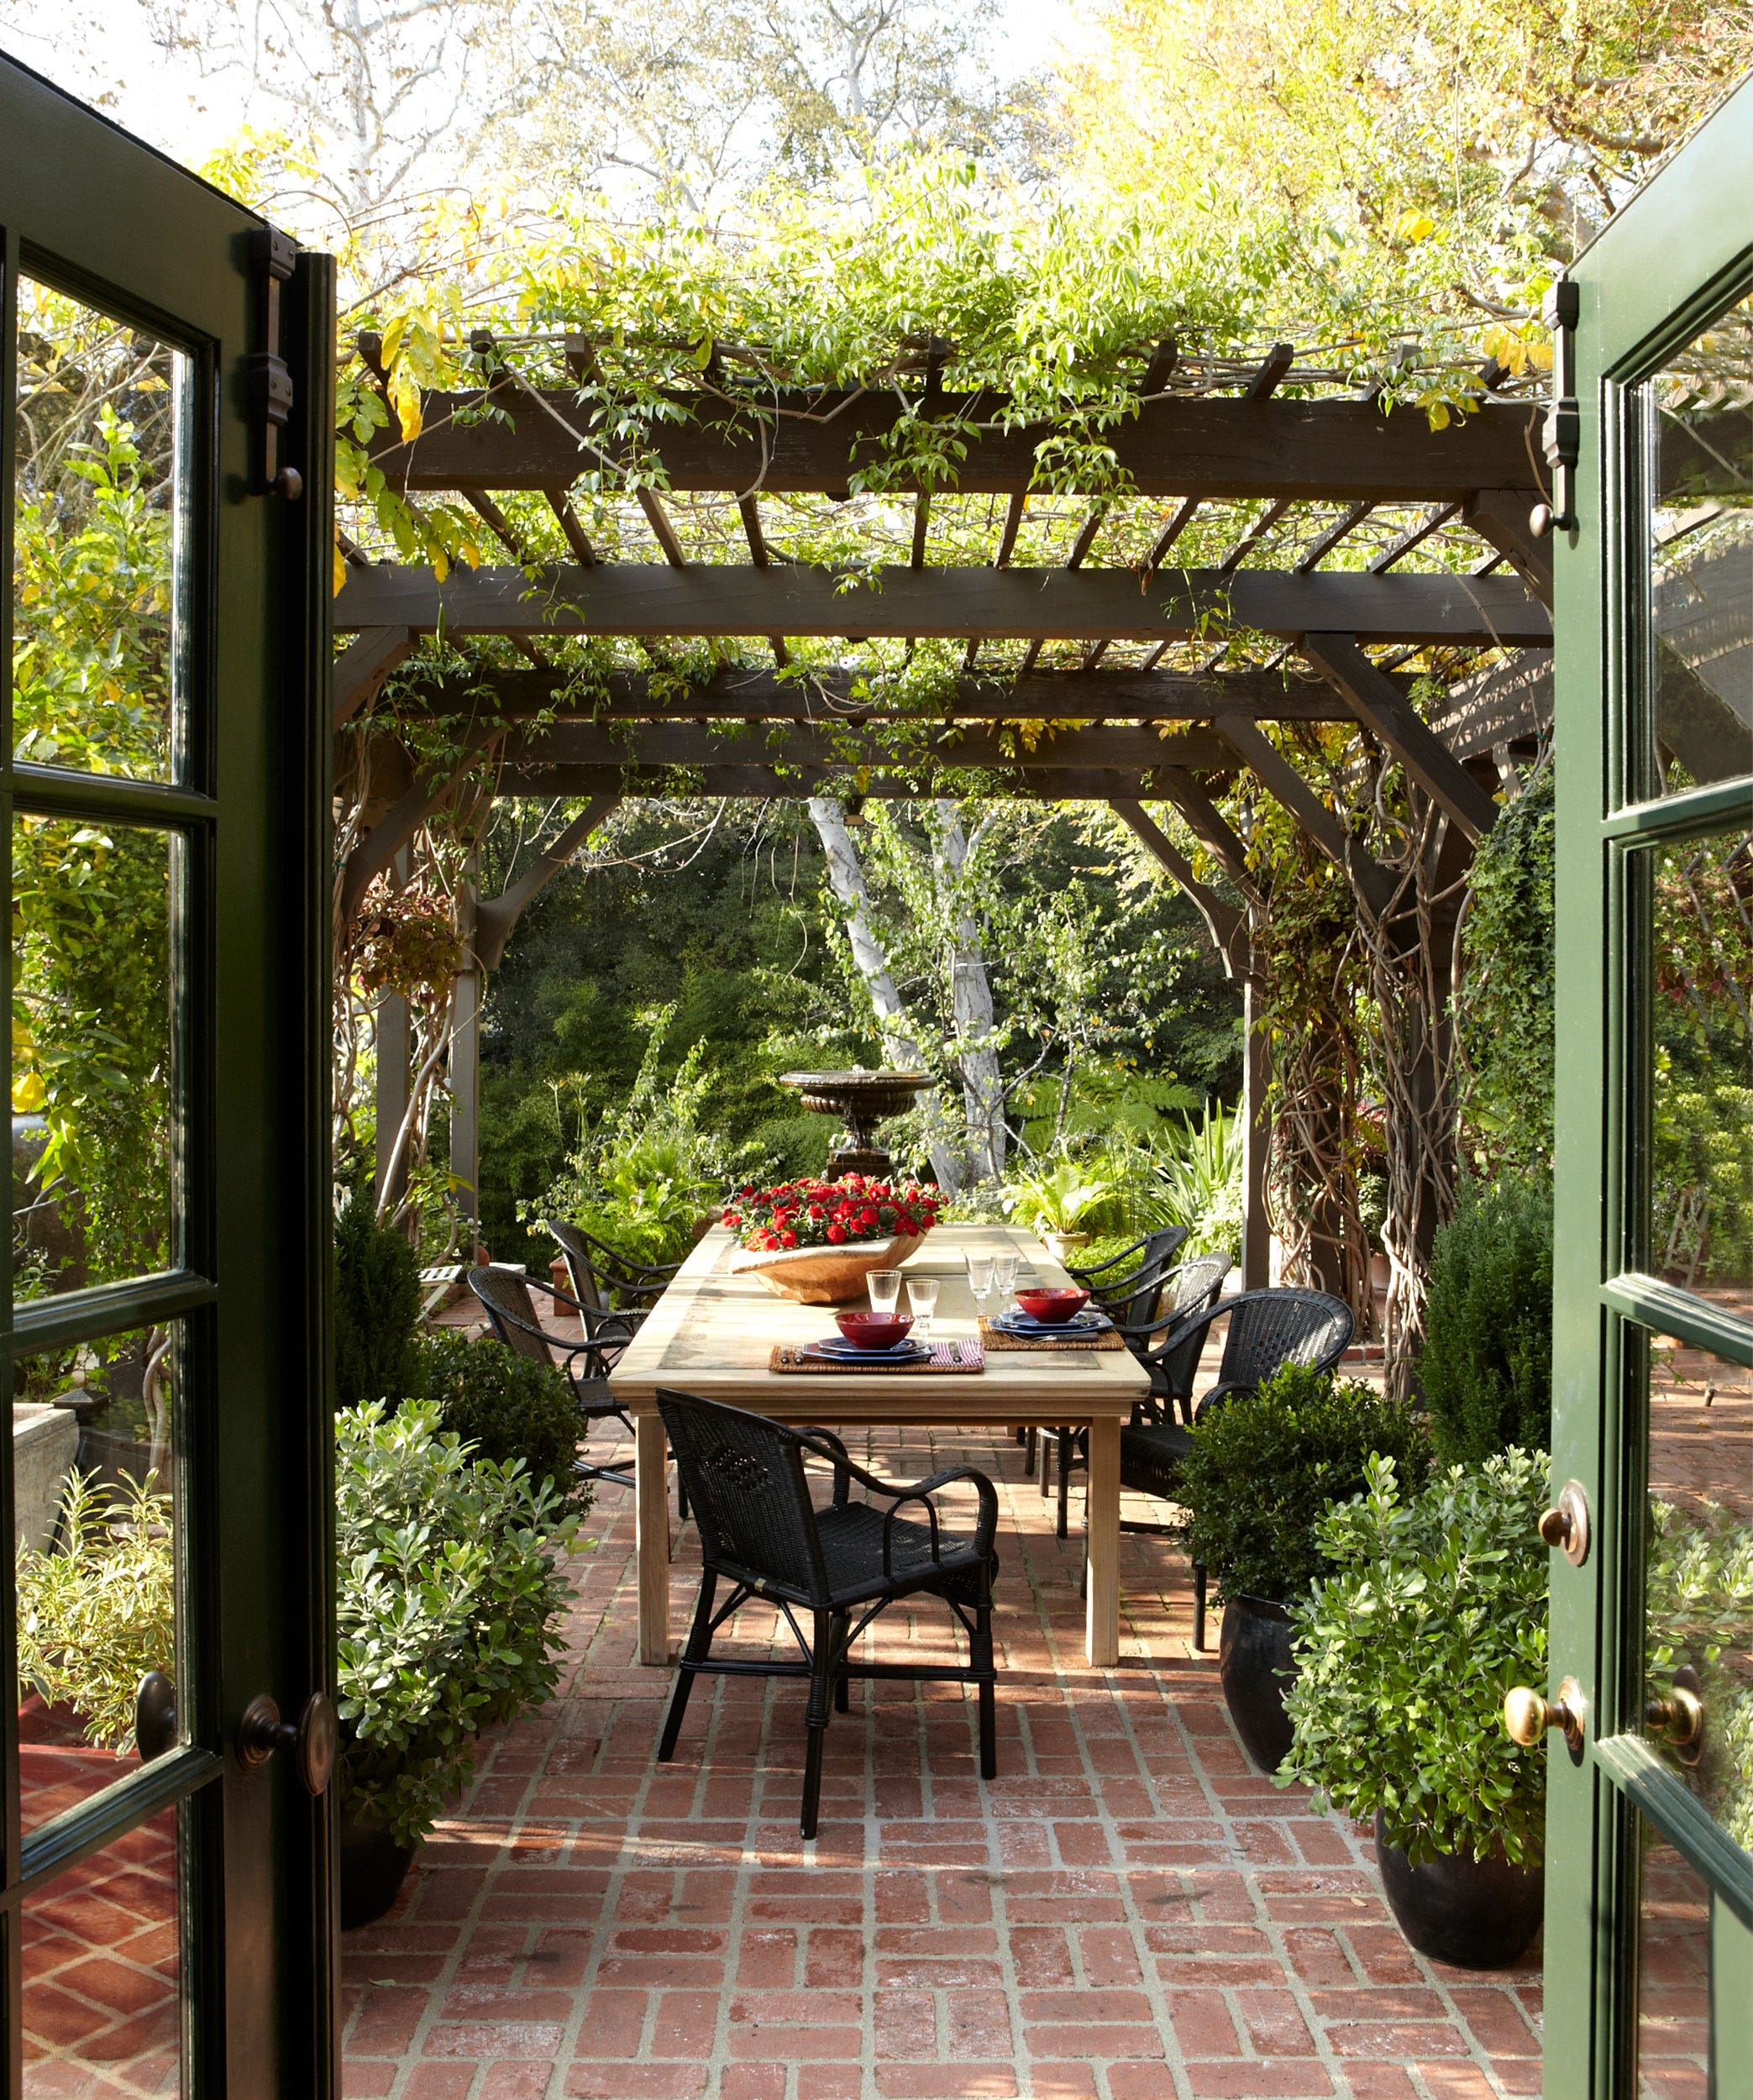
24. Dine Under a Vine-Covered Pergola on a Red Brick Patio
A vine-covered pergola is the dream, but be prepared for the guests it invites. The foliage and any fruit or flowers it produces can attract insects like bees and wasps, which might not be ideal for a dining area. The vines will also drop leaves, twigs, and petals onto your table and chairs, requiring regular sweeping. To minimize this, choose a less messy vine like a trumpet vine over something like a grape, and be prepared for a little daily tidying to keep the space ready for dinner.
|
$218.39
|
$1,399.99
|
$10.80
|
$205.70
|


“While all the elements are lovely, the one thing that truly defines the character of this space is the red brick paving.”
It injects a dose of timeless, rustic warmth that balances the dark wood of the pergola and the black wicker chairs. If you swapped the brick for modern concrete pavers, the entire mood would shift from a serene, intimate escape to something much cooler and more contemporary. The brick is the heart of this design’s natural, established feel. For a different pergola style, look at Idea #8.
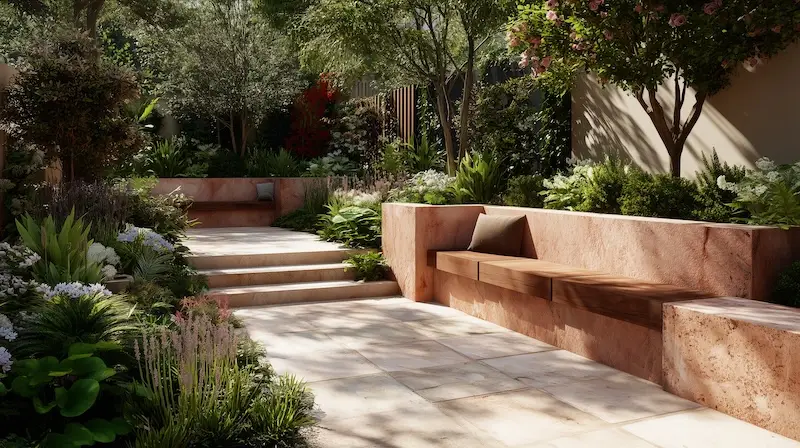
25. Build Integrated Wooden Benches into Terracotta-Toned Retaining Walls
A terraced garden with custom built-ins is a significant investment, but it can completely transform a sloped yard. Here’s a rough estimate of the costs involved for a medium-sized project.
|
$35.90
|
$1,210.65
|
$1.78
|
“Retaining Walls (Stuccoed block, 100 linear feet): $8,000 – $20,000
Integrated W”
- Retaining Walls (Stuccoed block, 100 linear feet): $8,000 – $20,000
- Integrated Wooden Benches (30 linear feet): $3,000 – $7,000
- Paving & Steps (light-colored stone, 250 sq ft): $5,000 – $10,000
- Plantings (Shrubs, trees, perennials): $2,000 – $5,000
- TOTAL: $18,000 – $42,000
- Budget alternative: Use pre-cast concrete retaining wall blocks and build simple, freestanding wooden benches to get a similar tiered effect for 40-50% less.
This design is so successful because it perfectly marries the functional and the beautiful. The terracotta-toned retaining walls are a necessary solution for a sloped yard, but they’re also a stunning design feature. Integrating the dark wooden benches directly into the walls is a brilliant space-saving move that makes the seating feel like a completely organic part of the landscape. It’s a garden where every element is working hard and looking good at the same time.
26. Carve Out a Cozy Nook with an Ornate Metal Bench and Decking
This cozy corner follows a simple recipe for rustic charm: 50% lush greenery + 30% warm wood + 20% ornate detail. The dense foliage and flowering plants create a feeling of private enclosure. The wooden deck and fence provide a warm, natural base. The final, critical touch is the ornate metal bench and marble-topped table. The intricate scrollwork and classic materials add a touch of old-world elegance that elevates the space from a simple deck to a romantic garden retreat.
|
$169.97
|
$40.00
|
$62.97
|
$110.38
|


“You can find ornate, vintage-style metal benches for a steal if you know where to look.”
Instead of high-end garden stores, check Facebook Marketplace, flea markets, or thrift stores. People often sell these for under $100. A quick sanding and a fresh coat of Rust-Oleum spray paint in black or dark green can have it looking brand new. Pair it with a simple, affordable wooden deck made from standard pressure-treated pine to get this cozy, inviting feel on a serious budget.
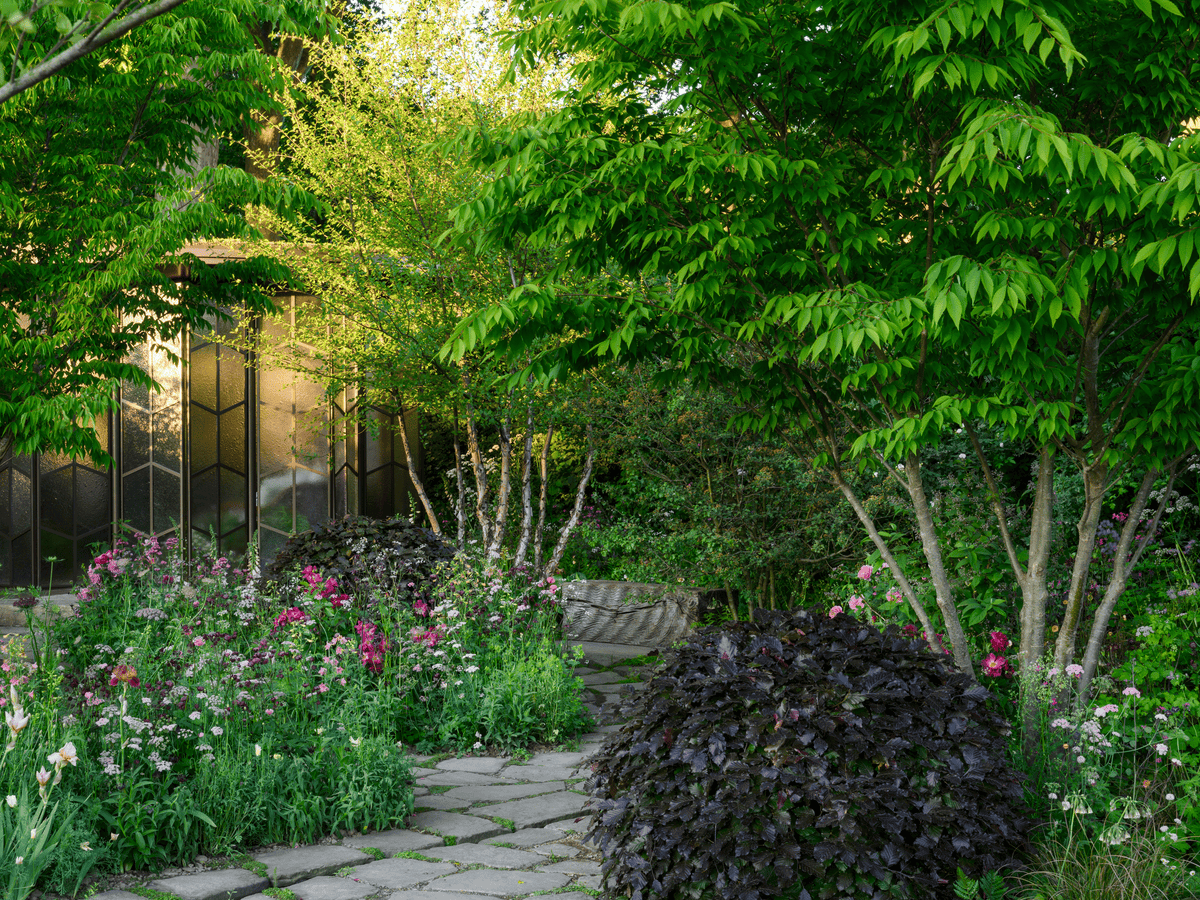
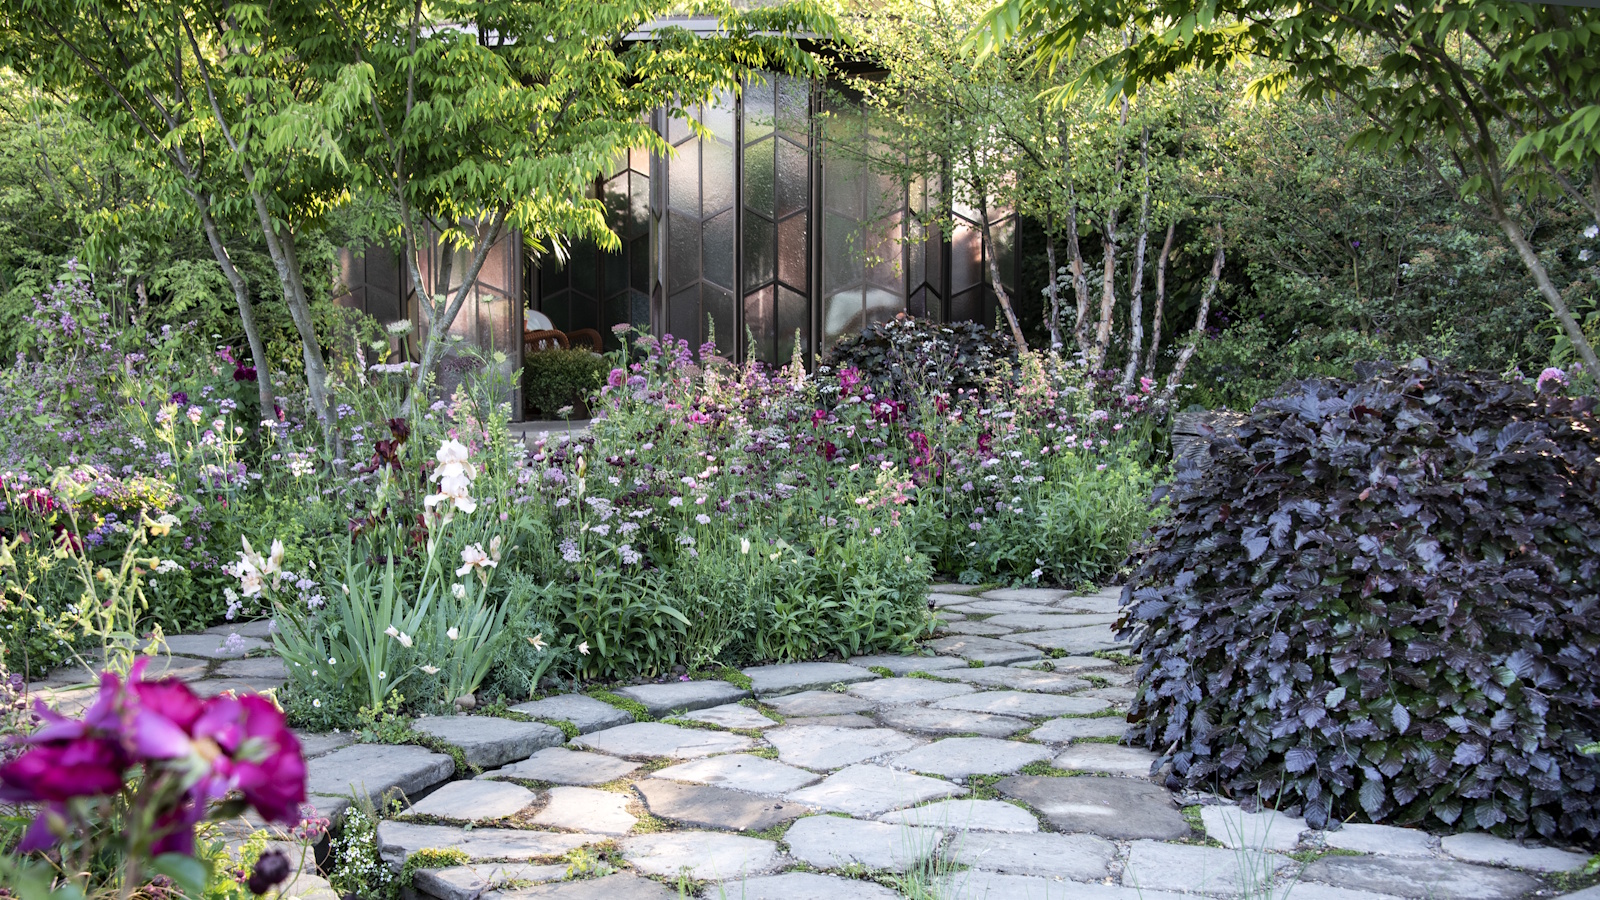
27. Lay a Winding Flagstone Path Towards a Secluded Glass Structure
To make a flagstone path feel natural and serene like this one, the secret is to vary the size and shape of the stones as much as possible. Avoid using stones that are all the same dimension. Mix large, irregular anchor stones with smaller, medium-sized pieces to fill in the gaps. Let the edges of the path be undefined, with plantings like the dark foliage shrubs and flowers spilling over the stones. This breaks up any hard lines and makes it feel like the path was discovered, not just installed.
|
$28.46
|
$27.95
|
$261.89
|

“A garden this lush and densely planted requires a significant amount of water to stay vibrant, especially with thirsty plants like the birch trees and mixed flower beds.”
If you’re not in a climate with regular summer rain, you will need a consistent watering plan. An automated drip irrigation system, while an upfront investment, would be far more efficient for a garden like this than hand-watering, ensuring water gets to the roots where it’s needed without promoting fungal growth on the dense foliage.
28. Create a Romantic Hideaway with a Rust-Colored Metallic Gazebo
The single element that gives this garden its enchanting, romantic quality is the metallic gazebo. It functions as a destination, a focal point, and a piece of sculpture all in one. Its ornate crown and intricate scrollwork add a fairytale-like detail, while the rust-colored finish helps it blend beautifully with the natural tones of the garden. The cozy café seating inside transforms it from a simple structure into an intimate, secluded retreat for two.

|
$299.00
|
$101.04
|
$5.97
|
$1,999.95
|


29. Stage Elegant Outdoor Dining with Woven Chairs and Golden Lanterns
Before you invest in a large outdoor dining setup like this, do a quick reality check.
|
$15.01
|
$69.99
|
$149.00
|


“Measure your patio space carefully.”
You need at least 3 feet of clearance on all sides of the table to comfortably pull out chairs.
Consider your climate. Will the woven chairs and wooden table withstand the sun, rain, or snow in your area? Check the material specifications.
Where will you store it all? If you need to bring furniture or cushions in for the winter, ensure you have adequate storage space.
Think about lighting. Are there overhead lights, or will you need to rely on lanterns and candles for evening gatherings?
While beautiful, those golden lanterns and woven chairs require some specific care. The glass on the lanterns will need frequent cleaning to remove dust, pollen, and wax drips if you use real candles. Woven furniture, even if it’s all-weather wicker, can trap dirt and debris in its crevices. Plan to give it a good scrub with a soft brush and soapy water at the beginning and end of each season to keep it looking fresh and prevent mildew from forming in damp climates.
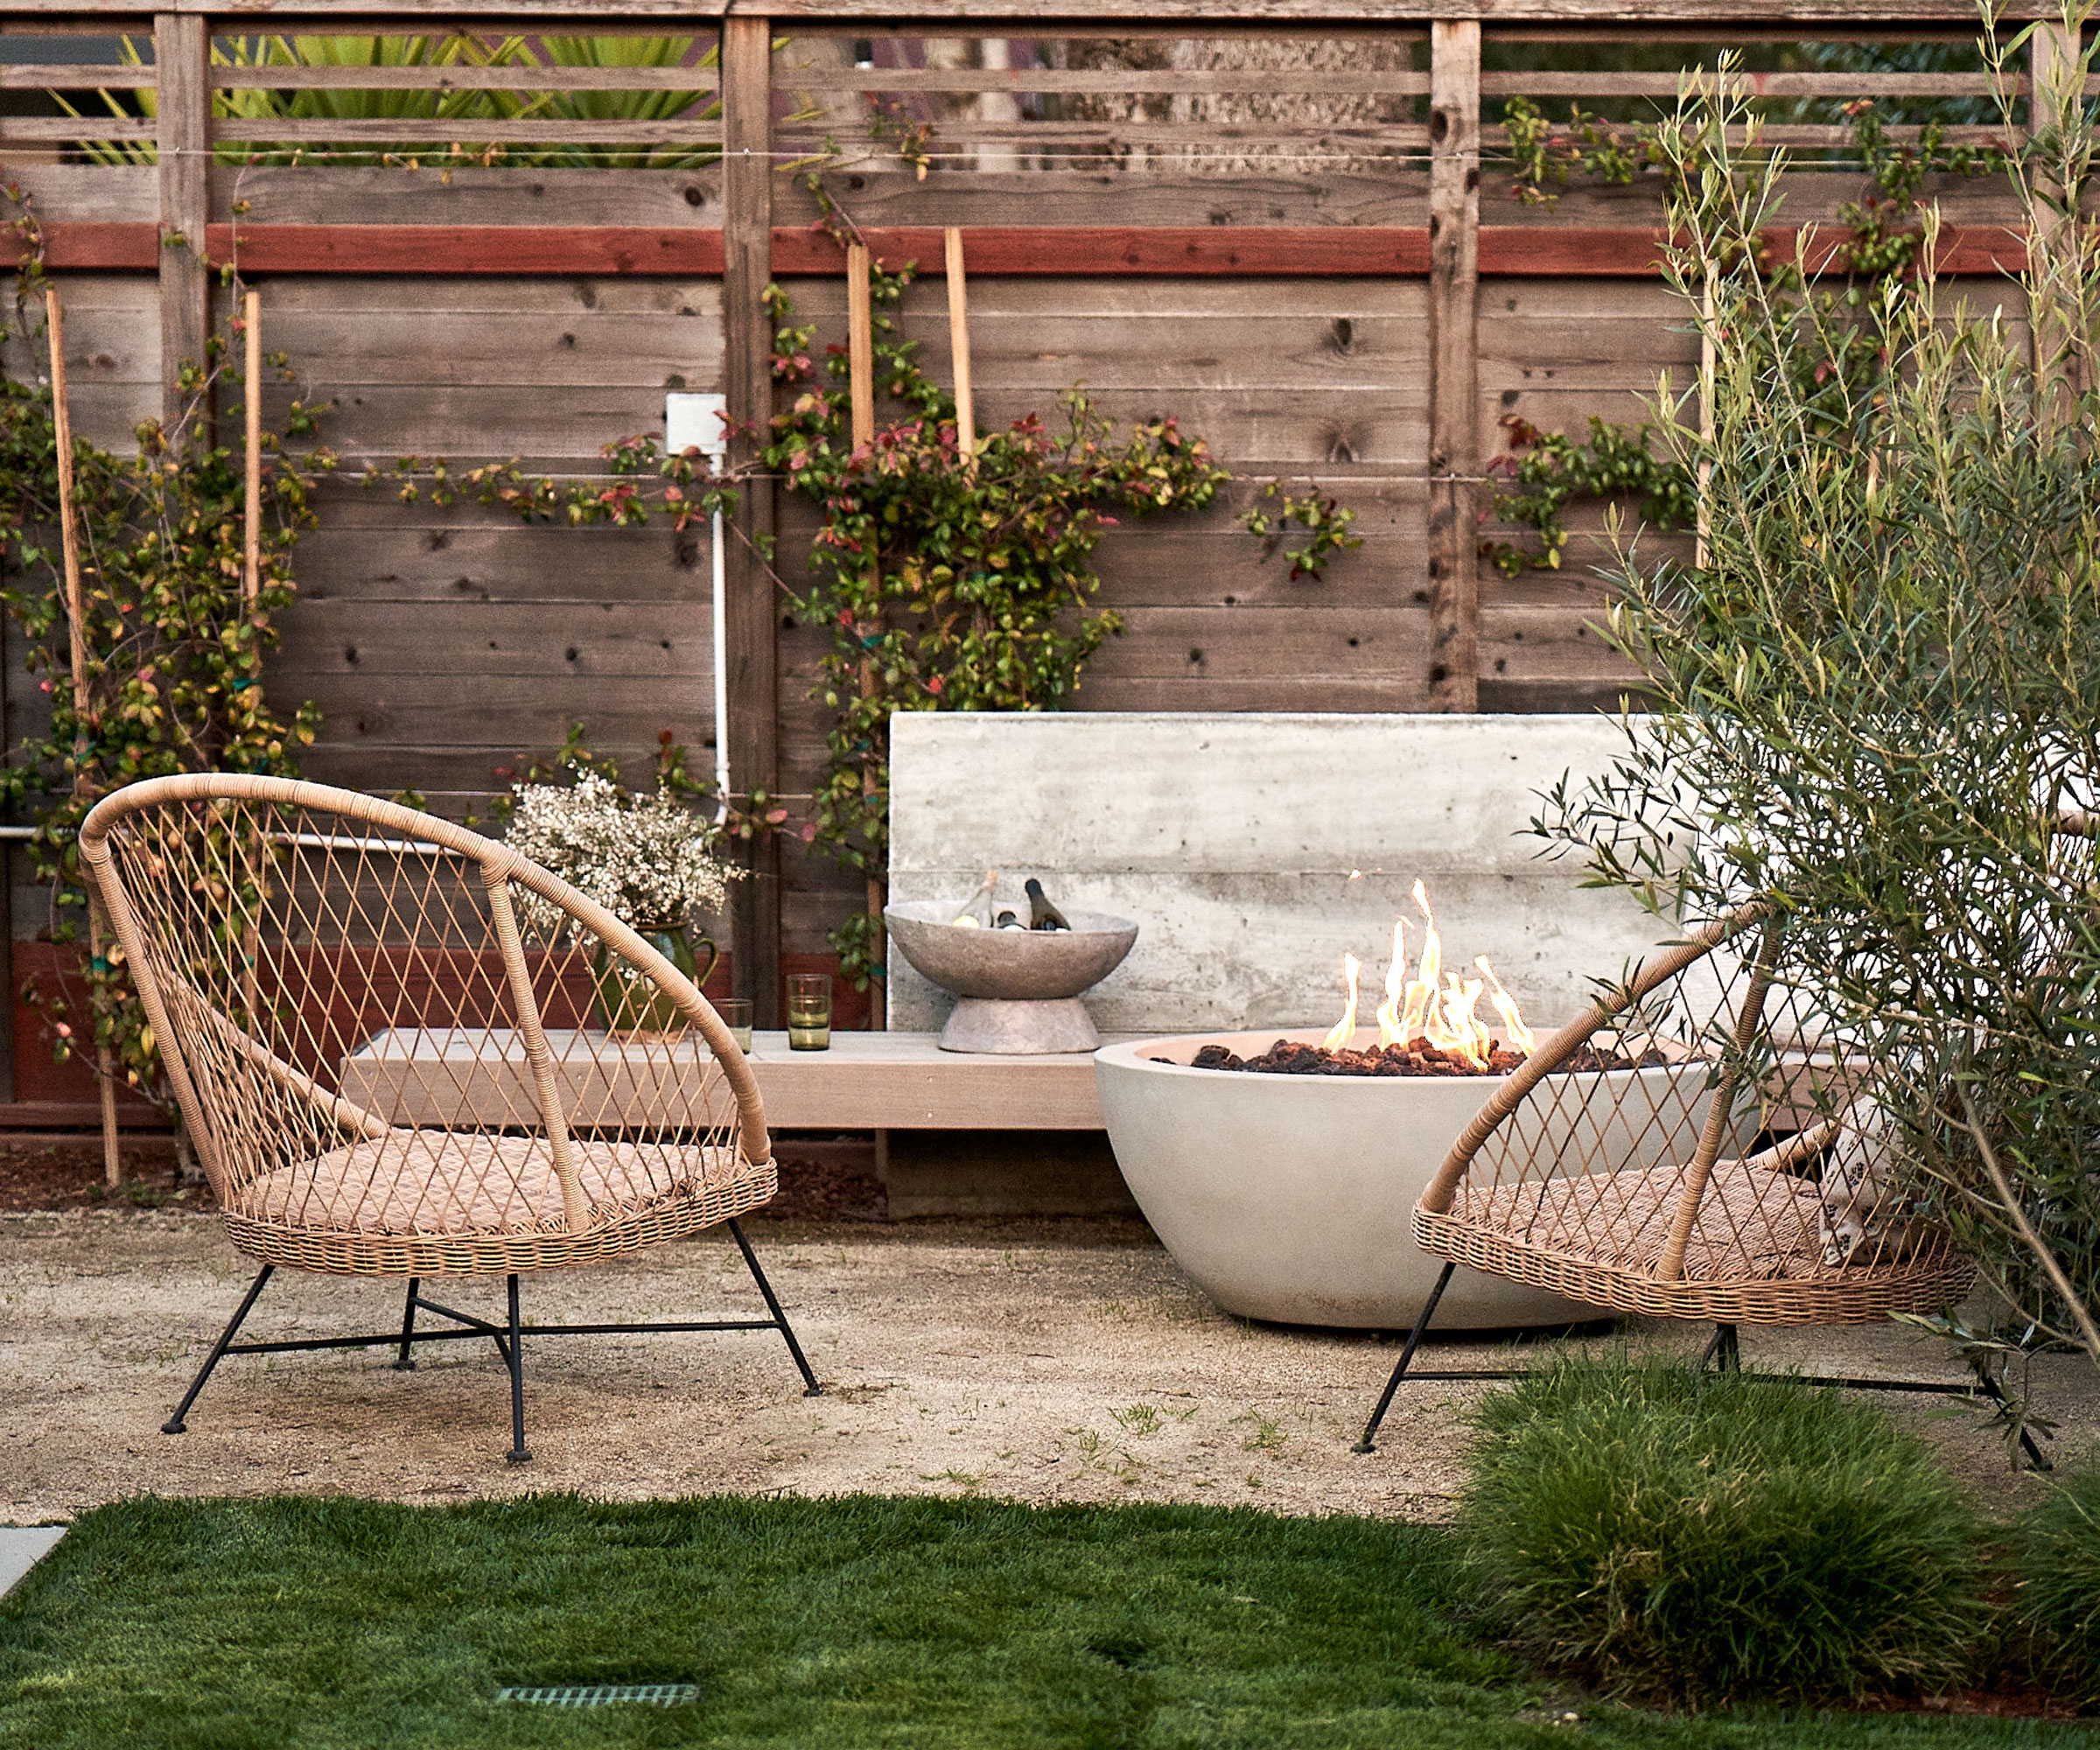
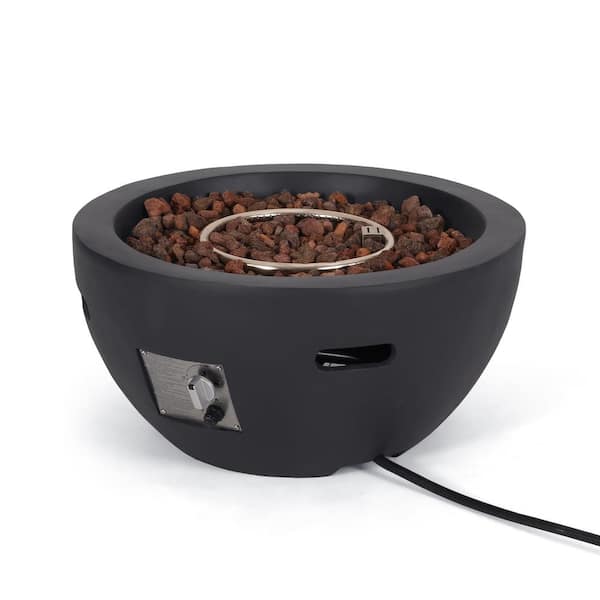
30. Arrange Wicker Chairs Around a Modern Bowl-Shaped Fire Pit
Love the look of that concrete backrest and integrated bench? You can create a similar feature with concrete retaining wall blocks.
|
$1,869.00
|
$297.39
|
$59.99
|
$299.99
|


“Time: 1-2 weekends.”
Cost: $400-$900.
Lay out and level a gravel base for your wall’s foundation.
Stack pre-cast concrete retaining wall blocks (like those from Allan Block or Belgard) to your desired height, using construction adhesive between layers.
For the bench, leave an opening in the wall and frame it out with pressure-treated lumber.
Top the bench frame with composite decking or sealed cedar boards for a durable seating surface.
This cozy, modern retreat look is very achievable on a budget. The key pieces—the gas fire pit and the woven wicker chairs—are widely available at various price points. Look for bowl-shaped fire pits at Target or Wayfair, where they often sell for $250-$500. The woven chairs can frequently be found on sale at the end of the season at Home Depot or Lowe’s. The wood fence backdrop is a classic DIY project that can be built with affordable pine or cedar fence pickets.
31. Define a Modern Courtyard with Light Wood Furniture and Tall Grasses
When designing for a small, enclosed courtyard like this one, keeping the materials palette simple is essential. Notice how the design relies on just a few key materials: the light wood of the furniture, the large gray stone tiles, and the brick accents. By repeating these materials, the space feels cohesive and intentional, not cluttered. The variety comes from the texture of the different green plants, which provides more than enough visual interest without introducing chaotic new colors or finishes.
|
$218.27
|
$241.55
|
$5.18
|
$624.65
|


“This space feels so serene and relaxed because of the smart balance between hard and soft textures.”
The large, smooth gray patio tiles and the clean lines of the wooden fence create a calm, modern foundation. But it’s the tall, wispy green grasses and other lush plants that bring it to life. They soften the hard edges of the architecture and add movement as they sway in the breeze. This interplay prevents the modern design from feeling too rigid and creates a truly comfortable outdoor room. If you need a larger seating area, see Idea #3.
Your Garden Story Begins Now
Don’t just dream about a beautiful garden—start planning it. Pick one detail from an idea you love—a plant combination, a paving material, a piece of furniture—and make it your own. Your perfect outdoor escape is closer than you think.
Now, go get that garden board started on Pinterest!
Photo credits: Sunset Magazine, Better Homes & Gardens, The Pros, Inc., Acacia Gardens, TheCoolist, The English Garden, Garden Ornaments, Gardening Know How, Southview Design, ELLE Decor, Martha Stewart, Homes and Gardens, Southern Living, Oxford Garden Centre, Veranda, Country Living Magazine, Goodnet.org, AOL.com, Friends of Mounds State Park, Woman&Home, Swick’s Landscaping Ltd. / Web