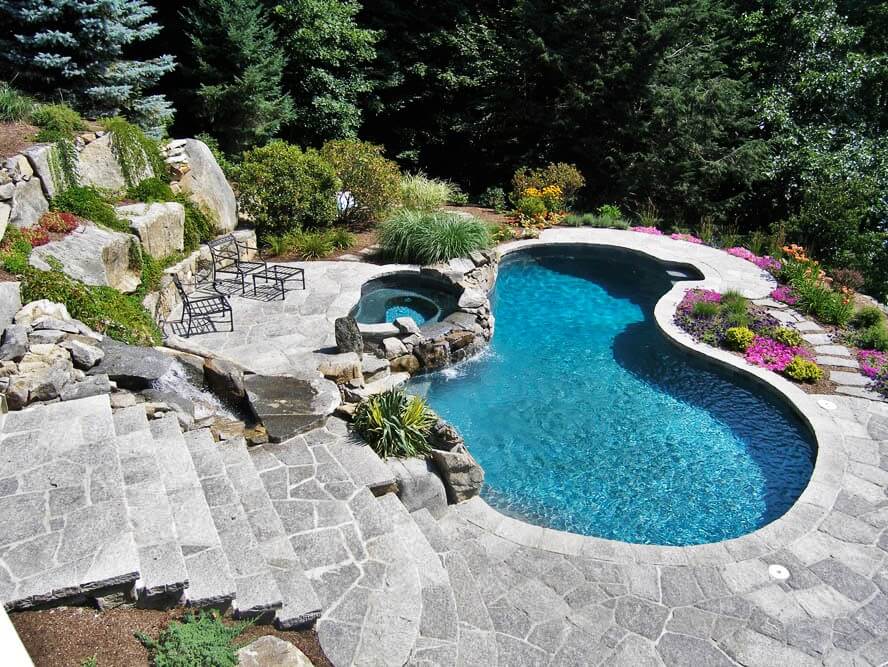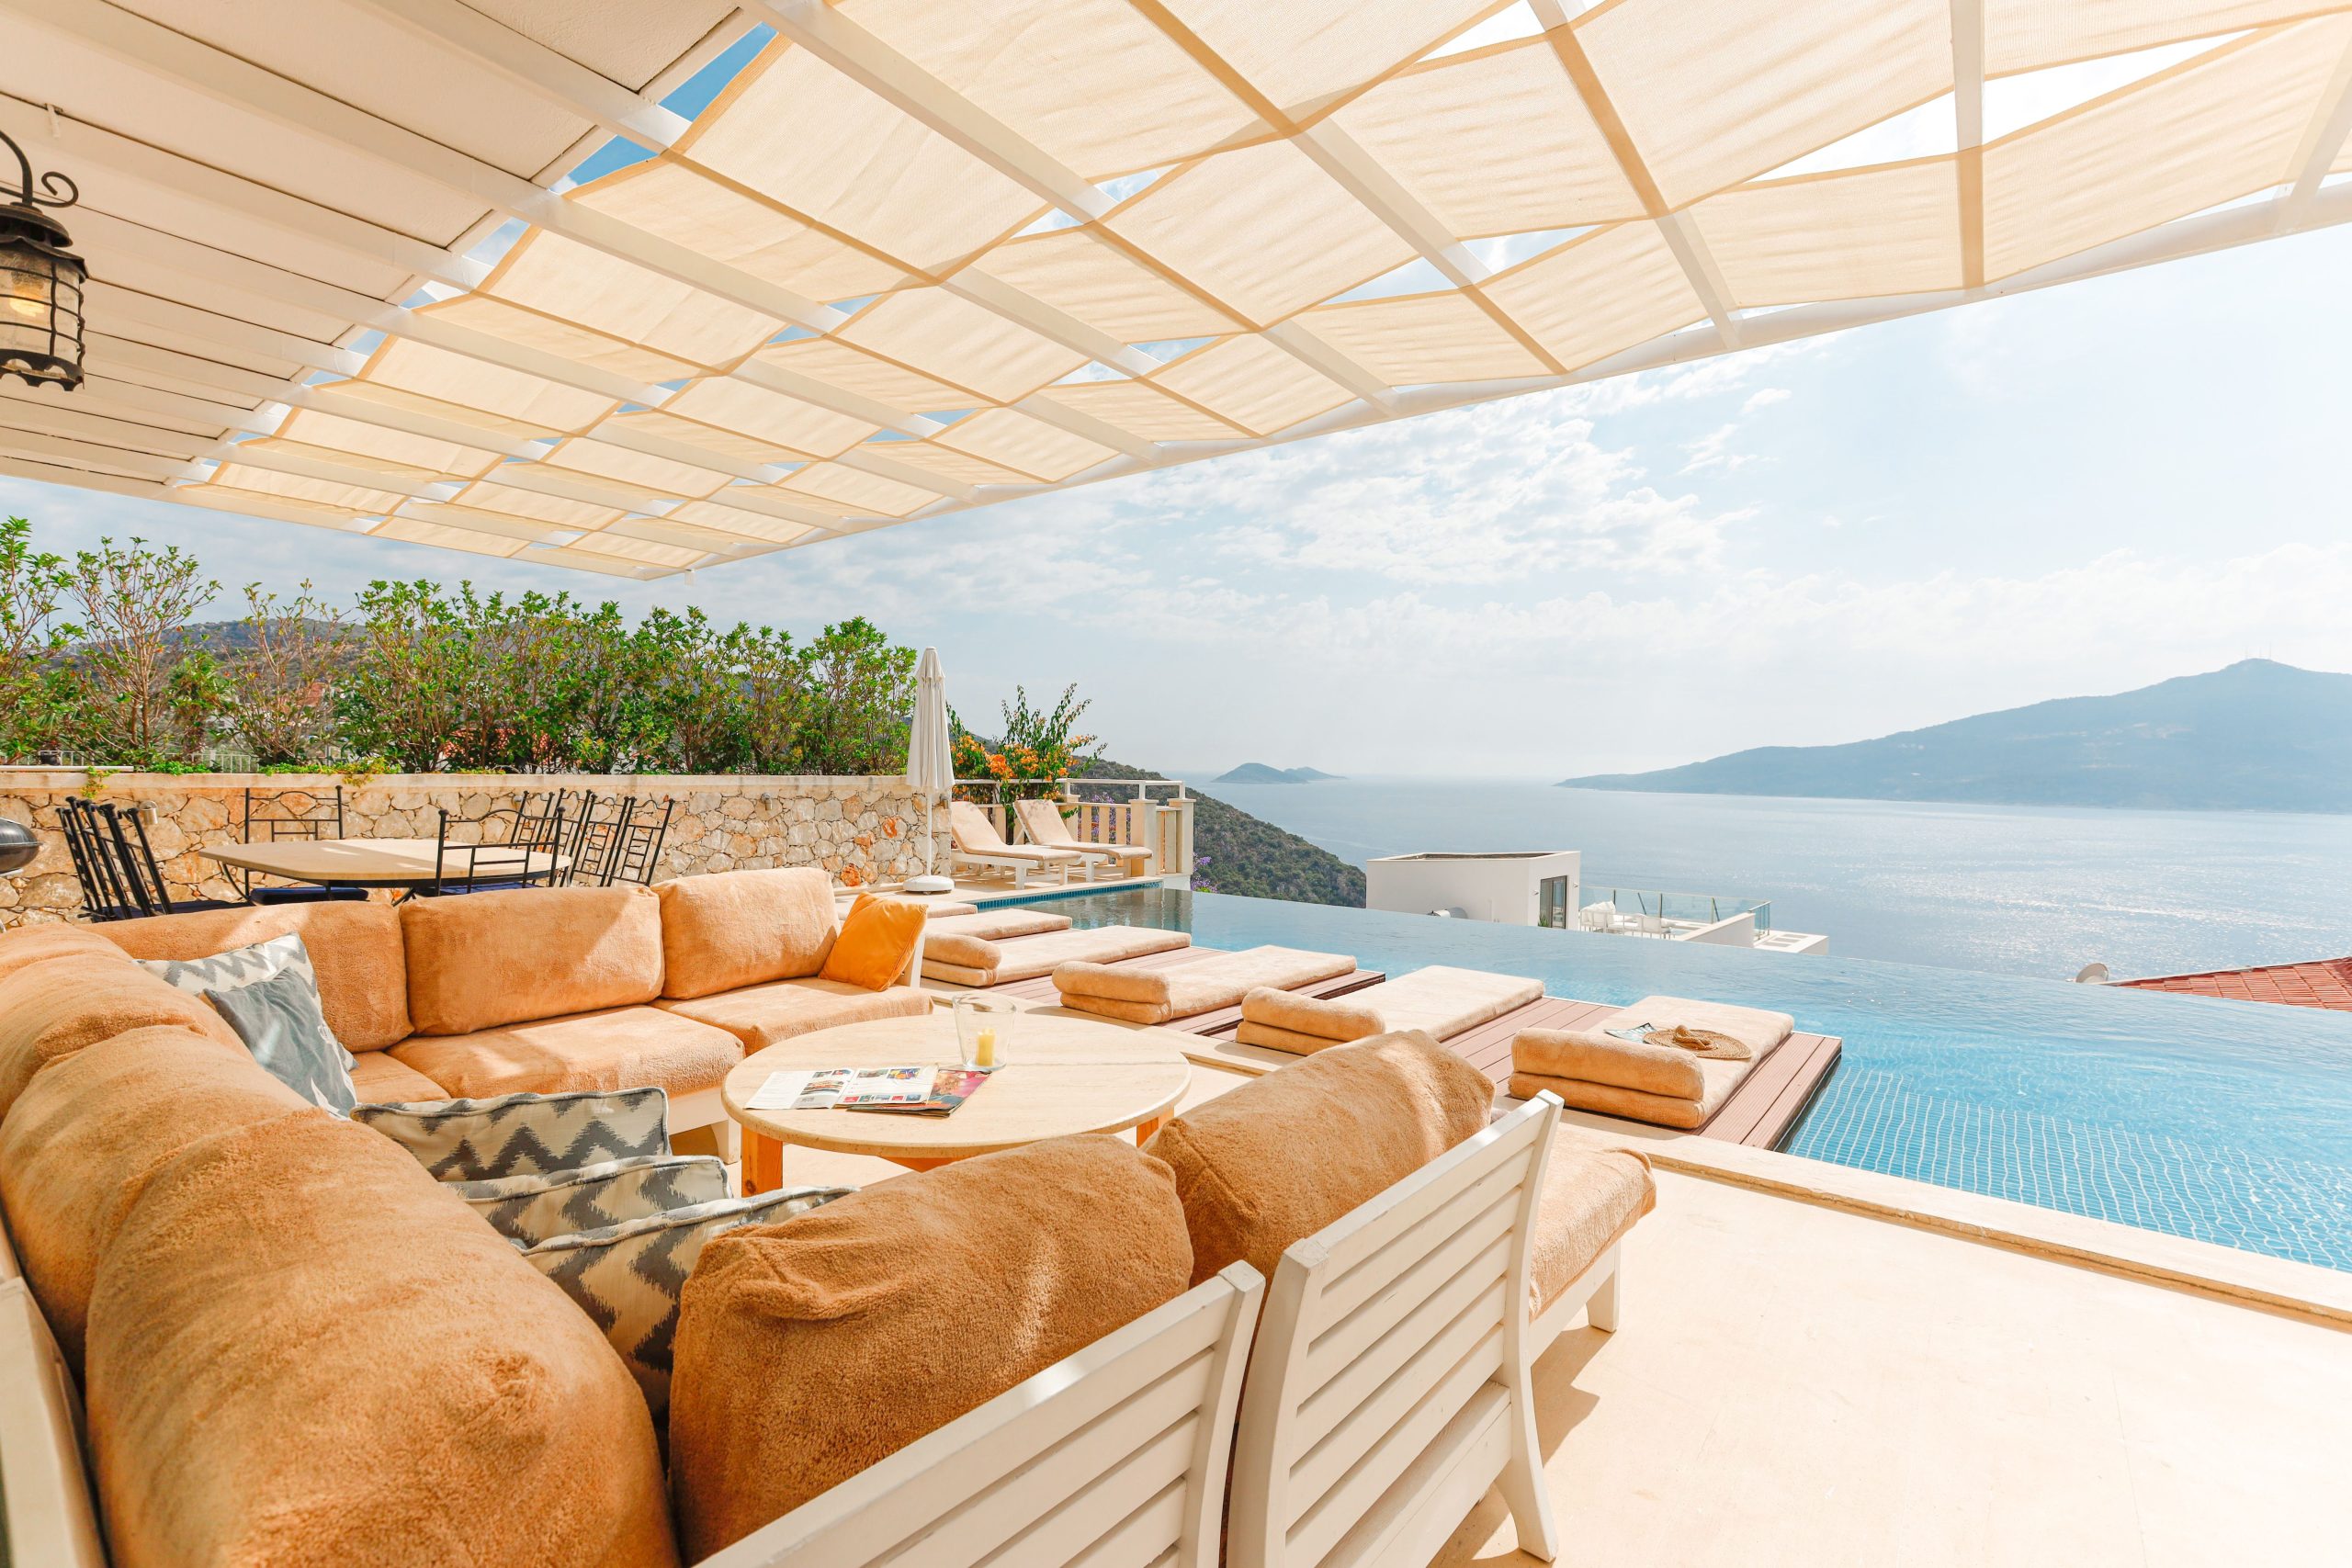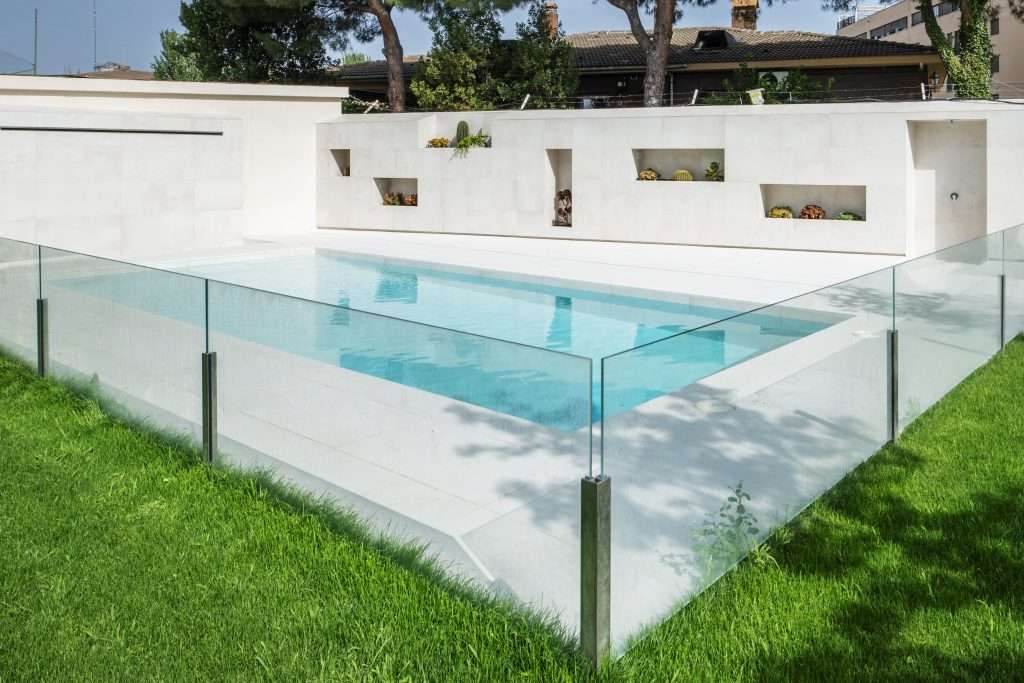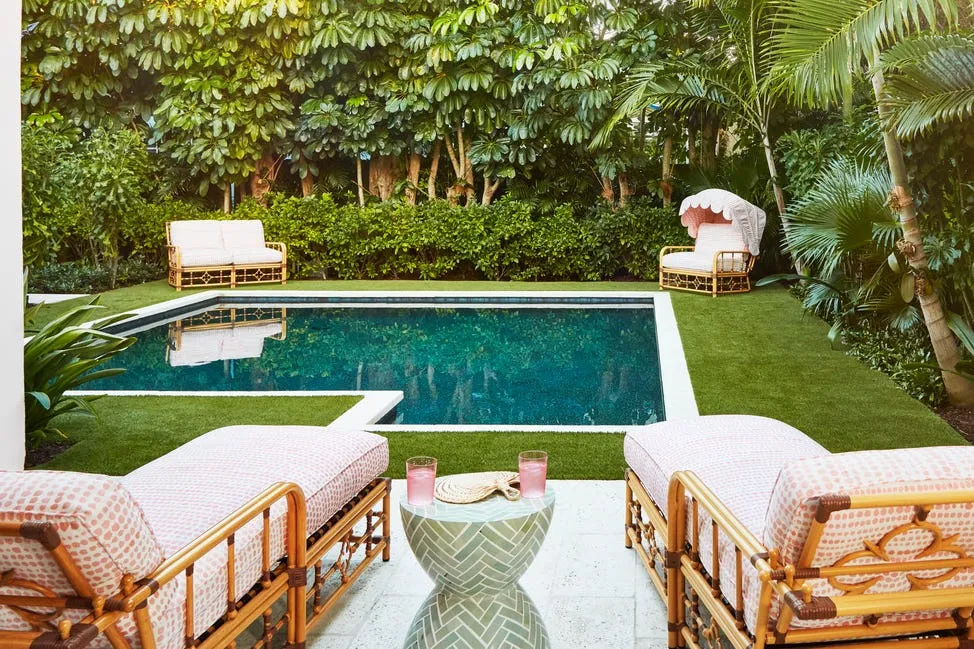
You know that feeling when you finally scroll past the thousandth pin and find the one? The backyard idea that looks exactly right for your family, your space, and your budget? Getting there can feel impossible, but it doesn’t have to be. We’ve done the hard work for you, filtering through hundreds of options from places like Amazon, Wayfair, and The Home Depot to find what actually delivers. We’re talking everything from a $200 inflatable slide to a $50,000 resort-style pool.
Inside, you’ll find 31 incredible ideas—from lush, tropical oases to modern play zones and shockingly fun budget setups—all pulled from real backyards. In 2026, the ‘outdoor room’ isn’t just a trend; it’s a full-blown movement as families invest more in home-based experiences that create lasting memories. And stay until the end—we break down the most common mistakes that can ruin these amazing looks. 📌 Pin this guide for later—your future self will thank you when it’s time to actually build something.
1. Go Big with a Dual-Lane Blue and Yellow Inflatable Water Slide
There’s a simple genius to this setup: symmetry. The dual slide lanes aren’t just for moving more kids through; they’re an open invitation for friendly races and shared fun. The bright, primary color scheme of bold blue and sunny yellow is a visual magnet for children, telegraphing ‘fun’ from across the lawn. By integrating the splash pool directly at the base, the entire experience is self-contained, keeping the wet-and-wild zone manageable and preventing the whole yard from turning into a swamp.
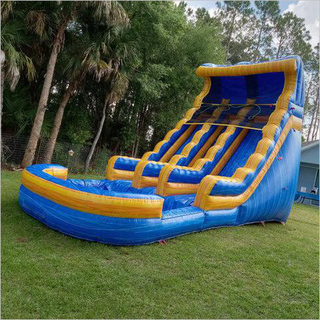
“Let’s be honest: while this is a guaranteed win for the kids, it’s a bit of work for you.”
These large inflatables require a significant, perfectly flat, and debris-free patch of lawn—we’re talking at least 20×15 feet. You also need to account for the continuous drone of the electric air blower, which is not exactly a peaceful garden sound. The biggest hassle? Post-party cleanup. It must be completely dried before you deflate and store it to prevent mildew, which can take hours in the sun.
2. Add a Magical Glow to a Red Playhouse with String Lights
To get this magical, layered lighting effect, use at least two different types of outdoor string lights. First, wrap the main tree trunk and larger branches with warm white ‘fairy’ or micro-dot lights on a green or brown wire to make them disappear. Then, hang larger G40 globe bulb strands between major branches or from the house to the tree. This creates a soft, ambient ‘ceiling’ of light. Aim for a color temperature of 2700K for that perfect, cozy, incandescent-like glow that feels warm, not harsh.
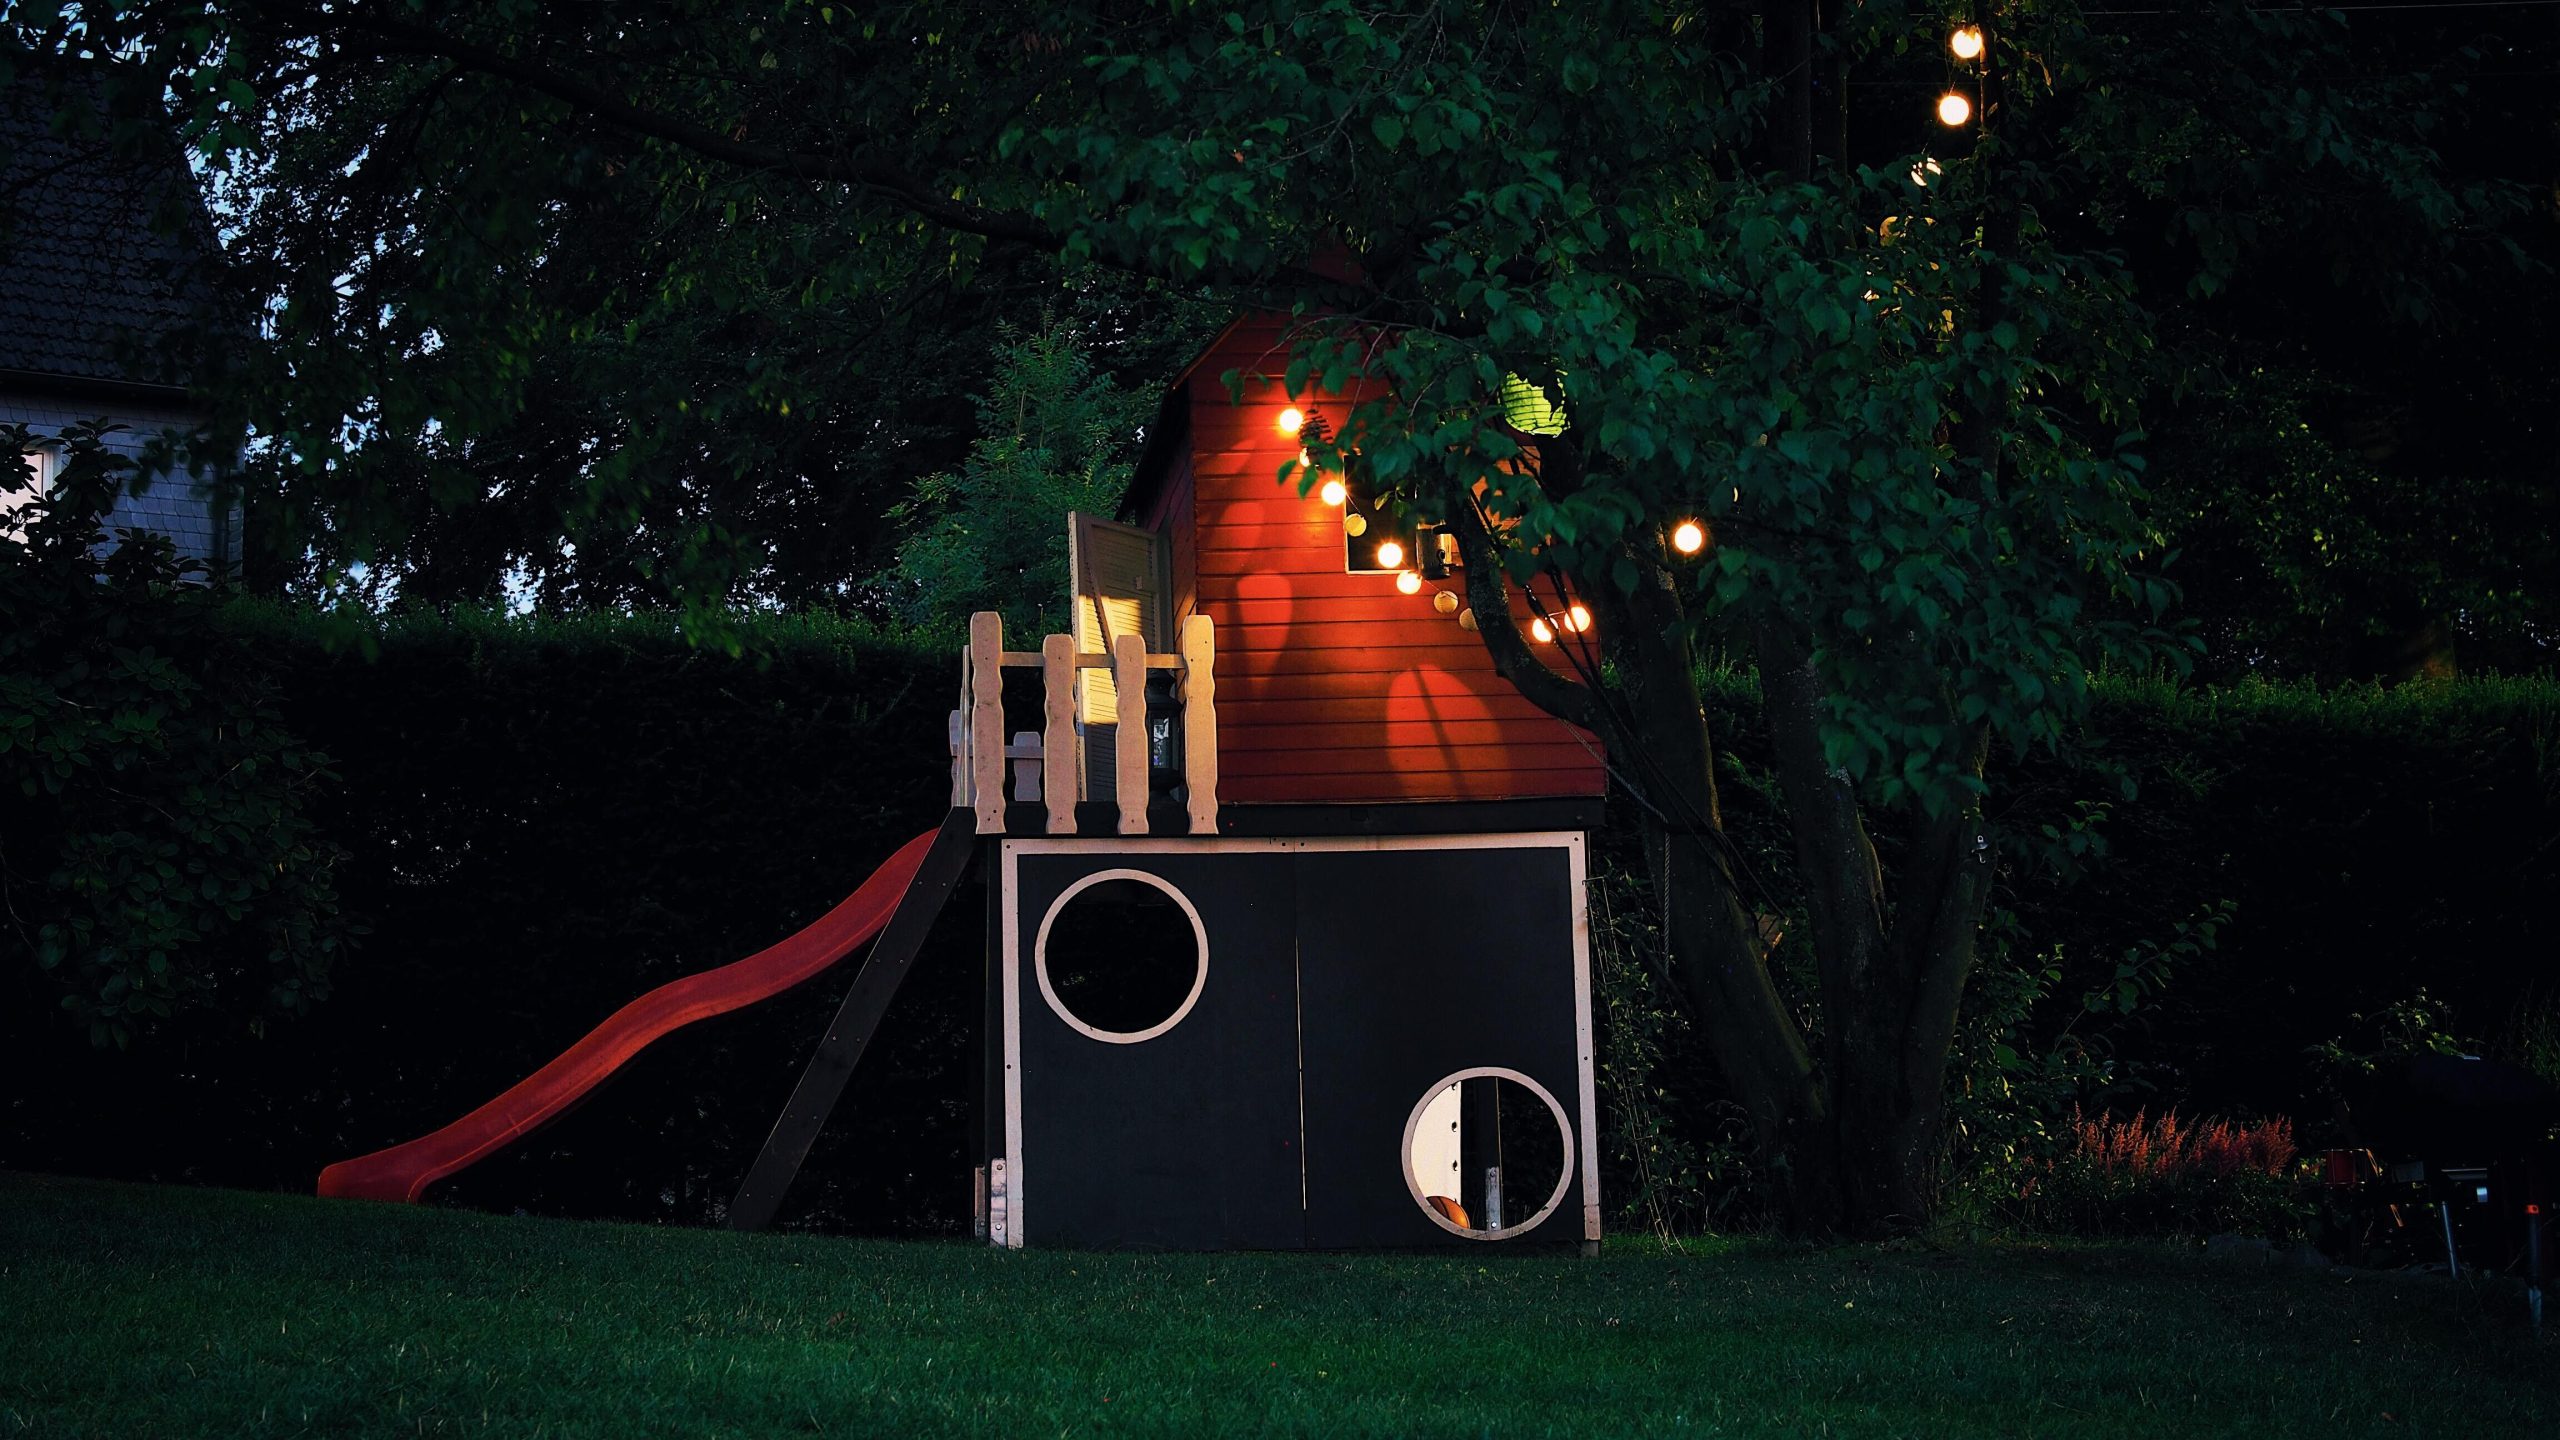
“that makes this entire scene feel special is the string lights.”
Without them, it’s just a playhouse in a yard. With them, it’s a magical fort, a secret hideout, an enchanting space that extends playtime well past dusk. The lights do more than just illuminate; they define the area, creating a glowing ‘room’ within the garden that feels intentional and incredibly inviting for kids and adults alike.
3. Create an Old-School Soapy Slip-n-Slide
You don’t need a massive inflatable to have an epic water slide day. This entire look is the definition of budget-friendly fun. A heavy-duty plastic painter’s tarp from a hardware store costs about $20. Add a bottle of tear-free baby soap for foam ($5) and a garden hose you already own. For less than $30, you’ve recreated the exact thrill of a much more expensive setup. Pro tip: secure the edges of the tarp with landscape staples to keep it from bunching up during use.
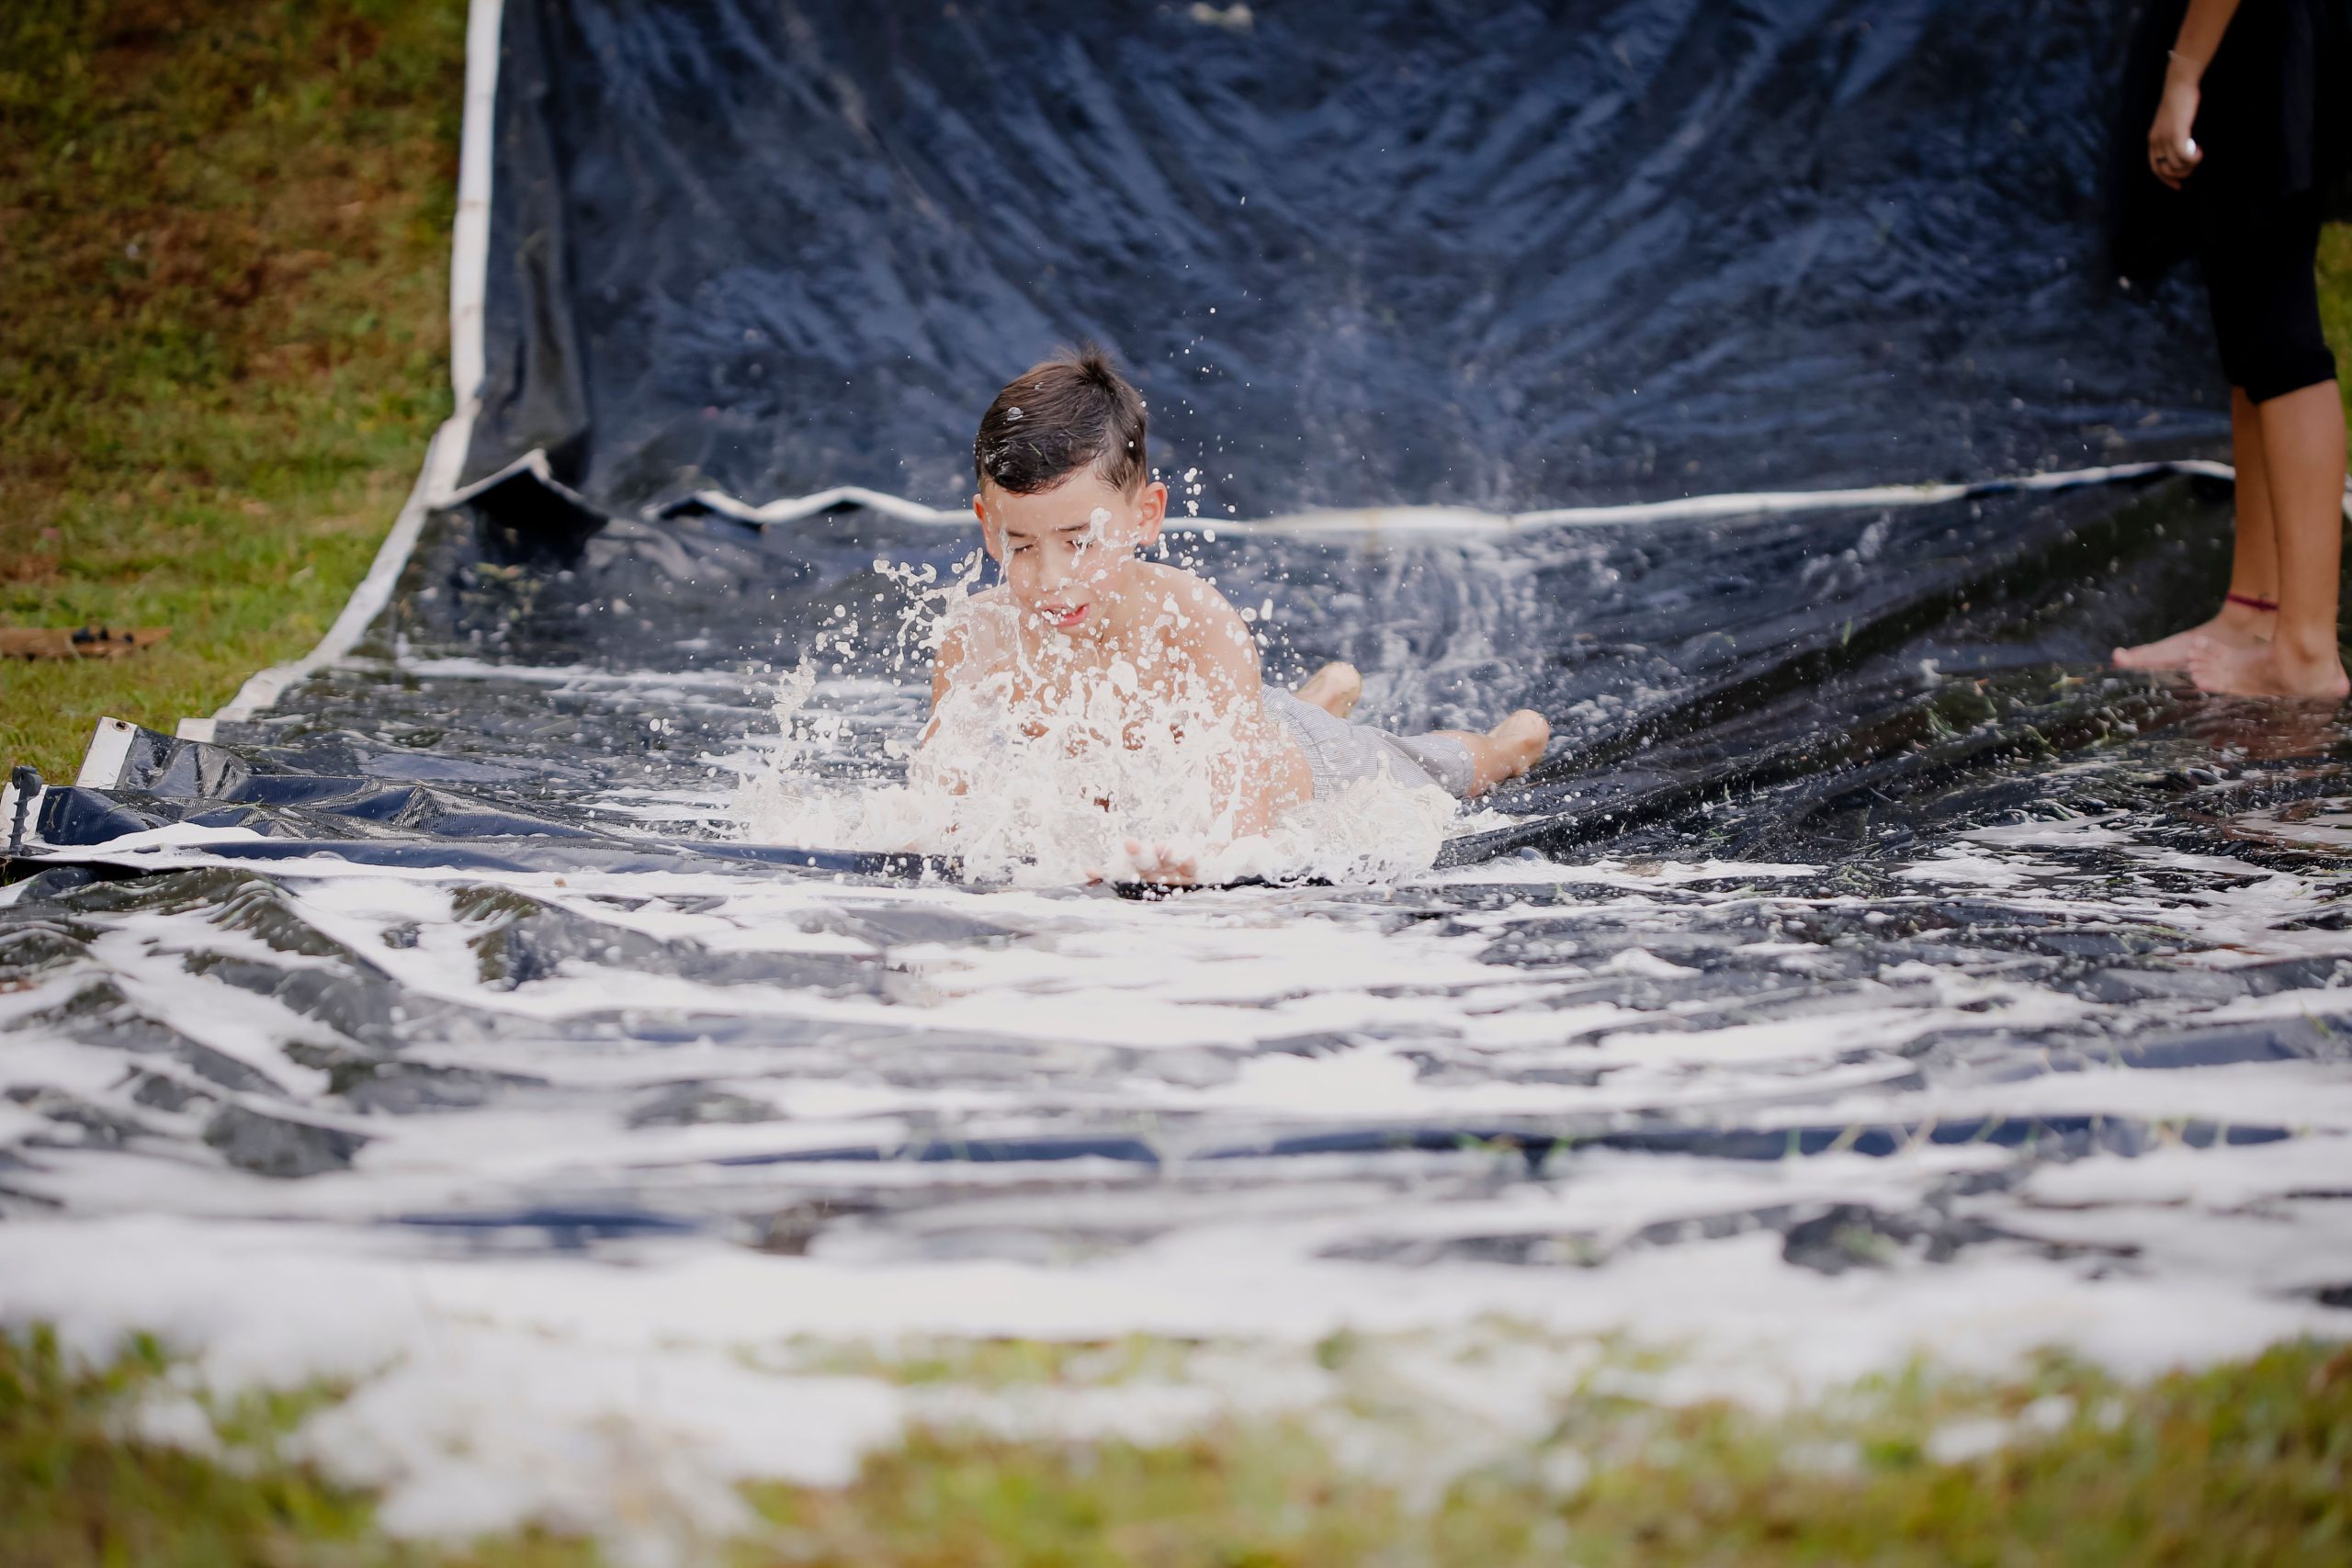
“This is a fantastic, low-cost activity, but be prepared for the lawn impact.”
The combination of a plastic sheet, soap, and constant water can suffocate the grass underneath, leaving you with a yellow or brown patch for a few weeks. To minimize damage, move the slide to a new spot each day or two. Also, make sure the sliding path is completely clear of rocks, sticks, or sprinkler heads, as the thin plastic sheet offers zero padding.
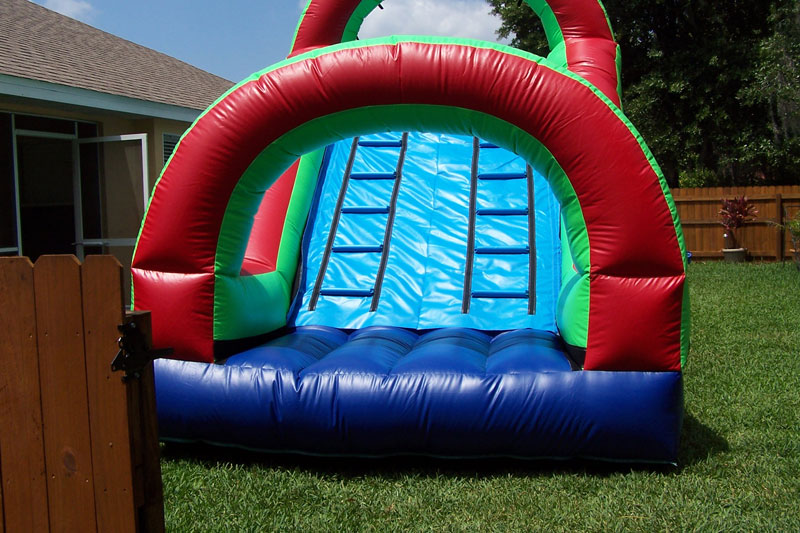
4. Choose a Vibrant Inflatable with Built-In Ladders
The visual appeal here is all about confident color blocking. Think of it as 60% primary colors + 40% secondary colors. The base structure uses bold dark blue, red, and light blue for a strong, classic playground feel. Then, the green arch adds a pop of a secondary color that complements the surrounding grass. The black ladders act as a neutral grounding element. You could swap the palette—imagine a purple, orange, and yellow version—and as long as you stick to that 60/40 bold color formula, it will still look just as fun and balanced.
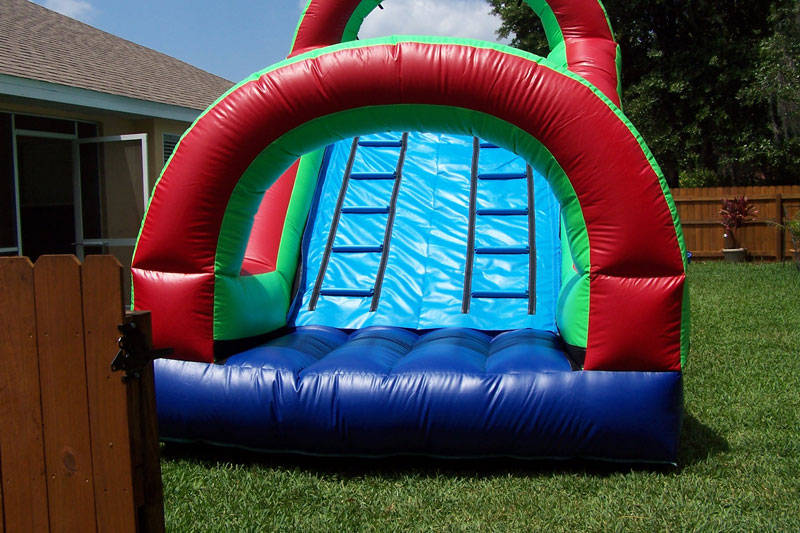
“An inflatable of this size works best in a medium to large backyard with at least 400 square feet of usable, flat lawn space.”
You’ll want a minimum of 5 feet of clearance on all sides for safety—so kids aren’t launching themselves into a fence or patio furniture. The vertical height, often around 8-10 feet, is usually not an issue unless you have low-hanging tree branches you want to preserve. It’s a great choice for a standard suburban lot.
5. Unleash Fun with a Blue Inflatable Shark Water Slide
This design works because it leans into a strong, singular theme. It’s not just a slide; it’s a *shark*. The designers used a monochromatic color scheme—various shades of blue—which makes the entire structure feel cohesive and water-focused. This allows the one major graphic element, the shark’s mouth at the top, to have maximum impact without competing with a rainbow of other colors. The sheer size communicates ‘big fun’ and makes it the undeniable focal point of the yard.
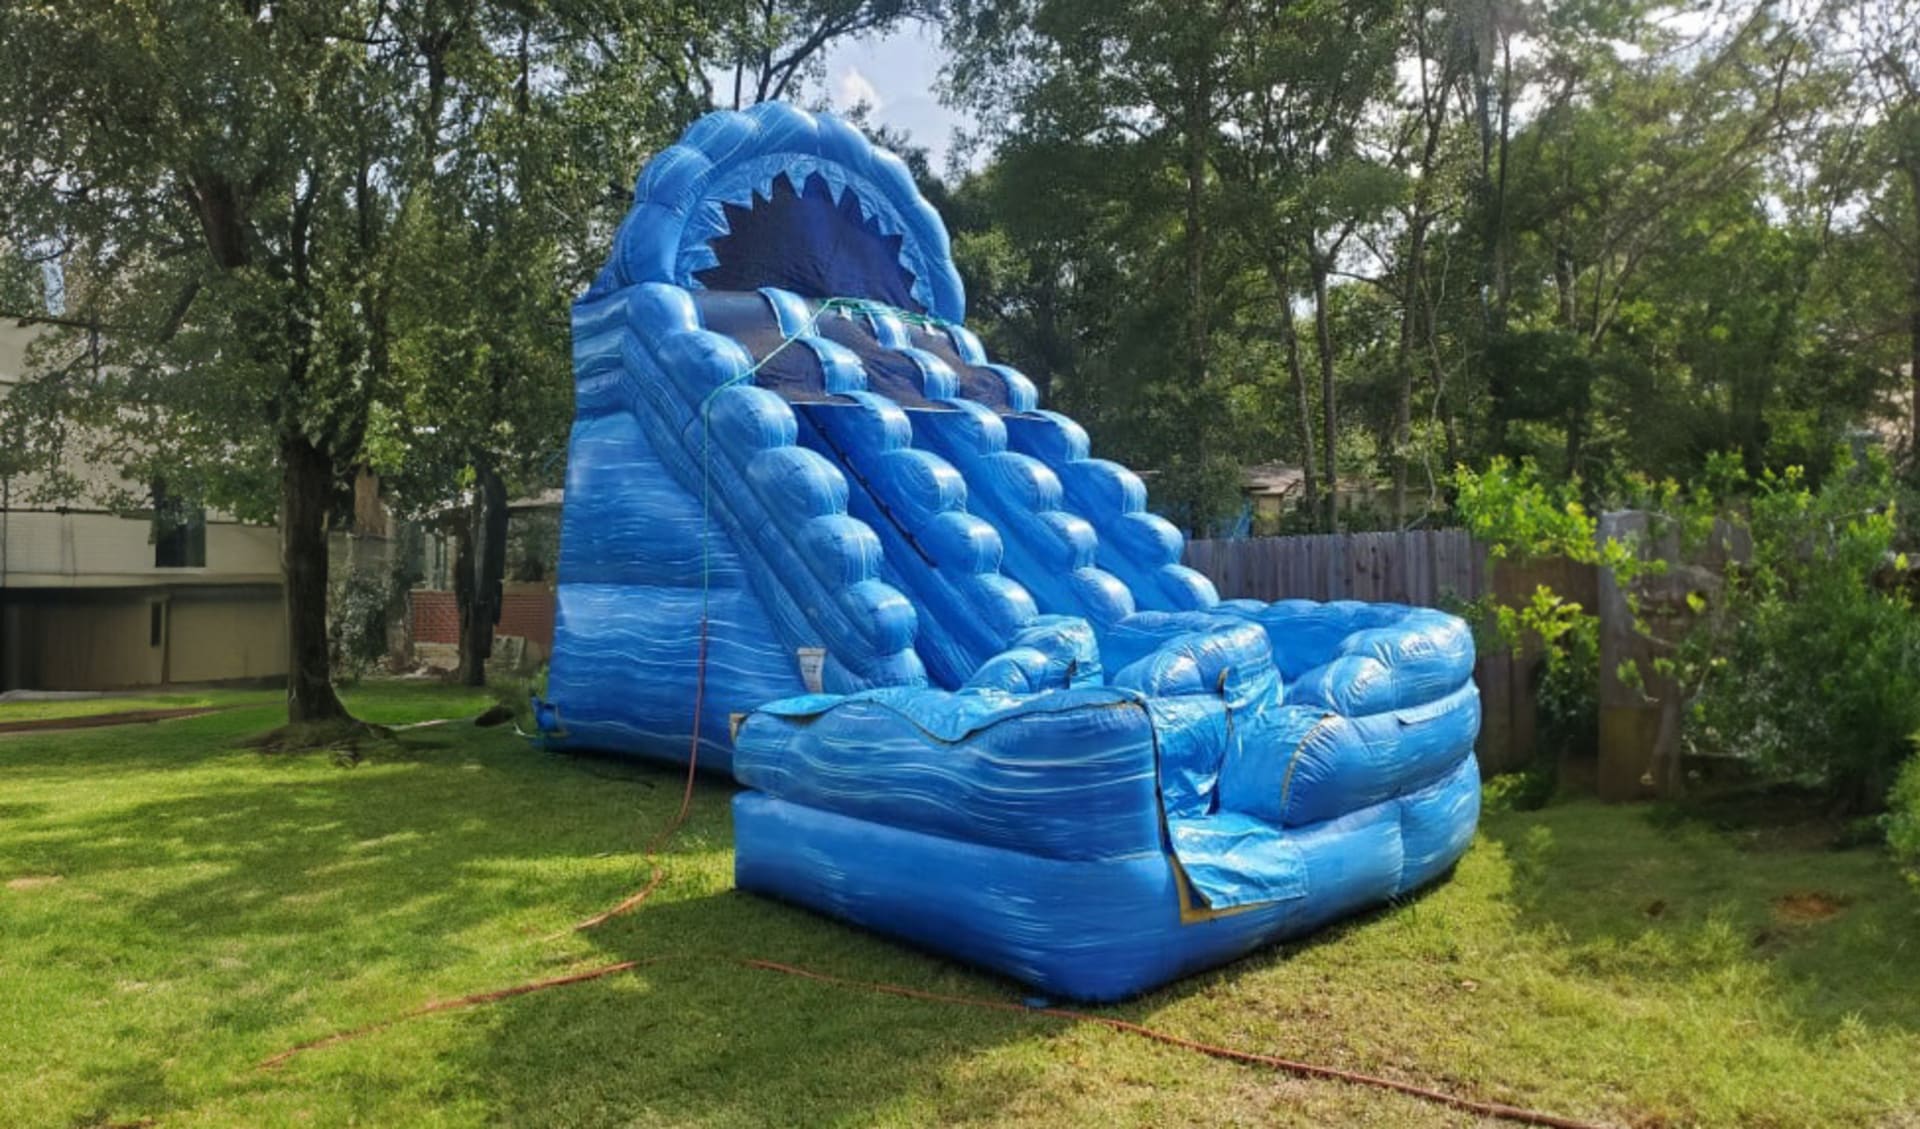
“It’s all about the shark mouth entrance.”
That single, playful feature transforms a standard inflatable slide into an adventure. It adds a narrative element—kids aren’t just sliding, they’re escaping a shark! This imaginative hook is what they’ll remember and talk about long after the party is over. Remove the shark head, and you’re left with a perfectly fine but far more forgettable blue slide. The theme is everything here.
6. Install a Permanent Blue Tube Slide Next to the Pool
When installing a permanent poolside slide, position is everything. For maximum fun and safety, the slide’s exit should be aimed towards the deeper end of the pool—ideally in water that’s at least 3-4 feet deep. Ensure the exit point is no more than 8 inches above the water’s surface to prevent harsh landings. Also, orient the staircase away from the main patio and high-traffic areas to avoid creating a bottleneck. This keeps swimmers and sliders from constantly crossing paths.
“Before you commit to a permanent slide, go through this checklist.”
You’ll save yourself a world of headaches later.Check your local building codes and HOA rules. Many have specific requirements for poolside structures, including height and setback from property lines.Confirm your pool deck’s structural integrity. Can it support the weight and force of the slide and its users? You may need to pour a new concrete footing.Map out the plumbing. Many slides require a dedicated water line for lubrication. Can you easily tap into your pool’s return line or a nearby spigot?
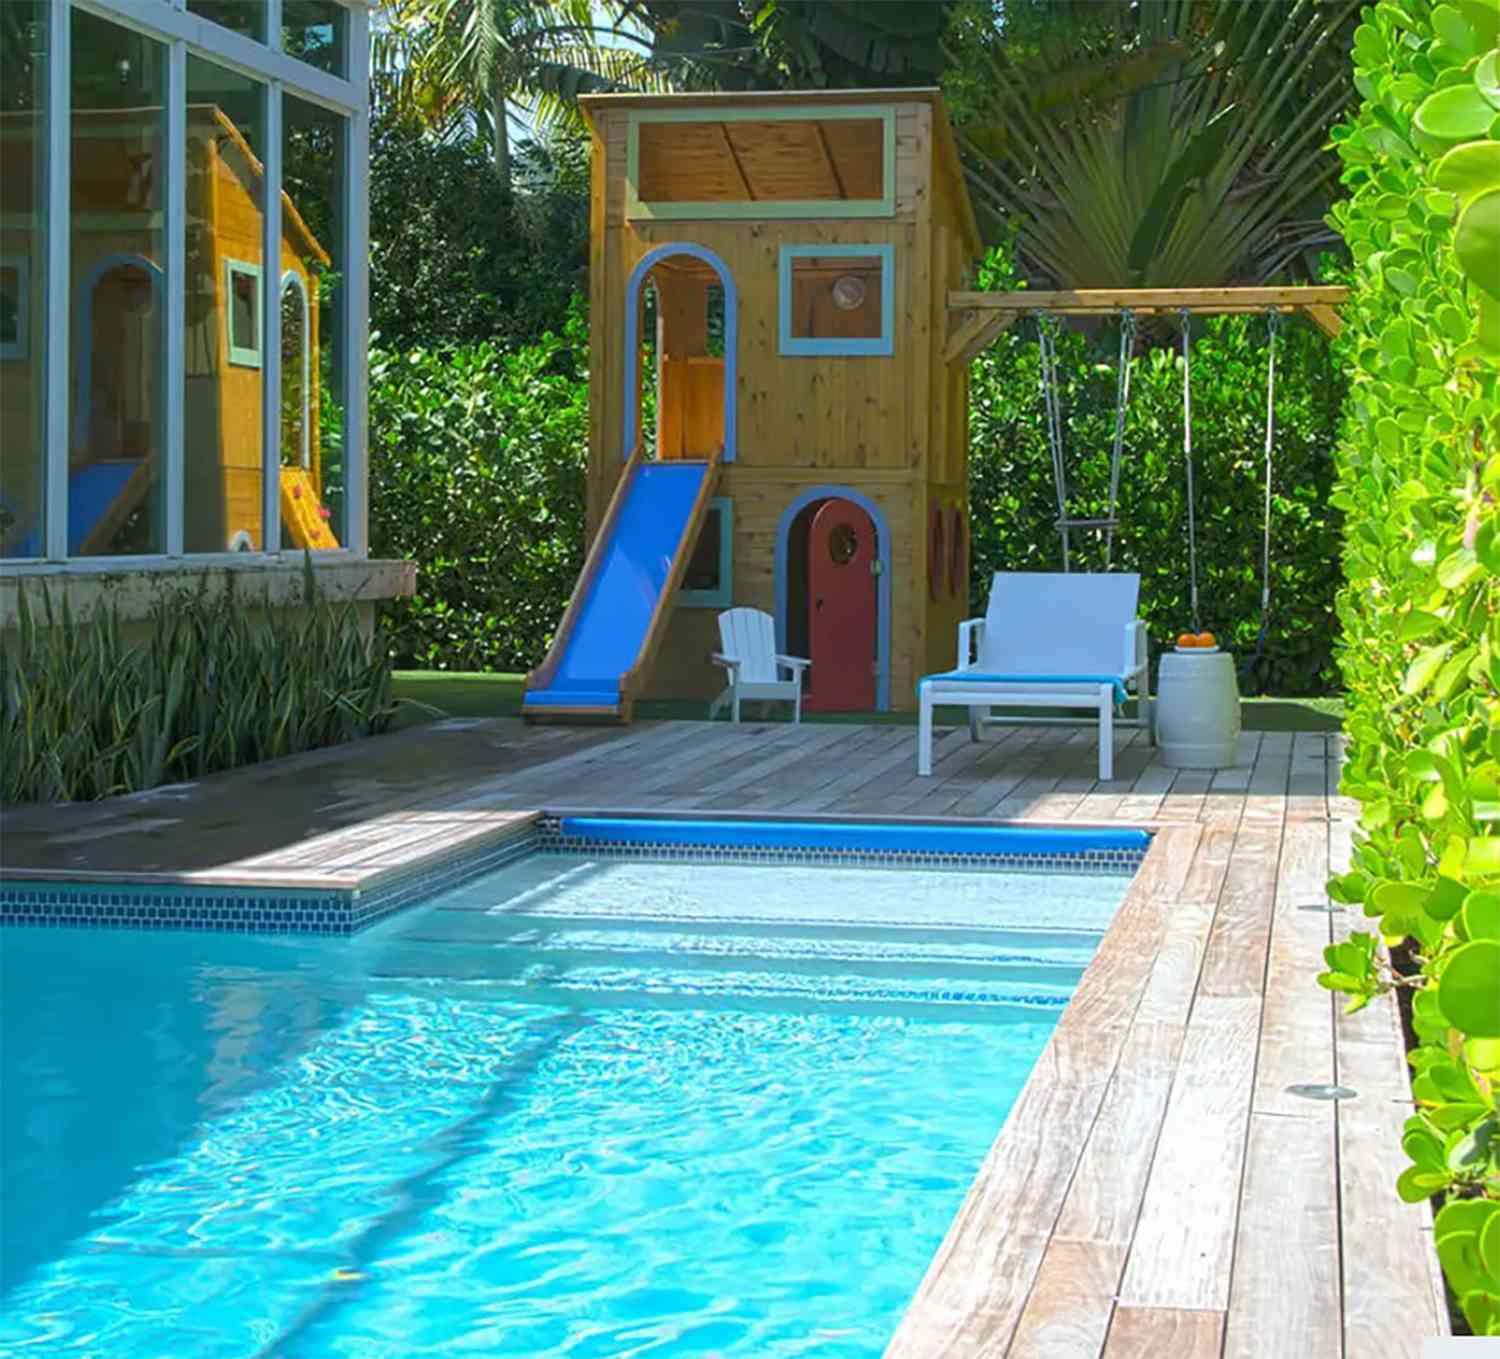
7. Combine a Playhouse, Slide, and Sandpit for a Toddler Fun Zone
Recreating this charming play zone is more achievable than it looks. Here’s a rough estimate for doing it yourself:
- Playhouse Kit: $400 – $900
- Slide (if not included): $100 – $250
- Sandpit (DIY wood frame + sand): $150 – $300
- Artificial Turf Patch (approx. 5’x8′): $100 – $200
- Decor (string lights, paint): $75 – $150
- TOTAL: $825 – $1,850
Budget alternative: Find a used playhouse on Facebook Marketplace ($100-$300) and build a simple sandpit frame with inexpensive landscape timbers for a total cost of around $500.
“Want to build that simple, effective sandpit?”
Here’s how. (Time: 2 hours, Cost: $150) Measure and mark a square or rectangular area for your sandpit, typically 4×4 or 5×5 feet.Purchase four landscape timbers or 4×4 posts cut to your desired length. Also get a roll of landscape fabric and several bags of play sand.Lay the landscape fabric down over the marked area to prevent weeds and stop sand from mixing with soil.Assemble the timbers in a square on top of the fabric, securing the corners with long exterior wood screws.Fill the frame with play sand, and you’re ready for action!
8. Design a Shaded Oasis with a Curved Pool and Lush Grasses
This look is a direct response to the ‘structured resort’ trend of the last decade. Homeowners are now leaning into a more natural, ‘found’ aesthetic. Instead of perfectly manicured shrubs, we’re seeing an embrace of wilder, more organic plantings like the tall grasses shown here. It’s less about looking like a hotel in Vegas and more about feeling like a private swimming hole you discovered in the woods. The heavy shade from mature trees is no longer seen as a problem to be solved, but a desirable feature to be celebrated.
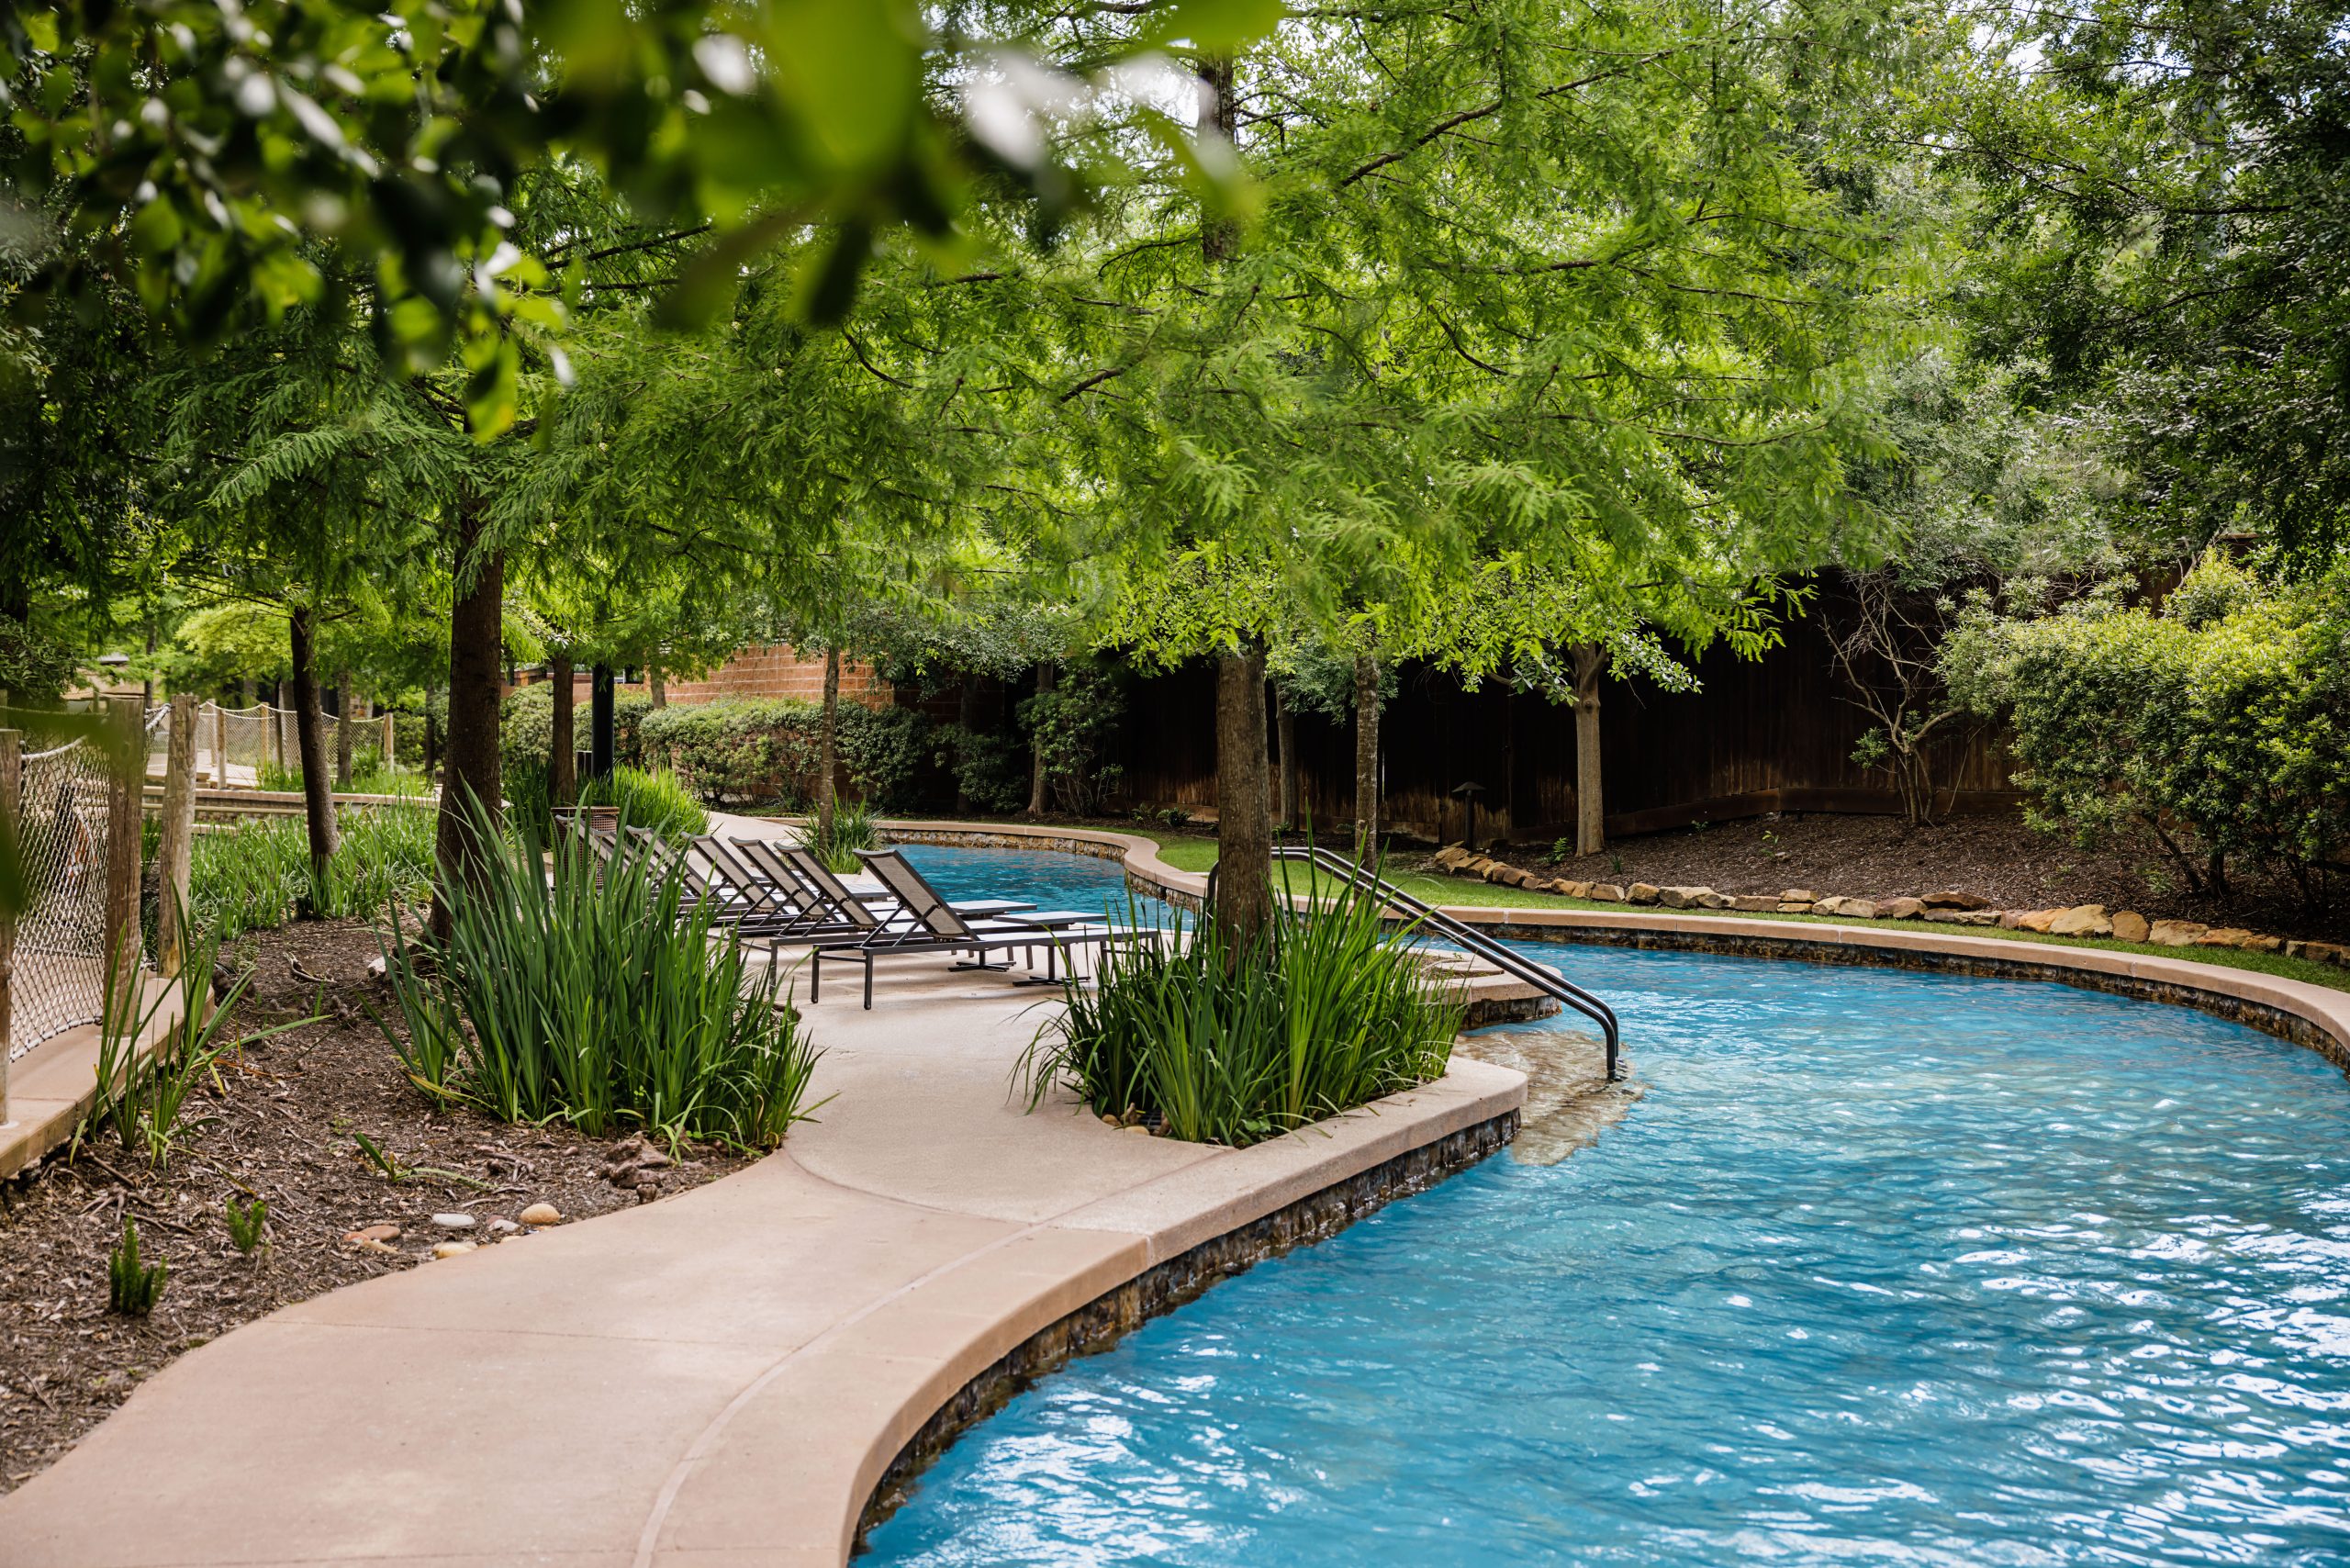
“The magic here is in the contrast of textures and forms.”
The sharp, clean lines of the dark lounge chairs and stone tile provide a modern anchor against the soft, organic shapes of the serpentine pool and the feathery tall grasses. Furthermore, the design masterfully plays with color temperature. The cool tones of the blue water and green foliage are beautifully balanced by the warm, light tan of the concrete coping and path, creating a scene that feels both refreshing and inviting.
9. Create a Resort-Style Yard with a Freeform Pool and Rock Spa
This luxurious, resort-at-home formula is about balancing natural elements with refined comfort. The recipe is: 50% Water Features (the large pool and spa) + 30% Natural Texture (the artificial rock formations and greenery) + 20% Structured Living (the pergola, lounge areas, and house architecture). By keeping the man-made structures in neutral whites and beiges, you allow the deep blue of the water and the tan of the rockwork to be the stars of the show. The terracotta roof adds a crucial touch of warmth to the palette.
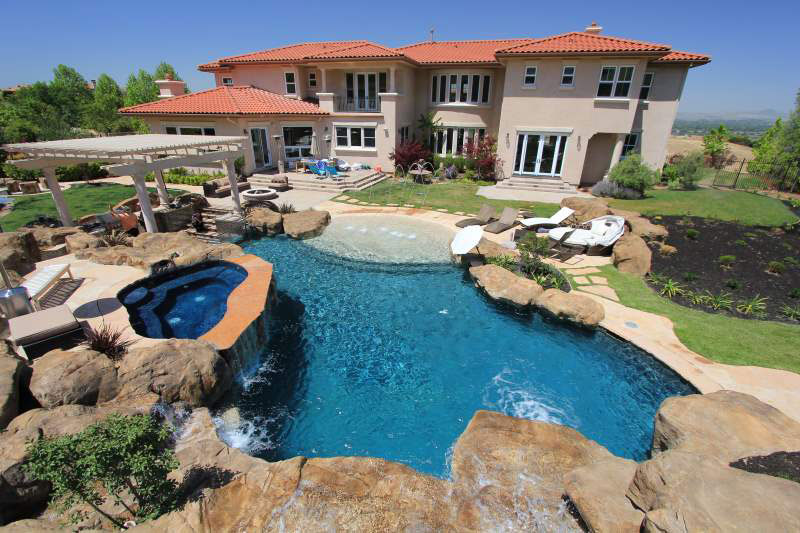
“This is not an idea for a small yard.”
To achieve this kind of expansive, multi-zone feel without it looking cramped, you need a minimum of 1,500-2,000 square feet of open backyard space, not including the house footprint. The freeform pool with extensive rockwork alone can easily consume a 40×25 foot area. This design thrives on having distinct ‘rooms’—a swimming zone, a spa zone, a lounging zone, a fire pit zone—which requires significant square footage to feel unforced and luxurious.
10. Build a Play-Focused Pool with a Slide, Waterfall, and Basketball Hoop
This backyard is successful because it fully commits to the ‘active fun’ theme. Every major element is geared towards play: the curved slide encourages races, the rock waterfall creates a splash zone, and the basketball hoop invites competition. Nothing is purely decorative. The design cleverly integrates these features using natural-looking materials like the artificial rock and lush plantings, which prevents the space from feeling like a commercial water park and keeps it rooted in a residential garden aesthetic.
“While a rock waterfall is visually stunning, it requires specific upkeep.”
The textured surfaces are prone to algae growth, especially in crevices, and will need to be scrubbed with a stiff brush a few times a season. Calcium deposits can also build up, creating a white scale that’s tough to remove. Annually, you should check the pump and filter dedicated to the waterfall feature. Also, a portable basketball hoop is great, but its base can leave rust stains on your deck if not properly maintained.
11. Have a Classic Summer Day with a Rainbow Slip-n-Slide
This is the quintessential backyard upgrade that delivers maximum joy for a minimal price tag. For about $20-40 at Target or Walmart, you get an entire water park experience that rolls up into a tiny box at the end of the day. Compared to the simple plastic sheet in Idea #3, these commercial versions have built-in sprinklers that keep the surface slick and a padded end to prevent crash-landings. It’s the best bang-for-your-buck in summer fun, period.
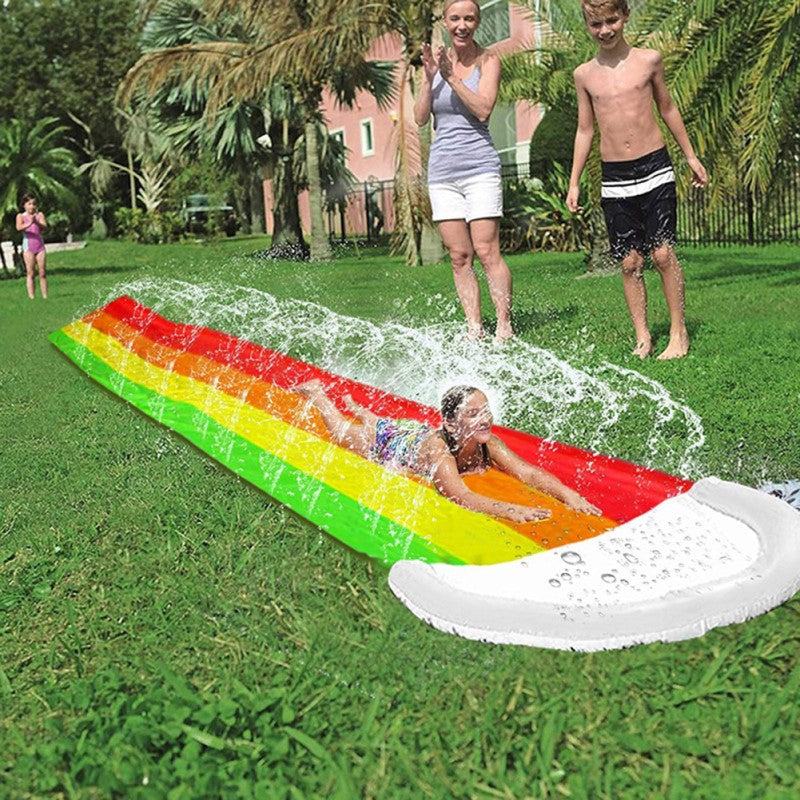
“A word of caution: water pressure is key.”
If your home’s water pressure is low, the built-in sprinklers on these types of slides may just dribble, failing to create the super-slick surface needed for a good slide. This leads to friction, frustration, and a slide that doesn’t, well, slide. Before you promise the kids an epic water day, test your outdoor spigot’s pressure. If it’s weak, you may need to supplement with a handheld hose sprayer to keep the fun going.
12. Invest in a Grand Wooden Play Fort with Multiple Slides
When installing a large play structure like this, the ground prep is non-negotiable. Don’t just place it on grass. You need to create a safety surface that extends at least 6 feet out from all sides of the structure, especially at the base of slides and under swings. The best material is a 9-to-12-inch layer of engineered wood fiber (wood chips) or rubber mulch. This provides critical fall attenuation and prevents the area from turning into a muddy pit.
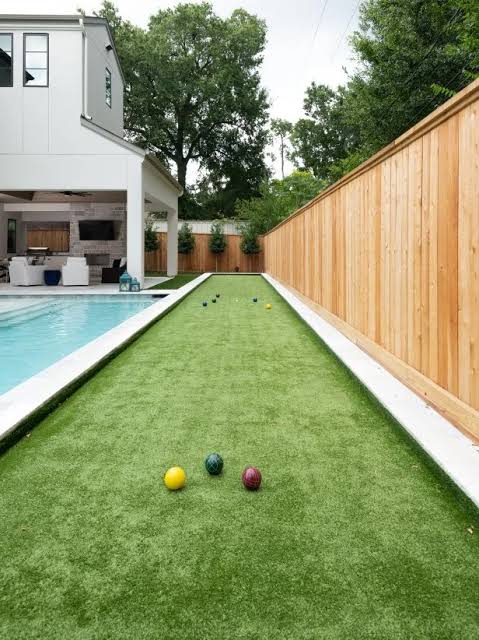
“that makes this backyard a kid’s paradise is the sheer variety of play offered by the single wooden fort.”
It’s not just a slide or a swing set; it’s a multi-level castle with climbing walls, multiple slides (yellow and blue), and different types of swings. This variety caters to different ages, energy levels, and types of imaginative play, ensuring that a group of kids can all play simultaneously without getting bored or being on top of each other. It’s an entire playground in one structure.
13. Combine a Rock Waterfall, Pool Slide, and Fire Bowls
This design is a masterclass in elemental balance. It powerfully combines water (the pool and waterfalls), earth (the stone formations), and fire (the flaming bowls). This classic trio creates a dynamic, high-energy environment that feels both primal and luxurious. The cool blue of the water is perfectly offset by the warm glow of the fire, while the natural texture of the rockwork grounds the entire scene. The sculptural palm tree adds a touch of living art, completing the composition.
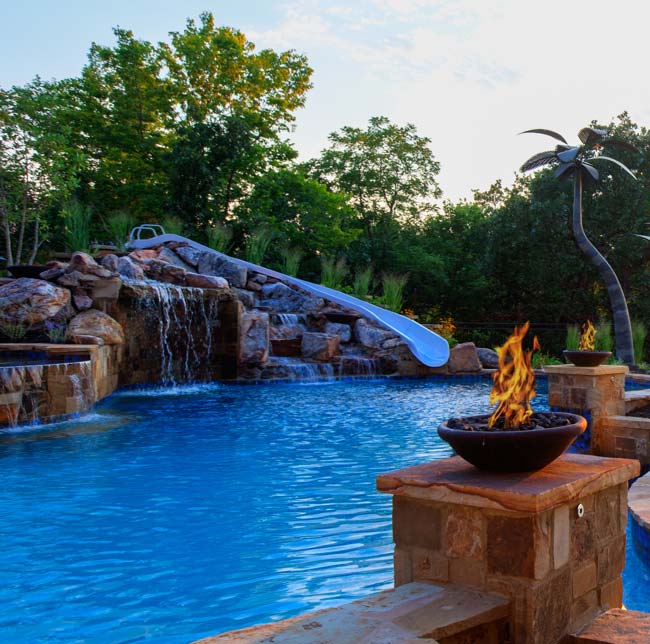
“Thinking of adding fire features near your pool?”
Here’s a quick gut check:Gas Lines: Do you have an accessible natural gas or propane line? Running a new one is a significant expense that needs to be factored into your budget from day one.Local Codes: Check your city’s regulations on open flames, especially regarding distance from the property line, fences, and the house itself. These are strict for a reason.Safety Zone: Ensure the fire bowls are positioned away from the primary splash zones. While designed for outdoor use, constant dousing from cannonballs isn’t ideal for the ignition components.
14. Build a Two-Story Waterslide from an Upper Deck
This is an ambitious, large-scale idea that requires a very specific architectural setup: a multi-level home with an upper-story deck or patio directly overlooking the pool area. The slide itself will need a significant footprint, requiring a clear, straight drop zone of about 25-30 feet. This design is best suited for properties with generous lot sizes where the house is set back, allowing for a large pool and lawn area to balance the visual weight of the massive slide and home.
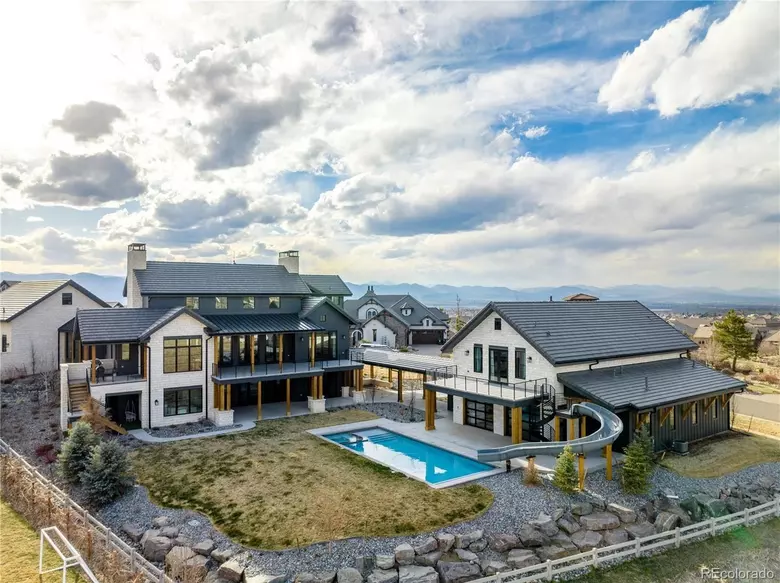
“We’re seeing more of this ‘architectural play’ in high-end new builds and renovations.”
As backyards become more integrated into the home’s overall design, features are literally being built *into* the house itself rather than just placed in the yard. A slide that starts on the second-floor deck transforms the entire house into a part of the fun, blurring the lines between indoor and outdoor, and between structure and recreation. It’s playful, bold, and a total statement piece.
15. Enclose a Simple Backyard Pool with a Natural Wood Fence
A simple, above-ground or semi-inground pool can be elevated with the right surroundings. This look is focused on the essentials.
- Rectangular Pool Kit (12’x24′): $3,000 – $7,000
- White Plastic Slide: $1,500 – $3,000
- Wood Privacy Fence (DIY, per linear foot): $25 – $50
- Dark Composite Panels (for accent): $100 – $300
- Inflatables & Accessories: $100 – $200
- TOTAL: $4,725 – $10,600
Budget alternative: Opt for an inflatable pool ($500) and a smaller, freestanding slide ($200), focusing the budget on the wood fence for a polished look totaling around $2,500.
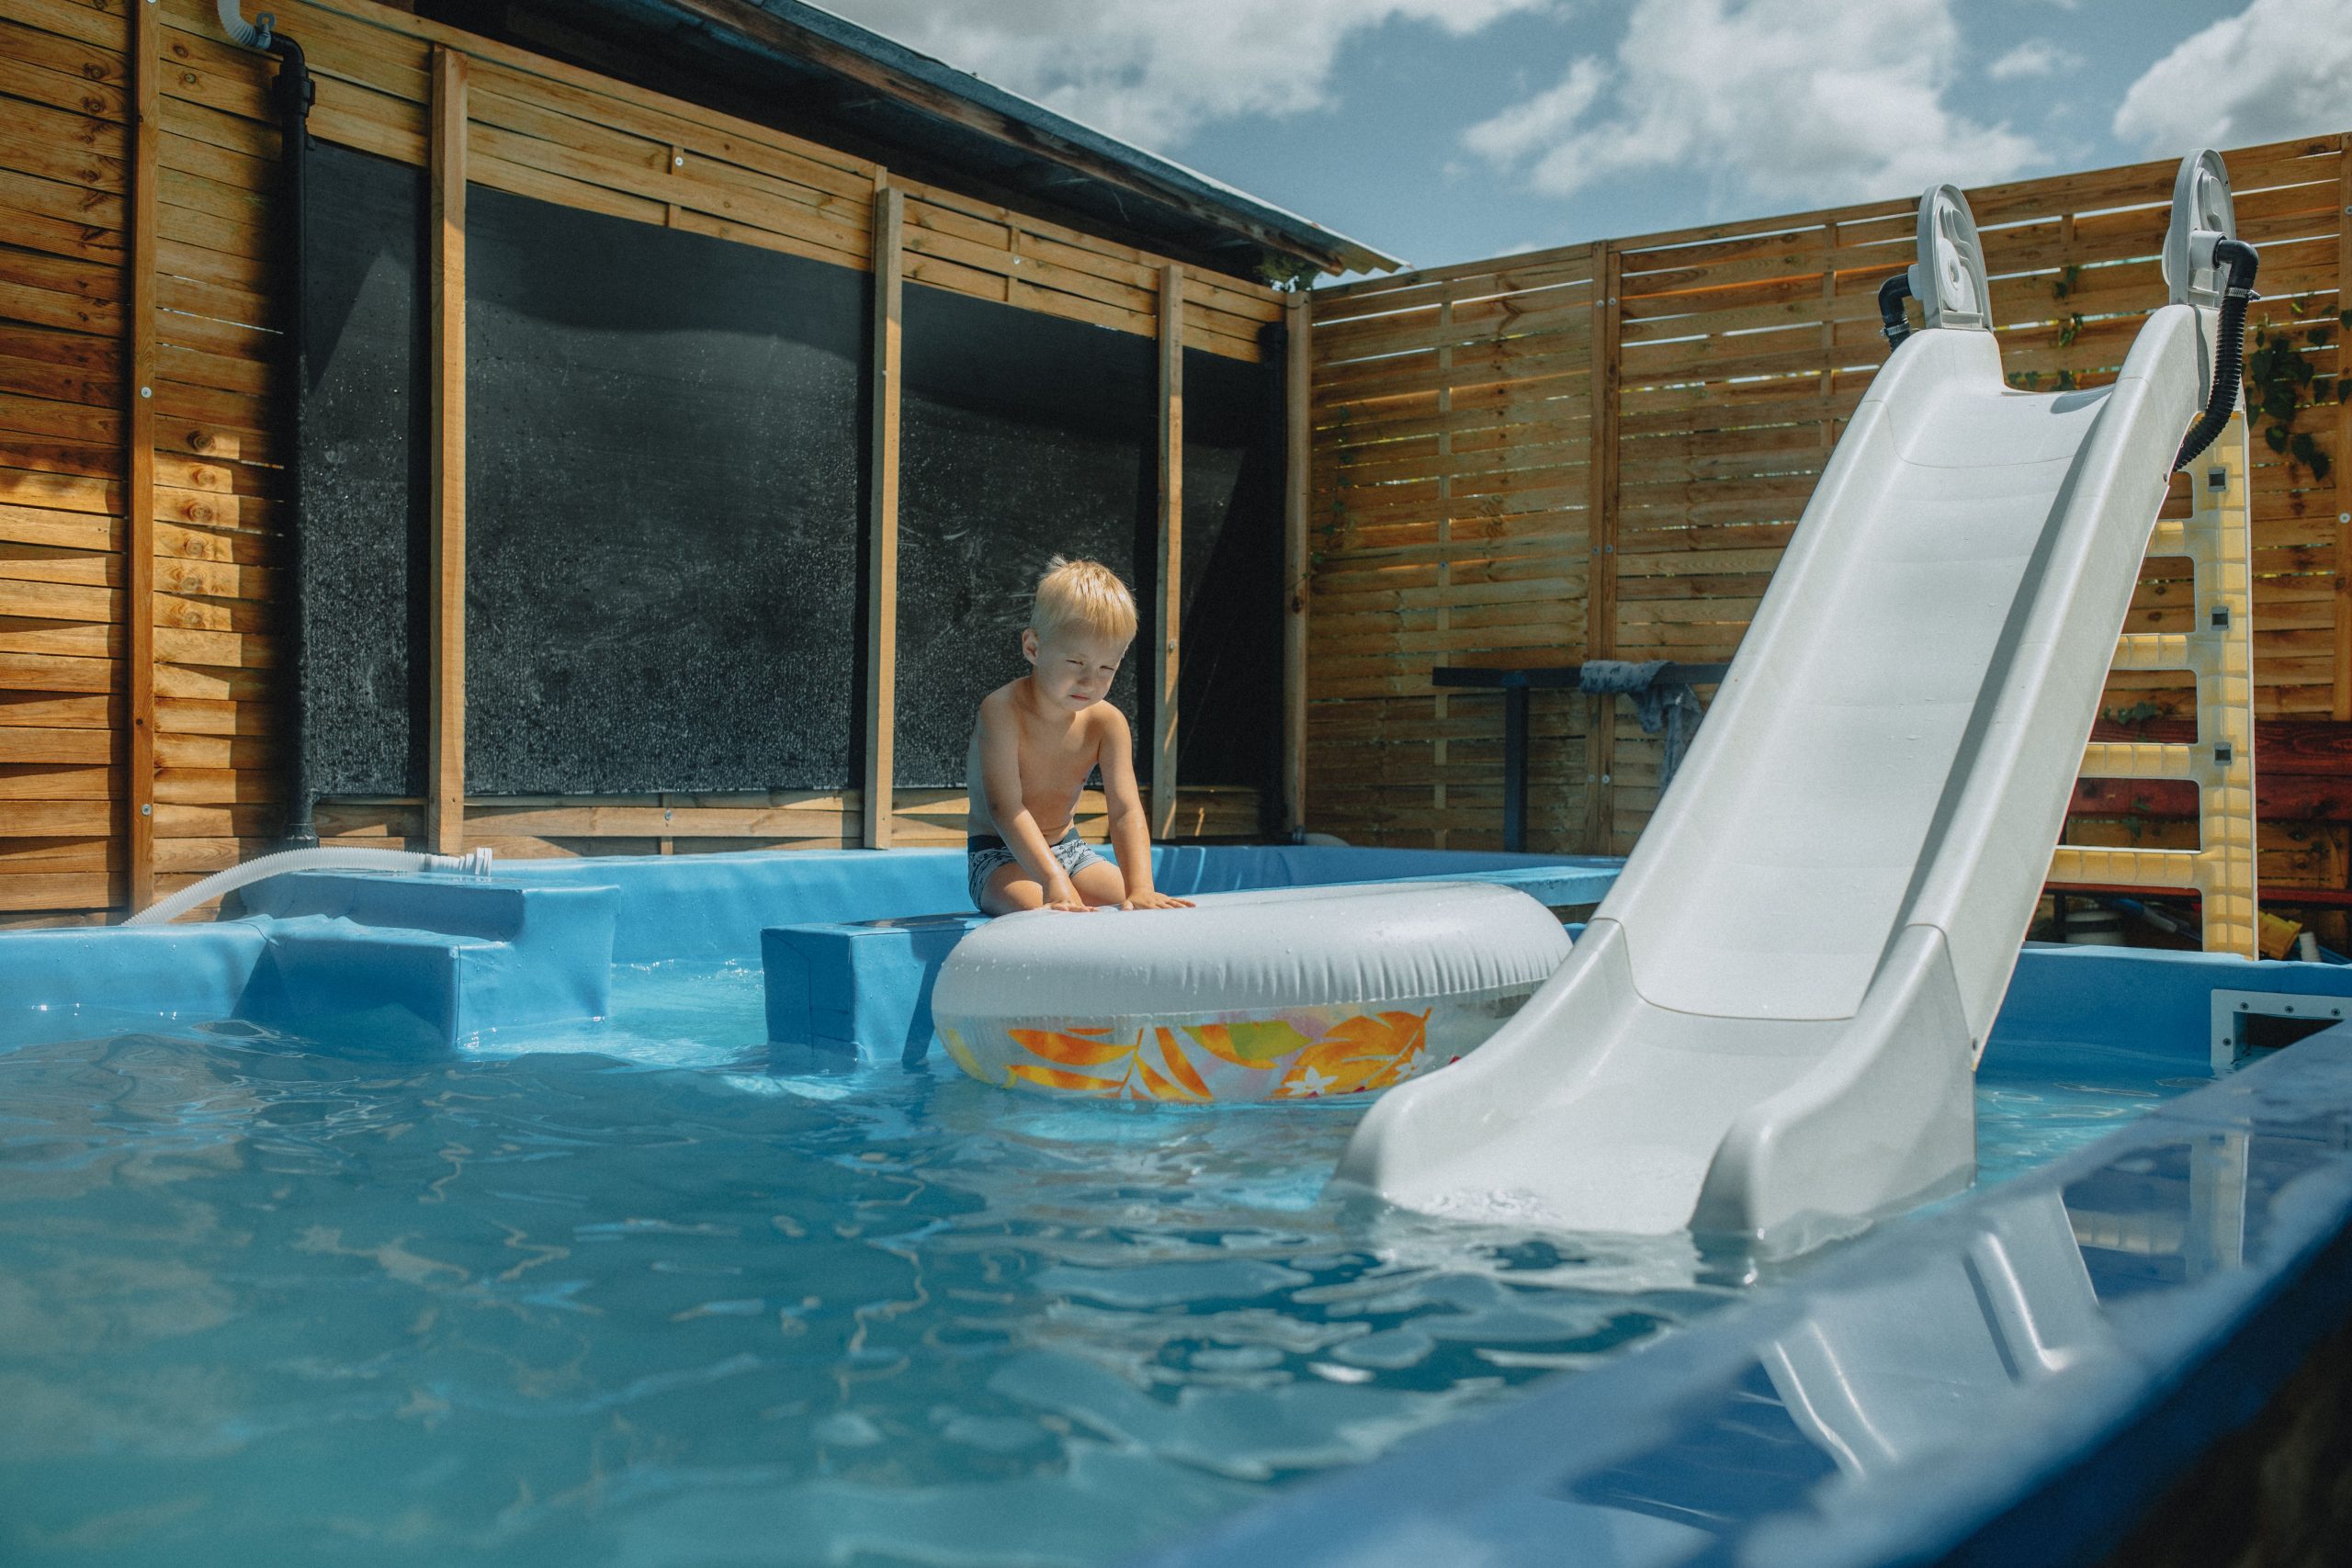
“When installing a slatted wood fence for privacy, the gap between the slats is crucial.”
For total privacy, you’d overlap the boards. For a modern, semi-private look like this one, aim for a gap that is no more than half the width of the board itself. For example, if you are using 6-inch wide boards, a 1- to 2-inch gap looks intentional and stylish. Any wider, and it can start to feel less private and more like a farm fence.
16. Design a Multi-Zone Yard with a Pool, Hot Tub, and Gazebo
The formula for this relaxing, multi-use backyard is about dividing the space by function. It’s roughly 40% Active Zone (the swimming pool) + 30% Relaxation Zone (the hot tub and gazebo) + 30% Connection Zone (the paver patios and lawn that link everything). The color palette is kept simple and serene: cool blue water, warm tan/beige pavers, and rich brown accents for the hot tub and furniture, all set against a neutral backdrop of green lawn. This clear division makes the yard feel larger and more organized.
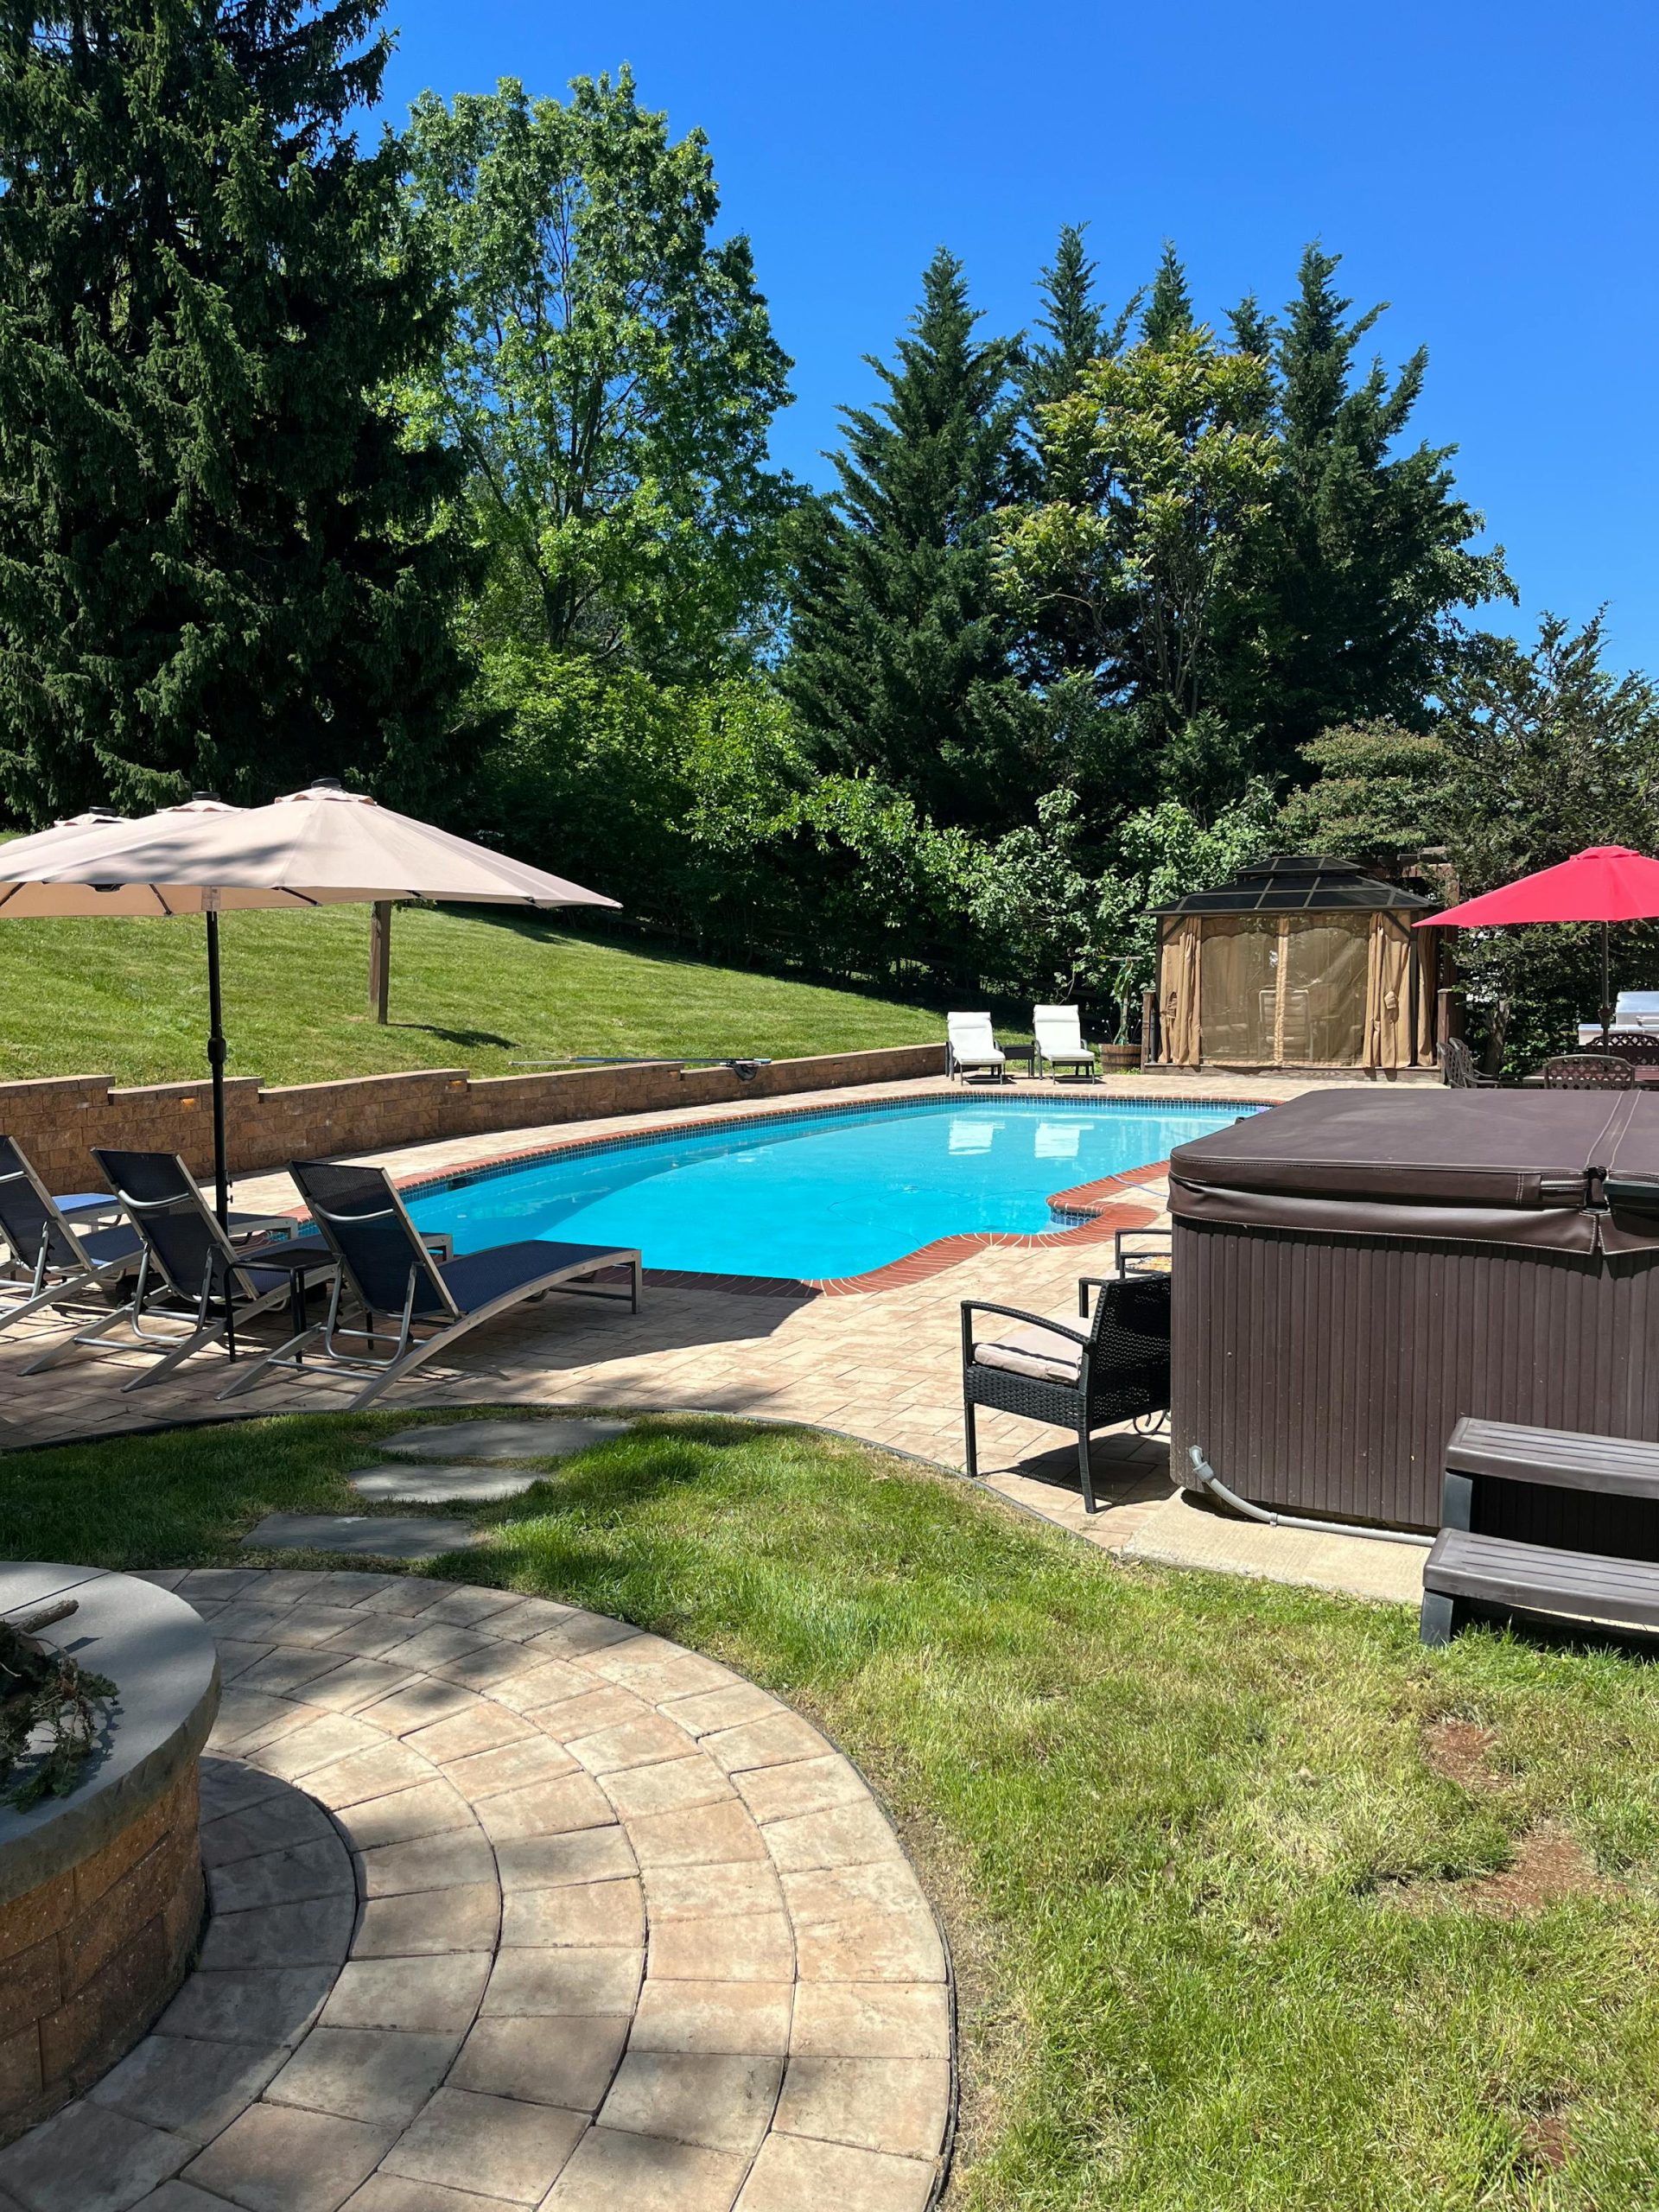
“Owning both a pool and a hot tub means doubling down on water chemistry management.”
They are two separate bodies of water with different needs. A hot tub, being smaller and hotter, requires more frequent testing and chemical adjustments than a large pool. A dark-colored hot tub cover is great for heat retention but can show dirt and water spots easily, so plan to wipe it down weekly. The light-colored pavers are beautiful but will show stains from leaves, dirt, and spills more readily than darker options.
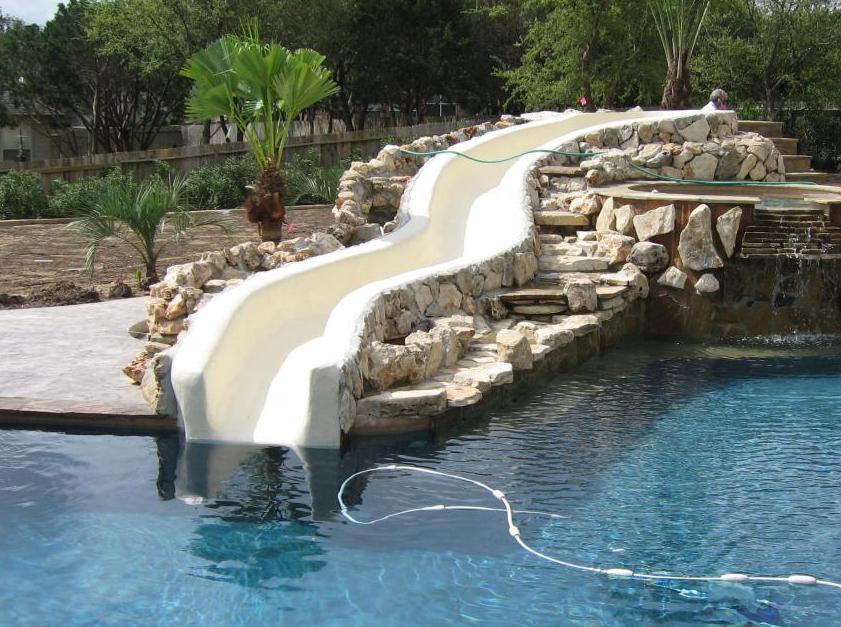
17. Integrate a Beige Pool Slide into a Tiered Stone Landscape
The smartest choice here was the beige color of the slide. A standard bright blue or white slide would have looked jarring and artificial against the natural stone and lush greenery. By choosing a neutral, earthy beige, the slide blends almost seamlessly into the tiered landscape. It becomes part of the scenery rather than a loud interruption, allowing the vibrant blue of the pool and the rich greens of the foliage to remain the focal points. It makes the whole installation feel more sophisticated and organic.
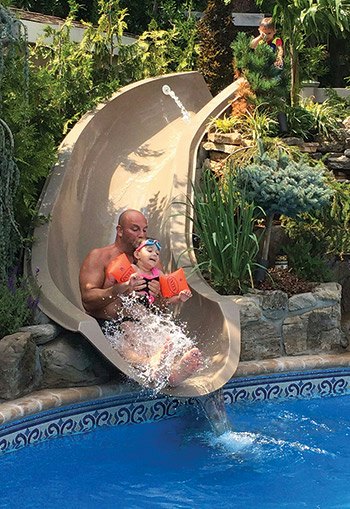
“This design succeeds by mimicking nature.”
The multi-tiered landscaping with its mix of stone and diverse plant life feels like a natural hillside leading down to a swimming hole. The slide’s gentle curve follows the organic lines of the pool and the surrounding foliage, avoiding harsh angles. Even the decorative tile border on the pool adds a touch of handcrafted detail that enhances the custom, thoughtfully designed feel of the space, preventing it from looking like a standard, drop-in pool.
18. Create an Activity Hub with a Pool, Blue Slide, and Basketball Court
A backyard with this many activity zones requires careful planning around safety and supervision. The black metal fence is not just a boundary; it’s a critical safety feature, especially with a deep pool. However, the placement of the basketball court and playground behind the pool area can create blind spots. If you have younger children, it’s difficult to watch a child on the swings and another in the pool simultaneously from a single vantage point. This setup is better suited for older kids and teens who require less direct supervision.
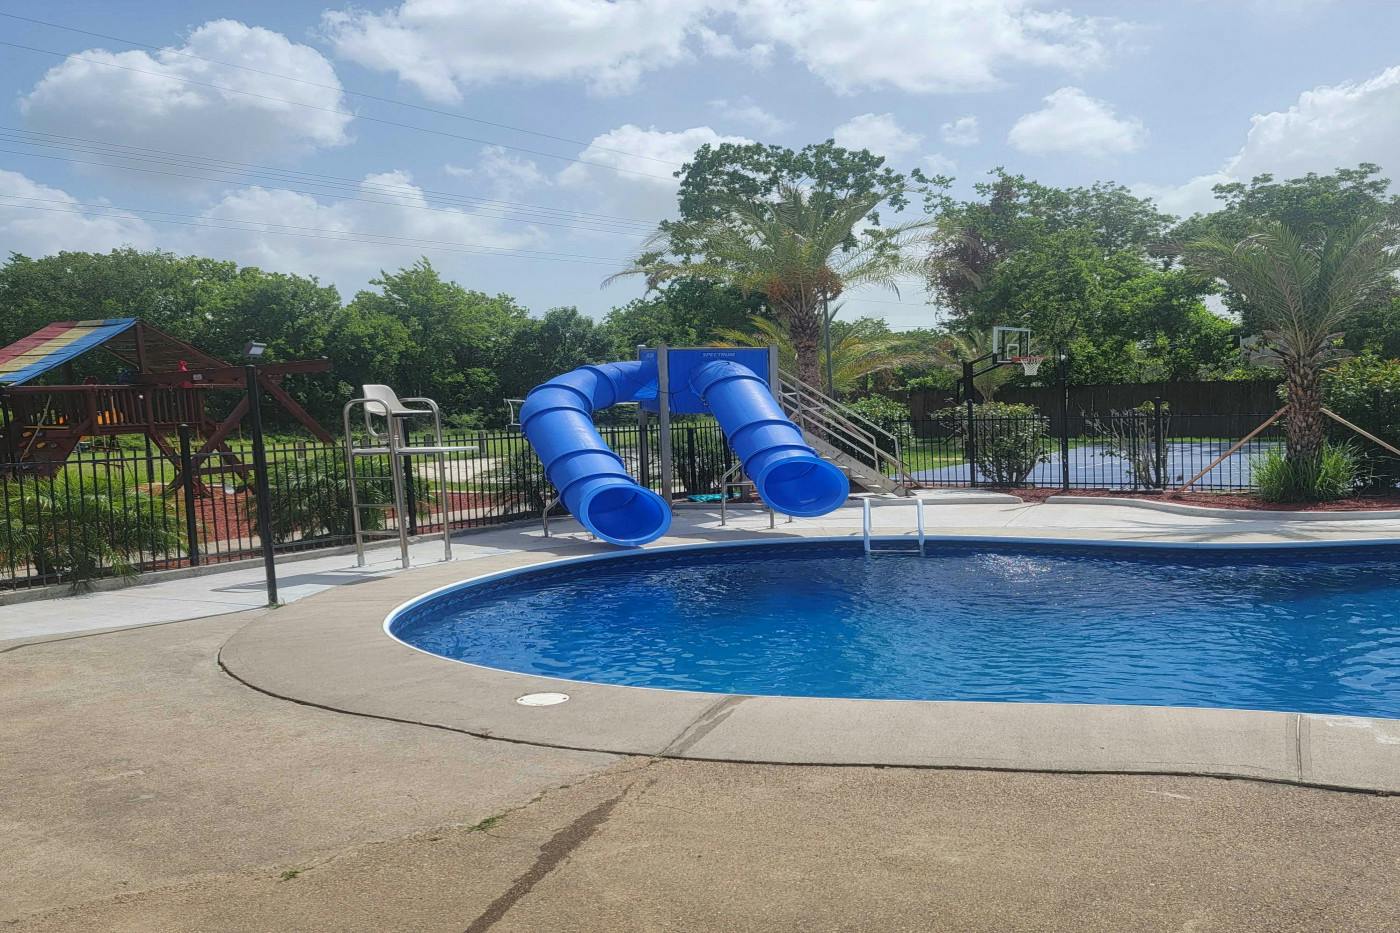
“This is a full-scale family resort, and it needs the space to match.”
To comfortably fit a kidney-shaped pool, a dedicated playground area, AND a half-basketball court, you’re looking at a minimum requirement of 2,500-3,000 square feet of flat, usable yard. Trying to cram this many distinct, large-scale features into a smaller space will result in a yard that feels chaotic and cramped, with no room to breathe. For smaller yards, consider combining features, like the pool basketball hoop seen in Idea #12.
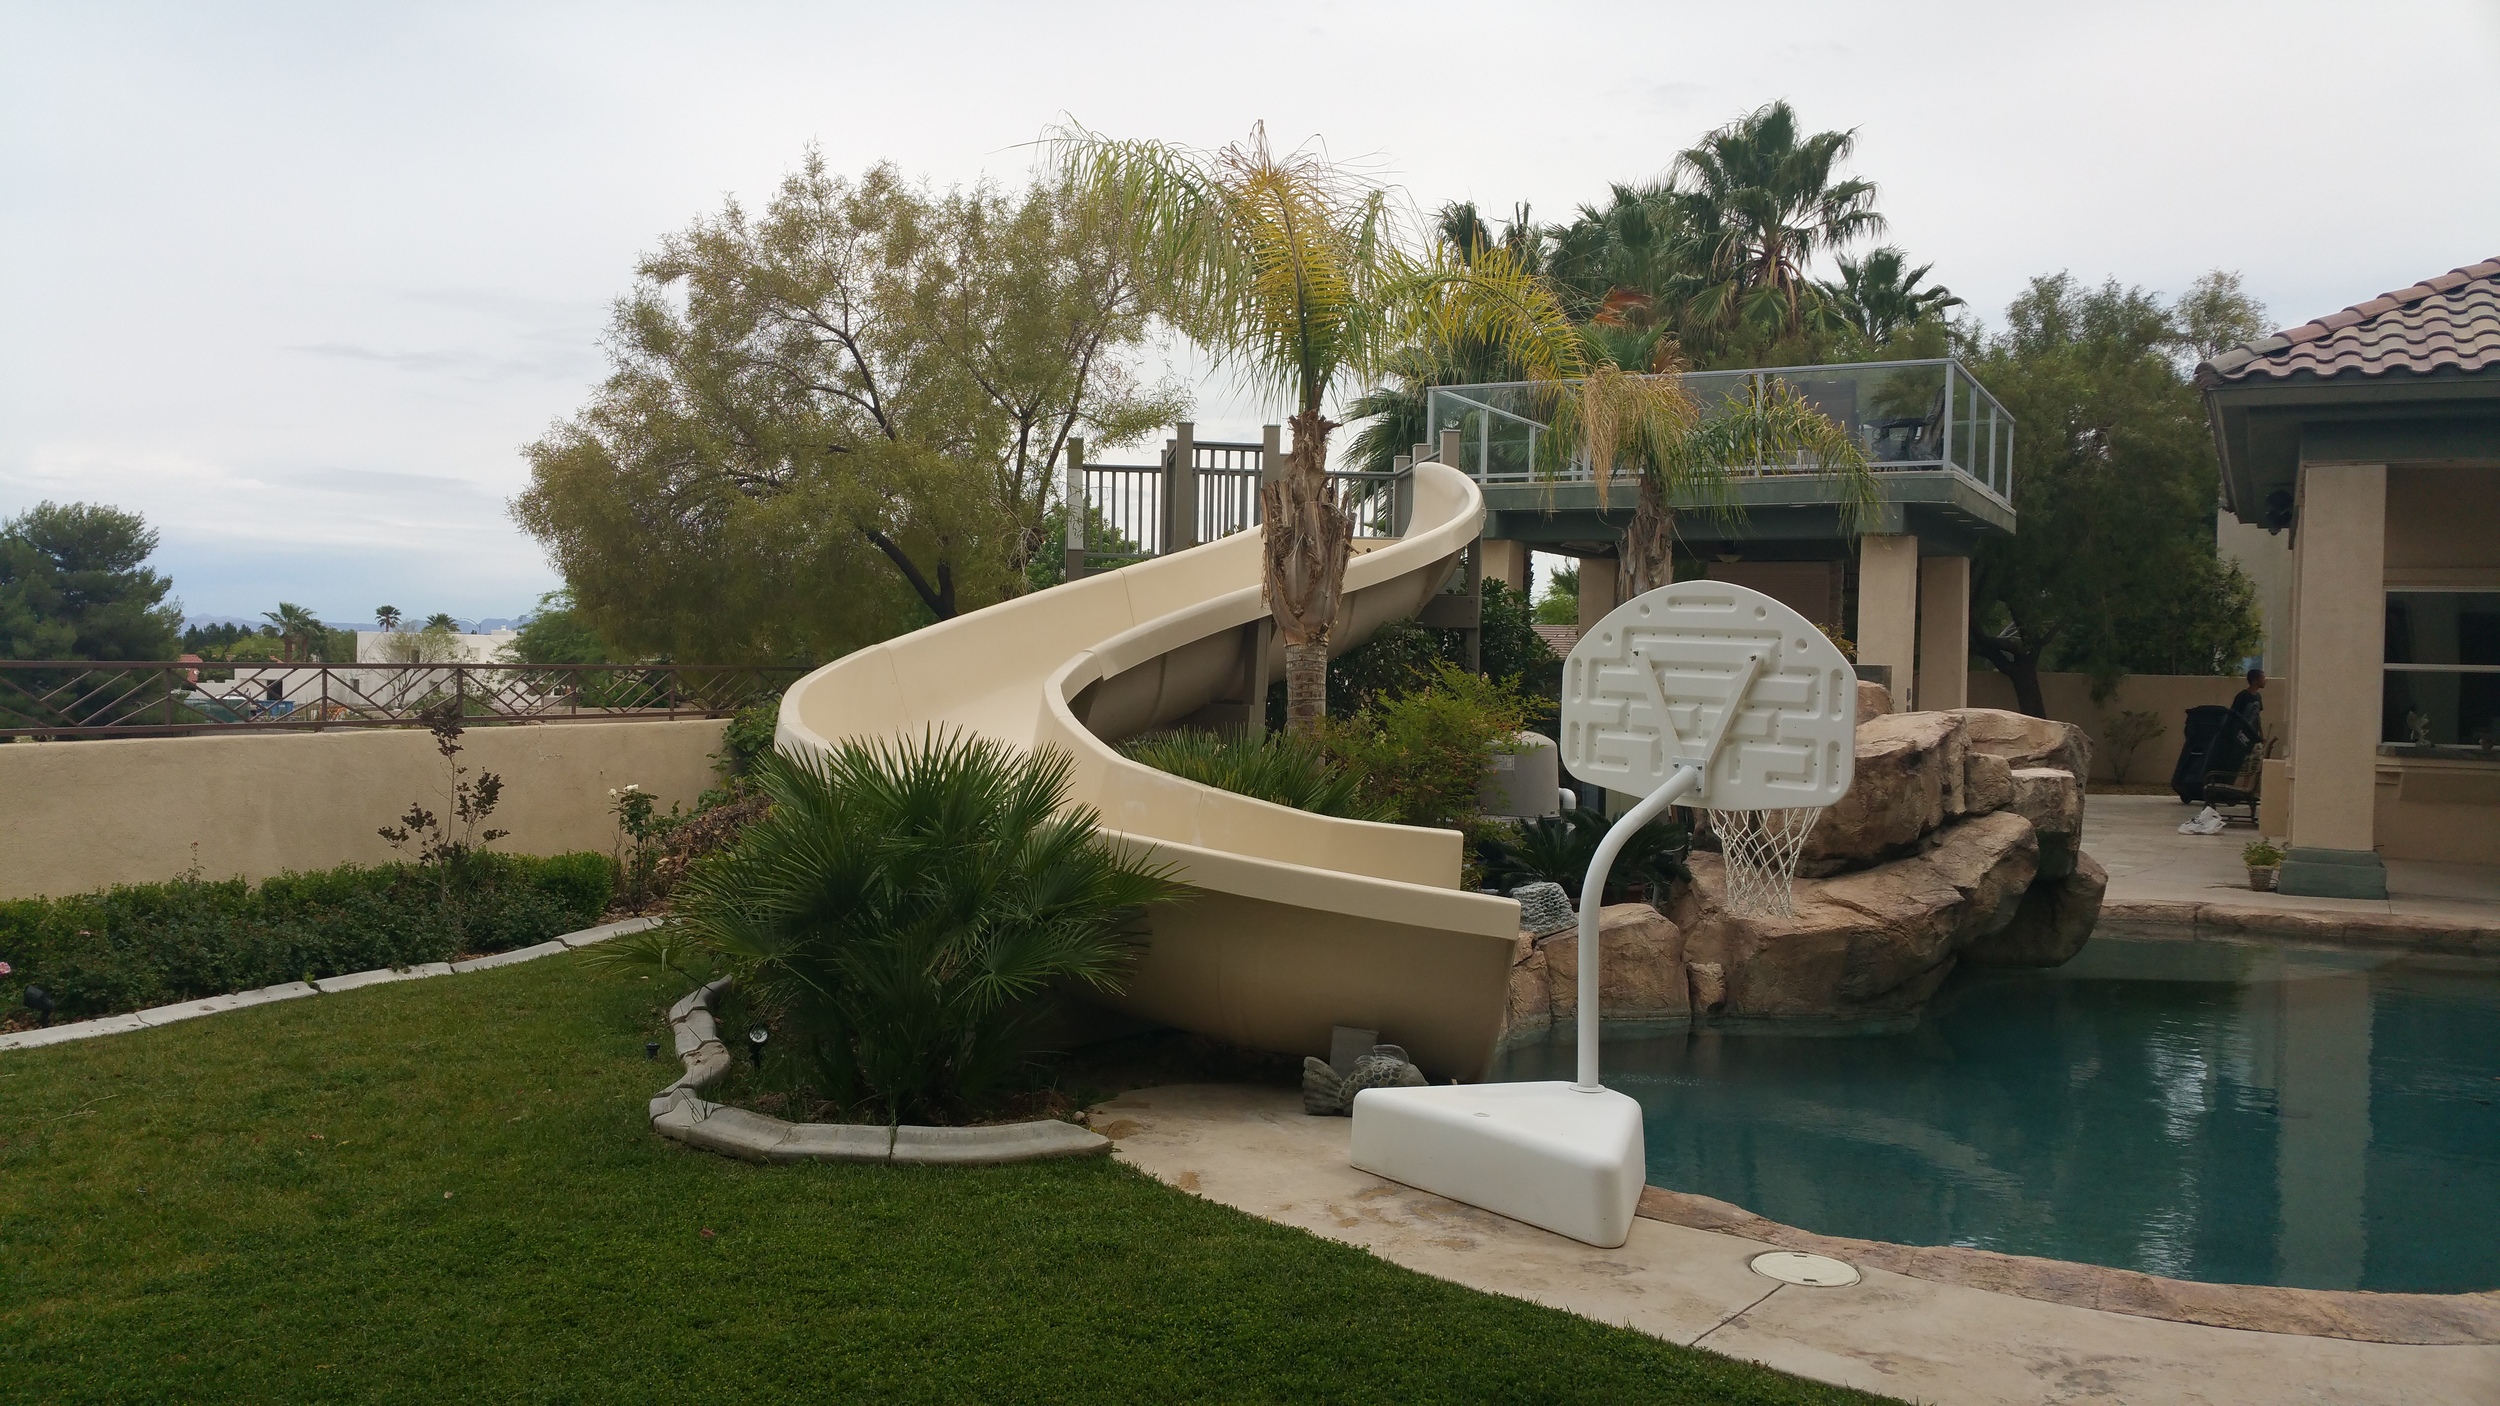
19. Nestle a Grey Spiral Slide into a Rock Waterfall Feature
When integrating a slide with a rock waterfall, use the rockwork to your advantage to hide the slide’s support structure. Instead of having visible posts and beams, build the rock formations up and around the slide’s foundation. This makes it look like the slide is emerging organically from the stone. Use a mix of large ‘hero’ boulders and smaller filler stones to create natural-looking pockets and ledges. Ensure the water from the fall doesn’t splash directly onto the slide’s walking path to prevent slipping.
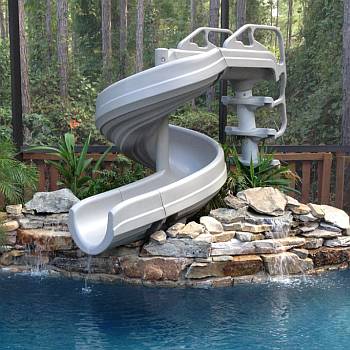
“Building a convincing artificial rock waterfall is an art.”
Here’s a simplified process: Create a framework using rebar bent into your desired shape, covering it with metal lath to form a mesh shell.Run your plumbing lines for the waterfall inside this framework.Apply a ‘scratch coat’ of a high-strength concrete mix over the entire mesh surface.Before it fully cures, apply a second, thicker ‘carving’ coat. This is where you’ll sculpt the details, textures, and cracks to mimic real rock.Once cured, stain the concrete using a variety of earthy tones to create depth and realism. (Time: 3-5 days, Cost: Highly variable, but DIY materials can be $1,000+).
20. Accessorize a Modern Pool with a Slide, Water Spouts, and a Shaded Swing
This sleek, contemporary look follows a clear formula: 60% Neutral Hardscaping + 20% Water Features + 20% Soft Furnishings. The beige walls, grey pergola, and light-colored decking create a calm, neutral canvas. The water elements—the deep blue pool, the white slide, and the dark sheet waterfalls—are the main event. Finally, the soft swing seat with its pop of blue and green cushions adds comfort and personality, making the space feel lived-in. You could swap the cushion colors to orange and yellow for a different vibe without changing the core formula. Compare the water spouts here to the more rustic version in Idea #28.
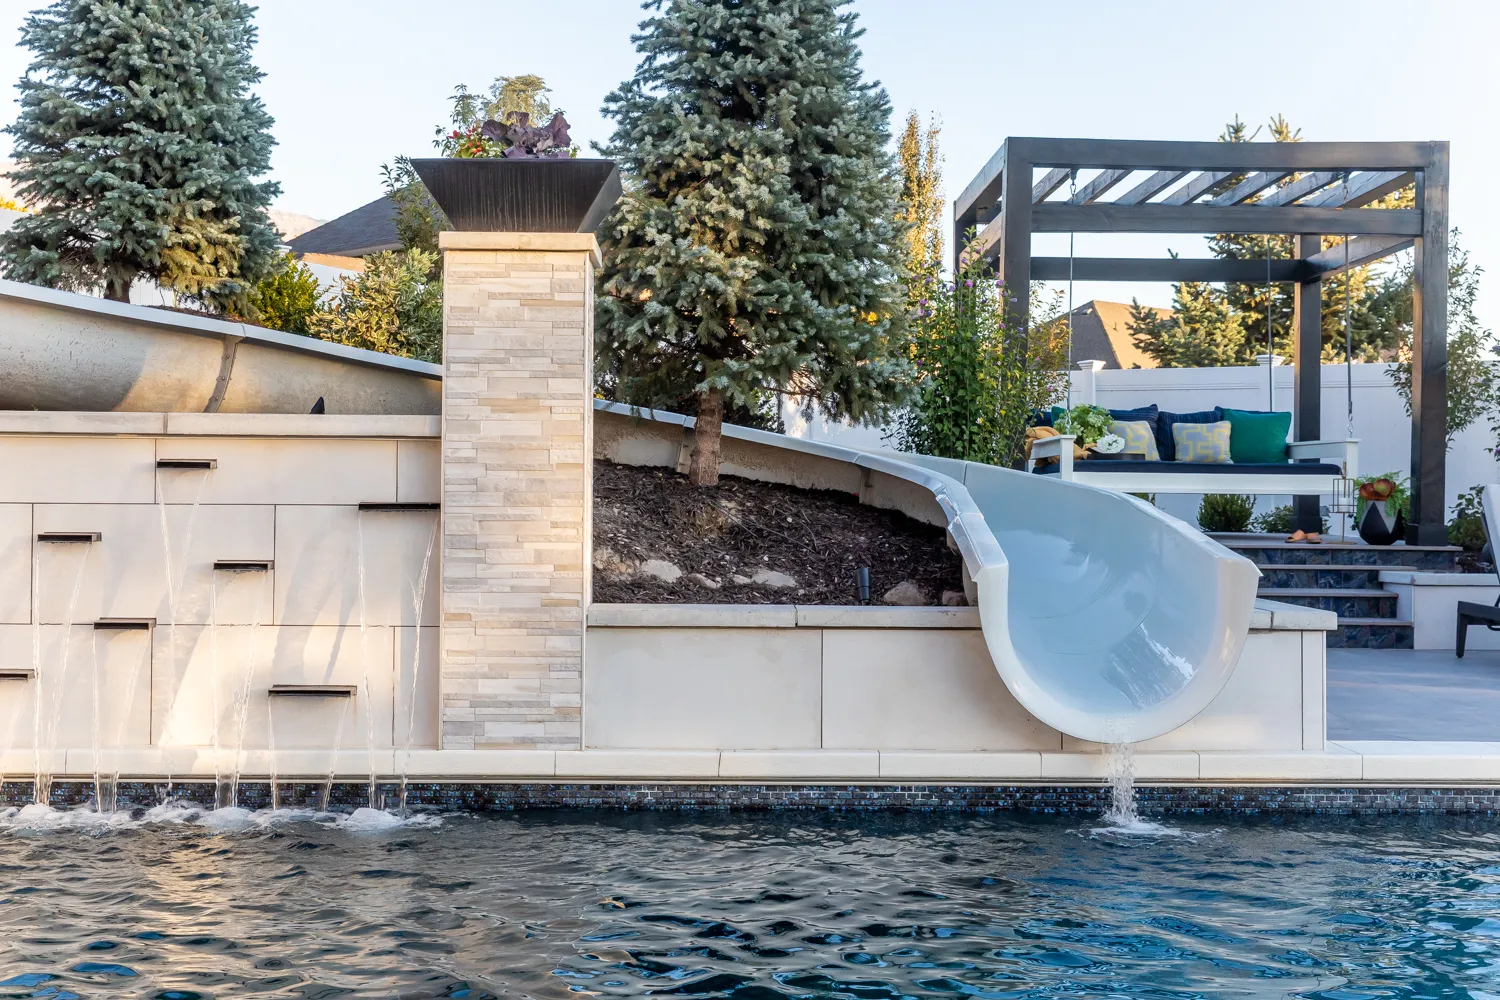
“The sheet waterfalls descending from the beige wall are the element that truly elevates this design.”
While the slide is fun and the swing is relaxing, the waterfalls add a layer of sound, movement, and architectural sophistication. They transform a simple retaining wall into a dynamic water feature, providing a soothing soundtrack to the entire backyard. Their dark metal spouts offer a sharp, modern contrast against the light-colored wall, reinforcing the contemporary aesthetic.
21. Place a Rustic Wood-Clad Hot Tub with a Scenic View
This setup works because it’s all about framing the view. The hot tub isn’t just placed randomly; it’s positioned to take full advantage of the stunning scenery of the water and forested hills. The design uses natural, unobtrusive materials—rustic wood, grey stone, low-growing ground cover—that complement the surrounding environment rather than competing with it. The tall evergreen trees create a sense of privacy and seclusion, making it feel like a secret escape, even if neighbors are nearby.
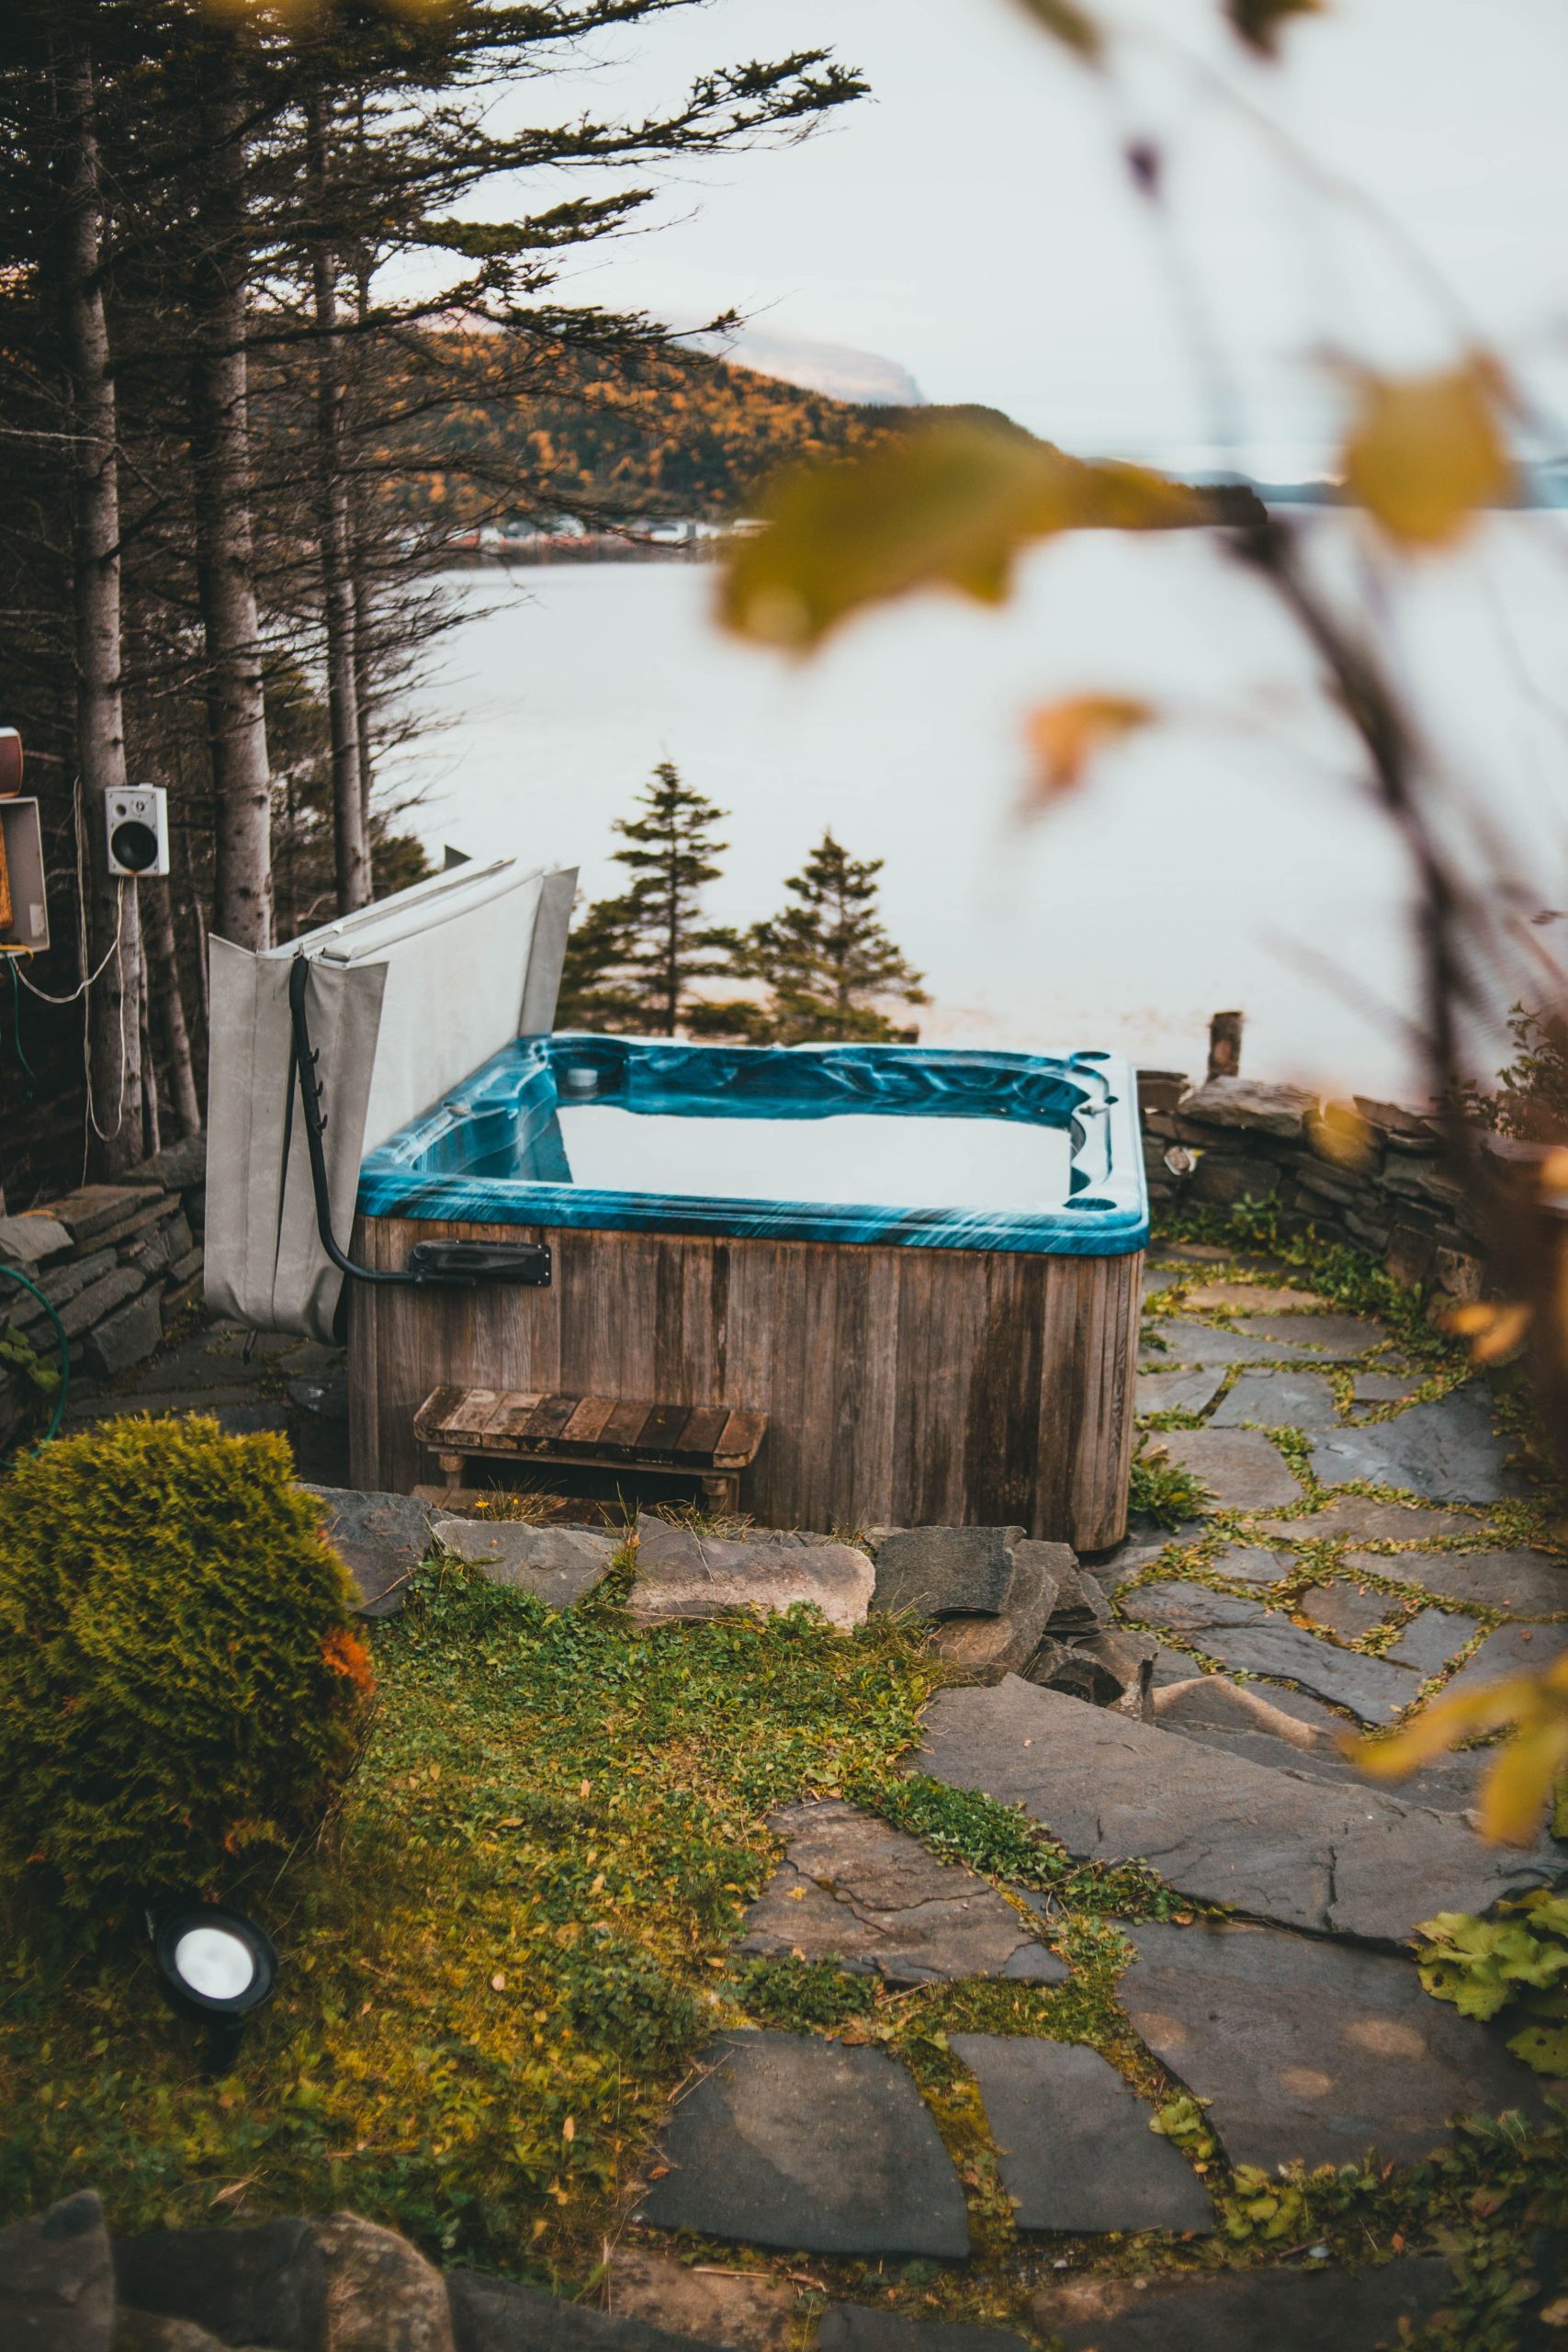
“A wooden hot tub exterior is gorgeous but requires more care than a standard acrylic shell.”
To keep the wood from graying, cracking, or rotting, you’ll need to clean and reseal it every 1-2 years, depending on your climate’s harshness. The irregular stone path looks beautifully organic, but the gaps filled with ground cover can be a haven for weeds and will require regular attention. Also, be mindful that leaves and needles from the surrounding evergreen trees will constantly be falling into the tub, requiring frequent skimming.
22. Create a Festive Play Zone with a Unicorn Tent and Balloons
You don’t need permanent structures for a magical play space. This entire look is achievable for a weekend party or as a semi-permanent summer setup for under $250. The unicorn tent can be found on Amazon for about $50. A few packs of balloons, paper fans, and string lights will run you another $50. The most expensive part might be the artificial turf if you don’t already have it, but a small 8×10 foot roll is often under $150. It’s a high-impact, low-commitment way to create a special zone for little ones.
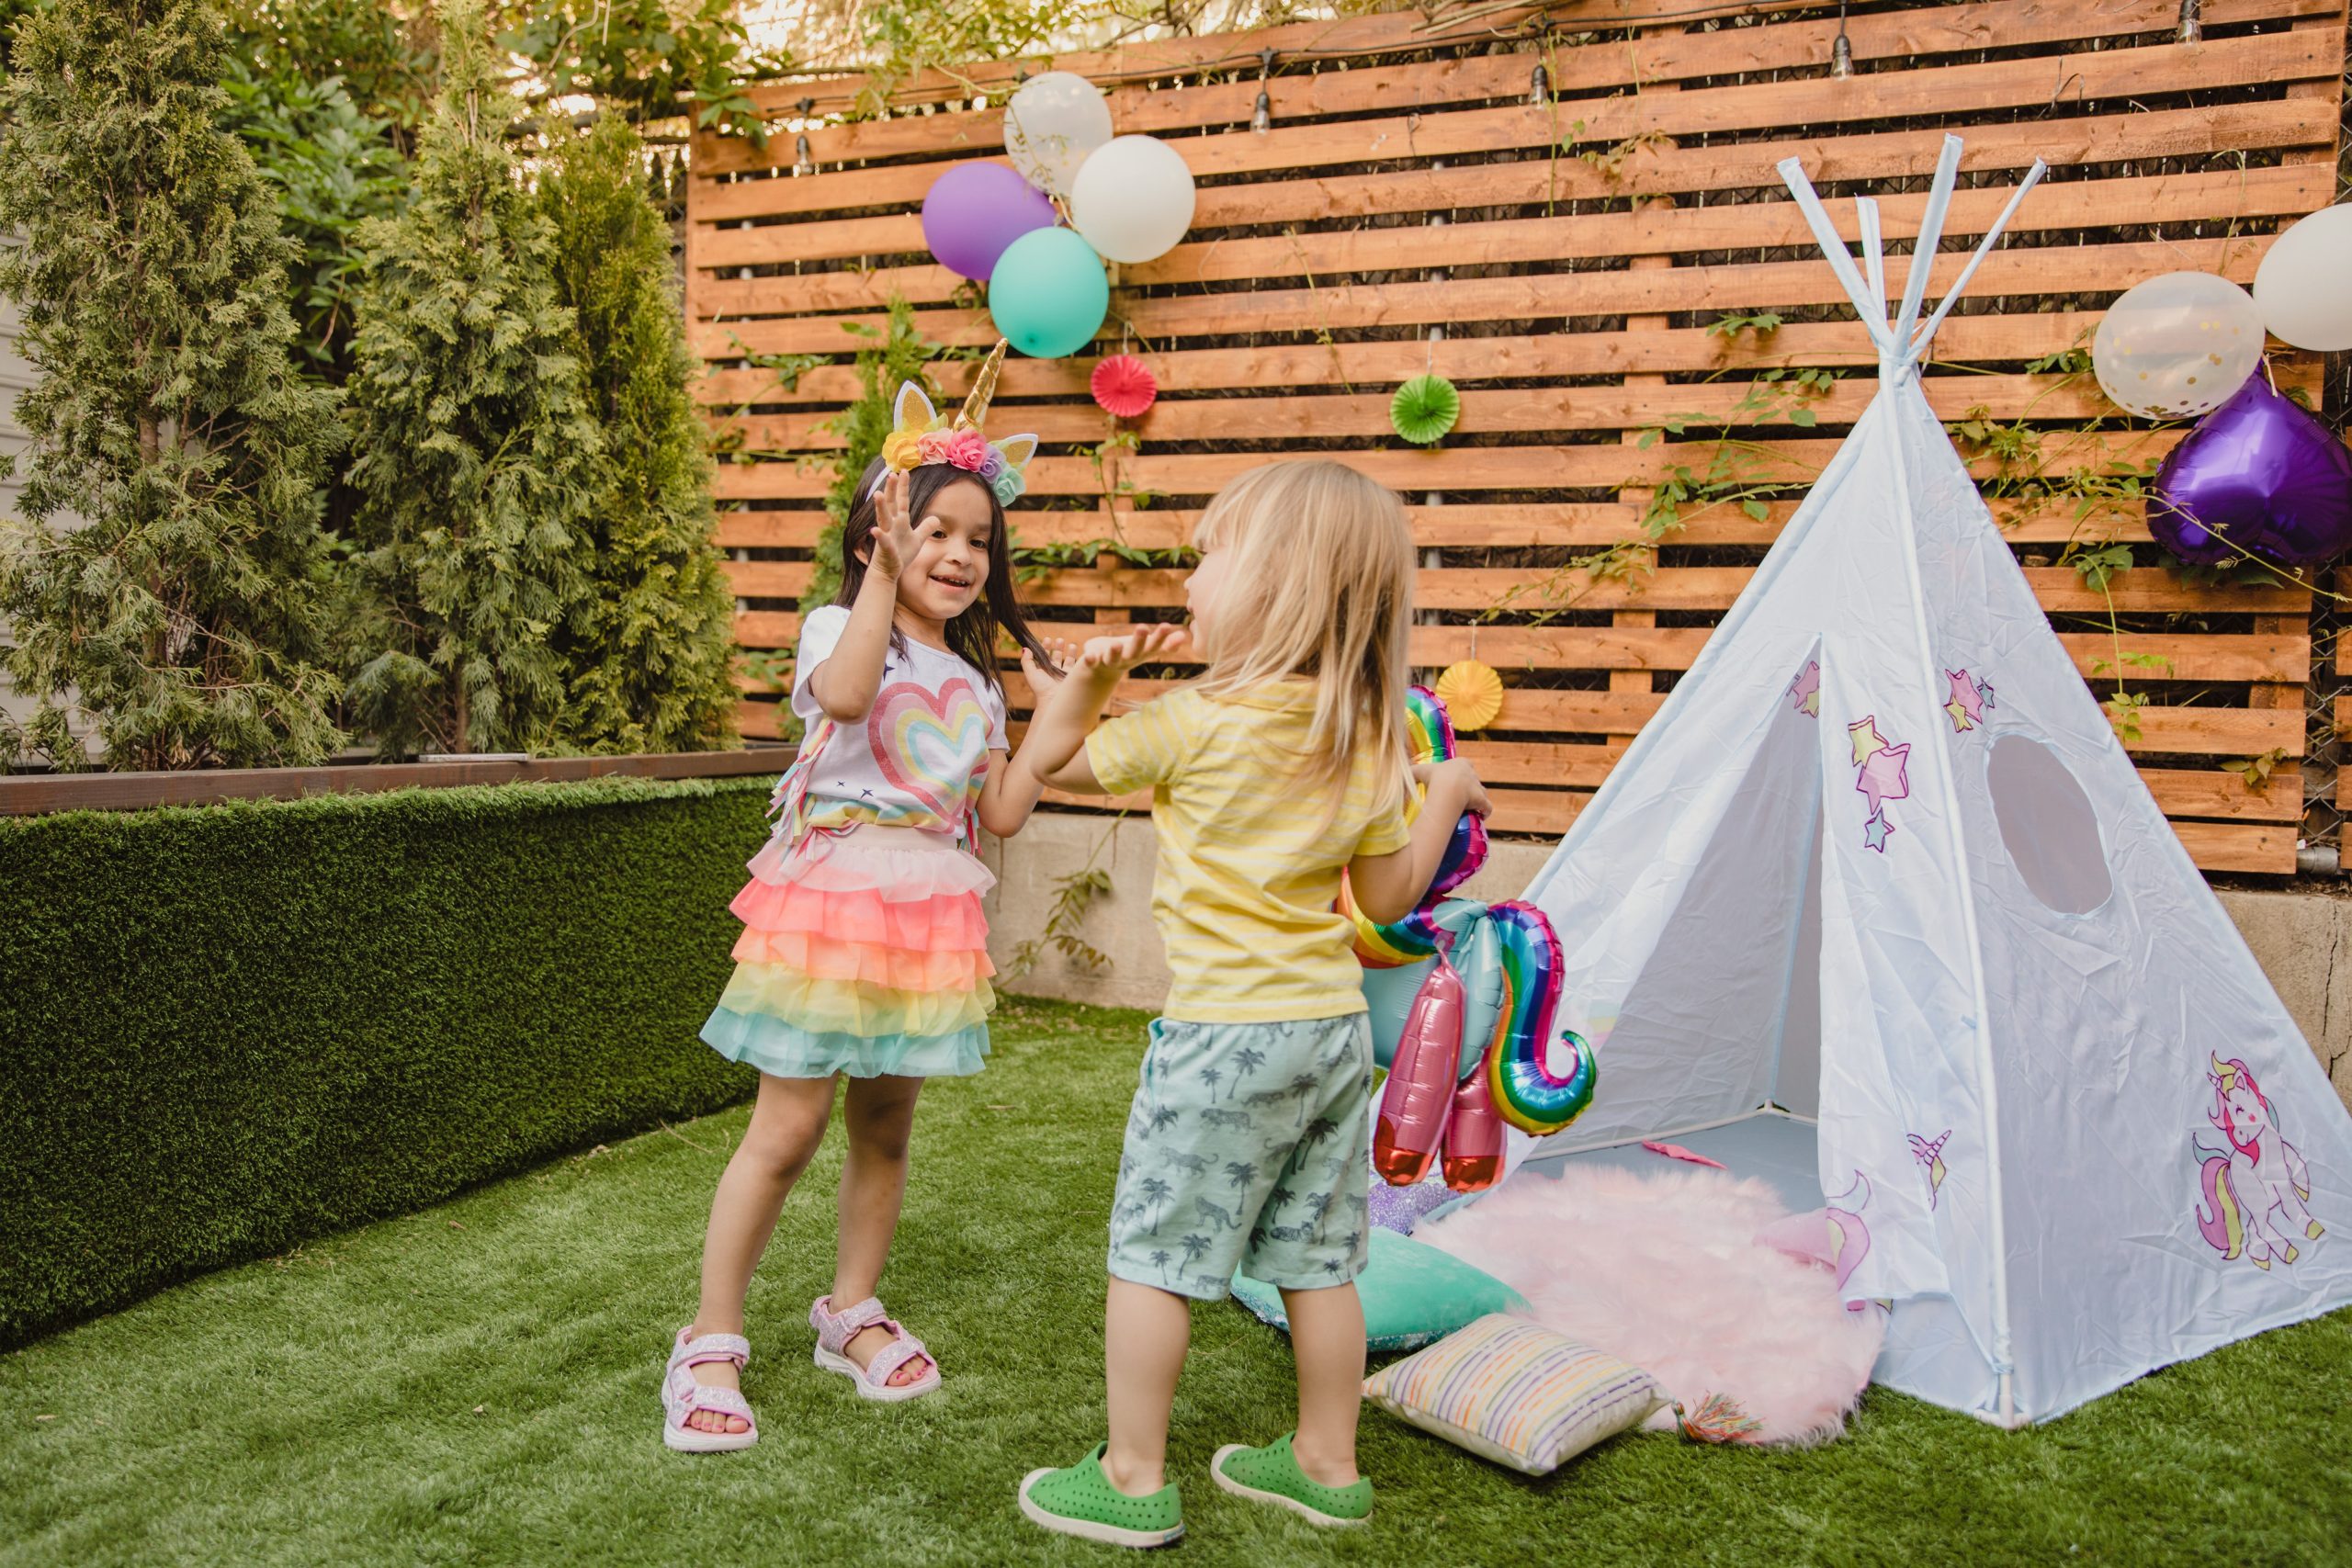
“To make temporary decorations like balloons feel more integrated and professional, attach them to the fence or wall in clusters of varying sizes, not in a single, straight line.”
Use three to five balloons per cluster, combining standard 12-inch balloons with smaller 5-inch and larger 18-inch ones. This variation in scale is what gives it a custom, designed look. Use clear fishing line or zip ties that match your fence color to make the attachments nearly invisible.
23. Surround a Blue Water Slide and Pool with Artificial Turf
Artificial turf looks amazing and solves the ‘muddy patch’ problem around a pool, but be warned: it gets hot. On a sunny day, the surface temperature of artificial grass can be significantly higher than natural grass, potentially reaching temperatures hot enough to be uncomfortable or even burn bare feet. Lighter-colored turf with tan or beige thatch woven in tends to stay cooler than dark, mono-green versions. Having a shaded area or a path of cooler paving stones nearby is a smart move.
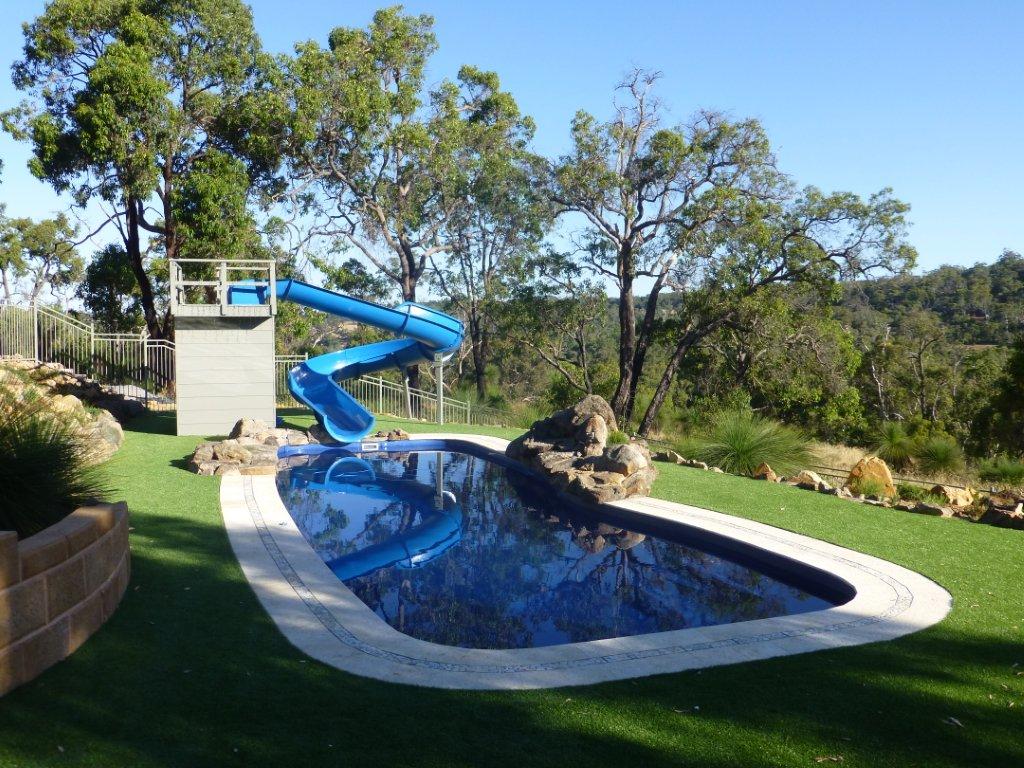
“Before you swap your lawn for turf, consider these key points.”
This is your last chance to fix what’s underneath before covering it up permanently.Drainage: Is your yard properly graded to drain water away from the house? Artificial turf is permeable, but it won’t fix underlying drainage problems. Now is the time to install a French drain if needed.Sub-Base: Proper installation requires a compacted sub-base of crushed rock, which is a significant cost and labor factor. Don’t just lay it over dirt.Sun Exposure: How many hours of direct, intense sun does the area get? This will influence your choice of turf material and infill to manage heat buildup.
24. Create a Vibrant Tropical Poolside Vibe with a Buddha Statue
This backyard’s formula is a blend of tranquility and energy: 40% Zen Elements (the Buddha head, natural wood fence) + 40% High-Energy Color (the electric blue pool lights, tropical mural, dramatic sunset sky) + 20% Modern Comfort (the sleek wicker loungers, floating chairs). The key is the tension between the calm, serene statue and the vibrant, almost club-like lighting and colors. It creates a space that feels both relaxing and ready for a party at the same time.
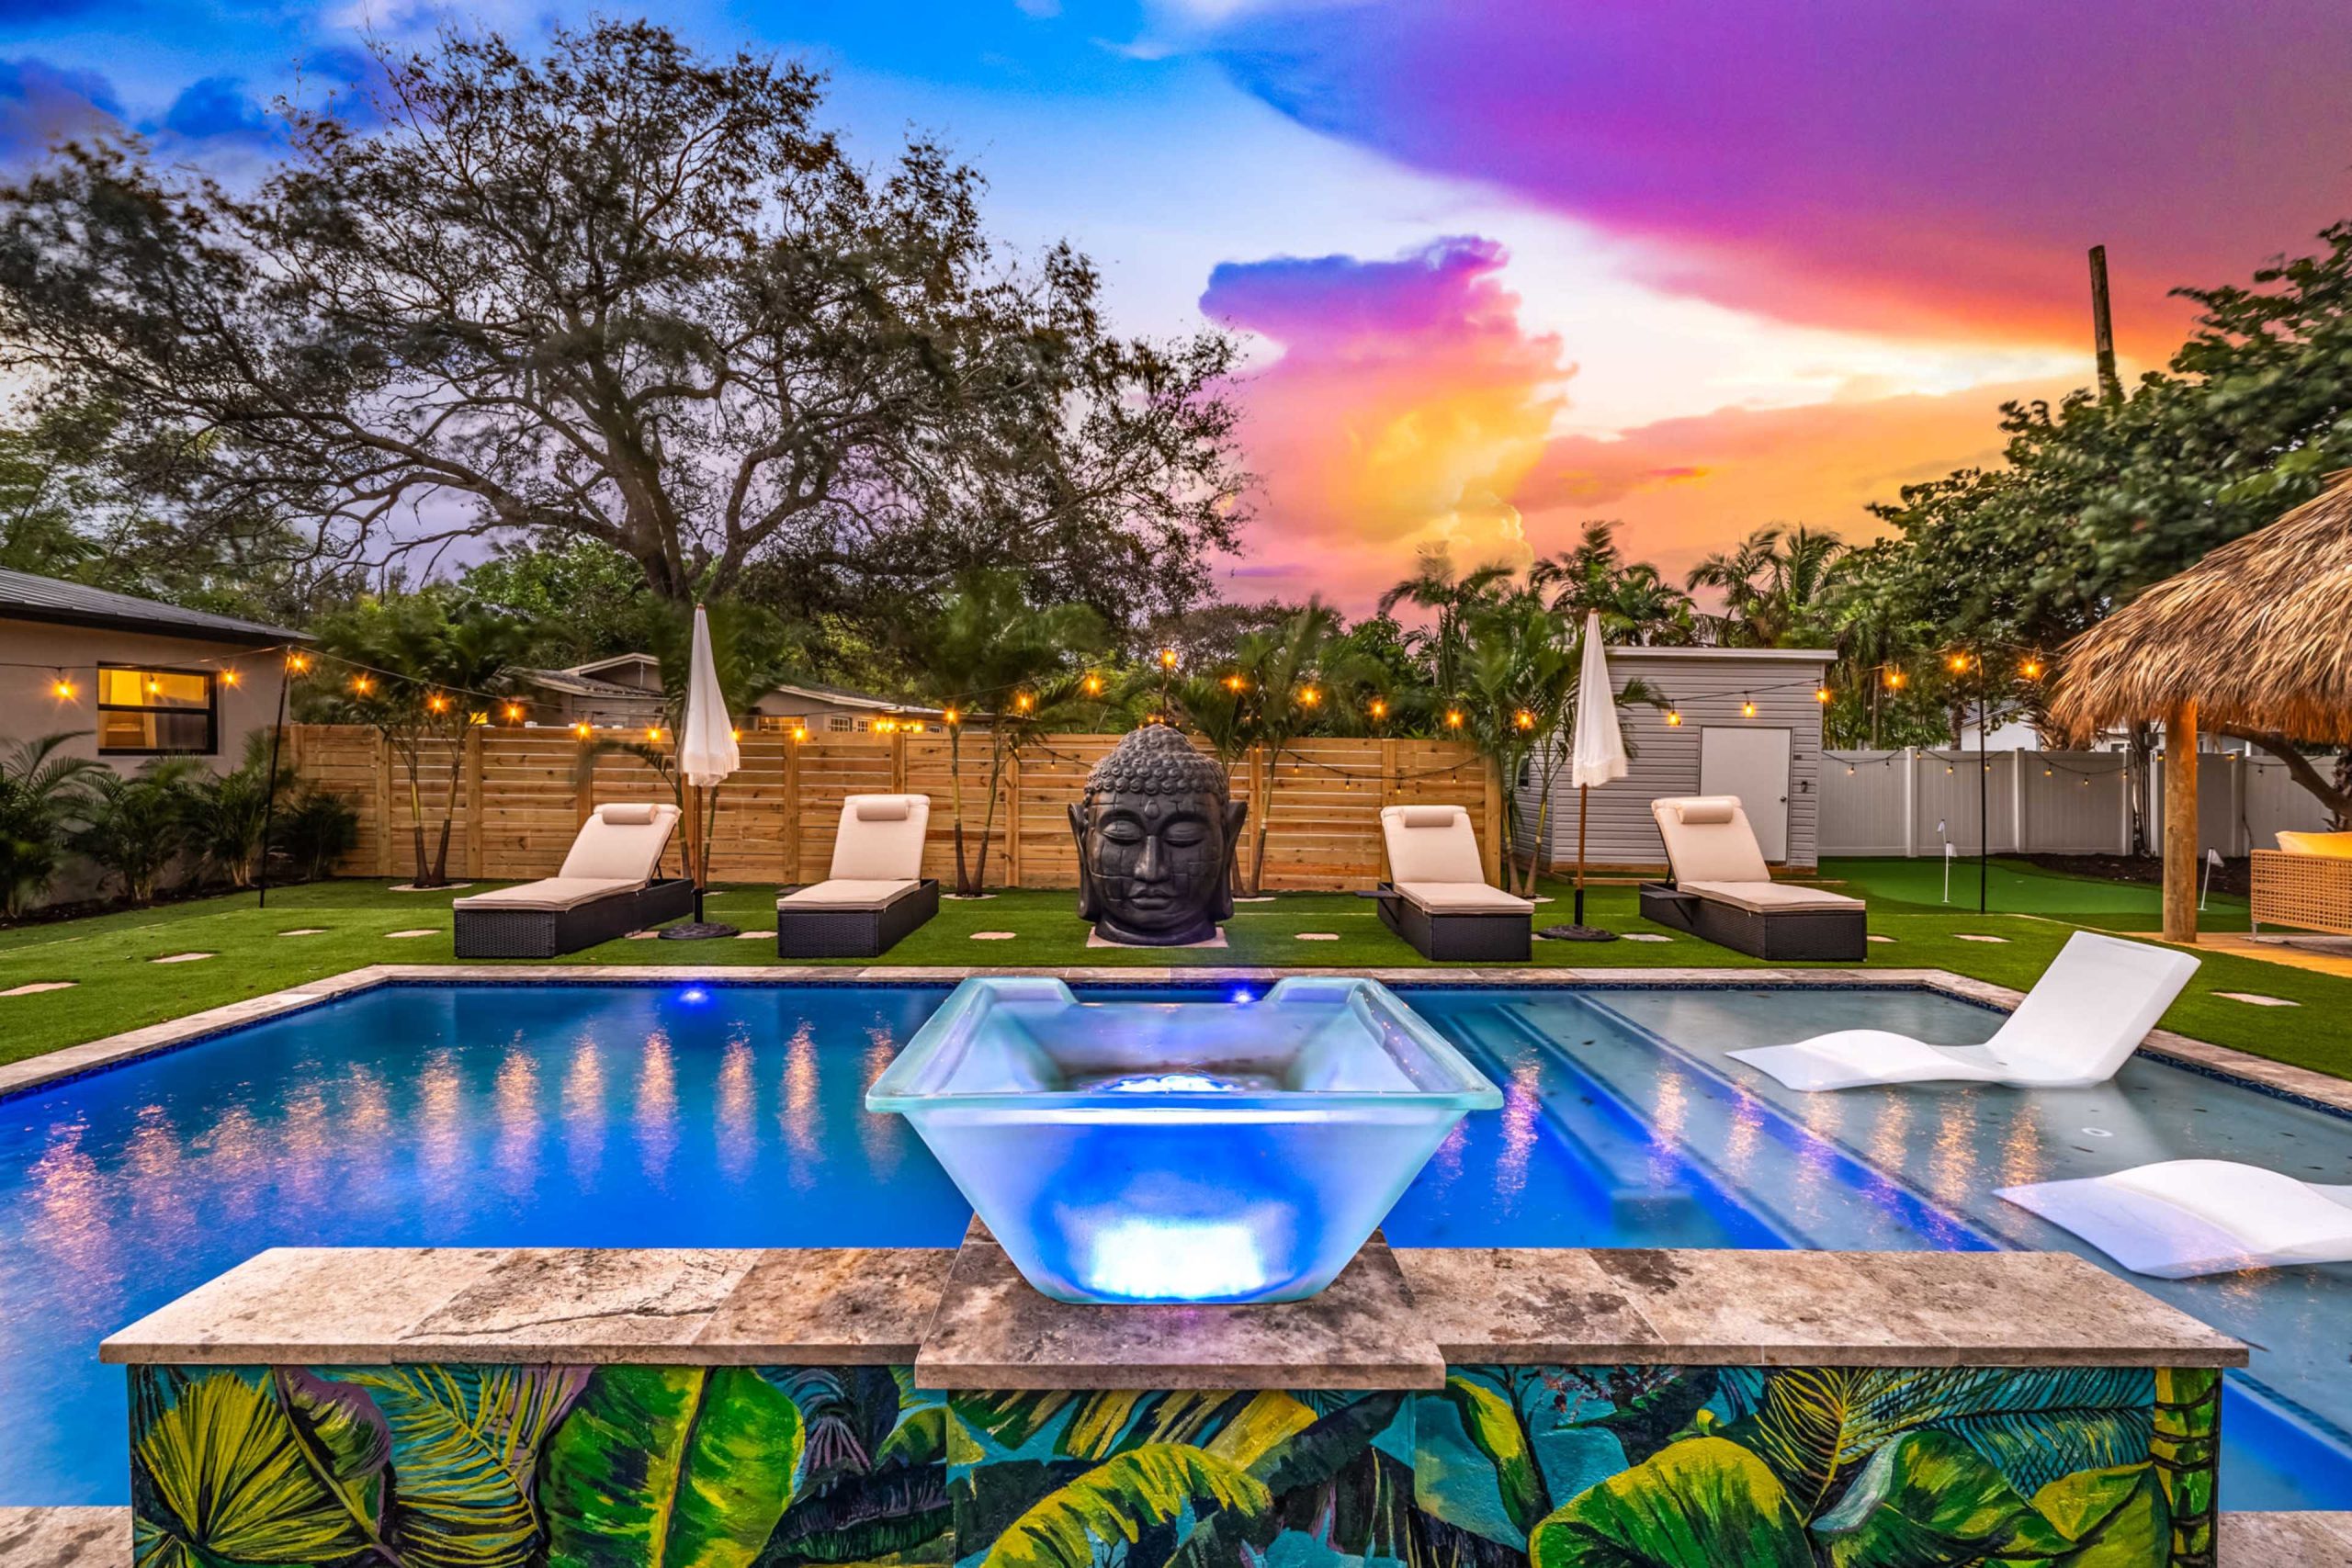
“This look is part of the growing ‘destination backyard’ trend.”
With travel becoming more complex, people are investing in creating vacation vibes at home. This isn’t just about having a pool; it’s about curating a specific atmosphere—in this case, a Bali or Thai resort. The use of specific cultural elements like the Buddha statue, combined with tropical plants and dramatic lighting, is a way to transport yourself without ever leaving your property. It’s escapism, built-in.
25. Design a Luxury Oasis with a Lit Pool, Spa, and Linear Fire Pit
The linear fire pit is the heart of this design. While the pool and spa are beautiful, the long ribbon of flame is what provides the drama, the warmth, and the central gathering point. It elegantly mirrors the curvilinear shape of the pool and provides a stunning visual anchor, especially at night. It transforms the patio from a simple pool deck into a luxurious outdoor lounge. For a similar feel with less commitment, see the fire bowls in Idea #13.
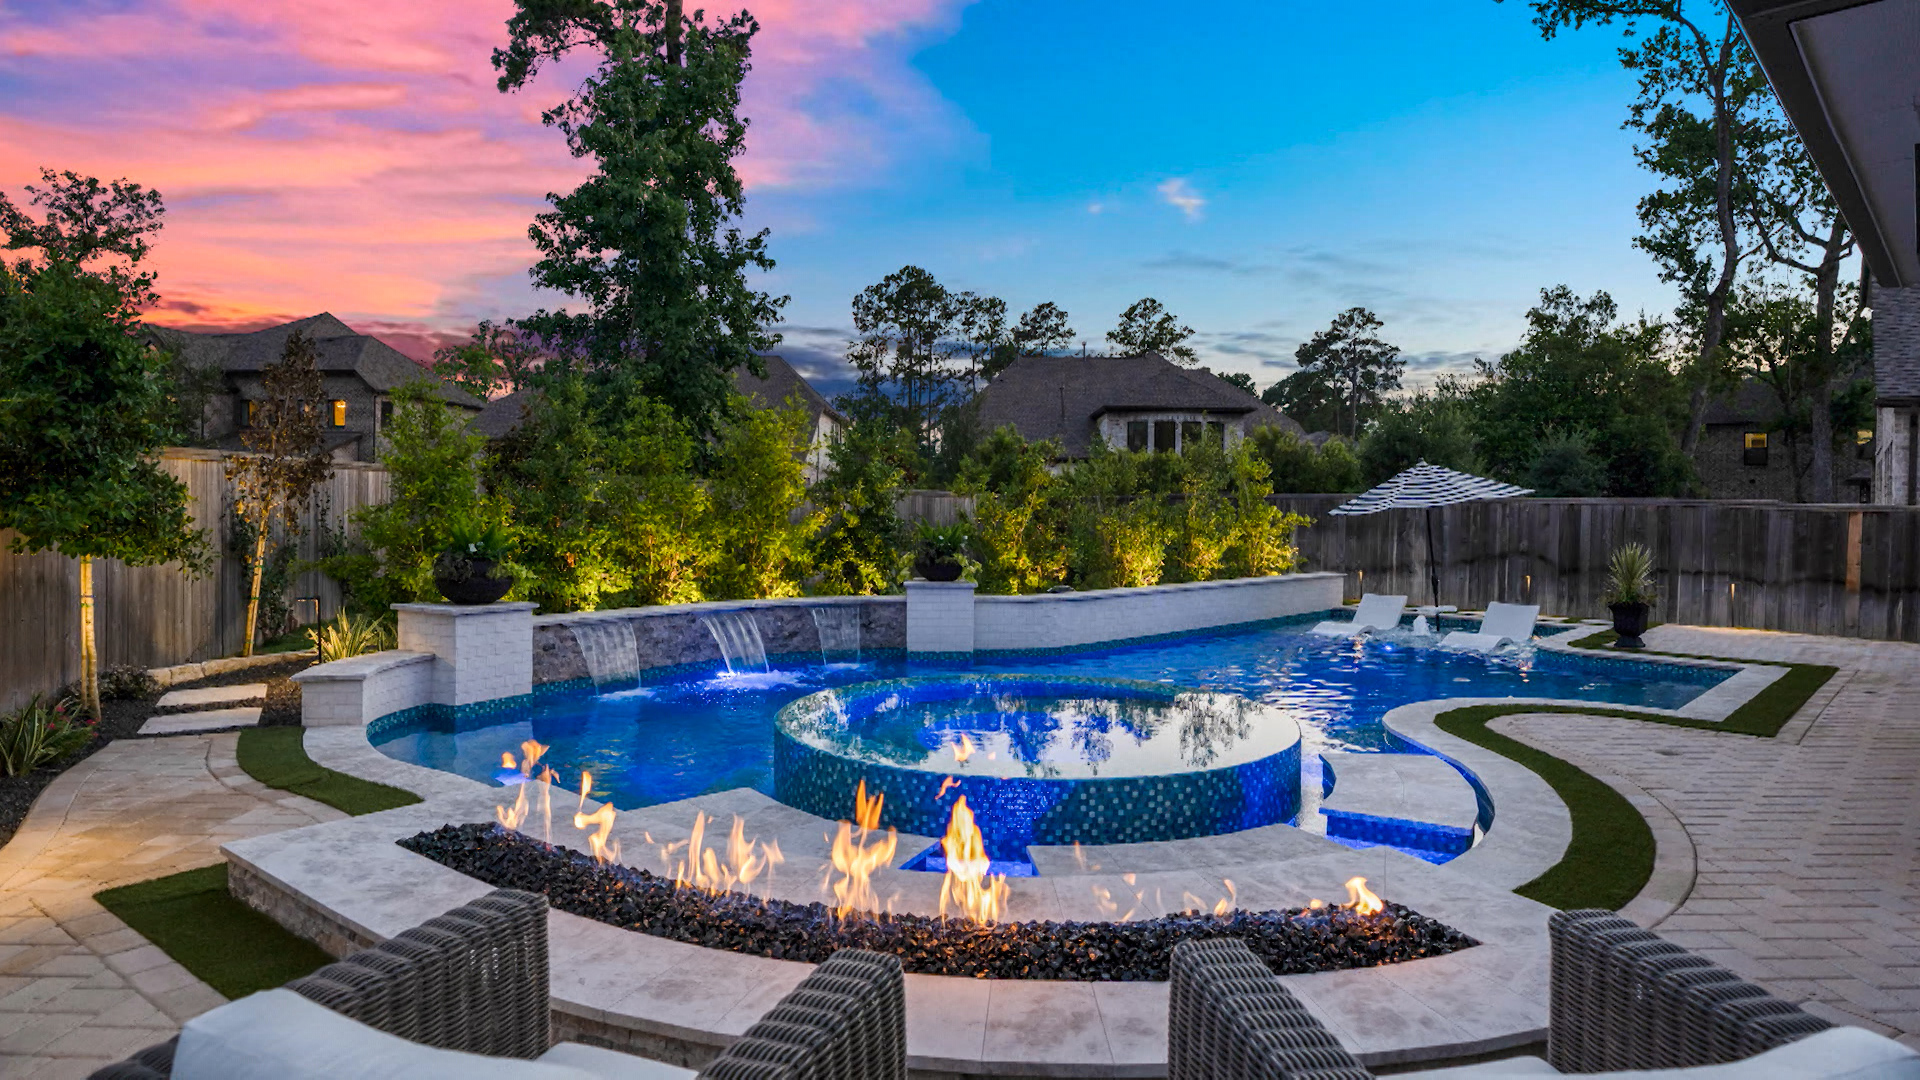
“This is a high-end, custom installation, and the budget reflects that.”
This is not a weekend DIY project.Custom Pool & Spa (gunite, with paving): $80,000 – $150,000+Waterfalls & Lighting: $10,000 – $25,000Linear Fire Pit (gas, custom installed): $8,000 – $20,000Landscaping (plants, turf, irrigation): $5,000 – $15,000Outdoor Furniture: $3,000 – $10,000TOTAL: $106,000 – $220,000+Budget alternative: An above-ground pool ($5k), a freestanding propane fire pit table ($1k), and some nice lounge chairs ($1k) can give you a ‘luxe-for-less’ vibe for under $7,000.
26. Set Up a Candy-Themed ‘Sugar Rush’ Inflatable Water Slide
The power of this inflatable lies in its over-the-top, unapologetic commitment to a theme. The ‘Sugar Rush’ banner, candy cane stripes, and lollipop decorations create an immersive, fantasy world for kids. The use of a broad, vibrant palette—purple, blue, red, green, yellow—is deliberately chaotic and exciting, mimicking a kid in a candy store. By not taking itself too seriously, it achieves maximum fun factor. It’s an instant, pop-up theme park in your own backyard.
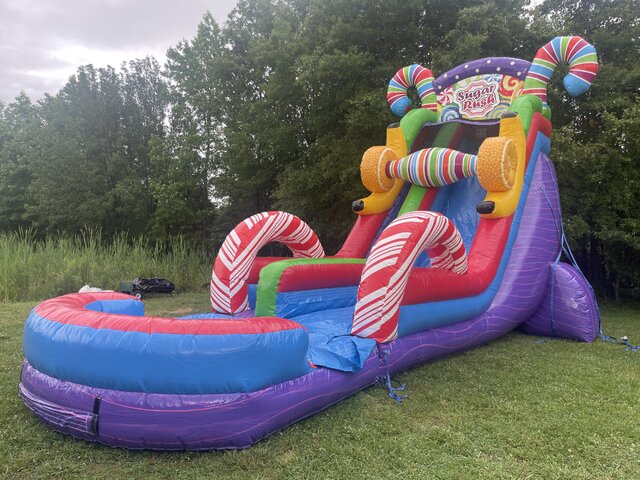
“This is a commercial-grade inflatable, and it’s a beast.”
You’ll need a large, flat, and completely unobstructed area, think 30×20 feet at a minimum. Pay close attention to overhead clearance; with its tall arches, this slide can reach heights of 15-18 feet, so it won’t work under mature trees with low canopies or near power lines. This is best suited for large, open yards or for use in a park or field where space is not a concern at all.
27. Achieve a Clean Look with Artificial Turf and a Light Wood Fence
To get this crisp, modern look, the details at the edges are everything. The dark grey paver border isn’t just for looks; it serves a practical purpose. It makes mowing or trimming along the fence line unnecessary and provides a clean, stable edge for the artificial turf installation. Use a paver that is at least 8 inches wide to create a visually substantial border. The thin, dark baseboard along the fence adds another layer of definition and gives the entire installation a finished, professional quality.
“Love this clean, low-maintenance look but don’t have the budget for a full turf installation and new fence?”
You can get 80% of the vibe for 20% of the cost. Start by creating the dark grey paver border around your existing lawn. Then, power wash and stain your current fence a light, natural wood tone. Simply defining the edges and freshening up the fence can provide that same sense of clean, modern order for just the cost of pavers and a can of stain—likely under $400.
28. Install a Modern Wood Wall with Triple Water Spouts
Building a freestanding wood feature wall like this requires a solid foundation. (Time: 2 days, Cost: $500-$1200)
- Dig post holes at least 3 feet deep for your 4×4 or 6×6 support posts. The number of posts depends on the wall’s length.
- Set the posts in concrete, ensuring they are perfectly plumb and level with each other. Let the concrete cure for 24-48 hours.
- Run your water supply lines, attaching them to the back of the support posts.
- Install horizontal blocking between the posts. This provides a surface to attach your vertical planking.
- Attach your wooden planks (like cedar or redwood) to the blocking, leaving small gaps for expansion.
- Drill holes for your water spouts and connect the plumbing before installing the final planks.
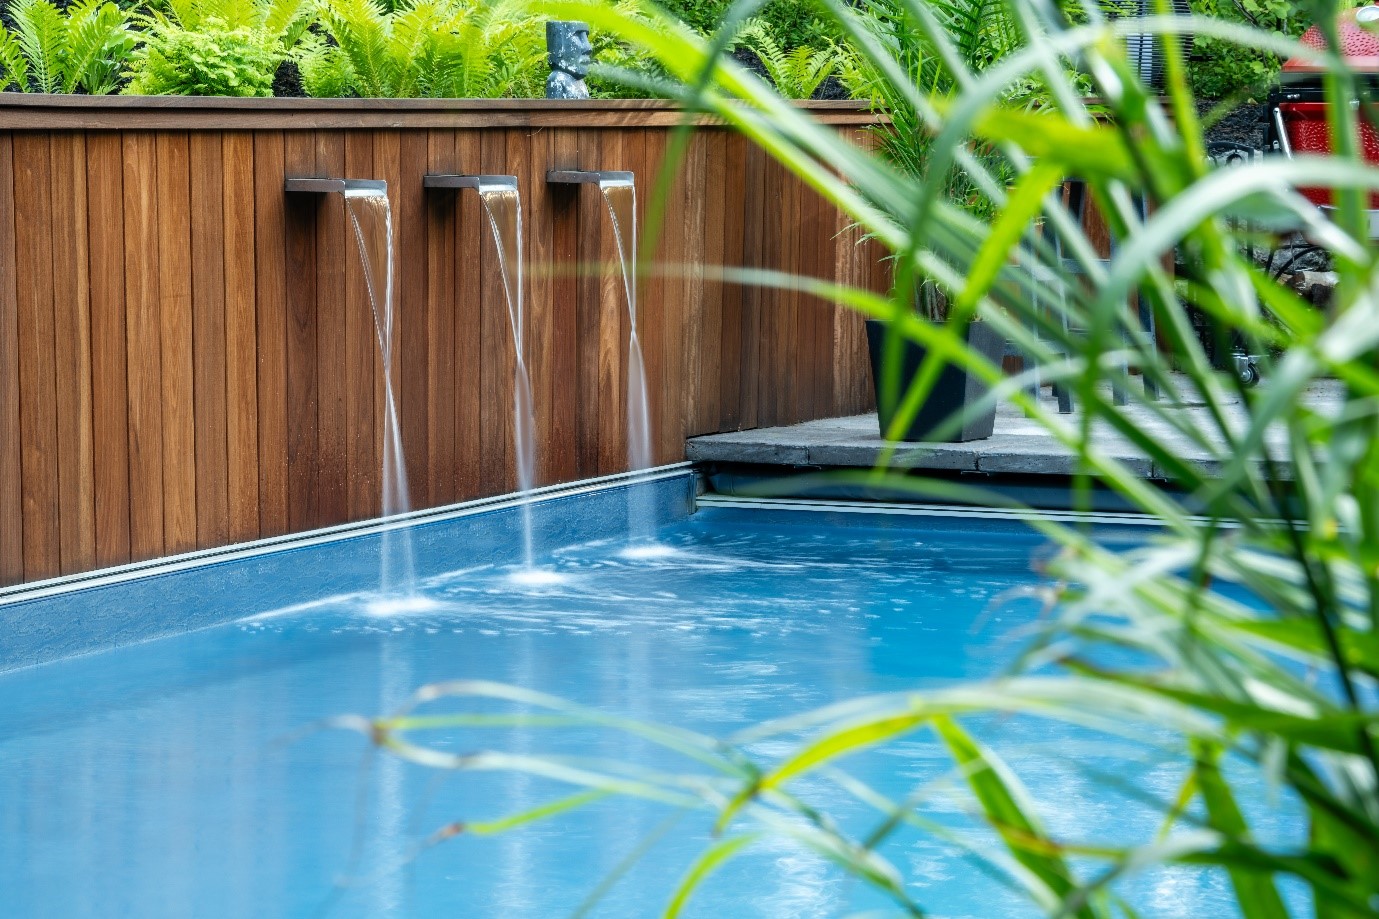
“A wooden wall next to a pool is a stunning feature, but it’s a high-maintenance relationship.”
The constant splashing will accelerate wear and tear. You must use a high-quality marine-grade varnish or sealant and expect to reapply it every single year to prevent rot, discoloration, and water damage. The dark metal spouts can also develop calcium buildup from hard water, requiring regular cleaning with a vinegar solution to keep them looking sleek. Be prepared for this annual upkeep before you commit.
29. Add a Simple Basketball Hoop for Active Pool Fun
The basketball hoop is the element that changes the entire energy of this pool. Without it, the scene is just kids swimming. With it, it’s a game. It provides a focal point for activity, encouraging interaction, competition, and collaborative play. It’s a simple, relatively inexpensive addition that dramatically increases the ‘fun-per-square-foot’ of a standard swimming pool, giving older kids and teens a reason to stay engaged and active in the water.
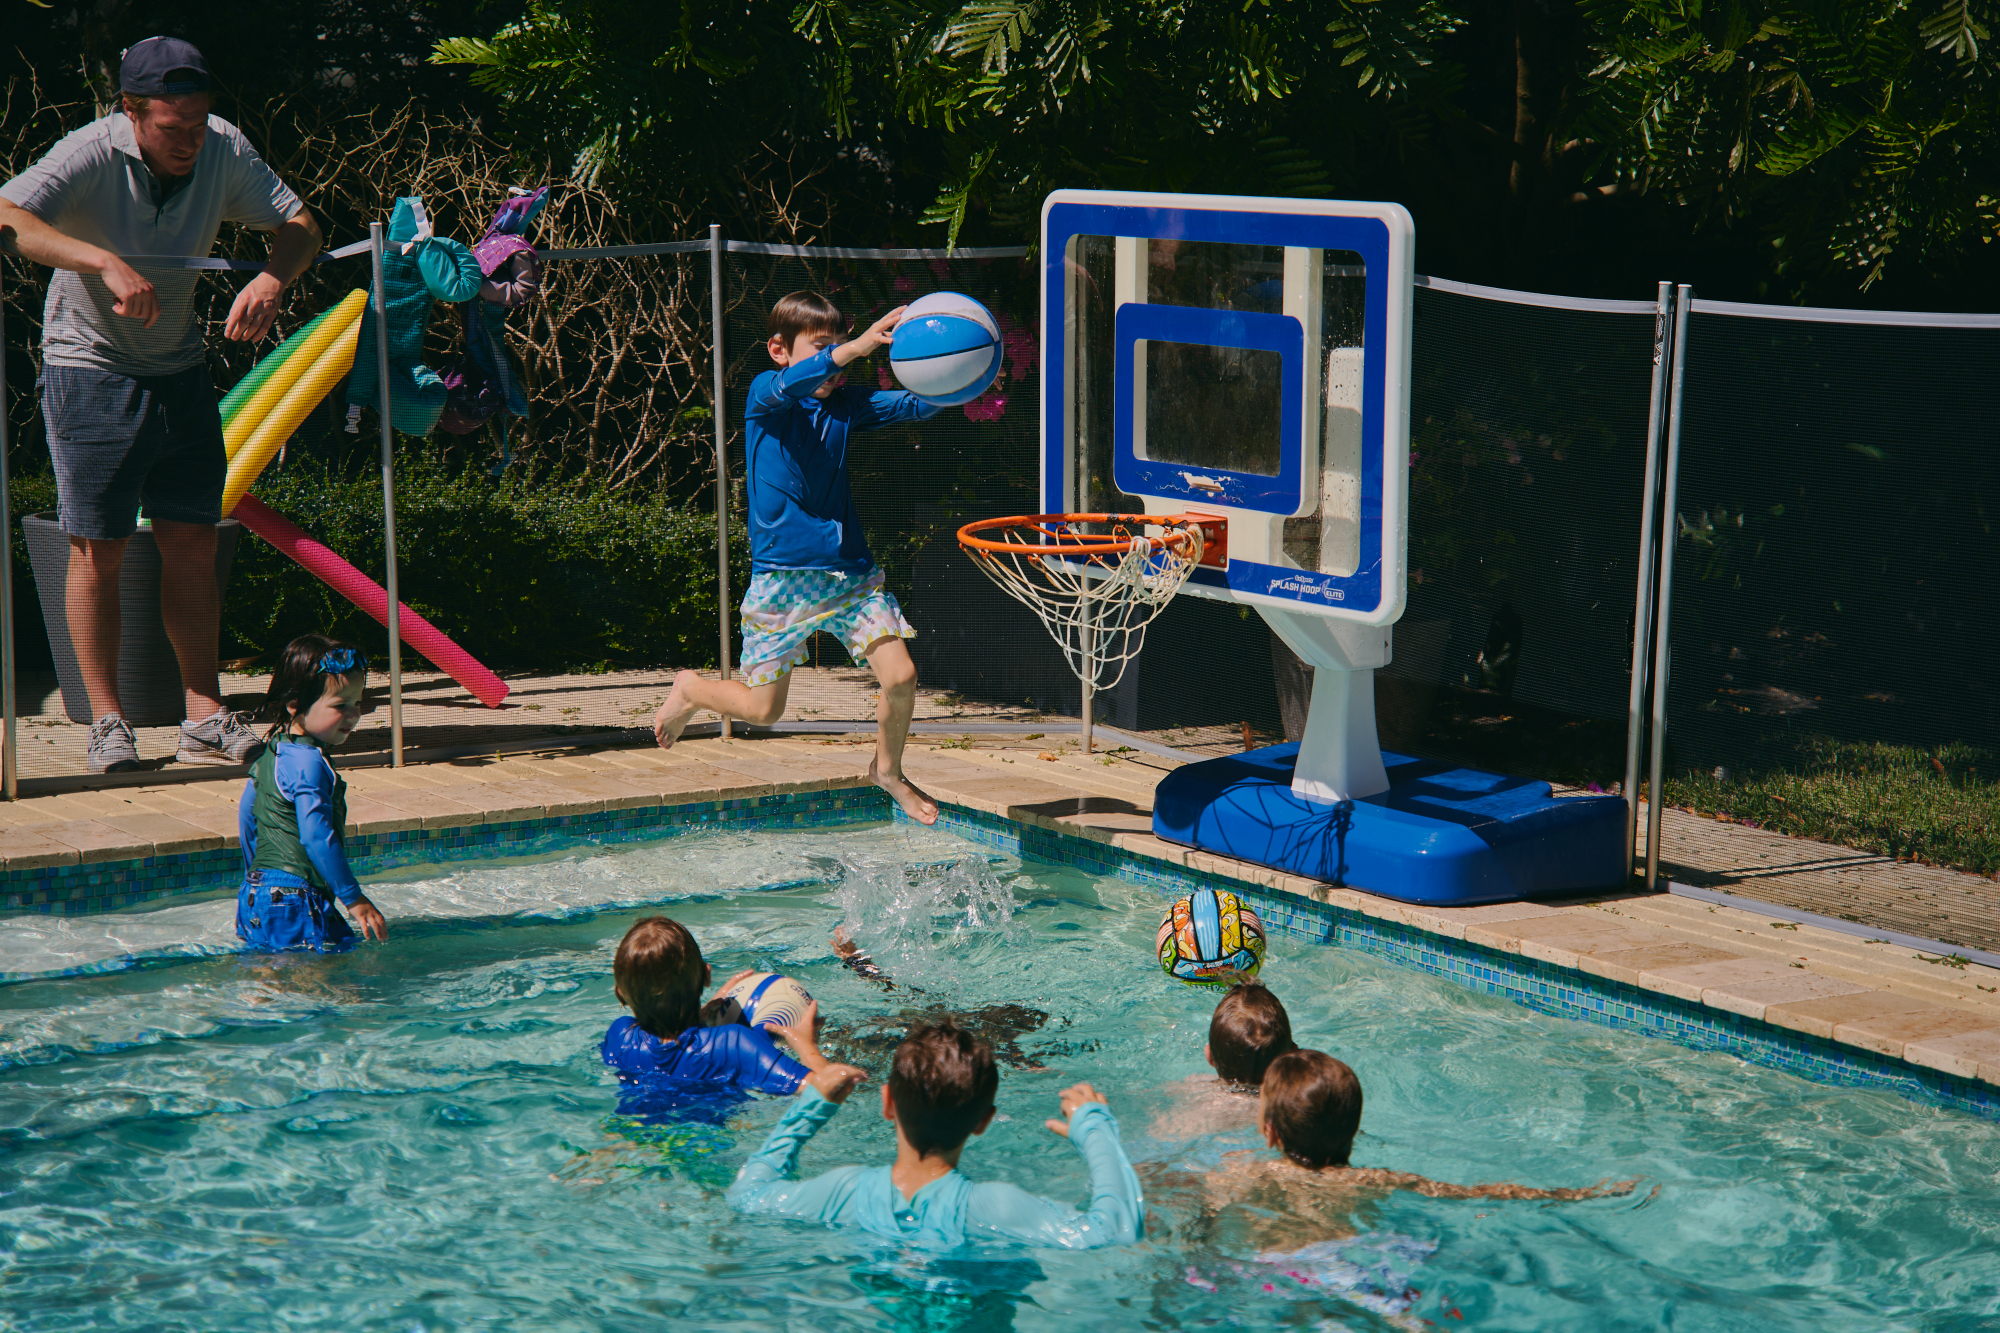
“A poolside basketball hoop is fantastic, but it also introduces a new level of chaotic energy.”
Expect a lot more splashing, which means surrounding patios will be constantly wet and potentially slippery. The area around the hoop becomes a high-action zone, so it’s wise to keep lounge chairs and breakable planters at a safe distance. Also, be aware that repeated, aggressive dunks can put stress on the pool’s coping and deck over time, especially with less expensive, non-professional grade hoops.
30. Design a Spacious Yard with a Play Structure and Trampoline
This is a great layout for a large, rectangular suburban lot of 5,000 square feet or more. The key is zoning. The wooden play structure is placed in one corner, and the trampoline is in another, leaving a huge, uninterrupted expanse of green lawn in the center for running, ball games, and open play. This prevents the yard from feeling cluttered with equipment. It requires significant space, but the payoff is a yard that can host multiple activities at once. For smaller yards, you may need to choose just one large play item, like the fort in Idea #12.
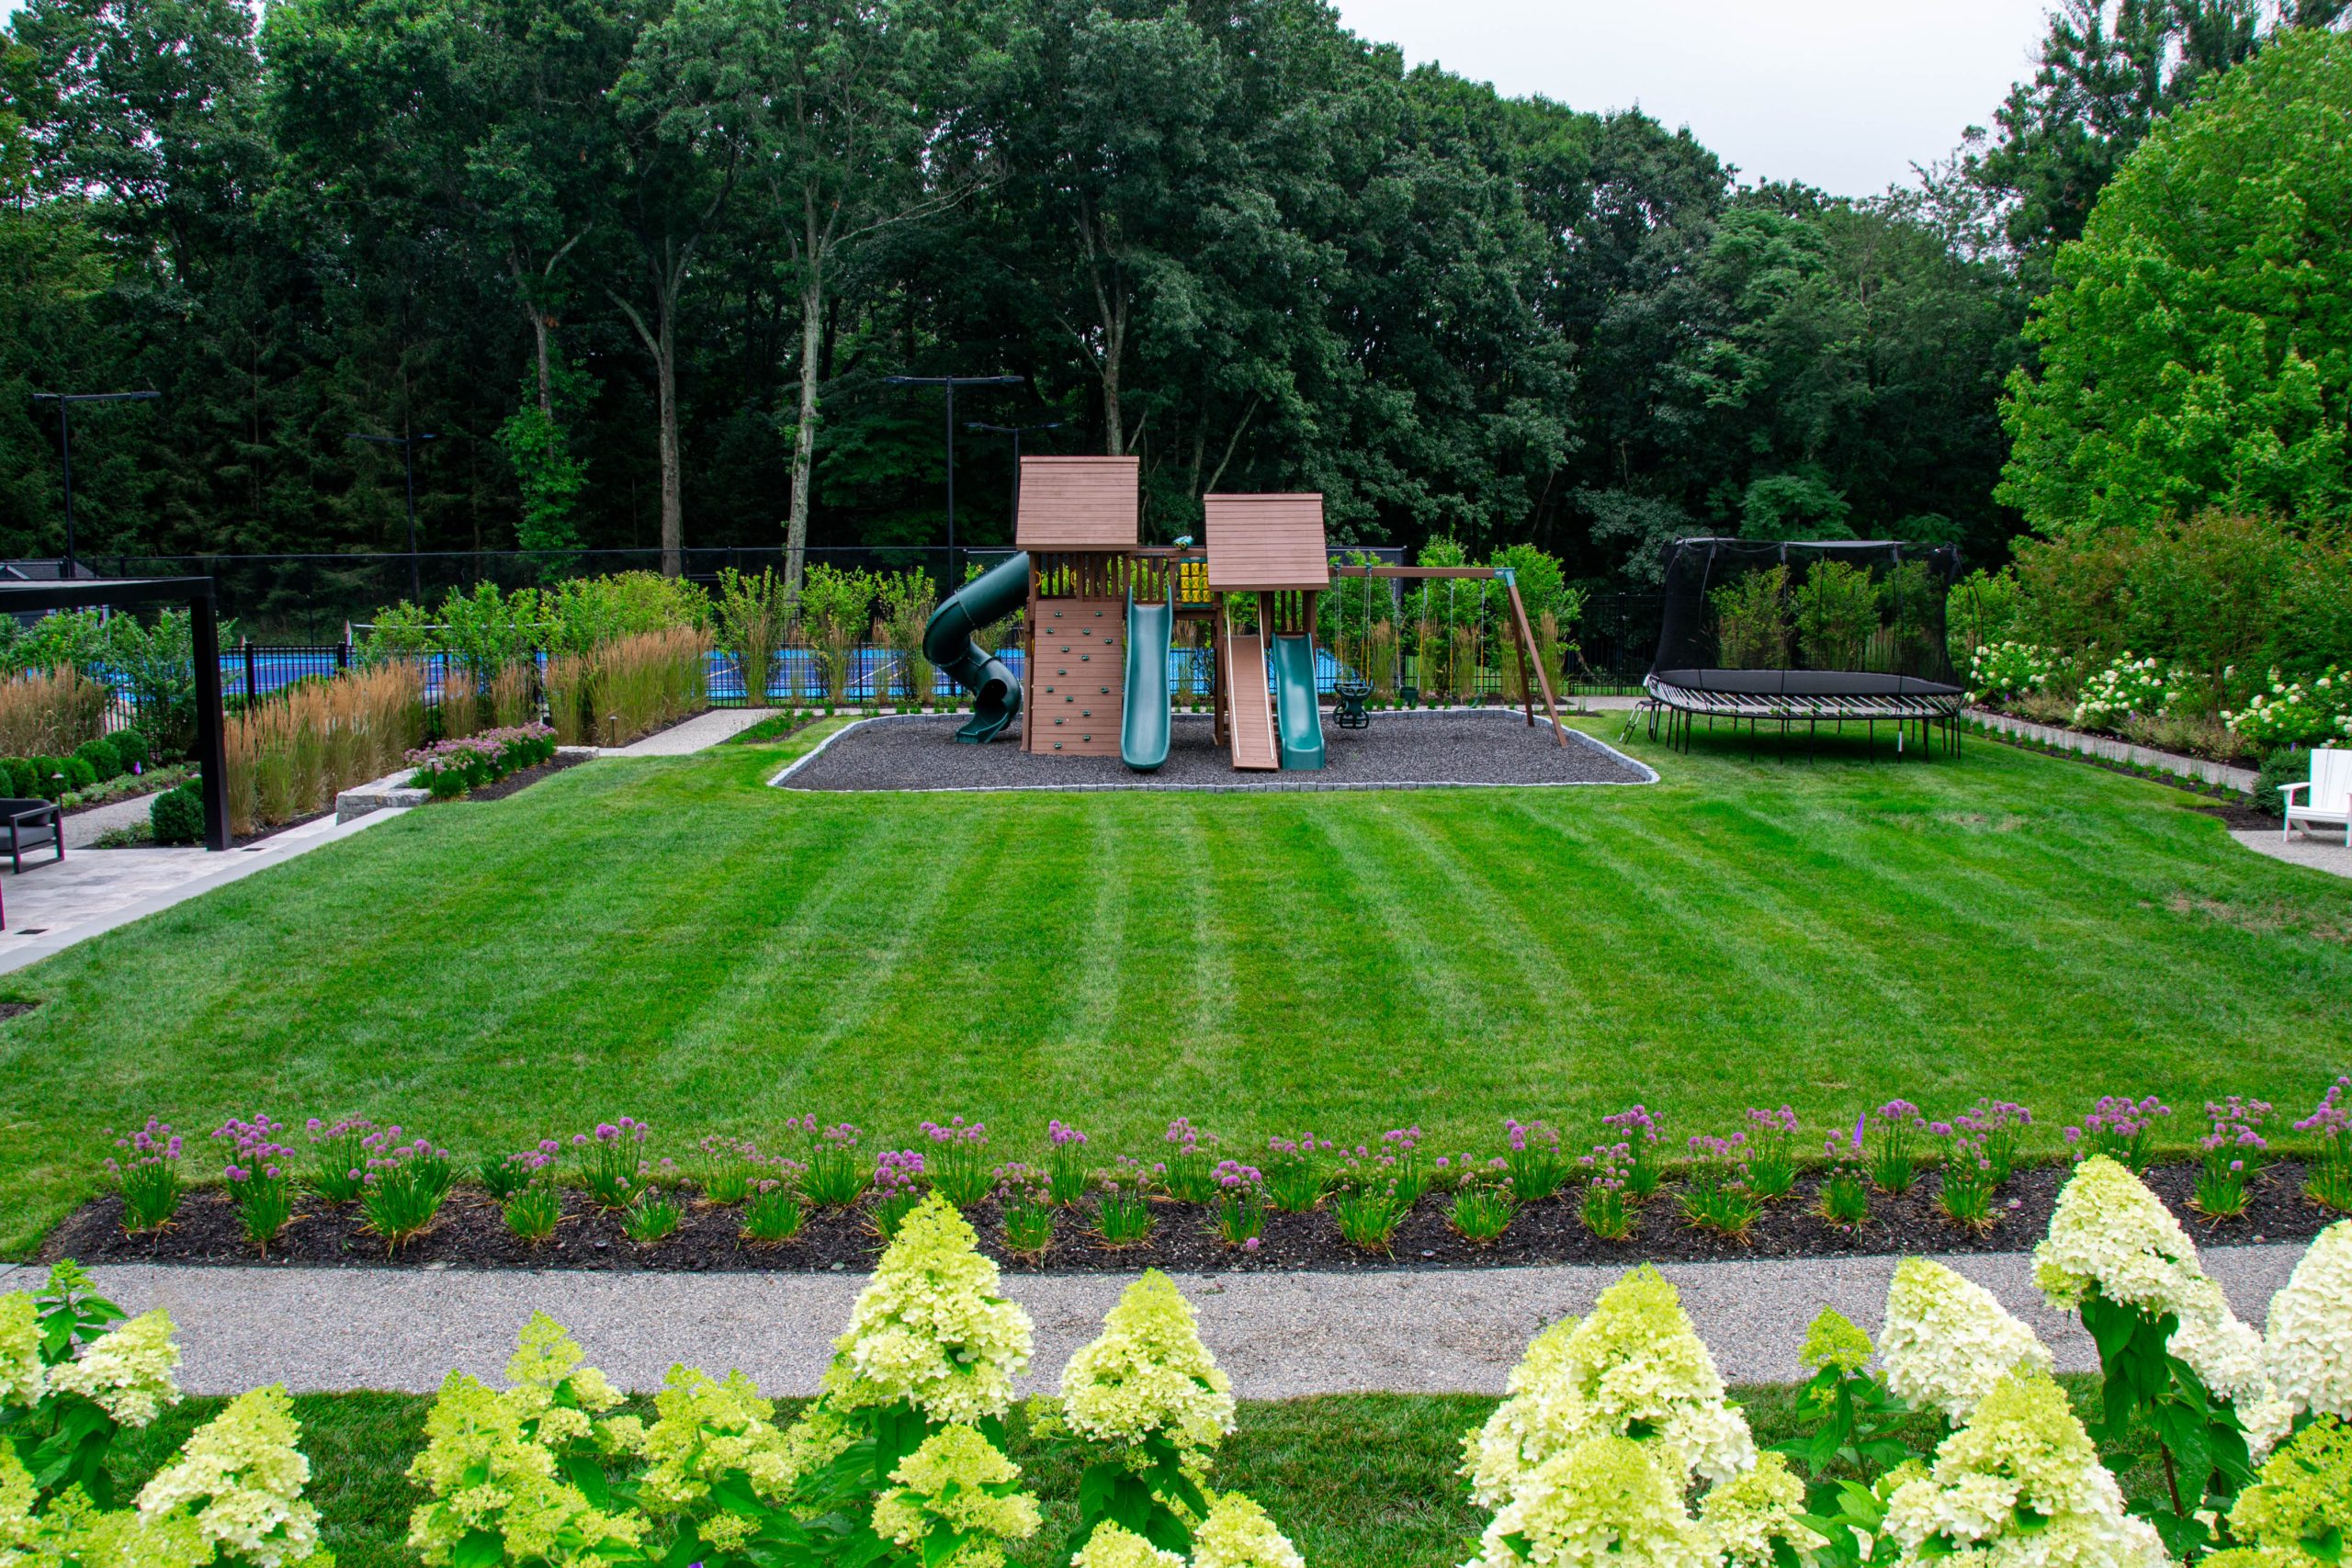
“The success of this backyard lies in its clear understanding of a kid’s need for both structured and unstructured play.”
The wooden fort and trampoline provide dedicated, ‘structured’ fun with a clear purpose. The vast, open lawn, however, is equally important. It’s a blank canvas for imagination—perfect for a game of tag, kicking a soccer ball, or just running in circles. By providing both types of spaces, the design caters to a full spectrum of childhood activity, ensuring there’s always something to do.
31. Combine a White Wooden Playhouse with a Water Play Wall
This playhouse is brilliant because it integrates multiple types of play into one compact structure. You have the imaginative play of the house itself, the physical play of the green slide, and the sensory/STEM play of the orange water wall. The clean white and green color palette keeps it looking fresh and stylish, not like a chaotic jumble of plastic. The striped awning and circular window add charming, house-like details that elevate it beyond a simple piece of playground equipment.
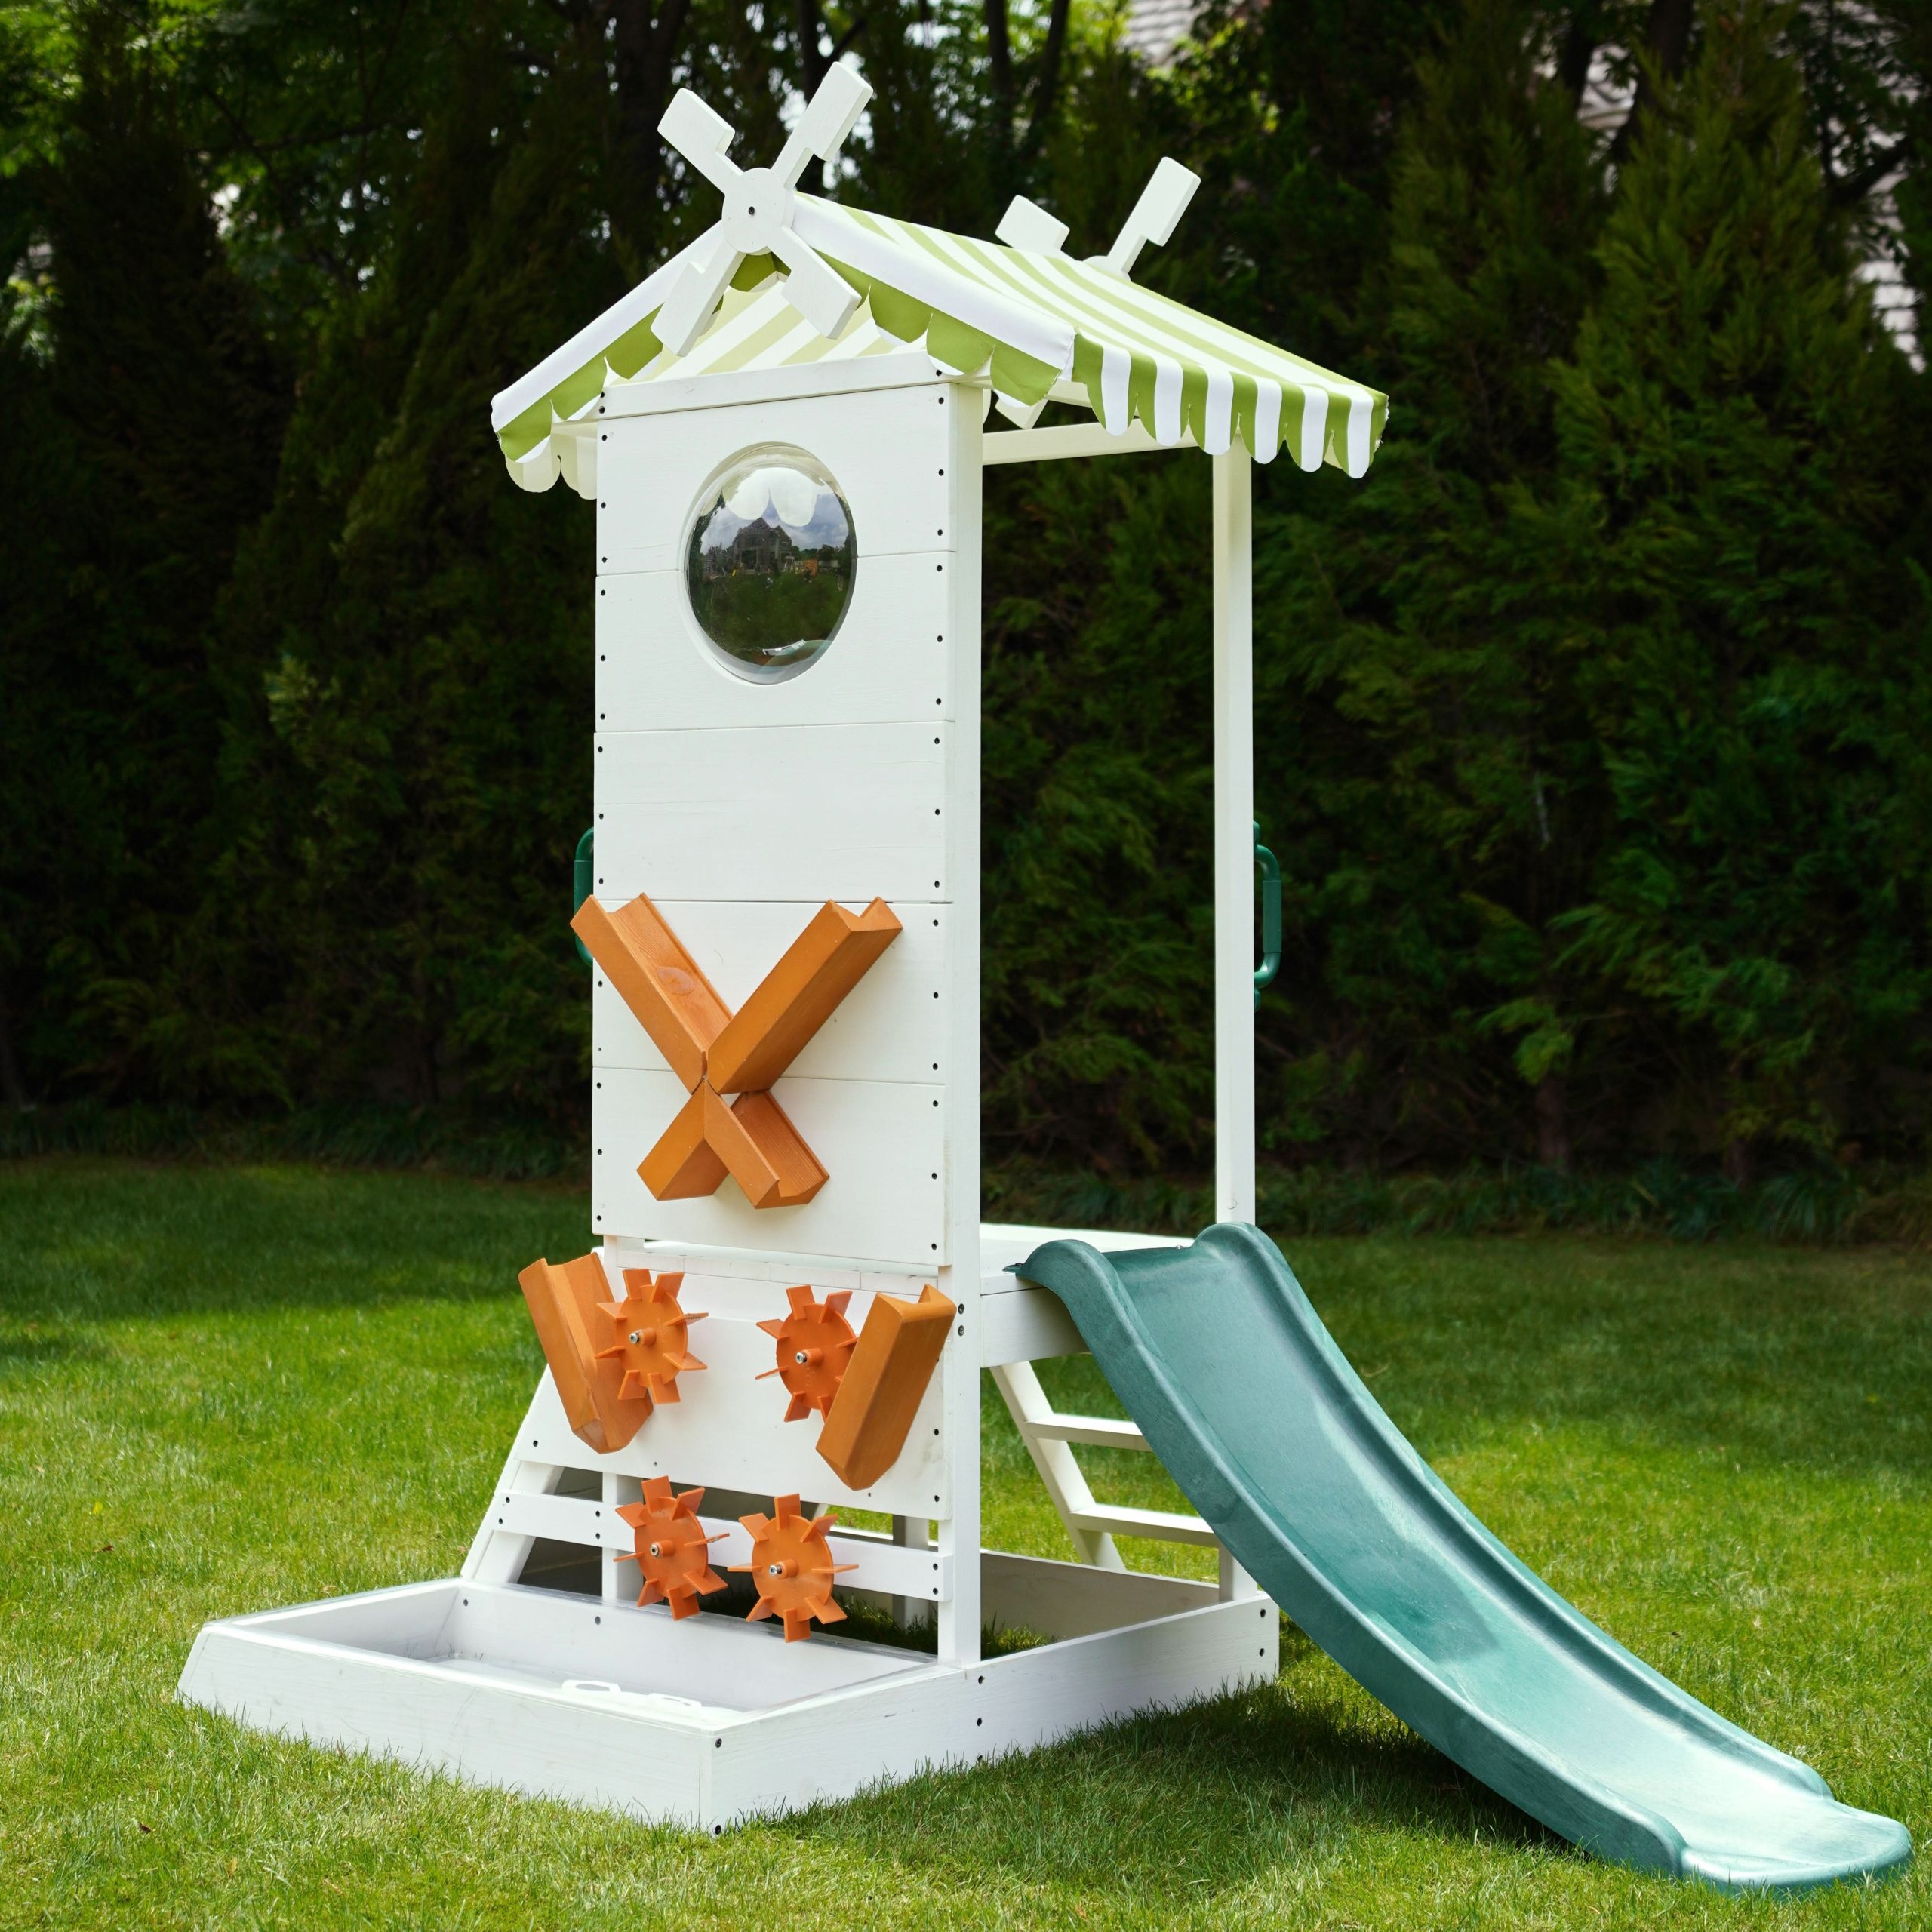
“You can create a water wall on any vertical surface.”
Here’s how to make one like this: (Time: 1.5 hours, Cost: $60) Get a few 1×4 cedar or pine boards, some outdoor paint in a fun color (like orange), and a variety of plastic funnels, tubes, and water wheels from a dollar store or Amazon.Paint your boards and let them dry completely.Arrange your funnels and water wheels on the boards in a zig-zag pattern so water will cascade from one to the next.Attach the plastic items to the boards using exterior-grade screws with washers to hold them in place.Mount the finished boards to the side of a playhouse or a fence, place a basin at the bottom, and hand the kids a bucket of water!
Your Backyard Adventure Awaits
Whew, that was a lot of inspiration! Remember, you don’t have to build a full-scale water park to make your kids’ summer. Sometimes the biggest memories come from the simplest things—a soapy slide, a magical string of lights, or a well-placed basketball hoop. The goal is to create a space that invites them outside to play.
Take the ideas you loved, combine them, and adapt them to your own space and budget. Now, head over to your Pinterest board and start saving your favorites. Your best family summer ever might just start right in your own backyard.