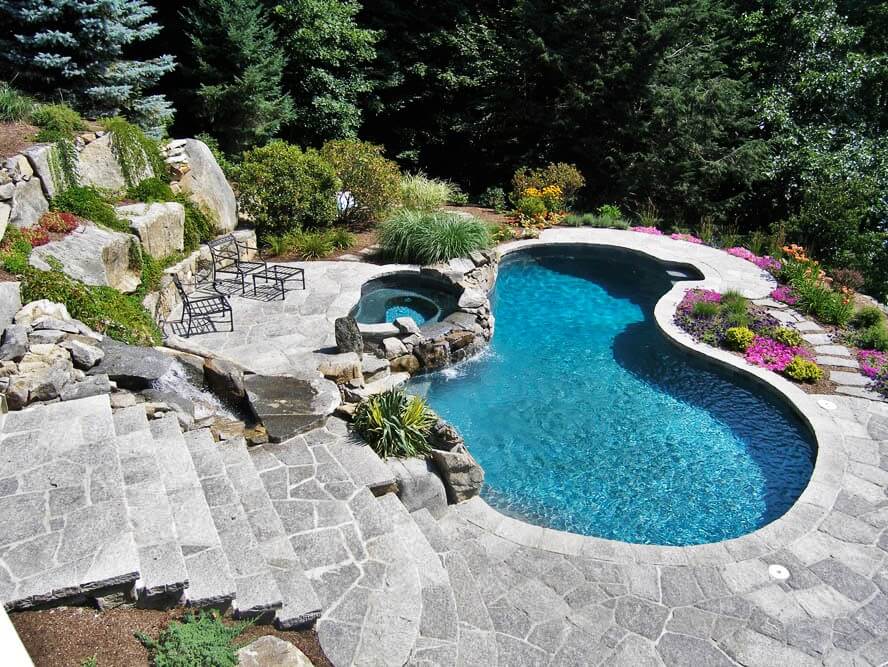
You’ve scrolled through endless Pinterest boards, saving pin after pin of stunning pools, but that one perfect edging detail remains elusive. It’s the design element that can single-handedly define your entire backyard, so getting it right feels like a huge decision. After filtering through hundreds of options from high-end landscape suppliers to accessible finds at Home Depot and Wayfair, we’ve narrowed it down to 30 incredible ideas that truly work.
Inside, you’ll find a curated collection covering every style, from sleek modern infinity edges to rustic natural stone and even clever budget-friendly looks. For 2026, the trend is all about seamless integration—blurring the line between the pool and the surrounding landscape to create a cohesive, resort-like experience right at home. And stay until the end — we break down the most common mistakes that can ruin these looks.
📌 Save this to Pinterest for later — you’ll want to revisit these ideas.
1. Infinity Pool with a Warm Wood Deck and Sleek Black Trim
There’s an immediate sense of calm and sophistication here, and it’s all about the clever mix of materials. The design works because of the high contrast and textural play. The smooth, cool aqua of the infinity pool is perfectly balanced by the warm, earthy tones of the horizontal wooden decking. That thin black tile trim is the secret weapon; it acts as a crisp, defining line that sharpens the entire look and keeps the wood and water from visually bleeding into one another. It’s a masterclass in using a small detail to create major impact.
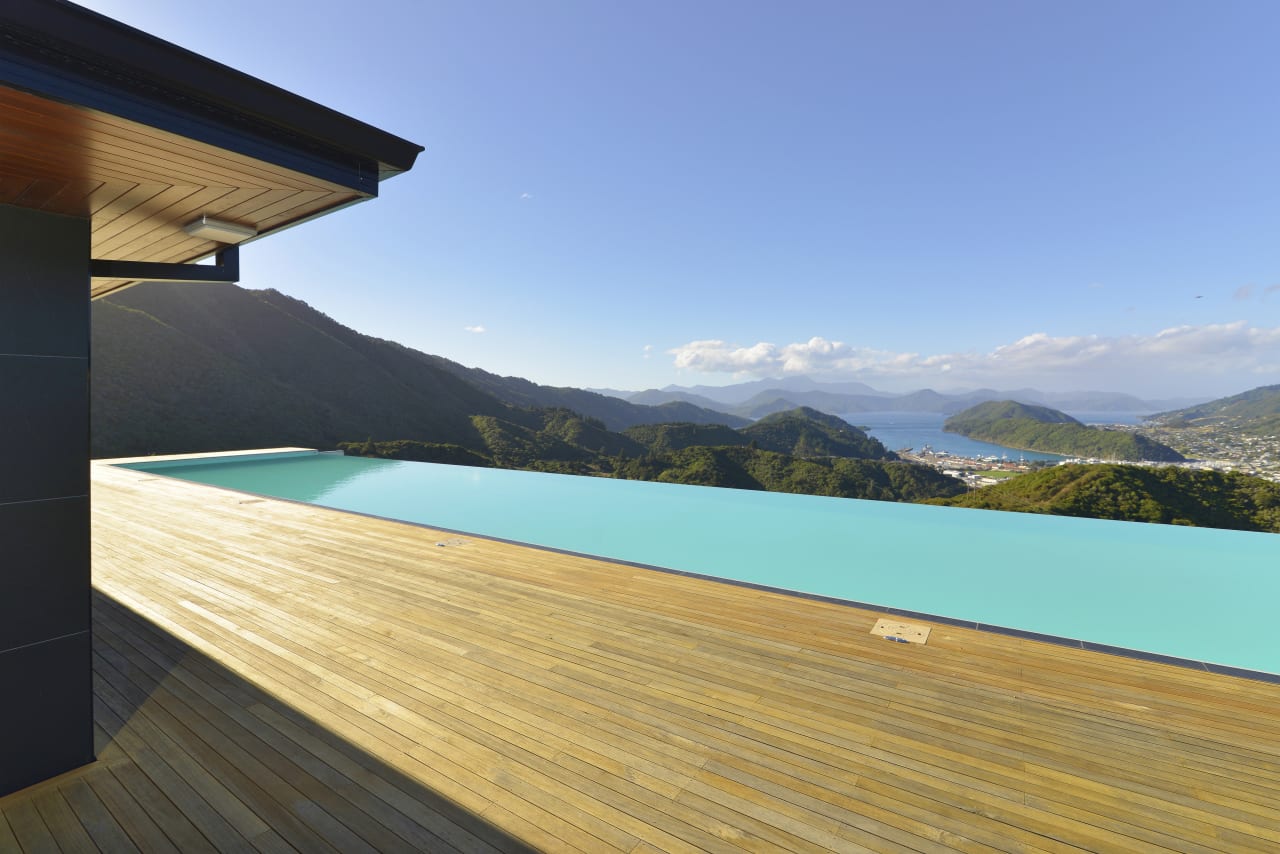
“For a seamless look like this, the transition from your deck to your pool coping needs to be absolutely perfect.”
To achieve this, specify a ‘zero-level’ or ‘flush-mount’ detail with your contractor. This means the top surface of the wood deck boards will sit at the exact same height as the top surface of the pool tile. This requires careful planning of the underlying substructure for both the deck and the pool shell. A difference of even a quarter-inch will ruin the illusion of a single, unbroken surface.
2. Modern Grey Concrete Deck with Crisp White Coping
This look is a beautiful exercise in minimalist geometry. Think of it as 60% neutral surfaces + 30% water + 10% architectural details. The core of the design is the large expanse of light grey speckled concrete, which provides a clean, neutral canvas. The brilliant white coping and subway tile act as a bright frame for the aqua water, making it appear even more blue. The final 10% comes from the dark, modern furniture and glass balustrade, which add just enough structural definition without cluttering the view. You could swap the grey concrete for light beige pavers to warm it up, and the formula would still hold perfectly.
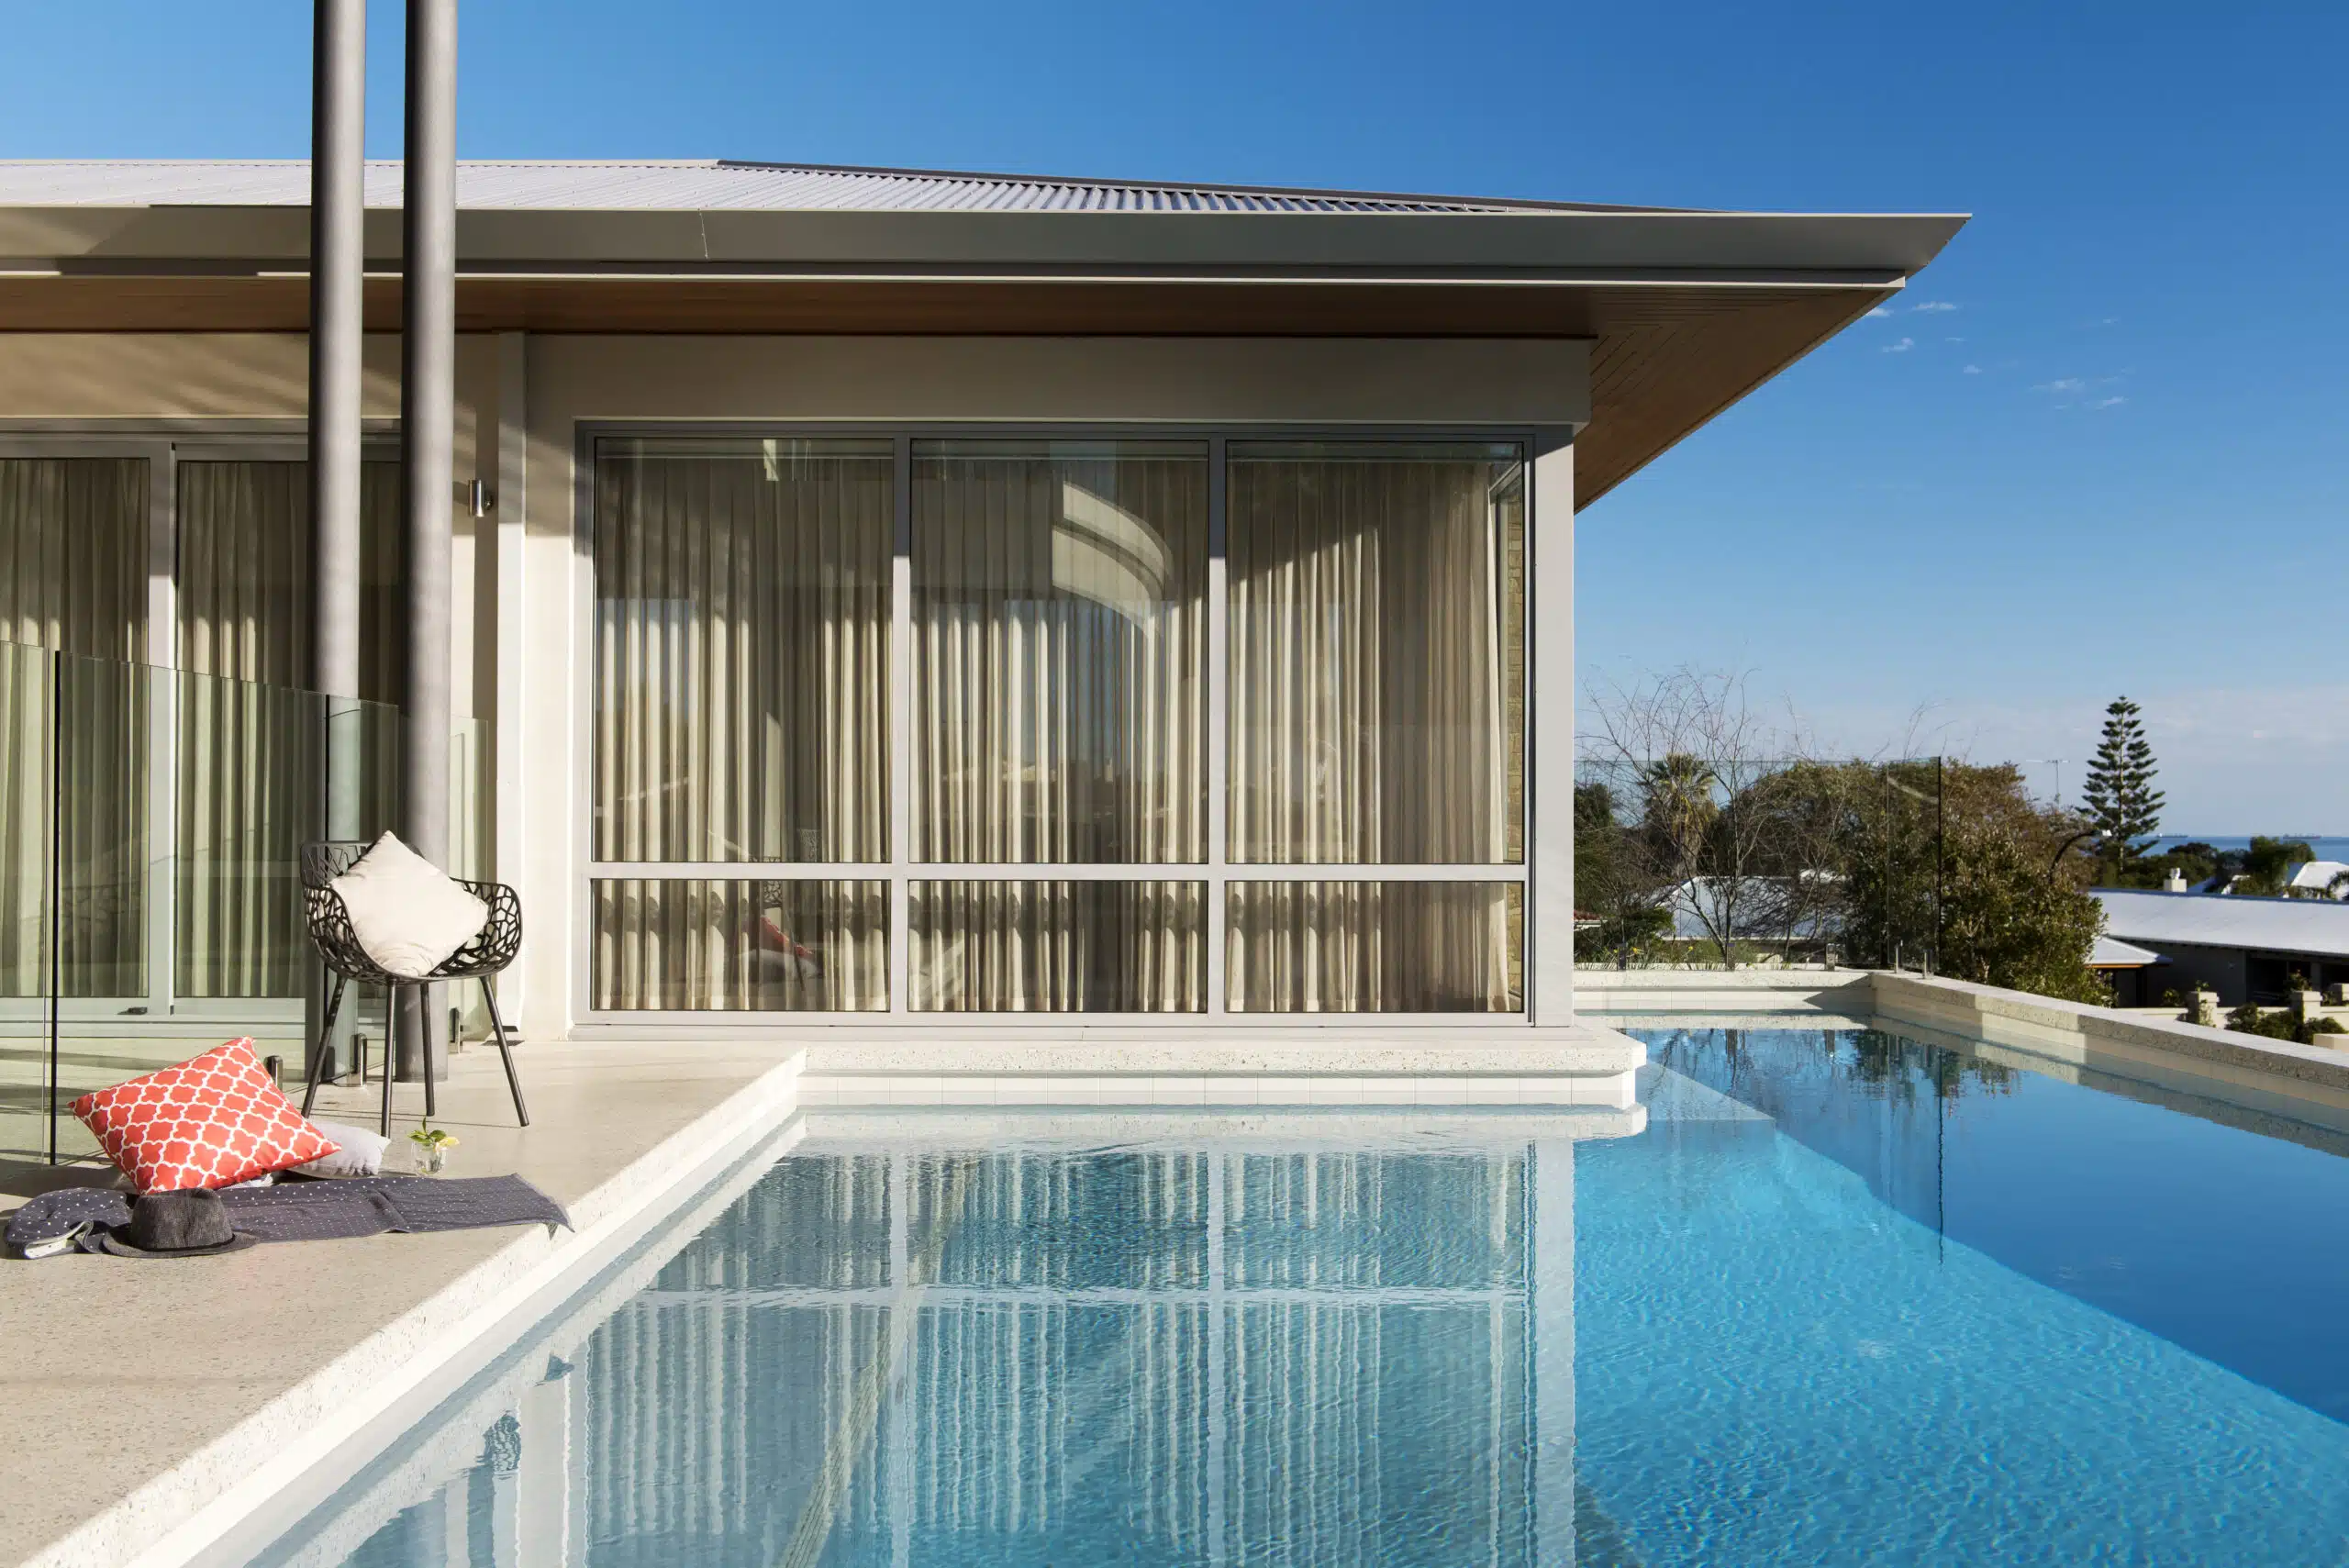
“A pristine, all-white pool edge is undeniably chic, but it requires commitment.”
White coping and tile, especially at the waterline, are magnets for scum, pollen, and sunscreen residue. Be prepared for weekly scrubbing with a non-abrasive tile cleaner to keep it looking sharp. The speckled grey deck is more forgiving, but it can show stains from things like dropped food or drinks. Sealing the concrete every 2-3 years is non-negotiable to protect it and make cleanup easier. This is a high-style, higher-maintenance choice.
3. Beige Tile Coping Paired with Lush Faux Grass
The single most important element making this design work is the clean, sharp line between the beige tile and the vibrant green turf. Without that crisp transition, the entire concept would feel messy and unresolved. It’s this deliberate contrast in both color and texture—the smooth, hard tile versus the soft, uniform grass—that creates a sense of modern, manicured luxury. It elevates the pool from a simple backyard feature to a structured, graphic statement. The faux grass provides a perfect, zero-maintenance frame that makes the blue of the water and the beige of the tile pop.
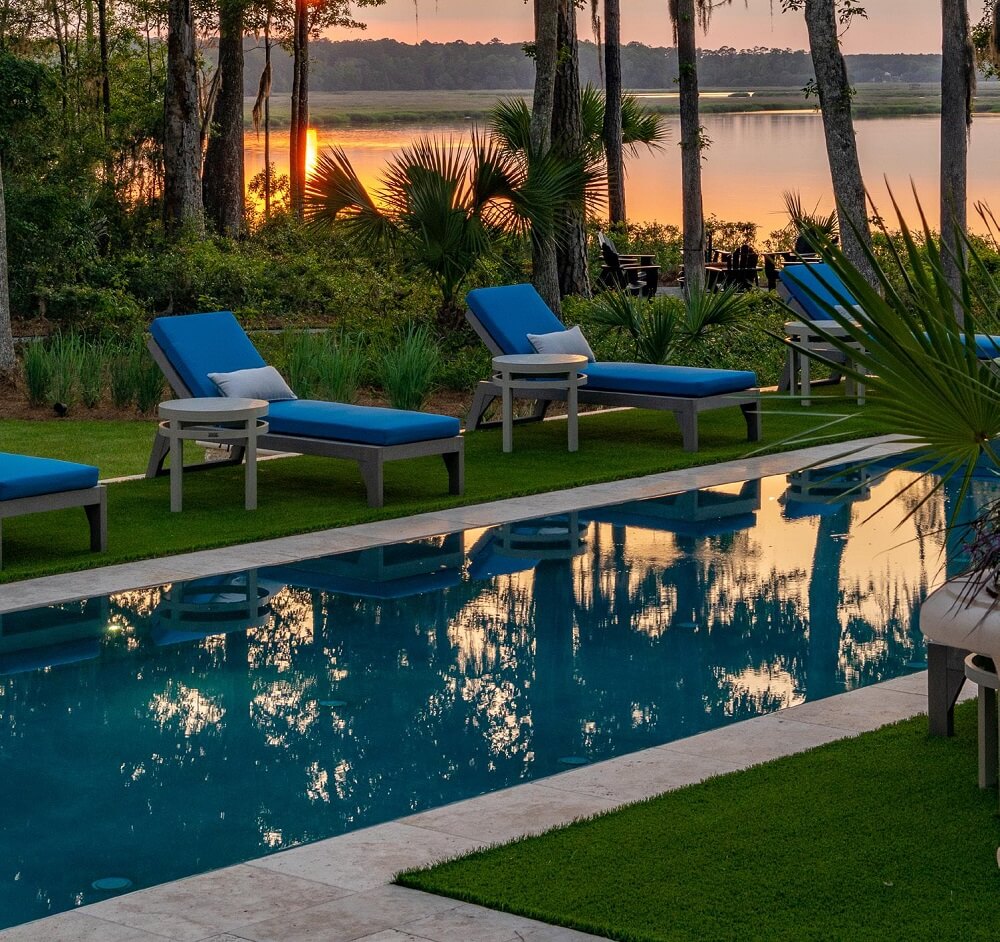
“While faux grass is incredibly low-maintenance compared to real sod (no mowing, no watering!), it’s not zero-maintenance.”
It needs to be rinsed down regularly to remove dust, pollen, and any spills. In high-traffic areas, the fibers can become matted, requiring occasional brushing with a stiff broom to fluff them back up. Most critically, ensure there is excellent drainage installed underneath the turf, especially right next to the pool edge, to prevent water from pooling and creating a squishy, unpleasant mess. Also, be aware that darker-colored turf can get quite hot in direct sun.
4. Interconnected Pool, Spa, and Bar with Continuous Stone Edging
An ambitious, multi-feature design like this demands significant space. To avoid feeling cramped, you’ll need a minimum patio area of at least 800-1000 square feet, not including the pool itself. The key is allowing for generous walkways (at least 4 feet wide) around all features—the pool, the spa, and the bar seating area. This ensures smooth traffic flow and distinct “zones” for relaxing, socializing, and swimming. Ceiling height isn’t a concern outdoors, but visual height, created by the raised spa and steps, adds dimension that works best in a larger, more expansive yard.
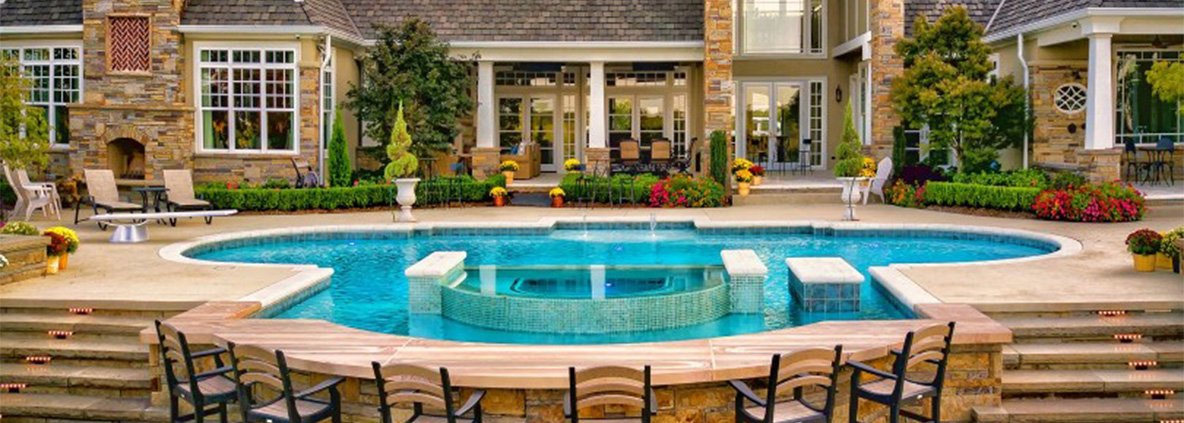
“Recreating this all-in-one resort-style setup is a significant investment in both materials and specialized labor (plumbing, electrical, masonry).”
Main furniture (bar stools): $1,200 – $3,000
Lighting (in-pool, steps, landscape): $3,000 – $8,000
Textiles (cushions, etc.): N/A
Decor/Accessories (waterfall, bar top): $5,000 – $15,000
Wall/Structure (Pool, Spa, Coping, Patio): $90,000 – $150,000+
TOTAL: $99,200 – $176,000+
Budget alternative: Achieve a similar vibe for 40-60% less by using a pre-fabricated spa instead of a custom-built one, opting for concrete pavers instead of poured stone, and choosing a high-quality portable outdoor bar instead of a built-in one.
5. Layered Travertine Edging with Integrated Grass Planters
This design succeeds by masterfully blending hardscape and softscape. The rigid, architectural lines of the beige travertine tile provide a strong structure, but the magic happens where that structure is intentionally interrupted. The integrated planters full of tall, wispy ornamental grasses break up the monotony of the stone, adding softness, movement, and a touch of organic texture. The use of dark river rocks at the base of the grasses adds another layer of natural detail. It’s the perfect balance of man-made luxury and natural beauty, making the pool feel like a sophisticated oasis.
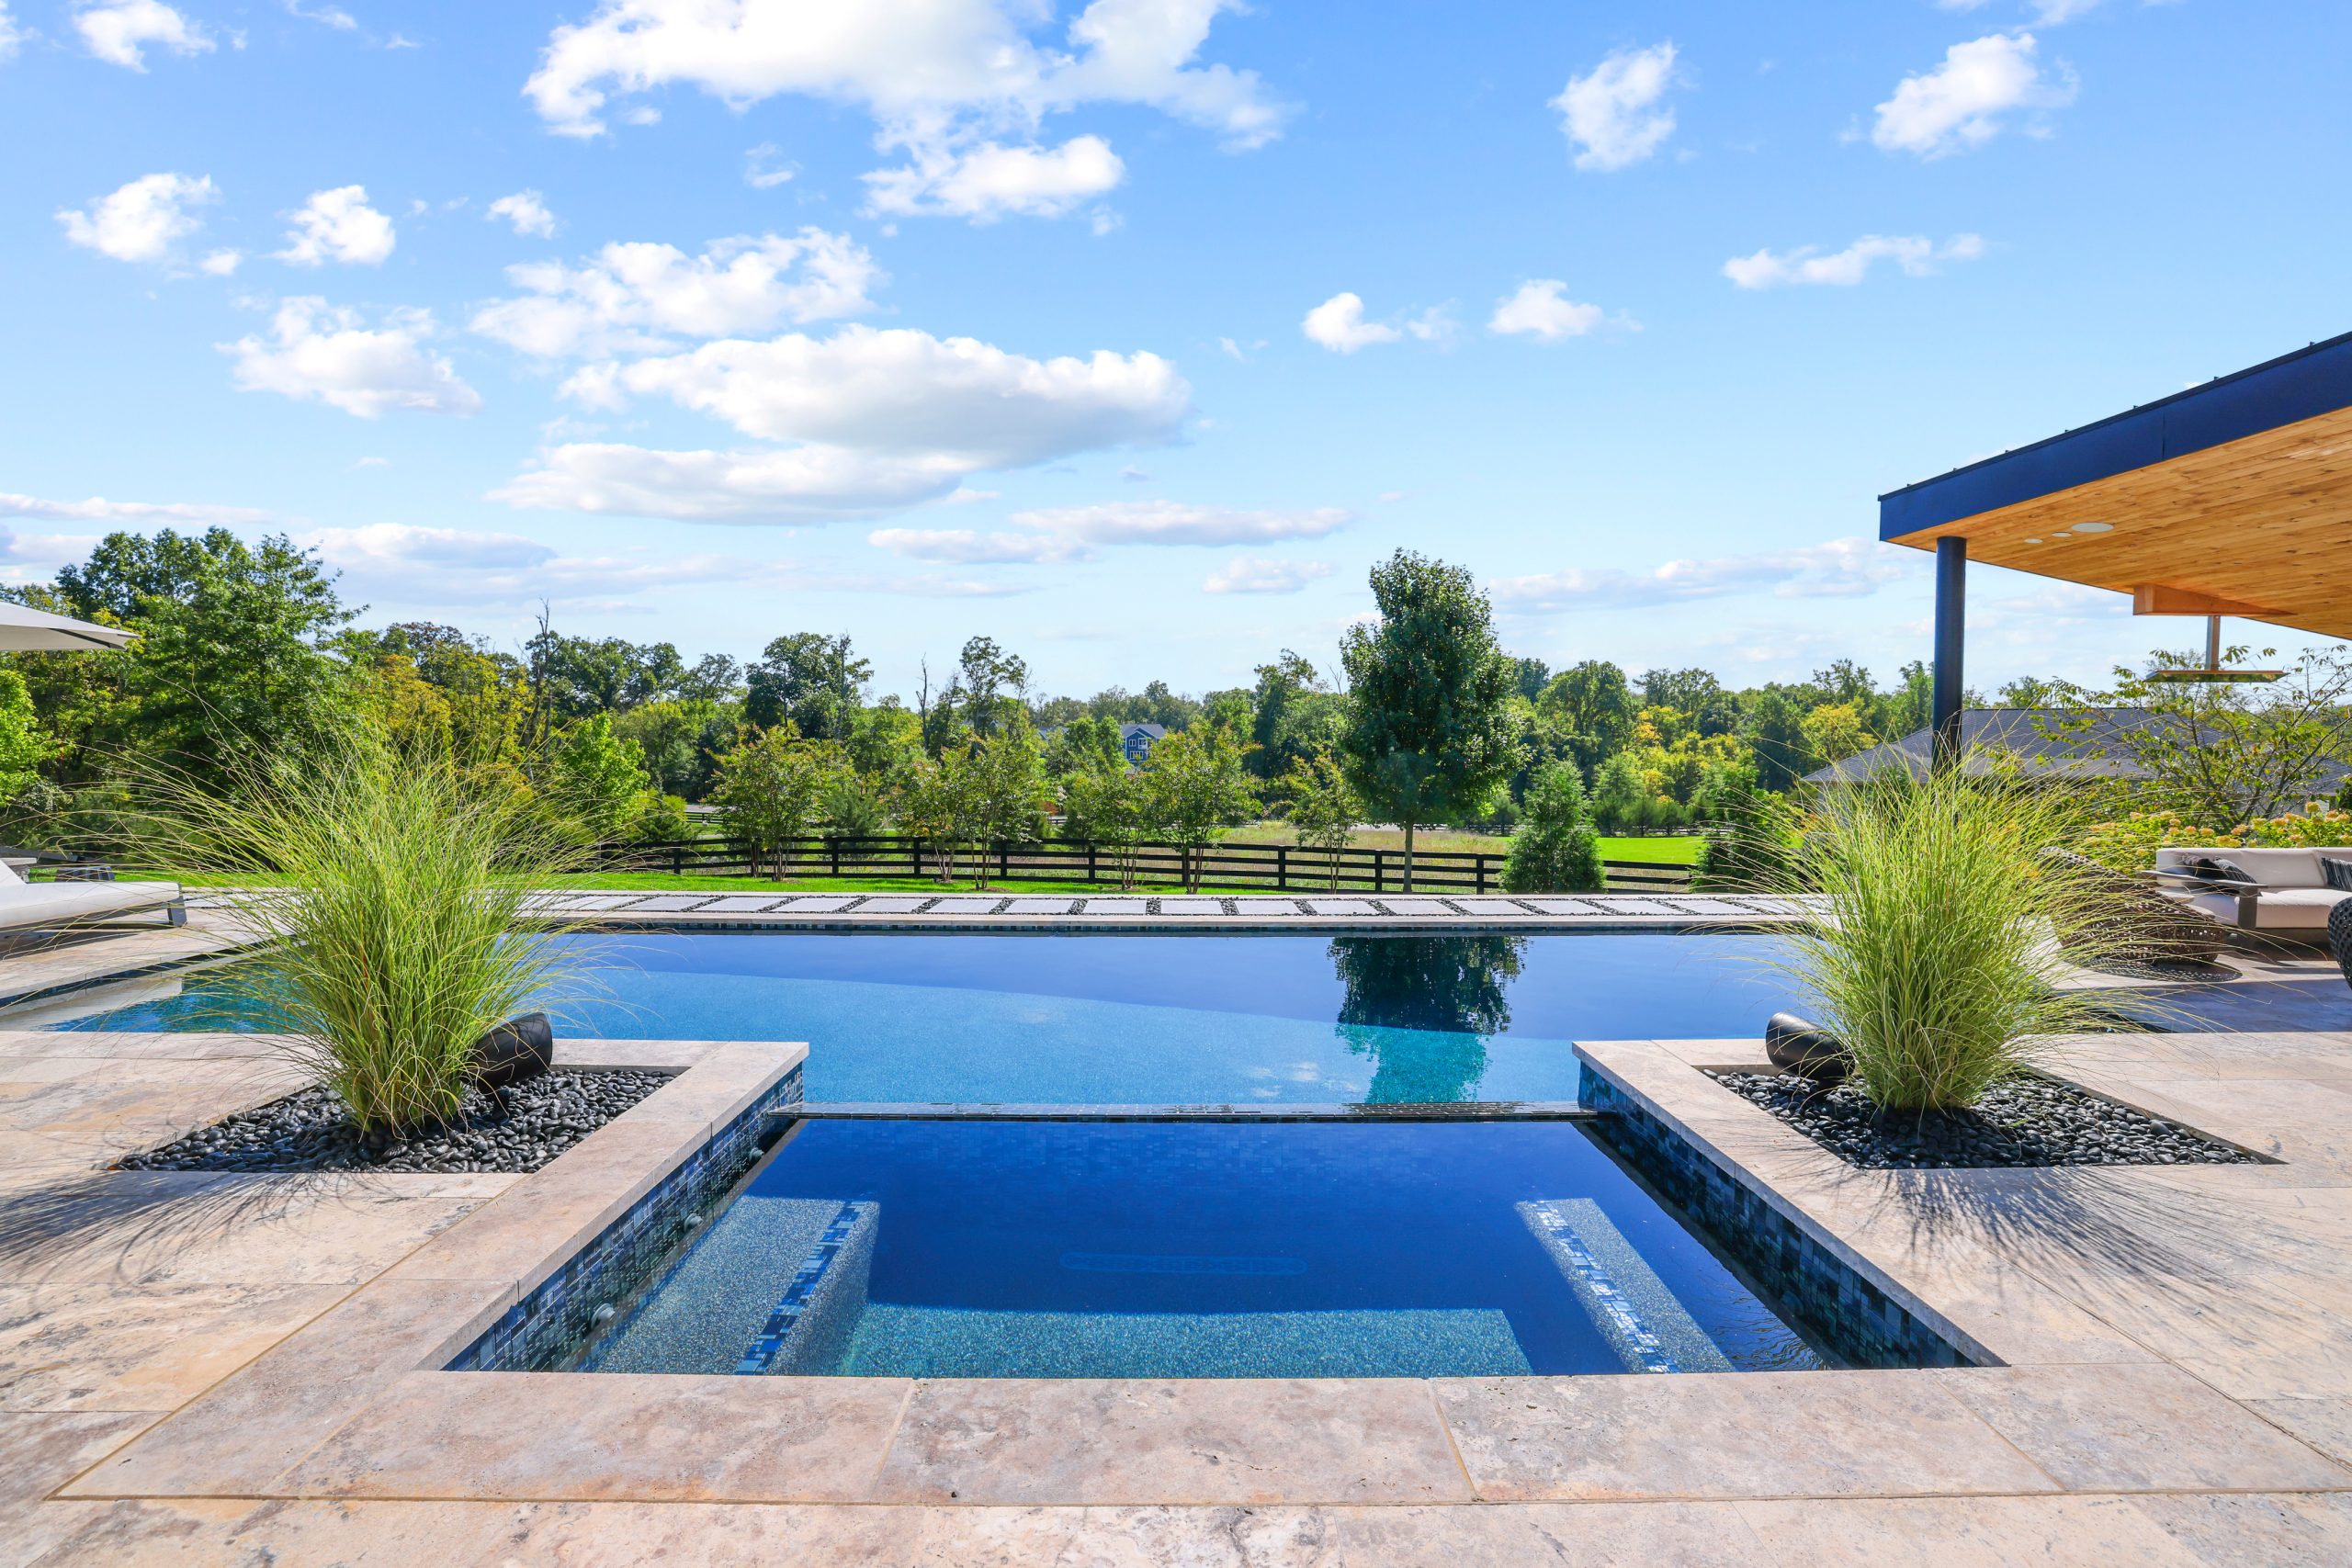
“When you’re integrating planters directly into a pool surround, waterproofing is paramount.”
You must insist on a robust waterproofing membrane inside the planter boxes before any soil or rock is added. This prevents water from the planters from seeping into the pool structure or the surrounding deck, which can cause efflorescence (those chalky white stains on stone) and long-term structural damage. Also, ensure the planters have their own separate drainage system that directs water away from the pool deck entirely.
6. Landscaped Edge Framing a Picturesque Virginia View
This look is a direct reflection of the growing “biophilic design” trend, which is all about strengthening the connection between people and nature. For years, pool design was about crisp separation: the manicured deck versus the wild yard. Now, especially in 2026, the goal is to blur those lines. Homeowners want their pools to feel like a natural part of the landscape, not an addition to it. This approach, which uses soft plantings, natural stone, and an organic layout to frame a view, makes the pool feel like a serene lagoon rather than a suburban backyard feature.
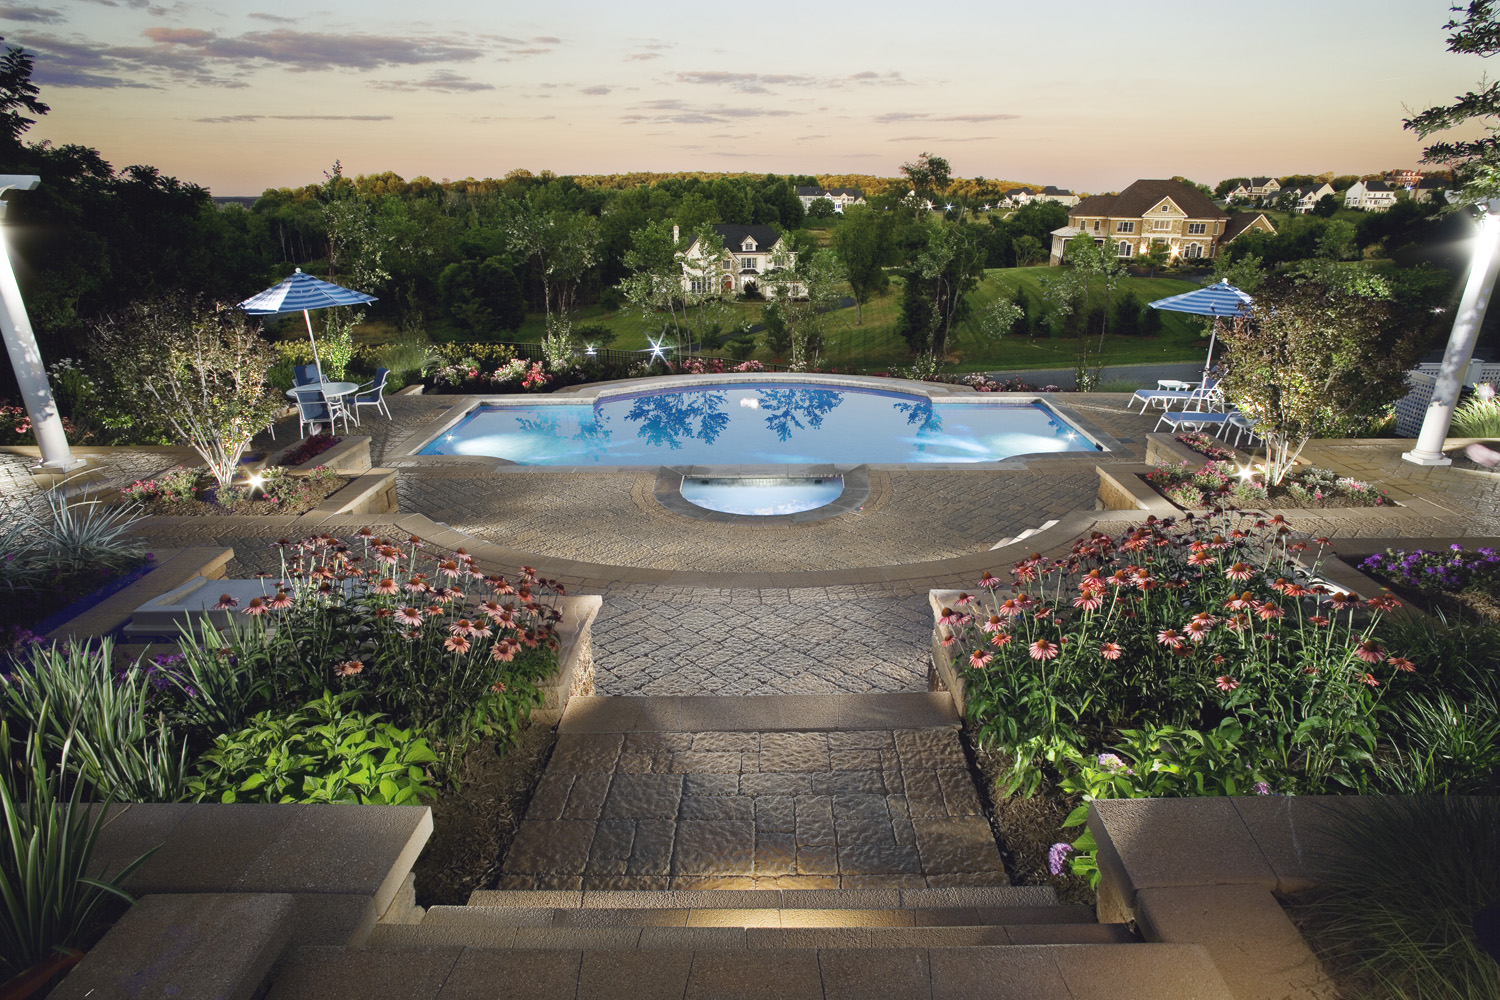
“Achieving this “natural” look requires a sophisticated understanding of landscaping.”
If you simply plant a few random shrubs around your pool, it will look messy, not curated. The key is selecting plants that thrive in a poolside environment (i.e., can handle some splash and reflected heat) and won’t create a maintenance nightmare by dropping leaves and flowers directly into the water. Avoid messy trees like crape myrtles or most fruit trees. Opt for ornamental grasses, hardy ferns, and evergreens that provide texture and color without constant shedding. Compare this with the more manicured approach in Idea #2.
7. Lush Plantings Softening a Luxury Infinity Pool Edge
that makes this infinity pool feel special is the abundant, multi-layered landscaping. An infinity edge can sometimes feel stark or severe, like a sharp cliff. Here, the choice to surround the architectural pool with lush, slightly wild plantings provides a crucial softness. It’s this green buffer that bridges the gap between the man-made structure and the natural view beyond, making the entire scene feel more cohesive and integrated. Without the greenery, it would just be a pool; with it, it’s a landscape experience.
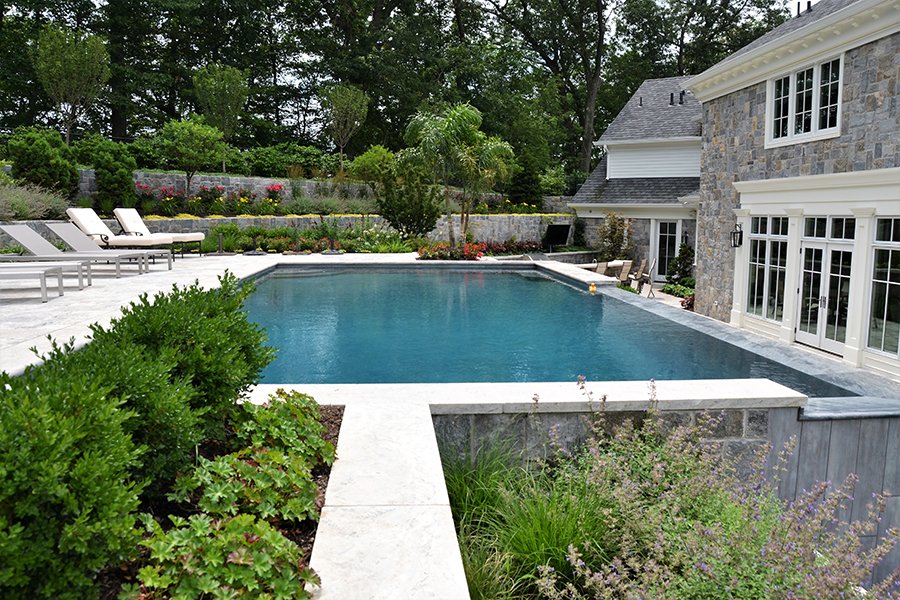
“The success of this design hinges on the principle of juxtaposition.”
It pairs the clean, hard, geometric line of the infinity edge with the soft, organic, and varied forms of the surrounding plants. This contrast creates a dynamic visual tension that is far more interesting than either element would be on its own. The calm, reflective surface of the water acts as a mirror, pulling the colors of the sky and the surrounding greenery into the pool itself, further unifying the composition.
8. Simple Concrete Deck with a Patterned Pool Liner
This setup is a fantastic example of achieving a custom, high-impact look on a more accessible budget. The key is the smart allocation of funds. Poured concrete decking is one of the most cost-effective, durable options for a pool surround. Instead of spending a fortune on expensive stone or tile for the pool interior, a patterned vinyl liner provides a huge visual punch for a fraction of the cost. You can get a vibrant, decorative look like this for $3-$5 per square foot with a liner, whereas tile could easily be $15-$40 per square foot. It’s all about putting the money where you get the most visible reward.
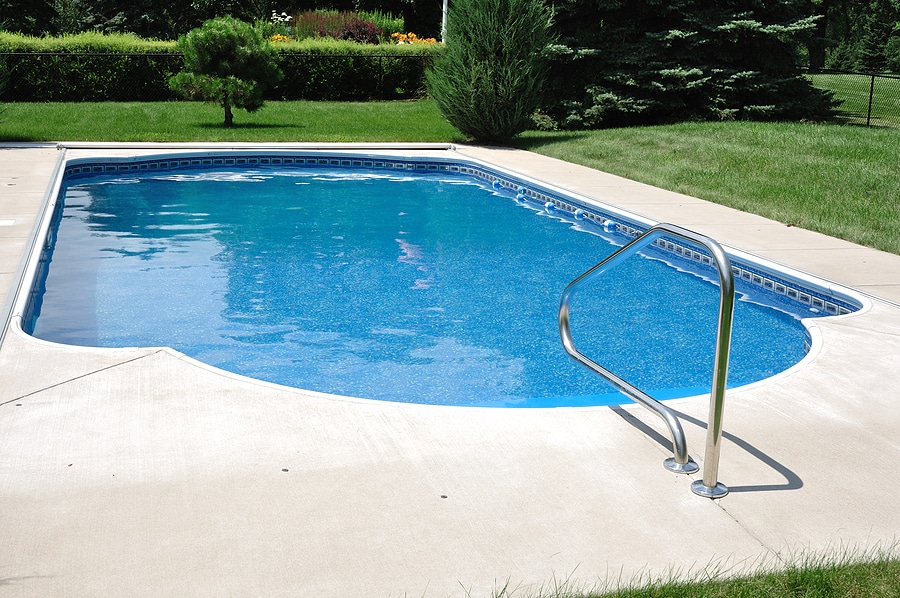
“A concrete deck is a workhorse, but it isn’t impervious.”
To prevent cracking, ensure your contractor installs control joints every 8-10 feet. It will need to be sealed every few years to resist staining and weathering. The biggest maintenance consideration here is the vinyl liner. While modern liners are durable, they can be punctured by sharp objects (like pet claws or broken glass). They also have a finite lifespan, typically 7-12 years, after which they’ll need to be professionally replaced, which can be a significant expense. The budget alternative to the extensive stone patio in Idea #9.
9. Random-Cut Flagstone Patio with Contrasting Dark Coping
This inviting, natural look is a balancing act of color and form. The formula is approximately 70% warm, varied surfaces + 20% cool water + 10% lush greenery. The majority of the visual space is the light-colored, randomly shaped flagstone, which provides texture and earthy tones. The dark coping acts as a strong visual outline for the pool, preventing it from getting lost in the patio. The final 10% is the crucial role of landscaping, with the waterfall and plants providing the organic softness that makes the whole space feel like a secret garden retreat.
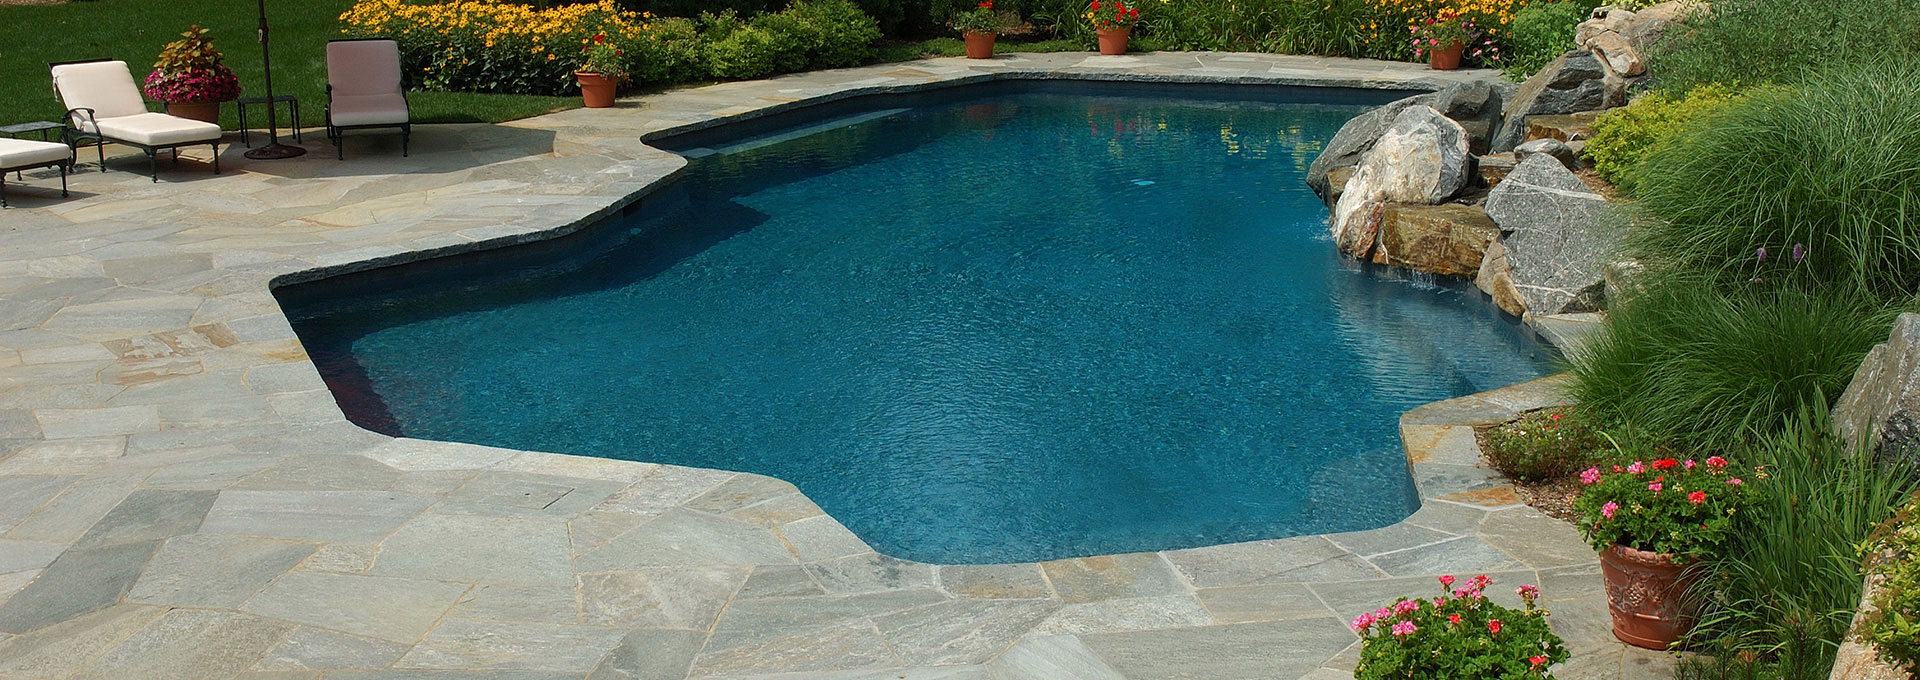
“Creating a natural rock waterfall is a project that blends artistry with engineering.”
Here’s a simplified approach for a small-scale version.
Foundation & Liner: Excavate the area and lay a strong pond liner, extending it into the pool. Place a large, flat boulder as your base stone inside the pool where the water will land. (Time: 2-3 hours; Cost: $100-$200 for liner)
Pump & Tubing: Install a submersible pump in the deepest part of your pool, running flexible tubing from it up to where the waterfall will begin. (Time: 1 hour; Cost: $150-$400 for pump/tubing)
Stacking the Rocks: Begin stacking your largest boulders first to create the main structure, making sure they are stable. Use a masonry chisel to adjust shapes as needed. (Time: 3-5 hours)
Creating the Spillway: Position a flatter stone at the top where the water will exit the tube. Use smaller rocks and expanding pond foam sealant to direct the water over this “spillway” stone and hide the tubing. (Time: 2 hours; Cost: $30 for foam)
Test and Adjust: Turn on the pump and watch the water flow. You may need to insert smaller stones or more foam to guide the water down the rocks in a natural-looking cascade. (Time: 1 hour)
Total Time Estimate: 8-12 hours. Material Cost: $280 – $630 (excluding rocks).
10. Natural Boulder and Flagstone Edging for a Freeform Pool
Before you commit to this beautiful, organic look, run through this checklist to make sure it’s the right fit for your project and budget.
- Have you priced out the cost of materials and delivery for large boulders? This can be a significant and often overlooked expense.
- Does your pool builder have experience integrating natural boulders into the pool shell itself? This is a specialized skill different from standard coping installation.
- Is the scale right? Large boulders can overwhelm a small yard, so make sure you have enough space for them to look natural and not just plopped down.
- Have you planned for landscaping? This look relies heavily on lush plantings to soften the rock and complete the naturalistic vibe.
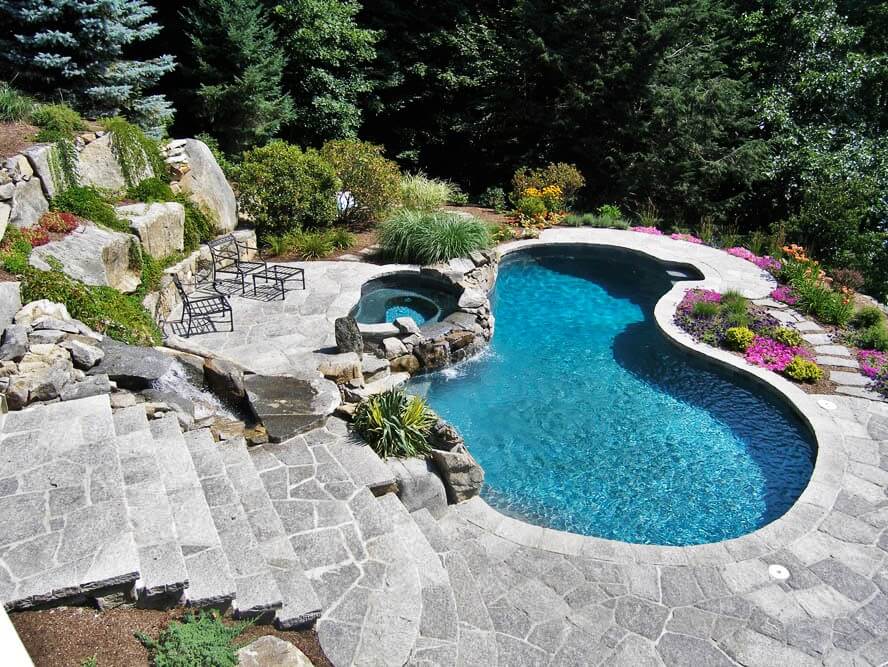
“The single element that defines this entire design is the use of large, natural boulders.”
While the flagstone patio is lovely, it’s the massive stones along the edge and integrated into the waterfall that give the pool its powerful, lagoon-like character. If you replaced them with standard concrete coping, the freeform shape would lose its magic and the spa would look like an afterthought. These boulders provide weight, authenticity, and a crucial vertical dimension that makes the space feel like it was carved from nature, not built on a flat lot. It’s what separates a nice pool from a truly transportive one.
11. Infinity Edge Pool with a Textured Stone Waterfall Wall
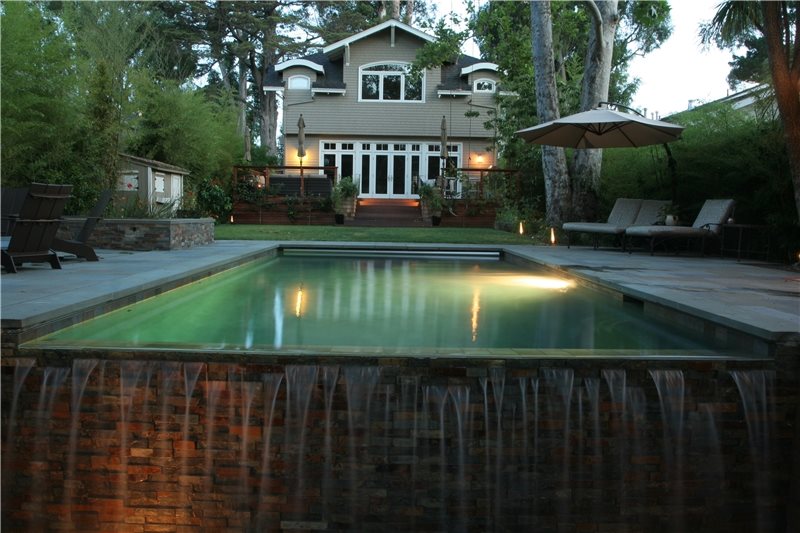
This design is so tranquil because it engages multiple senses. Visually, the dark, textured stone wall provides a dramatic, earthy backdrop for the cascading water. The water itself isn’t just a silent surface; the gentle sound of it flowing over the edge creates a constant, soothing white noise that masks other backyard sounds. The in-pool lighting adds another layer, turning the water into a glowing, ethereal element at dusk. It’s a holistic design that considers sight, sound, and a sense of calm, making it more than just a place to swim, but a place to unwind.
“When selecting pavers for a pool deck, especially a clean, modern one like this, bigger is almost always better.”
Using large format pavers (e.g., 24″x24″ or 24″x36″) drastically reduces the number of grout or joint lines visible. This creates a much cleaner, more monolithic and upscale appearance. Fewer lines mean less visual clutter, which helps to achieve that serene, uncluttered aesthetic. It makes the space feel larger and more luxurious. Ask your supplier for rectified pavers, which have precisely cut edges, allowing for tighter, more consistent joint lines.
12. Concrete Coping Edged with Mixed Pebble and Rock
If you love the naturalistic style of Idea #9 but don’t have the budget for a full flagstone patio, this is your answer. This design provides a similar organic feel for a fraction of the cost. A standard poured concrete coping is affordable and durable. The real savings come from using decorative pebbles and rocks as the surrounding ground cover instead of expensive pavers or decking. You can buy beautiful mixed river rock for just a few dollars per square foot. It’s a fantastic way to get a textured, custom-landscaped look that feels finished and intentional, without breaking the bank.
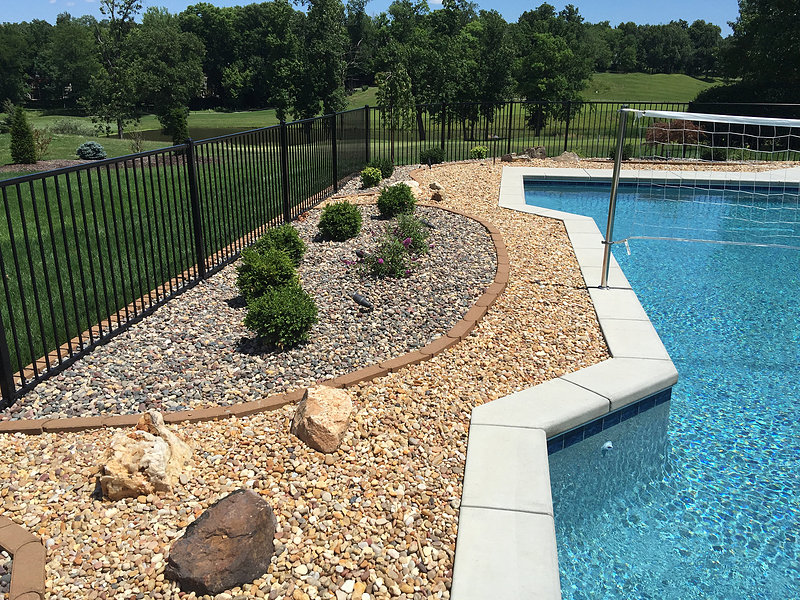
“That beautiful pebble border looks great, but let’s be honest: it can be a real pain.”
Pebbles inevitably get kicked or splashed into the pool, where they can interfere with automatic pool cleaners or even damage the pool surface. Walking on them barefoot is also not the most pleasant experience. To minimize this, use a larger-sized river rock (2-3 inches in diameter) that is less likely to be displaced. Also, consider installing a low-profile metal or composite landscape edging between the pebbles and any adjacent grass or garden beds to keep them contained.
13. Curved Pool Patio with Brick and Flagstone Edging
This charming, classic look follows a simple but effective formula: 50% textured stone + 30% rustic brick + 20% natural elements. The irregular flagstone provides the main surface area, offering varied, earthy tones and an organic pattern. The red brick is used as a deliberate border, its rigid, repeating shape and warm color providing a strong visual frame for both the pool and the patio itself. The final 20% is the blue water and green grass, which provide the cool and fresh colors needed to balance the warmth of the hardscaping. The result is a timeless, inviting, and unpretentious space.
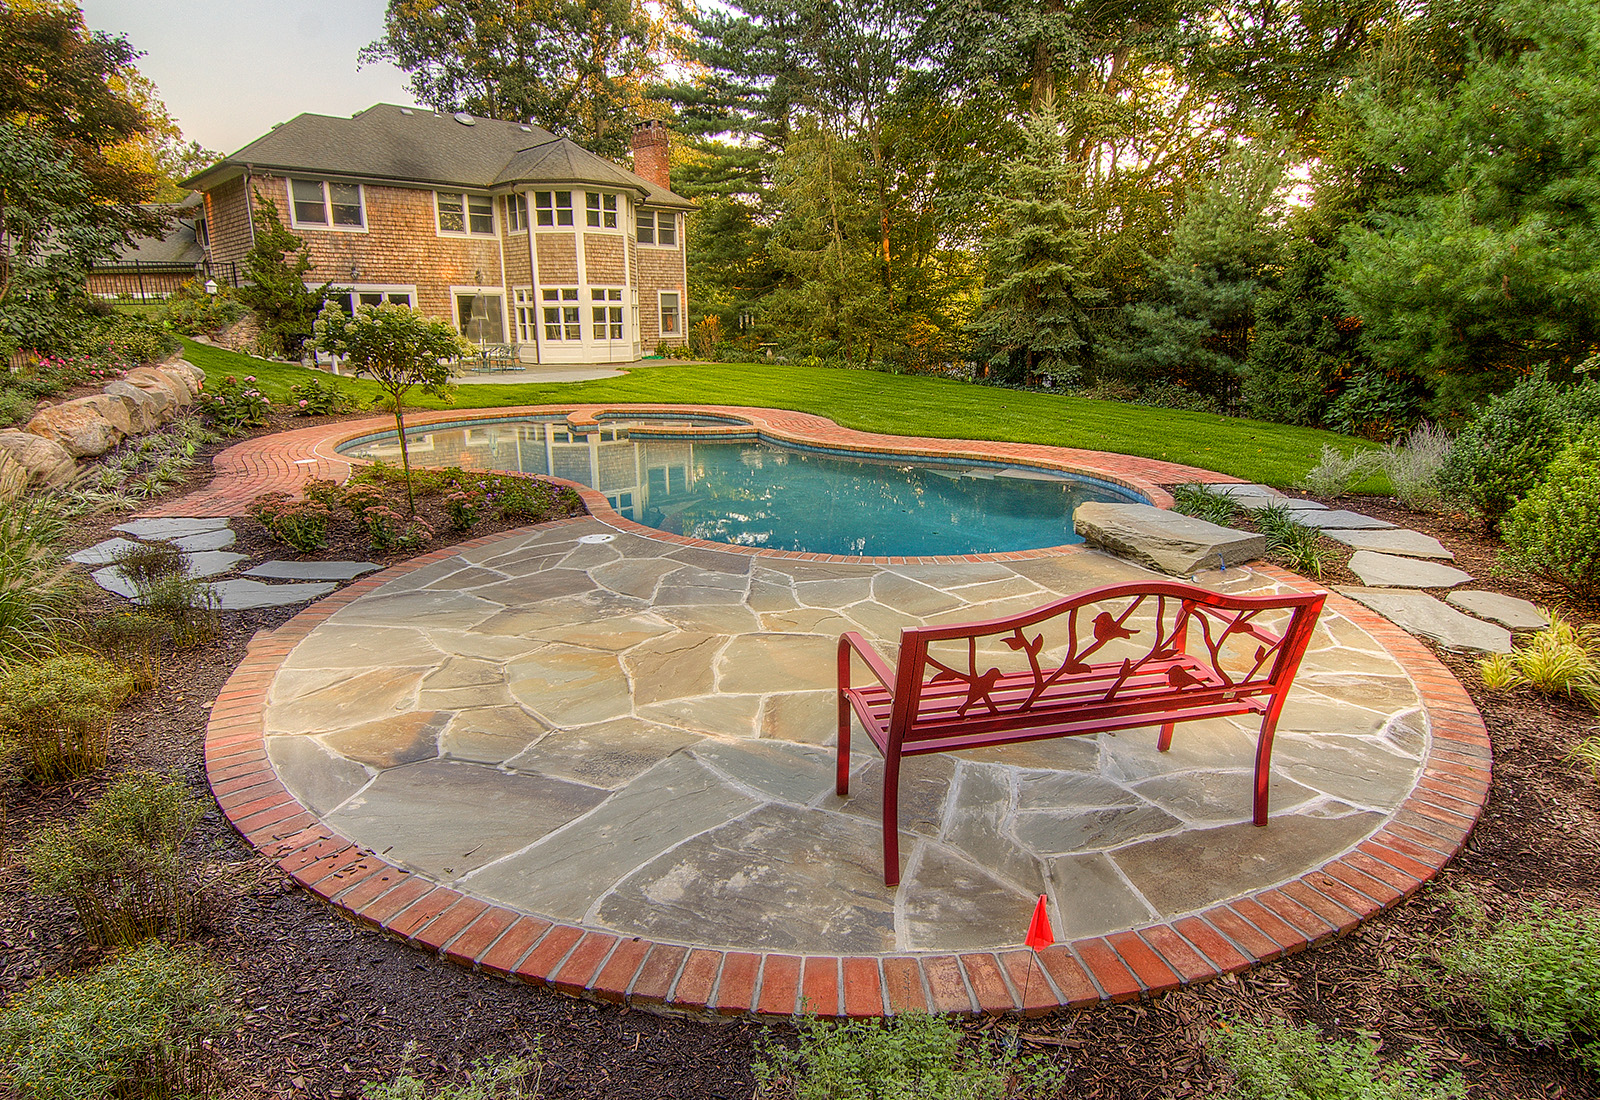
“While sleek, modern designs have dominated Pinterest for years, we’re seeing a major resurgence of more traditional, character-filled materials.”
Homeowners are getting tired of the ‘all-grey-everywhere’ aesthetic and are craving warmth, texture, and a sense of history. Brick, especially when paired with natural flagstone, feels established, welcoming, and permanent. This style is particularly popular in regions with colonial or Tudor architecture, as it harmonizes beautifully with the look of an older home, feeling like an extension of its original character.
14. Modern Dark Tiled Coping with a Light Pebble Deck
The power of this design lies in its bold, graphic contrast. The one thing that makes it stand out is the crisp, uncompromising line between the dark, smooth tile and the light, textured pebble aggregate. This isn’t a gentle, blended transition; it’s a deliberate, architectural statement. The dark tile creates a strong, modern frame around the pool, making the blue of the water feel deeper and more dramatic. The light pebble deck then acts as a bright, clean canvas for the rest of the space. This high-contrast approach is what gives the entire area its sharp, contemporary edge.
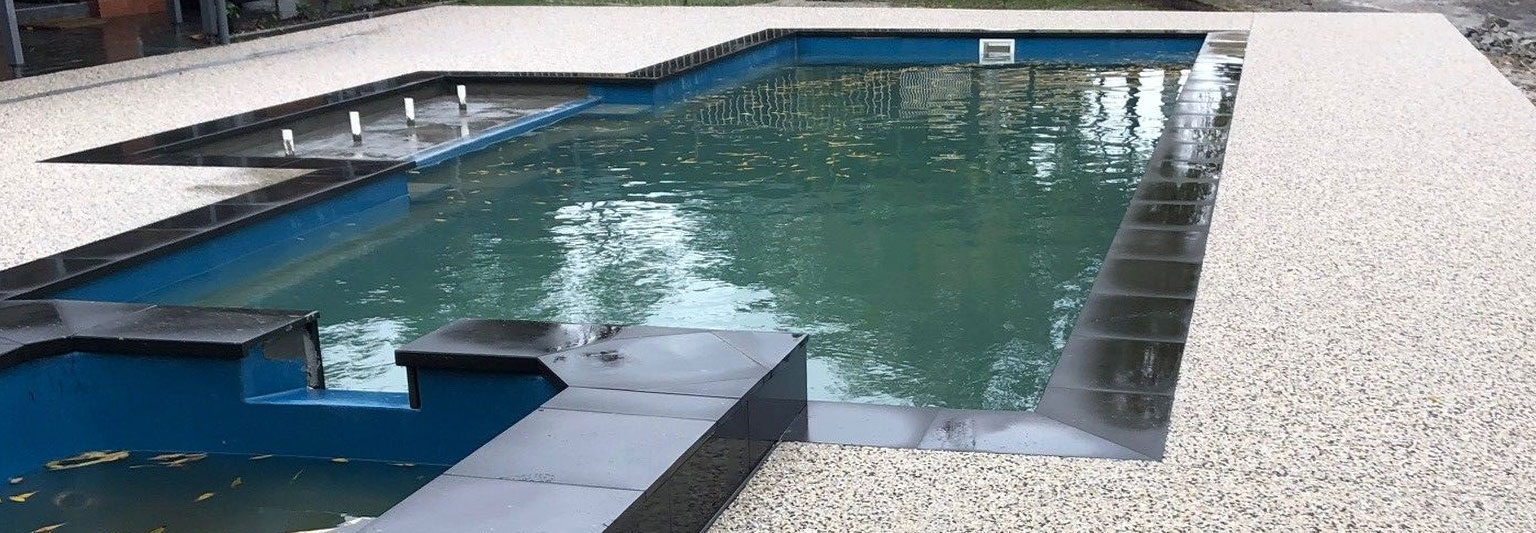
“Dark tiles, especially polished ones, look incredibly sleek but come with practical downsides.”
First, they get extremely hot in direct sunlight, to the point of being uncomfortable to sit on or touch with bare feet. Second, they show water spots and mineral deposits (efflorescence) much more readily than lighter-colored tiles. You’ll need to be diligent about wiping them down to keep them looking pristine. The pebble aggregate deck is great for texture and slip-resistance, but it can be rough on bare feet and is more difficult to clean than a smooth surface.
15. Extra-Wide Coping That Doubles as Poolside Seating
If you want your pool coping to function as comfortable, impromptu seating, the magic number for an ideal width is between 16 and 24 inches. A standard 12-inch coping is too narrow for an adult to sit on comfortably for any length of time. Extending it to at least 16 inches provides enough surface area to feel stable and inviting. For true lounge-worthy seating, aiming for 20-24 inches is best. Also, pay close attention to the edge profile. Choose a ‘bullnose’ (fully rounded) or ‘eased’ (slightly softened) edge for comfort. A sharp, square edge will be uncomfortable to sit on and can snag swimsuits.
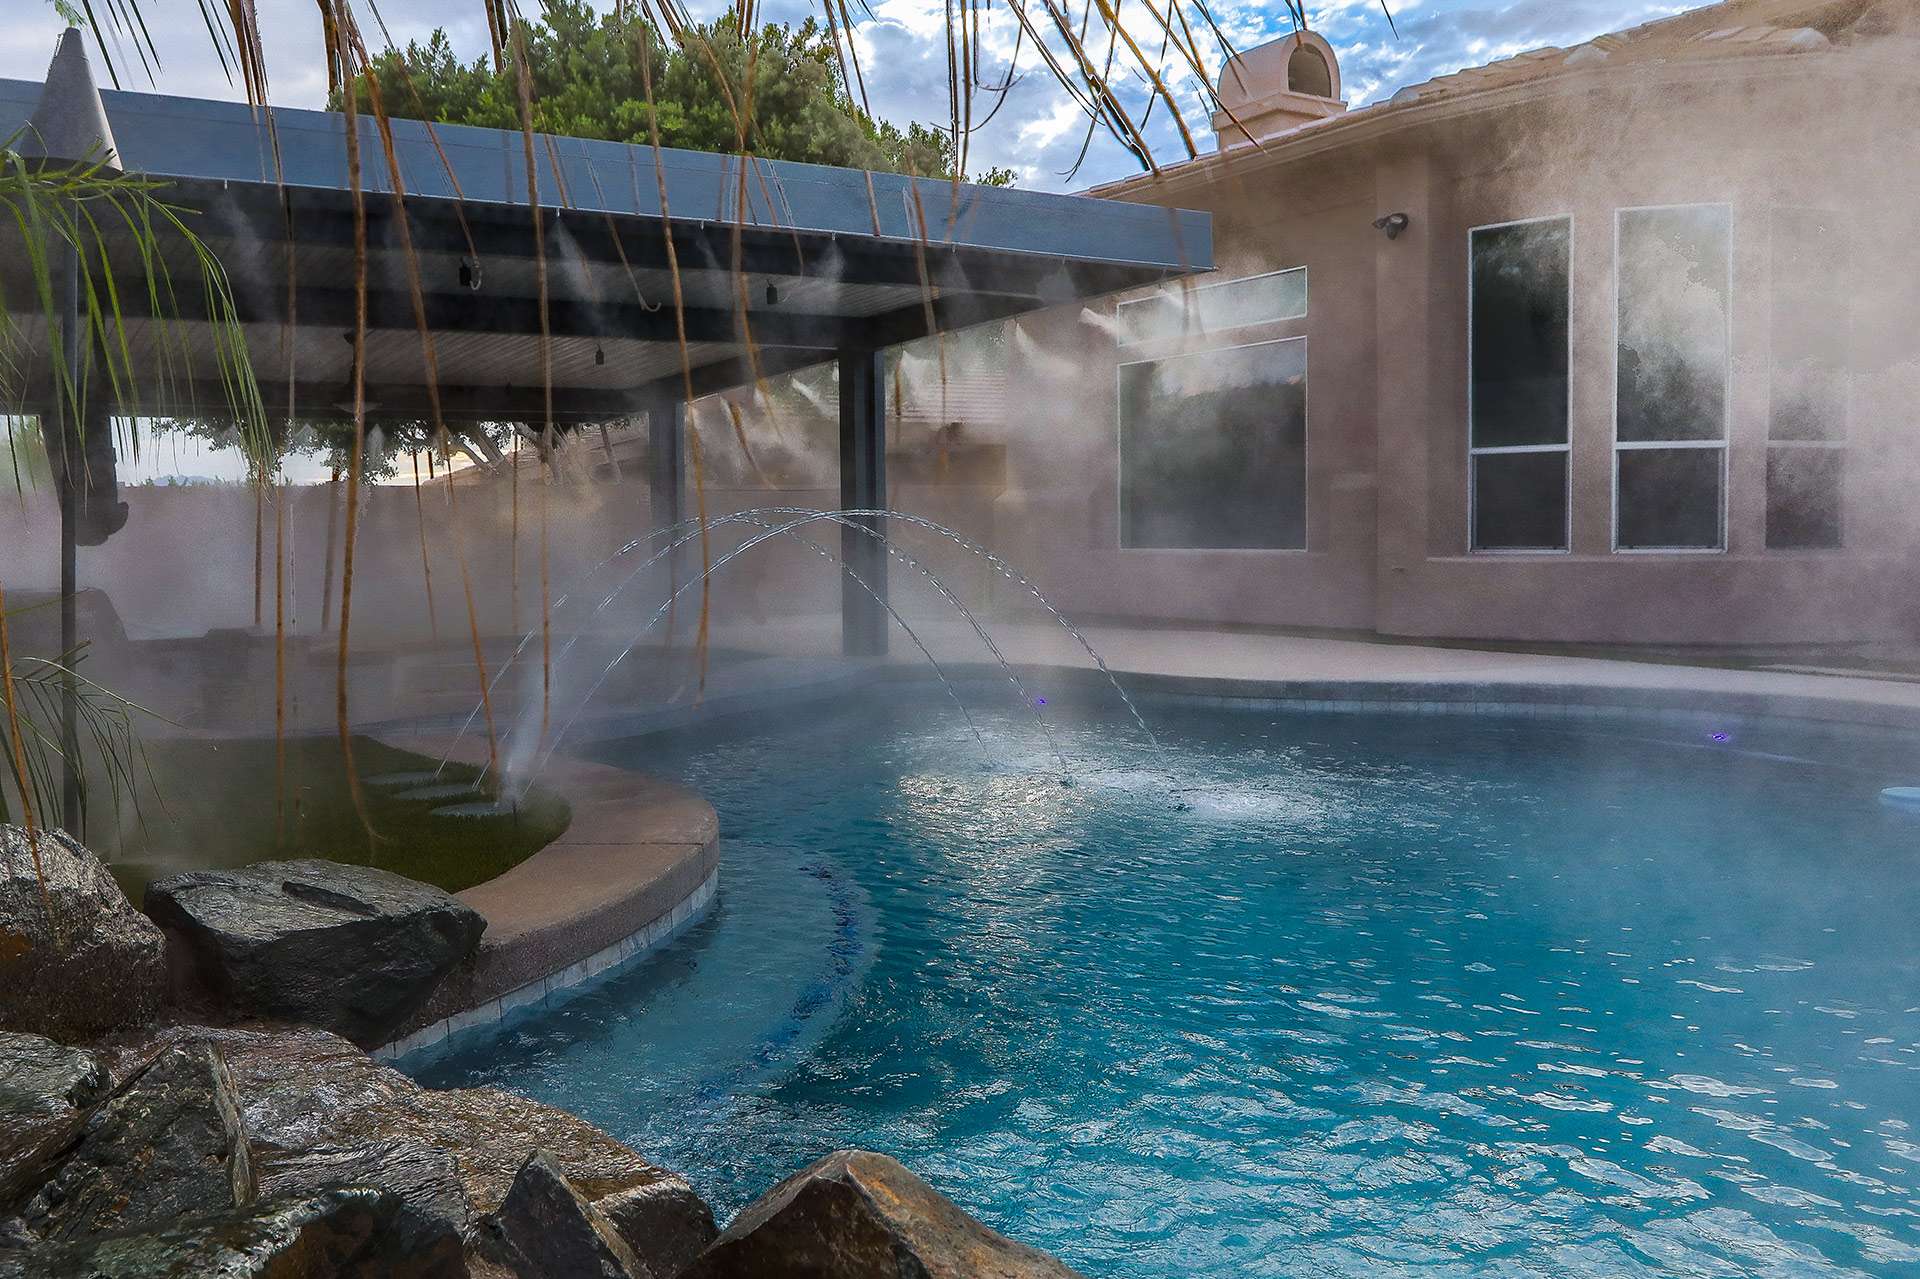
“This dual-purpose coping works best around pools with a total perimeter of at least 80 feet or more.”
On smaller pools, a very wide coping can start to look out of proportion, making the water surface itself appear smaller than it is. The brilliance of this idea is that it can save space on a smaller deck; instead of needing room for extra chairs, the pool edge *is* the seating. For an average 15×30 foot rectangular pool, a wide coping is a fantastic way to maximize function without cluttering the patio. It feels both minimalist and incredibly practical.
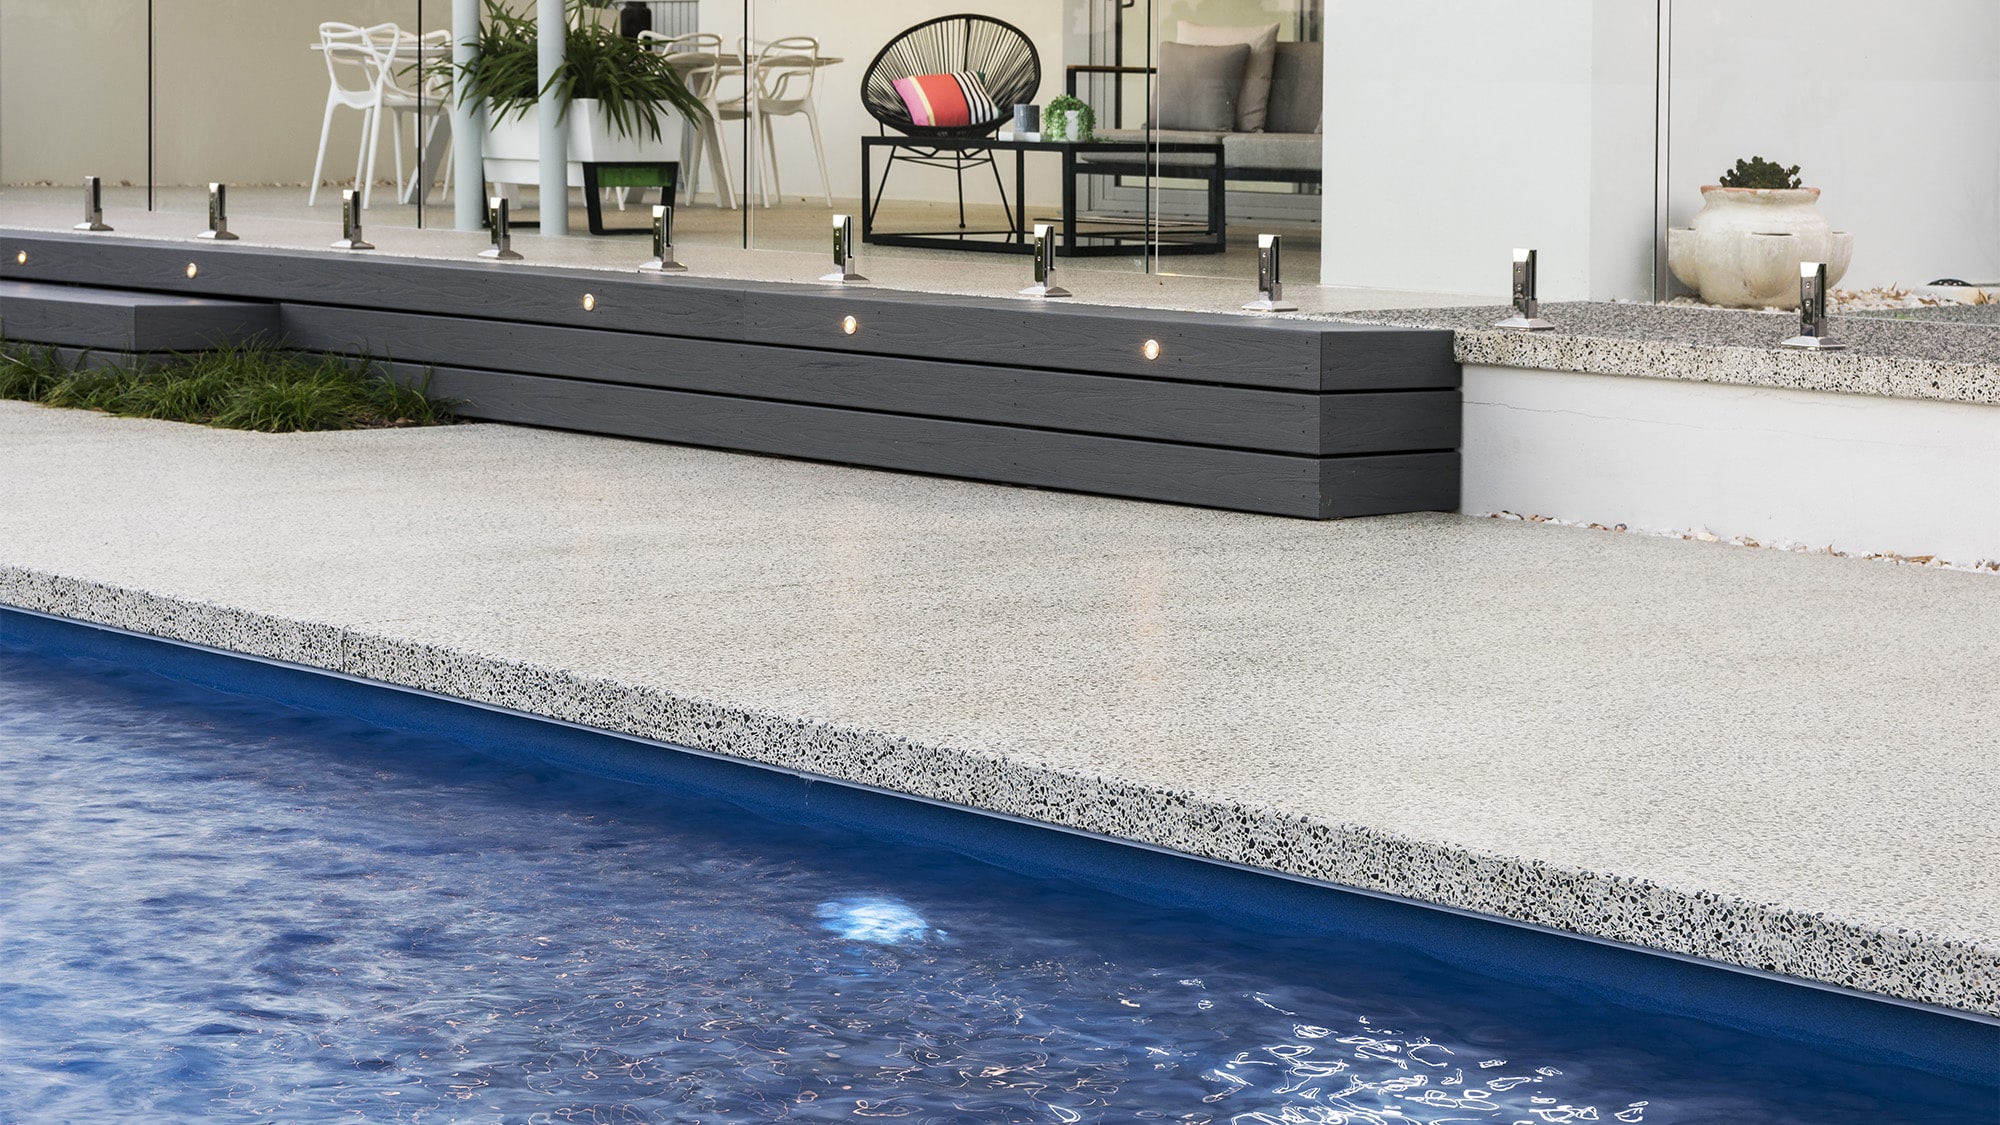
16. Modern Grey Composite Decking with a Glass Fence
This design is a study in clean lines and transparency. It works because it creates layers of function without creating visual clutter. The light grey concrete provides a durable, waterproof surface immediately around the pool. The dark grey composite decking, set at a different level, clearly defines a separate
17. Wavy Pool Edge with Granular Stone and Hexagonal Pavers
The single element that breathes life into this design is the playful use of the hexagonal pavers. A simple concrete or rectangular paver would have been functional, but predictable. The honeycomb shape of the golden-brown pavers adds an unexpected layer of pattern and texture that contrasts beautifully with the wavy, organic lines of the pool itself. It feels modern and slightly retro at the same time. This choice turns the pool deck from a purely utilitarian surface into a major decorative feature in its own right.
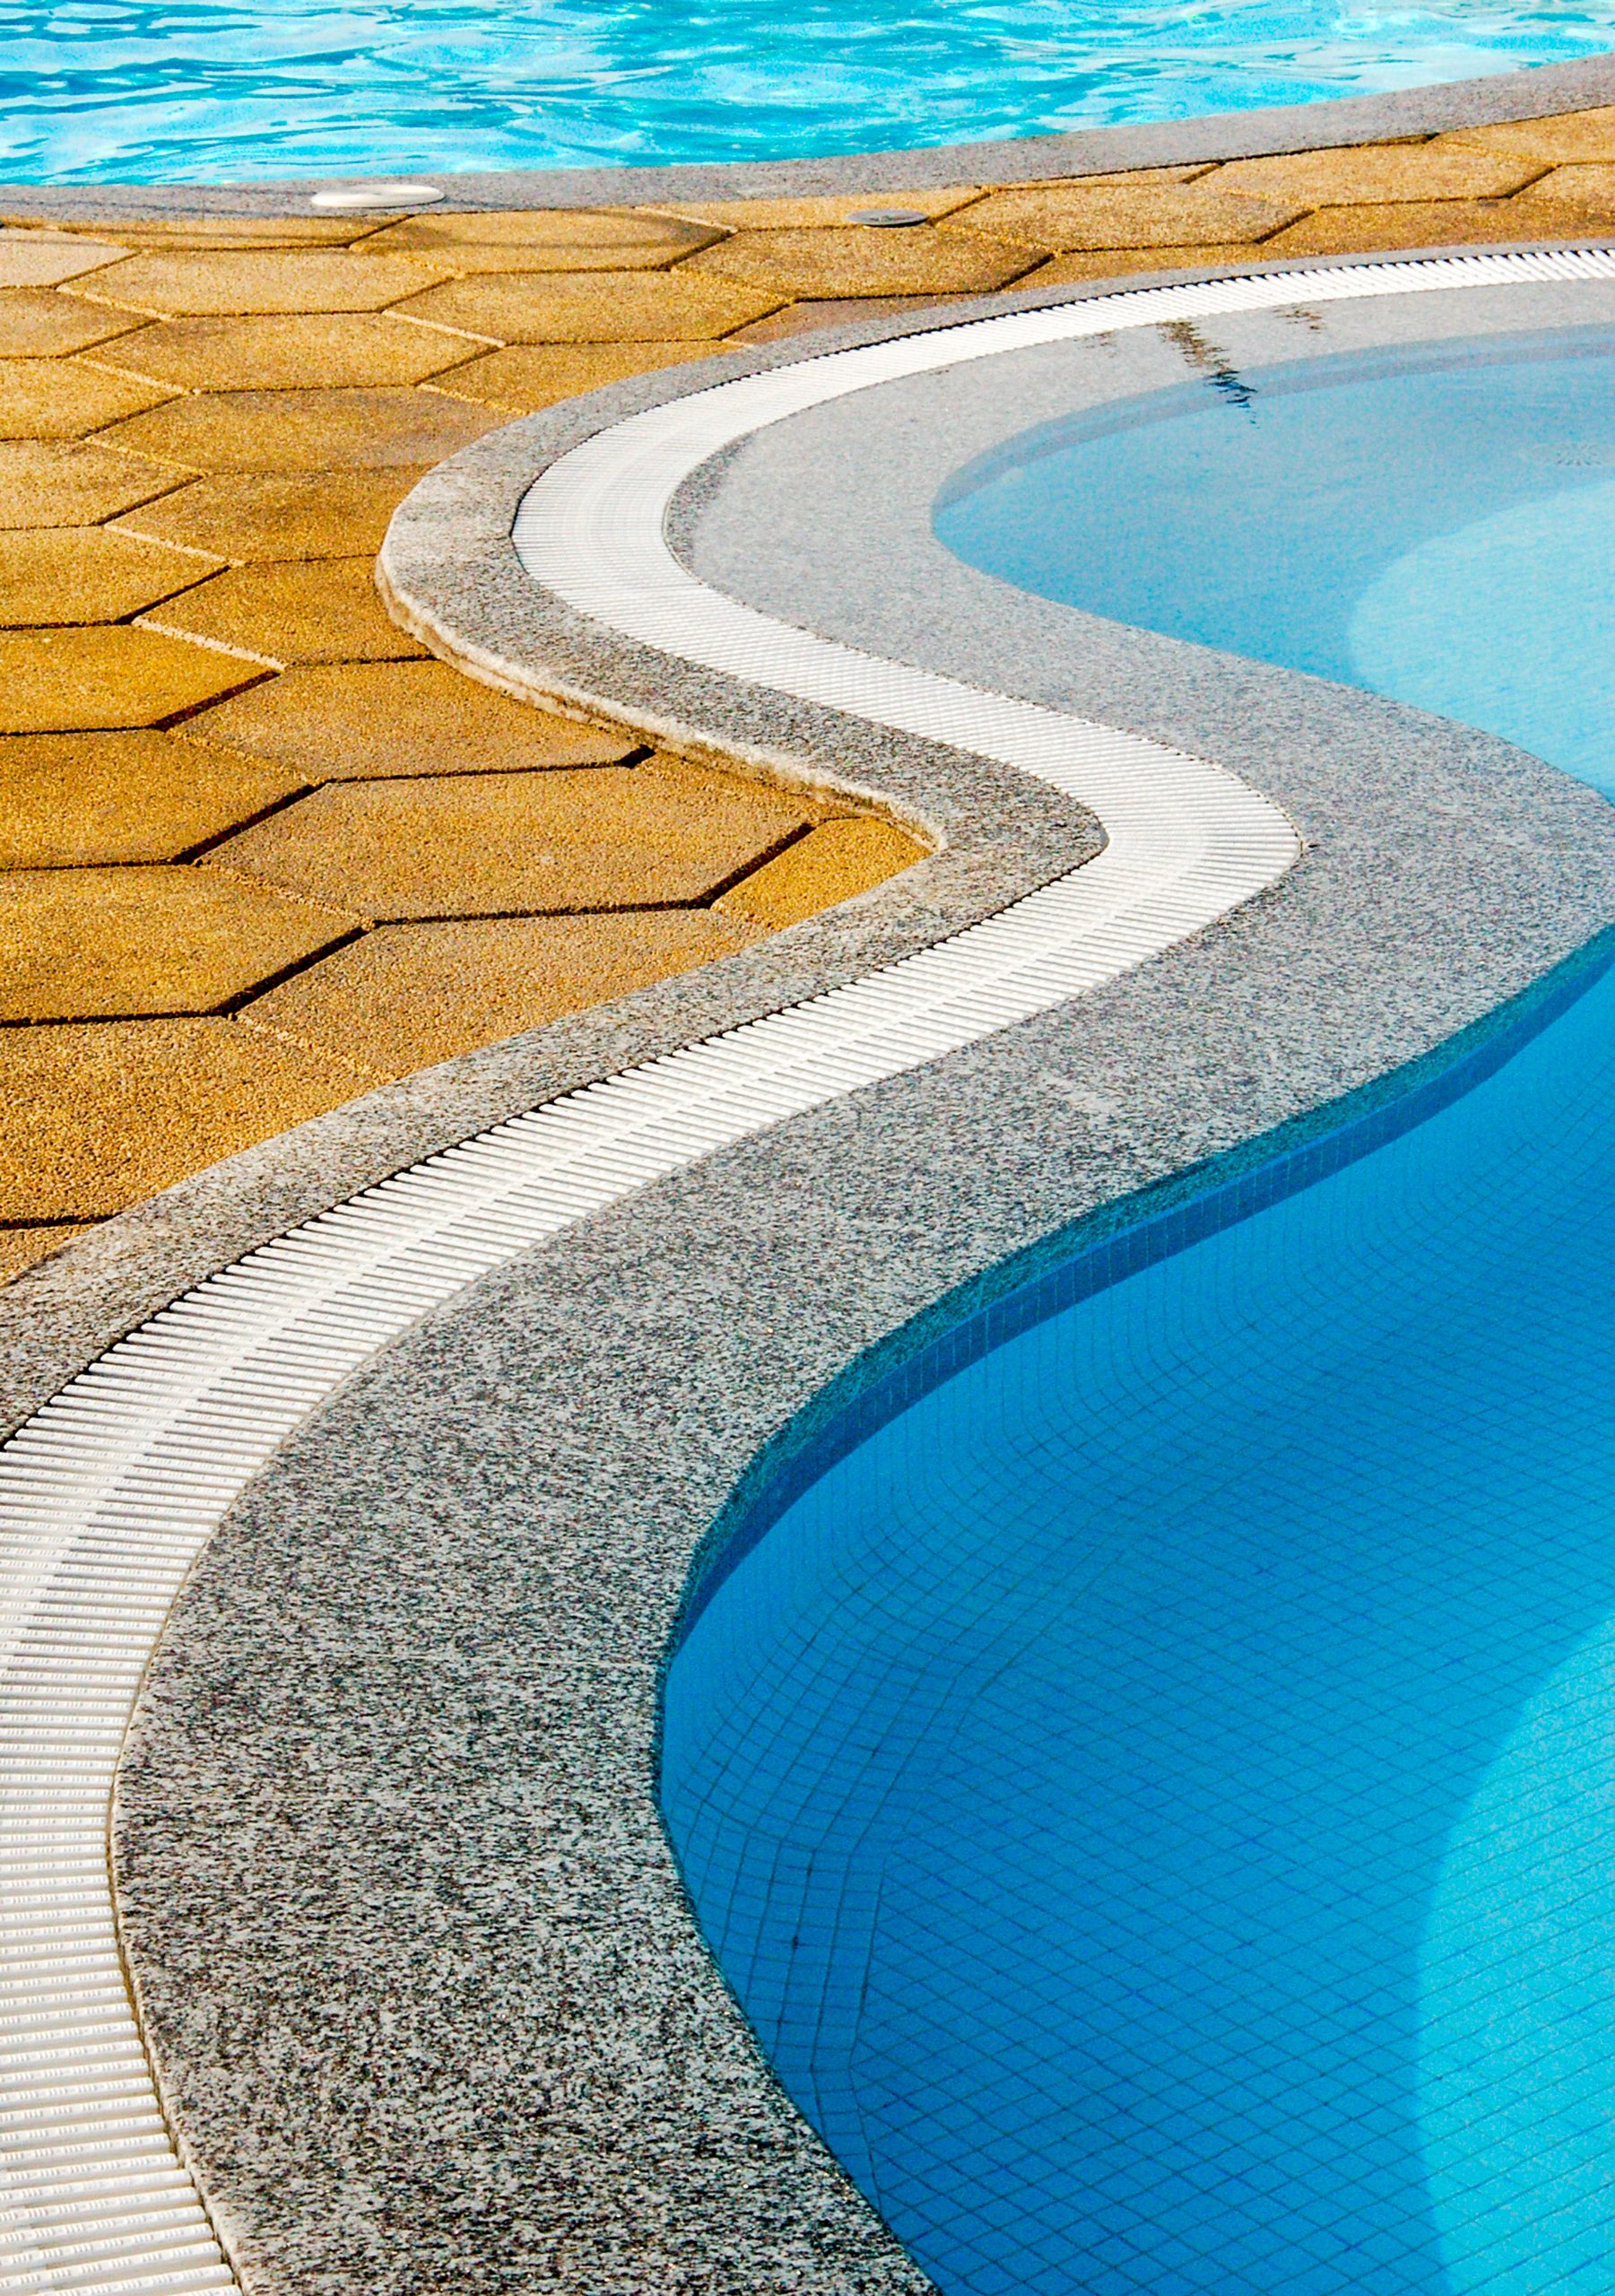
“Incorporating a slotted drain right at the edge of the coping is a pro move for both aesthetics and function.”
Unlike traditional round deck drains, a linear slot drain is incredibly discreet and maintains the clean lines of the design. By placing it directly against the coping, you ensure that any water splashed out of the pool is immediately captured and whisked away, preventing puddles from forming on your beautiful hexagonal pavers. This not only improves safety by keeping the deck drier but also protects the paver joints and foundation from constant water exposure.
18. Curved Dark Stone Coping with a Bright White Pebble Border
This is a masterclass in using contrast to create a high-end look. The formula is simple: 50% dark, structured coping + 40% dazzling water + 10% bright, textural accent. The dark stone coping provides a bold, graphic outline that makes the turquoise water appear even more vibrant. The masterstroke is the thin border of pure white pebbles. This 10% accent acts as a visual ‘pop,’ a clean dividing line that prevents the dark coping from looking too heavy against the surrounding dark pavers. You could swap the white pebbles for black ones for a more monochromatic, moody look. For a softer look, compare this with Idea #11.
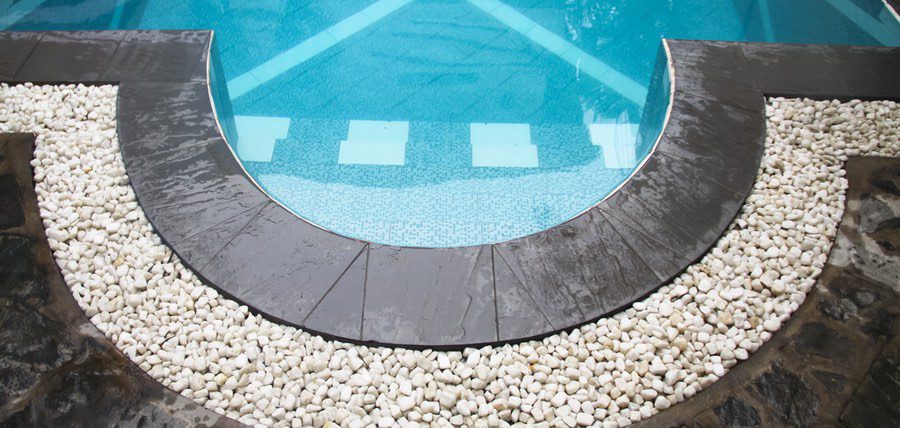
“The design’s success comes from the careful layering of textures and colors.”
The eye first notices the smooth, shimmering surface of the water, then the richly textured but dark-colored stone coping. The crisp, bright line of white pebbles provides a moment of visual relief and separation before the eye moves to the more muted, irregular texture of the ground pavers. This deliberate progression from smooth to textured, light to dark, creates a composition that feels sophisticated, complete, and thoughtfully planned.
19. Modern Overflow Pool with a Sleek Grate System
An overflow or ‘rimless’ pool like this is the epitome of clean, modern design, but the beauty comes at a maintenance cost. The overflow channel and grate are constantly collecting leaves, debris, and sunscreen slick. You must commit to regularly lifting the grates (which can be heavy) and clearing the channel beneath to prevent clogs and ensure proper water circulation. The holding tank that the water flows into also requires regular monitoring and cleaning. It’s a bit more complex than just skimming a traditional pool, so be prepared for the extra upkeep.
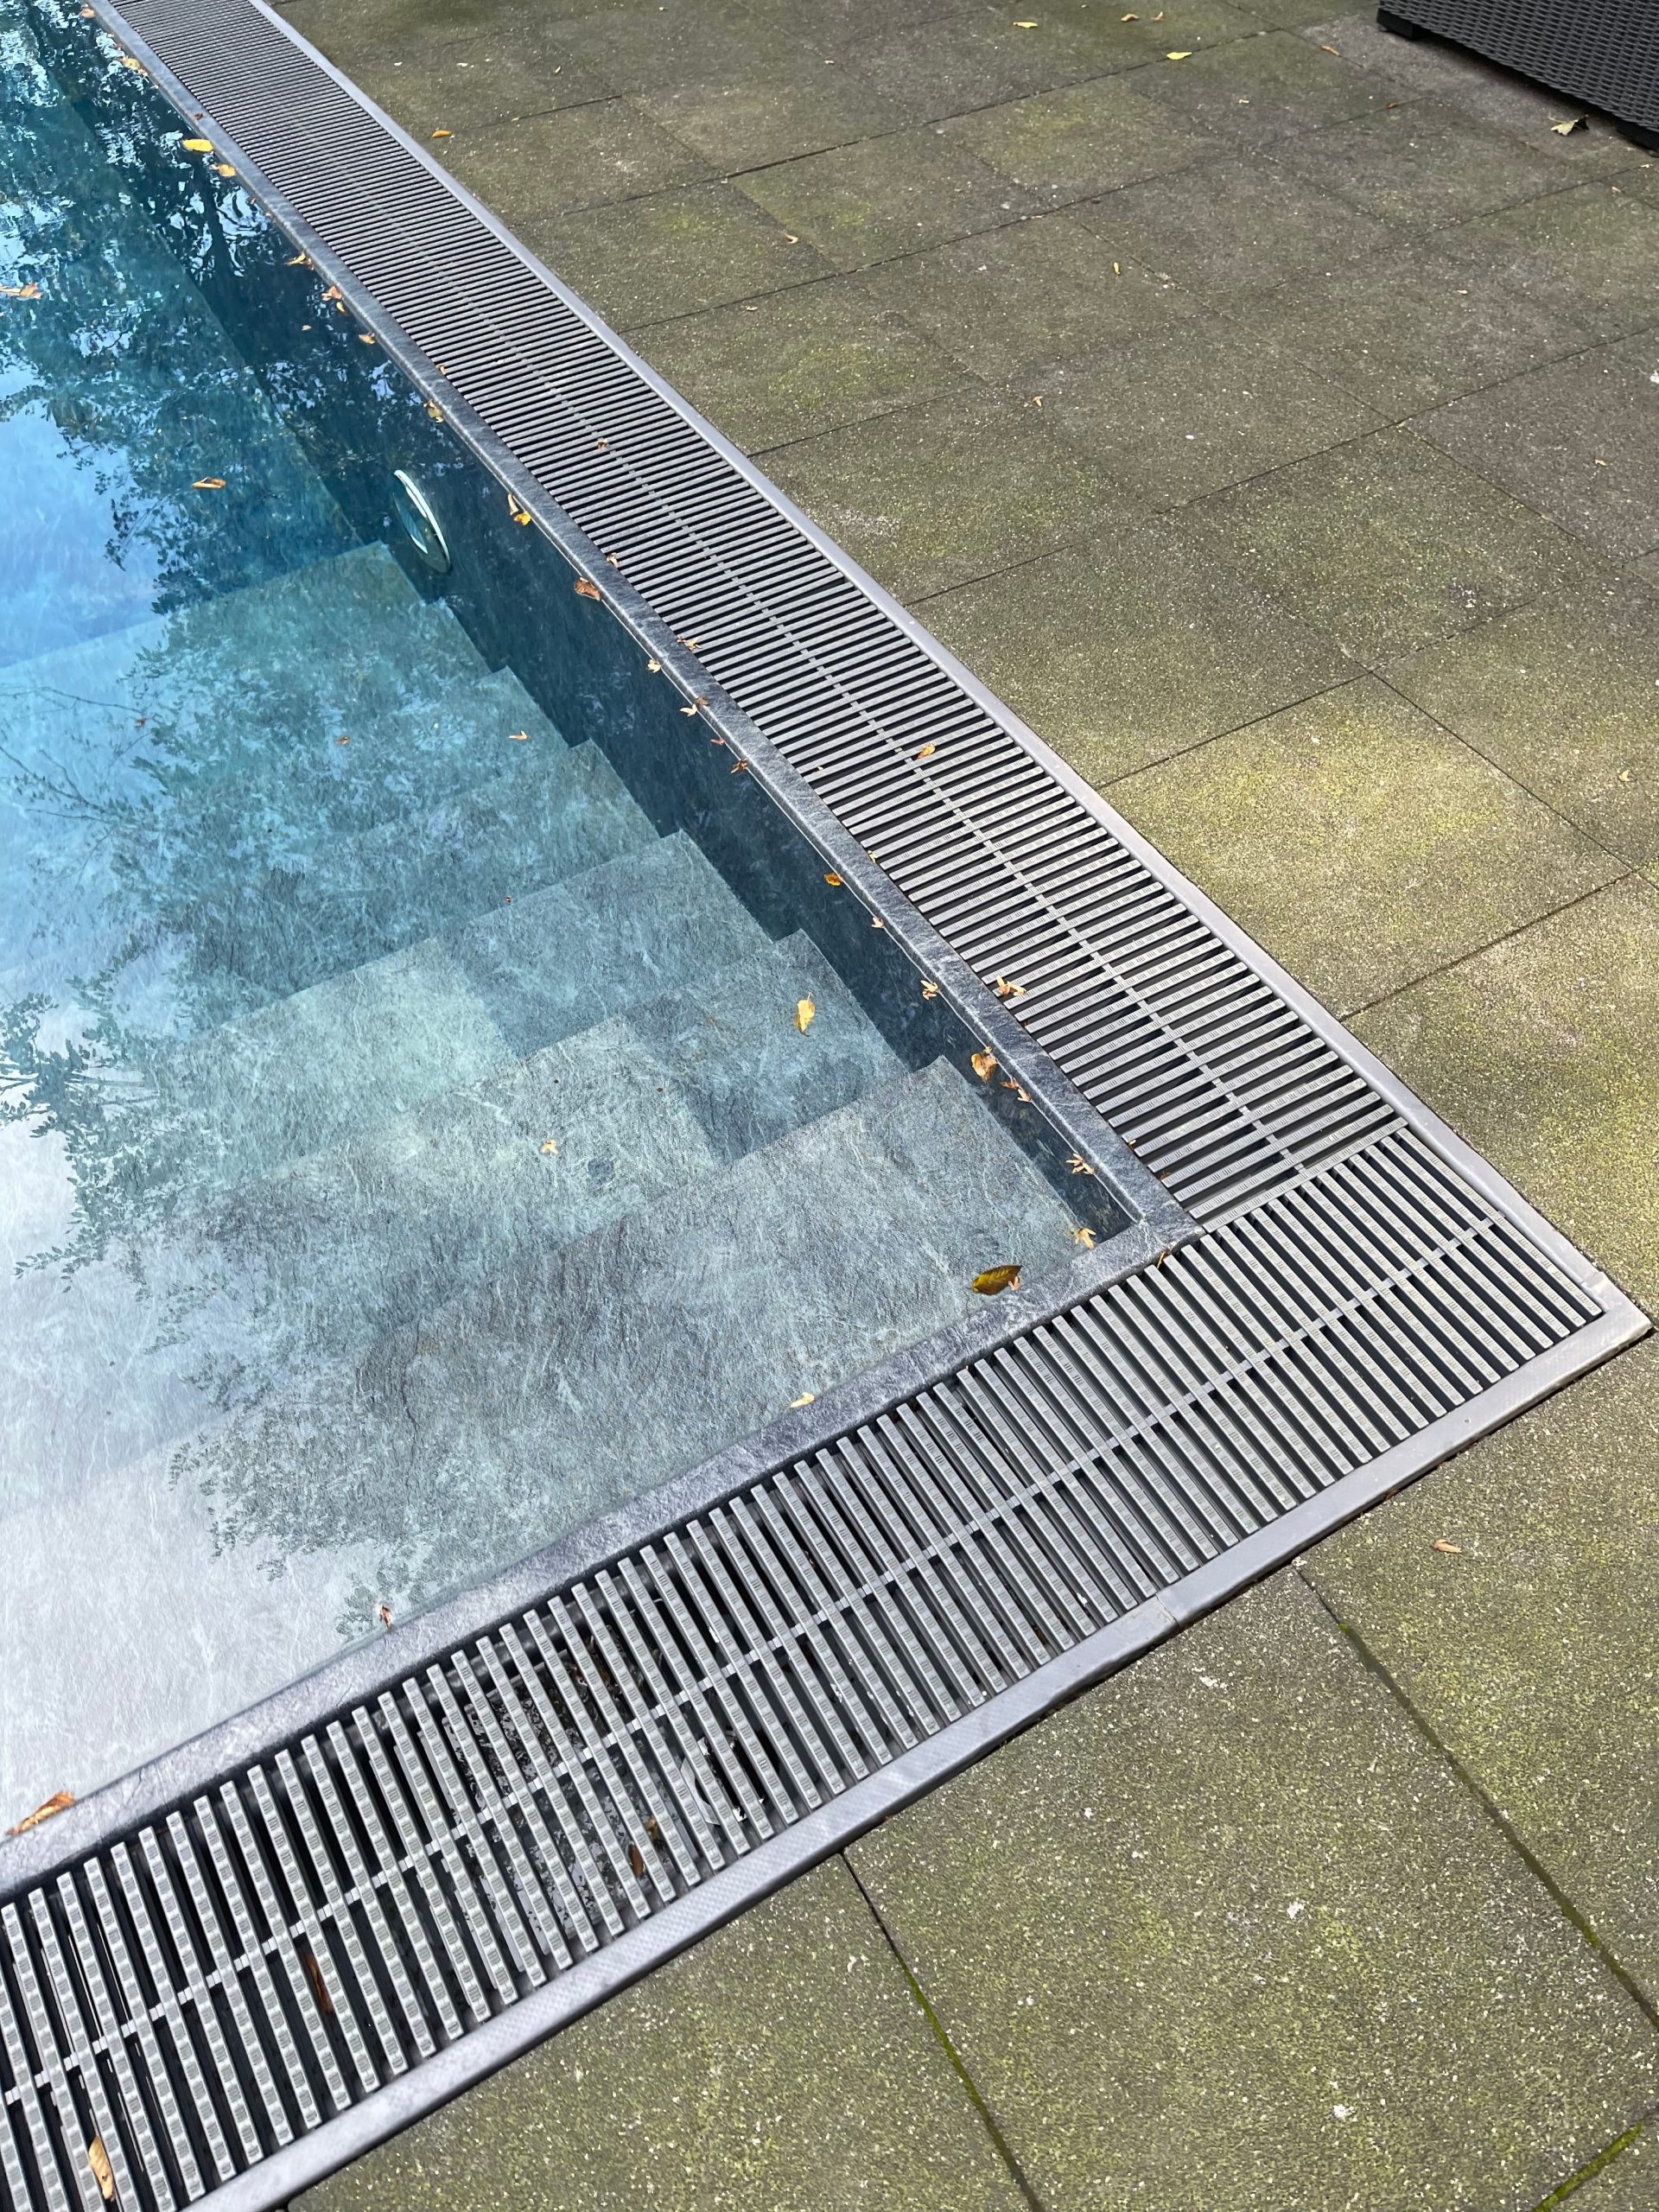
“This ‘knife-edge’ or ‘slot-edge’ design is a huge trend for 2026, especially for minimalist and architectural homes.”
It’s the next evolution of the infinity pool. While an infinity edge is designed to blend with a distant view, the overflow edge is all about creating a perfect, mirror-like surface on all four sides. It treats the water as a flat, polished plane, perfectly flush with the deck. This is popular now because it aligns with the desire for ultra-clean lines and a seamless integration of architectural elements, turning the pool itself into a piece of kinetic sculpture.
20. Classic White Coping with a Warm Light Brown Paver Deck
This classic, sunny look is achievable on a more moderate budget, proving you don’t need extravagant materials for a beautiful result.
- Main furniture (ladder): $300 – $700
- Lighting: N/A
- Textiles: N/A
- Decor/Accessories: N/A
- Wall/Structure (Pavers & Coping): $15 – $30 per square foot installed
- TOTAL (for a 500 sq ft deck): $7,800 – $15,700
Budget alternative: Get this look for less by choosing poured and stamped concrete that mimics the look of pavers, which can reduce the cost by 20-30%. Sourcing pavers from a local supplier can also significantly cut down on delivery fees compared to big box stores.
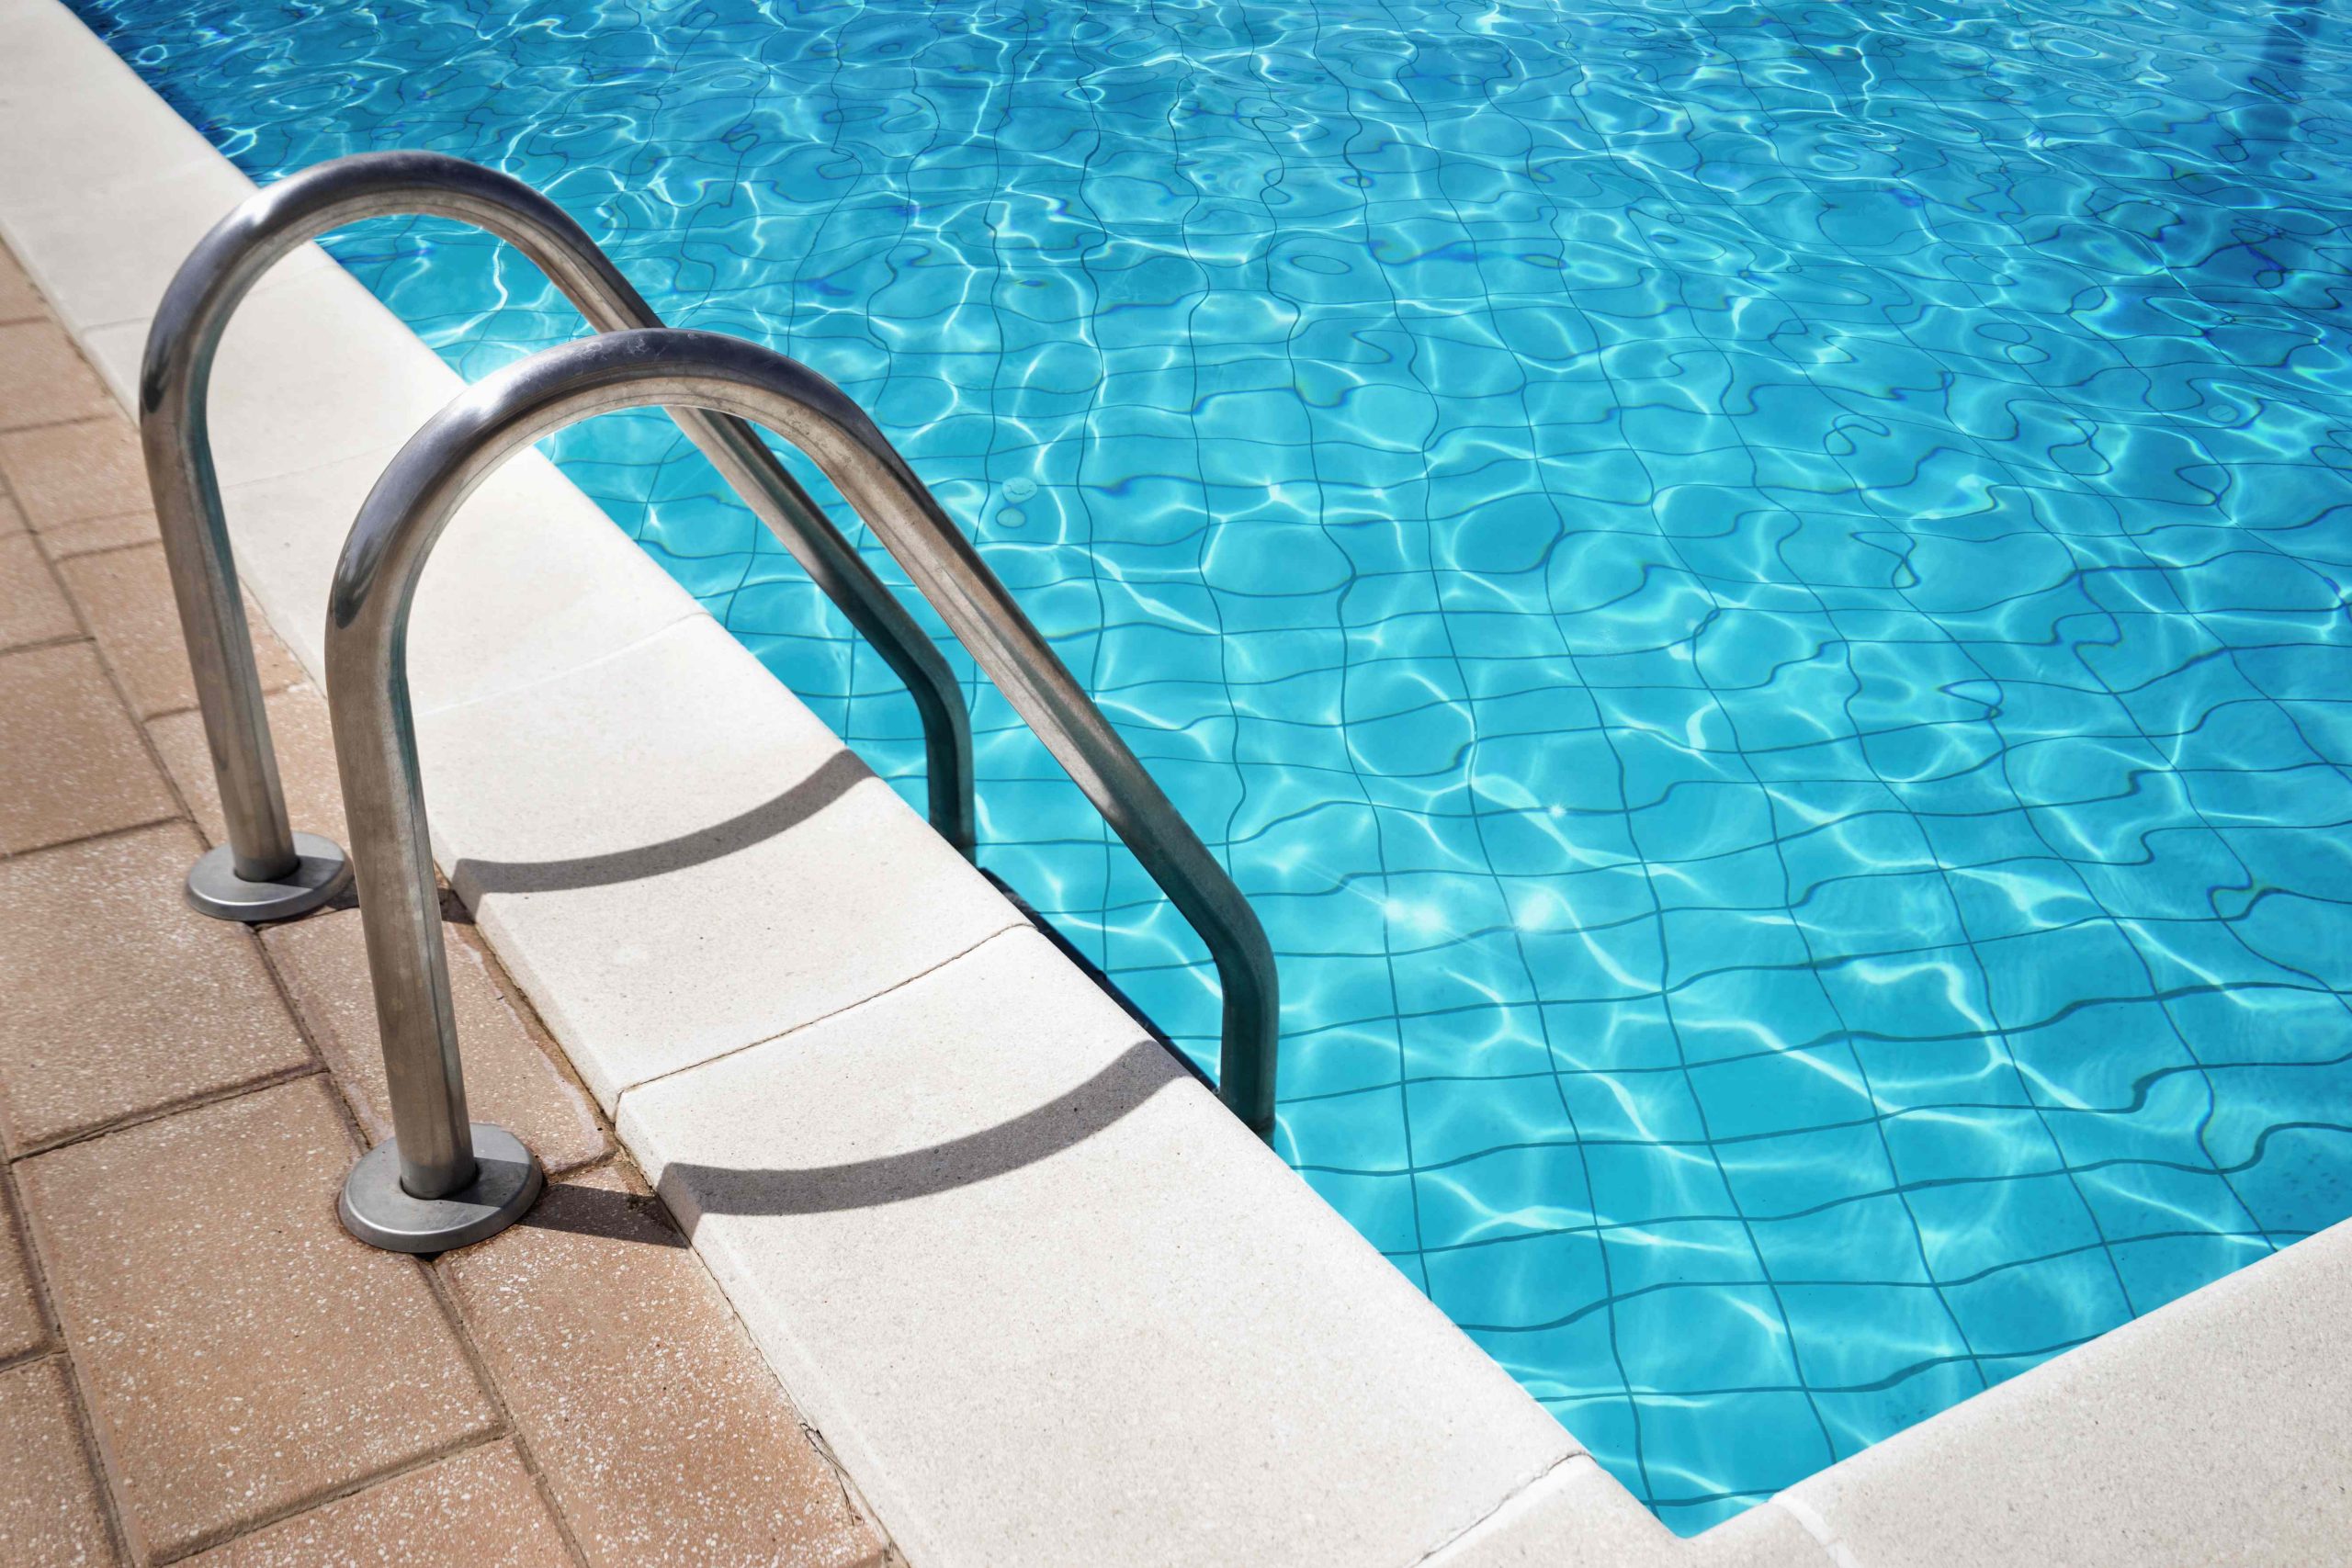
“Before you fall in love with this clean and simple aesthetic, make sure you’ve considered the following essentials.”
This is one of the places I will put in a list.
Have you confirmed the chosen pavers are specifically rated for pool decks? They need to be slip-resistant and able to withstand pool chemicals and salt.
Is the color too light? A brilliant white or very light beige paver can create a lot of glare on a sunny day. Test a sample in your yard first.
Did your contractor include polymeric sand in the quote? This special sand is swept between the paver joints and hardens to prevent weeds and ant hills.
21. Infinity Edge Pool with Textured Blue Tile Overlooking a Lake
The single most captivating element here is the choice of tile for the infinity edge wall. Instead of a standard smooth tile, the textured, varied blue squares create a dynamic, shimmering surface that mimics the movement and depth of the lake beyond. As water flows over it, the texture catches the light in a thousand different ways, making the transition from pool to nature feel more organic and alive. It’s a detail that adds immense richness and makes the pool feel custom and luxurious. A plain tile would not have the same magical effect.
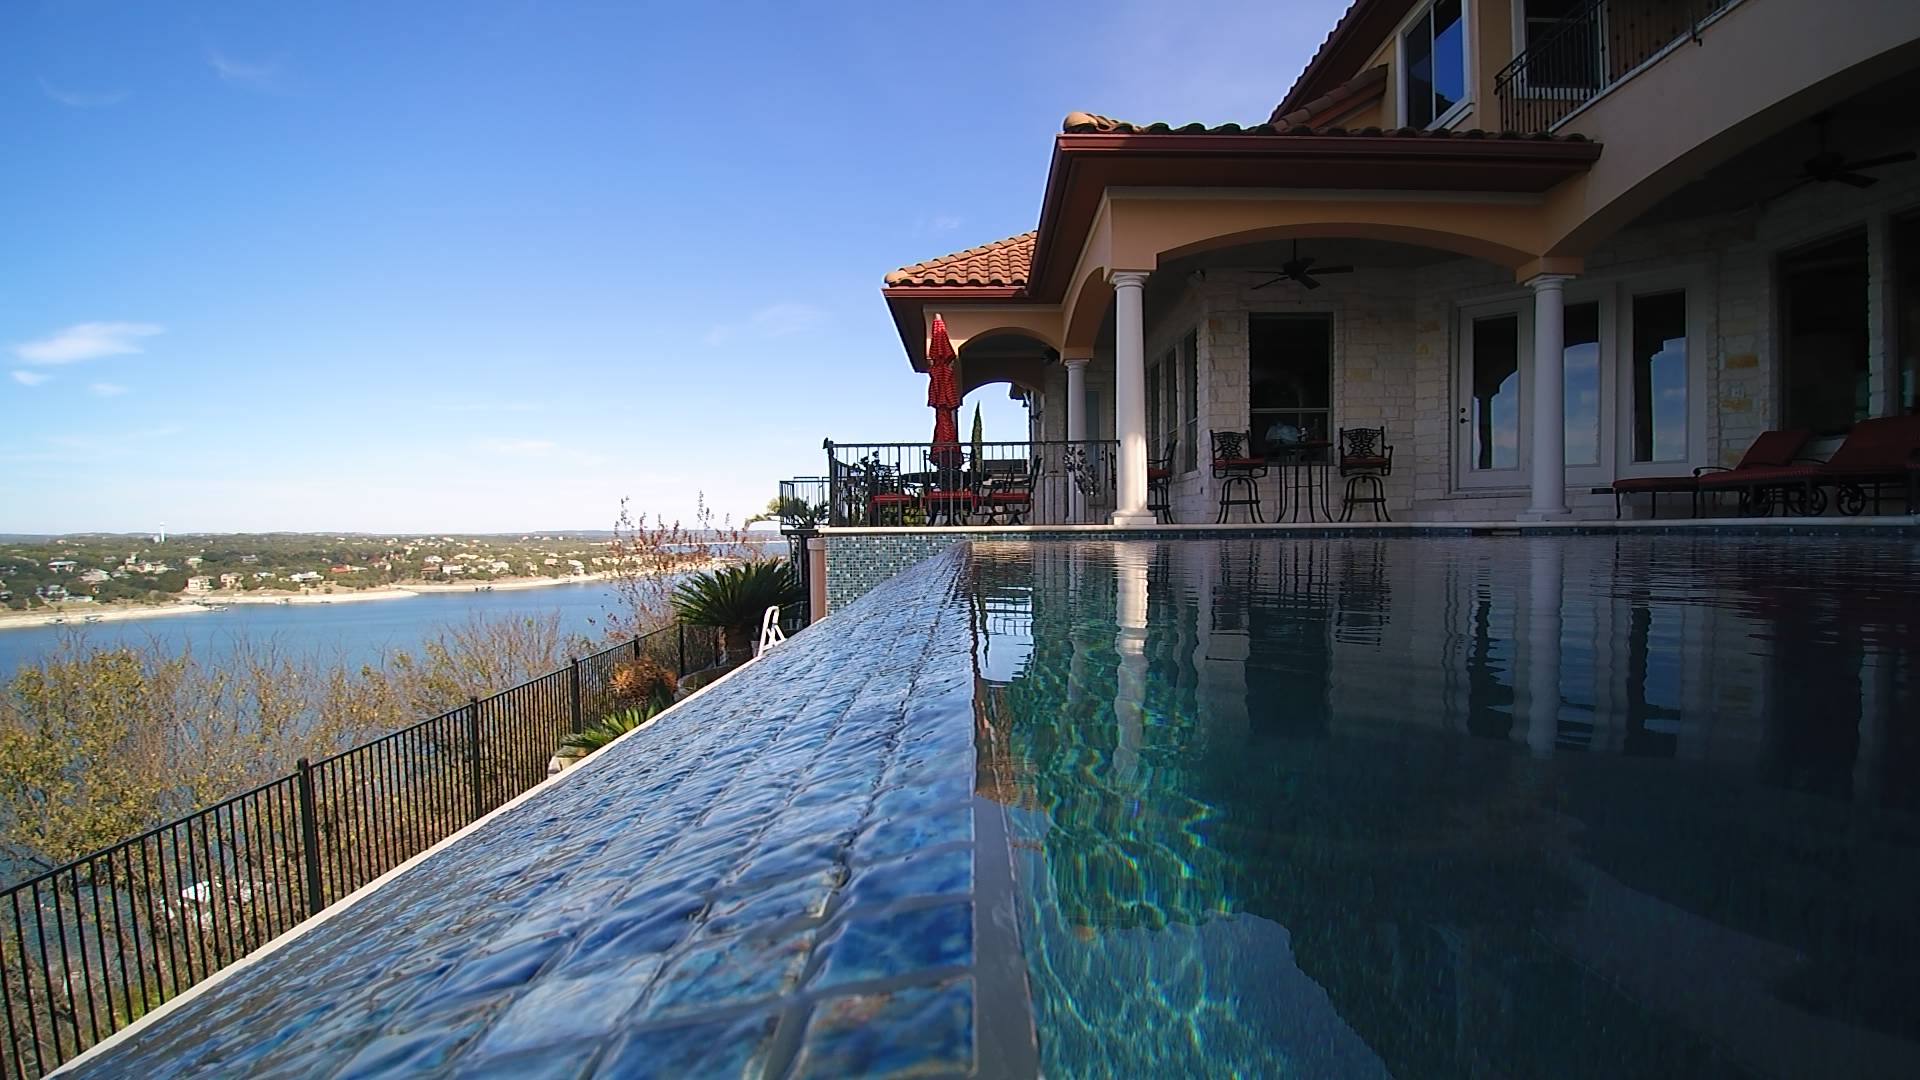
“That stunning, seamless view comes with a major safety consideration: the drop-off.”
Building code in most areas will require a fence or barrier below an infinity edge if the drop is more than a certain height (often 24-30 inches). As you can see, a discreet black metal fence is installed here. While it’s designed to visually disappear from the main viewing angle, it is a necessary and non-negotiable part of the design for safety. Don’t fall in love with the idea of a completely unobstructed edge without first understanding what your local building codes will mandate.
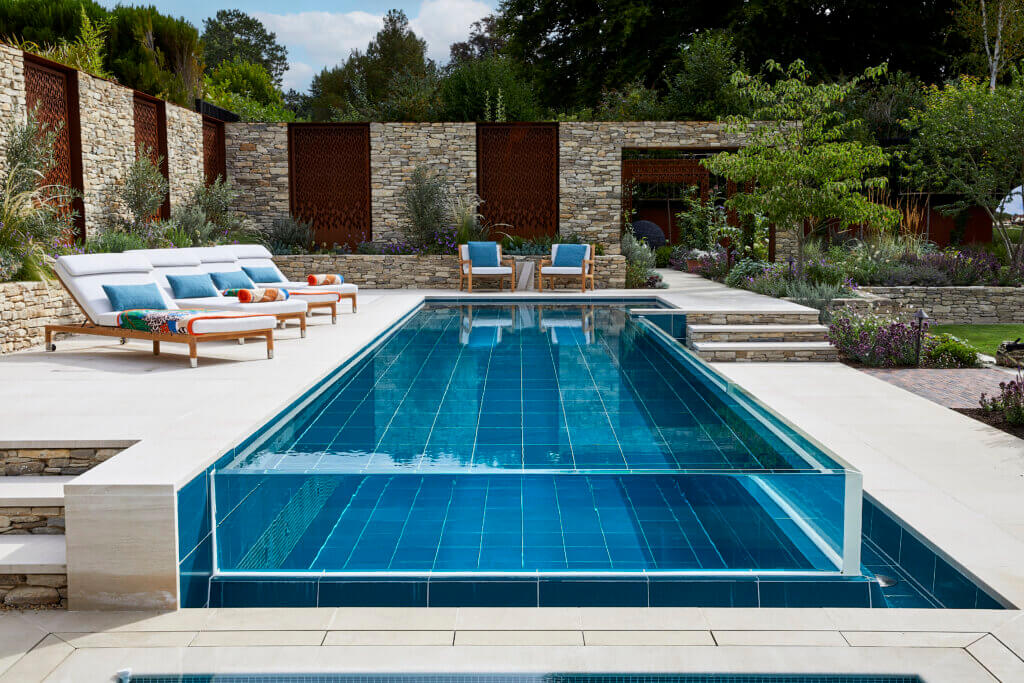
22. Glass-Walled Pool with a Stone-Clad Outdoor Living Area
A statement feature like a glass wall requires a setting of appropriate scale to truly shine. This idea works best in a medium to large backyard, ideally with at least 600-900 square feet of patio space. The glass wall itself needs room to be a focal point, not just crammed against a boundary. It’s particularly effective in yards with a natural slope, where the glass wall can be integrated into a retaining wall, creating a dramatic, multi-level effect. This isn’t an idea for a tight, narrow yard, as it needs space to be viewed and appreciated from a slight distance.
“Main furniture (lounge chairs, armchairs): $3,000 – $8,000
Lighting (in-pool and”
- Main furniture (lounge chairs, armchairs): $3,000 – $8,000
- Lighting (in-pool and landscape): $4,000 – $9,000
- Wall/Structure (Glass Panel & Engineering): $15,000 – $40,000+
- Hardscaping (Stone paving, retaining walls): $25 – $50 per square foot
- TOTAL (for a 10ft panel & 500 sq ft patio): $34,500 – $72,000+
23. Curved Pool Edge with a Cascading Waterfall Feature
Tiling a curved surface like this pool edge requires a specific technique, especially with small mosaic sheets. Here’s a simplified guide for achieving a smooth finish.
- Prepare the Surface: Ensure the underlying concrete (the substrate) is smooth, clean, and free of bumps or dips. Any imperfections will show through the tile.
- Use the Right Mortar: Apply a high-quality, flexible, waterproof tile mortar (thin-set) to a small section of the curve at a time.
- Drape the Sheet: Lay the mosaic sheet onto the mortar. Instead of pushing it flat, gently ‘drape’ it to follow the curve. The mesh backing is flexible enough to allow this.
- Set the Tile: Use a grout float to gently press the tiles into the mortar, ensuring even contact and a consistent curve. Don’t press so hard that mortar oozes up between all the tiles.
- Cut for Relief: You may need to use a utility knife to cut the mesh backing between some tile rows on tighter curves to prevent bunching.
- Grout and Seal: After the mortar cures (24-48 hours), apply grout, then clean and seal it according to the manufacturer’s instructions.
Time: 1-2 days. Cost: $100-$300 for mortar and grout for a small area.
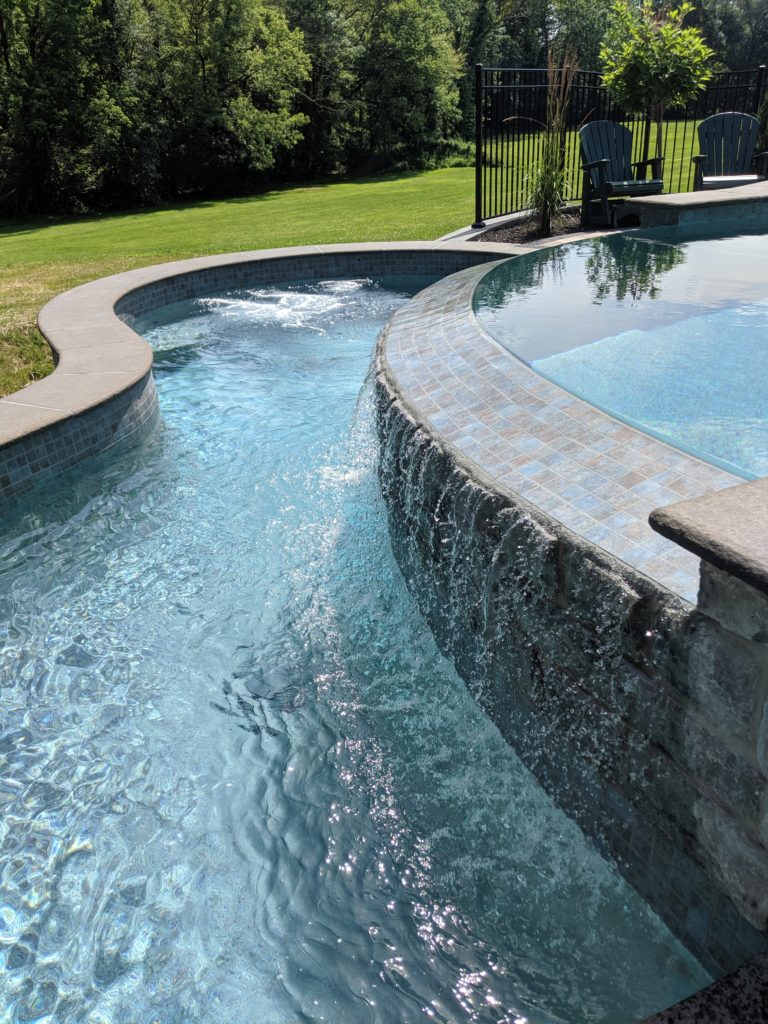
“This design is so effective because it mimics nature’s appeal.”
The gentle curve of the pool is a ‘soft’ line that feels more organic and relaxing than a rigid rectangle. The cascading water introduces soothing sound and movement, instantly creating a serene atmosphere. The use of varied, naturalistic materials—the cool concrete, the shimmering mosaic tiles, and the dark, rough stone of the waterfall—provides textural diversity that is engaging and feels high-quality. The combination of form, sound, and texture creates a complete sensory experience. For a more angular waterfall, look at Idea #10.
24. Modern Curved Pool with Mixed-Material Coping and a Built-in Bench
When combining wood decking with stone or tile in a pool environment, material selection is critical to ensure longevity. For the wood portion, don’t use standard pine or cedar. You must use a highly water-resistant hardwood like Ipe, Teak, or Cumaru, or opt for a high-quality composite decking specifically rated for pool use. These materials are far more resistant to rot, warping, and insect damage caused by constant exposure to moisture and pool chemicals. The investment is higher upfront but will save you from a complete tear-out and rebuild in just a few years.
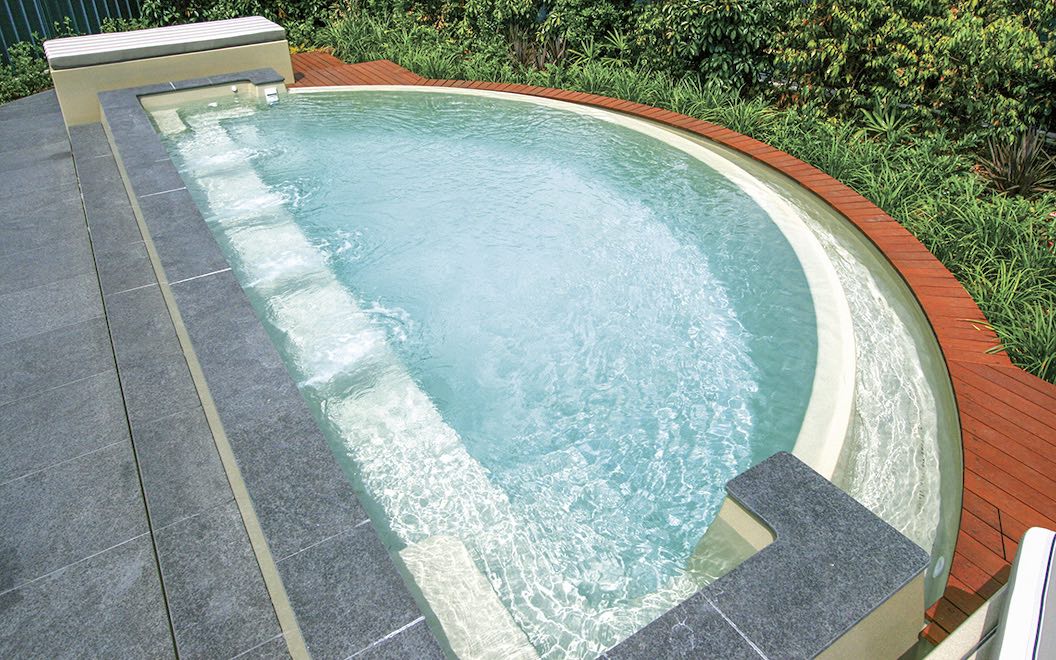
“The single element that elevates this design from good to great is the thoughtful integration of the built-in bench.”
The pool itself is lovely, but by building the seating directly into the surround and using the same materials, the entire area becomes a single, cohesive piece of architecture. It’s not just a pool with some furniture next to it; it’s a complete, unified outdoor lounge. This integration blurs the lines between hardscape, pool, and furniture, creating a custom, high-design feel that is both incredibly stylish and highly functional.
25. Concrete Paver Edging with a Crisp White Stone Border
This minimalist, high-contrast look feels very expensive, but it’s surprisingly achievable on a budget. Concrete pavers are a cost-effective material, often running just $5-$10 per square foot. The real secret is the white stone border. You can buy bags of decorative white marble chips or river stones from any home improvement store for around $10-$20 per bag. By creating a ‘trench’ around your paver deck and filling it with these stones, you get a million-dollar look for a couple hundred bucks. It’s a design hack that adds a clean, bright, and polished finishing touch with minimal expense.
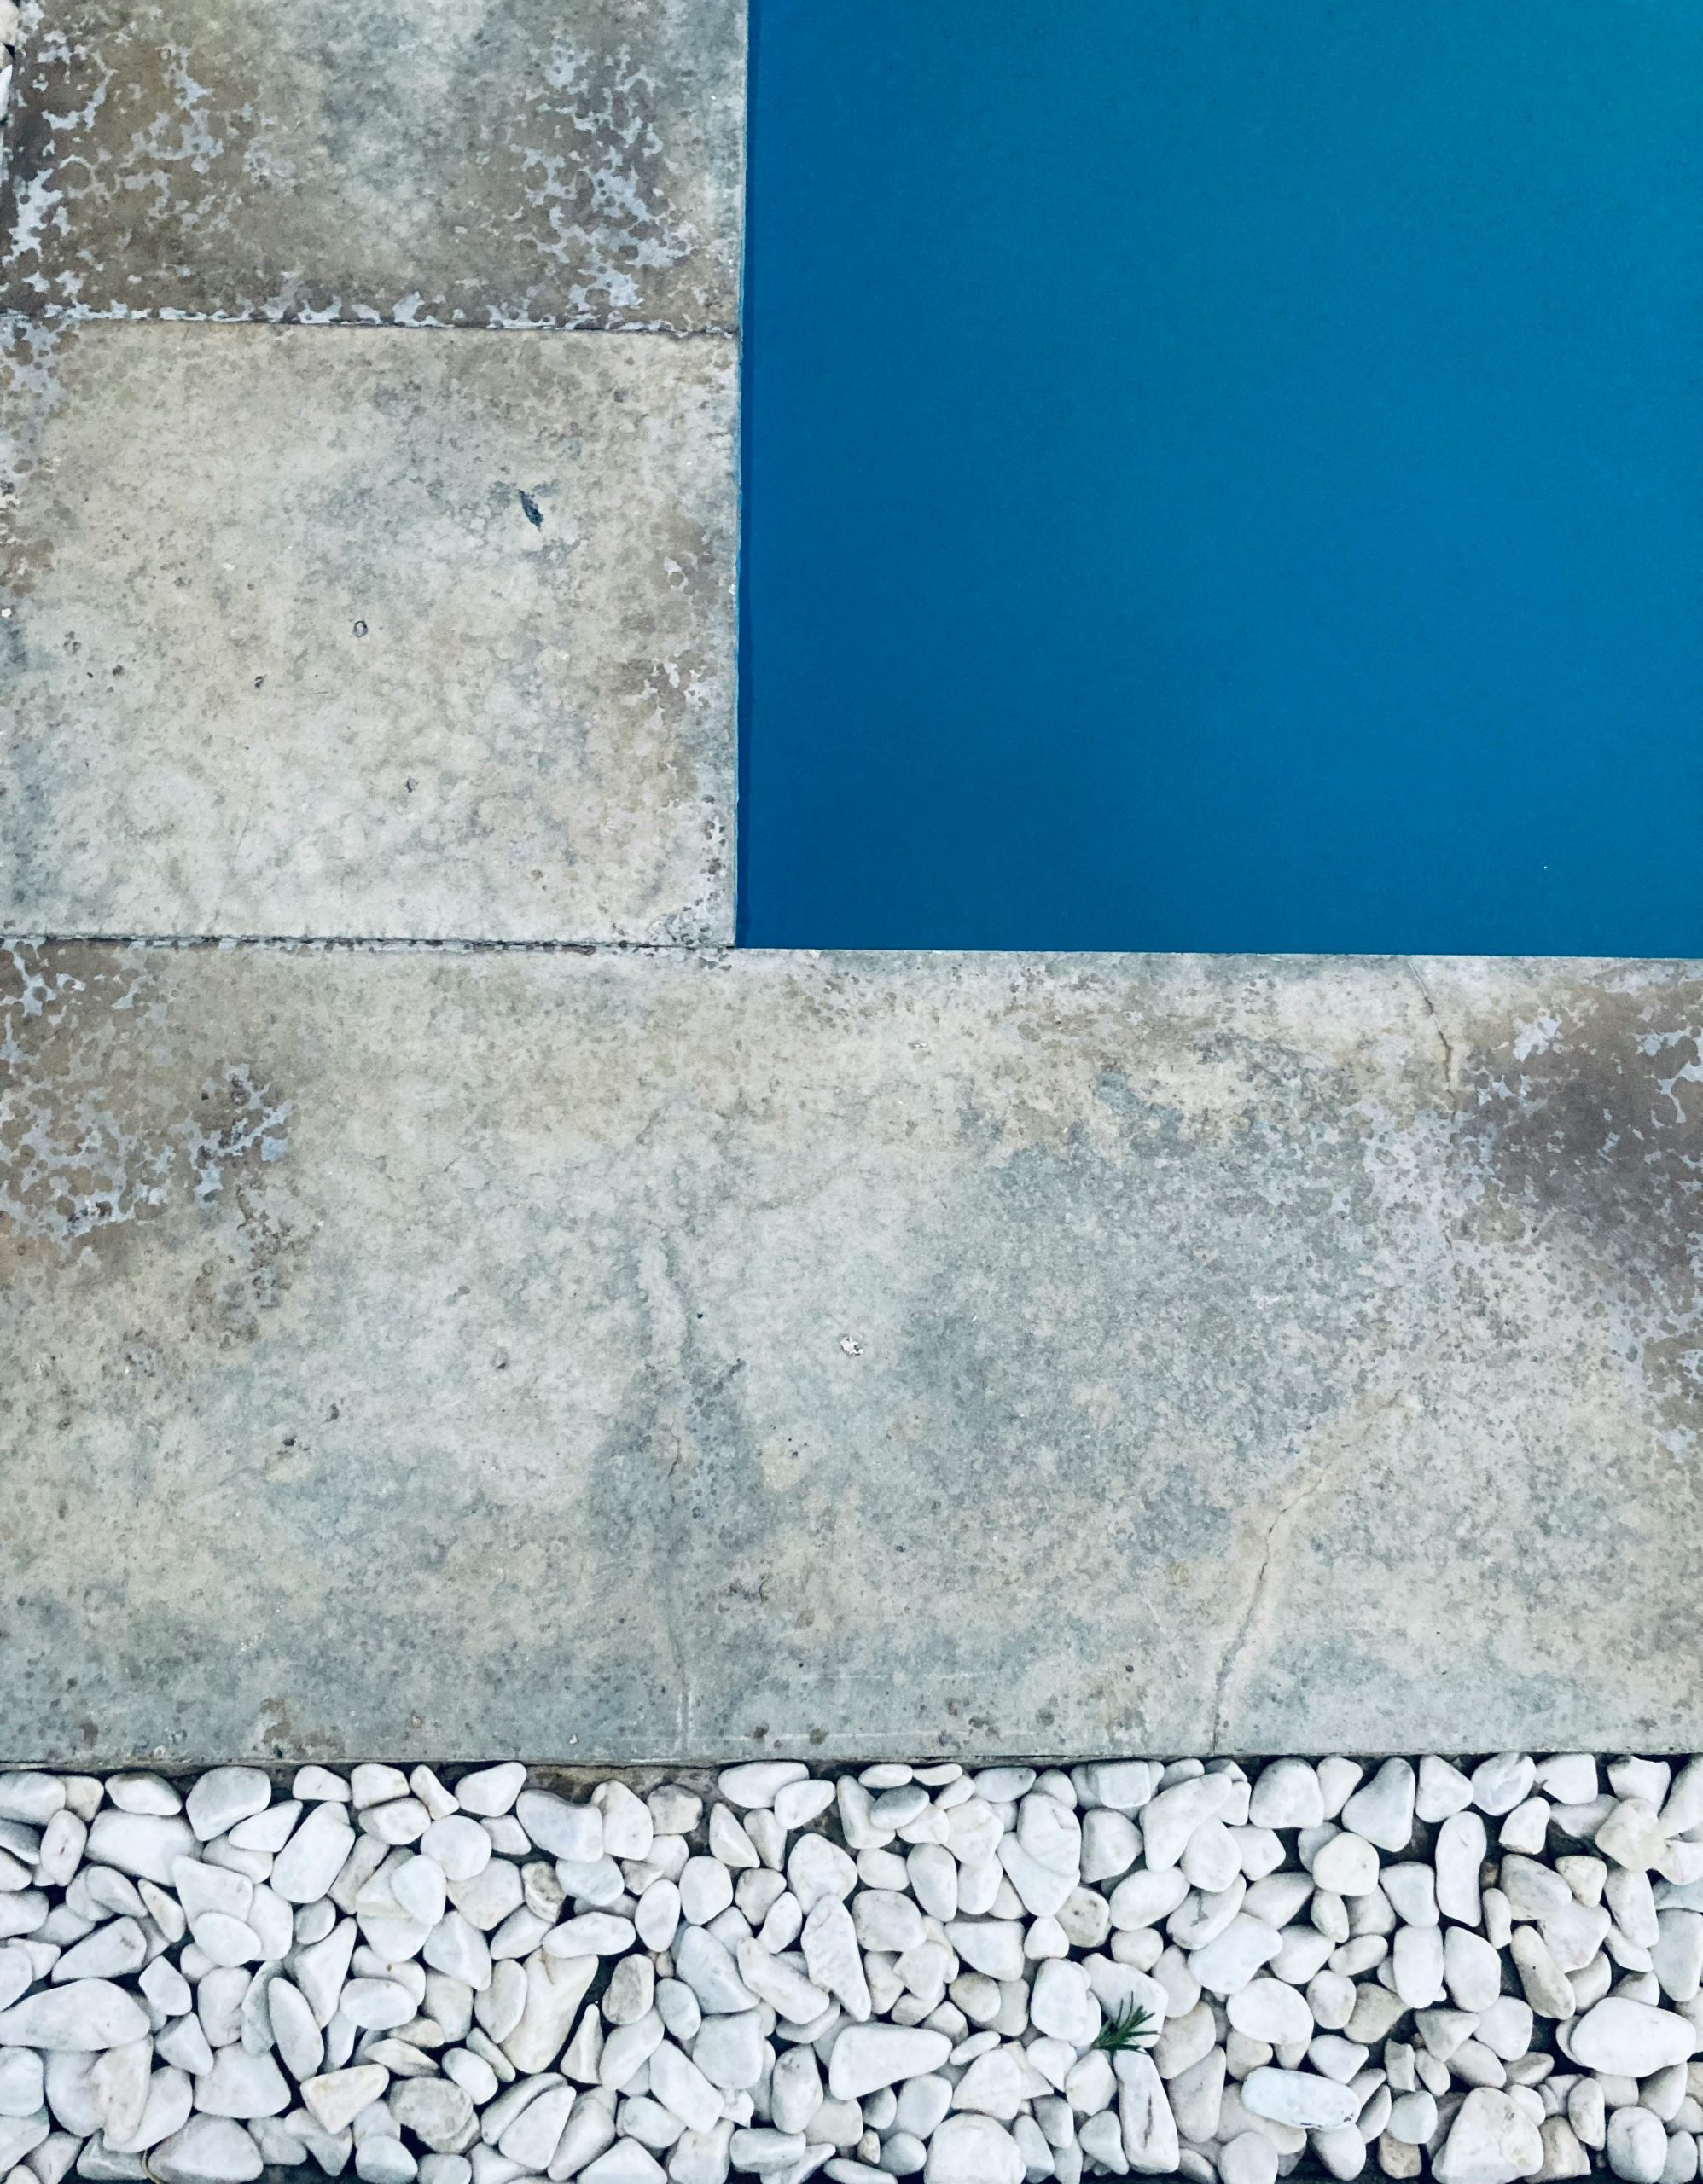
“Installing a decorative stone border is a fantastic weekend DIY project that adds a professional touch to your pool deck.”
Here’s how:
Dig the Trench: Around the perimeter of your paver deck, dig a shallow trench about 4-6 inches deep and 6-12 inches wide, depending on your desired look.
Install Edging (Optional but Recommended): Place a flexible plastic or metal landscape edging on the outside of the trench to create a clean line and keep the stones from migrating into your lawn or garden beds.
Lay Landscape Fabric: Line the bottom and sides of the trench with a heavy-duty landscape fabric. This is crucial for preventing weeds from growing up through your beautiful white stones.
Fill with Stone: Pour your decorative white stones into the trench, filling it up to be level with the surrounding patio and grass. Rake it smooth for a clean, even finish.
Time Estimate: 3-5 hours for a 50-foot perimeter. Material cost: $150-$400.
26. Luxury Infinity Pool with a Full-Length Glass Wall and Fire Bowls
This design’s dramatic impact comes from the powerful interplay of opposing elements: fire and water. The cool, serene, blue expanse of the infinity pool is juxtaposed with the flickering, warm, orange flames of the fire bowls. This elemental contrast is inherently captivating and creates a dynamic energy. The glass wall adds another layer, acting as a window into the water, making it feel both contained and endless. The stacked stone provides an earthy, textural anchor that grounds the two fluid elements, preventing the design from feeling too slick or ethereal.
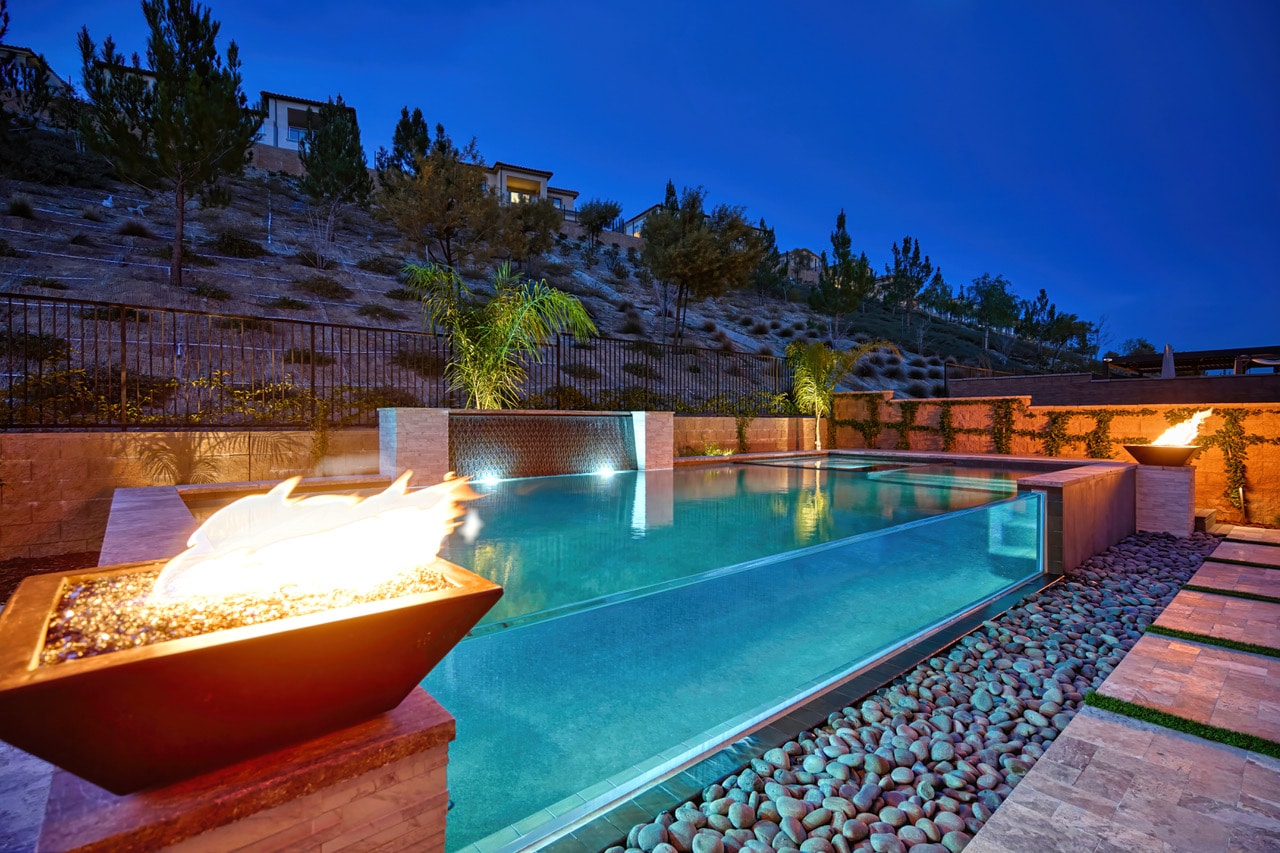
“Let’s be real: this is a millionaire’s backyard.”
The combination of three very expensive, custom features—an infinity edge, a structural glass wall, AND integrated fire bowls—puts this design in a very high budget category. Each one of those elements requires specialized engineering, custom fabrication, and complex installation (gas lines for the fire, waterproofing for the glass, hydraulics for the infinity edge). This isn’t just a design choice; it’s a significant structural and financial undertaking. It’s stunning inspiration, but don’t expect to replicate it without a six-figure budget. See Idea #21 for a look at a glass wall on its own.
27. Glass Mosaic Tile Infinity Edge with Natural Pebble Accents
The star of the show here is undoubtedly the glass mosaic tile. Its iridescent quality is what makes this infinity edge so mesmerizing. As the light changes throughout the day, the color of the tiles shifts and shimmers, creating a dynamic surface that cheap ceramic tile just can’t replicate. The mix of blues and greens gives the water a rich, deep teal hue that feels incredibly luxurious. This single material choice elevates the entire pool from a simple blue basin to a piece of art that reflects the sky and surrounding foliage.
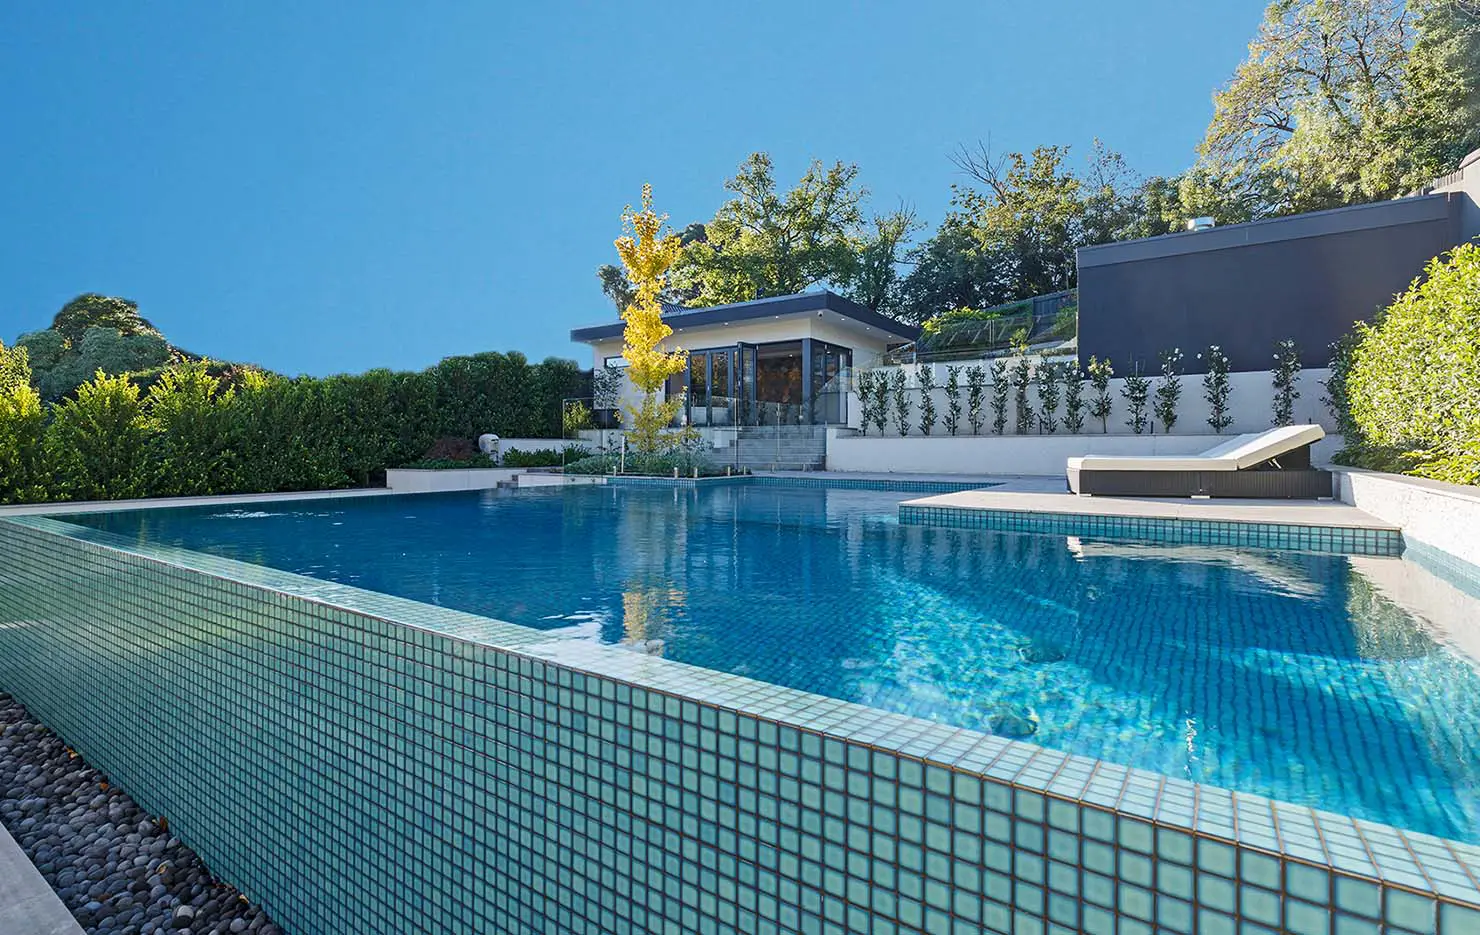
“When selecting glass mosaic tile for a pool, especially for a feature as prominent as an infinity edge, always get physical samples and look at them in the sun and in the shade.”
The color and reflectivity of glass tile can change dramatically depending on the light. A tile that looks perfect under showroom lights might look completely different in the bright, direct sun of your backyard. Also, be sure to view it both dry and wet, as water will deepen the color significantly. This extra step ensures there are no expensive surprises after the tile is installed.
28. Minimalist Grey Concrete Pool Edge with a Raised Dark Deck
This serene, modern look is all about proportion and restraint. The formula is roughly 70% minimalist surfaces + 30% natural elements. The light grey concrete and dark grey deck make up the majority of the visual weight, establishing a clean, two-toned neutral base. The deep blue water and the green foliage of the palm tree provide the essential 30% of organic color and shape, breathing life into the otherwise austere design. The light purple loungers are a clever touch, adding a small pop of pastel color without overwhelming the calm, minimalist vibe.
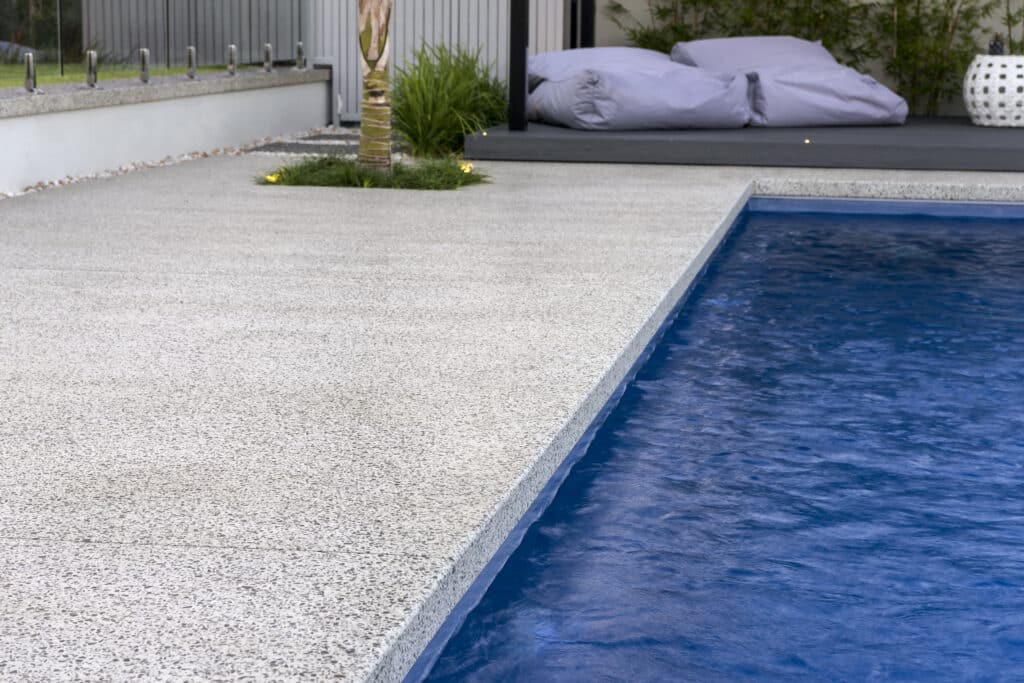
“This design is incredibly versatile and works well for a variety of pool sizes, from small plunge pools to larger lap pools.”
The key is maintaining the proportion of the decking. For a smaller pool (around 10×20 feet), the raised deck area should be of a similar square footage to provide balance. For a larger pool, the deck can be a smaller percentage of the overall space, acting as a defined ‘zone’. The minimalist concrete edge works universally, as its simplicity doesn’t compete for attention, allowing the pool size and shape to be the hero.
29. Deep Reddish-Brown Coping on a Light Blue Mosaic Tile Pool
The success of this design lies in its bold and confident use of complementary colors. The deep, warm reddish-brown of the coping and pavers sits directly opposite the cool, light blue of the mosaic tile on the color wheel. This high level of color contrast creates a vibrant, energetic visual that is immediately engaging. The use of dark slate-colored tiles for the interior steps adds a third, grounding neutral that connects the warm and cool tones. It’s a classic color combination that feels both timeless and full of personality. This is a warmer, more rustic take on the color contrast seen in Idea #17.
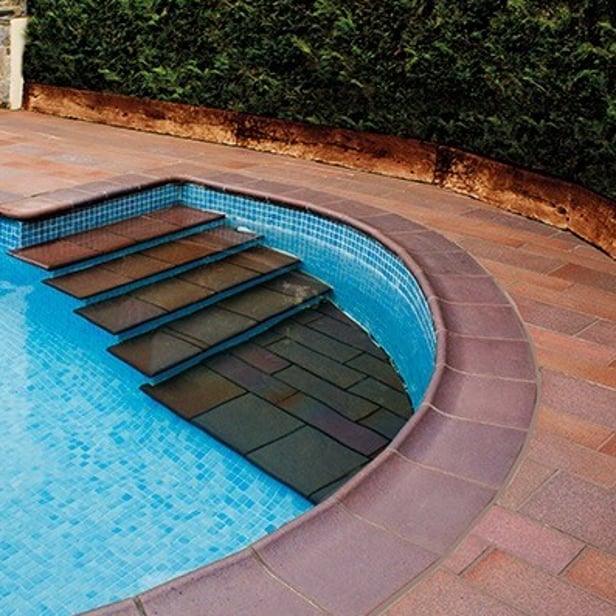
“The combination of light blue mosaic tiles and reddish-brown pavers requires some specific upkeep.”
Light-colored grout used with the blue mosaics can be prone to staining from algae or minerals. It will require regular brushing. The reddish-brown pavers, especially if they are natural stone like terracotta or certain sandstones, are often porous. They will need to be sealed every 1-2 years to prevent them from fading in the sun and to protect them from staining and salt damage, which can cause the surface to flake or spall over time.
30. Modern Grey Paver Pool Deck with an Integrated Spa and Waterfall Wall
This cohesive, modern look requires careful planning before you even break ground. Here’s your pre-build checklist:
- Have you decided on the final location and elevation for your pool equipment? The pumps and heaters for both the pool and spa, plus the waterfall, need to be accessible but also hidden for this clean look to work.
- Are all materials rated for poolside use? Ensure the decorative tiles for the waterfall wall are frost-proof (if applicable in your climate) and the pavers have a good slip-resistance rating.
- Has the plumbing been fully engineered? A multi-feature system like this requires complex plumbing to run the spa jets, main filter, and waterfalls. This is not a place to cut corners.
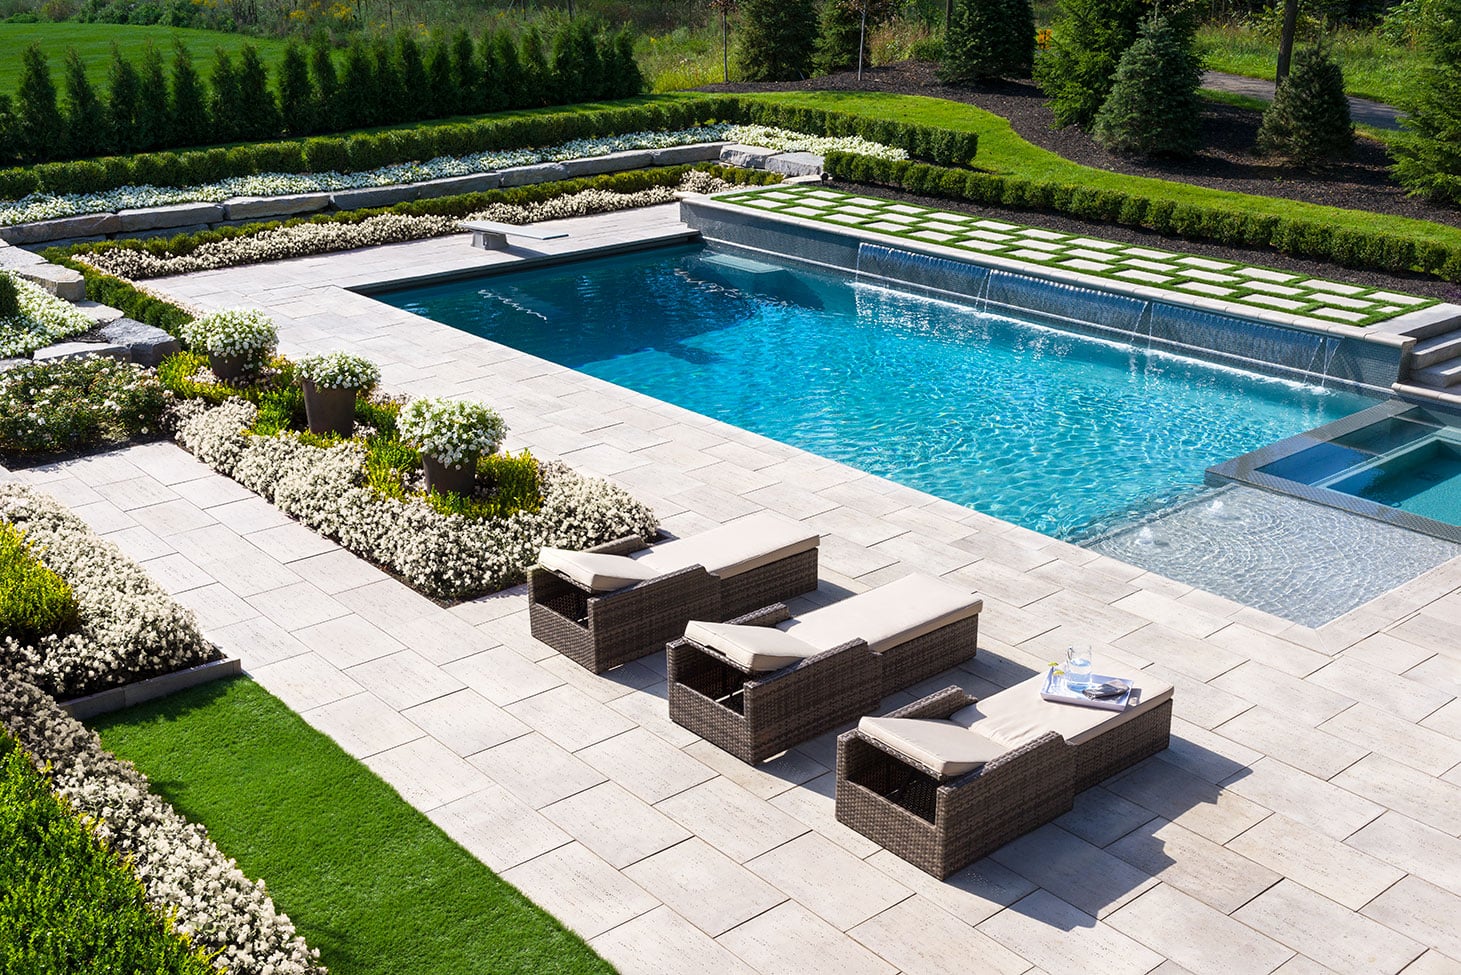
“For a sleek, contemporary look like this, choose a ‘remodeled’ or ‘pencil’ edge for your concrete pavers.”
These pavers have a very small, 45-degree chamfer (bevel) on the edge, rather than a heavily tumbled or rounded edge. This allows them to be laid very close together, minimizing the width of the joint lines. The result is a deck that reads as a more cohesive, flat plane, enhancing the modern aesthetic and creating a smoother surface underfoot. Avoid tumbled pavers, which are designed to look rustic and aged, as they would contradict the clean-lined goal here.
Your Pool’s Perfect Frame Awaits
Hopefully, these 30 distinct pool edging ideas have shown you just how much the right detail can transform a simple basin into a deliberate, beautiful design feature. It’s the frame for your backyard masterpiece. Now get back to your Pinterest board and start creating the outdoor oasis you’ve been dreaming of!