You know that feeling when you save a dozen gorgeous shrubbery landscaping photos to your Pinterest board, only to realize you have no clue where to start? We get it. After filtering through hundreds of options across local garden centers, Lowe’s, and specialty nurseries, we narrowed it down to the 31 ideas that actually deliver on style and substance. This guide showcases 31 distinct looks, from formal tiered gardens to lush, natural front yards, getting into the specifics of plant pairings, textures, and layouts. And stay until the end—we break down the most common mistakes that can ruin these stunning landscapes. 📌 Save this to Pinterest for later — you’ll want to revisit these ideas.
1. Vibrant Pink and Red Shrubs Against a Traditional Beige Home
This landscape sings because of a brilliant use of color theory and repetition. The vivid fuchsia and red of the flowering shrubs create a powerful contrast against the neutral beige siding and the deep green of the shutters and hedges. This makes the colors pop in a way they wouldn’t against a more complex background. Furthermore, the repetition of the soft, mounded shape in the shrubs creates a pleasing rhythm that guides the eye across the entire front yard, making a grand home feel cohesive and welcoming rather than imposing.
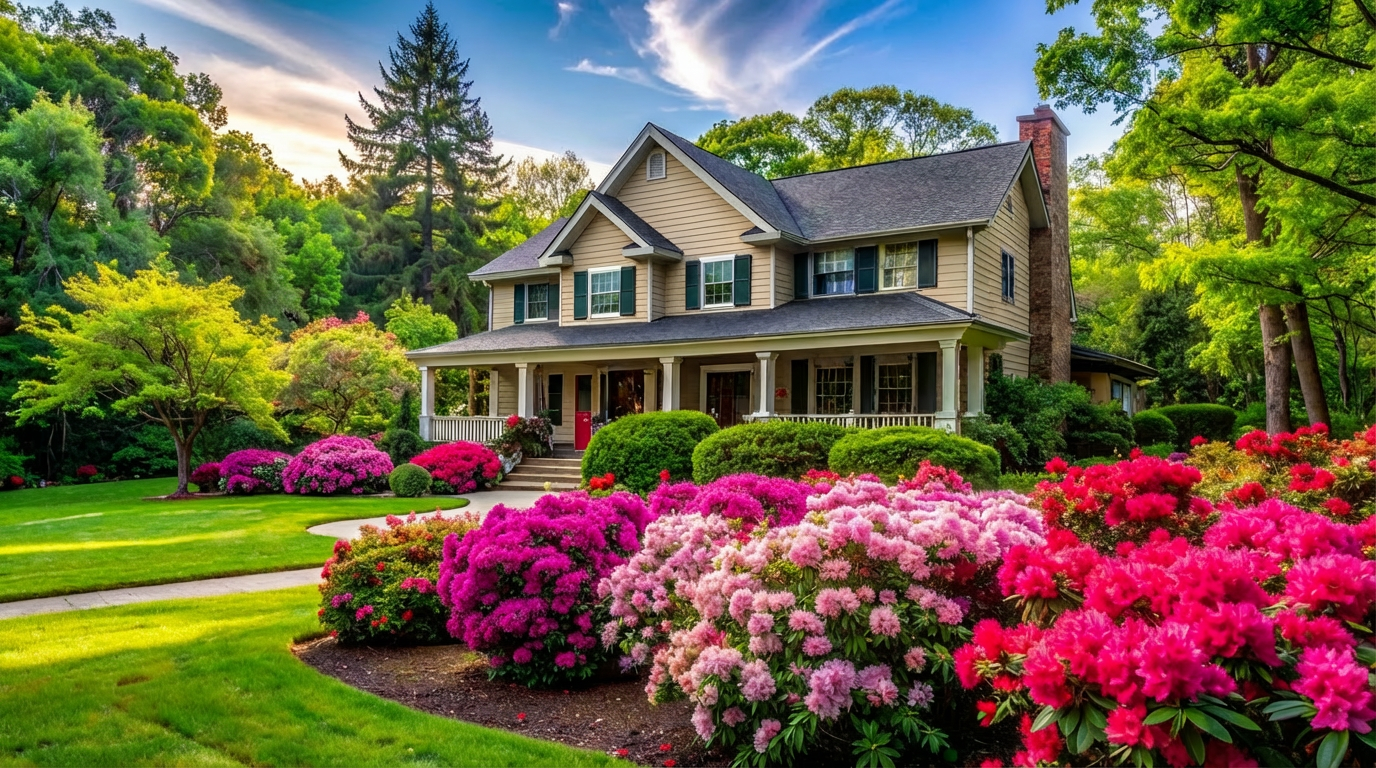
“For a full, dense look with flowering shrubs like these, plant them in a zig-zag pattern in two staggered rows.”
Space individual plants about 75% of their mature width apart—so if a shrub gets 4 feet wide, plant them 3 feet apart. This prevents that rigid ‘soldiers in a row’ look and encourages the shrubs to grow together into a single, undulating mass of color and texture. This technique is key to achieving that professionally landscaped, abundant feel, even with fewer plants than you’d think.
2. Formal Garden Path with an Ornate Stone Urn Focal Point
The single most important element here is the ornate stone urn. Remove it, and you’re left with a perfectly pleasant but somewhat aimless collection of plants. The urn acts as a powerful focal point, giving the entire composition an anchor and a sense of purpose. Its classical shape and light grey stone texture add a layer of formal elegance and history that elevates the surrounding topiaries and colorful flower beds from simple garden plantings to a structured, intentional design statement. It’s the punctuation mark at the end of a beautiful sentence.
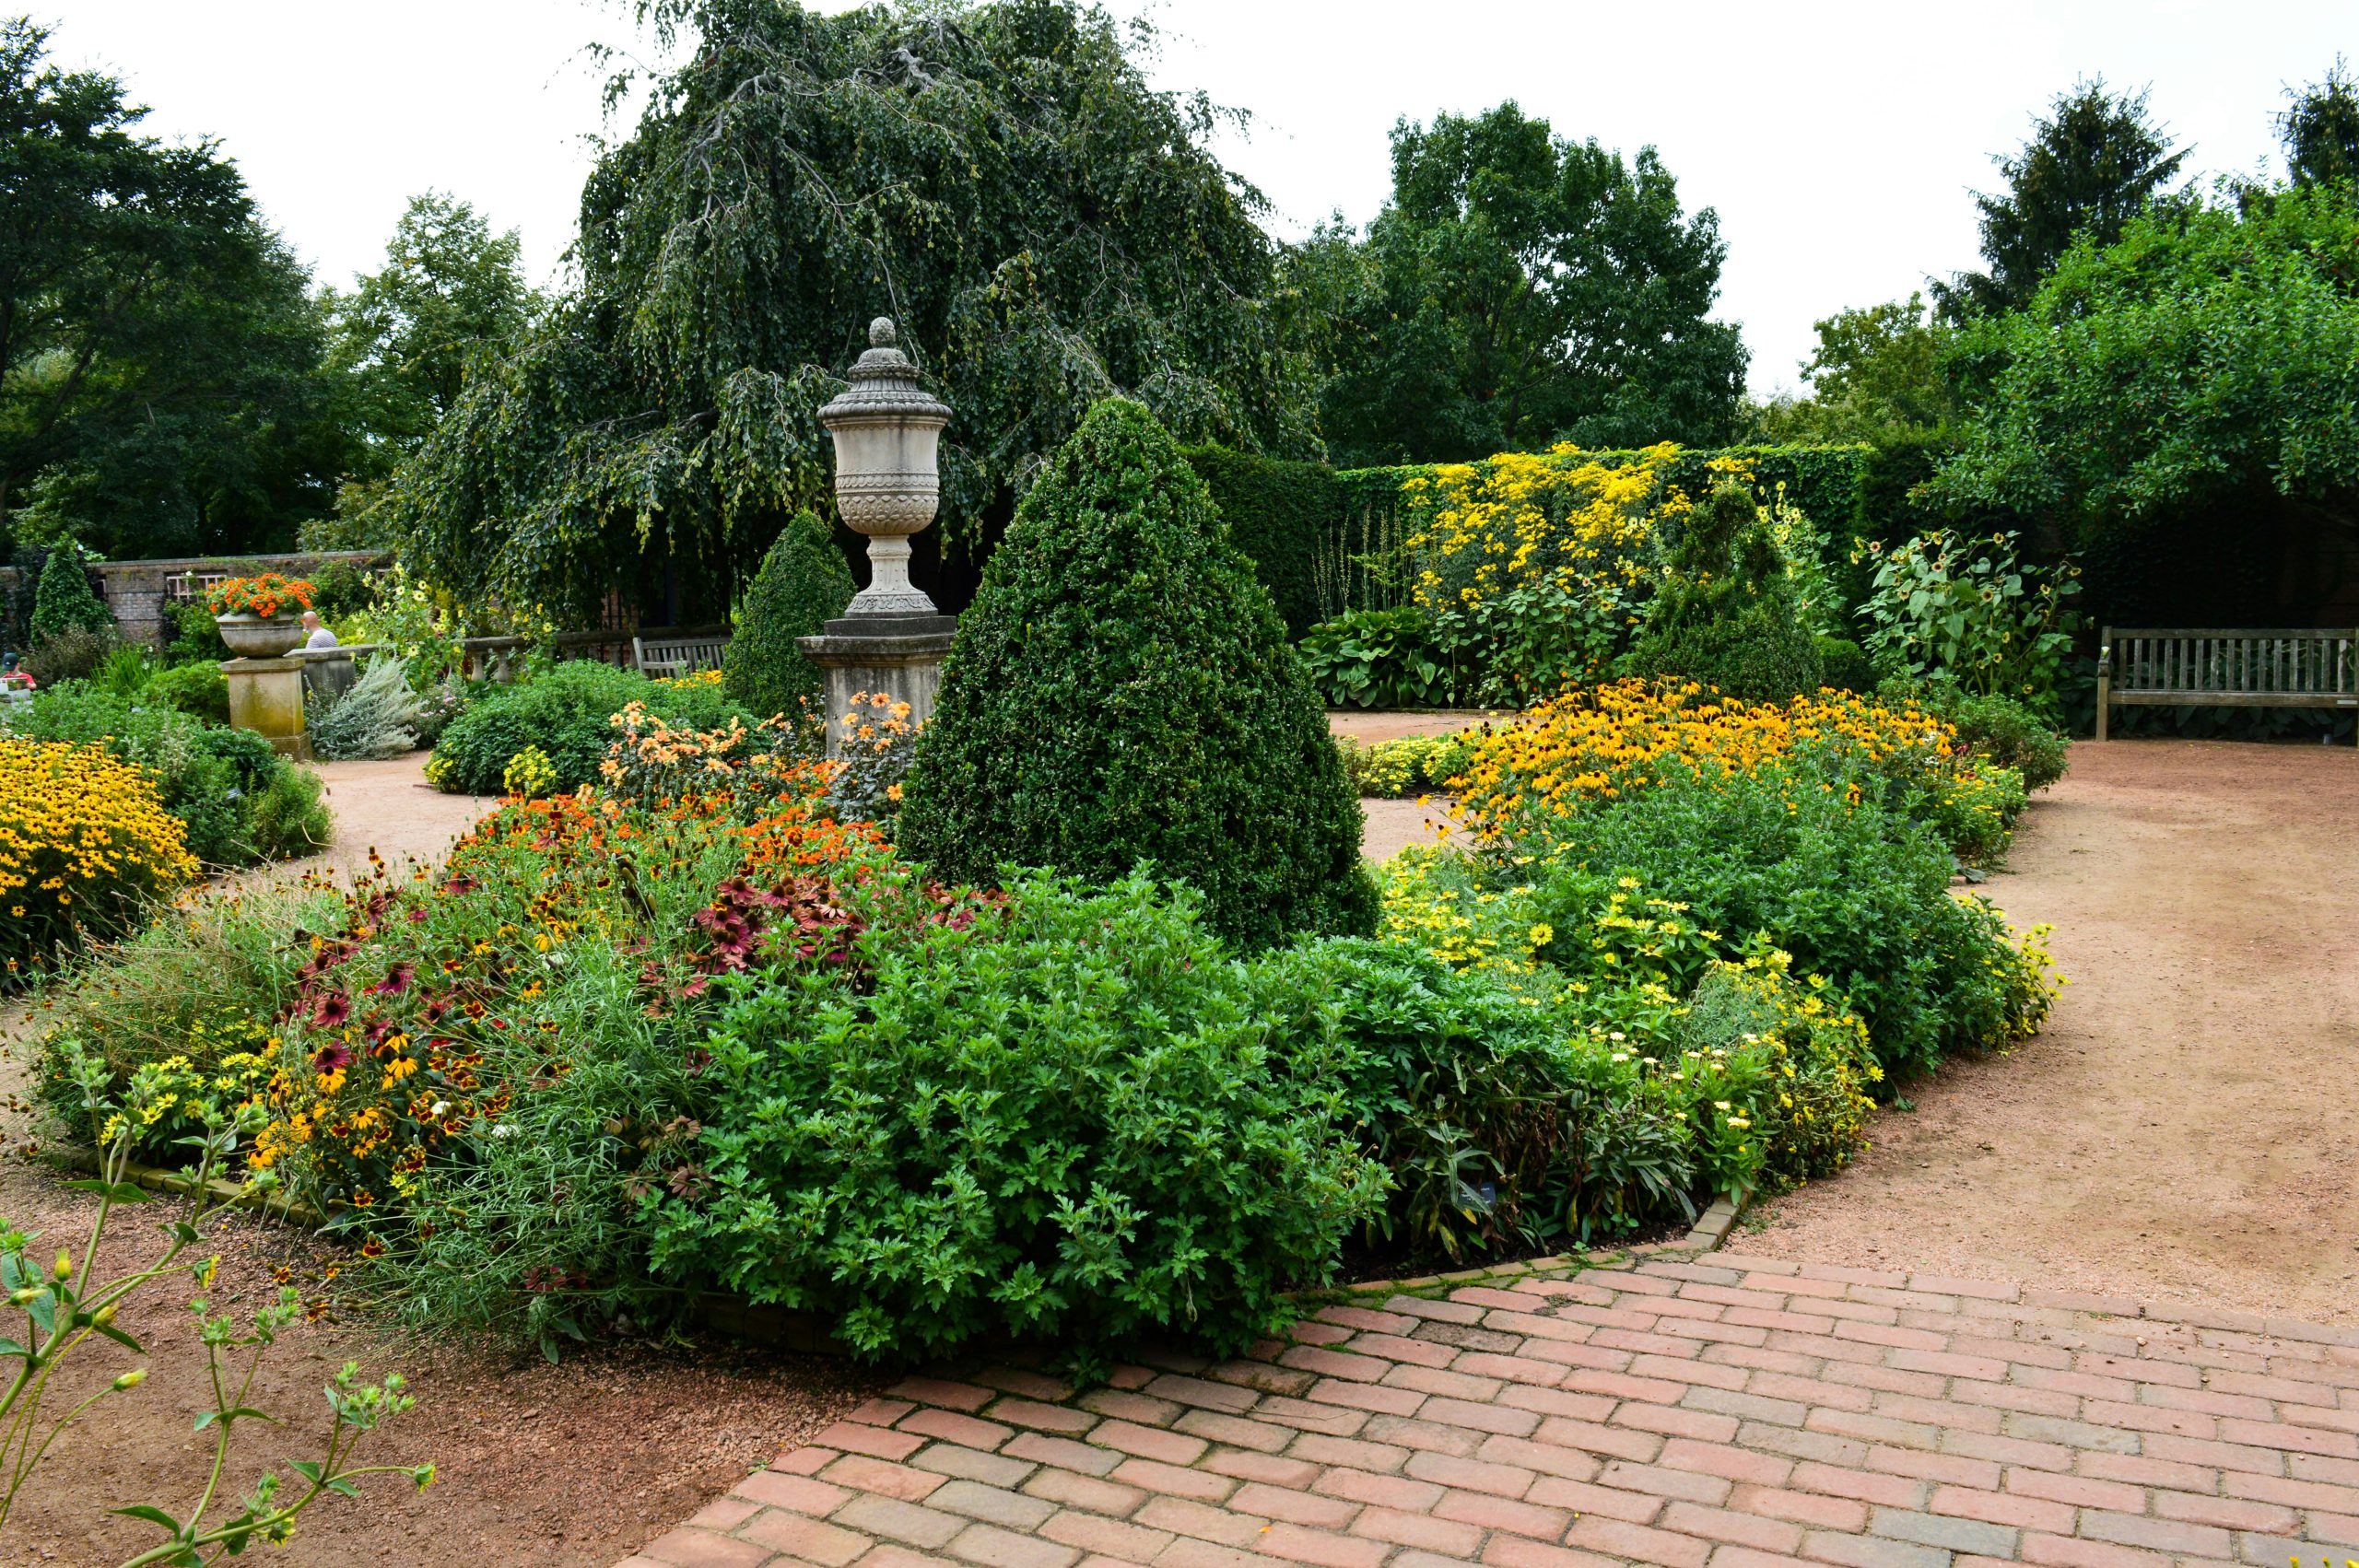
“This formal, focal-point-driven look is surprisingly adaptable.”
For a smaller garden or courtyard (around 150-250 sq ft), a single urn with two small topiaries can create a similar stately effect. For a grander space like this one (500+ sq ft), you can introduce multiple focal points or use a longer, more dramatic path. No matter the size, ensure your main path is at least 3 feet wide; anything narrower feels cramped and diminishes the formal, inviting feel. The conical topiaries should be scaled to the urn, roughly 1.5 times its height.
3. Winding Gravel Path Through Lush, Naturalistic Shrubbery
The visual formula for this serene escape is all about immersive layering. Think of it as 60% structural greenery (the dense canopy of mature trees and varied mid-size shrubs) + 30% soft, textural accents (the tall, wispy spider-like flowers and grassy areas) + 10% rustic pathway (the light brown gravel). This ratio ensures you feel enveloped by nature, not just looking at it. You could swap the gravel for wood mulch and the pink flowers for yellow rudbeckia, and that 60/30/10 balance would still deliver the same lush, tranquil vibe.
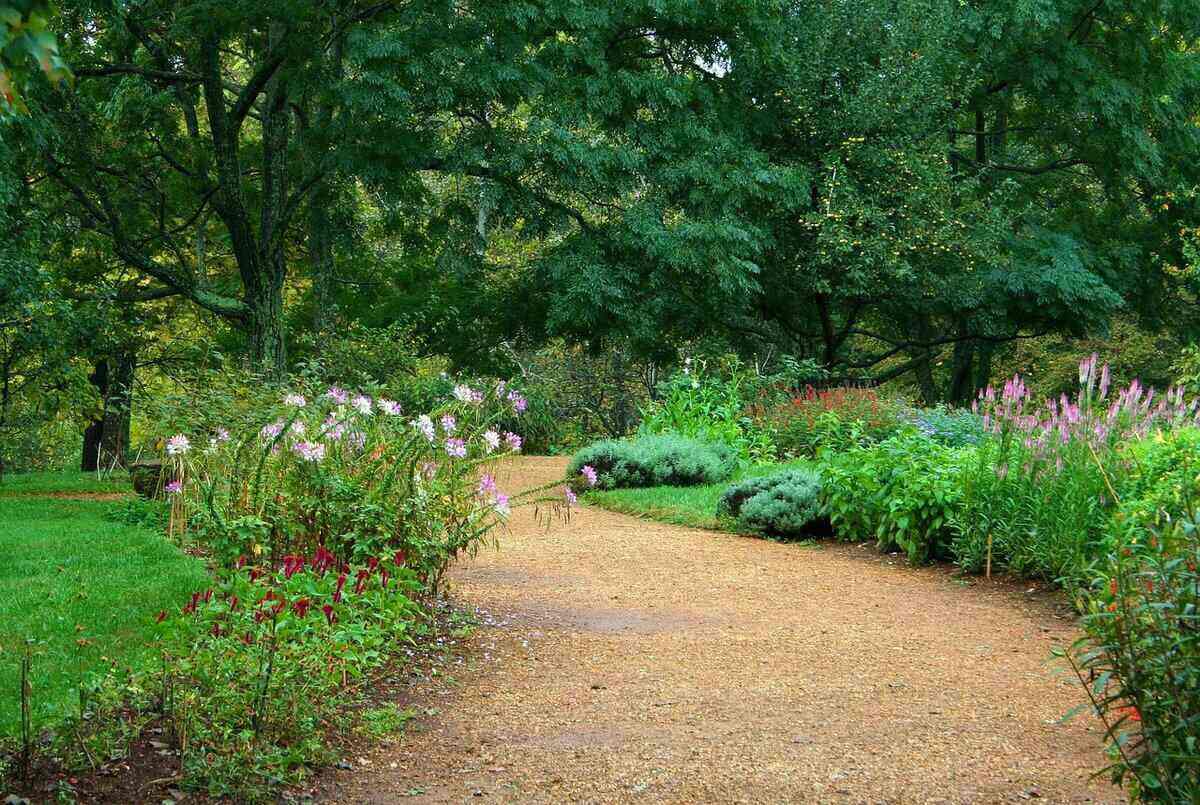
“Let’s be honest: a gravel path is a dream for its aesthetic and that satisfying crunch, but it’s not a set-it-and-forget-it feature.”
Weeds will absolutely try to colonize it, so laying down a high-quality landscape fabric underneath is non-negotiable. Even then, you’ll have to do some occasional hand-weeding. The gravel will also settle and get displaced over time, especially on a curve, requiring you to rake it back into place and top it off with a fresh bag every few years to keep it looking sharp.
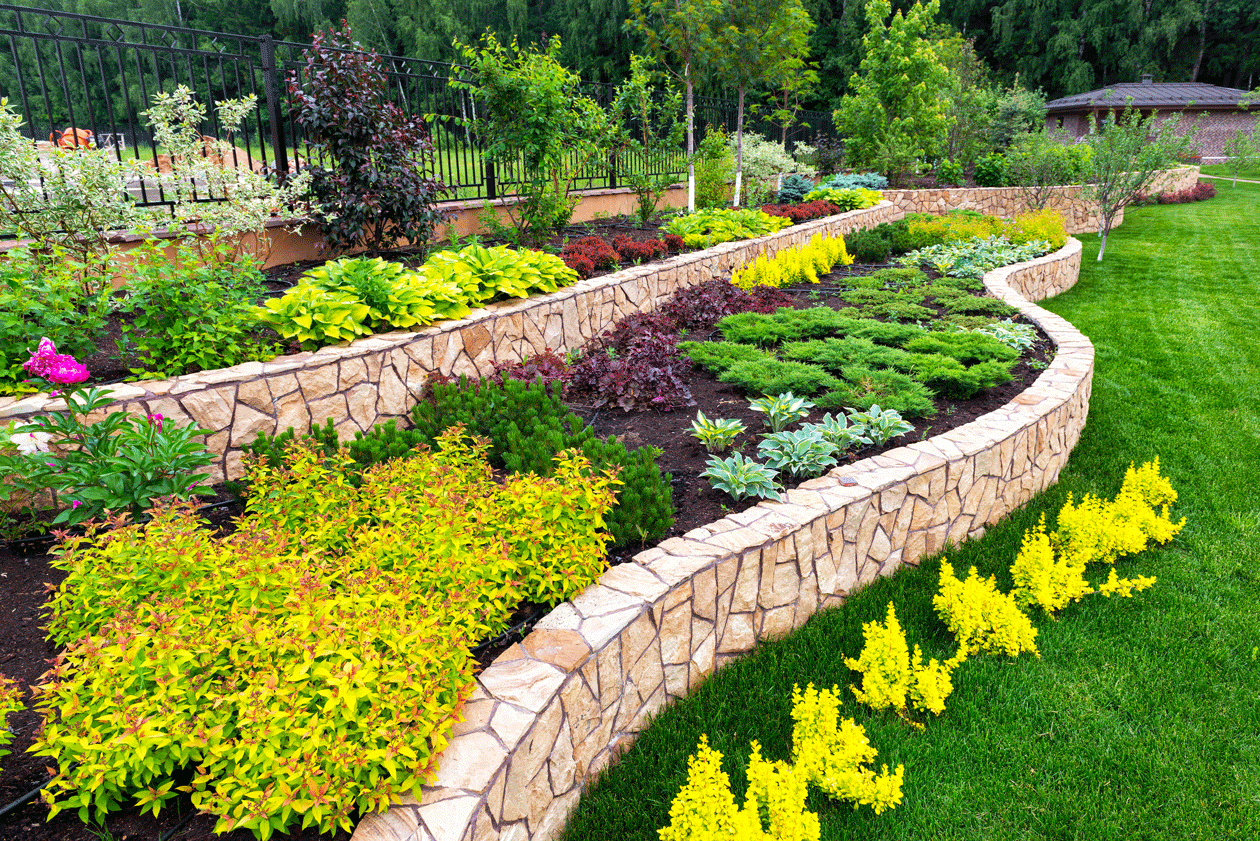
4. Winding Tiered Stone Walls with Rows of Colorful Shrubs
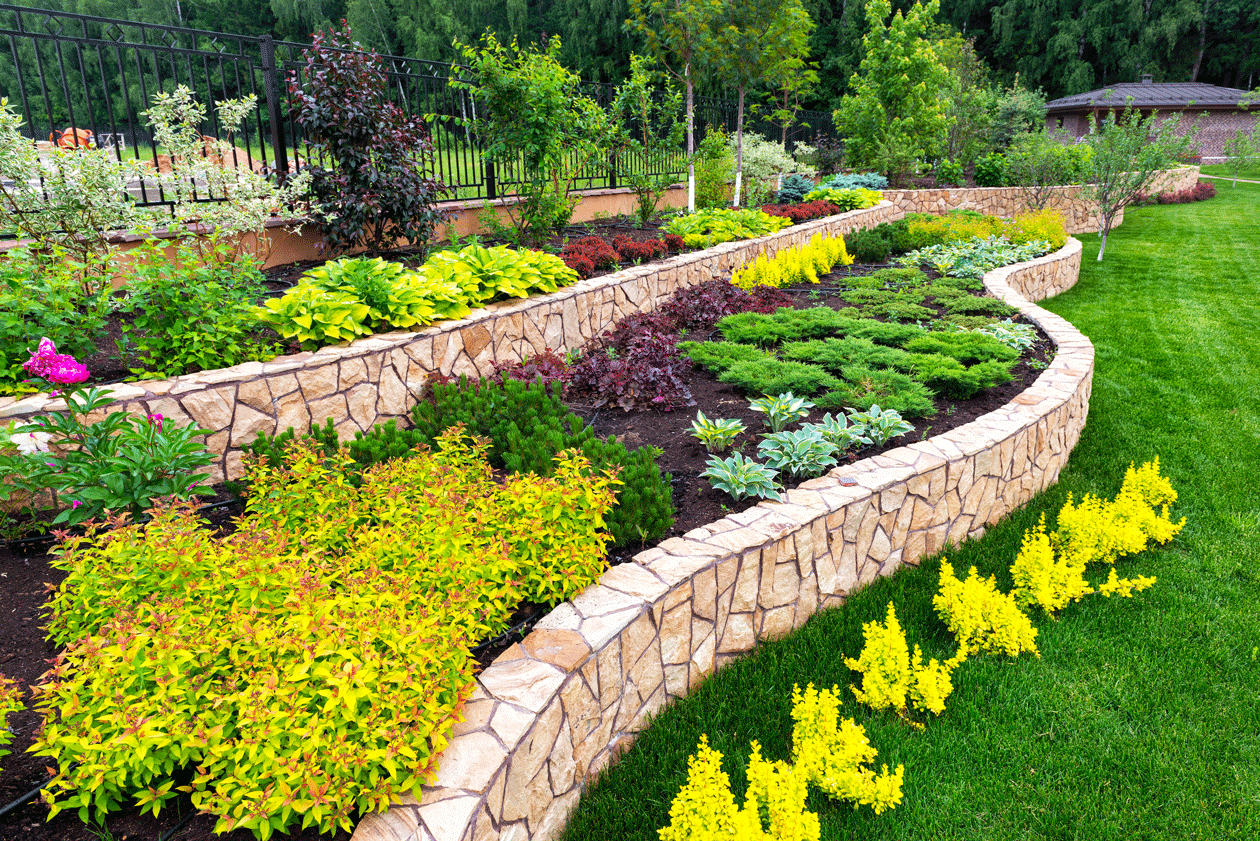
Recreating this multi-tiered, professionally installed look is a significant investment, primarily due to the stonework.
“Stone & Materials: $3,000 – $7,500 (for natural stone, gravel for backfill, land”
- Stone & Materials: $3,000 – $7,500 (for natural stone, gravel for backfill, landscape fabric)
- Labor for Walls: $5,000 – $12,000 (skilled masonry is crucial for longevity)
- Shrubs & Plants: $1,500 – $4,000 (for a mix of mature shrubs and perennials)
- Soil & Mulch: $500 – $1,200
- TOTAL: $10,000 – $24,700
- Budget alternative: For a similar tiered effect at about 40% of the cost, use interlocking concrete retaining wall blocks from a home improvement store and choose smaller, younger plants that will fill in over a couple of seasons.
To create a vibrant, layered planting scheme like this, follow these steps. (Time: 4-6 hours for planting; Cost: $500+ for plants):
- Start with the back row. On the highest tier, plant your tallest shrubs or ornamental trees. These will form the backdrop.
- Work your way forward. In the middle tier, choose plants that are about half to two-thirds the height of the back row plants. Arrange them in clusters or rows, as seen here with the red foliage.
- Define the front edge. On the lowest tier, use low-growing, mounding, or spreading plants. This creates a soft edge and makes the transition to the lawn feel intentional.
- Consider color and texture. Alternate textures (e.g., fine-leafed grasses next to broadleaf shrubs) and repeat colors on different tiers to create a sense of rhythm and unity.
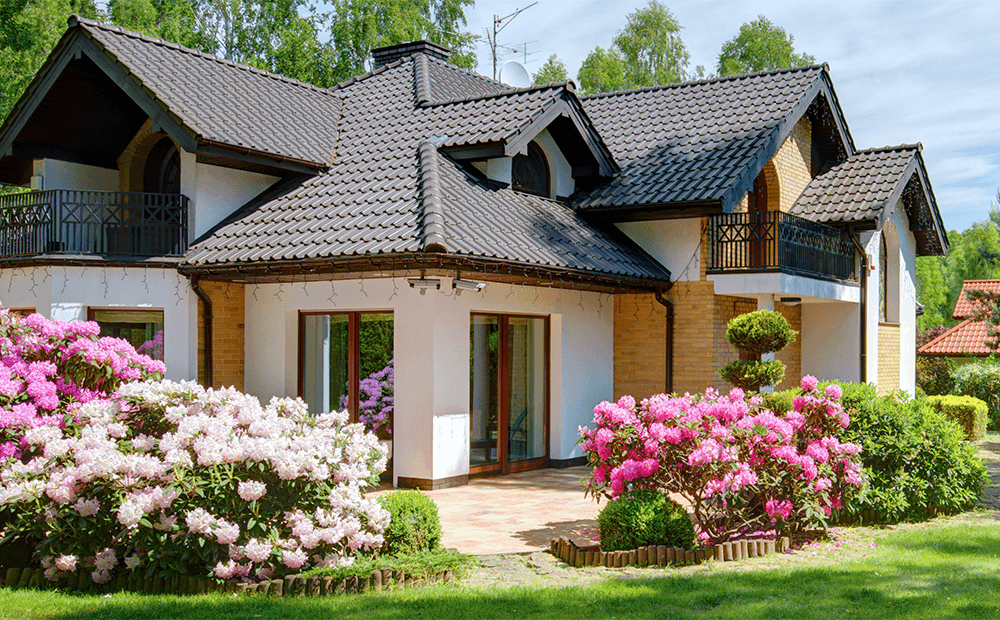
5. Vibrant Pink Flowering Shrubs Framing a White Stucco Home
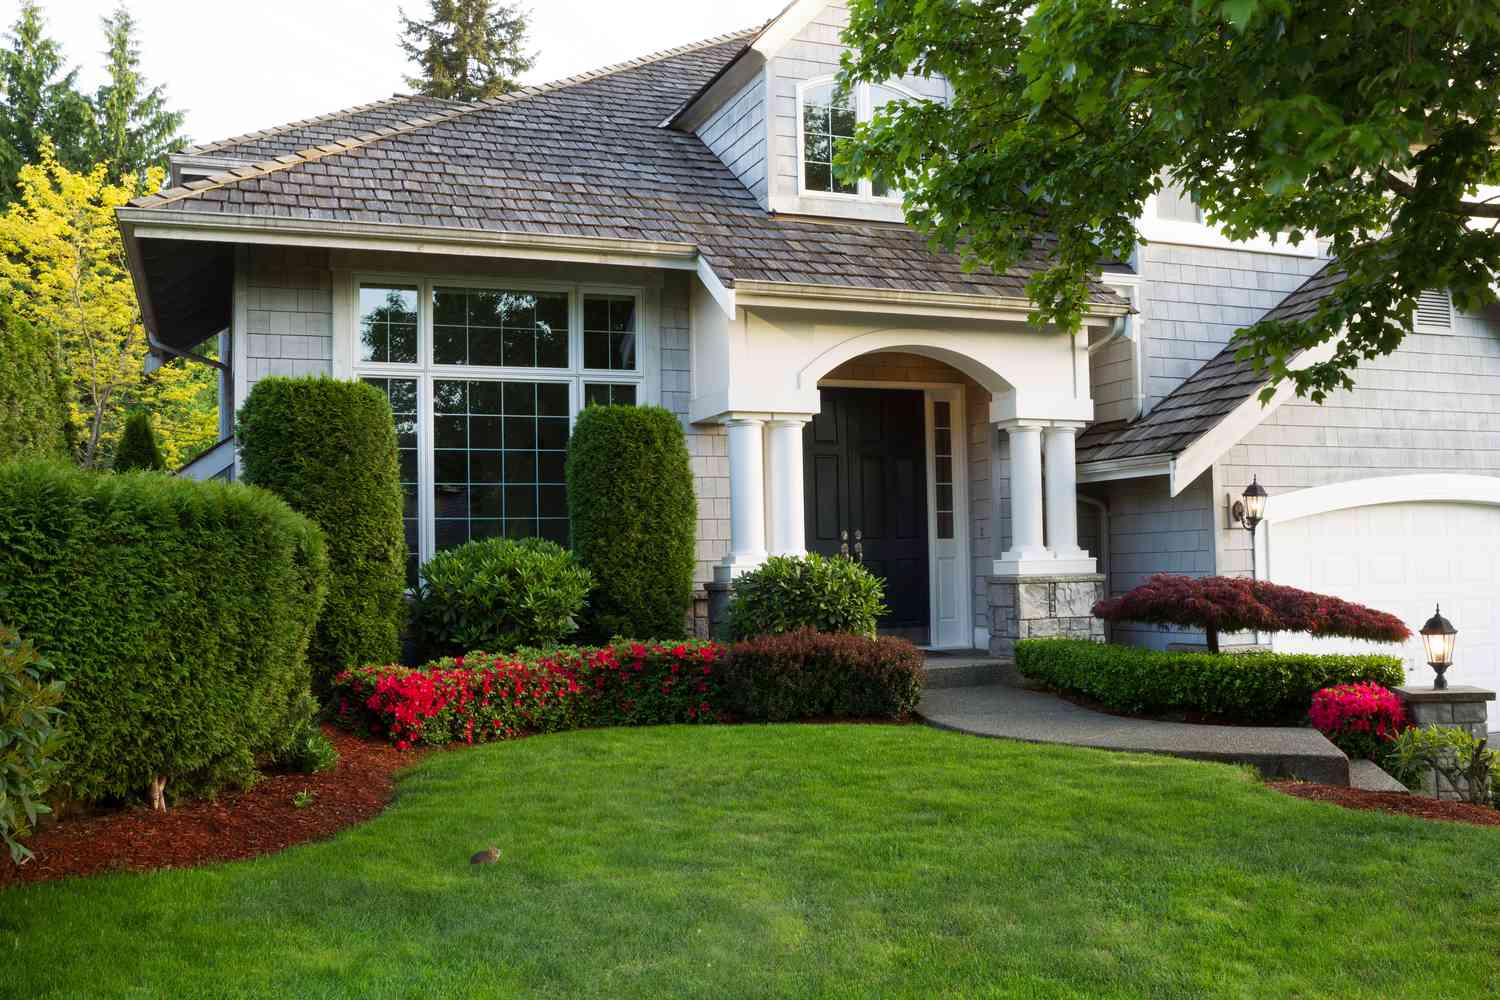
This design is a masterclass in balancing hard and soft textures. The crisp, clean lines and smooth surface of the white stucco facade are beautifully softened by the billowy, organic shapes of the bright pink flowering shrubs. It’s a classic pairing for a reason. The deep green of the manicured hedges provides a solid block of color that grounds the vibrant pinks, while the warm terracotta patio tiles prevent the white and grey palette of the house from feeling too cold. The organic log edging is a final rustic touch that connects it all to the garden. Compare this informal look with the structured hedges in Idea #27.
“Those gorgeous, cloud-like pink blooms don’t happen by accident.”
Shrubs like these (likely azaleas or rhododendrons) require a very specific pruning schedule. The key is to prune them within a few weeks after they finish flowering in late spring or early summer. If you wait too long and prune in the fall or winter, you will cut off the flower buds that have already formed for next year’s show, resulting in a year of no flowers. It’s a heartbreaking and very common mistake.
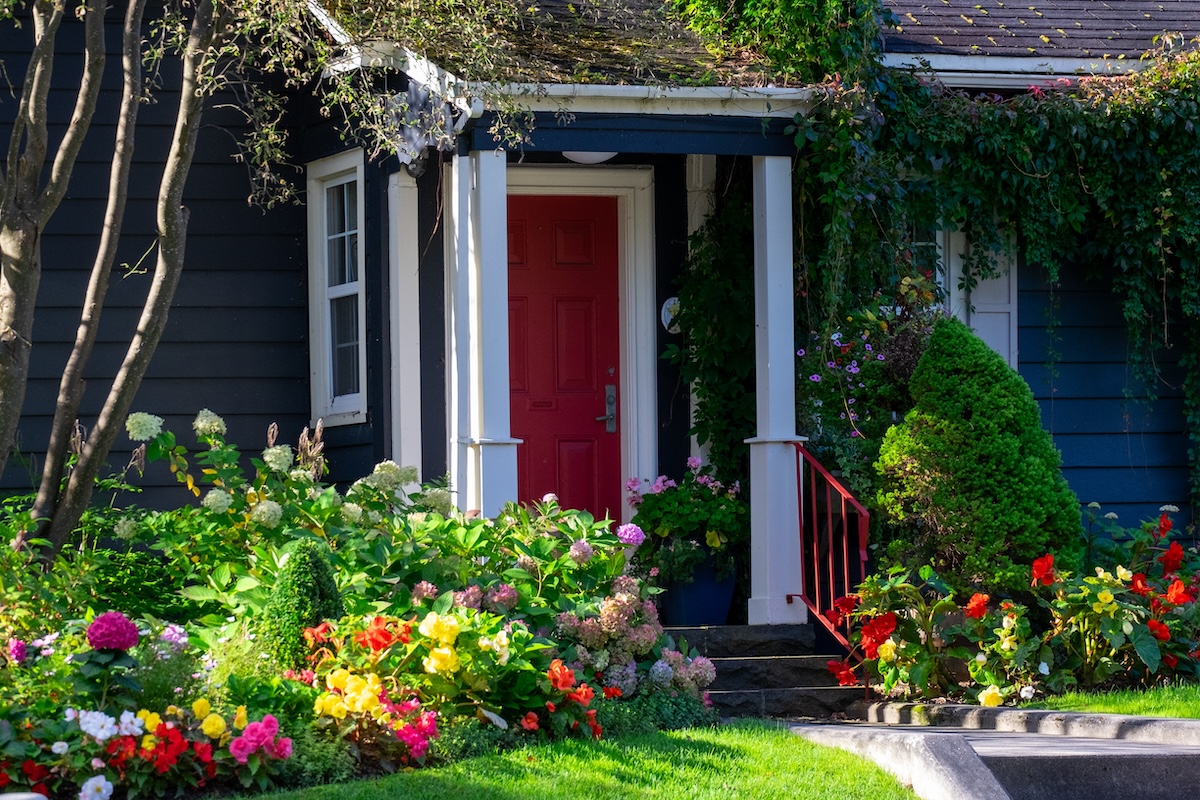
6. Colorful Flower Beds and Lush Greenery Around a Navy House
When working with a dark house color like this deep navy, don’t be afraid to go bold with your plant choices. The secret is to use a significant amount of white to break things up. Here, the crisp white porch pillars and trim act as a frame, preventing the navy siding and dense greenery from becoming a dark, muddled mass. That bright red door provides a perfect, high-contrast focal point. For your plants, choose flowers with saturated colors (pinks, purples, yellows) and foliage with hints of chartreuse or silver to pop against the dark backdrop.
“making this whole scene feel so inviting and complete is the sheer density of the plantings.”
It’s not just a few shrubs in a line; it’s a deep, layered bed where plants are literally spilling over the stone steps and climbing the porch pillars. This abundance creates a sense of establishment and generosity. If you were to remove half the plants, the home would suddenly feel much starker and less welcoming. The magic is in the messy, wonderful overflow of life right up to the front door.
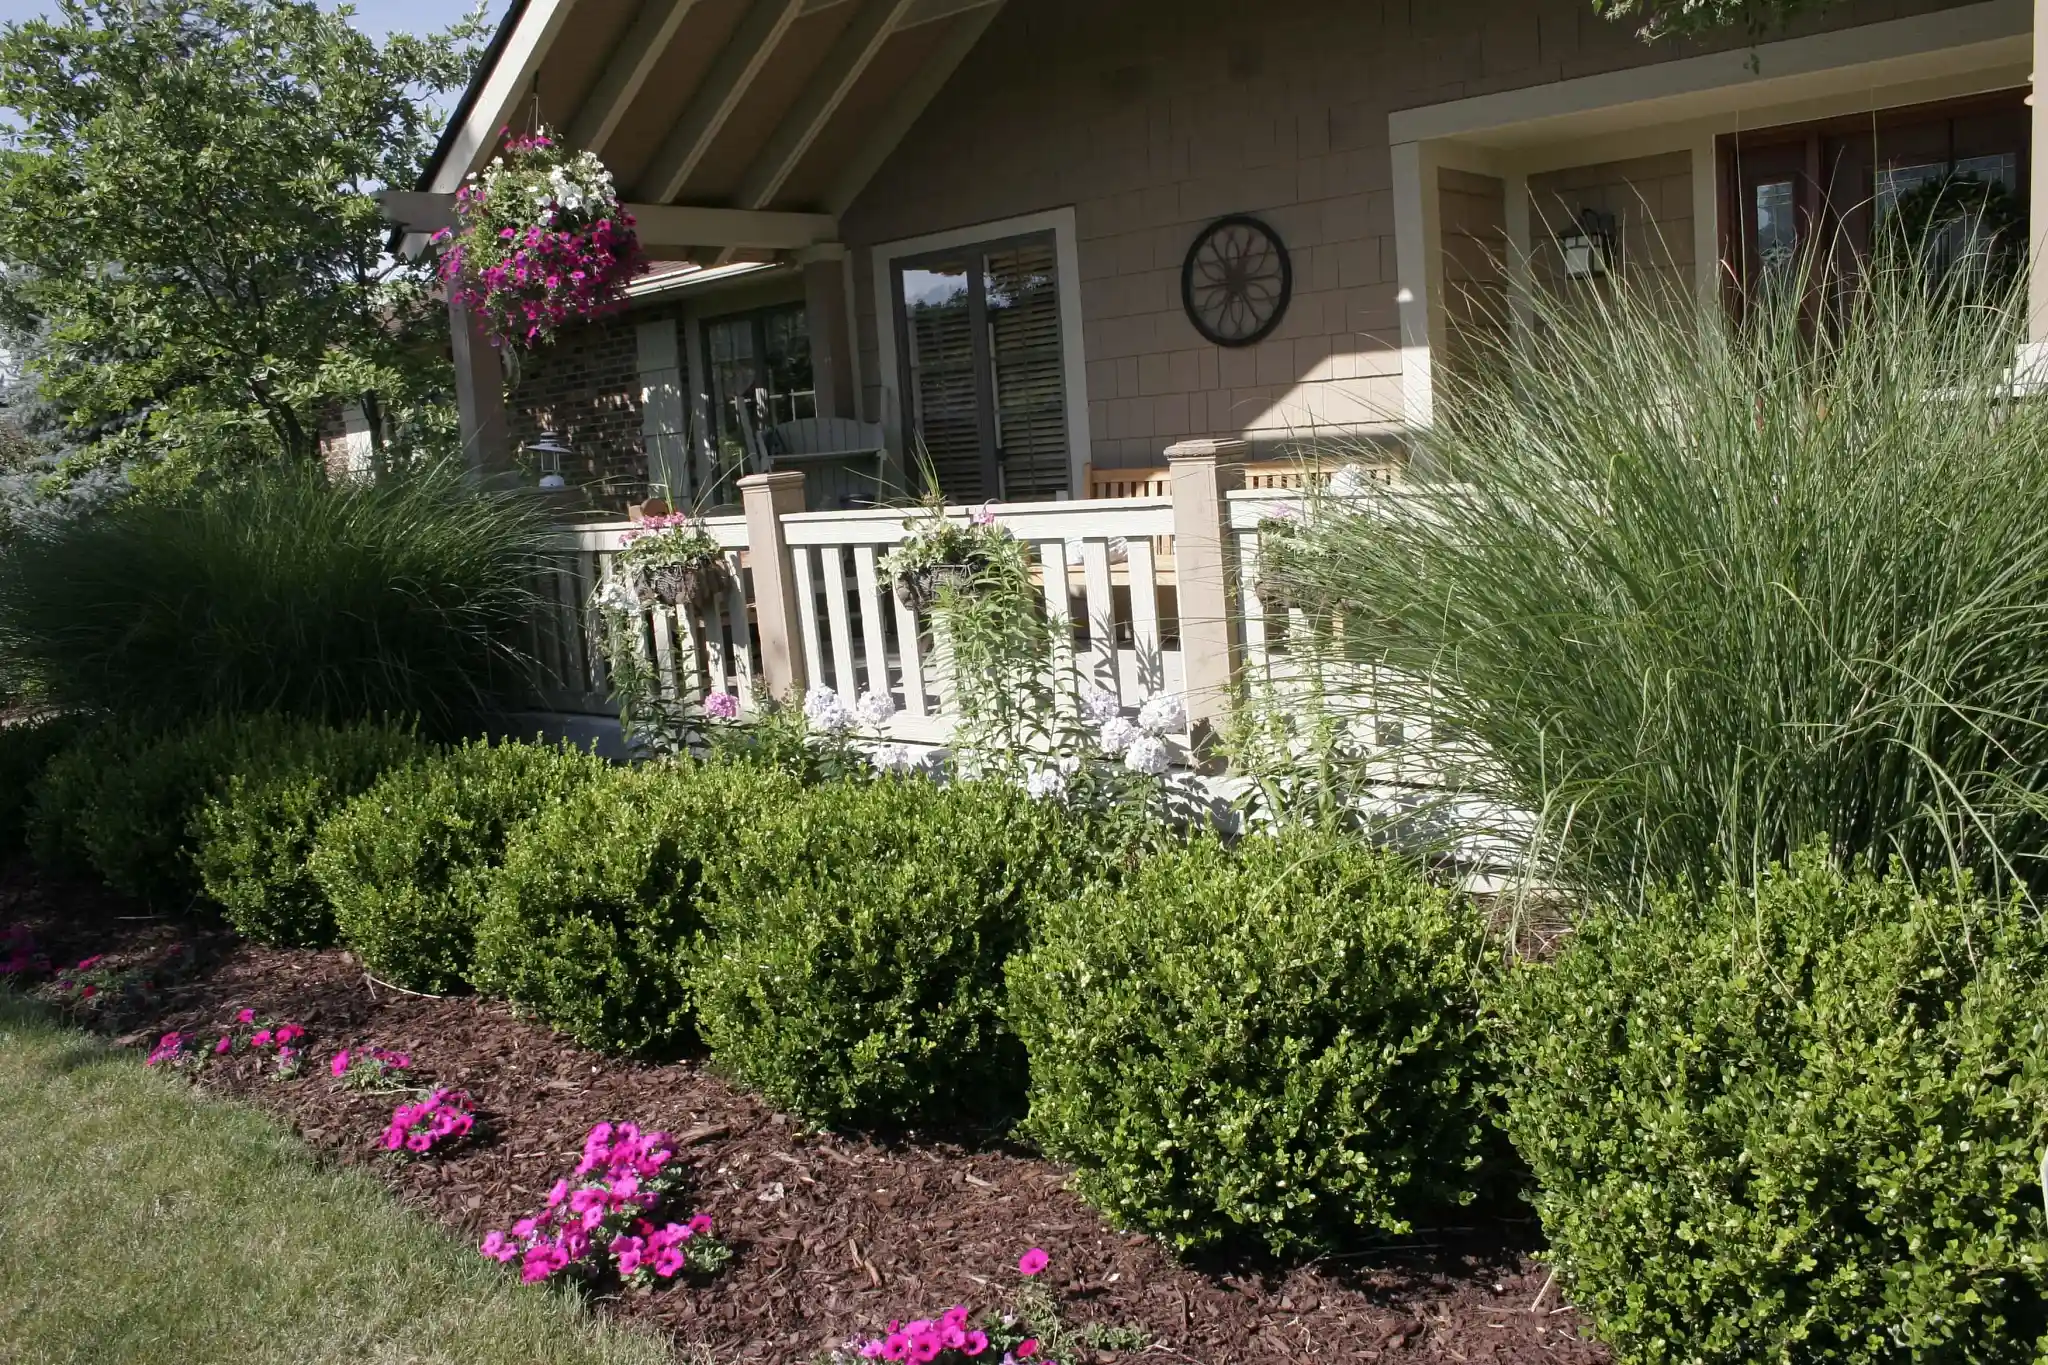
7. Manicured Shrubbery with Ornamental Grass and Pink Petunias
You can absolutely achieve this lush, layered look on a real-world budget. The key is buying smaller plants and being patient. Instead of large, balled-and-burlapped shrubs, opt for 1-gallon pots from a big-box store like Lowe’s or The Home Depot for around $15-$25 each. A flat of pink petunias for the front border is about $20. The ornamental grasses might be $30 each for a decent size. Forgo the hanging baskets for the first year. All in, you could install a 20-foot section like this for under $300 in plants and mulch if you provide the labor.
“The visual success here comes from a simple formula of texture and height variation.”
Let’s call it 50% structural green (the rounded shrubs) + 30% airy texture (the tall, wispy ornamental grasses) + 20% seasonal color (the bright pink petunias). The shrubs provide year-round form, the grasses add movement and a modern touch, and the annuals deliver that unapologetic pop of color. You could swap the petunias for white alyssum or the ornamental grass for feather reed grass, and the pleasing composition would remain intact.
8. A Perfect Row of Spherical Boxwoods Bordering a Lawn
The power of this design lies in its clean, graphic simplicity. The row of perfectly spherical shrubs creates a strong, repeating line that acts like a picture frame for the lawn and the stone house beyond. This repetition is incredibly pleasing to the human eye. The stark contrast between the bright green of the shrubs, the deep brown of the mulch, and the lush green of the lawn makes each element read clearly and distinctly. It’s an organized, intentional look that signals care and attention to detail. This is a more formal take on a border than the mixed planting seen in Idea #26.
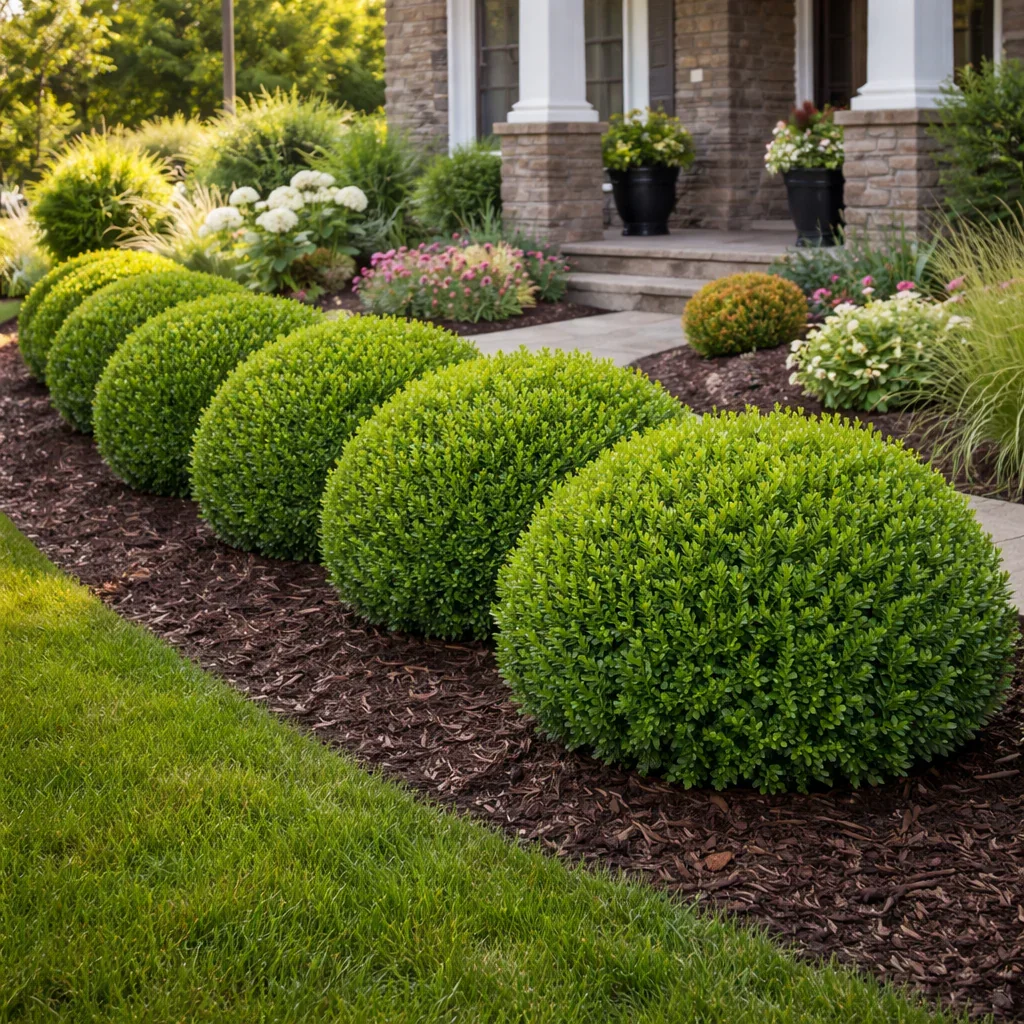
“Achieving and maintaining those perfect spheres is a serious commitment.”
Boxwoods are relatively slow-growing, but they require shearing at least once, sometimes twice a year, to keep that tight, formal shape. This isn’t a quick pass with the hedge trimmers; it’s a careful, deliberate process. These shrubs are also susceptible to pests and diseases like boxwood blight, which can be devastating. This is a high-maintenance choice that looks fantastic when done right, but can look messy very quickly if neglected.
9. Layered Shrubbery with Flowering Plants and Boulders
Before attempting a dense, naturalistic planting like this, tick these items off your list:
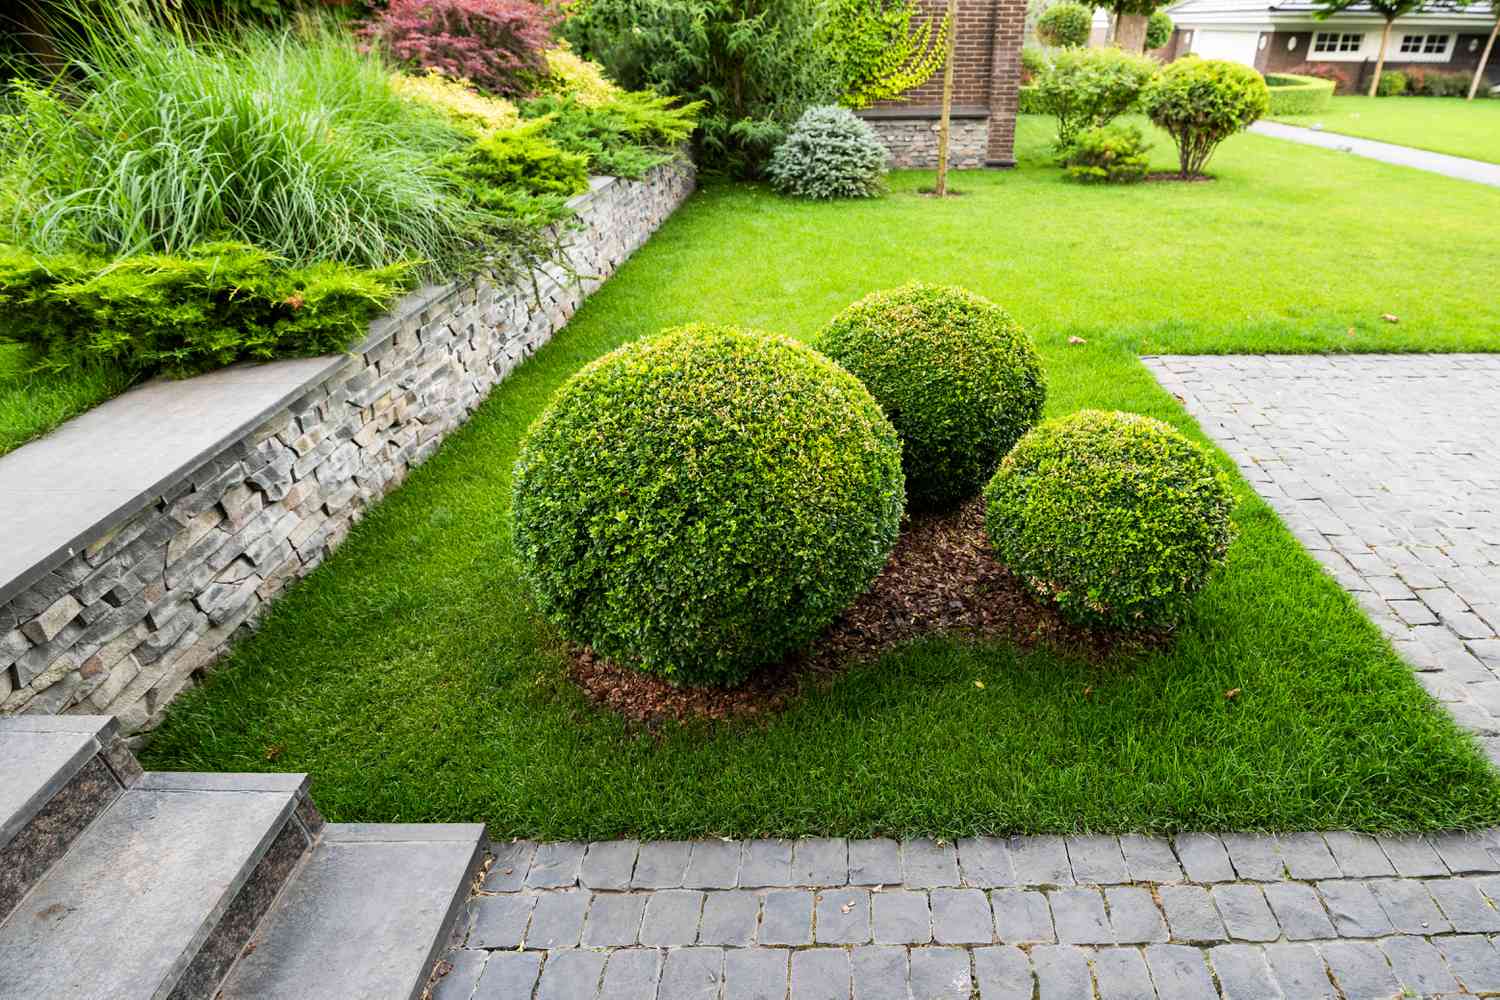
“Confirm your sun exposure.”
Track the sun for a full day. Does this spot get 6+ hours of direct sun (full sun), 4-6 hours (part sun), or less than 4 (shade)? Your plant choices depend entirely on this.Test your soil drainage. Dig a 1-foot-deep hole, fill it with water, and let it drain. Fill it again and time how long it takes. If it takes more than 4 hours, you have drainage issues that need to be fixed by adding organic matter.Measure the mature size of your space. Don’t just measure the bed. How tall can plants get before they block a window? How wide before they encroach on a walkway?Set a realistic budget. A dense look like this requires a lot of plants. Price them out beforehand to avoid sticker shock.
When incorporating boulders into a landscape, the key is to make them look like they belong. Bury at least one-third of each boulder into the ground. This mimics how rocks naturally sit in the earth and gives them a sense of permanence and stability. Simply placing them on top of the mulch will always look artificial. Arrange them in odd-numbered groups (3 or 5 is a classic choice) and orient them so their natural lines and strata flow in the same general direction for a more cohesive, natural appearance.
10. Manicured Shrub Garden with Layered Greenery and a Light Gravel Path
The element holding this entire design together is the light-colored gravel path. It’s more than just a way to get from A to B; it’s a graphic design tool. The bright, clean line of the path carves through the deep greens of the shrubbery, creating definition and contrast. It draws your eye into the space and dictates the flow of the entire garden bed. Without the path, the various shades and shapes of green might blur into a single mass. The path provides the structure and ‘bones’ that allow the lush plantings to truly shine. The look is more formal than the similar path in Idea #3.
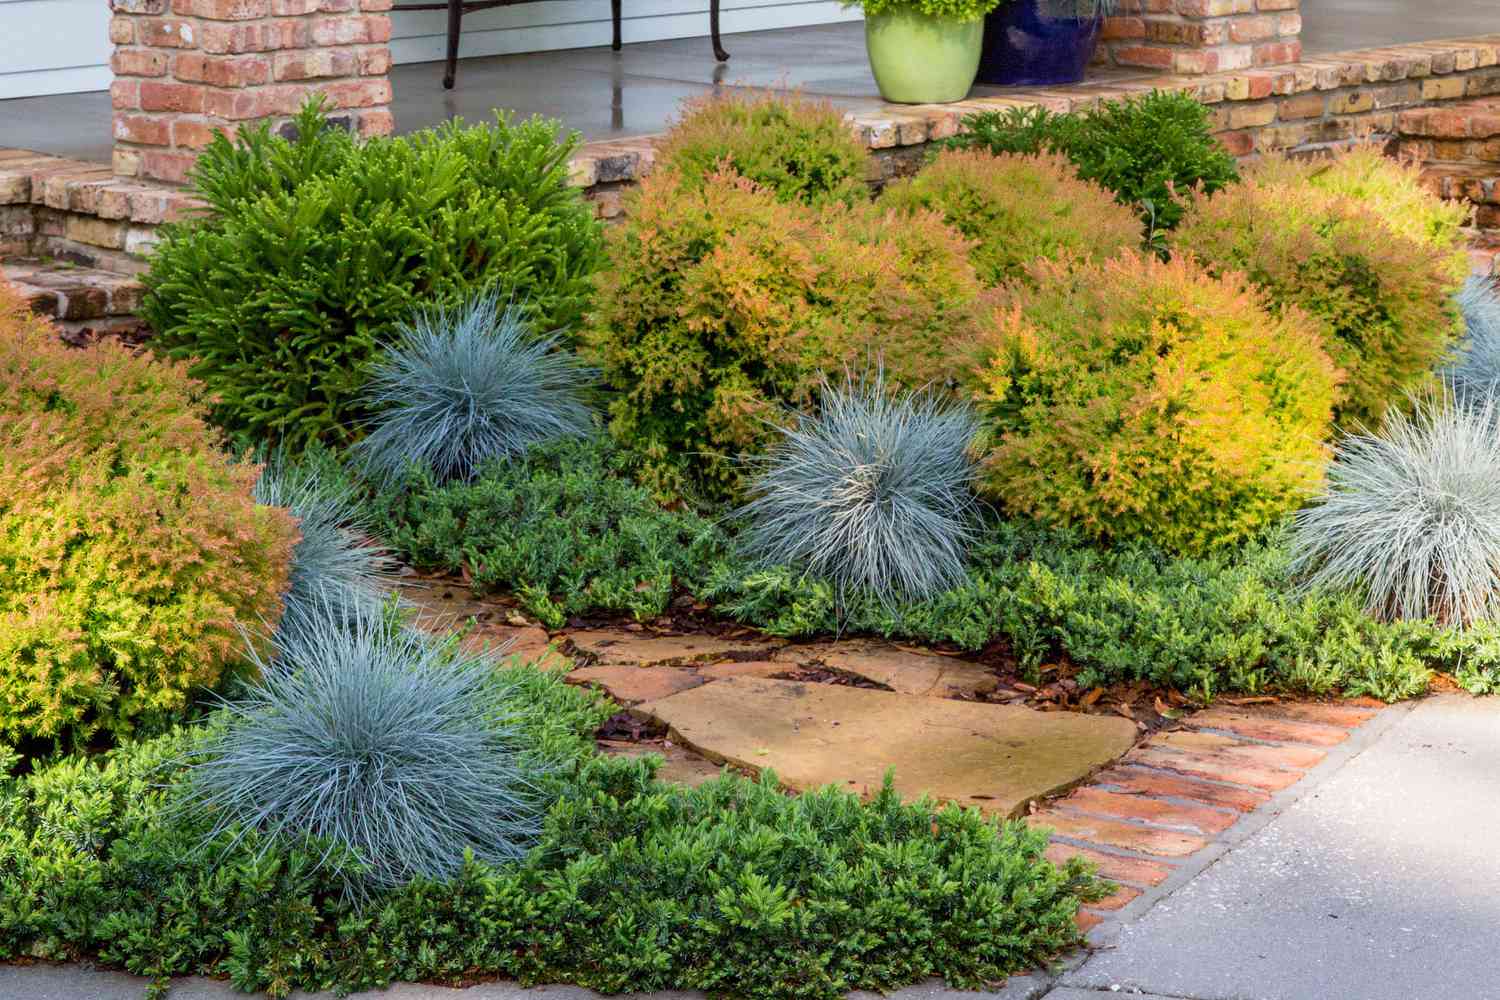
“This style, with its deep, layered beds, is ideal for a space that is at least 8-10 feet deep from front to back.”
A shallower bed won’t allow you to create the distinct layers of plant heights that are crucial to the look. The path itself should be a minimum of 3 feet wide to feel comfortable for walking. For a smaller yard, you can scale this down by using a narrower 2-foot path and choosing dwarf varieties of the shrubs so the proportions remain correct. The key is maintaining that generous depth in the planting beds relative to the path width.
11. Tiered Shrubbery and Stone Steps for a Sloped Entry
To build sturdy, informal stone steps on a slope, follow this simplified guide. (Time: 1-2 weekends; Cost: $400-$1,000 for stone and base material):
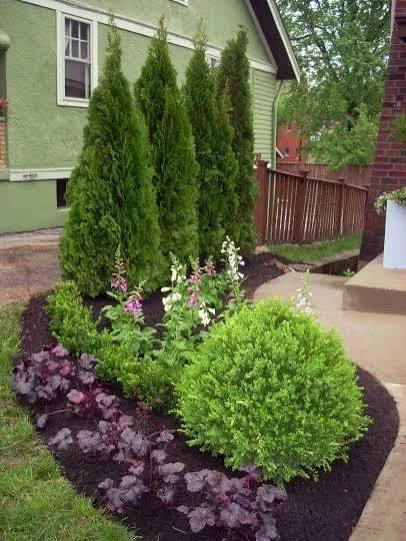
“Carve out the rough path.”
Use a spade to dig a trench about 6 inches wider than your stones, creating rough, level tiers for each step.Create a solid base. Fill each tier with 4 inches of paver base (crushed stone aggregate) and compact it firmly with a hand tamper. This is the most important step for preventing wobbly steps later.Set the first stone. Start at the bottom. Place your largest, flattest stone, wiggling it into the base until it’s level and doesn’t rock.Build upwards. Place the next stone up, making sure it slightly overlaps the one below it. Use stone shims to level it. Fill in gaps with soil.Plant around the steps. Tuck small groundcover plants into the crevices to soften the edges and make the steps feel integrated with the garden.
We’re seeing a huge move away from perfectly flat, manicured lawns and towards embracing the natural topography of a property. This design is a perfect example of that 2026 trend. Instead of spending a fortune on excavation to create a flat yard, homeowners and designers are using tiered gardens and stone steps to work *with* the slope. It’s a more sustainable, naturalistic approach that creates immense visual interest and makes a landscape feel unique and established, rather than like a generic suburban lot.
12. A Tiered Spiral Topiary Anchoring a Lush Brick Pathway
This scene is so captivating because it masterfully plays with structure and wildness. The perfectly manicured, sculptural form of the spiral topiary provides a single, powerful point of formal order. This is then beautifully contrasted by the surrounding environment: the rustic brick path with moss growing in its cracks and the dense, almost untamed green shrubbery that frames it. This tension between the wild and the controlled is what creates the drama and romance. The path leads your eye directly to the topiary, making it the undeniable star of the show.
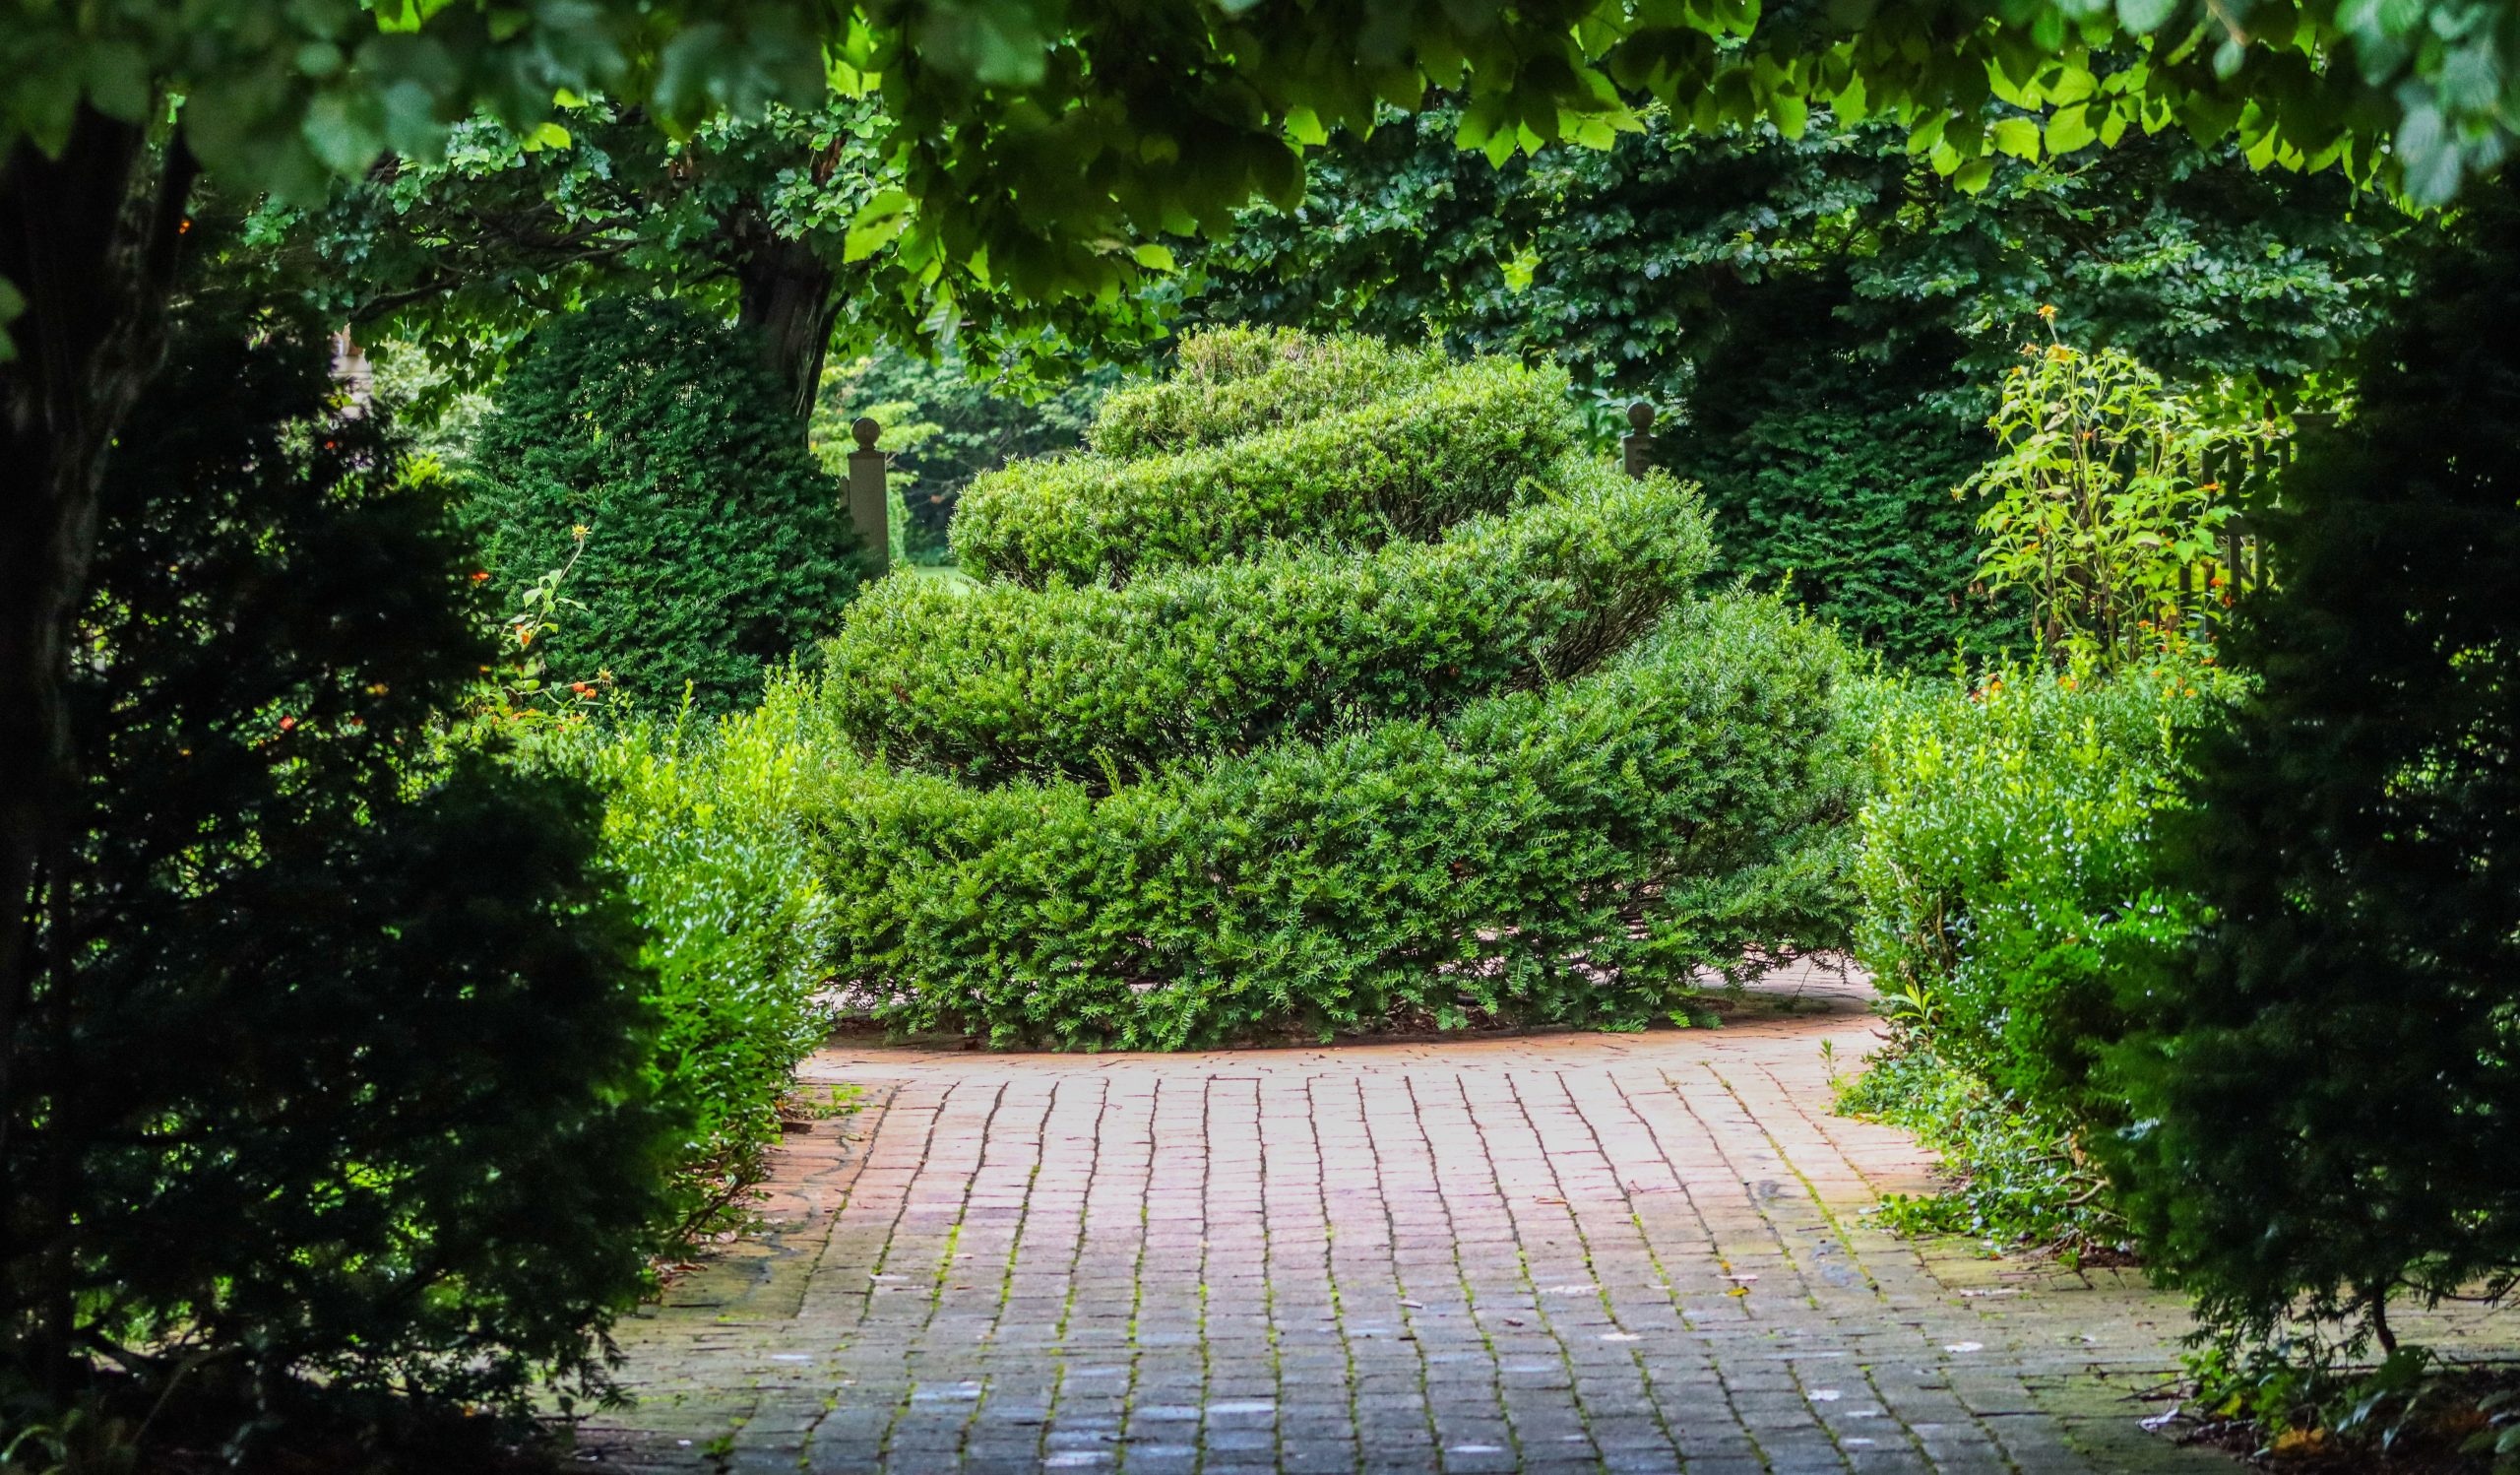
“A topiary like this is the definition of a high-maintenance plant.”
It’s not a shrub; it’s a living sculpture that requires constant attention to maintain its form. You’ll need to perform a careful, precise shearing with sharp topiary shears at least two to three times during the growing season. If you let it go for even one season, it will start to lose its sharp lines and can be very difficult to bring back. It’s also more susceptible to stress from drought or pests, so you need to be vigilant about watering and care. This is a commitment, not a casual plant choice.
13. Layered Green Shrubbery with Purple Flowers by a Paver Path
This composition works because of a well-executed layering of color, texture, and form. The formula is approximately 50% background structure (the dark wood fence and tall tree trunk) + 40% mid-ground texture (the varied green shrubs, including the bright conical one) + 10% foreground color (the purple flowering plants and ground cover). The bright green cone-shaped shrub acts as a focal point, while the dark fence makes the greens and purples in front of it appear more vibrant. This is a simple but effective recipe for a visually deep and interesting garden bed.
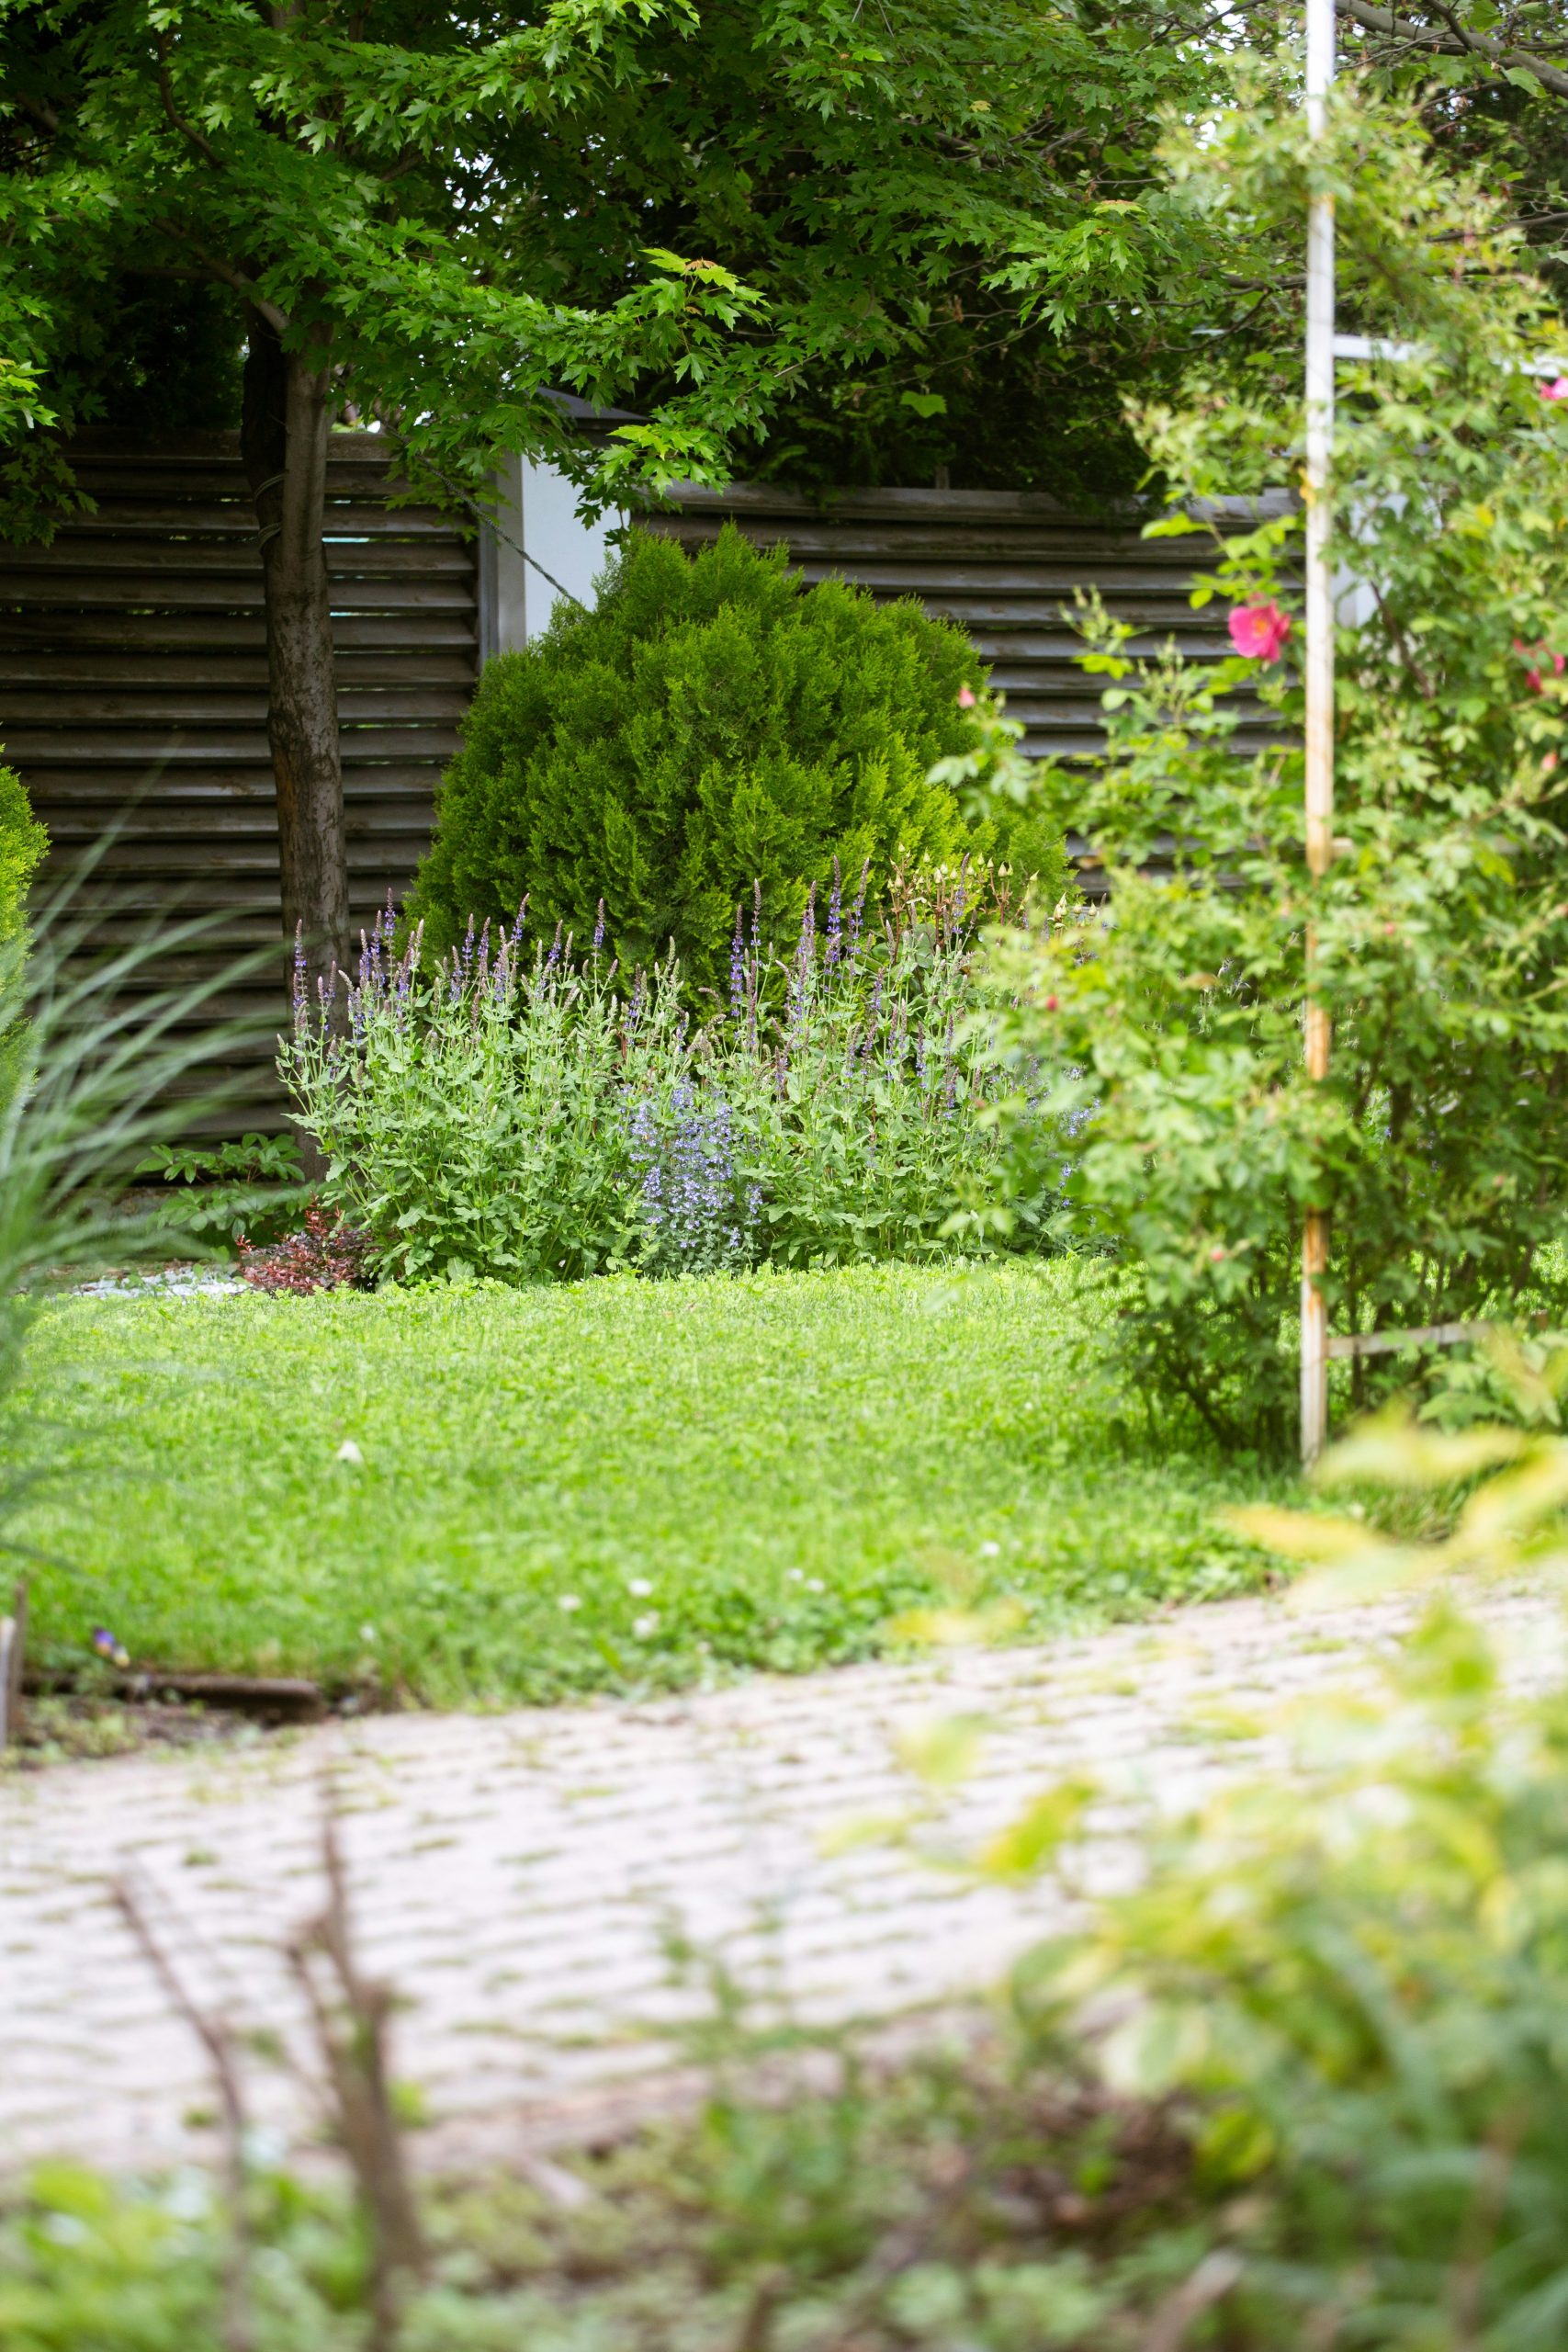
“That dark wood slatted fence is a fantastic backdrop, but be prepared for the upkeep.”
To keep that rich, dark grey color, you will need to clean and re-stain or reseal it every 2-3 years, especially if it gets a lot of direct sun or moisture. If you neglect it, the wood will eventually weather to a silvery-grey and can become susceptible to mildew or rot. Also, planting shrubs too close to the fence can impede airflow, which accelerates moisture-related issues and makes maintenance a real pain.
14. Structured Garden with Dense Green Shrubbery and Light Paving
To get that incredibly dense, solid wall of green from your shrubs, the secret is in the planting and the pruning. Plant your shrubs (like boxwood or yew) much closer together than you normally would—about half the recommended spacing. For the first few years, let them grow up more than out. Then, begin shearing the sides and top. The key is to always prune the top slightly narrower than the bottom. This allows sunlight to reach the lower branches, preventing that ugly, bare-legged look that plagues so many formal hedges.
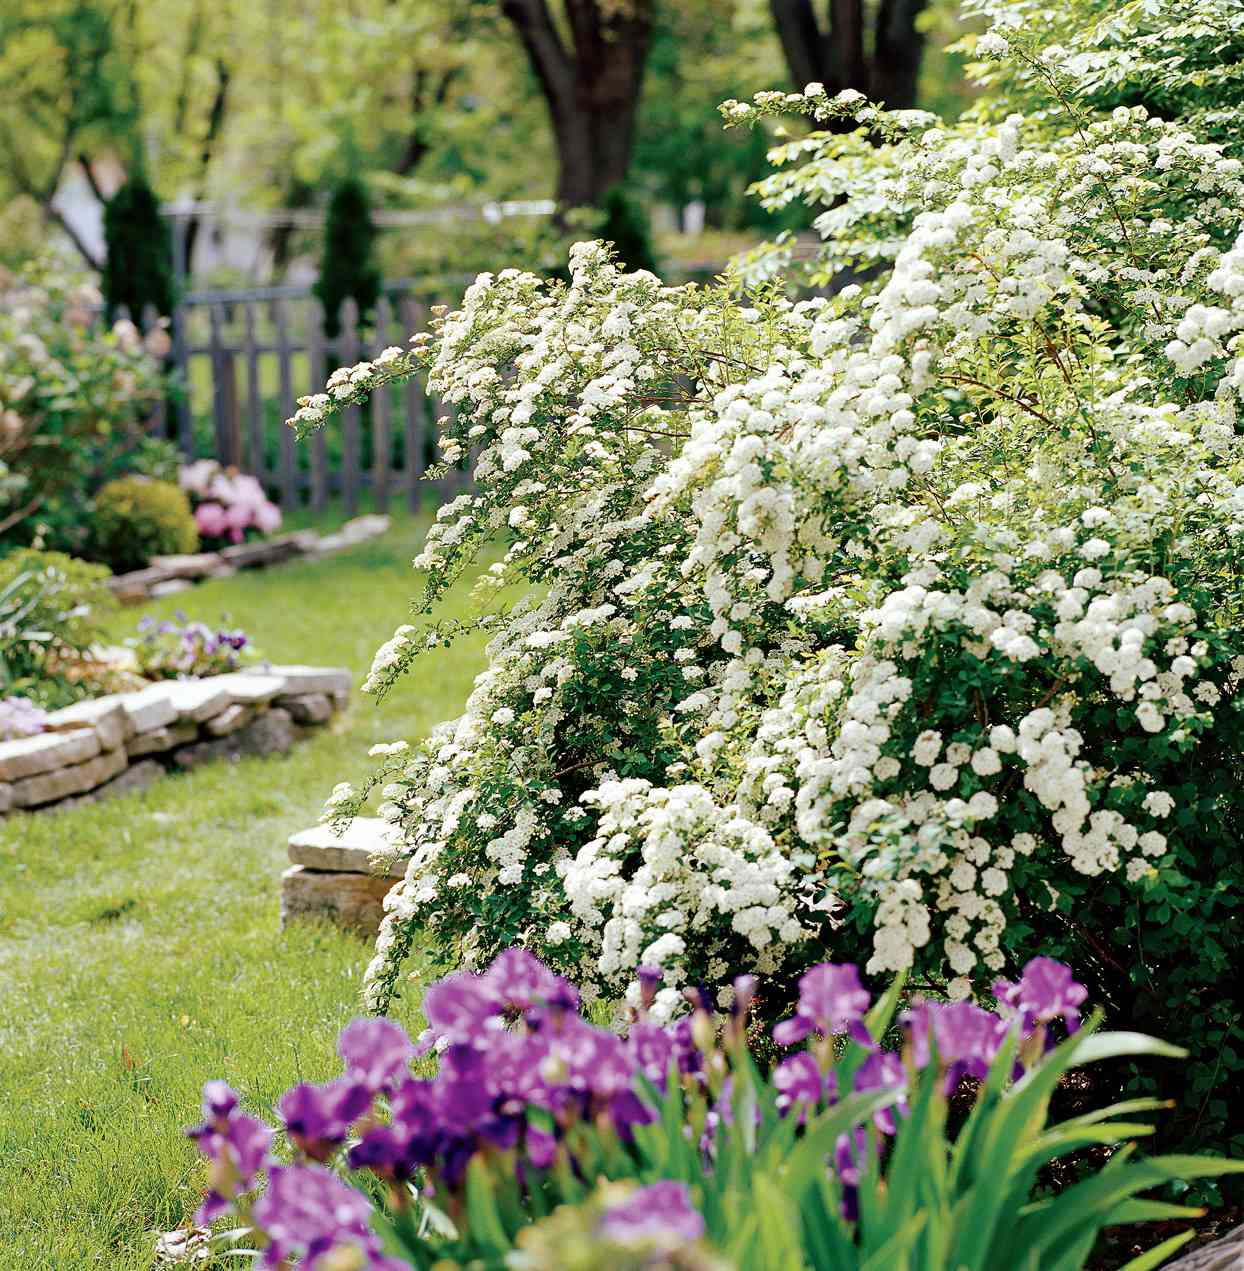
“A design with this level of formality and structure works best when it has room to breathe.”
The paved area should be substantial enough for its intended use—at least 10×10 feet for a seating area. The shrub beds themselves should be a minimum of 3-4 feet deep to create that sense of a lush, green wall. This look can feel cramped and overwhelming in a very small backyard. It’s best suited for medium to large properties where the clean lines of the paved area and hedges can contrast nicely with a larger expanse of lawn or less formal plantings beyond.
15. A Dense Border of Pink Rhododendrons Along a Paved Path
The singular element that makes this view breathtaking is the sheer, unapologetic mass of flowers. This isn’t just one or two flowering shrubs; it’s a long, continuous river of pink rhododendrons. The impact comes from the repetition and density. By committing to a single type of plant and using it on a massive scale, the design achieves a level of drama and coherence that a mix of different plants could never match. The variations in the pink hues, from light to fuchsia, add depth and prevent it from feeling monotonous, while the dark green leaves provide the perfect canvas.
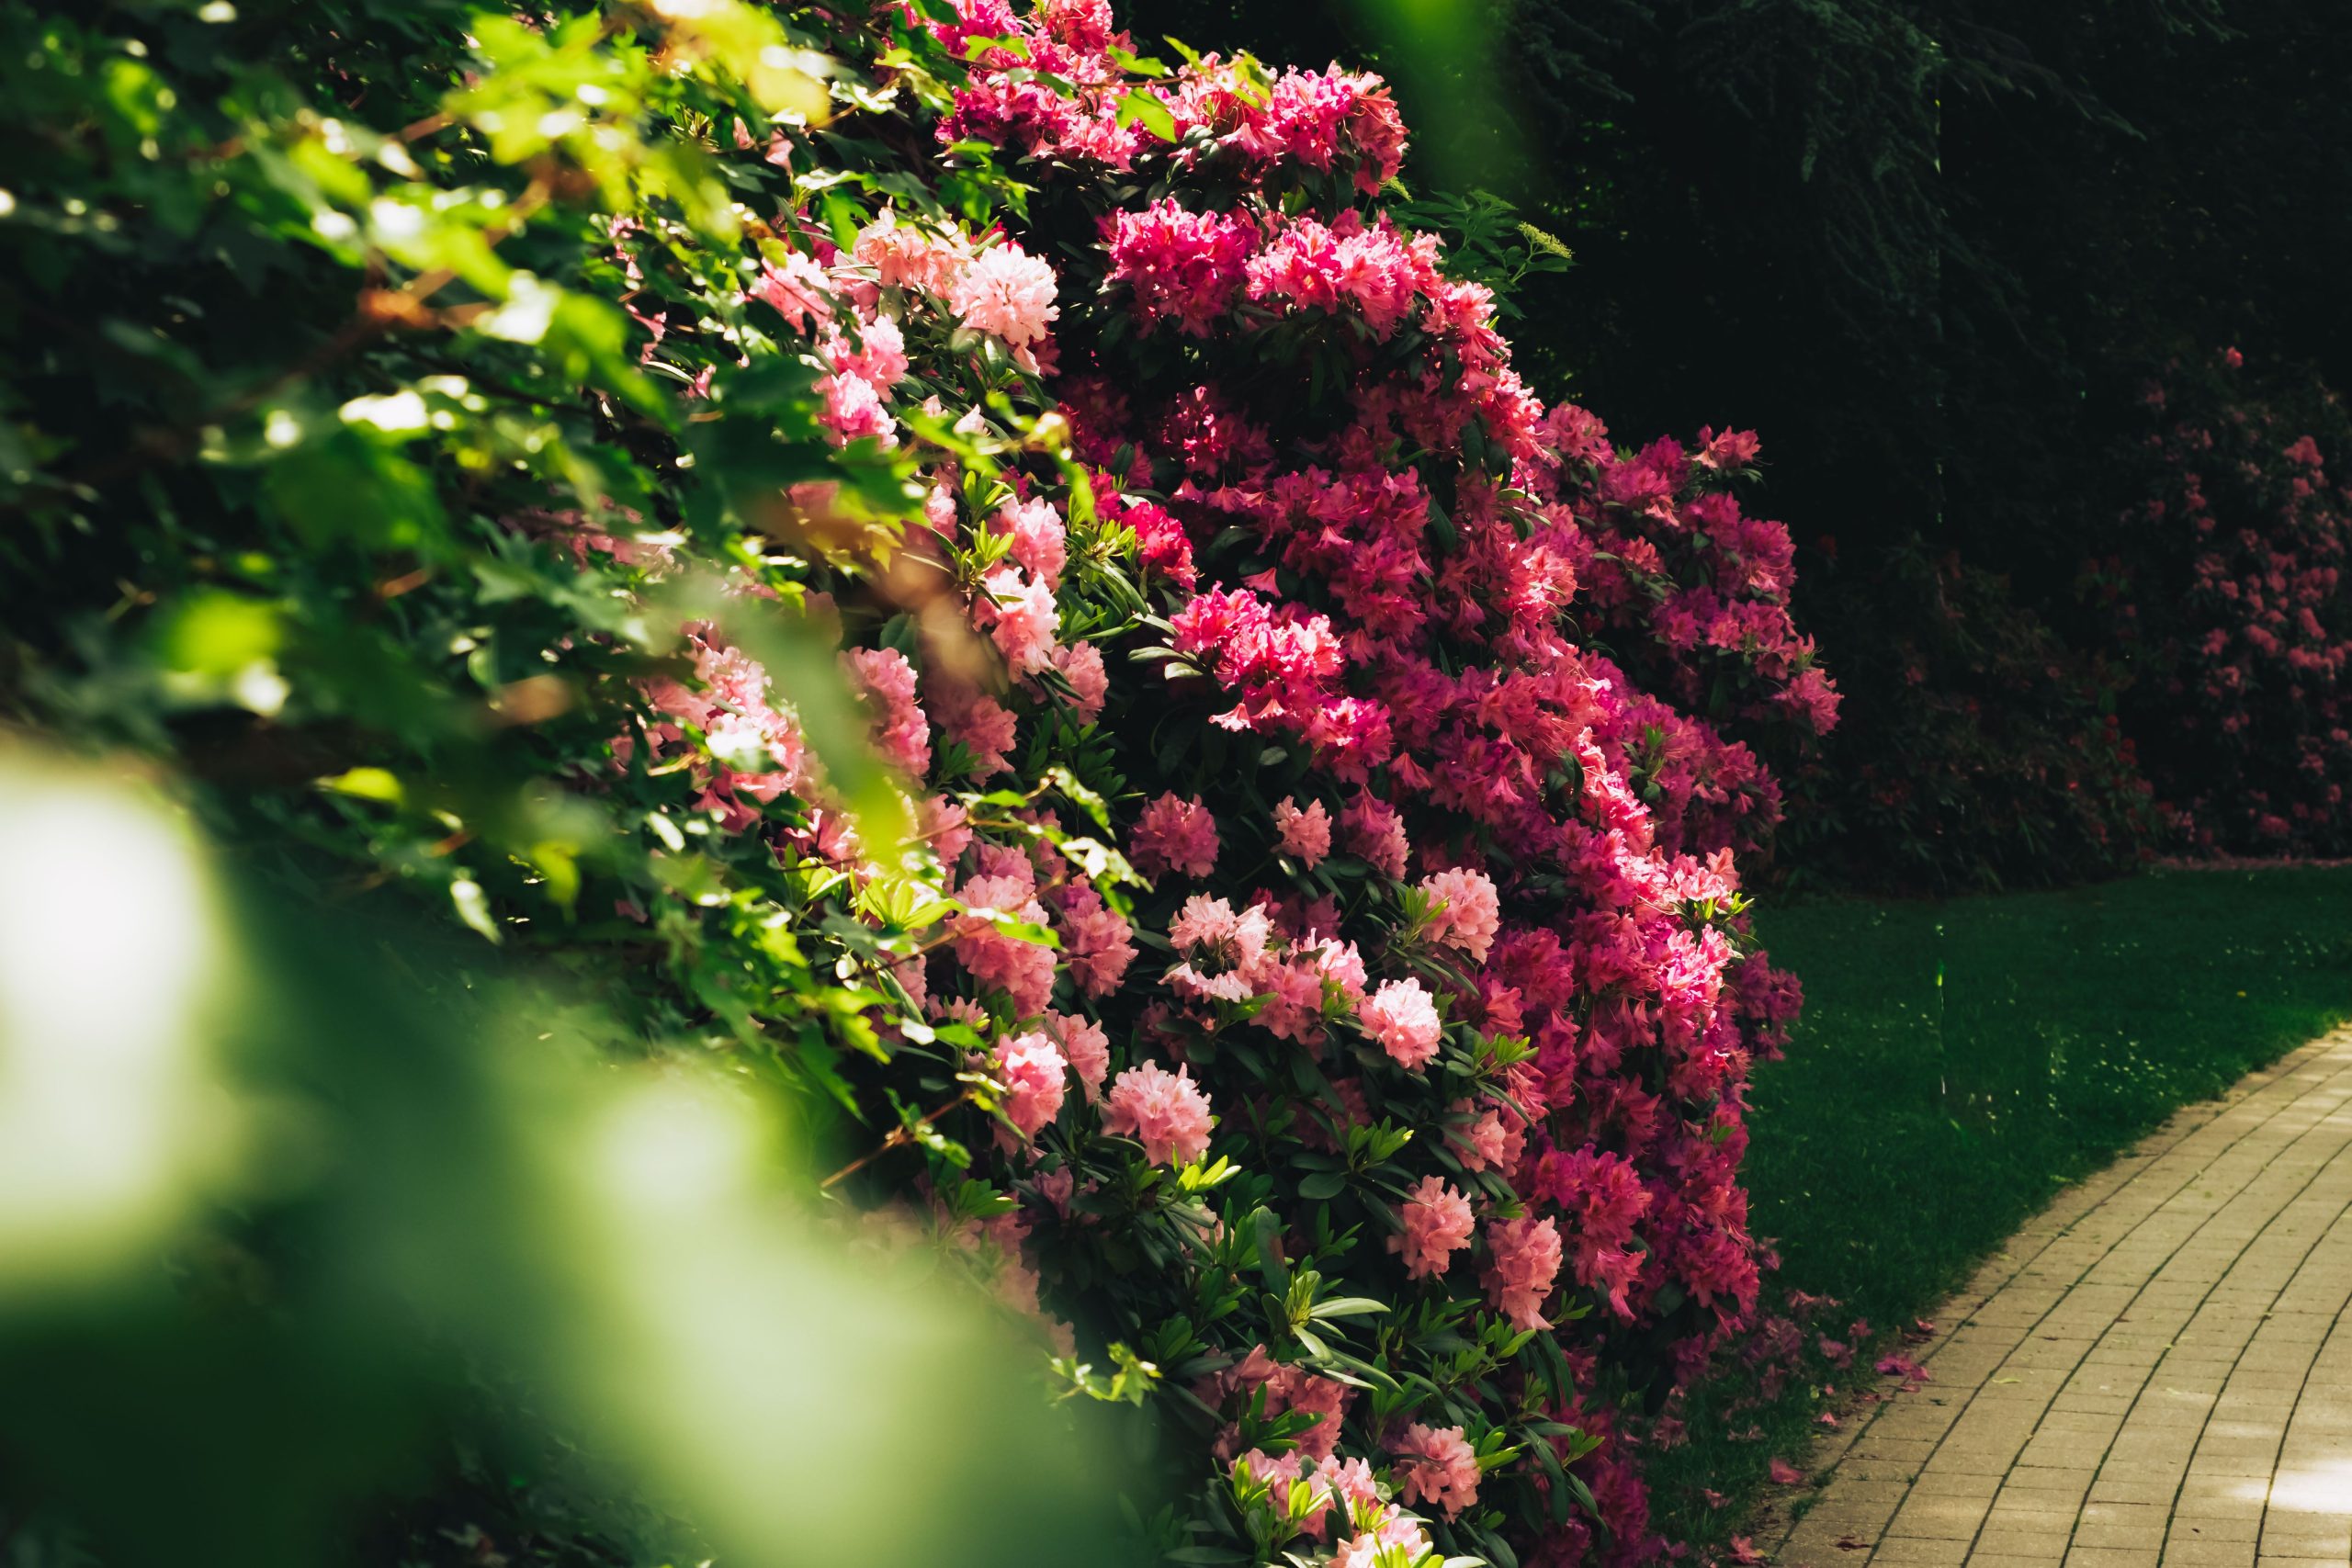
“You don’t need to buy twenty 5-foot-tall rhododendrons to get this look (unless you have a few thousand dollars to spare).”
The secret to doing this on a budget is patience. Go to a nursery in late spring when they’re in bloom so you can see the exact colors. Buy small, 2-gallon plants for $30-$50 each. Plant them with the correct spacing for their mature size, even if it looks sparse at first. Fill the gaps for the first few years with inexpensive annuals or perennials. In 3-5 years, they will grow together to form that dense, spectacular border you’re dreaming of.
16. Lush Green Garden with Mixed Hedges and Potted Plants
This garden feels so lush and established because it uses a technique called ‘borrowed scenery.’ The planted garden doesn’t just end at the hedge; the design cleverly incorporates the view of the distant green mountains into the overall composition. The color of the mountains echoes the dark green of the hedges, making the yard feel larger and more connected to the natural landscape. The mix of textures, from the fine blades of grass to the dense hedge and the potted plants on the flagstone, adds layers of interest that keep the eye engaged and moving through the space.
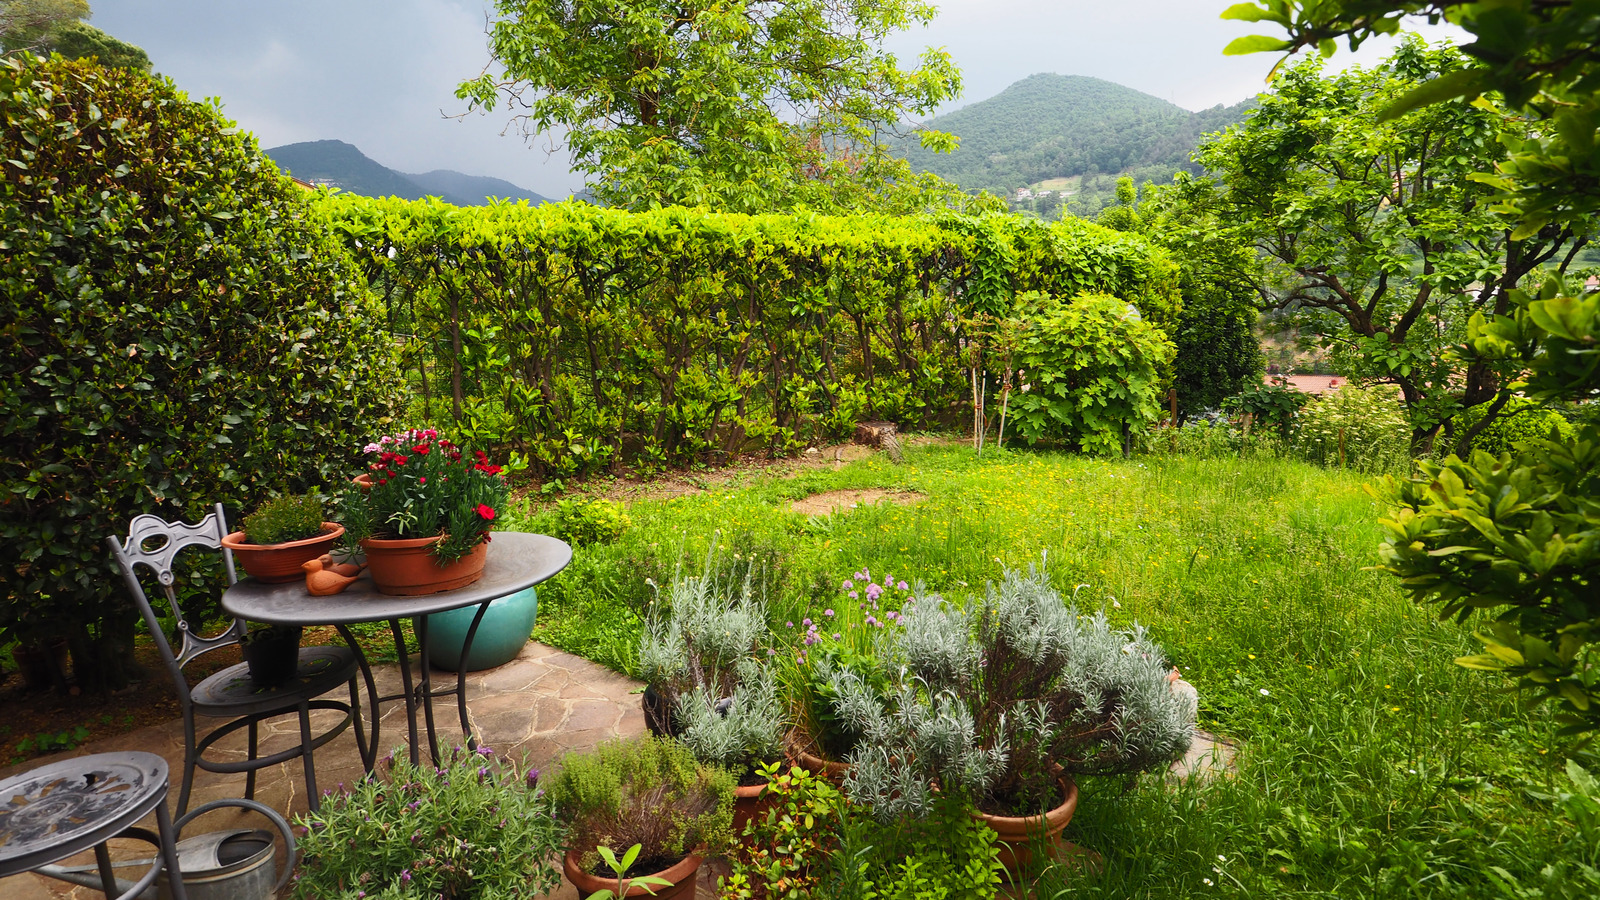
“Before you commit to a dense hedge border, take stock of your needs and limitations.”
Here’s a quick checklist:
- Privacy vs. View: Do you need a tall hedge to block neighbors, or a lower one to define a space while preserving a view like the one here?
- Maintenance Commitment: Are you willing to shear a formal hedge 1-2 times per year, or would you prefer a more natural, unpruned look that requires less work?
- Growth Rate: Do you need instant privacy and can afford larger plants, or are you willing to wait 3-5 years for smaller, more affordable plants to fill in?
- Sunlight: Does the entire line of the proposed hedge receive consistent sunlight, or are there shady spots that would require a different plant choice?
17. Curved Gravel Path with Layered Green and Purple Shrubs
The vibrant energy of this garden comes from a bold color and texture formula. It’s roughly 40% deep, moody foliage (the purple-leafed shrubs) + 40% bright, contrasting green (the strap-leaf and variegated plants) + 20% neutral pathway and background. The key is the high-contrast pairing of the deep purple and the almost-neon green. They make each other look more intense. The reddish-brown gravel path provides a warm, earthy line that complements both colors. This is a much more dynamic palette than the monochrome green look in Idea #23.
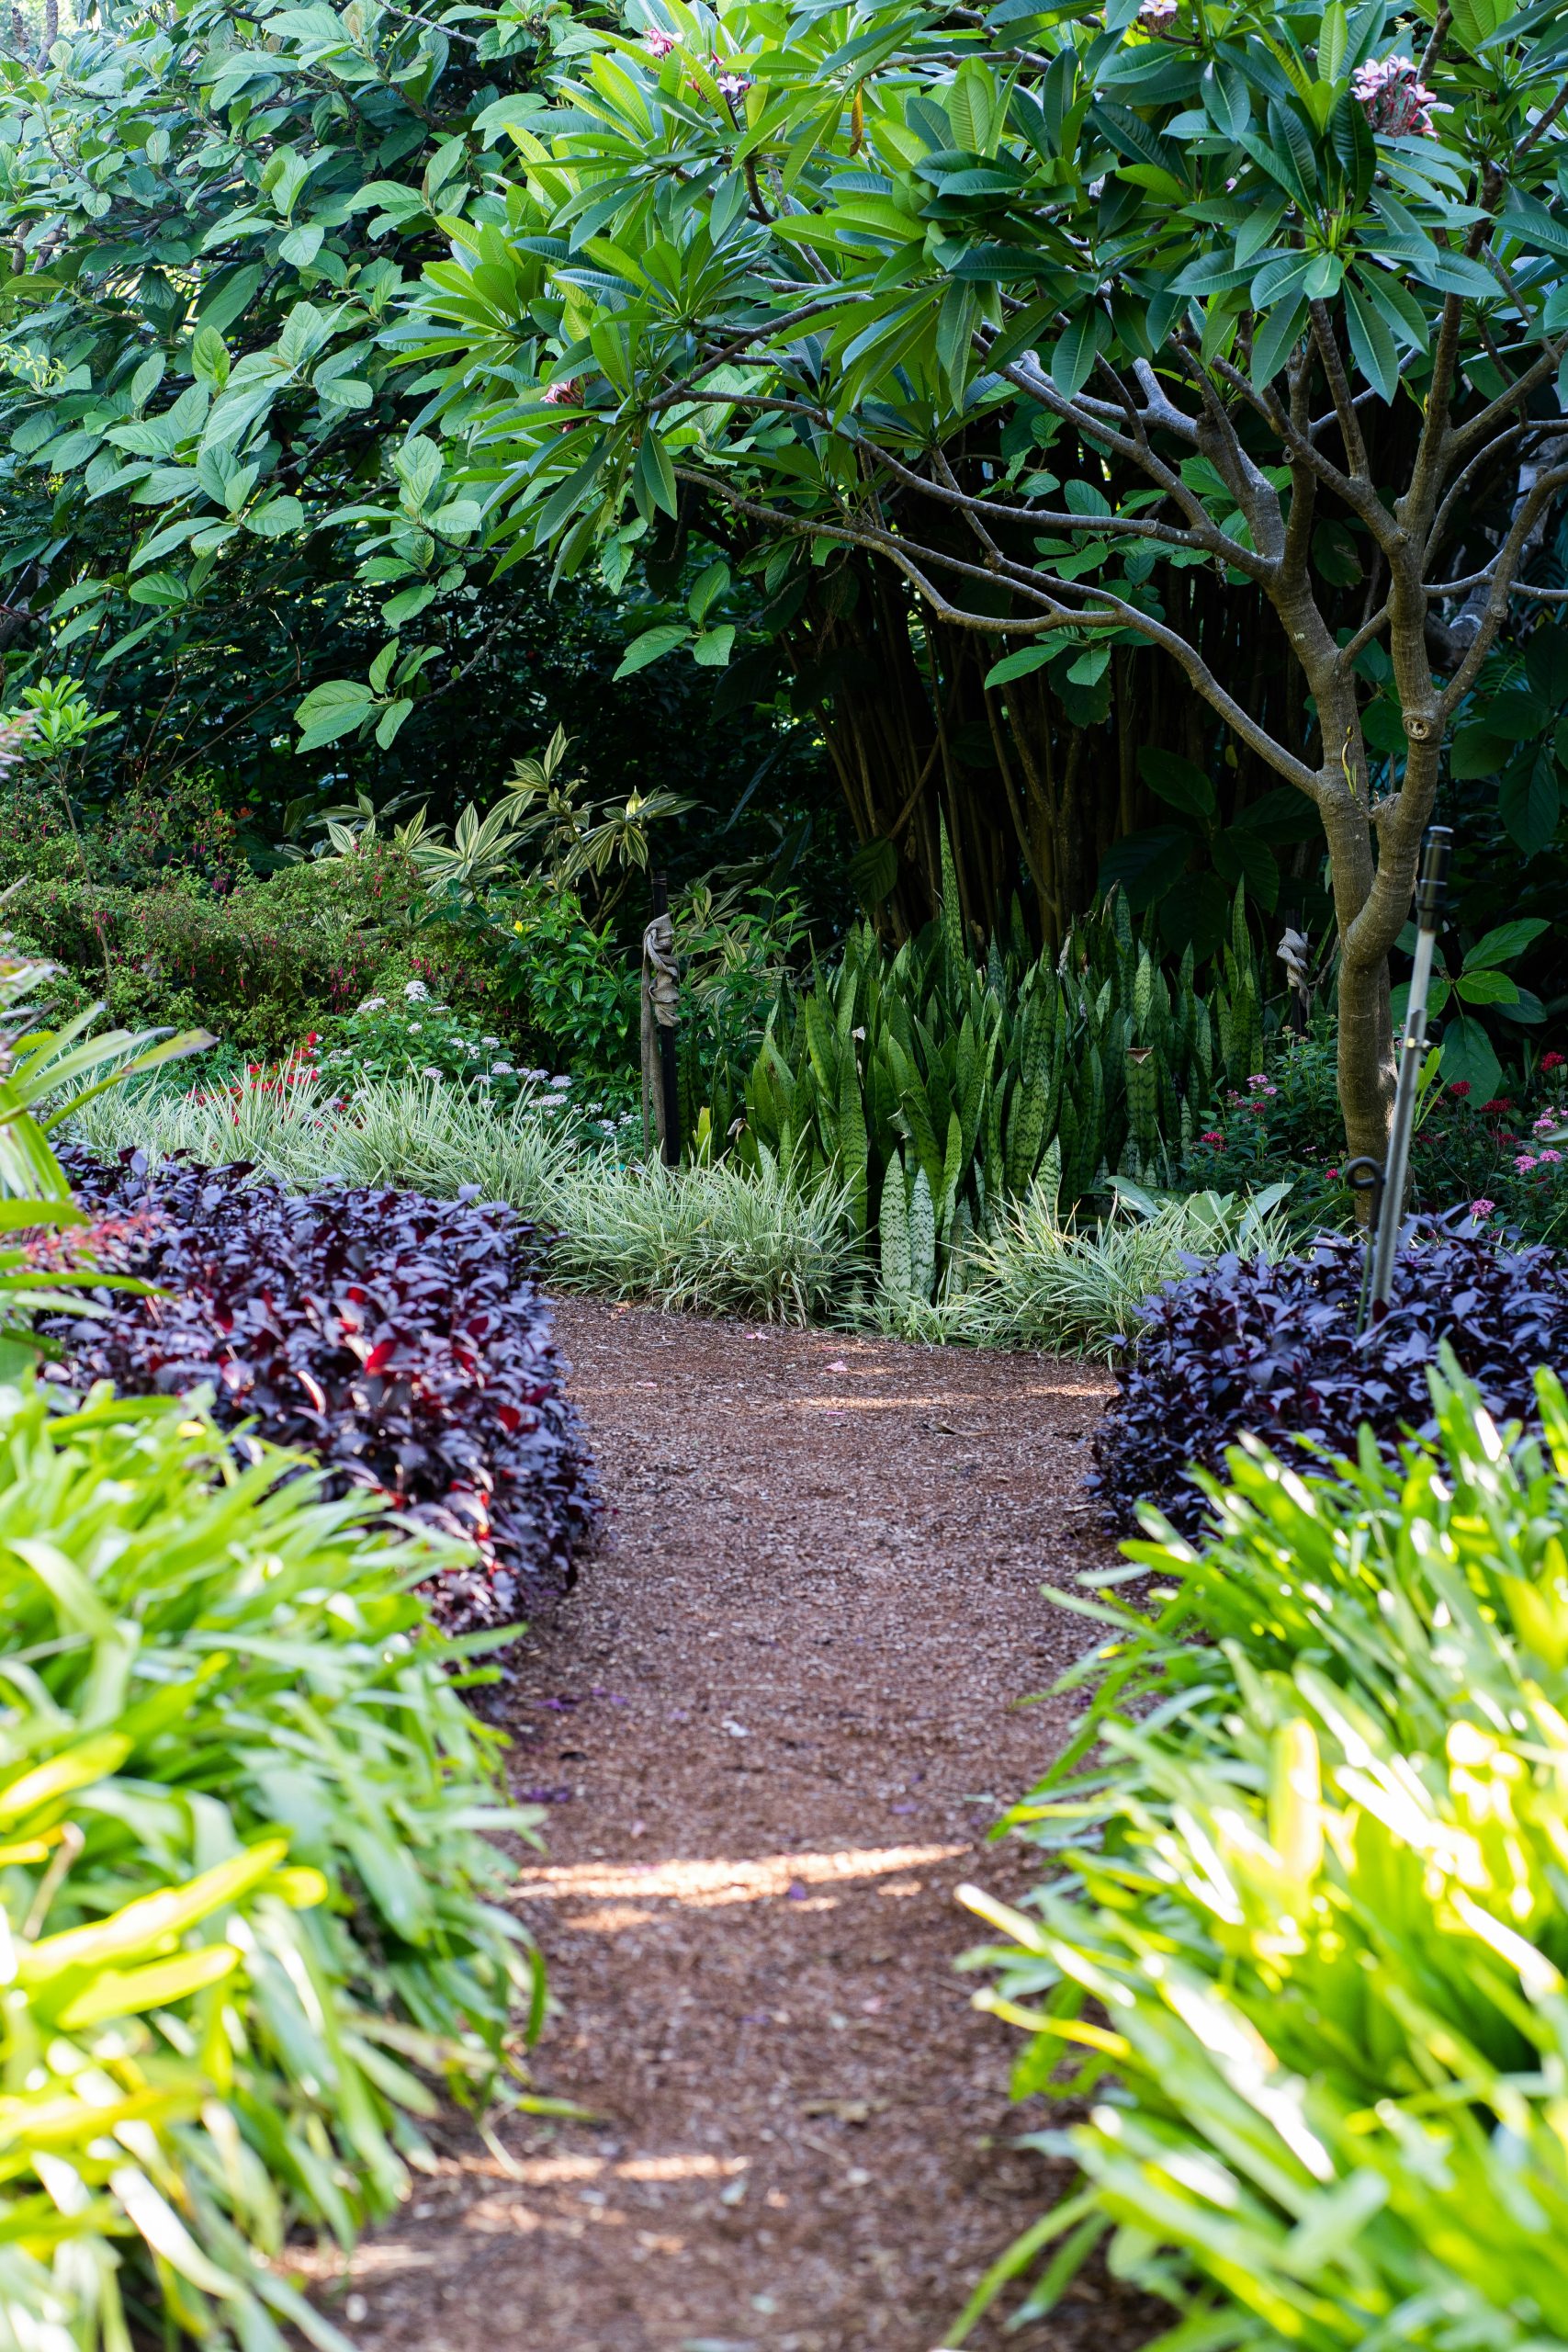
“A garden this lush and layered in a tropical or subtropical climate can be a haven for more than just beautiful plants.”
The dense, low-growing foliage provides the perfect cover for snakes, lizards, and a host of insects. While most are harmless, it’s something to be aware of, especially if you have curious pets or children. Regular maintenance to keep the path edges clear and remove any excessive leaf litter can help, but a truly dense, naturalistic garden like this will always be a bustling ecosystem.
18. Layered Drought-Tolerant Garden with Gravel and Wooden Steps
When designing a drought-tolerant garden, think in layers of texture, not just color. Place spiky, architectural plants like agave or yucca as focal points. Then, surround them with softer, finer-textured ornamental grasses. Finally, use low-growing, mat-forming succulents or groundcovers to fill in the gaps and cover the soil. This textural contrast is what makes a dry garden look lush and intentional, rather than sparse and sad. The single pop of color from the orange chair is all that’s needed to bring the whole scene to life.
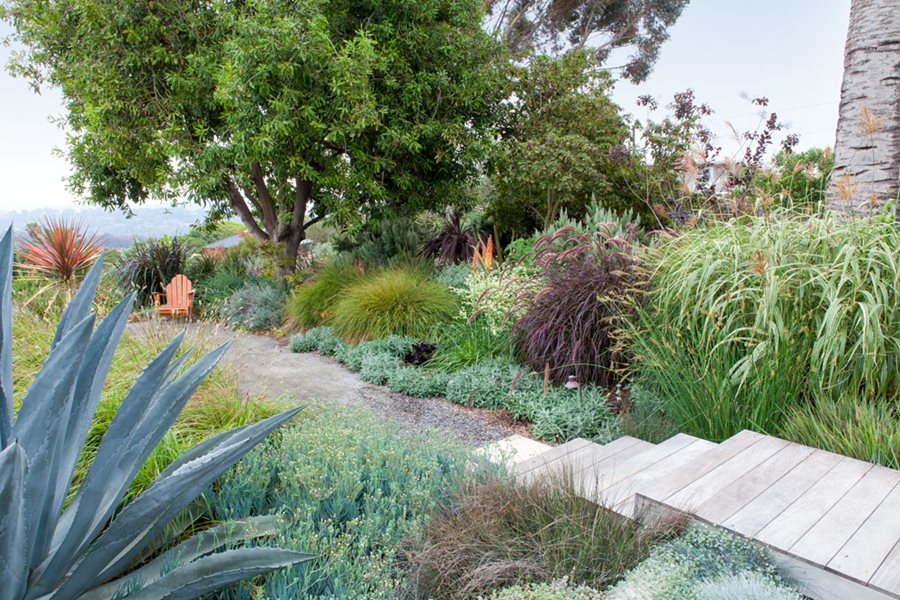
“You can build simple, rustic garden steps like these in an afternoon for under $200.”
Here’s how:
- Choose your lumber. Use pressure-treated 4×6 or 6×6 timbers cut to the desired width of your steps.
- Excavate the slope. Carve out a rough path and create level spots where each timber will sit.
- Set the base step. Dig a shallow trench for the lowest timber, ensuring it’s level side-to-side.
- Secure the timbers. Drill holes through the ends of each timber and hammer in 2-foot sections of rebar to anchor them into the ground.
- Backfill and repeat. Backfill behind the first timber with gravel and soil, tamping it down firmly to create a level surface for the next step. Repeat your way up the slope, maintaining a consistent step height and depth.
19. Irregular Stone Path Lined by Vibrant Blue and Pink Hydrangeas
This romantic, cottage-style look is all about the plants, but the stonework is a key expense.
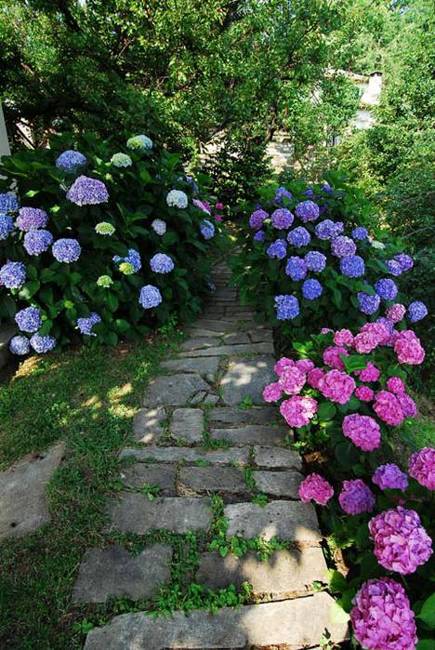
“Path & Installation: $2,500 – $6,000 (Irregular flagstone is labor-intensive to lay correctly)Hydrangea Shrubs: $800 – $2,000 (for 10-15 mature, 3-gallon+ plants)Soil Amendments & Mulch: $300 – $800 (Hydrangeas are heavy feeders)Other Greenery: $400 – $1,000TOTAL: $4,000 – $9,800Budget alternative: Get a similar feel for under $1,000.”
Create the path yourself using concrete paver molds and plant smaller, 1-gallon hydrangeas. It will take 2-3 years for them to reach the size shown, but the savings are enormous.
that makes this look so magical is the color variation in the hydrangeas. The mix of deep blue, soft lavender, and vibrant pink creates a painterly, impressionistic effect. This isn’t an accident; the color of many hydrangea varieties is determined by the pH of the soil. Acidic soil (low pH) produces blue flowers, while alkaline soil (high pH) produces pink ones. The blend of colors here suggests a soil with varying pH levels, creating a beautiful, natural-looking tapestry of blooms that feels far more special than a monochrome planting.
20. Dense Foundation Shrubbery with Mature Evergreen Landscaping
There’s a fine line between ‘lush and established’ and ‘overgrown and neglected,’ and this planting is walking it. While the density of the evergreen shrubs is impressive, they have been allowed to grow so large that they are covering the foundation and creeping up over the window sills. This can trap moisture against the brick and siding, potentially leading to mildew, rot, and providing a highway for pests to get into your home. A good landscape design should complement the house’s architecture, not swallow it. A strategic pruning is long overdue here, especially compared to the neat look of Idea #21.
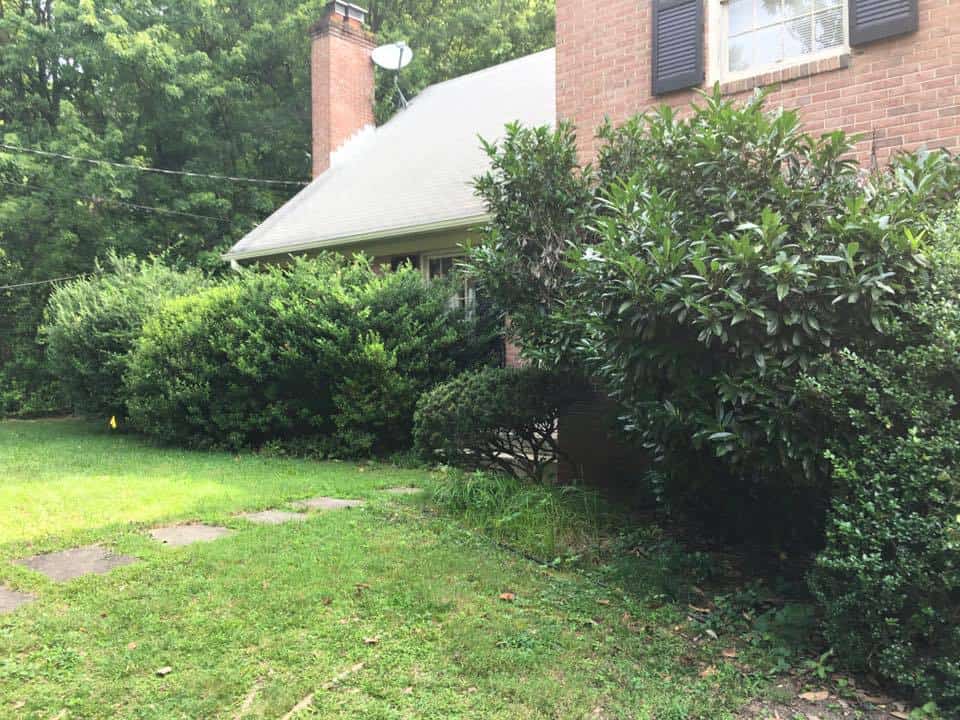
“The maintenance reality of large, dense evergreen shrubs like these is that they need regular ‘renewal pruning’ to stay healthy and in scale.”
This isn’t just a light shearing. It involves reaching into the plant and selectively removing some of the oldest, thickest branches all the way back to the main trunk. This opens up the plant to better air circulation and sunlight, which prevents the interior from dying out and becoming a hollow shell. It’s a once-every-few-years task that is critical for the long-term health and appearance of mature foundation plantings.
21. Mixed Shrub Garden Bed Alongside a White House
This clean, manicured look is incredibly achievable, even on a tight budget. The secret is the mulch. A thick, 3-inch layer of dark brown mulch instantly makes any garden bed look finished and professional, and it’s fantastic for suppressing weeds. You can get this entire look for a song at a big box store. A few bags of mulch ($20), a handful of small shrubs and grasses in 1-gallon pots ($100-$150), and one solar-powered landscape light ($15). For under $200 and a weekend afternoon, you can replicate a 15-foot section of this tidy, modern planting bed.
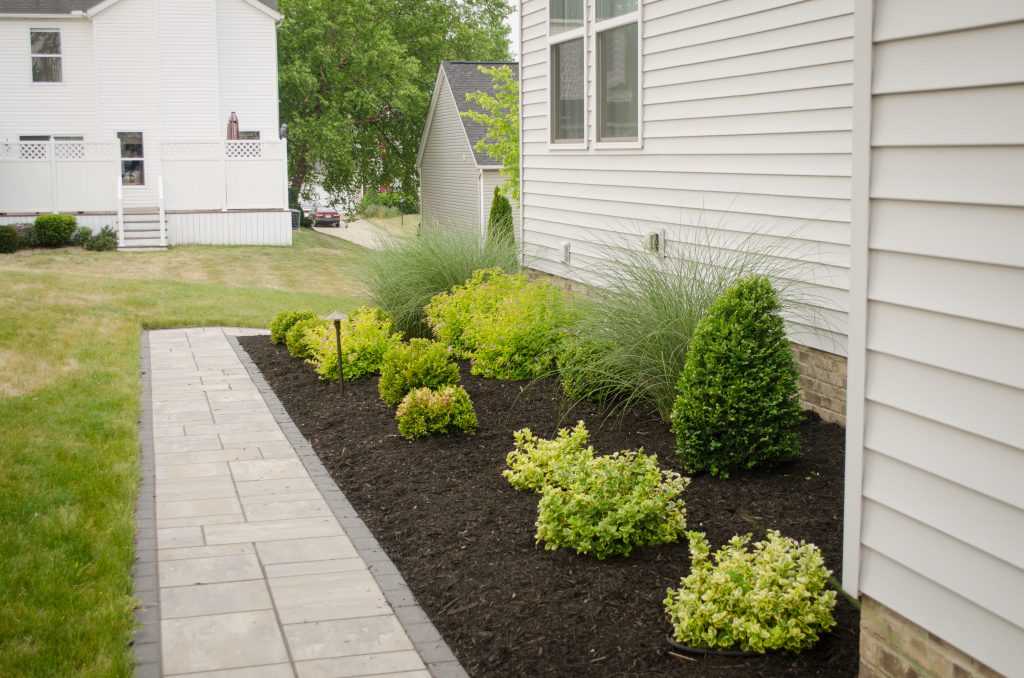
“When creating a mixed shrub bed, the key to a sophisticated look is to repeat plants.”
Notice how there isn’t just one of everything. You can see the same variegated yellow-green shrub appearing more than once. A good rule of thumb for a bed this size is to choose 3 to 5 different types of plants and then plant them in repeating clusters or drifts. For example, plant a group of three ornamental grasses, then a single conical evergreen, then another group of three grasses further down. This repetition creates rhythm and makes the design feel cohesive, not chaotic.
22. Winding Stone Path Lined with Shrubs at Golden Hour
The magic of this scene is the masterful interplay of light and form. The low, golden-hour sun backlights the foliage, making the leaves glow and creating long, dramatic shadows across the path. This turns a simple garden walk into an ethereal experience. The design enhances this by pairing formally clipped, rounded shrubs with wilder, more natural grasses. The smooth, solid shapes of the shrubs catch the light differently than the fine textures of the other plants, creating a rich visual tapestry that is most beautiful at the beginning and end of the day.
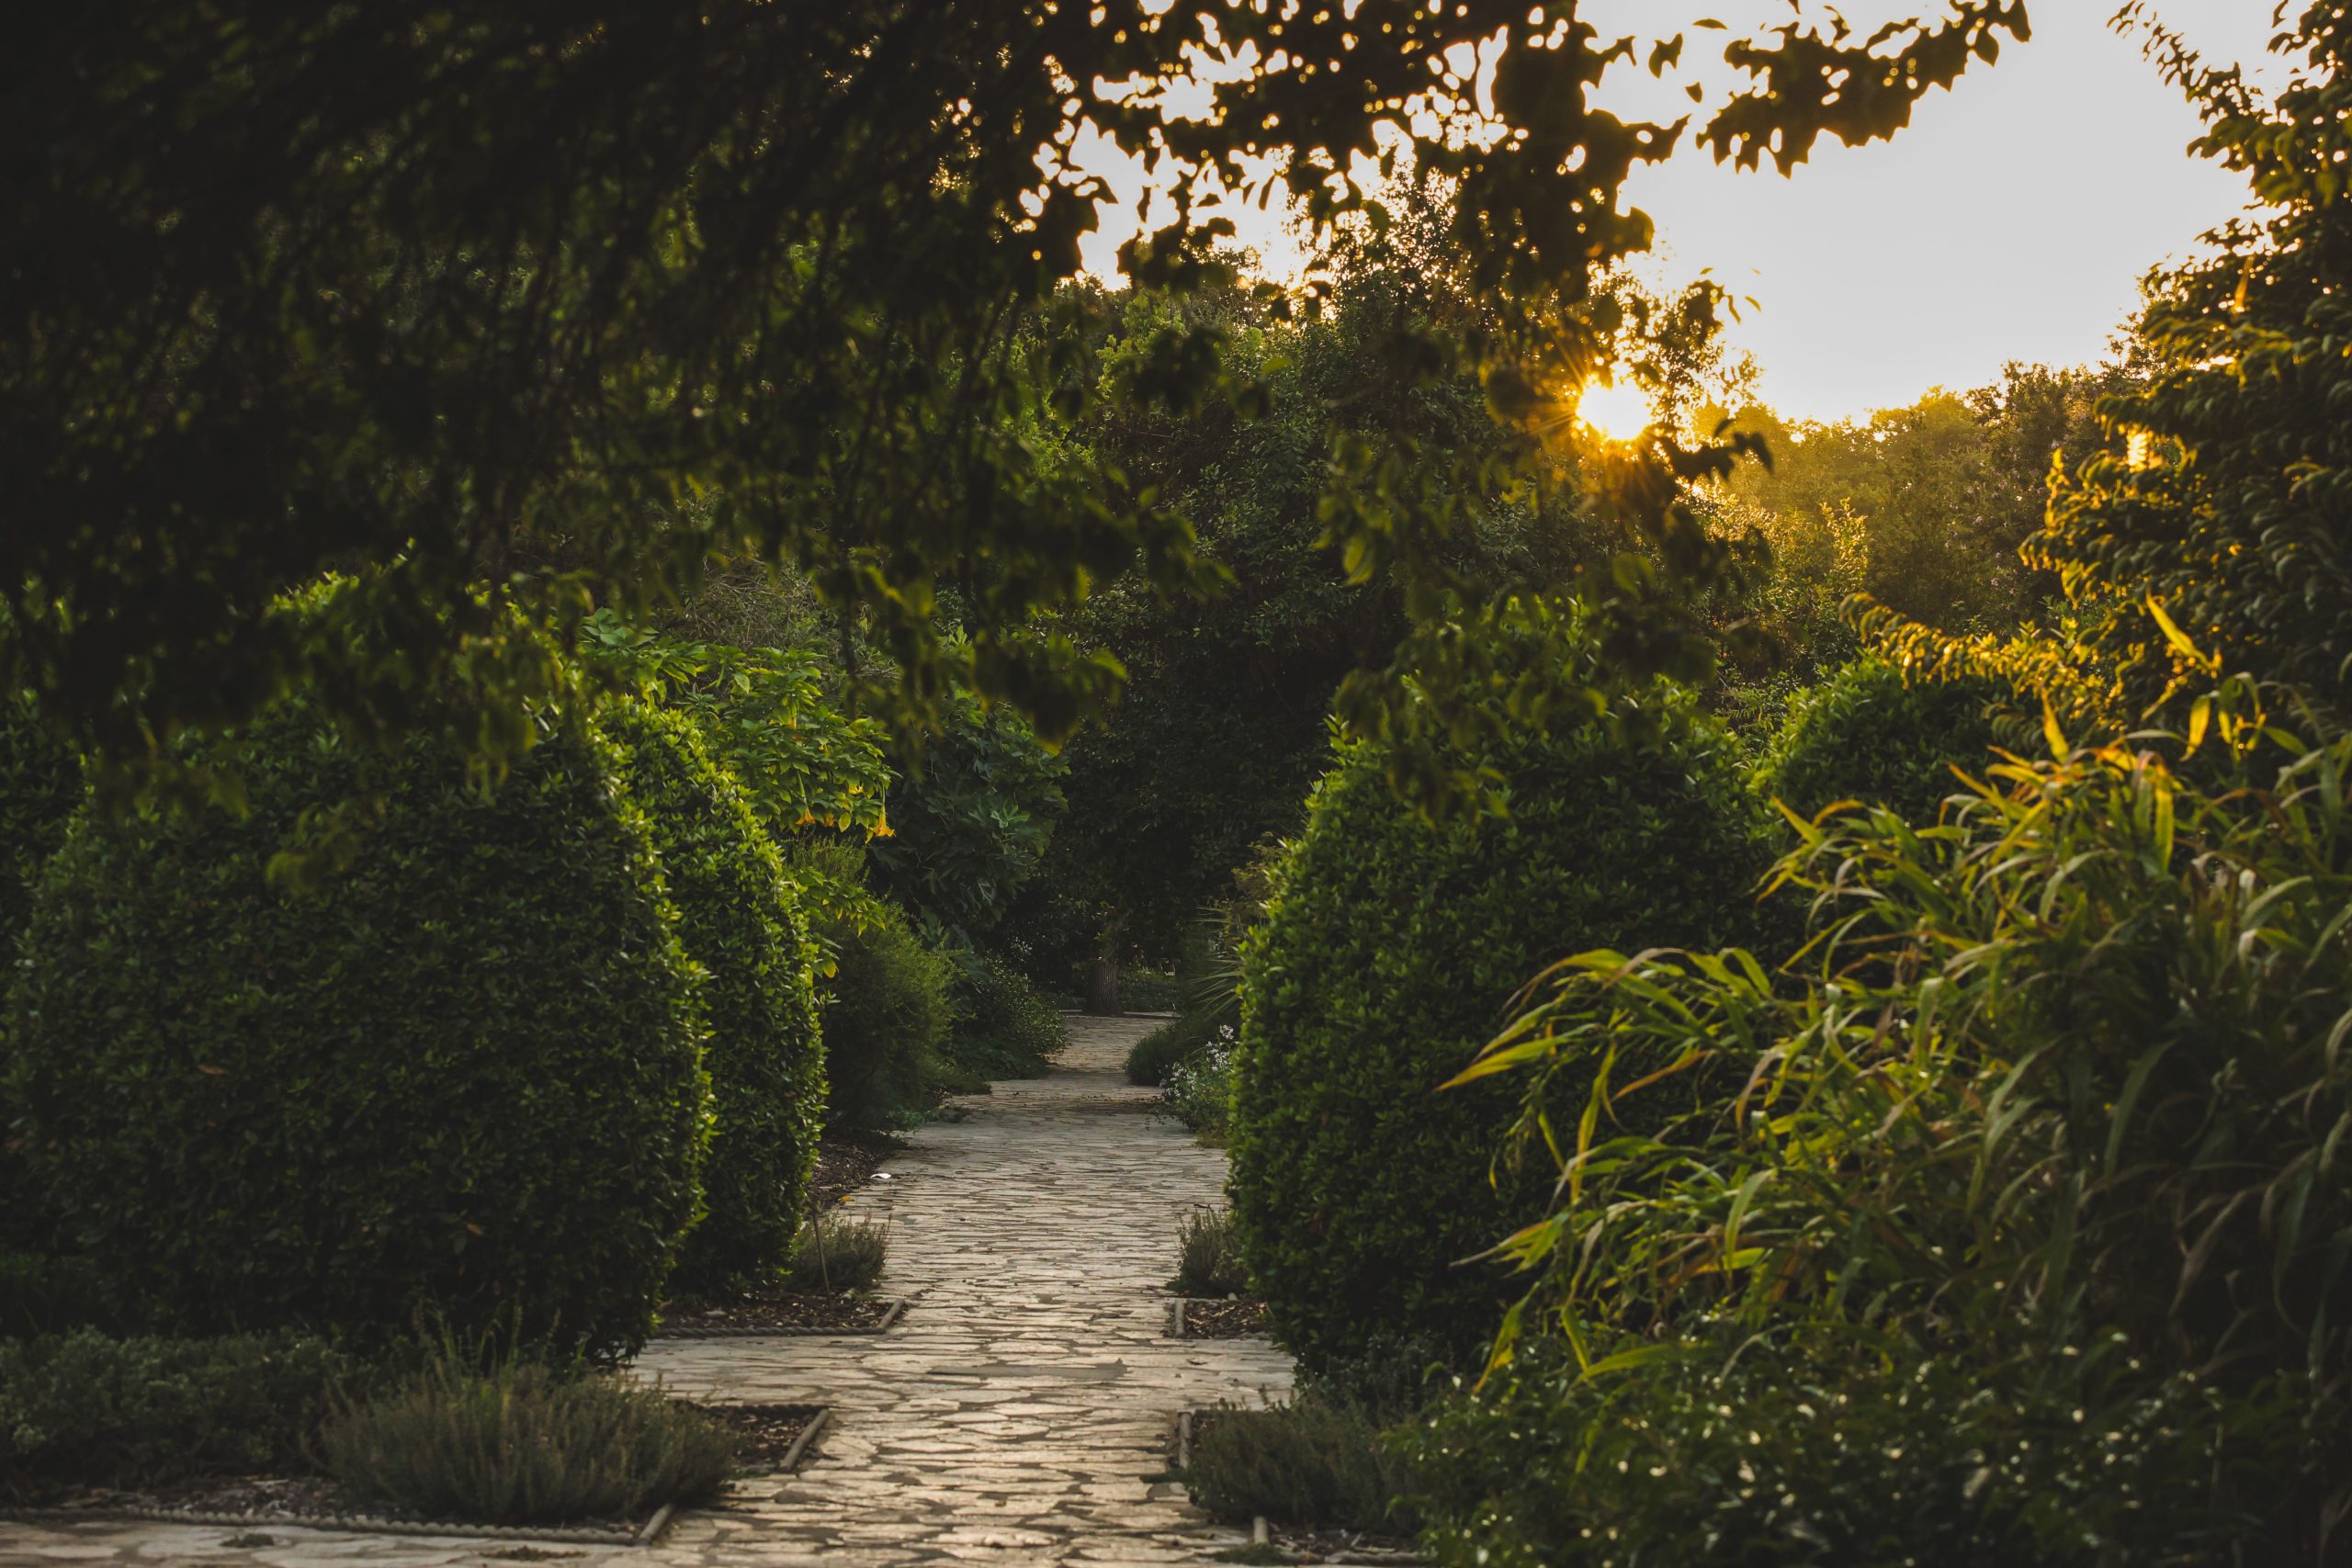
“This style of garden, often called a ‘dusk garden’ or ‘golden hour garden,’ is becoming incredibly popular as people look to their yards for tranquility and escape.”
The design intentionally uses plants with interesting silhouettes (like the rounded shrubs) and translucent or fuzzy textures (like ornamental grasses) that come alive in the low-angle light of sunrise and sunset. It’s a shift from gardens designed to be viewed in the harsh light of midday to spaces created for quiet moments of reflection when the day is winding down.
23. Winding Garden Path with Lush Tropical-Style Foliage
This lush, immersive experience is built on a formula of dramatic foliage contrast. It’s about 60% bold, broad leaves (like the banana-like plants) + 30% fine, bright texture (the chartreuse groundcover grass) + 10% vertical structure (the tall, slender trees). The huge leaves provide the jungle-like drama, while the fine-textured, brightly colored grass offers a soft, glowing carpet that keeps the scene from feeling too dark or oppressive. The tall, skinny cypress trees add a necessary vertical element, drawing the eye upward and preventing the garden from feeling flat.
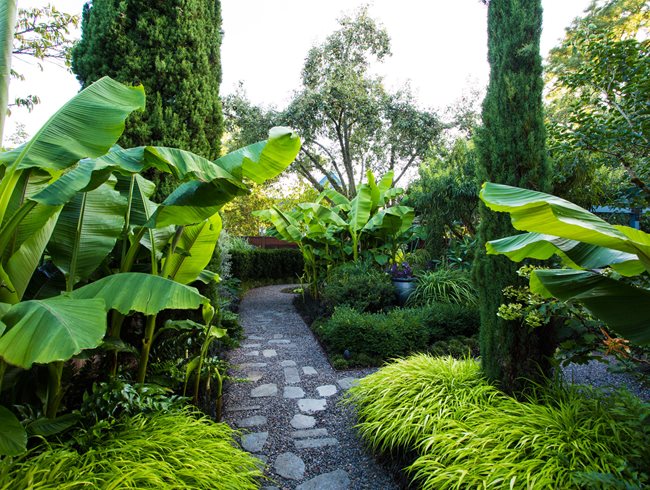
“To achieve this feeling of being enveloped by foliage, the planting beds need to be deep and the path relatively narrow.”
This look is perfect for a side yard or a pathway connecting different ‘rooms’ in a larger garden. The path itself should be no more than 3 feet wide. The planting beds on either side should be at least 4-5 feet deep to accommodate the layered, overlapping plants. This creates the illusion that you are walking through a dense jungle, rather than just alongside a garden bed. This approach makes a small space feel more mysterious and expansive.
24. Lush Garden Pond with a Weeping Conifer
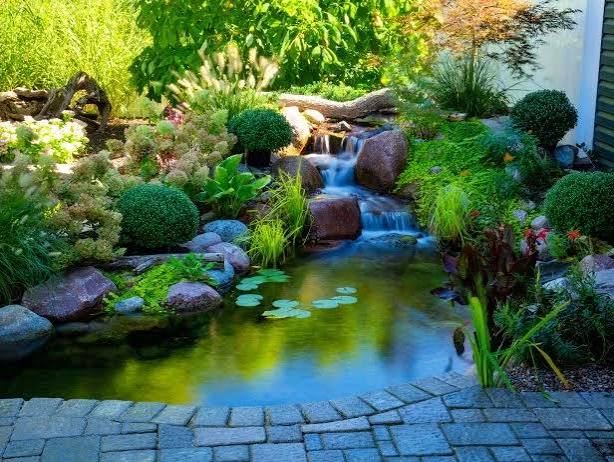
The entire mood of this tranquil garden hinges on the weeping conifer. It is the undeniable focal point and emotional heart of the landscape. Its graceful, drooping form introduces a sense of gentle melancholy and serenity that the other, more upright plants don’t possess. The fine texture of its needles contrasts beautifully with the bold leaves of the red shrub and the flat lily pads in the pond. If you were to replace it with a standard evergreen, the scene would still be pretty, but it would lose its unique character and poetic quality.
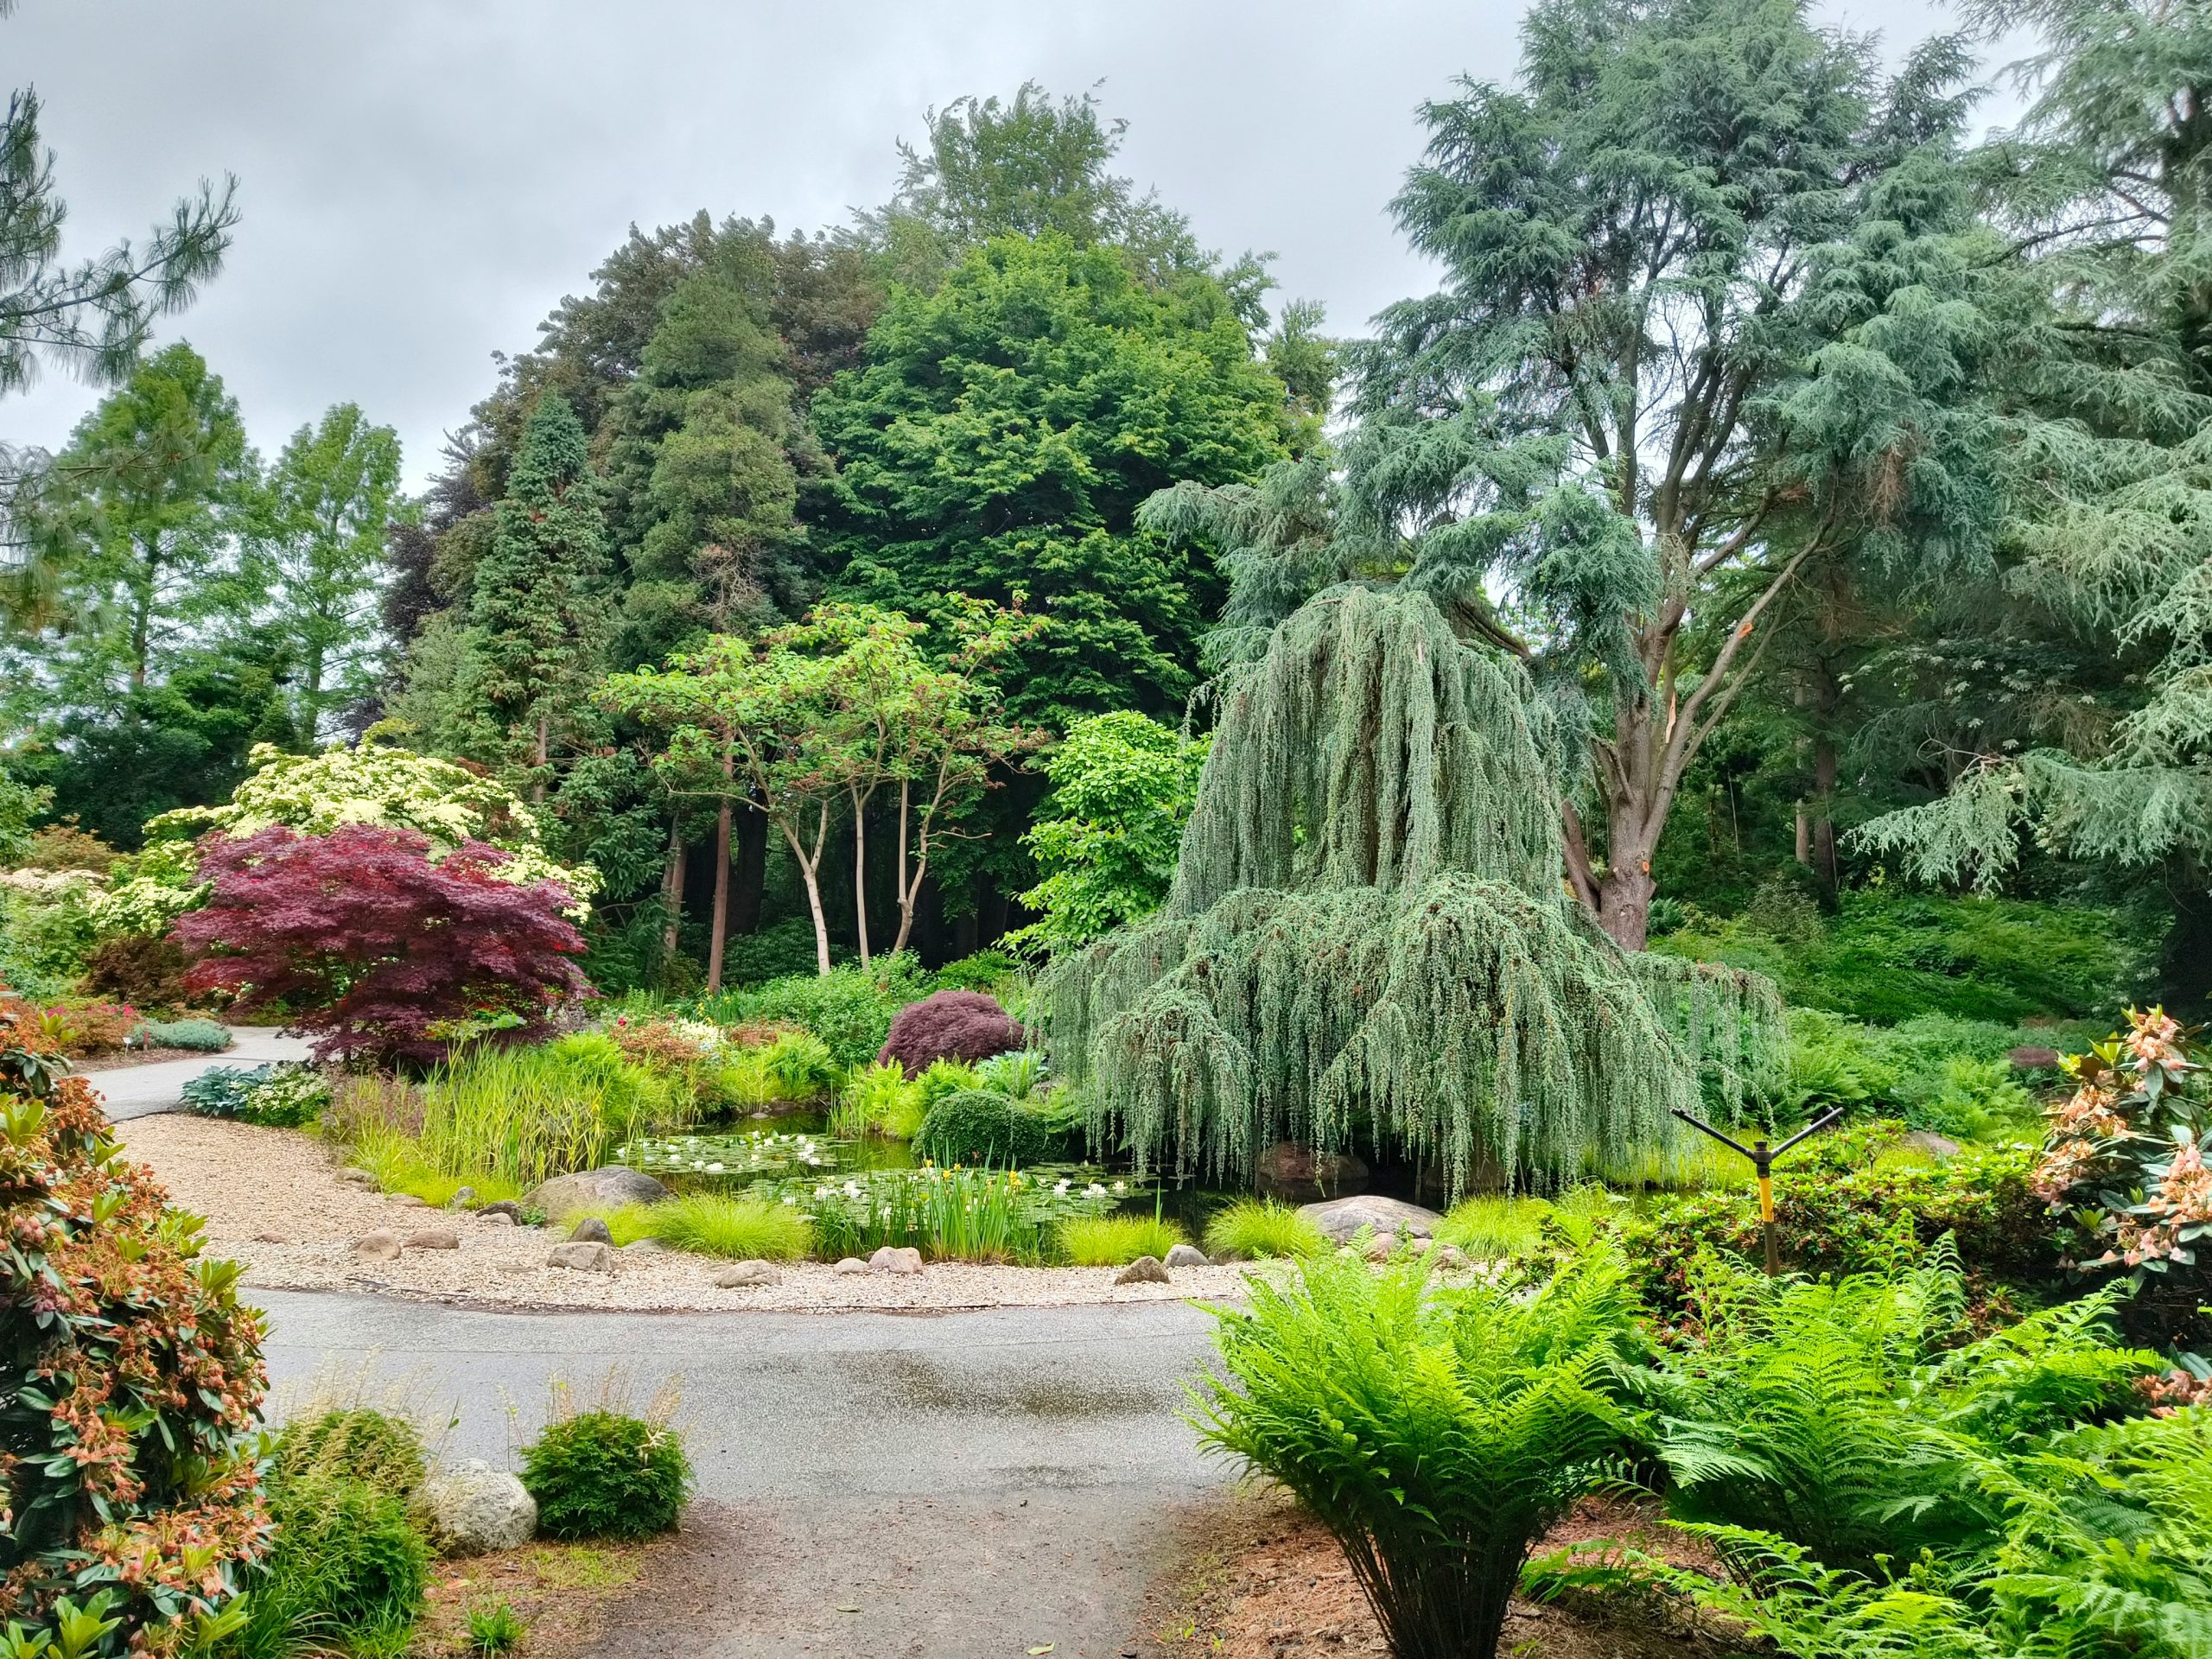
“Want to introduce a small, low-maintenance pond or water feature?”
Here’s a quick guide (Time: 1 weekend; Cost: $150-$500):
- Choose your location. Pick a spot that gets at least 4-6 hours of sun if you want water lilies, and is clear of overhanging trees that will drop leaves.
- Excavate. Dig a hole to the desired shape and depth. A pre-formed plastic pond liner from a garden center makes this step much easier than using a flexible liner.
- Install the liner. Set the pre-formed liner in the hole, making sure it is perfectly level. Backfill around the edges with sand or soil to hold it in place.
- Add water and plants. Fill the pond with water. Let it sit for a day before adding a few aquatic plants, like a water lily and some oxygenating grasses, to help keep the water clear. A small solar-powered fountain can help with aeration.
25. Lush Tiered Garden Beds with Natural Stone Walls
This lush, multi-level look involves significant labor and material costs, especially for the natural stone walls.
“Natural Stone: $2,500 – $6,000 (for wall-grade fieldstone or flagstone)Labor for Wall Construction: $4,000 – $10,000 (requires skill to stack securely)Plants & Small Trees: $2,000 – $5,000 (for a dense, mature look)Topsoil, Compost & Mulch: $800 – $1,500TOTAL: $9,300 – $22,500Budget alternative: Get a similar tiered look for much less by using treated landscape timbers to build the retaining walls.”
The look is more rustic than stone, but the installation is a much more approachable DIY project. This approach can bring the total cost down by 60-70%. Compare with the similar but more formal layout in Idea #4.
A densely planted slope like this can be more susceptible to erosion, especially in the first year or two before the plant roots have fully established to hold the soil. During heavy rainstorms, you might see mulch and topsoil washing down from the upper tiers onto the lower ones or the pathway. Using a high-quality, shredded hardwood mulch (which knits together) instead of fine wood chips can help. Also, installing a discreet, buried edging at the lip of each tier can help hold everything in place as the garden matures.
26. Neatly Trimmed Shrubs Bordering a Stone and Gravel Path
To create a crisp, clean edge between a garden bed and a gravel path like this, use a high-quality steel or aluminum landscape edging. Install the edging first, creating the desired curve of your path. Backfill the garden bed side with soil, and the path side with a base layer of crushed stone, then your decorative gravel. The metal edge, which should be barely visible once the materials are in, provides a permanent, sharp line that prevents gravel from migrating into your mulch and vice versa. It’s a pro detail that makes a huge difference.
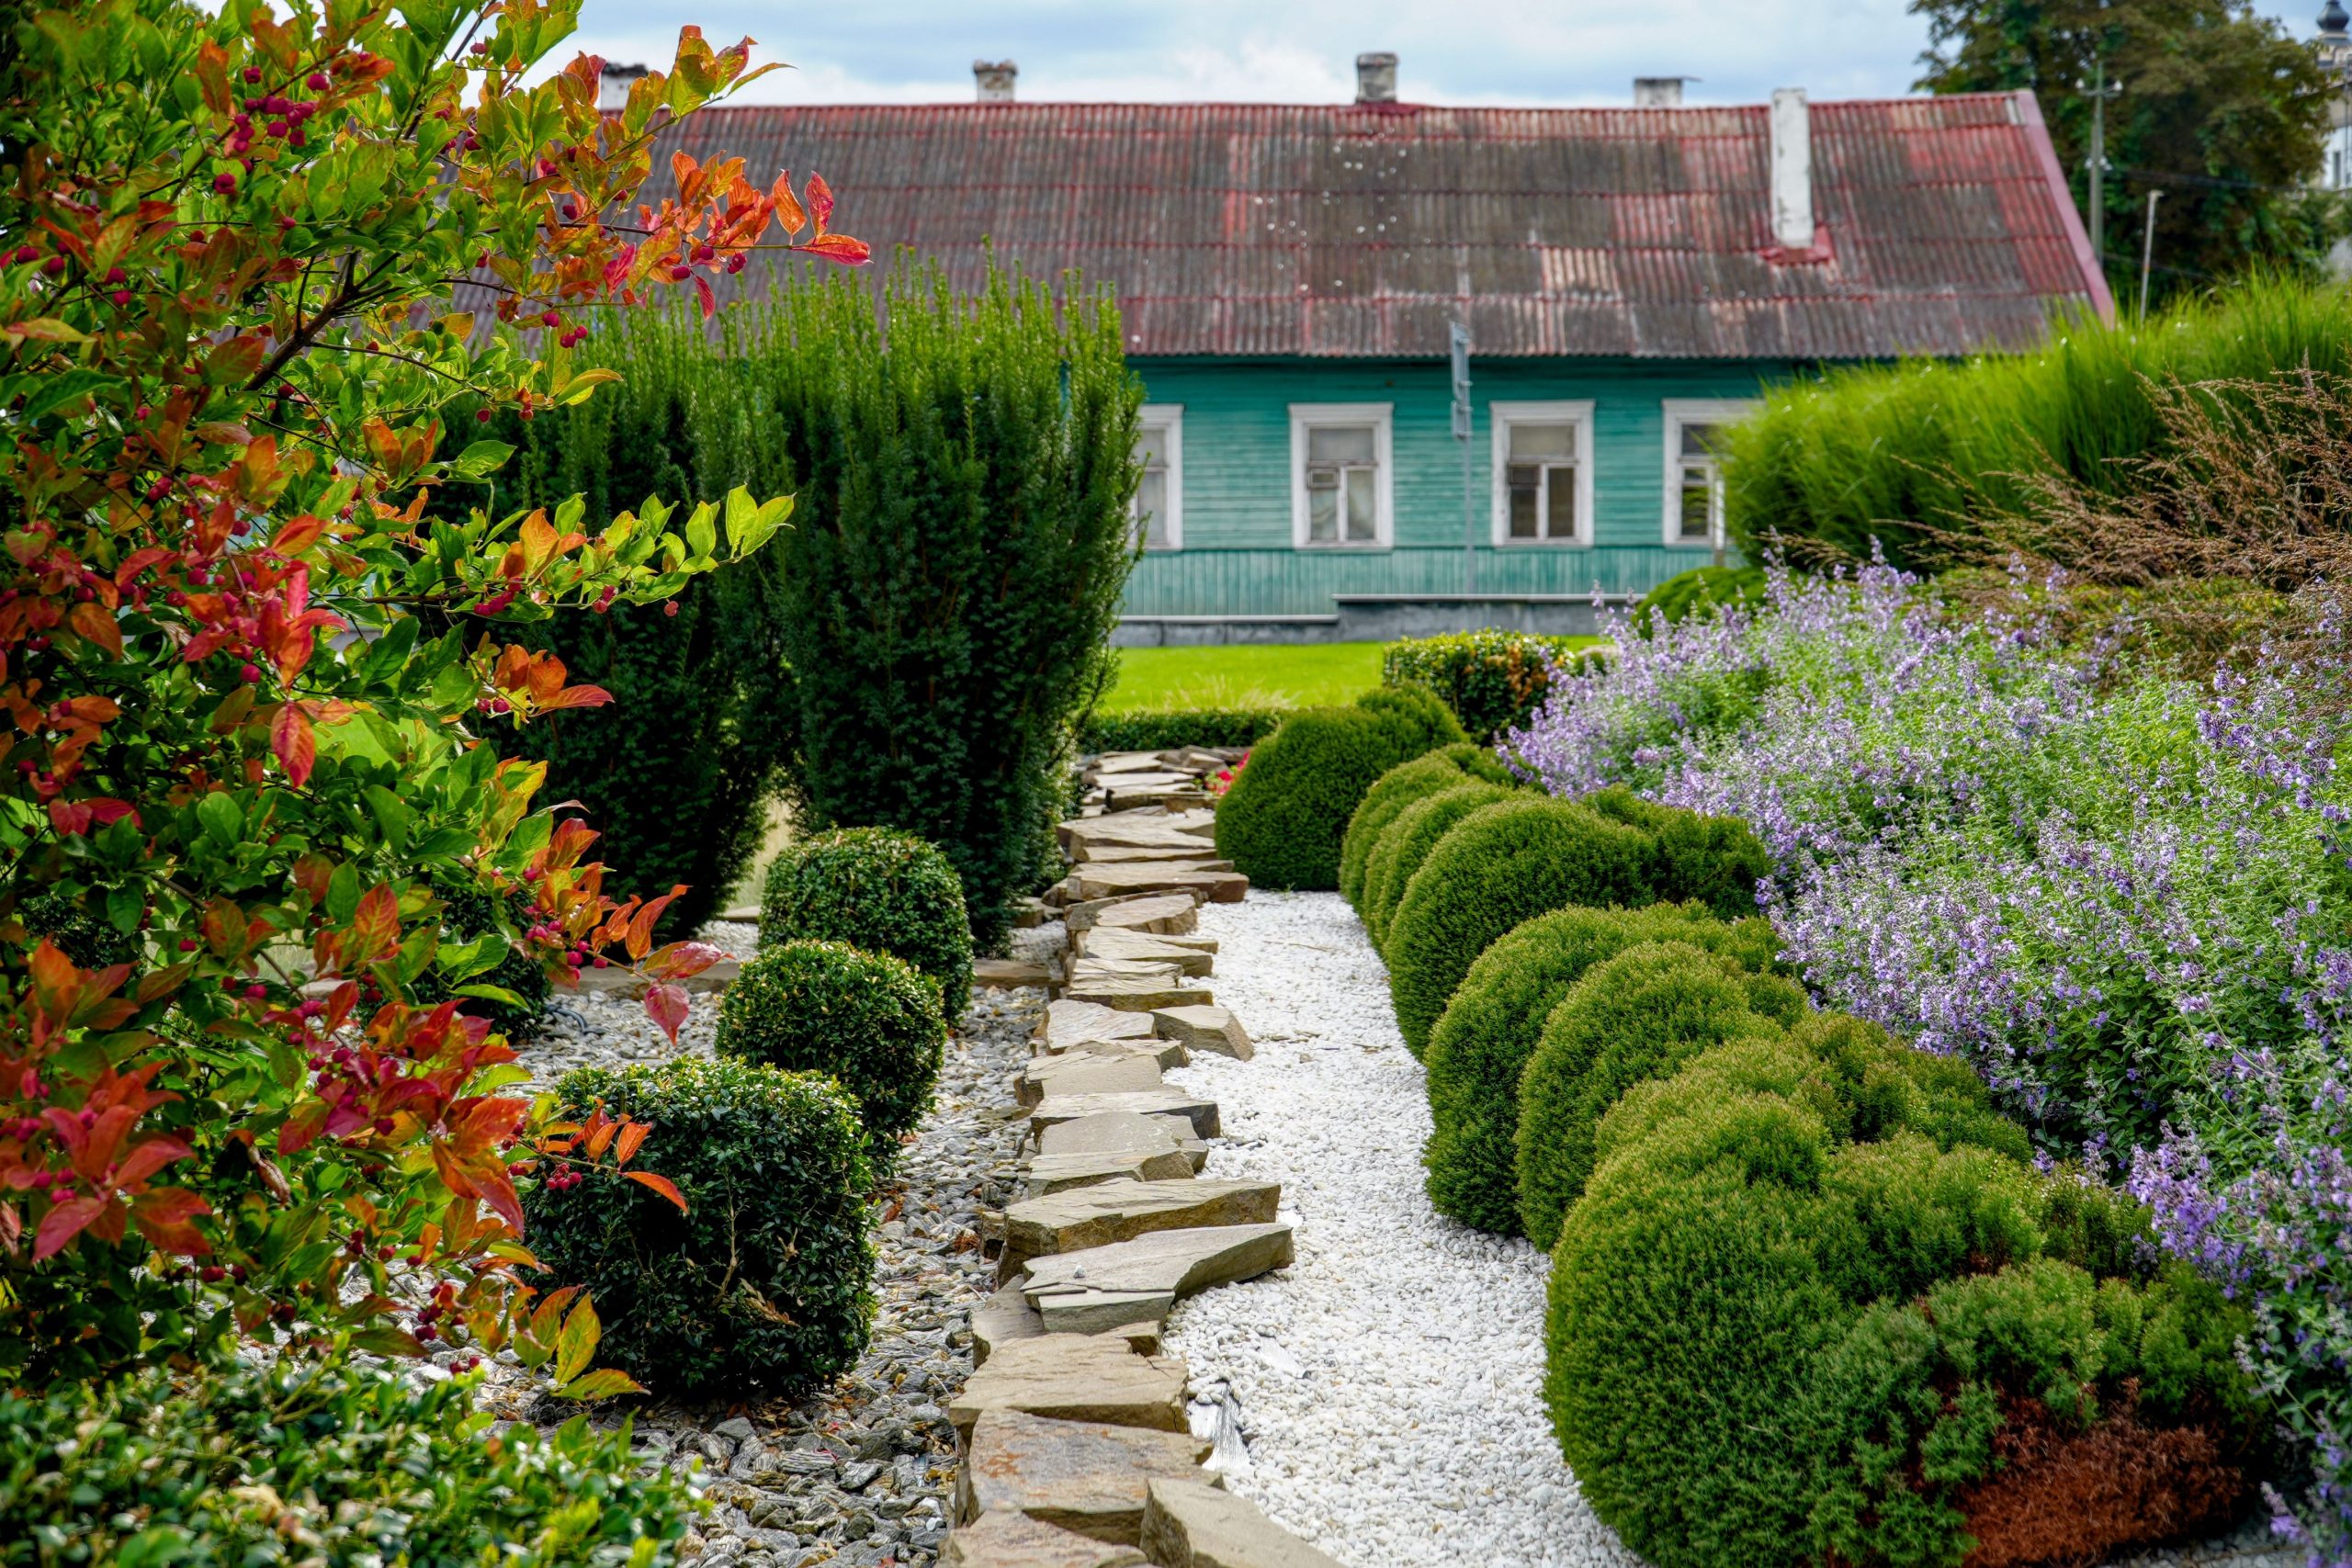
“This design is so successful because it perfectly balances formal structure with naturalistic planting.”
The perfectly rounded evergreen shrubs and the clean line of the gravel path provide a strong, orderly frame. This structure then allows the other elements—the vibrant red-orange foliage, the soft purple flowers, the irregular stone path—to feel lush and vibrant without looking messy or chaotic. The formal elements contain the ‘wildness’ of the other plants, creating a garden that feels both exciting and under control.
27. Curved Stone Path Flanked by Manicured Boxwood Hedges
That elegant, established look doesn’t have to cost a fortune. The key is to DIY the path and have patience with the plants. Instead of expensive natural flagstone, use a concrete paver mold (like those from WalkMaker) to create a custom stone path for about $50 in concrete mix. For the hedges, buy the smallest boxwood plants available—sometimes just $8-10 each. Plant them with the correct spacing and wait. It will take 3-4 years for them to fill in and be ready for shaping, but you will have saved thousands of dollars compared to a professional installation with mature plants.
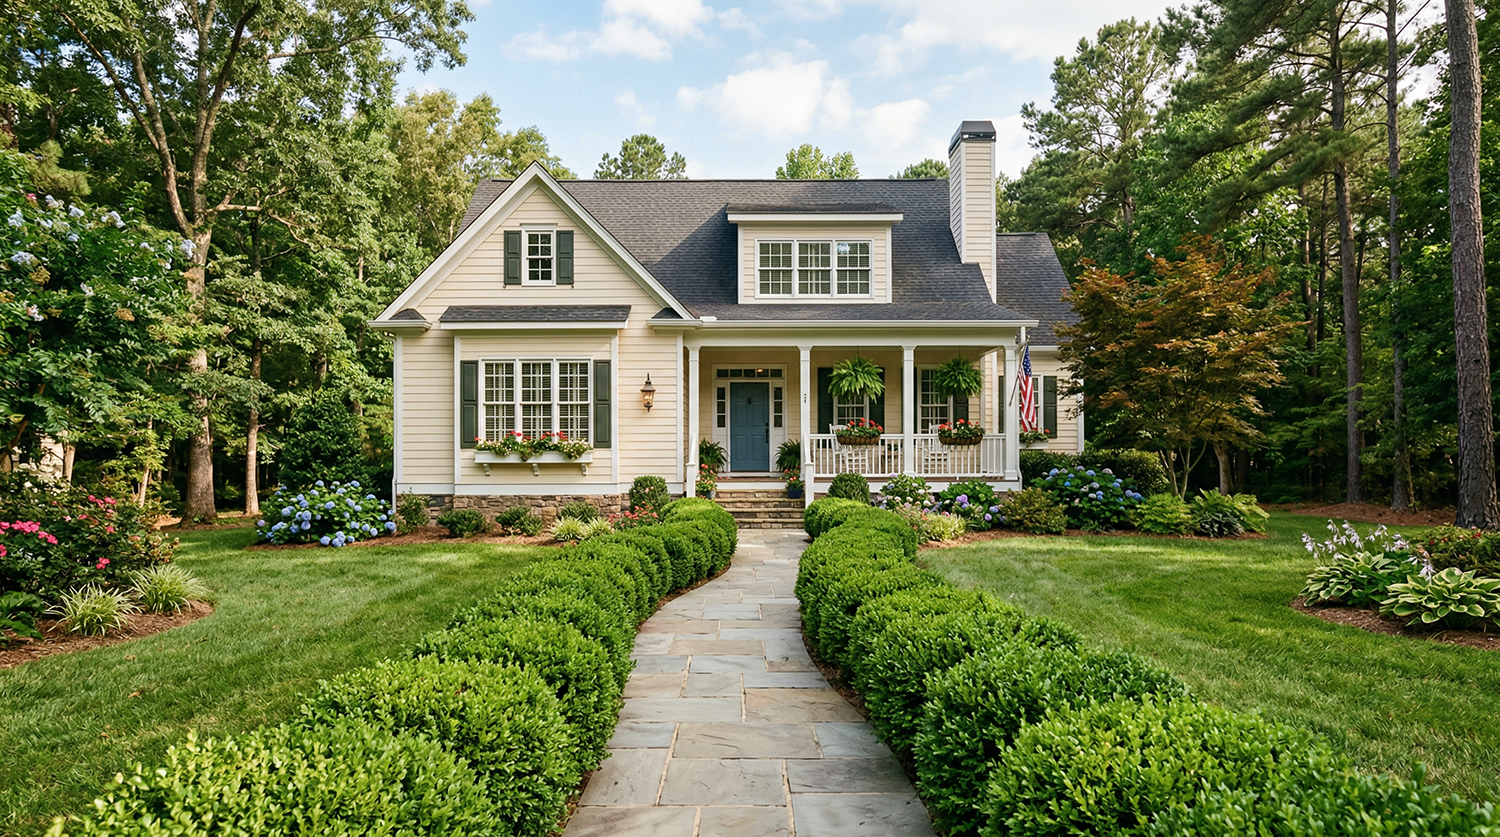
“The single element that gives this front yard its classic, upscale character is the manicured boxwood hedge bordering the pathway.”
It’s the ‘little black dress’ of landscaping. The crisp, clean lines of the low hedge provide a perfect frame for the stone path and a formal green edge for the more informal flowering shrubs behind it. Remove the hedge, and the whole design would feel less intentional and much more casual. It adds a layer of structure and timeless elegance that elevates the entire landscape.
28. Layered Shrubs with Burgundy Foliage and a Curved Paver Path
This visually rich landscape follows a classic design formula: 60% evergreen structure + 30% contrasting color/texture + 10% hardscape. The dark green rounded shrubs provide a year-round ‘backbone’ for the design. The reddish-burgundy and lighter green plants are then layered in front to provide seasonal interest and textural contrast. The light-colored paver path acts as a clean, curving line that defines the space. You could swap the burgundy plants for silver-leafed ones, and this successful ratio would still create a balanced, professional-looking garden.
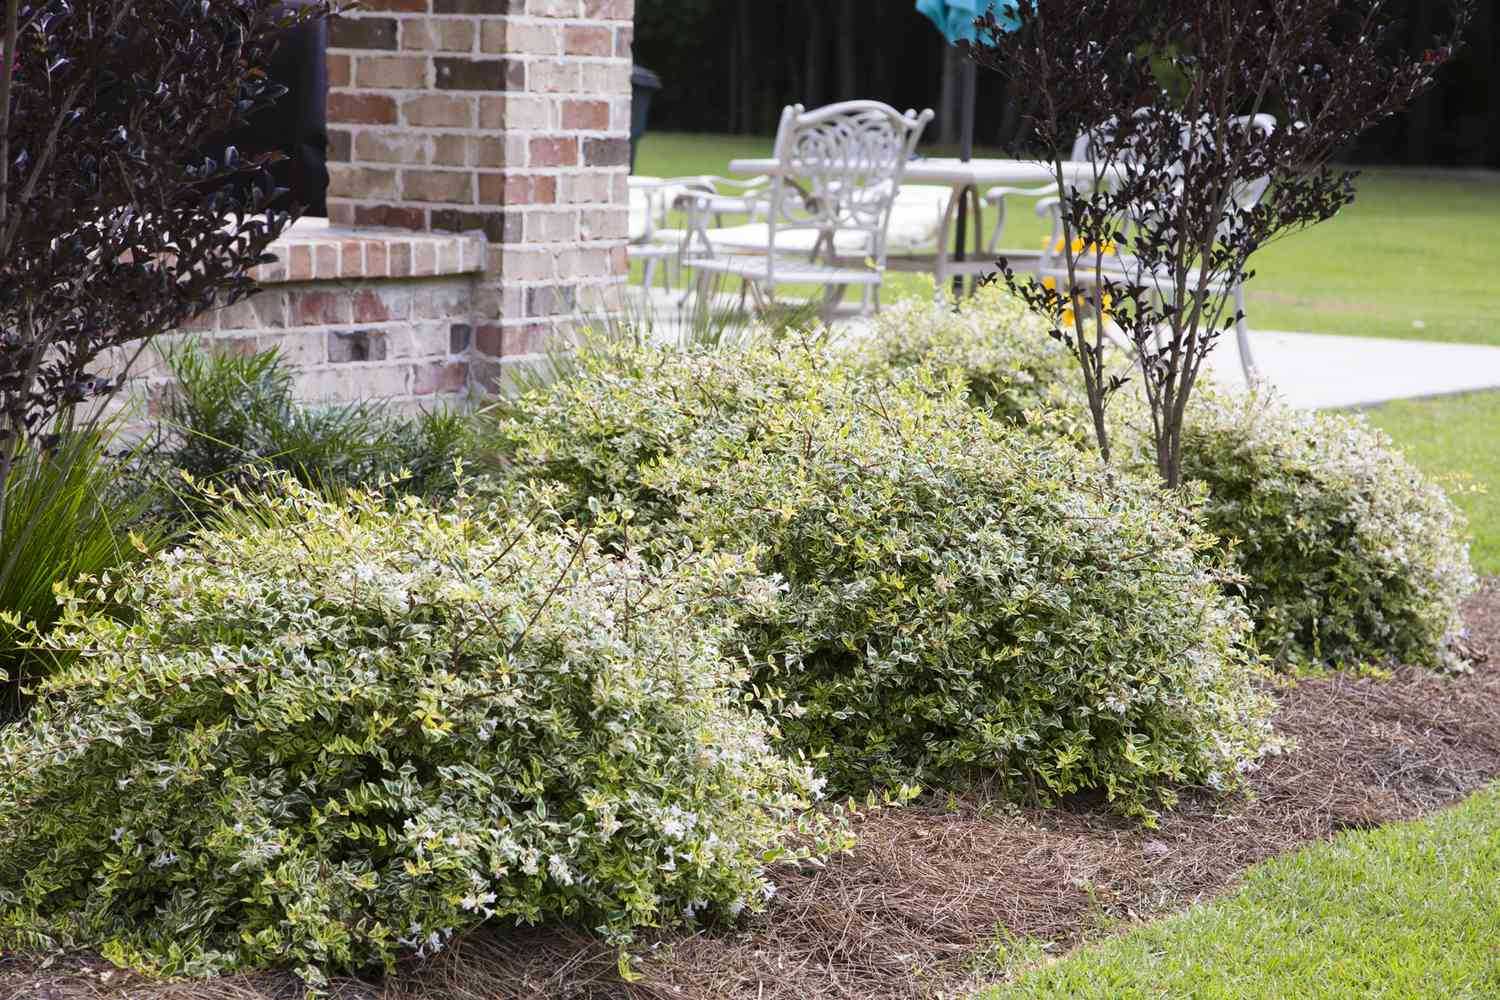
“Before you commit to a design with deep, layered beds, you must consider future access.”
How will you get to the back row of plants to prune them or treat for pests? Plan for a few strategically placed, hidden stepping stones within the bed, or ensure you can easily reach the back from behind the bed. Also, think about your utilities. Are there any cable boxes, water spigots, or basement window wells that this planting will eventually block? Check your house perimeter and plan your layout accordingly. Check out the boulder placement tips in Idea #9 for another way to add structure.
29. Curved Stone Path with Varied Greenery and a Natural Rock Feature
This serene, minimalist design is perfect for smaller spaces because it relies on a limited plant palette and bold forms. It works well in a space from 150 sq ft up to 500 sq ft. The key is the scale of the rock feature. In a smaller garden, the rock should be substantial enough to be a focal point but not so large it overwhelms the space—think something you can’t lift by yourself but two people could. The large, dark green shrubs provide a simple, calming backdrop, while the curved path adds a sense of movement, making the area feel larger than it is.
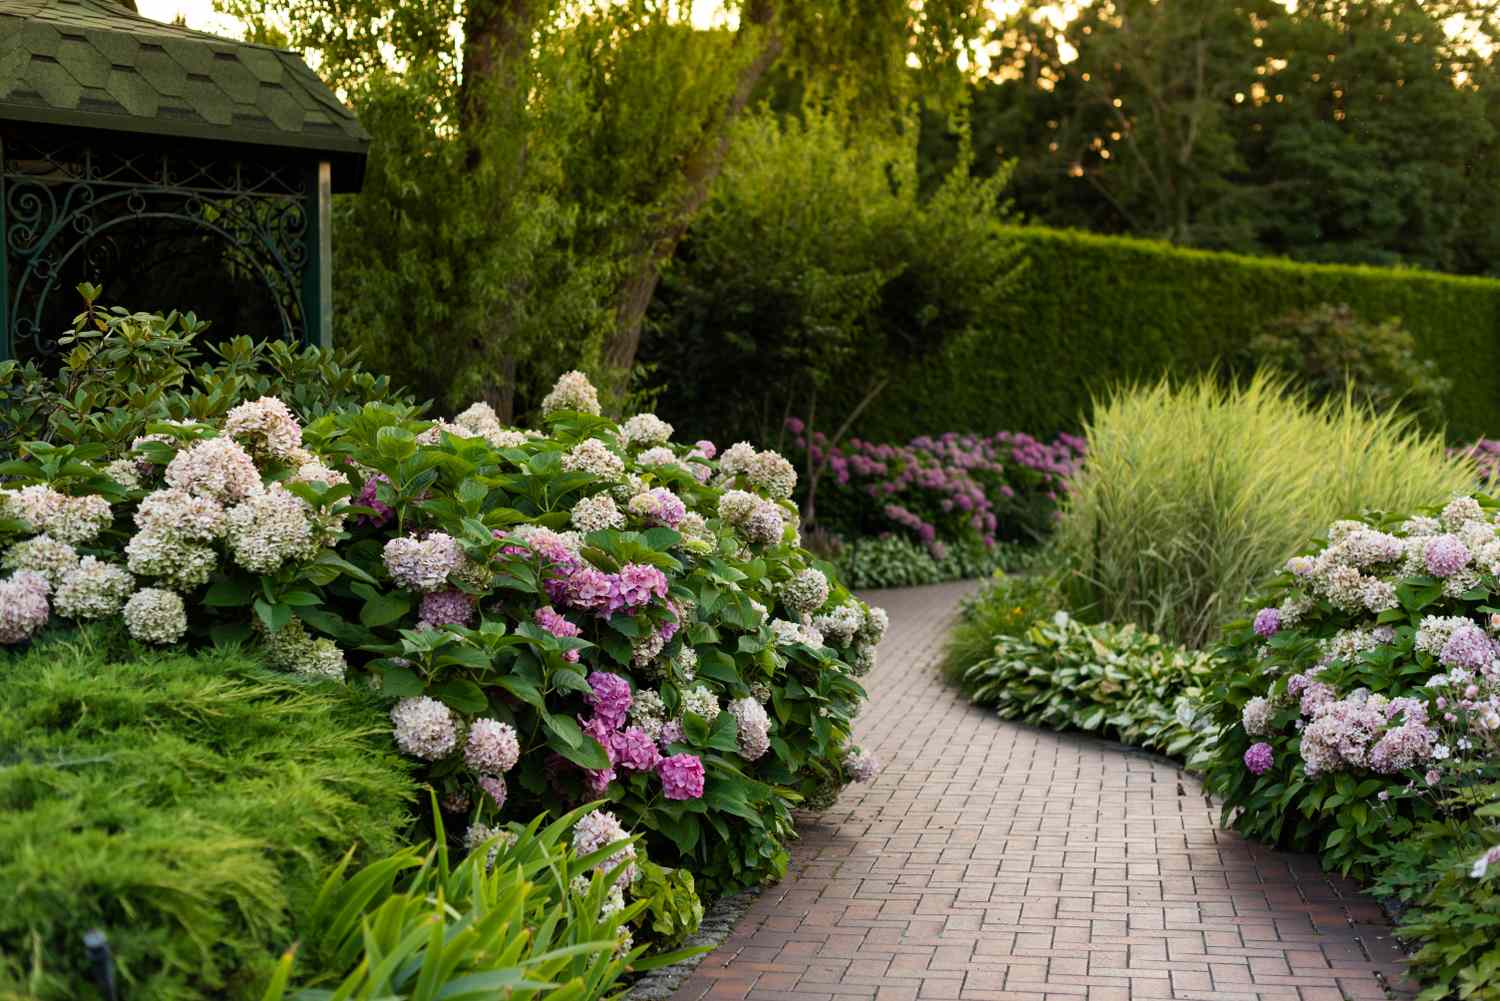
“While this looks like a low-maintenance ‘zen’ garden, reality can be a bit different.”
The large, dark green shrubs (likely a variety of yew or juniper) will require annual pruning to keep them from overtaking the lighter green plants and the pathway. The ground cover will need to be edged regularly to maintain the clean line of the path. And the biggest task? Keeping leaves and debris from collecting around the base of the rock and in between the groundcover plants, which can be a tedious but necessary task to maintain the clean, manicured look.
30. Lush Natural Garden with Red Flowers and a Stone Patio
This garden feels so effortlessly lush because it mimics a natural woodland edge. The design uses plants of varying heights, from tall evergreen trees that form a canopy, to mid-size shrubs, to low flowering plants and a creeping groundcover. This vertical layering creates a sense of depth and enclosure. The color palette is also controlled but effective: a base of many shades of green is punctuated by pops of vibrant red and soft pink, drawing the eye to key spots. The wet stone patio enhances all the colors, making the greens look greener and the reds richer.
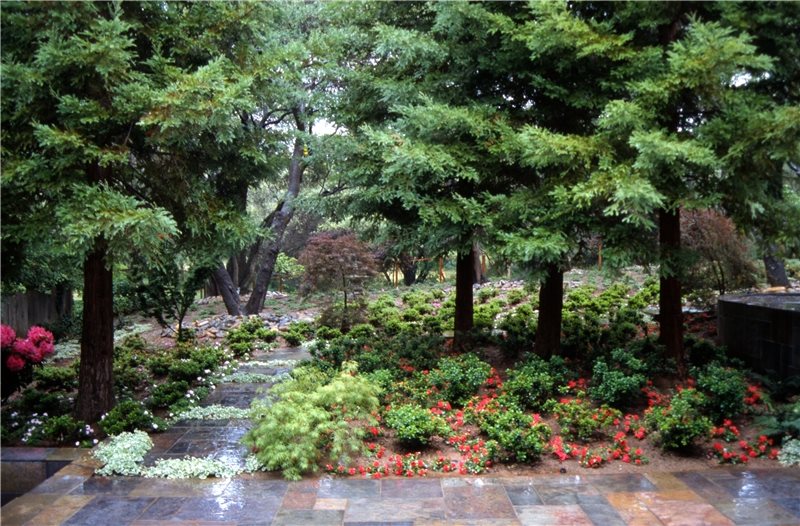
“A naturalistic garden like this is beautiful, but it’s an open invitation to wildlife—which can be both a blessing and a curse.”
You’ll likely enjoy more birds and pollinators. However, those vibrant red and pink flowers are also a buffet for deer and rabbits. The dense cover is a perfect home for chipmunks and voles, which can damage plant roots. If you live in an area with significant animal pressure, you’ll either need to choose deer-resistant plants (which can be limiting) or invest in repellents or fencing to protect your beautiful investment.
31. Structured Shrubbery and Stone Landscaping for a Formal Entry
Achieving this kind of formal, architectural entry is a high-impact upgrade with a price tag to match, driven by the stonework.
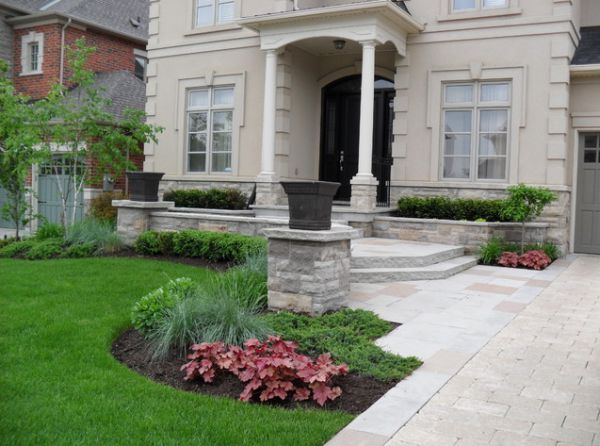
“Stone Veneer Walls & Pillars: $8,000 – $18,000 (Includes materials and specialized masonry labor)Paver Walkway & Stone Steps: $3,000 – $7,000Shrubs & Accent Plants: $1,000 – $2,500Planters & Lighting: $500 – $1,500TOTAL: $12,500 – $29,000Budget alternative: Get a similar tiered, formal feel using pre-cast concrete retaining wall blocks for the walls and basic concrete pavers for the walkway.”
Use fewer, more impactful plants like the reddish-purple foliage to draw attention. This can reduce the total cost by 60-75%.
When creating a formal landscape, contrast is your best friend. Notice how the dark green, low-growing shrubs have a very fine texture, which is placed directly in front of the light-colored stone with its rough, varied texture. Then, the reddish-purple foliage plants are used as accents. Their bold color and different leaf shape pop against both the green shrubs and the light stone. Don’t be afraid to use a dark-leafed plant; it adds a touch of drama and sophistication that green foliage alone can’t achieve. Use it sparingly for maximum impact.
Your Garden’s Next Chapter Starts Here
Don’t just let these ideas live on your screen! Pick one element—a color combination, a type of path, a single perfect shrub—and start there. Your dream yard is just a few small decisions away. Pin your favorites and get ready to start digging!