You know that feeling when you find a craft that’s relaxing, creative, and actually looks amazing in your garden? That’s the magic of painted rocks. But turning a simple stone into a tiny piece of art isn’t just about splashing on some color. After filtering through hundreds of options across Amazon, Michael’s, and Hobby Lobby, we narrowed it down to 29 ideas that actually deliver. We’ve curated projects covering whimsical characters, nature-inspired designs, and festive holiday themes, perfect for any skill level. In 2026, creating tactile, personal art is the perfect antidote to our digital lives, making rock painting a huge trend on Pinterest. And stay until the end—we break down the most common mistakes that can ruin these looks. 📌 Save this to Pinterest for later — you’ll want to revisit these ideas.
1. Create a Winding Creek Bed of Colorful Painted Rocks
How-To Brief
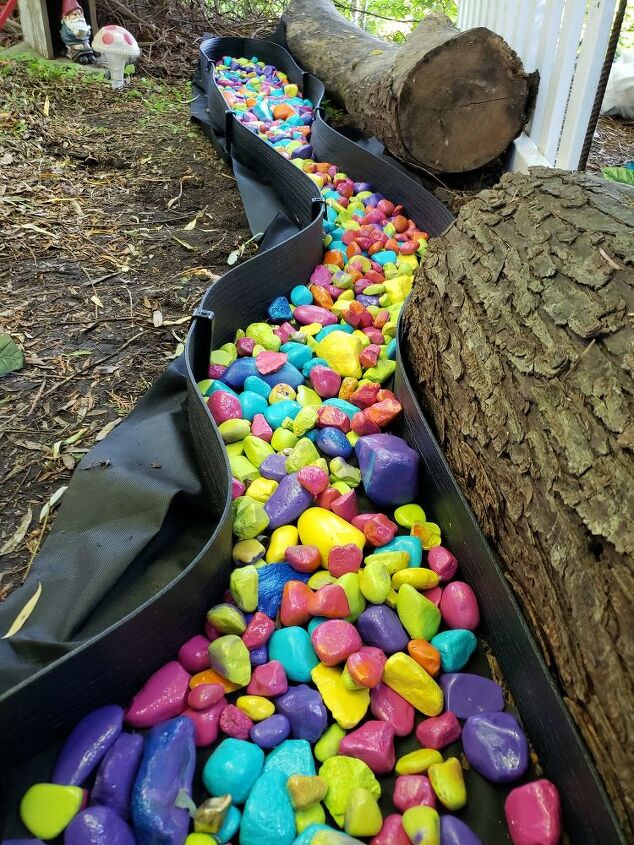
“Want to build your own rainbow river?”
It’s easier than it looks and makes a huge impact in a garden bed. This project takes about 3-4 hours of active work (plus paint drying time) and costs around $50-$100 for edging and a big batch of rocks if you don’t have them on hand.
- First, lay out your path using flexible landscape edging, creating a gentle, winding shape. Secure it in place according to the manufacturer’s instructions.
- Clear the channel of grass and weeds, and level the soil base slightly.
- Paint your rocks! Use a wide variety of vibrant, outdoor-safe acrylic paints. Let them dry completely, then apply a clear sealant.
- Once cured, carefully arrange the rocks inside your prepared channel, mixing sizes and colors for a natural, cascading effect.
Real Talk
While a painted rock creek bed is stunning, let’s be honest about the upkeep. The biggest enemy is the sun. Even with a UV-resistant sealant, the vibrant pinks, yellows, and blues will eventually fade after a few seasons of direct sunlight. You might need to pull out the most faded ones each spring for a quick touch-up. Also, dirt, mulch, and fallen leaves will inevitably get stuck between the rocks. A leaf blower on a low setting can help, but expect to do some occasional hand-cleaning to keep it looking fresh and not like a colorful, muddy ditch.
2. Paint Vibrant Peace Signs and Florals on Dark Rocks
Designer Tip
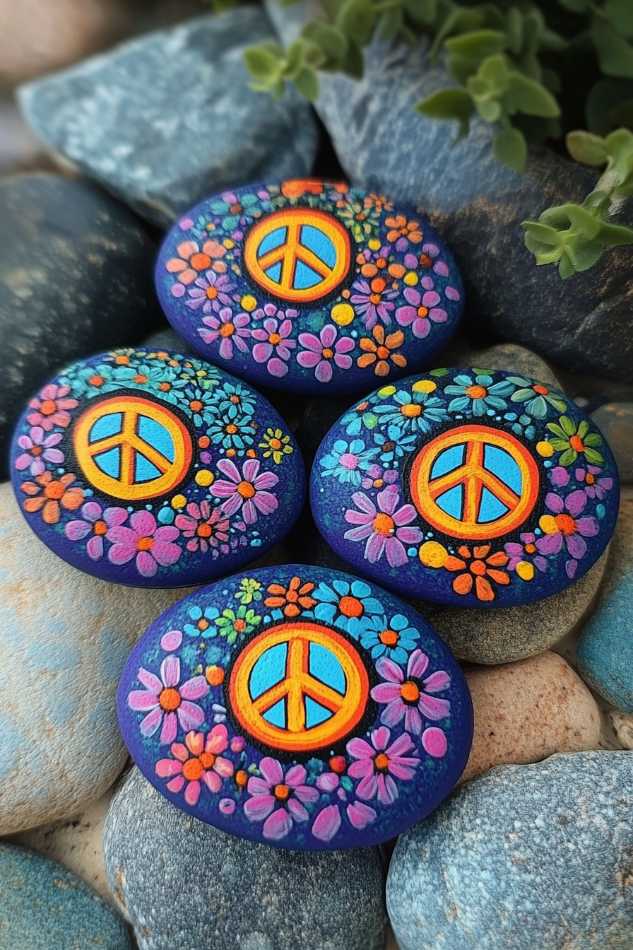
“The secret to making those bright pink, orange, and light blue florals pop so intensely is the dark blue base coat.”
Painting bright colors directly onto a natural gray rock can leave them looking dull and washed out. By creating a deep, uniform background first, you give the brighter accent colors a high-contrast canvas to shine against. For an even richer look, apply two thin coats of the dark blue paint, letting it dry completely between layers before you even think about starting your peace sign or flowers. This technique makes a world of difference.
Style Math
This look follows a simple but effective formula that you can easily adapt. Think of it as: 60% dark, moody base + 30% tiny, multi-color accents + 10% bold central graphic. Here, it’s a dark blue base, a scattering of little flowers, and an orange-outlined peace sign. You could swap the formula for a totally different vibe. Try a black base (60%) with tiny white starbursts (30%) and a single, metallic gold moon (10%). The key is the ratio: a dominant, dark background makes a small amount of bright detail feel incredibly dynamic and intentional.
3. Craft a Collection of Cheerful, Message-Bearing Rocks
What Makes It Work
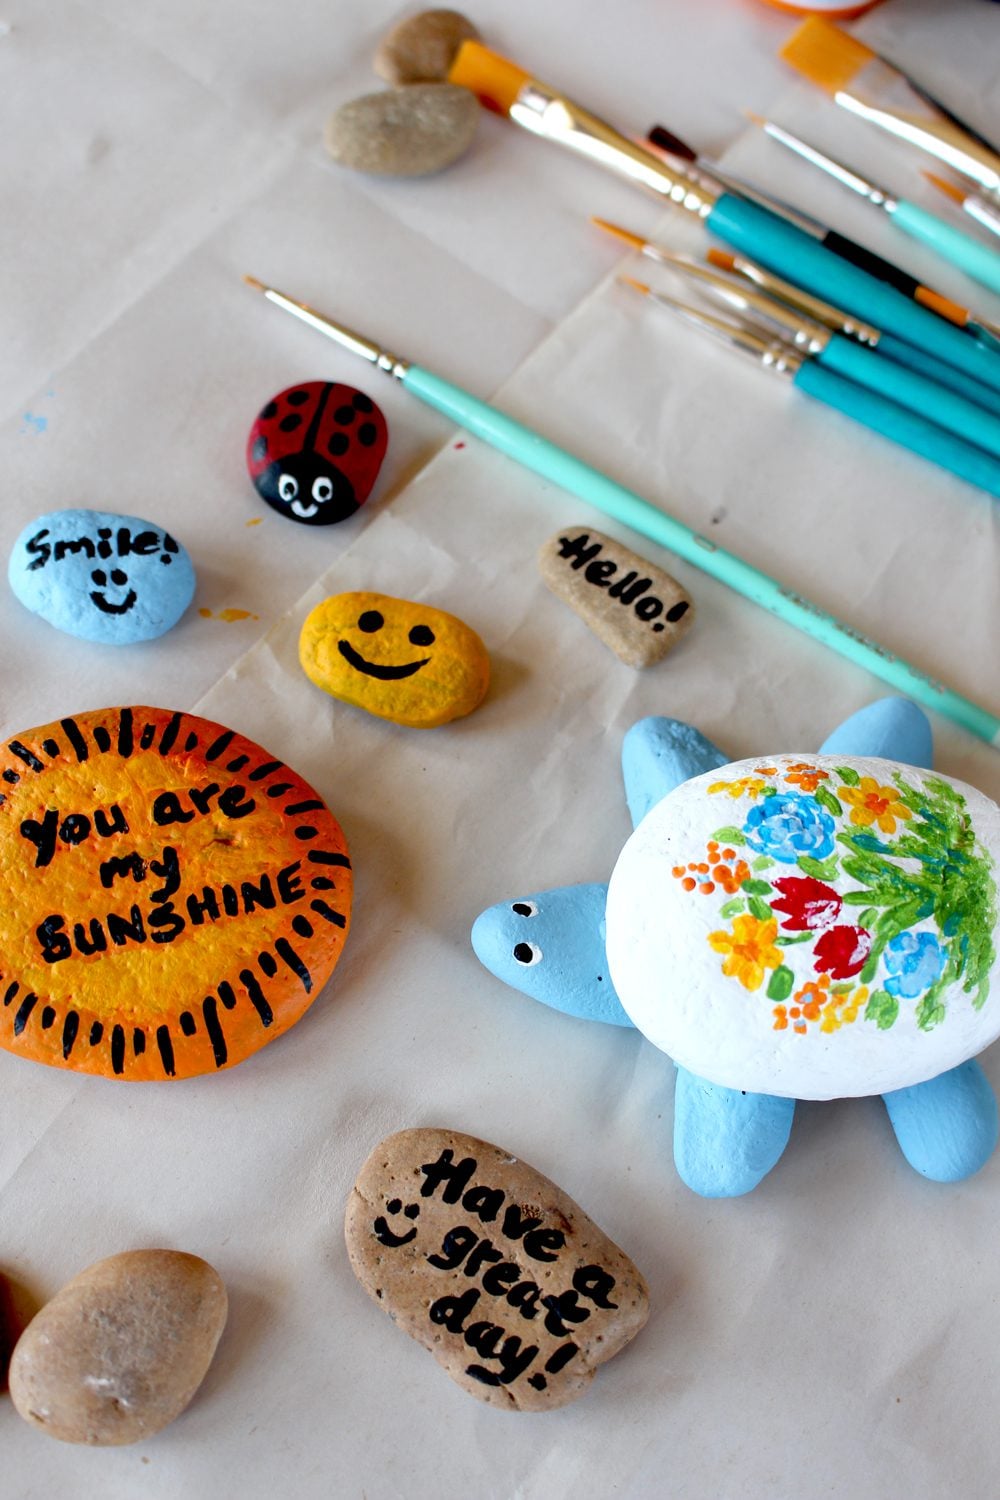
“This collection feels so joyful because it perfectly balances simple graphics with positive words.”
The ladybug and turtle rocks are charming on their own, but placing them next to rocks that say ‘Smile!’ or ‘Have a great day!’ creates a little story. It’s the combination of picture and text that elevates it from a simple craft to a set of ‘kindness rocks.’ The consistent use of bold black outlines on every piece, whether it’s around the ladybug’s spots or the letters, ties the whole diverse collection together, making it feel cohesive instead of random.
Get This Look For Less
You don’t need a fancy, expensive rock painting kit to create these. The entire project can be done for under $15. Find smooth, flat-ish river rocks for free on a walk (just check local rules first!). A basic set of acrylic craft paints from Walmart or a dollar store will run you about $5-$8. The key is a good black permanent marker or paint pen for the lettering and outlines, which you can get for a couple of bucks. Spread some newspaper on your table, and you’re ready to go. This is a craft where resourcefulness is part of the charm.
4. Set Up a Kid-Friendly Rock Painting Station
The One Thing
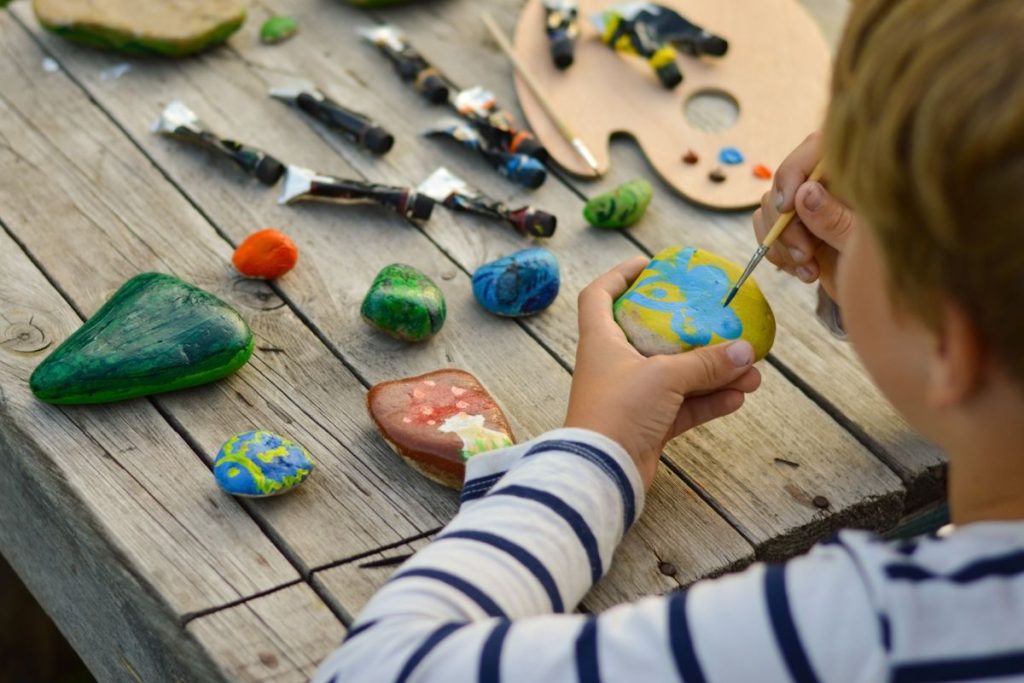
“The single most important element here isn’t the painted rocks themselves—it’s the visible process.”
Seeing the child’s hands, the dabs of paint on the palette, and the brushes ready for action is what makes this so special. It captures the pure joy of making something. This isn’t about achieving a perfect, polished result. It’s about the sensory experience of mixing colors, the focus of dabbing a brush onto a surface, and the freedom to create a green and orange mushroom next to a blue and yellow abstract piece. The magic is in the doing, not the finished product.
Before You Start Checklist
A successful (and low-stress) painting session with kids is all about the prep work. Run through this list before you hand over the paints to ensure it’s fun for everyone, including the person on cleanup duty.
- Have you covered your work surface? Old newspaper, a cheap plastic tablecloth, or a flattened cardboard box works perfectly.
- Are the rocks clean and dry? A quick wash with soap and water the day before is ideal.
- Are you using washable paints? Opt for non-toxic, washable tempera or acrylic paints to save yourself from stained clothes and furniture.
- Do you have smocks or old t-shirts ready? Because paint will find a way onto clothing. Every. Single. Time.
5. Display Diverse Hand-Painted Rocks on Simple White Plates
Trending Context
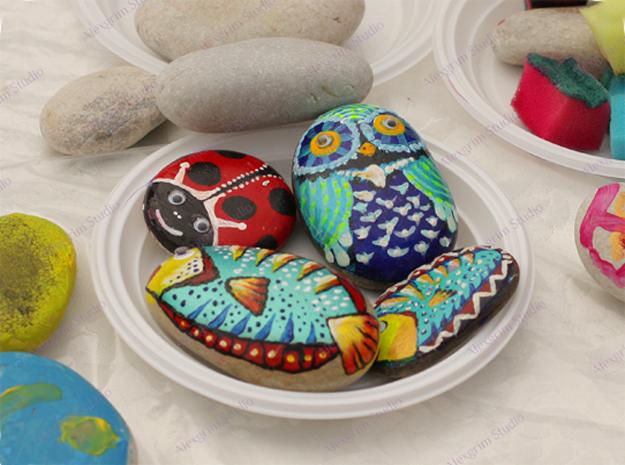
“Rock painting has been around forever, but it’s seeing a massive resurgence as part of the ‘hobby-craft’ wellness trend.”
In a world of screens and digital everything, people are craving tactile, hands-on activities that result in a physical object. The low barrier to entry—all you need is a rock and some paint—makes it incredibly accessible. This trend isn’t about creating museum-quality art; it’s about the mindful process of painting and the joy of creating something small and beautiful, like the little owl and ladybug here. It’s a small act of creative rebellion.
Maintenance Reality
If you’re painting rocks for indoor display, like these charming examples on white plates, maintenance is a breeze. A gentle dusting every now and then is all you need. However, if you plan to move them outdoors, you absolutely must seal them. Without a proper sealant, the first rain will cause the acrylic paint to run, and sun exposure will fade the vibrant colors in a matter of months. Use at least two coats of a clear, non-yellowing, UV-resistant spray sealant (available at any craft or hardware store) to protect your work from the elements.
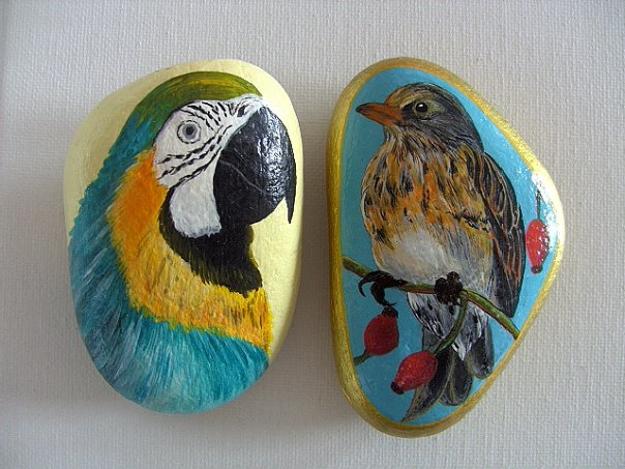
6. Paint Detailed, Realistic Birds on Smooth River Rocks
Designer Tip
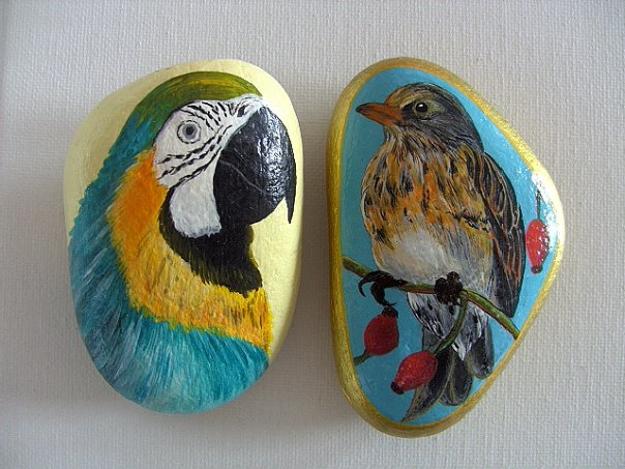
“For hyper-detailed work like the feathers on this macaw and songbird, your paint consistency is everything.”
Most acrylic paints are too thick straight from the tube for this kind of fine-line work. You need to thin it down slightly with a drop or two of water or an acrylic flow medium. Your goal is the consistency of melted ice cream. This allows the paint to glide smoothly off a fine-tipped brush (look for a size 0 or 00 round brush) without clumping, giving you those crisp, delicate strokes needed for feathers and tiny berries.
Scale Guide
This level of detailed painting works best on larger, smoother, and flatter rocks, ideally 4-6 inches in length. A smaller rock simply doesn’t provide enough canvas for the fine details that make these birds so lifelike. You need space to render the individual feathers on the macaw’s head or the delicate branch the songbird is perched on. Trying to shrink this design onto a 2-inch pebble will lead to frustration and a muddy-looking result. If you only have small rocks, opt for a simpler design like the cartoon birds in Idea #15.
7. Transform a Large Rock into a Whimsical Stone House
What Makes It Work
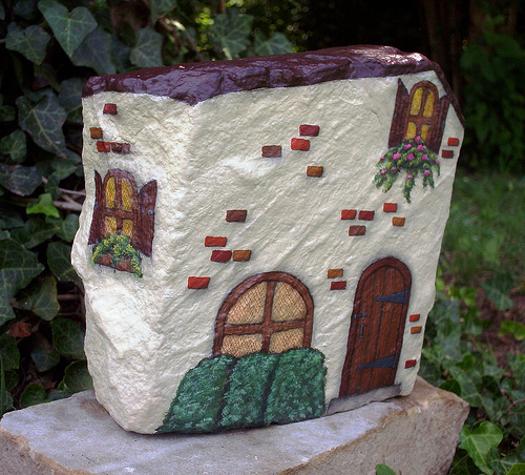
“This painted rock house is so charming because it works *with* the rock’s natural shape, not against it.”
The artist used the stone’s irregular, rustic form to enhance the old-world feel. The design genius is in the details: the arched windows and door add a fairy-tale quality, while the scattered, imperfectly painted ‘bricks’ give it a sense of history and texture. The dark brown ‘wood’ against the off-white ‘stucco’ provides strong contrast, making the architectural features pop. It feels less like a painting on a rock and more like a miniature house carved from stone.
Real Talk
A project this detailed requires a rock with at least one relatively flat, large face to act as your main ‘wall.’ Trying to paint intricate windows and doors on a perfectly round or lumpy rock will be an exercise in frustration as you fight the curves. You’ll also need a steady hand and some very fine-tipped brushes for the brick details and window frames. This isn’t a quick, one-hour craft. Plan for a multi-stage process: base coat, let it dry, draw your design, paint the details, let it dry, and then seal it. It’s a commitment!
8. Paint a Pebble House with a Grey Shingled Roof
The One Thing
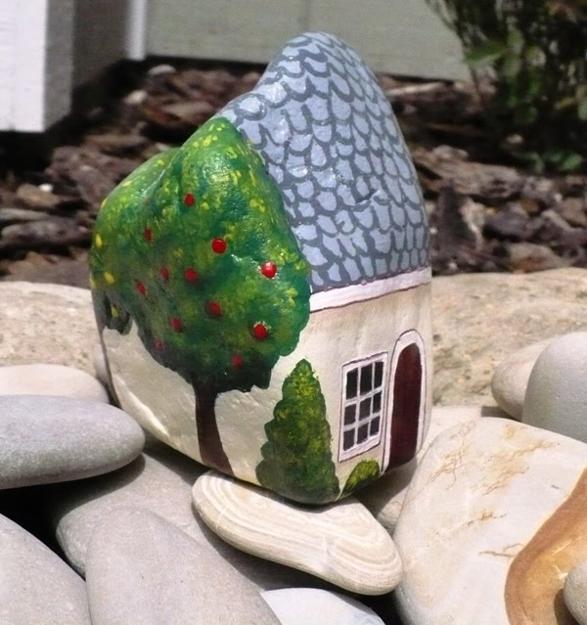
“The single element that makes this pebble house so convincing is the textured grey roof.”
Instead of just painting it a flat gray, the artist used small, overlapping strokes of different shades of grey to create the illusion of individual shingles. This one detail adds a layer of realism and craftsmanship that elevates the entire piece. Without the textured roof, it would just be a cute painting; with it, it becomes a miniature piece of architecture. Compare it to the charming but simpler house in Idea #7—the roof here adds a whole new level of detail.
Get This Look For Less
A project this delightful is incredibly budget-friendly. The main component—a smooth, rounded pebble—is free! Look for one about the size of your palm near a river or beach (where permitted). You don’t need expensive artist-grade paints. A small, multi-color set of acrylics from a store like Target or Michael’s costs around $10 and will be more than enough for this and many other rocks. Use a fine-tipped permanent marker for the door outline if you don’t have a tiny brush. This entire charming scene can be created for the cost of a fancy coffee.
9. Design Colorful Hand-Painted Vegetable Garden Markers
How-To Brief
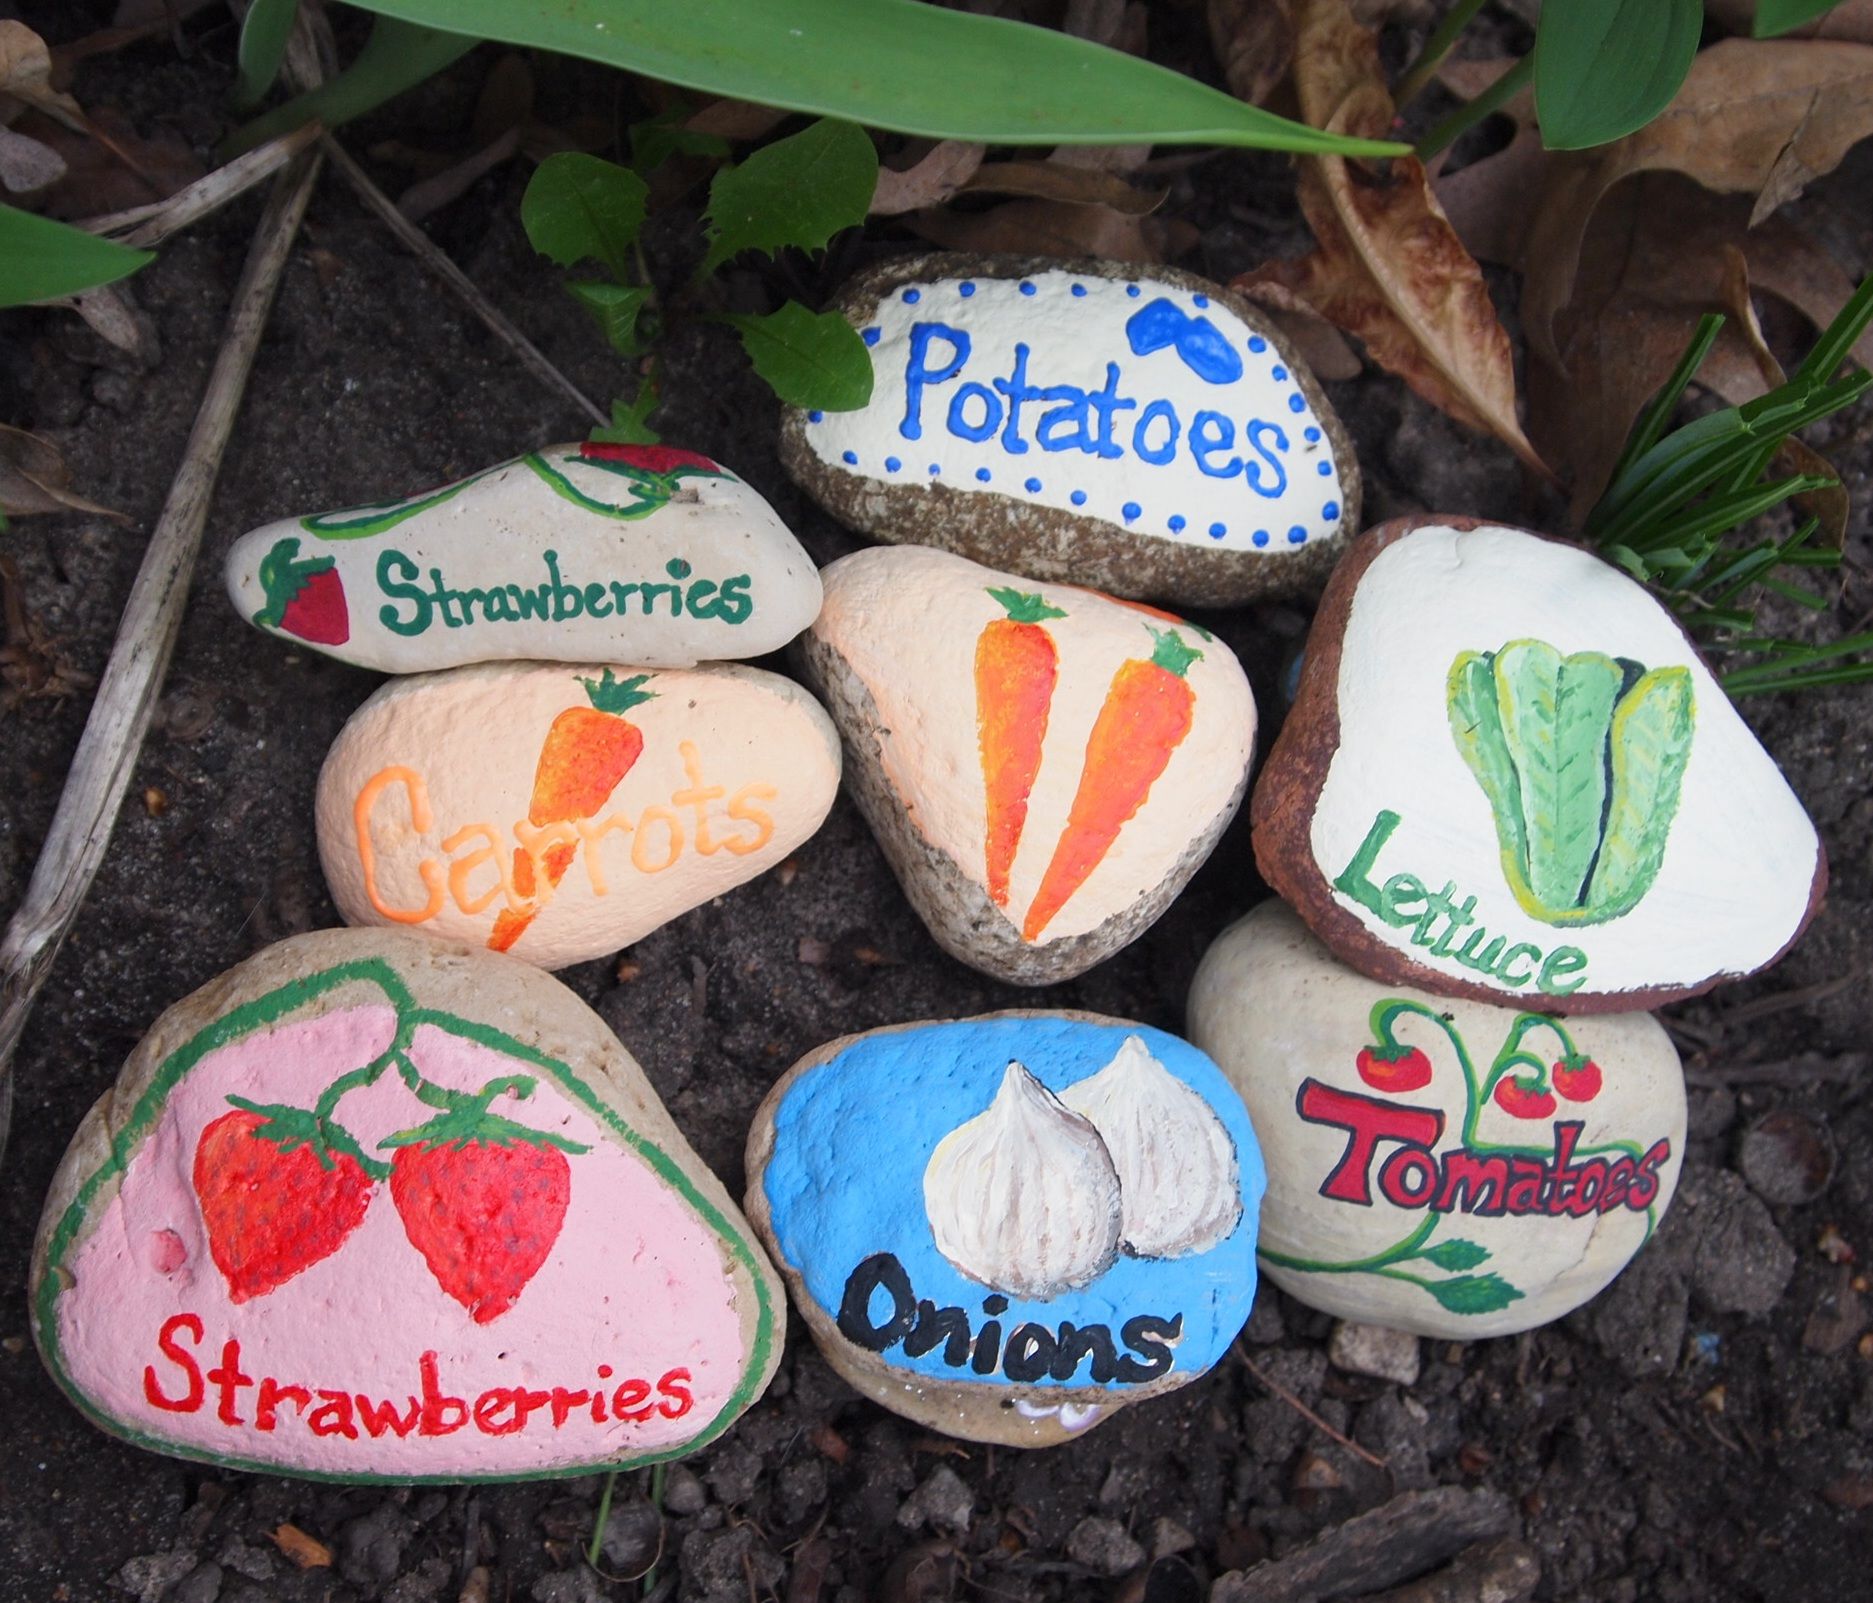
“Creating your own durable garden markers is a fun weekend project.”
This should take about 2-3 hours, plus drying time, with a material cost of around $20 for paints and a good sealant.
- Find or purchase smooth, relatively flat rocks, about 3-5 inches wide. Wash them with soap and water and let them dry completely.
- Apply a base coat of white or a light-colored acrylic paint. This makes your vegetable colors pop. Let it dry.
- Sketch your vegetable design lightly with a pencil. Don’t worry about perfection!
- Paint your design using colorful acrylics. Use a thicker brush for filling in and a finer one for details.
- Once the illustration is dry, use a black paint pen or a fine brush to write the plant’s name in bold letters.
- This is the most important step: Apply at least two thick coats of a clear, UV-resistant, outdoor-grade spray sealant to all sides of the rock. Let it cure for 24 hours before placing it in the garden.
Maintenance Reality
Even with the best sealant, garden markers live a tough life. They’re exposed to constant moisture from watering, dirt splatter, and direct sun. The bold colors will likely start to fade after a year or two, and the sealant might begin to yellow or peel. To maximize their lifespan, bring them indoors over the winter if you live in a climate with harsh freezes and thaws. You can also give them a quick cleaning and a fresh coat of spray sealant each spring to keep them looking their best for another season.
10. Craft Bright and Simple Garden Markers with Produce Illustrations
Designer Tip
“For maximum readability in the garden, always pair your illustration with bold, simple, hand-painted text, just as you see with the ‘STRAWBERRIES’ and ‘CARROTS’ labels.”
Use a high-contrast color—black on a light background is classic for a reason. And don’t overthink the font! A simple, slightly blocky, all-caps print is far more effective from a distance than a fancy, cursive script. The goal is function first, then form. You want to be able to tell your onions from your lettuce at a glance, and clear lettering is key. This is a perfect companion style to the markers in Idea #9.
What Makes It Work
The charm of these garden markers lies in their simplicity and consistency. Each rock follows the same formula: a clean white base coat, a colorful and slightly cartoonish illustration of the plant, and a clear, bold label. This repetition makes them look like a cohesive set, even though each design is unique. The white base is a crucial choice; it acts like a clean page in a book, making the red of the strawberries and the orange of the carrots appear extra vibrant and fresh, ensuring they stand out against the green foliage of a garden.
11. Paint a Whimsical Ghost in a Witch Hat for Halloween
Style Math
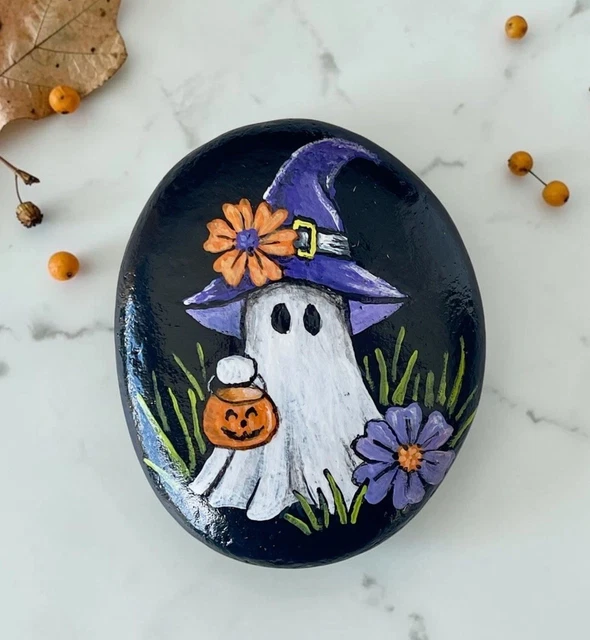
“This adorable Halloween design is a lesson in color balance.”
The formula is approximately 70% dark background + 20% primary character + 10% vibrant accents. The smooth black rock provides a perfect night-sky canvas. The white ghost is the undeniable star of the show. But it’s the 10% of accent colors—the pop of purple on the hat and the bright orange of the jack-o’-lantern bucket and flower—that bring the whole piece to life. Remove the purple and orange, and the design becomes flat. This high-contrast formula is a go-to for any festive or character-based rock art.
Trending Context
Seasonal, small-scale DIY decor is a huge trend, and this little ghost rock is a perfect example. People are moving away from buying mass-produced holiday decorations and are instead finding joy in creating their own unique, personal items. A hand-painted rock is low-cost, low-commitment, and high-reward. You can create a whole family of spooky characters to tuck into planters or line a windowsill. It’s part of a larger movement towards ‘cozy crafting’—simple, satisfying projects that bring a touch of handmade charm and personality into the home for holidays.
12. Create a ‘Bee Kind’ Rock with a Rainbow and Cheerful Bee
Real Talk
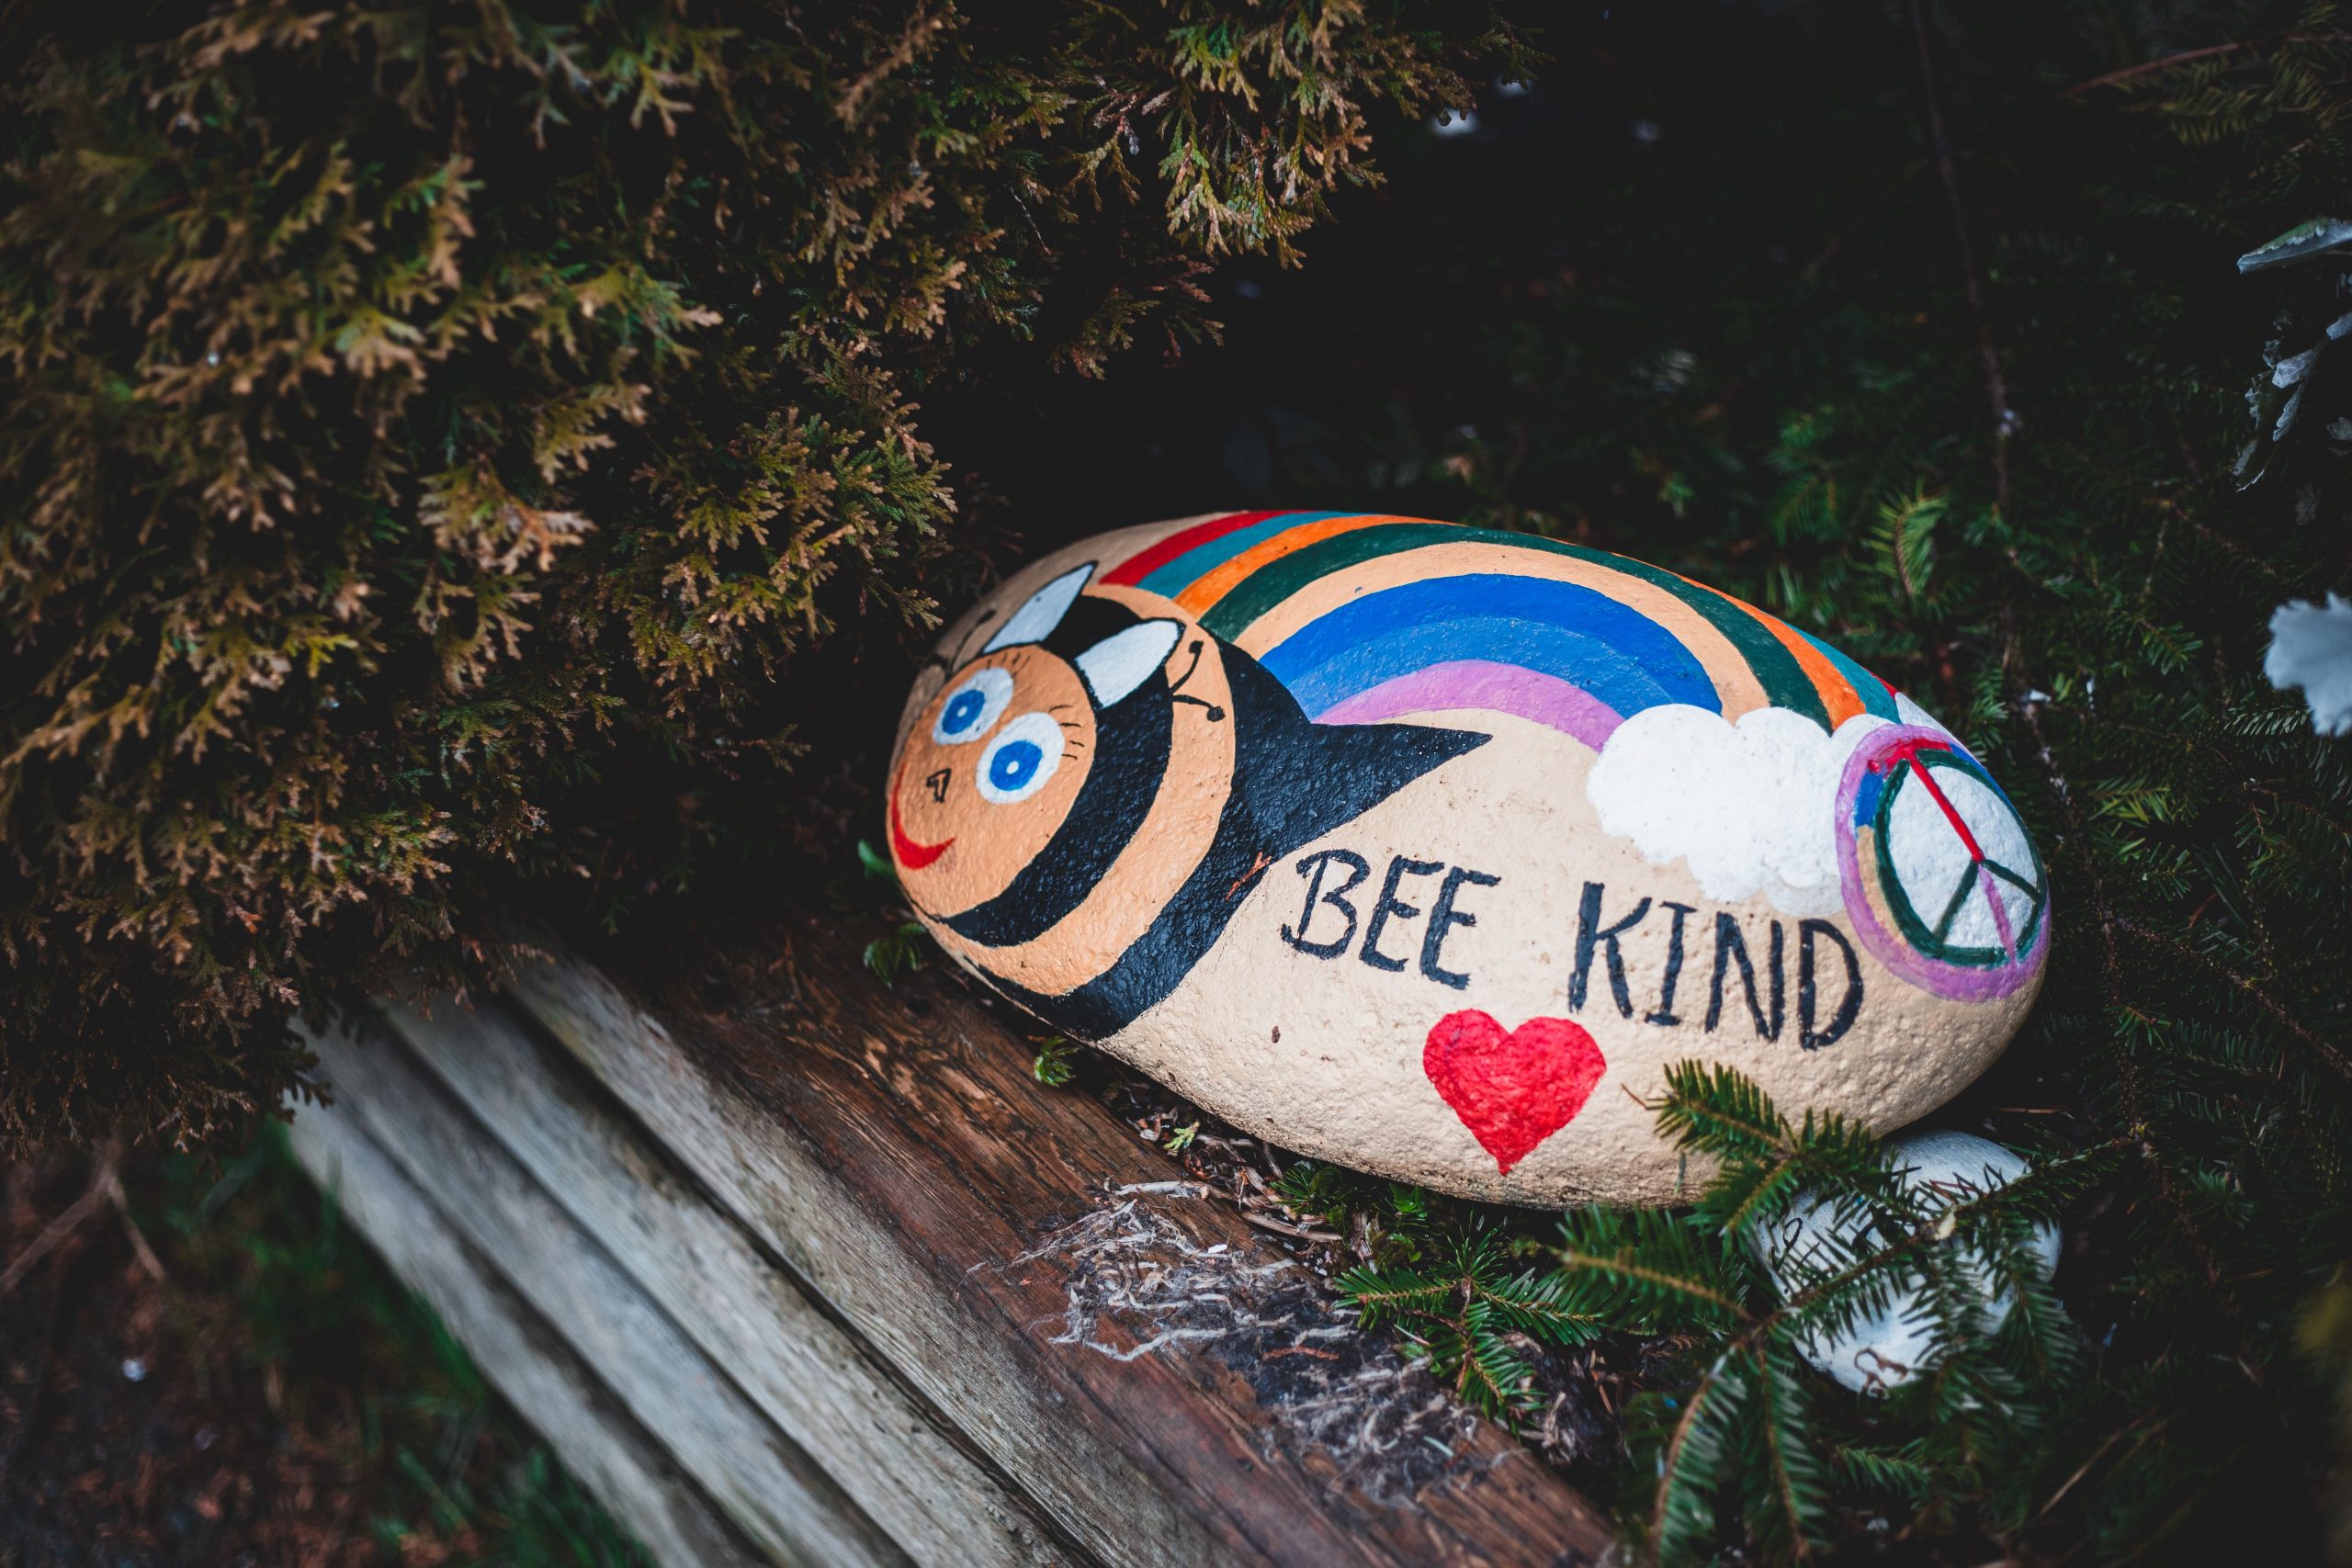
“A design with this many small elements—the bee’s stripes, the rainbow’s arches, the tiny peace sign, and the lettering—requires a very smooth, non-porous rock.”
If you try to paint this on a rough, bumpy stone, the fine lines will bleed and look messy. The text will be nearly impossible to read. You’ll also need a set of fine-tipped paint pens or very small brushes (size 00 or smaller) to get those crisp details. This isn’t a design you can dash off with standard chunky craft brushes. Patience and the right tools are non-negotiable for this one.
The One Thing
The whole piece is built around the pun: ‘BEE KIND.’ It’s the central message that gives meaning to all the other cheerful elements. The rainbow, the heart, and the peace sign are all generic symbols of positivity, but the bee illustration connects directly to the text, making the message clever and memorable. If you removed the text, you’d have a cute but random collection of doodles. The phrase is the anchor that ties it all together and transforms it from a painted rock into a ‘kindness rock’ with a clear, heartwarming purpose.
13. Paint a Lifelike Sleeping Tabby Cat on a Garden Rock
Scale Guide
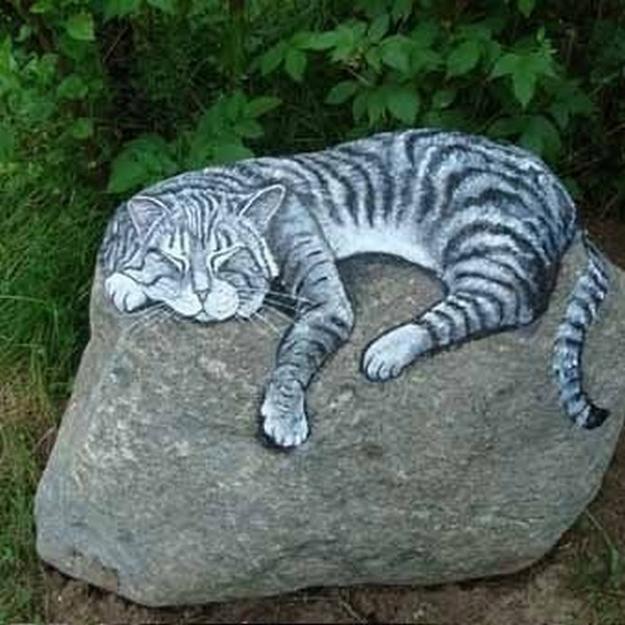
“This incredibly sweet sleeping cat illusion works because of the scale.”
The artist chose a large, rounded gray rock that mimics the shape and size of a curled-up cat. Placing this in a garden bed among green foliage creates a delightful surprise—is it a real cat napping in the sun? To achieve this effect, you need a substantial rock, at least 8-10 inches long. A tiny pebble painted with a cat just looks like a drawing; a life-sized rock painted with a cat becomes a piece of whimsical garden art. For smaller animal ideas, check out the cute bunny in Idea #25.
Designer Tip
To create realistic-looking tabby stripes, don’t just paint solid black lines. The key is layering and texture. Start with a base coat of light gray. Then, use a slightly darker gray to block in the general areas where the stripes will go. Finally, use a very fine brush with black paint to add thin, slightly varied strokes over the darker gray areas. Let some of the underlying gray show through. This creates depth and the illusion of fur. A single, flat black stripe will look like a cartoon; layered strokes look like fur.
14. Design a Patriotic Heart with a Sunburst of Stars and Rays
How-To Brief

“Creating this crisp, patriotic design is all about clean lines and careful layering.”
It takes about an hour, plus drying time. The cost is minimal—just the paint!
- Start with a clean, dry, oval-shaped rock.
- Paint a small heart in the center with blue acrylic paint. Let it dry completely.
- Use a very fine brush and white paint to carefully outline the heart and paint three small stars inside.
- Using a ruler or straight edge as a guide, lightly pencil in the rays emanating from the heart to the edge of the rock.
- Carefully paint the rays, alternating between red and white. Use a flat-head brush for wider, cleaner strokes. Let it dry.
- If needed, go back with the blue and white to sharpen the edges of the central heart. A final sealant coat is recommended if it will live outdoors.
Budget Breakdown
This is a wonderfully inexpensive craft, perfect for a holiday weekend. You can easily create a whole batch of these for very little money.
- Main ‘Furniture’ (Rocks): $0 (Find them in your yard or a park)
- Paint (Red, White, Blue Acrylic Craft Paint): $3 – $6
- Lighting (Not Applicable): $0
- Textiles (Not Applicable): $0
- Decor/Accessories (Brushes, Sealant): $5 – $10
- TOTAL: $8 – $16
Budget alternative: If you already have permanent markers in red and blue, you can achieve a similar, though less vibrant, look by coloring directly on a light-colored rock for a total cost of practically zero.
15. Assemble a Family of Painted Rock Birds on a Driftwood Perch
What Makes It Work
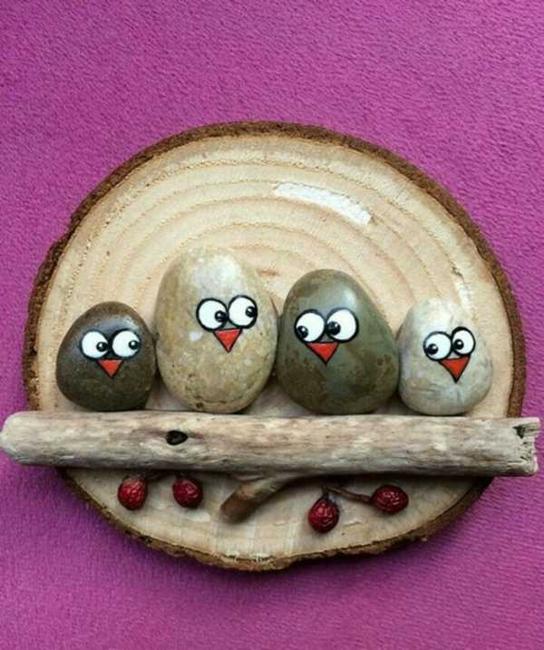
“This piece is a masterclass in using found objects to create character.”
The genius isn’t just in the painted rocks, but in their assembly. Arranging the four ‘birds’ of slightly different sizes and natural colors on a piece of weathered driftwood gives them a sense of family and interaction. Mounting the whole scene on a rustic wood slice provides a stable, frame-like base. The extremely simple painting—just eyes and a beak—is all that’s needed because the shape of the rocks and the composition does all the heavy lifting in telling the story. It’s rustic, clever, and utterly charming.
Get This Look For Less
The beauty of this project is that it’s practically free if you’re willing to go on a nature walk. You can find the rocks, the driftwood branch, and the wood slice in a park or forest. The only real cost is a tiny amount of white, black, and red acrylic paint, which you might already have. If you can’t find a wood slice, you can mount the driftwood on a larger, flat rock. This craft is all about creativity and resourcefulness, proving you don’t need to spend money to create something with immense personality.
16. Paint a Sweet, Sleeping Blue Bird on a Dark Rock
The One Thing
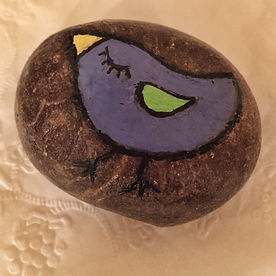
“The bold black outline is the single most critical element of this design.”
It’s what transforms simple shapes of color—a blue oval, a green wing, a yellow triangle—into a recognizable, character-filled bird. The outline defines the form, creates separation between the different colored parts, and adds a strong graphic, almost cartoon-like quality. Without the black lines, the colors would bleed together into an abstract blob. With them, it’s a sweet, sleeping creature. It’s a great lesson in how powerful a simple outline can be. For a more realistic take on birds, see the detailed paintings in Idea #6.
Real Talk
While this design looks simple, painting light colors like yellow and bright blue onto a very dark brown rock can be tricky. The dark base can make your light colors appear dull or require many, many coats. To avoid this, you have two options: either apply a primer or a base coat of white paint just in the area where the bird will be, let it dry, and then paint your colors on top. Or, be prepared to apply 3-4 thin layers of the blue and yellow paint, letting each coat dry completely in between, to build up to the full, opaque brightness you see here.
17. Hand-Paint a Grey River Rock with Delicate Peach Florals
Designer Tip
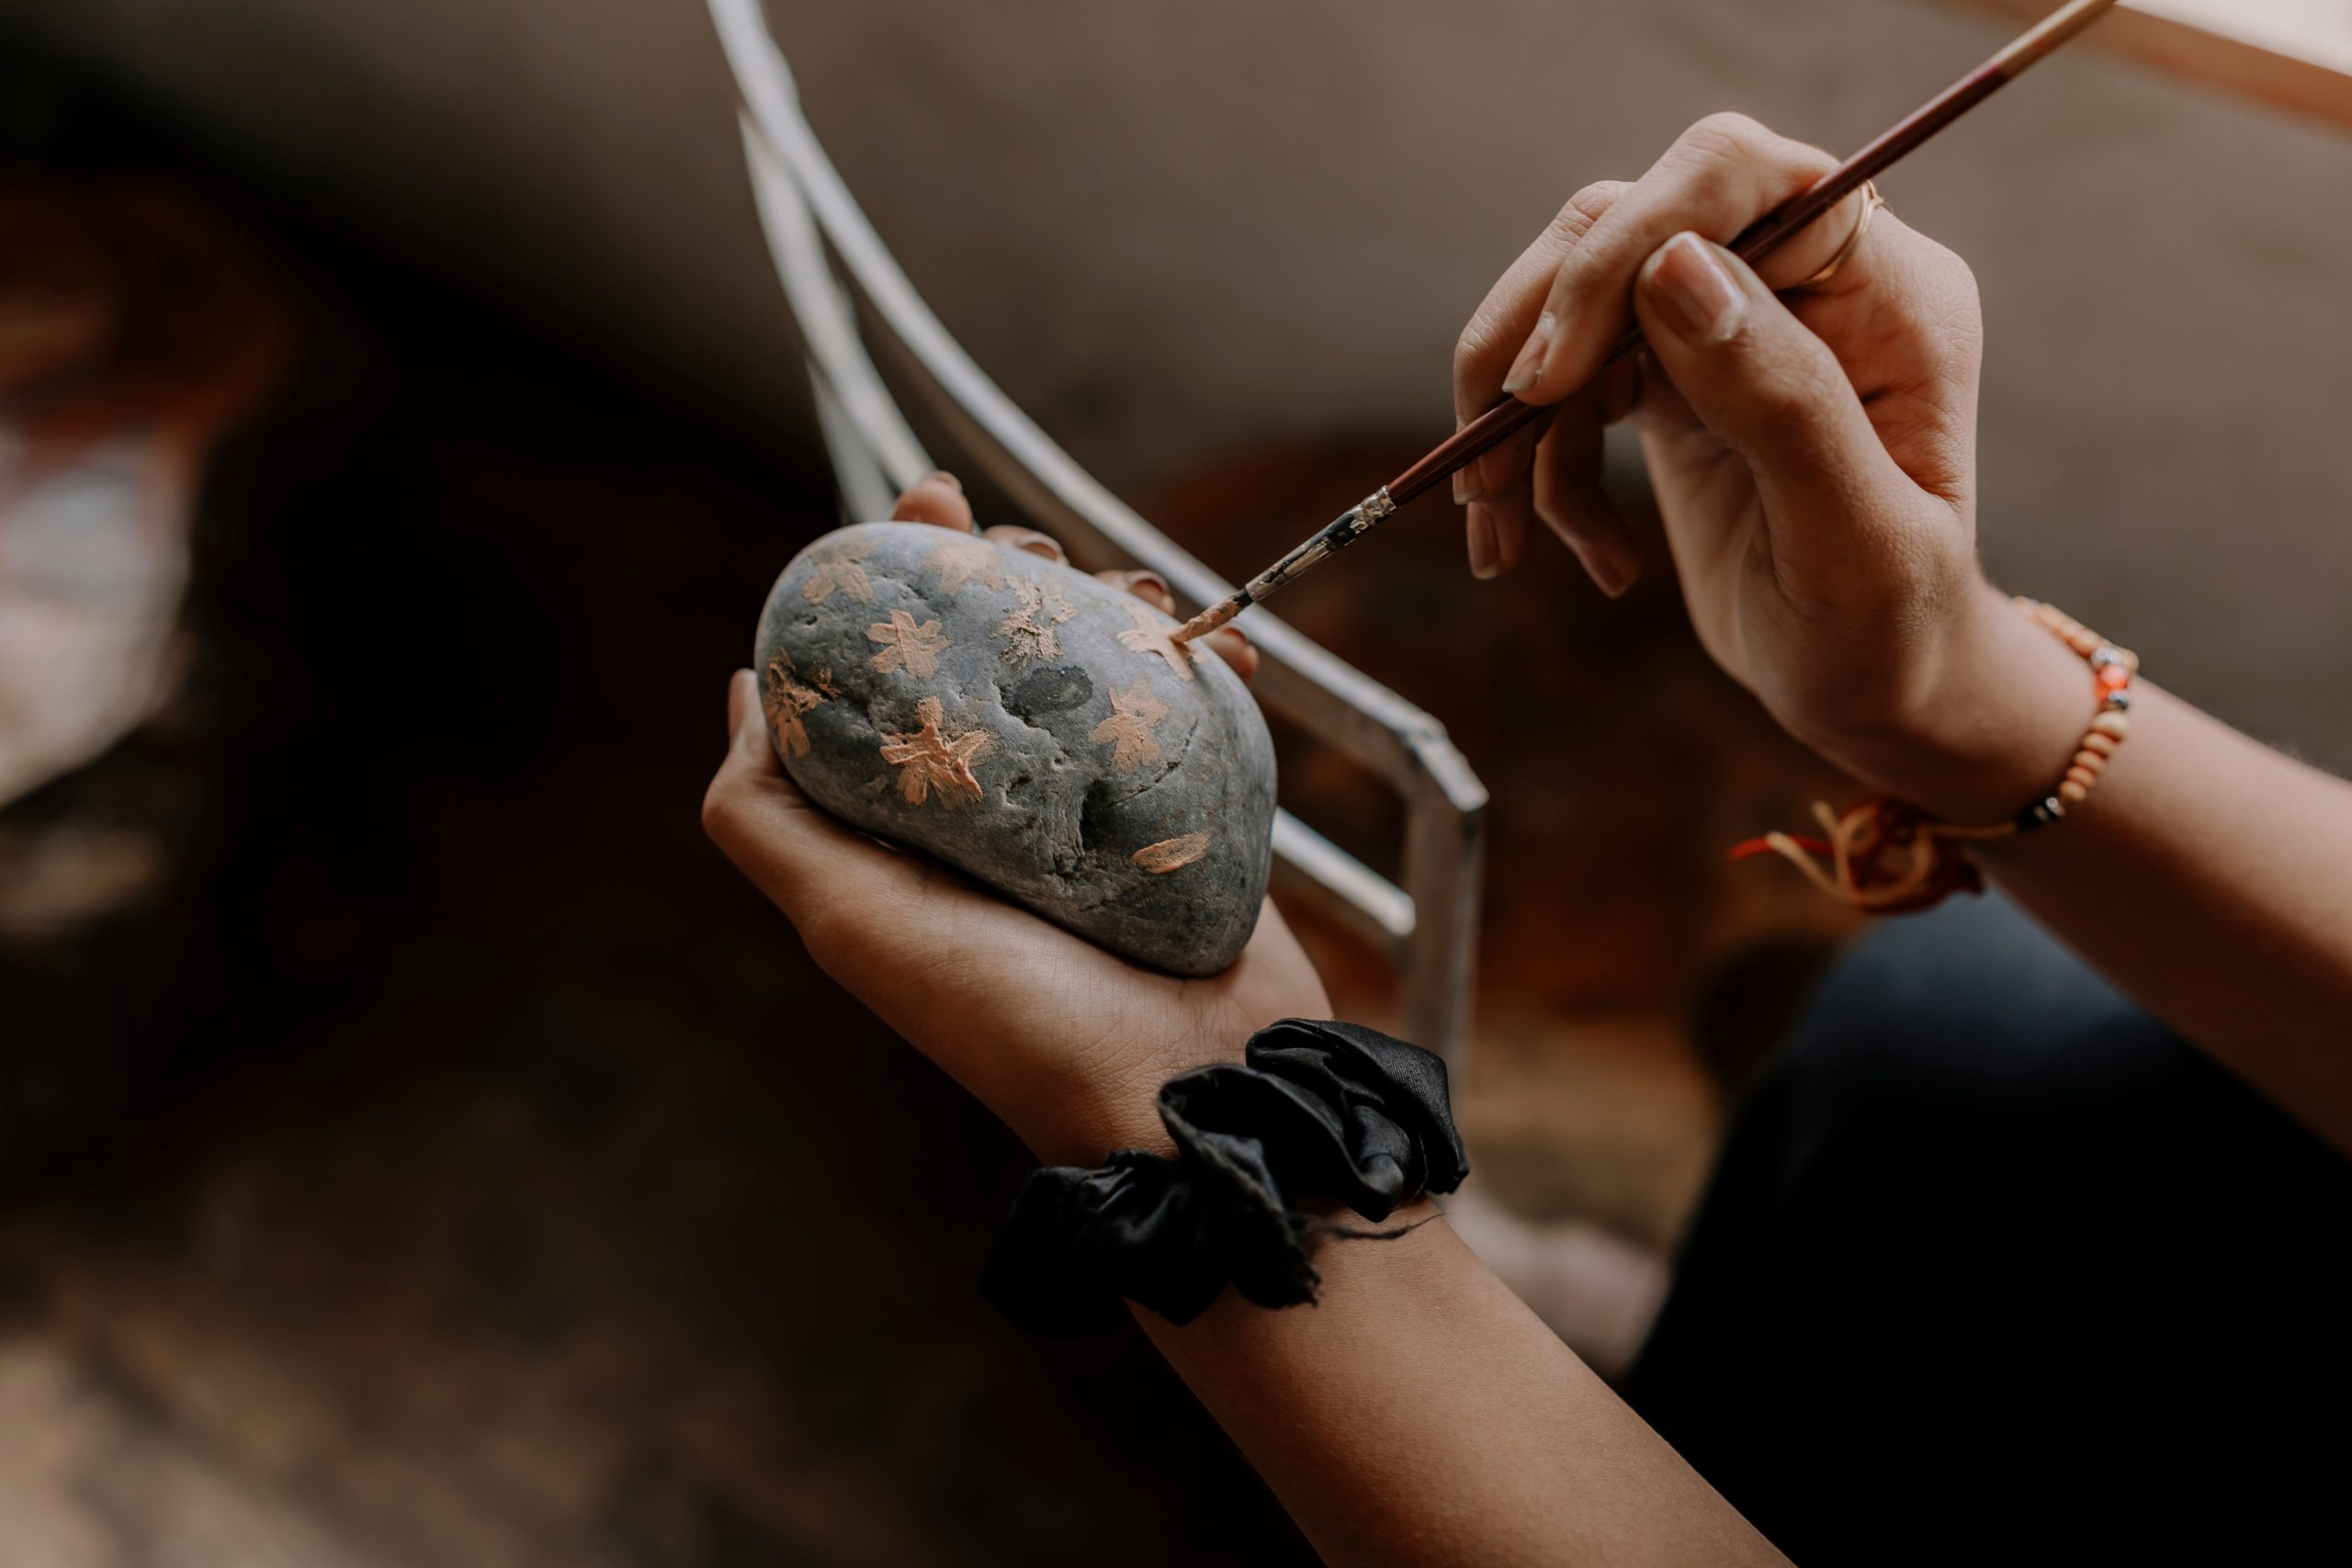
“For this kind of delicate, free-form floral pattern, don’t try to make every flower identical.”
The beauty comes from the variation. Use a very fine-tipped brush and load it with a small amount of your peach-colored paint. Create the petals with simple, short dabs and strokes. For some flowers, make five dabs in a circle; for others, make four. Let some be slightly larger and some smaller. This organic imperfection is what makes the design feel natural and hand-painted, rather than stamped or machine-made. Embrace the subtle differences in each little blossom.
Style Math
This minimalist design proves that less is more. The visual formula is about 80% natural element + 20% delicate pattern. The artist has left the majority of the beautiful, dark grey river rock exposed, allowing its natural color and texture to be the main feature. The small, scattered peach floral motifs are just enough to add a touch of artistry and whimsy without overpowering the stone itself. You could use this formula with any color: try 80% natural rock + 20% tiny white dots, or 80% natural rock + 20% fine gold lines. The key is celebrating the rock itself.
18. Create a Halloween Spider and Swirling Moon Painted Rock
Before You Start Checklist
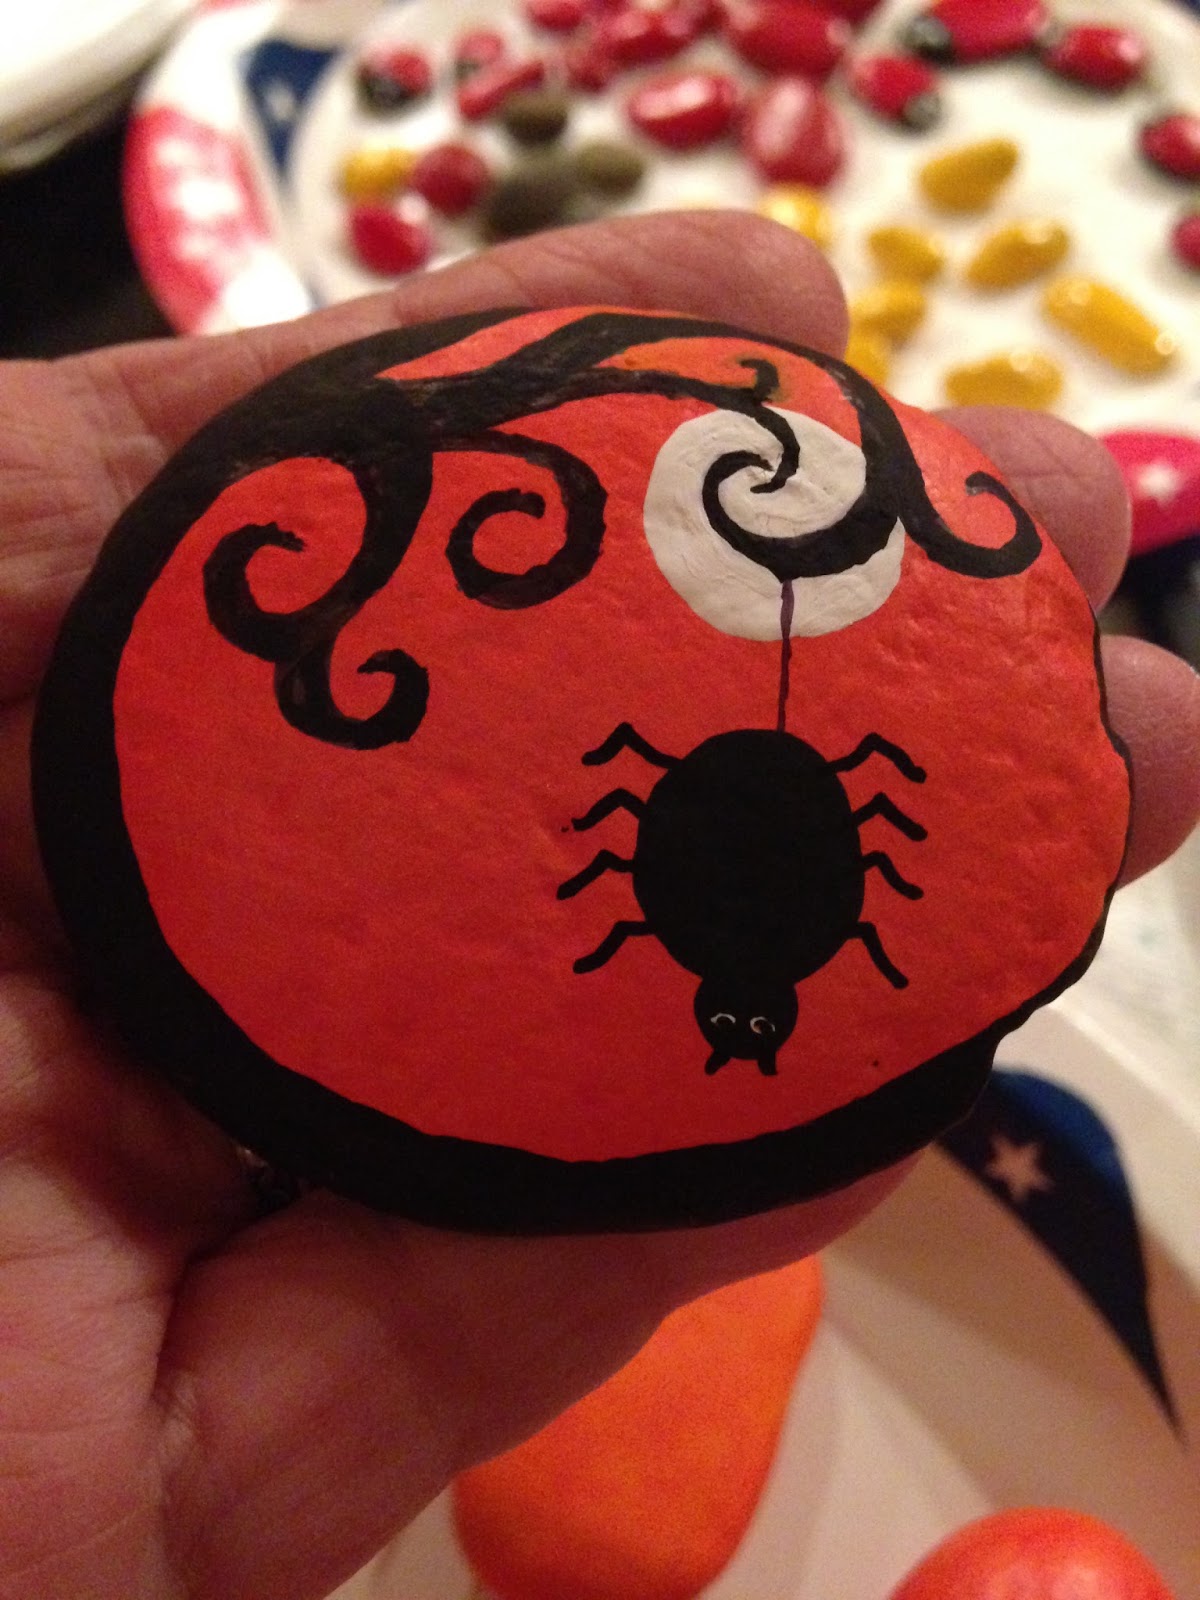
“This high-contrast design looks fantastic, but you need the right tools for those crisp lines.”
Check these items off your list before you begin.
- Do you have a vibrant, opaque orange paint? A streaky, translucent orange will ruin the effect against the black.
- Have you got a fine-tipped black paint pen? Using a brush for the thick border, spider legs, and thin web line can be tricky. A pen gives you much more control.
- Is your rock smooth and oval-shaped? The swirling moon and border will be much harder to execute on an irregular or bumpy surface.
- Did you get a white paint pen? It’s the easiest way to create that perfect spiral on the moon and the tiny eyes on the spider.
Trending Context
This rock is a perfect example of the ‘whimsigoth’ trend making waves in DIY and decor. It blends spooky Halloween elements (the spider, the black border) with playful, almost celestial whimsy (the swirling patterns, the spiral moon). It’s not about being truly scary; it’s about capturing a fun, magical, and slightly dark aesthetic. This style is incredibly popular on Pinterest and TikTok, especially for seasonal crafts, because it feels more creative and personal than traditional, store-bought Halloween decorations. It’s a little bit spooky, a little bit cute, and very stylish.
19. Paint a Handful of Tiny Rocks with Cartoon Faces
What Makes It Work
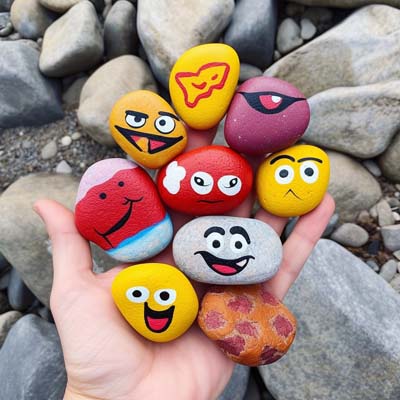
“These little guys are bursting with personality because of their extreme simplicity.”
The artist didn’t try to paint realistic faces; instead, they used the most basic cartoon elements: simple dots for eyes and a single line or curve for a mouth. This minimalist approach allows our brains to fill in the rest of the emotion. The use of bold, solid, primary colors—bright yellow, fire-engine red, deep purple—makes them feel like a cast of characters from a children’s show. Displaying them as a group in a hand or bowl amplifies their charm; one is cute, but a whole crowd of them is a party.
Get This Look For Less
This is the ultimate budget craft project. You can literally make dozens of these for under $5. The small, smooth pebbles can be gathered from a driveway, a park, or purchased as ‘river rocks’ in a bag from a dollar store for a couple of bucks. You only need a few basic colors of acrylic craft paint. To get the clean eyes and mouths without a fancy brush, simply use the end of a toothpick dipped in black paint for the dots and a permanent marker for the lines. It’s a perfect example of how creativity costs nothing.
20. Design a Whimsical Gnome and Mushroom House Scene
The One Thing
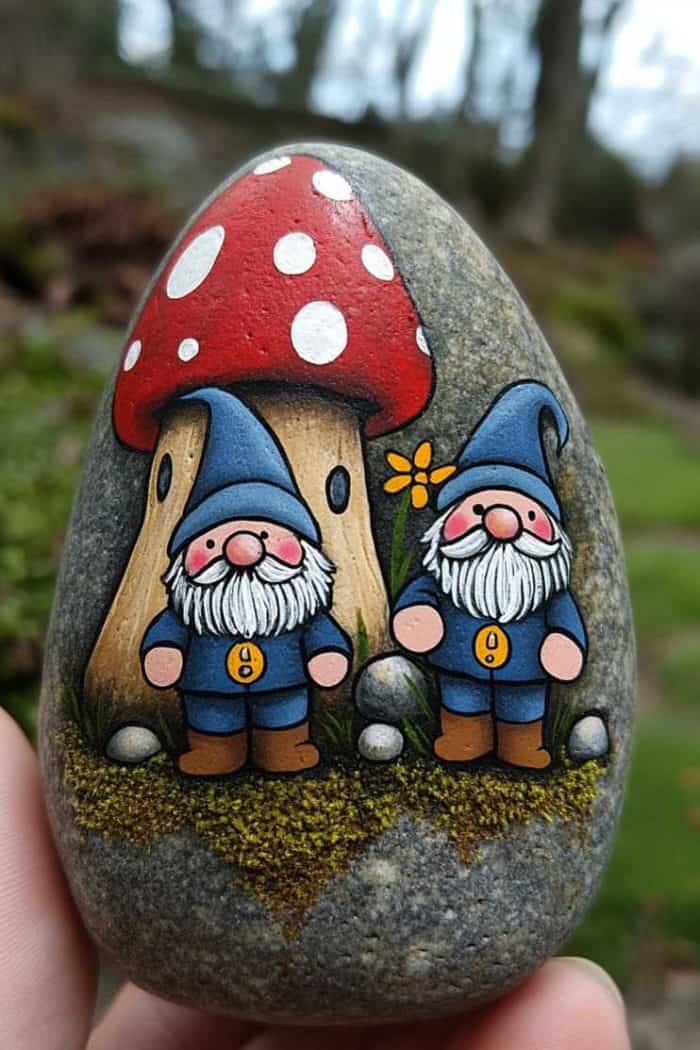
“The story is the one thing that makes this rock special.”
It’s not just a painting of a mushroom or a gnome; it’s a complete narrative scene. The two gnomes aren’t just standing there, they appear to be interacting in front of their mushroom-shaped home. The addition of the green moss, tiny stones, and little yellow flower at the base grounds the scene and creates a miniature world on the surface of the rock. It invites the viewer to imagine the lives of these little characters. Removing any of these narrative elements would weaken the magical, storybook quality of the piece.
Scale Guide
A detailed narrative scene like this requires a rock with a decent amount of surface area. Look for a stone that is at least 4-5 inches tall and has a relatively flat front face. This gives you enough room to create a sense of scale, with the tall mushroom house behind the smaller gnomes, and still have space at the bottom for the foreground details like moss and flowers. On a rock smaller than 3 inches, the elements would feel cramped and you’d lose the sense of a miniature landscape. The shape is also key—a taller, triangular-shaped rock can nicely mimic the shape of the mushroom itself.
21. Paint a Cheerful Snowman on a Natural Grey Rock
Designer Tip
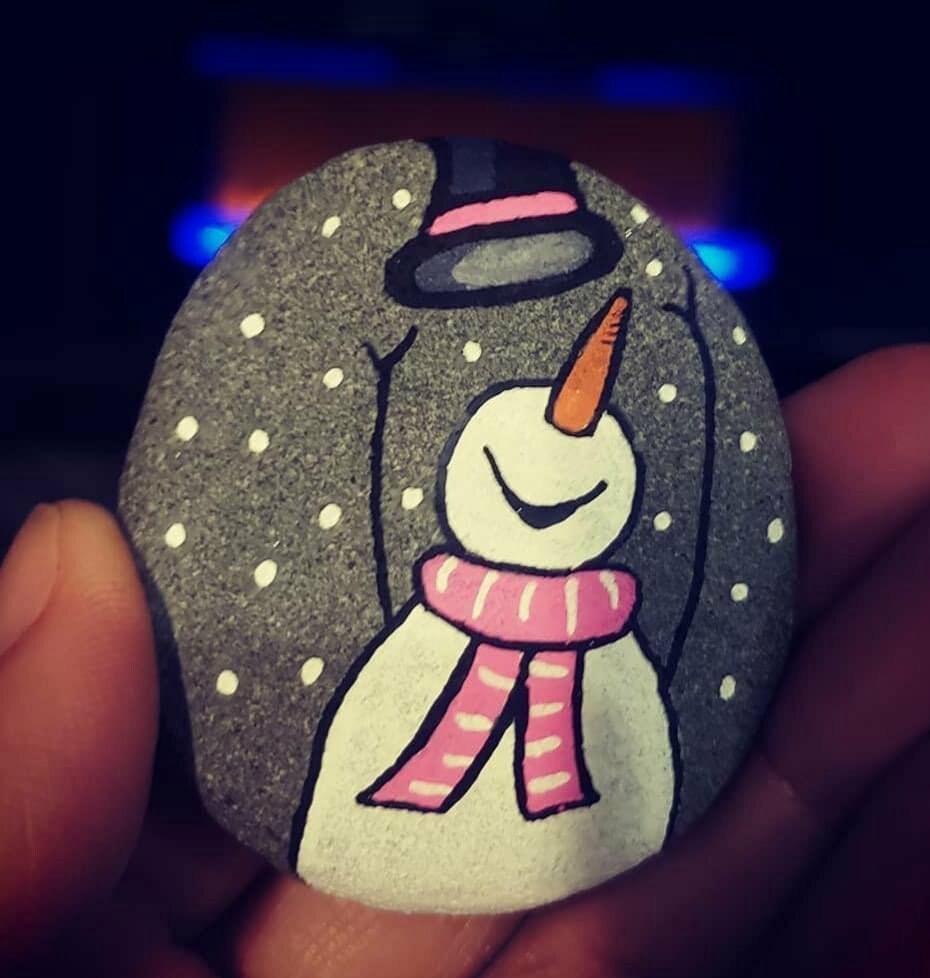
“The key to making this snowman feel integrated with the rock, rather than just stuck on top, is using the rock’s natural grey color as the background sky.”
The artist didn’t paint the entire rock white or blue first. By painting the white snowman directly onto the grey stone, it creates a beautiful, rustic contrast. The scattered white dots for ‘snow’ further connect the figure to its ‘environment,’ making it look like the snowman exists within a gentle, grey winter sky. Always consider how you can use the rock’s own color and texture as part of your design.
How-To Brief
This simple snowman is a perfect beginner’s project. It takes less than 30 minutes (plus drying) and requires very few colors.
- Start with a clean, dry, grey oval rock.
- Using white acrylic paint, paint two overlapping circles for the snowman’s body and head. Let it dry.
- Use a fine brush and black paint to add the top hat, dot eyes, and a simple curved mouth.
- With pink paint, add a small band to the hat and paint a simple striped scarf.
- Use a tiny dab of orange for the carrot nose.
- For the final touch, dip the wrong end of your paintbrush in white paint and dot it all over the grey ‘sky’ to create falling snow.
22. Create a Set of Festive Reindeer Rocks with Colorful Lights
Style Math
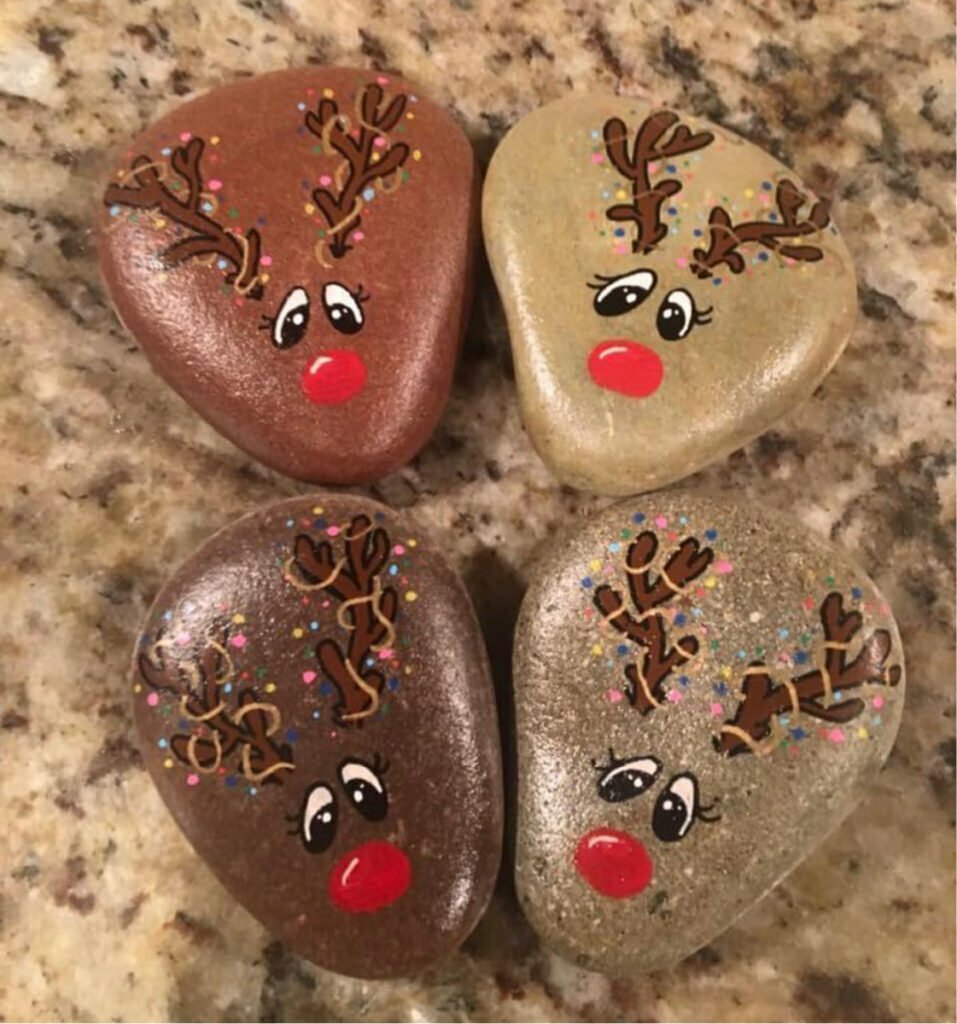
“The formula for these adorable reindeer is all about repetition with variation.”
The core equation is: 80% simple face + 15% detailed antlers + 5% pop of color. Every rock has the same basic elements: white eyes, a nose, and antlers. The variation comes from the base color (brown vs. grayish-tan) and the colors of the tiny ‘lights’ on the antlers. This makes them look like a cohesive team, but with individual personalities. The single 5% pop of the bright red nose is the focal point that screams ‘holiday’ and makes the design instantly recognizable and festive.
Budget Breakdown
Creating this festive reindeer herd is a very affordable holiday craft, perfect for making with family. You can make a set of four for well under twenty dollars, especially if you can find your own rocks.
- Main ‘Furniture’ (4 Smooth Rocks): $0 – $8
- Paint (Brown, Tan, White, Black, Red, plus assorted colors for lights): $8 – $12
- Decor/Accessories (Brushes, Paint Pens for detail): $4 – $7
- TOTAL: $12 – $27
Budget alternative: Buy a single multi-color pack of acrylic paint pens for about $15. This will give you all the colors you need and make painting the fine details like the lights and eyes much easier than using brushes. This is a great alternative to the reindeer in Idea #21.
23. Craft a Family of Painted Rock Penguins for Winter Decor
Real Talk
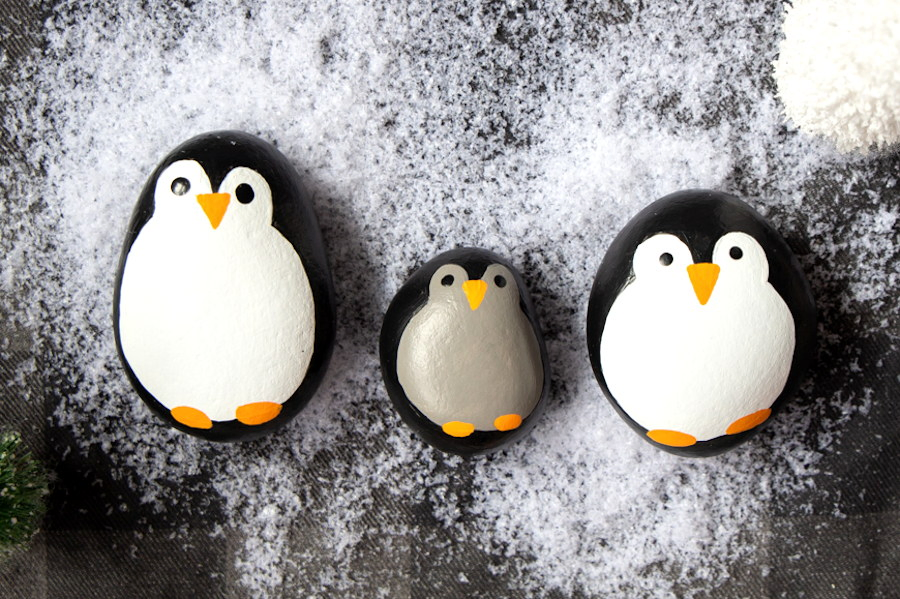
“Finding the perfect rock shape is more than half the battle for this project.”
To create a convincing penguin, you need rocks that are tall, oval, and have a relatively flat bottom so they can stand upright. Searching for these specific ‘penguin-shaped’ rocks can be a project in itself. If you just grab any round or flat stone, the final result won’t have the same charming, recognizable silhouette. Don’t be afraid to be picky when you’re gathering your supplies; the right natural form is the foundation of this entire design.
Maintenance Reality
These penguins are intended for indoor display, nestled in some synthetic snow on a mantel or shelf. As such, they need almost no maintenance beyond a light dusting. Do not put these outside. Standard acrylic paint, even if sealed, can be damaged by the freeze-thaw cycle of winter weather. More importantly, the synthetic snow they are sitting on is not meant for outdoor use and will become a soggy, messy clump after the first rain or snow. Keep this adorable trio inside where they can stay clean, dry, and charming all season long.
24. Decorate River Rocks with Intricate Hearts and Dots
What Makes It Work
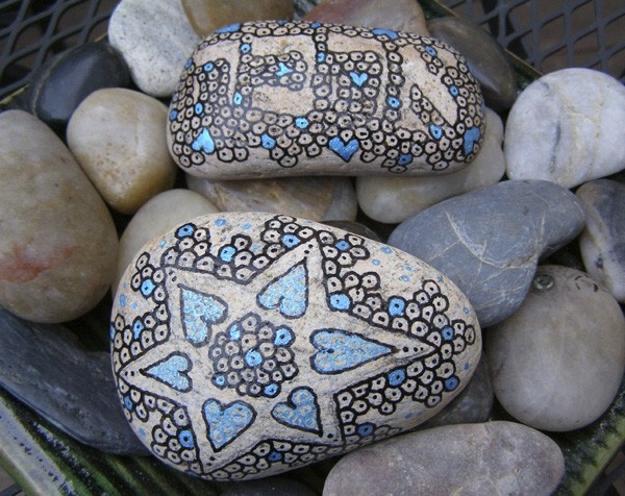
“This design feels so special and intricate due to the technique of ‘pointillism,’ or creating patterns with tiny dots.”
The artist didn’t just draw a heart; they filled it with a dense pattern of smaller hearts and dots, adding incredible texture and detail. The limited color palette—just black and light blue on a neutral beige rock—is a sophisticated choice. It keeps the focus on the complexity of the patterns themselves, rather than overwhelming the eye with color. The contrast between the organic, smooth shape of the rock and the precise, geometric patterns is what makes it so visually compelling.
Designer Tip
To get perfectly uniform dots like these, don’t use a brush. The secret is a dotting tool. You can buy a set of mandala dotting tools online or at a craft store for under $10. They come with different sized ball ends. Simply dip the end into your paint and press it gently onto the rock. You’ll get a perfect, round dot every time. For a DIY version, you can use the heads of nails, the ends of crochet hooks, or even the tip of a pencil eraser. This tool is a game-changer for creating intricate, professional-looking patterns.
25. Paint a Cute Cartoon Bunny on a Smooth Gray Rock
The One Thing
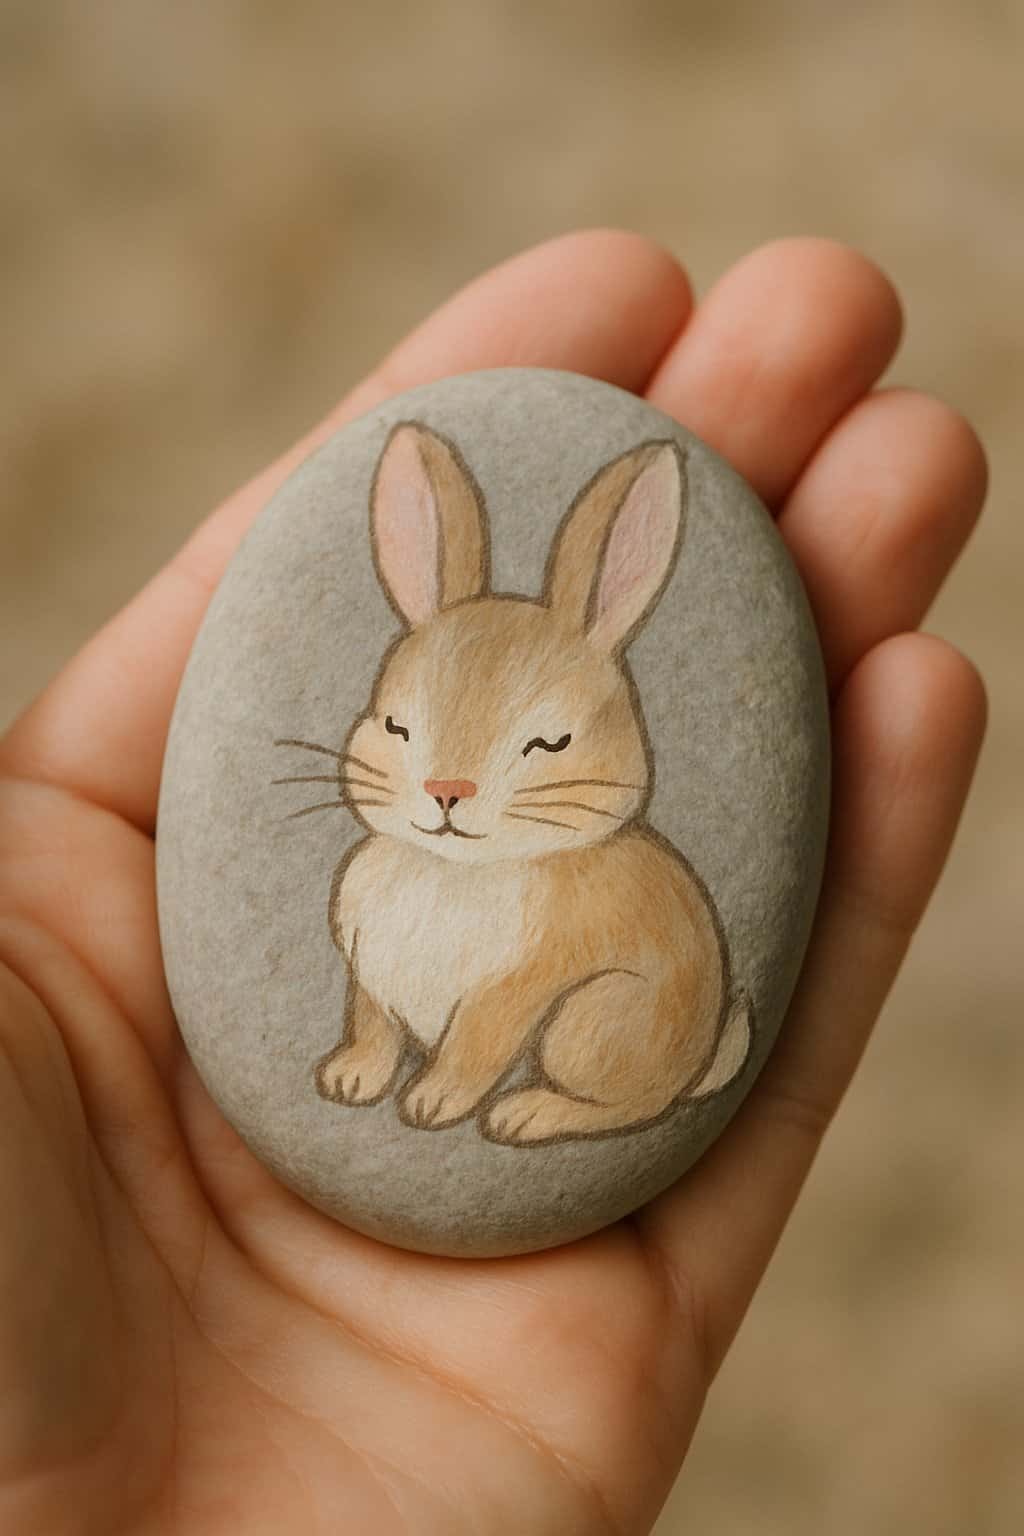
“The single thing that gives this bunny its overwhelming ‘cute’ factor is the expression.”
Specifically, the closed, smiling eyes. This simple artistic choice instantly conveys a sense of peace, contentment, and sweetness. If the eyes were open, it would still be a cute bunny, but it wouldn’t have the same gentle, serene personality. Paired with the soft pink nose and simple whiskers, the closed eyes tell a whole story of a happy, snoozing little creature. It’s a masterclass in how a tiny detail can define the entire mood of a character illustration.
Get This Look For Less
This adorable project is proof that you don’t need a lot of money to make something heartwarming. The gray rock is your free canvas. You only need four colors: brown, white, pink, and black. A small bottle of each from a craft store will cost you about $1 each. For the fine details like the whiskers and the outline of the eyes, you don’t need a special paint pen. Just use a regular fine-tipped black permanent marker like a Sharpie. The entire project can be completed for well under $5, making it a perfect, low-cost activity.
26. Showcase a Diverse Collection of Pop Culture Painted Rocks
Trending Context
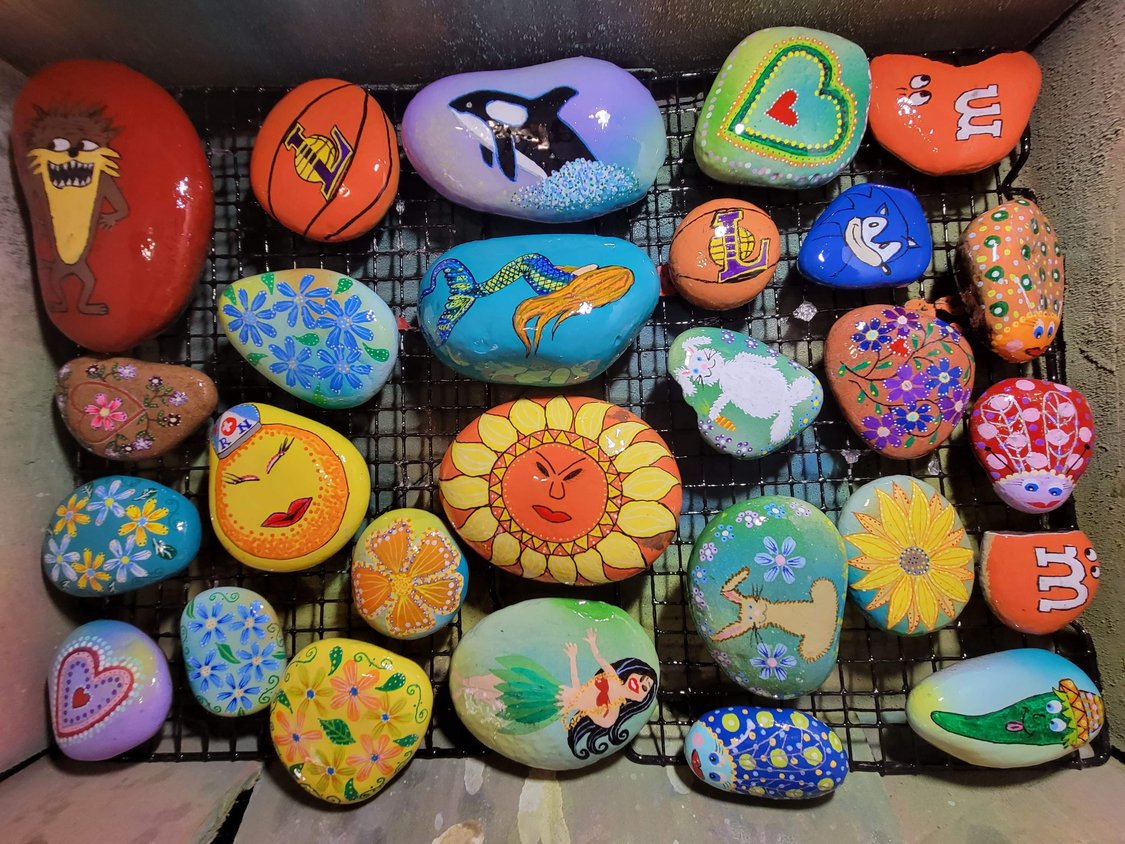
“This collection is a perfect snapshot of how rock painting has become a medium for expressing personal fandom.”
It’s not just about painting flowers and ladybugs anymore. People are using rocks as tiny canvases to pay homage to their favorite things—from the Tasmanian Devil and Sonic the Hedgehog to the Lakers logo and M&M characters. This is driven by a desire to create physical objects connected to the digital and media worlds we love. It’s a way of making your pop culture passions tangible and sharing them in a unique, handcrafted way. These aren’t just painted rocks; they’re tiny, personal fan art.
Scale Guide
A display rack like this is perfect for showcasing a large collection of small-to-medium-sized rocks (2-4 inches). The wire construction allows air to circulate, which is great if you’re using it as a drying rack after applying sealant. More importantly, it organizes the collection and turns it into a deliberate art display. If you just have a few larger, statement rocks (5+ inches), a rack can feel too busy. For bigger pieces like the sleeping cat in Idea #13 or the rock houses, it’s better to display them individually on a shelf or in the garden.
27. Paint a Delicate Wildflower Bouquet on a Greyish-Green Rock
Designer Tip
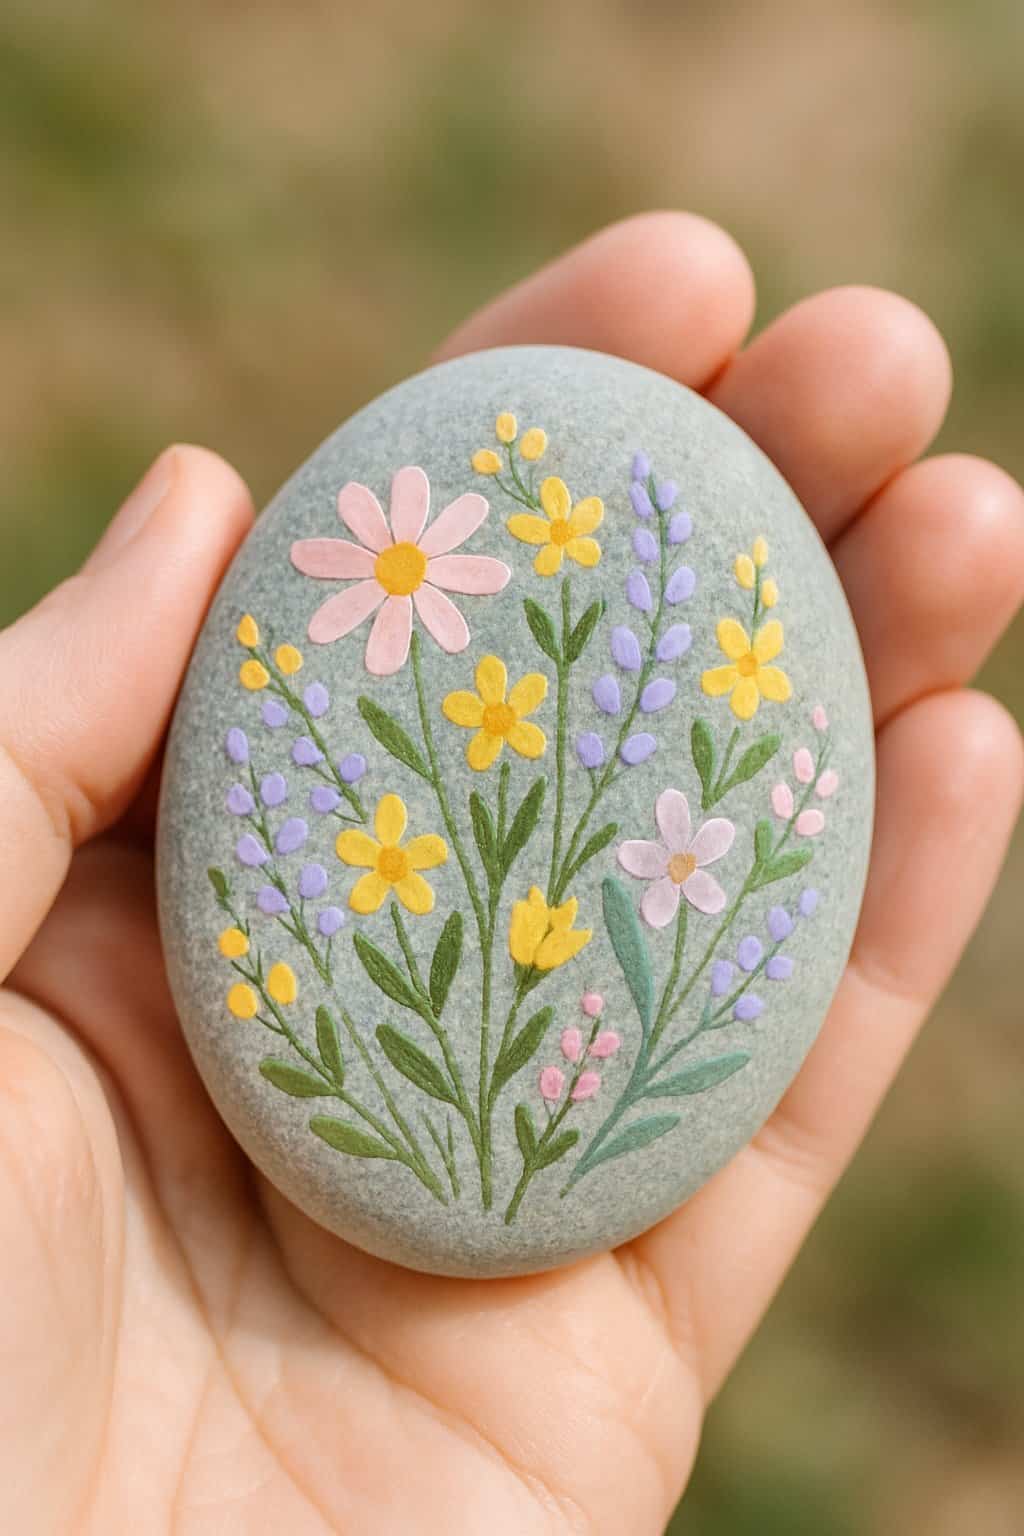
“The secret to this design’s delicate, natural feel is the use of the rock’s own color as the base.”
The artist didn’t prime it with white. By painting the yellow, pink, and purple blossoms directly onto the greyish-green stone, the colors are slightly muted, giving them an earthy, organic quality that feels more like real wildflowers. A bright white background would have made the colors pop more, but it would have looked less natural and more like a cartoon. Always ask yourself if the rock’s natural color can serve as your canvas.
Style Math
This beautiful bouquet follows a ‘clustered composition’ formula. Think of it as: 50% main flower + 30% secondary flowers + 20% foliage and filler. Here, the yellow daisy-like flowers are the main event, taking up the most space and drawing the eye. The smaller pink and purple blossoms act as the supporting cast, adding depth and color variation. Finally, the green leaves and stems fill in the gaps and tie the whole bouquet together. You can use this formula for any floral arrangement—just pick a star flower and build around it.
28. Create a Patriotic Fireworks Rock with a Gradient Background
What Makes It Work
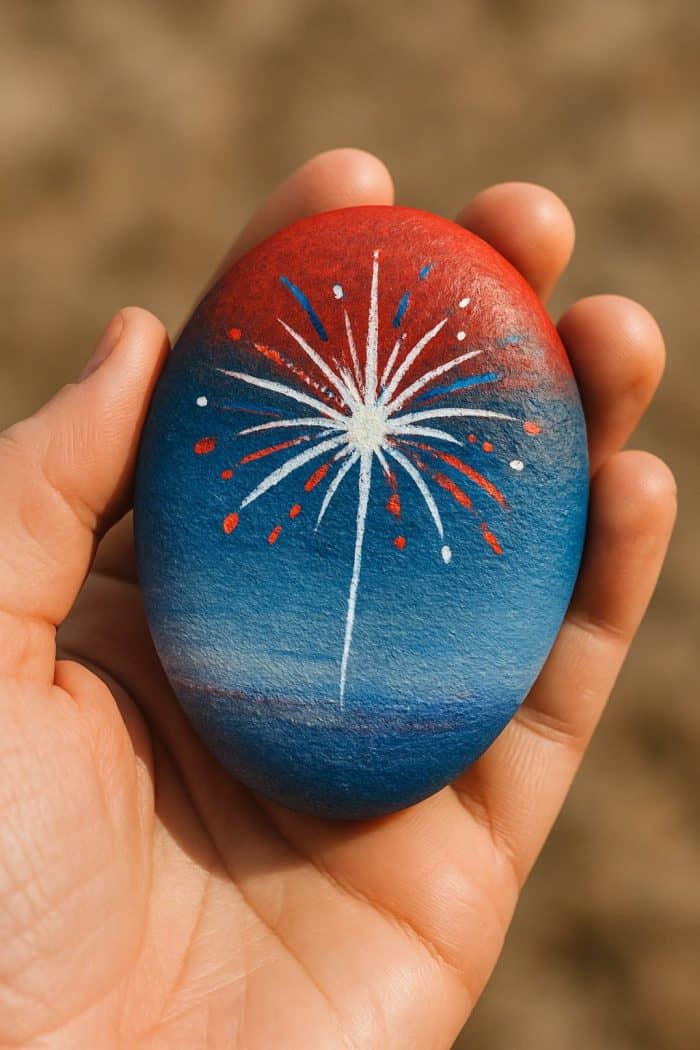
“The gradient background is the key to this rock’s success.”
Instead of a flat blue, the smooth transition from deep navy at the bottom to a vibrant red at the top mimics the look of a twilight sky on the 4th of July. This simple technique adds immense depth and visual interest. The central white firework explosion pops dramatically against this colorful backdrop, and the smaller red and blue bursts feel like secondary sparks echoing the main event. The gradient transforms the rock from a simple painted object into a miniature, dynamic scene. Compare it to the flatter design of Idea #14 to see the difference.
How-To Brief
That beautiful gradient background is easier than it looks! Here’s a quick guide to blending the colors smoothly.
- Start with a clean, dry rock. Paint the top half red and the bottom half dark blue, leaving a small gap in the middle.
- While the paint is still wet, put a bit of red and blue paint next to each other on a palette. Mix them slightly where they meet to create a purplish transition color.
- Use a clean, slightly damp brush to apply this transition color into the gap on your rock.
- Gently brush back and forth over the seams where the colors meet, pulling a little red into the purple, and a little blue into the purple, to soften the lines.
- Let it dry completely before painting your white firework on top.
29. Outline Cartoon Owl Rocks with a Black Marker
Real Talk
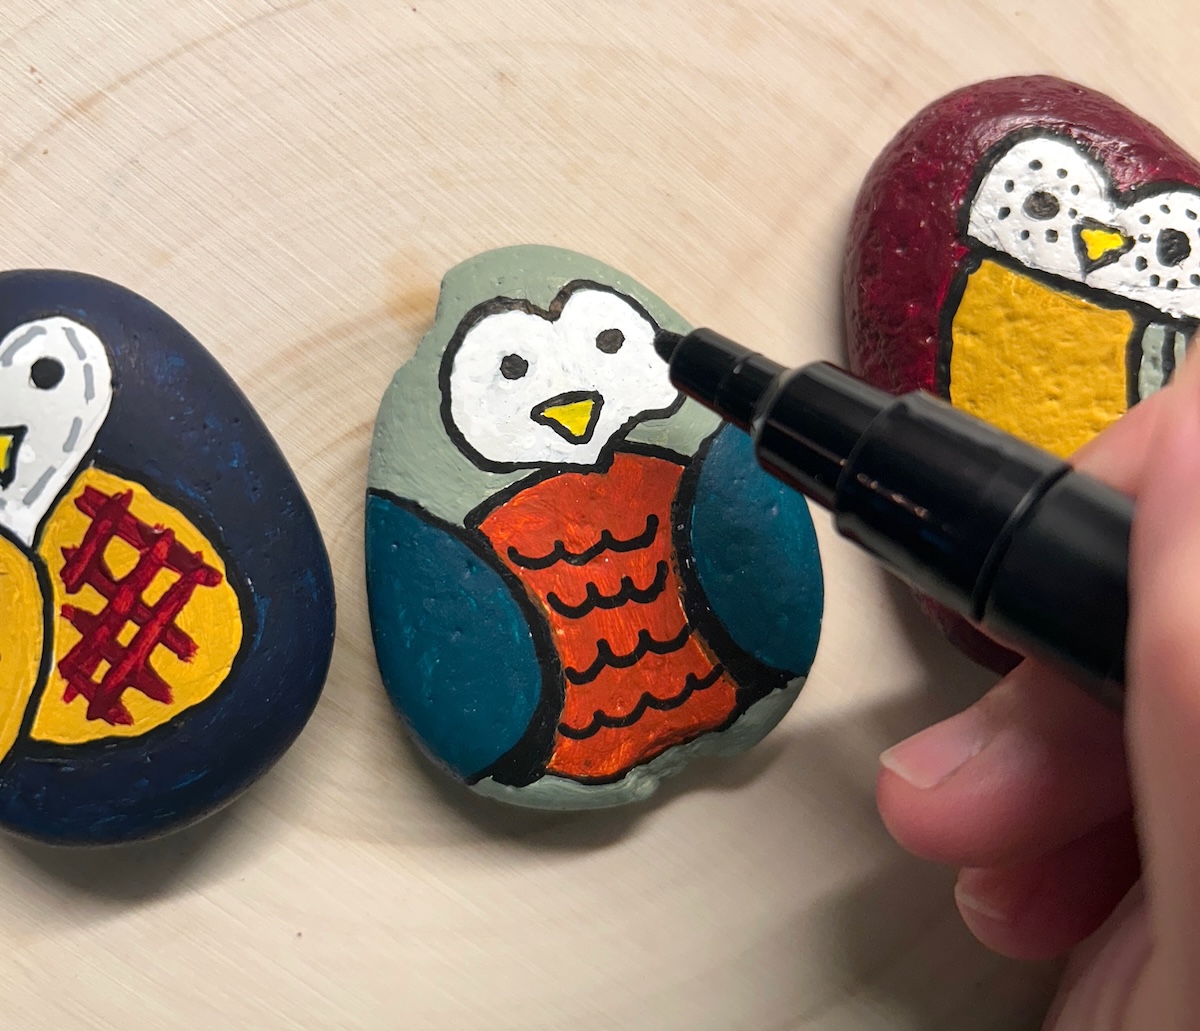
“Using a black marker for outlining is a fantastic shortcut for crisp lines, but you have to do it at the right time.”
You must apply your sealant *before* you use the marker, or seal it very carefully after. Many permanent markers are alcohol-based, and many spray sealants are solvent-based. If you spray sealant over a fresh marker line, the marker will dissolve and bleed, ruining your entire design. A better method is to seal the painted rock first, let it cure, then draw on top with the marker. The sealed surface is less porous and will give you even cleaner lines.
Get This Look For Less
You don’t need to buy expensive, fine-tipped artist paint pens to get the clean black outlines that make these owls pop. A standard black permanent marker, like a Sharpie, works wonderfully for this step and costs a fraction of the price. The trick is to let your acrylic paint base dry completely—we’re talking 24 hours to be safe. If you try to draw on even slightly damp paint, the marker tip will get clogged and ruined. A cheap permanent marker is your best friend for adding those final, defining details on a budget.
Now, Go Make Something Beautiful
You’ve got the ideas, the techniques, and the pro tips to avoid the common pitfalls. That simple grey rock in your garden is a blank canvas just waiting for a story. Whether you’re painting a whole family of penguins or a single, perfect wildflower bouquet, the most important step is to just begin. Have fun with it, and don’t forget to save this guide to your favorite Pinterest board for when your next creative impulse strikes!