You know that feeling when you finally find the cinder block fence idea that looks exactly right for your yard, but turning that pin into reality feels impossible? We get it. That’s why we went deep, filtering through hundreds of designs to find what actually works. This isn’t just a random collection of pretty pictures; we’re showing you 29 distinct, buildable ideas that mix materials like wood, metal, and decorative blocks. Whether you’re drawn to sleek modern lines, lush garden walls, or sturdy privacy fences, there’s a concept here for you. We’re also breaking down the common mistakes that can derail a project before it even starts. So before you do anything else, save this guide—you’re going to want to come back to it.
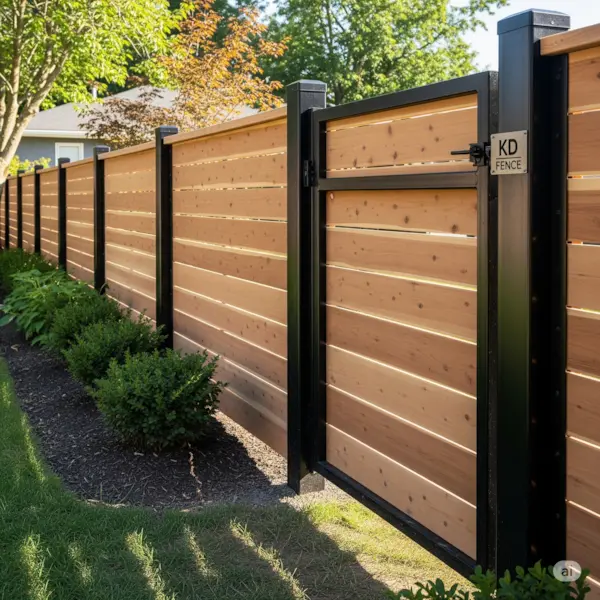
1. Modern Horizontal Wood Slats with Black Metal Posts
This look is a masterclass in material contrast. The warm, organic feel of the light natural wood slats plays perfectly against the rigid, industrial vibe of the matte black metal posts. It’s a visual conversation between natural and man-made that feels incredibly current and high-end. The horizontal lines of the slats also create an illusion of width, making your property line feel more expansive and deliberate. It’s a design that provides privacy without feeling like a solid, unfriendly wall.
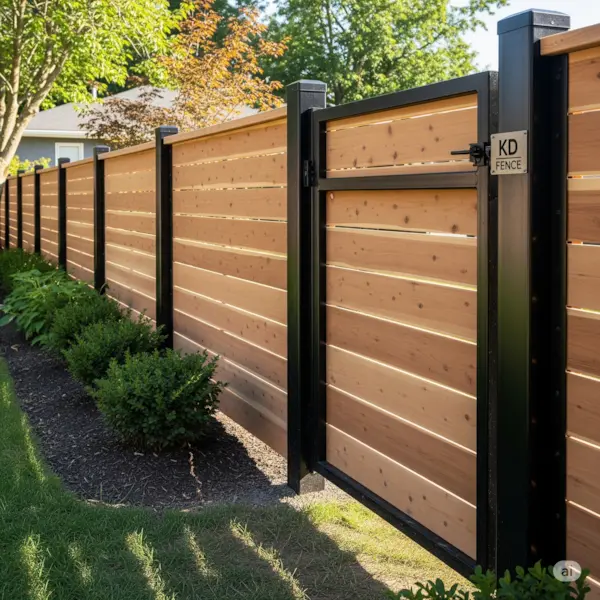
“For a fence like this, the gap between your horizontal slats is everything.”
For maximum privacy, aim for a gap of no more than 1/4 inch. If you want a bit more light and air to pass through, or if the fence is more decorative, you can go up to 3/4 inch. Any wider and you start to lose the sense of enclosure and privacy. Use a simple spacer block made from scrap wood to keep your gaps perfectly consistent during installation.
2. Sleek Sliding Gate with Reddish-Brown Wood Planks
While the reddish-brown wood is gorgeous, the element that truly defines this fence is the sliding gate mechanism. Instead of a traditional swing gate that requires a wide arc of clearance, this design slides neatly along the fence line. It’s a space-saving solution that feels incredibly sleek and modern. The visible bottom track and wheels aren’t hidden; they become part of the design, signaling a thoughtful, functional approach to security and access. Without this feature, it’s just a nice fence. With it, it’s a piece of smart engineering.
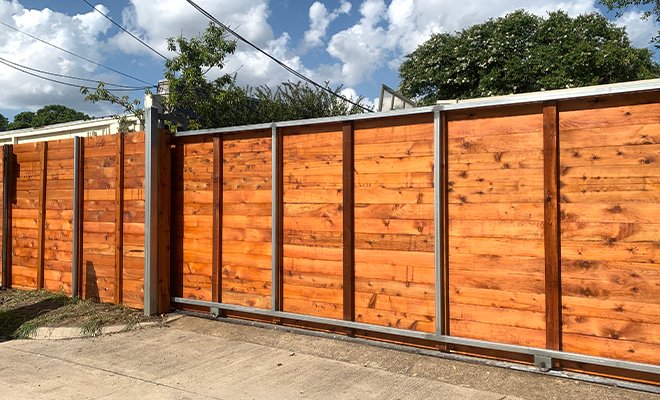
“A sliding gate is a fantastic solution, but the track and wheels are its Achilles’ heel.”
They need to be kept clean and free of debris like leaves, gravel, and dirt to operate smoothly. In autumn, you might be clearing the track weekly. In snowy or icy climates, the track can freeze up, rendering the gate useless until it thaws. Before committing, be honest with yourself about whether you’re up for the regular maintenance this system requires to stay functional.
3. Lush Garden with Dark Raised Beds and a Gravel Path
This cultivated garden gets its serene, organized feel from a balanced visual formula. Think of it as: 50% lush, varied greenery + 30% dark, grounding elements (the stained raised beds) + 20% light, textured hardscape (the gray gravel and concrete pavers). The dark beds make the greens pop, while the light path prevents the space from feeling too heavy or enclosed. You can swap the materials—maybe a Corten steel bed or black slate chips—but keeping this ratio of plant life to dark structure to light pathway is the key to its success.
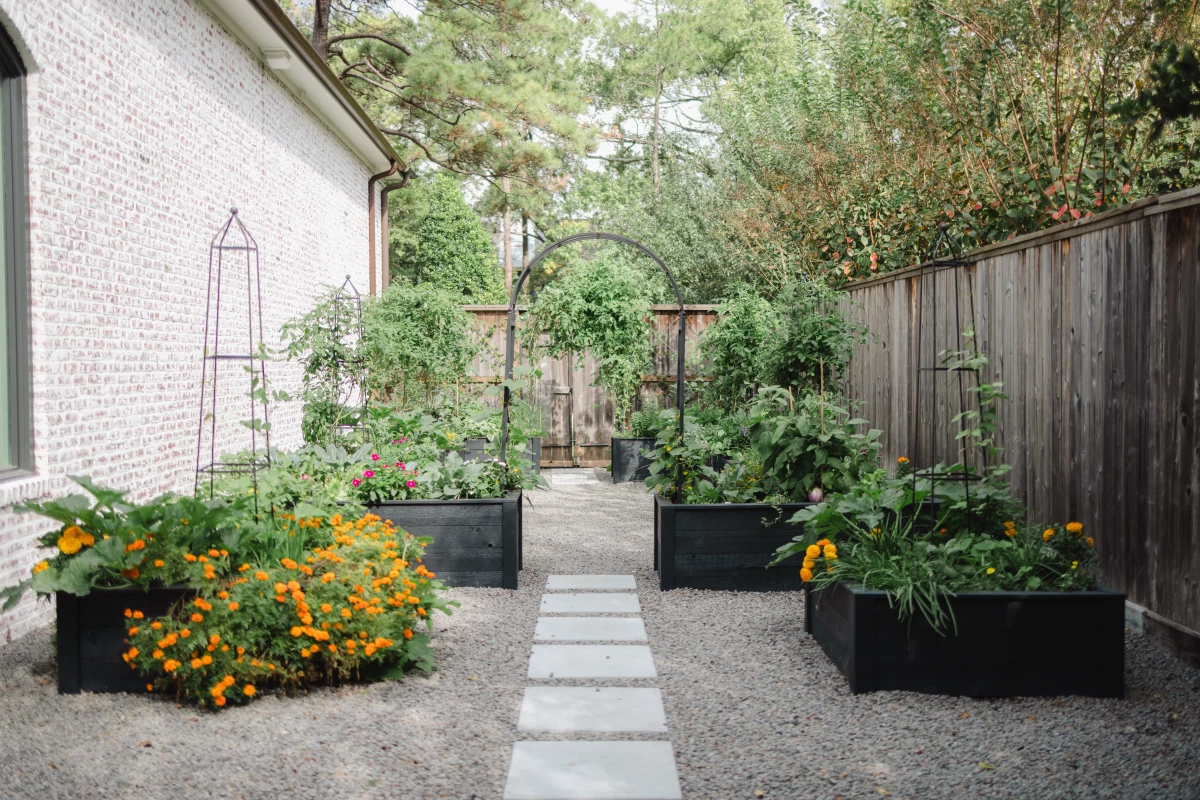
“You don’t need expensive cedar or custom-built beds to get this look.”
You can create a similar vibe for significantly less. Use standard pine boards for the raised beds (around $150 for this size) and seal them with a dark, food-safe stain. For the path, skip the large pavers and opt for a full bed of pea gravel from a landscape supply yard, which can cost as little as $50-$70 per cubic yard. A few bags of concrete mix can be used to pour your own DIY stepping stones for under $30.
4. Simple X-Braced Gate in a Natural Wood Privacy Fence
The classic ‘X’ brace on the gate isn’t just for looks; it’s a fundamental principle of structural engineering called triangulation. This design distributes weight and stress evenly, preventing the gate from sagging over time—a common problem with simpler gate constructions. Visually, the diagonal lines of the ‘X’ break up the monotony of the vertical fence planks, drawing the eye and clearly signaling the point of entry. It’s a timeless design that communicates sturdiness and traditional craftsmanship.
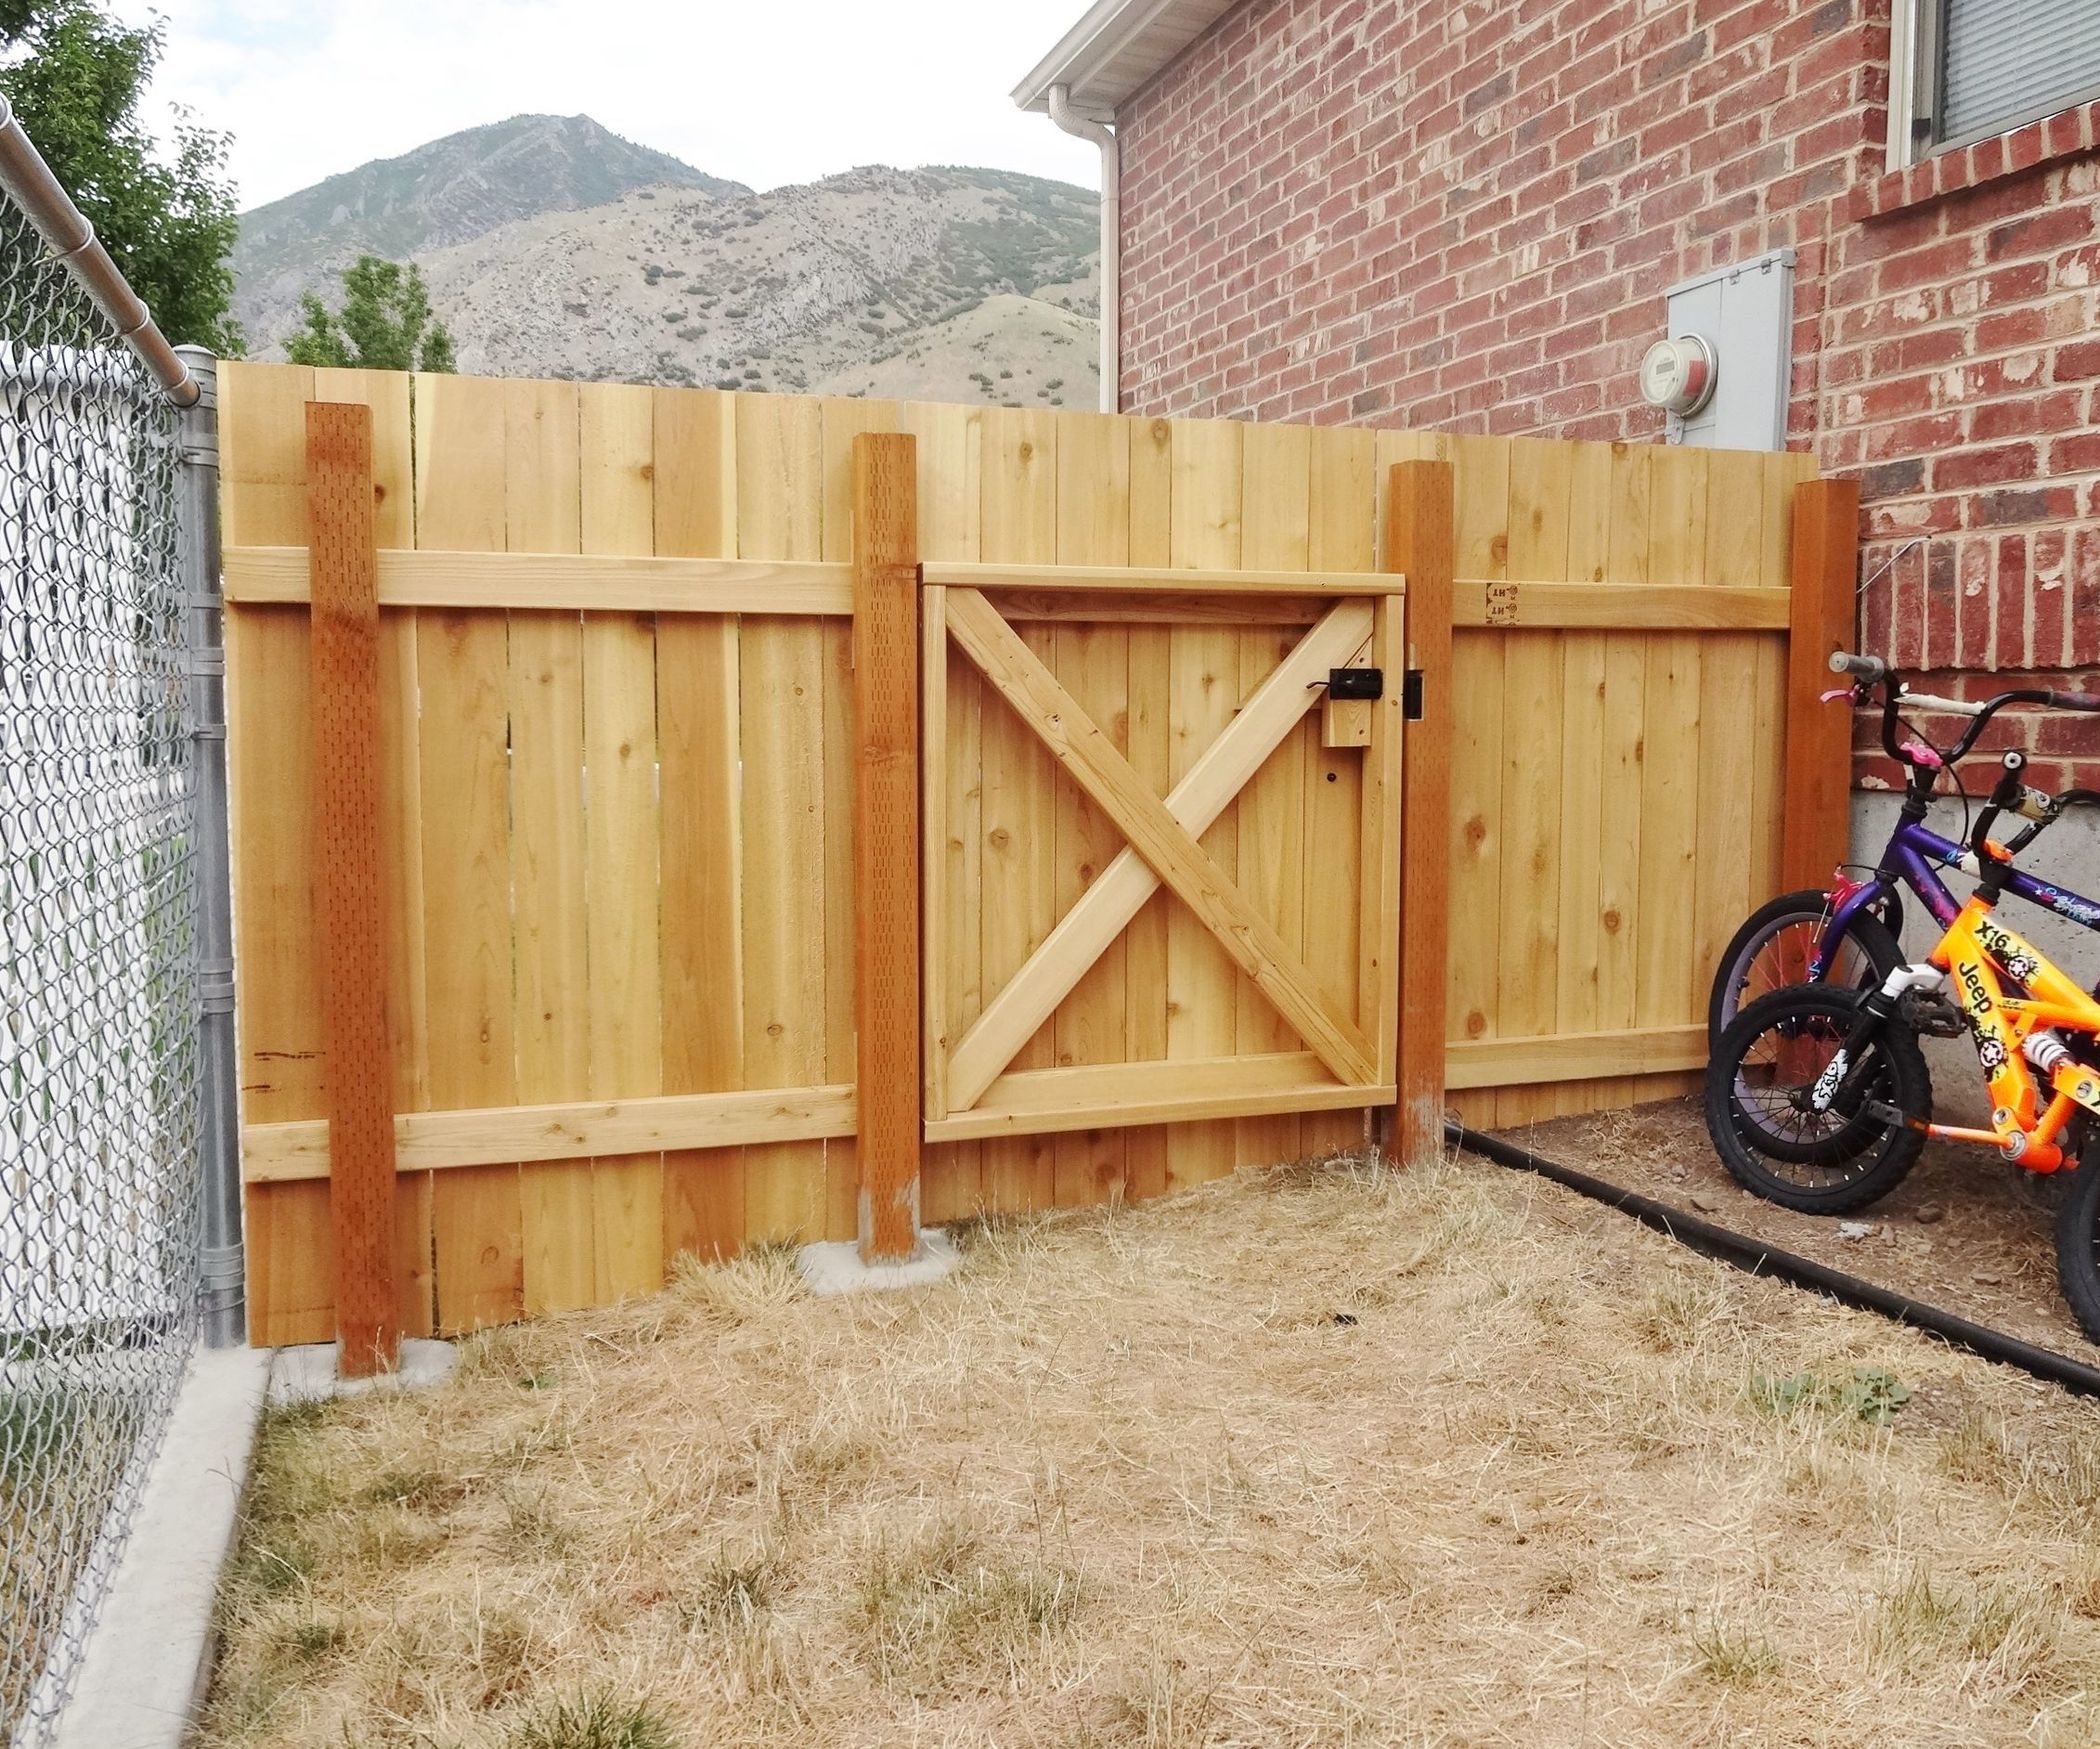
“A fence made from light, natural-toned, pressure-treated wood needs consistent care to keep it from turning a sad, splintery gray.”
Plan to clean and re-seal it every 2-3 years, depending on your climate’s intensity. A gallon of quality exterior wood sealant costs about $40-$60 and will cover around 250-350 square feet. The job itself is a weekend project: power wash on Saturday, let it dry completely, and apply the new sealant on Sunday. It’s not difficult, but it is a recurring chore.
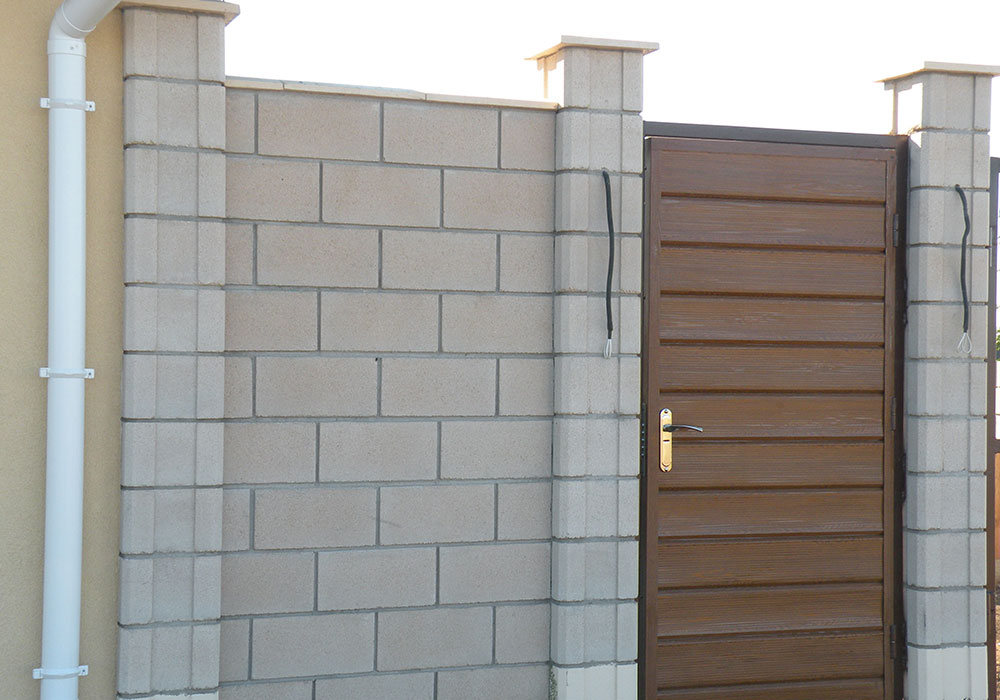
5. Cinder Block Wall with a Contrasting Wood-Look Slat Gate
This sturdy, practical fence offers a great mix of security and style. Here’s a rough idea of what it would cost to build a 40-foot section:
“Cinder Blocks (8x8x16): $250 – $400Mortar, Rebar, and Concrete Fill: $150 – $250”
- Cinder Blocks (8x8x16): $250 – $400
- Mortar, Rebar, and Concrete Fill: $150 – $250
- Wood-look Slat Gate (pre-fabricated): $600 – $1,200
- Gate Hardware (handle, hinges): $80 – $200
- Labor (if not DIY): $1,500 – $3,000
- TOTAL: $2,580 – $5,050
Budget alternative: Use standard pressure-treated wood for the gate instead of a composite wood-look material, and tackle the block work as a DIY to save over 50% on the total cost. Compared to the look in Idea #1, this is a more budget-conscious approach to a mixed-material fence.
When hanging a heavy gate from a cinder block wall, you can’t just drill into the block. The secret is to use long anchor bolts (like Sleeve or Wedge anchors) that go deep into the concrete-filled cells of the block pillars. For a gate this size, use at least three heavy-duty strap hinges, and ensure the pillar you’re mounting to is thoroughly reinforced with rebar and filled solid with concrete. This prevents the weight of the gate from cracking the blocks over time.
6. Classic Stacked Stone Base with a Wrought Iron Picket Top
The single element that makes this fence feel so grand and established is the combination of textures. It’s not just a stone wall, and it’s not just an iron fence. The stacked stone base provides a sense of permanence and connection to the earth, while the wrought iron pickets on top offer security without completely obstructing the view. This layering of solid, rustic stone with open, decorative metal is what elevates it from a simple barrier to a true architectural feature. Remove one, and the entire character is lost.
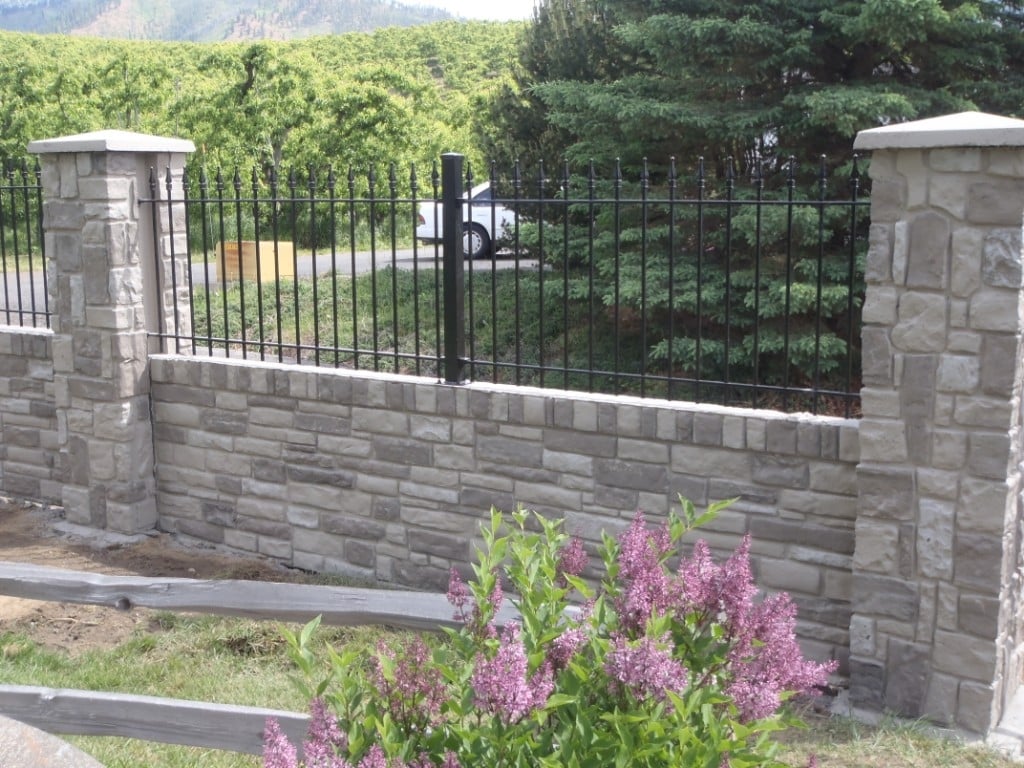
“This style of fencing works best on medium to large properties where its visual weight won’t overwhelm the space.”
For a front yard, you’ll want at least 40-50 feet of street frontage to keep it from looking like a fortress. The ideal height is a 2-3 foot stone base with 2-3 feet of iron on top. In a smaller backyard, a full fence like this can feel confining. Instead, consider using a shorter section as an accent wall or to define a specific area, like a patio.
7. Mid-Century Vibe with a Geometric Diamond Block Screen
This isn’t your grandma’s cinder block wall. The use of decorative screen blocks, often called breeze blocks, is a direct nod to the optimistic, stylish architecture of the mid-century modern era, particularly in sunny places like Palm Springs. This trend is surging right now because it hits all the right notes: it’s geometric, textural, and creates incredible light and shadow play. It feels both retro and completely fresh, offering partial privacy and ventilation while serving as a stunning architectural statement. It’s a wall that’s meant to be seen.
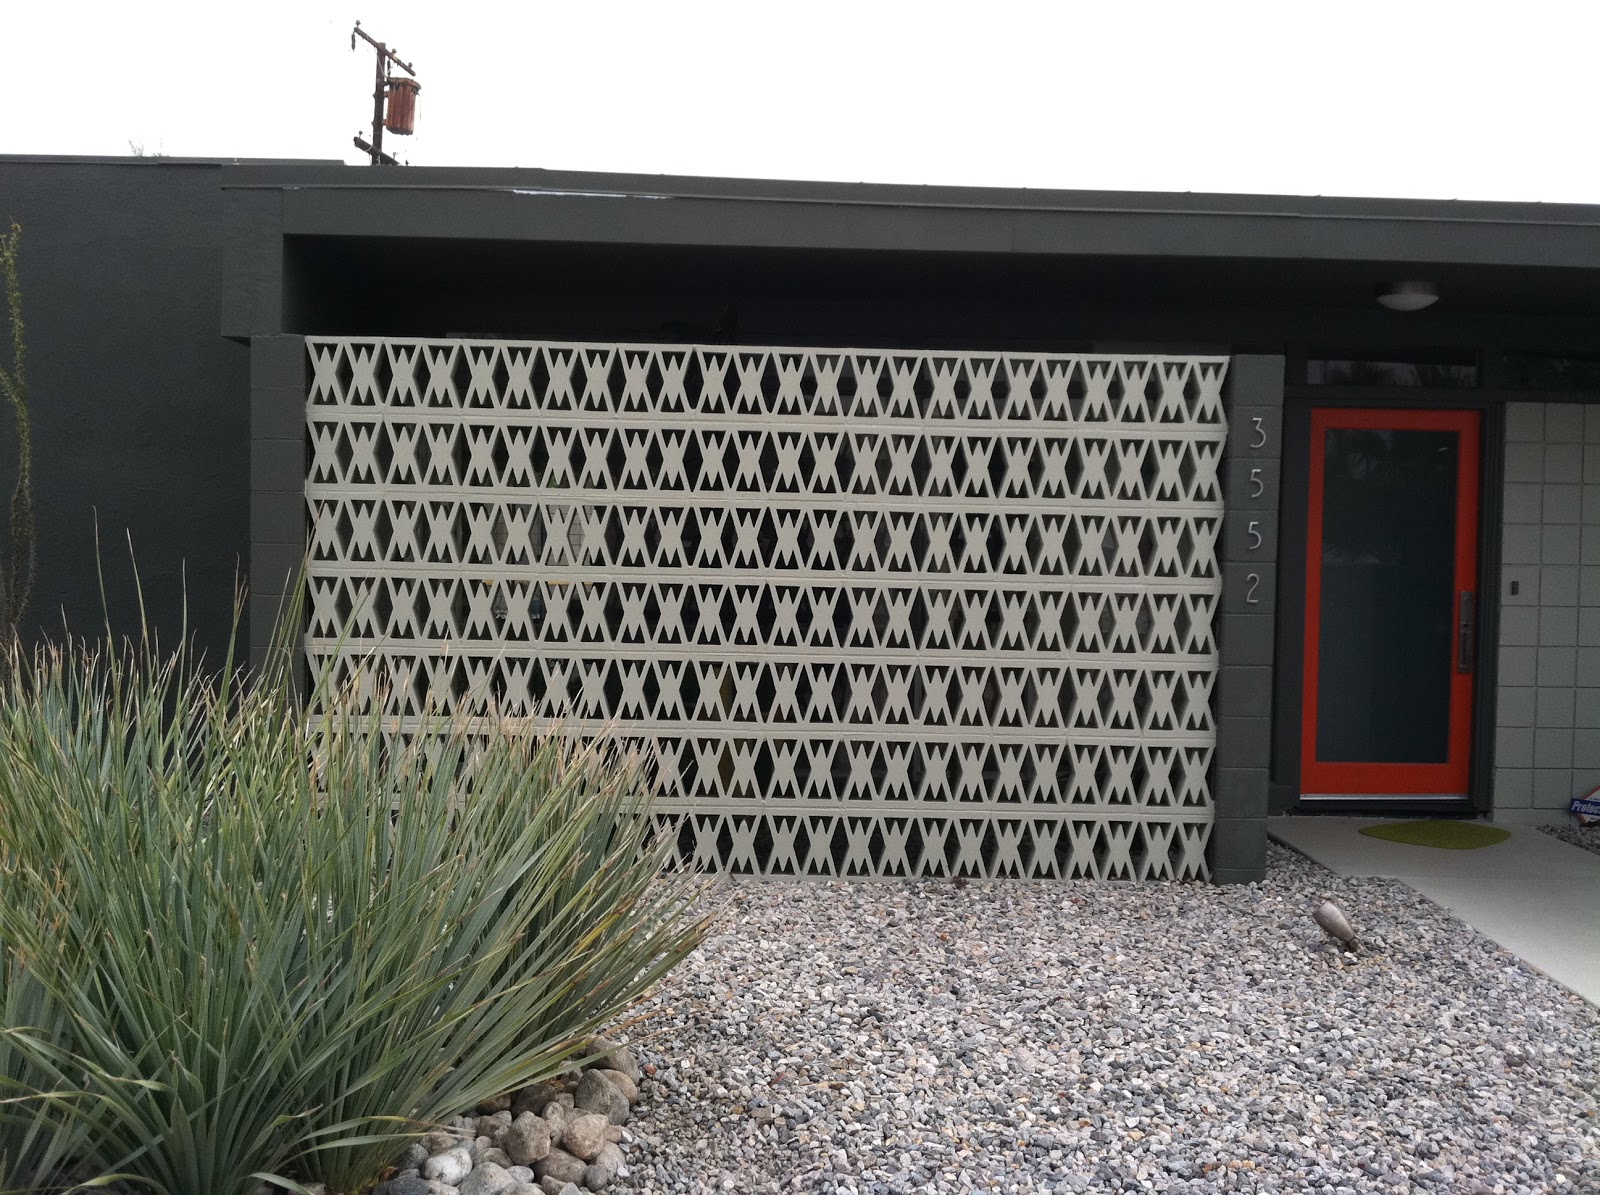
“Want to recreate a small screen wall like this?”
Here’s a mini-guide for setting the blocks. (Time: 2-3 hours for a small section; Cost: ~$150) Lay a level concrete footing or foundation first. This is non-negotiable.Mix your mortar to a peanut butter consistency. Apply a 1-inch layer to the footing.’Butter’ the ends of your first block with mortar and press it firmly into the base layer.Use a level to check that it’s perfect both horizontally and vertically. Tap gently with a rubber mallet to adjust.Repeat, adding mortar between each block, and use a jointing tool to smooth the seams as you go.
8. Textured Block Fence with Smooth Dark Grey Posts and Coping
This design succeeds because of its sophisticated play on texture. The main body of the fence uses rough, chiseled-face blocks, which catch the light and create dynamic shadows, giving the wall a rugged, organic quality. This texture is then framed and contained by the perfectly smooth, dark grey coping on top and the sleek vertical posts. This contrast—rough vs. smooth—is what makes the fence look so custom and intentional. It feels less like a simple barrier and more like a thoughtfully designed architectural element.
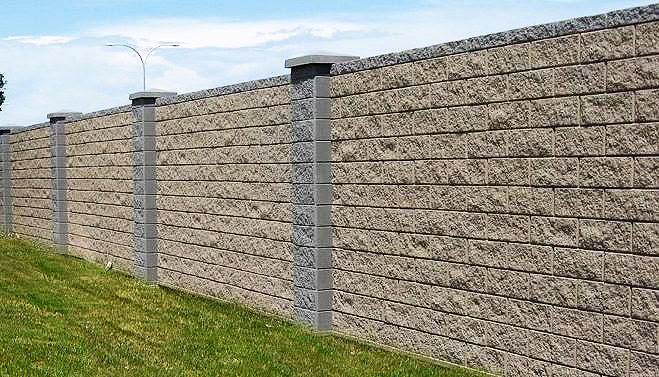
“Concrete and masonry blocks are prone to something called efflorescence—that chalky white powder that can appear on the surface.”
It’s caused by water-soluble salts being drawn out of the material as water evaporates. While it’s not structurally harmful, it can be an eyesore. You can clean it with a stiff brush and specialized efflorescence remover (about $30/gallon). To help prevent it, ensure the top coping is well-sealed to minimize water penetration from above.
9. A Simple Diamond Lattice Screen Wall for Privacy
A full architectural screen like the one in Idea #7 can be a major construction project. For a fraction of the cost and effort, you can get a similar mid-century vibe by using a few panels of these decorative screen blocks to partition a patio or hide an eyesore like an AC unit. A dozen blocks might only cost $50-$80. Set them in a simple wood frame or between two 4×4 posts for a freestanding screen that gives you that geometric shadow play without requiring a mason and a building permit.
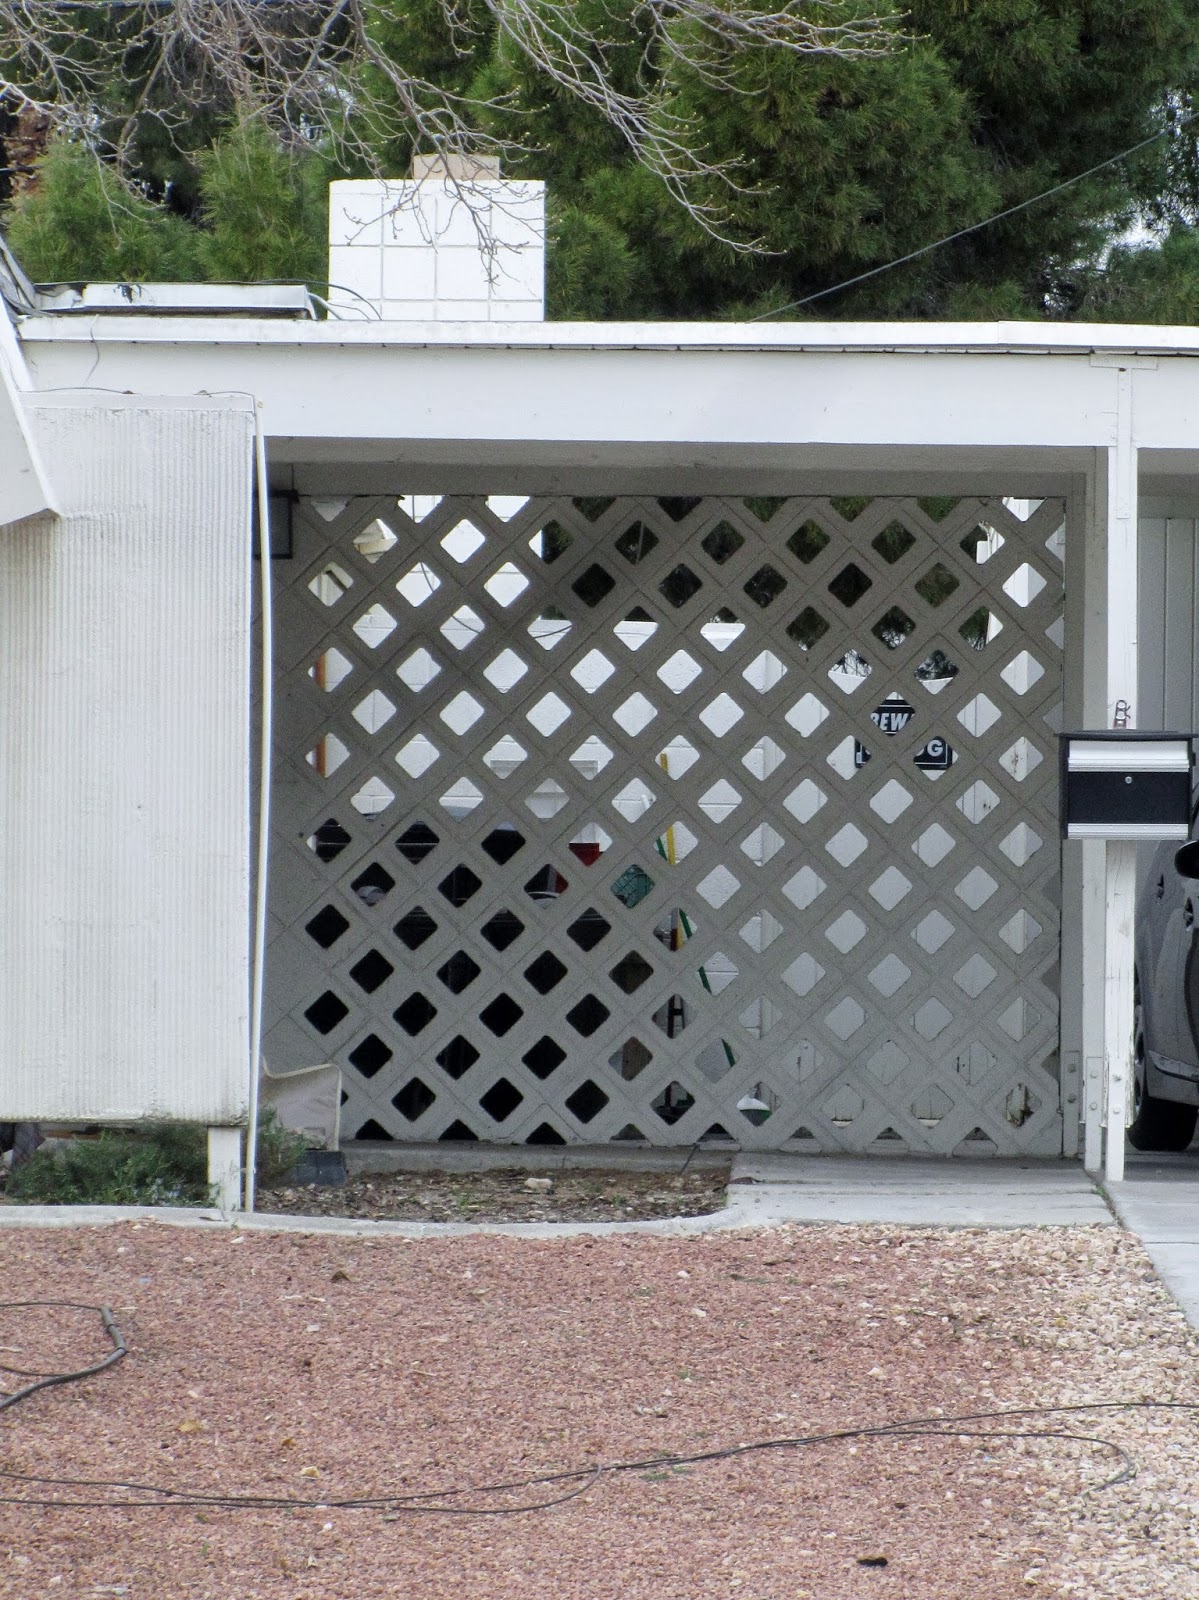
“Let’s be honest: a decorative screen block wall is not a security fence.”
The blocks are relatively thin and can be fragile. A well-aimed kick or a hard impact from a lawnmower could easily shatter one. This type of wall is purely for aesthetics and partial screening. It’s perfect for creating a sense of separation or a design feature, but if you need a true security barrier to keep pets or kids in (or intruders out), this is not the right choice. It’s a visual boundary, not a physical one.
10. Adjustable Louvered Wood Fence for Flexible Privacy
The beauty of a louvered fence is its adaptability. To maximize morning sun on your patio, orient the louvers to open towards the east. For afternoon privacy from a neighbor’s window, pivot them to a nearly closed position. The key is to install the pivot hardware so that the slats overlap slightly when fully closed, just like a window blind. This ensures you have a ‘full privacy’ mode with no gaps. Most louver hardware kits come with instructions, but testing the overlap before you screw everything in place is a crucial step many DIYers miss.
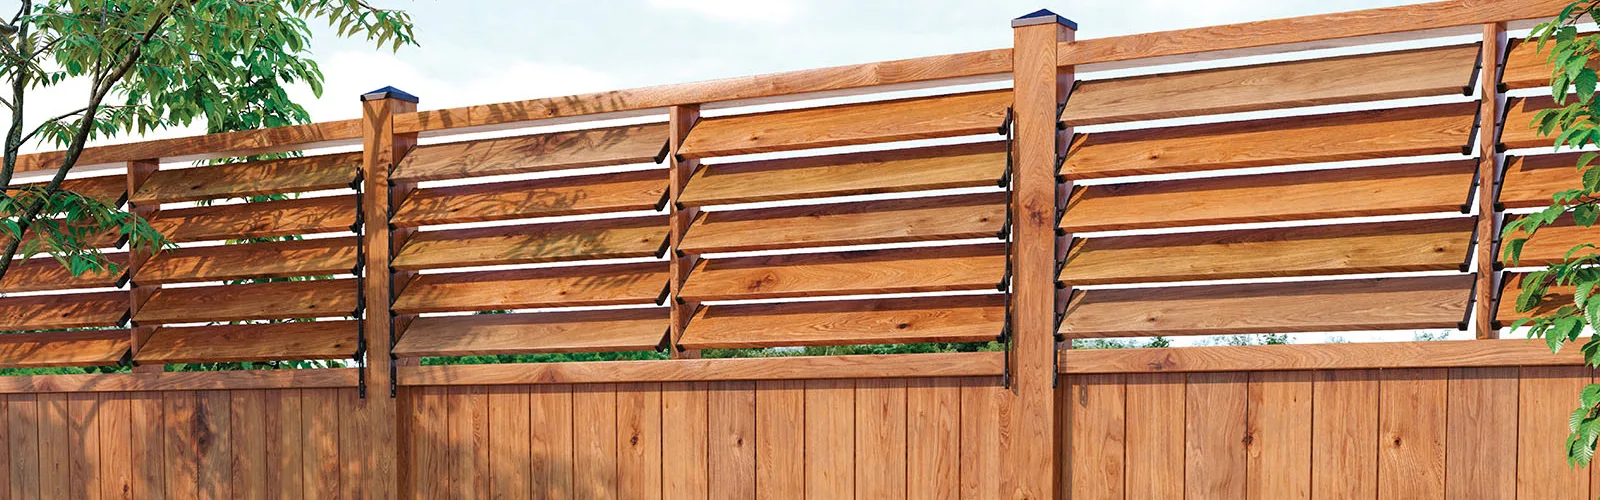
“The adjustability is, without a doubt, the single feature that makes this fence special.”
It transforms a static barrier into a dynamic tool for controlling light, air, and privacy. On a hot day, you can open the louvers to catch a breeze. When you have guests over for dinner on the patio, you can close them for an intimate, enclosed feeling. It’s a level of control that no other fence style offers, making your outdoor space more usable and comfortable throughout the day and across seasons.
11. Modern Wood Slats on a Concrete Retaining Wall
The visual harmony of this modern exterior comes down to a clean, three-part formula: 40% natural texture (the warm wood slats) + 40% crisp modern lines (the white board-and-batten siding and gray garage door) + 20% solid, grounding base (the light gray concrete block wall). This balance ensures that the look is neither too rustic nor too sterile. The black metal posts and light fixture act as punctuation, adding sharp, graphic details that tie it all together. Maintaining this ratio is key to achieving the same polished, cohesive aesthetic.
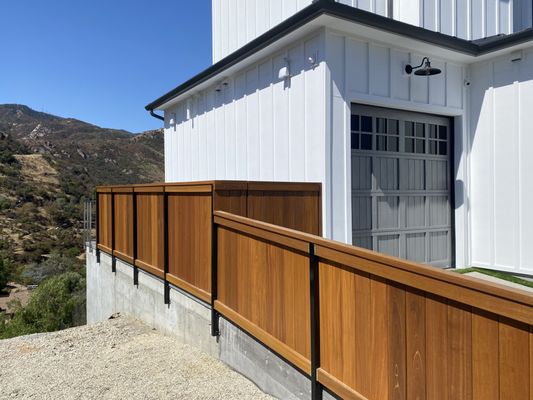
“Before you commit to building a wood fence on top of a concrete wall, run throug”
Before you commit to building a wood fence on top of a concrete wall, run through this quick checklist:
- Is the existing concrete wall structurally sound? Check for major cracks or leaning. A fence adds significant wind load.
- Do you know what’s inside the wall? You need to anchor into solid concrete, not hollow blocks.
- Have you checked local codes? Many municipalities have height restrictions for fences built on top of retaining walls.
- Are your post base brackets rated for outdoor use and sized correctly for your posts? Don’t skimp here.
12. Dramatic Entry with a Dark Slat Gate and Light Concrete Pillars
The power of this entrance comes from extreme contrast. The tall, light-colored concrete pillars feel massive and permanent, like ancient monoliths. Set between them, the gate—with its dark brown vertical slats and black metal frame—creates a sharp, almost graphic void. This high-contrast pairing of light and dark, solid and slatted, makes the gate feel more secure and the entrance more significant. The small detail of the silver fasteners adds a touch of industrial sparkle, preventing the gate from looking like a flat black hole.
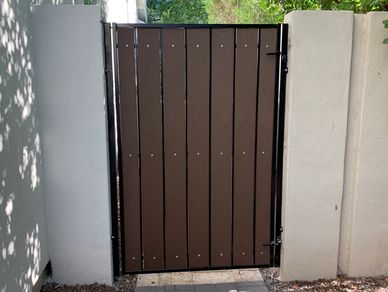
“A gate made with solid wood slats and a metal frame is incredibly heavy.”
Hanging it from masonry pillars requires serious forethought. The hinges must be heavy-duty and bolted deep into the pillar’s core. More importantly, the pillars themselves need substantial concrete footings (often several feet deep) to prevent them from leaning or shifting under the gate’s constant load. If you see even a hint of a crack or lean in the pillars, you’re looking at a future failure. This is not a project to eyeball.
13. Tall Reddish-Brown Privacy Fence with a Gravel Border
A tall privacy fence like this, likely 6 to 8 feet high, is excellent for blocking views but can have drawbacks in smaller spaces. In a narrow backyard, it can cast a significant shadow for much of the day, making it difficult to grow grass or sun-loving plants near the fence line. It can also make a small yard feel even smaller and more enclosed. This style is best suited for medium to large yards where the fence is further from the main living areas and its scale feels proportional to the overall space.
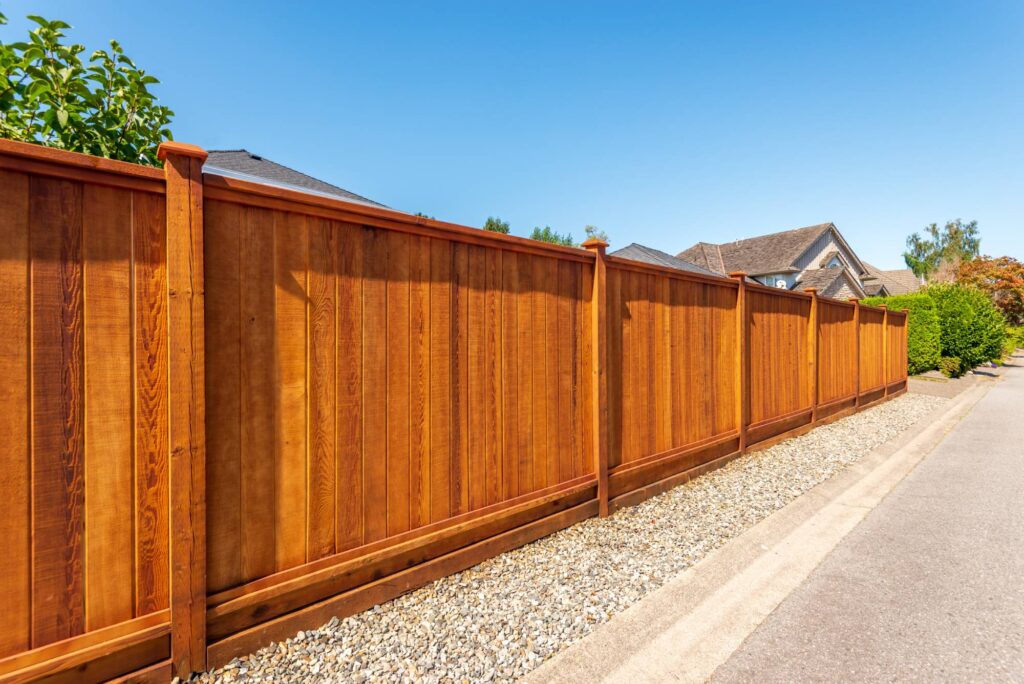
“That gravel strip at the base of the fence isn’t just for looks; it’s a smart maintenance move.”
It prevents moisture from the soil from wicking up into the wood baseboards and posts, which is a primary cause of rot. It also creates a buffer zone so you don’t have to run a weed whacker right up against the wood, which can chew up the stain and damage the fence over time. You will, however, need to pull weeds from the gravel itself a few times a year to keep it looking clean.
14. Crisp White Cinder Block Planter with a Warm Wood Cap
Painting cinder blocks is easy, but doing it right ensures it lasts. Here’s the no-fail method. (Time: 4-5 hours + dry time; Cost: ~$100)
- First, clean the block wall thoroughly with a wire brush and a TSP solution to remove all dirt and powdery residue. Rinse and let it dry completely for 24 hours.
- Apply one even coat of masonry primer or a block filler primer. This is crucial; it seals the porous surface so your paint doesn’t just soak in.
- Let the primer dry according to the can’s instructions.
- Apply two coats of a high-quality exterior acrylic latex paint, letting it dry fully between coats. Use a thick-nap roller to get into the texture.
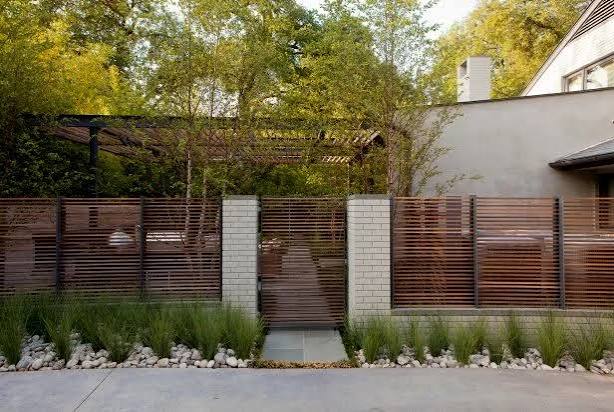
“The light wood cap adds a high-end finish, but you don’t need to buy expensive Ipe or cedar boards.”
For a fraction of the price, you can use standard pressure-treated 2×6 or 2×8 lumber from any home improvement store. Let it dry out for a few weeks, give it a good sanding to smooth the edges, and apply a warm-toned exterior deck stain and sealer. It will give you the same beautiful contrast against the white block for about 70% less cost.
15. Wood-Look Plank Gate Framed by Classic Brick Pillars
When choosing a composite or ‘wood-look’ material for a gate, pay close attention to its UV-resistance rating. Cheaper composite materials can fade significantly in just a few years of direct sun, turning from a rich brown to a chalky gray-brown. Look for products that have color integrated all the way through the material, not just a surface layer. Brands like Trex or TimberTech often have superior fade warranties, which is a good indicator of quality. It’s worth the extra cost upfront to avoid a faded gate in five years.
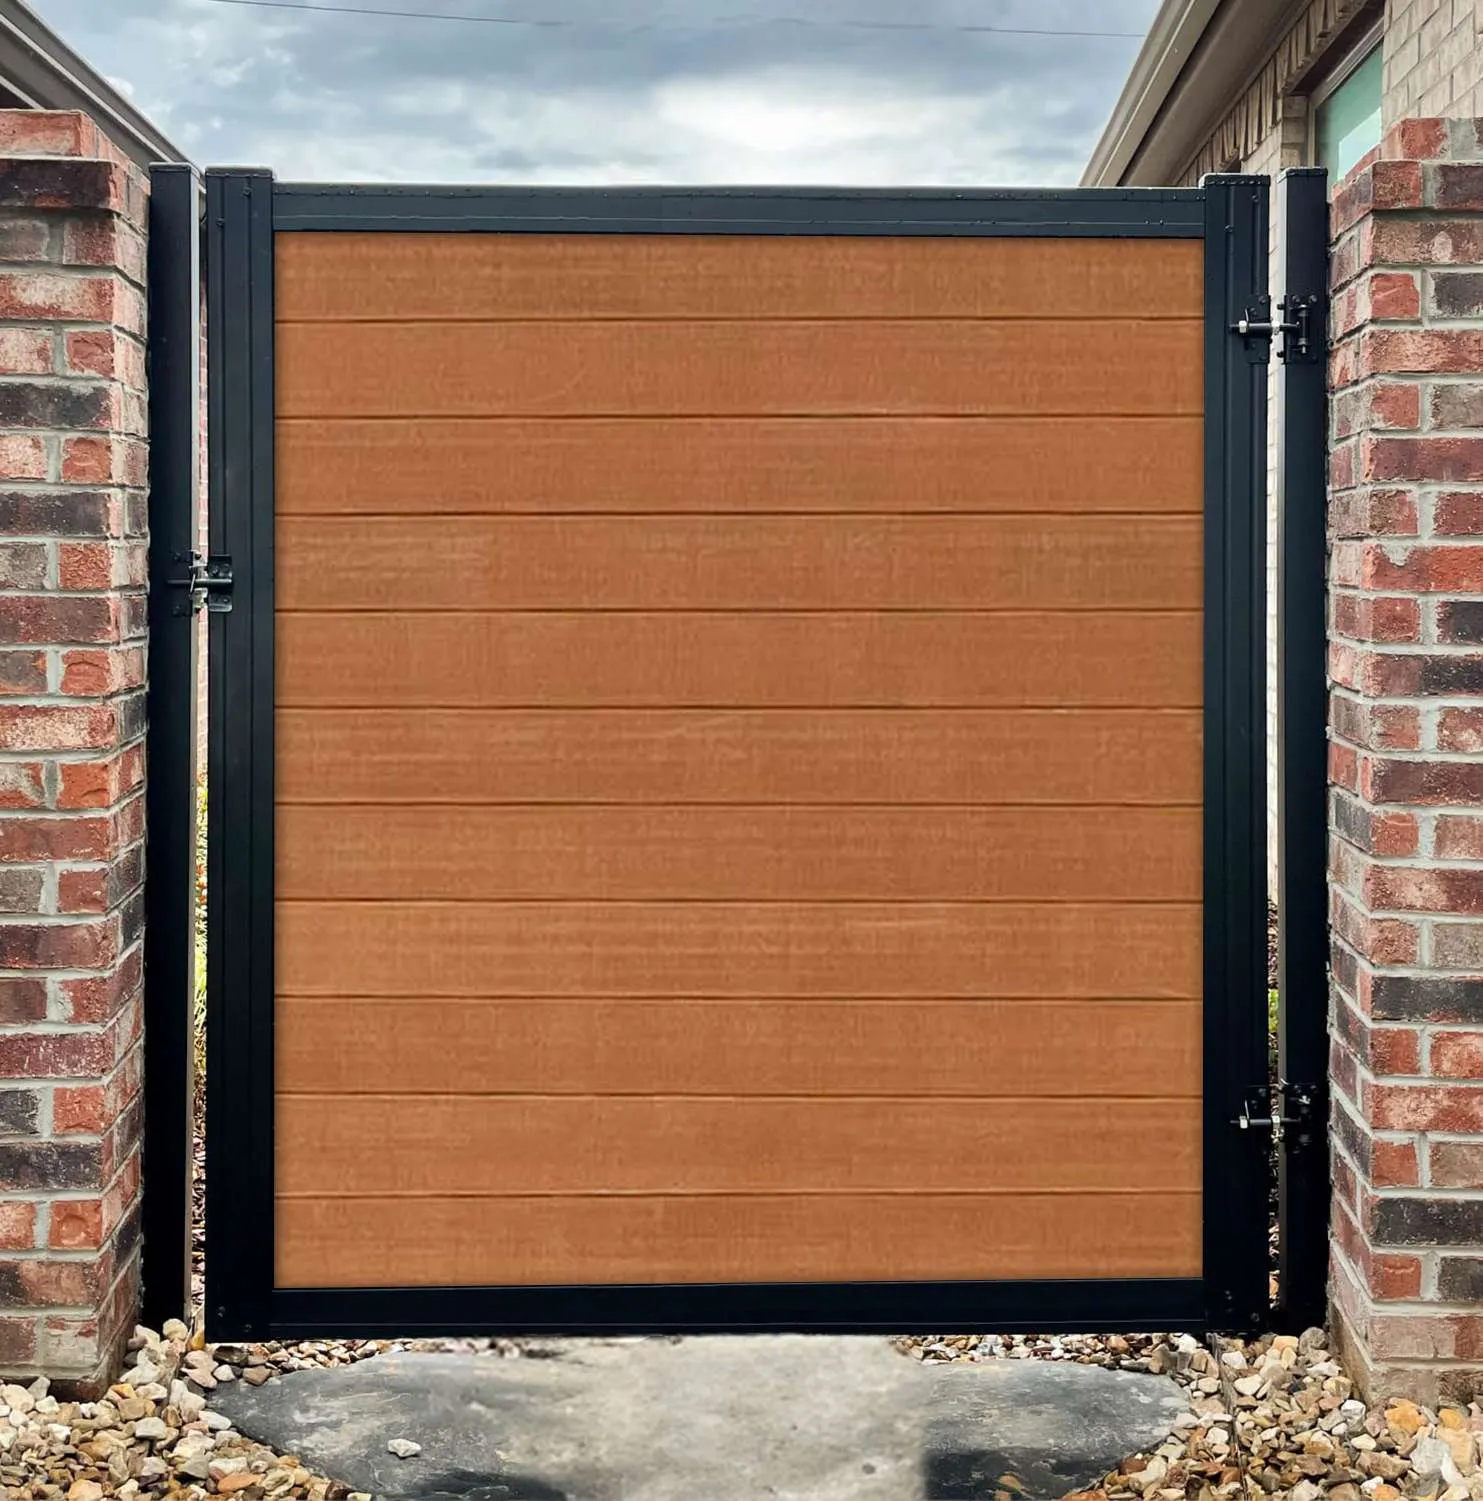
“The magic here is the seamless blend of modern and traditional.”
The horizontal planks and clean black metal frame of the gate are purely contemporary. The brick pillars, however, are classic and timeless. By pairing them, the design feels grounded and familiar, yet fresh and updated. It avoids looking too cold (like an all-metal gate might) or too dated (like an all-brick wall might). This successful marriage of styles, compared to the all-concrete pillars in Idea #11, gives it a unique warmth and character.
16. Curved Retaining Wall Defining a Cozy Fire Pit Patio
Creating a dedicated patio zone like this involves a few key components. Here is an estimated cost for a 15-foot diameter space:
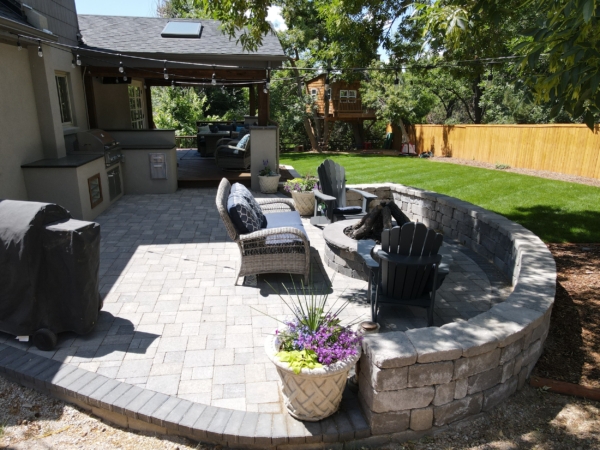
“Interlocking Pavers (200 sq.”
ft.): $800 – $2,000Curved Retaining Wall Blocks: $400 – $900Stone Fire Pit Kit: $500 – $1,500Paver Base, Sand, and Adhesive: $200 – $400Professional Labor: $2,500 – $5,000TOTAL: $4,400 – $9,800
Budget alternative: Tackle the paver and wall installation as a DIY project, and opt for a simple metal fire pit bowl instead of a built-in stone kit to bring the total cost down to under $2,000.
Our eyes and brains love curves. In a landscape dominated by straight lines—the house, the fence, the property line—a curved retaining wall instantly softens the entire space. It breaks up the rigidity and creates a gentle, flowing path for the eye to follow. The curve also forms a natural enclosure for the fire pit area, making it feel like a cozy outdoor ‘room’ without needing actual walls. This use of curves to define a zone is a classic landscape design trick that always works.
17. Horizontal Wood Slats Atop a Low Concrete Curb Foundation
That narrow planting strip between the curb and the fence is a lovely idea, but it can be a real headache. A strip that’s less than 12 inches wide will dry out extremely fast in the sun, and the soil volume is too low to support most plants long-term. You’ll be limited to very tough, drought-tolerant succulents or groundcovers. Be prepared for frequent watering or installing a dedicated drip irrigation line. Also, water runoff from the sidewalk can pool here, so good drainage is a must.
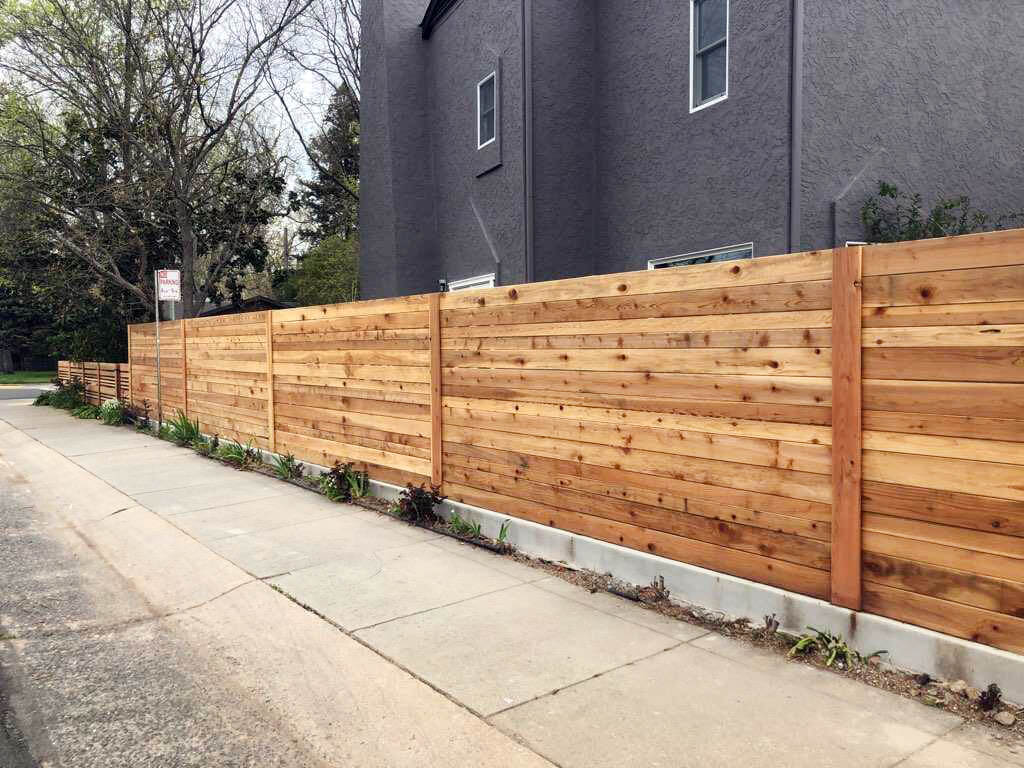
“This low-profile fence design is perfect for defining a property line without creating an imposing barrier.”
At a total height of probably 4 to 5 feet, it’s ideal for front yards or along a driveway where you want a sense of enclosure but don’t need maximum privacy or security. Its long, linear nature makes it particularly effective for long, straight property lines. It visually elongates the space and looks incredibly clean and intentional when running parallel to a sidewalk or road.
18. Indoor-Outdoor Flow with a Whitewashed Brick Feature
To translate this serene interior into a stunning outdoor living space, stick to this material recipe: 60% light, warm neutrals (like the cream sofa and light wood tones) + 30% textural, architectural elements (like the whitewashed brick) + 10% sharp black accents (the lighting and table frame). For a patio, this could mean light-colored pavers, a feature wall made of light brick or stone, natural wood furniture, and black planters or a pergola. The key is the dominance of soft, light tones punctuated by texture and graphic black details.
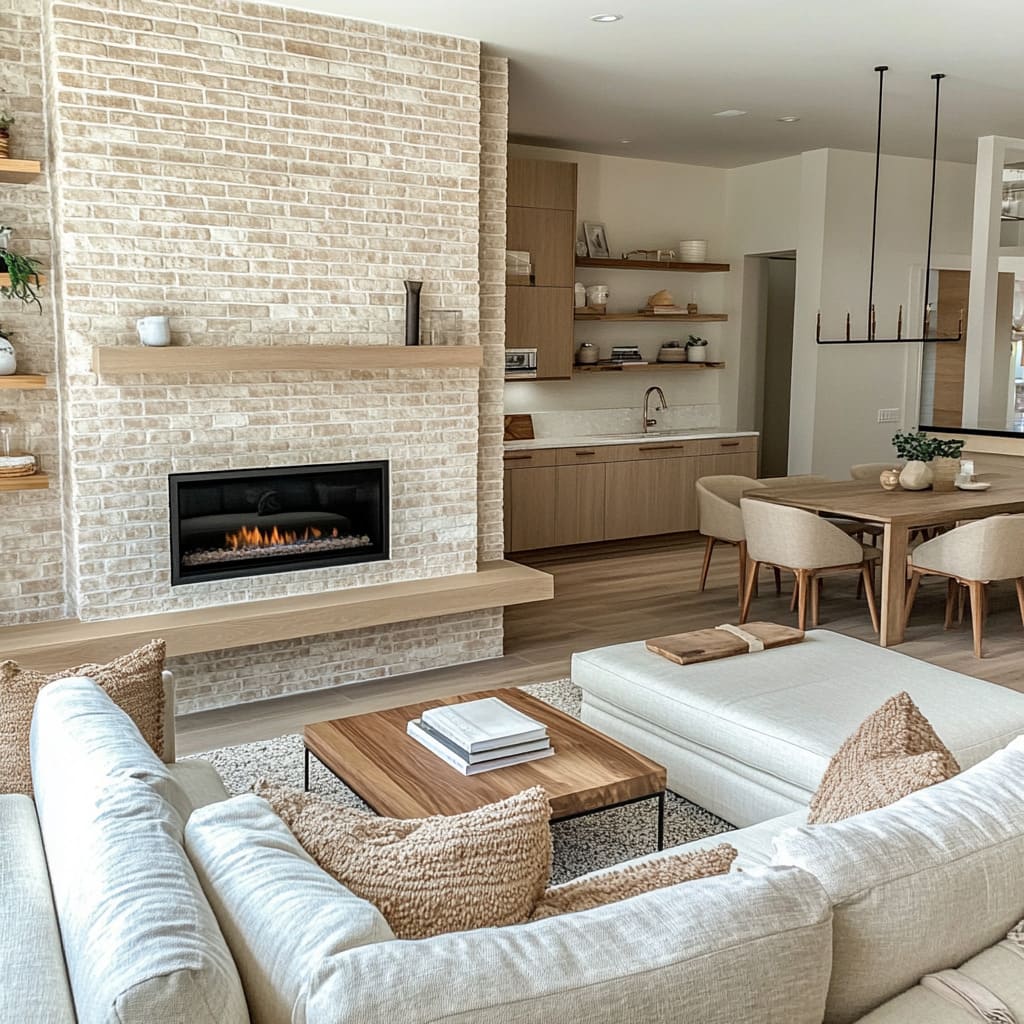
“One of the biggest shifts in home design is the blurring of lines between indoors and out.”
People want their patios and decks to feel as comfortable and stylish as their living rooms. This look is a perfect example. Taking materials like finished brick, floating mantels, and minimalist chandeliers and bringing them into an outdoor kitchen or covered patio design is a huge trend. It’s about creating cohesive, livable spaces, no matter which side of the door you’re on.
19. Rustic Hanging Planter Box on a Weathered Wood Fence
You can build a simple, rustic planter box like this in an afternoon. (Time: 2 hours; Cost: ~$30)
- Cut a standard cedar or pine fence picket into three equal lengths for the front, back, and bottom. Cut two smaller square pieces for the ends.
- Assemble the box using exterior-grade wood glue and galvanized screws. Pre-drill your holes to prevent the wood from splitting.
- Drill several 1/2-inch drainage holes in the bottom piece. This is the most important step for plant health!
- Attach heavy-duty metal brackets to the back of the box, spaced to align with your fence posts for maximum support.
- Hang the box and fill with potting soil and your favorite plants.
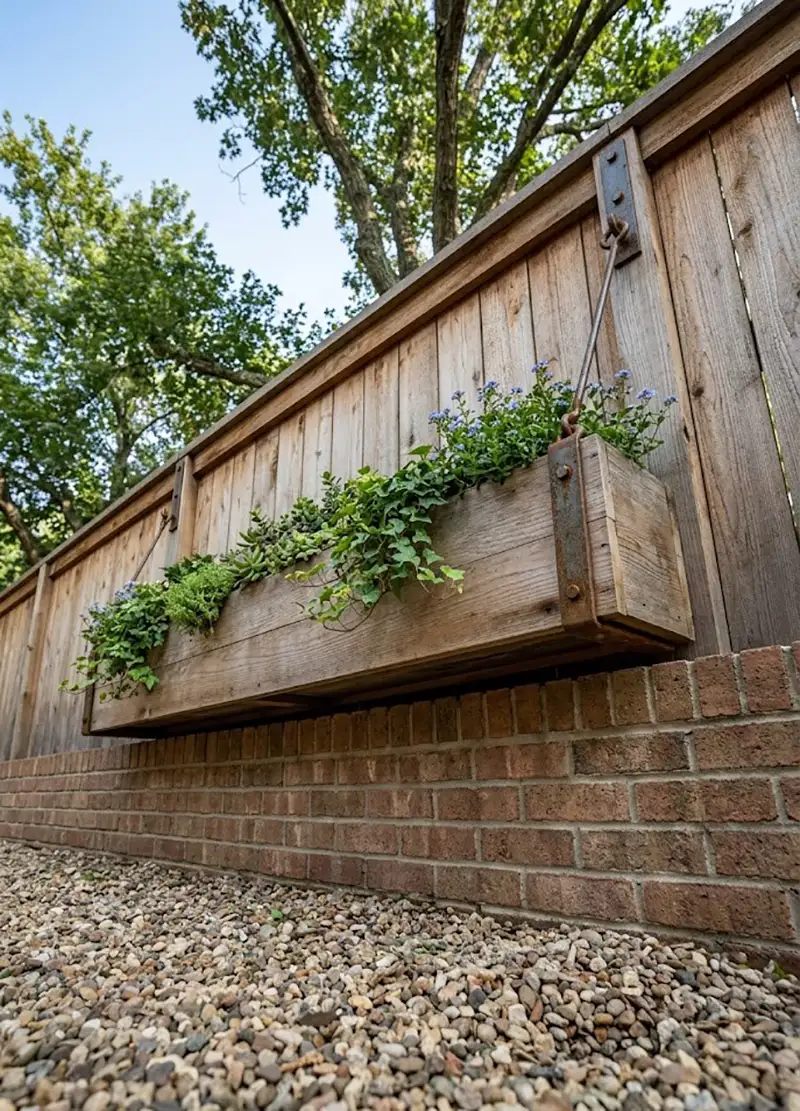
“Instead of buying new lumber, you can make this planter for next to nothing using reclaimed pallet wood.”
Look for pallets stamped with ‘HT’ (heat-treated), which means they are safe for gardening and haven’t been treated with chemicals. A single pallet can provide enough wood for two or three of these boxes. The weathered, rustic look of the pallet wood is a perfect match for this style, and it’s a great way to upcycle. Just give the wood a good scrub and a light sanding before you build.
20. High-End Privacy with Fluted Panels and Curved Wood
To get this sophisticated fluted look for an exterior application like a privacy screen or gate, don’t use real glass. Instead, look for fluted or reeded polycarbonate panels. They offer the same visual effect and light diffusion but are a fraction of the weight, much more impact-resistant, and inherently UV-stable. You can mount these panels in a custom aluminum or steel frame for a durable, weather-proof version of this high-end interior style. It’s a pro secret for achieving a delicate look with robust materials.
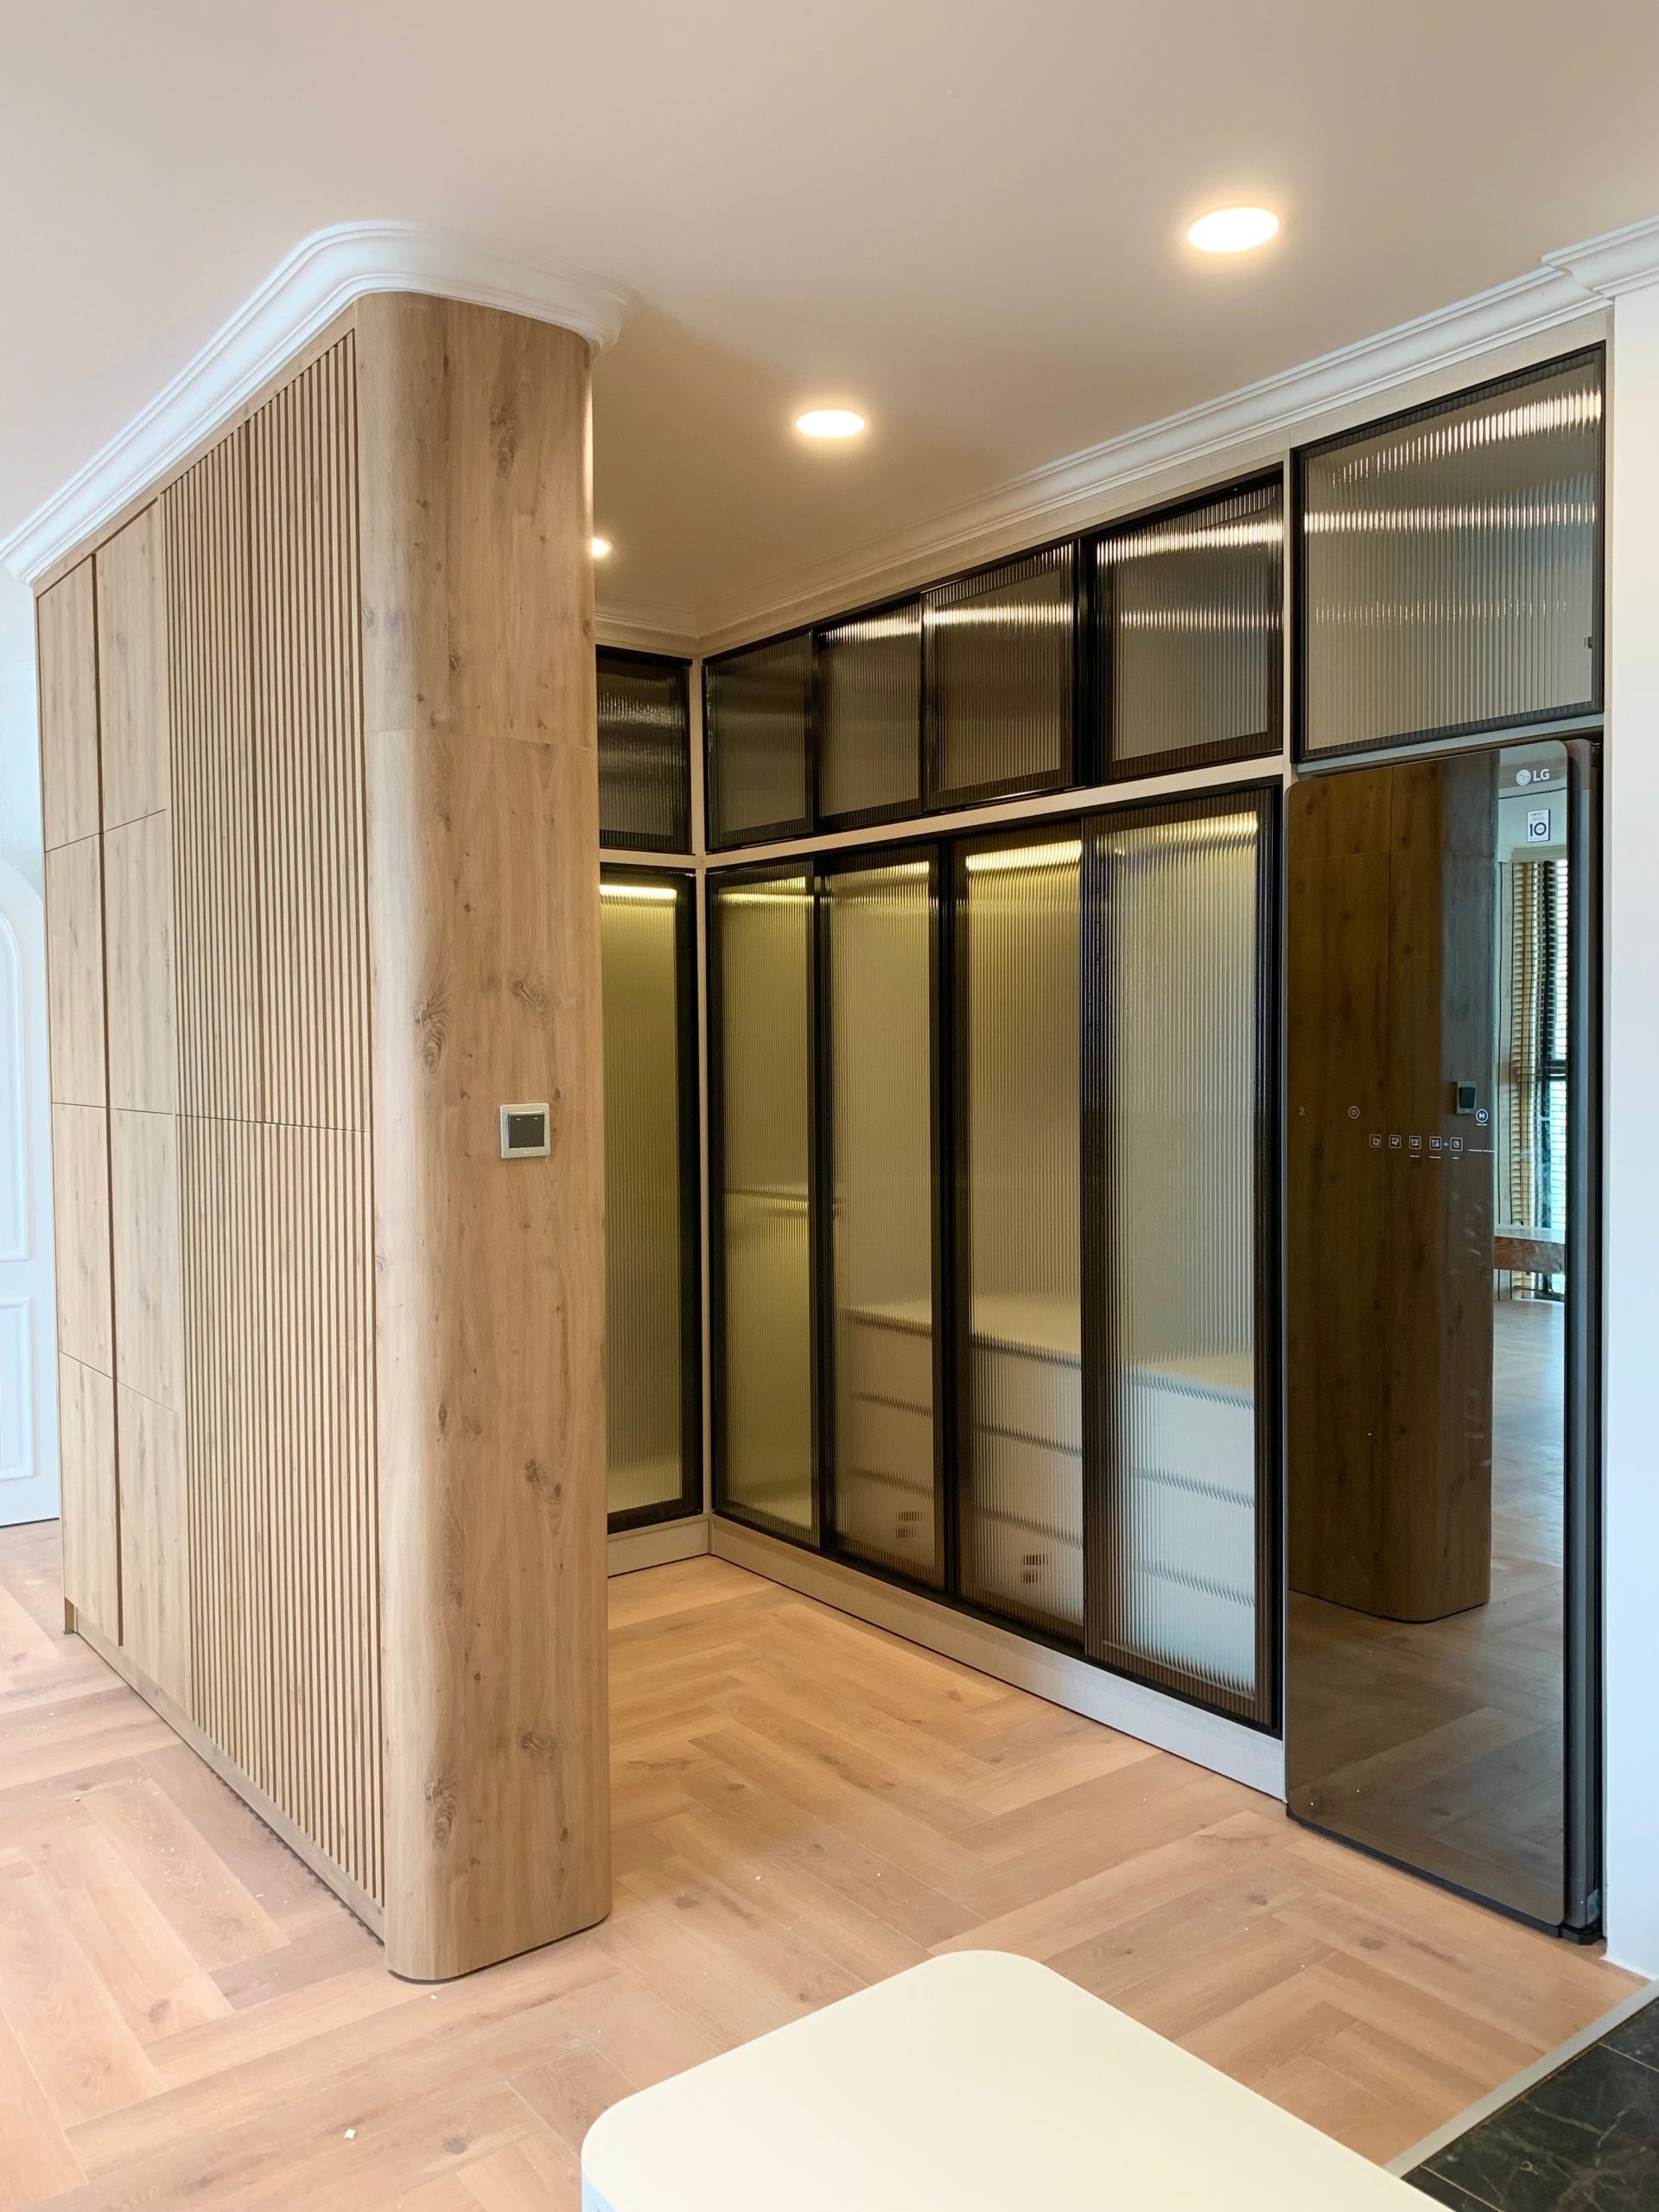
“The defining element here is the curve.”
Straight lines are easy; curves are intentional and expensive. The large, sweeping curve of the wood partition is what makes this design feel luxurious and architectural. In an outdoor context, a curved wall or screen creates a sense of gentle enclosure and flow that you can’t achieve with right angles. It’s a statement of craftsmanship that immediately elevates the entire space from standard construction to custom design.
21. Sleek Black Slatted Gate with Wood and Stone Accents
This entry is a masterclass in material harmony. It confidently mixes three distinct textures and colors: the sleek, modern black of the metal gate; the warm, organic lines of the vertical wood slats; and the cool, rugged texture of the stacked stone wall. The design works because each material is given its own clear zone, and the palette is kept tight. The black metal acts as the unifying thread that ties the warmer wood and stone elements together. It’s a much more complex look than a simple gate like Idea #4, but the payoff is huge.
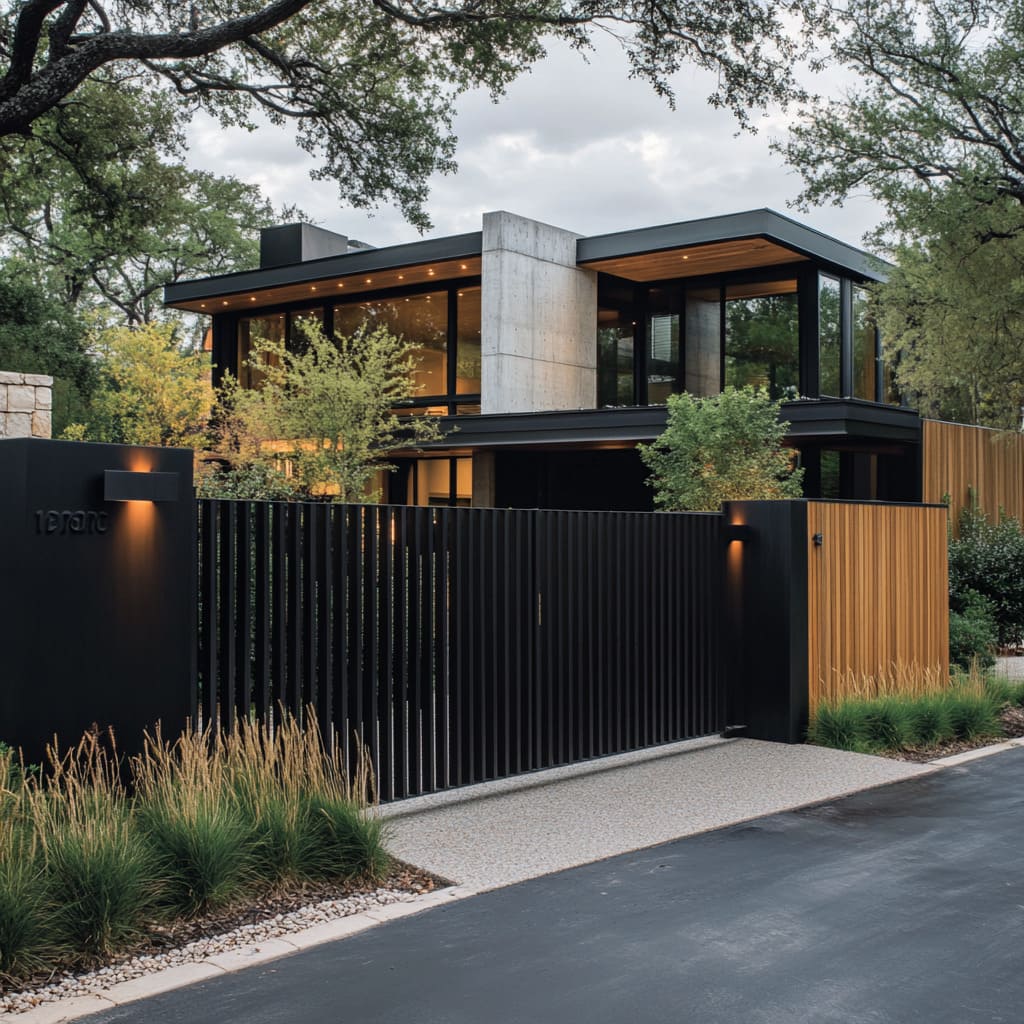
“A design this integrated and polished comes with a significant price tag and complexity.”
Integrating lighting, house numbers, and potentially an intercom system into a pillar requires careful planning and coordination between a mason, an electrician, and a fence installer. The wiring has to be run before the pillar is filled, and all components must be rated for exterior use. This isn’t a weekend DIY project; it’s a professional job that requires a detailed plan and a healthy budget.
22. Warm Horizontal Planks with Contrasting Black Metal Posts
Woods with a reddish-brown tone, like cedar or redwood, are beautiful but require upkeep to stay that way. Unprotected, they will fade to a soft gray in the sun and can be susceptible to mildew in damp climates, which appears as black spots. To maintain that rich, warm color, you’ll need to apply a UV-blocking stain or sealer every 1-2 years. It’s more frequent maintenance than a painted fence, but it’s the only way to preserve the natural beauty and color of the wood grain that makes this style so appealing.
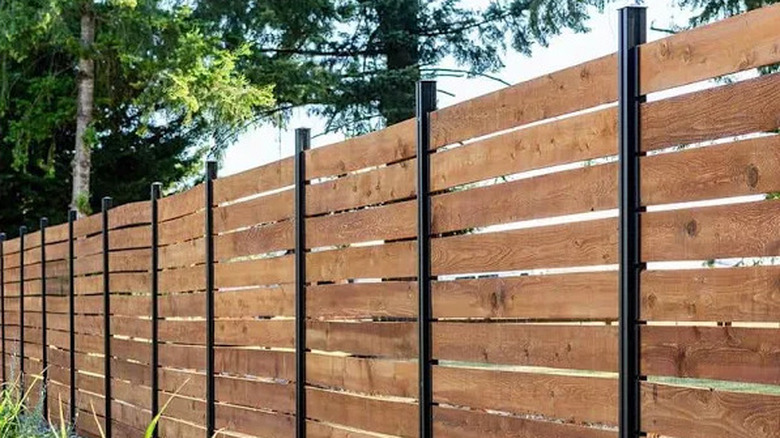
“This look is a simple but effective equation: 80% warm, natural texture (the wood planks) + 20% sharp, graphic structure (the black metal posts).”
The dominance of the wood ensures the fence feels inviting and connects to the landscape, while the slim black posts provide a modern, clean framework without being visually heavy. You could flip the ratio for a more industrial look, but this 80/20 split is the sweet spot for a warm-modern aesthetic. Compare it with the lighter wood in Idea #1 to see how the wood tone changes the whole vibe.
23. Lush Tiered Garden with Natural Stone Retaining Walls
Tiered retaining walls are the ultimate solution for a sloped yard, turning a difficult-to-mow hill into a stunning and usable garden space. This design is specifically for properties with a noticeable grade change. On a flat lot, building walls like this would be an immense amount of work for an artificial effect. The key is to work *with* your existing topography. Each tier should create a level planting area that’s wide enough to be functional, typically at least 3-4 feet deep to allow for layered plantings.
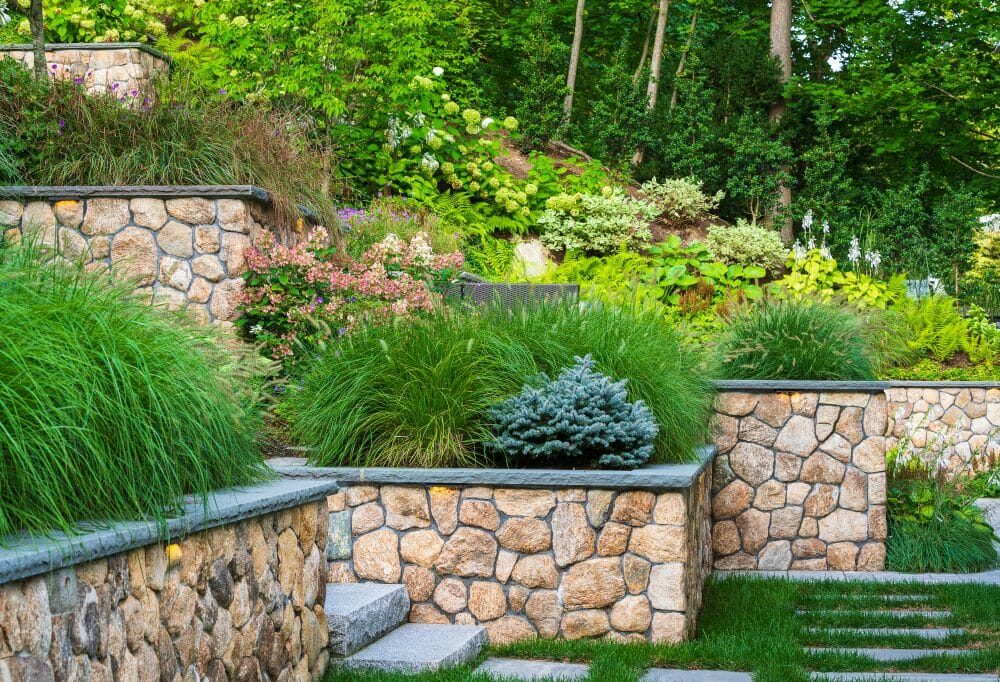
“Proper drainage is the number one thing that makes or breaks a retaining wall.”
Without it, hydrostatic pressure will build up behind the wall and cause it to fail. For a stone wall like this, you must install a perforated drain pipe at the base, surrounded by gravel, and have ‘weep holes’—small gaps or pipes in the lower course of the wall—every 6-8 feet to allow water to escape. The integrated lights are a nice touch, but drainage is the part you absolutely cannot skip.
24. Textured Grey Block Wall Paired with a Natural Bamboo Screen
This is a brilliant study in textural layering. The base wall, with its rough, projecting concrete blocks, feels solid, permanent, and very modern. Rising behind it, the fence of thin, natural bamboo poles provides a complete contrast. It’s organic, linear, and feels lightweight and natural. This pairing of a heavy, monolithic base with a light, organic screen is what gives the design its unique, sophisticated character. One material grounds the space, while the other provides warmth and privacy.
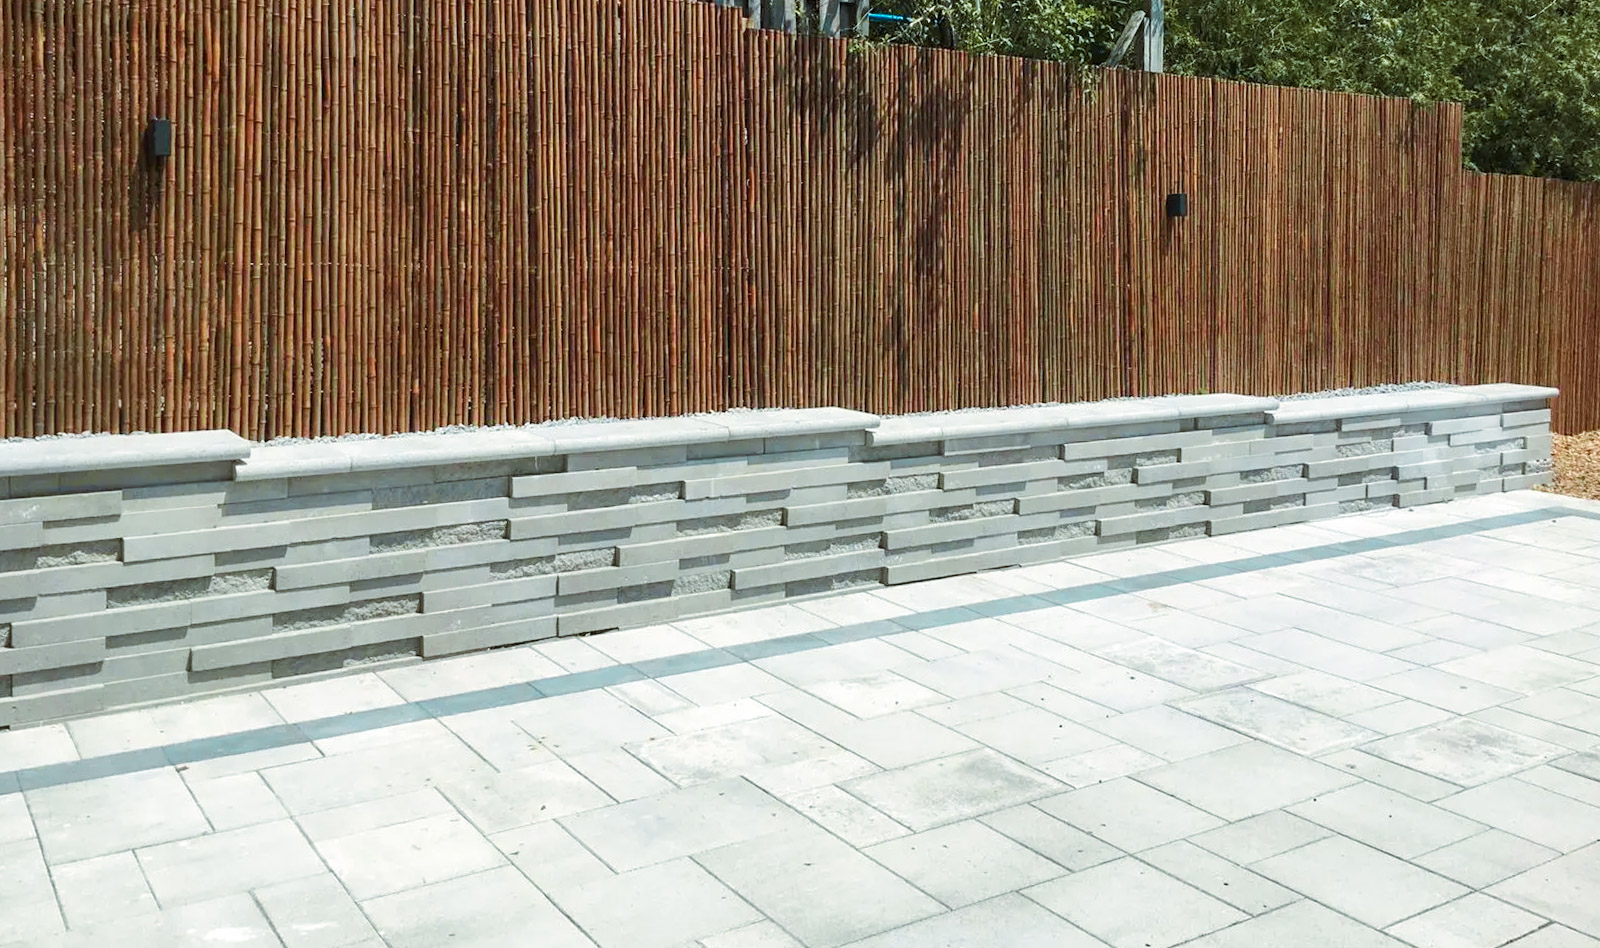
“Bamboo fencing is beautiful and offers a great natural look, but it is not a ‘forever’ material.”
Most rolled bamboo fencing has a lifespan of 5-10 years, depending on your climate. It will naturally fade to a silvery-gray color over time, and the individual poles can become brittle and crack. You can extend its life by applying a UV-protectant sealer annually, but you should still budget for its eventual replacement. It’s less durable than a traditional wood or composite fence.
25. Functional Treated Wood Fence on a Poured Concrete Base
This design is the workhorse version of a more polished look like Idea #11. By using standard pressure-treated lumber and simple metal supports on a poured concrete curb, you get the same functional benefit—a wood fence elevated off the ground to prevent rot—for a much lower cost. It may not have the same high-end architectural finish, but for a long property line where budget is a primary concern, this practical approach delivers 90% of the function for probably 50% of the price.
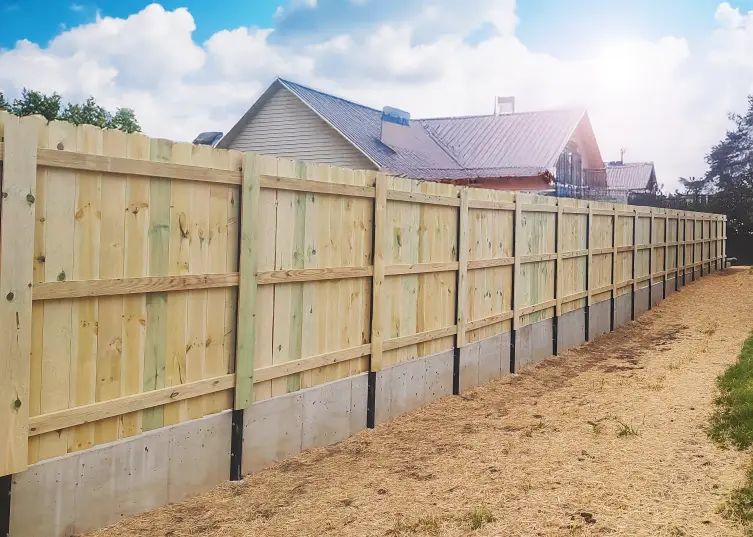
“Building a fence on a concrete base requires the right connection.”
Before you start, check these items: Have you chosen the correct post base anchors for your application? There are different types for wet-setting into fresh concrete versus drilling into cured concrete.Are your posts and the concrete base perfectly plumb and level? A small error at the base will be magnified into a huge lean at the top of the fence.Have you factored in drainage? Ensure the concrete curb won’t trap water against the base of the wood. A slight slope or small gaps can make a big difference.
26. The Biggest Fence Mistake to Avoid at All Costs
This isn’t a design idea; it’s a warning. The single most expensive, frustrating, and common mistake people make when building a fence is failing to check local regulations and property lines first. Building a fence that’s six inches over your property line can lead to a legal dispute and a court order to tear it down. Building it a foot taller than your city’s zoning code allows can result in daily fines until you fix it. The excitement of a new project can make you want to skip the boring paperwork, but doing so can be a catastrophic error.
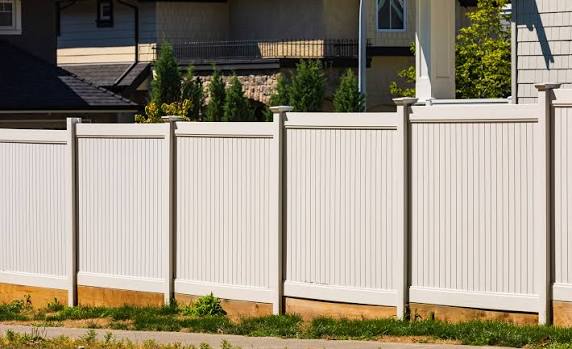
“Before you even buy a single post, get a copy of your property survey to see your exact property lines.”
If you don’t have one, you may need to hire a surveyor for a few hundred dollars—it’s cheap insurance. Then, go to your city or county’s website and search for ‘fence regulations,’ ‘zoning code,’ or ‘building permits.’ Read the rules on height, materials, and required setback from the property line. Call the planning department if you have questions. An hour of research can save you thousands of dollars and a massive headache.
27. Abstract Black Privacy Screen for a Modern Pool Deck
The element that elevates this pool area from nice to noteworthy is the privacy screen. Instead of a standard fence, the choice of a custom-cut, abstract patterned screen turns a functional requirement into a piece of art. It acts as a sculptural backdrop to the entire scene, with the wavy pattern playfully echoing the water in the pool. It proves that privacy doesn’t have to be a solid, boring wall. By choosing a decorative, semi-transparent screen, the area feels protected but not boxed in.
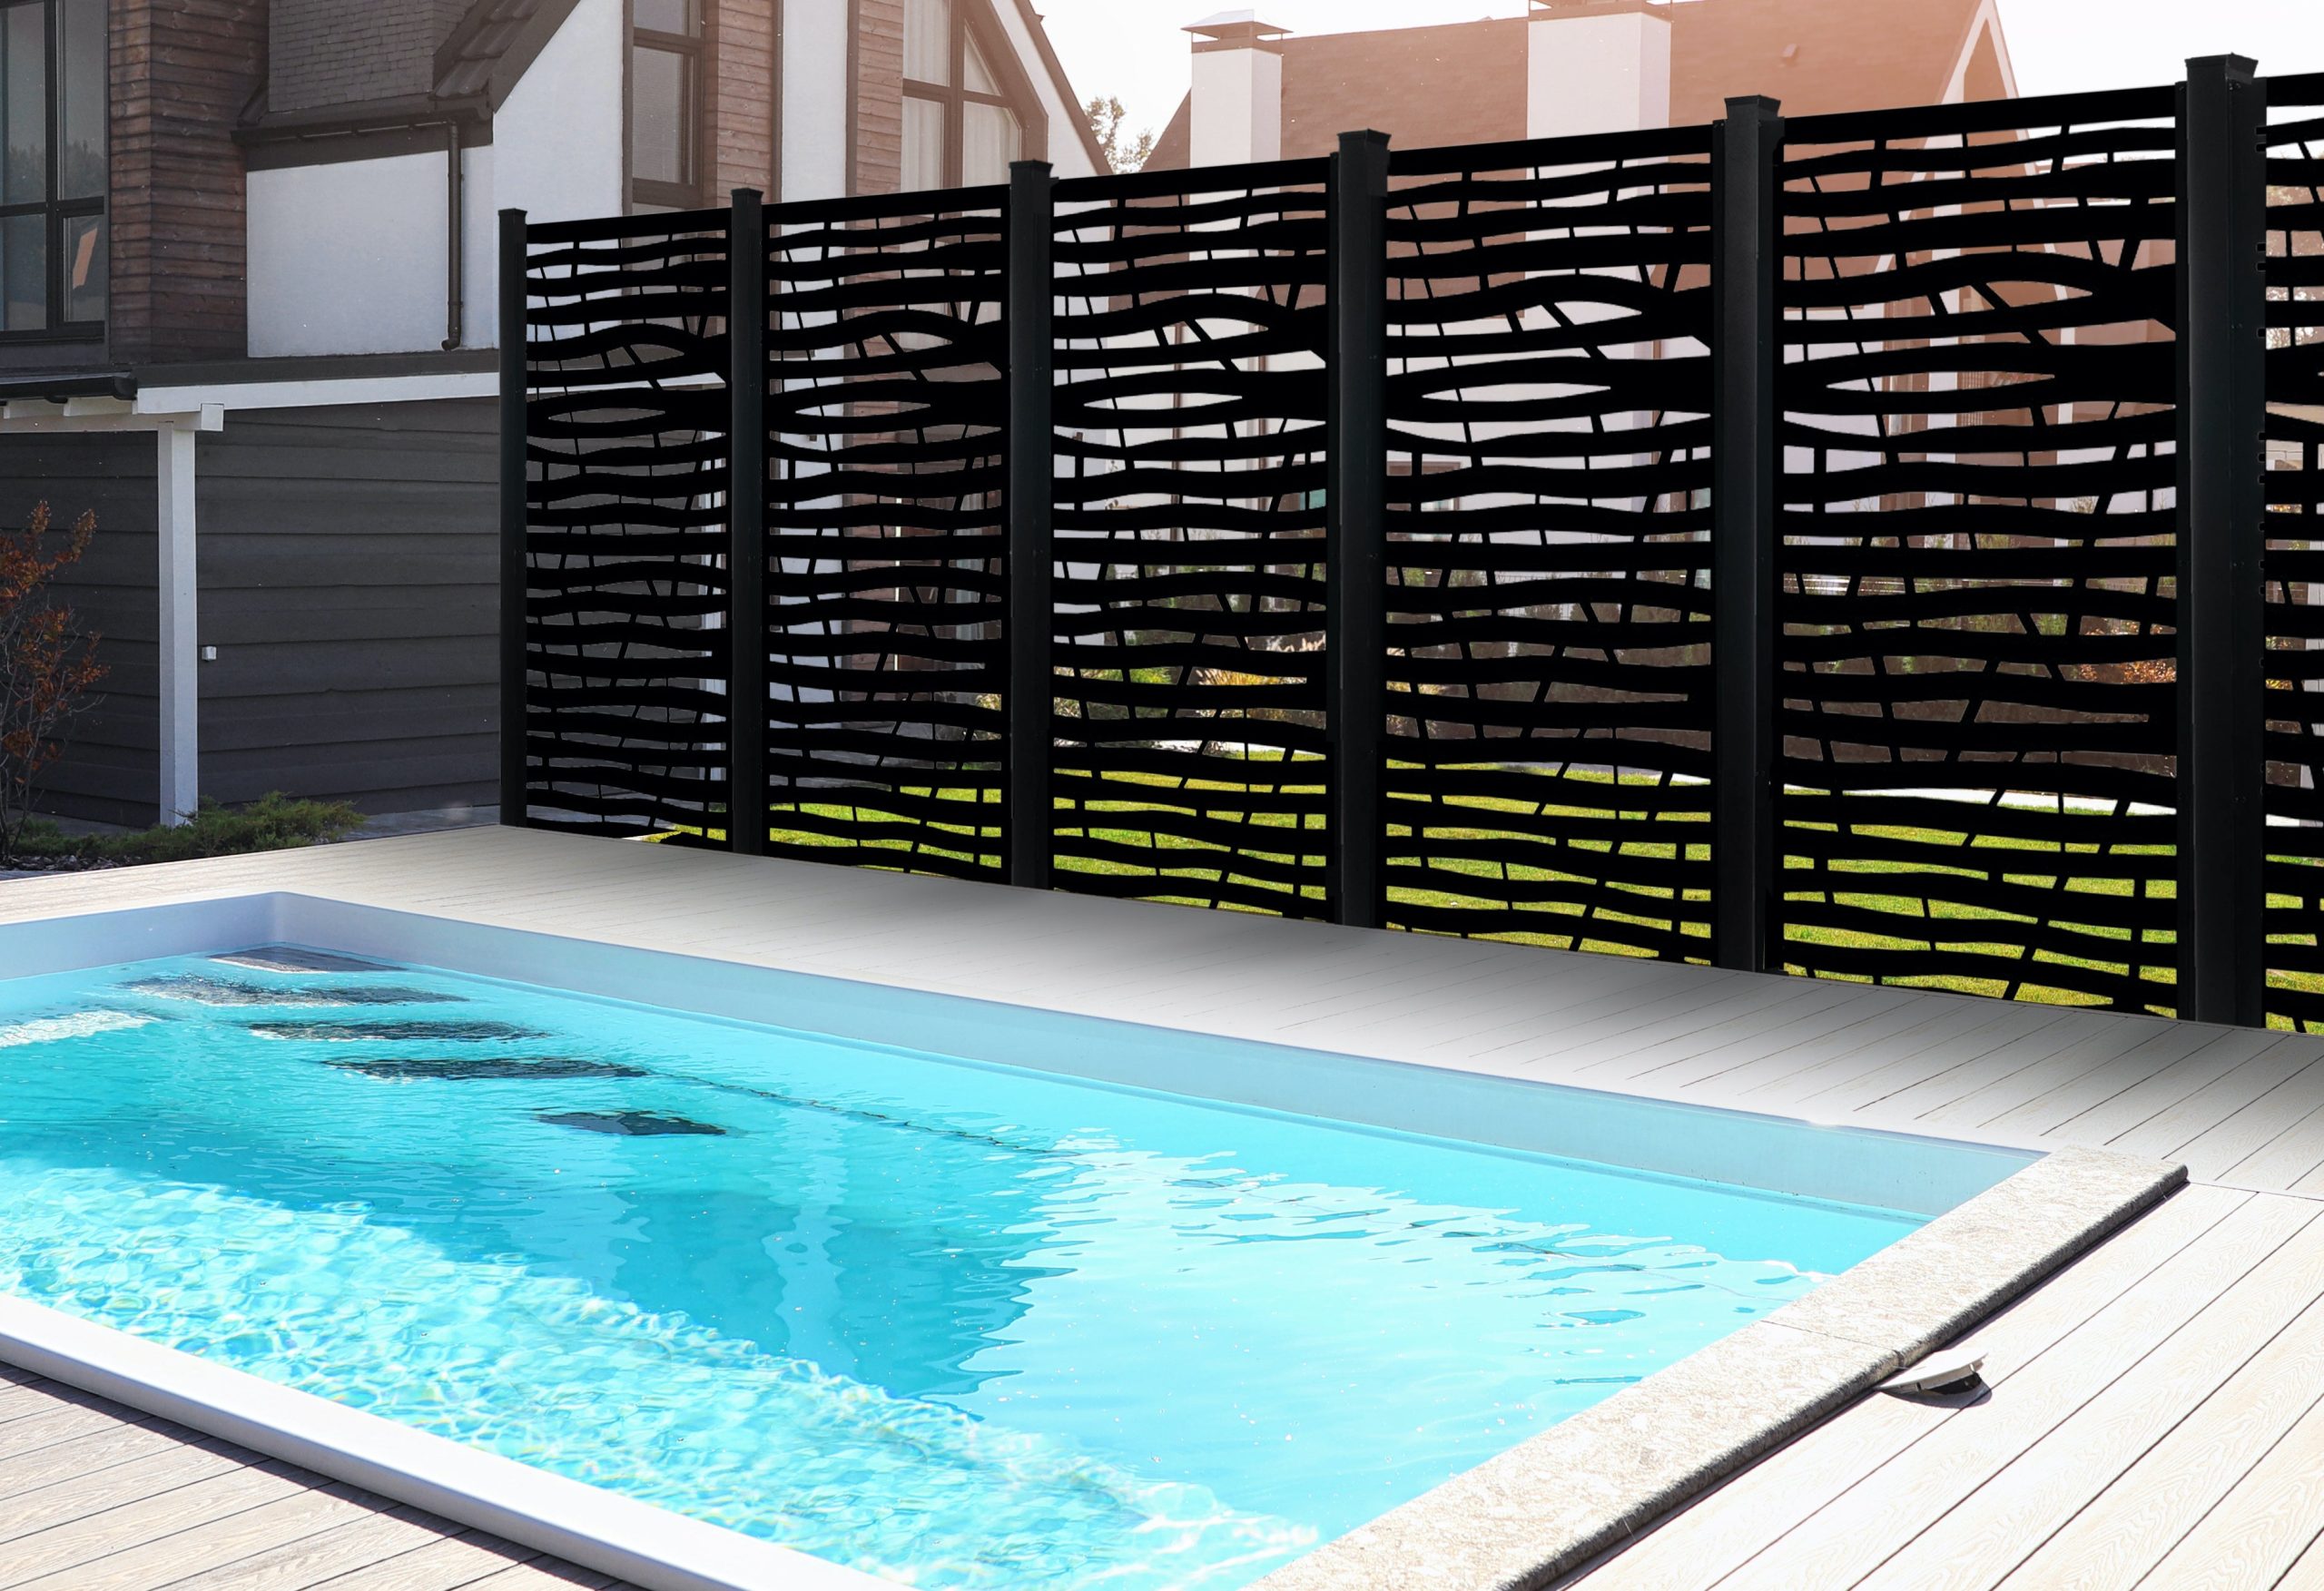
“When installing any screen or fence around a pool, aesthetics come second to safety regulations.”
Most municipalities have strict codes for pool barriers, often called the ‘Uniform Pool Code.’ This typically requires the fence to be at least 5 feet high, with no gaps wider than 4 inches. The design cannot be easily climbable (which can be a concern with some patterned screens), and gates must be self-closing and self-latching. Always check your local pool code before falling in love with a specific design.
28. Curved Landscaping Block Wall for Raised Garden Beds
Laying a solid, curved wall with landscaping blocks is a very achievable DIY. (Time: 1 day for a 20-foot wall; Cost: ~$200)
- Lay out your curve with a garden hose or spray paint. Dig a shallow, level trench about 4-6 inches deep along this line.
- Fill the trench with 2-3 inches of paver base or gravel and compact it firmly with a hand tamper. This creates a stable foundation.
- Set your first course of blocks in the trench, making sure they are perfectly level. Use a rubber mallet to make small adjustments.
- For subsequent courses, apply a zigzag bead of concrete landscape adhesive to the top of the lower blocks before setting the next one on top, staggering the joints like a brick wall.
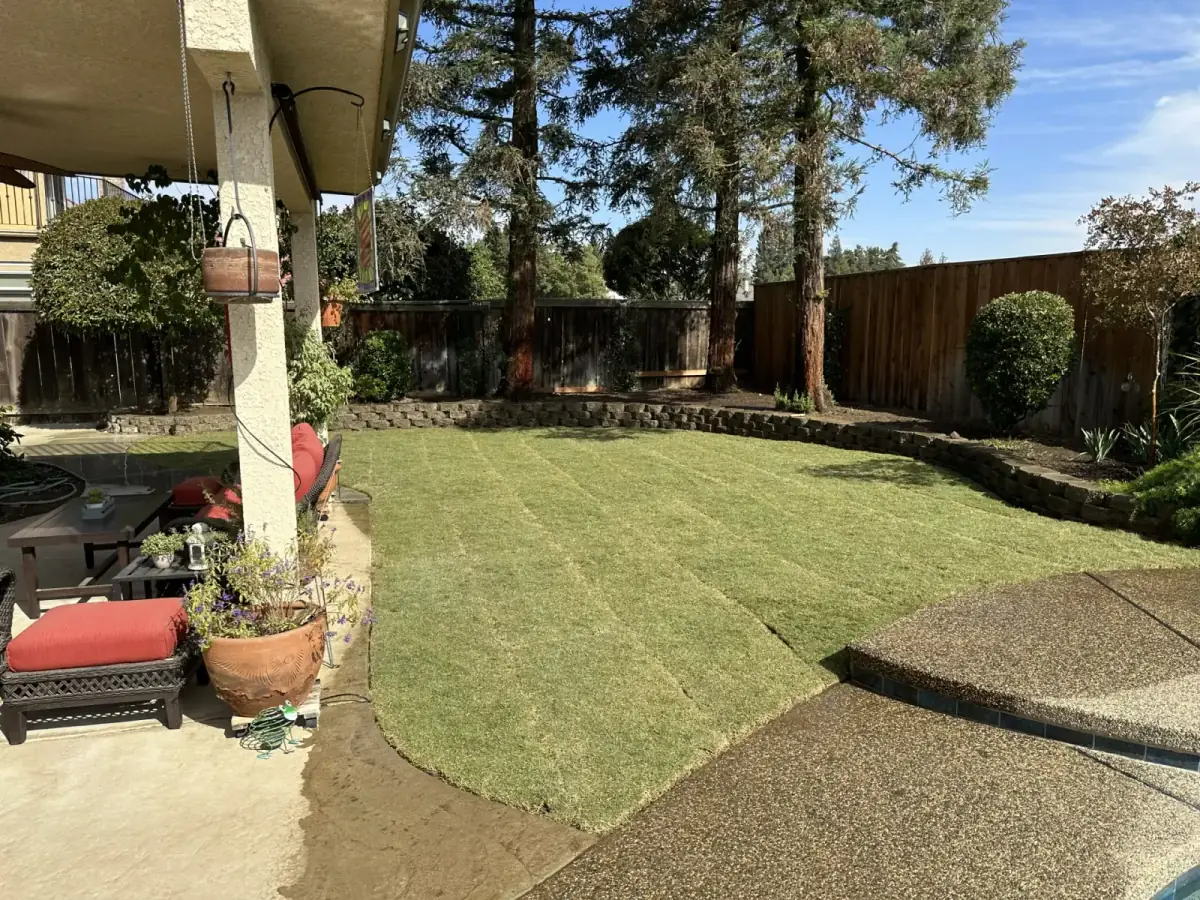
“A simple curved wall like this is so effective because it creates a clear and graceful ‘edge’ in the landscape.”
It neatly separates the manicured lawn from the more wild planting bed, making both areas look more intentional and cared for. The dark color of the blocks provides a visual anchor and a strong contrast that makes the green of the lawn and the plants in the bed appear more vibrant. It’s a simple intervention that adds a powerful sense of structure and definition to the entire yard.
29. Bold and Colorful Painted Concrete Fence with Relief Patterns
After years of minimalist-driven ‘greige,’ we’re seeing a joyful return to color, pattern, and personality in home design, and that includes the outdoors. This fence is a perfect example of the ‘dopamine decor’ trend, using bold, folkloric patterns and a vibrant palette to create a space that feels personal and expressive. It’s a rejection of the cookie-cutter beige wall and an embrace of maximalism. This style celebrates craftsmanship and turns a simple boundary fence into a stunning, artful feature that tells a story.
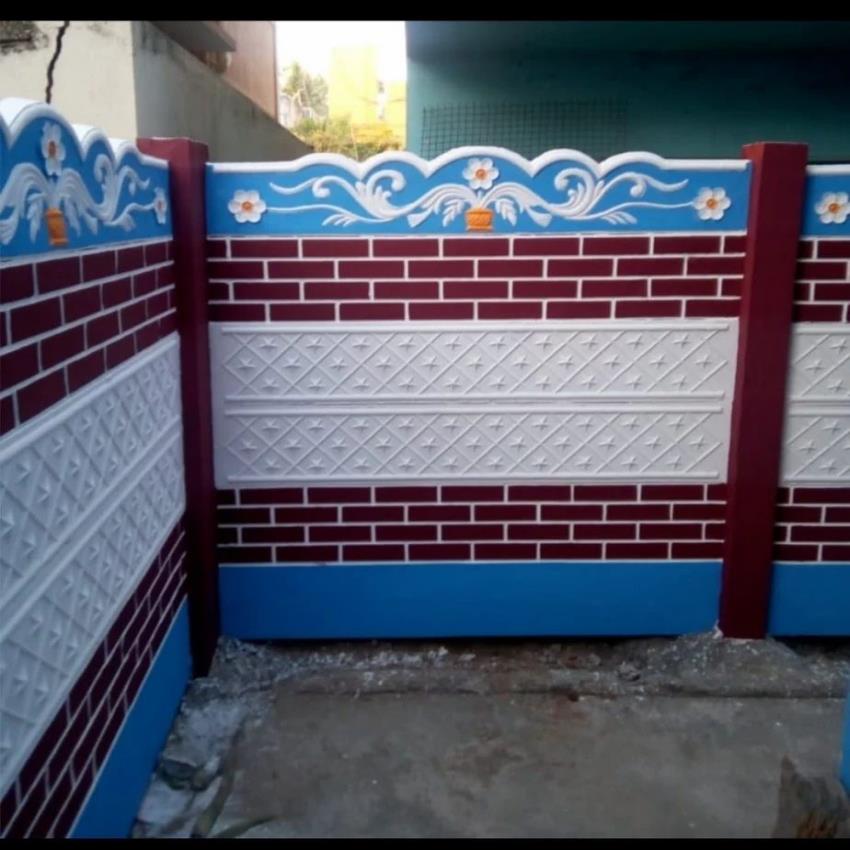
“A painted fence this intricate and colorful is a serious commitment.”
This is not a ‘paint it and forget it’ project. Painted concrete in an exterior setting, especially with this many colors, will require touch-ups every year or two to combat chipping, fading, and peeling. The crisp white sections will show dirt and mildew quickly. Before you fall in love with this look, be realistic about the high level of maintenance required to keep it looking sharp and not shabby. A simpler, single-color design would be far easier to maintain.
Your Backyard Boundary, Redefined
A fence is so much more than a property line—it’s the backdrop to your outdoor life. Whether you’re ready for a full DIY project or just gathering inspiration, we hope these ideas have shown you the incredible potential of mixing materials, playing with pattern, and thinking beyond the standard wooden fence. Now go create a boundary that feels like a beautiful extension of your home. 📌 Don’t forget to save your favorites to your Pinterest board for when you’re ready to make it happen!