You know that feeling when you finally find the garden inspiration that looks exactly right for your space, but the price tag feels… impossible? When it comes to creating durable, stylish garden features, concrete is the unsung hero of affordable design. We filtered through hundreds of options to bring you 31 concrete and paver ideas that actually deliver on both style and budget. Inside, you’ll find everything from rustic raised beds and modern privacy fences to charming pathways and simple DIY planters, with styles ranging from natural and whimsical to sleek and structured. And stay until the end — we break down the most common mistakes that can ruin these projects. 📌 Save this to Pinterest for later — you’ll want to revisit these ideas.
1. Terraced Garden Beds with Concrete Blocks and Gravel Paths
What makes this design so effective is its brilliant use of a natural slope. Instead of fighting gravity, the terraced concrete block beds work with it, creating distinct planting zones that are easy to access and visually organized. The combination of industrial concrete, soft green foliage, and crunchy light grey gravel is a classic texture play that just feels right. It turns a potentially awkward hillside into a productive and attractive feature.
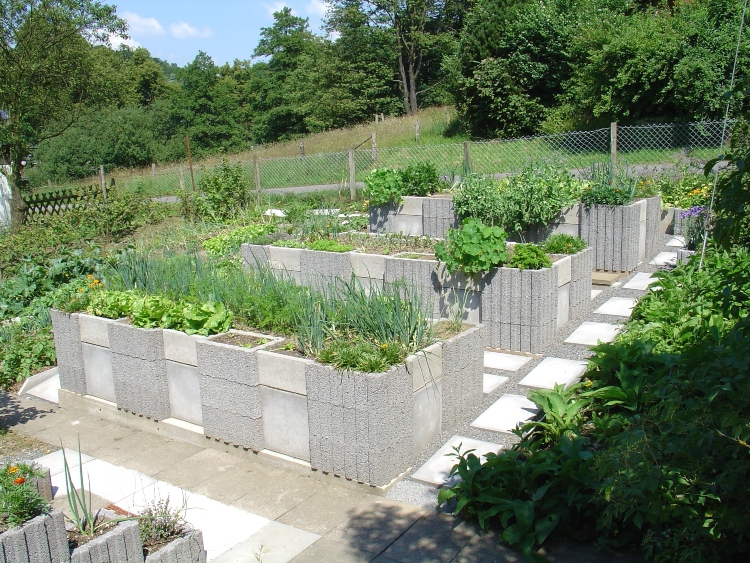
“This is one of the most approachable DIY projects out there.”
You can build a similar terraced bed in a weekend. Here’s a quick guide:Prep the Slope: Dig a level trench for your first course of blocks. A flat base is critical for a stable wall.First Course: Lay the first layer of concrete blocks in the trench, making sure they’re perfectly level side-to-side and front-to-back. Use a rubber mallet to make adjustments.Stack and Stagger: Stack the next course, staggering the joints like a brick wall for strength. Use construction adhesive between layers if your wall will be more than two blocks high.Backfill: As you build, fill the area behind the blocks with gravel for drainage, and then top with your garden soil. This prevents water pressure from pushing your wall over.This should take about 4-6 hours for a small wall and cost under $150 in blocks and gravel.
2. Polished Light Gray Concrete Driveway with a Dark Border
That highly reflective, almost-wet look isn’t just from a power washer. To get this finish on new concrete, the key is the final troweling stage. After the concrete is poured and leveled, you need to wait until it’s firm enough to stand on. Then, using a steel trowel, go over the entire surface multiple times with firm, sweeping motions. This process, called burnishing, brings the fine cement particles to the surface and creates that dense, polished sheen. For existing concrete, you’d need to use a concrete grinder with progressively finer diamond pads.
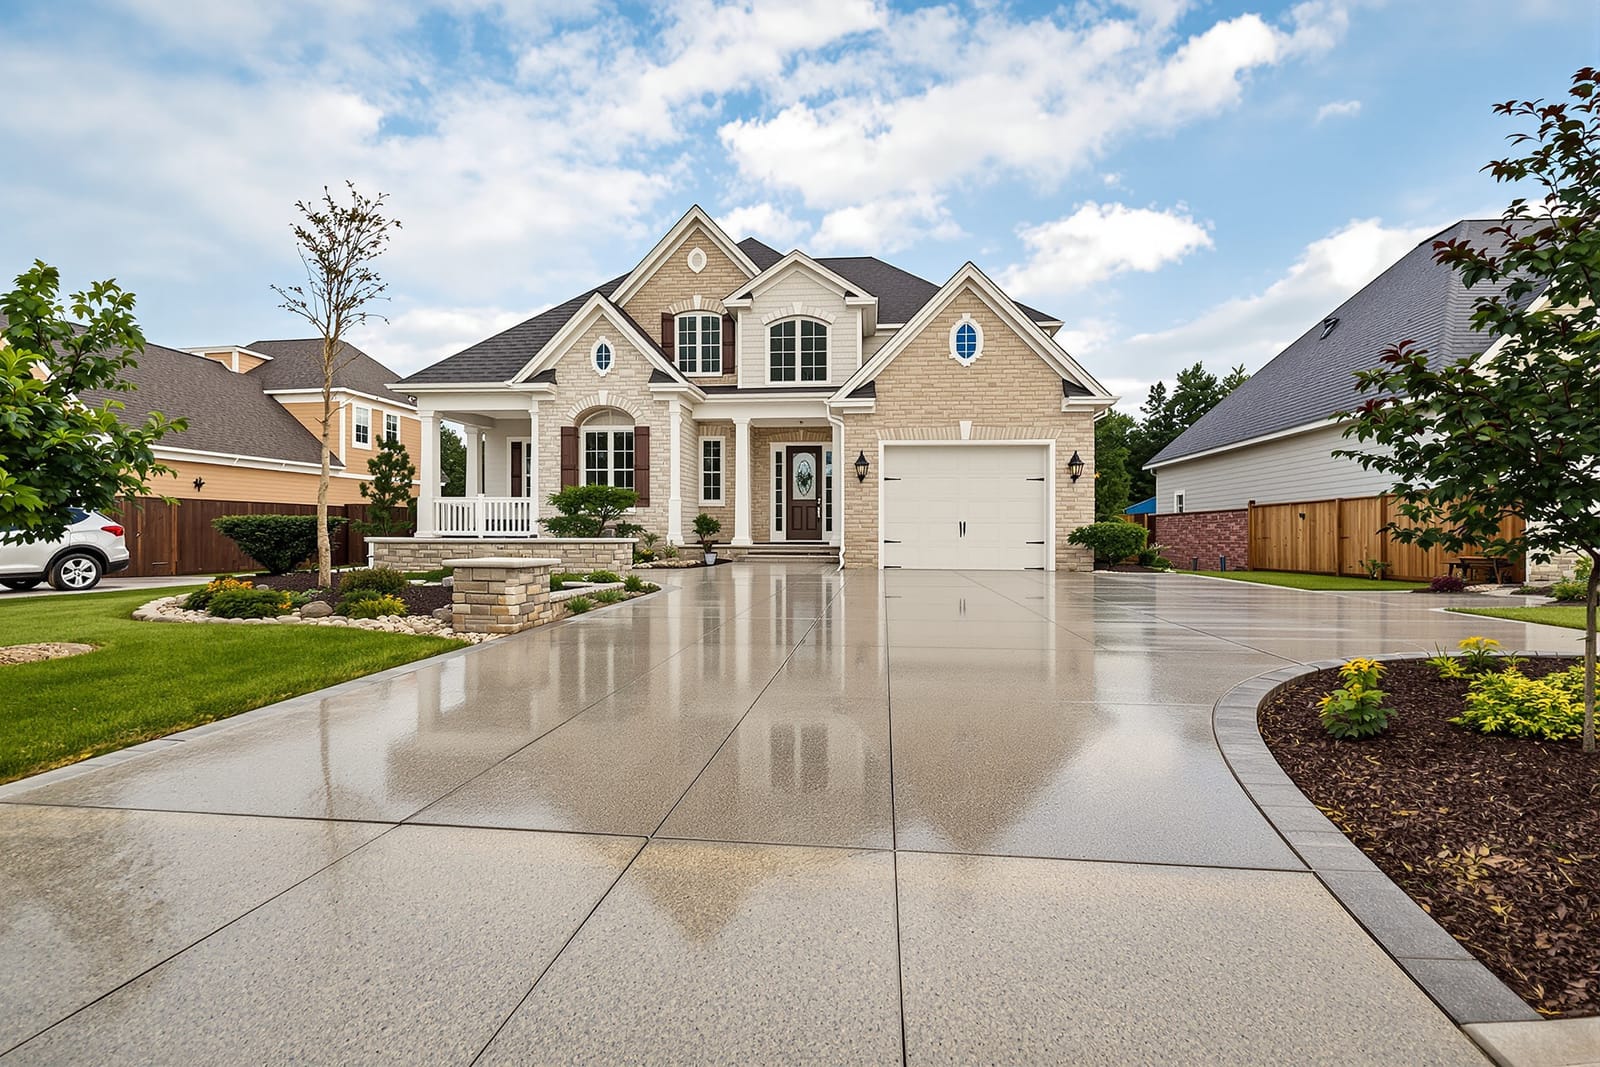
“Let’s be honest: a surface this pristine is not zero-maintenance.”
That light gray color will show every oil drip and tire mark. Plan on a thorough cleaning with a degreaser and pressure washer at least twice a year. To keep the reflective finish, you’ll want to apply a high-quality acrylic or epoxy sealer every 2-3 years, which can cost $150-$300 for a standard driveway. Without sealing, the surface will become more porous and prone to staining and freeze-thaw damage in colder climates.
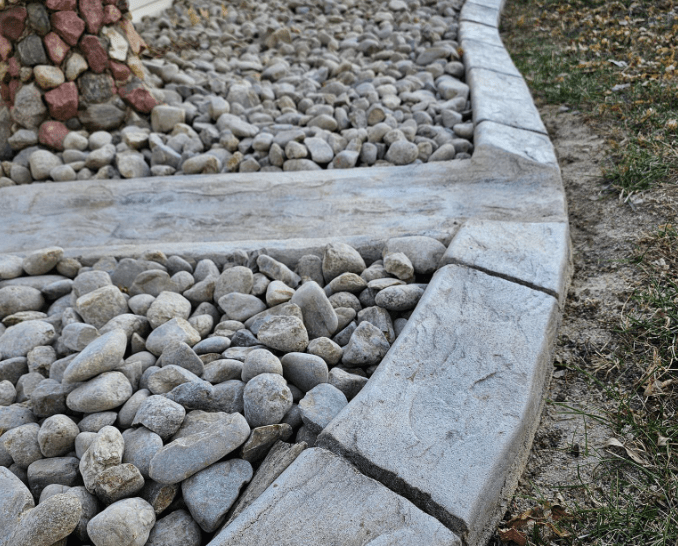
3. Curved Garden Edging with Stamped Segmented Block Texture
The single element that makes this garden bed work is the stamped concrete edging. Without it, you’d just have a pile of gravel and rocks spilling into the lawn. The edging provides a crisp, defined curve that contains the loose materials and creates a deliberate, professional look. It elevates the entire design from ‘rocks in the yard’ to ‘landscaped feature.’ The dark gray color also provides a strong visual anchor that makes the lighter gravel and green plants pop.
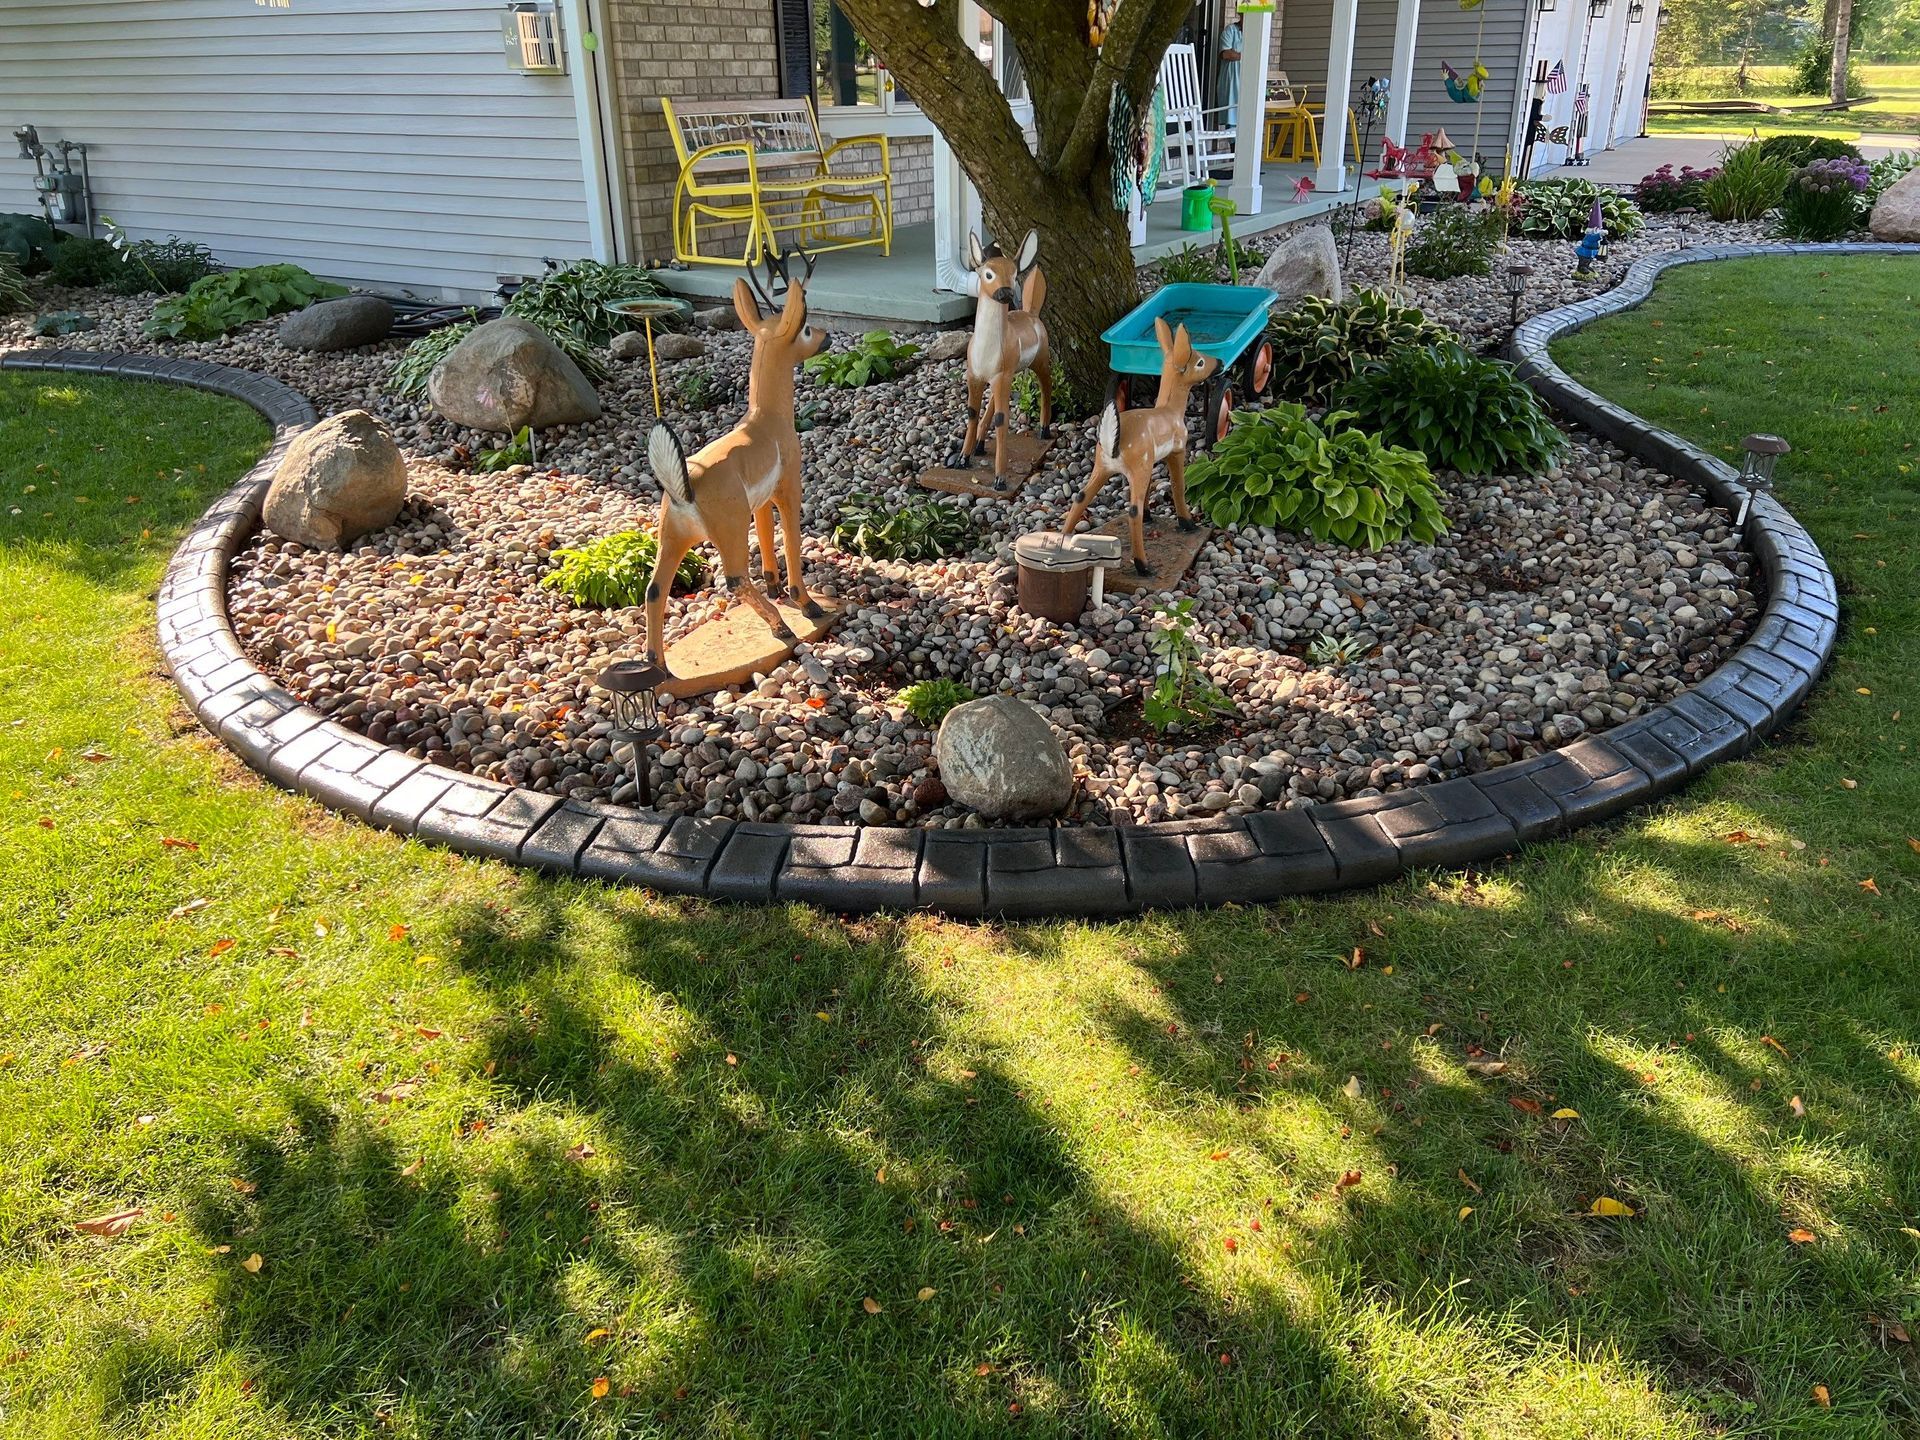
“This look is all about a simple, balanced formula.”
Think of it as: 50% Softscape (the green hostas and manicured lawn) + 40% Hardscape (the mixed light gravel and large boulders) + 10% Definition (the dark gray stamped edging). The edging is the smallest part by area, but it does the most work, framing everything else. You could swap the gravel for dark mulch or the hostas for ornamental grasses, and as long as you keep that strong border, the stylish, contained feel would remain.
4. Modern Landscape with Concrete Walkway and Artificial Turf
That bright green artificial turf looks perfect and low-maintenance, and for the most part, it is. But there are two things to know before you commit. First, it gets hot. On a sunny summer day, artificial grass can become significantly hotter than natural grass, which might not be ideal for pets or bare feet. Second, ‘low-maintenance’ isn’t ‘no-maintenance.’ You’ll still need to rinse it periodically to clean off dust and pet waste, and use a stiff brush or a leaf blower to keep it looking fresh and prevent matting.
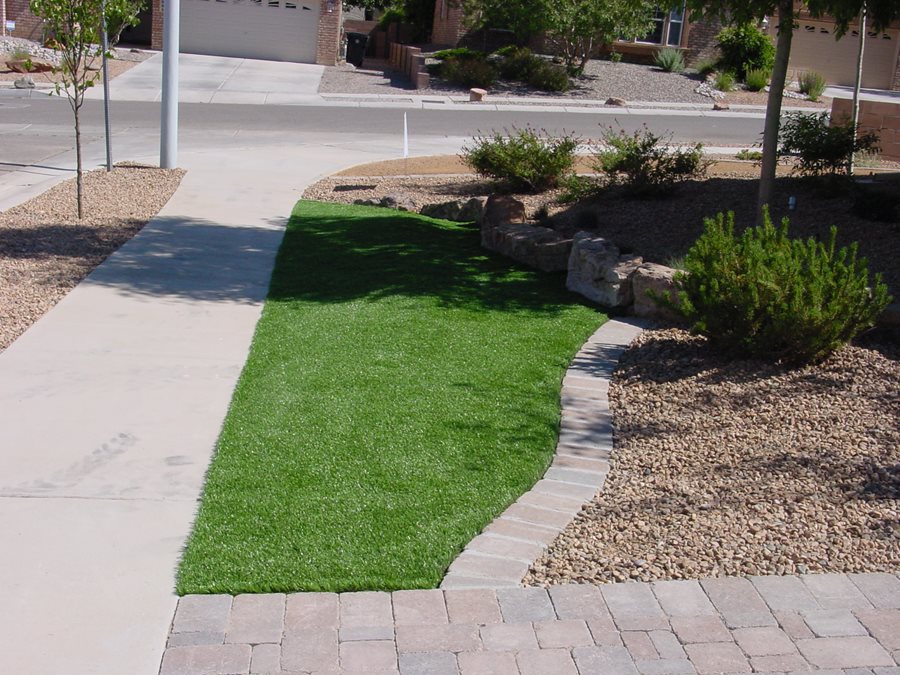
“A professional installation of high-quality artificial turf can be pricey.”
To get this clean, modern look for less, ditch the turf and go all-in on gravel and pavers. A bag of light brown gravel from a big box store is about $5, and you can cover a large area for under $100. Use the same light gray concrete pavers from the main walkway to create a secondary patio or path where the turf is shown. A few drought-tolerant ornamental grasses planted directly in the gravel will complete the look for a fraction of the cost. Check out the simple paver path in Idea #27 for a starter concept.
5. Layered Garden Beds with Stacked Stone and Concrete Edging
This garden feels so lush and full because of the smart use of layering and contrasting materials. The tall, rustic stacked stone wall in the back creates height and texture, providing a backdrop for the shorter plants. In front, the smooth, curved concrete edging creates a lower tier that defines the border with the lawn. This high-low combination adds immense visual depth and makes the garden feel much larger and more established than it might actually be. The different materials prevent the design from feeling monotonous.
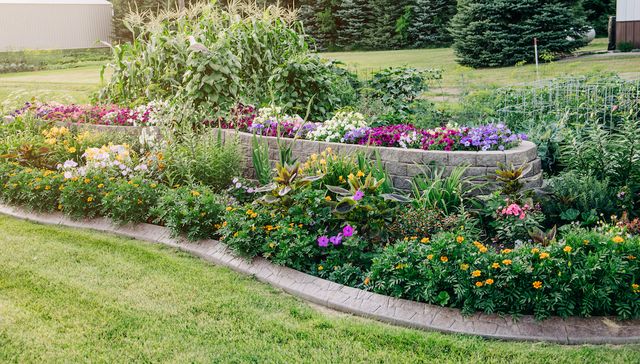
“This multi-tiered approach works best in a yard with at least 15-20 feet of depth to play with.”
You need enough space to create two distinct bed levels without them feeling cramped. The raised stone bed should be at least 2 feet deep, and the lower edged bed should be at least 3-4 feet deep to allow for substantial plantings. The overall length can vary, but a gentle curve of at least 10-12 feet is needed to get that graceful sweep seen here. This is a great solution for a medium-sized suburban backyard.
6. Light Grey Paver Patio with a Dark Brick Border
A simple, elegant paver patio like this is a fantastic weekend project. Here’s a rough cost estimate for a 10×10 foot space:
- Pavers: Light grey rectangular pavers from a home improvement store. ($300 – $600)
- Border Bricks: Dark grey or black pavers for the edge. ($80 – $150)
- Base Material: Paver base and leveling sand. ($100 – $200)
- Tools: Rental of a plate compactor, plus levels, shovels, etc. ($75 – $125)
- TOTAL: $555 – $1075
Budget alternative: Source pavers from Facebook Marketplace or Craigslist, where people often give them away for free if you haul them. This could bring your material cost down to just the base sand and gravel, potentially under $200.
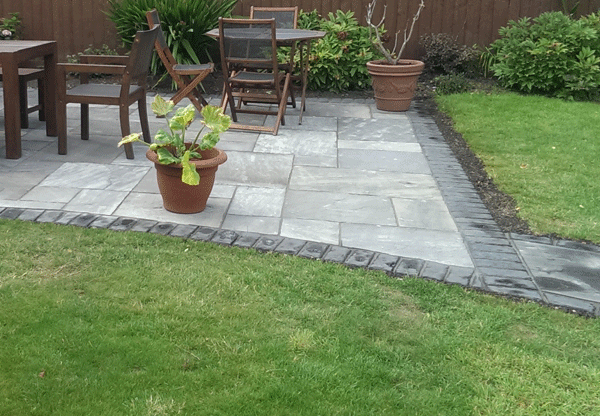
“The secret to a professional-looking paver patio is the border.”
Don’t just end the pavers at the grass. Install a dedicated border, and set it in a concrete footing. Dig a small trench (about 6 inches deep) around the perimeter of your patio area. Lay your border bricks in the trench on a bed of wet concrete mix. This locks the entire patio in place and prevents the main pavers from shifting or spreading over time. It’s the single step that separates a DIY look from a pro-level installation.
7. Creative Stacked Cinder Block Garden Planters
Stacking cinder blocks is easy, but making them stable is key. For a multi-level arrangement like this, a little planning goes a long way.
- Level Ground: Start on the flattest ground possible. If needed, clear the area and add a thin layer of sand or fine gravel to create a level base.
- Solid Foundation: Your bottom layer should be the widest and most stable part of your structure. Lay the blocks out completely before adding any upper tiers.
- Stagger and Lock: As you stack upwards, stagger the blocks so the joints don’t line up. This distributes the weight and makes the structure much stronger.
- Use Adhesive: For any block above the second layer, use a bead of concrete construction adhesive. It’s cheap, easy to apply with a caulk gun, and ensures nothing will topple over.
This is a quick project, taking just 1-2 hours of assembly time before you even add soil.
“Brand new cinder blocks cost about $2-$3 each, which can add up.”
But you can get this look for almost free. Check construction sites (ask permission first!) for leftover or broken blocks they might be happy to get rid of. Facebook Marketplace and Craigslist are also gold mines for free cinder blocks from demolished patios or walls. A can of spray paint can unify mismatched blocks, or you can embrace the varied, weathered look for a more rustic vibe.
8. Garden Archway with Flagstone Path and Picket Gate
The entire fairytale feeling of this garden hinges on one thing: the white wooden archway. If you remove it, you’re left with a simple gate and a path. But with the arch, you create a sense of entry, a destination, and a vertical element that draws the eye upward. It frames the view beyond, making the garden feel like a secret, secluded world. The climbing red roses are the icing on the cake, but the structure of the arch itself is what provides the magic.
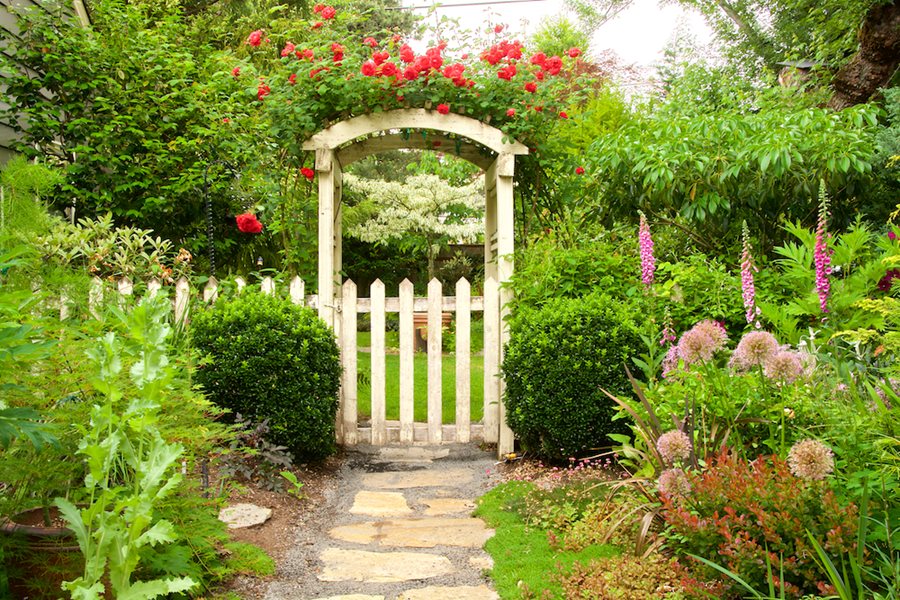
“This scene is a masterclass in creating a ‘journey’ in a small space.”
The flagstone path doesn’t run straight; it curves slightly, inviting you to slow down. The archway acts as a portal, a transition from one space to another. And the dense plantings on either side create a sense of enclosure and discovery. The combination of these elements makes you feel like you’re stepping into a special, hidden part of the garden, even if it’s just a few feet from the lawn.
9. Irregular Stone Path Through a Colorful Cottage Garden
The formula for a perfect cottage garden path is about controlled chaos. It’s roughly 70% Lush Plantings + 20% Natural Hardscape + 10% Open Space. The plants are the star, spilling over the edges and filling every gap. The hardscape, like these irregular flagstones and fine gravel, should feel like it was placed there by nature, not a machine. The small amount of open space on the path itself provides just enough room to navigate, making the journey feel intimate and immersive. You can swap the flagstones for reclaimed bricks or concrete rounds, as long as you let the plants be the hero.
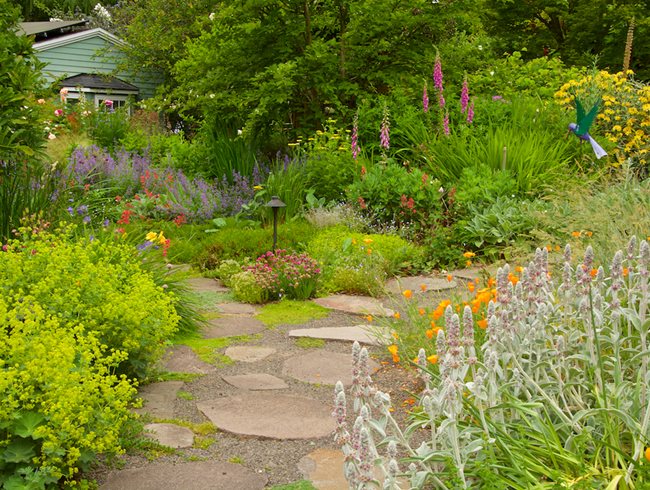
“While beautiful, a path made of irregular stones set in gravel can be a bit wobbly.”
If the stones aren’t set deeply and leveled properly, they can become trip hazards, especially for kids or anyone with mobility issues. The fine gravel will also inevitably get kicked into the garden beds and will need to be raked back into place periodically. Weeds love to sprout in the gaps, so plan on regular weeding or using a high-quality landscape fabric underneath to keep maintenance manageable.
10. Wavy Red Segmented Paver Edging for a Mulched Bed
Creating a smooth, wavy curve with segmented pavers can be tricky; it’s easy to end up with a jagged, awkward line. The trick is to lay it out first. Use a garden hose or a rope to define the exact curve you want. Then, dig your trench directly alongside the hose. As you lay the pavers, you’ll notice small gaps open up on the outside of the curve. Use a brick chisel or angle grinder to carefully trim a few pavers to fit snugly, or simply pack the wedge-shaped gaps tightly with polymeric sand to lock them in place.
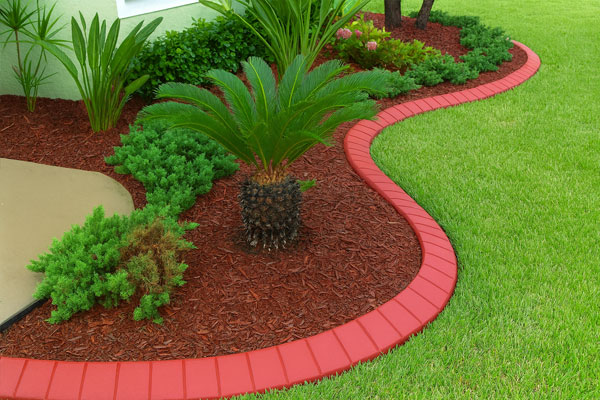
“That crisp line between the red pavers and the green lawn is stunning, but nature will constantly try to blur it.”
Grass runners will try to creep into the mulch, and weeds will sprout in the tiny crevices between the pavers. To keep it looking sharp, you’ll need to run a string trimmer or edger along the border every time you mow. A quick spray of vinegar or a specialized weed killer in the paver joints once a month during the growing season will also save you a lot of tedious hand-weeding.
11. Curved Brown Concrete Edging with Gravel and Boulders
We’re seeing this look everywhere because it perfectly blends two major trends: the desire for low-maintenance landscaping and a move towards more natural, prairie-style planting. The crisp concrete curb provides a clean, modern frame that says ‘this is intentional,’ while the gravel, boulders, and ornamental grasses inside the bed feel wild and organic. It’s the perfect compromise for homeowners who want a tidy yard without the rigid formality of traditional flower beds. It’s structured but not stuffy.
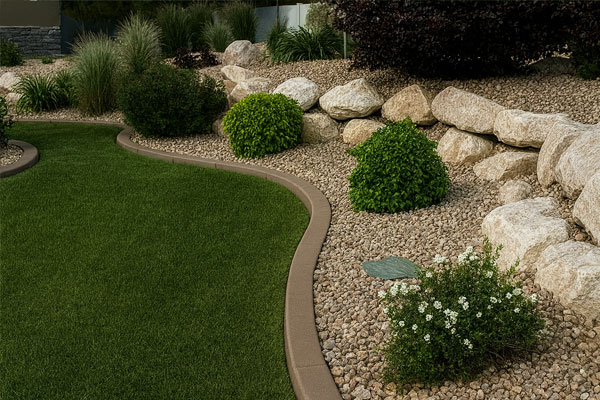
“Before you commit to pouring a concrete curb, tick off these essential prep steps:Define Your Line: Use spray paint to mark the exact path of your curve on the lawn.”
Live with it for a few days to make sure you like the flow and it works with your mower.Check for Utilities: Call 811 to have underground utility lines marked. The last thing you want to do is hit a cable or pipe while digging the trench for your curb.Plan for Drainage: Does water pool in this area? If so, you may need to incorporate small gaps or pipes in the curb to allow water to drain from the garden bed.Calculate Your Concrete: Measure the length and desired width/depth of your curb to accurately calculate how many bags of concrete mix you’ll need. Always buy one extra bag.
12. Minimalist Rough Concrete Trough Planter
You can make a custom planter like this for under $20. It’s a fun, messy project perfect for an afternoon.
- Create a Mold: Find two cardboard boxes, one about 2-3 inches smaller than the other in all dimensions. The smaller box will sit inside the larger one.
- Mix Your Concrete: In a bucket or wheelbarrow, mix a bag of standard concrete mix with water until it’s the consistency of thick oatmeal. For a rougher texture, add less water.
- Pour the Base: Pour about 2 inches of concrete into the bottom of the larger box.
- Position the Inner Mold: Place the smaller box inside, centered on the wet concrete base. Weigh it down with rocks.
- Fill the Sides: Pour concrete into the gap between the two boxes, tapping the sides to release air bubbles.
- Cure and Reveal: Let it cure for 48-72 hours, then tear away the cardboard molds. Don’t forget to drill drainage holes in the bottom!
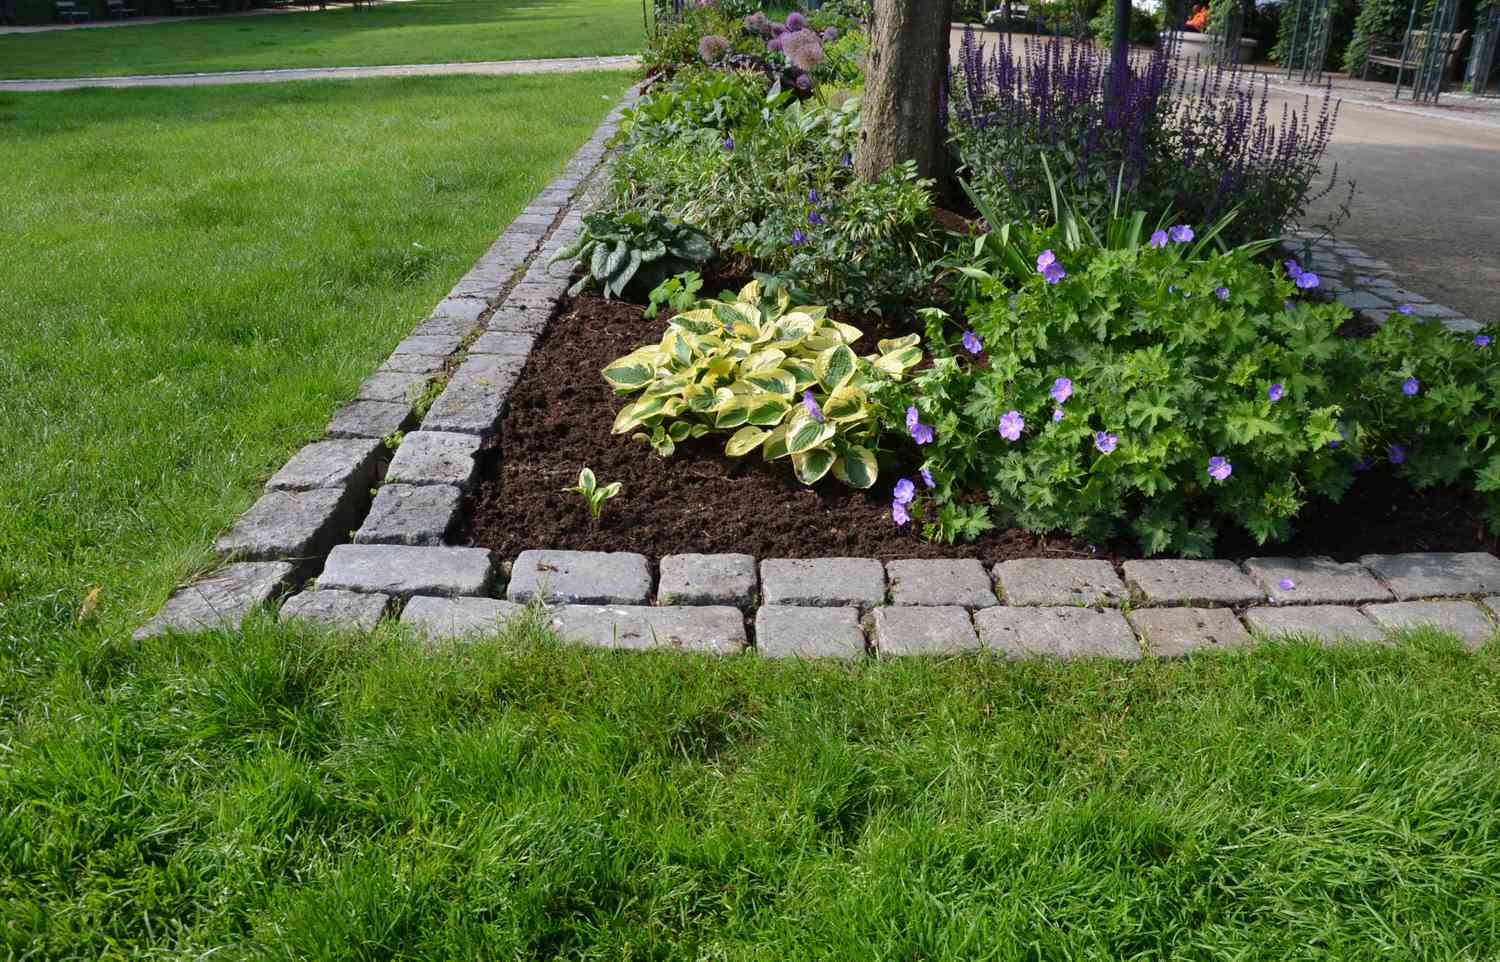
“What makes this simple planter so compelling is its raw, unpretentious texture.”
It’s not trying to be a polished, store-bought pot. The slightly uneven surface and subtle color variations in the concrete celebrate the material itself. This honesty gives it a wabi-sabi appeal that feels both modern and ancient at the same time. It’s a perfect foil for the delicate green plants, providing a solid, earthy anchor for them to grow from.
13. Modern Pathway with Gabion Planters and Concrete Pavers
This design is a fantastic example of using repetition and rhythm. The pattern is simple: paver, stones, paver, stones. This predictable rhythm creates a sense of order and calm, guiding the eye (and feet) along the path. The contrast between the smooth, manufactured concrete pavers and the rough, natural river stones is a huge part of the appeal. The gabion planters echo the materials of the path—metal mesh and stones—tying the entire look together into one cohesive, modern statement.
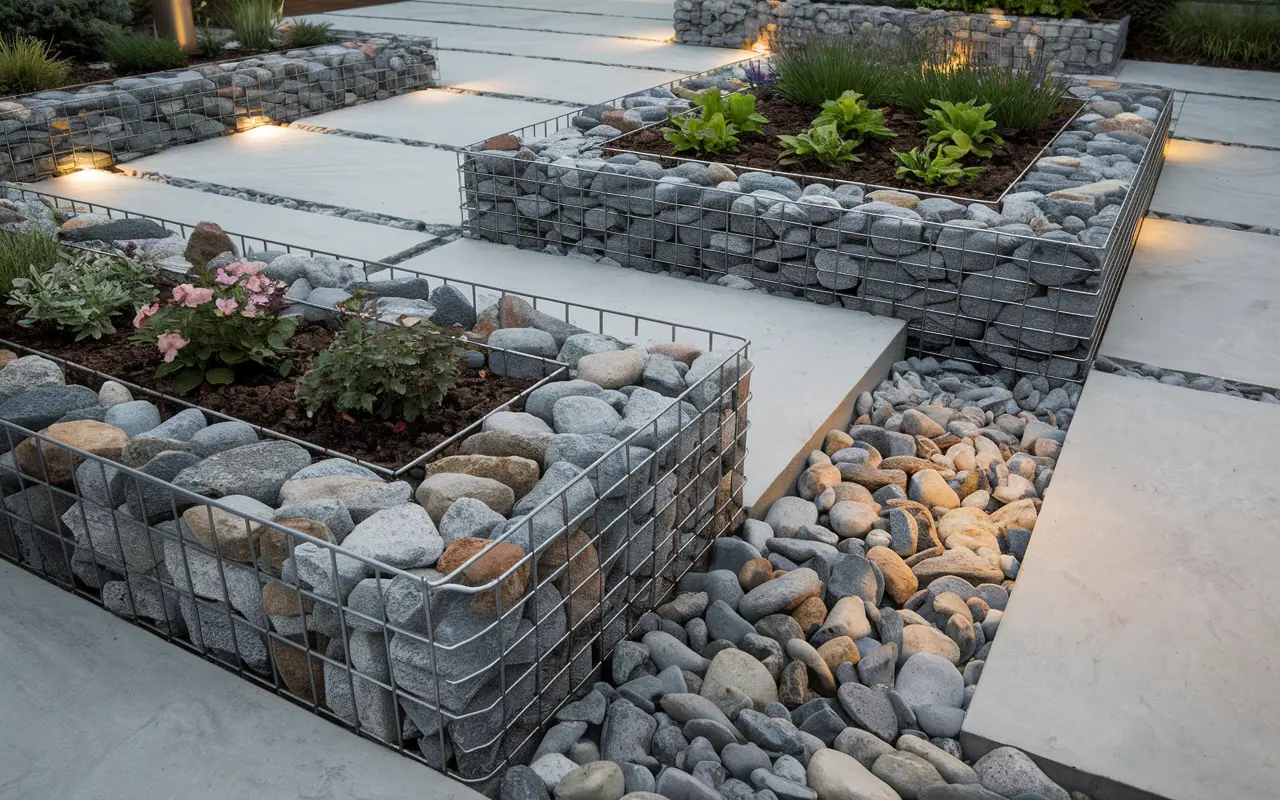
“This style is incredibly versatile but really shines in contemporary or minimalist home settings.”
It’s an ideal solution for a side yard or a connection between a driveway and a back patio. For the pavers to feel substantial, the path should be at least 3 feet wide. The gabion planters work well as accents in a smaller space or as a retaining wall on a gentle slope in a larger yard. The key is to keep the surrounding planting minimal to let the hardscape be the star.
14. Paver Patio with Green Ground Cover Between the Slabs
That lush green ground cover growing between the pavers looks so romantic and natural, but it’s not a ‘plant it and forget it’ situation. Depending on the plant you choose, it will require regular watering, especially while getting established. More importantly, it can become a haven for weeds, which you’ll have to pull by hand since you can’t just spray the area. The plants can also grow over the pavers, requiring trimming to keep the lines clean. It’s a higher-maintenance choice than sand or gravel, but the payoff is gorgeous.
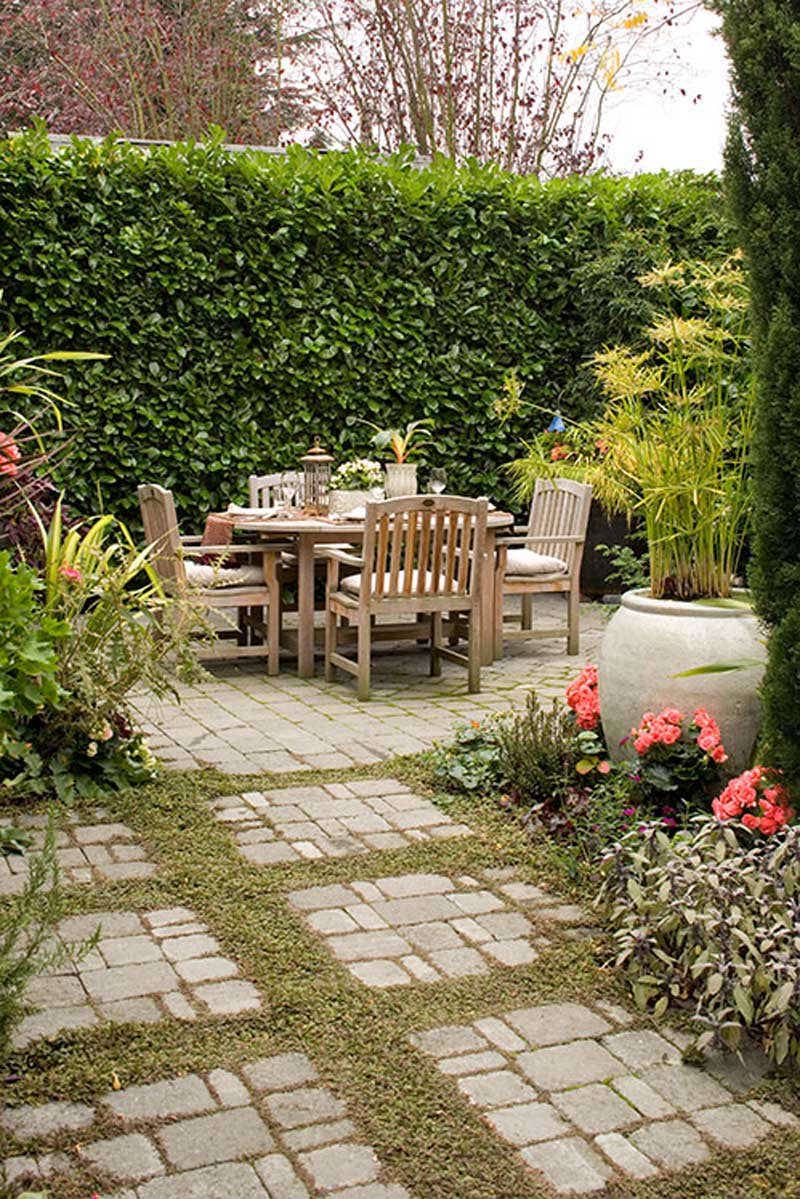
“The success of this look depends entirely on choosing the right plant.”
You need something that can handle regular foot traffic. Top contenders are Creeping Thyme, Dwarf Mondo Grass, and Blue Star Creeper. When planting, don’t just sprinkle seeds. Buy flats of the ground cover and cut it into strips to tuck into the gaps. Make sure the soil level in the gaps is about an inch below the paver surface to protect the plant’s crown from being crushed.
15. Stone Block Raised Beds with Black Metal Garden Arbors
This beautiful garden kitchen follows a simple but effective design formula: 40% solid structure (the light grey stone block beds) + 40% lush greenery (the assorted plants filling the beds) + 20% airy architecture (the black metal arbors). The heavy, earthy stone grounds the space, while the delicate arbors add height and a sense of elegance without blocking light or views. It’s a balanced composition of heavy and light, open and enclosed. Compare this to the more rustic brick beds in Idea #15.
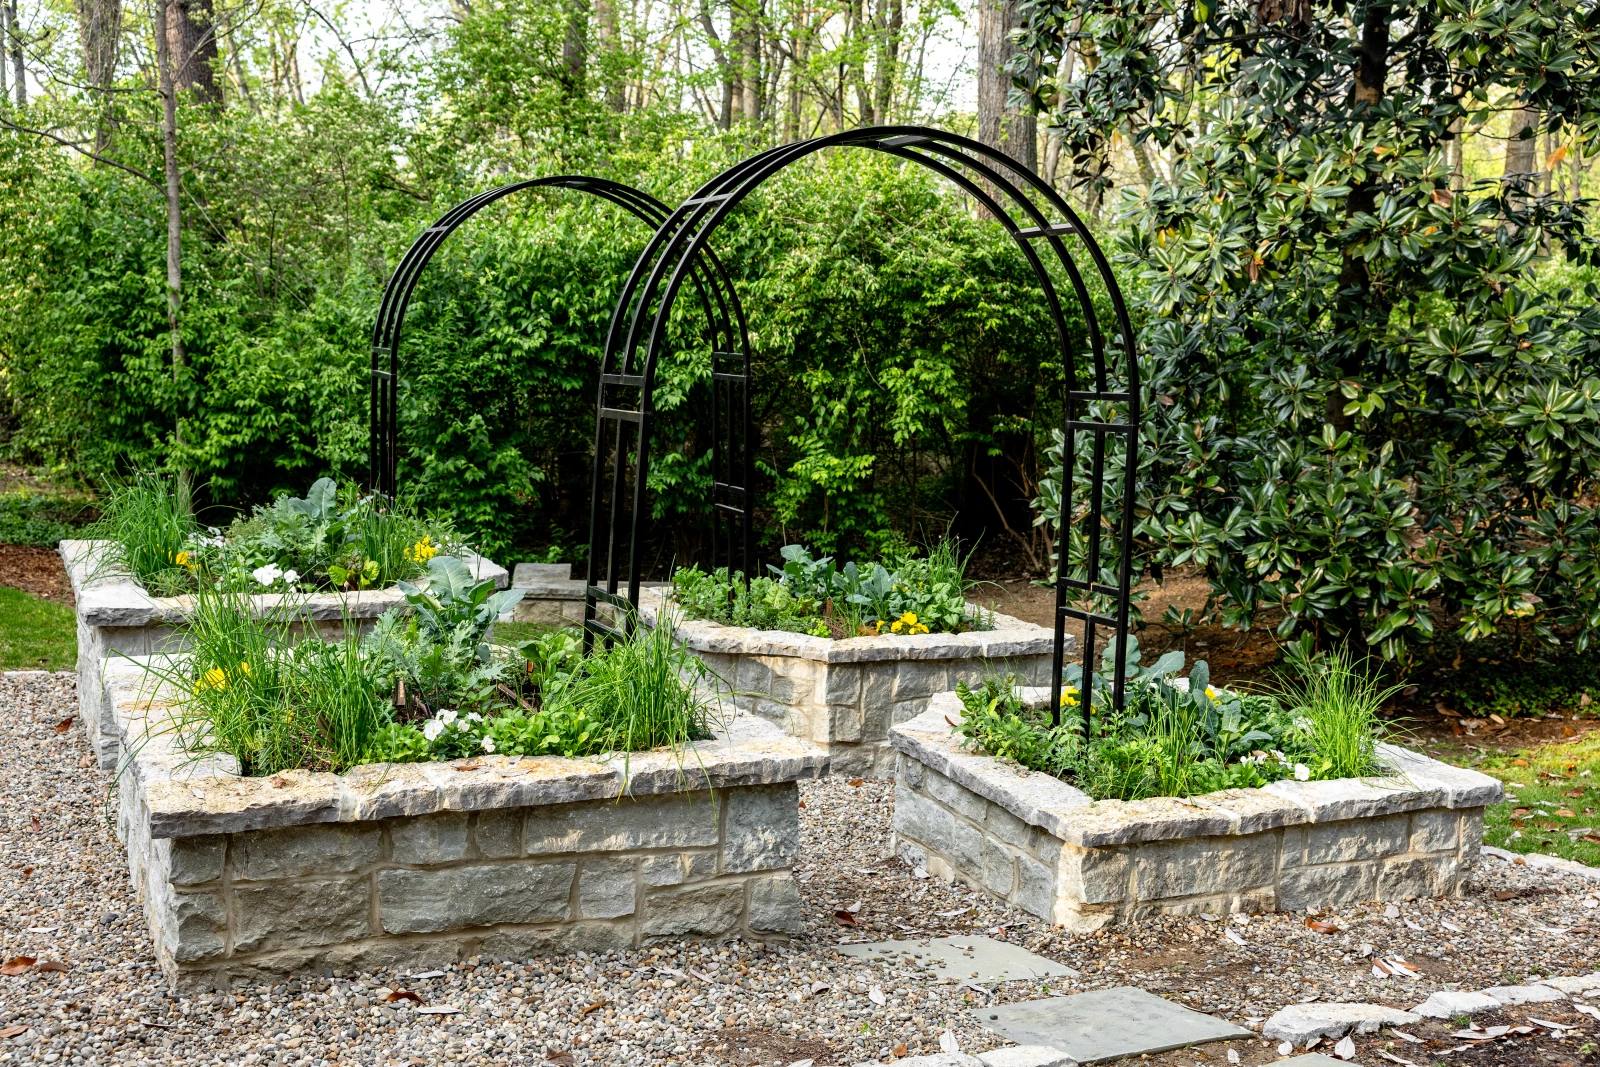
“Those rough-hewn stone blocks and fancy metal arbors can be a significant investment.”
For a similar feel on a tighter budget, swap the materials. You can create raised beds with simple, inexpensive treated lumber or even the stacked cinder blocks from Idea #6. For the vertical element, look for a simpler, more affordable metal or wooden trellis at a garden center. You can even build your own arbor from wood for under $100. The core concept of ‘solid base + airy vertical element’ will still shine through.
16. Red Brick Raised Garden Beds for Growing Strawberries
Building a classic brick raised bed is a timeless project. Here’s a cost estimate for one 4×8 foot bed, about two bricks high:
- Bricks: You’ll need about 100 standard bricks. ($50 – $120)
- Mortar Mix: A few bags to hold the bricks together. ($20 – $30)
- Soil & Compost: To fill the bed. ($40 – $80)
- Gravel/Pebbles: For the surrounding path. ($30 – $60)
- TOTAL: $140 – $290 per bed
Budget alternative: Look for reclaimed bricks on Facebook Marketplace. They often have more character and can sometimes be found for free if you’re willing to haul them away yourself, drastically reducing your costs.
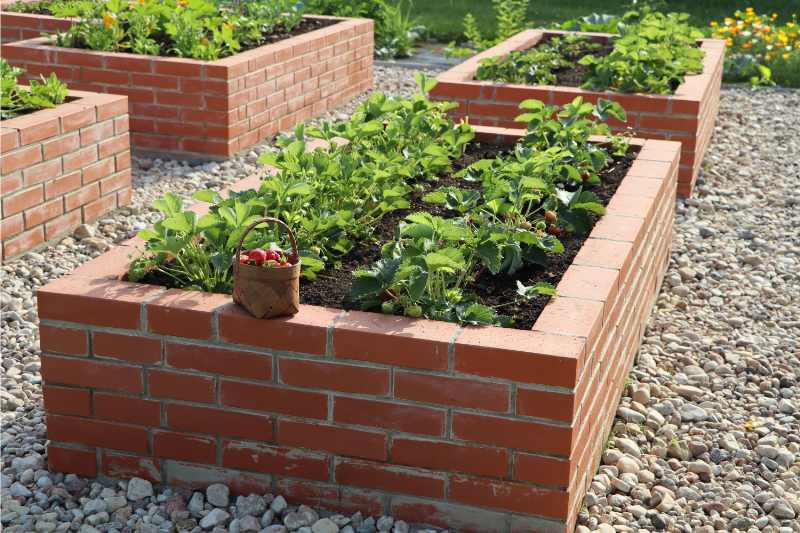
“Brick is charming and durable, but it’s not without its quirks.”
In very wet or freezing climates, the porous nature of older bricks can lead them to absorb water and then crack or flake (a process called spalling) during a freeze-thaw cycle. You might also find moss or algae growing on the surface, which some people love for the aged patina, but others prefer to scrub off. It’s a slightly higher-maintenance choice than concrete block but offers a warmth and character that’s hard to beat.
17. Irregular Edging Made from Repurposed Broken Concrete
This look is all about the beauty of reuse. The defining feature here is the chunky, irregular edging made from what is essentially construction waste. It’s the ultimate in upcycling. Instead of paying for pristine pavers or brand-new blocks, this design uses discarded broken concrete (also called ‘urbanite’) to create something functional and visually interesting. It gives the garden an immediate rustic, resourceful character that you could never get from something new and perfect.
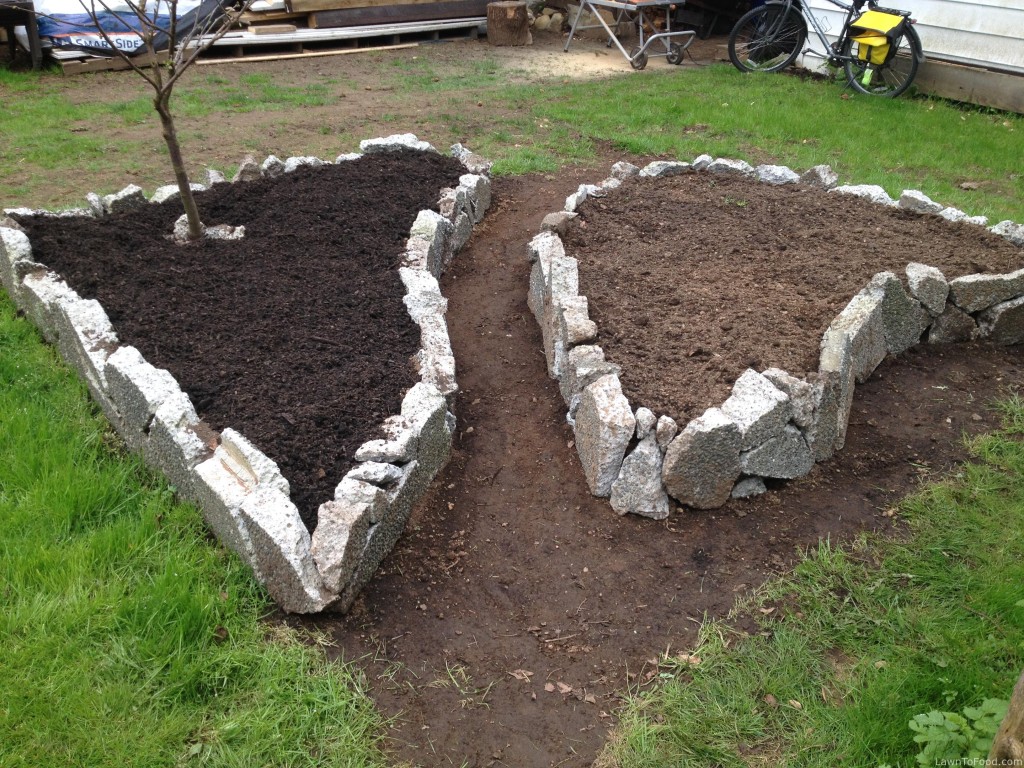
“Creating this ‘urbanite’ edging is straightforward, but safety is key.”
Source Your Concrete: Find a source for broken concrete. This might be from a patio or sidewalk you’re demolishing yourself.Break It Down (Safely): Place a large piece of concrete on a patch of dirt and cover it with a heavy-duty tarp. This prevents shards from flying. Use a sledgehammer to break it into usable, hand-sized chunks. Always wear safety glasses and gloves.Dig a Trench: Just like with any edging, dig a shallow trench where you want your border.Piece it Together: Arrange the concrete pieces in the trench like a puzzle, fitting them together as tightly as possible. Use the flattest edge as the top for a more uniform look. Backfill with soil on both sides to lock the pieces in place.
18. Dry-Stacked Irregular Concrete Block Retaining Wall
The charm of this retaining wall lies in its imperfection. The blocks are irregular and stacked without visible mortar, giving it a rustic, almost ancient feel, as if it were part of an old stone fence. This dry-stacked method allows for small gaps and shadows that create visual texture, which is a perfect backdrop for the soft, lush foliage of the hostas and ferns. The light grey color of the blocks provides a neutral base that makes the different shades of green in the plants really stand out.
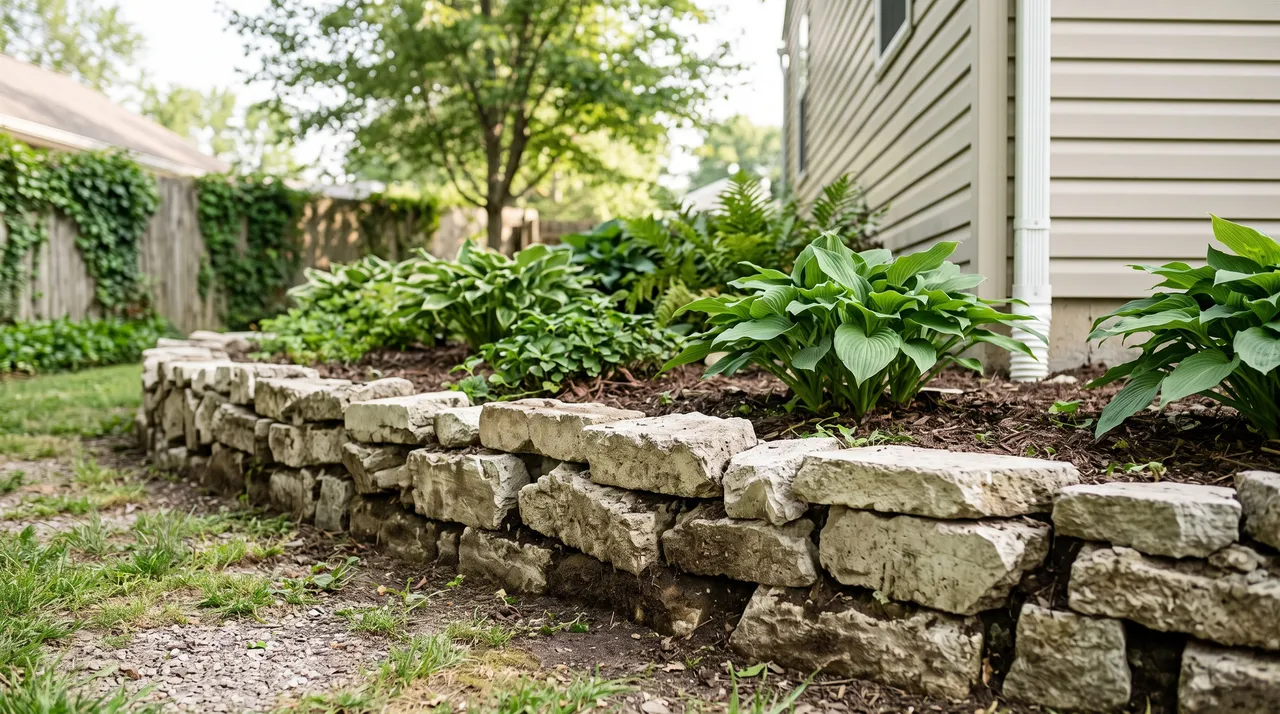
“Dry-stacking is a great DIY-friendly technique, but it has its limits.”
A wall like this is perfectly fine for retaining a small garden bed up to about 18-24 inches high. If you need to go any higher, or if the wall is holding back a significant slope with a lot of water pressure, you really need to use mortar and a proper concrete footing for safety and longevity. Without it, a taller wall can shift or even collapse over time.
19. Long Corten Steel Planter with Tall Greenery
While not concrete, this rusty metal planter is a huge trend for pairing *with* concrete elements. The style, often made from Corten steel, is popular because it offers a warm, organic, and evolving texture that beautifully contrasts with the cool, static nature of a concrete path or wall. As the steel weathers, its patina changes from bright orange to a deep, rich brown. This modern-yet-rustic look fits perfectly into the current design zeitgeist that celebrates natural materials and imperfections.
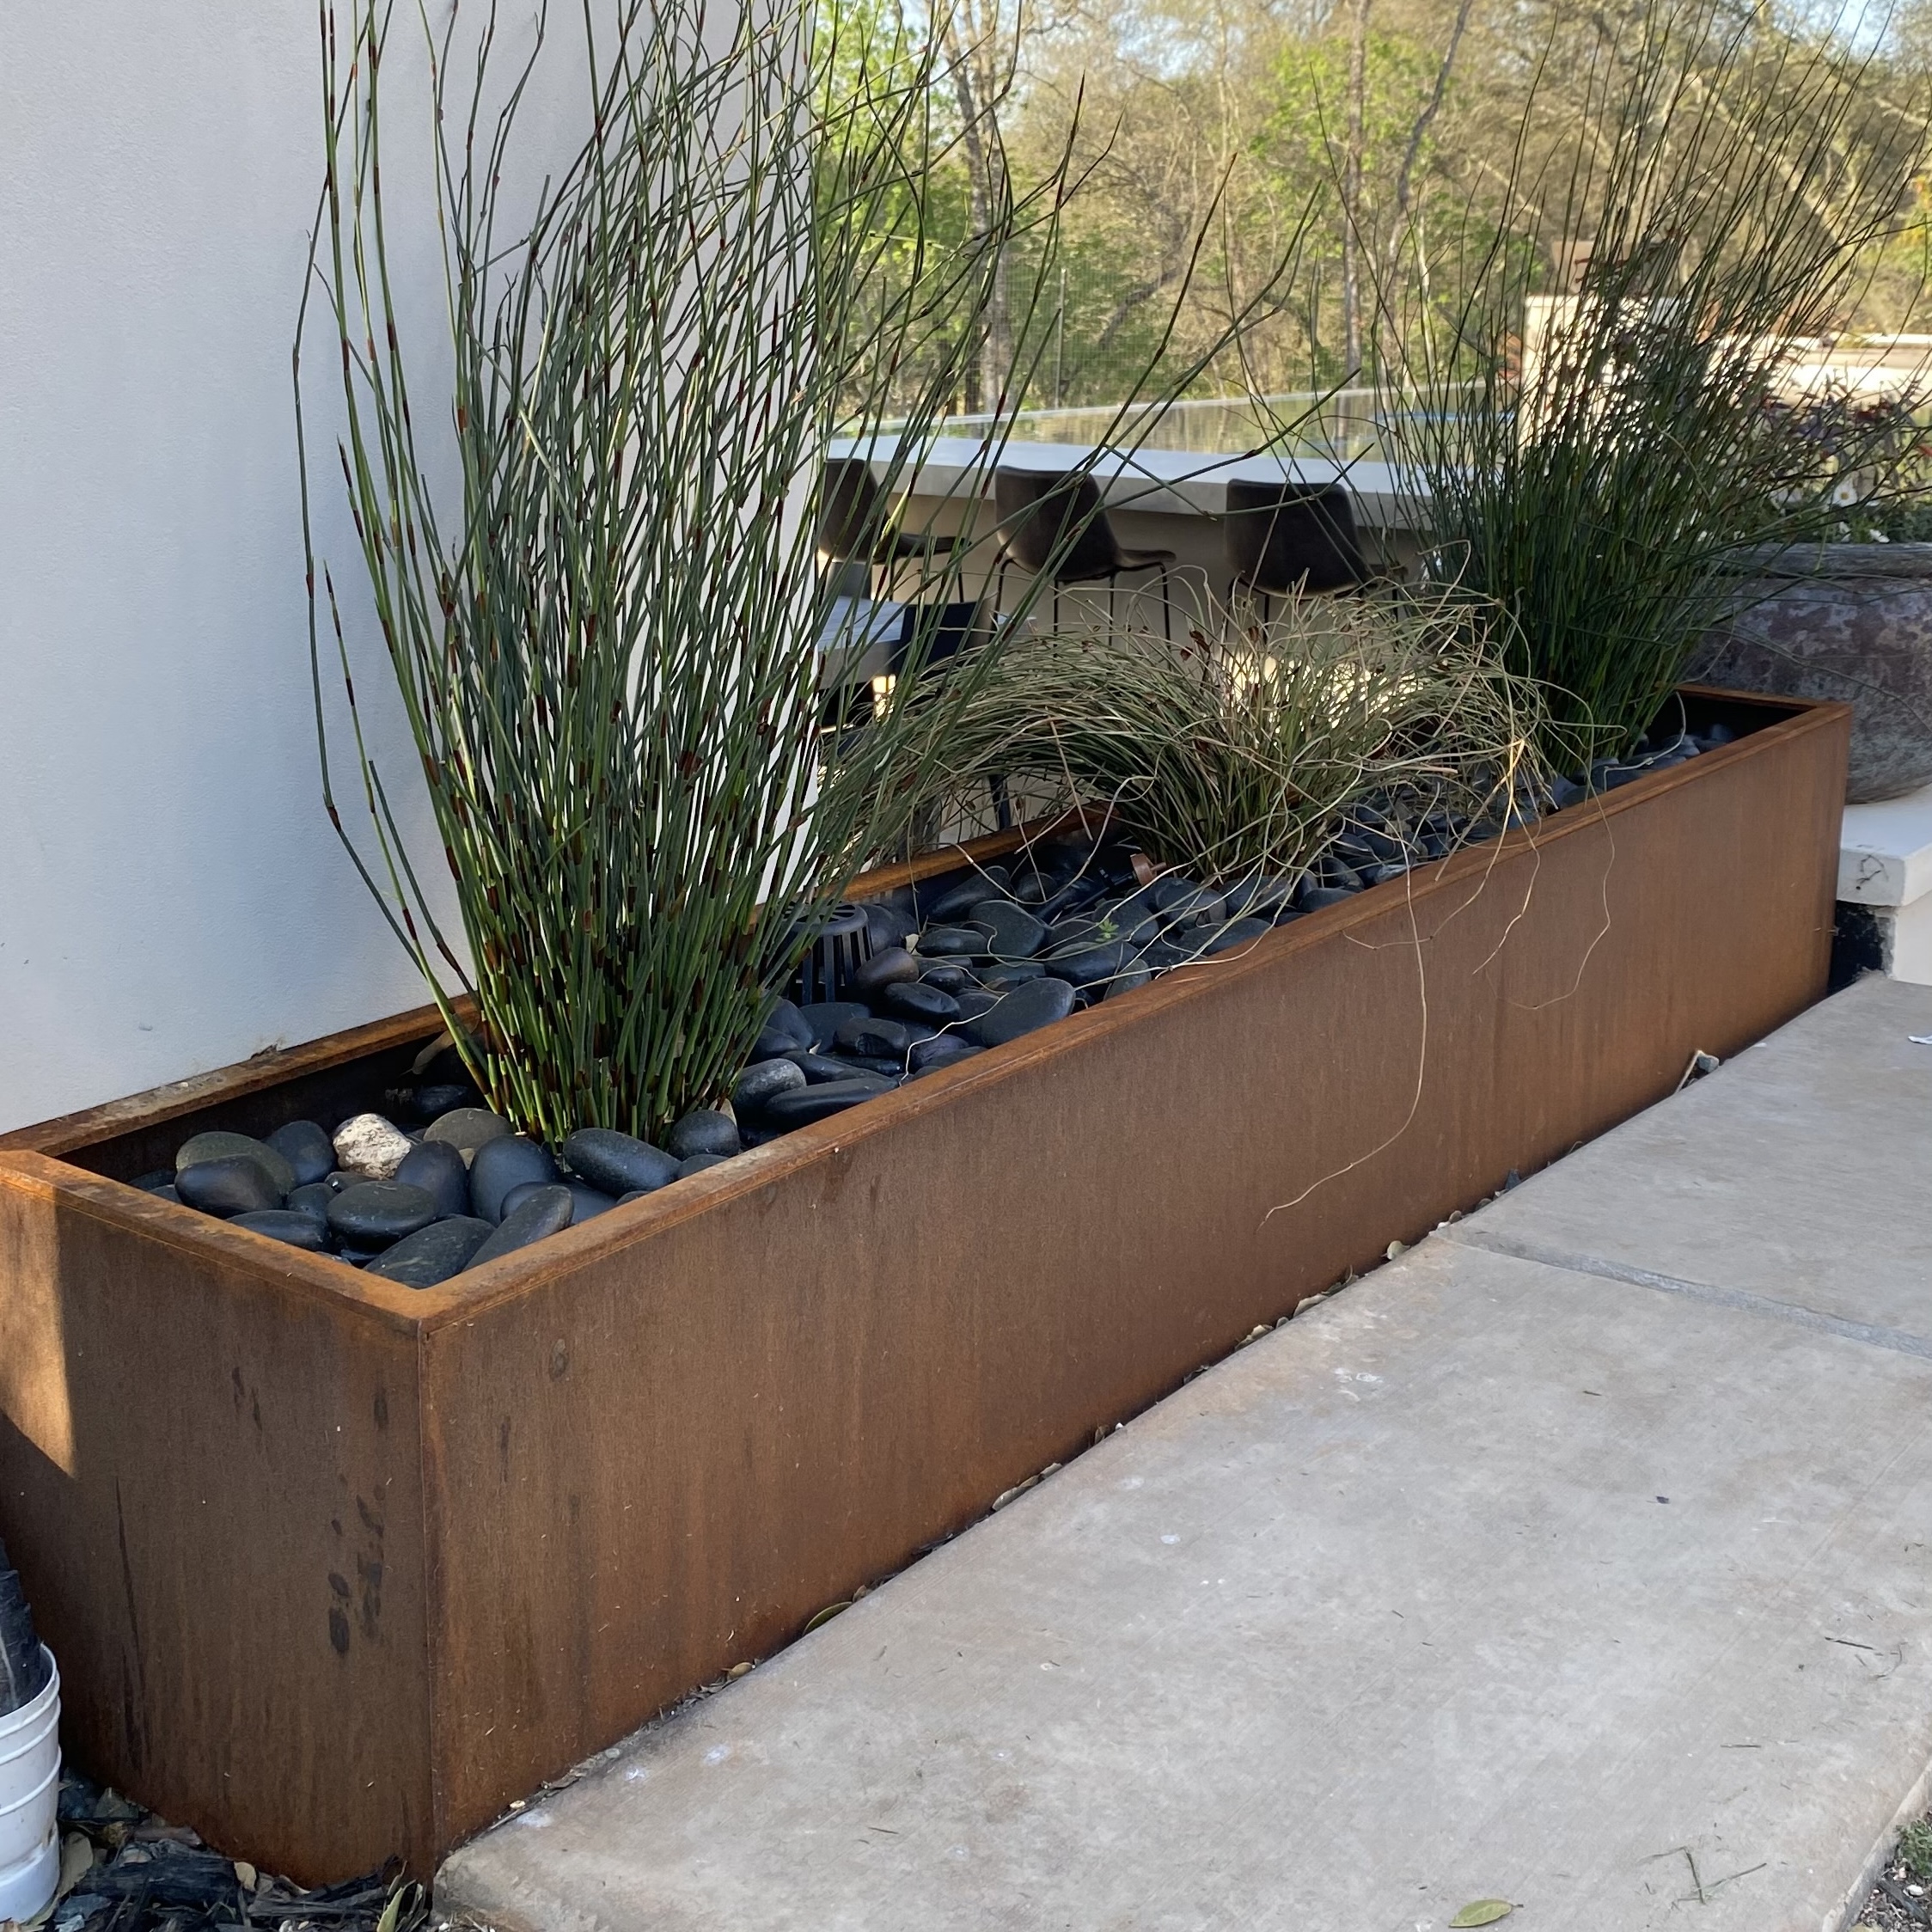
“That beautiful rusty finish comes with a notable side effect: rust runoff.”
For the first few years, as the protective rust layer (the patina) develops, rainwater running off the planter will contain rust particles that can stain the light grey concrete path beside it. While the staining can be cleaned with specific products (like oxalic acid), it’s something to be aware of. Some people choose to embrace it as part of the weathered look, while others might place a barrier of gravel between the planter and the concrete to catch the runoff.
20. Whimsical Elephant-Shaped Cement Planters Along a Path
Novelty planters can sometimes be surprisingly expensive, especially from boutique garden shops. But you can often find these playful cement figures for a steal if you know where to look. Check out stores like HomeGoods, T.J. Maxx, or even Christmas Tree Shops in the spring and summer. They often get shipments of quirky garden decor at great prices. Don’t forget to check flea markets and yard sales, where you might find a vintage one with a lovely, weathered patina for just a few dollars.
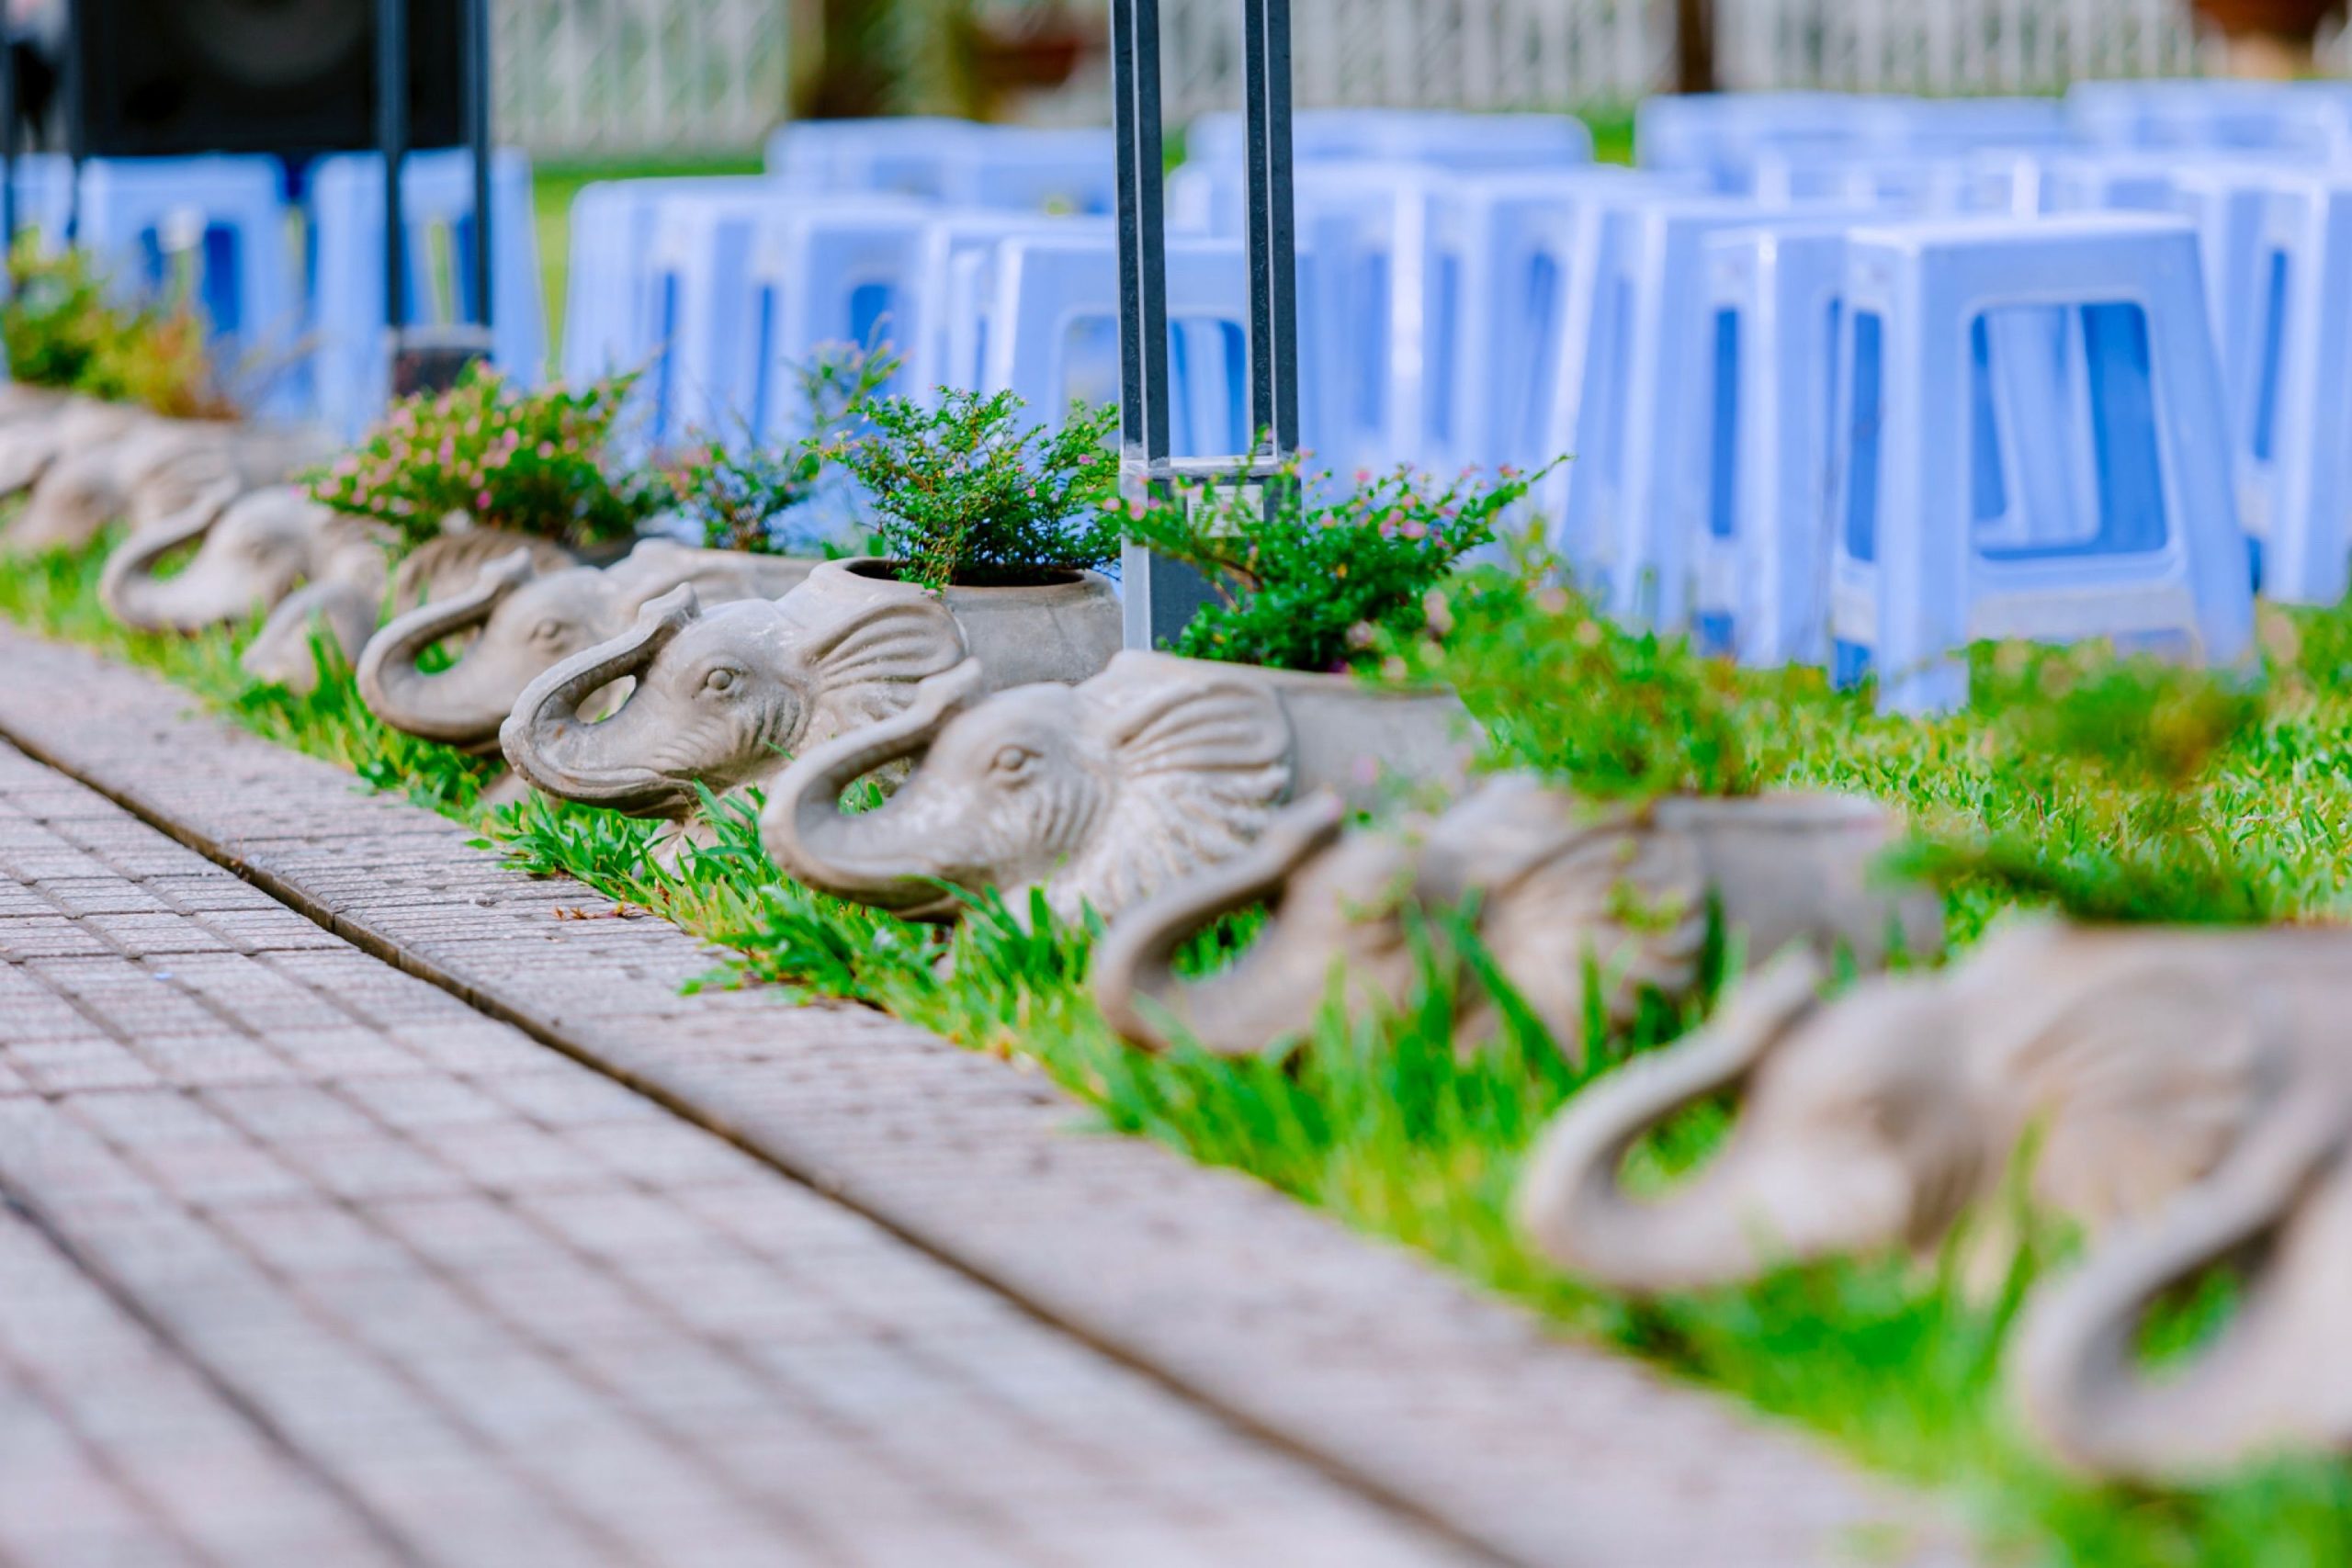
“The key to using whimsical or novelty decor like these elephant planters is to use it with intention and repetition.”
One lonely elephant might look a bit random. But a row of three or five, marching along a path, creates a purposeful, playful theme. By repeating the element, you’re telling a story and creating a rhythm. It signals that this is a deliberate design choice, not just a random object you didn’t know where to put. Keep the planting simple within them to let the shape of the planter be the star.
21. Small, Rough-Textured Organic Concrete Succulent Planter
This organic, rock-like planter is likely made from ‘hypertufa,’ a lightweight concrete mixture. It’s easy to make yourself.
- Gather Materials: You’ll need equal parts Portland cement, perlite, and peat moss. And water, of course.
- Mix It Up: In a bucket, mix the three dry ingredients thoroughly. Wear a mask – the dust is no joke. Slowly add water and mix with your hands (wear gloves!) until it holds together like a snowball.
- Form Your Shape: You can press the mixture into a mold or, for an organic shape like this, simply form a mound of it on a plastic sheet and carve out a hole in the middle for the plants.
- Cure: Cover the planter loosely with plastic and let it cure for at least a week, misting it with water every day. After a week, you can take the plastic off and let it cure for another 2-3 weeks before it’s ready for planting.
“The most captivating quality of this planter is its organic, found-object appearance.”
It doesn’t look like it was made in a factory; it looks like a piece of volcanic rock that was hollowed out by nature. This raw, natural form is what makes it so special. It creates a seamless connection between the container and the plants within it, making the whole composition feel like a tiny, self-contained ecosystem. It’s a celebration of natural texture and form.
22. Herringbone Paver Patio with a Stone Fire Pit
A setup this inviting needs some breathing room. To comfortably fit a fire pit and four substantial lounge chairs, you’ll need a patio that is at least 14 by 14 feet. This allows for about 3 feet of clearance around the fire pit for the chairs, plus another 3 feet behind the chairs for a safe and comfortable walkway. Anything smaller will feel cramped, and you’ll risk people getting too close to the flames. The glass railing suggests this is on a raised deck or ledge, which requires even more careful planning for safety and weight distribution.
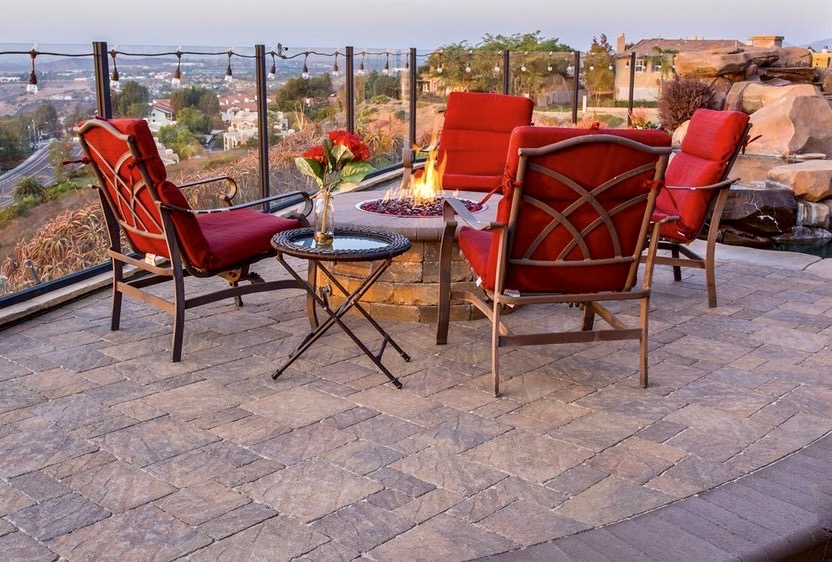
“Creating a cozy fire pit destination like this involves a few key costs.”
This is a higher-end look, but it’s achievable.Pavers: Irregular, multi-toned pavers in a herringbone pattern for a 14×14′ area. ($1,200 – $2,500)Fire Pit Kit: A stone block fire pit kit from a landscape supplier. ($400 – $900)Lounge Chairs: Four quality outdoor chairs with thick cushions. ($1,000 – $3,000+)Accessories: String lights, side table, professional installation of gas line (if not wood-burning). ($300 – $1,000+)TOTAL: $2,900 – $7,400+Budget alternative: Use more affordable pavers, a simple metal fire bowl ($100-$200), and find second-hand chairs on Facebook Marketplace.
23. Welcoming Paver Entryway with Wicker Seating
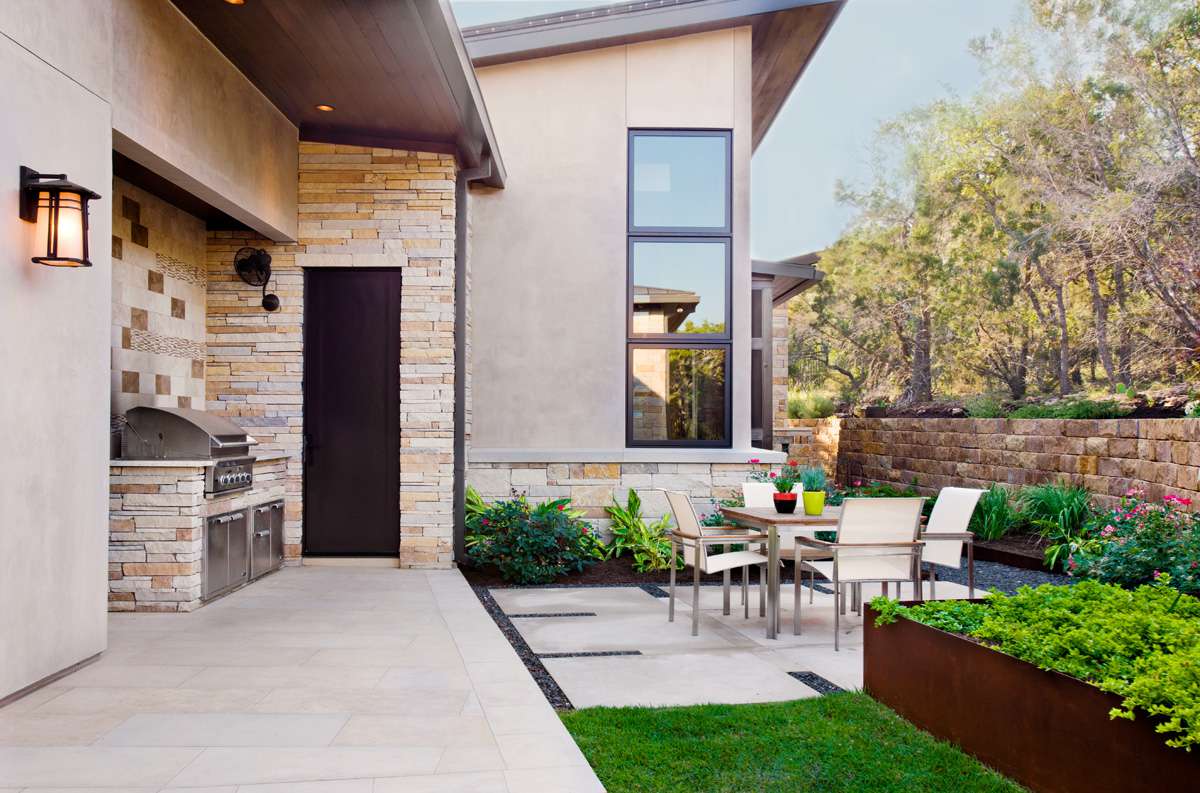
This welcoming entryway follows a classic formula for curb appeal: 50% Clean Architecture (the white siding, dark door, and stone pillars) + 30% Comfortable Furnishings (the wicker chairs and soft cushions) + 20% Lush Greenery (the shrubs and climbing plants). The hard surfaces provide a clean, structured backdrop, the chairs send a clear message of ‘welcome, stay a while,’ and the plants soften all the hard edges, making the space feel alive and inviting.
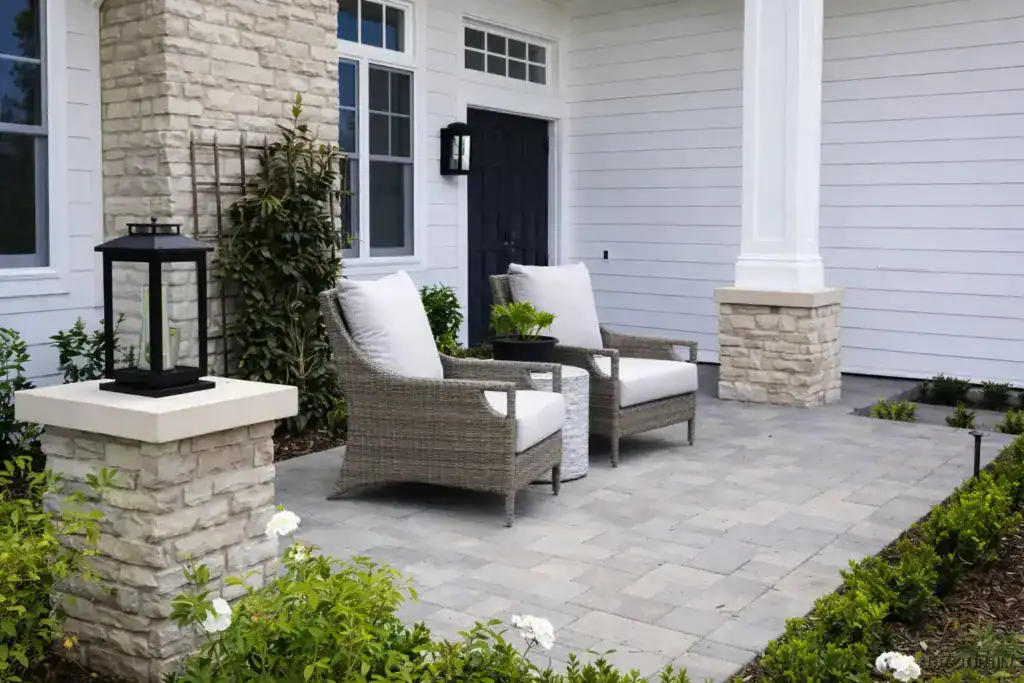
“This design works because it effectively creates an ‘outdoor foyer.’ It’s more than just a path to the front door; it’s a defined space that acts as a transition between the outside world and the home.”
The paver stones establish the floor, the house wall and pillars act as walls, and the chairs furnish it like a real room. This turns a simple entryway into a charming and functional patio, adding usable square footage and a huge dose of charm to the home’s exterior.
24. Curving Brown Composite Fence with Stamped Concrete Border
A subtle but powerful detail here is the color coordination between the reddish-brown border on the concrete walkway and the brown composite fence panels. This repetition of color creates a deliberate, cohesive look. It tells your brain that these two separate elements are part of the same design plan. When planning a project with multiple hardscape elements, pulling a minor color from one and using it in another is a pro-level trick to unify the entire landscape.
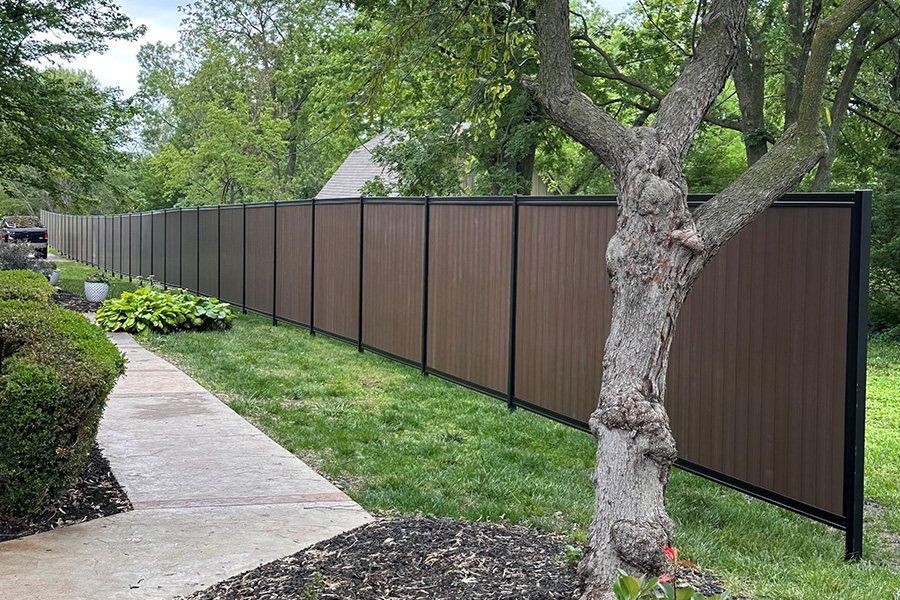
“Let’s have some real talk about fencing.”
That beautiful, curving composite fence is a fantastic, long-lasting, low-maintenance option. It’s also expensive. Professional installation of a composite fence can cost two to three times as much as a standard pressure-treated wood fence. While you’ll save money and time on staining and sealing over the years, the upfront investment is significant. Make sure to get multiple quotes and factor that high initial cost into your overall landscape budget.
25. Modern Dark Gray Slatted Fence with a Natural Wood Planter
The power of this combination is pure contrast. The dark gray, sleek, horizontal lines of the fence are cool, modern, and man-made. The natural wood planter is warm, textured, and organic. And the lush green plants are wild and chaotic. Each element makes the others look better. The dark fence, in particular, acts like a gallery wall, making the greens of the ferns and the brown of the wood planter box pop with incredible vibrancy. It’s a perfect pairing of opposites.
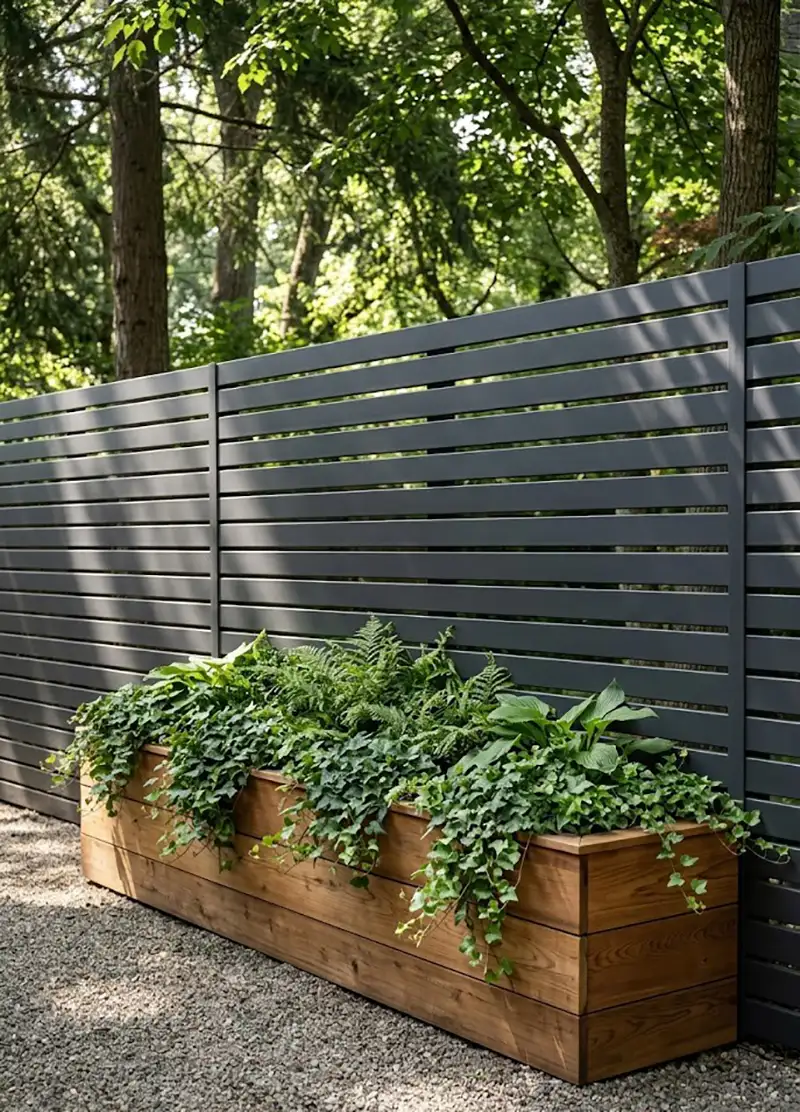
“A horizontal slatted fence looks incredibly chic, but those narrow gaps can be a pain to clean.”
Dust, pollen, and spiderwebs love to collect on all those horizontal surfaces. You can’t just quickly pressure wash it, as you might damage the wood or finish. The best way to clean it is with a hose, a soft-bristled brush, and some patience. Plan on giving it a good scrub at least once a year to keep it from looking dingy and faded, especially if it’s in a dusty or high-pollen area.
26. Irregular Concrete Stepping Stones on a Light Gravel Path
You can buy pre-made irregular stepping stones, but why not make your own for a fraction of the cost? All you need is a bag of concrete mix ($5-$8) and a cake pan or bucket lid from the dollar store. Or, for truly irregular shapes, you can dig a form directly into some damp soil or sand, line it with a plastic bag, and pour the concrete in. For about $20 in concrete, you can make enough stepping stones for a decent-sized path. It’s a great way to get a custom look on a shoestring budget.
“The key to a stable, long-lasting stepping stone path is a solid base.”
Don’t just place the stones on top of the gravel.Excavate: Dig out your path area about 4 inches deep.Compact the Soil: Tamp down the soil at the bottom of your trench.Add a Base Layer: Put down a 2-inch layer of paver base (crushed gravel) and compact it firmly. This is for drainage and stability.Add a Setting Bed: Add a 1-inch layer of coarse sand on top.Place Stones: Now, set your stepping stones into the sand, wiggling them until they are level and don’t rock.Fill with Gravel: Finally, fill the gaps around your stones with your decorative light grey gravel. This process ensures your stones won’t sink or become wobbly trip hazards over time. Compare this rustic look with the more structured walkway in Idea #28.
27. Simple Cement Paver Path in an Undeveloped Garden
Sometimes the most important step is just starting. This garden is clearly a work in progress, but the one thing that’s been done right is establishing a clear, functional path. Before a single plant goes in the ground, having a designated walkway prevents you from compacting the future garden soil by walking all over it. It provides a solid spine from which the rest of the garden design can grow. It’s a simple, practical first step that sets the stage for everything else.
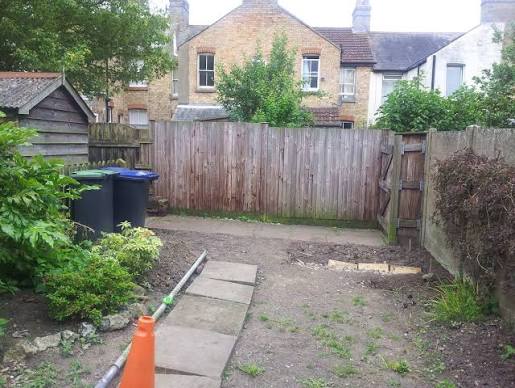
“An undeveloped space like this is a blank canvas, which is both exciting and daunting.”
Before you lay another paver or buy a single plant, run through this quick checklist:Map the Sun: Spend a day tracking where the sun and shade fall in your yard. This will determine what you can plant and where.Test Your Soil: Get a simple soil test kit to understand if your soil is acidic or alkaline, and whether it’s clay, loam, or sand. This will save you from planting things that are doomed to fail.Plan Your Water: Where is your hose spigot? Will you need to run a longer hose or consider an irrigation system for faraway beds?Define Your Zones: Think about how you want to use the space. Where will you relax? Where will the kids play? Where will you plant vegetables? Sketch out a rough plan before you start building.
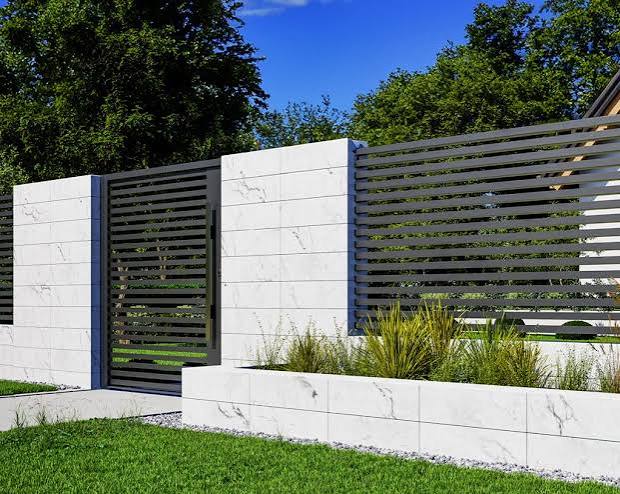
28. Black Privacy Fence and Rectangular Paver Patio
This combination is effective because of its bold, graphic quality. The black fence creates a strong, dark backdrop that essentially makes the boundaries of the yard disappear, especially at night. This allows the lighter-colored paver patio and the light blue house exterior to pop. The high contrast is modern and clean, and the simple shapes—rectangles of the pavers, vertical lines of the fence—create a sense of order and calm. It’s a minimalist approach that delivers maximum impact.
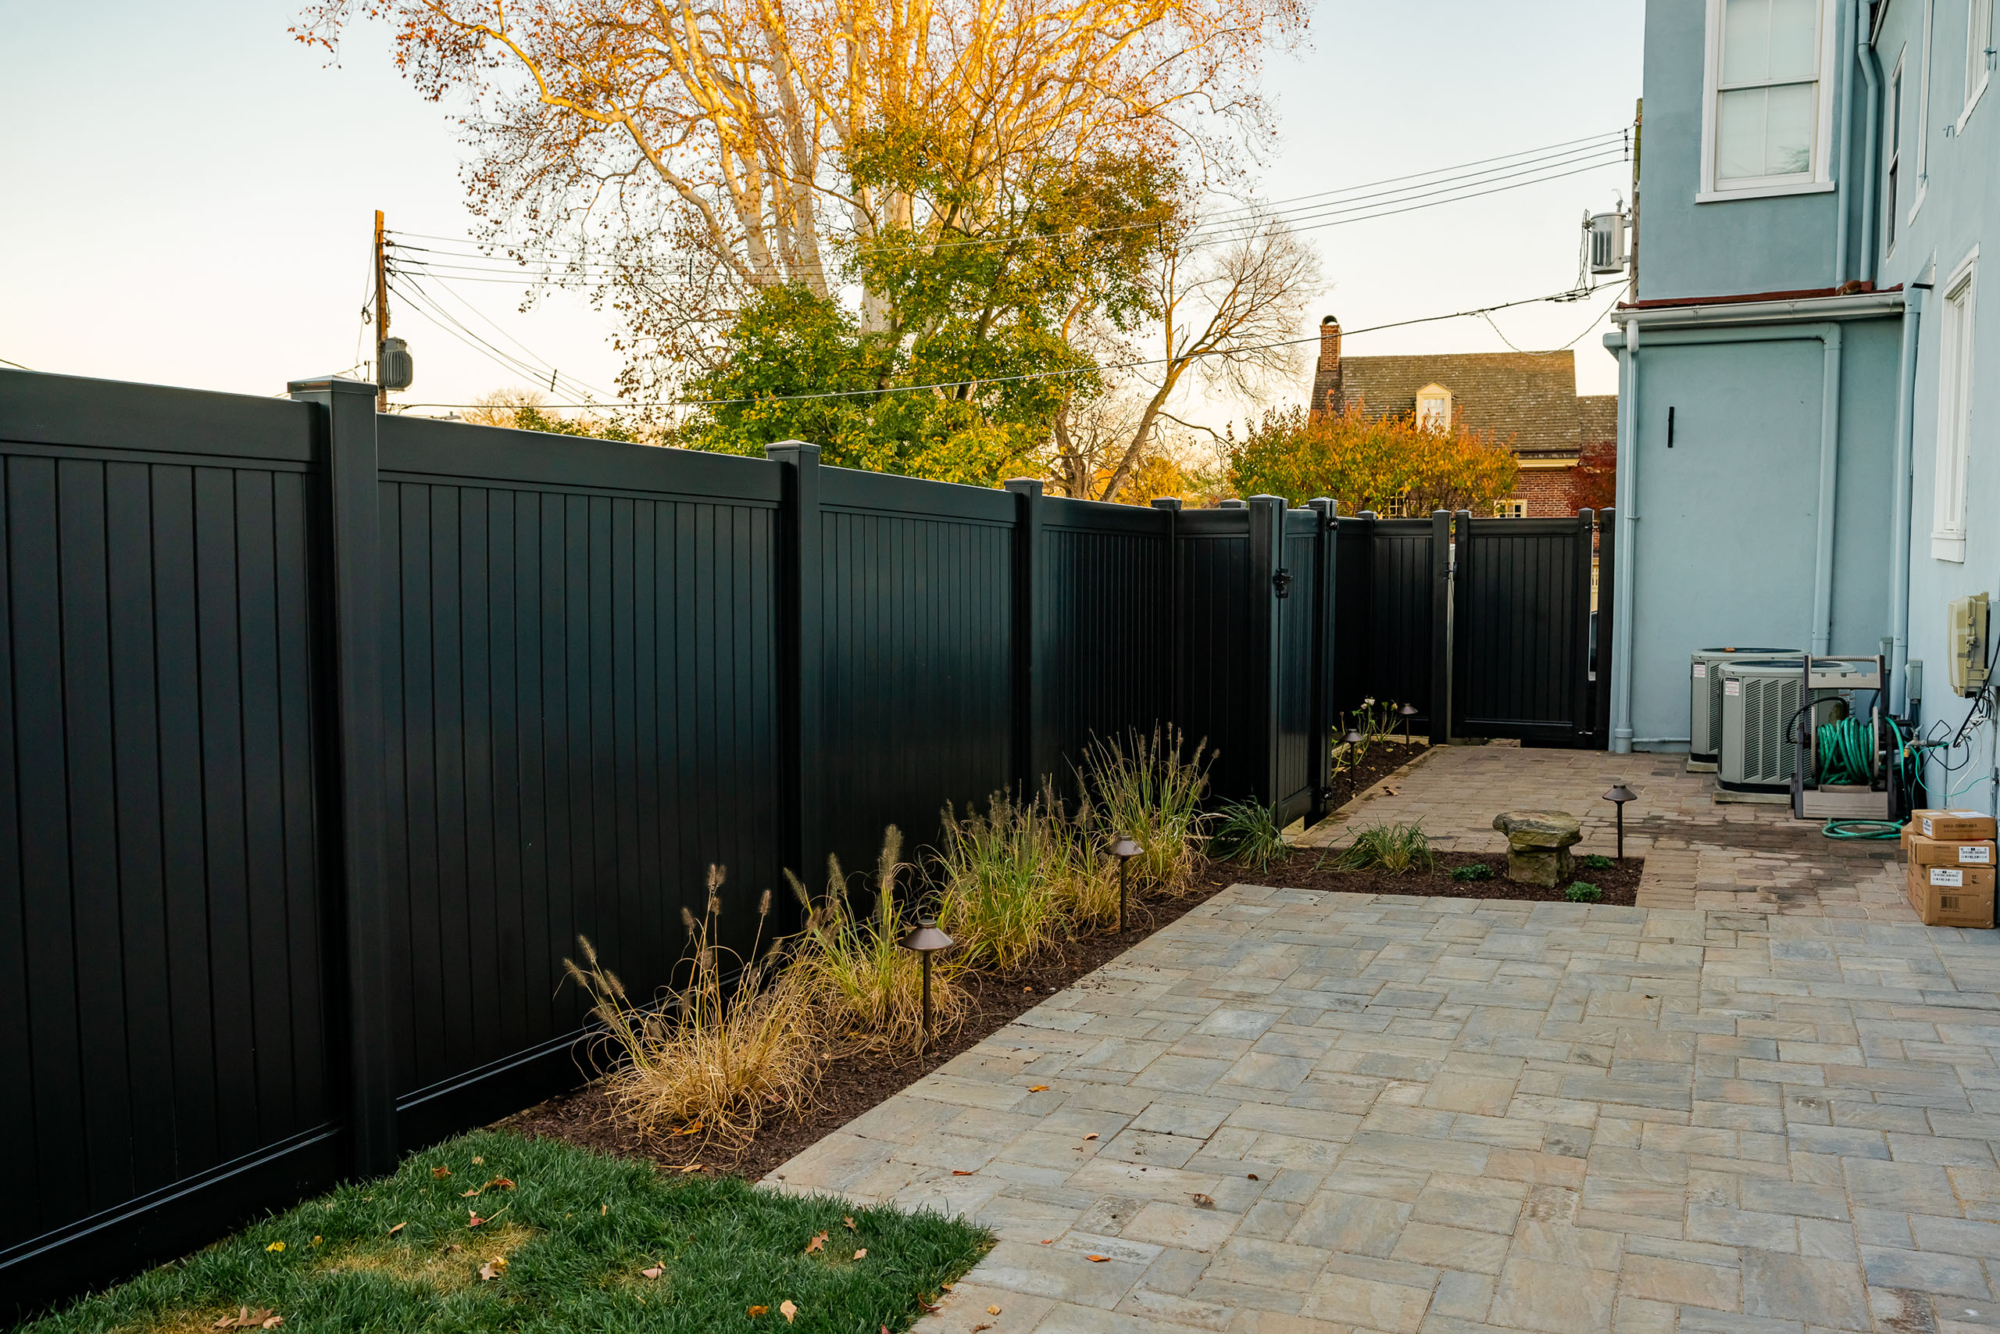
“This high-contrast, clean-lined look is an excellent strategy for small to medium-sized backyards, typically in the 500-1500 sq.”
ft. range. In a small space, the dark, uniform fence can create the illusion of depth, tricking the eye into not quite knowing where the yard ends. The large, simple paver patio provides a clear, usable floor space that makes the yard feel more functional and expansive. In a very large, sprawling yard, a black fence might feel too imposing unless it’s broken up by significant landscaping.
29. Textured Concrete Walkway and Square Tiled Landing
To achieve that textured, stone-like finish on the concrete path, the contractor likely used a texturing skin or roller. These are flexible mats with a stone or slate pattern embossed on them. After the concrete is poured and smoothed, the mat is laid on top and pressed into the wet concrete to impart the texture. It’s a much faster and cheaper way to get a natural stone look compared to stamping individual ‘stones.’ For a DIYer, you can buy smaller texturing skins online for around $50-$100.
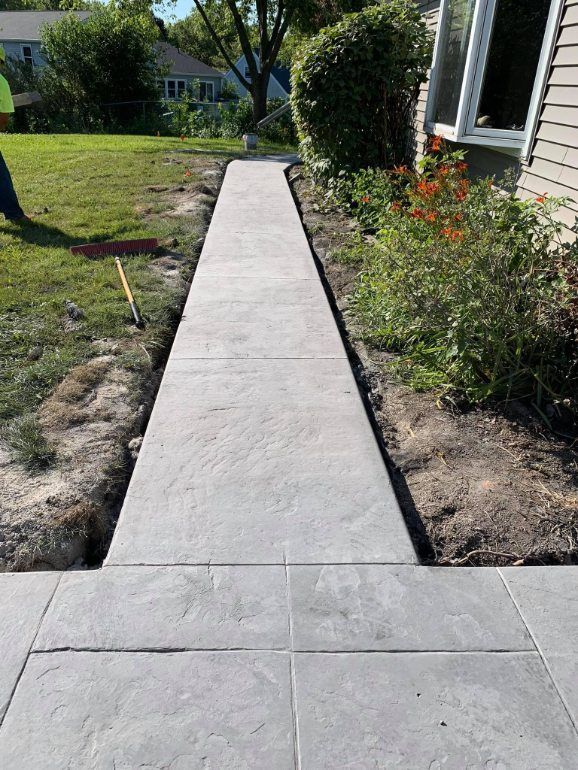
“That beautiful texture looks great, but all those little crevices are perfect for trapping dirt, pollen, and debris.”
A smooth concrete path can be cleaned with a quick sweep or a blast from a leaf blower. This textured path will require a bit more effort. You’ll likely need to use a pressure washer a couple of times a year to really get the grime out of the low spots and keep the light grey color looking fresh and clean. It’s a small trade-off for the upgraded look.
30. Curved Pathway of Stamped, Irregular Concrete Blocks
The visual recipe here is all about balance. It’s 60% Manicured Elements (the vibrant green lawn and the perfectly curved, stamped concrete path) + 40% Naturalistic Planting (the loose, colorful chrysanthemums and dark red foliage spilling out of the mulched beds). The crisp, clean lines of the lawn and path provide the structure, which then allows the plantings to feel lush and abundant without looking messy. It’s the perfect blend of formal and informal garden styles.
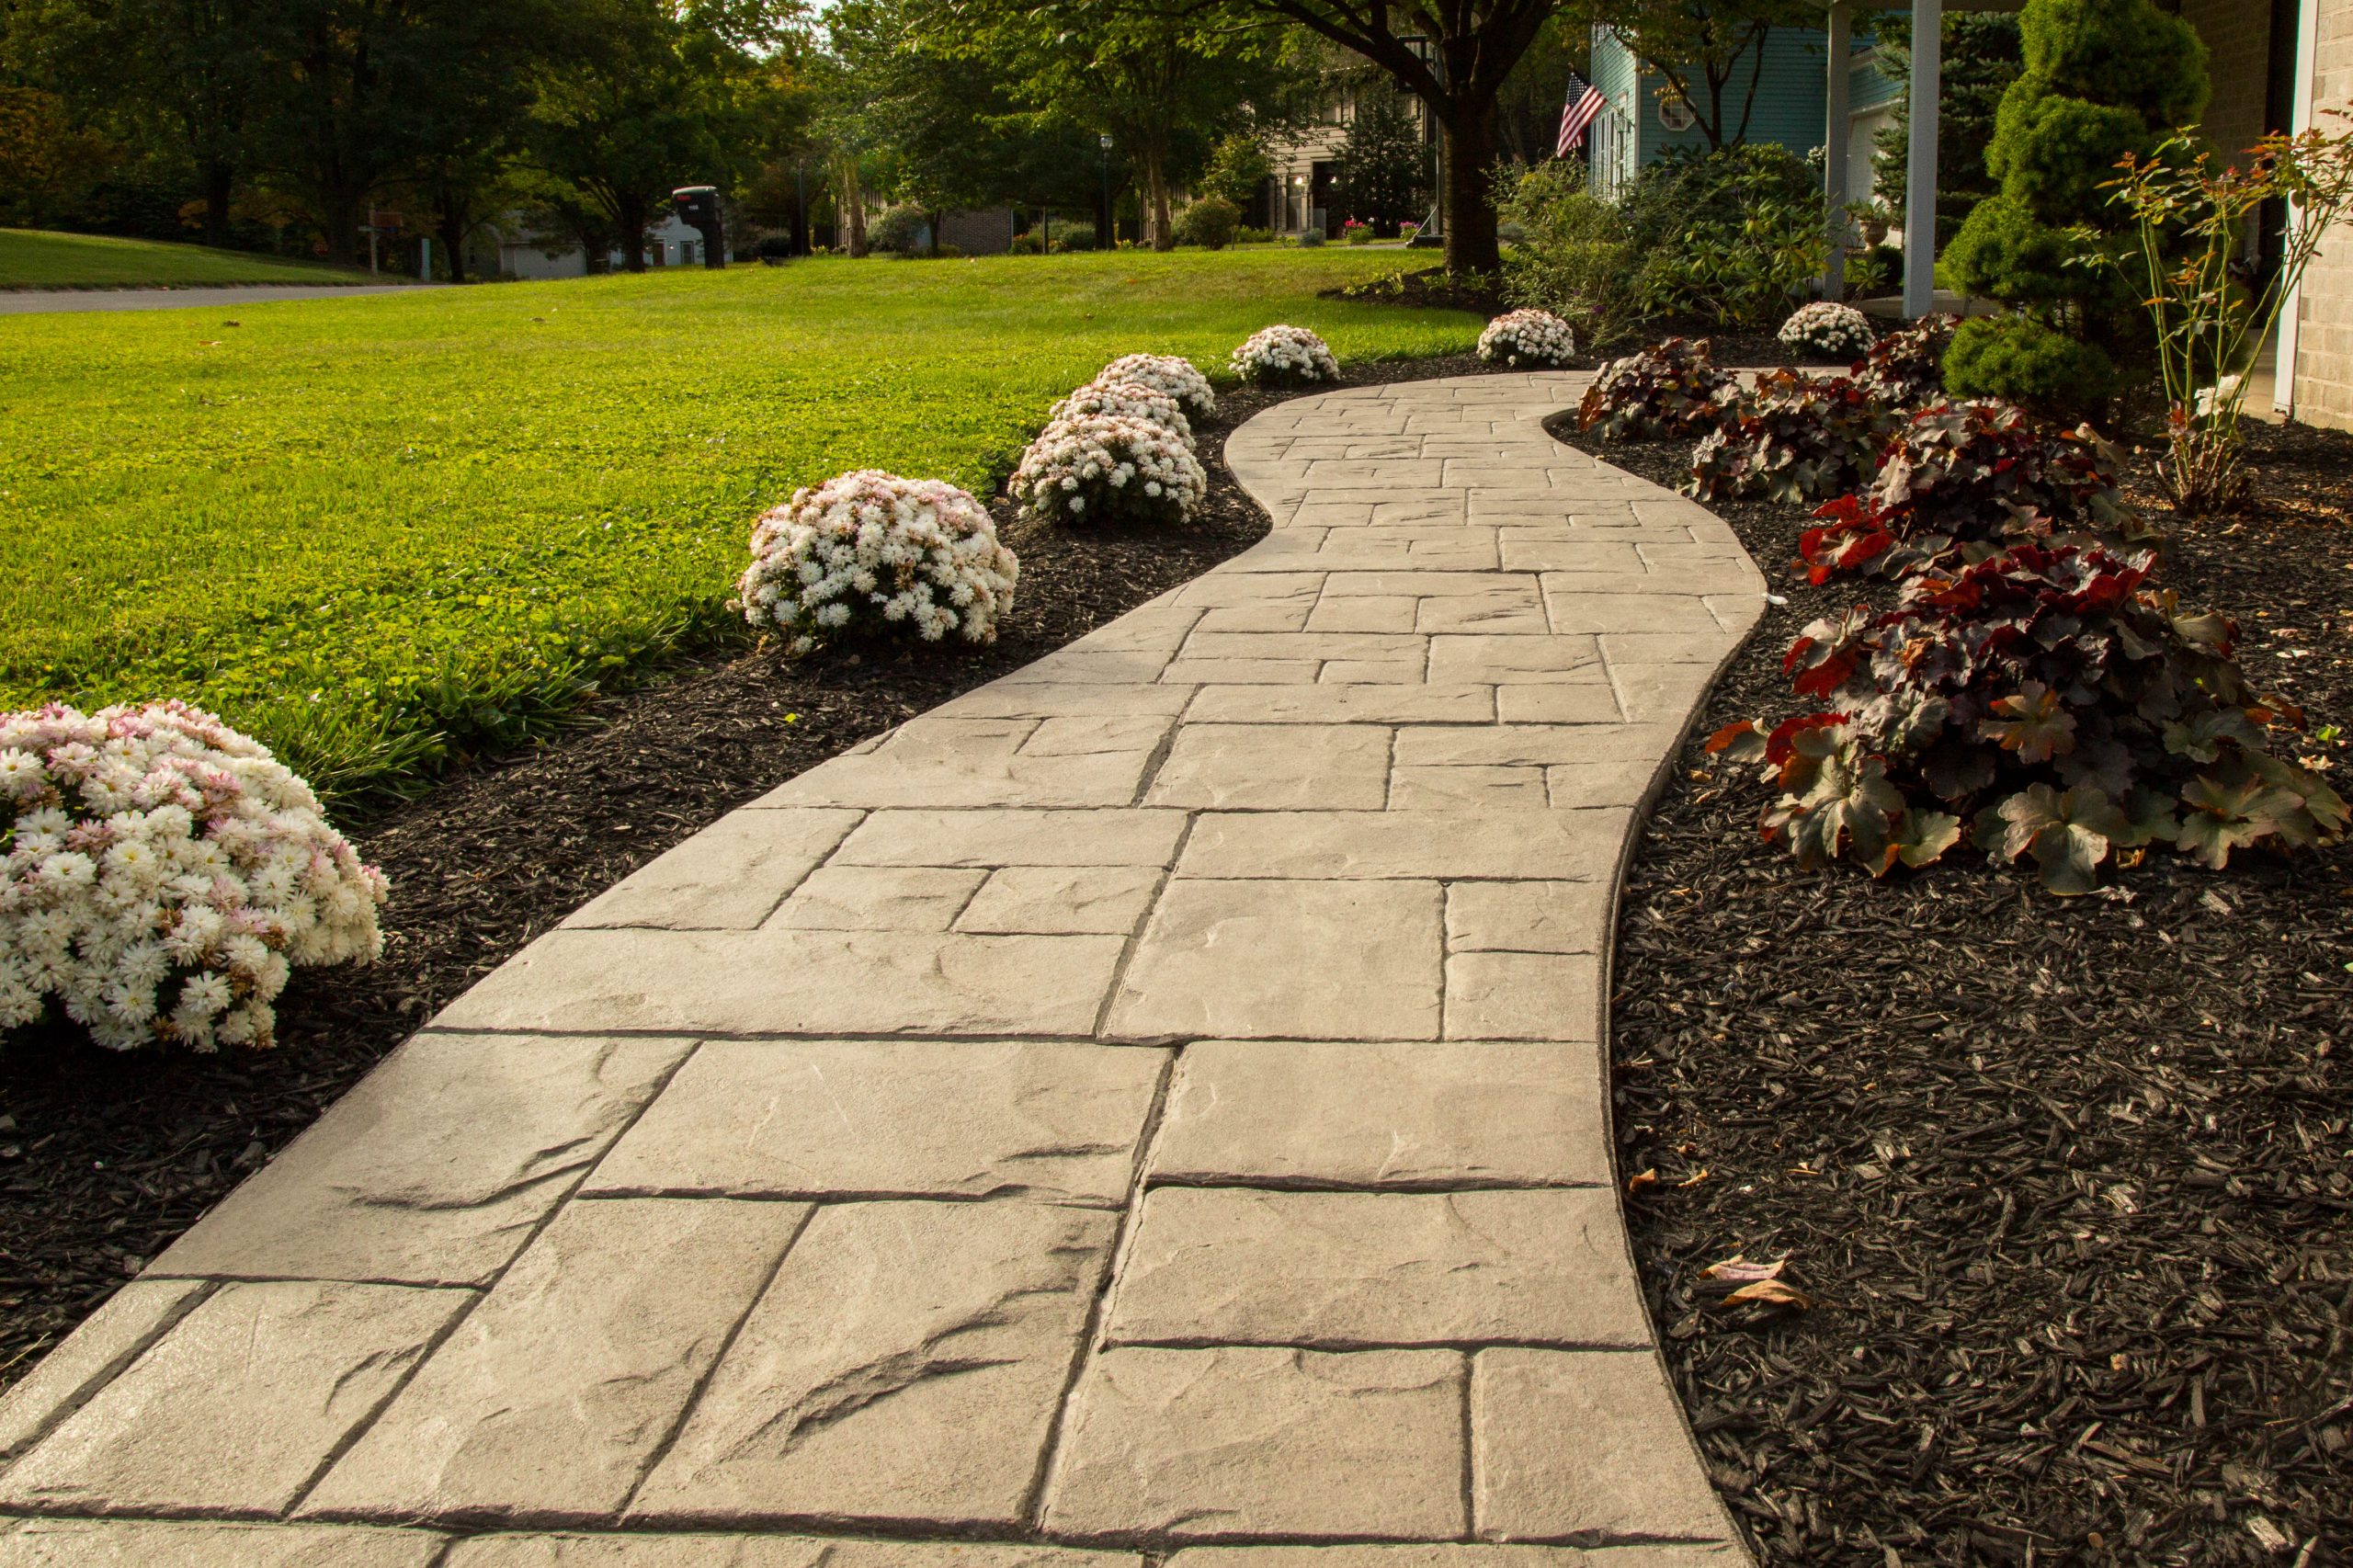
“Let’s be real: stamped concrete is not a ‘cheap’ garden idea in the DIY sense.”
While it’s less expensive than laying individual natural stones, it’s a job best left to professionals with the right tools (stamps, release agents, specialized colorings) and experience. A poorly done stamped concrete job can look tacky and is very difficult to fix. Expect to pay a professional installer significantly more than you would for a simple brushed concrete or paver path. This is a budget-friendly option compared to flagstone, not compared to a bag of Quikrete. It’s a ‘get the look for less’ splurge. This is the polished, pro version of the DIY path in Idea #25.
31. Curving Concrete Pathway Through a Hillside Garden
Landscaping on a slope comes with one major challenge: water. When it rains, water will run down the hill and can wash away your mulch, erode your soil, and even undermine the pathway itself if not managed correctly. A solid concrete path can act like a dam, causing water to pool on the uphill side. A smart design on a slope like this should include drainage solutions, such as integrated channel drains, or gaps in the path to let water pass through, or even a French drain running parallel to the path on the uphill side.
“The gentle, sweeping curve of this path is what makes it so successful.”
A straight path cutting directly across a slope can look harsh and artificial. By curving the path, the design works *with* the natural contour of the land rather than fighting against it. This creates a more organic, graceful journey through the garden. The curve also slows you down, encouraging you to appreciate the ornamental grasses and shrubs planted along the way, turning a simple walk into a more immersive garden experience.
Your Garden’s Concrete Canvas Awaits
As you’ve seen, concrete is so much more than a boring grey slab. It’s a versatile, affordable, and durable material that can create structure, texture, and style in any garden. Whether you start with a simple planter or map out a whole new pathway, we hope these ideas have inspired you to get your hands dirty. Pick a favorite, get planning, and transform your outdoor space into something you love. Don’t forget to save your top ideas to your Pinterest board to keep the inspiration flowing!