You know that feeling when you finally find the DIY garden idea that looks exactly right for your space, but the ‘how’ feels a million miles away? We’ve all been there, endlessly scrolling through Pinterest, saving pins that never leave the board. It’s time to change that.
We spent serious time digging through inspiration to bring you only what’s worth your weekend. After filtering through hundreds of options, we narrowed it down to 30 ideas that actually deliver on style and function, with projects ranging from a simple $50 planter to a full $2000 patio refresh.
Inside, you’ll find 30 curated ideas covering rustic, modern, and classic garden upgrades. We’re talking about everything from clever fence facelifts to genius raised bed solutions. Many of these are simple enough to tackle in an afternoon!
Creating a beautiful ‘outdoor room’ is more than just a trend for 2026; it’s about extending your living space and connecting with nature. These projects are designed to do just that, making your backyard the best room of the house. And stay until the end — we break down the most common mistakes that can ruin these looks.
📌 Save this to Pinterest for later — you’ll want to revisit these ideas.
1. Frame Your Wall with an Ornate Black Metal Trellis
This look is pure elegance because of the power of contrast and verticality. The bold, black metal trellis creates a striking silhouette against the light stucco wall, instantly drawing the eye and adding architectural interest where there was once a blank space. It’s not just a plant support; it’s wall art. The arrangement is balanced, with the tall topiary in its stone urn on one side and the lantern on the other, creating a pleasing, formal symmetry that feels intentional and high-end.
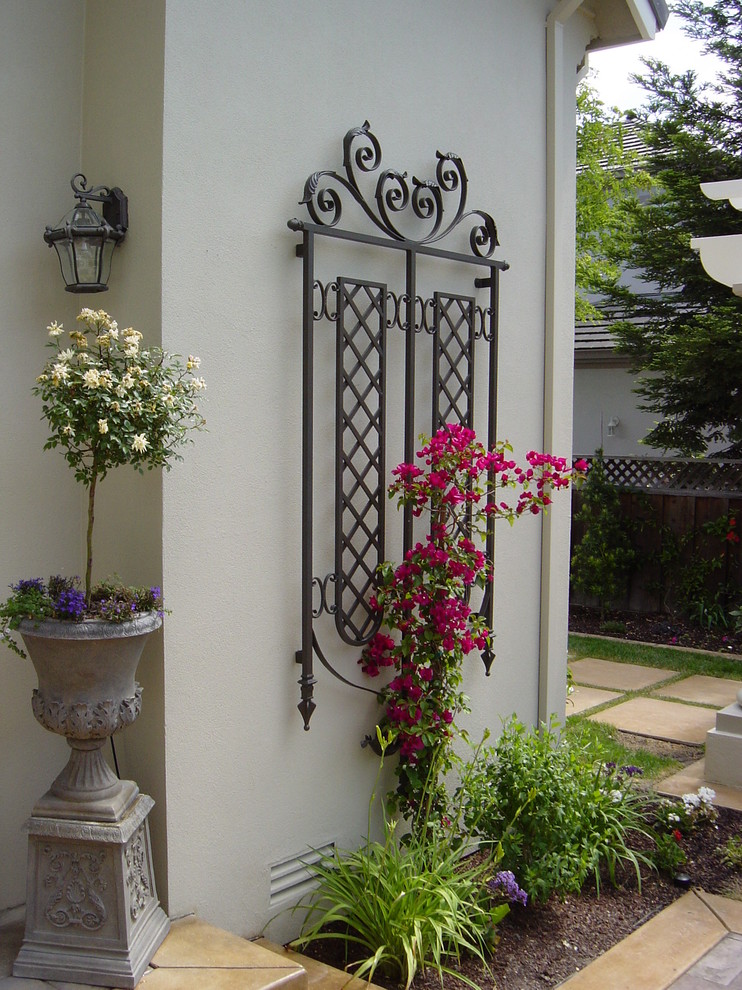
“When mounting a heavy trellis, especially one destined to support climbing plants, don’t rely on the included screws.”
Upgrade to stainless steel lag bolts and use wall anchors rated for at least twice the weight of the trellis itself. To prevent moisture damage to your wall, use 1-inch spacers between the trellis and the wall. This small gap allows for air circulation, preventing mildew and making it harder for pests to take up residence behind your beautiful bougainvillea.
2. Create a Rustic Planter with a Woven Basket and Metal Drum
The single element that makes this vignette so charming is the rusted metal drum. Without it, you’d just have a nice basket of flowers on the ground. But elevating it on this weathered, textured base adds a story. The rust and imperfections provide a perfect foil to the delicate white flowers and the basket’s natural weave. It’s this contrast between industrial decay and fresh life that creates a focal point with depth and character. It feels found, not bought, which is the secret to authentic rustic style.
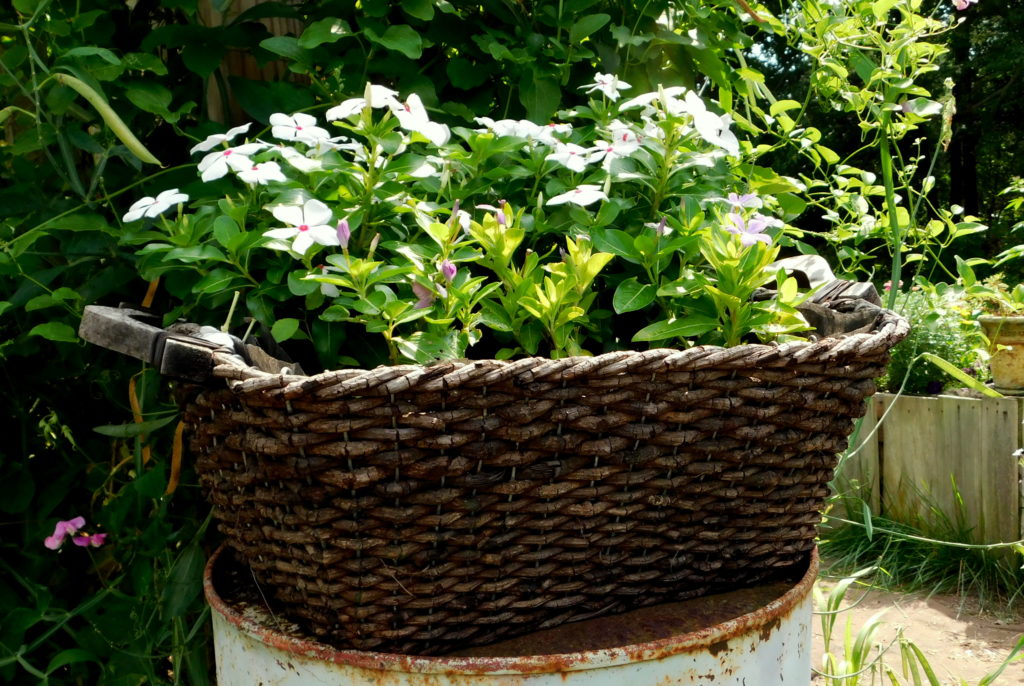
“Let’s be real about this combo.”
A natural woven basket will not last forever outdoors. To extend its life, line the inside with a heavy-duty plastic bag (poke drainage holes!) before adding soil. The rusted metal drum will continue to rust and may stain surfaces it sits on, like a stone patio. Place it on gravel or a sacrificial paver if you’re worried about orange marks. Expect to replace the basket every 2-3 seasons, depending on your climate.
3. Define Your Yard with a Classic White Vinyl Picket Fence
There’s a reason this look is timeless. The crisp white of the vinyl picket fence creates a sharp, clean line against the lush green of the lawn, a high-contrast combination that always looks fresh and tidy. This fence does more than just mark a boundary; it acts as a frame for the entire yard, making the landscaping look more intentional and put-together. The repetition of the pickets provides a satisfying visual rhythm that leads the eye around the property. It’s the visual equivalent of a neatly ironed collared shirt.
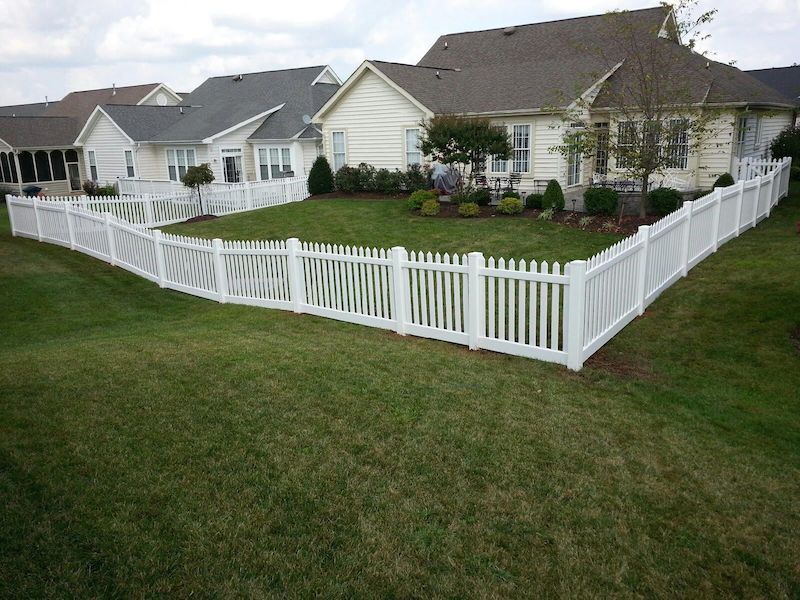
“A full vinyl fence installation can be pricey.”
To get this clean, classic boundary for less, search Facebook Marketplace or Craigslist for reclaimed wood picket fence sections. A weekend of sanding and a few coats of quality exterior white paint can give you a very similar look for a fraction of the cost. A 4-foot by 8-foot wood panel might cost you $20-40 used, versus $100+ for a new vinyl panel. Your total cost could be under $500 for a small yard if you’re willing to do the labor.
4. Organize Your Garden with Light Wood Raised Beds
You can build one of these simple, functional raised beds in an afternoon. This method requires no complex joinery. (Time: 2 hours, Cost: $60-$100 per bed).
- Cut your lumber. For a 4’x8′ bed, you’ll need two 8-foot boards and four 4-foot boards (for stacking two high). Use untreated cedar or fir.
- Assemble the first layer. On level ground, form a rectangle with two 8′ and two 4′ boards. Drive 3-inch exterior screws through the end of the long boards into the short boards.
- Stack and secure the second layer on top of the first, making sure the corners are flush.
- Drive screws down through the top layer into the bottom layer to lock them together.
- Optional: Add a 2×4 cap rail around the top edge for a finished look and a place to sit while you weed.
- Position your bed, line the bottom with cardboard to suppress weeds, and fill with a mix of topsoil and compost.
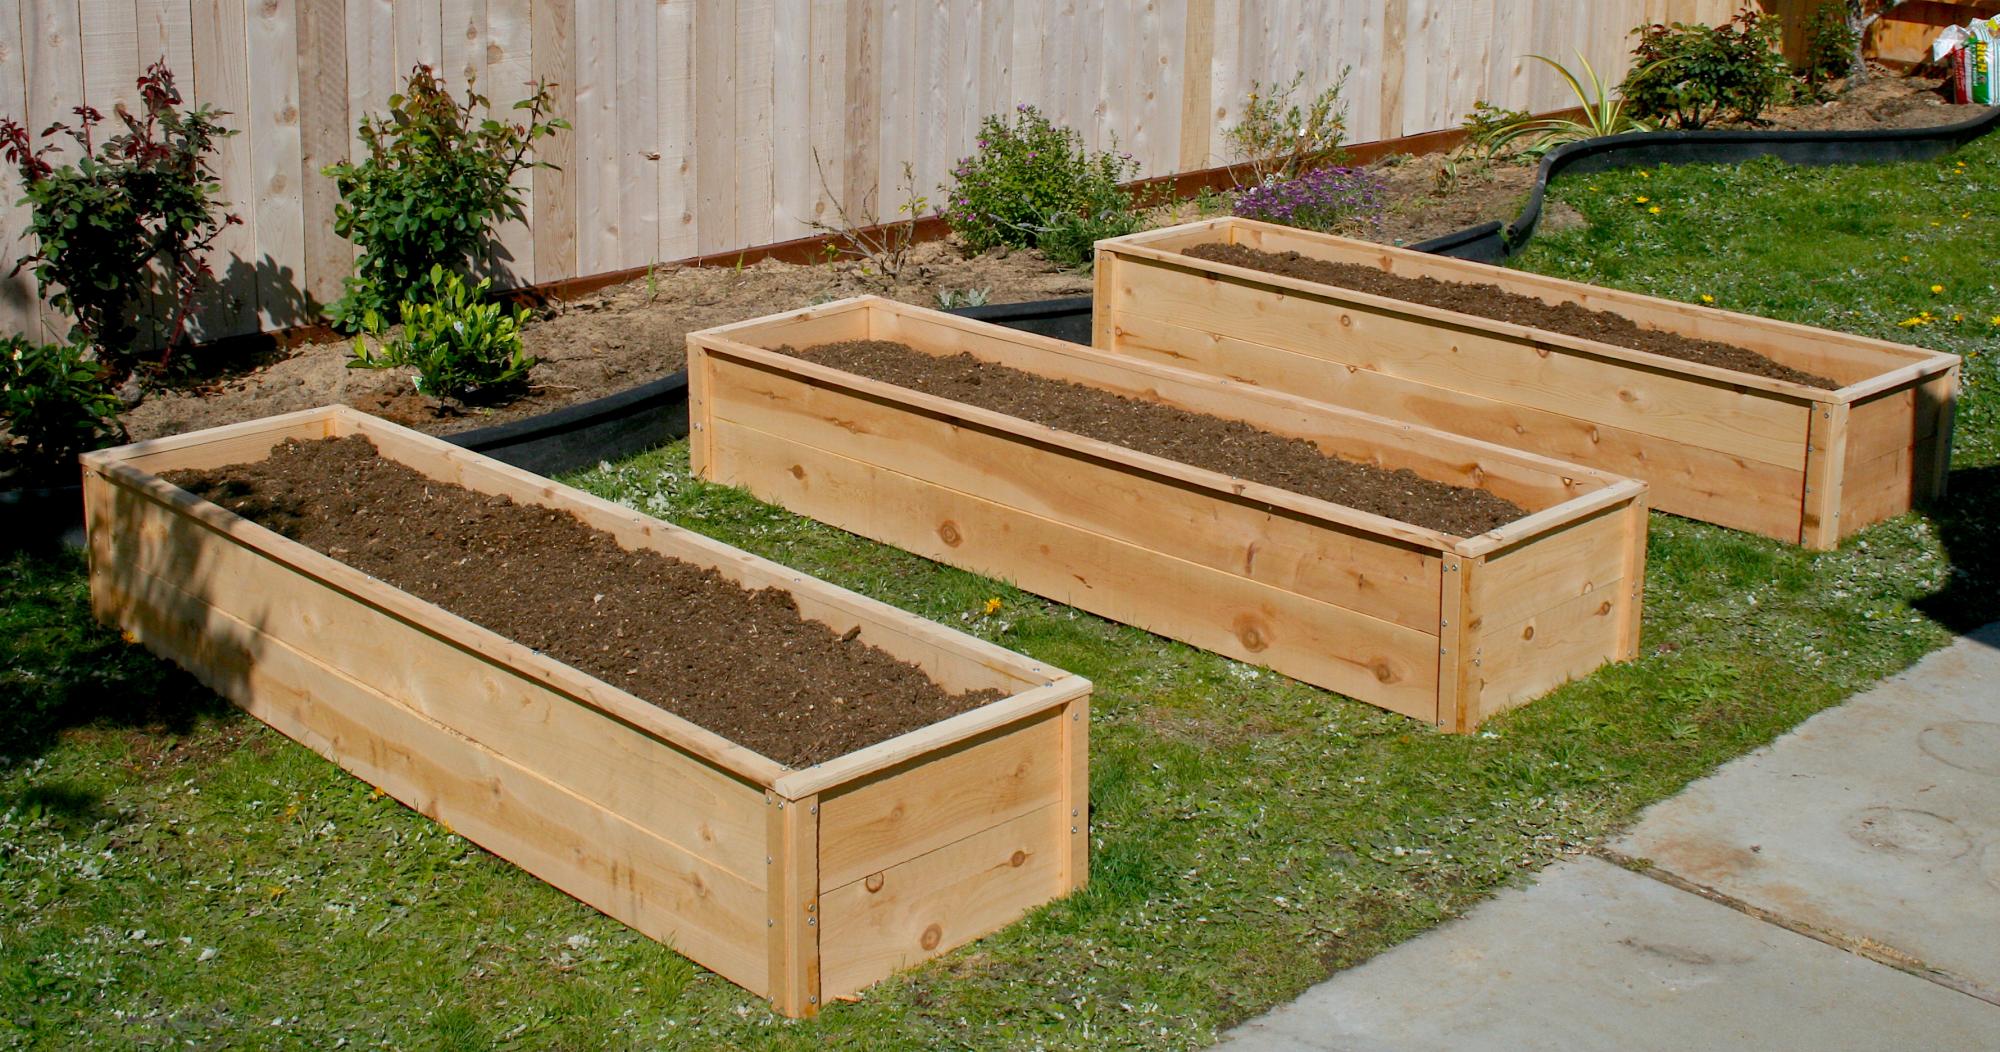
“Before you even buy the lumber for a raised bed, run through this quick checklist to avoid major headaches later:Sunlight Check: Have you tracked the sun in the proposed spot for a full day?”
Most vegetables need 6-8 hours of direct sun. Use a sun-tracking app if you’re unsure.Water Access: How far is the nearest hose bib? Dragging a 100-foot hose across the yard gets old fast. Plan for proximity to water.Level Ground: Is the area mostly level? A slight slope is okay, but a major one will require you to dig in one side of the bed, adding time and effort.Material Staging: Where will you dump several cubic yards of soil? Make sure you have a clear path for a wheelbarrow from the delivery spot to the beds.
5. Start Your Garden Upgrade with a Solid Plan
Okay, friend, let’s talk. The number one reason DIY garden projects fail or end up looking messy is the lack of a plan. It’s so tempting to go to the nursery, buy all the pretty flowers, and just start digging. But without a roadmap, you end up with a collection of plants, not a cohesive garden. You need to think about how you want to use the space, the paths you’ll walk, and where you’ll sit before you plant a single thing. A little bit of boring planning upfront saves a lot of back-breaking work later.
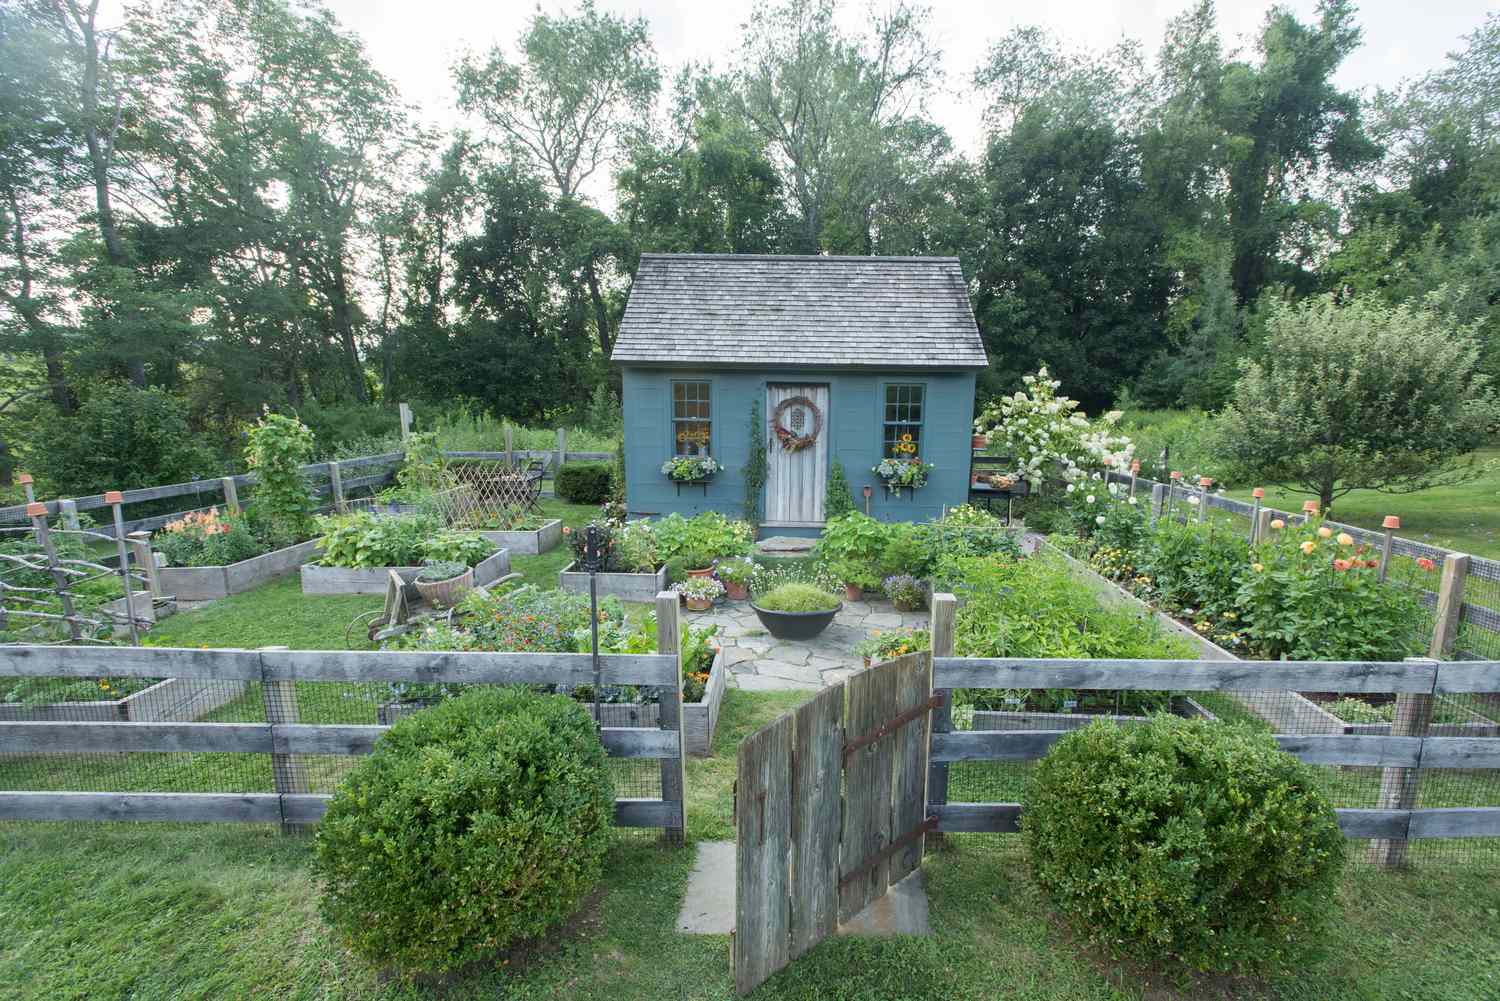
“Before you buy anything, grab your phone and take a picture of the area you want to upgrade.”
Open it in a photo editing app and just draw on top of it. Use a simple line tool to sketch out the shape of a new garden bed. Use a circle to mark where a big planter could go. Scribble a path. This isn’t about professional landscape design; it’s about visualizing shapes and flow in your actual space. This five-minute exercise can give you more clarity than hours of just staring at the yard.
6. Create a Rustic Vertical Herb Garden from a Pallet
This is the ultimate budget-friendly garden project, turning trash into treasure. The star of the show, a wooden pallet, is often available for free from local businesses (just ask nicely!). Instead of buying expensive vertical planter systems that can cost $150 or more, your main cost here is a box of screws, some landscape fabric to create soil pockets, and your herb seedlings. For around $30 in materials (plus the free pallet), you can create a productive and charming herb garden that takes up zero floor space. Compare this to the vertical metal garden in Idea #8, which offers a more modern look at a higher price point.
“Not all pallets are created equal, and this is critical for a project where you’ll be growing food.”
Look for pallets stamped with “HT,” which means they have been heat-treated, not chemically treated. Avoid pallets with an “MB” stamp, as they’ve been treated with Methyl Bromide, a pesticide you do not want near your basil. Also, inspect the pallet for any signs of spills or stains. If you don’t know what was on it, it’s not worth the risk. Always give it a good scrub with soap and water and let it dry completely before planting.
7. Achieve Serenity with a White Privacy Fence
The curved garden beds are the secret weapon here. The tall, straight white fence provides privacy and a clean backdrop, but it could easily feel sterile or imposing on its own. The gentle, sweeping curves of the planting beds at its base completely soften the look. They break up the long, linear expanse of the fence, add a sense of natural flow, and create deep pockets for lush plantings like those red roses. Without those curves, this would just be a yard; with them, it becomes a garden.
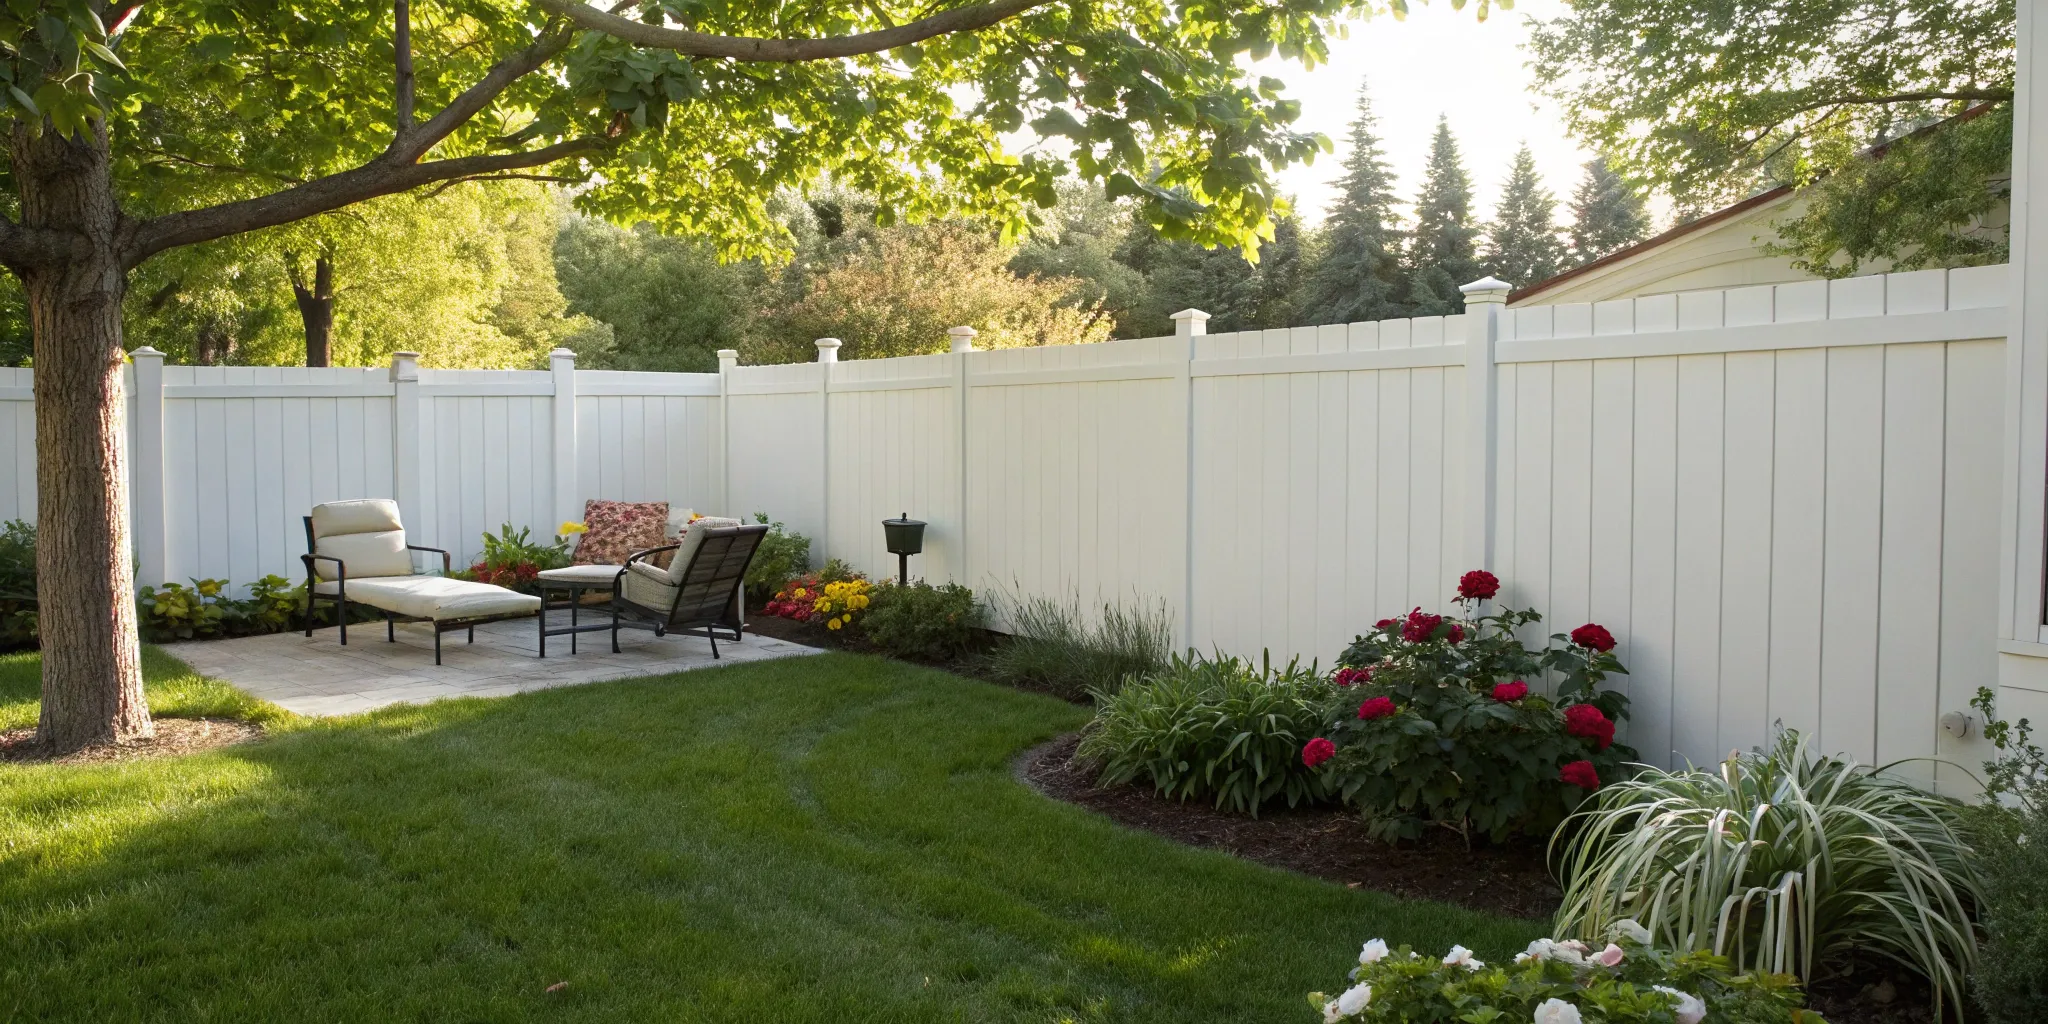
“A tall privacy fence like this one works best in medium to large backyards, typically 1,500 square feet or more.”
In a very small yard (under 500 sq ft), a 6-foot solid fence can feel claustrophobic, creating a ‘boxed-in’ effect and casting too much shade. If your space is tight, consider the open design of the picket fence in Idea #9 or the lattice style in Idea #10, which provide a sense of enclosure without completely blocking light and views.
8. Install a Multi-Tiered Metal Vertical Planter
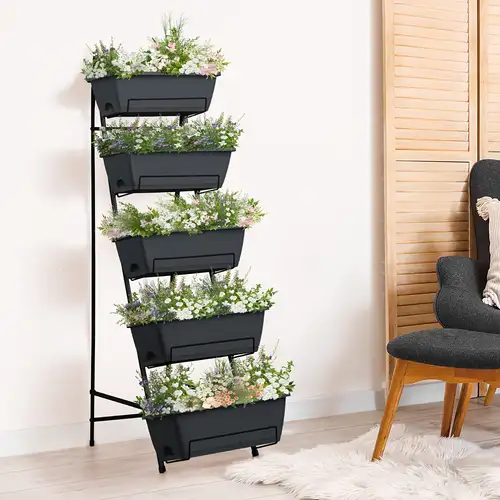
This modern look follows a simple but effective formula: 50% industrial material + 40% lush greenery + 10% warm wood. The galvanized metal troughs provide a cool, functional, and slightly industrial base. This is balanced by the sheer volume of soft, vibrant plants. The final touch is the horizontal wooden slat wall in the background, which adds warmth and texture, preventing the metal from feeling too cold or sterile. You could swap the metal for black powder-coated troughs or the wood for a dark grey composite board and still achieve a similar modern vibe.
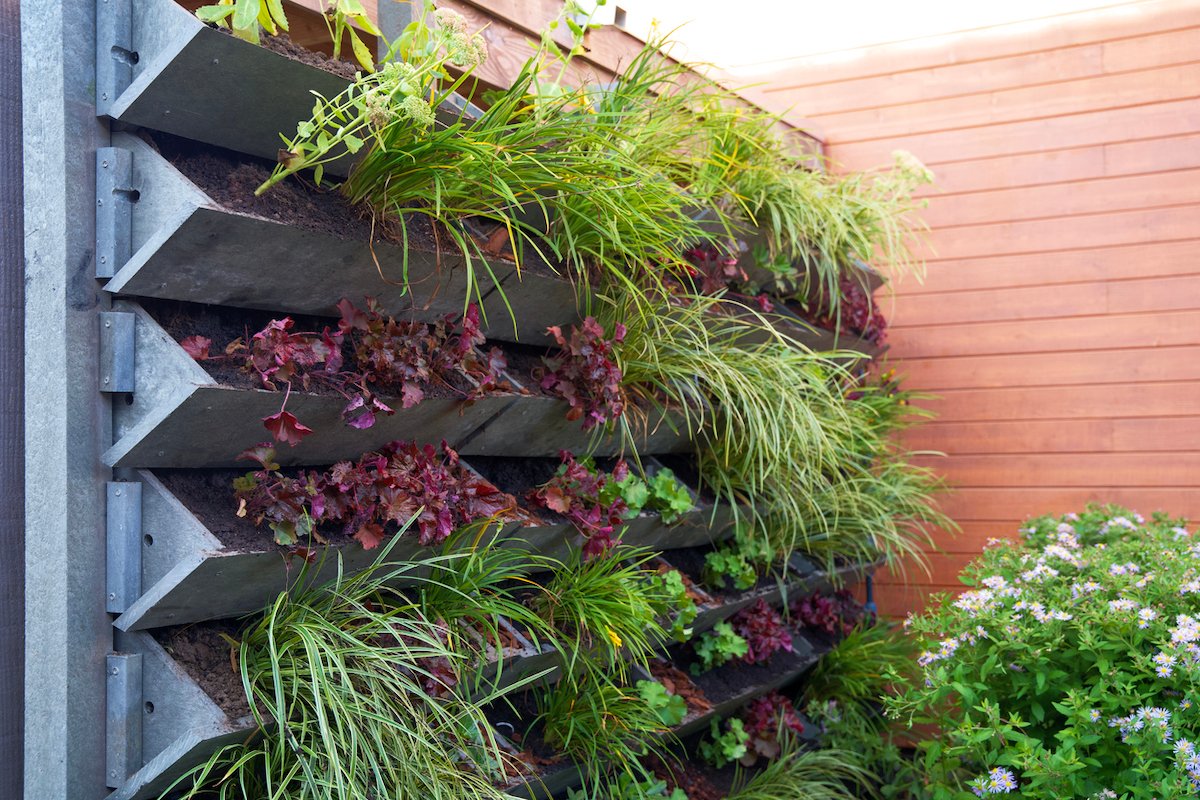
“Vertical gardens look amazing, but they are high-maintenance.”
The small amount of soil in each trough means they dry out *very* quickly, especially on a sunny day. You will need to water this daily, sometimes even twice a day in peak summer. The top tiers will dry out faster than the bottom ones. Consider installing a simple drip irrigation system with an emitter for each trough to save your sanity and your plants. This is not a ‘plant it and forget it’ project.
9. Welcome Guests with a White Picket Fence and Gate
This entrance feels so welcoming because it perfectly balances classic charm with pristine execution. The design works because of repetition and clean lines. The repeating white pickets create a cheerful rhythm, while the matching gate, complete with its sturdy X-brace, provides a clear and inviting focal point. The whole composition is framed by the neatly trimmed boxwood shrubs, whose dark green color makes the white fence pop. It’s a layered look that signals care and attention to detail before a guest even reaches the front door.
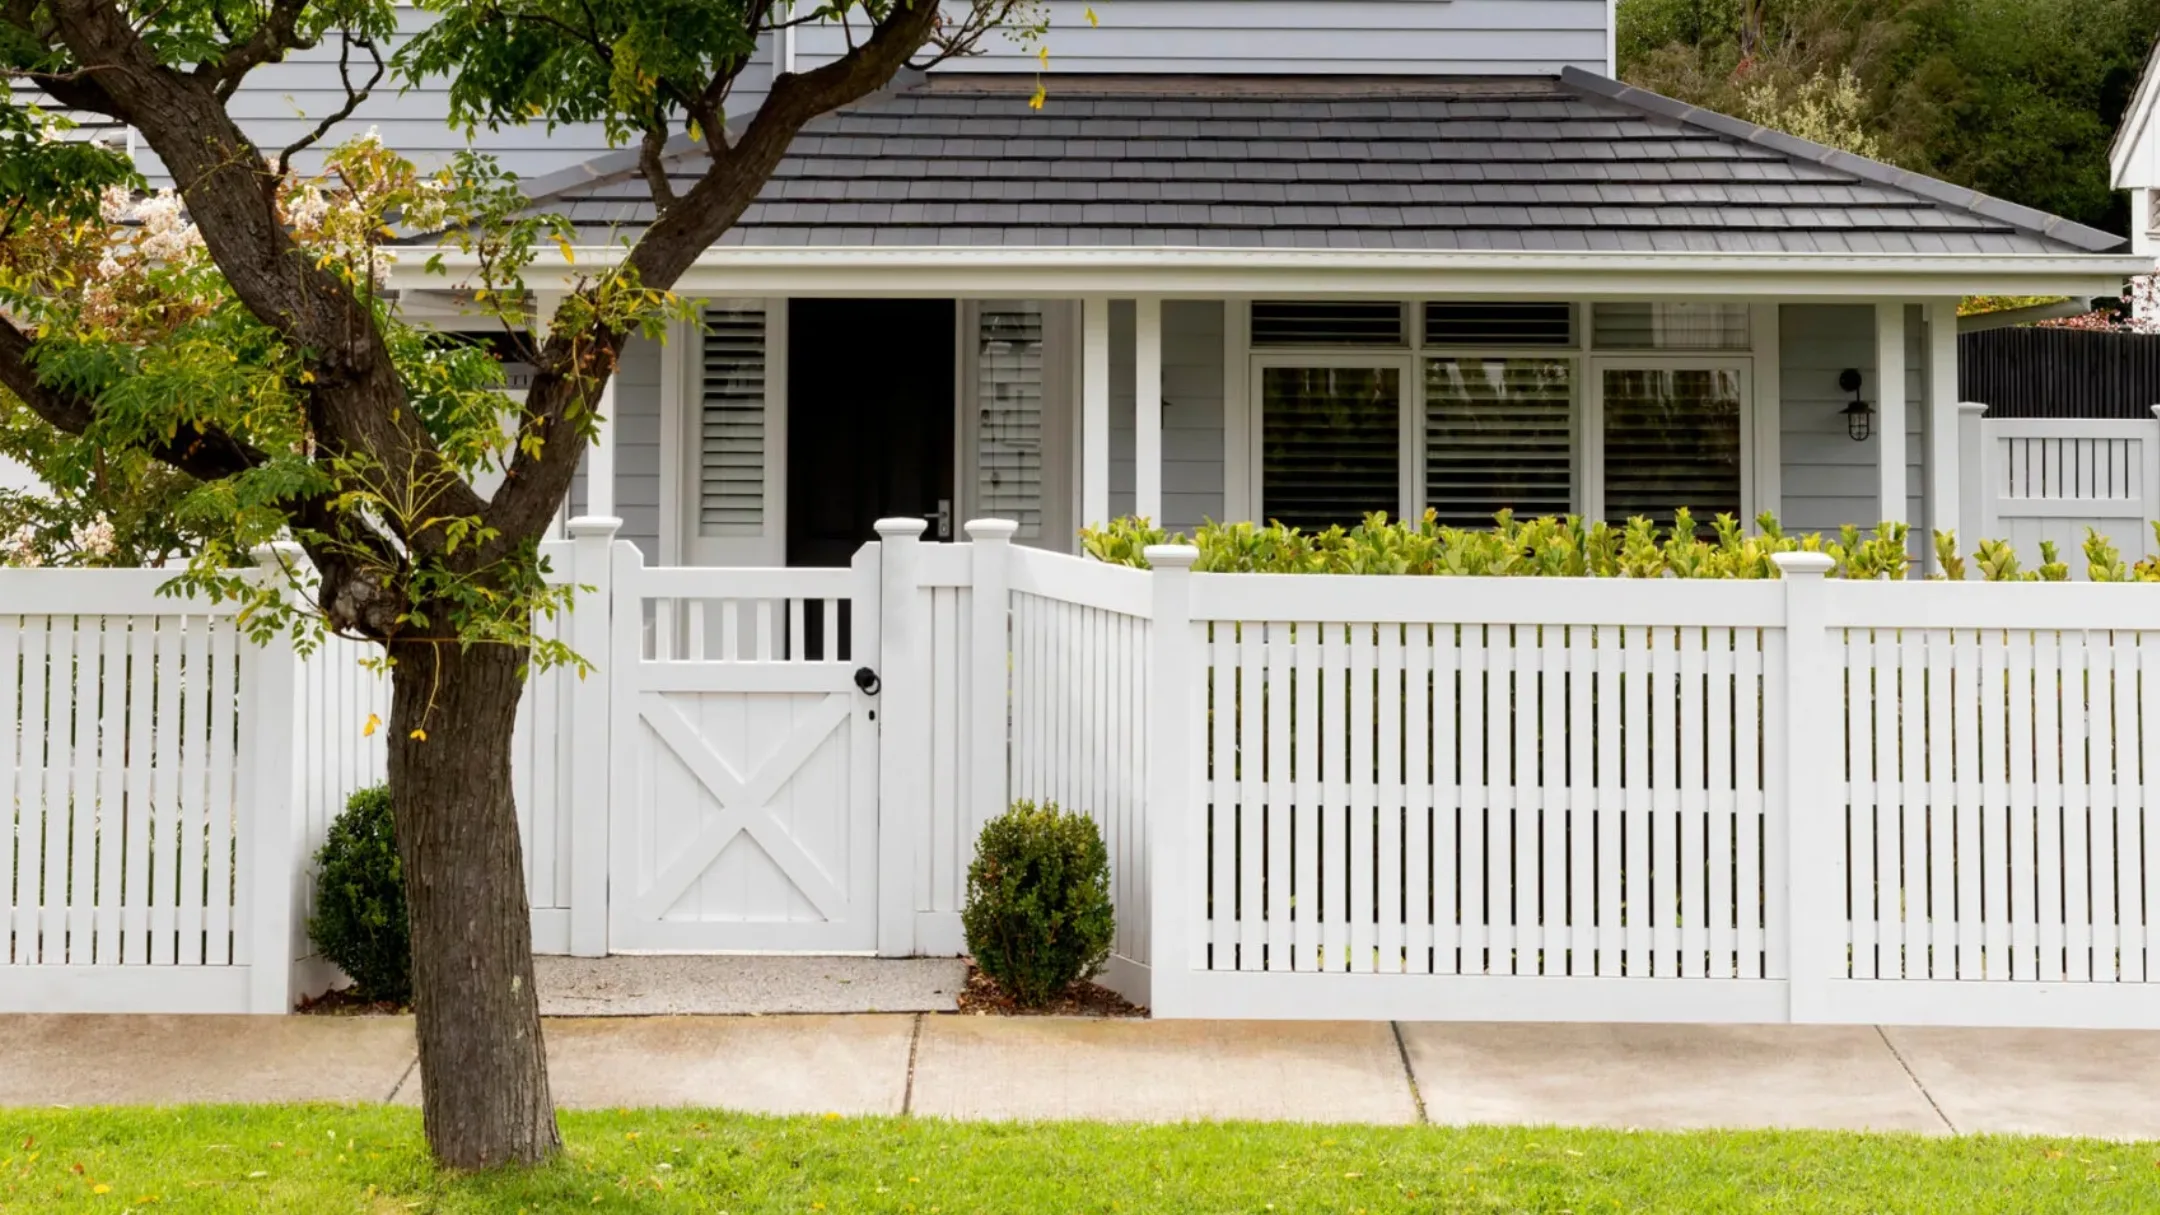
“Recreating this classic front-yard look requires a few key investments.”
Here’s a rough breakdown for a 40-foot section:Fencing: 5 wood picket fence panels (4’x8′) – $400-$600Gate: 1 matching wood picket gate – $100-$150Hardware: Hinges, latch, screws – $50-$75Paint: High-quality exterior white paint & primer – $100Plants: 10-12 small boxwood shrubs – $300-$450TOTAL: $950 – $1,375Budget alternative: Use fewer, more established shrubs and start with a smaller fence section. You can get a similar vibe for around $500.
10. Use a Red Wooden Lattice Fence for Structure
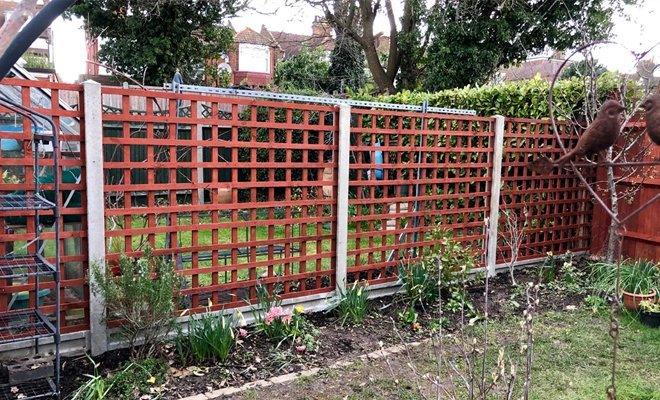
This functional garden fence is a great example of mixed-material style math. It’s roughly 60% warm, rustic wood + 40% cool, industrial concrete. The reddish-brown stain on the lattice provides a natural, earthy feel, perfect for a garden setting. The sturdy, light grey concrete posts ground the entire structure, adding a touch of modernism and ensuring longevity. The contrast between the open, airy lattice and the solid, heavy posts is what makes it visually interesting. This balance keeps it from looking either too flimsy or too brutalist.
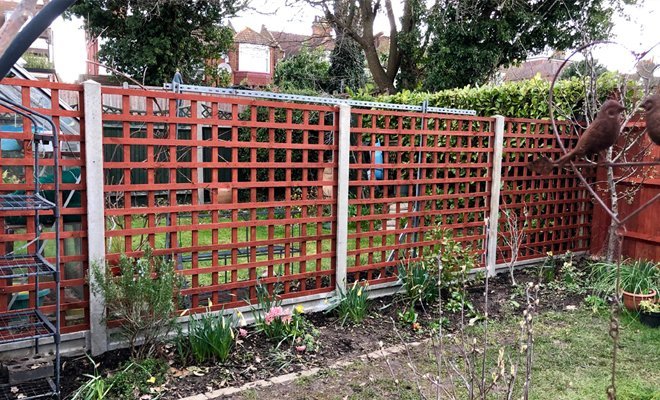
“A lattice fence is fantastic for supporting climbing plants, but it offers very little privacy.”
This is not the choice for you if your goal is to screen out your neighbors or block an unsightly view. It’s a ‘boundary marker’ fence, not a ‘privacy screen’ fence. Also, staining or painting a lattice fence is a notoriously tedious job. All those little holes mean you’ll spend more time dealing with drips than actually painting. A paint sprayer is highly recommended for this job.
11. Build a Raised Garden Bed with an Integrated Trellis
The integrated trellis is what elevates this from a simple planter box to a smart, space-saving garden solution. By building the vertical support directly into the bed, you create a seamless and sturdy structure for climbing plants like tomatoes, cucumbers, or beans. It maximizes your growing potential in a small footprint, drawing the eye upward and creating a lush green wall. This one feature turns a basic box into a highly productive piece of garden furniture. This is a much more structural solution than the pallet garden in Idea #6.
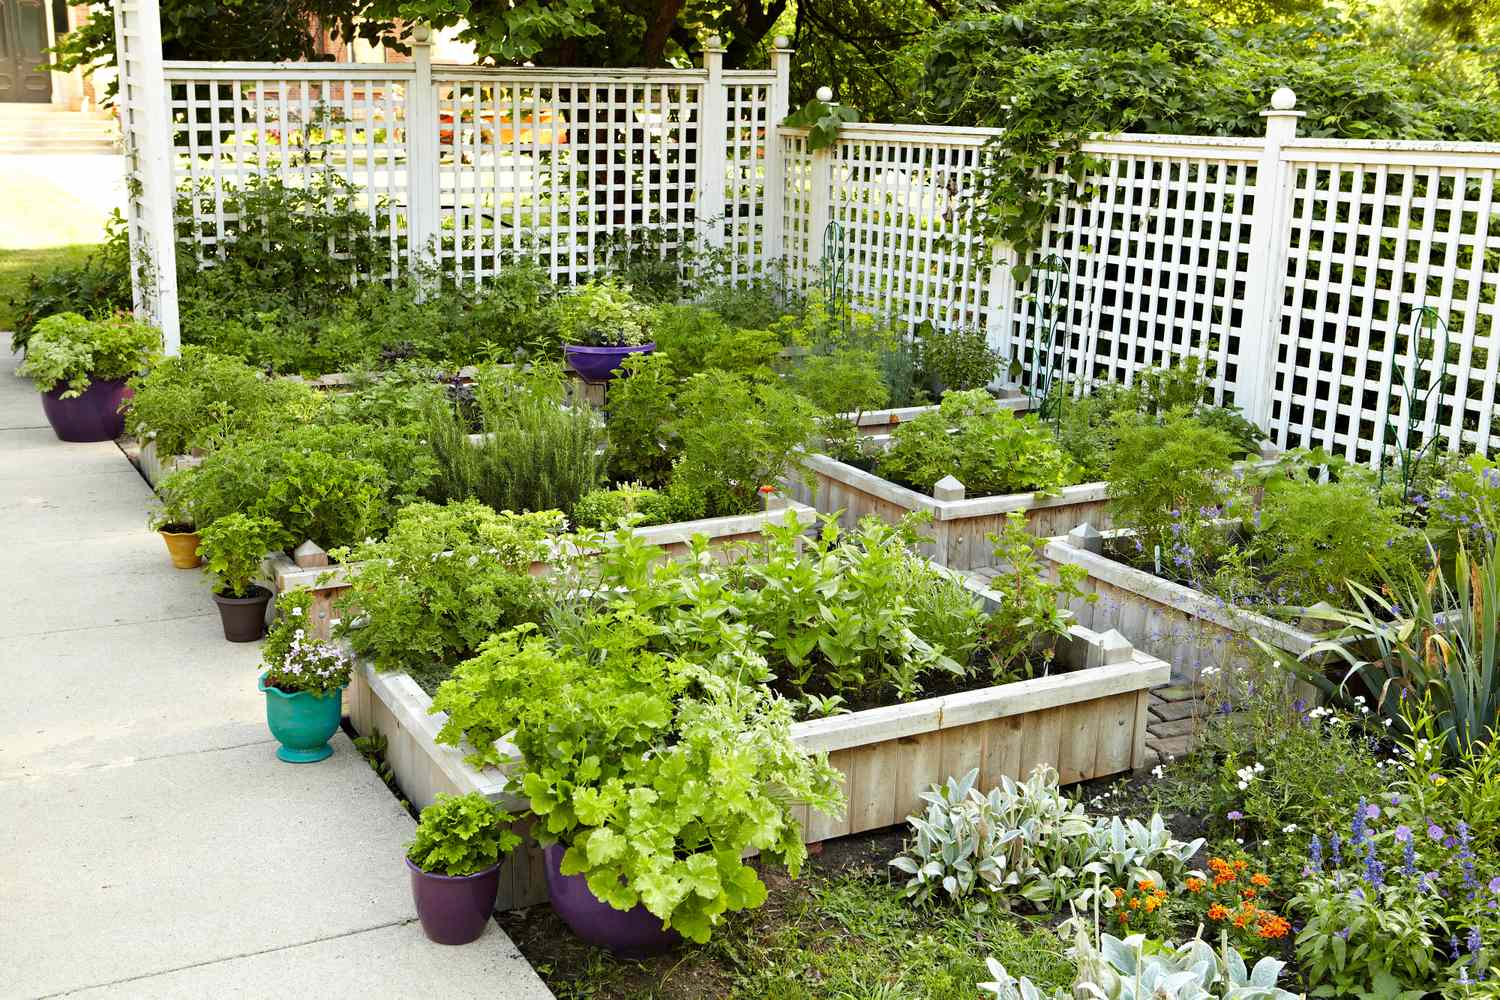
“When you build or buy a planter with an integrated trellis, make sure the trellis panel is on the north side of the box (if you’re in the Northern Hemisphere).”
This ensures that the tall, climbing plants won’t cast a shadow over the smaller plants in the rest of the bed. This single bit of planning can be the difference between a thriving, productive garden bed and one where half the plants are struggling for light. Always orient your garden for maximum sun exposure.
12. Create a Serene Corridor with a Bamboo Screen Fence
This narrow space feels like a tranquil escape, not a cramped alleyway, for two key reasons: texture and repetition. The vertical lines of the bamboo fence are repeated in the foliage of the tall, slender potted plants, creating a cohesive, upward-focused rhythm that makes the space feel taller. The combination of different textures—the smooth grey stone pavers, the organic bamboo, the feathery ferns, the smooth terracotta—adds a rich sensory experience that makes the walk down the path engaging and calming. It’s a masterclass in using materials to craft a mood.
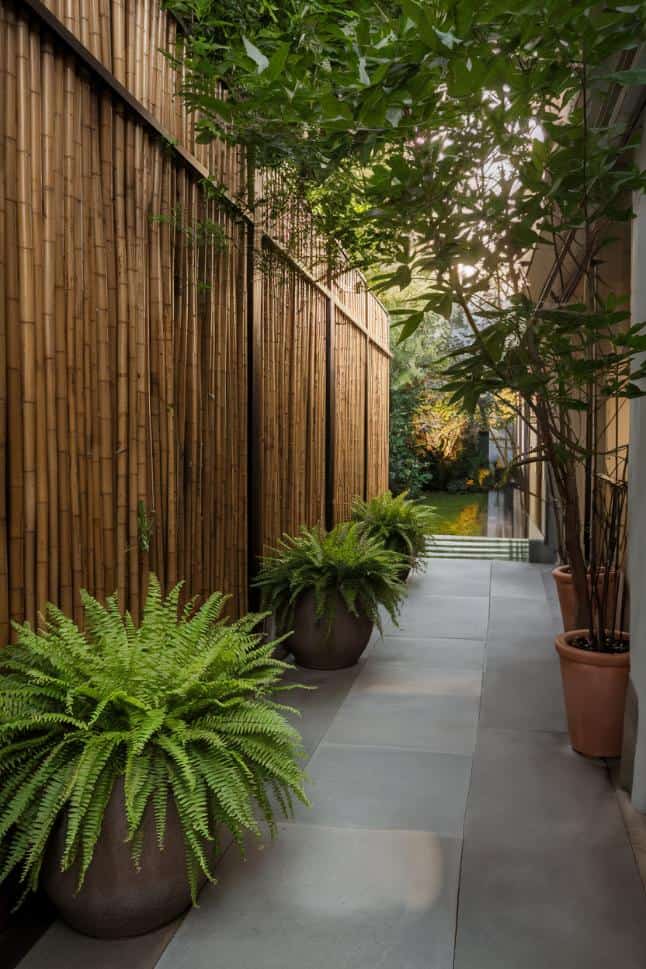
“The move towards creating ‘garden rooms’ and maximizing every inch of outdoor space is huge right now, and this is a perfect example.”
As yards get smaller, people are looking for clever ways to create privacy and a sense of lushness in narrow side yards. Bamboo screening, a key element of Japandi design, offers a warm, natural alternative to traditional wood or vinyl fences. It feels both modern and timeless, which is why you’re seeing it all over Pinterest as a go-to solution for awkward outdoor spaces.
13. A Black Metal Fence with a White Flowering Border
The formula for this crisp, elegant look is surprisingly simple: 70% sharp structure + 30% soft chaos. The black metal fence provides the strong, non-negotiable structure with its repeating vertical lines and dark, solid color. It’s formal and disciplined. The magic happens when that structure is contrasted with the soft, billowy, and slightly wild border of white flowers. The plants are allowed to spill over and through the base of the fence, softening its hard edges and creating a beautiful tension between the man-made and the natural.
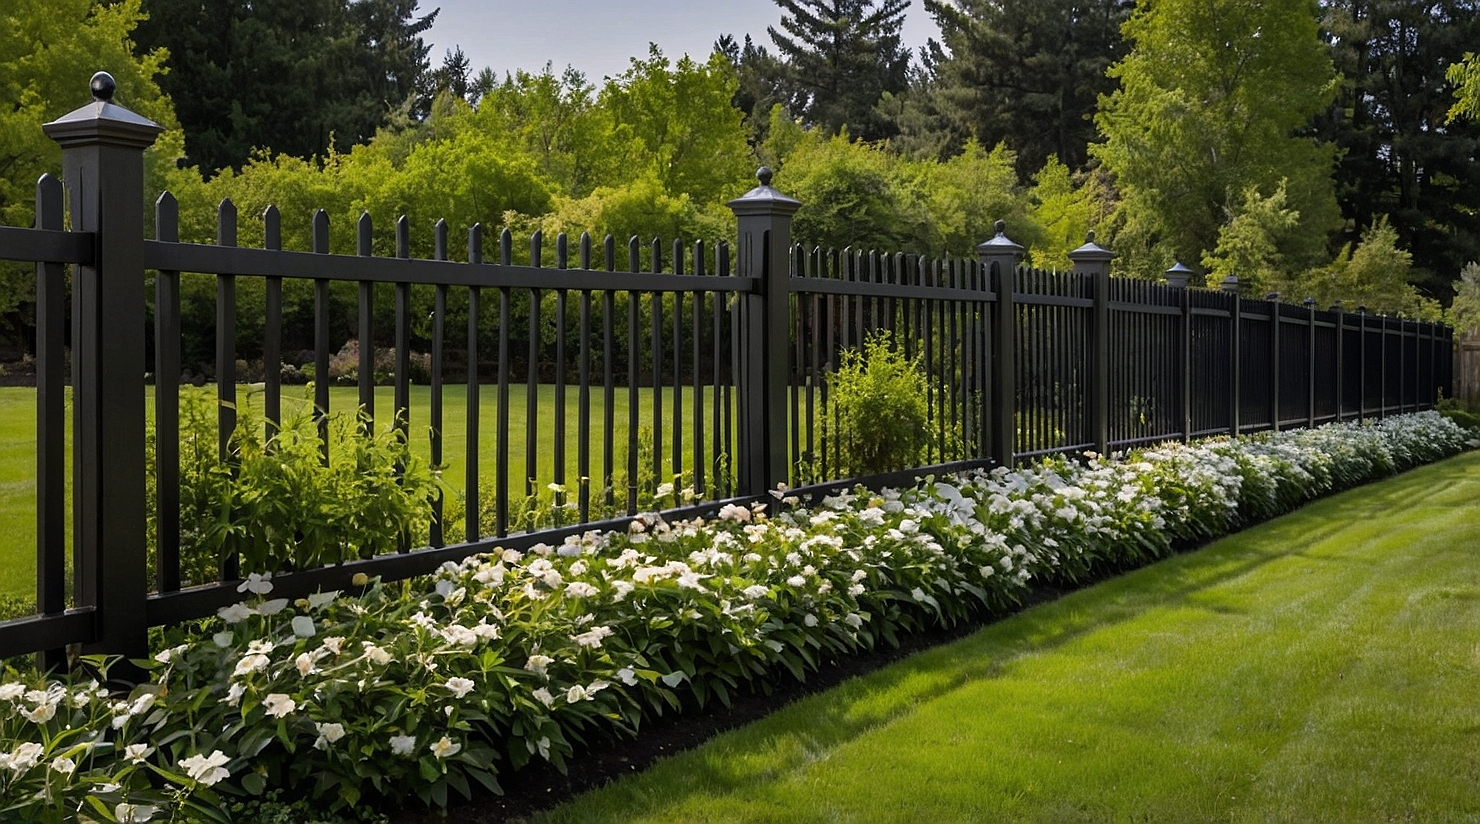
“To keep this border looking lush and full from spring through fall, you’ll need a mix of plants with different bloom times, which requires some planning.”
That dense planting also means you’ll need to be vigilant about weeding, especially in the first few years as the plants fill in. And to maintain that sharp contrast, the lawn edge along the flower bed will need to be trimmed every single time you mow. It’s a higher-maintenance look than just letting the grass grow up to the fence line.
14. Repurpose a Wheelbarrow into a Charming Flower Planter
that makes this idea work is the sense of effortless abundance. The key is to overfill the wheelbarrow so that plants are practically spilling out over the sides. This isn’t the place for timid, spaced-out planting. You want a dense, cottage-garden chaos of colors and textures that looks like it just happened to spring up. The rustic, weathered wheelbarrow serves as the perfect, unpretentious vessel for this explosion of life, grounding the vibrant flowers with its earthy, worn-in character.
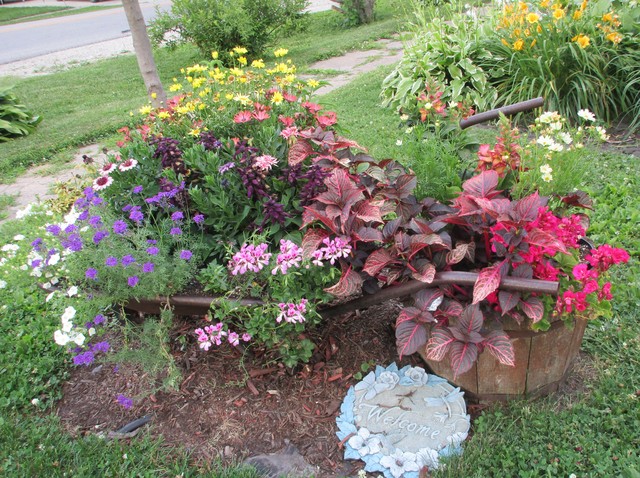
“Turning an old wheelbarrow into a planter is a quick and satisfying project.”
(Time: 1 hour, Cost: $10 for drill bit and gravel).First, ensure your wheelbarrow is where you want it to be permanently. Once filled with soil, it will be extremely heavy.Drill for drainage. Using a metal or wood drill bit, drill 5-7 half-inch holes in the bottom of the wheelbarrow basin. This step is non-negotiable for plant health.Add a drainage layer. Pour a 2-inch layer of gravel or broken terracotta pots at the bottom to keep the drainage holes from clogging with soil.Fill with a quality potting mix, not heavy garden soil. Potting mix is lighter and provides better aeration for container plants.Plant generously! Pack in your flowers and foliage, then water thoroughly.
15. Build a Pergola Lounge with Vibrant Green Cushions
Creating a cozy outdoor room like this is a significant project, but it’s a game-changer for a backyard. Here’s a potential cost breakdown:
-
- Structure: Dark wood pergola kit or custom build – $1,500 – $5,000+
- Furniture: Outdoor wicker sofa and two armchairs – $1,200 – $3,000
- Textiles: Lime-green cushions, pillows, jute rug – $400 – $800
- Decor: White faux deer head, trained vines, planters – $200 – $400
- TOTAL: $3,300 – $9,200+
Budget alternative: A simple sail shade instead of a pergola and secondhand furniture can achieve a similar lounge feel for under $1,000.
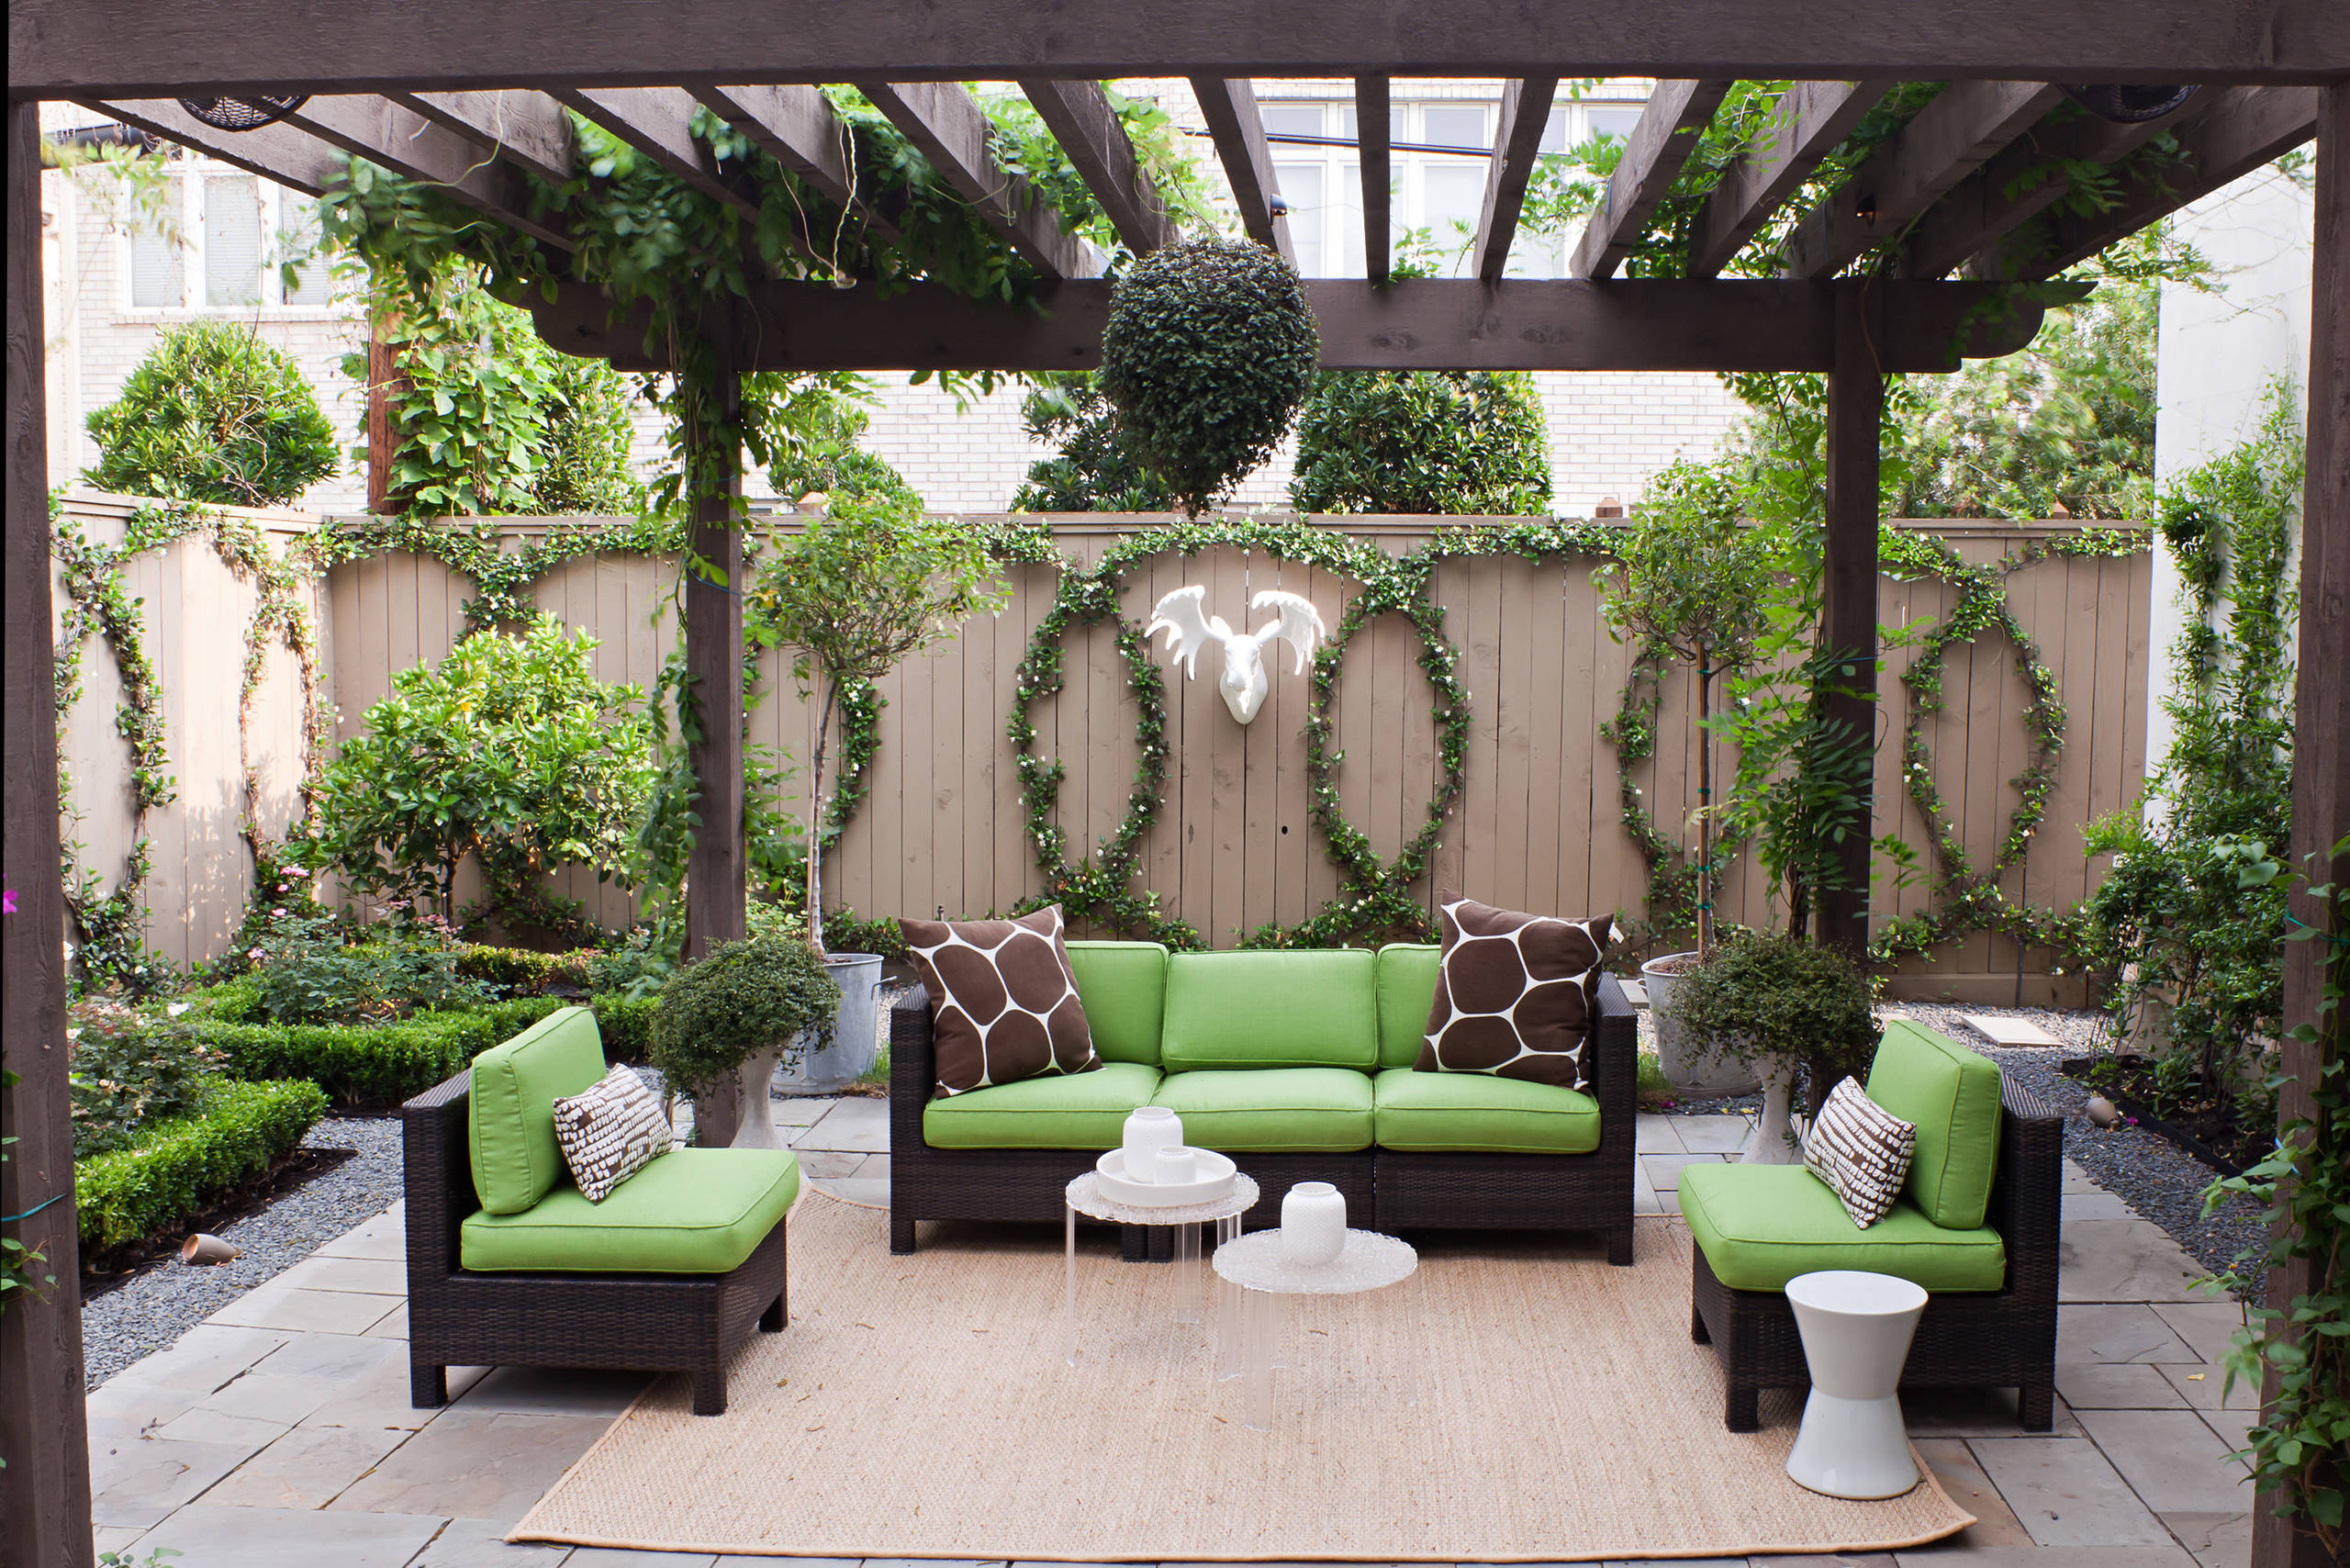
“That vibrant, lime-green color is stunning, but bright colors like that are prone to fading in direct sunlight.”
If your pergola doesn’t completely shade the seating area for most of the day, you will see fading within a season or two. To slow this down, invest in cushions made from solution-dyed acrylic fabrics (like Sunbrella) which are much more fade-resistant, though more expensive. At a minimum, plan to spray them with a UV protectant spray at the beginning of each season and store them indoors when not in use.
16. Style a Stone Planter Box with a Teal Lantern
This patio corner feels so inviting because of its smart use of color and texture. The dominant palette is earthy and neutral—brown stone, tan siding, gray pavers. This creates a calm, cohesive base. The magic comes from the single pop of saturated color: the teal metal lantern. Teal is the complementary color to the orange/brown tones in the stone and siding, which makes it visually pop. This small, inexpensive accessory does a ton of work, livening up the entire scene and acting as a deliberate, stylish focal point.
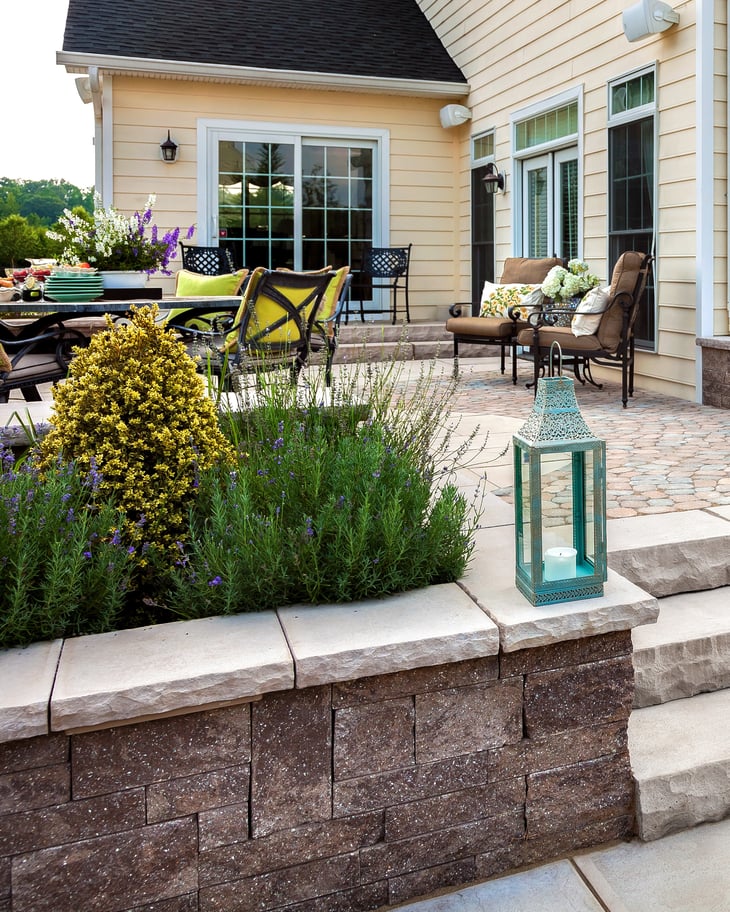
“When you have a large expanse of a single material, like this stone planter wall, break it up by creating small vignettes.”
Instead of scattering decor evenly, group items together. Here, the teal lantern, a small potted plant, and the change in level with the steps create a mini ‘moment’. This technique, called ‘clustering’, is what designers use to create points of interest. A group of three objects of varying heights is a classic, can’t-fail combination for styling any surface, indoors or out.
17. Install a Tall Vinyl Privacy Fence on a Slope
The concrete retaining wall is the unsung hero of this entire installation. Dealing with a slope is a major challenge, and this low wall is the perfect solution. It does two critical things: it creates a level base for the fence to sit on, ensuring a clean, professional-looking top line, and it neatly defines the edge of the sloped garden bed. Without it, the fence would have to be ‘stepped’ awkwardly down the hill, and the mulch and soil would constantly be washing away. This small bit of hardscaping makes everything else look better.
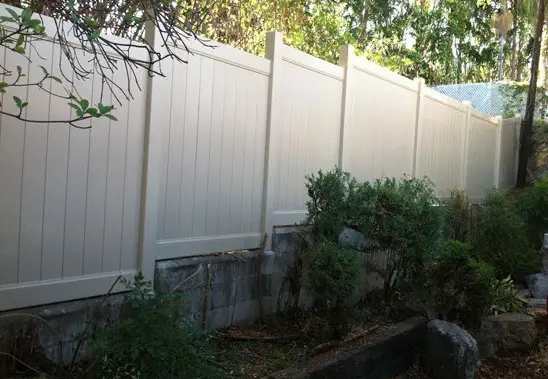
“This combination of a tall privacy fence and a retaining wall is specifically for yards with a noticeable slope or grade change.”
A 6-foot fence like this is ideal for providing privacy in suburban lots where houses are close together. The retaining wall can be anywhere from 6 inches to 2 feet high, depending on the severity of the slope. For slopes greater than 2-3 feet over the fence line, you may need a taller, professionally engineered retaining wall, which is a much larger and more expensive project.
18. Set Up an Organized Garden with Weathered Wood Beds
The appeal of this garden lies in its satisfying sense of order. The design works because it uses a simple grid system. The identical weathered wood raised beds act as repeating modules, creating a clean, geometric layout that is easy for the eye to understand. The gravel pathways reinforce this grid, clearly defining the walking areas and separating the planting zones. This structure brings a sense of calm and control to the potential chaos of a garden, making it feel productive and manageable rather than wild and overgrown.
“Planning a multi-bed kitchen garden?”
Don’t forget the paths! Here’s a quick pre-build checklist for your layout:Path Width: Is your main path wide enough for a wheelbarrow? Aim for a minimum of 3 feet for main arteries. Smaller paths between beds can be 18-24 inches.Material Choice: Have you considered your footwear? Gravel is cheap and drains well but can get into shoes. Mulch is soft but needs topping up. Pavers are clean but expensive.Weed Barrier: Did you lay down landscape fabric or a thick layer of cardboard under your path material? If not, you’ll be fighting weeds in your walkways all season.Edging: Will you use edging to keep your path material from spilling into the garden beds? Metal or stone edging creates a crisp, low-maintenance border.
19. Create a Dramatic Accent with a Mirrored Garden Fence
To get this diamond trellis pattern with your ivy, use a simple grid of nails and fishing line. Mark out your diamond pattern on the fence with a pencil. Hammer in small, rust-proof nails at each intersection point. Then, string clear fishing line tightly between the nails. As your ivy grows, gently train the new shoots to follow the fishing line, tying them loosely with garden twine. Once the ivy is established, you can remove the twine, and it will continue to follow the pattern you’ve created. It’s a low-cost, high-impact technique.
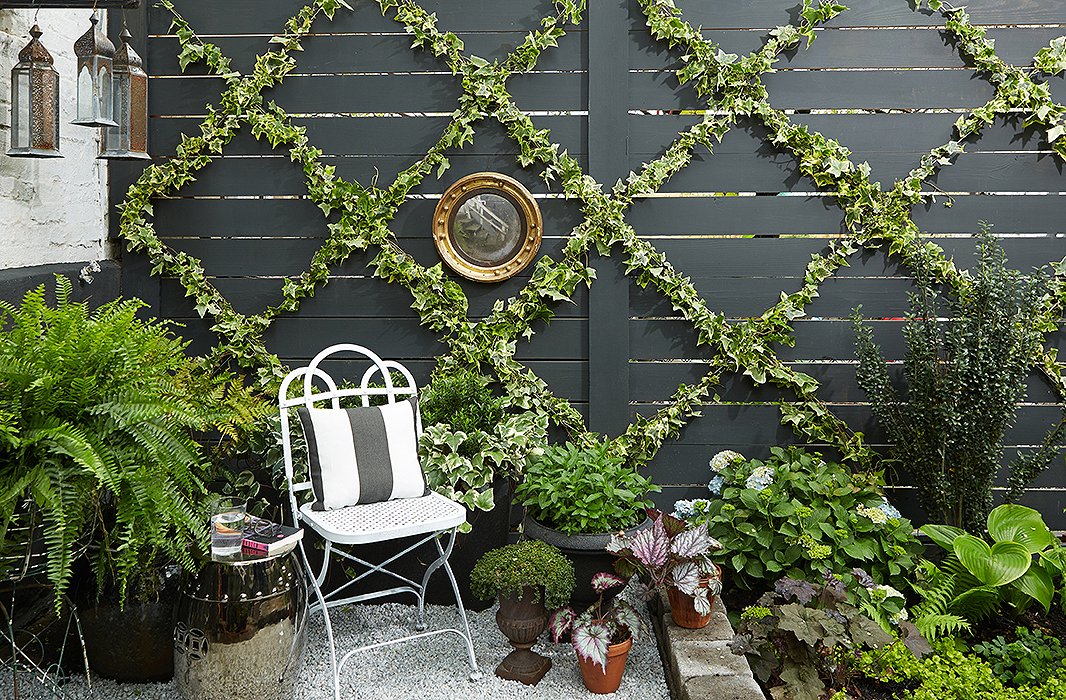
“A mirror can be a magical addition to a garden, but there’s a serious safety consideration.”
Never use a standard flat mirror outdoors, especially in a sunny spot. It can concentrate sunlight and create a fire hazard, like a magnifying glass. Instead, use a convex mirror (the kind that bows outward), which scatters light rather than focusing it. Also, be mindful of placement to avoid creating a collision hazard for birds. Placing it near busy areas with lots of human activity, like next to this chair, can help deter them.
20. A Cheerful Picket Fence with Purple and Yellow Flowers
This scene is so joyful because of its bold and confident color palette. The combination of purple, yellow-green, and light blue is a classic ‘split-complementary’ color scheme (a color plus the two colors on either side of its complement). The tall purple flower spikes create a strong vertical element, while the vibrant yellow-green shrubs provide a contrasting texture and shape. The crisp white of the picket fence acts as a neutral frame, allowing all these colors to sing without competing. It’s a lesson in how a little color theory can create a lot of curb appeal.
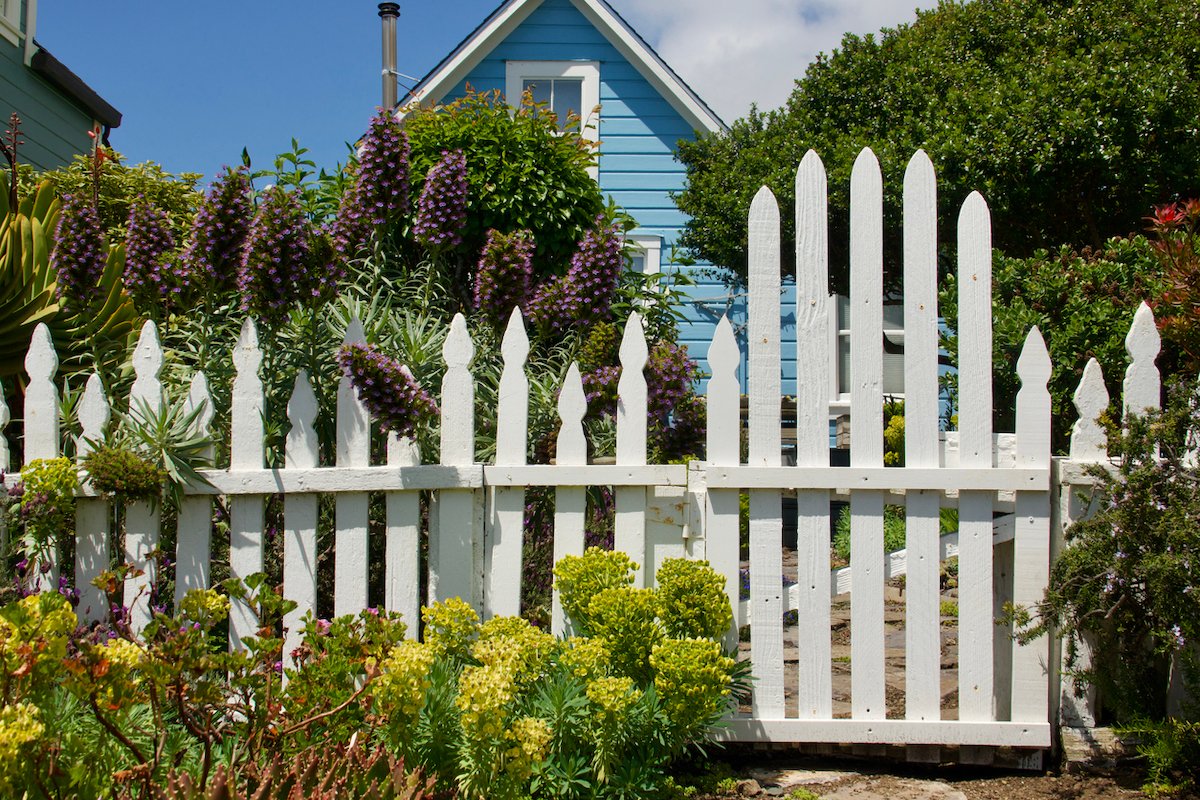
“A wooden picket fence and gate can run you several hundred dollars.”
For a super cheap alternative, you can create the *illusion* of a fence with a simple border. Get a few bundles of inexpensive wooden garden stakes from a hardware store ($20). Paint them white. Line them up a foot apart along your garden edge, pushing them firmly into the soil. Then, run a simple white rope or chain between them. It won’t keep a dog in, but for about $50, it gives you that charming, cottage-style boundary line.
21. A Lush Garden with Raised Beds and a Winding Gravel Path
that gives this garden its serene, naturalistic feel is the curved gravel path. While the raised beds and deck introduce straight lines and right angles, the gentle arc of the path breaks up that geometry. It encourages a slower, more meandering journey through the space, creating a sense of discovery as it winds around the plantings. If this path were a straight line, the garden would feel much more rigid and formal. The curve is what makes it feel like a peaceful retreat. A similar effect is used in Idea #7 with the curved flower beds.
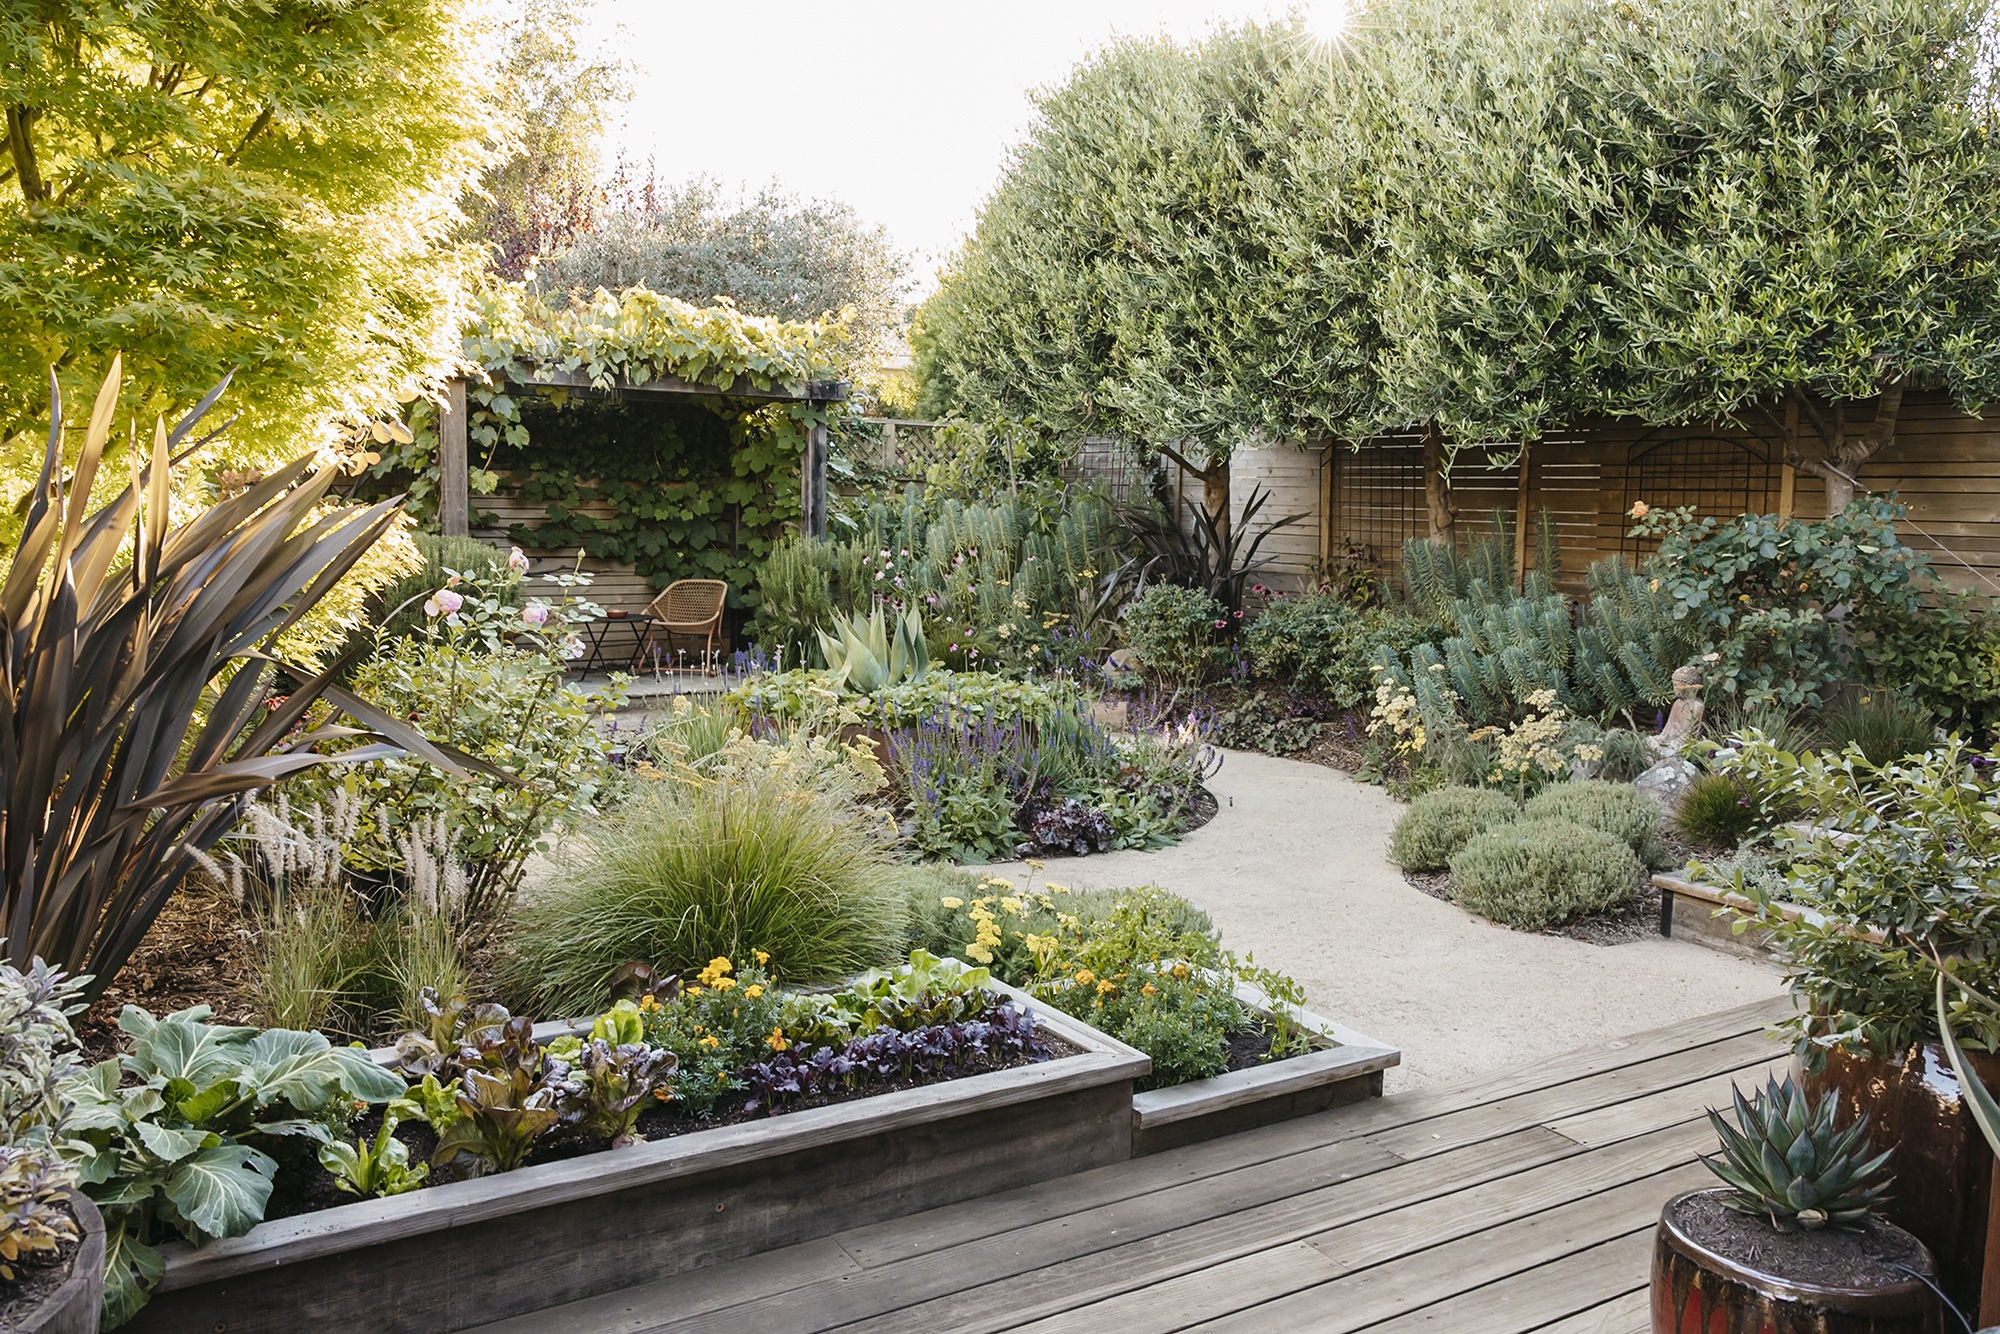
“This layered, multi-zone design with a deck, path, and multiple beds works best in a medium to large yard, at least 40-50 feet deep.”
You need enough space to allow the path to make a meaningful curve and to have distinct planting zones that don’t feel crammed together. In a smaller yard, trying to fit all these elements in can make the space feel busy and fragmented. For a smaller space (under 25 feet deep), focus on one or two key elements, like the raised beds from Idea #4.
22. Terraced Landscaping with Stacked Gray Stone Walls
Building a low, dry-stack stone retaining wall (under 2 feet) is a manageable DIY project. (Time: One weekend, Cost: $200-$500 for a 15-foot wall).
-
-
- Dig a trench. Your trench should be about 6 inches deep and 1.5 times the width of your stones.
- Create a level base. Fill the trench with 3-4 inches of paver base or gravel and tamp it down firmly until it’s level. This is the most important step for a stable wall.
- Lay the first course. Set your largest, flattest stones for the base course, wiggling them into the gravel until they are solid and don’t rock.
- Stack subsequent courses. Overlap the joints like you would with bricks. For stability, slightly angle the wall back into the hillside (this is called ‘batter’).
- Backfill as you go. Shovel soil or gravel behind the wall as you build each course to lock it in place.
-
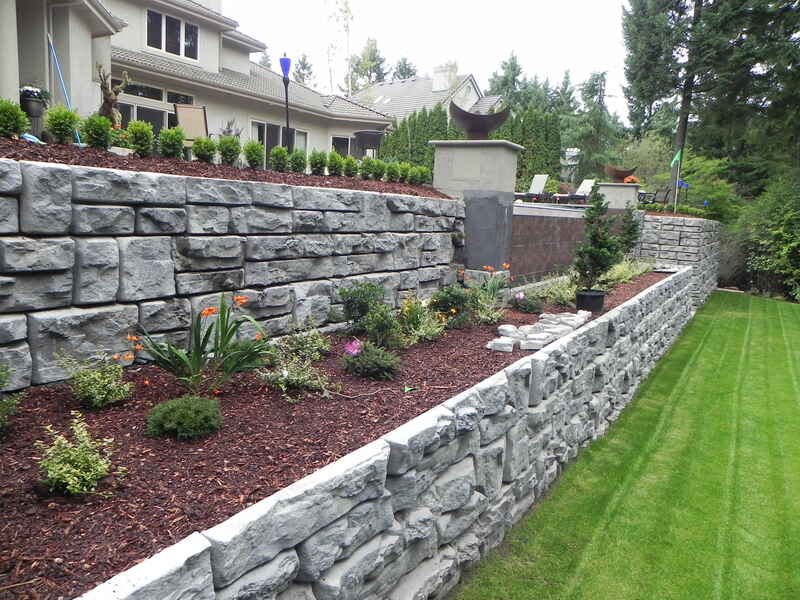
“While stacked stone walls look beautifully natural, they can be a haven for weeds.”
Wind blows seeds into all those little crevices, and they can be a real pain to remove without dislodging the stones. Your best defense is prevention: use a pre-emergent herbicide in early spring. For weeds that do pop up, a targeted weed torch or a careful application of boiling water is often more effective and less disruptive than pulling. Also, inspect the wall each spring for any stones that may have shifted over the winter and reseat them.
23. A Backyard Oasis with a Hanging Egg Chair and Fire Pit
The hanging egg chair continues its reign as the ‘it’ piece for outdoor spaces. Why? It perfectly taps into the current desire for our backyards to be wellness retreats. It’s not just a chair; it’s a personal cocoon. It offers a gentle, soothing motion and a semi-enclosed feeling that signals ‘me time’. As we continue to invest in our homes as sanctuaries, items like this that explicitly promote relaxation and disengagement are more popular than ever. It’s the ultimate symbol of a garden designed for lounging, not just looking at.
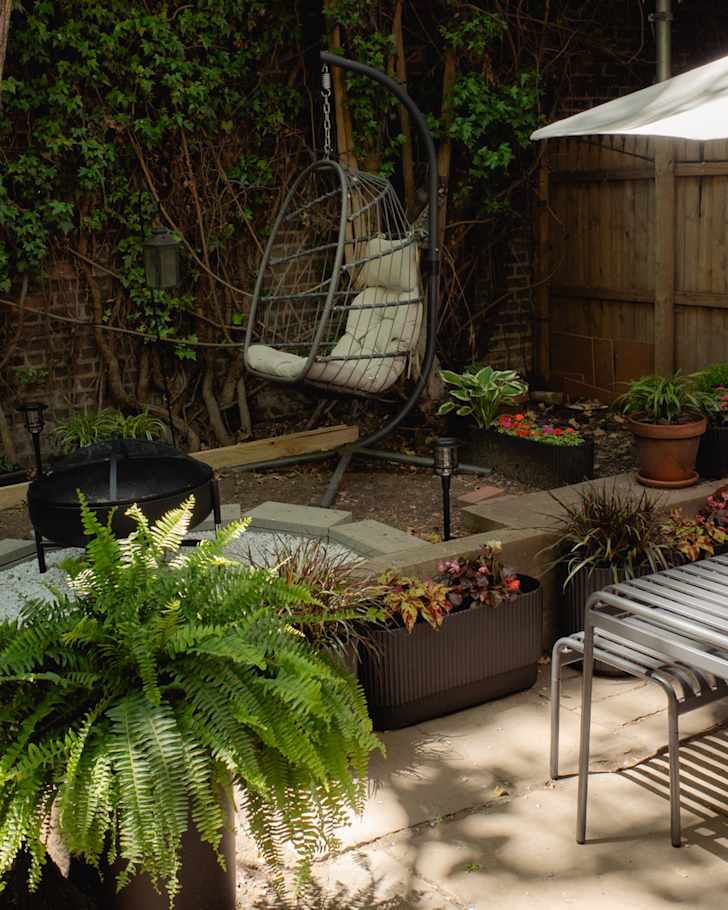
“This cozy, bohemian vibe is all about layering natural textures.”
The formula is: 40% lush green foliage (the ivy wall, the potted ferns) + 30% warm organic materials (the rattan of the chair, the wooden fence) + 20% hardscape (the stone pavers, the black metal fire pit) + 10% soft textiles (cushions and throws, not pictured but essential!). The key is that no single texture dominates; it’s the rich mix of smooth, rough, soft, and hard surfaces that makes the space feel so inviting and complete.
24. A Formal Garden Centered on a Classic Stone Fountain
The entire design of this formal garden hinges on one element: the central stone fountain. It acts as the primary focal point, the anchor around which everything else is organized. The pebble-paved walkways radiate from it, and the perfectly spherical boxwood shrubs are arranged in service to it. If you removed the fountain, the entire space would lose its purpose and grandeur. It provides not just visual interest but also the gentle sound of running water, which adds a crucial layer of tranquility to the serene, orderly landscape.
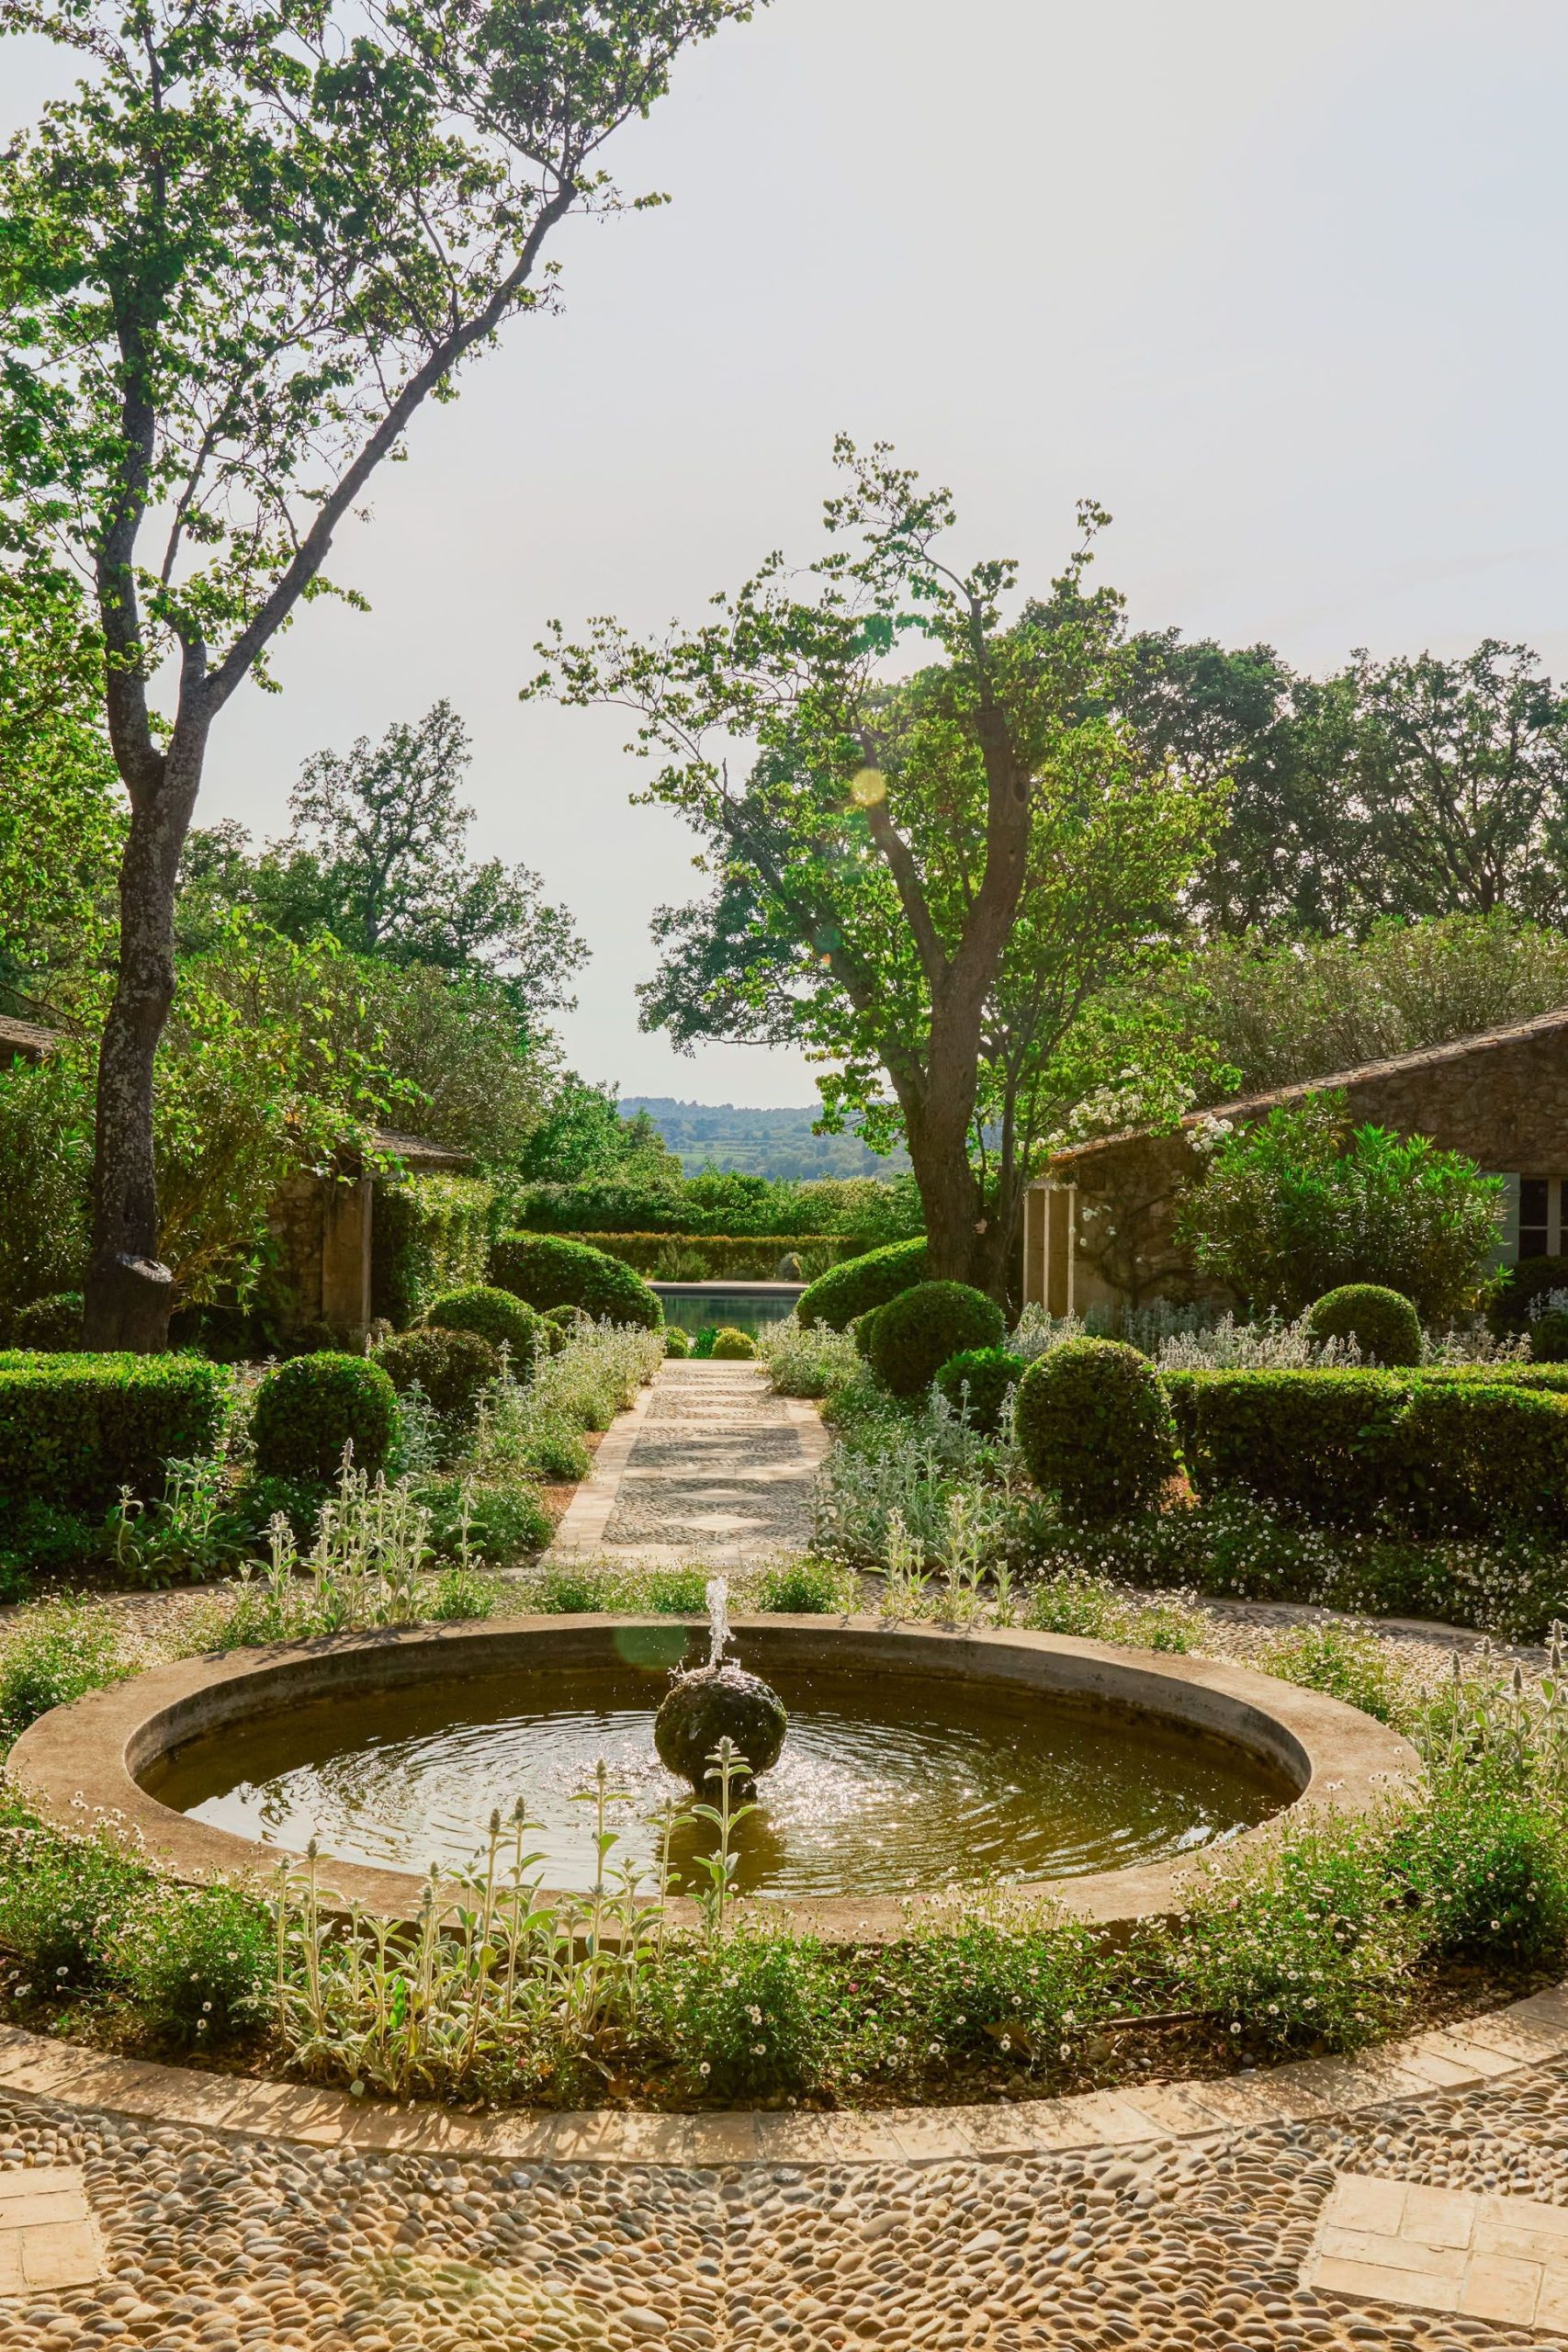
“Achieving this level of formal elegance is a serious investment in both money and maintenance.”
Here’s a look at the potential costs for a small formal garden area:Focal Point: Tiered stone fountain with pump – $1,500 – $6,000Hardscaping: Pebble walkway with professional installation (100 sq ft) – $2,000 – $4,000Plants: 12 mature, spherical boxwood shrubs – $1,200 – $2,500Lighting & Irrigation: Professional installation – $1,000 – $3,000TOTAL: $5,700 – $15,500+Budget alternative: A large, ornate urn planter can serve as a convincing focal point for under $500.
25. How to Factor in Your Garden’s Microclimates
Before you finalize any garden plan, spend a day mapping your yard’s microclimates. The spot against a south-facing brick wall might be a full climate zone warmer than a shady corner under a large maple tree. Take note of ‘hot spots’ that get baked in the afternoon sun, ‘wet spots’ where water puddles after it rains, and ‘wind tunnels’ between houses. Choosing plants that are specifically suited to these mini-environments, rather than just your overall climate zone, is the secret to a garden where everything thrives.
“It’s easy to fall in love with a plant at the nursery and buy it without knowing exactly where it will go.”
This is how you end up with sun-loving lavender languishing in the shade or a shade-loving hosta getting its leaves scorched in the afternoon sun. A plant that is ‘stressed’ because it’s in the wrong spot is also far more susceptible to pests and diseases. The ‘right plant, right place’ mantra is the most repeated piece of garden advice for a reason: it’s the absolute truth and ignoring it leads to frustration and wasted money.
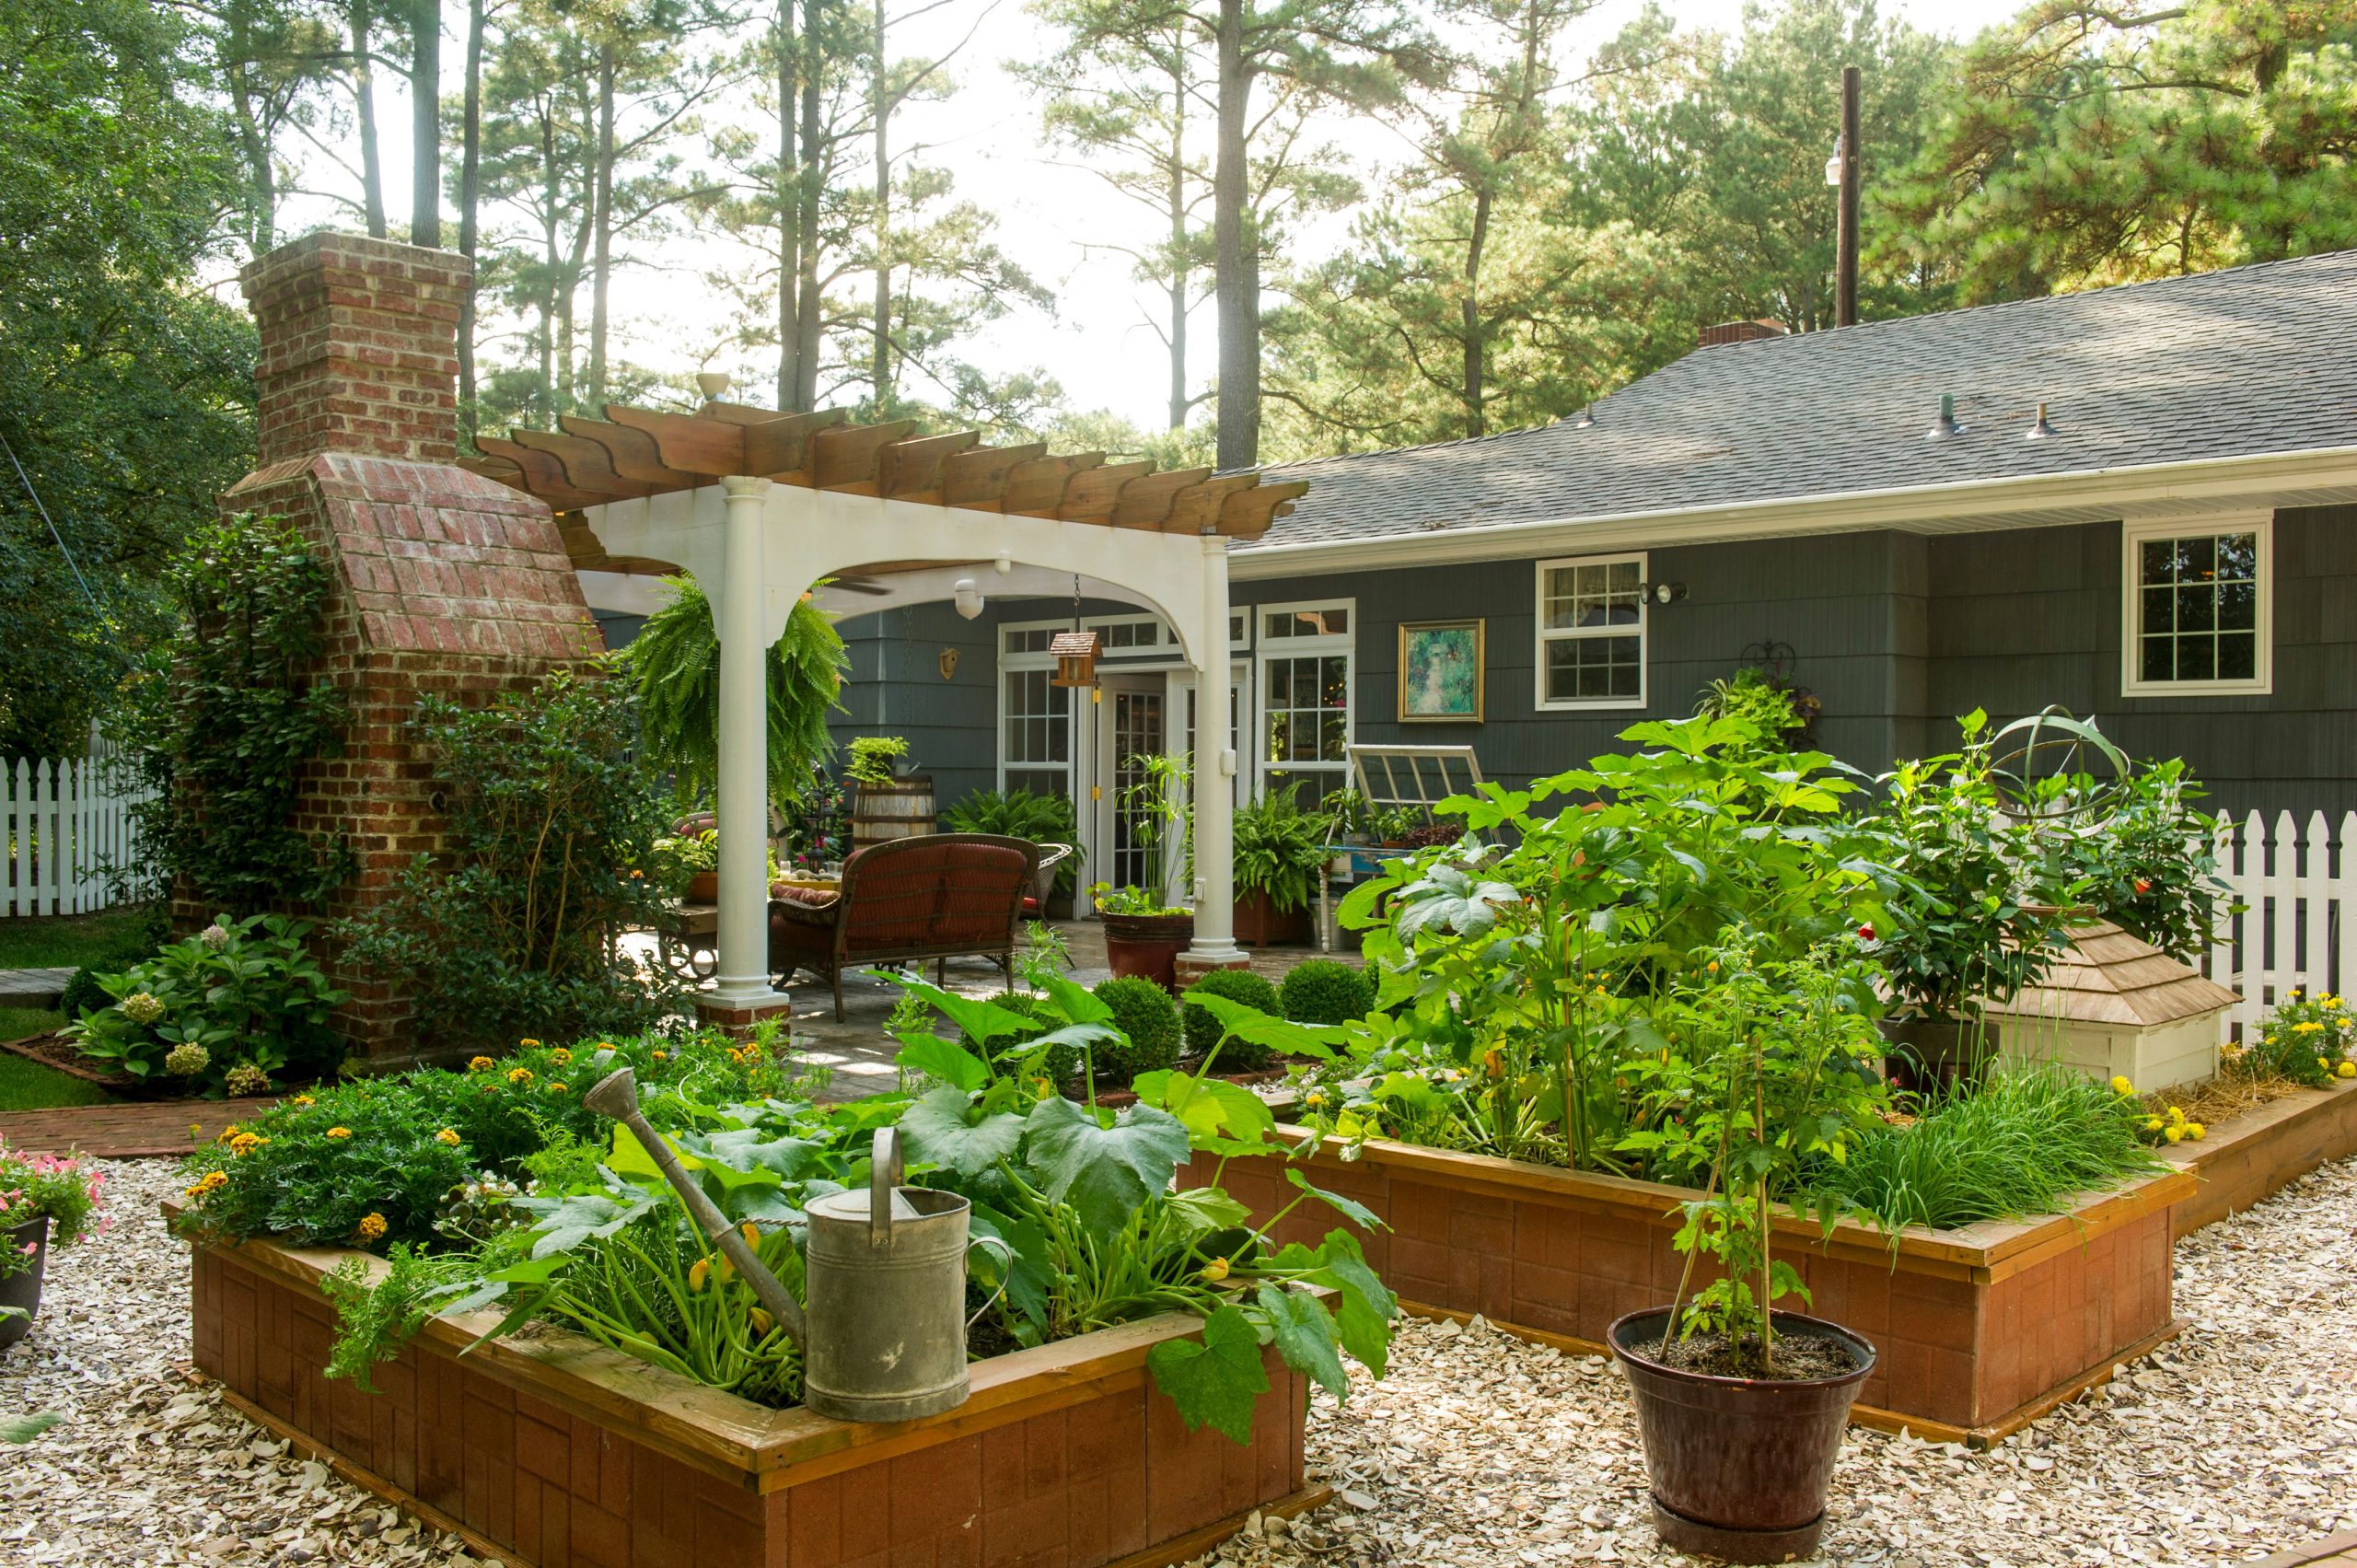
26. Productive Gardening with Custom Raised Planter Boxes
This setup looks so appealing because it combines the rustic charm of natural wood with a clean, organized layout. The raised planter boxes create a clear distinction between the growing areas and the walking paths, bringing order to the garden. This organization isn’t just aesthetic; it’s also highly functional. It makes tasks like weeding, watering, and harvesting much easier by concentrating the good soil and raising the plants to a more accessible height. The surrounding mulch keeps weeds down on the pathways, reinforcing the tidy, productive look.
“Custom-built wooden planters are fantastic, but you can get a similar organized look for much less.”
Check out farm supply stores for galvanized steel stock tanks. A 4-foot round tank might cost $100-$150 and requires zero assembly—just drill some drainage holes in the bottom, and you’re ready to plant. For an even cheaper option, look for large, sturdy plastic storage totes. A 30-gallon tote can be had for under $20. A few drainage holes and you’ve got a mini-raised bed.
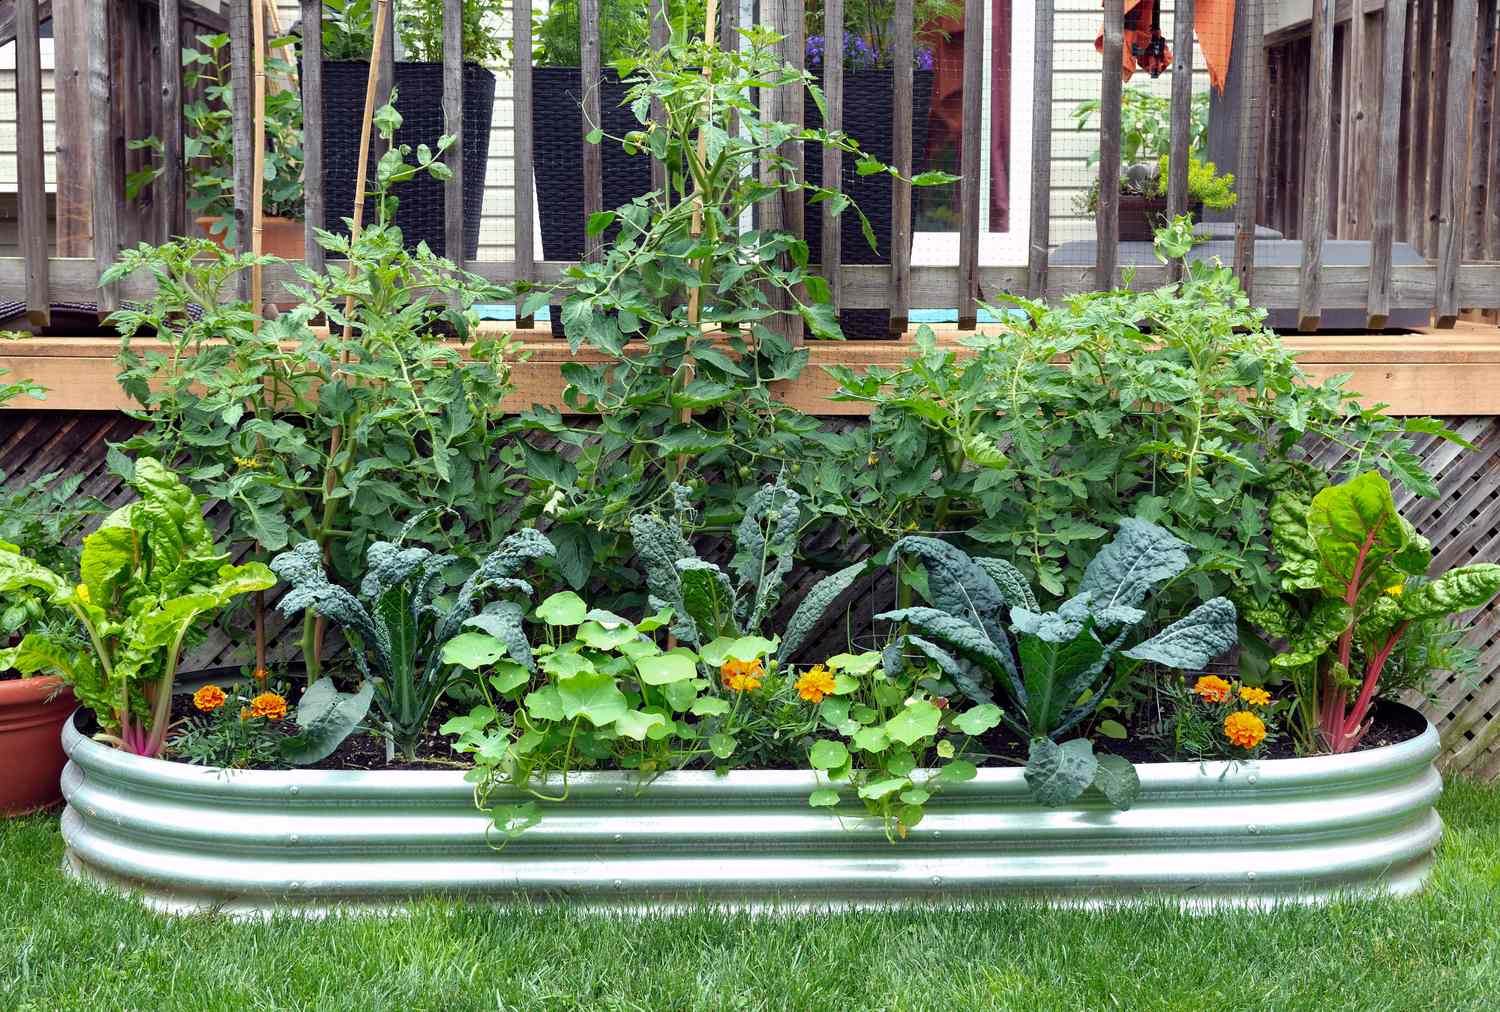
27. An L-Shaped Corrugated Metal Vegetable Bed
We’re seeing a big move towards using honest, industrial materials in garden design, and this corrugated metal bed is a prime example. For years, the go-to for raised beds was wood. But gardeners are realizing that materials like galvanized or Corten steel (like in Idea #30) offer incredible durability and a modern aesthetic. The clean lines and cool, gray tones of the metal provide a striking contrast to the vibrant green of the vegetables. It’s a look that says ‘I’m serious about my garden, but I also have great taste.’
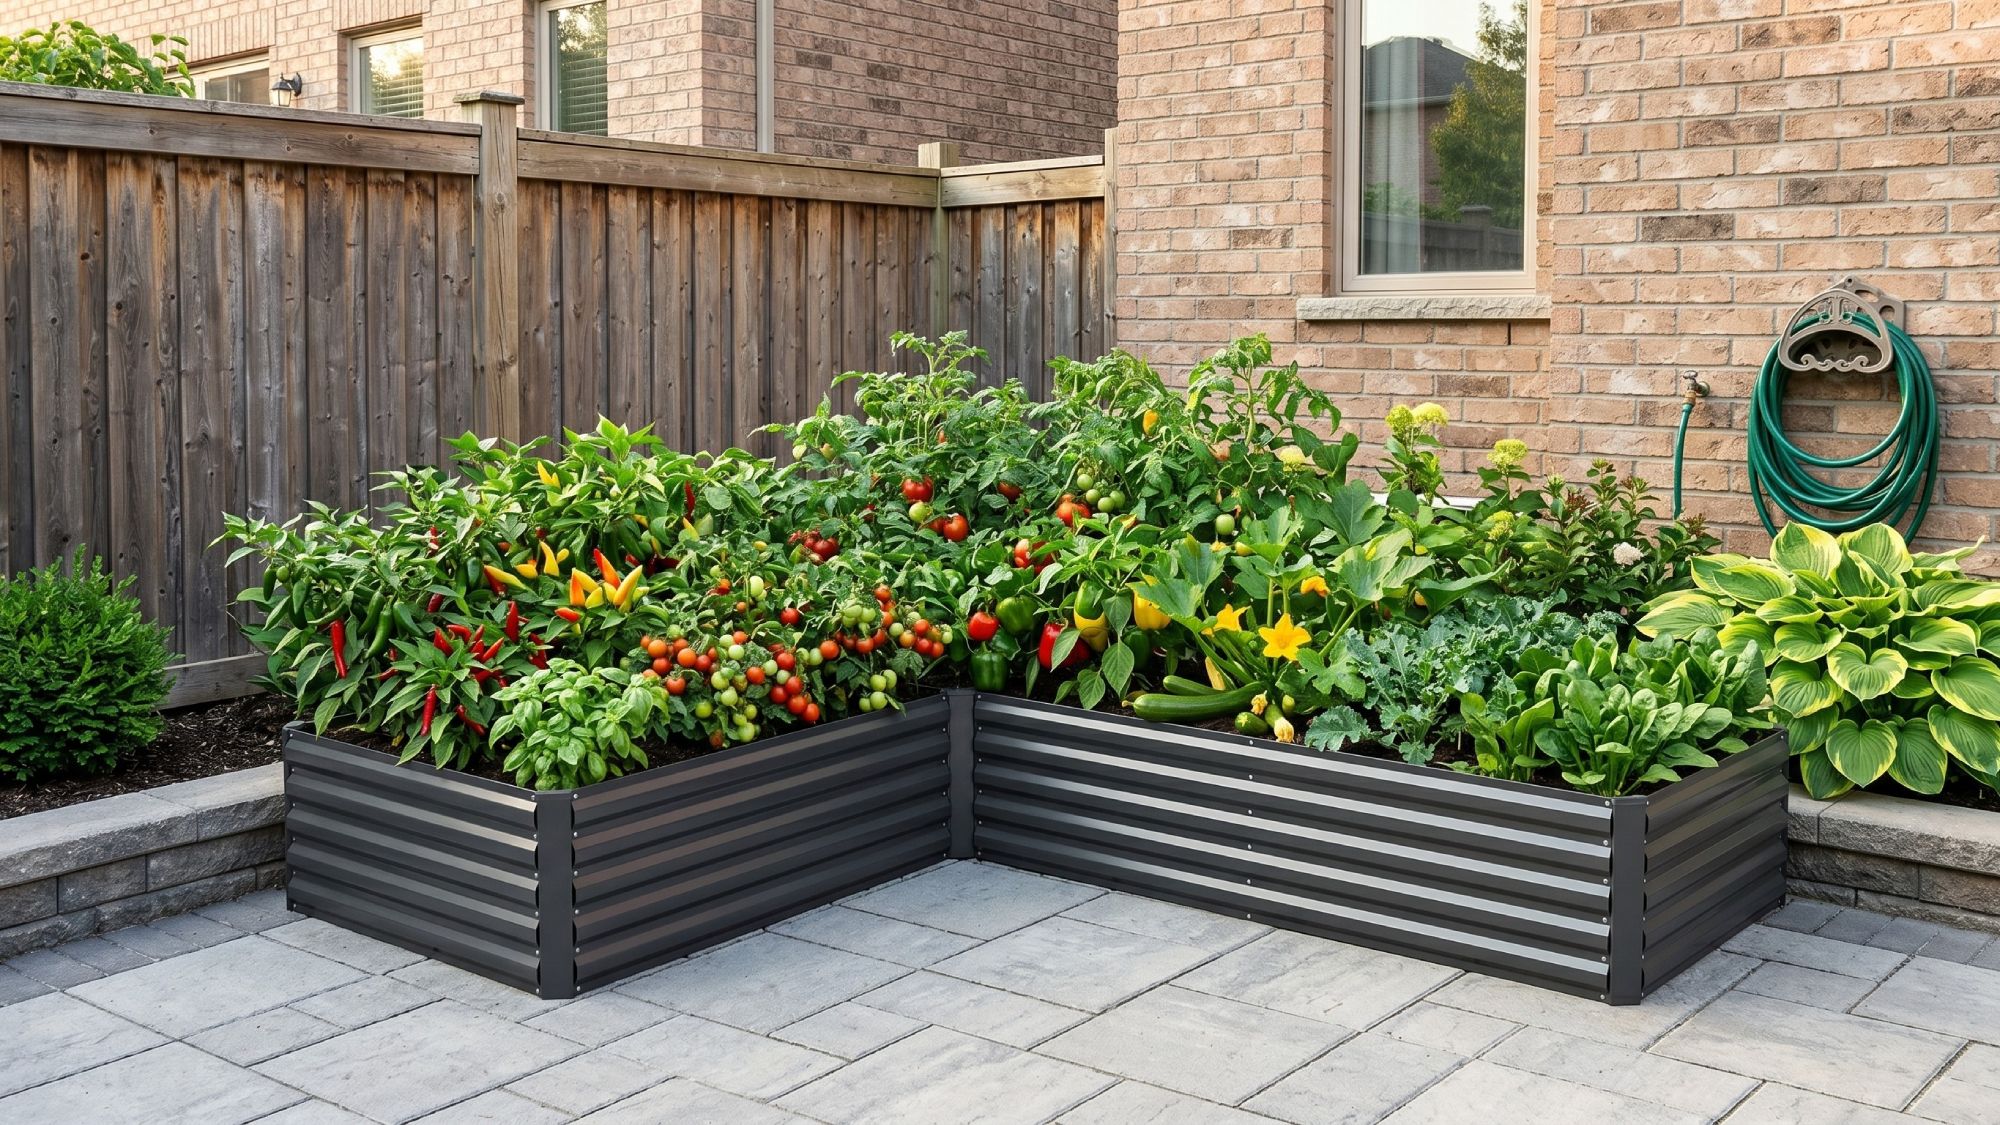
“When filling a deep raised bed like this, don’t waste money by filling the entire thing with expensive bagged garden soil.”
Use the ‘Hugelkultur’ method. Fill the bottom third of the bed with old logs, branches, and even cardboard. This organic matter will slowly break down over time, releasing nutrients and holding moisture. The middle third can be filled with cheaper topsoil or compost. Save your premium potting and garden soil mix for only the top 8-12 inches, where the plant roots will be most active.
28. Upcycle a Pallet into a Vertical Planter
This is a fantastic way to garden on a balcony or small patio, taking up wall space instead of floor space. (Time: 2 hours, Cost: $25).
-
-
- Find a safe pallet. Look for the ‘HT’ stamp, indicating it was heat-treated, not chemically treated. Sand any rough spots.
- Create planting pockets. Staple landscape fabric to the inside of the pallet. Start by stapling it along the back plank of an opening, then the bottom plank, and finally the front plank, creating a pouch for soil.
- Leave the top opening of the pallet fully open for larger plants.
- Mount or lean it. Securely screw the pallet to a wall or lean it at a steep angle. Make sure it’s stable before you fill it.
- Fill with potting mix and plant your herbs or flowers. Water gently at first until the soil settles.
-
“This is the exact same concept as Idea #6, and the same warning applies: pallet safety is paramount.”
But beyond that, let’s be honest about the plants. Because the soil pockets are small and shallow, they will dry out very quickly. This setup is not ideal for thirsty plants or for forgetful gardeners. It works best for drought-tolerant plants like succulents, sedums, or woody herbs like rosemary and thyme. If you want to grow lettuce or basil, be prepared to water it every single day in the summer.
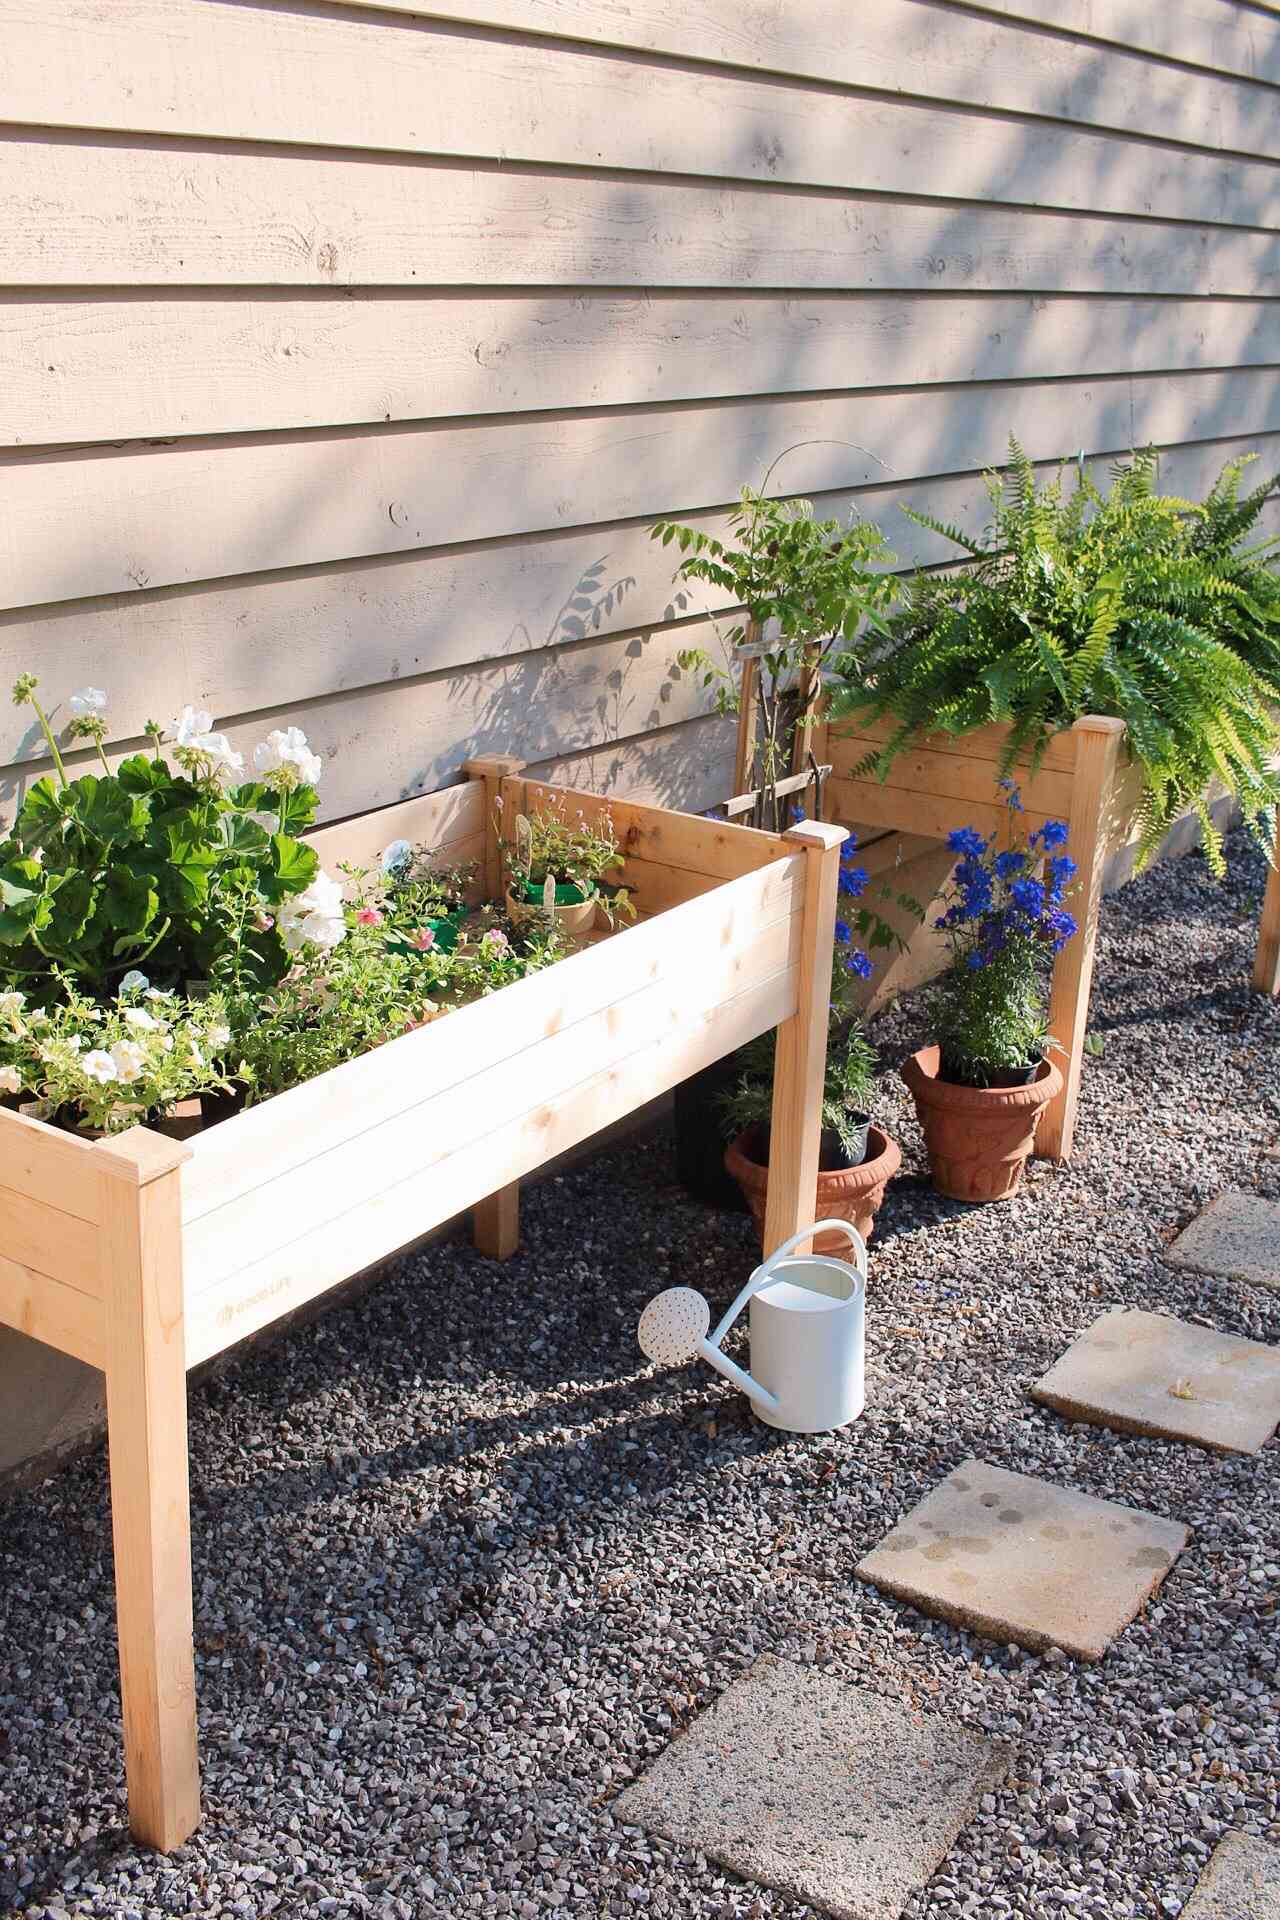
29. A Freestanding Planter Box with a Square Lattice Trellis
The single best feature of this design is that it’s elevated on legs. This seemingly small detail has huge benefits. First, it brings the garden up to a comfortable working height, saving your back and knees from bending and kneeling. Second, it improves drainage and air circulation around the base of the planter, which is great for plant health and helps the wood last longer. Finally, it gives the planter a lighter, more furniture-like appearance, making it feel less like a clunky box and more like an intentional piece of garden decor.
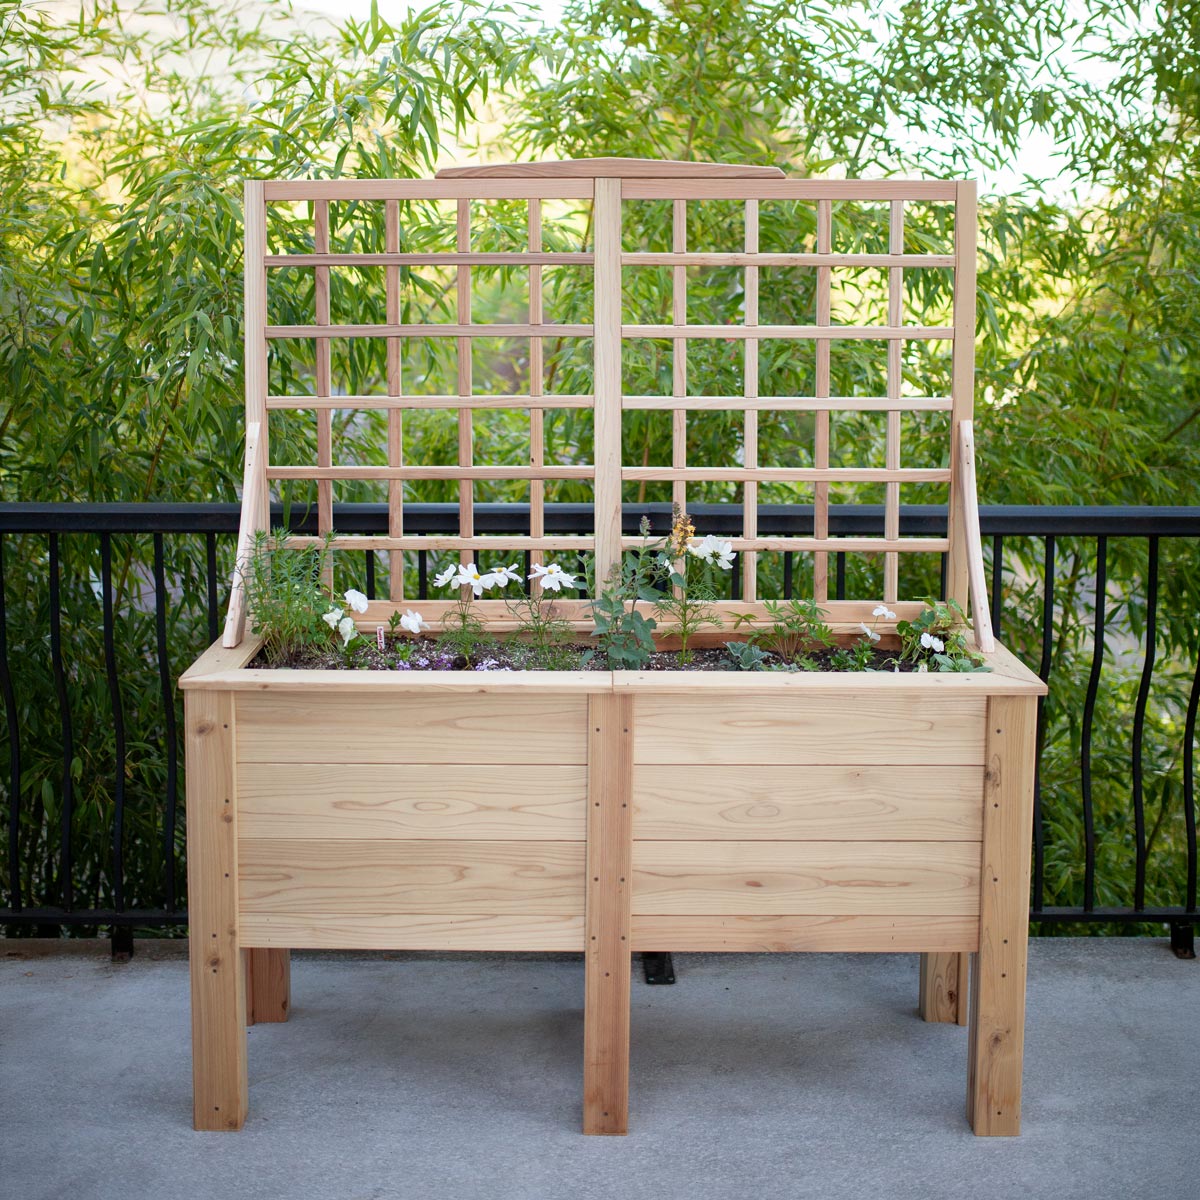
“A self-contained planter like this is the perfect solution for small-space gardening.”
It’s ideal for balconies, decks, and small patios where you don’t have in-ground planting space. The footprint is typically around 2×4 feet or 2×6 feet. Its height, usually 30-36 inches, makes it an excellent choice for gardeners with mobility issues. While you can’t grow a huge crop, it’s perfect for a curated ‘kitchen garden’ of herbs, a few salad greens, and one climbing plant like a cherry tomato or cucumber on the trellis.
30. Grow a Kitchen Garden in Corten Steel Planters
This garden looks so fresh and modern because of the powerful contrast between the materials. The Corten steel planters, with their warm, industrial rust-orange patina, provide a bold, solid frame. This hard, weathered material makes the vibrant, delicate green leaves of the herbs and tomato plants look even more lush and alive. The dark gravel ground cover adds another layer of texture and a cool color that makes both the planters and the plants pop. It’s a sophisticated palette of rust, green, and charcoal that feels very current.
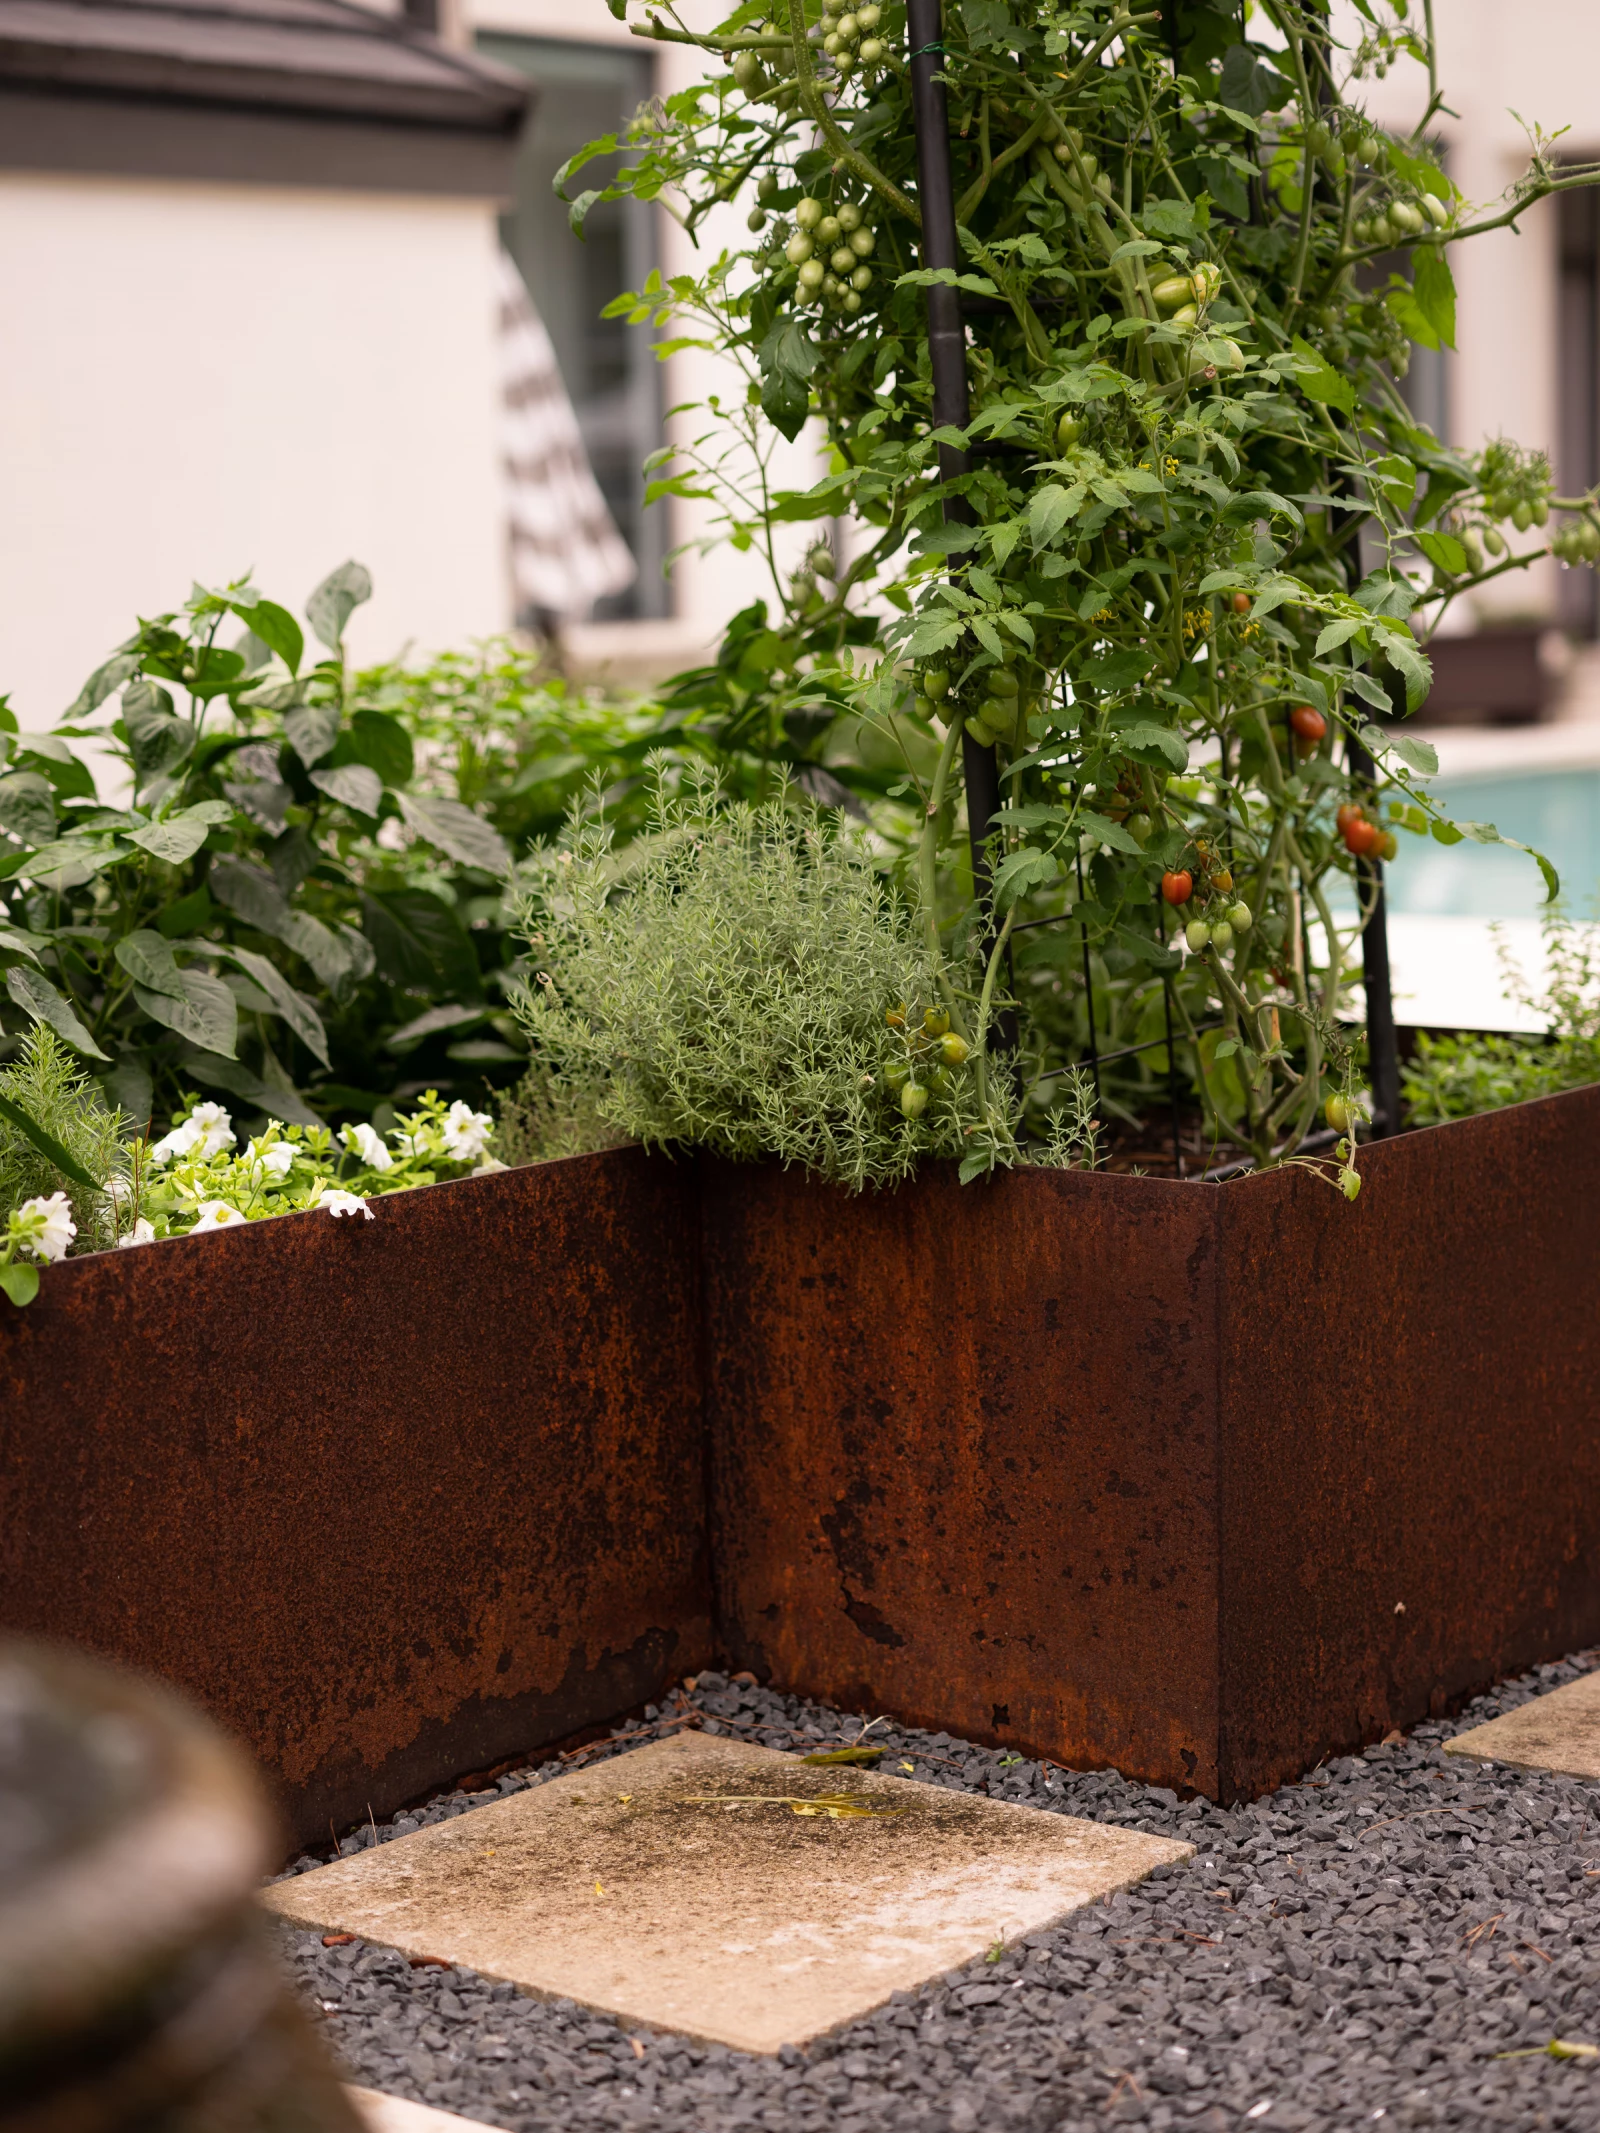
“Corten steel is prized for that beautiful rusty finish, but that rust can be a problem.”
For the first 1-2 years, as the protective patina develops, the steel will ‘bleed’ rust-colored runoff whenever it gets wet. This will permanently stain concrete, light-colored pavers, or a wooden deck. As you see here, placing the planters on a bed of dark gravel is a smart way to manage this. Alternatively, you can accelerate the patina process by spraying the steel with a mix of vinegar, salt, and peroxide before you install it.
Your Garden’s Next Chapter Starts Now
Feeling inspired? The best garden upgrades start with a single idea. Don’t feel like you have to do it all at once. Pick one project that excites you, whether it’s a simple wheelbarrow planter or a whole new fence line, and make it happen. Your perfect outdoor space is waiting for you.
Go on, open up that Pinterest board. It’s time to move a few of those pins from the ‘dream’ column to the ‘to-do’ list. Happy gardening!