You know that feeling when you finally find the low-water landscaping idea that looks exactly right for your space, but a little voice whispers, “Can I actually pull this off?” We spent hours browsing local nurseries, stone yards, and specialty online stores to bring you only what’s worth your attention in 2026. After filtering through hundreds of options, we narrowed it down to 30 ideas that actually deliver, with projects ranging from a few hundred dollars to more comprehensive overhauls.
Inside, you’ll find 30 curated ideas covering everything from Southwestern desertscapes and lush Mediterranean gardens to modern minimalist designs. As sustainability becomes less of a trend and more of a necessity, these water-wise gardens are the perfect way to create a stunning outdoor space that’s both beautiful and responsible. And stay until the end — we break down the most common mistakes that can ruin these looks. 📌 Save this to Pinterest for later — you’ll want to revisit these ideas.
1. Embrace a Warm, Southwestern Stucco & Gravel Yard
Budget Breakdown
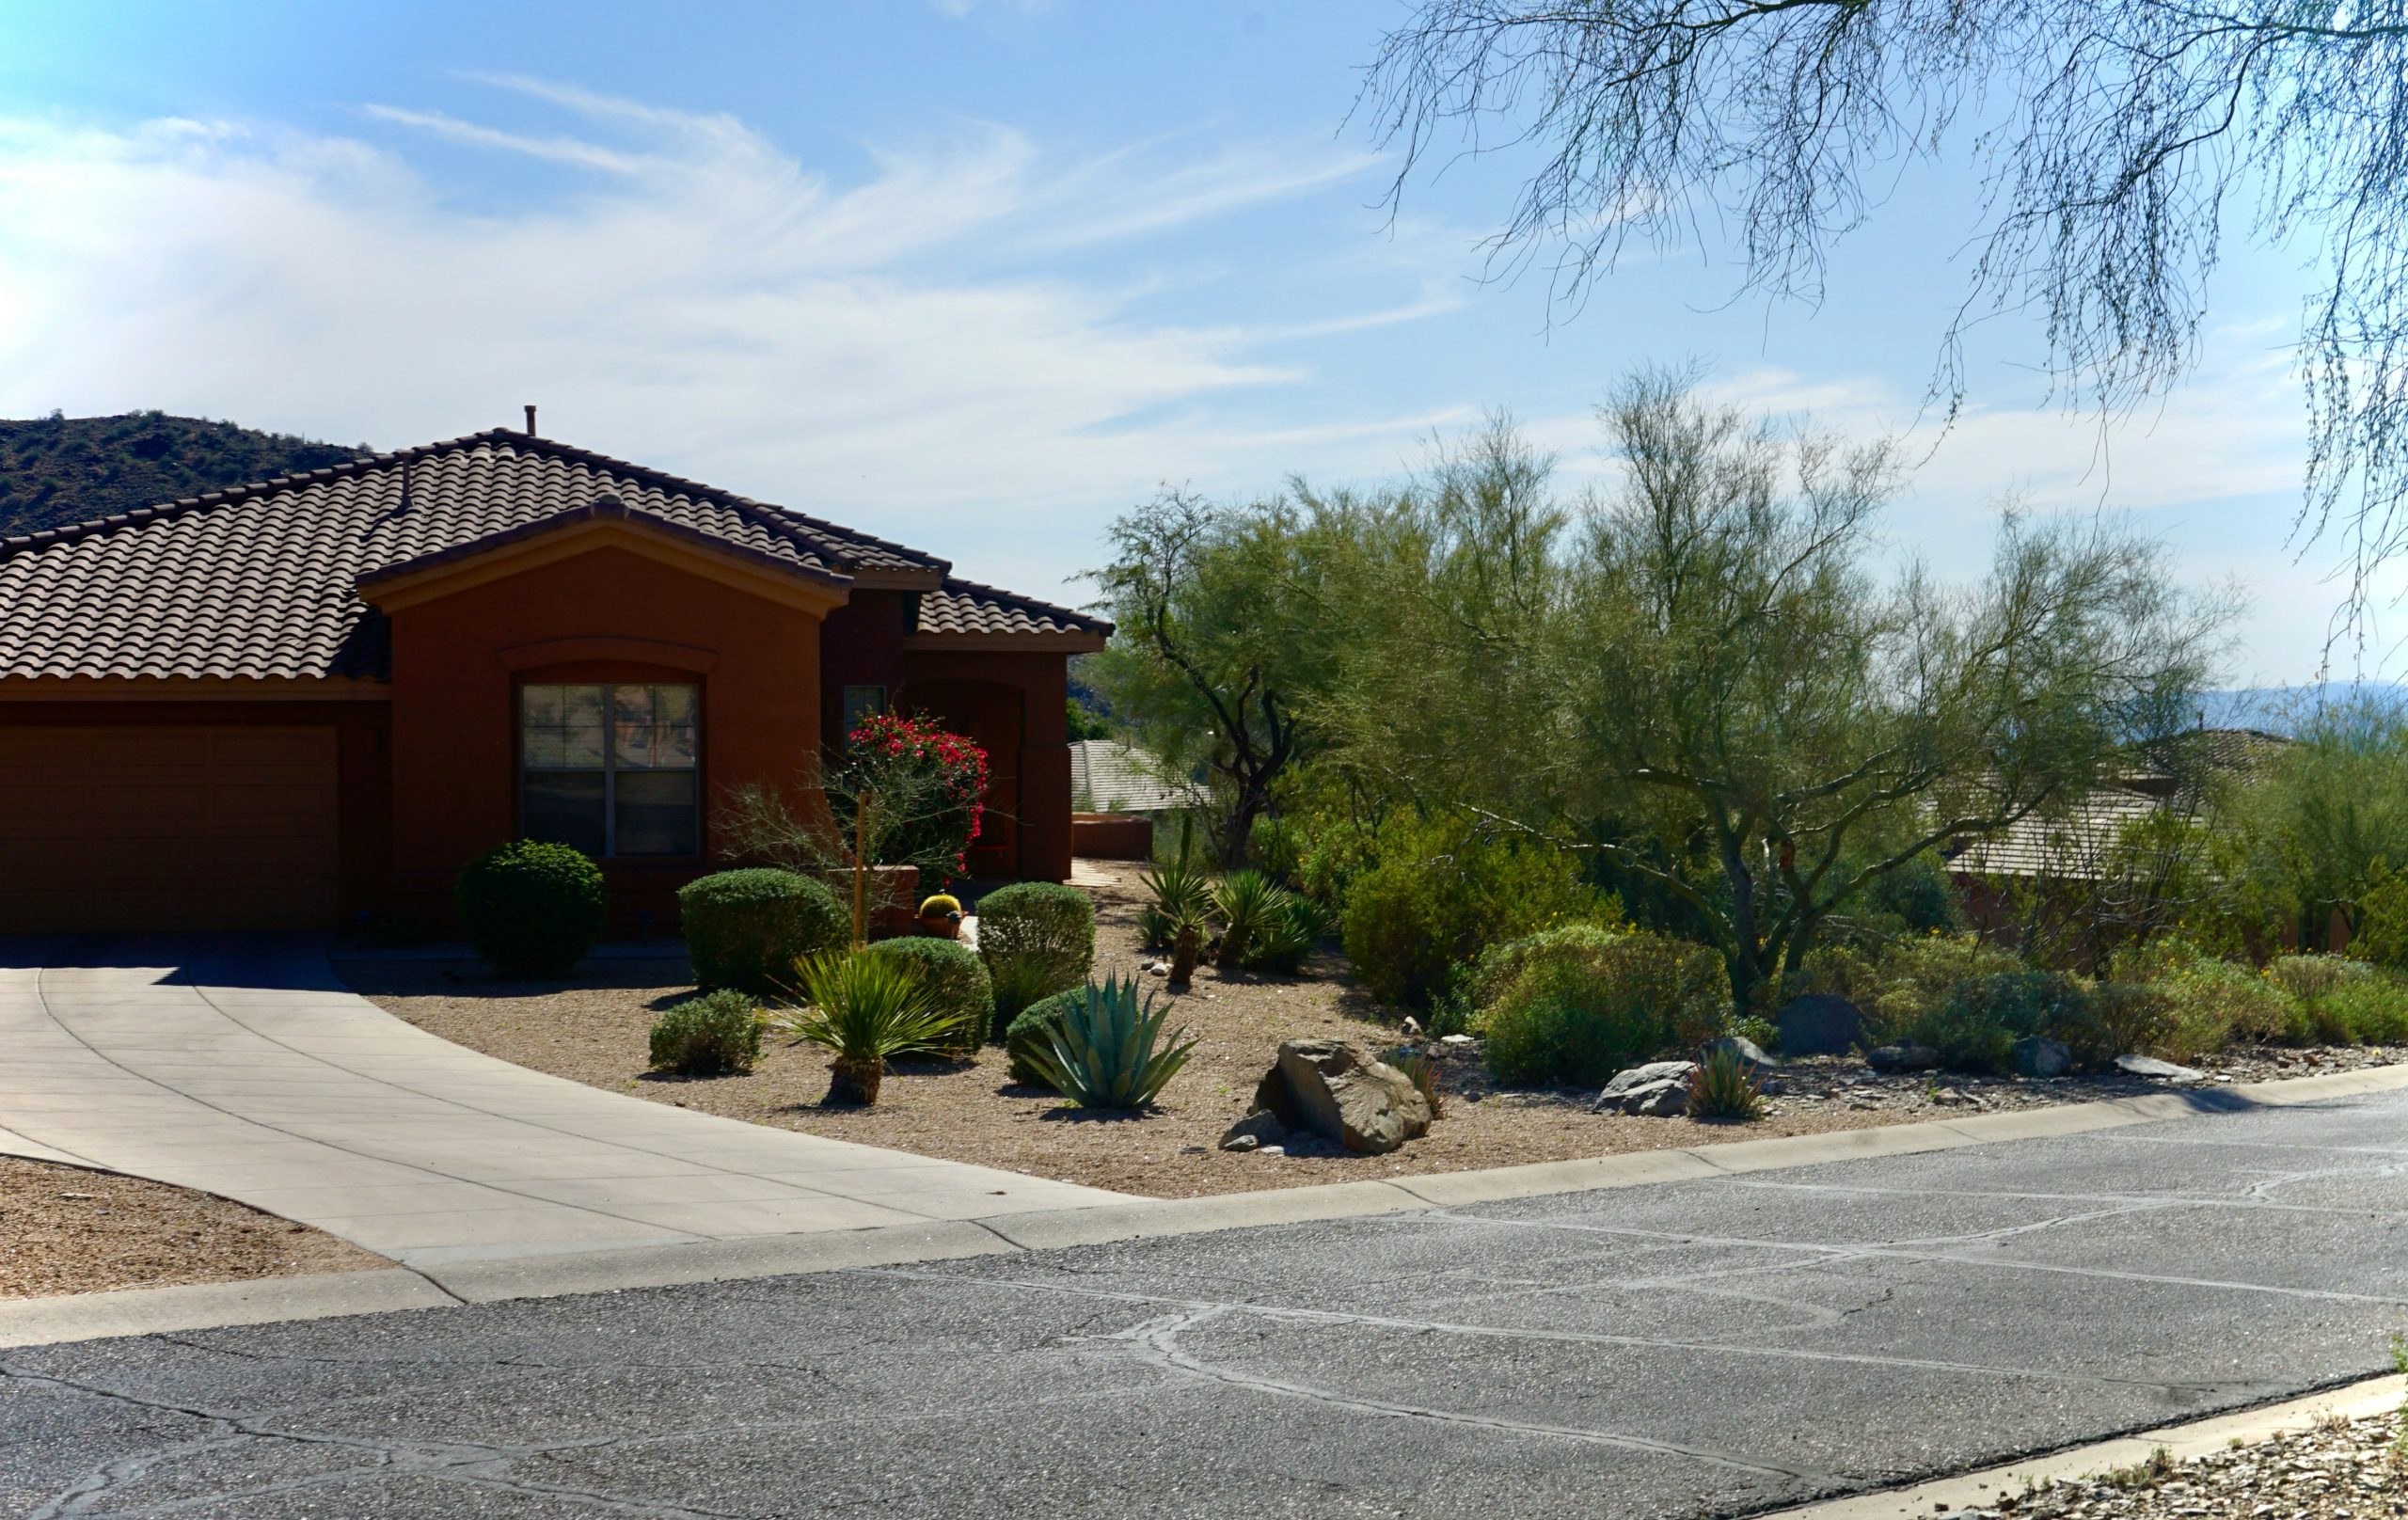
“Main Plants (Agave, small shrubs): $300 – $800
Ground Cover (Gravel): $400 -”
- Main Plants (Agave, small shrubs): $300 – $800
- Ground Cover (Gravel): $400 – $1,000 for a typical front yard
- Accent Boulders: $200 – $700 depending on size and quantity
- Labor (if not DIY): $1,500 – $3,000
- TOTAL: $2,400 – $5,500
- Budget alternative: Get a similar look for around $1,000 by using smaller, immature plants that will grow over time, sourcing free rocks locally (check marketplaces!), and doing the gravel spreading yourself.
What Makes It Work
This design succeeds by committing fully to its regional identity. The rust-colored stucco of the home and the terracotta roof provide a warm, earthy base that the landscaping complements rather than competes with. The limited, cohesive color palette—warm oranges, varied greens, and neutral gravel—creates a harmonious and intentional look. The use of large, natural rocks as anchors grounds the design and prevents the smaller plants and gravel from feeling scattered or random. It’s a masterclass in texture over color.
2. Frame a Modern Patio with a Bold Red-Orange Accent Wall
Designer Tip
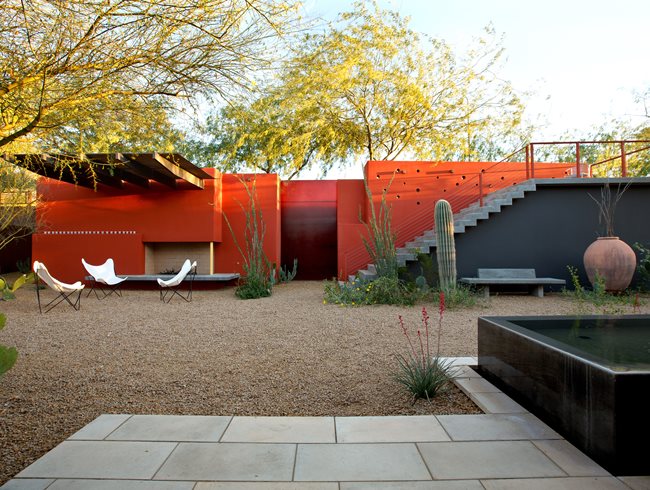
“When using a wall color this bold, the texture is just as important as the hue.”
A hand-troweled stucco or plaster finish will catch the light in interesting ways throughout the day, creating depth and shadow that a flat paint finish cannot replicate. Ask your contractor for a “Santa Fe” or “skip trowel” finish to achieve this organic, slightly imperfect texture that works so well with desert modernism. It hides minor imperfections and feels much more luxurious and integrated than a simple painted surface.
The One Thing
The reddish-orange stucco wall is the undeniable hero of this space. It does more than just add color; it defines the entire patio area, creating a room-like enclosure and providing a stunning backdrop for the sculptural desert plants. Without it, the gravel groundcover and minimalist furniture would feel exposed and disconnected. The wall provides warmth, intimacy, and a powerful architectural statement that everything else supports. It turns a simple yard into a destination.
3. Design a Garden as an Extension of Your Home’s Interior
Style Math
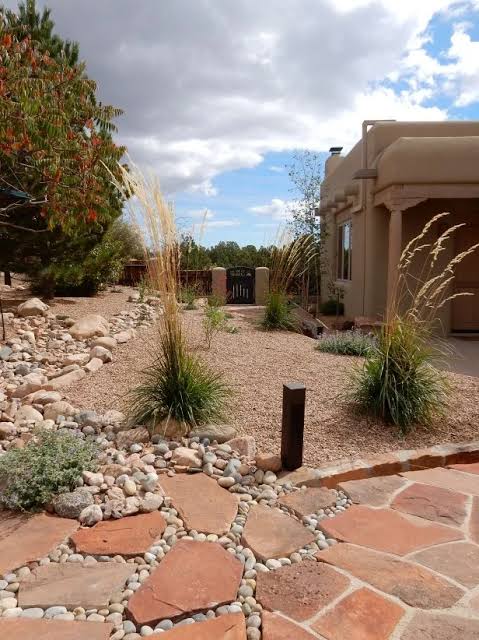
“To create a seamless flow from indoors to out, think in terms of shared elements.”
The formula is: 50% matching materials + 30% complementary color palette + 20% repeated shapes. If you have stone floors inside, use similar stone for your exterior path. Echo an interior accent color in your outdoor planters or cushions. If your furniture has clean, modern lines, choose plants with strong, sculptural forms like agave or cacti. It’s about creating a visual conversation between the two spaces so the garden feels like another room of the house.
Real Talk
True indoor-outdoor living requires more than just a pretty garden. Consider the practicalities. Large glass doors or windows are key, but they can also lead to heat gain and higher cooling costs in sunny climates. You’ll also be tracking more dirt and debris inside. Invest in high-quality doormats at every entry point and consider flooring options like tile or polished concrete near the doors that are easy to sweep clean. This lifestyle is beautiful, but it requires a commitment to a little extra cleaning.
4. Weave a Golden Gravel Path Through a Stone-Walled Garden
What Makes It Work
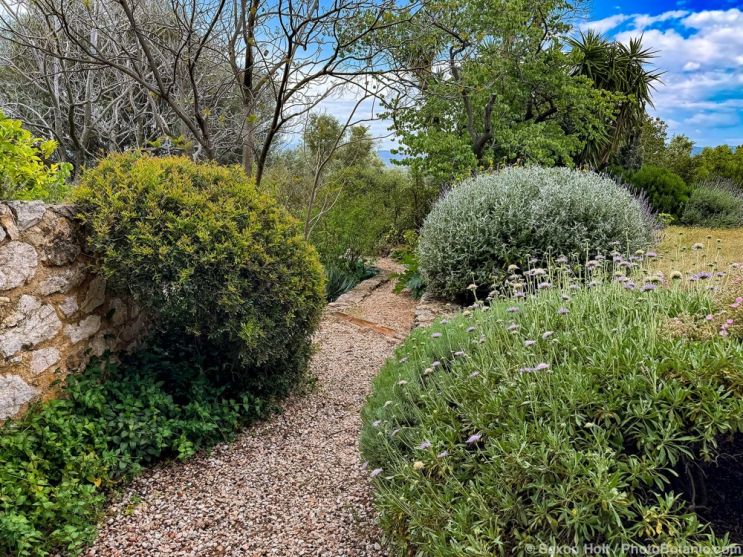
“This path feels so magical because of the expert use of contrast in texture and form.”
The rough, earthy texture of the dry-stacked stone wall is a perfect counterpoint to the soft, rounded shapes of the silvery-grey and green shrubs. The narrow, winding nature of the golden gravel path encourages a slower, more mindful journey through the space, unlike a straight, wide walkway. The repetition of rounded plant forms provides a sense of rhythm and cohesion, making the wild planting feel intentional and designed.
Maintenance Reality
A gravel path like this is wonderfully low-maintenance, but not zero-maintenance. To keep it looking sharp, you’ll need to rake it back into place periodically, especially after heavy rain or foot traffic. Weeds can and will eventually pop through. While a good landscape fabric underneath is essential, expect to spend an hour or two every few months hand-pulling stubborn intruders or spot-treating with a vinegar-based herbicide. The beauty of gravel is that it’s a forgiving surface that hides small imperfections well.
5. Create a Tapestry of Color with Mixed Succulents
Style Math
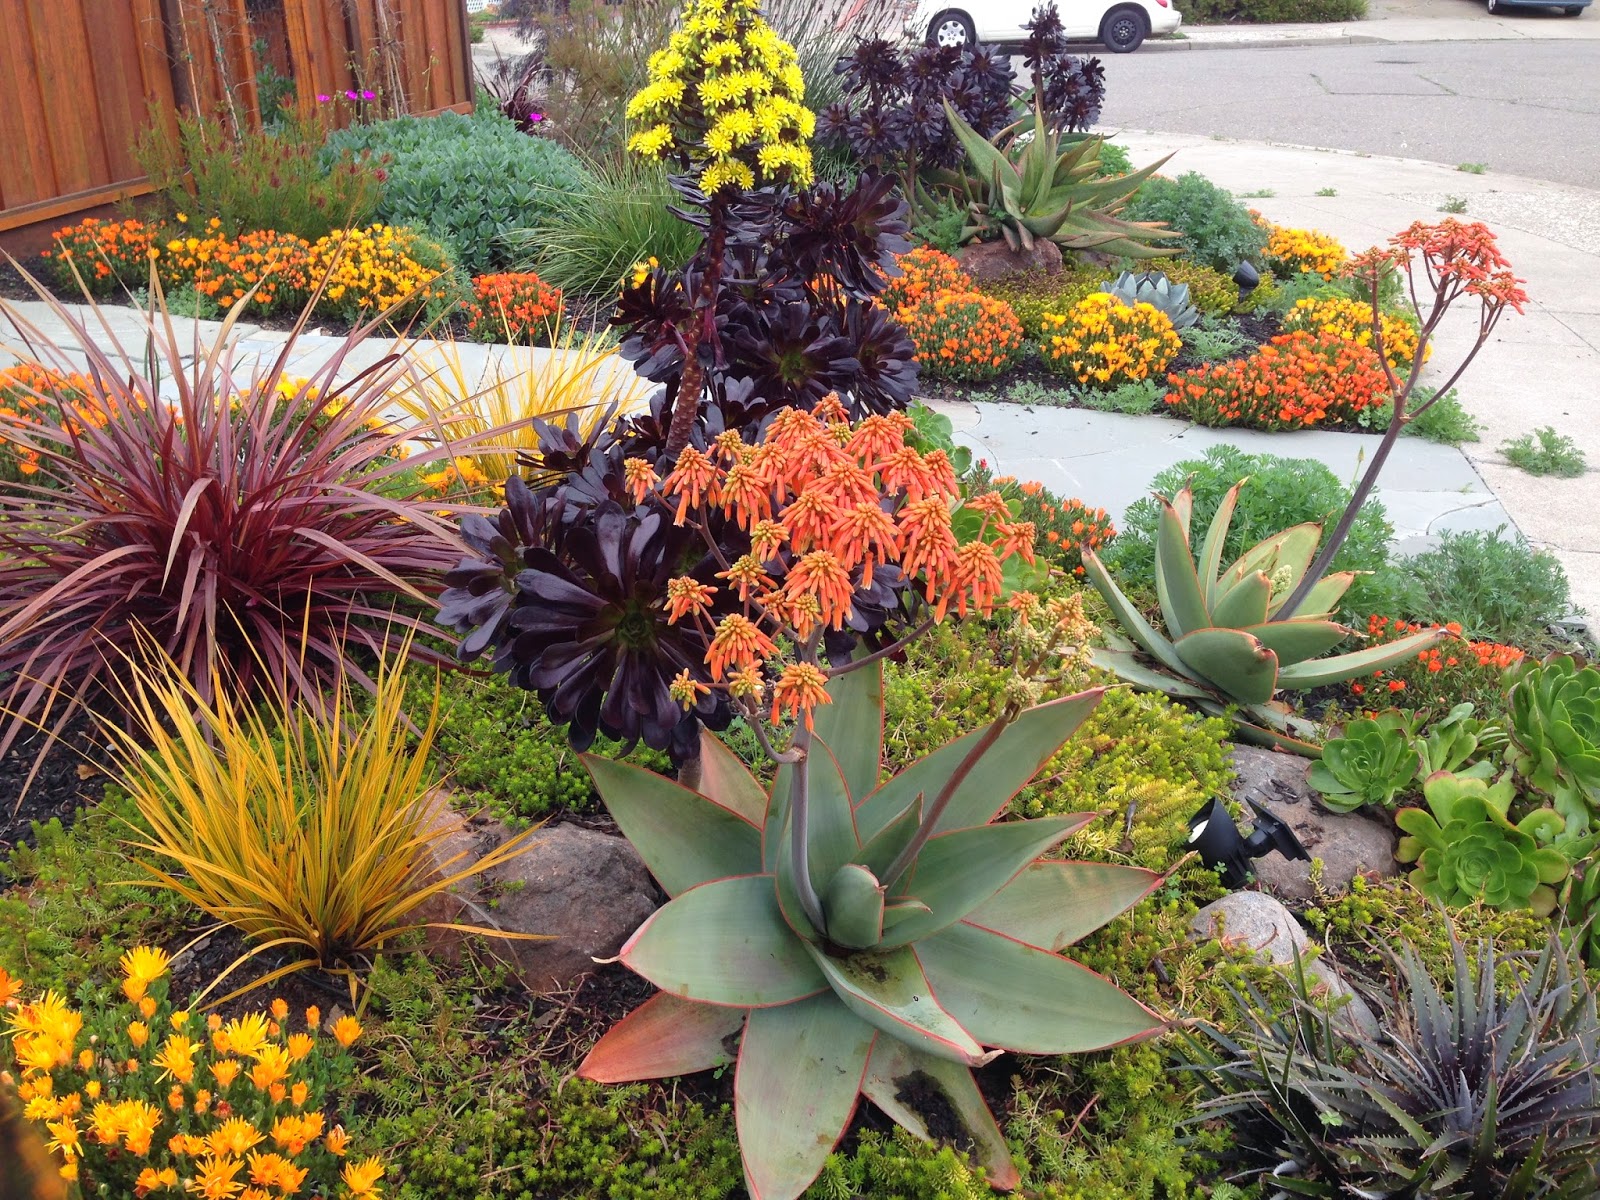
“This vibrant, yet cohesive look is a brilliant balancing act.”
The formula is roughly: 40% structural greens (like the large central agave) + 30% bold color (the dark purple Aeonium and orange flowering Aloes) + 20% fine-textured fillers (the yellow Sedum groundcover) + 10% airy accents (the reddish ornamental grass). By starting with a strong green backbone, you can layer in much bolder colors without it feeling chaotic. The key is to repeat each color or texture in at least two or three places for a sense of rhythm.
Designer Tip
To achieve this dense, “tapestry” look, ignore traditional spacing advice. When planting succulents and groundcovers for a massed effect, you can plant them 30-50% closer than the nursery tag suggests. This encourages them to grow into each other more quickly, choking out potential weeds and creating that lush, overflowing feel. You will need to divide them in a few years, but the immediate visual impact is well worth it. Just be sure not to crowd larger, structural plants like agaves.
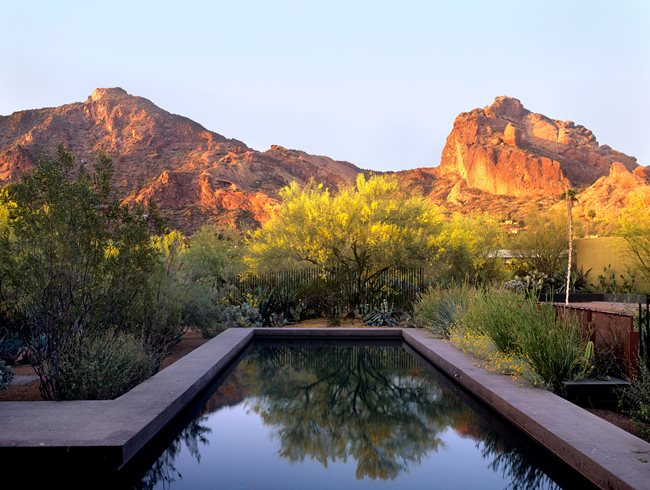
6. Install a Serene Reflecting Pool in a Desert Setting
Scale Guide
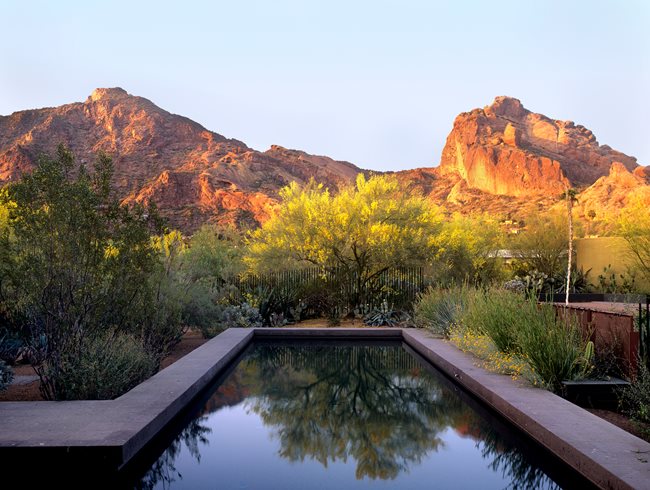
“A reflecting pool is all about proportion.”
For it to have a real impact and create a sense of stillness, it needs room to breathe. This idea works best in a yard with at least 800-1000 square feet of open, relatively flat space. The pool itself should be a minimum of 8 feet in its longest dimension to effectively capture the sky and surrounding landscape. For a more dramatic effect as seen here, a length of 15-20 feet against a distant view is ideal. Ceiling height isn’t a concern, but a wide, open sky is the real ceiling you want to capture.
The One Thing
The dark, still water of the reflecting pool is the element that elevates this landscape from simply beautiful to truly transcendent. It introduces the element of water—precious and cooling in a desert environment—not for swimming, but for contemplation. The dark bottom creates a near-perfect reflection of the sky and distant mountains, bringing the vastness of the landscape into the intimate garden space. It’s a focal point that offers tranquility and a touch of modern luxury.
7. Define Zones with a Gravel Path and Dry Riverbed
How-To Brief
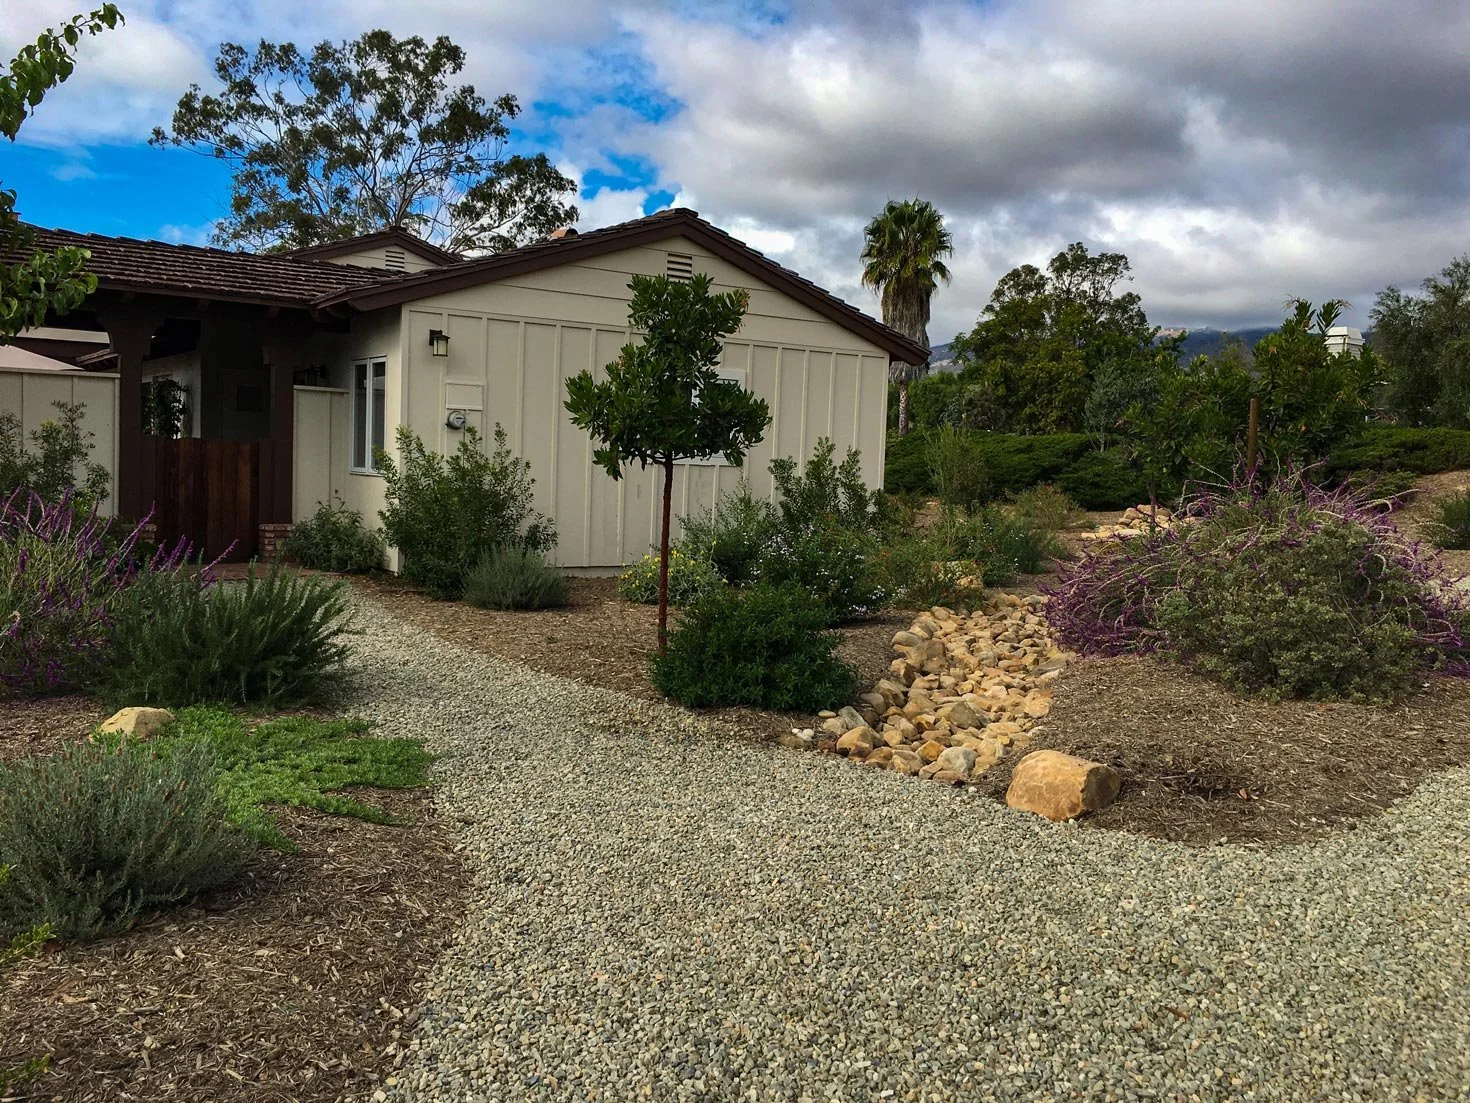
“Creating a functional dry riverbed is easier than it looks.”
Here’s a quick guide:
Excavate: Dig a shallow, meandering trench about 12-18 inches wide and 6-8 inches deep.
Line It: Lay down high-quality landscape fabric to prevent weeds and keep the rocks from sinking into the soil.
Place Boulders: Position a few larger rocks (6-12 inches) along the edges to create a natural, varied look.
Fill the Base: Fill the trench with a layer of mid-sized river rocks (2-4 inches).
Top Dress: Scatter a mix of smaller stones and pebbles on top to fill gaps and create a more authentic, multi-toned appearance.
Time: A weekend afternoon. Cost: $200-$500 for a 25-foot bed.
Get This Look For Less
The cost of rock and gravel can add up. To get this look on a tighter budget, focus on using gravel for the main path only. Instead of a rock-filled dry riverbed, create a similar winding channel using dark brown or black bark mulch. It will still provide the same visual separation and graceful curves but costs about 70% less than decorative rock. You can often get mulch for free from local arborists or municipalities. Spend your rock budget on just a few larger, statement boulders to accent the mulch bed.
8. Create a Mosaic with Multiple Types of Gravel and Stone
Before You Start Checklist
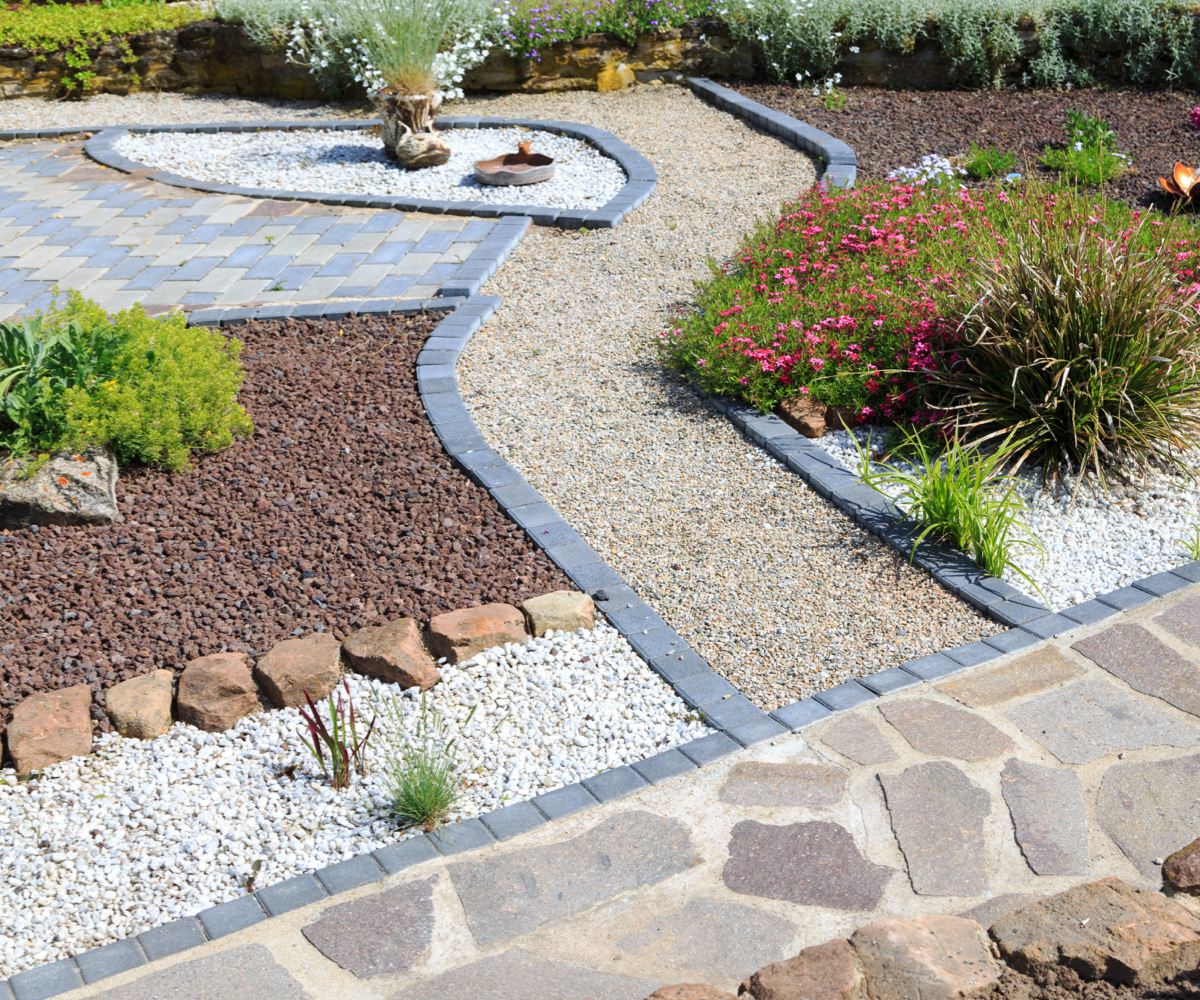
“Measure Your Zones: Map out the distinct areas for each material.”
Do you have enough square footage for each zone to feel intentional and not cluttered? A minimum of 25 sq. ft. per material is a good rule of thumb.
Check Your Edging: The success of this look hinges on crisp separation. Is your chosen edging (like the dark pavers here) flexible enough to create the curves you want?
Plan for Drainage: Ensure the ground is graded properly so water doesn’t pool in your gravel areas.
Sample Your Stones: Get physical samples of your chosen gravels and rocks. Colors can look wildly different online versus in your yard’s specific lighting.
What Makes It Work
This design is a masterclass in delineation. The dark gray paver edging is the secret weapon; it acts like a bold outline in a drawing, making each material—the beige path, the red volcanic rock, the white pebbles—pop. Without this crisp separation, the different materials would bleed into one another and look messy. It’s a highly structured approach that paradoxically allows for more organic, free-flowing shapes within each zone. This is a great example of how a rigid element can create a sense of controlled, natural beauty. For a similar effect with less structure, see the flowing path in Idea #4.
9. Integrate Natural Rock Outcroppings with Dry-Stacked Walls
Designer Tip
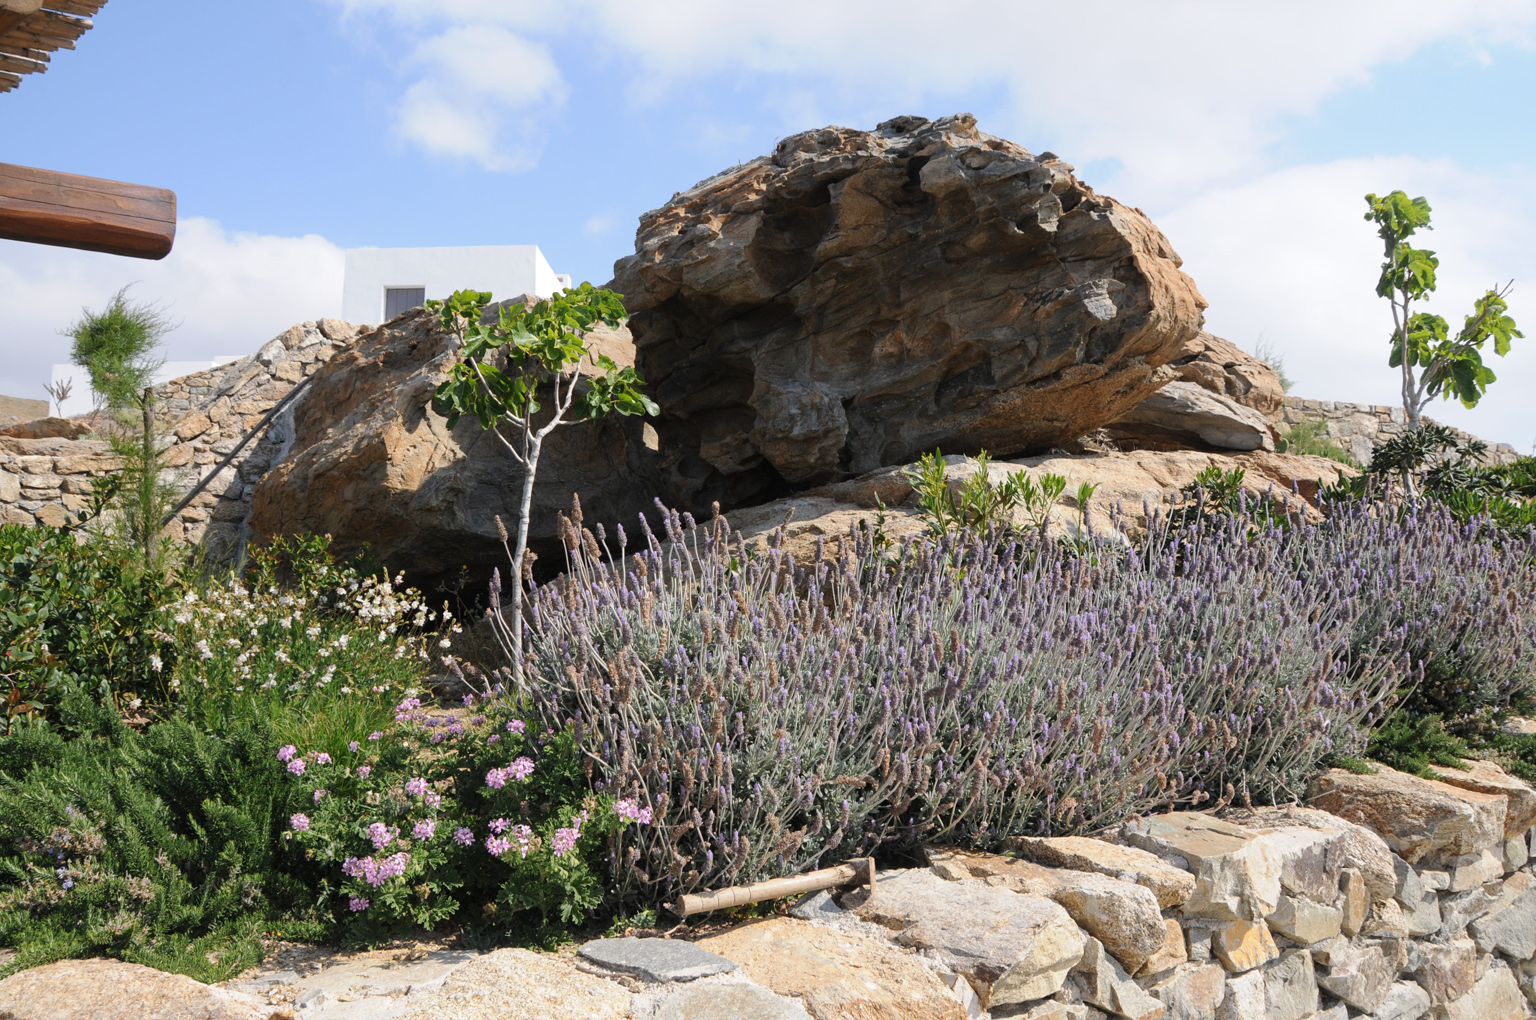
“When combining natural rock formations with man-made stacked walls, the key is to make it look like the wall is growing out of the existing rock.”
Use stones for your wall that match the color family of the natural outcropping. Start the wall by interlocking the first few stones directly against and around the natural rock. Avoid a hard, straight seam where the two meet. By blurring the lines and using similar materials, you create a cohesive and ancient look, as if the wall has been there for centuries.
Style Math
The serene, Mediterranean feel here comes from a simple but effective formula: 70% stone and rock + 20% soft, mounding foliage + 10% fine-textured color. The overwhelming majority of the visual weight is the hardscape—the massive brown and grey rocks. This is softened by the gentle, rounded shapes of lavender and other shrubs. The final touch, the 10%, is the delicate purple, pink, and white flowers, which act as a sprinkle of color that prevents the stone from feeling too heavy or monolithic.
10. Lay a Rustic Terracotta Brick Path Through Wild Plantings
The One Thing
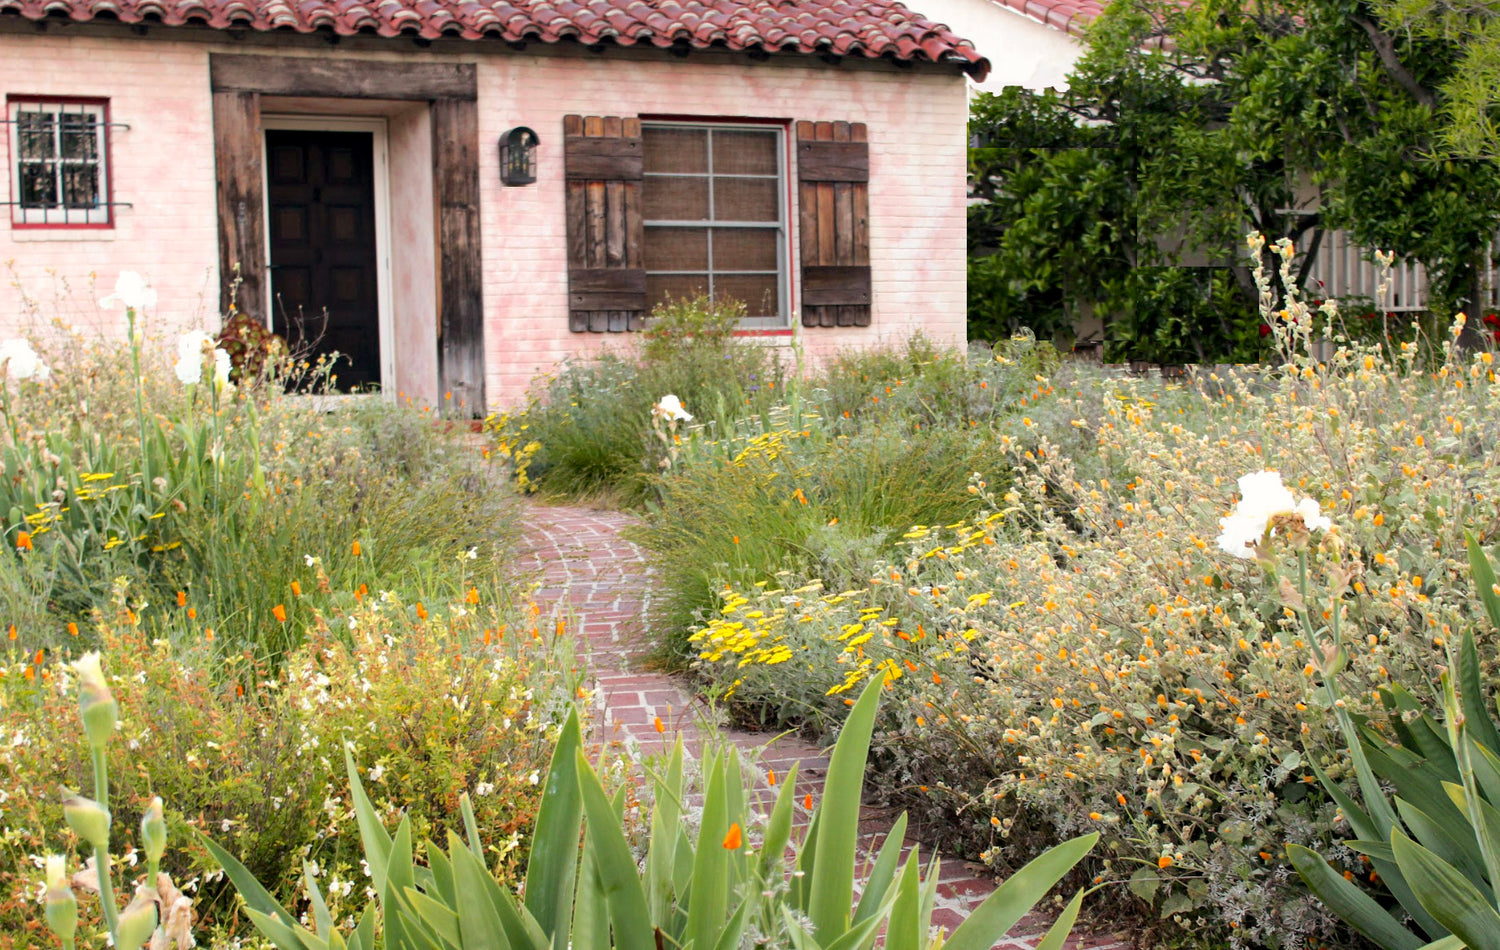
“The narrow, terracotta brick path is the heart of this design.”
It provides a warm, earthy-red line that guides the eye and foot through the seemingly untamed garden. Its traditional material and slightly irregular layout give the entire space a timeless, rustic character. If you were to swap it for concrete pavers or gravel, the garden would instantly feel more modern and less charming. The brick makes the scene feel established, inviting, and connected to the architectural details of the house.
Trending Context
This look is gaining traction as a reaction against overly manicured, sterile landscapes. It taps into the “rewilding” and “cottagecore” movements, which favor gardens that look natural, support pollinators, and feel a bit untamed. Homeowners are tired of rigid, high-maintenance gardens and are drawn to this more relaxed, romantic aesthetic. It’s about creating a space that feels like a discovery, where nature is allowed to blur the edges. This isn’t a passing fad; it’s a shift towards more sustainable and emotionally resonant garden design.
11. Design a Sculptural Garden with Specimen Cacti
Real Talk
“Creating a beautiful cactus-focused landscape requires restraint.”
The temptation is to collect one of everything, resulting in a jumbled, chaotic look. A successful design uses repetition and massing of just a few carefully chosen species. More importantly, be honest about safety. Large, spiny cacti are not a great mix for areas where small children or pets play. Install them in raised beds or in areas far from main pathways to appreciate their sculptural beauty without the risk of painful encounters.
Scale Guide
A sculptural cactus garden thrives on negative space. This approach is incredibly versatile and works in spaces from a tiny 50 sq. ft. side yard to a sprawling multi-acre lot. In a small space, use one large, dramatic specimen (like a Saguaro or Organ Pipe cactus, where climate permits) as a living sculpture. In a larger area, group three or five of the same tall species together to create a powerful architectural statement. The key is to allow plenty of open ground (covered in gravel or decomposed granite) around the plants to emphasize their unique forms.
12. Mix Pavers and Gravel for a Modern, Textured Path
Get This Look For Less
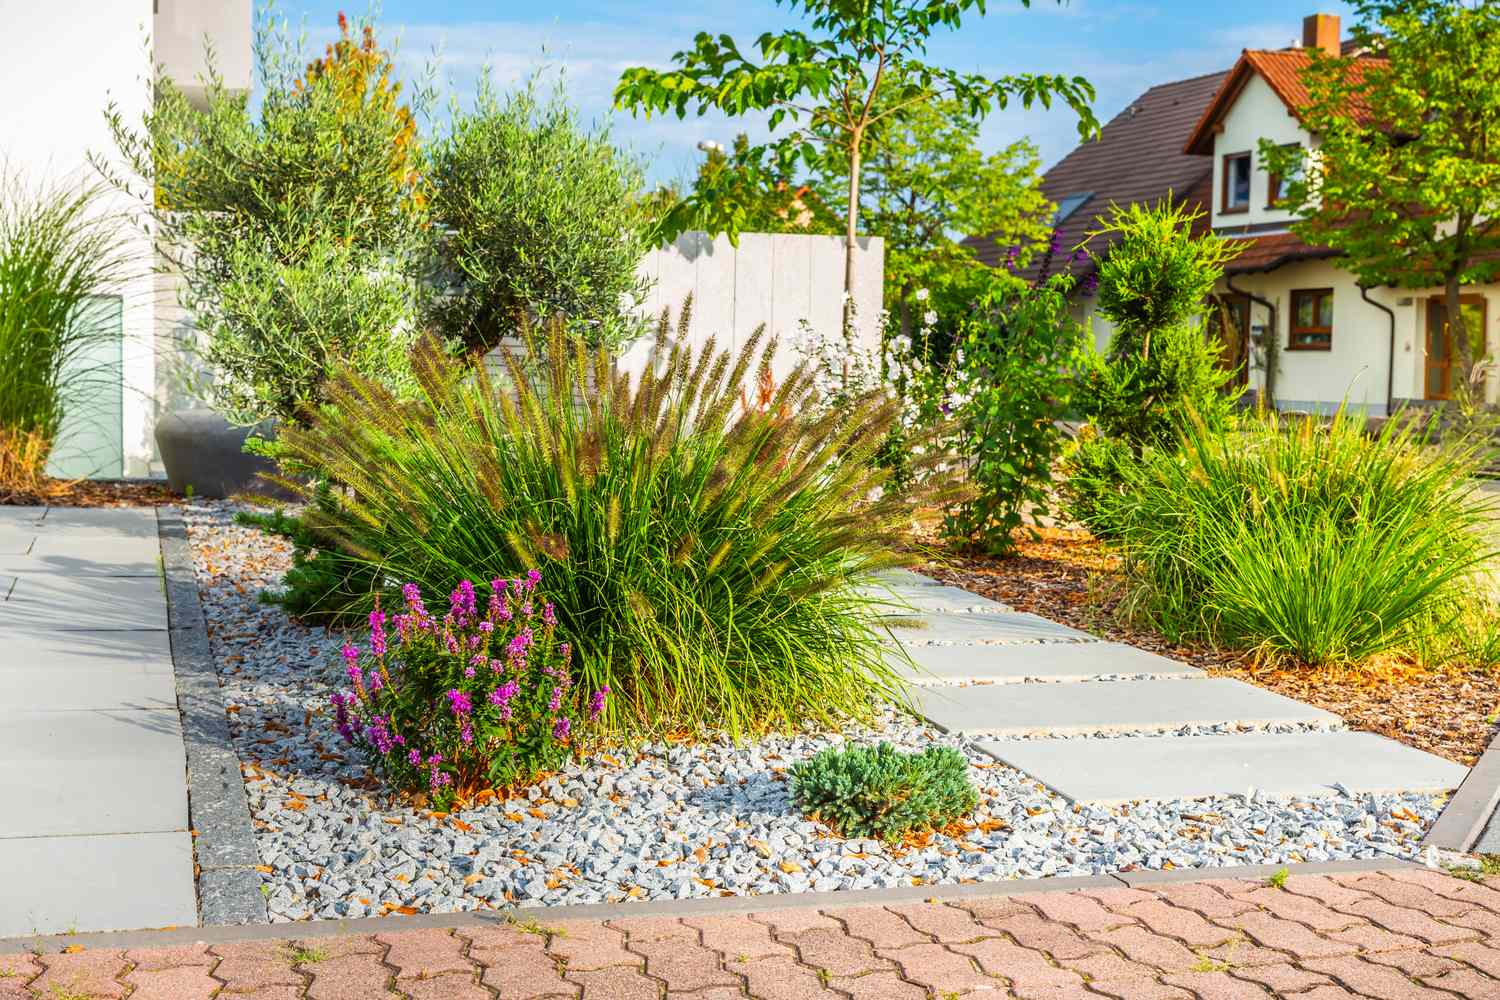
“Large rectangular pavers can be pricey, often running $15-$30 per piece.”
To get this modern, graphic look for less, use standard 12″x12″ concrete pavers from a big-box store, which cost as little as $2-$4 each. Lay them in the same offset pattern, but increase the spacing between them. This means you buy fewer pavers and more of the less expensive gravel filler. You get the same dynamic, geometric feel for a fraction of the cost. Painting the cheap pavers with a high-quality concrete paint can also elevate the look. Compare this modern path to the vibrant, succulent-heavy look in Idea #5.
What Makes It Work
This design is successful because of its strong graphic quality. The clean lines and right angles of the light grey stepping stones create a clear, intentional geometry that contrasts beautifully with the soft, organic forms of the ornamental grasses and shrubs. The use of two different groundcovers—small grey gravel around the pavers and the adjacent red brick—adds another layer of texture and color, defining the zones. It feels structured without being rigid, a hallmark of great modern landscape design.
13. Layer a Lush-Looking Garden with Water-Wise Plants
Style Math
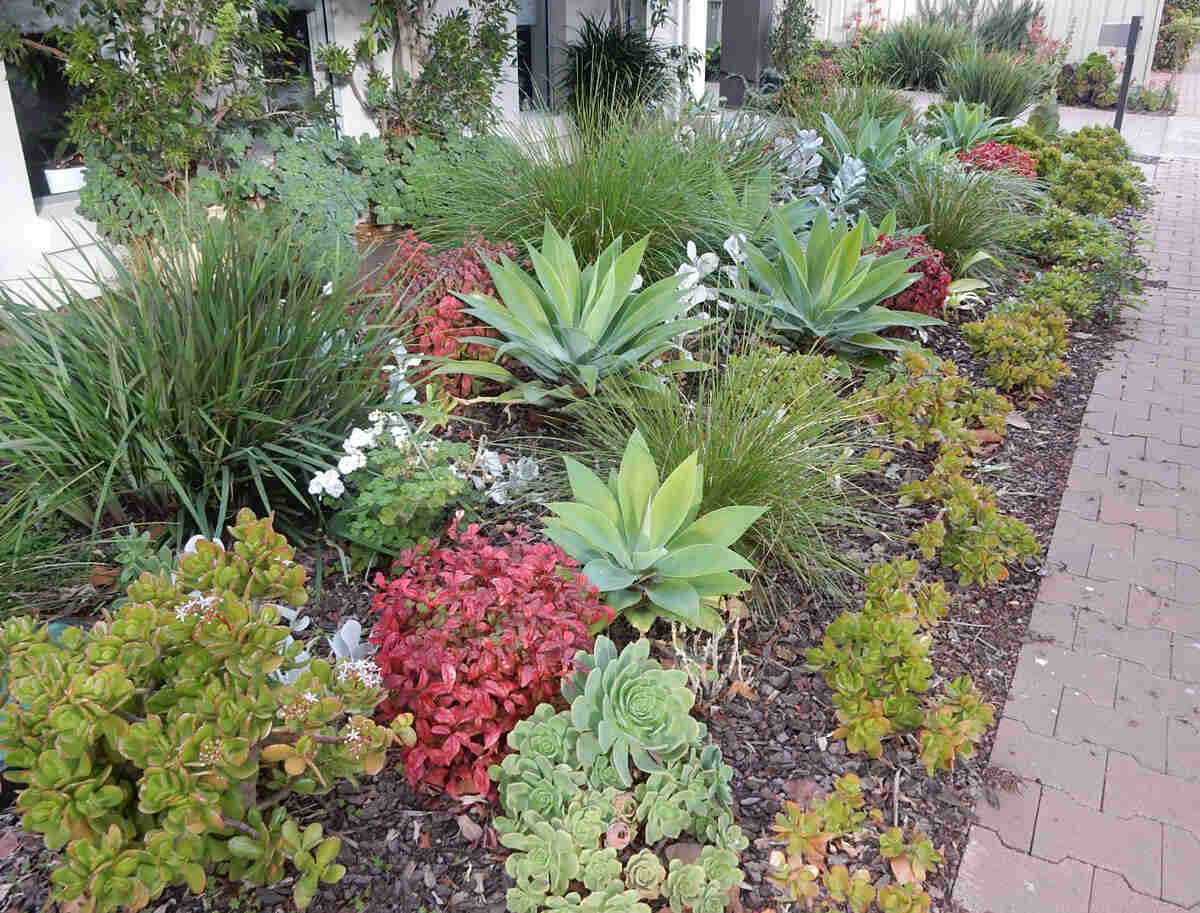
“The secret to a lush yet water-wise garden is layering heights and textures.”
Aim for this ratio: 25% tall, airy plants (like the ornamental grasses) in the back, 40% mid-sized structural plants (the large agaves and red-leafed shrubs) in the middle, and 35% low-growing groundcovers and rosette succulents in the front. This layering technique ensures no bare ground is visible once the plants mature, creating a dense, jungle-like effect that looks thirsty but is actually incredibly resilient and low-water. Brown mulch acts as the unifying base layer.
Designer Tip
When creating a layered design, think like you’re arranging a group photo. Place your “tall friends” (grasses, tall aloes) in the back. Your “medium-height, interesting characters” (agaves, shrubs) go in the middle. Finally, your “short, colorful personalities” (echeverias, sedums) sit right up front. By staggering the plants this way, you ensure every plant is visible and gets adequate light, and you create a much more dynamic and visually interesting composition than simply planting in rows.
14. Create a Calm Oasis with Grey Stepping Stones and Silver Foliage
The One Thing
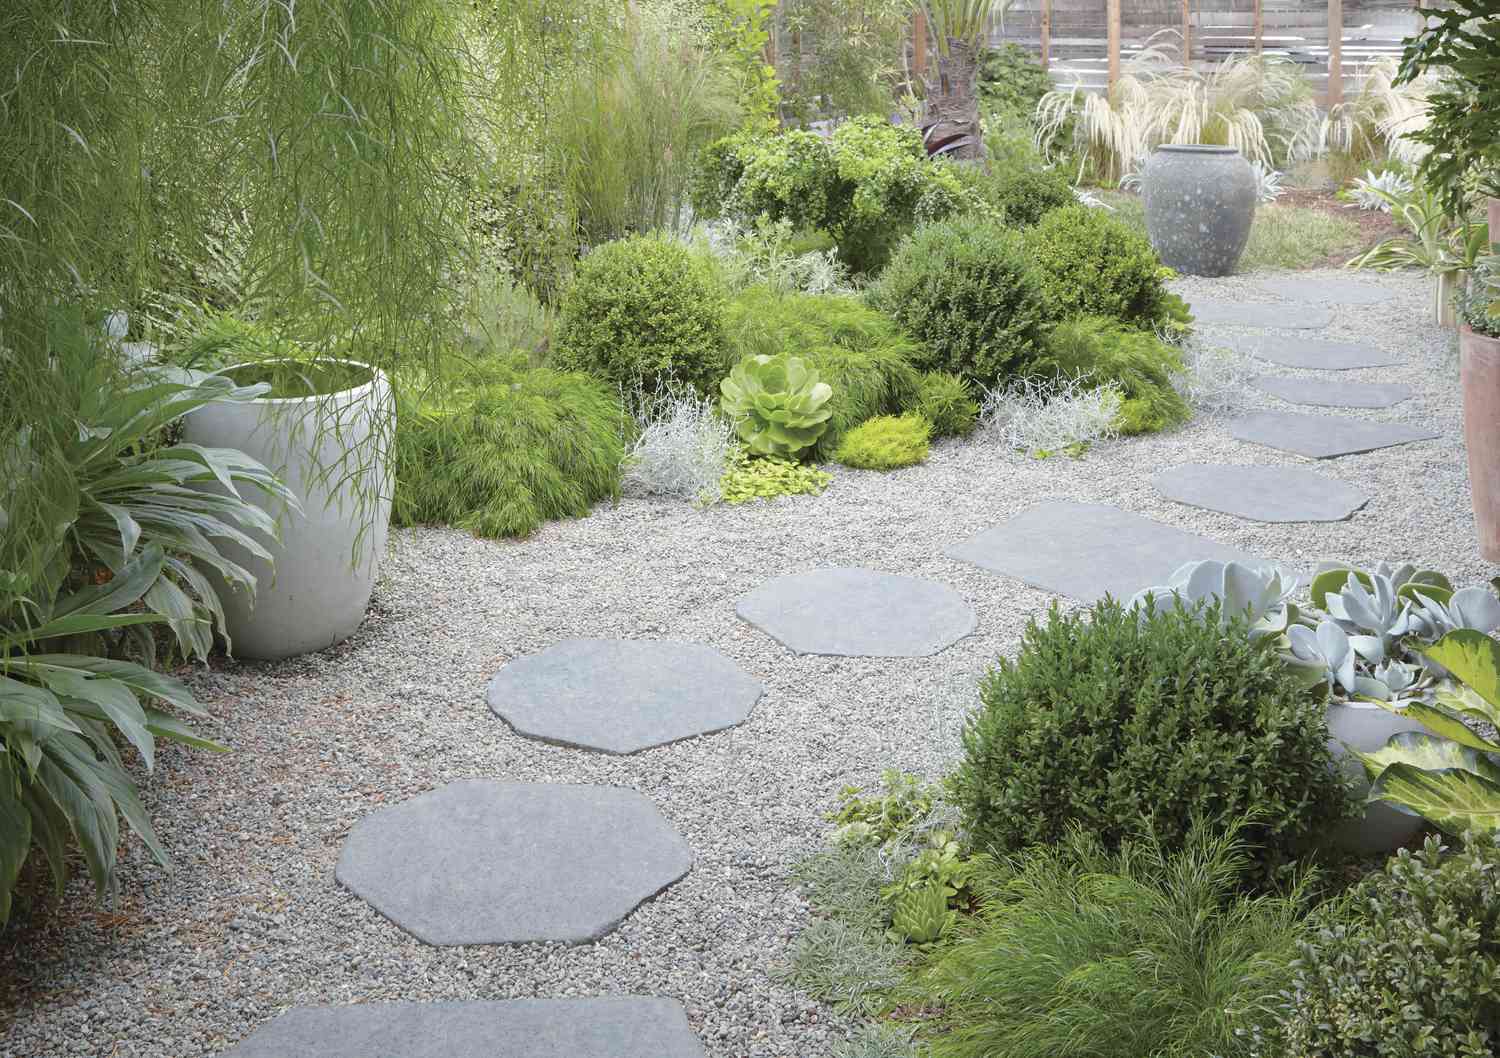
“The strict commitment to a green, grey, and silver color palette is what makes this garden so incredibly serene.”
By intentionally leaving out bright, jarring colors like reds, yellows, or oranges, the design achieves a tranquil, almost meditative quality. The silver-gray foliage catches the light beautifully and provides a soft, shimmery contrast to the various shades of green. This disciplined palette feels sophisticated and calming, turning the garden into a true retreat from the visual noise of the everyday world.
Maintenance Reality
Plants with silver or gray foliage are stunning drought-tolerant heroes, but they can be a bit particular. They almost universally demand excellent drainage and lots of sun. If planted in heavy clay soil or in a shady spot, they are prone to root rot and will quickly lose their silvery sheen, turning a sad, muddy green. Before committing to this look, amend your soil heavily with sand or gravel to improve drainage, or, even better, create raised beds to ensure these plants have the dry feet they crave.
15. Replace Your Front Lawn Entirely with Xeriscape
Budget Breakdown
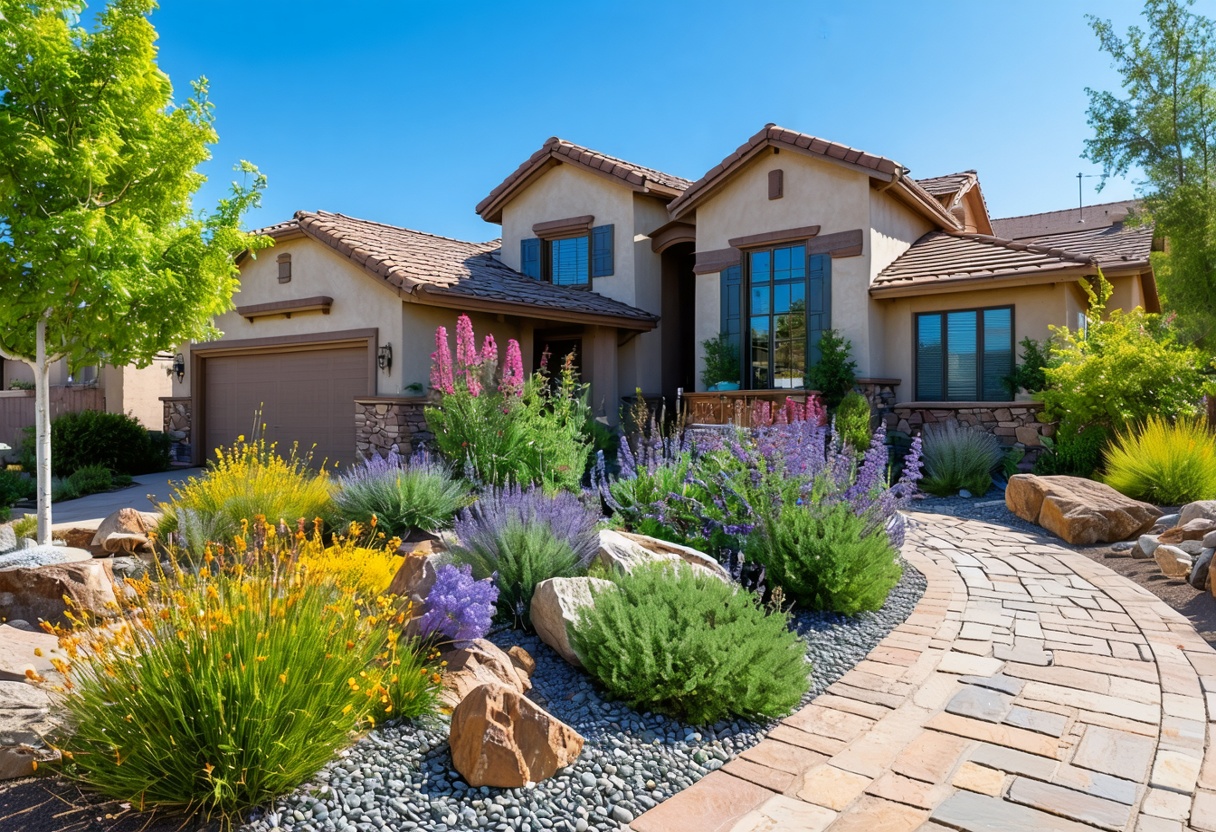
“Lawn Removal (sod cutter rental or labor): $200 – $1,000
Weed Barrier Fabric”
- Lawn Removal (sod cutter rental or labor): $200 – $1,000
- Weed Barrier Fabric: $150 – $400
- Ground Cover (Gravel/Mulch): $500 – $1,500
- Plants (mix of shrubs, perennials, grasses): $500 – $2,000
- Boulders/Accents: $200 – $700
- TOTAL: $1,550 – $5,600
- Budget Alternative: Sheet mulching! Instead of removing the lawn, cover it with cardboard and a thick (6-8 inch) layer of wood chips. It’s often free from local arborists and smothers the grass over time, while enriching the soil.
Before You Start Checklist
A full lawn conversion is a big project. Tick these boxes first:
- Check Local Rules: Does your city or HOA have any regulations about lawn removal or approved plant lists for front yards? Get a copy of the rules before you dig.
- Map Your Utilities: Call 811 to have underground gas, water, and electrical lines marked for free. You don’t want to hit one while digging.
- Test Your Soil: Is your soil sandy, clay, or loam? Knowing this will help you choose plants that will thrive, not just survive.
- Observe Sun Patterns: Track how the sun moves across your yard for a full day. Note the full-sun, part-shade, and full-shade zones.
16. Build a Tiered Rock Garden on a Natural Slope
How-To Brief
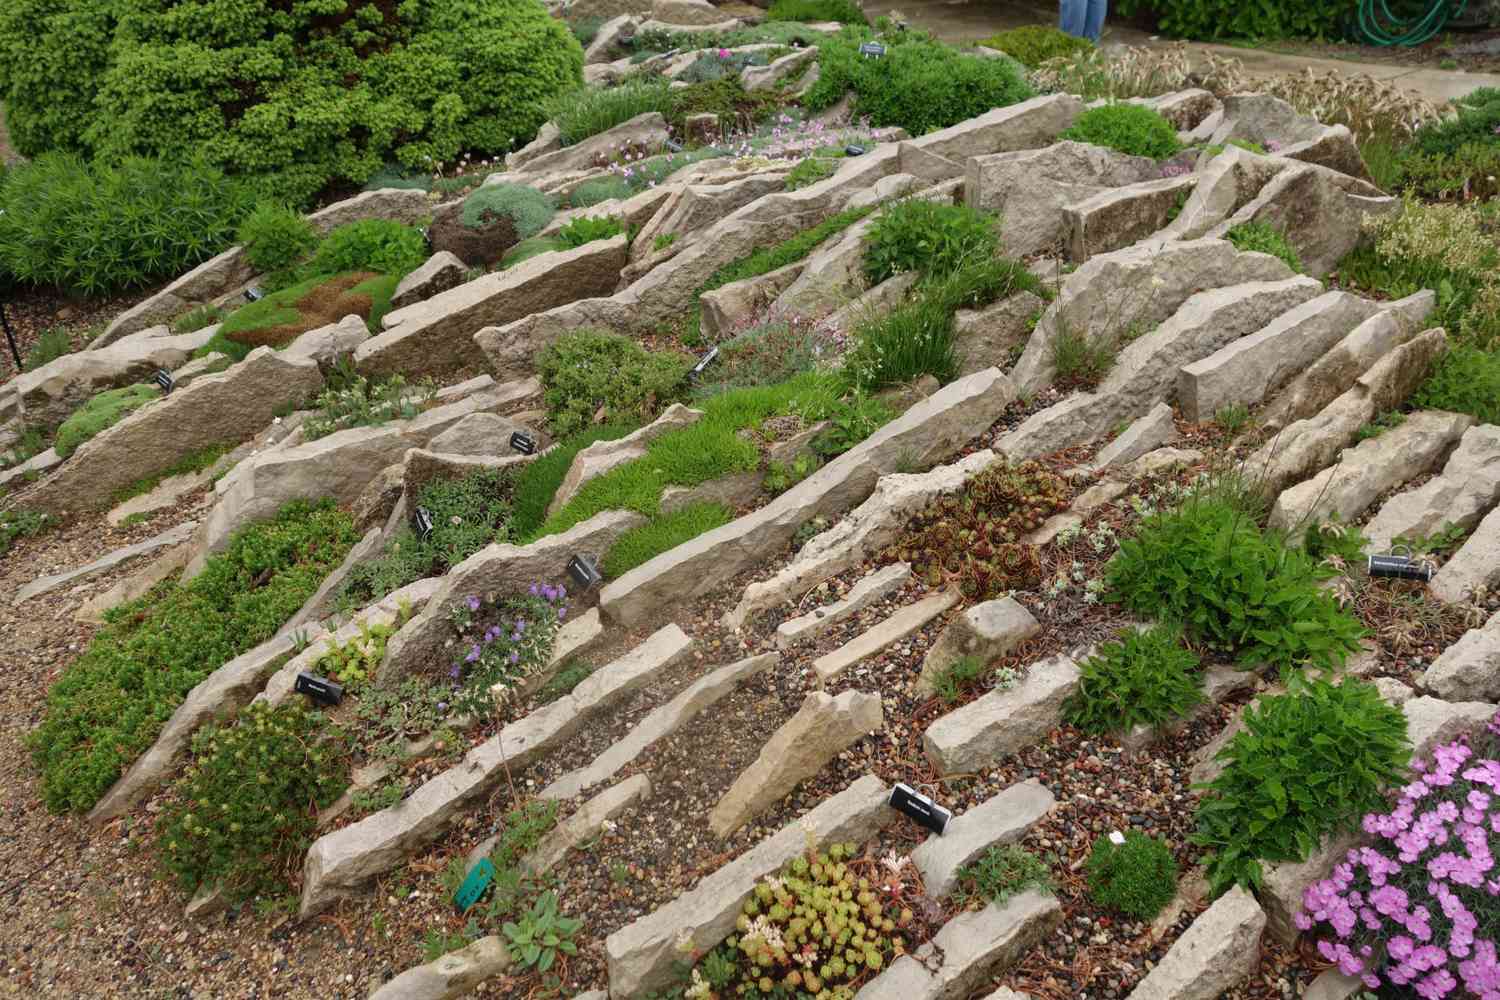
“Using a slope to your advantage is key.”
Here’s a quick guide to building stable rock tiers:
Start at the Bottom: Begin at the lowest point of the slope. Dig a shallow trench and set your largest, flattest “foundation” rocks firmly into the ground.
Backfill and Angle: Backfill with soil behind the first layer of rocks. As you place the next layer, ensure it is set back slightly (by an inch or two) from the layer below and tilted slightly back into the hillside for stability.
Stagger Joints: Like laying bricks, avoid lining up the seams between rocks. Staggering the joints makes the wall much stronger.
Create Planting Pockets: Intentionally leave gaps between rocks and fill them with a mix of soil and gravel. These pockets are perfect for tucking in small groundcovers and alpine plants.
Time: 1-2 days. Cost: $300-$1,200 depending on the type and amount of rock.
What Makes It Work
This design feels natural because it mimics how rock layers, or strata, appear in nature. The elongated slabs are laid horizontally, following the contour of the land rather than fighting it. By creating small terraces, the design turns a potentially difficult slope into a series of intimate planting opportunities. The mix of purple and pink flowering plants softens the hard edges of the rock, while the gravel mulch unifies the entire scheme and reinforces the low-water aesthetic.
17. Wind a Flagstone Path Through a Lush Cactus Collection
Designer Tip
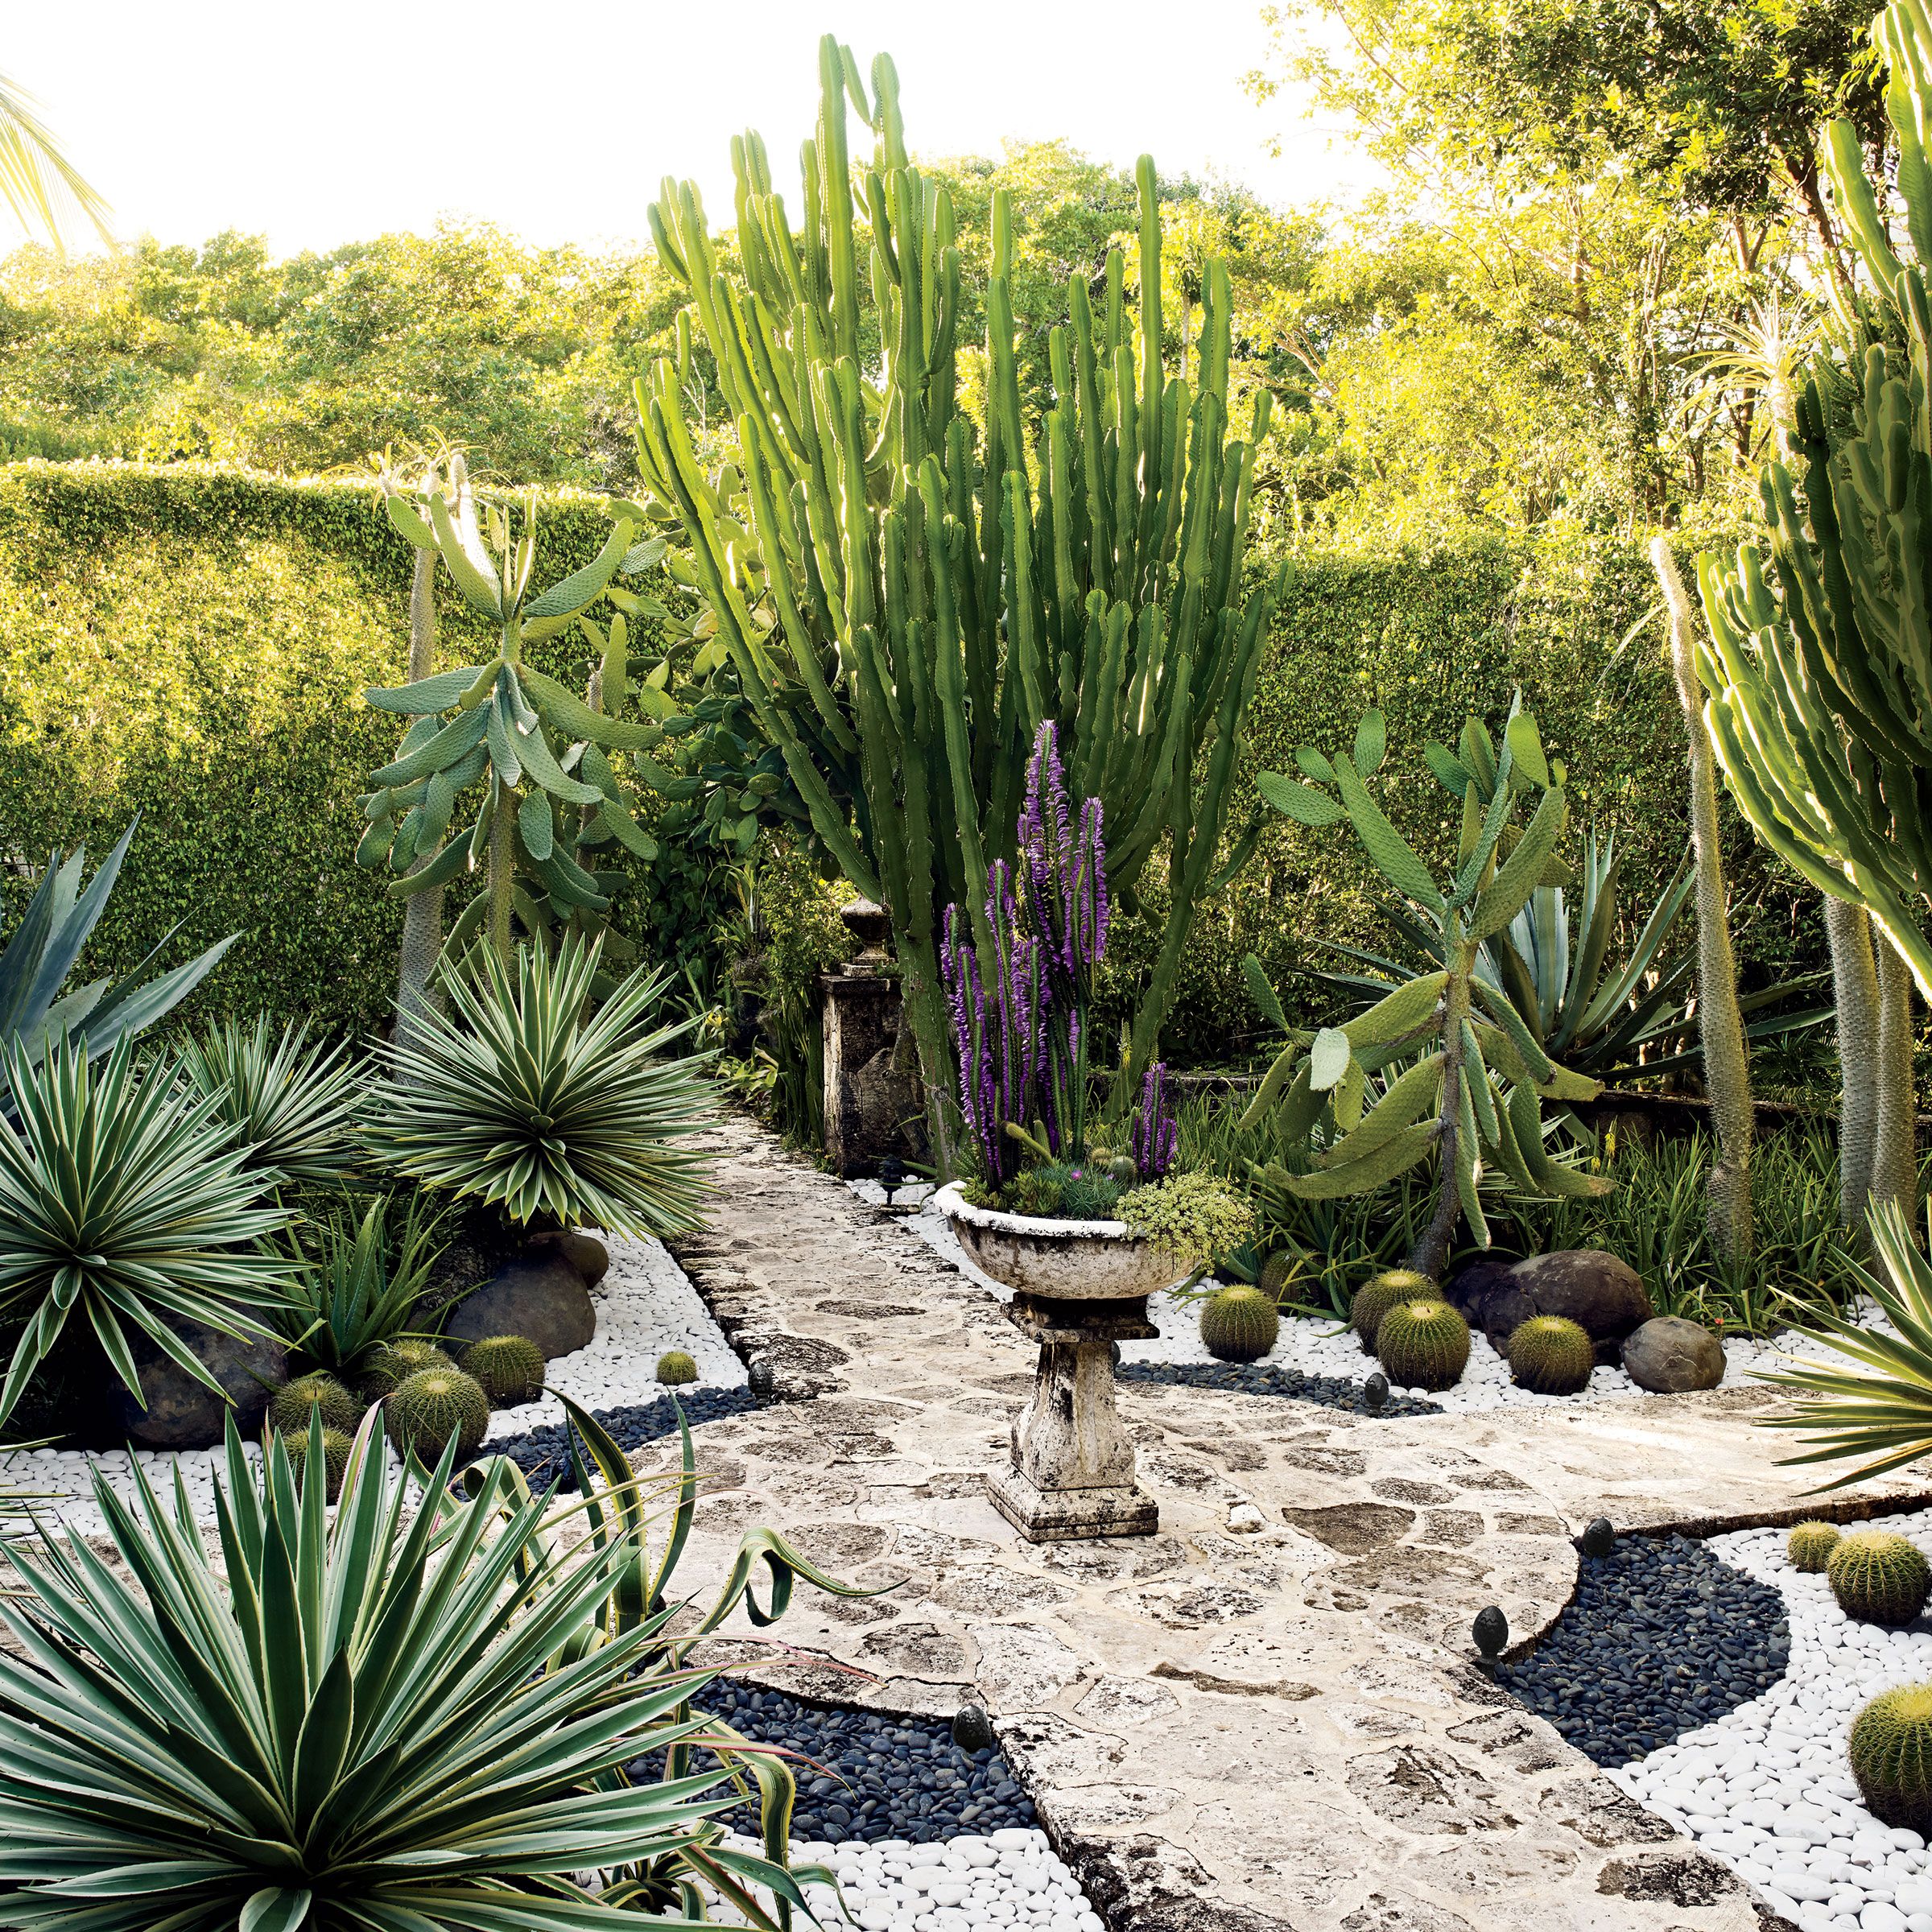
“To make a flagstone path feel integrated and natural, vary the spacing between the stones.”
A perfectly uniform gap looks artificial. For a more organic feel, place stones closer together on curves and slightly farther apart on straightaways. Then, use at least two different sizes of filler material, like the white and black pebbles seen here. Use the larger pebbles in the wider gaps and the smaller ones in the tighter spots. This variation creates a richer texture that feels less like a manufactured path and more like a natural clearing.
Style Math
This garden masterfully balances “lush” and “arid” elements. The formula is: 50% sculptural cacti & succulents + 30% textured groundcover + 20% hardscape path & borders. The key is that the groundcover itself is split into two contrasting colors (the white and black pebbles), creating distinct zones and visual interest. The light-colored flagstone path provides a clean, smooth surface that prevents the scene from becoming too busy, offering a place for the eye to rest amidst the spiky, textured plants.
18. Use Cacti and Thorny Shrubs for Natural Privacy
Real Talk
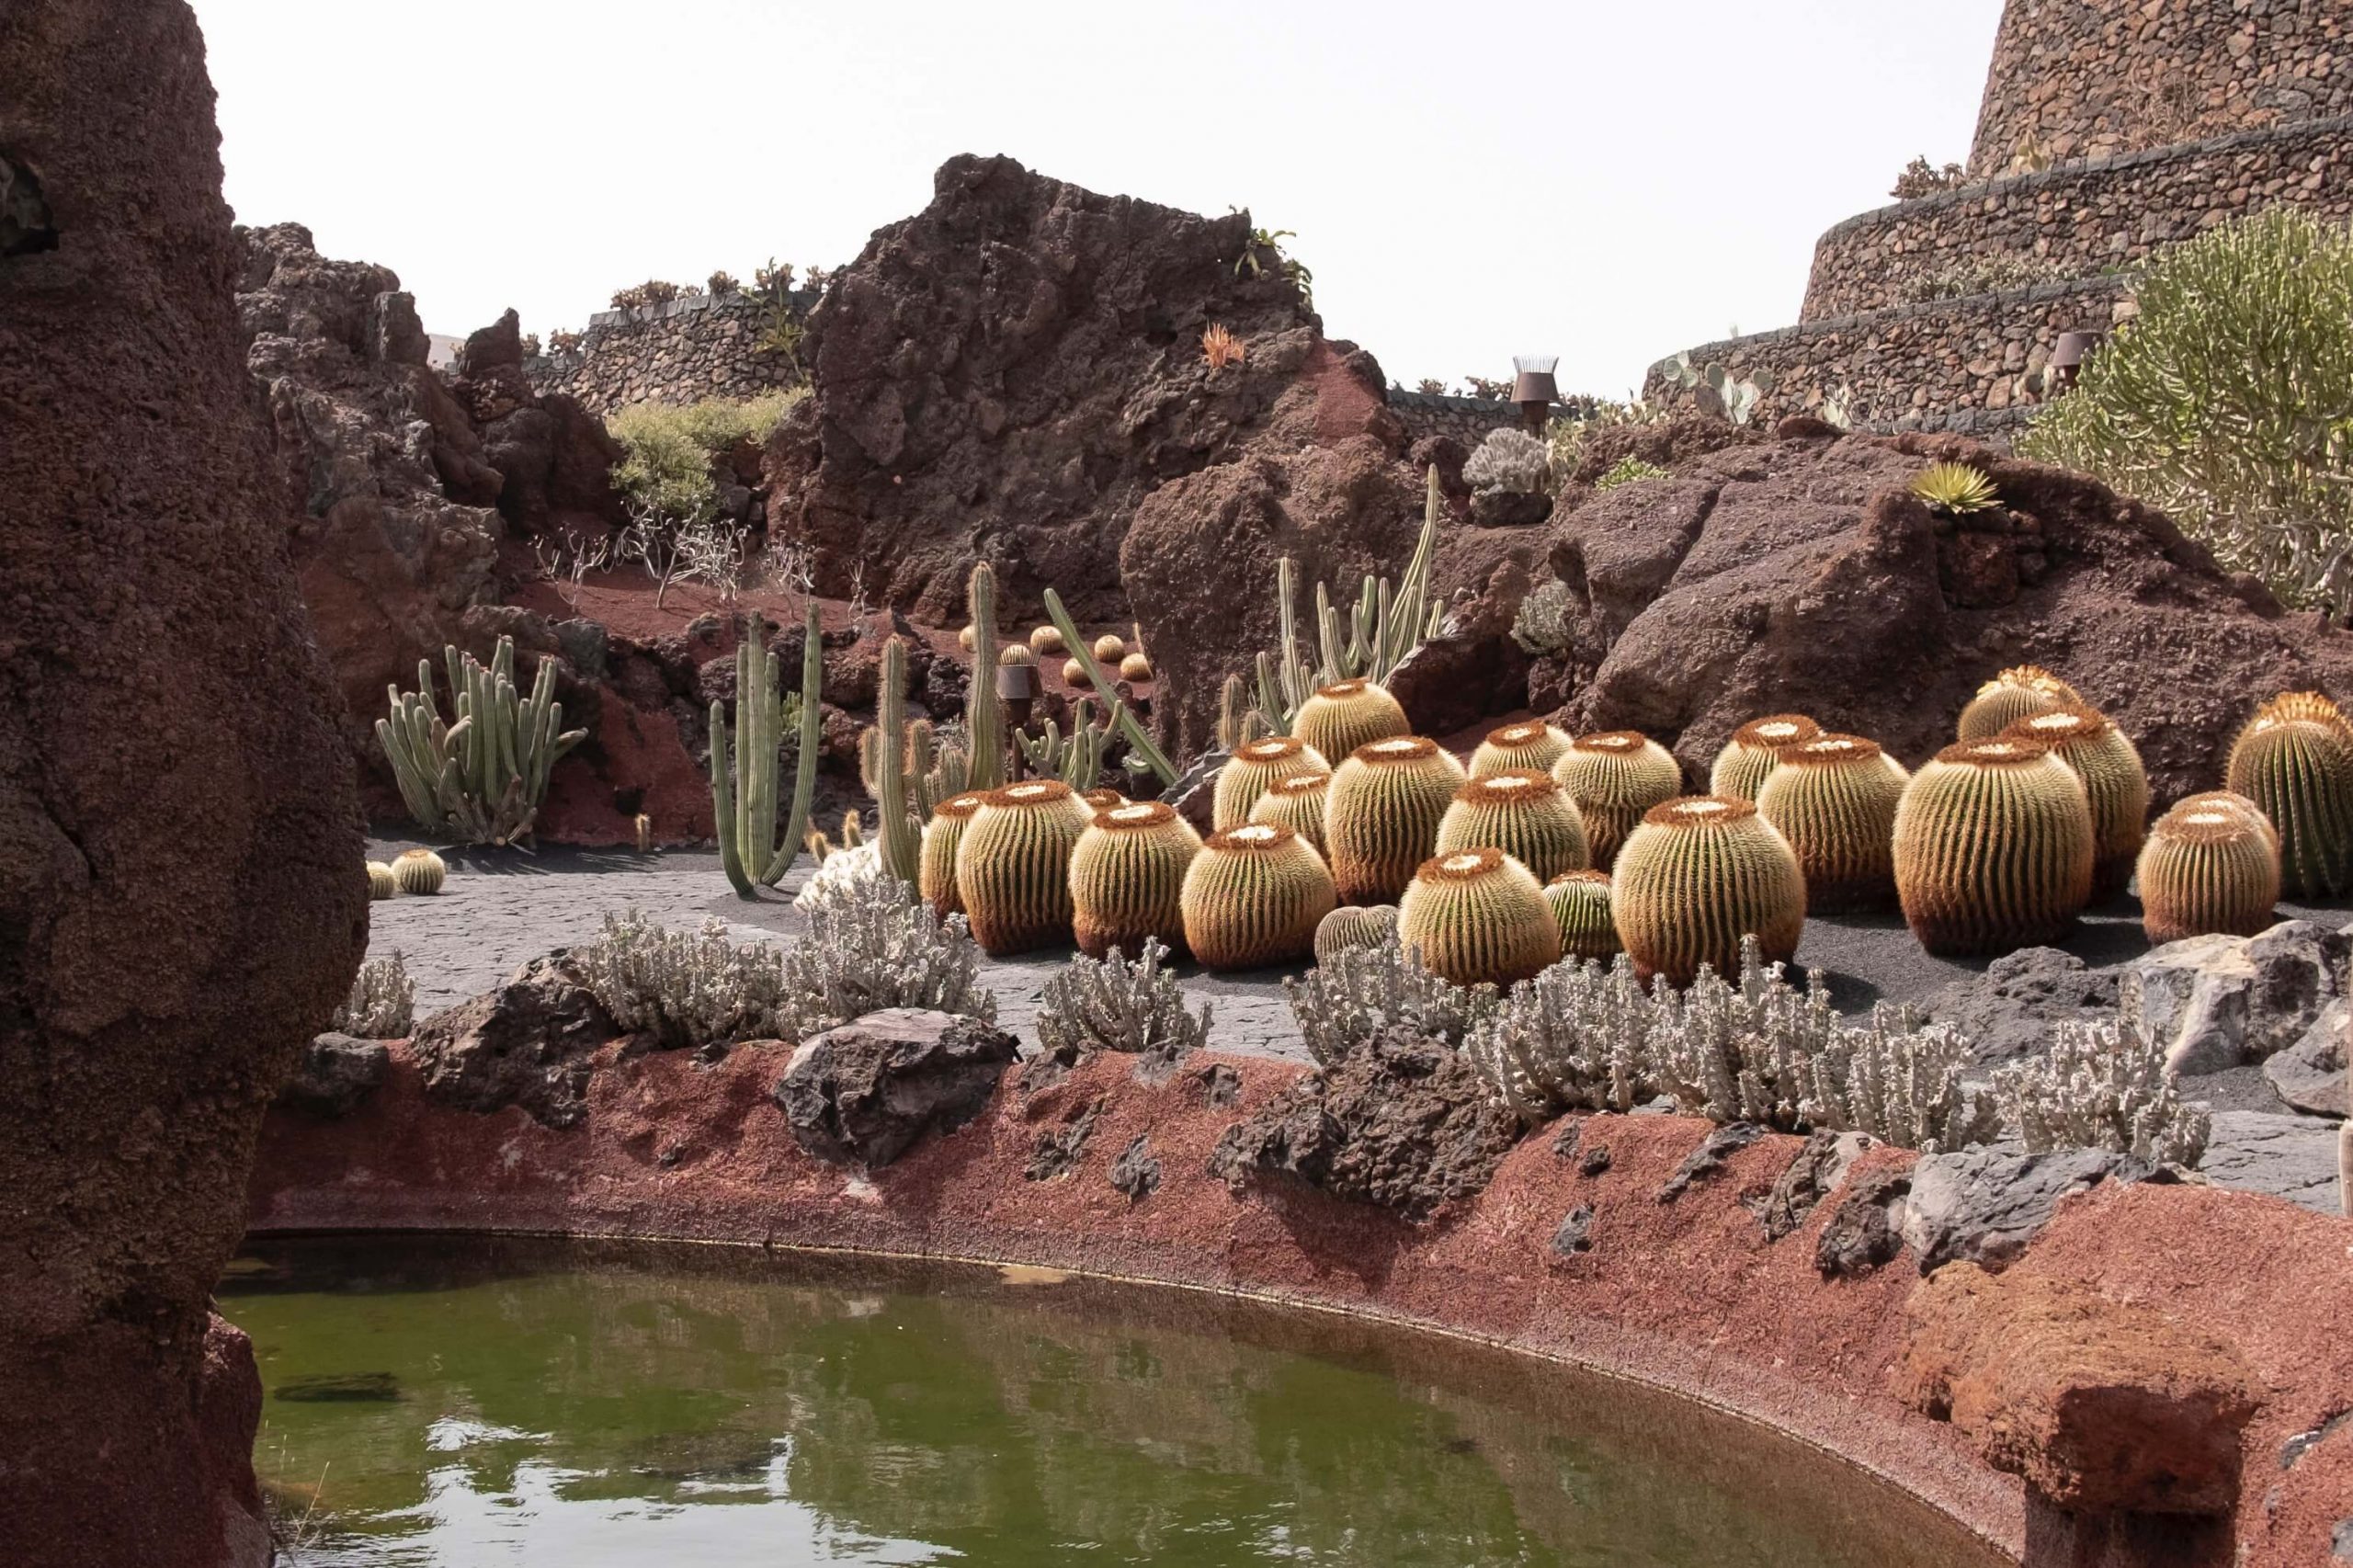
“Planting for privacy is a great idea, but using thorny plants as a barrier comes with a major caveat: maintenance.”
You will eventually need to prune these plants, and that is a hazardous job. Invest in thick, high-quality leather gauntlet gloves and long-sleeved workwear. Use long-handled loppers and tongs to handle cuttings. Never plant dense, spiny plants directly over utility boxes, water meters, or anything you need to access regularly. Give them plenty of space away from paths where a person could accidentally brush against them.
Scale Guide
For an effective privacy screen, plant height and density are critical. This strategy is best for property lines or for screening an unwanted view. Look for species that grow at least 6-8 feet tall. Plant them in a staggered, zig-zag pattern rather than a straight line. This creates a denser visual barrier much faster. A typical spacing for a staggered row is 4-5 feet between plants. For a 50-foot property line, you would need approximately 20-25 plants to create a formidable, water-wise screen within 3-5 years.
19. Create a Meditative Zen Garden with Raked Gravel and Rocks
The One Thing
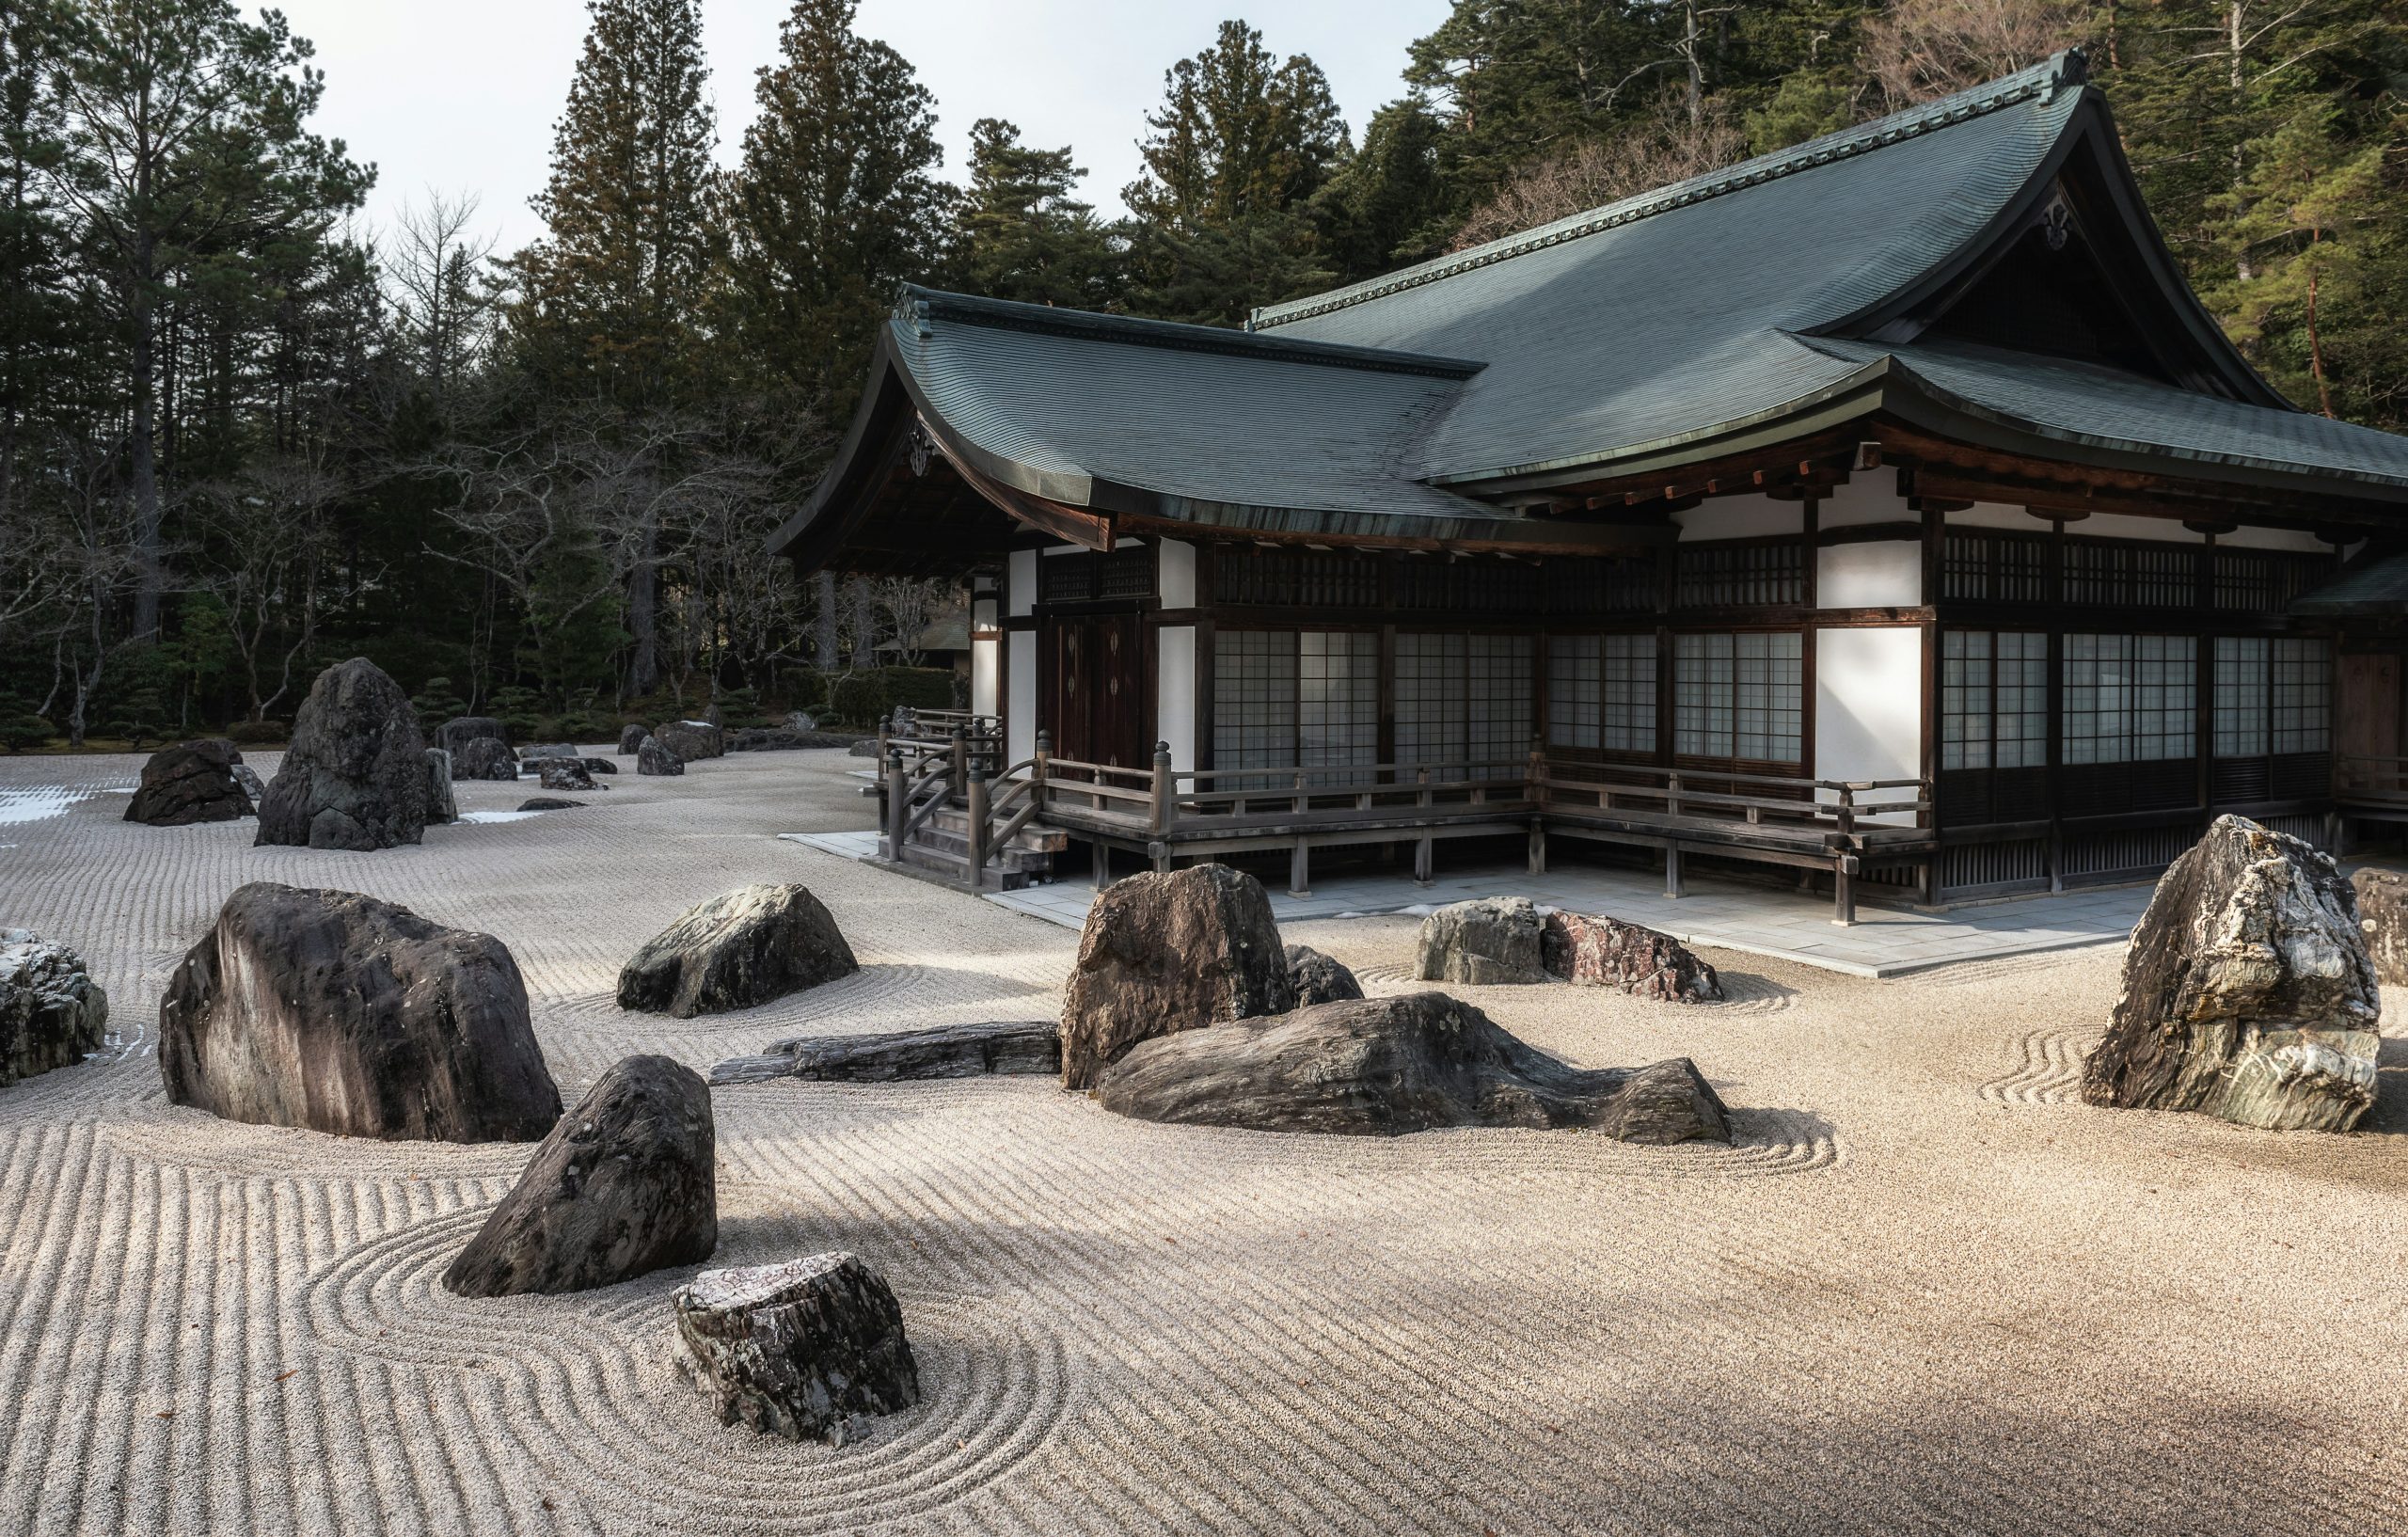
“The raked gravel is the soul of a Japanese zen garden.”
It is not just decorative; it is a symbolic representation of water, with the raked lines suggesting ripples or waves. The act of raking itself is a meditative practice. The large rock formations become islands in this symbolic sea. Without the meticulously maintained patterns in the gravel, the garden would lose its profound sense of tranquility, order, and symbolism. It’s an element that requires participation, not just passive viewing, which is what makes it so powerful.
Trending Context
In a world of constant digital noise and overstimulation, the zen garden is experiencing a resurgence as a tool for mindfulness at home. People are craving spaces that encourage them to slow down and disconnect. This ancient design practice is the antithesis of a “smart” home; it’s a deliberately analog space. The focus on natural materials, minimalism, and the quiet ritual of maintenance resonates with a growing desire for mental clarity and a connection to the physical world. It’s a landscape designed for mental well-being, not just curb appeal.
20. Soften a Concrete Patio with Weathered Wood and Flowers
What Makes It Work
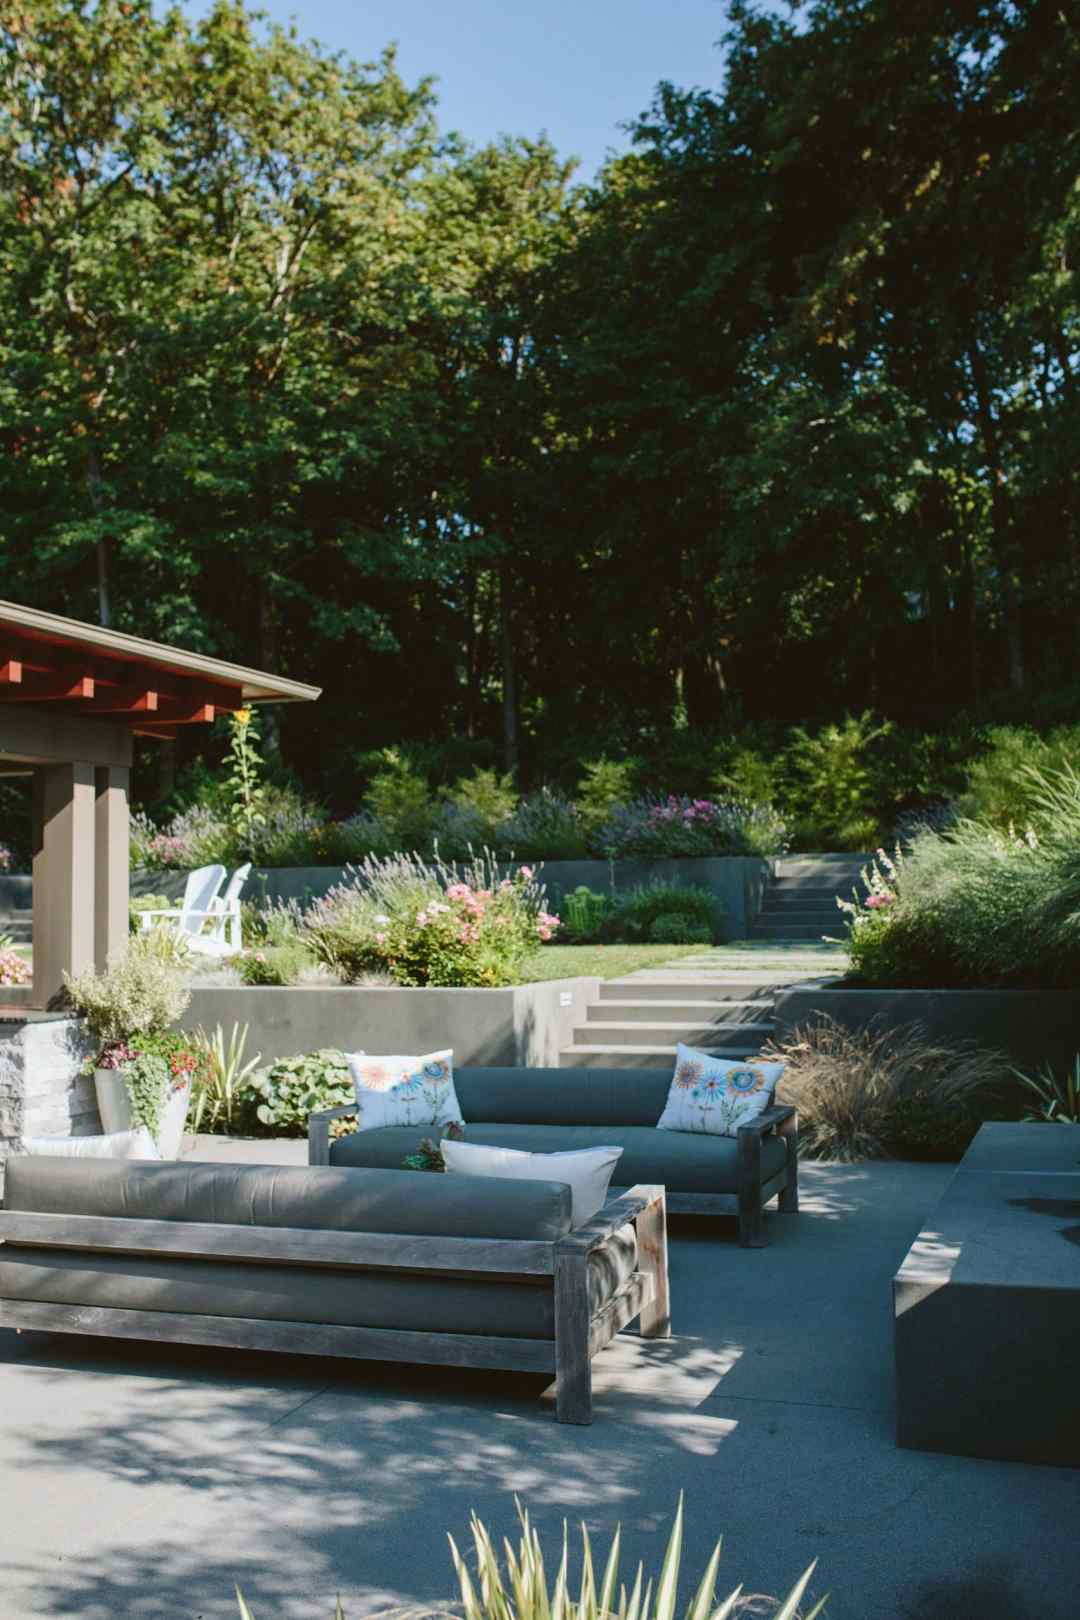
“This space feels so inviting because it expertly balances hard and soft, warm and cool.”
The cool gray of the concrete patio and retaining walls provides a modern, neutral base. This could easily feel cold and industrial, but it’s perfectly warmed up by the weathered wood frames of the sofas and the vibrant pinks and purples of the floral pillows and plants. The deep gray cushions mediate between the two, tying the wood and concrete together. It’s this thoughtful mixing of materials and temperatures that creates a comfortable, relaxed atmosphere.
Get This Look For Less
A custom concrete patio and retaining walls can be a major expense. You can get a very similar feel on a budget. Start with a simple gravel or decomposed granite patio base, which is a fraction of the cost of poured concrete. Instead of concrete walls, use stacked landscape timbers or even affordable concrete blocks (you can paint them a dark gray!) to create tiered planting beds. Source outdoor sofas from Target or on Facebook Marketplace during the off-season for the best deals. The key is to maintain the color and material balance.
21. Embrace Minimalism with a Few Perfect Cactus Specimens
Style Math
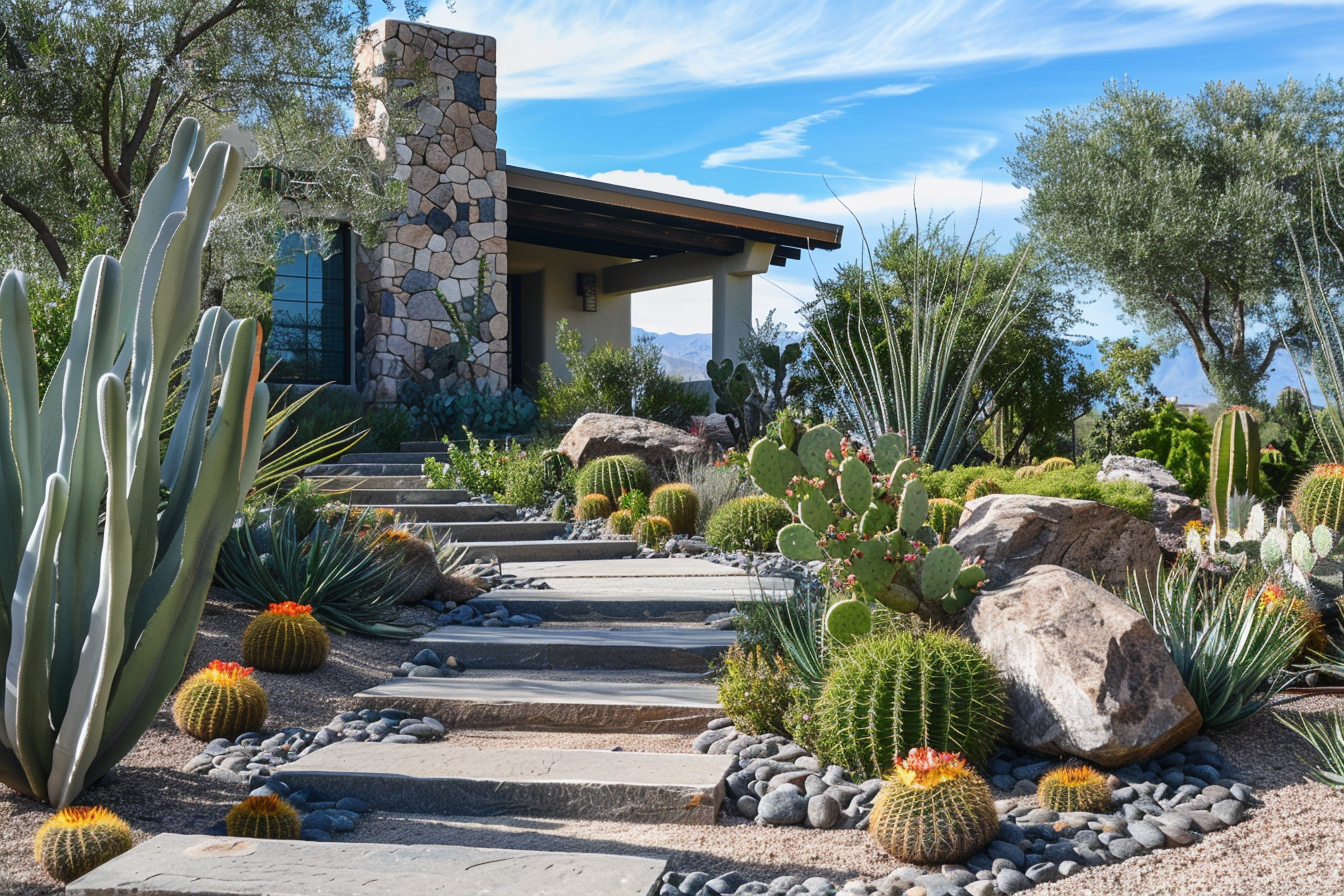
“A minimalist desert landscape follows a rule of subtraction.”
The formula is: 80% negative space + 15% specimen plants + 5% accent elements. The “negative space” is your ground cover—decomposed granite or fine gravel—which should be the dominant feature. Then, add just two or three sculptural plants with beautiful shapes. Don’t crowd them; let them stand alone like sculptures in a gallery. The final 5% is a single, perfect accent: a beautiful ceramic pot, a unique boulder, or a simple bench. Less is truly more here.
Designer Tip
In a minimalist design, every detail counts. The most critical and often overlooked element is the topdressing around your specimen plants. Instead of letting the gravel or soil meet the base of the plant, create a “collar” of a different material. Take stones that are 2-3 inches in diameter and arrange them carefully in a circle around the base of each cactus. This small detail makes the planting look incredibly deliberate and “finished,” like a piece of art being properly framed. It also helps with drainage right at the plant’s crown.
22. Use Bright Orange Succulents as a Fiery Groundcover
The One Thing
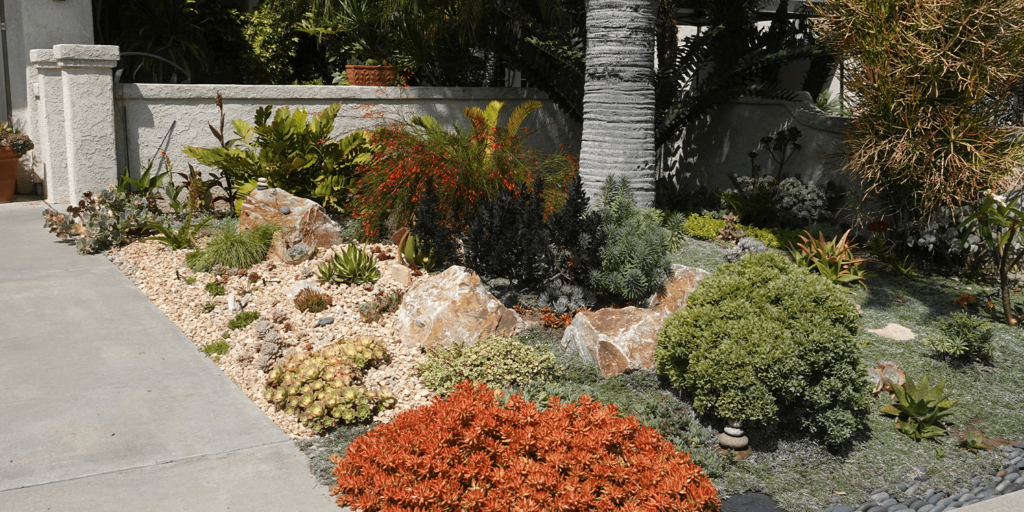
“The swath of brilliant orange-red succulent groundcover (likely Sedum nussbaumerianum or a similar variety) is the electrifying element that makes this garden unforgettable.”
While the boulders and other green plants provide a lovely natural structure, the fiery groundcover injects a massive dose of energy and personality. It transforms the space from a standard drought-tolerant yard into a vibrant, head-turning landscape. This is a perfect example of how a single, bold plant choice can define an entire design. I love how this contrasts with the cooler purple tones you see in Idea #26.
What Makes It Work
This composition works because of the classic design principle of a “hot” accent color against a neutral background. The light tan gravel, tan boulders, and muted green shrubs create a calm, earthy canvas. This neutrality allows the intense orange-red of the groundcover to take center stage without overwhelming the scene. If the gravel were a busy mix of colors or the other plants were equally bright, the effect would be chaotic. The restraint in the rest of the palette is what gives the accent color its power.
23. Layer Red, Lime, and Purple Foliage Against Dark Mulch
Designer Tip
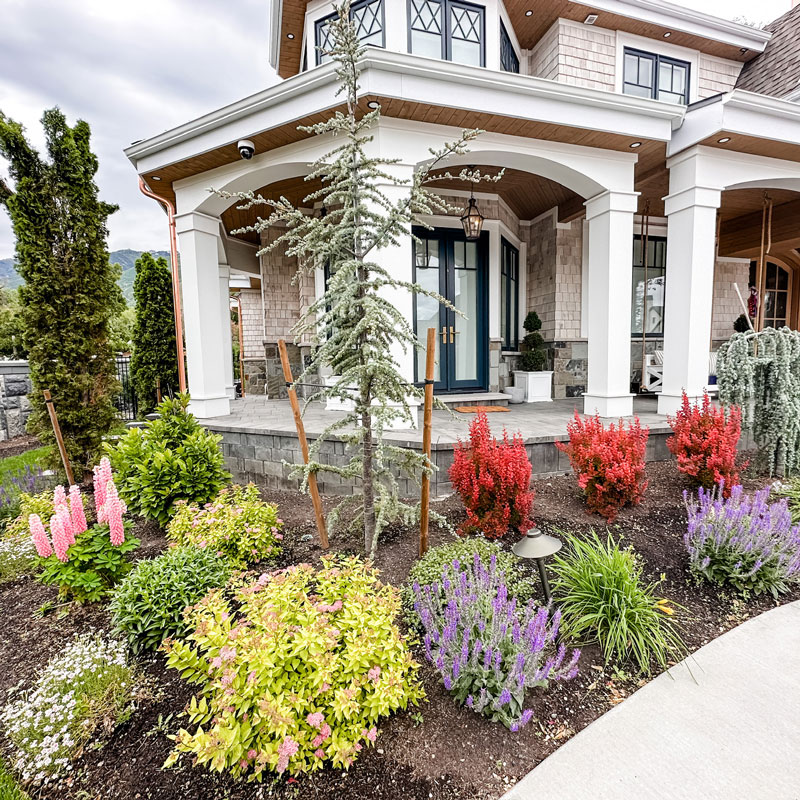
“The secret to making a colorful foliage garden pop is the groundcover.”
Using a dark brown or black mulch is a pro-level move. A dark, uniform base makes all the colors planted in it appear more saturated and vibrant. Lighter-colored mulches or bare soil would visually compete with the leaves of the red barberry and purple salvia, muting their impact. Always choose a mulch color that contrasts with your primary foliage colors. For bright greens and reds like these, dark mulch is the perfect choice for maximum drama.
Maintenance Reality
To keep these colors vibrant, you need to be strategic about sun and pruning. Red-leafed plants like Barberry will often turn a muddy green if they don’t get at least 6 hours of direct sun per day. Conversely, some lime-green or yellow-leafed shrubs can scorch in intense afternoon sun. Read the plant tags carefully! Also, many flowering perennials like Salvia require “deadheading” (removing spent blooms) to encourage continuous flowering throughout the season. Plan on a quick 30-minute pass through the garden every other week to snip and tidy.
24. Plant a Terraced Hillside with a riot of Color and Texture
Scale Guide
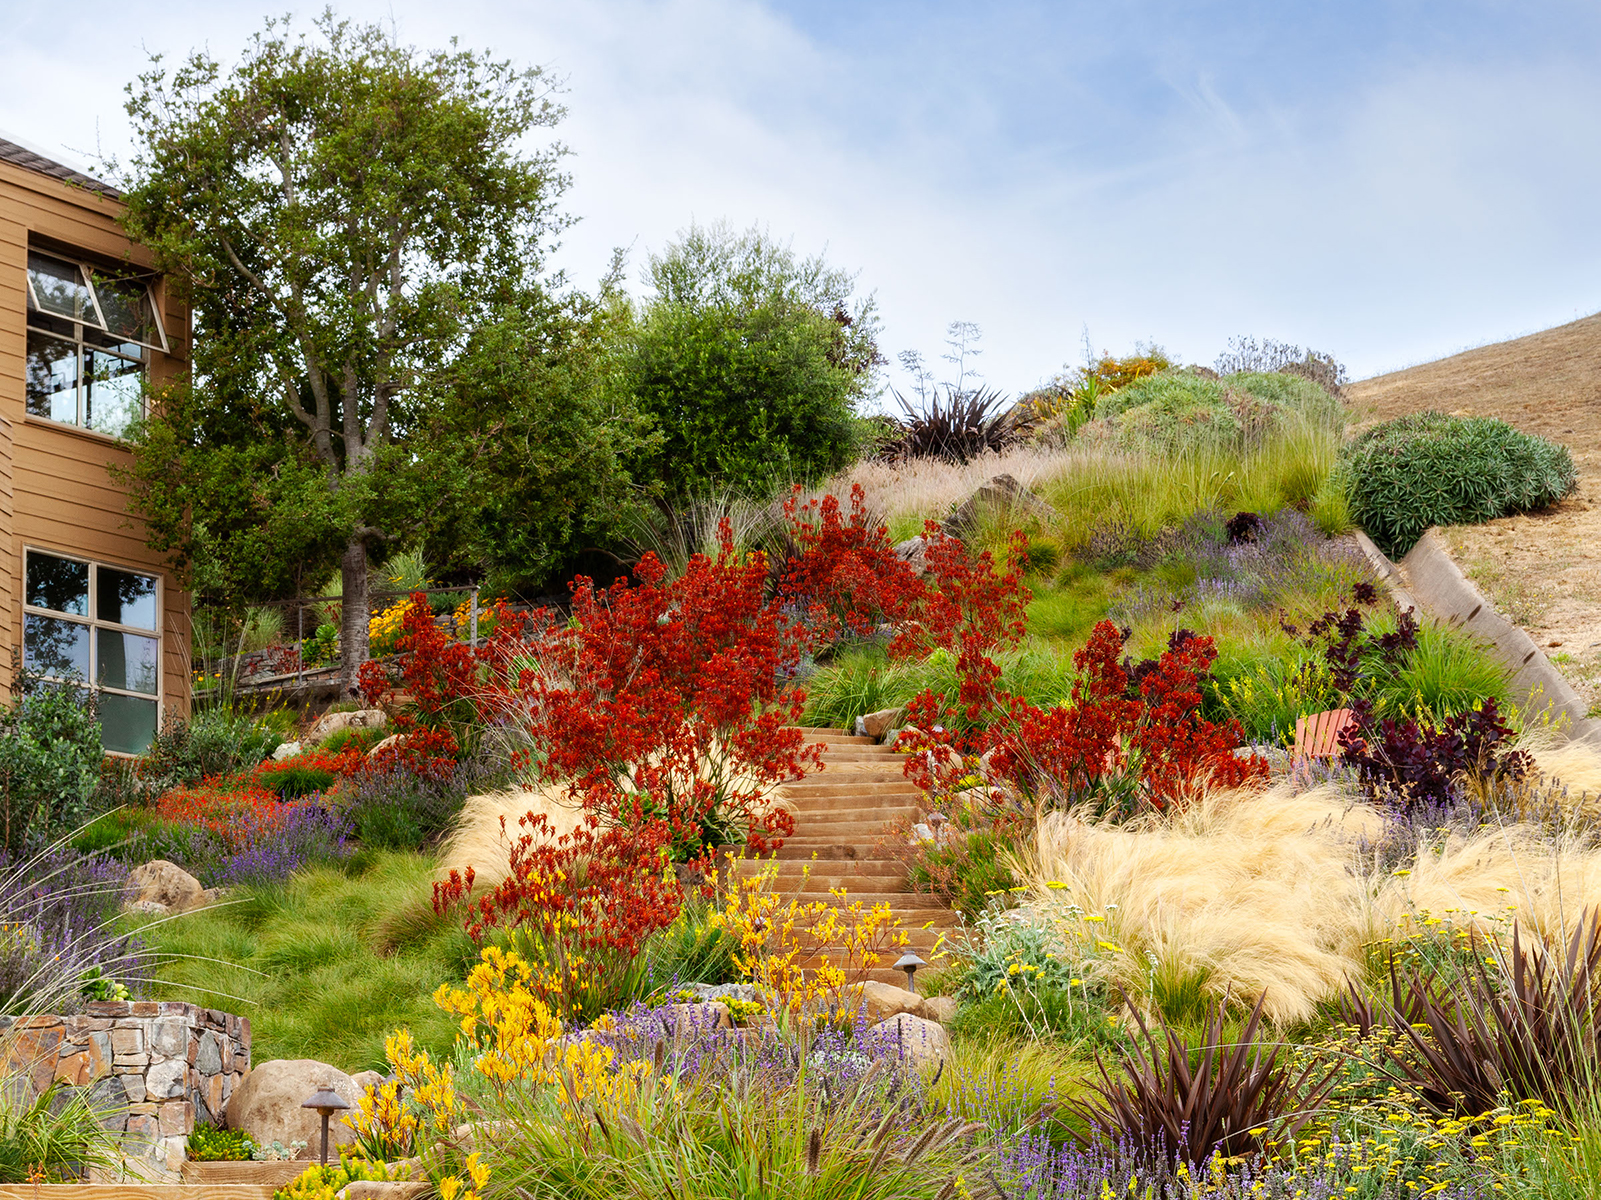
“A densely planted, multi-level design like this is perfect for a moderately sloped yard, typically with a grade of 10-25%.”
It requires a decent amount of space to achieve the layered, “amphitheater” effect; aim for a planting area that is at least 15 feet deep from front to back. The stone steps are crucial for access and maintenance. For comfortable use, each step should have a rise of no more than 7 inches and a tread (depth) of at least 11 inches. This approach turns a challenging slope into a stunning feature, but isn’t suitable for very small or flat yards.
How-To Brief
To create this lush, layered look, follow the “thriller, filler, spiller” planting method for each terrace.
- Thriller: On each level, plant a few tall, eye-catching plants (the “thrillers”) in the back. These could be tall grasses or upright flowering shrubs.
- Filler: In front of the thrillers, use mounding plants with interesting foliage or flowers (the “fillers”) to add mass and color. Examples include the red and yellow flowering shrubs seen here.
- Spiller: Right at the edge of the retaining wall or terrace, plant low-growing, trailing plants (the “spillers”) that will cascade over the side, softening the hard edges of the stone.
This simple recipe creates a professionally designed look full of depth and interest.
25. Combine a White Pergola with a Reddish-Brown Mulch Bed
Get This Look For Less
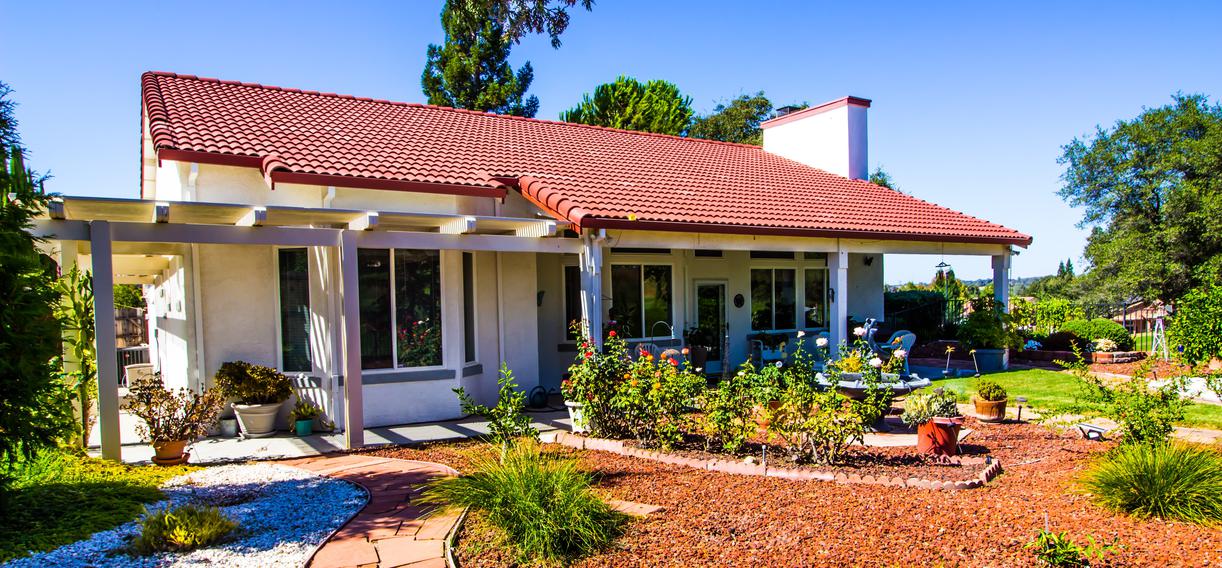
“The large white pergola is a beautiful but potentially costly feature.”
You can achieve a similar effect for much less by using a simple, dark-colored sail shade attached directly to the house facade and a couple of posts. This provides the same functional shade and architectural interest for 50-70% less than a custom-built pergola. For groundcover, reddish-brown wood mulch is one of the most affordable options available and gives a rich, earthy look that contrasts beautifully with a white house, much like the classic Southwestern style in Idea #1.
What Makes It Work
The design succeeds through its high-contrast, clean-lined palette. The crisp white of the stucco and pergola creates a bright, reflective backdrop that feels clean and modern. The deep reddish-brown of the mulch provides a rich, earthy base that anchors the entire scene. The green of the plants and the terracotta red of the roof act as secondary accents. This simple, three-color scheme (white, brown, green) is timeless and effective, making the entire property look deliberate and well-maintained.
26. Spotlight a Sculptural Agave with Purple Groundcover and Cream Pavers
The One Thing
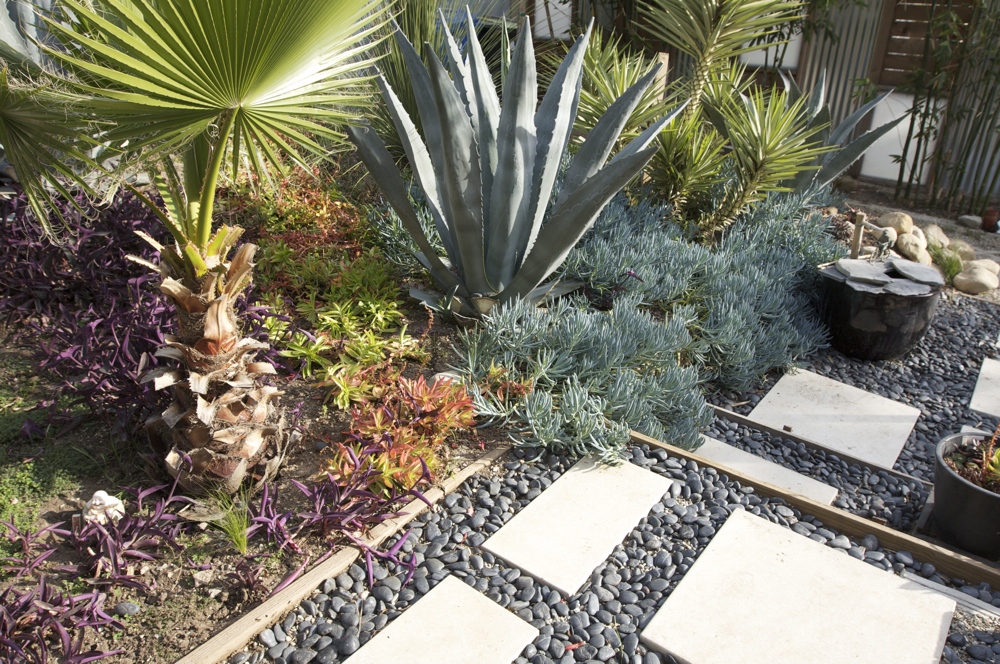
“The large, spiky, grey-green agave is the undisputed star of this garden bed.”
It serves as a living sculpture, with its dramatic form and size creating an immediate focal point. Every other element—the low-lying purple groundcover, the cream pavers, the dark river stones—is chosen and placed specifically to highlight the agave. If you removed it, the other elements would lack a central purpose and the design would feel incomplete. It’s a perfect example of how one spectacular plant can carry an entire design.
Style Math
This composition is a lesson in color theory. The formula is: 60% neutral hardscape (cream pavers, grey stones) + 25% cool accent colors (the grey-green agave and deep purple groundcover) + 15% warm accents (the surrounding dirt bed and distant green foliage). The magic is in the use of complementary colors. The deep purple groundcover makes the grey-green of the agave appear more vibrant and structural. The neutral cream and grey hardscape provides a calm stage for this color play.
27. Add Charm to a Courtyard with a Striped Awning and Brick Path
Designer Tip
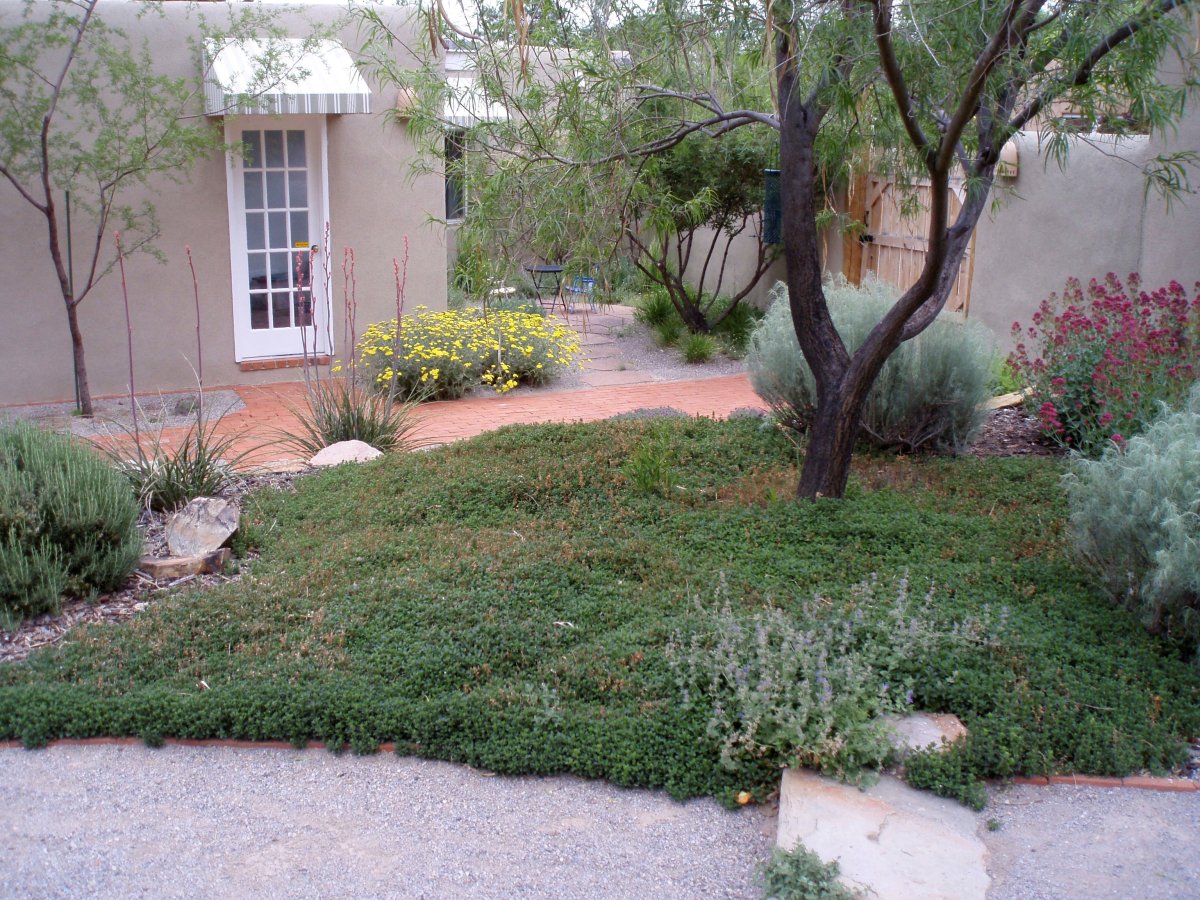
“When you have a landscape with many different textures—stucco walls, brick path, dense groundcover, gravel sections—it’s important to have a few clean, graphic elements to prevent visual chaos.”
The black and white striped awning and the clean white frame of the French door serve this purpose perfectly. They provide a “visual resting place” for the eye. The simple stripes offer a crisp geometry that balances the organic, sprawling nature of the plants. Don’t be afraid to mix in a simple, bold pattern to bring order to a complex scene.
Real Talk
A dense, beautiful groundcover that sprawls over paths and between pavers looks amazing, but it can be a tripping hazard. This “soft-edges” look is best for secondary paths or areas with less foot traffic. For your main entrance or most-used walkways, it’s safer to maintain a clear, crisp edge between the path and the planting bed. You will need to get out there with shears or an edger a few times a year to trim back the growth and maintain a safe, clear passage. Beauty sometimes requires a little tough love!
28. Create Evening Drama with a Lighted Dry Creek Bed
How-To Brief
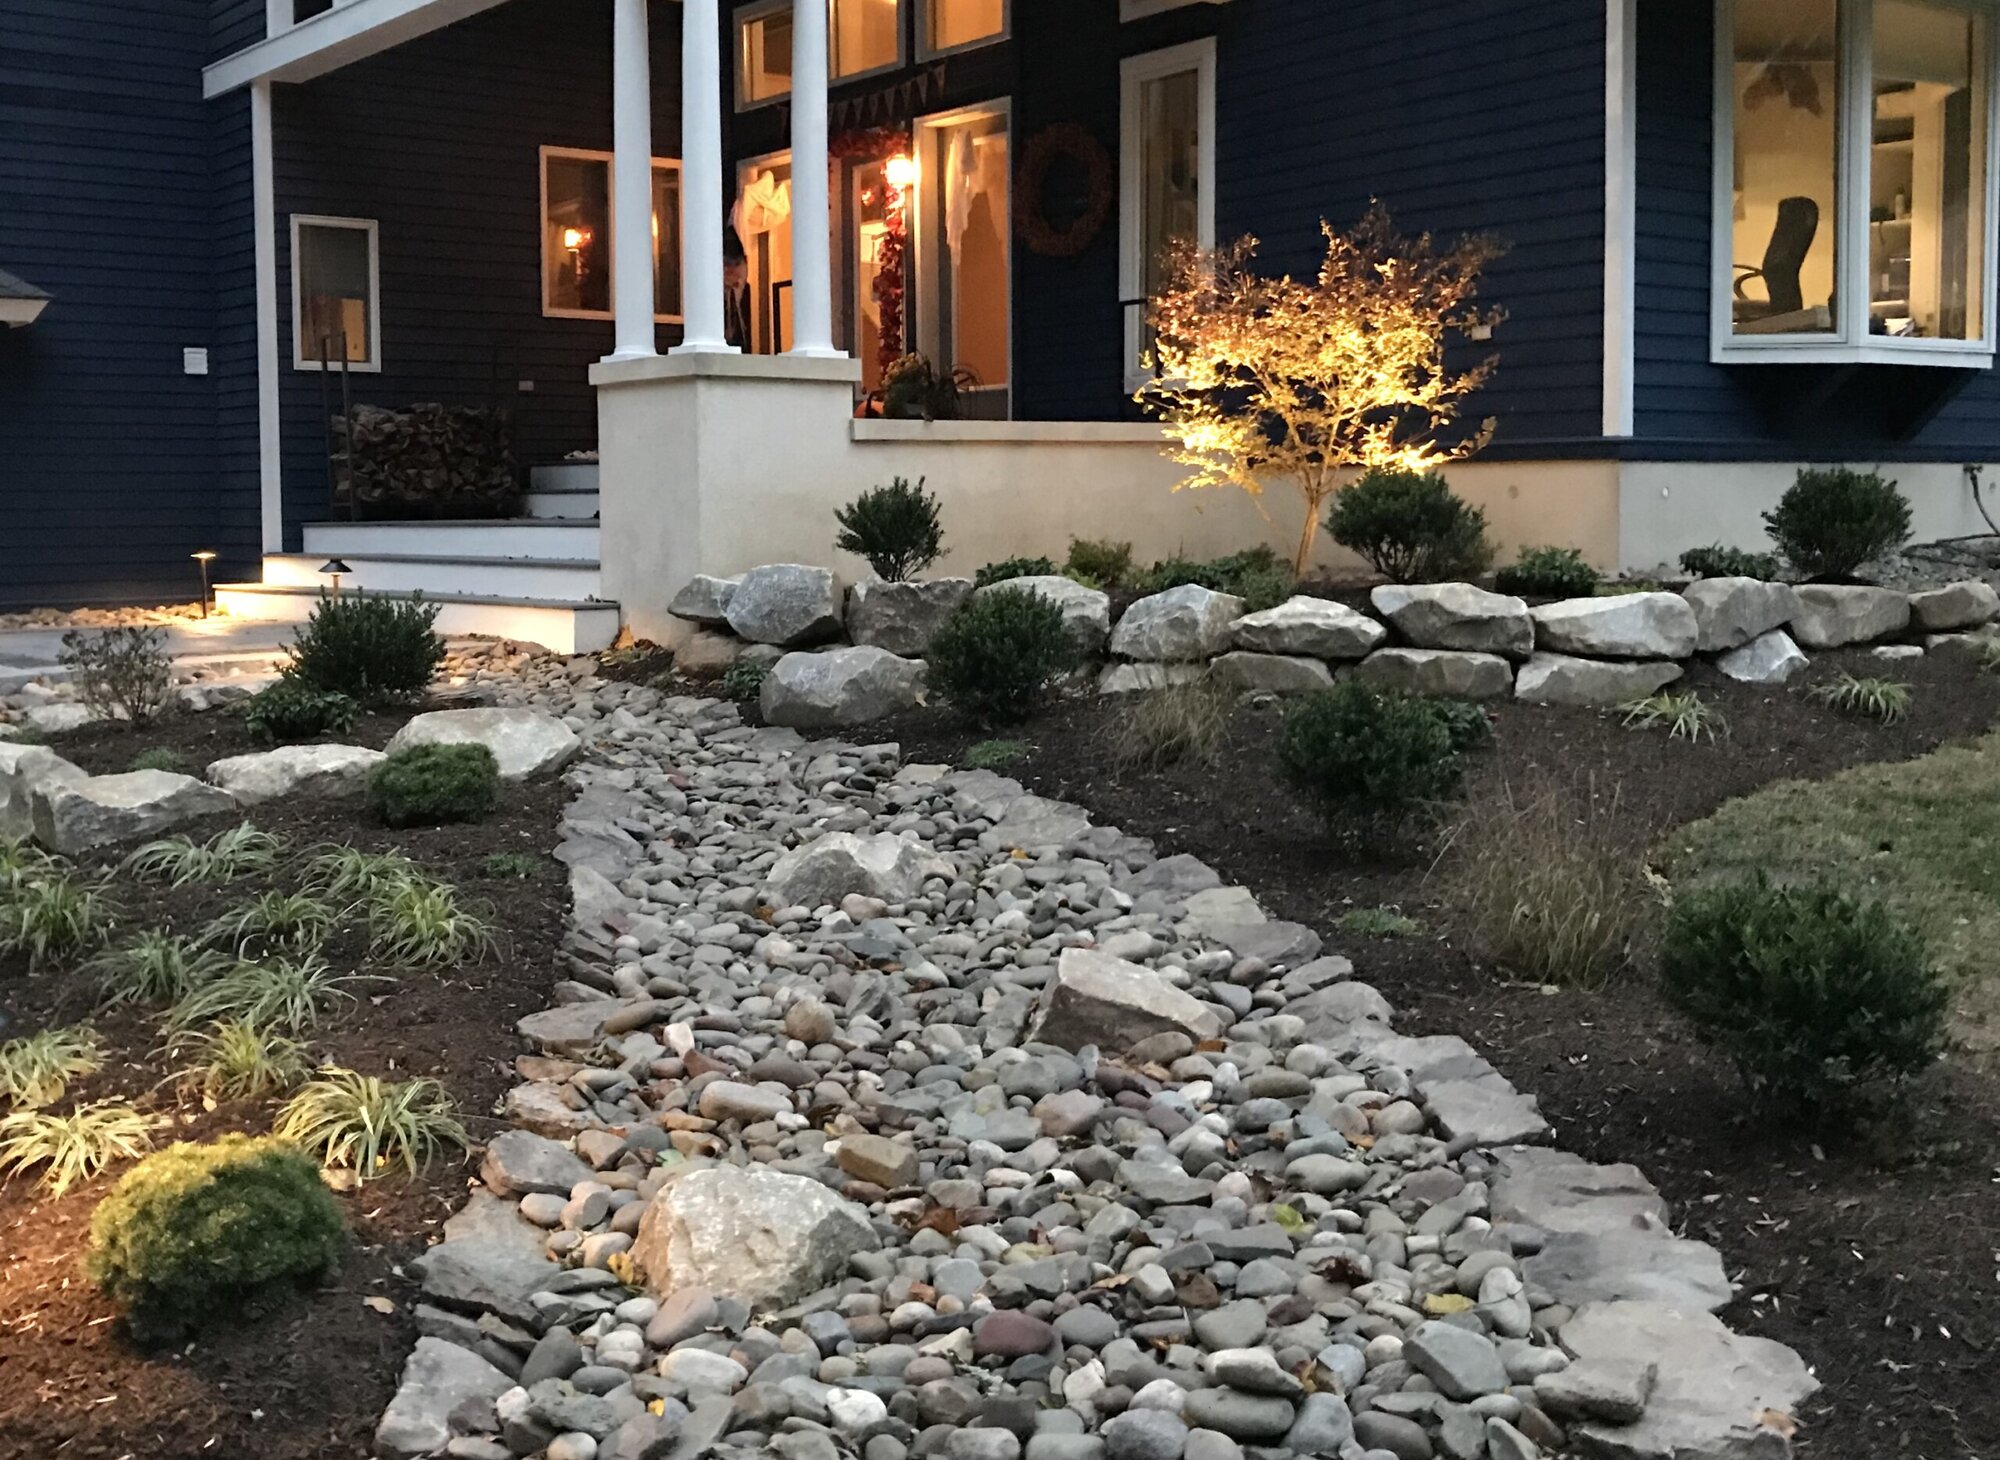
“Subtle landscape lighting makes a huge difference.”
Here’s how to light a dry creek bed effectively:Choose Low-Voltage: Use a low-voltage (12V) landscape lighting system. It’s safer, easier to install for a DIYer, and more energy-efficient.Go for Warm Light: Select fixtures with a warm white color temperature (2700K-3000K) for a welcoming, natural glow.Uplight the Boulders: Place one or two spotlights at the base of your largest, most interesting boulders, aiming the light upward to highlight their texture.Hide the Fixtures: Tuck the light fixtures in between rocks and shrubs so you see the light, not the source.Add Path Lights Sparingly: If the creek bed is near a path, add a couple of small, shielded path lights to safely illuminate the way.You can get a complete starter kit for around $150-$300.
What Makes It Work
This design is effective because it perfectly mimics nature while solving a potential drainage problem. The winding shape, the mix of rock sizes, and the larger boulders along the banks all feel authentic. The use of dark mulch is a critical choice; it recedes visually, especially at dusk, making the lighter grey rocks of the creek bed stand out dramatically. The subtle uplighting at night transforms it from a daytime feature into a source of evening ambiance and mystery, highlighting textures you wouldn’t notice in broad daylight.
29. Pair a Terracotta Patio with a Lush Wall of Flowering Ivy
The One Thing
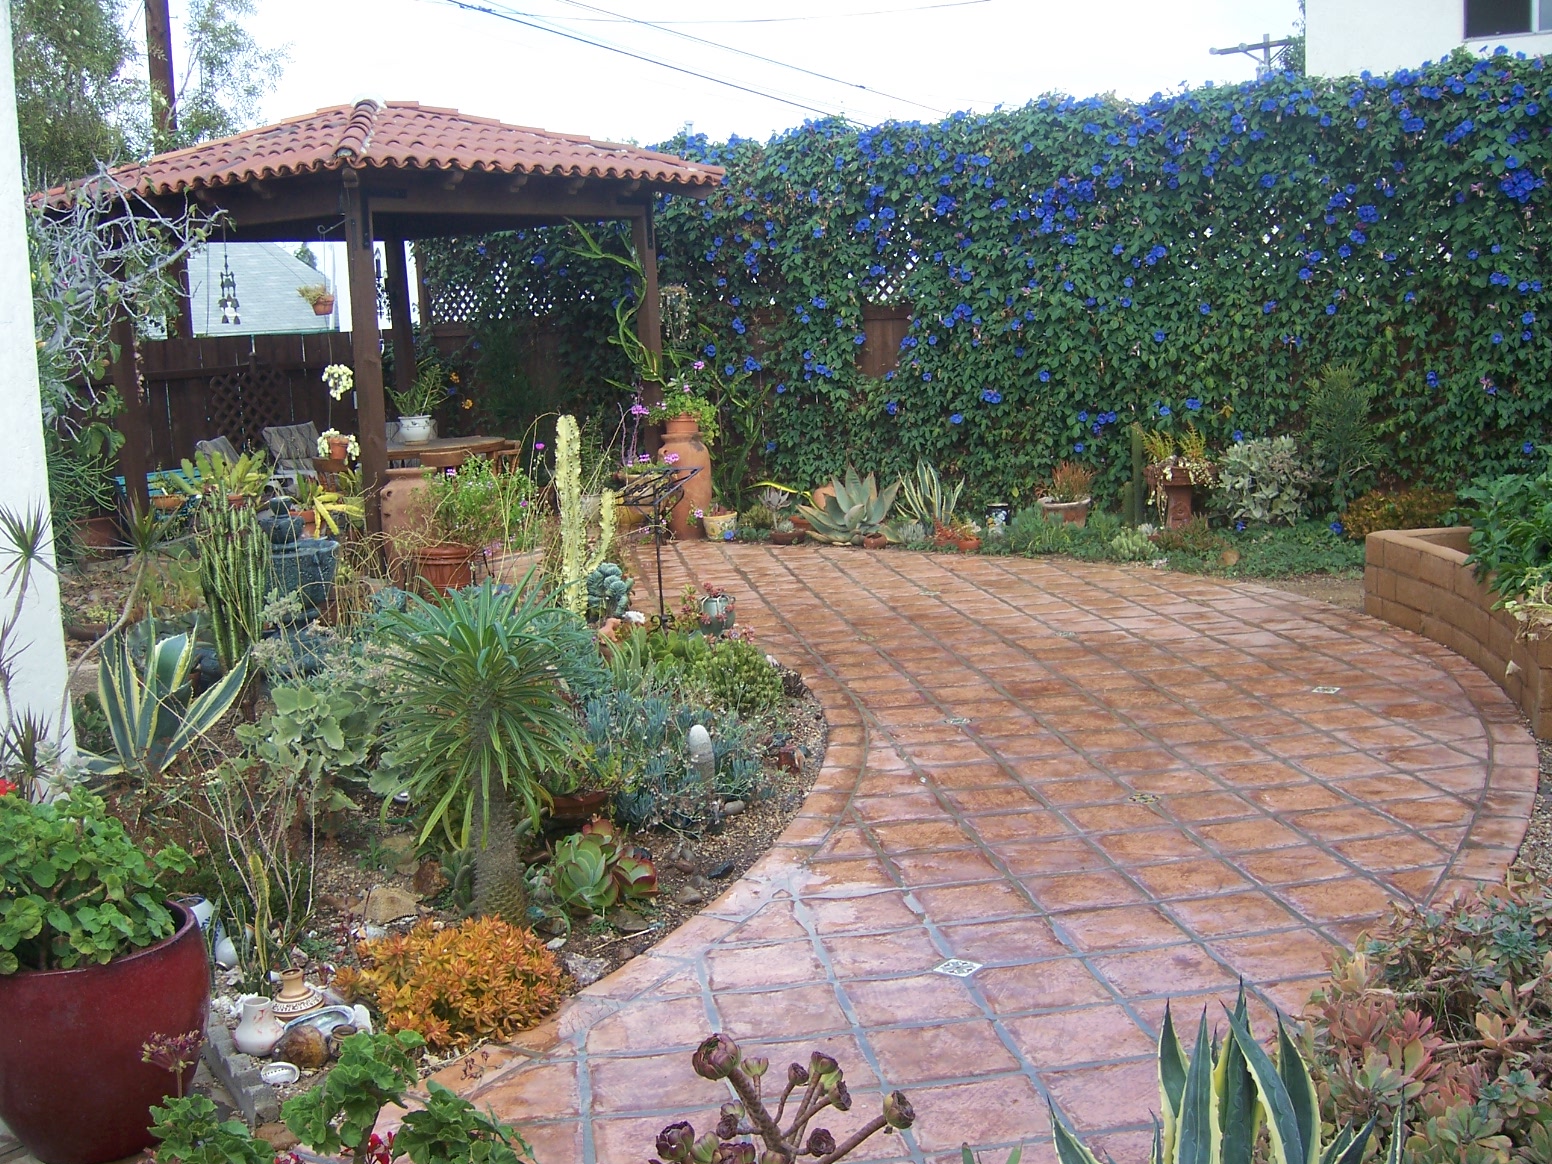
“The wall of green ivy, studded with vibrant blue flowers, completely transforms this space.”
It acts as a living mural, providing a lush, green backdrop that makes the warm terracotta tiles and desert plants pop. It adds a vertical element that draws the eye upward and creates a sense of enclosure and privacy. Without this green wall, the patio would feel much more exposed and the hardscape would dominate. It’s a powerful reminder that “walls” in a garden don’t have to be made of brick or stone. For a similar path material check out Idea #10.
Get This Look For Less
A built-in wooden pergola with a tile roof is a significant investment. You can create a similar sense of enclosure and a support for climbing plants for much less. Install a simple wire trellis system or a few sections of wooden lattice against a block wall or sturdy fence. These options cost 70-90% less than a full pergola. Plant fast-growing, flowering vines like star jasmine or bougainvillea (in appropriate climates). Within a couple of seasons, you’ll have a lush, green wall that gives you the same privacy and vibrant backdrop.
30. Design a Serene Backyard Retreat with a Winding Stone Path
Scale Guide
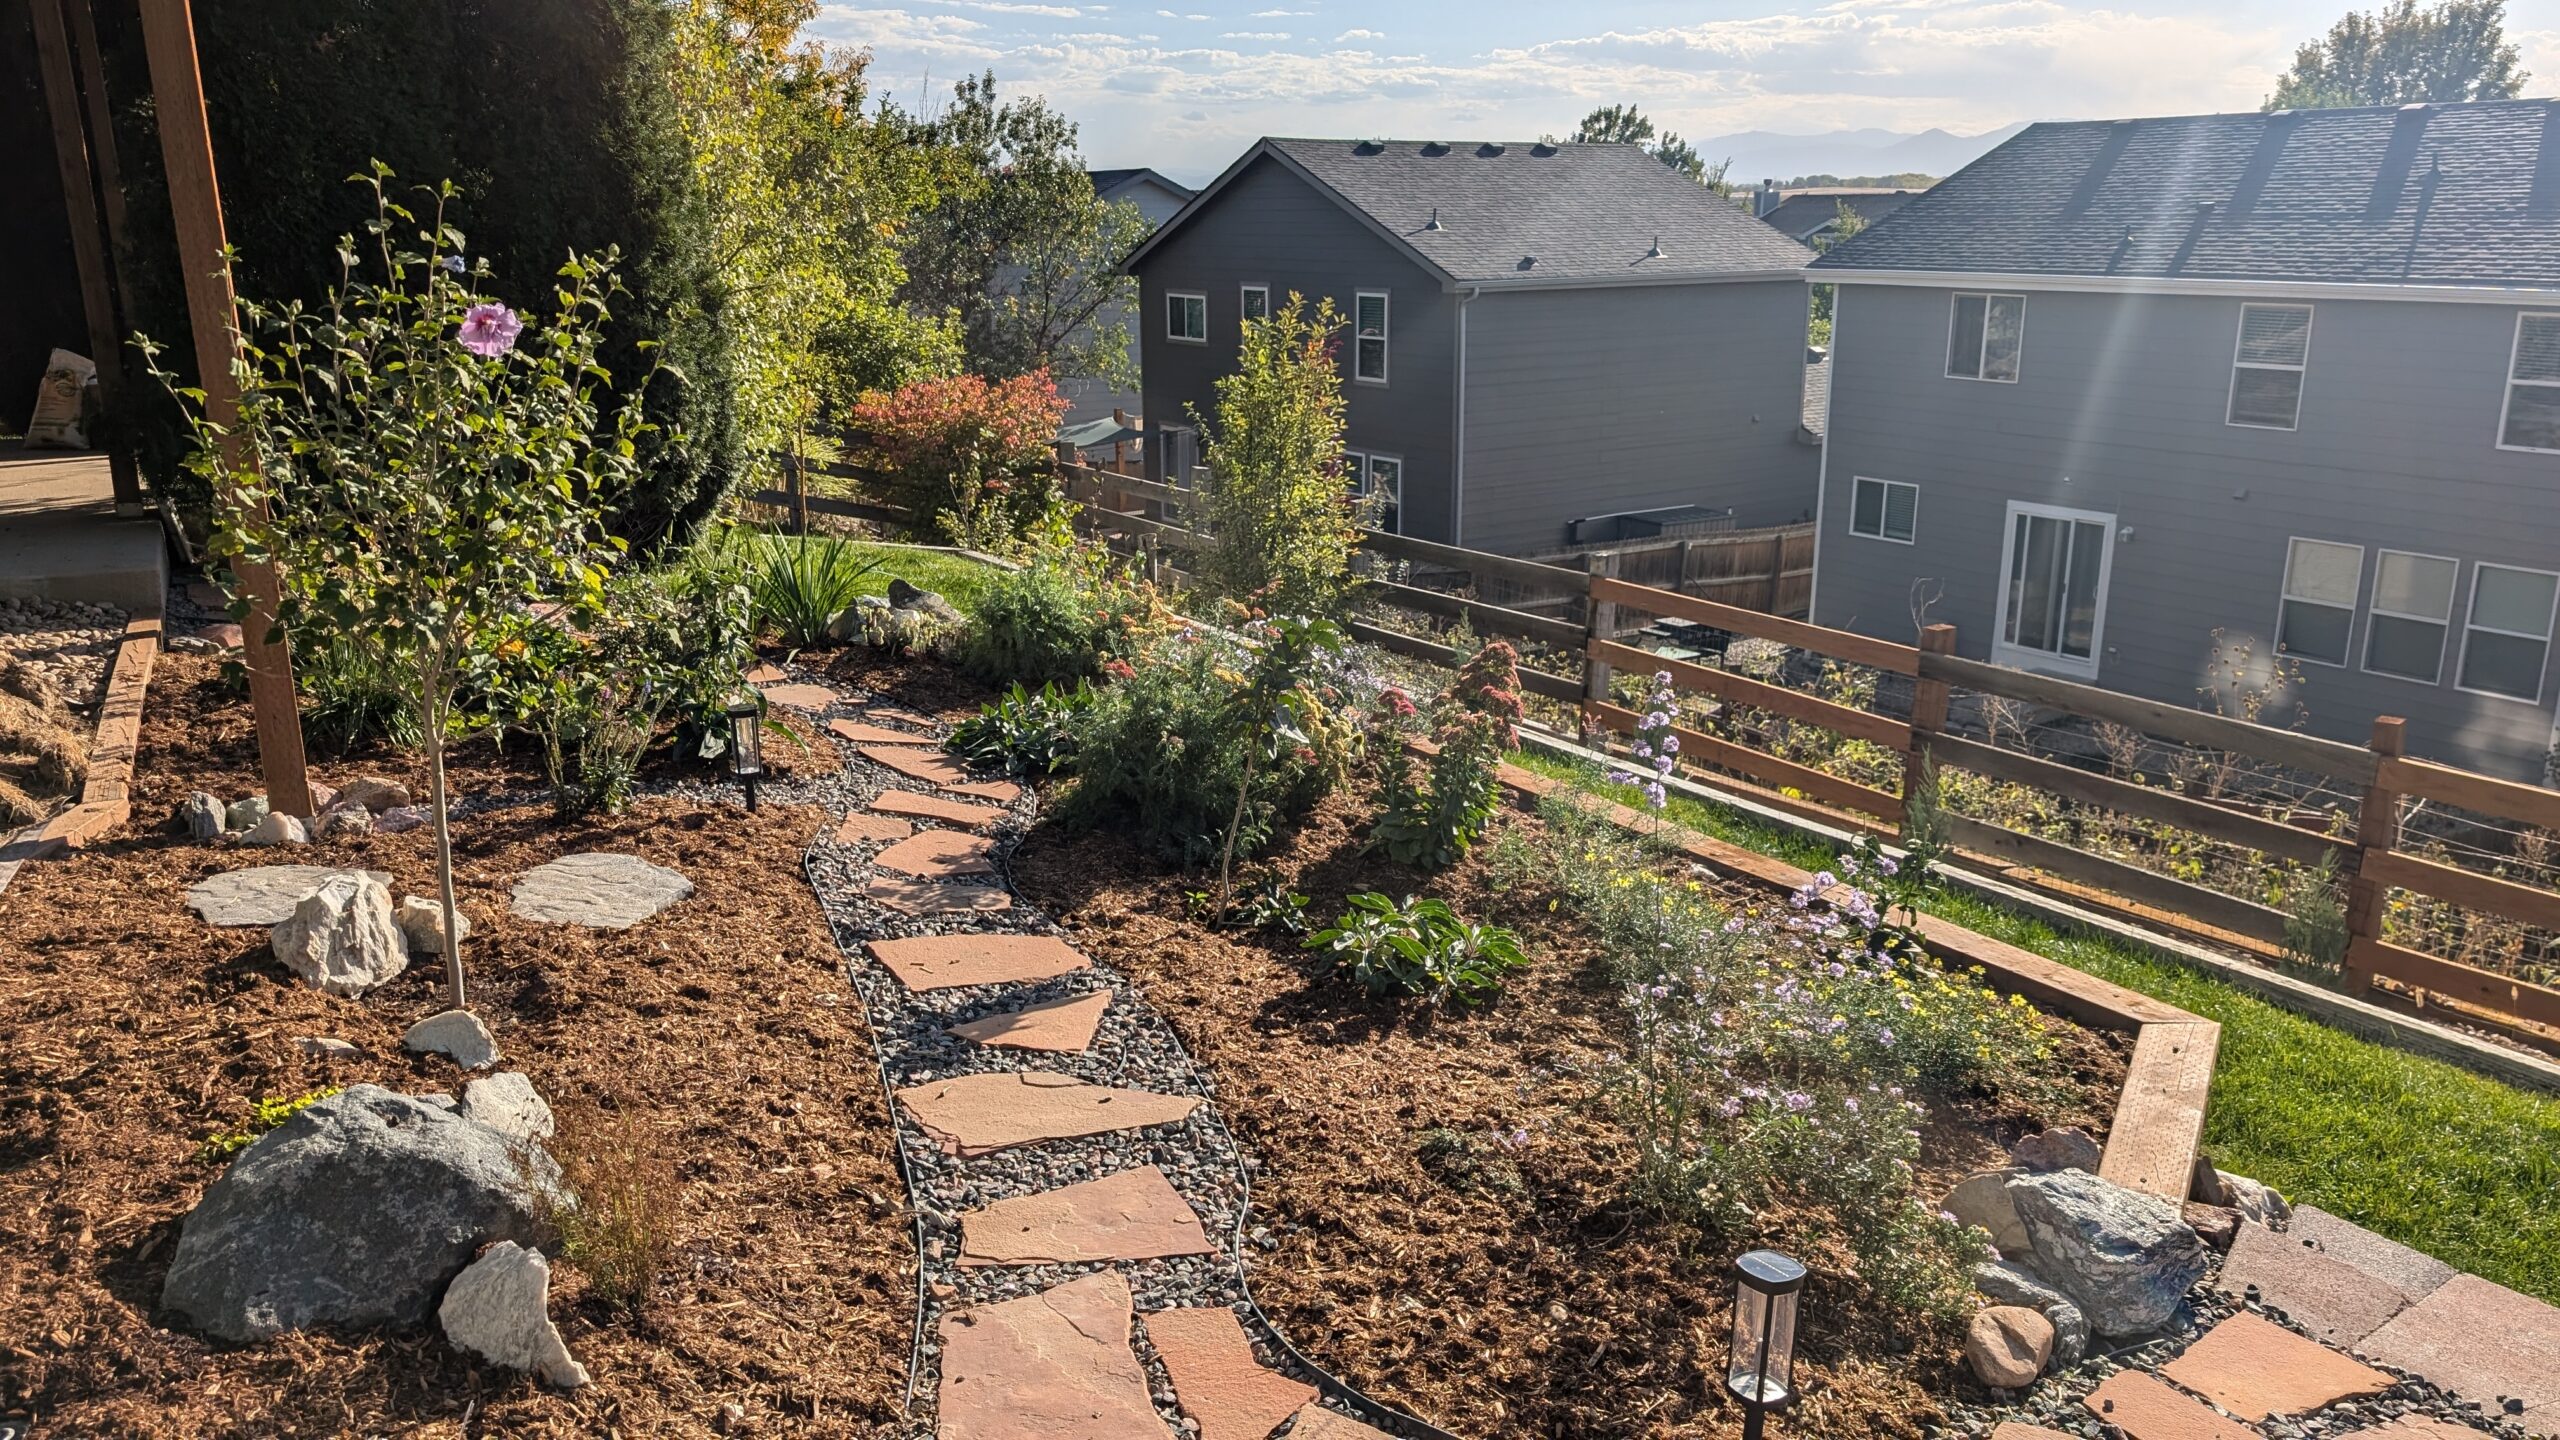
“A winding path with multiple material layers works best in a medium to large backyard, at least 1,500 square feet.”
The path itself needs to be wide enough for comfortable walking, about 3-4 feet. The gentle curves require space to feel graceful; in a very small yard, they can feel forced and cramped. The key is to have deep enough planting beds (at least 5-6 feet) on either side of the path to layer plants, rocks, and mulch as shown here. This creates a sense of journey and discovery that is difficult to achieve in a narrow space.
What Makes It Work
This landscape feels balanced and natural due to the repetition of materials and colors. The gray of the gravel in the path is echoed in the distant houses and mountains, visually connecting the garden to its larger environment. The warm reddish-orange tones of the pavers are a beautiful complementary color to the greens of the foliage. The brown wood chip mulch and the wooden fence tie the whole scene together with an earthy, rustic element. It’s a multi-layered design that feels cohesive because of its limited, well-chosen color and material palette.
Your Sustainable Sanctuary Awaits
Creating a beautiful, water-wise landscape is one of the most rewarding home projects you can tackle. It saves water, reduces maintenance, and connects your home to the natural environment in a stunning way. Start with one small area, pick an idea that speaks to you, and don’t be afraid to adapt it to your own space.
Ready to start planning? Pin your favorite ideas from this article to your Pinterest boards to keep the inspiration flowing!