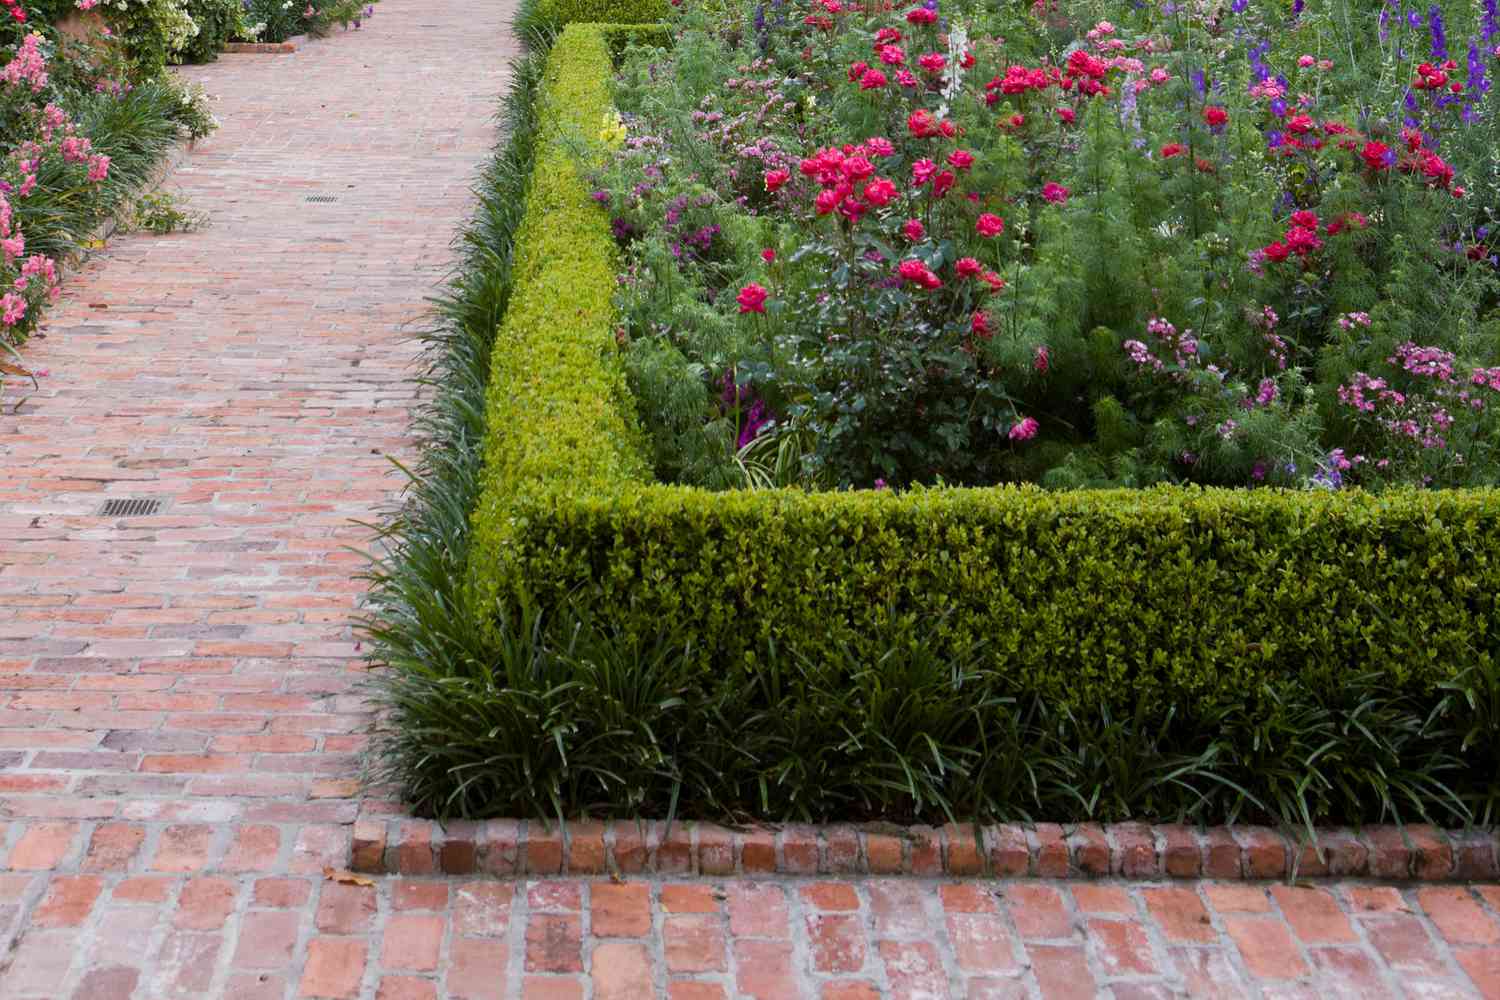
You know that feeling when you finally scroll past the hundredth generic photo and land on a brick edging idea that looks *exactly* right for your yard? That’s the feeling we’re chasing today. After filtering through hundreds of options from local garden centers, Home Depot, and Lowe’s, we narrowed it down to the absolute best. In this gallery, you’ll find 30 distinct brick edging ideas, covering everything from traditional red brick borders to modern concrete block designs, with costs ranging from a budget-friendly $2 per linear foot to more premium $15+ installations. We’re seeing a huge move towards creating defined, polished ‘outdoor rooms,’ and the right edging is the foundation of that entire look for 2026. And stay until the end — we break down the most common mistakes that can ruin these looks. 📌 Pin this guide for later — your future self will thank you when it’s time to get your hands dirty.
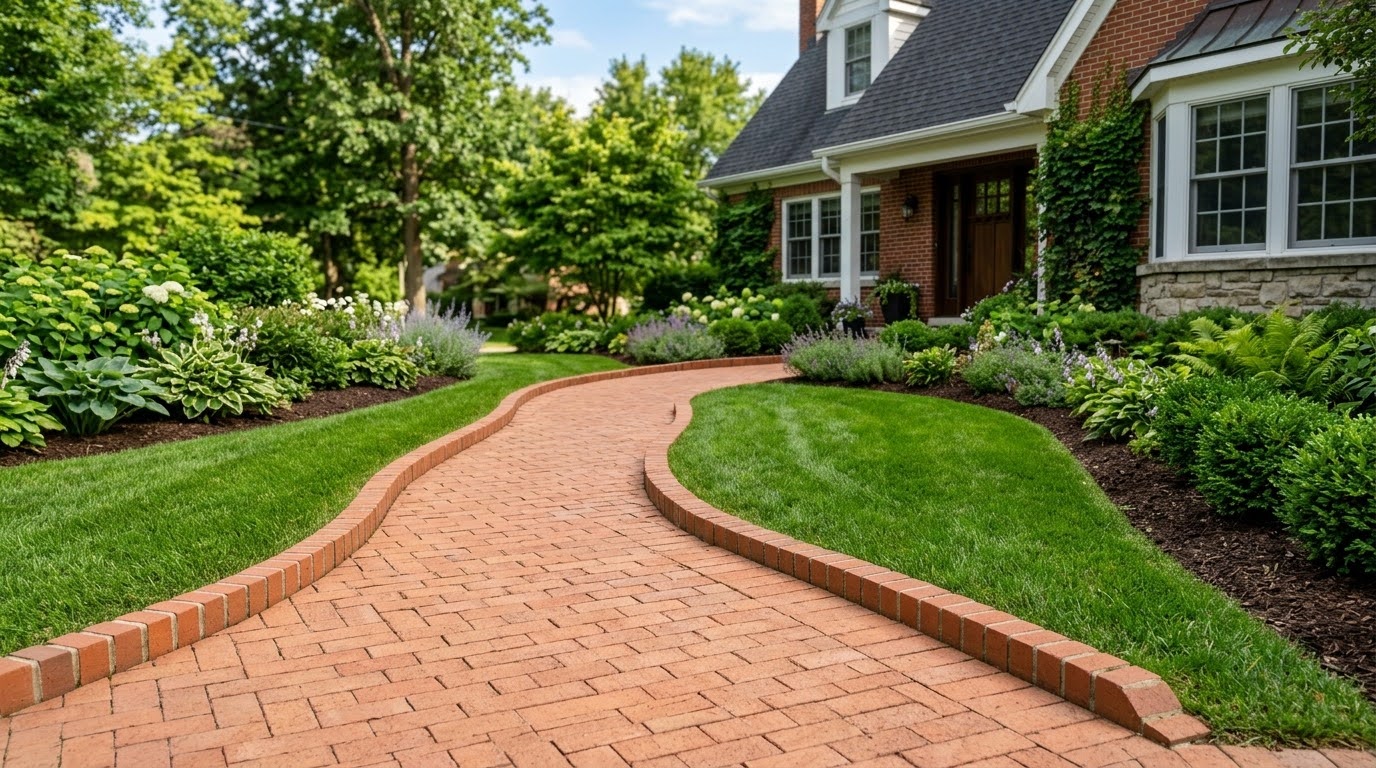
1. Winding Herringbone Path with Vertical Brick Edging
This look is a masterclass in combining pattern and structure. The herringbone pattern of the reddish-orange bricks isn’t just for looks; its interlocking nature creates a strong, stable path that resists shifting over time. The real genius, though, is the contrast. The dynamic, zigzag energy of the path is perfectly contained by the simple, clean line of the vertical brick edging. This creates a visual frame that makes the green of the lawn and the textures of the hydrangeas and hostas feel even more lush and deliberate.
“Let’s be honest: a brick path like this isn’t a set-it-and-forget-it feature.”
The crevices in that beautiful herringbone pattern are prime real estate for opportunistic weeds. You’ll want to plan for a twice-yearly weeding session, or look into polymeric sand which hardens to lock bricks in place and deter growth. Over time, moss can also grow on the bricks in shadier spots, which some people love for a classic look, but if you prefer a clean surface, a stiff brush and a bit of elbow grease will be your friend each spring.
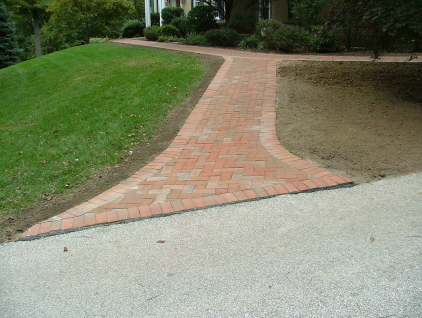
2. Curved Red Brick Paver Path Along a Grassy Slope
Creating a graceful, sweeping curve with brick pavers is an art, but here’s a pro trick: lay out a garden hose in the exact curve you want first. Live with it for a day or two, mowing around it and seeing how the path feels. Once you’re happy with the shape, use landscape paint to trace along the hose before you remove it. This gives you a perfect guide for digging your trench and ensures your curve is smooth and intentional, not wonky and accidental. It’s the single best way to avoid a lumpy, amateur-looking result.
“Those herringbone brick pavers are classic, but they can be pricey.”
To get this same defined, colorful edge for less, look for a concrete paver in a terracotta color—you can often find them for about 40% cheaper. Instead of a full path, consider creating a 12-inch-wide ‘mowing strip’ with the pavers. This still gives you that clean separation between lawn and bed but uses a fraction of the materials. For the edging strip itself, the flexible black plastic version seen here is incredibly affordable and available at any big-box home store.
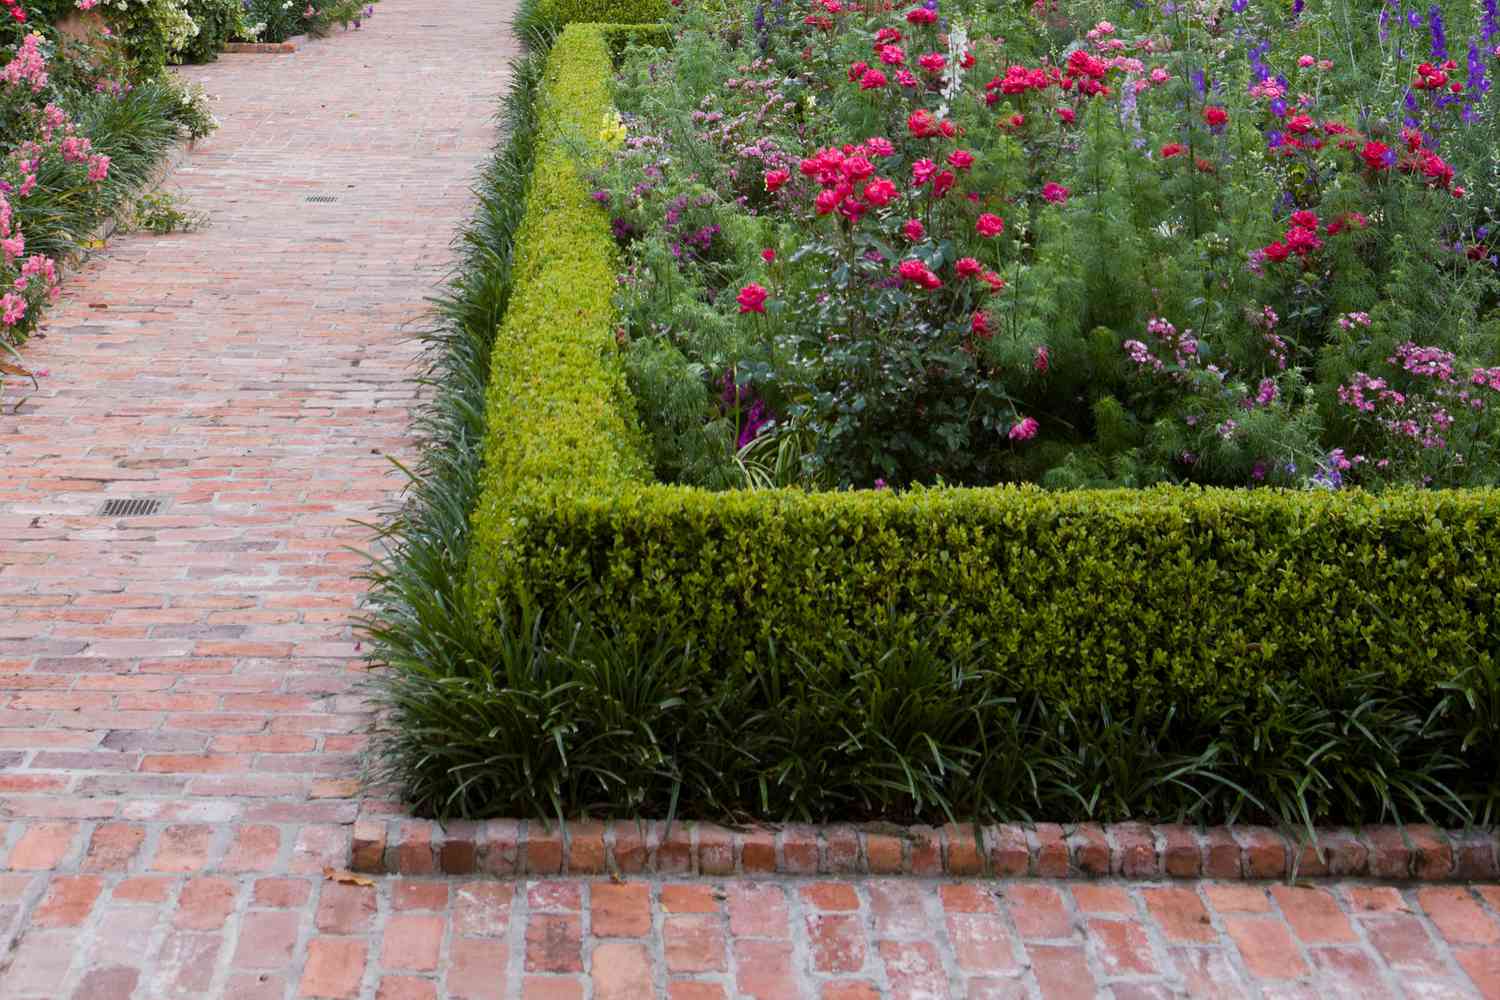
3. Vertical Brick Border for a Flat-Paved Garden Path
that makes this design work is the change in orientation. The path itself is made of bricks laid flat, which is standard. But by turning the border bricks up vertically, you get an instant sense of definition and depth. It’s a simple, almost no-cost design decision that adds a surprising amount of character. Without that vertical edge, the path would just bleed into the garden; with it, the path becomes a feature in its own right. It’s a subtle signal that says “this was thoughtfully designed.”
“Here’s how to set those vertical bricks for a long-lasting edge.”
Time: 1 hour per 10 feet. Cost: Price of bricks + $20 for sand/tools. Dig a trench about 6 inches deep and 4 inches wide along your desired edge.Pour about 2 inches of paver sand into the trench and tamp it down firmly to create a level base.Place your first brick vertically in the trench, pressing it into the sand. Use a level to ensure it’s perfectly upright.Place the next brick snugly against the first. Use a rubber mallet to gently tap them to the same height.Once all bricks are set, backfill the trench with soil on the garden side and path material on the other, tamping firmly to lock the bricks in place.
4. Simple Vertical Red Brick Edging for a Garden Bed
This is a beautiful, rustic look, but here’s some real talk about vertical brick edging: frost heave is your enemy. In climates with cold winters, the ground freezes and thaws, which can push individually-set bricks up and out of alignment over time. After a few years, your once-neat row can look like a set of crooked teeth. The fix? A little more work upfront. Digging a deeper trench and adding a solid base of compacted gravel (about 4 inches) before the sand layer can dramatically reduce movement. It’s the difference between a 3-year solution and a 30-year one. This is a simpler version of the technique shown in Idea #3.
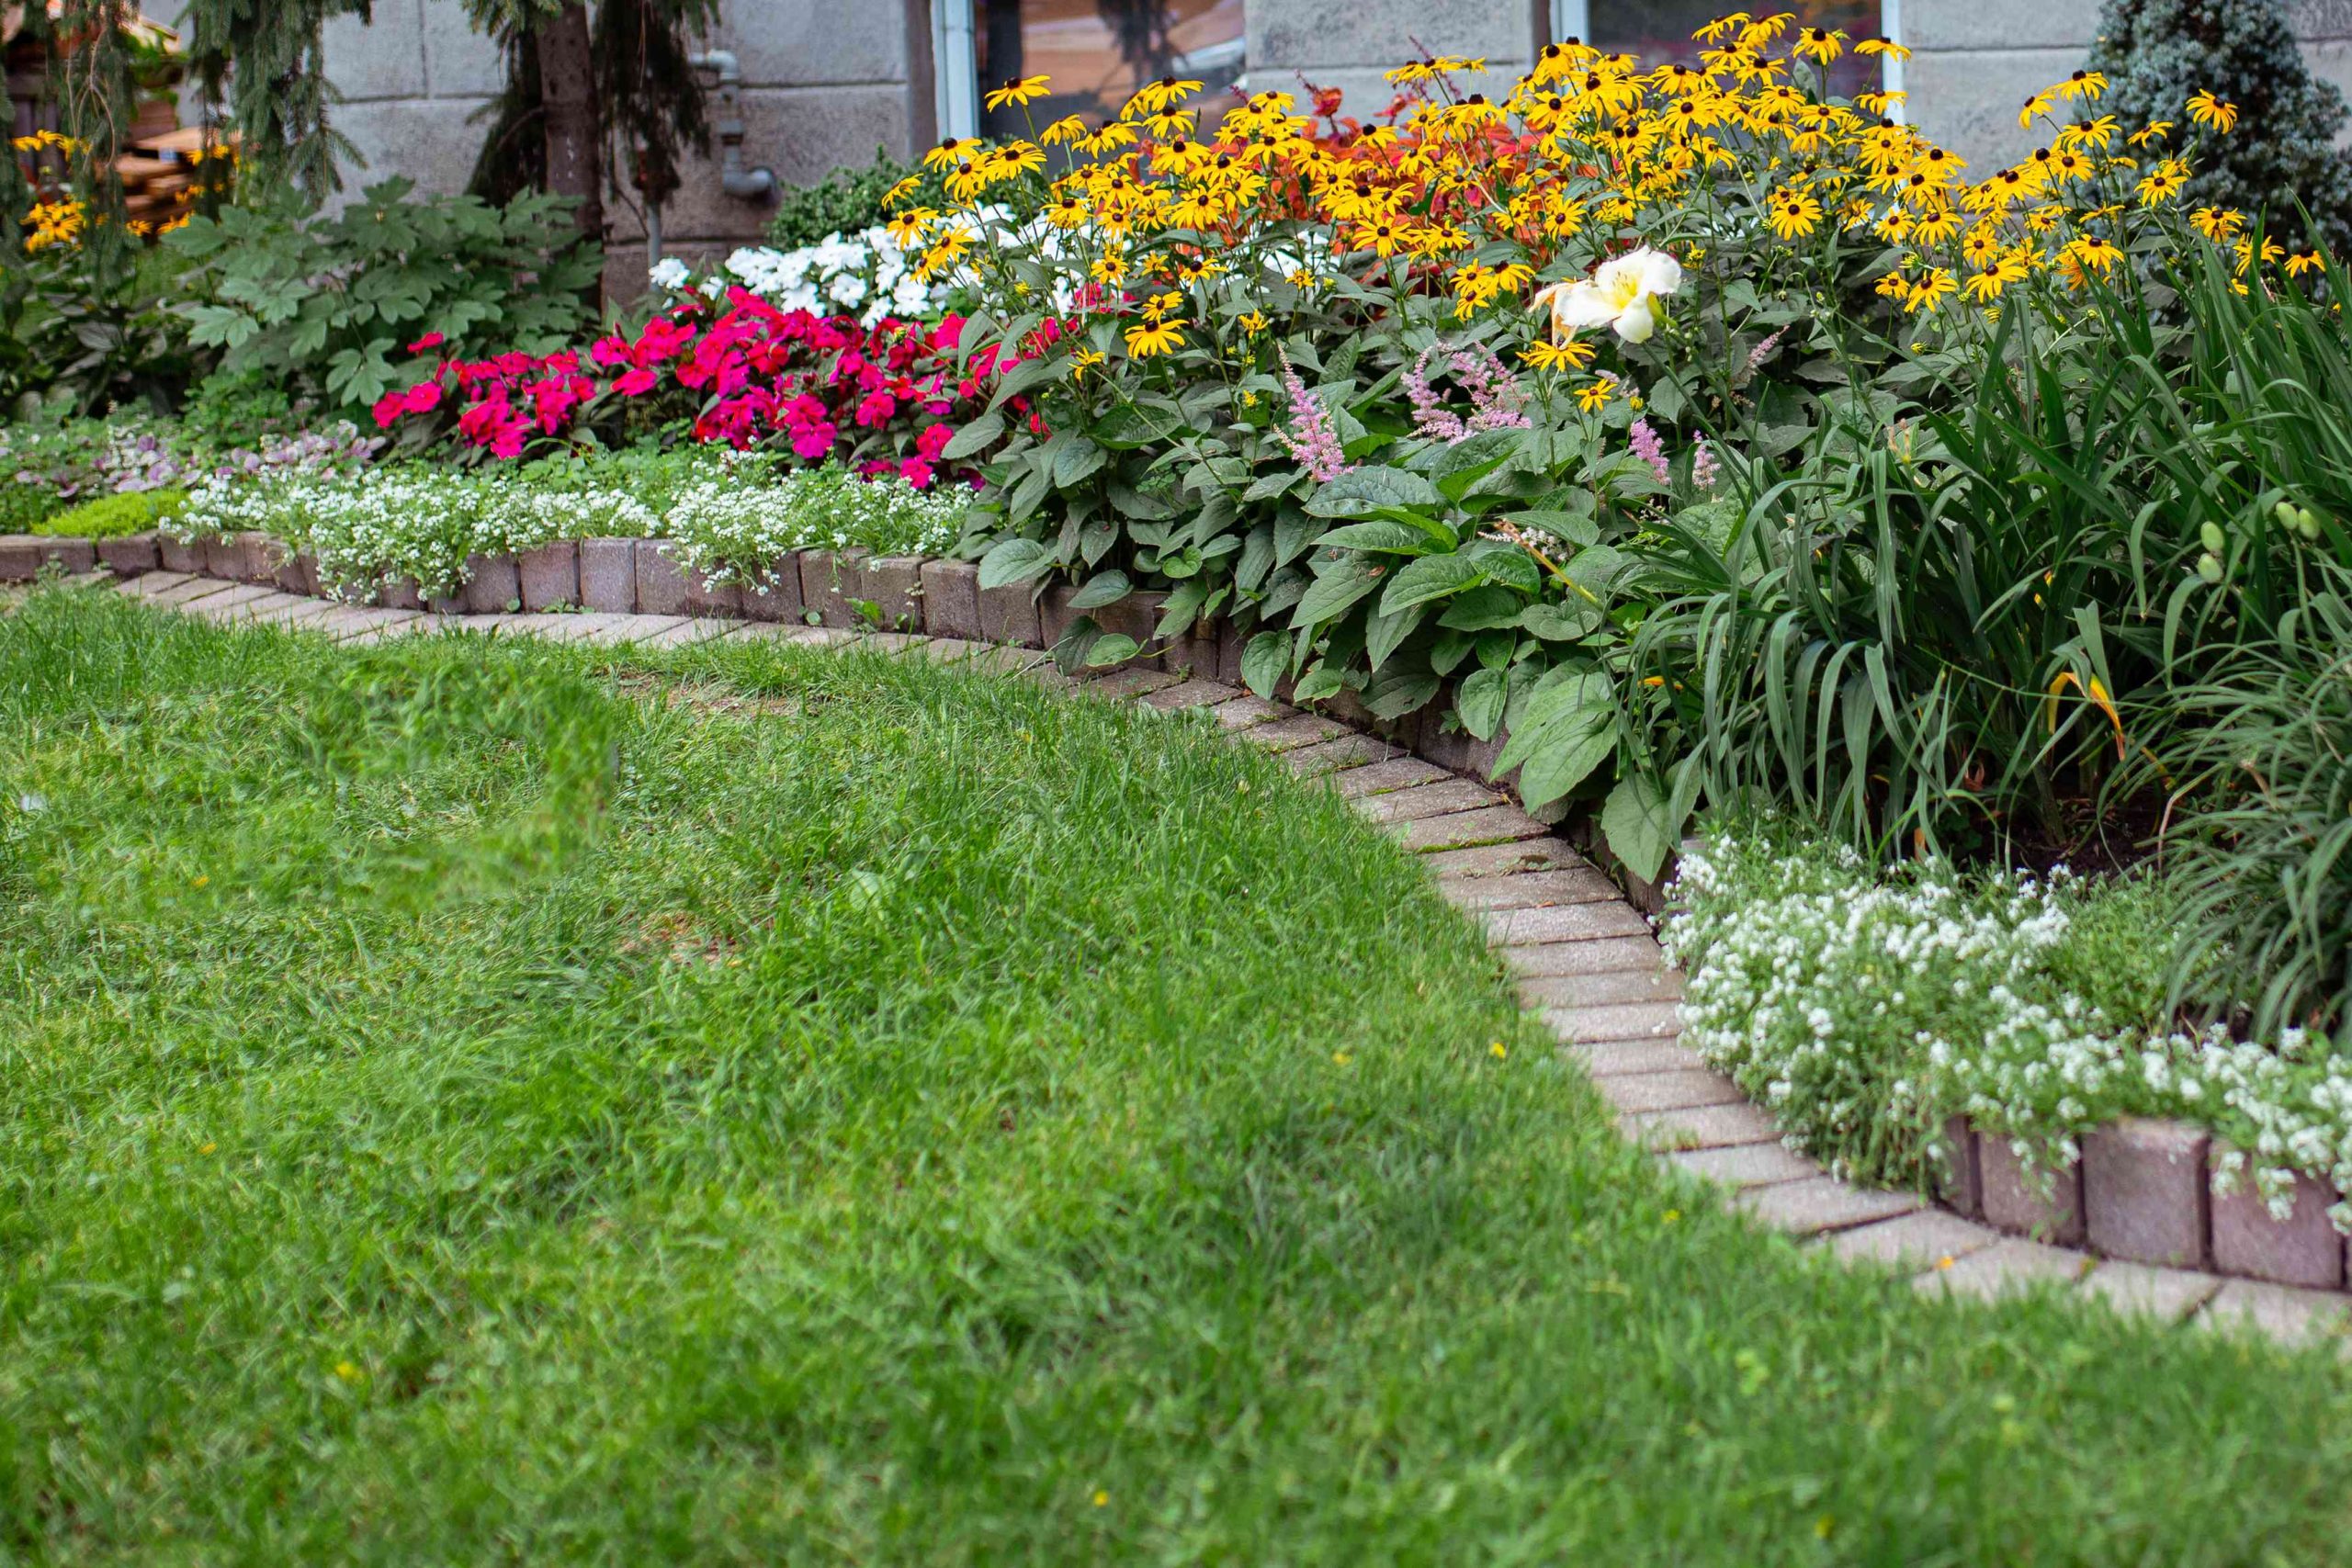
“This design is all about subtle balance.”
Think of it as a 60/40/10 formula. 60% of the visual is the soft, natural texture of the garden itself (soil, foliage). 40% is the light-colored gravel or soil path, which provides a bright, clean contrast. The final 10% is the brick edging itself. It’s not meant to be the star, but a sharp, colorful line that makes the other two elements pop. You could swap the red brick for a darker charcoal one, but then you’d want a much lighter gravel to maintain that essential contrast.
5. Low-Profile Segmented Brick Border for Grasses
The magic here is in the rhythm. Laying the bricks horizontally with small, deliberate gaps creates a pleasing staccato pattern that feels more decorative than a solid line. It’s a technique that draws your eye along the border without being overpowering. The reddish-brown tone of the brick provides a warm, earthy contrast to the vibrant green lawn and the feathery texture of the ornamental grasses, bridging the gap between the manicured and the wild parts of the garden.
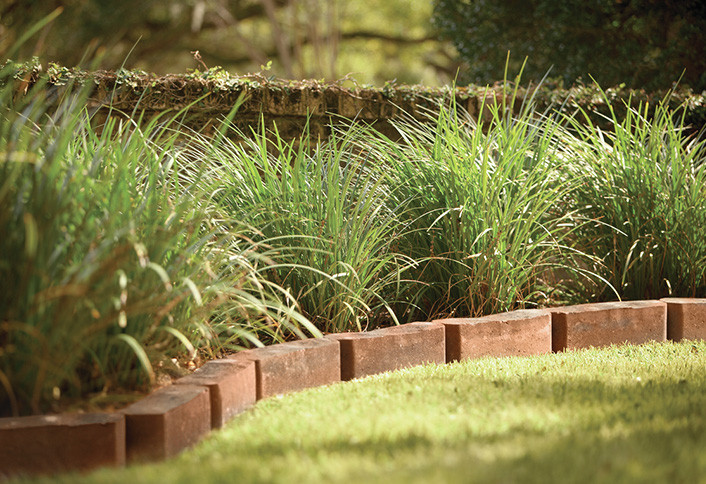
“This low-profile, single-course brick edging is perfect for small to medium-sized yards where you want definition without adding visual bulk.”
It works best for level ground and beds that don’t require any soil retention. The minimum space you’d want for this to be effective is a garden bed at least 10 feet long. For anything smaller, the segmented look can feel a bit busy. It’s not suitable for a sloped yard or a raised bed, as it offers no structural support. Compare with the raised block wall in Idea #6 for a more substantial option.
6. Curved Garden Bed with Two-Tier Stacked Concrete Blocks
When you’re creating a multi-tiered wall like this, especially a curved one, the secret is to ‘step back’ the second layer. The front face of the top block should be set back about half an inch from the front face of the block below it. This slight angle provides much greater stability against the pressure of the soil behind it. It also creates a subtle shadow line that adds depth and makes the wall look more professional. Always use a high-quality landscape block adhesive between the layers—gravity is not enough.
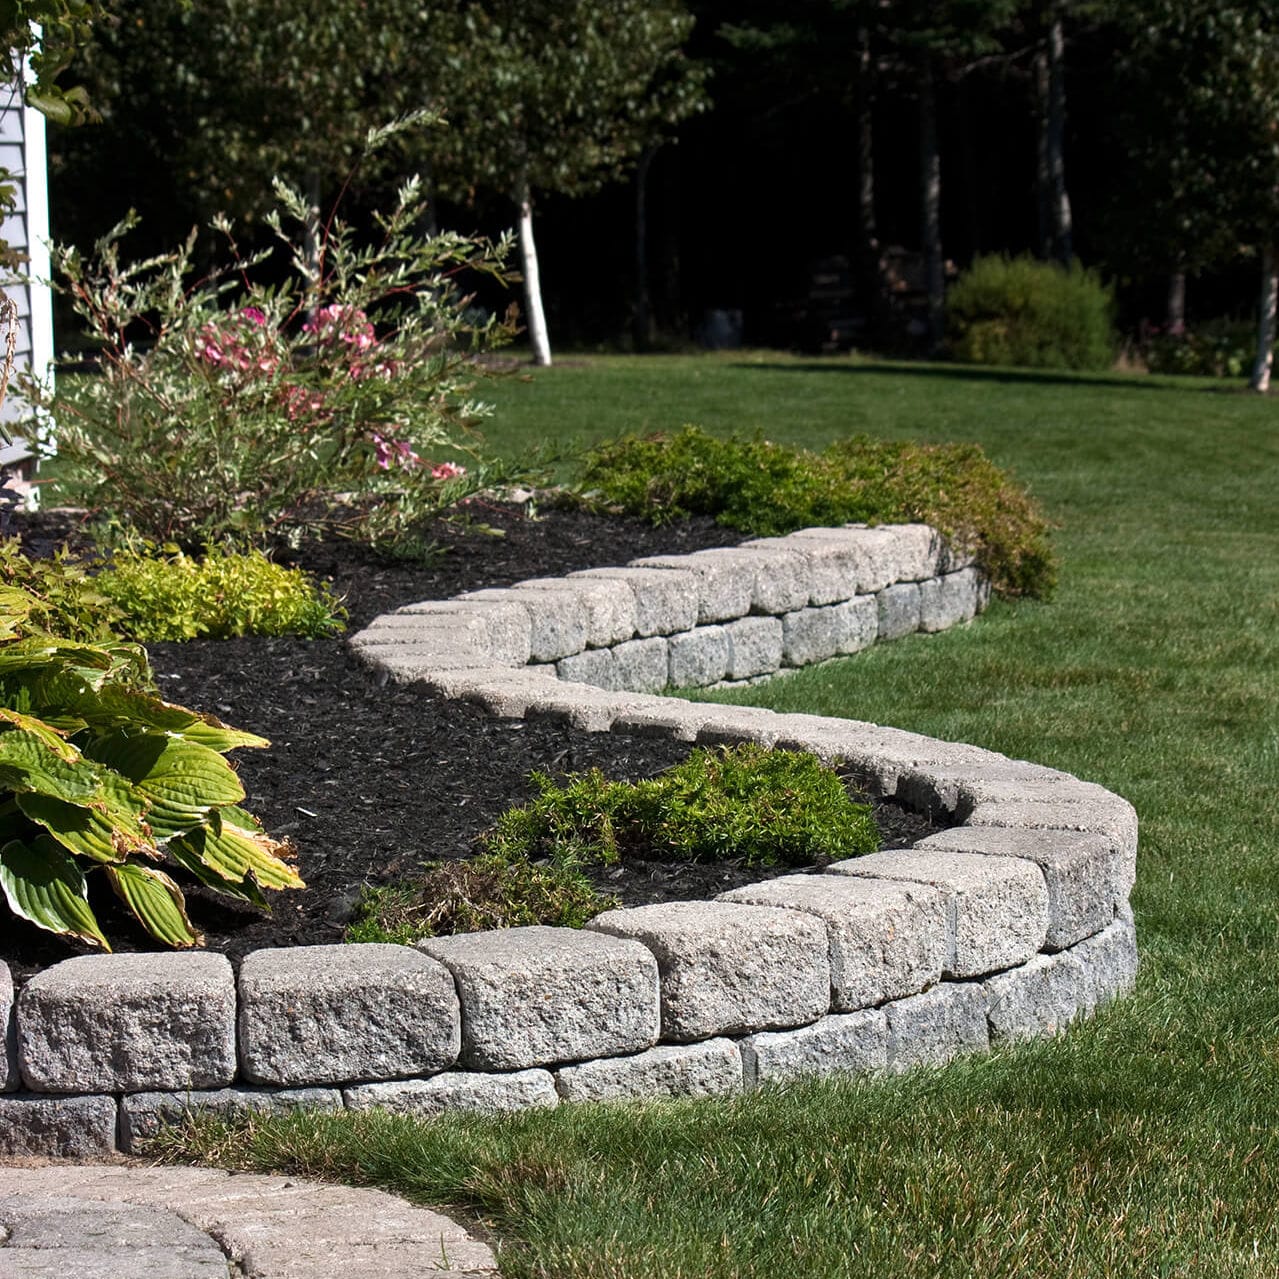
“Here’s a rough estimate to recreate this two-tiered, curved bed (approx.”
20 linear feet):Concrete Blocks: $250 – $400Landscape Adhesive: $20 – $30Mulch & Soil: $100 – $150Plants (Hostas, Shrubs): $150 – $300TOTAL: $520 – $880Budget alternative: You can achieve a similar tiered look for about 50% less by using pressure-treated landscape timbers instead of concrete blocks. The installation is often faster, though the lifespan may be shorter.
7. Raised Circular Light Brick Edging Around a Tree
Before you build a raised ring around a tree, check these things first:
- Tree Type: Some trees have shallow root systems that can be damaged by piling on soil and mulch. Do a quick search for your tree species and ‘raised bed’ to ensure it’s safe.
- Ring Diameter: The ring should be at least 4-6 feet in diameter for a young tree, and wider for a mature one. Keep the brick and added soil away from the tree’s trunk flare (where the trunk widens at the base).
- Watering Plan: Remember that the raised bed will dry out faster than the surrounding lawn. You’ll need to water the tree inside the ring more frequently.
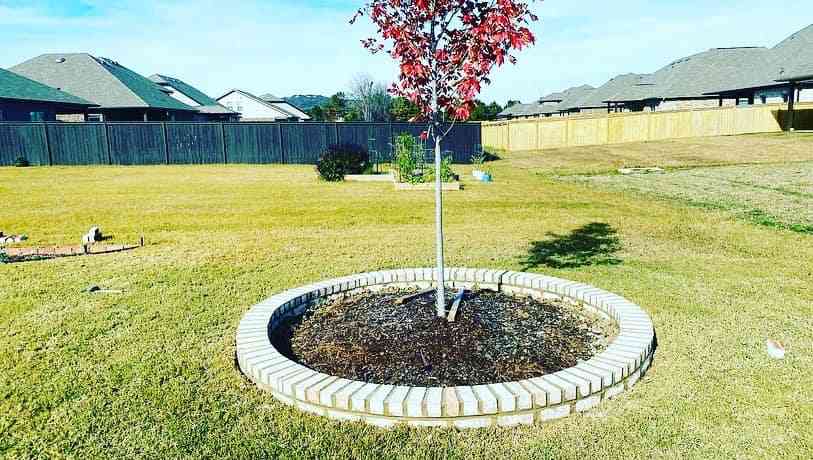
“that makes this so effective is the contrast in color and material.”
The light beige bricks create a crisp, clean circle that pops against the dark brown mulch. It’s a deliberate choice that elevates a simple tree in the middle of a lawn into a ‘feature’. If the bricks were a similar red-brown color to the mulch, the whole thing would blend into a messy-looking mound. That sharp, light-colored line is what gives it structure and intention.
8. Angled Vertical Bricks Bordering a Light Gravel Path
This design is a small but impactful upgrade from a standard vertical brick edge. By setting the bricks at a slight angle (around 30 degrees), you create a sawtooth edge that catches the light in a more interesting way. It’s a classic English garden trick. This angle also helps to lock the bricks in place more securely against the soil of the bed. The varied tones of the bricks, from deep red to pale orange, add to the rustic charm, preventing the border from looking too rigid or manufactured. It’s a perfect pairing with the soft texture of the gravel path.
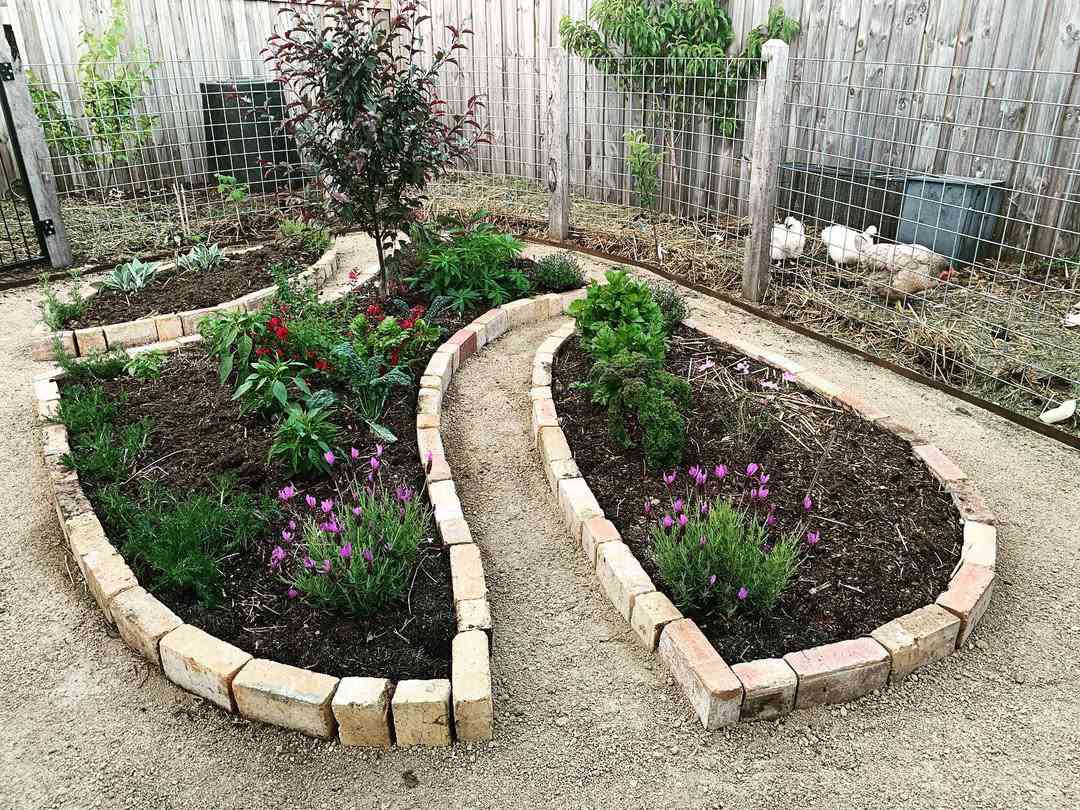
“That light-colored gravel path looks fantastic, but it’s a magnet for leaves, twigs, and dirt.”
A leaf blower on a low setting will be your best friend for keeping it clean without blasting all the gravel into your garden bed. Over time, the gravel will get pushed around and may need to be raked back into place and topped up every few years to maintain a consistent depth. The vertical bricks, especially angled ones, can also make it tricky to use a string trimmer for edging the lawn on the other side.
9. Vertically Laid Red Brick Edging Defining a Curved Gravel Path
The formula for this timeless look is surprisingly simple: 50% Lawn + 40% Path + 10% Edging. The lush green lawn and the light grey gravel path do most of the heavy lifting, creating broad swaths of color and texture. The red brick edging is the critical 10%—it’s the ‘ eyeliner’ of the landscape. It’s a thin but powerful line of warm color that defines the boundary and makes both the lawn and the path look sharper and more intentional. The same formula works with different materials; swap the gravel for wood chips, but keep that crisp brick line. Compare this to the similar feel of Idea #9.
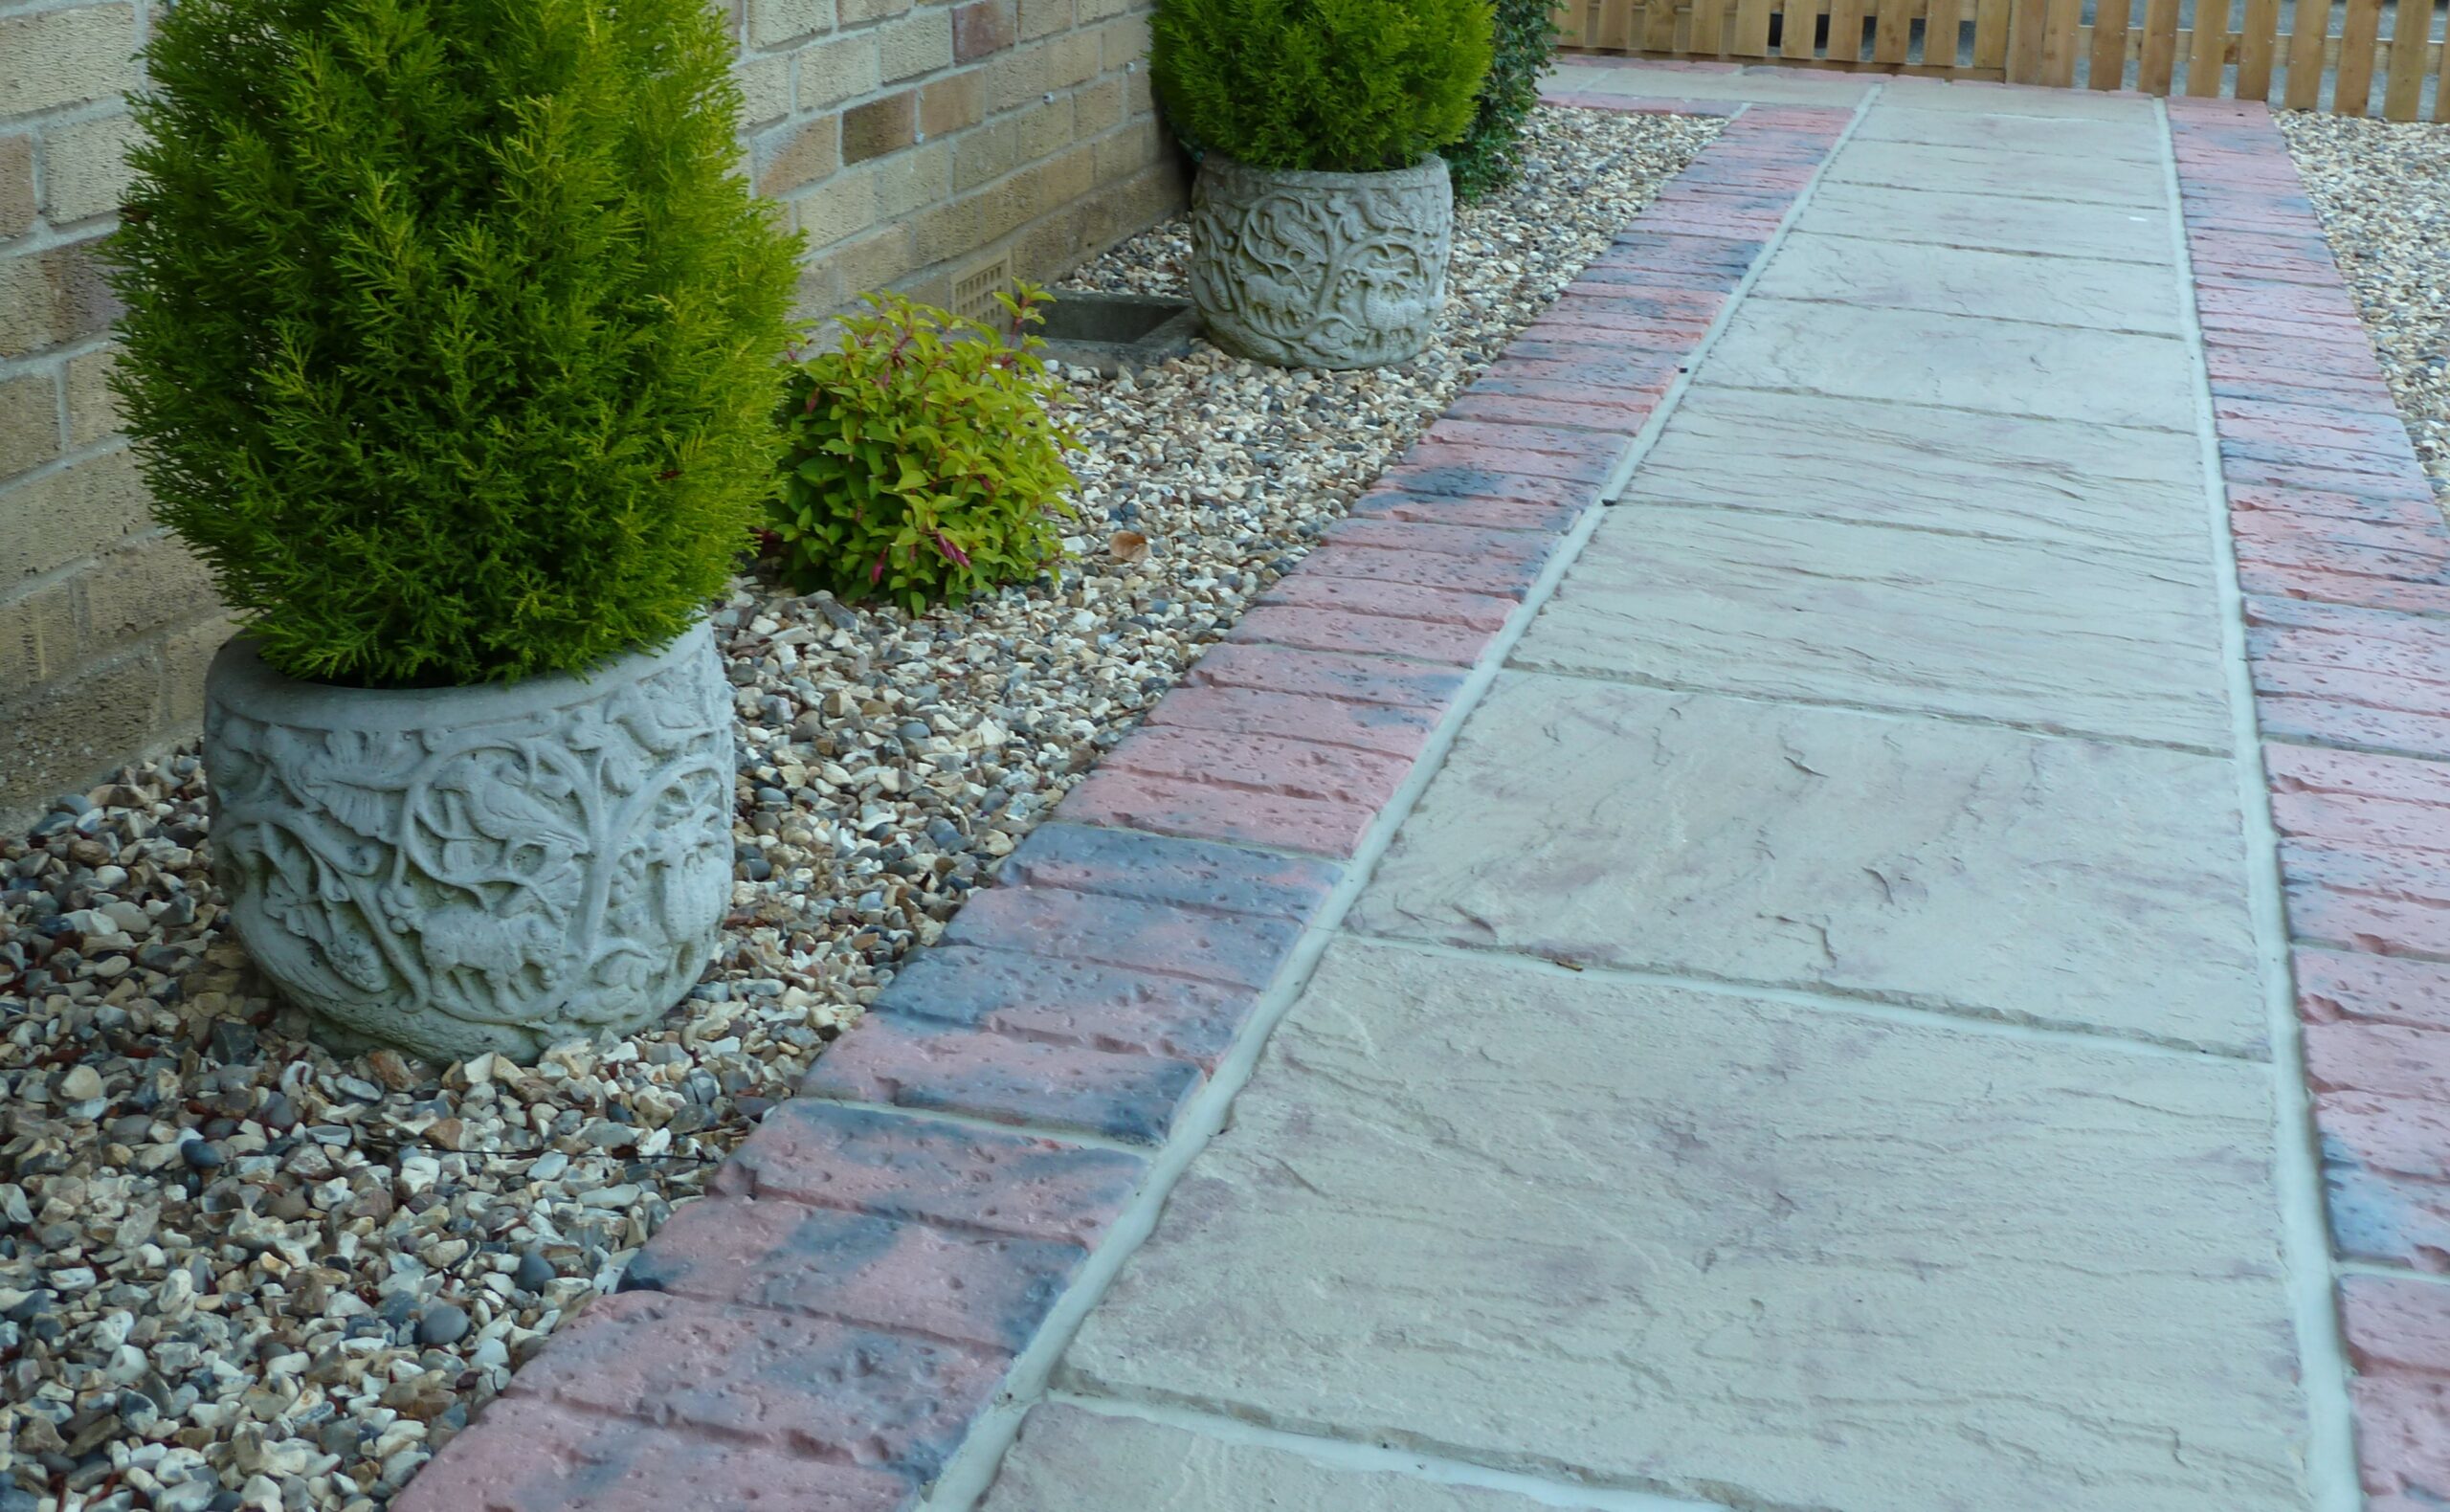
“Reclaimed bricks have unbeatable character but can be expensive and inconsistent in size.”
For a more budget-friendly approach, check Facebook Marketplace or Craigslist for people giving away leftover bricks from a patio project. You can often get them for free if you’re willing to haul them. Alternatively, modern concrete pavers are made in ‘tumbled’ or ‘olde town’ styles that mimic the look of reclaimed brick at a fraction of the cost, and their uniform size makes them much easier to install.
10. Dark Gray Modular Block Planter with Red Flowers
When working with bold colors like the vibrant red flowers here, the choice of your hardscape material is crucial. The designer chose dark gray modular blocks for a reason: gray is the perfect neutral backdrop. It makes the red of the flowers appear more saturated and the green of the foliage look more vibrant. If they had used a reddish-brown brick, the planter and flowers would have visually competed with each other. The rule is: for bold plants, use a neutral container; for neutral plants, you can use a bolder container.
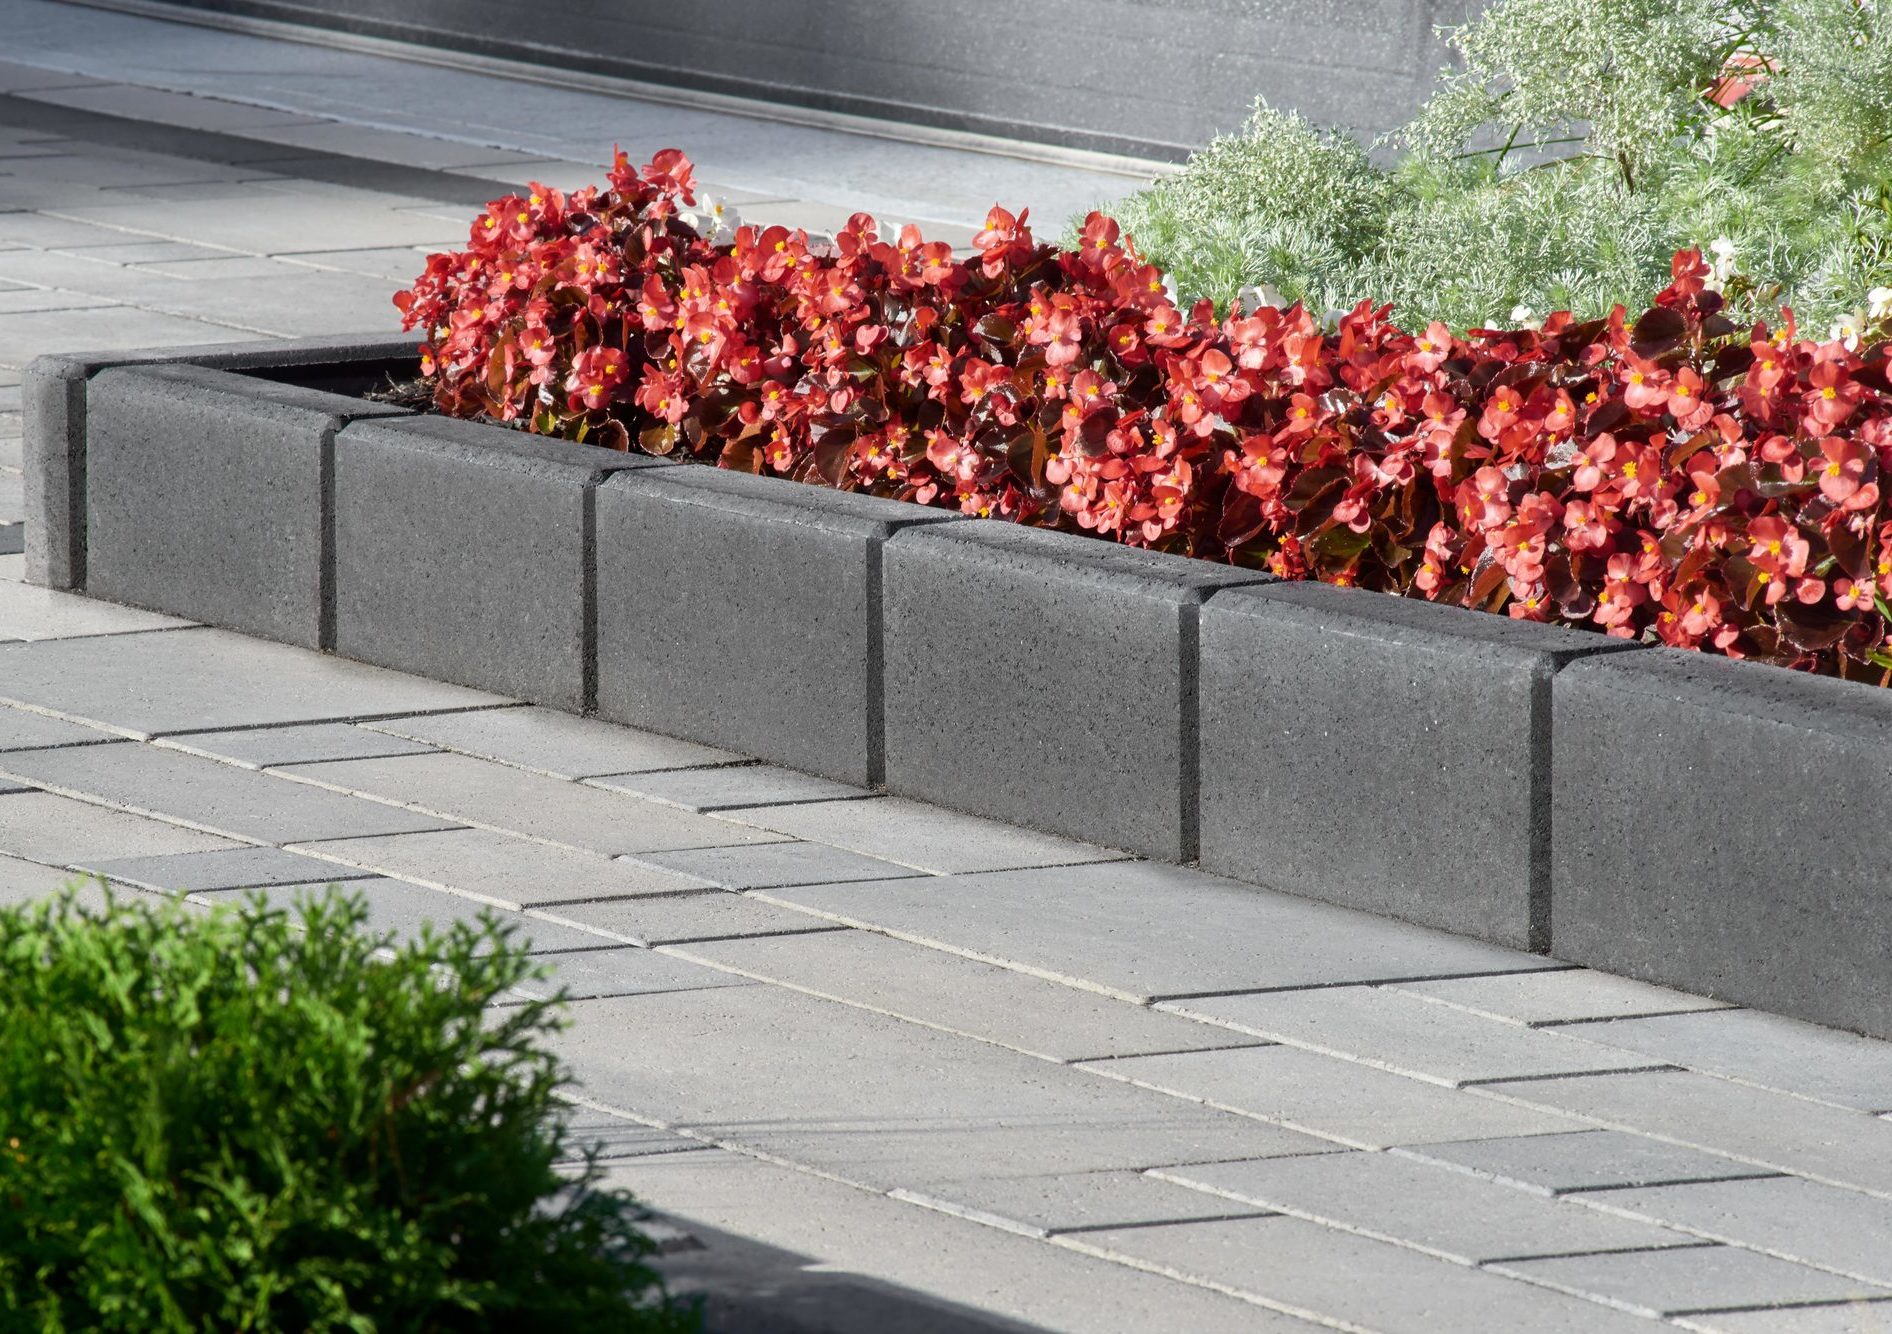
“that truly makes this design pop is the color contrast.”
It’s not just red against gray; it’s a carefully considered trio. You have the vibrant, warm red of the flowers, the cool, dark gray of the modern blocks, and the clean, light gray of the pavers. This play of warm vs. cool and light vs. dark creates a dynamic tension that is incredibly eye-catching and modern. Remove the red flowers, and it’s a nice but muted scene. It’s the color that provides the energy.
11. Classic Red Brick Basketweave Garden Path Edging
Laying a basketweave pattern is easier than it looks. It’s just a repeating sequence of two bricks. Time: 2 hours per 10 feet. Cost: Price of bricks.
- Lay two bricks vertically, side-by-side, parallel to your path edge.
- Next to them, lay two more bricks horizontally, also side-by-side, so they form a square.
- Repeat this pattern: two vertical, two horizontal.
- To create a continuous border, you’ll start the next section with the opposite orientation. If the last block was horizontal, the next starts with two vertical bricks. It’s that simple!
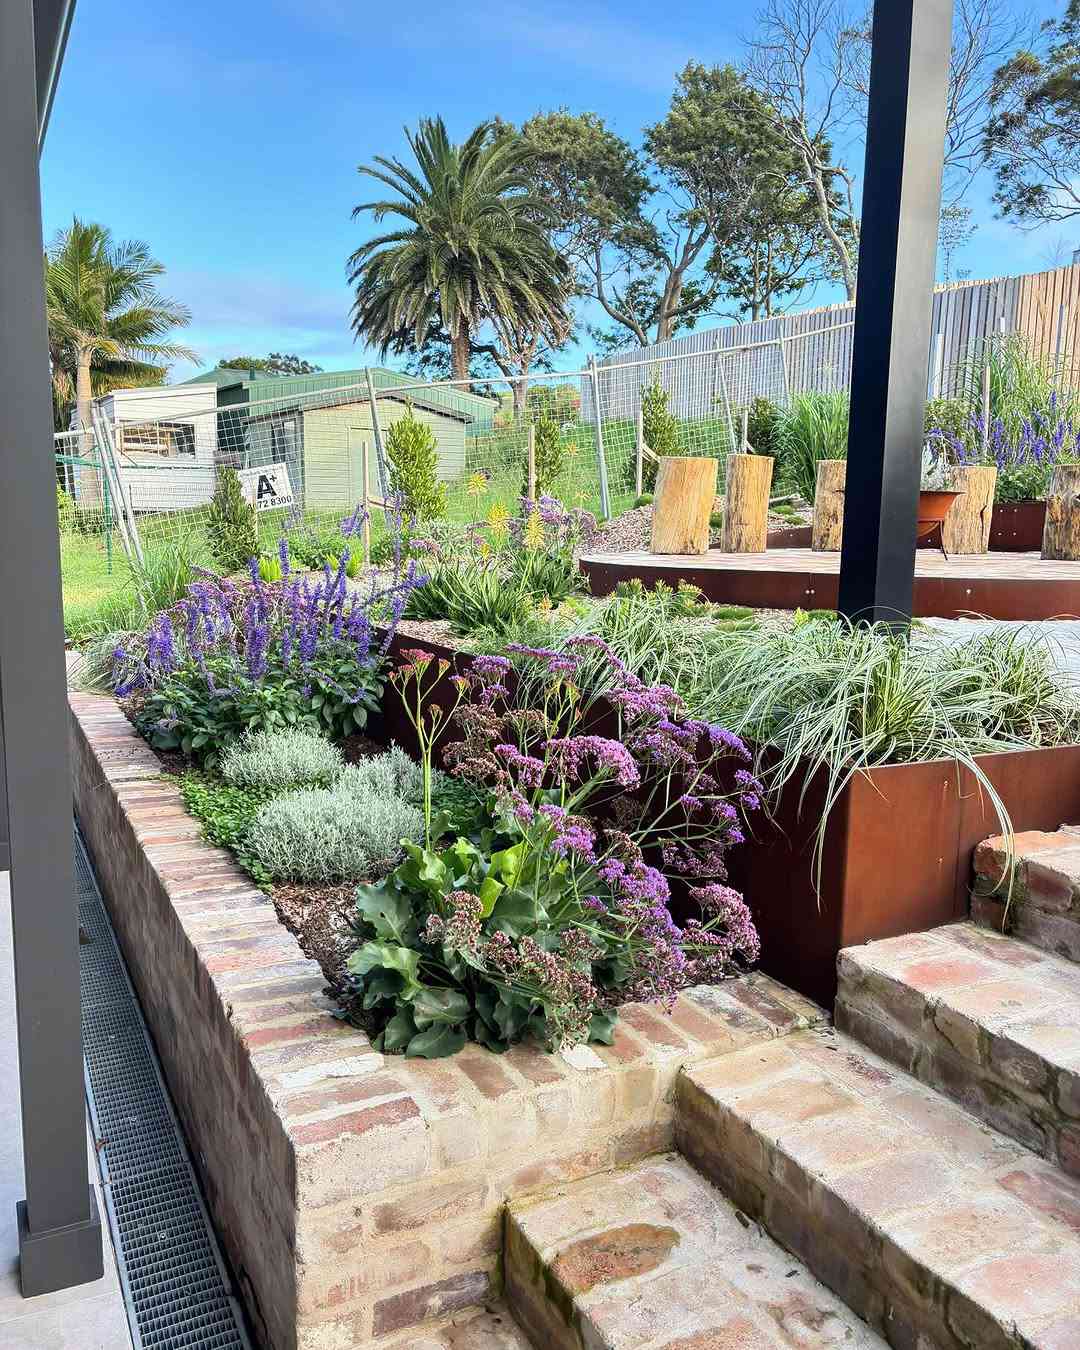
“There’s a reason you’re seeing more of these traditional, decorative patterns on Pinterest lately.”
It’s part of a larger trend called ‘Grandmillennial’ style, which embraces classic, sometimes nostalgic, design elements. After years of minimalist modernism, people are craving detail, texture, and craftsmanship. A basketweave brick pattern feels timeless and established, like it could have been in an old English garden for a hundred years. It adds a layer of history and charm that plain concrete just can’t match.
12. Single Row Red Brick Border for Curved Concrete Driveway
This is a fantastic, clean look, but it’s crucial that the bricks are set correctly. A single row of flat-laid bricks bordering a driveway needs to be set in a concrete or mortar base, not just sand. A car driving over the edge, even accidentally, will immediately dislodge bricks that are only set in sand. This isn’t a place to cut corners. Taking the time to dig a proper trench and lay a wet mortar bed ensures the edging will stay put and won’t become a long-term maintenance headache. See a similar curved design in Idea #21.
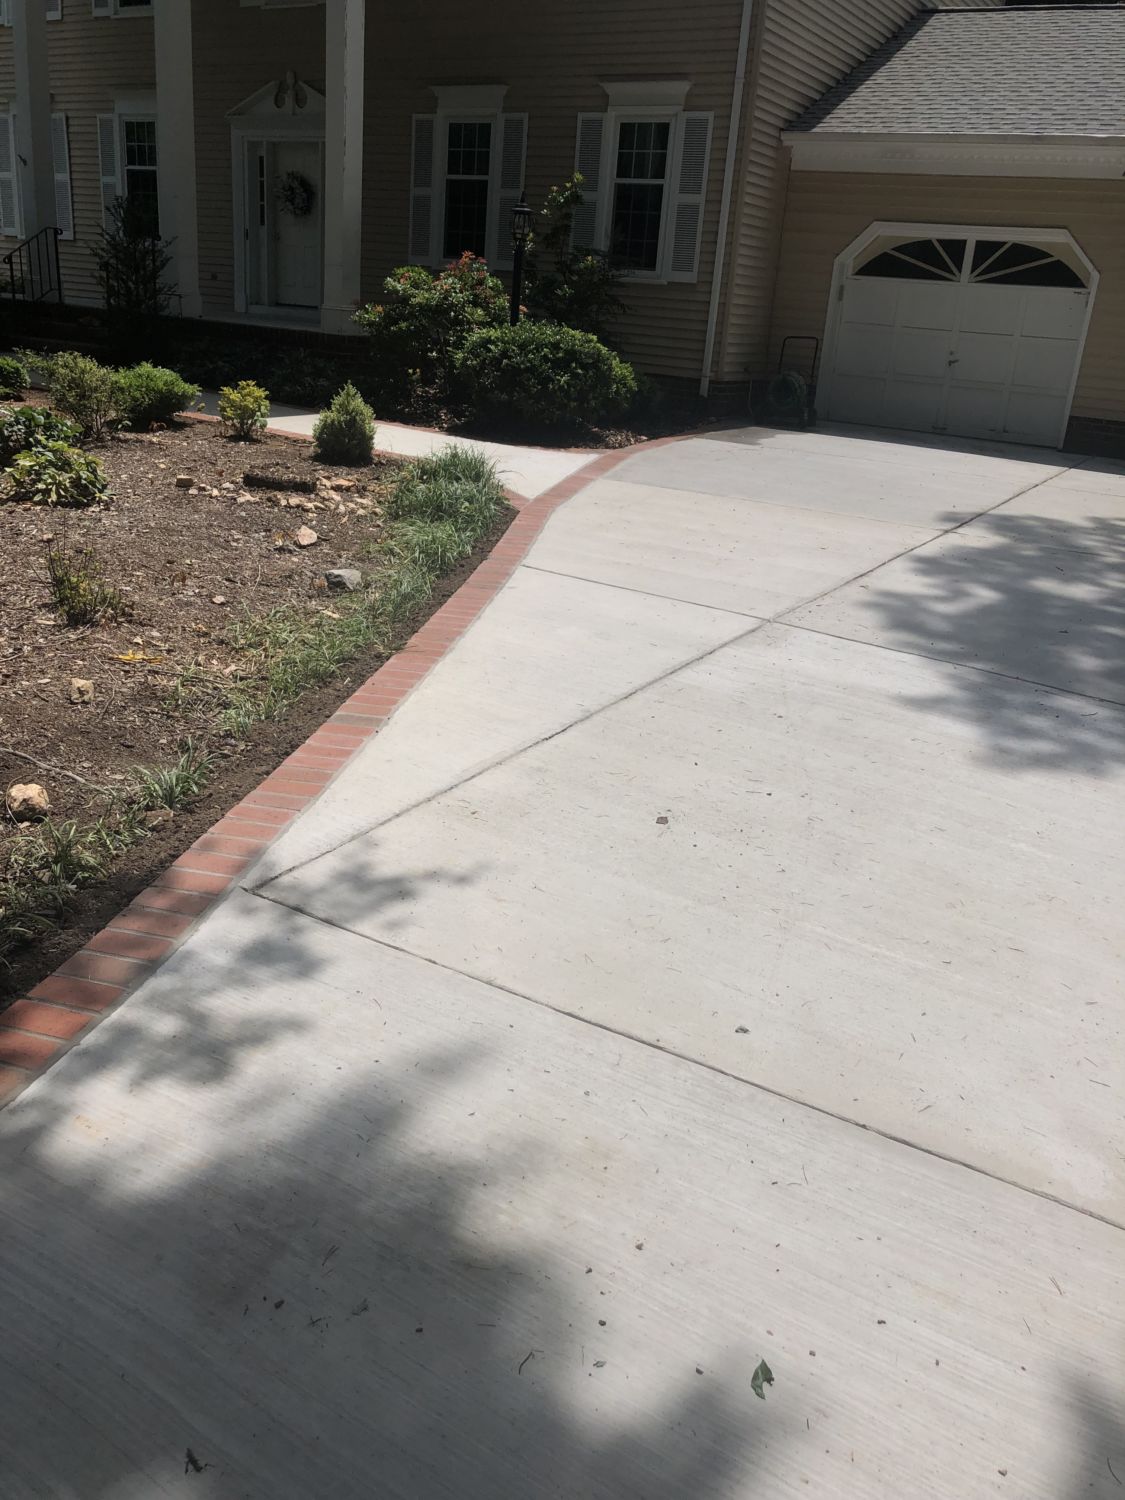
“This design works because of its simplicity and function.”
The warm, reddish-brown color of the brick creates a visual ‘stop’ that clearly separates the cool, light gray of the concrete driveway from the dark soil of the garden bed. Laying the bricks flush with the driveway surface is a key detail. It means you can easily sweep or hose off the driveway without debris getting caught, and it doesn’t create a tripping hazard. It’s a practical and aesthetically pleasing solution.
13. DIY Flat-Laid Red Brick Edging Under Construction
Thinking of DIY-ing this classic brick edge? Here’s what the material costs look like for a 50-foot section. The real saving is on labor!
- Red Clay Bricks (approx. 150): $75 – $150
- Bags of Concrete Mix (4-5): $25 – $35
- Paver Sand/Gravel for base: $20 – $30
- Tools (Trowel, Mallet, Level – if you don’t own them): $50 – $75
- TOTAL: $170 – $290
Budget alternative: Use ‘paver edging’—long plastic strips that are nailed into the ground—and then lay a single row of bricks against it without mortar. It’s less permanent but much cheaper and faster.
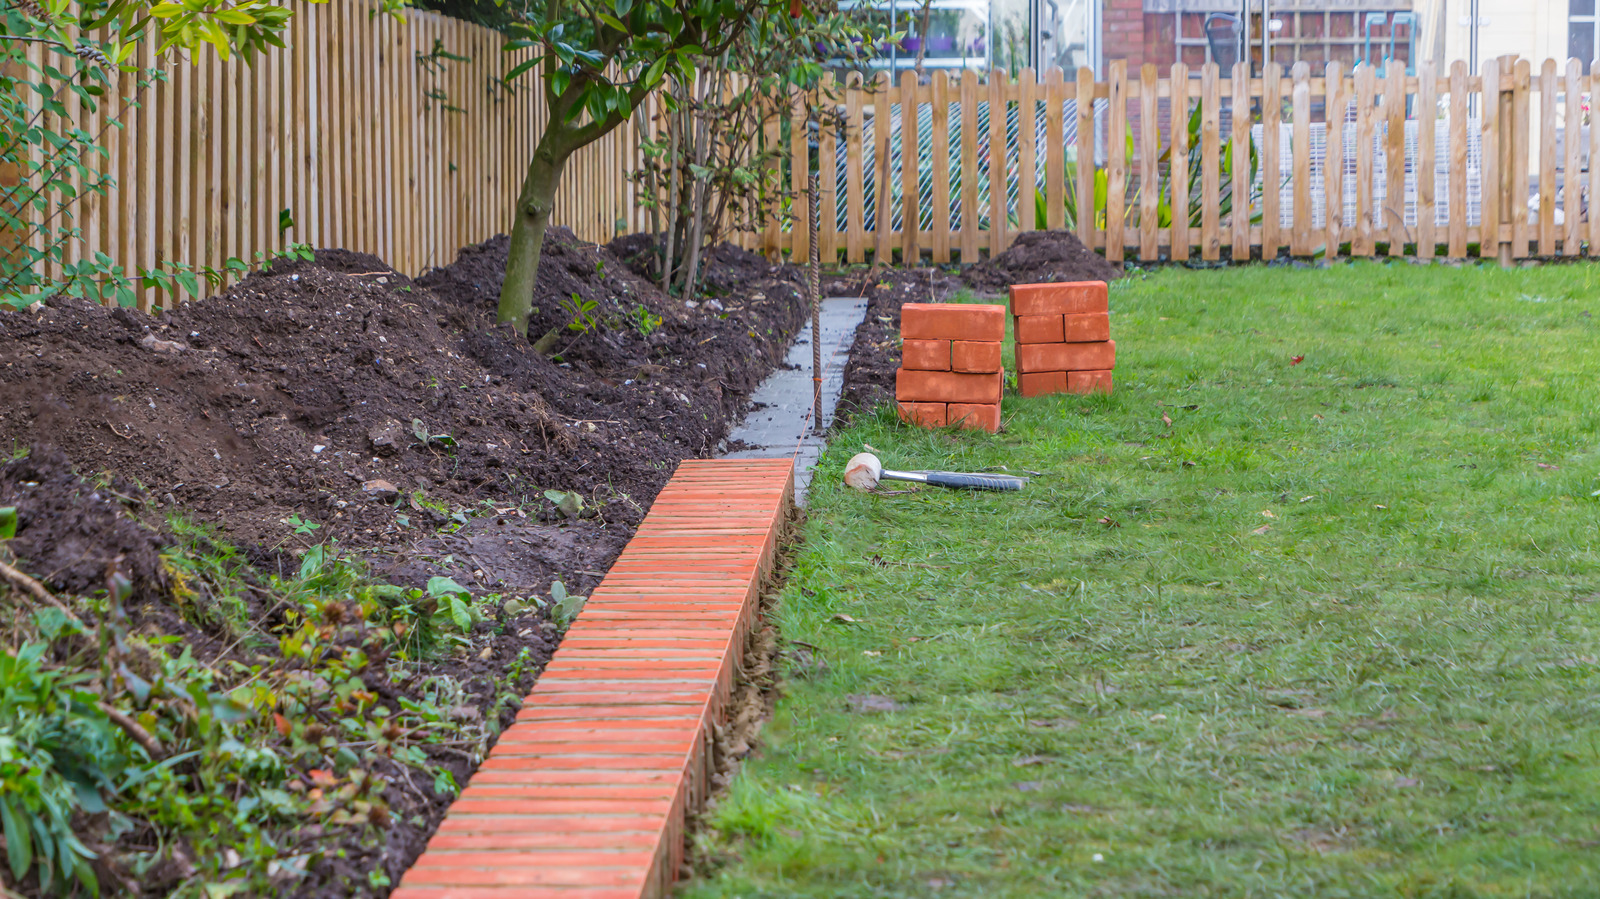
“Notice the wet concrete trench in the photo?”
That’s the secret to a professional-grade edge that lasts. After you dig your trench, mix concrete to a thick, oatmeal-like consistency and lay about 2-3 inches in the bottom. Then, press your bricks into the wet concrete, tapping them level as you go. Use a trowel to smooth the concrete on either side of the brick base. This ‘haunching’ locks the bricks in place and prevents them from shifting or sinking for decades.
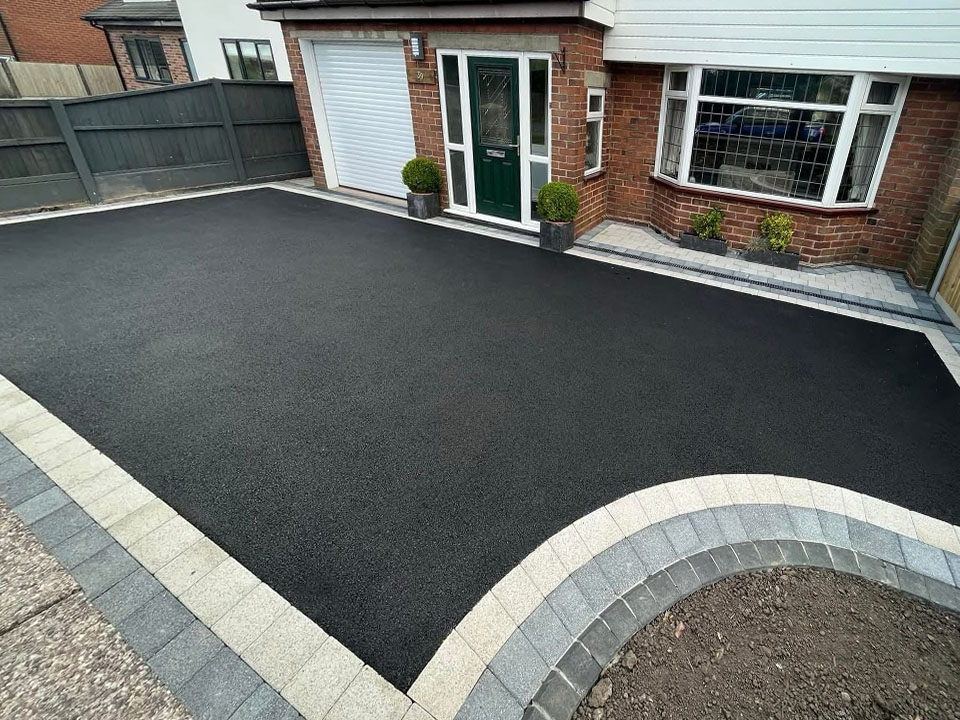
14. Flat Red Brick Border on a Black Aggregate Driveway
This combination is all about strong material contrast. The rough, dark texture of the black aggregate driveway makes the smooth, warm reddish-brown of the bricks appear even cleaner and more defined. The light grey concrete curb below adds another layer of separation, creating a sophisticated, tiered look. It’s a very intentional design that signals quality and attention to detail. This isn’t just an edge; it’s a frame that elevates the entire driveway from a utility surface to a design element.
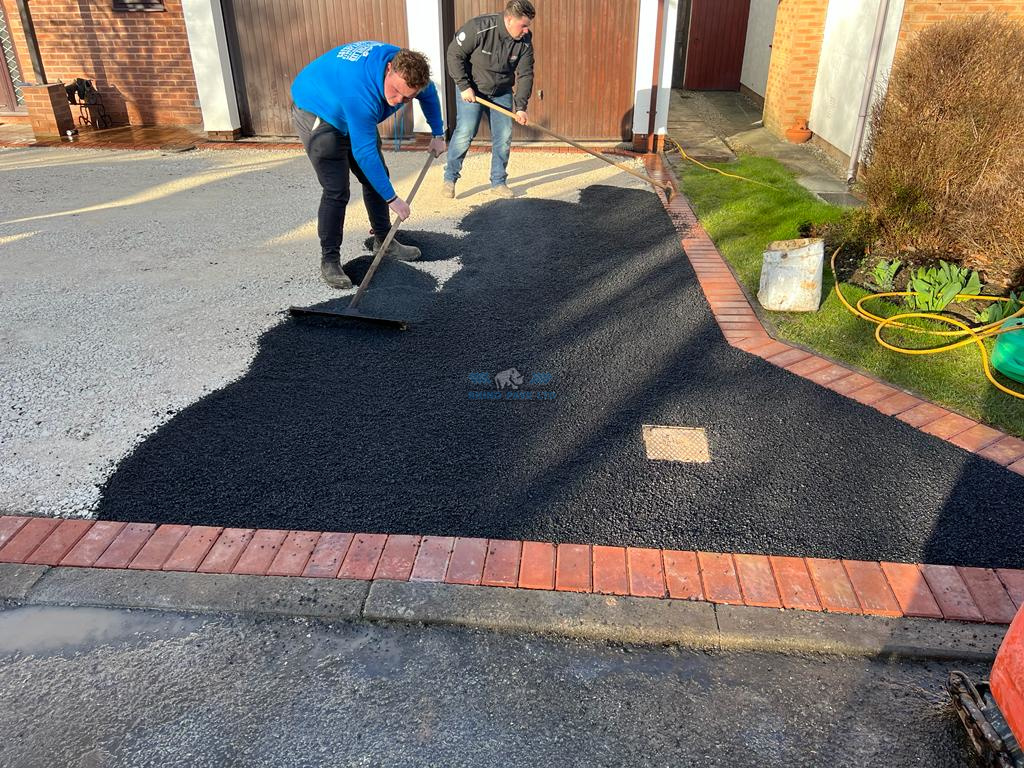
“An aggregate driveway surface looks incredible, but the brick edging next to it needs special care.”
Sealing the bricks is non-negotiable here. The tar and oils from a newly sealed blacktop driveway can easily stain the porous brick. Also, in winter, be careful with snow shovels and plows. A metal edge can easily chip the corners of the bricks. Using a plastic shovel or a plow with a rubber guard will protect your investment and keep that crisp edge looking sharp.
15. Red Textured Block Edging Separating Lawn and Shrub
The key to this system is the interlocking design. Those little connectors you see on the top surface of the reddish-brown blocks are what set this apart from just placing loose bricks next to each other. They ensure perfect spacing and alignment, and more importantly, they help the entire line of edging move as one unit. This prevents individual blocks from tipping, sinking, or shifting over time, giving you a much more stable and long-lasting border with minimal effort.
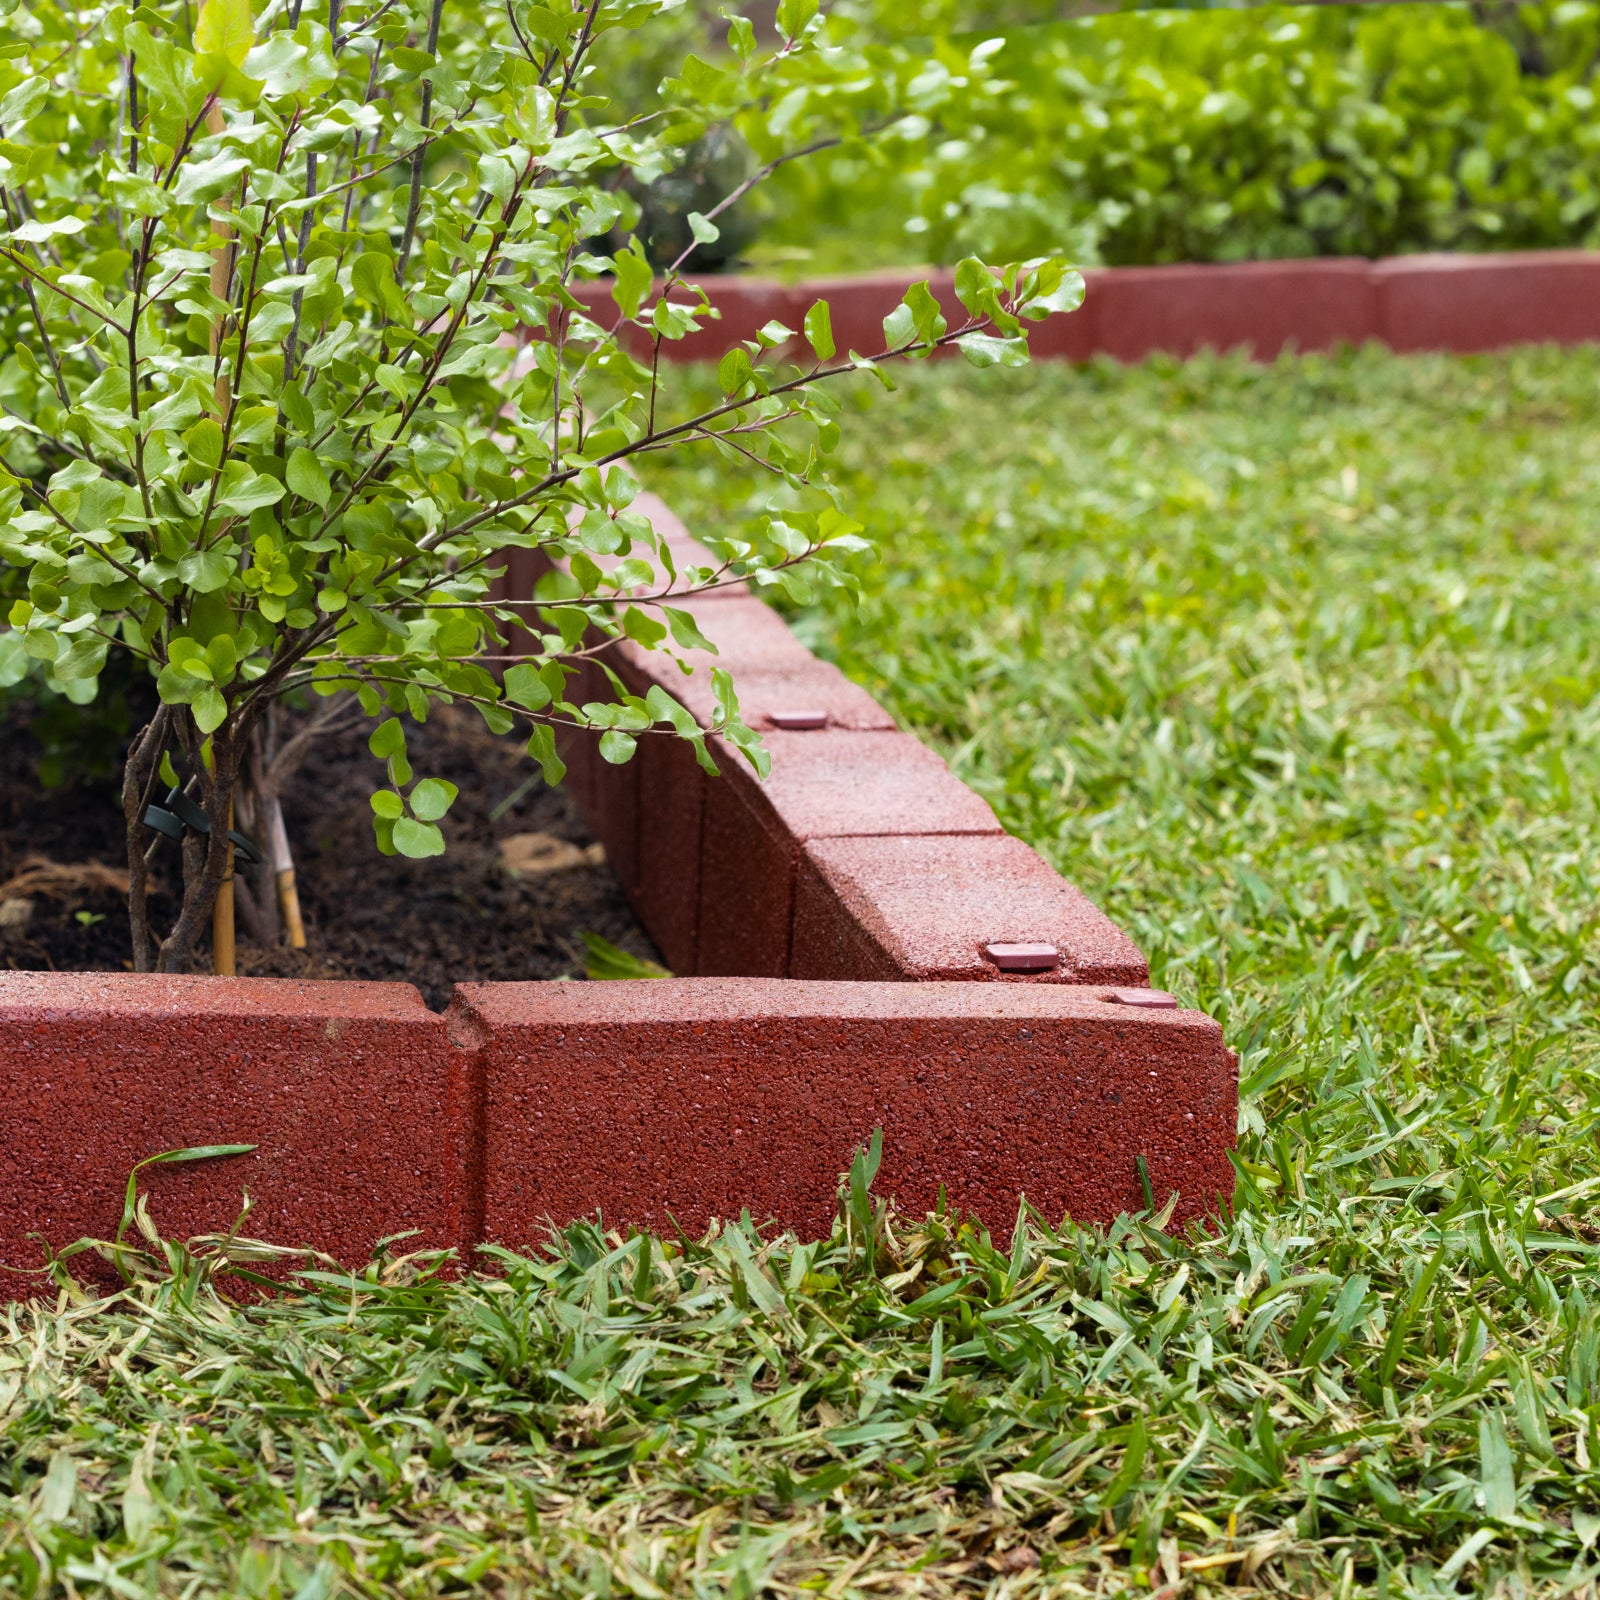
“These textured concrete block edging systems are super popular because they’re easy for a DIYer to install.”
But let’s be real: they scream ‘I got this at a big-box store’. That’s not necessarily a bad thing, but it’s not a high-end custom look. The key to making it look as good as possible is in the prep work. If you just place them on top of the dirt, they will look cheap and uneven. Take the time to dig a shallow, level trench to set them in. It’s the difference between a project that looks finished and one that looks temporary.
16. Straight Flat-Brick Edge for a Raised Garden Bed
To get a perfectly straight line like this over a long distance, don’t trust your eyes. Use string. Hammer in two stakes at either end of where you want your edging to be. Tie a mason’s line or a sturdy string tightly between them, making sure it’s pulled taut and positioned at the exact height you want the top of your bricks to be. Then, simply lay your bricks along that string line. It is the single most effective way to guarantee a dead-straight, perfectly level result. For a crisp look like this, perfection matters.
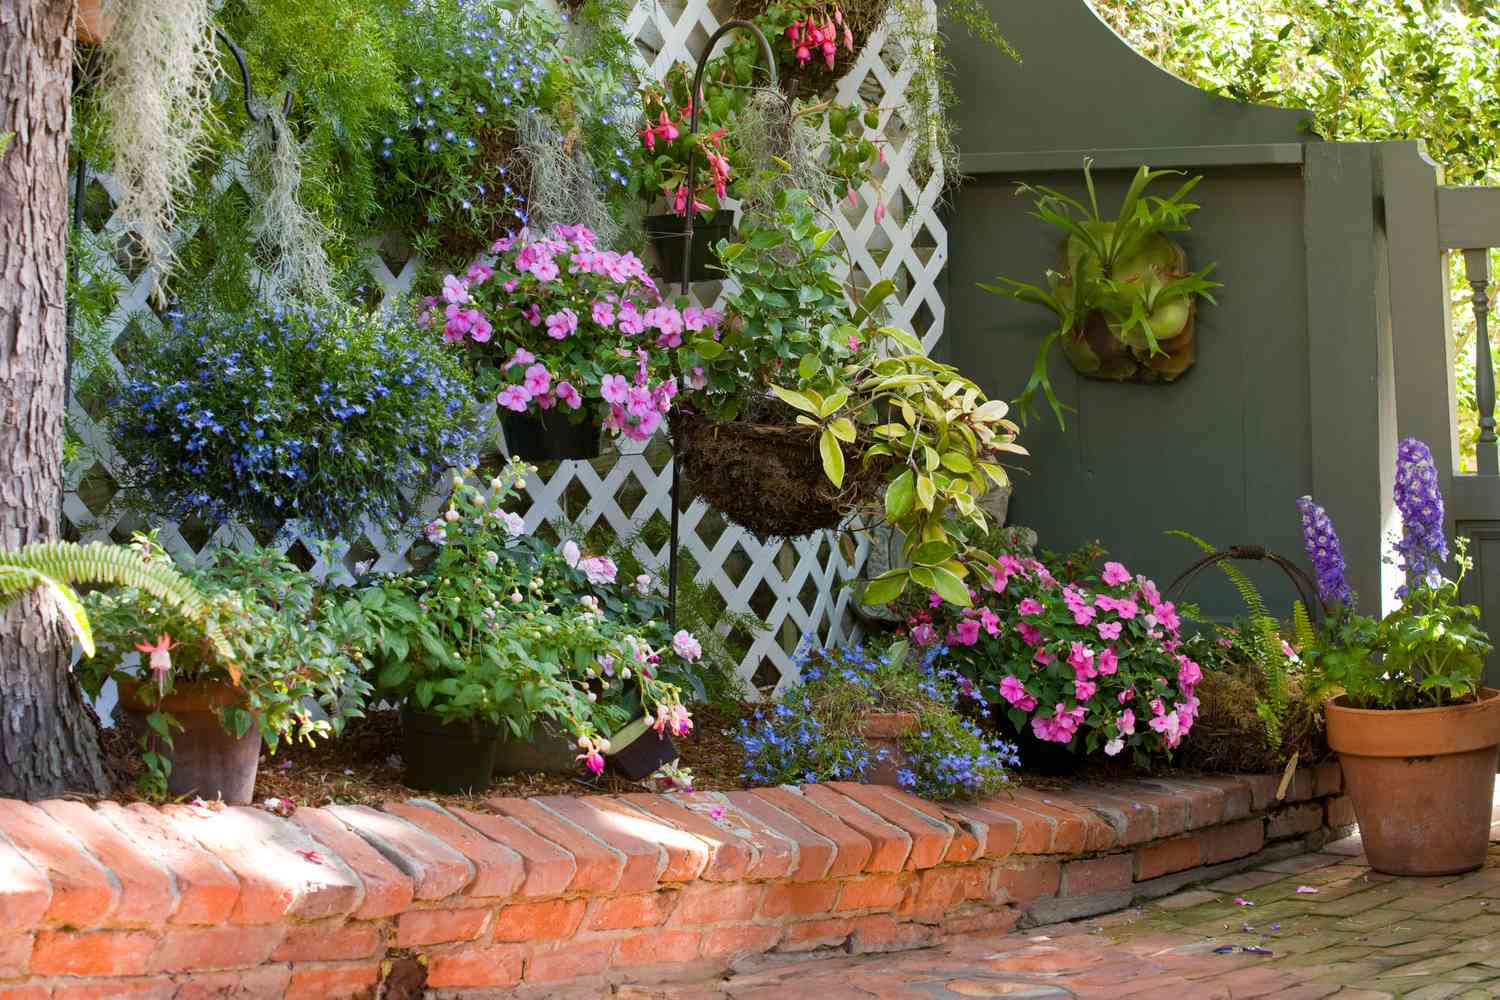
“This flat-laid, single-course brick edging is ideal for defining beds that are level with or only slightly raised (2-3 inches) above a path or lawn.”
It’s a visual border, not a structural retaining wall. It works beautifully for beds from 10 to 100 feet long. However, if your garden bed needs to be raised more than 4 inches to improve drainage or for ergonomic reasons, you need to switch to a more substantial solution like a stacked block wall or vertically set bricks with a concrete footing. Compare with the curved version in Idea #17.
17. Curved Flat-Brick Border Between Gravel Path and Plants
This gentle, meandering look follows a simple formula: 70% Texture + 30% Line. The vast majority of the visual appeal comes from the textures—the crunchy, light-colored gravel and the soft, deep green groundcover. They create a pleasing sensory contrast. The brick edging is the 30% that gives it all structure. The reddish-brown line acts as a visual guide, leading your eye through the landscape. By laying the bricks perpendicular to the path, each brick becomes a small arrow, subtly reinforcing the direction of the curve.
“The effectiveness of this design lies in its repetition and simplicity.”
Using a single material—reddish-brown brick—laid in a consistent, perpendicular orientation creates a strong, readable line. Even as it curves and winds, the pattern remains the same, which is calming to the eye. The flat installation makes it a low-profile choice, defining the space without shouting for attention. It feels like a natural, organic part of the garden, rather than a man-made barrier imposed upon it.
18. Curved Driveway Edged with Pale Bricks and Dark Gravel
Here’s a high-end landscape architect’s secret: create a ‘maintenance buffer’. That narrow band of dark gravel between the pale brick edging and the manicured hedge isn’t just for looks. It’s a genius functional detail. It keeps the mulch from the garden beds from washing onto the driveway, provides a clear space to prevent weeds, and most importantly, it creates a ‘mower-free zone’ right next to the hedge. You can run a string trimmer down this gravel strip in seconds, avoiding damage to the hedge and the brickwork.
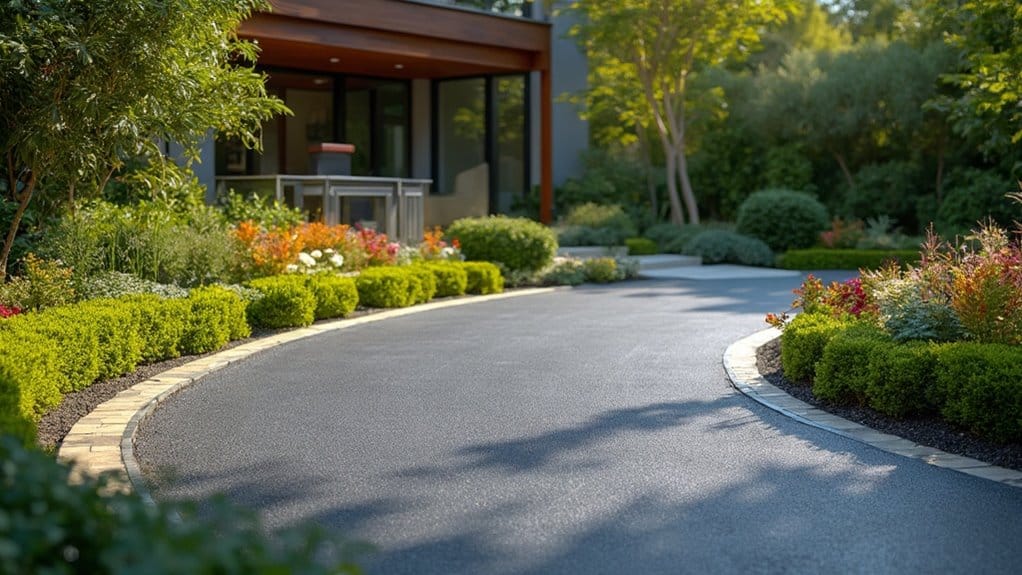
“The single element that elevates this entire design is the triple-edging technique.”
Most driveways just have asphalt meeting grass. Here, you have three distinct bands: the dark asphalt driveway, the single row of pale rectangular bricks, and the narrow band of dark gravel. This layering of color and texture creates an incredibly rich, custom look. It’s a detail that costs more in labor and materials, but the payoff in curb appeal is immense. It’s the difference between a builder-grade landscape and a designer one.
19. Curved Paver Edging with Illuminated Garden Beds
This scene is a perfect example of ‘layering’ in landscape design. You have the short green lawn in the foreground, the mid-height grey paver edging, the slightly taller shrubs and flowers in the bed, and finally, the tall wooden fence in the background. Each element has its own space and height, creating a sense of depth and fullness. The warm landscape uplighting adds another layer, highlighting specific textures and creating a completely different, more dramatic mood at night.
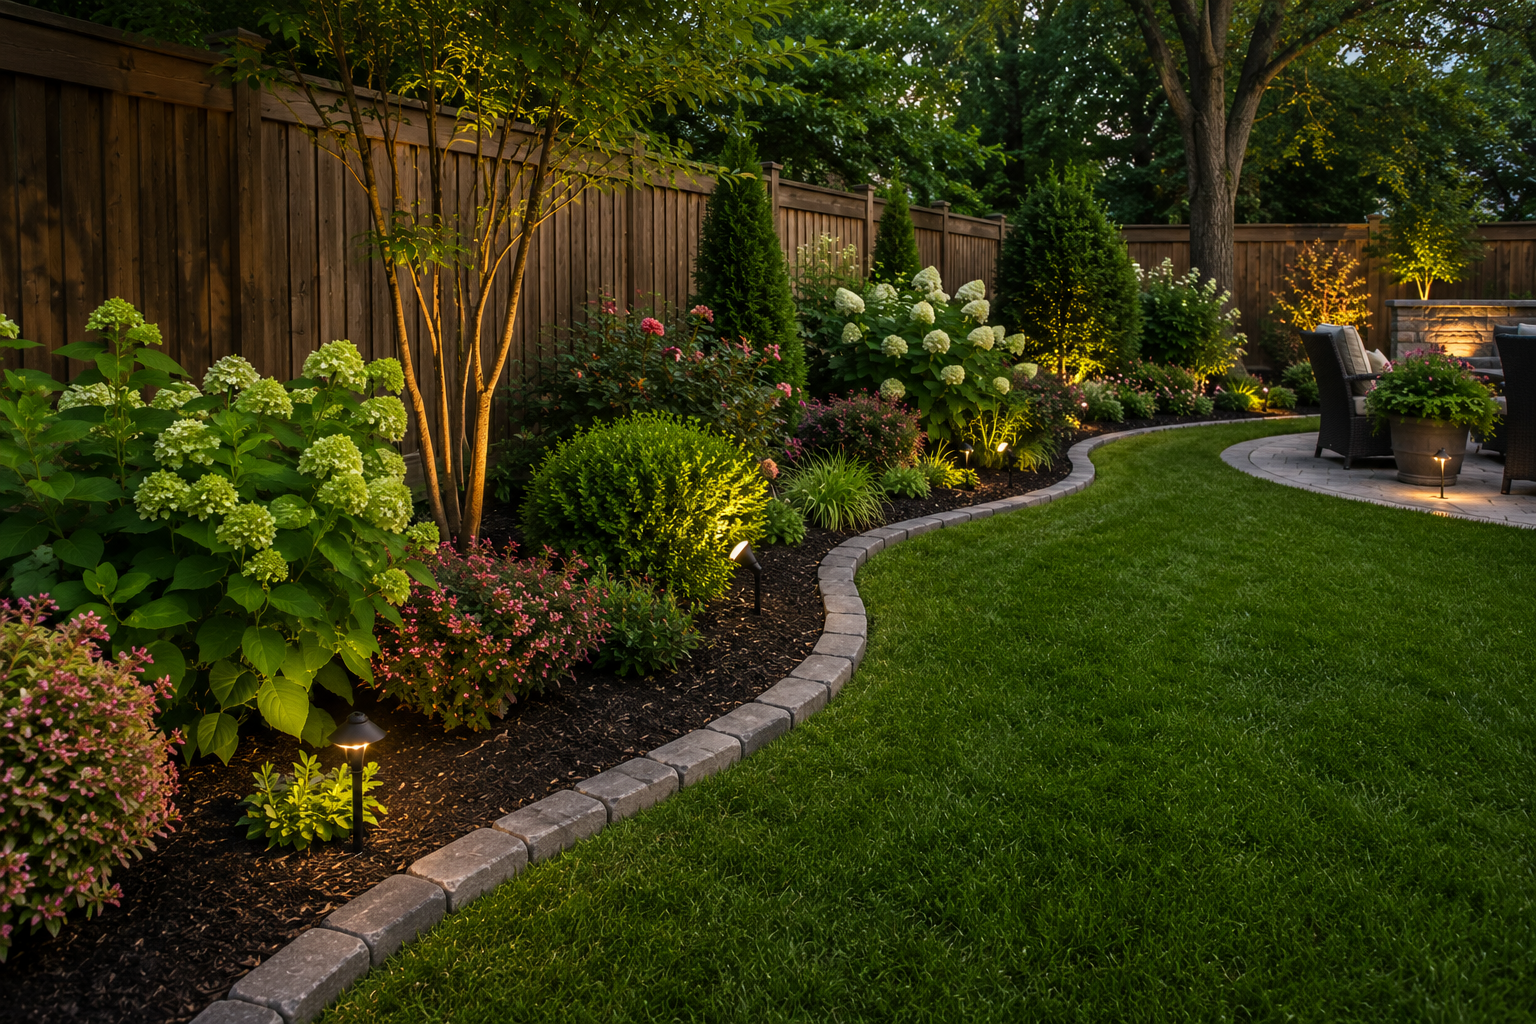
“Landscape lighting has become incredibly accessible and is a huge trend for homeowners looking to maximize their outdoor spaces.”
For years, it was a luxury feature requiring professional installation. Now, with high-quality, low-voltage LED and even solar-powered options available at stores like Home Depot, anyone can achieve this kind of warm, inviting glow. People are realizing that their yard doesn’t have to disappear after sunset; it can become a whole new living space. The lighting here makes the garden an inviting destination, not just something to look at.
20. Dark Block Edging with Gently Curved Garden Bed
A dark, bold edging like this works best in medium to large-sized yards. In a very small space, a dark, thick border can feel heavy and make the area seem even smaller. For this look to be successful, you need enough green lawn on one side to balance the visual weight of the dark blocks and enough dense planting on the other side. A good rule of thumb: the border itself shouldn’t take up more than 5% of the visual ‘width’ of the lawn area it’s bordering.
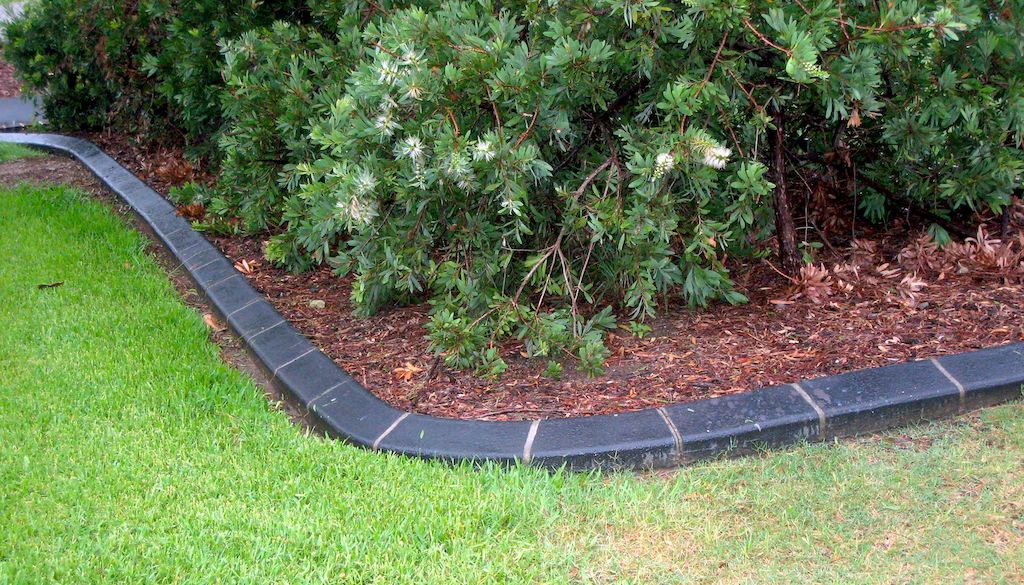
“The mortar lines between these dark blocks are a critical detail.”
While they create a nice grid-like pattern, they are also the most likely point of failure. Temperature changes and ground movement can cause cracks in the mortar over time. If you’re DIYing this, use a flexible mortar mix specifically designed for outdoor use. And be prepared for the possibility that you might have to do some minor touch-up work on the mortar joints every 5-7 years to keep it looking pristine.
21. Simple Single Row Curved Brick Edge for Driveway
This is the absolute workhorse of driveway edging—and for good reason. It’s one of the most cost-effective ways to get a clean, finished look. Standard red clay bricks are inexpensive and widely available. The real budget saver is that you only need a single row. Compared to a full brick driveway or a wide border, this minimalist approach uses a fraction of the material. For maximum savings, look for ‘utility’ or ‘cull’ bricks at a landscape supply yard, which are perfectly functional but have minor cosmetic flaws and are sold at a deep discount.
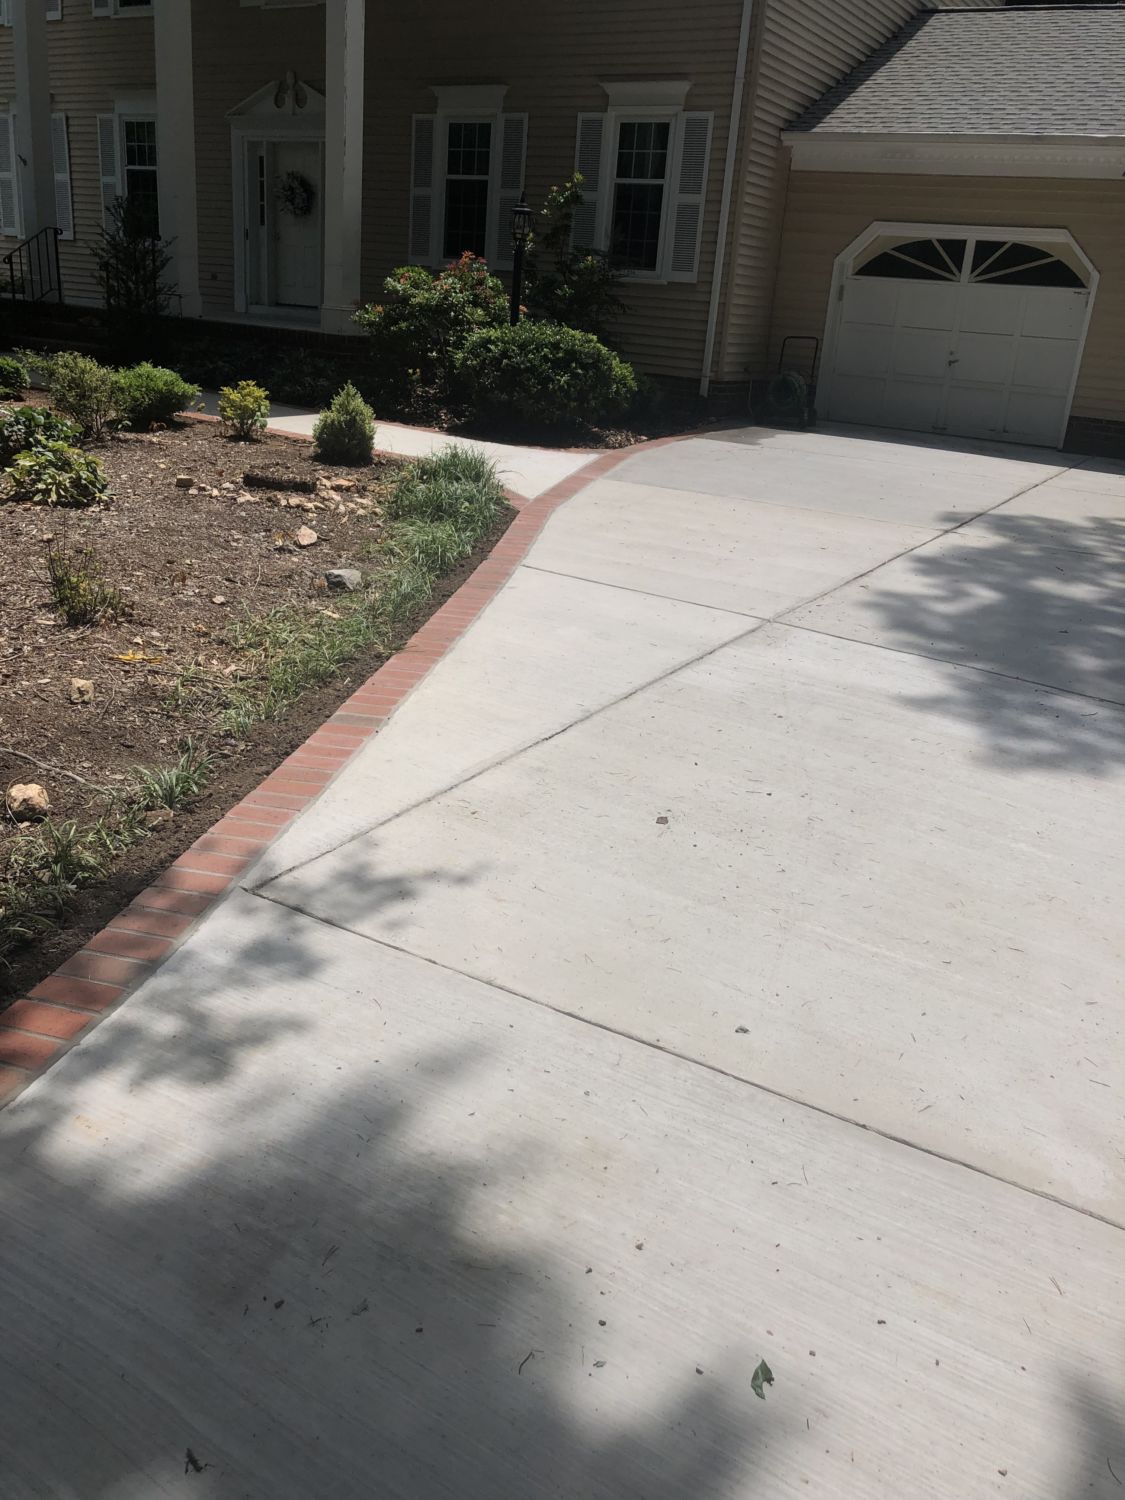
“The beauty of this design lies in its understated functionality.”
It’s a perfect example of ‘form follows function’. The curve isn’t just decorative; it’s likely dictated by the natural sweep of the driveway. The single row of reddish-brown brick provides a clear visual and physical boundary, preventing the lawn from creeping over the concrete and stopping the car’s tires from crumbling the edge of the soil bed. Laying them flush with the driveway, as seen in this and Idea #12, also makes snow removal much easier.
22. Curved Brick Edging Defining Beds on a Herringbone Patio
The single most important element here is the continuity of material. The designer used the exact same red-brown brick for the herringbone patio field and the curved garden bed edging. This creates a seamless, cohesive look that makes the entire space feel unified and expansive. If they had switched to a different material for the edging (like concrete or stone), it would have visually chopped up the space. Using the same brick throughout makes the garden beds feel like they were carved out of the patio, not just placed next to it.
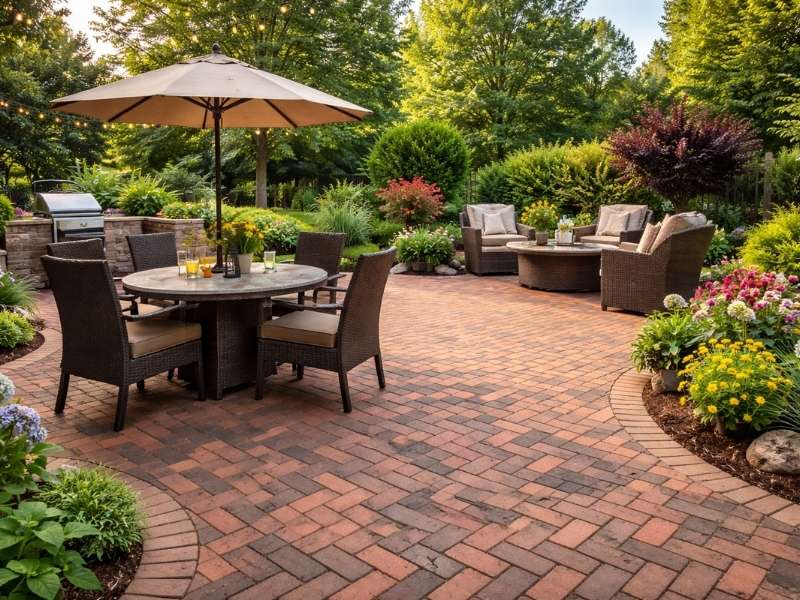
“When you have a large expanse of a single pattern like this herringbone brick, it’s crucial to break it up to avoid monotony.”
Here, the designer cleverly used two distinct seating zones—a dining area and a lounge space—to create ‘rooms’ within the patio. The large beige umbrella also helps to break up the visual field and create a focal point. Don’t be afraid to place outdoor rugs and furniture groupings directly on the pattern; it helps to ground the space and make it feel more intimate.
23. Curved Single-Row Brick Border for a Mulched Bed
The formula for this lush, classic garden look is all about color balance. It’s roughly 50% Green + 30% Brown + 20% Red/Orange. The dominant visual is the vibrant green of the lawn and the hosta leaves. The next biggest element is the rich, dark brown of the bark mulch, which provides a perfect neutral canvas. The brick edging and scattered marigolds make up the final 20%, acting as a warm, colorful accent that ties everything together. This palette is practically foolproof for creating a welcoming, natural feel.
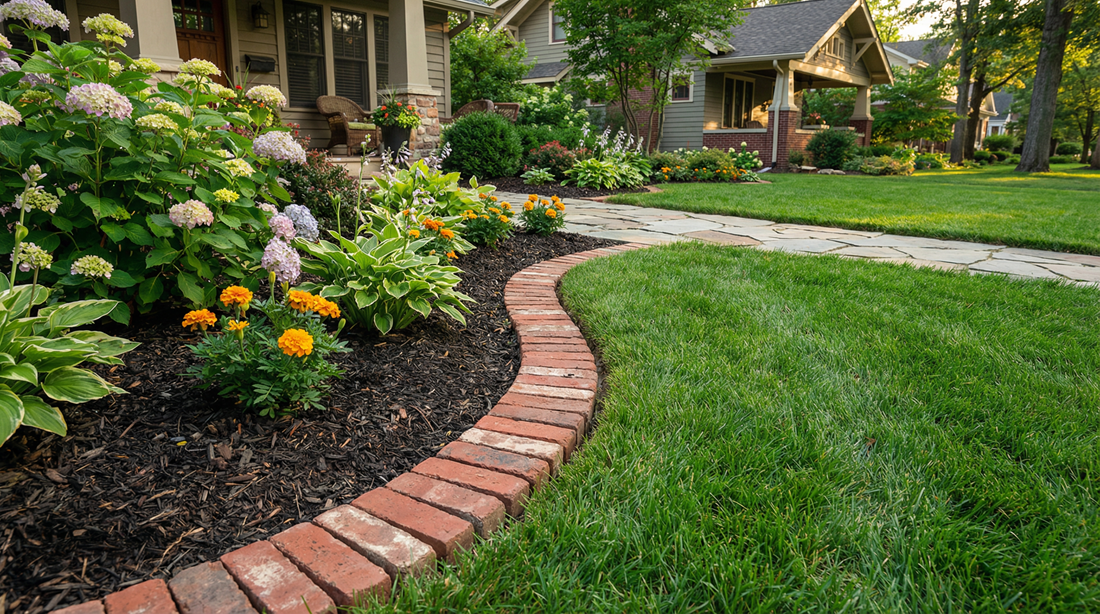
“A single row of weathered, reclaimed bricks is beautiful but can be surprisingly hard to find and expensive.”
To get this look for less, buy the cheapest new red clay bricks from a big-box store. Mix a half-and-half solution of water and white latex paint, brush it on sloppily, and then immediately wipe most of it off with a rag. Let some bricks dry, then rub them with dirt or a handful of mulch. This quick ‘aging’ process will give you that charming, inconsistent, weathered look for a fraction of the cost.
24. Curved Tan Interlocking Block Edging with Ornamental Cabbage
The success of this tidy garden bed comes from color harmony. Notice how the tan color of the interlocking brick edging is a neutral, earthy tone that doesn’t compete with the plants. Instead, it complements them. The tan picks up on the lighter tones in the soil and provides a gentle, warm frame for the cool colors of the plants—the vibrant green lawn, the deep purple pansies, and the stunning pink and green ornamental cabbage. It’s a sophisticated choice that lets the plants be the star. For a blocky edging, it’s a softer look than the concrete in Idea #6.
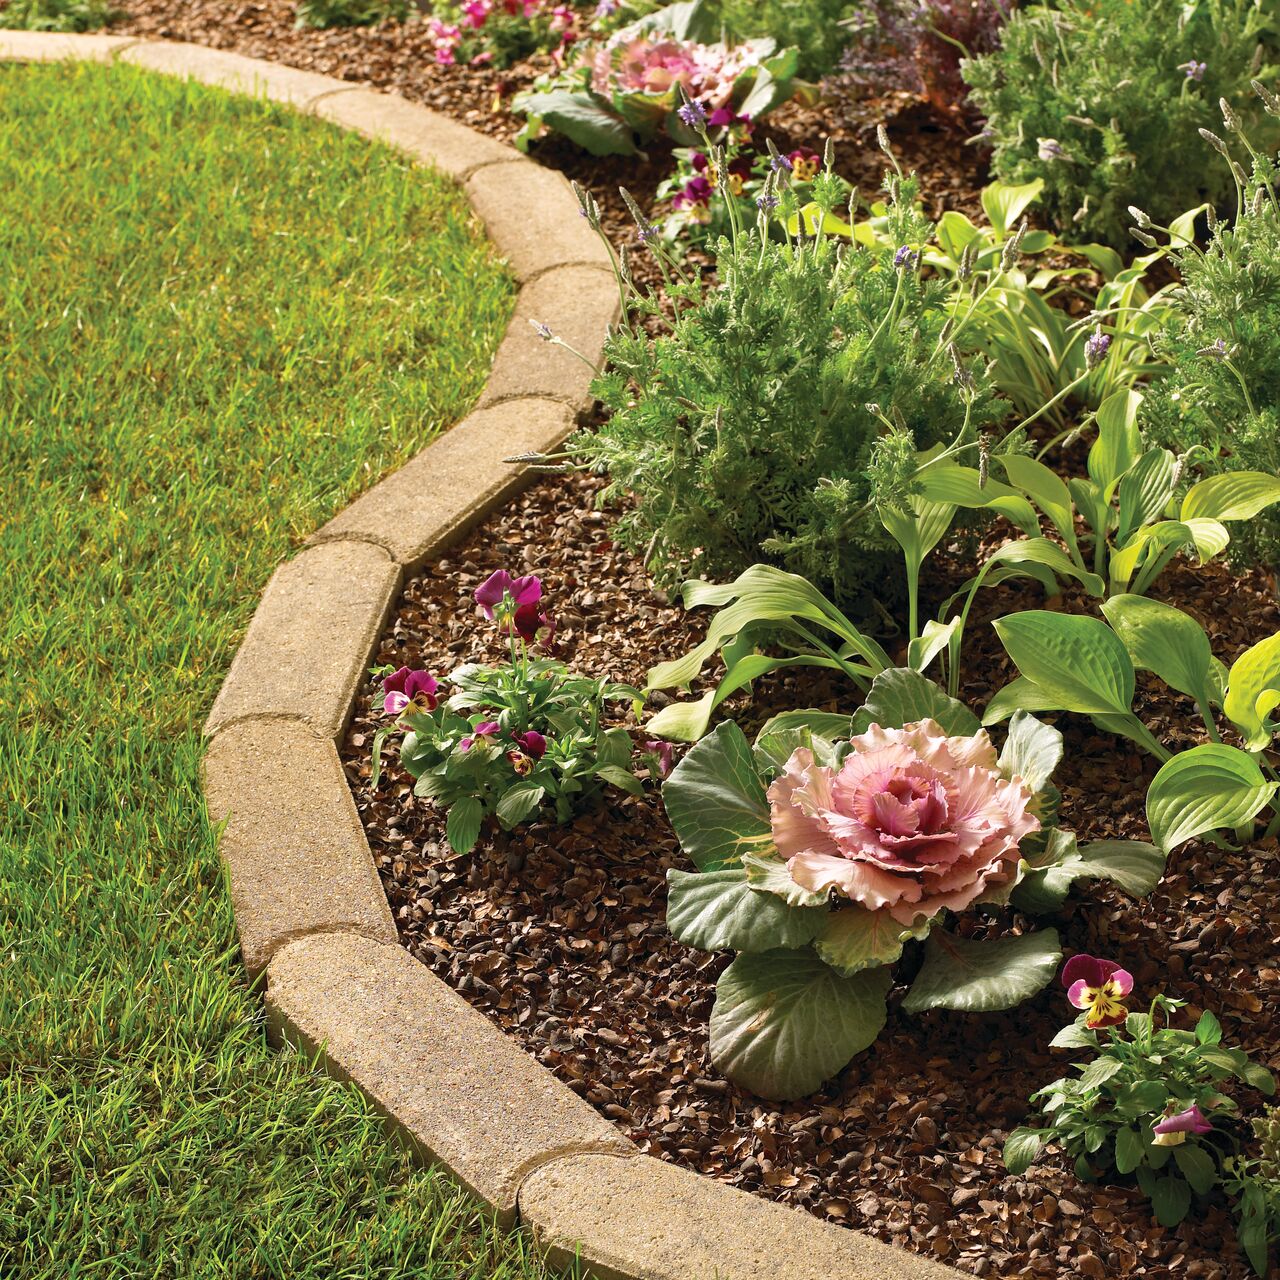
“That ornamental cabbage is the showstopper here.”
When designing a garden bed, always include one ‘thriller’ plant. A thriller is a plant with a unique shape, color, or texture that serves as the focal point. The ornamental cabbage does that perfectly. The rest of the plants—the ‘fillers’ (like the hostas) and ‘spillers’ (plants that would hang over the edge)—play a supporting role. This ‘thriller, filler, spiller’ method is a simple but powerful way to create professional-looking container and garden bed designs.
25. Curved Paver Path with Sculpted Dark Grey Edging
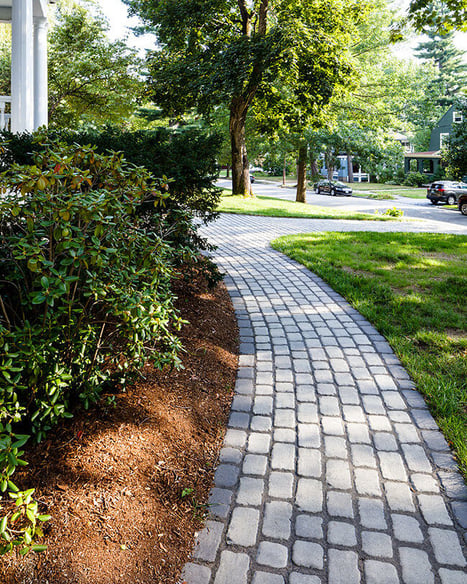
that gives this pathway its polished, high-end feel is the raised, dark grey edging. While the light grey pavers of the path are functional, the sculpted brick-like edge is purely for style. It creates a strong, dark line that ‘contains’ the path and separates it cleanly from the mulch and lawn. This dark line makes the light grey of the pavers look brighter and the green of the grass look richer. It’s a small detail that has a huge impact on the overall perceived quality of the landscape.
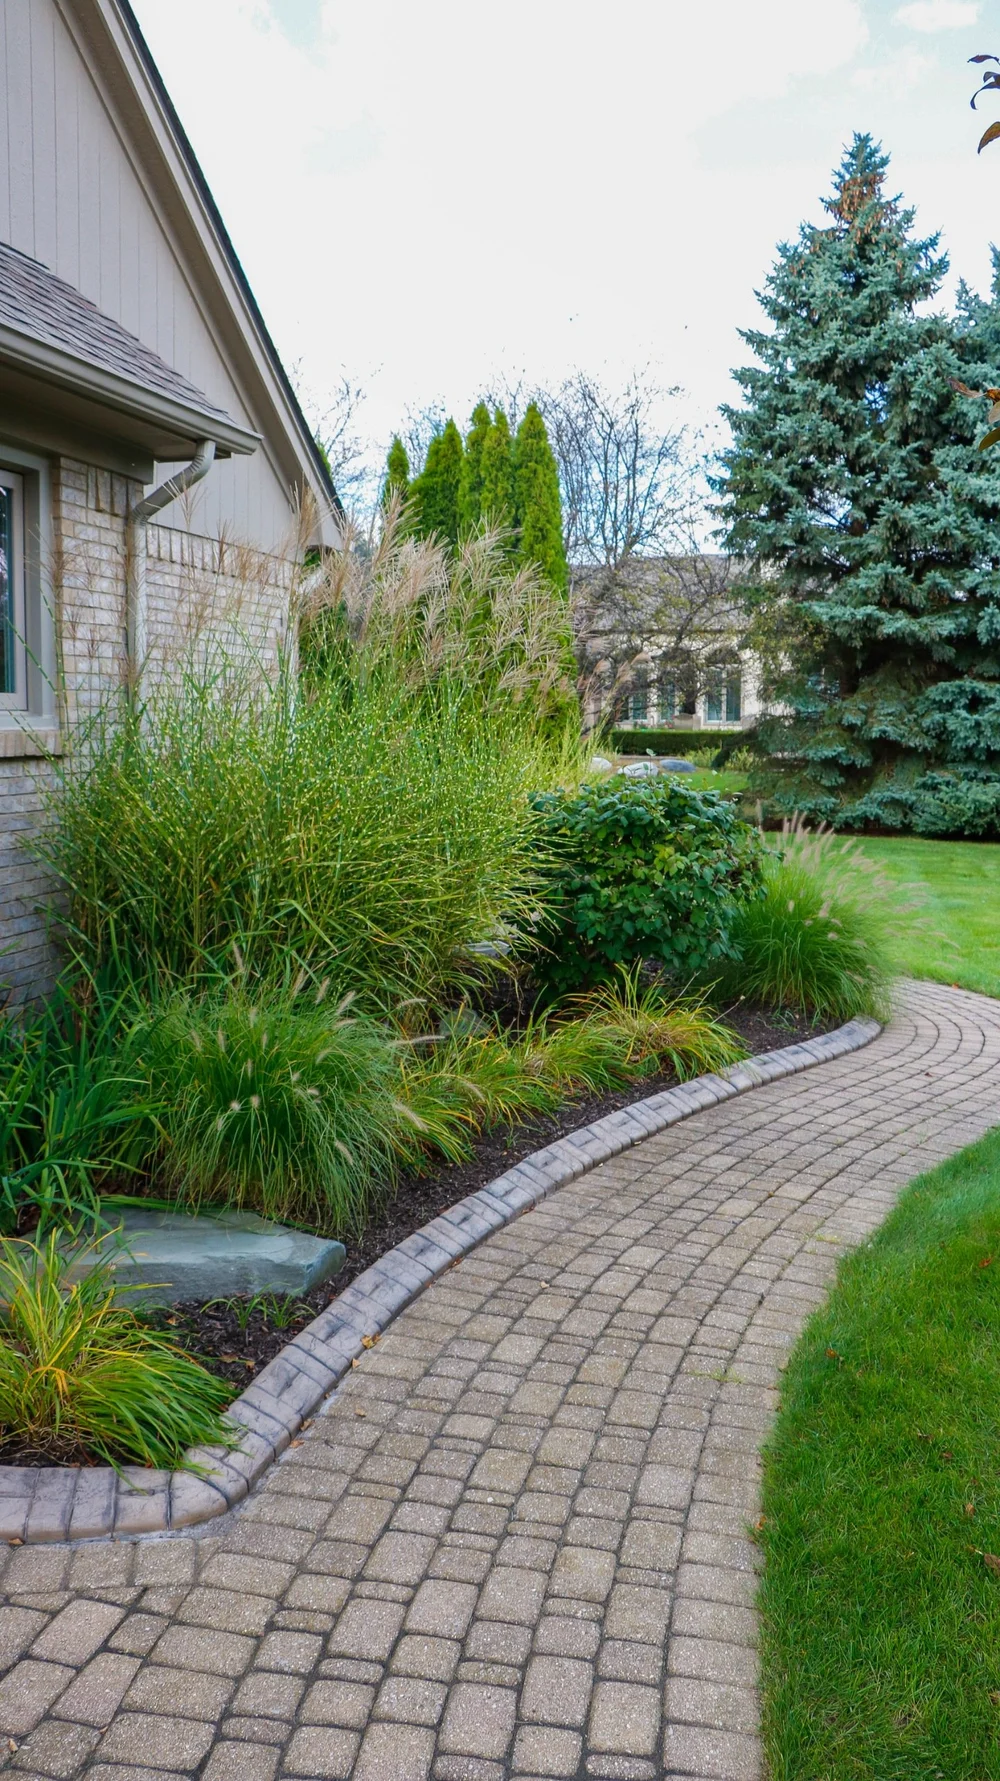
“A mulched garden bed next to a paver path requires a bit of upkeep to look this neat.”
The raised edging helps a lot, but mulch will inevitably find its way onto the path, especially after a heavy rain or when you’re working in the garden. A quick sweep or a blast with a leaf blower is a regular task. Also, ornamental grasses, while beautiful, can be messy shedders. You’ll need to trim them back hard once a year (usually in late winter or early spring) to encourage healthy new growth and keep them from looking scraggly.
26. Curved Red Brick Edging with Rounded Capstones
This classic, romantic look is achieved through the use of soft lines and textures. The brick wall itself has a gentle curve, which is more inviting than a hard straight line. The real secret, however, is the rounded brick capstones on top. A standard flat brick top would have looked much harsher. The bullnose edge of the capstones is pleasing to the eye and soft to the touch, inviting you to run your hand along it. This softness is echoed in the lush, cascading foliage of the ivy and rose bushes, creating a cohesive and charming English garden feel.
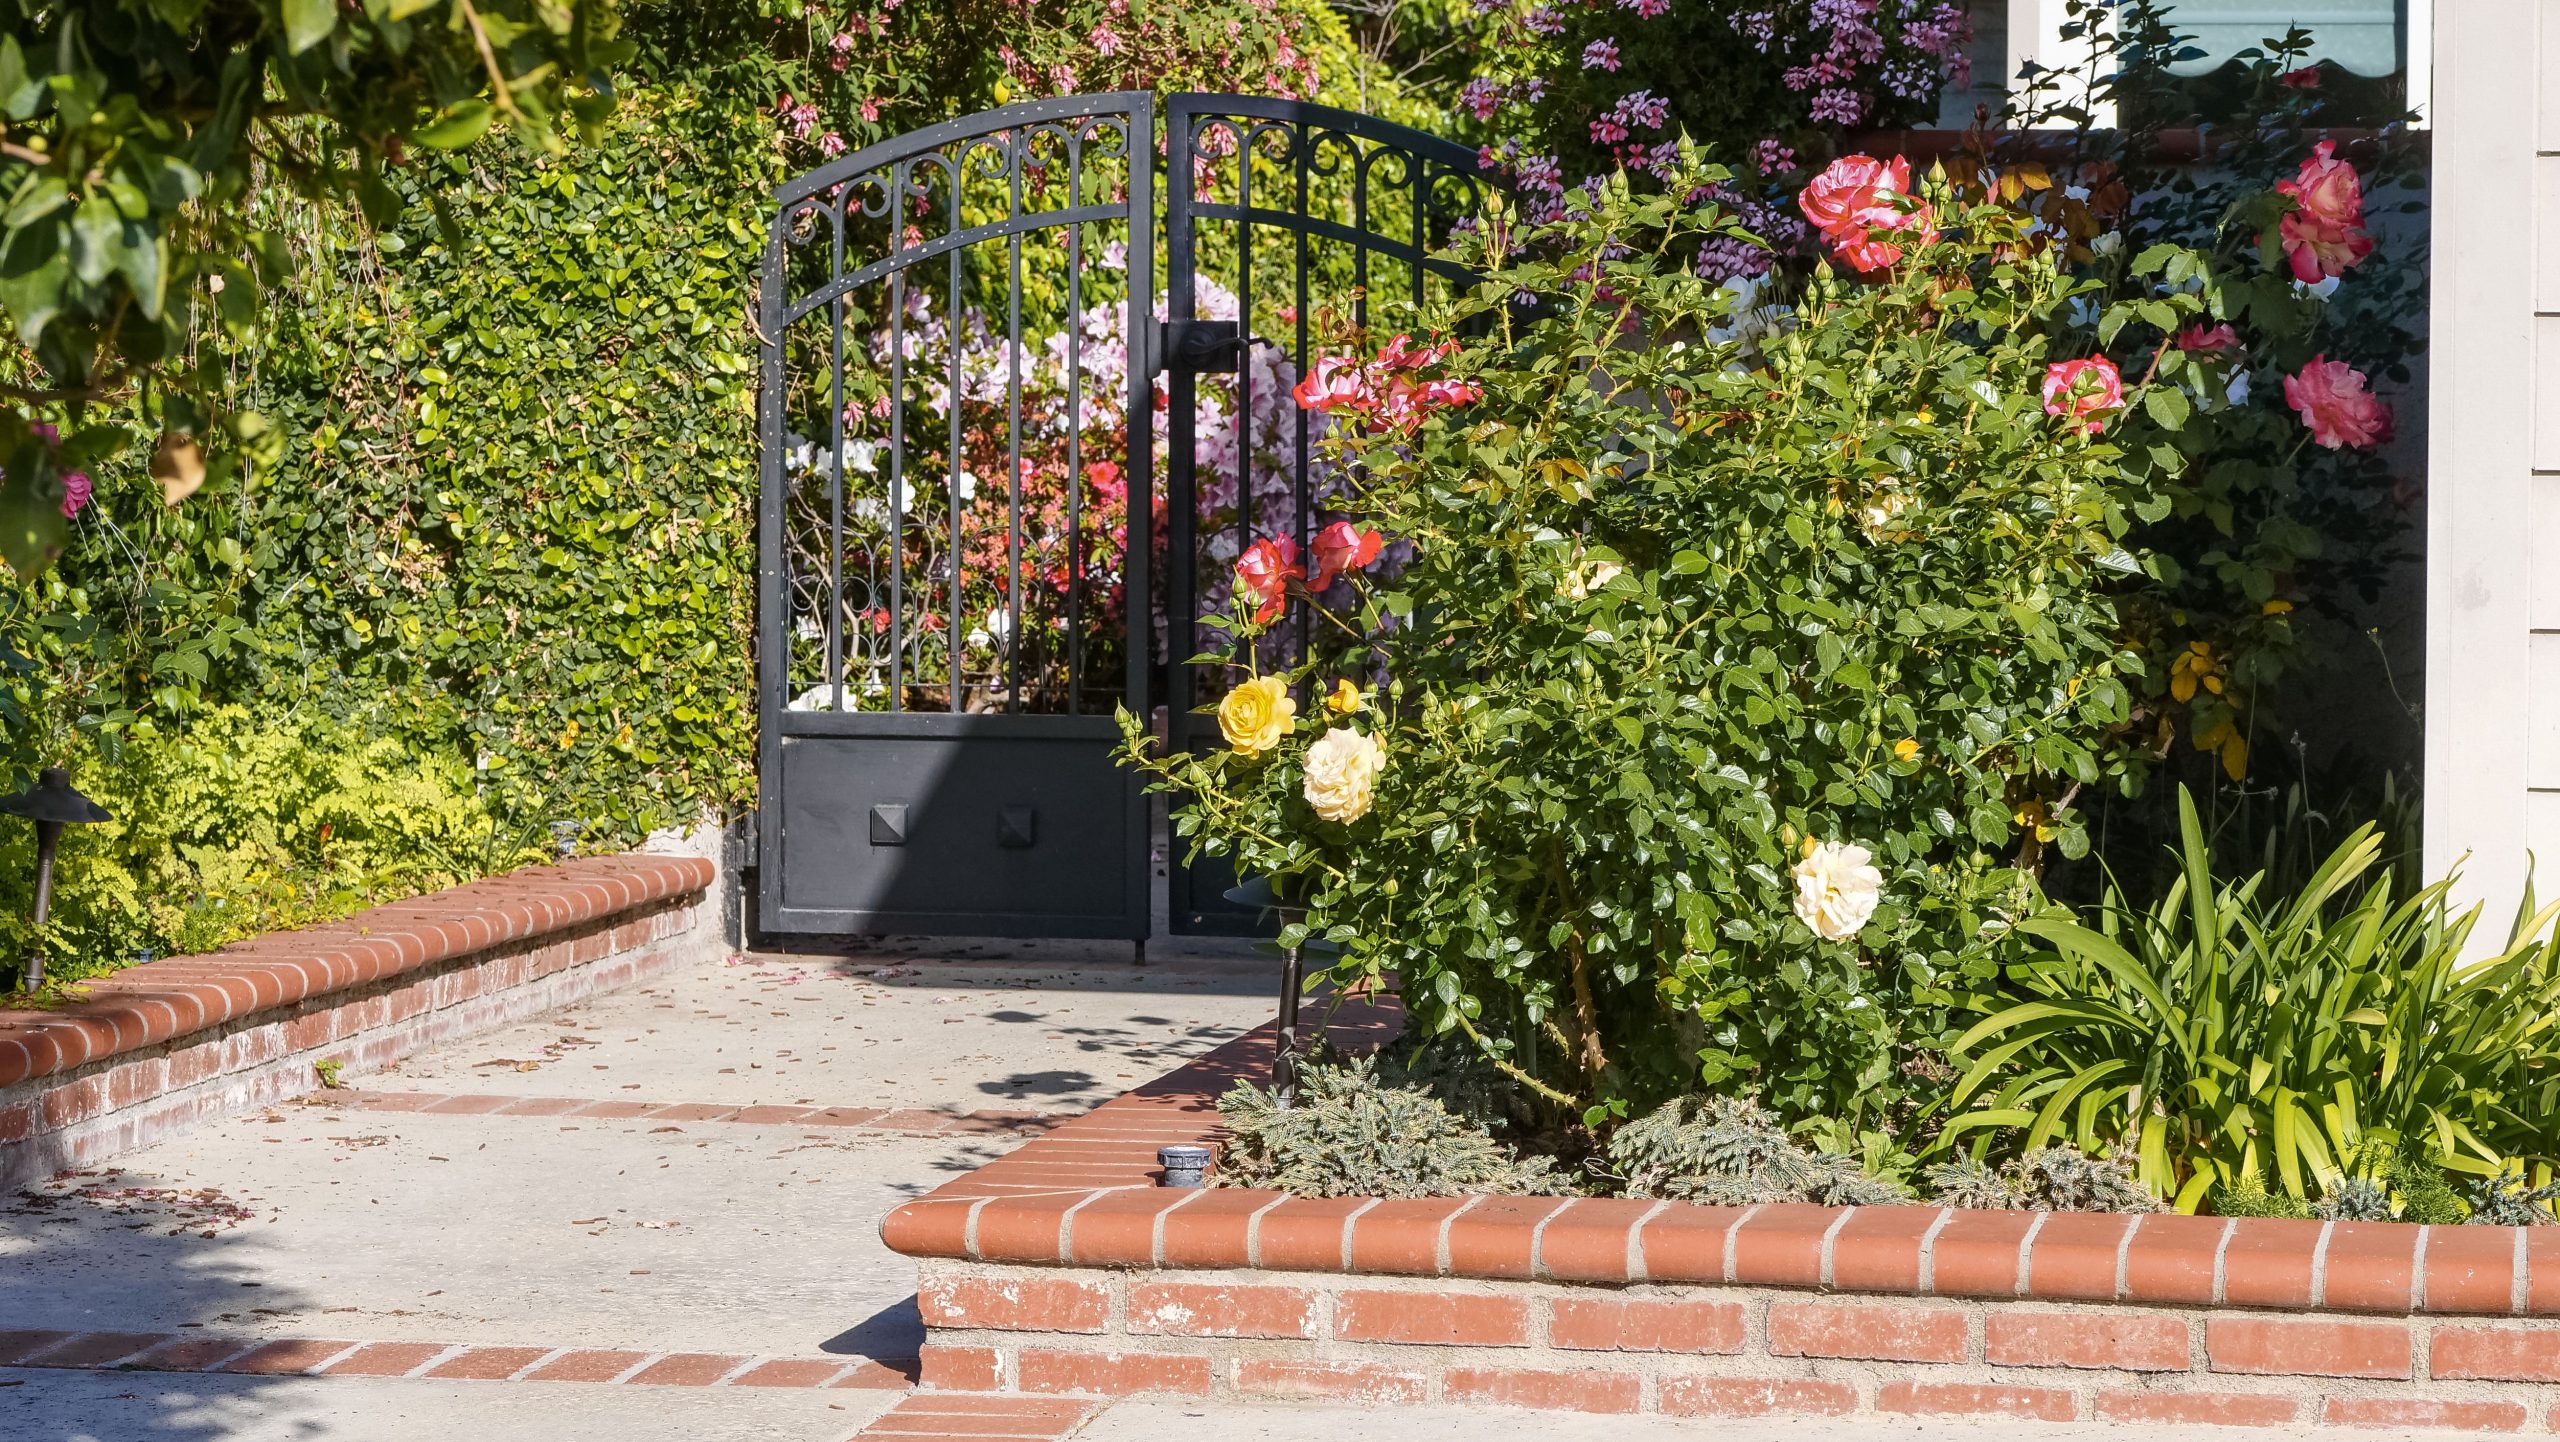
“That lush, ivy-covered wall and the beautiful rose bushes are a gardener’s dream, but they come with a price.”
Ivy is notoriously aggressive and can damage mortar and brick over time if not kept in check. It will require regular, disciplined trimming to keep it from taking over the path and the ornate metal gate. Similarly, rose bushes are prone to pests and diseases like black spot and will require a consistent routine of pruning, feeding, and pest management to keep them blooming and beautiful.
27. Curved Stone-Look Edging Separating Lawn and Mulch
Getting a natural stacked stone look with real stone is expensive and requires a lot of skill to install. These reddish-brown, textured concrete edging blocks are the perfect budget-friendly alternative. They are designed to mimic the irregular shape and rough face of natural stone but are lightweight and often have an interlocking system, making them a straightforward DIY project. You can find them at any big-box home improvement store, often for less than half the price of natural stone edging.
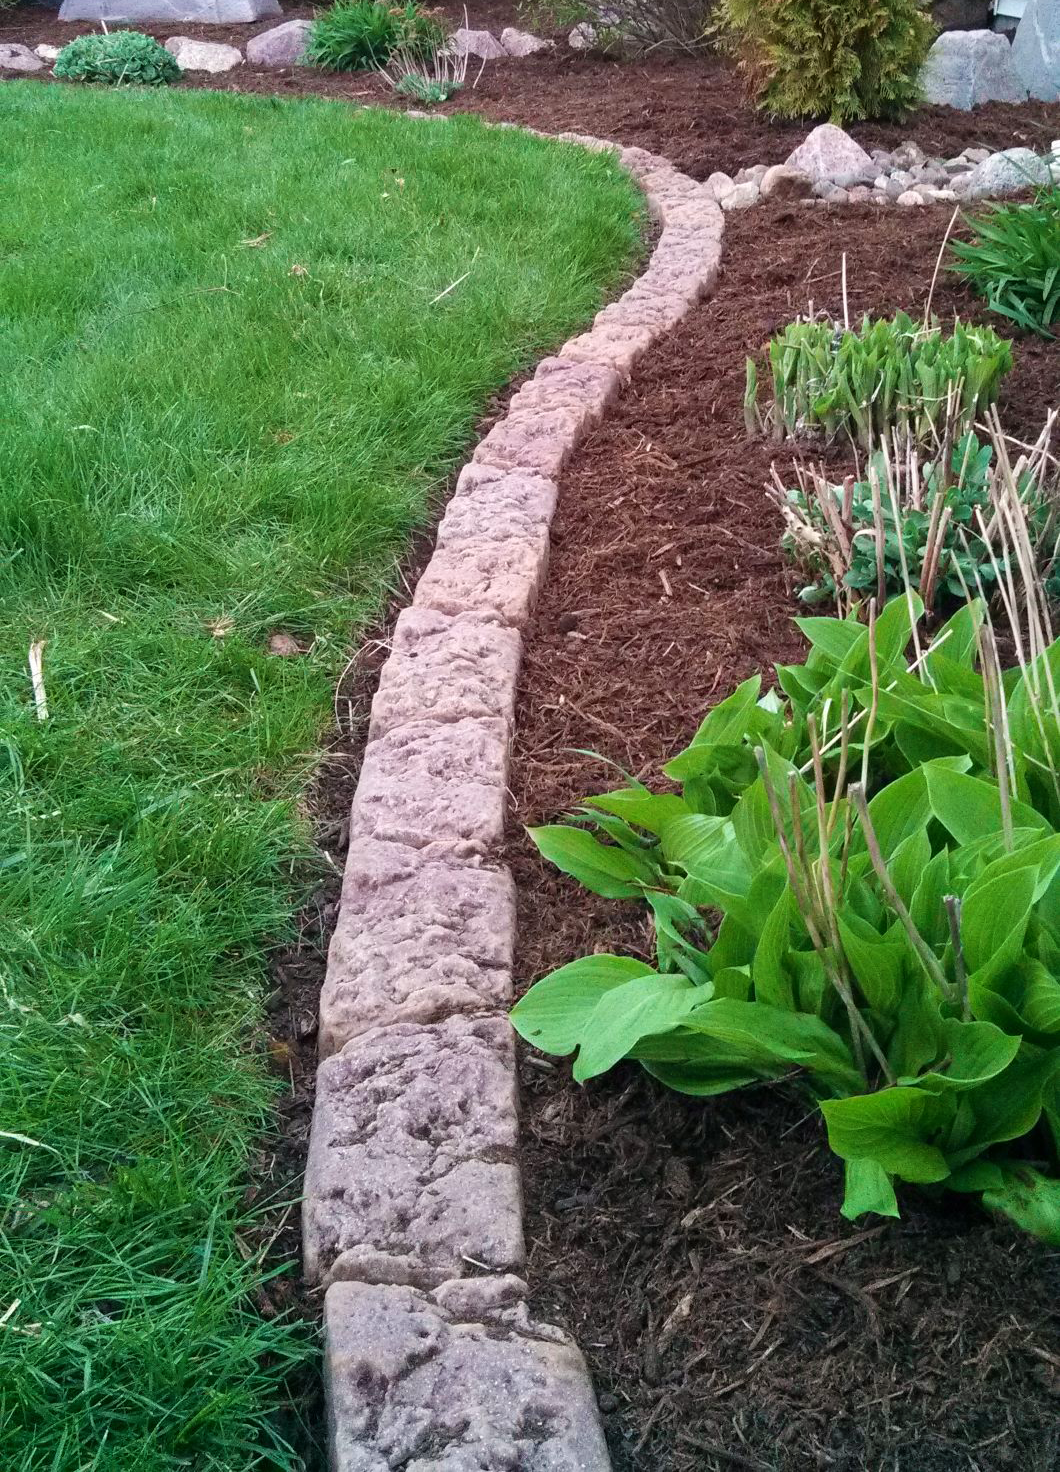
“This organic, natural look is all about a balance of textures.”
Let’s break it down: 40% smooth (the finely cut green lawn), 40% chunky (the dark brown wood mulch and grey rocks), and 20% rough (the reddish-brown stone-like edging). The edging acts as the perfect transition between the smooth lawn and the chunky mulch bed. If you were to swap the wood mulch for a finer-textured soil, the overall look would feel less rustic because you’ve lost one of the key textural elements.
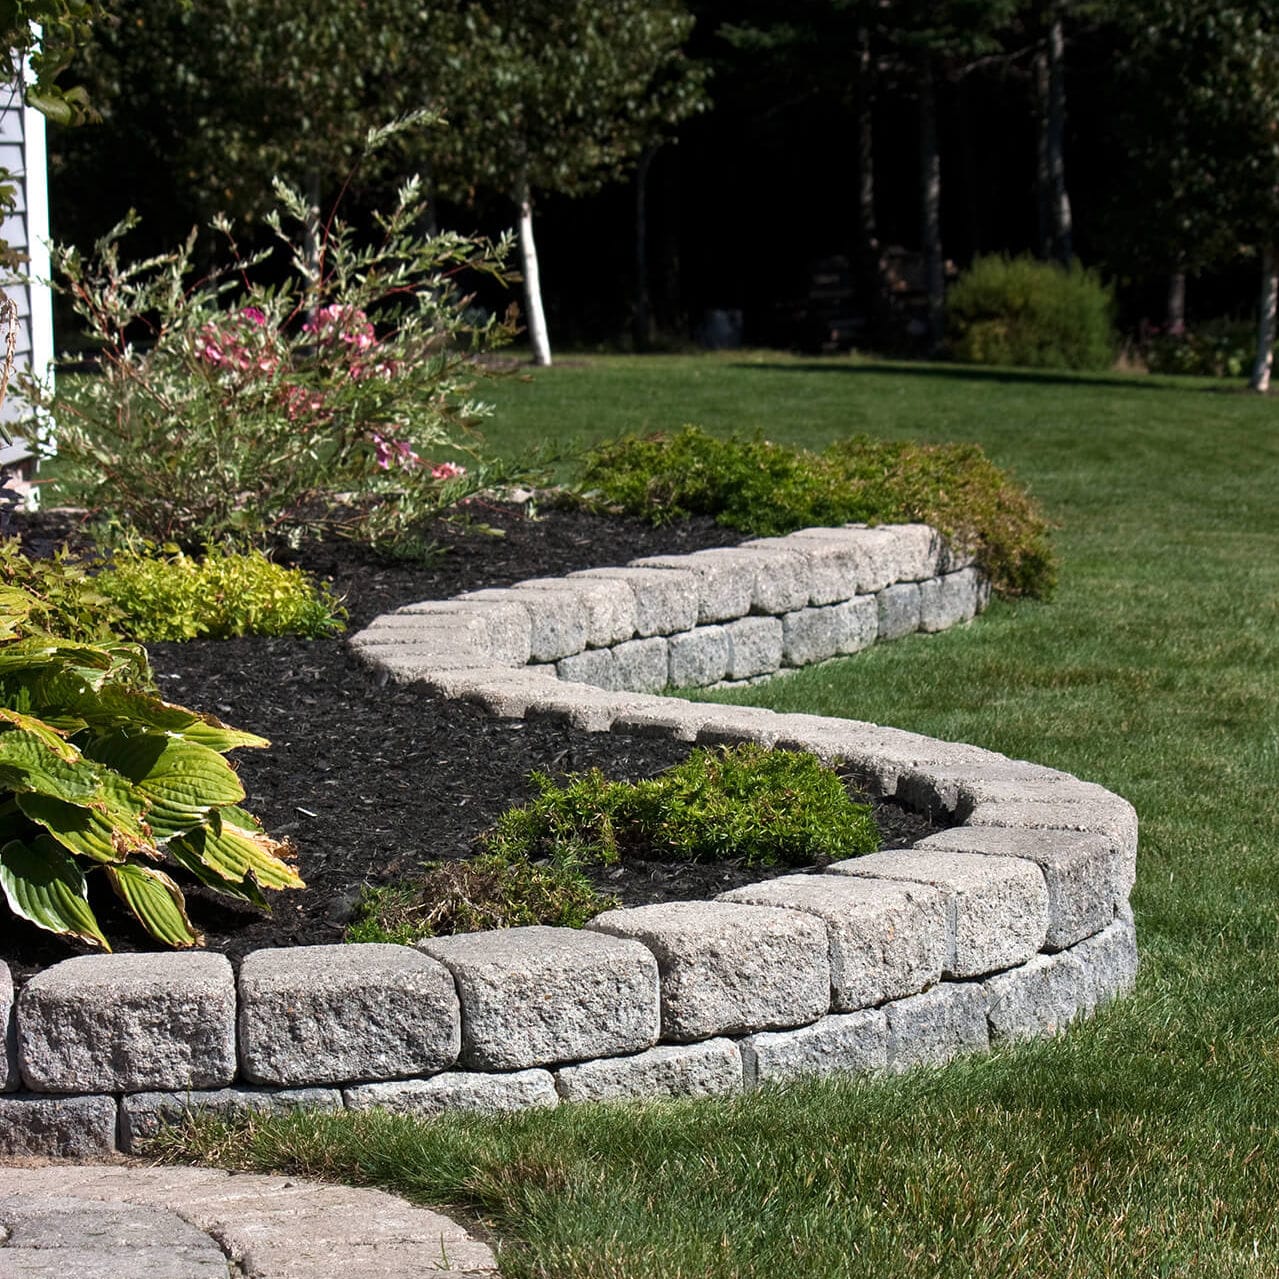
28. Curved Stacked Stone Block Garden Bed with Mulch
Creating a stable stacked stone wall like this is all about the base. Time: 3 hours for a 15-foot curve. Cost: Price of blocks.
- Mark your curve with a hose, then dig a trench 6 inches deep and about 12 inches wide.
- Fill the trench with 4 inches of paver base or gravel and tamp it down until it’s completely level. This is the most critical step.
- Lay your first course of grey stone blocks in the trench, making sure they are level both front-to-back and side-to-side.
- For the second course, apply landscape adhesive and set the blocks back about a half-inch from the front of the course below. Stagger the joints like you would with bricks for strength.
“Before you commit to building a raised bed, here’s a quick checklist:Check for Utilities: Before you dig, call 811.”
It’s a free service that marks underground utility lines so you don’t accidentally hit a water pipe or electrical line.Sunlight Mapping: Watch how the sun moves across the area throughout the day. A spot that’s sunny at 9 a.m. might be in deep shade by 2 p.m. This will determine which plants will thrive.Water Source: How will you water this bed? Is it within reach of a hose, or will you need to plan for a drip irrigation system?
29. Defined Lawn Edge with Vertically Laid Reddish-Brown Brick
For an ultra-clean look like this, the secret is in what you can’t see. After digging your trench, lay a strip of commercial-grade landscape fabric in the bottom and up the side of the trench that faces the garden bed. This barrier will prevent roots and persistent weeds from creeping through the soil and popping up right next to your pristine brick line. Then, set your bricks in place and backfill. It’s an extra $20 step that will save you hours of weeding later on.
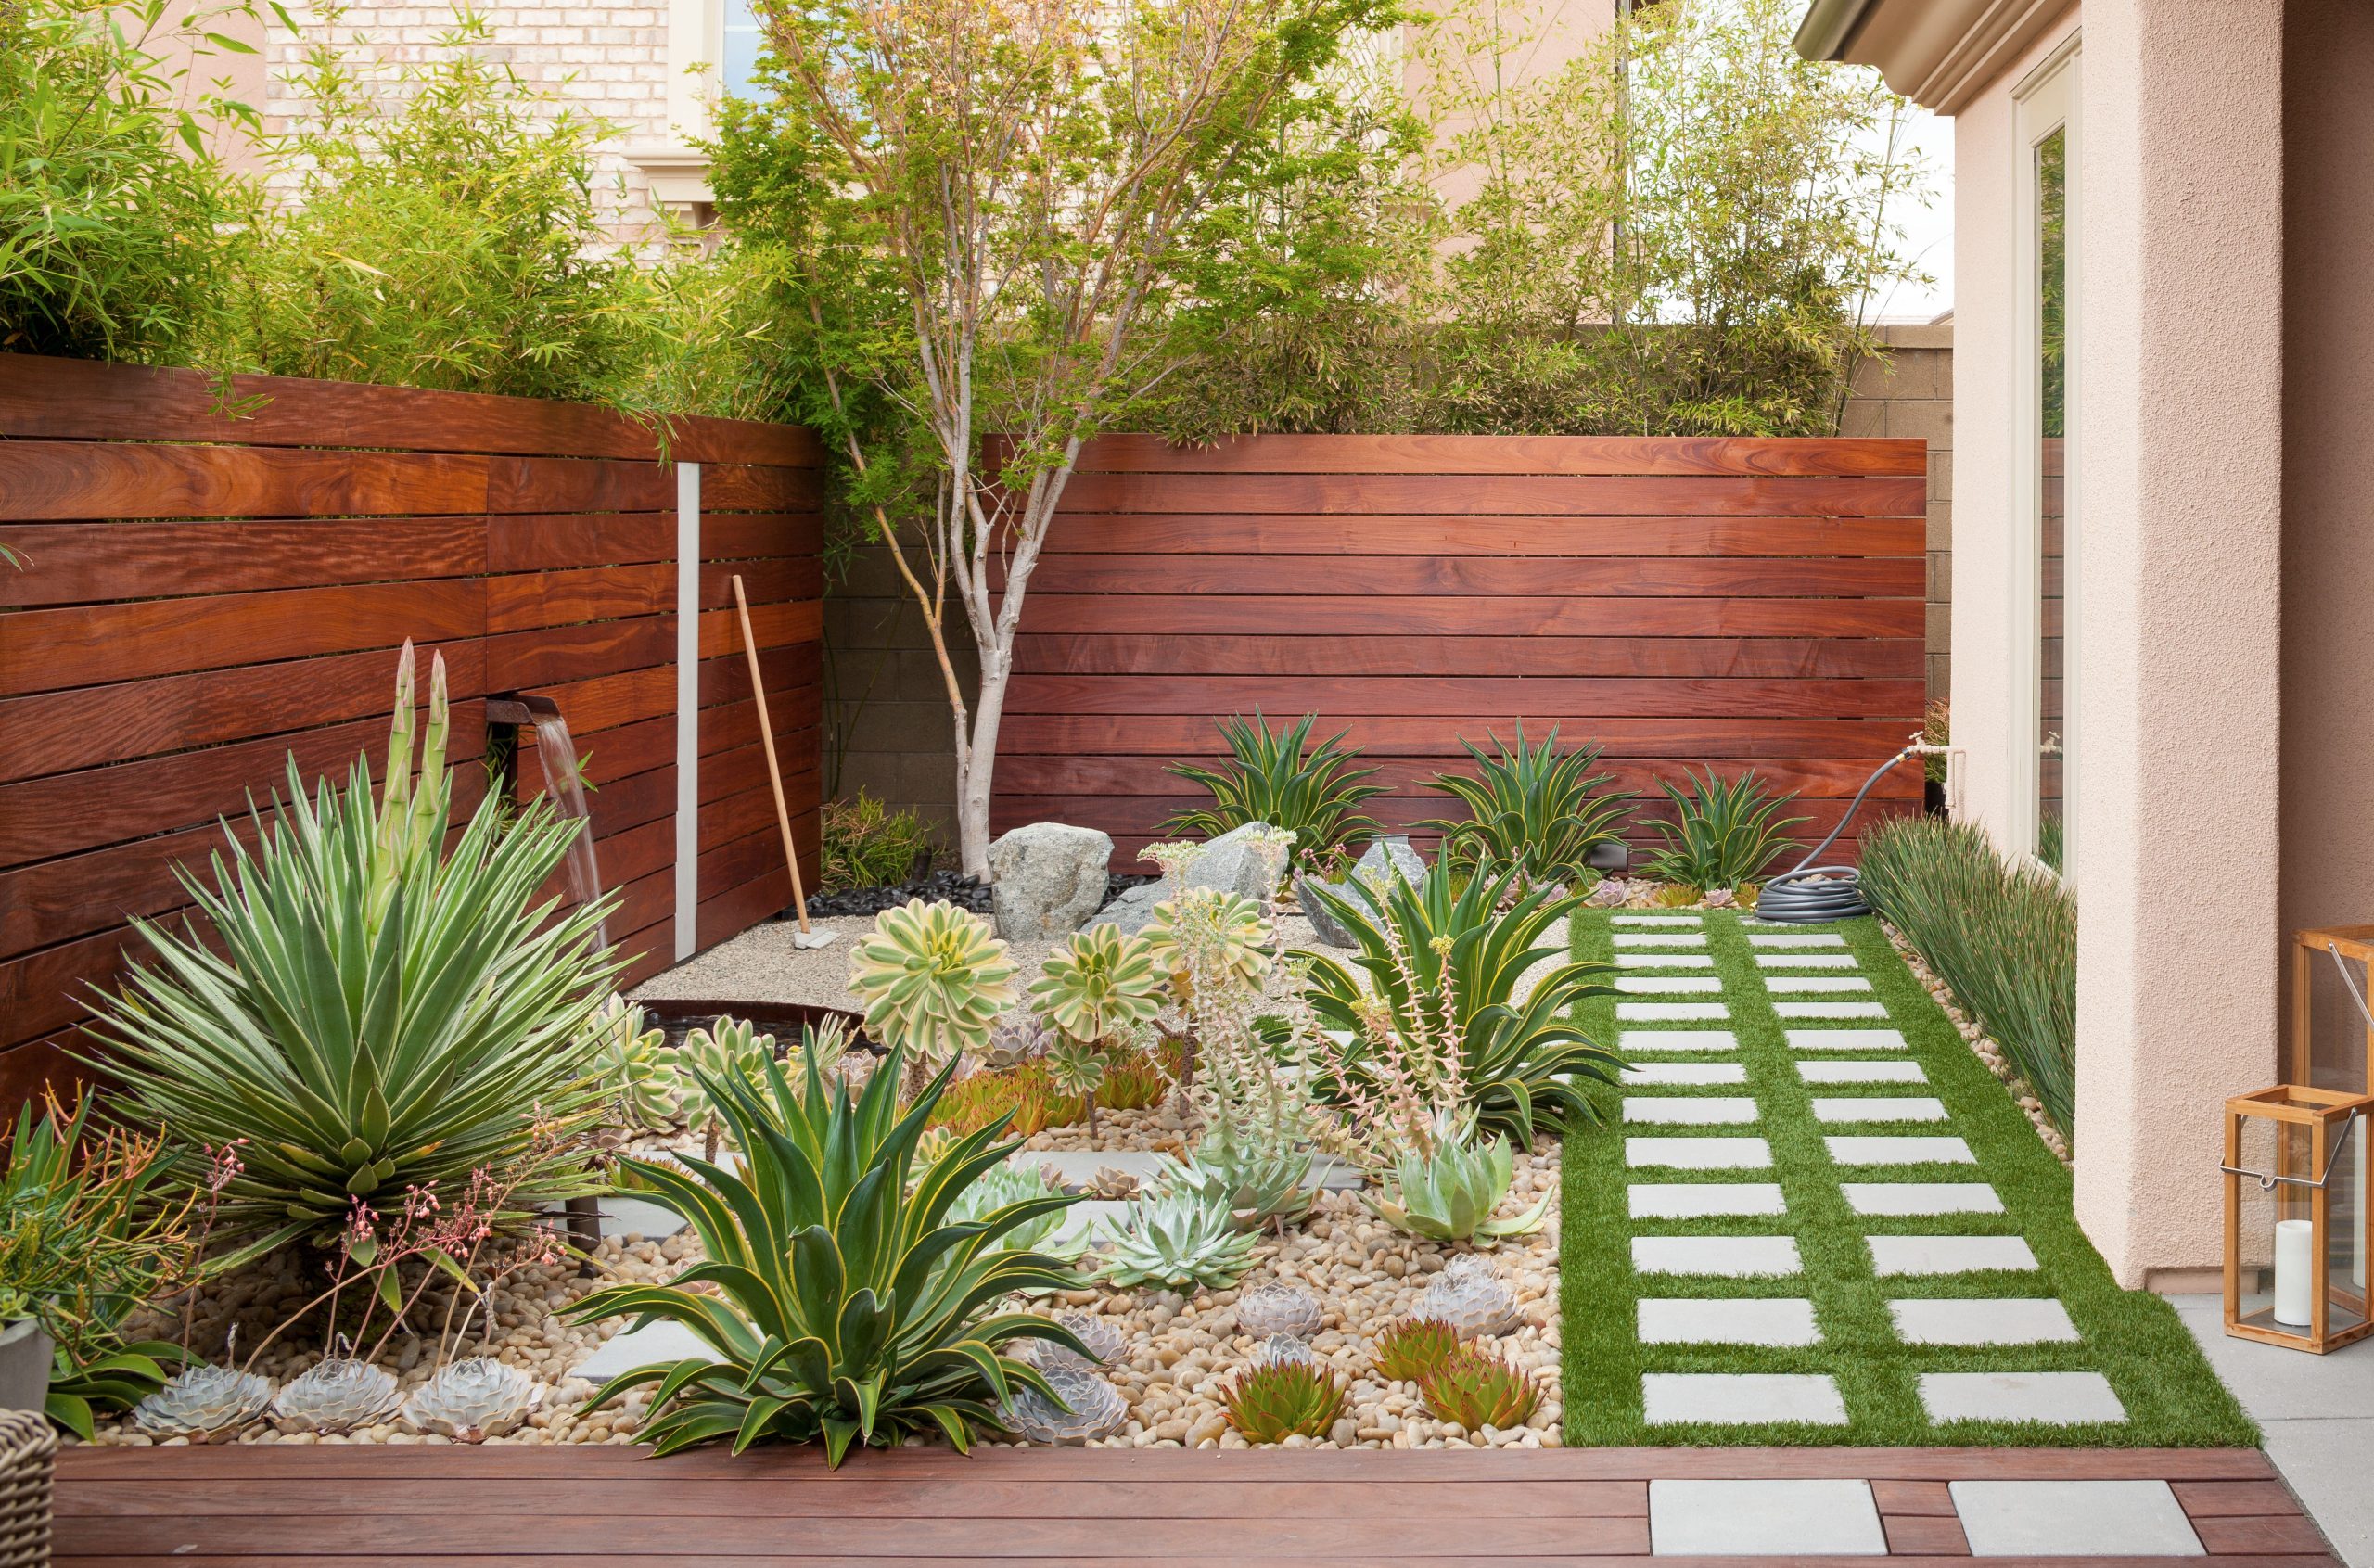
“A perfectly manicured edge like this looks amazing, but it can be a real pain to mow.”
The wheels of your lawnmower can’t get close enough to the raised bricks to cut the last strip of grass, which means you have to make a second pass with a string trimmer every single time you mow. For some, that’s a worthy price for a sharp look. For others, it’s a weekly annoyance. One of the biggest mistakes you can make is not considering maintenance. See our list of common errors at the end of the article, which can be avoided like the plague, unlike this mistake.
30. Low Brick Planter Ledge Along a Textured Wall
This design is a master study in coordinating materials. The low planter ledge isn’t a separate element; it’s an extension of the variegated brick wall behind it. By using a similar (though not identical) brick, it feels integrated and intentional. The dark flagstone paving provides a grounding, earthy base, while the mustard and brown tiles of the water feature introduce a surprising, artistic pop of color. Each material is distinct, but they all work together within a warm, cohesive palette to create a rich and layered space.
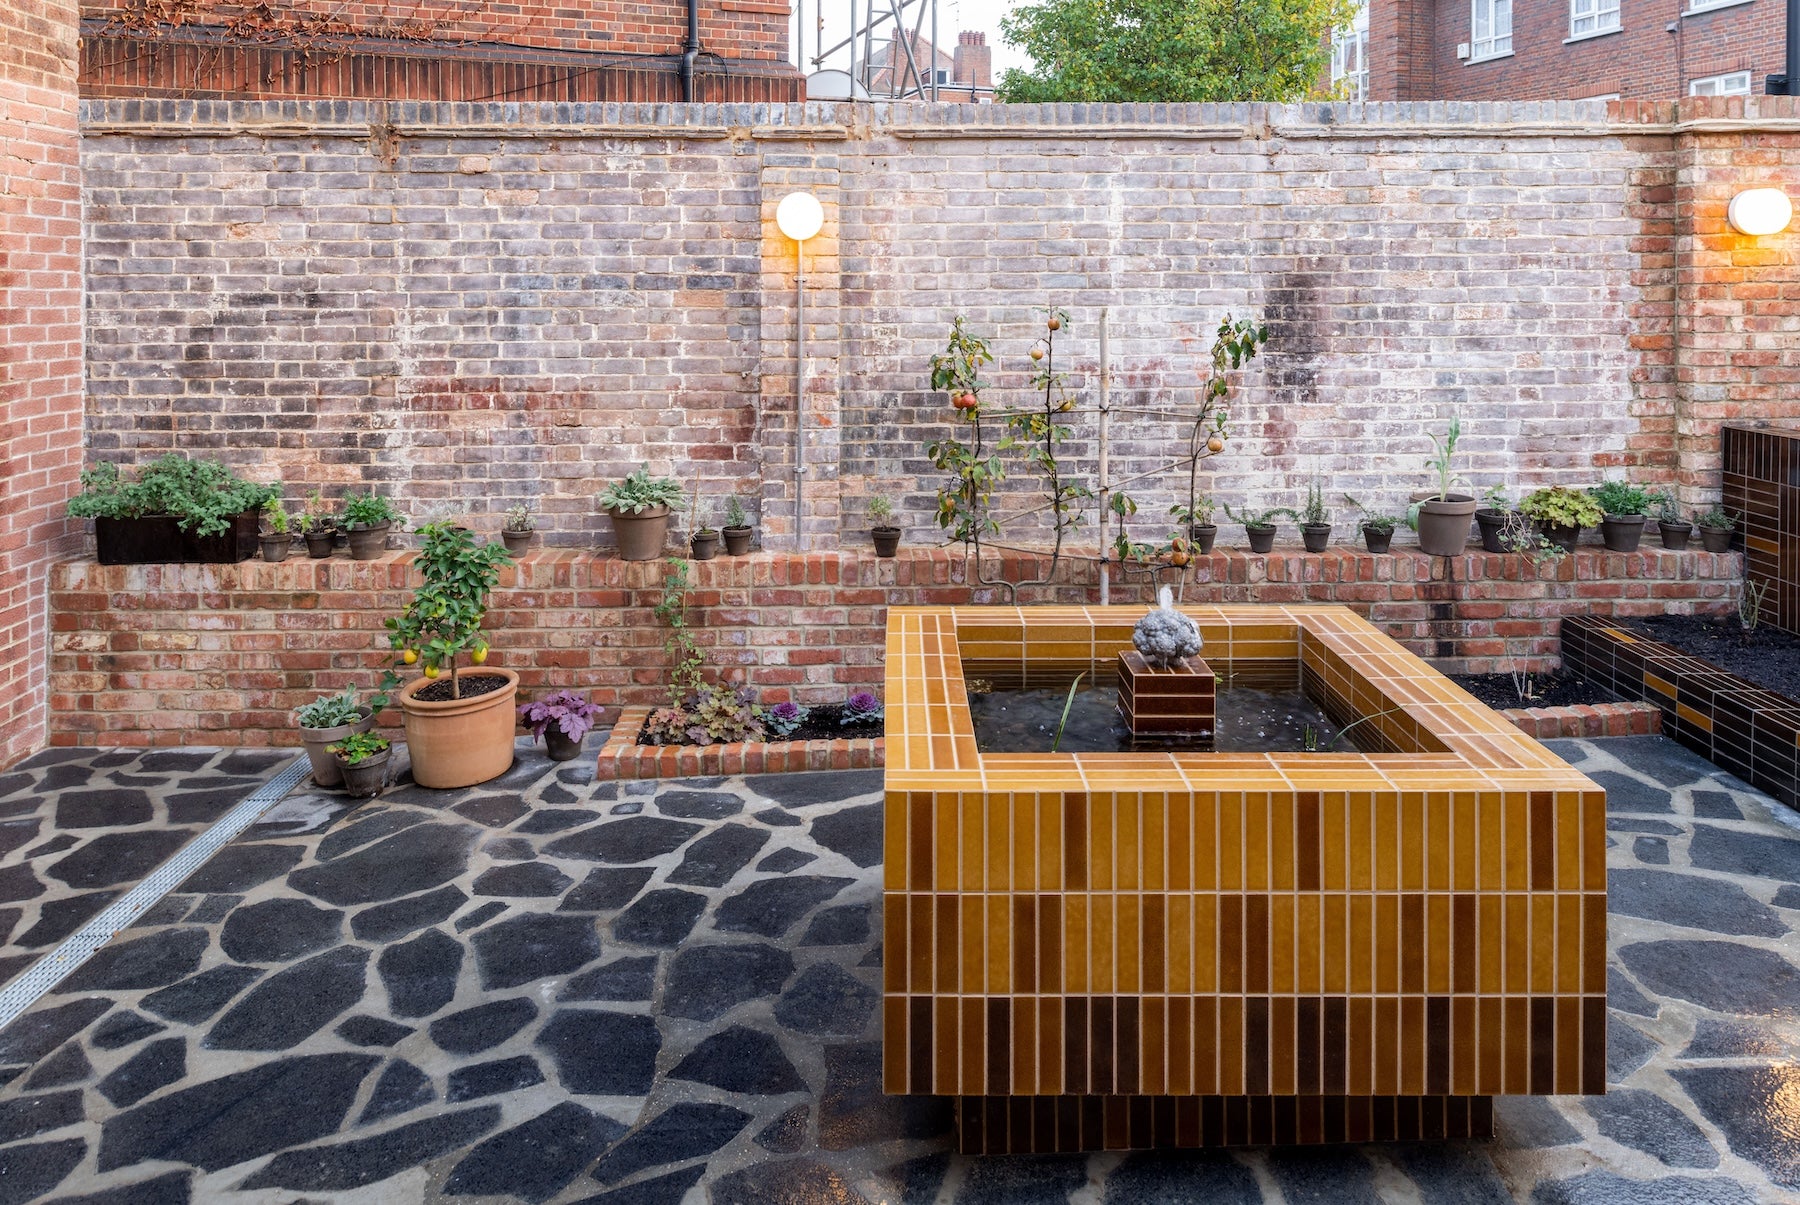
“This kind of built-in, structural feature works best in a defined, enclosed space like a courtyard or a walled patio.”
It requires a significant footprint. The low brick ledge itself is about 18 inches deep, and you need at least 3-4 feet of clear walkway in front of it for comfortable passage. This idea is not well-suited for a small backyard where space is at a premium. It’s designed for creating zones and structure within a larger outdoor ‘room’.
Your Garden’s Finishing Touch
We’ve walked through herringbone paths, curved concrete walls, and simple, classic borders. Hopefully, you’ve found the perfect inspiration to give your garden that finished, polished look you’ve been dreaming of. Now the fun part begins: making it your own. Go ahead and save your favorites to Pinterest—it’s the perfect place to start planning your weekend project.