Still scrolling through hundreds of built-in planter photos without a clear plan? You know the feeling—you find a look you love, but have no idea how to make it happen in your own home. We’ve moved past the generic inspiration to curate 31 real-life projects, from simple weekend builds to stunning architectural features that bring life and structure indoors. Whether you’re a DIY novice or a seasoned renovator, we have a project that will work for you. And stay until the end—we break down the most common mistakes that can ruin these looks. 📌 Save this to Pinterest for later—you’ll want to revisit these ideas.
1. Elevated DIY Planter with a Wire Mesh Base
This is a fantastic weekend project that gives you a sturdy, freestanding planter without major construction. The magic here is in the wire mesh base, which provides excellent drainage—a non-negotiable for healthy plants. This elevated design also saves your back from endless bending over. Because it’s a standalone piece, you can move it around your yard or patio as the seasons (and your design whims) change. The unfinished wood gives it a raw, natural appeal that can be left to weather gracefully or stained to match your existing outdoor furniture.
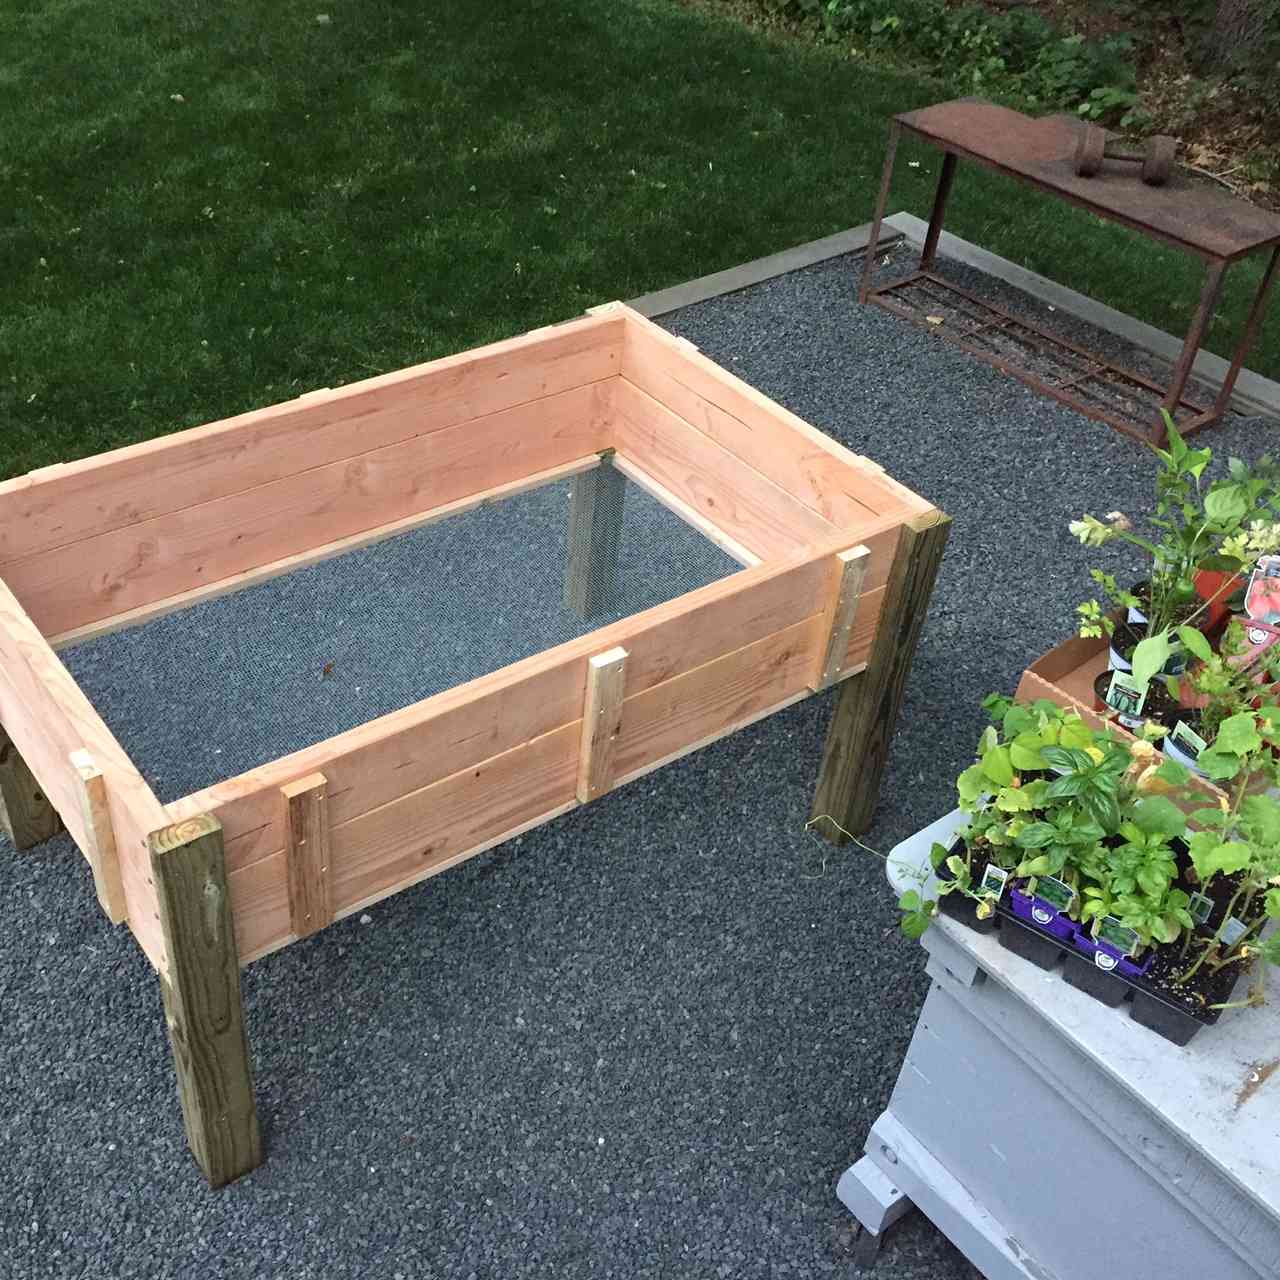
“An unfinished wood planter like this will require some upkeep to prevent rot, especially if you live in a wet climate.”
To keep it looking its best, you should plan to treat the wood annually with a clear, waterproof sealant. Be mindful that the light-colored, untreated wood is prone to staining from soil and moisture. Over time, it will naturally weather to a silvery-gray patina. If you prefer to maintain the original light wood tone, you’ll need to lightly sand it and reapply the sealant every year, which can be a 2-3 hour task.
2. Classic Raised Garden Beds for a Sunny Lawn
There’s a reason this design is timeless. A series of simple, rectangular raised beds on a lawn is the quintessential setup for a productive home garden. Filling them with high-quality soil gives you complete control over the growing medium, bypassing any issues with the native ground soil. The light-colored wood brightens up the space and creates a clean, organized look against the green grass. This approach neatly contains your garden, preventing soil from washing away and making weeding a much more manageable task.
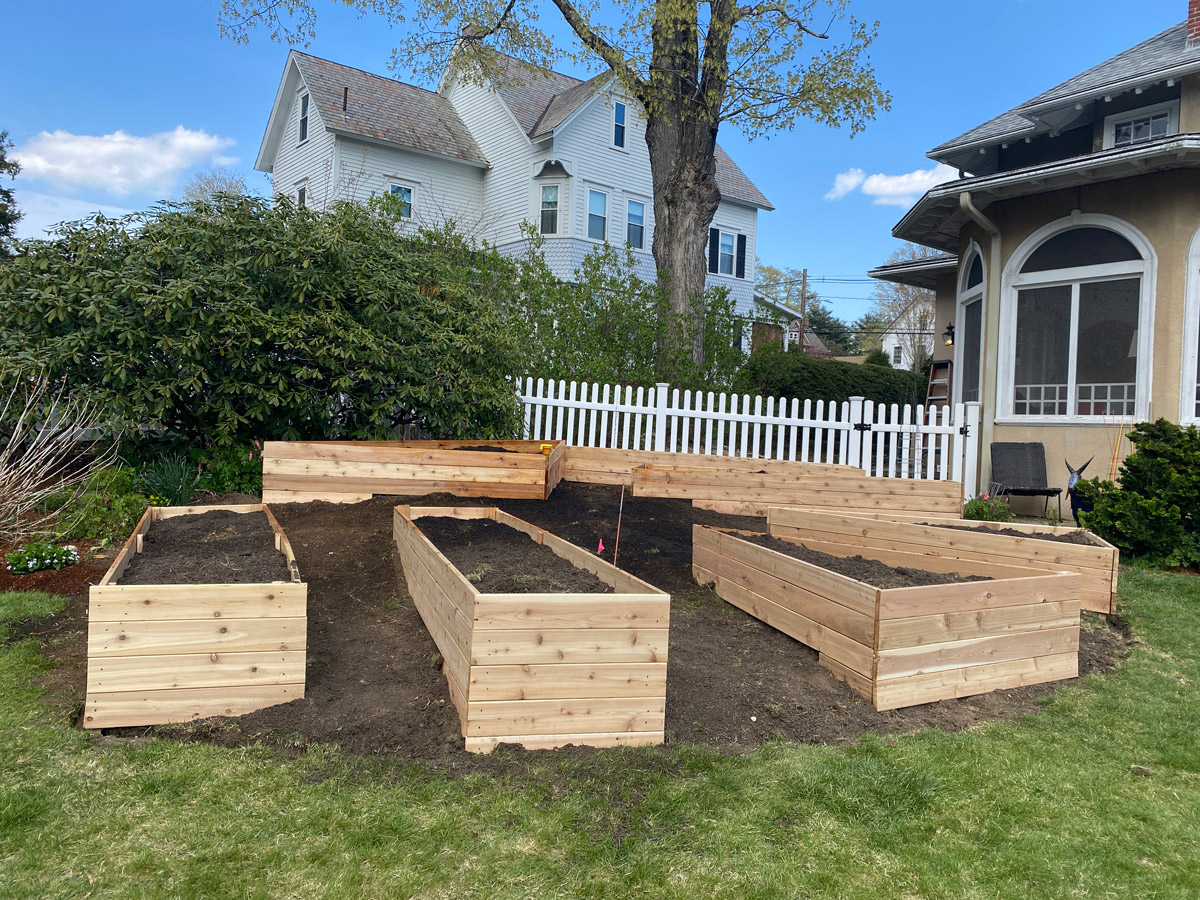
“Lumber (for three 4’x8′ beds): $250 – $400Deck Screws & Hardware: $30 – $50Weed ”
- Lumber (for three 4’x8′ beds): $250 – $400
- Deck Screws & Hardware: $30 – $50
- Weed Barrier Fabric: $40 – $60
- Soil & Compost to fill: $200 – $350
- TOTAL: $520 – $860
- Budget Alternative: Use reclaimed pallet wood (ensure it’s heat-treated, not chemically treated) and mix native soil with bagged compost to cut costs by 50-60%.
3. Seamless Seating and Planters on a Composite Deck
This design is a masterclass in integration. By using the same composite material for the decking, the seating, and the planters, the entire structure feels like a single, cohesive unit. This continuity is what elevates the design from a simple deck to a custom outdoor room. The planters aren’t an afterthought; they’re part of the architecture, serving as a living railing that adds privacy, color, and texture. The built-in bench is another stroke of genius, maximizing seating without cluttering the deck with extra furniture.
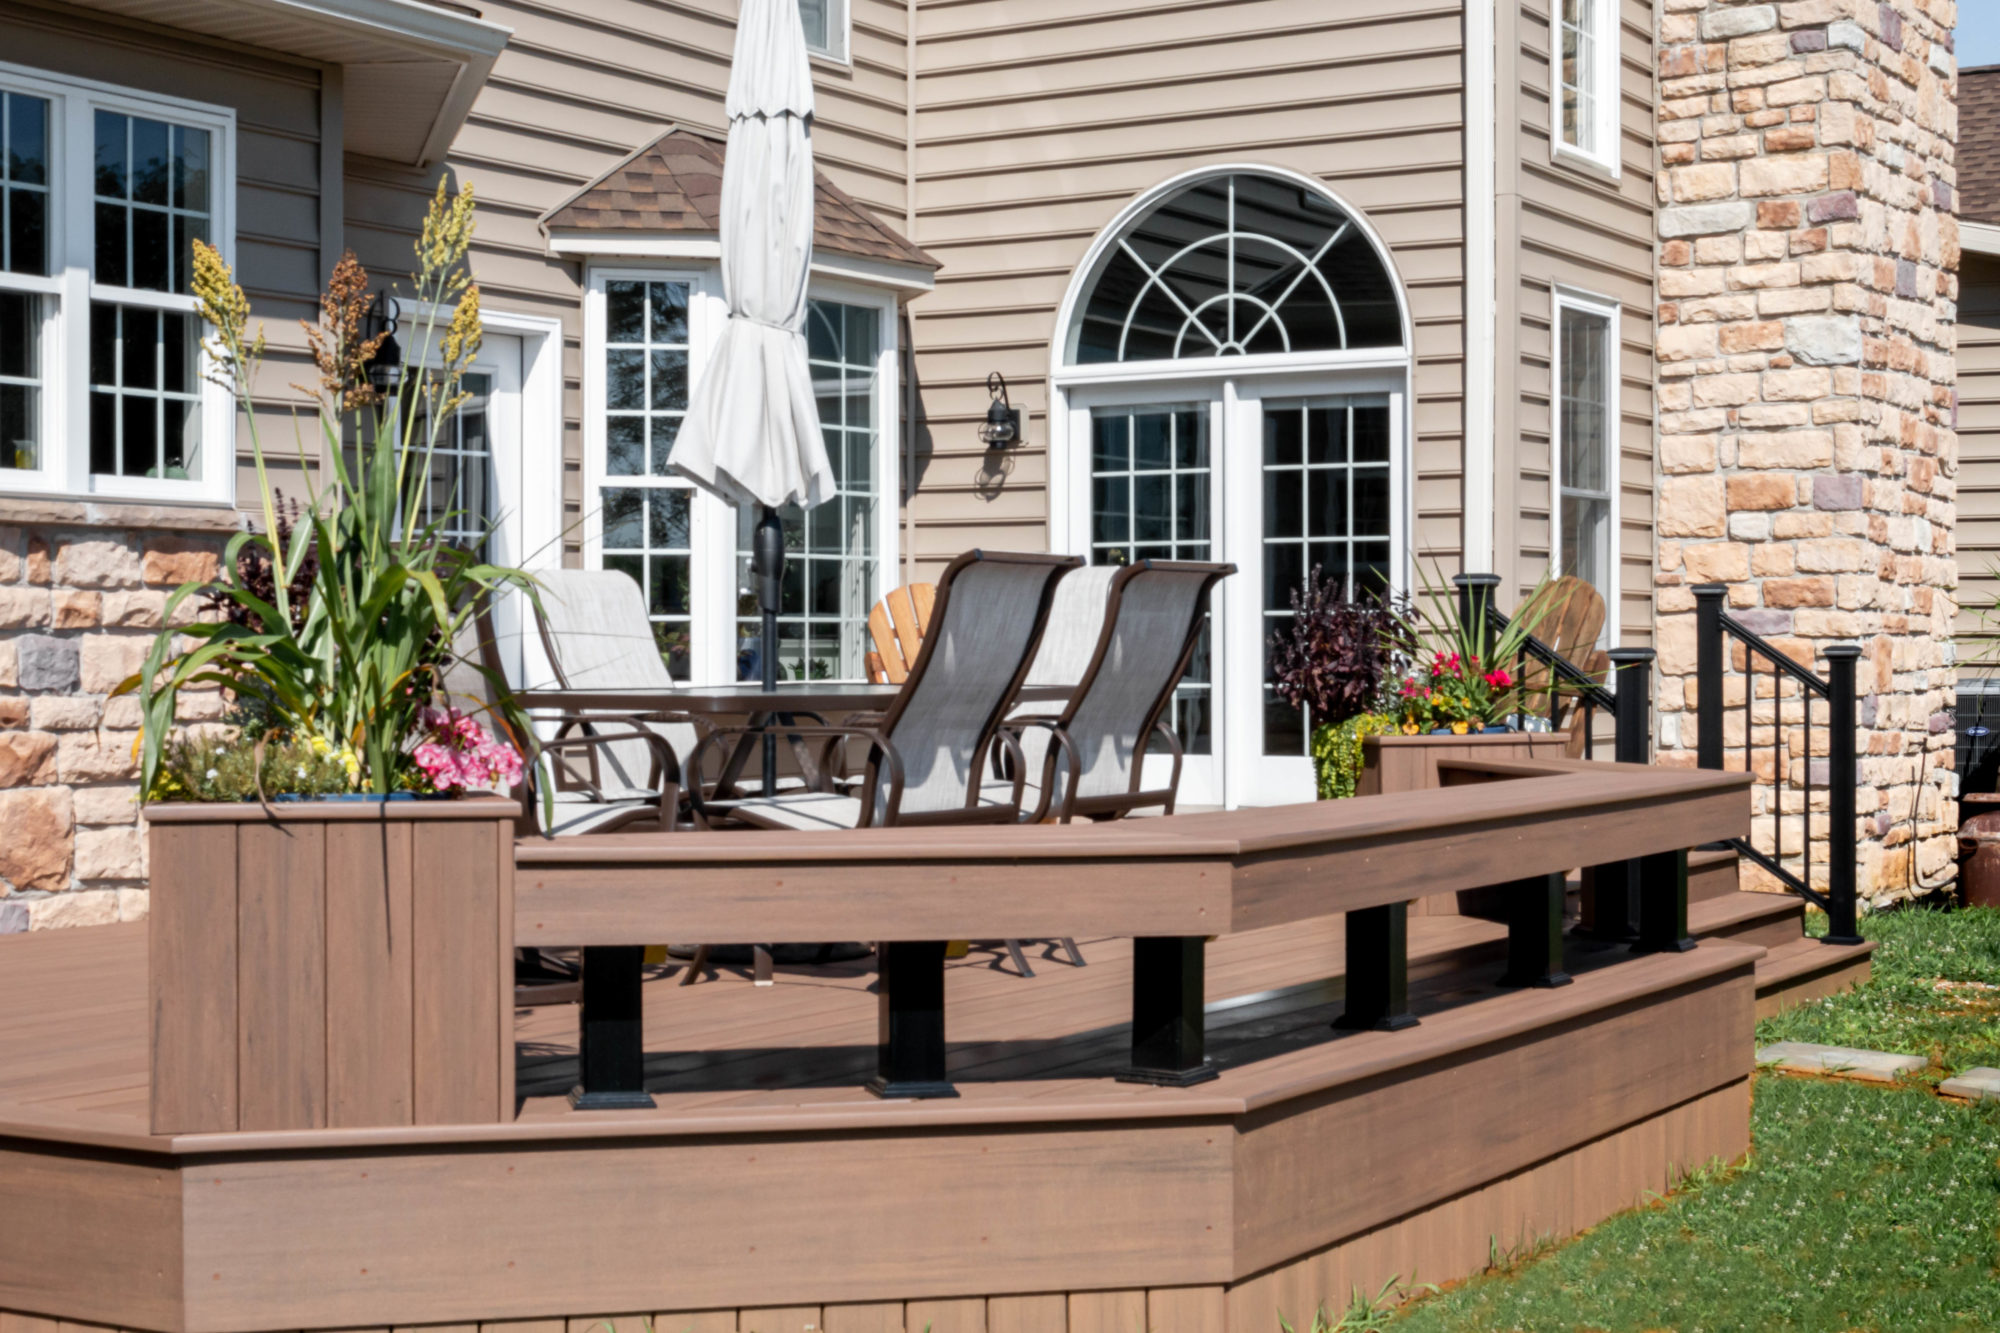
“An integrated system like this works best on a medium to large deck, ideally with at least 150 square feet of open space to avoid feeling cramped.”
The built-in bench needs a straight run of at least 8-10 feet to be truly functional. For smaller spaces, consider a scaled-down version with a single corner planter box instead of a full perimeter, which you can see in Idea #13. The key is to ensure the planters and seating don’t overwhelm the primary function of the deck as an open-air living area.
4. A Green Privacy Screen with a Built-In Banquette Planter
Take away the built-in planter, and you just have a nice window seat. With it, you have a living, breathing piece of art that doubles as a privacy screen. The row of snake plants is the element that makes this entire dining nook work. Their tall, slender, and architectural form creates a subtle barrier from the outside world without completely blocking the natural light. It’s a much softer and more dynamic solution than frosted glass or keeping the blinds down 24/7. It brings a dose of nature right to your dining table.
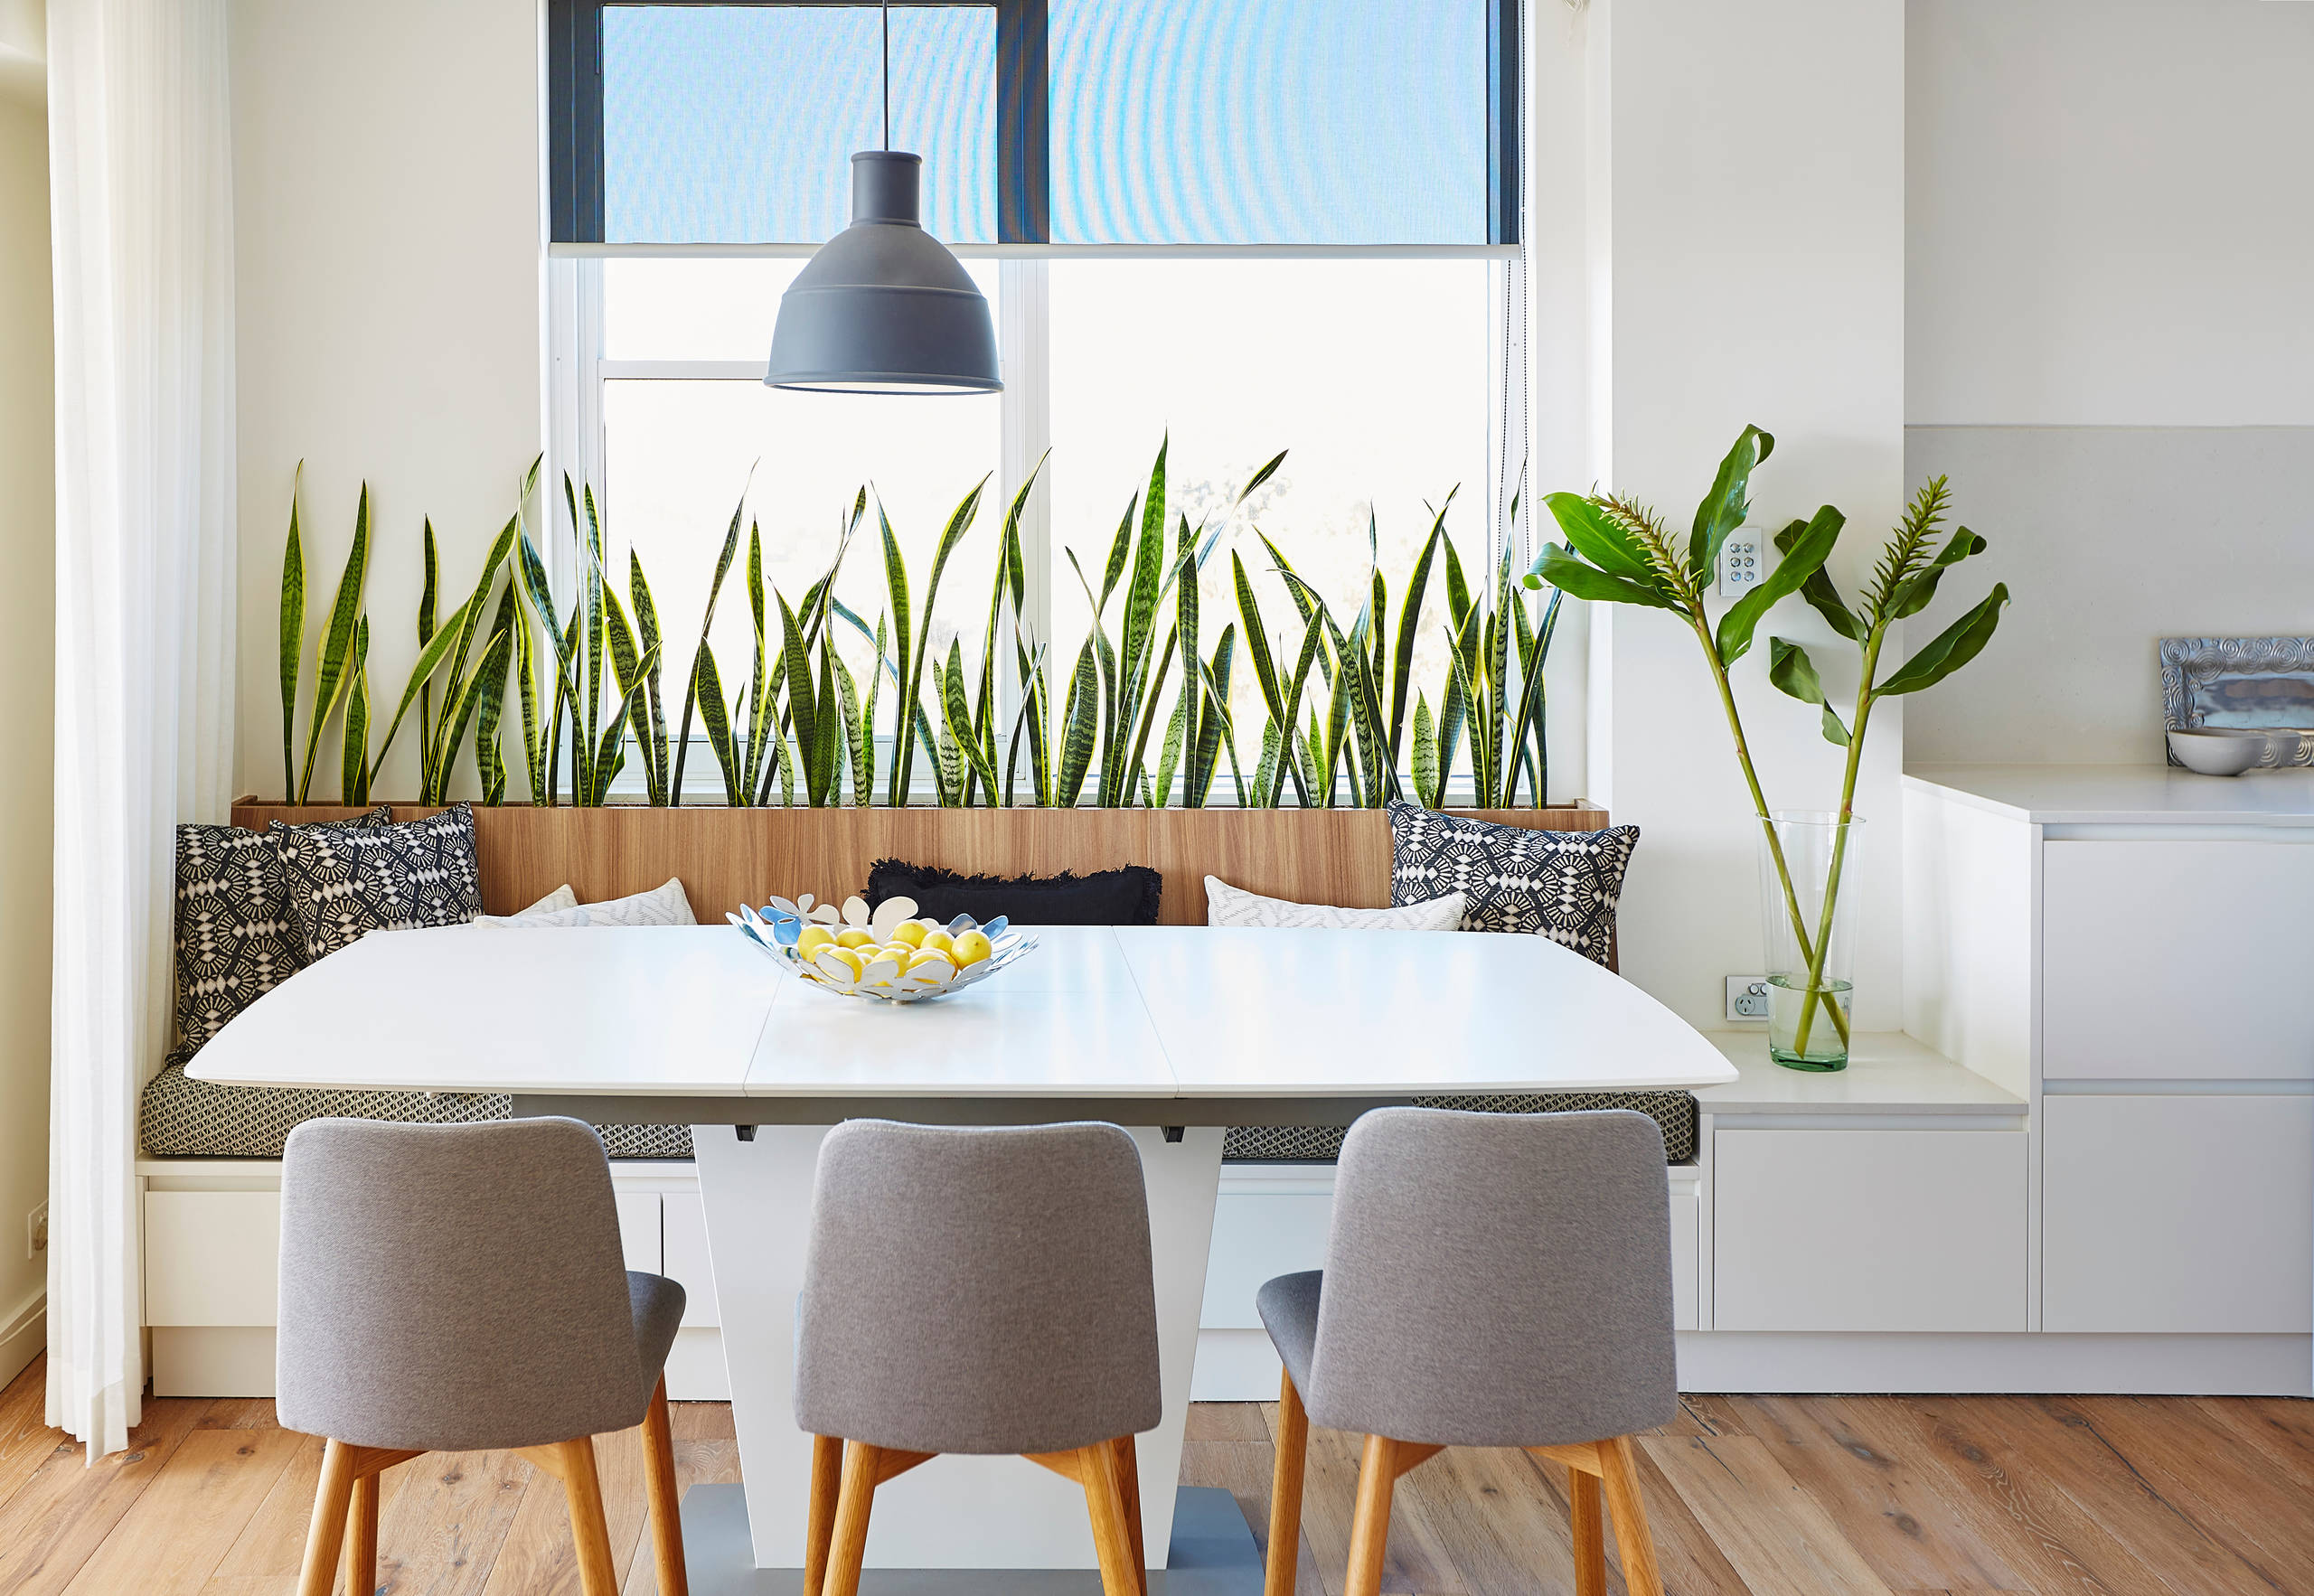
“Let’s be honest about watering a long, continuous indoor planter like this.”
You can’t just take it to the sink. Overwatering is a huge risk and can lead to root rot and water damage to the surrounding millwork. The best solution is to build a waterproof liner (using a custom-fit fiberglass or a heavy-duty pond liner) into the planter box from the start. Also, consider adding a layer of gravel at the very bottom before the soil to create a drainage reservoir. It’s extra work upfront but will save you from a messy, smelly disaster later.
5. Under-Stair Planter for a Modern Floating Staircase
The formula here is all about contrast and balance. It’s 50% sleek, hard architecture (the floating metal-and-wood stairs) + 50% soft, organic nature (the lush, slightly wild greenery). The clean lines of the staircase are beautifully softened by the mix of plants. The light wood of the planter box and stair treads ties the two elements together, creating a harmonious composition. This isn’t just filling an empty space; it’s a deliberate design choice that makes the staircase a central feature of the home, not just a utility.
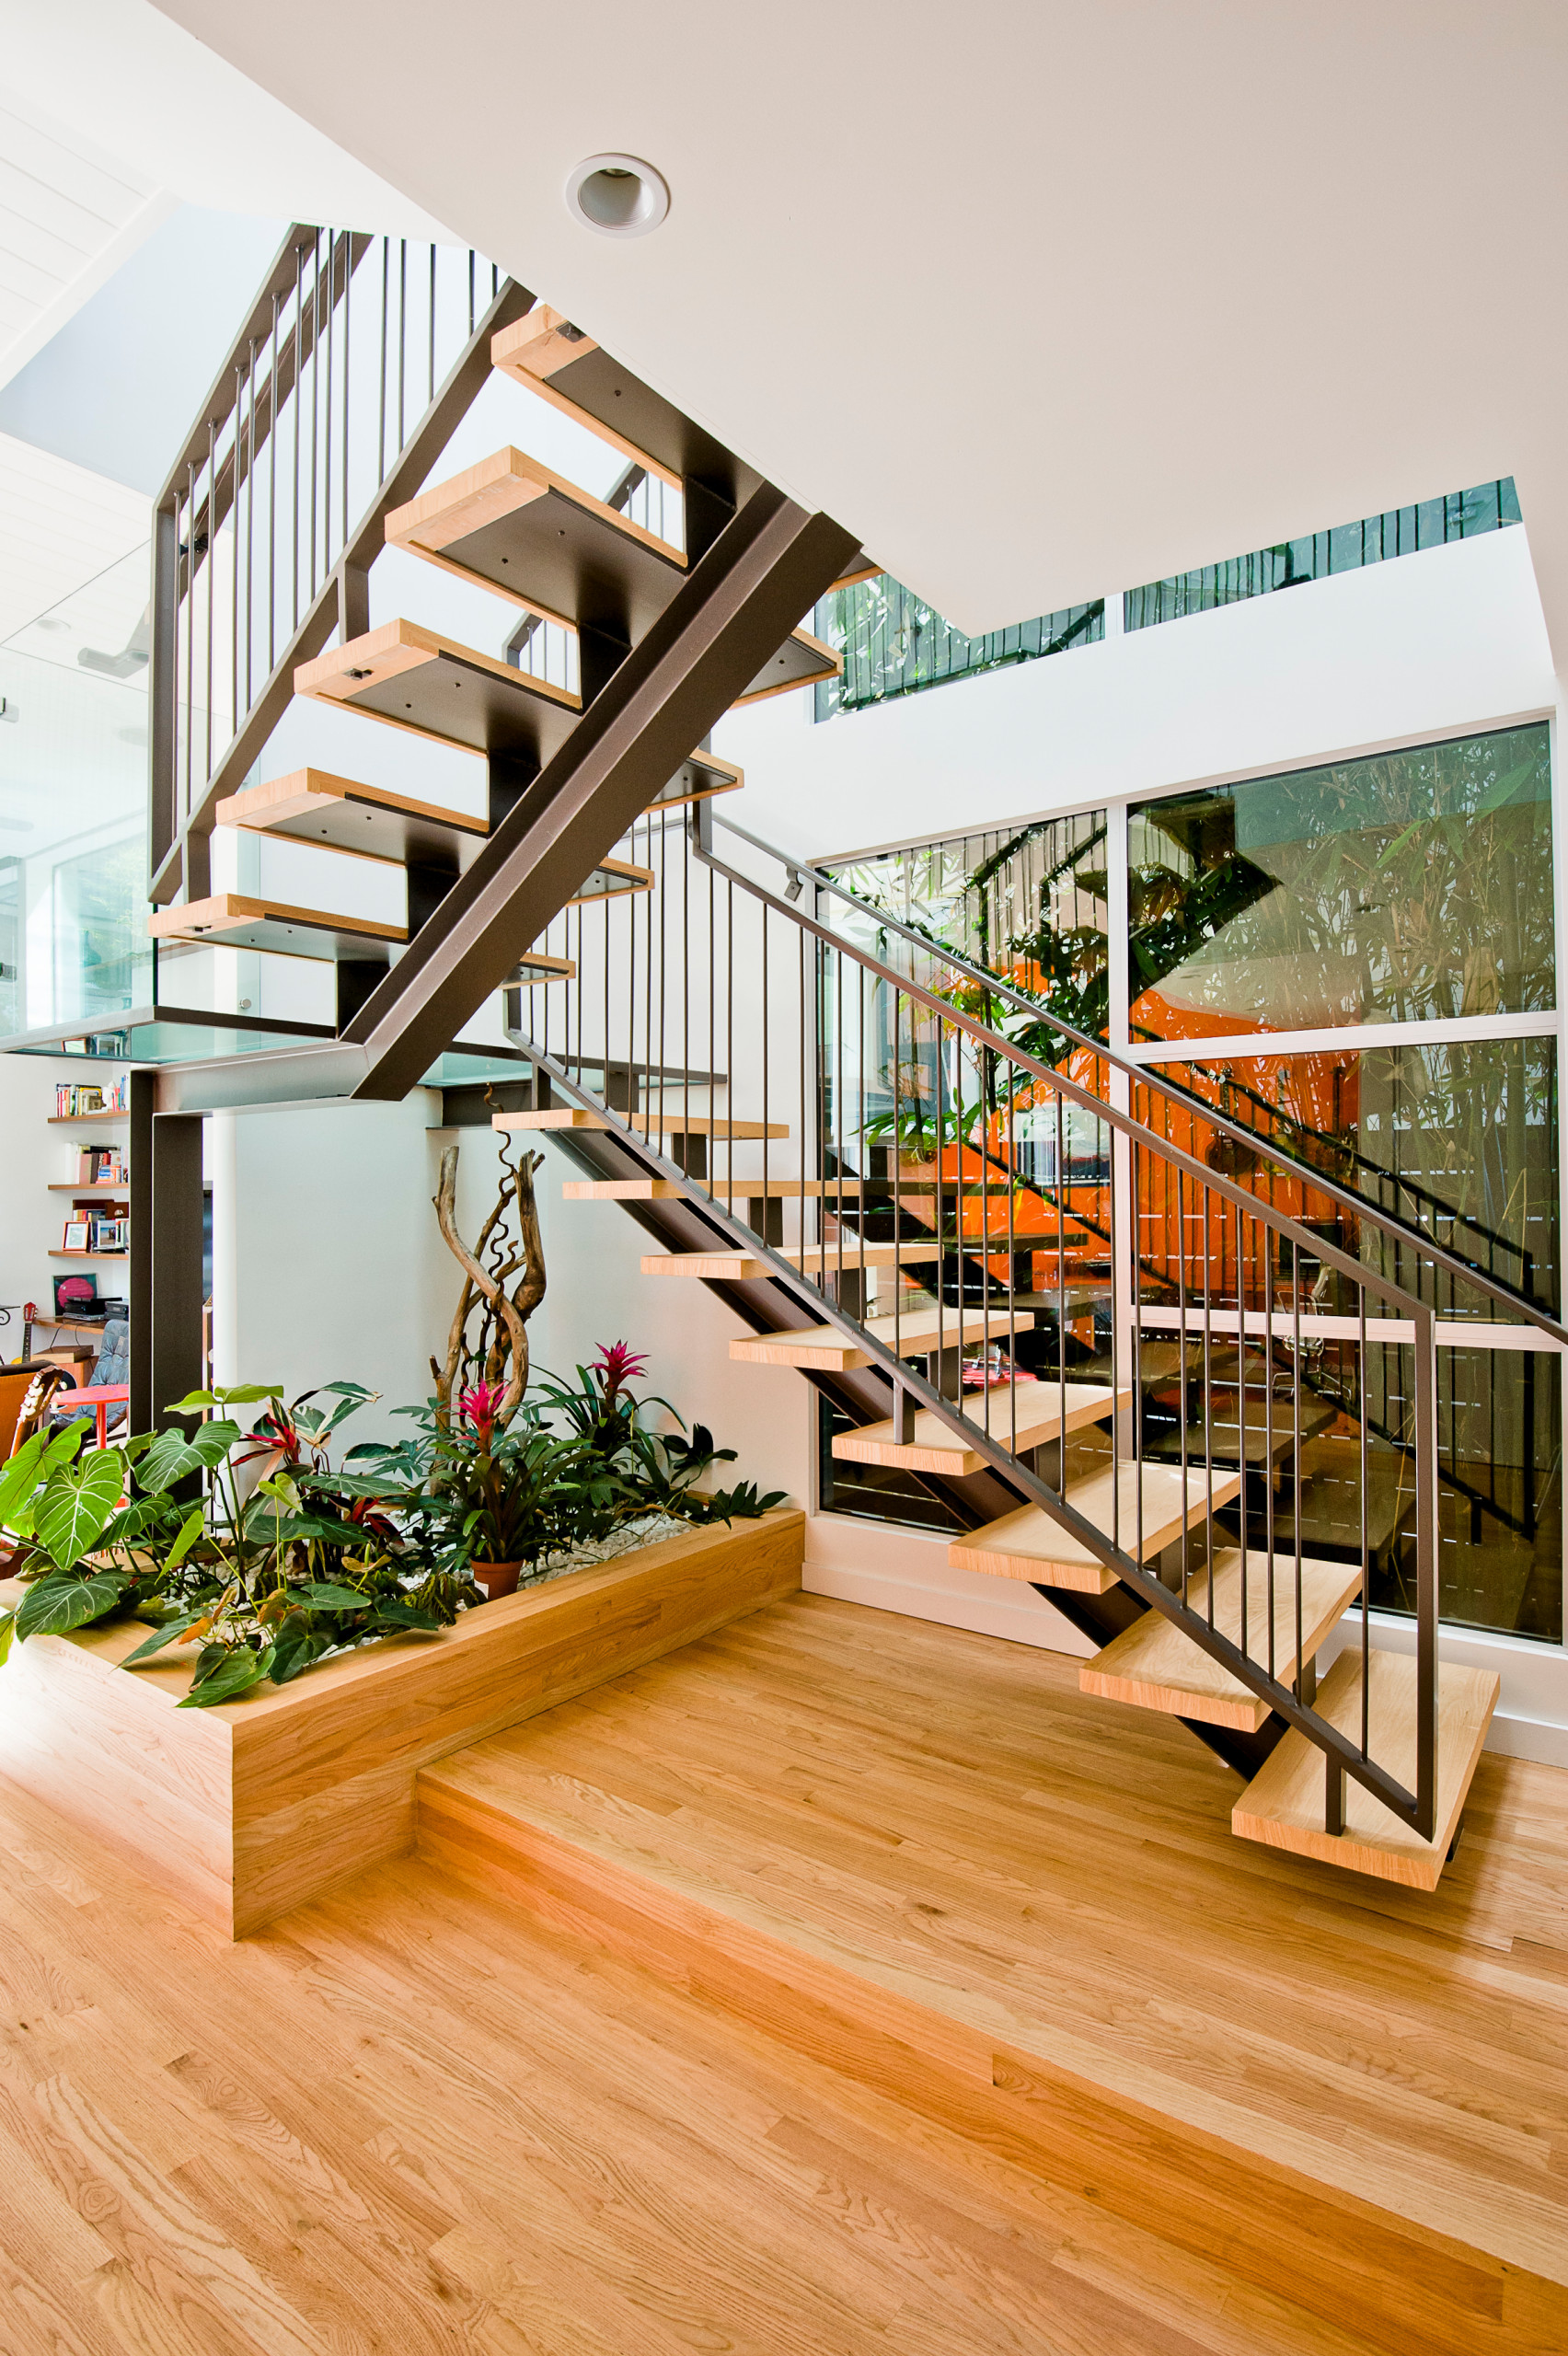
“Before you commit to a built-in planter under your stairs, tick off these crucia”
Before you commit to a built-in planter under your stairs, tick off these crucial checks:
- Measure Everything: Confirm the exact footprint available. How much headroom will be left? Will it impede the walkway or create an awkward pinch point?
- Check Your Light: Is there a nearby window or skylight, or is this a dark corner? Your plant choices will depend entirely on the available natural light. If it’s dark, you must commit to running electrical for a grow light.
- Waterproofing Plan: This is non-negotiable for a built-in. How will you waterproof the interior of the box? A custom-fit metal or fiberglass liner is the most reliable option.
6. Second Life: Upcycled Furniture as a Front Porch Planter
Why buy a generic planter when you can give an old piece of furniture a new purpose? This idea is all about creativity and seeing the potential in forgotten items. An old dresser, a small cabinet, or even a wooden chair can become a charming and unique planter for your front porch. You can often score these pieces for next to nothing at thrift stores, flea markets, or on Facebook Marketplace. Look for pieces with interesting shapes or details. A fresh coat of paint and some creativity are all you need to turn trash into treasure.
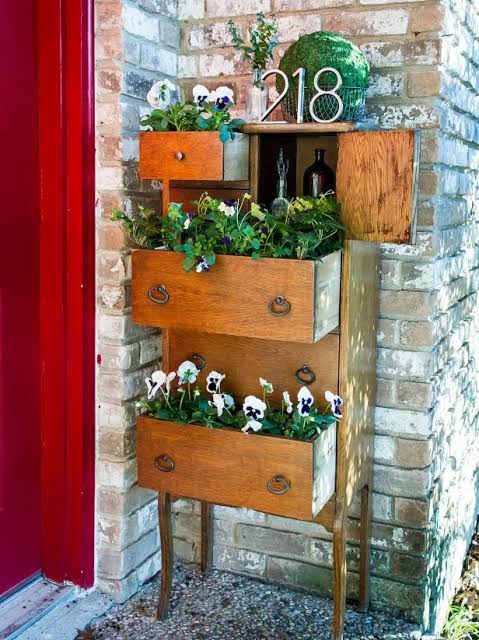
“When turning any wooden furniture into an outdoor planter, sealing it correctly is the most critical step.”
Don’t just slap on a coat of exterior paint. For maximum durability, start by sanding the piece to remove any old finish. Then, apply two coats of an oil-based outdoor primer. Once that’s dry, follow up with two coats of high-quality exterior paint. For the inside of any drawer or cabinet you’re planting in, use a thick, flexible rubberized coating like Flex Seal for the best waterproofing.
7. Frame Your Greenery with a Planter-Trellis Combo
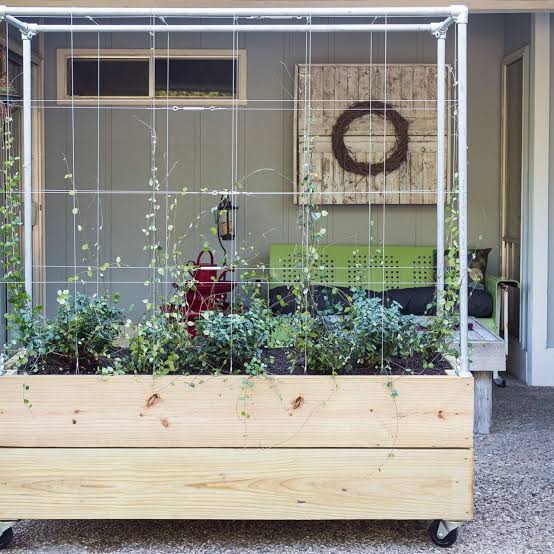
This combination is brilliant because it addresses two needs at once: a place for your plants to grow and support for them to climb. It creates a self-contained vertical garden that is perfect for patios, balconies, or even indoors against a sunny wall. The trellis adds height and a sense of structure, turning a simple planter box into a significant design element. It’s an ideal solution for vining plants like jasmine, clematis, or even indoor plants like pothos or philodendron, giving them a dedicated space to trail upwards.
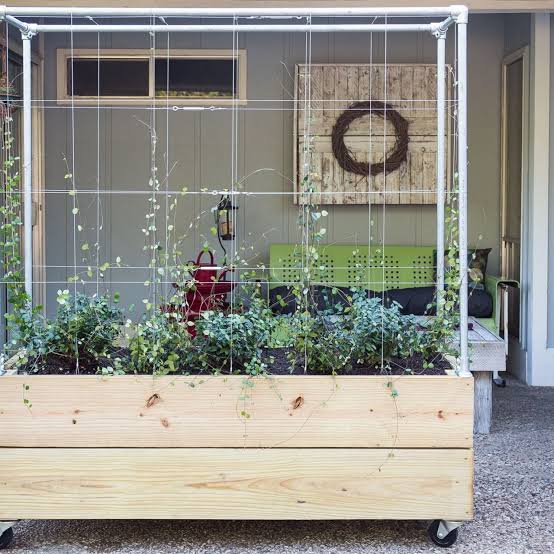
“Want to build a simple trellis for your planter box?”
Here’s a quick guide:Materials: You’ll need thin wood lath strips (1.5″ wide), wood glue, and a brad nailer. Cost: ~$30. Time: 2 hours.Build the Frame: Create a simple rectangular frame the width of your planter box and desired height.Attach Verticals: Evenly space your vertical lath strips inside the frame and secure them with glue and brad nails.Weave the Horizontals: Add the horizontal strips, weaving them over and under the verticals to create a lattice pattern. Secure at each intersection.Attach to Planter: Secure the finished trellis to the back of your planter box using exterior-grade screws.
8. A Tale of Two Kitchens: The Split-Aesthetic Planter Wall
The single element that makes this kitchen unforgettable is the bold, unapologetic split in materials. It’s a design choice that commits fully to contrast. One side is all airy, light wood and white tile, evoking a natural, almost Scandinavian feel. The other is dark, moody, and industrial with rich wood and stainless steel. The built-in planter acts as the bridge, a ribbon of green that ties these two dramatically different worlds together. Without that planter, the transition would feel jarring; with it, it feels intentional and artful.
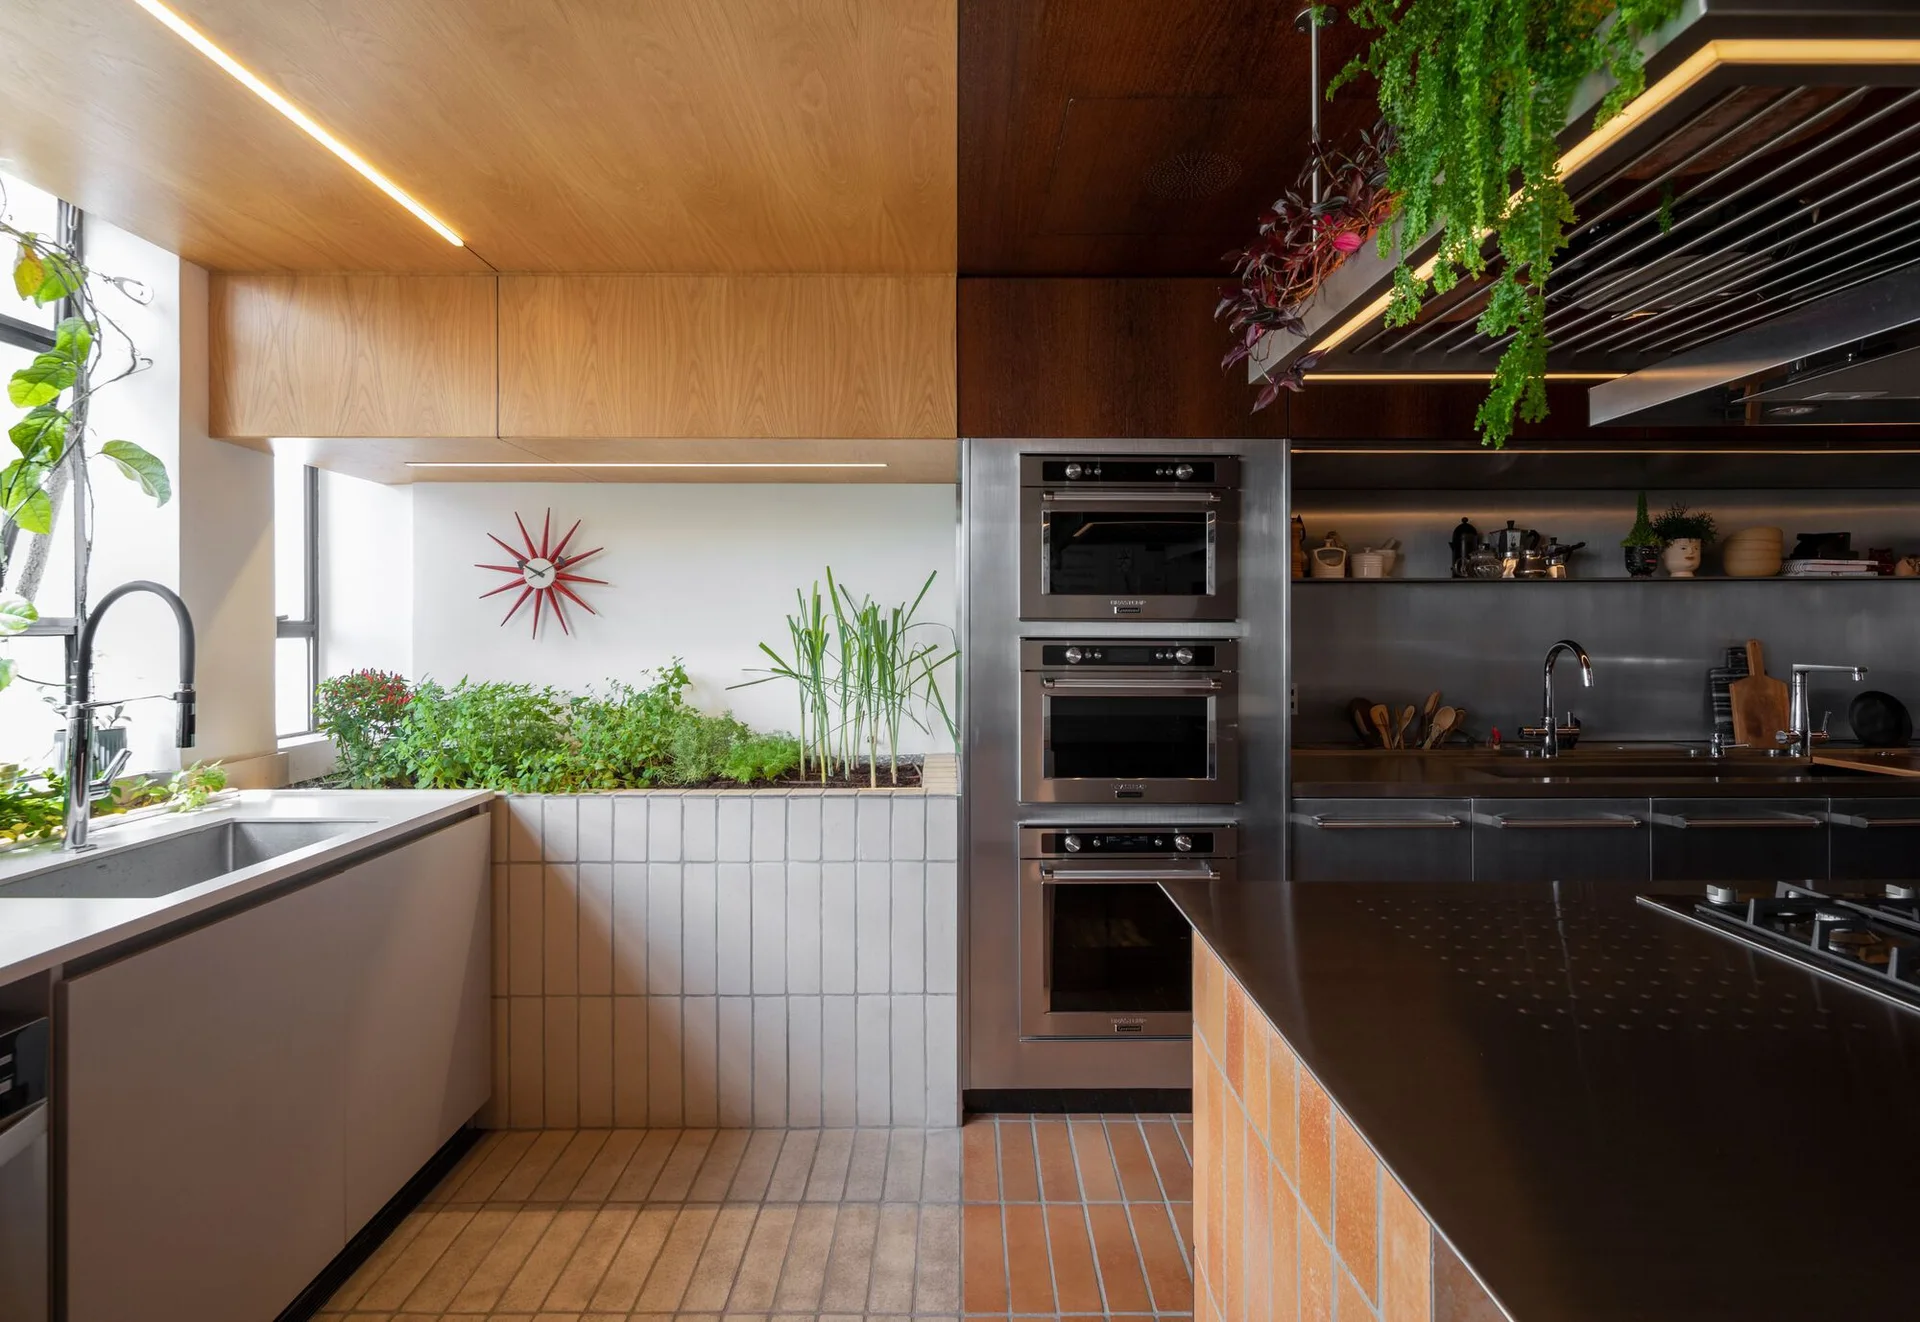
“This look taps directly into the growing “two-tone kitchen” trend, but pushes it to a more architectural level.”
While most examples of this trend use different colors for upper and lower cabinets, this design splits the whole room down the middle. It’s a bold move that reflects a shift away from perfectly uniform, monochromatic spaces towards interiors that have more personality and tell a story of contrasting tastes. Expect to see more of this high-contrast material blocking in the coming years.
9. Create a Cozy Garden Nook with a Lattice Privacy Screen
This cozy corner follows a simple but effective formula: 60% structure + 40% lush greenery. The tall wooden lattice and integrated planter boxes provide the architectural ‘bones’ of the space, creating a sense of enclosure and privacy. The plants, both in the boxes and in the surrounding pots, are the ‘soft’ element, filling the space with texture and color. The string lights are the finishing touch, adding a magical glow that transforms it from a garden corner into an outdoor room. This is a great example of how to define a space within a larger yard.
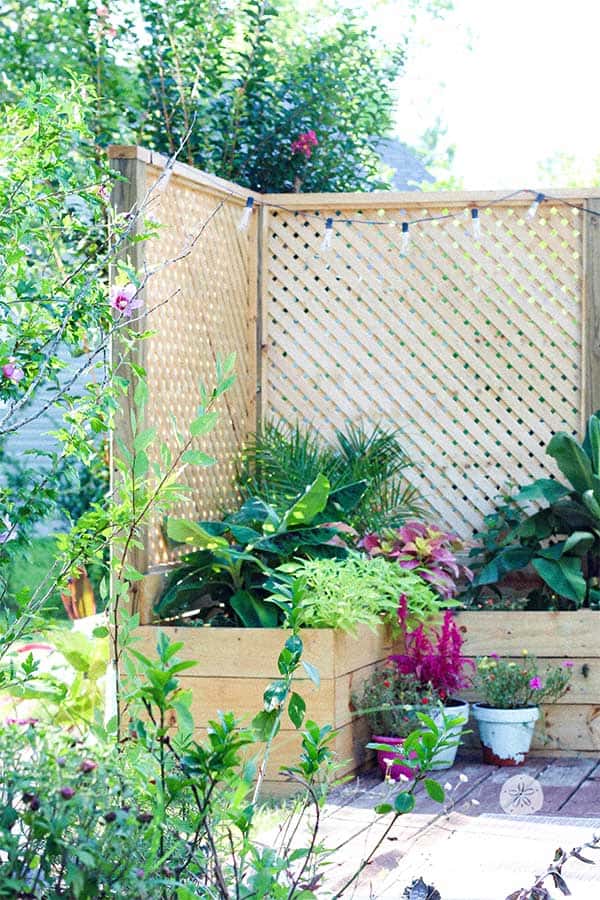
“Wood for Lattice & Planters (8’x10′ section): $300 – $550Outdoor String Lights: ”
- Wood for Lattice & Planters (8’x10′ section): $300 – $550
- Outdoor String Lights: $40 – $80
- Plants & Soil: $150 – $300
- Pots & Decor: $75 – $150
- TOTAL: $565 – $1080
- Budget Alternative: Use pre-made lattice panels from a home improvement store and build simpler planter boxes from reclaimed wood to bring the cost down by 40-50%.
10. Modern Minimalism with a Faceted Geometric Planter
This works because of its elegant simplicity and textural contrast. The sharp, clean lines of the faceted gray planter provide a beautiful counterpoint to the soft, organic shapes of the white orchids and the plush fabric of the sofa. The color palette is incredibly tight and controlled—shades of gray, white, and green against a neutral wood floor. This isn’t a look that shouts; it whispers. It’s a confident, minimalist statement where every single object is carefully chosen and given room to breathe.
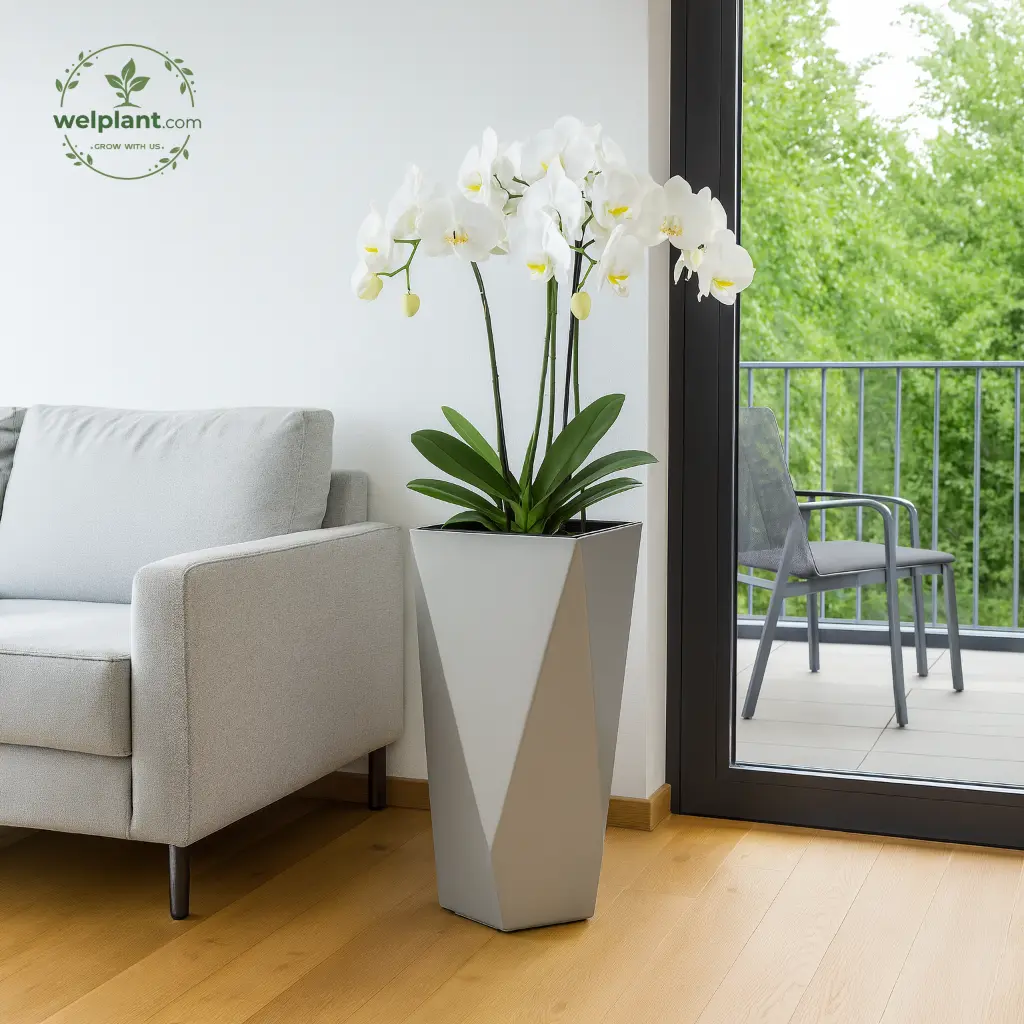
“The key to pulling off a tall, sculptural planter like this is giving it the right amount of space.”
It needs to be a focal point, not just another piece of clutter. This idea works best in a room with at least 9-foot ceilings to accommodate the verticality of the orchids. It should be placed beside a large piece of furniture, like a sofa or a console table, to feel anchored. In a small room, a similar but shorter planter would be more appropriate—the top of the plant should not exceed two-thirds of the ceiling height.
11. A Rustic Planter Shelf Against a Natural Stone Wall
A planter made of weathered, raw wood will definitely have a shorter lifespan than one made of composite or sealed wood, but that’s part of its charm. To keep it from deteriorating too quickly, ensure the inside is lined with a heavy plastic liner to prevent direct contact between damp soil and the wood. The slatted shelf below is great for air circulation but will collect dirt and debris from the planter above. Expect to give it a good wipe-down every few weeks to keep it looking tidy. The biggest maintenance chore will be managing the vining plants to ensure they don’t overwhelm the space.
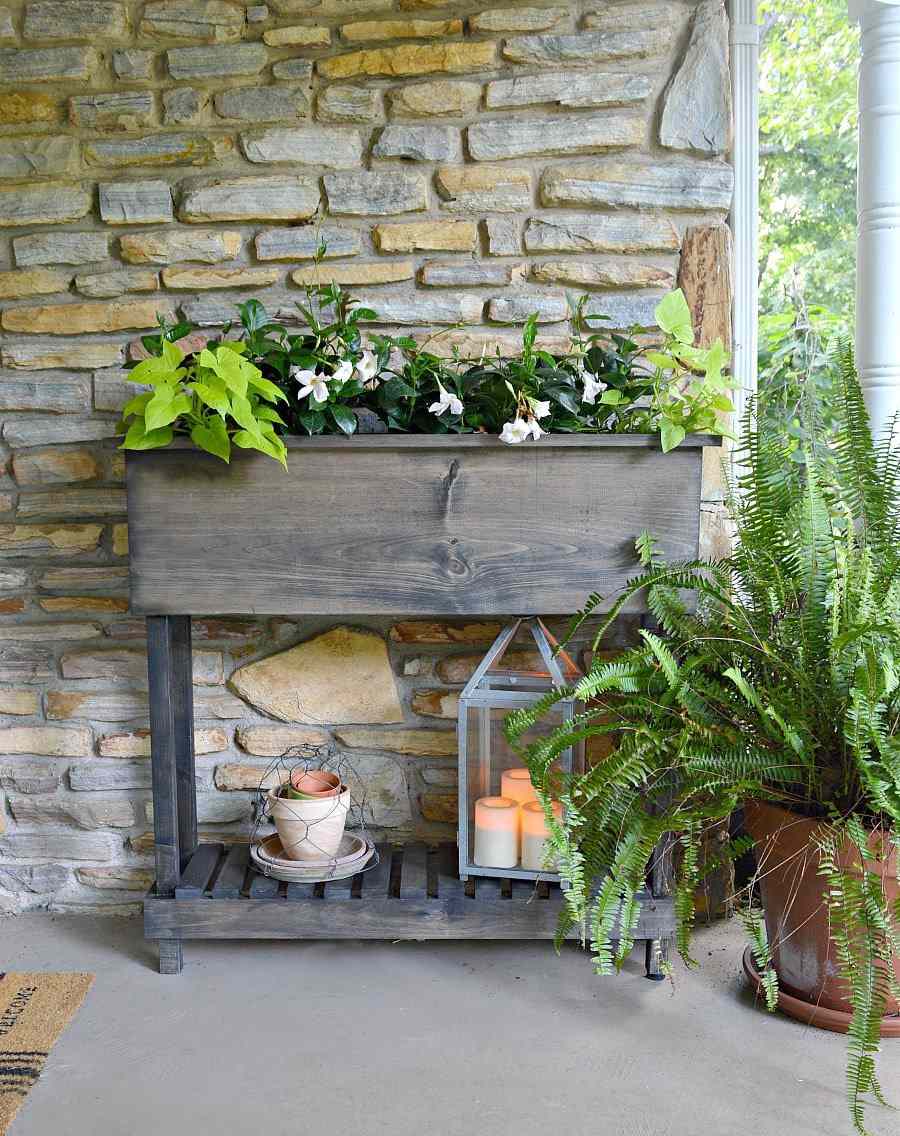
“The defining feature here is the texture mixing.”
It’s the combination of the rough, aged wood of the planter, the chunky, multi-toned stone of the wall, and the soft, delicate foliage that makes this scene so rich and inviting. If you were to place this same planter against a plain, painted wall, it would lose 90% of its impact. The stone wall provides a backdrop with depth and history, making the entire vignette feel established and authentic. Compare this to the very smooth, modern look of Idea #10.
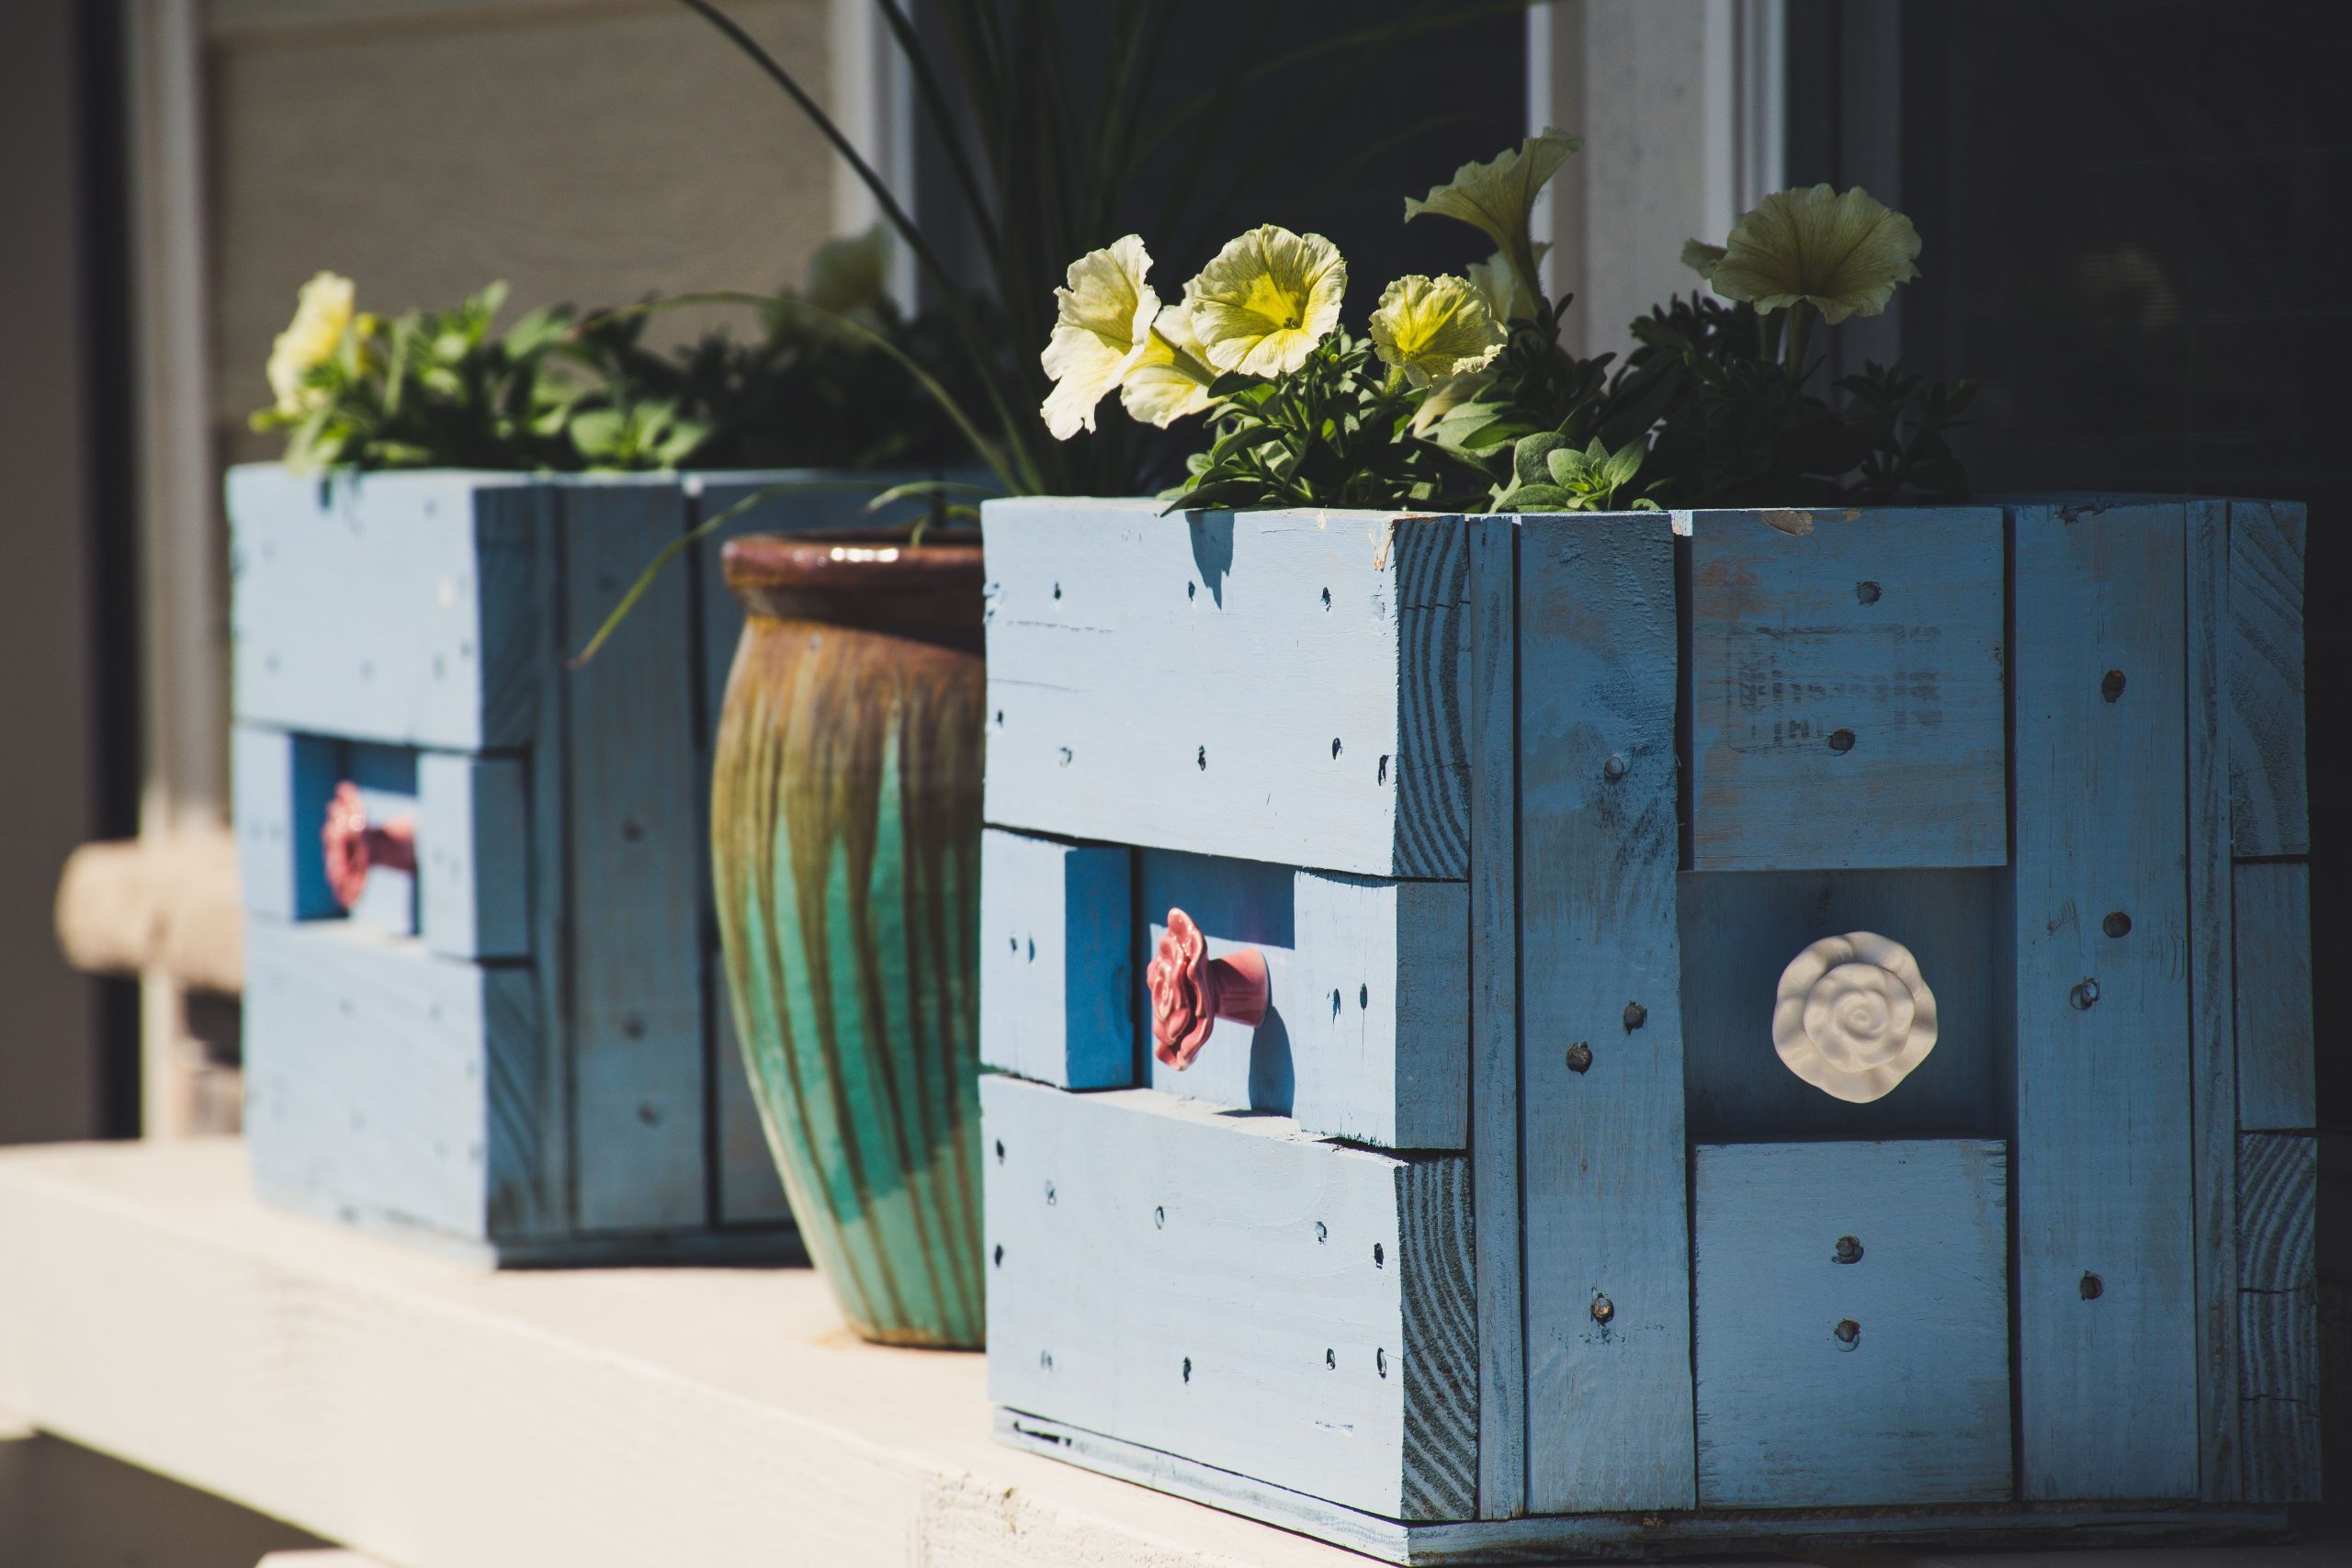
12. Charming Pallet Planters with a Weathered Blue Finish
If you’re looking for a budget-friendly project with a ton of charm, this is it. These planters are made from reclaimed pallet wood, which you can often find for free. A little bit of sanding, a coat of watered-down paint to create that ‘weathered’ look, and you have a completely custom planter for less than $20. The decorative rose-shaped knobs are a lovely touch, easily found at craft stores or online. This is a perfect entry-level DIY that delivers a high-impact result, proving you don’t need a huge budget to create something beautiful for your garden.
13. Simple White Corner Planter for a Minimalist Touch
This is a perfect example of using vertical space in a small, otherwise overlooked corner. The tall, slender profile of the planter draws the eye upward and adds a splash of life without taking up a significant footprint. The simple white color allows it to blend with the wall when viewed from some angles, while contrasting sharply with the dark door frame from other angles. This subtle play of color blocking makes the corner feel intentional. The leafy green plant provides the only source of color and organic texture, making it a quiet but impactful focal point.
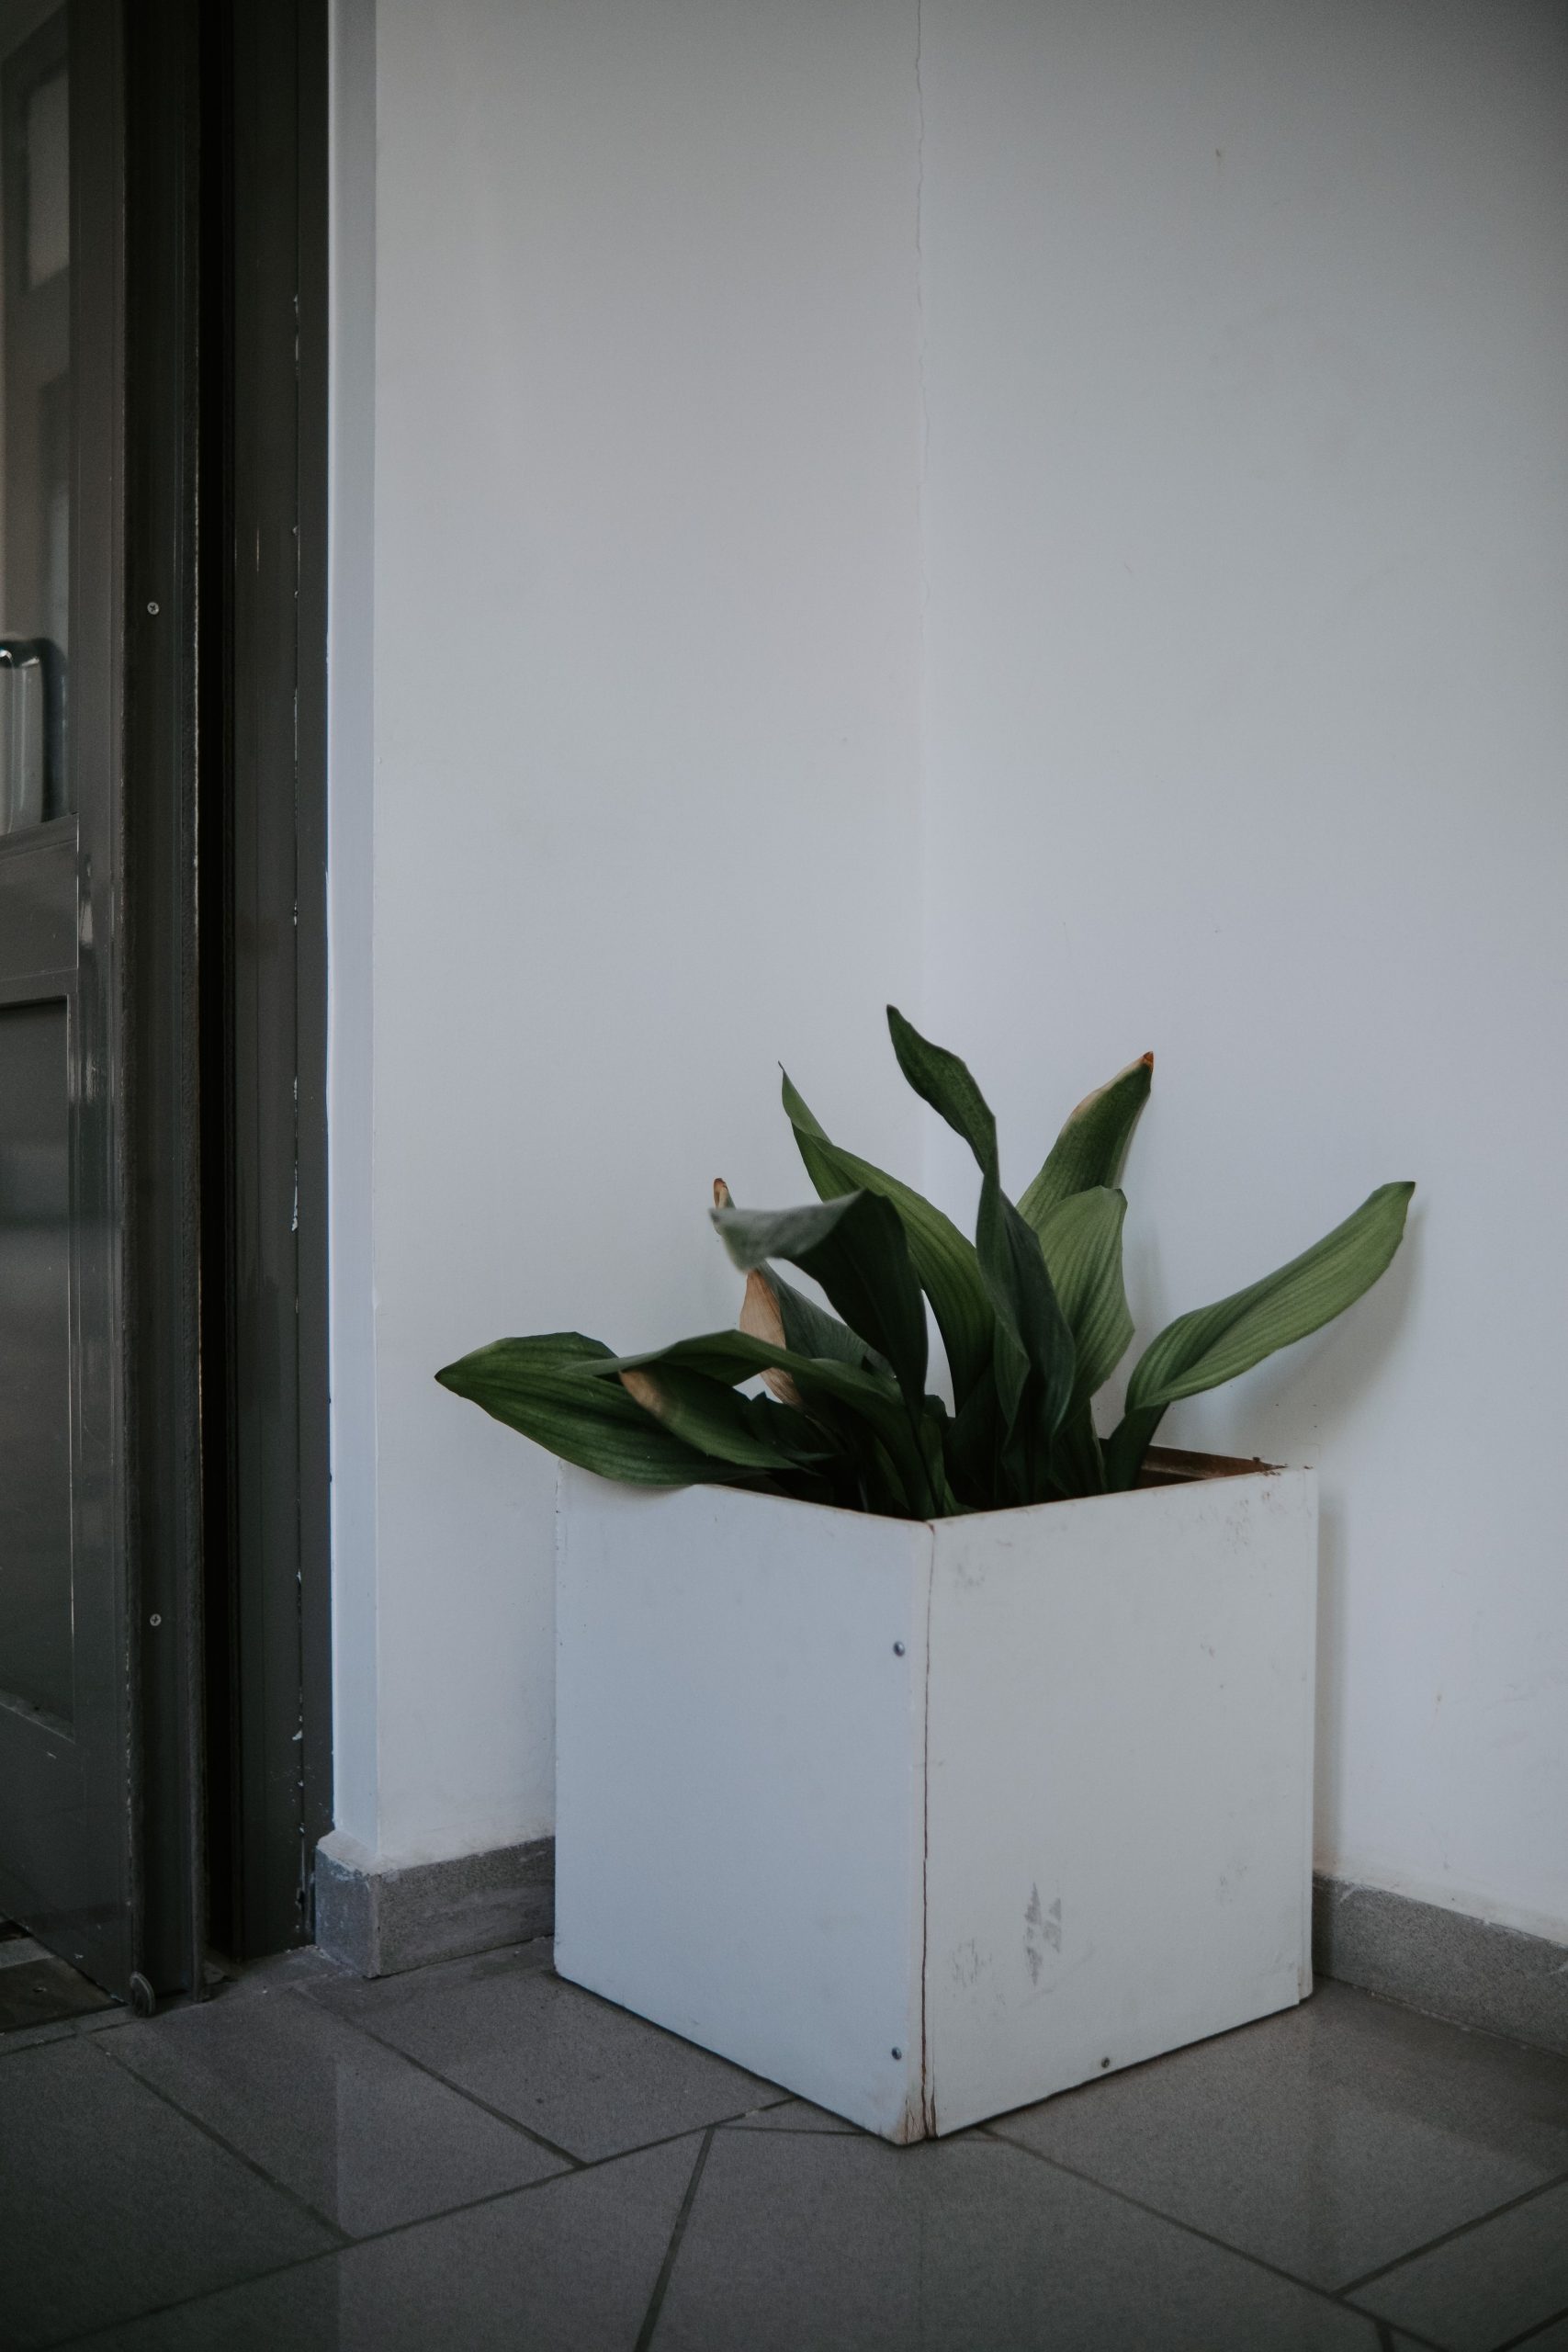
“You can get this exact look for very little money.”
A tall, simple planter like this can be found at stores like IKEA or Target for around $30-$50. If you’re feeling handy, you can build one yourself from a single MDF or plywood board for even less. The key is to paint it with a durable, semi-gloss white paint to make it easy to wipe down. For the plant, a ZZ plant or a snake plant would be a great low-maintenance option that provides that same lush, green vibe.
14. Rustic White Plank Planter with Vivid Purple Pansies
The single element that makes this image so compelling is the contrast. It’s the juxtaposition of the vibrant, perfect purple pansies against the weathered, peeling white paint of the planter box and the surrounding wood. It’s a classic rustic-chic move: pairing something new and beautiful with something old and character-filled. This contrast tells a story of an object that has been loved and used for seasons, now holding fresh life. If the planter were brand new, the scene would feel much less interesting.
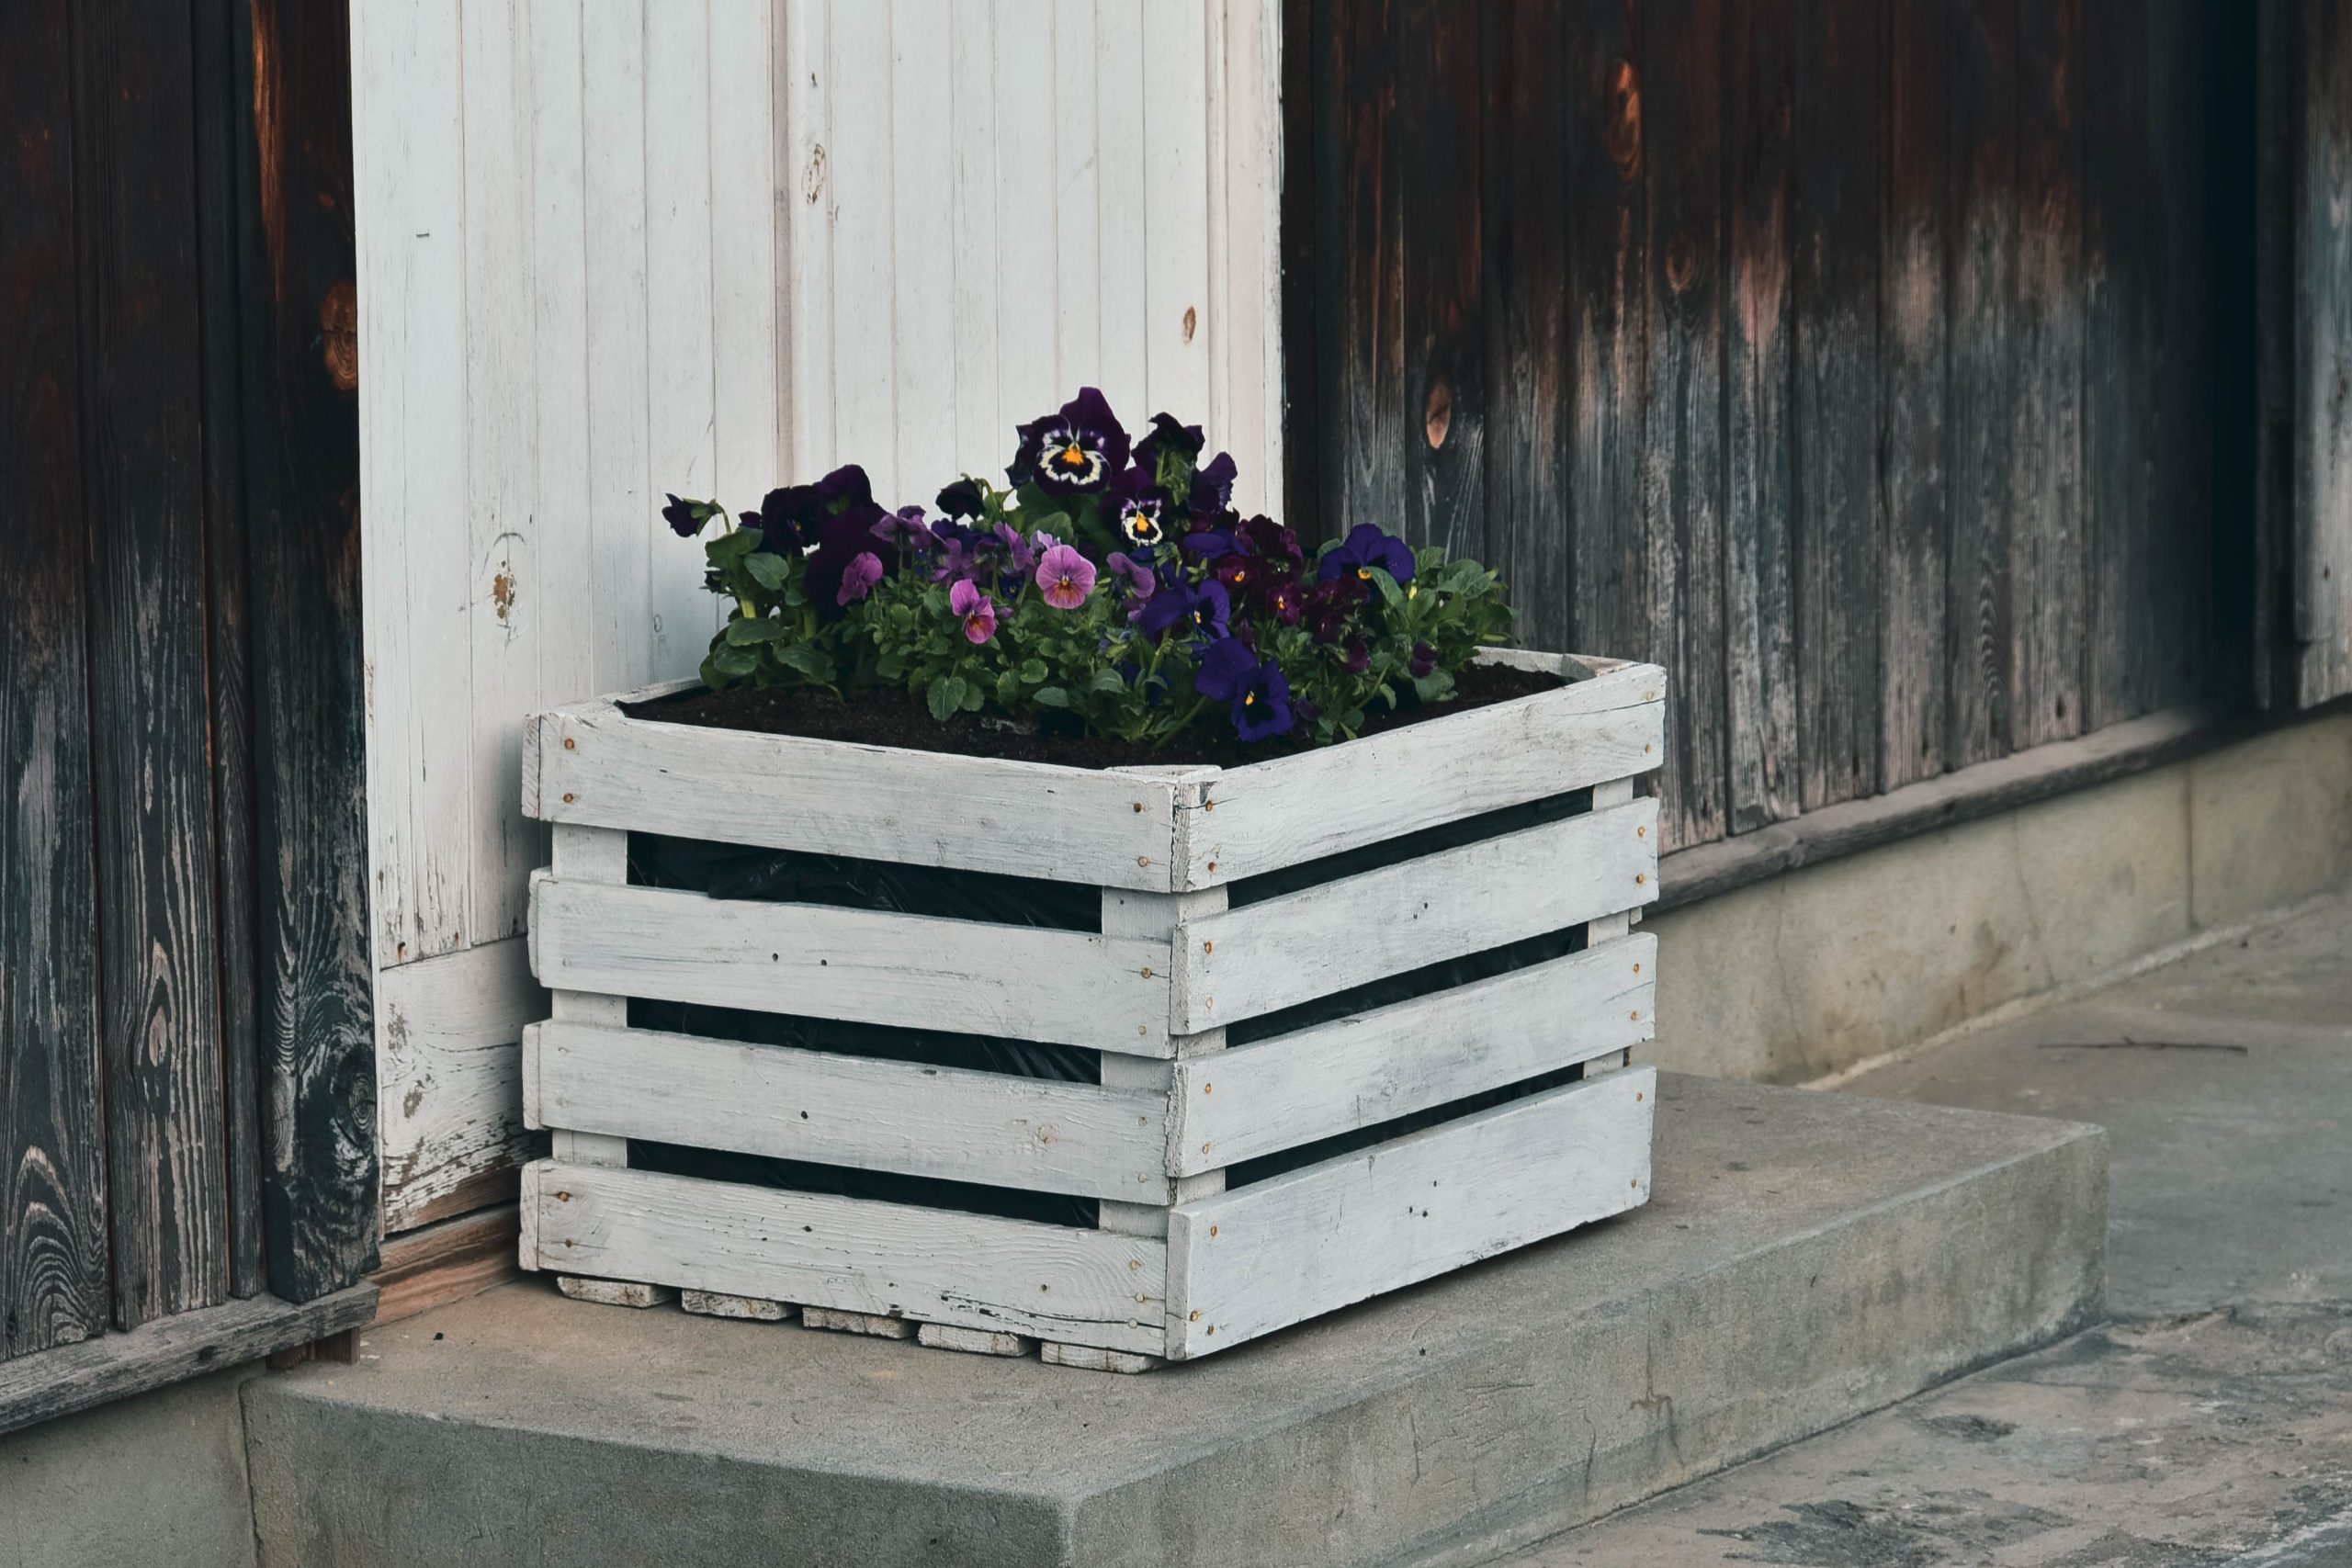
“When creating a rustic look, don’t be afraid to embrace imperfection.”
The charm comes from the signs of age and wear. To get this look on a new wooden box, you can use a ‘paint-and-sand’ technique. Apply a dark base coat (like a dark brown or gray). Once dry, rub wax in the areas you want the ‘wear’ to show through. Then paint a top coat of white. Once the white paint is dry, use sandpaper to gently rub away the paint in the waxed areas, revealing the dark coat underneath. It gives you instant history.
15. Sunny Yellow Wall with a Weathered Gray Window Box
The visual harmony here comes from a classic color theory formula: 60% warm color + 30% cool color + 10% neutral. The sunny yellow siding is the dominant warm base, creating a feeling of cheerfulness and energy. The weathered gray of the window box acts as the complementary cool tone, providing a sophisticated, grounding element. The bright white of the window frame and the white petunias is the 10% neutral that adds a crisp, clean highlight and makes both the yellow and gray pop. It’s a balanced, eye-pleasing combination that always works.
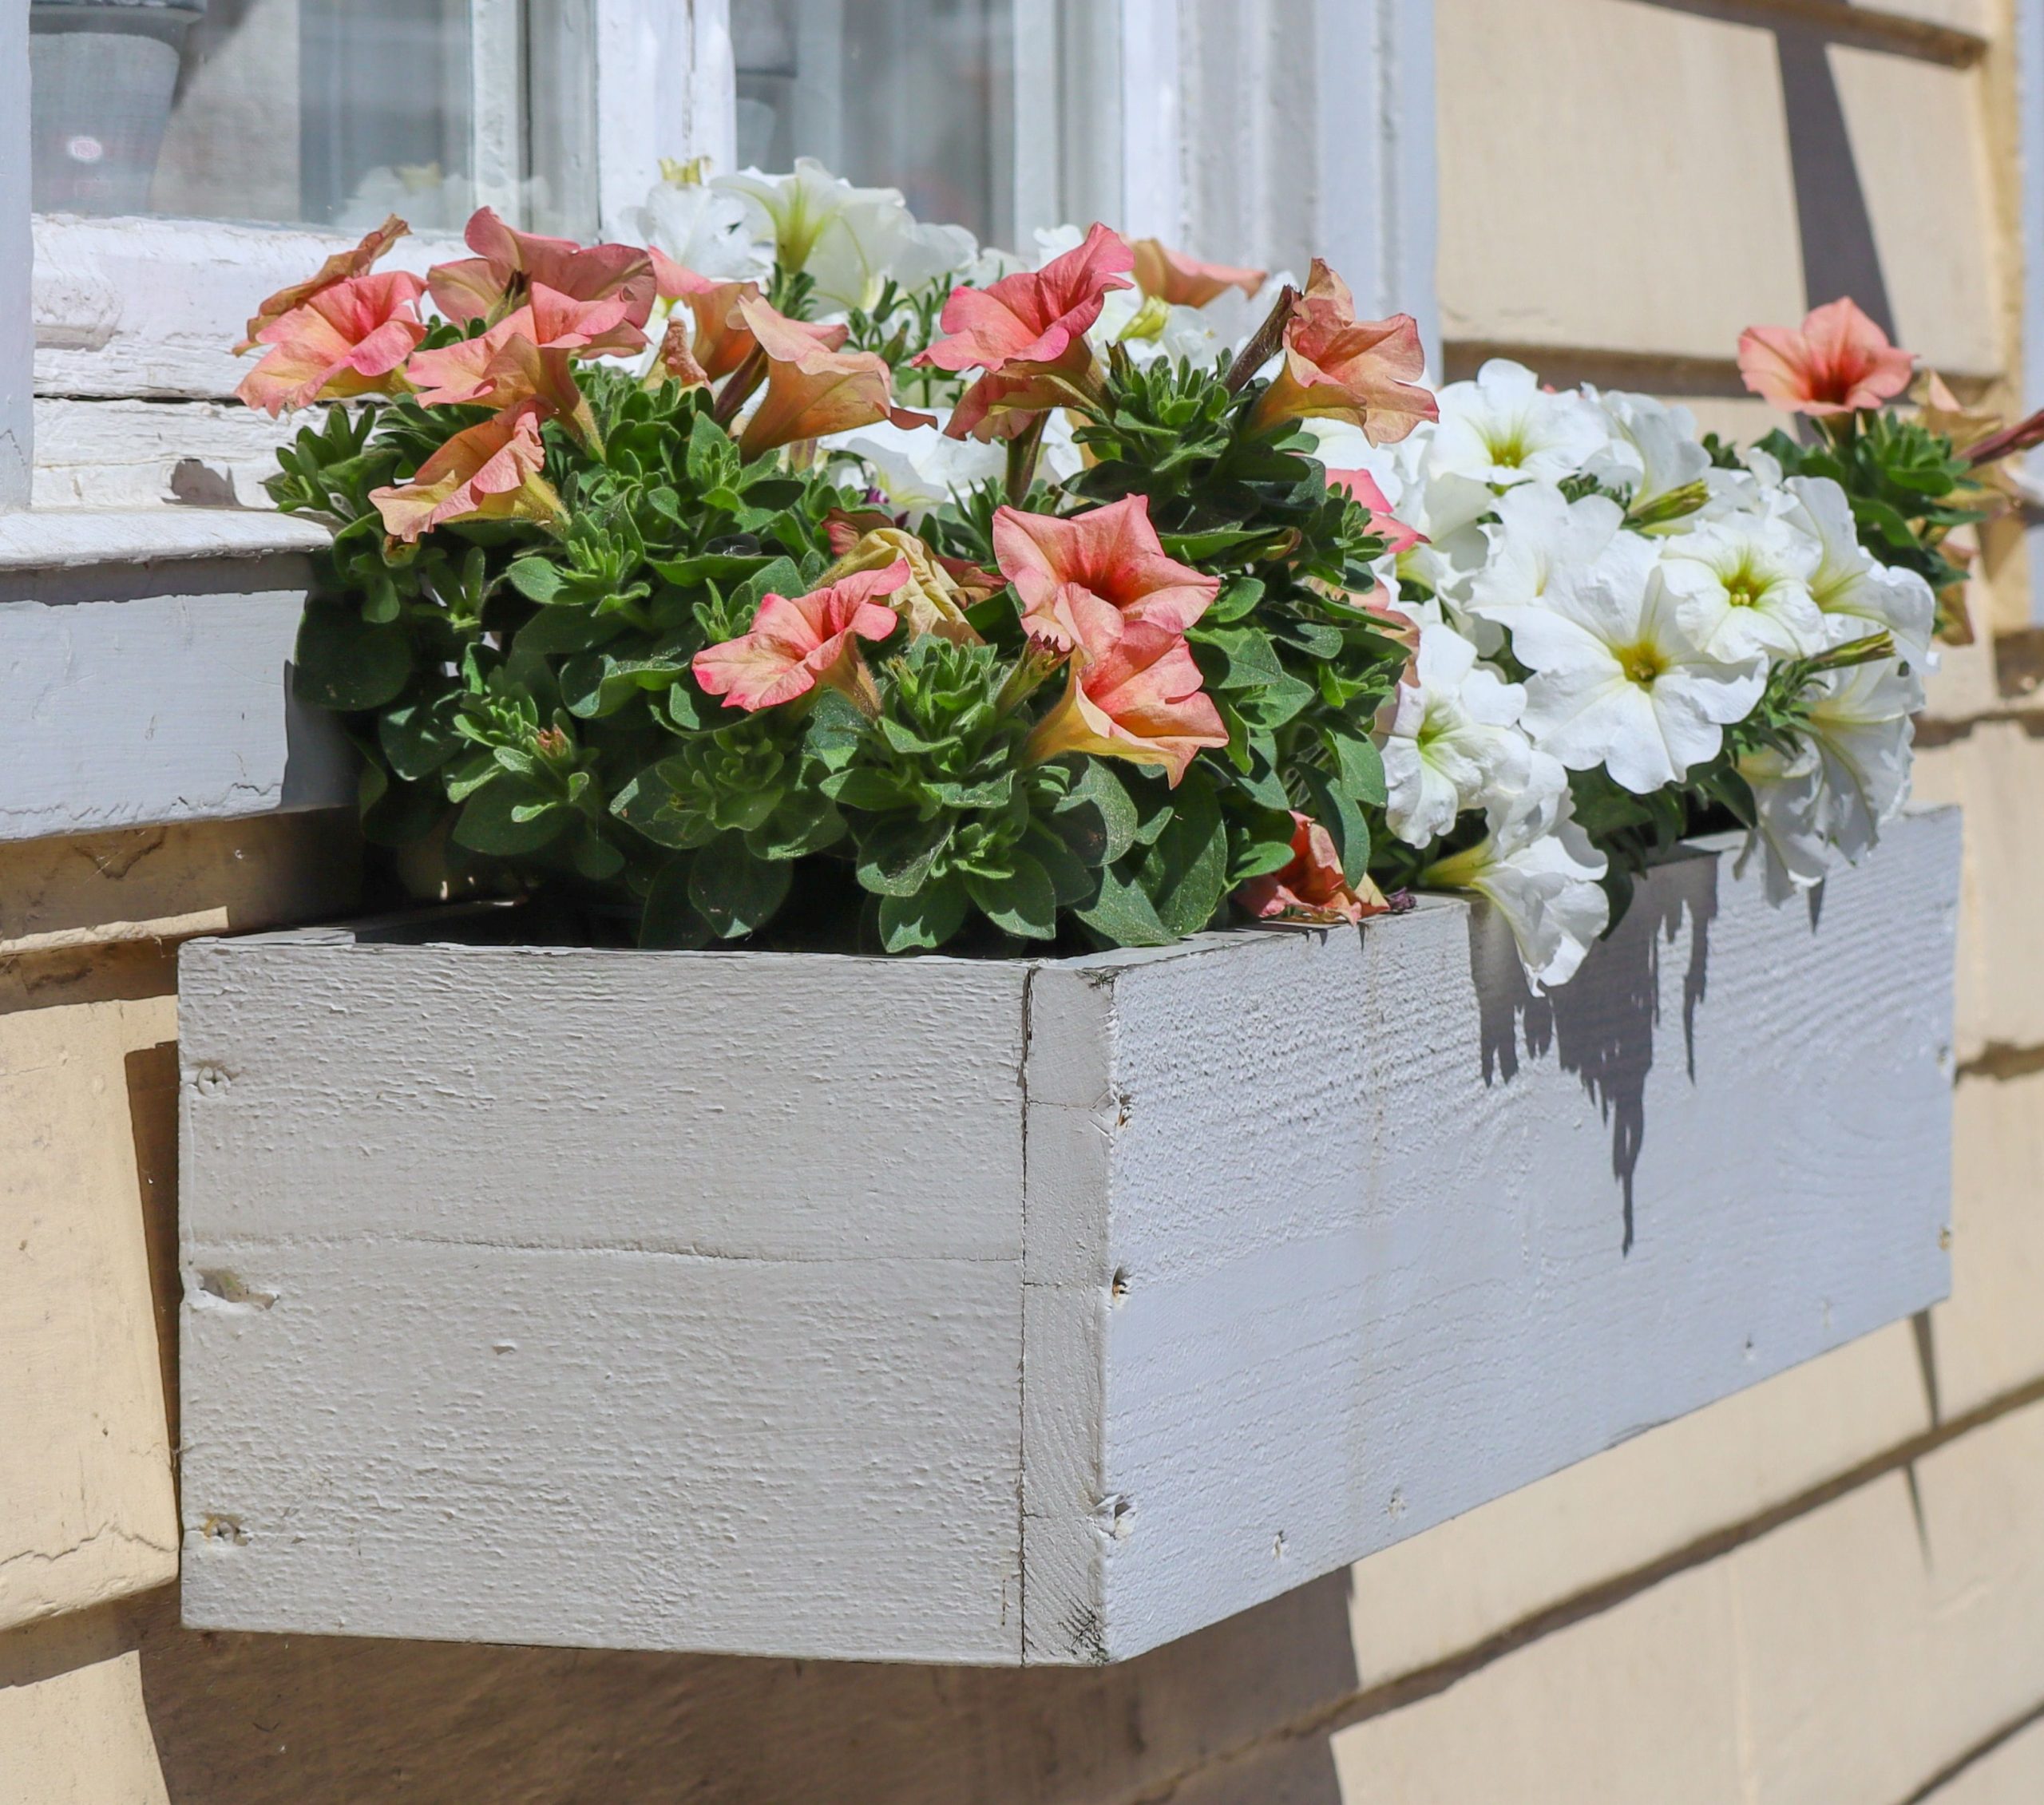
“Here’s how to mount a window box securely:Materials: Window box, L-brackets (sized for the box depth), galvanized screws, level.”
Time: 1 hour.Choose Brackets: Select brackets that can support the full weight of the box filled with wet soil and plants.Mark Your Placement: Position the empty box under the window and use a pencil to mark where the top of the box sits. Ensure it’s level.Install Brackets: Remove the box and install the L-brackets into the wall studs just below your pencil line. Use long screws that go at least 1.5 inches into the studs.Secure the Box: Place the planter box onto the brackets and drive screws up from the bottom of the brackets into the base of the planter to prevent it from shifting.
16. Rustic Birch Branch Arrangement in a Spring Planter Box
This planter arrangement works so well because it combines elements with different timelines. The birch and pussy willow branches provide immediate height, structure, and a hint of winter-turning-to-spring. The blooming flowers like the daisies and muscari offer instant, vibrant color for the current season. And finally, the green foliage promises continued growth and fullness as the season progresses. It’s a layered, multi-dimensional display that feels both complete right now and full of future potential. The rustic wooden box is the perfect vessel for this naturalistic composition.
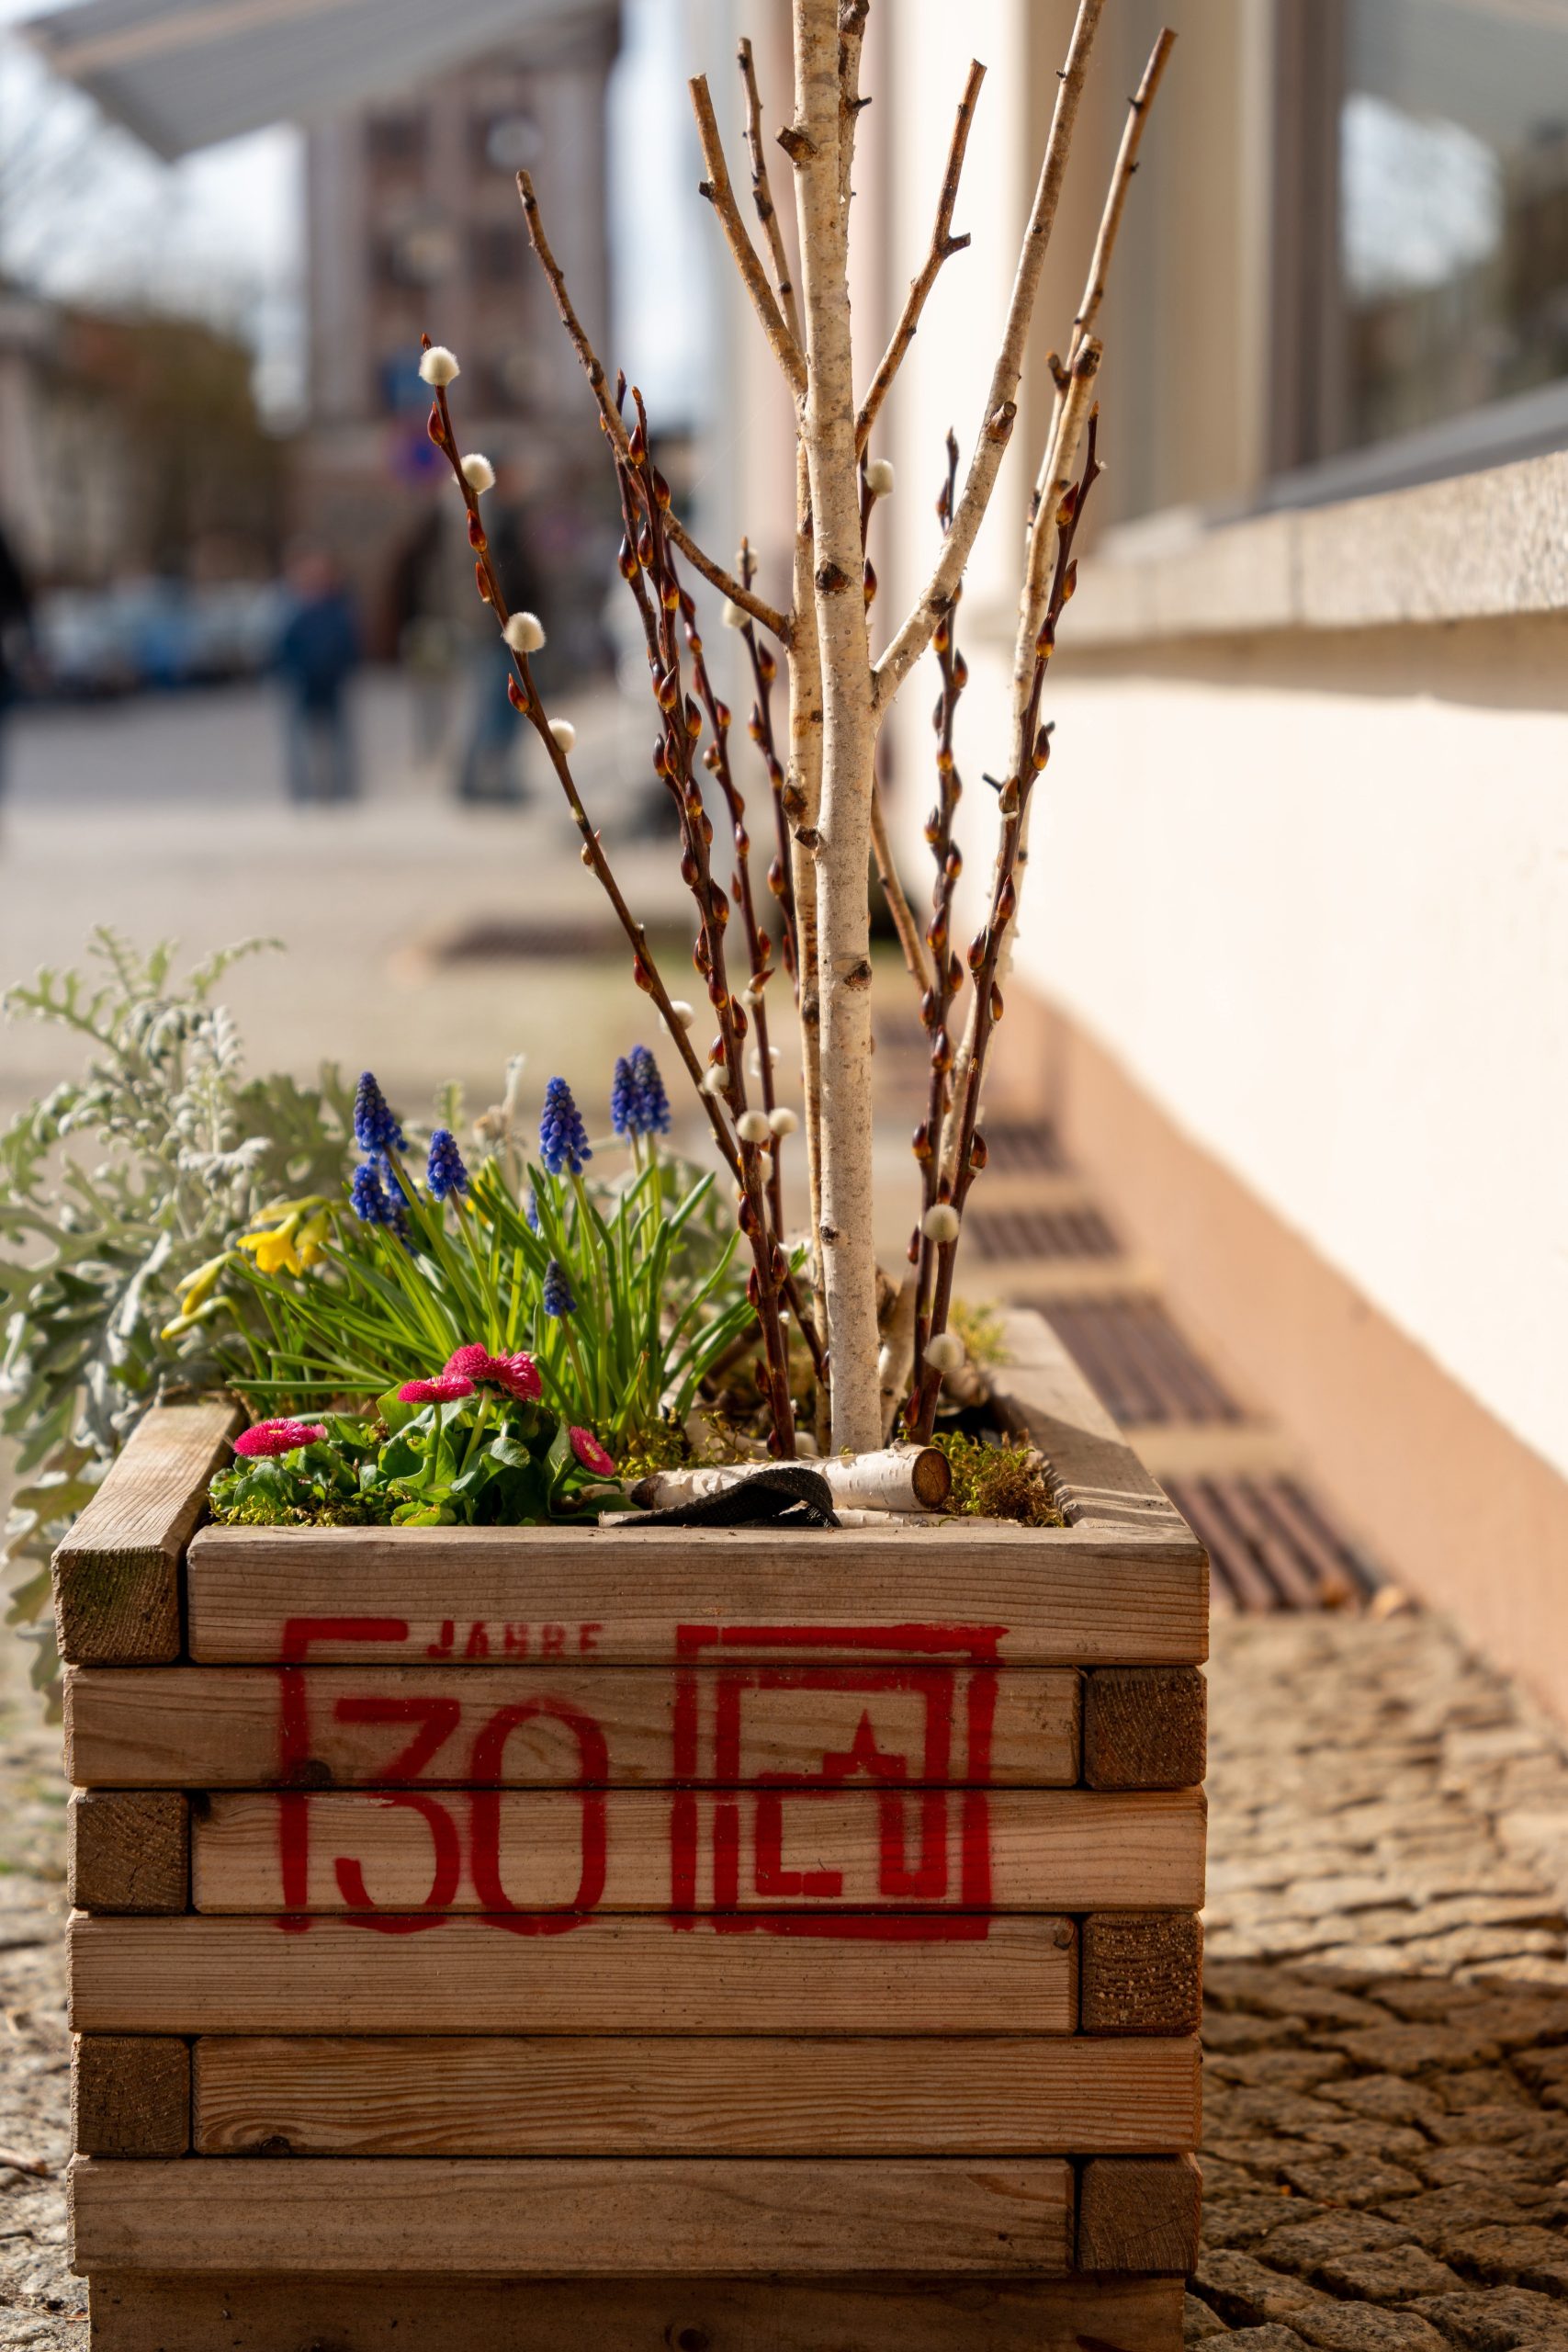
“While this arrangement is beautiful, remember that the branches and flowers have different lifespans.”
The fresh flowers may only last a few weeks, while the pussy willows will hold their form for much longer as they dry. The green plants will continue to grow. This isn’t a ‘set-it-and-forget-it’ planter. Be prepared to edit the arrangement as some elements fade. You’ll need to deadhead the spent blooms and you might choose to replace them with new seasonal flowers to keep the look fresh and vibrant throughout the spring and summer.
17. A Simple Indoor Herb Garden by a Sunny Window
To keep an indoor herb garden thriving, it needs two things above all else: tons of light and excellent drainage. Place your planter directly in your sunniest window—a south-facing exposure is ideal. If you don’t have enough natural light, invest in a small, full-spectrum LED grow light. For drainage, drill several 1/2-inch holes in the bottom of your wooden planter box and place a saucer underneath to catch excess water. This prevents the roots from sitting in water, which is the fastest way to kill most herbs.
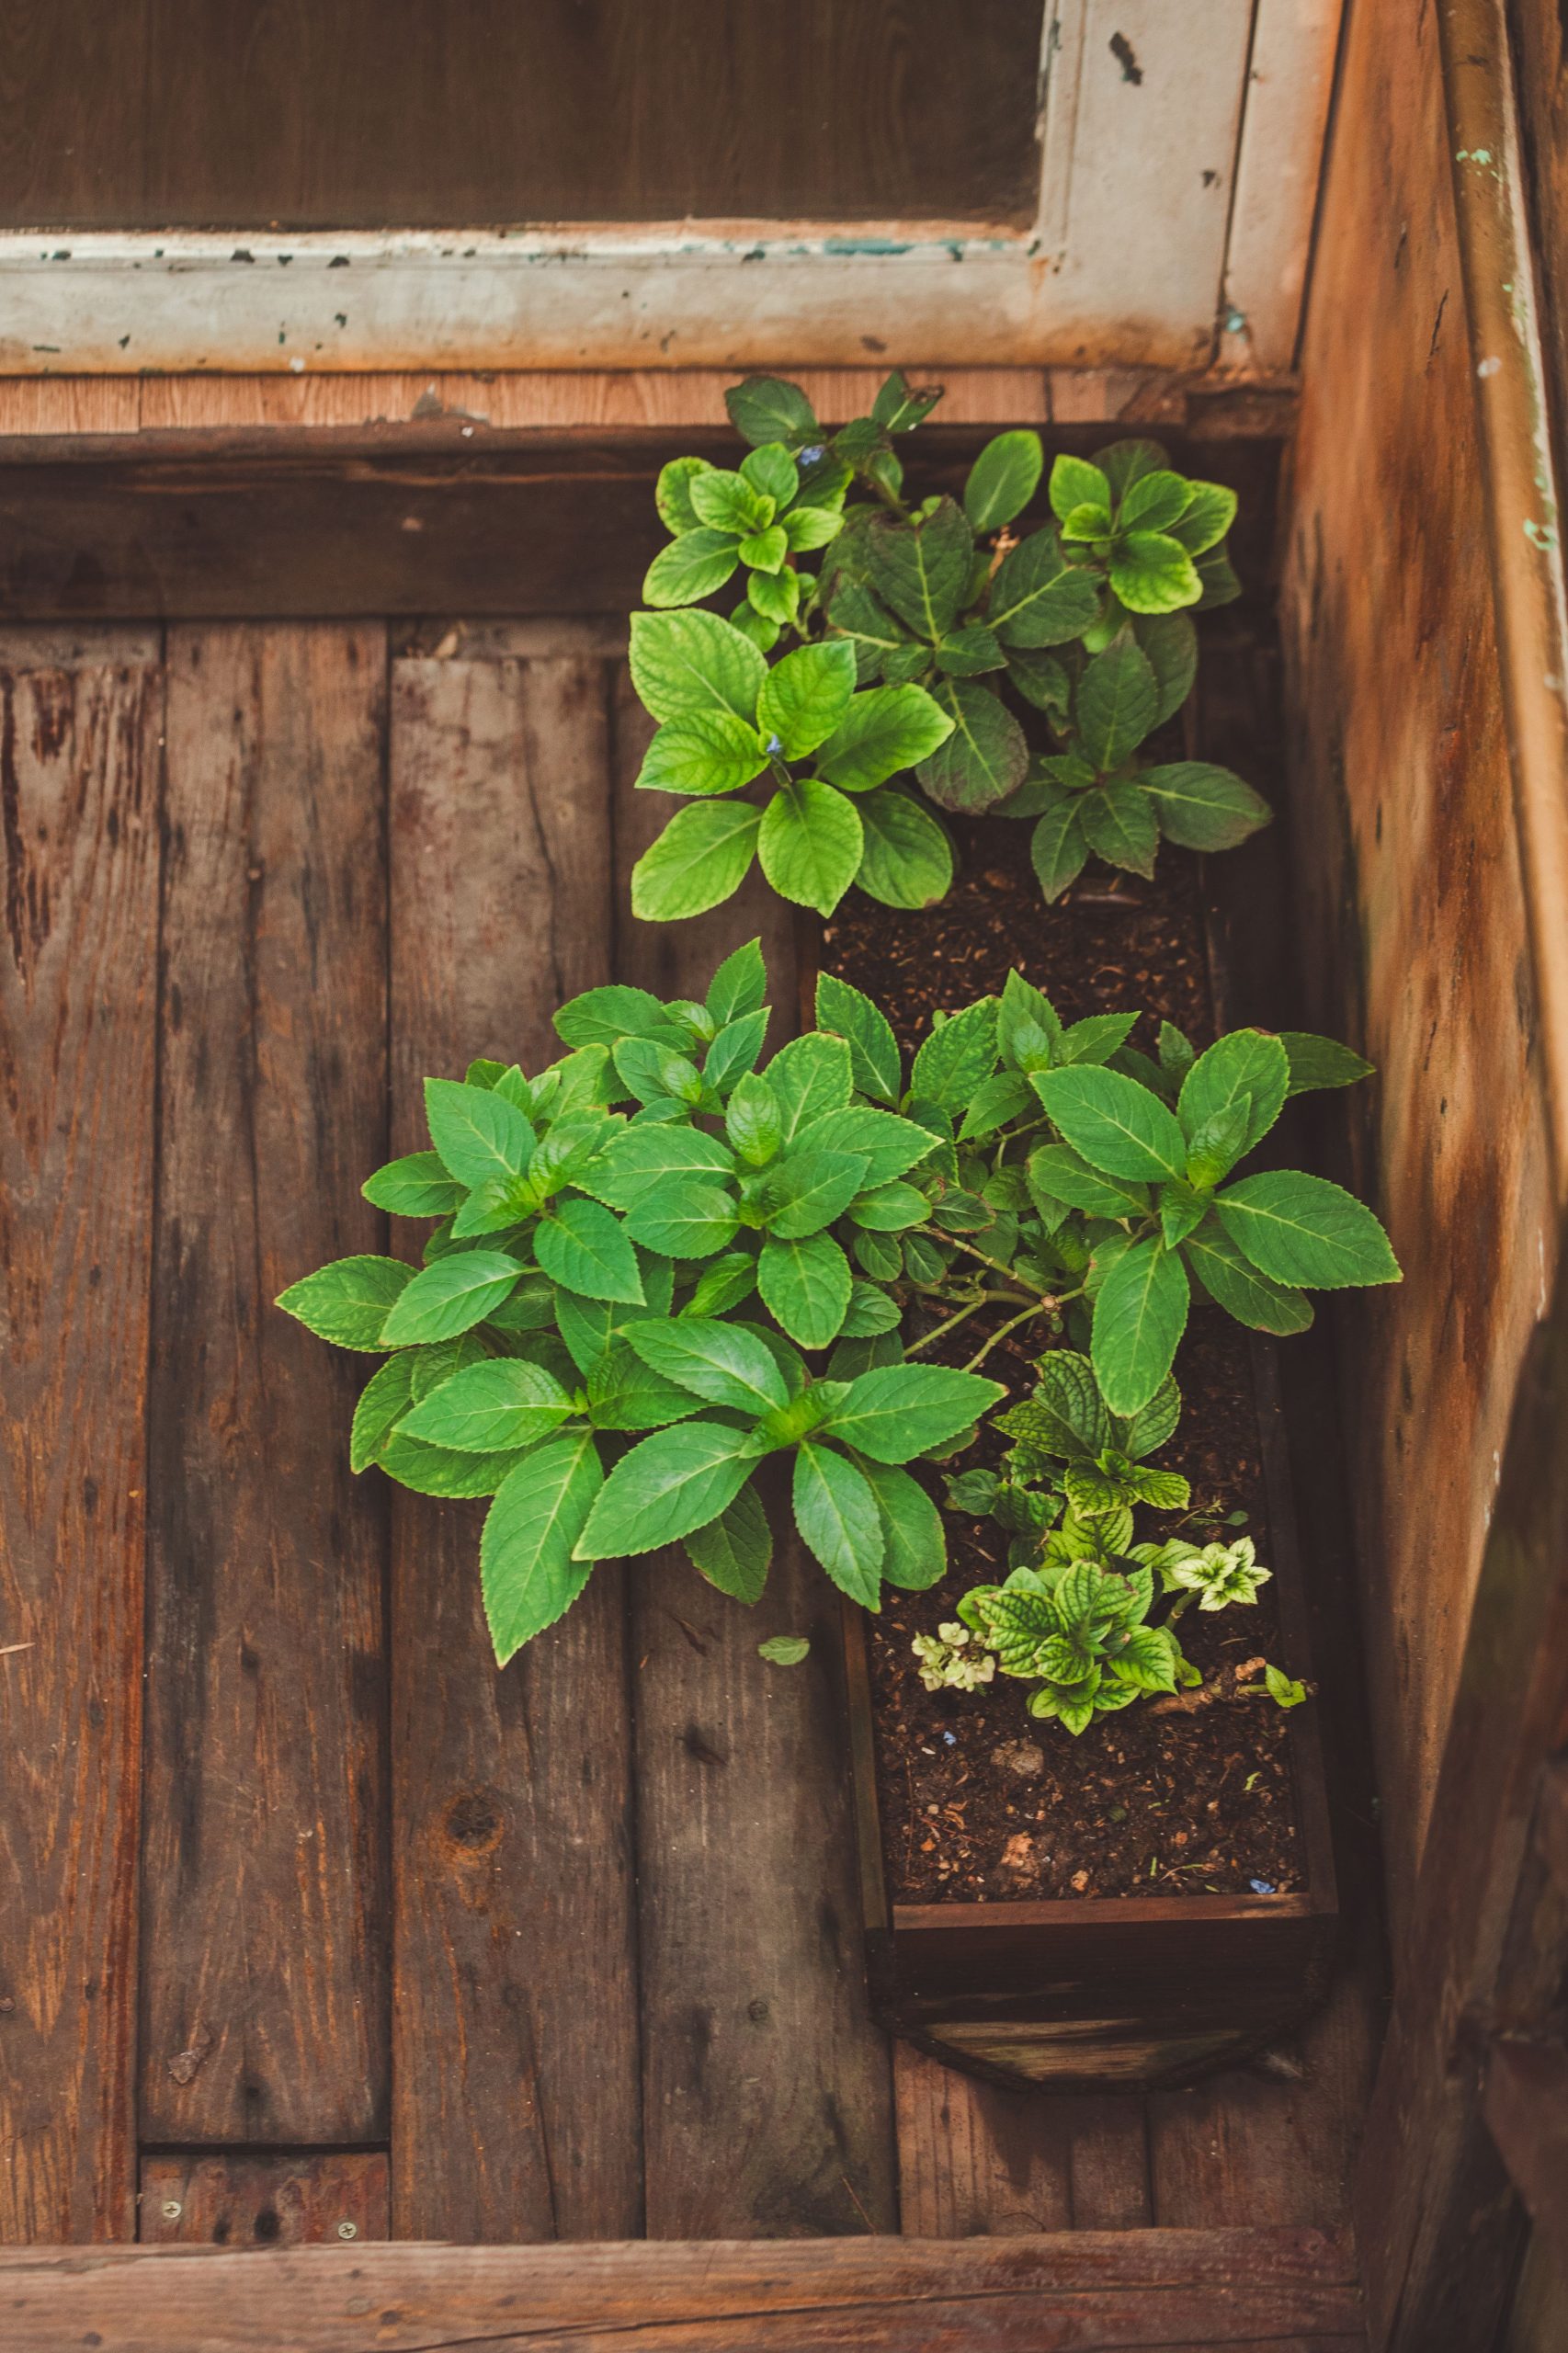
“You don’t need a fancy, expensive container for an indoor herb garden.”
A simple rectangular terracotta planter will provide excellent drainage and a classic look for under $25. You can also build a rustic wooden box, like the one pictured, from a single cedar or pine board from a hardware store for about $15. Just make sure the wood is untreated if you plan to consume the herbs. The goal is function over form—happy plants will always look better than sad plants in a fancy pot.
18. How to Build Your Own Deck Planter Boxes
Building a simple deck planter box is a great beginner woodworking project. Here’s a quick rundown:
- Measure and Cut: Using standard deck boards (like cedar or composite), cut four pieces for the sides and one for the bottom. For a 3-foot long box, you might have two 36″ pieces and two 12″ pieces.
- Assemble the Box: Form a rectangle with your side pieces and fasten them at the corners with exterior-grade deck screws.
- Attach the Bottom: Flip the box frame upside down and lay your bottom board(s) on top. Secure them with screws. Be sure to leave small gaps (about 1/4 inch) between bottom boards for drainage.
- Add Trim (Optional): For a more finished look, add a top ‘cap’ rail around the rim of the box.
- Line and Fill: Line the inside with landscape fabric, fill with soil, and start planting!
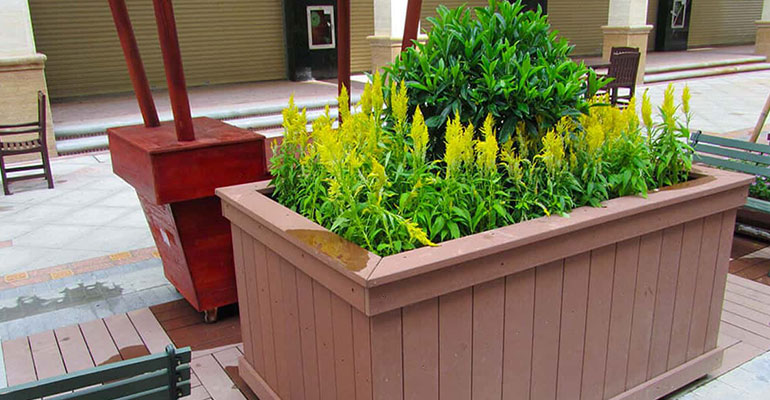
“When adding planter boxes to a deck, scale is everything.”
A good rule of thumb is to keep the height of the planter at or below the height of the deck railing to maintain a clean sightline. For a standard 36-inch high railing, a planter that is 18-24 inches tall is ideal. The length can vary, but placing a long, continuous planter box along one edge, like in Idea #3, can make a deck feel larger, while multiple smaller boxes can feel cluttered. Aim for the planters to take up no more than 15% of your total deck surface area.
19. Gothic Romance: A Garden Scene with Urns and Latticework
This look is a beautiful exercise in creating a mood. The formula is roughly 40% dark, weathered structure (the lattice and crates) + 30% ornate, vintage decor (the urns and lanterns) + 30% soft, colorful life (the purple flowers). It’s the combination of hard and soft, dark and light, that creates a sense of romantic decay. The mirror is a clever touch, reflecting the garden and adding an illusion of depth, making the small space feel more expansive and mysterious. It’s a very curated, almost theatrical, approach to garden design.
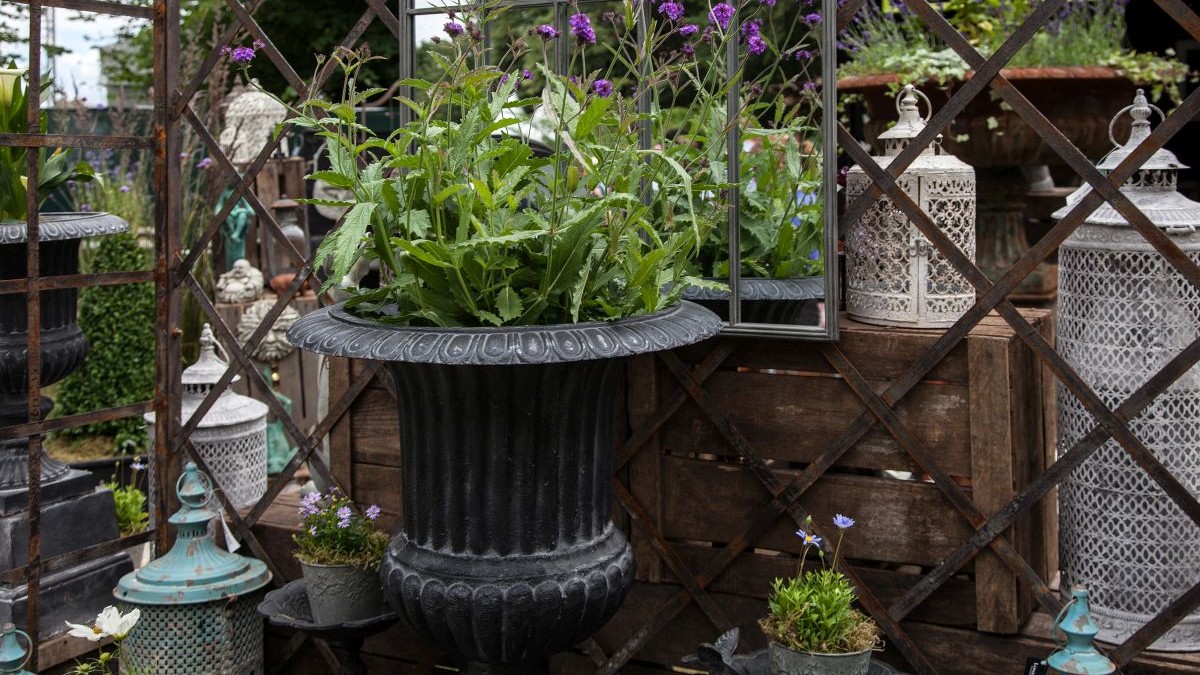
“This aesthetic, often called ‘Gothic Garden’ or ‘Dark Academia Cottagecore’, is having a moment on Pinterest and Instagram.”
It’s a reaction against the overly clean, minimalist gardens of the past few years. People are craving spaces that feel layered, personal, and a little bit wild. This trend embraces the beauty of imperfection, weathering, and age. It has staying power because it’s not about buying a whole new set of furniture; it’s about collecting and curating unique pieces over time from thrift stores, antique shops, and flea markets.
20. Layered Garden Design with Stone Planter Retaining Walls
This design brilliantly solves a common landscaping problem: a sloped yard. Instead of fighting the gradient, it embraces it, using the stacked stone retaining walls to create a series of level terraces. This not only prevents soil erosion but also creates beautifully integrated, naturalistic planter boxes. The stone material feels timeless and solid, anchoring the landscape. The neatly trimmed hedges within the planters add a layer of formal structure that contrasts nicely with the more rugged stone, resulting in a landscape that feels both natural and intentionally designed.
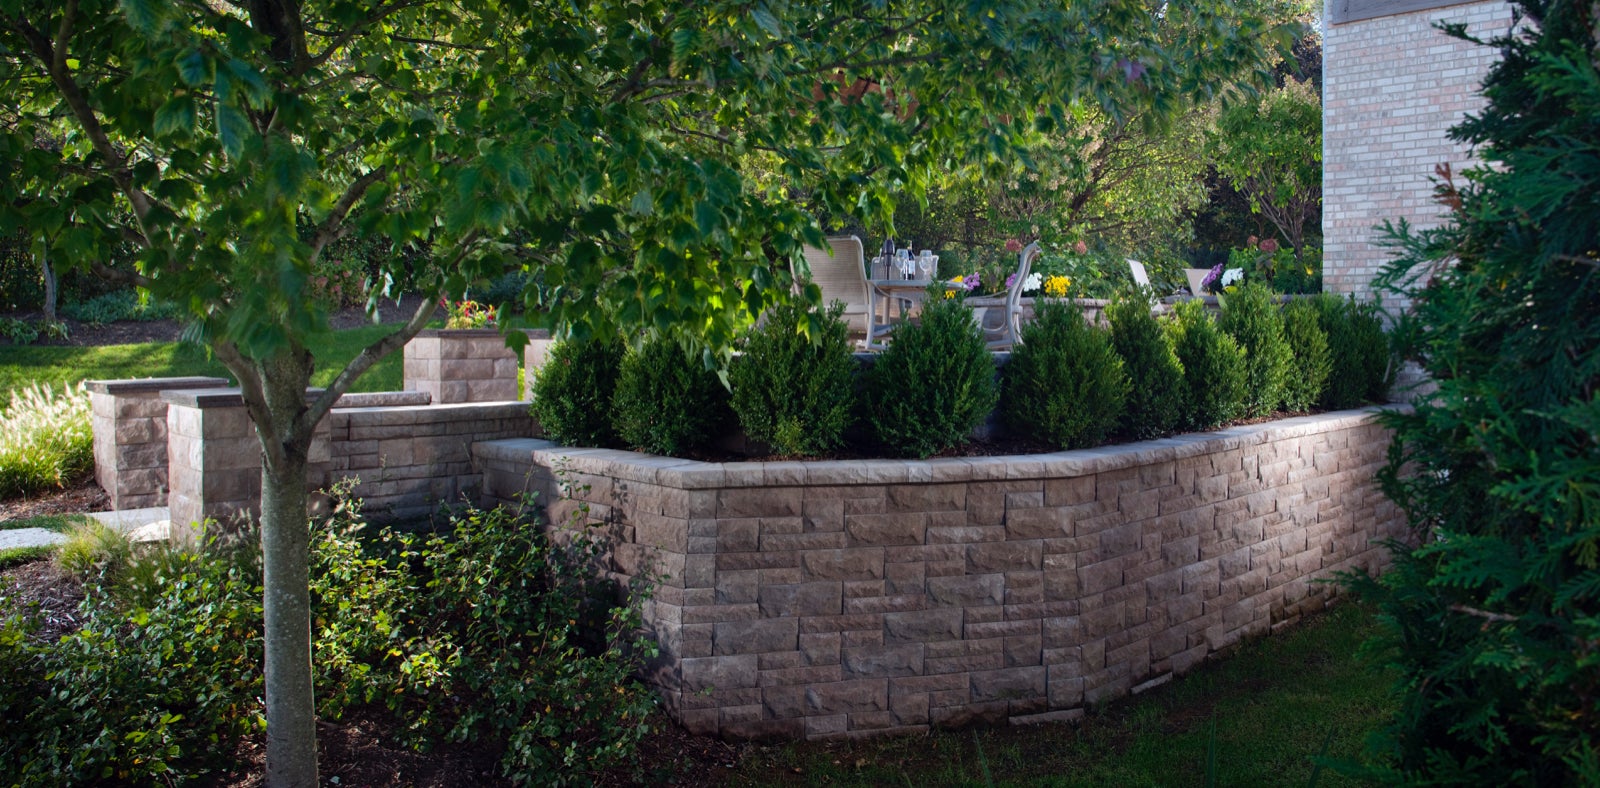
“While stone retaining walls are incredibly durable, they are not zero-maintenance.”
Weeds and moss can grow in the crevices between stones, which will require periodic removal to keep the walls looking clean. The biggest task is caring for the hedges. To maintain their neat, trimmed shape, they will need to be sheared 2-3 times per year during the growing season. This can be a significant time commitment, but it is essential for preserving the formal, structured look of the design. You could opt for slower-growing shrubs to reduce the frequency of trimming.
21. Low-Profile Redwood Garden Beds on a Matching Deck
When placing raised beds on a wooden deck, matching the wood species is a pro-level move. Here, the redwood of the planters blends seamlessly with the redwood of the deck, creating a custom, high-end look. It avoids the visual clutter of having mismatched wood tones. To achieve this, you can either build the planters from the same decking material or use a different wood and apply the exact same stain and sealant as the deck. This continuity makes the planters feel like an integral part of the deck’s design, not just boxes sitting on top of it.
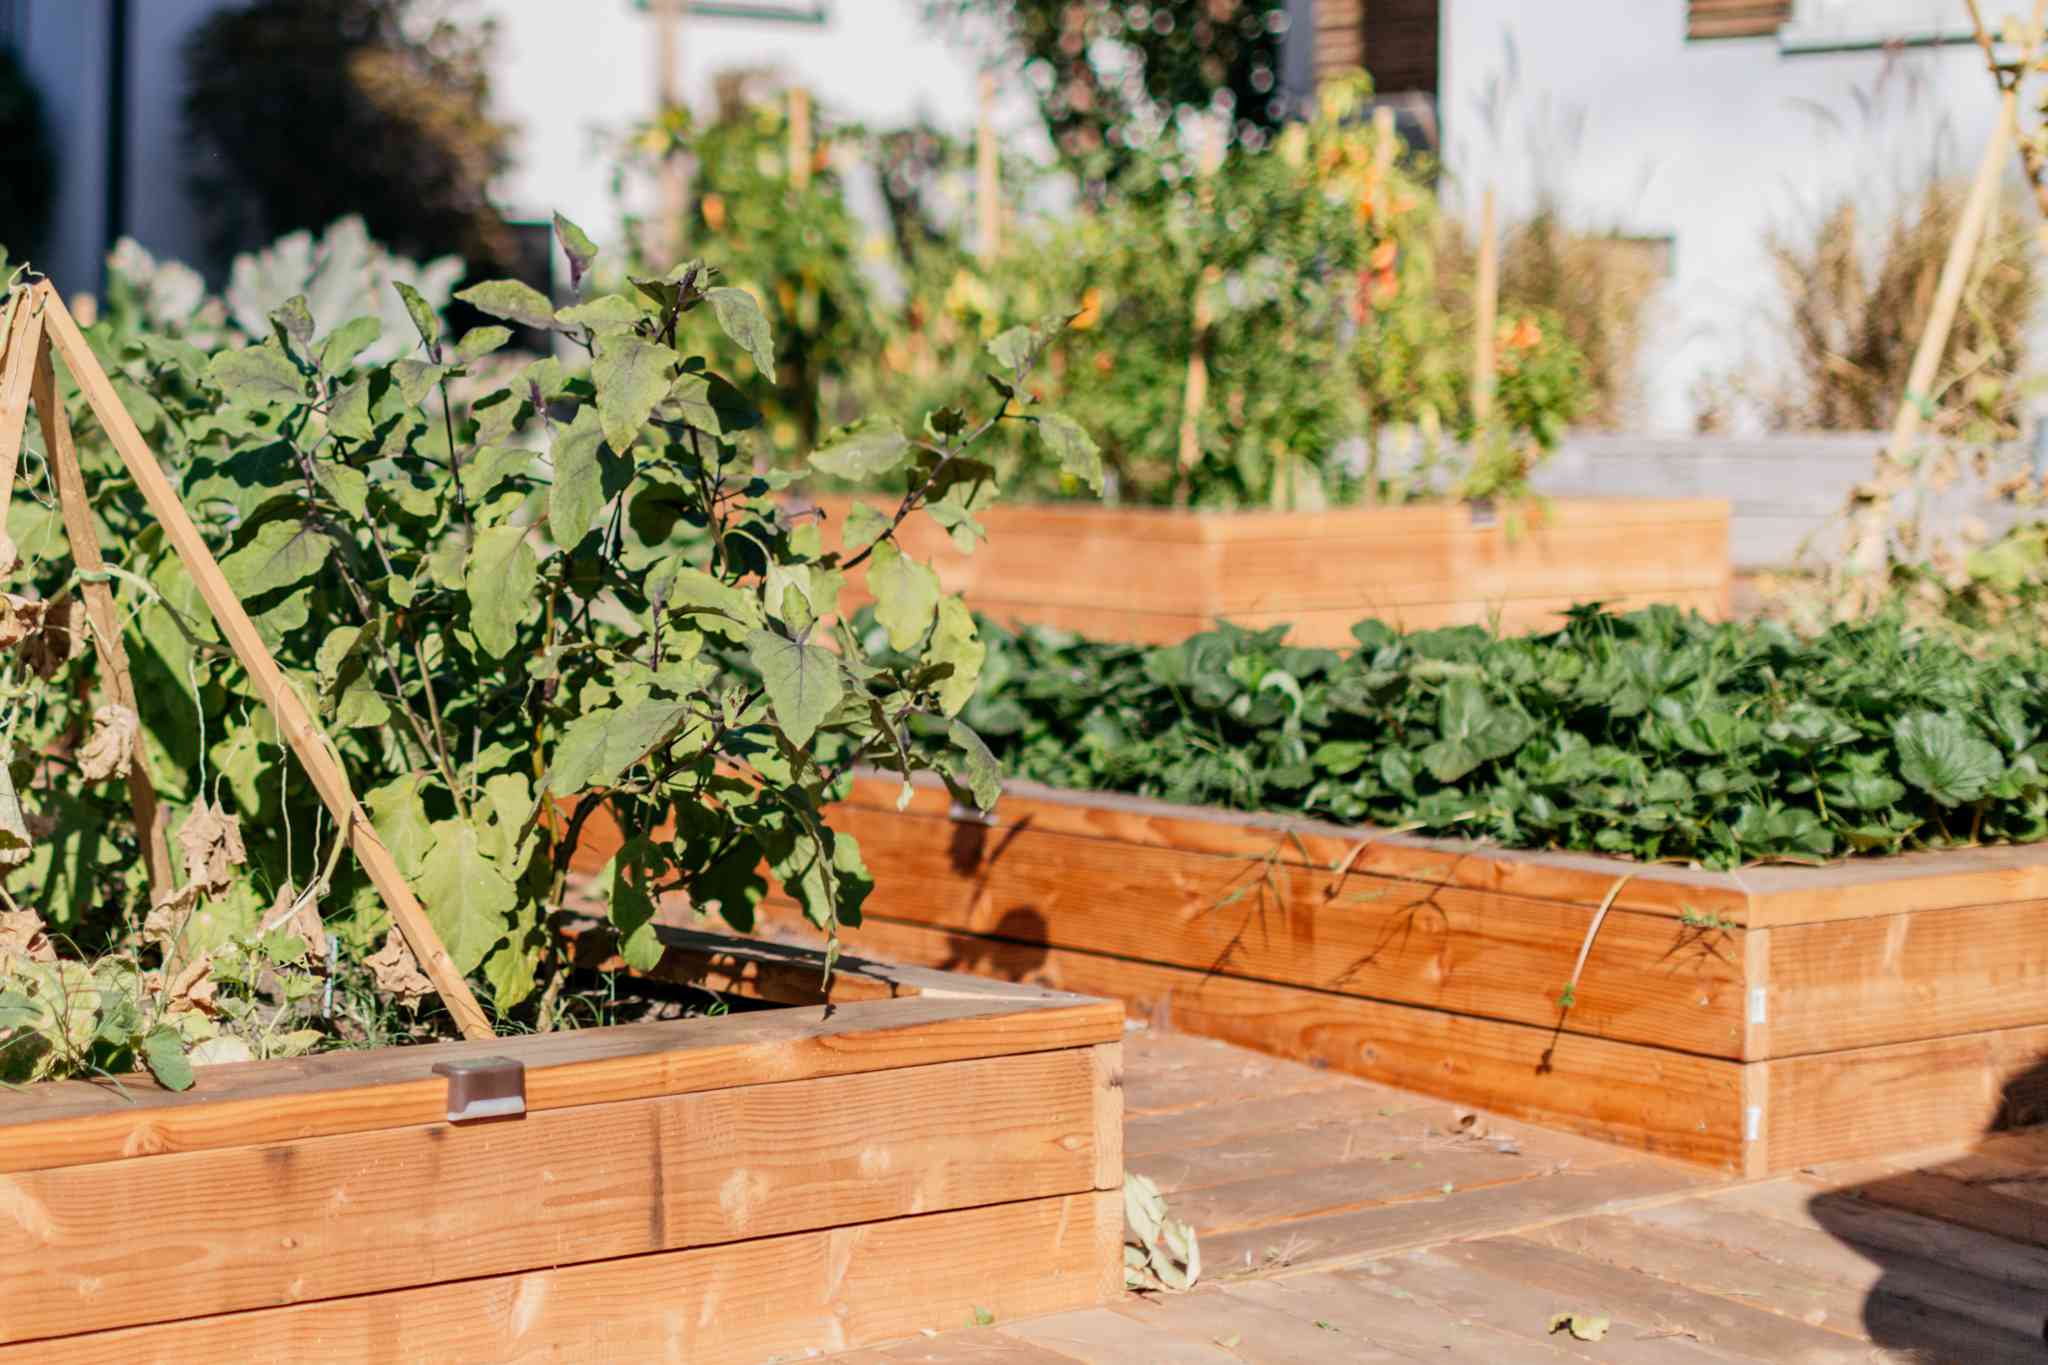
“Placing soil-filled planters directly on a wood deck can be risky if not done correctly.”
Moisture is the enemy of wood. You must ensure the planter boxes are raised slightly off the deck surface to allow for air circulation and drainage underneath. You can use small, hidden blocks or composite shims under the boxes. Without this air gap, trapped moisture will inevitably lead to rot and decay on your deck boards, creating a very expensive repair job down the line. Proper airflow is non-negotiable.
22. A Lush Greenery Wall with Integrated Shelving
The element that elevates this from a simple planter to a ‘feature wall’ is its integration with the shelving unit. By building the planter and the shelves as a single, continuous piece, the design feels intentional and architectural. It creates a complete storage and display solution that is both functional and beautiful. The living greenery of the planter softens the clean lines of the shelves and baskets, creating a perfect balance. It’s a much more impactful statement than a standalone planter and a separate shelving unit would ever be.
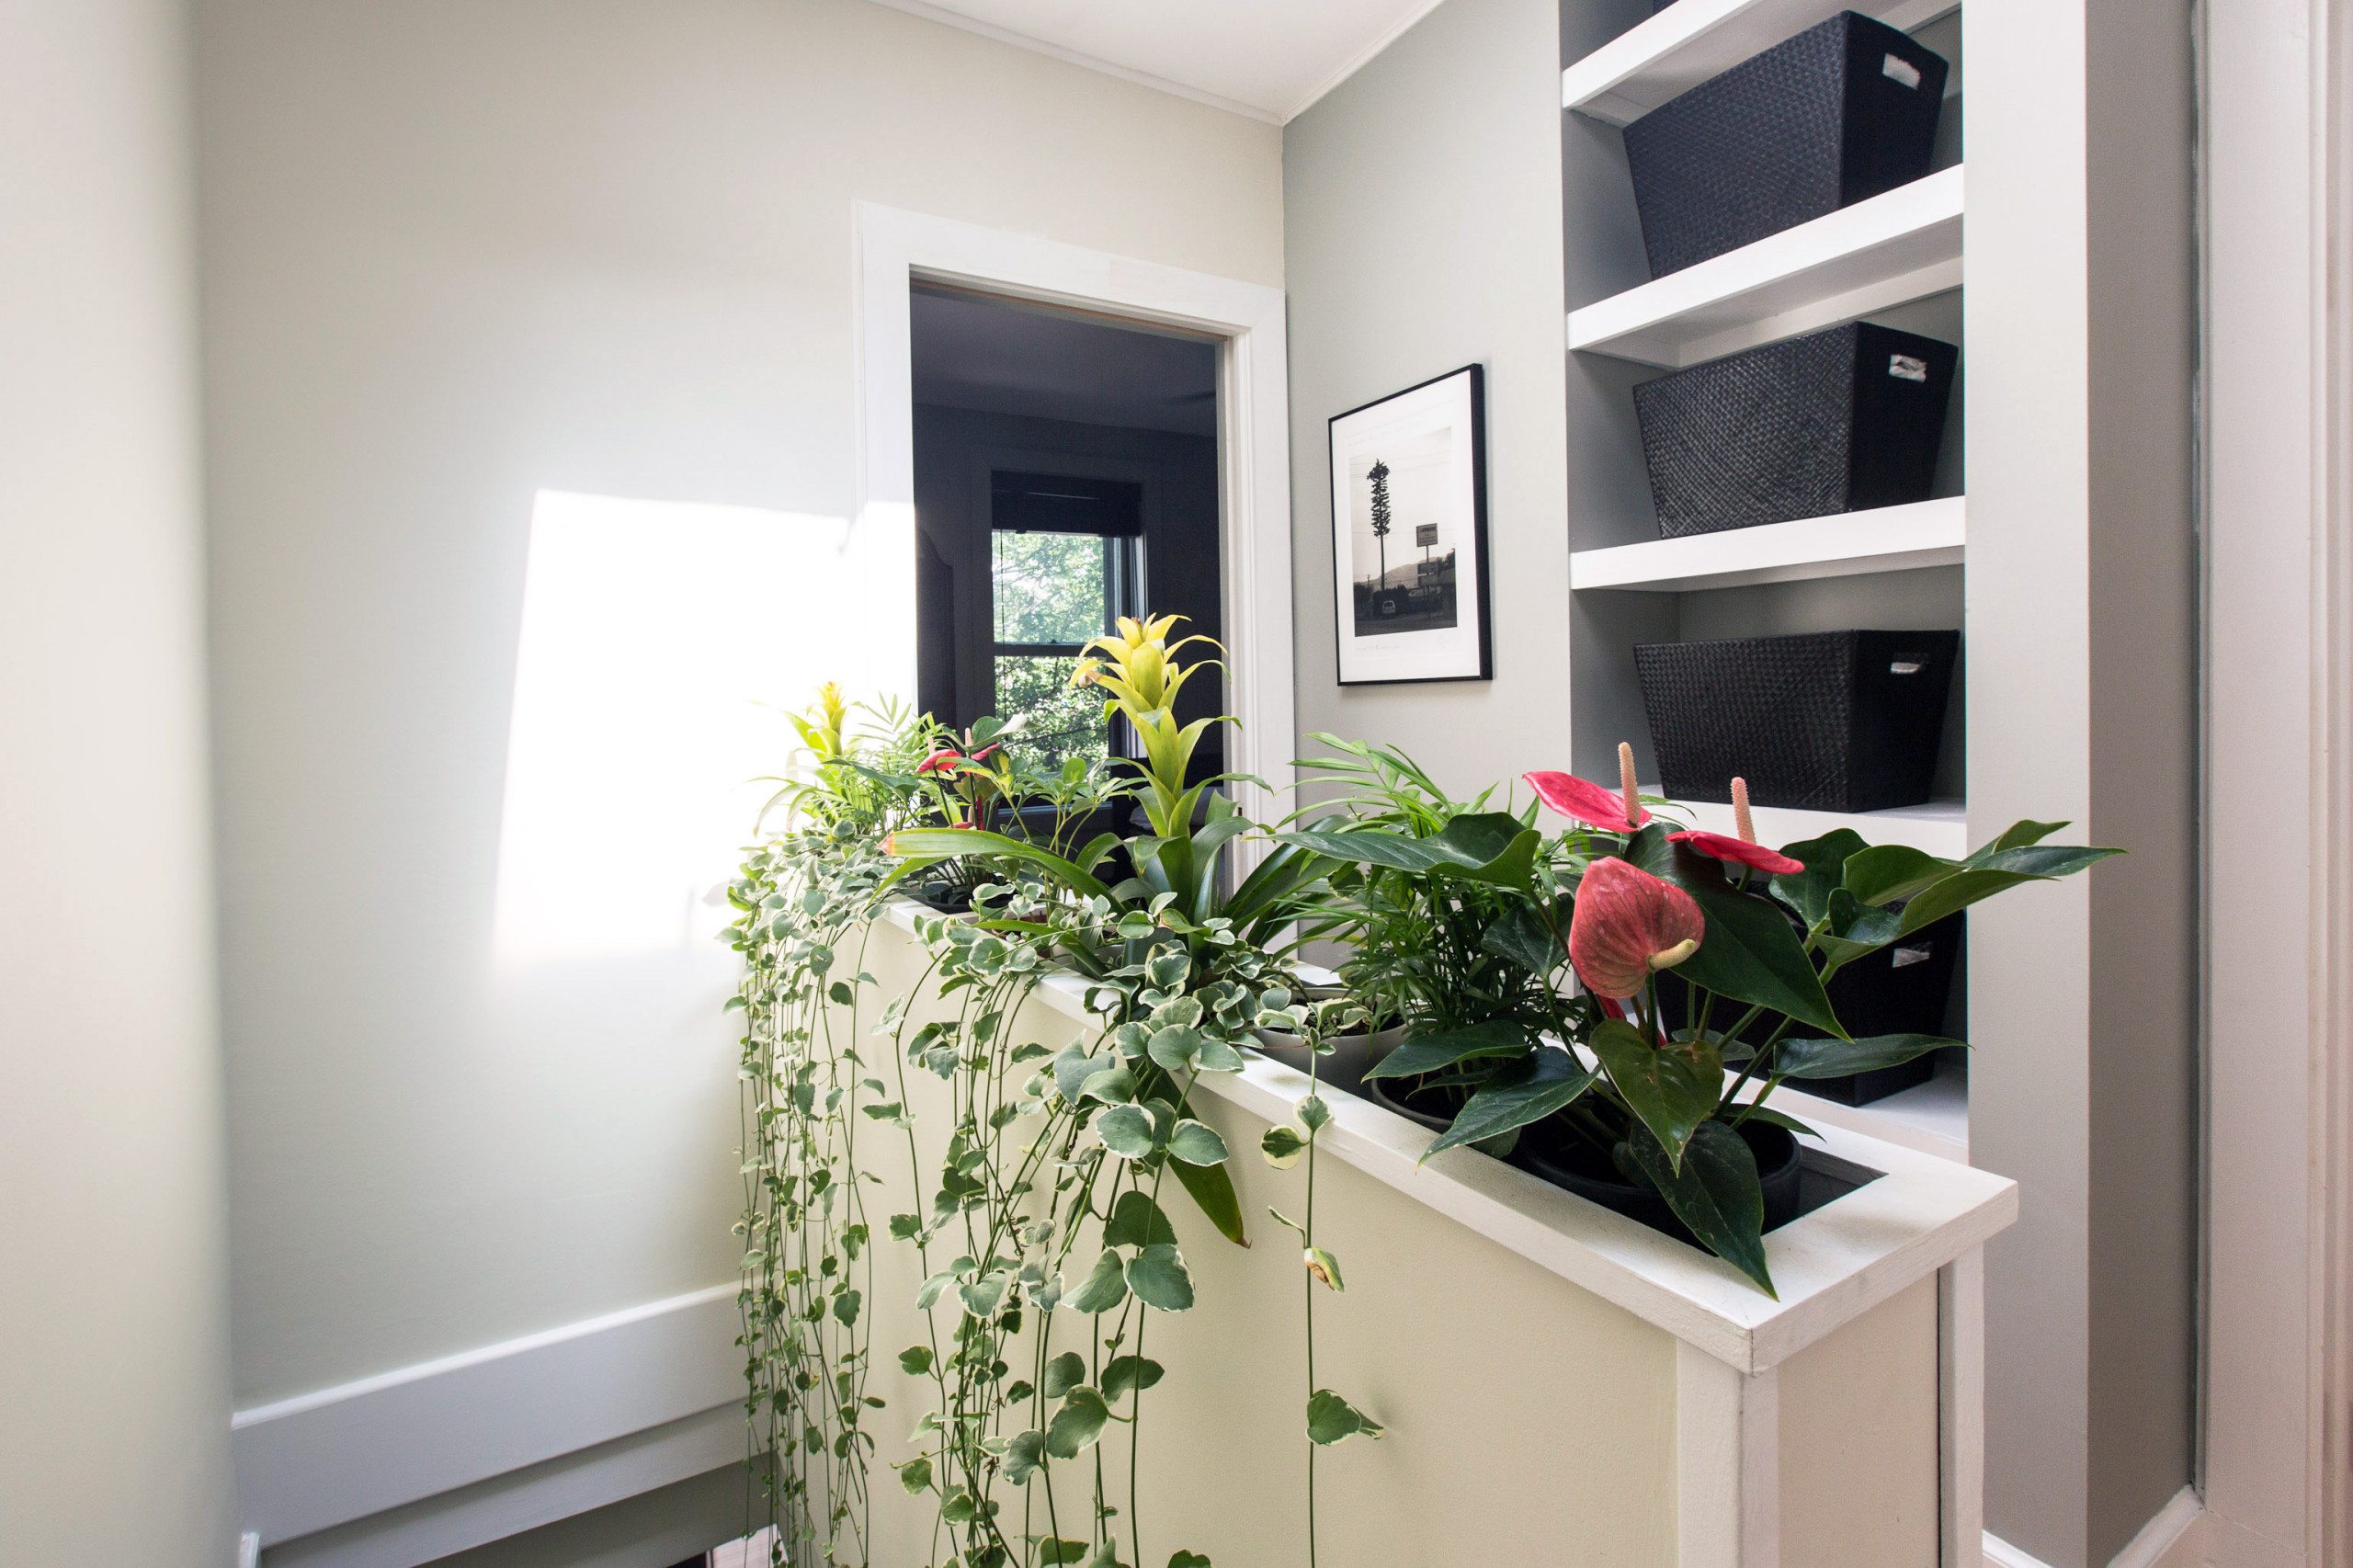
“Thinking of adding a feature like this?”
Run through this checklist first:
- Structural Support: Is the wall you’re building against strong enough to hold the weight of the shelving, the planter, soil, and water? Built-ins should be anchored directly to wall studs.
- Lighting: Does this spot get enough natural light for the plants you envision? If not, are you prepared to install a dedicated grow light? This is a key detail that is much easier to wire before you build.
- Waterproofing: A built-in indoor planter absolutely must have a professionally installed waterproof liner. This is not the place to cut corners.
23. White Painted Brick Planter as a Living Room Divider
This is such a smart way to define a space without putting up a solid wall. The planter acts as a ‘soft’ divider, creating a sense of separation between two areas while still allowing light and conversation to flow freely. The white painted brick adds a wonderful textural element that is more interesting than a simple plaster wall, and it links to the room’s architectural history. Filling it with lush, overflowing plants turns a functional divider into a stunning, living centerpiece for the room. It’s much more dynamic than a piece of furniture.
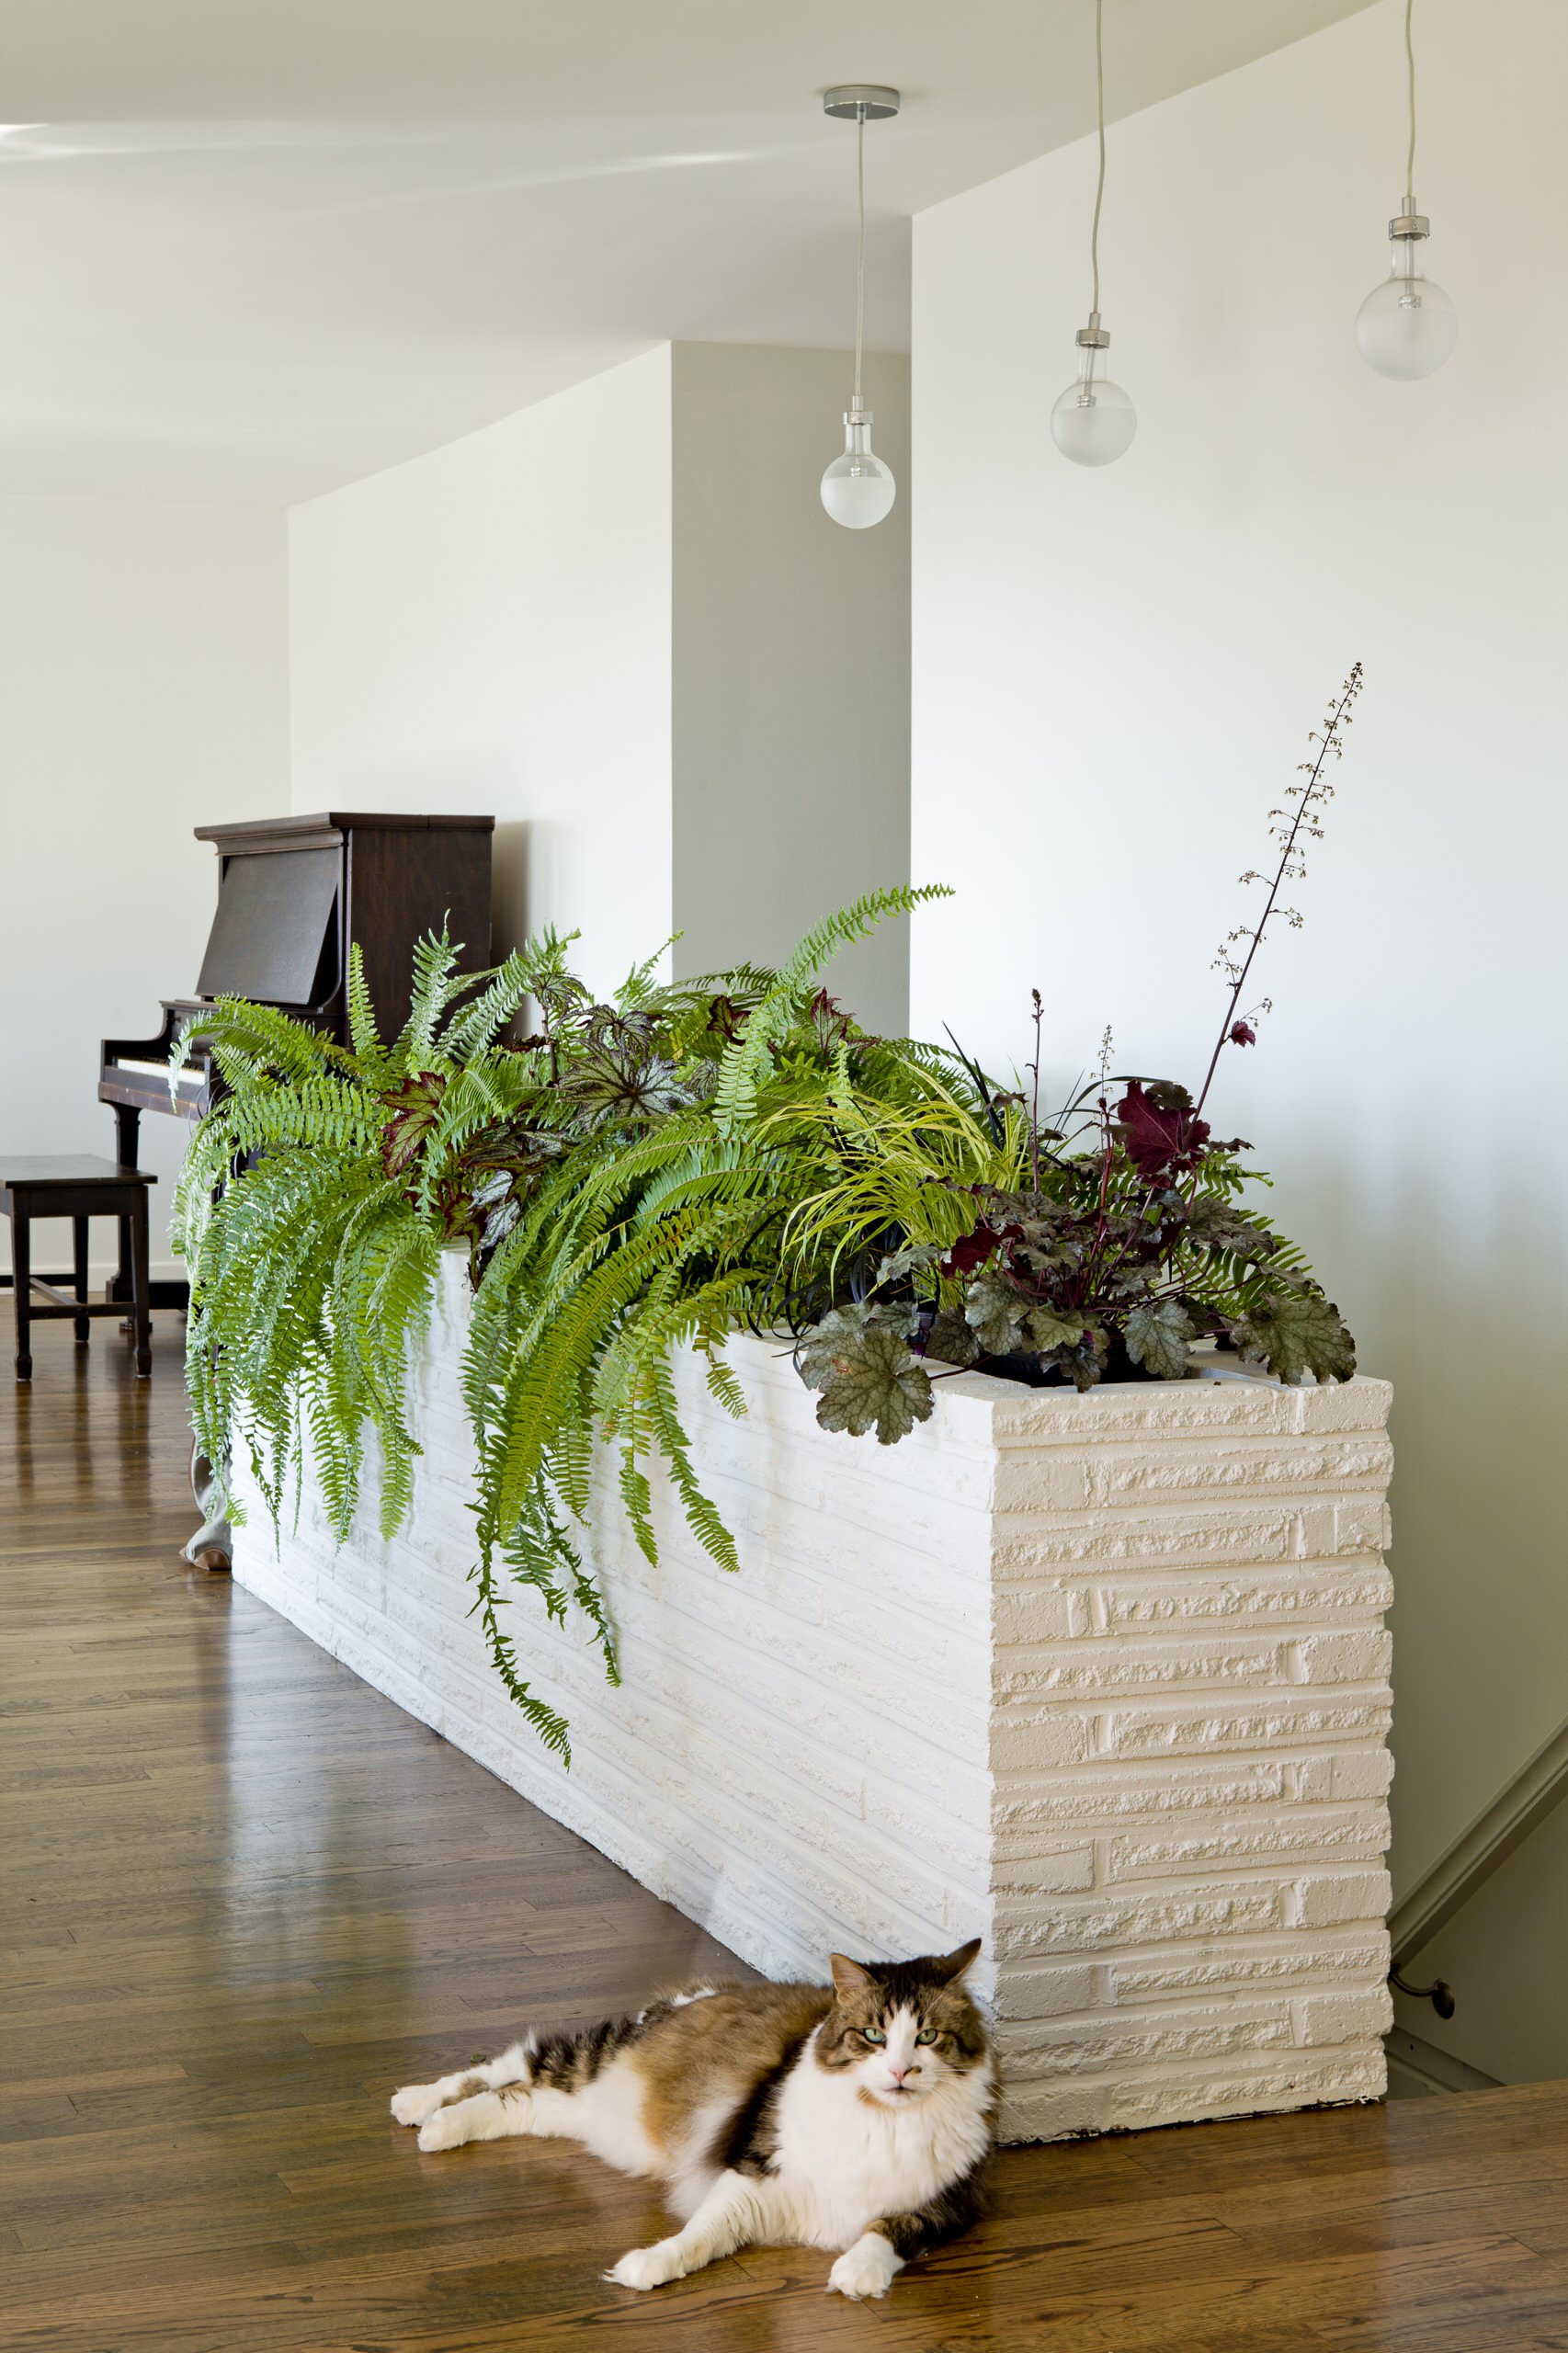
“A planter divider like this is perfect for open-concept living spaces of at least 400-500 square feet.”
The key is that it needs to define, not divide. The planter itself should be low—no more than 24-30 inches high—so that it doesn’t block sightlines when people are seated. The overall height, including the plants, should ideally not exceed about 4-5 feet. In a smaller room, this could feel bulky. For a more petite space, consider the narrower built-in style shown in Idea #22.
24. Structured Garden Path with Interlocking Stone Planters
The visual appeal of this design comes from a simple equation: 50% structured hardscaping + 50% natural, soft planting. The interlocking stone blocks and the clean lines of the dark gray pathway provide a strong, geometric foundation. This ‘hard’ structure is then beautifully softened by the vibrant, slightly wild flowers and foliage spilling over the edges. It’s this balance that makes the design feel complete—organized without being sterile, and natural without being messy. Swapping the stone for wood or the path for gravel would change the feel but maintain the formula.
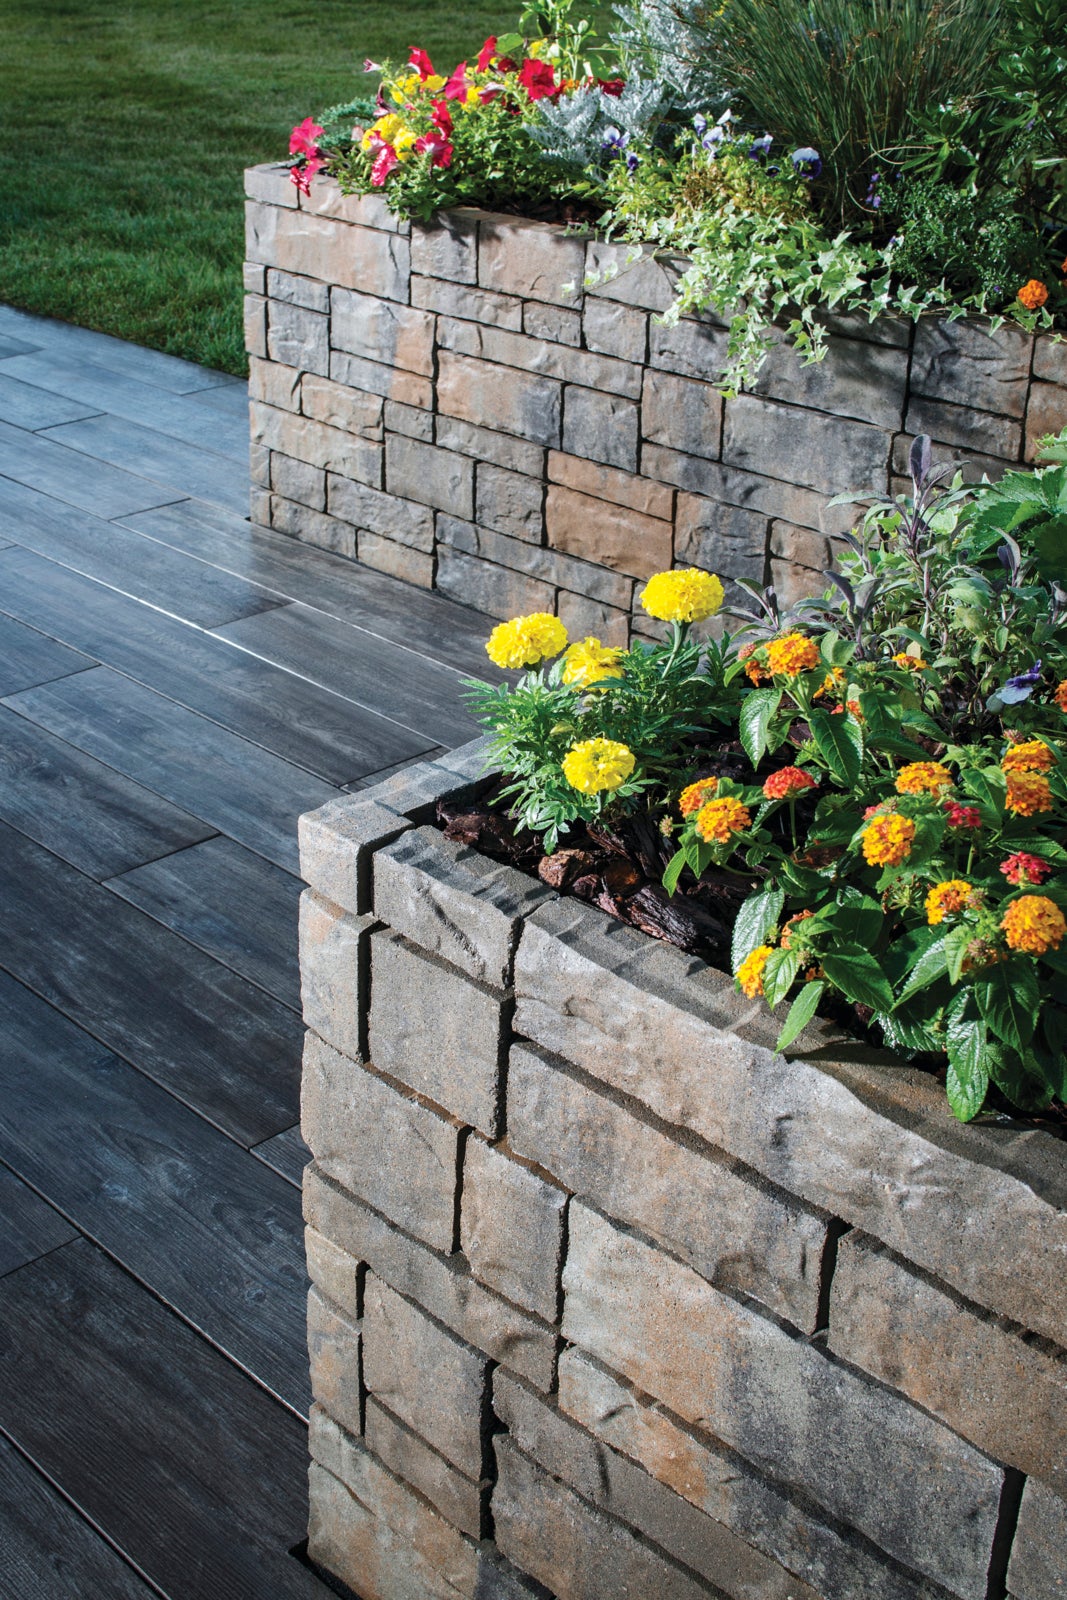
“Interlocking Stone Blocks (for two 3’x6′ beds): $400 – $700Pathway Pavers or Planks (approx.”
30 sq ft): $150 – $300Gravel/Sand for base: $50 – $100Plants, Mulch & Soil: $200 – $400TOTAL: $800 – $1500Budget Alternative: Use poured concrete or less expensive cinder blocks (which can be painted) for the planters and simple gravel for the pathway to achieve a similar look for 40-60% less.
25. A Minimalist DIY Bench from Concrete Blocks and Wood
This is one of the most accessible and clever DIY projects out there. Here’s the brief:
- Get Materials: You’ll need 12-16 standard concrete masonry units (cinder blocks) and four 8-foot 4×4 lumber posts. Cost: ~$100. Time: 1 hour.
- Build the Supports: Stack the cinder blocks at each end to create two ‘legs’ for your bench. Make sure the holes are aligned horizontally.
- Slide in the Slats: Carefully slide the 4×4 wood posts through the holes in the cinder blocks to form the bench seat.
- Create the Planter: On one end, arrange the blocks to form an open-topped box. This becomes your integrated planter.
- Finish: You can leave it as is, or you can paint the blocks and stain the wood. No screws or glue required!
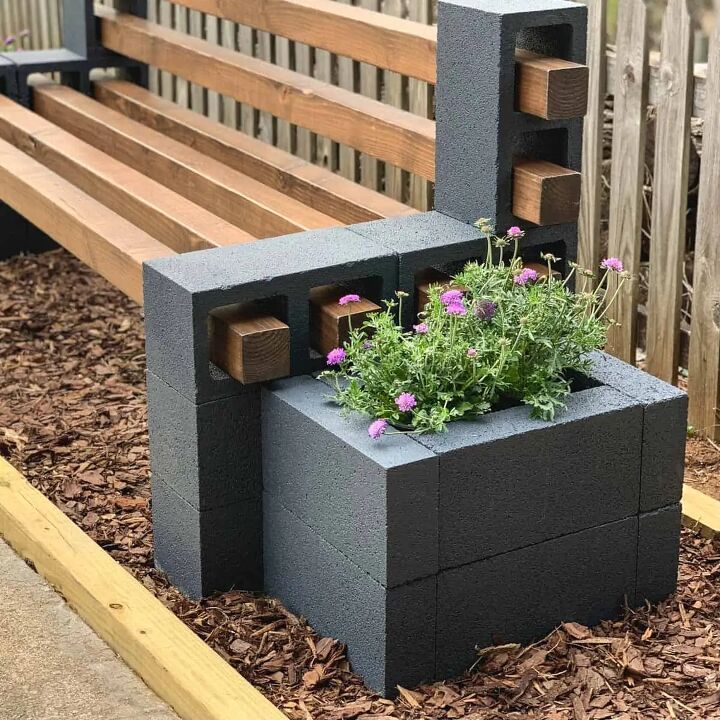
“Let’s be real: while this bench is stylish and easy to make, it might not be the most comfortable seat for a long afternoon of lounging.”
The 4×4 slats are sturdy but rigid, and the bench has no back support. Untreated concrete blocks can also be quite rough and may snag clothing. This design is perfect as a functional, sculptural piece in a garden or as short-term seating on a patio. If you plan to use it frequently, you’ll definitely want to add some thick outdoor cushions for comfort.
26. A Simple Row of Terracotta Wall Planters
When mounting a series of wall planters, precision is everything. The key to making this look intentional and not accidental is an absolutely perfect alignment. Use a laser level to mark a guidline on your wall. Then, measure the distance between each planter precisely—don’t just eyeball it. A good rule of thumb is to leave a space between each planter that is equal to half the width of one planter. This mathematical rhythm creates a sense of calm and order, turning simple pots into a deliberate design feature.
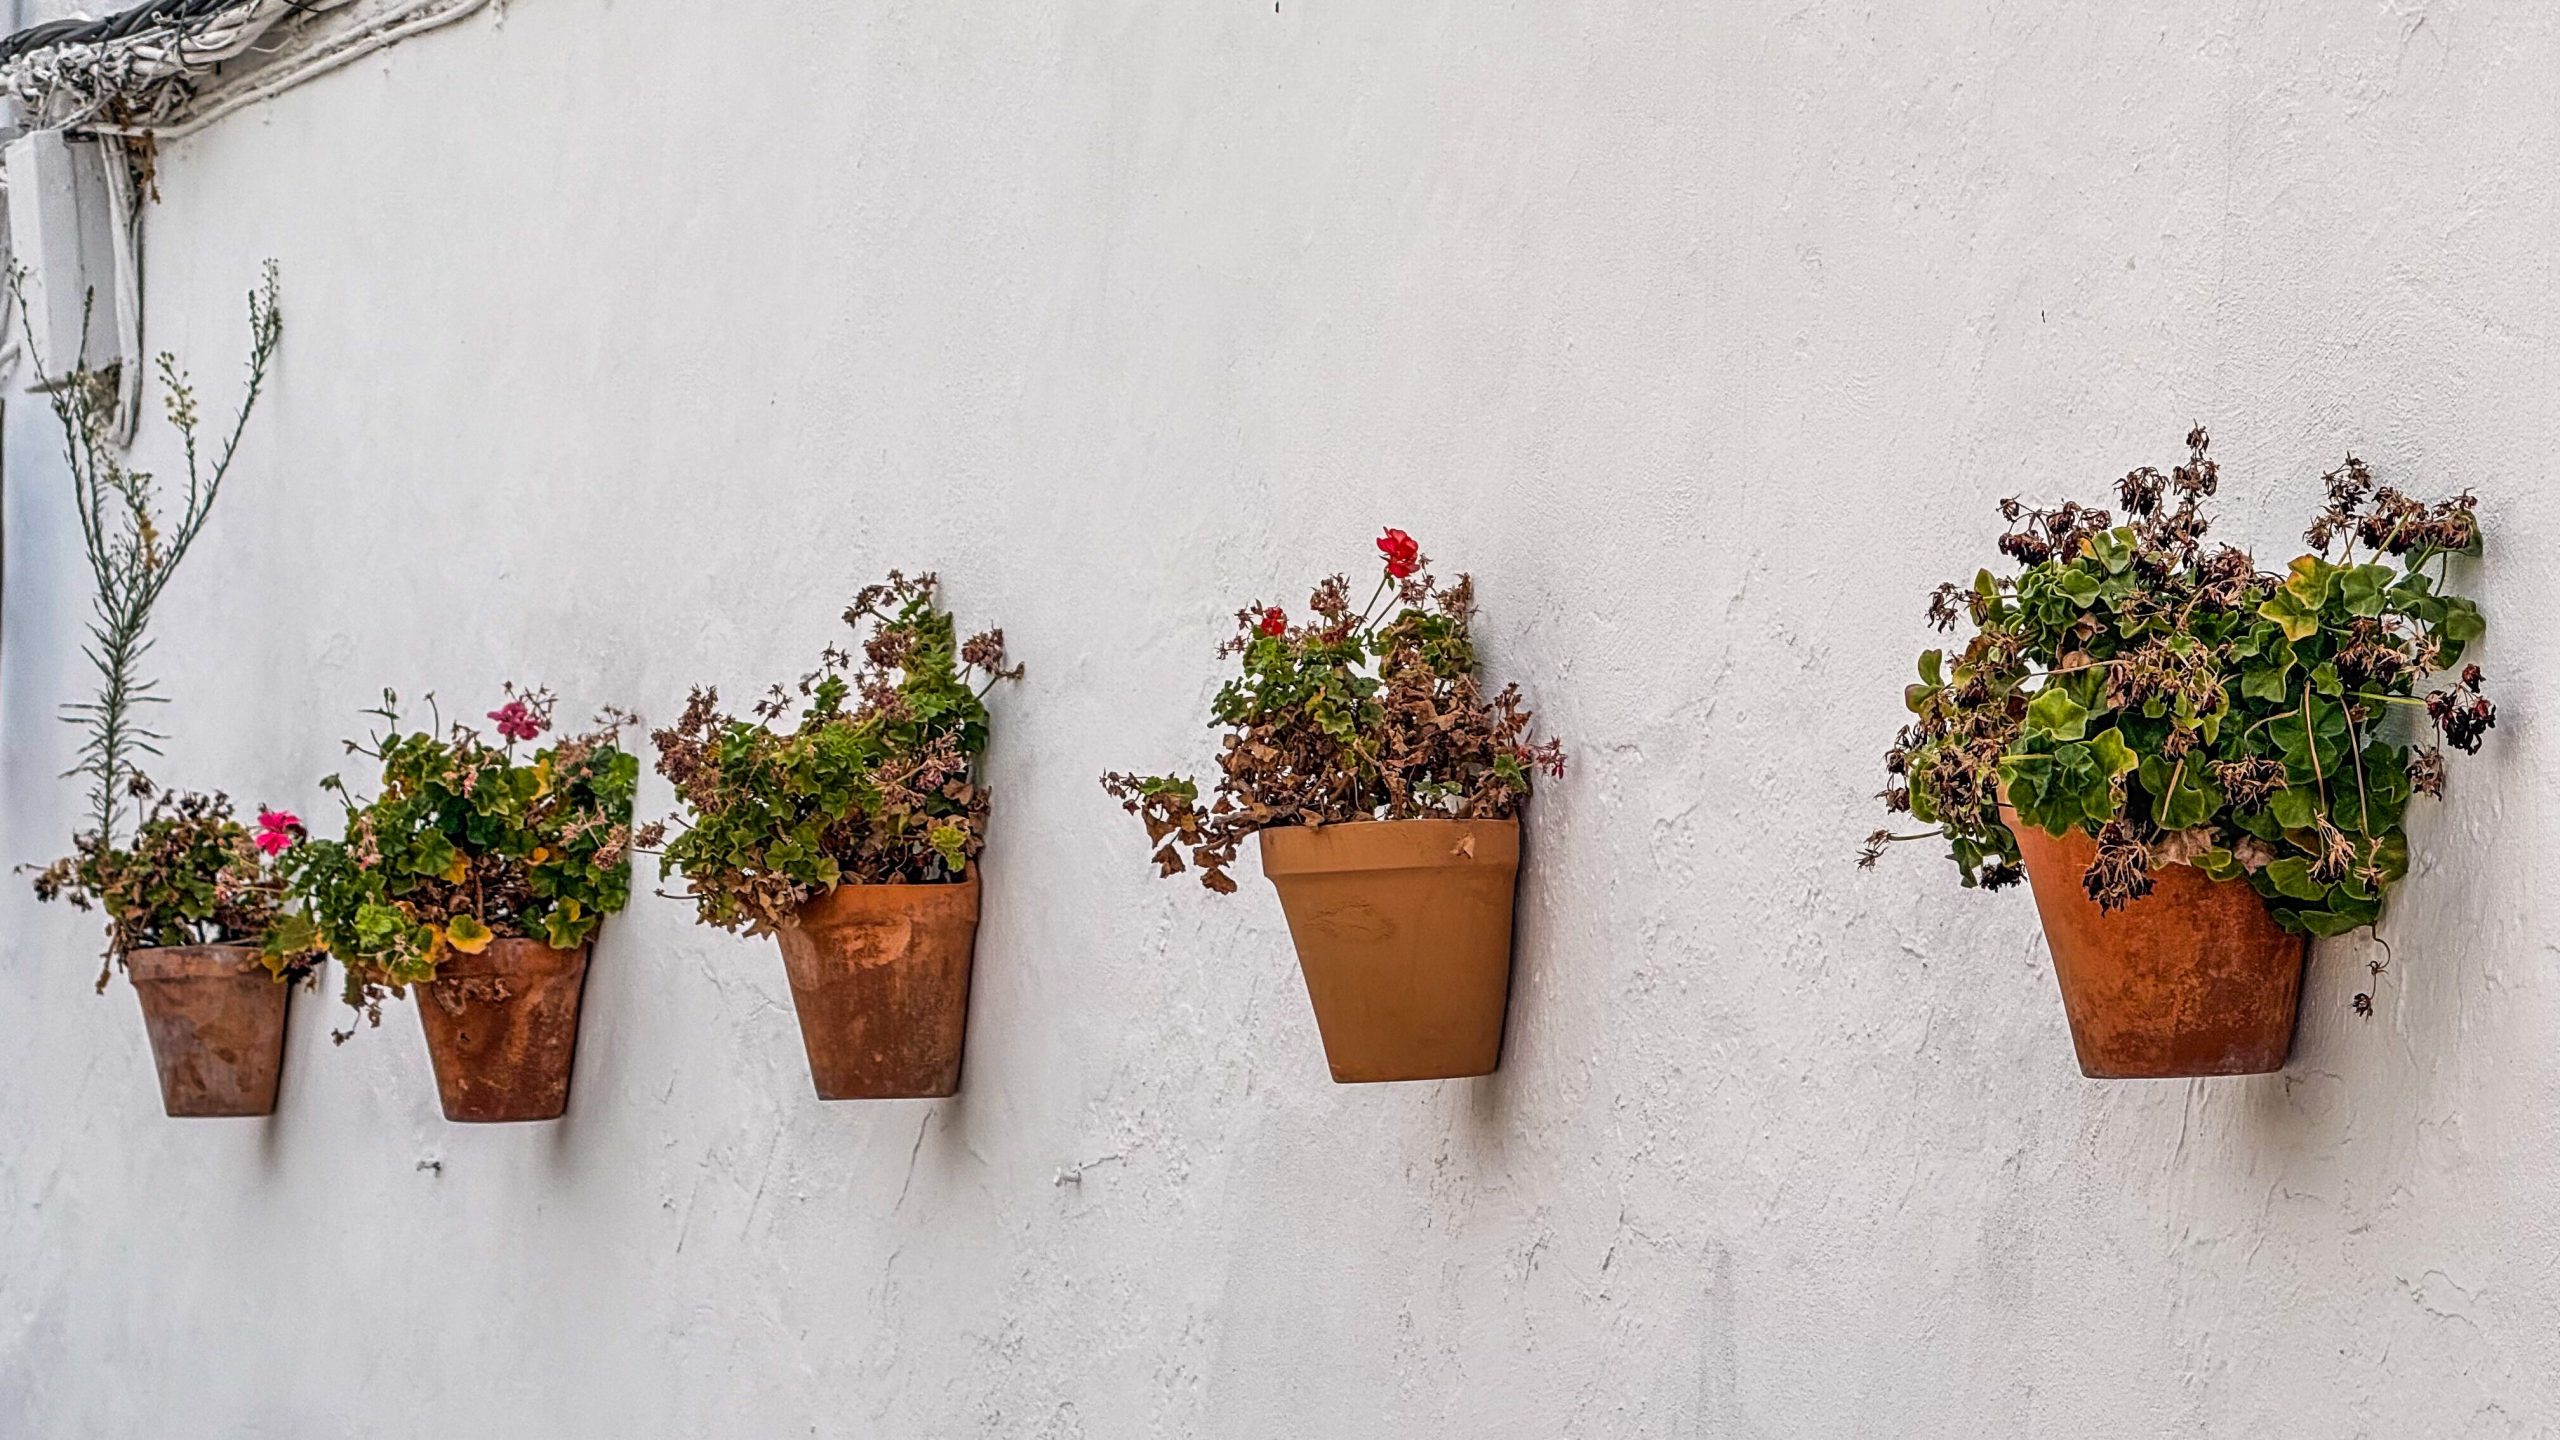
“Terracotta is a porous material, which means it dries out very quickly.”
For wall planters, especially ones on a sun-drenched wall, this means you will be watering them frequently—perhaps even daily in the peak of summer. The plants in the photo appear to be struggling, likely due to inconsistent watering. If you love the look but not the high-maintenance reality, consider lining the inside of the planters with a small piece of plastic (with a drainage hole) to slow down moisture loss, or choose extremely drought-tolerant plants like succulents.
27. Mixed Textures in a Wooden Planter Box
The success of this planter lies in its thoughtful combination of textures and forms. You have the tall, spiky, and linear striped grass creating a strong vertical element. Then, you have the wide, variegated leaves with splashes of red adding a bold, painterly quality. Finally, the delicate, small white flowers provide a soft, gentle detail. This variety keeps the eye moving and makes the composition feel dynamic and full. It’s a great lesson in how to create a rich look in a small space by simply choosing plants with different characteristics.
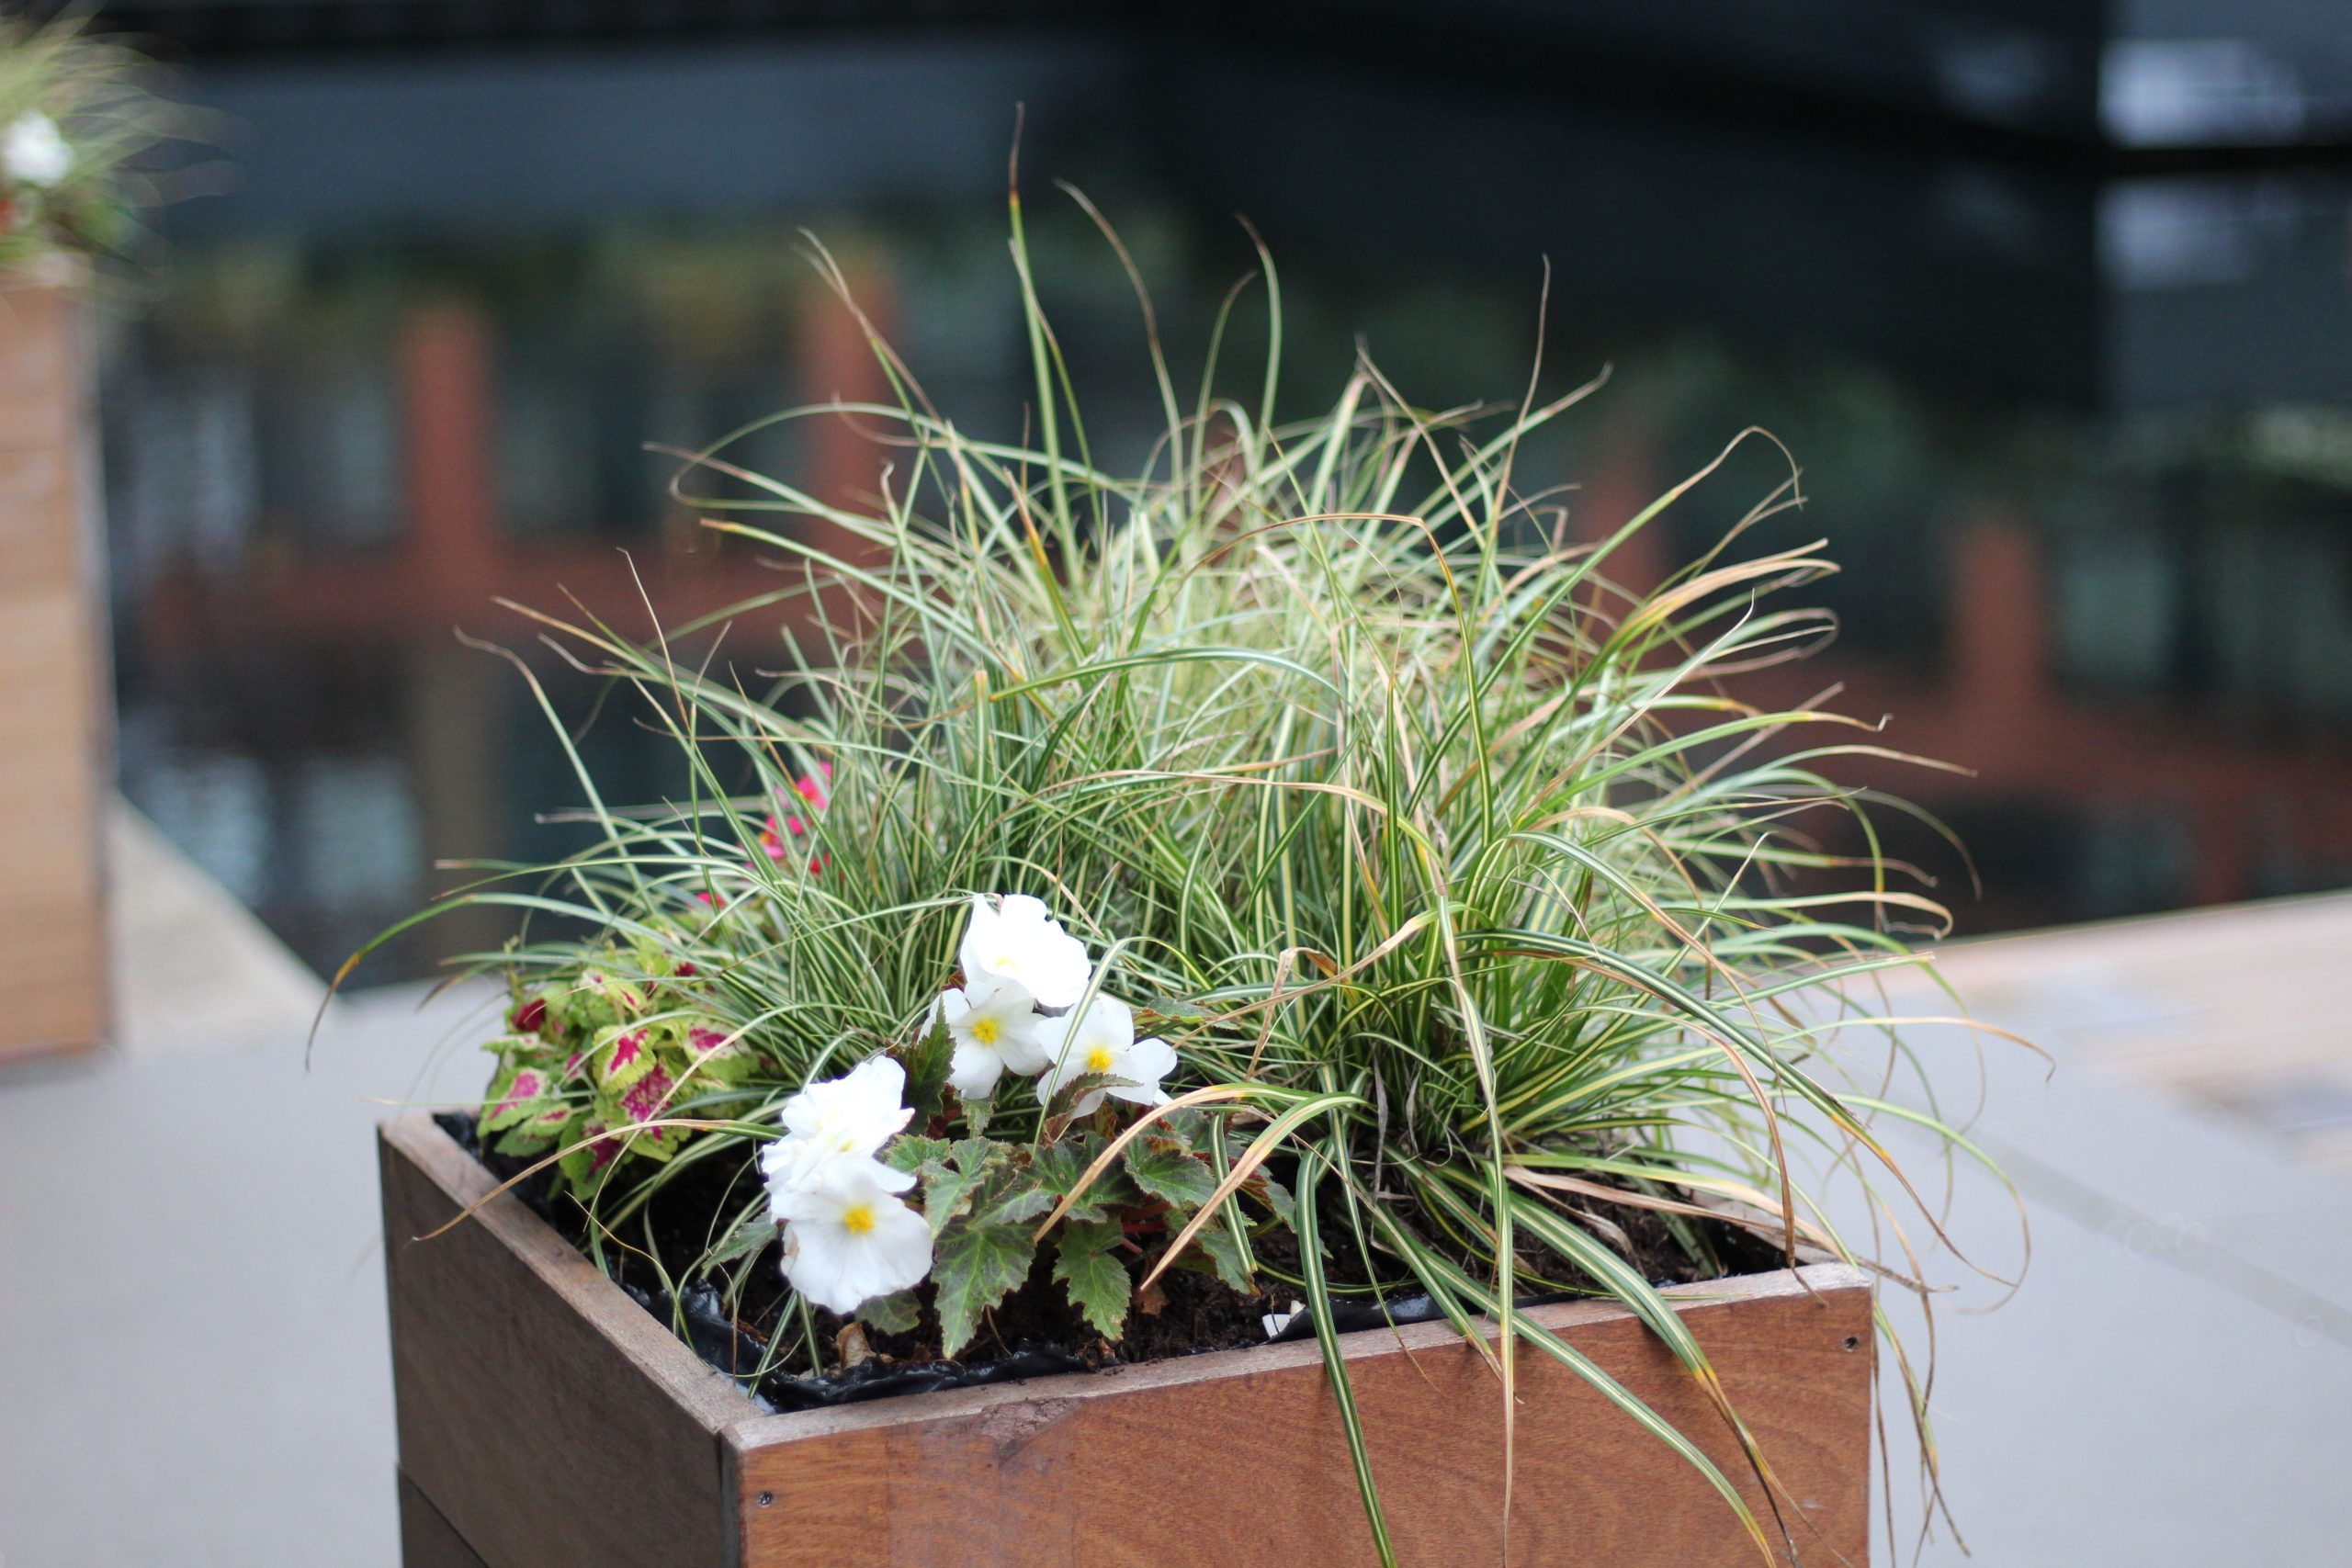
“The single element holding this entire arrangement together is the tall, striped grass.”
It provides the structure and height that everything else is built around. If you were to remove it, the other plants would feel low and muddled, lacking a focal point. It acts as the ‘thriller’ in the classic ‘thriller, filler, spiller’ container design formula. When you’re creating your own planter arrangements, always start by choosing that one tall, dramatic plant, and then build around it. It’s the secret to creating professional-looking containers.
28. A Rustic Planter Box on a Simple Folding Stand
This is an incredibly flexible and budget-friendly way to get the ‘raised planter’ look without any building. You can find simple wooden folding stands like this at garden centers, home goods stores (like IKEA or Target), or even build one with a few hinges and wood strips. Pair it with any rectangular planter box you like—a rustic wooden one like the one shown, a sleek metal one, or a colorful ceramic one. This approach allows you to easily change your style and move your garden around as needed, a much more adaptable setup than the heavy built-in of Idea #25.
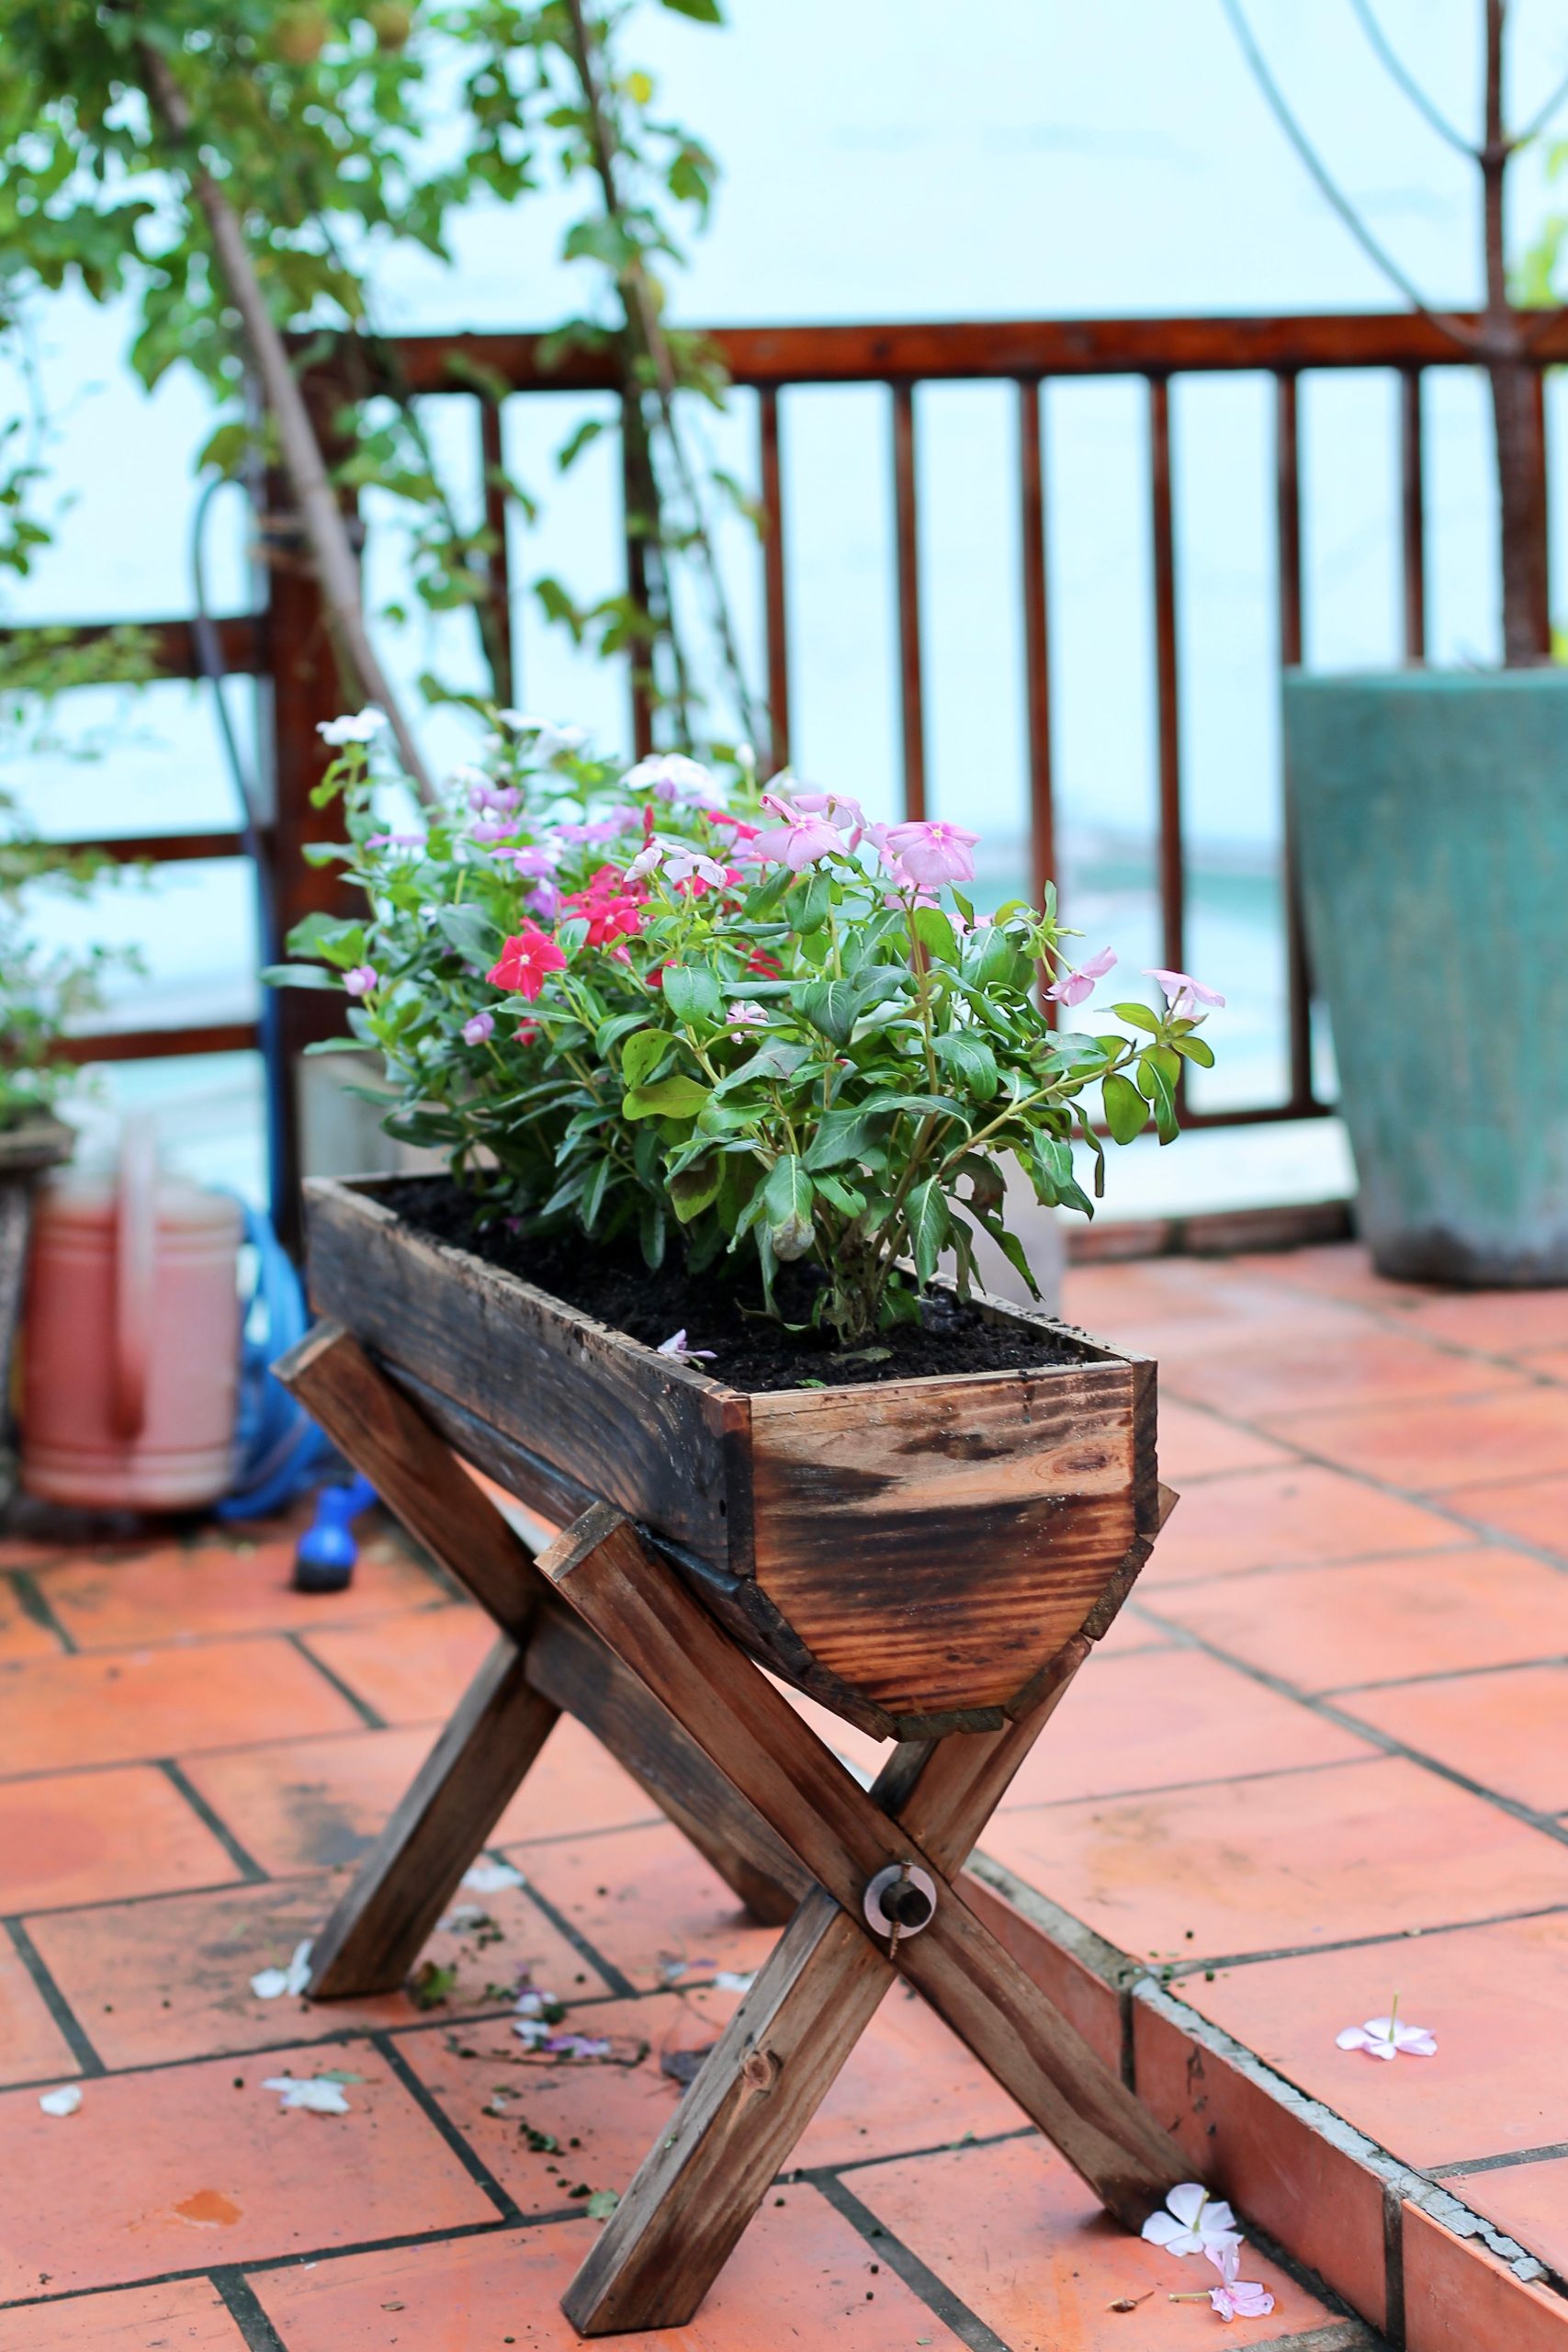
“A planter on a simple stand can be top-heavy and prone to tipping over, especially once it’s filled with tall plants that can catch the wind.”
This setup is best for a sheltered spot on a patio or deck, away from strong gusts. If you live in a windy area, consider placing a few heavy rocks or bricks in the bottom of the planter box before adding soil to lower its center of gravity. Also, be mindful of placing it in high-traffic areas where it could be easily bumped by kids, pets, or clumsy adults.
29. Fresh Herbs in a Rustic Box on a Steel Counter
This works because of the powerful contrast between the materials. The raw, splintery, warm wood of the planter box feels tactile and organic. Placing it on a cold, smooth, sterile stainless steel counter creates a fantastic sensory and visual juxtaposition. It’s the meeting of the rustic farmhouse and the professional kitchen. This single decor choice instantly warms up the industrial surface, making the space feel more approachable and alive. The vibrant green of the fresh herbs is the bridge that makes the whole scene feel fresh and functional.
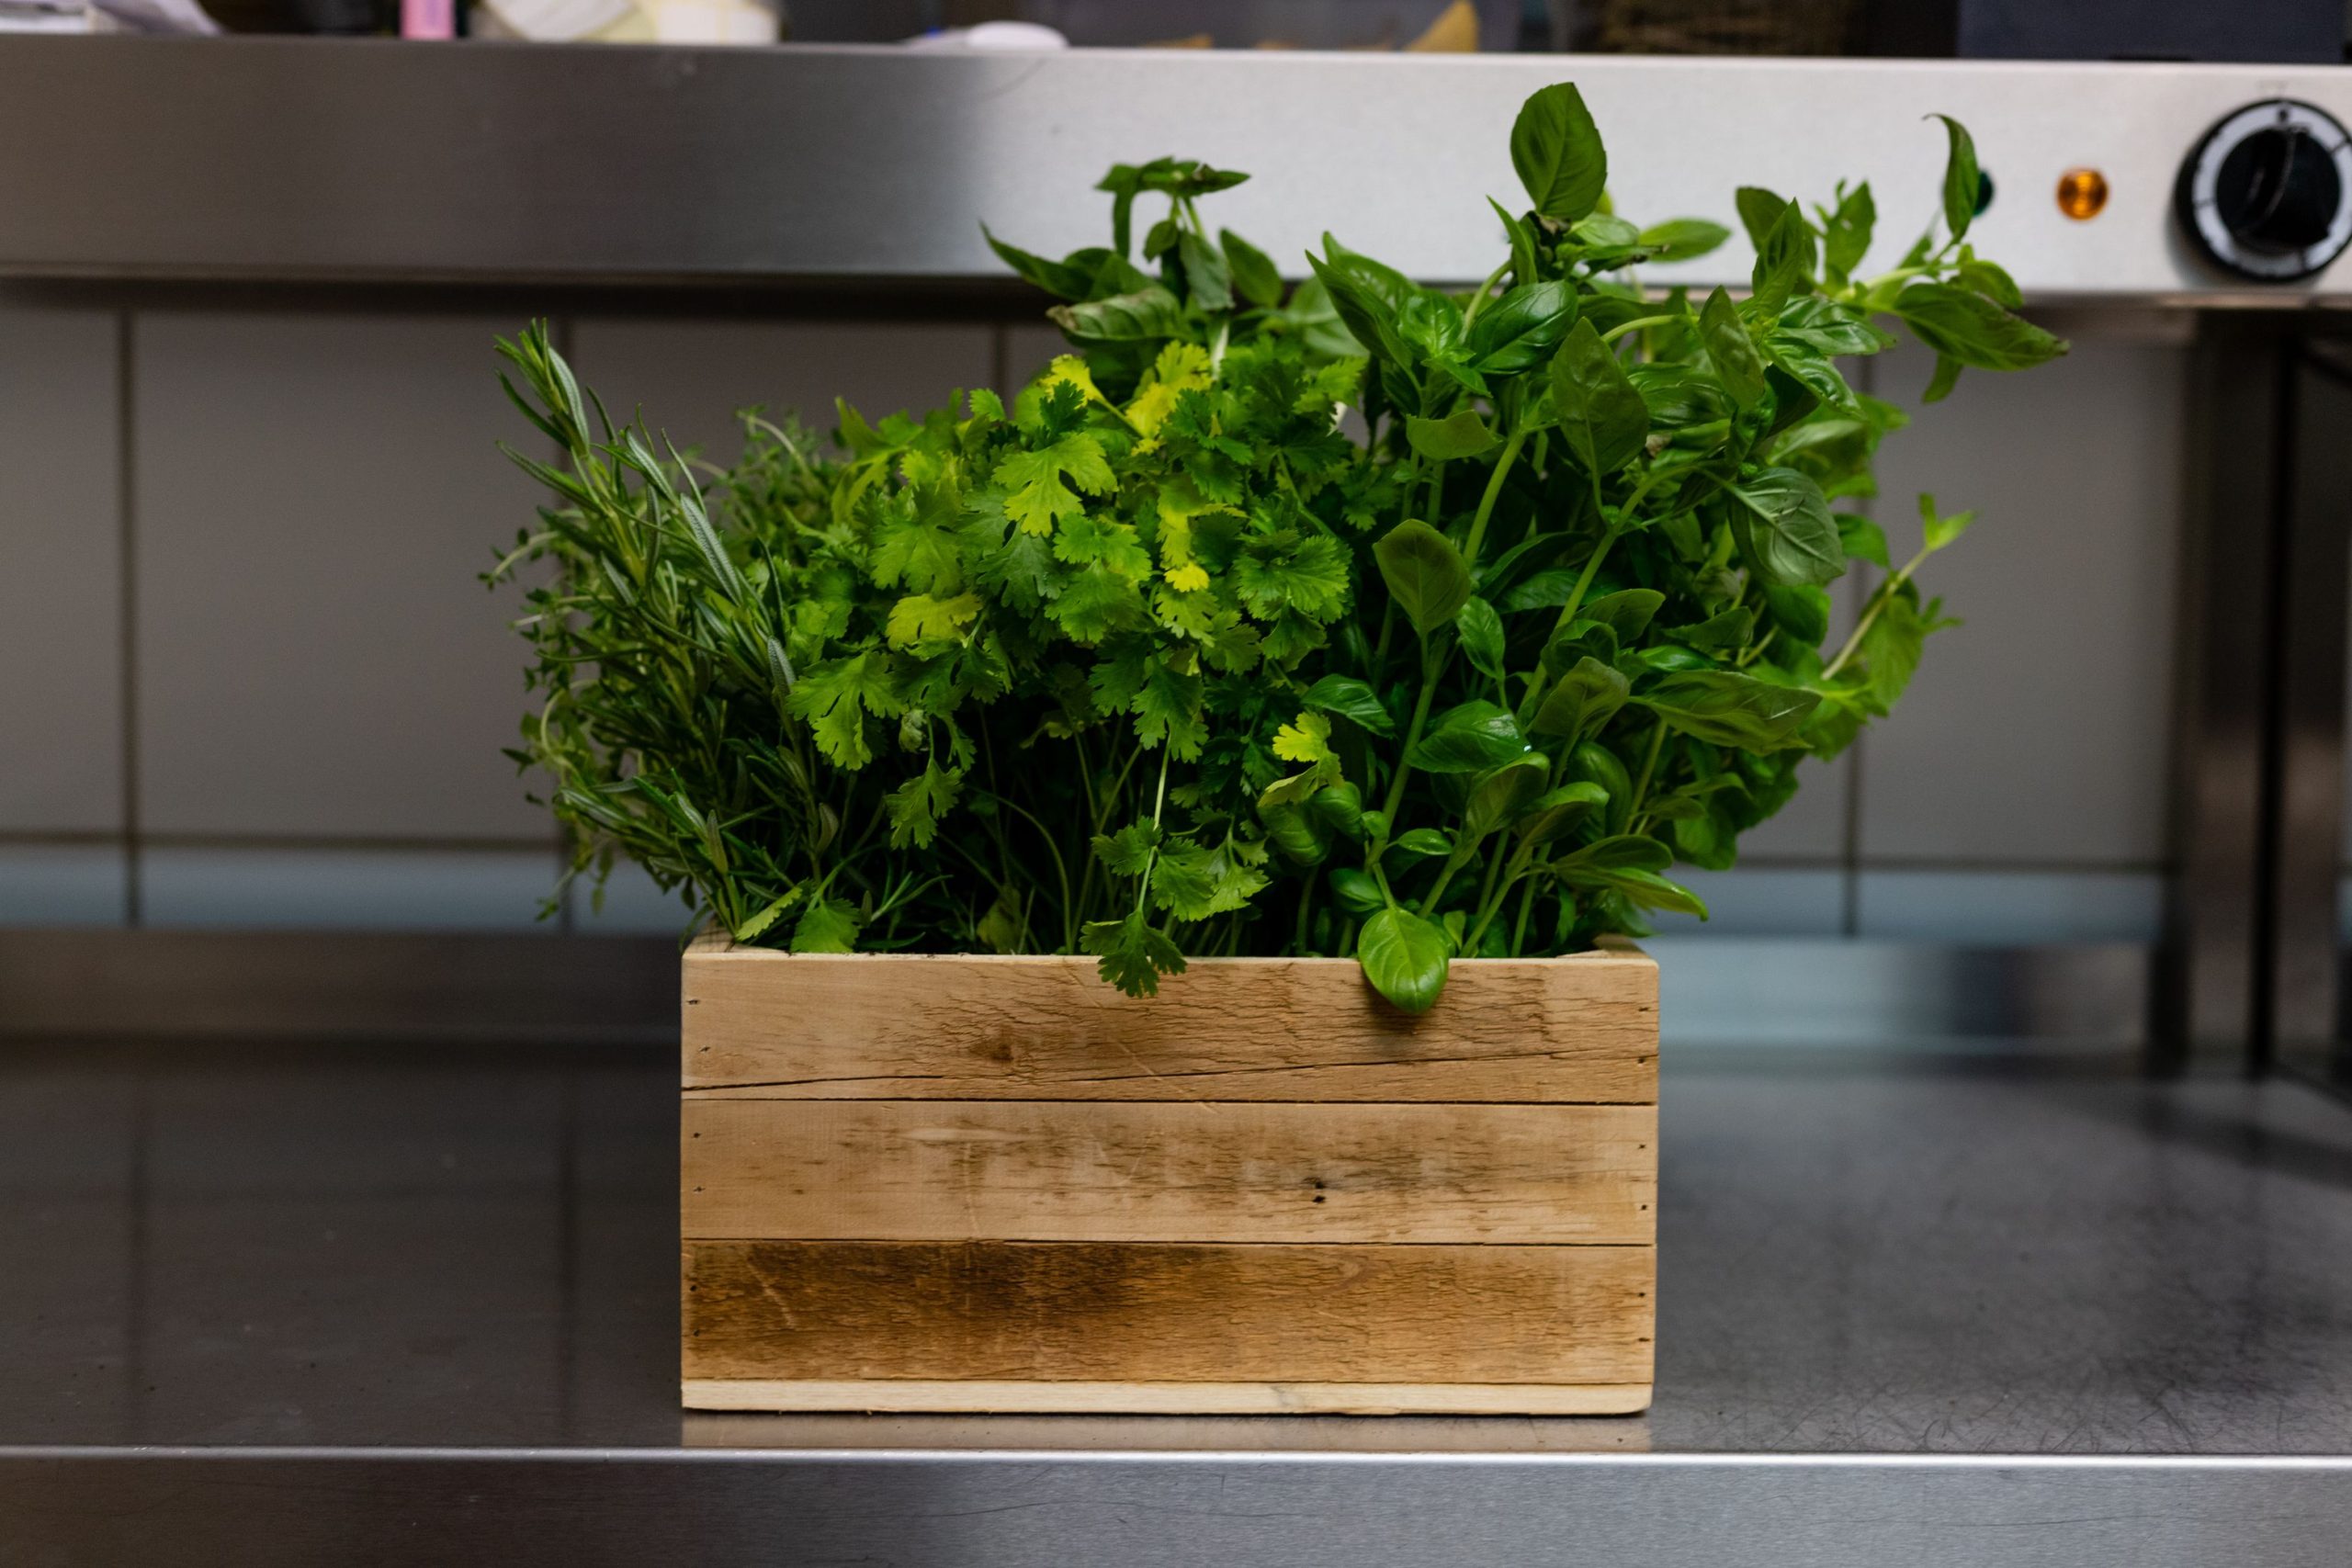
“This look speaks to the huge ‘garden-to-table’ movement.”
More than ever, people want to know where their food comes from, and there’s nothing more immediate than snipping herbs right in your own kitchen. This isn’t just a decoration; it’s a functional herb garden. It signals a focus on freshness, flavor, and hands-on cooking. Having living herbs within arm’s reach is a luxury that has become a major aspirational element in modern kitchen design, blending aesthetics with utility beautifully.
30. Mediterranean Vibe with Tiled Planter Boxes
The tile is everything here. Without it, these would just be simple cubic planters. With it, they become vibrant, architectural features that transport you straight to the Amalfi Coast or a Greek island. The choice of bold blue tile with crisp white grout lines is what defines the entire aesthetic of the space. It’s a daring, high-impact choice that turns the planters into the main stars of the deck. This is a brilliant way to inject personality and a strong color story into an outdoor area, far more effective than just painting a wall.
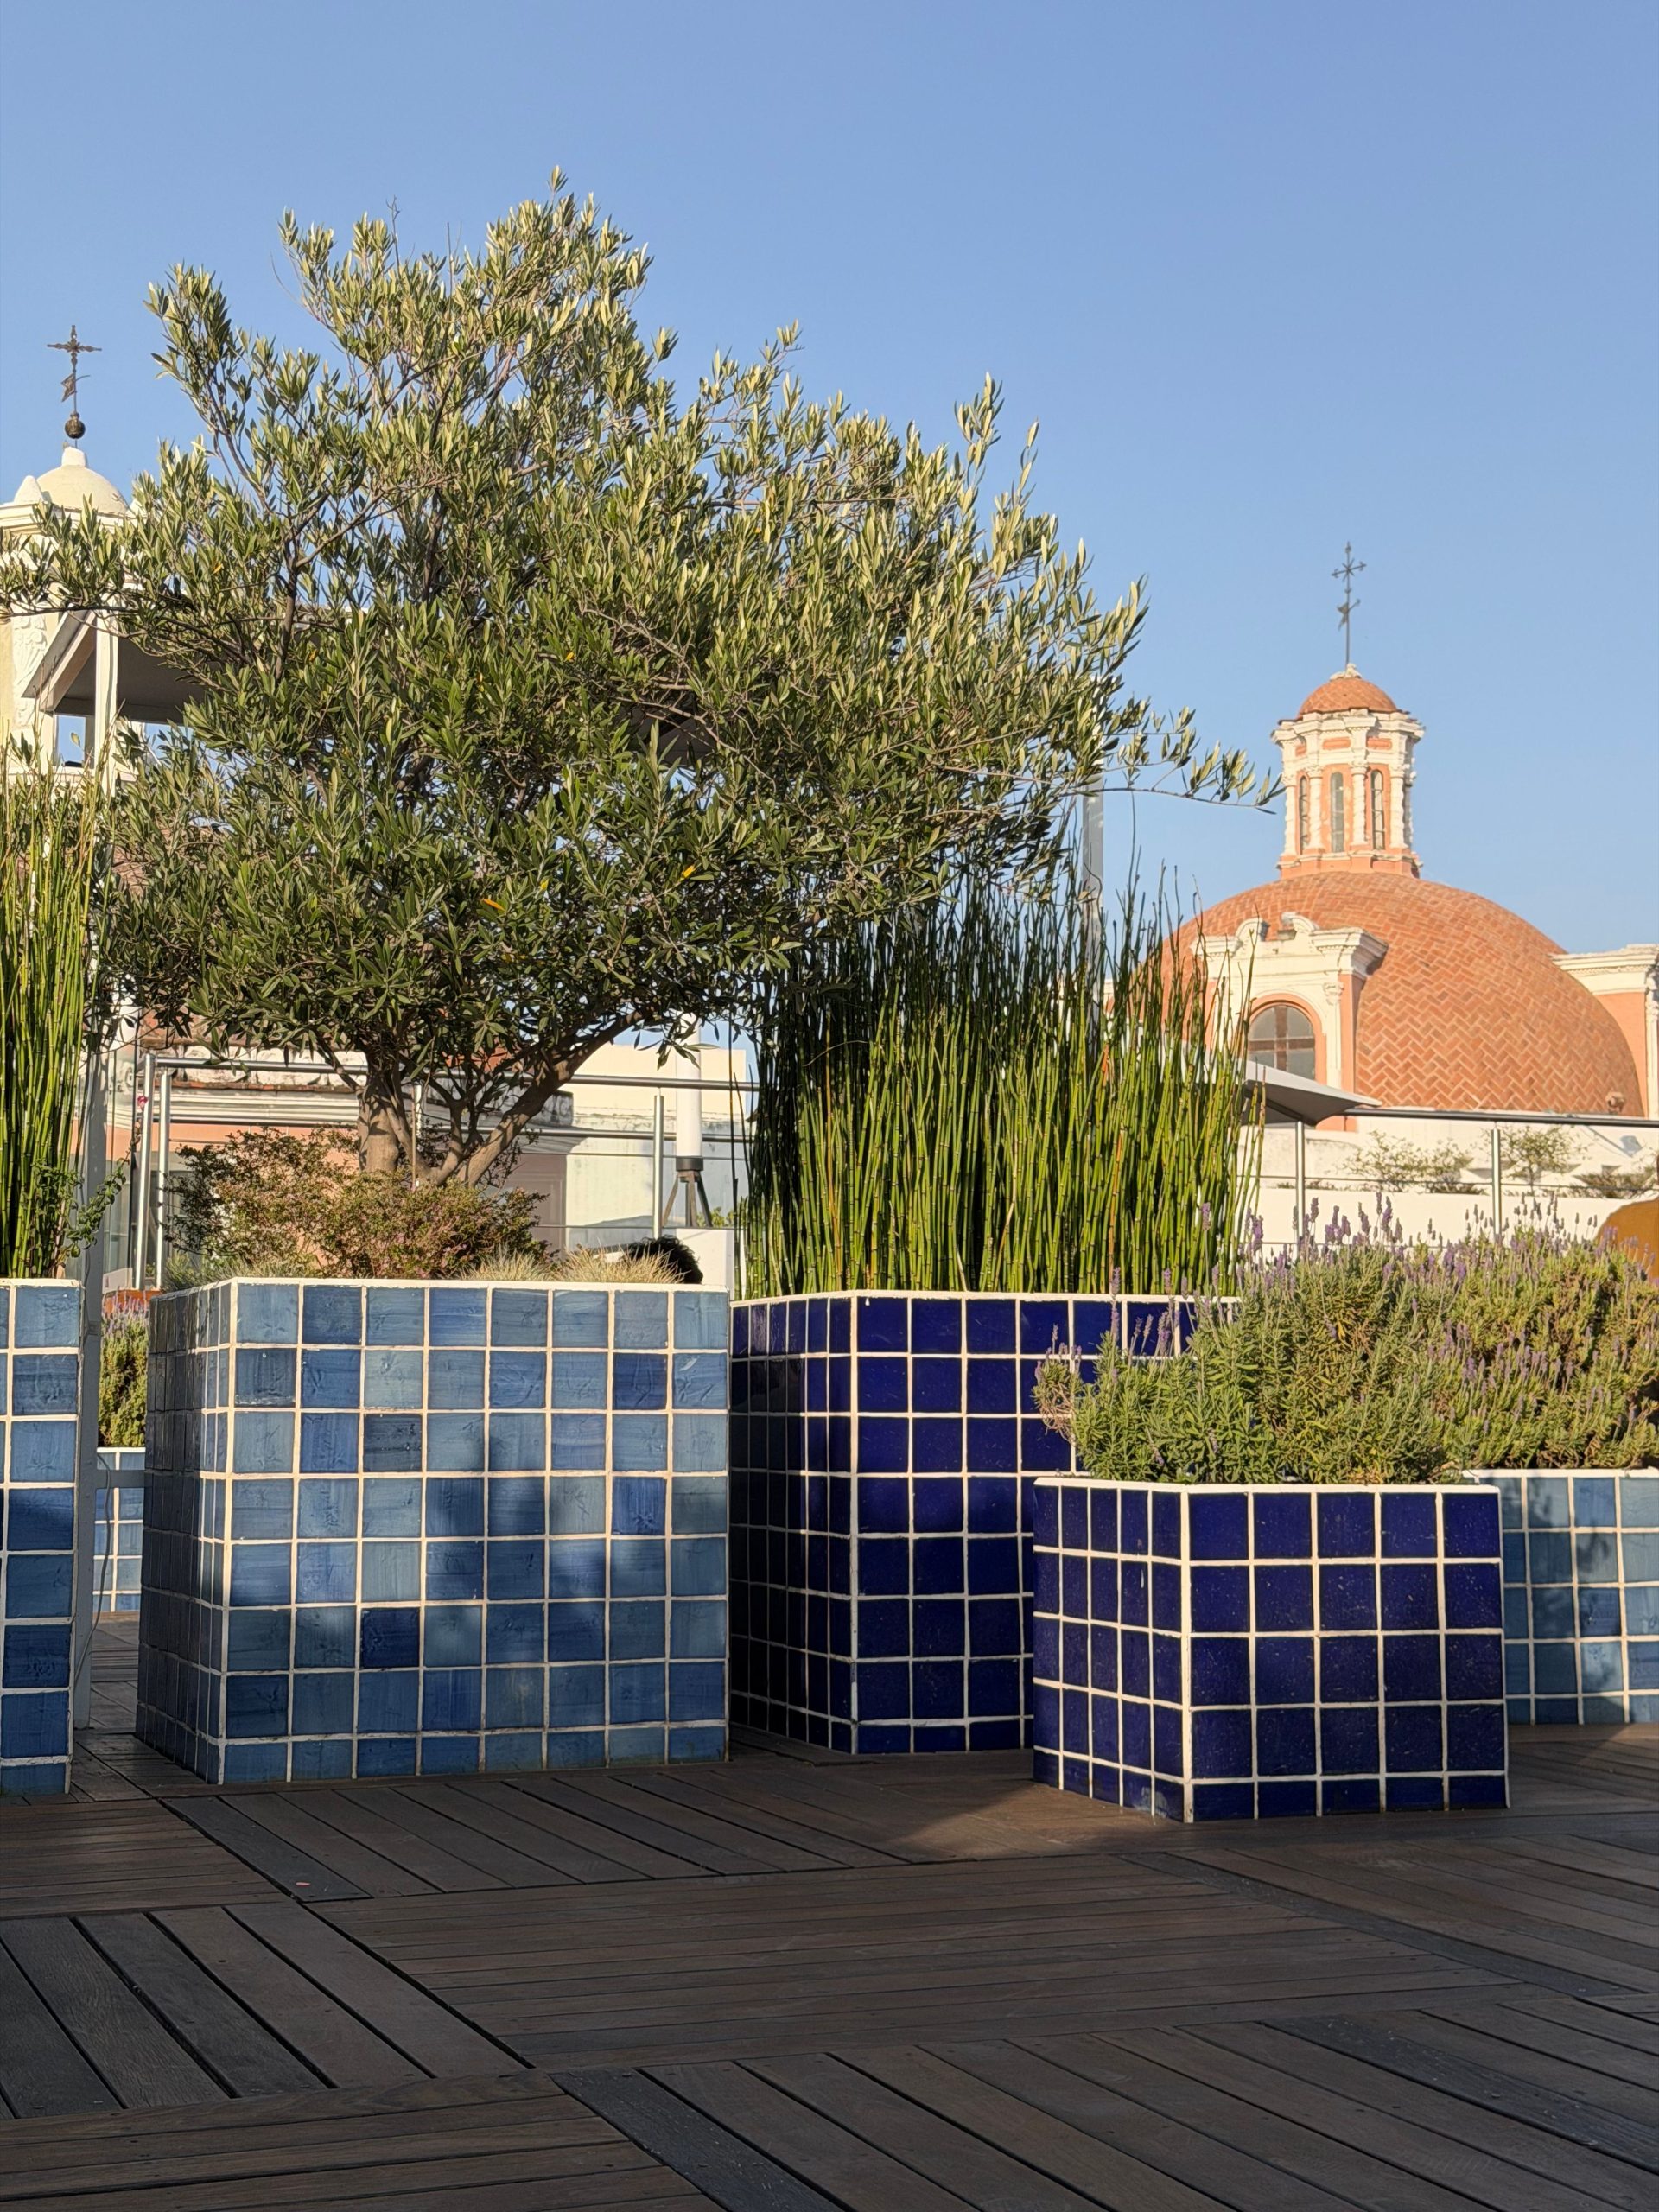
“While tile is durable, the grout lines are its Achilles’ heel, especially outdoors.”
Grout is porous and can attract dirt, mildew, and stains over time. To keep these planters looking sharp, you’ll need to scrub the grout lines once or twice a year with a stiff brush and a cleaning solution. Applying a high-quality grout sealant after cleaning will help repel moisture and dirt, reducing your maintenance workload. In climates with heavy freezes and thaws, be sure to use a frost-proof tile and grout to prevent cracking.
31. Modern Slatted Planter with Ornamental Grasses
The visual formula for this contemporary look is all about balancing color and form. It’s roughly 50% moody, dark structure (the gray slatted planter) + 50% vibrant, airy foliage (the tall grasses and plants). The key is the color contrast between the deep purple grass and the bright green grass, which adds another layer of interest. You can easily adapt this formula: a white slatted planter with only green grasses would feel more serene, while a black planter with fiery red and orange foliage would be much more dramatic. The core principle remains the same.
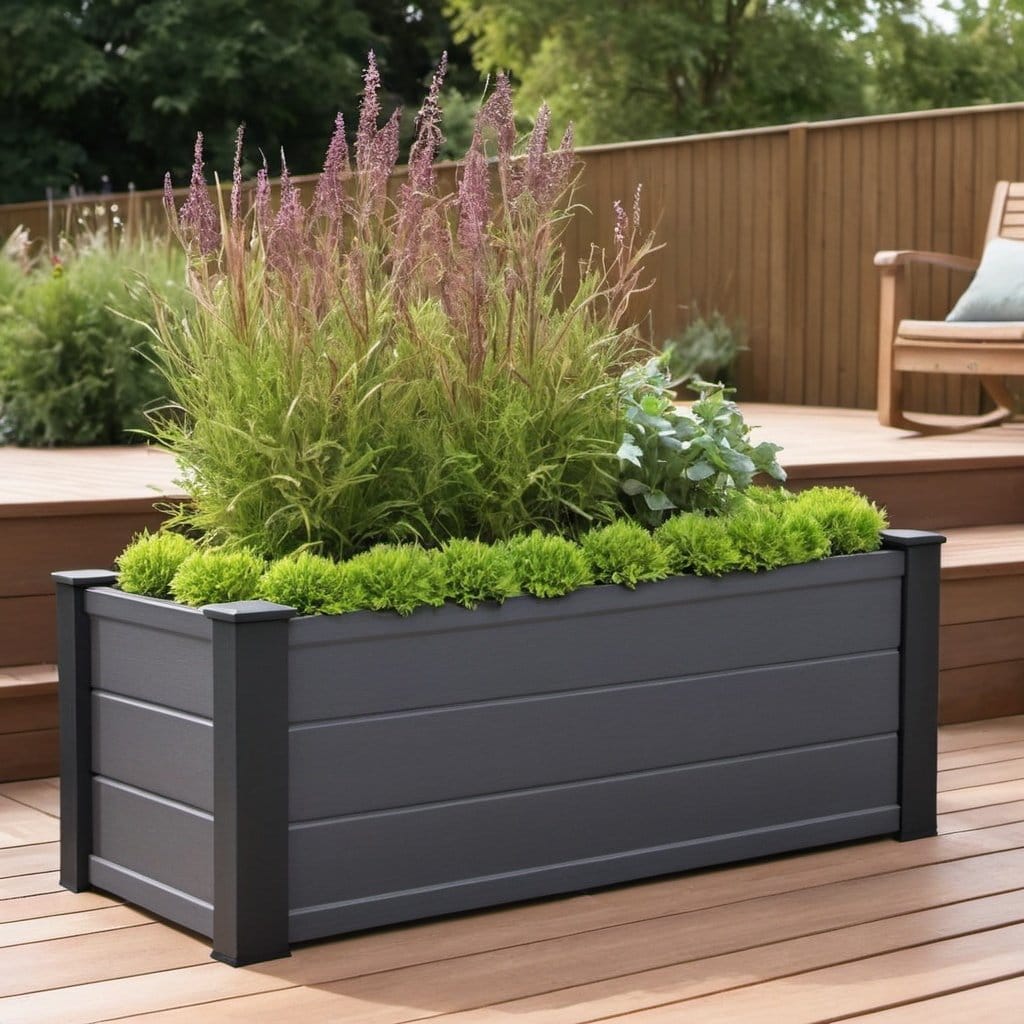
“When you’re planting tall ornamental grasses, don’t plant them right up to the front edge of the planter.”
As seen here, it’s best to place them towards the back two-thirds of the box. This allows you to plant a layer of shorter, bushier plants along the front edge. This technique, called ‘layering’, creates a much fuller, more finished look. The low plants hide the bare base of the tall grasses and create a lush, overflowing effect that softens the hard edges of the planter box. See Idea #27 for another example of layering.
Ready to Dig In? Your Green Oasis Awaits.
Hopefully, these 31 ideas have sparked some genuine inspiration for your own home. Remember that the best projects start with a clear plan and a little bit of courage to get your hands dirty. The perfect built-in planter is out there, waiting to bring a little bit of nature into your life. Now, head over to Pinterest to find even more ideas and start your next project board!