31 Jaw-Dropping Driveway Apron Ideas for 2026 That Will Dramatically Boost Your Curb Appeal

Let’s be honest, you’ve probably pinned a dozen driveway apron ideas by now, but what’s the next step? It’s that small strip of pavement, but it makes a massive first impression. We get it. That’s why we’ve sifted through hundreds of designs to curate this list of 31 distinct driveway apron ideas that deliver serious curb appeal. And stay until the end — we break down the most common mistakes that can ruin these looks. 📌 Save this to Pinterest for later — you’ll want to revisit these ideas.
1. Asphalt Driveway with a Clean Concrete Apron and Sidewalk
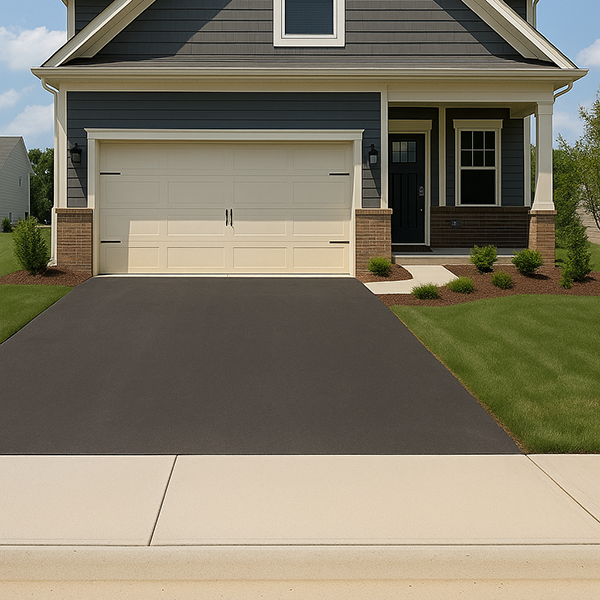
There’s a reason this combination is a classic. The dark, uniform surface of the asphalt driveway creates a visually quiet foundation, which allows the lighter concrete apron to act as a clean, bright welcome mat for your home. This contrast isn’t just for looks; it clearly delineates the transition from the public street to your private property. The use of the same concrete for the sidewalk creates a cohesive, unified look that feels intentional and neat, tying the entire front-facing hardscape together effortlessly.
“When pouring a new concrete apron against existing asphalt, control is key.”
Specify a clean, saw-cut edge on the asphalt before the pour. This ensures a crisp, straight line and prevents the ragged, crumbly edge you often see. For a truly professional finish, ask your contractor to tool a smooth, rounded edge on the concrete where it meets the asphalt. This small detail prevents chipping and creates a seamless transition that looks polished for years.
2. Beige Brick House with a Patterned Concrete Apron
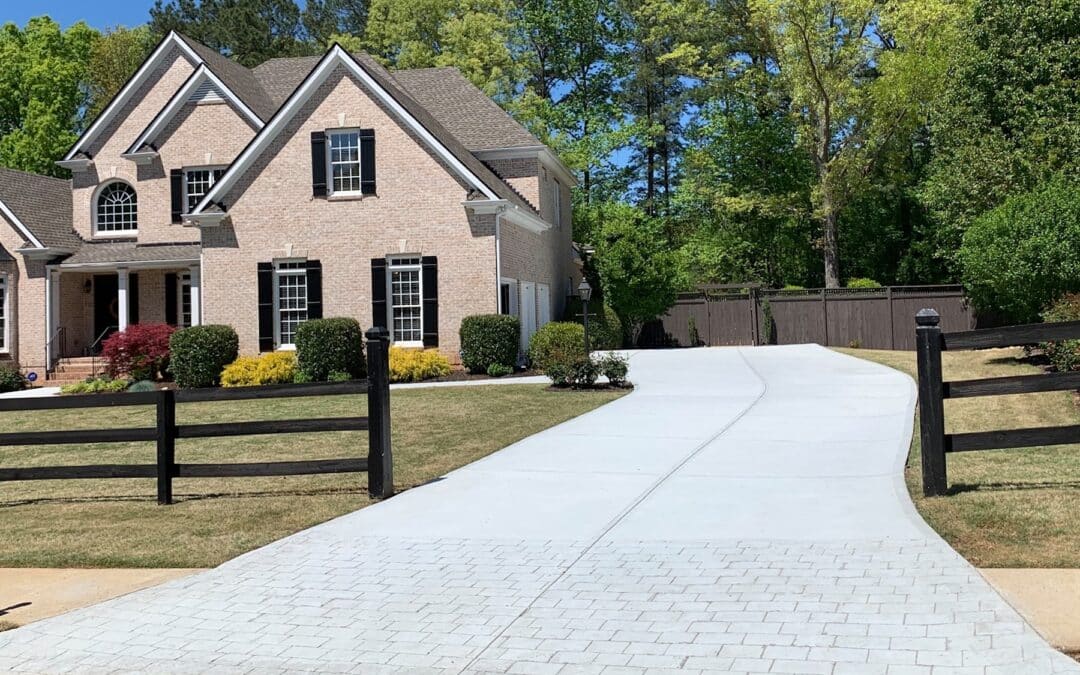
This look achieves its stately, traditional feel by adhering to a simple formula: 60% classic architecture (the beige brick and shutters) + 30% textured hardscape (the patterned concrete) + 10% rustic framing (the split rail fence). The key is that the apron isn’t just a plain slab; it has a subtle pattern that adds character without competing with the brick facade. You could swap the beige brick for painted siding or the split rail fence for a low hedge, and the formula would still hold, proving its versatility.
“While a patterned or stamped concrete apron adds incredible custom detail, be prepared for the upkeep.”
The crevices that create the pattern are prime real estate for dirt, moss, and mildew, especially in damp or shady climates. Regular pressure washing (at least once a year) is non-negotiable to keep it looking sharp. Also, applying a high-quality sealer every 2-3 years is crucial to protect the surface from stains and prevent the color from fading under UV exposure. It’s not a set-it-and-forget-it surface.
3. Red Brick Paver Apron with Defined Cobblestone Curbing
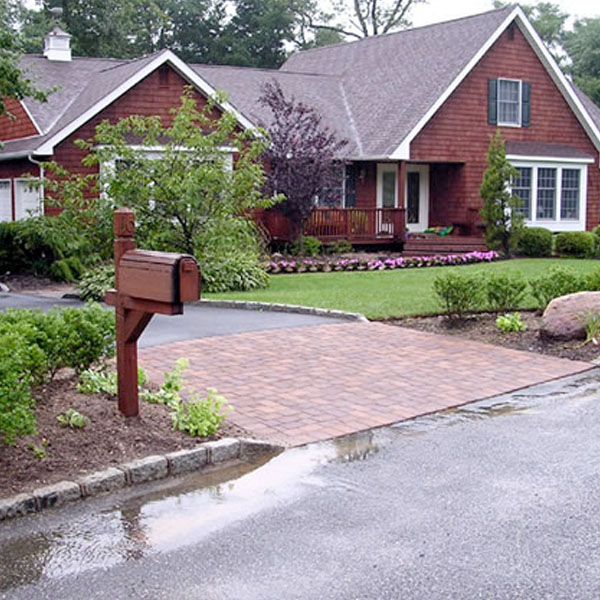
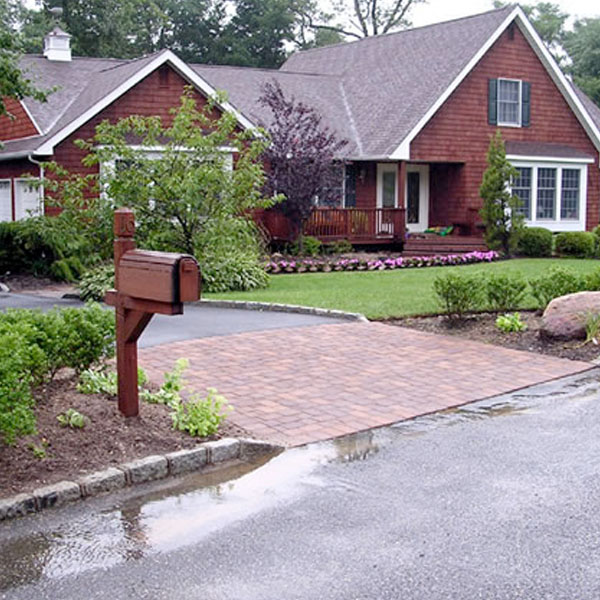
The single element that makes this design work so well is the cobblestone curbing. Without it, the brick pavers would simply bleed into the gray asphalt, creating a much less defined and impactful transition. The cobblestones act as a sturdy, rustic frame, elevating the entire look from a simple paver patch to an intentional, architectural feature. It’s a detail that adds a sense of history and permanence, making the entrance feel more established and thoughtfully designed. It’s what separates a functional apron from a grand entrance.
“Brick and cobblestone are incredibly durable, but they aren’t maintenance-free.”
The sand-filled joints between pavers can wash out over time and will require sweeping in new polymeric sand every few years to prevent weeds and shifting. The reddish-brown brick can also be susceptible to efflorescence—a white, powdery deposit—which may require specialized cleaners to remove. While the stones themselves are tough, be mindful of oil or fluid leaks from vehicles, as the porous nature of brick makes stains difficult to lift.
4. Expansive Gray Interlocking Paver Driveway with Gravel Edging
An expansive paver apron like this is best suited for larger properties with a significant setback from the street. It requires a minimum width of at least 20 feet to avoid looking cramped. The beauty of this design is its ability to handle scale; the large format of the pavers feels proportional to the wide double garage and substantial white stucco house. On a smaller lot, this much hardscape could overwhelm the home. This approach is a great contrast to the more contained design seen in Idea #19, which is better suited for tighter spaces.
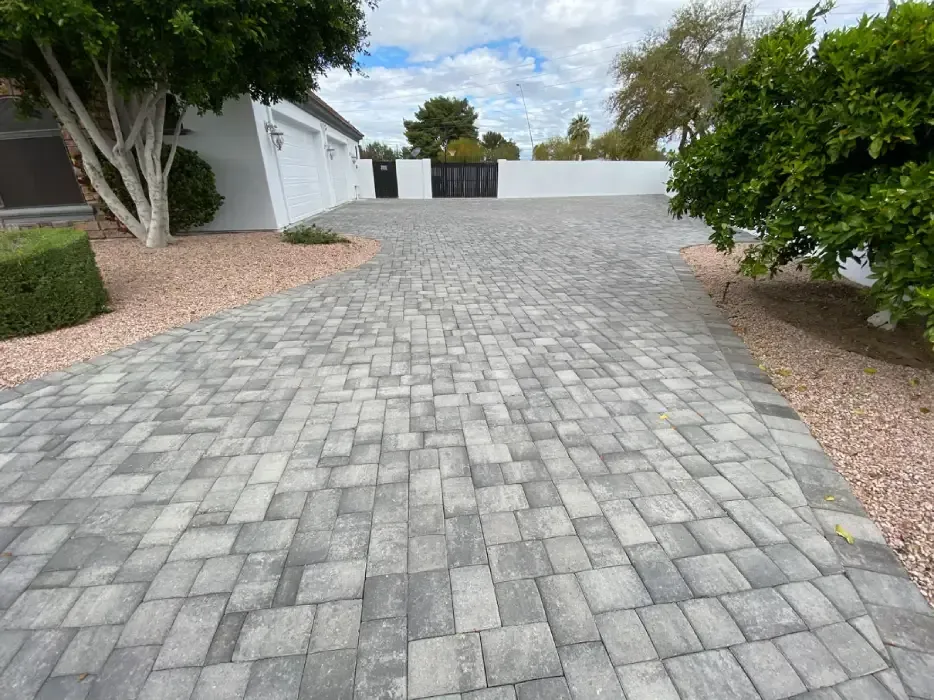
“You don’t need to spend a fortune on interlocking pavers to get a similar textured, durable feel.”
A fantastic budget-friendly option is to create a large gravel apron. Use a heavy-duty landscape fabric base, add a 4-inch layer of compacted crusher run stone, and top it with 2-3 inches of decorative pea gravel or crushed granite. Edge it with simple metal or pressure-treated wood edging. You can achieve a similar expansive look for a fraction of the cost—often around $3-$5 per square foot, compared to $15-$25 for professionally installed pavers.
5. Asphalt Driveway with a Decorative Paver and Cobblestone Apron
Creating this multi-layered apron involves a few key costs. The decorative pavers are the main event, but the border and edging add up.
- Pavers: $900 – $1,800 (for a 150 sq. ft. apron)
- Darker paver border: $300 – $600
- Cobblestone-look edging: $400 – $700
- Labor & Base Prep: $1,500 – $3,000
- TOTAL: $3,100 – $6,100
Budget alternative: Use standard concrete pavers from a big-box store and stain a section of them with a darker concrete stain to create the ‘border’ effect for about 50% less.
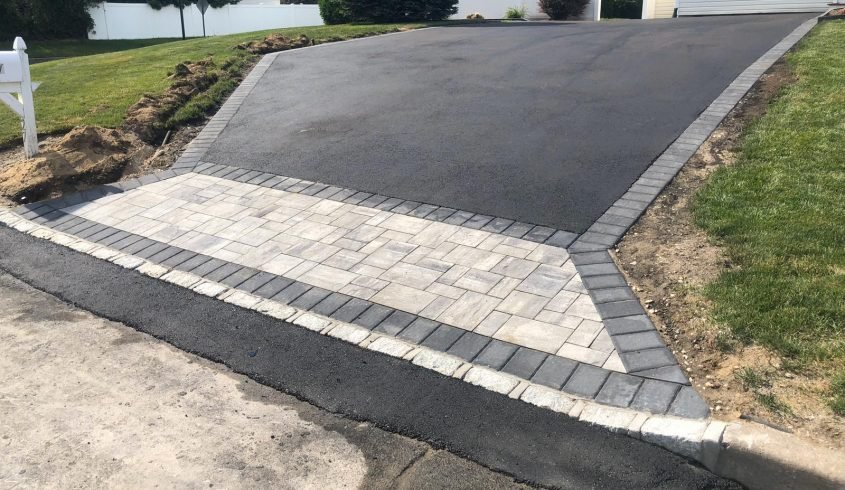
“The key to making a multi-material apron look cohesive is choosing one unifying color.”
In this design, the color is gray. Even though the pavers are a mix of light tan and grey, the darker paver border and the light grey cobblestone edging all share a common grey undertone. This keeps the look harmonious rather than chaotic. When you’re at the stone yard, lay your paver, border, and edging options next to each other in the sun. If they share a base color, you’re good to go.
6. Asphalt Driveway Framed by Light-Toned Paver Borders and Walkways
This design’s success lies in its clever use of repetition. The same light-toned pavers aren’t just used for the apron’s border; they extend to form all the walkways connecting the different buildings. This repetition of material creates a strong visual path, guiding the eye and unifying the entire property. It makes the garage, main house, and even the charming red outbuilding feel like part of a single, cohesive estate. The dark asphalt becomes a neutral backdrop, making the paver lines pop.
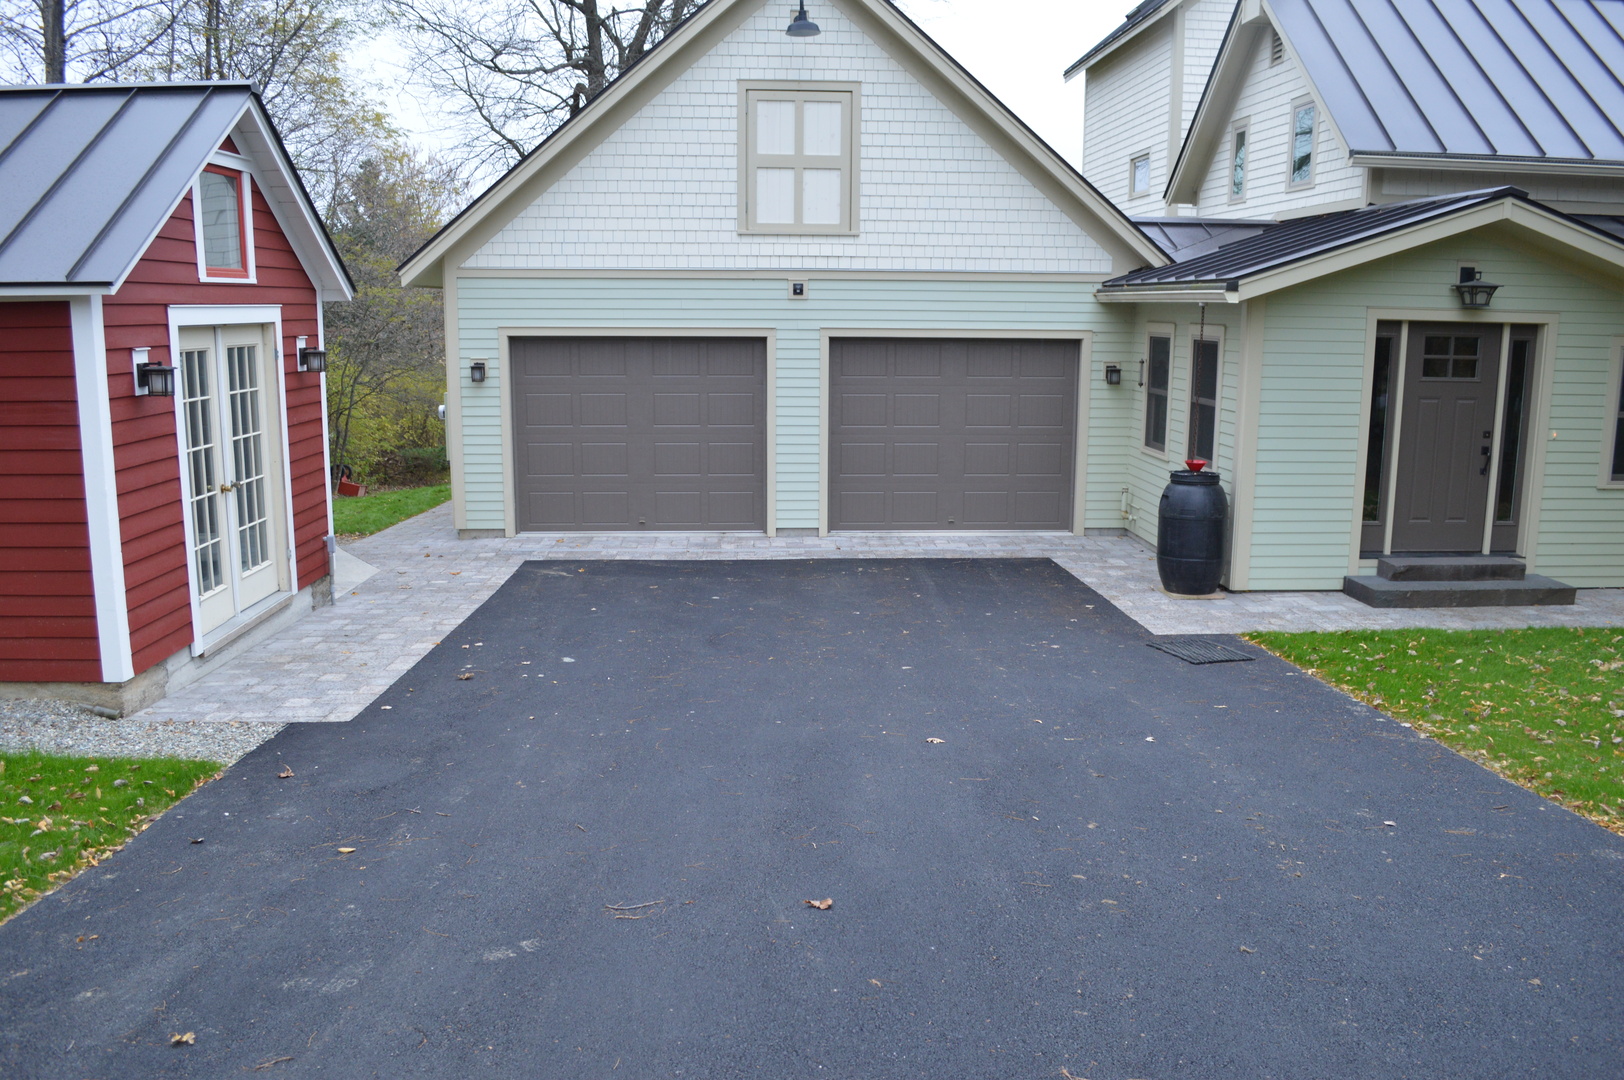
“We’re seeing a huge move away from monolithic slabs of concrete or asphalt.”
Homeowners on Pinterest are increasingly searching for ways to add custom, layered details to their exteriors. Using pavers as a ‘frame’ for a more budget-friendly material like asphalt is a top trend for 2026. It gives you that high-end, custom look and maximizes curb appeal without the massive cost of paving the entire driveway in expensive materials. It’s a calculated design choice that signals attention to detail.
7. Simple and Clean: The Classic Concrete Driveway Apron
The most important element here is simplicity. In a world of complex patterns and expensive materials, a well-executed, simple concrete apron provides an uncluttered and clean look that just works. It doesn’t scream for attention, allowing the house and landscaping to be the stars of the show. Its job is to provide a smooth, functional transition from the street to the home, and it does so without fuss. This understated approach is its strength, offering a crisp, neat appearance that never goes out of style.
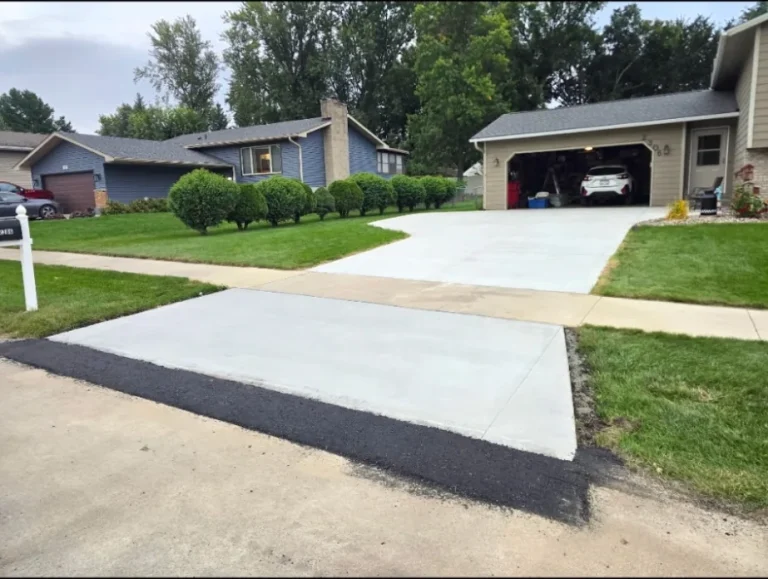
“Concrete seems indestructible, but it’s prone to cracking.”
Control joints (those lines scored into the surface) are essential to encourage cracks to happen in a neat, straight line. However, ground settling, freeze-thaw cycles, and heavy vehicles can cause unexpected cracks anyway. Also, concrete is a sponge for stains. Oil, rust, and even wet leaves can leave permanent marks. Sealing your concrete every 2-4 years is the single best thing you can do to protect your investment and make it easier to clean.
8. Textured Grid: Exposed Aggregate with Poured Concrete Borders
This driveway’s visual recipe is all about controlled texture. It’s roughly 70% textured surface (the exposed aggregate) + 30% smooth structure (the concrete grid lines). This formula provides the best of both worlds: the natural, grippy texture of the aggregate and the clean, modern lines of the concrete. You could alter the ratio—perhaps 80% aggregate with thinner grid lines for a more organic look, or 50/50 for a bolder graphic statement—but the core principle of texture + line remains a winner.
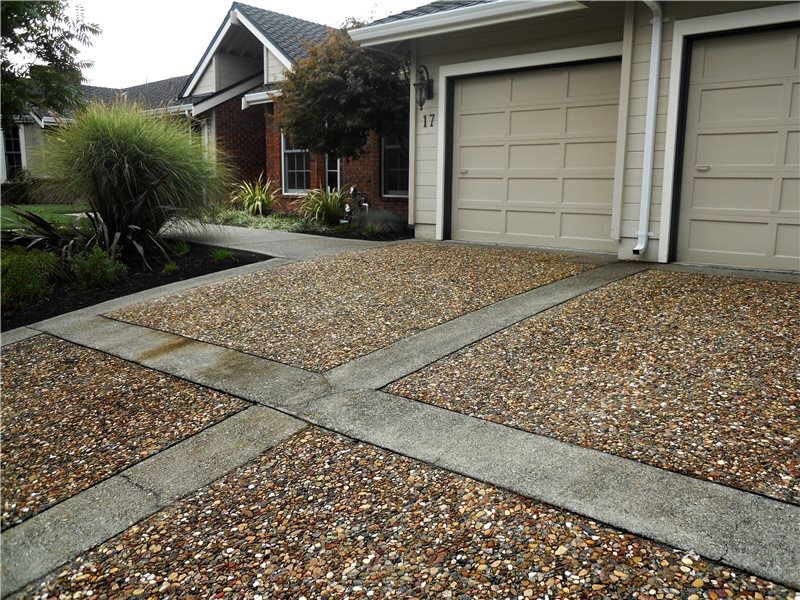
“Exposed aggregate is fantastic for grip and hiding dirt, but it can be tough to clean.”
Unlike a smooth surface you can easily sweep, aggregate’s pebbled texture traps dirt, salt, and fine debris. A leaf blower is your best friend for routine cleaning. For deep cleaning, a pressure washer is effective, but you must use a fan tip and keep it moving to avoid dislodging the small stones. Also, in snowy climates, avoid using sharp metal shovels that can catch and knock pebbles loose; a plastic shovel or snow blower is much safer.
9. Classic Contrast: Asphalt Driveway with Gray Paver Apron and Cobblestone Edging
The power of this design comes from its clear visual hierarchy, created by three distinct textures and tones. The dark, smooth asphalt is the background. The light gray paver apron is the main feature, drawing the eye. Finally, the slightly chunkier, lighter gray cobblestone edging acts as the frame, defining the space and separating the hardscape from the soft lawn. This layering of texture and color adds depth and a custom-built feel that a single material could never achieve. Compare this layered approach to the simpler look in Idea #7.
“A full cobblestone edge and paver apron can be costly.”
To get this look for less, consider using poured concrete for the main apron area. Then, purchase cobblestone- or paver-stamped molds (available online for $50-$150). You can press these into the edges of the wet concrete apron and along the driveway border before it cures. A little bit of charcoal release agent will give the ‘stones’ a darker, more realistic look. It’s a labor-intensive DIY but can save you thousands in material and specialty labor costs.
10. A Grand Entrance with Stone Pavers and Natural Stone Pillars
While the paver apron is lovely, it’s the natural stone pillars that truly define this entrance. They are the undeniable focal point, transforming a simple driveway into a grand estate-style gateway. They add verticality, substance, and a powerful sense of permanence. Removing them would leave you with a nice driveway; with them, you have a statement. They anchor the entire design and signal that you’ve arrived somewhere special, beautifully framing the transition from the public road to the private drive.
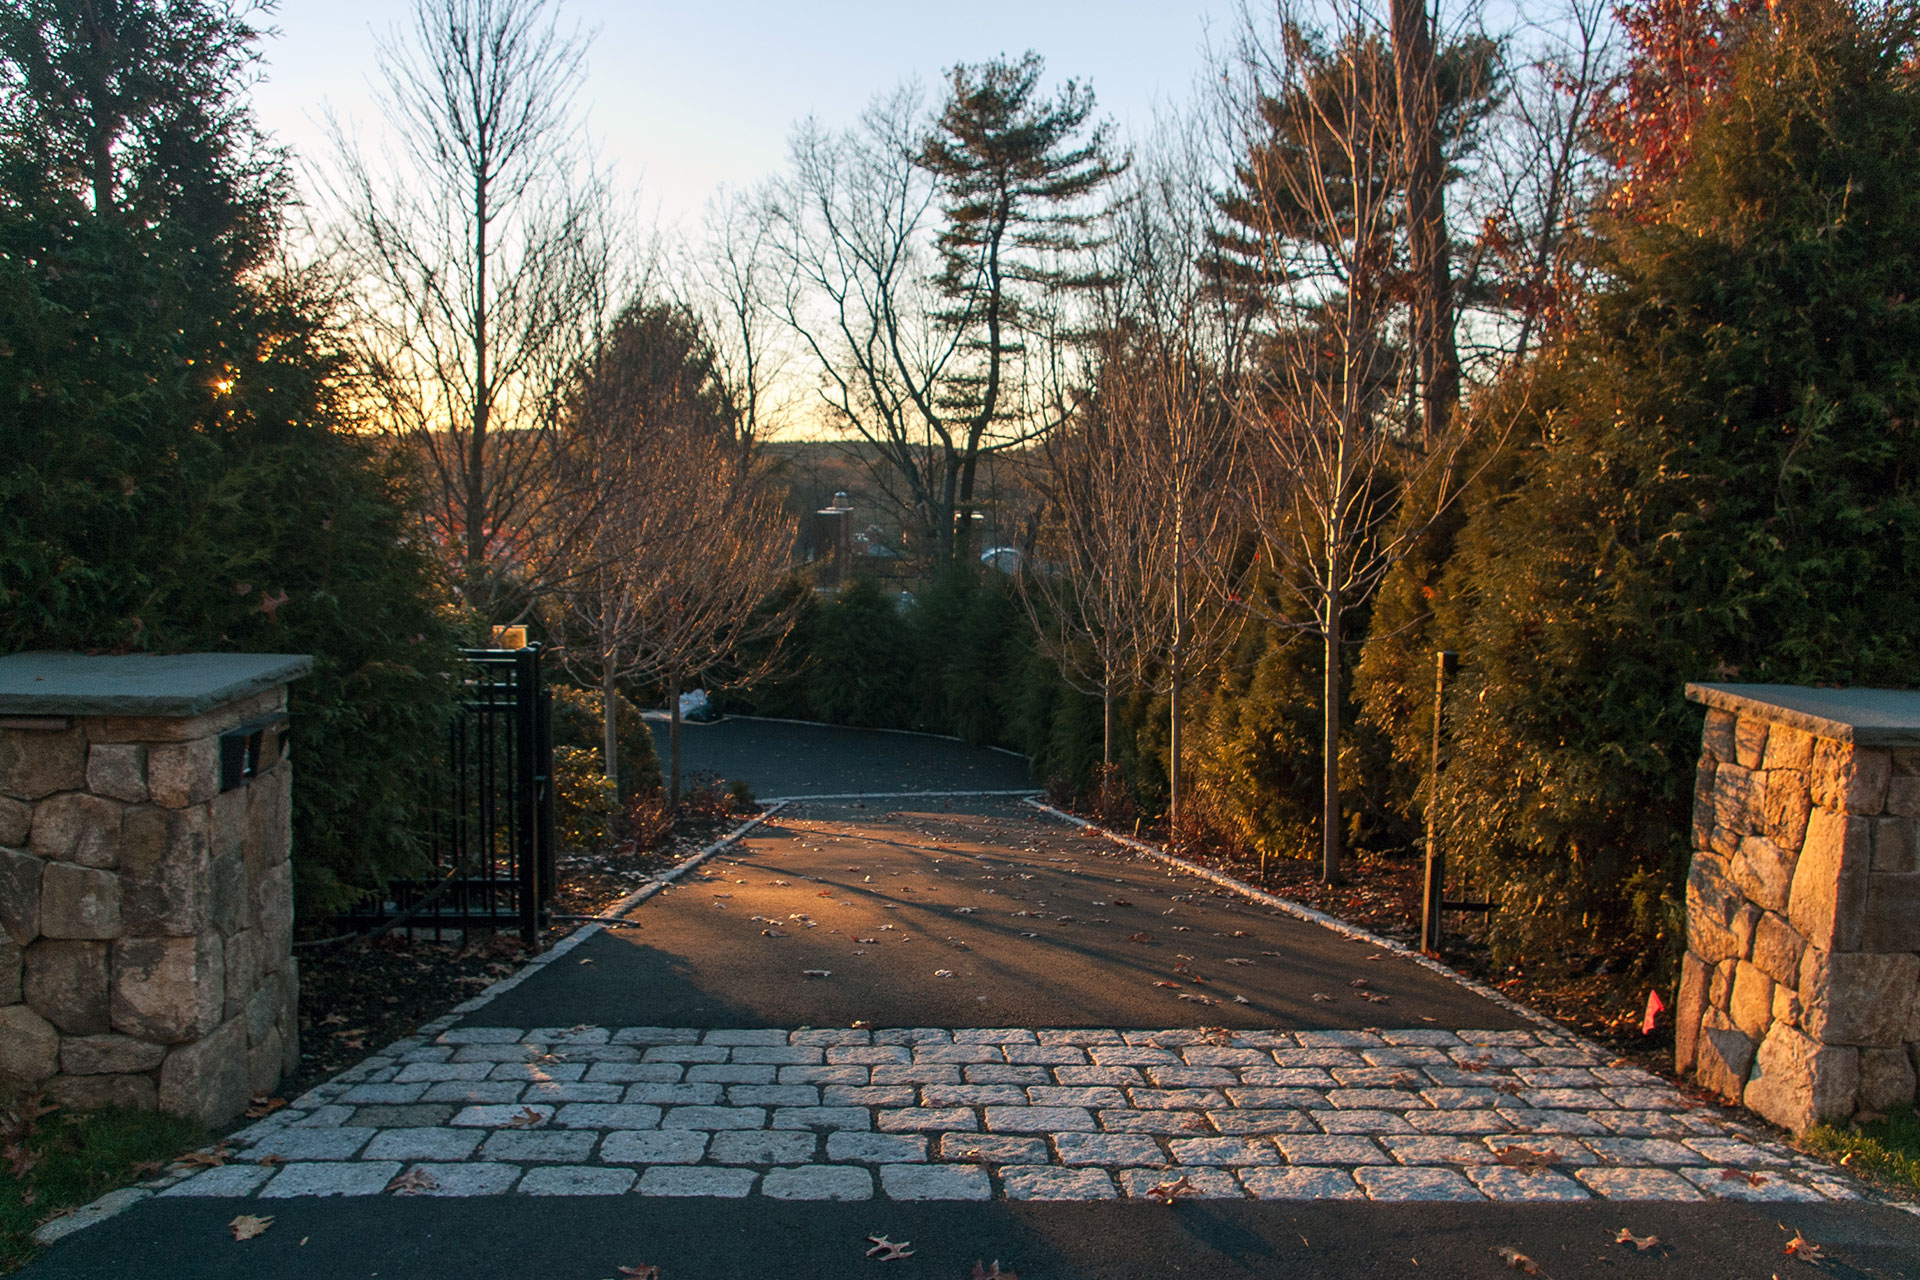
“An entrance with this much presence requires space.”
The driveway itself should be at least 12 feet wide to feel proportional to the pillars. The pillars themselves work best when they have breathing room; plan for at least 3-4 feet of landscaping on the outer side of each one. This idea is ideal for properties with a long driveway or a significant front yard. On a typical suburban lot with a short driveway, pillars of this size would feel overwhelming and out of place, much like the mistake we break down in the ‘Mismatched Scale’ example later on.
11. Rich and Rustic Brown Stamped Concrete Apron
You can add a warm, rustic look to new or existing concrete with a multi-toned stain. Here’s a simplified process:
- Prep is everything: Thoroughly clean the concrete with a pressure washer and degreaser. Allow it to dry completely for 24-48 hours.
- Apply the base color: Use a pump sprayer to apply a light tan or beige semi-transparent concrete stain over the entire surface.
- Layer the accent color: While the base is still damp, lightly and randomly spray a darker brown stain in select areas to create depth and variation.
- Create highlights: Use a sponge to dab a very small amount of the light stain back onto some of the high points of the stamp pattern.
- Seal it: After the stain has cured for at least 24 hours, apply two thin coats of a high-gloss sealer for that ‘wet look’ and protection.
This process takes a full weekend and costs around $200-$400 in materials.
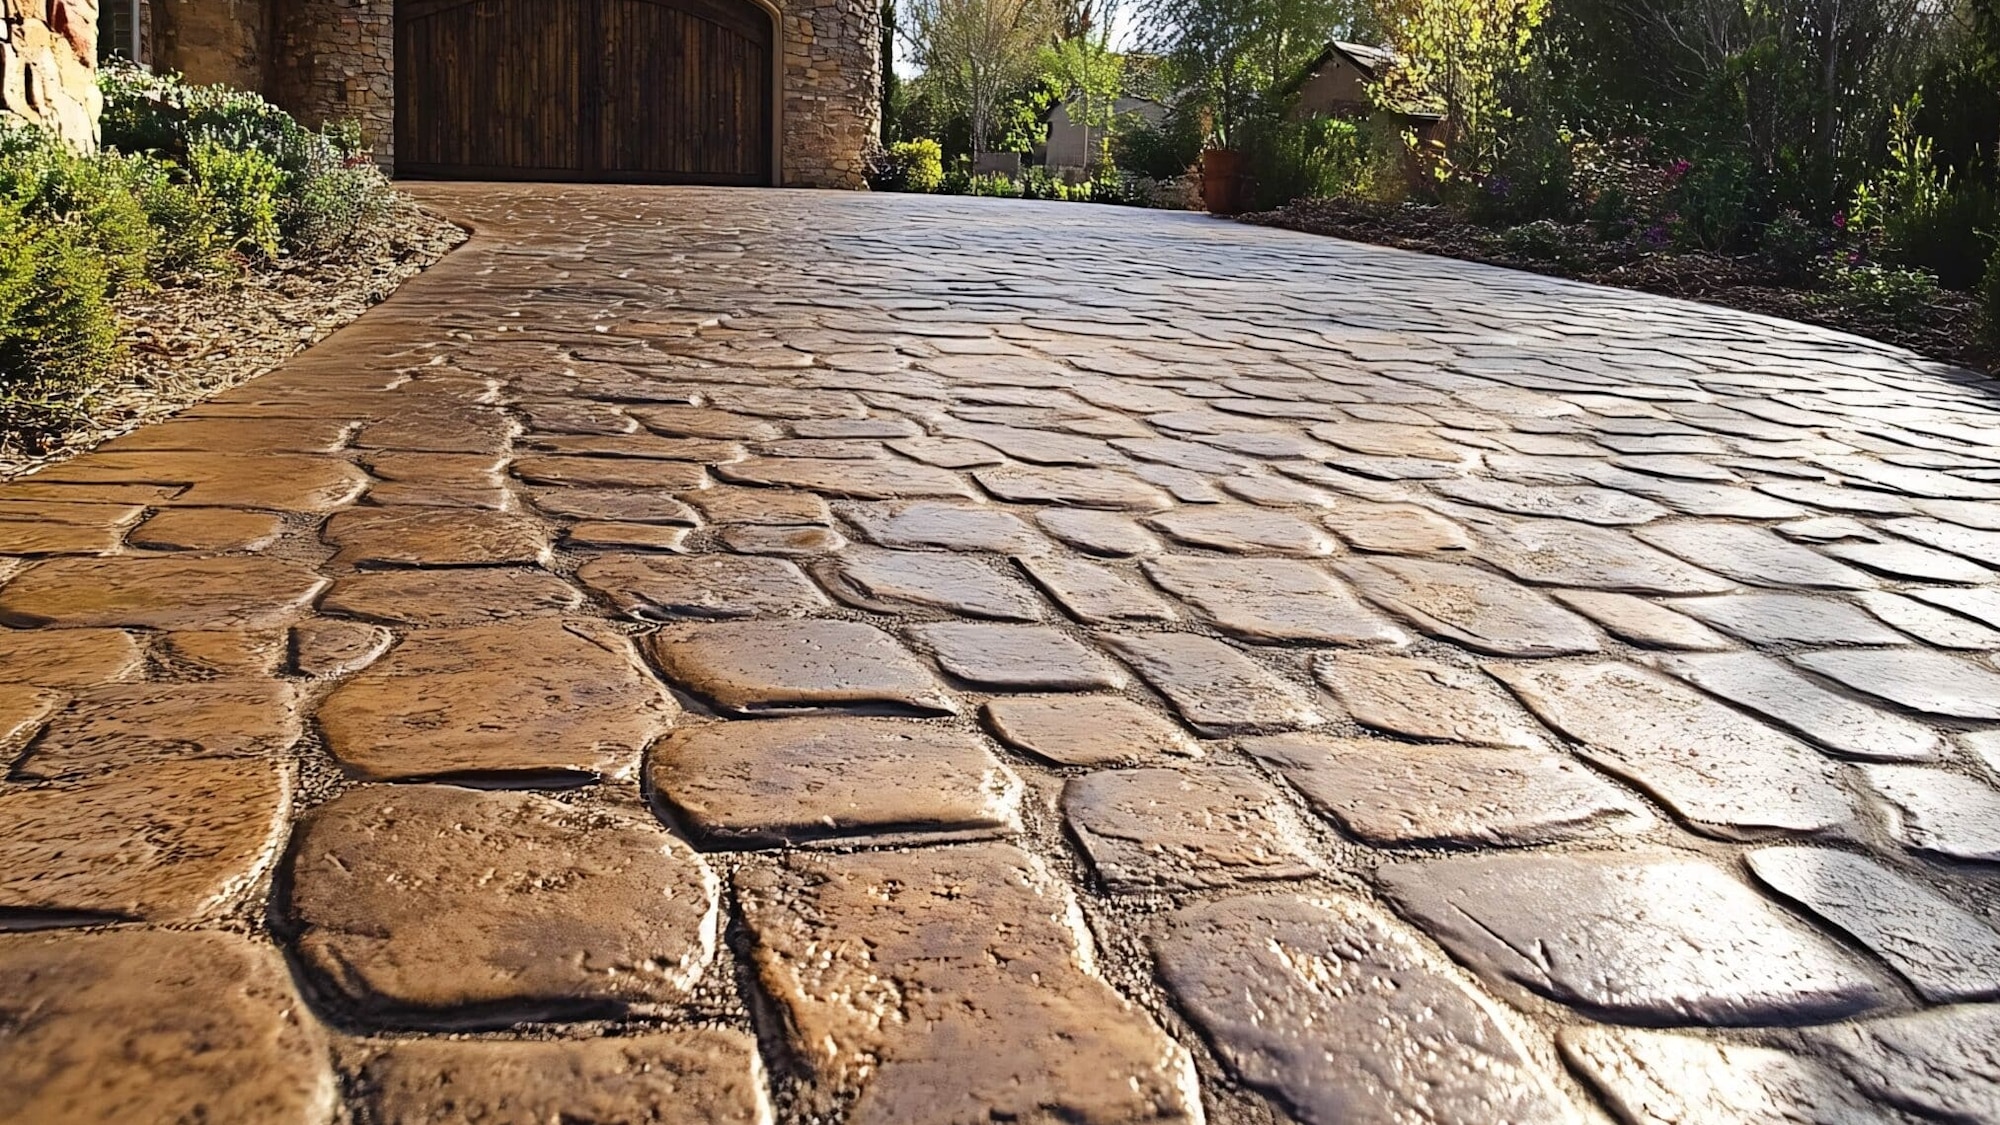
“The secret to a realistic stamped concrete job is in the antiquing.”
After the concrete is stamped and has cured for a day, a powdered ‘release agent’ with a dark pigment is brushed over the surface and then washed off. This dark powder settles into the low points and crevices of the stamp pattern, creating the shadows and depth that mimic real stone. Without this step, stamped concrete can look flat, fake, and plasticky. Always insist on an antiquing release agent for your project.
12. Natural Welcome: Gravel Driveway with a Cobblestone Apron and Stone Pillars
This design masterfully blends formal and informal materials. The loose, natural gravel of the main driveway gives a relaxed, country feel, while the solid, structured cobblestone apron and stone pillars provide a sense of tradition and permanence right at the entrance. This transition works because it follows a logical hierarchy—the closer you get to the public street and the formal ‘entrance’, the more structured the materials become. It’s a thoughtful progression that feels both welcoming and well-designed.
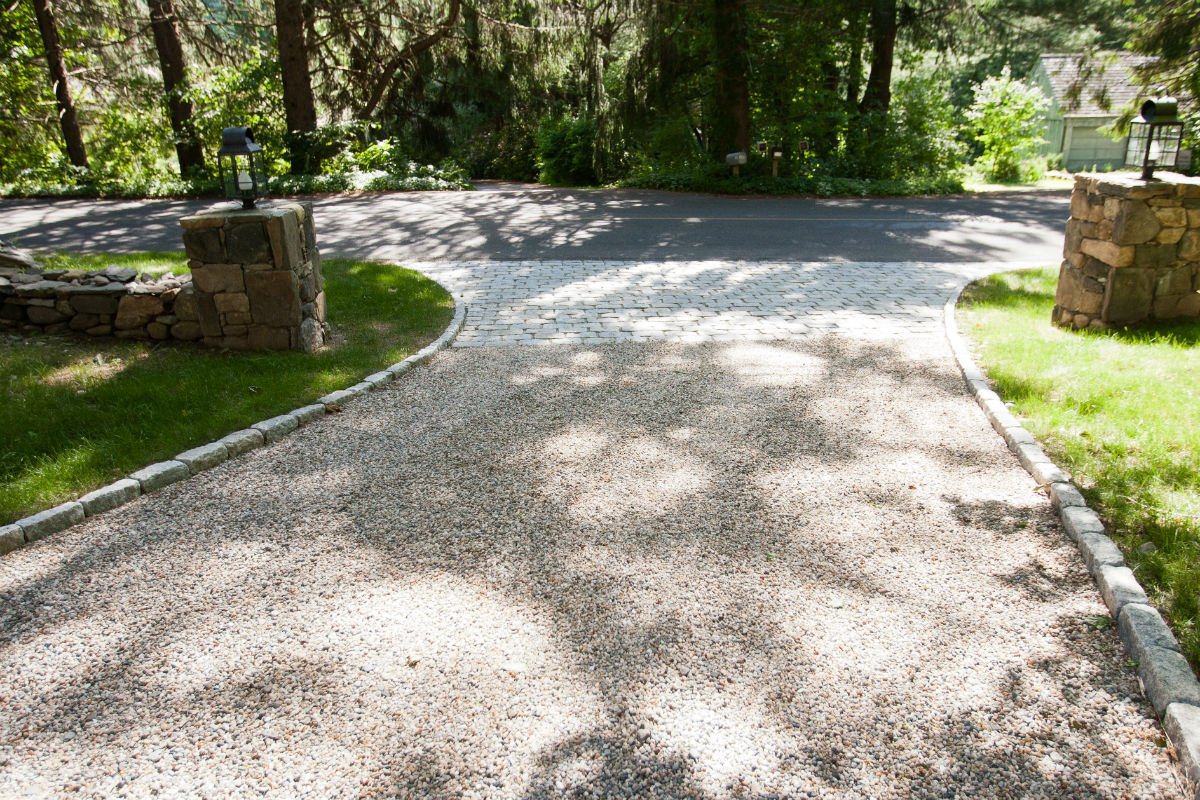
“Let’s be real about gravel: it travels.”
No matter how well you install it, gravel will migrate into your lawn, get kicked up by tires, and need to be raked back into place. Over time, it will also get pressed into the soil base, requiring a top-up every few years to maintain its depth. Furthermore, snow removal can be a major challenge. A snow blower can easily throw stones, and a plow can scrape the gravel away. It’s beautiful and permeable, but it is not a low-maintenance surface.
13. Grand Statement: Concrete Driveway with a Central Compass Rose Motif
The compass rose is everything here. It’s the singular design element that elevates this from a very large, functional driveway into a piece of art. It serves as a stunning focal point, breaking up the vast expanse of concrete and providing a bespoke, custom feel that screams high-end design. The circular driveway literally revolves around it, making it the undeniable heart of the home’s exterior approach. Without it, the space would feel empty and lack a central anchor.
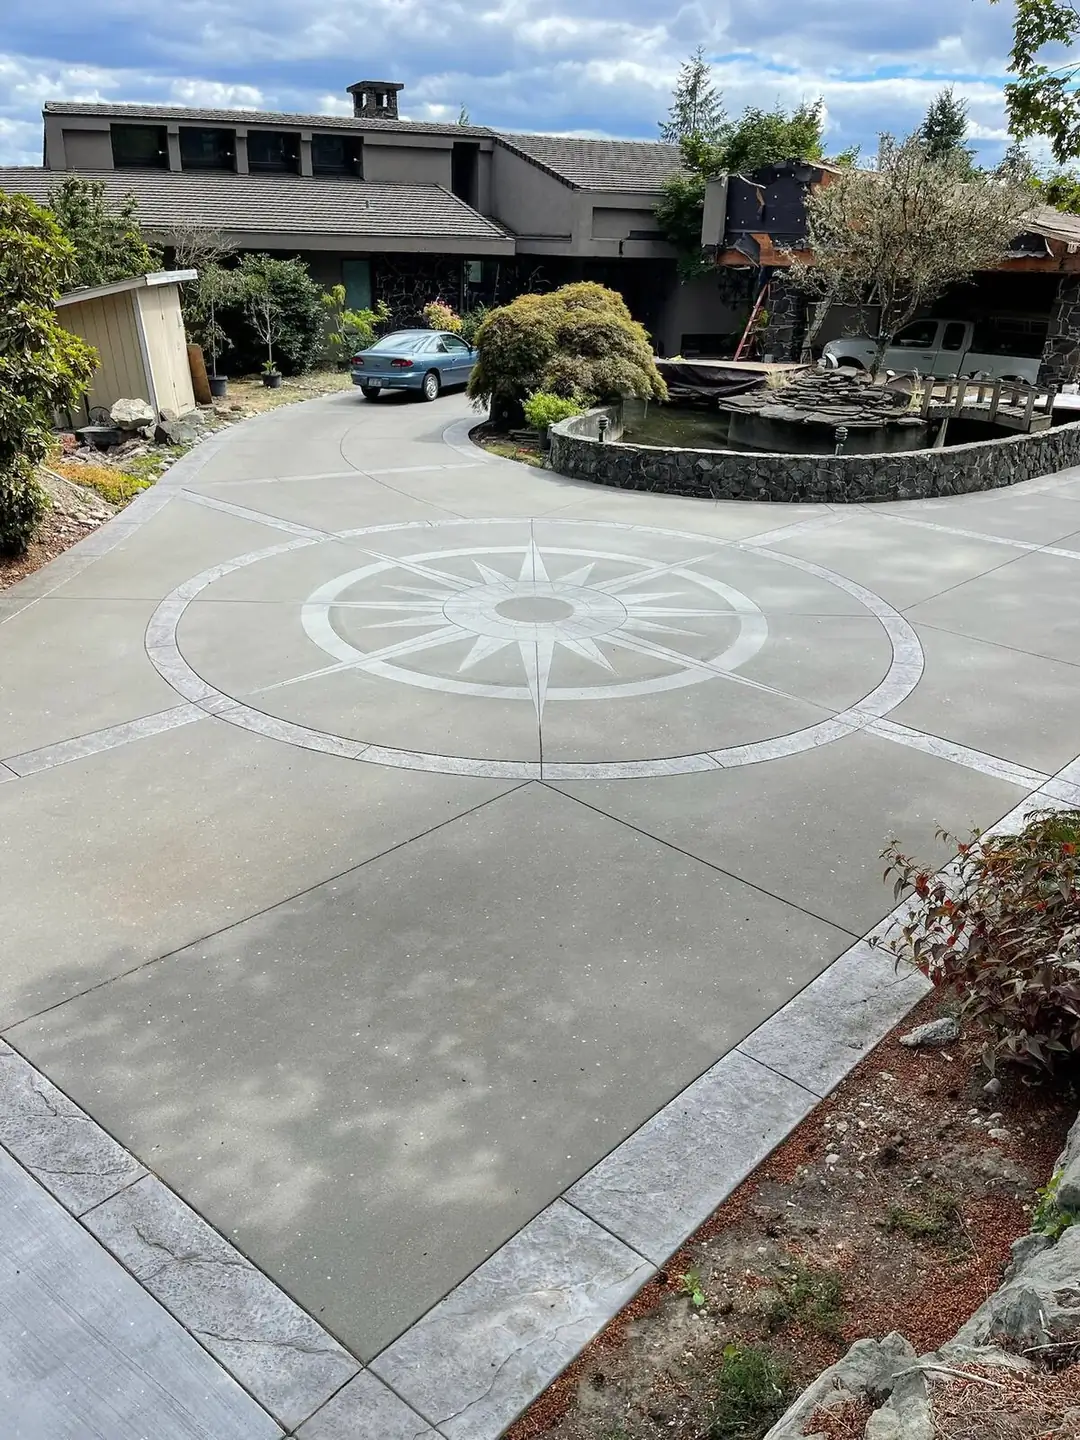
“A statement feature like a large compass rose or circular driveway demands a grand scale.”
This design is best suited for properties with at least a quarter-acre of open front yard space. The circular element needs to be large enough for easy vehicle navigation—a minimum of a 40-foot outer diameter is recommended. Trying to squeeze a feature like this onto a smaller, rectangular lot will feel forced and look out of proportion, diminishing its intended grand effect. It’s a go-big-or-go-home design choice.
14. Neat and Orderly: Concrete Apron with a Mulched Stone Planting Bed
The balance of this look comes from a simple ratio: 50% hardscape (the concrete apron) + 40% softscape (the green shrubs and lawn) + 10% texture (the mulch and scattered rocks). This formula ensures that the functional concrete doesn’t feel too sterile or overwhelming. The planting bed, with its deep mulch color and organic shapes, provides a necessary soft contrast to the hard lines of the driveway and house. It’s a classic combination that always looks tidy and intentional.
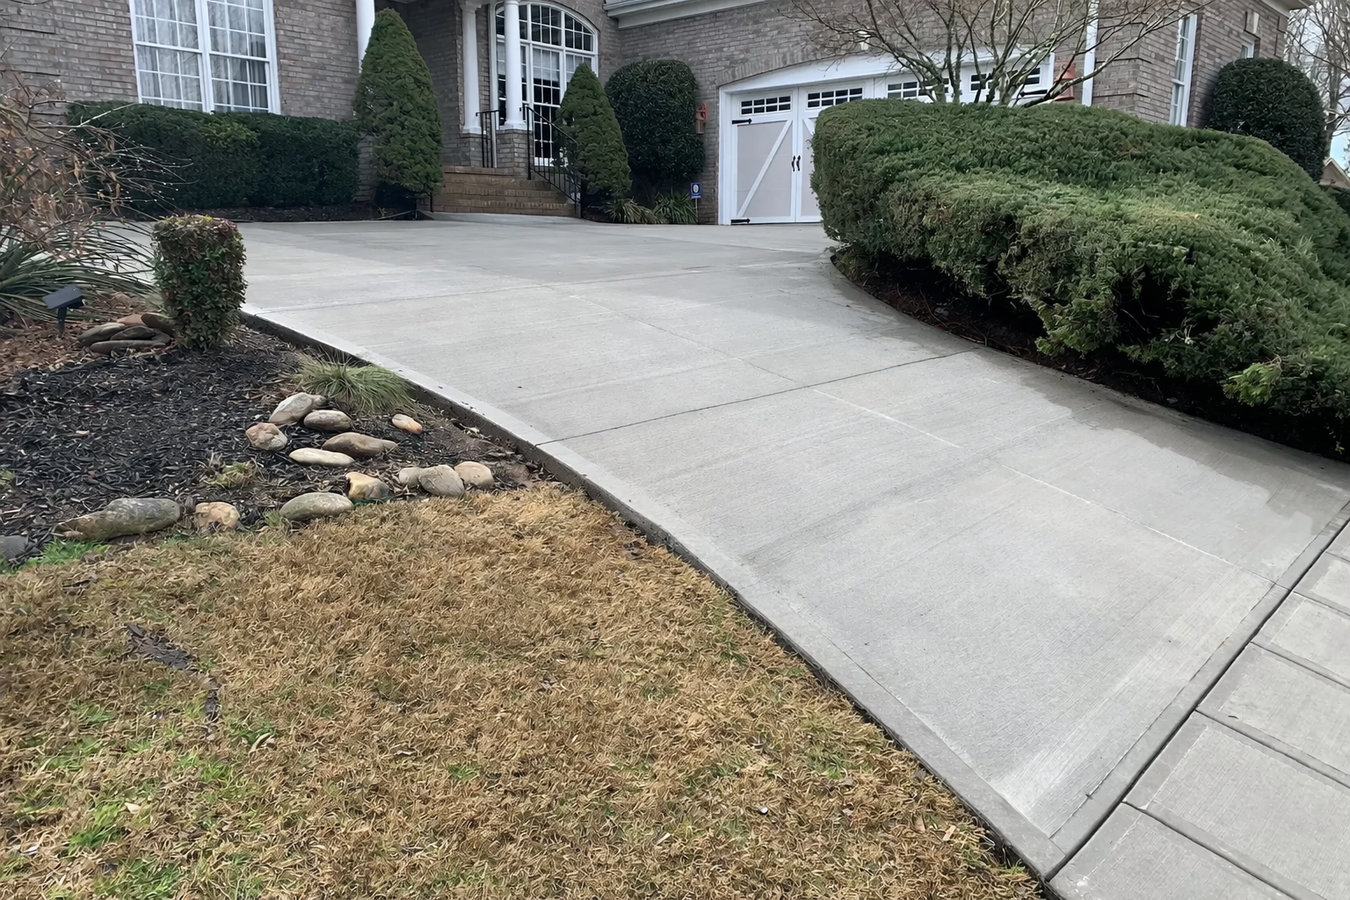
“To keep a planting bed looking this sharp next to a driveway, a high-quality edge is crucial.”
Don’t just rely on a shallow trench. Install a rigid steel or aluminum edging strip at least 4 inches deep between the bed and the concrete. This creates a clean, permanent barrier that prevents mulch from washing onto your driveway during heavy rain and stops the lawn from creeping into your garden bed. It’s a small upfront cost that saves hours of maintenance each year.
15. Modern Suburbia: Concrete Apron with a Textured Gravel Border
This design is effective because of its high-contrast texture. The smooth, light gray concrete of the apron and driveway provides a clean, predictable surface. The dark gray crushed gravel border introduces a rough, almost crunchy texture that creates a visually interesting and modern edge. The rounded corner where the concrete meets the gravel softens the look just enough, preventing it from feeling too rigid. It’s a simple, cost-effective way to add custom detail to a standard concrete driveway.
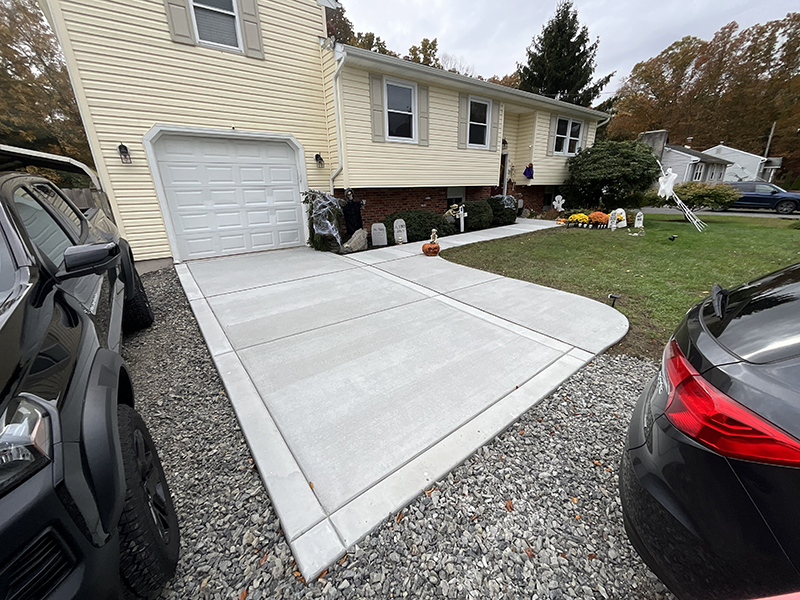
“A gravel border looks fantastic, but it’s a magnet for weeds and debris.”
To minimize upkeep, proper installation is key. Make sure there is heavy-duty landscape fabric underneath the gravel to suppress weed growth. Even with fabric, you’ll still have airborne seeds that germinate in the stones. A quick spray with a vinegar-based weed killer every month or so is a must. Also, be prepared to use a leaf blower to clear out fallen leaves and grass clippings, as a rake will just displace all the stones.
16. Fresh Beginnings: A Newly Poured Light Grey Concrete Apron
A new concrete pour is a fantastic upgrade, but the color match is a real challenge. As seen here, new concrete is significantly lighter and greyer than older concrete or asphalt that has been weathered and cured for years. While the new concrete will lighten slightly as it cures, it will *never* perfectly match the old surface. You must be okay with a distinct color difference. Trying to ‘blend’ them is a fool’s errand; it’s better to embrace the contrast and treat the new apron as a distinct design feature.
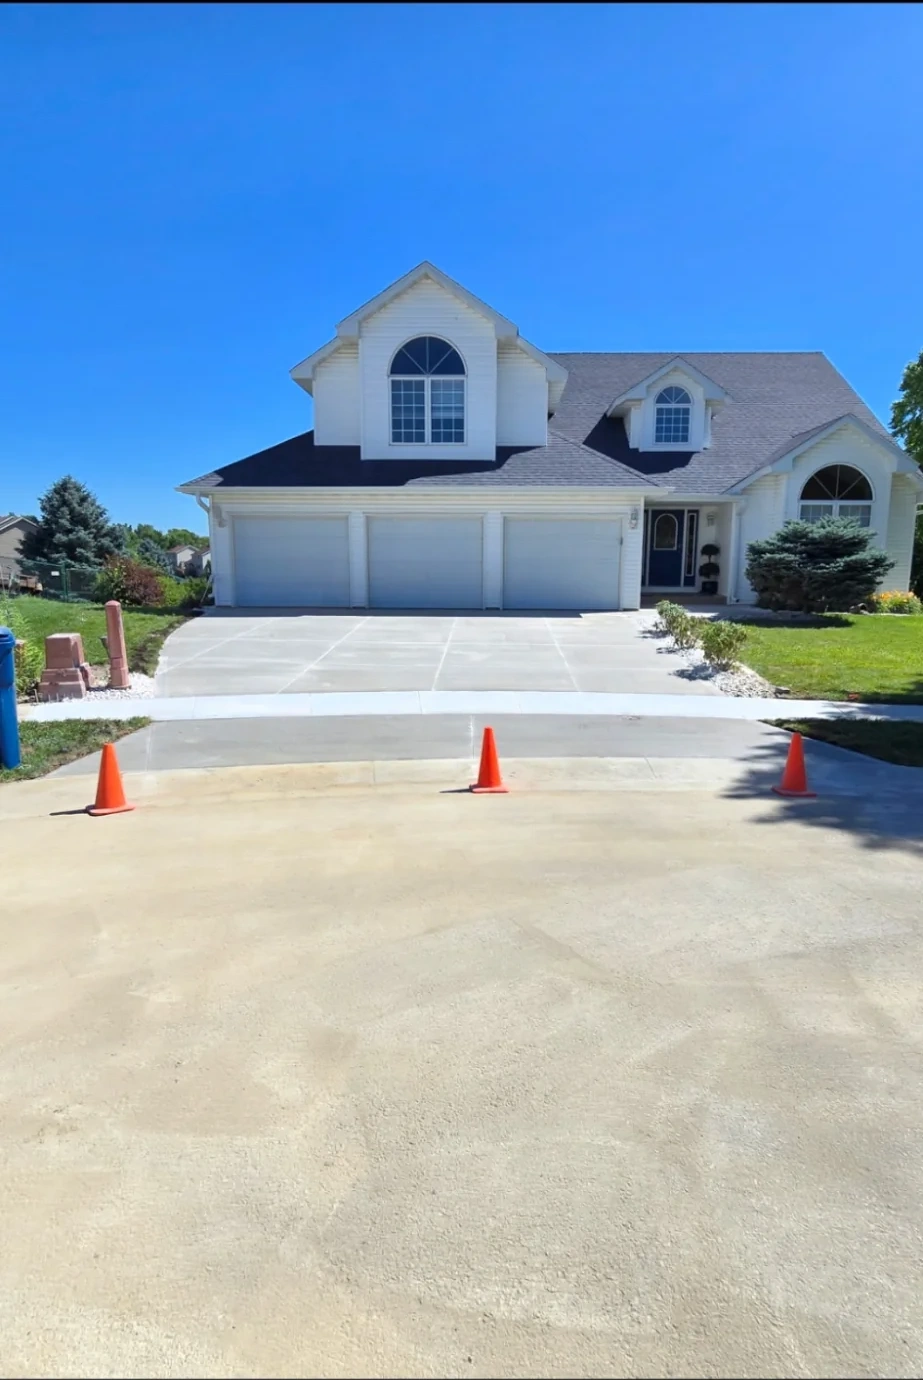
“Before you pour a new concrete apron, you absolutely must check a few things:
L”
Before you pour a new concrete apron, you absolutely must check a few things:
- Local Regulations: Does your city or HOA have rules about apron materials, dimensions, or permits? A quick call to the municipal office can save you a massive headache.
- Underground Utilities: Call 811 to have all underground utility lines (gas, water, electric) marked before any digging begins. It’s free and it’s the law.
- Water Drainage: Where will rainwater go? The apron must be sloped correctly (a quarter-inch per foot is standard) to direct water away from your garage and foundation, towards the street.
17. Functional Simplicity: The Broom Finish Concrete Garage Apron
The single most important feature of this apron is the broom finish. It might seem like a minor detail, but those fine-lined striations are critical for both safety and aesthetics. They provide essential traction, preventing the concrete from becoming dangerously slick when wet or icy. Aesthetically, the uniform lines of the broom finish create a clean, intentional texture that looks far more professional than a simple troweled-smooth surface. It shows that even on a basic, functional element, care was taken in the execution.
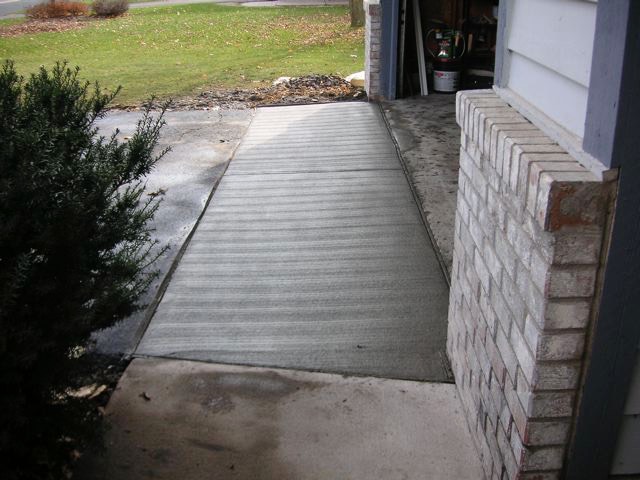
“For the best possible traction and a professional look, the broom finish should always be pulled in one consistent direction, perpendicular to the path of travel.”
For a driveway apron, this means the lines should run horizontally, parallel to the garage door. This ensures your tires are always crossing the lines, maximizing grip. A finish pulled in multiple directions or parallel to the car’s path can look messy and is less effective for traction.
18. Sleek and Minimalist Modern Grey Concrete Driveway
This look is a study in minimalist geometry. The formula is simple: 80% smooth, monochromatic surface (the grey concrete) + 15% clean lines (the expansion joints) + 5% organic counterpoint (the spiky green plants). The key is the lack of ornamentation. The beauty comes from the pristine surface and the crisp grid created by the joints. The small pop of green is just enough to keep it from feeling sterile. It’s a confident, restrained approach to curb appeal.
![What is a Driveway Apron? [with photos]](https://quotableideas.com/wp-content/uploads/2026/07/what-is-a-driveway-apron-with-photos-2.jpg)
“This clean, almost architectural look for driveways is a direct reaction to the overly fussy, patterned designs of the past.”
As home design trends on Pinterest and Instagram lean more towards minimalism and ‘quiet luxury,’ homeowners are looking for exterior surfaces that reflect that ethos. A sleek, perfectly finished concrete apron feels intentional, modern, and high-quality. The wet-look sealer enhances this, giving it a polished, gallery-like finish that’s very popular in contemporary landscape design for 2026.
19. Textural Transition: Granite Cobblestone Apron with Grey Siding
This design works because it’s a masterclass in monochrome texture. The entire palette is a narrow range of grays and whites, from the garage door to the siding to the cobblestones and asphalt. What makes it visually interesting is the dramatic shift in texture. The smooth painted garage door gives way to the lightly textured shingles, which then meet the chunky, irregular granite cobblestones, finally transitioning to the grainy asphalt. This progression of textures creates depth and interest without using a single bold color.
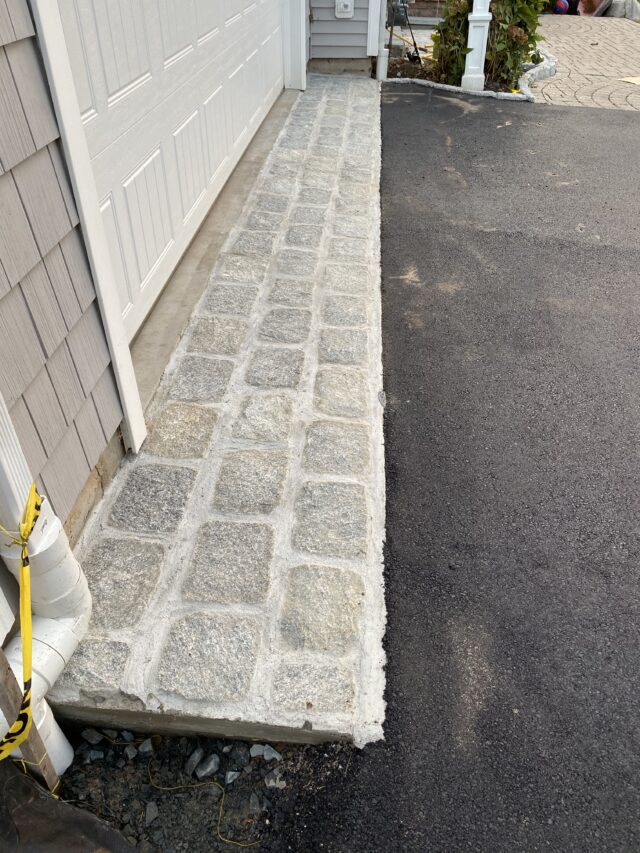
“Real granite cobblestones are gorgeous but carry a hefty price tag.”
For a similar durable and textural effect, look into concrete ‘cobble’ pavers. Major manufacturers like Belgard and Unilock make high-quality concrete pavers that mimic the shape and texture of old-world cobblestones for about half the price. For an even more budget-friendly approach, you could pour a concrete apron and use a cobblestone stamp, as detailed in the tip for Idea #9. You’ll get the texture and pattern, saving big on materials.
20. Garden Border: Grey Paver Apron with a Natural Stone Retaining Wall
The stacked stone retaining wall is the hero of this design. It does more than just hold back the garden bed; it introduces a beautiful, organic texture and a sense of permanence that pavers alone can’t achieve. The wall physically and visually separates the driveway from the garden, creating a clean, multi-level landscape. The varied colors in the natural stone add warmth and a rustic counterpoint to the uniform grey of the pavers, making the whole area feel more dynamic and custom-built.
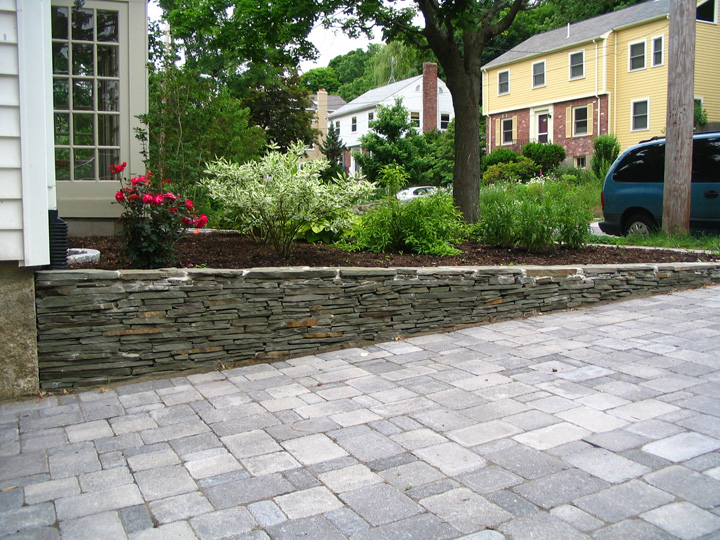
“Building a low, dry-stack stone wall like this is a manageable DIY project.”
Here’s a quick guide:
Dig a trench: Excavate a trench about 6 inches deep and 12-16 inches wide where you want the wall.
Add a gravel base: Fill the trench with 4 inches of paver base or crushed gravel and compact it thoroughly with a hand tamper. This is crucial for stability.
Lay the first course: Select your largest, flattest stones for the base. Set them firmly into the gravel, ensuring they are level.
Stack and stagger: Begin your second course, making sure to stagger the joints like you would with bricks. Set each course back about a half-inch from the one below it.
Finish the top: Use your flattest, most stable stones for the cap layer. Secure them with a construction-grade adhesive if needed.
Time estimate: One weekend for a 15-foot long wall. Cost: $300-$800 for stone.
21. Basic Concrete Driveway Apron
Let’s be perfectly honest: a plain concrete apron is the workhorse of the driveway world. It’s not going to win any design awards for innovation, and it’s not the most exciting choice on this list. However, it is functional, relatively inexpensive, and when done well, provides a clean, neutral transition to your home. Its primary purpose is utilitarian, and in many situations, that’s perfectly okay. Don’t feel pressured to choose intricate pavers if a simple, durable surface is all you really need.
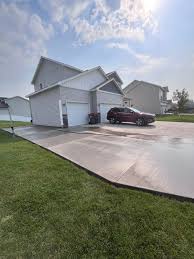
“If you’re opting for a simple concrete apron, the finish is what separates a cheap-looking job from a professional one.”
Insist on a ‘picture frame’ border. This is when the contractor uses a smaller tool to create a smooth, troweled border about 4-6 inches wide around the perimeter of the apron *before* applying the main broom finish to the center. This simple detail gives the slab a crisp, defined edge and makes the entire project look significantly more expensive and custom.
22. Suburban Standard: Concrete Apron with Decorative Garage Hardware
A concrete apron is a long-term commitment. Before you pour, run through this quick checklist to ensure you get it right:
- Measure and Mark: Use spray paint to mark the exact footprint of the apron. Live with the markings for a few days. Does it feel wide enough? Is the shape right?
- Check the Slope: Place a long, straight 2×4 with a level on top from your garage floor to the street. Is there a clear downward slope away from the house? If not, you need to address grading before pouring.
- Reinforcement Plan: Are you using rebar or wire mesh? Discuss the pros and cons with your contractor for your specific climate and soil type. Don’t skip reinforcement.
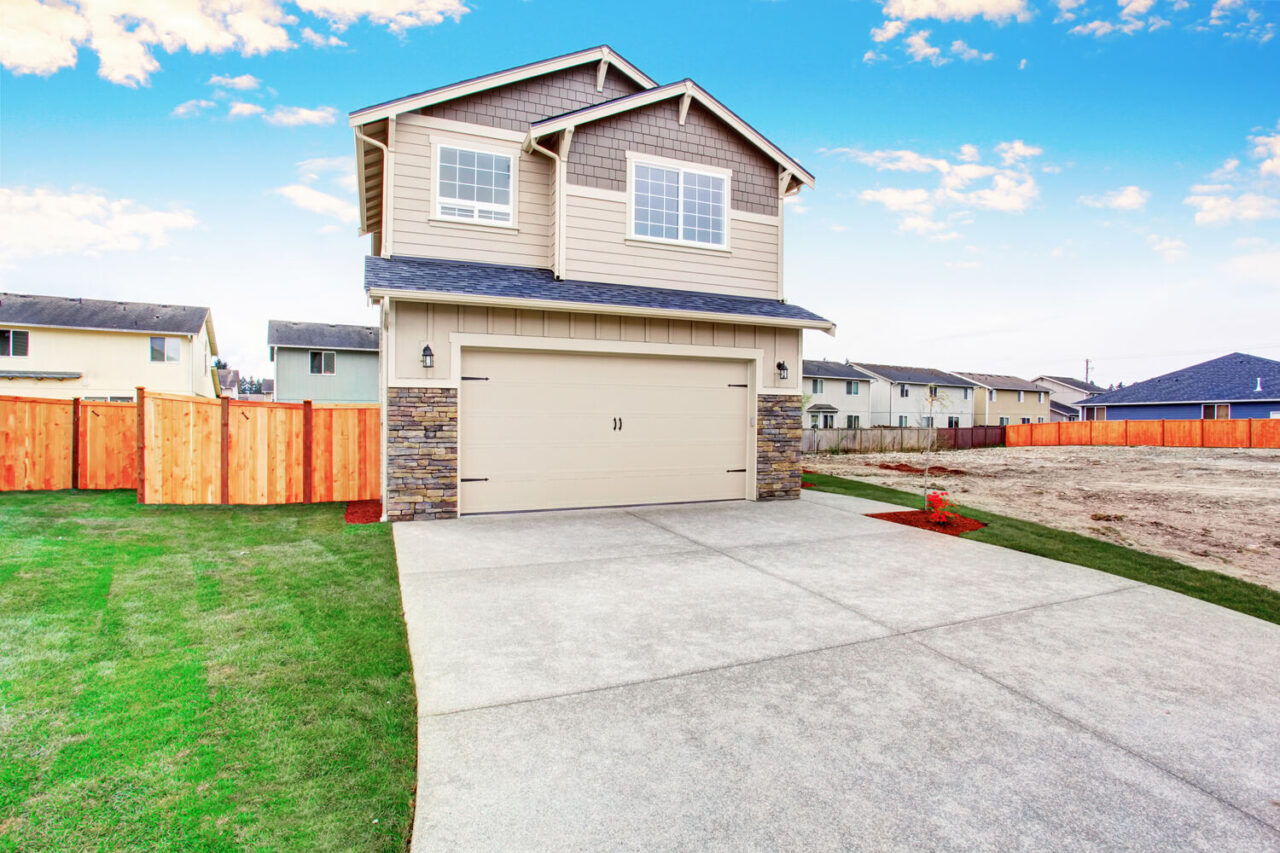
“This classic suburban look is all about balancing basic elements.”
Think of it as 70% standard surfaces (concrete apron, asphalt roof, vinyl siding) + 20% upgraded facade (the stone veneer columns) + 10% personality (the decorative garage door hardware). The concrete apron provides a clean, neutral base that allows the small, inexpensive upgrades like the faux hinges and stone veneer to really pop and add character without the cost of a full stone facade or a high-end paver driveway.
23. The Grand Interlocking Paver Driveway with Dark Border
The single detail that makes this driveway feel so luxurious is the dark paver border. It functions like matting on a piece of art. The border neatly contains the variegated field pavers, making their pattern appear more organized and intentional. It also adds a crisp, graphic line that defines the driveway’s shape and separates it from the lawn. This simple addition elevates the entire installation from a sea of pavers to a tailored, high-end hardscape feature. For a similar high-impact border idea, look at Idea #26.
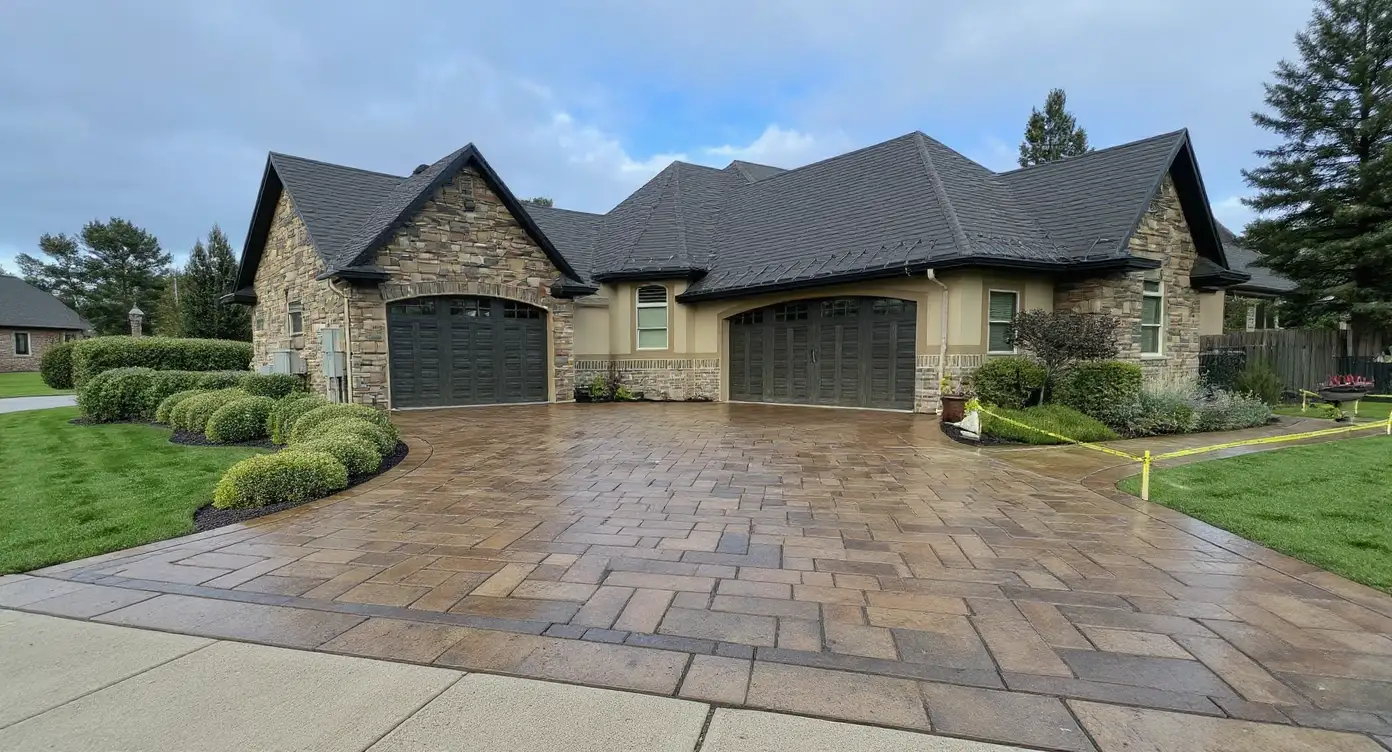
“A wide, multi-toned paver driveway like this is built for a substantial home.”
It works best on properties with a house frontage of 40 feet or more, allowing the driveway’s scale to match the home’s presence. The driveway width should ideally be 18-24 feet to accommodate two cars comfortably and allow the paver pattern to be fully appreciated. On a smaller home or a narrow lot, this much pattern and color could feel too busy and visually shrink the property.
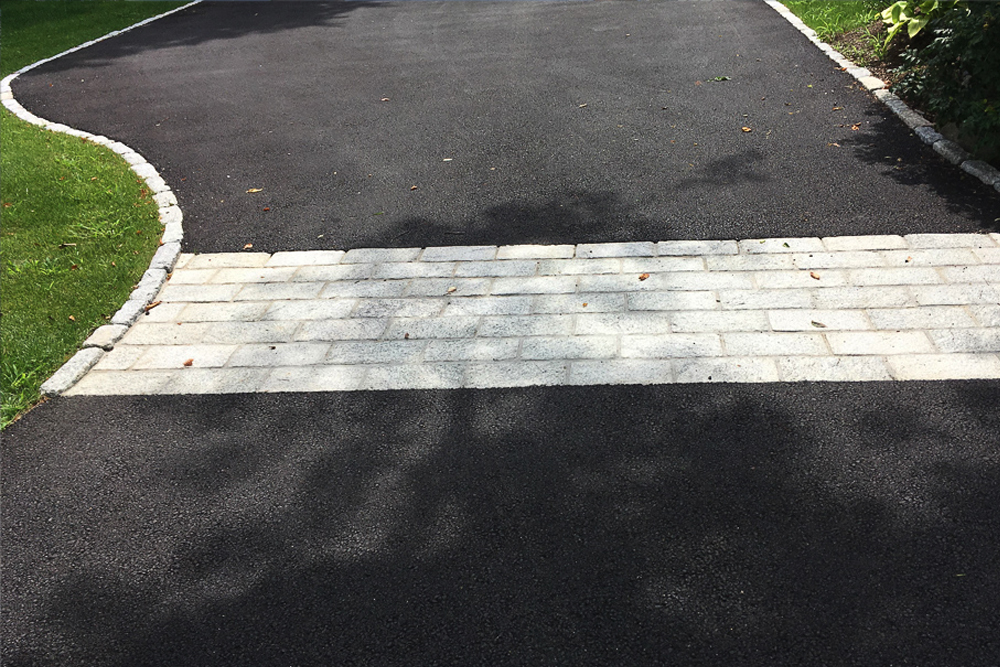
24. Freshly Paved Asphalt Driveway with a Light Gray Brick Border
This design is a perfect example of the power of framing. The dark, uniform asphalt acts as a negative space, a blank canvas. The light gray brick border creates a sharp, clean line that ‘frames’ the canvas, giving it shape and intention. This high contrast makes the curves of the driveway look deliberate and graceful. Without the brick border, the asphalt edge would look unfinished and blend messily into the lawn. It is a relatively simple addition that has a massive impact on the overall perceived quality.
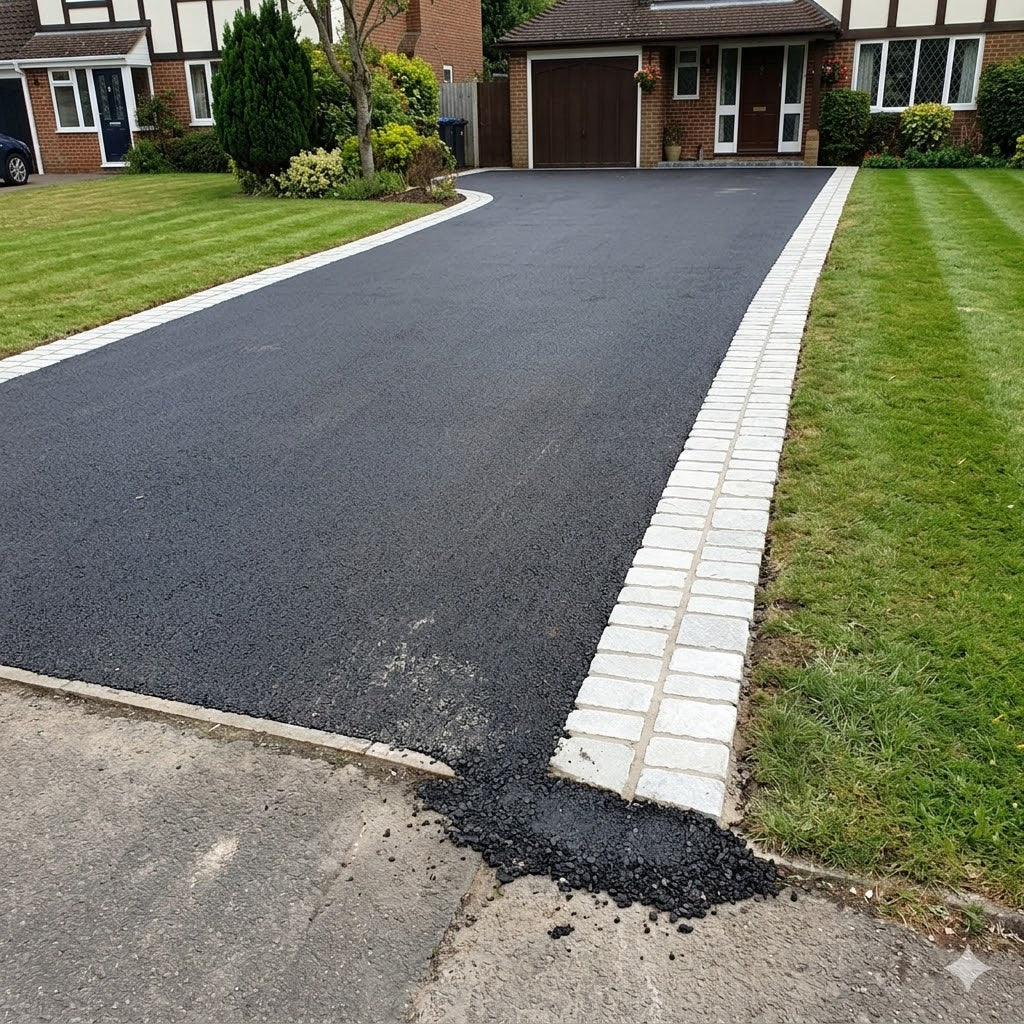
“While a brick border is beautiful, it can be a maintenance headache for lawn care.”
The edge of the brick creates a barrier that lawnmower wheels can’t easily run over, meaning you’ll always have a small strip of grass that needs to be trimmed with a string trimmer. Also, be aware that ground frost in colder climates can heave the bricks over time, making them uneven. You may need to reset a few bricks every 5-10 years to keep the line looking perfectly crisp.
25. Elegant Curves: Interlocking Paver Driveway with Lush Landscaping
The formula for this elegant look is a balance of refined hardscape and lush nature. It’s about 50% structured pavers (the driveway surface and dark border) + 50% soft, organic shapes (the curved lawn edges and dense, green shrubbery). The key is the interplay between the two. The firm, defined line of the paver border makes the soft curve of the lawn look even more graceful. Neither element would be as impactful without the other. This creates a perfect harmony between the man-made and the natural.
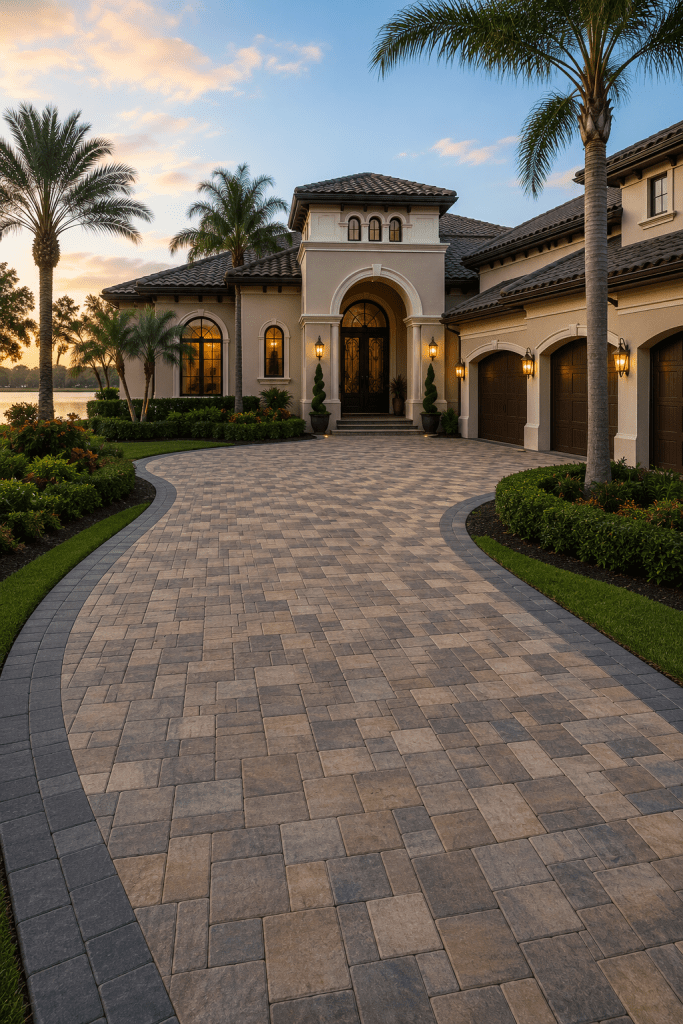
“A paver driveway this large is a significant investment, and protecting it is key.”
Pavers are porous and can stain from oil, tire marks, and organic matter. Applying a high-quality sealer every 3-5 years is the most important thing you can do to protect the surface. It will prevent stains from penetrating, make cleaning easier, and can even enhance the color of the pavers. While it adds to the long-term cost, it’s far cheaper than trying to remove a large oil stain or replacing a section of pavers.
26. Classic Herringbone Brick Apron with a Cobblestone Border
The combination of a herringbone pattern with a cobblestone border works so well due to the contrast in both pattern and scale. The herringbone pattern, with its small, repeating rectangular bricks, creates a sense of dynamic movement and intricate detail. The cobblestone border, composed of larger, more irregular shapes, acts as a static, sturdy frame. This contrast makes the herringbone section feel more special and contained, preventing the busy pattern from feeling chaotic.
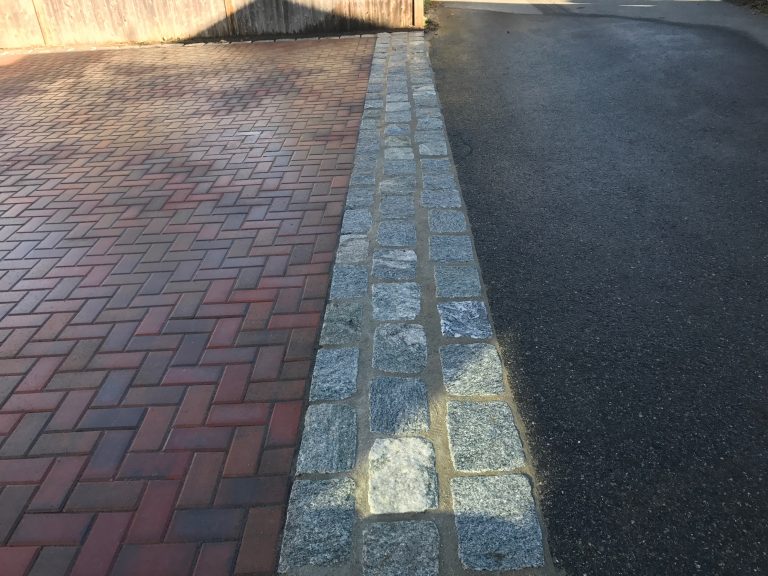
“The herringbone pattern is the absolute star of this show.”
It’s a timeless, classic pattern that signals craftsmanship and attention to detail. It elevates simple brick pavers from a basic surface to a sophisticated design element. If you were to lay these same bricks in a simple running bond pattern, the look would be far more utilitarian. The herringbone layout is what gives this apron its unique character and distinguished, old-world charm, making it a clear focal point of the driveway entrance.
27. A Mediterranean Welcome: Circular Driveway with Cobble Borders
Grand, circular driveways require significant space to feel graceful rather than cramped. For comfortable navigation, the inner diameter of the central island should be at least 20 feet, and the driveway lane itself should be 12-15 feet wide. This results in an overall feature that can easily span 50-60 feet across. This design is built for large, estate-style lots where the house is set back significantly from the road, allowing the sweeping curves and grand scale of the driveway to be the impressive feature it’s meant to be. This is a more expansive version of the concept seen in Idea #13.
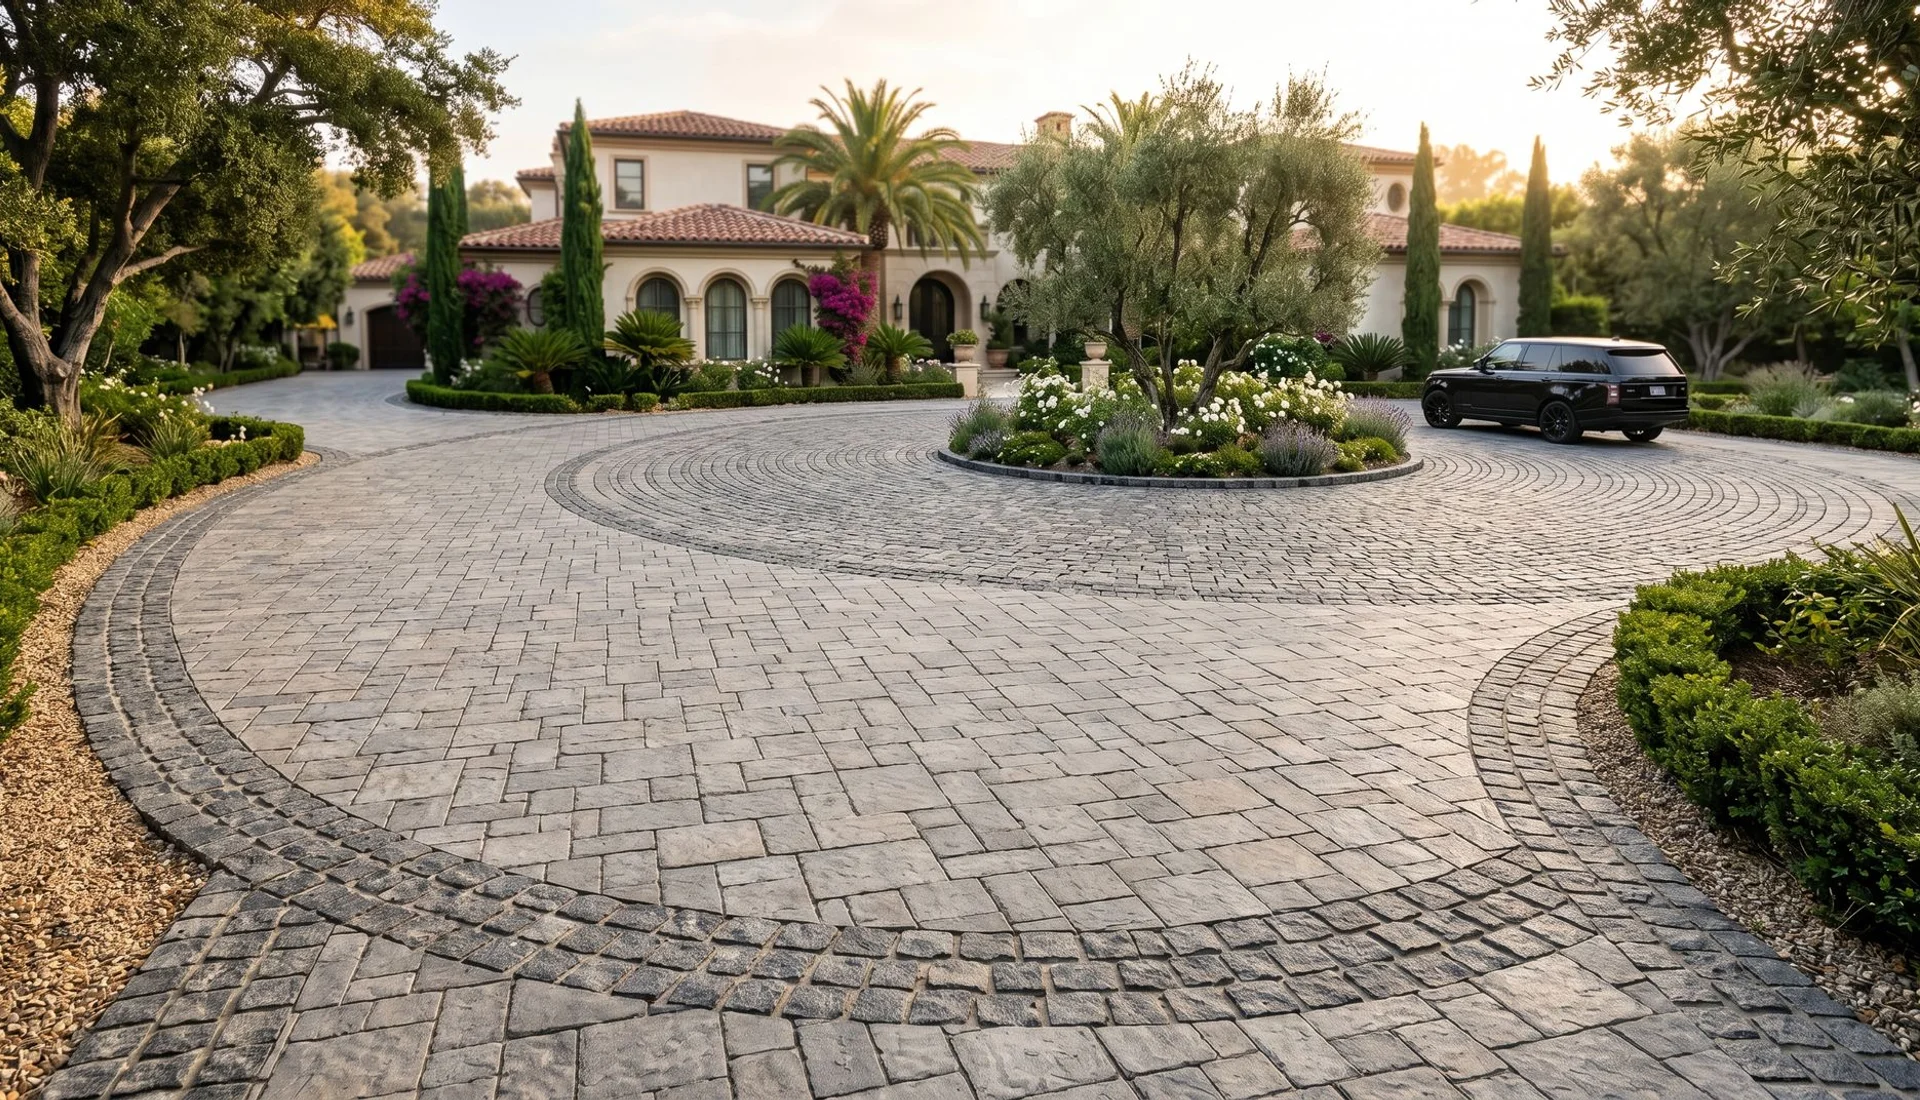
“Want this Mediterranean vibe without the custom paver price tag?”
Opt for a poured, colored concrete driveway. Choose a light buff or terracotta color to mimic the warm tones. Instead of expensive cobblestone borders, use a simple, dark-colored paver brick as the edging. For the central island, use compacted gravel and a few large, statement terracotta pots with olive or citrus trees instead of extensive in-ground landscaping. You’ll get the same sense of shape, color, and grandeur for potentially 60-70% less cost.
28. Ornate Beige Paver Driveway with a Geometric Inlay
When incorporating a bold geometric inlay, the key is placement. Position the inlay where it will be seen most often and from the most important angle—typically at the very end of the driveway, right before the street. This makes it a farewell statement as you leave and a grand welcome as you arrive. Avoid placing it halfway up the driveway or right in front of the garage, where it can be obscured by parked cars. It’s a focal point, so treat it like one and give it center stage.
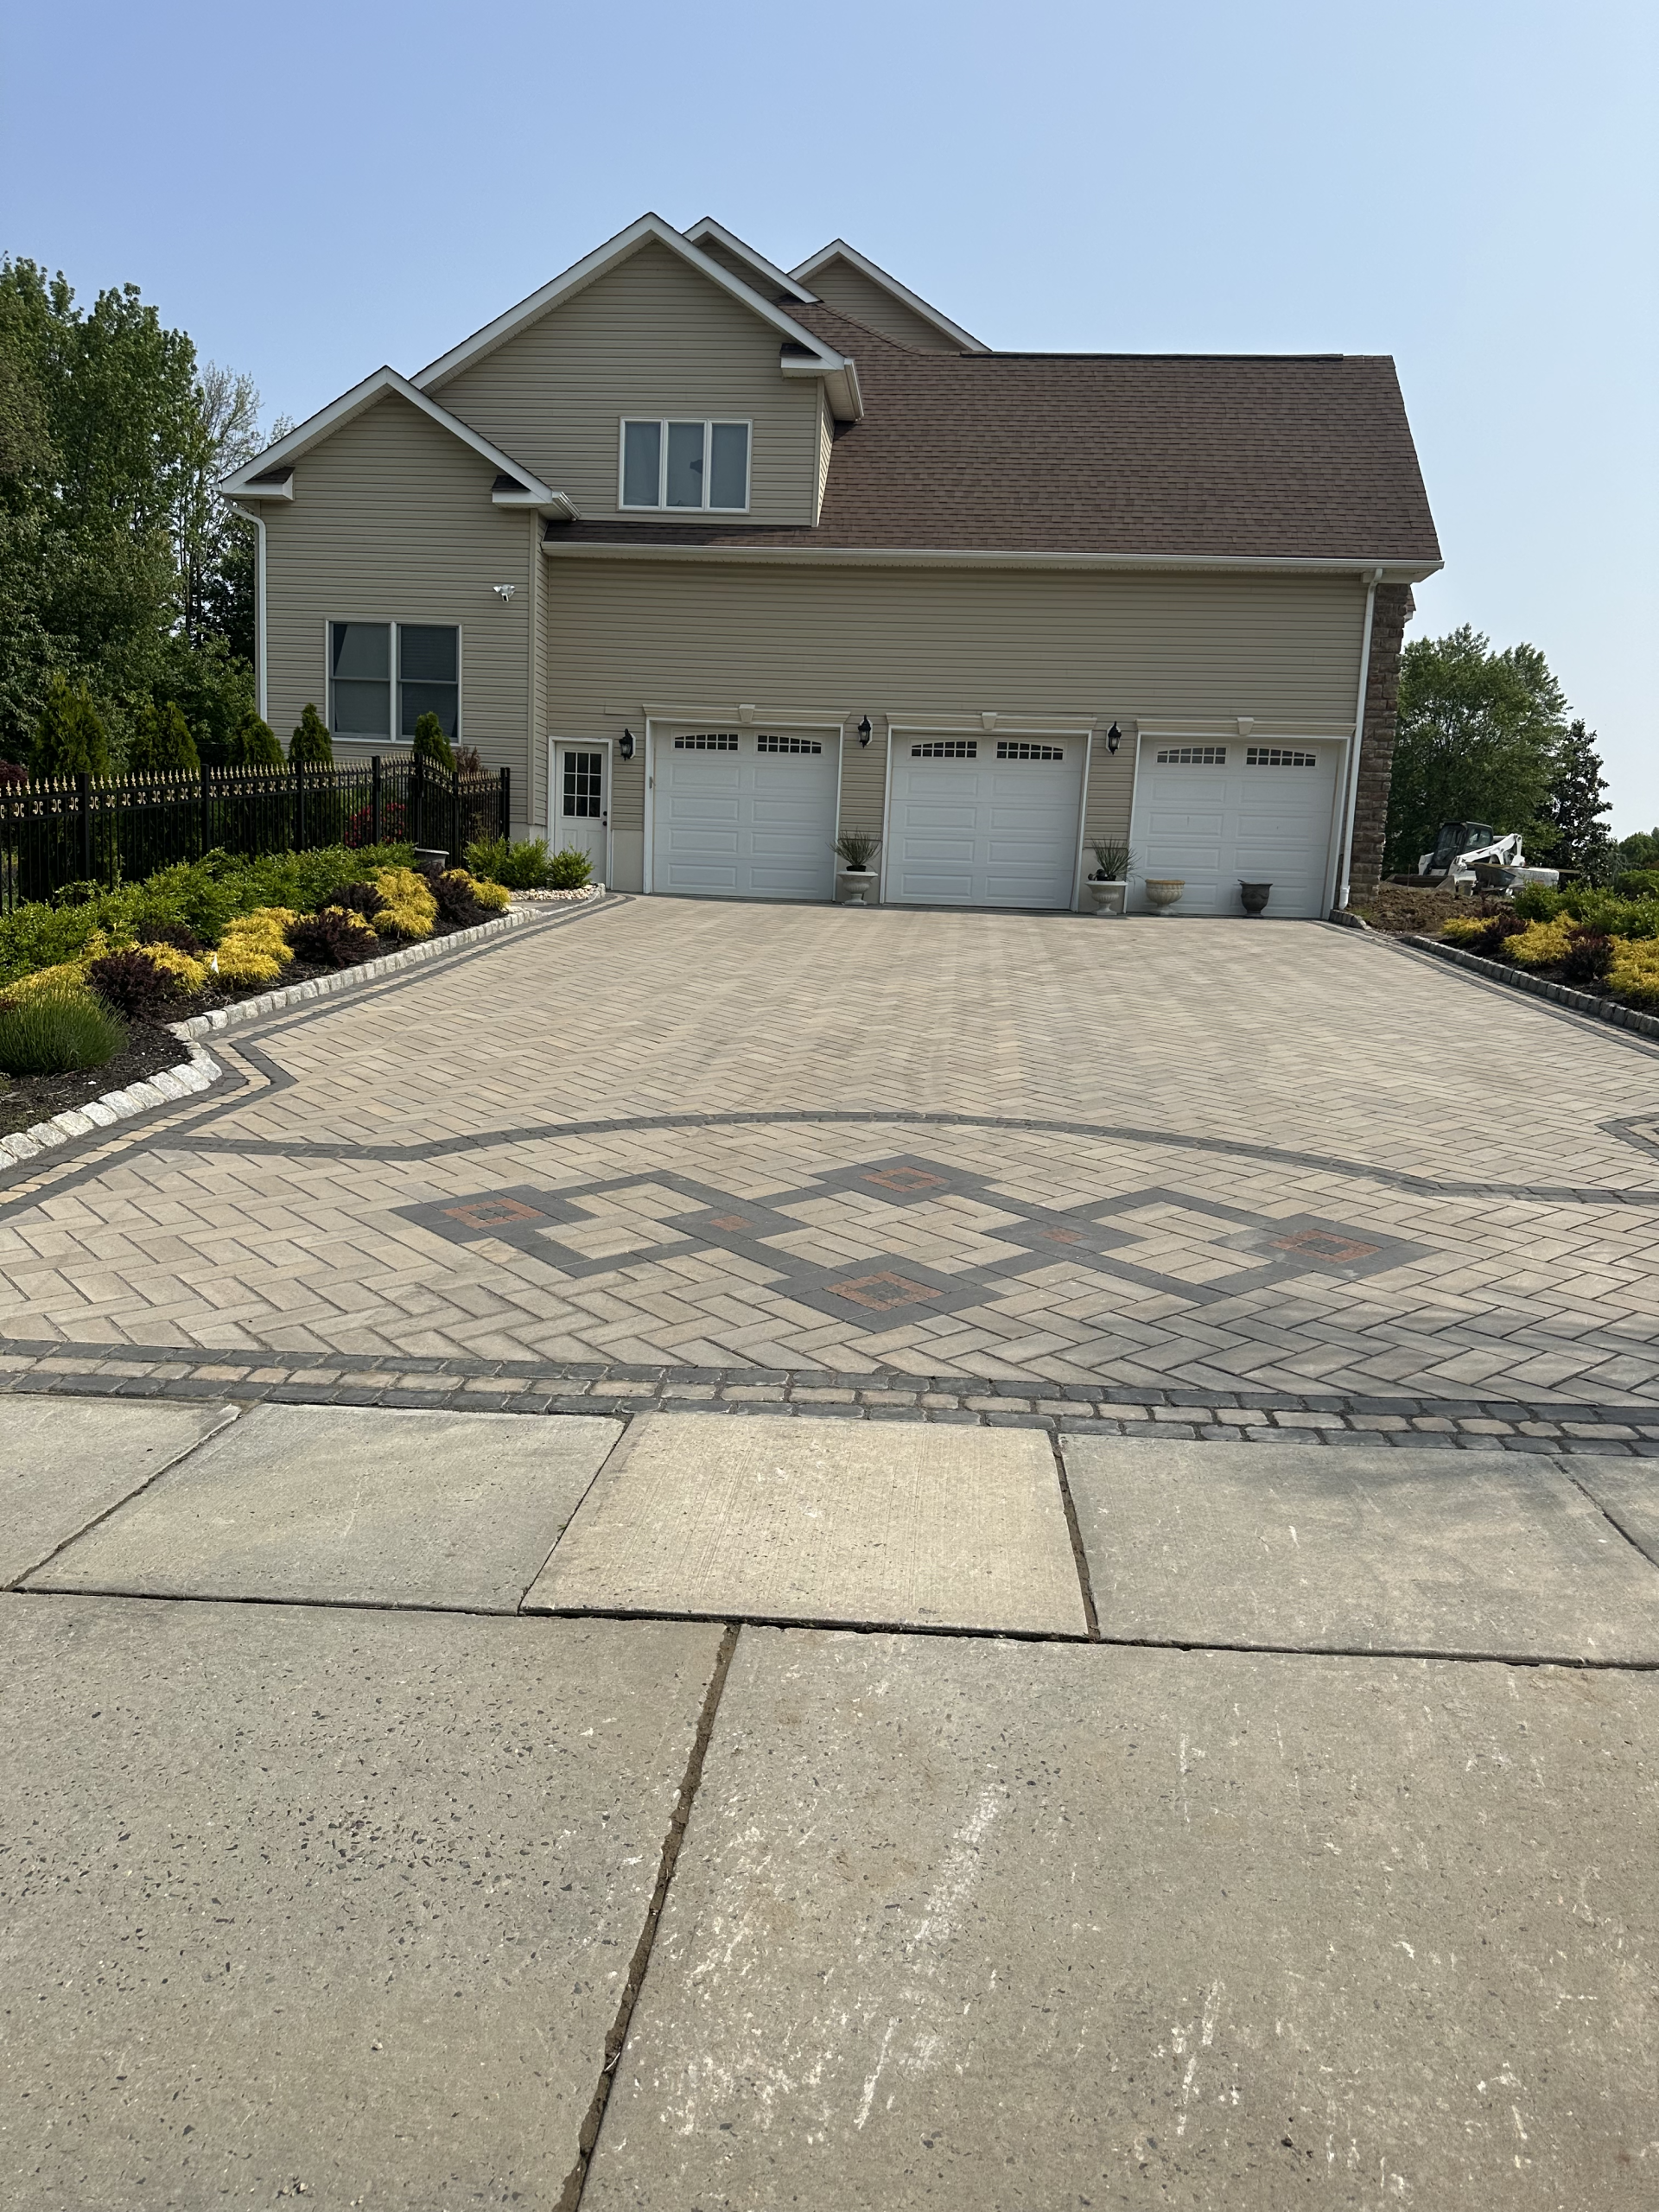
“An intricate design like this, with two colors of pavers and a geometric pattern, significantly increases labor costs.”
The time it takes for a crew to cut and lay the small pieces for the dark gray inlay is substantial. Expect the labor cost for an inlaid section to be 2-3 times higher per square foot than for the main field of pavers. It’s a beautiful, custom touch, but be sure to get a detailed quote that breaks out the cost for the inlay specifically so you’re not surprised by the final bill.
29. Clean Lines: Concrete Driveway with Gray Garage Doors and Manicured Landscaping
This look is a masterclass in tonal coordination. The light gray of the concrete driveway speaks directly to the medium gray of the siding and garage doors. This creates an incredibly calming and cohesive visual experience. The dark control joints in the concrete add a subtle graphic element that echoes the dark mulch in the garden beds. Nothing is jarring or out of place. The vibrant green of the manicured lawn and shrubs provides the only major color, making it pop beautifully against the serene gray backdrop.
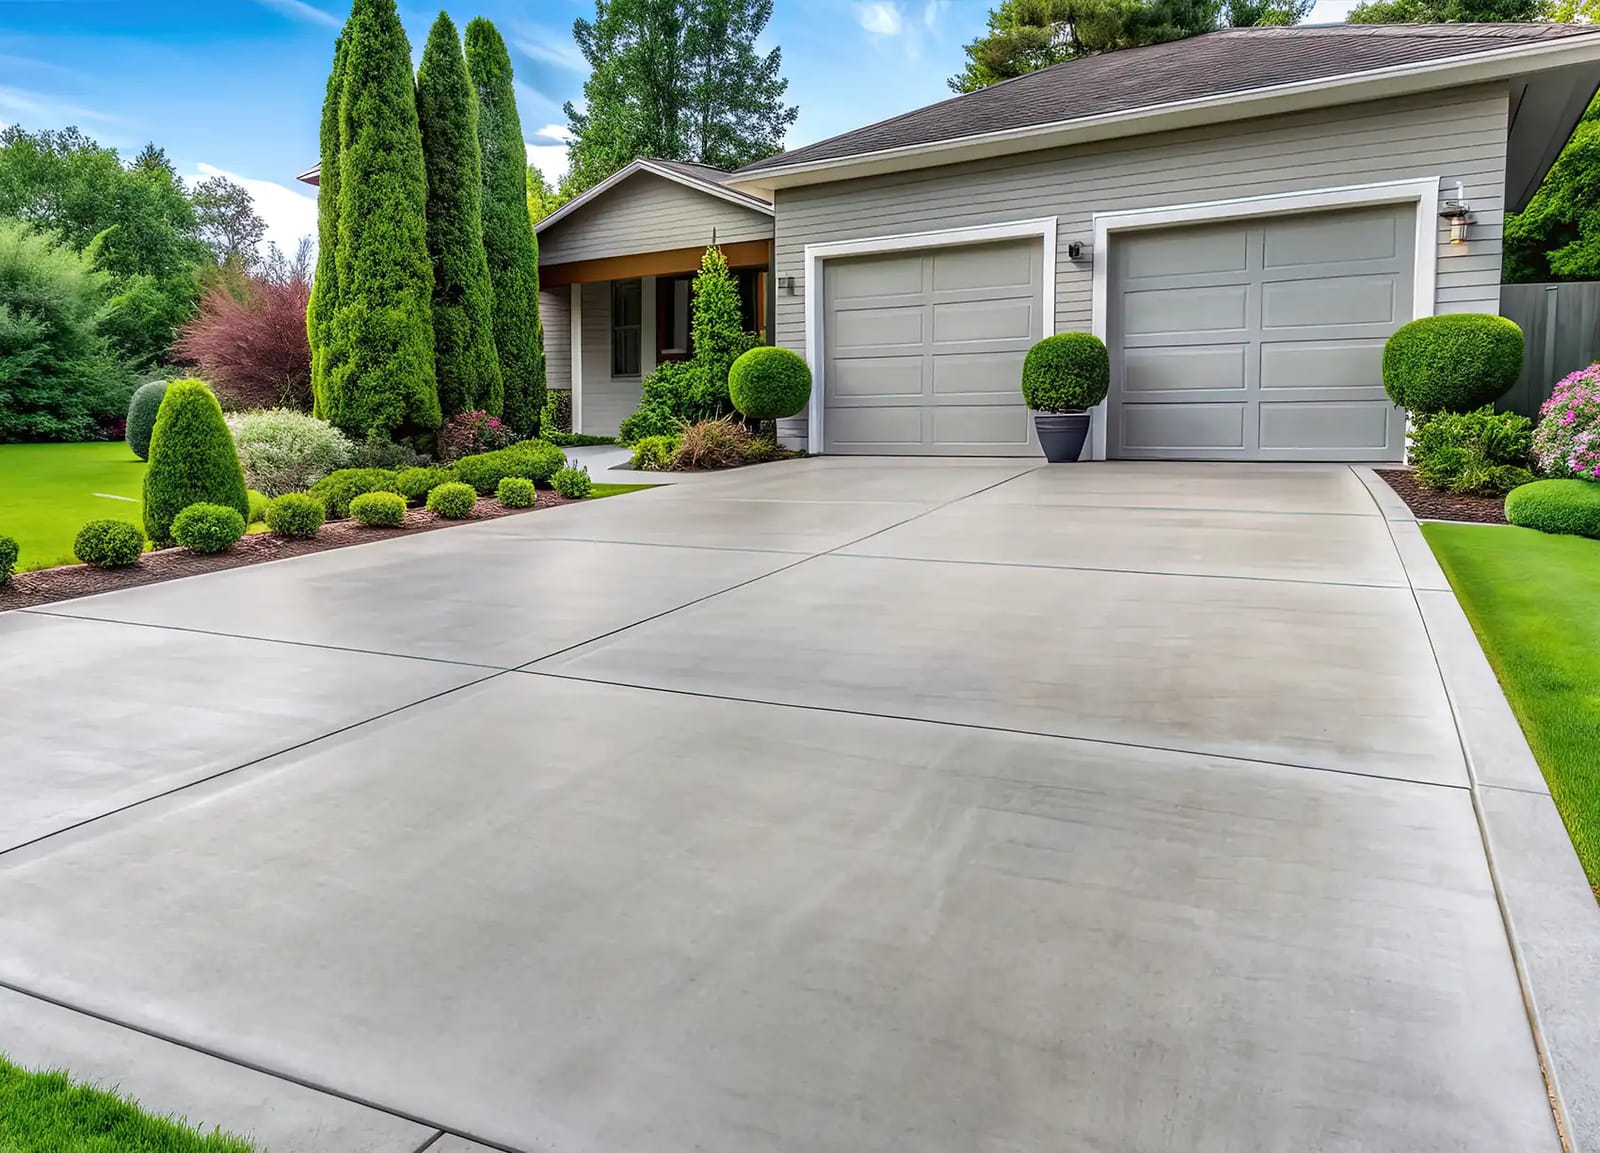
“This design’s success can be broken down into a simple formula: 60% monochrome base (the gray concrete, siding, and garage doors) + 30% lush greenery (the lawn and shrubs) + 10% dark accents (the control joints and mulch).”
This recipe for a clean, contemporary suburban look is almost foolproof. You could change the monochrome base to beige or white, and as long as you maintain that strong foundation and pair it with vibrant greens and dark accents, the sophisticated result will be the same.
30. Functional Form: Concrete Apron with a Wide Tapered Edge
The most important design choice here is the generously tapered or ‘flared’ edge of the apron where it meets the street. This isn’t just an aesthetic choice; it’s highly functional. The wide flare makes turning into and out of the driveway significantly easier, reducing the risk of driving over the lawn or curb. It’s a subtle but thoughtful gesture that improves the daily use of the driveway, making the entrance feel more generous and accommodating. A straight, non-flared apron can often feel tight and restrictive by comparison.
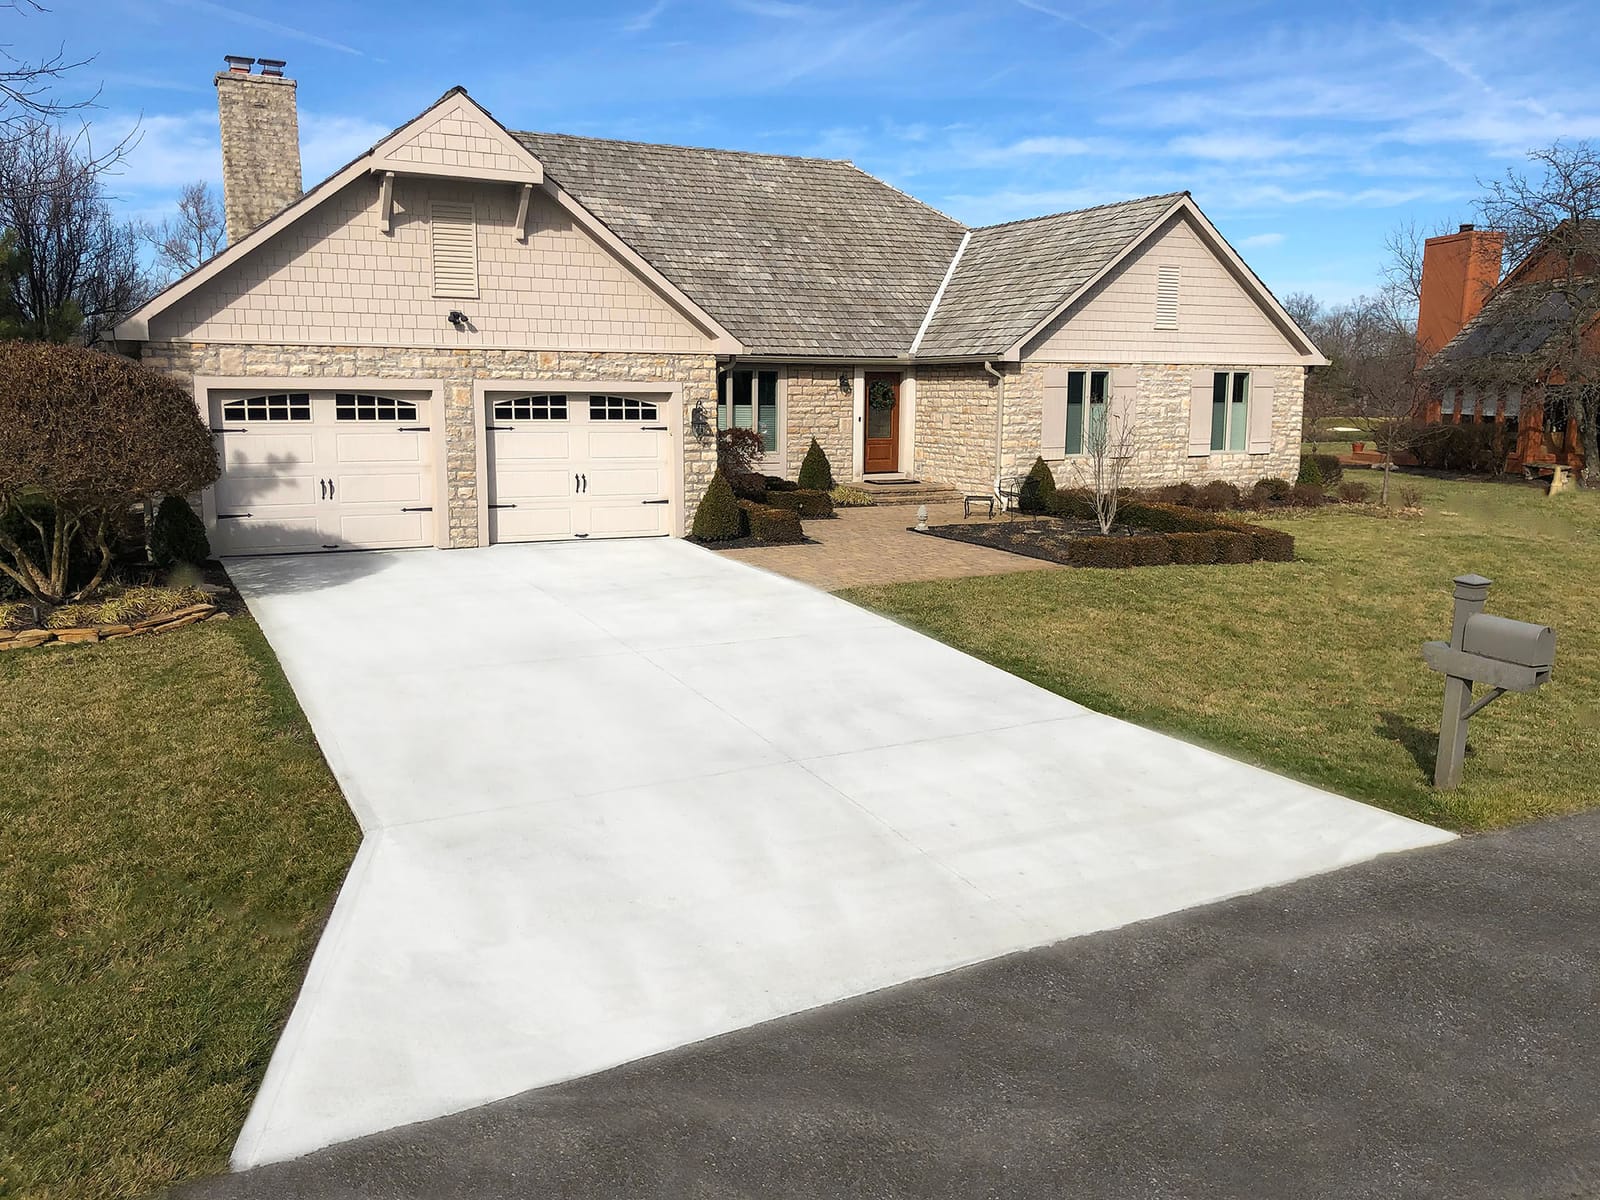
“When planning a driveway flare, don’t be shy.”
A common mistake is making the taper too small to be useful. As a rule of thumb, each side of the apron should flare out at least 2 to 3 feet from the edge of the driveway. So, if your driveway is 12 feet wide, the apron at the street should be at least 16-18 feet wide. This ensures the flare is generous enough to make a real difference when maneuvering a vehicle, especially larger SUVs or trucks.
31. Approachable Classic: Concrete Driveway with Gentle Curves
The gentle curves of this concrete driveway apron are what make it feel so soft and approachable. Hardscaping can often feel rigid and severe, but introducing soft, organic curves completely changes the mood. It helps the large expanse of concrete blend more naturally with the surrounding green lawn, blurring the line between the man-made and the natural. This is a much friendlier and more welcoming look than a driveway with sharp, 90-degree corners, and a great alternative to the tapered edge seen in Idea #30.
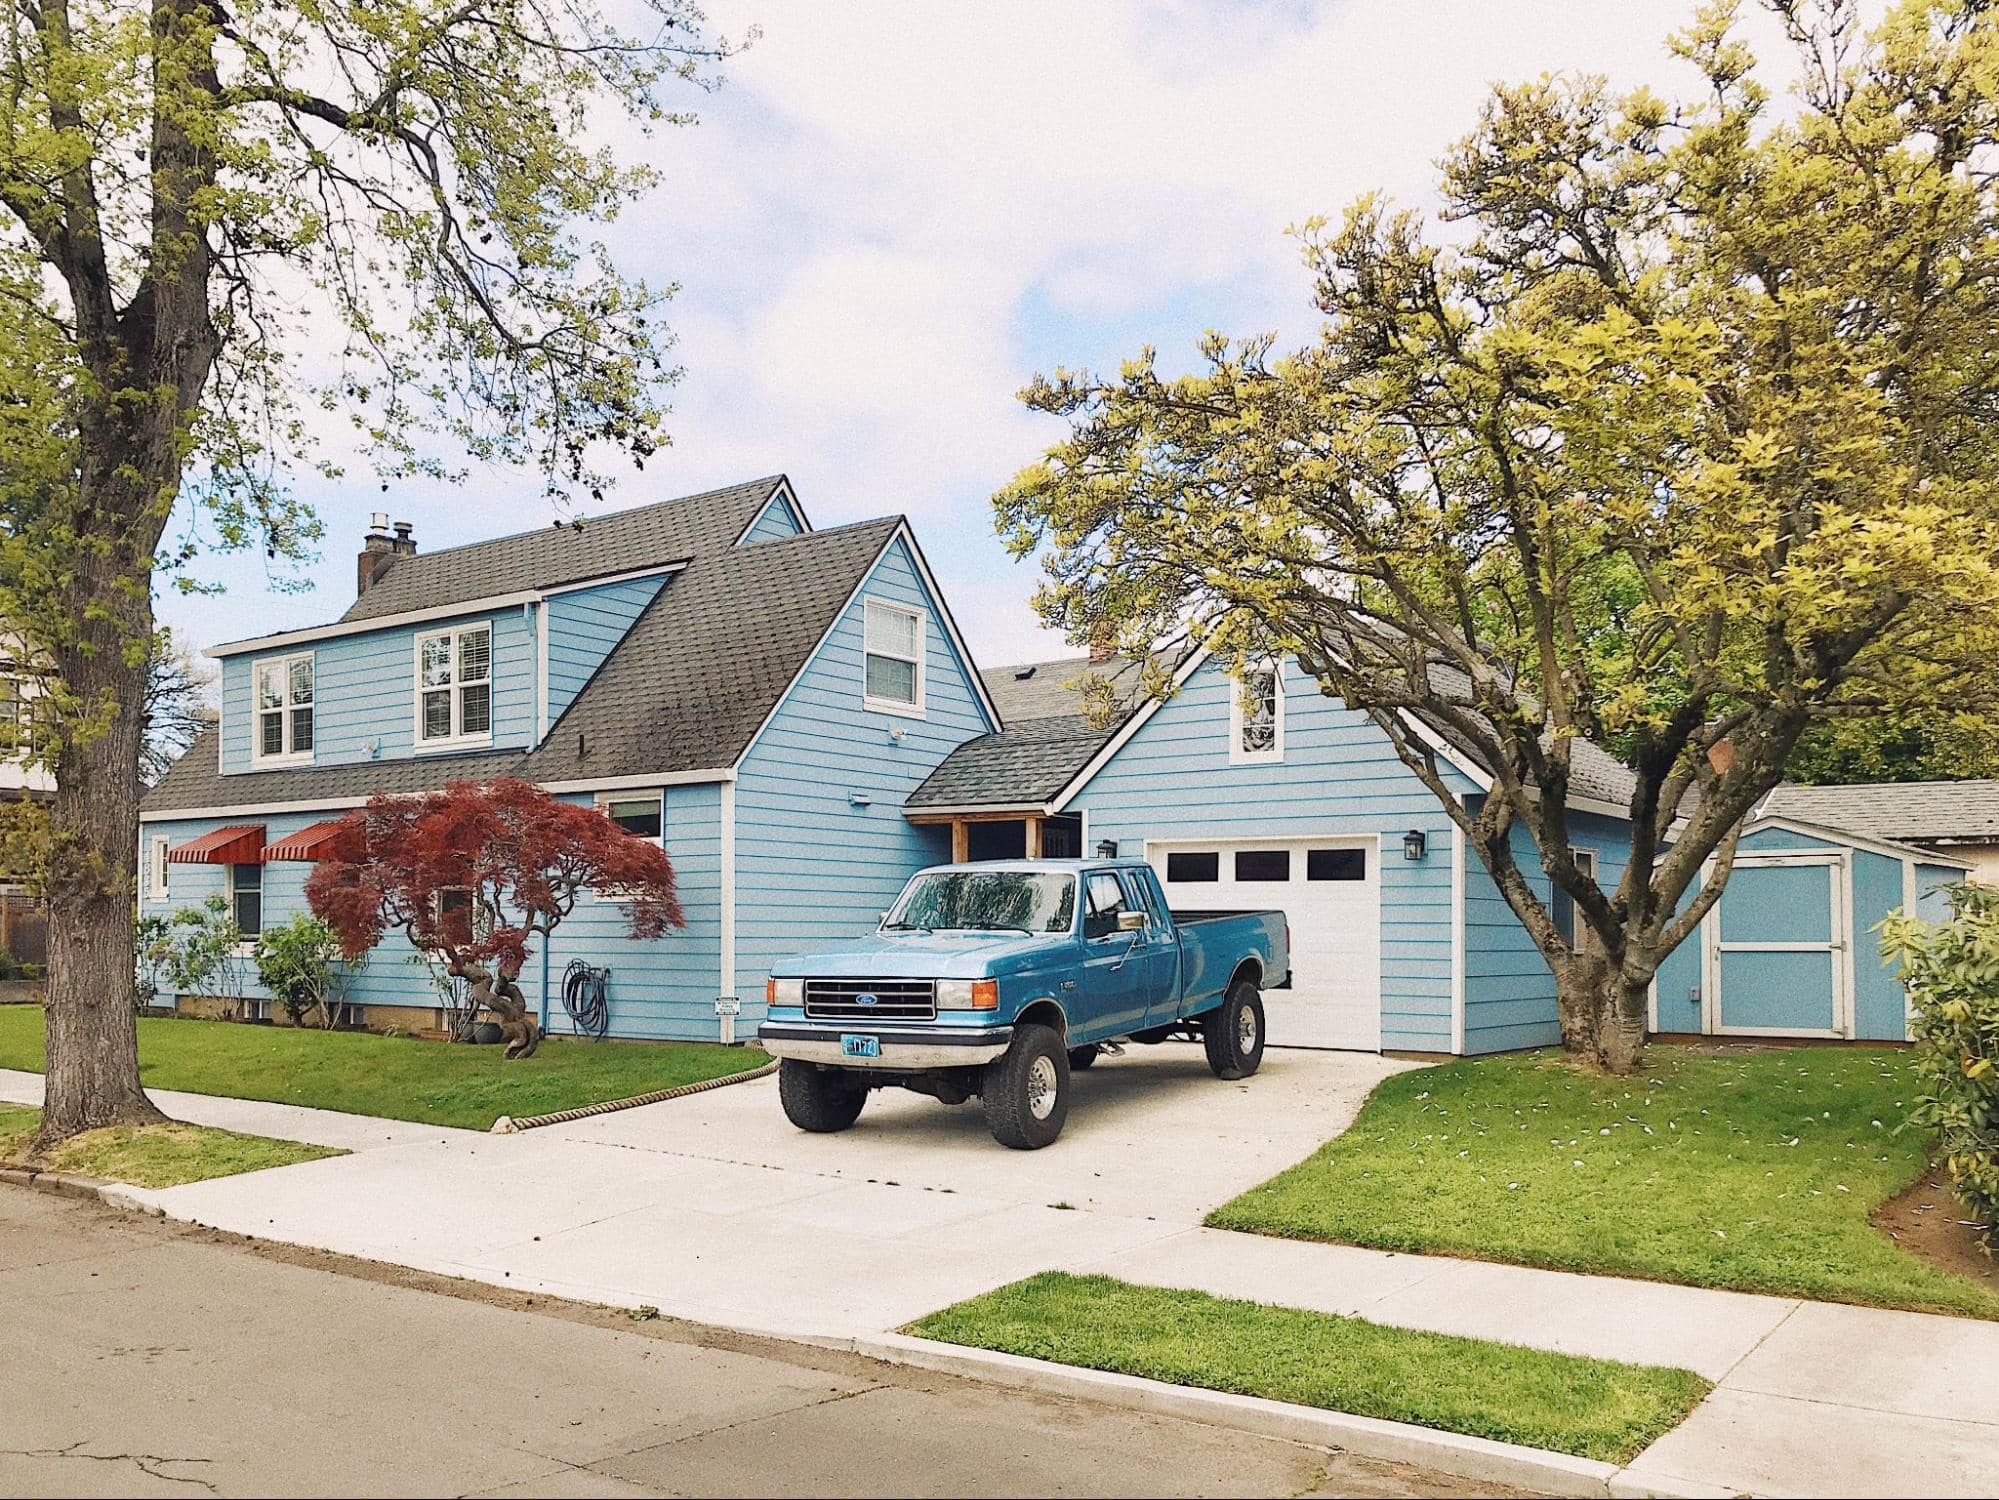
“Creating smooth, graceful curves with concrete forms is more labor-intensive for a contractor than setting up straight lines.”
The forming material (often bender board or flexible plastic forms) has to be carefully staked to hold the curve’s shape against the pressure of the wet concrete. This extra labor and attention to detail will likely add a slight premium to the cost of your project compared to a simple rectangular slab. Be sure to discuss this with your contractor upfront.
Your Curb Appeal Story Starts at the Street
That strip of hardscape where your property meets the world is more than just functional—it’s the first word in your home’s design story. We hope these 31 ideas have sparked some inspiration for your own grand entrance. Now, which one are you pinning first?