You know that feeling when you finally find the flower garden idea that looks exactly right for your yard? That “aha!” moment is what this guide is all about. After filtering through hundreds of real gardens, we’ve narrowed it down to the 31 ideas that truly deliver inspiration for 2026. Inside, you’ll find stunning layouts for every style, from lush, rambling cottage gardens to clean, modern floral displays. This year, it’s all about creating personal, tangible escapes that feel as immersive as the beautiful digital worlds in games like Animal Crossing—turning screen inspiration into soil-grown reality. 📌 Pin this guide for later—your future self will thank you when it’s time to start planting.
This post may contain affiliate links. As an Amazon Associate, we earn from qualifying purchases at no extra cost to you.
And for a dose of reality, stay until the end—we break down the most common mistakes that can ruin these beautiful looks and tell you exactly how to avoid them.
As a heads-up, this post may contain affiliate links. If you buy something through one of those links, you won’t pay a penny more, but we’ll get a small commission, which helps keep our garden-loving lights on.
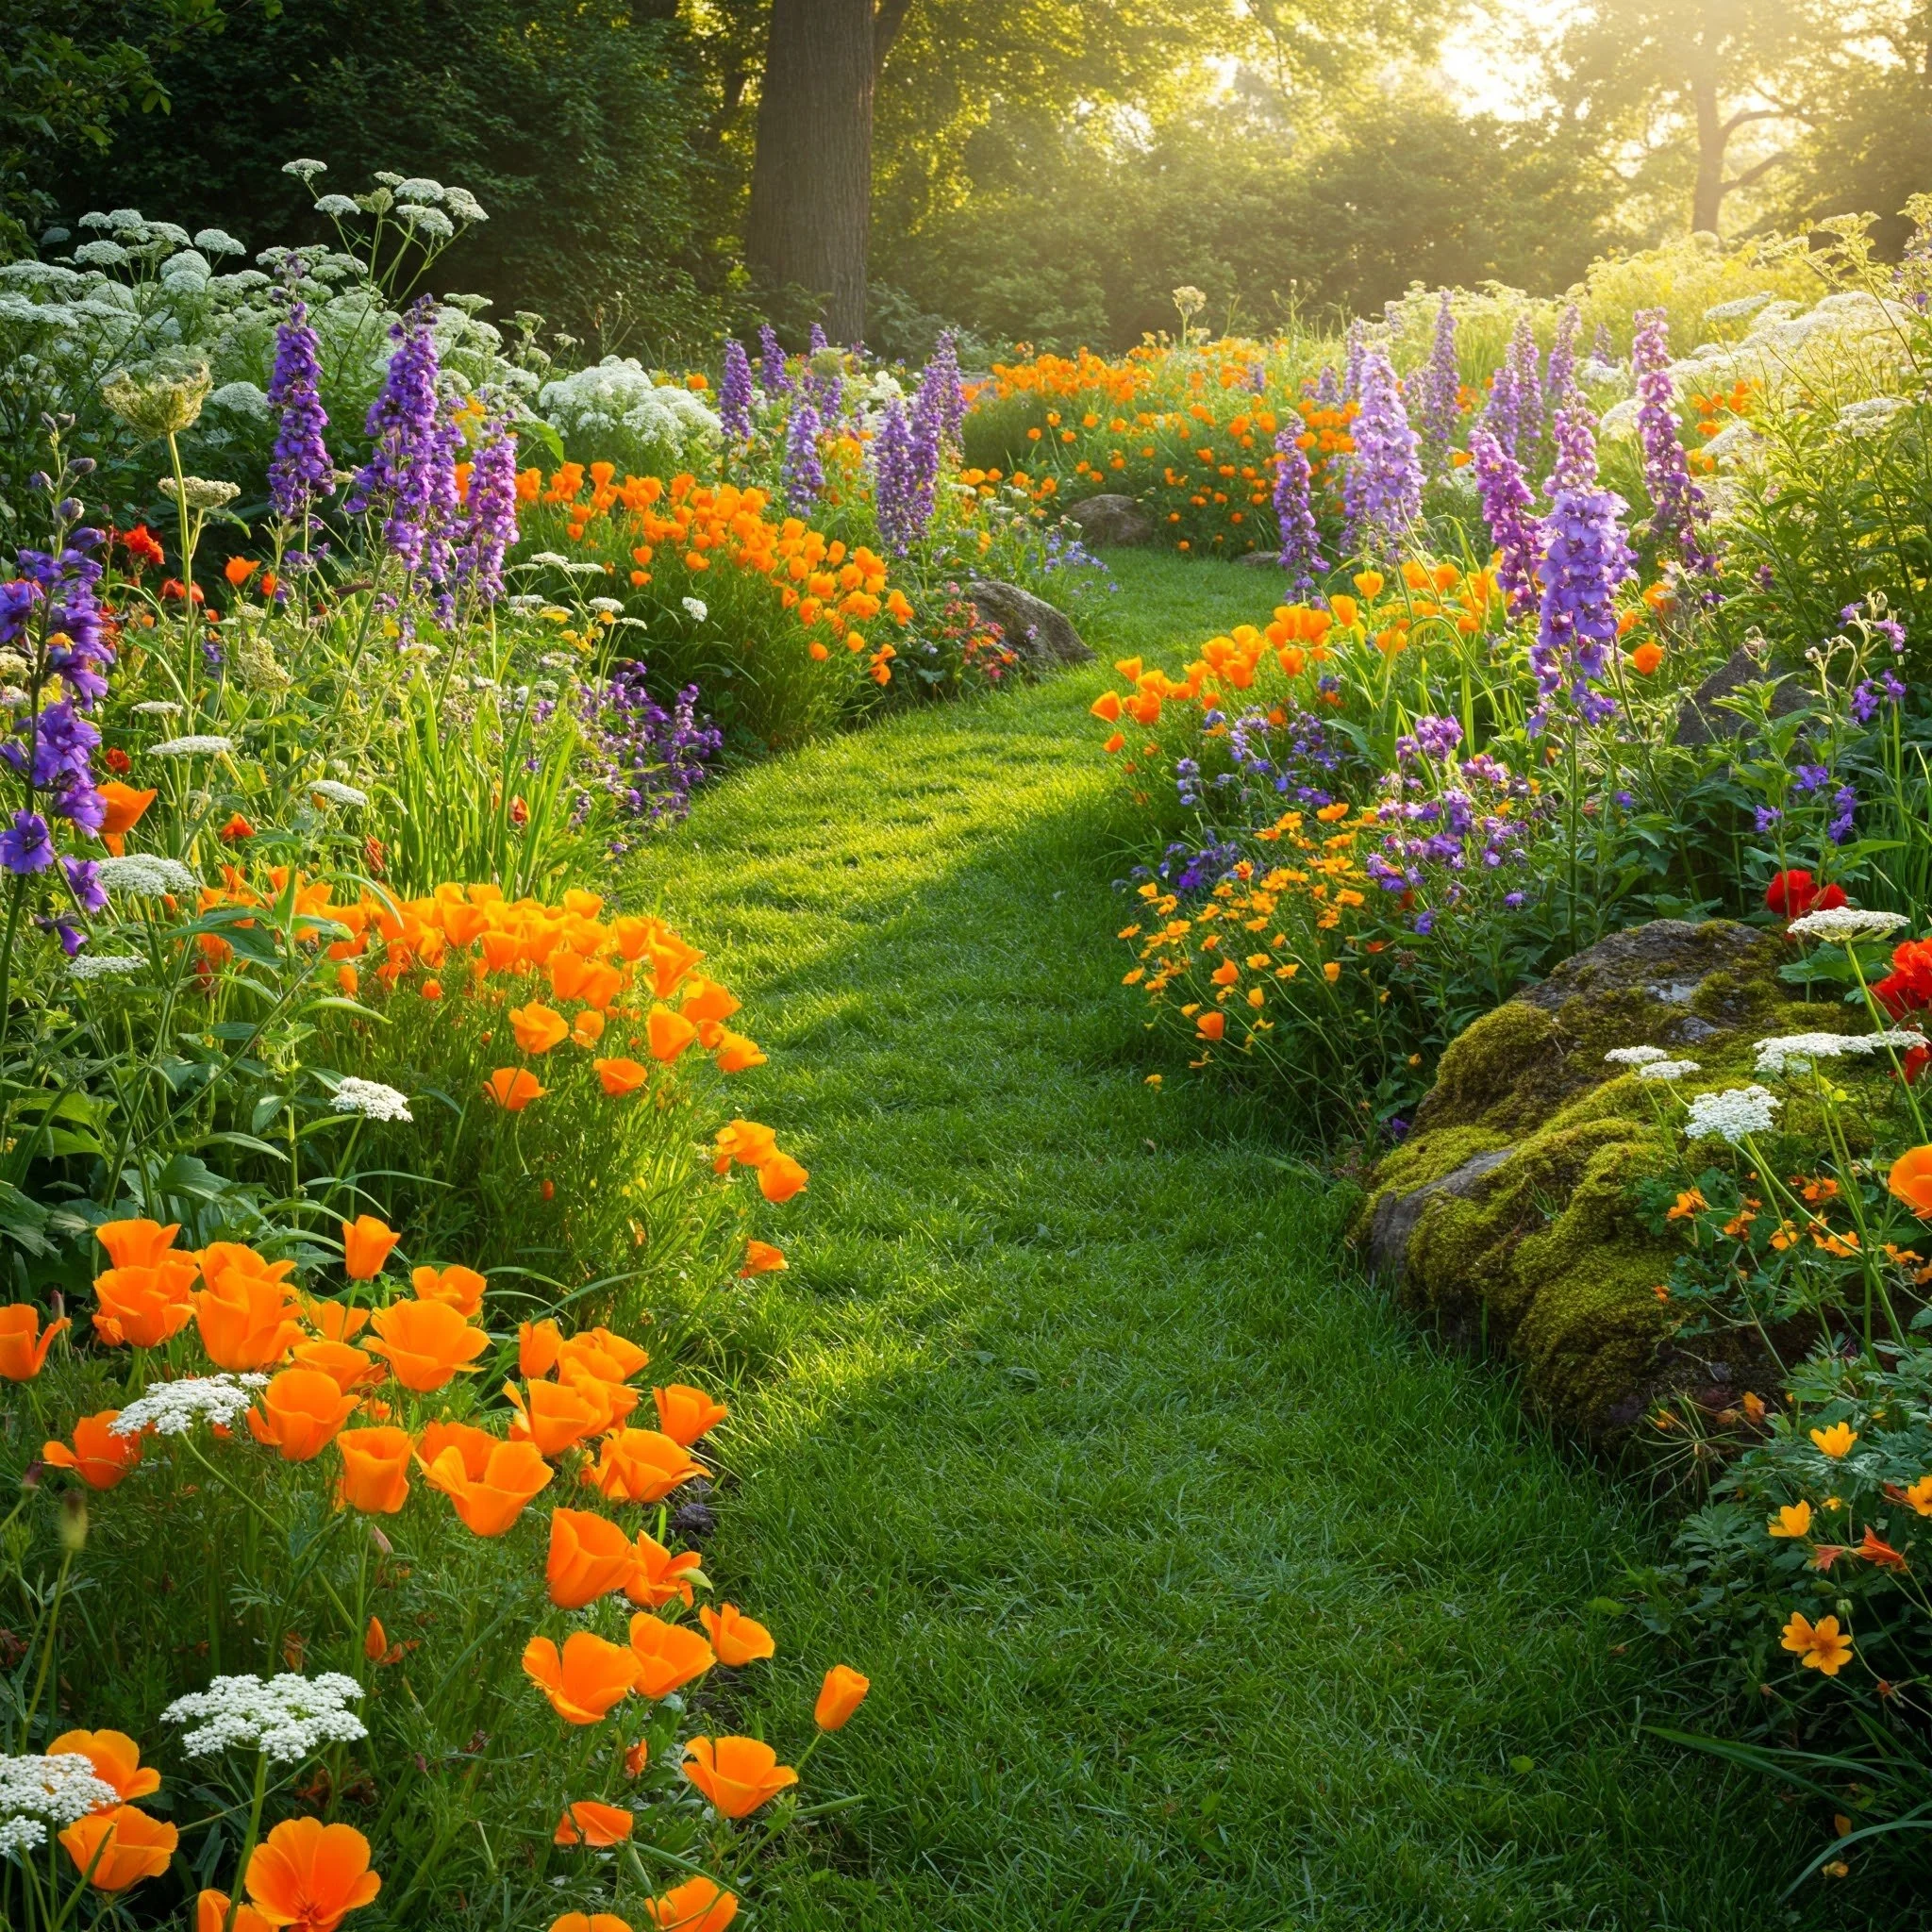
1. Follow a Sun-Drenched Path of Purple and Orange Poppies
The magic here is all about color theory. The vibrant orange of the poppies and the deep purple of the delphiniums are complementary colors, meaning they sit opposite each other on the color wheel. This creates a high-contrast, visually exciting pairing that makes both colors appear even brighter and more dynamic. The winding grass path adds a layer of relaxed, natural charm, inviting you to wander through the scene rather than just look at it.
|
$34.99
|
$0.34
|
$7.99
|
$22.86
|

“To get this look, plant in masses rather than single rows.”
For a truly natural feel, create large, irregular drifts of each color. Use a 2:1 ratio of purple to orange flowers to let the vibrant orange act as a powerful accent. Ensure your taller plants, like the delphiniums, are placed toward the back of the bed so they don’t block the shorter poppies from soaking up a full day of sun.
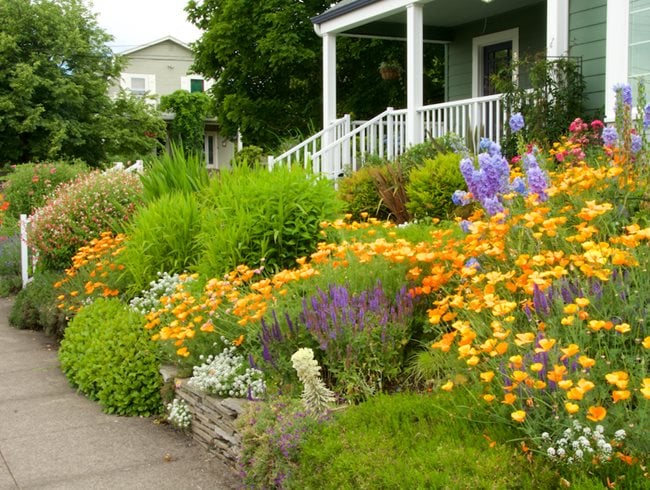
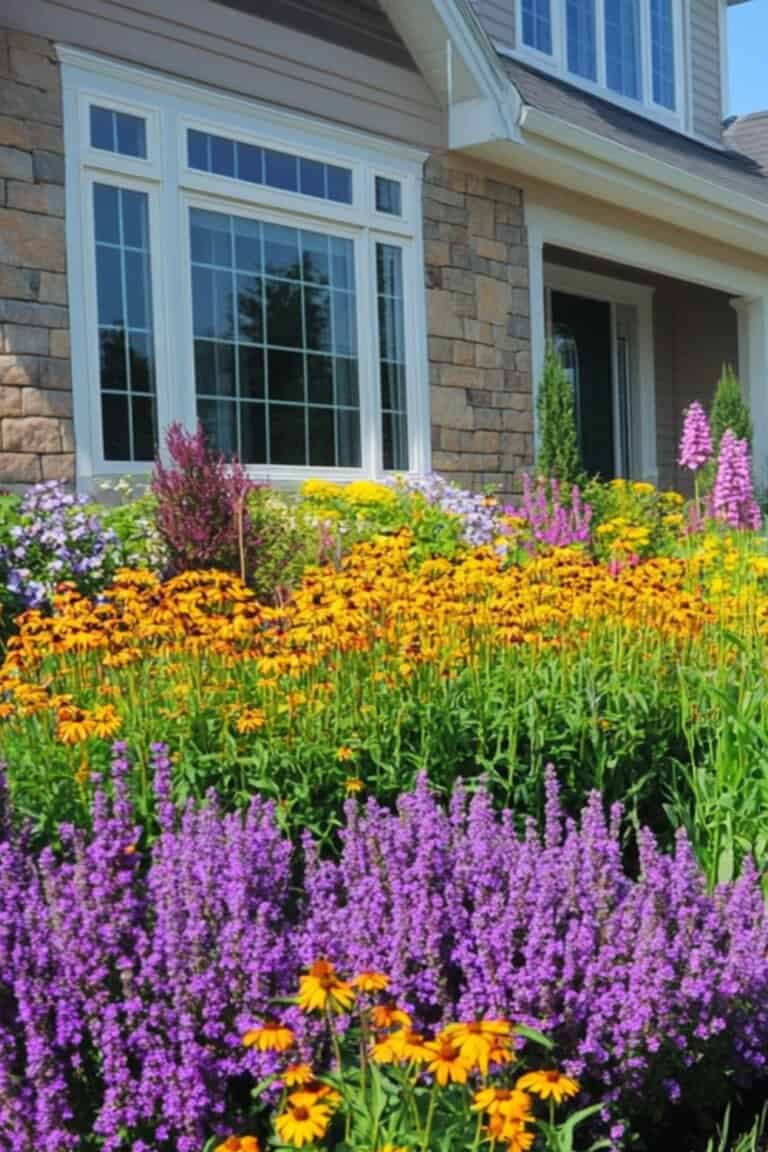
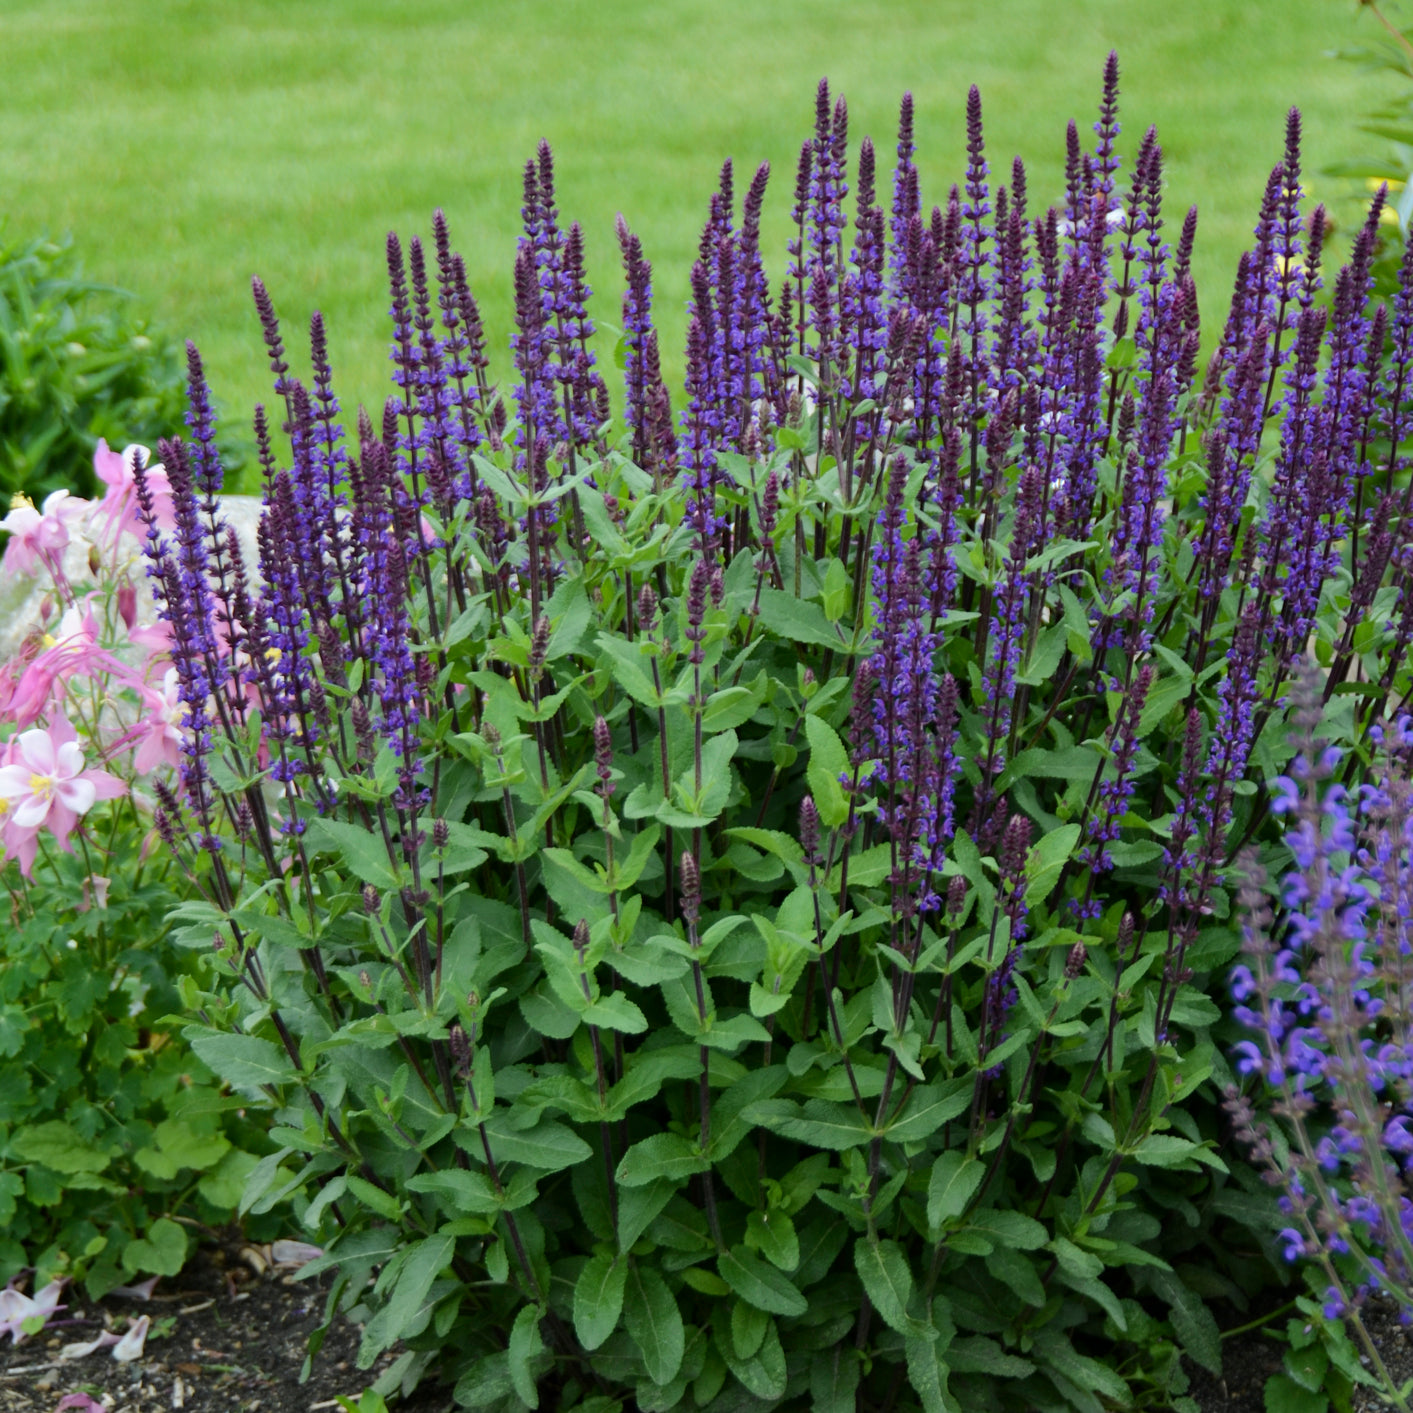
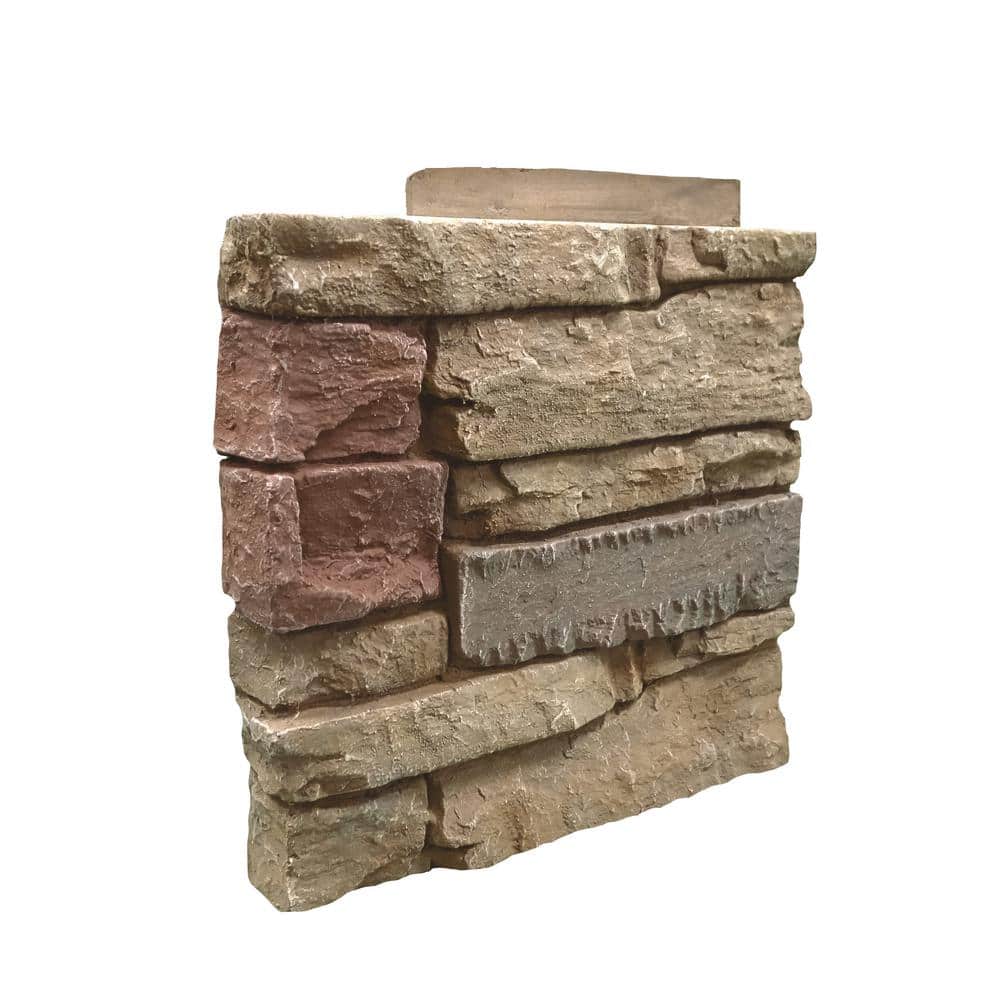
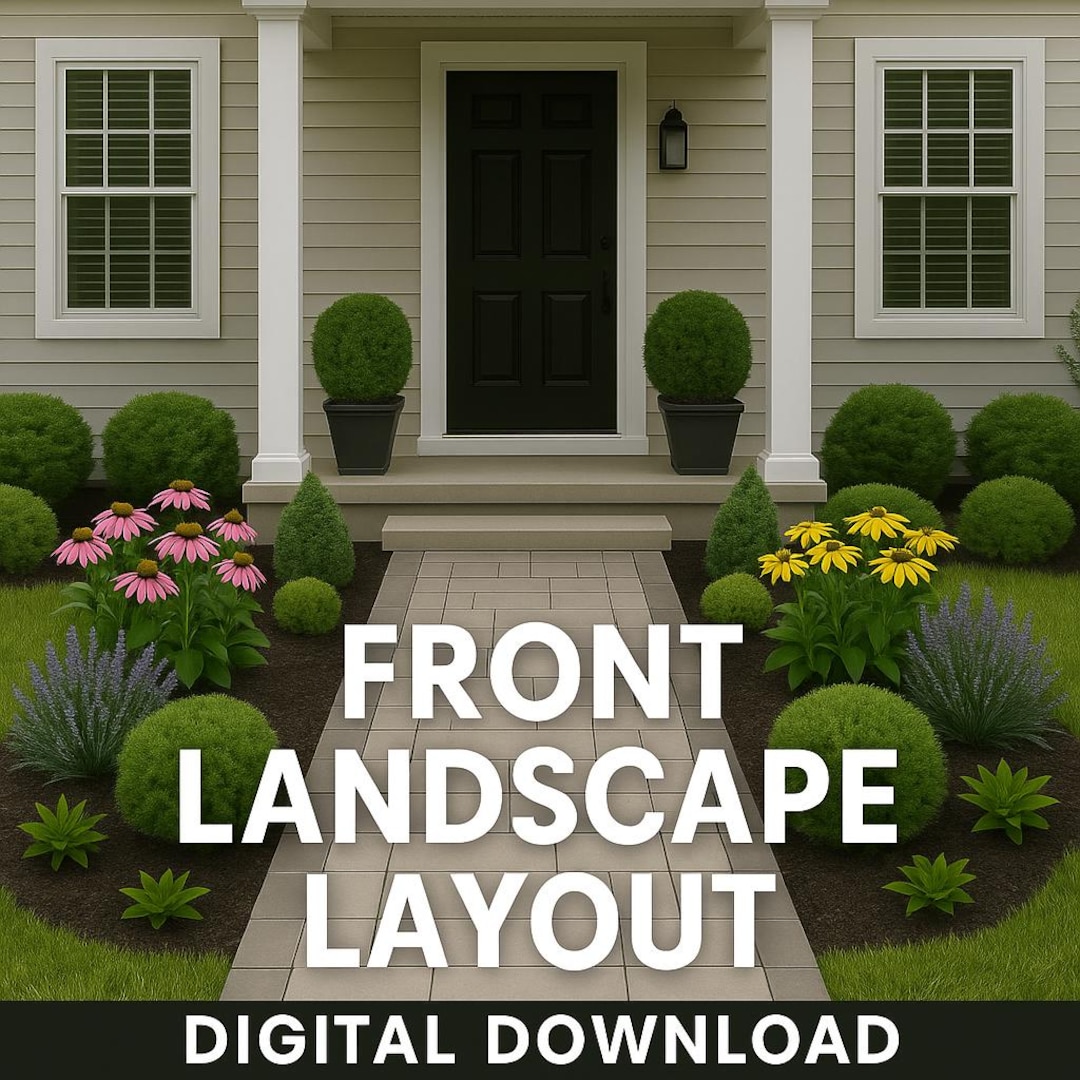
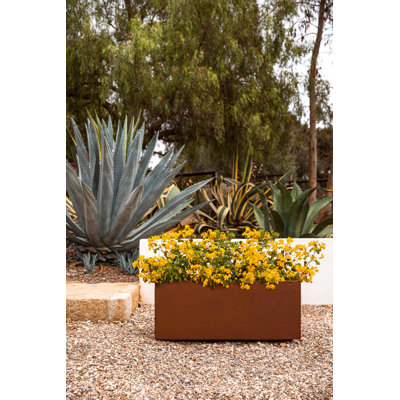
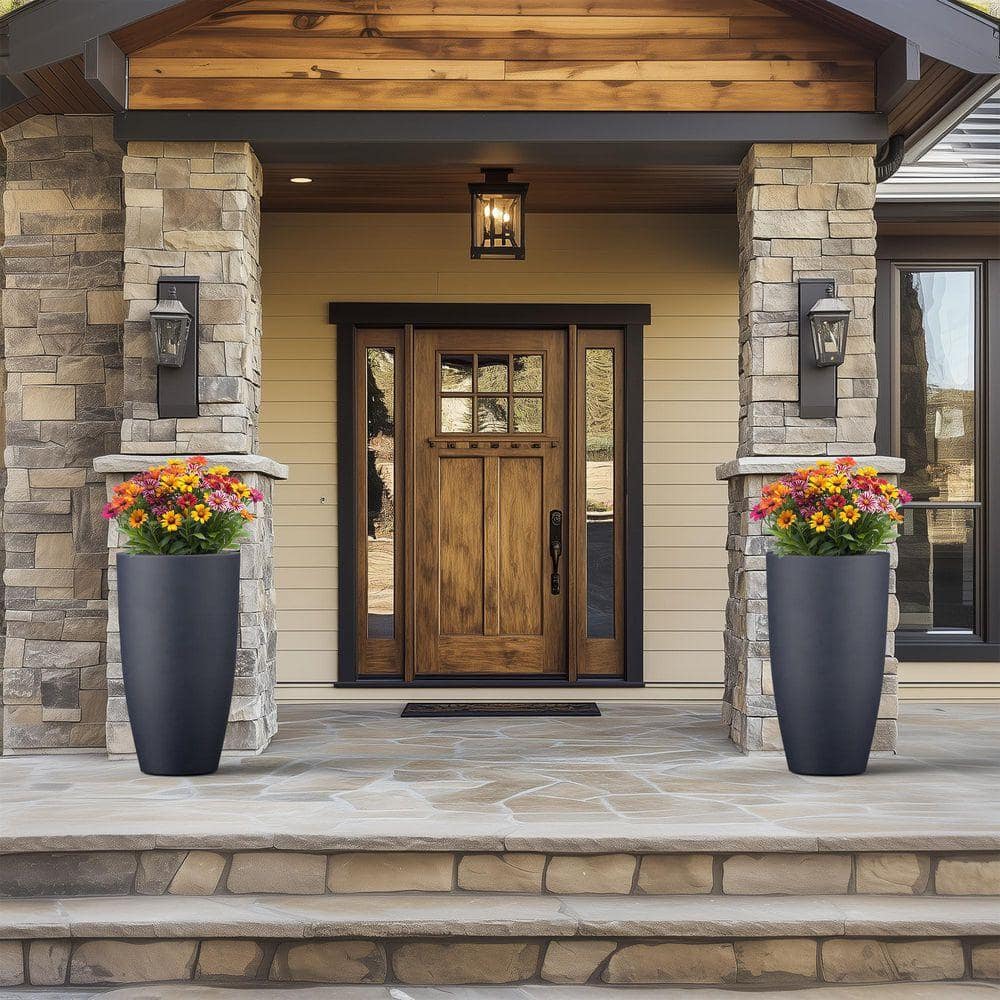
2. Frame Your Home’s Entrance with Bold Purple and Yellow
This welcoming front yard display follows a simple but effective formula: 60% lush green foliage + 30% dominant flower color (the vibrant purple) + 10% secondary accent color (the golden yellow Rudbeckia). The stone veneer of the house provides a neutral, textured backdrop that makes the colors pop. You could easily swap the palette—try pink and white for a softer cottage feel—while keeping the same ratio for a balanced design.
|
$7.99
|
$16.99
|
$50.13
|
$165.02
|

“A word of caution: a garden this dense and close to the house requires smart plant selection.”
Be sure to choose varieties that won’t grow tall enough to block windows or have invasive root systems that could damage your foundation. Regular thinning and pruning will be necessary to maintain airflow and prevent moisture issues against the siding and stone.
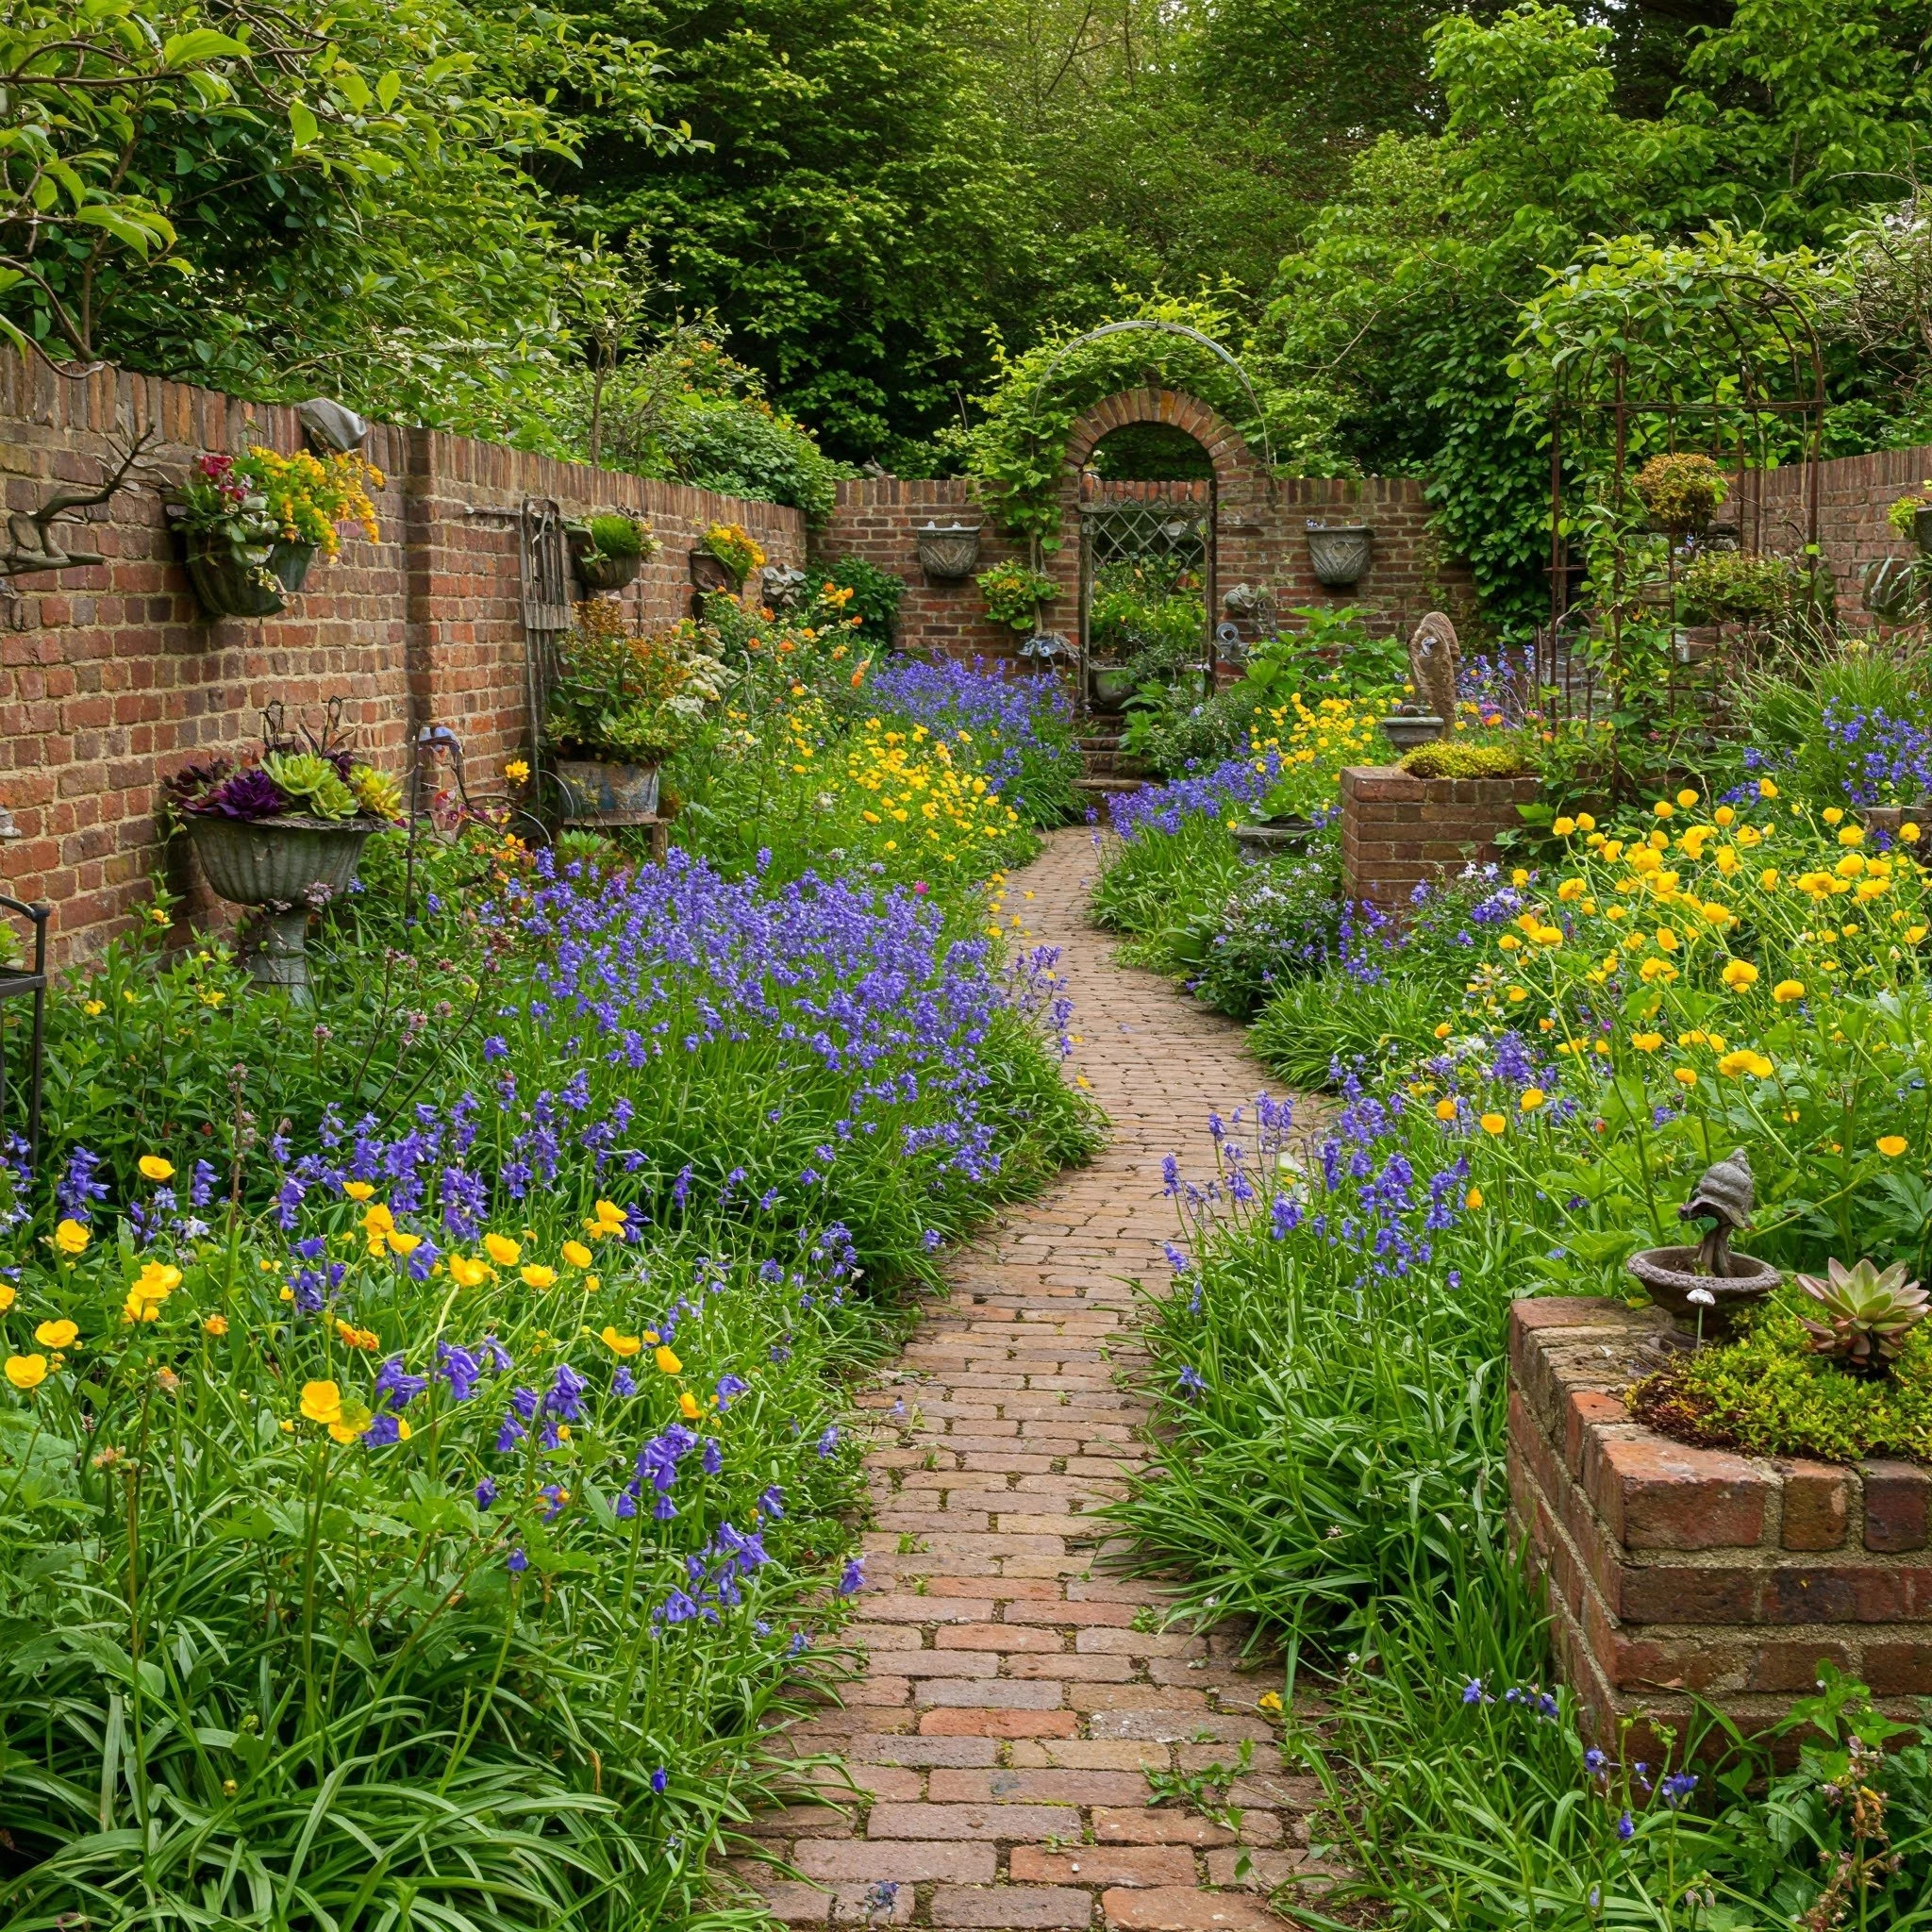
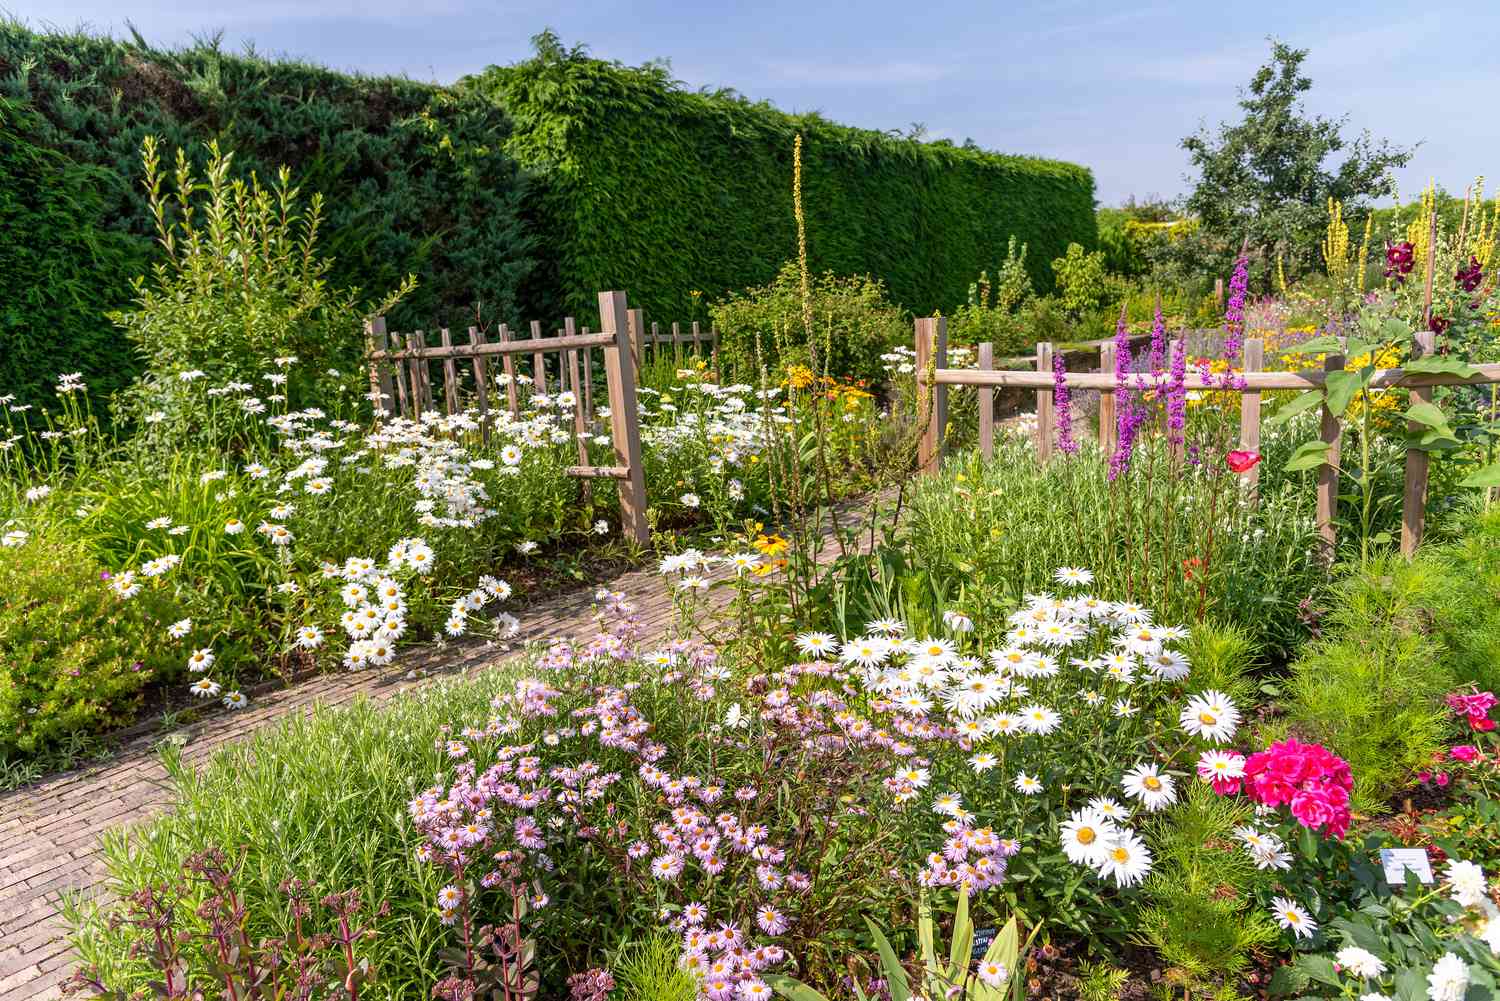
3. Weave Through Wildflowers Along a Herringbone Brick Path
The single most important element in this design isn’t a plant—it’s the herringbone brick path. It provides structure, texture, and a warm, earthy color that grounds the entire scene. Without this strong architectural line, the abundant blue and yellow wildflowers would feel chaotic and overgrown. The path turns the wildness into a deliberate, enchanting journey. It’s the perfect foil to the loose, cottage-style planting around it.
|
$11.99
|
$5,064.00
|
$19.98
|
$153.00
|


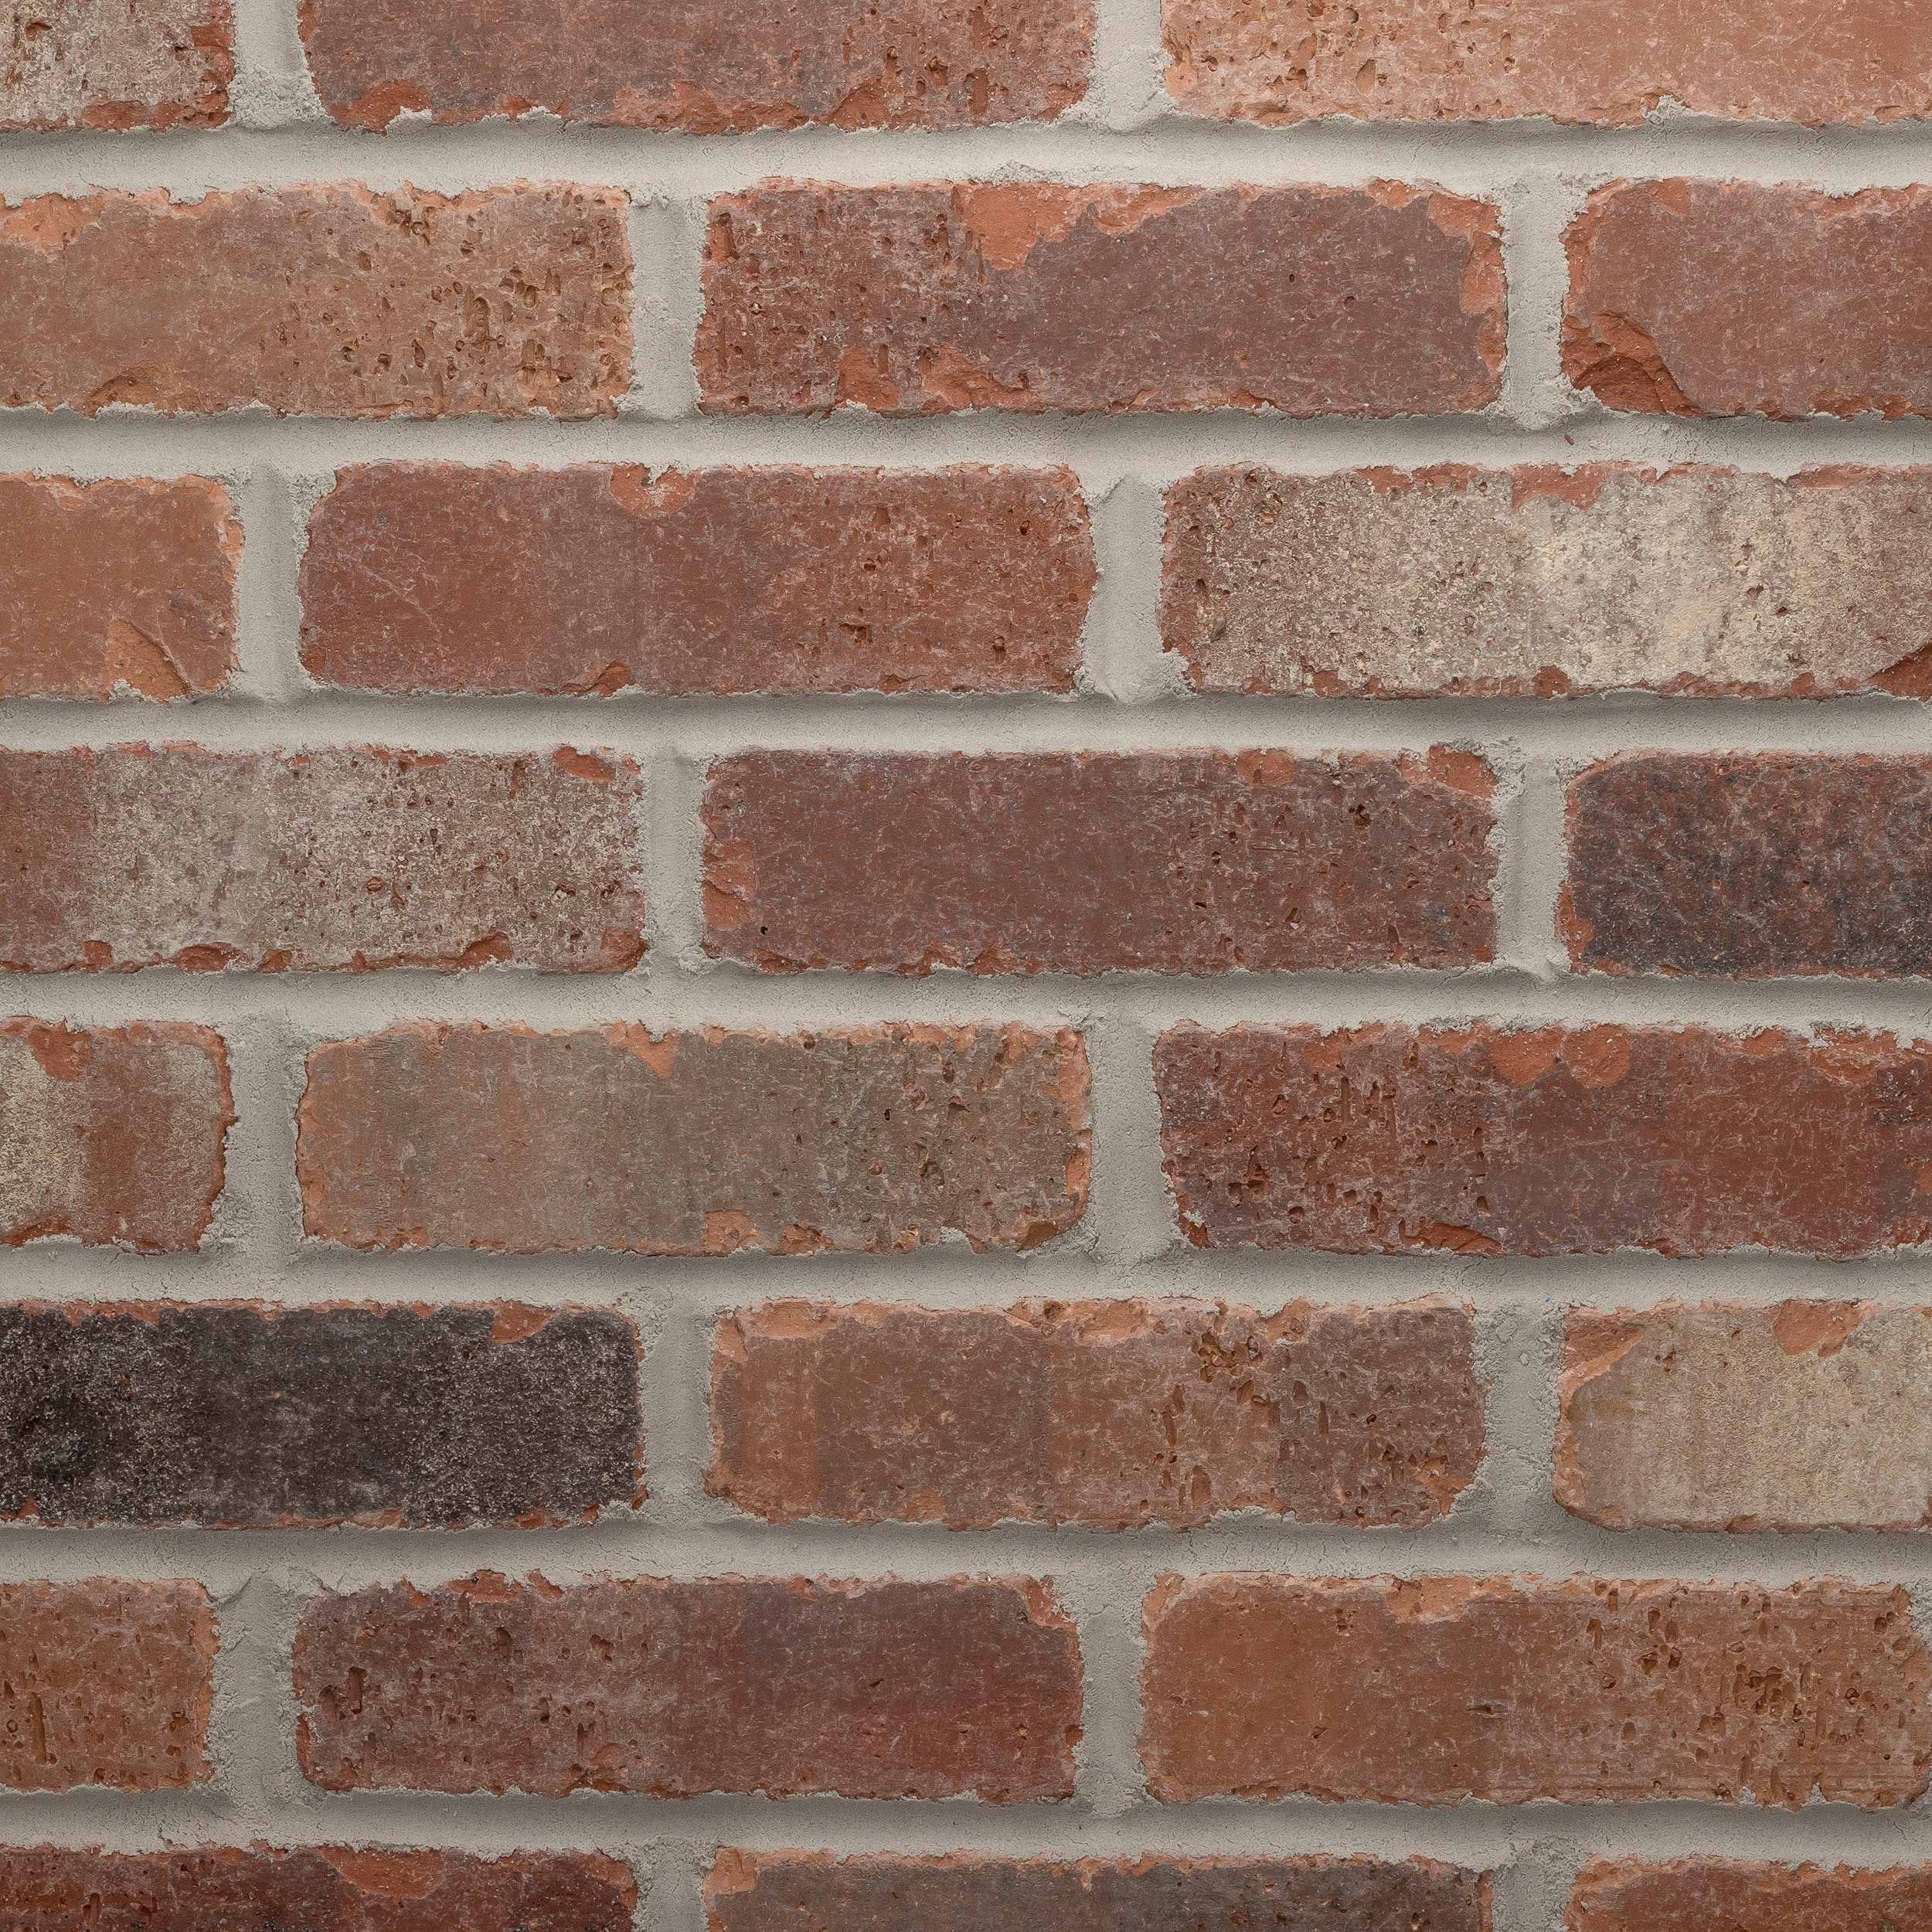
“Let’s be honest: a brick path laid in a herringbone pattern is a masterpiece, but it’s not zero-maintenance.”
Weeds and moss love to grow in the crevices between bricks, especially in damp, shaded areas. To keep it looking pristine, you’ll need to scrub it down and brush new sand into the joints every couple of years. The charming, aged look is part of the appeal, but neglect can turn charming into crumbling.
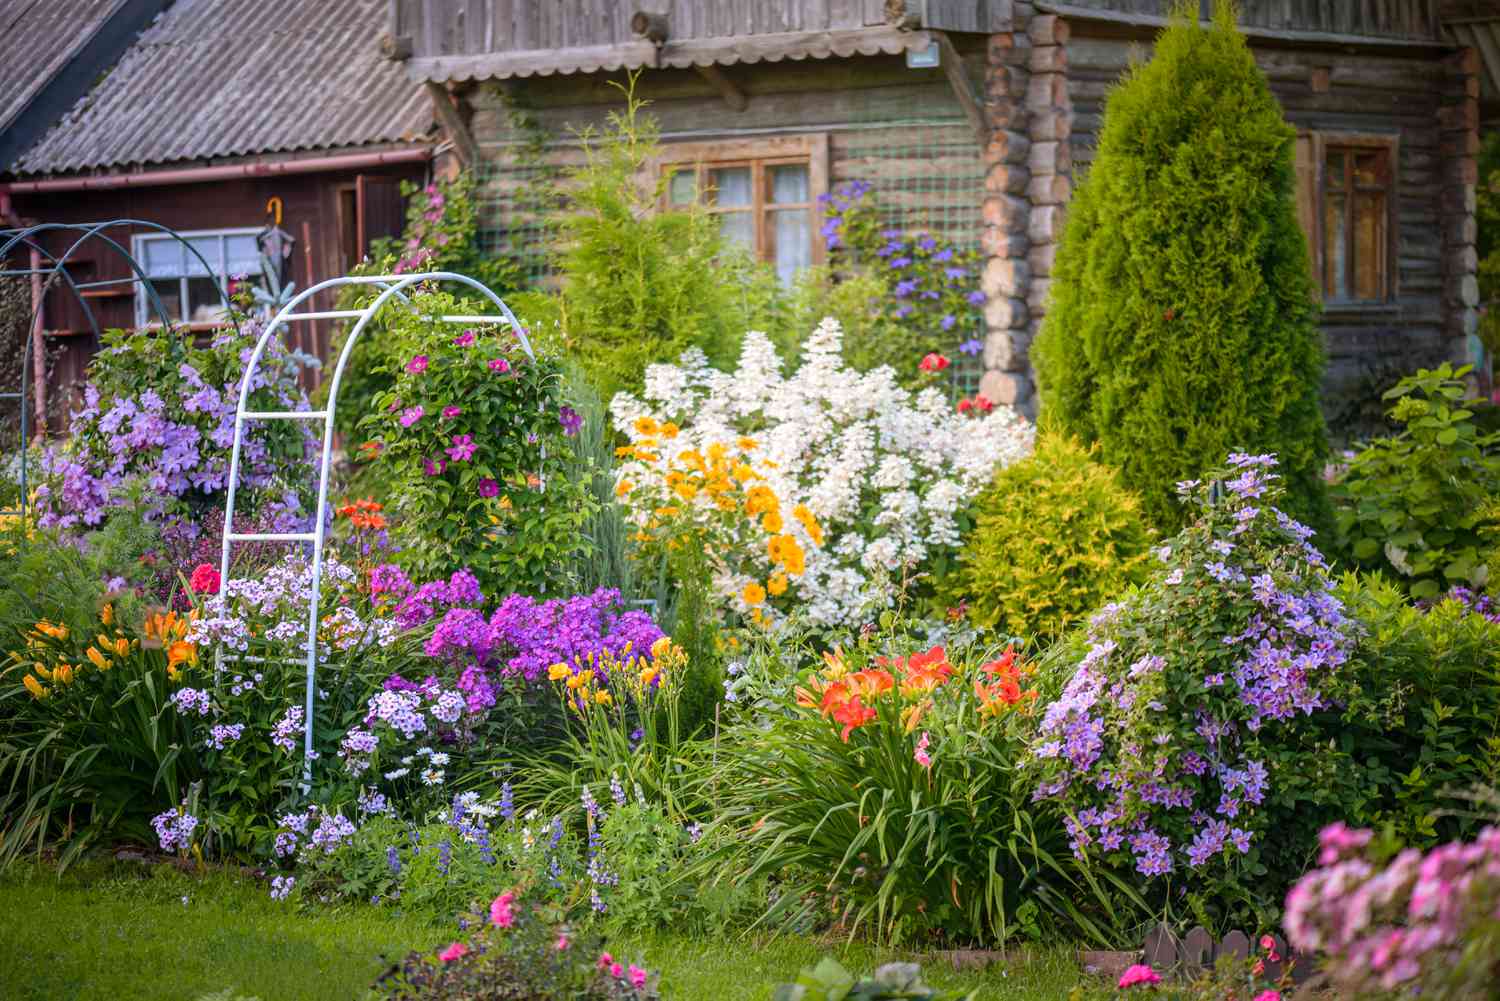
4. Anchor a Rustic Garden with a Simple White Arch
This wildly abundant garden works because of a principle called ‘order and chaos.’ The chaos is the explosion of colorful, multi-textured flowers planted in a dense, naturalistic style. The order comes from the simple, clean lines of the white metal arch. It provides a focal point and a sense of verticality, preventing the lush plantings from feeling like an overwhelming jungle. The purple clematis climbing the arch beautifully links the structure to the garden itself.
|
$81.99
|
$43.96
|
$6.95
|
$68.76
|


“An idea this lush needs room to breathe.”
This isn’t for a tiny courtyard. You’ll want a planting bed that’s at least 8-10 feet deep to achieve this level of layered density. The arch itself works best when it frames a pathway or an entrance, so ensure you have at least 5 feet of clear width for it to feel purposeful. For smaller spaces, consider the more contained approach in Idea #15.
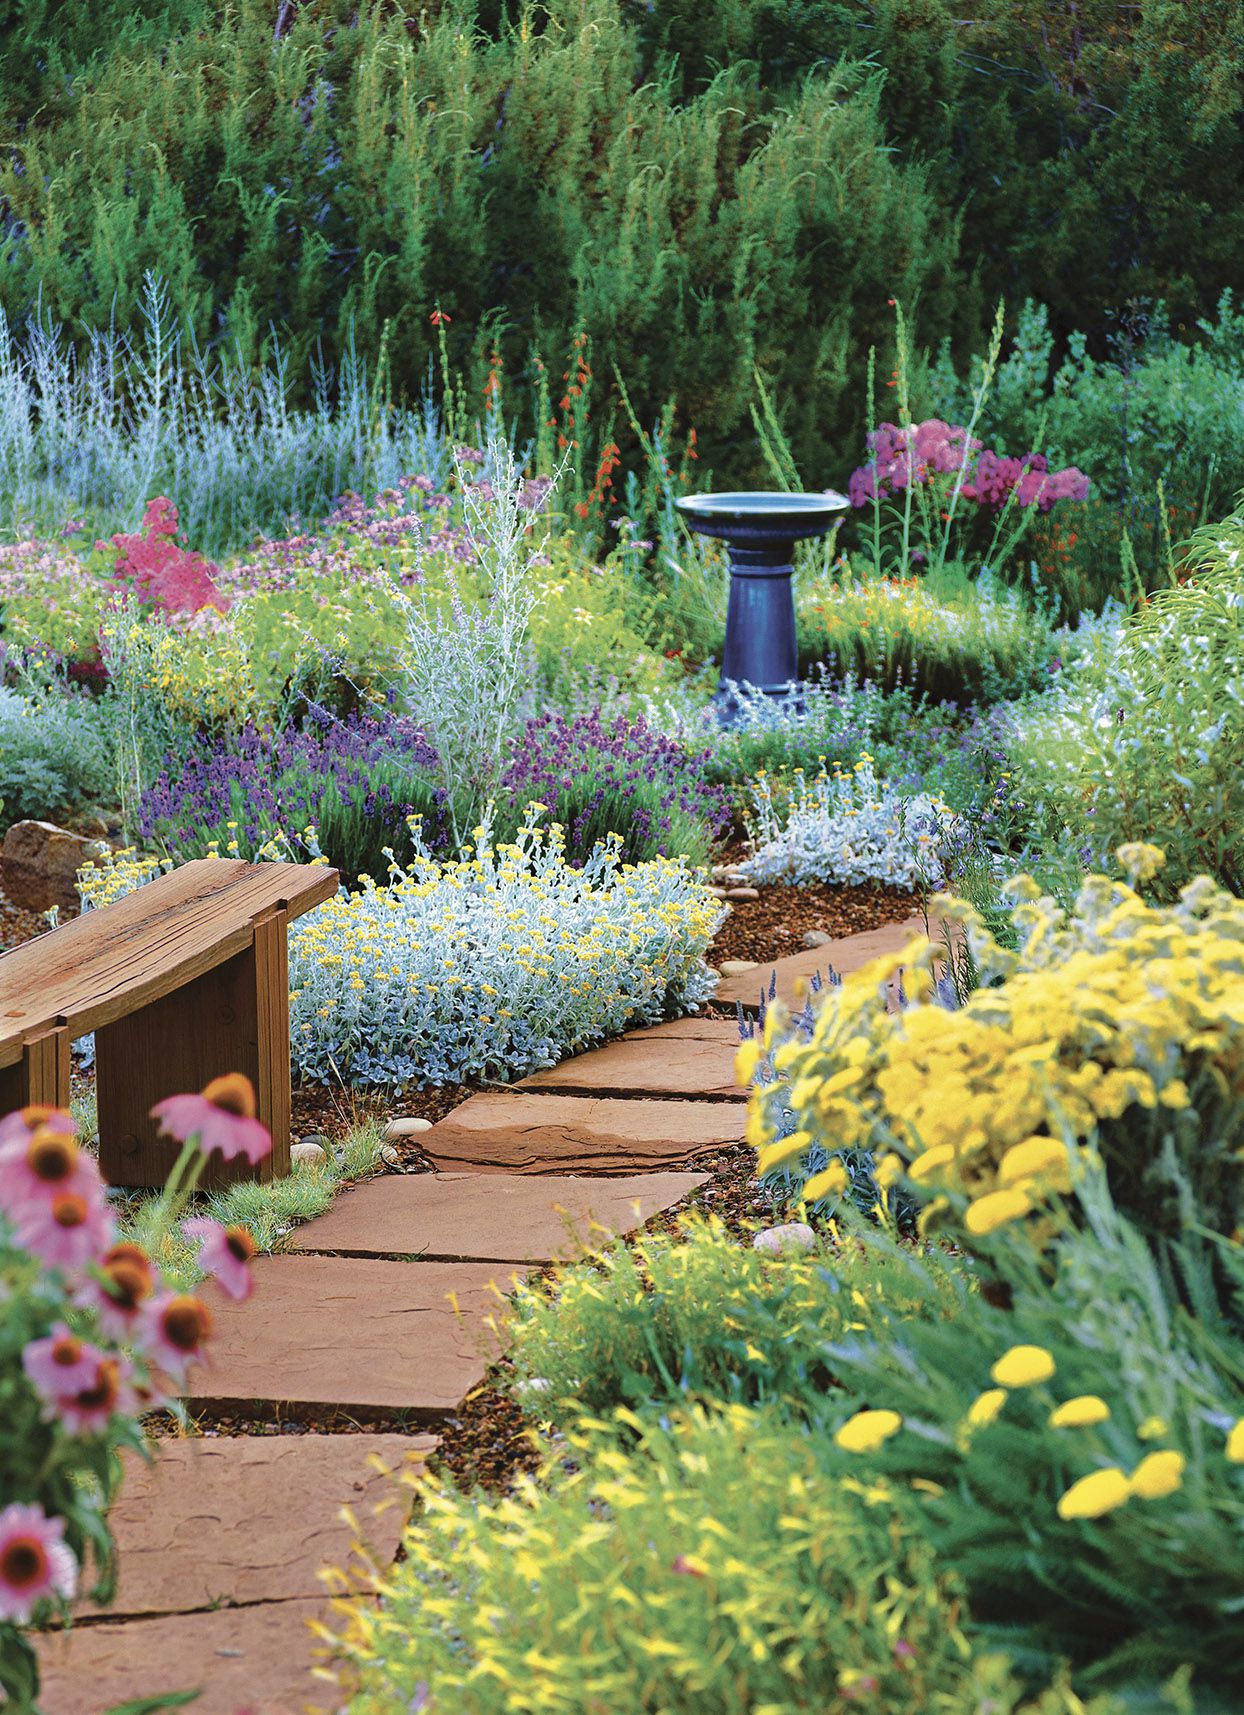
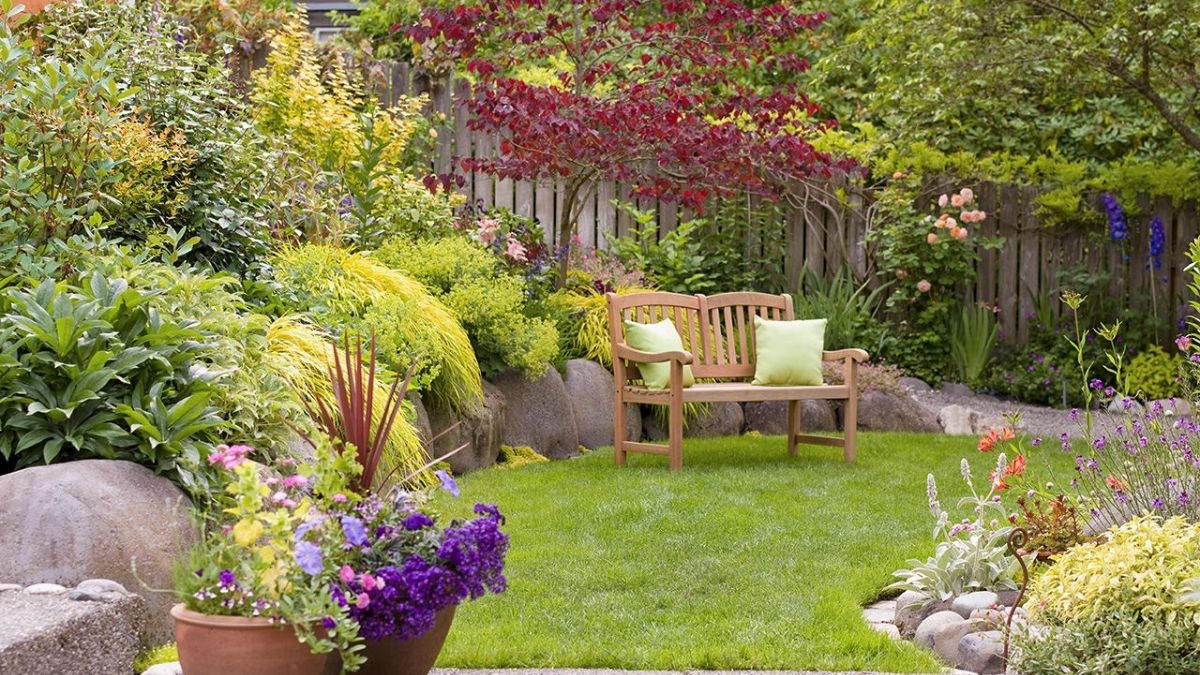
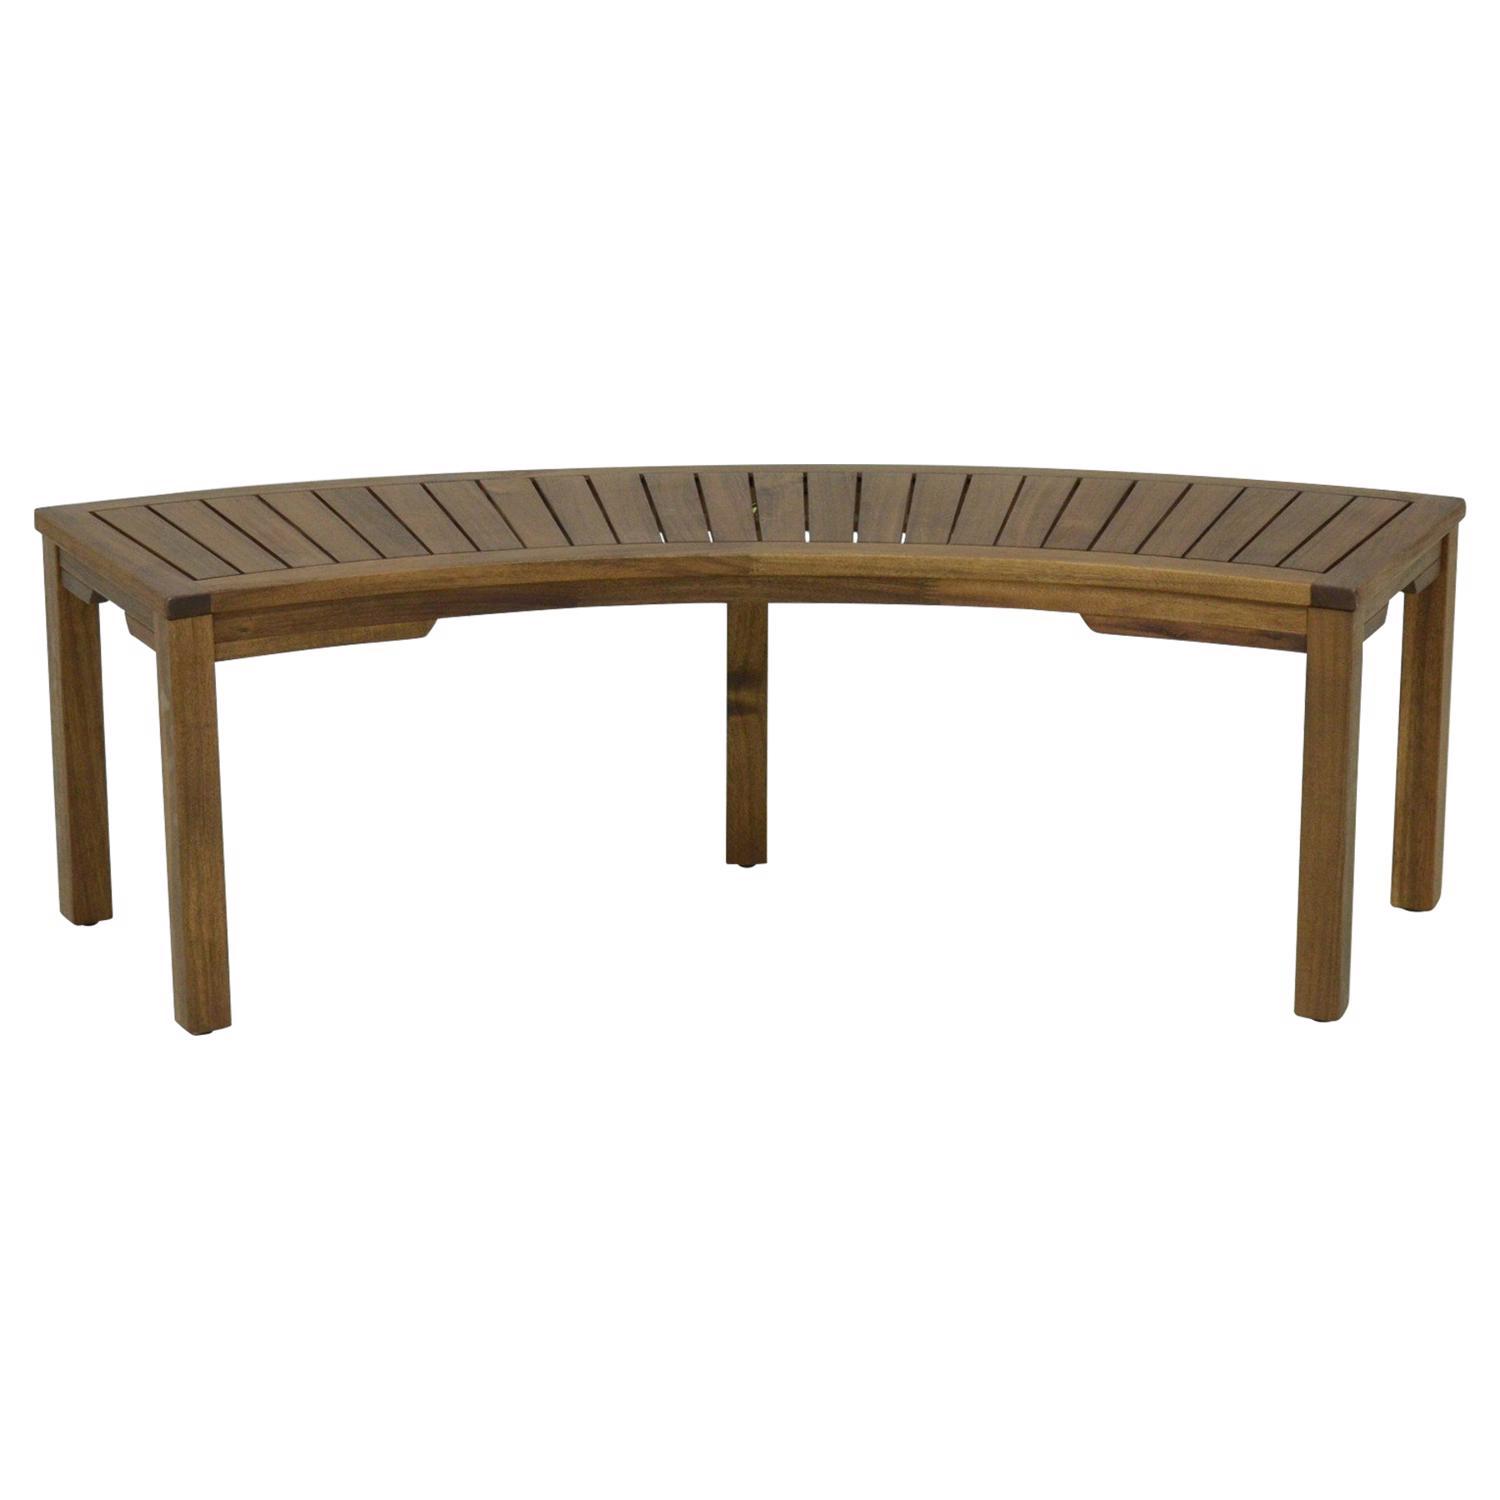
5. Create a Tranquil Moment with a Bench Among the Blooms
Creating this serene garden nook is more achievable than it looks. The key is investing in a few quality pieces and letting the plants do the heavy lifting.
|
$589.00
|
$135.49
|
$79.99
|
$54.97
|


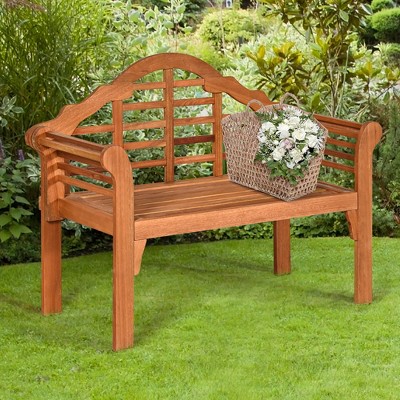
“Main Furniture: Rustic wooden bench ($250 – $600)
Focal Decor: Bird bath & l”
- Main Furniture: Rustic wooden bench ($250 – $600)
- Focal Decor: Bird bath & large planter ($150 – $400)
- Structural Elements: Wooden archway ($200 – $500)
- Plants: Mixed perennials, shrubs, and tulips ($400 – $900)
- Budget Alternative: Find a weathered bench on Facebook Marketplace ($50), use a simple terracotta bird bath ($40), and grow perennials from seed to save hundreds.
- TOTAL: $1,000 – $2,400
Before you commit to a bench, map out your garden’s sunlight. A bench is only inviting if it’s usable. Is this a spot for morning coffee with the sunrise, or shaded afternoon reading? Make sure the location gets the type of light you’ll enjoy at the time of day you plan to use it. Also, verify you have a level spot; nobody likes a wobbly bench!
6. Contrast a Rustic Fence with a Manicured Hedge
The secret to a high-end looking garden is layering different textures and levels of formality. Here, the charmingly imperfect rustic wooden fence provides a warm, natural texture in the mid-ground. Behind it, the tall, sharply manicured green hedge acts as a ‘full stop’—a clean, formal backdrop that makes the looser flowers and fence in front of it look more intentional and composed. This high/low mix of rustic and refined is a classic designer trick.
|
$579.00
|
$13.59
|
$39.99
|
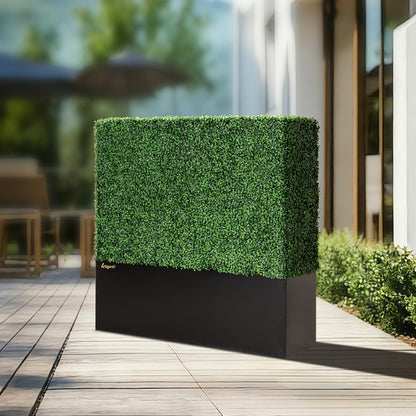

“Think of this composition as a layer cake: 40% informal flowers (the mixed colors in front), 30% rustic texture (the wooden fence and brick path), and 30% formal structure (the solid green hedge).”
By keeping the formal element as a simple, solid block of color, you allow the eye to appreciate the complexity of the flowers without feeling overwhelmed. The brick path serves as a visual guide, leading the eye through the layers.
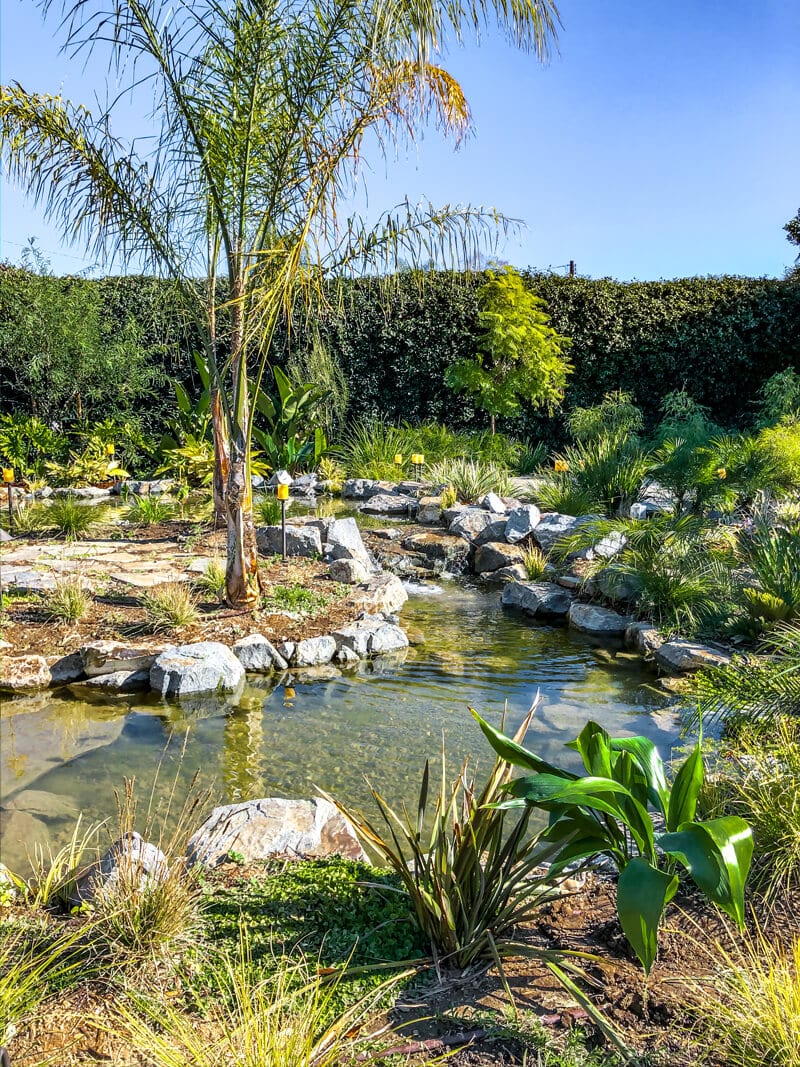
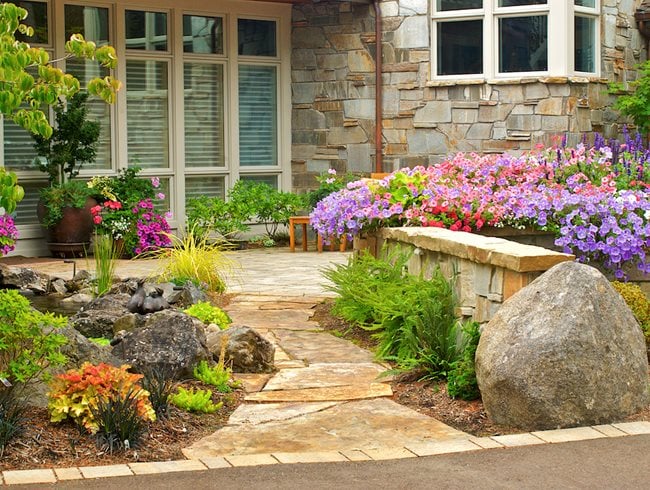
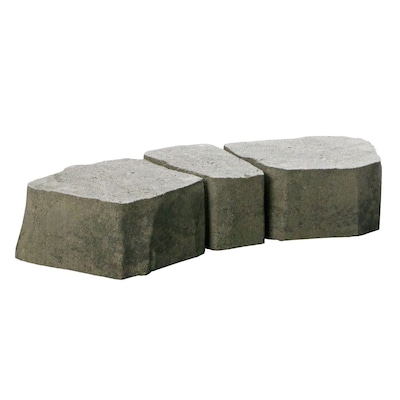
7. Layer a Stone Wall with Vibrant, Overflowing Planters
The game-changer here isn’t the beautiful stone wall or the flagstone path—it’s the elevation. By building raised stone planter boxes, the design lifts the flowers up to eye level, creating an immersive wall of color and life. It moves the garden from being something you walk past to something you walk *through*. This verticality makes the entire entrance feel grander and more lush than if the flowers were planted at ground level.
|
$3.90
|
$190.00
|
$137.99
|
$713.46
|


“To recreate that small rock garden water feature: 1.”
Choose a waterproof basin or pot (18-24 inches wide). 2. Place a small, submersible solar-powered fountain pump in the center. 3. Arrange larger rocks around the pump to hide it, creating a mountainous look. 4. Fill in gaps with smaller pebbles and gravel. 5. Add water until the pump is submerged. 6. Place a few water-loving plants like creeping jenny around the edges to soften the look. Time: 2 hours. Cost: $50-$150.
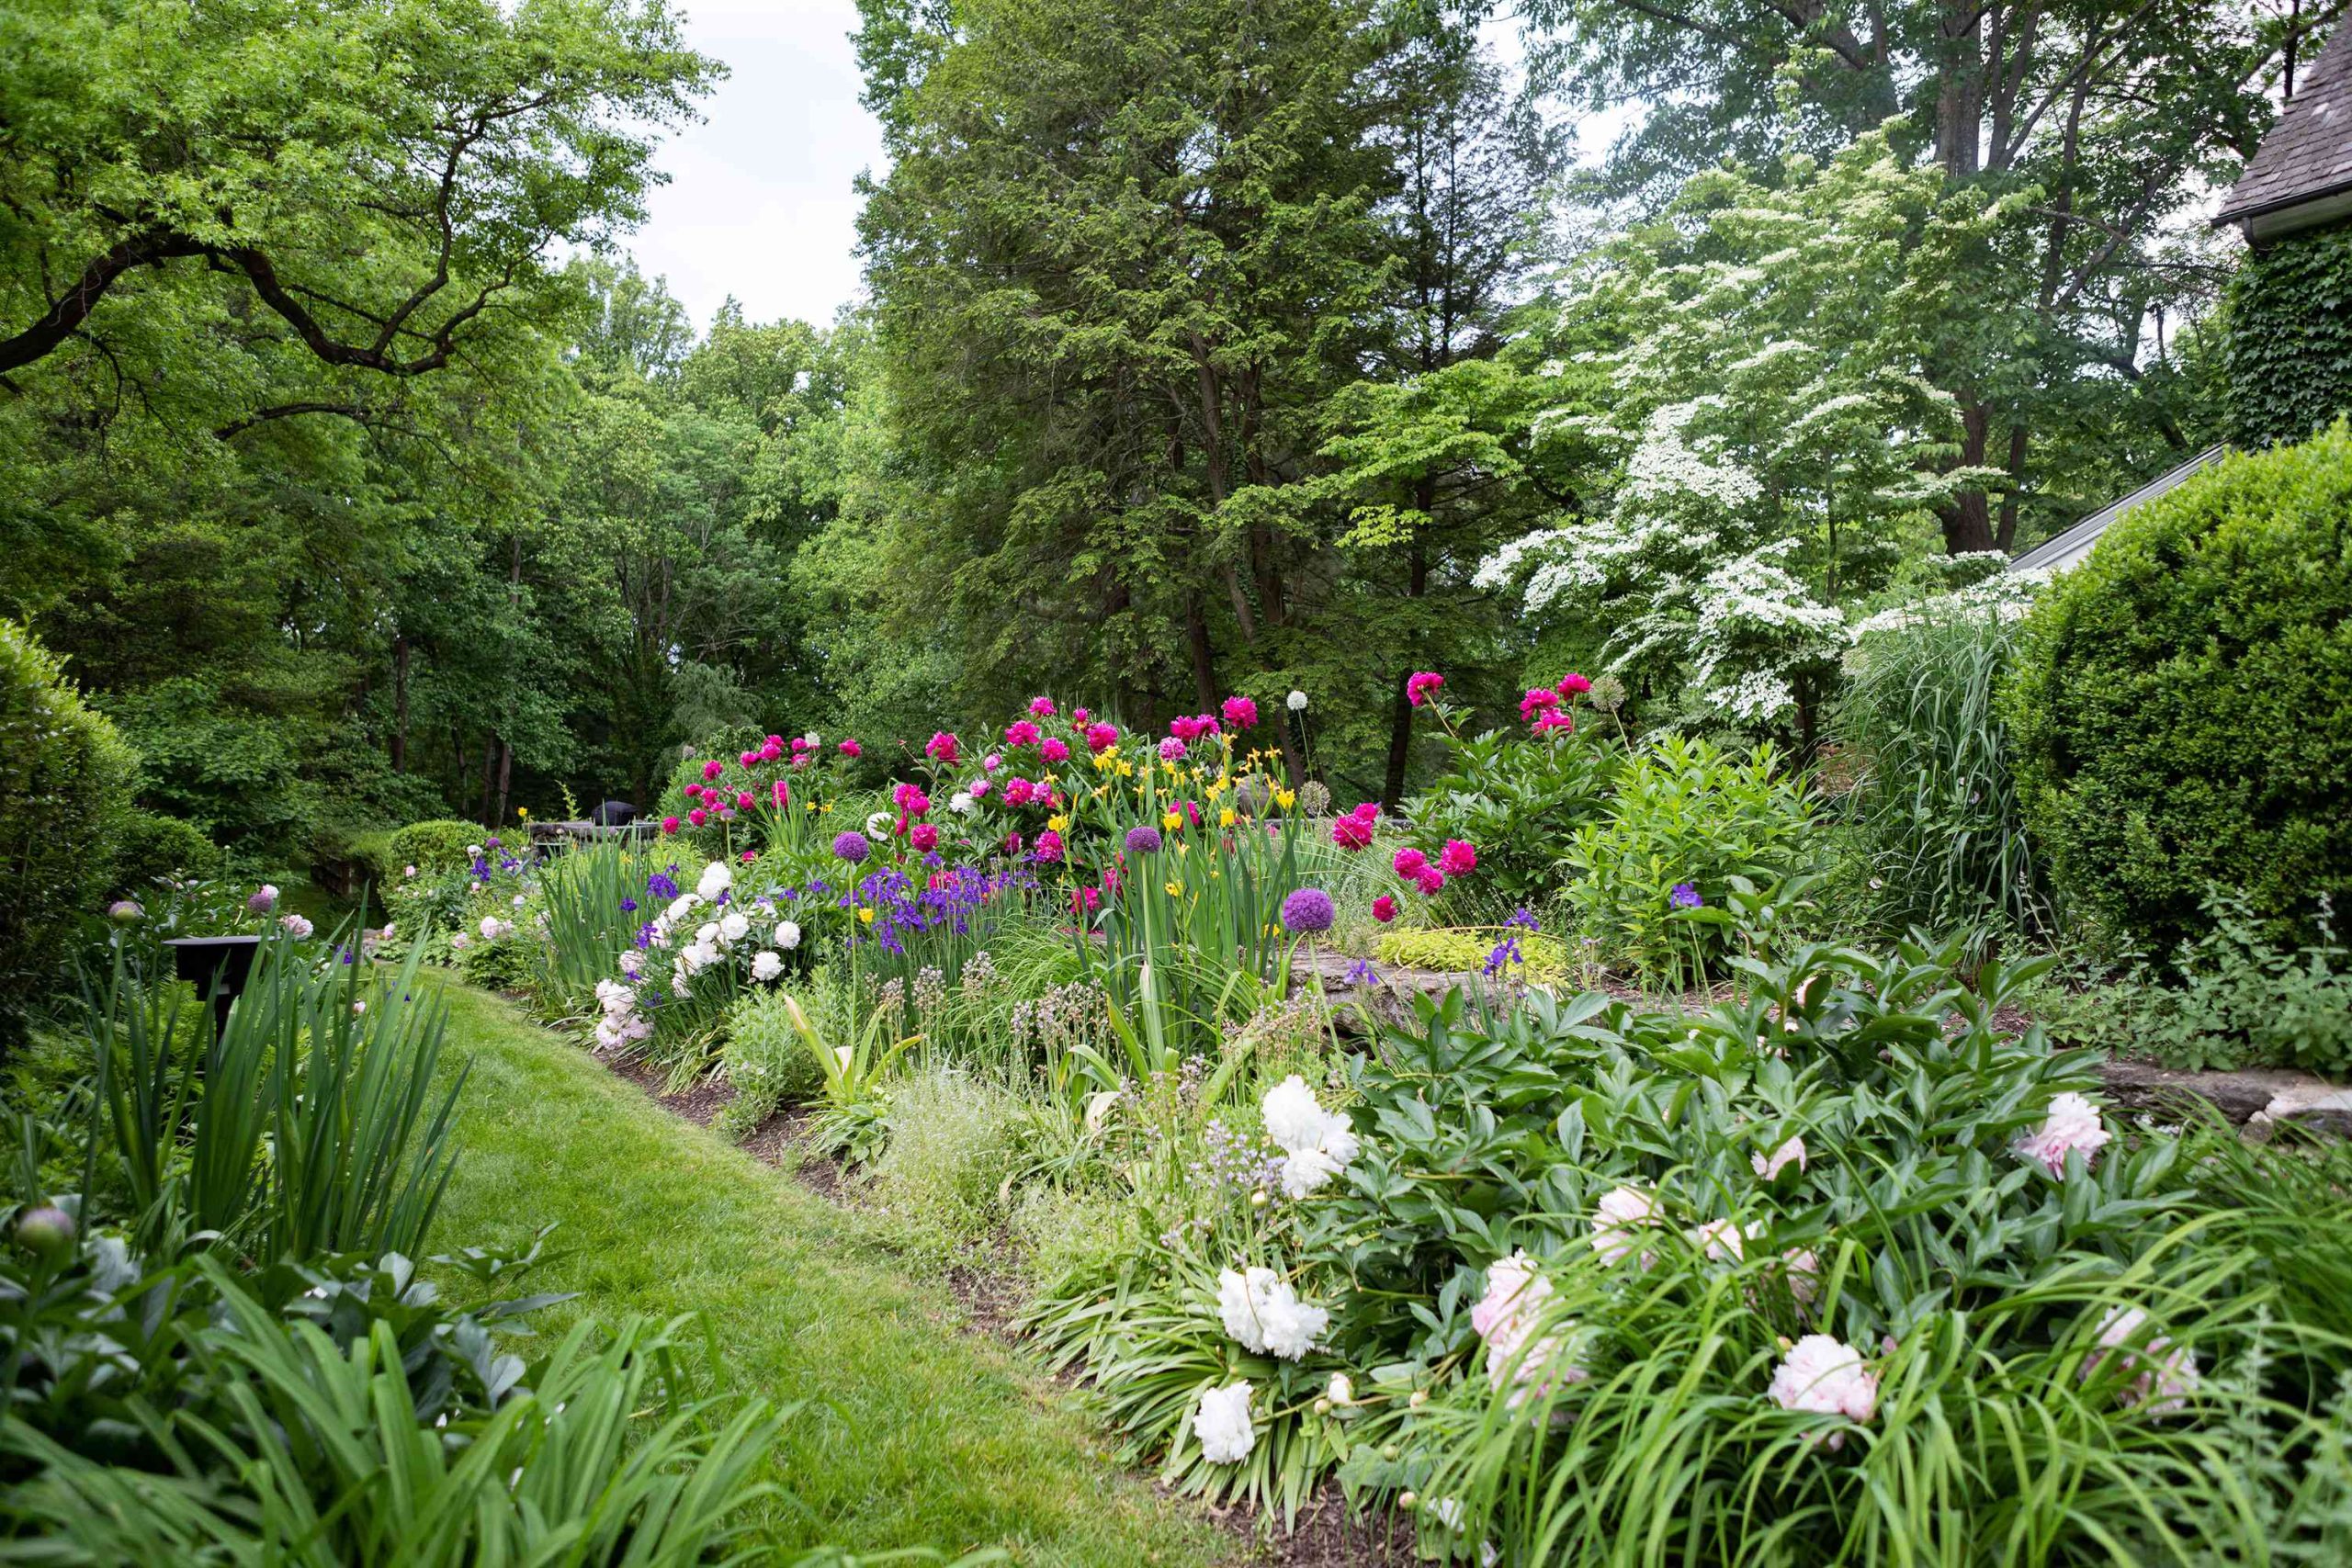
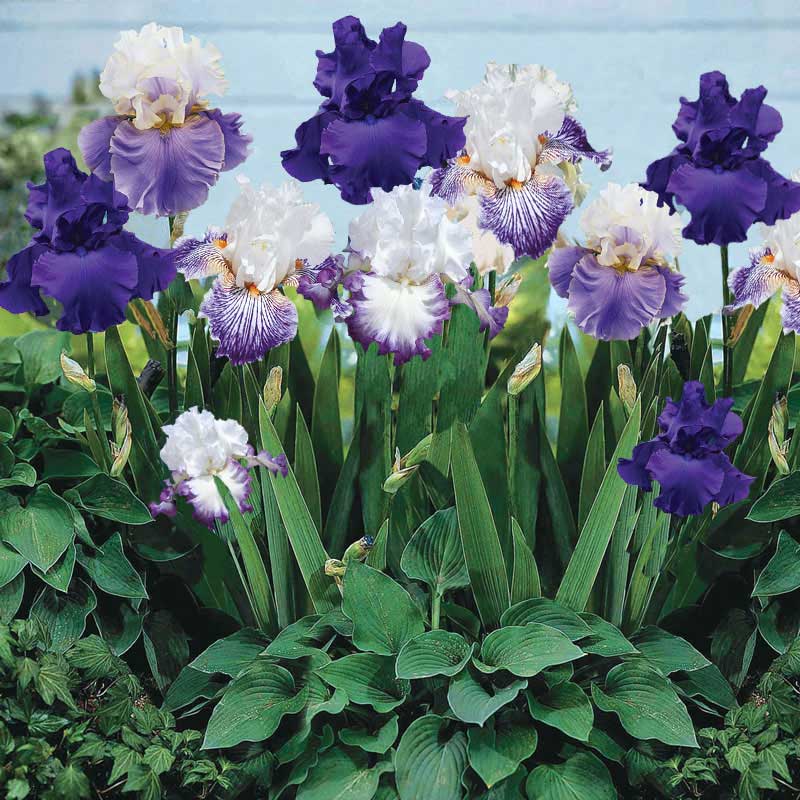
8. Paint a Garden Canvas with Peonies, Alliums, and Irises
This stunning border works because it masterfully combines different forms. You have the big, soft, romantic globes of the hot pink peonies, the sharp, spherical geometry of the purple alliums, and the delicate, vertical flags of the yellow irises. It’s a masterclass in varied shapes. The dense green foliage acts as a unifying backdrop, allowing each flower’s unique silhouette to stand out. The composition feels balanced yet full of energy.
|
$3.75
|
$29.74
|
$99.95
|
$103.16
|


“There’s a growing movement away from rigid, overly-manicured gardens and toward a more painterly, ‘New Perennial’ style, and this is a perfect example.”
Popularized by designers like Piet Oudolf, this approach prioritizes texture, form, and how plants look throughout the seasons. It’s about creating an ecosystem that is both beautiful and resilient, which is why it’s dominating Pinterest boards and garden design in 2026.
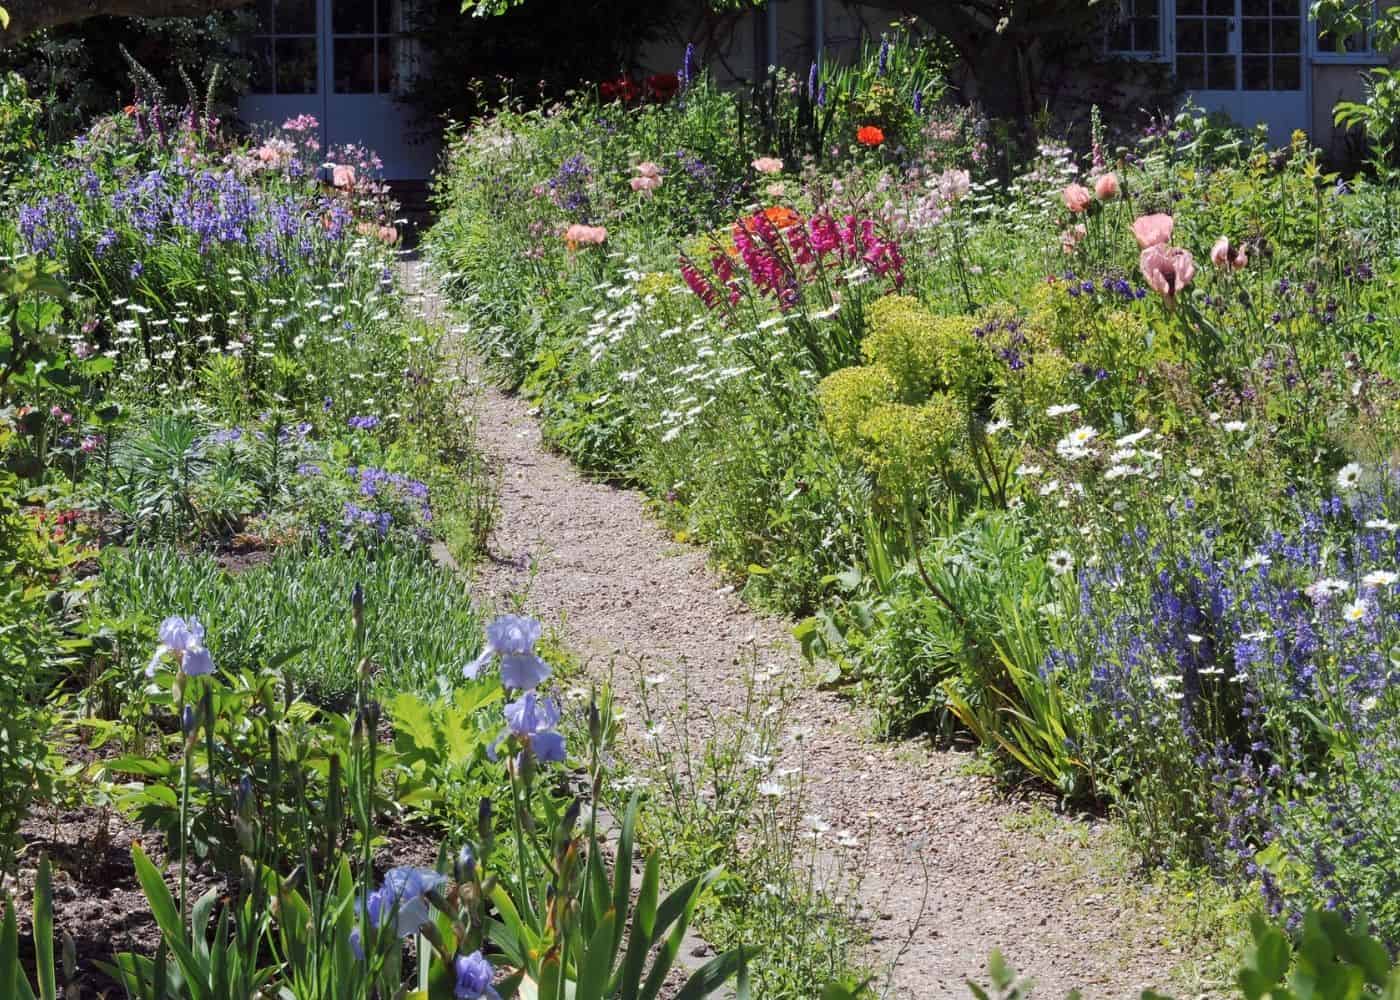
9. Get Lost in a Winding Gravel Path Through Wildflowers
You don’t need expensive hardscaping to get an enchanting garden path. A simple gravel path is one of the most budget-friendly and DIY-able options. A roll of landscape fabric to suppress weeds ($30), several bags of pea gravel from a home improvement store ($50-$100), and some flexible plastic edging to keep it tidy ($40) are all you need. The real investment is in the wildflower seeds or starter plants, which can be purchased for under $100 for a large area.
|
$56.99
|
$21.99
|
$32.42
|
$14.98
|
“While a gravel path is easy to install, it does have its quirks.”
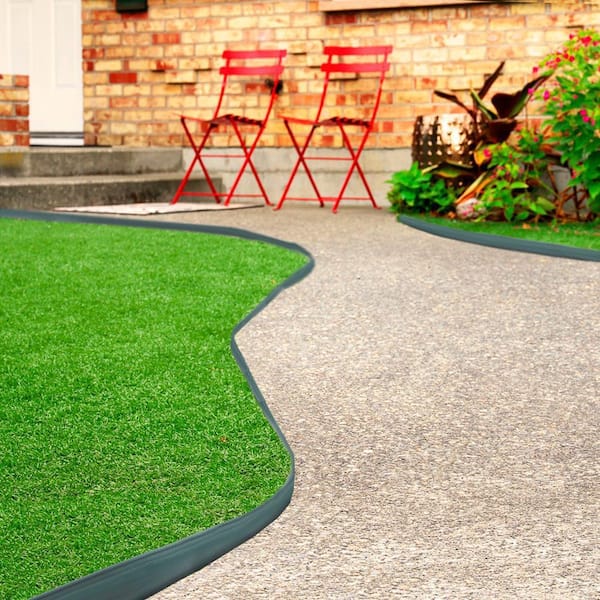
It can be noisy to walk on, tough to roll a wheelbarrow over, and stray gravel will inevitably find its way into your lawn. It also requires occasional weeding and raking to keep it looking fresh. If you have pets or small children who love to run, be prepared for some scattered stones. For a lower-scatter option, see the grass path in Idea #1.
10. Combine a Rustic Bench and Bird Bath for a Cozy Corner
When placing ‘vignettes’ like this bench and bird bath, create a visual triangle. Imagine a triangle connecting the bench, the bird bath, and a key planting (like that prominent purple floral mound). This arrangement encourages the eye to move between the elements, making the composition feel balanced and dynamic rather than static. Don’t place them in a straight line; staggering them with one element forward and two back is key.
|
$129.00
|
$168.00
|


“This little corner feels so inviting because it successfully balances purpose and beauty.”
The bench and bird bath are functional objects that invite you (and the birds!) to stop and stay awhile. The stepping stone path guides you to this destination. Surrounding these functional pieces with a riot of colorful, soft plantings blurs the line between hardscape and garden, making the entire space feel like a cohesive, tranquil retreat.
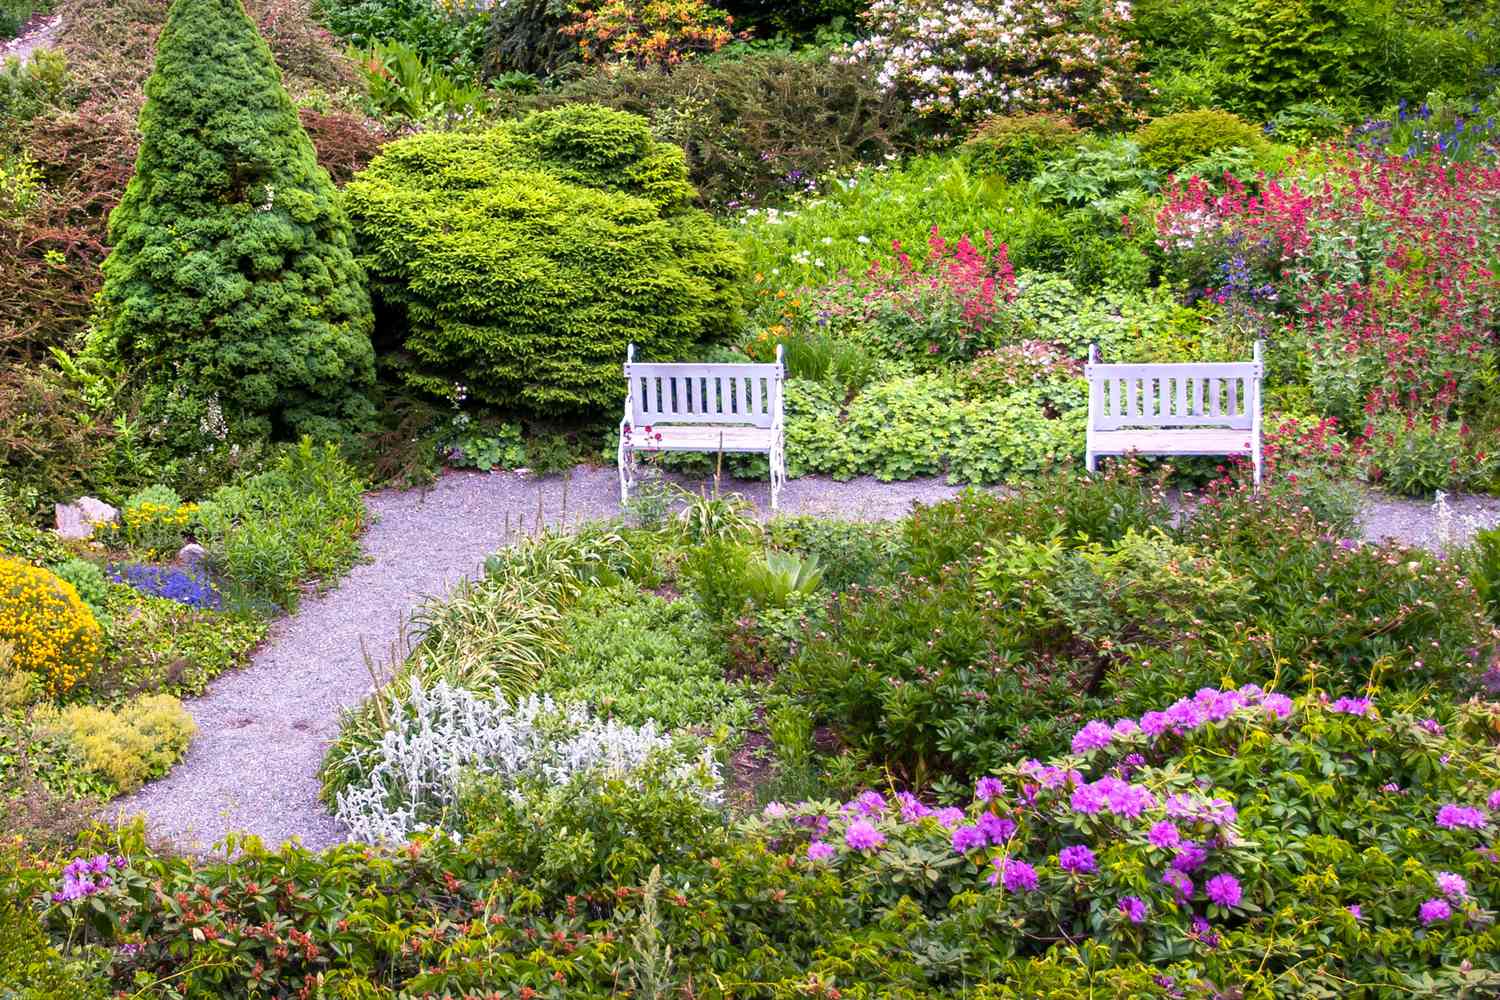
11. Place Twin White Benches Along a Meandering Path
The most brilliant move here is the repetition. Using one white bench would be nice, but using two identical benches transforms them from simple seating into a powerful design element. This repetition creates rhythm and a sense of intentionality. It tells you this isn’t just a garden, but a designed landscape with multiple, deliberate destinations. It draws your eye deeper into the scene, following the path from one resting spot to the next.
|
$84.99
|
“This idea is perfect for a medium to large-sized garden where you have a pathway of at least 30-40 feet.”
The benches need space between them to feel like separate ‘events’ along the journey. Placing them too close together would feel cramped and redundant. This approach is all about celebrating the journey through a larger landscape, making it less suitable for small, compact yards where a single bench, like in Idea #9, would be more appropriate.
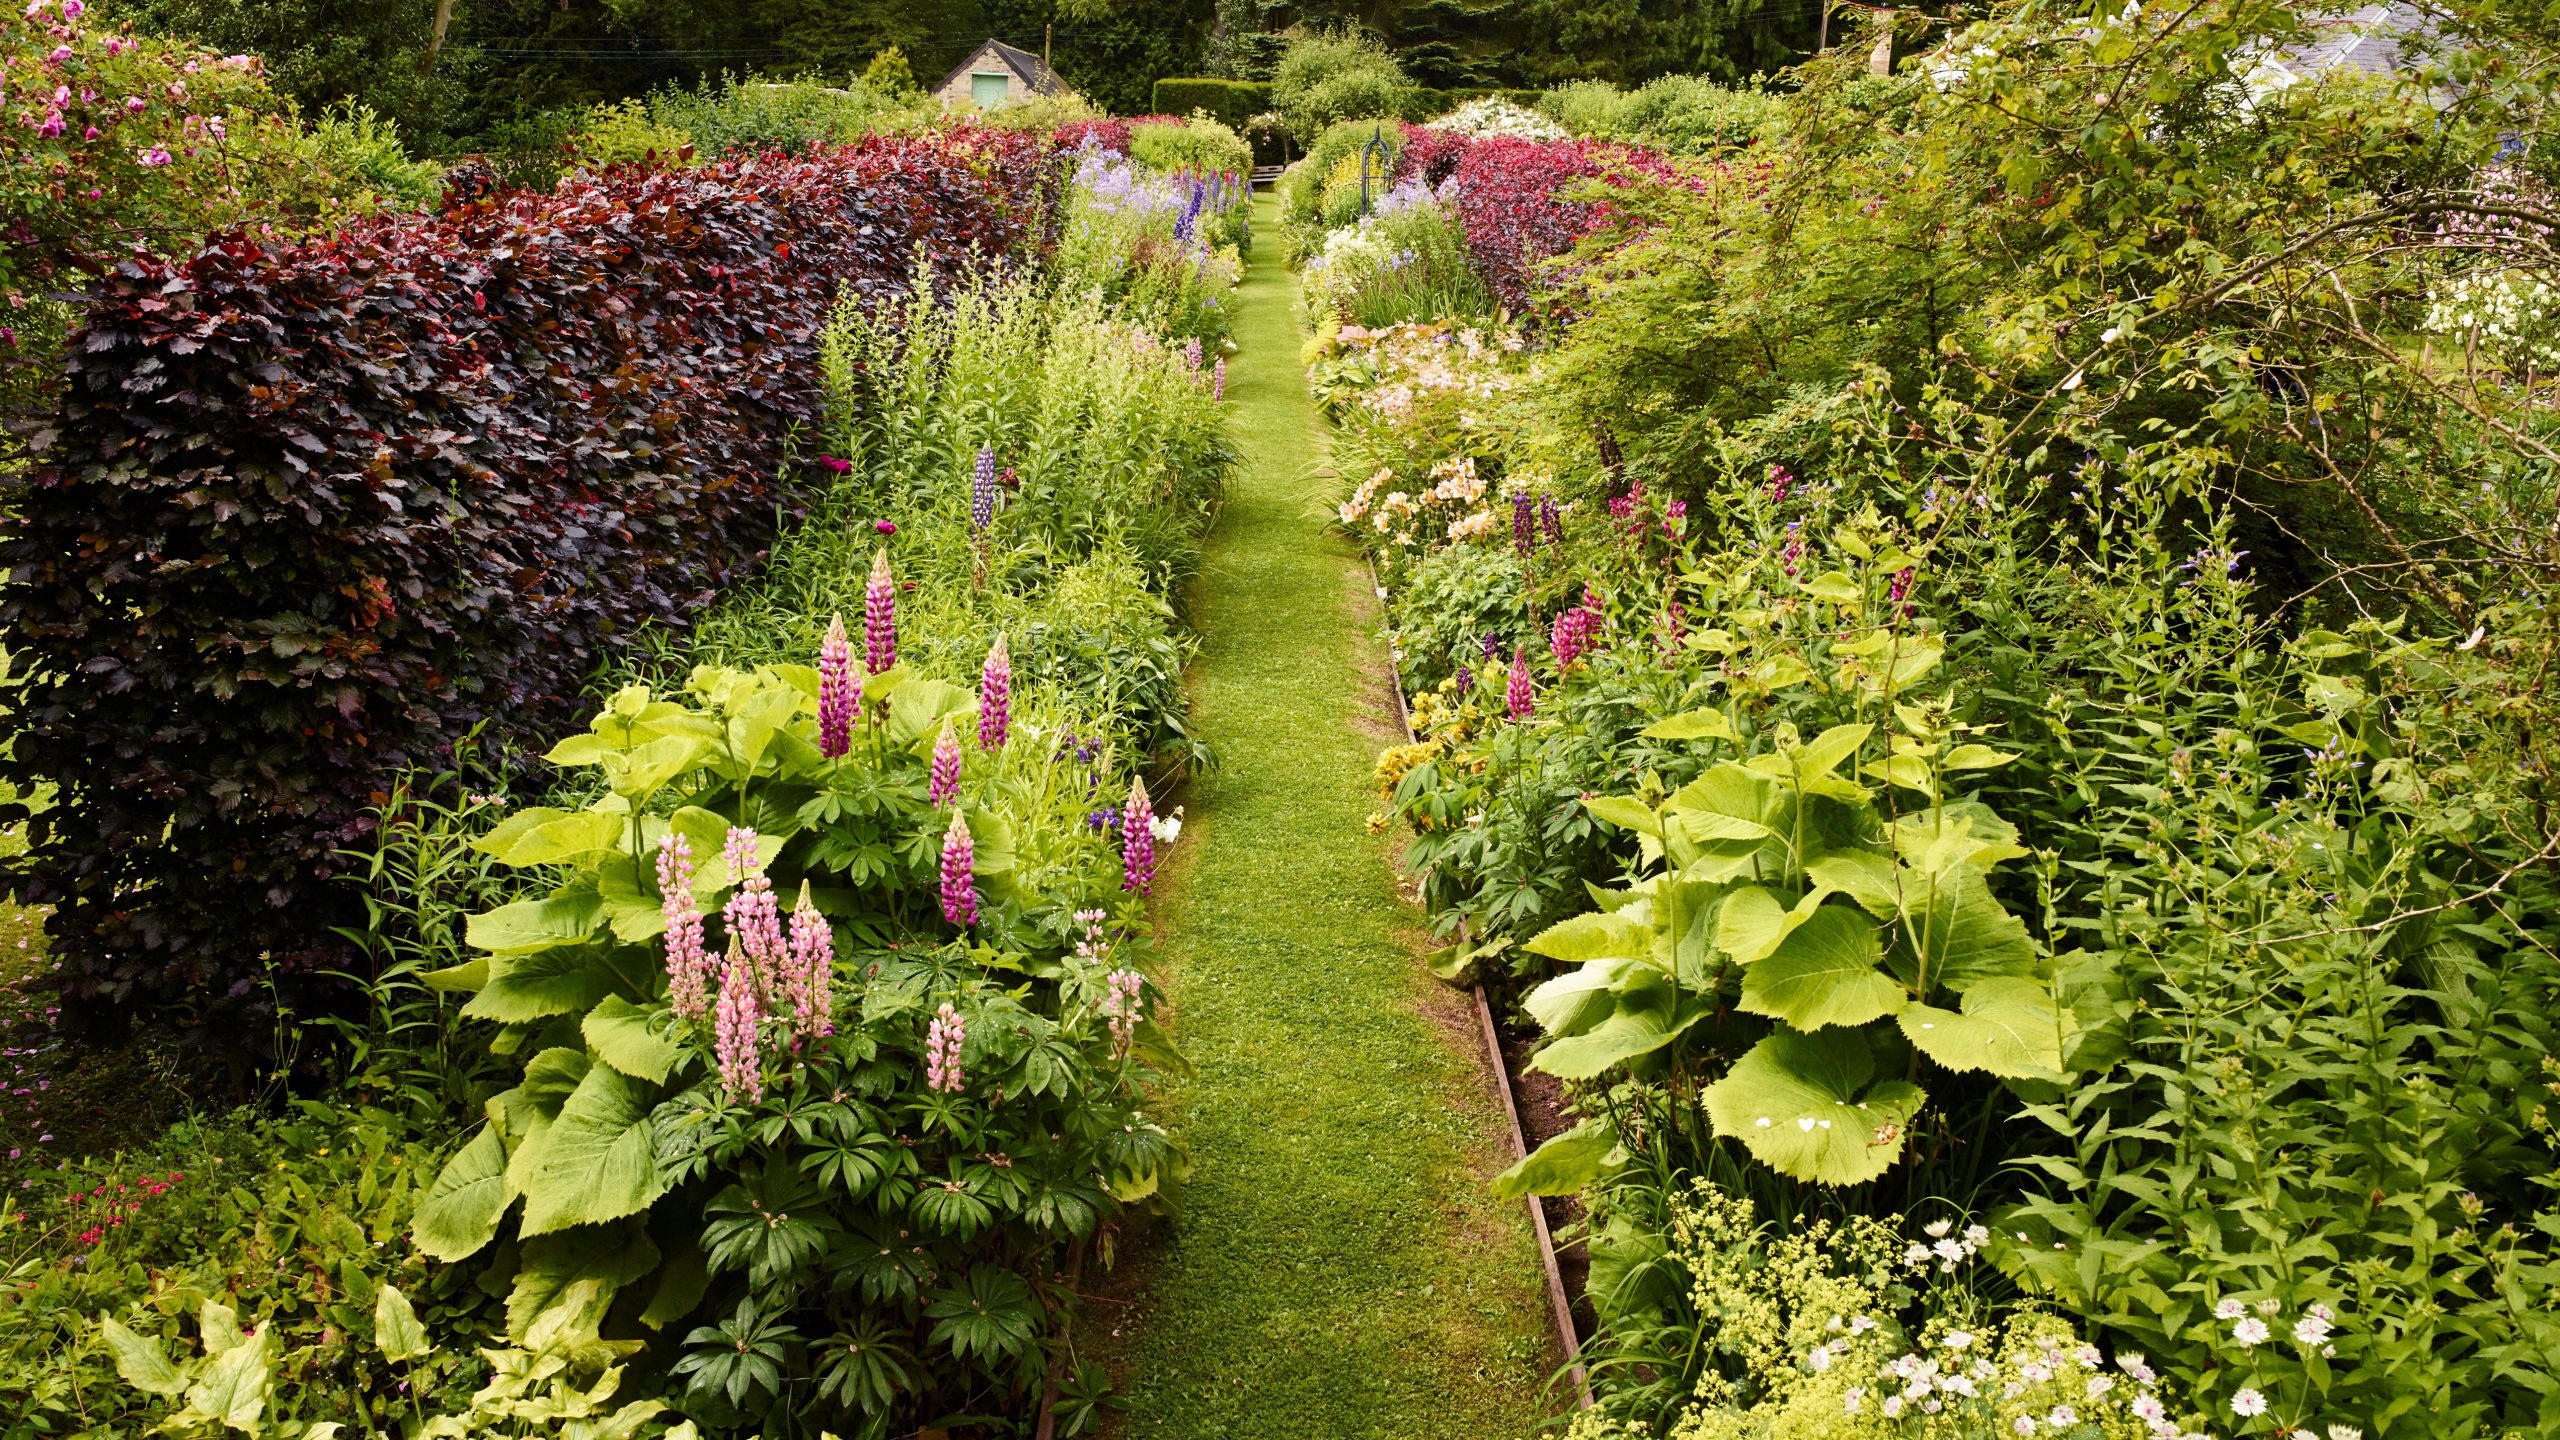
12. Carve a Grass Path Between a Red-Leaf Hedge and Pink Lupines
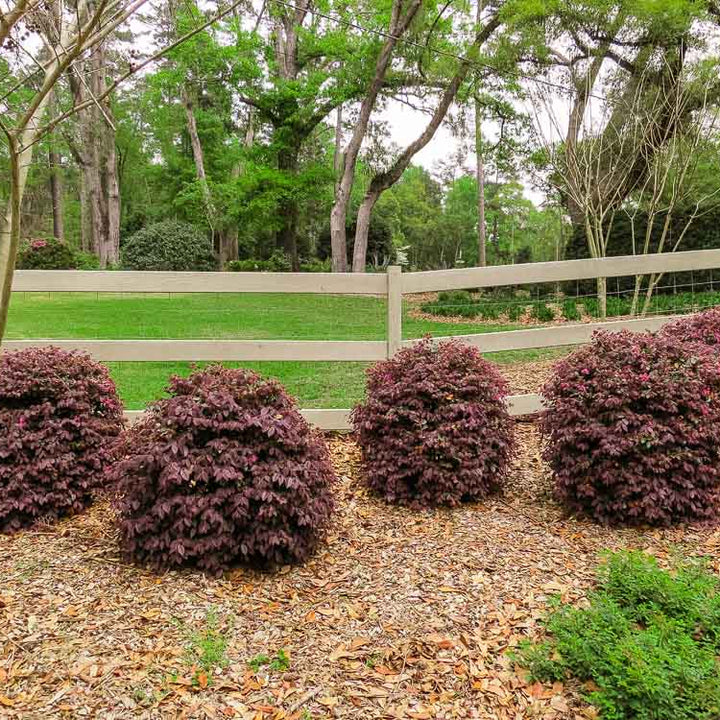
This garden feels so alive because of the powerful color contrast between the deep burgundy of the red-leaf hedge and the vibrant greens and pinks of the flowering perennials. The red foliage acts as a dramatic backdrop, making the pink lupines appear even more electric. The narrow grass path in the middle serves as a ‘neutral space,’ a visual resting point that allows both sides of the border to shine without competing.
|
$15.00
|
$29.66
|
$13.59
|
$8.99
|

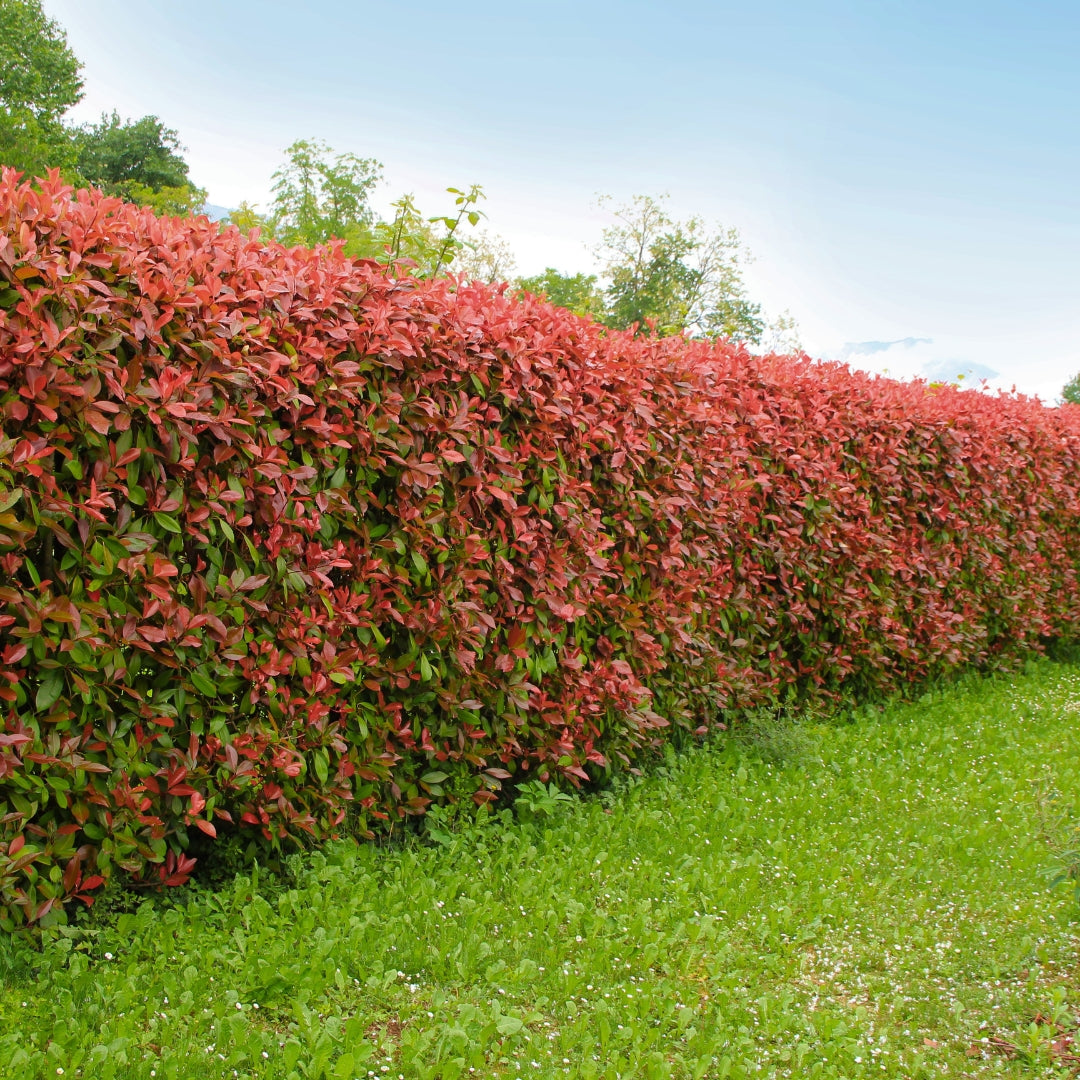


“A simple grass path looks effortless, but it requires more upkeep than a stone or gravel path.”
You’ll need to mow it regularly, and, more importantly, meticulously edge it to keep the turf from creeping into your flower beds. This crisp edge is what makes the design look sharp and intentional. A string trimmer will be your best friend. Be prepared to re-seed or patch spots that get worn down from foot traffic.
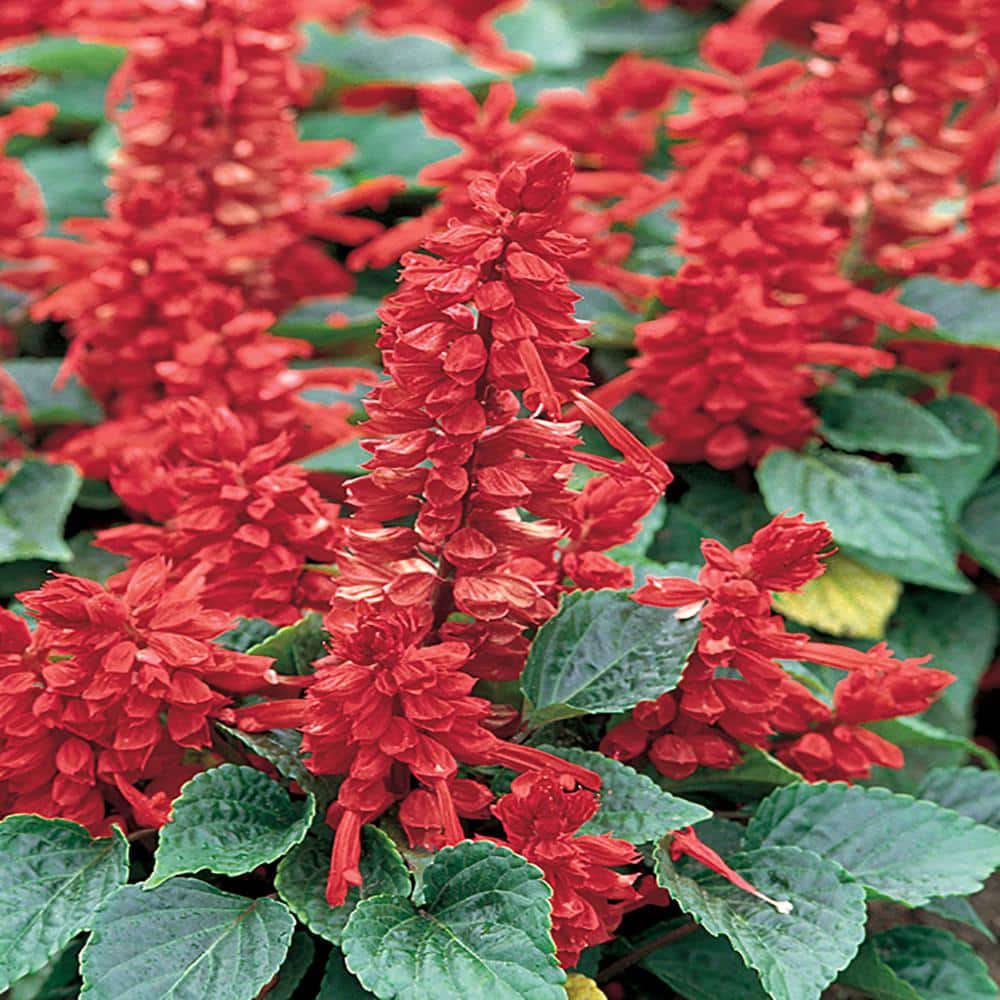
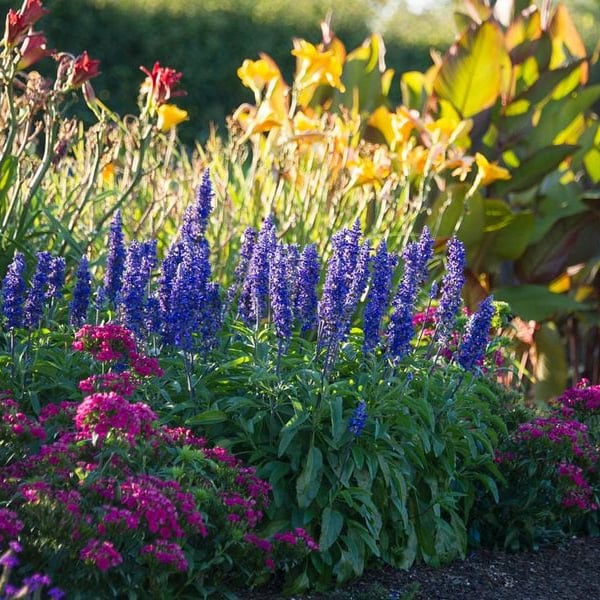
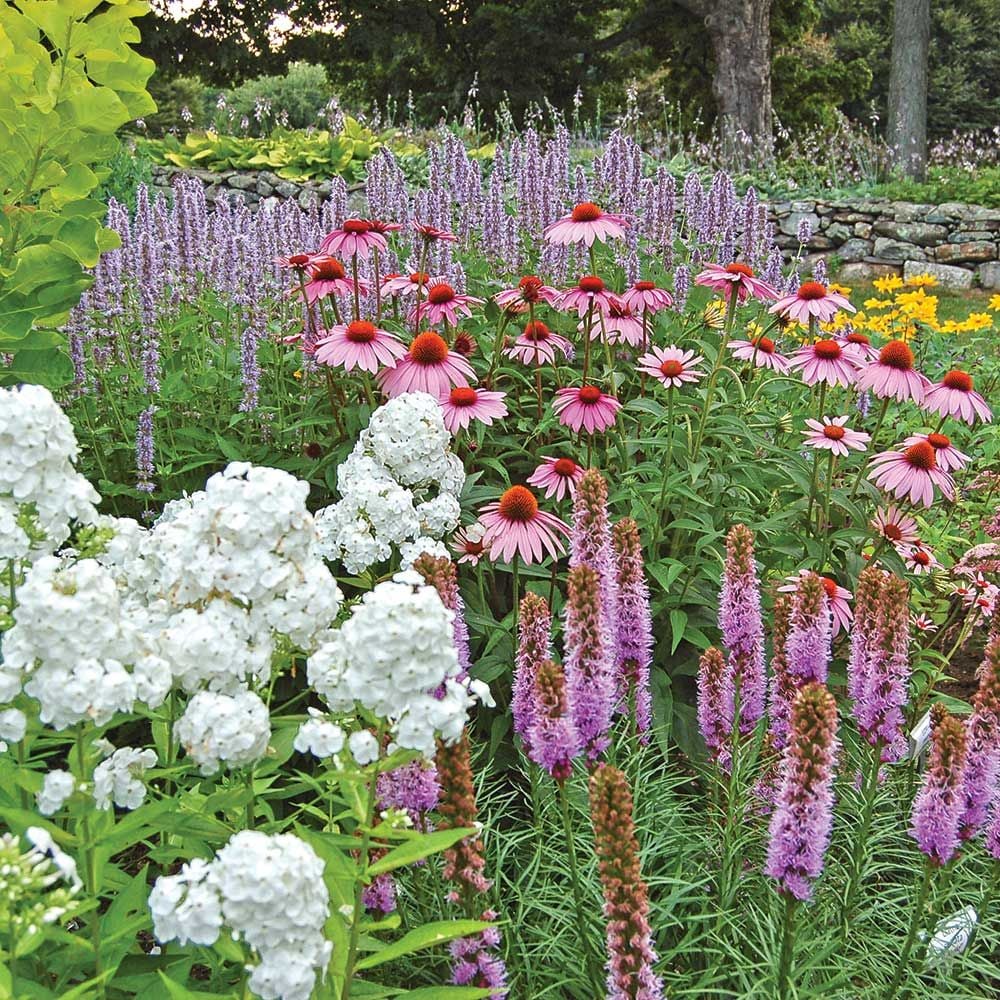
13. Layer Blue Salvia, Pink Phlox, and Yellow Daylilies
Breaking down this vibrant display, it’s a study in primary color relationships. You have a base of 50% cool tones (the spiky blue salvia and lush green foliage) + 30% warm accent (the bright yellow daylilies in back) + 20% bridging color (the deep pink phlox, which has both cool and warm notes). This balanced palette creates energy without chaos. You can swap the plants, but keeping this color ratio will give you a similarly dynamic feel.
|
$39.99
|
$13.99
|
$26.36
|
$21.98
|

“The key to achieving this layered, full look is planting in drifts and paying attention to ‘bloom succession.’ Don’t just plant one of everything.”
Plant at least 3-5 of the same plant in a grouping. Then, choose plants that bloom at slightly different times from spring through fall. This ensures that as one flower begins to fade, another is just starting its show, keeping the garden vibrant for months on end.
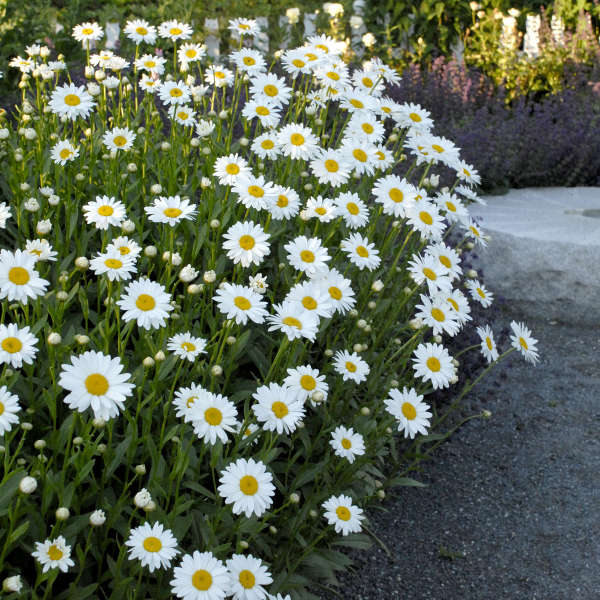
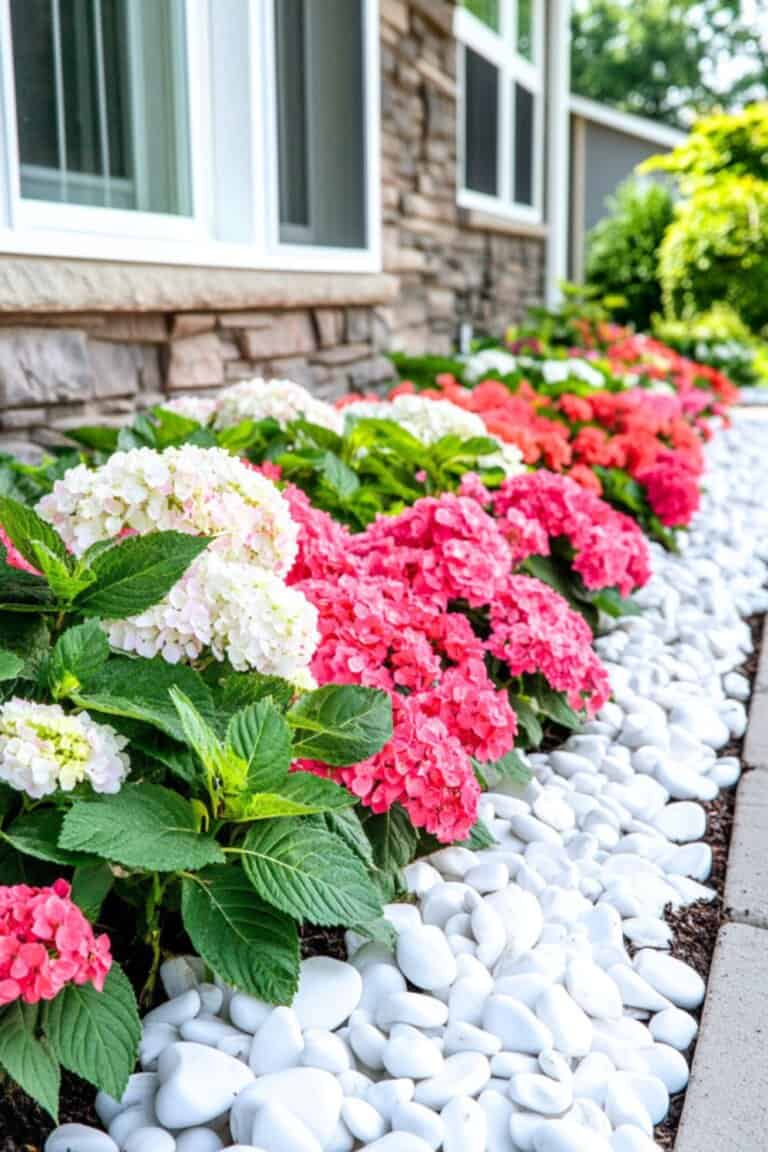
14. Edge a Hydrangea Bed with a River of White Pebbles
The element that elevates this design from ‘nice flower bed’ to ‘modern landscape feature’ is the broad border of white pebbles. It acts like a crisp mat around a piece of art. The clean, bright white provides a sharp contrast to the soft, billowy texture of the hydrangeas and the natural green of their leaves. It introduces a contemporary, almost graphic element that feels polished and intentional, cleanly separating the garden from the path and lawn.
|
$49.96
|
$59.95
|
$678.17
|
$4.97
|
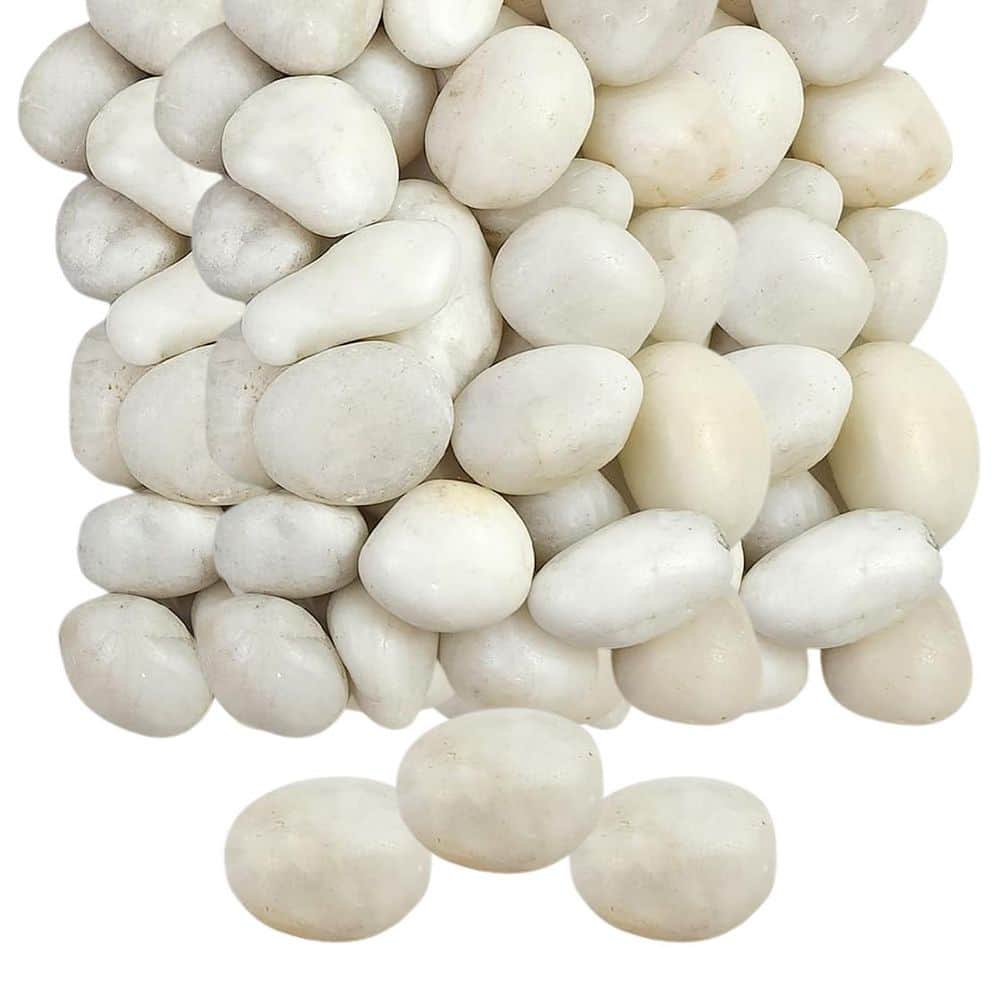

“White pebbles look stunning when they’re first installed, but they are high-maintenance.”
They show every fallen leaf, twig, and speck of dirt. To keep them looking pristine, you’ll need to regularly blow or rake off debris. Over time, they can become dingy from rain-splashed soil and algae growth in shady spots. A deep clean with a pressure washer or a vinegar solution might be needed every few seasons. The aesthetic is clean, but the reality can be a bit messy.
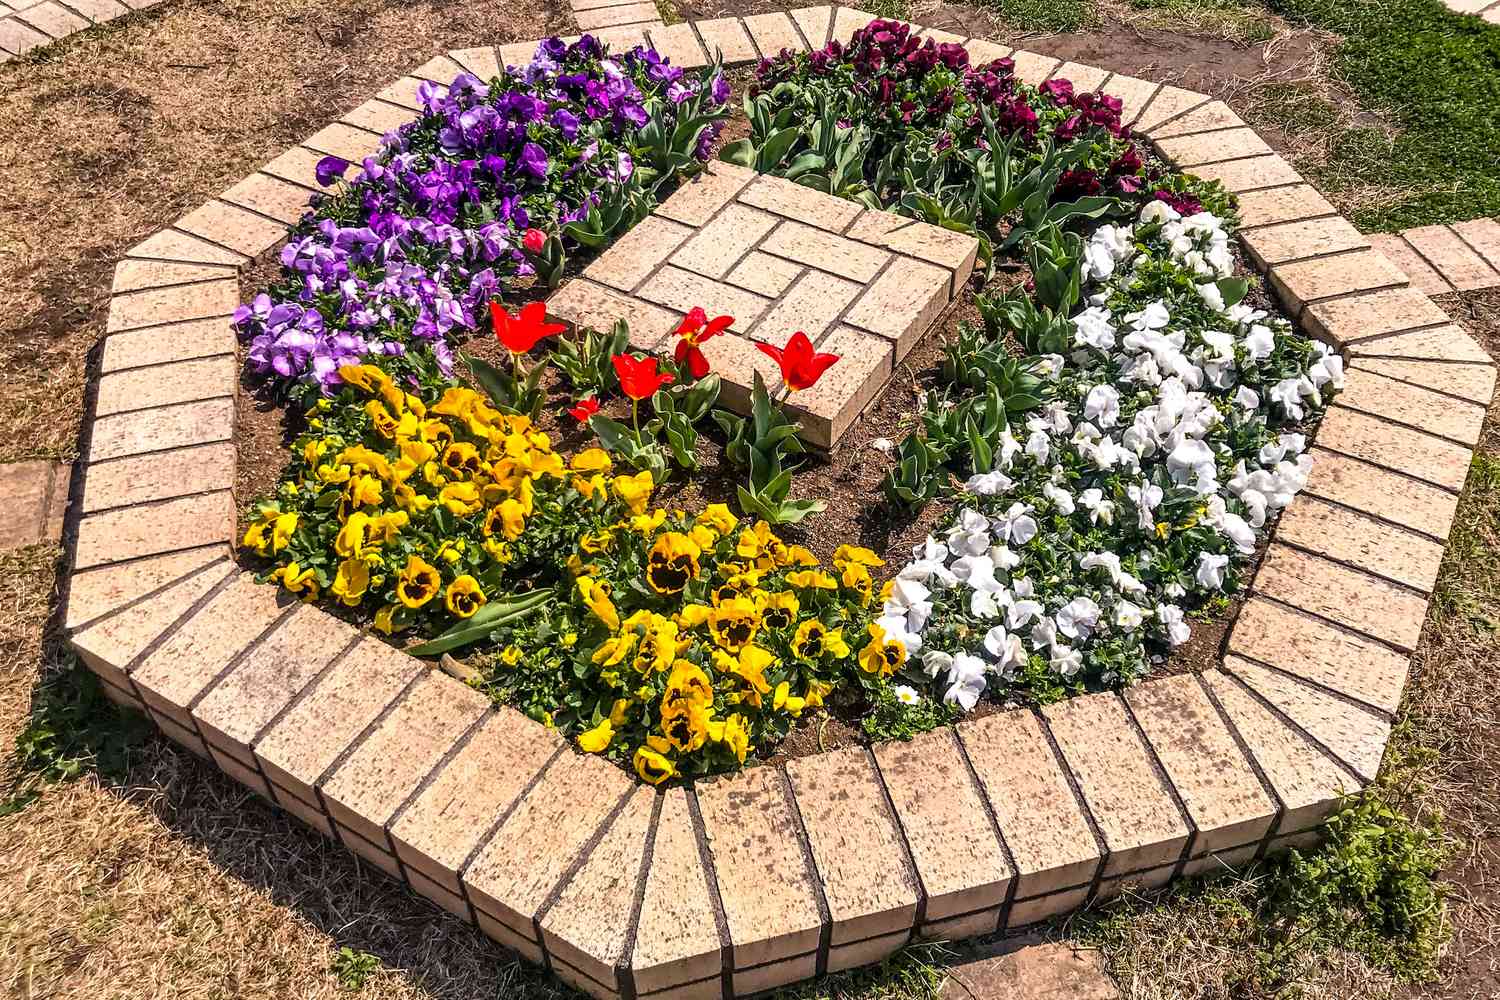
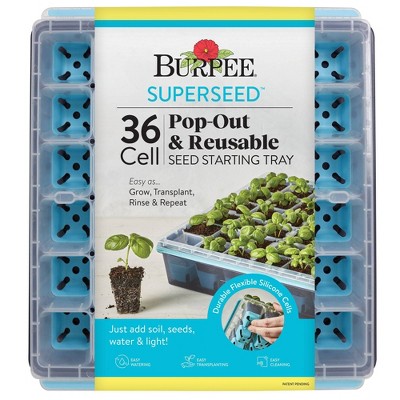
15. Create a Living Quilt with an Octagonal Brick Planter
Recreating this precise, quilt-like planting is all about planning. 1. Start with your empty, prepared octagonal bed. 2. Use string and small stakes to divide the bed into the desired geometric sections. 3. Group your pansies by color. 4. Plant one color section at a time, spacing the plants closely (about 4-6 inches apart) for a dense, immediate effect. 5. Plant your central element, like the tulips, last. 6. Water thoroughly to settle the soil. Time: 3-4 hours. Cost: $75-$150 for plants.
|
$25.50
|
$9.99
|
$3.27
|
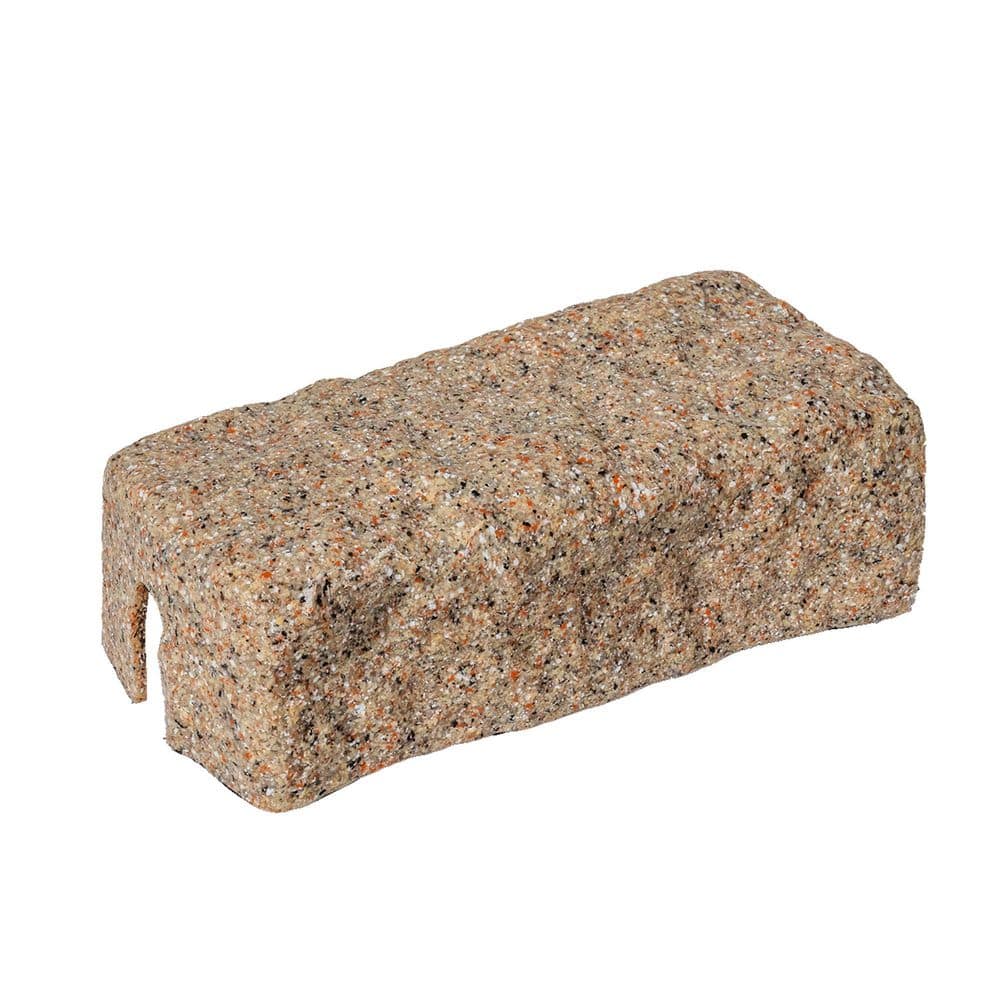

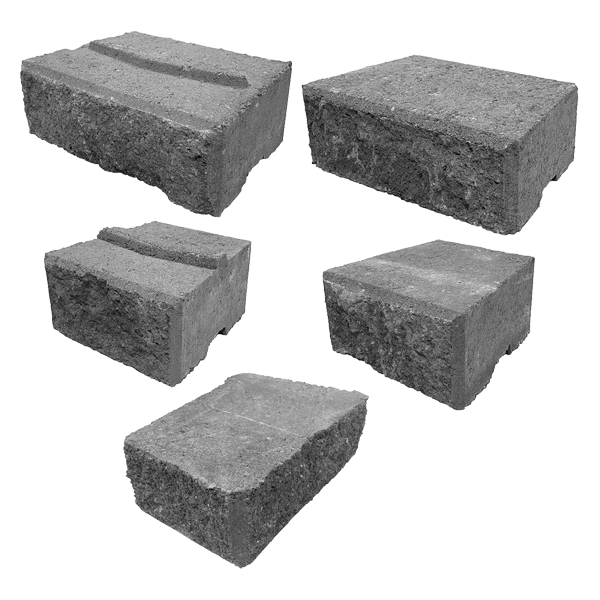
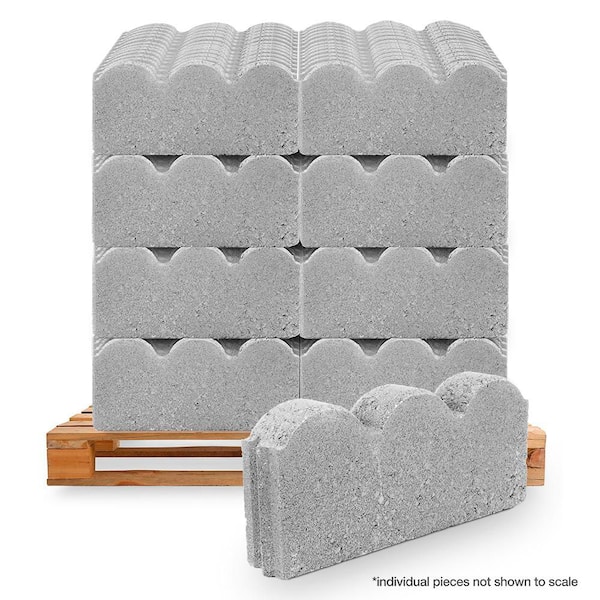
“You don’t need a custom-built brick planter to get this look.”
You can create a similar octagonal shape using affordable retaining wall blocks from a big-box store, which often cost just a few dollars each. For an even cheaper route, use reclaimed wood planks to build a geometric raised bed. And for the ‘quilt’ effect, using packets of annual seeds for flowers like zinnias or cosmos is far more cost-effective than buying dozens of starter plants.
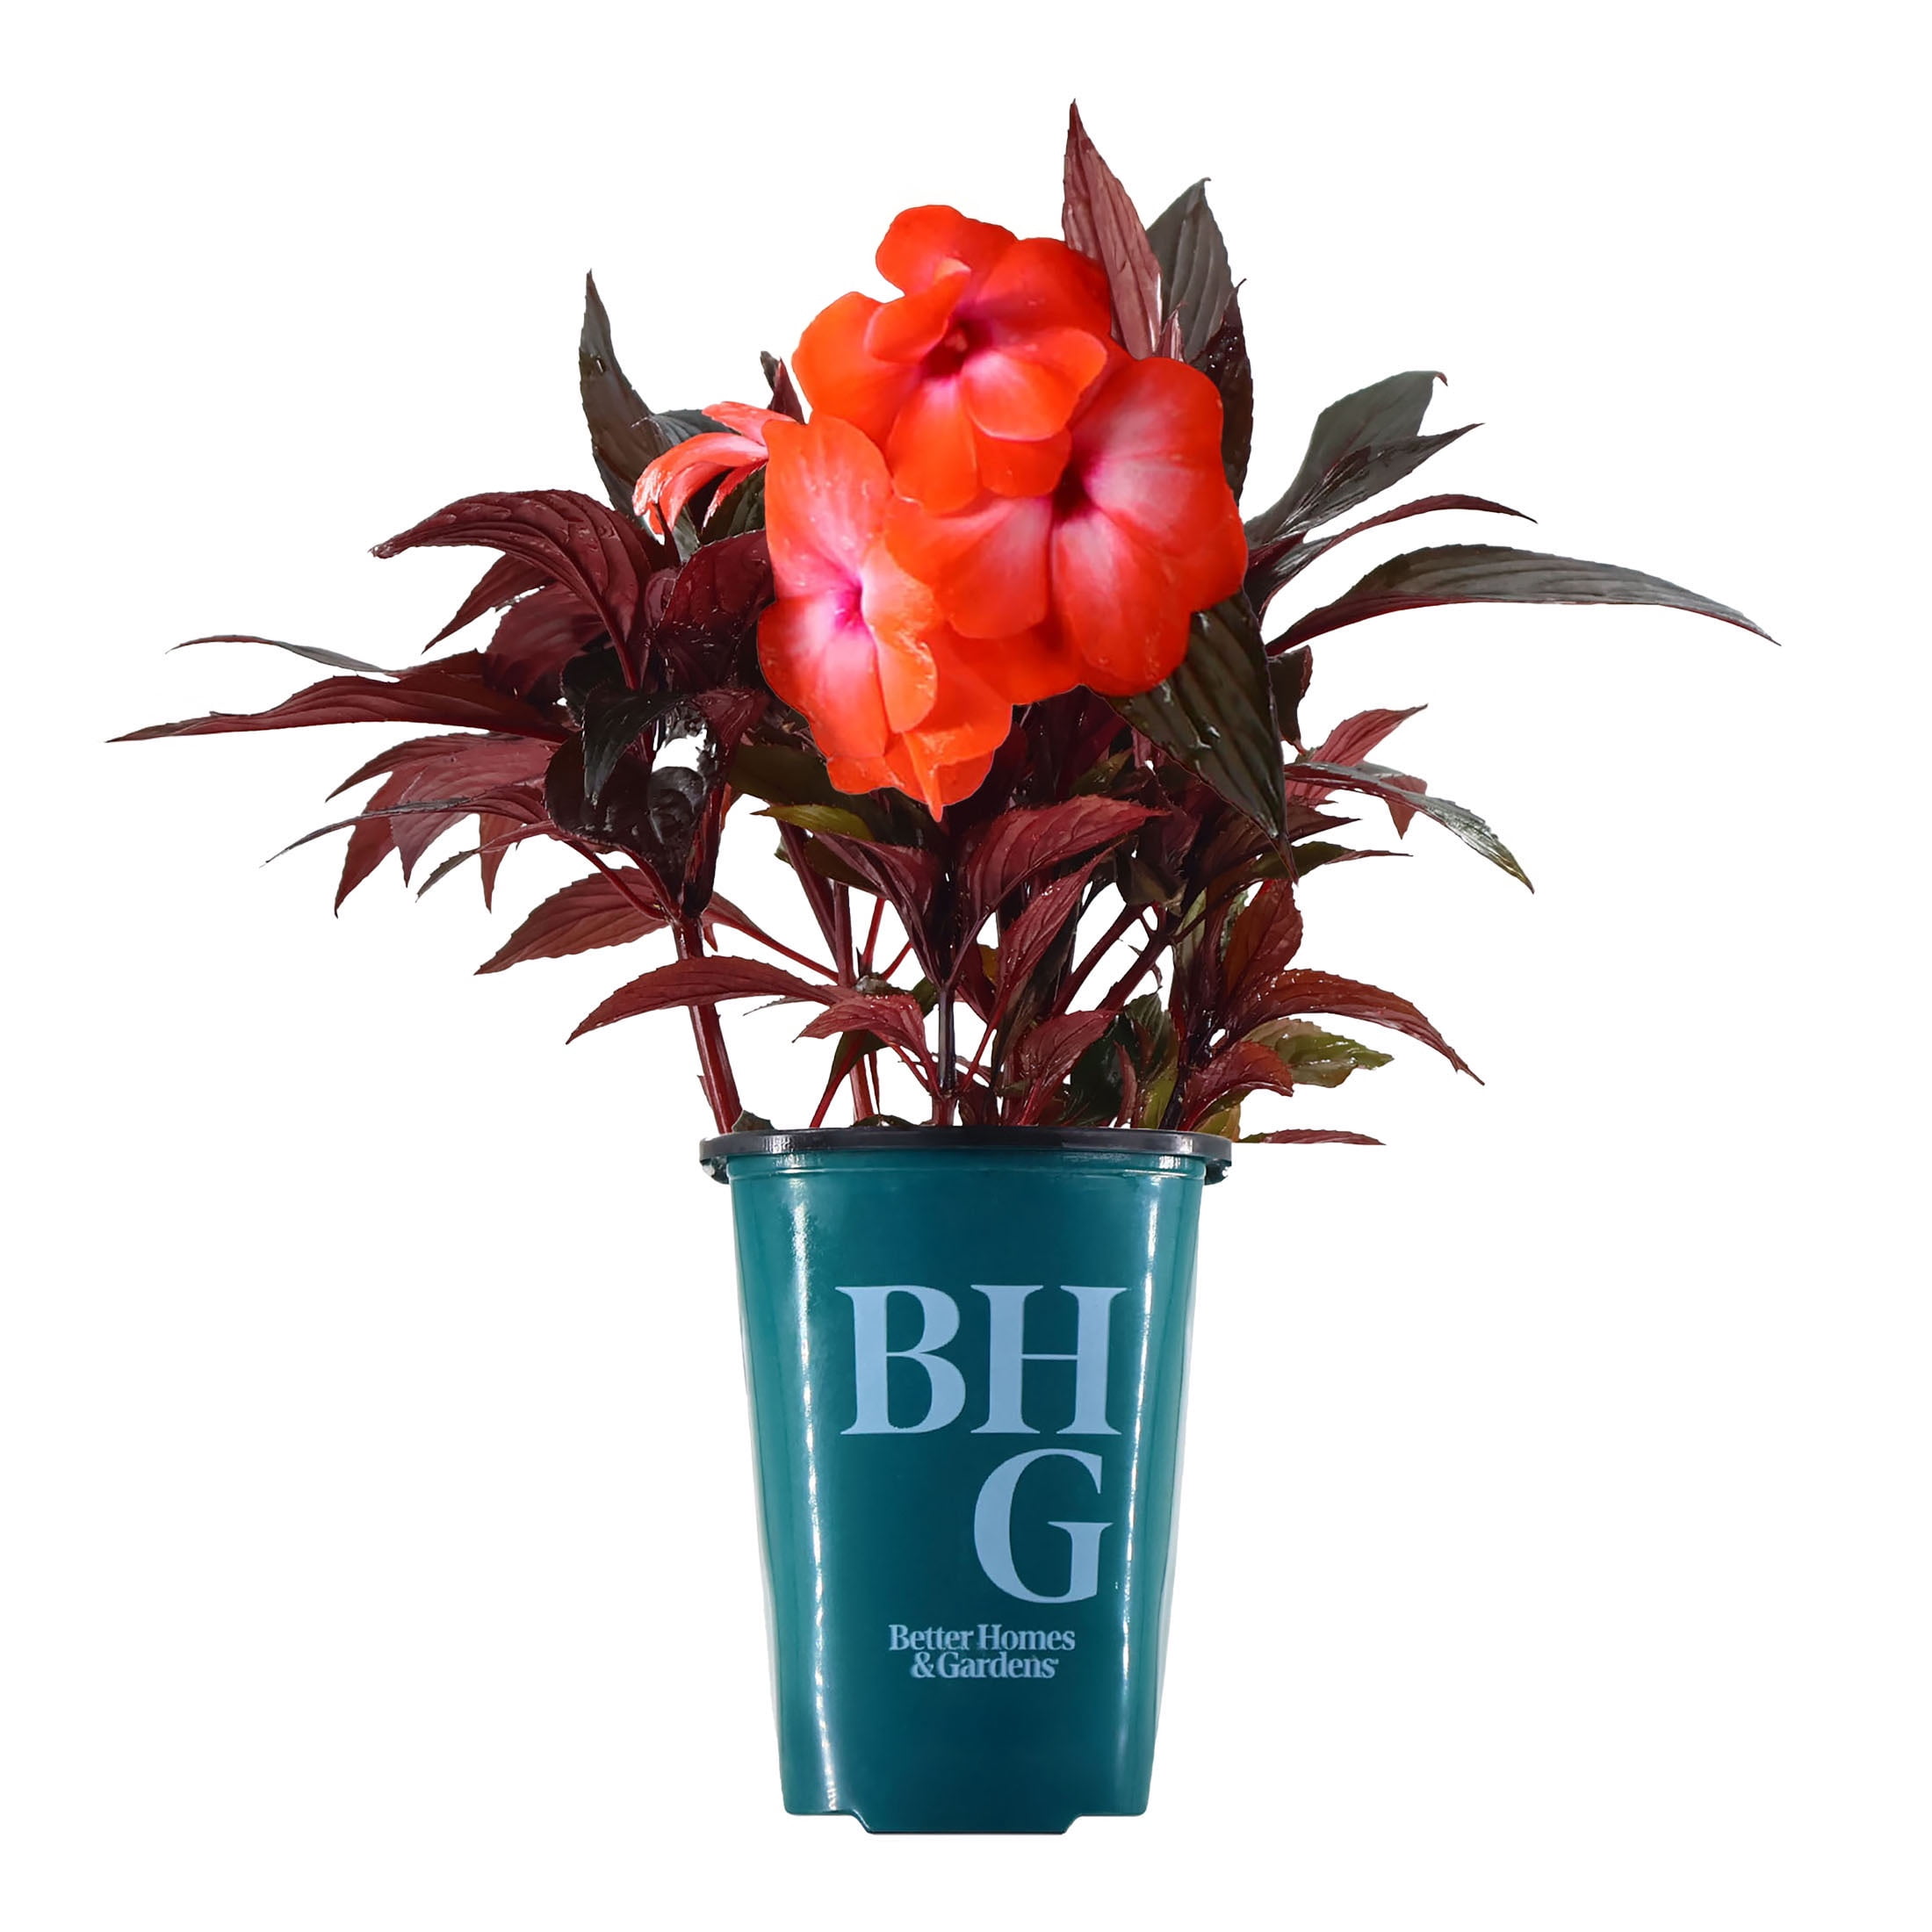
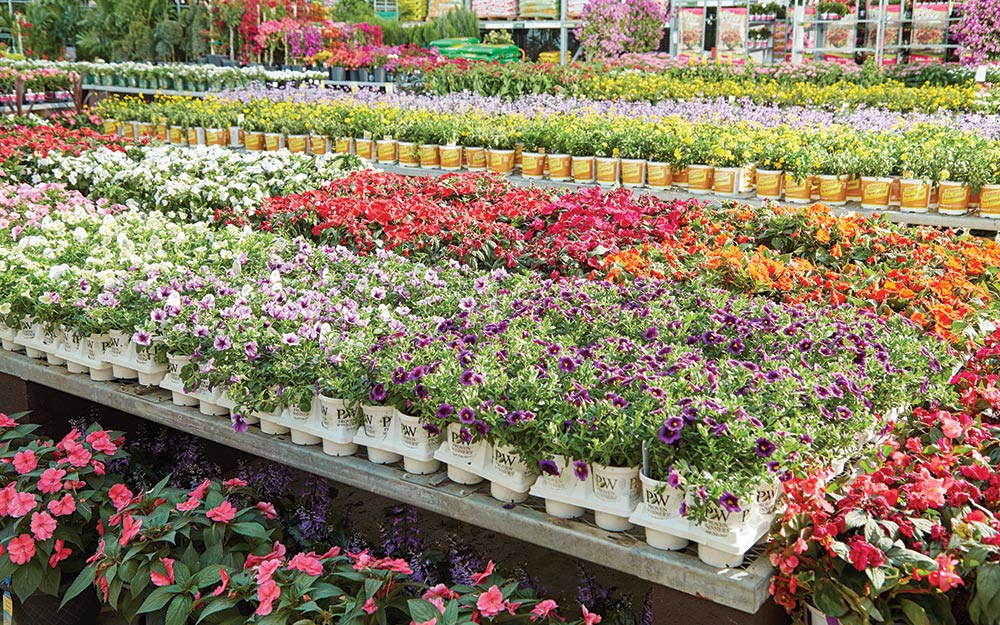
16. Organize Your Nursery Haul by Color for Maximum Impact
When you bring your plants home from the nursery, don’t just start digging. Arrange them on the ground first, still in their pots. Grouping them by color, as seen in this retail display, is a powerful pro-move. It allows you to see how the colors will mass together in your garden bed. Create large drifts and ribbons of a single color rather than dottings one of each everywhere. This creates a much more cohesive and impactful design that looks intentional, not accidental.
|
$12.98
|
$1.80
|
$19.88
|
$9.49
|

“That incredible, full-bloom look at the garden center is the result of perfect greenhouse conditions and specific fertilizers designed to force blooms for sale.”
Don’t be discouraged if your plants experience some transplant shock or don’t look quite as perfect after a few weeks in the ground. Give them proper soil, water, and light, and be patient. The goal is long-term health, not a short-term retail display.
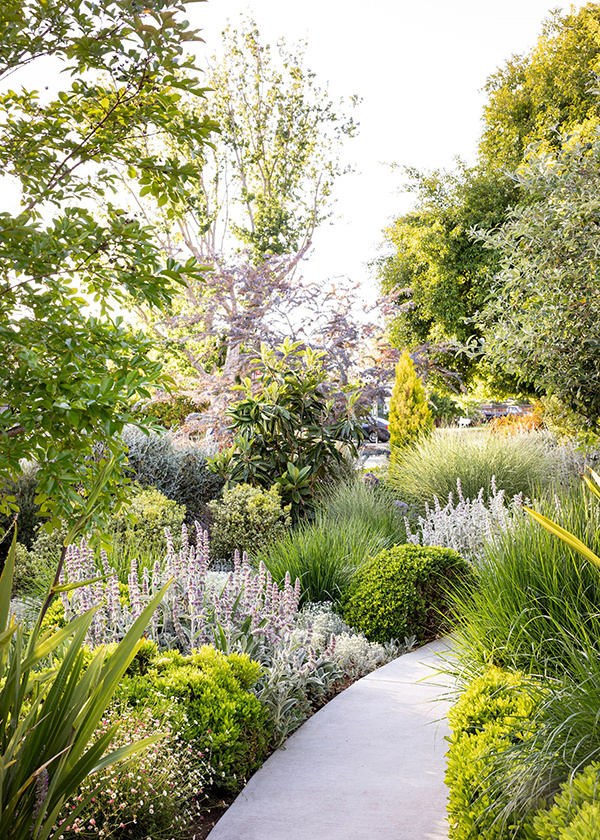
17. Soften Stone Walls with Climbing Vines and Lush Plantings
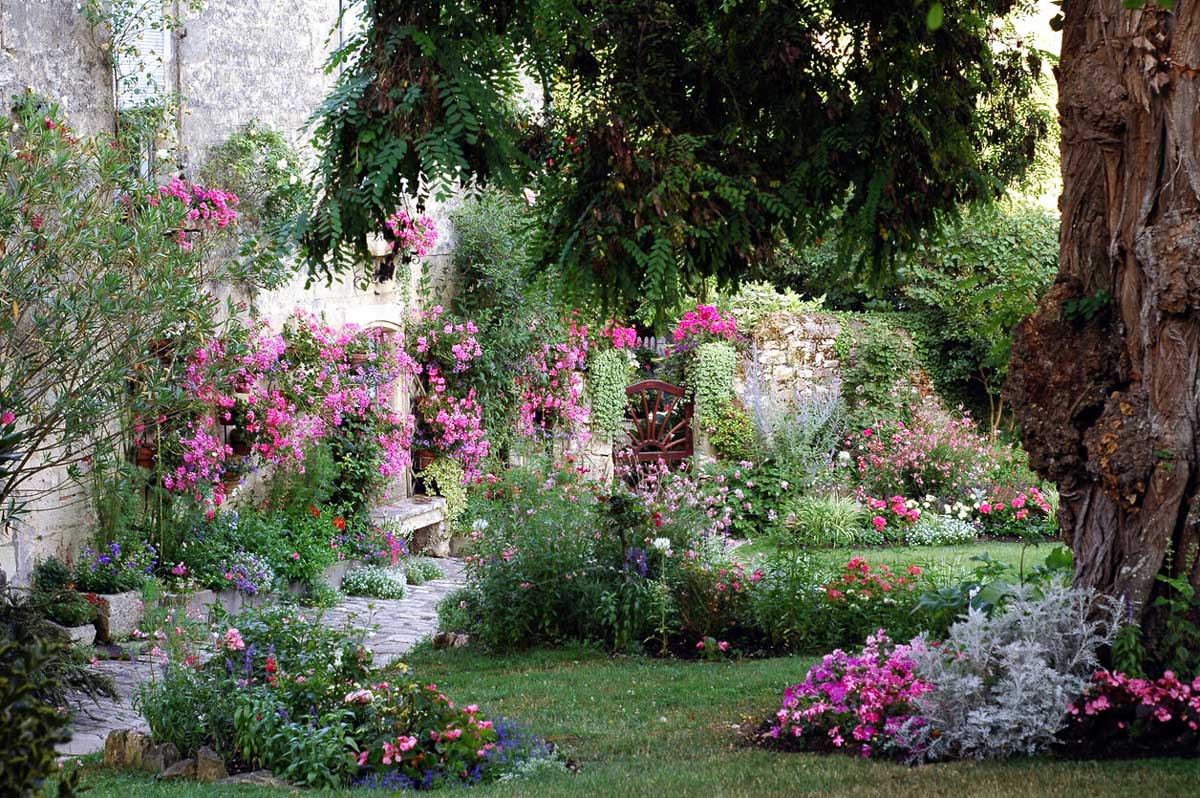
A tall stone wall can feel imposing, but this garden demonstrates how to make it an asset. The climbing plants and overflowing greenery work to soften the hard stone, breaking up its monolithic surface with fine textures and organic shapes. The cobblestone path adds another layer of rustic texture that complements the wall, while the stone benches integrate seamlessly. The result is a space that feels enclosed and private, yet lush and abundant, not stark or cold.
|
$1,823.40
|
$84.96
|
$28.56
|
$119.96
|


“This enchanting, ‘secret garden’ feel is best suited for a space with some existing vertical structure, like a property wall, the side of a garage, or a sturdy fence.”
You’ll need a bed depth of at least 5-6 feet to allow for layered plantings in front of the wall. For the climbing vines to thrive without becoming a nuisance, ensure the wall is in good condition and not something you’ll need to repaint or repair often, as removing mature vines can be a major task.
18. Create a Modern Retreat with Dark Fences and White Chairs
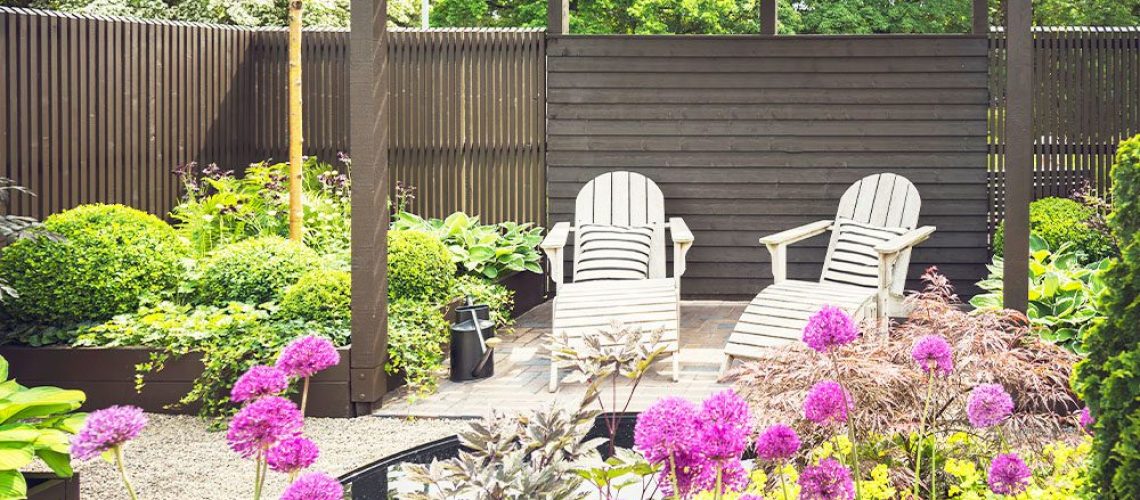
The secret ingredient that makes this space feel so chic and modern is the dark, almost-black, stained wood. It’s a bold choice that pays off beautifully. The dark color makes the vibrant green foliage and bright purple alliums pop with incredible intensity. It also gives the space a sophisticated, contemporary edge that you wouldn’t get with natural or light-colored wood. It’s a backdrop that adds drama and depth. Contrast this with the rustic wood in Idea #21.
|
$9.99
|
$110.23
|
$23.96
|
$179.00
|
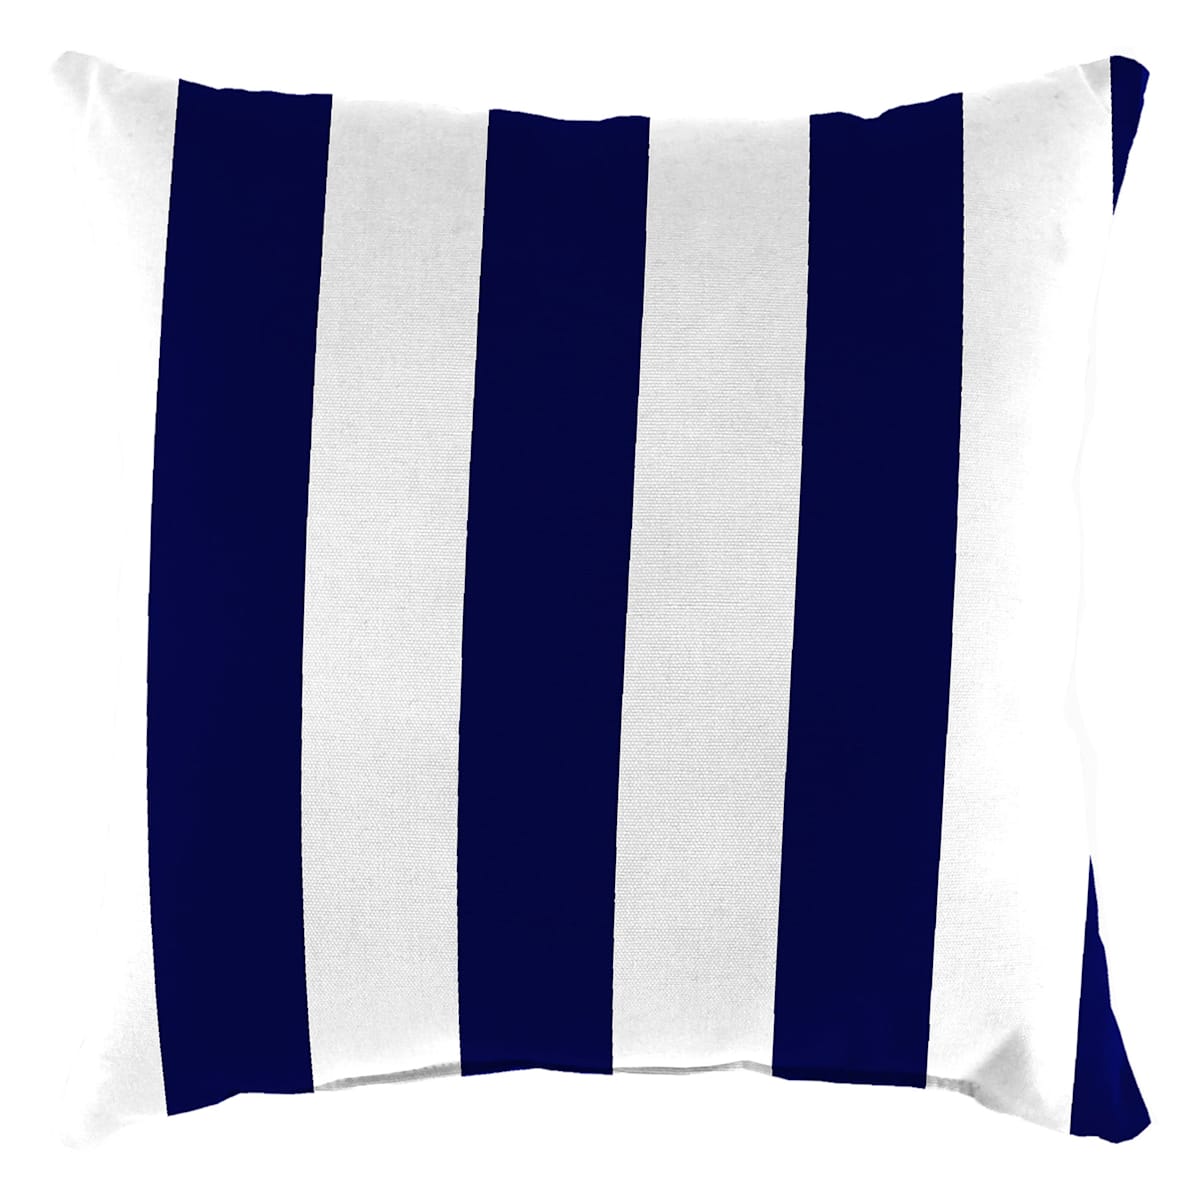
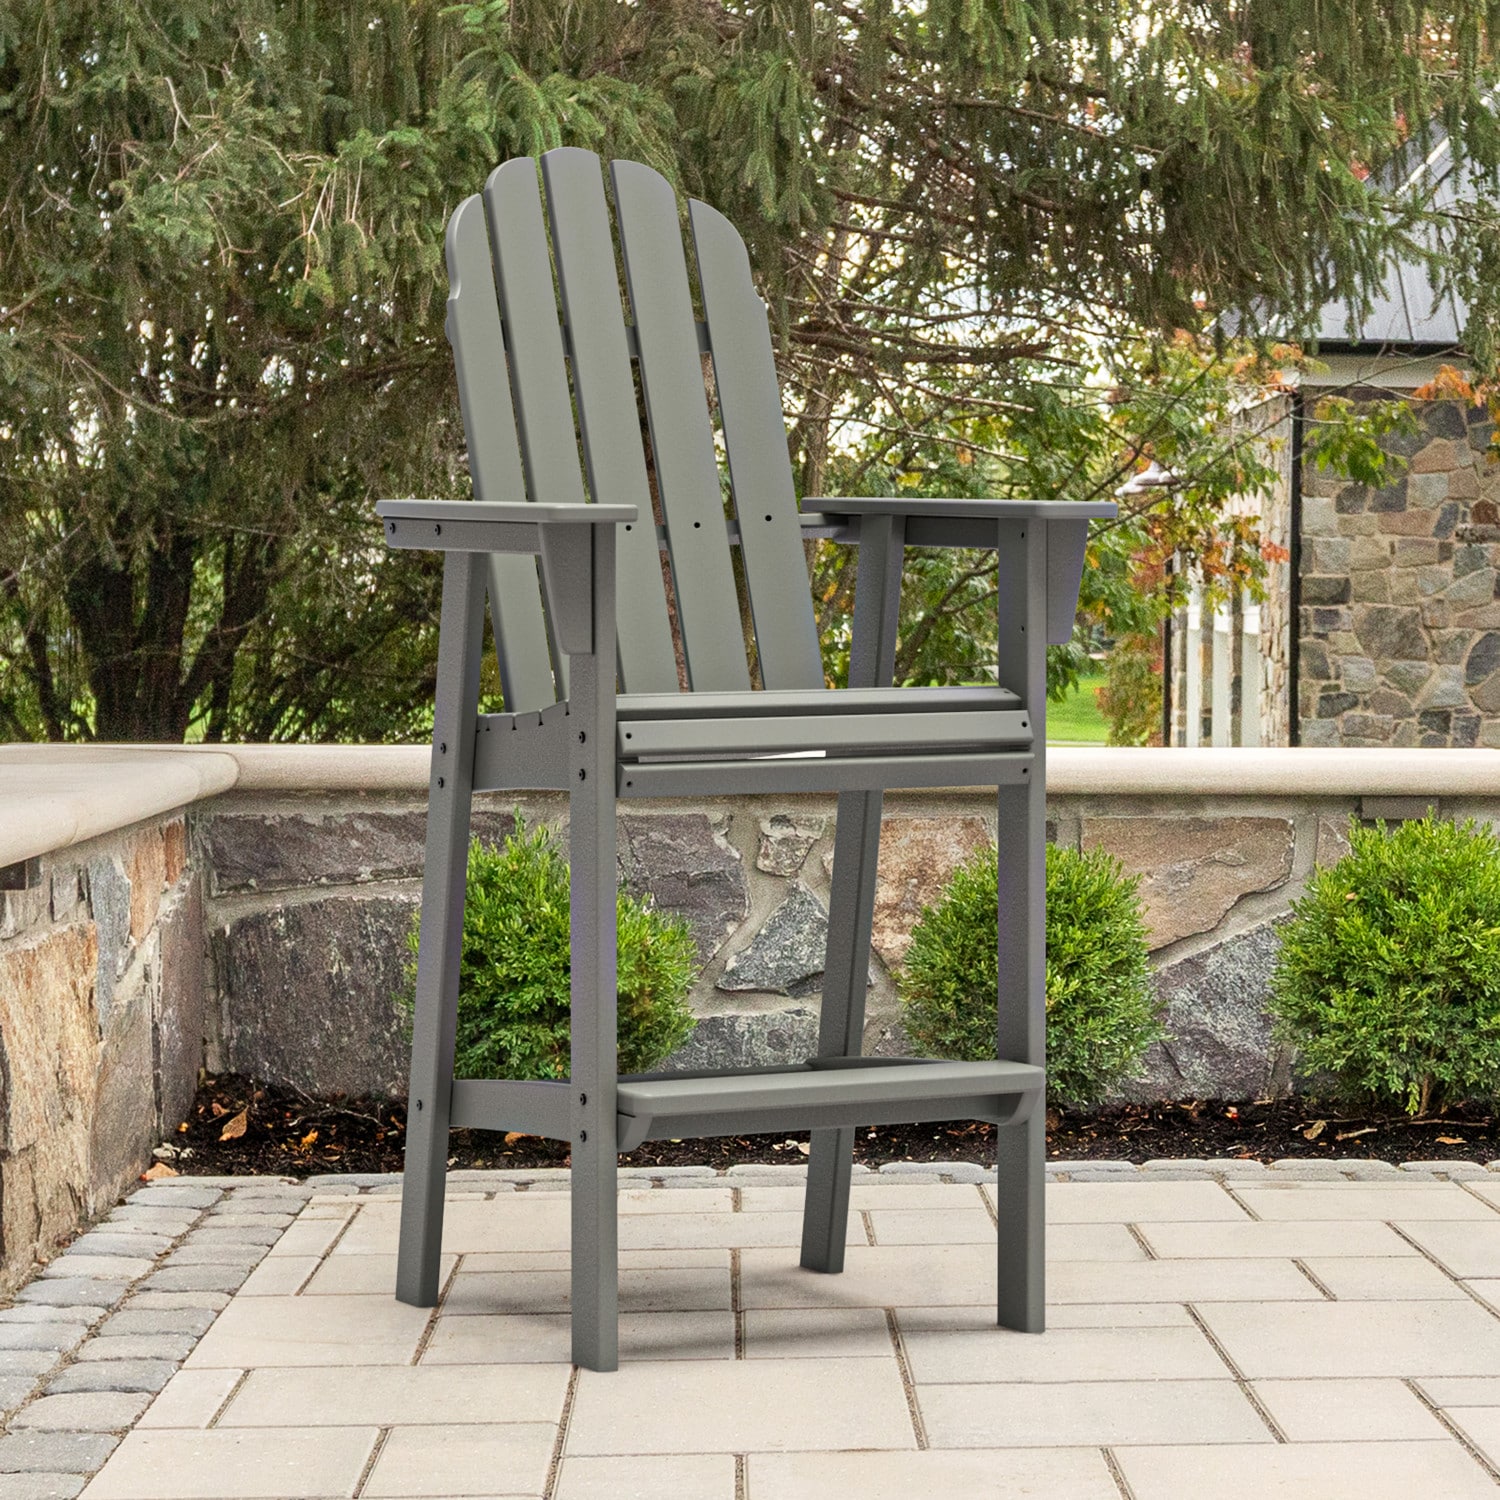
“The design math here is simple and striking: 50% dark structural elements (the fence and planters) + 30% lush, vibrant plantings (greens and purples) + 20% crisp white accents (the Adirondack chairs).”
This high-contrast recipe is the heart of its modern appeal. Removing any one element would dramatically alter the mood. The striped pillows are the perfect finishing touch, tying the black and white elements together.
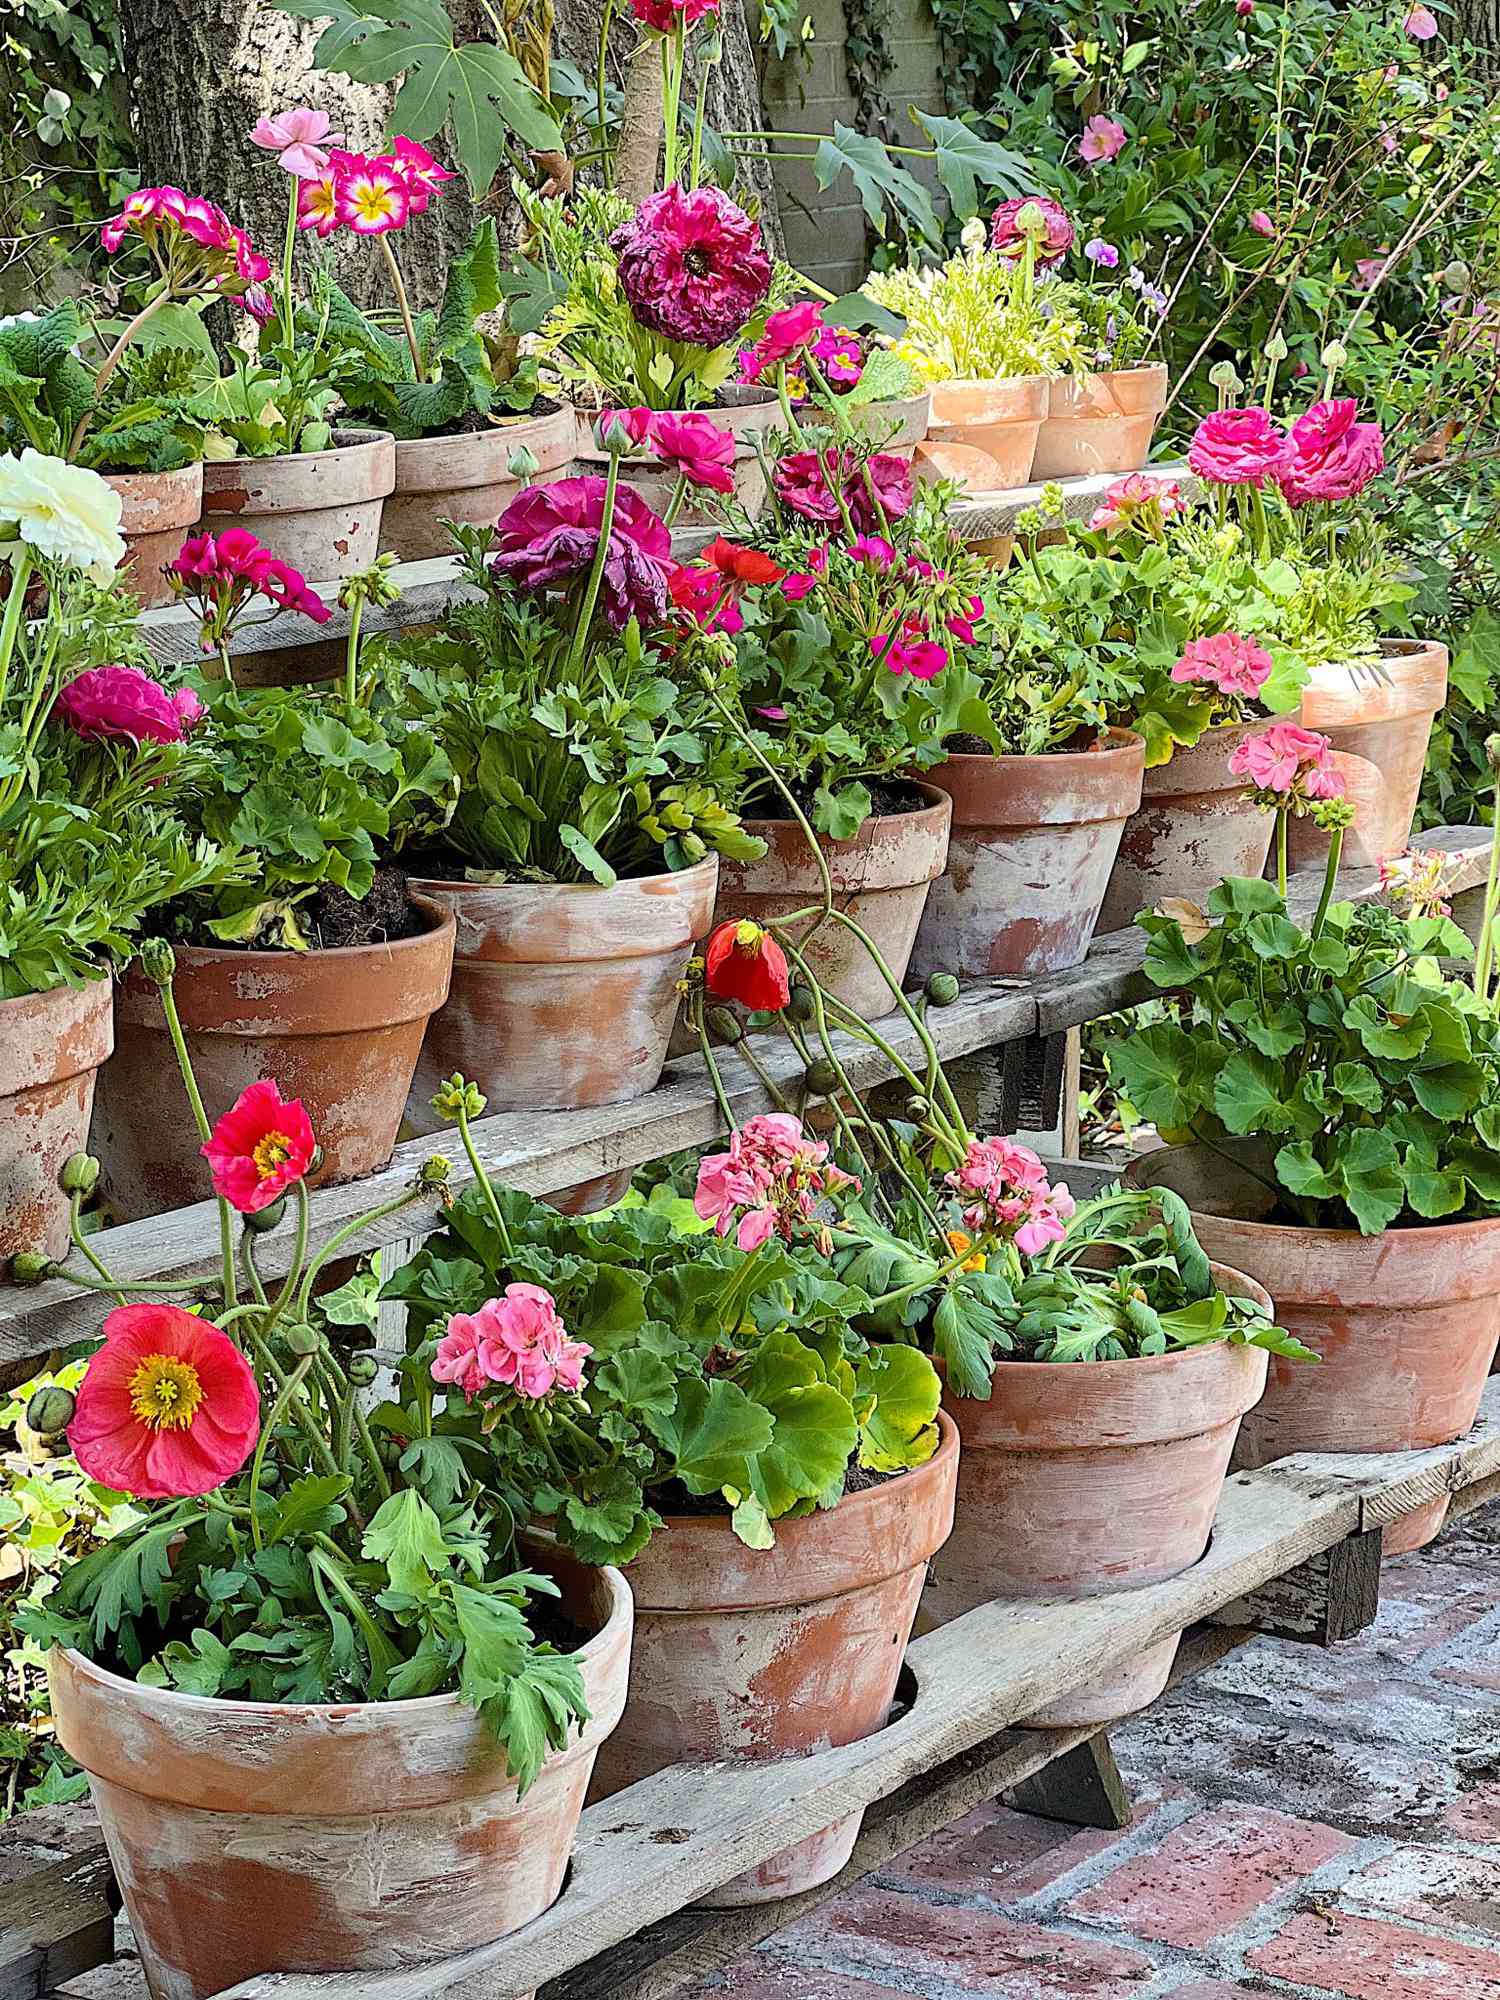
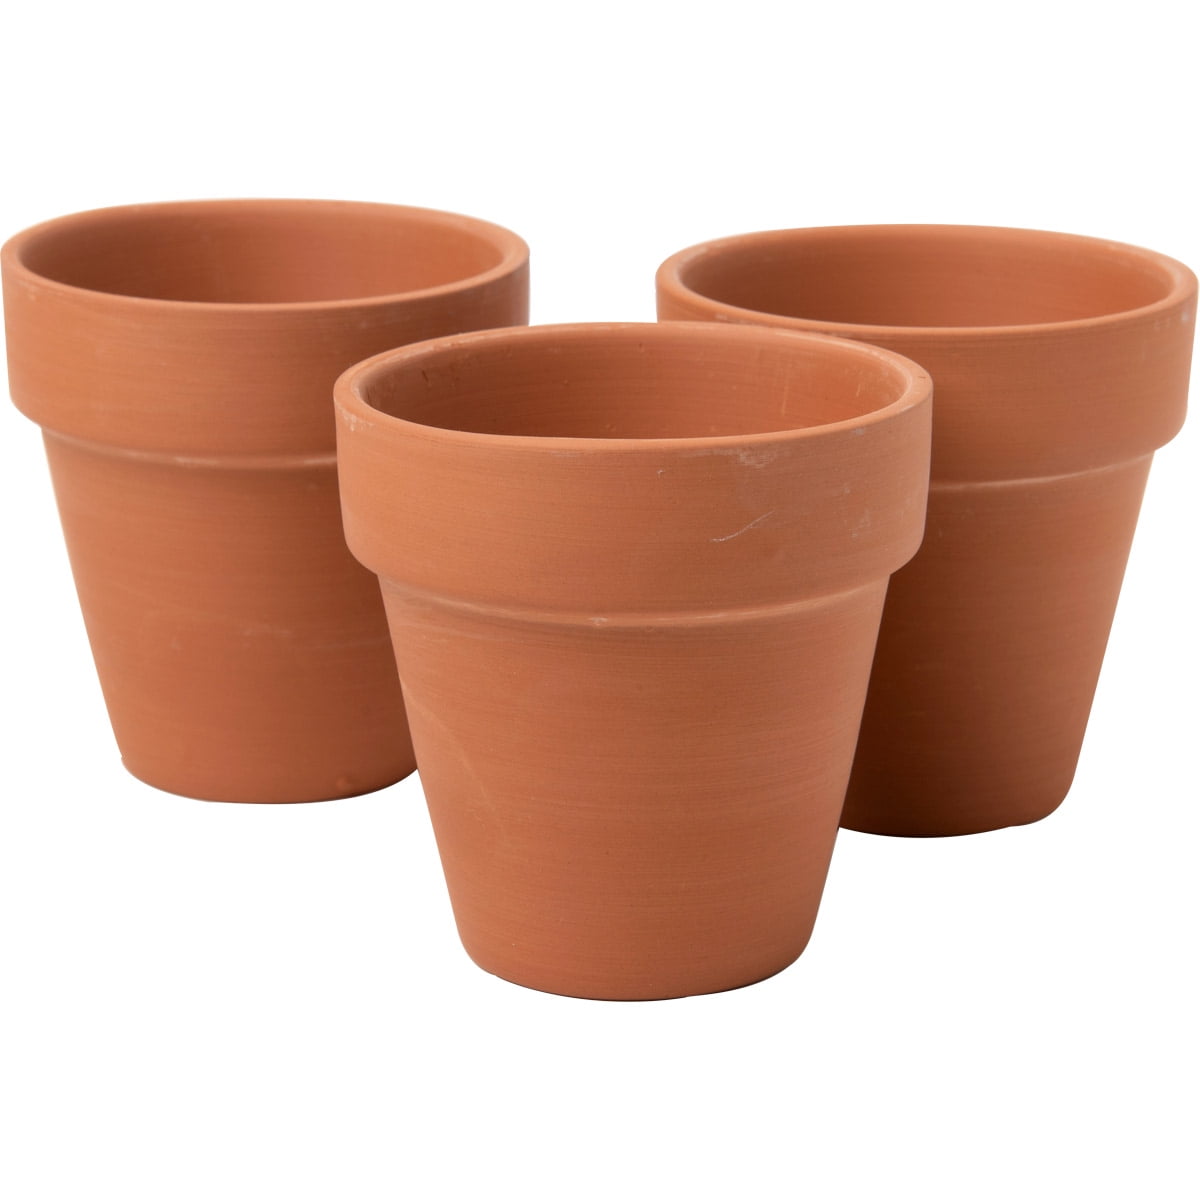
19. Display a Terracotta Pot Collection on Tiered Wooden Shelves
This charming, rustic display is incredibly easy to recreate on a budget. You can build similar tiered shelves using inexpensive cedar or pine boards and a few bricks or concrete blocks as risers—no complex carpentry required. Scour thrift stores and Facebook Marketplace for terracotta pots, which are often available for a dollar or two apiece. The mismatched, aged look is part of the charm, so don’t worry about everything being perfect. The whole setup could be done for under $75.
|
$5.94
|
$8.49
|
$57.64
|
$54.97
|


“Potted plants, especially in porous terracotta, dry out much faster than plants in the ground.”
On hot, sunny days, you may need to water them daily. This kind of display is a commitment. Also, terracotta can crack in freezing temperatures, so if you live in a cold climate, you’ll need to bring the pots into a protected garage or shed for the winter, which can be a significant chore.
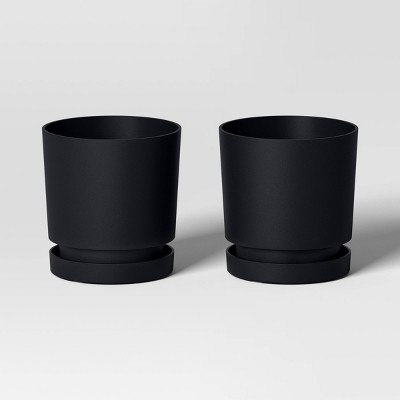
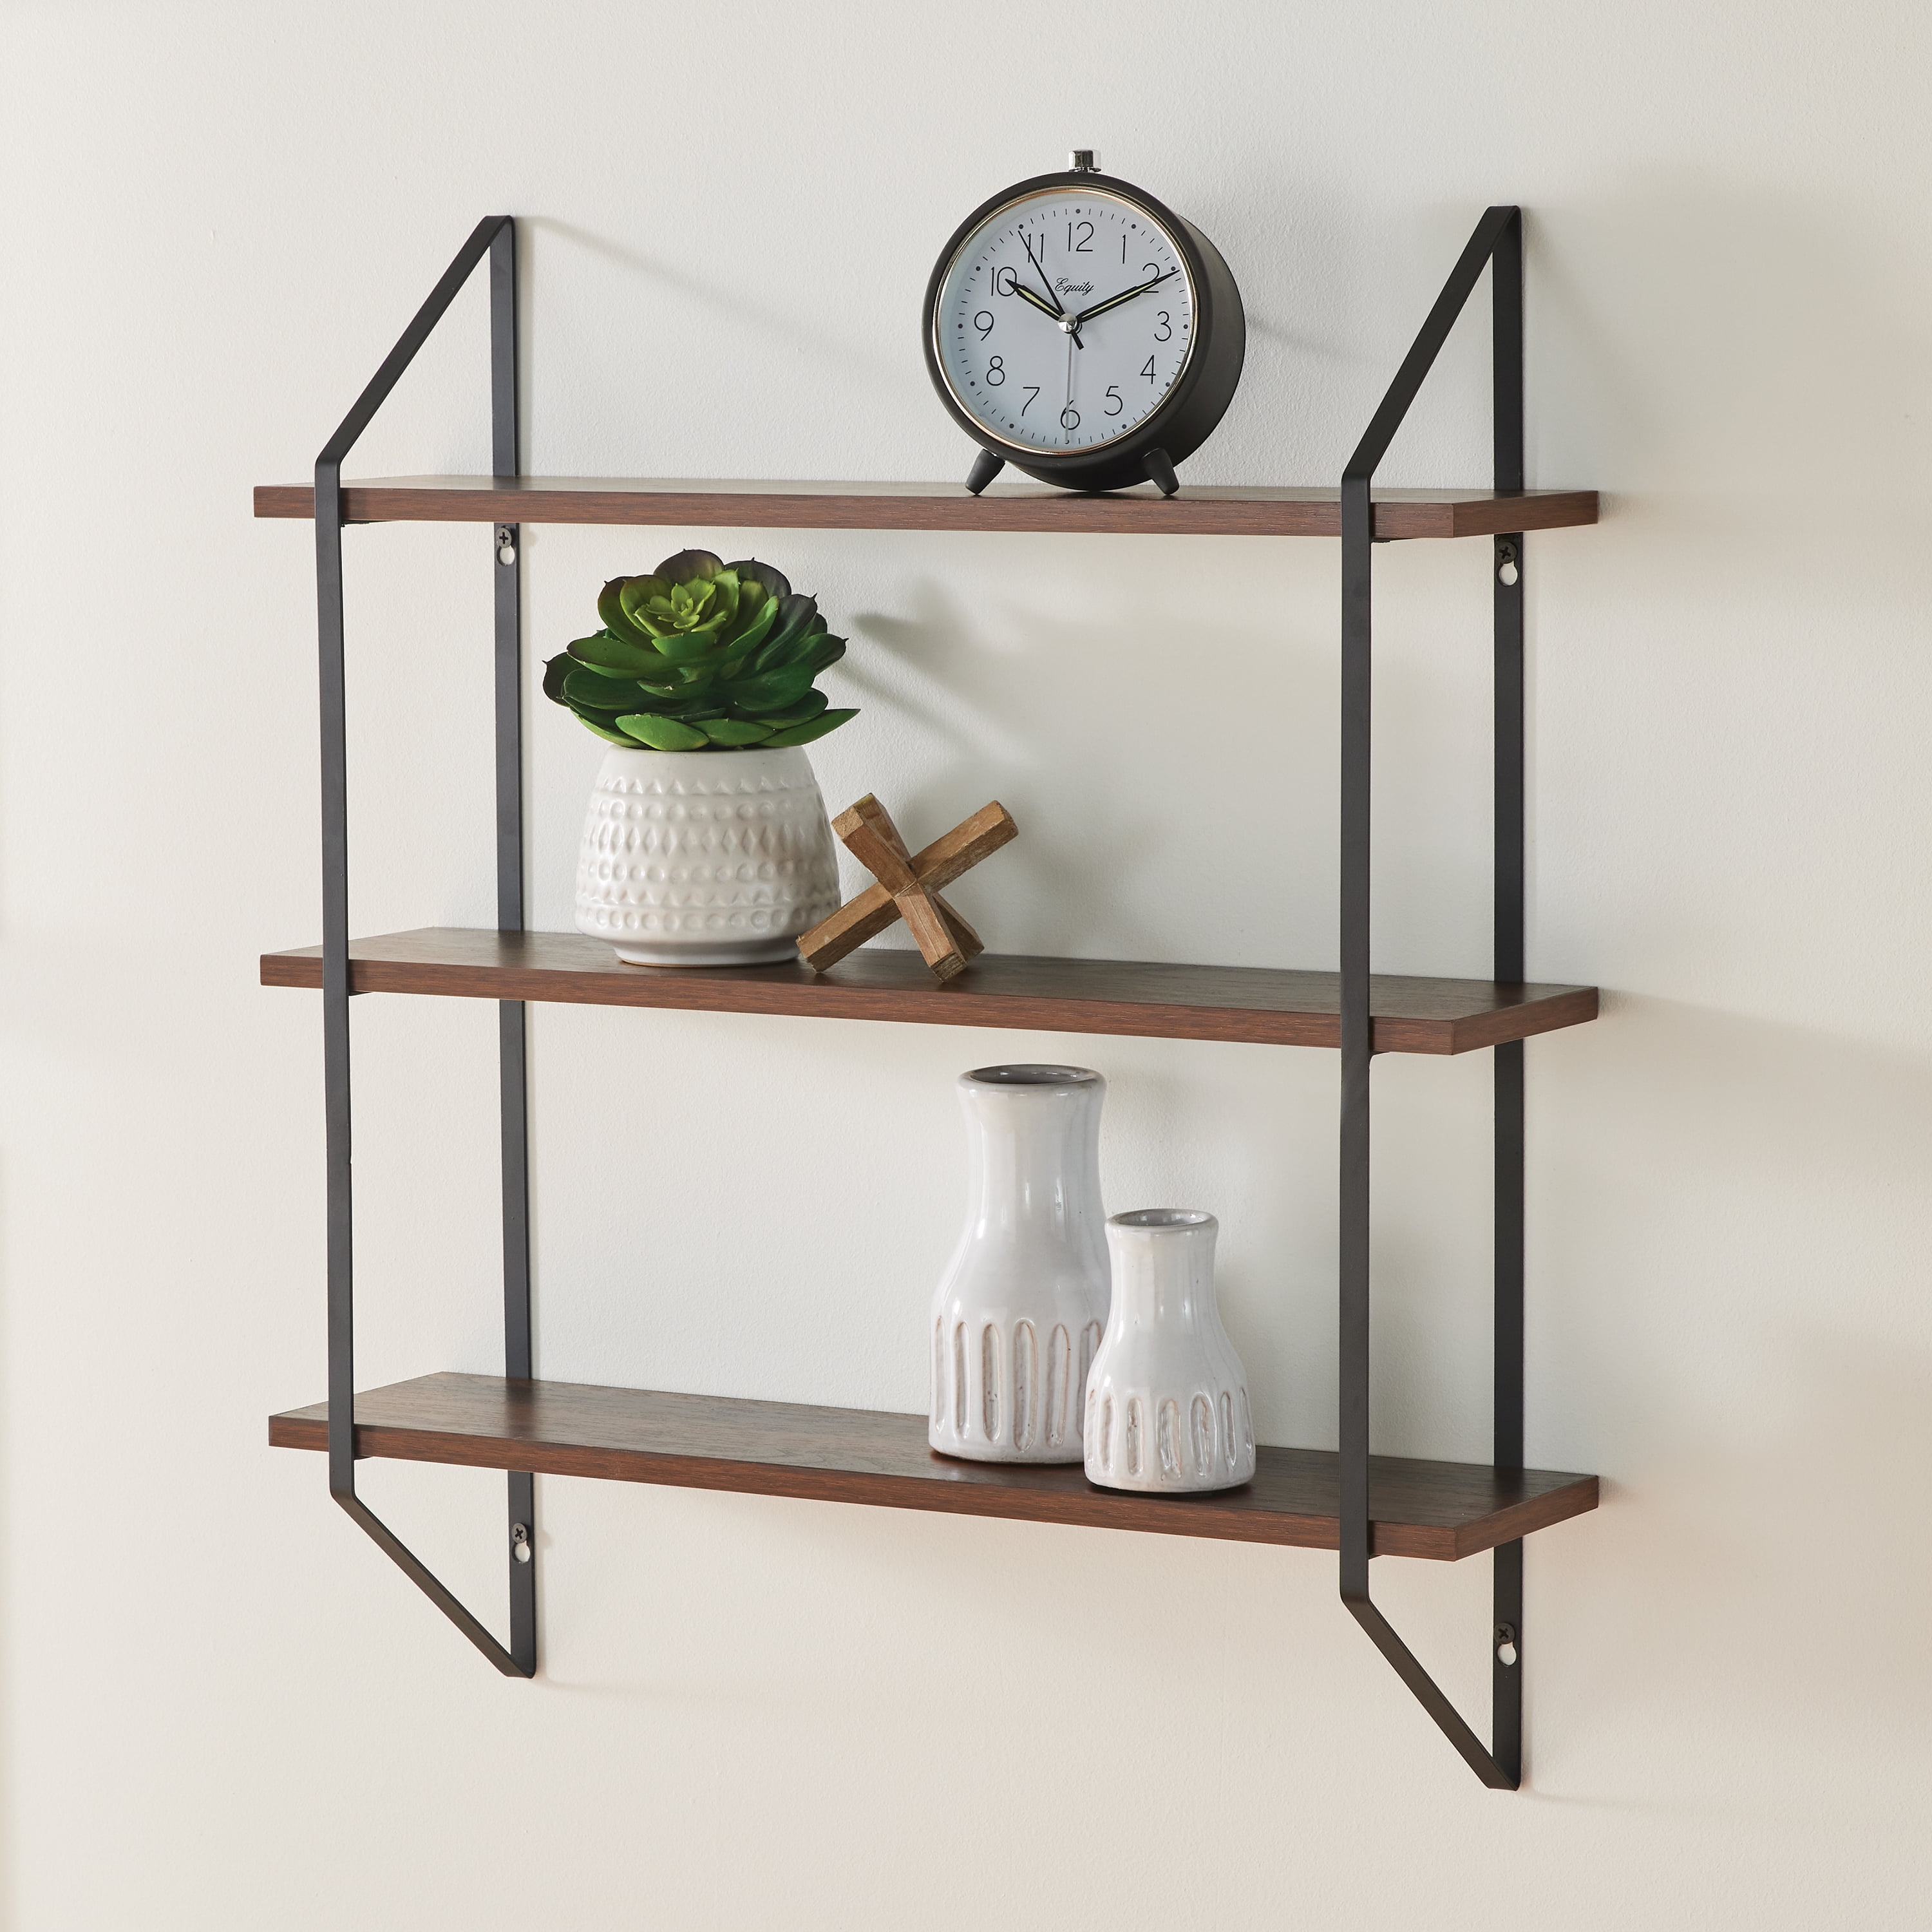
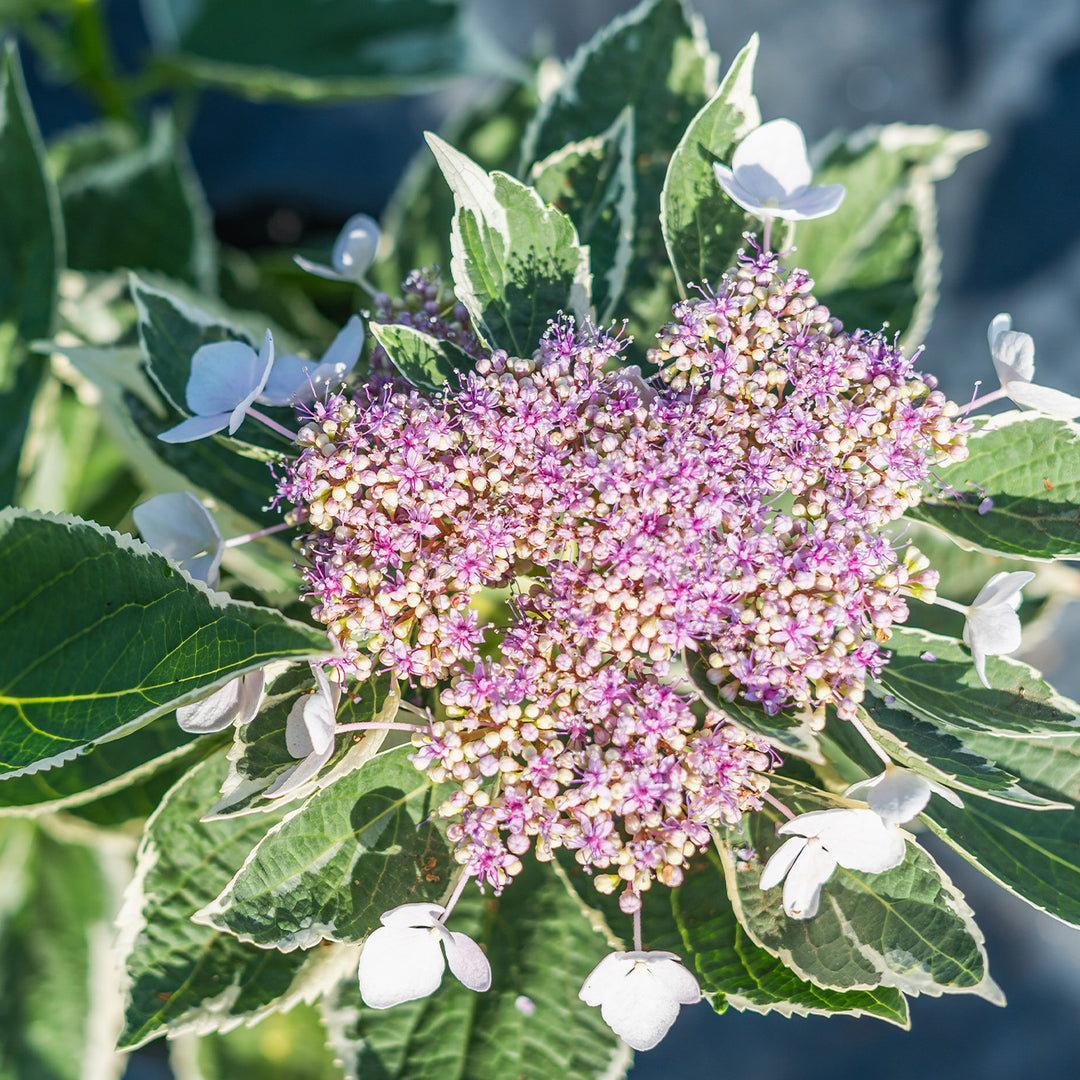
20. Showcase Sculptural Foliage on a Simple White Shelf
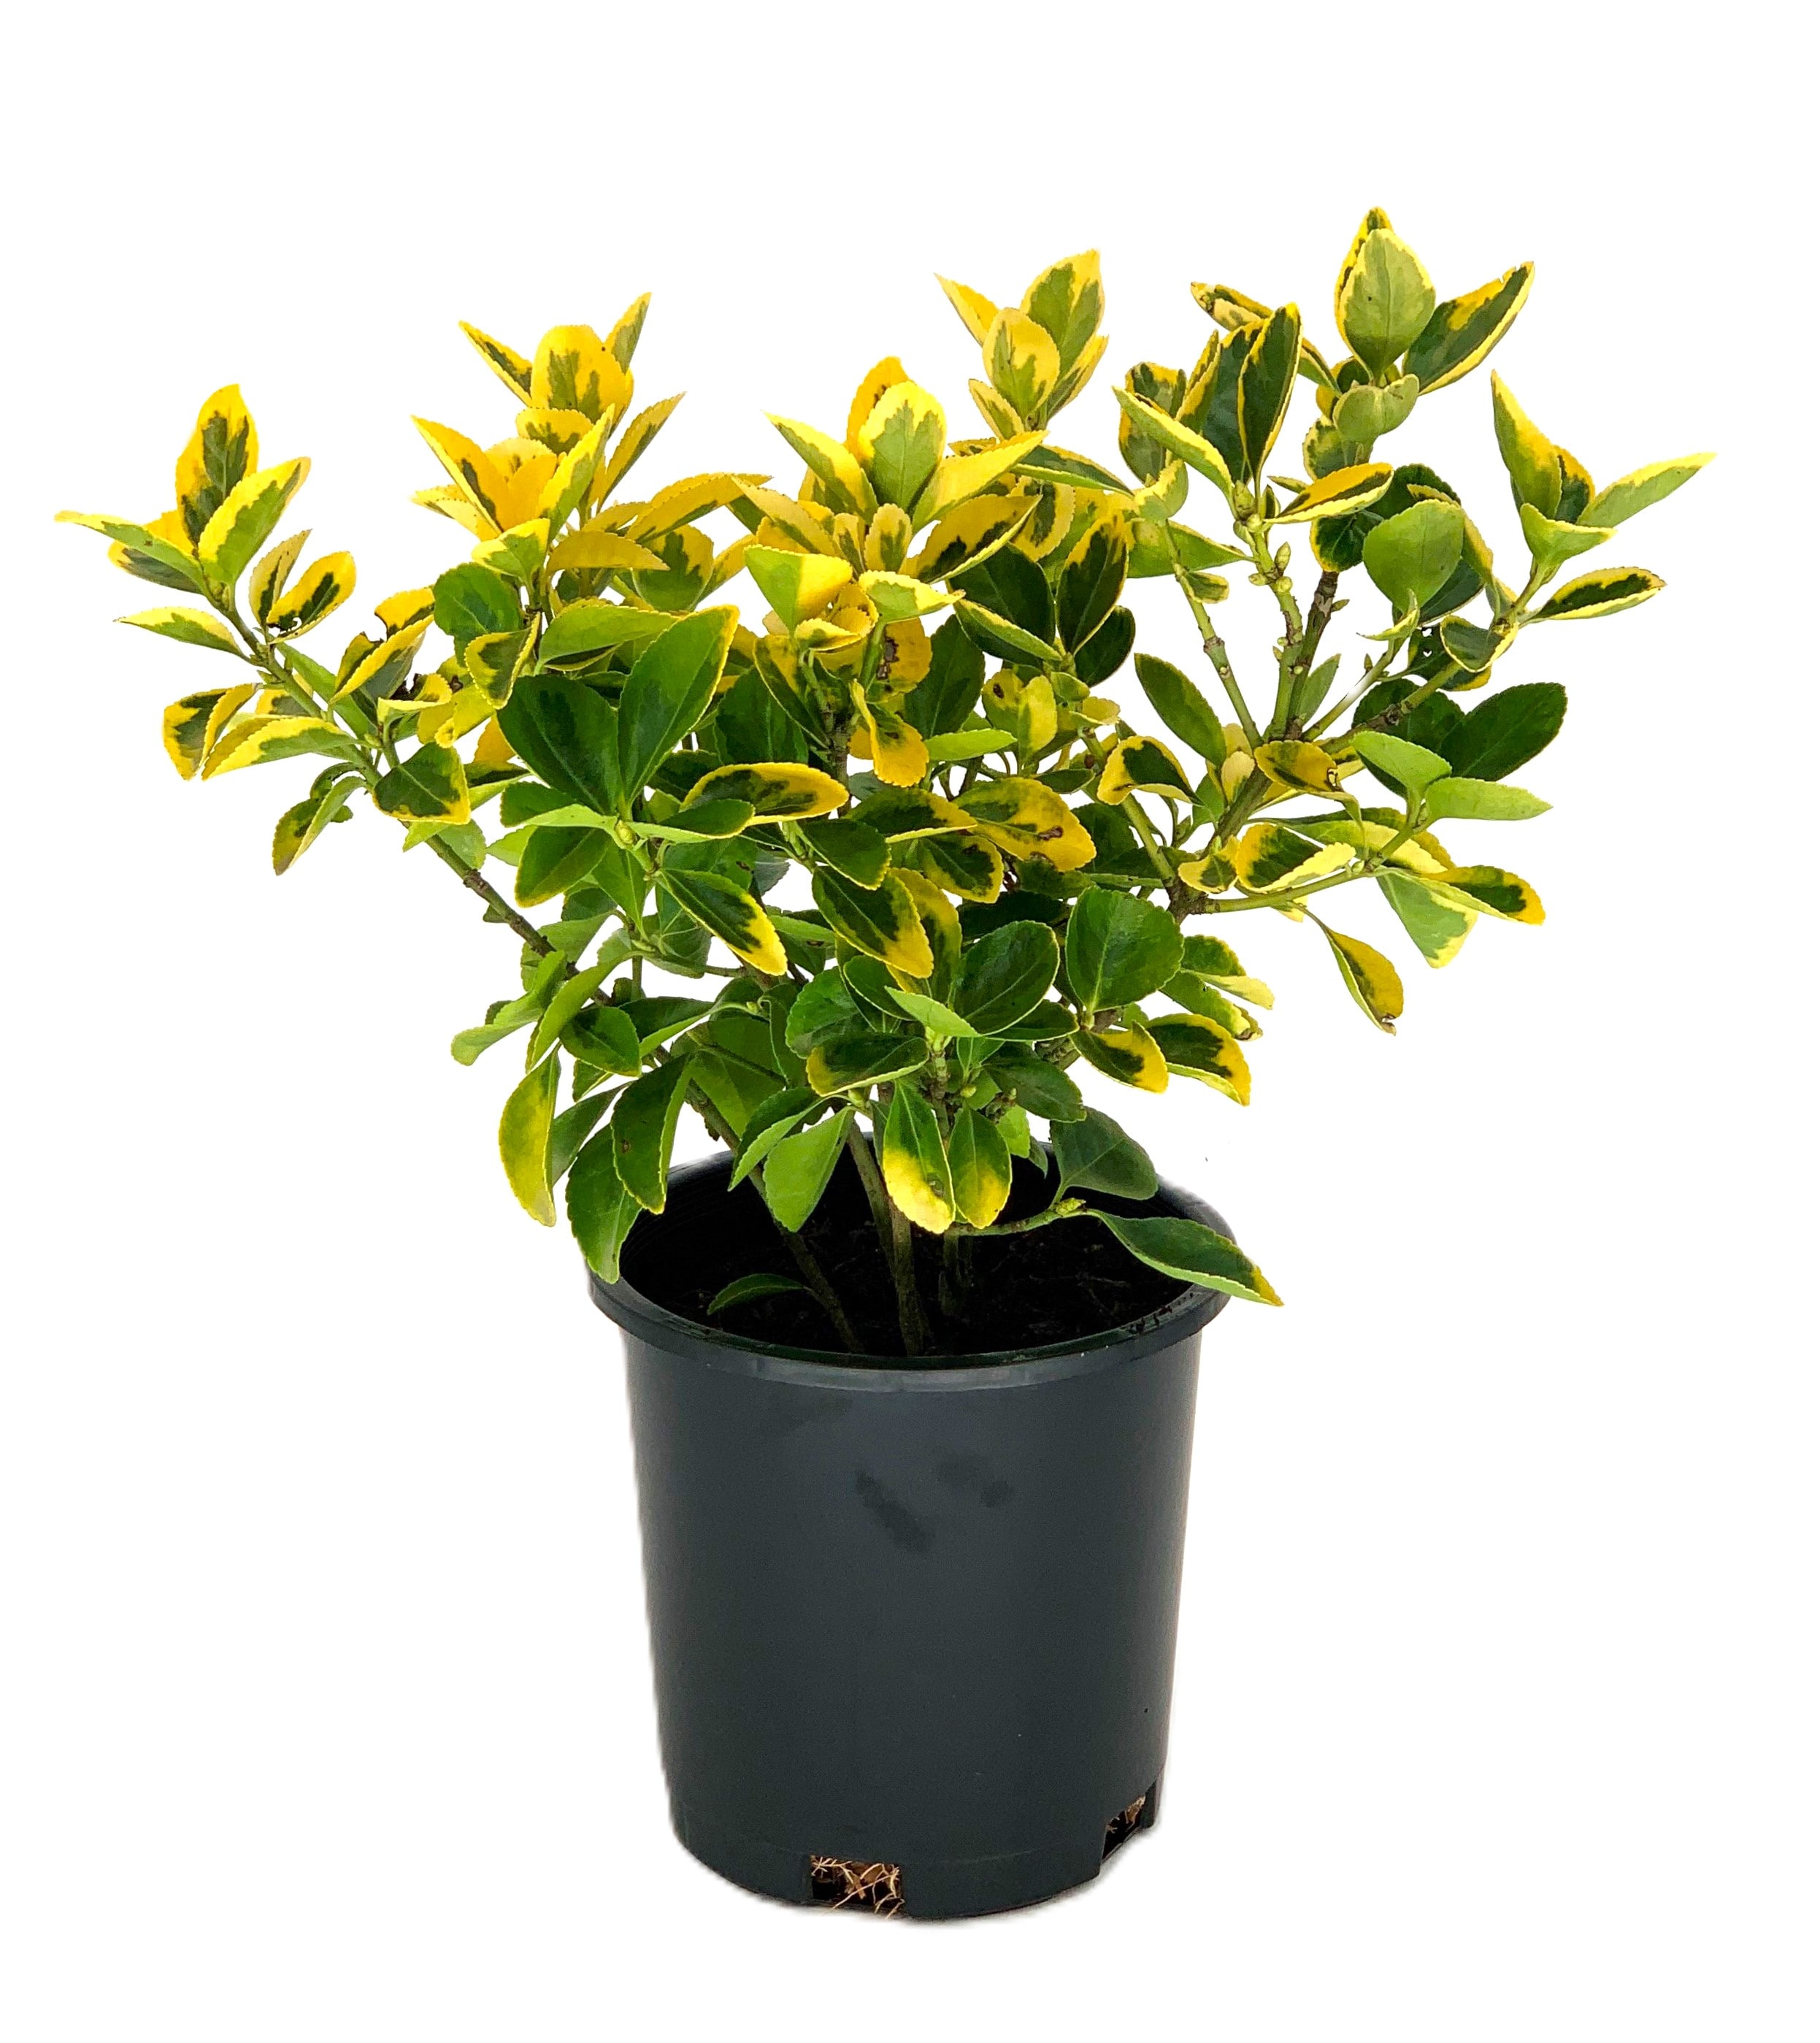
This display works because of its restraint. By using a monochrome background (white shelf, white wall) and simple, matching white planters, the focus is entirely on the plants themselves. It treats each plant like a piece of sculpture, highlighting the unique shapes, colors, and textures of their foliage. The variation from dark green to variegated purple creates interest without the need for a single flower. It’s a clean, serene, and highly effective minimalist approach.

|
$41.00
|
$7.00
|
$16.50
|


“Before you mount shelves for plants, consider your light source.”
Which way does the nearest window face? North-facing light is gentle and indirect, great for plants like ferns. South-facing light is intense and can scorch delicate leaves. Also, check the material of your chosen planters. Do they have drainage holes? If not, you’ll need to be extremely careful not to overwater, or drill a hole yourself before planting. Matching planters create a cohesive look, as shown here.
21. Surround a Weathered Wood Patio Set with Climbing Greenery
There’s a huge trend right now towards ‘biophilic design,’ which is all about blurring the lines between indoors and outdoors. This patio is a perfect example. By allowing lush, climbing plants to grow up and over the fence and surrounding the weathered wood dining set, the space feels less like a patio and more like a room carved out of the garden itself. It’s a move away from stark, separate hardscapes and towards creating immersive, natural living spaces.
|
$99.43
|
$2,580.00
|
$44.97
|
$34.99
|
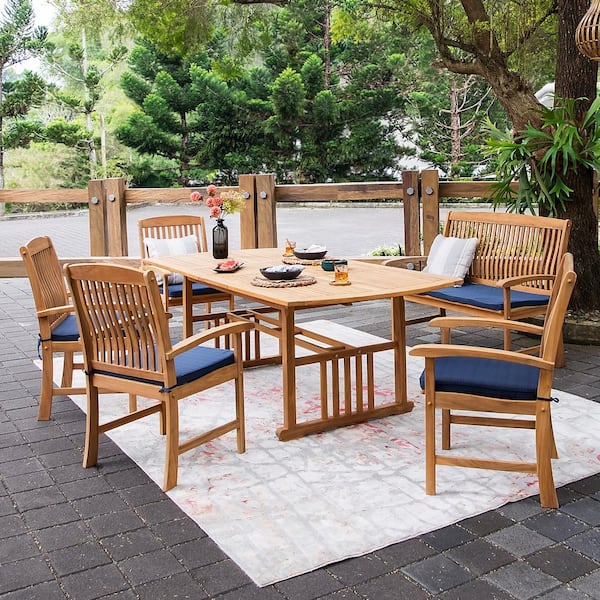

“A weathered wood set looks beautifully rustic, but ‘weathered’ can quickly turn to ‘rotted’ without proper care.”
Depending on the type of wood, you’ll likely need to clean and seal it every 1-2 years to protect it from moisture and UV damage. And while the lush greenery is gorgeous, it can also be a haven for bugs. Be prepared for more spiders, mosquitos, and other critters than you’d find on a more open, sun-baked patio.
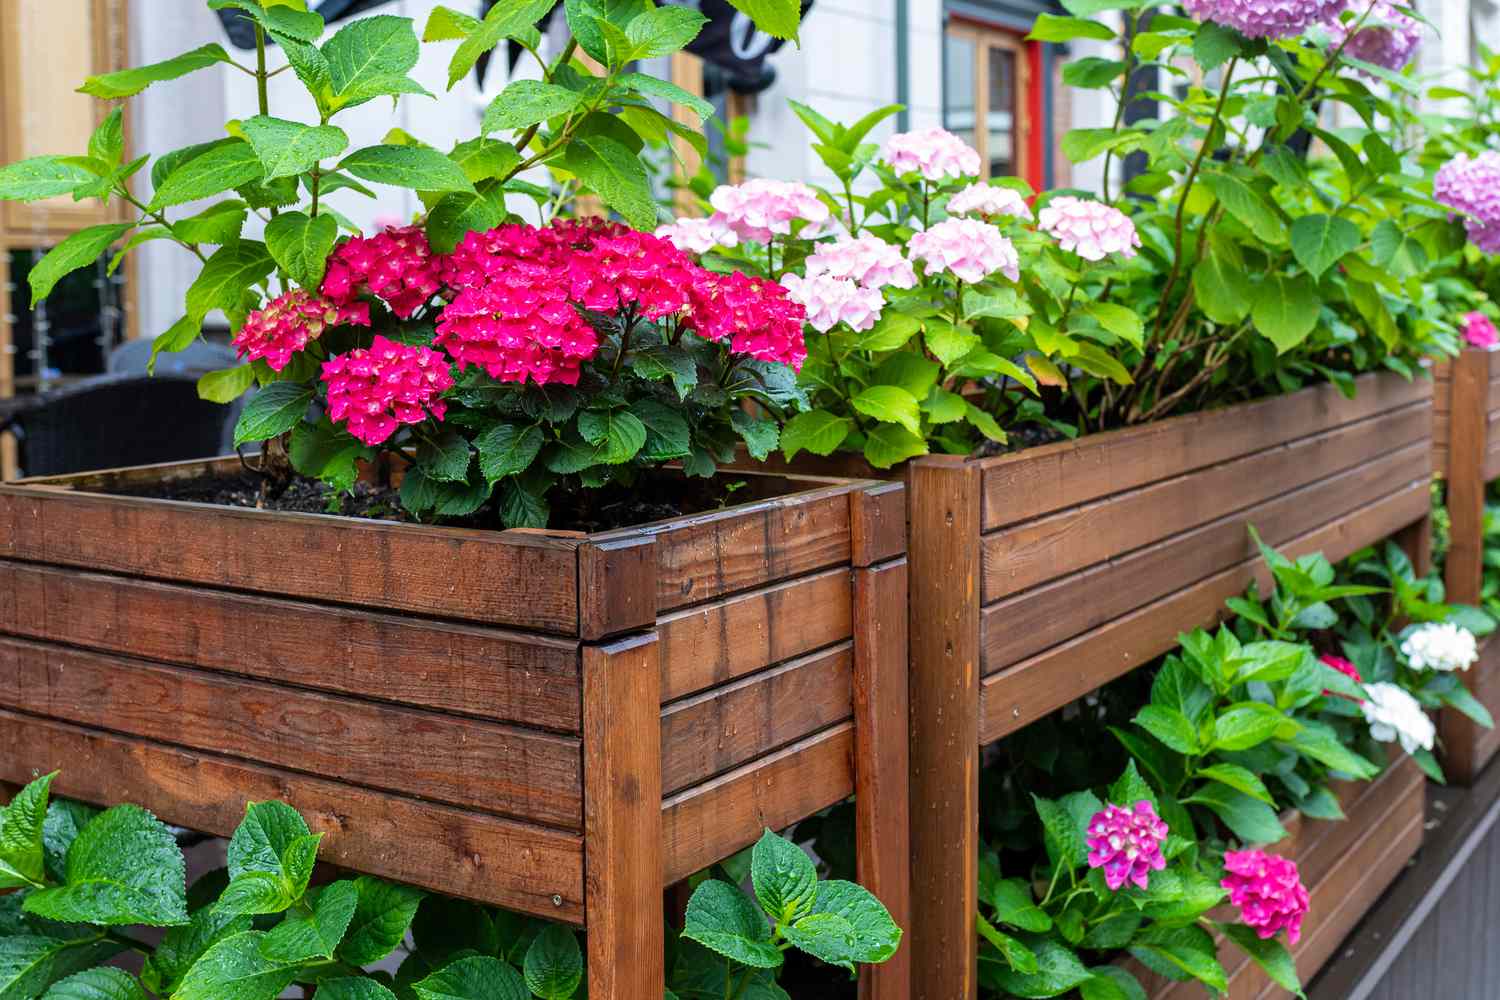
22. Build Tiered Wooden Planters for a Wall of Hydrangeas
Creating a tiered planter wall is a great weekend project. 1. Measure your space and purchase cedar or pressure-treated lumber. 2. Build the back frame first, creating two tall rectangular ladders. 3. Construct three rectangular planter boxes of the same size. 4. Attach the boxes to the frames, leaving about 18-24 inches of vertical space between each tier. 5. Line the boxes with landscape fabric to contain the soil and improve drainage. 6. Fill with potting mix and plant your hydrangeas! Time: 1 day. Cost: $200-$500.
|
$79.67
|
$25.46
|
$20.44
|
$50.29
|

“When planting a tiered structure like this, use the same plant variety throughout for a cohesive, powerful visual statement.”
Using different plants on each level can look busy and disjointed. By repeating the vibrant pink hydrangeas, you create a solid wall of color and texture that reads as a single, impressive feature. It’s a classic case of ‘more is more’ being the right design choice.
23. Revisit a Wild Garden Path with Peonies and Alliums
The defining feature that makes this garden so breathtaking is its sheer density. This isn’t a politely spaced border; it’s a joyful, competitive jungle of flowers. Plants are packed in, spilling over each other and the grassy path, creating a sense of overwhelming abundance. This generosity of planting is what gives it that immersive, ‘lost in a secret garden’ feeling. It’s a commitment to a maximalist vision. This design is very similar in plant choice to Idea #8, but the narrower path here makes it feel even more immersive.

|
$129.00
|
$16.99
|
$126.95
|
$34.99
|


“To achieve this look, you need significant depth.”
A narrow bed of 2-3 feet won’t cut it. You’re looking at a minimum planting bed depth of 8-12 feet from front to back. This allows you to create multiple layers: shorter plants near the path, mid-height plants like peonies behind them, and taller structural plants or shrubs at the very back, all backed by mature trees.
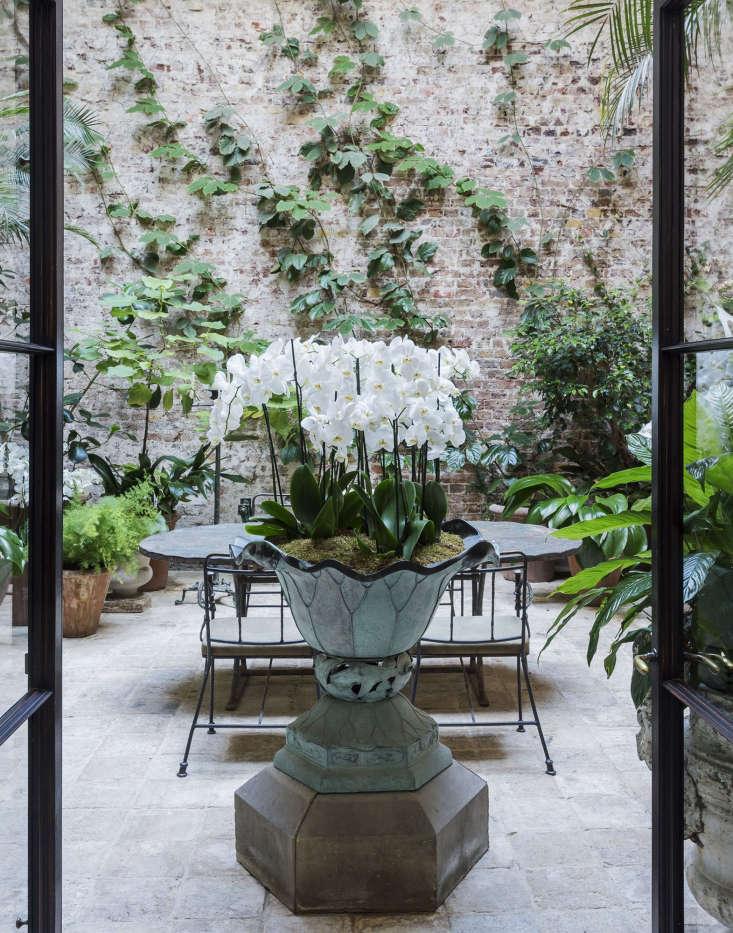
24. Feature a Patinated Urn with White Orchids in a Courtyard
This scene is a masterclass in texture and patina. The smooth, waxy petals of the white orchids contrast beautifully with the rough, verdigris finish of the metal urn. This, in turn, is set against the weathered texture of the brick wall and the smoothness of the stone pavers. It’s a rich, layered composition that feels like it has evolved over time. The limited color palette—greens, whites, and earthy tones—allows the textures to take center stage.
|
$387.00
|
$2,491.04
|
$2.99
|
$244.99
|


“A large, antique urn can cost thousands, but you can get this look for much less.”
Start with a large, inexpensive concrete or resin planter from a big-box store. You can create a faux patina effect using specialty paints or by applying a mix of yogurt and moss to the surface and leaving it in a shady spot to encourage natural growth. For the plants, choose a resilient outdoor-friendly orchid or a look-alike like white Angelonia for a similar vibe without the fussy care.
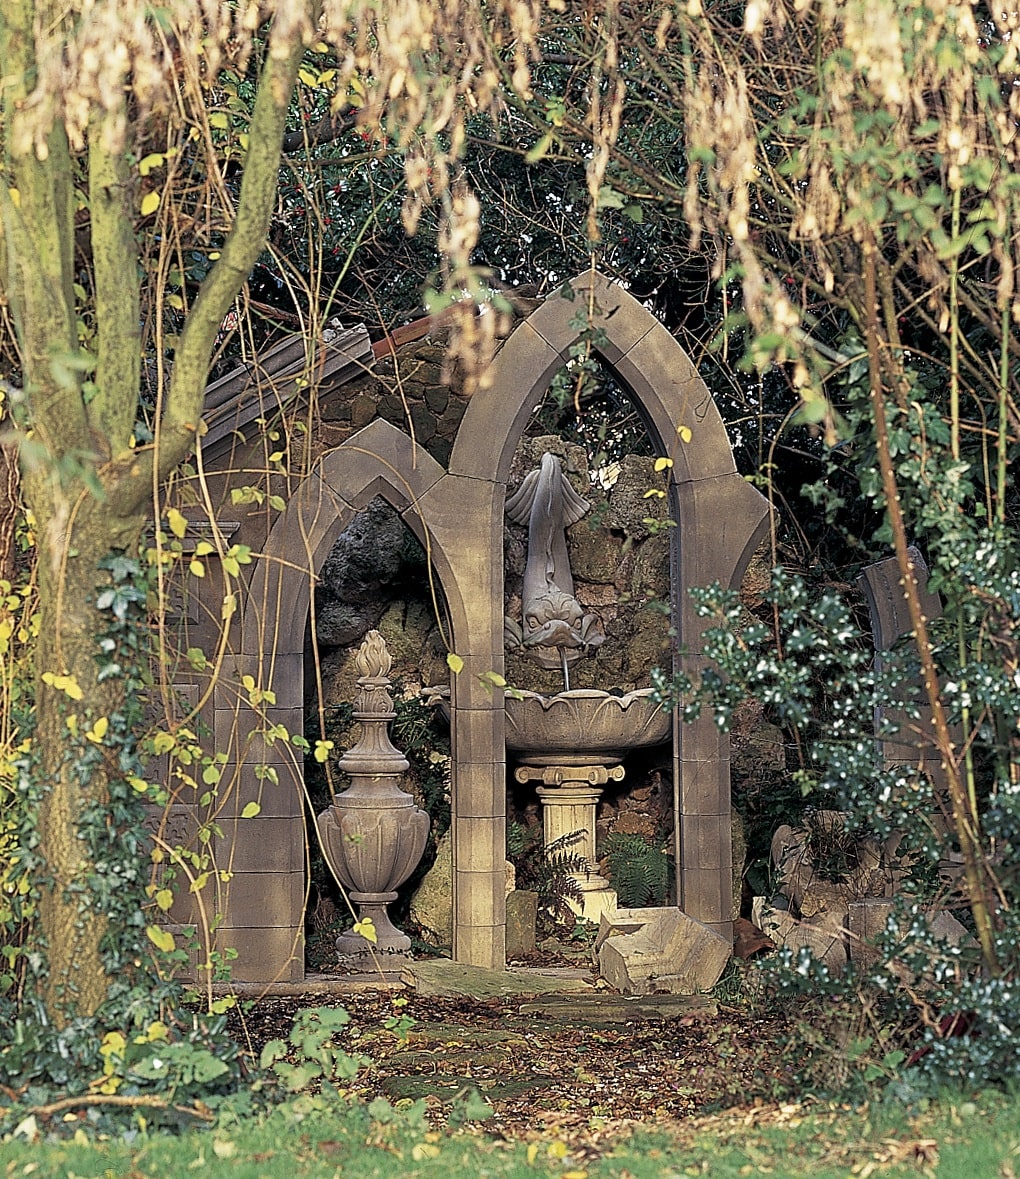
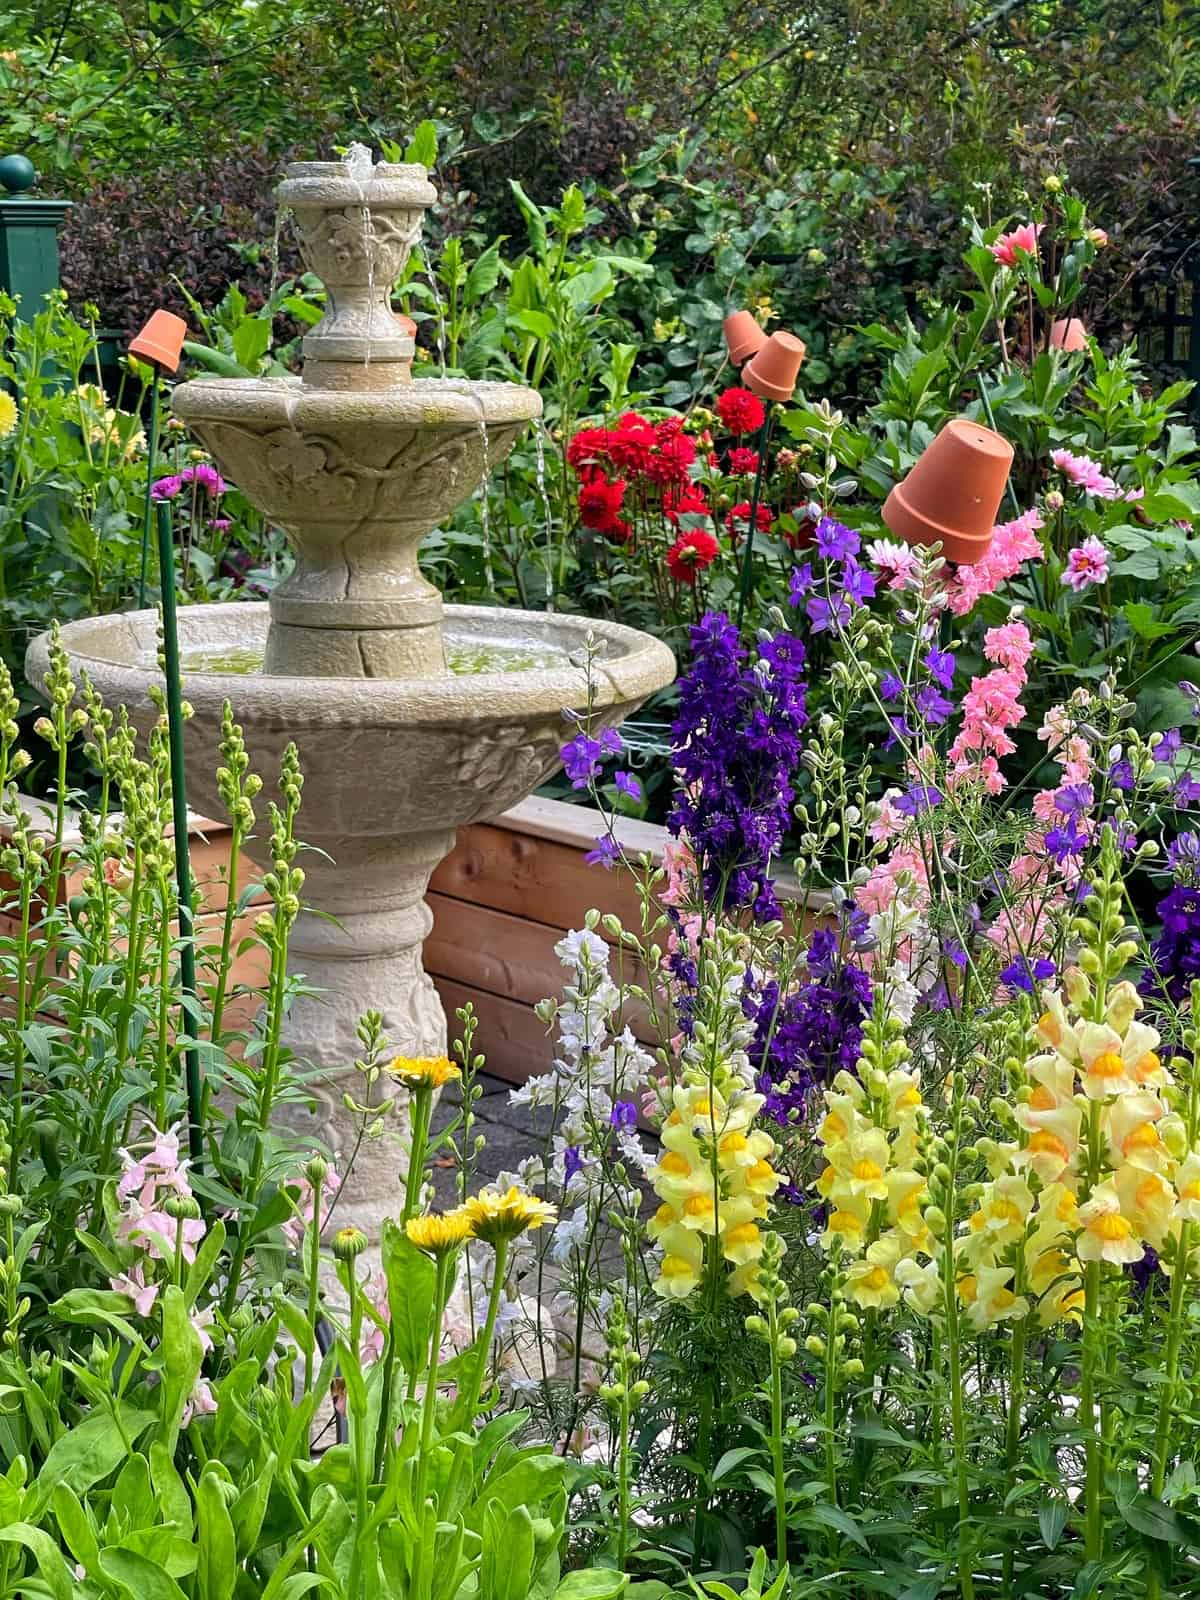
25. Surround a Classical Fountain with a Riot of Color
The formula here is a delightful clash of styles: 30% formal structure (the classical tiered stone fountain) + 70% informal cottage planting (the riotous mix of colorful flowers). This juxtaposition is what makes it so successful. The fountain provides a strong, elegant focal point, while the surrounding flowers keep it from feeling too stuffy or cold. It’s a perfect blend of timeless elegance and joyful chaos.
|
$1,999.00
|
$13.23
|
$2.72
|
$4.45
|


“This look taps into the ‘cottagecore’ and ‘grandmillennial’ trends, which celebrate traditional design elements but interpret them with a more relaxed, personal, and sometimes playful touch.”
A formal stone fountain might have traditionally been paired with clipped boxwoods and single-color plantings. This version, bursting with a mix of colorful, anachronistic blooms and quirky terracotta pot stakes, feels much more 2026—it respects the past but isn’t afraid to have fun with it.
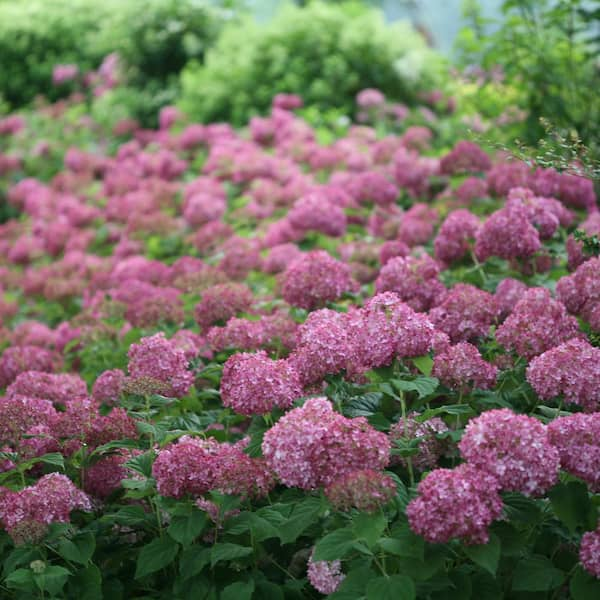
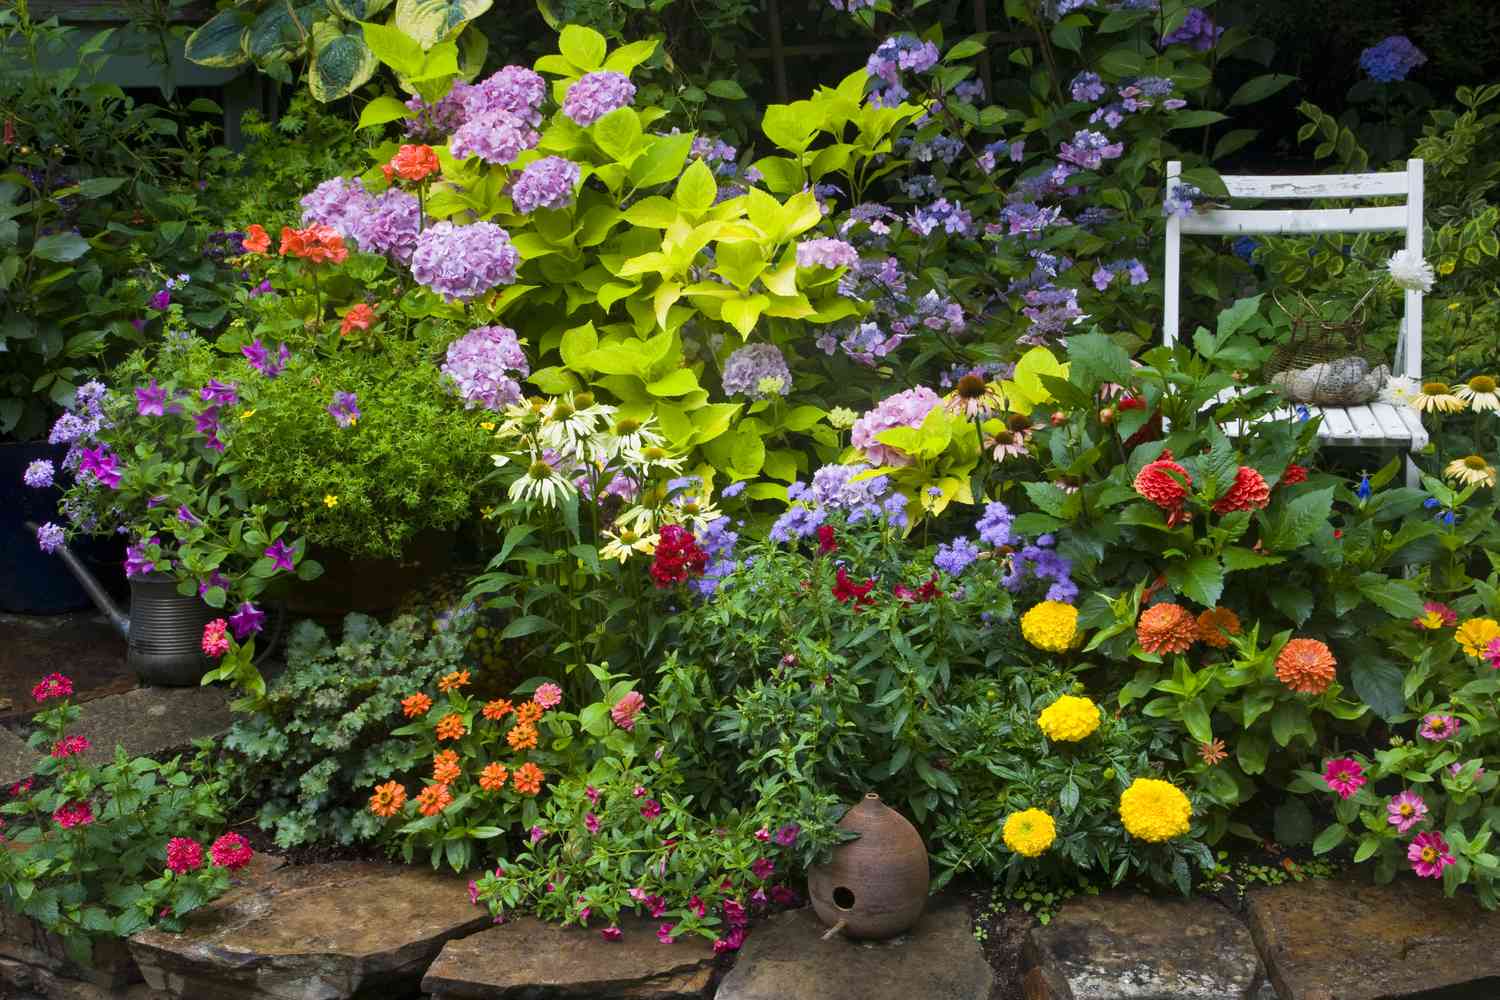
26. Pack a Cottage Garden with Hydrangeas, Marigolds, and Dahlias
that truly defines this cottage garden style is the lack of visible soil. The plants are packed so densely, from the ground-hugging foliage to the tall dahlias, that the entire bed becomes a living tapestry of color and texture. This feeling of ‘fullness’ and generosity is the heart of the cottage aesthetic. It suggests a garden that is well-loved, productive, and bursting with life, where every square inch is put to beautiful use.
|
$35.00
|
$25.00
|
$17.99
|


“An ultra-dense garden like this is stunning, but it requires diligent maintenance to keep it healthy.”
Good air circulation is crucial to prevent fungal diseases like powdery mildew, especially on plants like hydrangeas and dahlias. You will need to selectively prune and thin out stems throughout the season to ensure air can move through the plants. It’s a hands-on style of gardening—not a ‘plant it and forget it’ situation.
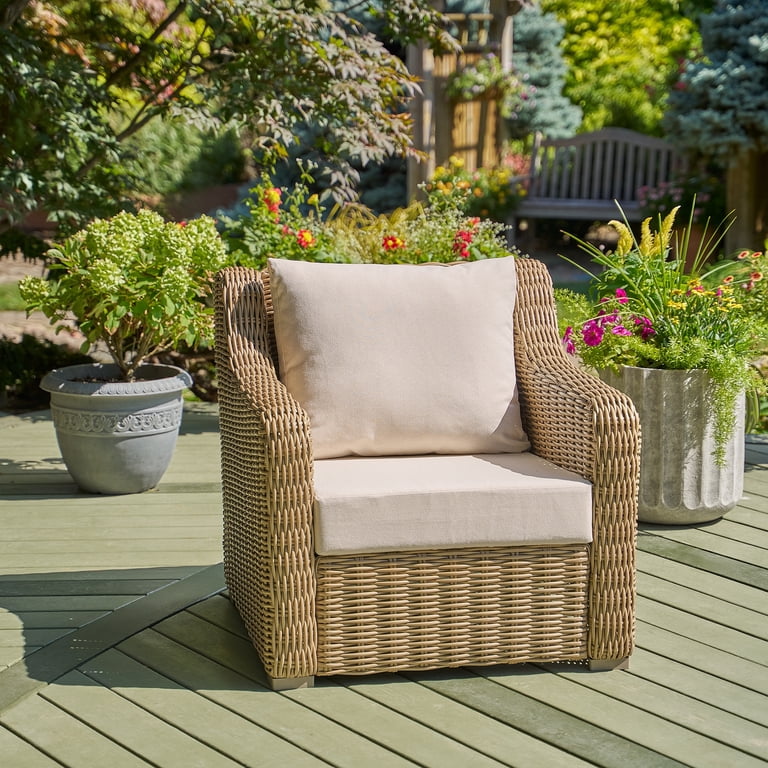
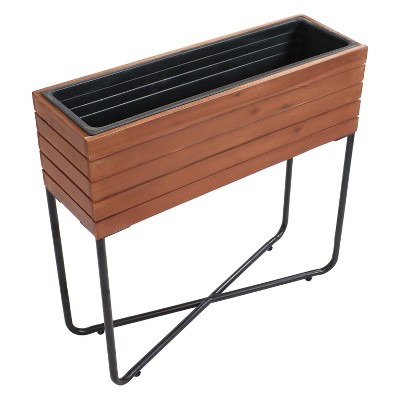
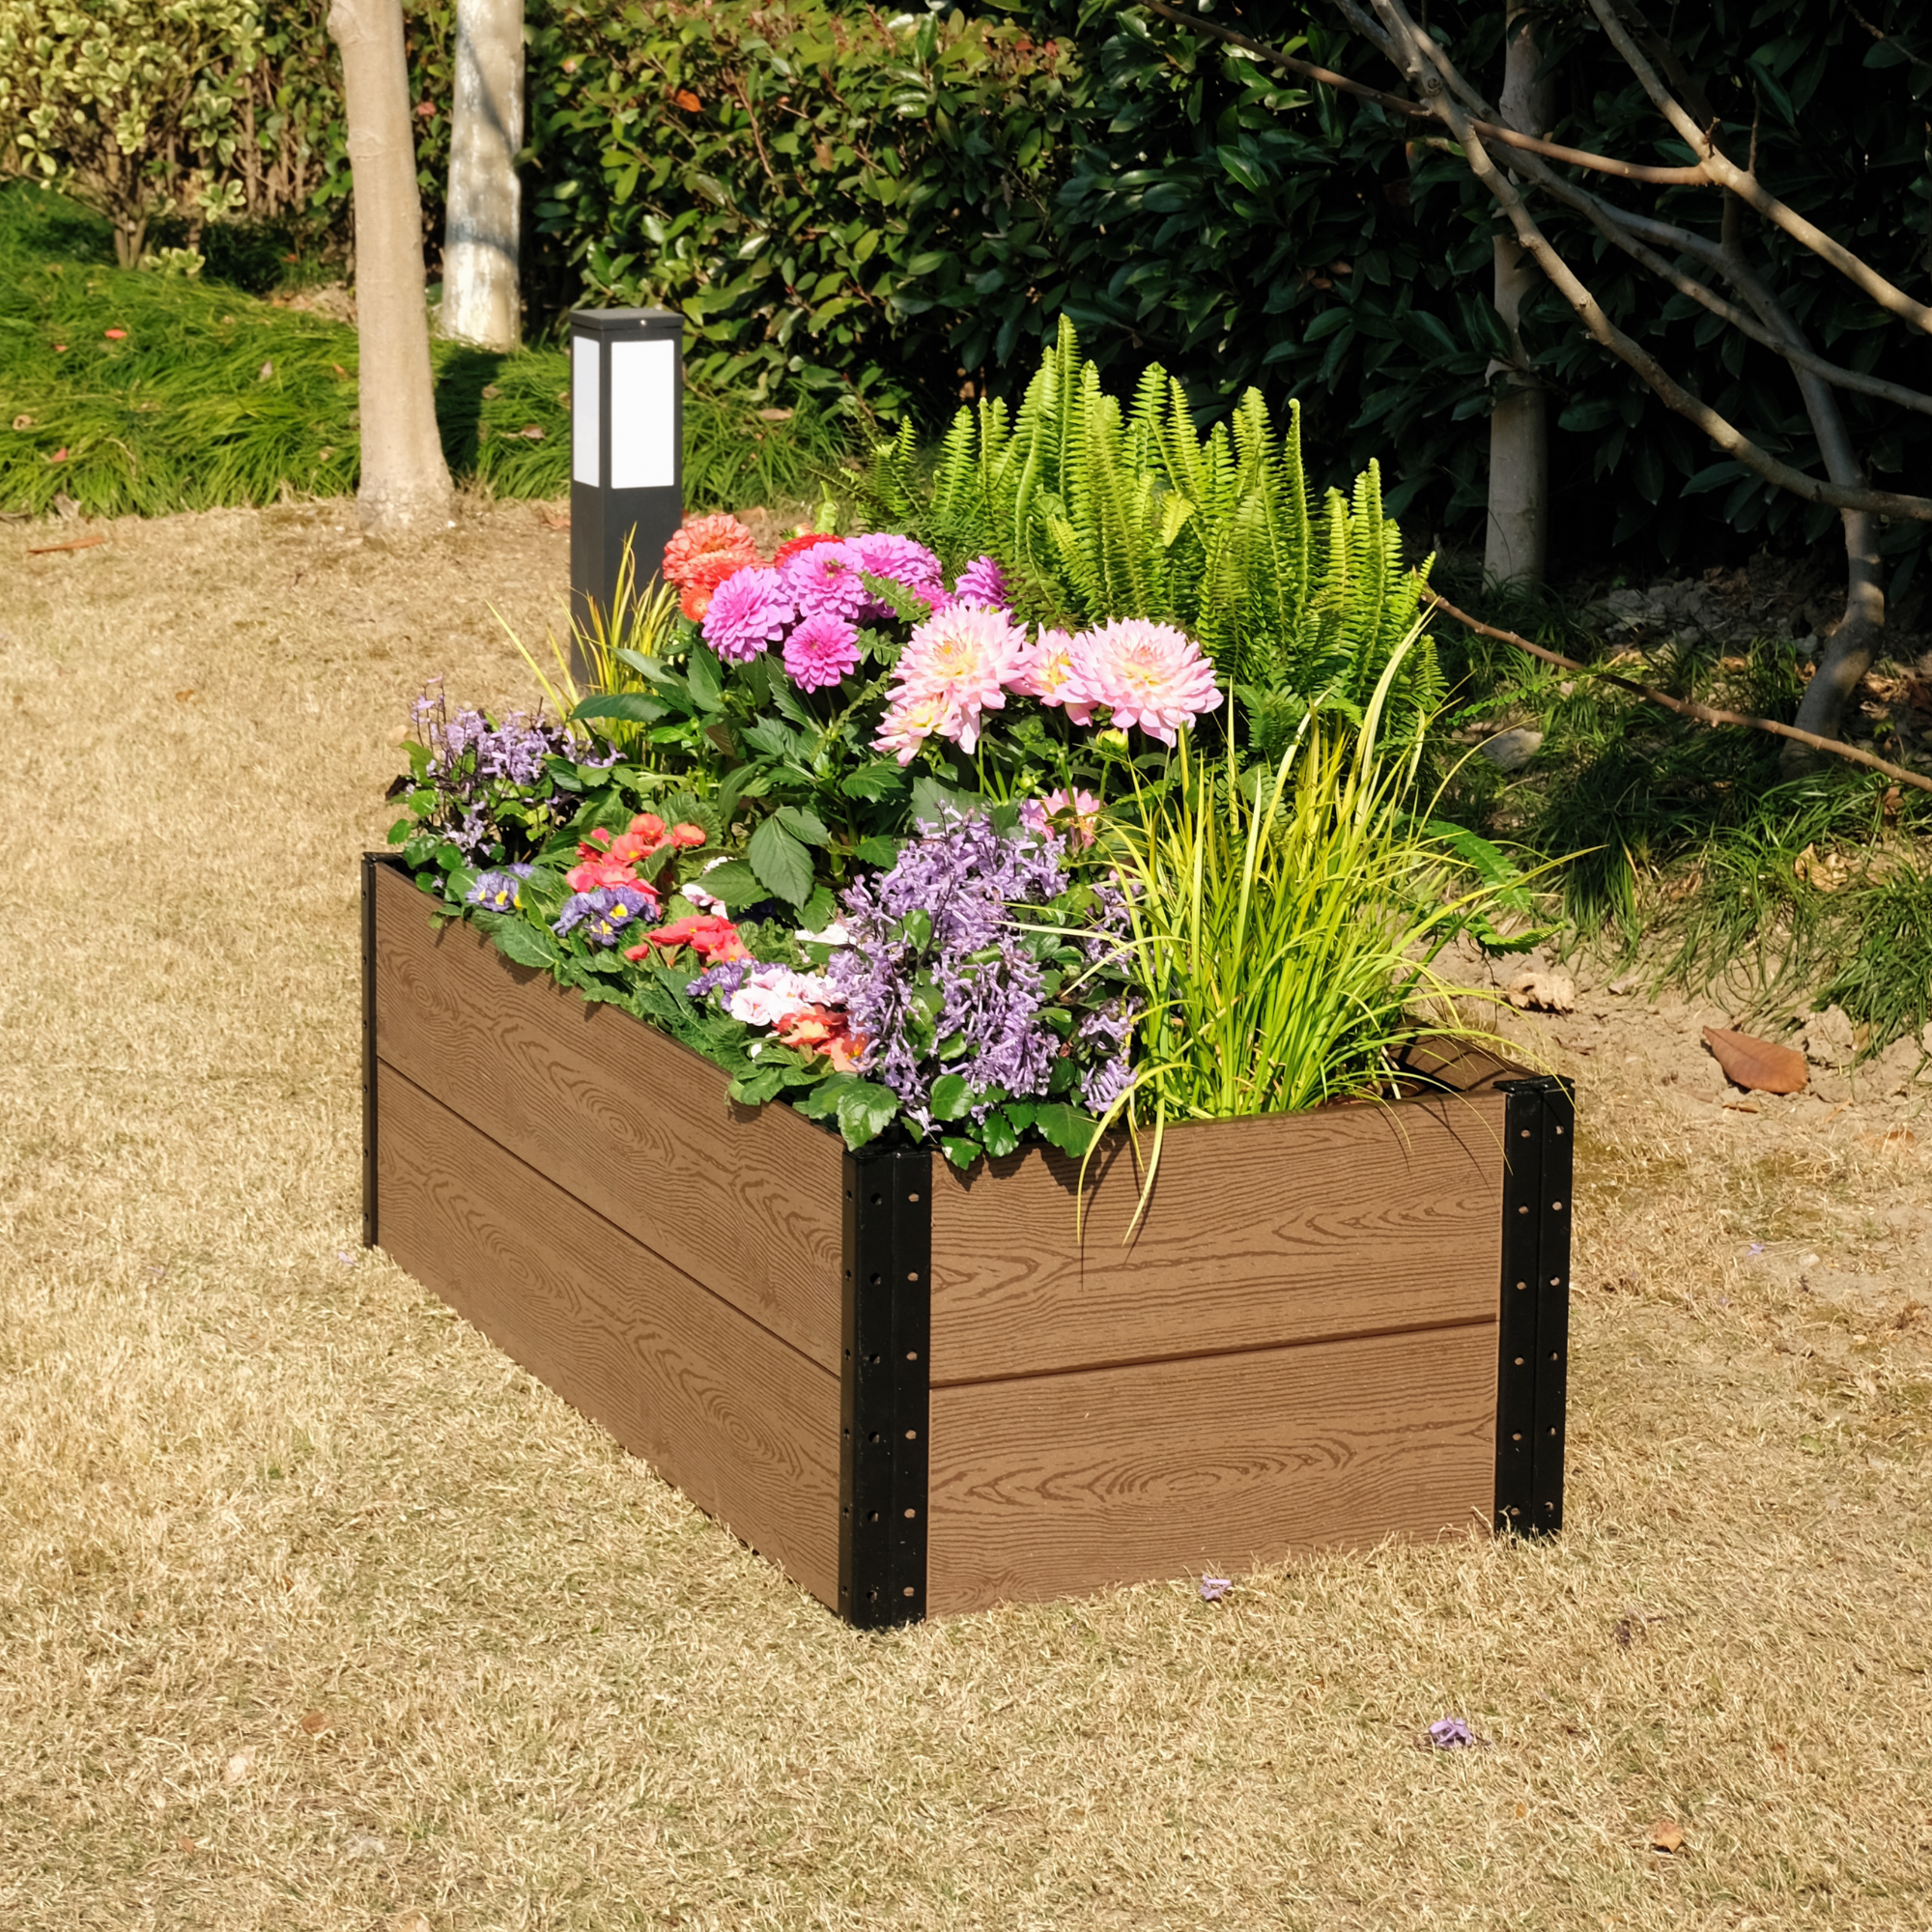
27. Fill a Raised Wooden Planter with Ferns and Pink Dahlias
The success of this planter lies in its smart combination of textures. The soft, feathery fronds of the ferns provide a lush, green base that contrasts beautifully with the bold, tightly packed petals of the pink dahlias. The purple flowers add another layer of color and a different, smaller bloom shape. This ‘thriller, filler, spiller’ concept (Dahlias as the thriller, purple flowers as the filler, ferns as the spiller) is a classic for a reason: it creates a balanced, professional-looking container garden.
|
$32.29
|
$39.49
|
$138.51
|
$57.44
|

“Check your sun exposure: Does this spot get 6+ hours of direct sun (full sun) or less (part shade)?”
Choose plants accordingly. Dahlias need full sun to thrive.
Measure your space: A large planter like this can overwhelm a small patio. Make sure the scale is right for its surroundings.
Plan for watering: Raised beds dry out faster than in-ground gardens. Is there a hose bib nearby, or are you prepared to carry a watering can?
28. Accessorize a Garden Bench with Bright Green Pillows
Don’t just place a bench—style it. Adding outdoor pillows is the fastest way to add comfort, personality, and a pop of color. The key is to choose a color that connects to the surrounding garden. Here, the vibrant light green of the pillows perfectly echoes the new growth and sunny foliage in the background. It makes the bench feel like an integrated part of the garden, not just a piece of furniture dropped into it. Always use pillows specifically made for outdoor use; they’ll resist fading and mildew.
|
$129.99
|
$9.99
|
$2.50
|
$75.00
|

“A bench and retaining wall combination like this works wonderfully to define the edge of a lawn or patio.”
This specific setup is ideal for a medium-sized yard where you want to create a ‘room-like’ feeling. The bench should be proportional to the wall; a good rule of thumb is for the bench to be about one-third to one-half the length of the visible retaining wall section to feel balanced. For a much smaller space, consider a single chair instead of a bench.
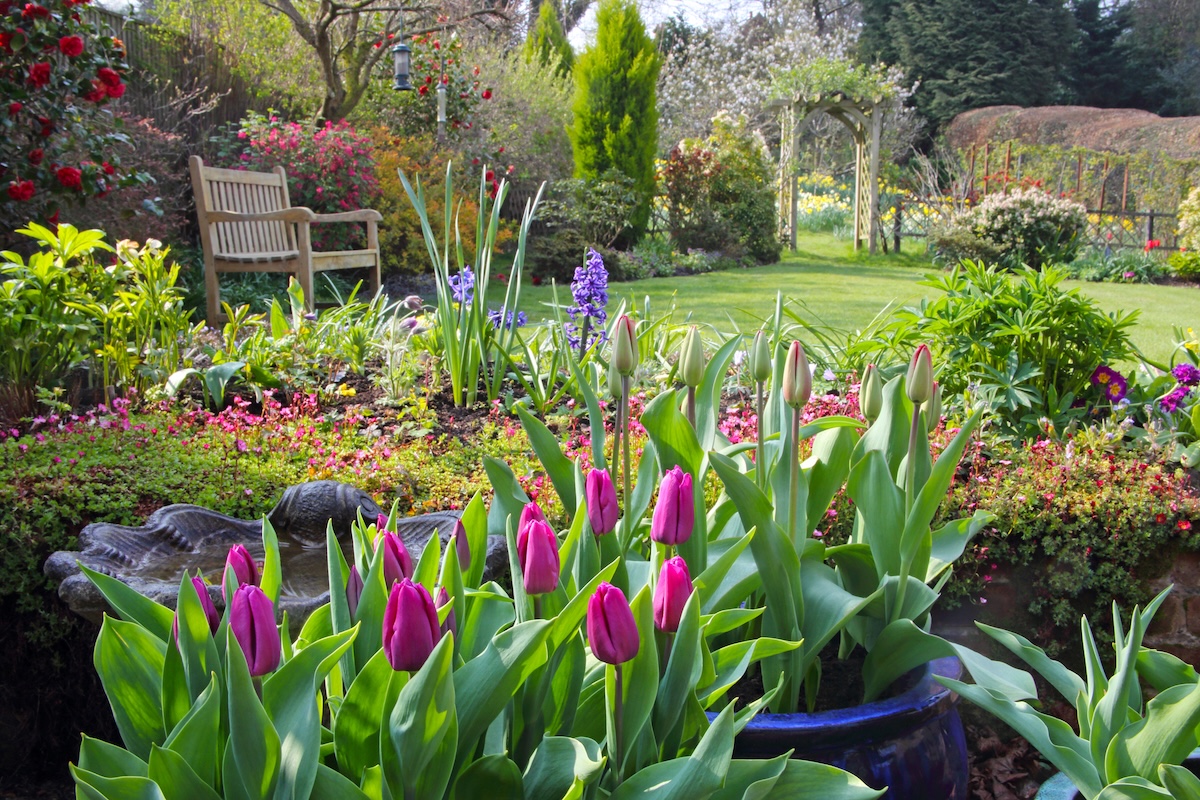
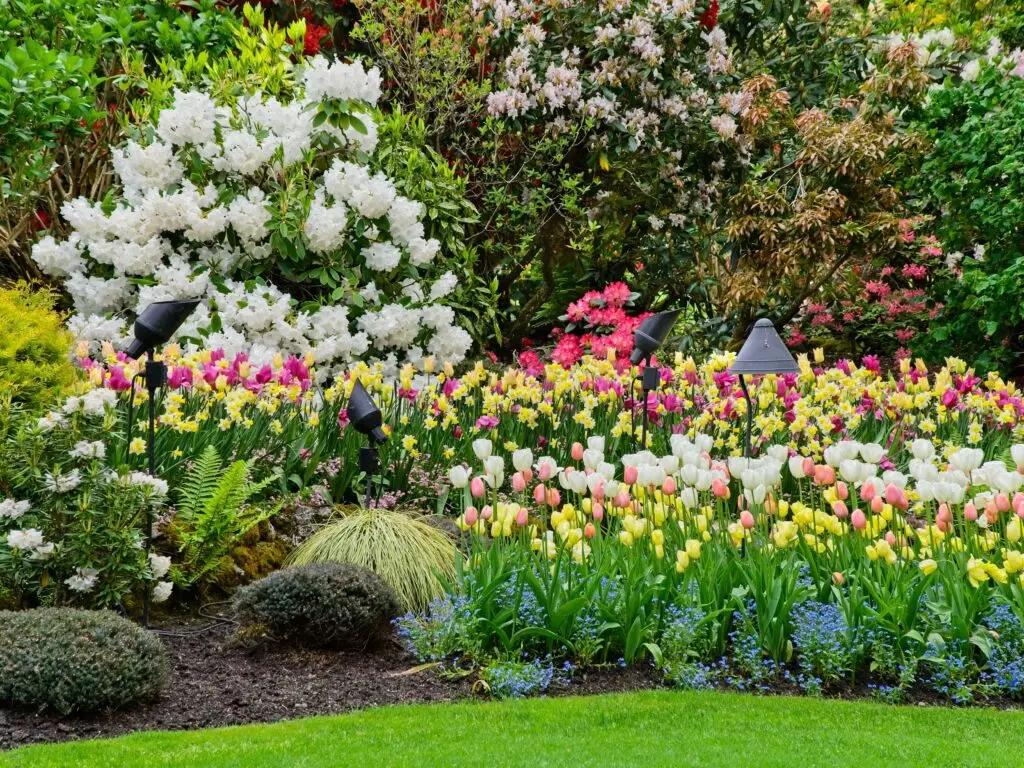
29. Illuminate a Layered Spring Garden with Uplighting
Installing low-voltage landscape lighting is a game-changer. 1. Purchase a kit which includes a transformer, low-voltage cable, and several uplights. 2. Place the transformer near an outdoor outlet. 3. Lay the cable along your garden bed, tucking it under mulch. 4. Position the uplights, pointing them at key plants like the rhododendron bush. 5. Attach the lights to the cable using the simple clip-on connectors. 6. Plug in the transformer and set the timer. Time: 2-3 hours. Cost: $150-$400.
|
$29.00
|
$16.95
|


“This garden bed is so visually satisfying because it’s built in distinct, readable layers.”
The foreground is a crisp, neat edge of green lawn. The next layer is low-growing spring bulbs like tulips and daffodils. Behind that, a taller layer of rhododendrons creates a solid wall of bloom. This clear separation of heights, from low to high, creates a sense of depth and order that is incredibly pleasing to the eye, while the uplighting adds drama and extends the garden’s beauty into the evening.
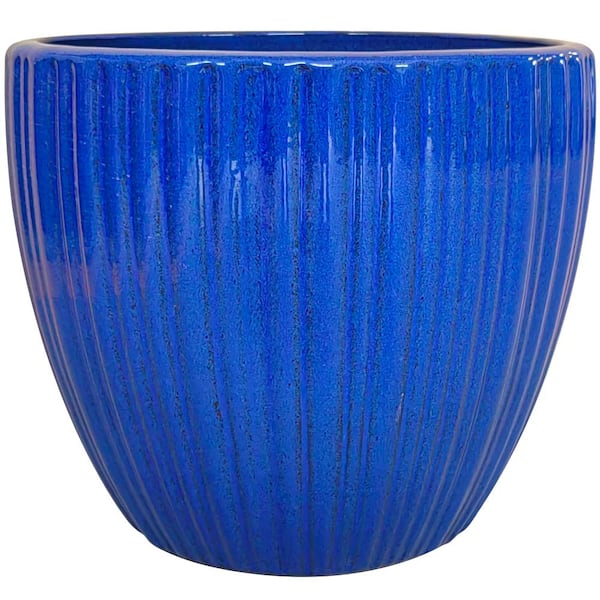
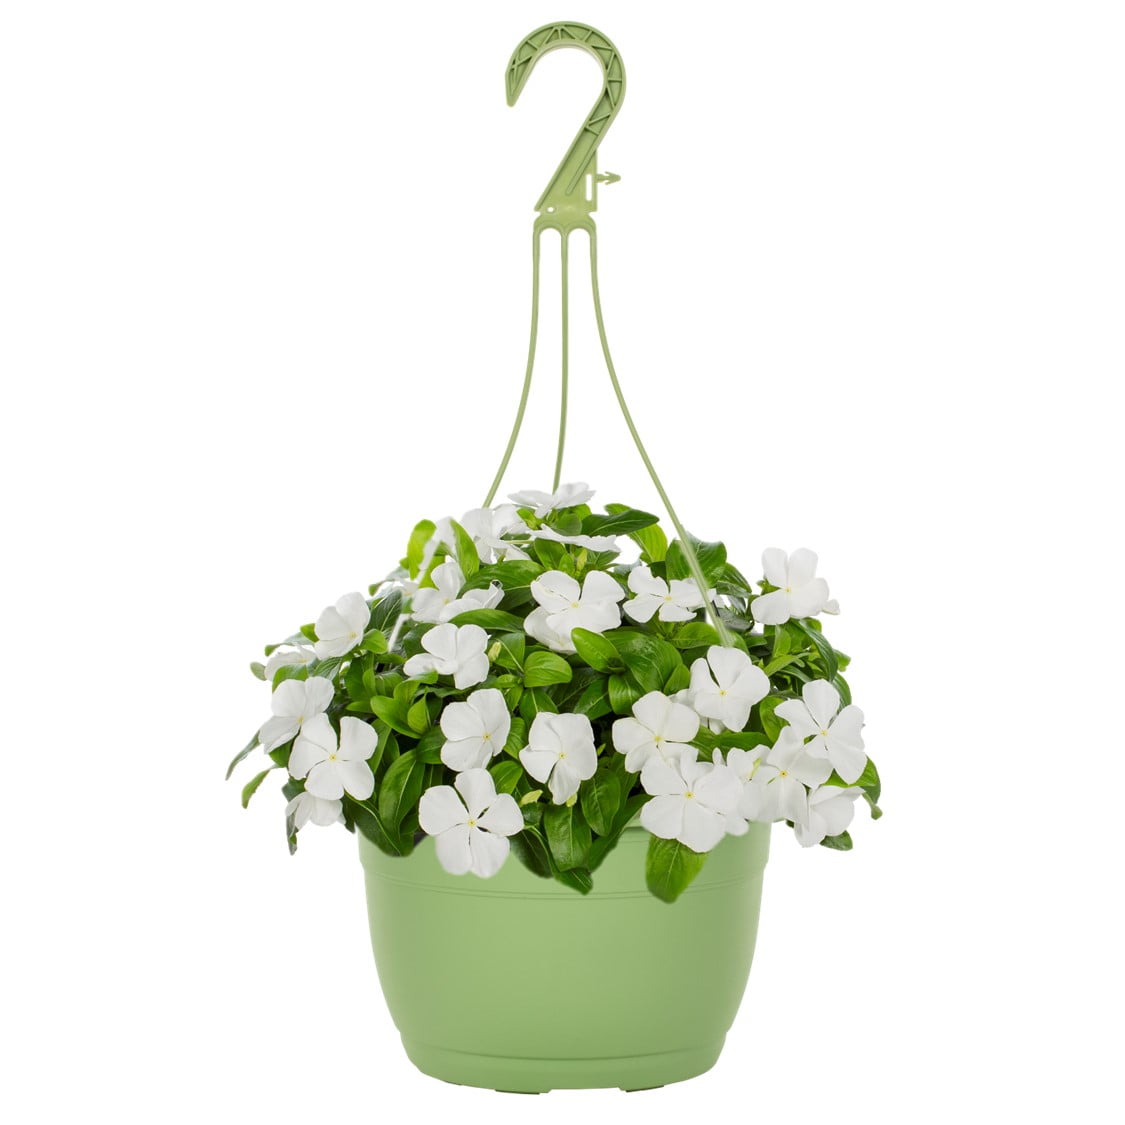
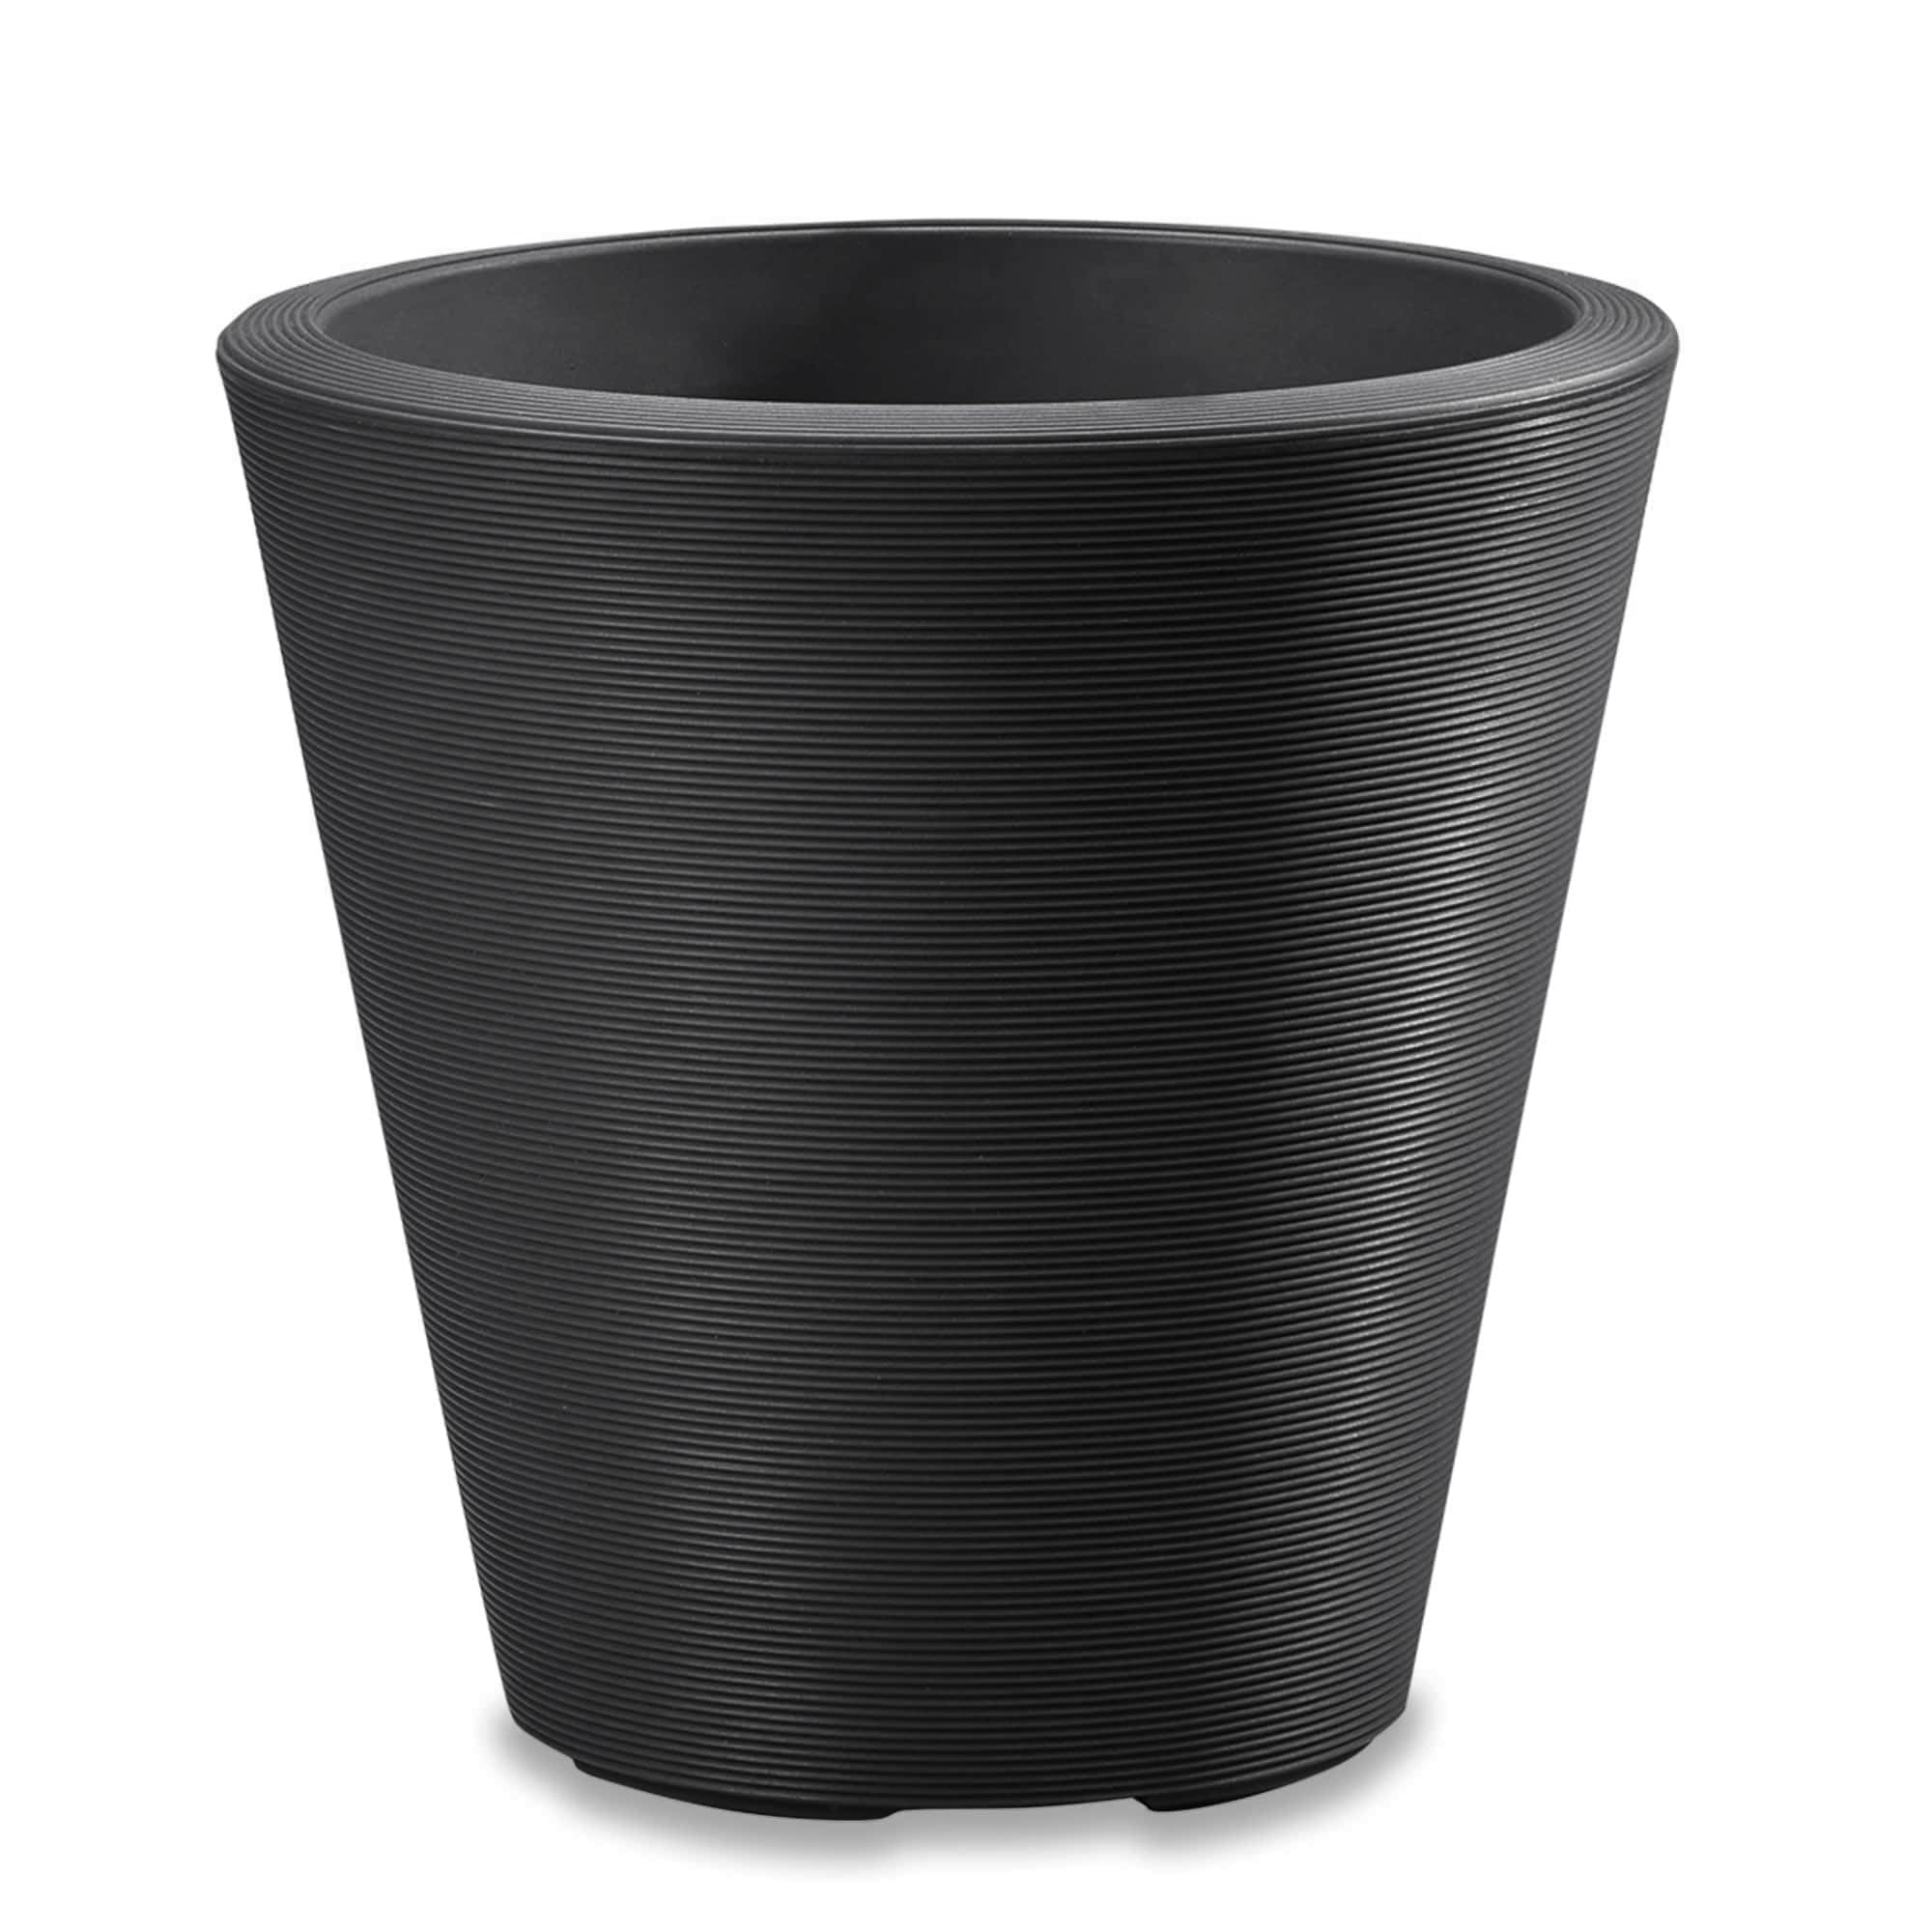
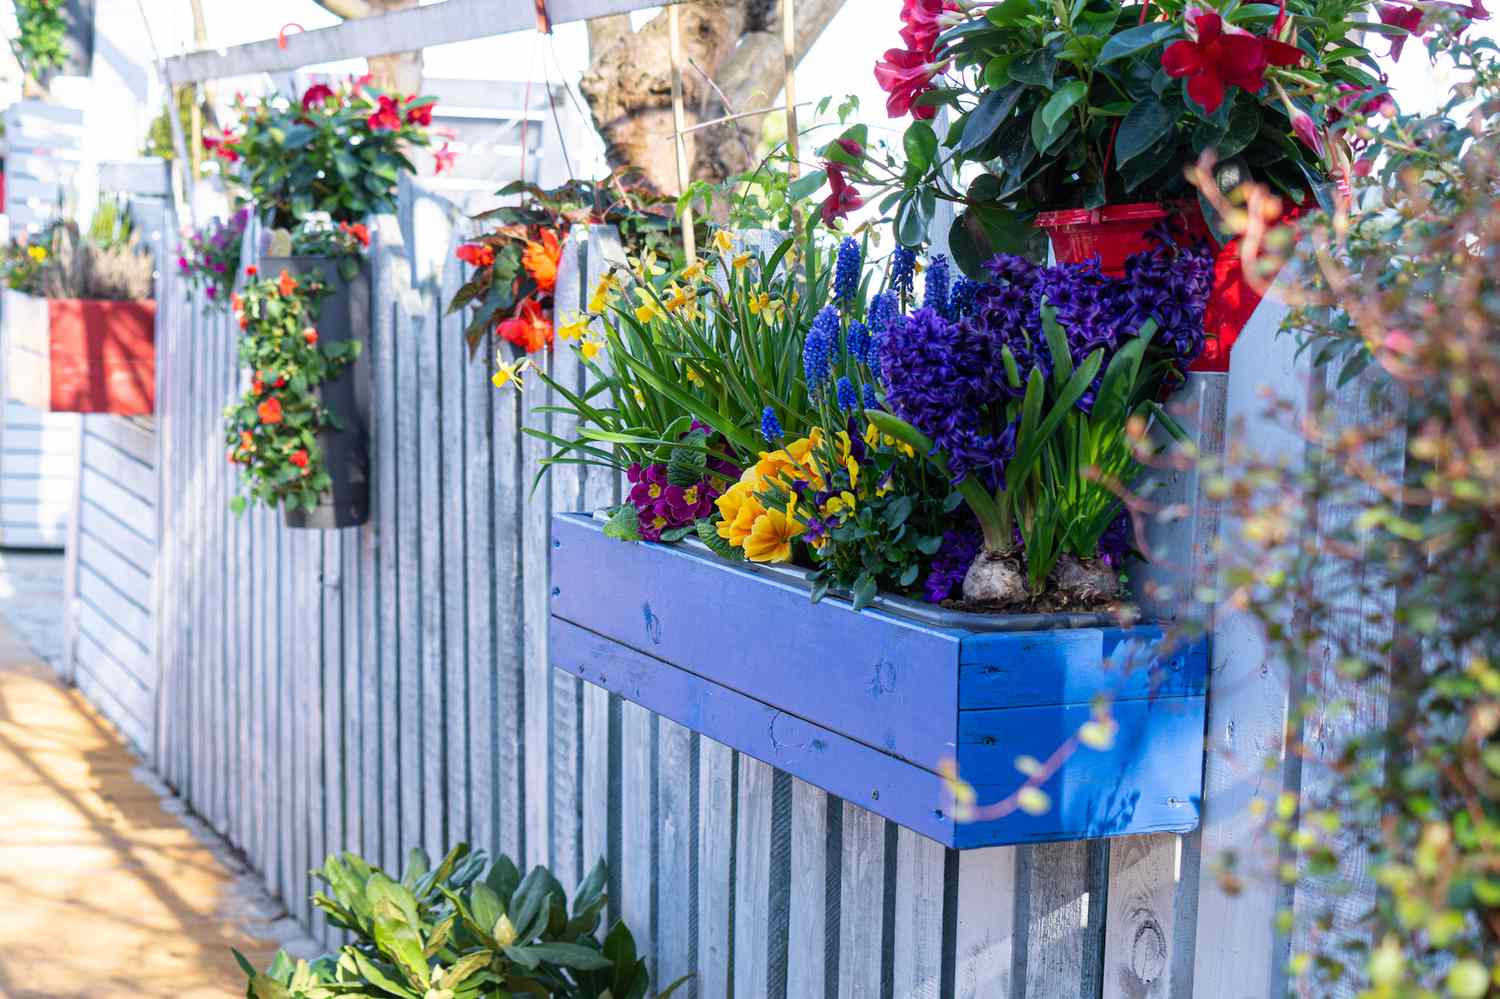
30. Add a Pop of Color with a Bright Blue Planter Box
You can easily recreate this cheerful fence display with a trip to the hardware and garden store. It’s a high-impact, low-footprint idea perfect for a patio or balcony.
|
$10.48
|
$27.99
|
$95.99
|
$42.57
|

“Main Planter: DIY wooden planter box + bright blue paint ($40 – $75)
Hanging”
- Main Planter: DIY wooden planter box + bright blue paint ($40 – $75)
- Hanging Planters: One red hanging basket, one black vertical planter ($30 – $60)
- Plants: Assorted spring flowers (pansies, bulbs) ($40 – $80)
- Budget Alternative: Repurpose an old wooden crate or drawer as the planter box and use sample-sized pots of exterior paint for color. Grow flowers from seed.
- TOTAL: $110 – $215
While the whole arrangement is cheerful, the single element doing the most work is the bright blue color of the main planter box. It provides a shocking, joyful jolt of color against the neutral gray fence. The purple and yellow flowers are beautiful, but they are classic garden colors. That unexpected shot of saturated blue is what makes the whole vignette feel modern, creative, and memorable. It’s a design risk that pays off.
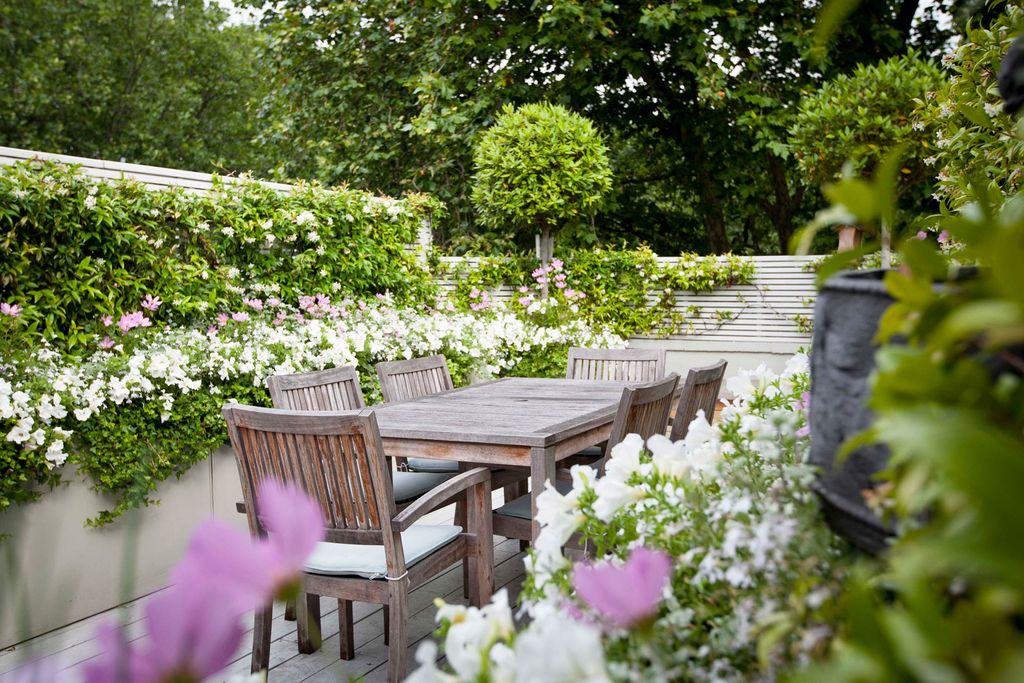
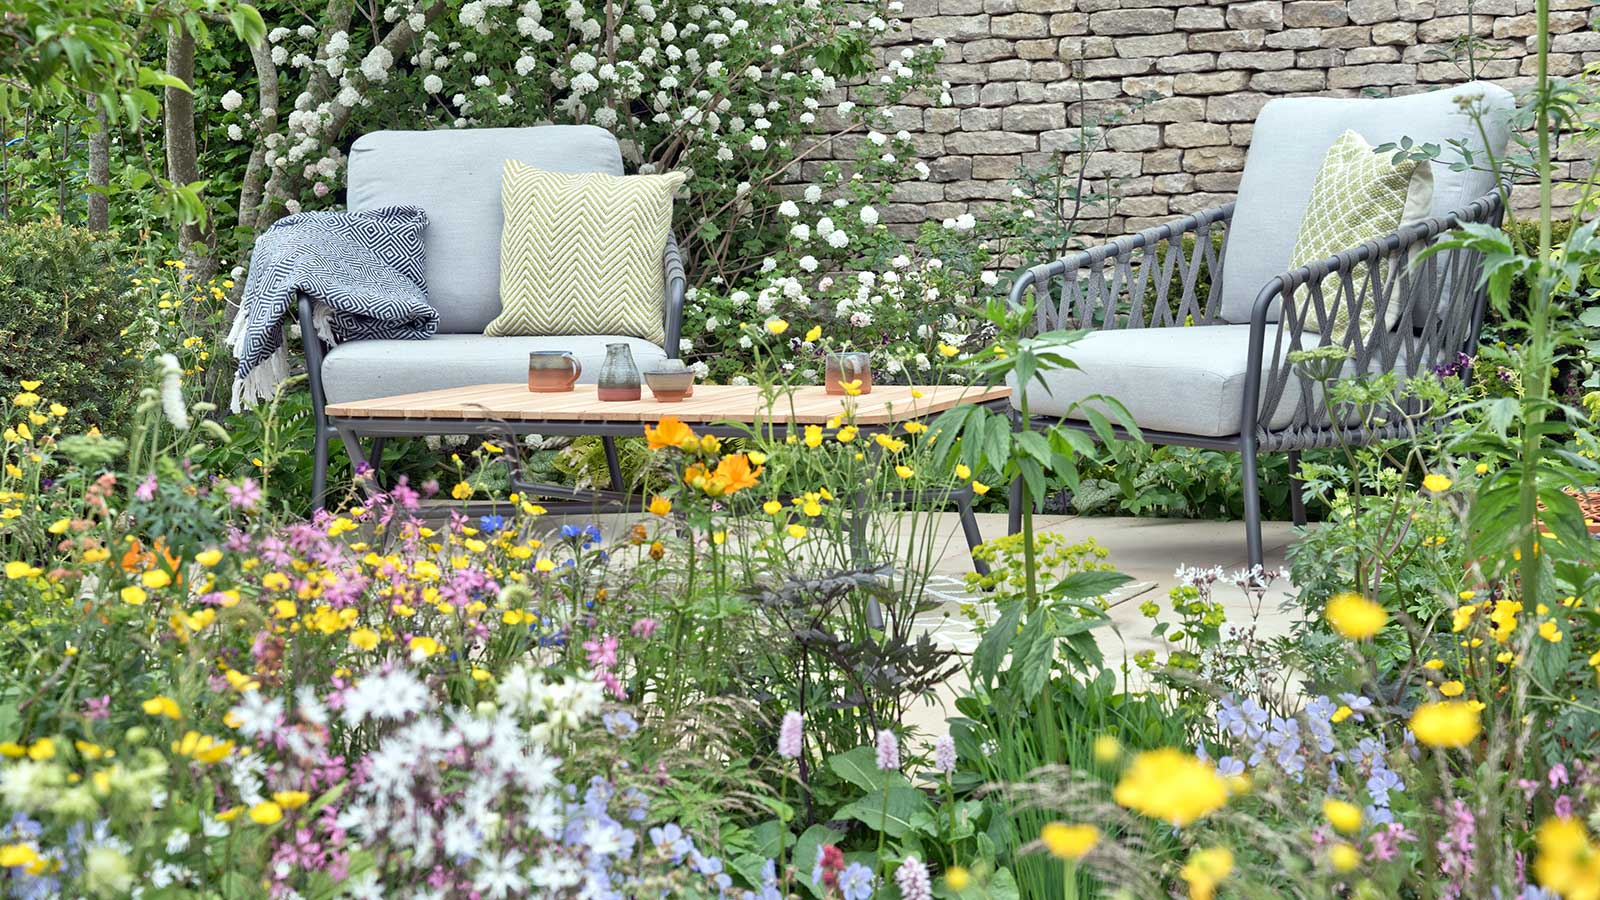
31. Define a Patio with a Lush Border of Wildflowers
This patio feels like a tranquil oasis because it’s ‘held’ by the garden. The dense border of green foliage and colorful wildflowers acts as a soft, living wall, enclosing the space and separating it from the rest of the world. This creates a sense of privacy and intimacy. The contrast between the clean, hard lines of the patio furniture and the wild, soft textures of the surrounding plants is what gives the space its relaxed, contemporary energy.
|
$291.35
|
$9.99
|
$448.08
|
$27.99
|

“A naturalistic garden bordering a patio is beautiful, but it can lead to more ‘garden visitors’ on your furniture.”
Expect more fallen petals, leaves, and insects than you would with a more sterile hardscape. The stone wall is a fantastic, low-maintenance backdrop, but you will need to trim back the wildflowers periodically to prevent them from completely taking over the patio seating area. A little bit of wild is good; a total jungle takeover is less relaxing.
Ready to Bring Your Garden to Life?
With these real-world ideas, you’re ready to move beyond just saving pins and start creating a garden that reflects your own personal style. Whether you start with a single planter or a full-yard overhaul, the goal is to create a space that brings you joy. Pick an idea that speaks to you, get your hands dirty, and watch it grow.
Feeling inspired? Head over to Pinterest and start a board for your project—and don’t forget to save your favorite ideas from this article!
Photo credits: Martha Stewart, The Spruce, Bob Vila, Garden Eros, Home for the Harvest, Kellogg Garden Products, House & Garden, Stacy Ling, Bower & Branch, White Flower Farm, Sponge Hacks, Garden Design, Royal City Nursery, EverBloom Garden, Homes and Gardens, Gardenista, Proven Winners, The Home Depot, Lumbini Park, Better Homes & Gardens / Web