You know that feeling when you finally find the DIY sun shade idea that looks exactly right for your space, but the photo has zero information on how to actually do it? We’ve all been there. After filtering through hundreds of options, we narrowed it down to 29 incredible, real-world examples that actually deliver. In this guide, you’ll find everything from dramatic overlapping sails to clever retractable awnings and rustic wooden pergolas. Many of these ideas are more achievable than they look, we promise. Creating functional, beautiful outdoor ‘rooms’ is the biggest home trend of 2026, as we all look to maximize our living space and connect with nature. And stay until the end — we break down the most common mistakes that can ruin these looks. 📌 Save this to Pinterest for later — you’ll want to revisit these ideas.
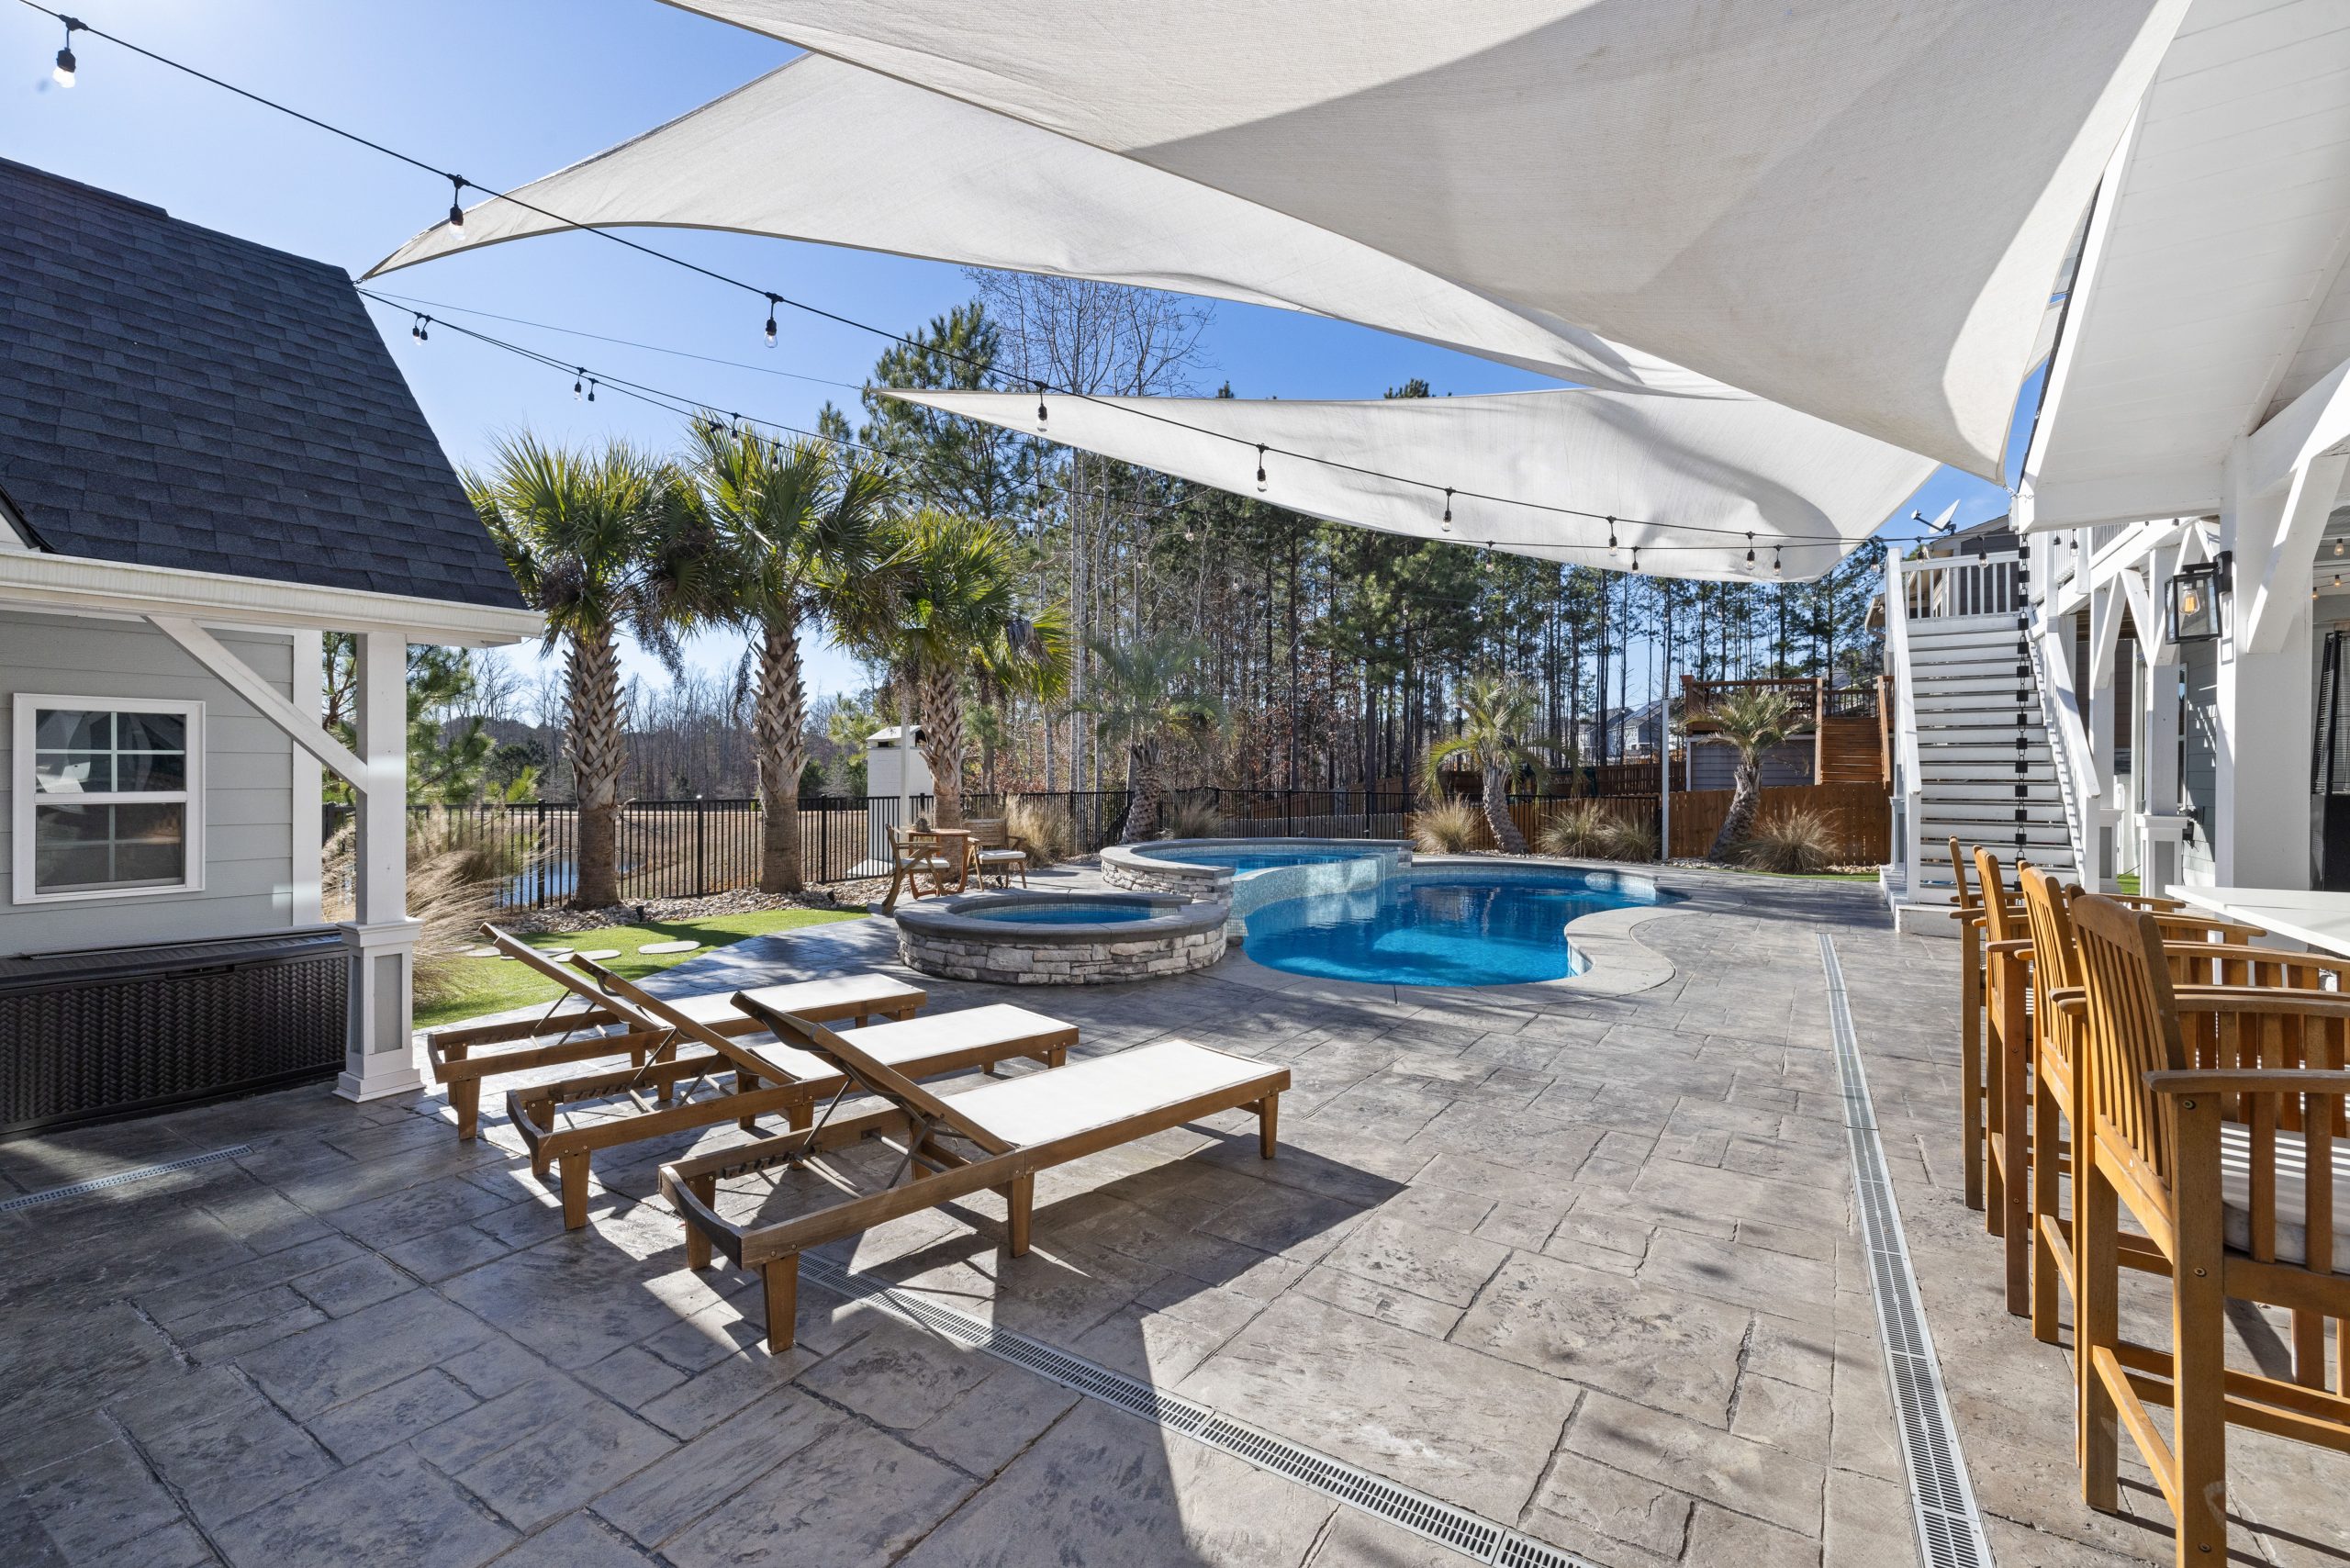
1. Create a Resort Vibe with Layered White Sails and String Lights
The magic here is in the layering. Overlapping the crisp white triangular sails creates dynamic, shifting shade patterns throughout the day, which feels much more alive than a single, static cover. This layering also adds architectural depth, making the space feel more like an intentional outdoor room. There’s a beautiful material contrast at play between the airy, light fabric of the sails and the solid, warm wood of the lounge chairs and bar stools. The final touch—the crisscrossing string lights—adds a layer of function and ambiance, transforming the pool deck into a usable, glowing retreat after the sun goes down.
“For a professional, sag-free installation, the secret is in the tension.”
Always purchase a sail shade that is slightly smaller than the area you need to cover. A good rule of thumb is to allow for about 10% of the sail’s length for tensioning hardware. So, for a 20-foot distance between anchor points, you’d want a sail that’s closer to 18 feet. Use heavy-duty stainless steel turnbuckles at each corner. This allows you to crank the tension until the fabric is drumming-tight, which not only looks sharp but also helps it withstand wind and shed rain more effectively.
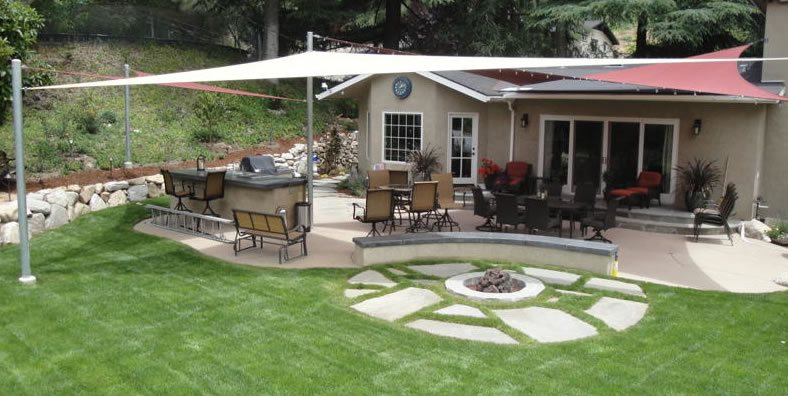
2. Build a Multi-Zone Patio with Triangular Shade Sails
Recreating this multi-zone outdoor paradise requires some investment, particularly in hardscaping and dedicated zones. The shade sails themselves are relatively affordable, but the support structure and surrounding features are what define the space. This is for a serious outdoor entertainer.
“Main Furniture (Dining & Lounge Sets): $2,500 – $6,000Structures (Shade Sails, P”
- Main Furniture (Dining & Lounge Sets): $2,500 – $6,000
- Structures (Shade Sails, Posts, Hardware): $800 – $2,000
- Outdoor Kitchen Island & Grill: $3,000 – $10,000+
- Fire Pit (Built-in Stone): $1,500 – $4,000
- Patio/Decking: $5,000 – $15,000 (depending on material)
- TOTAL: $12,800 – $37,000+
- Budget Alternative: Use freestanding furniture instead of built-ins, a portable fire pit, and fewer sails for a similar feel at around $4,000 – $8,000.
This kind of expansive, multi-zone design needs significant room to breathe. You’re looking at a minimum of 600-800 square feet to comfortably house a kitchen, dining area, and fire pit lounge without them feeling cramped. The key is to create distinct ‘rooms’ under the sails. For this to work visually, you also need height. The support posts for the sails should be at least 10-12 feet tall to maintain an open, airy feeling and provide clearance. Anything lower, and the sails will feel oppressive. This is a look for a generous suburban backyard, not a tight urban patio.
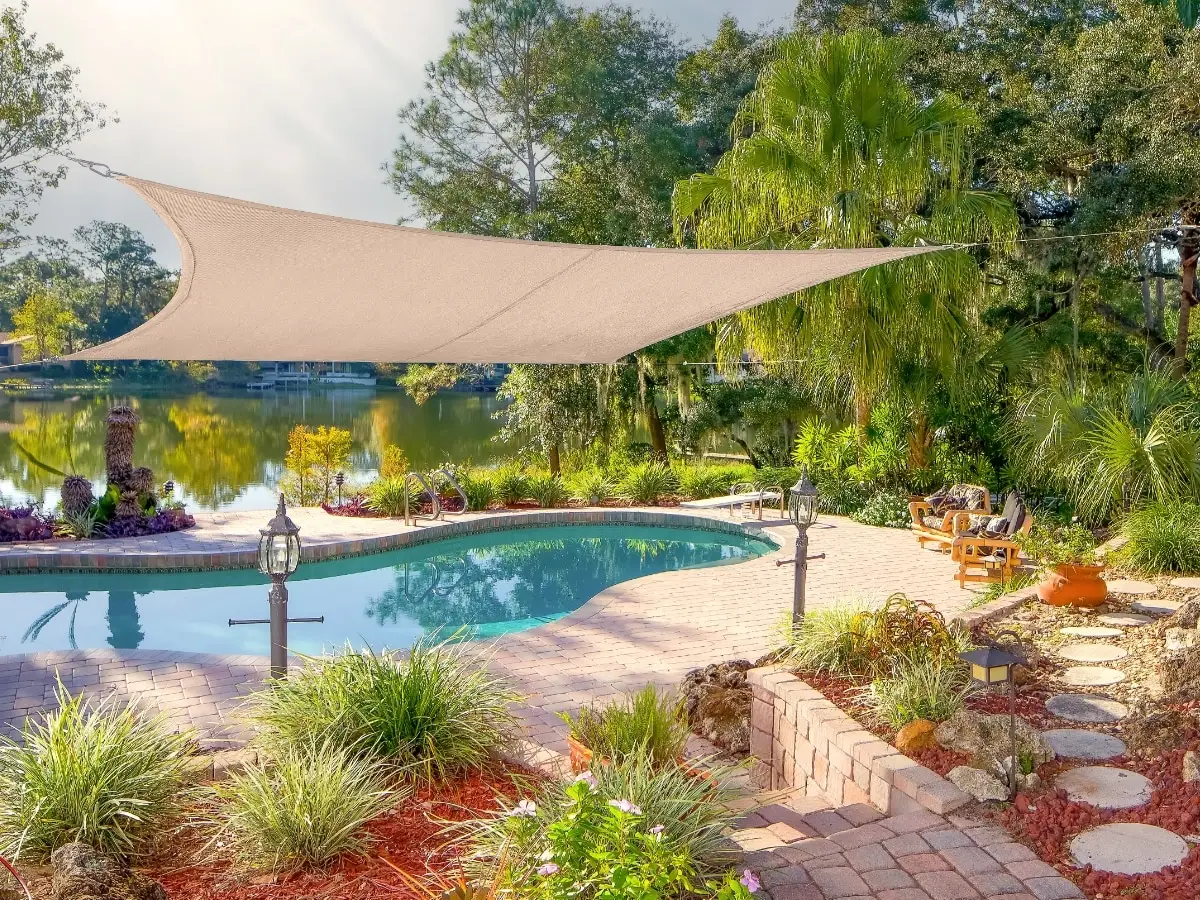
3. A Single Beige Sail for Serene Poolside Shade
that makes this entire scene work is its simplicity. Unlike the complex layered sails in Idea #1, this design uses a single, large rectangular sail. This deliberate restraint is what creates the calm, uncluttered, and serene atmosphere. By using one large shade element, the eye isn’t drawn upwards to a busy pattern; instead, it’s allowed to relax and take in the whole view—the pool, the patio, and the lake beyond. Removing it would just leave a standard (though lovely) pool deck. The sail defines the lounge space and gives it purpose and a feeling of protection from the sun.
“While a fabric sail shade looks fantastic, it’s not a ‘set it and forget it’ feature.”
At least twice a year, you’ll need to take it down for a thorough cleaning to prevent mildew and staining from leaves, bird droppings, and pollution. A gentle scrub with mild soap (like Dawn dish soap) and a soft brush, followed by a complete rinse, is usually sufficient. Make sure the sail is 100% dry before re-hanging or storing it to prevent mildew growth. Check the tensioning hardware seasonally; it can loosen over time, causing sag. In areas with heavy snowfall, you absolutely must take the sail down for the winter to prevent it from stretching or collapsing under the weight.
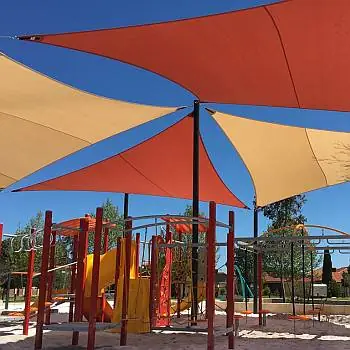
4. Layer Terracotta and Tan Sails for a Playful Playground Canopy
This vibrant look is all about a playful, warm color formula. It’s about 50% terracotta, 40% tan, and 10% dark metal structure. The terracotta is the star, bringing energy and warmth, while the tan acts as a calming neutral that prevents the orange from becoming overwhelming. The dark metal posts provide a strong graphic outline that grounds the composition. You could easily swap the palette while keeping the formula. Imagine 50% navy blue, 40% crisp white, and 10% silver metal for a nautical theme, or 50% forest green, 40% beige, and 10% black metal for a more woodsy feel.
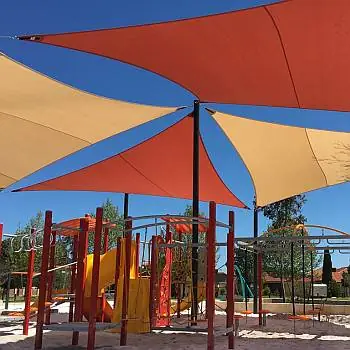
“Let’s be honest: while this looks amazing, installing multiple overlapping sails at different heights and angles is an exercise in geometry.”
This is not a simple Saturday afternoon project. You need to precisely map out your anchor points, accounting for the sun’s path throughout the day to ensure you’re actually shading the intended area. You also have to consider the significant tension forces at play; anchor points must be incredibly secure, often requiring concrete footings for the posts. Getting the angles right so the sails don’t just look like a jumbled mess takes careful planning and probably a few adjustments.
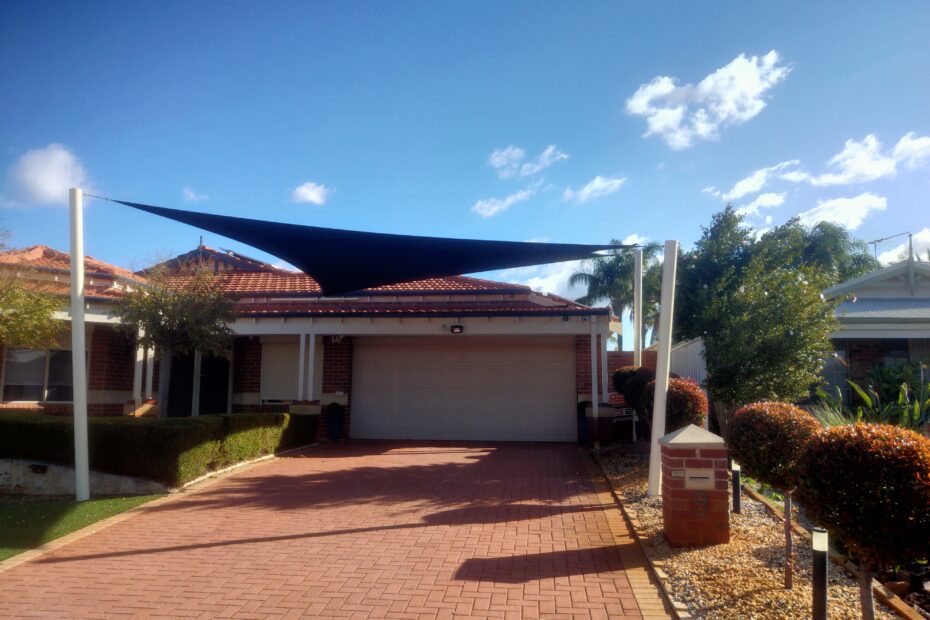
5. A Bold, Dark Triangular Sail for Driveway Sun Protection
Installing a support post for a shade sail is a crucial step that ensures safety and longevity. Here’s a quick guide for setting a post in concrete. (Time: 4-6 hours + concrete curing time. Cost: $50-$100 per post).
“Dig the Hole: Dig a hole that is three times the width of your post and about one-third the length of the post’s height.”
For a 10-foot post, you’ll want a hole about 3.5 feet deep.Add Gravel: Pour 4-6 inches of gravel at the bottom of the hole for drainage.Position the Post: Place your metal post in the center of the hole. Use a level and temporary braces to ensure it is perfectly plumb (vertically straight).Mix and Pour Concrete: Mix fast-setting concrete according to the package directions and pour it into the hole, surrounding the post.Slope the Top: Shape the top of the concrete so it slopes away from the post. This will prevent water from pooling at the base.Cure: Allow the concrete to fully cure for at least 48-72 hours before attaching the shade sail and applying tension.
You don’t need a custom-installed sail to get this functional benefit. A heavy-duty, ready-made carport canopy from a store like Harbor Freight or Costco can offer similar protection for a vehicle for a fraction of the cost, typically in the $200-$500 range. While it might not have the same sharp, architectural look of a tensioned sail, it’s a practical solution you can assemble in a weekend. For an even cheaper route, search Facebook Marketplace for used canopies at the end of the summer season; people often sell them for under $100 just to get them out of their garage.
6. Modern Patio Shade with Overlapping White Triangular Sails
When using multiple sails, creating height variation is key to achieving a dynamic, architectural look instead of a flat, boring one. A great rule of an interior designer is to vary the attachment point heights on your posts or walls by at least 18 to 24 inches. For example, on a single post supporting two sail corners, attach one at 8 feet and the other at 9.5 feet. This forces the fabric into dramatic, swooping curves and planes, which looks far more sophisticated and custom. It also helps with water runoff, preventing pooling on any single sail.
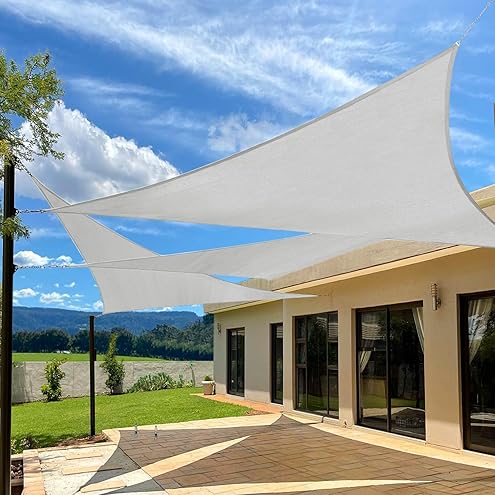
“This design succeeds by embracing high contrast.”
The brilliant white of the sails pops against the deep blue sky, creating a clean, graphic statement. This is echoed by the dark, thin metal frames of the windows and support posts against the light beige walls of the house. The overlapping sails aren’t just for show; they create a sense of volume and turn a simple flat patio into a three-dimensional space. The geometric shapes of the sails also provide a modern counterpoint to the organic shapes of the lawn and the distant mountains, making the whole composition feel balanced.
7. Warm Up a Patio with Layered Terracotta Sun Sails
Earthy, warm tones like terracotta, rust, and clay are having a huge moment in both interior and exterior design. This trend is a reaction against the cool grays that dominated the 2010s. People are craving warmth, texture, and a connection to natural materials. These terracotta sails tap directly into that desire, bringing a Mediterranean or Southwestern desert vibe to any backyard. They feel grounded and organic, and they pair beautifully with wood, stone, and lots of greenery. This isn’t a fleeting fad; the move toward warmer, earth-inspired palettes has real staying power as we focus on creating comforting, soulful spaces.
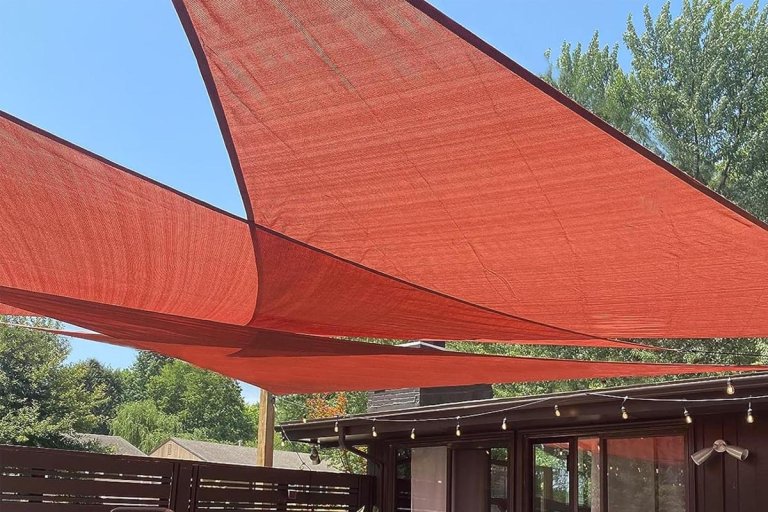
“The color is everything.”
If these sails were white or beige, the space would feel fine, but it wouldn’t have this specific, enveloping warmth. The rich terracotta color is what gives the patio its distinct personality and emotional temperature. It casts a warm, rosy glow on the area below, making it feel instantly inviting and cozy, even on a bright, expansive day. It’s a bold choice that pays off by defining the entire atmosphere of the space. Remove the color, and you lose the soul of the design. This is a great example of how color can be a primary architectural element.
8. Create a Breezy Retreat with Tan Sails and Wicker Loungers
The formula for this relaxed, tropical vibe is surprisingly simple: it’s roughly 60% neutral textures, 30% bright white, and 10% lush greenery. The ‘neutral textures’ category includes the tan sails, the dark brown wicker chairs, and the stone retaining wall. They all bring texture without competing for attention. The bright white comes from the support posts and the lattice fence, which act like crisp trim, making the neutrals feel clean and intentional. The final 10% of greenery provides a necessary pop of life and color. Keeping this ratio is key to its success.
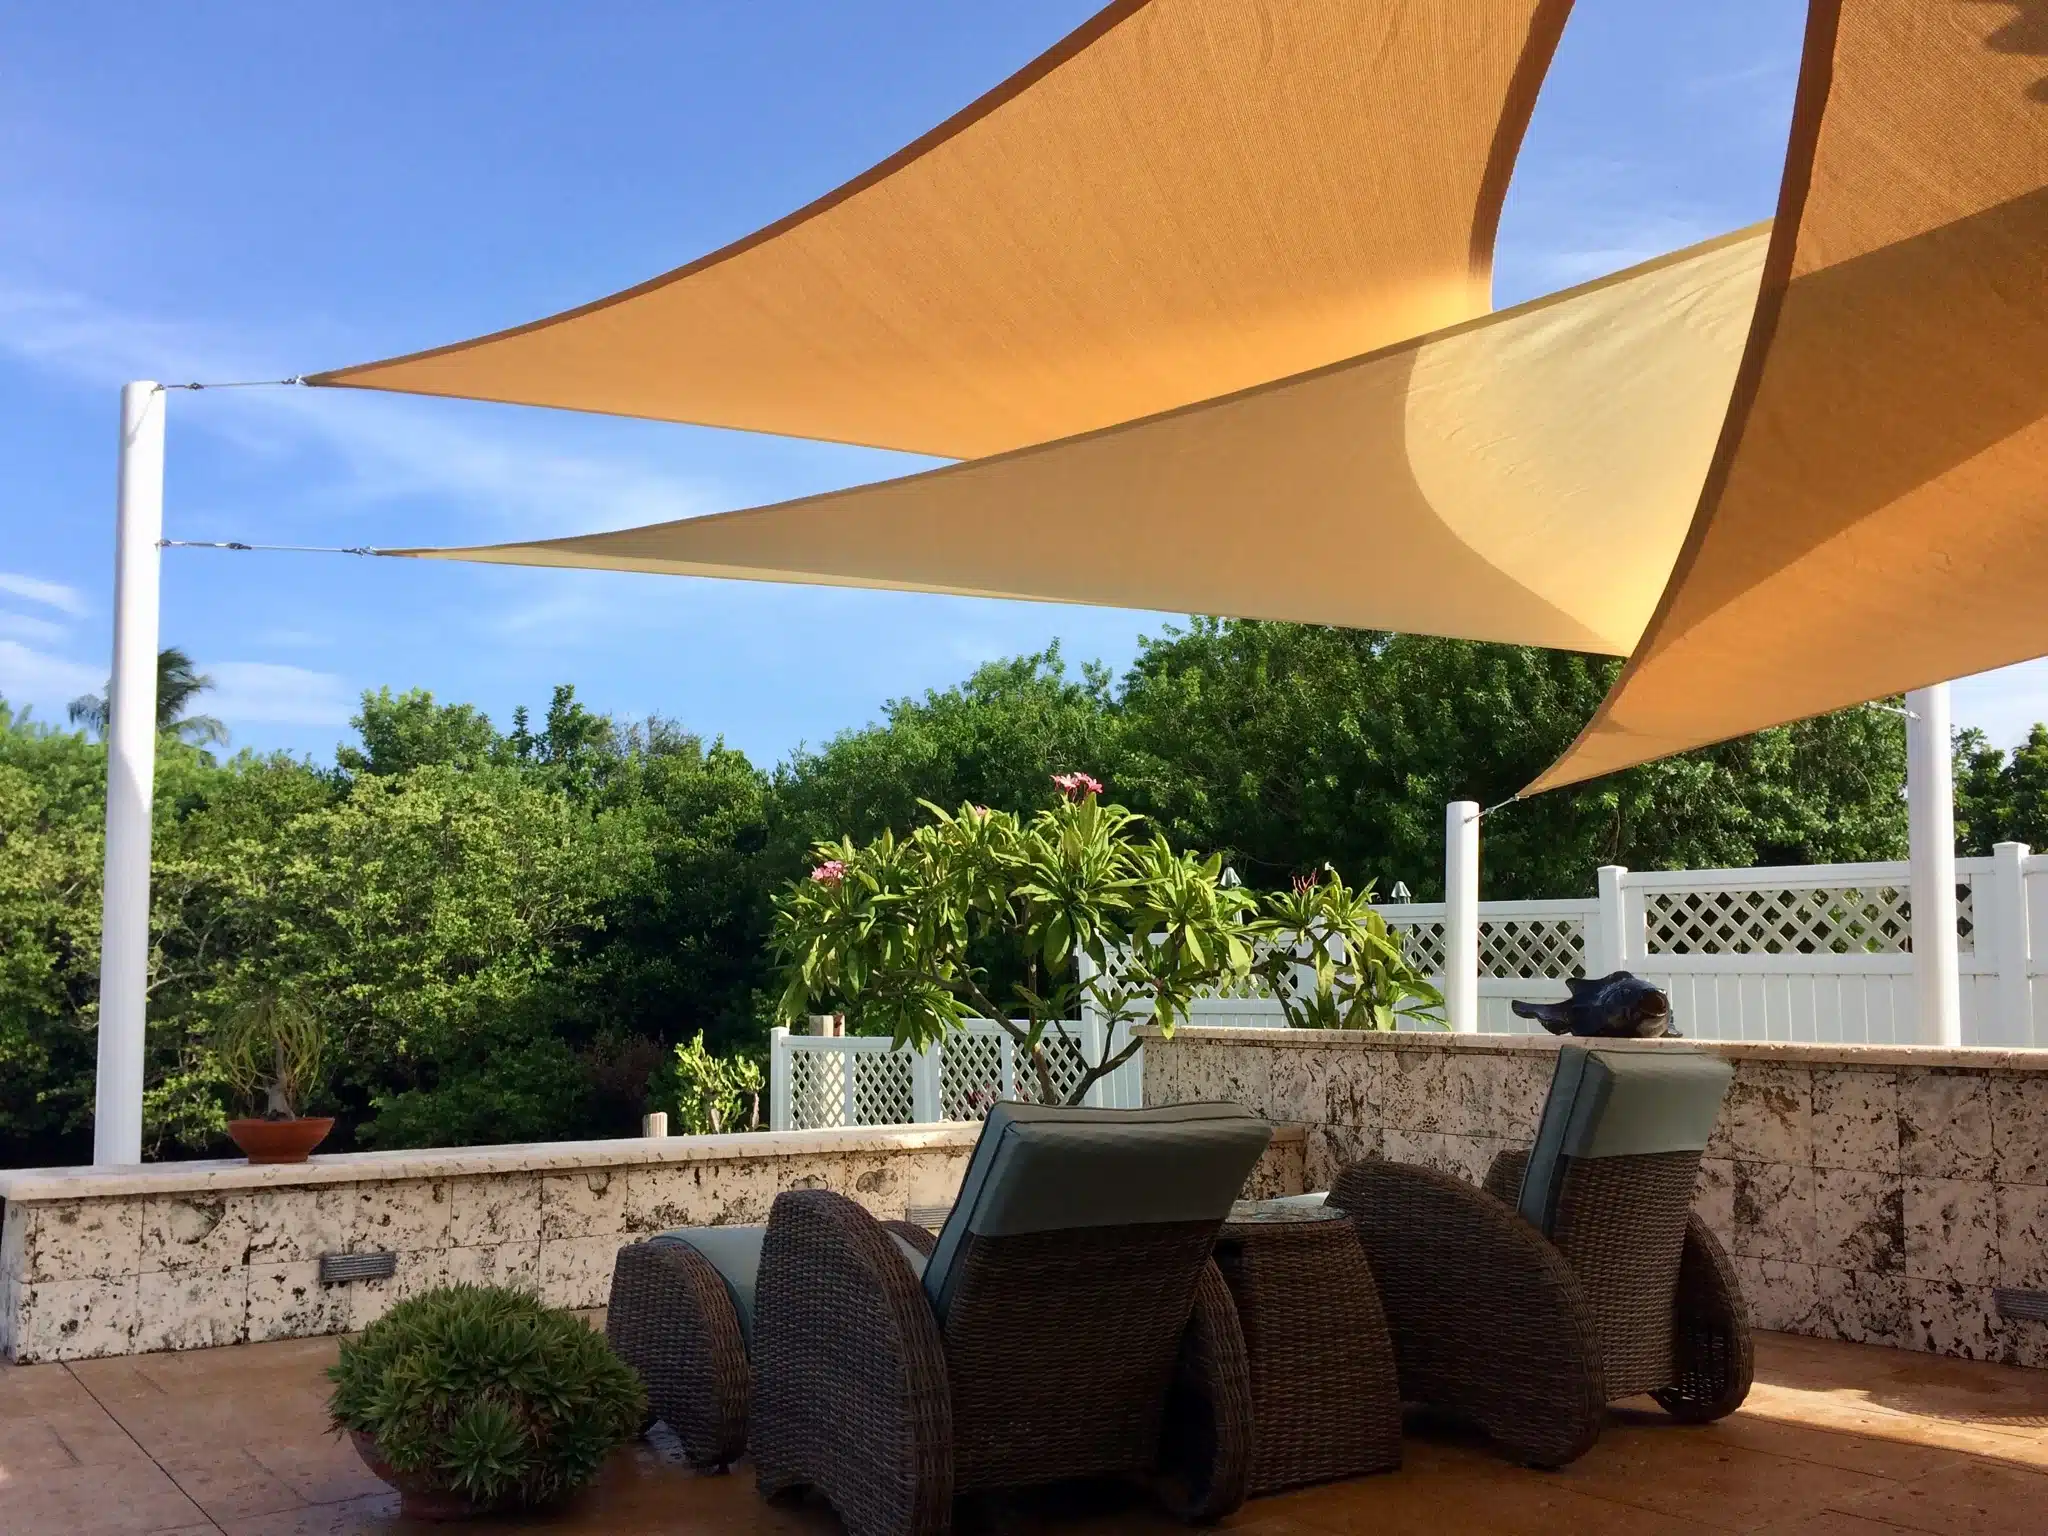
“This kind of layered sail installation is incredibly versatile and works well for medium-sized patios, typically in the 200-400 square foot range.”
It’s perfect for defining a specific zone, like a lounge area or dining spot, within a larger backyard. The key is to have enough space to allow the sails to overlap gracefully without feeling crowded. For this to look right, your anchor points should be at least 12-15 feet apart. It’s a more approachable scale than the massive poolside structure in Idea #1, making it ideal for a standard suburban home.
9. A Modern Shaded Nook with Dark Gray Sails and a Slat Fence
Dark-colored sails, like this chic gray, look incredibly modern but they do have a specific maintenance need: they show dust, pollen, and bird droppings more readily than lighter colors. A light-colored sail might camouflage pollen, but on a dark gray surface, that yellow-green film will be obvious. Plan on a quick rinse with a hose every few weeks during high-pollen season to keep it looking sharp. Also, be aware that dark colors can show fading from intense, direct sun over several years more than a white or beige sail might. When you take it down for its annual cleaning, rotate it if possible to even out the sun exposure.
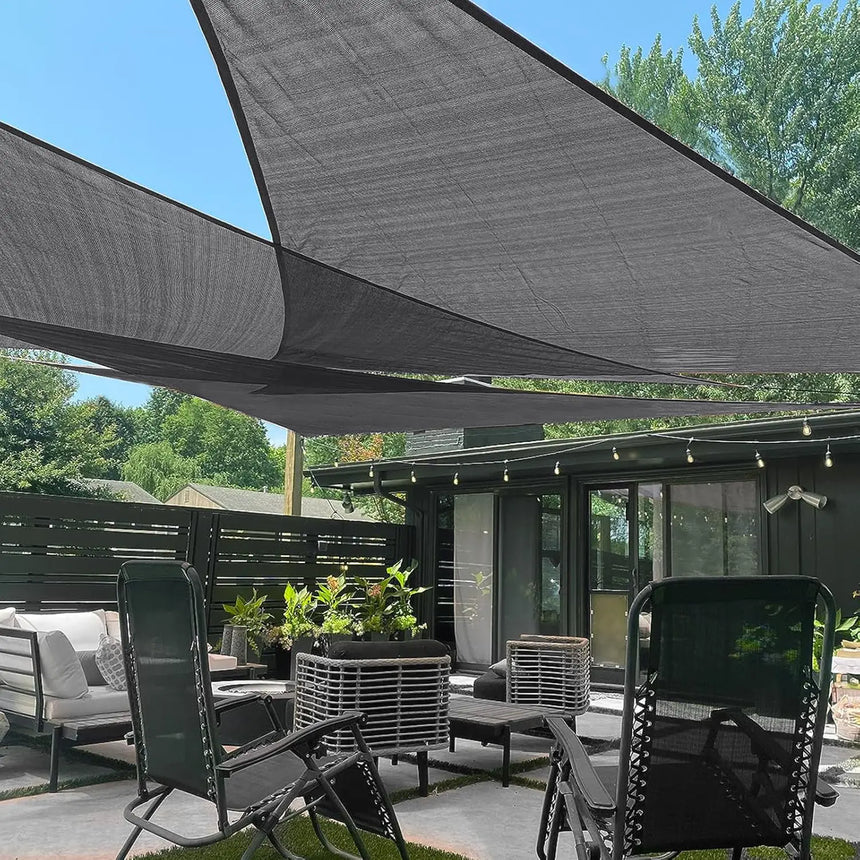
“To make a shaded area feel like an intentional ‘room,’ lighting is non-negotiable.”
The string lights here are a perfect example. When installing outdoor lighting under a shade sail, use commercial-grade, weatherproof string lights with shatterproof bulbs. Plan your lighting layout *before* you finalize your sail positions. A great trick is to run the main string light cable along the perimeter of the sail, attaching it to the same anchor points. This creates a clean outline of light and avoids a messy web of wires crisscrossing underneath your beautiful canopy. Use zip ties that match the color of your sail or cable for a nearly invisible attachment.
10. Add Flexible Shade with a White Retractable Awning
A retractable awning offers incredible flexibility, but it comes with a major caveat: wind. These are not structures you can leave extended during a storm or even on a very windy day. The large fabric surface acts like a sail (an uncontrolled one!), and strong gusts can damage the fabric, bend the support arms, or even rip the mounting bolts from your house’s exterior wall. You have to be diligent about retracting it when not in use or when the weather turns. Some higher-end models have automatic wind sensors that retract it for you, which is a feature worth investing in for peace of mind.
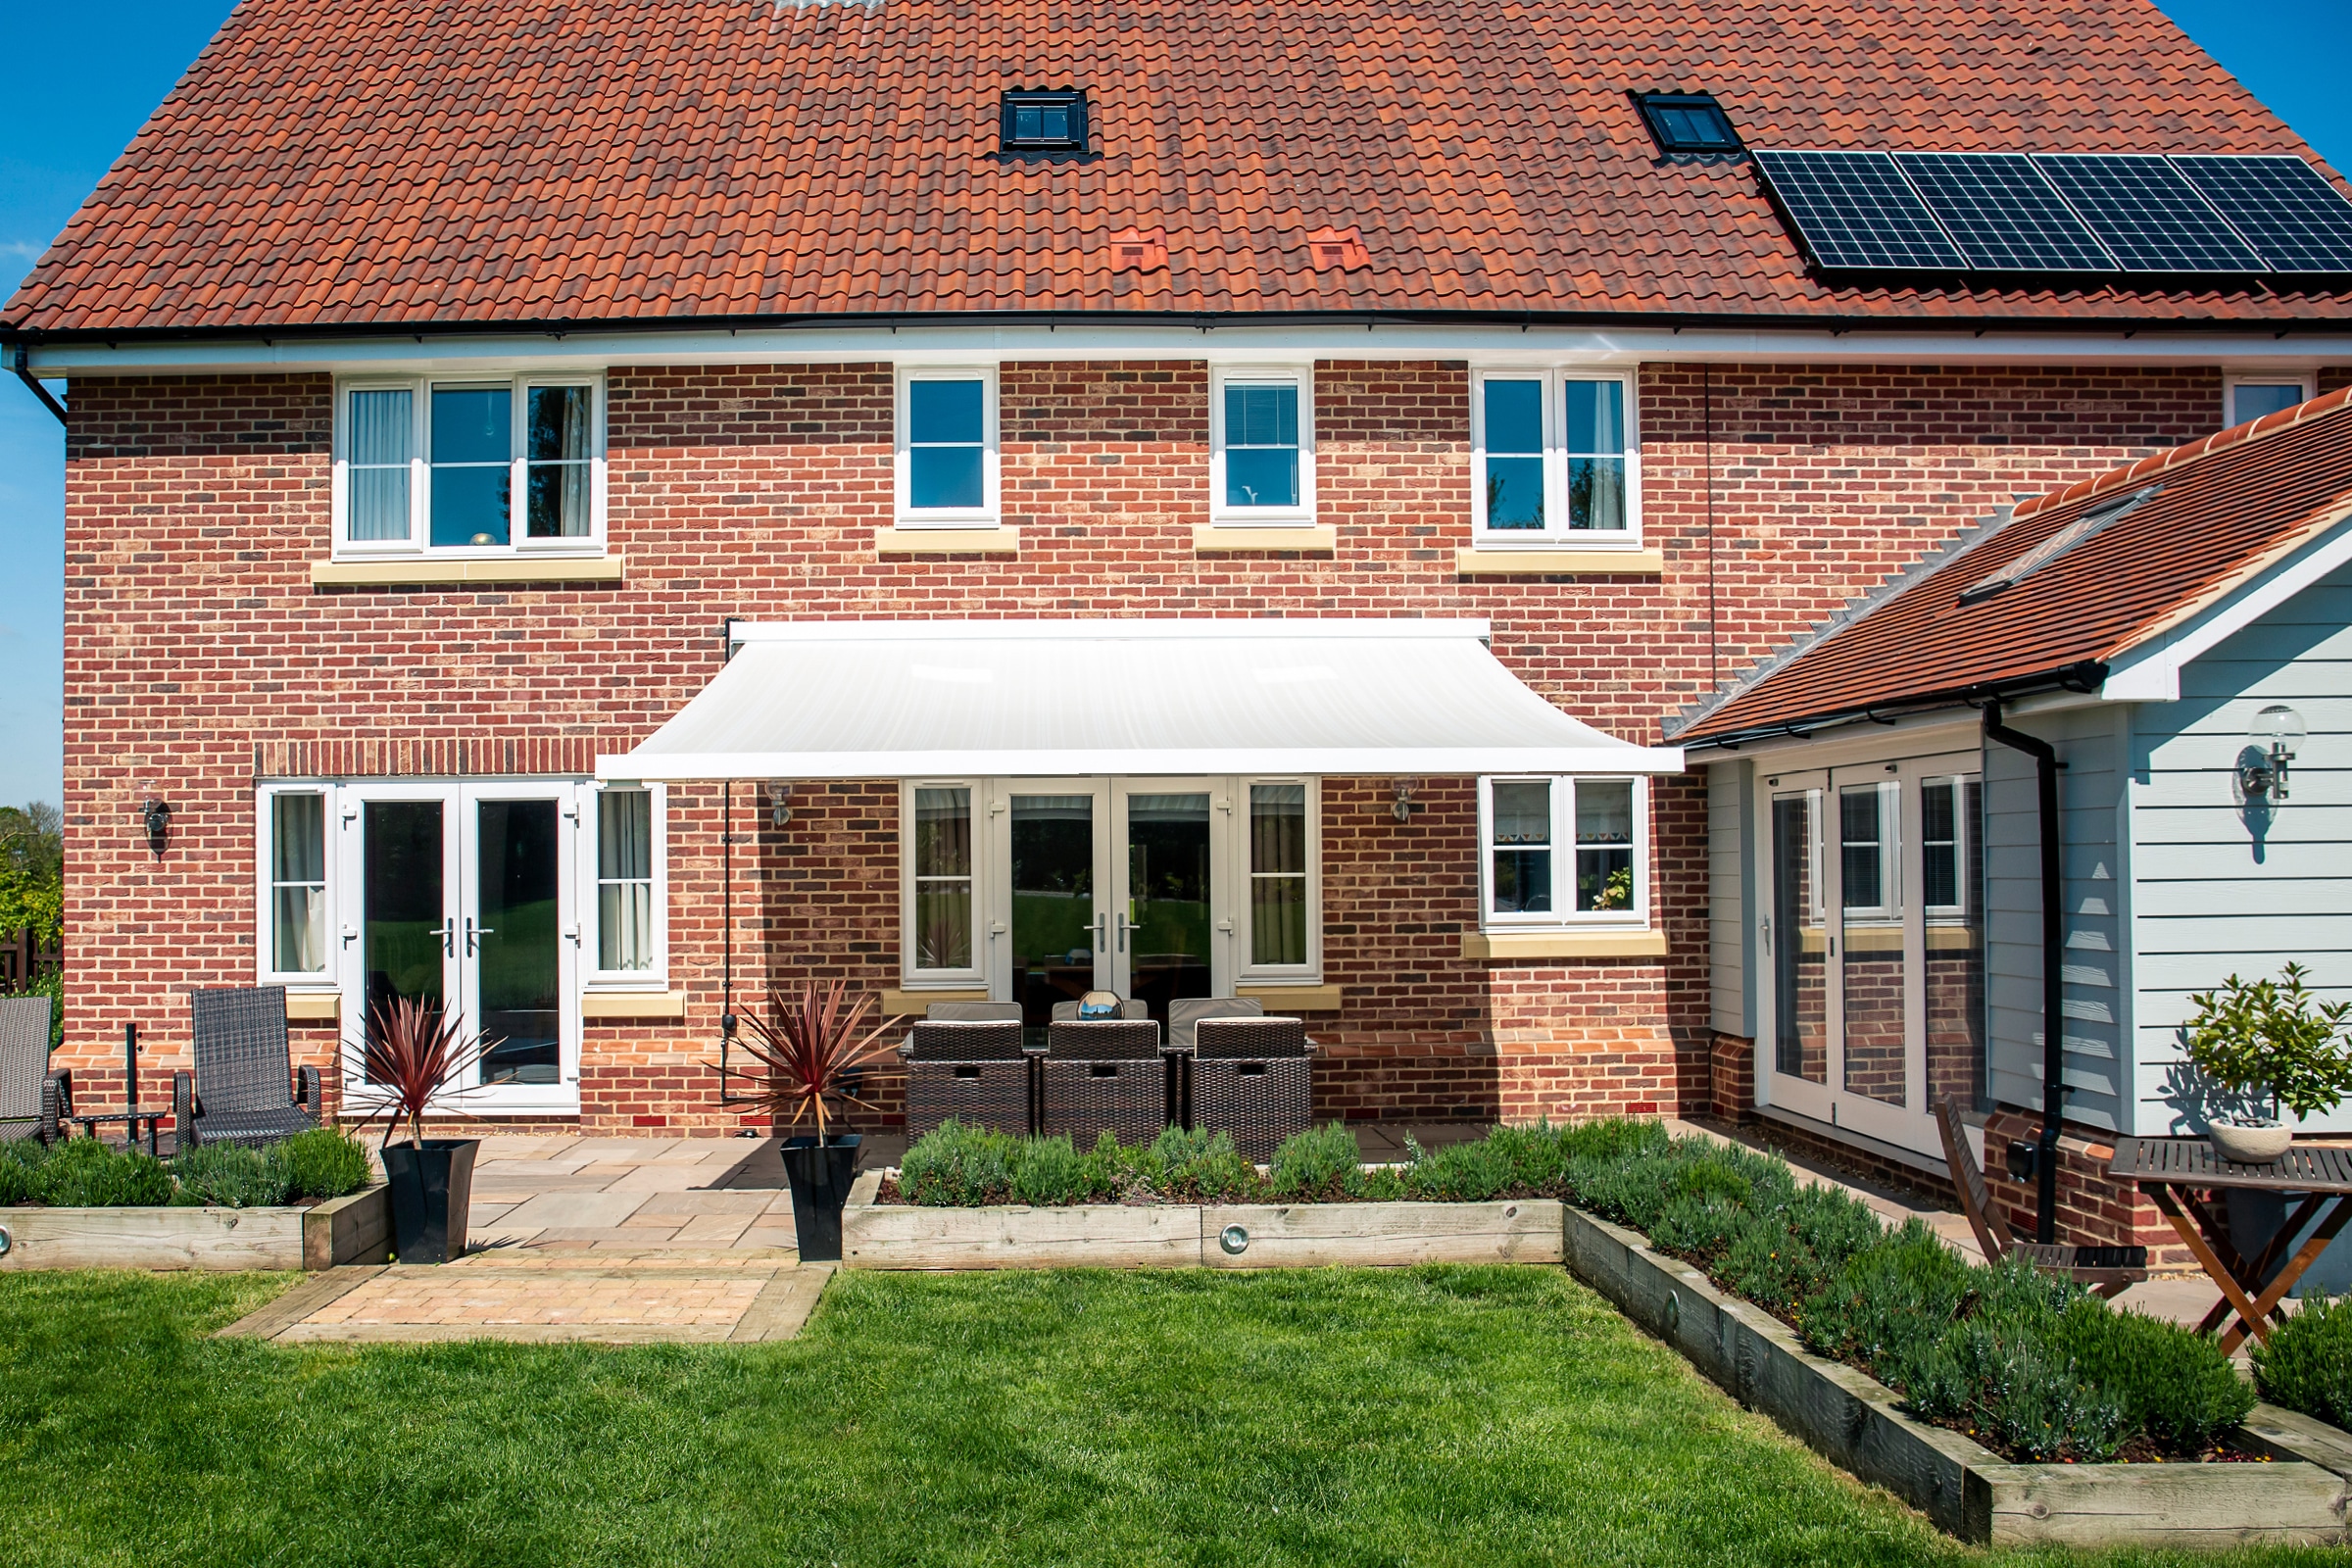
“A professionally installed, motorized retractable awning can cost anywhere from $2,000 to $7,000.”
For a much lower price point, you can get a similar effect with a manual, crank-operated awning. These are available at big-box stores like Home Depot or online for $300-$800. The installation is more DIY-friendly, though you still need to ensure it is mounted securely to your home’s framing. It provides the same essential shade and on-demand flexibility without the high cost of motorization and professional installation. It’s a bit more work to open and close, but the savings are substantial.
11. Construct a Rustic Sun Shade from Wooden Poles and Branches
This design is a masterclass in texture and repetition. The structure works because it commits fully to a single material—natural wood—and explores its possibilities. The thick, sturdy posts and beams create a strong, grounding frame. Then, the dense repetition of the thinner branches in the canopy creates a beautiful, dappled light effect. It’s this interplay between the massive scale of the support structure and the delicate pattern of the overhead branches that makes it so visually compelling. The pure blue sky visible through the gaps acts as the perfect contrasting color, highlighting the warm, organic tones of the wood.
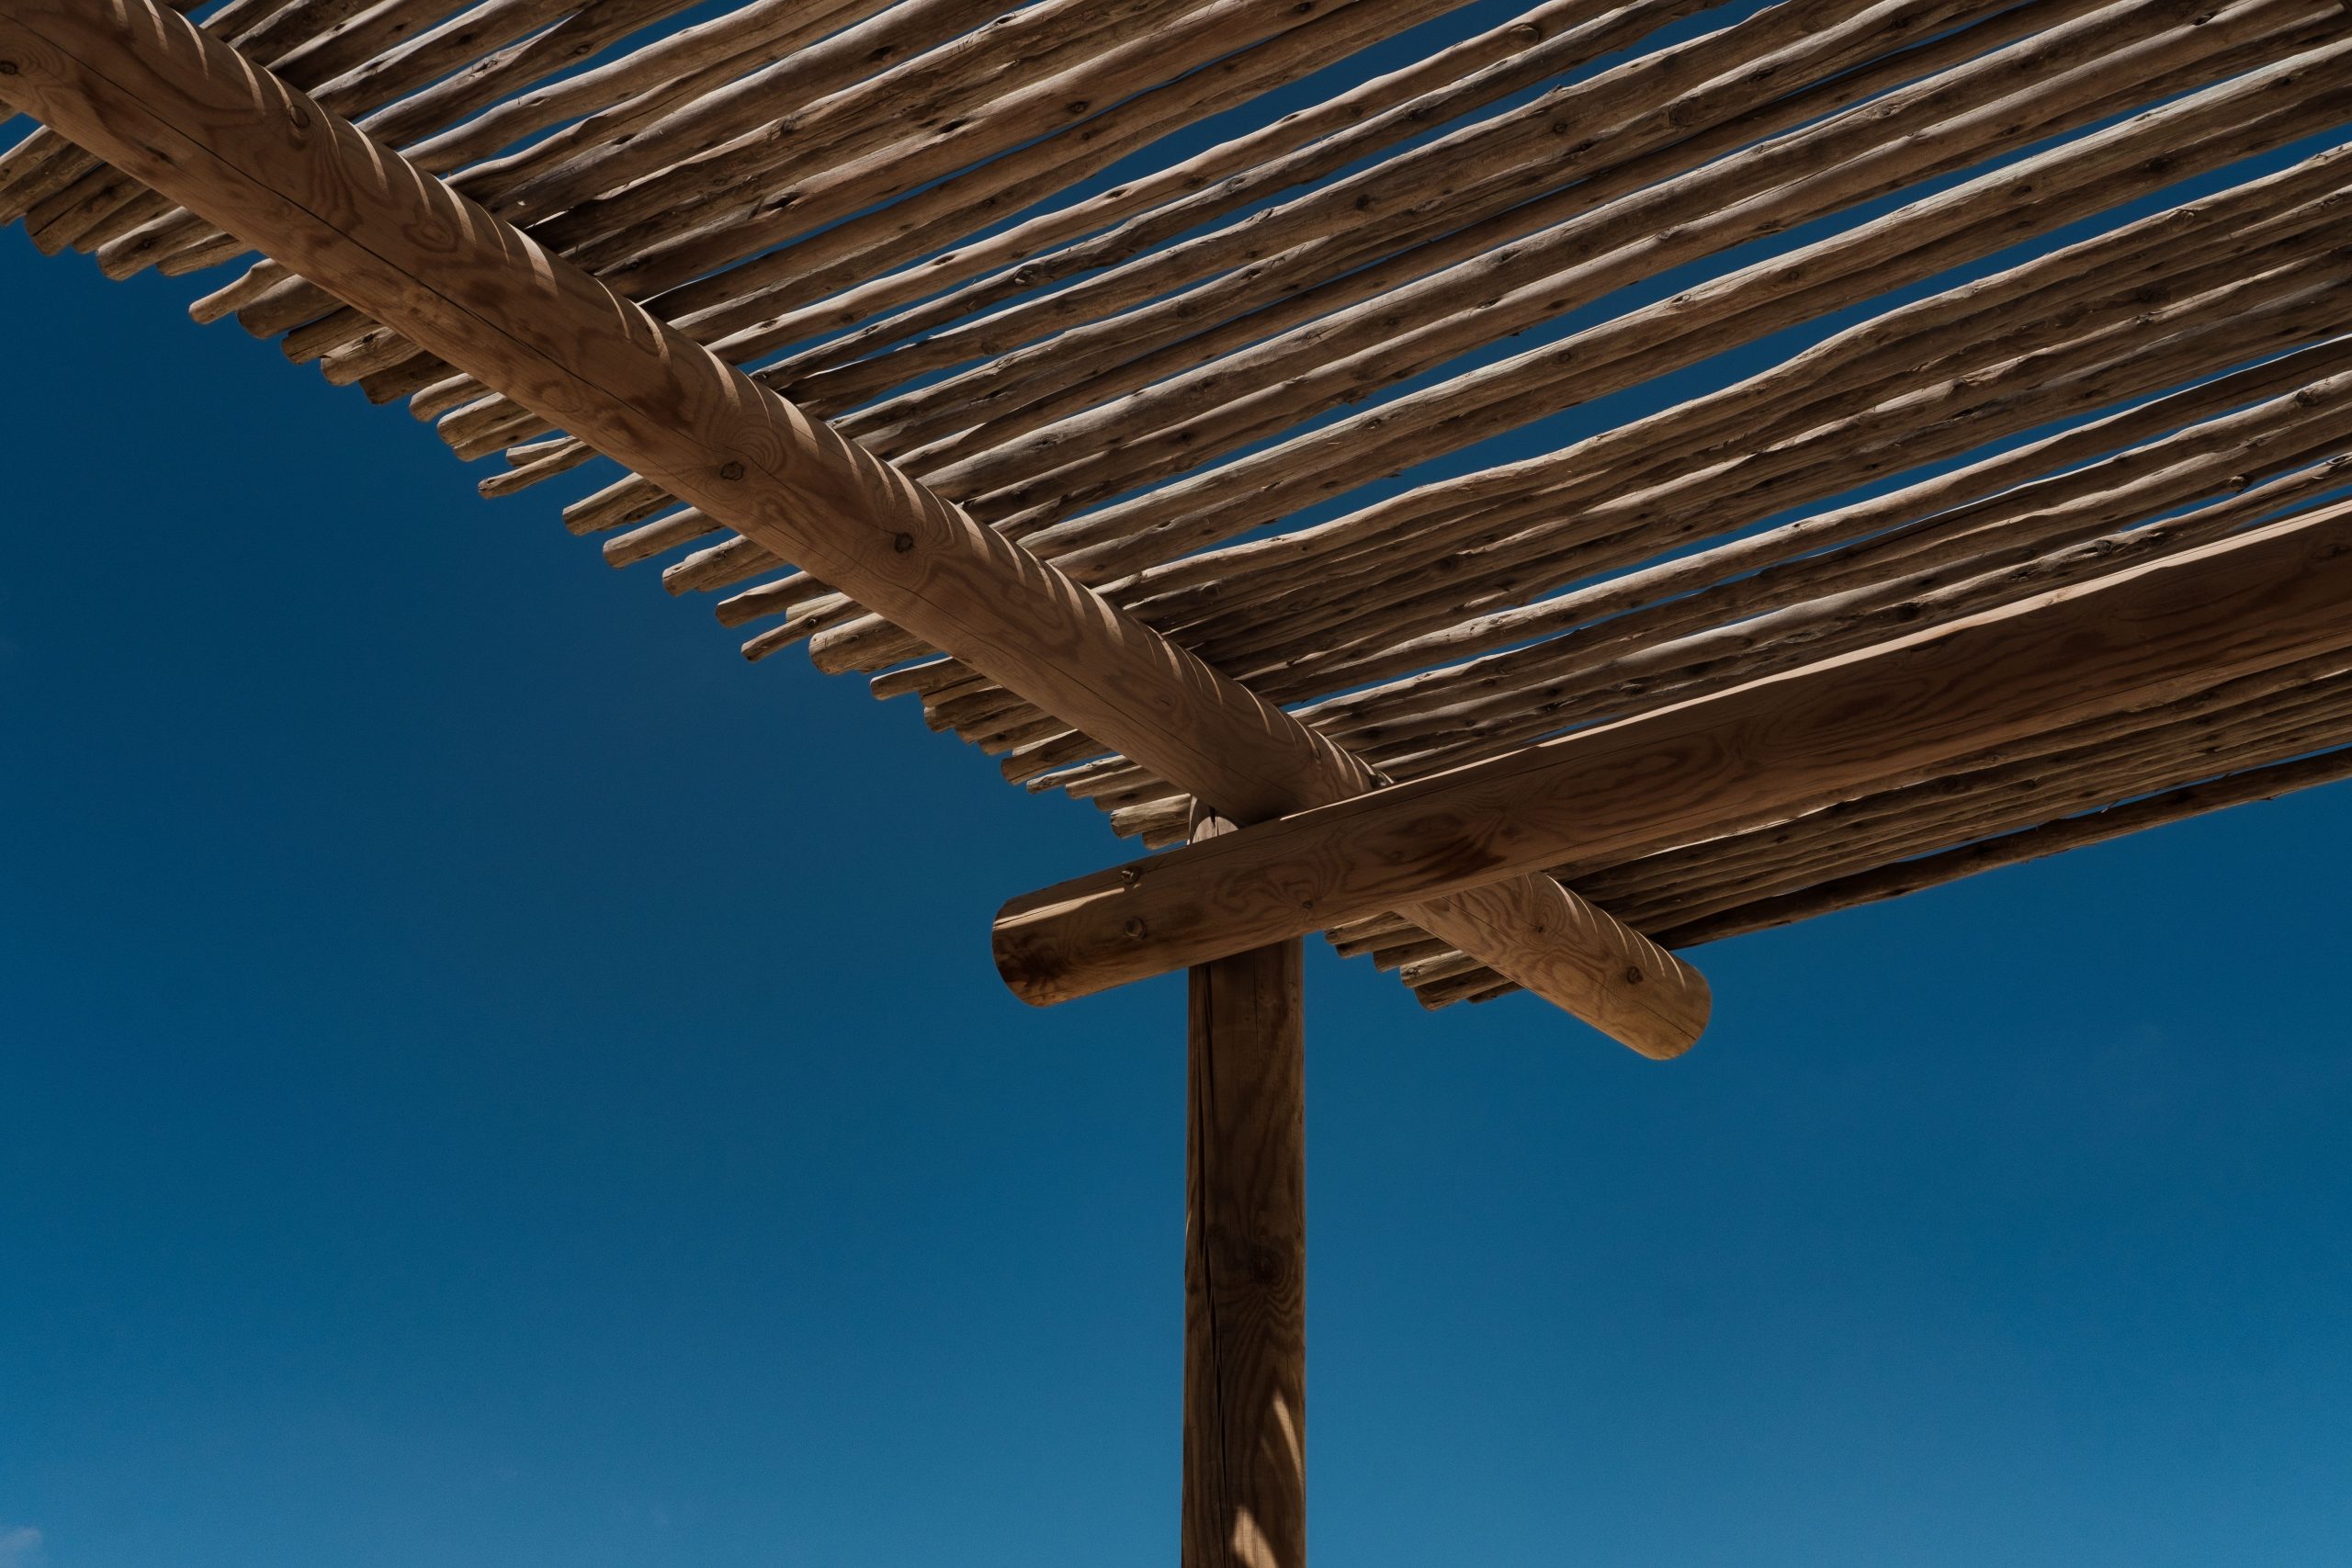
“The single most important element here is the dappled light.”
The entire purpose of this structure isn’t to create dense, total shade, but to filter the sunlight in a way that mimics the feeling of being under a mature tree. It’s about creating an atmosphere. If you were to replace the branch canopy with solid wood or fabric, you would lose that magical, shifting pattern of light and shadow on the ground below. That filtered light is what makes the space feel alive, natural, and deeply relaxing. It’s an experience, not just a function.
12. Install a Dark Triangular Sail Over a Driveway
Before you commit to a permanent shade sail over your driveway, run through this quick checklist to avoid common headaches:
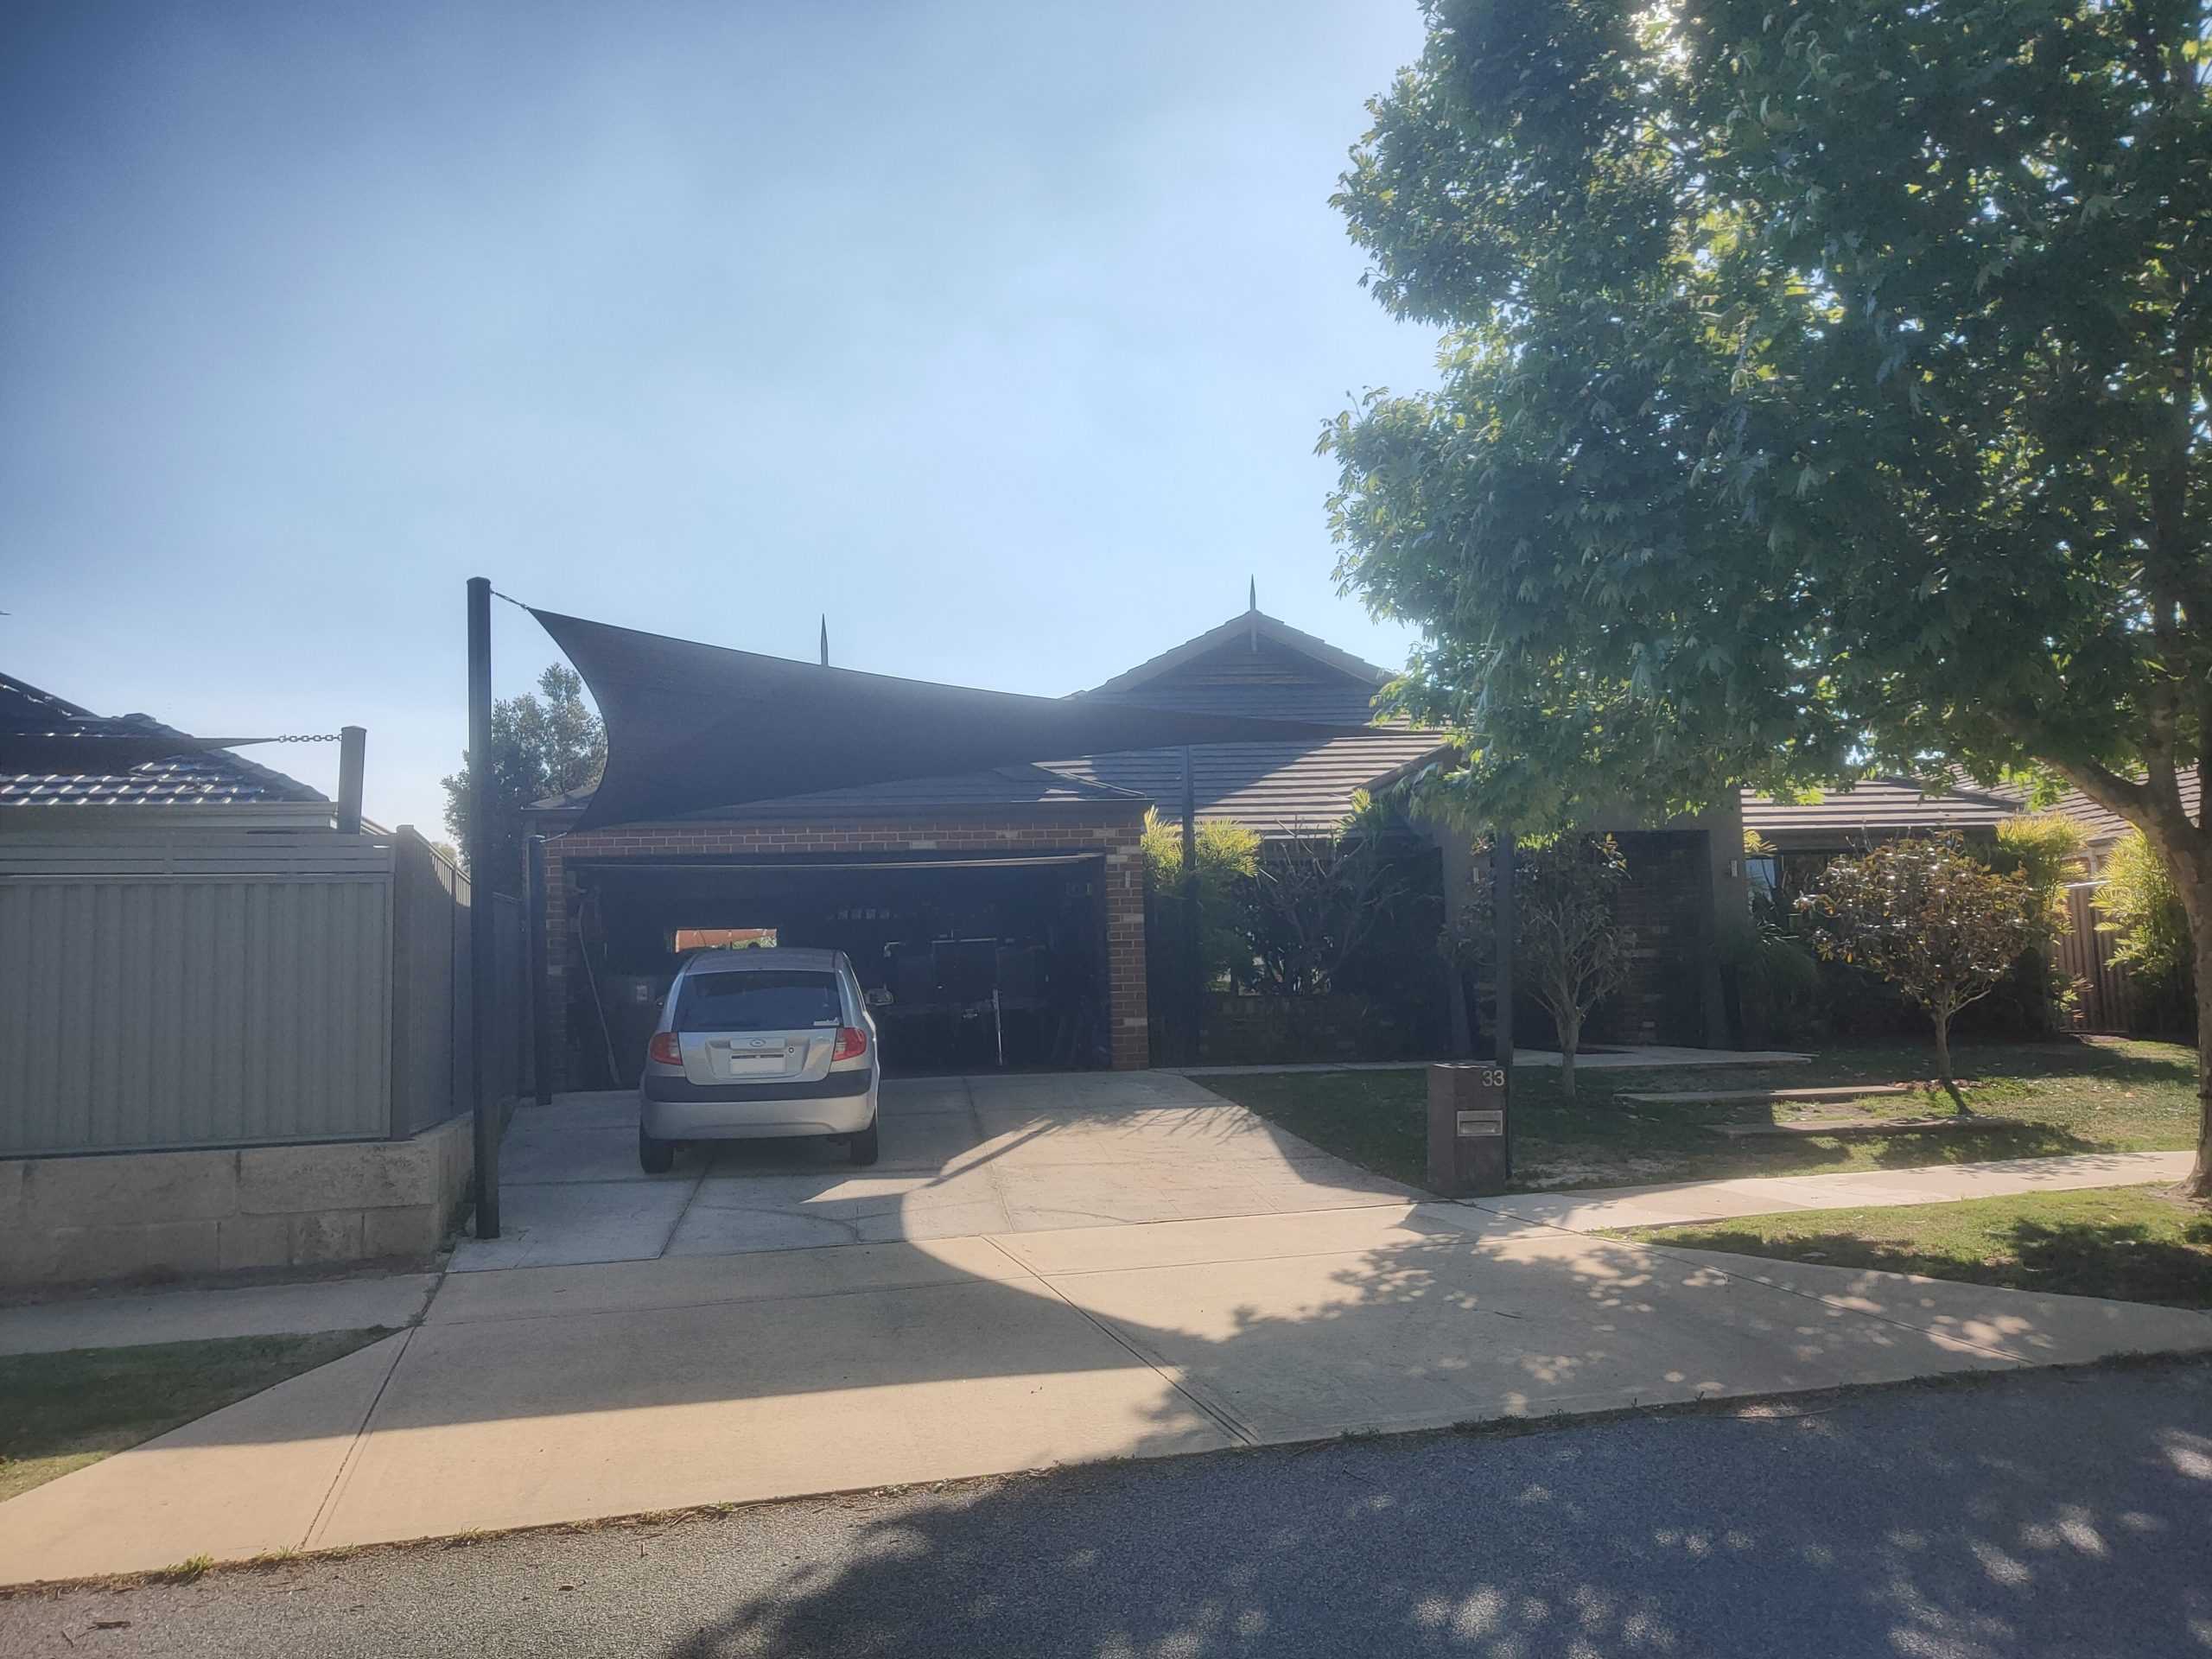
“Check Local Ordinances: Does your city or HOA have rules about ‘permanent structures’ in a front yard or over a driveway?”
Get approval *before* you buy anything.Map Underground Utilities: You’ll be digging deep footings for the posts. Call 811 (the national ‘call before you dig’ number) to have all underground utility lines marked. Hitting a water or gas line is a very bad day.Measure Vehicle Clearance: Measure the height of your tallest vehicle (including any roof racks). Ensure the lowest point of the sail will be at least 1-2 feet higher than that to avoid any accidental collisions.Confirm Anchor Points: Are you attaching to the house? Make sure you can locate structural studs or headers, not just screw into siding or brick veneer. If using posts, plan their exact location.
A driveway shade sail needs to be sized appropriately not just for the car, but for the scale of the house. For a single-story home like this one, the sail should feel substantial but not overpowering. The highest point of the sail should ideally not exceed the roofline of the house to keep things visually balanced. The anchor points on the ground should be set wide enough to allow for easy maneuvering of a car. You’ll want at least 12-14 feet of width for a single car bay. A double-wide driveway could accommodate two overlapping sails for a more dynamic look, similar to the patio in Idea #8.
13. A Simple Grey Mesh Canopy for a Small Balcony
When shading a small space like a balcony, installing the shade on a diagonal is a brilliant trick. By running the canopy from one corner of the railing to the opposite corner of the building wall, you create the longest possible shade path. This provides more usable shaded time throughout the day as the sun moves across the sky. It also creates a dynamic, interesting angle that makes the small space feel more thoughtfully designed and less like a box. It’s a simple way to maximize both function and style without adding any extra materials.
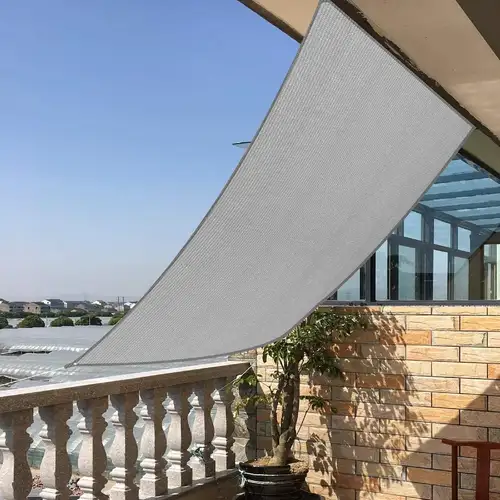
“A woven mesh fabric like this is fantastic for providing shade and a sense of privacy while still allowing for air circulation—a must for a potentially stuffy balcony.”
However, ‘water-resistant’ is not the same as ‘waterproof.’ During a steady rain, water will drip through the mesh. This means any furniture or cushions underneath will get wet. It also means you can’t rely on it to keep the balcony floor completely dry. If you need true rain protection, you’ll have to opt for a solid, waterproof fabric or a more permanent awning structure, but you will sacrifice the breezy quality of the mesh.
14. Inject Vibrancy with Orange Cushions Under Beige Sails
This patio proves you don’t need colorful sails to make a big statement. The formula here is about balance: 70% calm neutrals + 30% high-energy accent color. The beige sails, stucco walls, and dark brown furniture create a soothing, earthy base that makes up the majority of the visual space. Then, the punchy orange cushions are introduced as a powerful 30% accent. This high-contrast approach makes the orange feel incredibly vibrant and intentional. If the ratio were 50/50, it might feel chaotic. The neutral backdrop is what gives the orange its power.
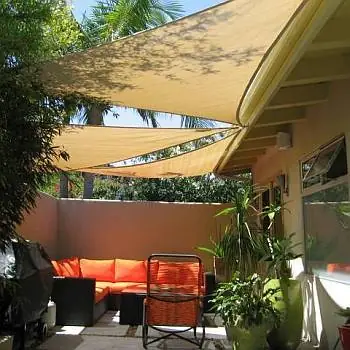
“An L-shaped outdoor sectional can be a big investment, often running $2,000 or more.”
You can achieve this exact same color-pop vibe for much less. Start with a basic, affordable outdoor sofa from IKEA or Walmart, or even a second-hand find from Facebook Marketplace (for around $200-$500). The magic is in the cushions. Instead of buying the expensive, brand-name orange cushions, search for outdoor cushion covers on Amazon or at stores like At Home. You can find vibrant, weather-resistant covers for a fraction of the price and simply slip them over the basic cushions that came with your sofa.
15. A Cheerful Striped Awning for a Small, Private Balcony
This small balcony feels like a charming European retreat, and it’s all thanks to a smart use of pattern and texture. The bold green and yellow stripes of the awning create a playful, cheerful focal point and immediately set a sunny, relaxed tone. This pattern is beautifully balanced by the rough, tactile texture of the stucco wall and the organic feel of the mosaic floor tiles. The ornate metal railing adds a touch of classic detail that ties it all together. It’s a small space, but every element has a distinct character, and they all work in harmony.
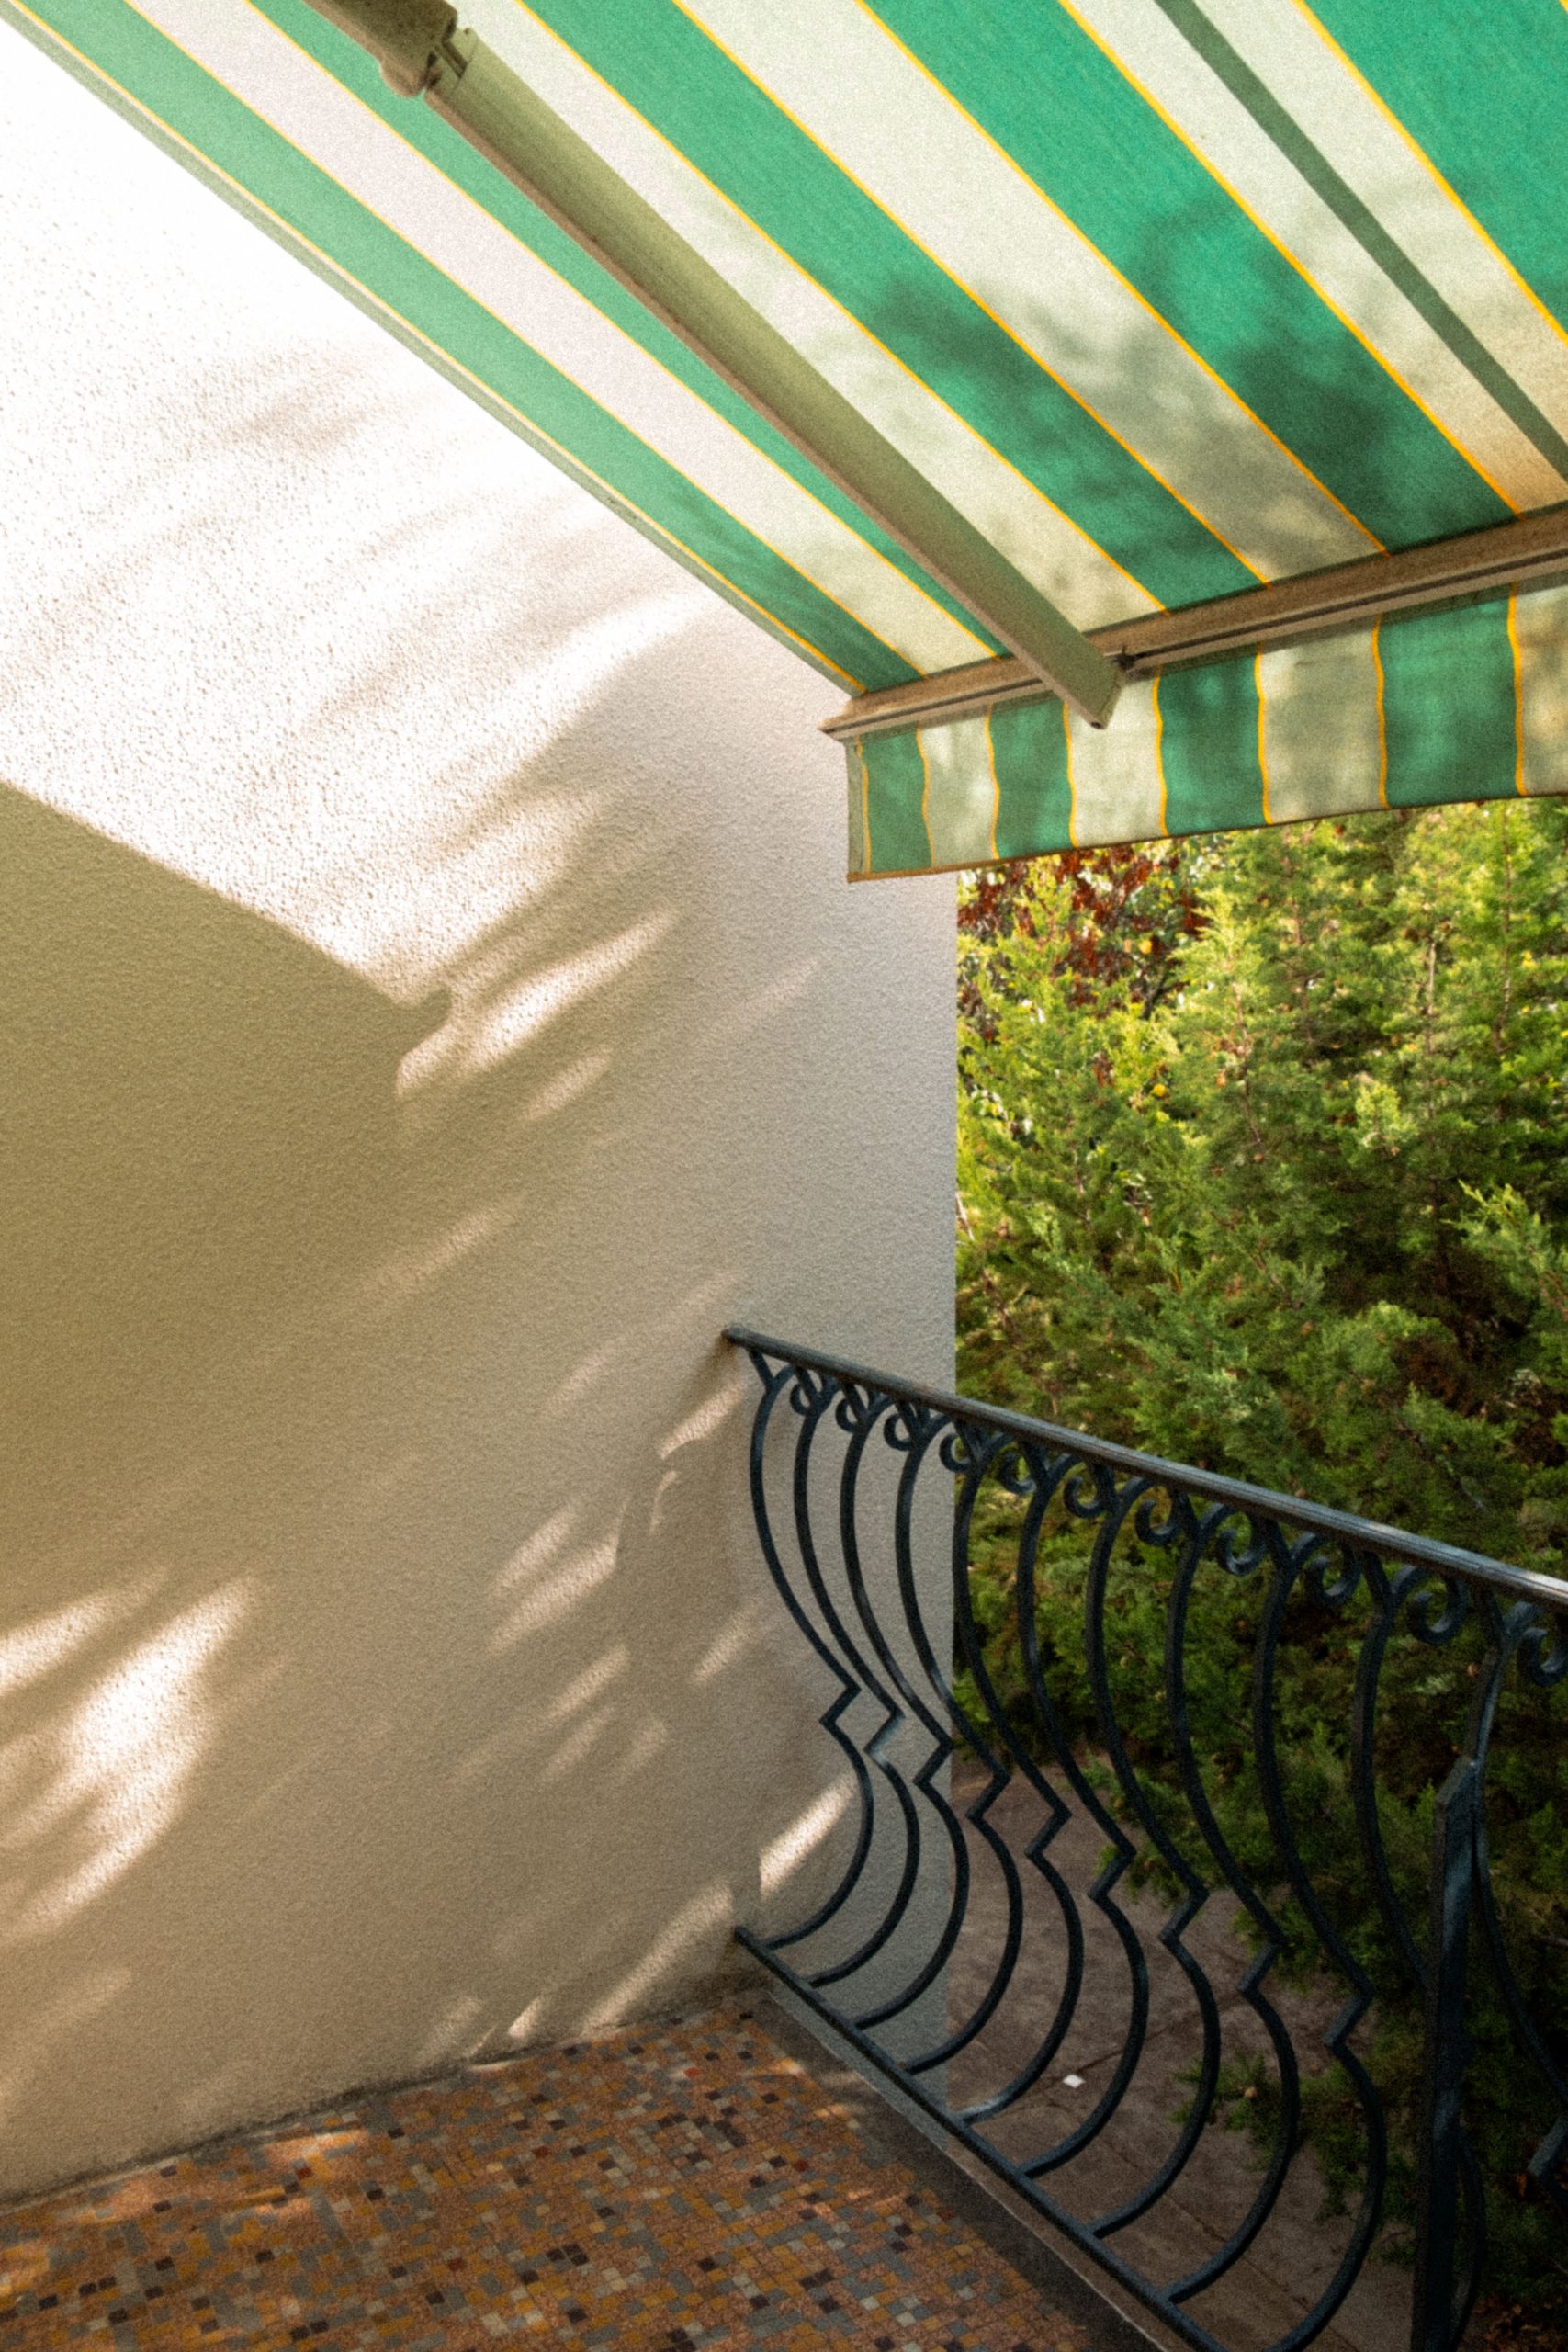
“The stripes are the heart of this design.”
Without them, you’d have a simple, functional awning. But with the stripes, you have *style*. They inject personality, energy, and a touch of vintage charm into what could be a very plain space. The pattern also does something clever: the vertical-feeling stripes draw the eye, creating a sense of height and importance, making the awning feel like a deliberate, decorative feature rather than just a practical necessity. It’s the single element that transforms the balcony from a simple outdoor space into a destination.
16. A Cozy Deck Nook with a Gray Sail and Wicker Sectional
When selecting a color for your shade sail, consider the color of the light it will cast. A gray sail, like this one, is an excellent choice because it provides neutral-toned shade. It simply reduces the intensity of the sunlight without altering the colors of your furniture, deck, or plants underneath. In contrast, a green sail can cast a sickly green light, and a red sail can make everything look alarmingly pink. For the most natural-looking and versatile shade, stick with neutrals like gray, beige, or white. The light will feel much more pleasant and natural.
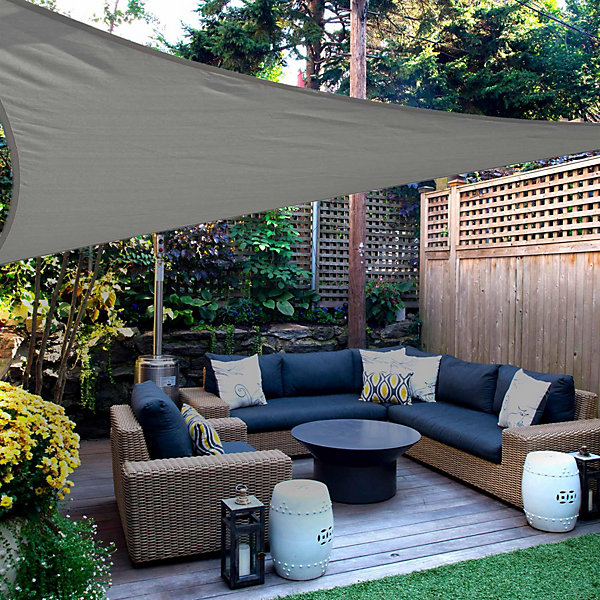
“A wooden deck under a shade sail is a beautiful combination, but it creates a specific maintenance issue: uneven weathering.”
The portion of your deck that is constantly shaded by the sail will retain its color and finish much longer than the parts exposed to direct sun and rain. Over a few years, this can create a very noticeable ‘shadow’ line on your deck. To combat this, you’ll need to be diligent about cleaning and re-staining or sealing the *entire* deck every 1-2 years to maintain a consistent finish. It’s a trade-off for having that lovely, protected nook.
17. Industrial-Modern Shade Using Yellow Sails and a Black Frame
This look is all about the custom metal structure, which is where the bulk of the cost lies. This isn’t a simple DIY kit; it requires professional metal fabrication and installation. The sails themselves are a smaller part of the overall budget.
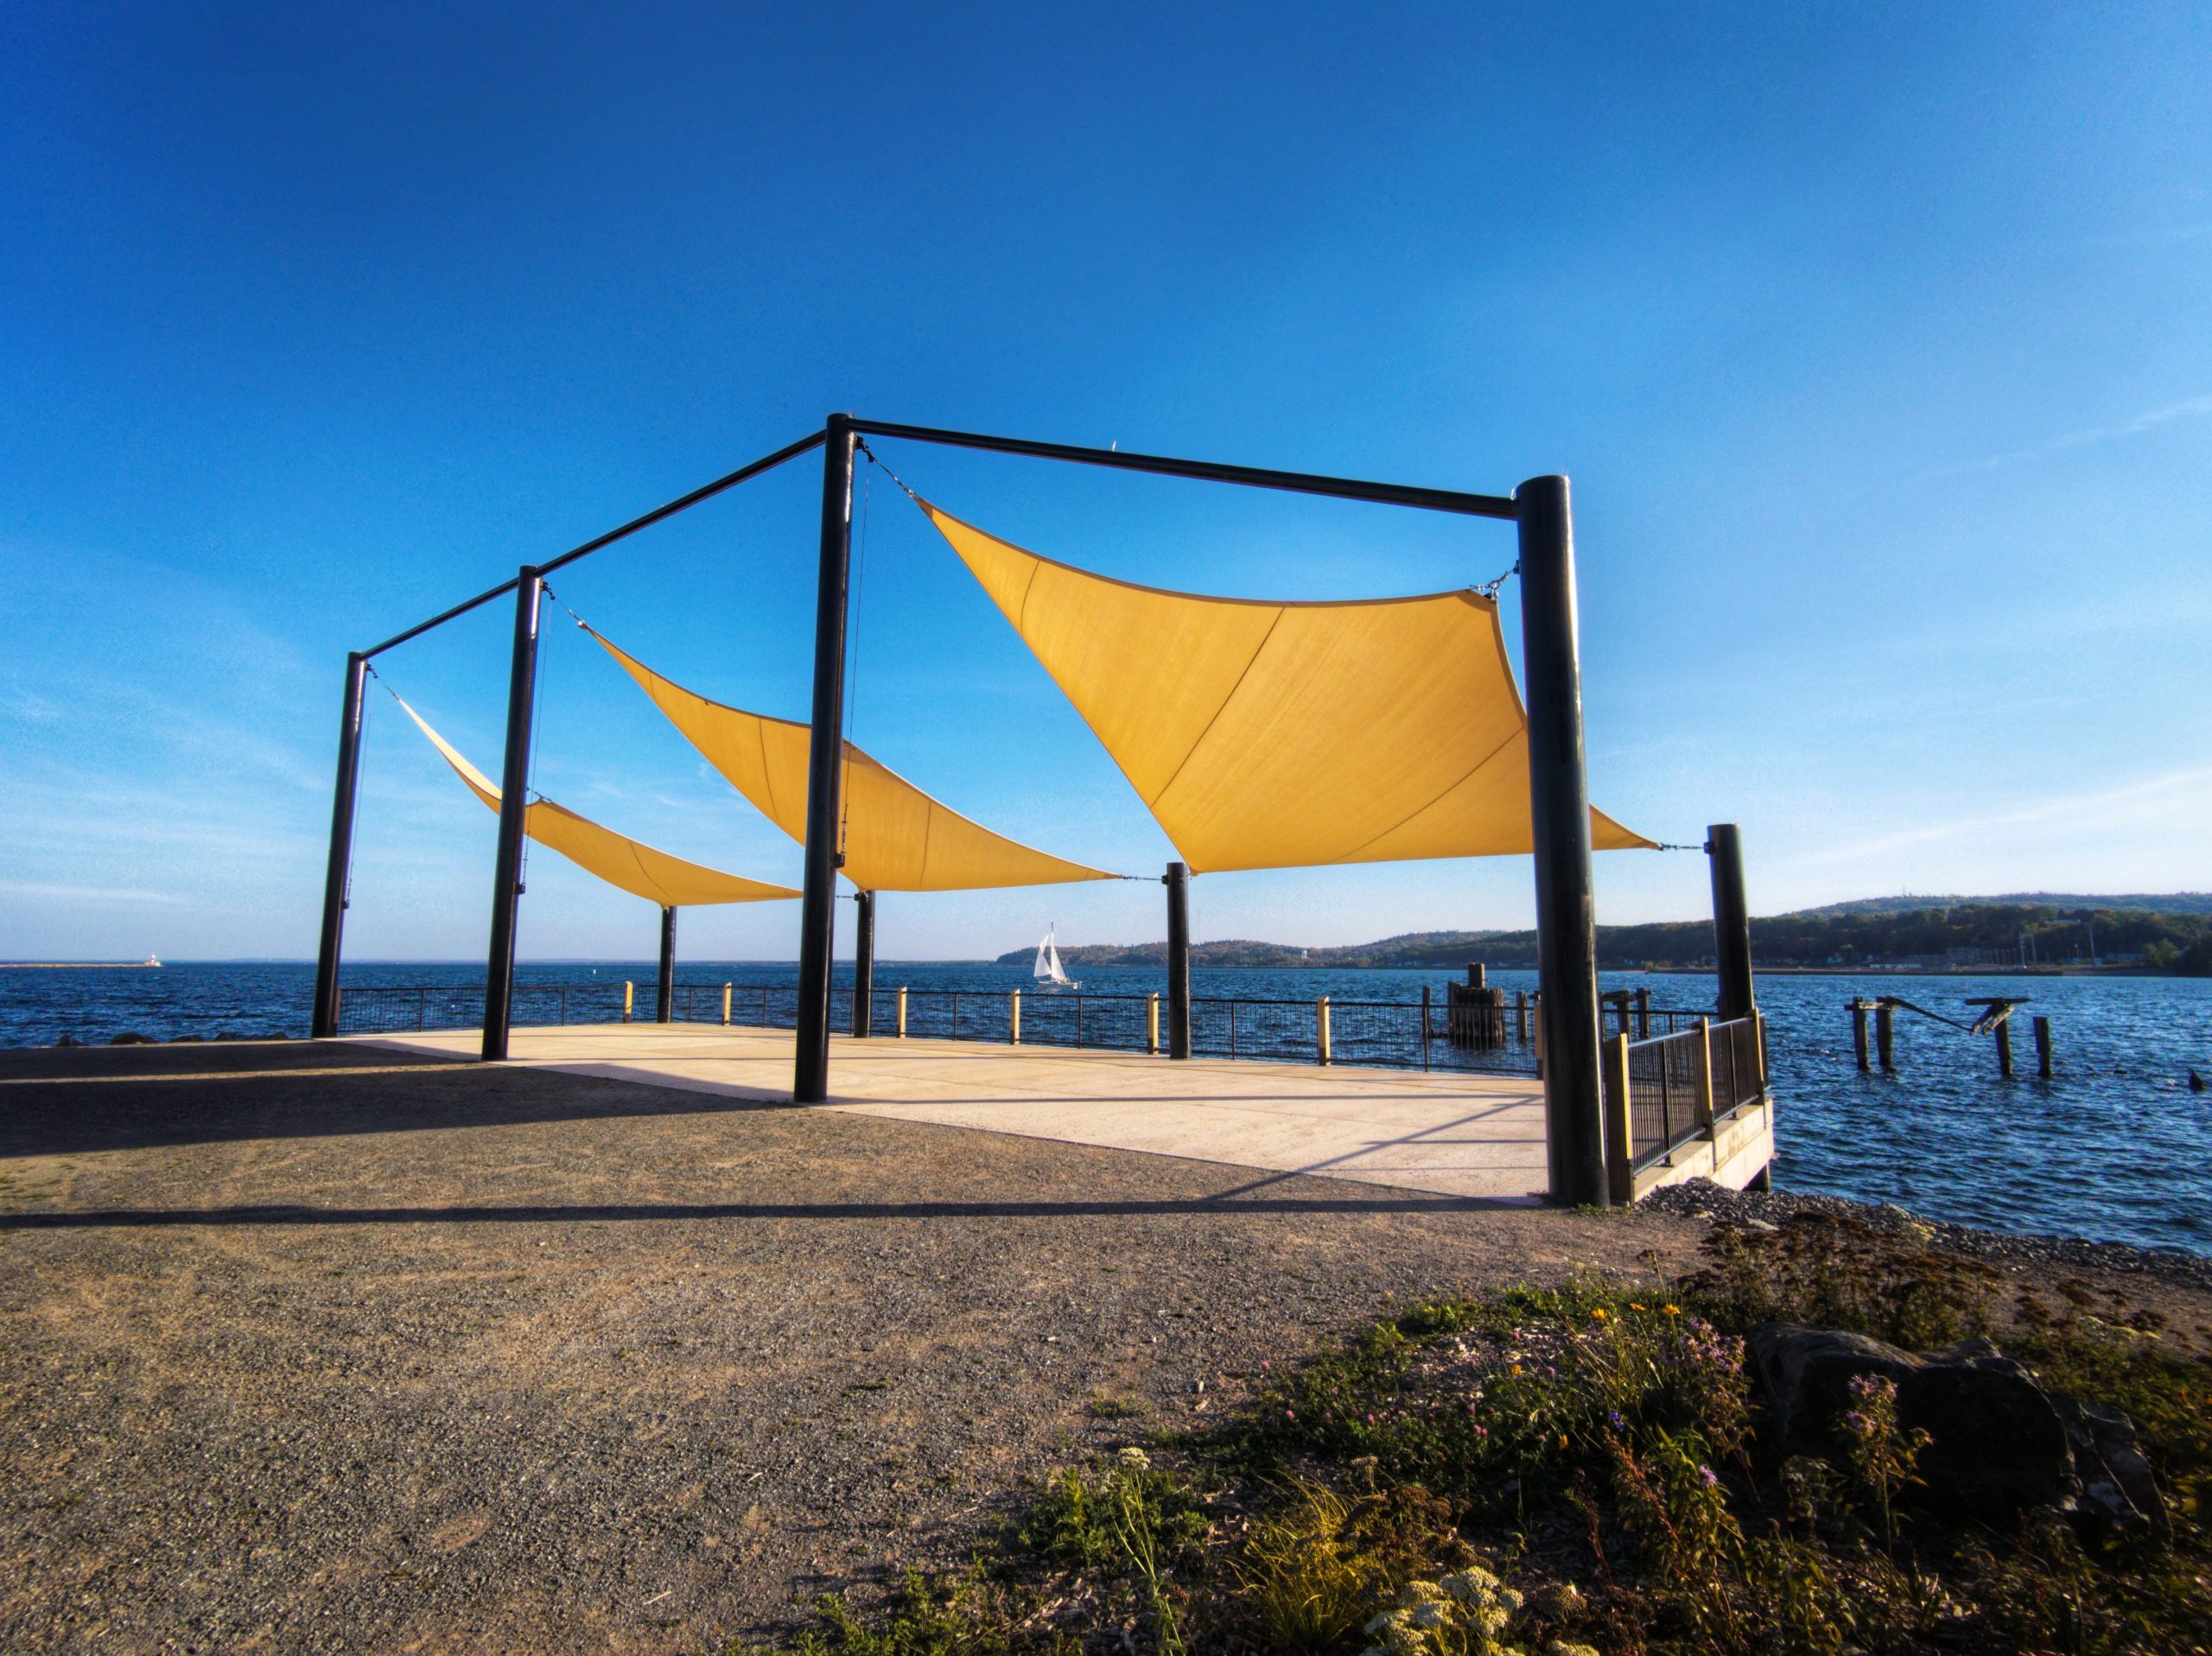
“Metal Structure (Fabrication & Installation): $5,000 – $15,000+Shade Sails (Multiple, Custom Sized): $1,000 – $2,500Paved Platform/Decking: $3,000 – $8,000Railing: $1,500 – $4,000TOTAL: $10,500 – $29,500+Budget Alternative: Mimic the color scheme with a standard black metal pergola kit (~$800) and ready-made yellow triangular sails (~$150) from Amazon.”
You’ll get the same industrial color contrast for a tiny fraction of the cost.
A rigid, architectural structure like this is best suited for large, open spaces like a commercial plaza, a public park, or a very expansive waterfront property. The scale is intentionally monumental. To have this kind of impact, the structure needs to be at least 15-20 feet tall and span a minimum of 40-50 feet. In a typical residential backyard, a structure this large and industrial would be completely overwhelming and out of place. It’s a great source of inspiration for color and form, but the scale needs to be adapted dramatically for a home setting. Compare this to the more residential scale of Idea #25.
18. A Curved Wooden Pergola with an Outdoor Fireplace
Those hanging blue glass lanterns add a touch of magic. Here’s how to DIY something similar for your own pergola (Time: 1 hour. Cost: $30-$60).
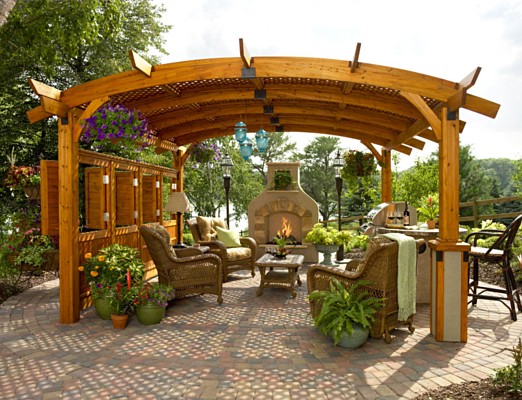
“Source Your Lanterns: Find solar-powered lanterns or battery-operated LED lanterns with a decorative colored glass casing.”
Look at World Market, Pier 1, or even Amazon for options.Choose Your Hanger: Get decorative chain or natural jute rope, depending on the look you want. You’ll also need some S-hooks or screw-in hooks.Measure and Cut: Decide how low you want the lanterns to hang. Cut your chains or ropes to varying lengths for a more dynamic, staggered look.Install Hooks: Securely screw your hooks into the underside of the pergola beams. Make sure they are screwed into solid wood.Hang and Arrange: Use the S-hooks to attach the chains to the lanterns and the ceiling hooks. Step back and adjust the heights and spacing until it looks just right.
A stunning custom wooden structure like this is a serious piece of craftsmanship, and it comes with a serious price tag. A curved pergola involves complex cuts and joinery that go far beyond a standard DIY kit. You’re looking at a project that will likely cost between $10,000 and $25,000+ when done by a skilled carpenter or landscape construction company. It’s a permanent, high-impact architectural feature, not a simple weekend project. Be realistic about the budget and skill level required before falling head-over-heels for this kind of bespoke woodworking.
19. A Black Metal Pergola with a Draped Fabric Canopy
This setup masterfully combines hard and soft elements. The black metal pergola provides a strong, rigid, and modern frame. It’s very architectural and linear. But the draped beige fabric canopy introduces a soft, flowing counterpoint. This contrast is what makes it so appealing—it’s structured but relaxed at the same time. The fabric softens the hard lines of the metal and creates a gentle, diffused light underneath. The blue and white patterned rug further adds to this layering of hard (deck) and soft (rug), making the space feel incredibly complete and comfortable.
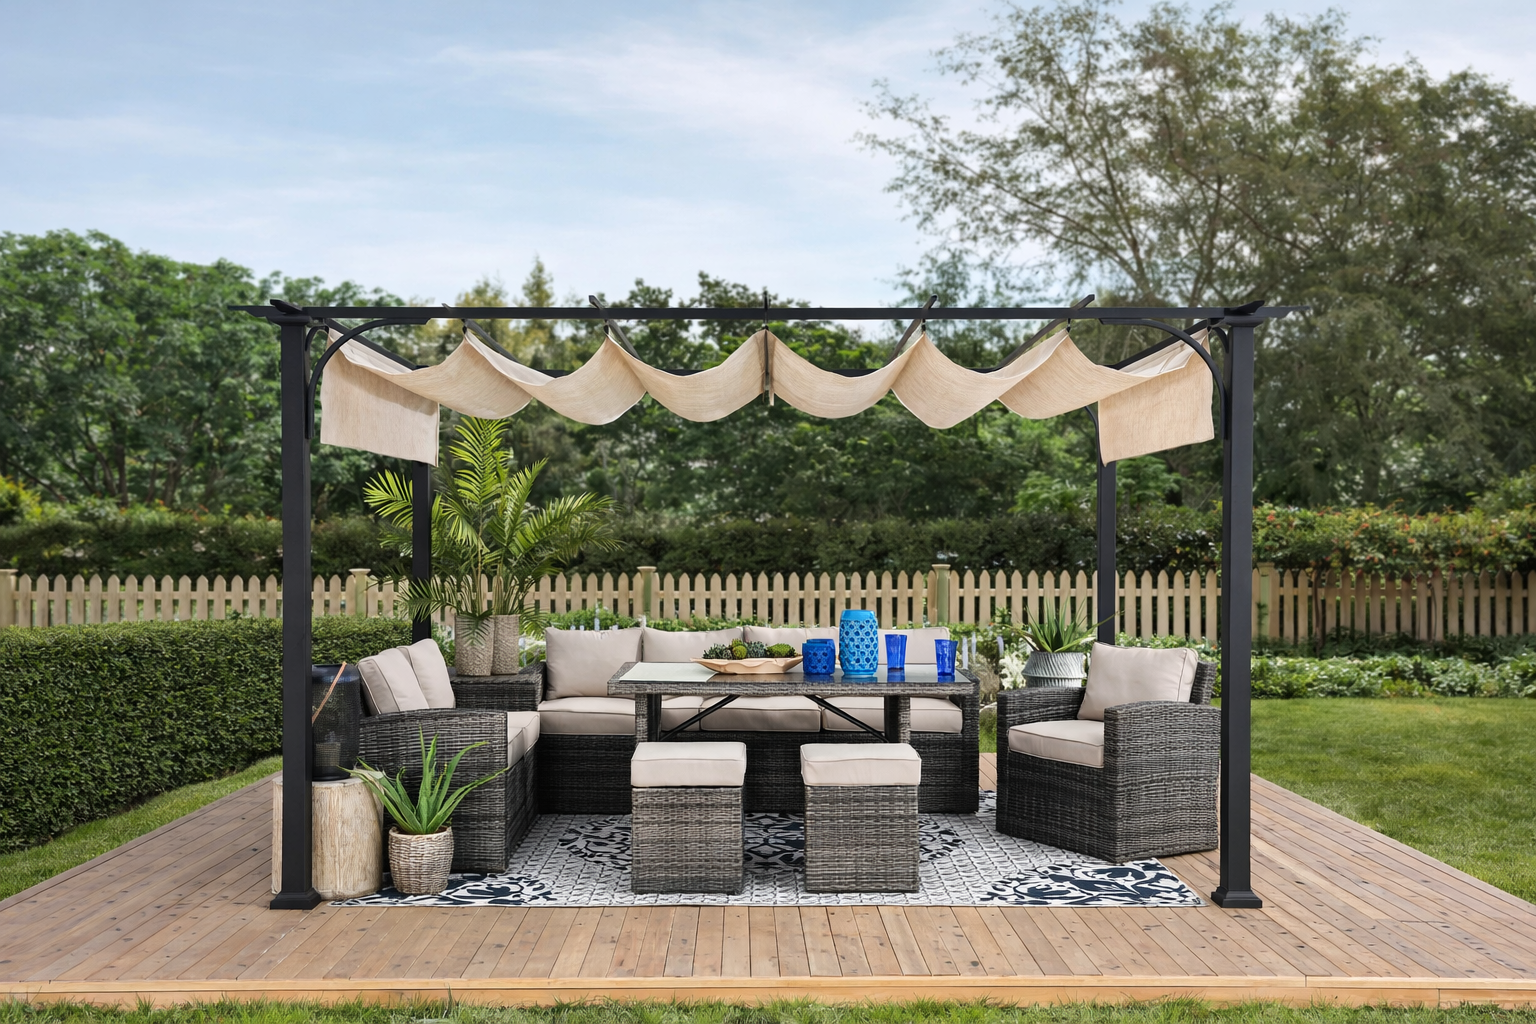
“A high-end metal pergola with a custom sliding canopy can be pricey.”
You can get this exact look with a much smaller budget. Start with a basic black metal pergola kit, which you can find online or at big-box stores for $500-$900. Instead of a fancy integrated canopy, buy several large, inexpensive outdoor fabric curtain panels (like those from IKEA or Target) in a weather-resistant fabric. Use simple curtain wire and clips to string them along the top beams. This gives you the same soft, draped effect and allows you to slide them open and closed for a total cost of under $1,000.
20. A Classic White Pergola Over a Tiered Stone Patio
The single element that truly elevates this backyard is the tiered stone patio. The white pergola is beautiful, but it’s the change in levels that adds dimension, interest, and a sense of journey to the space. It separates the dining area from the lower lounge spots, creating distinct ‘rooms’ without any walls. This use of vertical space makes the entire yard feel larger and more thoughtfully designed. Without the tiers, it would be a nice, flat patio. With them, it becomes a multi-level outdoor living experience. It’s a landscape architecture trick that makes a huge impact.
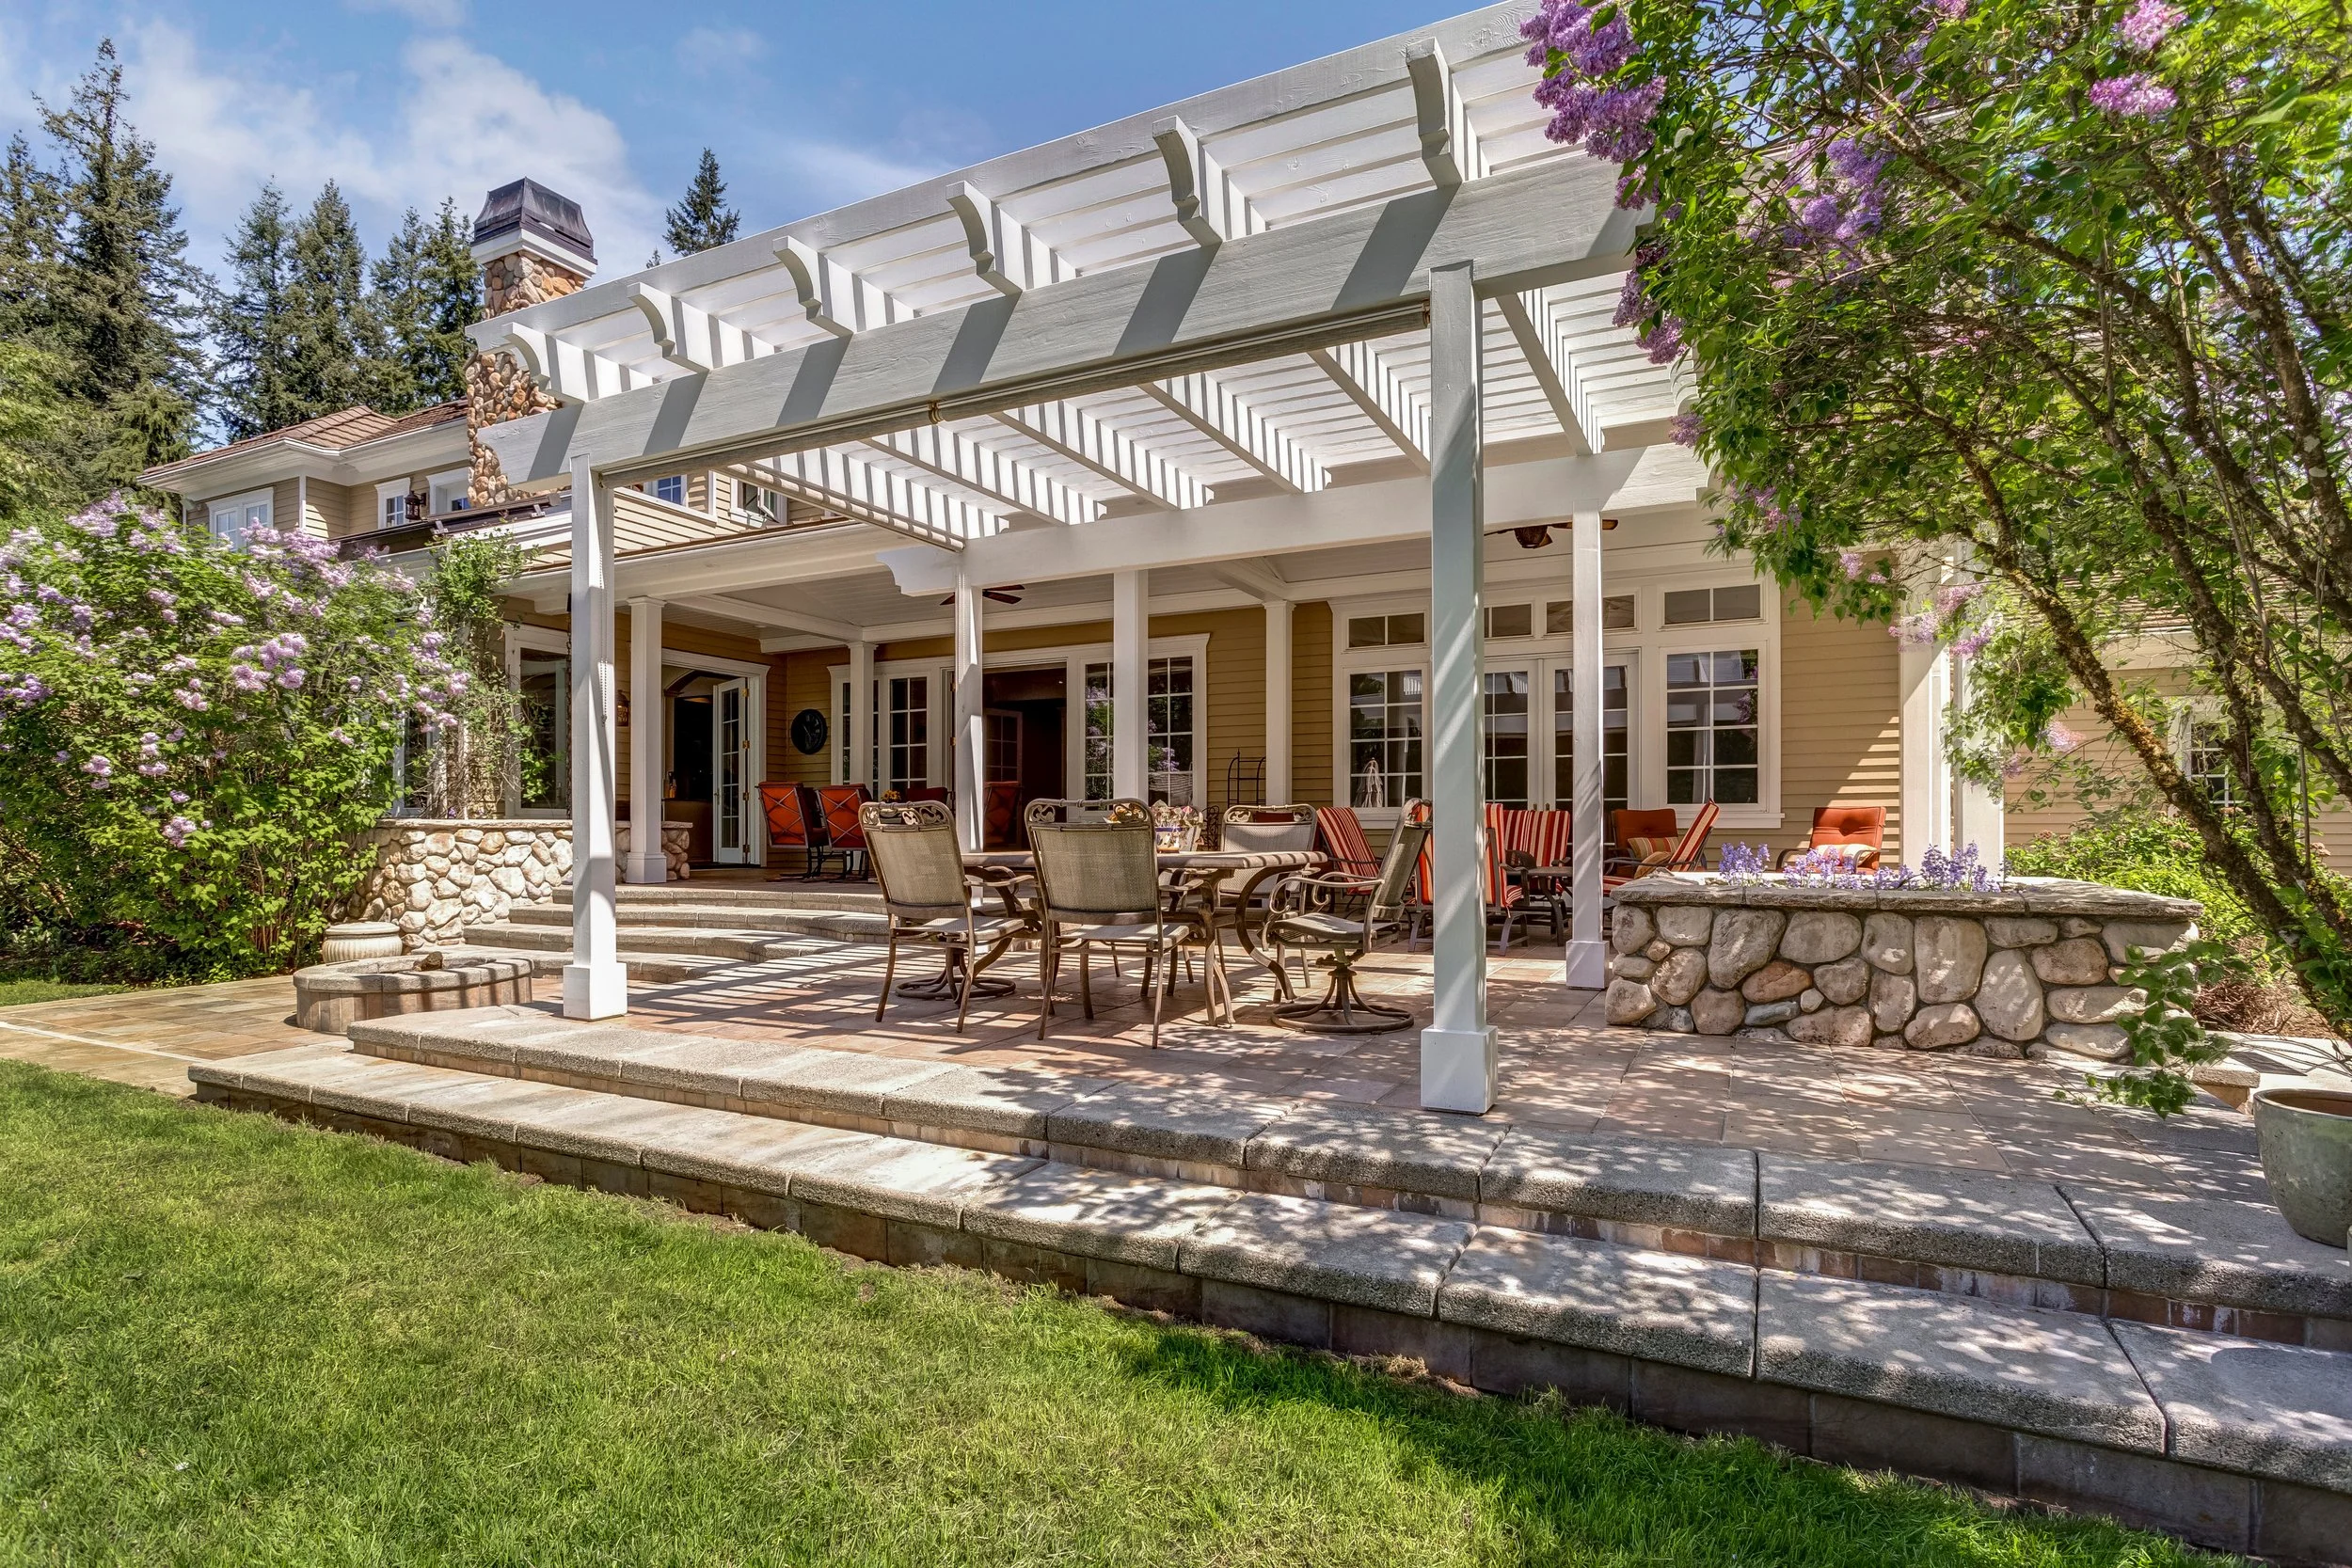
“When painting a wooden pergola, especially one that will be exposed to the elements, proper prep is more important than the paint itself.”
Do not skip the priming step. Use a high-quality exterior-grade oil-based or shellac-based primer. This will seal the wood, prevent tannins from the wood (especially on cedar or redwood) from bleeding through and staining your white paint, and provide a much stronger bond for your topcoat. Apply two coats of high-quality exterior latex paint over the primer for a durable finish that will last for years instead of peeling after one season.
21. Bohemian Charm with a Macrame Fringe Patio Umbrella
This dreamy Mediterranean look is a study in restrained texture. The formula is: 40% intricate bohemian texture (the macrame), 40% clean, minimalist surfaces (the white walls and urn), and 20% rustic, raw elements (the wooden chairs and concrete floor). The macrame is the star, but it needs the smooth white surfaces to truly pop. If everything were textured, it would just be visual noise. The rustic wood and concrete ground the look and keep it from feeling too precious or delicate. It’s this balance of intricate, smooth, and raw that creates the sophisticated yet relaxed vibe.
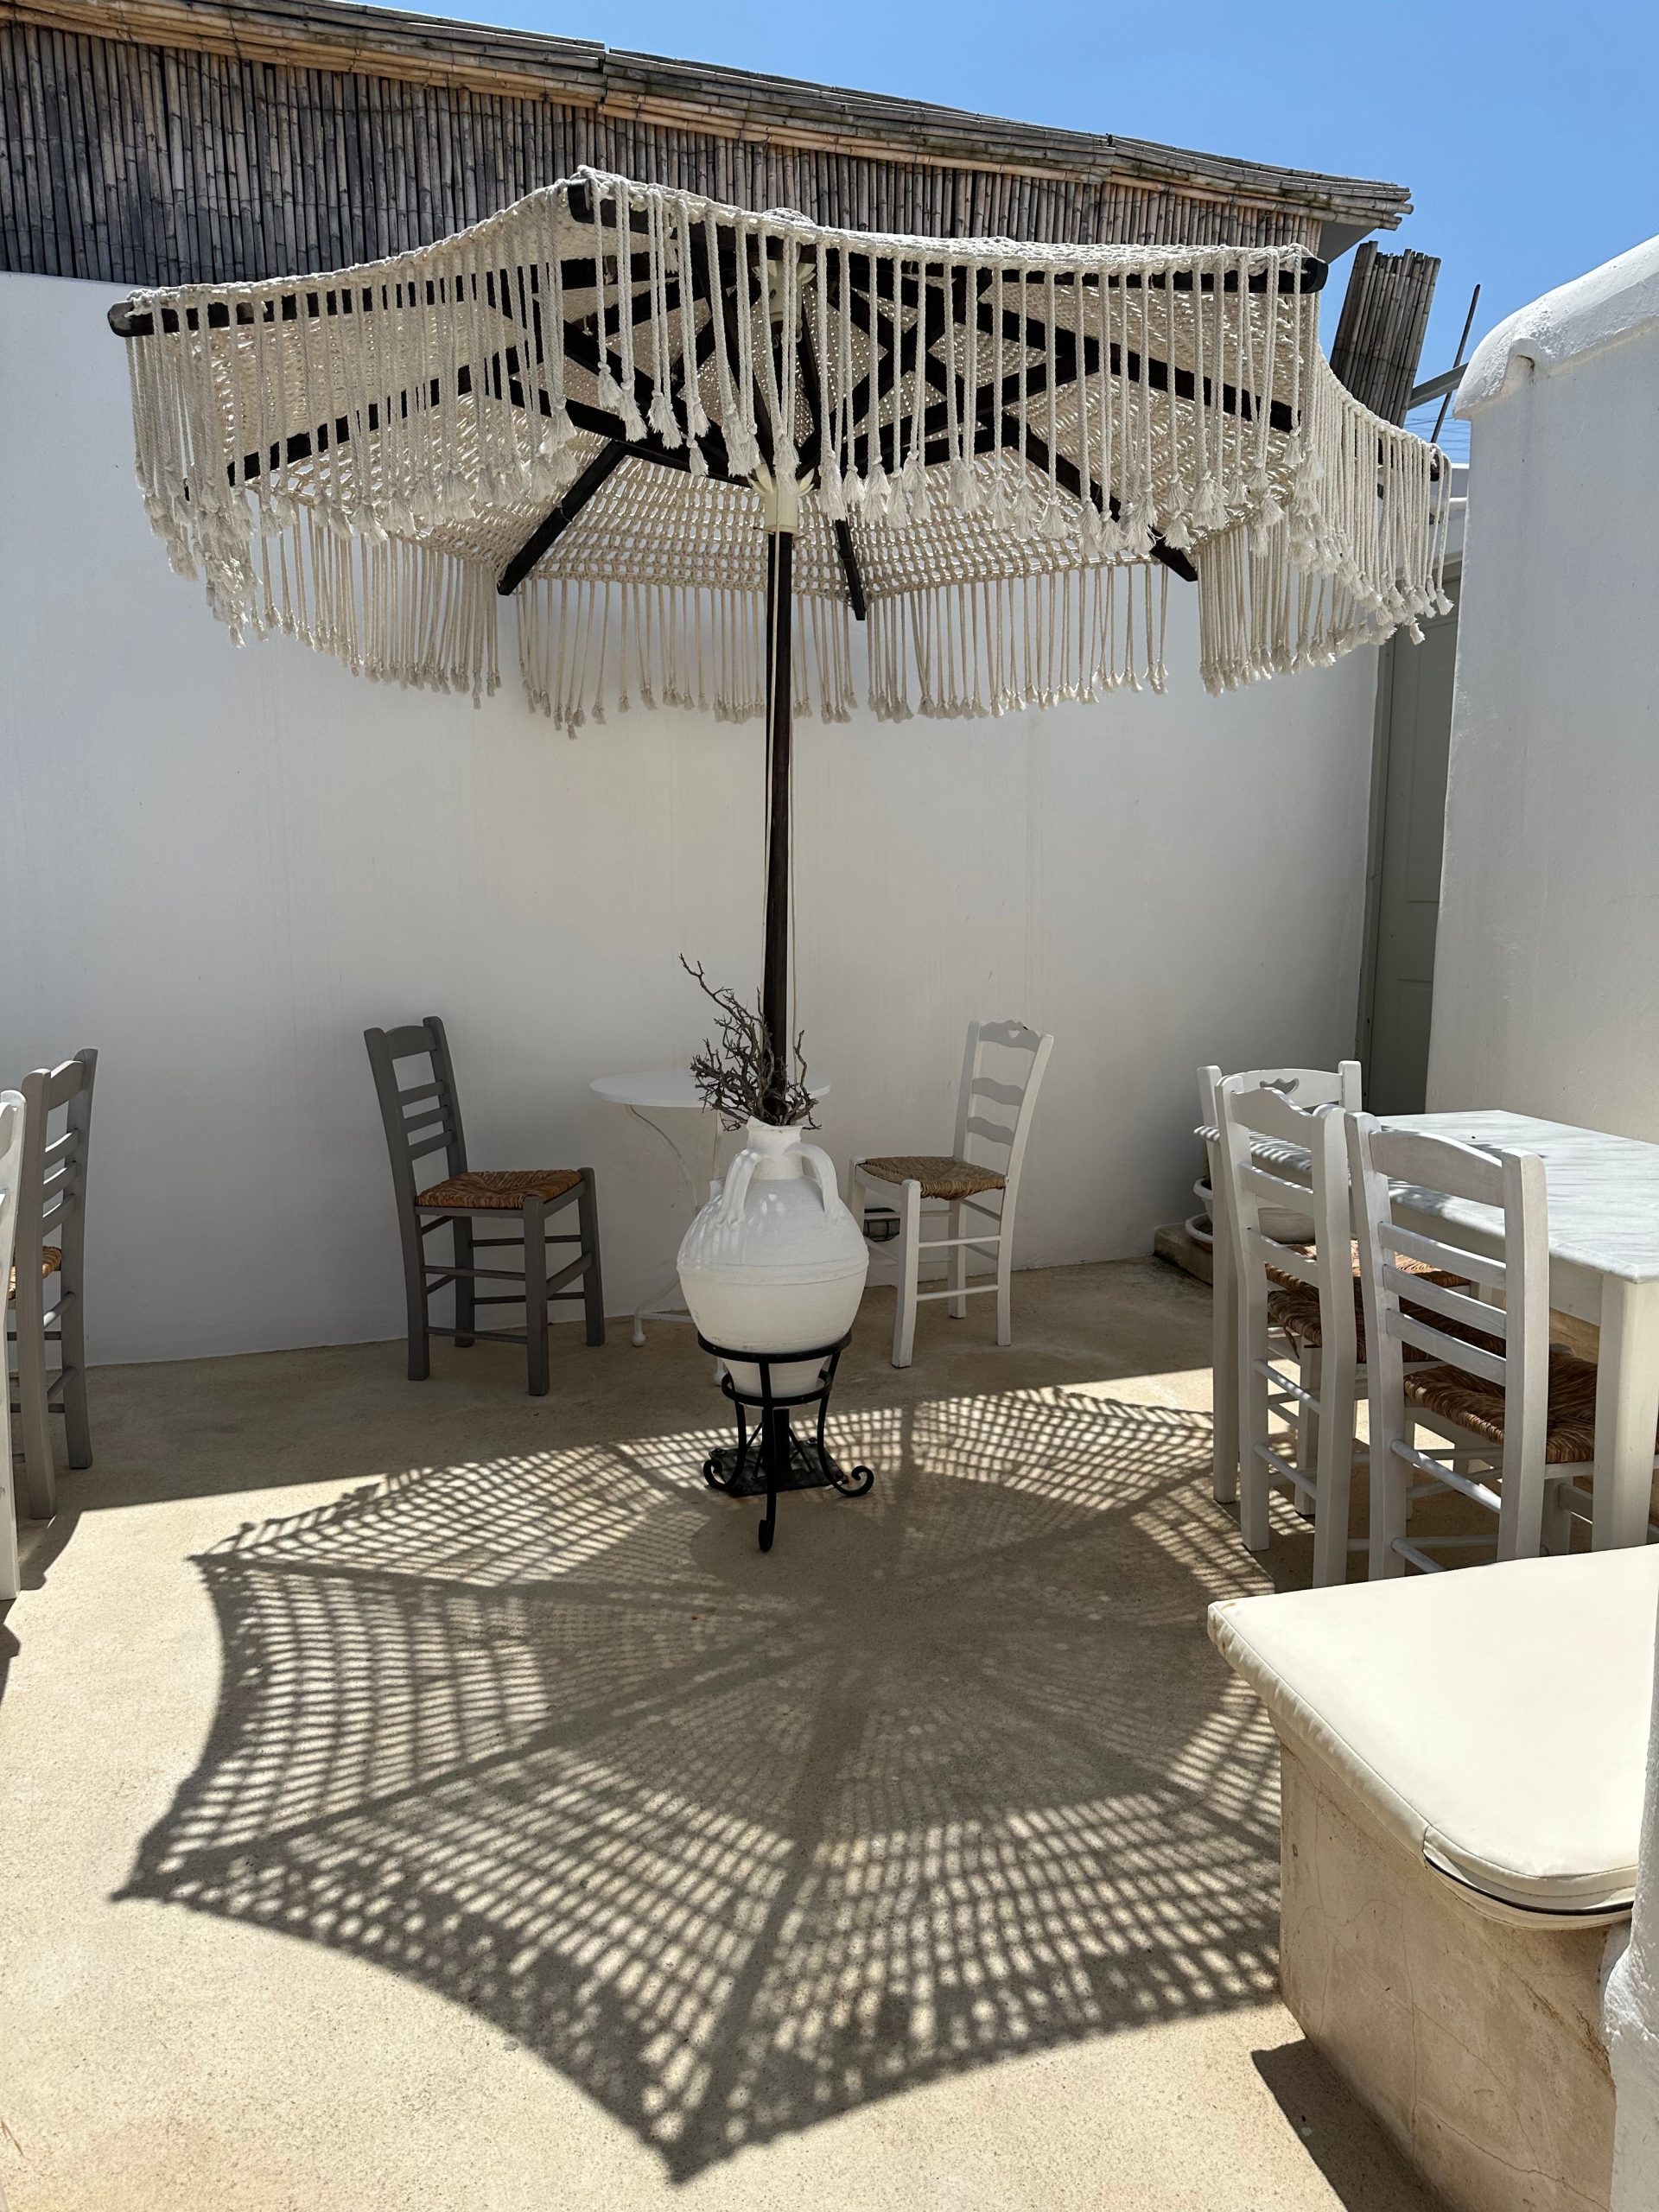
“The ‘Modern Bohemian’ or ‘Boho-Luxe’ style continues to be a dominant force on Pinterest and in design magazines.”
This umbrella is a perfect example of why. It takes a traditional craft (macrame) and applies it to a modern form (a patio umbrella) to create something new and stylish. This trend is all about mixing handmade, artisanal textures with clean lines and a neutral palette. It speaks to our desire for spaces that feel personal, collected, and unique, rather than mass-produced. It has staying power because it’s highly adaptable and focuses on texture and soulfulness over specific, fleeting patterns or colors.
22. An Aerial View of Two Overlapping Beige Sun Sails
This two-sail configuration is ideal for shading a specific, squarish zone of about 15×15 to 20×20 feet, like a fire pit area or a small dining set. The beauty of this setup is its flexibility. By using two smaller triangular sails instead of one large square one, you have more control over the shape of the shade and can create a more interesting, architectural look. This specific overlapping design works best when you have at least three anchor points—for example, two on the house and one on a dedicated post, as seen here. This is a very achievable scale for most backyards.
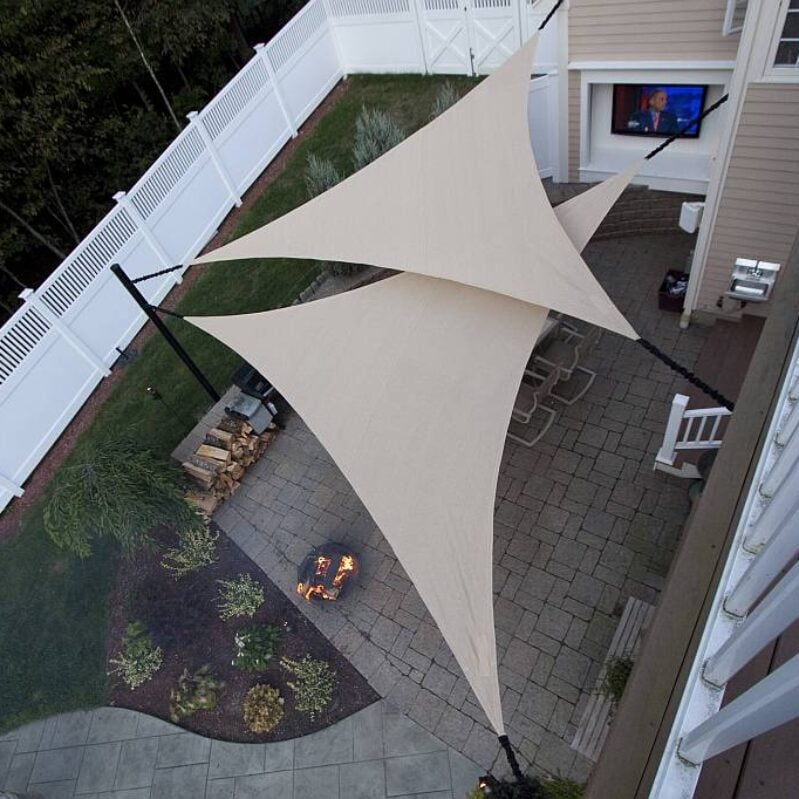
“When you see perfect, taut sails in photos, you’re not seeing the work that goes into them.”
Achieving and maintaining that tension is key. The ropes and hardware are under constant, significant force. You must use hardware specifically rated for shade sails—do not cheap out with generic ropes and hooks from the hardware store. They will stretch, rust, and fail. Also, a single, strong gust of wind can put immense stress on your anchor points. Make sure any attachments to your house are secured into structural beams or headers, not just the siding or fascia board, which can be easily ripped off.
23. Waterfront Shade with Curved Metal Frames and White Sails
This design is successful because its form echoes its function and location. The curved metal supports and flowing white sails have a distinctly nautical feel, like the sails of a ship or the wings of a seabird. This creates a strong sense of place and harmony with the waterfront setting. The repetition of the identical shade structures down the boardwalk creates a powerful rhythm and a sense of movement, guiding people along the path. The integration of the benches into the support structure is a brilliant move, making the entire piece feel like a single, unified sculpture.
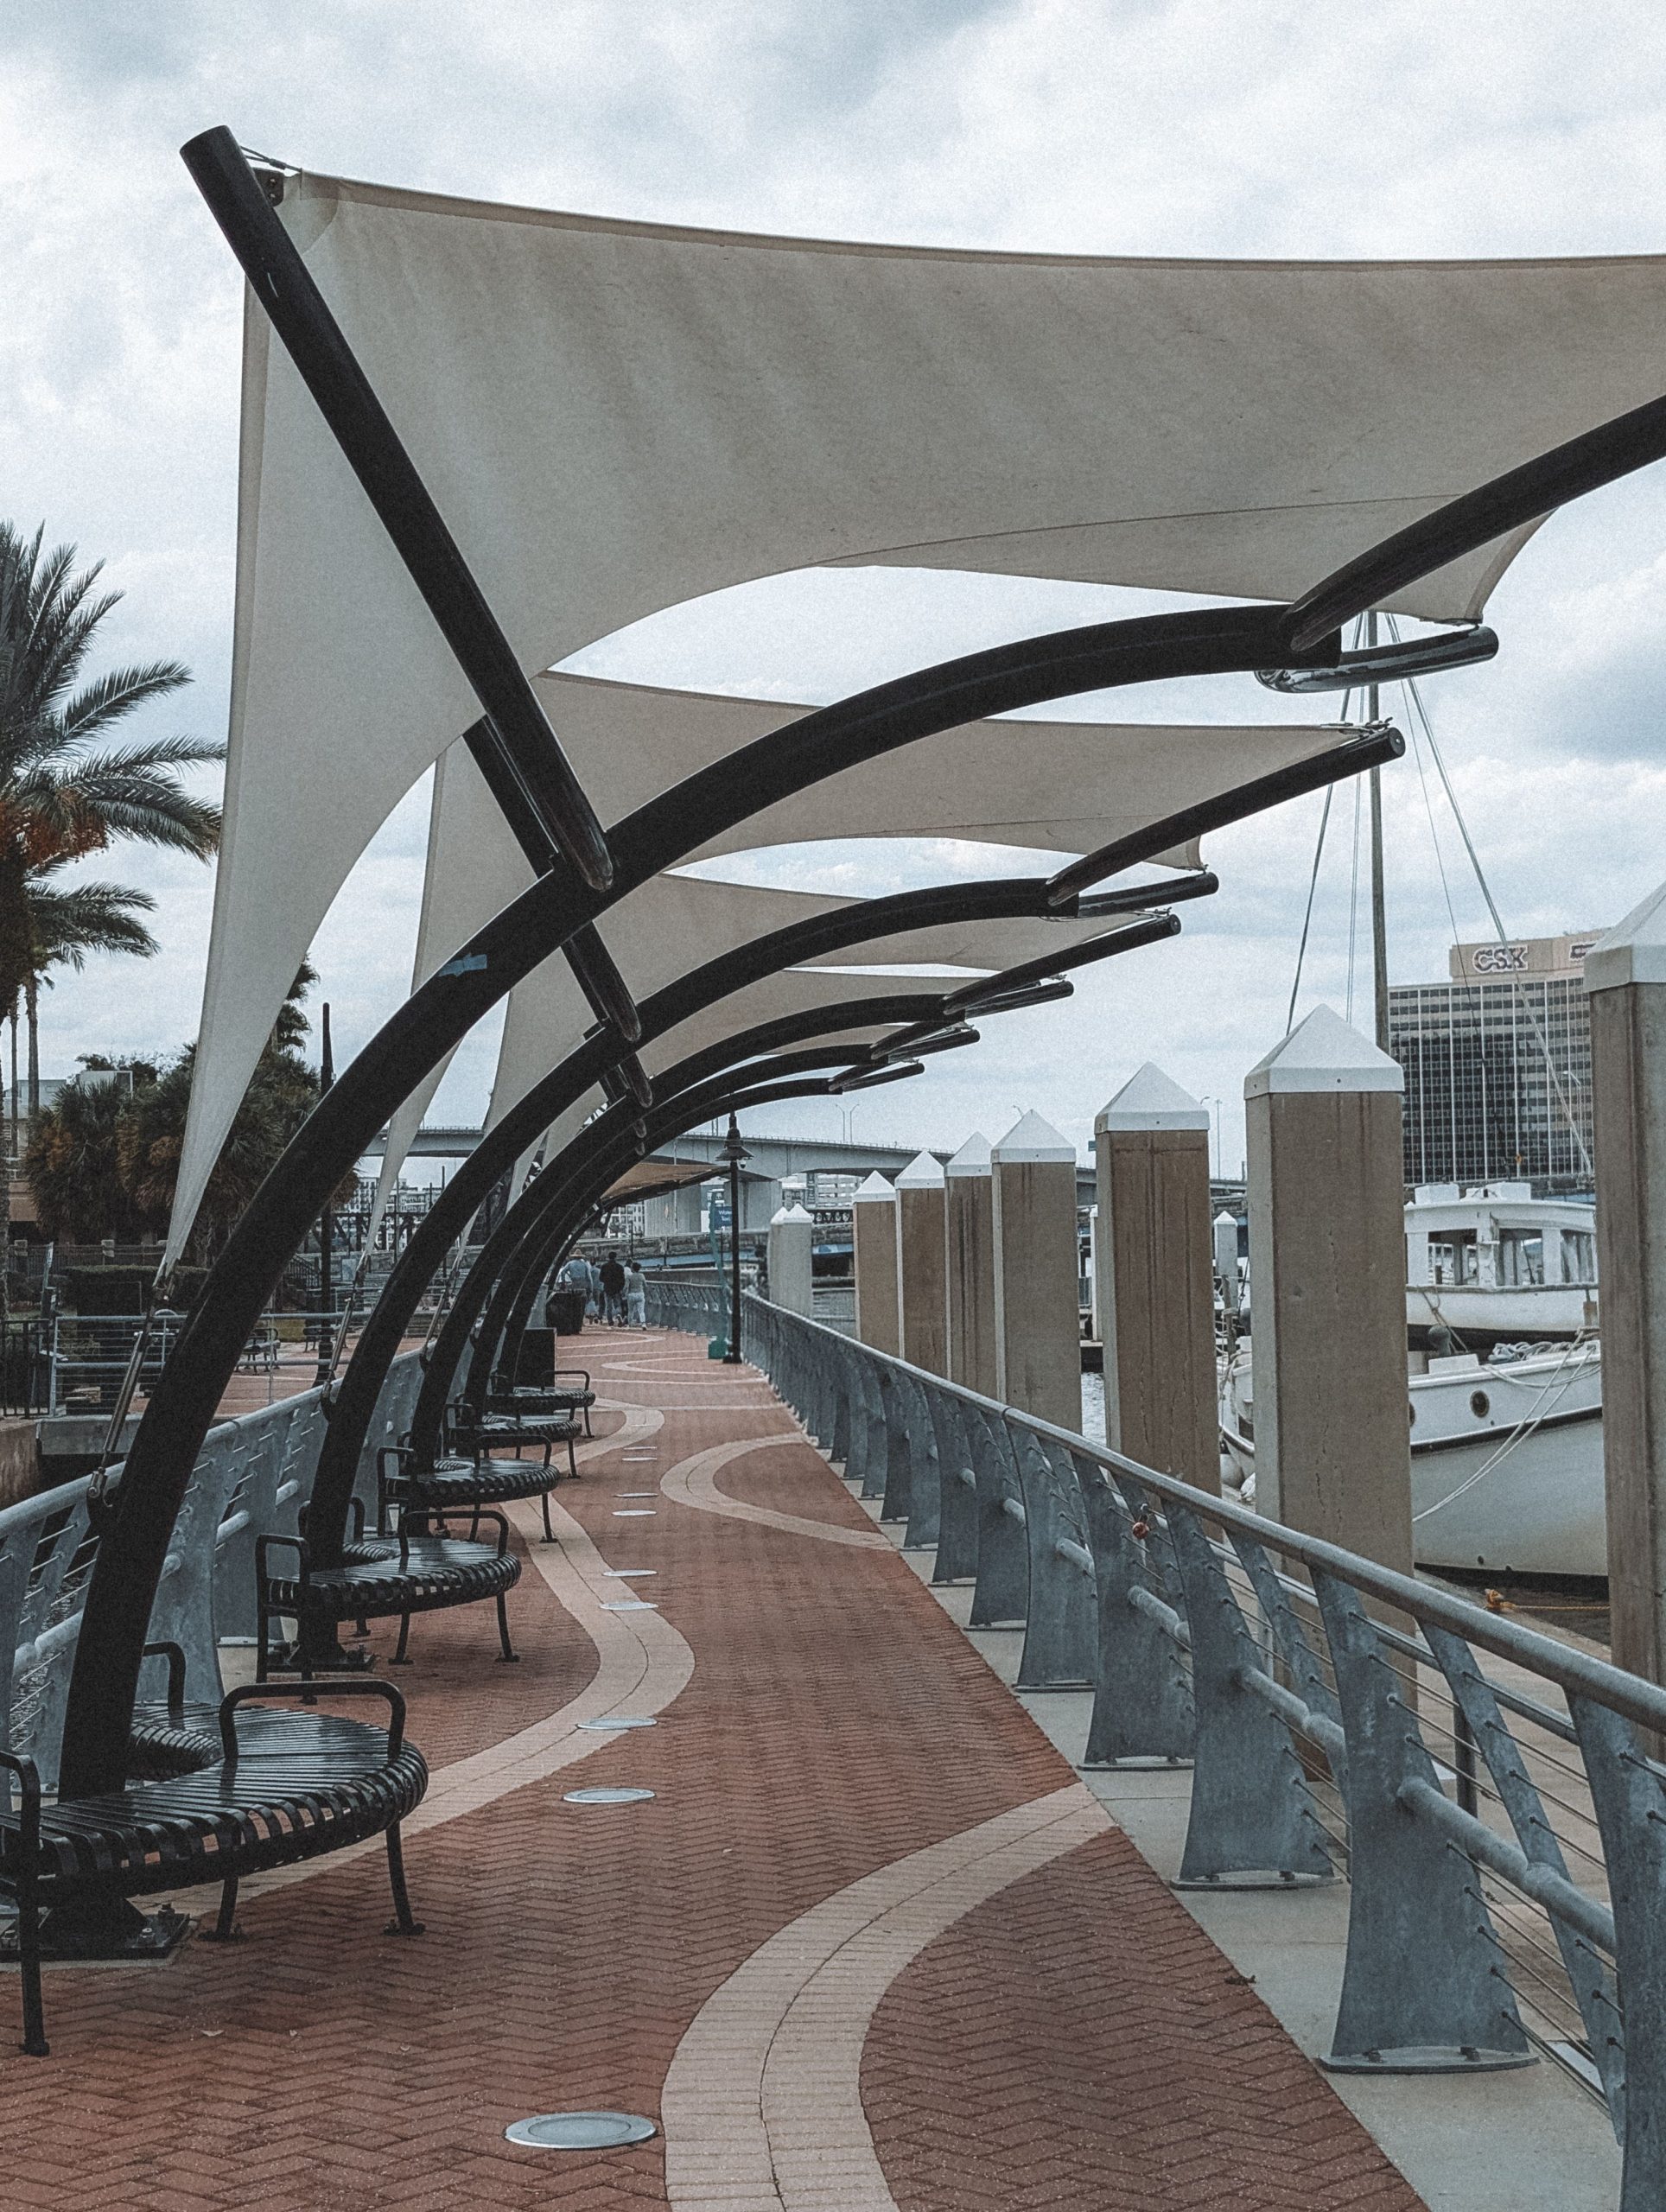
“To get that dynamic, twisted ‘hypar’ (hyperbolic paraboloid) shape in a fabric sail, the secret is varying the height of your four anchor points.”
For a square or rectangular sail, you need two diagonally opposite corners to be high and the other two to be low. For example, anchors A and C are at 10 feet, while anchors B and D are at 8 feet. This height difference forces the 2D fabric into a stunning 3D shape as you apply tension. The greater the height difference, the more dramatic the twist will be. This is the technique used to create those incredibly architectural sail forms.
24. A Simple White Sail for a Lush Garden Patio Nook
A white sail looks stunning against lush greenery, but it’s a magnet for garden-related stains. Green streaks from brushing leaves, brown spots from dripping sap, and stains from bird droppings on a nearby branch will be very visible. To keep it looking crisp, you’ll need to be proactive. Trim back any overhanging branches before you install the sail. Plan on taking it down for a gentle scrub with an oxygen-based cleaner (like OxiClean) at least once mid-season, in addition to its end-of-season deep clean. It’s a bit more work than a beige or gray sail, but the visual payoff is worth it if you love that clean, bright look.
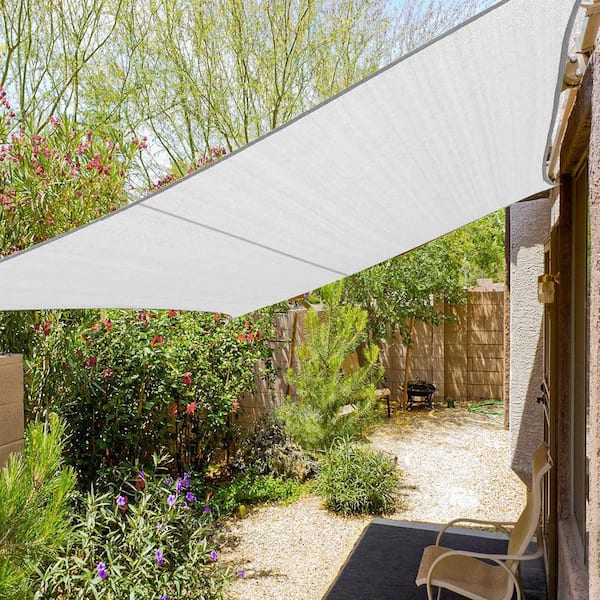
“You don’t need expensive hardware and professionally installed posts to create a simple shaded nook.”
A high-quality, ready-made sun sail can be purchased online for $50-$150. For a simple installation like this one, you can often use existing structures as anchor points. Attach two corners to the house (ensuring you hit studs) and the third corner to a sturdy, mature tree or a well-secured fence post. Just be sure to use hardware that allows for quick release, so you can easily take the sail down before a storm. This approach gives you 90% of the look for 10% of the cost of a custom setup.
25. Gain Balcony Privacy with a White Fabric Screen
The single element that transforms this balcony from a generic, exposed space into a private, serene retreat is the white fabric screen. It’s not about blocking the sun, like in Idea #13; it’s about creating a visual barrier. This simple piece of fabric provides an essential sense of enclosure and privacy from neighbors, making it feel like a true outdoor room. Without it, the bistro set would feel uncomfortably on display. The screen defines the boundary and creates the psychological comfort needed to truly relax and enjoy the space. It’s a small addition with a massive impact on usability.
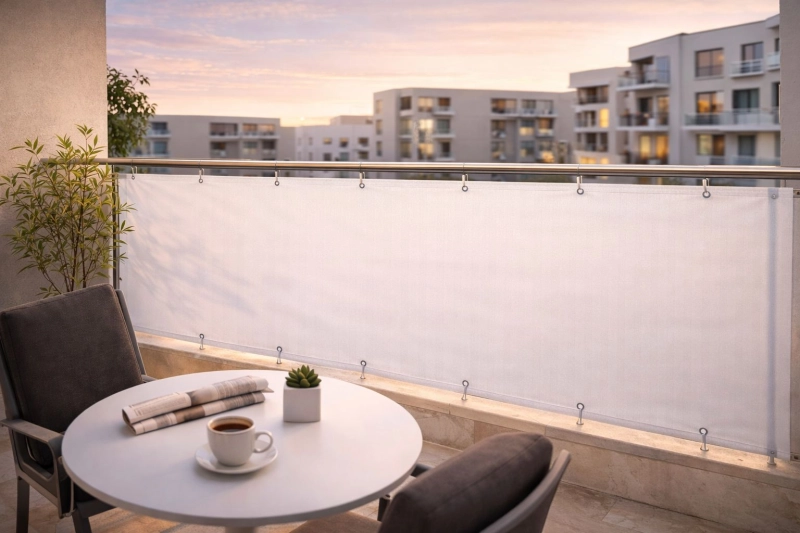
“Installing a fabric privacy screen with grommets is a quick and satisfying DIY project.”
(Time: 20 minutes. Cost: $30-$70).
- Purchase the Right Size: Measure the length and height of your balcony railing. Buy a screen that matches these dimensions. Most come in standard heights like 3 feet.
- Start at a Corner: Unroll the screen and align the first grommet with a corner of your railing.
- Secure with Zip Ties: Thread a heavy-duty, UV-resistant zip tie through the grommet and around the railing post. Pull it snug, but don’t tighten it completely yet.
- Work Your Way Across: Move along the railing, attaching a zip tie through every grommet. Keep the fabric taut as you go to avoid sags.
- Final Tightening: Once all zip ties are in place, go back to the beginning and tighten them all fully.
- Trim the Ends: Use flush cutters to neatly snip off the long ends of the zip ties for a clean, professional finish.
26. A Modern Rooftop Terrace with a Beige Sun Shade Sail
This urban retreat masters the art of texture and tone. The formula is approximately 50% warm wood, 30% soft neutrals, and 20% dark structural elements. The wooden decking and privacy screen provide a huge amount of warmth and organic texture, forming the base of the design. The soft neutrals—the beige sail and the light gray sofa cushions—add a layer of comfort and keep the space from feeling too heavy. Finally, the black metal posts and dark planters provide sharp, graphic contrast, grounding the design and giving it a modern edge. This balance is what makes it feel both cozy and chic.
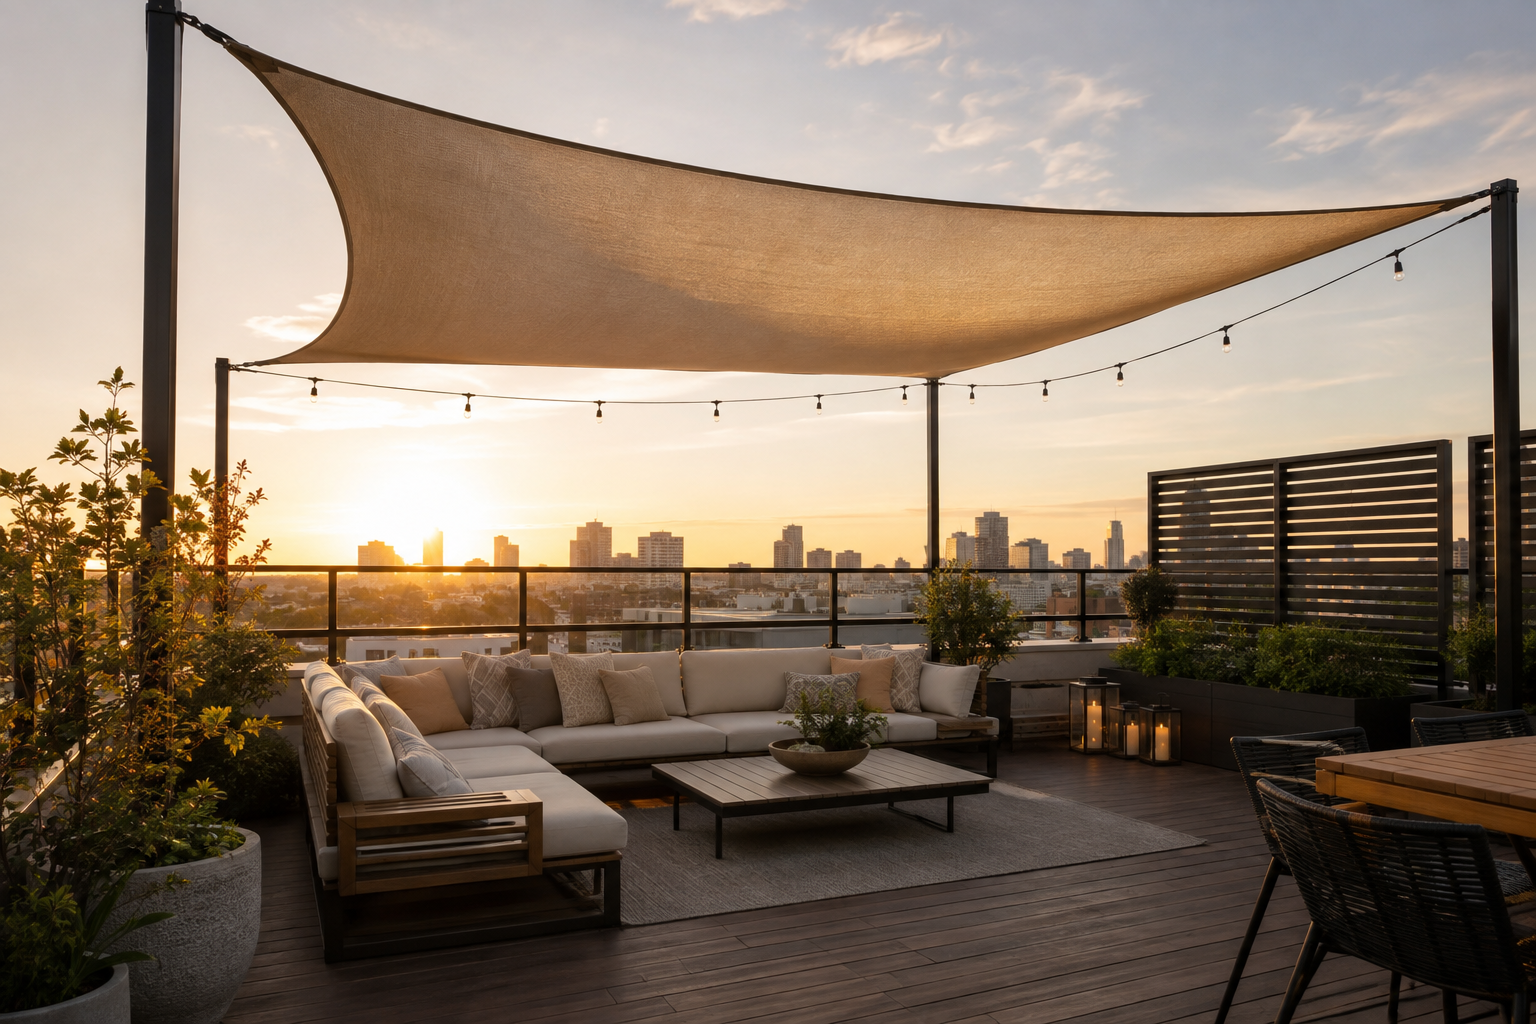
“A rooftop installation presents a unique and serious challenge: wind uplift.”
Unlike a backyard where the wind flows around and over things, on a rooftop, wind can get *under* the sail and exert a powerful upward force. This can rip anchors out of your decking or roof structure, causing significant damage. You cannot simply screw anchor points into a rooftop deck. They must be bolted through to the building’s structural joists. Furthermore, installing posts often requires penetrating the roof’s waterproof membrane, which must be done by a professional roofer to prevent leaks. This is not a DIY-friendly location for a large sail.
27. A Casual Patio Dining Area with a Beige Shade Sail
That trendy mixed-and-matched chair look can get expensive if you’re buying individual designer chairs. Here’s how to do it on a dime. Start with a basic wooden table and bench set from IKEA or a thrift store. Then, hunt for single chairs. The key is to look for different styles but keep them unified in some way. In this case, the chairs are all wire-frame construction. You can find similar wire chairs at Target or Overstock. For an even cheaper option, collect mismatched wooden chairs from garage sales or Facebook Marketplace for a few dollars each, and then unify them all with a single, bold color of spray paint.
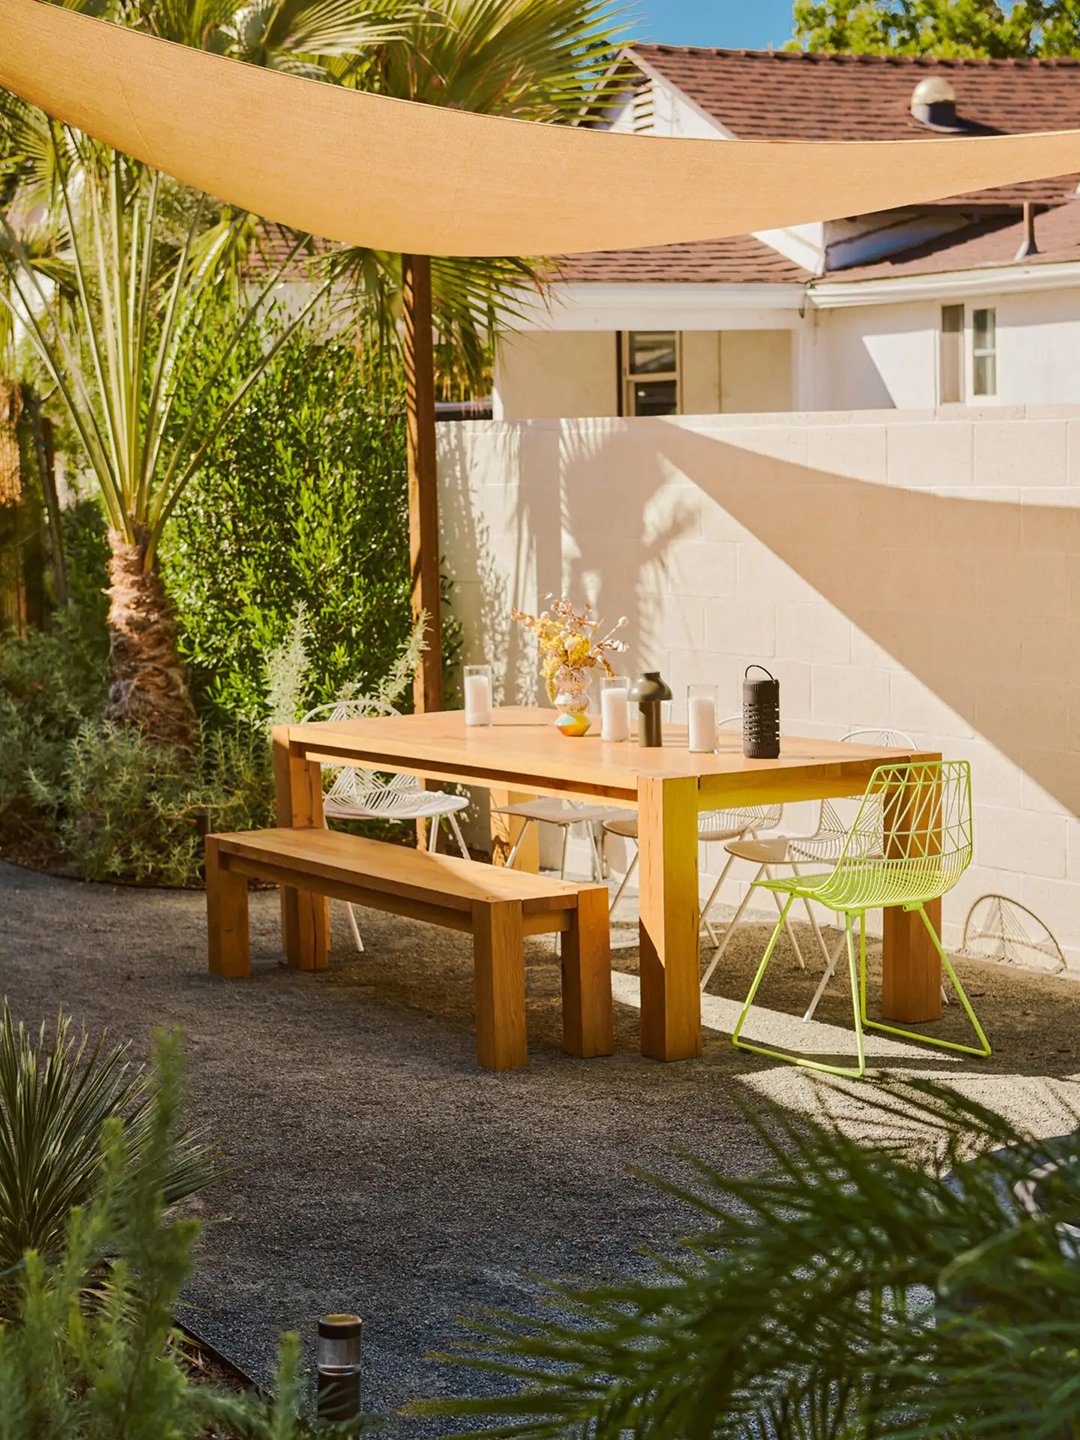
“This space feels so effortlessly cool because it breaks the rules of formal dining.”
The mix of a bench, a lime green wire chair, and white wire chairs feels personal and collected, not like a pre-packaged set. The use of gravel for the patio floor is another clever choice; it’s inexpensive, provides great texture, and adds to the relaxed, informal vibe. The simple beige sail overhead defines the space without trying to be the star of the show. It’s the perfect neutral backdrop that allows the vibrant chairs and lush tropical plants to really shine.
28. A Geometric Canopy of Overlapping Brown Triangular Sails
When creating a complex, multi-sail pattern like this, planning is everything. Before you even buy the sails, model your design. You can do this with software like SketchUp, or go low-tech: use graph paper and cardboard cutouts. Create a scale drawing of your space and the posts. Cut out triangles to the scale of the sails you plan to buy. Arrange them on your drawing, overlapping them and twisting them to see what patterns emerge. This allows you to visualize the final look, identify any awkward gaps, and figure out exactly how many sails you need to achieve the desired effect.
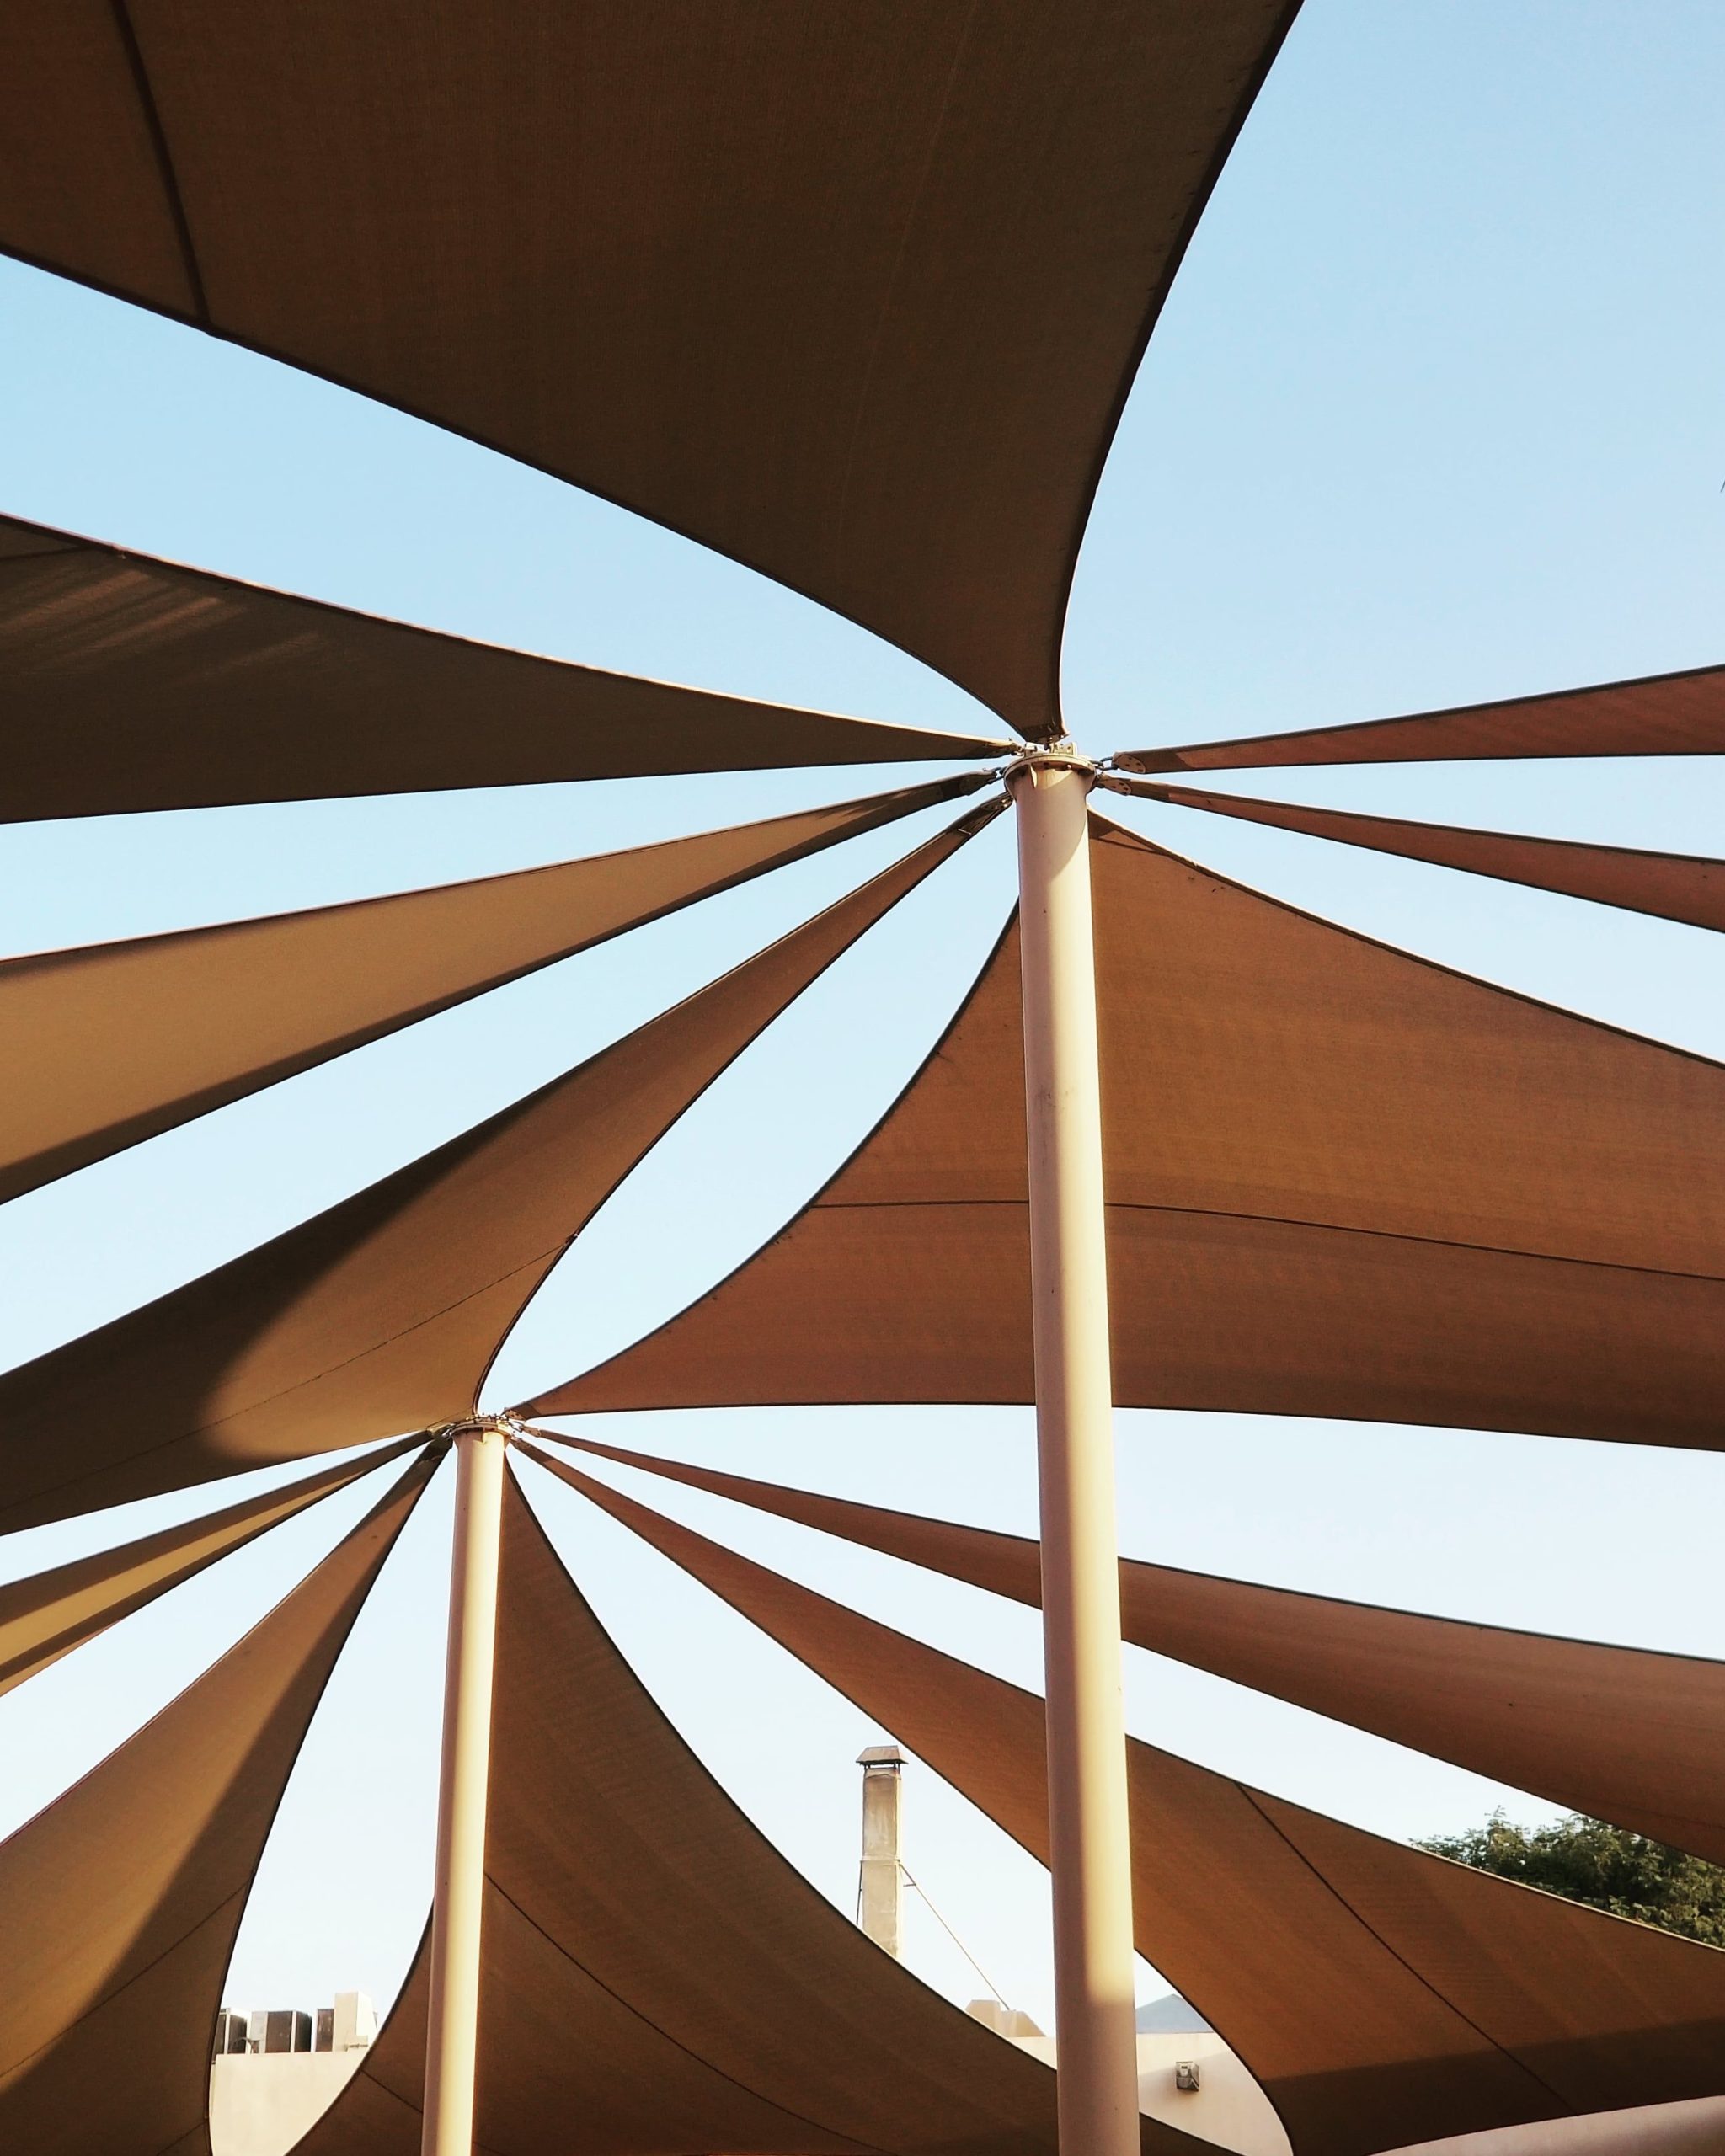
“This radiating, geometric style is a high-impact choice best suited for covering large, open areas where the structure itself is a primary feature.”
Think community spaces, outdoor restaurant seating, or a very large central patio area of at least 1,000 square feet. The pattern requires multiple tall posts (12-15 feet high) and significant space between them to allow the sails to span out gracefully. In a smaller yard, this would look cluttered and chaotic. It’s a design that needs room to be appreciated from a distance, much like the industrial structure in Idea #16.
29. A Striped Retractable Awning and Rattan Screen on a Sunny Balcony
The key to this balcony’s success is the combination of two different types of screening. The awning provides shade from above, tackling the vertical challenge of direct sunlight. But the woven rattan screen provides privacy and screening from the side, tackling the horizontal challenge of neighboring balconies. It’s this two-pronged approach that makes the space feel truly private and protected. Many people only think about overhead shade, but adding a side screen for privacy is often what really transforms a balcony into a usable, comfortable outdoor room.
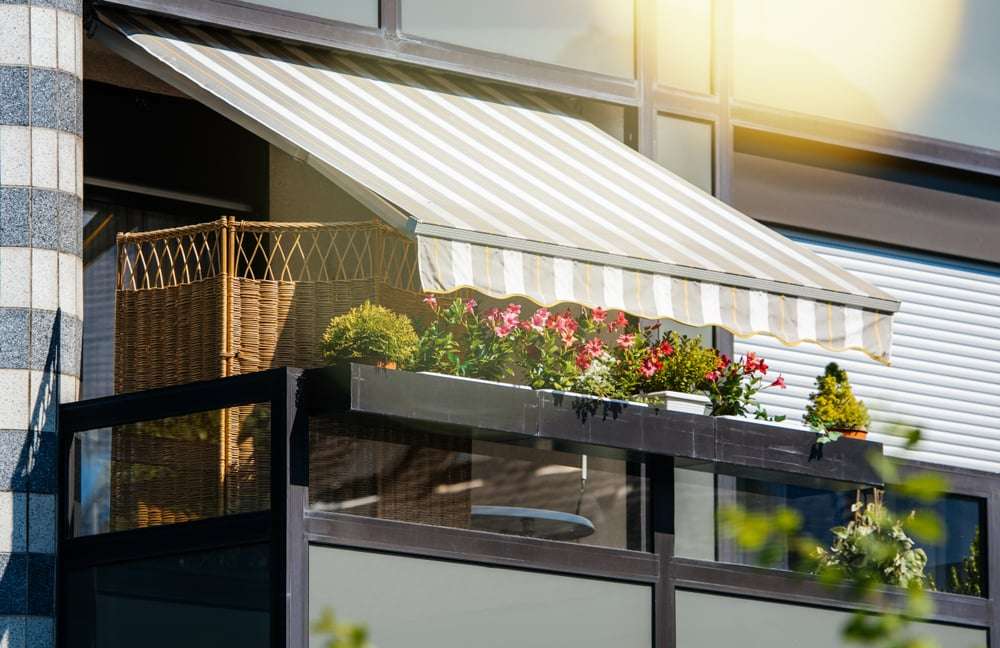
“Natural, woven textures are everywhere in design right now, and this rattan screen is a perfect example of the trend.”
It’s part of a larger movement towards biophilic design—the idea of connecting our living spaces with the natural world. Materials like rattan, jute, wicker, and seagrass bring organic texture, warmth, and a handmade quality that feels like a welcome antidote to our sleek, digital lives. This trend has incredible staying power because it’s not about a specific color or pattern, but about a feeling: calm, grounded, and connected to nature.
Your Perfect Shady Spot Awaits
Whew, that was a lot of inspiration! The right sun shade can completely change how you use your outdoor space, turning a sun-blasted patio into a comfortable, stylish oasis. Whether you’re drawn to a simple sail or a grand pergola, the perfect solution for your home is within reach. Now, open up that Pinterest board you’ve been saving to—it’s time to start planning.