You know that feeling when you finally find the perfect garden gate on Pinterest, the one that looks exactly right for your entrance? After filtering through hundreds of options online, we narrowed it down to the ideas that truly deliver. We’ve curated 31 distinct garden gate ideas, covering everything from classic cottage styles and rustic wooden arches to more modern, structured designs. For 2026, it’s all about creating a personal ‘secret garden’ moment, and your gate is the first chapter of that story. And stick around until the end, where we break down the most common mistakes that can ruin an otherwise perfect garden entrance.
📌 Pin this guide for later—your future self will thank you when it’s time to build.
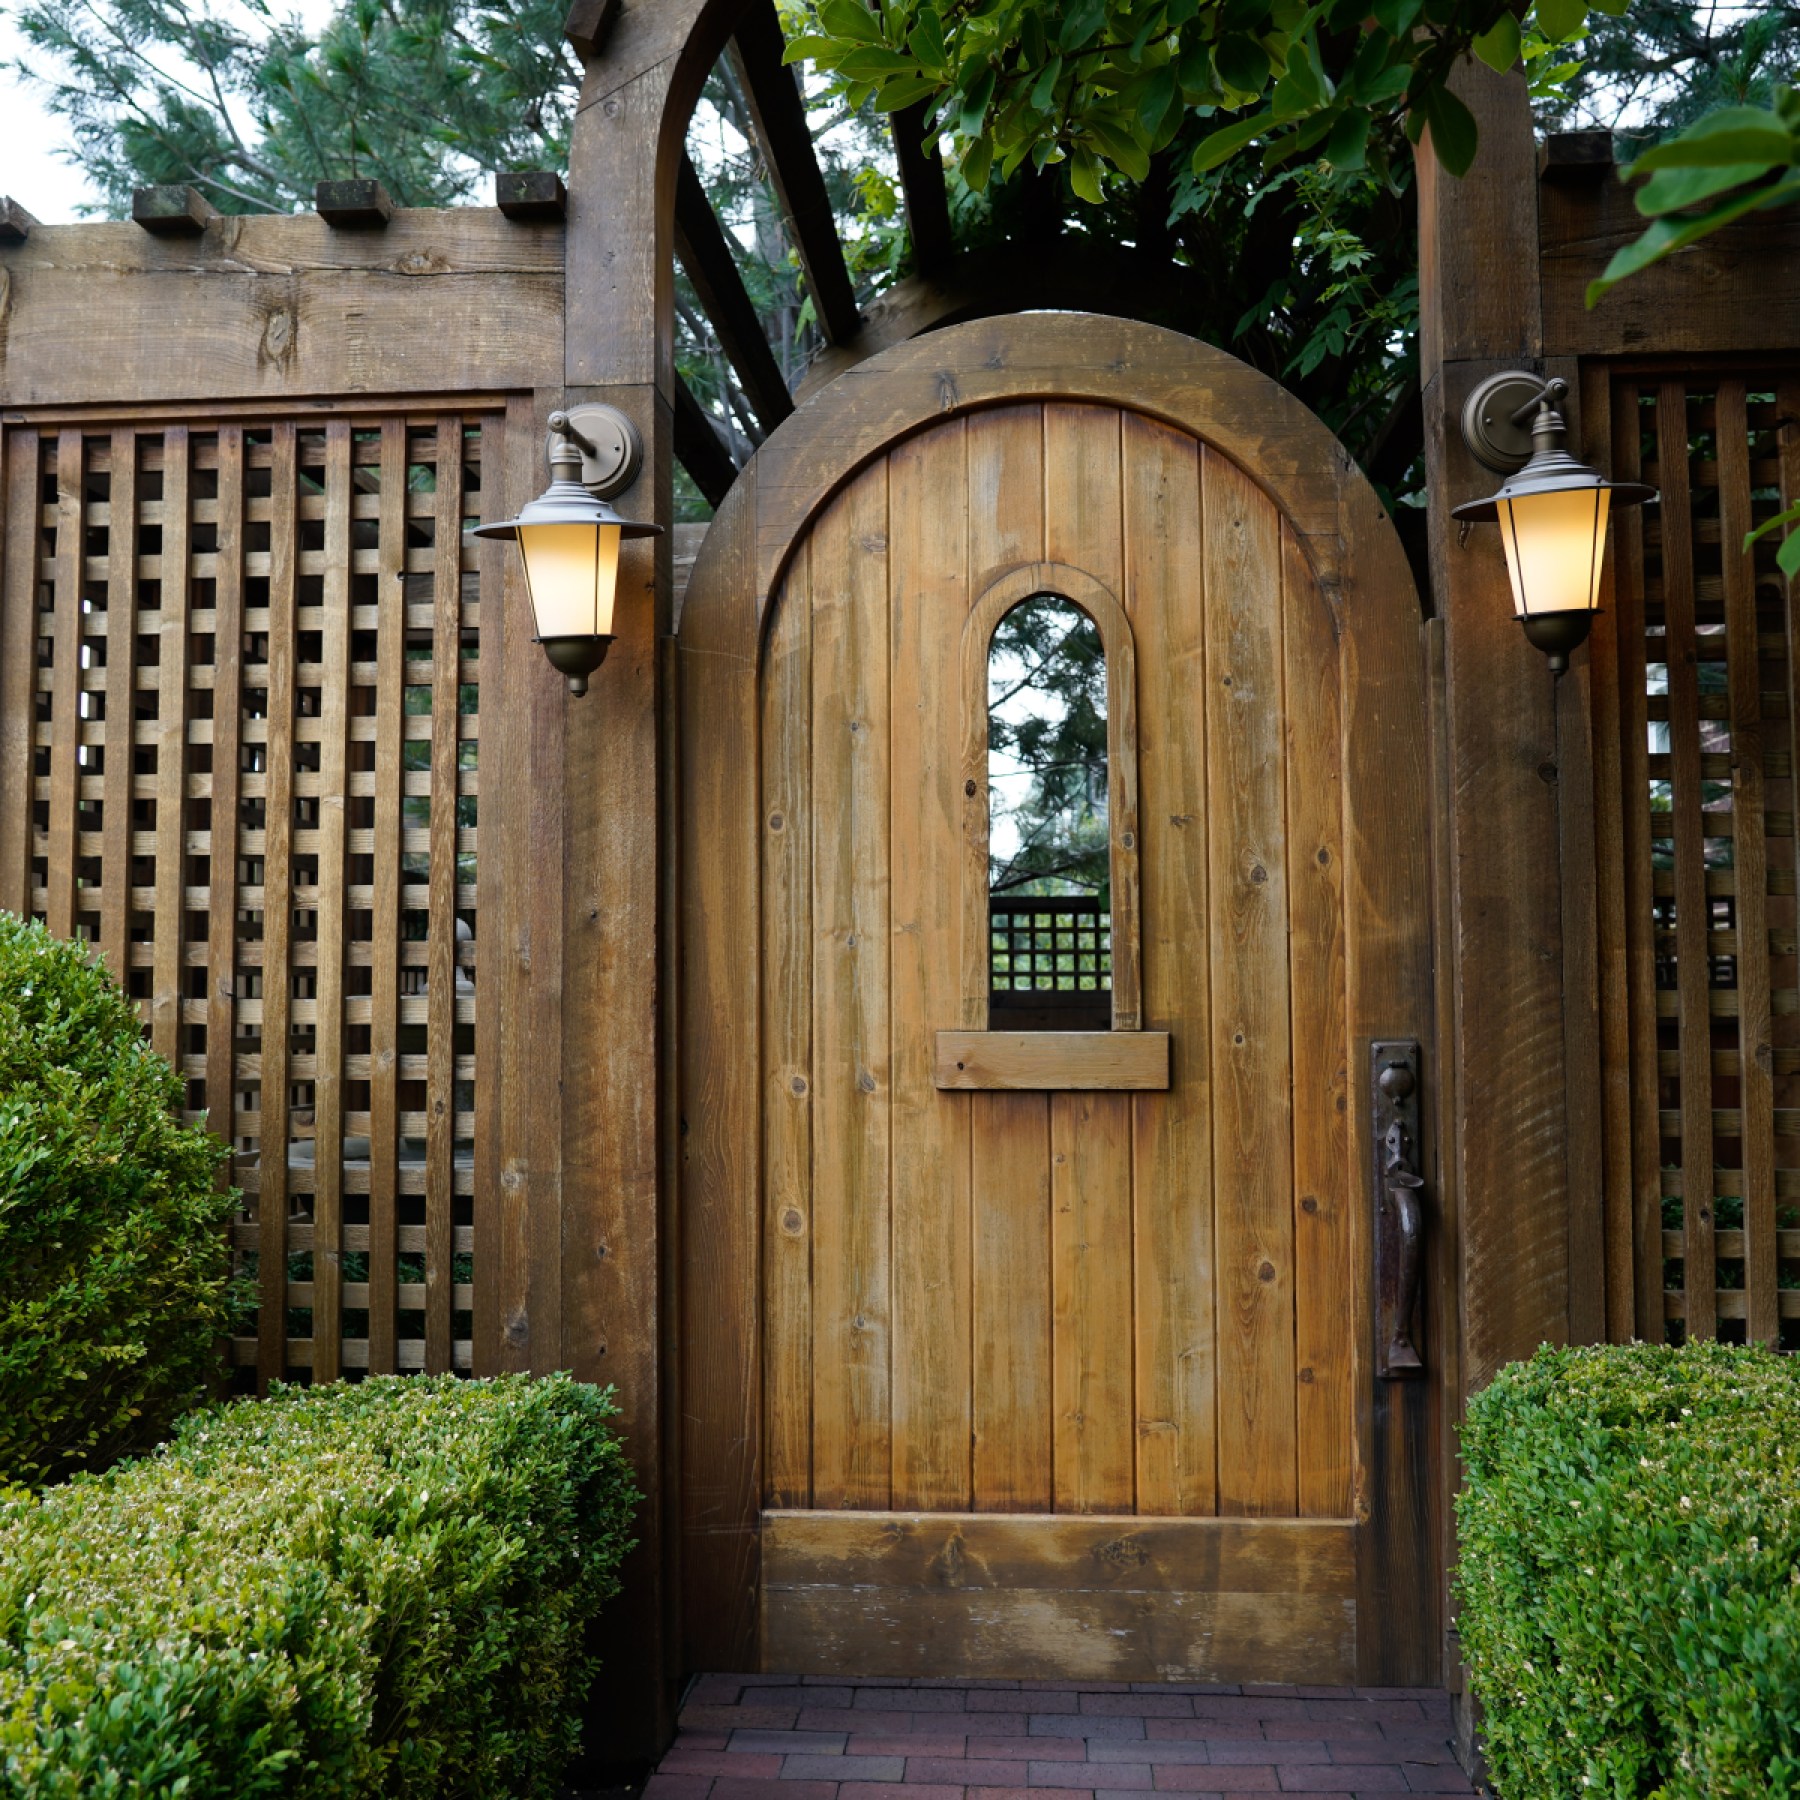
1. Frame Your Entry with an Arched Wooden Gate and Lanterns
This design works because it masters the principle of symmetry and balance. The arched gate creates a central focal point, and the identical brass lanterns on either side provide perfect visual equilibrium. This symmetry is incredibly pleasing to the eye and signals a well-thought-out, intentional design. Furthermore, there’s a beautiful mix of materials—the warmth of the stained wood, the classic appeal of the brick path, and the aged look of the brass—that creates a rich, textural experience before you even step through the gate.
“For an entrance that feels this established, lighting is key.”
Don’t just pick any lantern. Choose fixtures with a ‘warm’ color temperature, specifically between 2200K and 2700K. This range mimics the soft glow of candlelight or gas lamps, enhancing the rustic, inviting mood. Avoid harsh, blue-toned LED light above 3000K, which can make the entrance feel cold and clinical. Also, ensure the lanterns are rated for outdoor, wet locations to prevent damage from the elements.
2. Create a Verdant Tunnel with a White Picket Archway
The formula here is simple but incredibly effective: 70% lush, untamed greenery + 30% crisp, white structure. The overwhelming abundance of trees and shrubs creates a sense of natural drama and privacy, while the clean lines of the white picket arch act as a perfect, bright focal point. You can change the ‘greenery’ part to flowing wisteria or colorful bougainvillea, and the ‘white structure’ to a dark-stained wood for a more rustic feel, but the ratio of wild-to-structured is what gives this its magic.
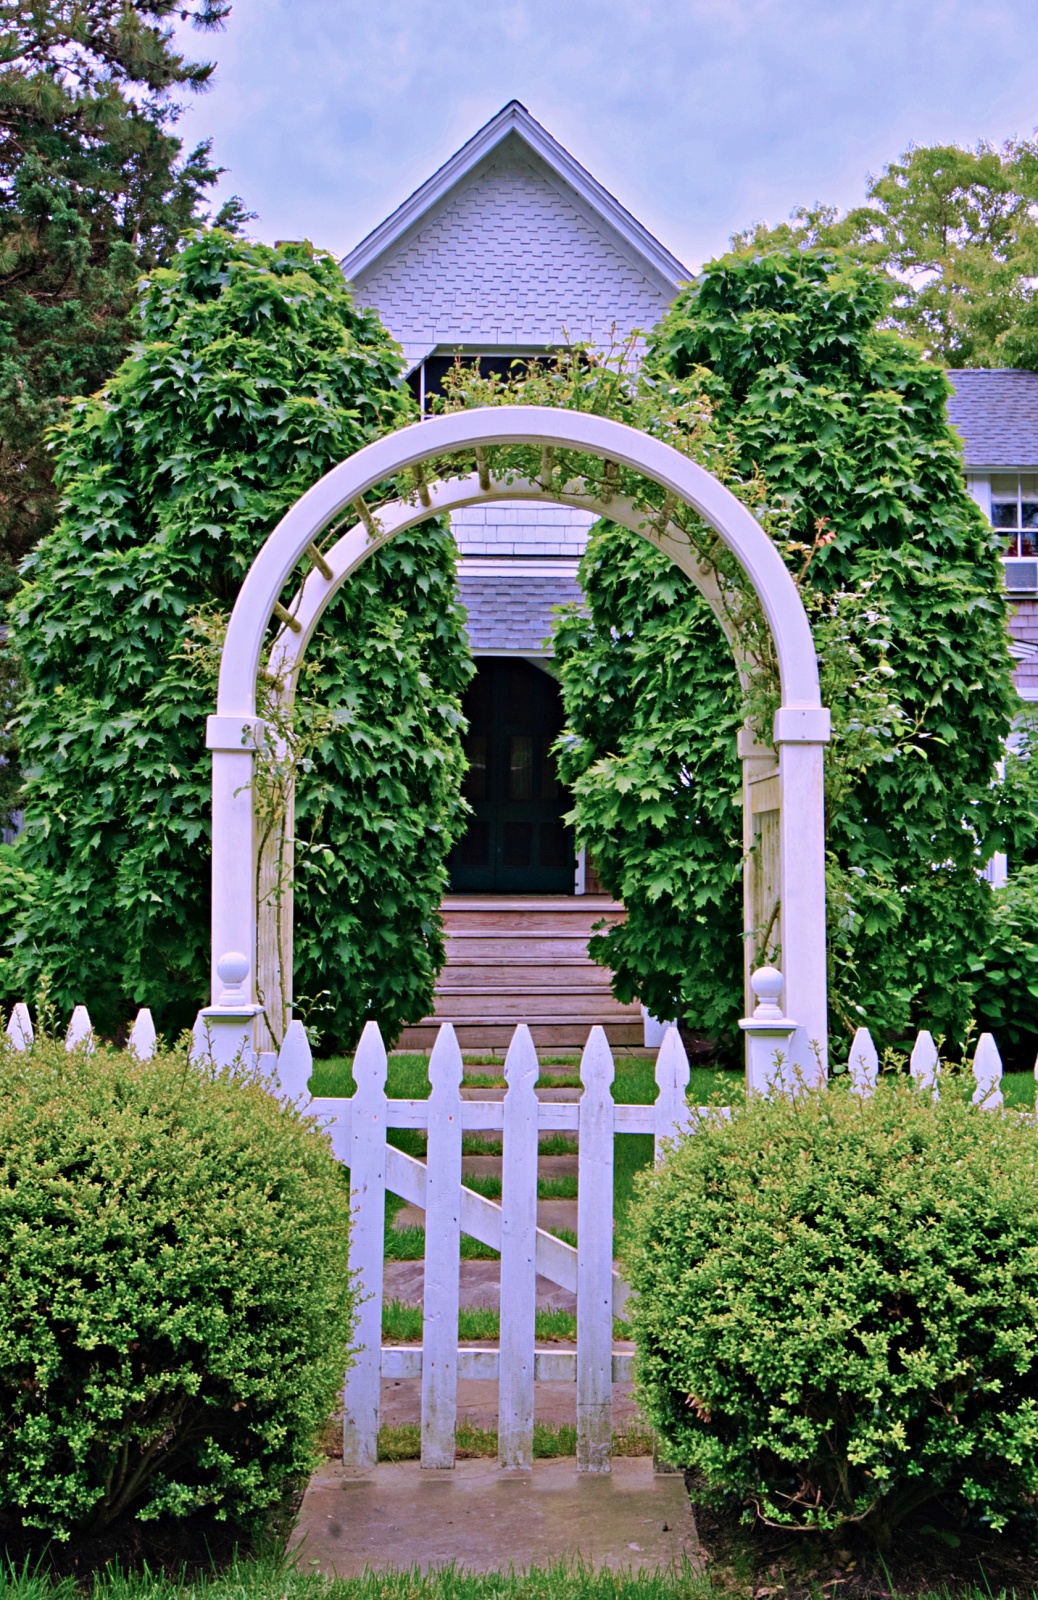
“Let’s be honest: achieving this level of lush, green envelopment takes time.”
You’re not just planting a few shrubs; you’re cultivating a dense, layered landscape. This look isn’t ideal for a brand-new garden unless you’re willing to invest heavily in mature, large-scale plants. It also requires consistent pruning to keep the pathway clear and prevent the arch from being completely swallowed by foliage. Be prepared for a yearly trim to maintain that perfect balance of wild and welcoming. Compare this to the more manicured look of Idea #7.
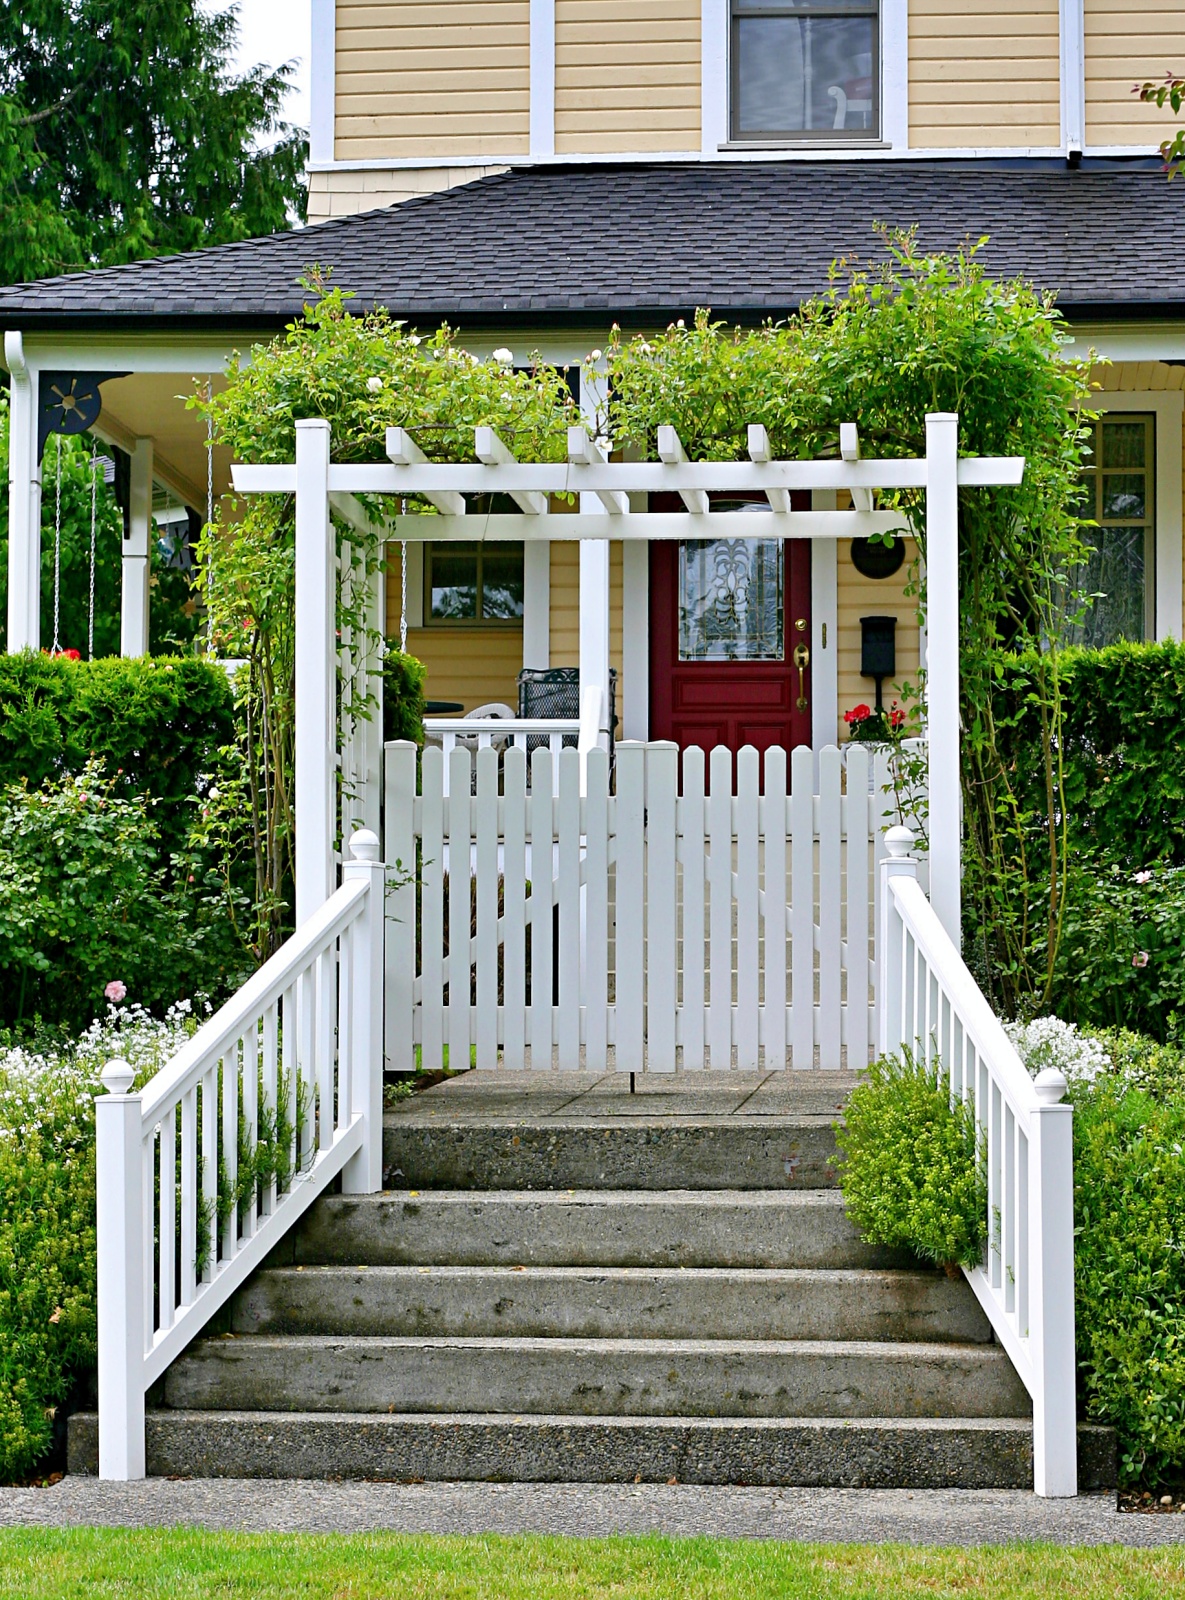
3. Top a Picket Gate with a Rose-Covered Pergola
that makes this entire scene work is the pergola. Without it, you’d have a perfectly nice picket gate and a pretty house. But the pergola adds an essential vertical dimension. It lifts the eye upward, connects the fence line to the house’s architecture, and provides the structure for those beautiful climbing roses. It’s the element that transforms a simple gate into a romantic, storybook entrance. Removing it would make the entire composition feel much flatter and less grand.
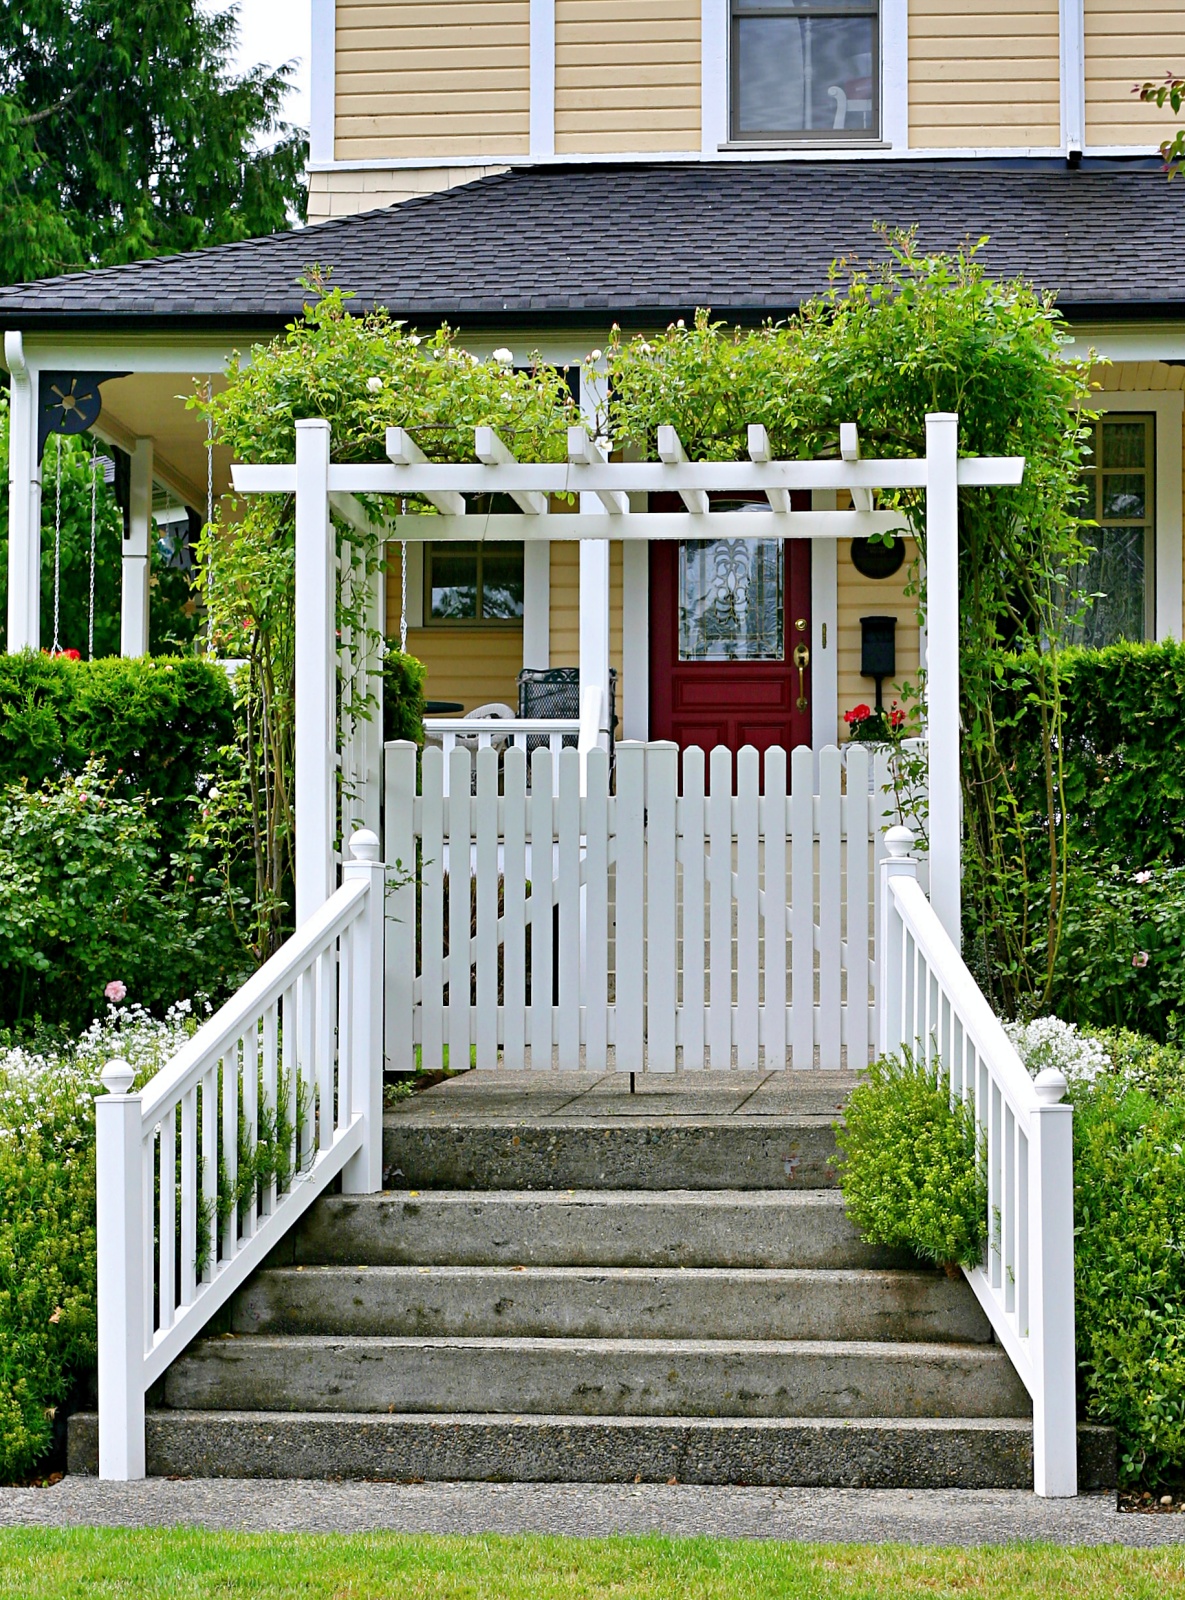
“You don’t need a custom-built pergola to get this effect.”
You can find simple, self-assembly wooden or vinyl pergola kits at major home improvement stores for $200-$500. For an even more budget-friendly option, create a simpler archway using two vertical 4×4 posts and a few crosspieces of 2x4s, which you could build for under $100 in materials. The key is to provide a structure for the climbing plants; once they grow in, they become the main attraction, and the structure beneath is less of a focus.
4. Go Bold with a Picket Arch and Vibrant Climbing Roses
- Fence & Archway Kit: $400 – $900
- Climbing Rose Plants (2-3): $90 – $200
- Hanging Lantern: $50 – $150
- Border Hedges & Bushes: $200 – $500
- Paint & Primer: $70 – $120
- TOTAL: $810 – $1,870
- Budget alternative: Build a simpler arch from treated lumber ($150), use faster-growing, less expensive vines, and source a lantern from a thrift store or Facebook Marketplace. You could achieve a similar overflowing look for around $400-$700.
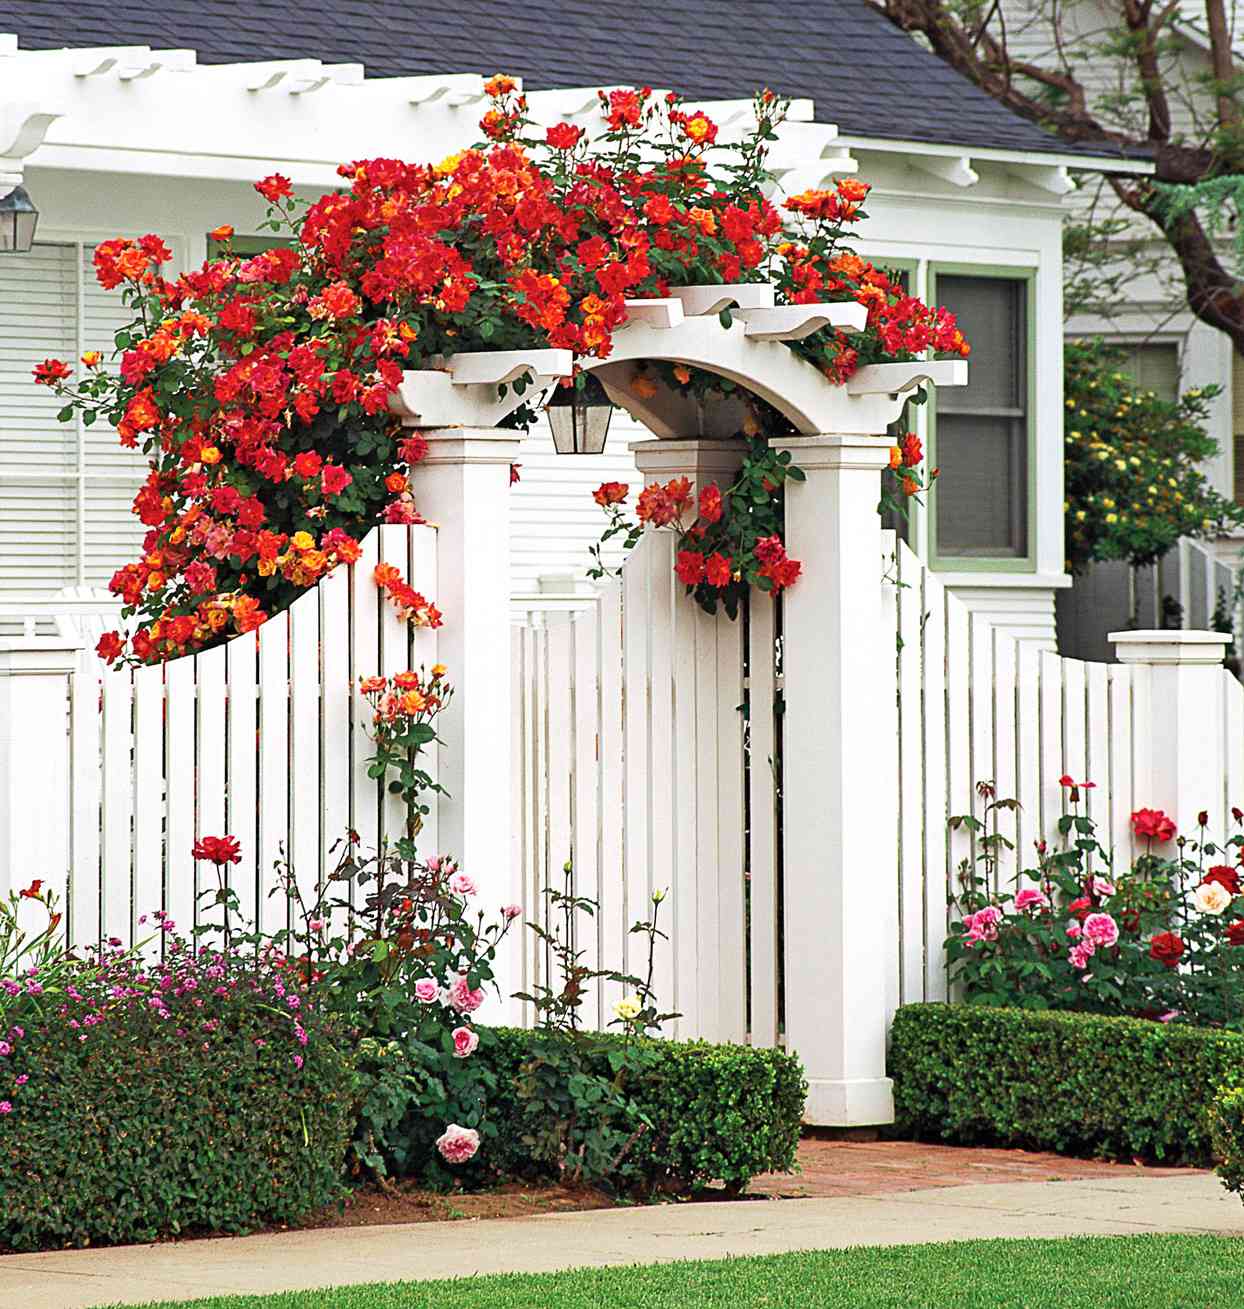
“This idea works best for a standard suburban lot with a front garden or a defined side yard.”
The archway itself needs a footprint of about 5-6 feet wide to feel substantial and not cramped. The key measurement is height: aim for an arch that’s at least 7.5 to 8 feet tall at its peak. This ensures that even when the roses are in full, drooping bloom, there’s ample headroom for people to walk through comfortably without getting snagged. This grand scale is a nice contrast to the more humble entrance in Idea #14.
5. Add Whimsy with an Ivy-Covered Arbor and Heart Placard
The charm here comes from the delightful interplay of textures and shapes. You have the rigid, repeating lines of the white picket gate set against the soft, organic chaos of the ivy-covered arbor. This contrast is a fundamental design principle that creates visual interest. The dark, simple heart shape is the perfect punctuation mark; it’s a surprising element that introduces a touch of personal, handmade whimsy and prevents the scene from looking like a generic garden entrance. The color contrast of the dark heart against the white gate makes it pop.
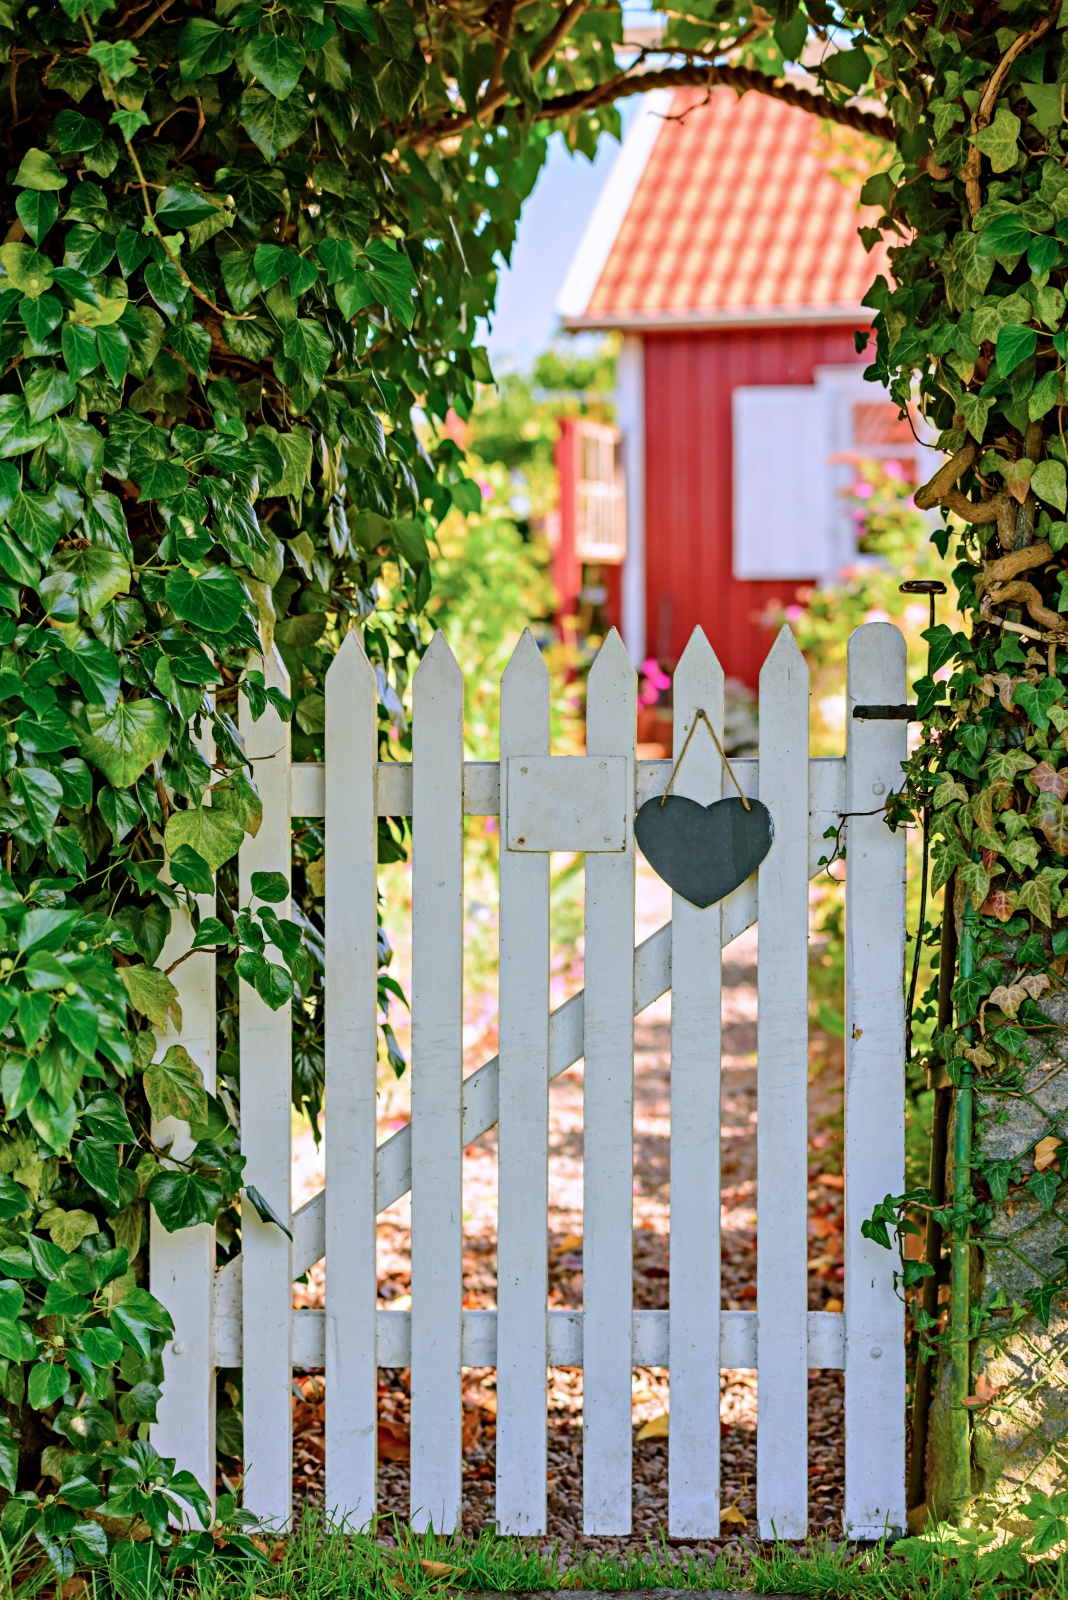
“An ivy-covered arbor is undeniably romantic, but be warned: ivy is an aggressive grower.”
If you don’t commit to pruning it back at least twice a year, it can quickly overwhelm the structure, find its way into nearby mortar, and even damage the wood of the building behind it. It can also become a haven for pests. If you love the look but not the work, consider a less aggressive climbing vine like clematis or a climbing hydrangea, which are easier to control.
6. Incorporate a Diamond Inlay in a White Picket Gate
The diamond-shaped inlay is the single detail that elevates this gate from standard to special. It’s a simple geometric touch, but it breaks up the monotony of the vertical pickets and adds a point of visual focus. This small detail shows a level of craftsmanship and intentionality. Without it, the gate would blend in with any other picket fence, but with it, it has a distinct personality. The way the overgrown flowers frame this central feature only enhances its importance.
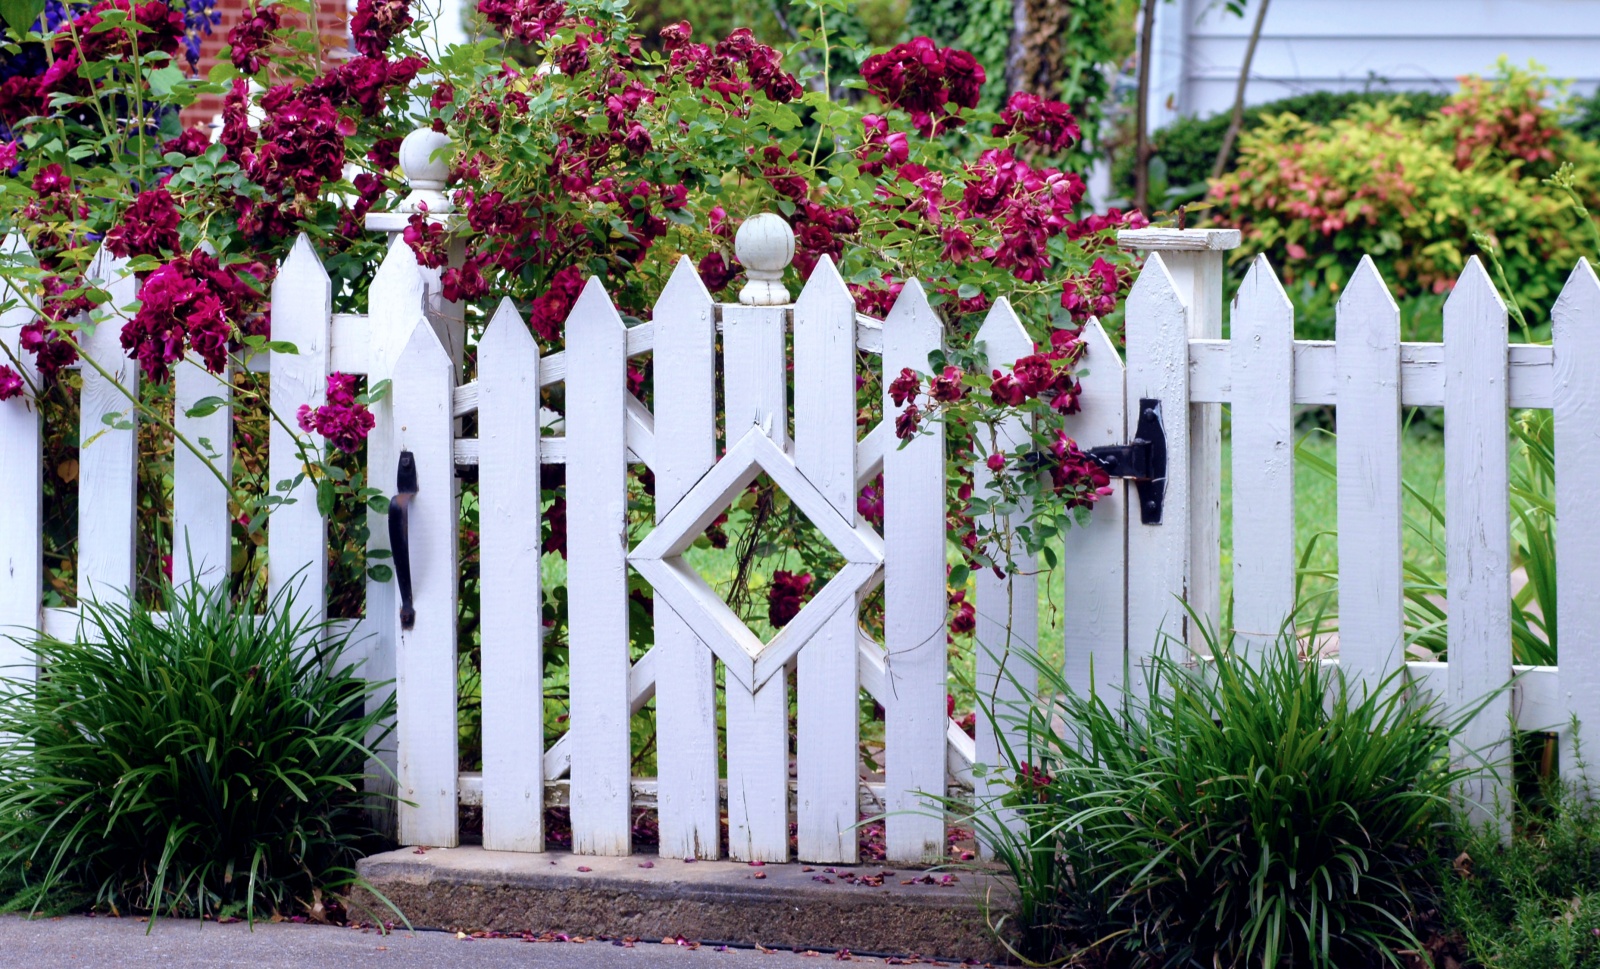
“When adding a decorative inlay like this, the key to making it look professional is precision.”
The angles of the diamond must be perfect, and the joints where it meets the gate’s frame should be seamless. Use a miter saw for clean, accurate cuts. To ensure longevity, assemble the inlay separately, then attach it to the gate. Use high-quality exterior wood glue and galvanized screws (hidden on the back if possible) to prevent rust stains on the white paint. A little extra time spent on joinery makes all the difference.
7. Weave Pink Roses Through a Classic White Picket Fence
This vibrant look follows a classic garden formula: 50% neutral structure (the white picket fence) + 40% dominant flower (the hot pink roses) + 10% accent foliage (the purple and light green plants). This recipe ensures the roses are the star of the show, while the fence provides a clean, bright canvas. The accent plants add depth and prevent the color scheme from being one-note. You could easily swap the pink roses for yellow ones and the purple plants for blue salvia to create a completely different mood with the same successful ratio.
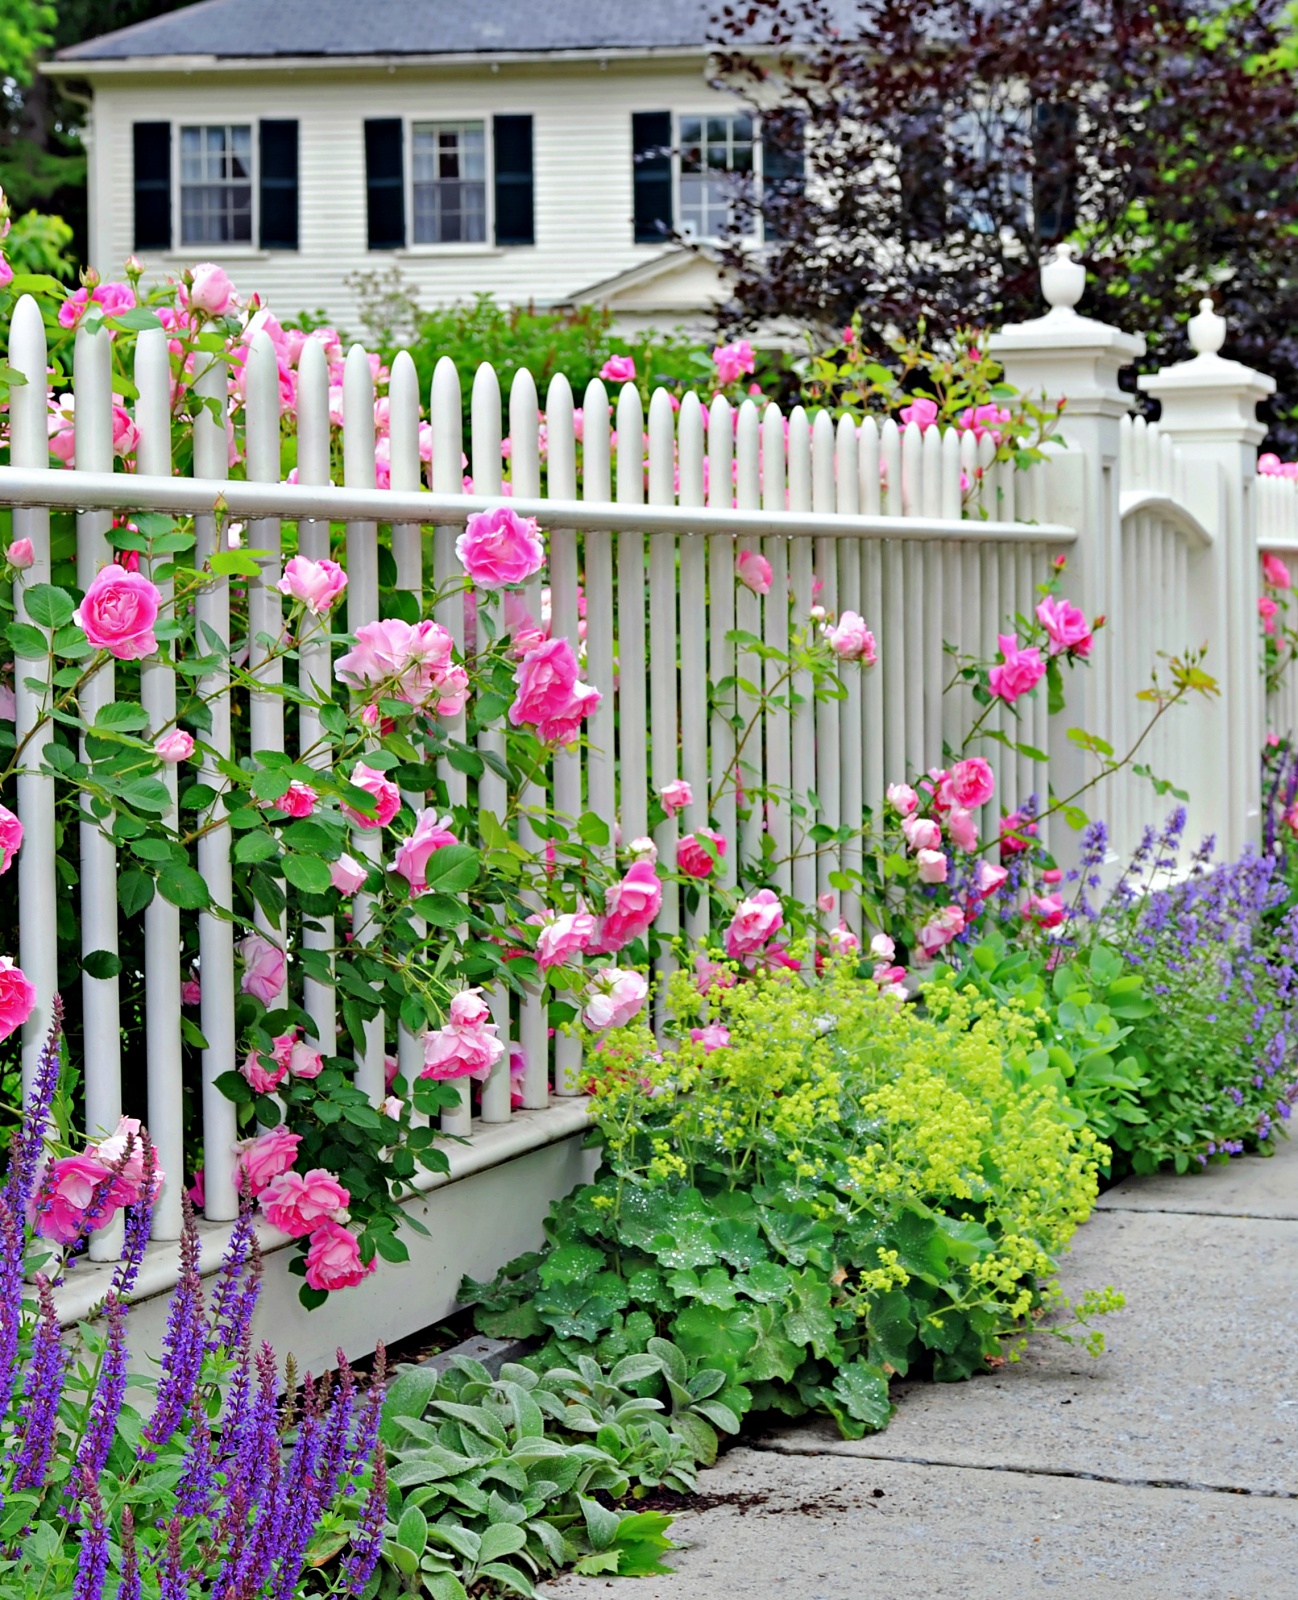
“While breathtaking, a look this lush requires a commitment to maintenance.”
Climbing roses need to be trained and tied to the fence as they grow to create that woven effect. After they bloom, you’ll need to deadhead the spent flowers to encourage new growth. The white picket fence itself will need annual cleaning to remove dirt, pollen, and any mildew that forms, especially in the shaded areas behind the dense foliage. A pressure washer on a low setting is great for this, but be prepared for it to be an annual spring chore.
8. Combine a Wrought Iron Medallion Gate with a Picket Fence
This design beautifully marries two different styles: the delicate, ornate detail of wrought iron and the simple, rustic charm of a picket fence. It works because they are unified by a single color—white. The shared color palette allows the different materials and levels of detail to coexist harmoniously. The intricate medallion on the gate becomes the clear focal point, while the picket fence acts as a quiet, supporting frame. It’s a lesson in how to mix styles without creating chaos, a similar concept to the mixed materials in Idea #10.
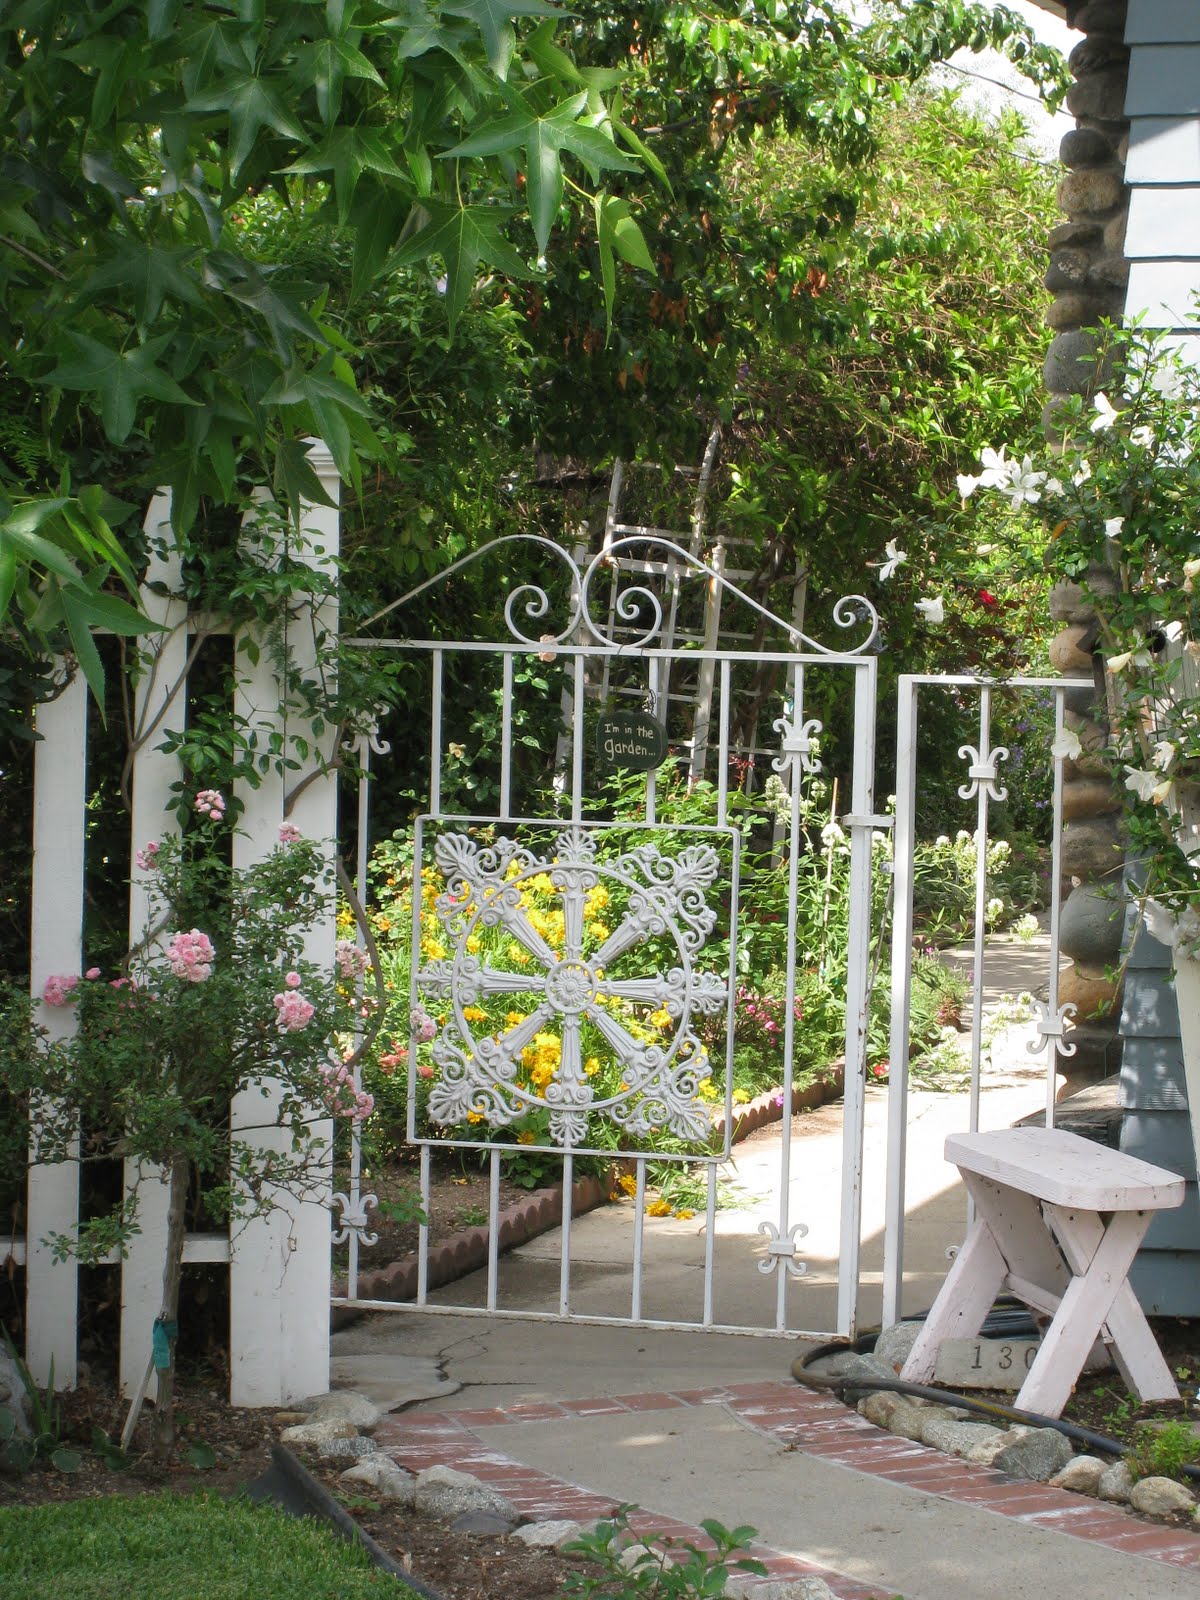
“A custom wrought iron gate can be pricey.”
To get this vibe for less, focus on finding the medallion. Search for ‘cast iron wall art’ or ‘architectural salvage medallions’ online or at flea markets. You can often find beautiful pieces for under $50. Purchase a standard, inexpensive wooden picket gate from a big-box store. Paint the gate and the medallion the same color and then bolt the medallion securely to the center of the gate. You get the same custom, high-end feel for a fraction of the cost.
9. Embrace Nature with a Vine and Leaf Metal Gate
that defines this gate is its celebration of organic, imperfect forms. Unlike a gate with rigid bars or perfect geometry, this one’s decorative elements are designed to look like intertwining vines. The stylized leaves and buds are the whole story here. They transform a simple barrier into a piece of art that echoes the natural world around it. This gate isn’t just about keeping things in or out; it’s a statement piece that shows a deep appreciation for nature-inspired design.
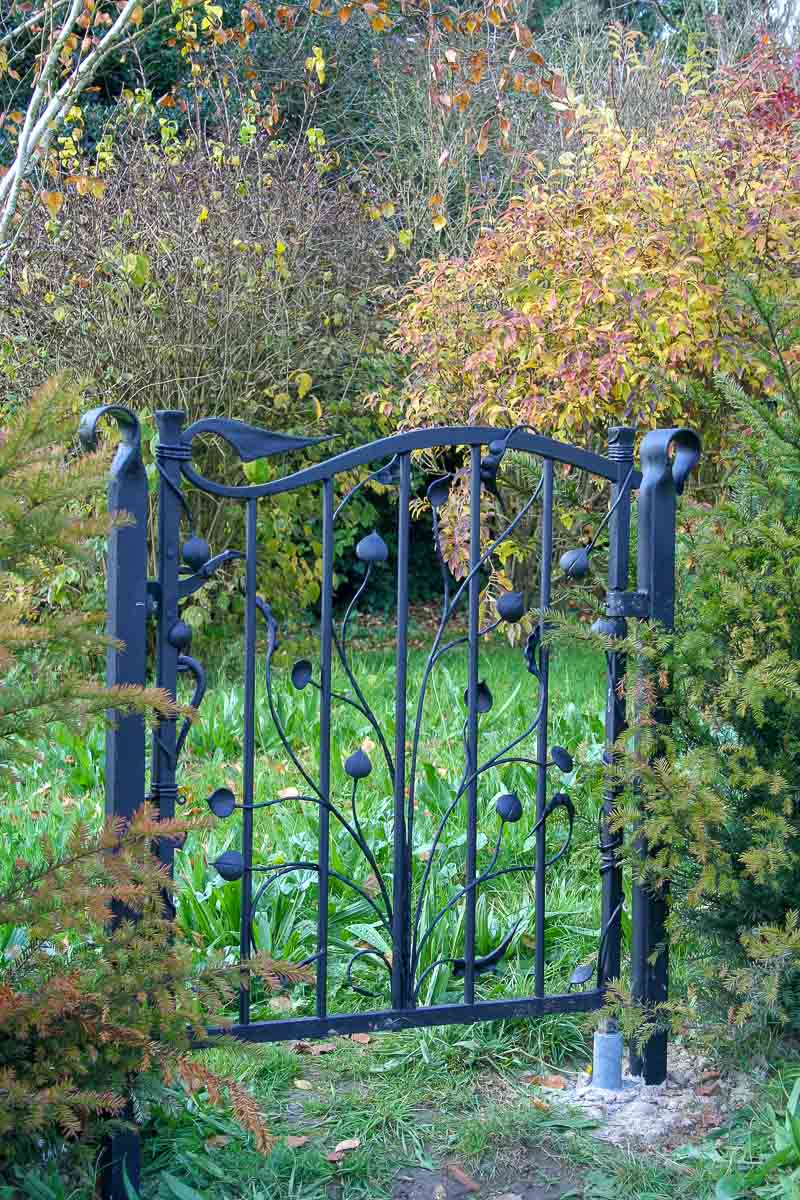
“This style is part of a larger trend called ‘biophilic design,’ which is all about incorporating natural elements and forms into our living spaces to foster a stronger connection to the outdoors.”
As we spend more time at home, there’s a growing desire to make our spaces, including our gardens, feel more organic and less sterile. A gate with botanical motifs is a perfect expression of this shift, offering a hint of the living garden that lies beyond it. It feels both timeless and perfectly suited for our current moment.
10. Create a Secret Garden Entry with a Brick Arch and Iron Gate
This entrance is a masterclass in creating a sense of journey and enclosure. The arched brickwork and the climbing vines overhead form a short tunnel, a classic technique to create a feeling of transition and discovery. Your view is intentionally framed and focused through the gate, building anticipation for what lies beyond. The repetition of the reddish-brown brick from the path to the pillars provides a strong visual continuity, making the entire structure feel cohesive and grounded.
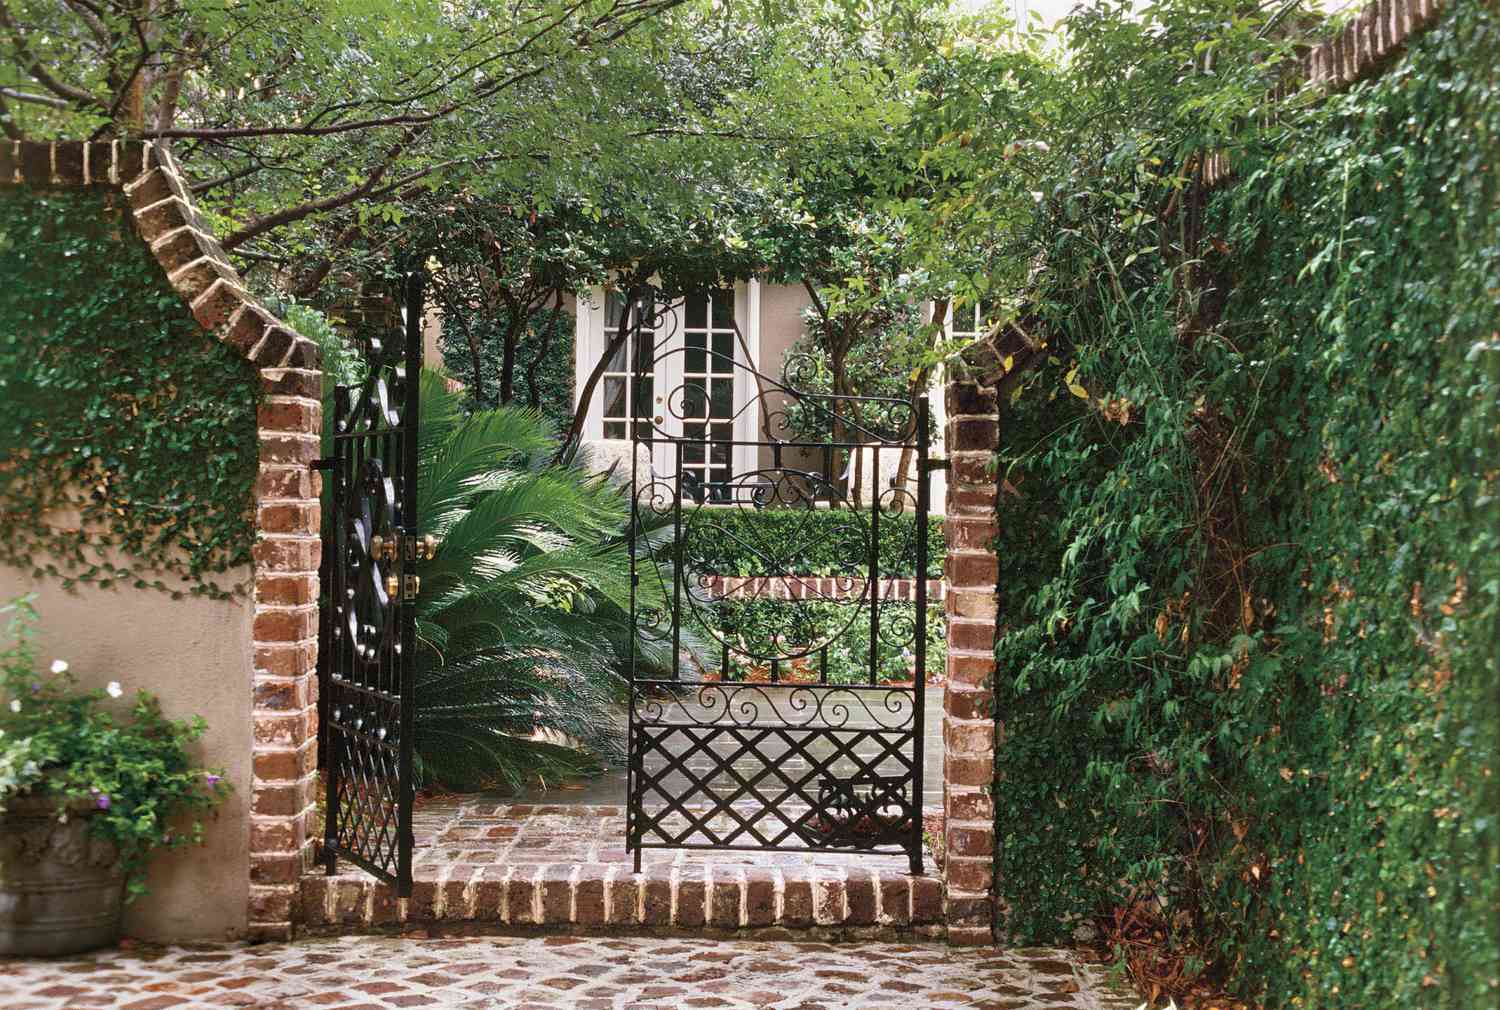
“This is a grand statement that requires space.”
The brick pillars need a solid footing and a substantial presence, so this isn’t for a narrow side yard. You’ll want a total width of at least 8-10 feet to accommodate the pillars and the gate without it feeling cramped. The height of the arch is also critical for creating that ‘tunnel’ effect; it should be significantly taller than the people passing through it, ideally 9-10 feet high. This creates a sense of drama that a standard-height gate can’t match.
11. Build a Rustic Archway with a Weathered Wood Gate
A weathered wooden gate like this has undeniable rustic charm, but the key is distinguishing between ‘charming weathering’ and ‘structural decay.’ This gate’s green-tinged patina suggests it might be pressure-treated lumber, which holds up well. If you use untreated wood for a similar look, you must apply a high-quality water-repellent sealant every 1-2 years. Pay special attention to the bottom of the gate and any joints where water can collect, as this is where rot begins. Neglect it, and your charming gate will become a sagging, splintered mess in a few seasons.
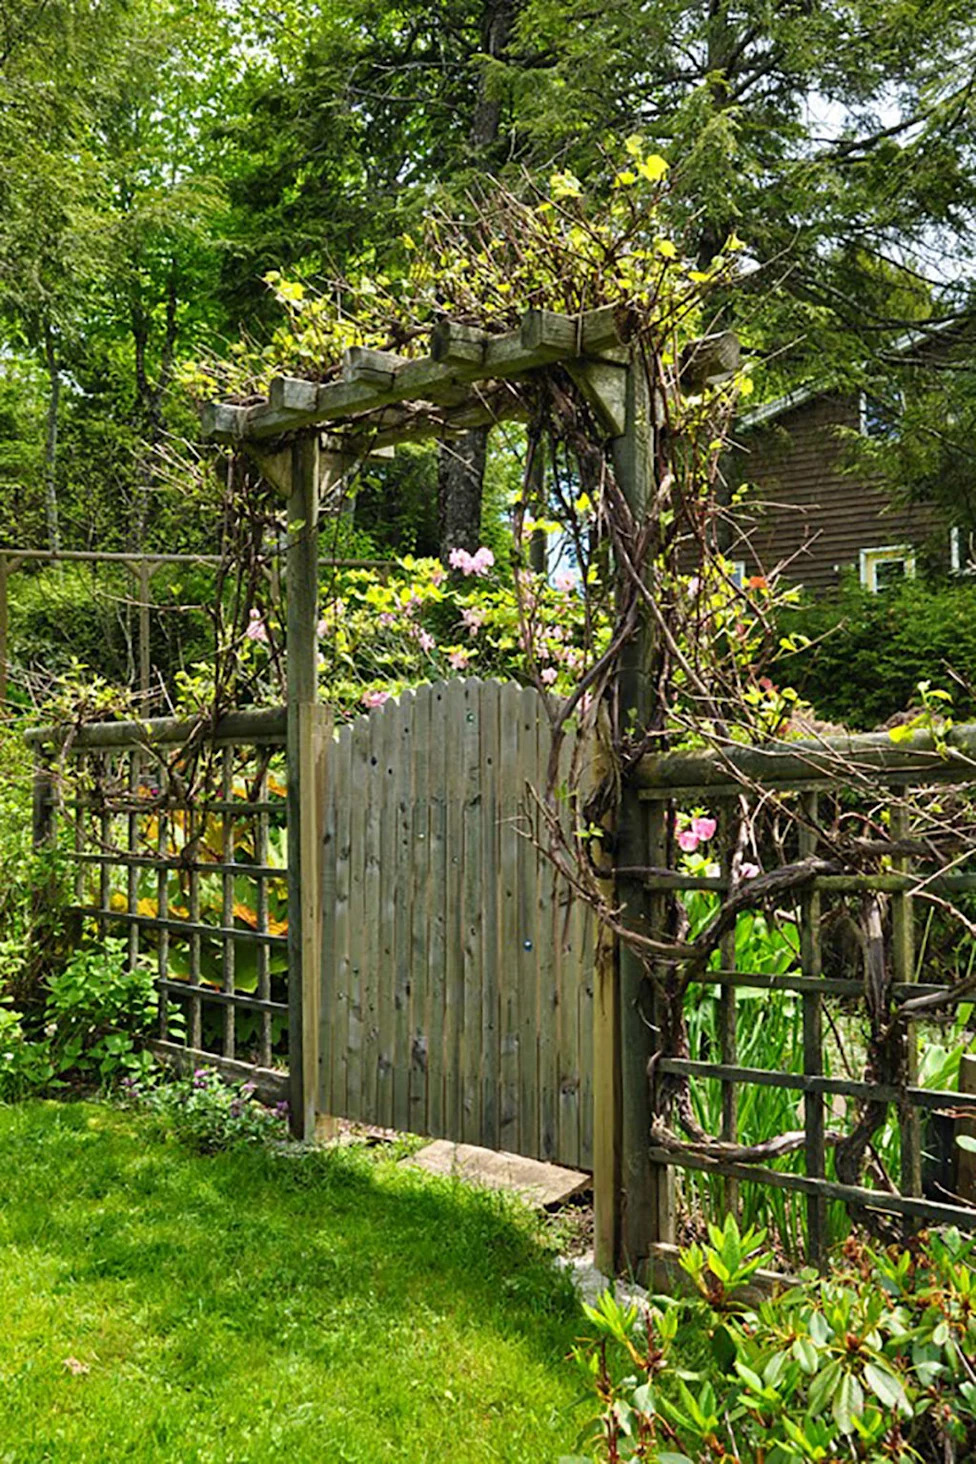
“To create a similar scalloped top on a simple wooden gate (Time: 1 hr, Cost: $0 ”
To create a similar scalloped top on a simple wooden gate (Time: 1 hr, Cost: $0 if you own a jigsaw):
- Start with a standard rectangular gate.
- Find a circular object with the right curve, like a large bucket lid or a trash can lid.
- Place the lid on the corner of the gate and trace a perfect arc with a pencil.
- Flip the lid and trace the identical arc on the other side.
- Use a jigsaw to carefully cut along your traced lines.
- Sand the cut edges smooth to prevent splintering and prepare for painting or staining.
12. Frame a Rustic Wooden Gate with Climbing Pink Roses
This serene look is a study in texture and softness. The formula is approximately 40% weathered wood, 40% soft green foliage, and 20% delicate floral accents (the pink roses). The rough, aged texture of the wooden gate provides a beautiful rustic base, which is then softened by the sheer volume of surrounding greenery. The sparse but bright pink roses are just enough accent color to draw the eye without overwhelming the tranquil, natural mood. It’s a very forgiving style; a few weeds or overgrown leaves only add to the charm.
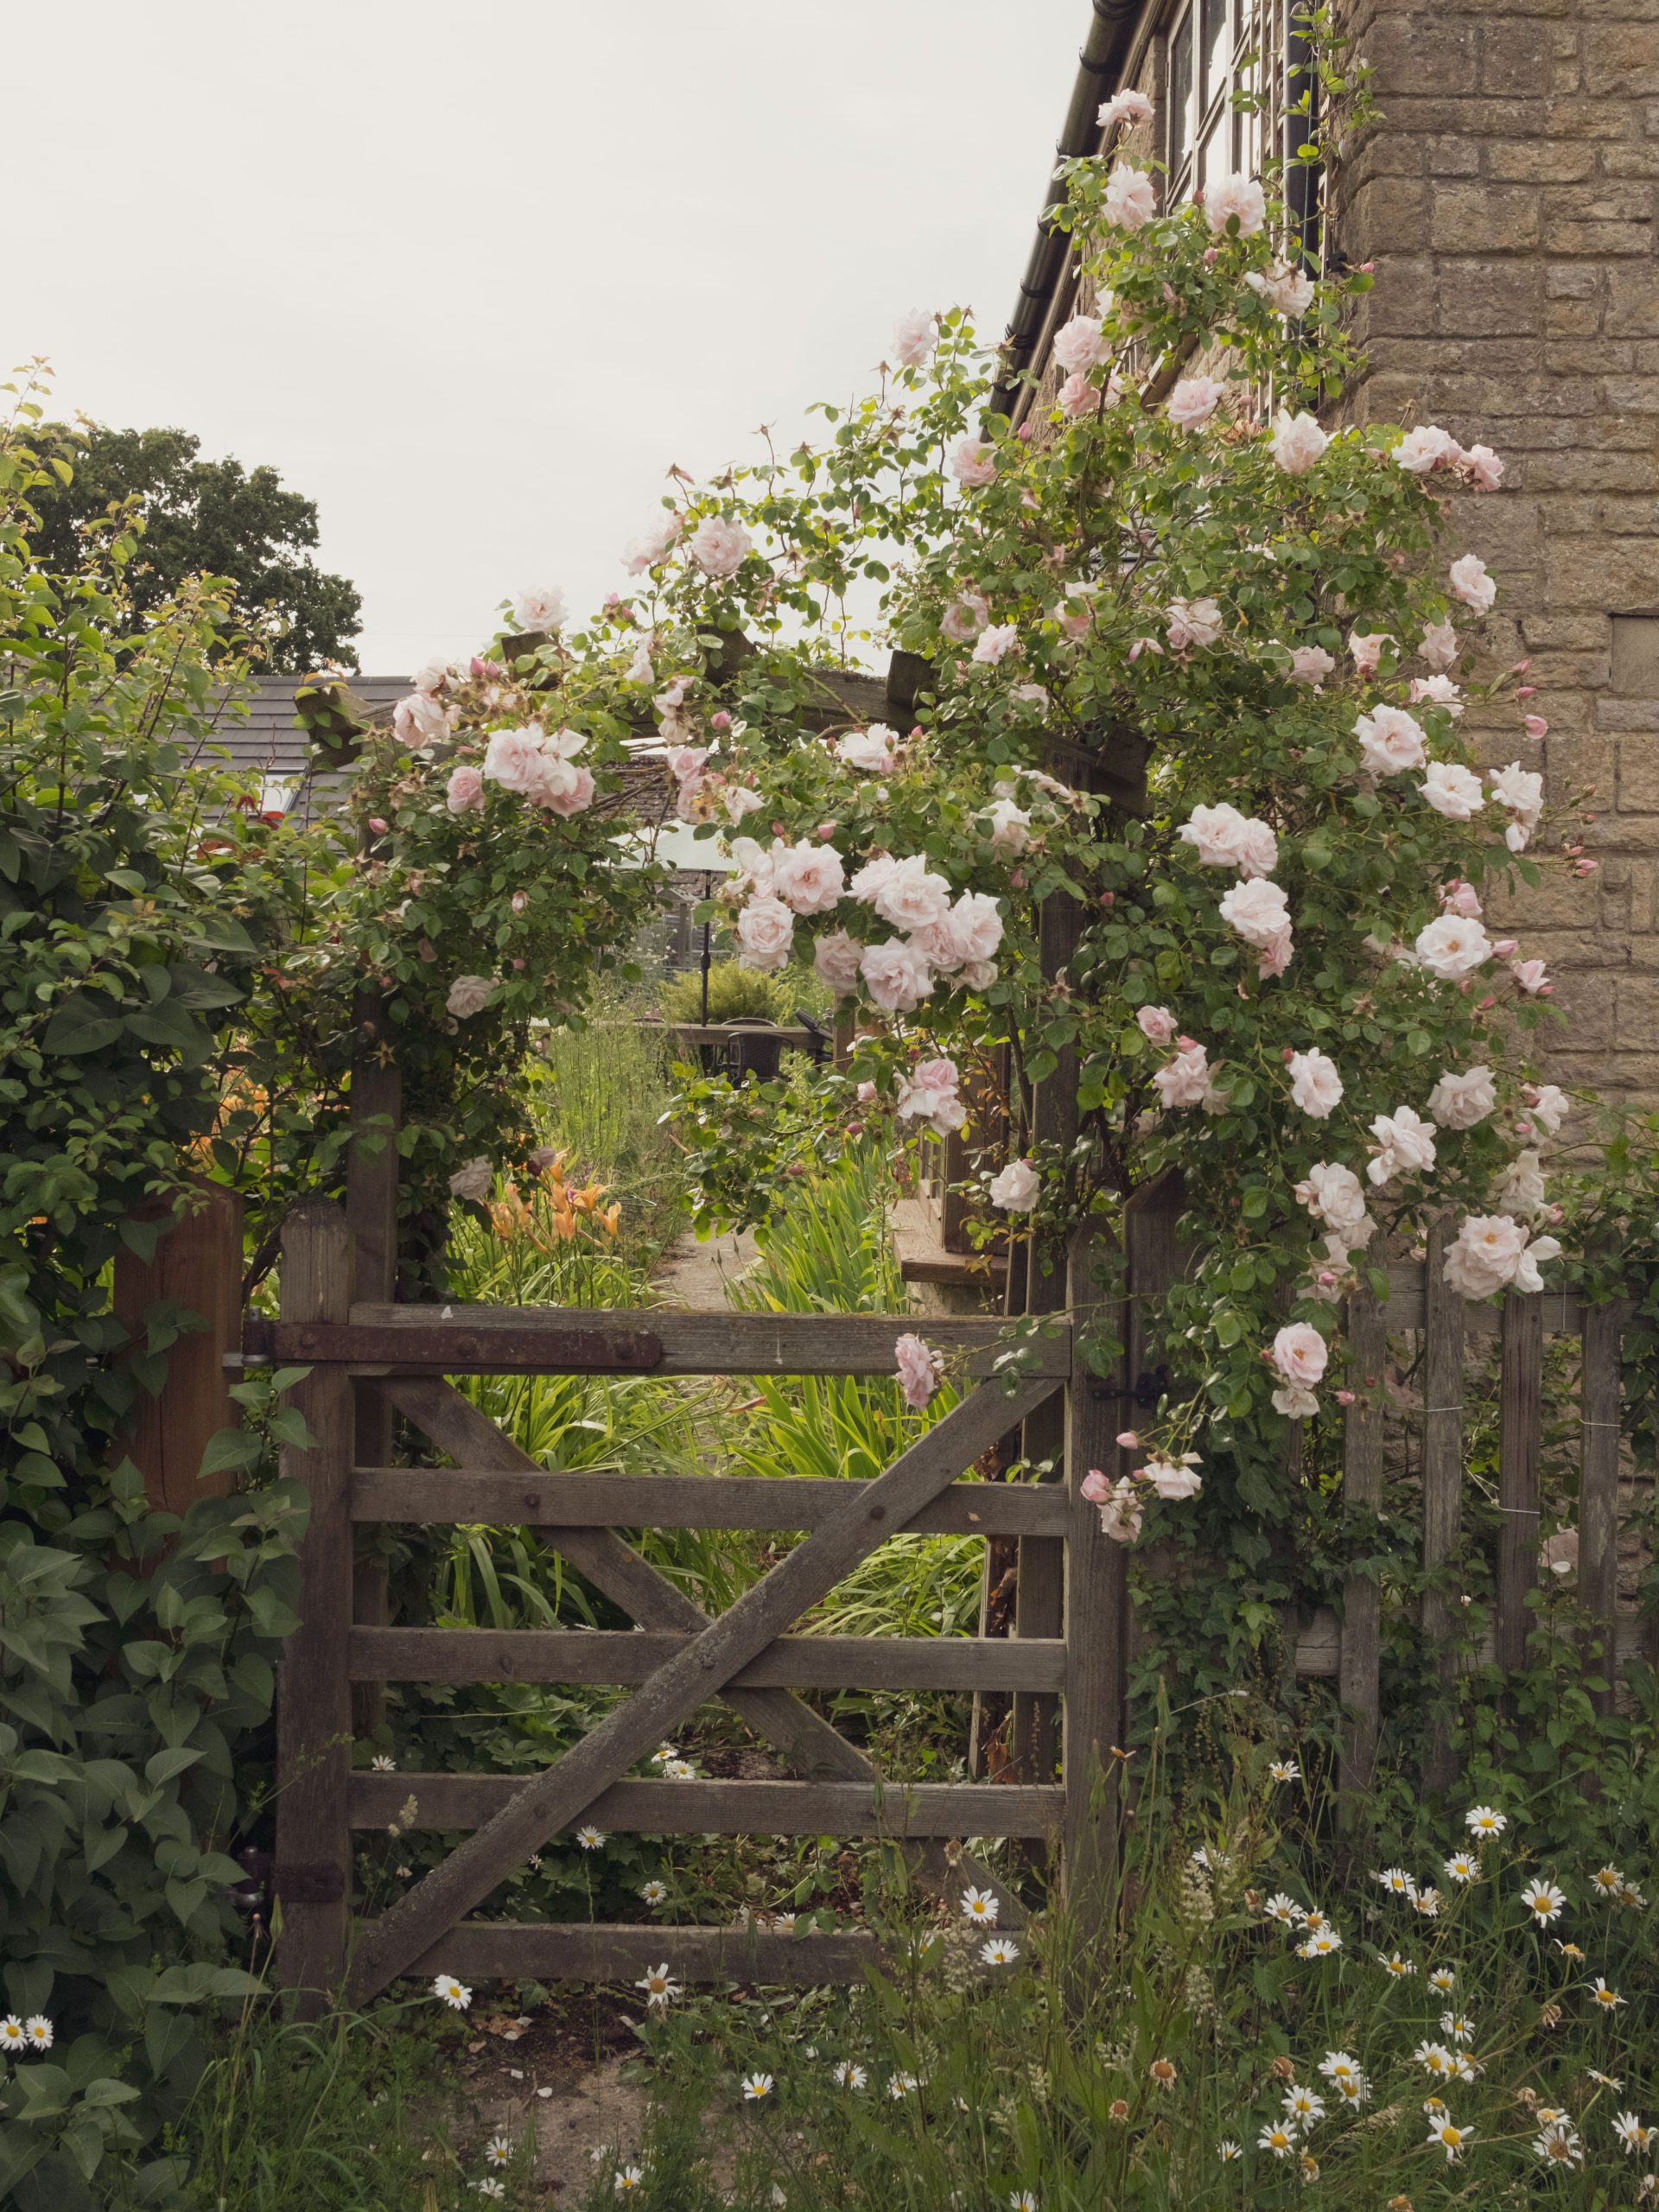
“This idyllic, ‘effortlessly rustic’ look can be deceptive.”
A gate this enveloped in foliage is prone to moisture retention, which can accelerate wood rot. It also makes it difficult to inspect or repair hinges and latches. If you love this style, be sure the gate is made from a rot-resistant wood like cedar or teak, or that it’s been thoroughly treated with a preservative. Also, check for pests like termites or carpenter ants that might be drawn to the damp, sheltered wood.
13. Craft an Enchanting Passage with a Green Metal Arch
The single most important element here is the dark green metal archway. The simple wooden gate is purely functional, but the arch is what provides the magic. It creates a distinct ‘portal’ or threshold, suggesting a passage into a different, more natural world. By painting it a deep green, it blends almost seamlessly with the surrounding foliage, making it feel like a natural part of the landscape rather than a man-made structure. This is what creates that enchanting, secret garden feeling.
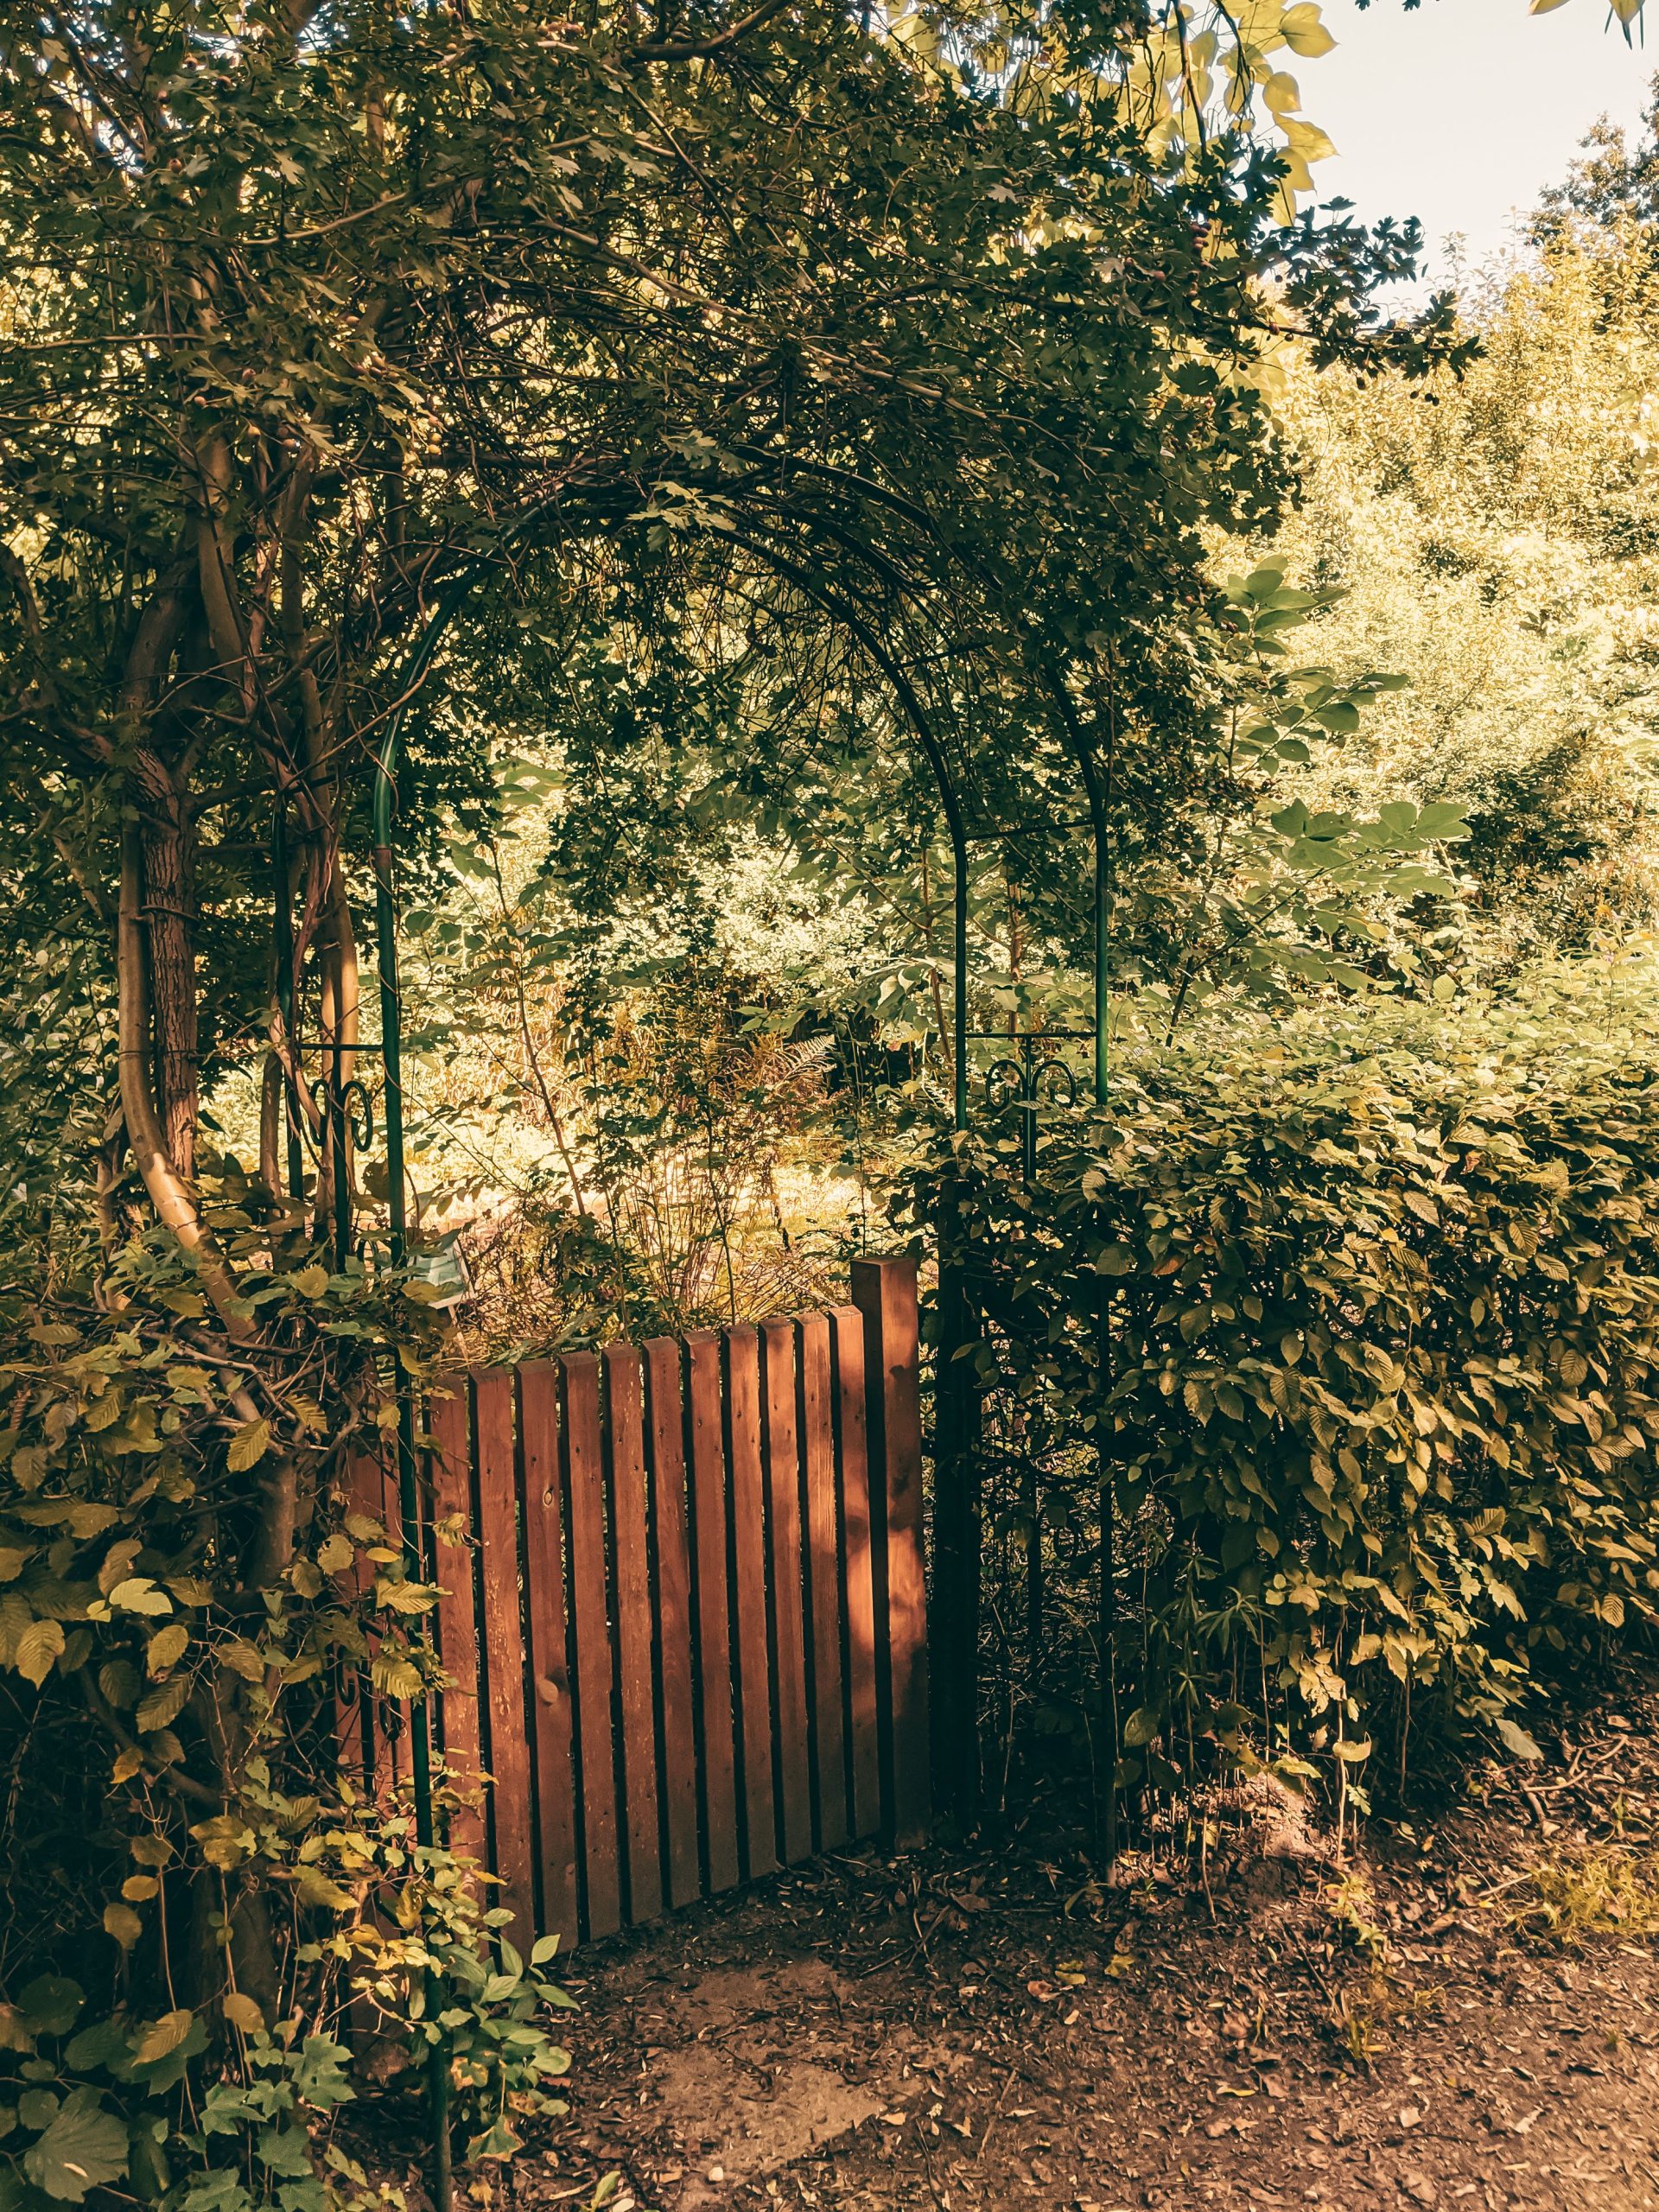
“Before you commit to a narrow archway like this, check a few things:
Access Nee”
Before you commit to a narrow archway like this, check a few things:
- Access Needs: Will you need to get a wheelbarrow, lawnmower, or other large equipment through this gate? A narrow, decorative archway can become a major bottleneck. Measure your largest piece of equipment first.
- Sunlight: The dense foliage creates deep shade. Is the path beyond the gate one that needs sunlight to stay dry and free of moss, or is it a shade-tolerant path like the one in Idea #16?
- Plant Choice: Ensure the plants you choose to grow over the arch aren’t too aggressive. You want them to adorn the arch, not pull it down.
14. Design a Humble Entry with a Weathered Metal Gate
This design’s success lies in its unpretentious honesty. It’s not trying to be grand or ornate. The weathered gray metal, the simple chain, and the utilitarian green mesh fence speak to a purely functional, rustic purpose. It works because it feels authentic to a working garden or a simple, natural landscape. The beauty comes from the way these humble materials are softened by the lush green foliage and the carpet of autumn leaves, creating a poignant contrast between the man-made and the natural.
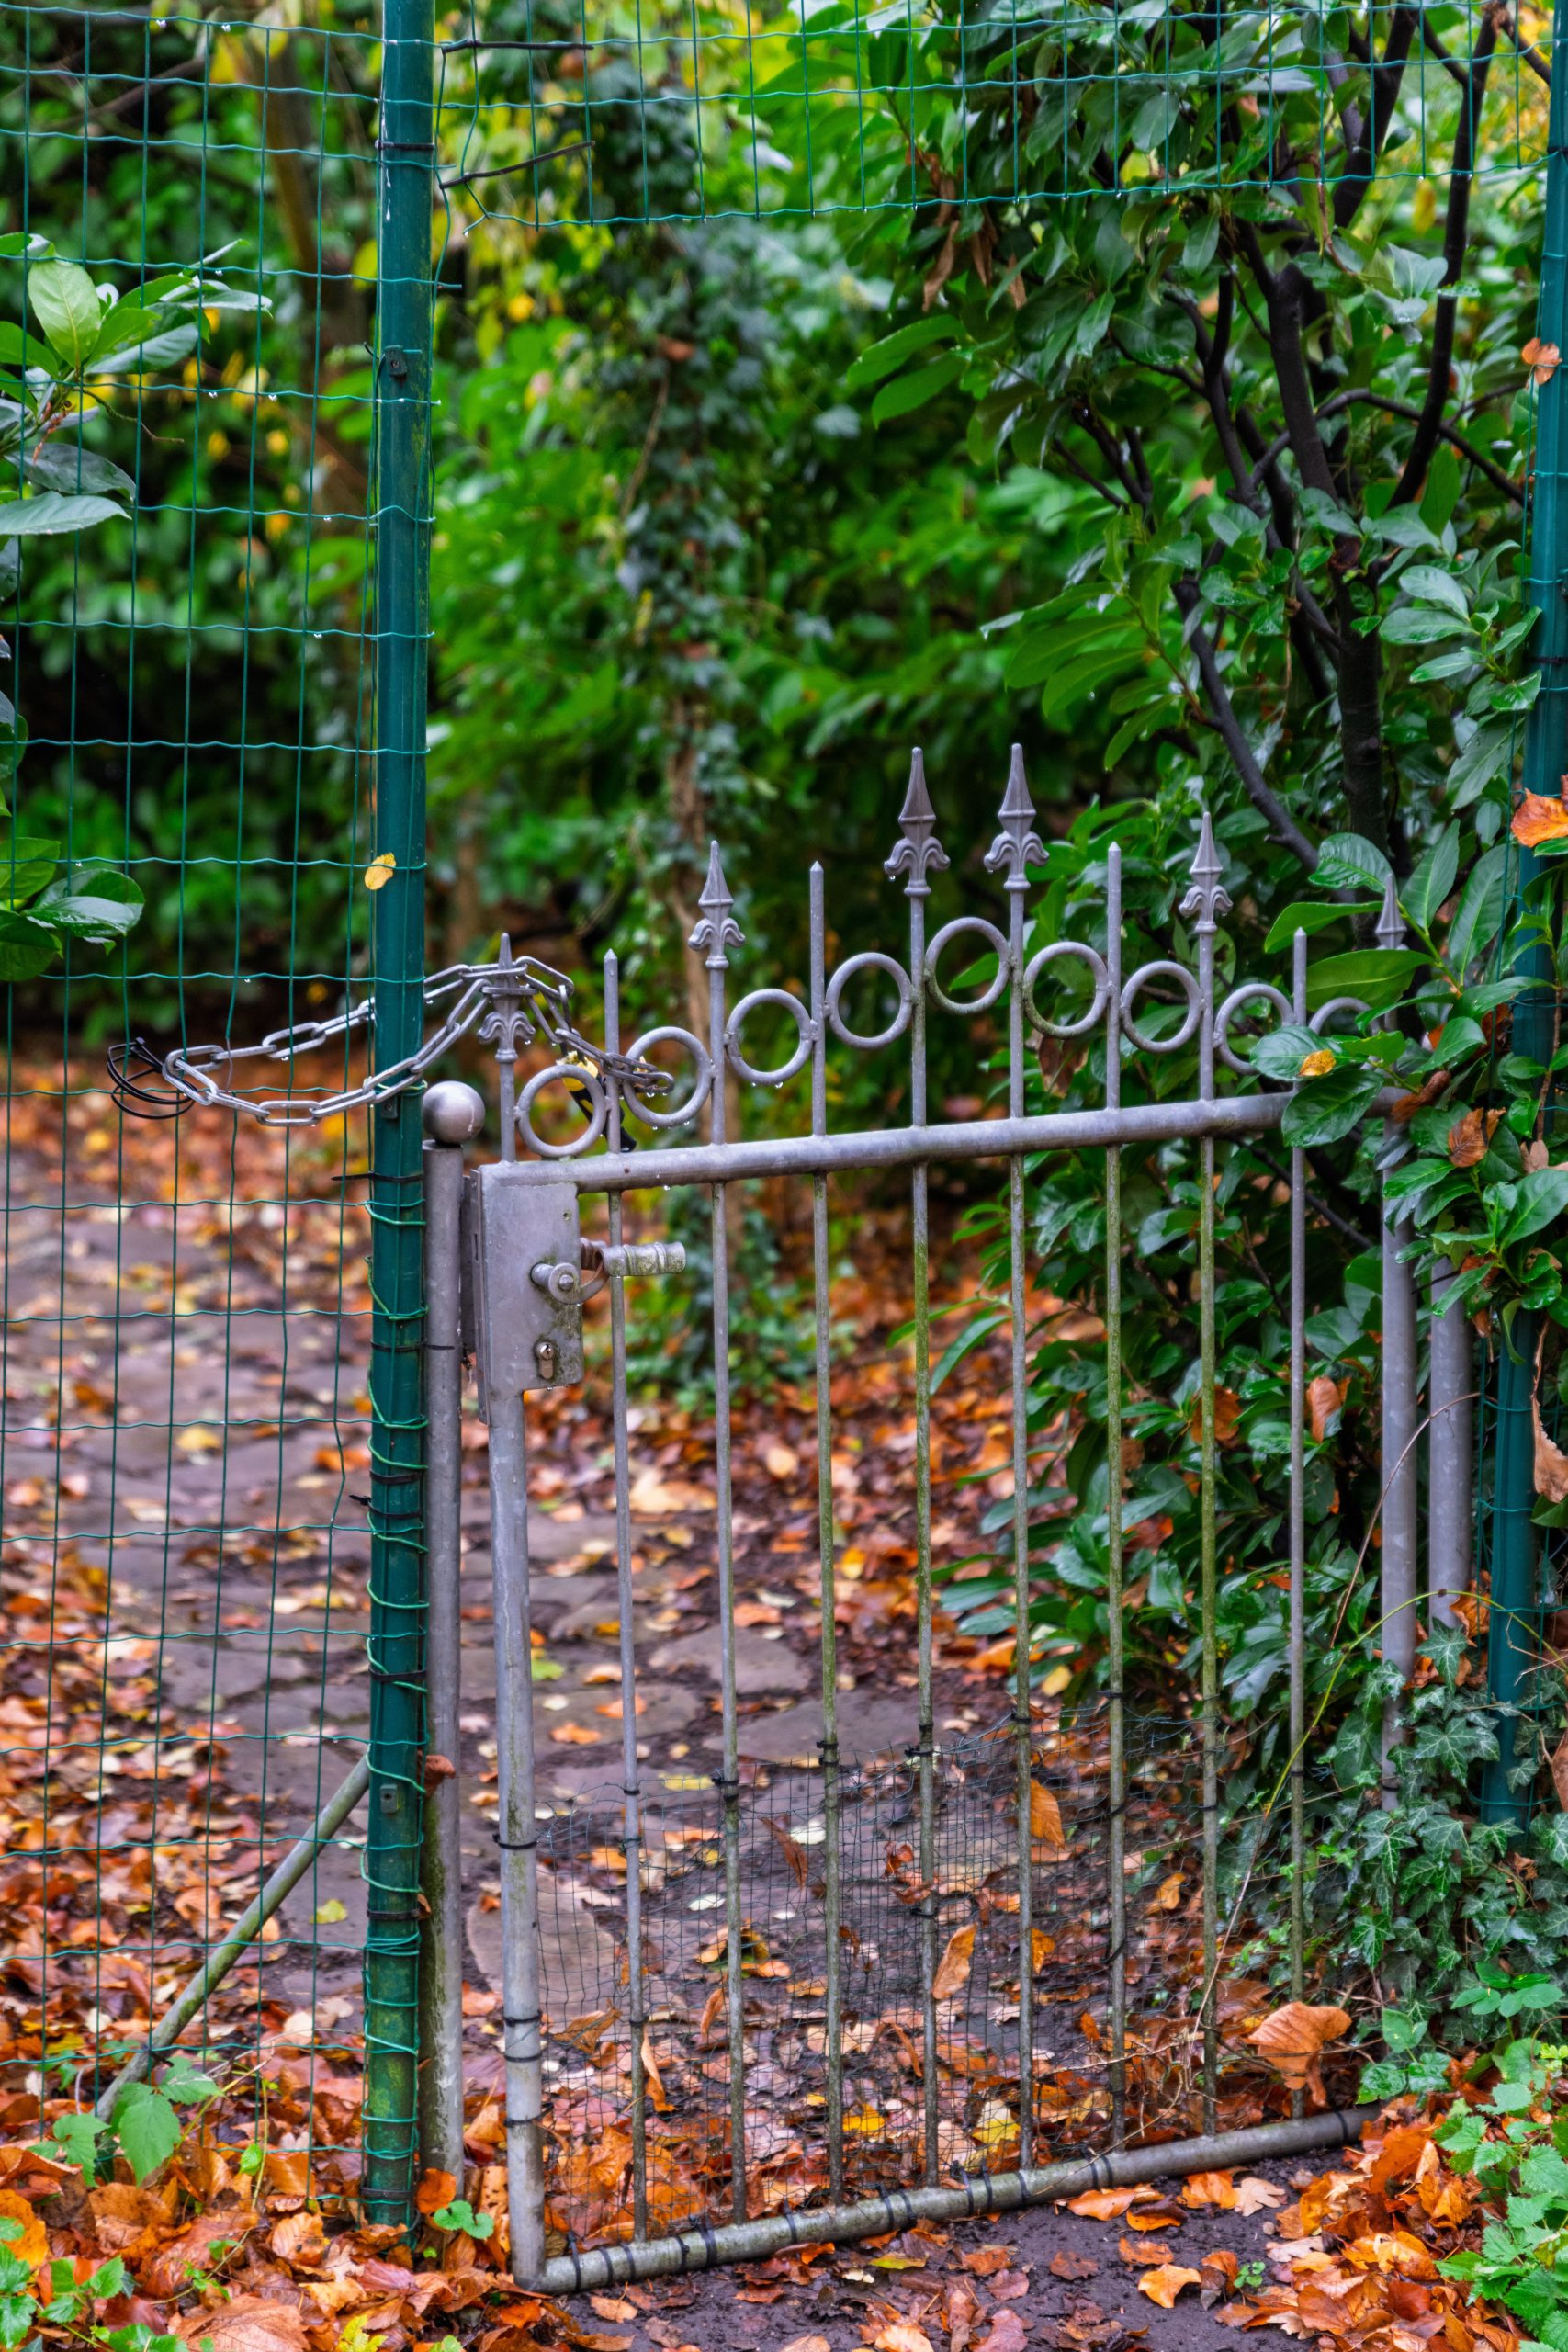
“This is a look you can achieve almost entirely through salvage and thrift.”
Habitat for Humanity ReStores, architectural salvage yards, or even the ‘free’ section of Craigslist are treasure troves for old metal gates like this one. They often sell for as little as $20-$40. A roll of simple green wire fencing is inexpensive at any hardware store. The ‘weathered’ patina is free, courtesy of time and the elements. This is proof that you don’t need a big budget to create a gate with character.
15. Create a Romantic Focal Point with a White Iron Arch and Red Roses
When training roses over an arch, don’t just let them grow straight up. To achieve this abundant, covered look, you need to encourage horizontal growth. As the main canes grow, gently bend and tie them to the archway in a spiral pattern. This slows the upward flow of sap, which encourages the plant to produce more lateral shoots. More lateral shoots mean more flowers all over the arch, not just a sad little tuft at the very top. Use soft plant ties that won’t cut into the canes as they thicken.

“A white gate covered in red roses is a classic romantic image, but it’s not without its challenges.”
Red pigments in flowers can sometimes ‘bleed’ after a heavy rain, potentially staining the white paint. More significantly, the thorns of the rose bushes will scrape against the paint every time the wind blows, leading to chips and scratches over time. Be prepared to do annual touch-ups with white exterior paint to keep the archway looking crisp and clean. Without this upkeep, it can start to look shabby quickly.
16. Carve a Gateway Through a Sculpted Hedge
The absolute star of this show is the hedge itself. The wooden gate is secondary. The sculpted evergreen archway is a living structure, a piece of topiary art that transforms the entrance into something magical and secretive. It’s a testament to patience and a gardener’s skill. Without the carefully pruned hedge, the gate would just be a simple gate in a row of shrubs. With it, it’s the entrance to another world, reminiscent of a classic storybook garden.
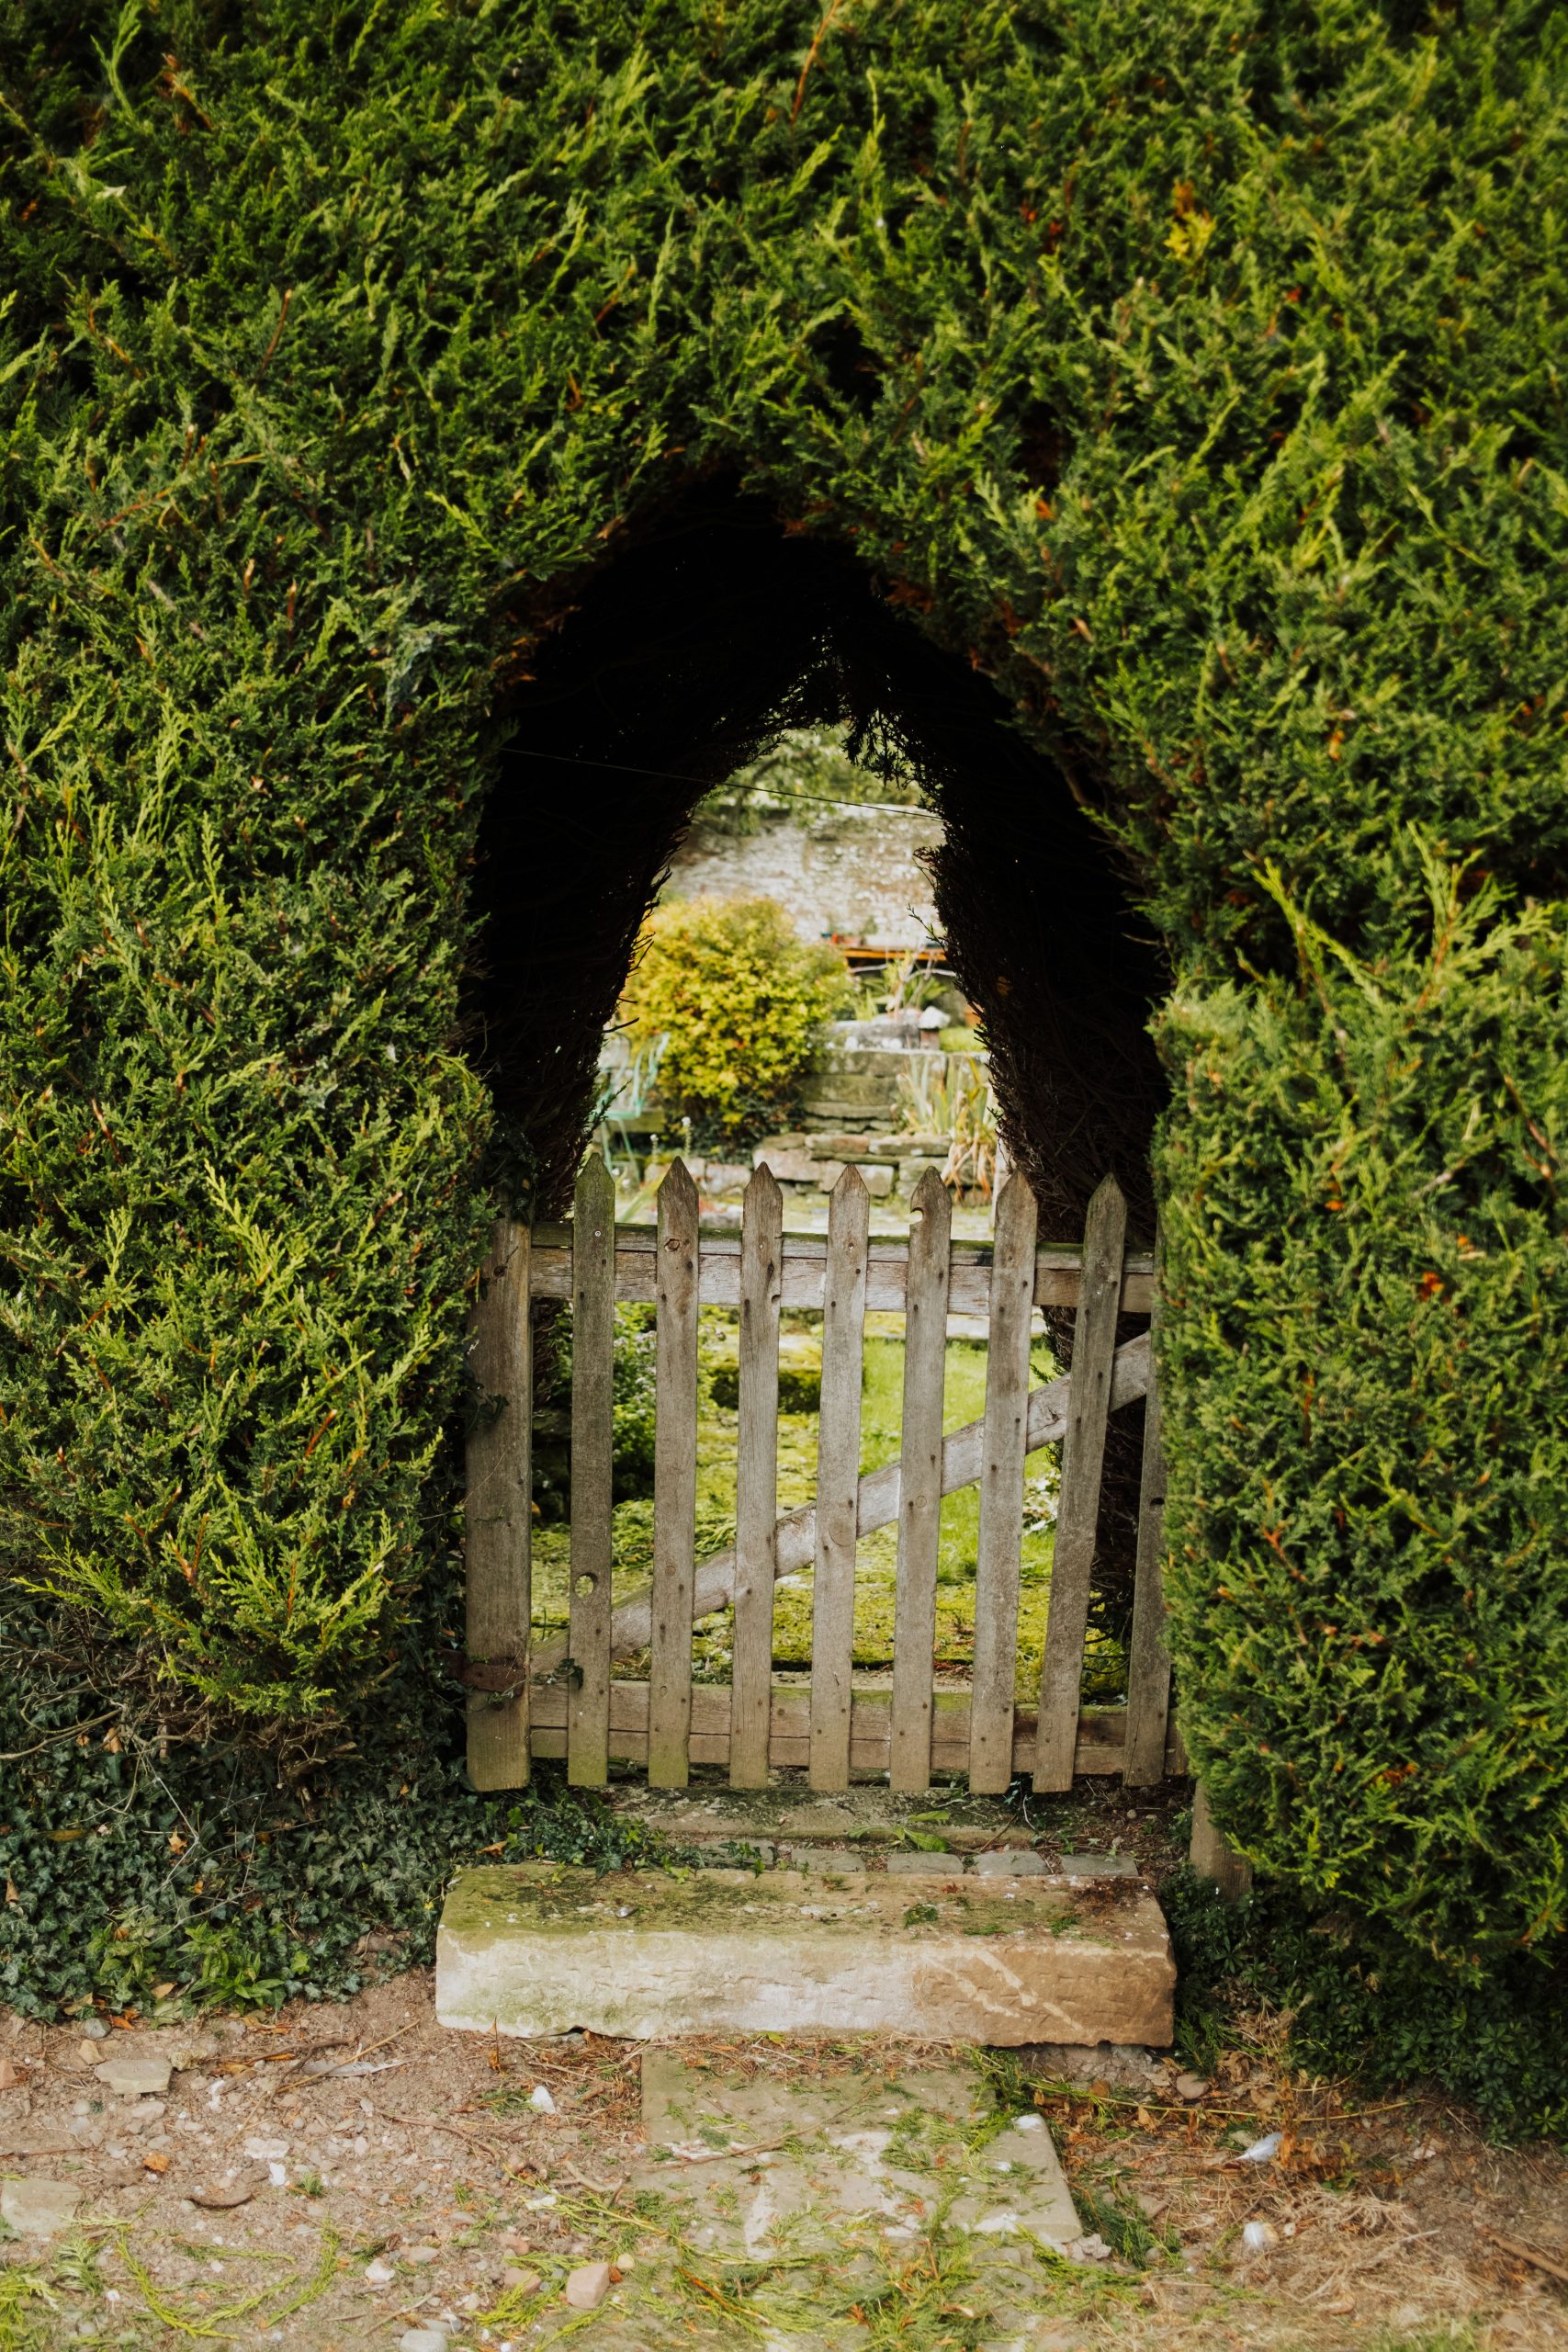
“This entrance works because of the powerful contrast between the formal and the informal.”
The hedge is formally sculpted into a perfect, clean arch. This man-made shape is juxtaposed with the rustic, weathered wooden gate and the rough, natural stone step. Beyond the gate, you see a hint of an overgrown, wilder garden. This ‘formal frame around an informal view’ is a classic design technique that creates depth, intrigue, and a powerful sense of place. It’s a more rustic take on the formal entrance in Idea #28.
17. Adorn a Wrought Iron Gate with Pink Climbing Flowers
Wrought iron gates and stone walls can be a significant investment. For a look that captures this enchanting, overgrown feeling on a smaller budget, use pre-fabricated black metal fence panels from a home improvement store instead of custom ironwork. For the ‘stone’ walls, consider using retaining wall blocks with a convincing stone-like texture, which are much cheaper and easier to install than traditional masonry. The real star is the climbing flower; invest in a healthy, fast-growing vine like a pink clematis, and it will quickly become the focal point, masking the simpler structures beneath.
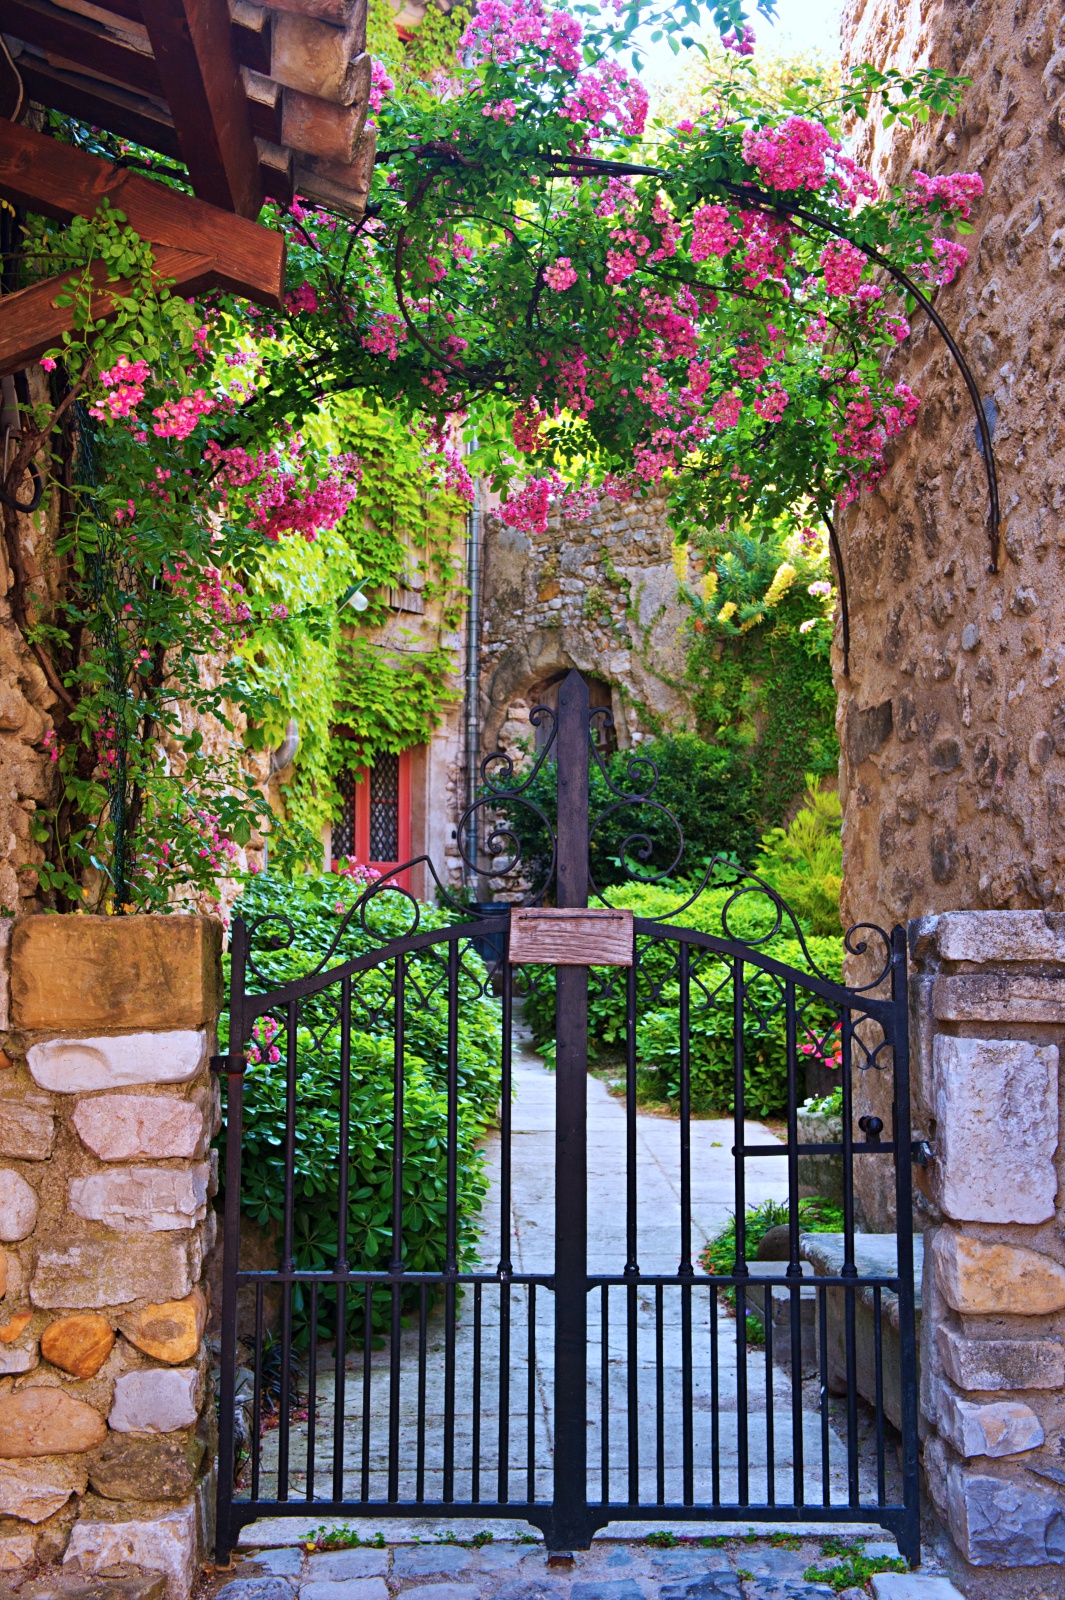
“This idea is perfect for a narrow side yard or a passage between a house and a garage.”
The gate itself doesn’t need to be wider than 3-4 feet. The key is to have at least 2 feet of planting bed on either side to accommodate the stone walls and give the climbing plants room to establish a healthy root system. The overhead arch gives the illusion of more space, but the actual footprint is quite small, making it a great solution for adding charm to a utilitarian walkway.
18. Make a Statement with a Bright Red Gate in a White Arch
The power of this design comes from its bold use of color theory. The bright red gate and the lush green foliage are complementary colors, meaning they sit opposite each other on the color wheel. This creates the strongest possible contrast, making the red of the gate appear even more vibrant and saturated. The white arch acts as a neutral frame, preventing the scene from becoming visually chaotic and allowing the red and green to truly sing. The effect is cheerful, confident, and incredibly welcoming.
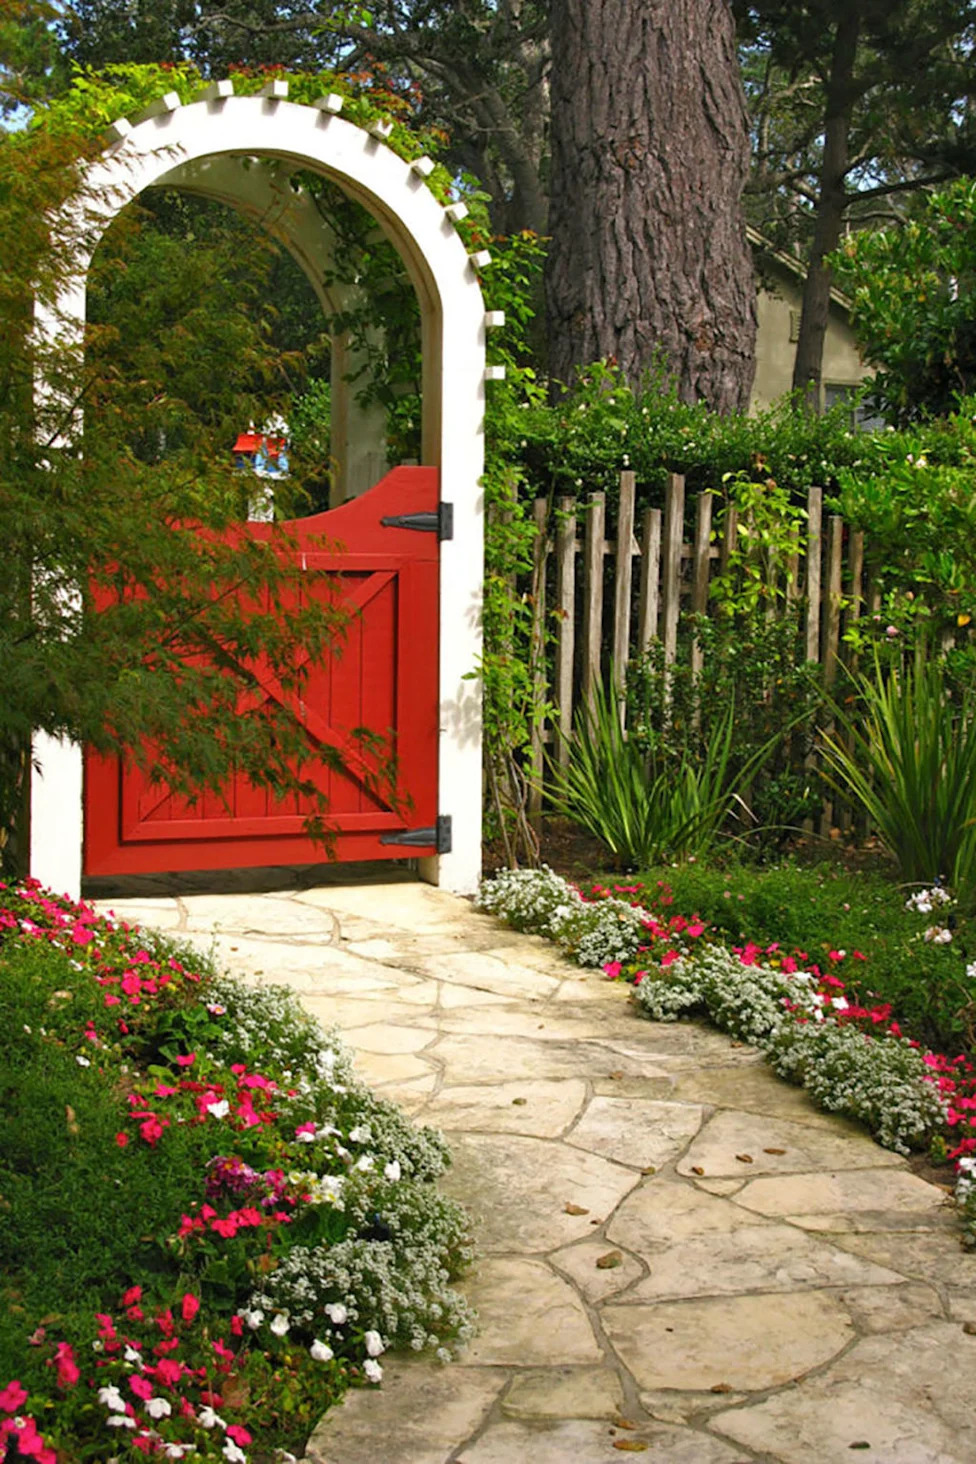
“When painting a garden gate a bold color like this fire-engine red, prep work is 90% of the job.”
Don’t skip the primer, especially on new wood. Use an exterior-grade oil-based or stain-blocking primer. This will prevent tannins from the wood from bleeding through and yellowing your beautiful red paint. It also provides a much better surface for the topcoat to adhere to, meaning your vibrant color will last for years instead of peeling after one season.
19. Add Storybook Charm with a Heart-Cutout Blue Gate
To get that perfectly weathered, multi-tonal paint finish (Time: 2 days, Cost: $40 for paint samples):
- Start with bare wood or a stripped gate. Apply a base coat of a dark color, like charcoal or navy, and let it dry completely.
- Rub a wax candle or paraffin block along the edges and in random spots where you want the dark color to show through.
- Paint over the entire gate with your main light blue color.
- Once the blue paint is dry, use a putty knife or sandpaper to scrape away the paint in the waxed areas. The topcoat won’t have adhered there, revealing the darker color underneath for a naturally distressed look.
- Finish with a coat of clear matte exterior sealant to protect your work.
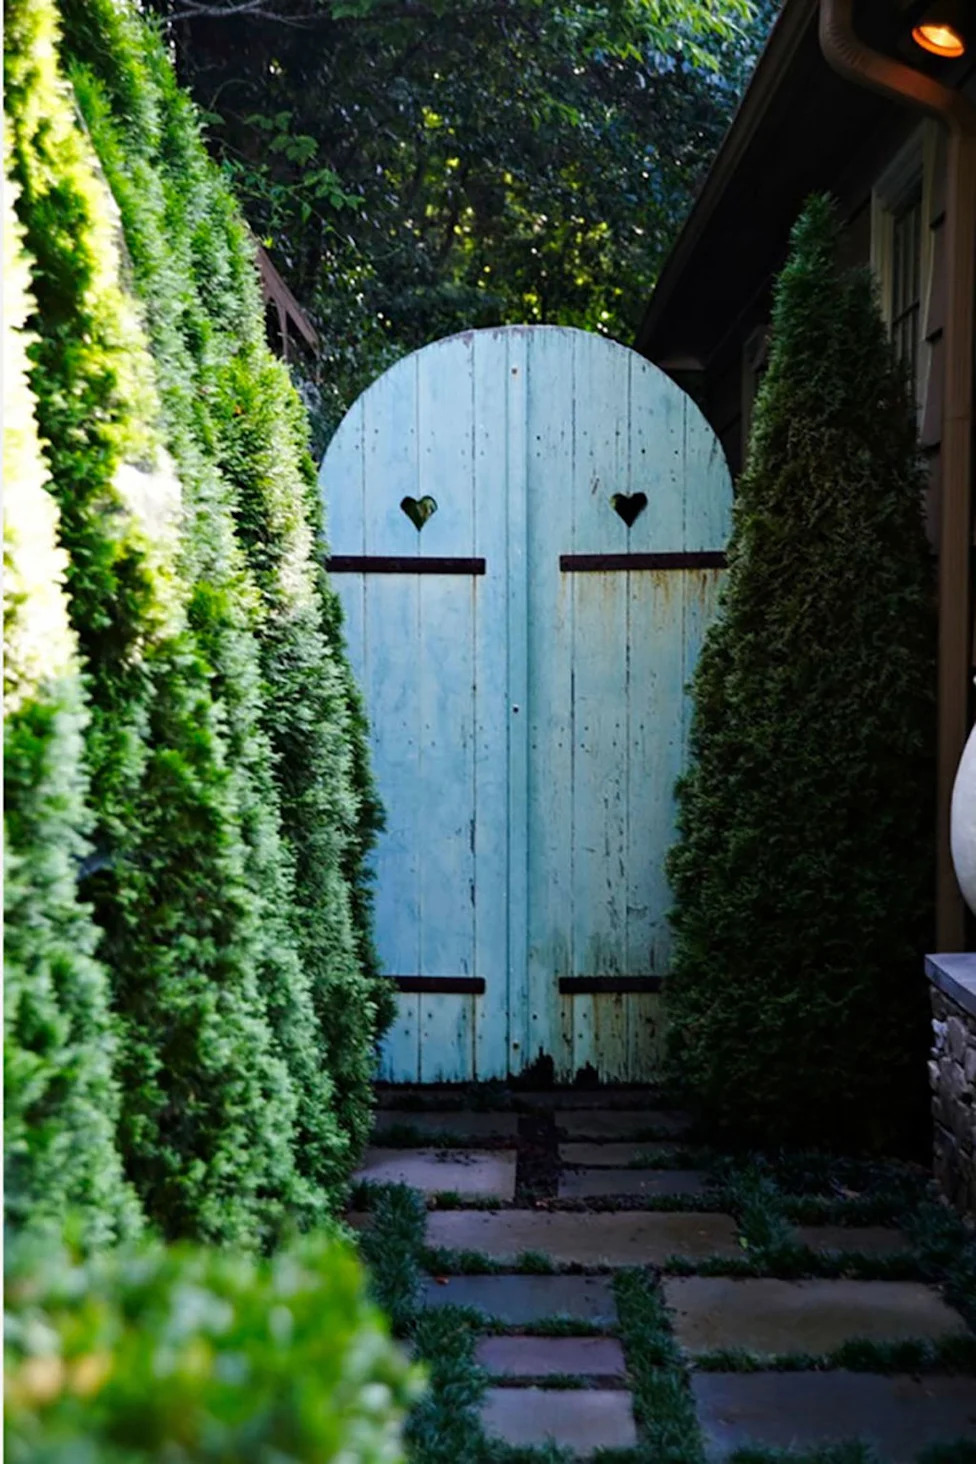
“A gate with cutouts, especially charming ones like these hearts, is lovely but offers less privacy and security than a solid gate.”
It’s best suited for an internal garden division or a front garden where the goal is demarcation rather than security. Also, be aware that those cute cutouts can be an invitation for small animals like rabbits or squirrels to peek through and possibly squeeze into your garden if the gap is large enough. It’s a trade-off of charm versus practicality.
20. Pair a Weathered White Picket Gate with Blue Hydrangeas
This quintessential cottage garden look relies on a balanced palette. Think 40% cool tones (the blue hydrangeas and cool greens), 40% warm neutrals (the cream house, stone path, and autumn leaves), and 20% bright neutral (the white gate). This balance of cool and warm, with the gate as a bright focal point, creates a scene that feels harmonious and complete. The slightly ‘undone’ or overgrown nature of the planting softens the formal structure of the house and path, making it feel welcoming and lived-in.
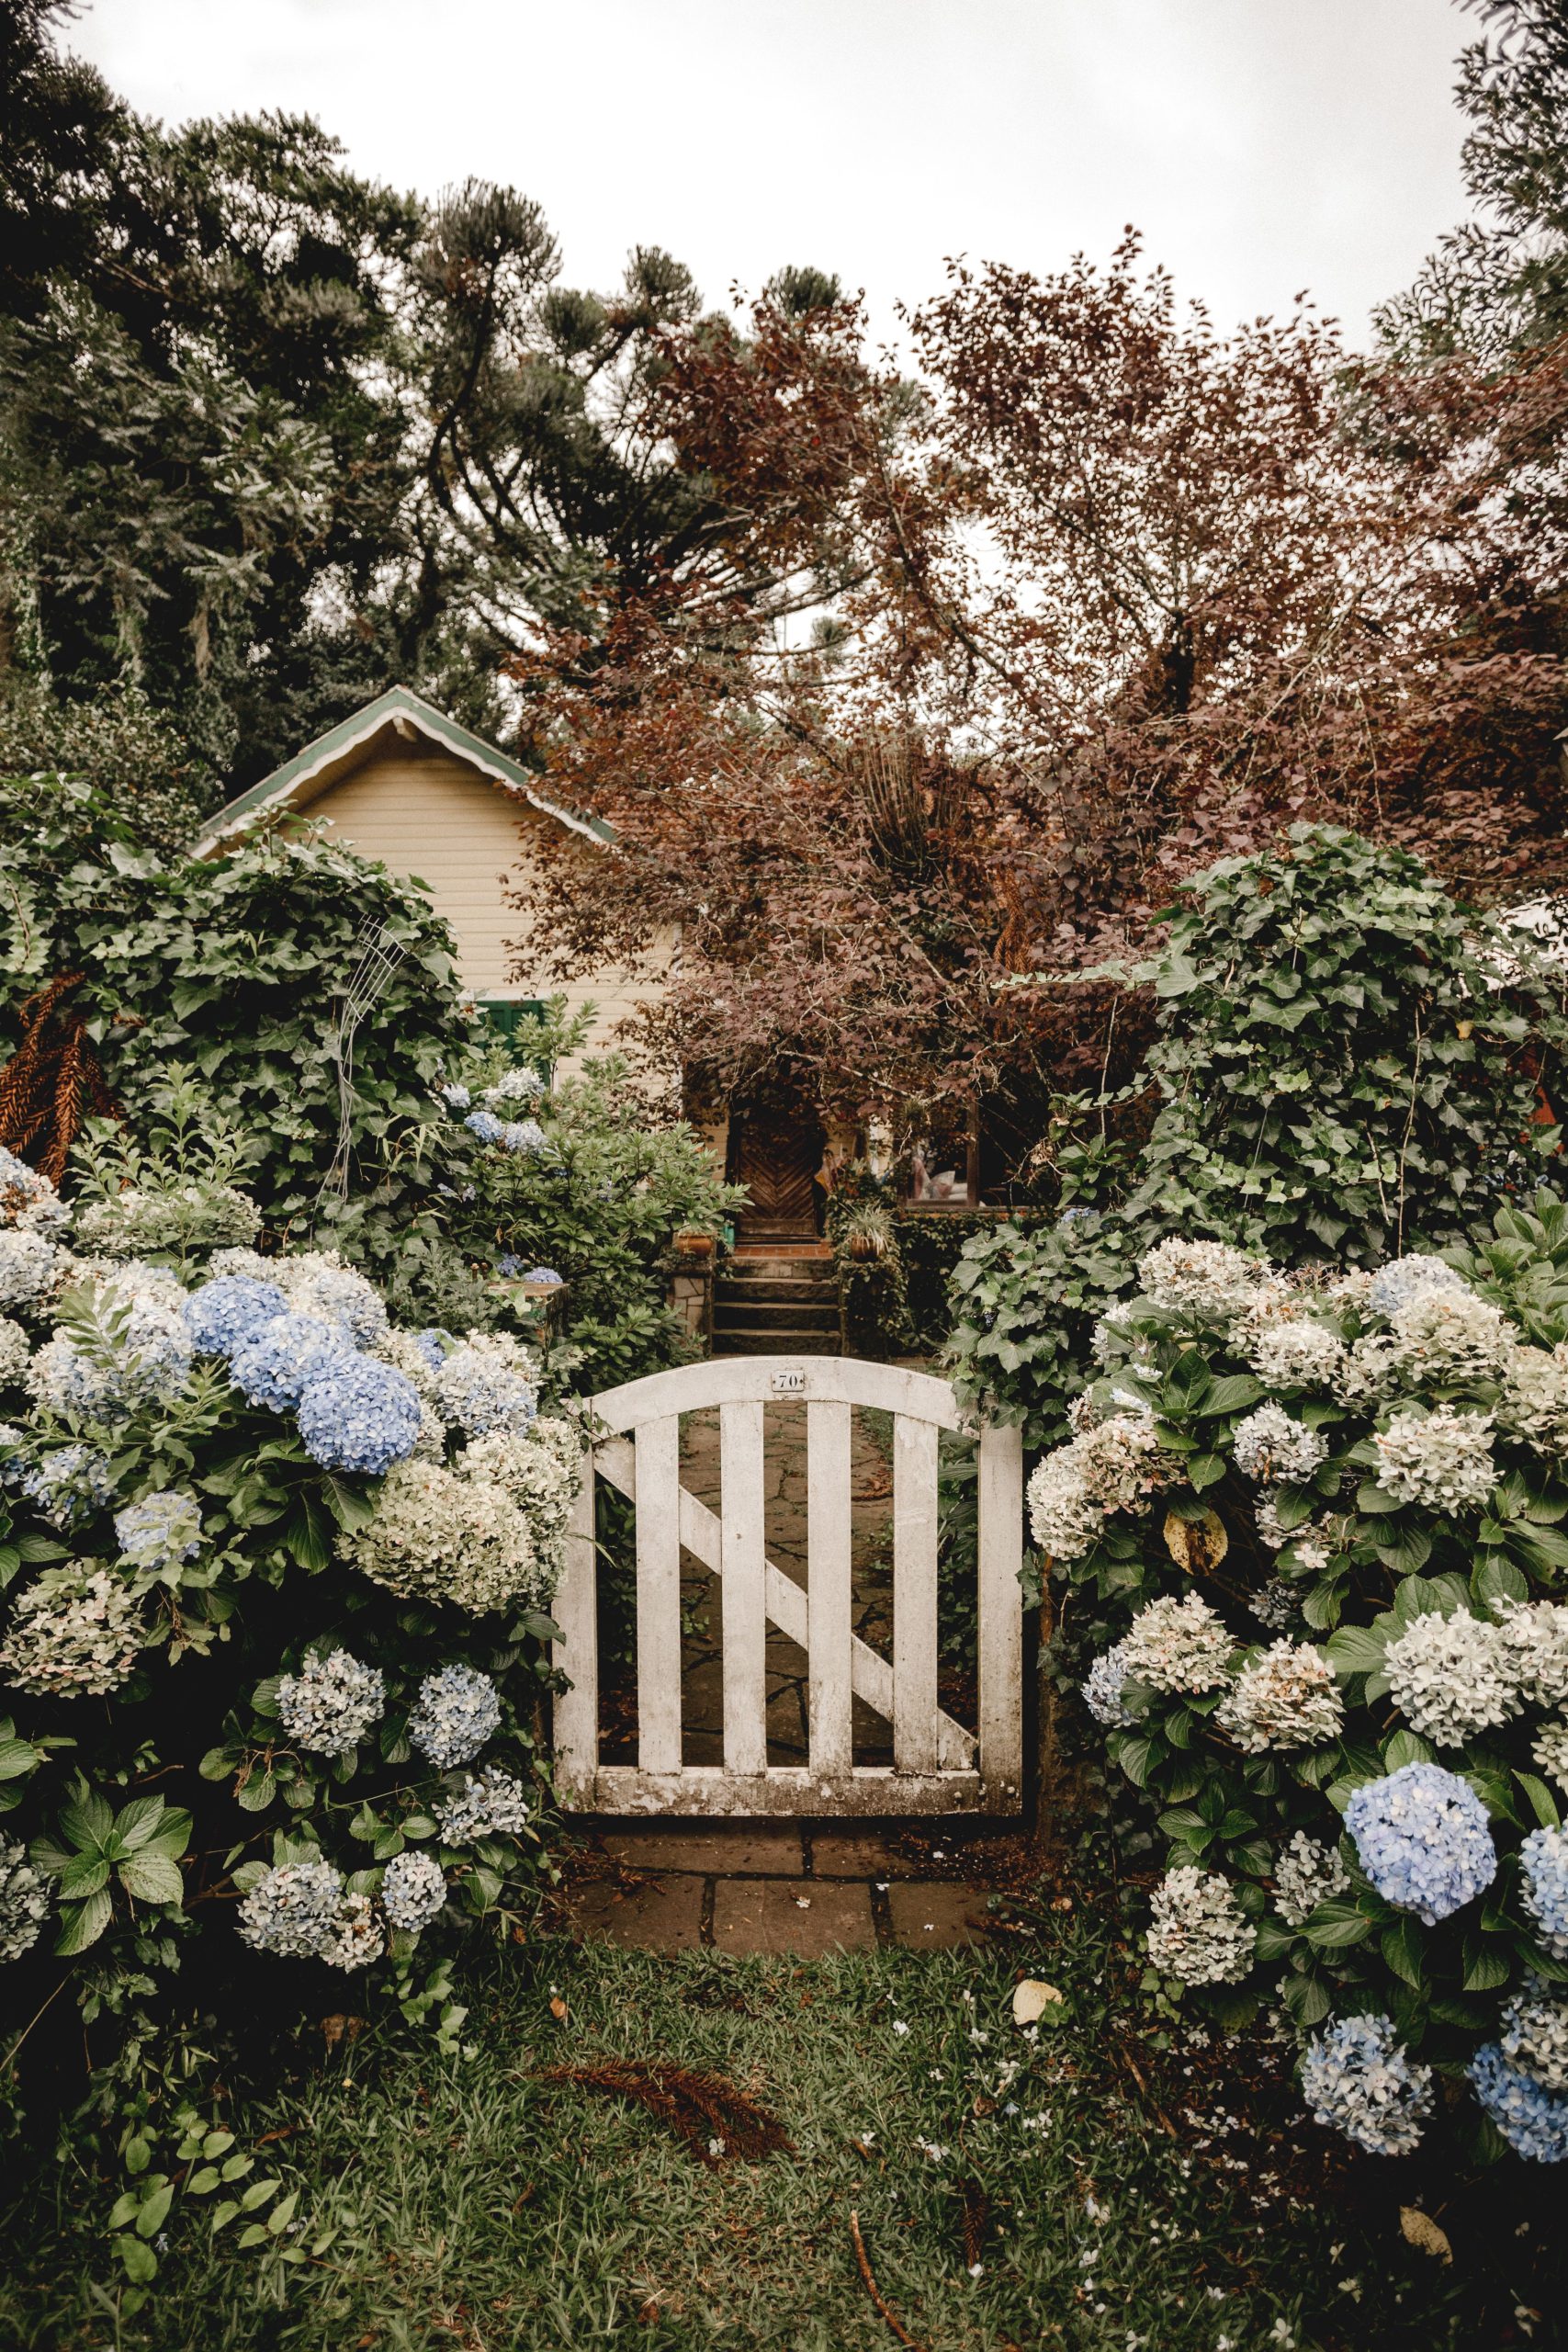
“The key to keeping those hydrangeas that stunning shade of blue is soil chemistry.”
Hydrangea macrophylla flowers act like a pH litmus test. For blue blooms, your soil needs to be acidic (pH 6.0 or lower). If your soil is naturally alkaline, the flowers will turn pink or lavender. You can amend your soil to make it more acidic by adding garden sulfur or aluminum sulfate, which you can find at any garden center. This isn’t a one-time fix; you’ll likely need to re-apply it each year to maintain that beautiful blue hue.
21. Go Modern with a Dark Slat Gate and Brick Pillars
This design is effective because of its clean lines and strong material contrast. The horizontal slats of the dark gray gate create a sense of width and modernity, while the vertical orientation of the classic red bricks provides a grounding, traditional element. The light-colored gravel path adds another layer of texture and color contrast, making each element stand out crisply. This is a highly structured, architectural look that communicates tidiness and order. It proves that a garden gate doesn’t have to be ornate to make a strong impression.
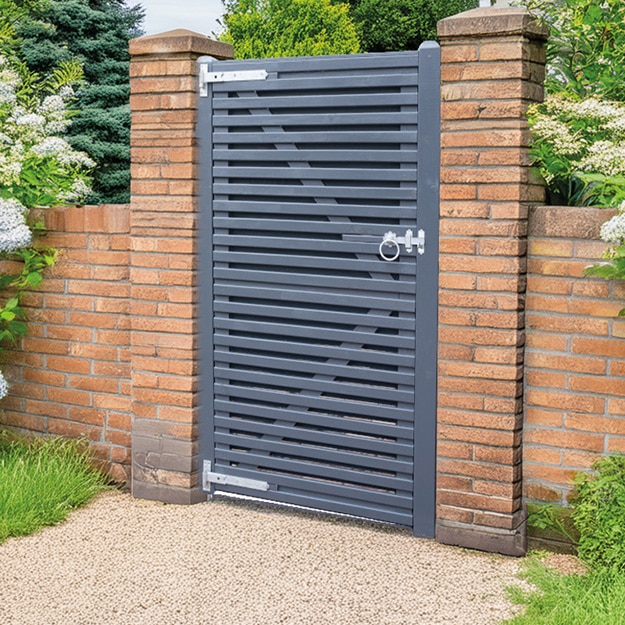
“Brick pillars can be costly due to labor.”
To get a similar modern, structured look for less, use simple 6×6 inch wooden posts painted a dark charcoal gray to match the gate. Instead of a low brick wall, use affordable concrete paver blocks to create a clean-edged planting bed. For the gate itself, you can easily construct it from standard deck boards or treated lumber, painted with a high-quality exterior paint. This brings the material cost down significantly while preserving the clean, linear aesthetic.
22. Keep It Natural with a Vertical Slat Wood Gate
For a light, natural wood gate like this, the finish is everything. To keep the wood looking fresh and prevent it from turning a blotchy, weathered gray, you need to use a penetrating oil finish with a UV inhibitor. Unlike a film-forming varnish that sits on the surface and can peel or crack, a penetrating oil soaks into the wood fibers, protecting it from within and enriching the natural color. Reapply the oil every year or two, especially on the surfaces that get the most sun and rain. It’s a quick job that makes a huge difference.
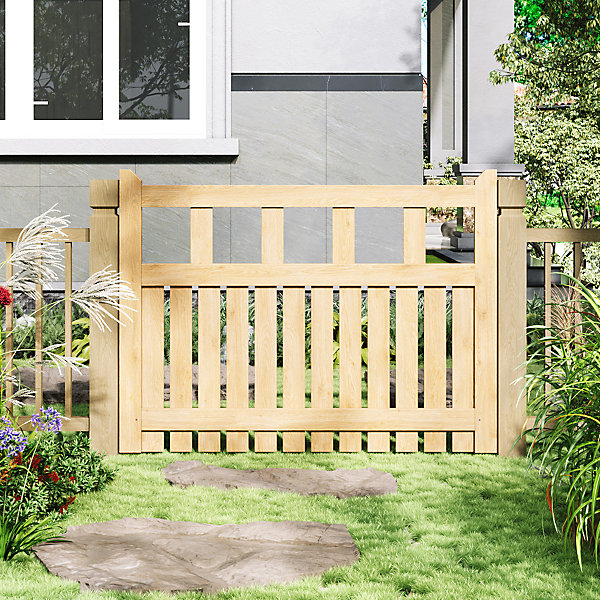
“Before installing a simple gate that opens onto a lawn, consider your foot traffic.”
Wear and Tear: Will this be a high-traffic entrance? Constant foot traffic will quickly wear a path in the lawn, leading to a muddy patch. The stepping stones here are a smart solution.
Mowing: Can you easily mow around the stepping stones and the gate itself? Ensure the gate swings clear of the stones and that there’s enough room to maneuver a lawnmower.
Drainage: Does this area of your lawn get soggy after rain? If so, a more robust path made of gravel or pavers might be a better long-term solution than grass or stepping stones.
23. Show Your Personality with a Garden Tool Gate
The whimsical infill made of garden tools is, without a doubt, the one thing that makes this gate a memorable piece of art. It’s a literal expression of the gate’s purpose and the owner’s passion. This isn’t just a barrier; it’s a conversation starter and a piece of sculpture. It turns a mundane object into something deeply personal and unique. Swapping this out for simple wooden slats would make it just another gate, completely stripping it of its unique character and charm.
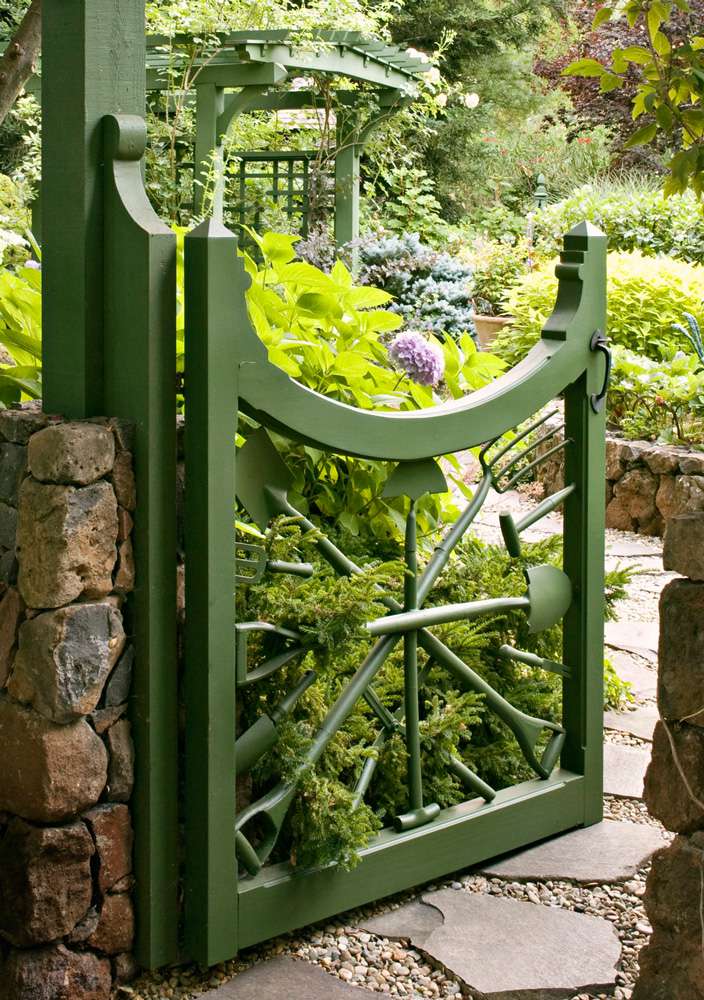
“A gate with this many nooks, crannies, and overlapping pieces is a magnet for dirt, pollen, and spiderwebs.”
It will be significantly harder to clean and repaint than a simple slat or panel gate. You’ll need a brush to get into all the tight spots. Also, depending on the type of metal used for the tool silhouettes, rust could be an issue. You’ll want to inspect it yearly for any signs of corrosion and touch it up immediately with a metal-appropriate paint to keep it looking its best.
24. Combine a Weathered Iron Gate with Stucco Pillars
This serene entryway follows a beautiful 60/30/10 ratio. The foundation is 60% soft, natural textures, including the lush green foliage and the sandy stucco pillars. Then, 30% is dedicated to the hard, rustic elements of the weathered iron gate and the herringbone brick path. The final 10% is the bright pop of accent color from the purple and orange flowers. This formula creates a look that feels both grounded and permanent, yet soft, natural, and inviting. It’s a perfect balance of hardscape and softscape.
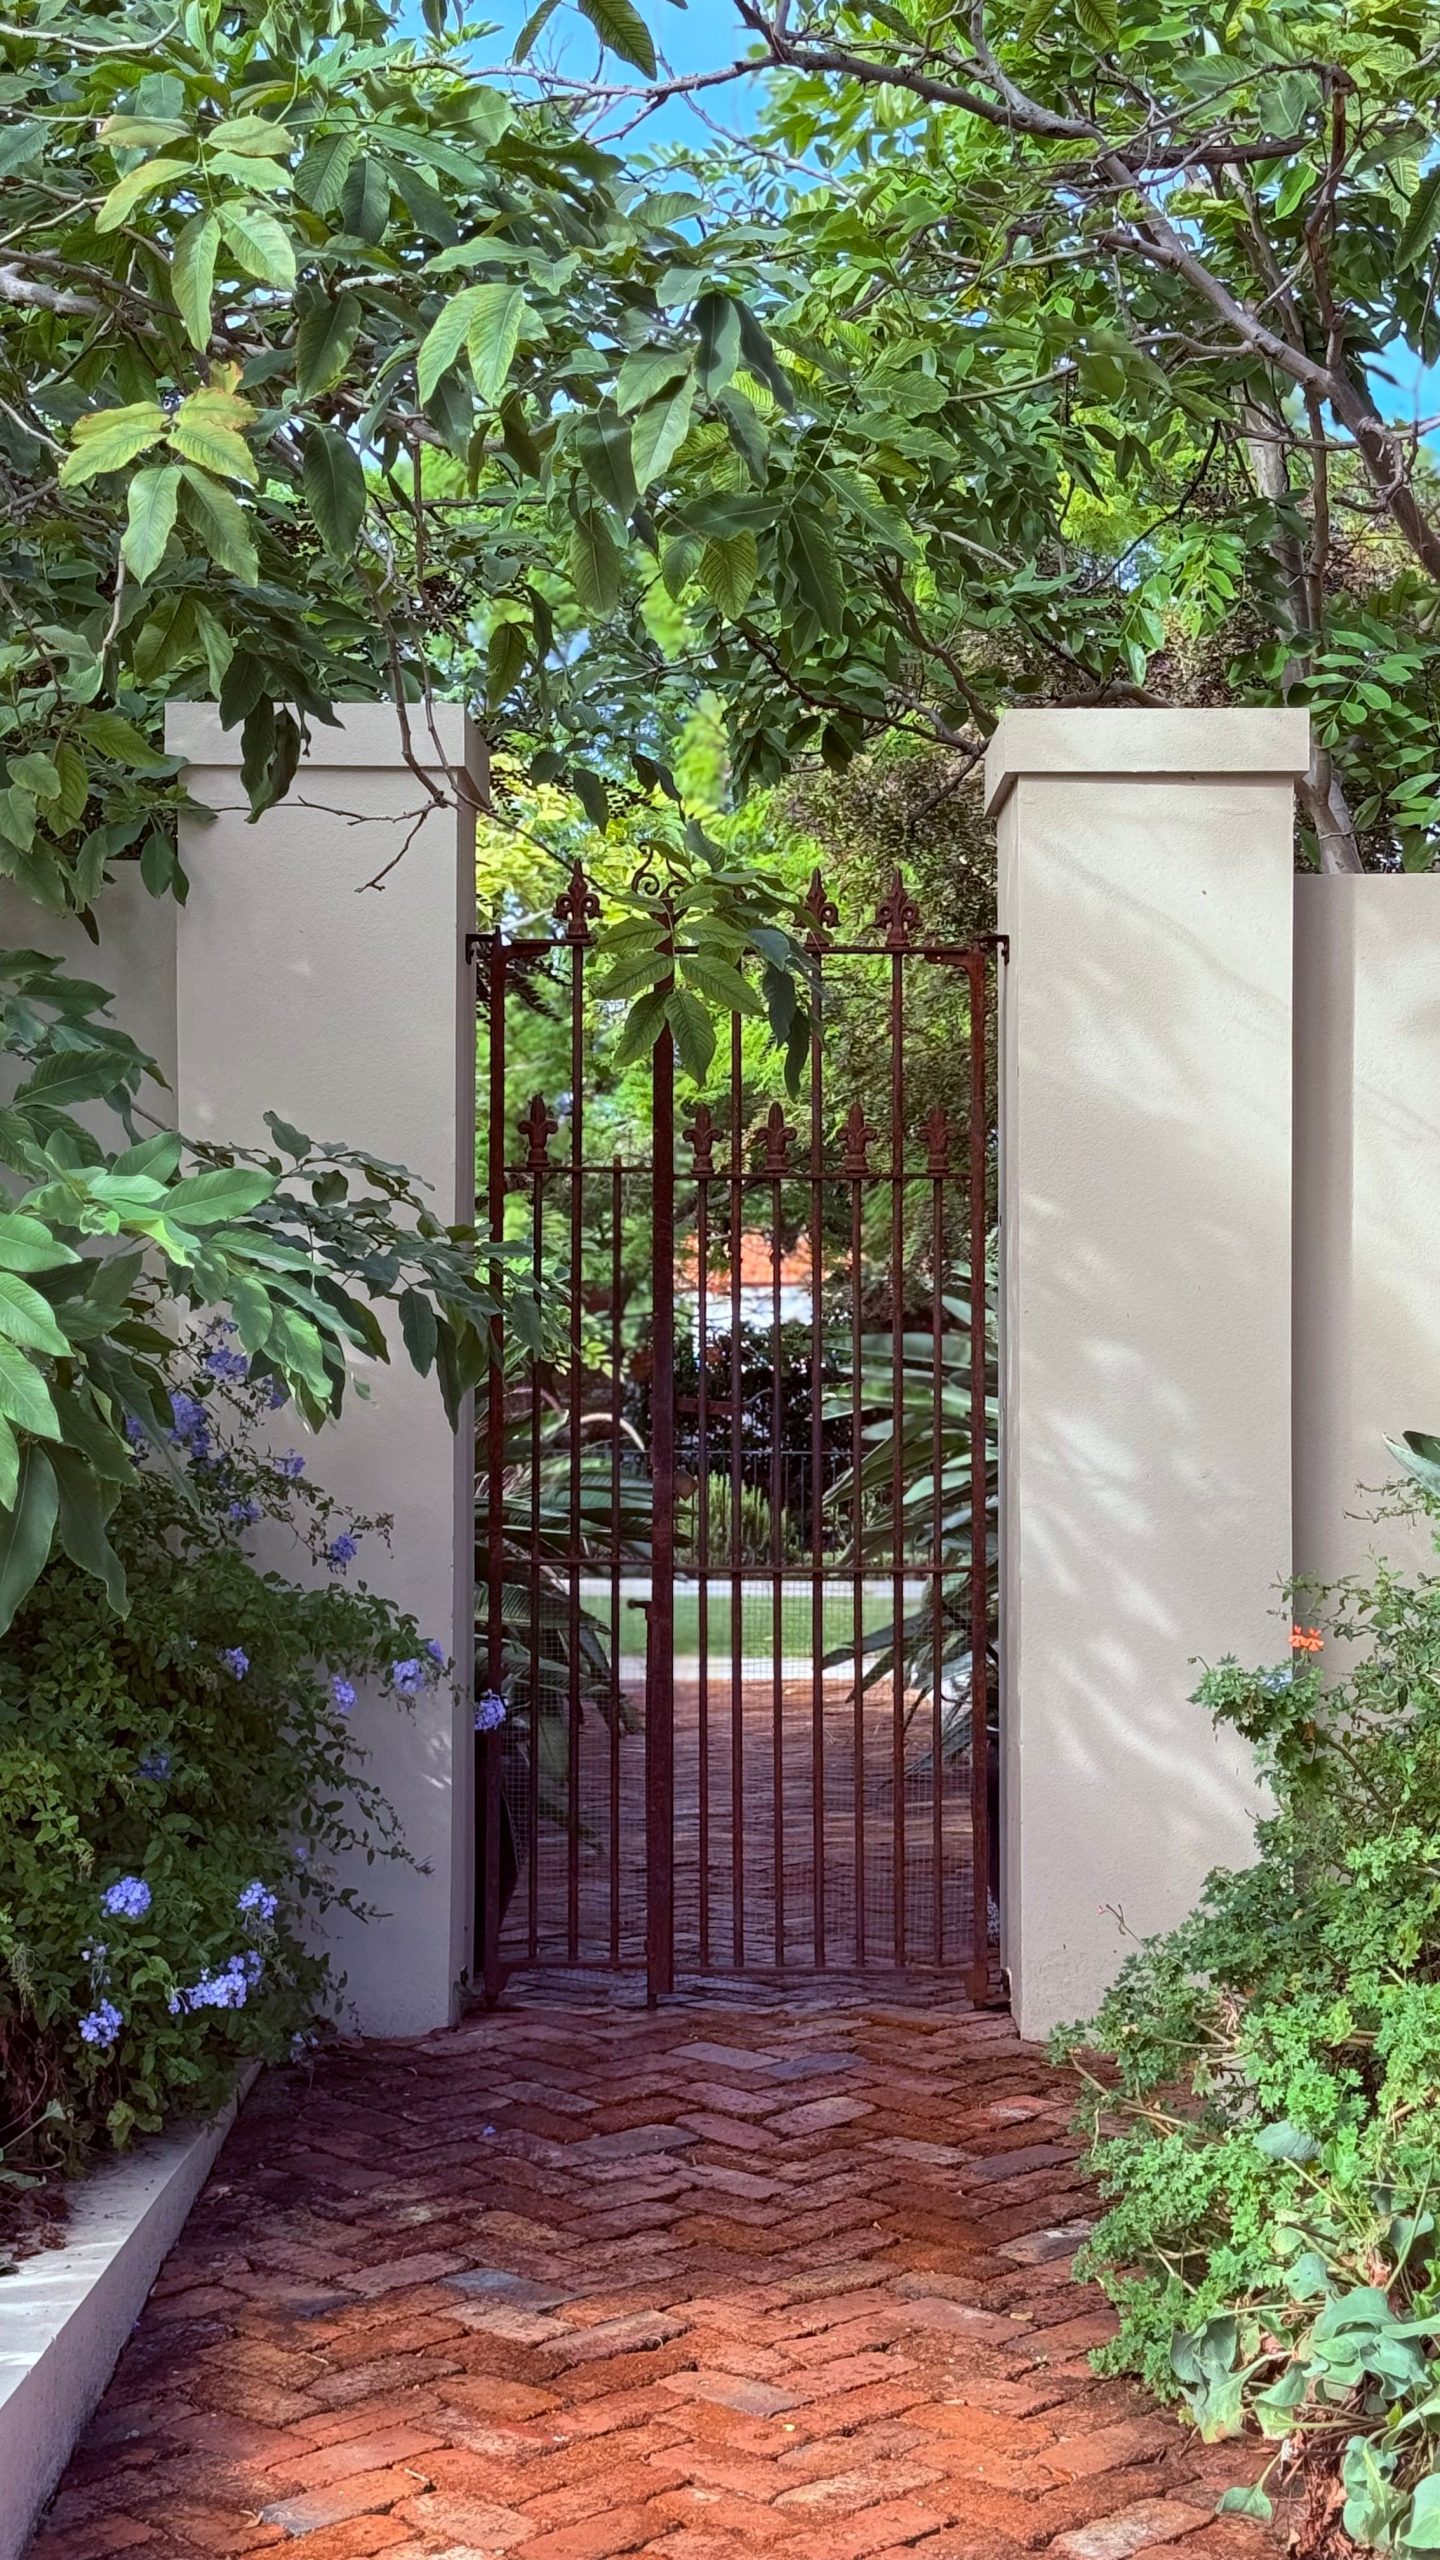
“There’s a growing movement towards ‘resilient landscaping,’ which favors durable, long-lasting materials and plants that thrive in local conditions.”
This entryway is a perfect example. The iron gate, brick pavers, and stucco pillars are all incredibly durable and require minimal maintenance. The surrounding foliage appears to be a mix of hardy shrubs and perennials. This isn’t a fussy, delicate garden; it’s a beautiful, robust space designed to stand the test of time, which really resonates with homeowners looking for sustainable, long-term solutions.
25. Design a Grand Entrance with an Ornate Gate and Arched Door
This entrance feels so grand because it uses layers to create a sense of procession. First, you approach the ornate wrought iron gate, your first threshold. Passing through it, you are in a small, defined courtyard space, framed by the stone walls. Finally, you reach the main event: the beautifully arched green door of the house. This layering creates a much richer and more formal experience than a simple gate that opens directly to the front door. It’s a technique often used in historic homes to add gravitas and a sense of arrival. The ornate, semi-transparent nature of the gate from Idea #26 offers a similar layered feeling.
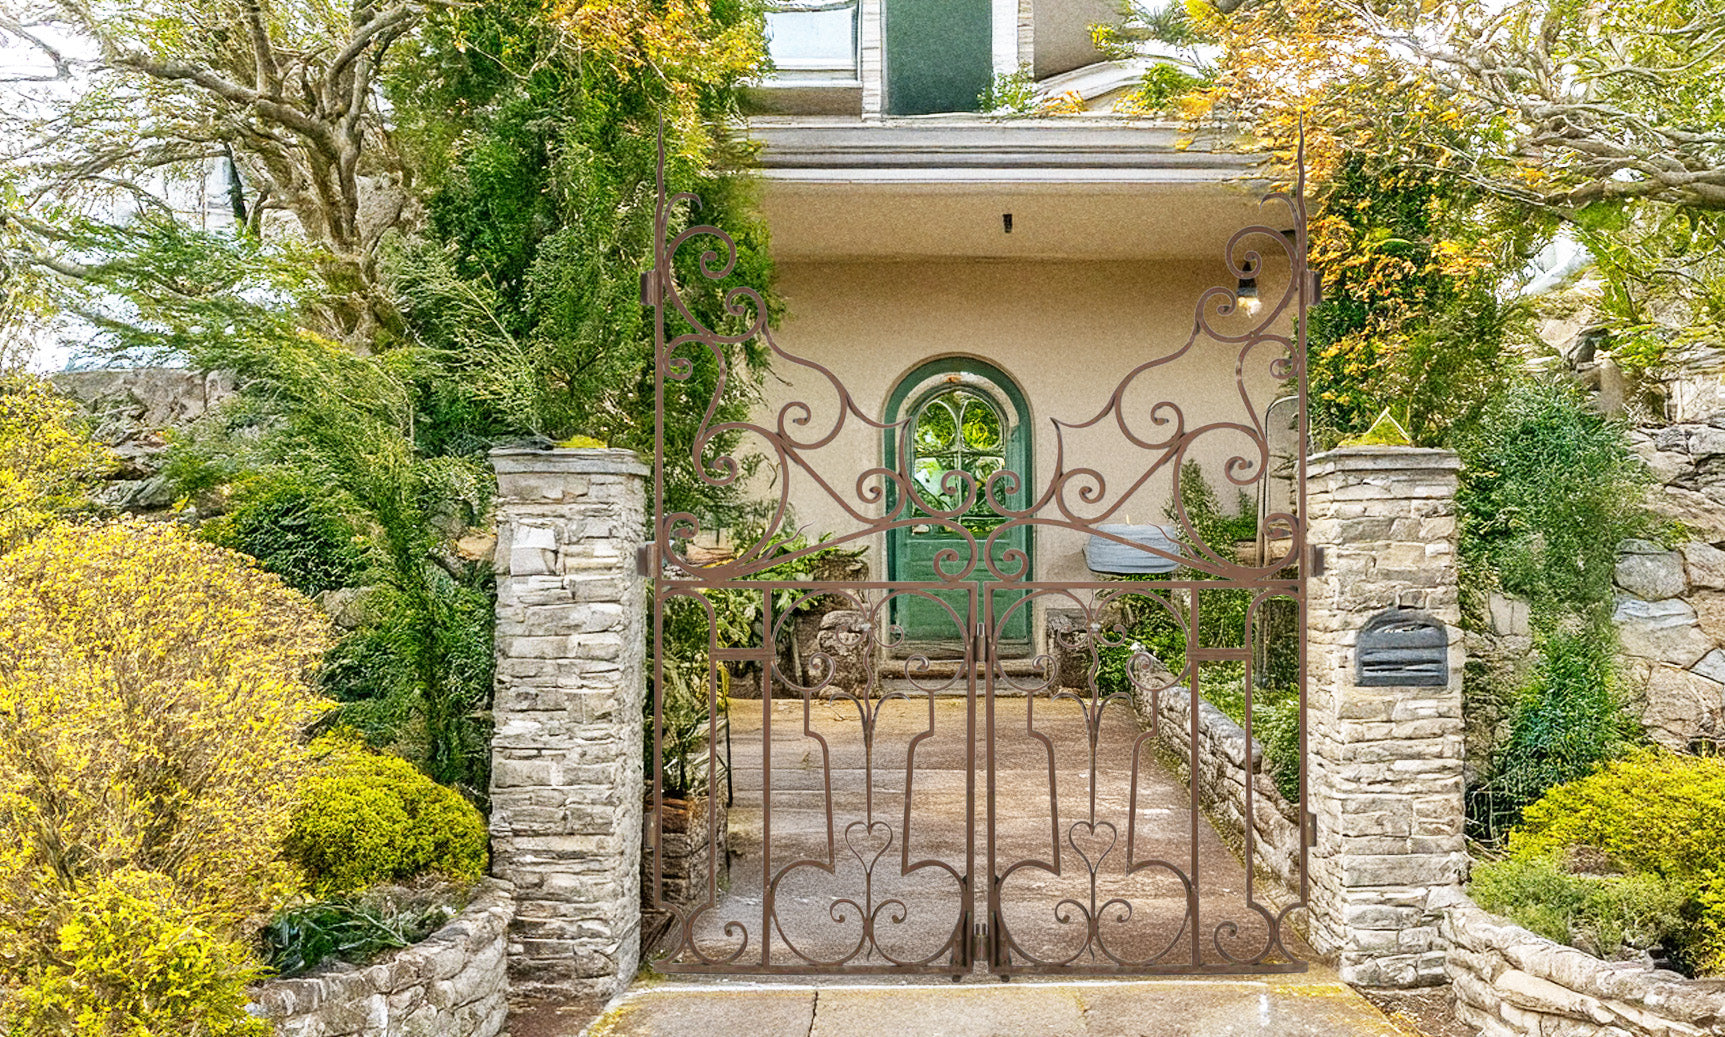
“A double gate, especially an ornate one like this, demands a wide opening.”
You’ll need a clear span of at least 6-8 feet between the stone pillars to accommodate the gates and allow for comfortable passage. This style is best suited for a primary entryway or a significant garden opening, not a small side path. The stone pillars also require a substantial footprint and deep concrete footings for stability, so be sure you have both the space and the appropriate ground conditions before falling in love with this look.
26. Opt for Classic Elegance with a Black Cast Iron Gate
When installing a heavy gate like cast iron between stone pillars, the hinges are your most critical component. Don’t use standard strap hinges. You need heavy-duty J-bolt or weld-on hinges that can be securely set into the masonry with hydraulic cement or epoxy. The weight of a cast iron gate can easily rip a standard hinge out of the mortar over time. Ensure the hinges are perfectly level and plumb during installation; even a slight angle will cause the gate to swing shut or open on its own, putting constant stress on the hardware.
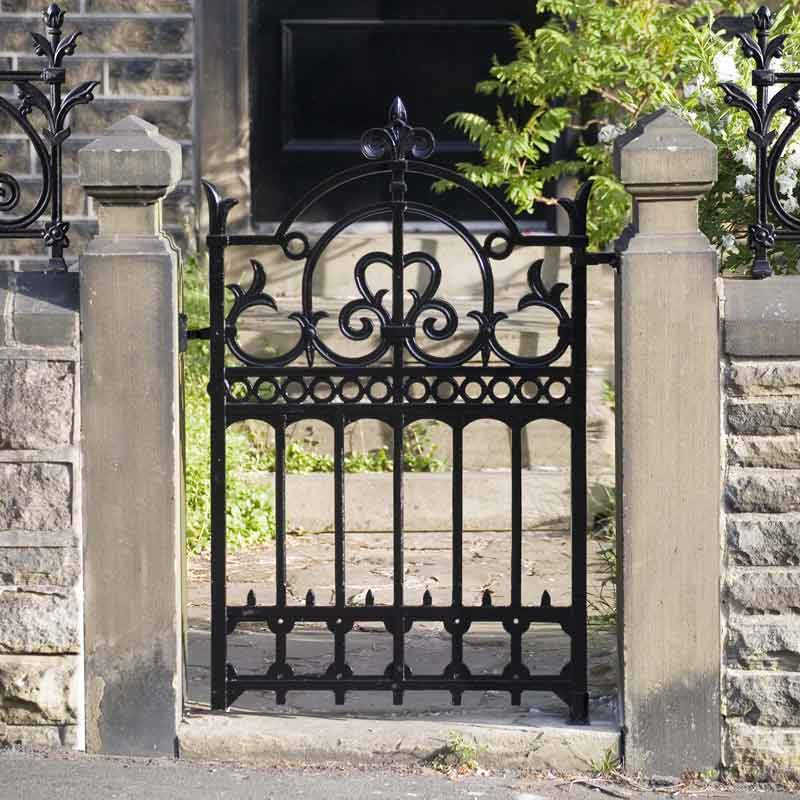
“Cast iron is incredibly durable, but it is not rust-proof.”
Its main enemy is moisture, which can cause rust to form, especially at joints and in detailed scrollwork. To keep it looking pristine, you should inspect the gate annually for any chips in the paint or signs of rust. At the first sign of corrosion, sand the area down to bare metal, apply a rust-inhibiting metal primer, and then touch it up with a high-quality exterior black paint. A little preventative maintenance will prevent a small rust spot from becoming a major restoration project.
27. Cascade Orange Trumpet Vines Over a White Picket Gate
that makes this scene unforgettable is the sheer explosive power of the orange trumpet vines. The white picket gate is a lovely, classic backdrop, but it’s completely upstaged by the sheer volume and vibrant color of the flowers. They create a sense of wild, untamed abundance that is incredibly appealing. Removing the vines would leave you with a nice, but forgettable, garden gate. The flowers provide all the drama and energy, turning a simple entrance into a spectacular floral event.
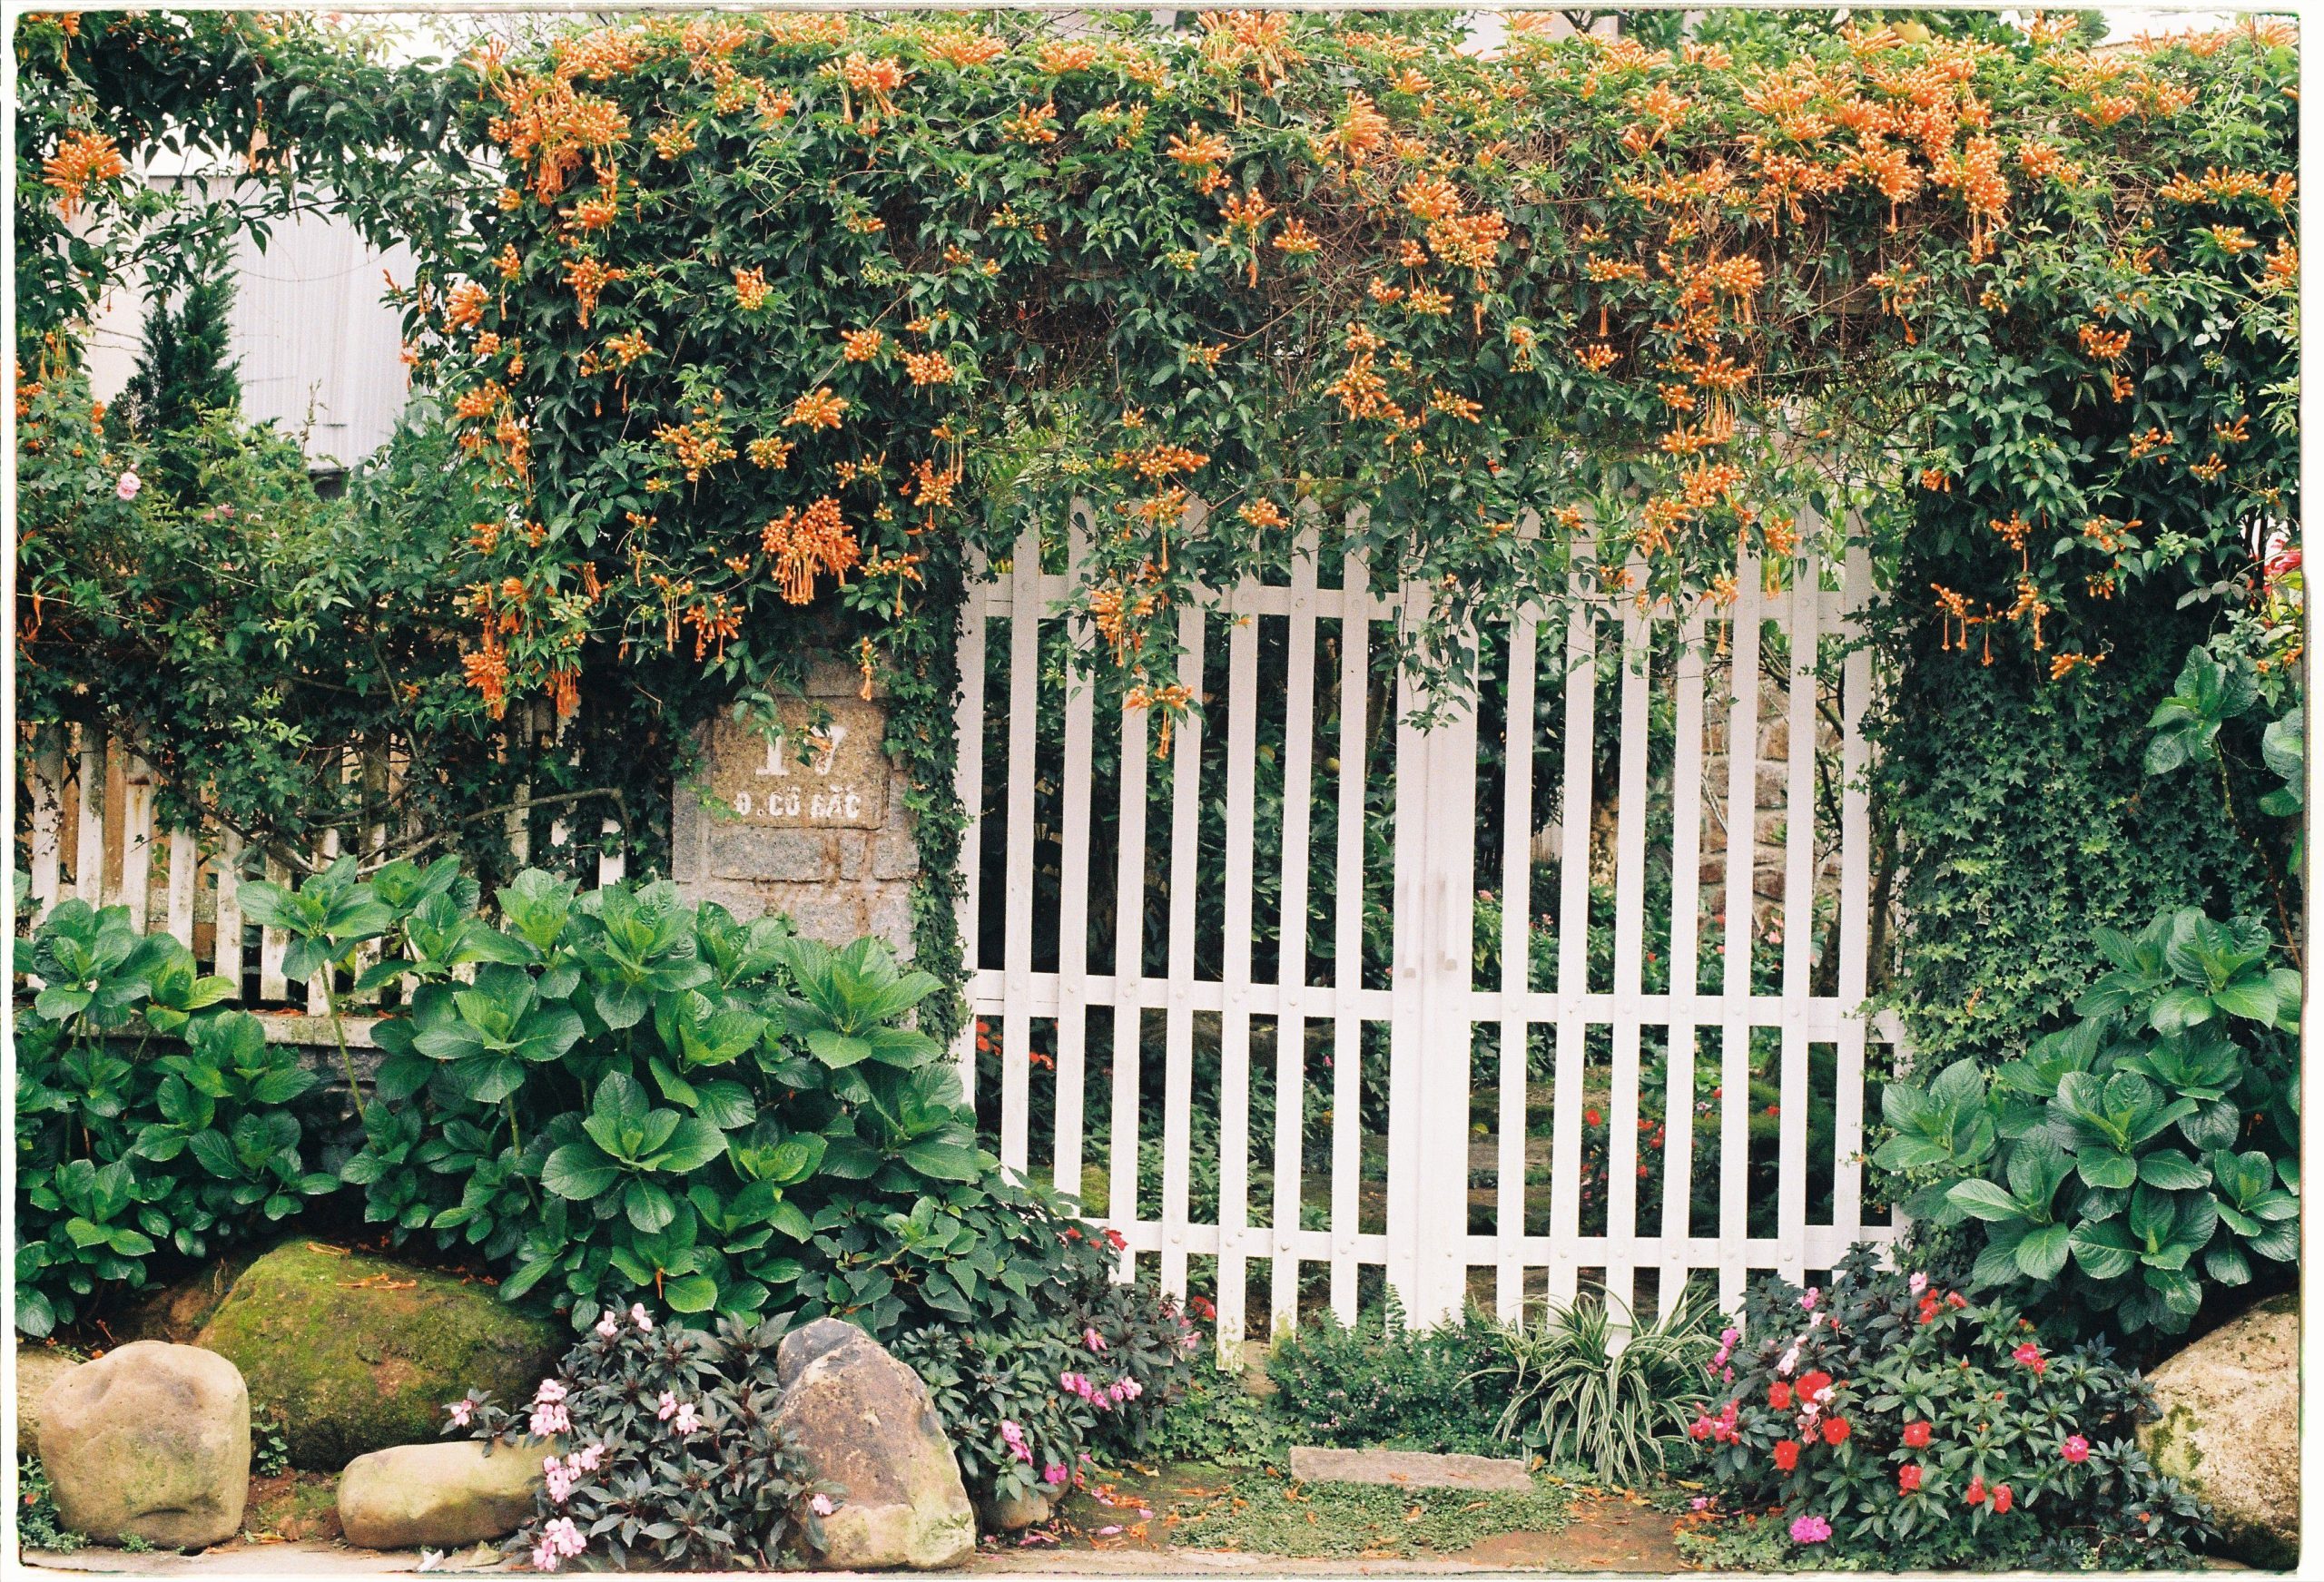
“Trumpet vine (Campsis radicans) is stunning, but it is an extremely aggressive and fast-growing plant.”
Its aerial roots can cling to and damage wood, stucco, and even mortar. It also spreads voraciously through underground runners, popping up far from the original plant. If you plant a trumpet vine, you are signing up for a long-term relationship that involves vigorous annual pruning to keep it in check. It can be a beautiful addition, but only if you are fully prepared for its rampant nature.
28. Create a Hidden Passage with an Arched Wrought Iron Gate
This design is a masterclass in creating mystery and intrigue. The tall, dense hedges create a feeling of enclosure, channeling your movement and your gaze toward the single opening. The archway acts as a ‘periscope,’ framing a tantalizing glimpse of the garden beyond without giving it all away. The decorative white gate is the perfect threshold—it’s visually light and lets you see through it, but it still represents a clear boundary, heightening the sense of entering a special, secluded space. The terracotta tiles add an aged, Mediterranean touch, suggesting an old, established garden.
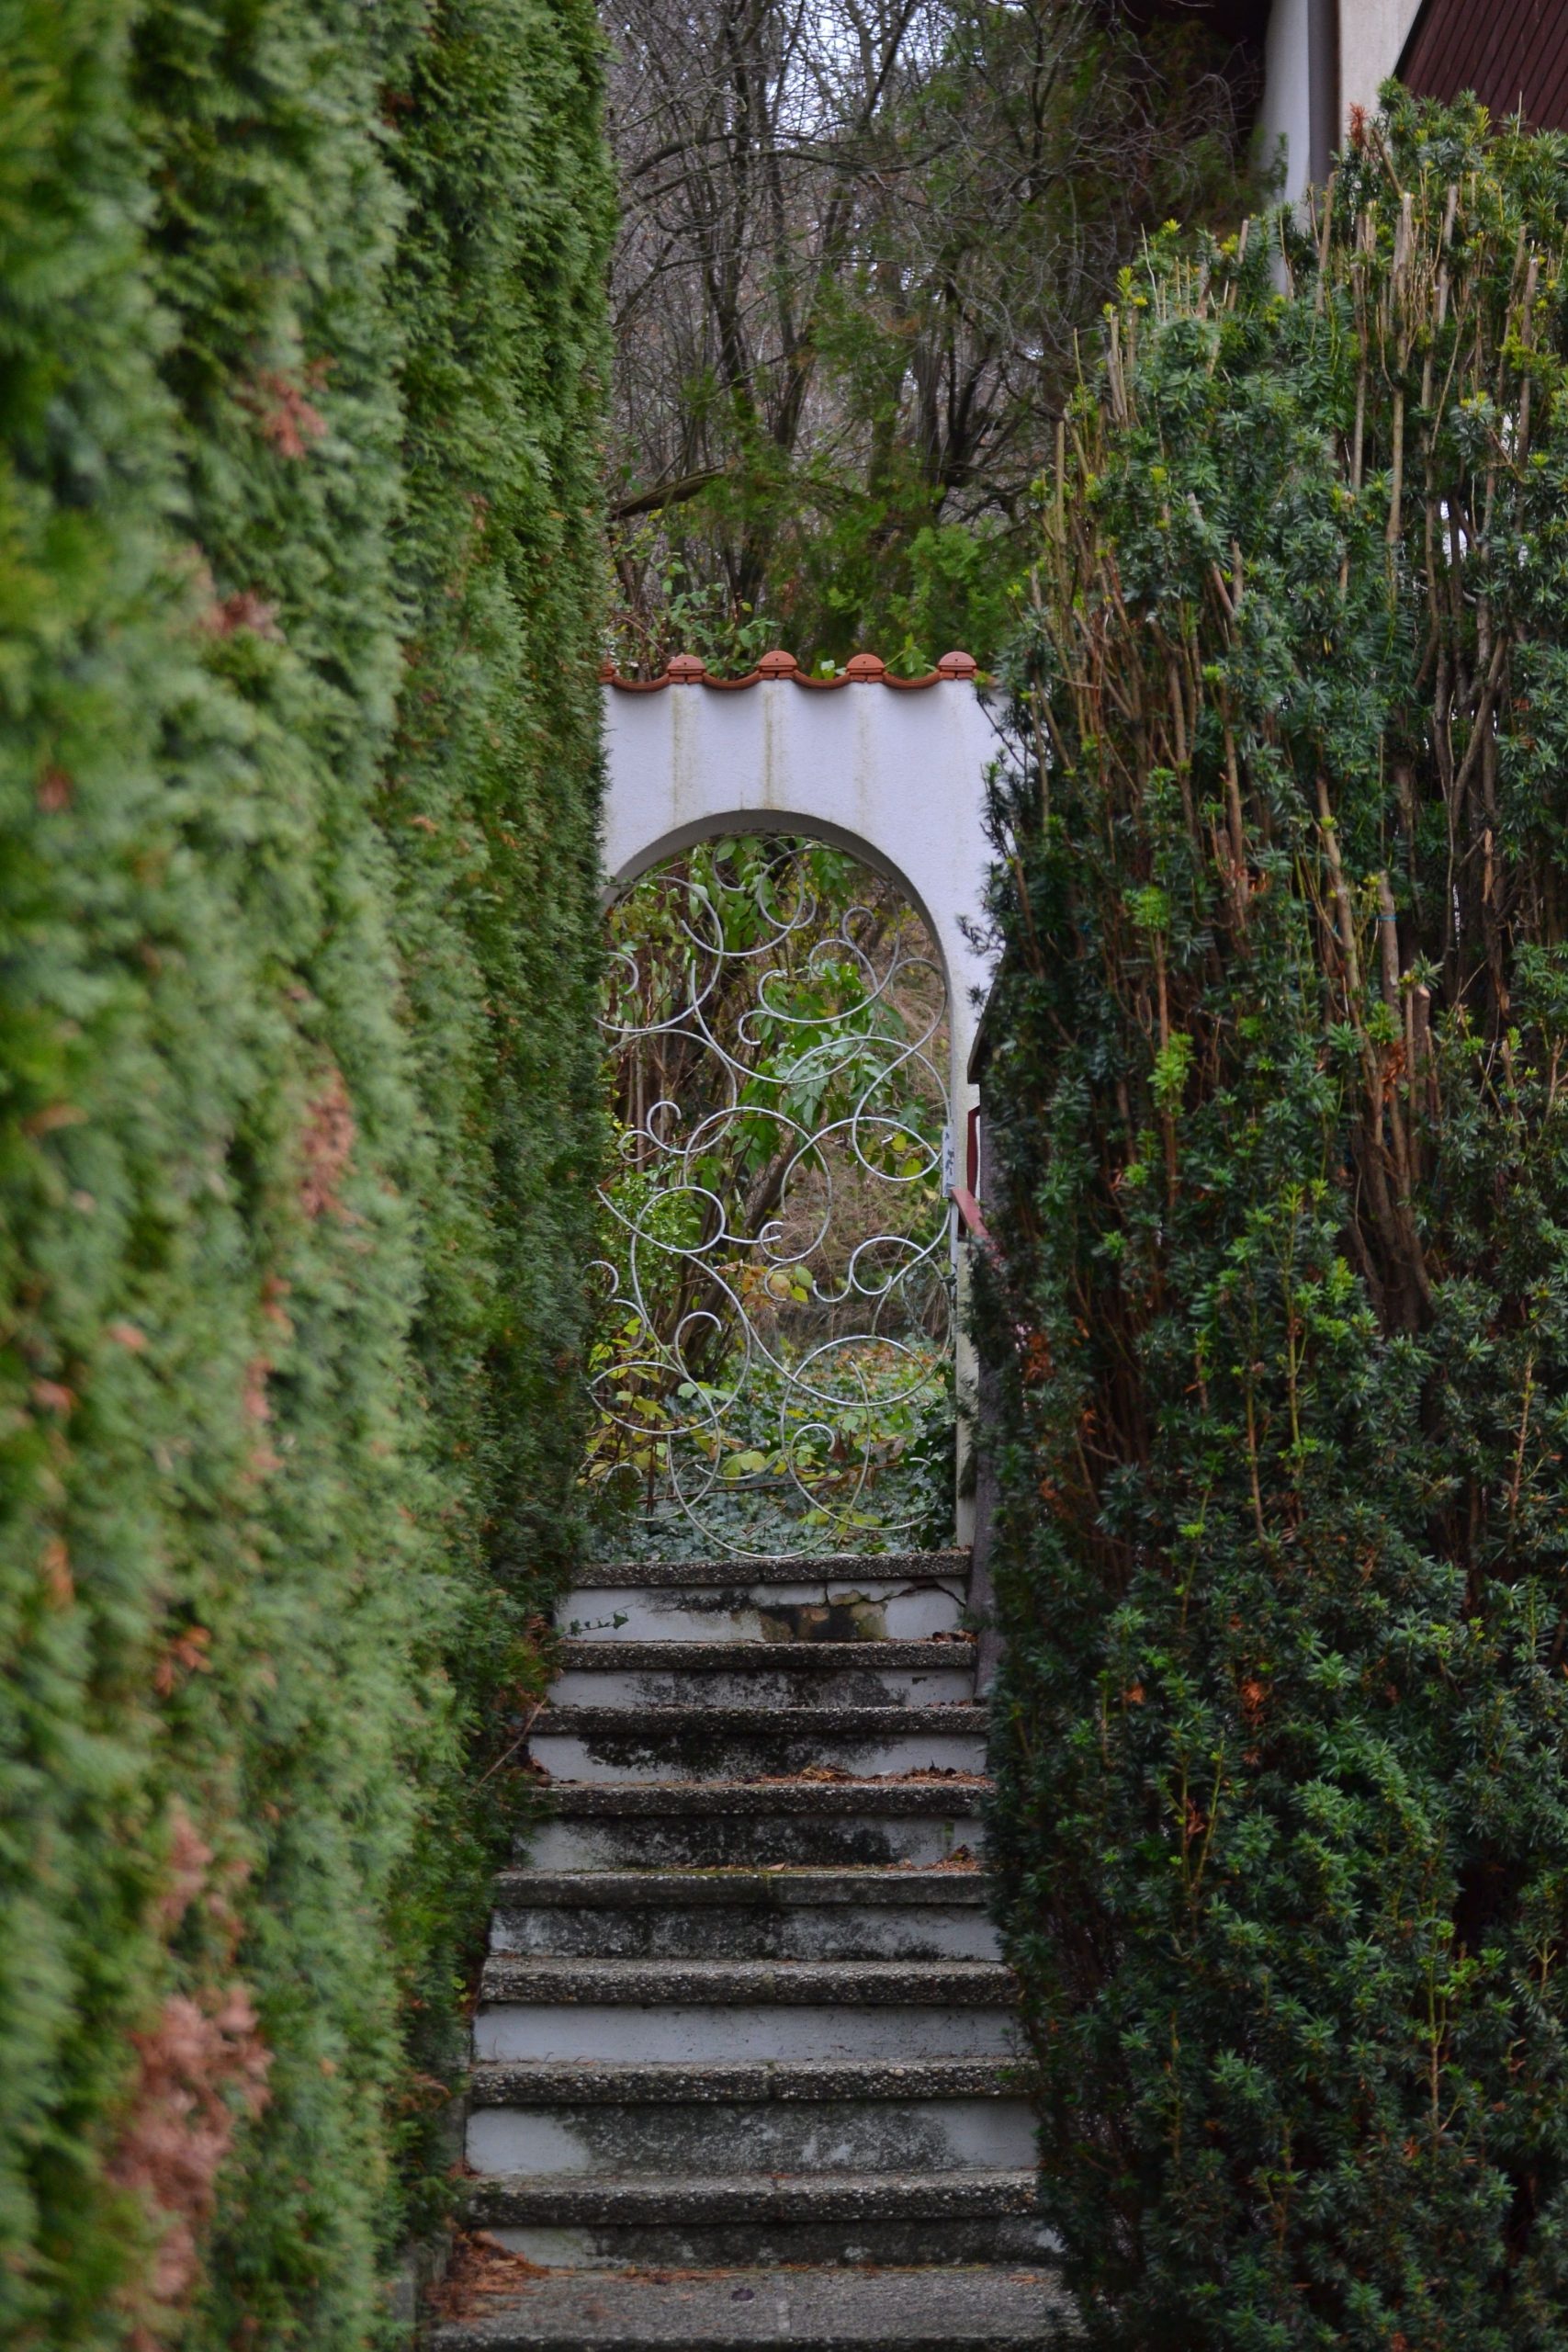
“To create a faux terracotta tile roof on a wooden arch (Time: 3 hours, Cost: $70”
To create a faux terracotta tile roof on a wooden arch (Time: 3 hours, Cost: $70):
- Build a simple pitched ‘roof’ for your archway using exterior-grade plywood.
- Prime the entire plywood structure with an exterior-grade primer.
- Purchase a few lightweight, curved terracotta-colored plastic garden edging panels.
- Starting from the bottom edge, attach the panels to the plywood roof using exterior construction adhesive and small galvanized screws, overlapping them like real tiles.
- Continue in rows up to the peak of the roof.
- For an aged look, you can dry-brush the ’tiles’ with a light gray or green paint to simulate moss and weathering.
29. Evoke Old-World Charm with a Weathered Red Wooden Archway
The defining feature here is the incredible texture. It’s all about the aged, peeling paint on the red wooden archway and the moss-covered terracotta tiles. These details tell a story of time, weather, and history. They give the entrance a sense of authenticity and rustic charm that a pristine, newly-painted structure could never achieve. The dark iron gate and the lush greenery are beautiful supporting characters, but the beautifully decayed archway is what gives this scene its soulful, mysterious character.
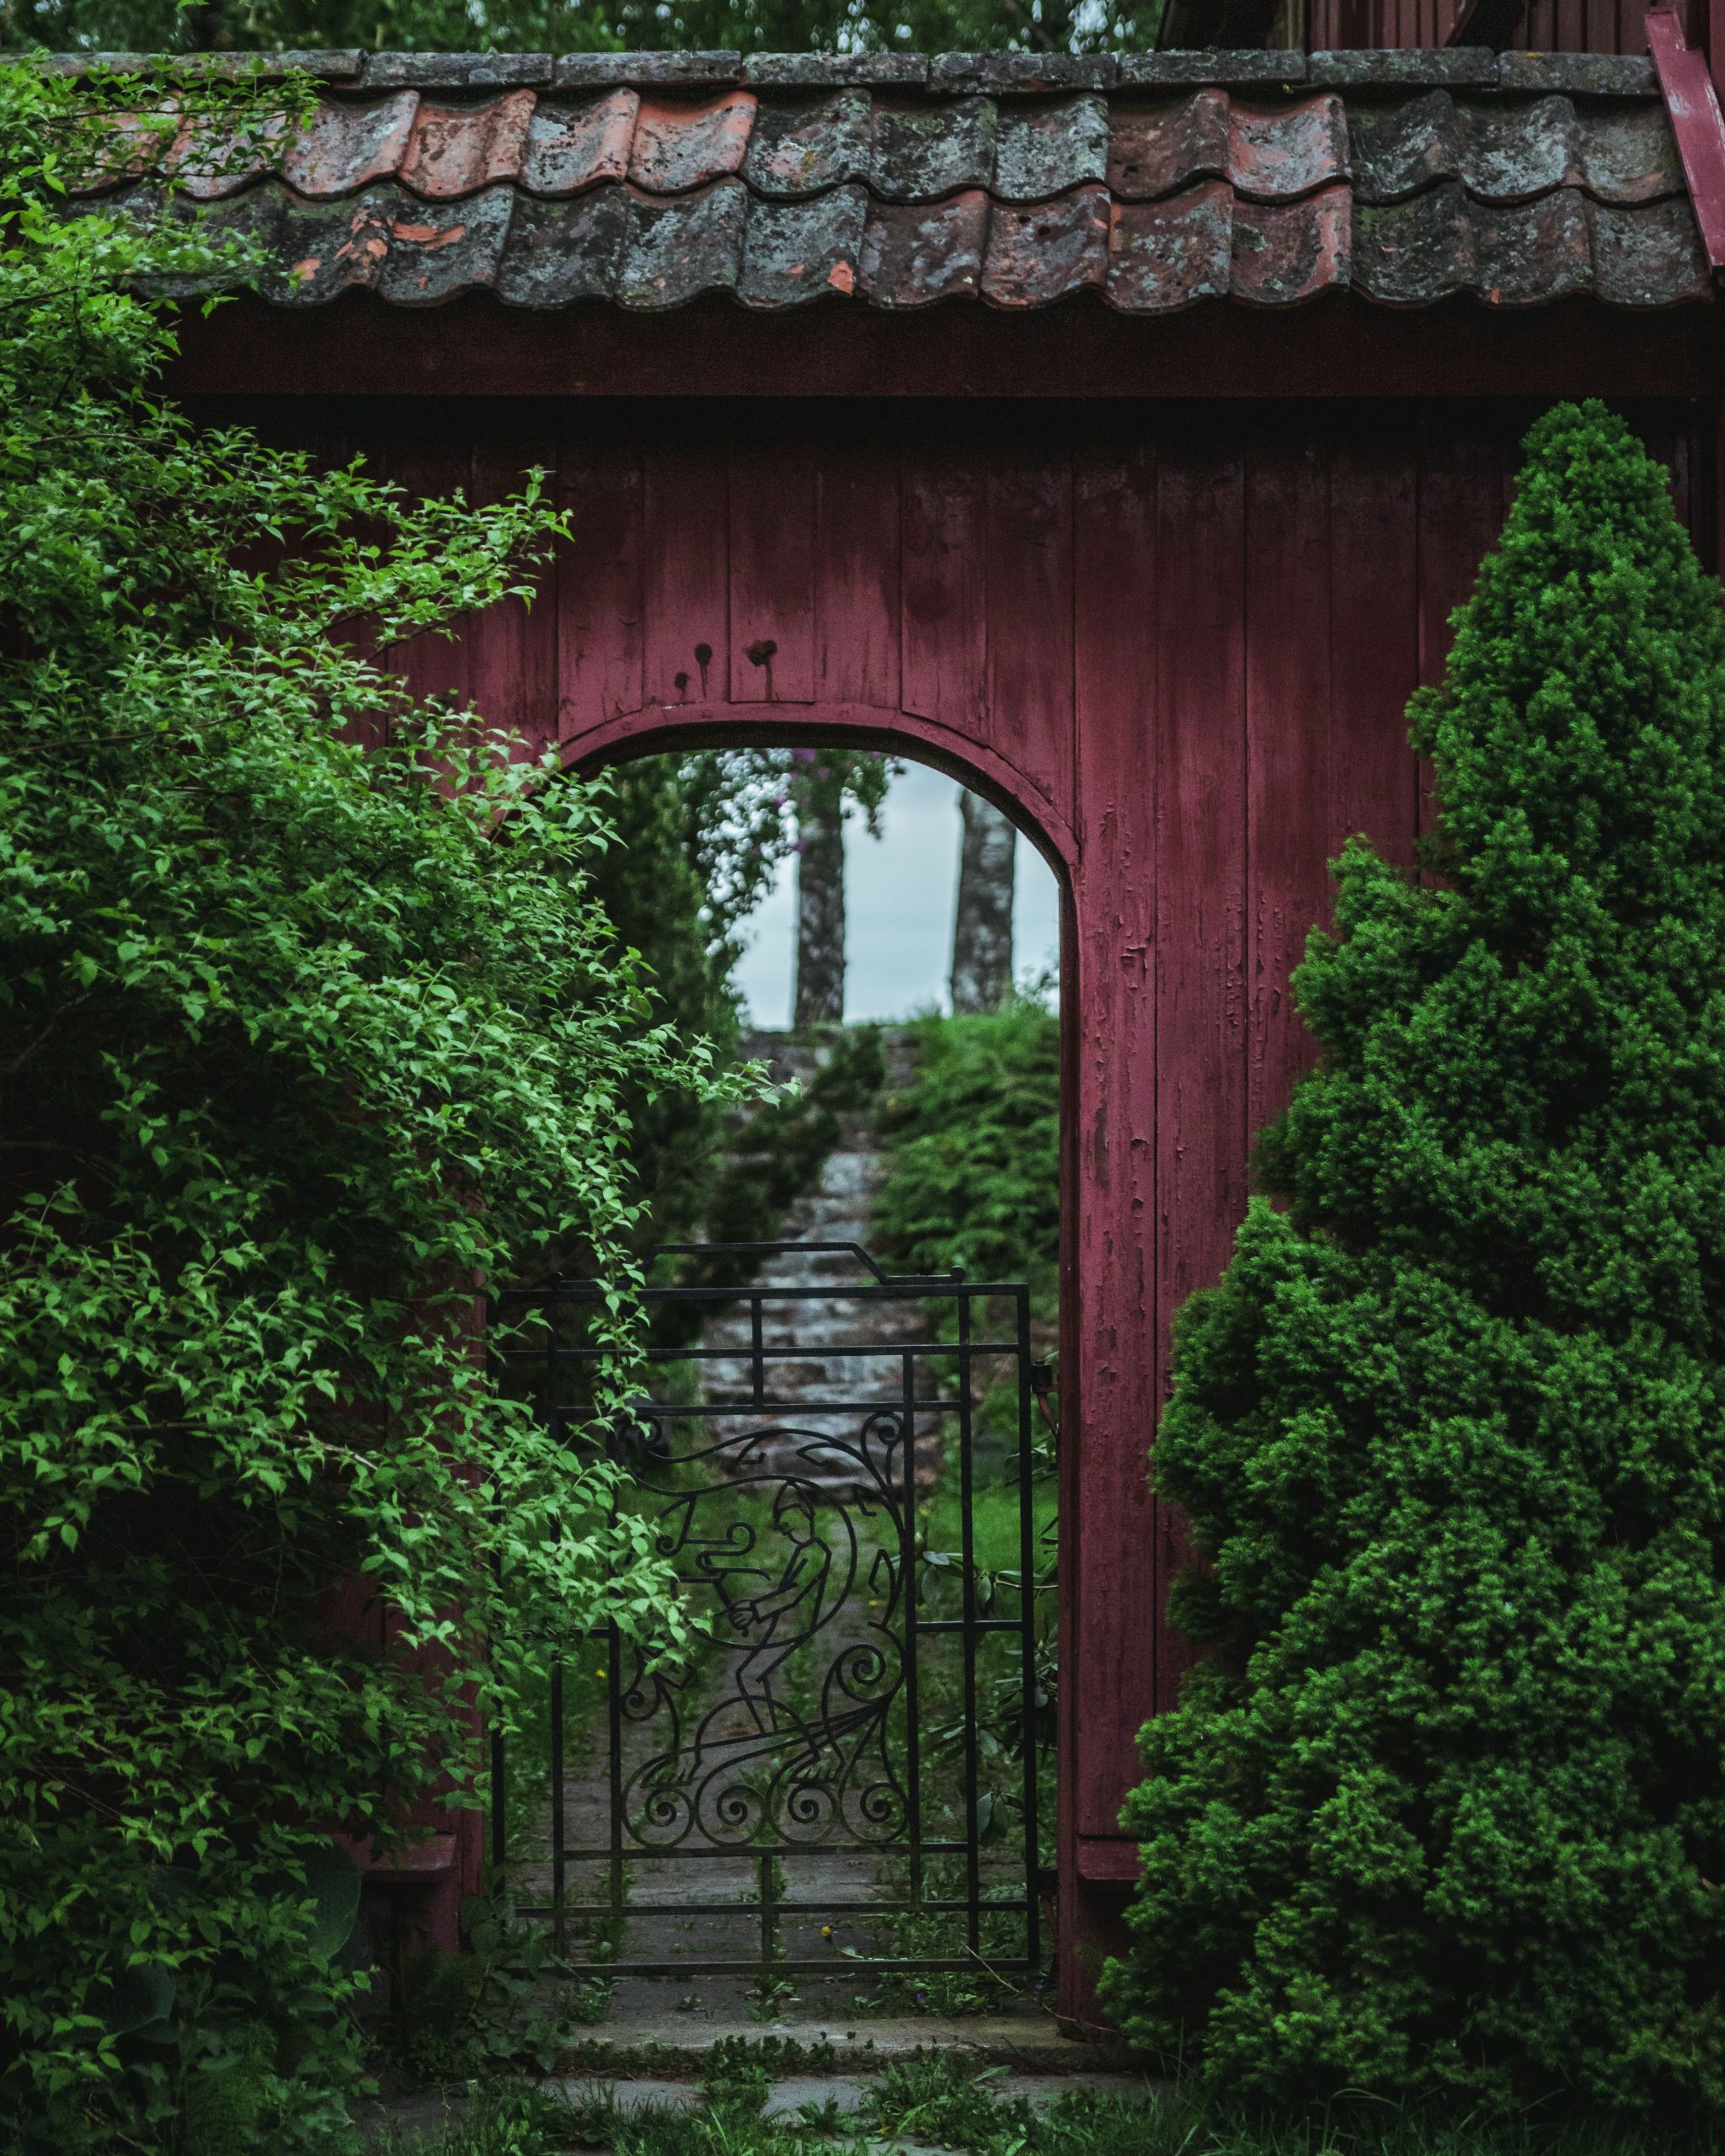
“Lumber for Archway (Treated): $150 – $300
Salvaged Terracotta Roof Tiles: $50 – ”
- Lumber for Archway (Treated): $150 – $300
- Salvaged Terracotta Roof Tiles: $50 – $200 (check salvage yards)
- Simple Black Iron Gate: $150 – $400
- Paint and Primer: $80 – $130
- Fasteners and Concrete: $40 – $70
- TOTAL: $470 – $1,100
- Budget alternative: Get a similar feel by distressing new lumber and using faux tile panels as described in Idea #28. Focus your budget on lush, mature plants to frame the entrance.
30. Install an Arched Wooden Gate Between Rustic Stone Pillars
This design succeeds by perfectly balancing rustic materials. The light natural wood of the gate has a clean, almost modern feel with its simple vertical slats, while the weathered, irregular stone of the pillars provides a heavy, historic anchor. The arch of the gate echoes the rounded shapes of the stones, creating a pleasing visual connection. It’s a harmonious marriage of ‘old’ and ‘new’ rustic styles, preventing the entrance from looking like a historical theme park and instead making it feel like a timeless, natural part of the landscape.
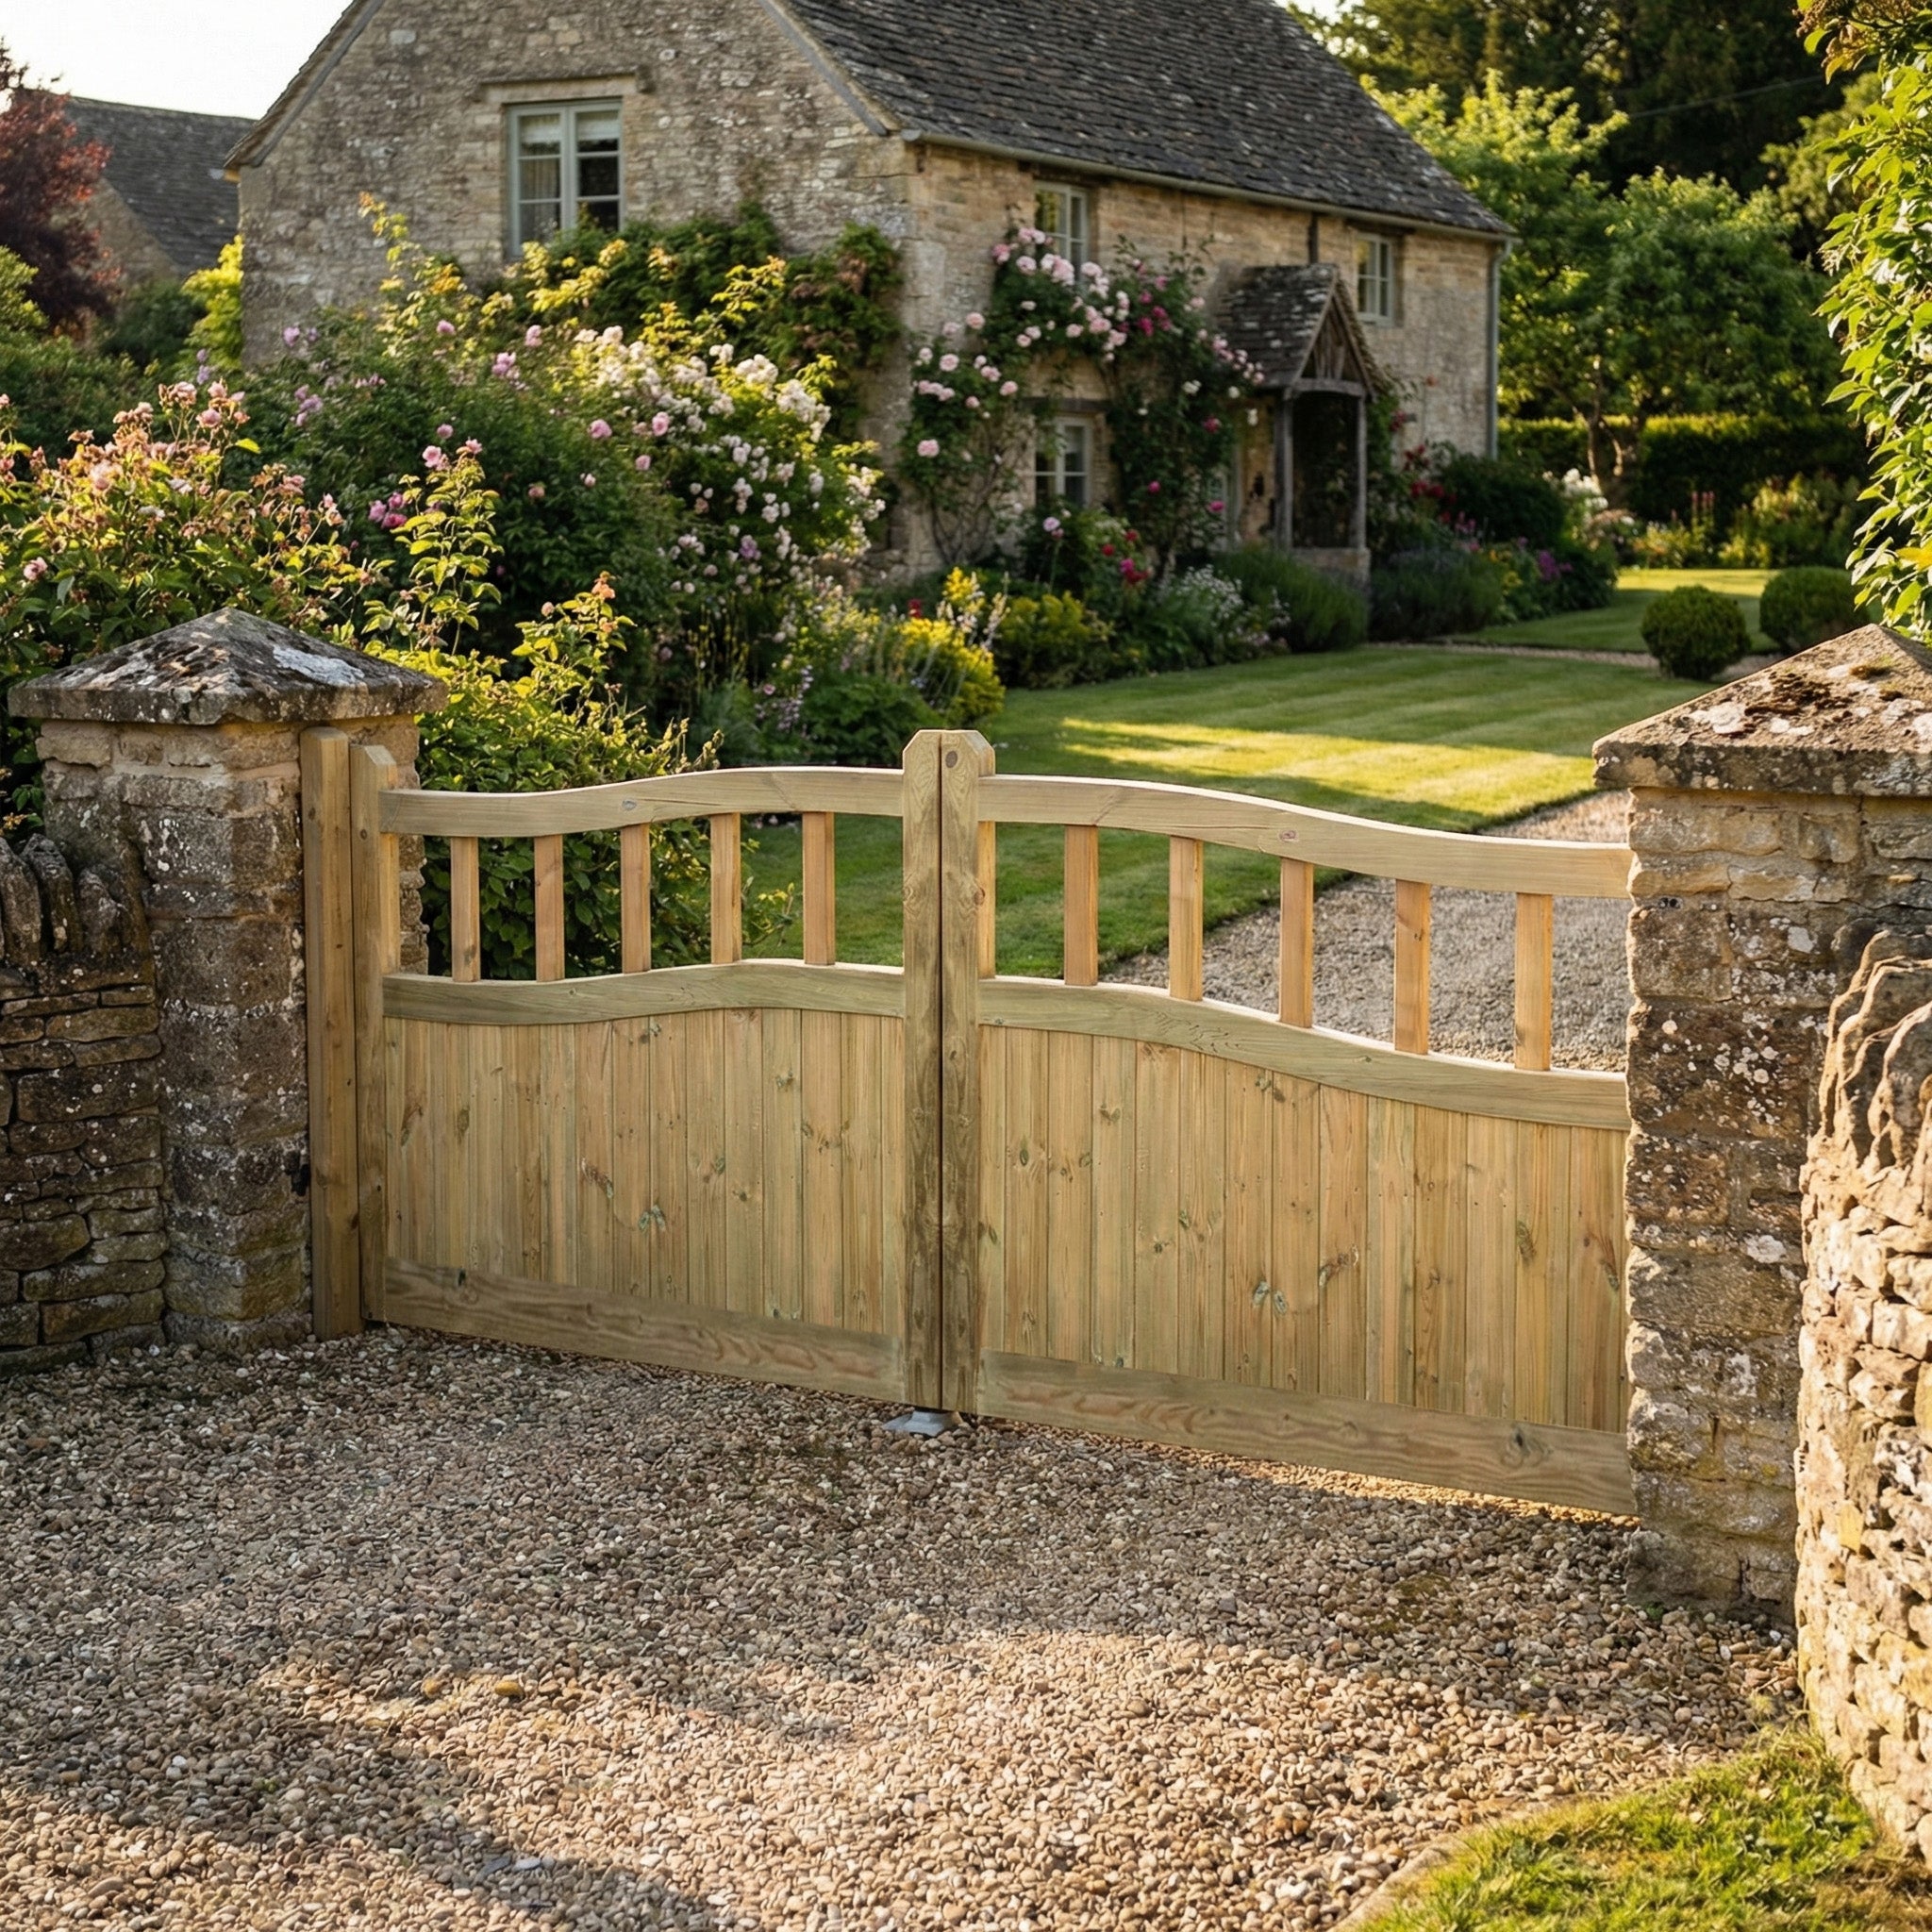
“Before committing to an installation between heavy stone pillars, get your measurements right—three times.”
Measure the Gap: Measure the distance between the pillars at the top, middle, and bottom. Old stone can be irregular, and the gap may not be perfectly uniform. You’ll need to build the gate to fit the narrowest measurement.
Check for Plumb: Use a long level to ensure the inside faces of the pillars are perfectly vertical (plumb). If they lean in or out, it will dramatically affect how the gate hangs and swings.
Assess the Ground: Is the gravel driveway level through the gate’s entire swing path? A double gate like this requires a large, flat area to operate without scraping the ground.
31. Frame a Classic White Picket Gate with Lush Plantings
For an inviting entrance, hang the gate so it swings inward, into the garden space. This is a subtle but powerful psychological cue. A gate that swings inward feels like it’s welcoming you in and drawing you into the space. A gate that swings outward towards the person approaching can feel more defensive and barrier-like. It’s a small detail that has a big impact on how the entrance is perceived. Always check for clearance for the inward swing before installation.
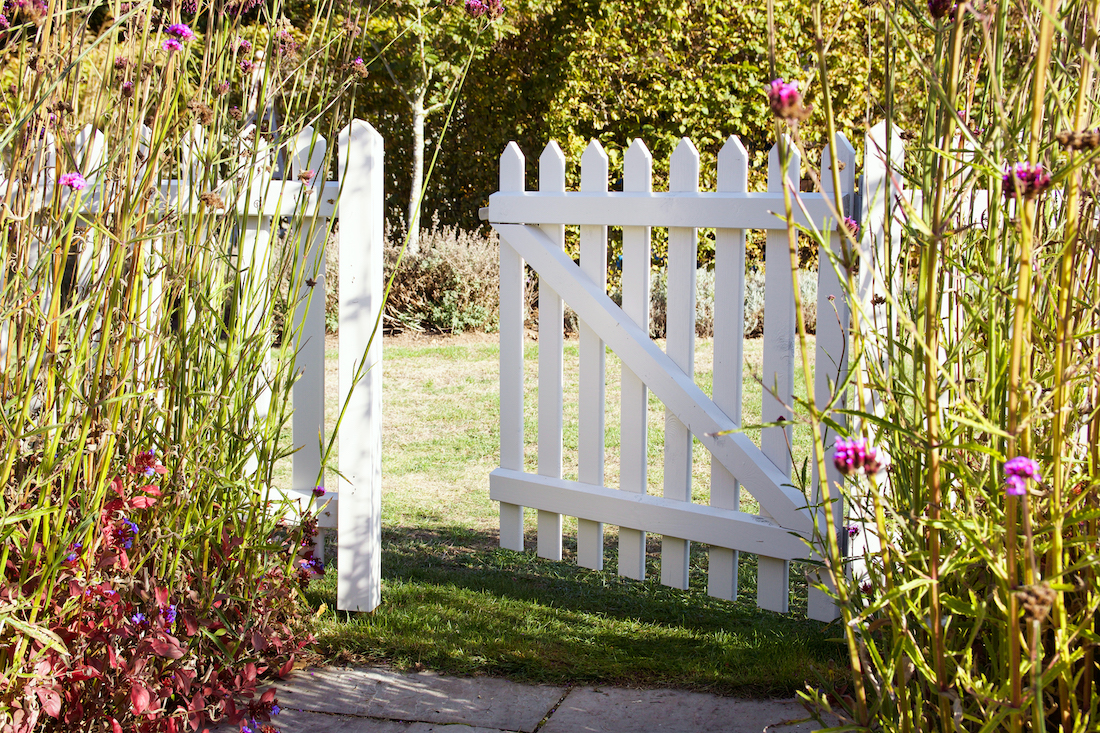
“This classic, charming look relies on a simple recipe: 30% clean, man-made structure (the white picket gate) and 70% abundant, slightly wild foliage.”
The key is the variety within the foliage: use plants of different heights, textures, and shades of green, with one or two color accents (like the purple flowers and reddish leaves). The formal, rigid lines of the gate provide a necessary contrast to the softness of the plants, creating a perfect balance that feels both tidy and natural at the same time.
Your Garden Story Begins at the Gate
A garden gate is more than just an entry point; it’s an invitation, a statement of style, and the first hint of the world you’ve created behind it. Whether you’re drawn to a rustic archway overflowing with roses or a clean, modern design, the perfect gate is waiting to be built.
Feeling inspired? Save your favorites to your garden board on Pinterest and start planning your perfect entrance!